


Cap'n Rat Fink
-
Posts
829 -
Joined
Content Type
Profiles
Forums
Gallery
Events
Posts posted by Cap'n Rat Fink
-
-
Thanks Bob and also for stopping by....

-
Hey Tarbrush,
It's our annual trip to the Carlsbad, Ca. Beach. It's by San Diego. We live in a desert so 30 degrees cooler makes for a nice visit. Plus we will be going to check out the on going building of the replica of the San Salvador Galleon.
-
-
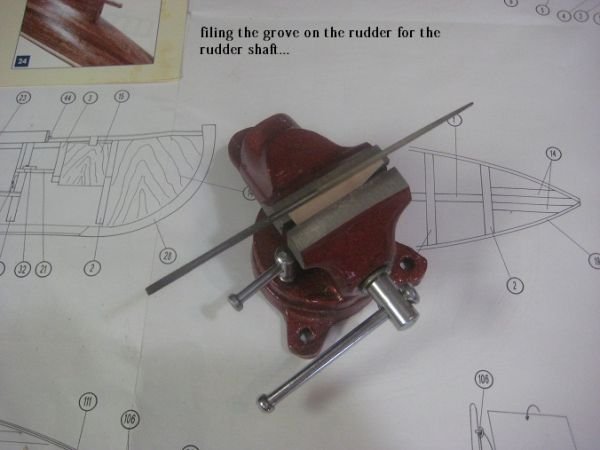
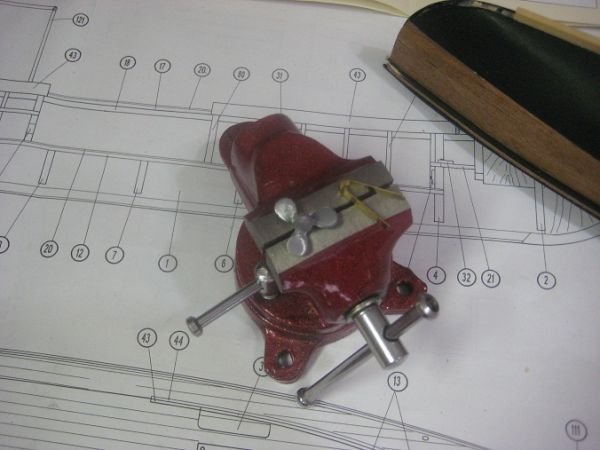
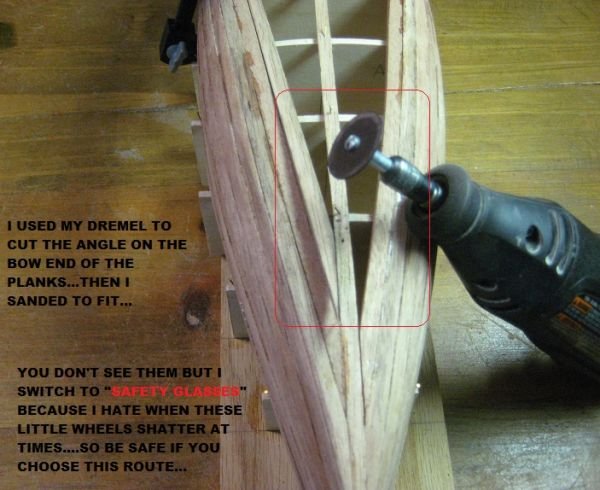
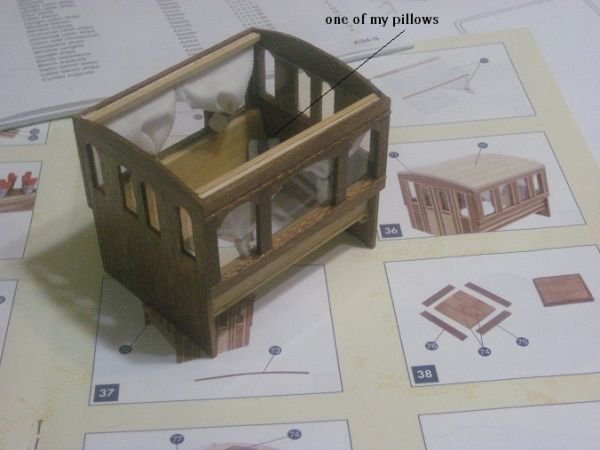
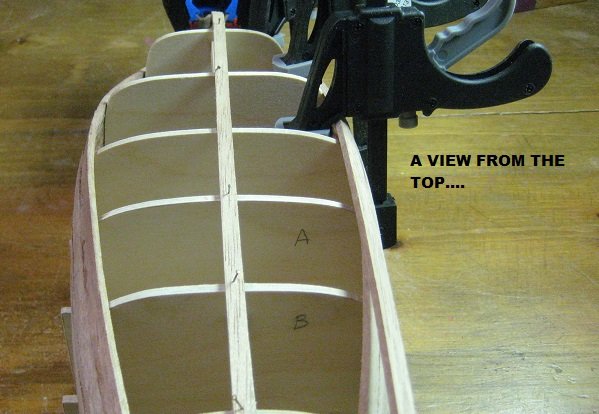
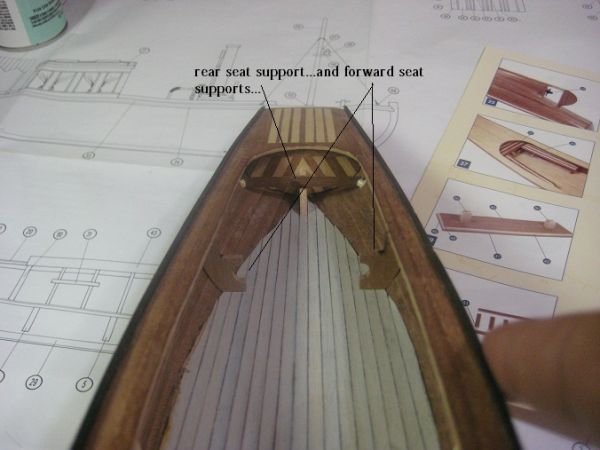
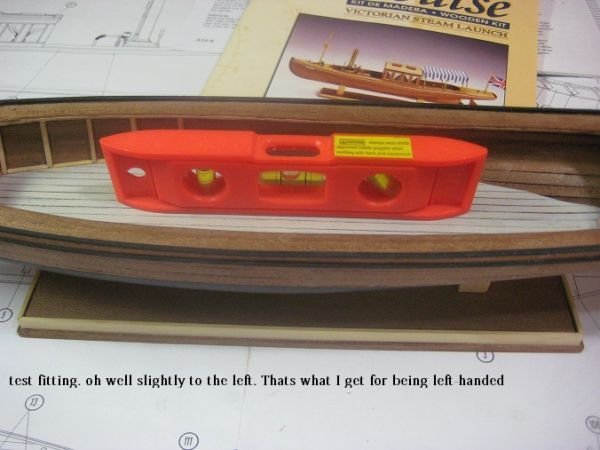
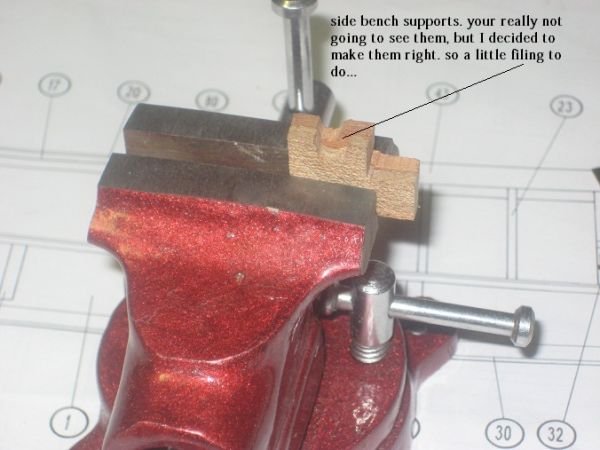
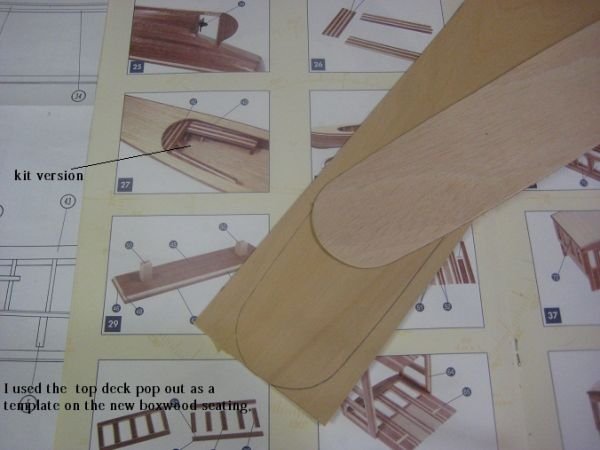
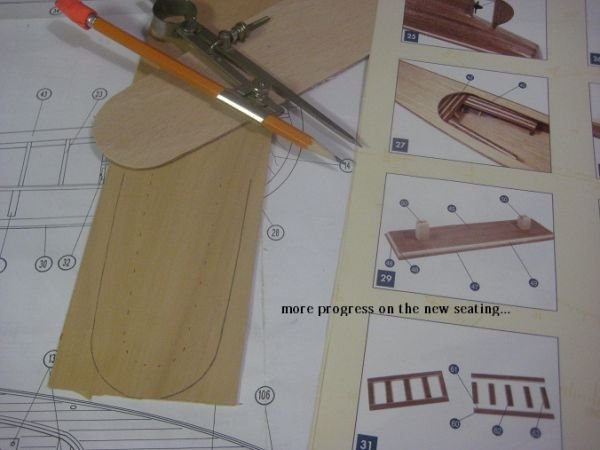
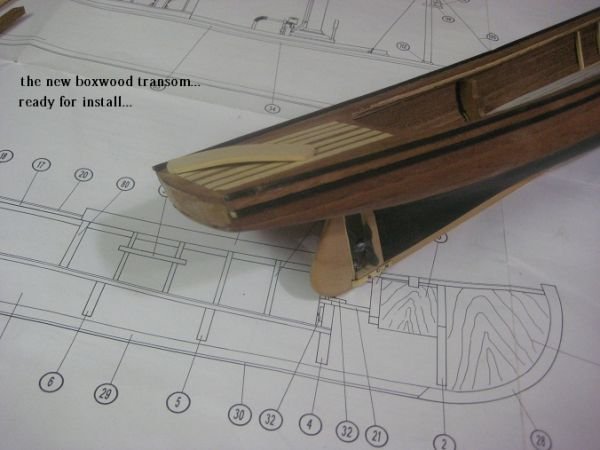
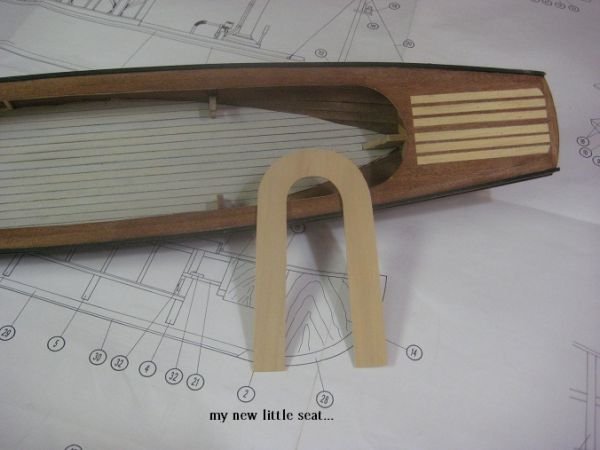
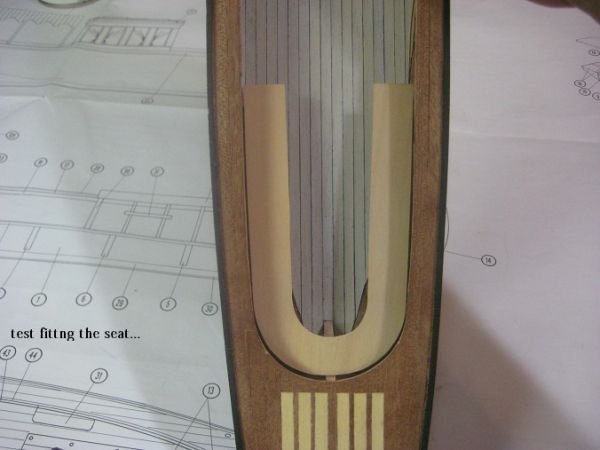
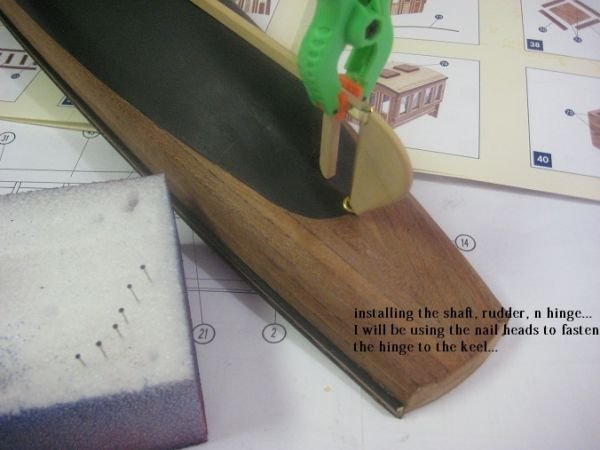
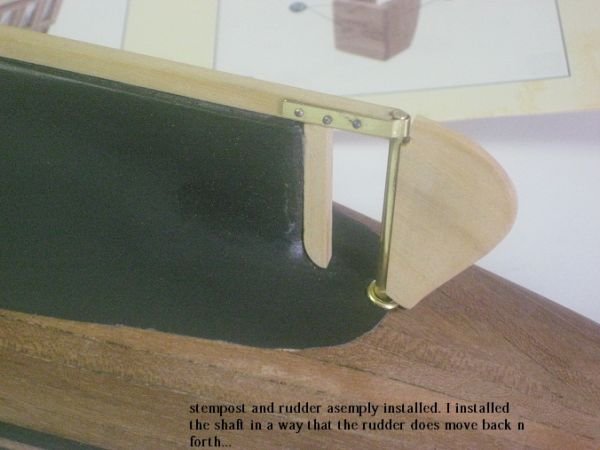
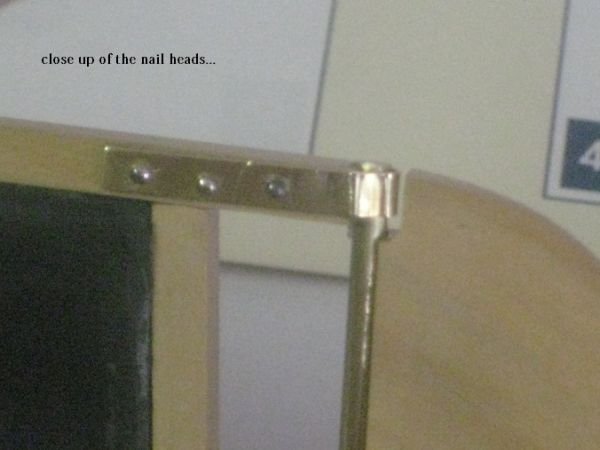
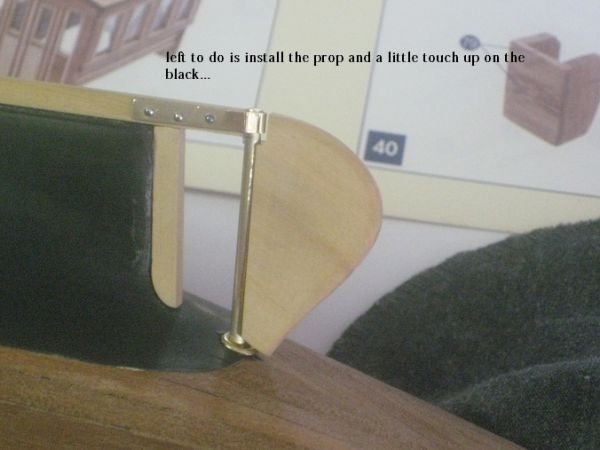
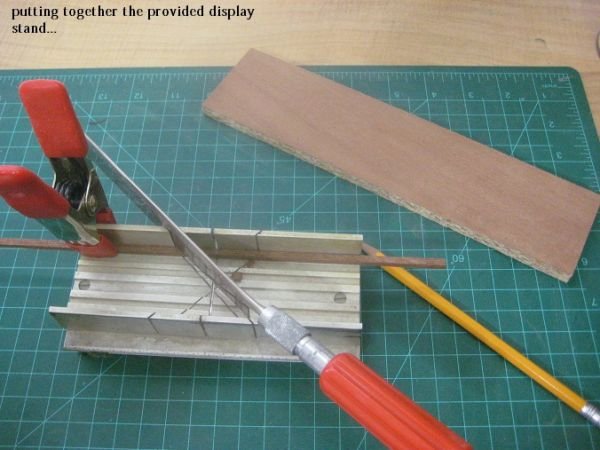
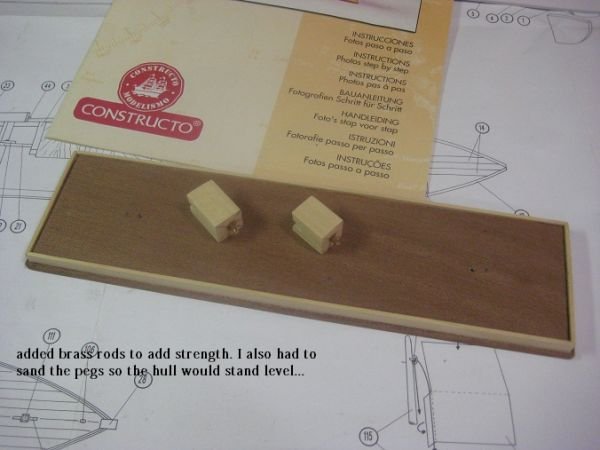
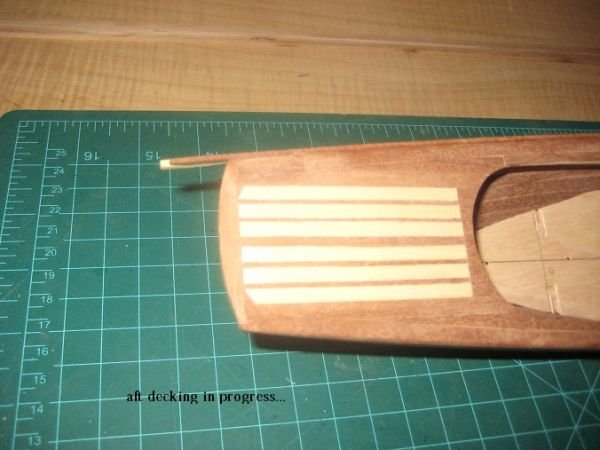
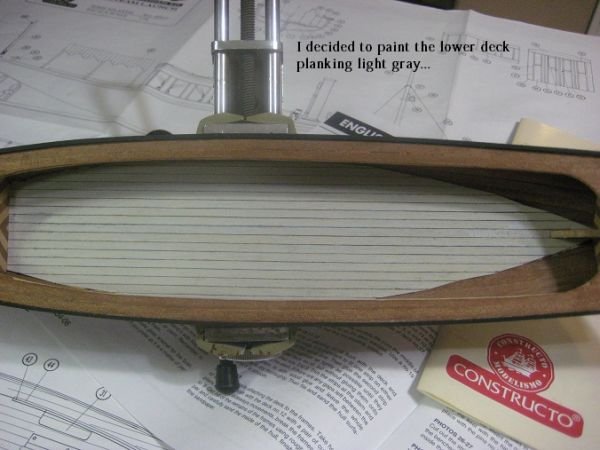
Have a little time to update my log. Been very busy with work and before I get emergngy called out again I thought I would add some photos while I have some free time....


-
I agree with Adam,
very nicely done Simon.
-
Thank You calt4 and tarbrush,
Tarbrush I just read over my thread again. My wife will be driving around town this week getting us ready for vacation. I noticed your remark, if you PM me with your address I still have the plans and instruction booklet, and I could mail them to you if you like sometime later this week. They are just sitting in a box so they won't collect dust....let me know..
-
-
-
-
Hi Guys Thanks for stopping by....
I have been working long hours so i have not been able to reply as quick as i usually do....
Now to answer your questions Ken....
Your moving fast, your hull is going to be complete before I even get my lumber ordered.
I'm undecided whether to use PVA or CA on the planking. I won't be able to easily clean-up excess PVA on the interior, but CA doesn't allow for minor adjustments when bonding the plank in place.
I was under the same impression Ken when I got started. What worked for me is using CA thick which allowed me about 30 seconds before it really started to take hold. But I spaced little drops of Thick along the plank. Once dry I wicked in the rest of the plank with thin CA.
I'm also confused by the tapering of the planks at one end only? Shouldn't they be full width in the center and tapered at the bow and stern to req'd widths for number of strakes?
Ken I am building a kit of this boat. But i also asked this question to Scott who developed this kit.....here is his answer...........
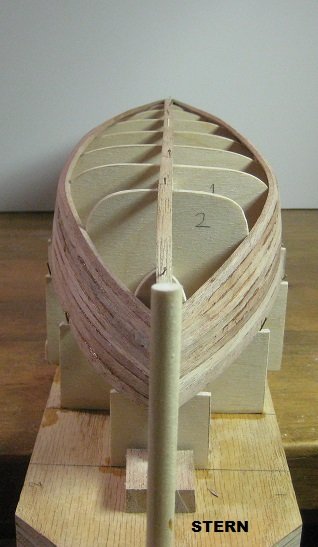
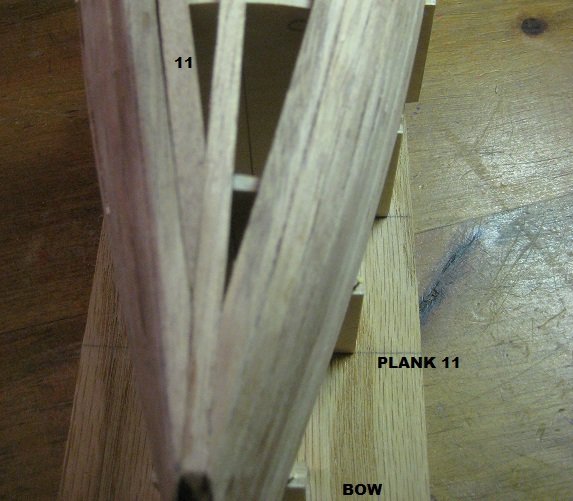
"If you make the planks a little wider (less taper) at the stern it will make the hull harder to make. I tried this on my second hull and what happens is that you still have to make that hard transition at frames 1 & 2 (circled on your photo) but you also have to bend the planks more severely into a "C" shape at the stern (flat axis of the plank not the narrow profile). If you use the taper, the planks can be more straight (less curved) at the stern. The "C" shape is hard to do because you have to try to force the plank to bend into this shape along the wide axis of the plank and to make matters worse the bend has to occur over the last 1 1/2 inches of the plank. Sadly, I have not found a better solution to this than what you did and that is what makes this hull for advanced to intermediate builders so pat yourself on the back for making this work!"
I was planning on full width sheer planks and garboard tapered to fit without bow/stern rise and then developing a plank tapering for the remaining 10 planks to fit in the space evenly.
Sorry for so many questions, but I have limited experience and have only planked one hull "the AVS" in the past.
Ken I am building a second boat. I have been studying and making my own decisions on how to go about it. I am going to go with How I perceive the hull to be built, by examining the photos, diagrams, and literature from the book. Ken I will put a more detailed explanation on how i will be doing this second hull hopefully this weekend on my thread here. I will also be giving my opinion of my decisions on doing the next hull this way.....But like you I do believe a garboard and sheer plank can both be placed on the hull. Scott pointed out how the most difficult part of the hull is how at the sides of the hull nearest the stern go from perpenticular to the water to horizontal to the water. I agree totally with Scott on this one.
Ken I will only be building the hull different from Scott's hull, but the rest of the build will pretty much follow his kit, with some little changes. As Scott pointed out, and I agree with this also is the fresh water eroded away all the exposed wood so you go to the bible and other information from the boat discovered in the Mederranean to build that portion of the hull which there is nothing really to go by. So it's will be my perseption from there on up to the sheer. So talk to you this weekend.............
Ken
-
-
Hi Mark, John, and Scott,
Thanks for your kind remarks guys appreciate it very much.....
-
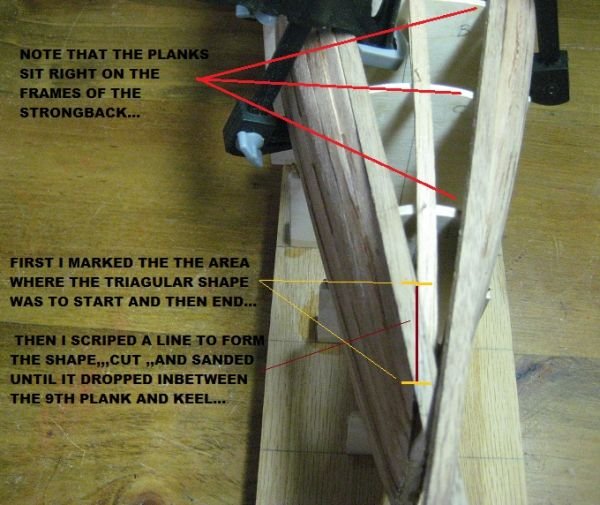
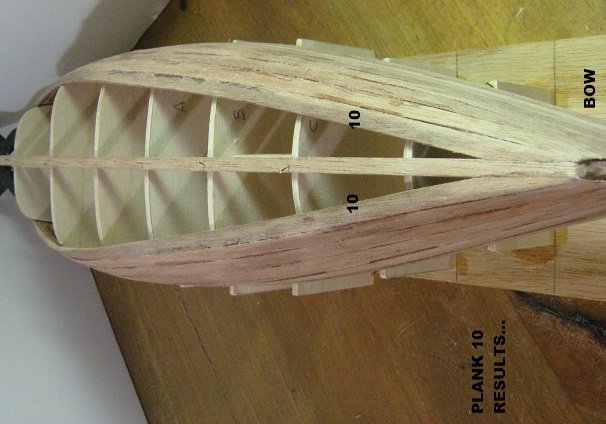
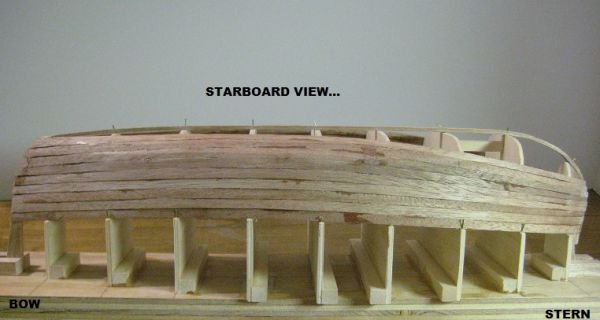
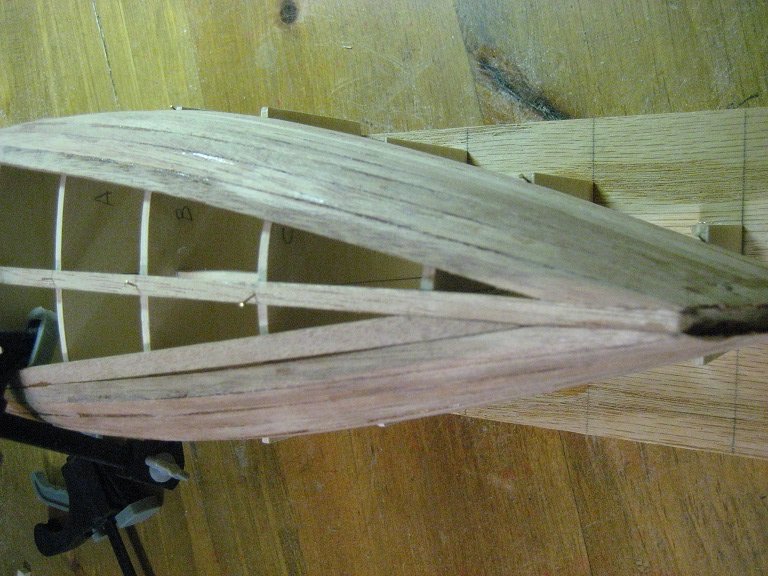
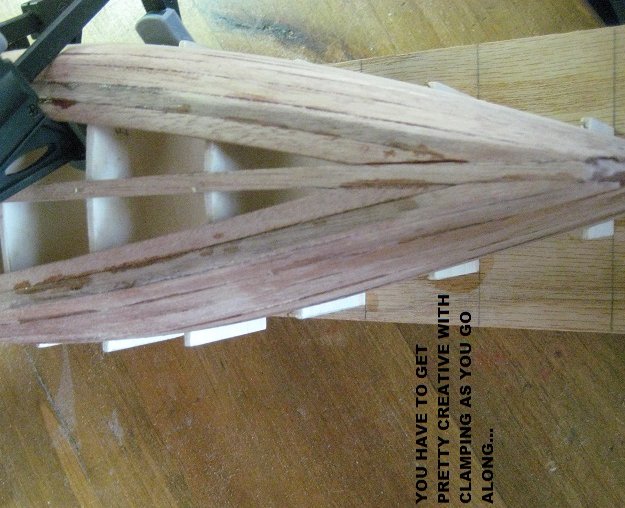
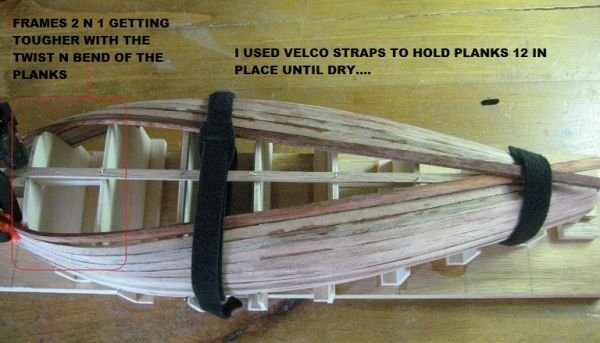
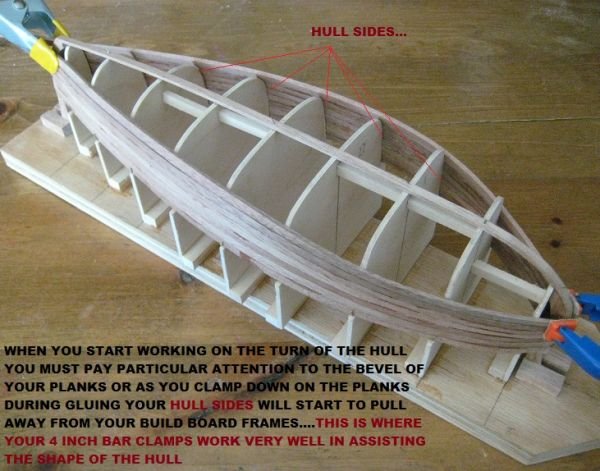
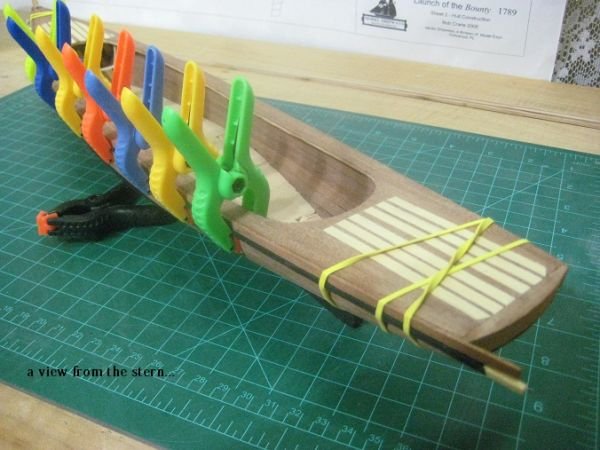
I FOUND THAT THE PLANKS COVERING THE FRAMES 1 AND 2 THE MOST DEMANDING AT THE STERN AREA. TO MAKE THEM FIT PROPER I HAD TO BEVEL THE PLANK ALREADY PLACED AND THE NEXT PLANK IN LINE...
 QUESTIONS AND REMARKS ARE VERY WELCOMED

- avsjerome2003 and Anja
-
 2
2
-
-
-
-
-
GREAT PRICE ON THE "CHUCKIE BLOCKS"
-
Hi Simon,
I try to keep it simple in my head about the Garboard. Its the first one i place, because i look at it as the foundation for all the other planks to sit on. As for how long it will be you must take measurements. But just keep in mind you want the garboard to have a horizonal or straight as possible edge on the top of the plank. That your next plank will sit as clean as possible. But you will get to the point tha this will change slightly and that is where you will have to bevel the edge of the plank that you are fitting the the already glued in placed plank. You keep this in mind then you stay away from spilling planks. But in your case a small boat like this should not have any spilled planks. I hope this helps you out...

-
Hi Michael and tarbrush and Thanks for stopping by.
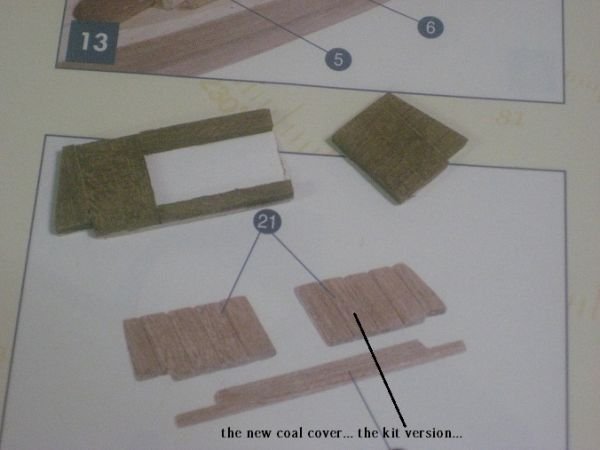
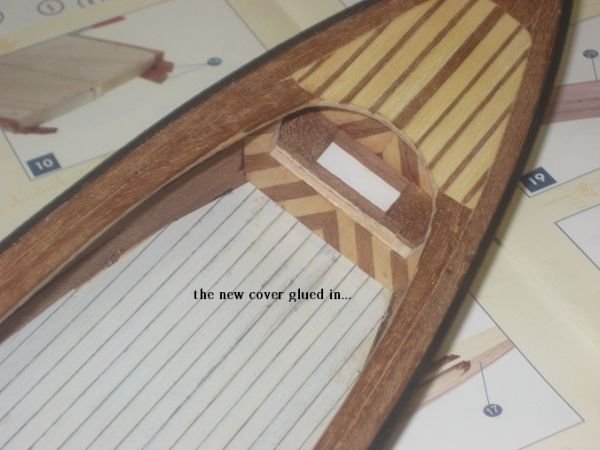
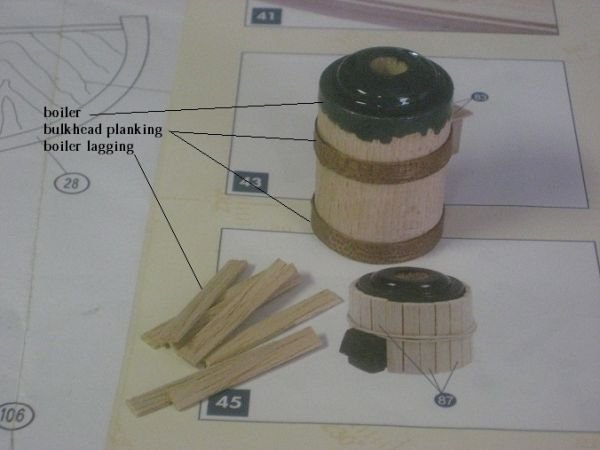
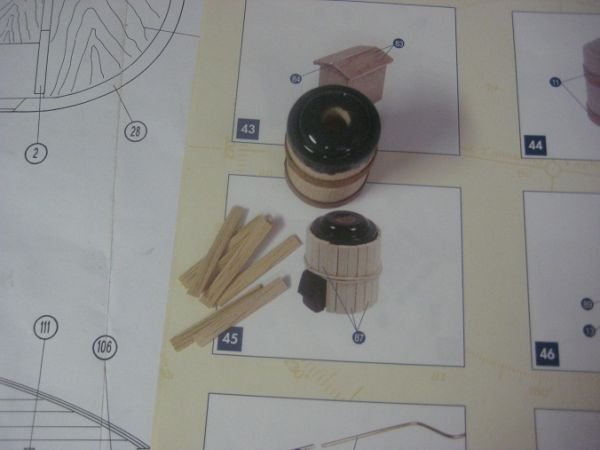
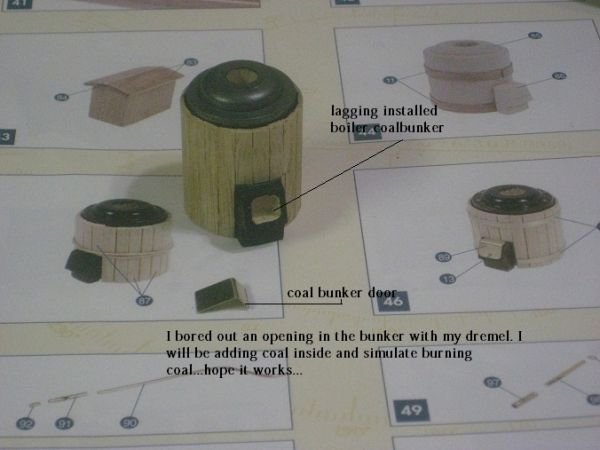
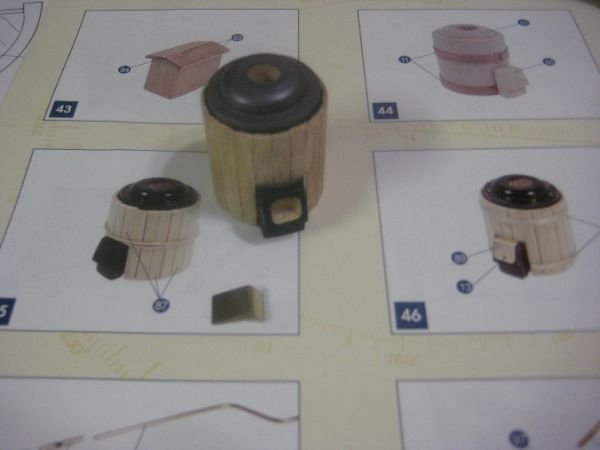
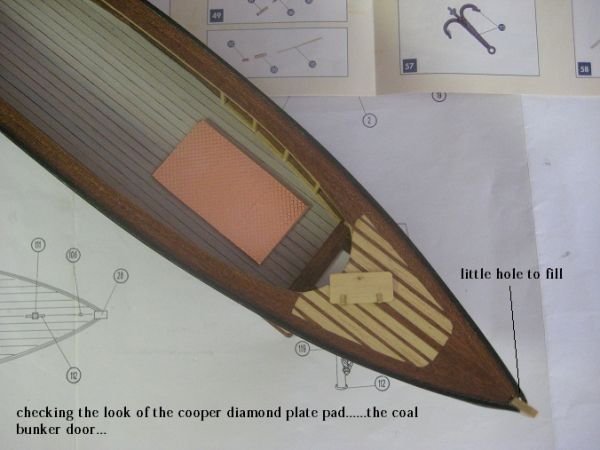
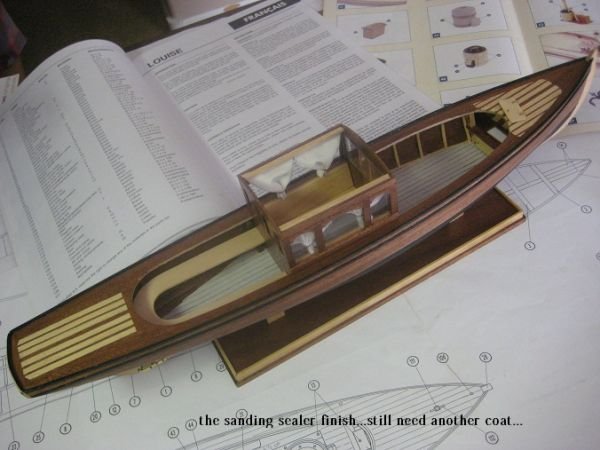
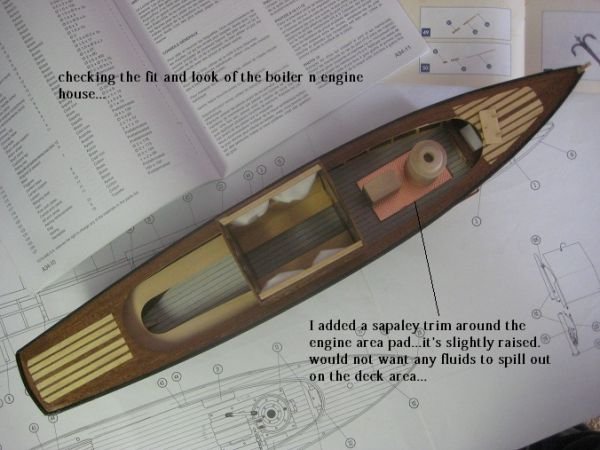
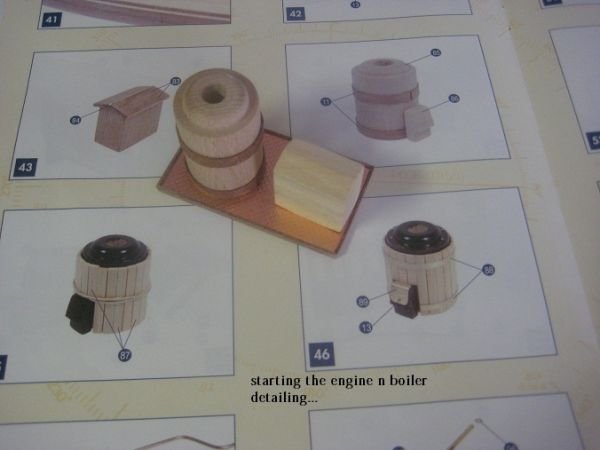
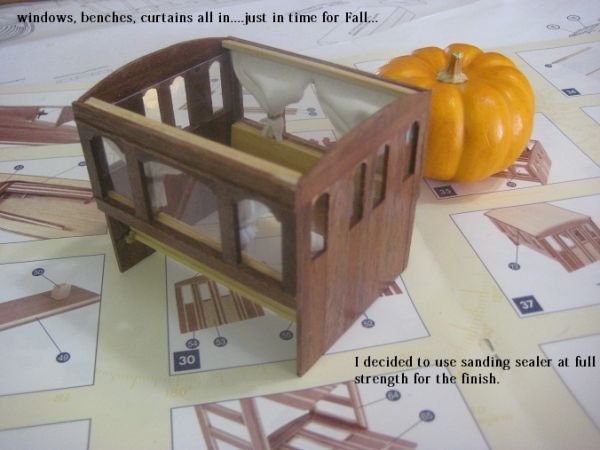
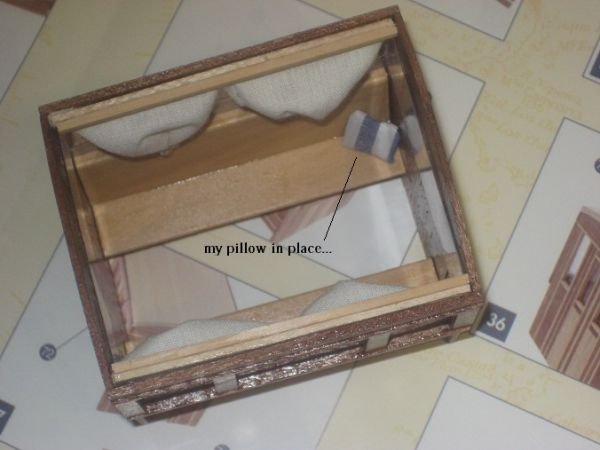
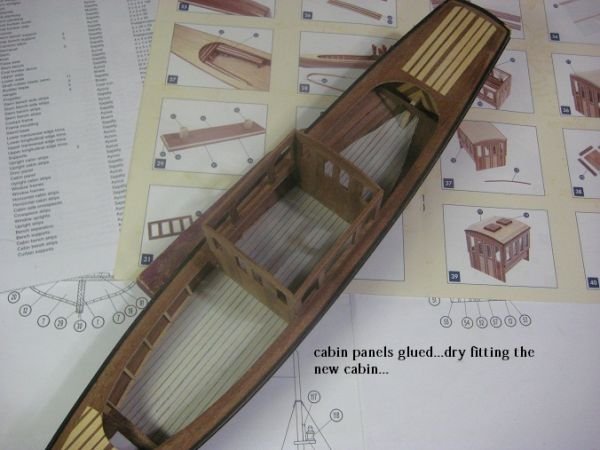
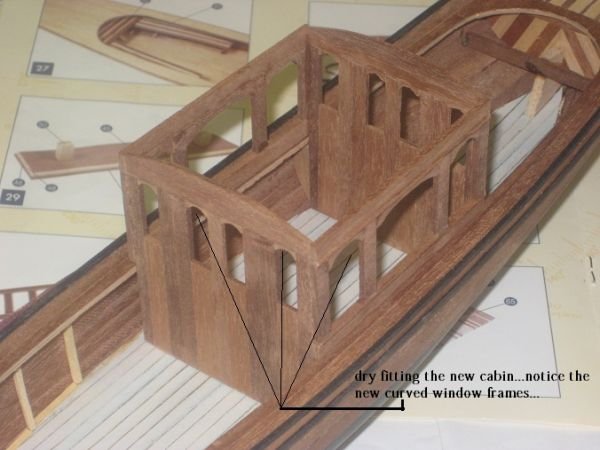
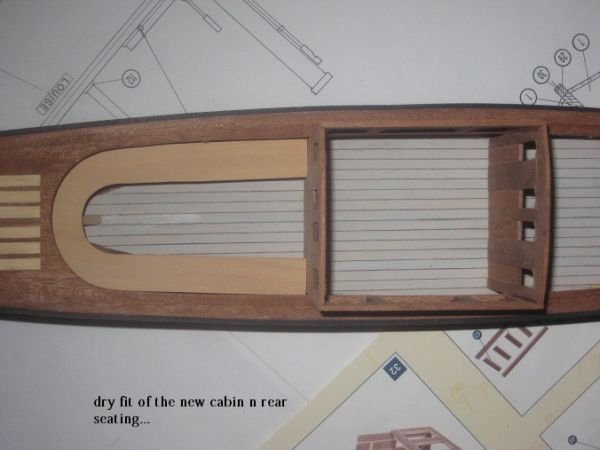
Tarbrush pictures you want pictures, well you got'em. I went a little overboard on this build by detailing out the fake stean egine by adding a whole lot more detail to it, plus I upgraded the canopy. So I got a lot of pictures to post on this little launch...

-
Hi John and Scott,
That was one of the reasons to tryout this kit from Scott. Building the hull from the sheer on up, using CA only, pre-tapered planks, plus going the ancient way of strakes first and frames afterwards. Like Scott said John he was trying to make the construction of the hull as easy as possible for a modeler. Tapering for him was no big deal because he's in the same club as you. You know you guys and your Brynes Table Saws.

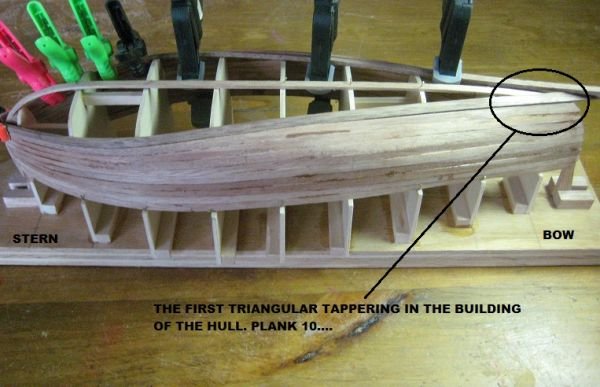
But here is a clearer explanation of the tapering of the planks that Scott had explained in his praticum....
Planks Three Through Six Or Seven
The Rest of the planks for the hull have been taper cut for you. The Tapered end goes toward the stern and I Put the tapered edge up (as You look at the hull on the strong back). This Will allow the planks to “rise” Toward the stern and will make it easier to place planks 7--‐12 Which must not only curve lengthwise, but also form the turn of the hull where the hull goes from being perpendicular to the water to being parallel to the water.
-
Impressive building log, Mario. What I would like to know, is how you write comments across your pictures. There must be instructions somewhere, but I have not located it yet.
Montani semper liberi Happy modeling to all and every one of you.
Crackers

Hi Crackers and Thank You,
To answer your question i use windows paint, or when ever my wife lets me use her photoshop but she is always editing your pictures with it. So its mainly windows paint. Just open it, pick your picture click on the icon "A" and your ready. click any where on your picture and a box will open up and your ready to go, just add your texted. I also use it to size my pictures also to fit MSW format. I add the lines and boxes you see on my pictures.
I enjoy reading other logs but hate to read an explanation and then I have to shift my screen back n worth as I read and shift ot see the picture. I like to make my threads easy to read when they are looking directly at my pictures....I hope this helps you out. Just give it a try and just remember to "save as" then once you save you have the original picture and your new edited picture to.
-
all questions and remarks are welcomed

-
 cheers Mario.......
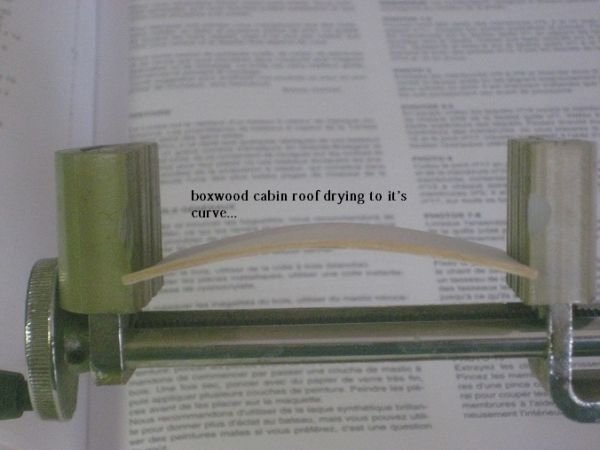


The Sea of Galilee Boat by Cap'n Rat Fink (mario) - FINISHED - 1/24 shell-method
in - Kit subjects built Up to and including 1500 AD
Posted
Hi Sjors, Frank, John, and Mark,
First of all it sure is nice to have a quiet weekend so far and able to stay home.
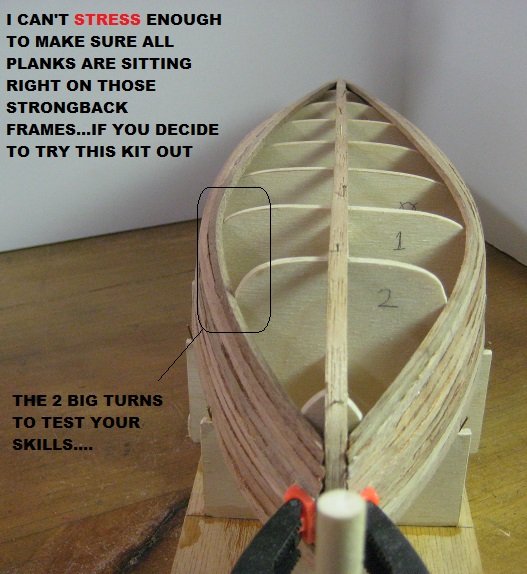
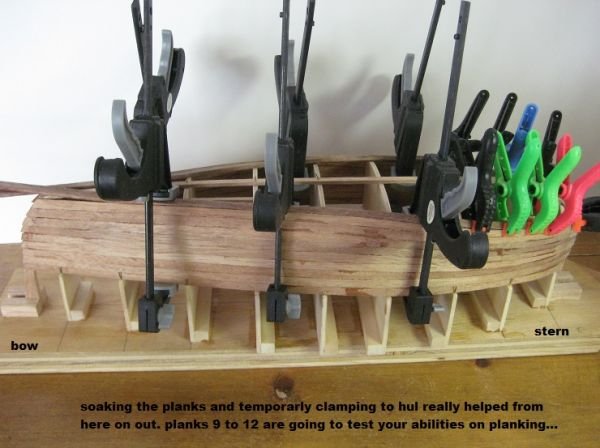
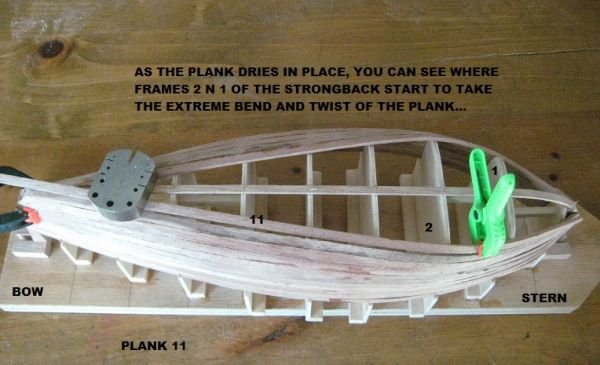
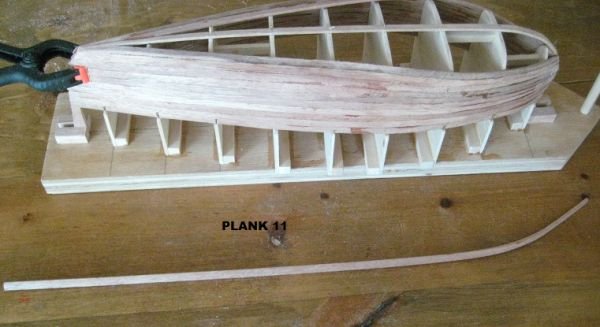
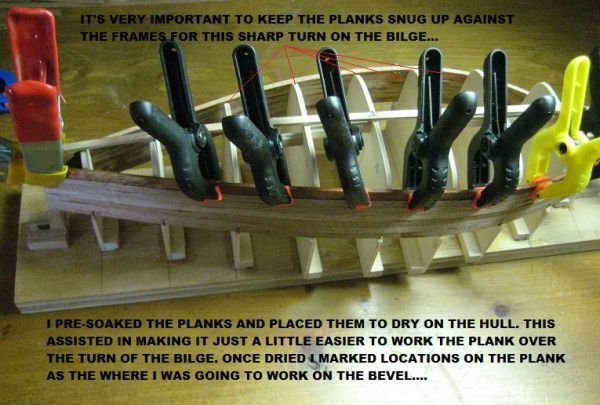
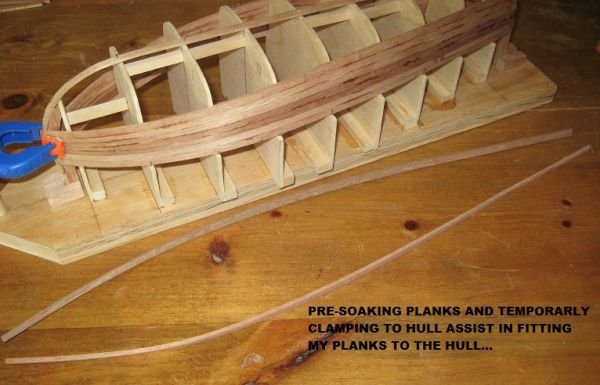
Next (I'm Bad). I just notice my remarks on my photos. When I remarked the planks drying in place I meant I soaked them all night then placed them and let them dry in place. Once dry I slowly fitting them, and then I glued them in place. Even with that they were still hard to get them in place. This by far is the most difficult hull I have ever faced. Those frames 1 n 2 on the strong back are a bear to deal with.
I have been doing some research and checking out other ancient boats and disecting "THE SEA OF GALILEE BOAT" book. I noticed some interesting things about how it was put together. So the 2nd hull in my second model will be more to what i have found from my research. I might do a Popeye and show the second hull on the same thread. If all works out I will start the 2nd hull when I return from vacation...