


Cap'n Rat Fink
-
Posts
829 -
Joined
Content Type
Profiles
Forums
Gallery
Events
Posts posted by Cap'n Rat Fink
-
-
THANKS FOR STOPPING BY DAVE.....
Well finally back at the echo again.............
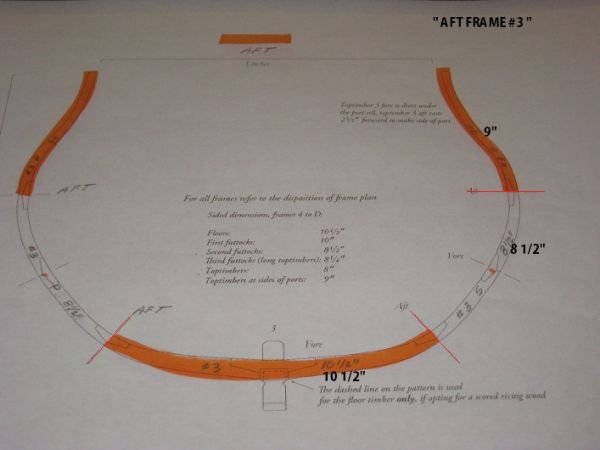
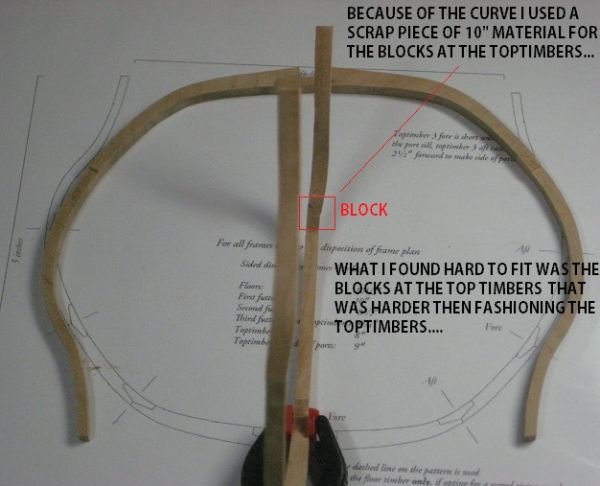
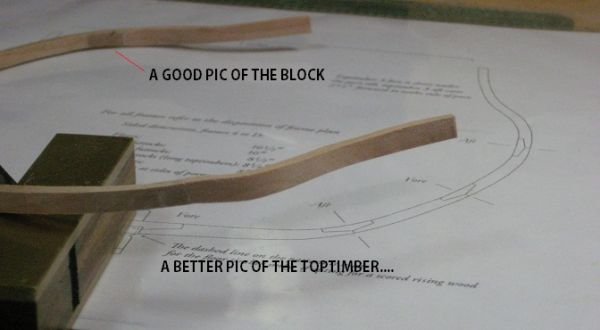
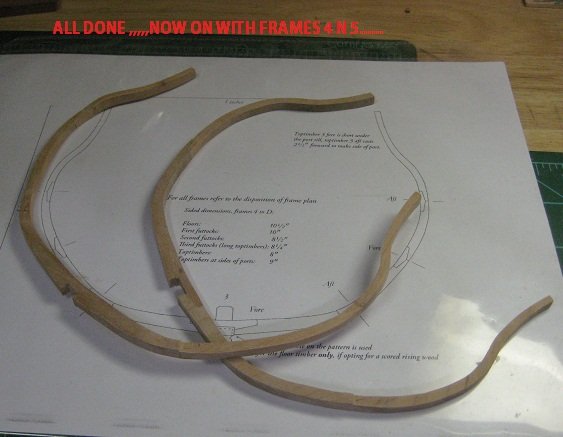
over the weekend i started and finished off frames 3 fore n aft. the only power tool i used was my micro mark band saw. i have no jig saw or barrel sander. after using the band saw it was all files and sanding blocks to get frame 3 aft shaped per the plans.....i found that making the toptimber was easier then i thought it would be, but i had a devil of a time fashioning the blocks to the toptimbers.
i placed the frame in all sorts of configurations in my panavise, being very careful not to break it during filing and sanding it down. i even held it in my hand with some areas of sanding because i just could not get to sit right in the vise. ah to have a barrel sander. oh well ! so here are my results.
hopefully by tomorrow night frames 4 n 5 will be completed and i will be raising the frames by the weekend....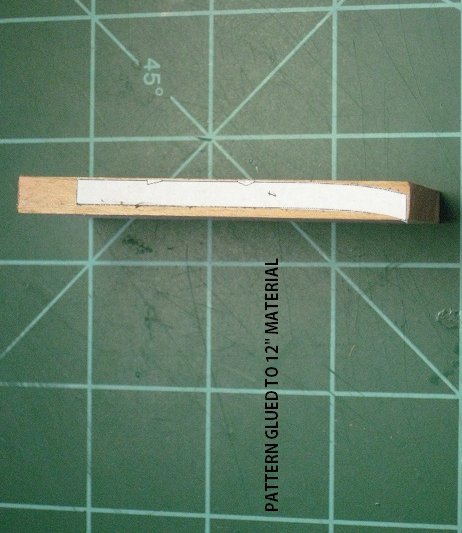
cheers Mario.......
"Develop success from failures. Discouragement and failures are two of the surest stepping stones to SUCCESS!" -
HI FRIENDS THANKS FOR STOPPING BY,
WELL I TRIED TO GET ALL THE FRAMES COMPLETED THIS WEEKEND, BUT SO MANY THINGS WERE GOING ON THAT I HAD VERY LITTLE TIME TO MESS THE THE FRAMES.
BUT I WAS ABLE TO COMPLETE FRAME 3 FORE N AFT SECTIONS. THEN AS LUCK WOULD HAVE IT MY INTERNET PROVIDER WENT DOWN AT 8 PM LAST NIGHT CAILF TIME. SO I COULD NOT POST MY PROGRESS. OH WELL MAYBE TONIGHT WHEN I GET HOME IT WIL BE UP N WORKING AND I WILL POST MY FRAME 3 CONSTRUCTION.
RIGHT NOW IT LOOKS LIKE MONDAY AND TUESDAY LOOK GOOD. SO HOPEFULLY FRAMES 4 N 5 WILL BE COMPLETED BY TUESDAY NIGHT AND I WILL BE RAISING THE FRAMES BY THIS COMING WEEKEND....
YOU ALL HAVE A GOOD DAY AND SEE YA TONIGHT
-
COMING ALONG NICELY MAURY...
-
HI DAVE,
SHE LOOKS REAL GOOD.
-
VERY NICE KEEL ASSEMBLY BOB....WELL DONE
-
NICE WORK JIM....
-
-
WELL WITH COMING AND GOING THIS WEEKEND I WAS ABLE TO BUILD AND COMPLETE 6 OR THE 12 FRAMES.
I DECIDED TO BUILD ONE FRAME AT A TIME WHICH WORKED VERY WELL FOR. THAT WOULD I WAS ABLE TO DEVOTE ALL MY CONCENTRATION TO ALL THE PARTICULAR DETAIL THAT GOES INTO JUST ONE FRAME.
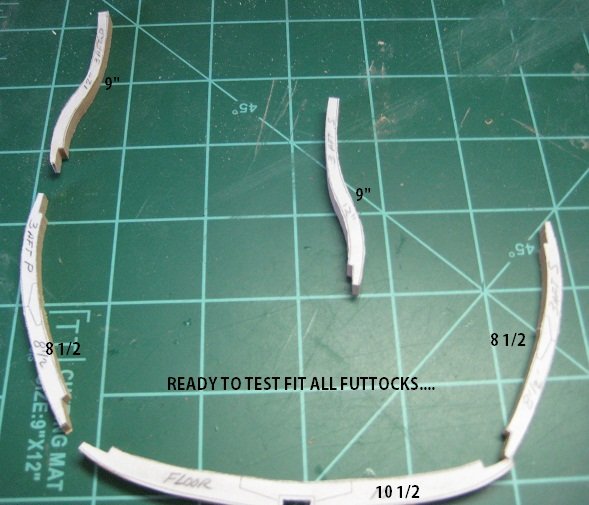
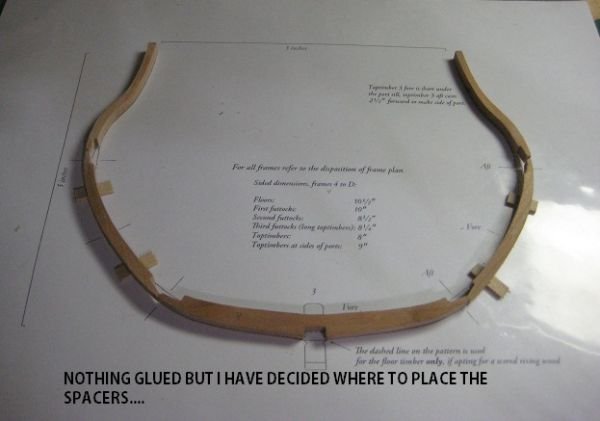
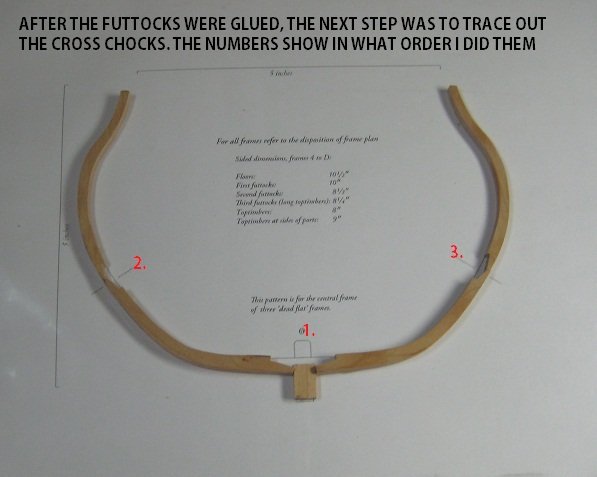
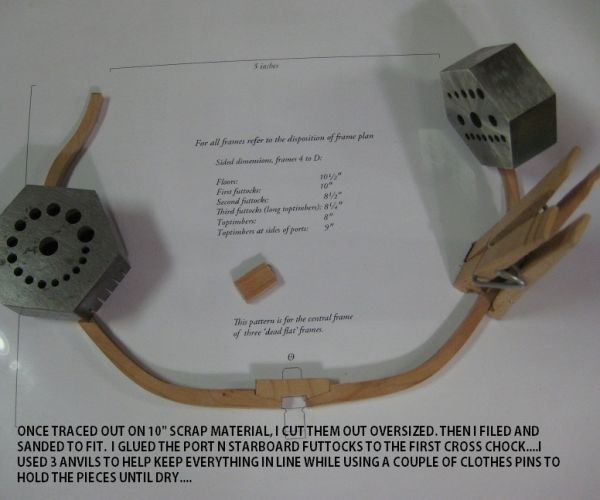
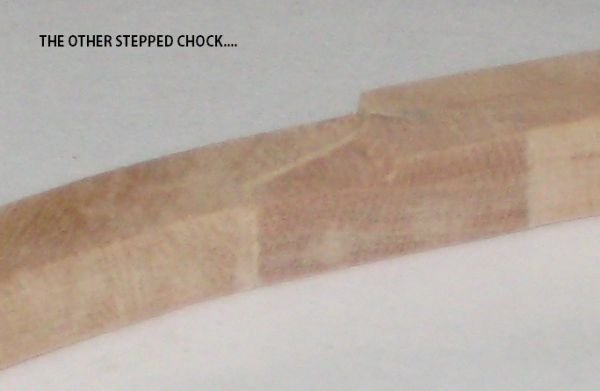
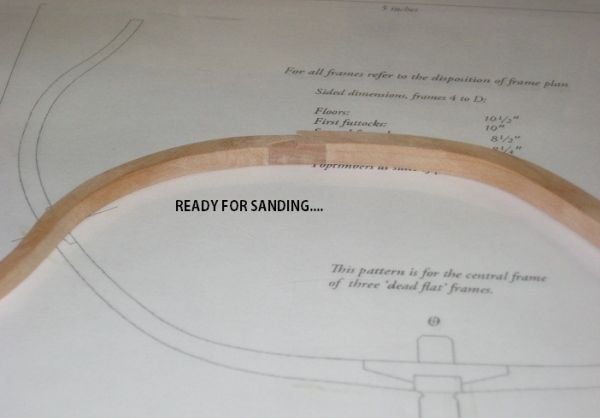
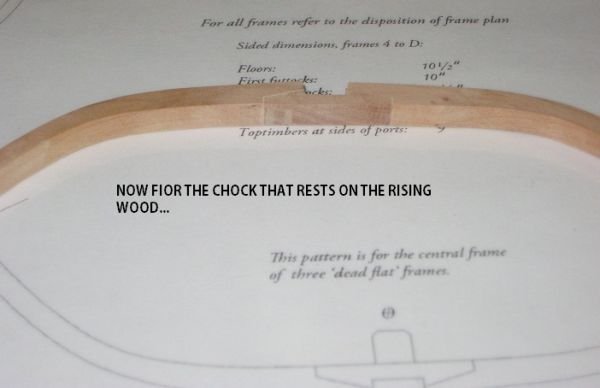
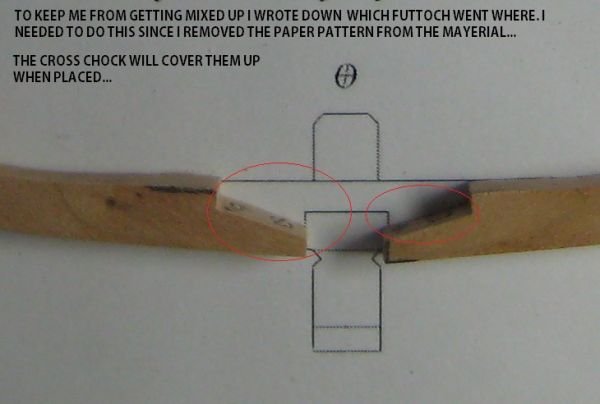
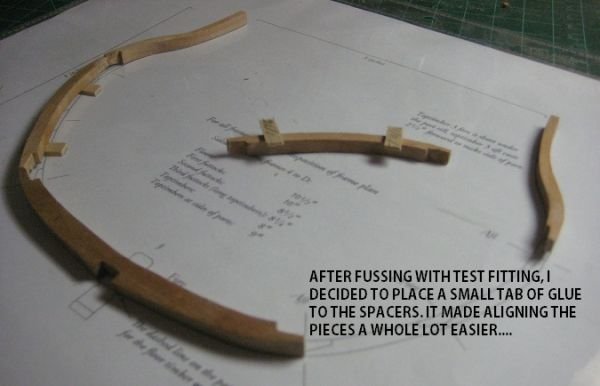
ONCE ALL THE FUTTOCKS WERE LINED UP I GLUED THEM OVER THE DIAGRAM TO THEM ALIGHNED. ONCE DRIED I CUT OUT THE CROSS CHOCKS. FILED THEM TO FIT. THEN I GLUED THEM IN PLACE, OVER THE DIAGRAM TO THEM LINED UP. I PLACED WEIGHTS ON THEM UNTIL DRY.
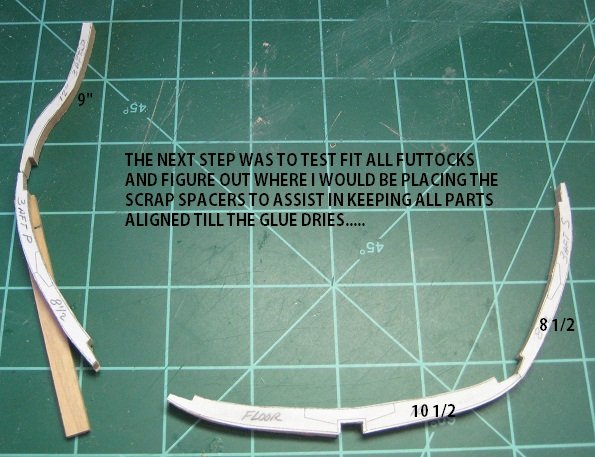
WHILE I WAS WAITING FOR THE GLUE TO DRY, I WENT AHEAD AND PREPPED THE NEXT FRAME IN LINE. ANOTHER WARDS GLUEING THE PATTERNS TO THE MATERIAL AND CUTTING ALL FUTTOCKS OUT. BY THEN THE PREVIOUS FRAME WAS DRIED.
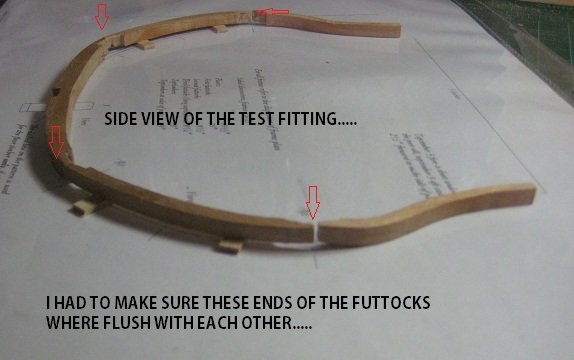
I WENT AHEAD AND GLUED THE NEXT FRAME TOGETHER. FUTTOCKS ONLY.....WHILE DRYING I TRIMMED THE CHOCKS AND STARTED CLEANING UP THE PREVIOUS FRAME.
THIS WAY IT KEPT ME MOVING ALONG.
MAKE SURE YOU KEEP PAGE 12 RIGHT NEXT TO YOU, BECAUSE IT GOES OVER SEVERAL DIFFERENT FRAMES YOU MUST PAY PARTICULAR ATTENTION TO DETAIL...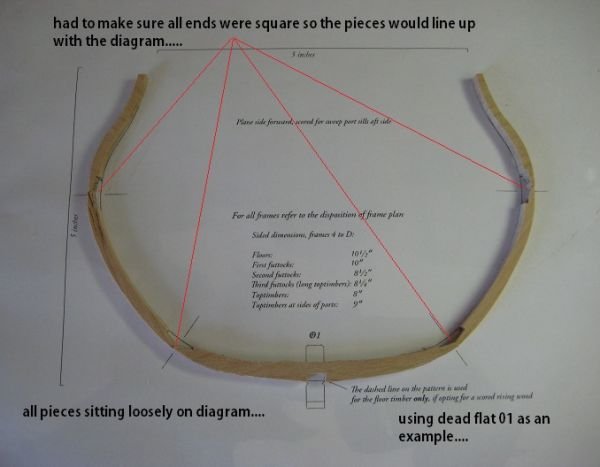


-
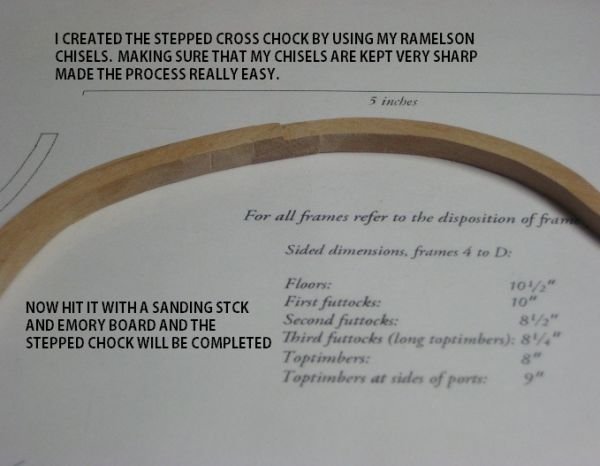
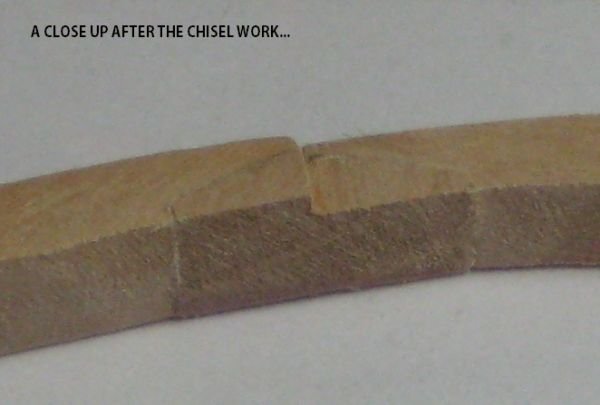
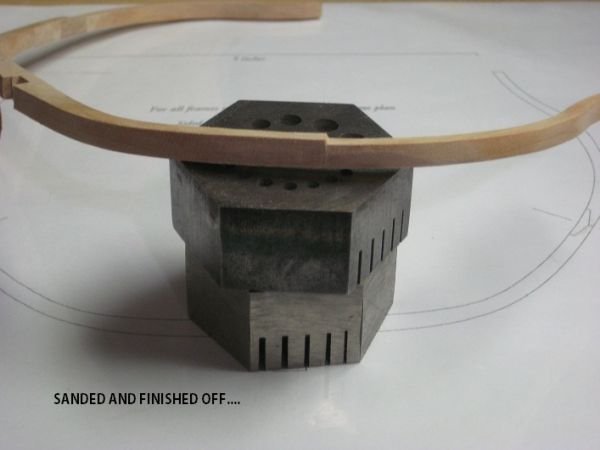
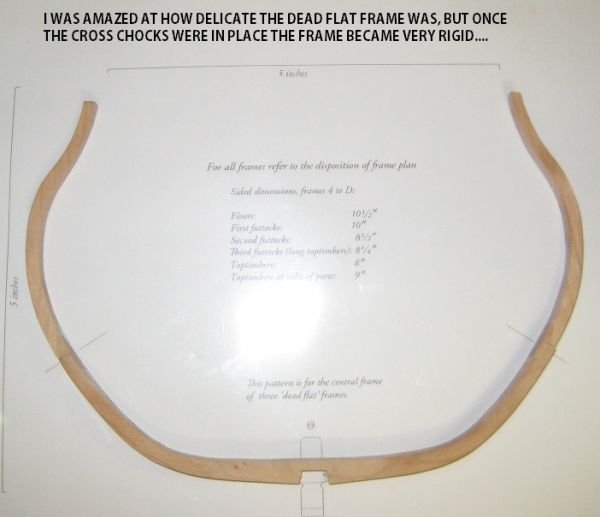
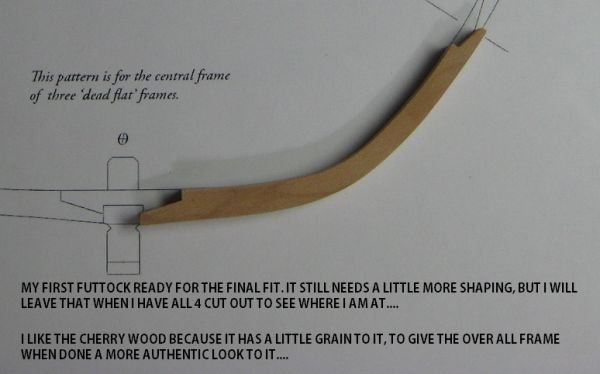
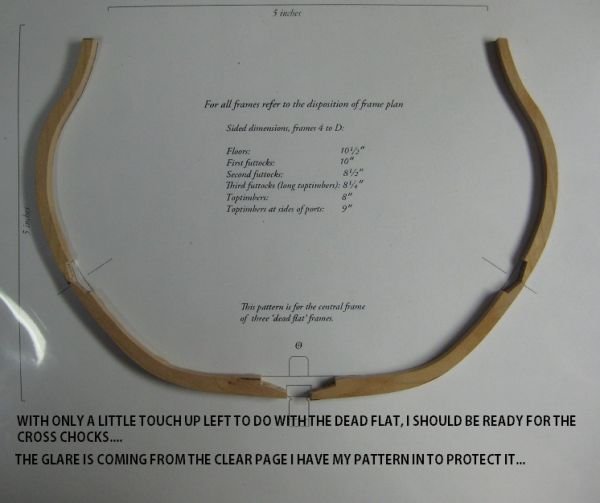
HOME LATE FROM WORK TONIGHT BUT HAD TO FINISH OFF THE “DEAD FLAT FRAME”. IT TOOK ME A COUPLE OF HOURS SINCE THIS IS ALL NEW TO ME. BUT IT WAS GREAT FUN. I LEARNED A LOT FROM THIS ONE FRAME. I SHOULD BE ABLE TO SPEED UP A BIT NOW THAT I HAVE A GOOD IDEA ON HOW TO CONSTRUCT THE FRAMES. I EXPLAINED MY PROCESS ON MY PICTURES AS USUAL. IF I AM DOING IT WRONG PLEASE LET ME KNOW.
WHAT AMAZED ME WAS HOW DELICATE THE FRAME WAS WHEN GLUED WITHOUT THE CROSS CHOCKS, AND THEN HOW RIGID IT BECAME ONCE THE CHOCKS WERE IN PLACE.
I'M HAVING A GREAT TIME LEARNING THIS METHOD OF CONSTRUCTION!!!!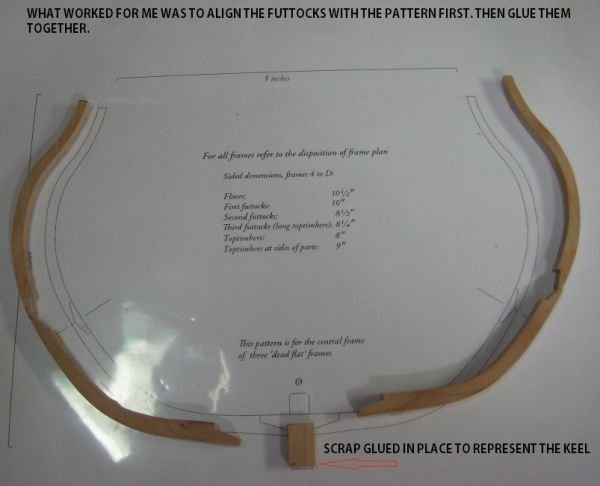
-
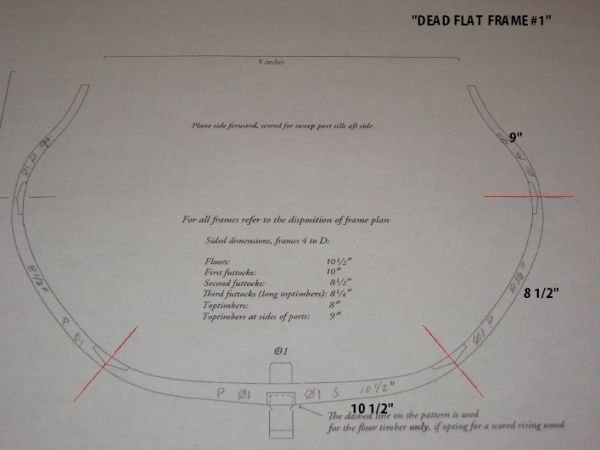
WELL I HAD A LITTLE TIME TONIGHT TO MAKE A LITTLE MORE PROGRESS. I DECIDED TO WORK ON CREATING THE “DEAD FLAT 0”....
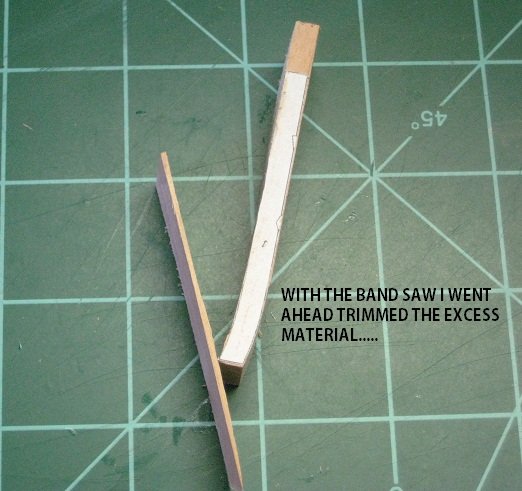
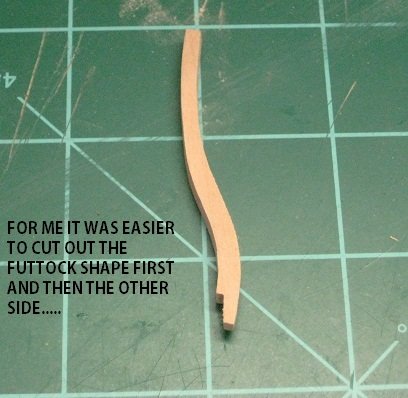
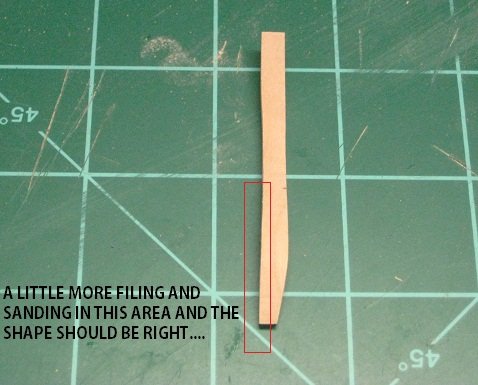
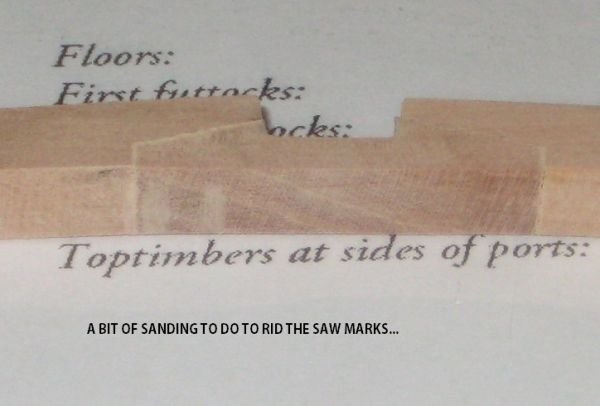
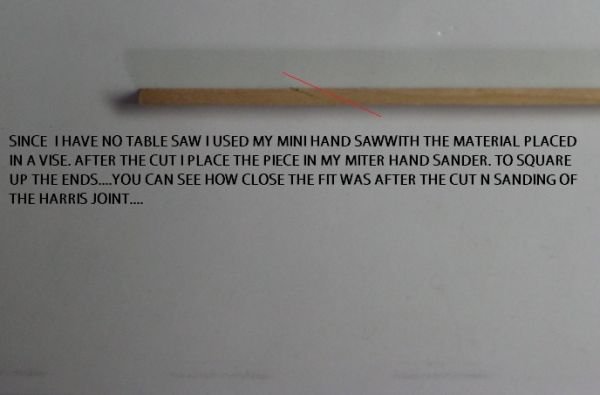
AFTER GLUING AND CUTTING OUT THE FUTTOCKS WITH MY BAND SAW, I CLAMPED THE PIECE TO MY VICE. NOW FROM THERE I USED MY FILE, DIFFERENT SIZE DOWELLS WITH SANDPAPER, SANDING BLOCKS, SANDING STICKS OF VARIOUS SIZES, AND EMORY BOARD. MOST WERE HAND MADE.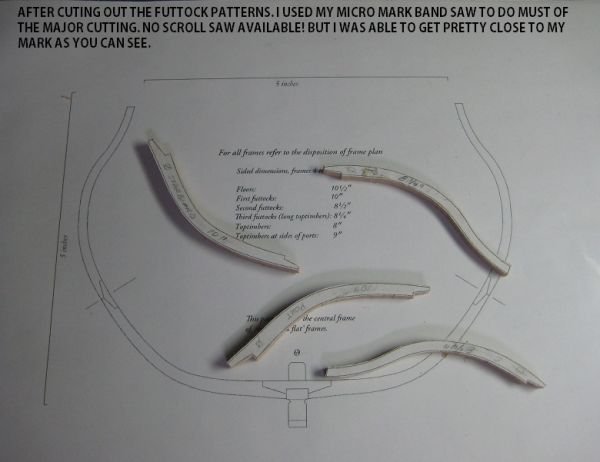

-
-
WELL I FINALLY GOT GOING WITH THIS CROSS SECTION. GETTING OVER MY BRONCHITIS SLOWLY, SO ALL WORK IS BEING DONE INSIDE OF THE HOUSE, A REALLY COLD FRONT HAS HIT SOUTHERN CALIFORNIA. 16 DEGRESS LAST NIGHT.
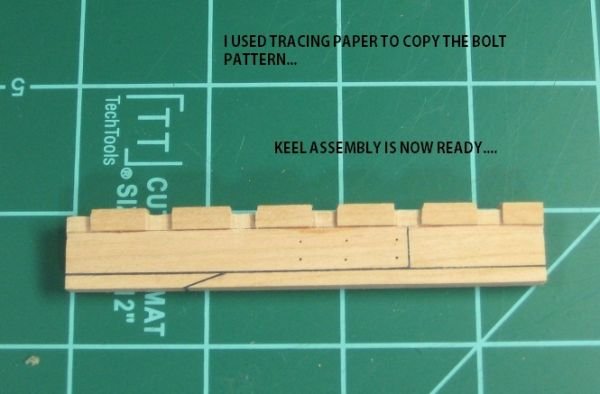
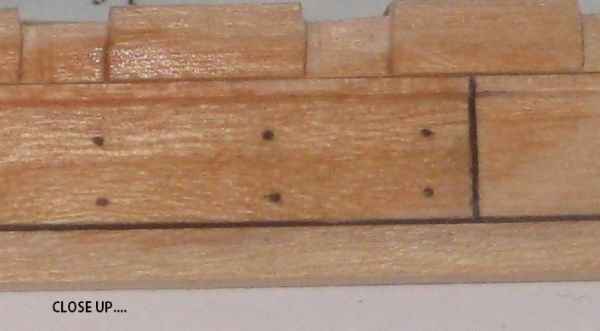
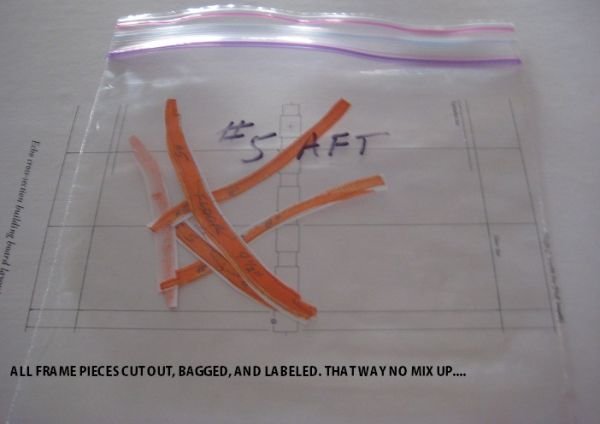
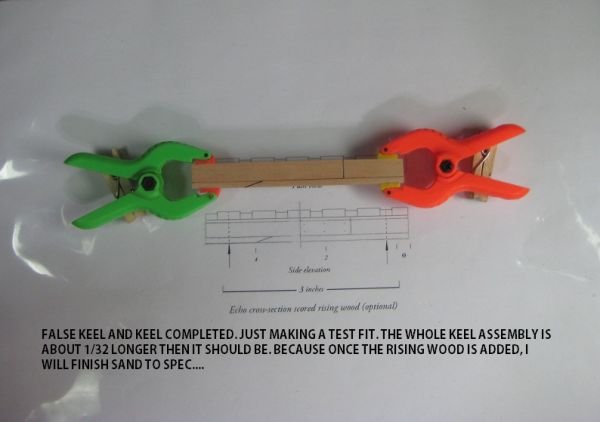
SINCE BEING SICK AND NOT DOING MUCH I FIRST DID MORE PREPPING. CUTTING OUT ALL THE FRAME PATTERNS AND ORGANIZING THEM. MOUNTING THE PLAN TO THE BUILDING BOARD.....AND FINALLY CUTTING OUT AND BUILDING THE KEEL ASSEMBLY.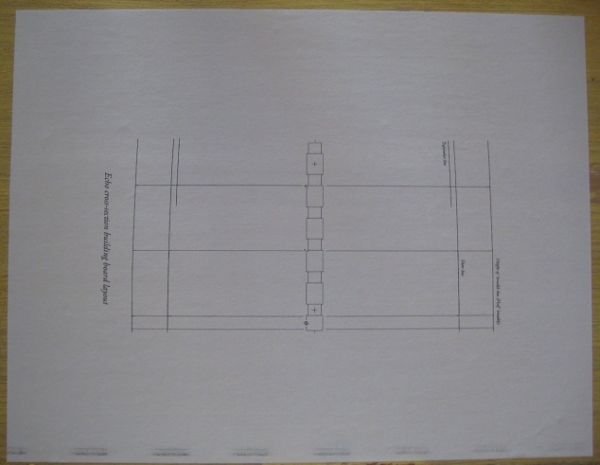
-
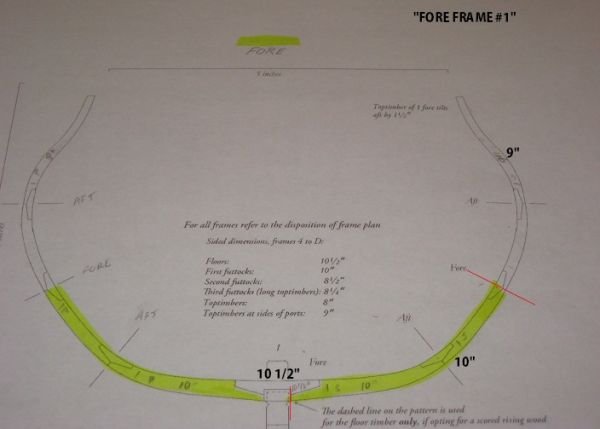
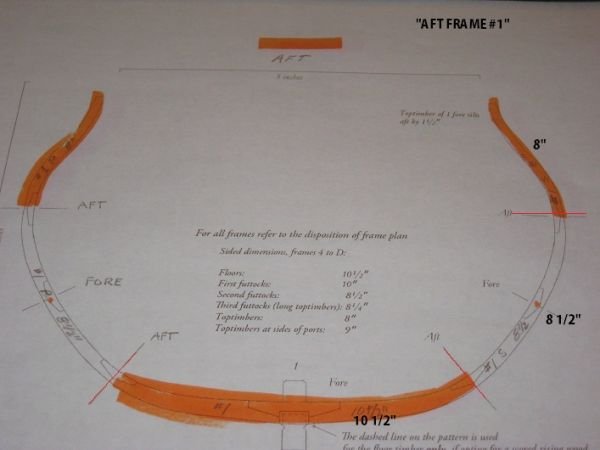
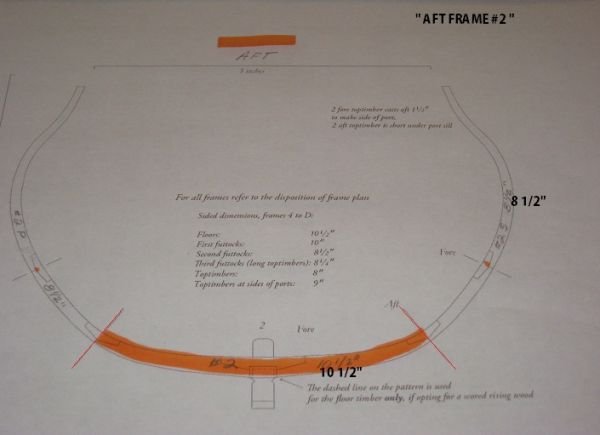
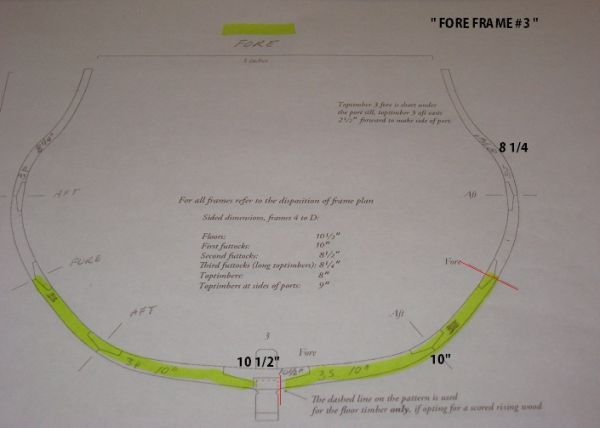
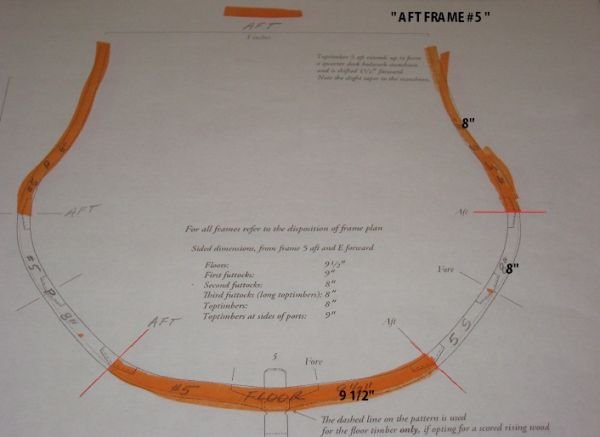
So enough said and on with the show.....and already I have a few questions.
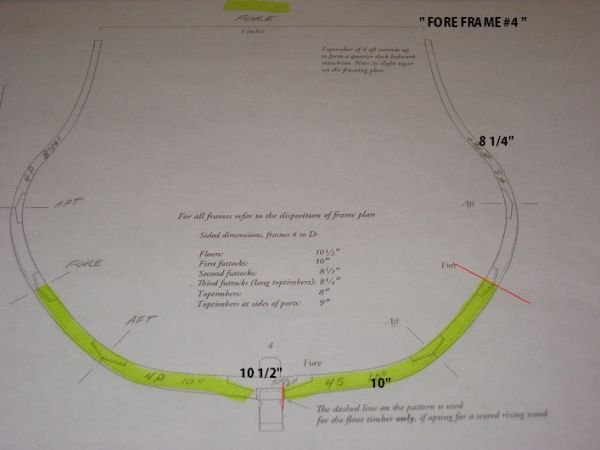
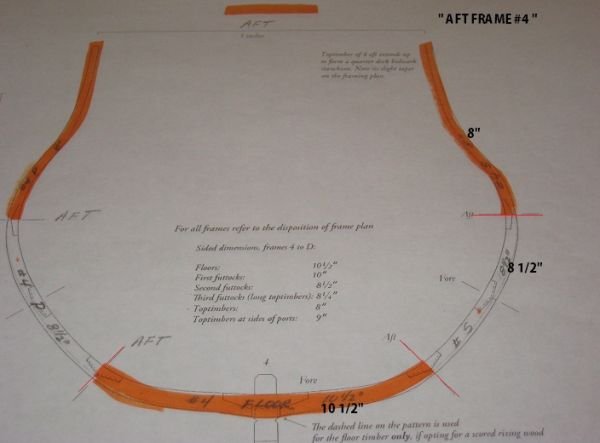
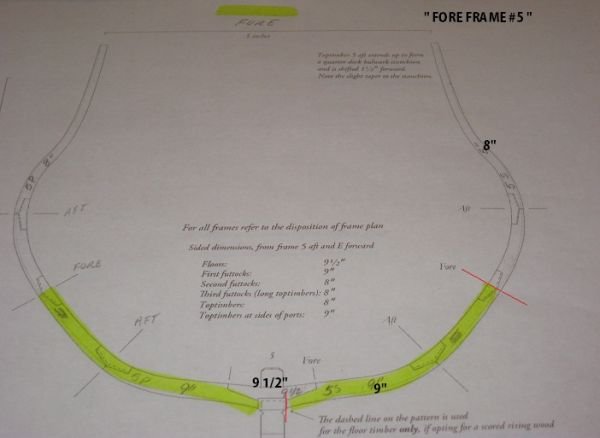
I decided to add pictures of my deductions on how I perceive what size timber goes with which futtock. Please you experience modelers with POF, let me know if my deductions are correct. If not please let me know how I screwed up. If I really screwed up, no matter just have to re-print more copies and start from square one.
I have also decided to cut down on my posting to spend more time with my family and some more time on physical modeling, rather then spend soooo much time on the PC. So see you all next week and have a wonderful week
cheers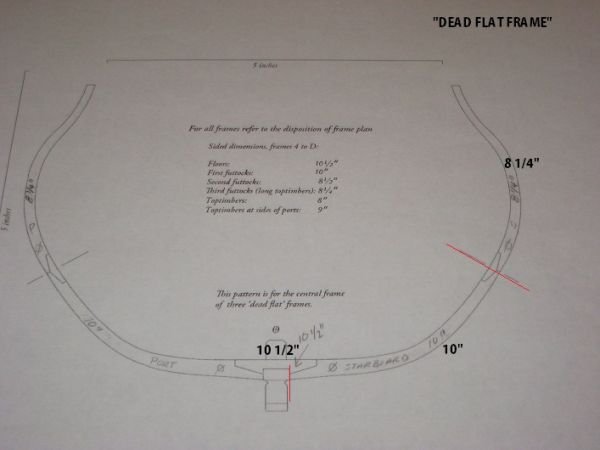

-
HELLO ALL,
I decided upon THE ECHO CROSS SECTION be cause of my naivness with plank on frame models.
This little model looked to be a great way to learn the details of putting together a POF model. Without taking on a bigger project and finding out it was a bit too complicated.
After reading through the practicum and already learning about futtocks, floors, long top-timbers, top timbers, and ect. Admiralty Models put a great little project together to learn these things. It will fill in a lot the blanks that I have with model ship building.
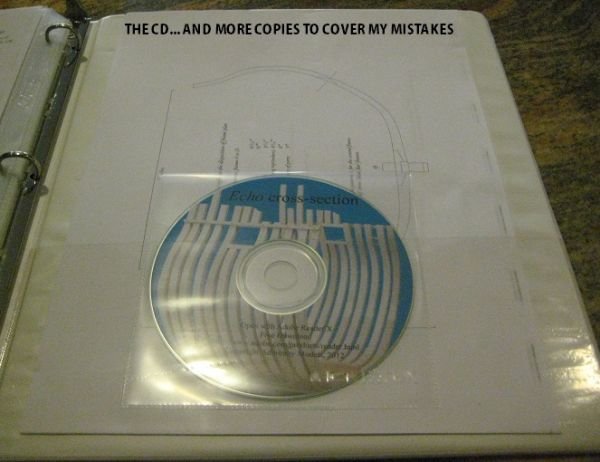
As my custom I will be posting a lot of detailed pictures. Not only for others to pull information from, but also for others to help me with my roadblocks. After working things out with Greg and Jeff I will be making my cross section out of CERRY WOOD. I received the CD and the 6 pounders a little over a week ago. Jeff notified me that the material should be in my hot little hands by the end of this coming week. That's good because I am battling bronchitis and the Dr. said to cool it or I will be seeing Pneumonia in my future. So with my voice going out I gotta do something. So I am sitting on my butt trying to cough up a lung at times. But there is nothing wrong with my brain. So I am playing Capt. Kirk(STAR TREK) and trouble shooting my plan of attack from the bridge. So I won't be doing any physical modeling until I am over this bronchitis thing. But I will be prepping everything I can get away with.
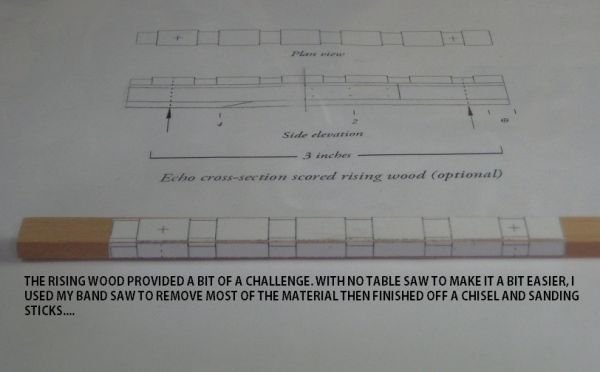
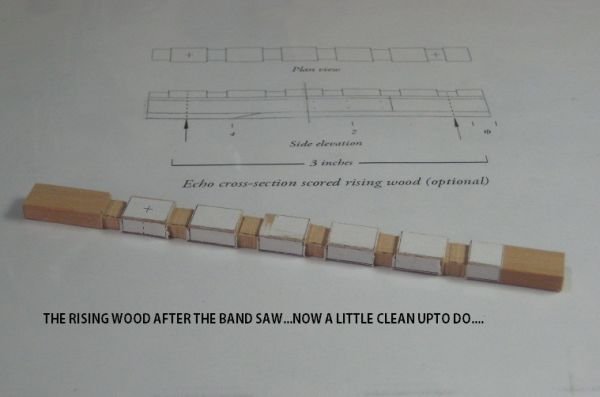
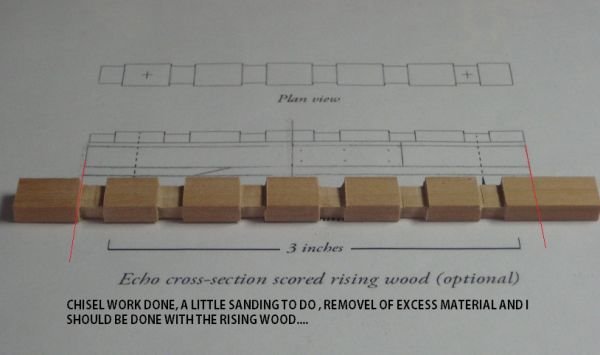
So those of you who do not know me. All I have for power tools is a couple of Dremels, micro mark band saw, and a combination mini wood lathe. So most of this model will be done with hand tools. I am a little anal about details. I am also very organized. At this time I am deciding weather to finish off with diluted sanding sealer or teac oil. I will be building a build board before I start anything. I still have not decided on how I will be making the scores for the ports. Greg gave 2 examples to choose from. I will be doing the scores on the rising wood.
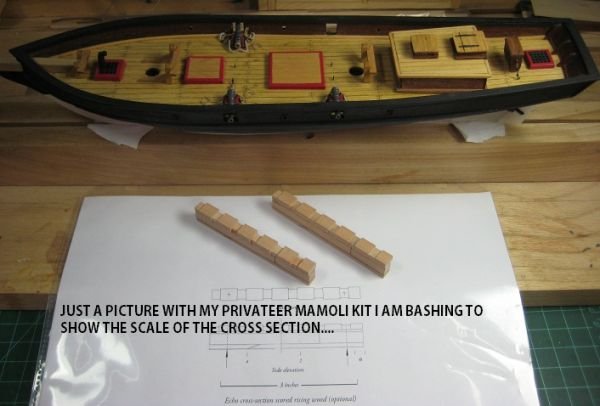
So with the challenges of the scores for the rising wood and the port sills, the timbers that are shifted or cast, the cross chocks, the scrap pieces being used for the spacing of aft frame 5, and other challenges this kit packs a BIG PUNCH in a SMALL PACKAGE to learn and gain a whole lot of knowledge of ship wrighting. Which I lack very badly.

-
Hi Rusty nice to see you having at it again. Good to know you will being updating your Triton cross section too.
take care
-
HI Mark, Jeff,
Good to be back.....

-


Echo by Cap'n Rat Fink - 1/48 - Cross-Section
in - Build logs for subjects built 1751 - 1800
Posted
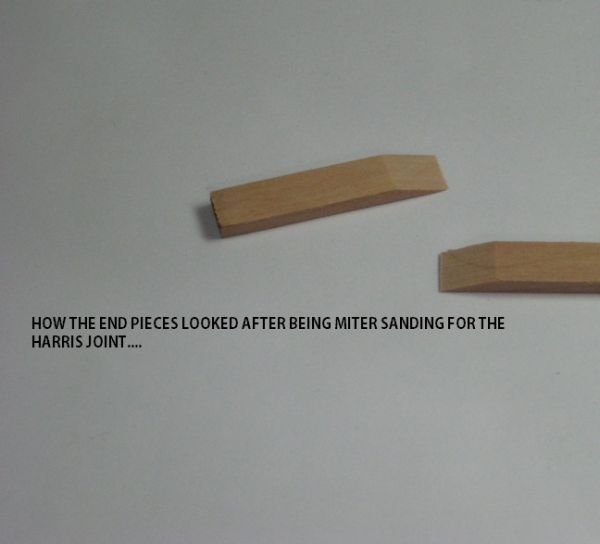
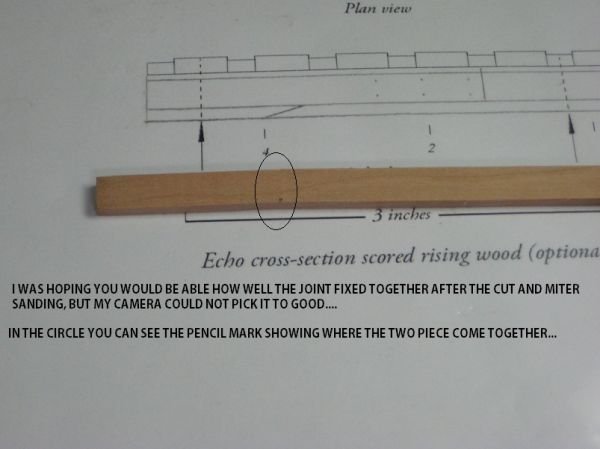
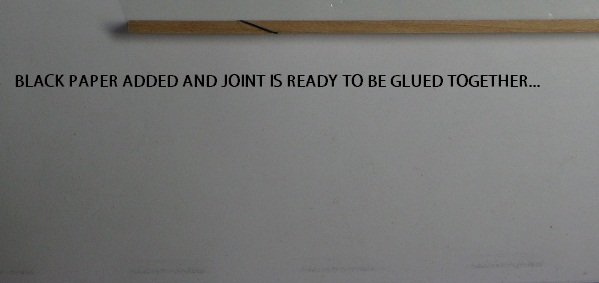
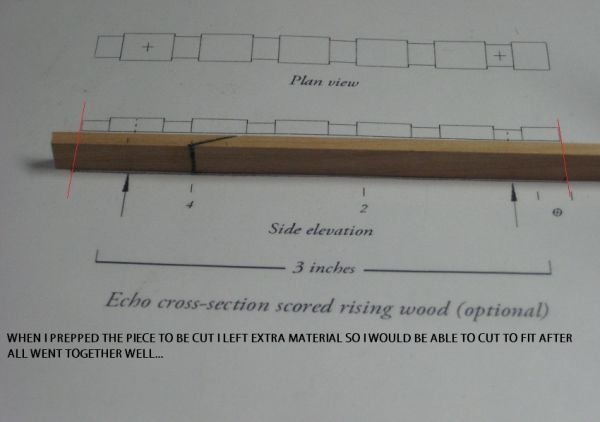
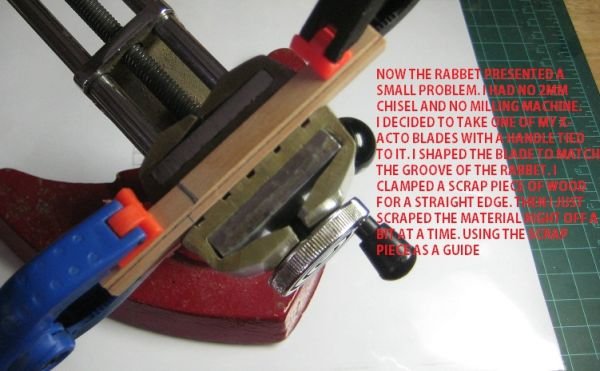
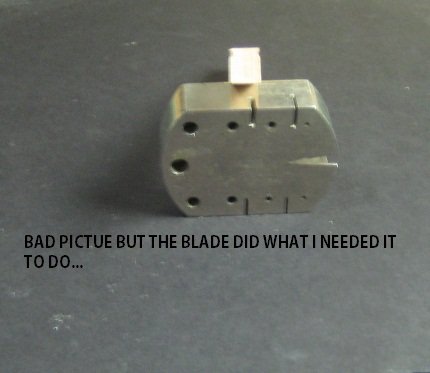
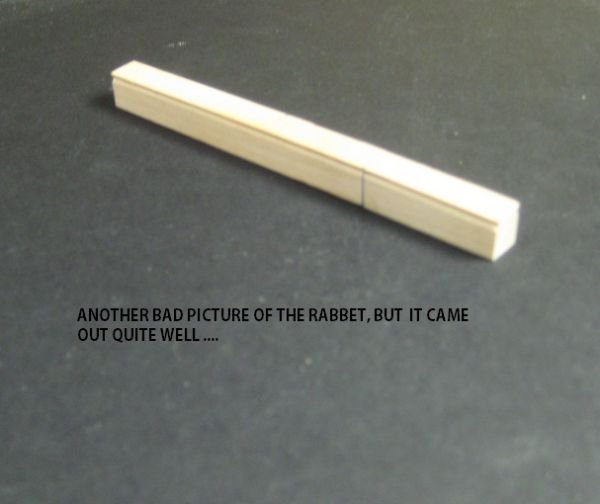
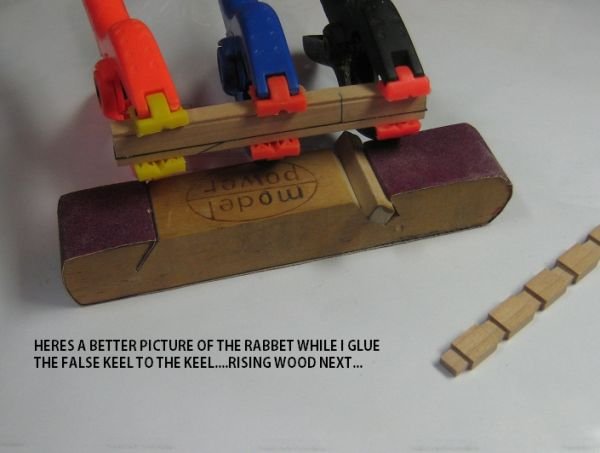
nd a few more pic's........

cheers Mario.......