HOLIDAY DONATION DRIVE - SUPPORT MSW - DO YOUR PART TO KEEP THIS GREAT FORUM GOING! (Only 20 donations so far - C'mon guys!)
×


jonny.amy
-
Posts
346 -
Joined
-
Last visited
Content Type
Profiles
Forums
Gallery
Events
Everything posted by jonny.amy
-
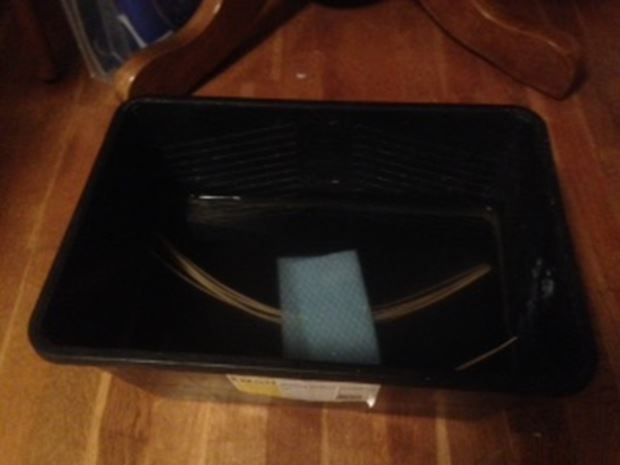
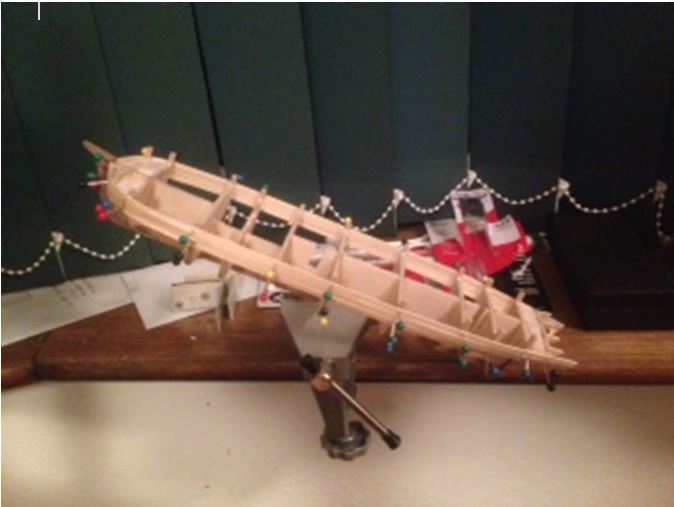
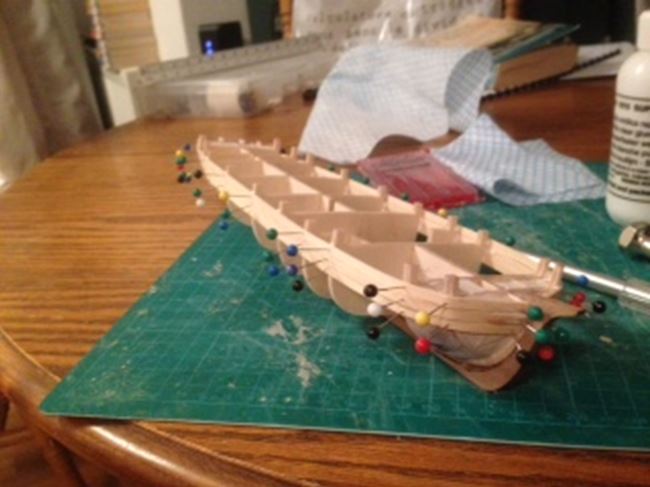
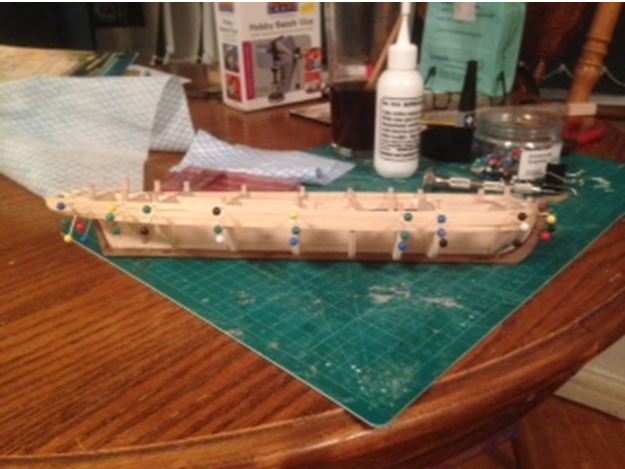
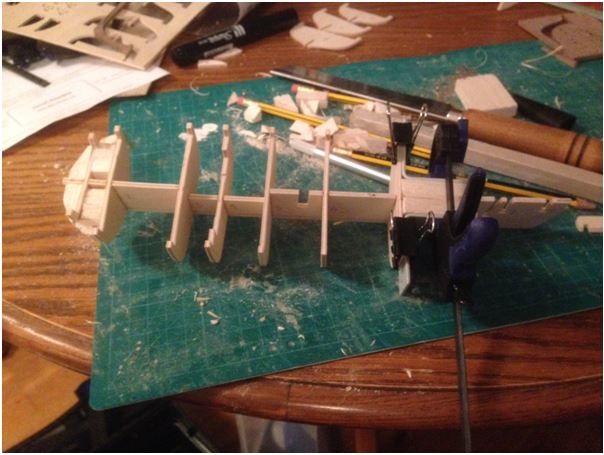
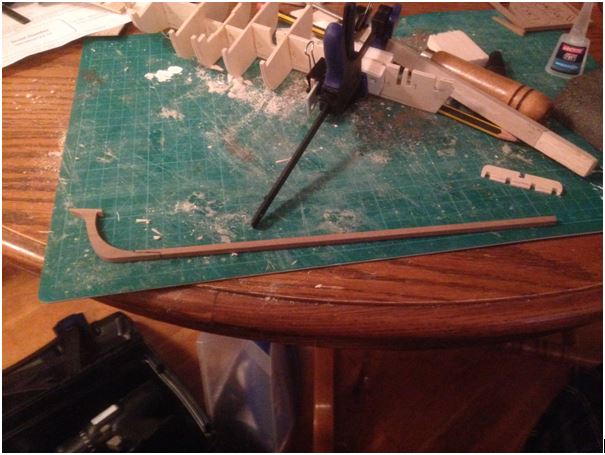
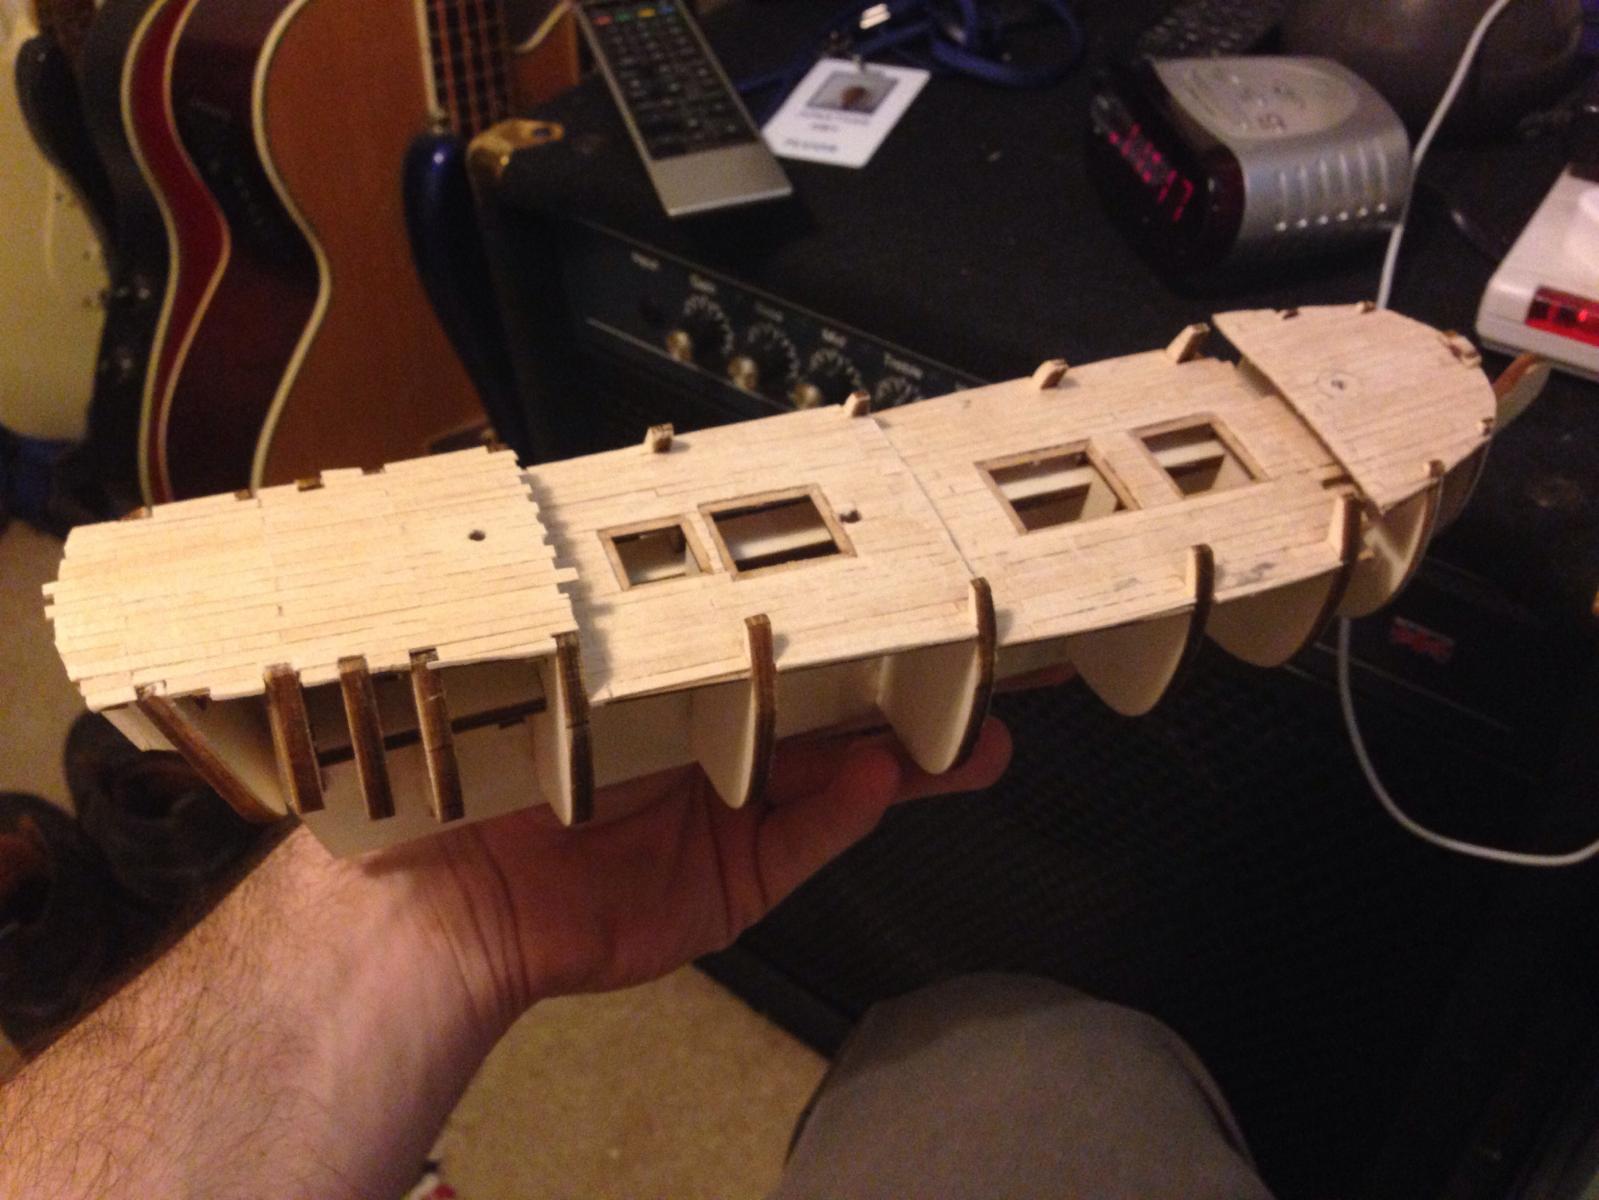
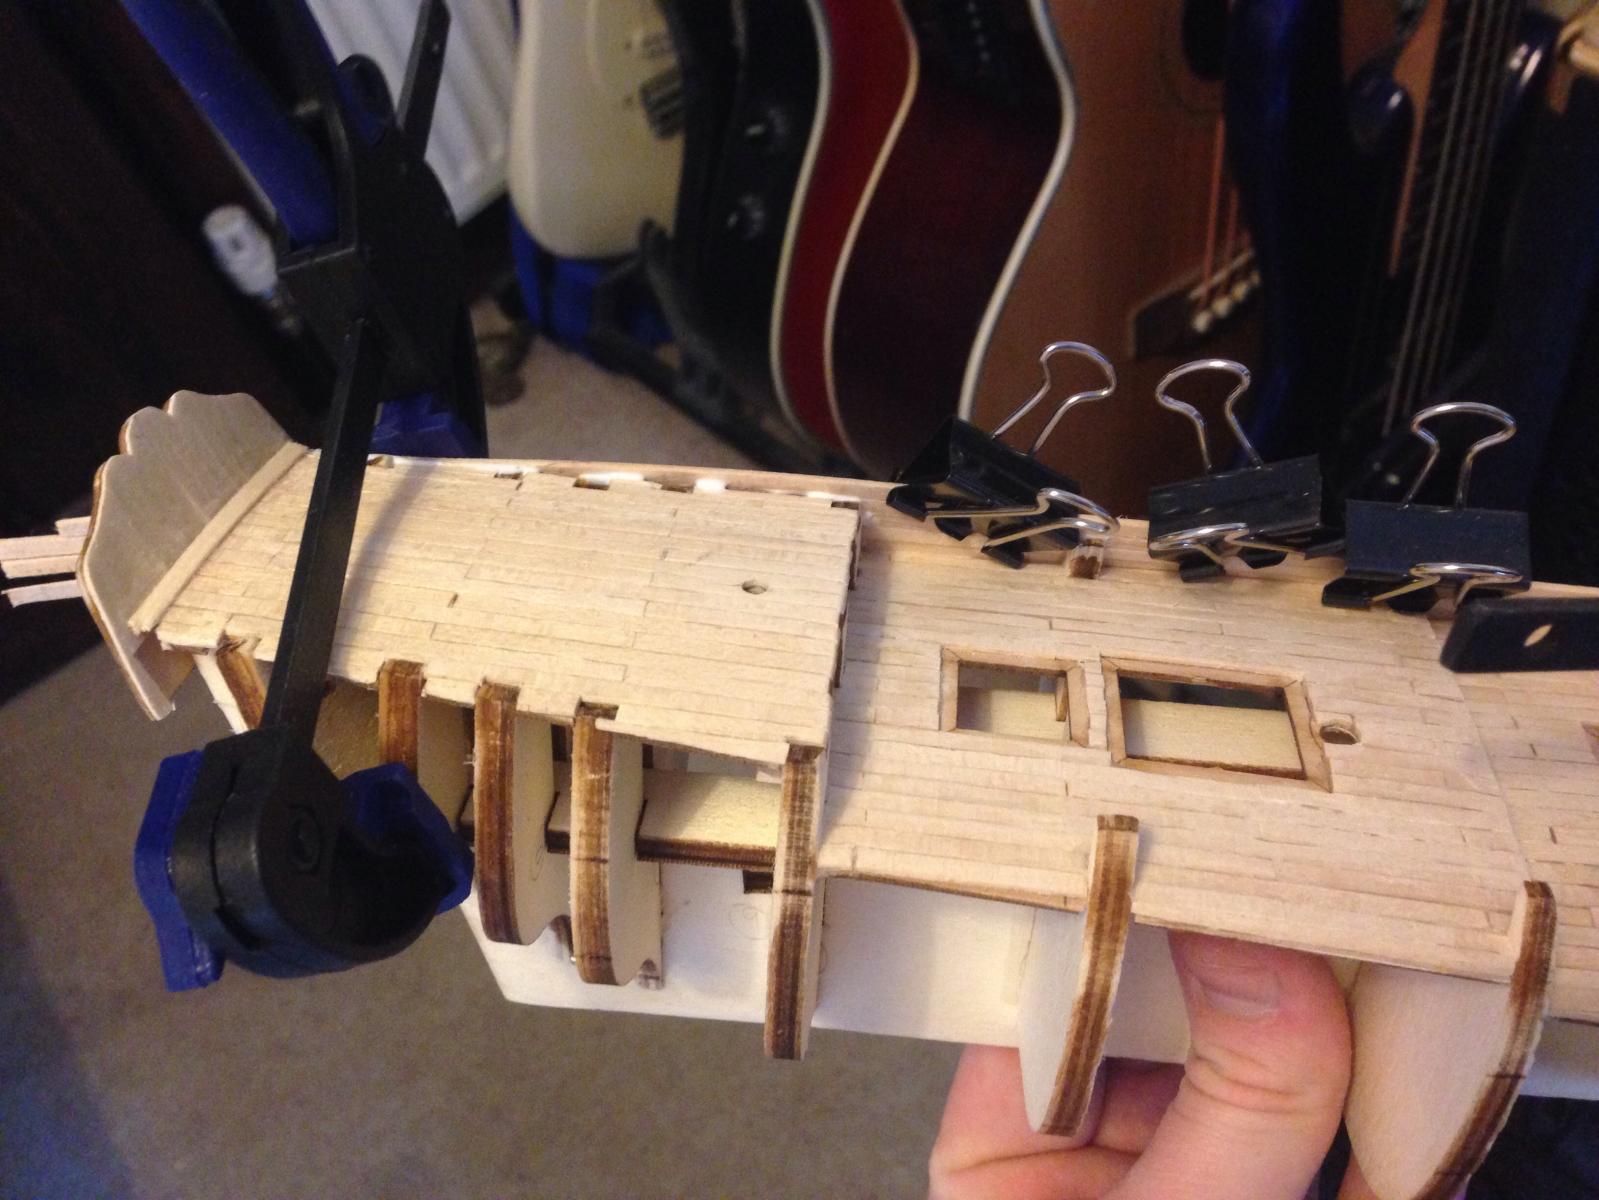
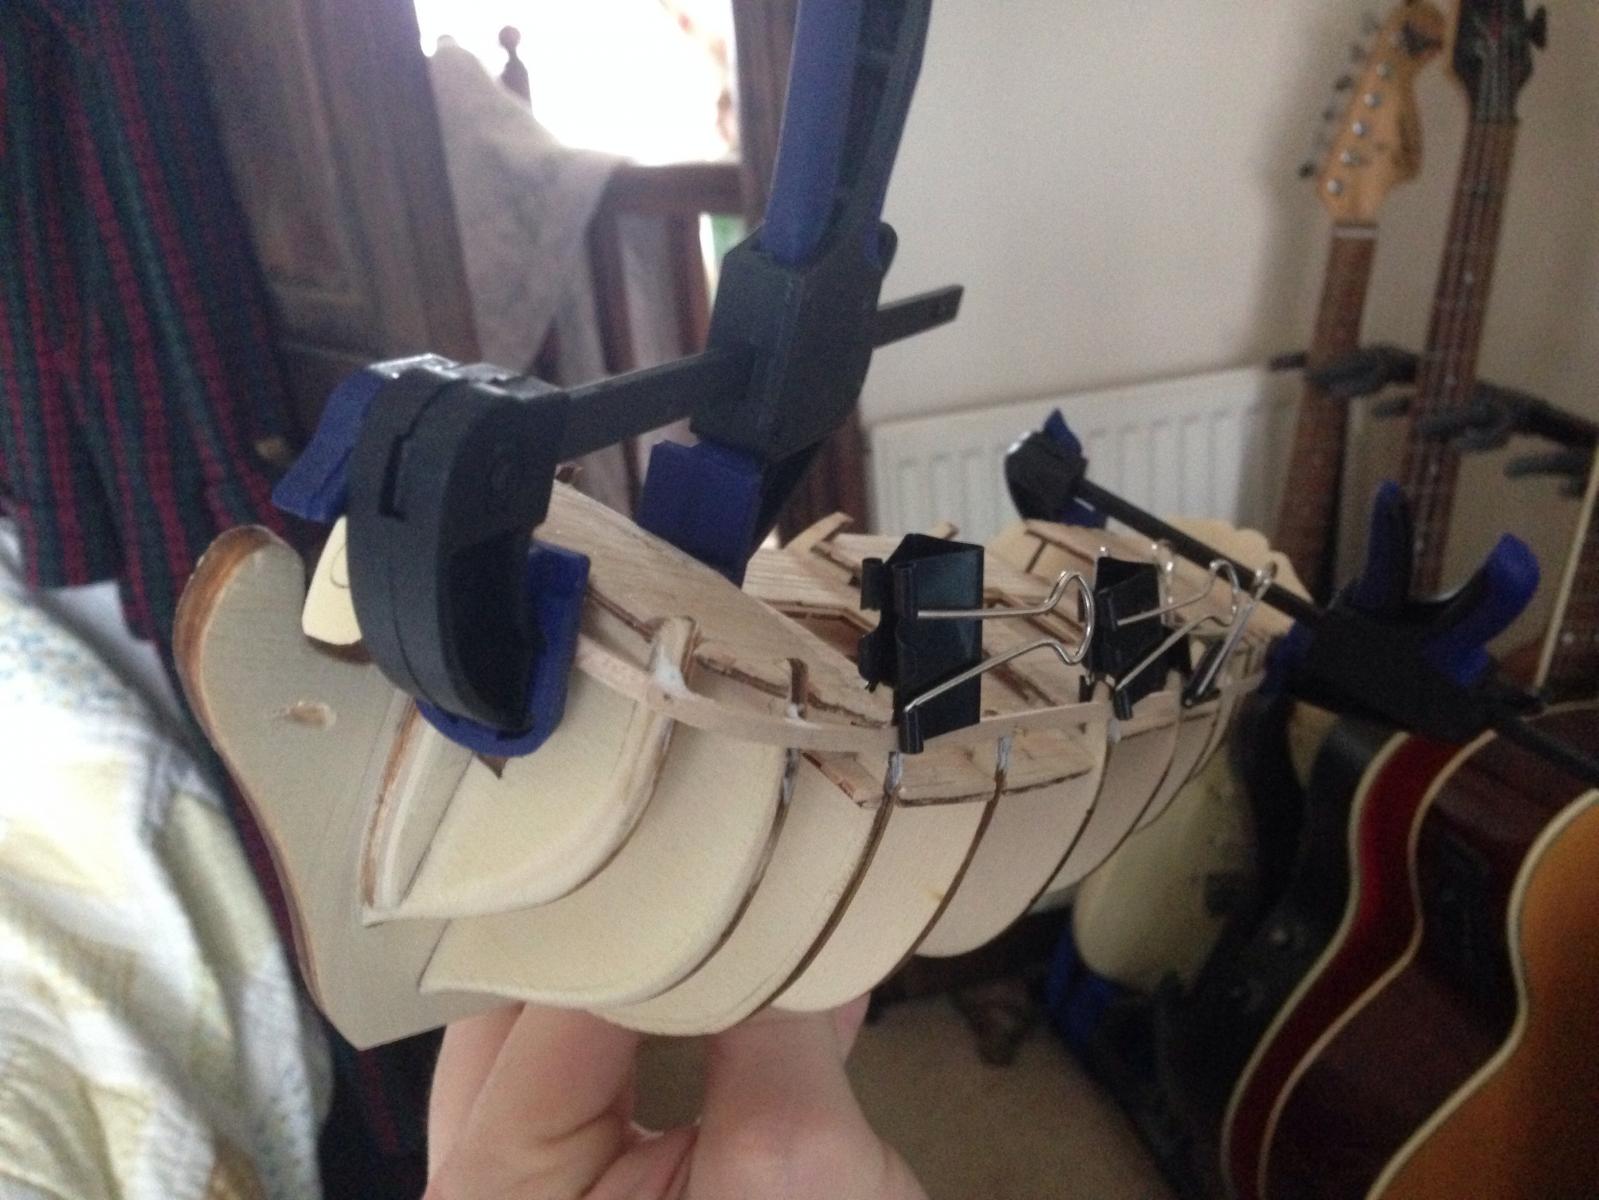
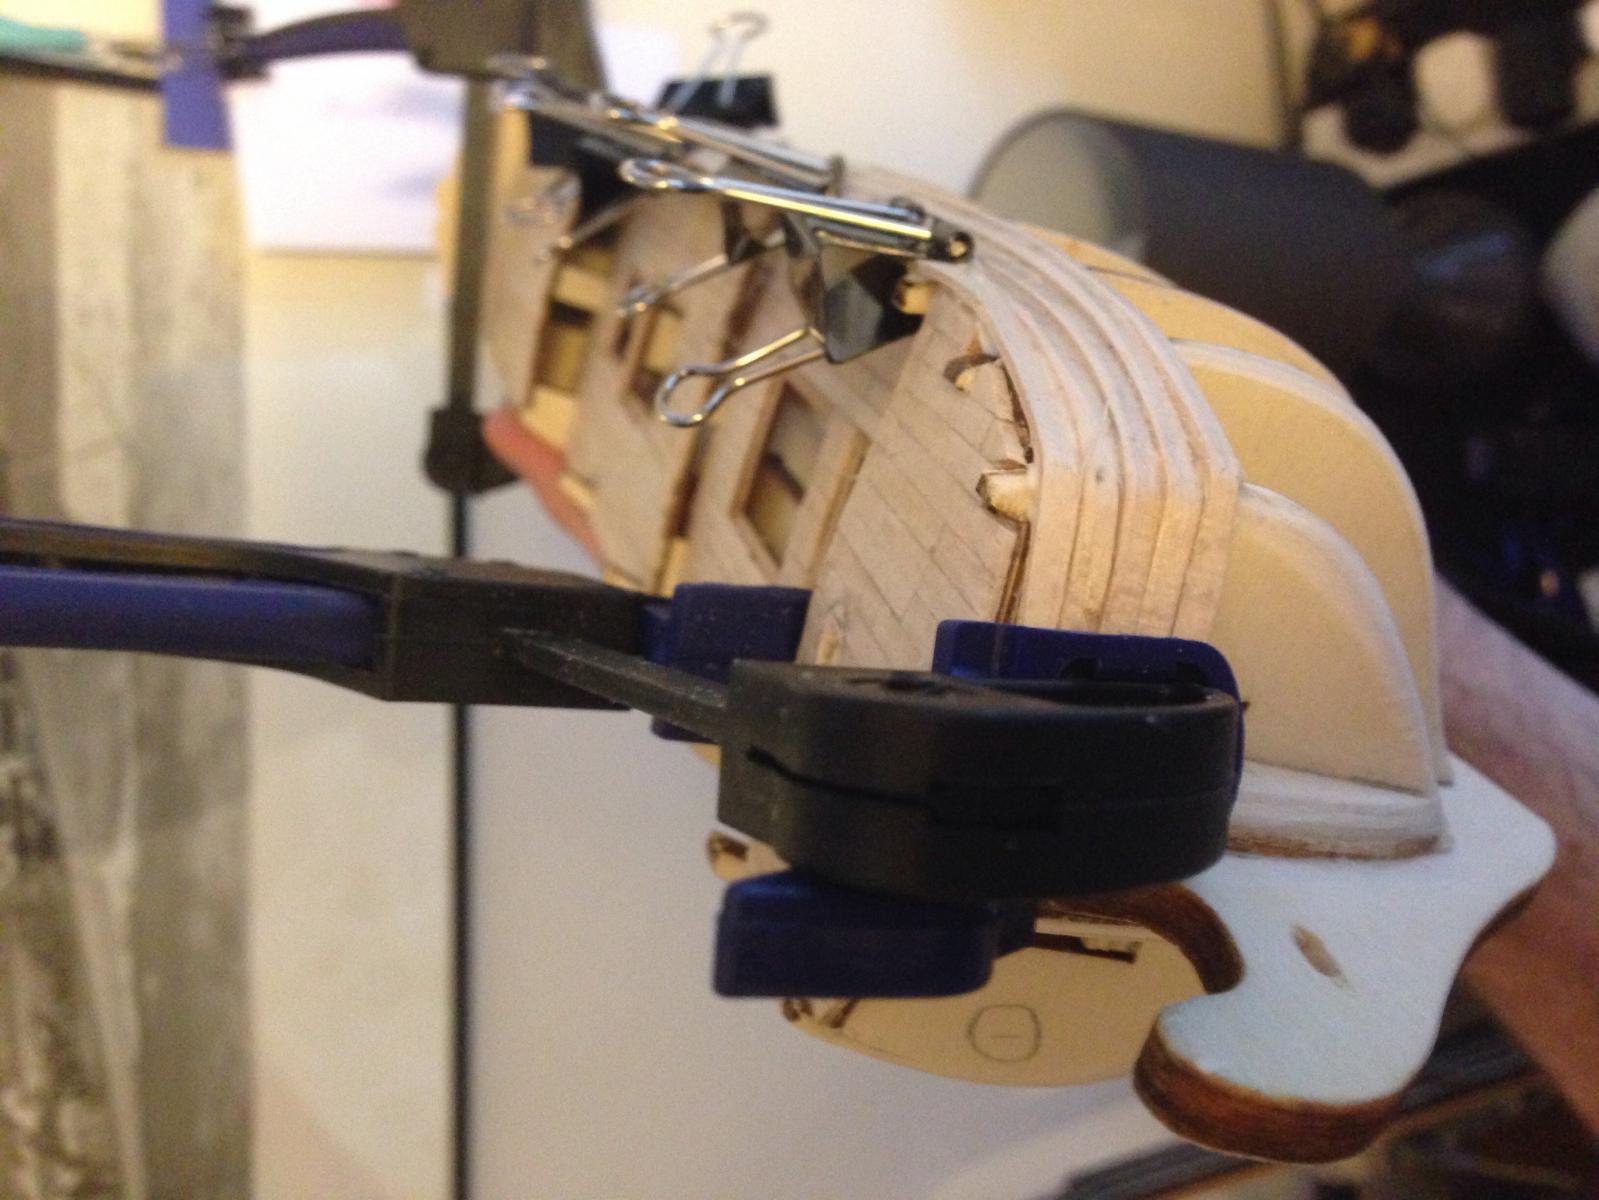
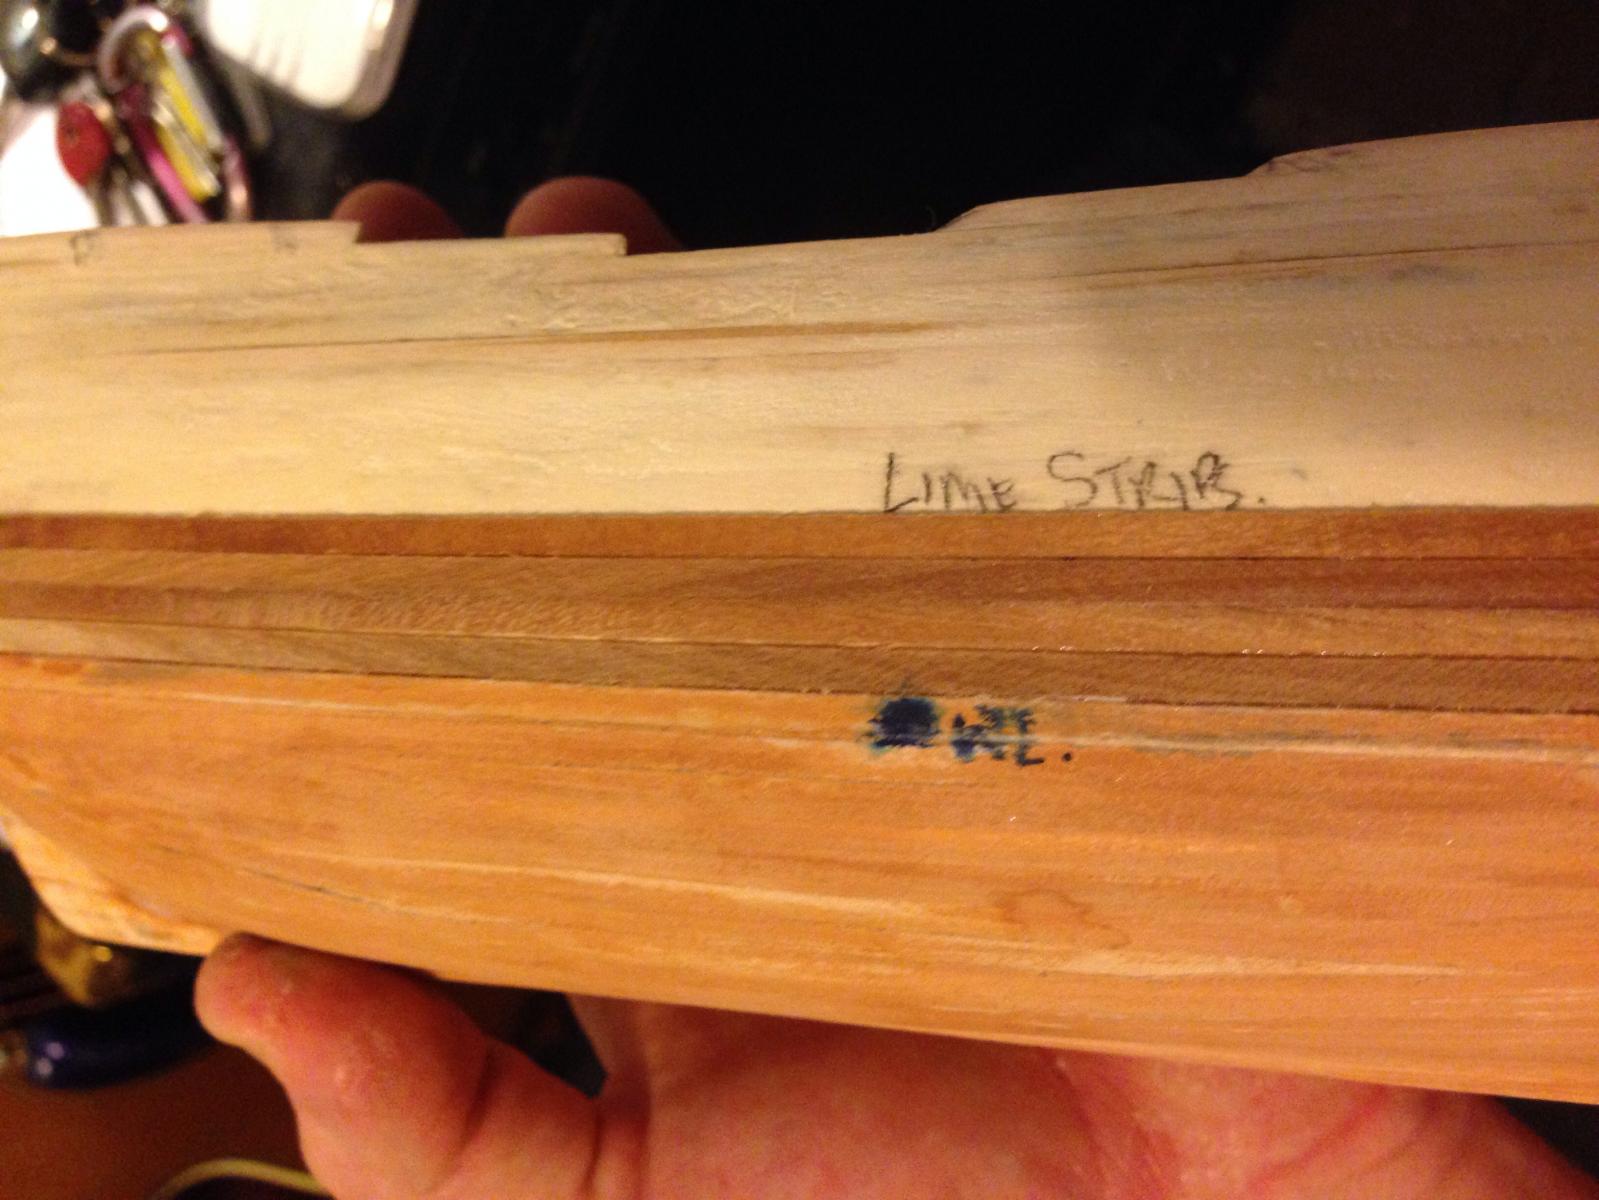
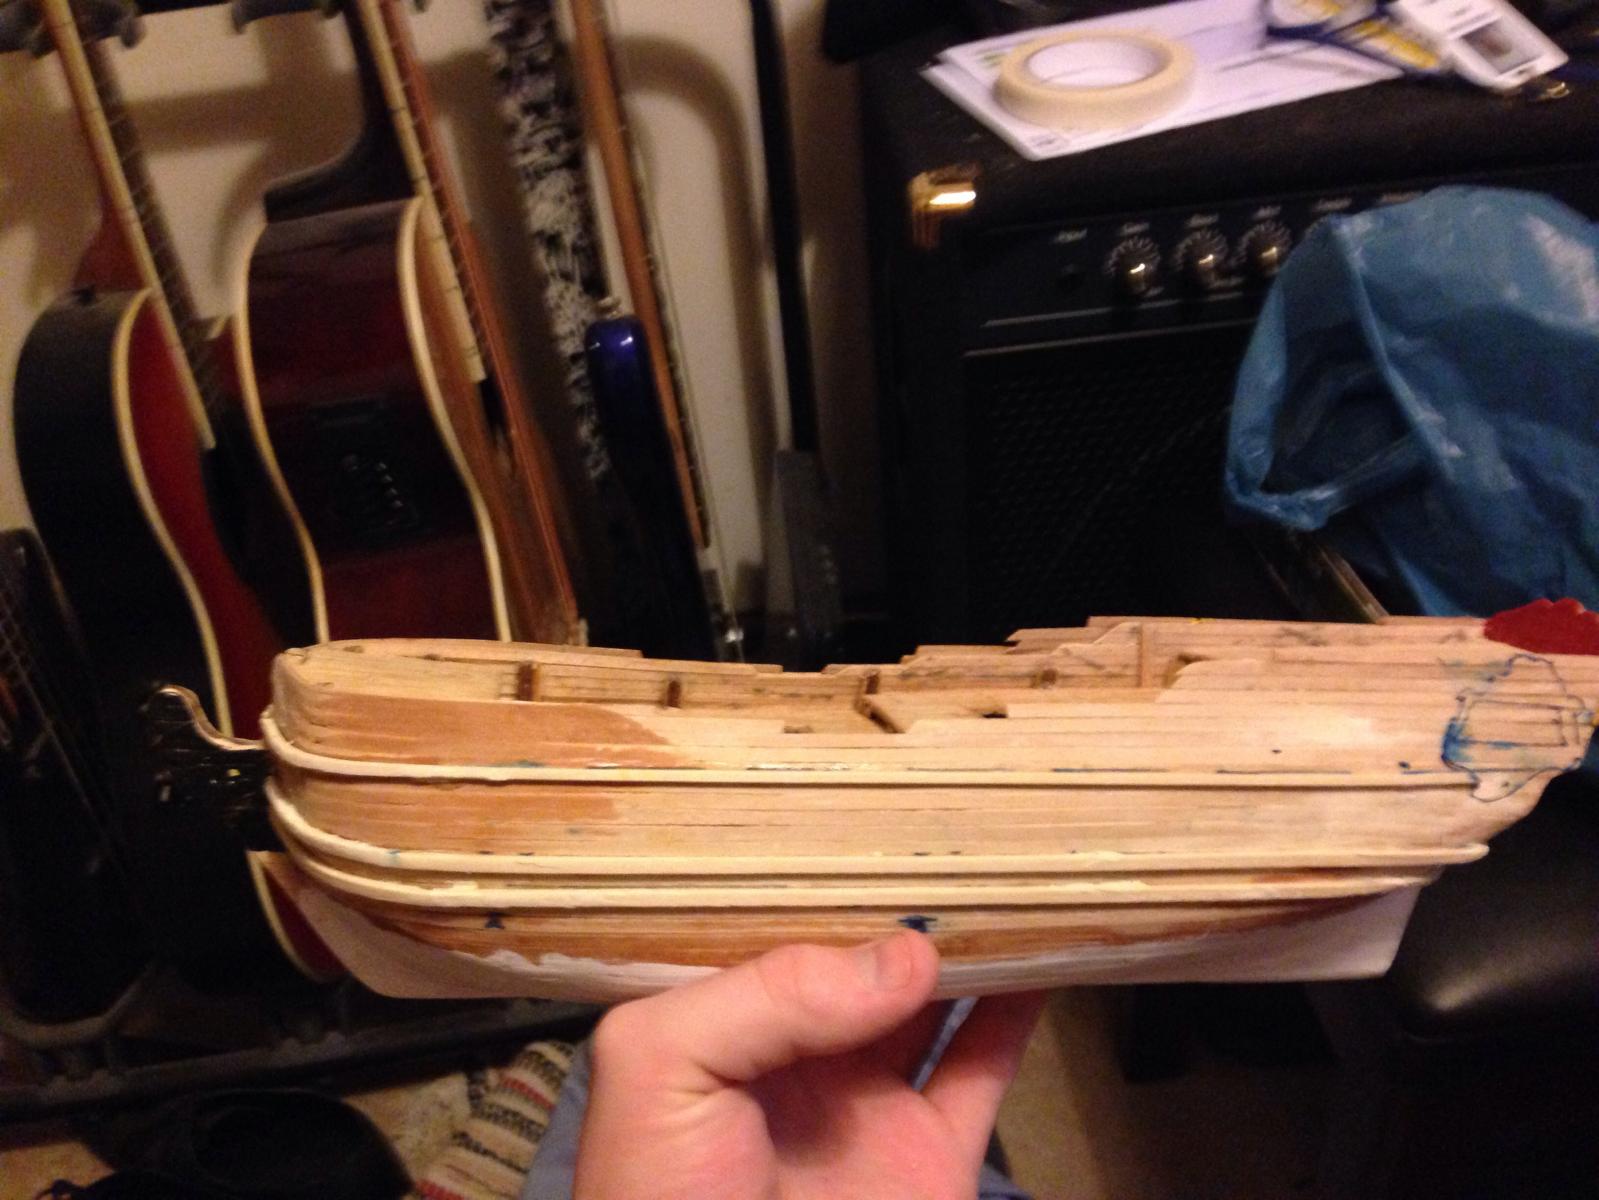
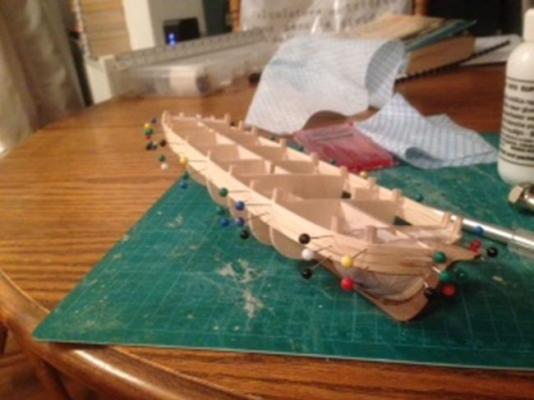
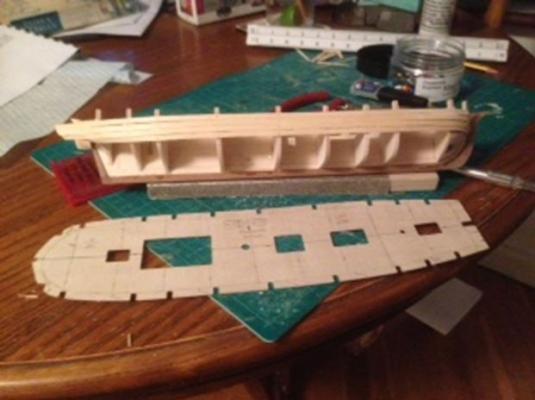
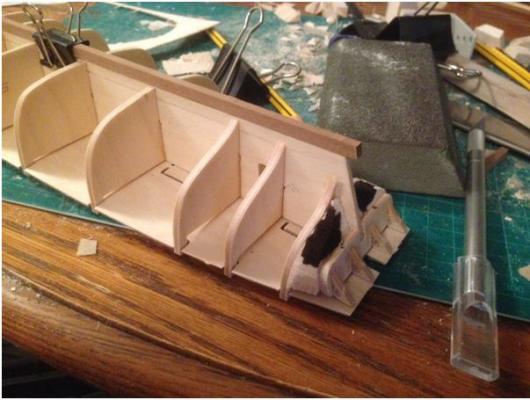
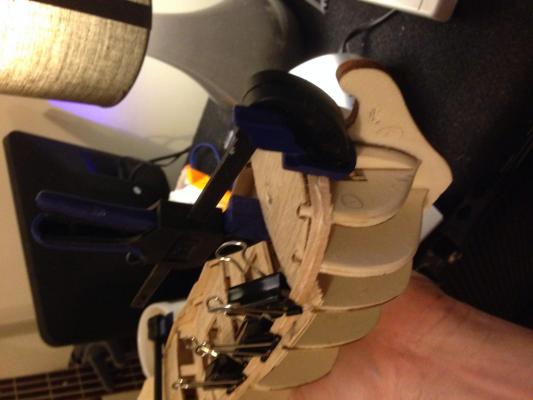
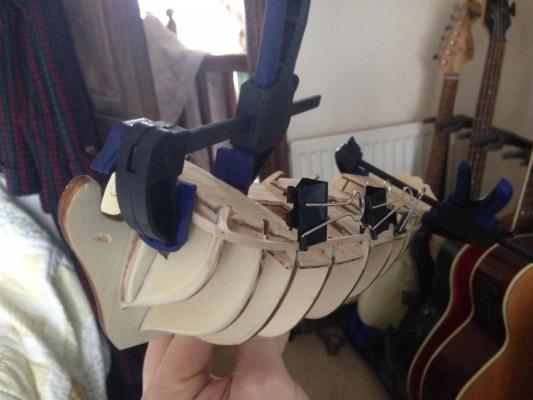
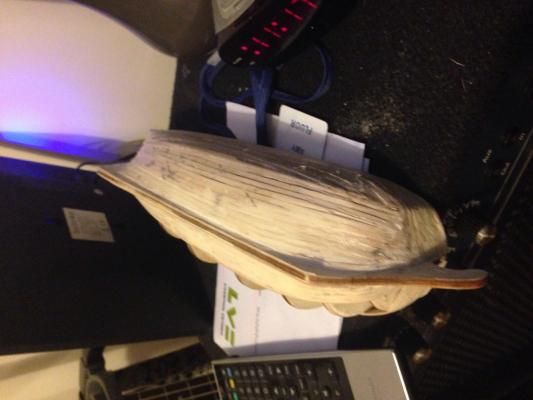
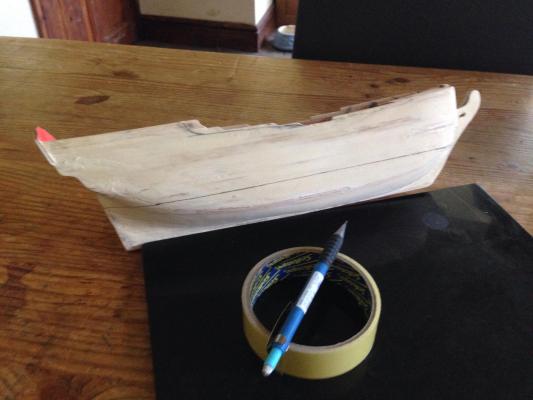
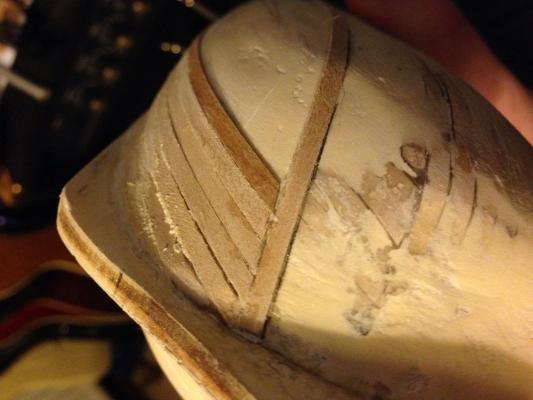
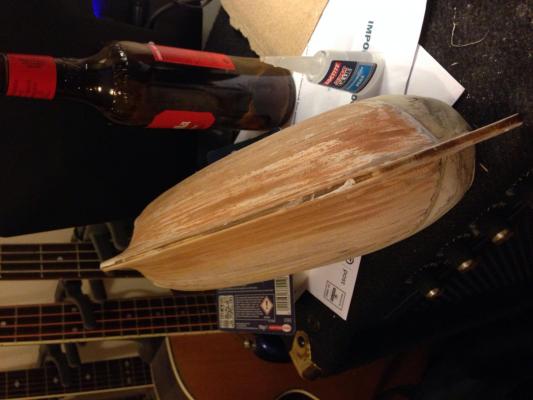
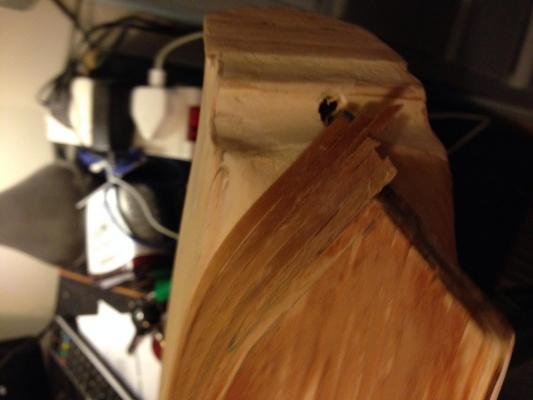
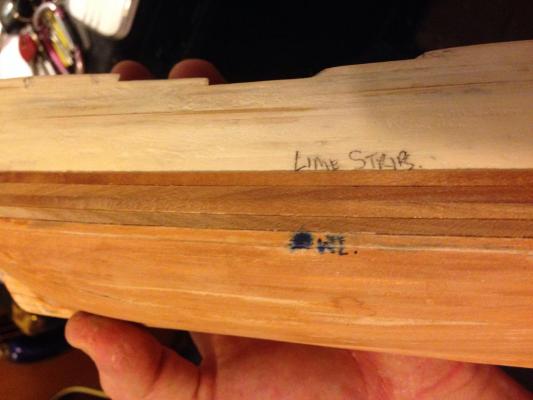
 Morning All, Planking started last night. I managed to get the first 5 planks on the Port and Starboard sides last night, and I'm pretty happy with the results. This was my first attempt in planking in just over a year, so it took me the first 3 planks either side to get in to the swing of things, but I've got my method, so I will crack on tonight and hopefully make some further headway on the planking. I decided not to use the brass pins supplied with the kit as I tried this with President and ending up getting frustrated as I could not push them in easily (and no I did not have a pin vice at that time - that was one of last nights purchases on my way home via the model shop). Note: I am not yet the proud owner of a plank bender, so I've been doing it the old fashioned way in a decorators paint bucket full of warm water. So as you can see in the photos, I used Map Pins I "borrowed" from work. I also drew on the centre-line on the false deck, and worked out where each butt of my deck planking will be, but I need to decide whether to Tree Nail the deck, and which pattern I was going to lay the deck. I have been considering the "3 Butt Shift" Method and the "4 Butt Shift" Method, which one would be easiest, and look the best? Michael, Sorry, I have a habit of scimming through content whilst I do this at work (so I don't get caught by the real boss)!! It's very quiet here at the moment, so I think he's turning a blind eye to it right now Anyway, I now understand your previous post (having read it again) and building up and checking the clearence/fit of the mortor bed is on my to do list for tonight (that and hoover up the sawduct on the floor)! Paul, thanks very much! Eamonn suggested that I cut the rabbet and bearding lines, and I found from my previous experience with President, this is vital. The false keel was just shy of 3mm THK and the keel is shy of 5mm, so this gave me an natural rabbet line, but I decided to sand the corners down a fraction to increase this natural rabbet. The bearding line has reduced the the false keel at the Stern Post to around 1.5mm THK, so this will take the shear thickness to slightly thicker than the Stern Post, whcih will eventually be met with a piece of 120 Grit sand paper! Cheers for all the likes and comments, Jonny
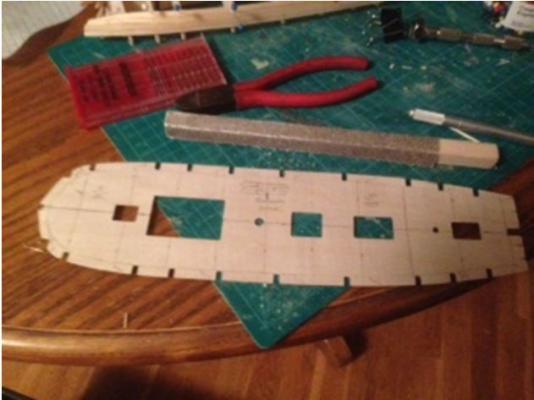


- 215 replies
-
- 2
-

-
- convulsion
- caldercraft
- (and 1 more)
-
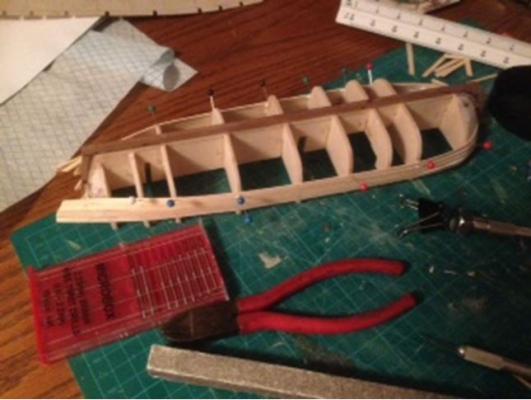
Michael, Sorry I was meant to add this reply to the post... I had no problems with the joints between the bulkheads and the false keel - if anything, they may have been slightly tight, but a tight slot is better than a loose slot (that sounded really filthy in my head)! It is a shame your Convulsion build was stopped in it's tracks, I hope at some point you will be able to continue with the build as I'm sure your passion for the hobby will rekindle. Eamonn, I also forgot to mention in th post that I cut a rabet line on the false keel, but I'll get it to the required depth I need later on tonight when I'm sandind down the bulkheads. Cheers, Jonny
- 215 replies
-
- 1
-
-
- convulsion
- caldercraft
- (and 1 more)
-
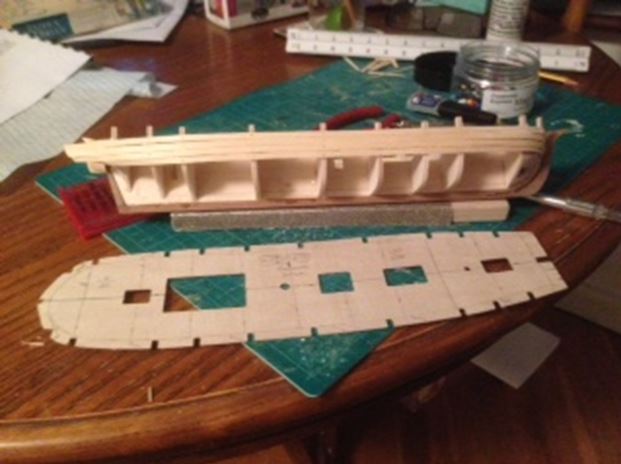
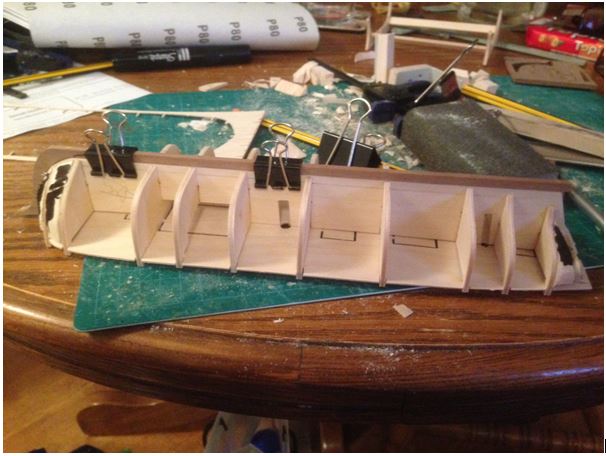
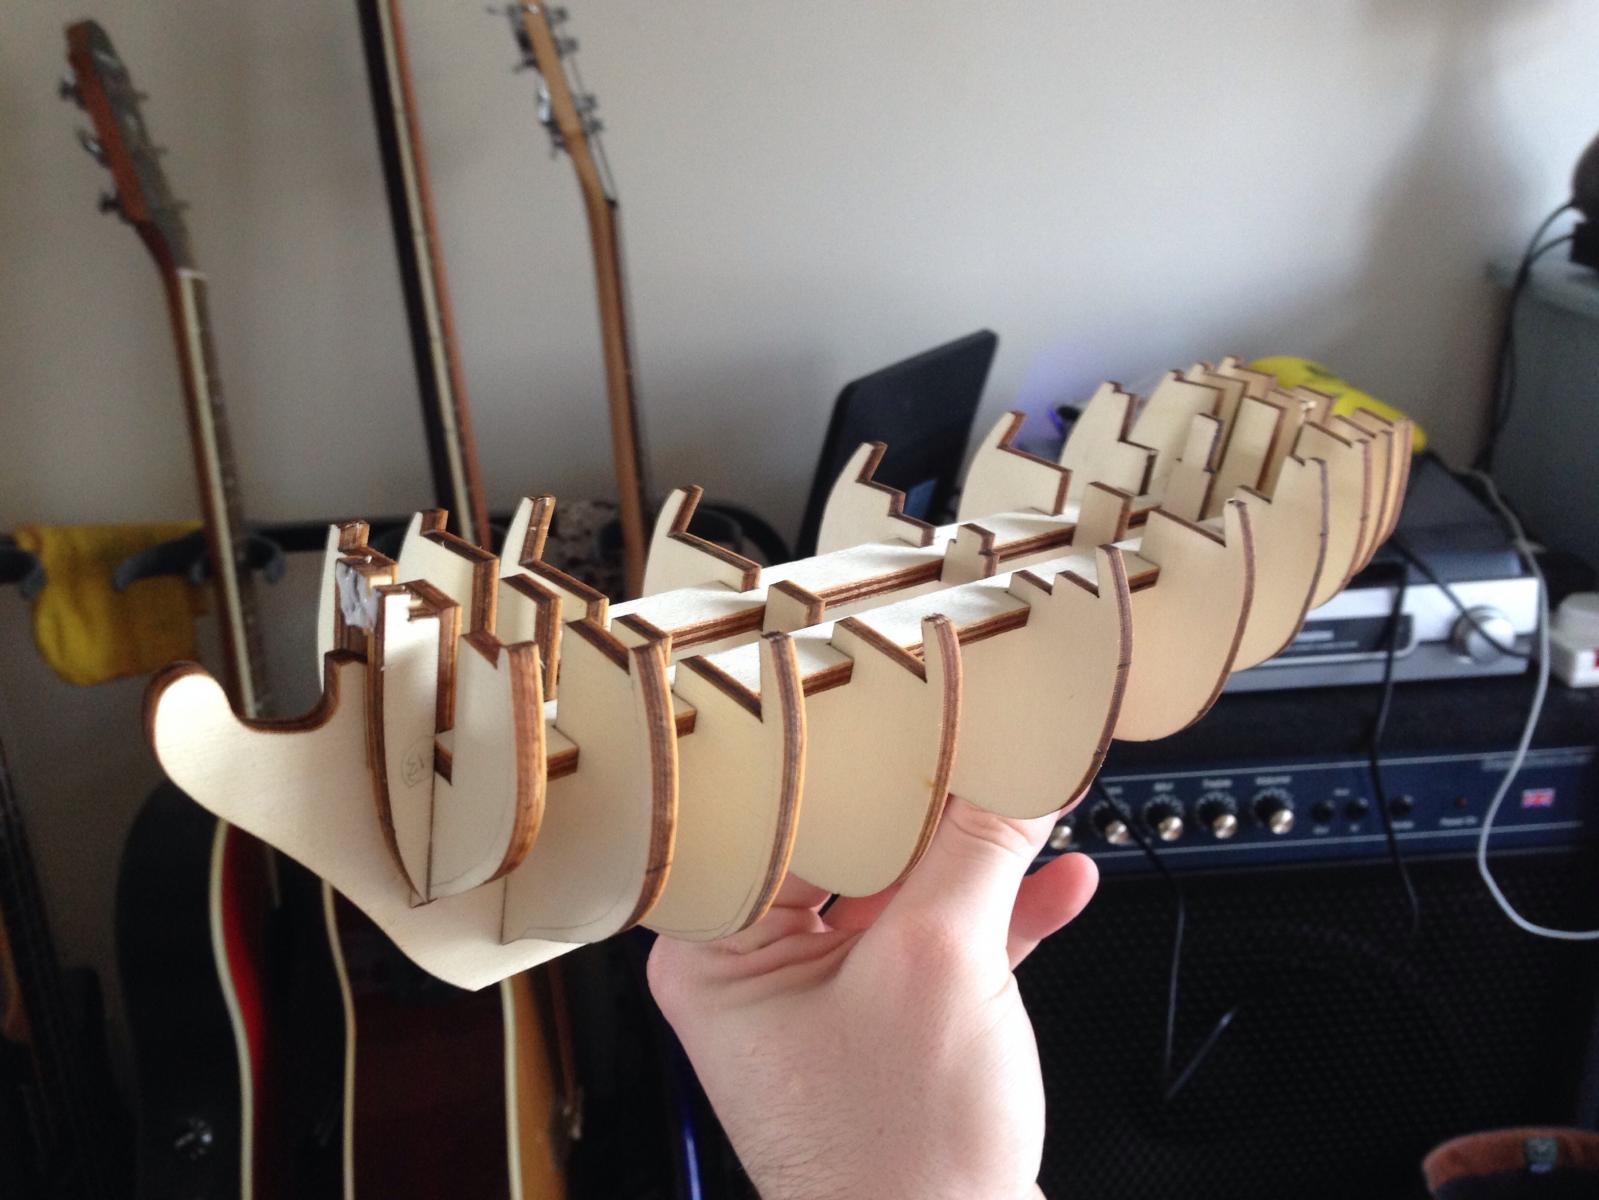
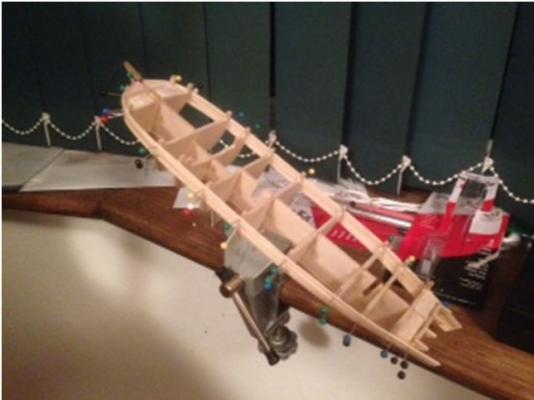
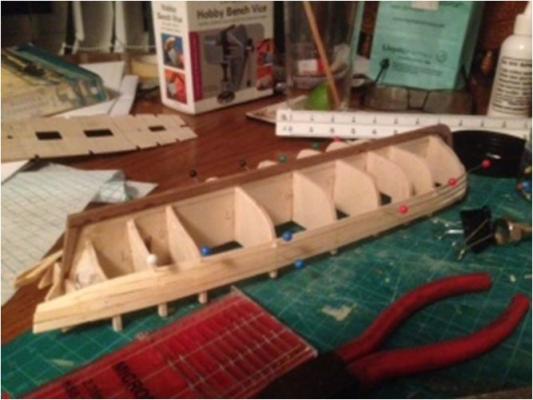
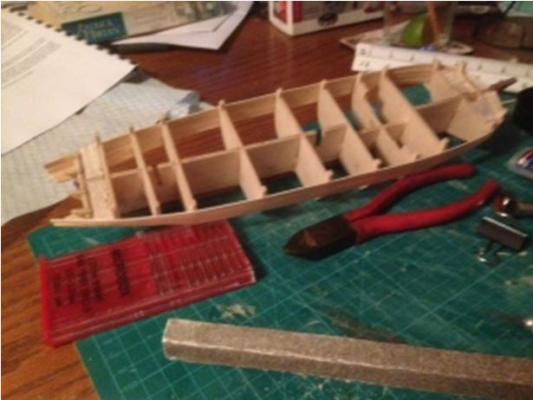
Afternoon all, Construction has commenced!!!!! First things first, I checked the kit against the register of parts and all were present and accounted for! Next I checked the quality of the parts, and Oh My Word, the quality was outstanding! No fraying of edges on any of the stripped materials, all lines were straight and true, and the castings for the carronades and mortor were execptional, the fact they've cast the evelation bottle screws on the carronades with a thread was just insane!! I squealed like a little girl when I saw those (my girlfriend thought I had cut myself already)! As you can imagine, I was very impressed, and compared to Matura/Sergal President kit, this was a shear delight! I am one very happy shipwright! I then proceeded to cut out all the false keel items, clean them up, dry it, and test my improvised set square (balsa block & 90 degree angle bracket glued together), and enough roughly shaped balsa blocks to build up the bow and stern bulkheads. Unfortunately, I could not get Bulkhead no. 2 completely staright as I put the balsa packer in the wrong way round (d'oh)! So I will have to rasp the proud edge down slightly more than the others, but that is no problem. As I superglued each bulkhead in place to start off with, I later ran a bead of PVA glue along each join to help reinforce the interface between False Keel and Bulkheads. Whilst the PVA was drying, I turned my attention to the keel. I cleaned the gash material off from the keel, and and cut out the stern post and the stem. I used a permanent marker to imitate calking in between the joints, but I realised this is probably a fruitless effort, as I'll be painting the under water profile white. Oh well! Lastly, I decided to dry fit the keel and false deck to check for overall "square-ness" of the ship so far. This proved to show me that Bulkhead 2 was not too much of an issue, and a slight trimming to the false deck, and it fitted perfectly! Tonight, first priority will be moving all of my President bits and bobs to another tool box so I can use the dividers to partition off the Convulsion part, then I will be sanding down the balsa blocks and bulk heads to the required shear, and if the "boss" lets me, I might start running a few planks. Fingers crossed! Cheers, Jonny


- 215 replies
-
- 4
-
-
- convulsion
- caldercraft
- (and 1 more)
-
***News Flash*** Convulsion has arrived - I noticed a few dings and dents on the packaging, but I've checked the model over briefly, and all seems to be in order! Needless to say, I'm one happy chappy! Alistair - unfortunately, I can't call in sick as I have deadlines to keep at work. But I will be starting on her tonight, and I'm at home all weekend so progress will pick up from this evening!! Wooo Hooo! Cheers Jonny
-
Quick update..... Building should commence tonight as Convulsion is now being delivered to work, thanks to a 25 minute phone call made by myself last night to UPS about their shoddy service (much emphisis went on the fact the delivery personnel did not read the written instructions on the box). So I'm waiting for the office Post Room to call me to come and collect it! Just a quick note: I was researching Convulsion online this morning, and found a German log of a Convulsion build (I don't speak German, so I could only look as his photos), but I was impressed with the false keel & bulkhead arrangement. The kit looks like it should be a very straight forward build in that aspect! I'm itching to get started now.... Do I go home "sick" when it arrives?!? Cheers, Jonny
- 215 replies
-
- 1
-
-
- convulsion
- caldercraft
- (and 1 more)
-
Quick update for this afternoon - will hopefully get the kit tomorrow now. I've had no luck with UPS as they did not call me when they first attempted delivery, and now it has gone back to their Distribution Depot in Reading, so I will have to figure out how I am going to get the kit from them! I have my tracking number, but I can't speak to anyone at UPS to change the delivery address to my work address! Fantastic!! Cheers, Jonny
-
Hi Eamonn & Paul, I'm glad somebody else has attempted Convulsion - I was under the opinion it was not a popular kit because there aren't many (if any) build logs on here. I've just had an email come through saying a delivery was attempted with my parcel, but being a Tuesday morning, I've been at work (still am), so now I've got to go to the Depo tonight to pick up Convulsion. Woohoo, I can't wait!! Paul, no need to worry about knocking your model off the work bench, I did the same thing with my President and a boisterous Labrador. Only minor damage, but enough for me to swear like trooper. Eamonn, it seems like a tough decision to make! I couldn't decide which kit I'd like to decide, but as I discribed in my earlier post, my girlfriend decided for me in a round about way. I would go for the model that sparkes your enthusiasm and intrigue, as I made a big mistake with President, as I went for price over substance and quality. For what it's worth - President and Convulsion cost virtualy the same from Cornwall Model Boats including P&P, so I really should have looked further afield before I decided on President. Finally, just a quick update on Convulsion preparation - I constructed the build board last night from 4No. of 40mm Angle Brackets from B&Q, and 12mm THK scrap balsa (doubled up under the brackets) and glued and screwed the brackets to holster the stern in place. Once I get Convulsion out of the box I will mark out the position of the Bow support brackets, and glue and screw them in place. Note: this is something I didn't do with President, and because of that, she is slightly warped to Port, so I'm taking this phase of the build more seriously. Cheers, Jonny
- 215 replies
-
- 1
-
-
- convulsion
- caldercraft
- (and 1 more)
-
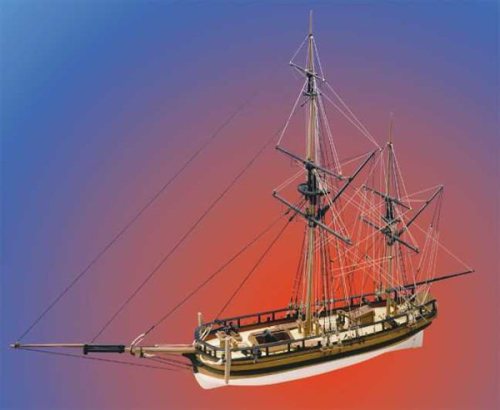
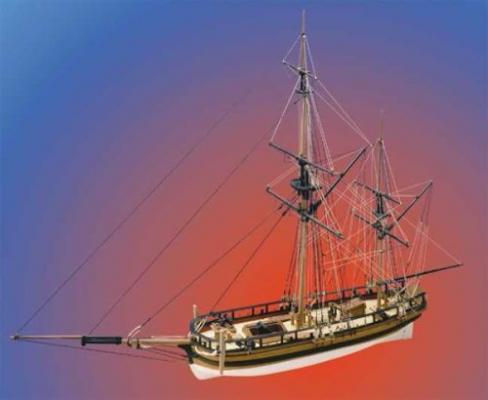
Hi All, This is my second build log on NRG Model Ship World. I have recently ordered the Caldercraft "Nelson Navy" HM Mortor Vessel Convulsion kit. I am still waiting for my delivery of the kit, but I am more than excitied to work on a decent kit with a well documented building process, unlike my ongoing build of HMS President by Sergal/Mantura. I have chosen Convulsion due to build and display space limitations.... I spent all of this weekend umm'ing and ahh'ing about the maximum size of a model, and eventually the "Boss" decided Convulsion was "big enough" for our 1 bedroom flat. Oh well, I'll just have to get a bigger flat for the next build!! As mentioned above, my build of HMS President is still ongoing, but I have been disheartend to a great degree over the lack of decent instruction for the teadious task of rigging. Currently, the Main Mast has all the shroads and running rigging in place, and all masts have the Fore-Aft standing rigging in place, but the prospect of running all the shroads, and ratlines on the fore and mizzen masts fills me with dread!! So, with this attitude in the back of my mind, as I slowly tackle President, I decided to give myself a decent break from her and work on something new. My initail thoughts for a new project were Granado, HM Yacht Chatam, or HMS Snake, but all were deemed too big by the Boss and so I gladly settled with Convulsion. Cheers, Jonny
- 215 replies
-
- 3
-
-
- convulsion
- caldercraft
- (and 1 more)
-
Hi Joe V. The Granado is an incredibly intising kit, and your example is the cleanest kit build I've seen so far! I've decided purely on your work here, that my next build will be Granado. The quality of the kit (although with a few quirks) looks great, and is significantly better in quality than the Sergal HMS President kit I'm currently building. Thanks for helping me make my mind up about my next build! I will be following closely... Cheers, Jon
- 302 replies
-
- 1
-
-
- granado
- caldercraft
- (and 1 more)
-
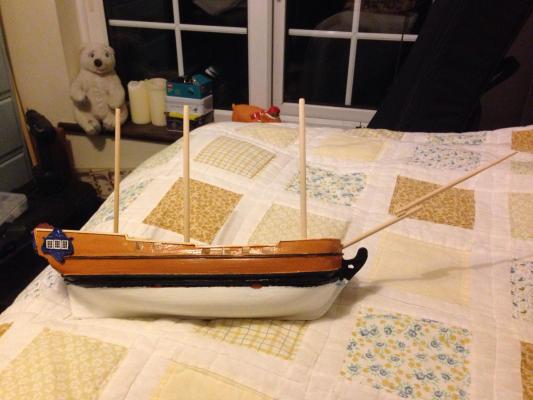
Hi Guys, Sorry for the absence from the forum for the last few months, it's been a busy few months with work and moving house (twice). I have made some significant progress in the last few months though. I have rigged the main shroads on the main mast, installed all the deck fittings (replaced the carronades with truck mounted 12 pounders) replaced the "home made" ships boat with a cast long boat (at 1:64 scale - but close enough is near enough), and rigged a lot of the standing rigging. I will follow with pictures shortly, and I will give a detailed description of all work carried out on HMS President over the last 4 months. Cheers.
-
Hi Banarb, I had exactly the same problem as you..... I spoke with numerous model shops within the local area and they all had various ideas, but the easiest soultion I found was to replace the chainplates all together. I scoured the local model shops for replacement pieces that looked more substantial, but found very little of use, withoput waiting for 2 to 4 weeks for the next order to be delivered from Jokita. So, thinking on my feet whilst in the last model shop I tried, I decided to use wire to act as the chainplates. I bought a thin gauge wire (around 1mm DIA), got it home with my other finds, and started working on the chainplates. Make sure you buy enough wire to make 30 deadeye/chainplate arrangements, plus another 5, as you have to have contingency in the length of wire, as it is very soft and can break if overworked. So I cut the wire in to strips around 90mm in length, and placed the dead eye about 1/3rd from the top of the wire, and placed the chain plate about the same length from the bottom. I then proceeded to wrap each end in turn. then just use ordinary CA glue and the nails provided in the kit to attach the arrangement in place. Definitely use a thin pair of pliers to hold the nails in place as you send them home as it is very frustrating when they bounce back out again after you've given it some "gentle" persuation. See the image below for a rough sketch of what I did to each chainplate. CHAINPLATES.pdf The end solution is certainly not glamourous, but saves you a lot of time. It took me 3 hours to make, and a further 2 hours on a rainy sunday evening to put the arrangements in place. I spent 4 hours attempting to get the kit supplied chainplates to work, and only got 2 done.... I think that speaks for itself really! I hope this helps, Jonny P.s. I have made a lot of progress recently, so will post a new build log shortly.
-
Cap'n Jack, The way you did it is similar to the way I filled the gaps on my HMS President. Although, I caked the hull in filler, but I wiped most of it off with a damp cloth, that way the filler was in the gaps and a very thin layer was on top of the wood. Then I sanded down the hull and it looked absolutely beautiful!
-
Craig, The brass was really tarnished and looking second best when I recieved the kit, so the first thing I did was take some wire wool to the brass castings and clean them up. The hardest thing was getting an even finish, so I decided to paint them. They've had 2 undercoats of white paint and a coat of blue. Lining the gun ports was going to be the next task because I was not happy with the job I did on the gun ports. I'm considering using thw walnut strip to do so as it's only 0.5mm thick! Progress will probably be slow for the next few days as my day job is turning in to a round the clock job! Cheers
-
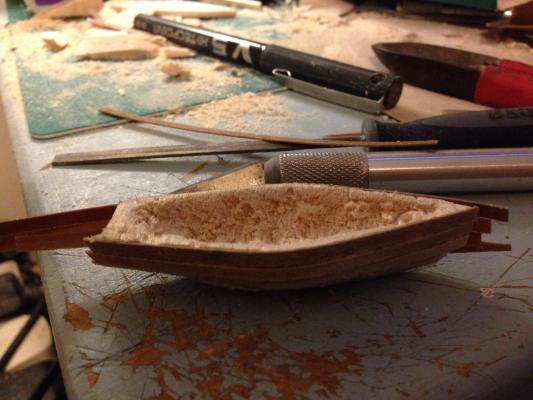
Hello Everyone, Sorry I've not posted much recently about my progress, I've had a very busy couple of weeks at work that have seen me doing at least 14 hours a day with an hours commute either side! I've made some progress with HMS President. I have cut the gun ports out, glued the capping rails in place, cut the lower spars to length and dry fitted them (including the bowsprit) and I have made a ships boat out of balsa and planked it using some if the remaining Walnut strips. All in all, progress is slow, but the basic layers of paint are on, and I've also got round to fettling, painting and placing the brass pieces. Cheers


-
I don't finish work til late most evenings and with an hours commute from door to door (on a good day), I don't start modelling until late in the day, but saying that I finid it is the best way for me to relax after a stressful day in the office trying to meet impossible deadlines! Haha yes that's very true! Tonight I will be cutting the gun ports in to the top sides. What is the best way to do this? I was thinking I could drill a hole in each corner, cut out the rest, and the rasp the corners square? Is that too complicated or should I just cut them out with a scaple and a ruler?
-
Very nice! I'm very proud of my President, but I really can not wait to get in to a model that is of greater detail and a slightly larger scale! I'll be putting up the next part of my log shortly. I'll hopefully leave work around 7pm so I'll be working on President from about 8:30pm, so I may find time to do it tonight, or leave it until later on in the week. Must remember to tidy up the work bench when I get home. Cheers
-
Hi Craig, I probably added the wales and rails on to the model too soon, but after all this is a learning experience, so if that is the case, I need to consider that next time! Progress has slowed to a stop this weekend as I've spent all weekend with my girlfriend, so progress will hopefully continue tomorrow evening. I will finish off shaping the profile of the top sides and I'll try cutting the tops of the frames off and place the gun ports. In retrospect, I should have done that before the wales and rails went on. Cheers
-
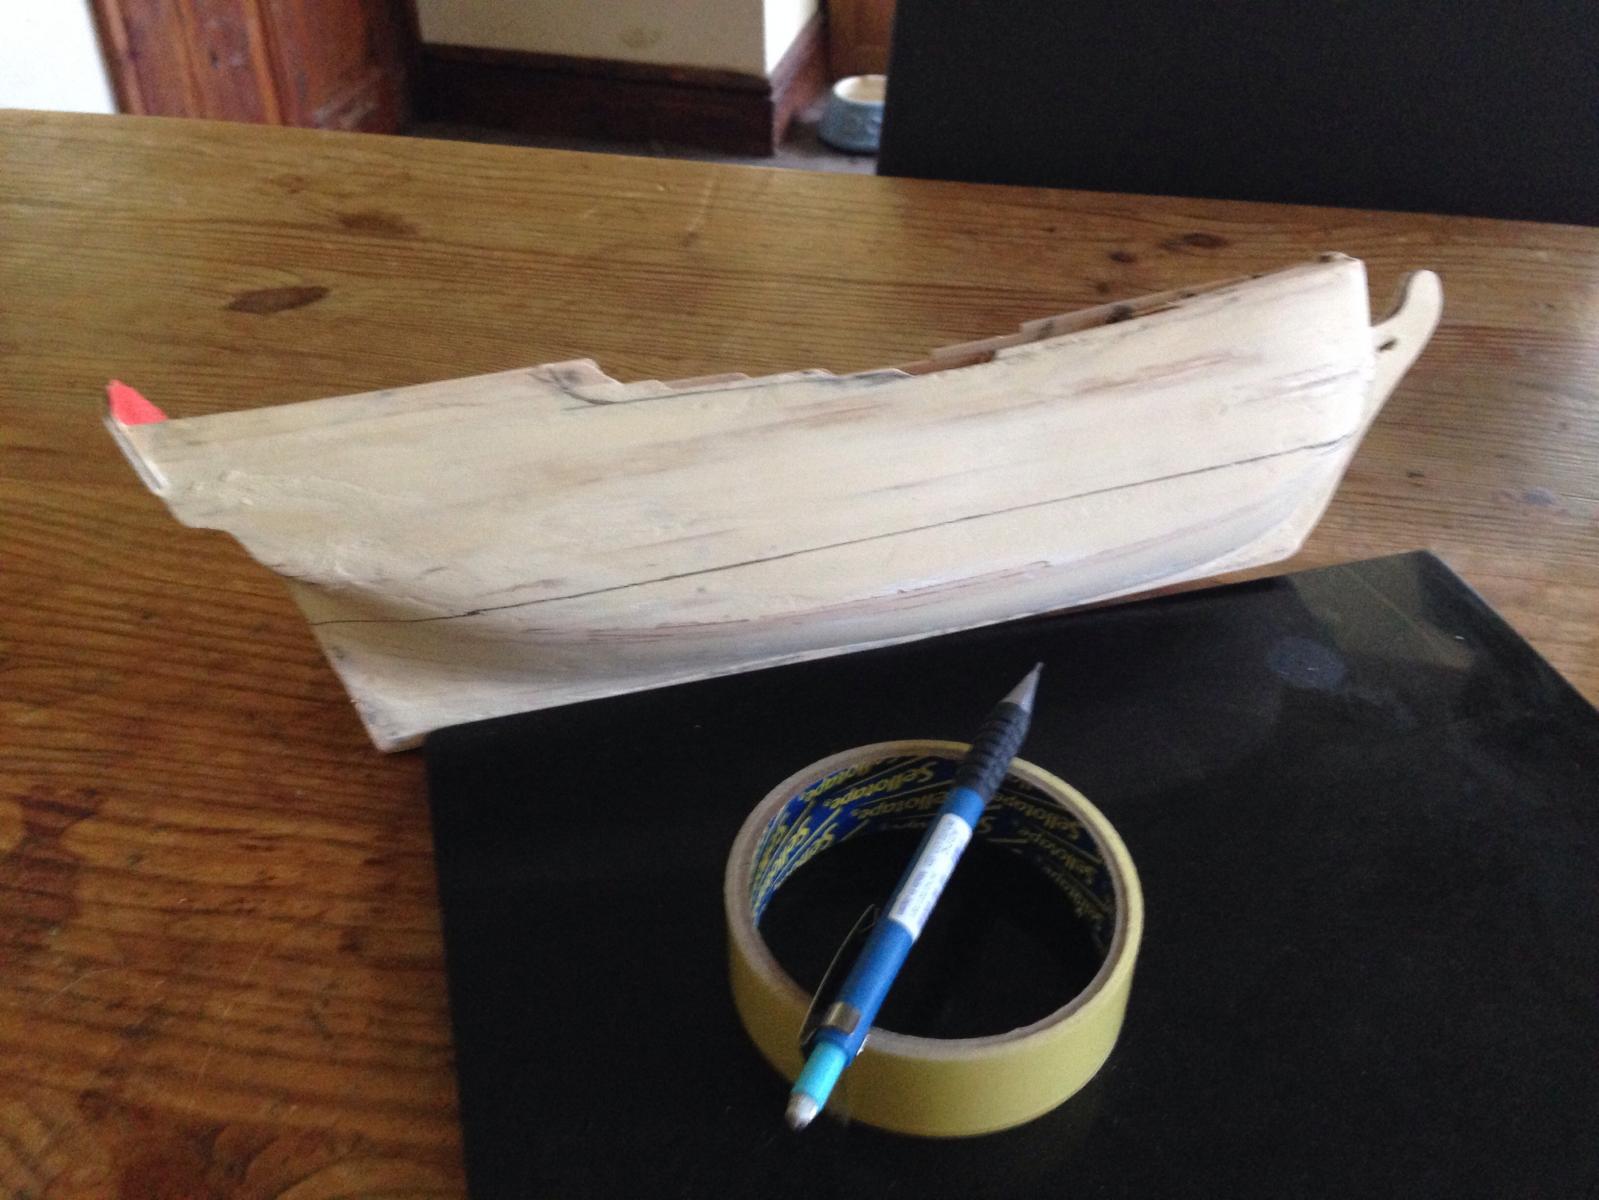
Hi Guys, This is my first attempt at a Build Log, so please be kind! So, I decided to build HMS President in January 2014, I've spent about 4 years up until this point asking myself whether I could do this or not, and whether I have the patiences. Turns out I do! I bought the kit from the Cornwall Model Boats website on the Monday after New Years Day, and by the following Friday I had the kit in my sweaty hands!! As described in the discussion above this build log, I was very disappointed with the fittings on the ship, and that is still an on going matter that needs to be addressed. Due to a major lack of patience, I started building the kit that night (big mistake) as I hadn't clear my build area or set up my building jig. But the following morning, the bulkheads were looking great! Next I laid the false decks in place, but realised my first major error........ Because I didn't build my kit this far in a build jig, the quarter deck was a really tight fit in to position, meaning I had to trim the false deck to suit. Once all of the false deck pieces were in place, I started placing the deck planks, cutting them to 50mm long strips and gluing them in place. This was a bit tricky in some places as I have big hands and I found my limited supply of teasers wasn't as helpful as I thought they'd be! Next, I sanded down the deck planks and gave them a significant dosing of tung oil hoping that this would make the look like they had been "bible stoned" recently. After that, I was ready to start planking! Woo hoo! So my next cock up was not buying a strip bender (something that came back to bite me in the **** with the whales and rubbing strakes), but I slowly made progress applying plank after plank. The progress was very slow and messy because I was using a PVA type glue for this, which has meant significant amounts of filling and sanding has had to be undertaken to get the profile of the hull right. Once the first layer of planking, filling and sanding was complete, I makes out the position of the waterline on the hull. This was so I could split the Walnut planks in to four manageable areas. Lastly, I'm now in the process of cutting the bulwarks to match the profile on the "scale" plans. Next process will to be paint the topsides and underwater profile and attach President to her base. Cheers, thanks for reading my build log.


-
Hi Steve I will hopefully be staring my PROPER build log tonight, and hopefully will be able to get some of the 90 odd photos I've taken so far on to this log. My girlfriend is working tonight, so it's quality time with the other woman in my life, the fair lady HMS President! Craig, I like the idea of the Grenado, actually it was the advert in a magazine of that kit that got me inspired to try this hobby! Although I am tempted to build a bass guitar after this (that will be guitar no.7!!), so the next model may have to wait a while! I quite like the idea of HMS Mars or HMS Snake or HMBV Granado, so many choices!!! Cheers
-
Hi Craig, This project was definitely a intended as a learning experience, and because of the I am trying to be true to scale as possible, but that is very hard when the plans aren't even to scale, so I'm relying on this being more of a technical exercise and tool gathering exercise than a purist's model. I will investigate the Carronades in a bit more detail before I get too far ahead! Which kit did you move on to after the President? I'm considering a Caldercraft Nelsons Navy kit, but I'm going to have to consider a smaller kit as I'm running out of space at home since I've moved back in with my folks, and have 6 guitars and 250W Amplefier, bed chest of drawers, and this kit in a single room! I may need a man shed! Cheers
-
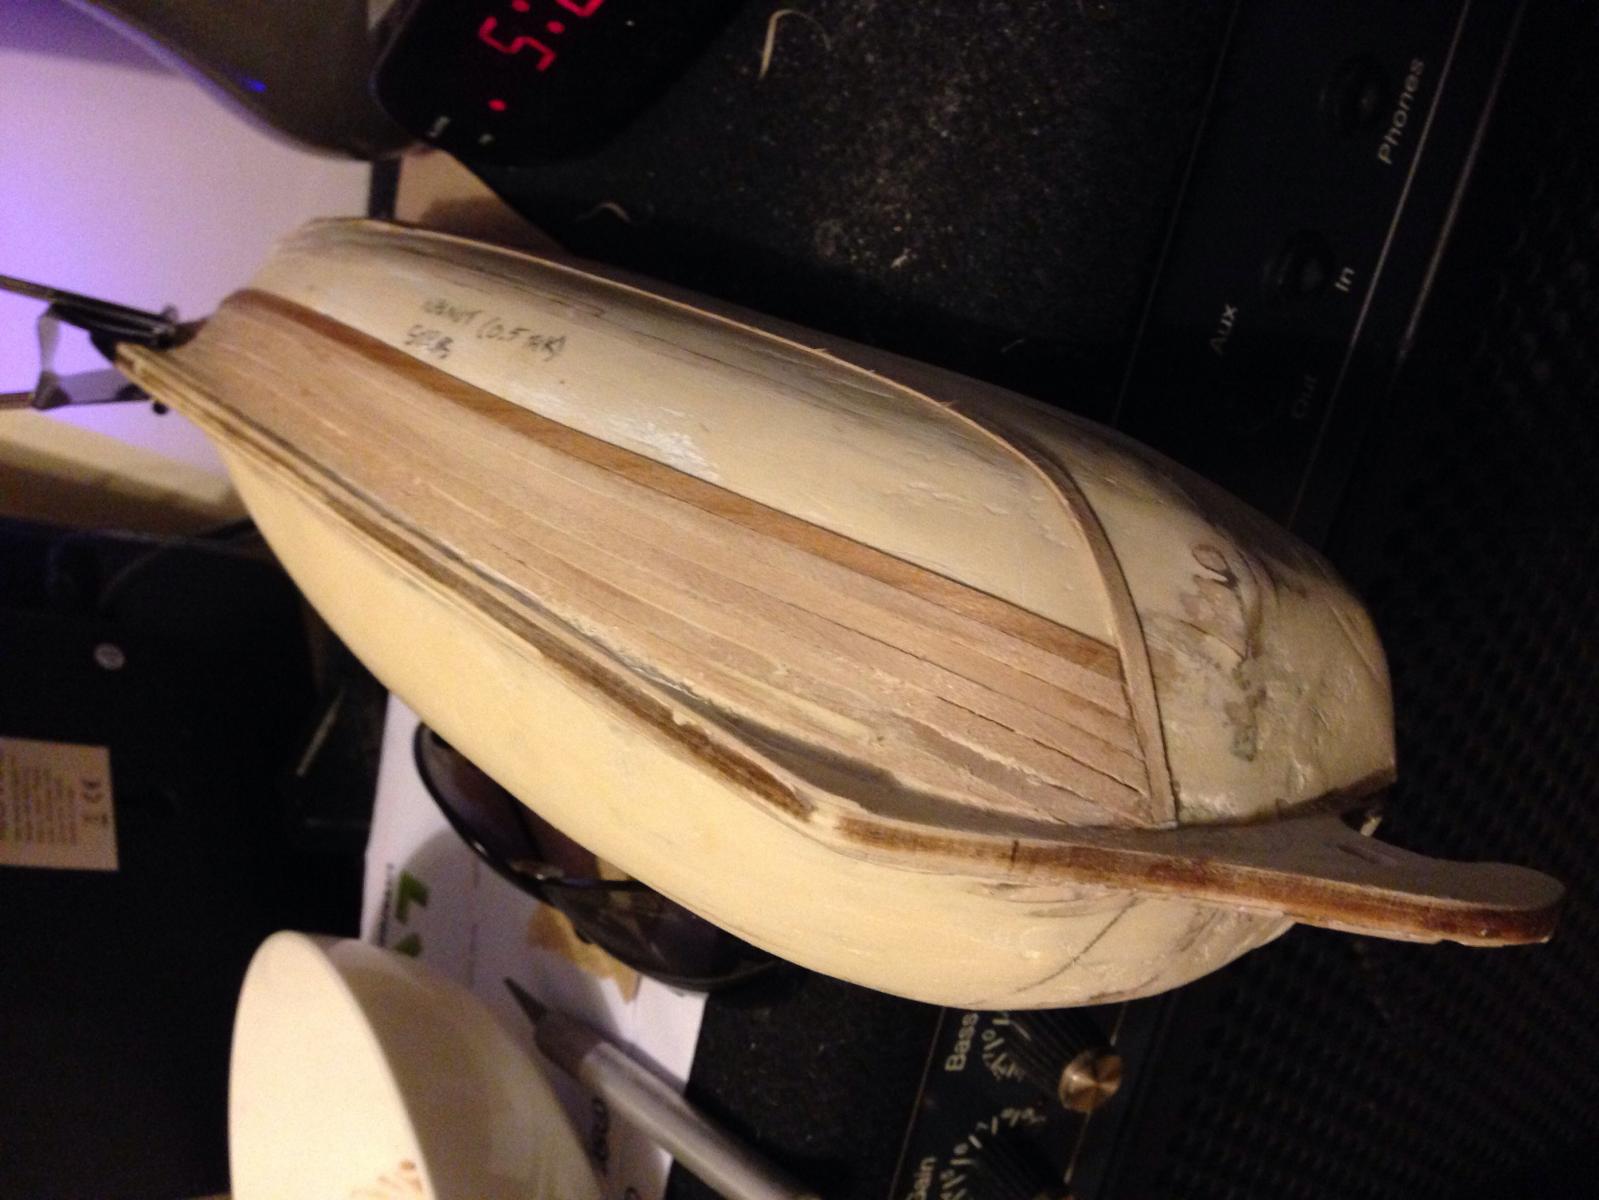
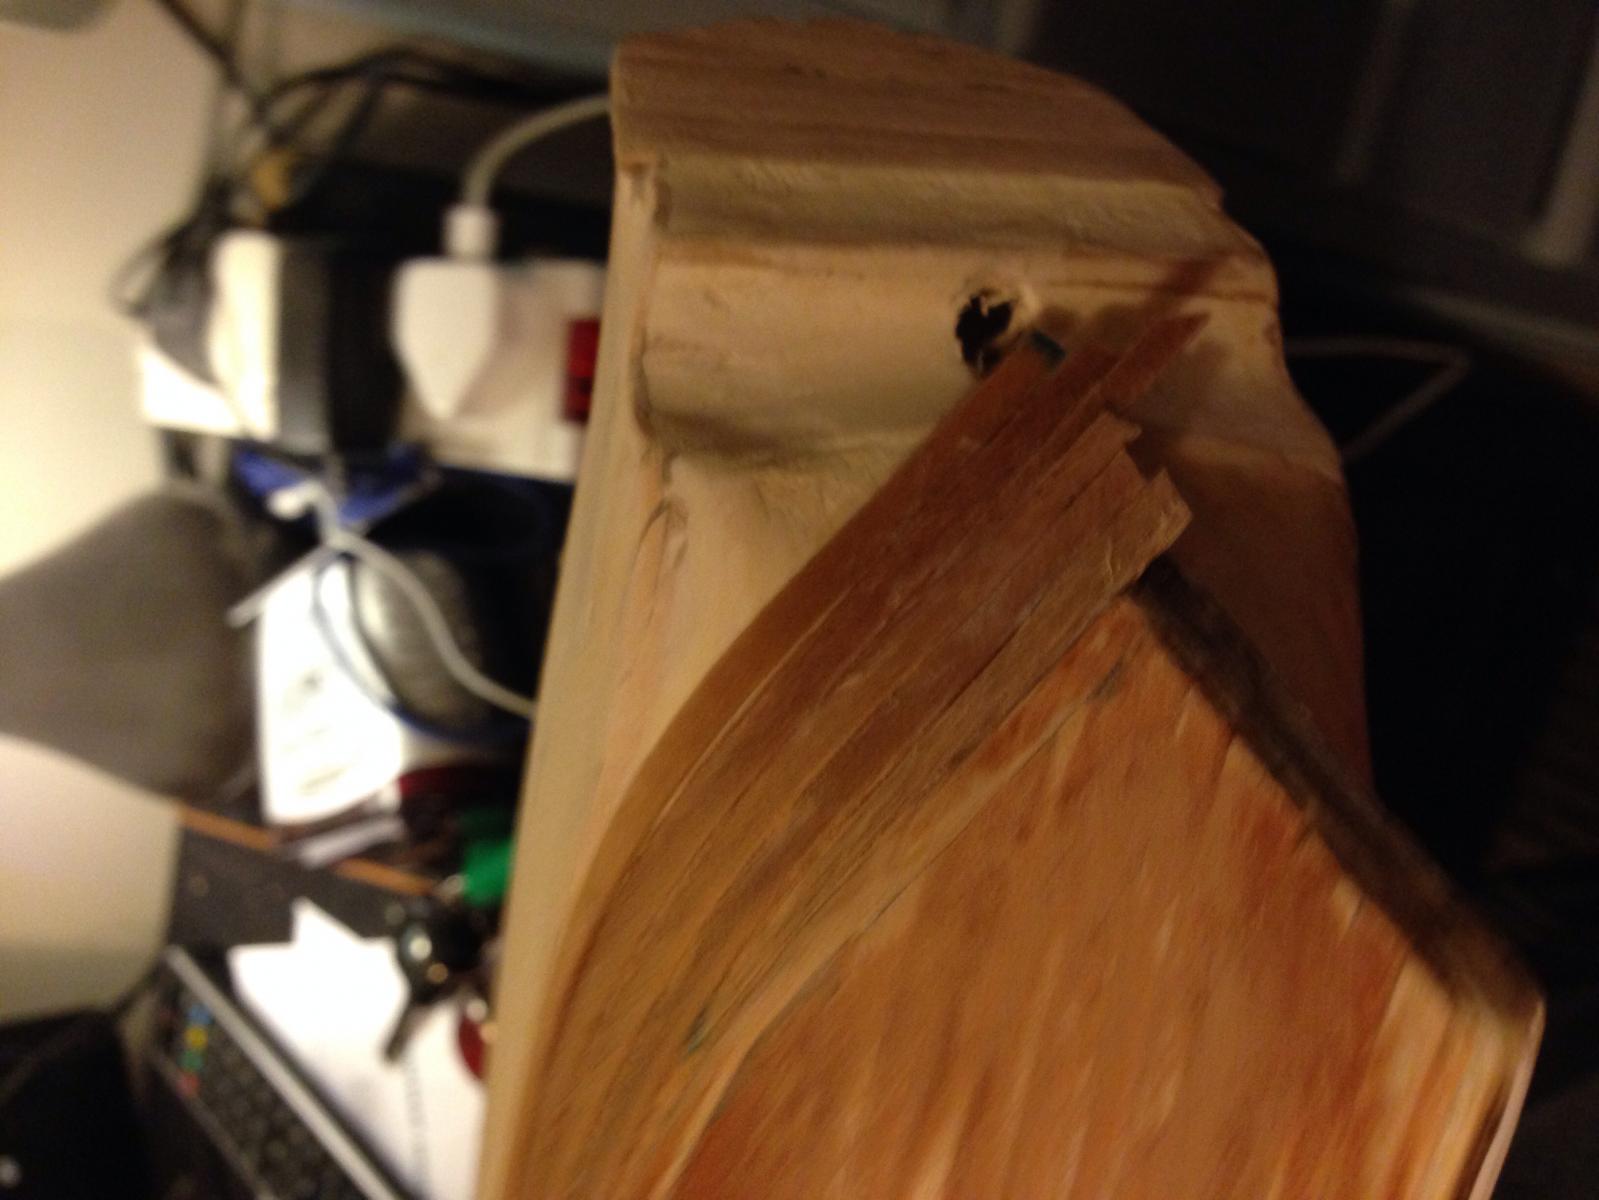
Looks great Cap'n Jack, your's puts mine to shame! Haha I've just got the Walnut layer of planks on my model. It's a breeze getting them on to a smooth hull, I split my planking in to quarters, Port and Starboard underwater profiles, and Port and Starboard Topsides, as I found it was easiest to attempt to scale the waterline length off the plans and set about planking down each side, then eventually planking up from that datum point too. The walnut strips looked really dry when I first looked at them, so I left all the planks to saok in a bucket of water for at least 24 hours. I'm now at the point of putting the rubbing strakes on - which has proven to be a headache without a strip bender. So again, there will have to be a tiny bit of sanding required there! Woohoo!
-
Hello Cap'n Jack, I have aslo found the planking fun, although it was a bit of challenge getting some of the planks bent correctly without a strip bending maching! Probably a serious rookie mistake in the eyes of the Veterans! This has resulted in some serious filling and sanding to get the desired sheer on the hull! As for the attention to detail, I was surprised when I got the kit that the "important" bits of kit I mentioned before weren't included, and have read around on this website, I decided that I must add in these attributes for my own piece of mind! I am not entirely convinced the 1:64 cannons will fit, but I think the rest of the attributes I want to add (ships boat, bilge pumps, anchor strakes, etc.) will be fine on this model. And as you mentioned, I would not suggest to anybody that they start with this kit, or any Mantua kit, as I have found the instructions and "scale" plans are very lacking! Do you have a build page set up yet? I'd like to see the progress you've made so far! Cheers
-
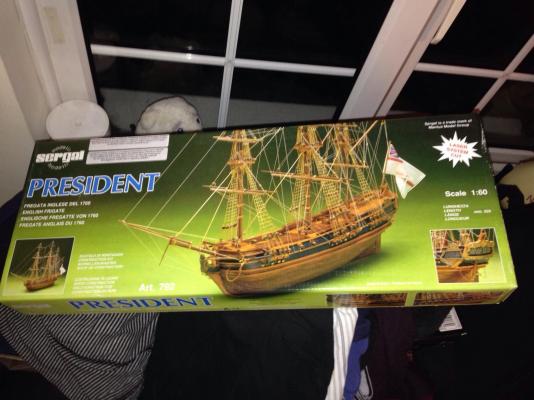
Hi, new guy here. First time building a Mantua/Sergal 1:60 scale wooden kit of HMS Prseident, a light Frigate, or Sloop of War. I have lots of questions to ask regarding scales, details, colours, rigging, and fittings. The kit doesn't seem to be 100% accurate with scale, and the fittings are very lackluster. Any ideas on what I can do? The building instructions have very little detailed information and give you a basic overview of the build process. I have practically flown blind with this first build attempt. I will post a build log later on when I have finished the second layer of planking to the hull. Firstly, as I am getting near the stage of cutting the gunports out, I really need some help with the so called "cannons" that are supplied with the kit - to be frank, they are alarmingly under detailed for the kit (even if it is a starter kit), and consist of 12 roughly turned brass "guns", and 12 "trucks" that are made of walnut U-shaped sections. I was wondering if I could use 1:64 scale cannon kits on the model from an online distributor? I am a Design Engineer, so I under stand about the importance of scale, but I was wondering if anybody else has had the same problem, or resorted to the same solution? Also the kit is missing, what I would call esstential items for a naval ship of the period, i.e. Ships boats, gantry ladders on the Port and Starboard sides, Swivel guns, Anchor Strakes, and Bilge Pumps. Again I was considering using the 1:64 scale kits available online to add to the President to make it look more like a real ship. Lastly, Sergal have displayed the ship as a fully varnished model with just the topsides leading to the aft gallery (captains cabin) painted with a dark blue streak. Would I be right in assuming that this is not how a naval ship circa 1760 - 1790 is painted? I will post pictures and start a build log shortly. Jonny