jlheureux
-
Posts
170 -
Joined
-
Last visited
Content Type
Profiles
Forums
Gallery
Events
Everything posted by jlheureux
-
 I know I have seen it on one of these logs but could someone advise me as to how the different parts of the frames would have been fastened together on a real ship? Pegs? Treenails? cast iron? or were the frames all one big ol piece of timber?
 -
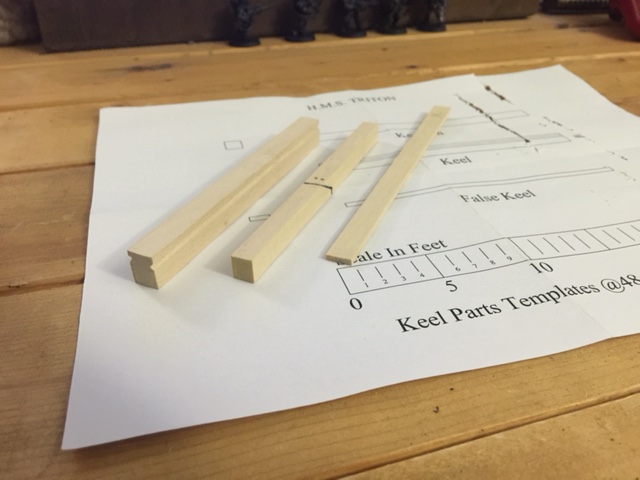
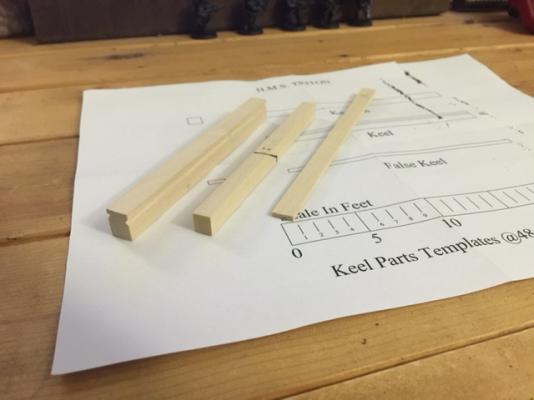
Now I've completed my Constellation I am in mourning and in need of another project to keep my hands busy. With the help of a few moderators I've stumbled upon this thread and want to join the party. I'm going to be building this as I build everything; on my coffee table with a dremel and a smile. I don't have all the fancy workshop gear some of you guys have so I'm sure I'll need some creative help. I tried making a keelson with a treenail joint just for fun. But I have a spare in case I don't end up liking it. Requesting access to the rest of the plans.
-
Guys! It's kind of depressing actually. I've been messing with that ship for almost a year. Every day when I get home from work I have her waiting for me to do just one more thing..... I got the post-build blues!
- 116 replies
-
- 1
-

-
- constellation
- artesania latina
- (and 1 more)
-
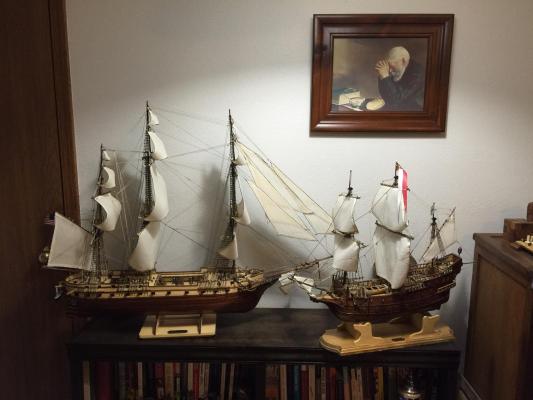
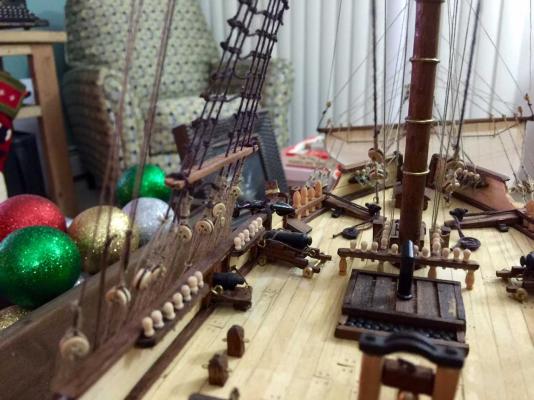
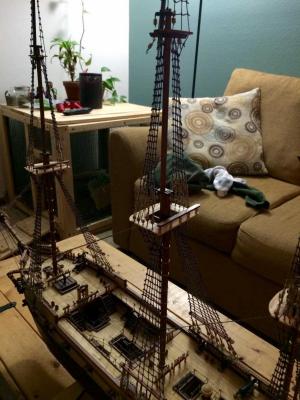
For a little size comparison here she is next to my San Francisco. It's been a running joke since the beginning of this build with my wife that when the box for the Constellation showed up at our doorstep it was a bit larger than I had negotiated with the Mrs. I got myself the start of a little fleet here...
- 116 replies
-
- 4
-
-
- constellation
- artesania latina
- (and 1 more)
-
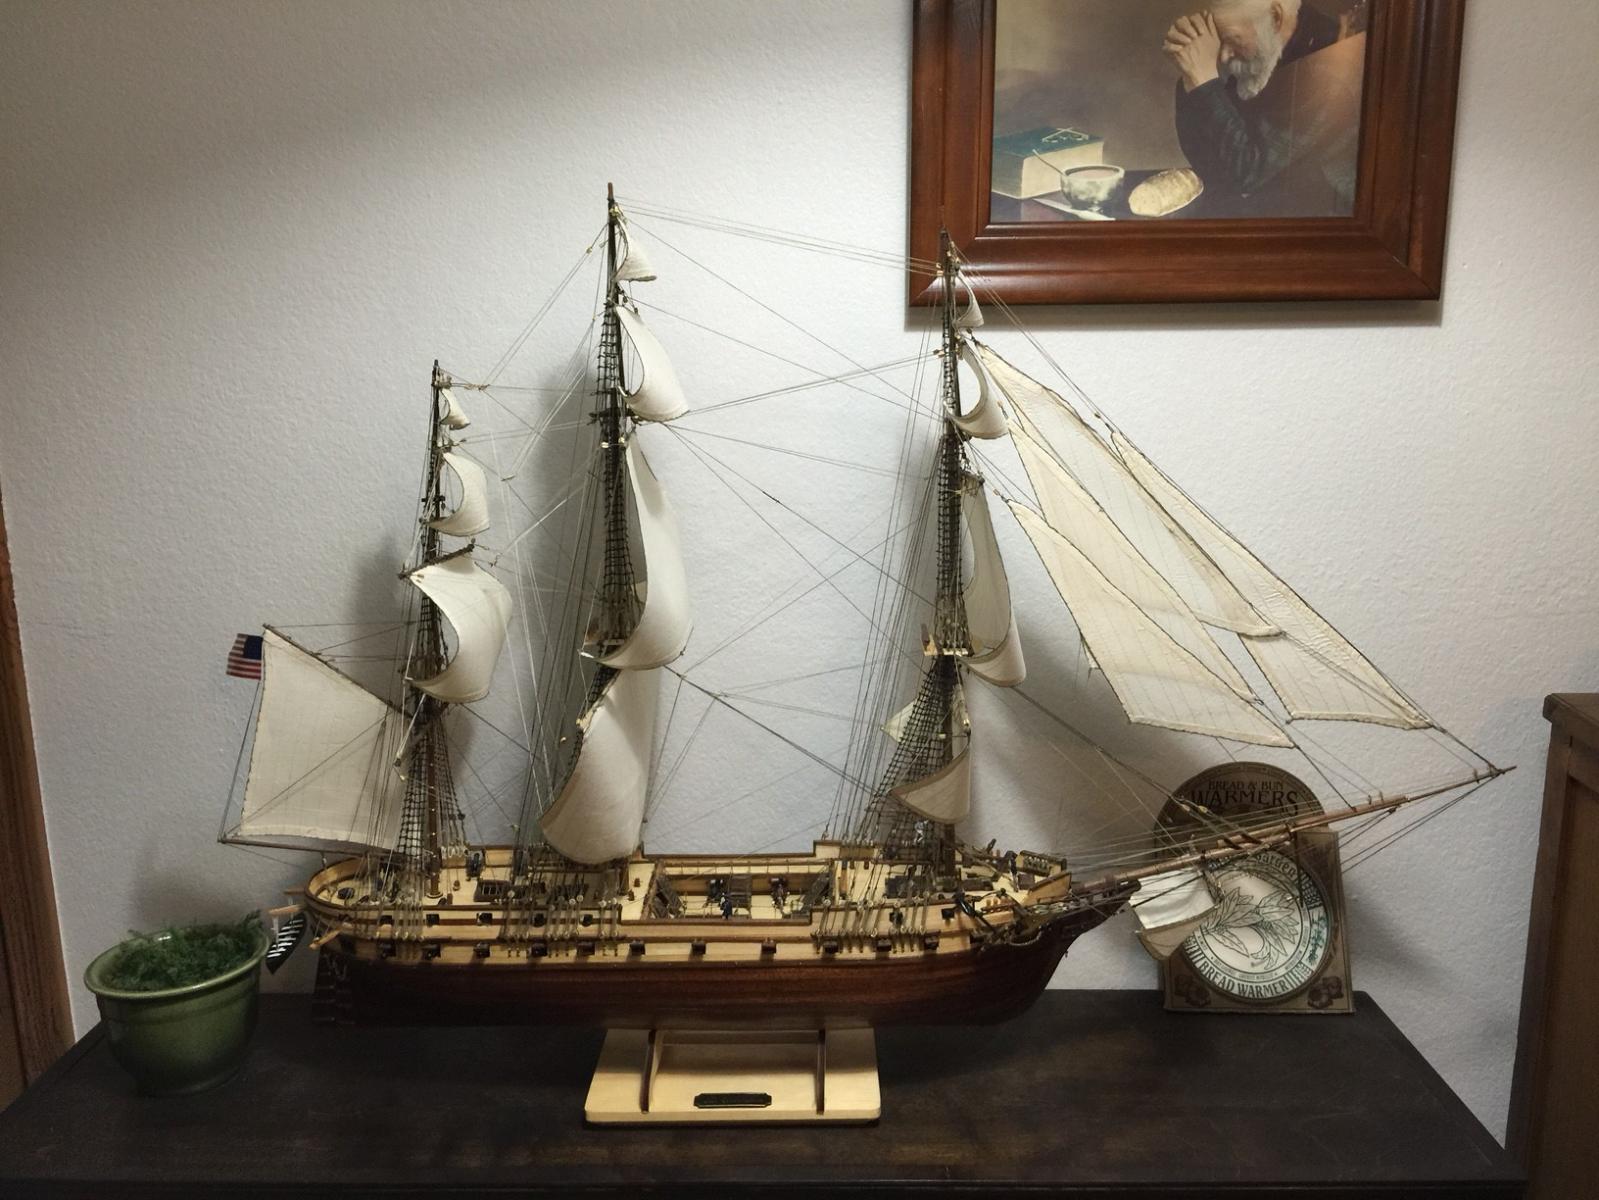
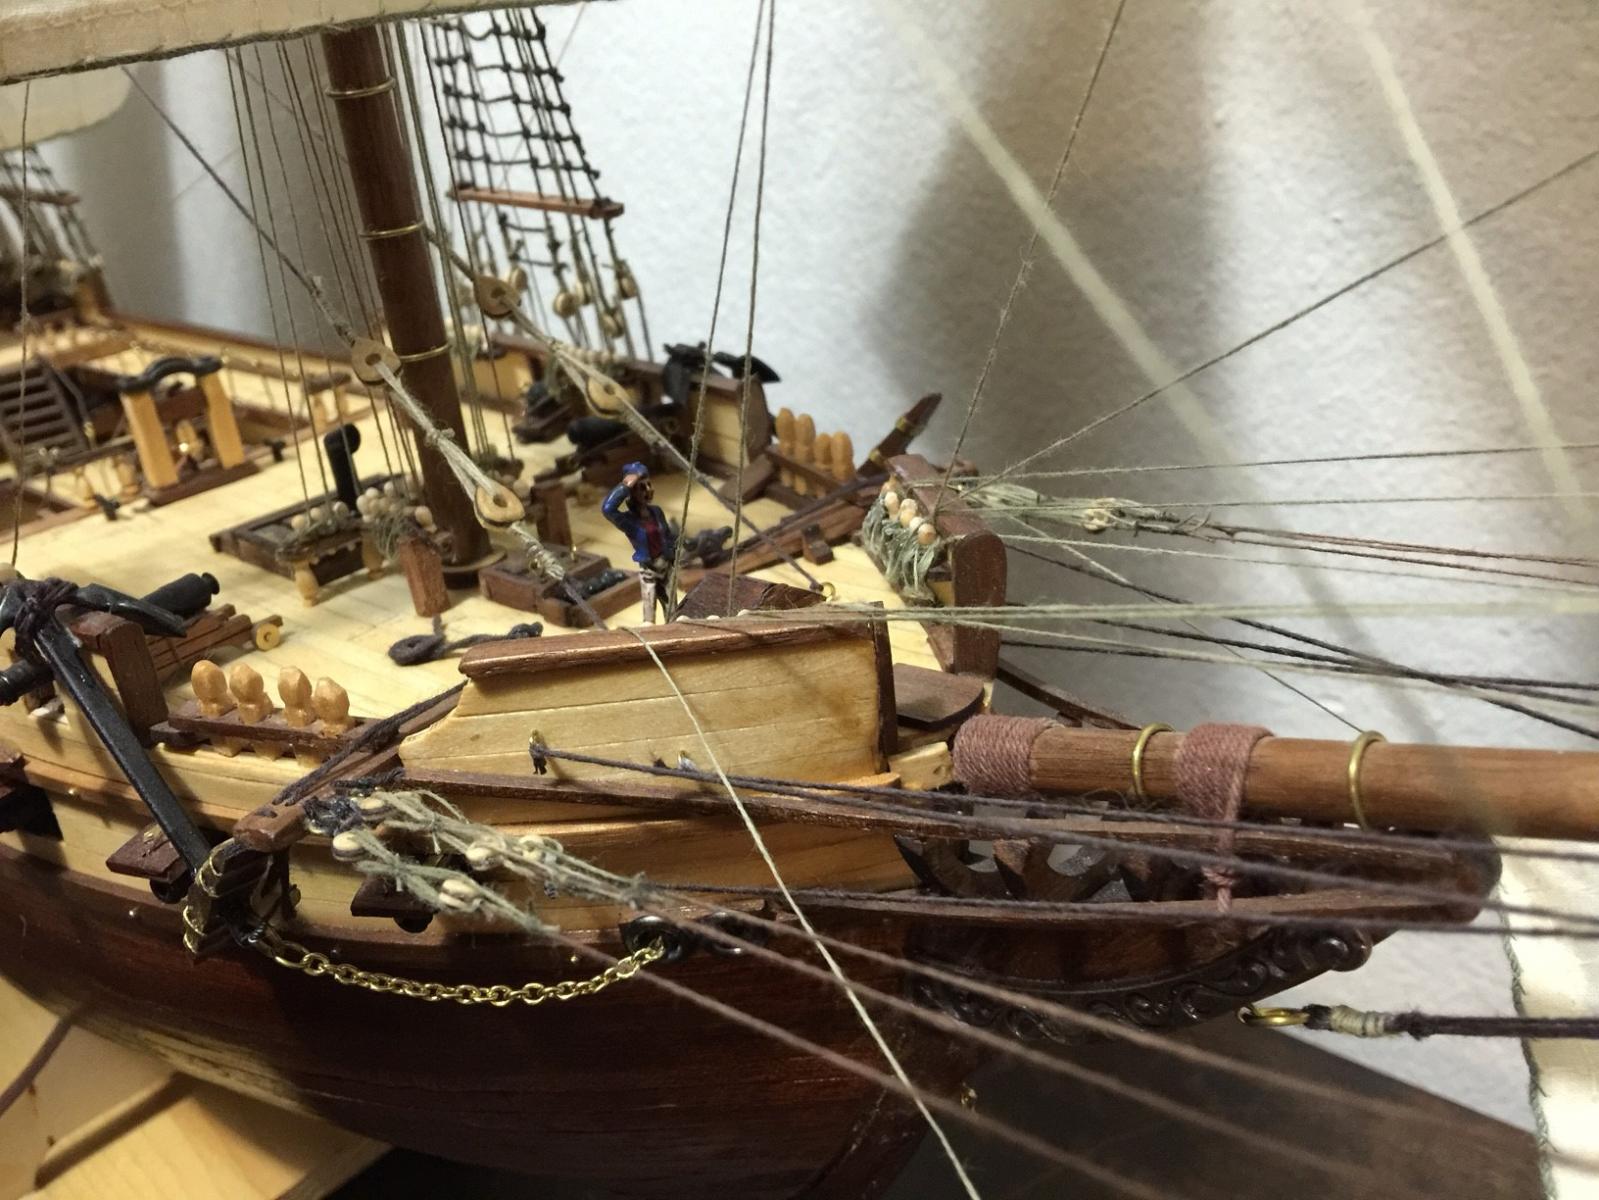
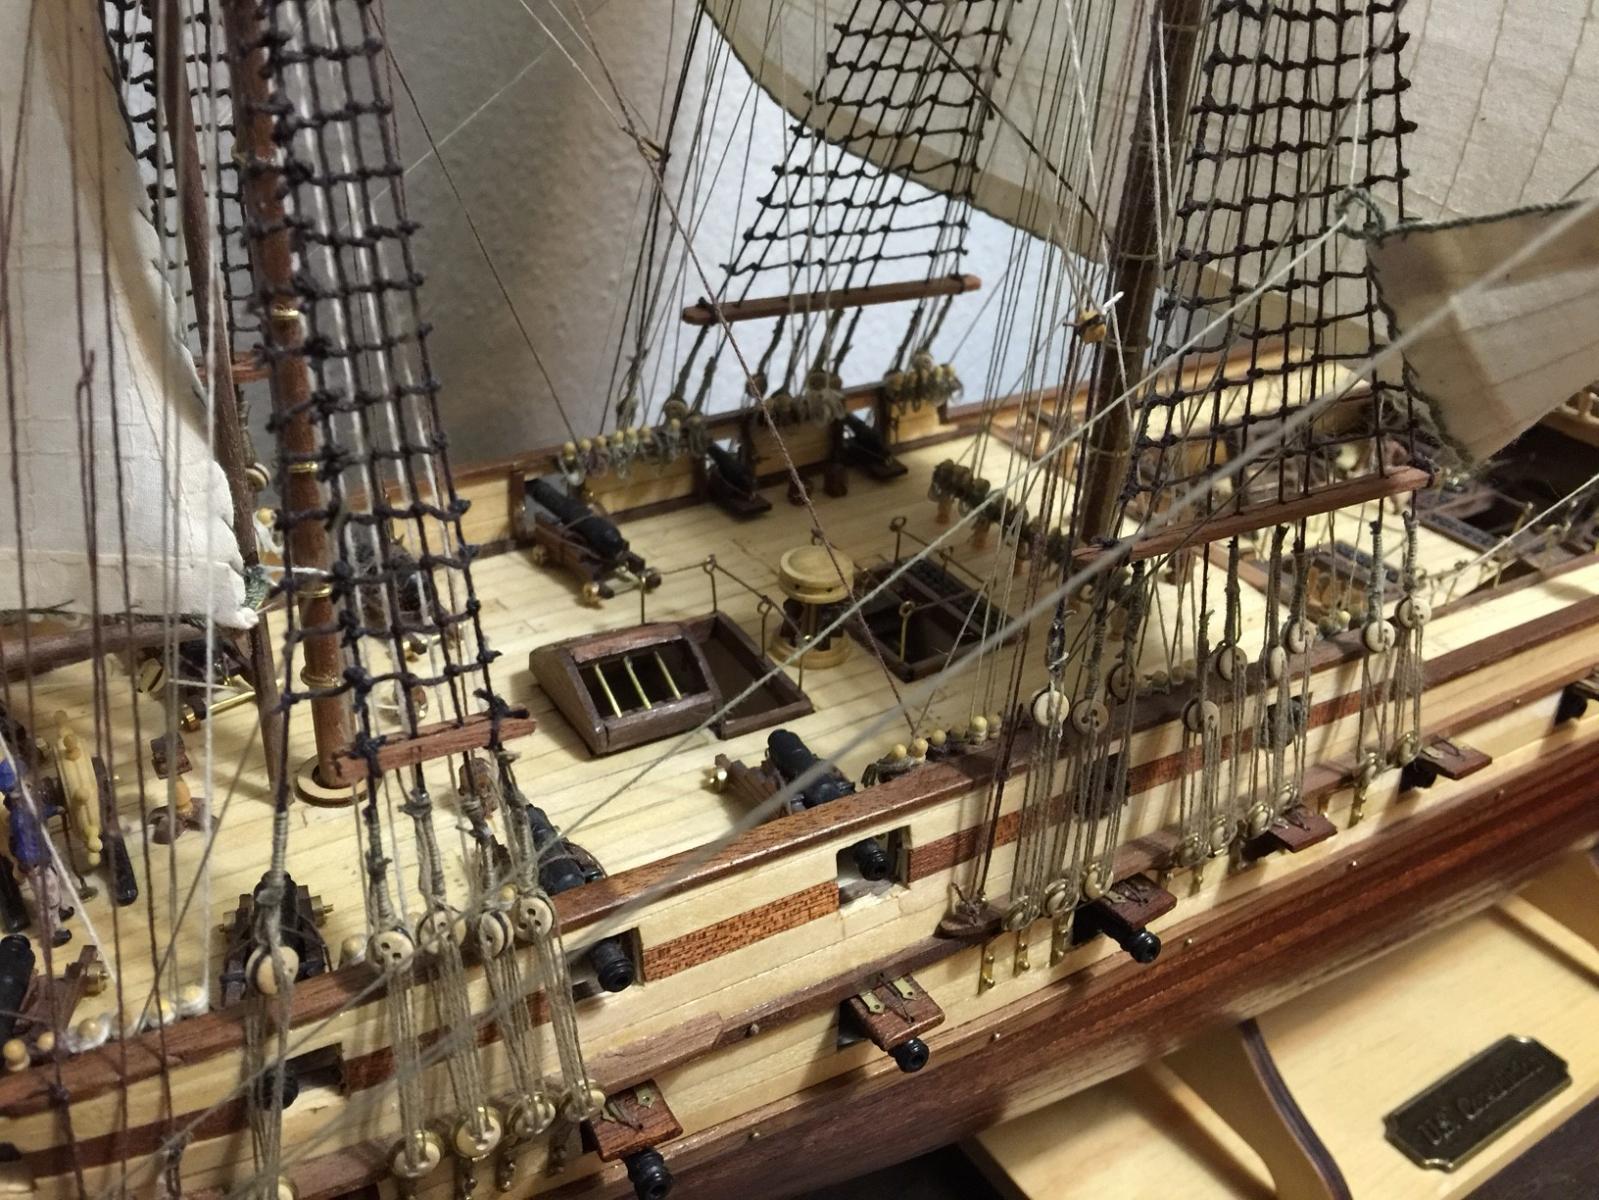
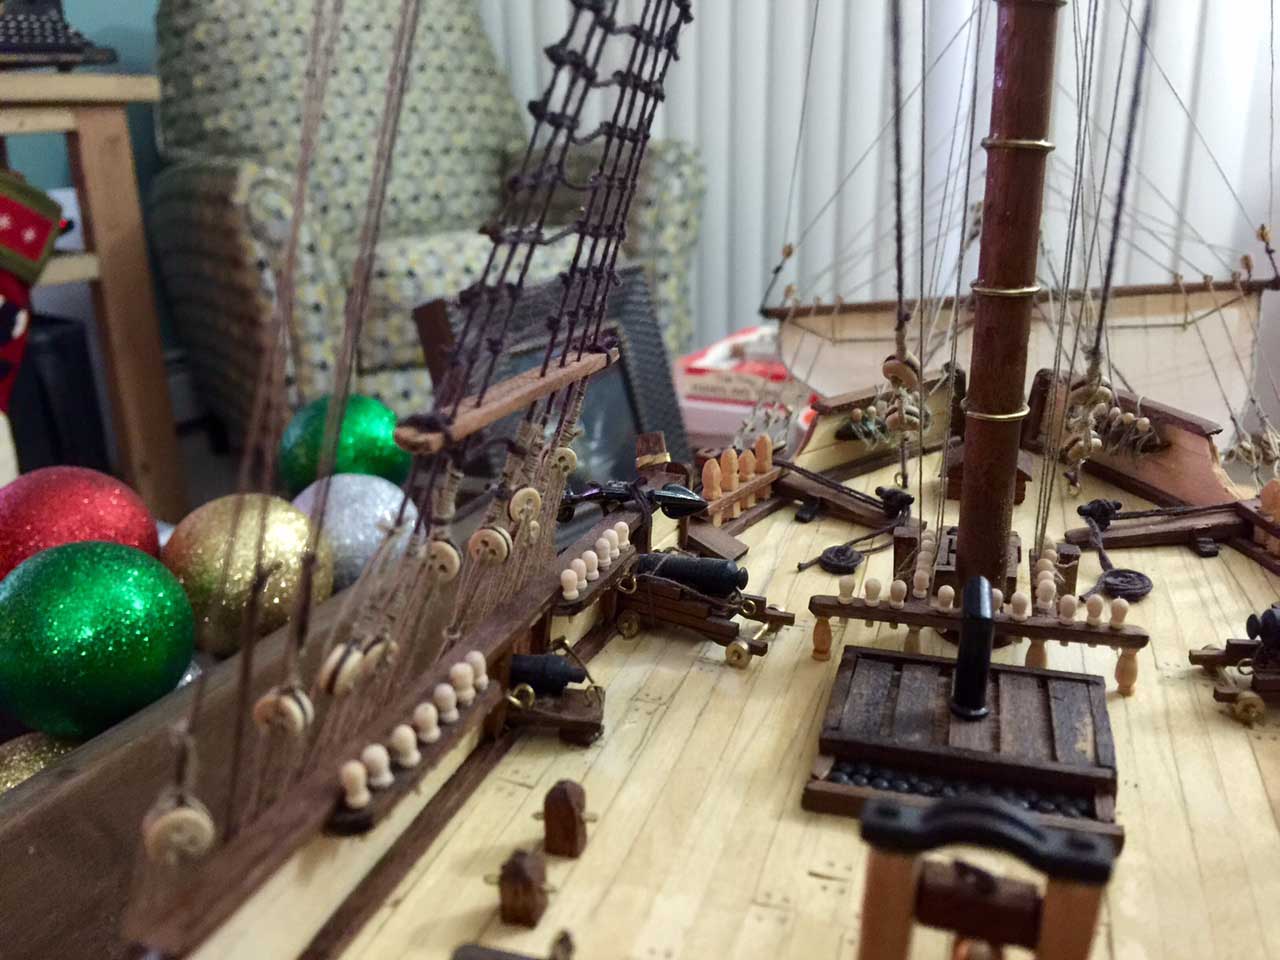
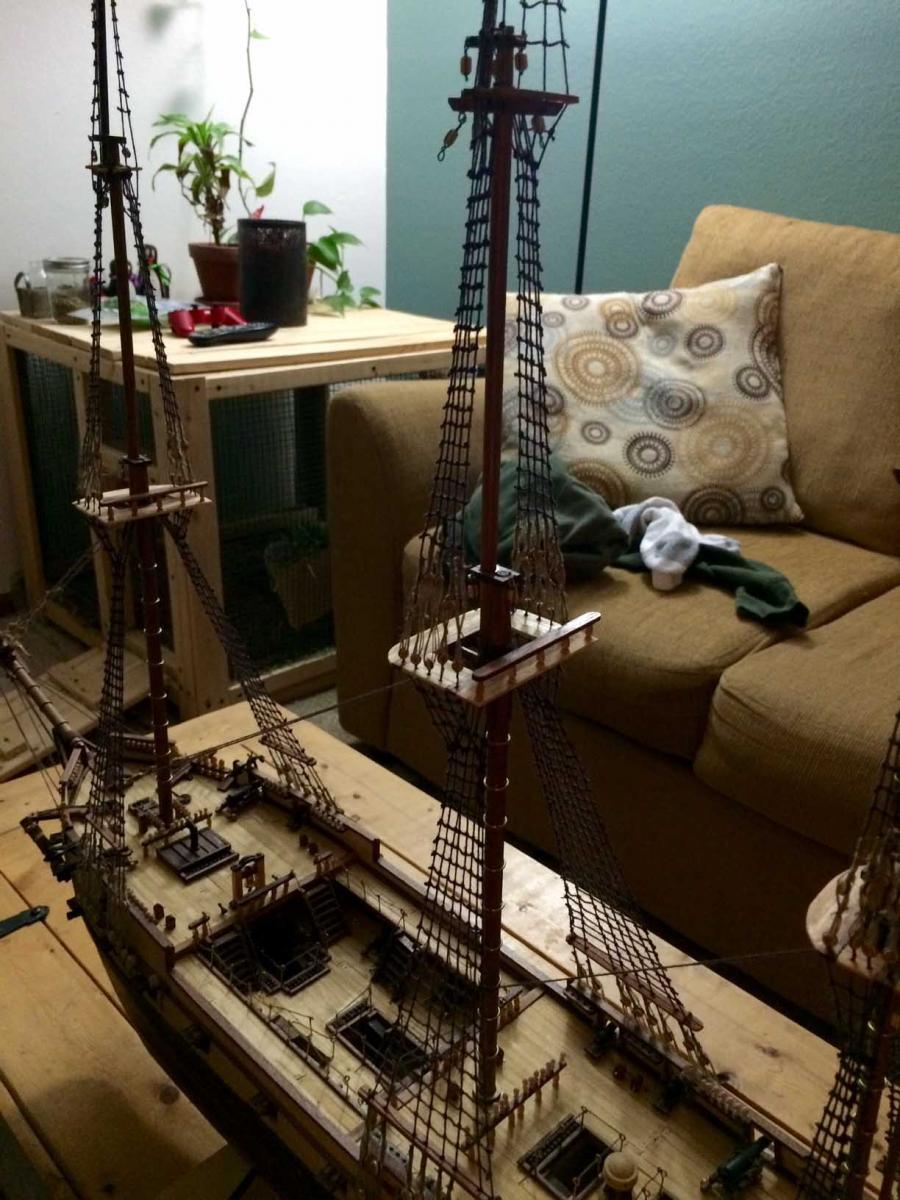
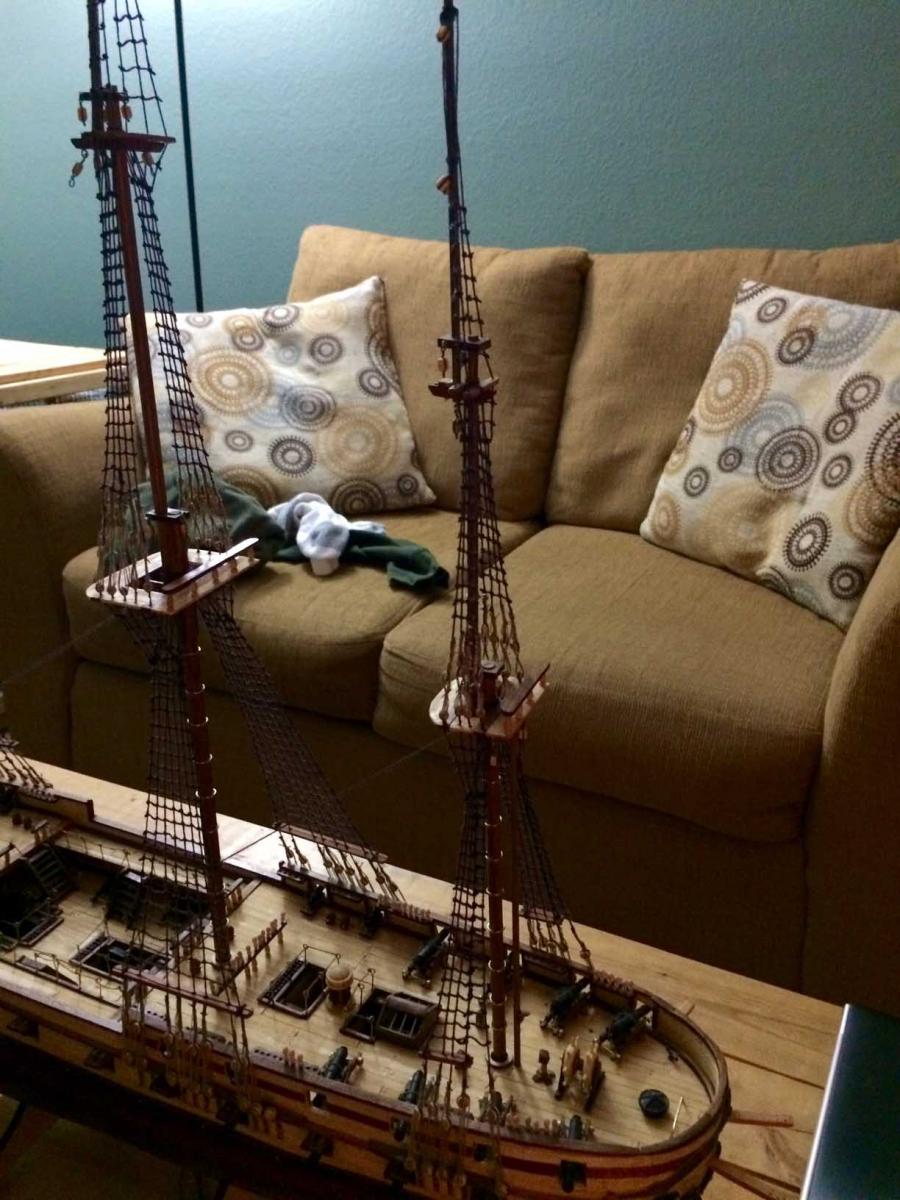
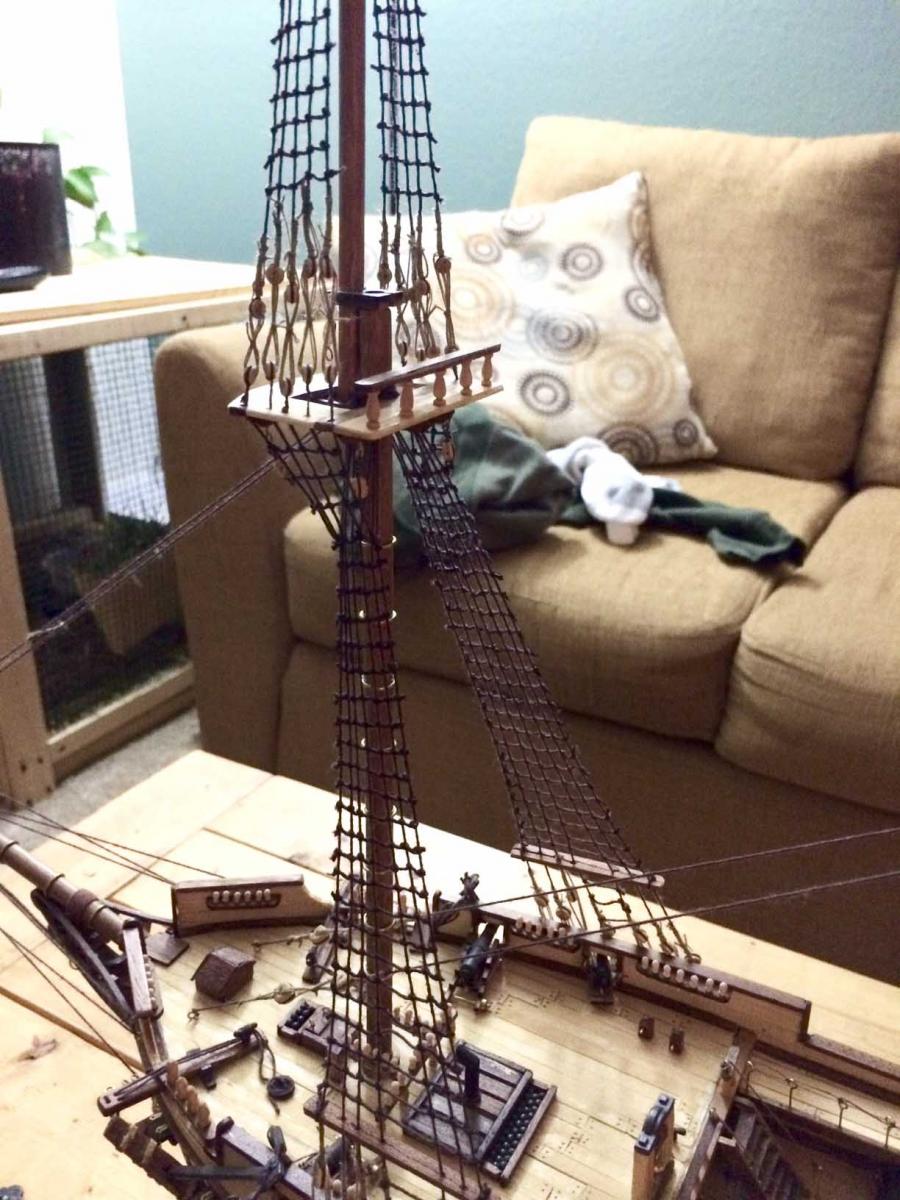
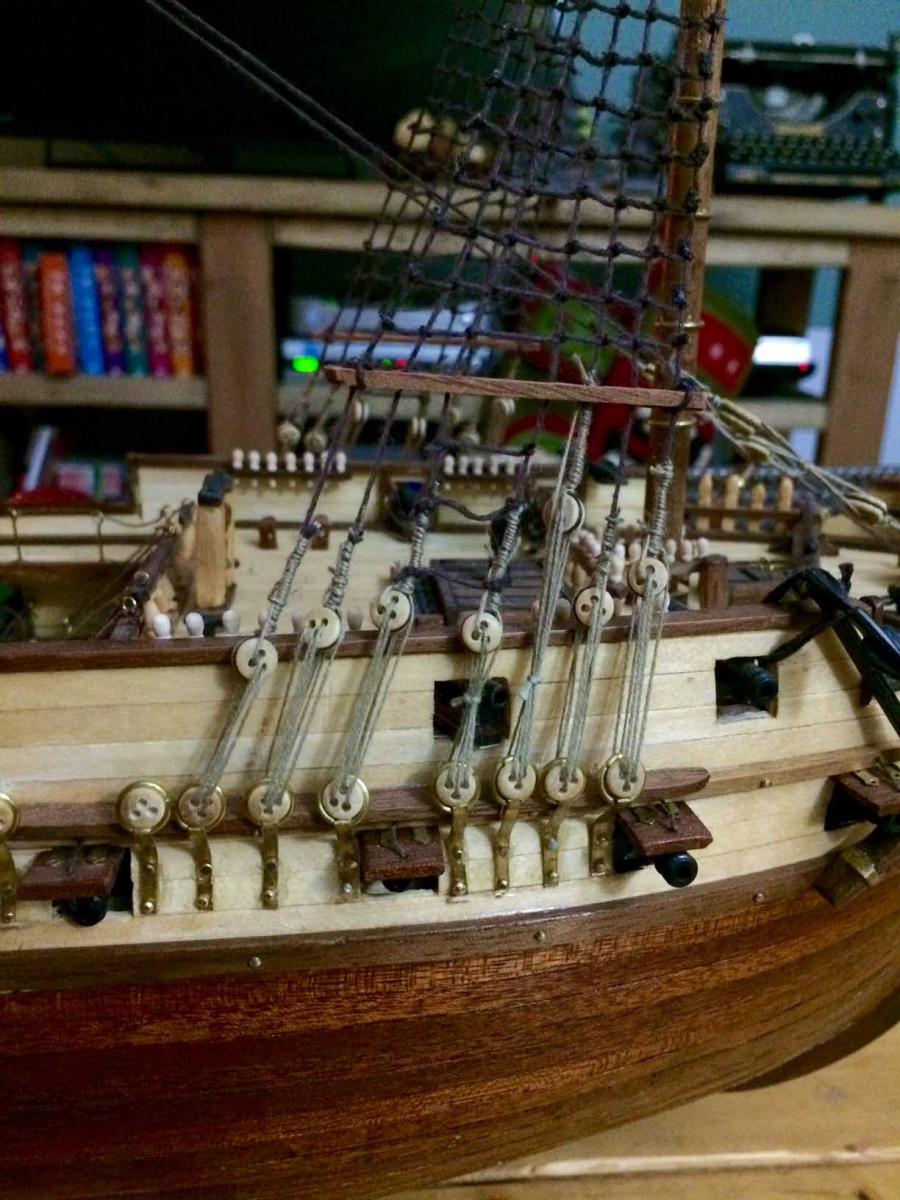
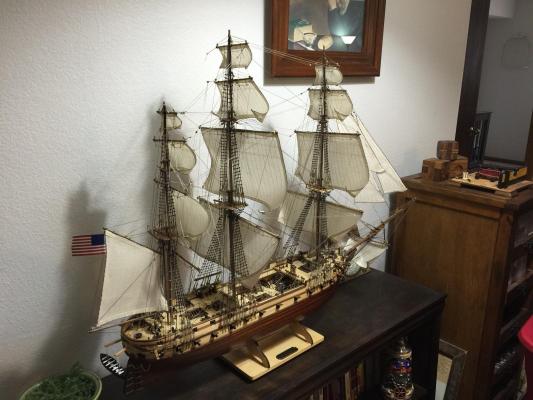
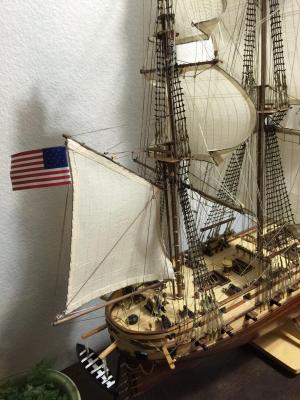
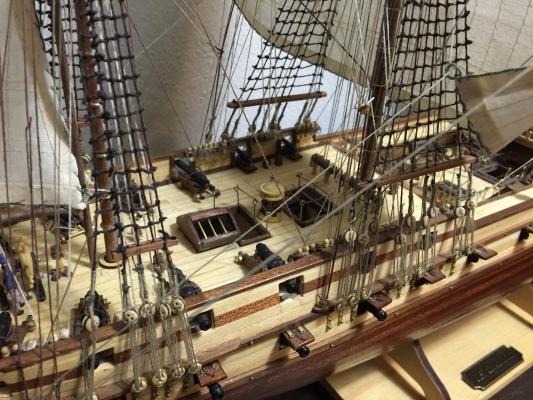
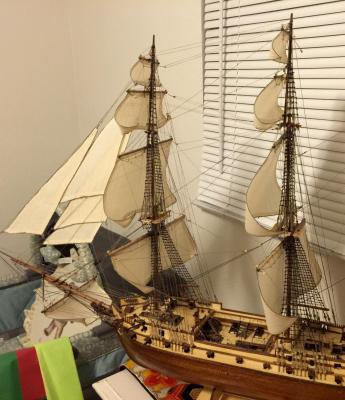
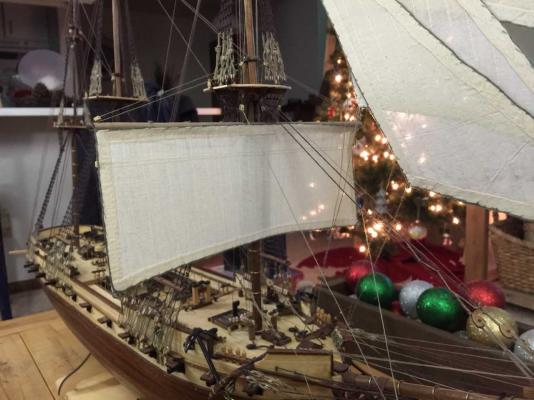
Well...Picking up where we left off I'm done! I think as of last post I just had to finish the sheets on the main, and do the mizzen and the spanker. All done now. Also did the little row boat (it's a pretty lowsey cast) and I painted up the little crew. Overall this was a great ship and I had a blast! I'm glad I took my time on it. I basically did the hull up to he masts then took about 3 months off on it then did all the masts, took another month off then did all the rigging. I've found it's important to take breaks! This is a great model and a great kit. Instructions are as is typical kind of lowsey as well, but with some knowledge, a little research and some help on the forums it's not too bad at all.


- 116 replies
-
- 8
-
-
- constellation
- artesania latina
- (and 1 more)
-
Thanks so much guys. you are too kind. really running the extra rigging wasn't bad at all. just like normal you take it one piece of rigging at a time and then you're golden. it gets a little crowded in the lubbar holes but it's all good. I'll post some pics when it's all done and am happy to help anyone in the future so feel free to PM me. My extra line should be in soon. I ordered it today and if it wasn't for Christmas Id have it on Friday.
- 116 replies
-
- 1
-
-
- constellation
- artesania latina
- (and 1 more)
-
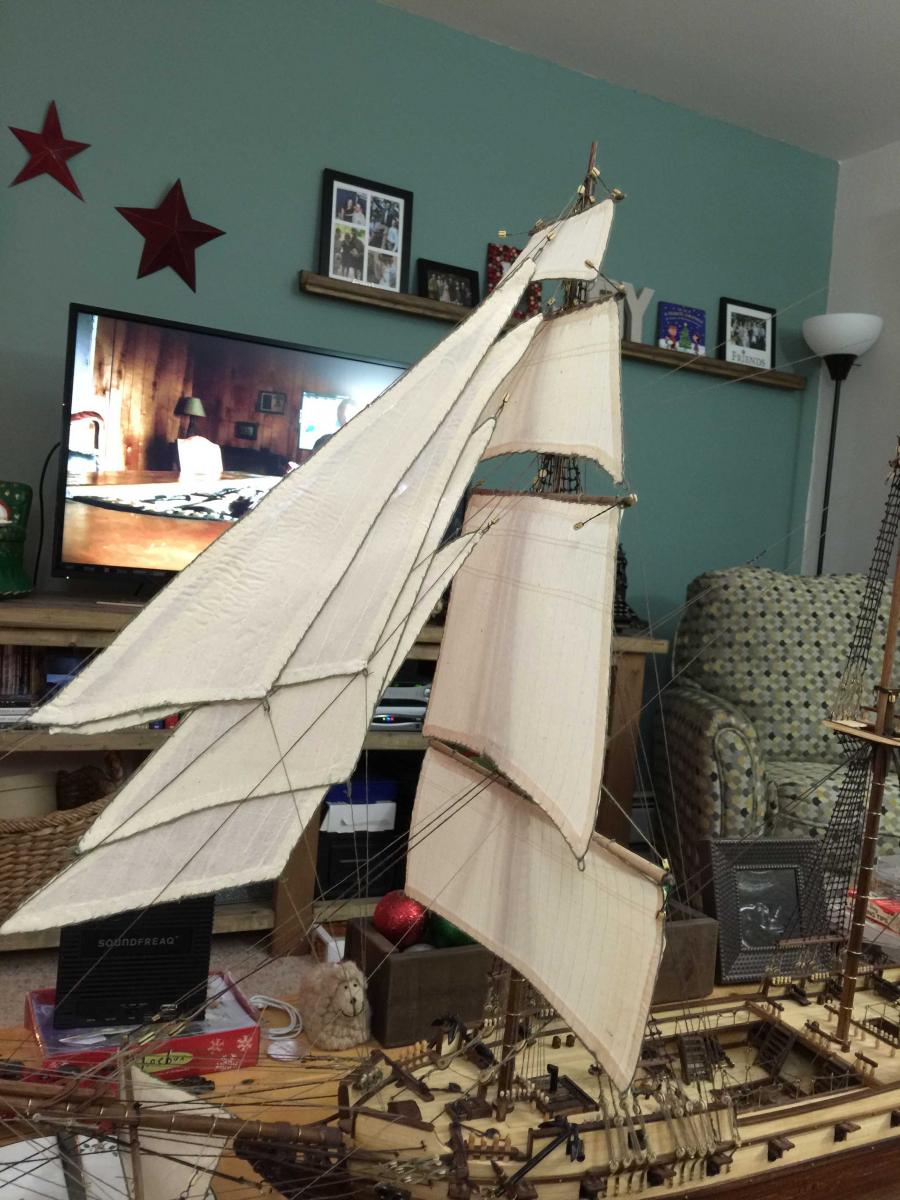
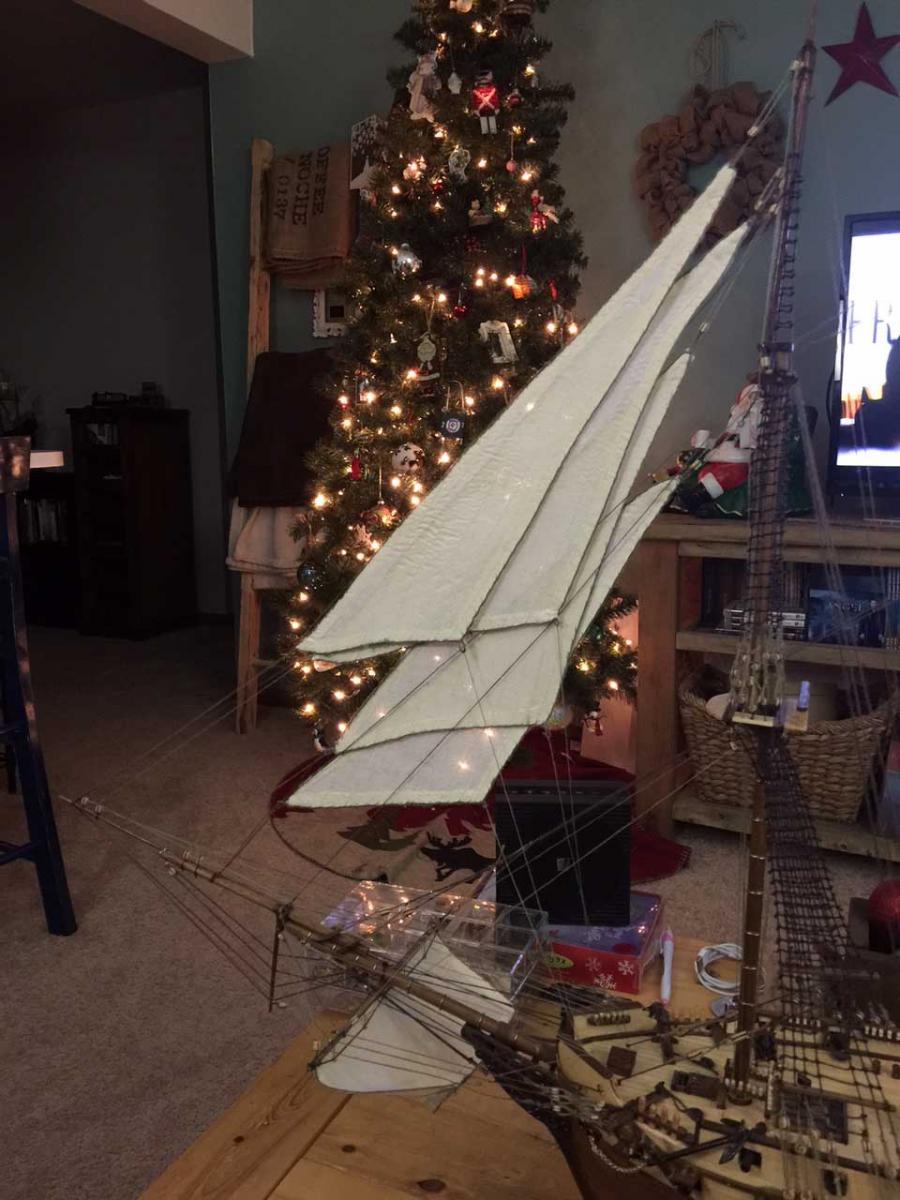
Thanks for the encouragement Azzoun. take it one step at a time. In order to get the full sail effect what I do is I iron out the sails and then spray them with a spray heavy starch and iron it out like you would iron out a linen shirt. start slow and add the starch in layers so you achieve the desired level of fullness without making them look too fake. I did this on my San Francisco as well and while initially I thought they were a little too still over time the starch softens up and now it looks pretty good. I also found that step helped with sewing the sails into the yards and then when you rig the sheet lines on the corner of the sails it trims them in and they curl nicely. I suggest reading the post on this thread a little ways back about the lines not included in the original rigging diagram I added because once you get all those lines in place the sails really pop.
- 116 replies
-
- 1
-
-
- constellation
- artesania latina
- (and 1 more)
-
So I've been running those extra lines so I have the sheets to trim up the sails and those down haul lines to trim down the sails. in reviewing the pin diagrams I totally had enough space on the rails, the instructions just watered down the rigging a little bit by not including these lines. so, since I've been doing twice the planned running rigging I got stalled tonight as I am out of .15 line! fortunately my shop should be able to get it in for me but it will take me till after Christmas which is a bummer because I had hoped to be finishing up while Im off this week. SO close!
- 116 replies
-
- 4
-
-
- constellation
- artesania latina
- (and 1 more)
-
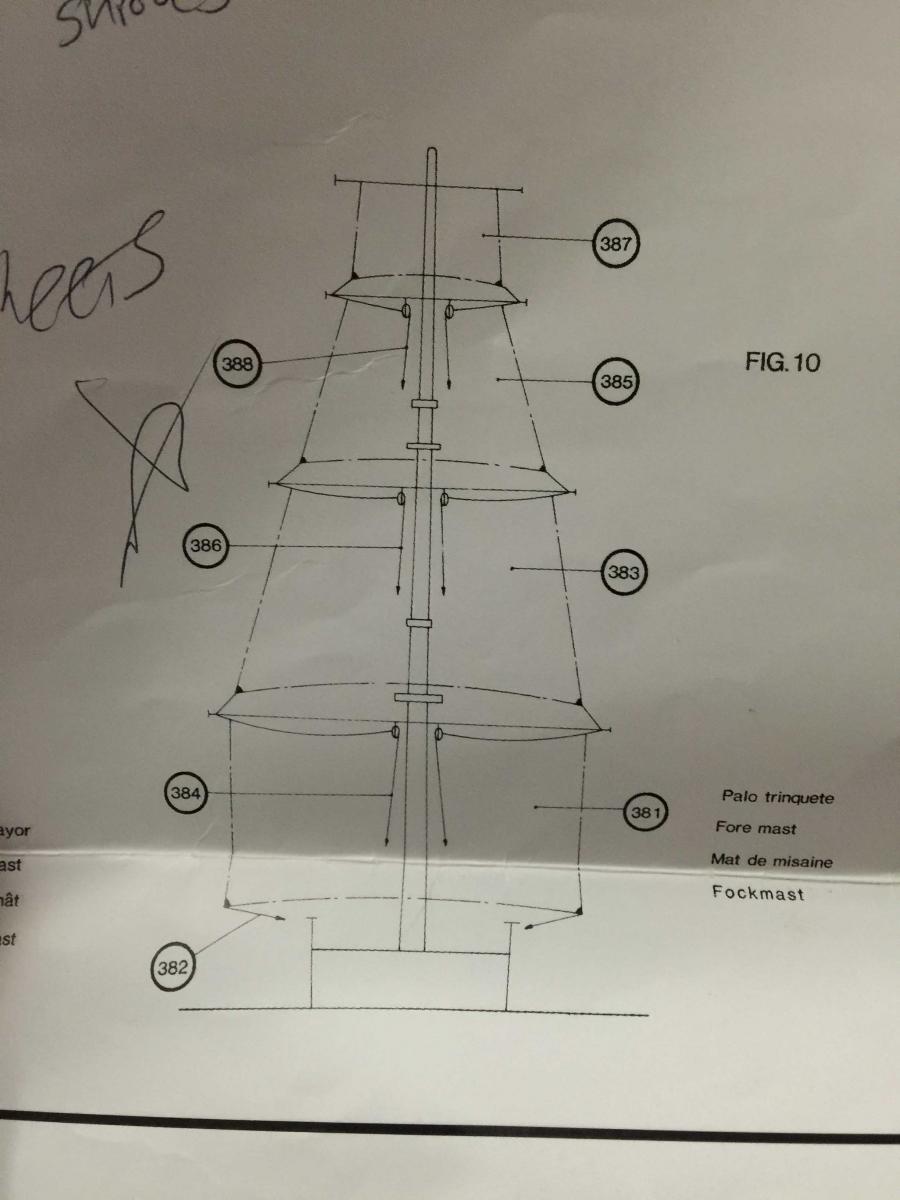
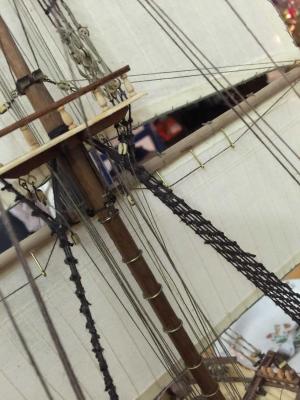
thanks so much. that actually makes total sense. this diagram is of those foot of the sail ropes which my last kit did not have so I misinterpreted those as the 'blue ones' you drew in which allow the sails to be furled. in reviewing the rigging diagram there actually isn't a diagram for these lines and the yard diagrams only one set of blocks on the yard which are for these 'green lines. ' so. in order to do both I will have to take an inventory of my blocks and add another set of single blocks to each yard and then assess if I have enough room on my pintails. strange they decided to include these lines but not the other ones. if it comes to it and I don't have enough space I will probably approximate those green lines and rig up the furling sheets instead as I like them better anyhow. maybe I can do both. I'll let you know. this is the first real hiccup I've had with the otherwise pretty good rigging diagrams for this kit so other builders keep a lookout for this piece.
- 116 replies
-
- 1
-
-
- constellation
- artesania latina
- (and 1 more)
-
just having a hard time visualizing I guess. so in this ship these sails would have been furled by hand and these lines are just to haul the corners into place? my last ship seemed to have lines that ran from the corners of the sails to blocks to the deck so the sails could be furled from the deck.
-
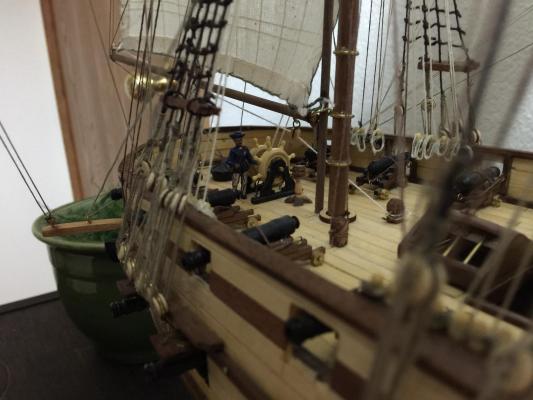
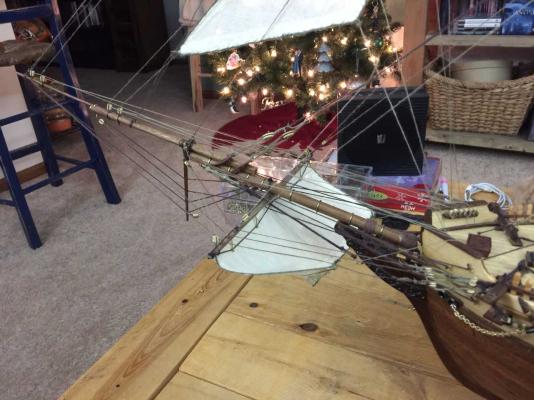
Keep pressing on. I got the formast main, top, gallent and royal up and hung on the masts. I then completed rigging the hallyards for all the formast yards. My next step is to do all the foresheets etc and hten finish up dressing the pinracks. A good ay of work tonight though. ****I have one question. As per the diagram I attach here on this post it appears to be diagramming the sheets coming off of the corners of the sails which then go through blocks and to the deck. However, with that rigging through the holes in the yards all those sheets will do is make the sails go 'more straight' for want of correct terminology. It seems that the rope should go from the end of the sail to the block to the deck so when you haul on the line it would trim the sail in....Does that description make sense? Any idea what's up with this particular diagram? If I rig up the formast as per this diagram it doesn't seem like the rope will be 'doing' anything....Help please.....****


- 116 replies
-
- 2
-
-
- constellation
- artesania latina
- (and 1 more)
-
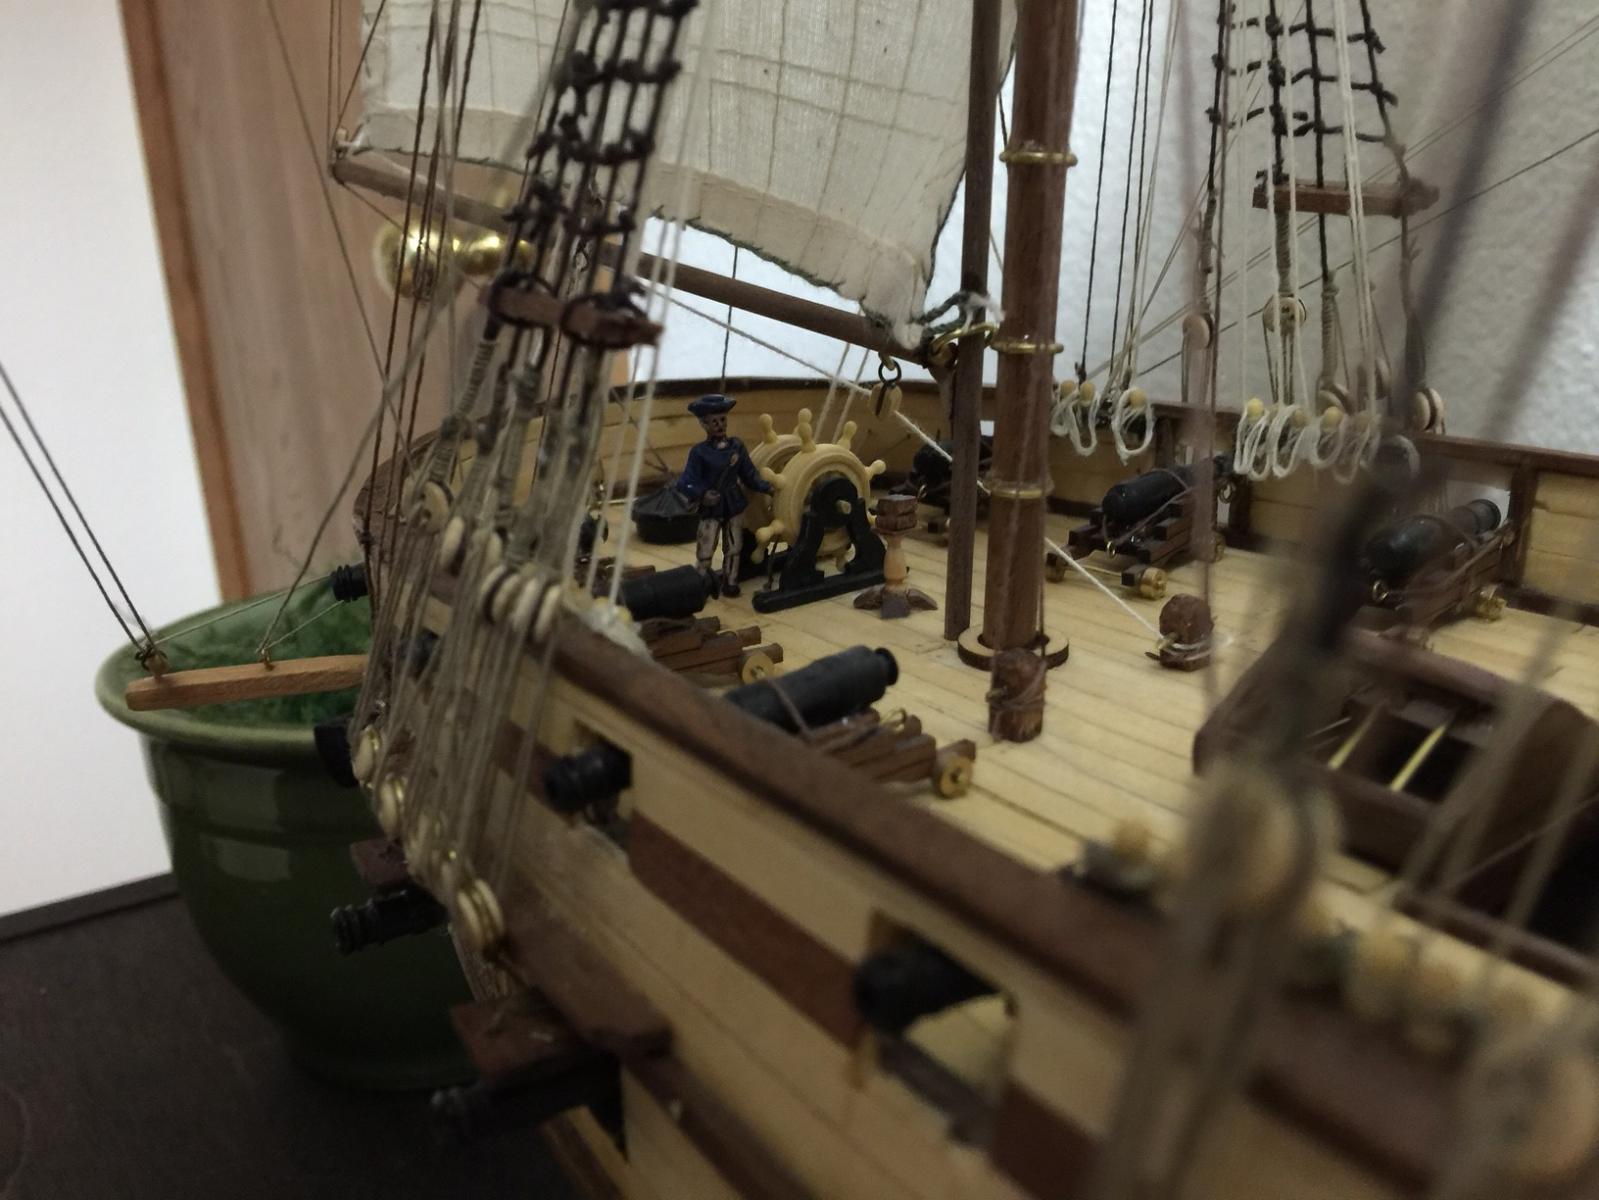
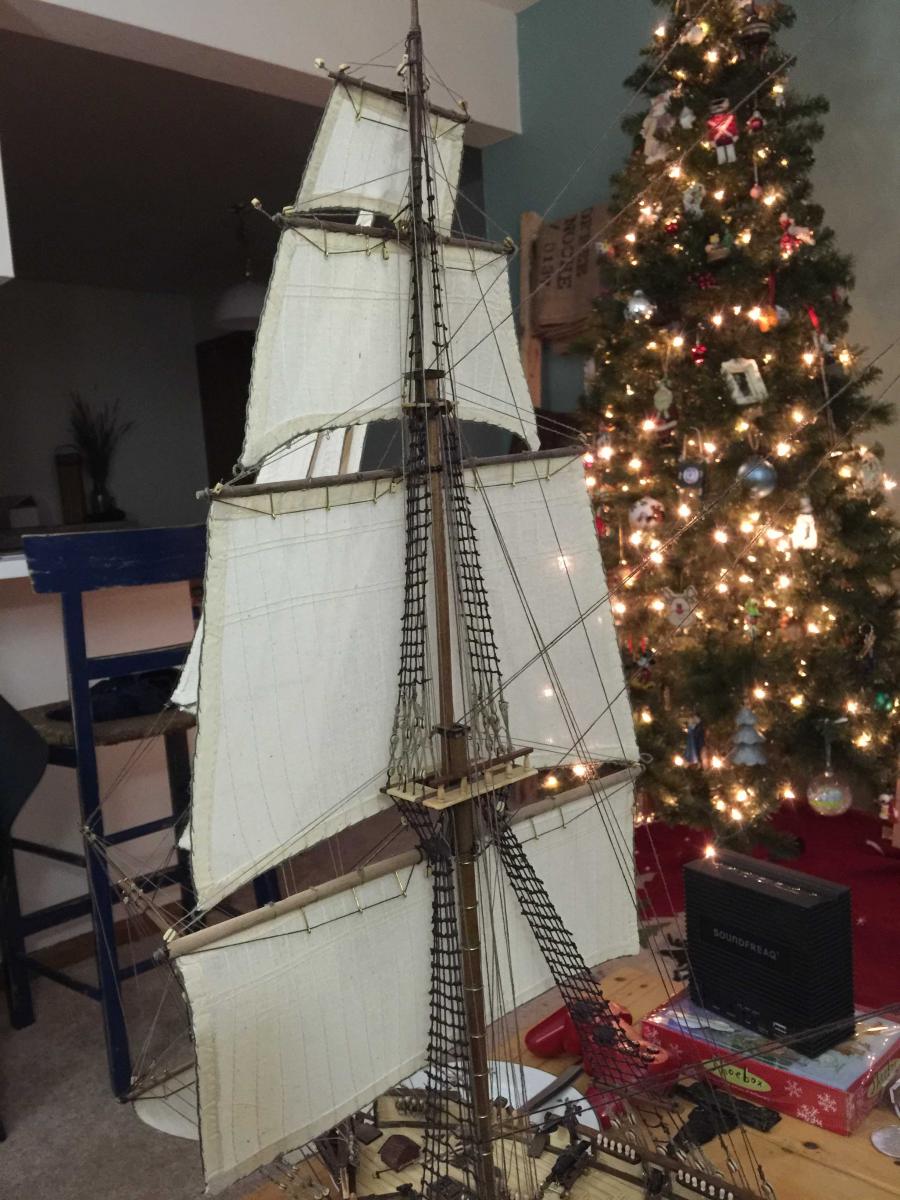
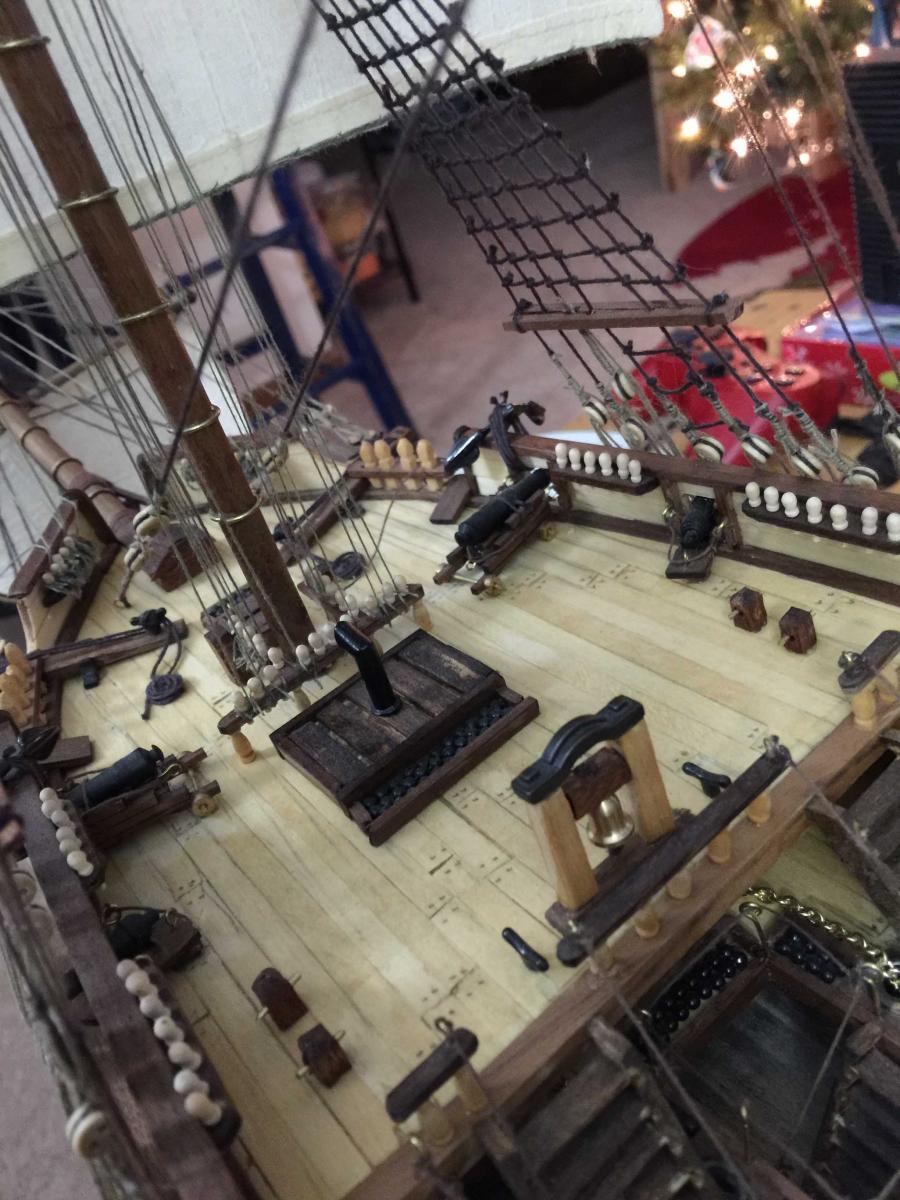
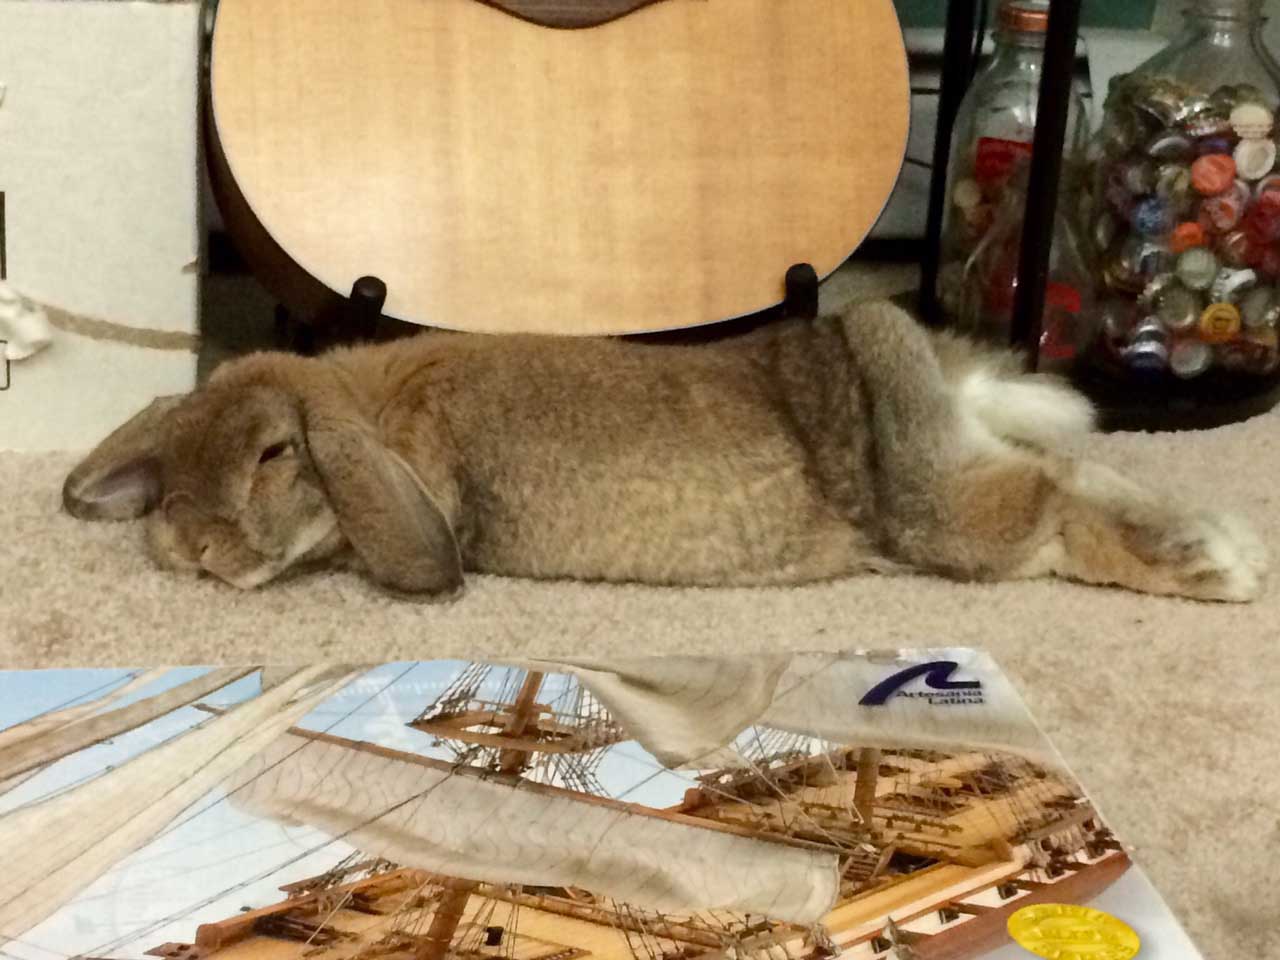
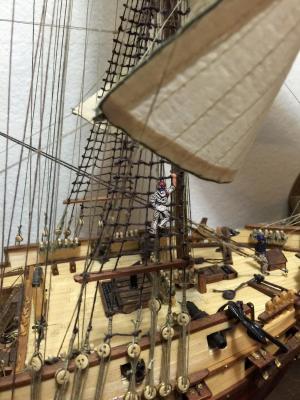
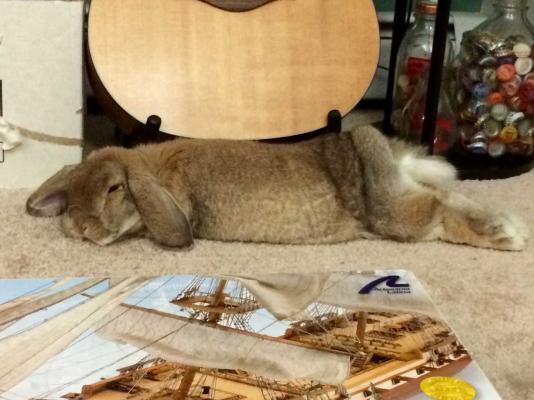
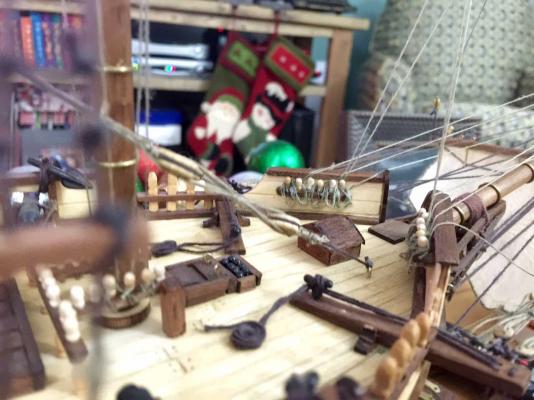
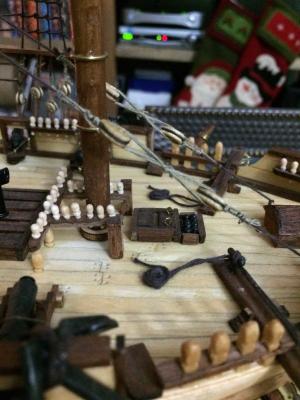
A good weekend of progress. Whenever the Lady has to work and I have the weekend off I get a lot done. It's a good trade off. I get to build and my wife knows I'm out of trouble. All I have to keep an eye on me is the rabbit and as you can see she's rarely impressed with my work. I got the rest of the sails ironed and got the 'rough draft' done on all of the yards for the ship. I got them all shaped and then I'm gonna get the blocks on them as I go along. Next I finished the stays and the spritsail. It's crazy how much line is just on the front of the ship. Then i got in all of those staysails. Mine hang a little differently than the rigging diagrams, but I like em anyhow. I was starting to get tired but I had a little more juice so I went ahead and rigged the foremast mainsail and did my loops for the bow pinracks. Good progress overall. I got the hallyards for the foremast main yard but will have to wait on running the other lines until I get the top / gallant / royal foremast yards up. Maybe I'll find a couple hours this week. To anyone else working on this kit: The rigging diagram on this kit is pretty good, but I'm noticing all the kits make the assumption that you have some knowledge of ship rigging before hand. I recommend really looking at the diagrams and being completely sure what every line is and what pin they all run into. On my rigging diagram I labeled them all so as I go along it's just one line at a time. What a fun hobby.

- 116 replies
-
- 4
-
-
- constellation
- artesania latina
- (and 1 more)
-
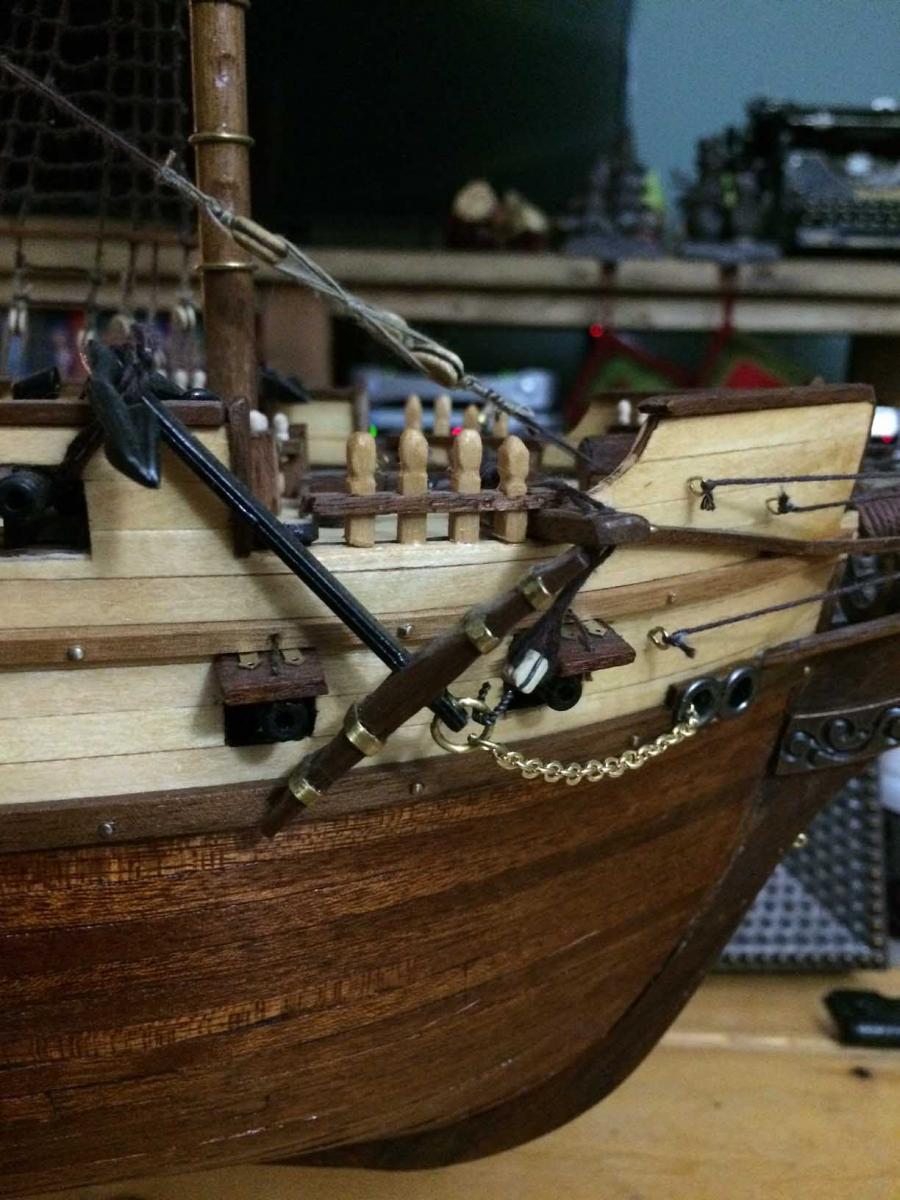
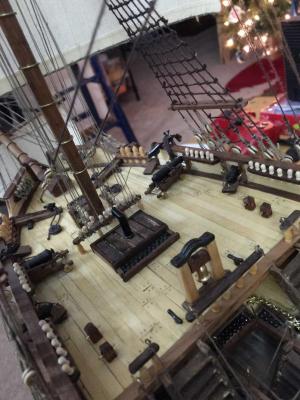
good luck in the kit!! I'm hanging sails on my Constellation. it's a fun build. I didn't put in the dummy cannons until I was done with the hull and then went back and drilled with a pin vice.
-
Thanks guys! It's a process and I am still learning. This is only my second ship so I still have a way to go!
-
Unless they changed it this is a single plank kit. Honestly, for my first kit as well that wasn't too bad. Single plank has it's challenges but is also easier in some ways. The process of planking isn't too hard bro and you'll get it after a few planks. Just take it slow. The only thing that you'll wanna note is the mahogany provided with this kit (at least on mine) was brittle as HELL. I recommend steam bending and adding a little moisture to those strips as at least on my go at this kit they snapped pretty easily. Planking goes fast once you get the hang of it, just don't try to do too many in one sitting. Also look ahead at gunport placement as some folks like to cut gunports as they go along, and others like to go back later and measure and cut them.
-
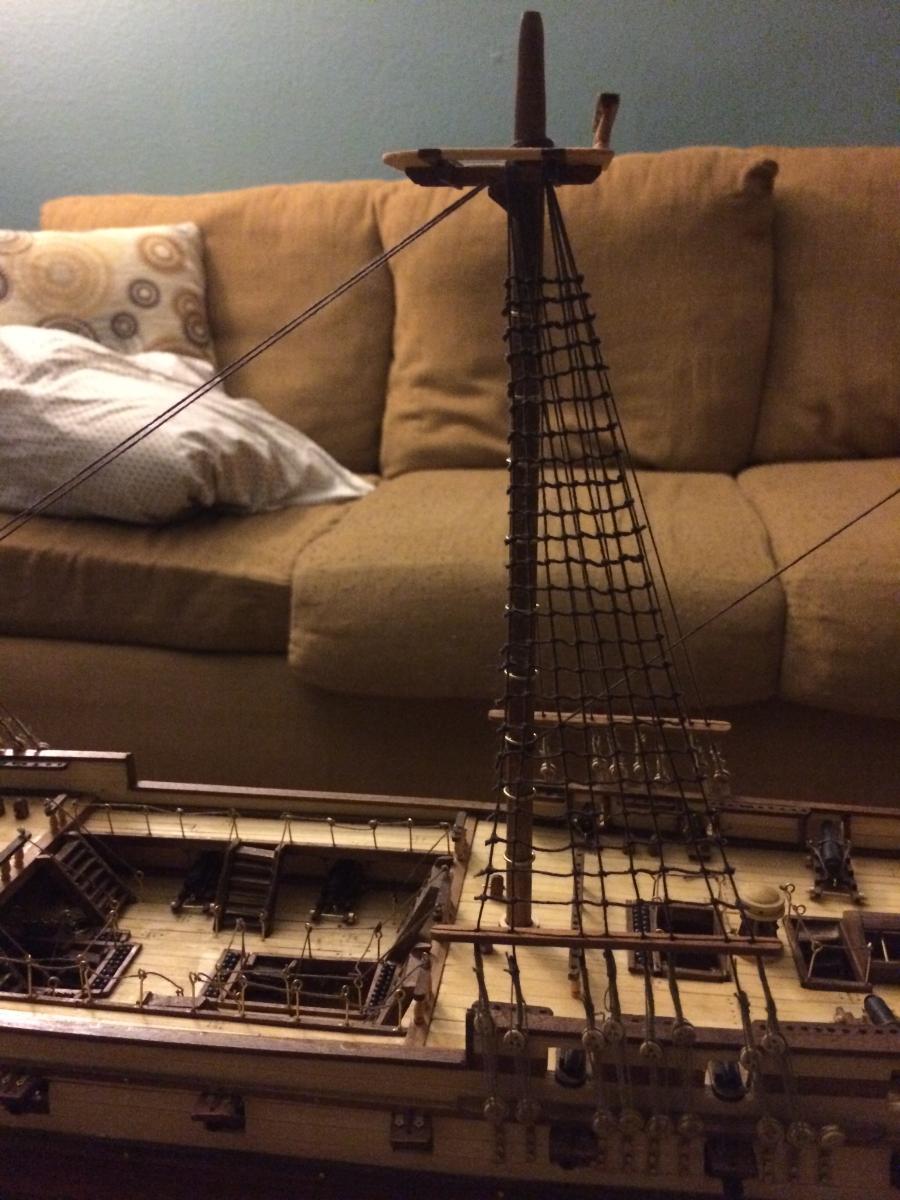
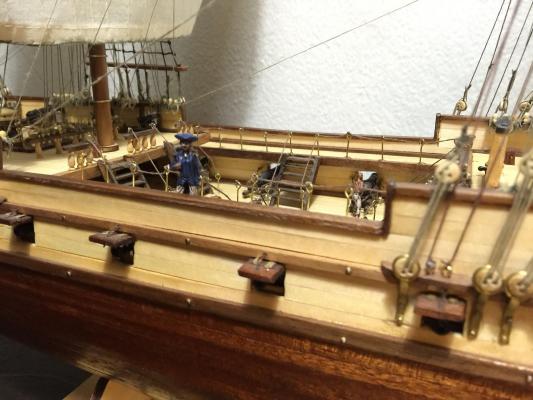
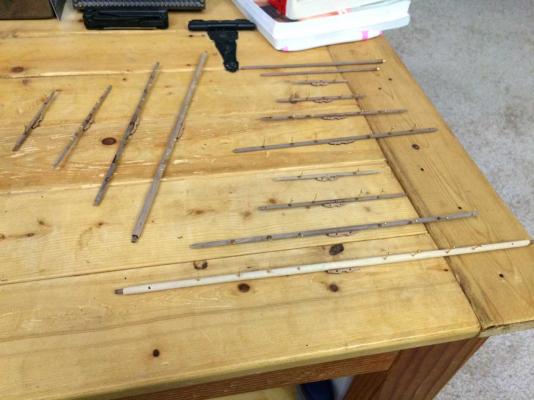
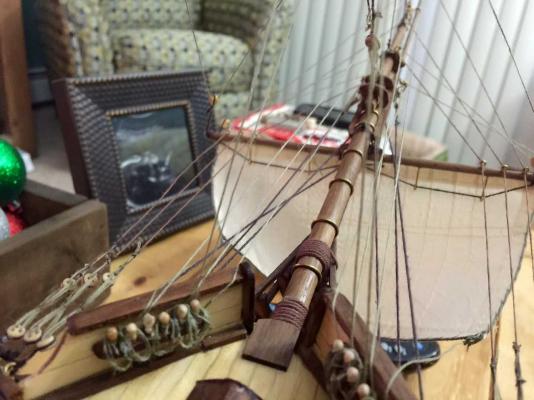
Well, it's been a while. I promise you I've been hard at work. BUT I've also had a wife hit 4 months pregnant, had a birthday, moved to a new apartment hit 290lb on bench press, brewed a TOP NOTCH batch of Winter ale, and tied a couple thousand clove hitches. I'm working on back and forward stays this week, then will get my jib sails on and then I'll be back to the woodworking carving up some yards to get some sails on this thing. It's coming along and I'm happy. A much more complex kit than that SF and I've learned a lot on this kit. I'm already looking forward to my next kit and will be trying my hand at painting next time. Here's a couple shots of my recent progress for your enjoyment.


- 116 replies
-
- 6
-
-
- constellation
- artesania latina
- (and 1 more)
-
Good luck with the build man. Lots of great resources on here for that kit including a log I did. It was my first and man it's a great kit. Take it slow and walk those gunports!
-
Looking really good man. This was my first full on wooden ship too and I couldn't think of a better first ship. You get the whole treatment and when it looks done it's so worth it. Take a look at some of the finished builds on here if you need any help. My build log is on here as well and I tried to really hit all the main points as I went along. Be patient, that's the best suggestion I have. Really funny with the lego guys too!
-
See that's what I thought was bizarre. The ones that came with the kit were 8mm long and appeared to be boxwood ish. I need almost 100 to fill all the pinholes but the kit came with literally 20. Online they are availible in 10 but not 8. Seemed absurd. I'll give those model expo ones a shot
- 116 replies
-
- 1
-
-
- constellation
- artesania latina
- (and 1 more)
-
So a quick hand here...I have WAYYY to little belaying pins in this kit. I went to my local game shop and they ordered me some AL pins, but they are too big. They were cheap so I'm not stressing out about it. A quick measure shows that the one they ordered in for me are 10mm in length and the ones supplied by the kit are a scale size or two smaller at 8mm. So, would my best bet be ordering these from Model Expo? Does this look right? http://www.modelexpo-online.com/product.asp?ITEMNO=MS0680
-
Yea, that cannon was a worthwhile diversion. My other coping strategy is to take my time more. MY first ship came out great, don't get me wrong but I went straight out on it and built the whole thing in about 2 months flat. So I'm just working on this one, then taking breaks as I need them and it's been working well. I'm a hobby addict so I brew beer, play guitar, workout, ride my motorcycle, write, paint, build furniture, build models......It's a busy life!
- 116 replies
-
- 1
-
-
- constellation
- artesania latina
- (and 1 more)
-
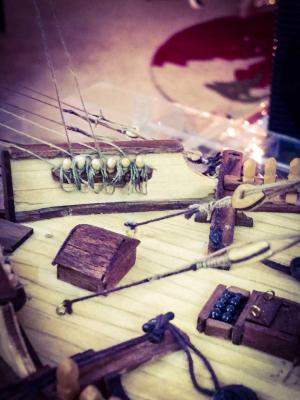
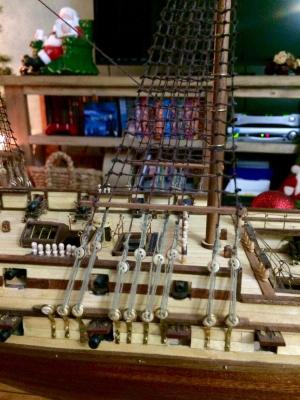
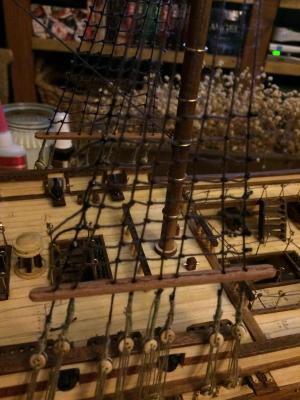
Made a little headway back on the Constellation. Got the mainmast lower shrouds 95% done. Man it is a slow tedious process tying all those knots. This one has 8 lines and I made 25 rungs, on both sides. 8X25X2 is a lot of tiny knots. Hey anyone else working on this kit: how do you keep from going insane?

- 116 replies
-
- 2
-
-
- constellation
- artesania latina
- (and 1 more)
-
Thanks man! It was basically a one day project but a great diversion. Only gripe I had with the kit was it didn't come with deck planking. The instructions stated "mark lines with a marker on the base to simulate deck planking" and I was like "yea, right" and made a quick trip back to the ship for some plank material.
- 116 replies
-
- 1
-
-
- constellation
- artesania latina
- (and 1 more)
-
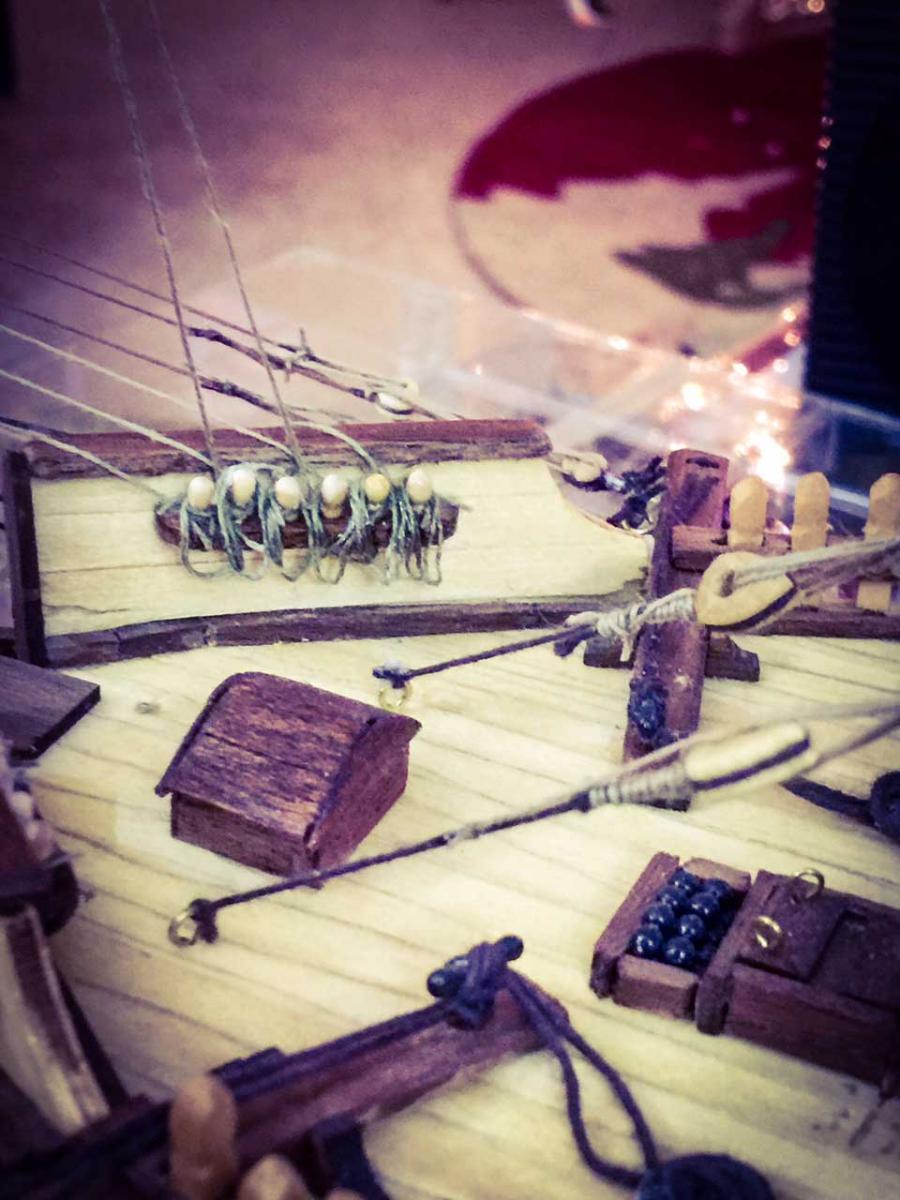
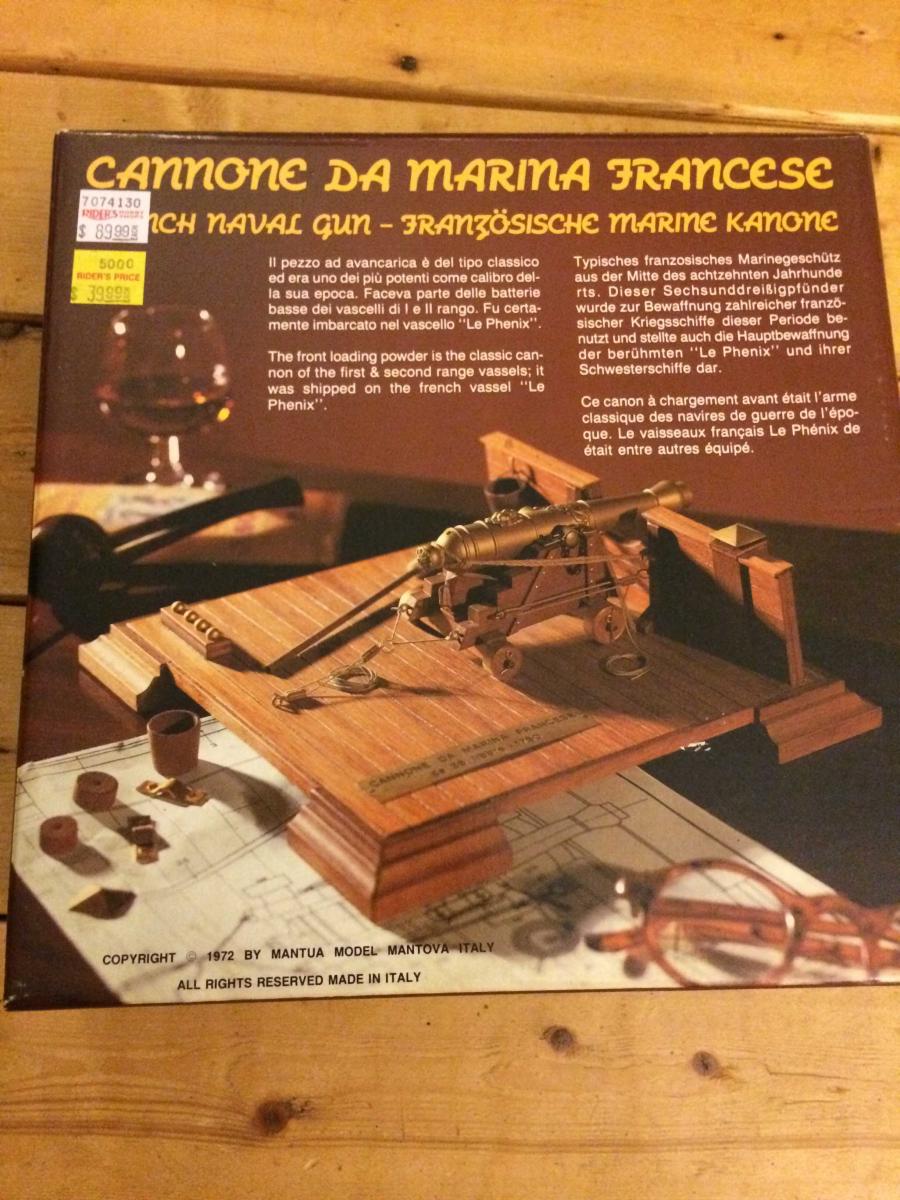
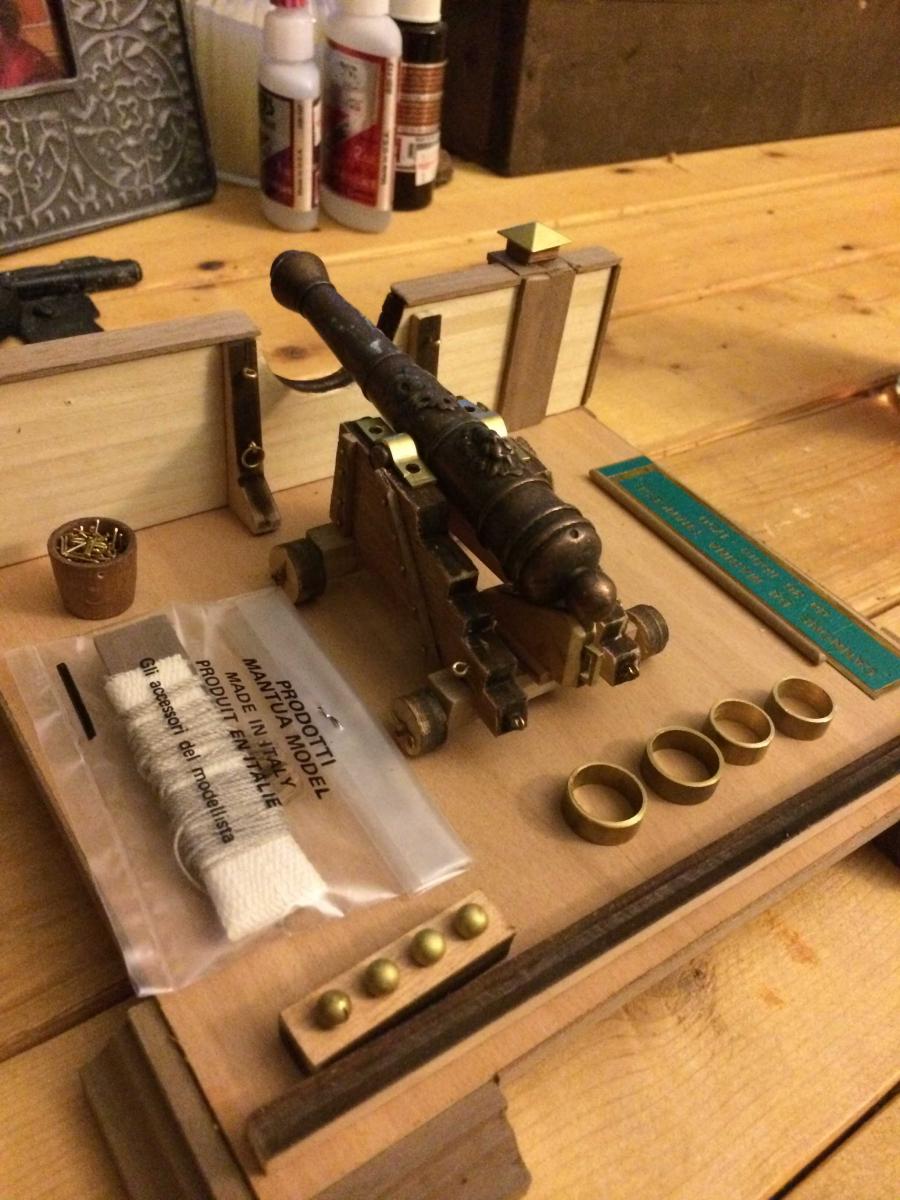
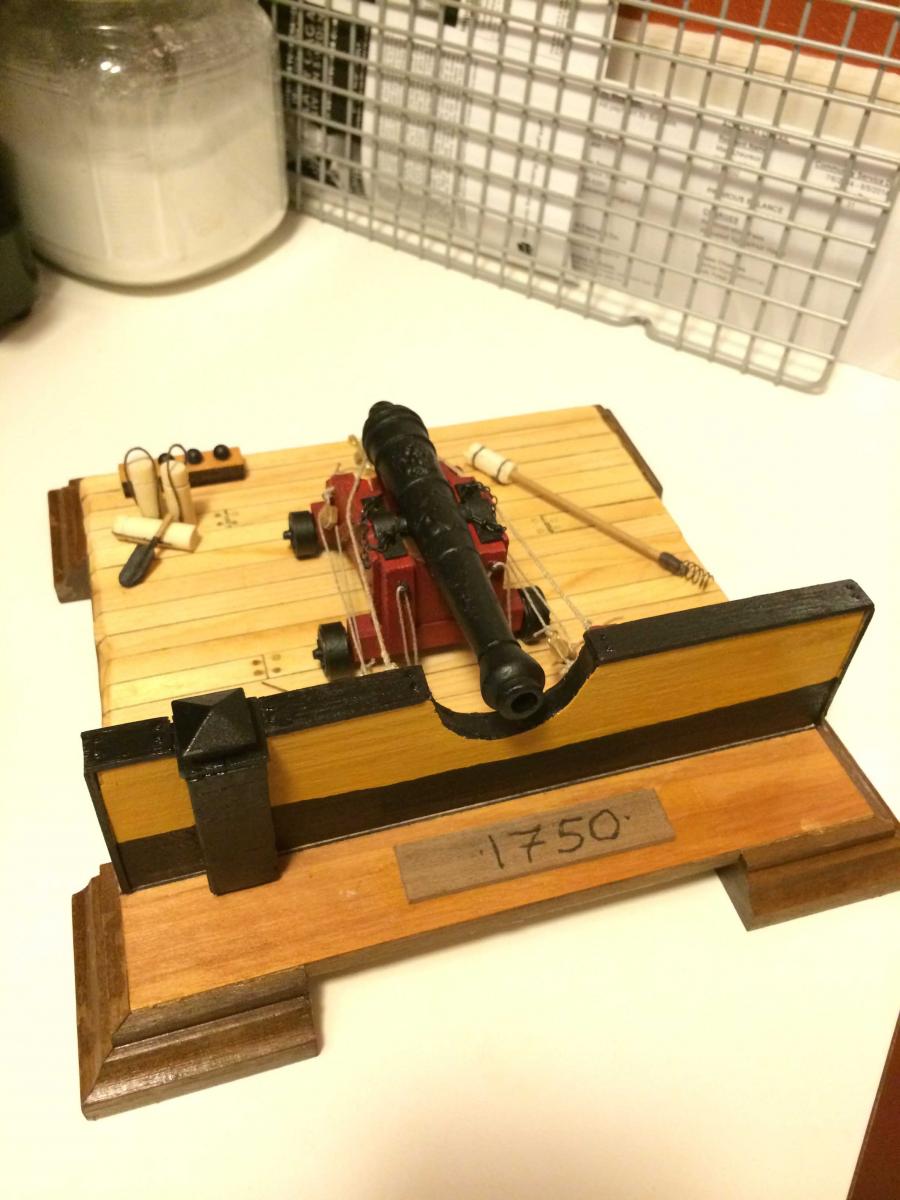
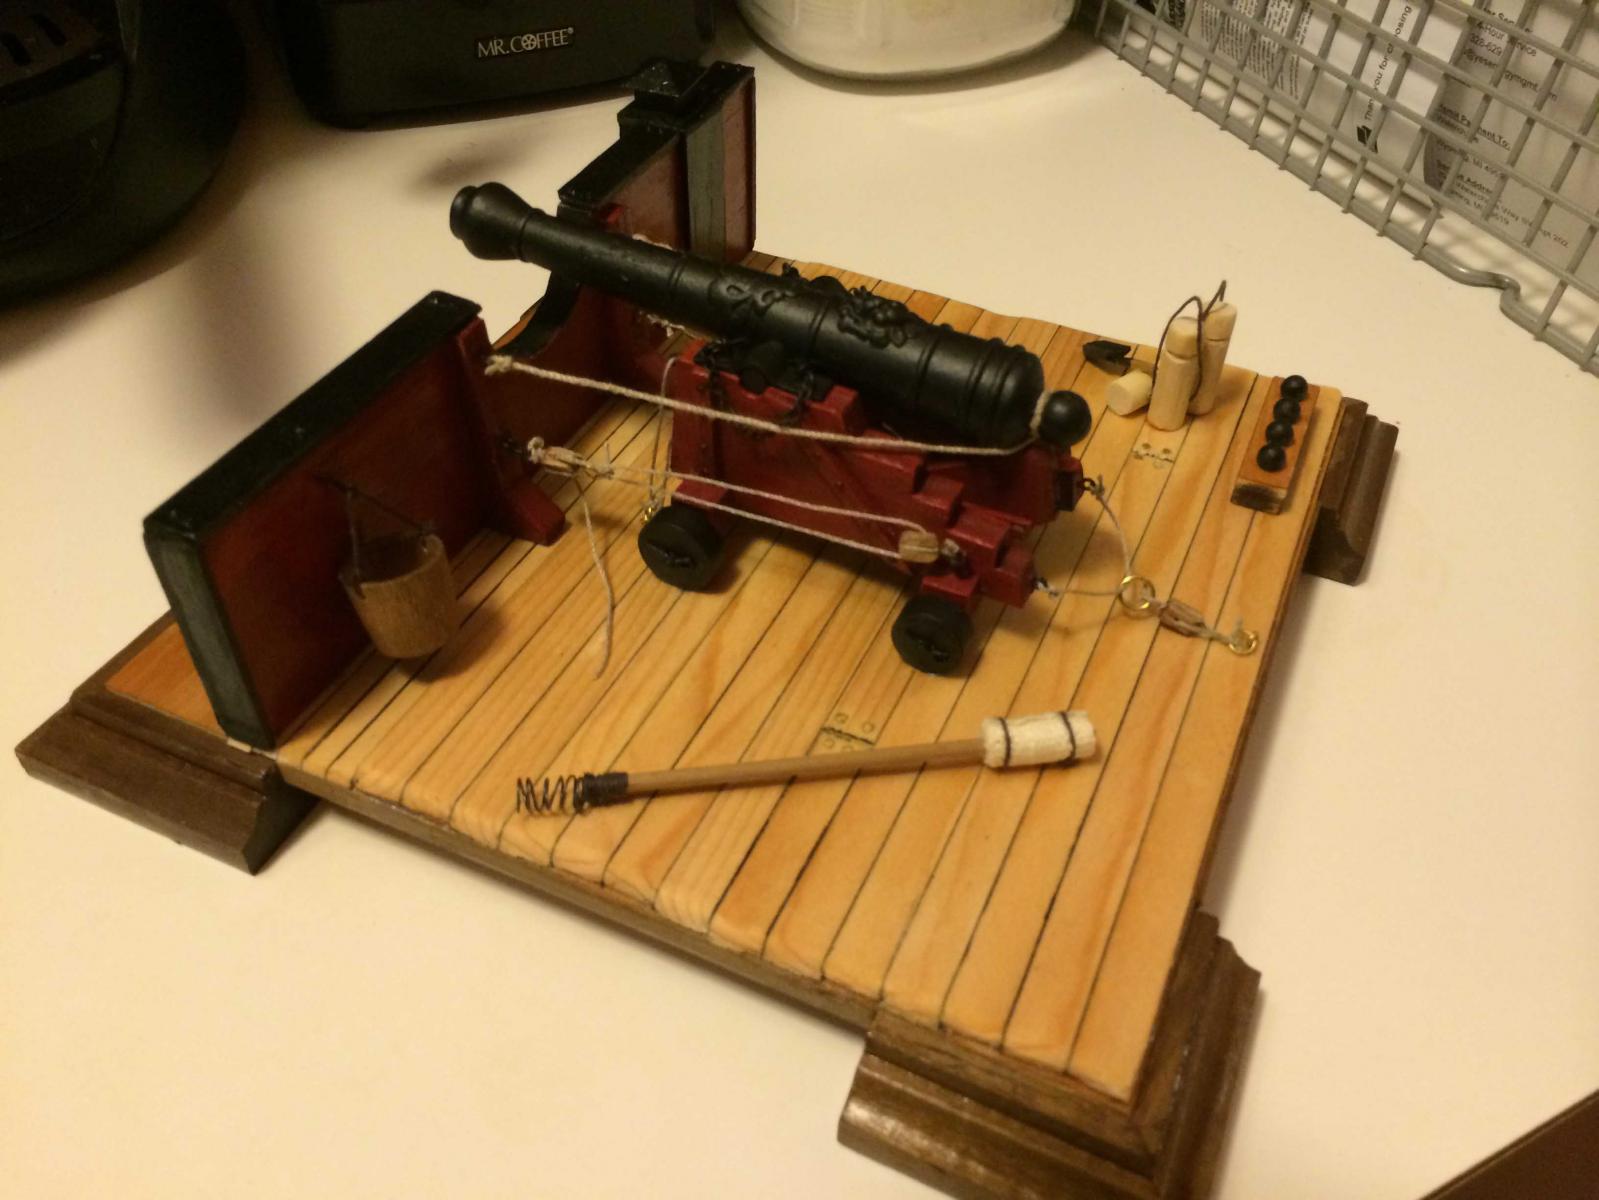
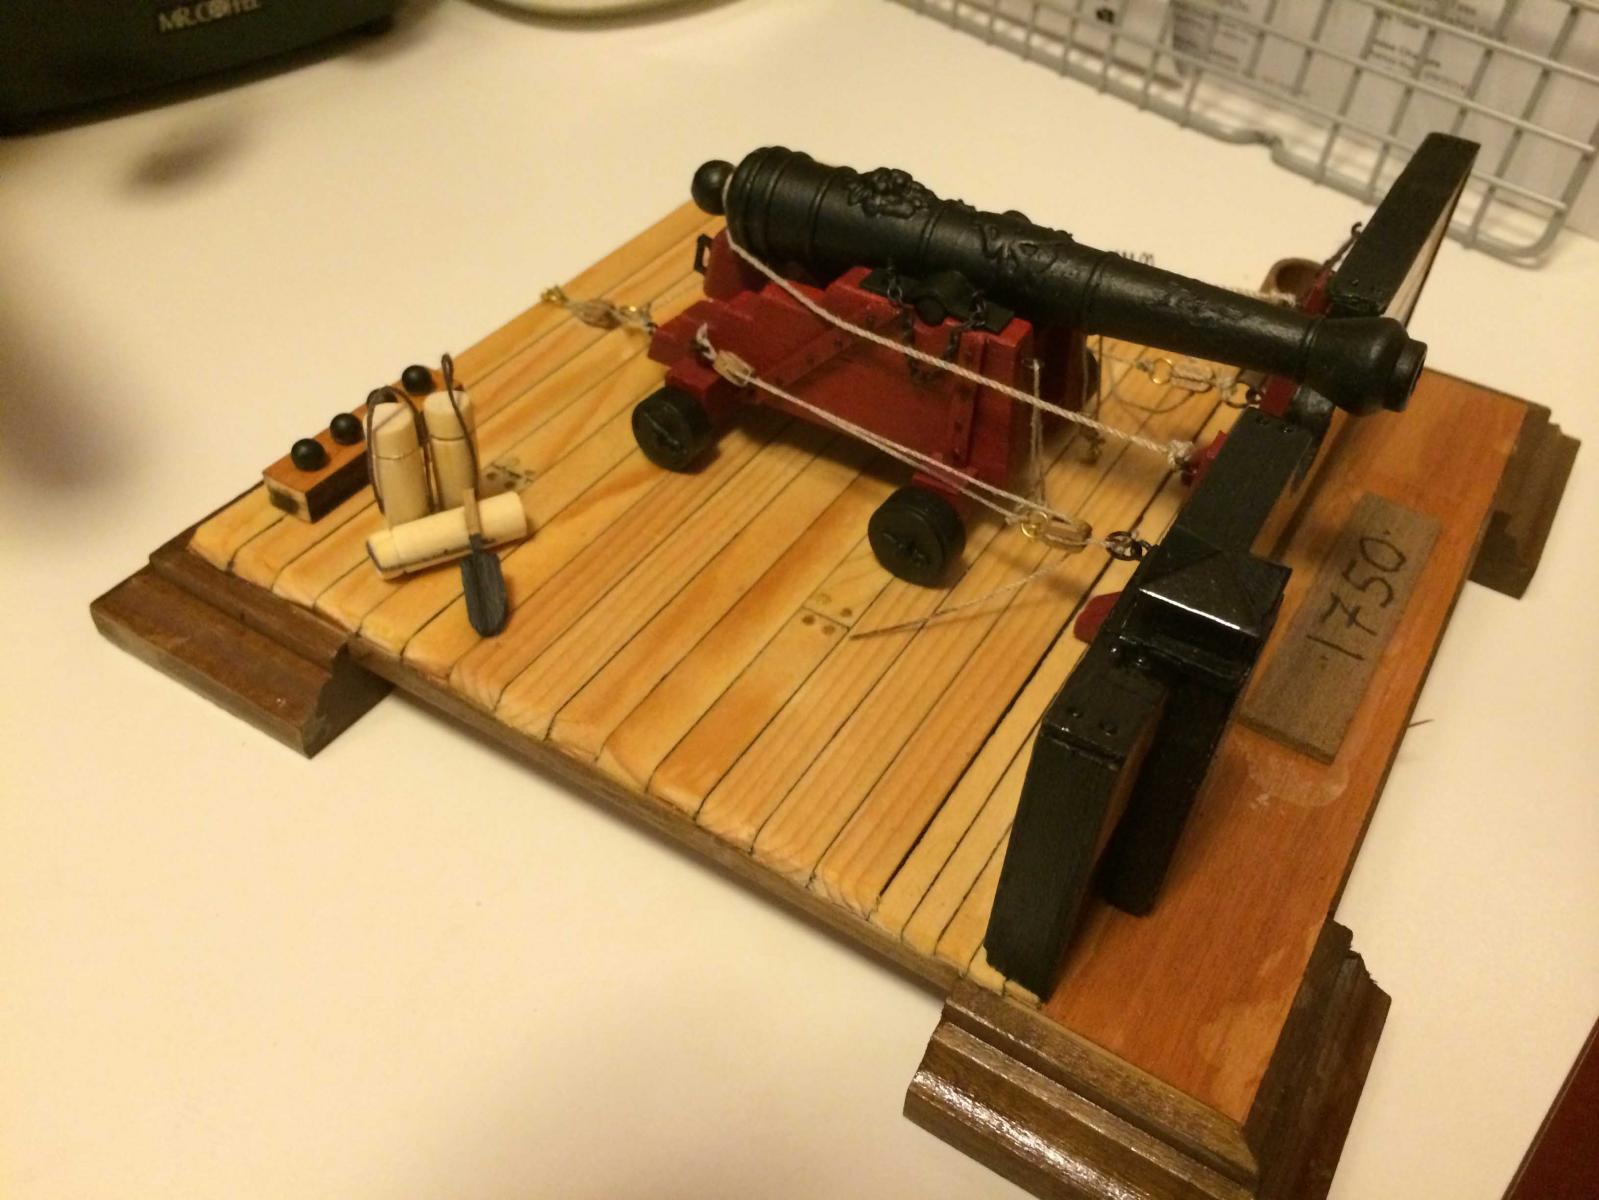
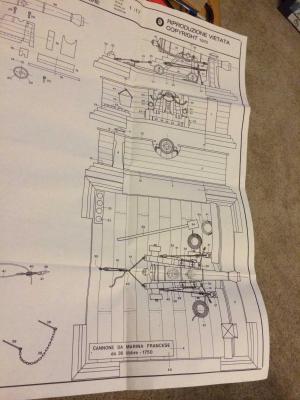
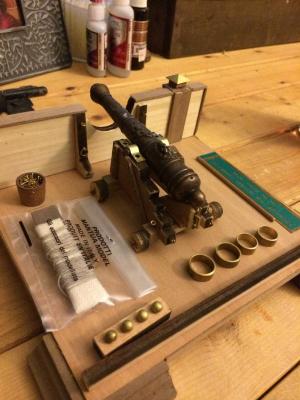
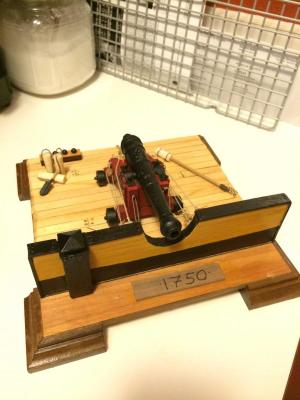
Side Project: Mantua Naval Cannon In my adventures with the USS Constellation model build I hit a 'road bump.' I happened to be browsing the isles of my local hobby shop and happened upon this little gem. This kit was marked down from $90 to $40 bucks. At a $50 discount I couldn't pass it up. The guy at the shop said a fella had come in and traded in a bunch of old kits, hence the markdown. I left feeling like a winner. I think it's technically a 'French Naval Cannon' but I liked the red, yellow, and black scheme of a Victory style ship so I painted it up that way. I ran out of room on the board so the one rear line isn't exactly accurate, but it works. For giggles I made a few extra little accessory pieces like the power canisters and the cannon bore scraper. I think it came out pretty good. It was just the distraction I needed to get my mind off of tying all those tiny damn knots. Now back to work on the Constellation!!


- 116 replies
-
- 5
-
-
- constellation
- artesania latina
- (and 1 more)
-
Thanks for the suggestion Jack. I'm not into un-armed ships, if it ain't got cannons I'm not interested. HOWEVER-That ship you suggest has a pretty sweet looking swivel cannon I've not seen before. I may have to give that one a shot.
- 116 replies
-
- 1
-
-
- constellation
- artesania latina
- (and 1 more)