HOLIDAY DONATION DRIVE - SUPPORT MSW - DO YOUR PART TO KEEP THIS GREAT FORUM GOING! (89 donations so far out of 49,000 members - C'mon guys!)
×


torpedochief
-
Posts
378 -
Joined
-
Last visited
Content Type
Profiles
Forums
Gallery
Events
Everything posted by torpedochief
-
Thank you both for the info. Lots of research still to do.
-
Friends if you are scratch building a project and the plans give no idea of the number of planks to use how is this arrived at? Thanks Chief
-
HMS Pandora 1779 in 3D
torpedochief replied to ppddry's topic in CAD and 3D Modelling/Drafting Plans with Software
Uhhhhhhhhh yeah. I really don't know how words can describe this project. This is worthy of the ANATOMY of THE SHIP SERIES. The teaching potential for this work is beyond measure. This has the potential for a practicum and a book, and a real 1:1 build should someone have the money. You sir are an artist. -
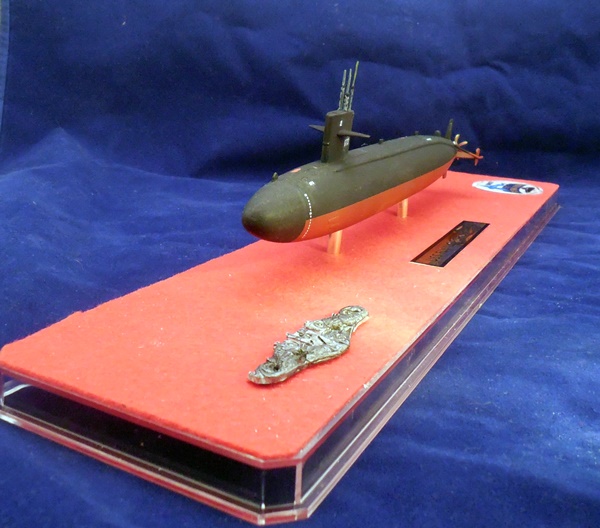
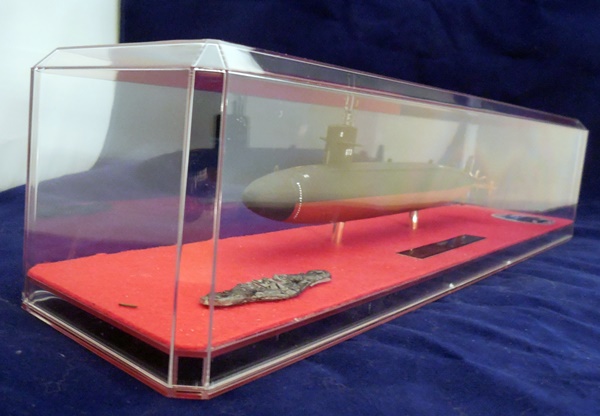
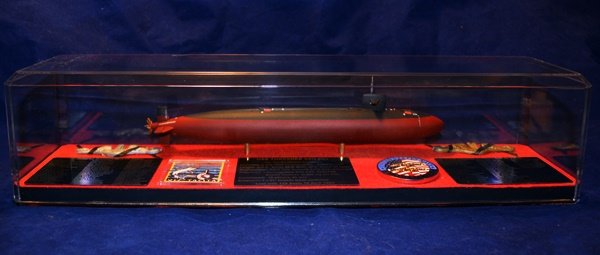
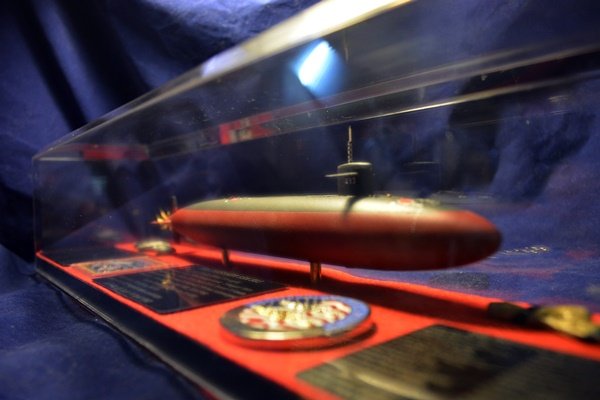
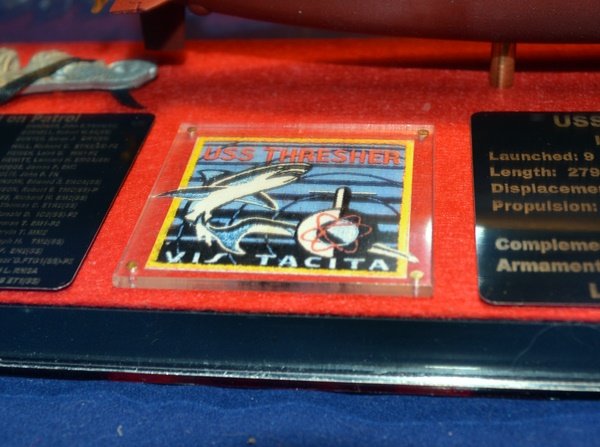
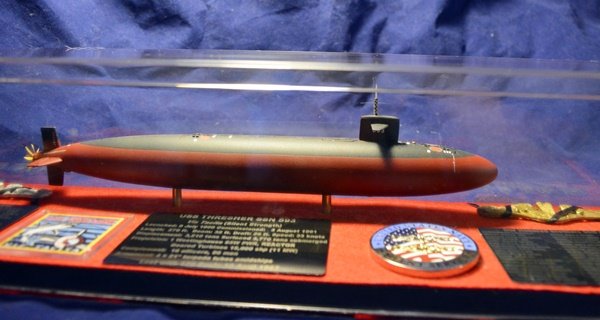
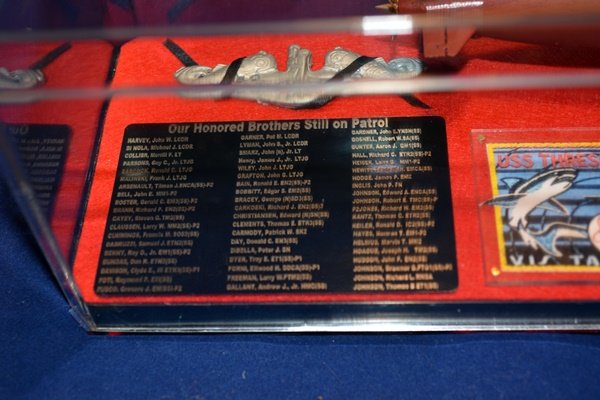
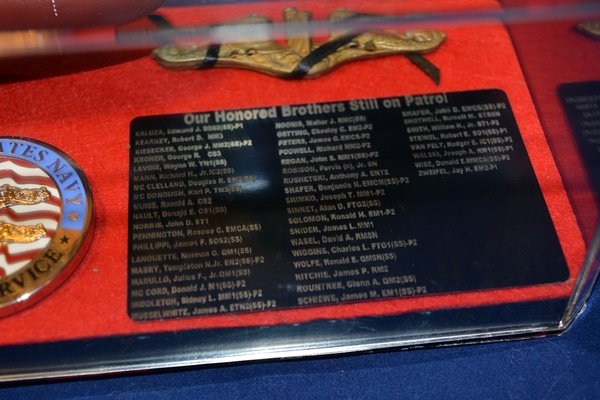
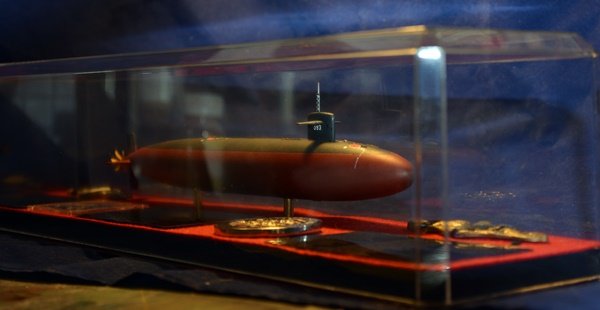
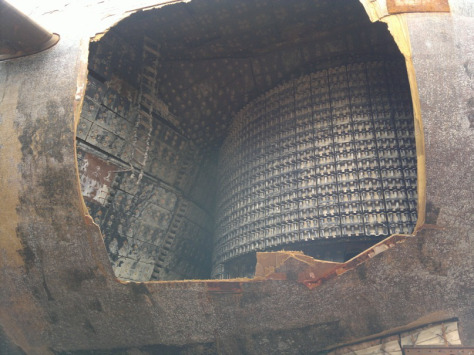
I know that many on here do not like modern warships much less submarines, and that is okay. However if I may, please pause a moment and look at my USS THRESHER. Look at it not because I built it, or it is some fantastic model but of what and who is reminds us of. Following a yard period USS THRESHER conducted sea trials of the New England coast. One of the test was a deep dive. During the deep dive a silver braised seawater fitting burst in the engine room. At this depth a leak the size of a pencil lead had enough pressure to slice a man into. The stream of water caused damage to nearby electrical panels that control parts of the reactor, it also caused blinding mist. The Captain ordered the Emergency blow system activated. 3000 psi air raced to the tanks. However a diffuser cage at the end of the pipe caused a block of ice to form in the pipe stopping the blow. It was then the reactor scrammed eliminating propulsion. Again an emergency blow was attempted and again ice blocked the air flow. The flooding in the engine room became worse and with nor power to the drain pump the water could not be pumped out. THRESHER sank stern first until the sea crushed her. I as a retired submariner can imagine what was going on during those last moments. They were not Sailors who manned cannons, or climbed the rigging, or fought the storms off Cape Horn, however they were heroes who stood at their stations till the end. Like Sailors from the days of canoes to sail to steam to nuclear power they have no tombstone. So shipmates stop just a second and remember them. Chief

- 7 replies
-
- 13
-

-
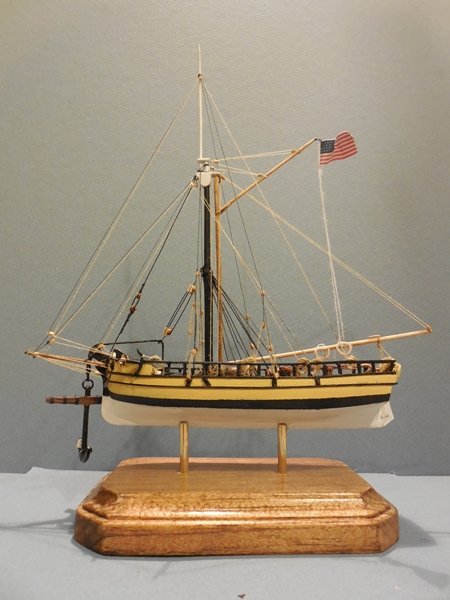
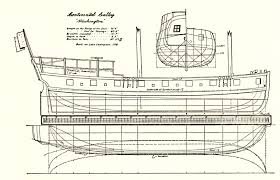
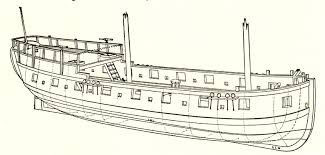
If someone could help me out as I can find nothing on what the Sweeps would look like and where would they be stored when under sail. Thank you. Chief
- 1 reply
-
- 2
-
-
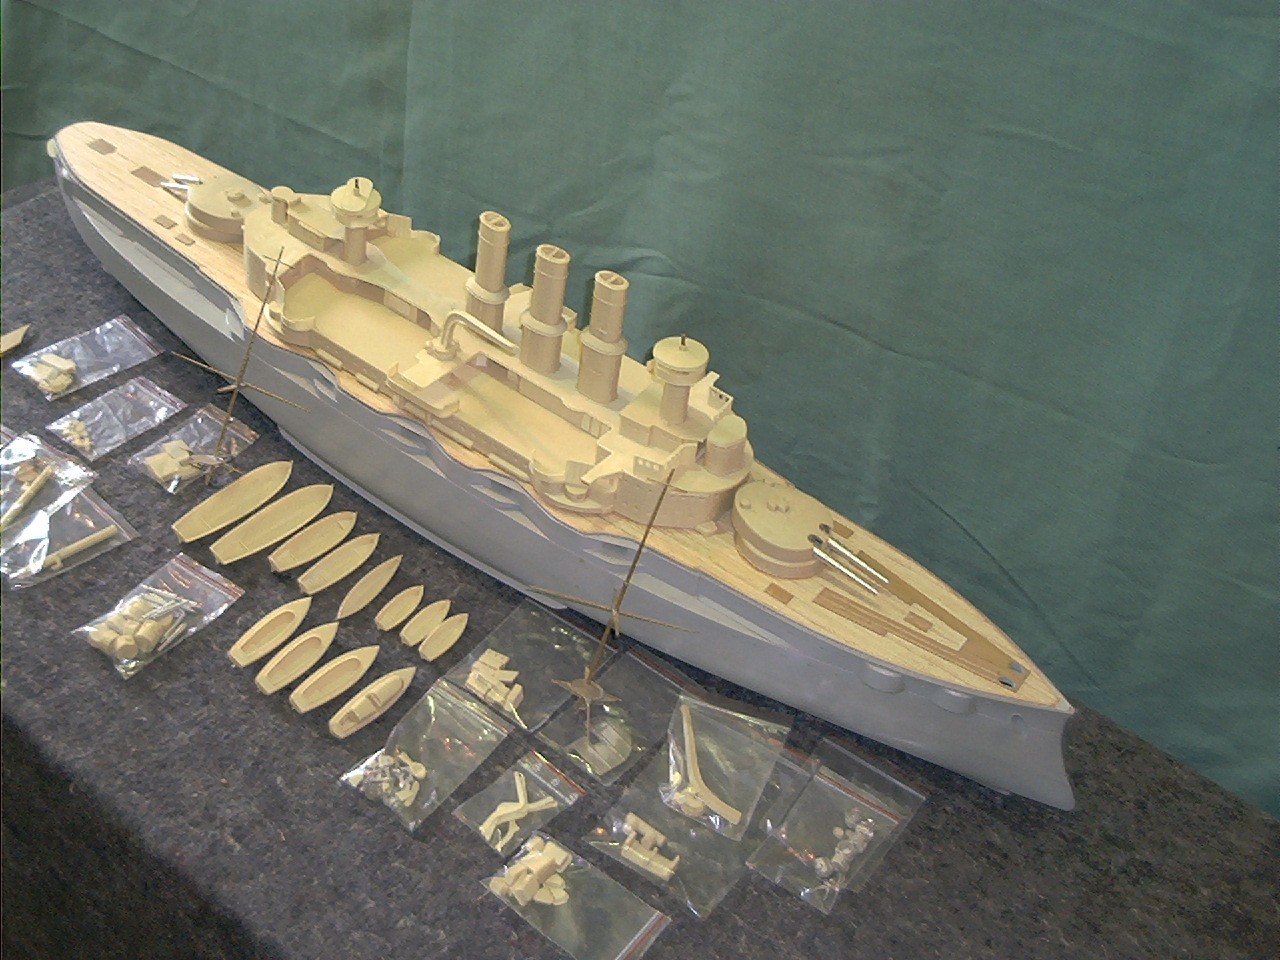
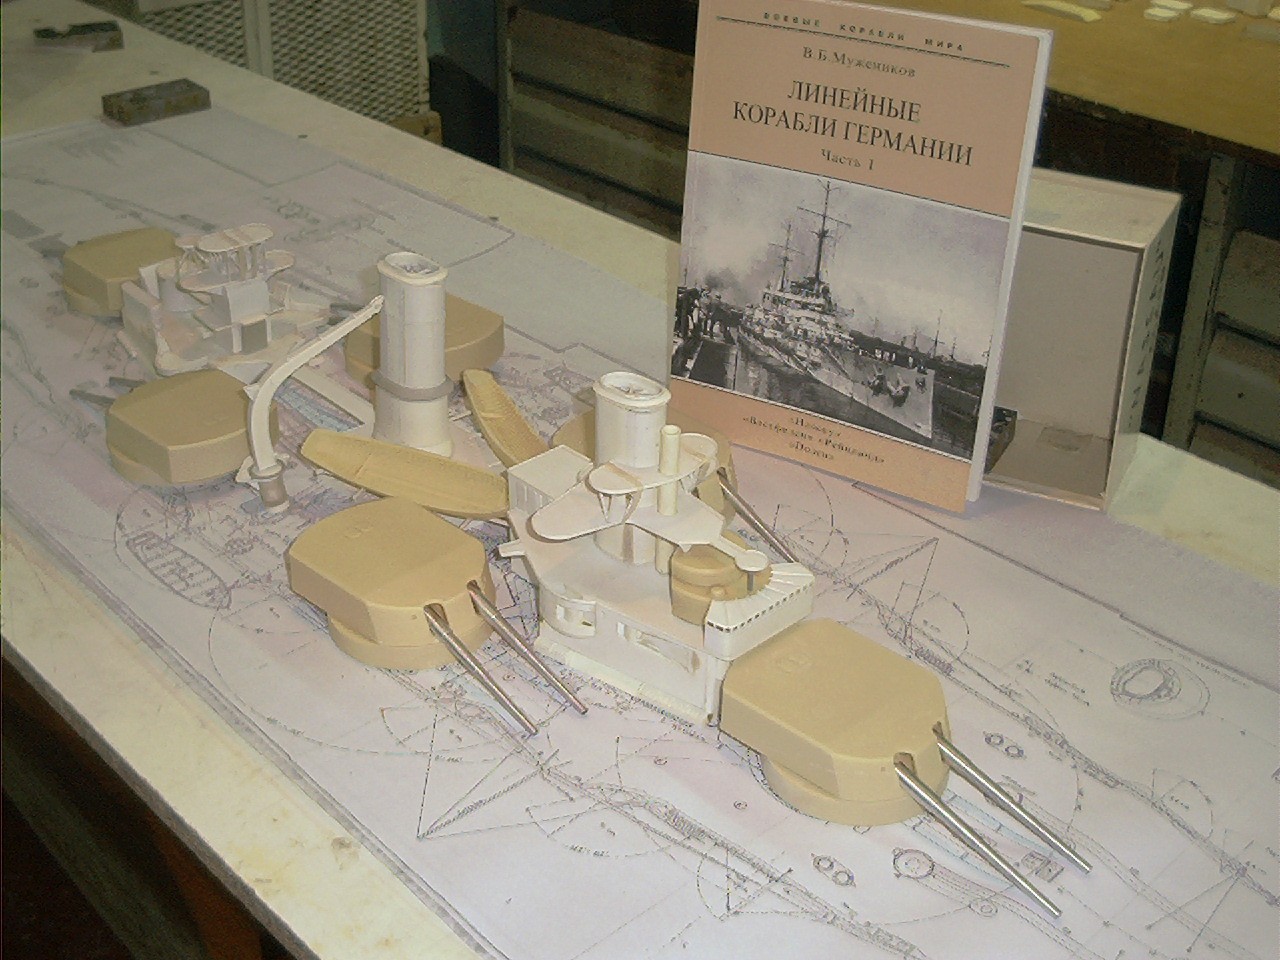
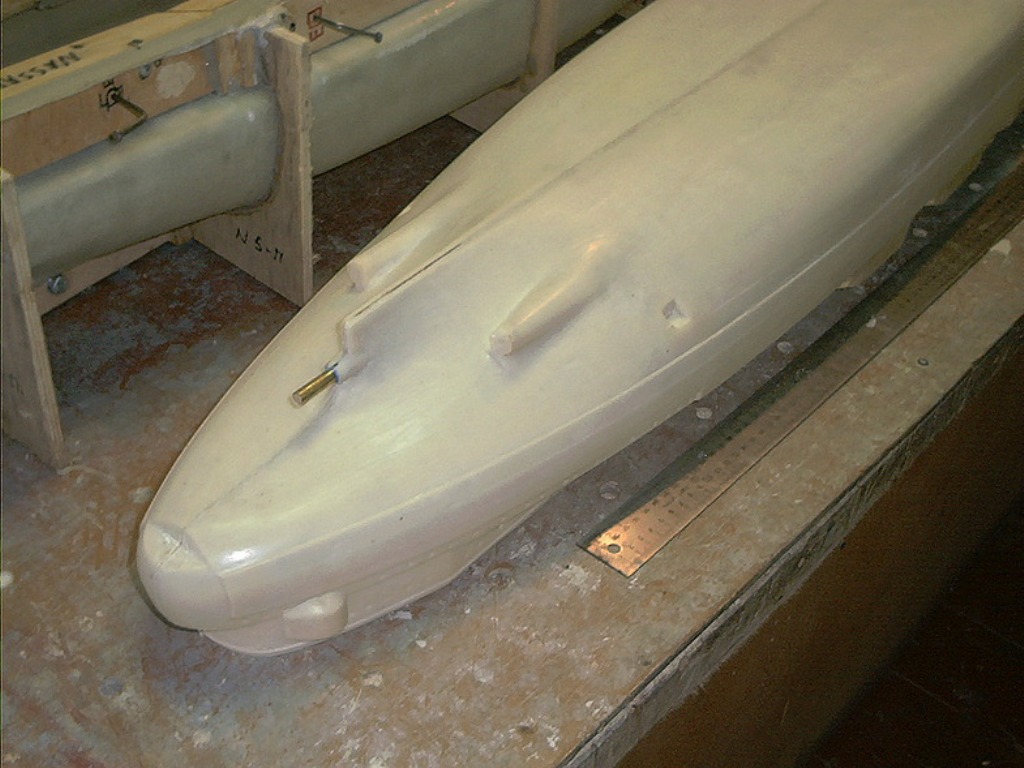
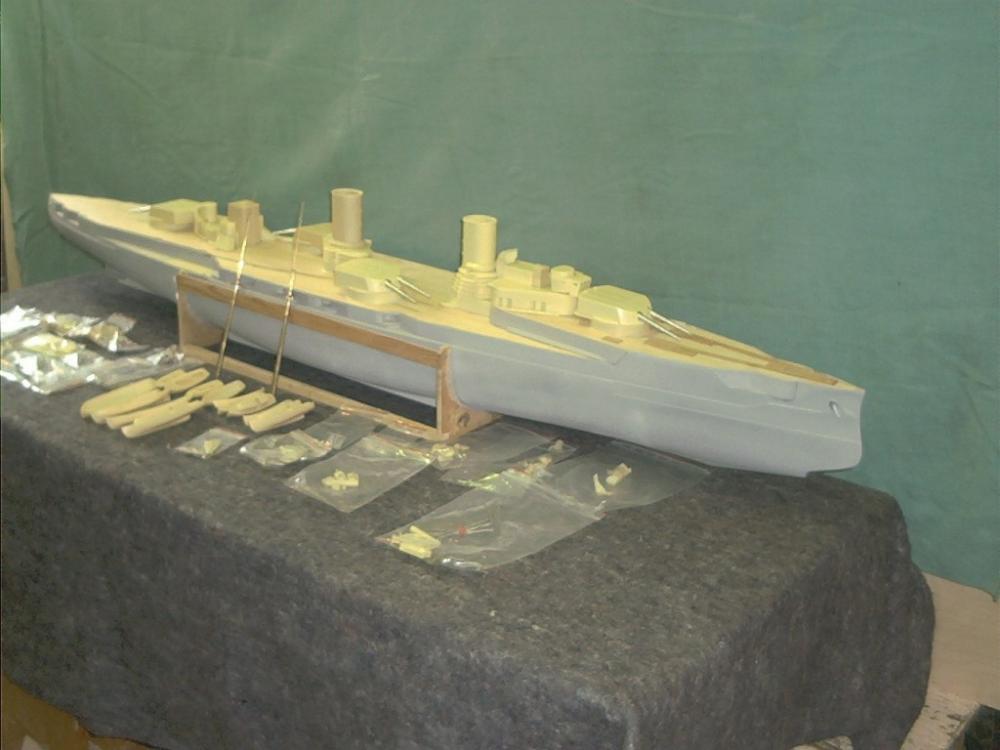
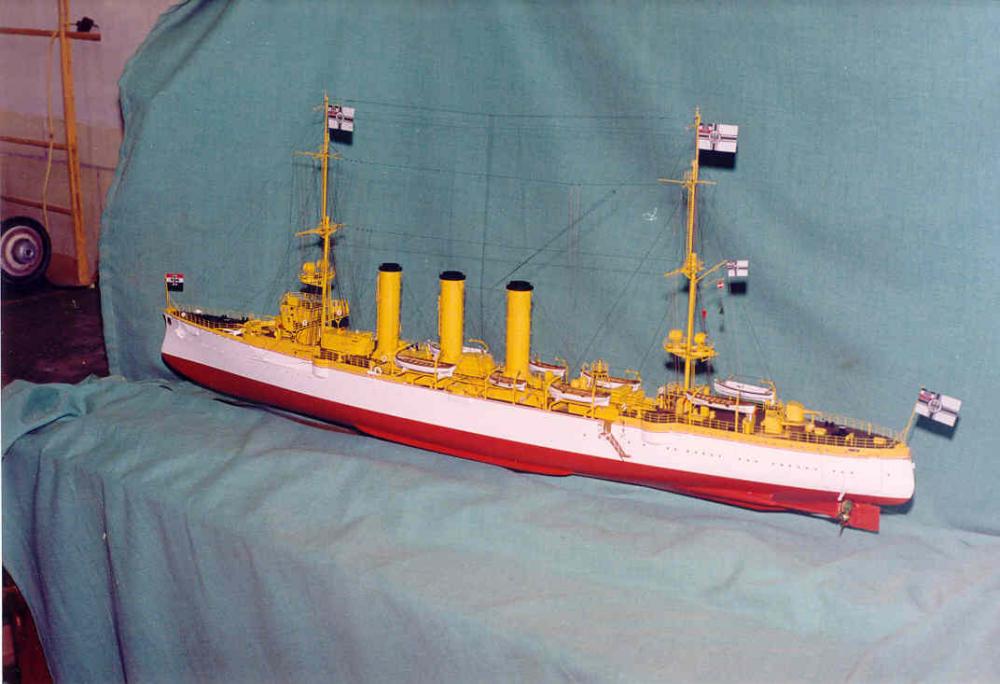
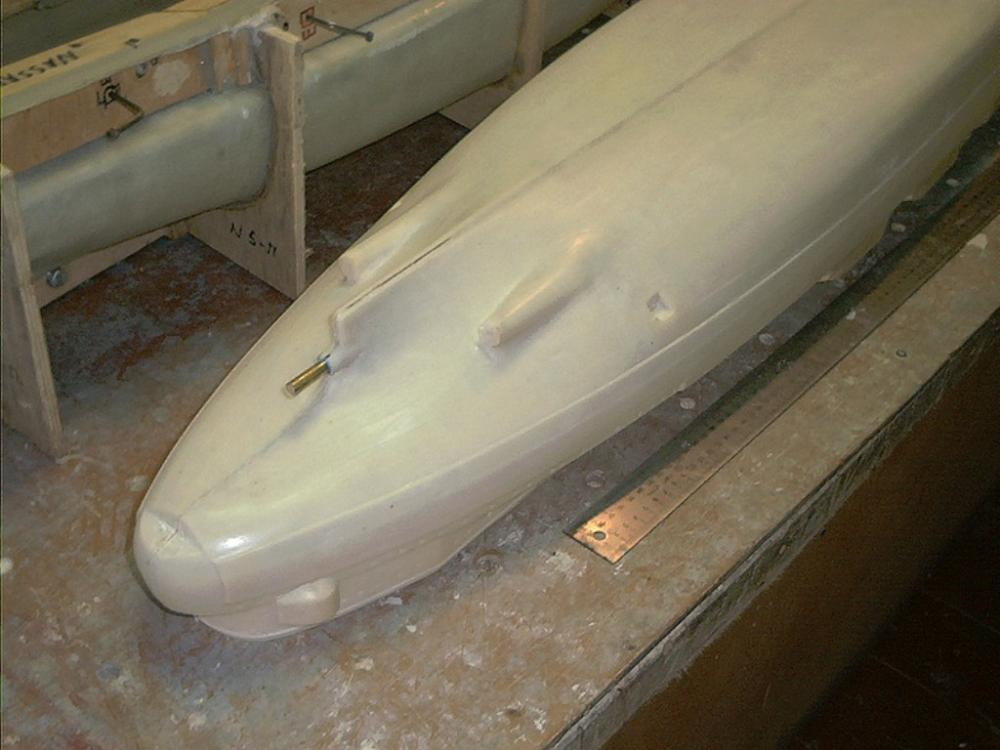
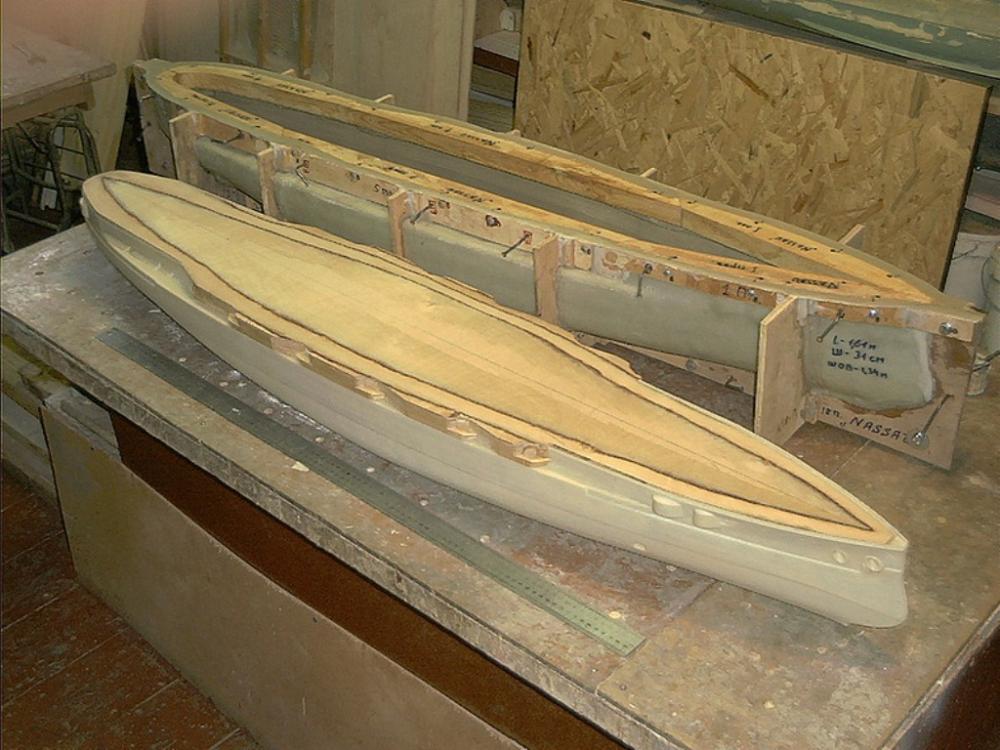
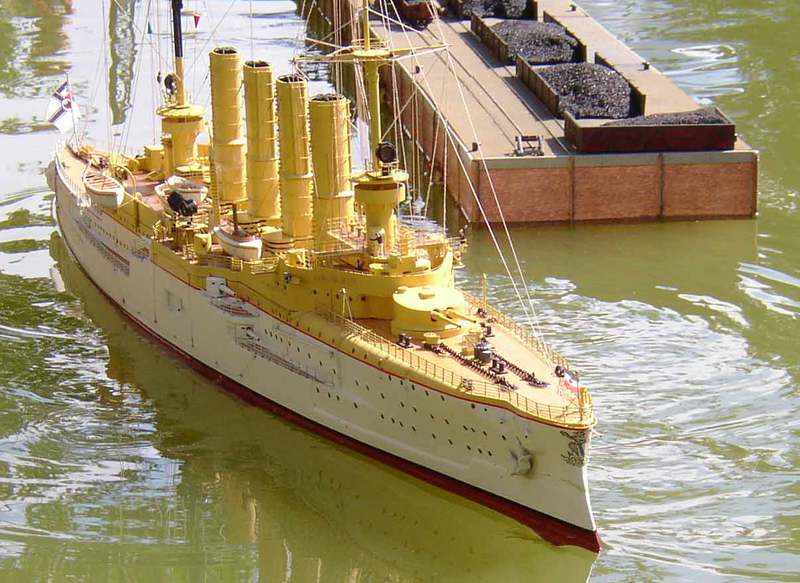
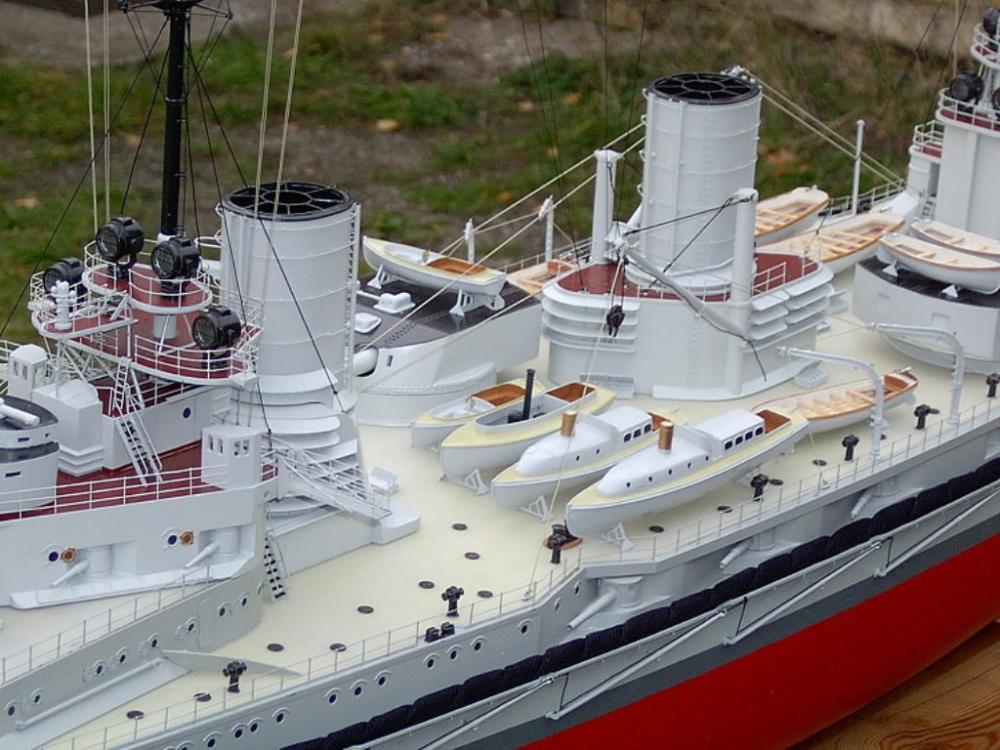
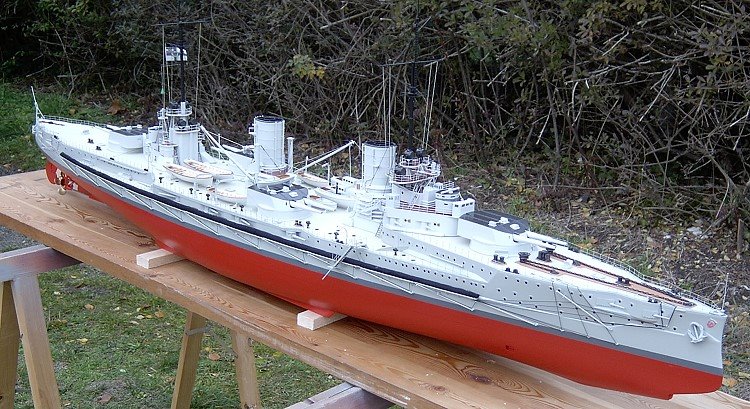
Shipmates I found a young man who sells kits of WWI Battleships and other models. These are really exquisite works of art. They are big at 1/100 scale. I really don't know what else to say. other than breathtaking. here is a link to his site http://www.ml-modelships.com.ua/ Chief Out!


-
- 12
-
-
- WWI
- battleships
- (and 5 more)
-
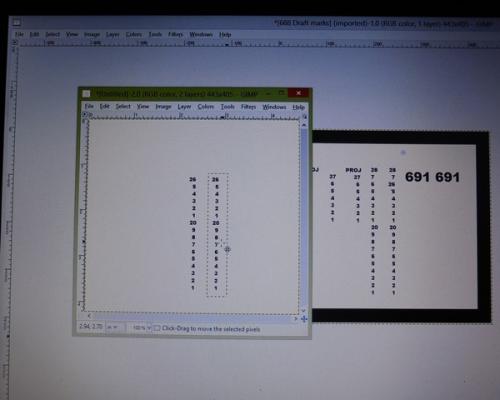
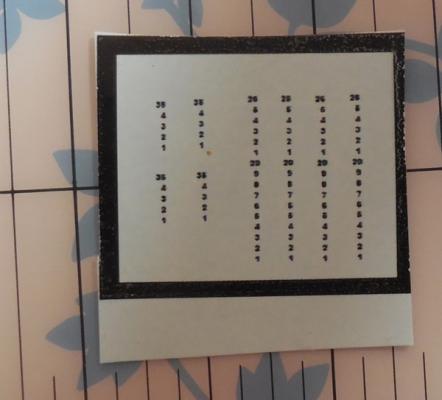
Masts, screw hull ready to go. Base made and all the dandy funk added. We need decals!!!! I use a system to make my own dry transfers decals. With this system the decal design is drawn into the computer. You can use any of a million programs to accomplish this. Once the design is complete it is printed onto a special paper using a laser printer. With the image is on the special paper, I need to change the black numbers into white numbers. This is done by laminating white mylar foil into the black toner. A special laminator is used which is the only really thing expensive in this system. Once the white is added the decals is then again laminated with a clear carrier film. This process causes static to adhere to the foil and toner. Then the decal is dipped into water which releases the image from the paper. the decal is dried trimmed and then sprayed with an alcohol based adhesive. The decal is positioned and burnished. The carrier is then removed leaving the decal in place. If you are interested in the system let me know and I will get you the particulars. The model was then mounted using brass tubing. That was it guys hope you enjoyed!!!


- 4 replies
-
- 4
-
-
- Flying Fish
- Yankee Model Works
- (and 2 more)
-
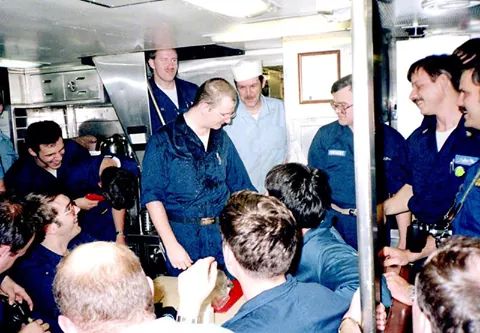
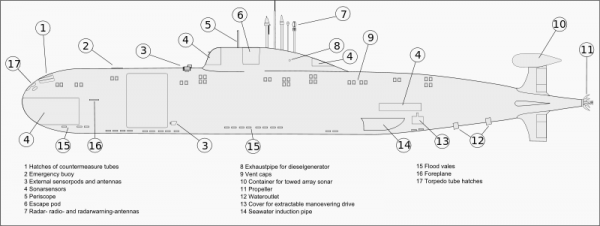
Hello again all you Steely Eyed Killers of the Deep! Now FLYING FISH has be bit of a history. I hate to leave your hanging but you an find some of it on the net if you look hard enough. Unfortunately if you find anything I cannot confirm or deny what you find actually happened, but if it is on the internet it has to be true....right? With the hull primed it was time to build the mast and antennas. The masts included with the kit were not very good or accurate so I made some.This was done using everything from solder to sheet plastic. Like I stated in the beginning, this class of boat was a great spy platform. To that end the sensors other than sonar were are some still are state of the art.. The ESM (Electronic Surveillance and Counter Measure) Mast sits in front of the cockpit. In a nutshell this mast is used to collect and analyze radar information, as well as receive other forms of communication. Want a creepy fact? Where ever you are right now chances are your cell phone conversation has been listened to and recorded by a Russian Submarine. Welcome to the real world!!!! Oh if you doubt that it happens....well. The periscope designated #2 is a marvel of engineering. It can follow a target, video, still pictures. ( If you are on a cruise and decide to go about in your birthday suit in your cabin, I suggest you shut the drapes.) Like the ESM mast the #2 periscope has an electronic early warning receiver. Some modern radars are able to pick up even the tiny bit of a periscope sticking out of the water. Damn helicopters are good at that. We want to know as soon as we can that someone is out there looking so we can get back in the basement. Next are the multipurpose BRA-34 communications antennas. These are light green in color except for the fairings. Nuclear submarines have back up diesel generators in case the reactor stops reacting. To get air to the engine a snorkel mast is used. This features a head valve that shuts should water wash over the snorkel mast. Oh and when that happens the diesel sucks all the air from the inside the boat. That is really fun. The submarine ID mast mast is a simple pole with an amber light on top. This light is unique in the nautical world as it flashes 3 seconds on and 3 seconds off. The BPS -15 radar is standard issue among most US submarines. Used mostly for Navigation.. The class also carried a VLF direction finder. Once the masts were made I used RTV rubber to make a mold. When cure the masts were cast in resin. Oh and a picture of me in crew"s mess of USS RAY SSN 653 on HALF WAY NIGHT under the ice. May 1986. Until next time!!! All Clear on the Broadcast!! All Stations Conn, going Deep
- 4 replies
-
- 1
-
-
- Flying Fish
- Yankee Model Works
- (and 2 more)
-
Started on mine. I will be watching closely. Great stuff!!
- 20 replies
-
- 1
-
-
- phantom
- model shipways
- (and 1 more)
-
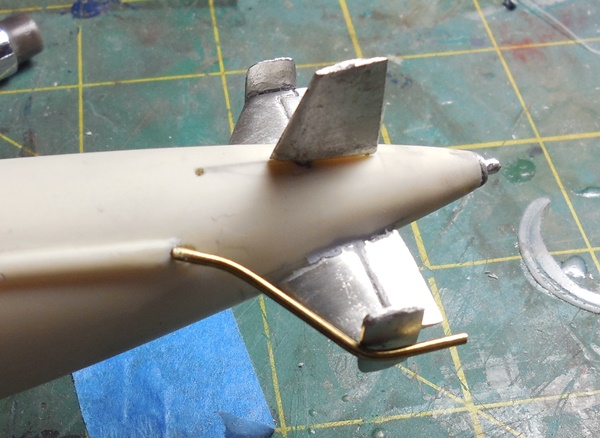
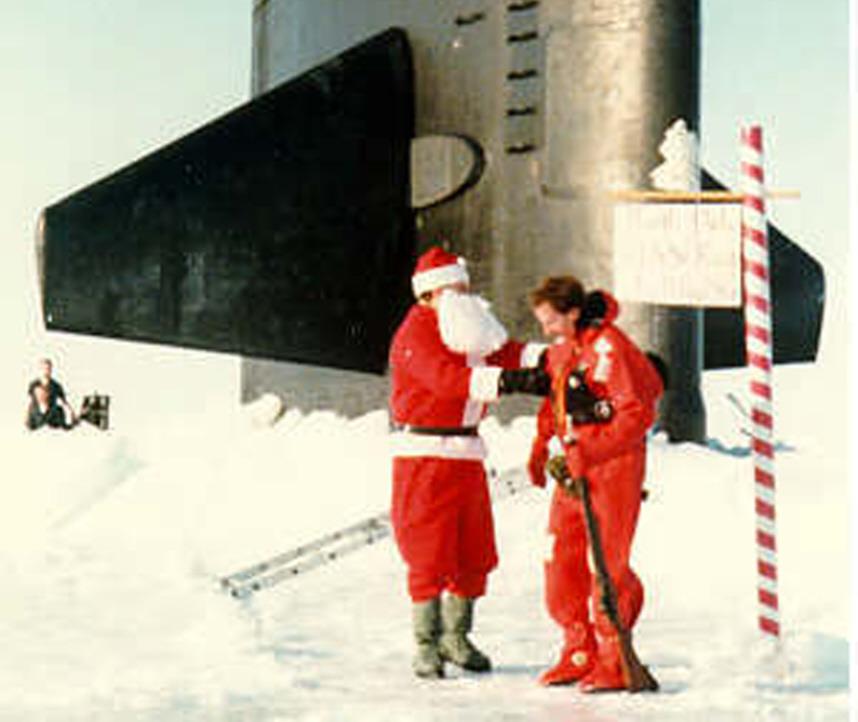
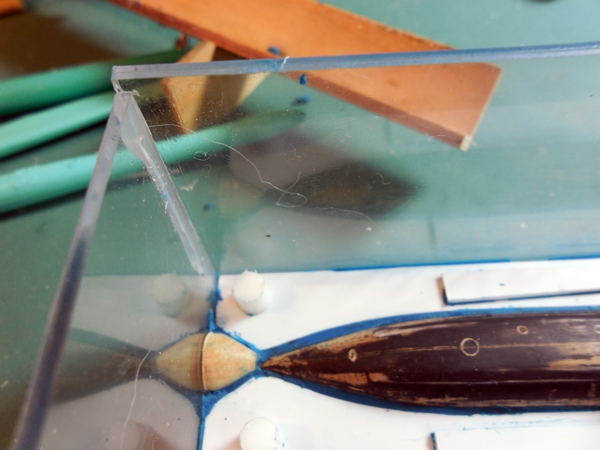
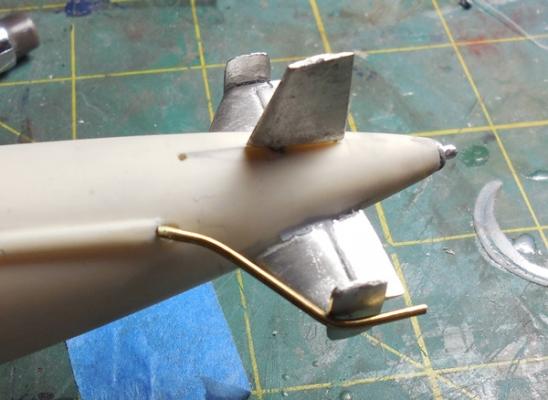
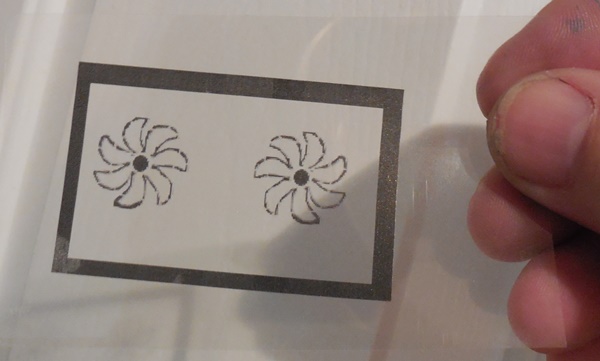
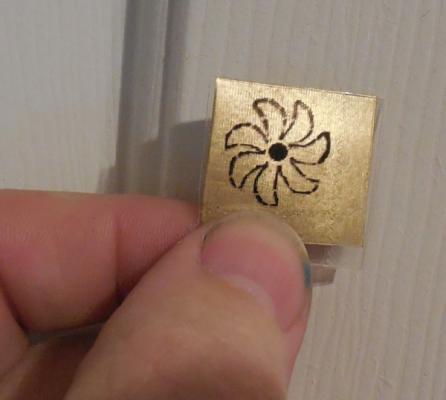
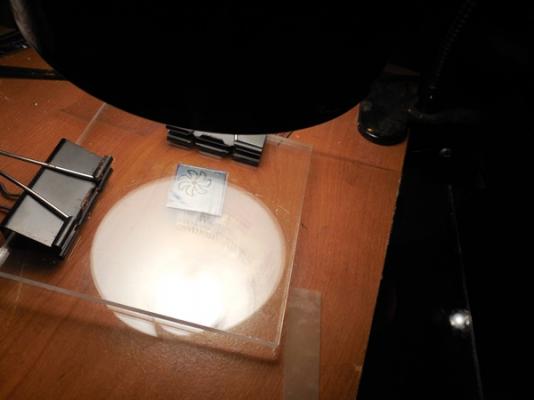
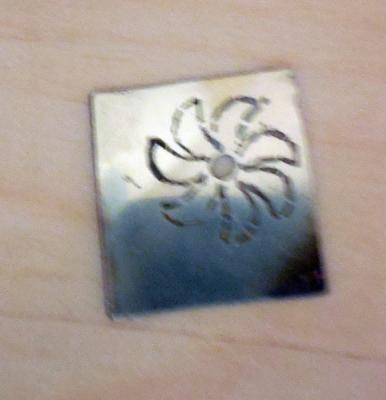
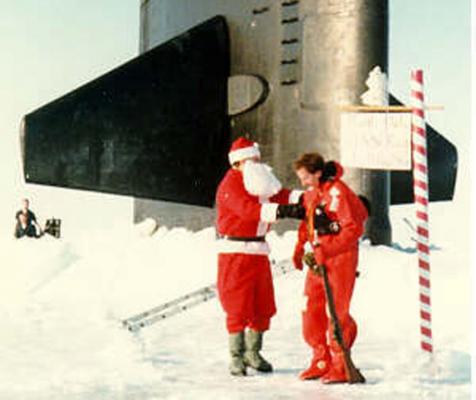
Hey Again Shipmates! Okay we have our control surfaces on. Just a note about the Fairwater planes. These are the ones sticking out of the sail. In this class of submarine these rotate 90 degrees. This is so we could punch through the ice. I added a picture of my boat USS RAY SSN 653 when we surfaced at the pole. I made a good Santa!! To fabricate the external portion of the towed array. Brass tubing was bent to shape and attached to a indentation in the casting The other end is attached to the stabilizer and a filet made in CA. Once cured this is sanded smooth. The screw as supplied was not correct. Now unclassified, I can model the correct blade geometry. This was first drawn into my computer. Once I was happy, the image was mirrored and then printed on clear plastic. The image was then cut and the mirrored image aligned one atop the other, in a process known as registering. Once this was done I cut to size, and cleaned with 3200 grit sandpaper .005 brass sheet. This was then laminated with photoresist. The clear plastic was placed so as to sandwich the brass. This was then clamped between plexi and exposed to 100 watt light for 20 minutes per side. After exposure the protective plastic was removed and the imaged developed. Following development, The new screw was etched in ferric chloride. It took about 40 minutes to etch the screw. After etching the remaining resist was removed and the screw gently filed and sanded to final shape. I like etching just a bit larger than the size needed so I can get a smooth edge filed and sanded. With the screw made and the towed array installed. I shot the hull with the first coat of primer. These old castings will have holes you cannot see until you prime. Go light on the first coat. I indeed found some errors and used putty to fill the bad areas then another coat of light primer.
- 4 replies
-
- 4
-
-
- Flying Fish
- Yankee Model Works
- (and 2 more)
-
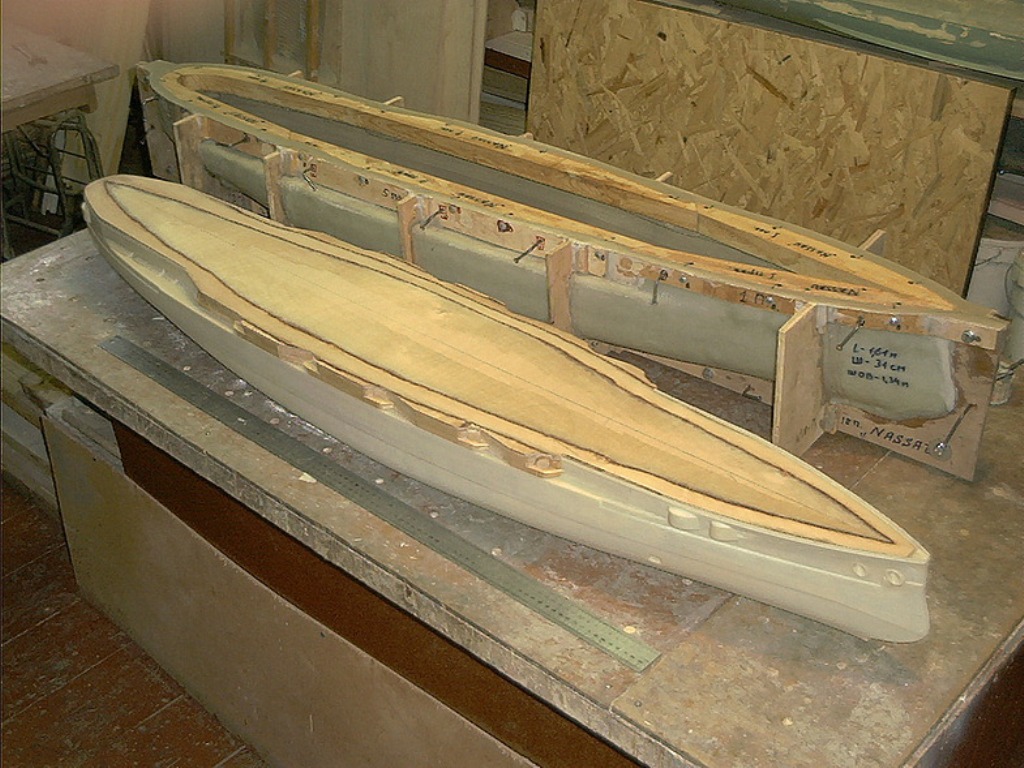
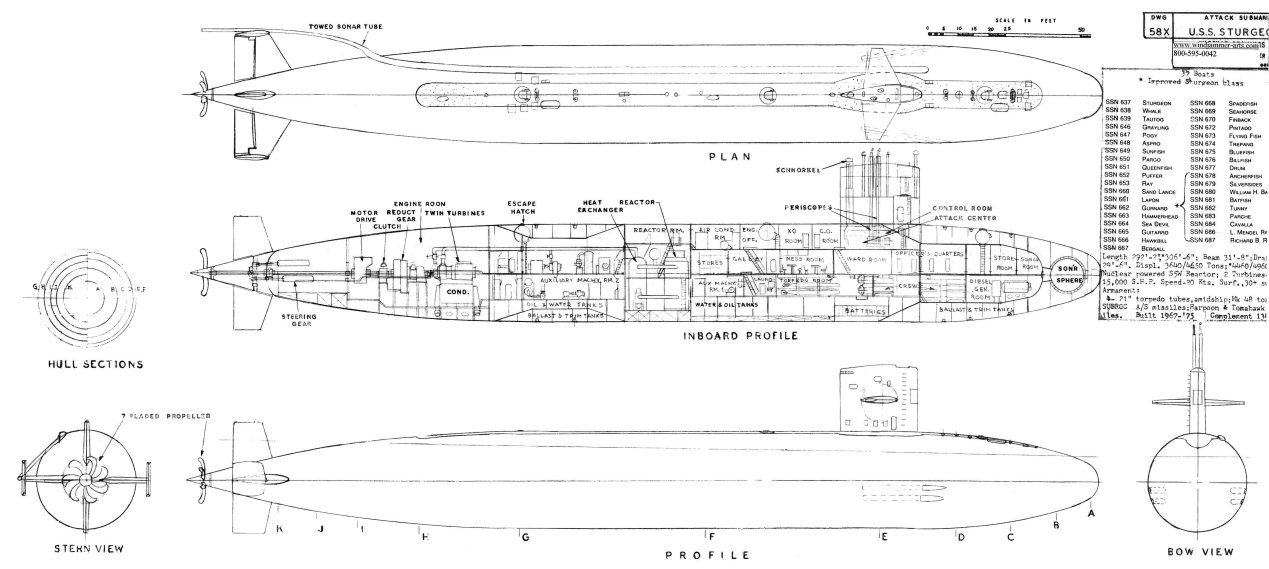
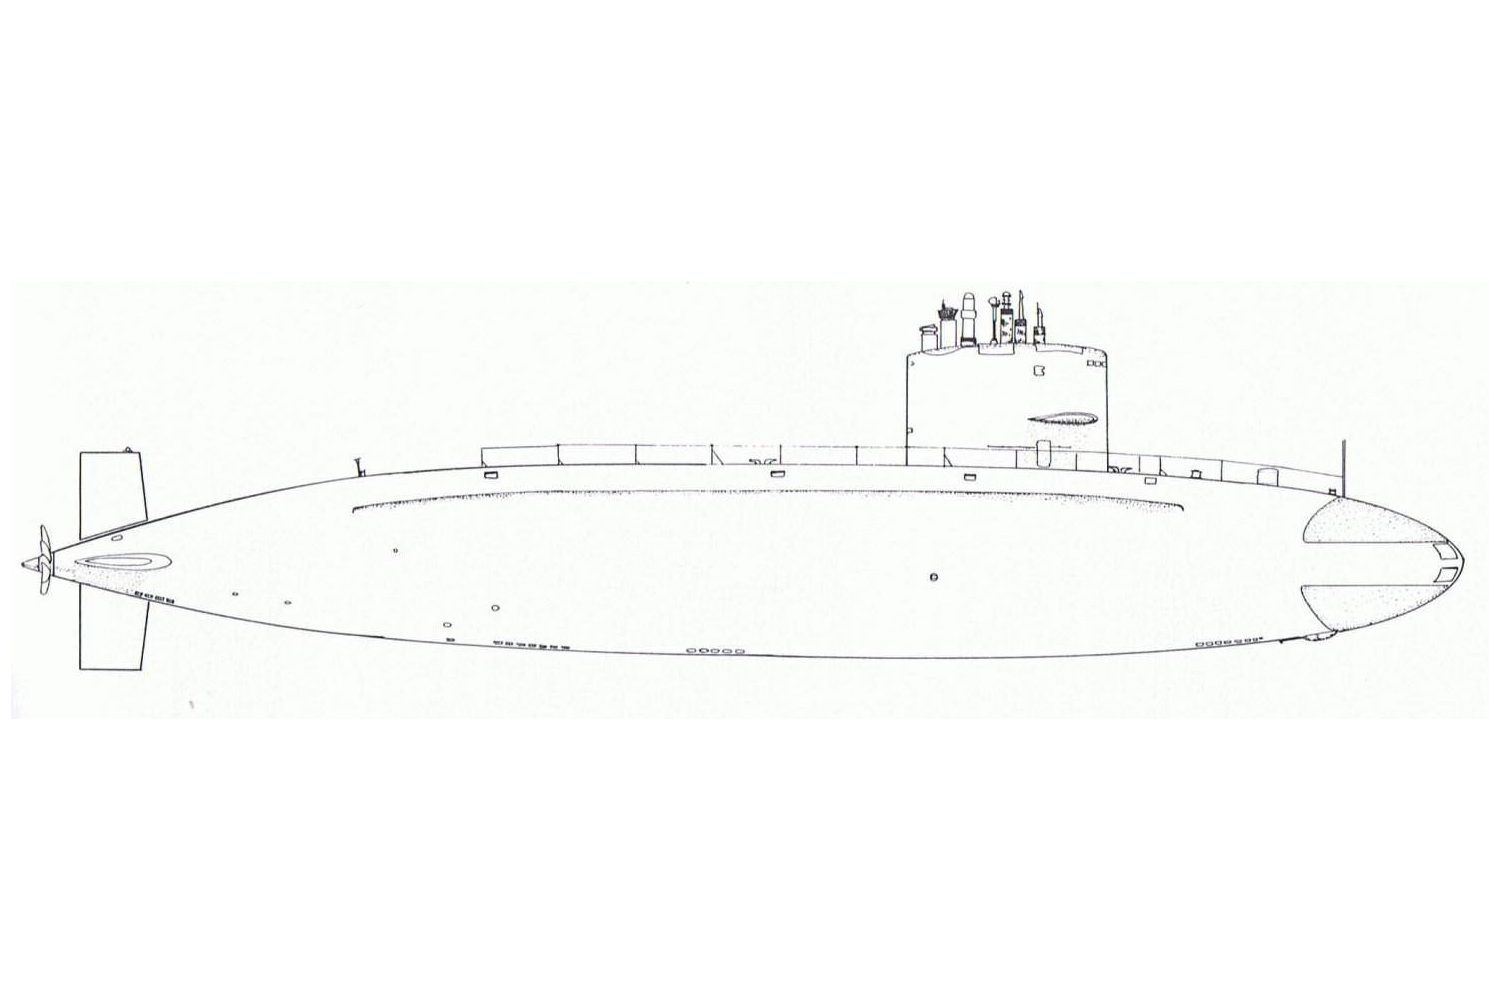
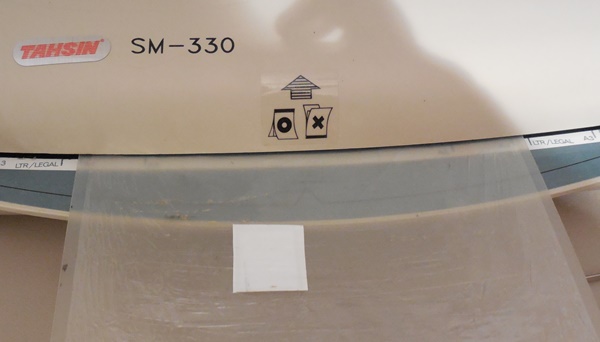
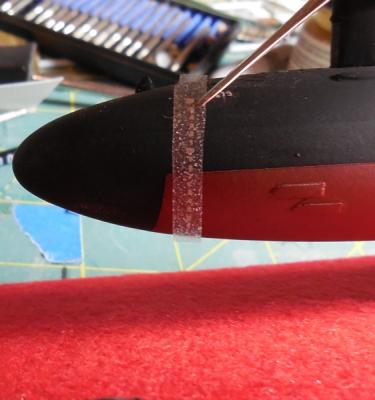
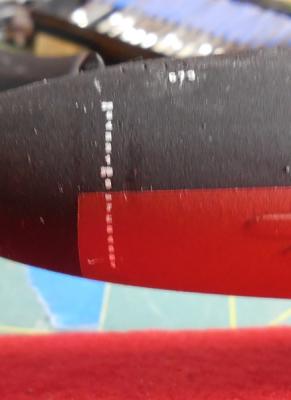
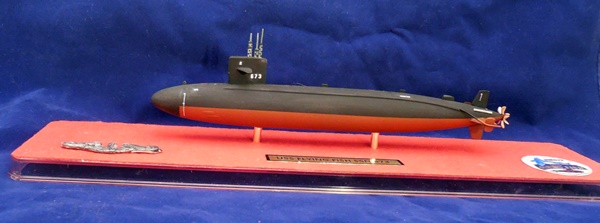
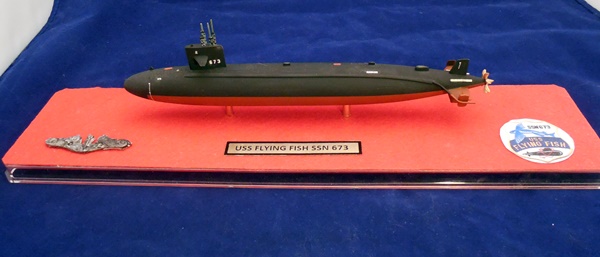
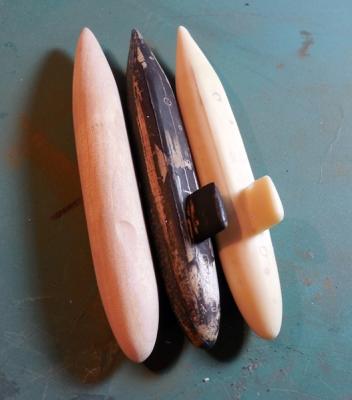
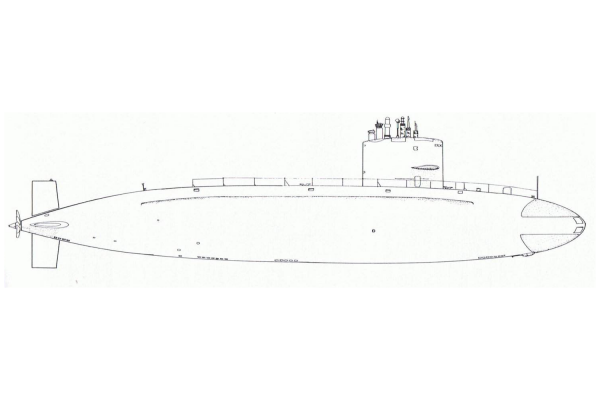
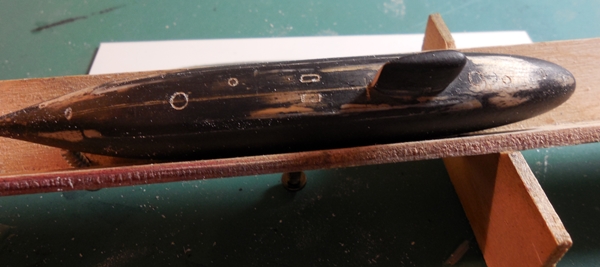
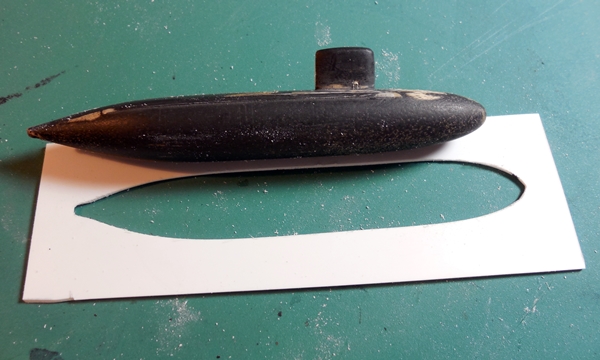
A client hired mw to build this for him. It was like a walk down Memory Lane. Originally this kit was the child of BLUE WATER NAVY. In the early 1990s this was one of the only resin submarine kits to be had. In addition it was only one of two or three modern submarine models to be had anywhere. If you can fins one of these kits be sure you take a look at the detail. It is not that great, however that is what to me is wonderful about this model. This was made before lasers and CNC, and 3d printing. This bad boy was turned and scribed!! I have included some shots of the scribing prior to me working on this little jewel. I decided to limit the modification to that which would replicate the clients memories of the ship he served on. As you can see in the first picture, the builder is left with some mathematics to contend with and a bit of brain usage. No witness marks, no alignment guides, lots of sanding filling and love need to be lavished on this Cadillac of the US Submarine Force. I decided to add the WLR-9 Early Warning Acoustic Intercept and other transducers. I would replicate the mast and antenna array as was carried on FLYING FISH in the last years of her service The FLYING FISH was a member of the 637 or STURGON Class of nuclear attack submarines. This class is the follow on from the ill fated 594 class. Remember it was supposed to be 593 Class, however SSN 593 was the THRESHER. 637 Class Attack Submarines were designed to perform multiple roles. Spying was the role in which the class excelled. Of this you can trust me. I served on USS RAY SSN 653; the things I could tell you would keep you up at night. Sitting under an anchored Soviet KIROV class Battle Cruiser in a Libyan harbor waiting for a VICTOR III to leave port, all the while the Russian sonar code named HORSE JAW is pounding the water with such energy it boils sea water for 30 yards. Yeah I got stories. In addition to being top notch spies, this class could deliver the nuclear tipped anti-submarine missile SUBROC, the deadly MK-48 Mods1-4 and ADCAP torpedoes. MK-67 and later CAPTOR Mines. We could employ UGM-84 A HARPOON Cruise Missiles as well. My claim to fame is my ship USS RAY SSN 653 was the first submarine to carry UGM 109 Encapsulated TOMAHAWK Cruise Missile. We could carry A-2 (Nuclear Land Attack) C-2 (Conventional Land Attack) B-2 (Ship Attack) and D-2 (Cluster Munitions.) If a 637 class could not kill you with her weapons, the Special Forces capabilities of the class could. With all the advantages and abilities the class was also top notch in crew comfort. They could dive deeper than the 688 class as well as out maneuver them. Only in sound silencing and speed did the 637s lag behind the 688 Class. Okay, now to the build. First thing is to remove the over pour "keel." You are going to need a belt sander or moto-tool for this. Hand sanding will take you longer than if you were building the real sub! Also the dust from the resin is a major irritant so wear a mask! When you are close to finishing switch to finer grades of paper and end with 0000 steel wool. Next task is marking the location for your control surfaces. The instructions offer little help in location. I have added a plan set here for you should you find one of these kits. Since I am not the sharpest knife in the drawer I find it easier if I mark two sets of lines along the hull. The double line method lets me better center the control surface and it gives me a rough idea of any dips or bulges in the old resin. Before I forget. 637 Class boats were not originally fitted with passive towed sonar arrays. This was a modification done during major shipyard refits. If you choose an early boat, you will need to sand off the towed array faring on the port side. Prior to having a retracting towed array we used what was called a STASS. STASS was basically a "clip on" towed array. You have never known misery like surfacing in the North Atlantic in Winter, state 4 seas to drag the dam thing on deck by hand. The control surfaces in the kit are white metal. You want to file and sand these very carefully. To give the CA glue greater surface area I scribe the glue contact edge in a cross hatch fashion. Prior to gluing I also give the white metal parts a vinegar bath for 20 minutes. This micro etches the surface giving the paint prier some tooth to hold onto. After the vinegar bath the parts are scrubbed with soap and water , rinsed and let dry. The surfaces are then glued to the hull. Rudders on this class are not fixed to the hull. These are set into holes drilled into the resin. More Later!!


- 4 replies
-
- 4
-
-
- Flying Fish
- Yankee Model Works
- (and 2 more)
-
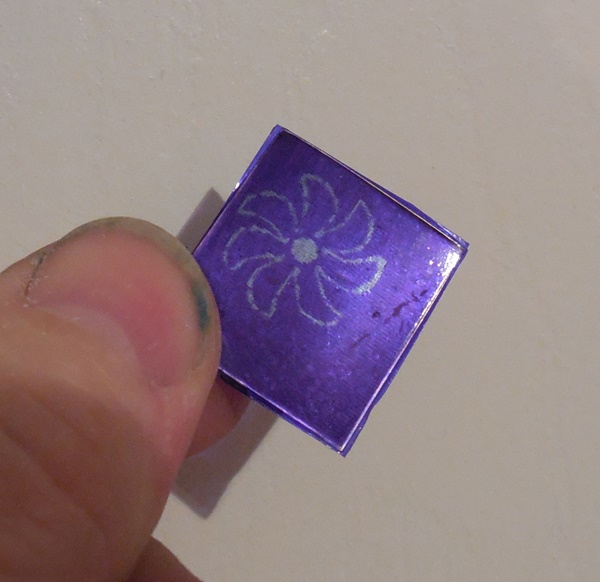
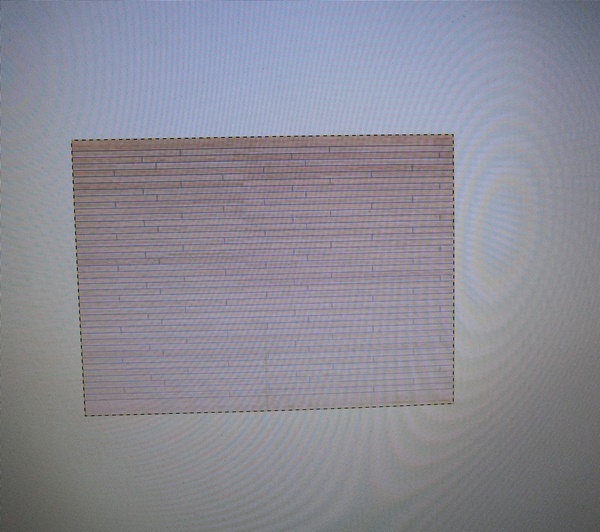
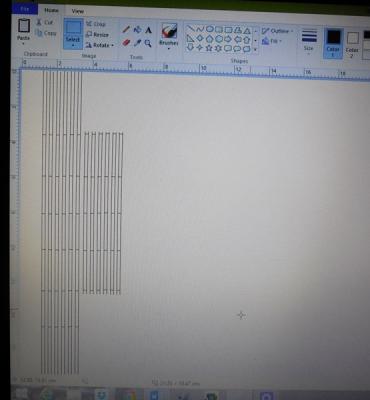
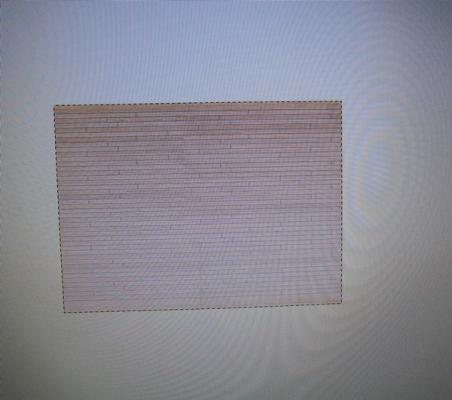
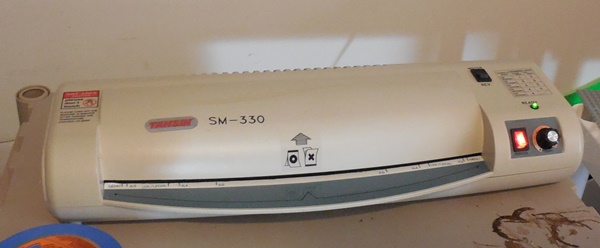
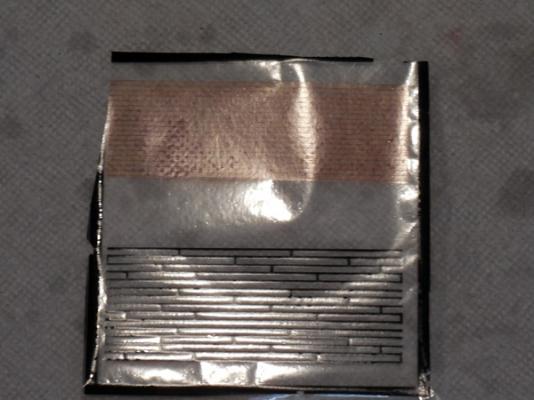
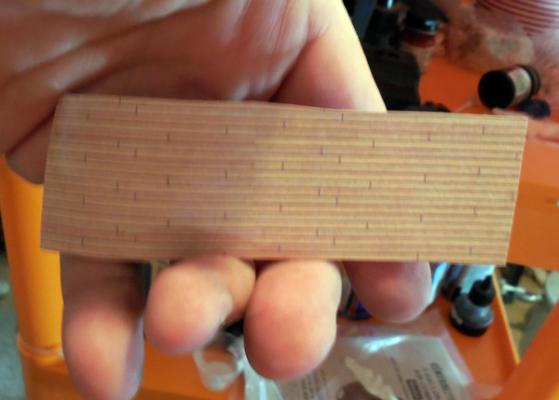
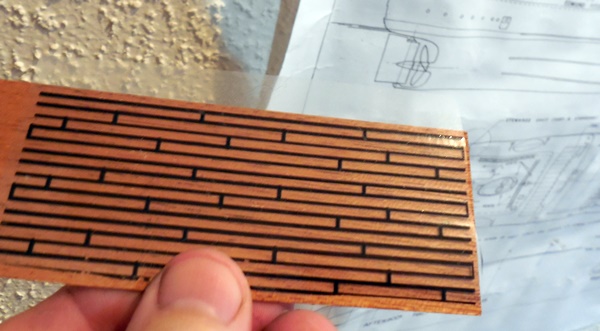
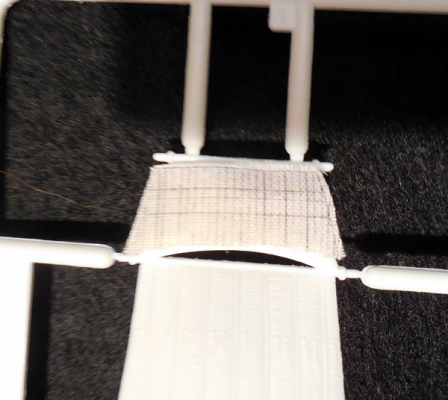
Shipmates!!! Discovered this while I was looking for a better way to make draft marks for my submarines. DECALPRO offers a nice easy system to make your own dry transfer decals. Using this system I came up with ways to make decking. With this technique material thickness will not be an issue, and it can be used on any surface. As always there are a few issues with a new technique. You will require a laminating machine recommended by the manufacturer. I found one on Ebay. You also need a laser printer, and a heat gun. You can do like I did and create your decking in the PAINT program on windows. (NOTE: This deck is way out of scale and proportion so I could show you the technique.) You can also hand draw the deck and then scan it in your computer, or you can find deck patterns on the Net. The decal instructions will show you exactly what to do to set up the special decal paper and transfer Mylar film. The laser printer uses toner which is plastic. When printed on the special paper the image is bound to the paper by a water soluble chemical. A Mylar carrier sheet is laminated to the special paper. This causes the image to bond with the Mylar carrier sheet with static. The deal is then given a water bath where the chemical in the paper releases the image to the Mylar film. The image is dried with a paper towel then sprayed with an alcohol based adhesive. For demonstration I used a piece of Mahogany. The image is laid down and rubbed with a paper towel. Then the backing is peeled away. For the colored deck. I demonstrate on white card stock. If you choose to place your deck on say grey polystyrene then you will have to reverse your image in the computer,apply the white foil film to the back and then use the carrier Mylar. You can use this system to make name plates, sails, just about anything. Enjoy!!

-
- 3
-
-
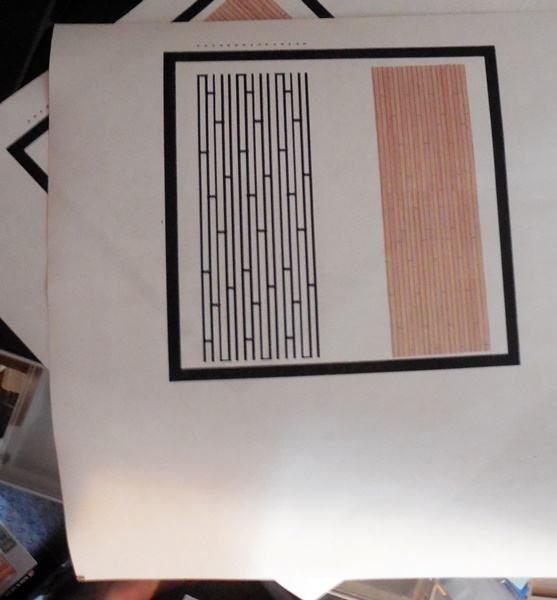
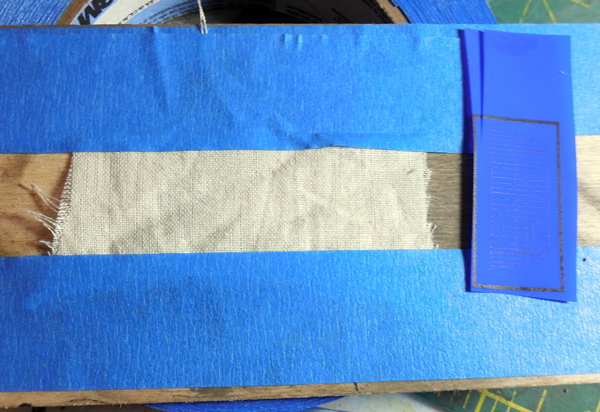
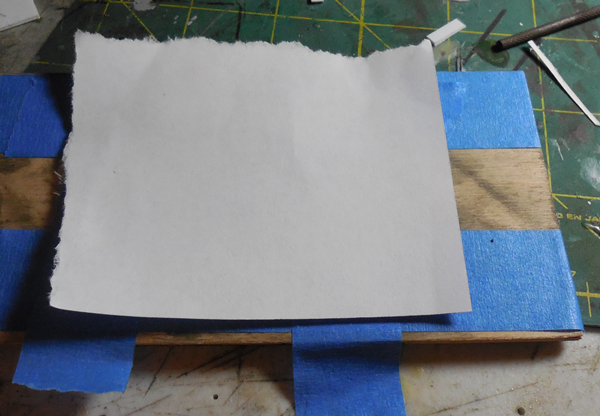
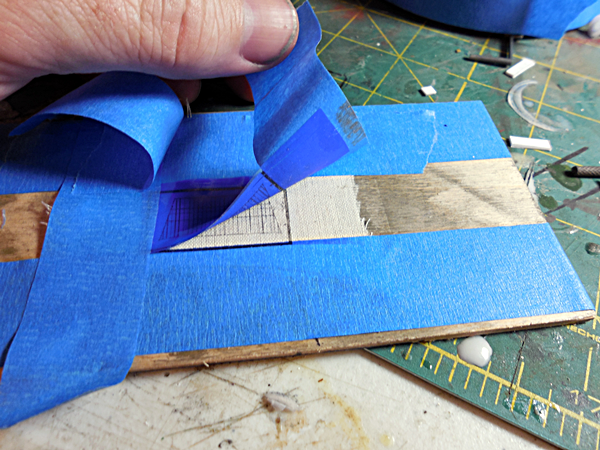
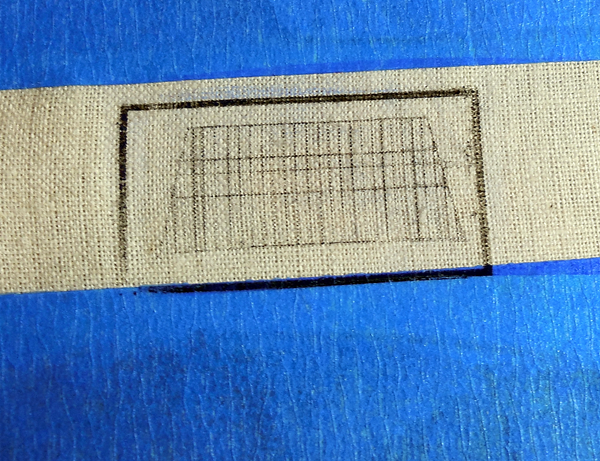
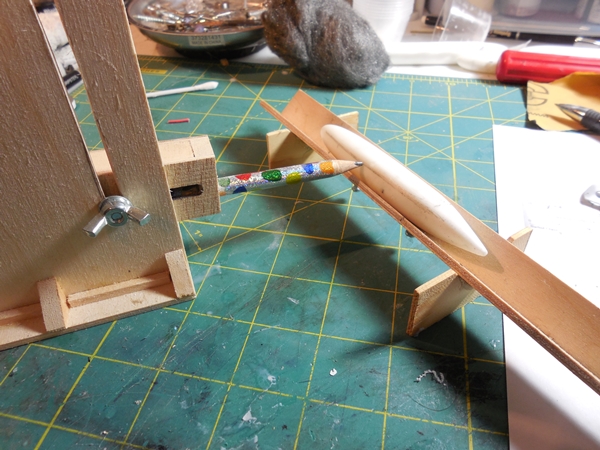
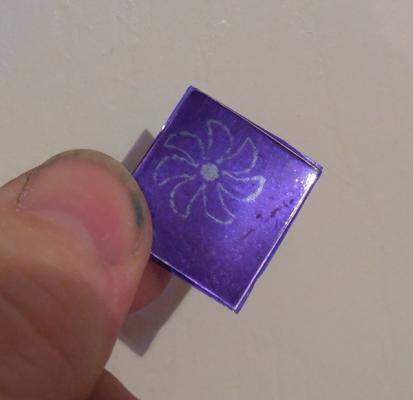
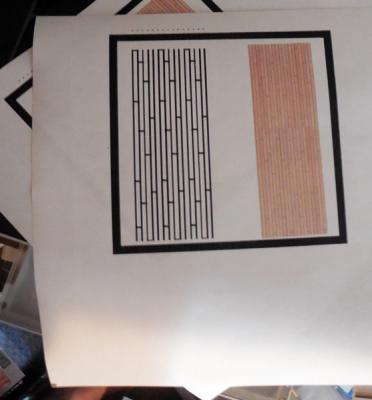
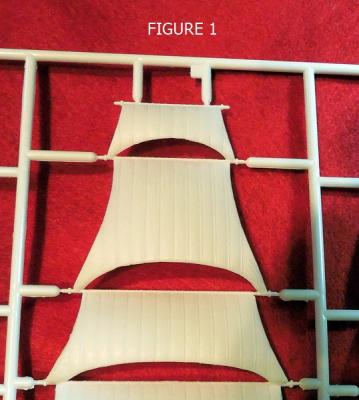
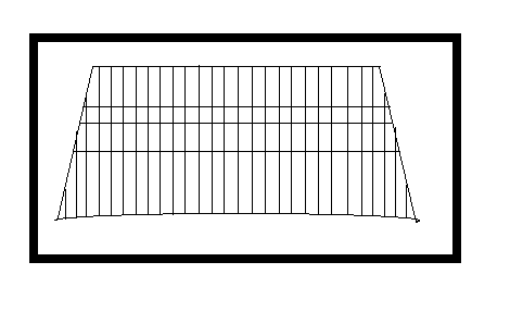
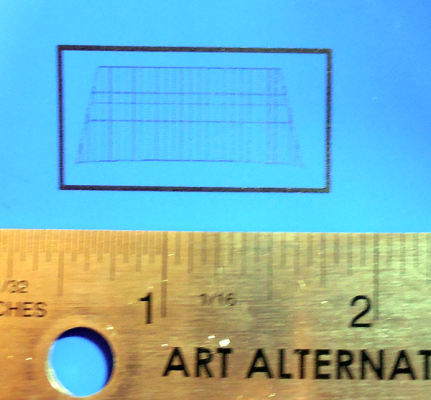
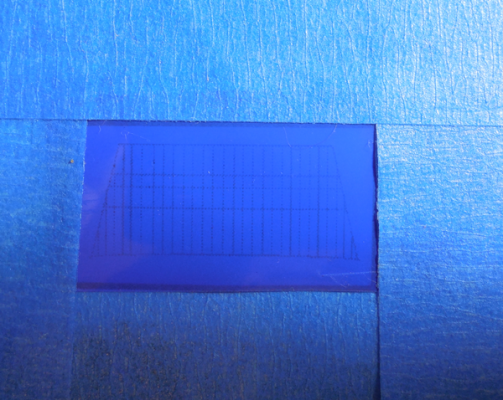
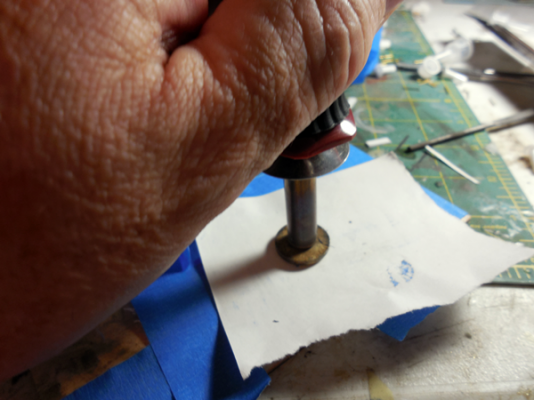
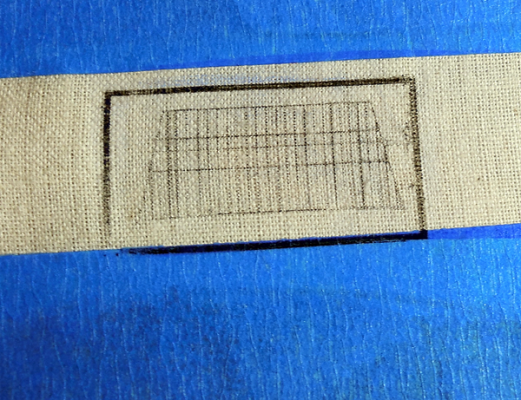
Chief Don the submarine guy here! Subs I use to make a living, however my passion is the age of sail. Here is a method to make sails for the new folks, for the builders of small stuff, or if you wanna add something special to your sails such as a color logo or symbol (Part 2). Plastic builders, scratch builders or wood kit builders the sails are often not to scale, horribly made, or are plastic. I build my own PCB circuits to make my Lighthouses in the bottle flash, the cannons on my ships go boom, and such. One of the materials I use to transfer the circuit layout to copper clad board is called Press N Peel. You can get this on E-bay for right around $12. Trust me that will last you a long time. You will need a laser printer or copier and a PC program such as PAINT. You will need sail cloth (Duh!), Blue tape, a Wood burner or soldering iron with a transfer nib. You can use a clothing iron in a pinch. You are also going to need a flat board. You can use a PC program to make your sail panel lines, reef lines and what ever else you need. You could also hand draw your sail and then scan it to your computer. When you have your design as you like you will print it on the blue Press N Peel. BE SURE you print on the dull side. Laser printers use toner, toner is little more than powered plastic. As the powder goes over the paper a laser melts the plastic and fuses it to the paper in the shape of the letters and pictures we type in. (Lot more to it than that but you get the drift.) Note the border around the image. This is used to place and align the image over the sail cloth. Also when you trim the Image leave and side about 1/2 inch longer than the rest. Use Blue Painter's Tape (This is a must use. Other tapes have adhesives that melt under heat and will make your life not so much fun.) and stretch and tape the sail cloth to the wood. Don't go nuts just a little stretch. Now place the image dull side down over the sail cloth. Again with the blue tape, tape along the border printed on the image. If the image moves while you transfer it will be a big smear. Okay now this is the art vs science part. I use a wood burning too that has this transfer button. You can get the anywhere for about $30. They come with many nibs that might come in handy. I sign all my work with a wood burning tip on the wooden base. If you do not have one a regular iron will work as long as you do not use any of the steam settings. I regulate the temperature to a high medium. The top of the Press N Peel is plastic film. If you melt that you will also spoil your work and get the blue all over your tool, and or iron. (Explain that to your Hunny Bunny.) You can see where I have had a few of those problems. That is why I cover the work with a plain sheet of paper. If I have the tool too hot the paper will brown fast. I know to come down on the juice some. Now go over the image back and forth, up and down, side ways, this way that way every way for about 3 minutes. Let it cool about 30 seconds. Remove the cover paper. Remove one of the pieces of tape over the Press N Peel you left the extra 1/2 inch. Gently lift. Look to see in the image has transferred all the lines and detail. f not place the image back down re-tape and go over it some more with the heat and pressure. When you are done remove the tape trim to shape. You can add bolt ropes, cringles reef lines ans anything else you need. If anyone is interested let me know and I will do Pt 2. How to add color images to your sails for pennys. Enjoy shipmates!!


- 1 reply
-
- 3
-
-
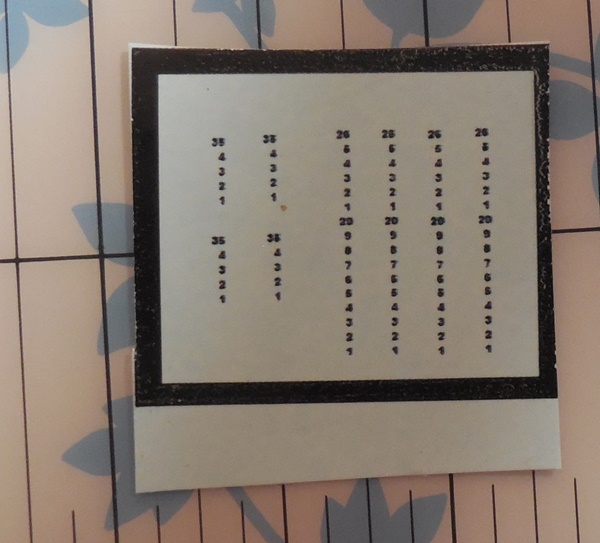
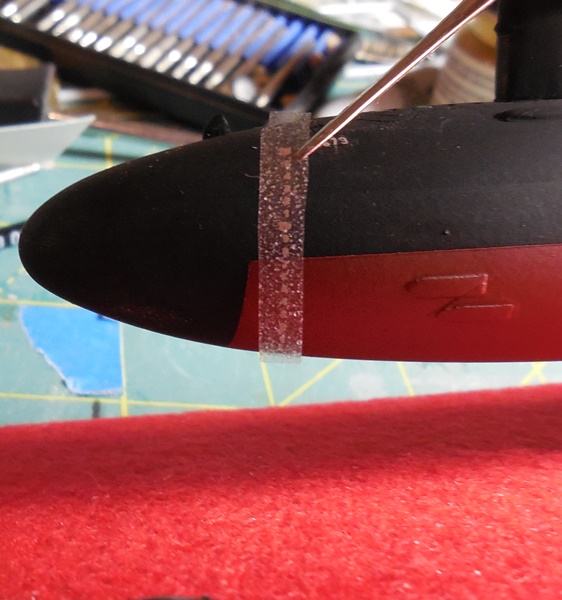
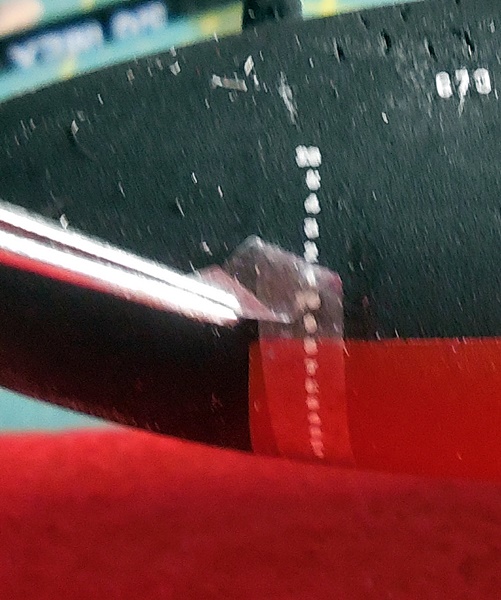
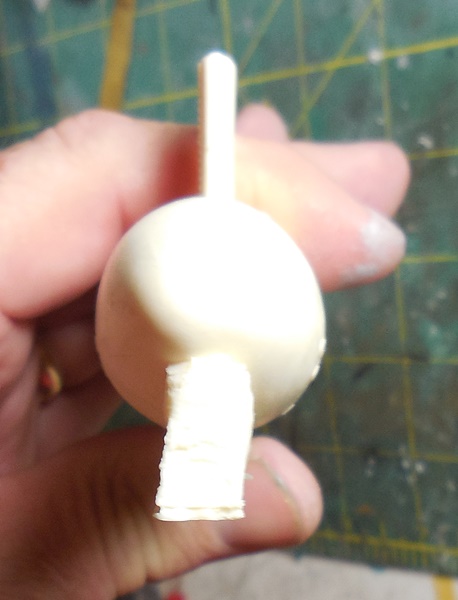
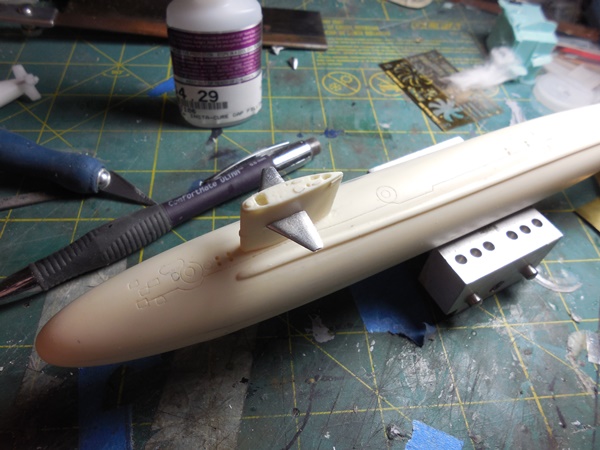
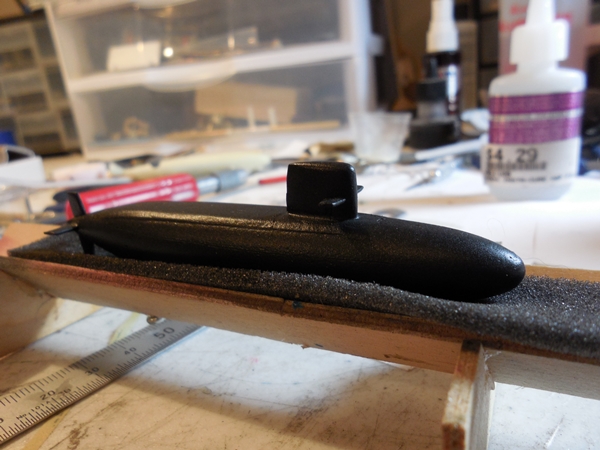
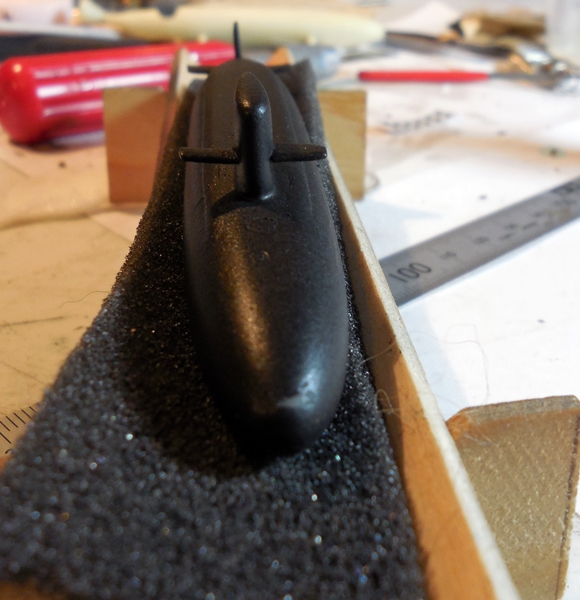
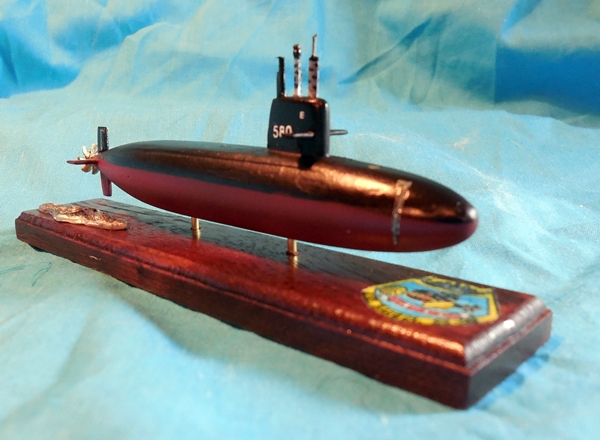
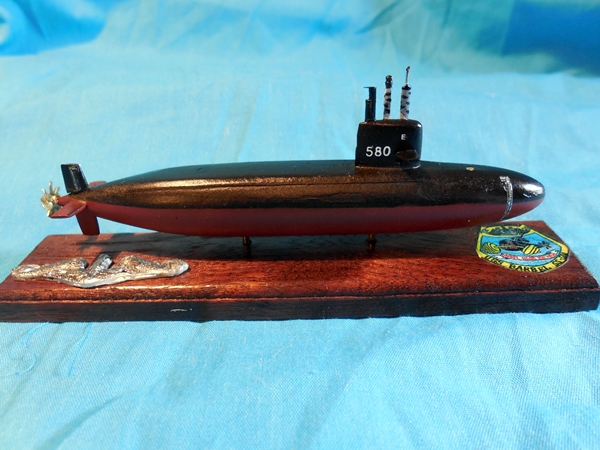
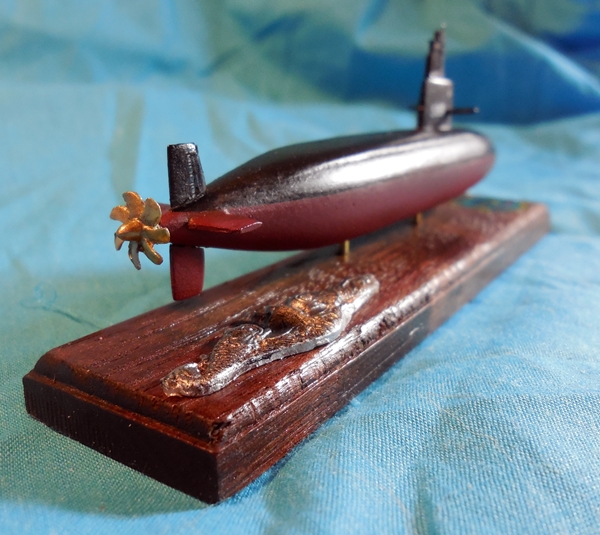
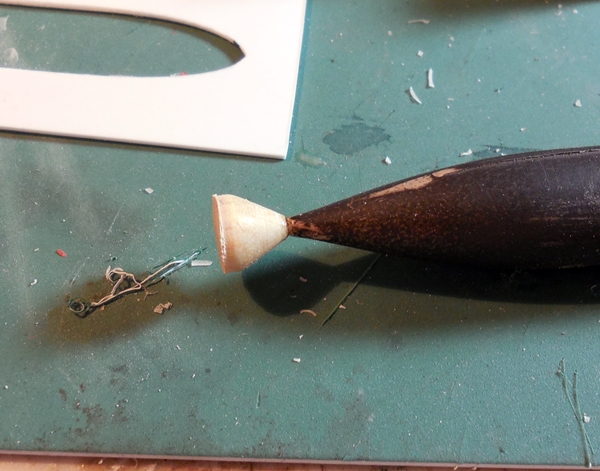
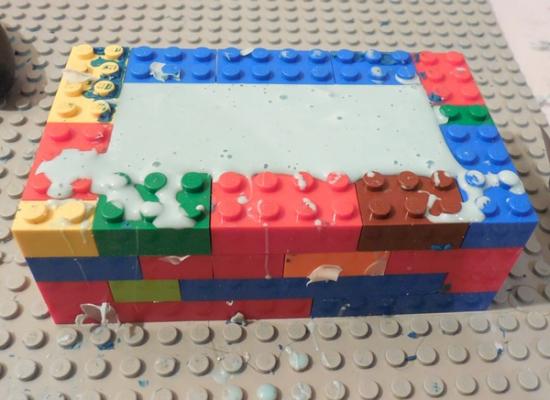
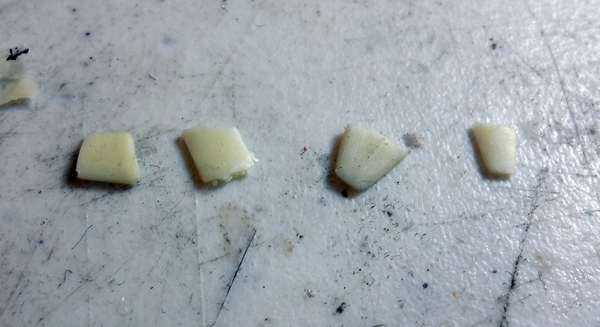
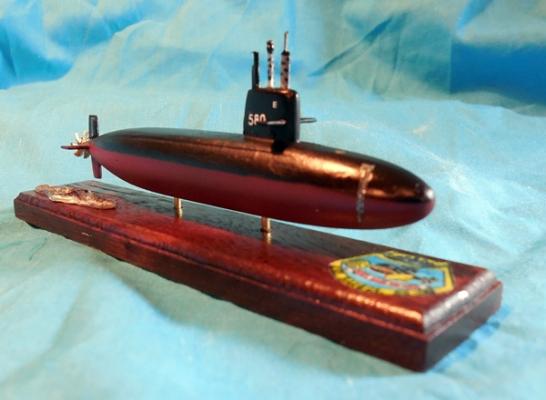
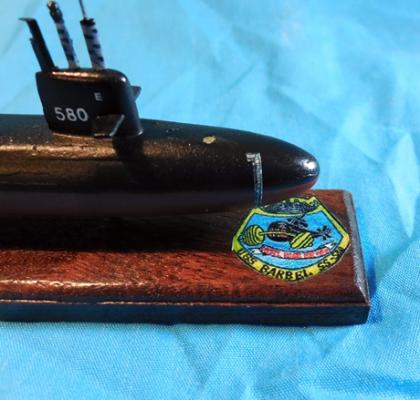
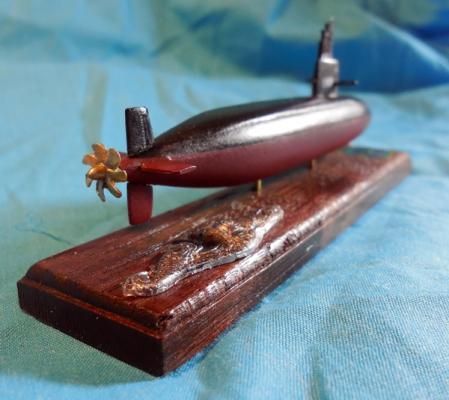
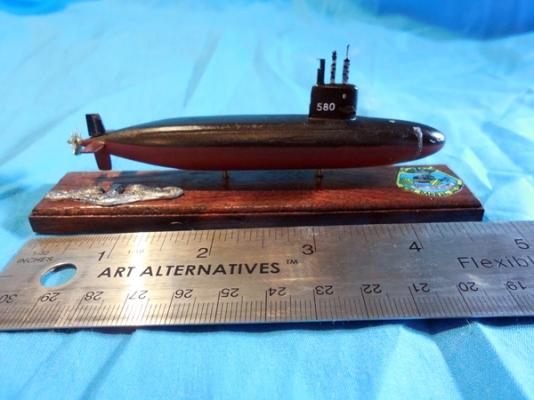
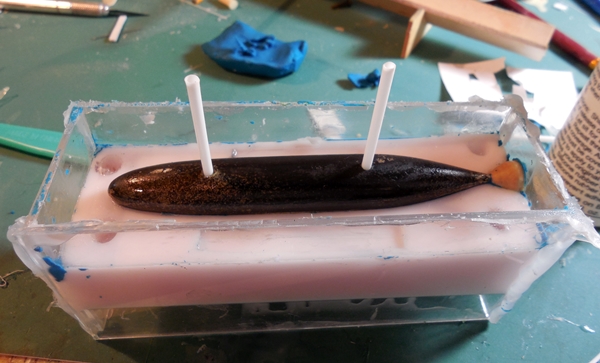
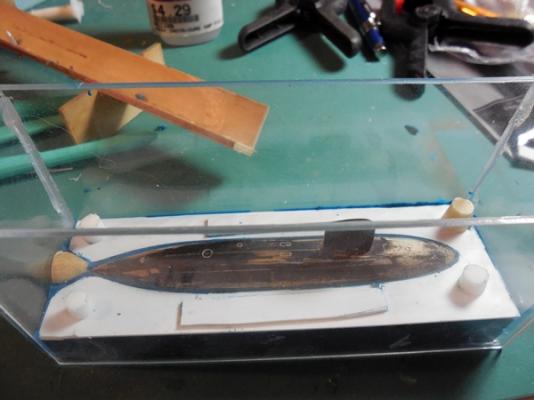
First of all I want to thank you all for the kind words. I do love all ships, however I spent from my late teens to my 40s riding submarines. So bear with me. Still have many projects going. Scratch Building the LEE, upgrading a little Academy Whale Ship. Oh yeah and a 1/700 EDMUND FITZGERALD. Lets Rig for Dive and get this little puppy to bed! Well I poured the mold by using the syringe method to ensure the pour hole did not become clogged and result with a missing mid ship. SUBMARINE FACT TIME!!! On a US 688 Class Fast Attack there are only two water tight doors. One is at Frame 57 and separates operations from engineering. We have another name for forward people and after people. We are Coners (We work in the cone.) and Nukes. The other water tight door is the washing machine in the laundry space. I did not attach any control surface to the master prior to pouring. Thin areas of a pour take forever to cure out as they can not generate heat that well. Also unless you can spin cast or have a pressure pot there is always the chance a bubble will somehow get trapped and really complicate your day. After 30 minutes I de-molded the hull, and re-drilled the mounting holes. The mold for the control surfaces was heated to 150 F in the oven. Your mold might sweat some so be sure you wipe it clean and give it a bit of mold conditioner. With the mold heated I mixed and poured the control surfaces. The surfaces were allowed to cure for an hour then removed from the mold and the little bit of flash trimmed away. The surfaces were attached to the hull at locations indicated by the plan using CA. A fillet was made where the vertical stabilizers meet the hull just forward of the Stern Planes using Green Filler Putty, and sanded smooth. Three light coats of auto primer were applied. After each the hull was given a light going over with 0000 steel wool. With the primer coats dried I next airbrushed Flat Black Acryl over the entire hull. As with the Primer this was steel wooled between coats. While these dried I used GIMP 2.0 to design the screw and decals for the model. The decals were printed and sealed and the screw was photo-etched. With my water line marker I retraced the previous marks and taped the hull at the line. The lower hull was air brushed with a mixture of 80% Red 10% dark Blue and 10% Black. With the paint cured I gave the little monster a few coats of clear coat. Then the dry transfer hull numbers went on the sail. Along with the BARBEL'S BATTLE E Award. We love getting those! Means we are best of the best. Of course! I then applied the draft marks and locked then down with Micro sol decal solution. Black ink was used to highlight the hatches and Bronze was used to paint the capstan. I made the base from Walnut and added the ships patch and a set of Dolphins. After a coat or so of clear, the ole girl was moored on her base. Well that is that friends. BARBEL was the test bed for many of the systems modern subs use. It was found that bow mounted torpedo tubes can really interfere with passive sonar as it is also bow mounted. Starting with PERMIT 594 Class SSNs the tubes were located on the sides of the ship. These are at and angle of 8.5 degrees off centerline. S.I.N.S was tested on BARBEL Ships Inertial Navigation System. This system was in use until late 637 and all 688 Class Attack boats. Hope you enjoyed the build and a little sub history. All clear on the broadcast. All messages aboard. Lower all masts and antennas. Going Deep!! Chief


-
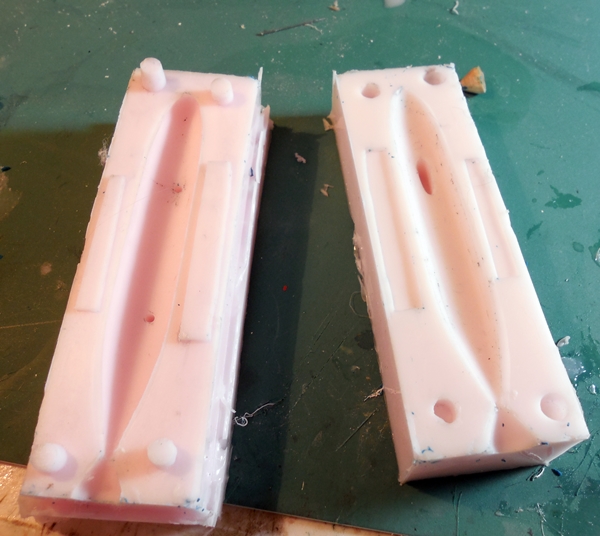
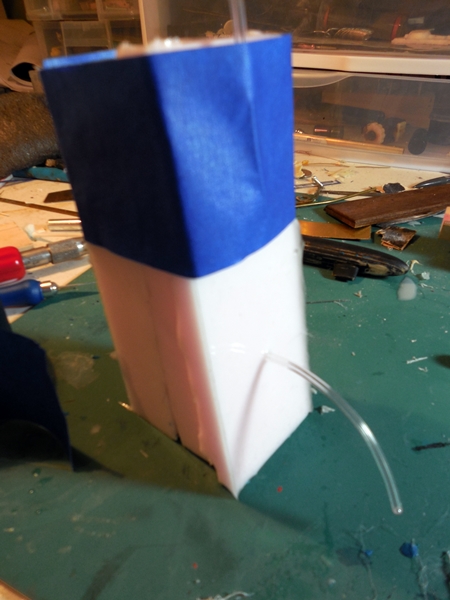
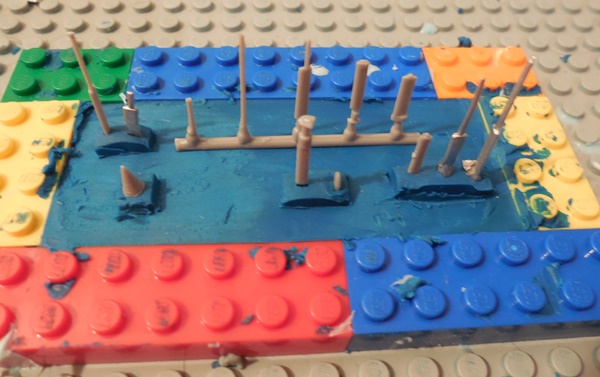
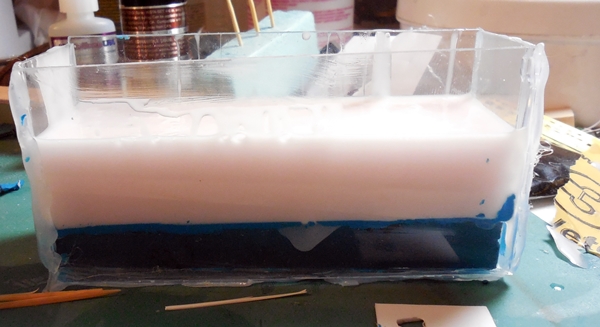
Welcome back shipmates! With the top half of the hull mold cured. I turned the mold box upside down and removed the bottom. The clay was removed carefully as not to upset the intermediate in the top mold. If you move your master there is the possibility the top coat of rubber will seep past your master and into the cavity. Since there is no way to apply rubber to rubber mold release into the cavity your mold will be a failure. After removing the clay and cleaning up the bottom with cotton swaps moistened with denatured alcohol, I placed vents for the hull. It was convenient that the mounting screw holes where right where the vents needed to go. I extended the mold box bottom (now the top) with sheet styrene to provide a deeper pour on the bottom mold. Rubber to rubber mold release was applied in three coats making sure I hit all the areas I could and then some. After the last coat dried I mixed the rubber and poured the bottom mold. SUBMARINE FACT TIME!! The Pilgrim Nut is used to hold the screw on a 688 class submarine. The torque spec for the nut is "Hand Tight." After a 3 hour cure the mold box was removed from around the mold. I trimmed what rubber had seeped down the side and ever so gently separated the mold halves. These will need a bit of cleanup, and a dusting of talc before you use them. The casting resin I use works better if the molds are warm. Double edged sword here. It makes the resin kick faster, however it makes the resin kick faster. One the one hand fast cure is good, but when you are trying to get your resin down a tiny fill hole within 2 minutes you are flirting with frustration. It will happen that your fill hole will sure before the mold is completely filled. Uggggg!! Time to call in the heavy reinforcements! Well not really heavy. You know those meat injectors for the ole BBQ? Get you a couple and some fish tank air line hose. You are going to be tempted to use the needle that is attached to the injector. It will do the job....once. After the resin cures in the needle there is way to clean it out that I know of. Instead remove it an put your airline hose over the nipple. The hose you can toss and be good to go on the next pour. I inserted small gauge hose into the vents for the bottom mold. thee were secured using tape that holds the mold together during the pour. More later Shipmates. I hear the rack calling!!


-
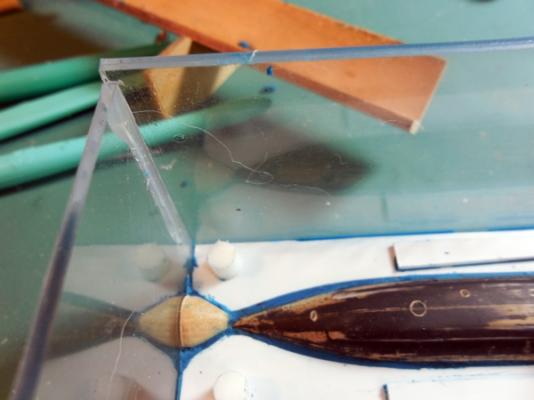
Thank you all for your kind words. I bet there are more than a few of us who model for a type of therapy I imagine. Many people think we submariners go to sea and just sit down there. Oh no my brothers and sisters. If I could tell you some stories, you would have a new out look on not only the submariners of the US but around the world under many flags. However those who talk don't know and those who know don't talk. Well I know and I talk a little..... SUBMARINE FACT TIME!!! The largest US submarines are the OHIO Class. Only 12 Pounds of air hold them on the surface. This model was an 'Honor Build" for a former crew member who will not be with us much longer. I do want to make more since as of now or at least will be the only model of BARBEL class there is, (as far as I know.) After the master plug was turned as we discussed last evening. I made a silicone mold of the hull. This was cast in resin and became my intermediate master with this hull I could add further details that would not scribe well in wood. A note here: Know your materials! Cheap is not always best. I recommend you get the best quality silicone and resin you can afford and please if you do go ala carte read read read! You might find you have a platinum base rubber that a type of resin will have for lunch. Still scraping out what looks like a bad version of the movie blob from one of my 688 masters. With the hull cast and the master plug put away, (Keep everything you make. Never know when a model company might want to give you a little bit for your efforts.) I determined what I needed to etch and how tough would it be to get to. Fortunately BARBEL has a superstructure. The top of the boat is not part of the pressure hull. This makes a place for the crew to walk about, and provides wet storage areas for lines, and such. I was relieved I would be able to get away with easy etching. You can buy etching guides but chances are you will not get the shape or size you need in that one instance. So I make my own etching stencils. Like the photo etch parts I make, I can also make etching stencils. I did a how to a while back about photo etching for about $0. Take a look at that and have a ball. makes life easier and much cheaper. Another tip on etching details into resin or plastic. Use the proper tool. Blades and scribes basically push the material aside without real etching. You will see what I mean after you spend 3 weeks etching a 1/96 scale Typhoon. Yes you stand back and look at your masterpiece, and think you are the stuff. Well that is until you paint it and all your detail line fill up with paint. Micro Mark has etching tools that seem to work ok, but again I make my own. I went about making the control surfaces (rudders, stern planes, fairwater planes,) from sheet styrene. Once cut they were brought to shape with a file and finished with 600 grit sandpaper. Other than the rudders I only built one of each. I will cast these to be sure they match perfectly. SUBMARINE FACT TIME!! Have you ever built a modern US Sub? I bet you did it wrong. Little known fact: The rudder is offset 1 degree to counteract the torque of the screw. Speaking of rudders. Do your research. On some classes the upper and lower rudders are not connected. On some classes only the upper rudder turns I was ready to now cast the production master. I cut the hull shape in sheet. This was sized so the hull would fit half way in. I then added the key ways to mold alignment; I call it the casting flange. The hull was gently pressed into blue clay. The flange was placed over top and clay was used to fill in gaps. Folks this takes a long time to get right, so go slow. I turned a filling hole and used a tiny drop of CA to attach it to the stern. I also made up the mold box for the control surfaces and mounted them on styrene sticks. These sticks were beveled so there will be less resin where I want the control surface to snap from the sprue. Mixed the ole rubber up and poured the top half and control surfaces. Oh before I poured the mold for the control surfaces I used CA to attach micro slivers of bamboo for venting. Hit the rack Shippys!!


-
Sanding sealers are glorified baby powder in lacquer. What this takes in my opinion is a good primer like Zinnzer. However to really beat the grain you first have to raise it up. A damp rag along the wood will lift the grain that you knock down again with some very fine sand paper. Remember you are going after the raised grain not the wood. After doing this a few times use the Zinnzer in very light coats. 0000 Steel wool is then used to gently remove most of the primer. Keep doing this and you will notice the grain starting to fill up. It will take a while but it will be worth the effort. Going Deep!!
-
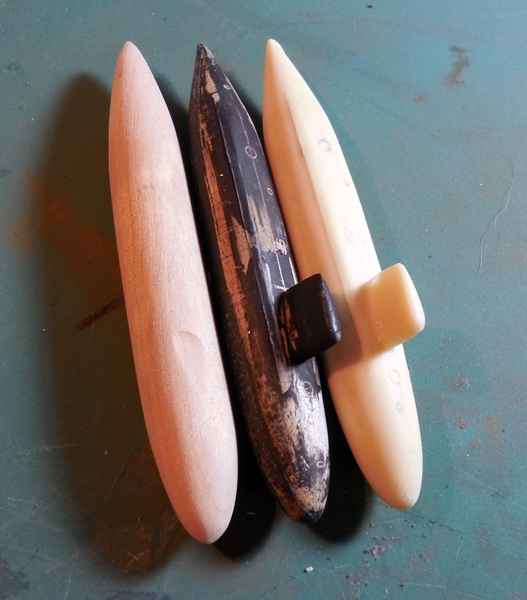
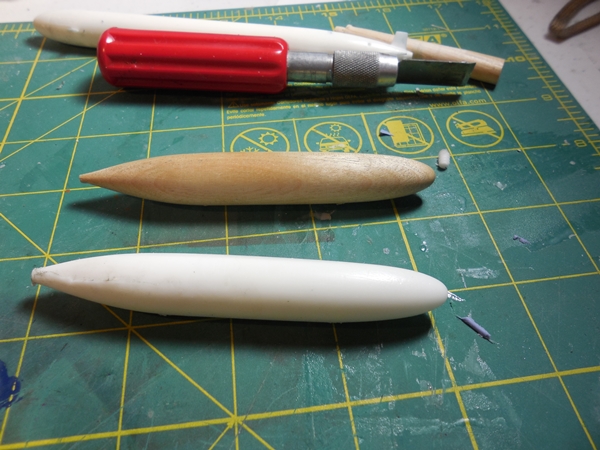
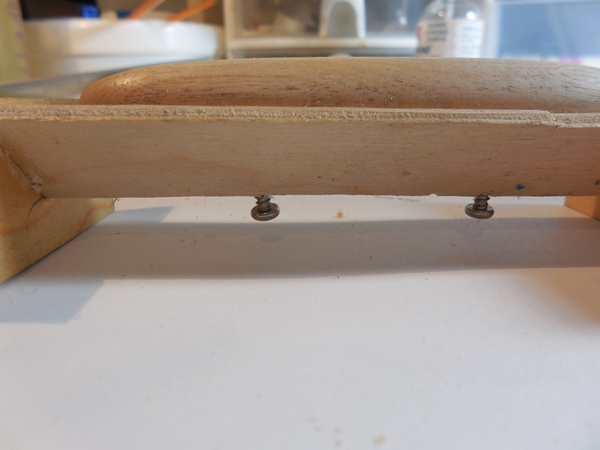
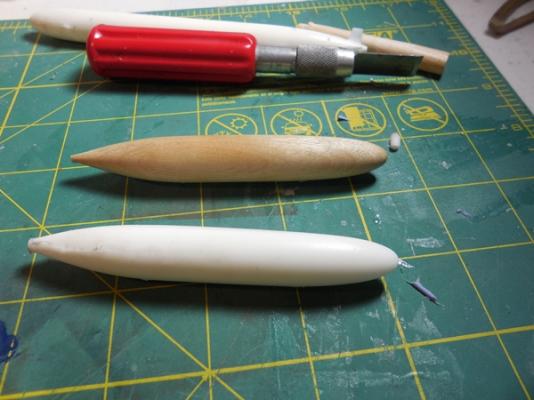
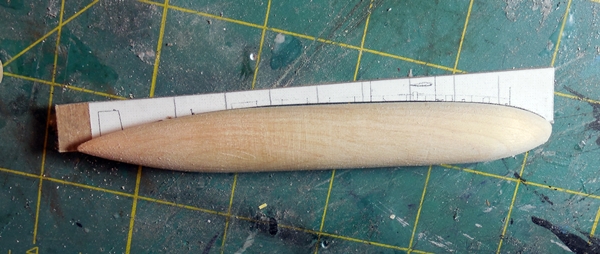
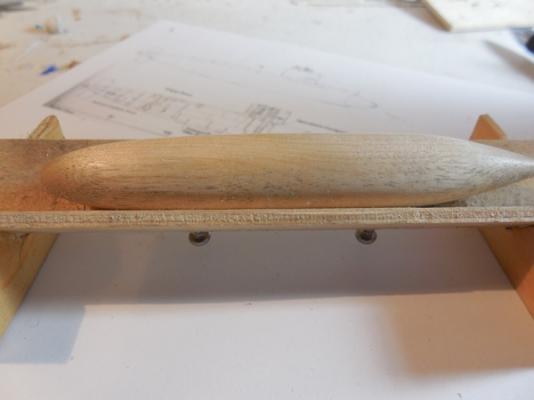
Little tough building this guy so far. It has nothing to do with the technical aspect of building the model. This brings back some memories of the USS BONEFISH which had a battery fire and burned out, with the loss of three shipmates. At the time of the fire I was on shore duty in Charleston serving in Engine build up of Navy Torpedo Facility. When we heard of the fire we knew our shipmate TM2/SS Ken Kutcher was aboard. We also knew they were abandoning ship. The theory about what the PBXN-103 explosive within the warheads of the MK-48 torpedoes would do when exposed to high temp was just that, a theory. We watched on CCTV as our shipmates lined on the smoldering deck that was so hot their shoes melted to the steel. True submariners they waited as helicopters carried a few at a time to safety. Each second seemed hours as we prayed the weapons designers were right. The plastic explosive should just melt and burn....should. Finally the last soul left the burning ship. There was little else to do but watch it burn and hope for the best. Three days later the fires went out. After a week the sad submarine was towed back to her berth at Pier Mike. I was divorced at the time and volunteered to go inside the burned submarine to check the status of the 12 MK-48 Mod 3 torpedoes. The explosive had indeed melted and some had burned. The situation was now very dangerous. The melted explosive was now devoid of a desensitizer and could detonate from shock or being stepped on. 700 gallons of peanut oil was used provide some reduction of risk as we cleaned up the explosive and off load the weapons. Each day we had to walk by where one of our Sailors departed on Eternal Patrol. I will not go into it but he was unable to be moved until our work was done. BARBEL and her sisters BLUEBACK, and BONEFISH known as the "B Girls" were the first "combat" submarines to use a teardrop hull for greater underwater performance. Diesel powered these little submarines played a big roll in the future development of our Submarine Fleet. Originally launched with bow planes like ALBACORE, BARBEL was soon fitted with planes on the forward end of the sail or as we call them "Fairwater Planes." This move provided two major advantages for the time. 1. Moving the planes gave better depth control at periscope depth. Radar at the time was becoming effective enough to detect periscopes. The whole sail sticking out would be a very good way to have a bad day. 2. This eliminated any mechanical noise near the passive sonar array. for that matter it left more for additional systems that for some strange reason are still classified. To begin the model I selected a very closed grain lemon wood. Tough but workable. Using plans I made half templates, and turned the hull on my little Dremel lathe. Once turned and sanded, the hull was fastened into a building cradle. This not only held the hull secure but gave me a way of making perfect holes for the stand. It also enabled a secure work surface as I planed and sanded the flat deck area. With modern submarines it is very ease to get the hull out of round. Whenever I work I continue to use my waterline marker to ensure the lines are where they should be as I remove material. Ok up next I will get some detail scribed in, build the sail, and see what other trouble we can get into. Chief!


-
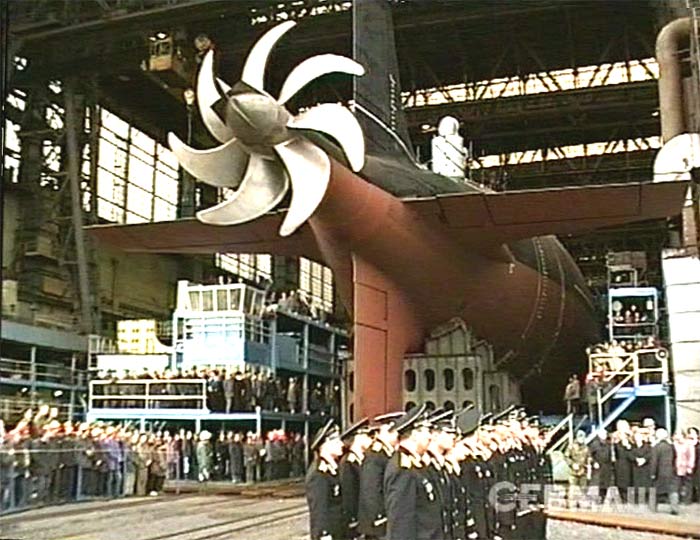
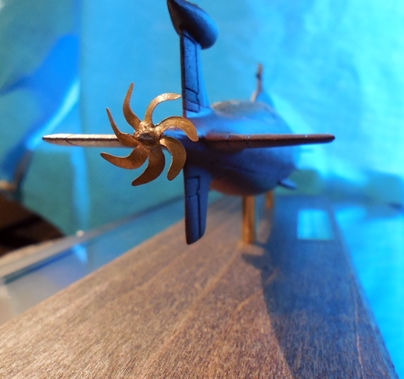
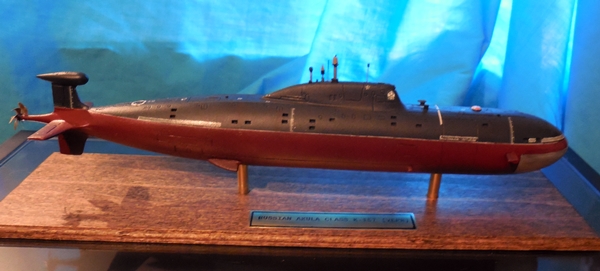
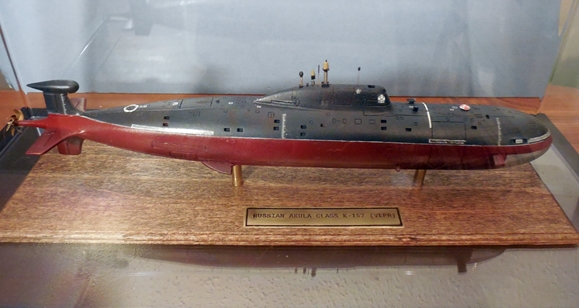
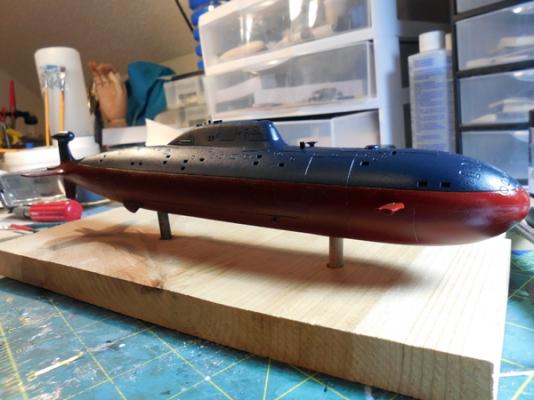
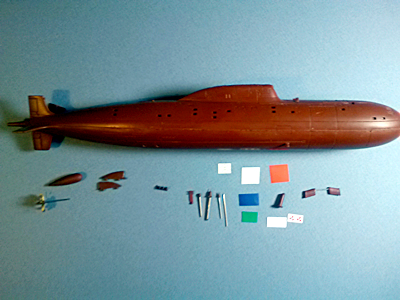
Lets get this guy on the shelf. If you note the seven bladed screw, it might look like another propeller, but oh no. Second and third generation Russian submarines benefitted from Toshiba selling Russia the machining equipment to produce such a fine balanced and precise screw. Screws on submarines are so precise that in manufacturing each blade must be polished with the same number of strokes. Screw are x-rayed, balanced, and yes tuned. In dry dock they are covered, to prevent wind blown sand or debris from scouring the surface. Even a scratch can cause a harmonic or what we call a "singing screw." Such a noise offender means death. The vortex dissipater is cast in resin and painted brass. The ability of the Russia to use the technology from Toshiba closed the quality gap between the US and Russia. Thinned black ink was used to fill the lines around the control surfaces. Ink is great since it will fill the lines yet is easy to wipe off the surface if you get all butter fingers. Decals were made from photos. I imported pictures into a program called GIMP 2.0 . There I could manipulate the image to flatten or skew to the shape and size I needed. Since you cannot print white I used white decal paper. I scanned a swatch of the paint I made to the upper hull and used that to match the outline of the decal sheet. This would show up if at all as a small shadow. Once satisfied the decals were printed and sealed with three coats of lacquer. During application a decal setting solution was used. In hindsight I should have applied coat of furniture polish to the areas to receive decals. This would have made it easier to hide the edges. Once in place selected decals around the water line were "distressed," to show wear. Faint rust tracks from the limber holes were brushed on using dry pigment powder. The silver gray of the acoustic window of the SHARK GILL Sonar was hand brushed to give it texture. what appear to be oppses around the window are in face correct. The screw holes for the window mounting are filled with putty and sometimes it is not the neatest stuff. The white line around the hull was also left kinda well... authentic. Being at the water line and in the arctic makes getting the lines just so a little rough. One major system missing from the model is the anecroholic tiles. These square rubber tiles are vital in absorbing active sonar and holding in some of the passive noise offenders. When my first submarine was fitted with them, we had a hoot bouncing coffee mugs off the hull. Then we got the bright idea to Armor All the boat Big time booboo. Once done the USS RAY SSN 653 was indeed a shining beauty. However there is a reason you do not armor all your brake pedal, seats or steps...you get the drift. Adding these tiles would have been very difficult so I went with what I had. The AKULA was given three coats of clear, and mounted on a stained poplar board. I proto etched a name plate and secured the model and plate into the display case. Kinda fun build and I hope it helps me draw attention to my books. Chief


- 10 replies
-
- 12
-
-
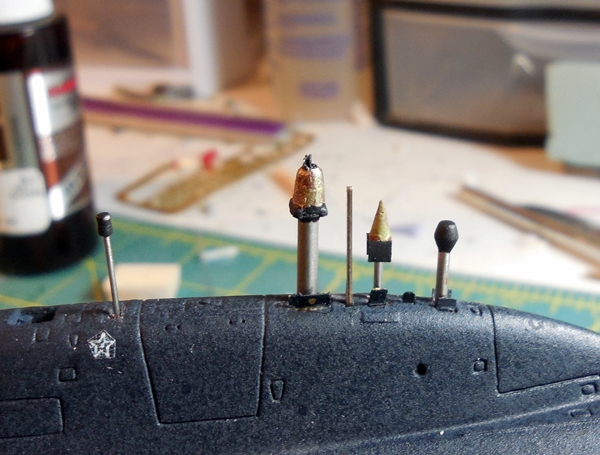
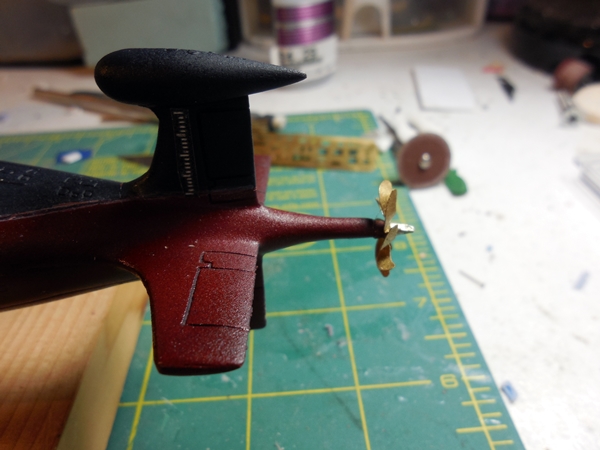
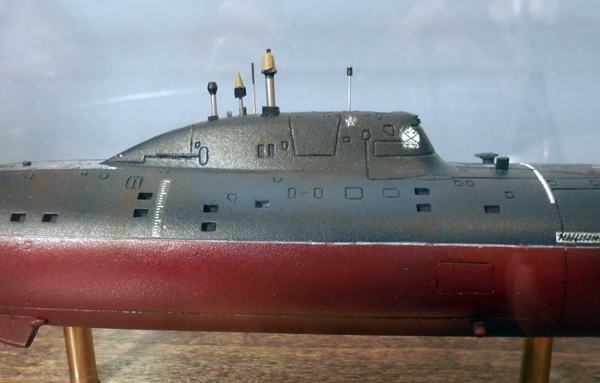
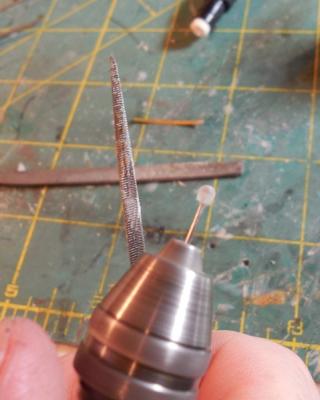
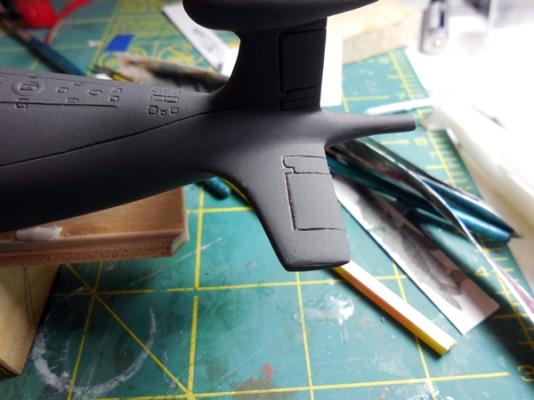
Getting close to getting this bad boy on the shelf. Found some major problems with the sail. The supplied masts PERT SPRING, (Satellite Navigation) SNOOP SLAB/SNOOP Pair are for the wrong submarine. The supplied mast is for OSCAR II class SSNGN (KURSK.) The rear most mounted mast is called PARK LAMP (Direction Finder) it is not easy to build, and if it were or even included in the kit the sail opening is not larger enough. Here is what happened. The Russian Navy employees several modifications of the AKULA class. Where as the hull of my submarine is an AKULA II (971M) it seems Boris got his molds mixed up and I have a sail from modification (971MT) There is only 1 AKULA thus far with this modified sail the GEPARD. Seeing as how I am in a rush to use this for my book signing I decided to make the best of what I have until I have a spare minute to make proper modifications. Boris was very embarrassed but heck it happen and it gives me a challenge. Following primer the upper hull was painted using Tamiya Paints. Russian submarines are not painted all black like our boats, They are a very dark blue. To make this paint I mixed 6 parts blue to 4 black. This I airbrushed and allowed to dry overnight. Once dry I applied three light coats of acrylic gloss. (This prevents paint peel when masking.) The hull was then masked at the water line. A little note here: Western submarines are for the most part single hull. This means that when you see the outside of an American submarine you are seeing the pressure hull. Russian subs on the other hand are double hull. What you see is an outer hull that provides hydrodynamic shape. The Russians call this "The Easy Hull." Double hull boats are slower to submerge however they can be controlled better at periscope depth. Double hulls can be a bit louder than single hulls due to mechanical linkage and other thru hull systems. One advantage to double hull is reserve buoyancy. With the vents grates and Kingston valves shut a Russian submarine is tight as a drum and can trim herself for a sea state. The biggest advantage for the Russian subs is standoff distance. Between the pressure hull and the "easy hull" Russian engineers have placed various materials in such a way as to mitigate the blast effect of an exploding torpedo. The theory is the overpressure wave of the explosion will be absorbed by the material and dissipate over the length of the hull rather than in one area. While this might lesson the damage from an air dropped MK 46 or MK 50 torpedo, it is doubtful the system would lesson the shock and bending stresses imposed by a heavy weight MK 48 ADCAP or British SPEARFISH torpedo. Hopefully it will never be tested. Ok once masked I painted the bottom half a mix of 7 to 3 red and black. With this done I set it aside to dry while I worked on the masts. Like I said I was having to make do. The PERT SPRING was not to bad. I added the low horizon plates and painted it dull yellow and the plates black. The SNOOP array was fixed up by adding the receiver elements at the top. I included a picture of how it should look. The incorrect RIM HAT(Over the Horizon Missile Targeting Receiver. was stepped where the PARK LAMP should be. One of the hatches was open but no mast provided. This hatch was for SHOTGUN HF Communications. I made the mast by trimming the long leg from and LED, and painting the top gun metal. The hatch for the Submarine ID mast was also open. This was made by curing drops of CA on the top of a stick pin then turning it to shape using my moto tool. Something interesting you might notice is the "Hogner Stern." See the long taper that sets the screw some distance from the control surfaces. This is Supposed to aid in maneuvering at high speed by offering less cross section. One big draw back is that at slow speed and with the towed array deployed the screw seems to want to suck in the towed array. That can be very bad. Got some other stuff done but I will cover that later on. Going Deep!!!


-
Thank you for your kind words. These AKULA class SSNs are a force to be reckoned with. I have tangled with a couple in my day. Last year the Russians deployed this very ship to the Gulf of Mexico. He went undetected for a month or so. That means a Russian submarine with nuclear tipped cruise missiles could have taken out any number of US cities within minutes. It is also very humbling to model a ship that at one time may have been able to kill me in a flash. On the flip side I maybe could have done the same thing.
-
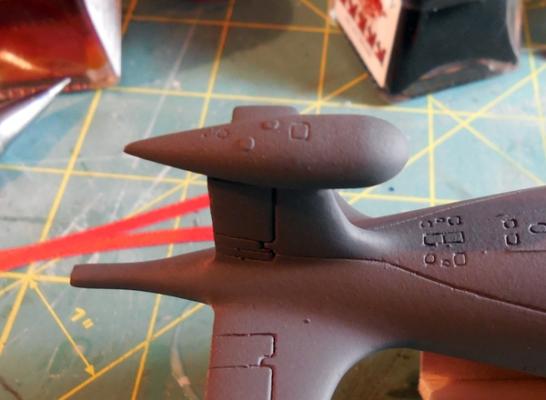
Some more progress on the AKULA project. Russian submarines trade drag for lack of noisy seawater pumps by using water scoops to feed in reactor coolant. These aft mounted scoops differ depending on boat and year built, so be careful. I have included a chart to show which scoops go to witch boats. To add to the detail I photo etched inlet screens for the scoops. The scoops were then attacked and filets formed from putty. With all repairs and flaws filled, and sanded I gave the hull a primer coat to see it everything looked ok. While this dried I began my research and design of the decals I would need to replicate VEPR K-157 (Wild Boar) It seems like a bit of overkill with the decals, however Russian Attack subs feature more than one type of detection system. These include Shark Gill bow mounted Active/Passive, Hull mounted Flank HF/LF active/passive, MT-70 Under Ice Sonar. AKULA also carries non acoustic detection systems. These sensors like sonar are hull mounted above and below the water line. Bumping an array or sensor with a tug boat is really not the best career moves, so AKULA hulls are heavily marked. Some mistakes have been made and the results are costly and dangerous. Here is a shot of K-154 What you are looking at is the spherical array of the MK-503 (Shark Gill) transducers. Not good....not good at all. The norm these days is for Russian submarines to display emblems and other art on the sides or front of the sail and even on the submarines nose. Again research is needed to get the right emblem or markings. Once the decals were done. I then made the photo etched hatch covers for the sail. The non acoustic sensor arrays (SOK) were made and installed. A final coat of primer and we are ready to paint this bad boy!


- 10 replies
-
- 11
-
-
You are doing great work on a great ship. She has to my favorite. Enjoy the build!! Don
-
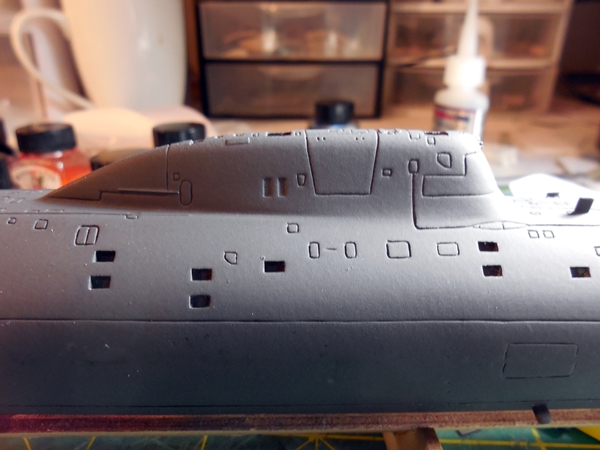
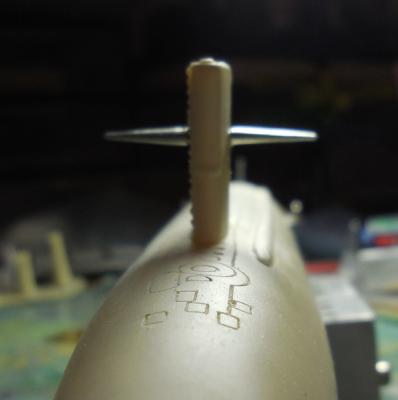
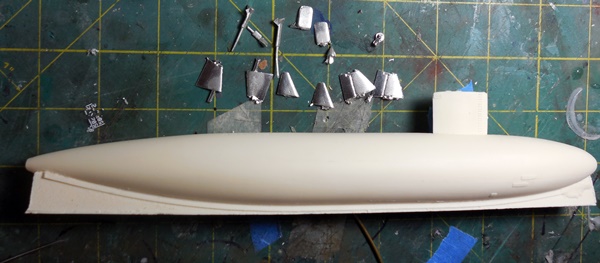
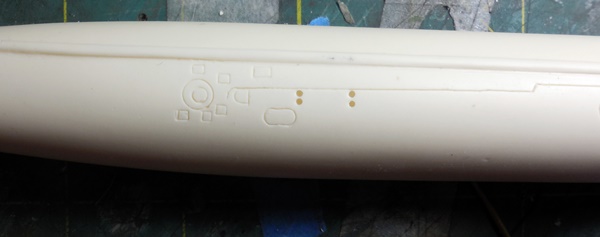
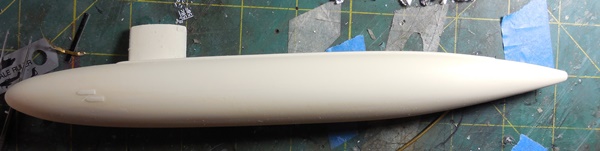
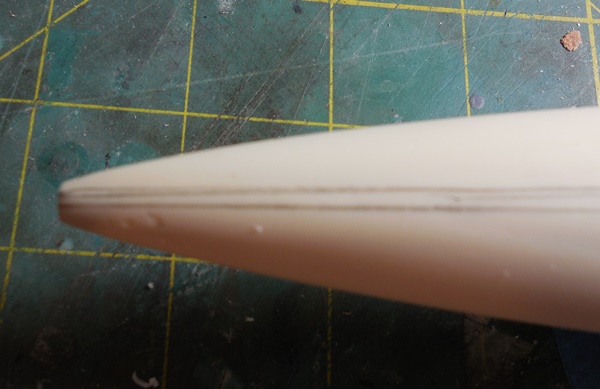
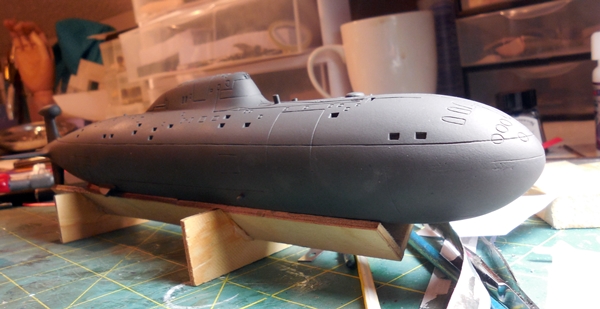
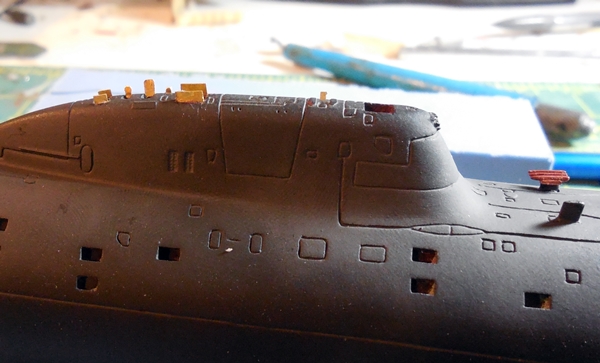
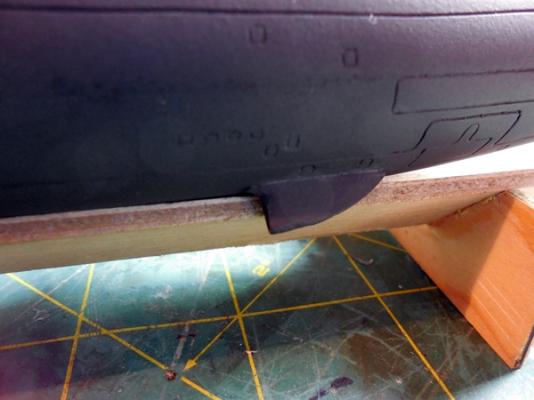
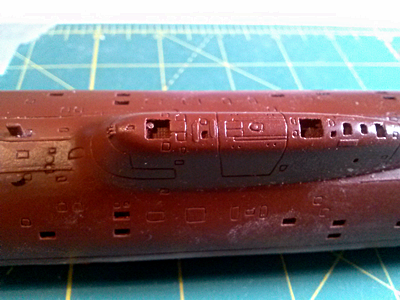
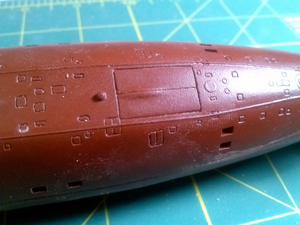
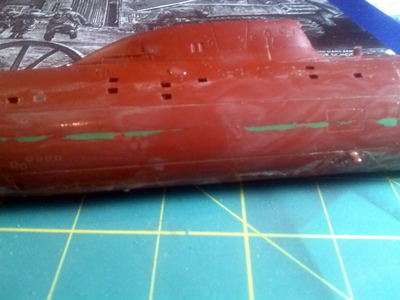
Still hard at work on the LEE, however I wanted to share a build with you of a Russian 3rd Gen Nuclear Attack Submarine. This is a High Quality resin Kit from Ships-n-Such from Russia. For those who do not know most of my adult life was spent chasing or being chased by Russian subs. I love'em!!! Before you close this topic as "Resin kit? Really? I've built the battle of Trafalgar out of one log," I might suggest you give a resin sub a whirl. There is more detail on a submarine than you think. Remember in a modern sub, anything on the hull could make noise, so we must come up with ways to make cleats rote into the hull, capstans lower to deck level, chocks are removable. Heck the who darn thing is coated in rubber! So here you see the Ships-n-Such 1/350 scale Russian Project 971 (NATO Code Name AKULA.) A little bit of confusion here. In the Russian Navy the Akula is called the PIKE Class. In the Russian navy the huge SSBN TYPHOON as it is known to NATO is called the AKULA. Ok take some time with that. First thing you notice on these late 2nd, 3rd and 4th gen Russian boast is the long stern. This is called the Hogner Stern. So don't cut it off!. Take some time and look over the hull a few times, note the many little boxes and lines that cover the hull. Unlike American submarines and their single hull design, Russian subs are double hulled. (Typhoon has 4 hulls.) It is because of this double hull design that many access points must be built to allow repair and maintenance work between the hulls. So you have looked at all the neat little do-dads, keep them in mind because you might have to remake them! Resin kits are made with a pressure pot or the spin method. These methods remove air and allow resin to completely fill the rubber molds. Molds for the Akula are two piece units. The halves are fit together and resin poured in and pressurized or spun. This can sometimes cause resin to run from one side of the mold to the next creating a lip of unwanted material. This is also caused when heat from the curing resin breaks down the mold. No big deal, but be careful!! The obvious way to remove this mold line is sanding...right? Well yes, but you need to plan and use the ultimate in patience or you could really spoil the look of your hull. Remember a modern sub hull is round. If you sand the side flat, you no longer have a round submarine with is what you wanted in the first place. I take some model putty and place under or over the lip at the parting line. This is NOT to fill in the lip. If you did that you would have a great parting line but an out of shape hull. The putty is used to let me know when I have sanded the right amount as have still maintained my hull shape. I tell myself, "Green-Gone-Good." It is a slow process, but the results will give you a mean looking underwater killer. Next installment we will get some parts on and make a few extra details and make some decals. Stay tuned!!
- 10 replies
-
- 10
-