Brucealanevans
-
Posts
448 -
Joined
-
Last visited
2 Followers


Recent Profile Visitors
2,771 profile views


-
 Ken_2 reacted to a post in a topic:
Fifie by Brucealanevans - FINISHED - Amati - 1:32 - Scottish Motor Fishing Vessel
Ken_2 reacted to a post in a topic:
Fifie by Brucealanevans - FINISHED - Amati - 1:32 - Scottish Motor Fishing Vessel
-
KennyH78 reacted to a post in a topic:
USF Confederacy by Brucealanevans - FINISHED - Model Shipways - 1:64
-
KennyH78 reacted to a post in a topic:
USF Confederacy by Brucealanevans - FINISHED - Model Shipways - 1:64
-
KennyH78 reacted to a post in a topic:
USF Confederacy by Brucealanevans - FINISHED - Model Shipways - 1:64
-
KennyH78 reacted to a post in a topic:
USF Confederacy by Brucealanevans - FINISHED - Model Shipways - 1:64
-
 KennyH78 reacted to a post in a topic:
USF Confederacy by Brucealanevans - FINISHED - Model Shipways - 1:64
KennyH78 reacted to a post in a topic:
USF Confederacy by Brucealanevans - FINISHED - Model Shipways - 1:64
-
KennyH78 reacted to a post in a topic:
USF Confederacy by Brucealanevans - FINISHED - Model Shipways - 1:64
-
KennyH78 reacted to a post in a topic:
USF Confederacy by Brucealanevans - FINISHED - Model Shipways - 1:64
-
KennyH78 reacted to a post in a topic:
USF Confederacy by Brucealanevans - FINISHED - Model Shipways - 1:64
-
KennyH78 reacted to a post in a topic:
USF Confederacy by Brucealanevans - FINISHED - Model Shipways - 1:64
-
 Unfortunately no build log - dates from pre-MSW days.
 -
Wow, thanks for the props on what was my first complicated build all those years ago. I still love liking at it. before that I did build the whaleboat - my first wood model in nearly thirty years! yes, I know the sail panels are aligned incorrectly, but couldn’t bring myself to do over I have dropped in on the St. Louis build from time to time. Hugely impressive. I have been interested in the civil war since 5th grade, as my book shelves attest, although concentrated on medical aspects since 2000 or so.
- 245 replies
-
- 2
-
-
- model shipways
- Finished
- (and 1 more)
-
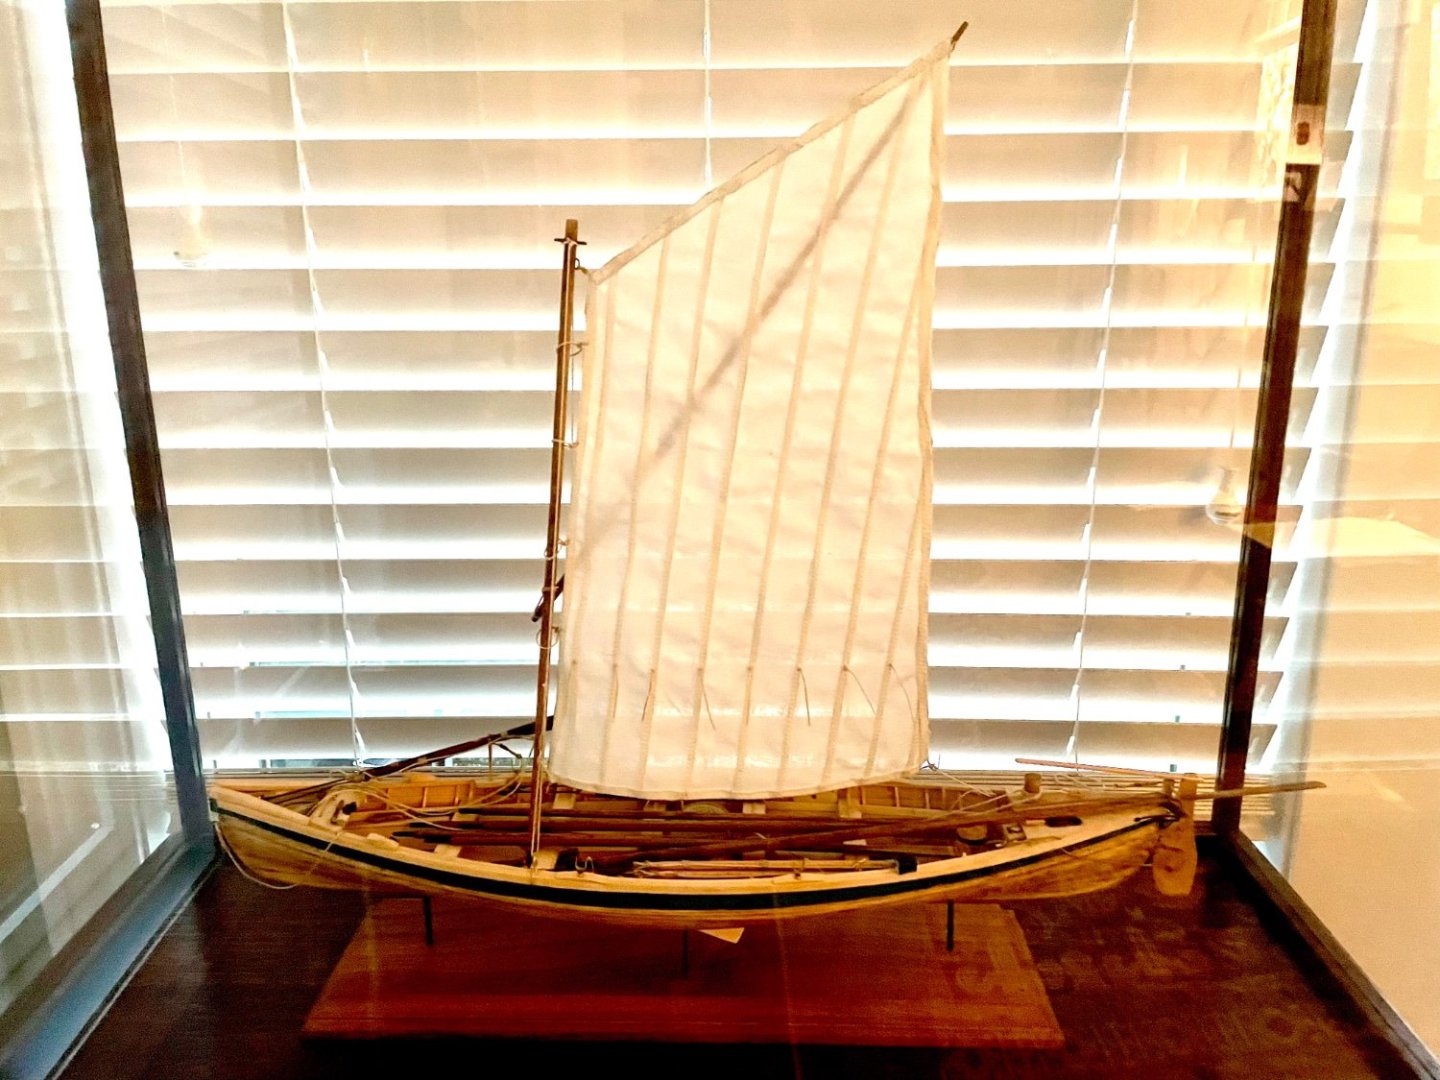
texxn5 has great detail on rigging the blubber hooks etc. on an old build log on this site. I used this info in my MS Morgan build.
-
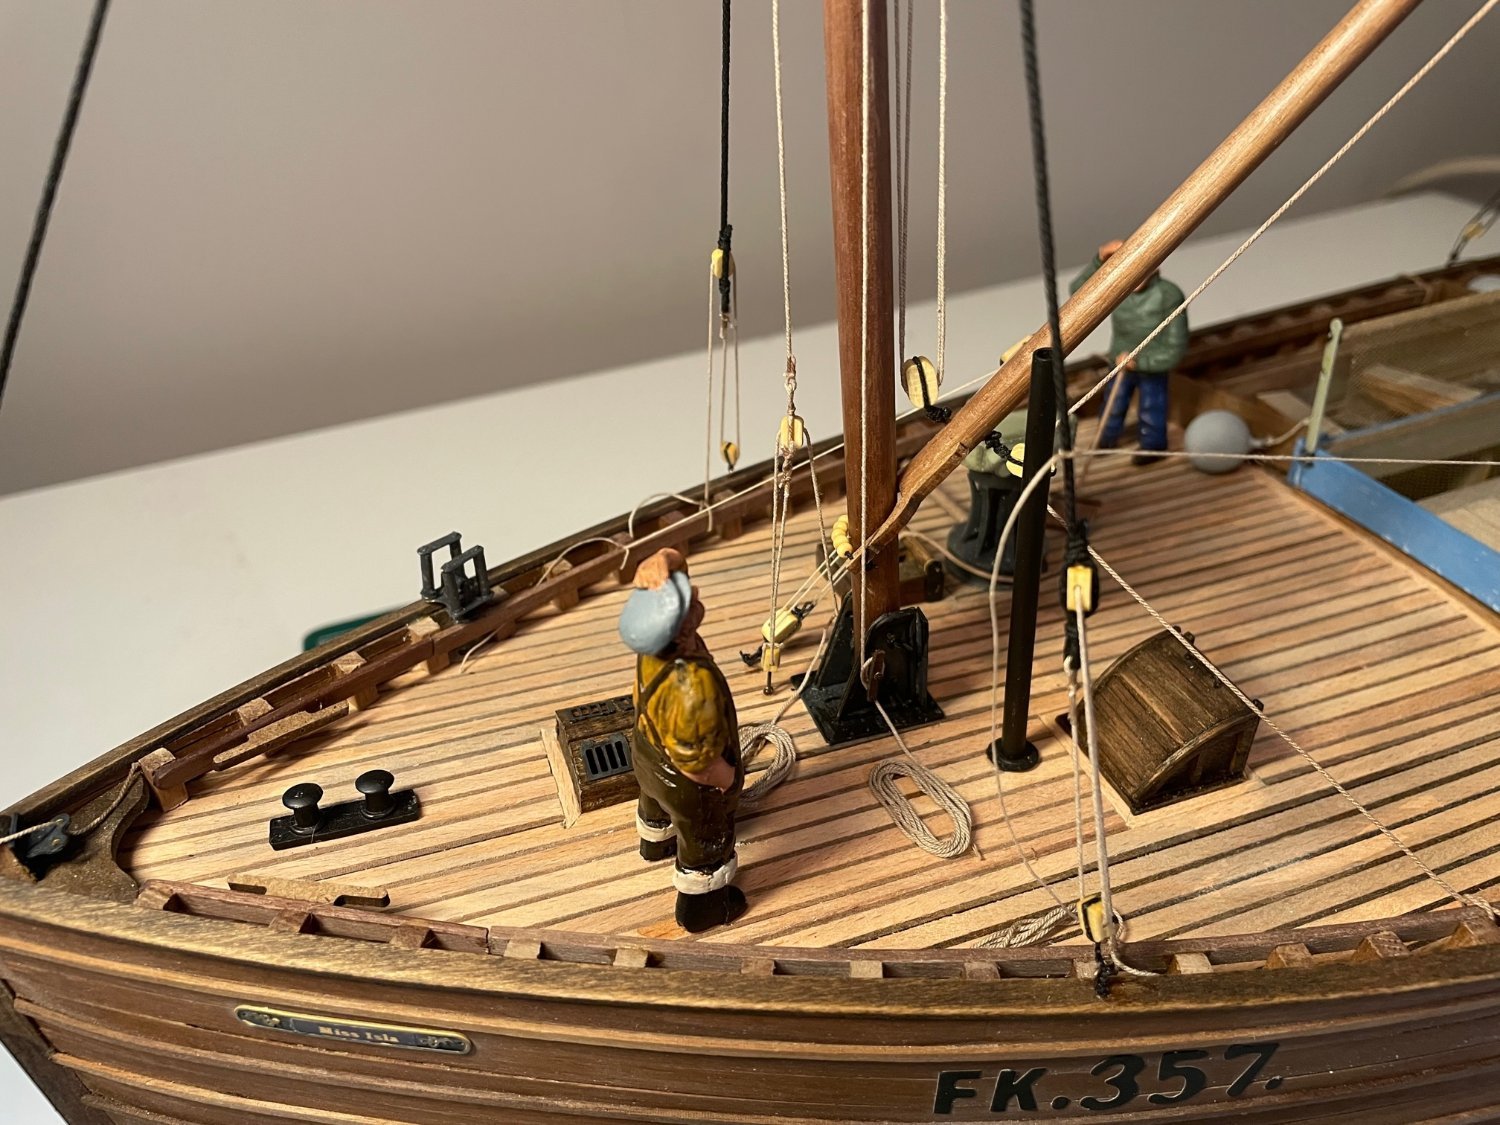
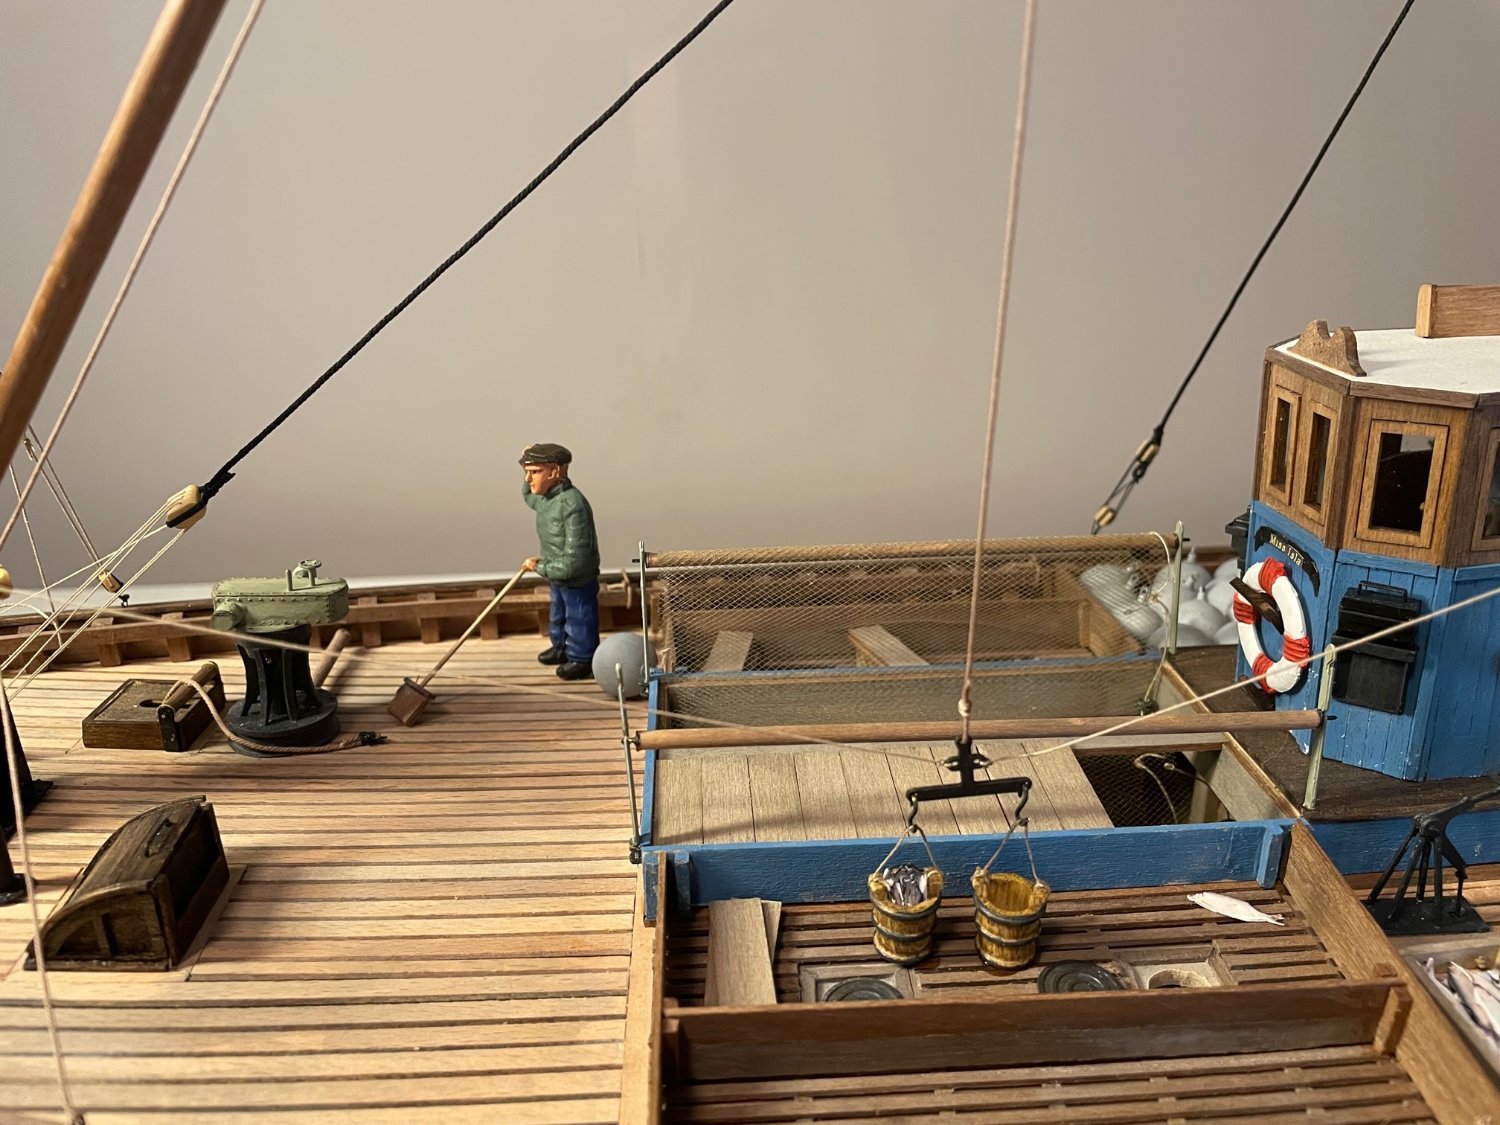
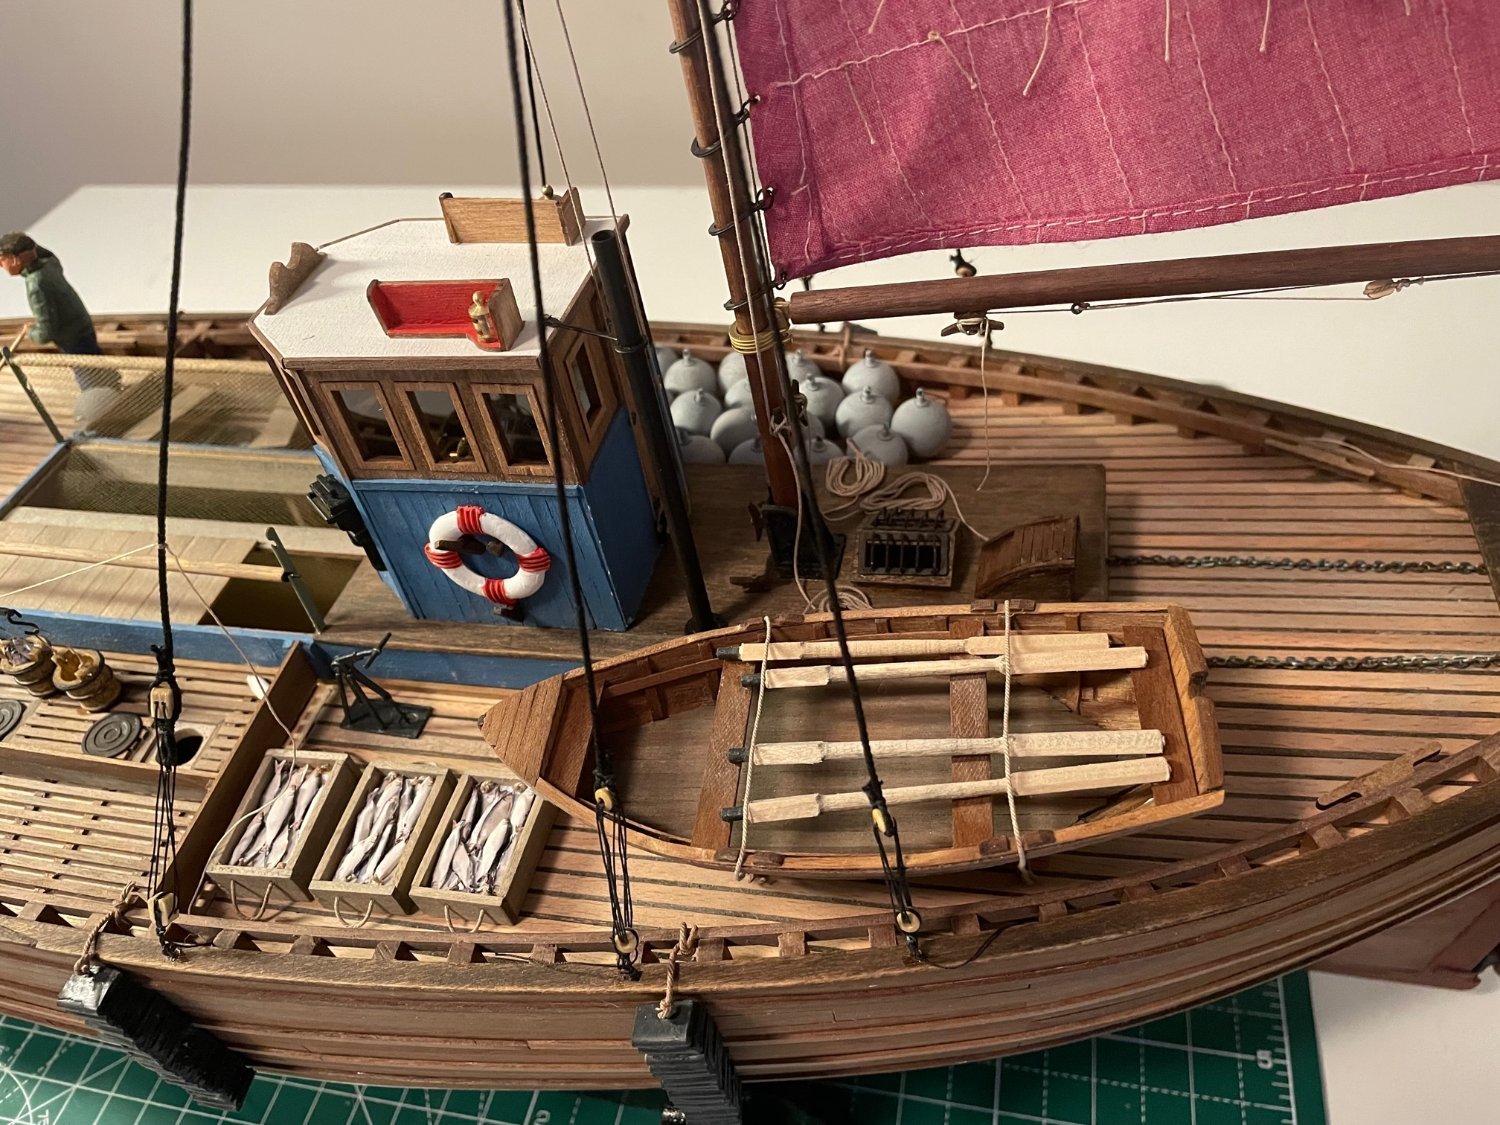
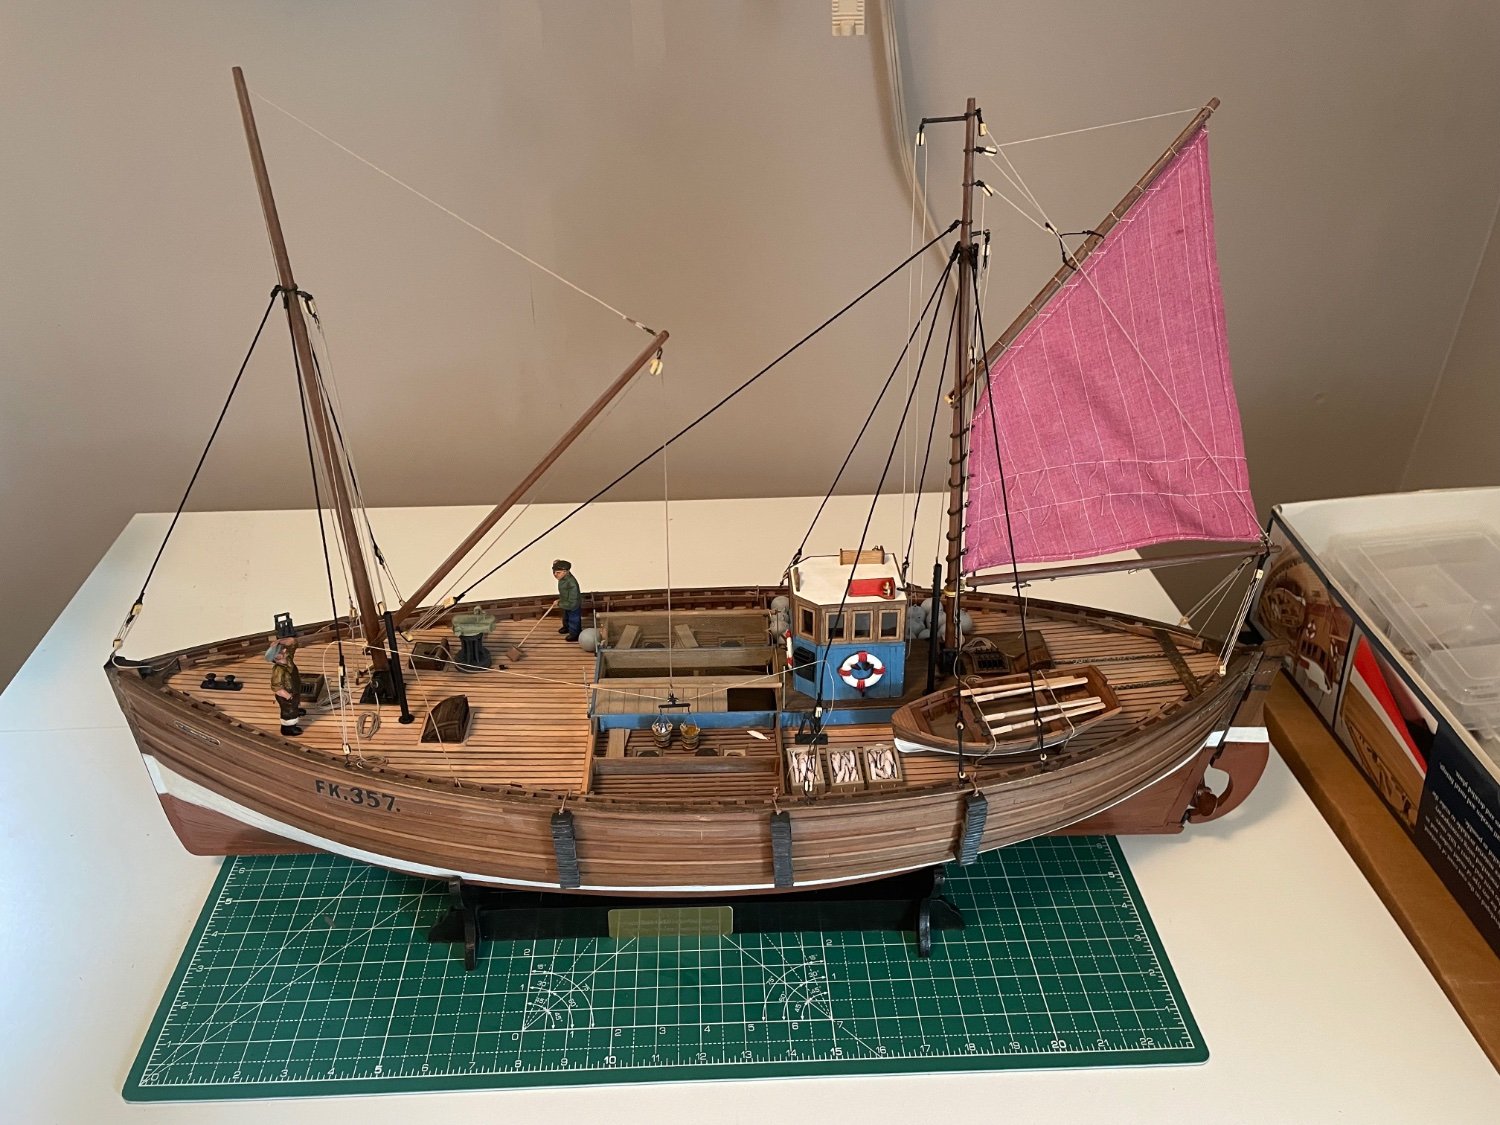
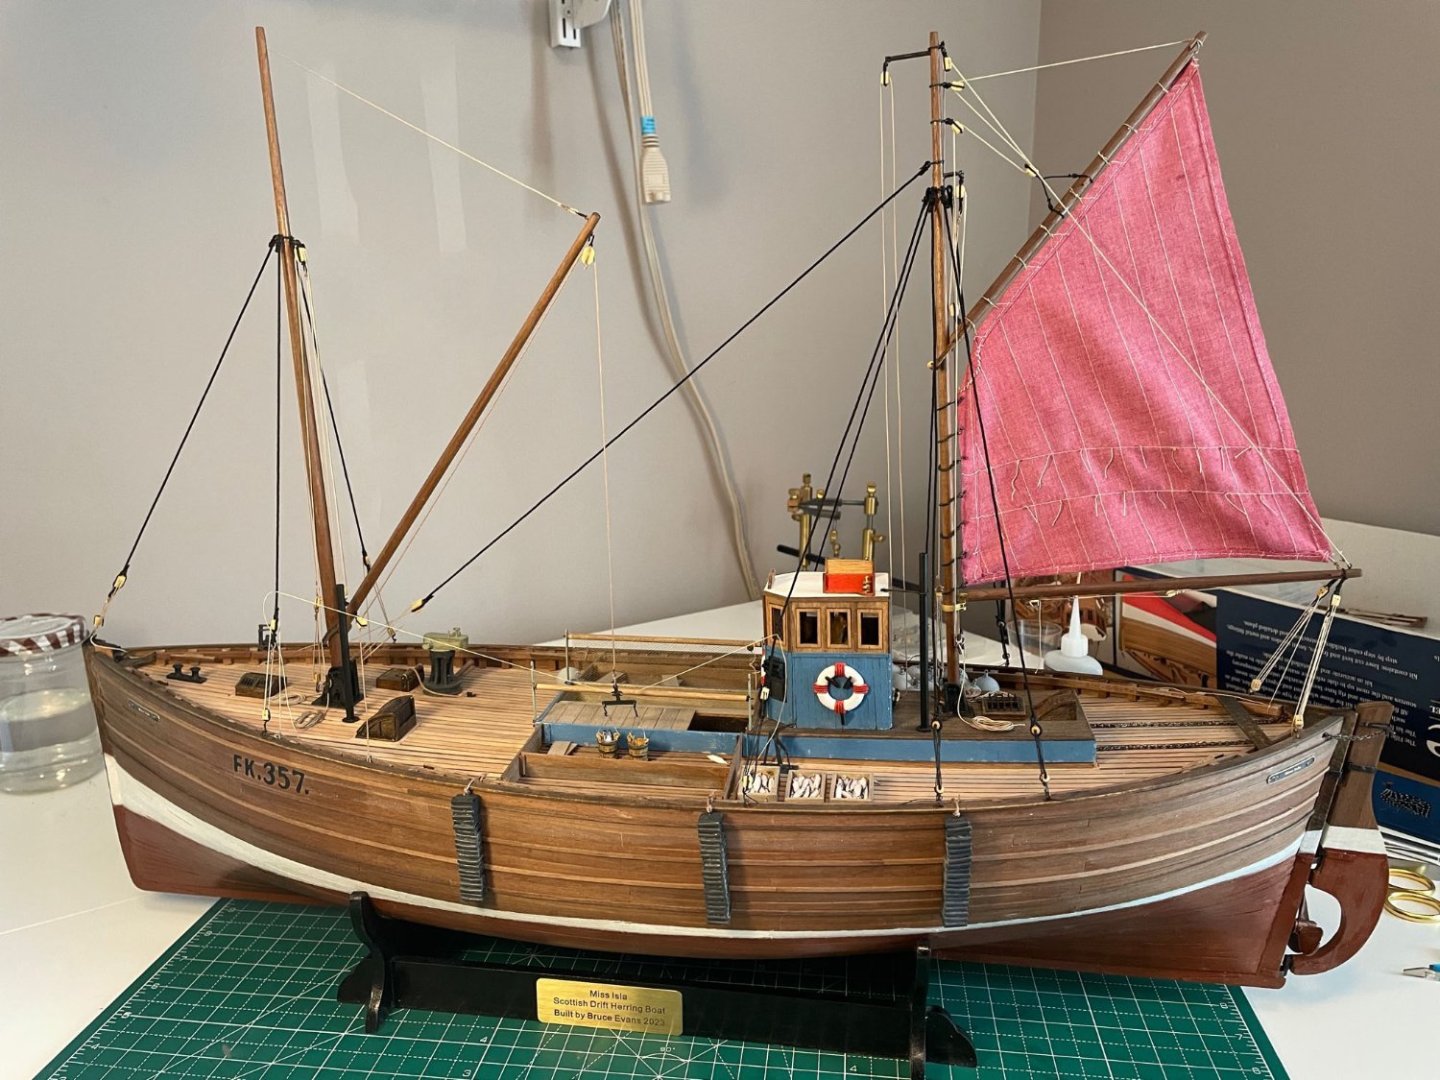
Thanks to all, as well as the prior build logs for this kit that gave me numerous useful tips and ideas, albeit not directly recognized. For just one example, the French source for the fishing crew figures which I neglected to save somewhere. This is a great kit, and an enjoyable build. I’m very happy with the results.
-
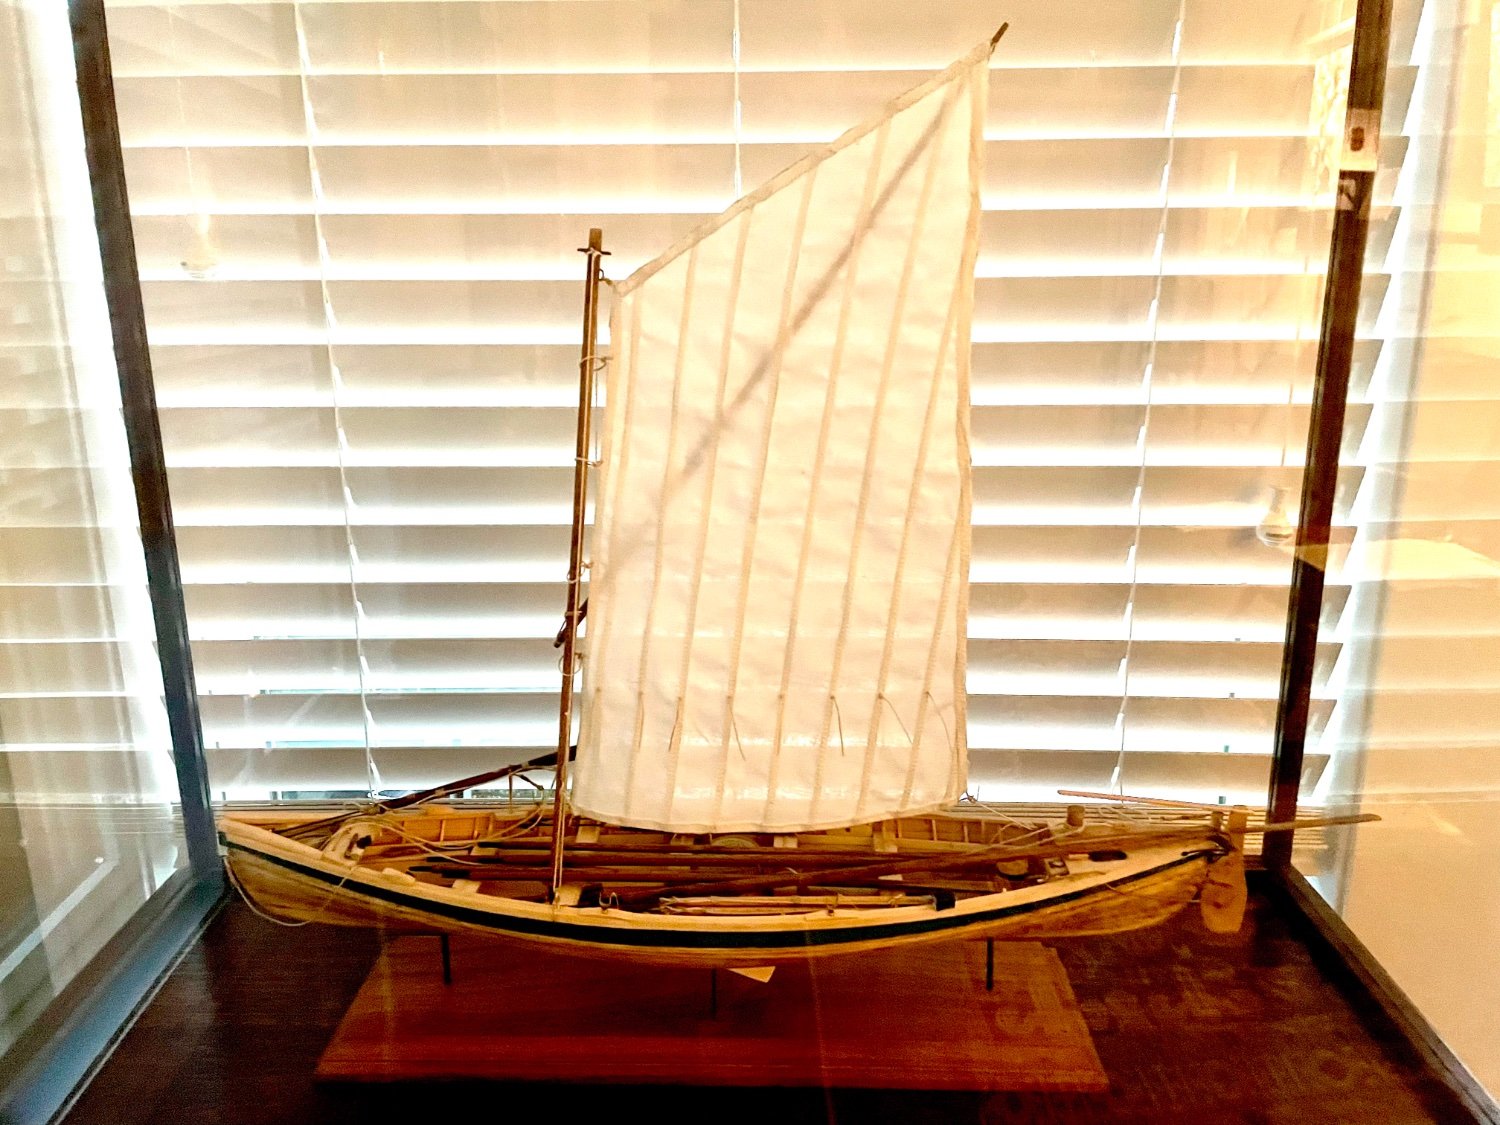
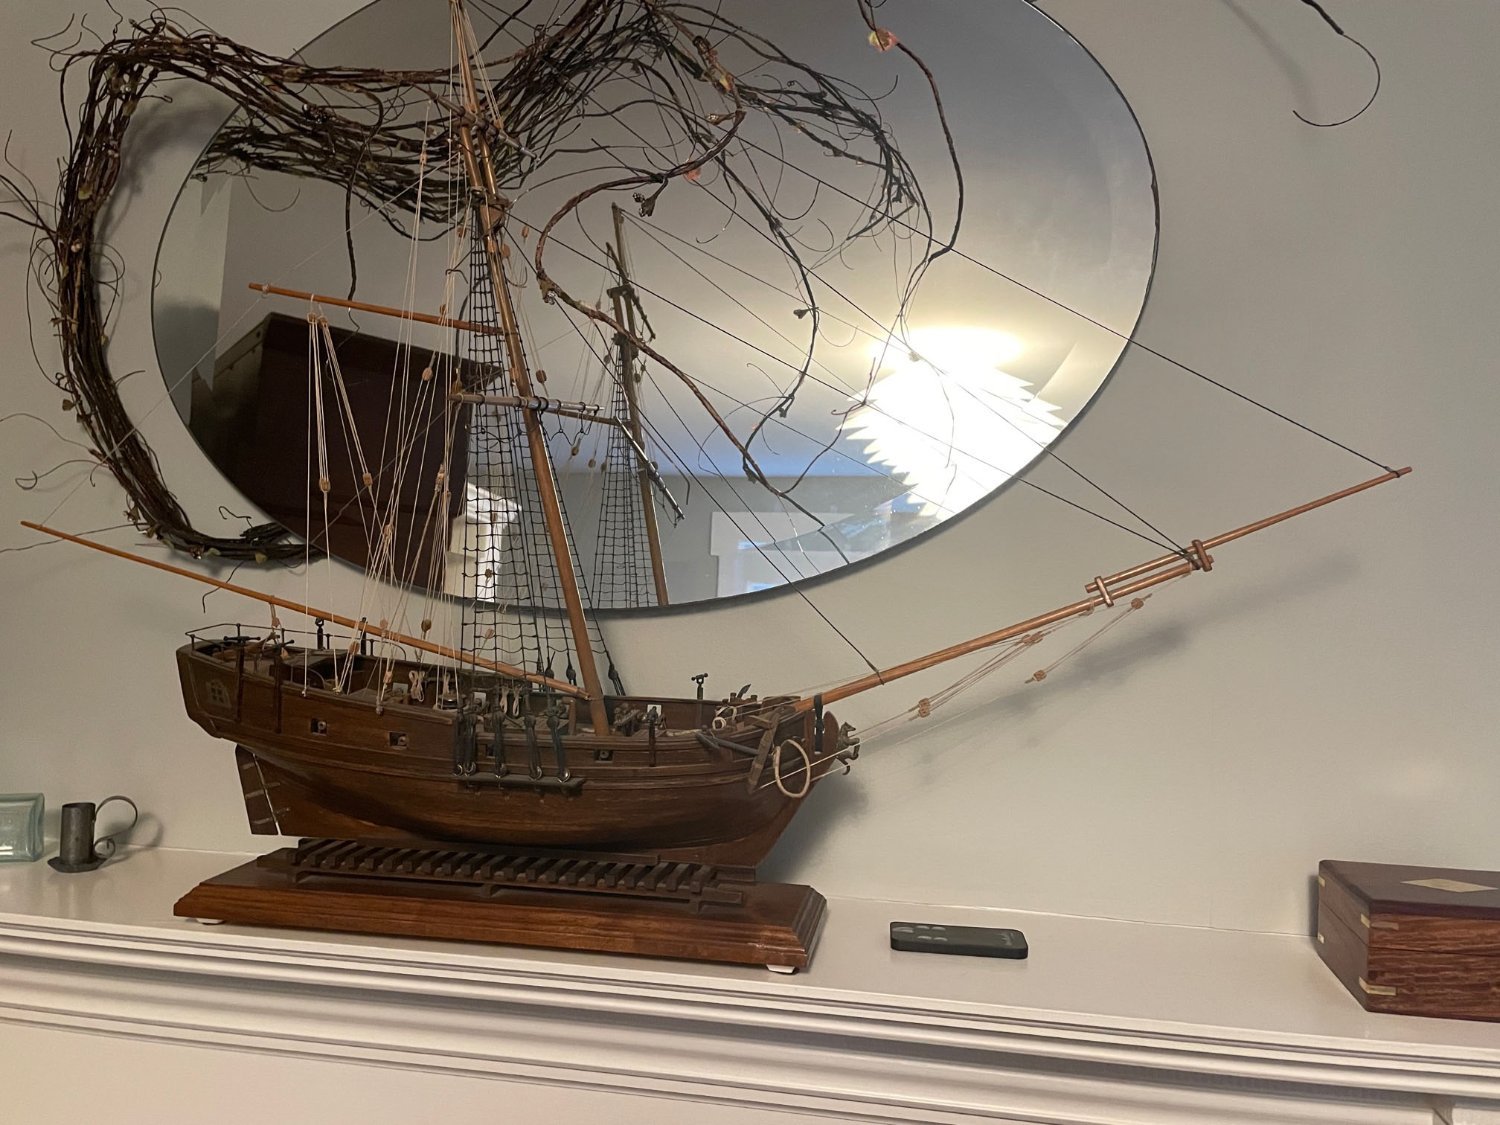
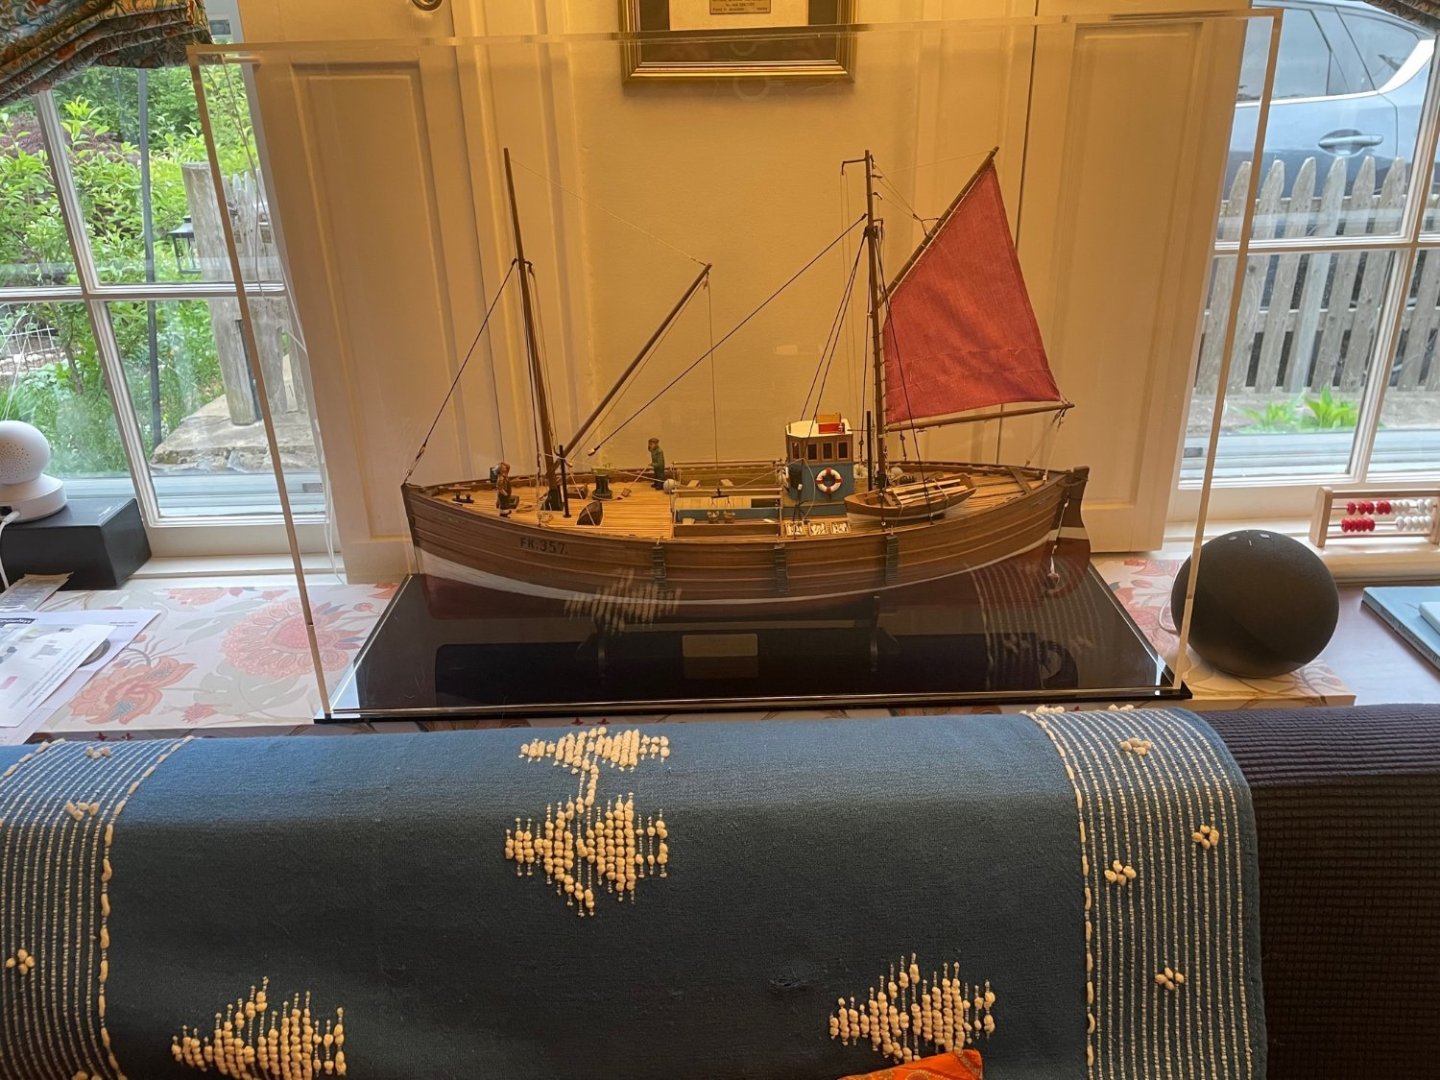
I built my first ship in 1979. I bought the Mantua Sharke to replace a partially built Billings Vasa kit that was way beyond my pay grade. I was just realizing there was no way I could finish the Vasa when I was relieved of the problem by the Rochester Minnesota flood of 1978 which blew in the basement wall of our first house and I think the partially built model probably headed downriver towards the Mississippi river. I built the Sharke with more success but never finished the rigging and just displayed it as it was. A few years ago while waiting for some parts for one of my bulilds I took a few days to finish the rigging to my current standards, place the sweep guns (which amazingly I still had) and brought it to our Marblehead house when we bought it a couple of years ago. After that, no ship building until 2006 or so (New Bedford Whale Boat). Now the Fifie is at home in Marblehead - likely the last ship I will build (out of room as I have previously mentioned). Here she is, nestled in her new case in the living room.

-
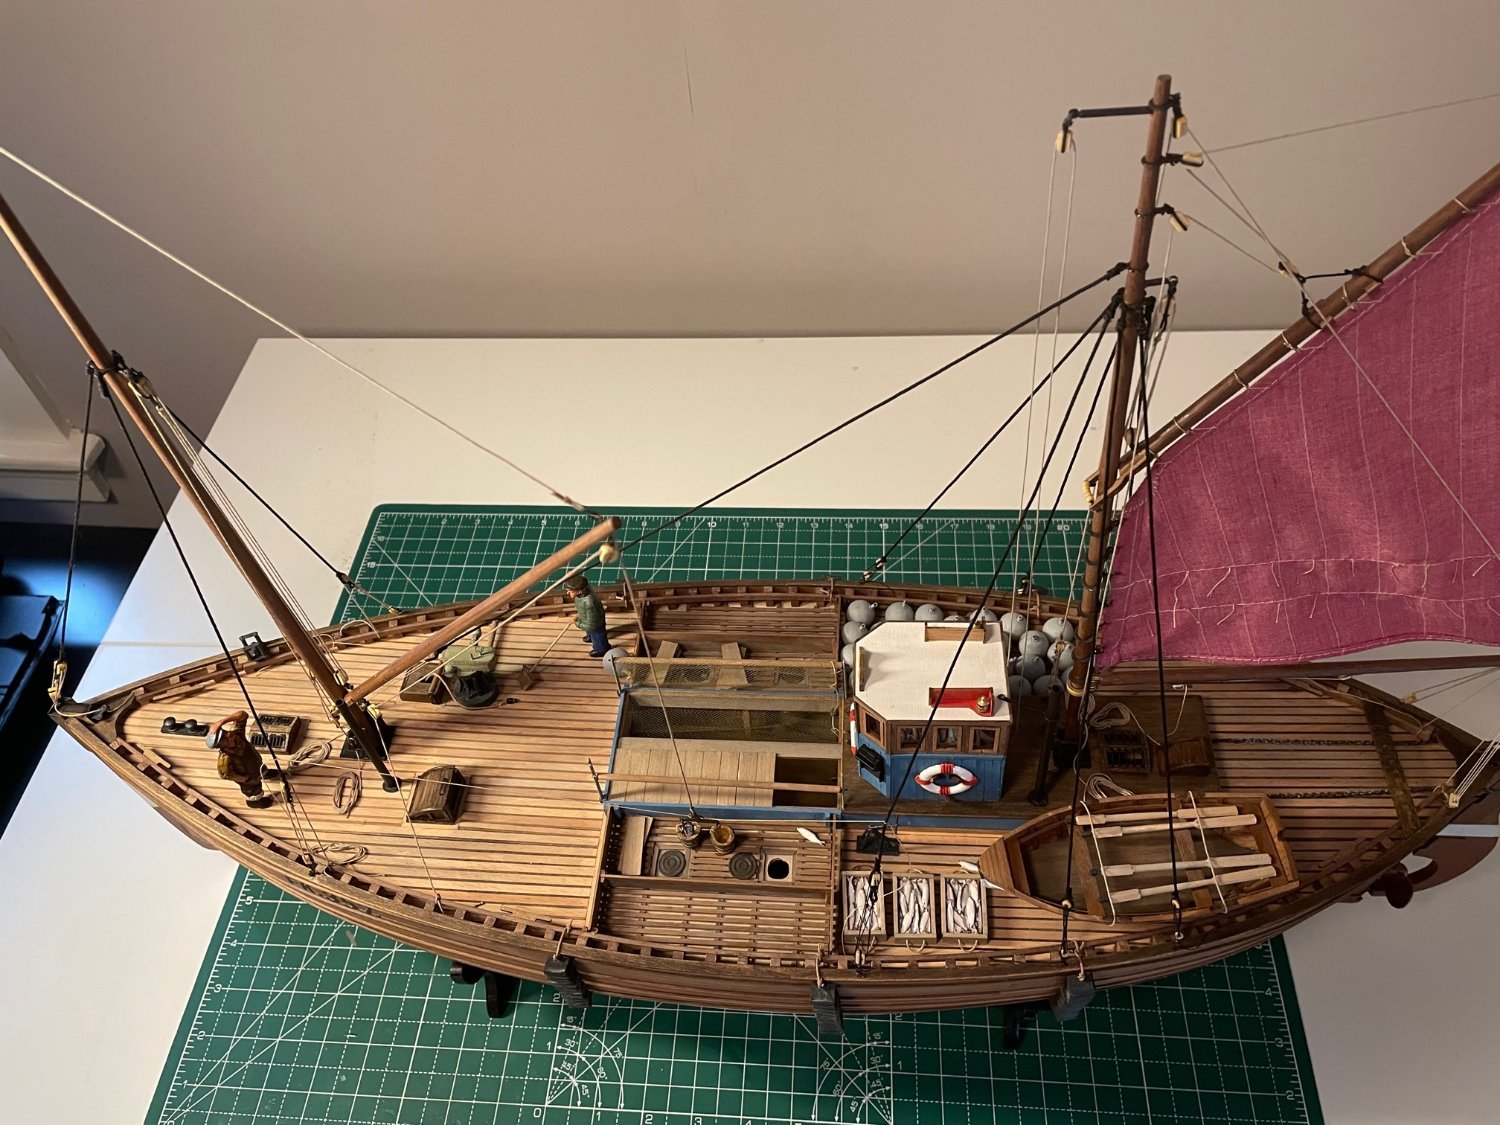
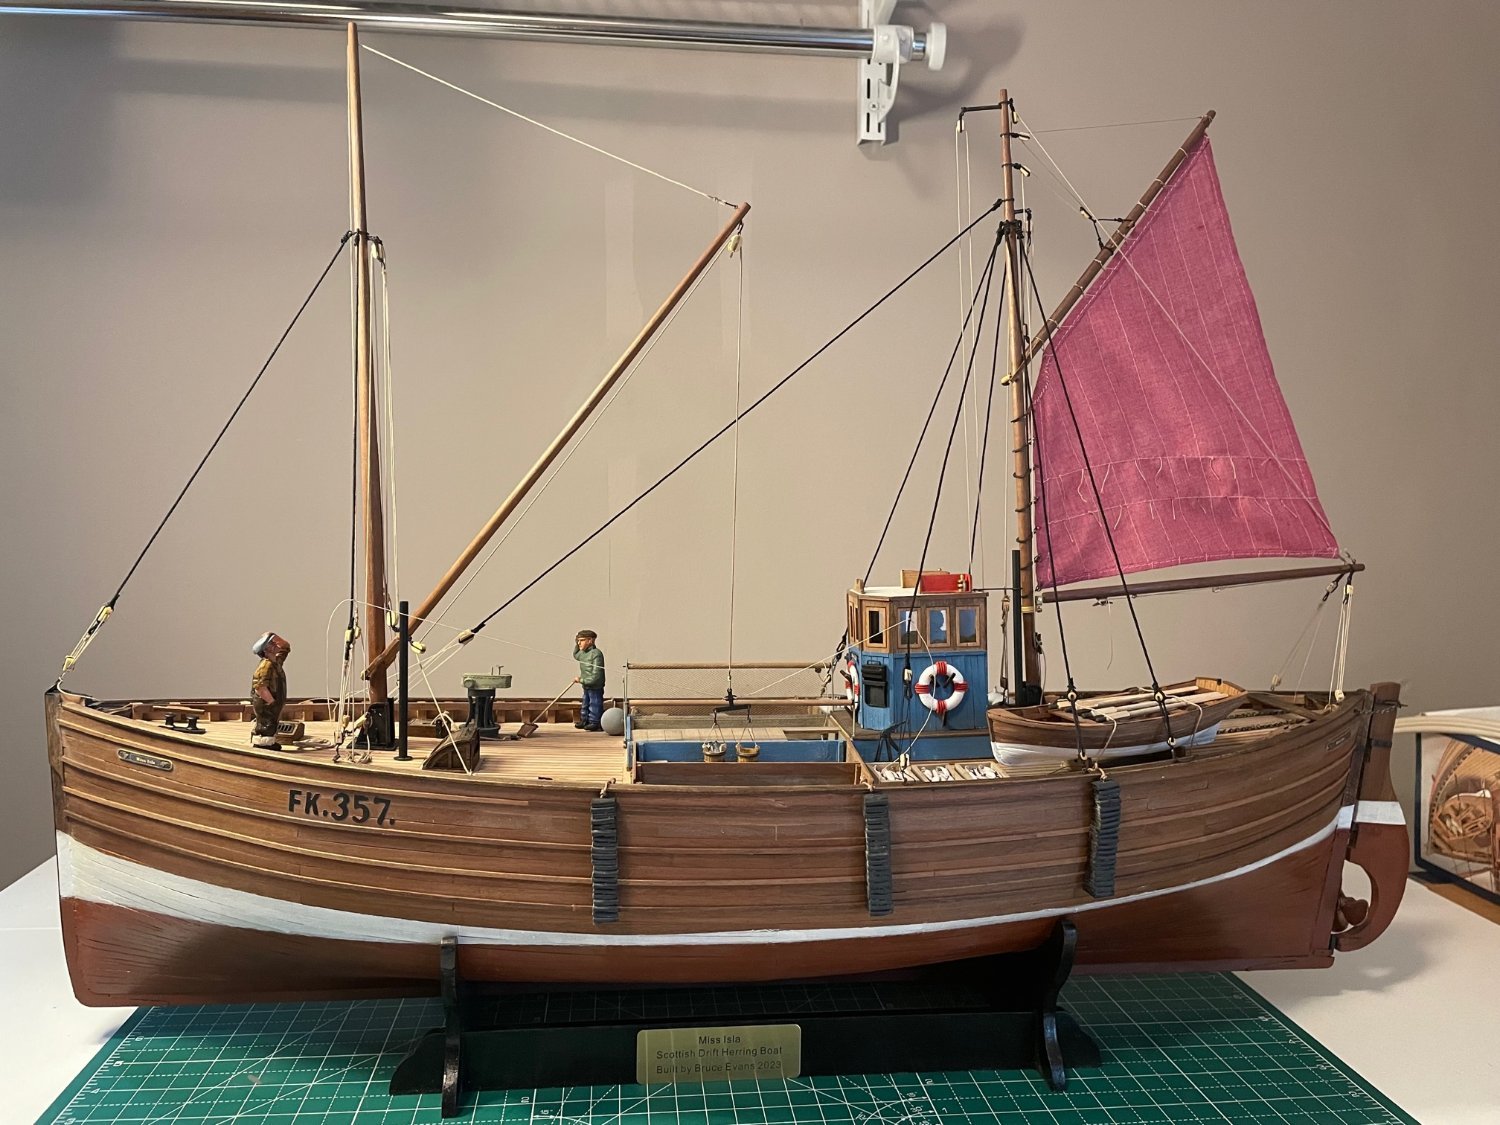
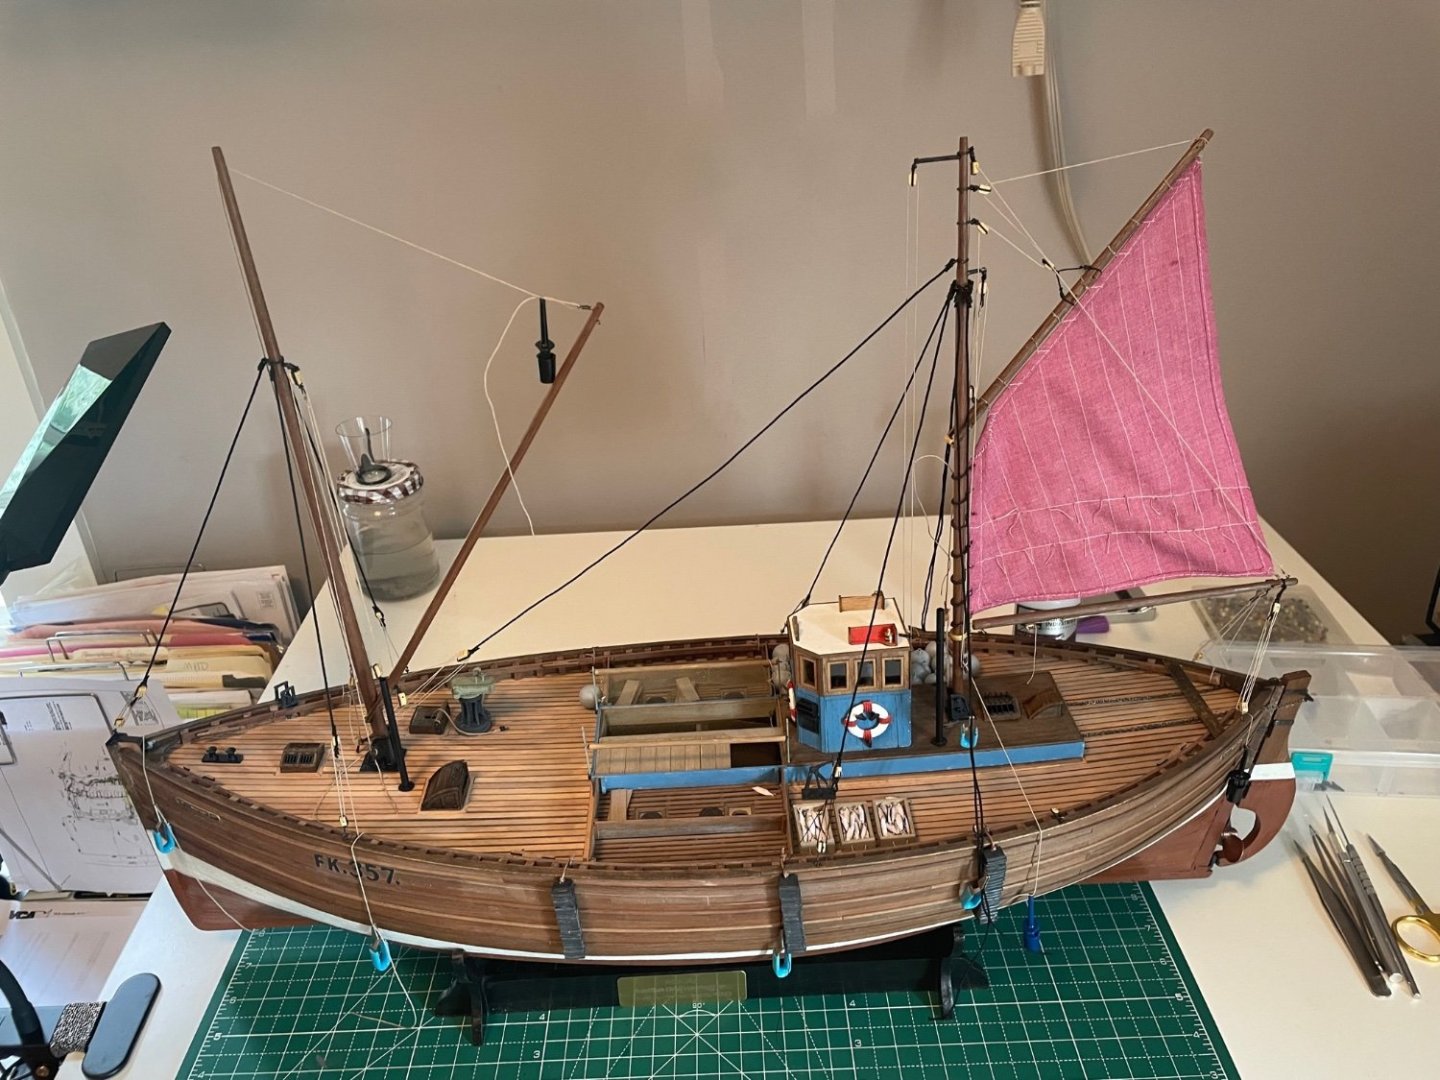
Finished the rigging after receiving the deadeyes from MExpo. Now just to cement the dory in place and add my two additional crew (The one in the pilot house is hard to see). Case arriving today - the completed model should be on display soon!
-
Despite depicting the boat as unloading I decided to leave the sail up. It looks better.
-
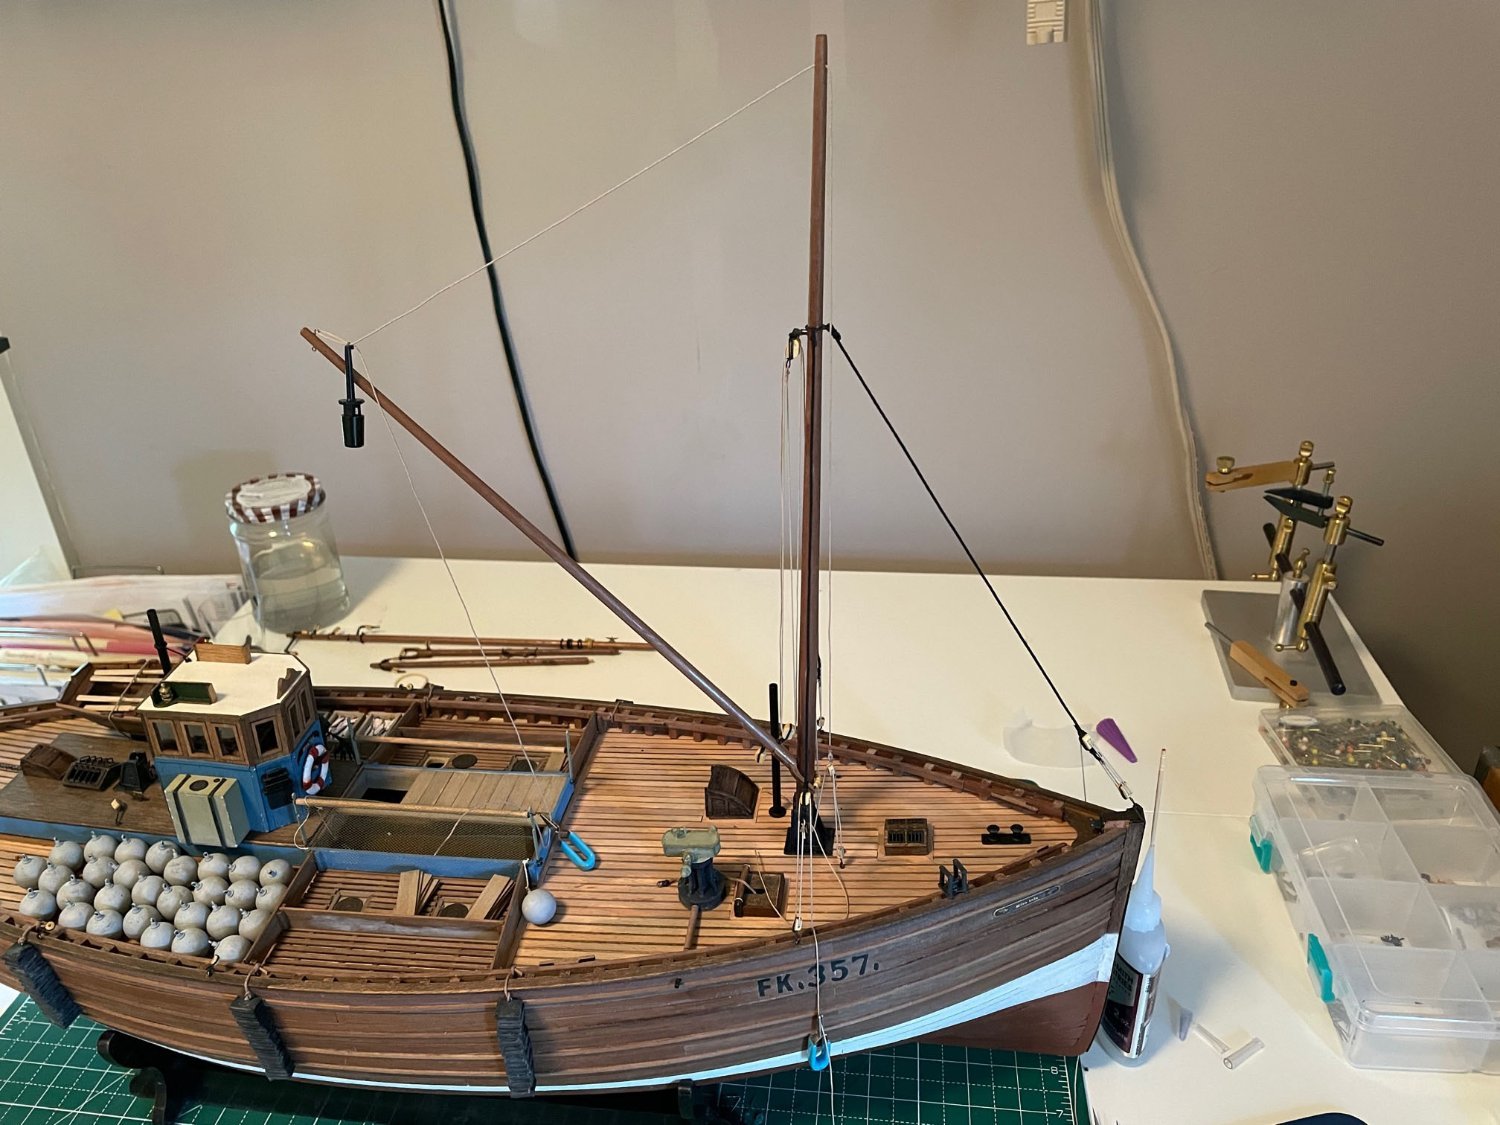
Rigging is coming along. Unfortunately the 4 deadeyes I need for 4 aft mast stays apparently didn’t make the trip here so I had to order some and must wait to rig them and tighten everything up prior to fixing in place.
-
So glad to see this! I have both of these at home awaiting my return from Massachusetts (where I am finishing the Amati 1/32 Fifie) in the early fall. I am undecided which to do first but with your log I’m gifted with tips and experience whichever way I go! I have planked my last full ship model (out of room as well as patience) following closely.
-
Settled into my mini-shipyard in Marblehead for the summer. Attached all the important lines for the foremast and crane, but nothing permanently fastened at this point so I can adjust the mast inclination appropriately when everything is in place.

-
The whaleboats in the MS Morgan kit were made from lifts supplied, glued together, and sanded inside and out. Ribs and details added. I made 5 of them (you can check my log). Yours will be what, half that size, so fiddly but doable. Good luck. bruce