threebs
-
Posts
297 -
Joined
-
Last visited
Content Type
Profiles
Forums
Gallery
Events
Everything posted by threebs
-

USS Columbus 1819 by threebs - 1/72 scale
threebs replied to threebs's topic in - Build logs for subjects built 1801 - 1850
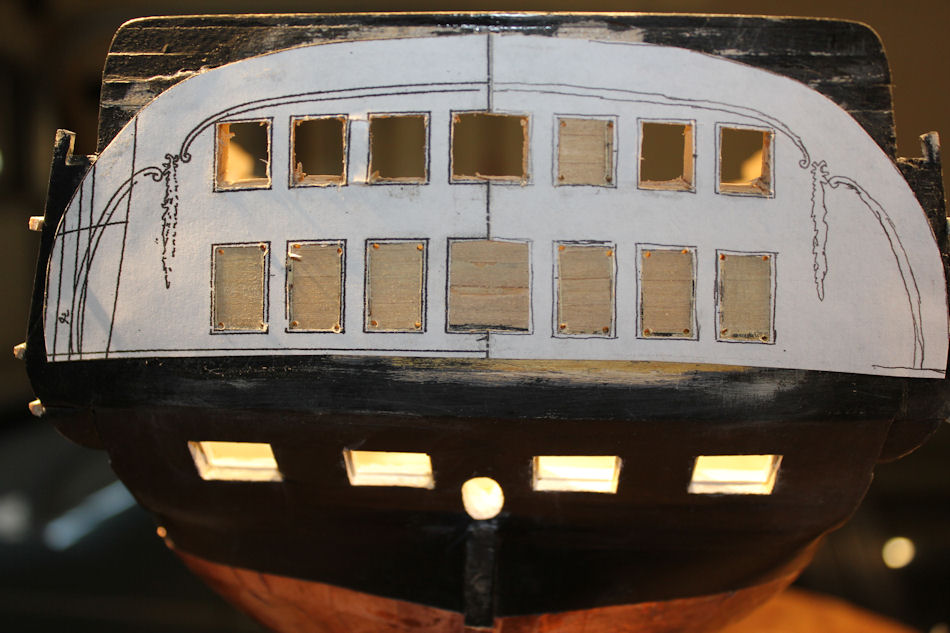
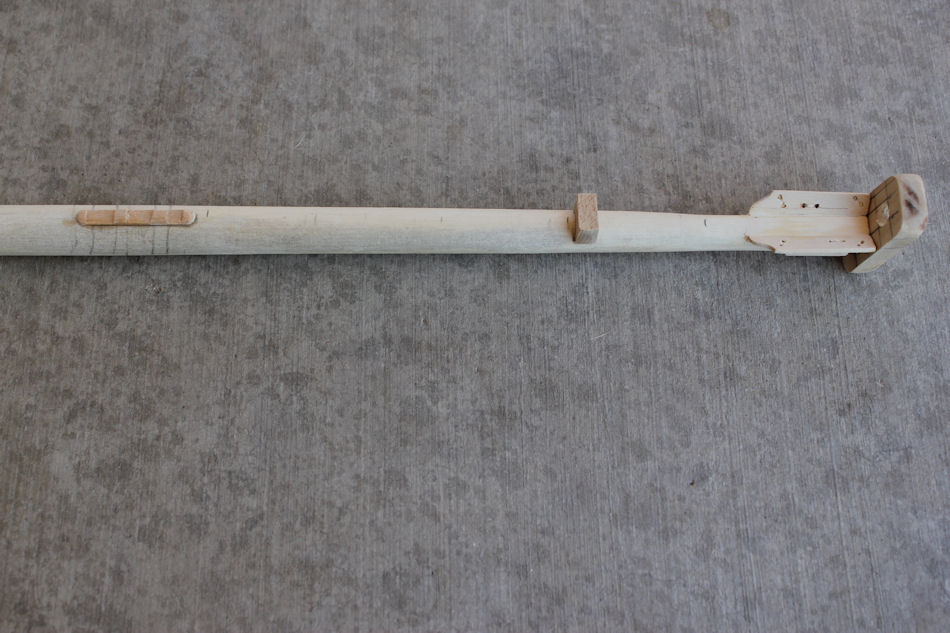
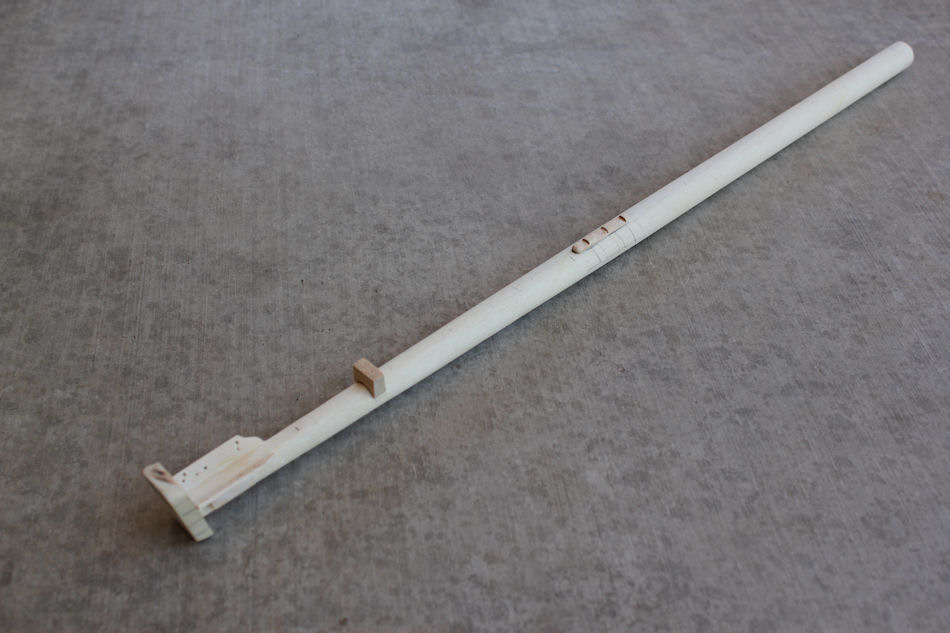
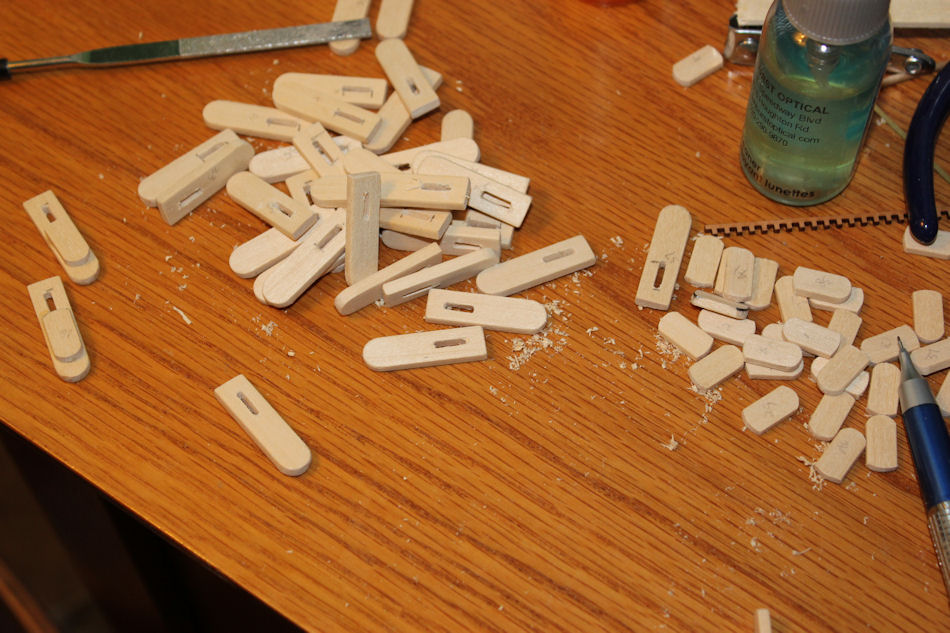
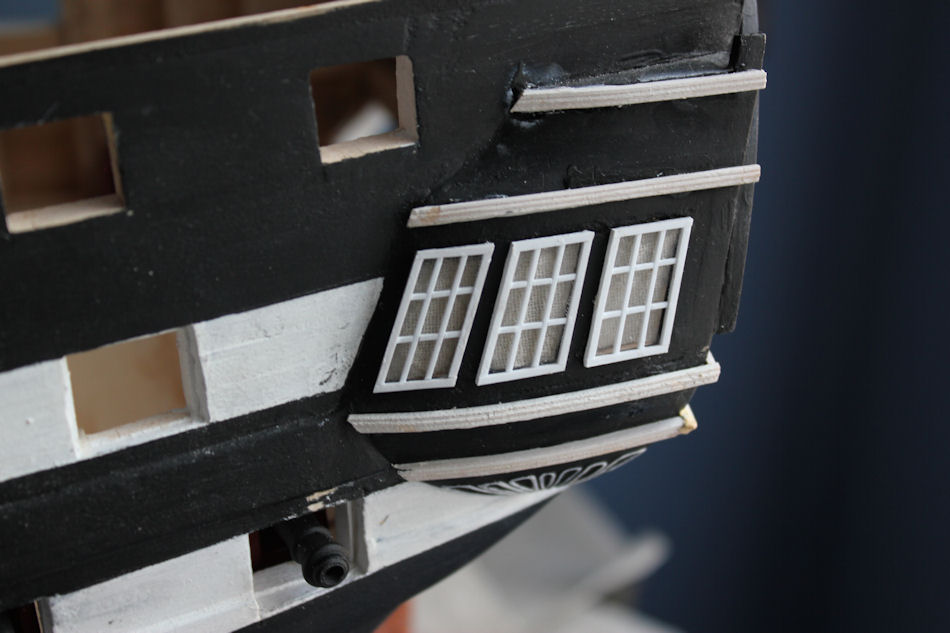
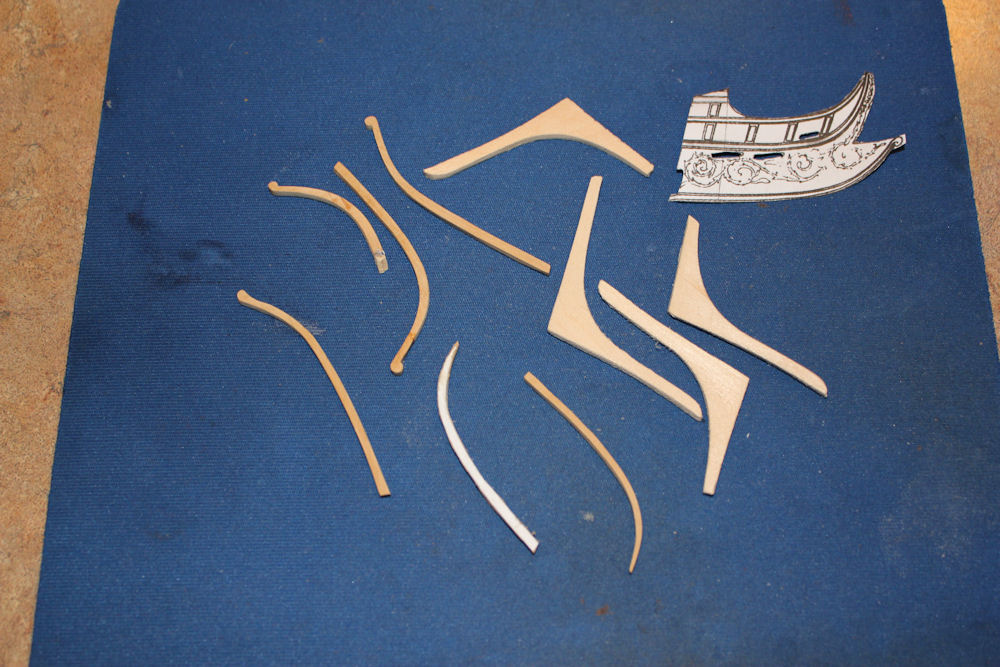
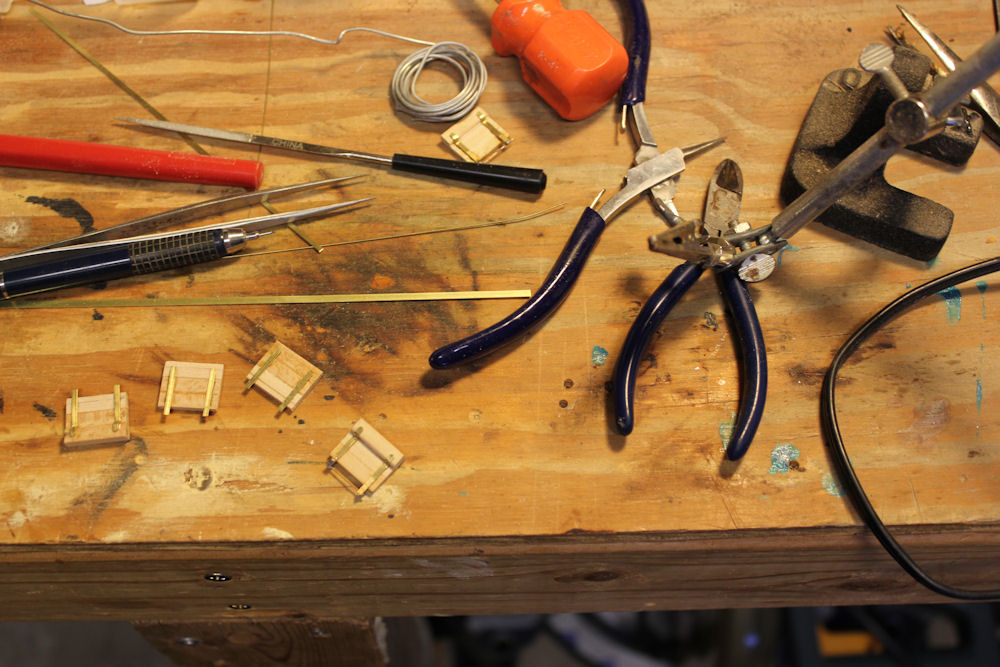
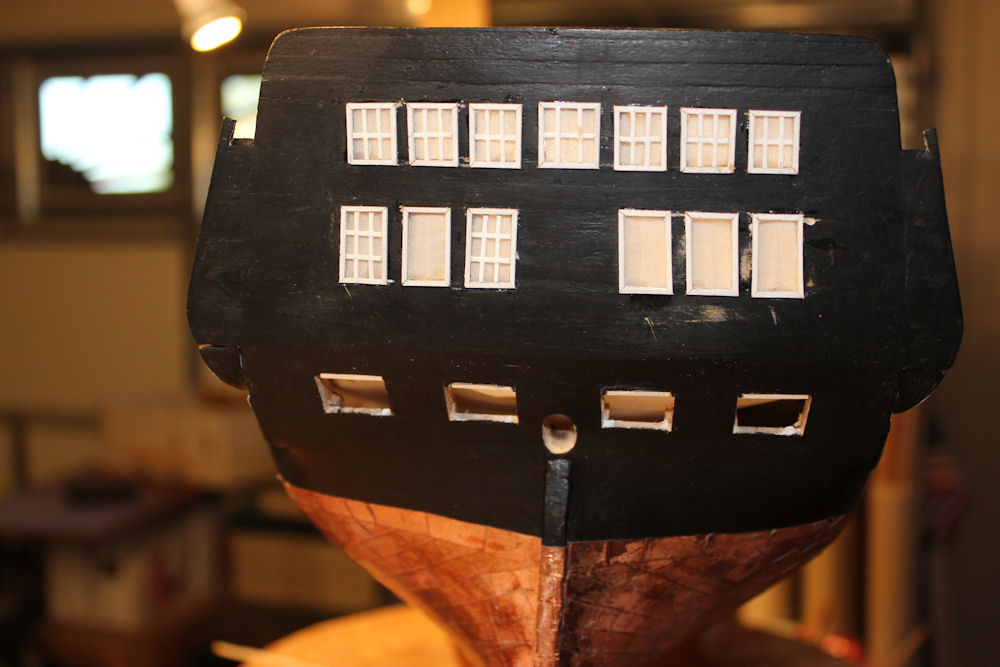
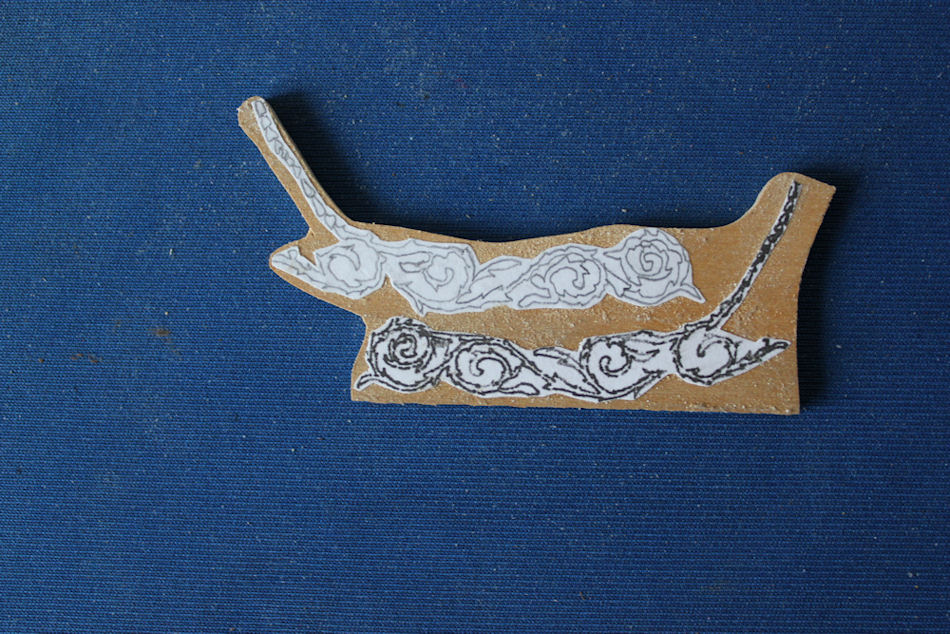
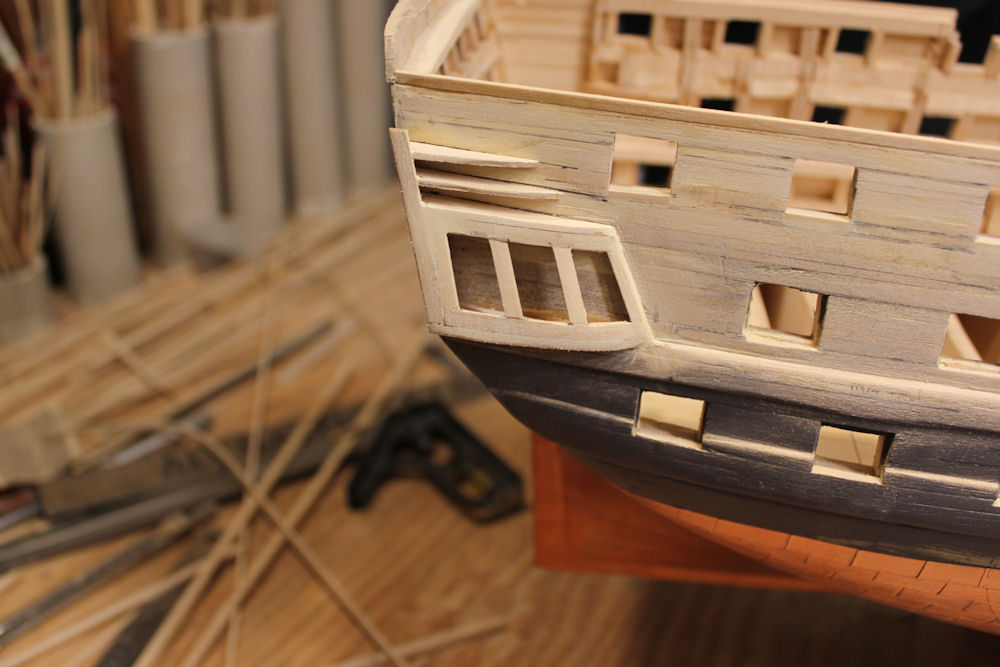
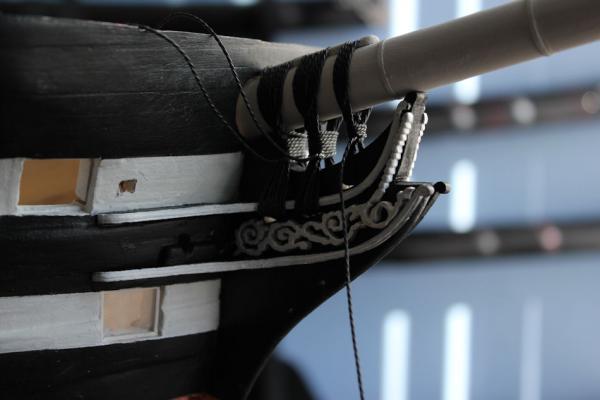
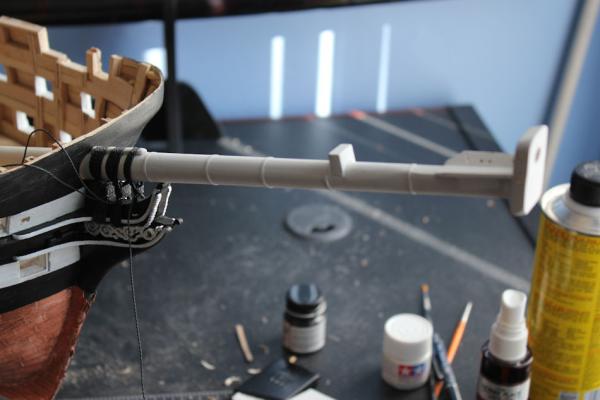
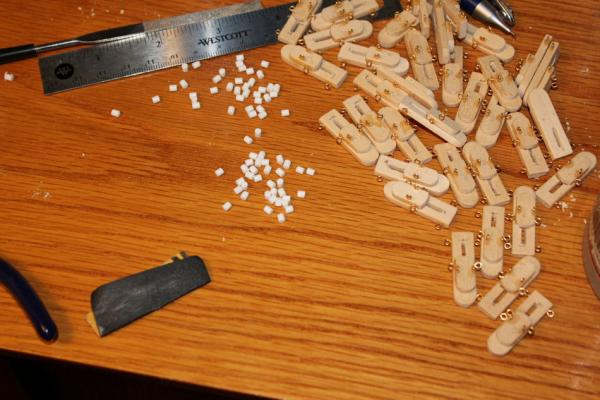
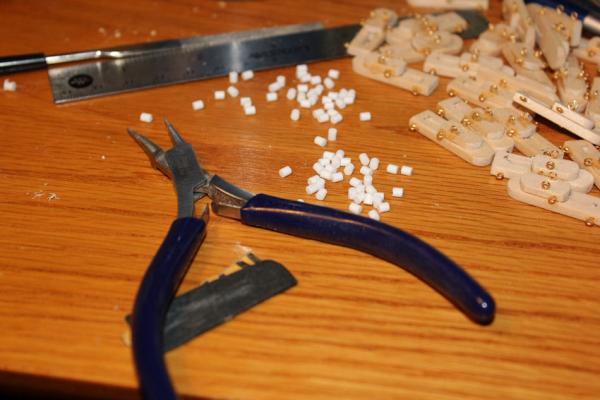
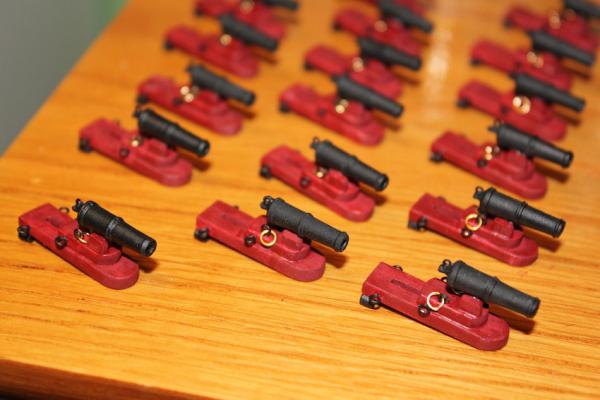
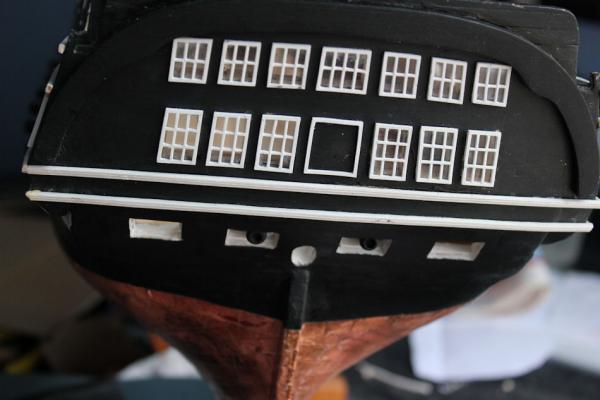
since son moved out a few months ago, i have his room to work in when it is hot in the garage. redoing the windows strern and quarter galleries, was not happy with first attempt. put main gun deck guns in, made bow sprit and a lashed it down. made bow decorations and hawse holes. Made carronade carriages. I am now making blocks for carronades. And installing second gun deck.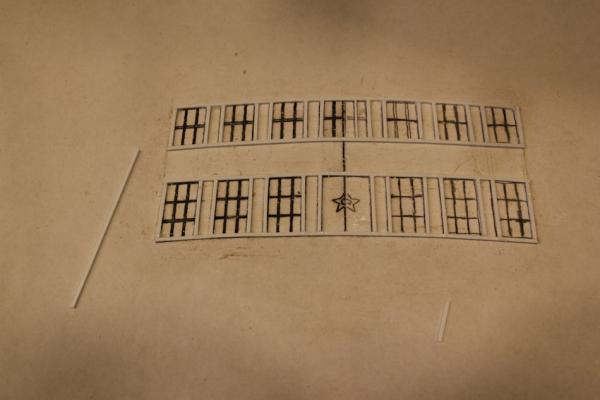


-
USS Columbus 1819 by threebs - 1/72 scale
threebs replied to threebs's topic in - Build logs for subjects built 1801 - 1850
No photos yet, but I am redoing the windows at the stern and quarter will send pics soon. -
USS Columbus 1819 by threebs - 1/72 scale
threebs replied to threebs's topic in - Build logs for subjects built 1801 - 1850
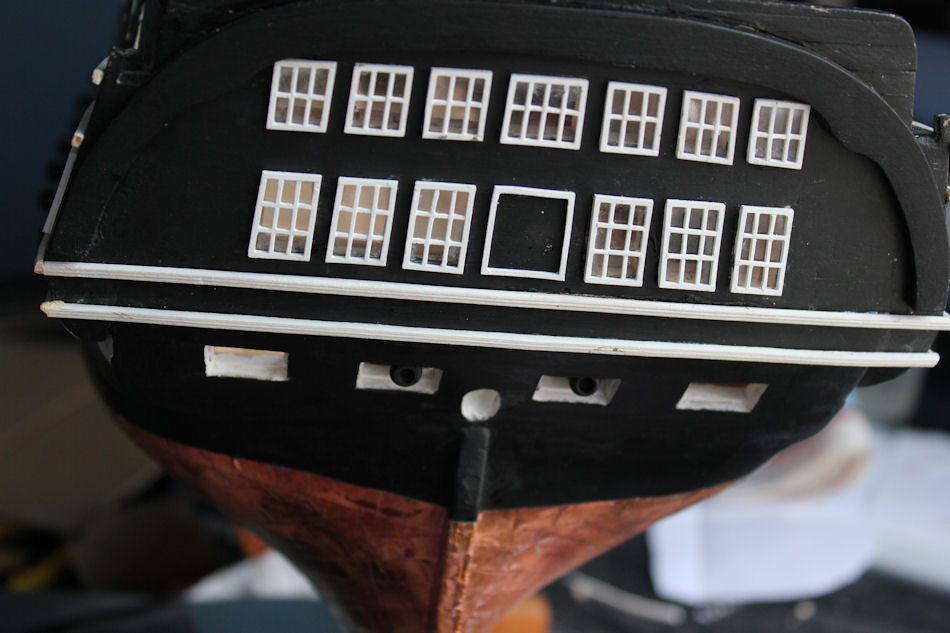
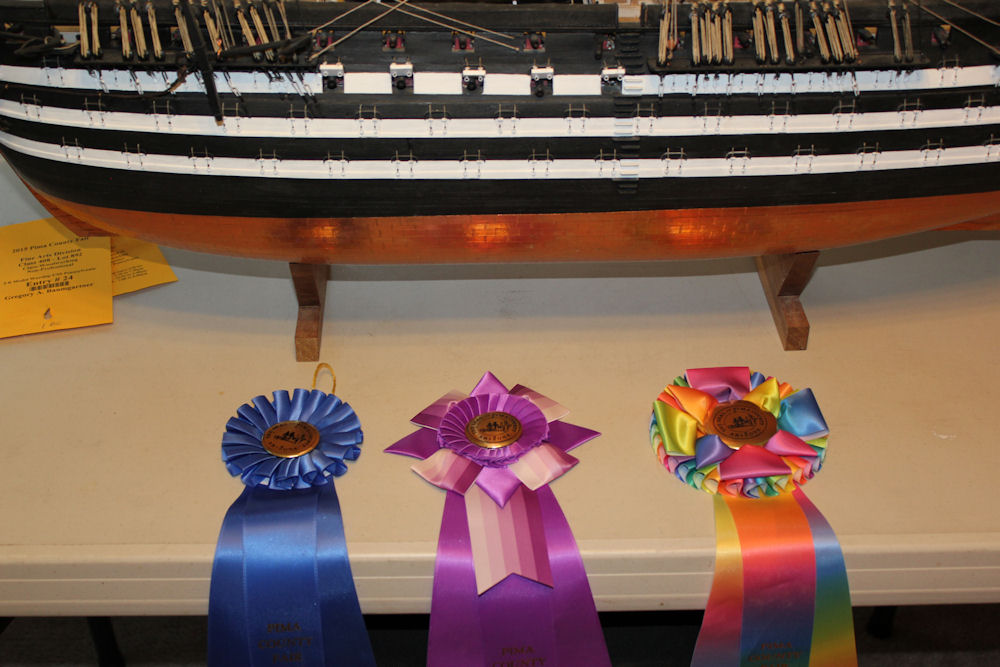
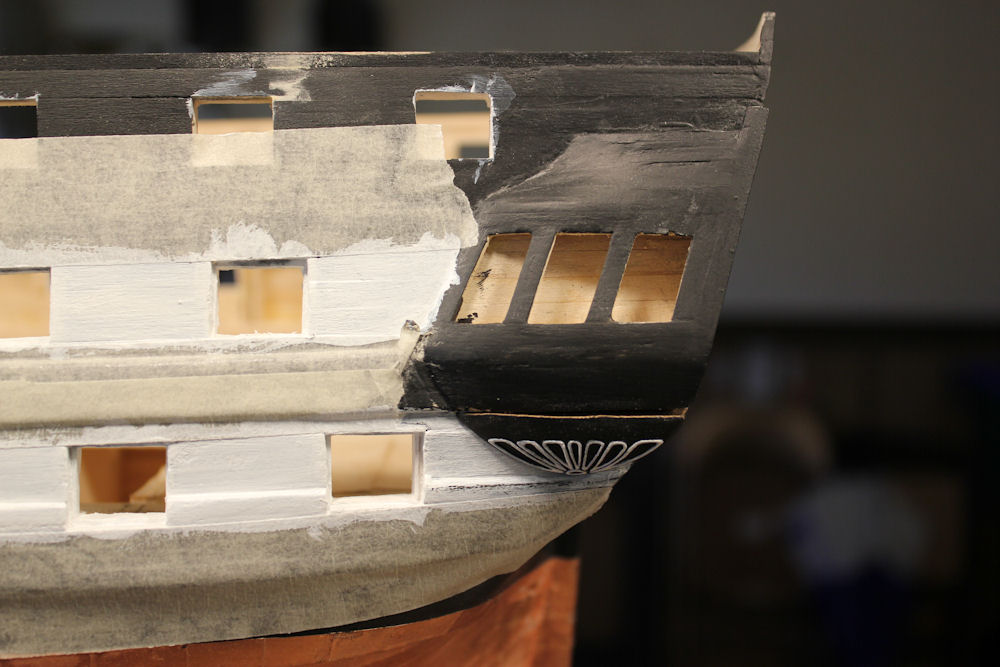
Sorry it has been so long since my last post, been busy, but now have a lot of stuff done. The Pima county fair was April 16 to 26th and i entered my ship in the fine arts non professional category. You can see the ribbons i won, including best of show. I demonstrated model ship building all 10 days for 6 hours each day, got a LOT done! As you can see, all the gun port doors, the hinges on the lower gun port doors, and the middle deck gun port doors which are split and have a hole for the barrel. I made a dozen or so of the hinges, a lot more to file and cut from 1/64 x 1/16th stock. I am getting the windows framed up and the mullions in them, curtains are installed. Also. working on bow scroll work and framing.


-
USS Columbus 1819 by threebs - 1/72 scale
threebs replied to threebs's topic in - Build logs for subjects built 1801 - 1850
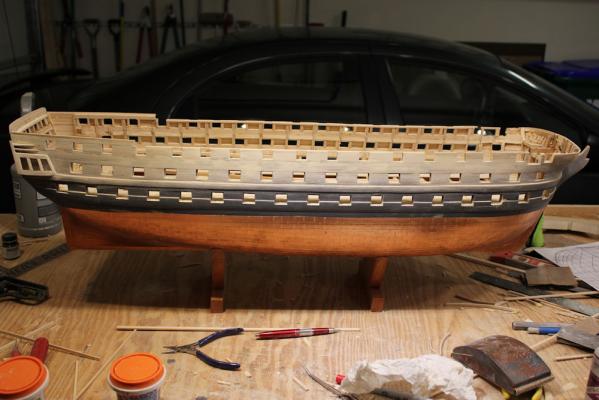
I work on her a little everyday. I will frame, "glass", and curtain the stern and quarter gallery windows next, then finish the white gun port stripes, put in the lower gun deck, mount the cannon, and then lay the middle gun deck. There are grates that show through the spar deck main cargo hatch opening that I will make and install on the middle gun deck, make the carriages for the cannon on the middle gun deck, mount them, and then install the spar deck. Once all that is done, I do the bow framing and put in the hauser holes.


-
USS Columbus 1819 by threebs - 1/72 scale
threebs replied to threebs's topic in - Build logs for subjects built 1801 - 1850
Where could I get a set of the plans by Crouther? -
USS Columbus 1819 by threebs - 1/72 scale
threebs replied to threebs's topic in - Build logs for subjects built 1801 - 1850
I think it is one of the banes of plank on bulkhead building as opposed to plank on frame. Building frames from as many as six or 8 different pieces glued and sometimes doweled together makes them much less likely to warp. That is at least my estimation. I could be wrong, as I have only built two, including this one, plank on bulkhead shps, and no plank on frame ships at all. Perhaps they have their own idiosyncrasies that I cannot be aware of as a result. -
USS Columbus 1819 by threebs - 1/72 scale
threebs replied to threebs's topic in - Build logs for subjects built 1801 - 1850
Jerry: thanks for the kind words. Yes, I plan on a frigate after this ship. When I was researching my first build, (USS Pennsylvania) I saw she had been destroyed to keep the Confederate Army from capturing her. In addition the Columbus and United States were also destroyed. I thought it might be a nice tribute to those ships to build a model of each of them. So, The build after the Columbus will be the United States. Although 44 gun frigates did not have the sleeker lines of the 32 and 36 gunners, I still thought the American 44's had their own sort of panache if you will. -
USS Columbus 1819 by threebs - 1/72 scale
threebs replied to threebs's topic in - Build logs for subjects built 1801 - 1850
TBlack: The bulk heads on the spardeck always seem to be miss aligned. No matter how careful i am making sure the bulkheads are square to the keel, after a time the slim "beams" warp out of shape. Even if it is only a millimeter or so, it is enough to put them in the path of a gun port. So, sometimes I have to cut them off at the deck line and re-lay the "beams" This is true at the hull as well, and the result is a wavy hull. So, I have to replace some that have warped either out away from the hull or inward toward the center line. I use birch furniture grade plywood for the bulkheads for the strength. but, the "skinny" tips of each bulkhead always seem to waver. Even as dry as it is here in Tucson, AZ it always happens. In all the builds I have ever seen, the hull is planked first. However. I do not see why the decks cannot be done first. I do not plank the lower gun deck, it is never seen, and I only plank the sections of the middle gun deck that can be seen through the openings in the spar deck. I use "beams" only where I need them to support the deck. I under lay my deck planking with 1/16 inch model aircraft plywood and use thinner planks to cover it. It keeps the deck from having a wavy look from the bulkheads being so far apart. Hope this answers your questions. -
USS Columbus 1819 by threebs - 1/72 scale
threebs replied to threebs's topic in - Build logs for subjects built 1801 - 1850
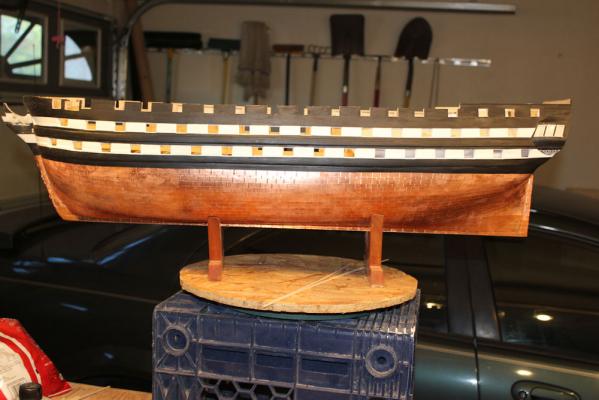
I have Finished one side of the hull. I will pick away at it and complete the entire hull in a couple weeks at most. :woo_hoo: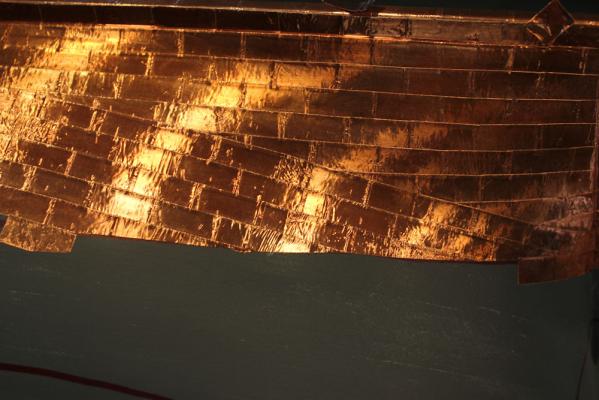


-
USS Columbus 1819 by threebs - 1/72 scale
threebs replied to threebs's topic in - Build logs for subjects built 1801 - 1850
The latest issue of Ships in Scale published a photo of my Pennsylvania on the inside cover. Pretty cool that they considered it good enough. -
USS Columbus 1819 by threebs - 1/72 scale
threebs replied to threebs's topic in - Build logs for subjects built 1801 - 1850
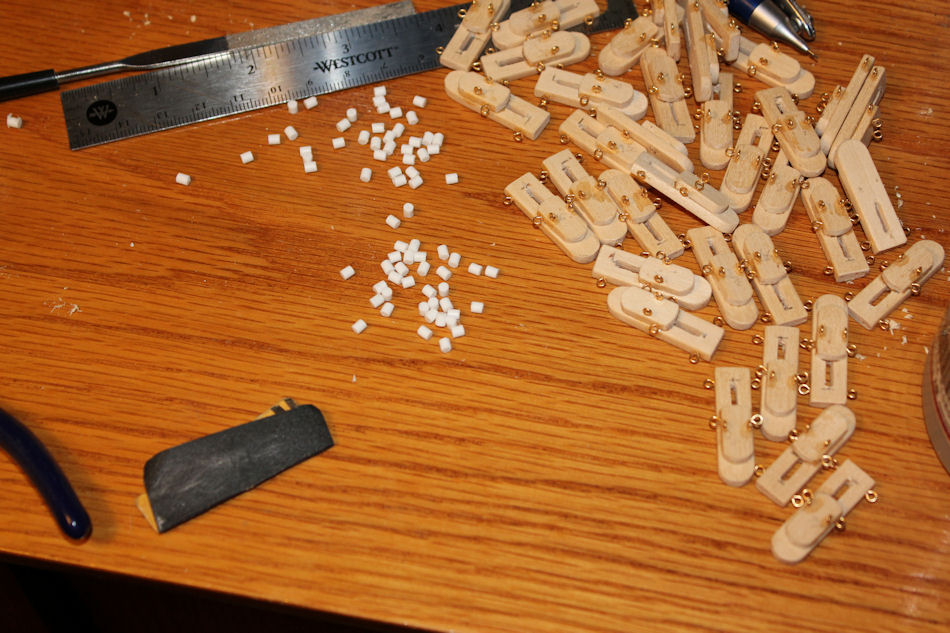
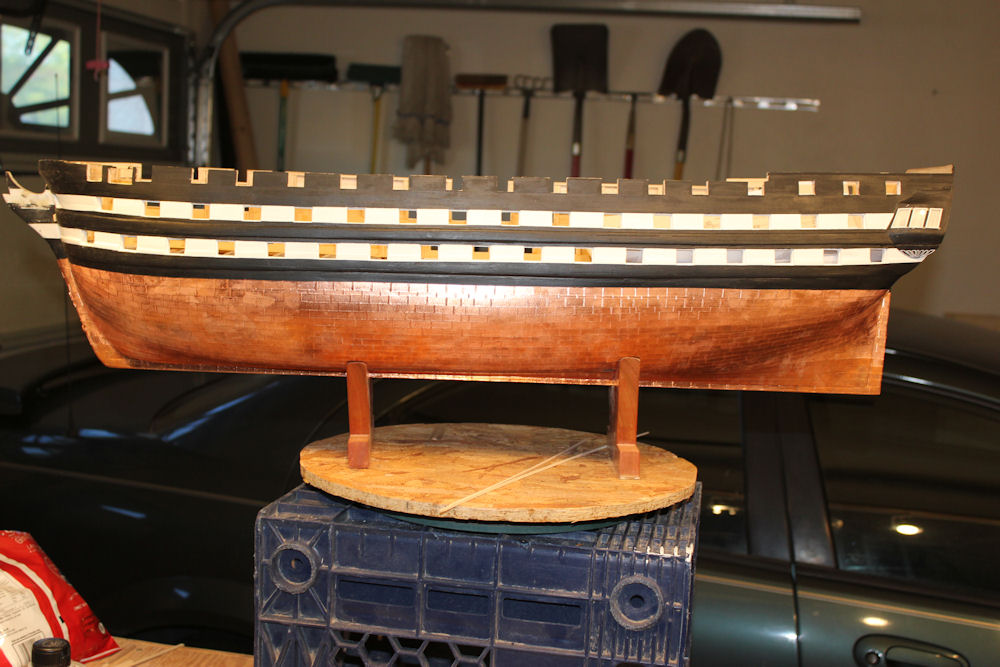
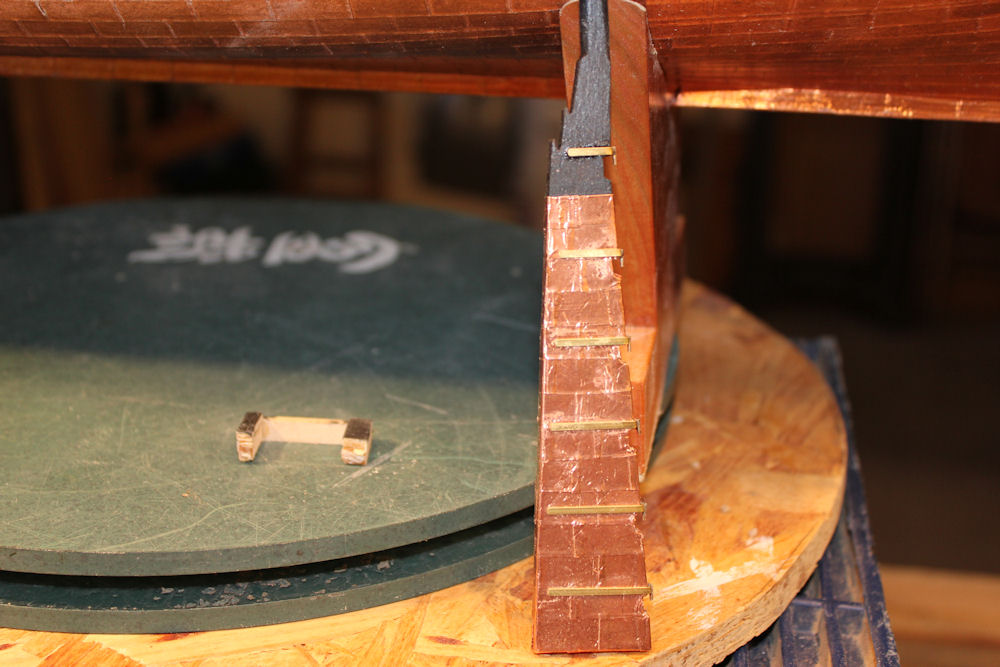
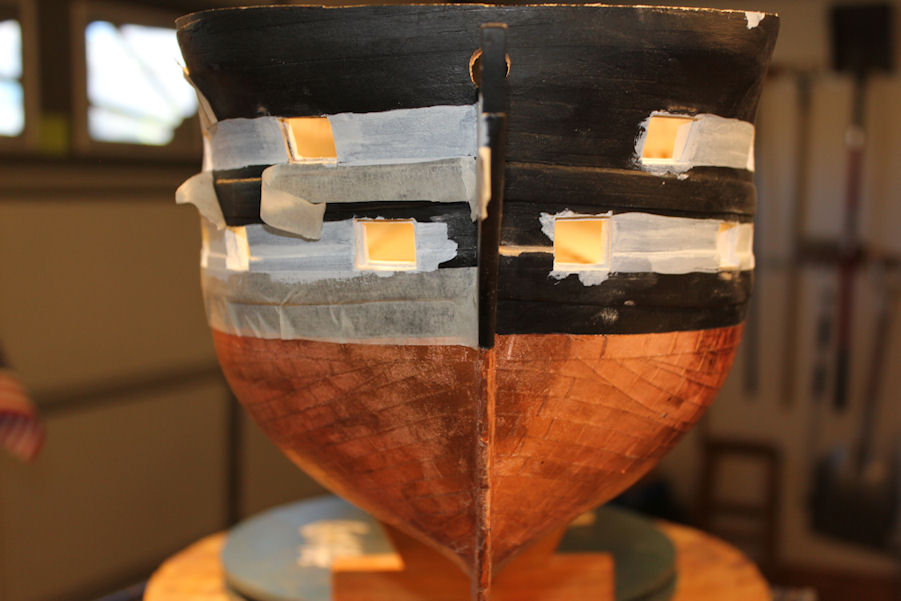
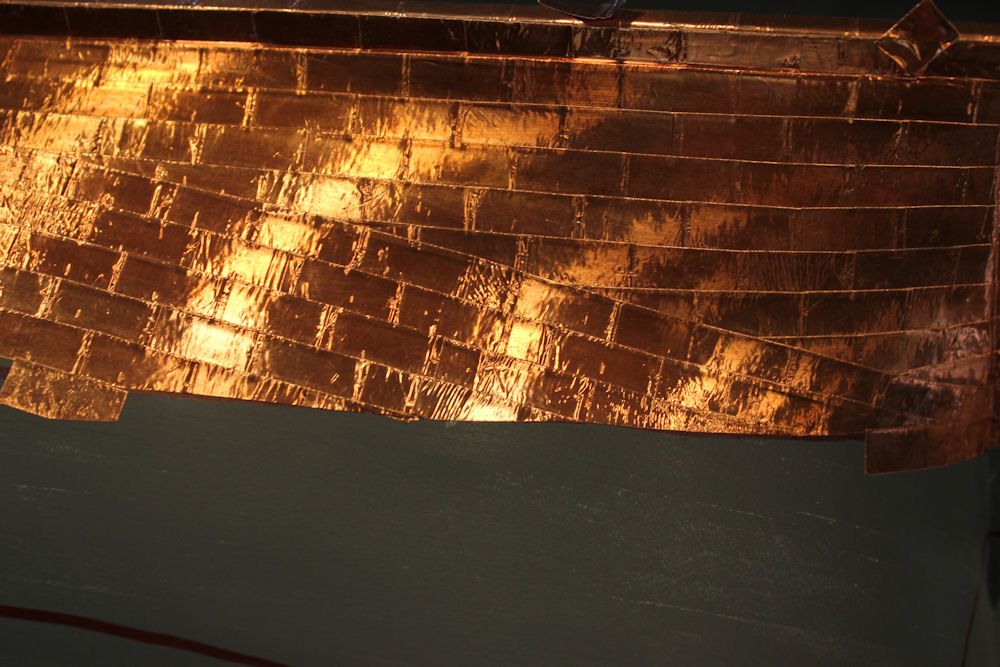
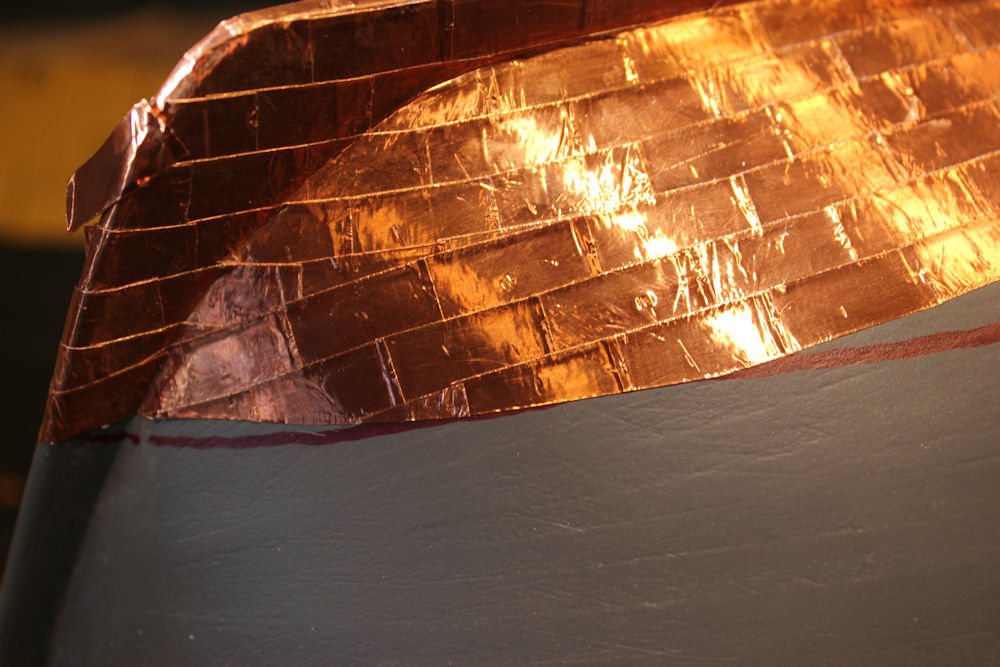
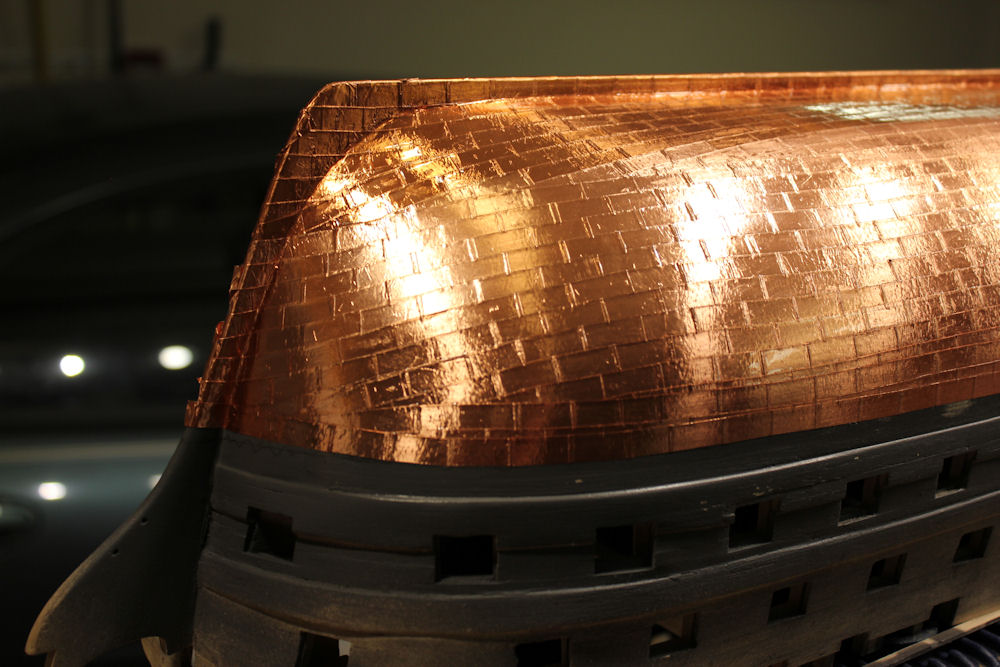
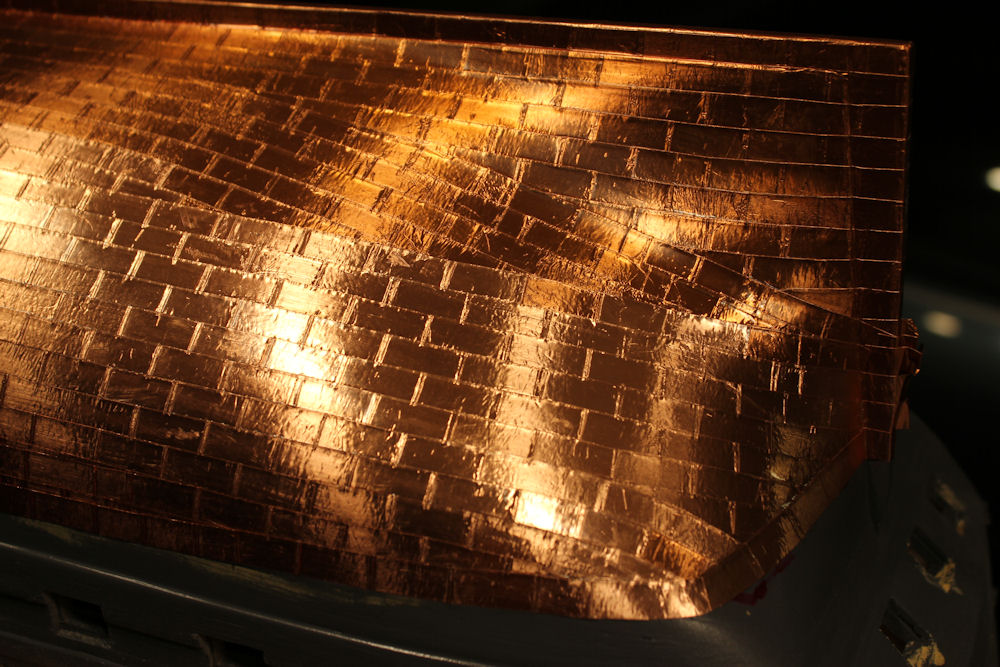
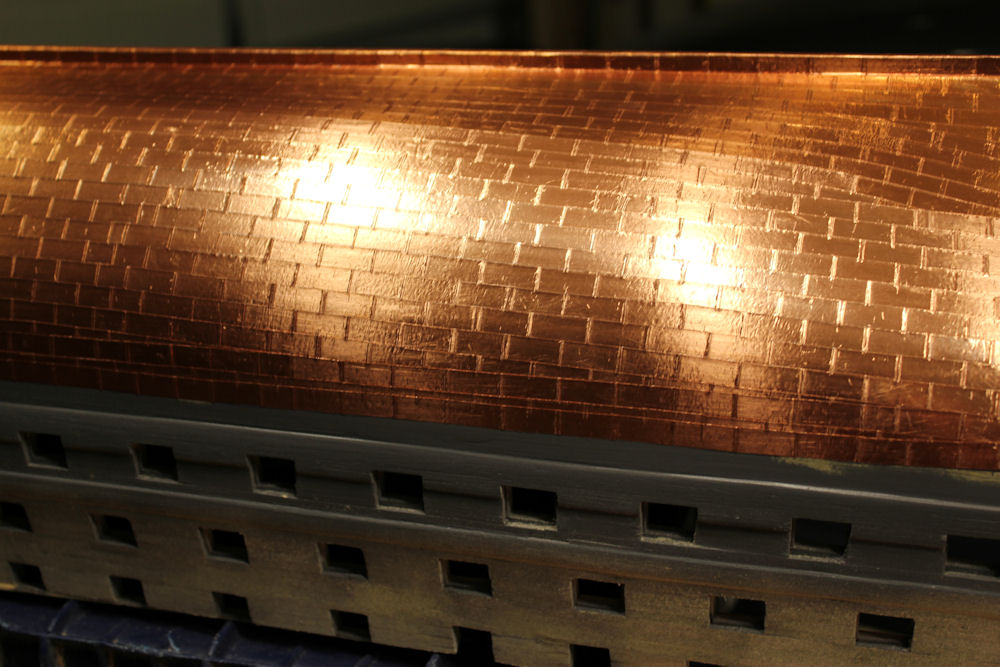
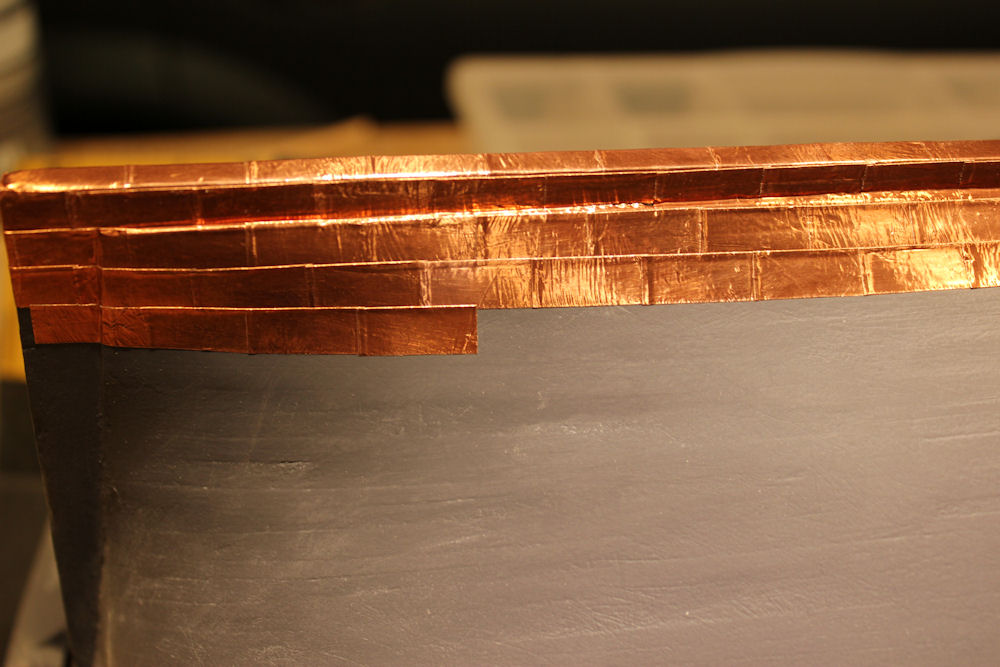
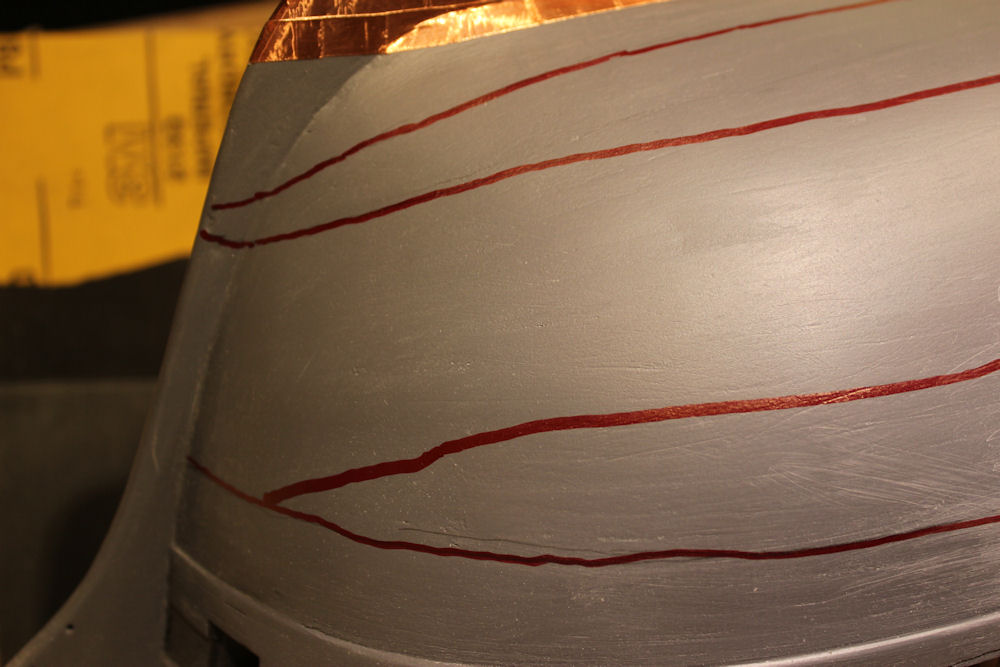
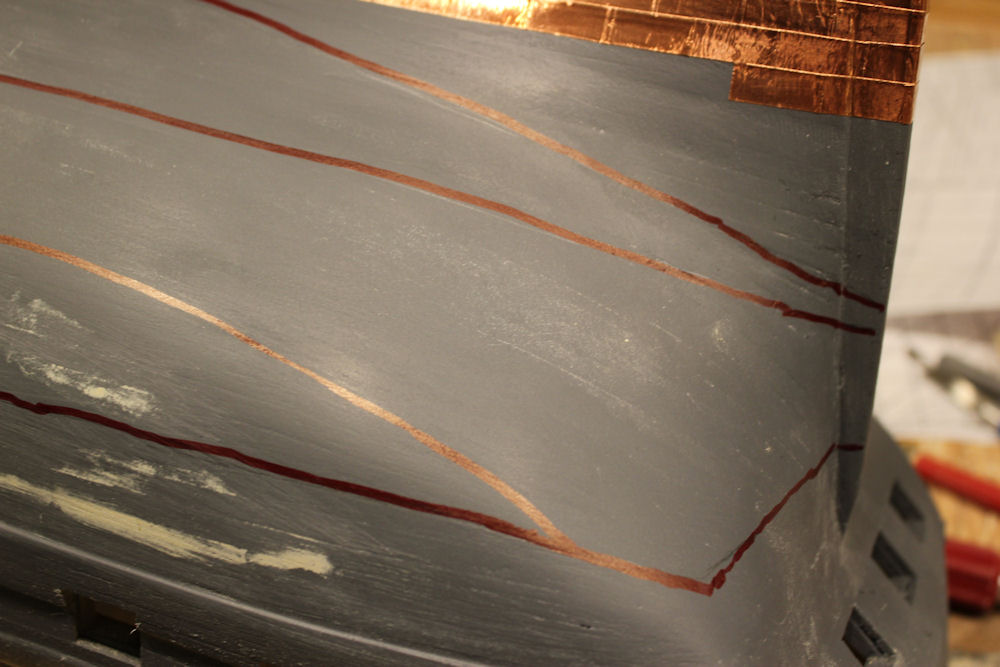
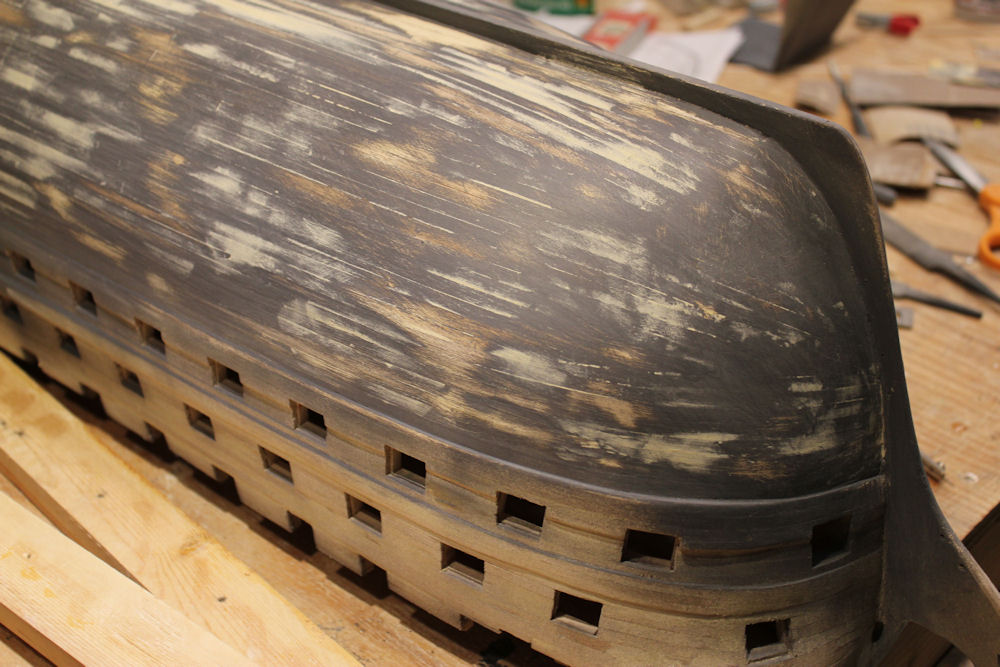
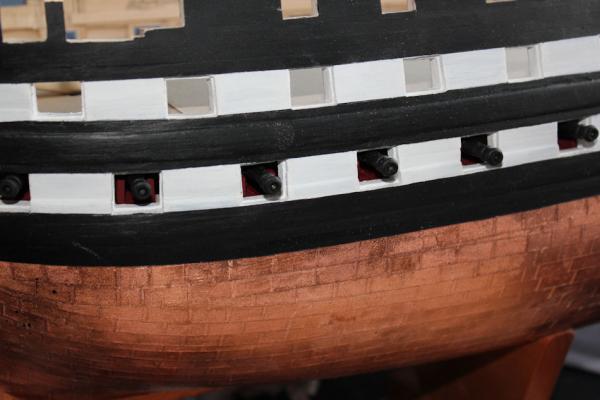
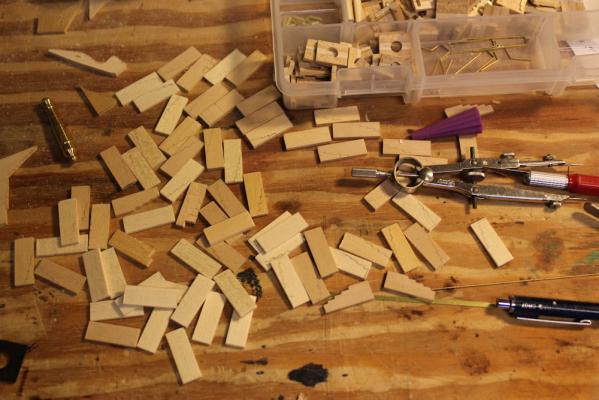
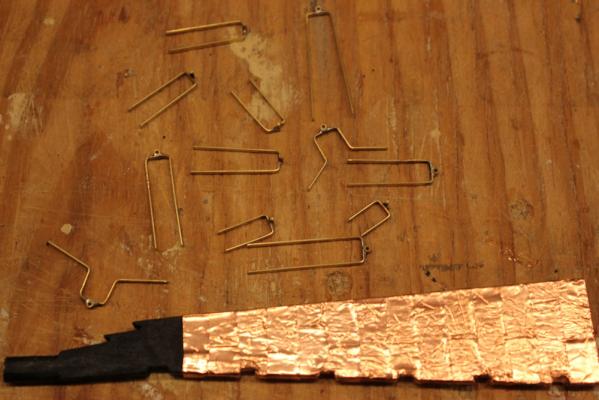
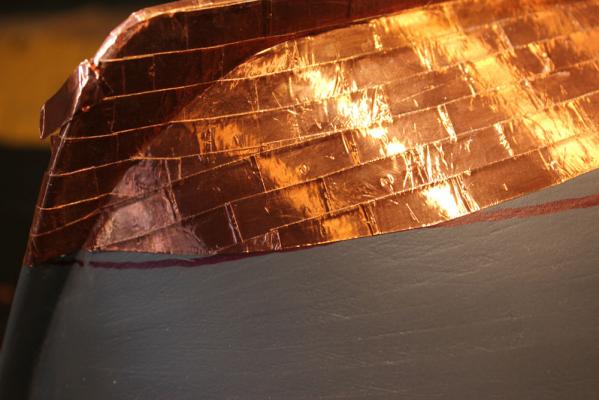
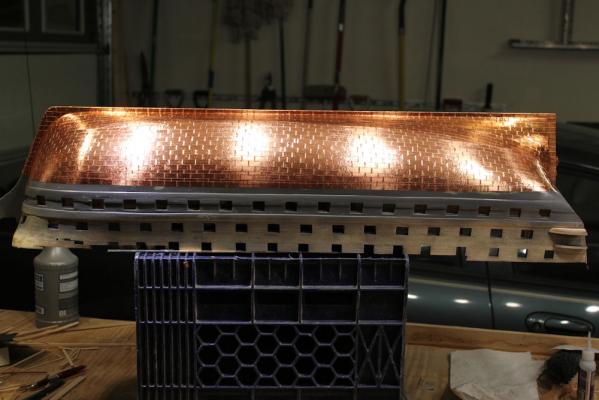
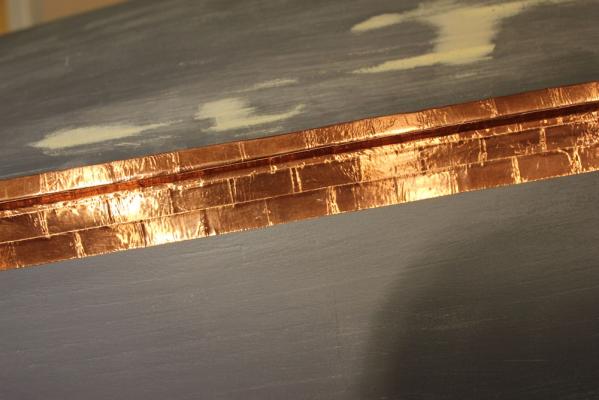
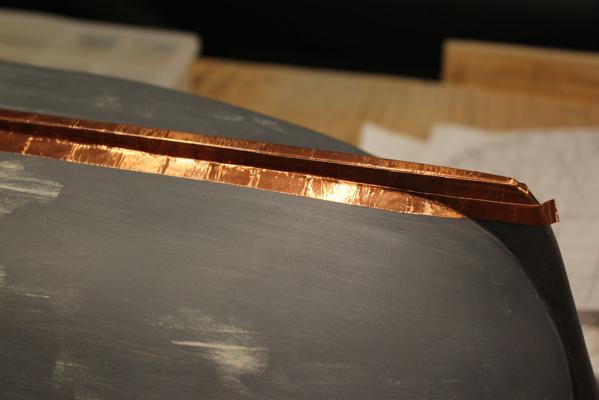
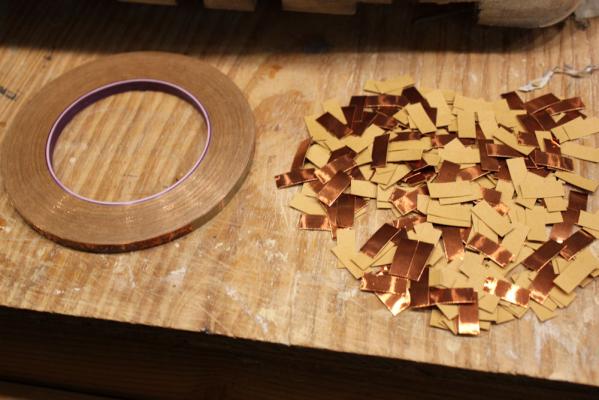
I have now started to copper the hull. You can see the rough pattern I have laid out that I will follow. There are about 400 tiles in that pile. Each cut from a 5/16" role of copper adhesive backed tape. There are 44 tiles in a row, about 12 rows. Allowing for shorter rows on the curved sections, there will be about 1200 tiles on the hull when it is done. I am not going to ponce roll the dimples as the 3/4" heads of the copper nails in real life would be so small in 1/72 scale as to be redundant. I have done more tiles since these photos, so, I have done about 300 tiles now. It takes about 10 minutes to lay a row. It will take longer per row as the curved sections need to be cut and laid carefully. I am going to give the copper a couple of coats of dull coat to seal the tape edges, something I did not do on my last model. This will keep the tile edges from curling up as I handle the model to move it about, which will be a lot.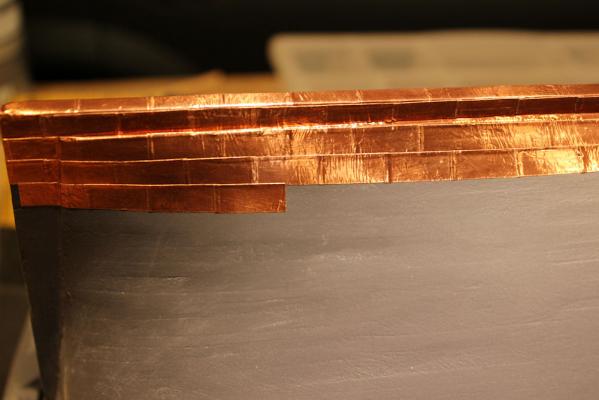


-
USS Columbus 1819 by threebs - 1/72 scale
threebs replied to threebs's topic in - Build logs for subjects built 1801 - 1850
no lathe, I have a small proxxon mini lathe for turning yards. I think I could do it with jewelers files by hand. Thanks for the photo of the various cannon. I have a drawing of a shell gun in Chappelle's book I can go by for the carriage. -
USS Columbus 1819 by threebs - 1/72 scale
threebs replied to threebs's topic in - Build logs for subjects built 1801 - 1850
I searched for shell guns in 1/72 scale when I did my Pennsylvania. Could not find any. I do not want to start casting my own barrels, but, since there are only six of them maybe I can carve them from boxwood. they are below decks and you will only see abour 3/4 inch of the barrel sticking out of the gun port. would anyone really notice anyway? -
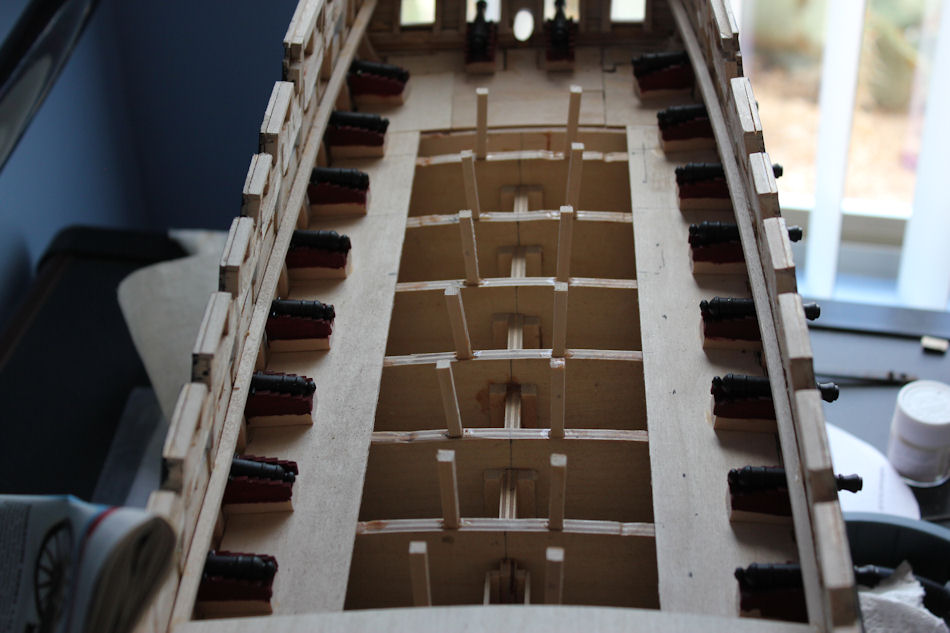
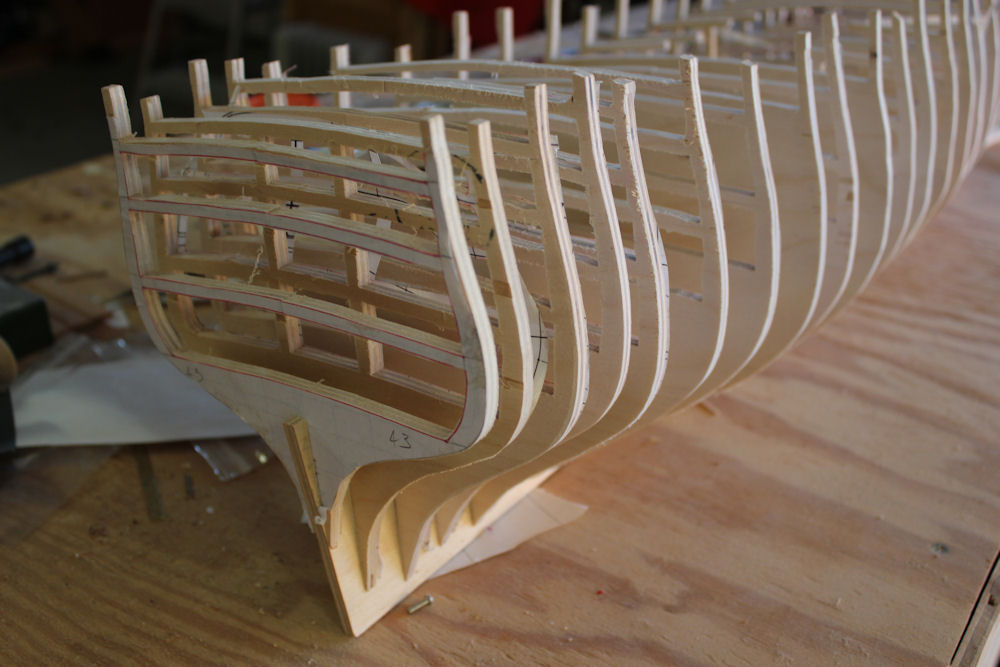
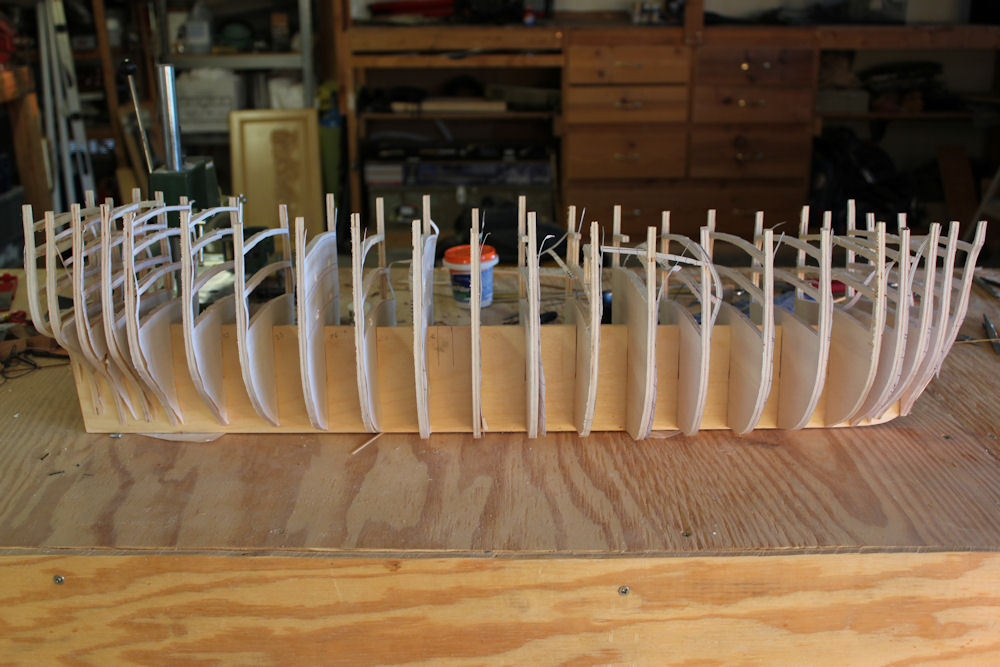
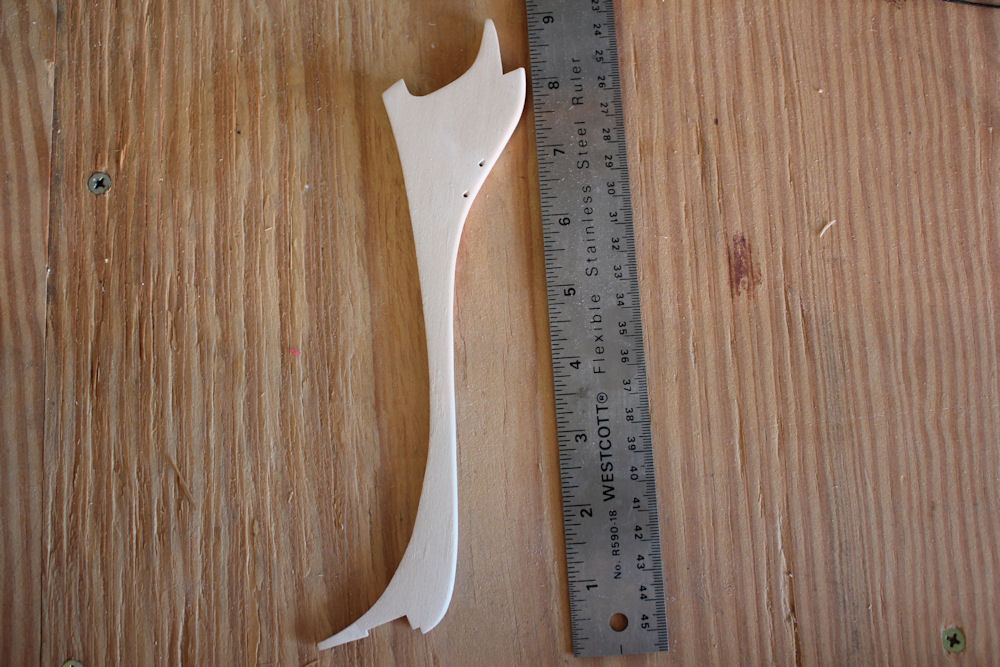
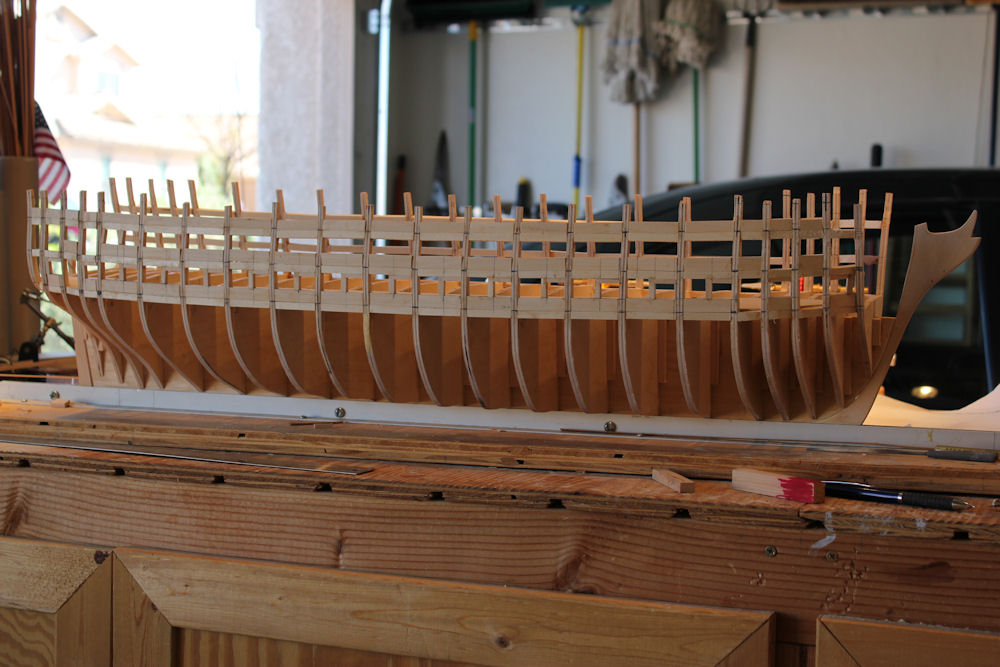
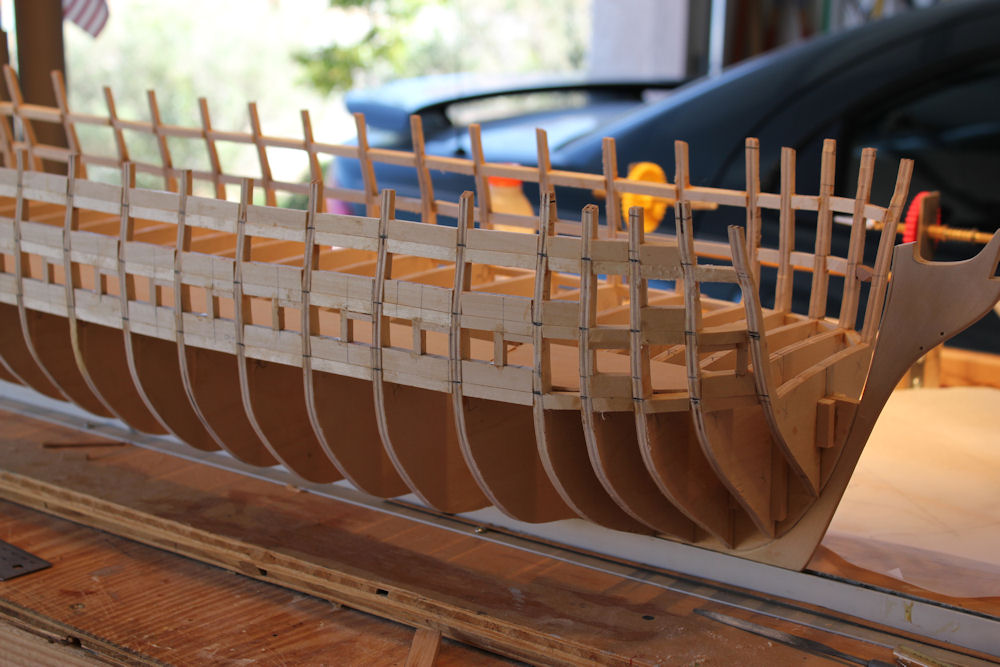
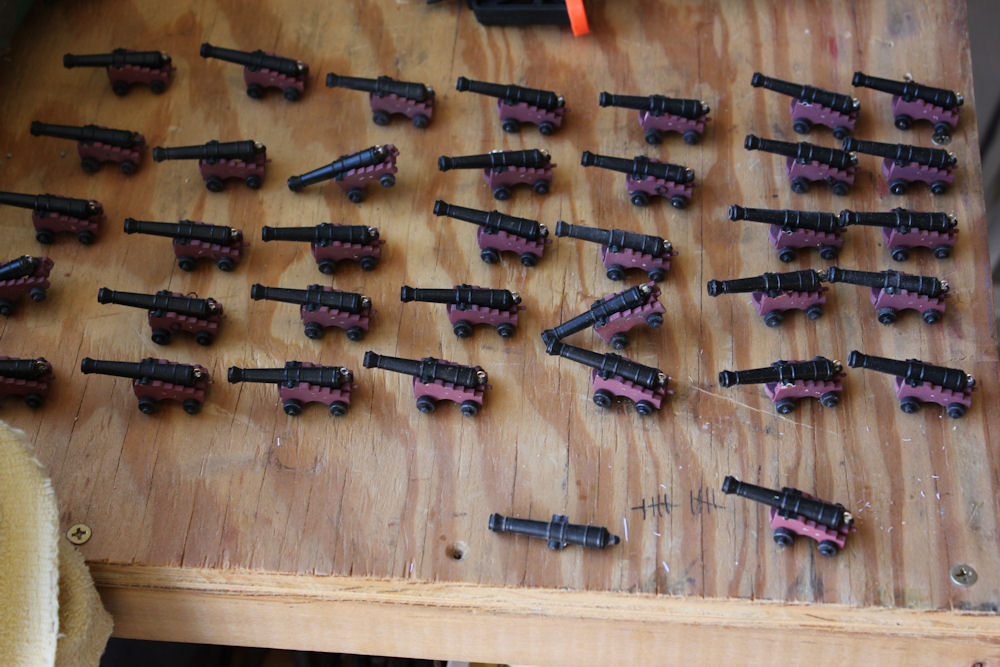
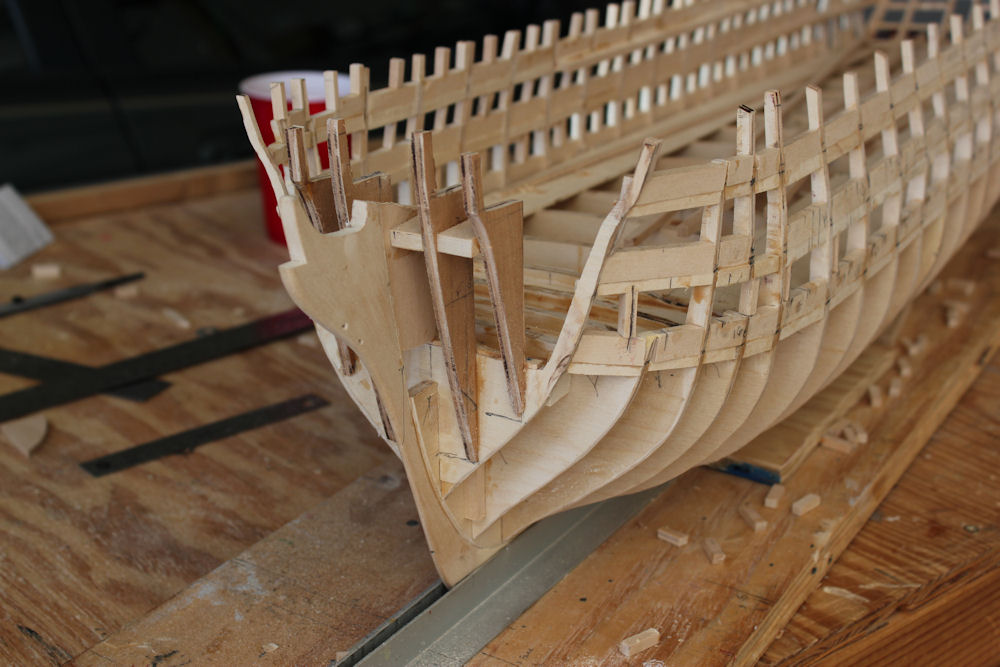
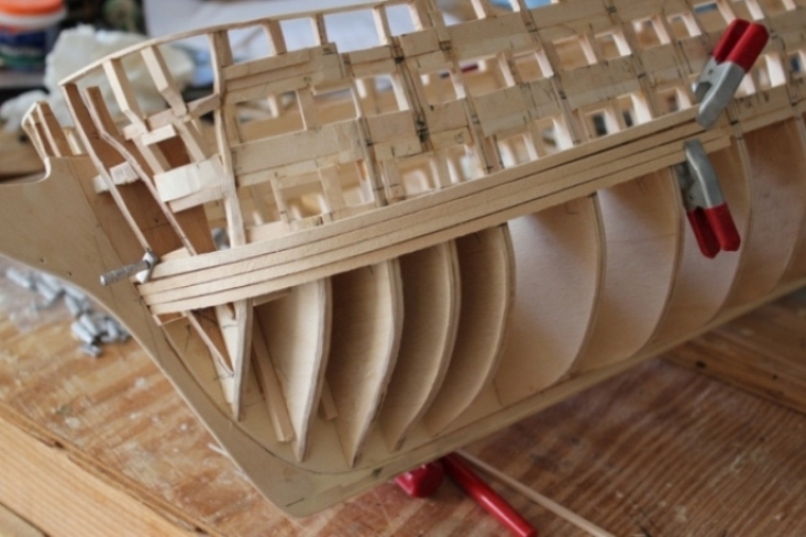
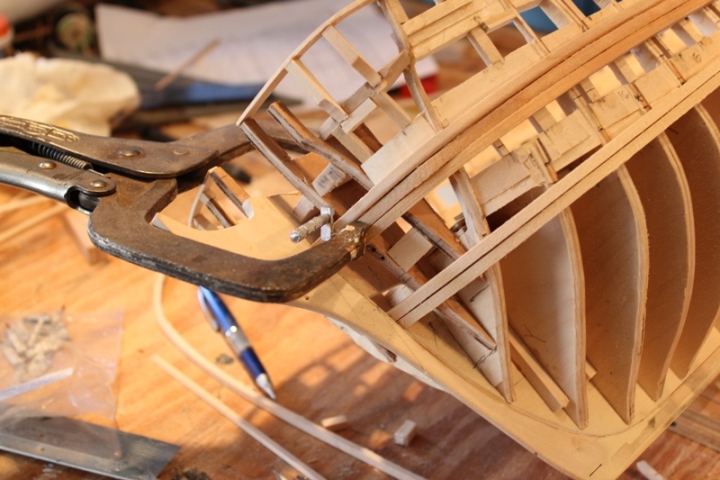
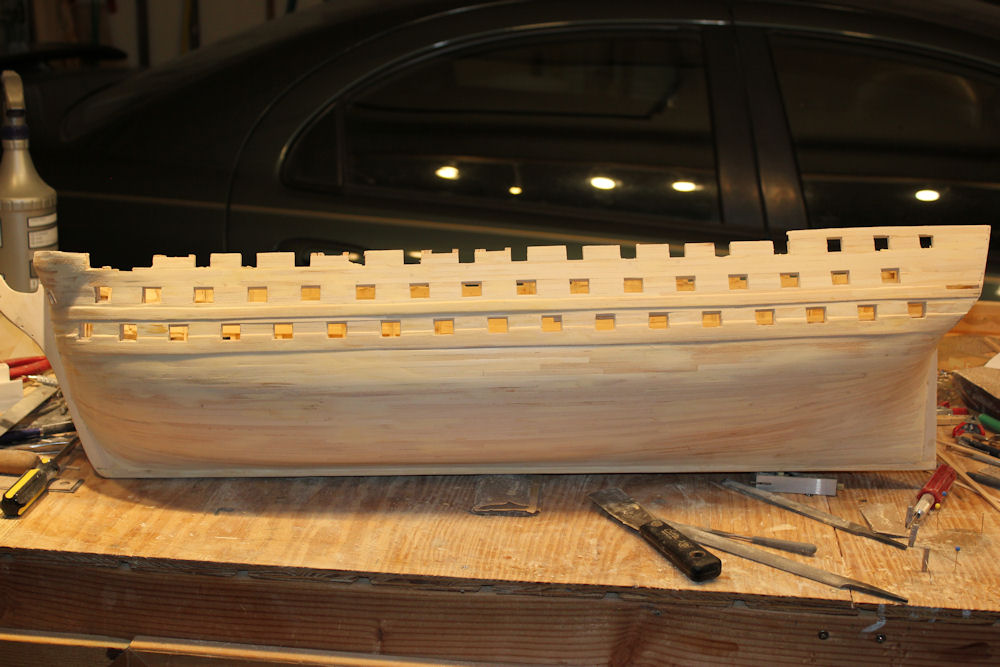
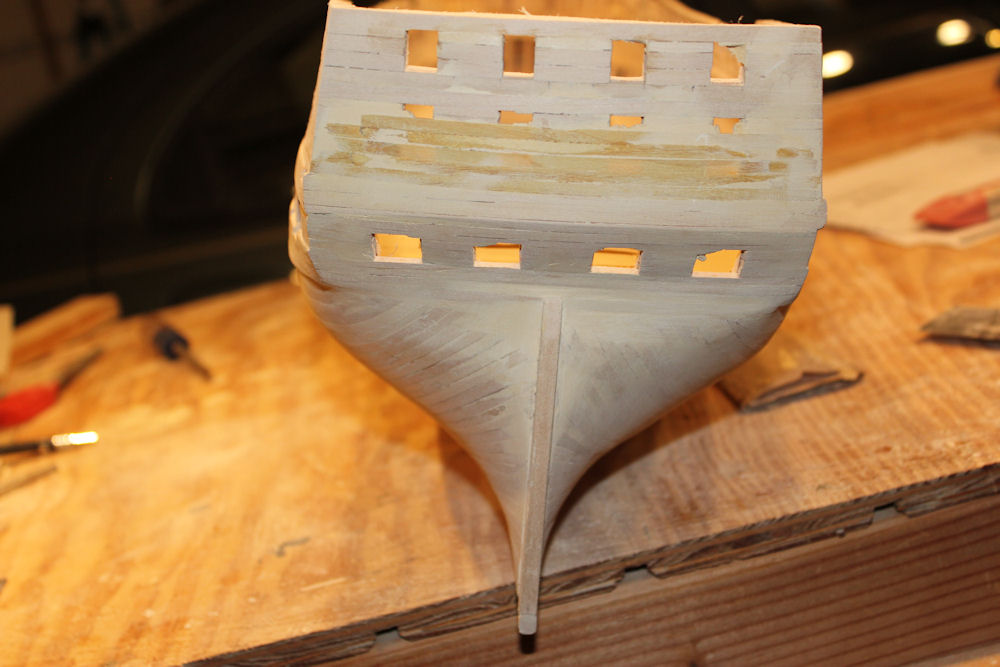
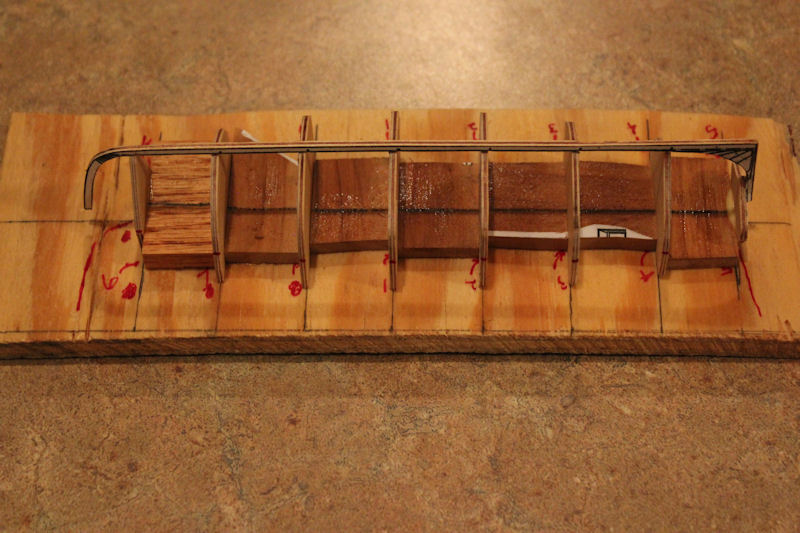
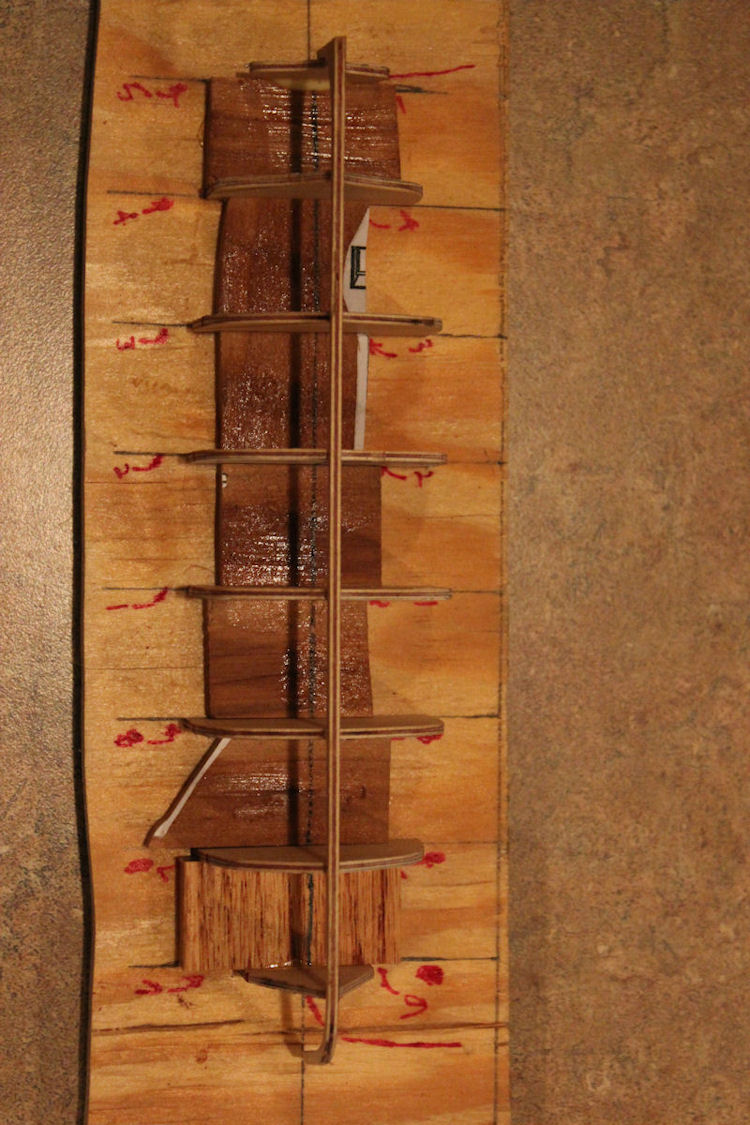
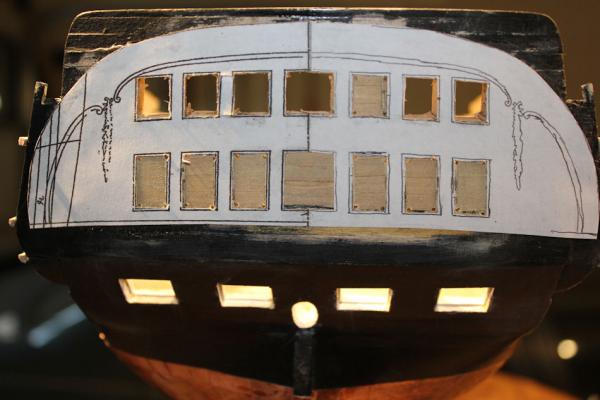
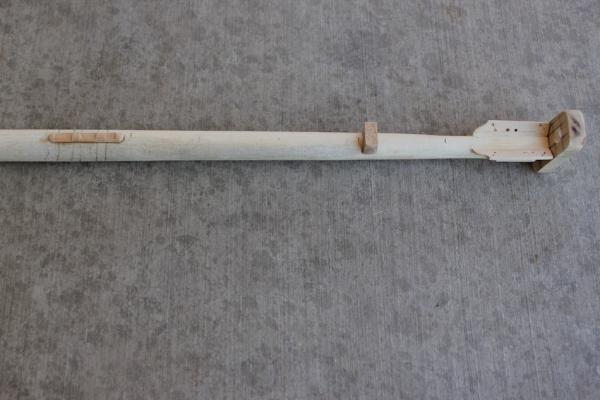
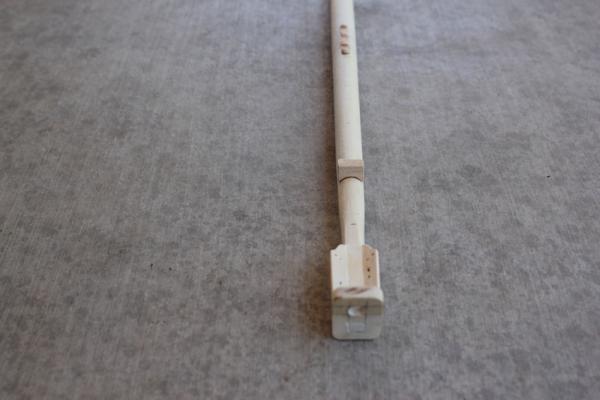
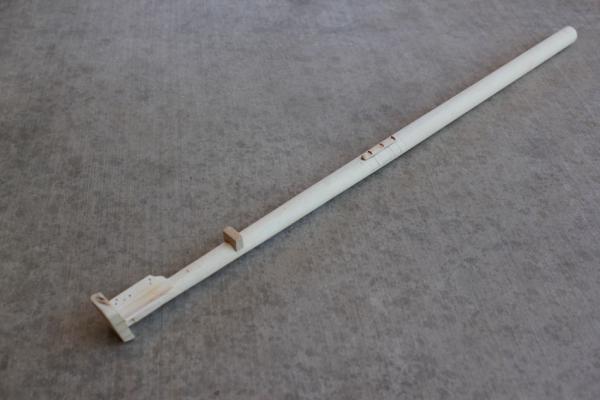
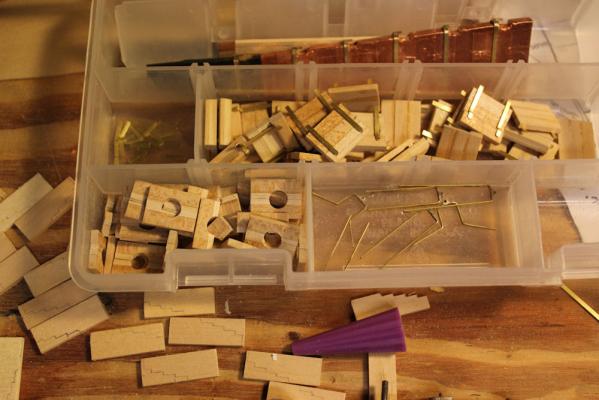
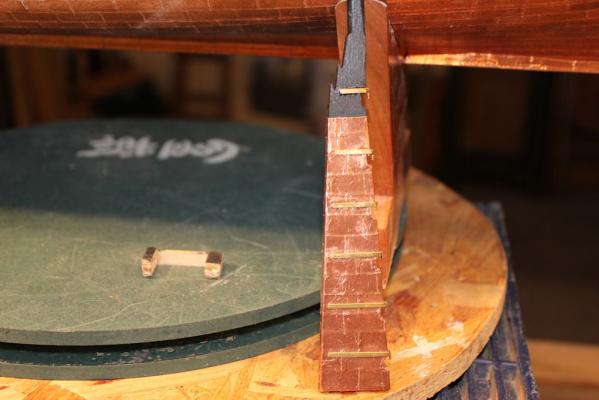
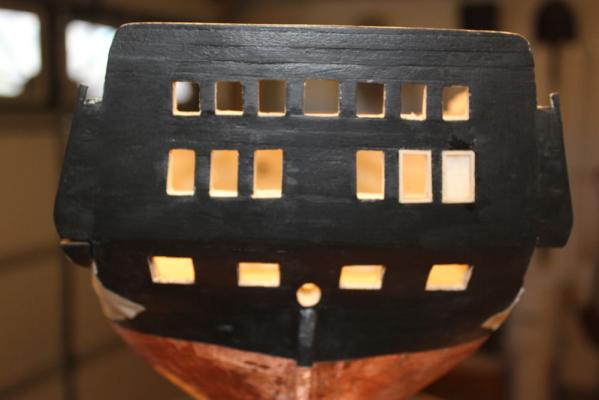
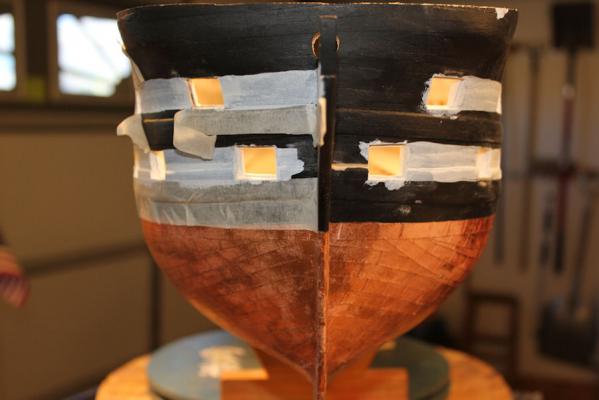
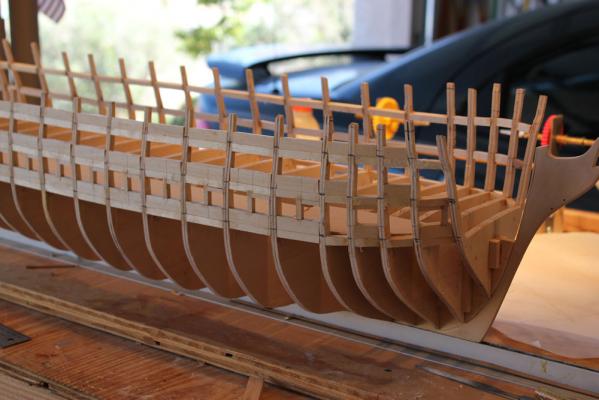
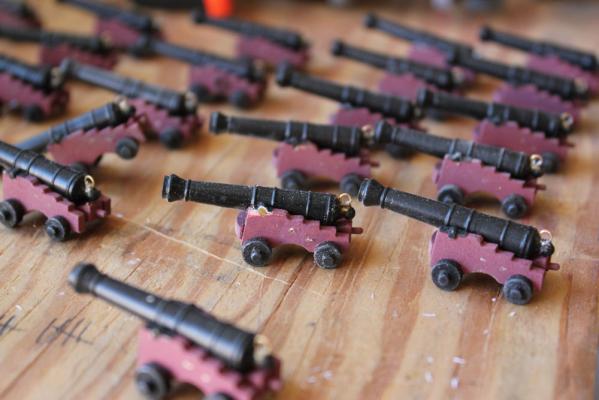
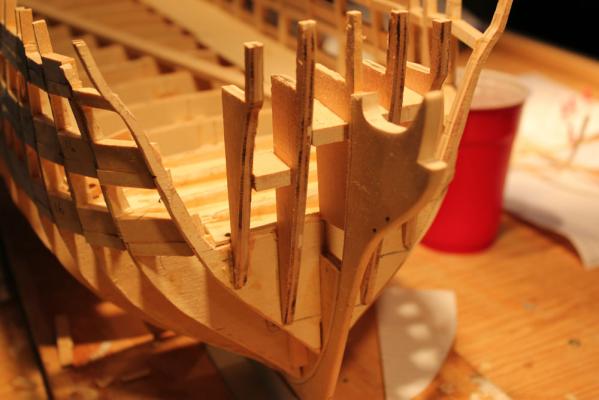
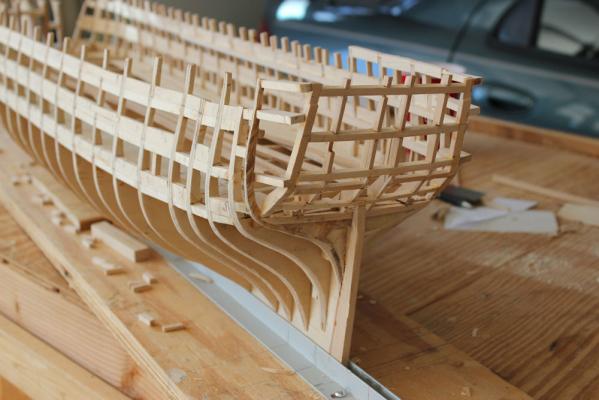
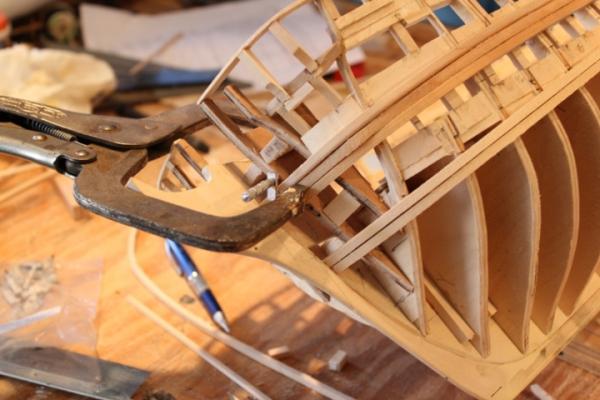
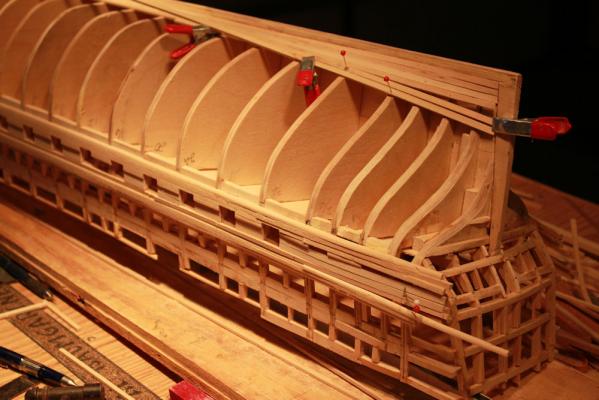
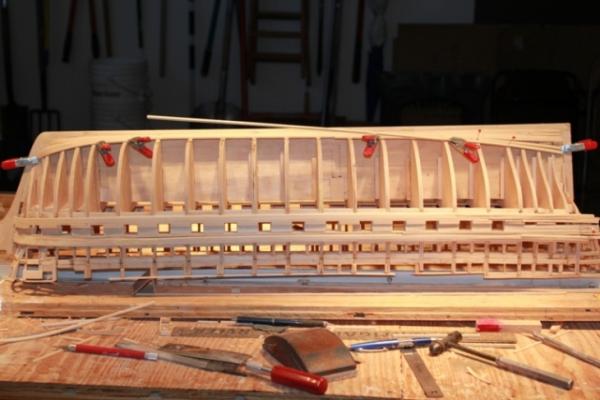
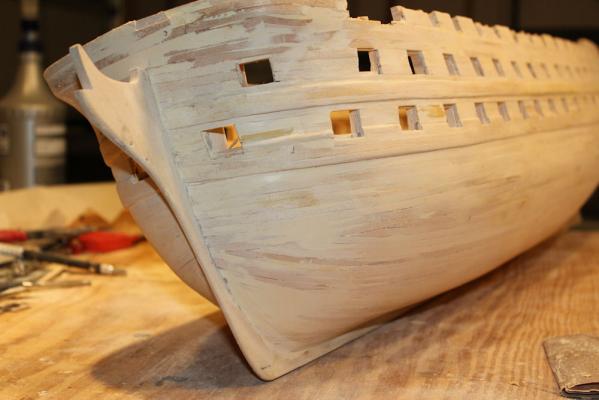
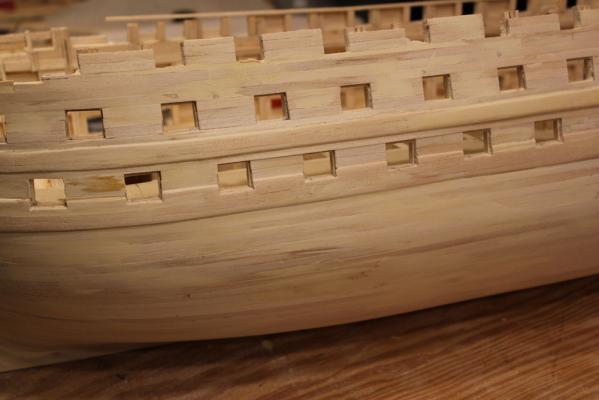
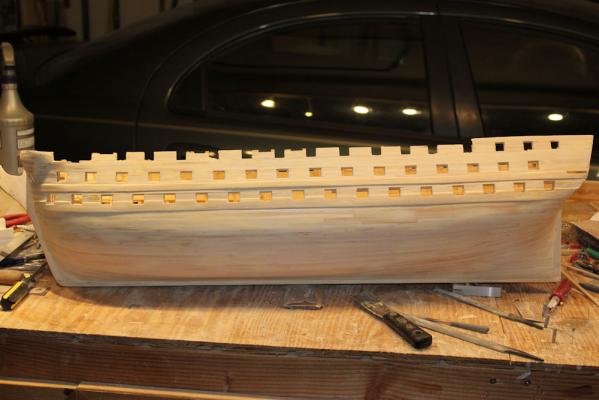
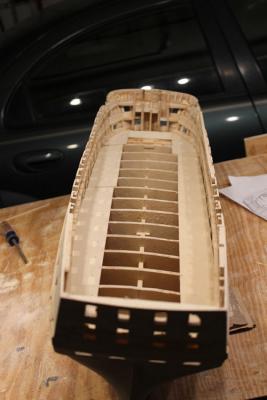
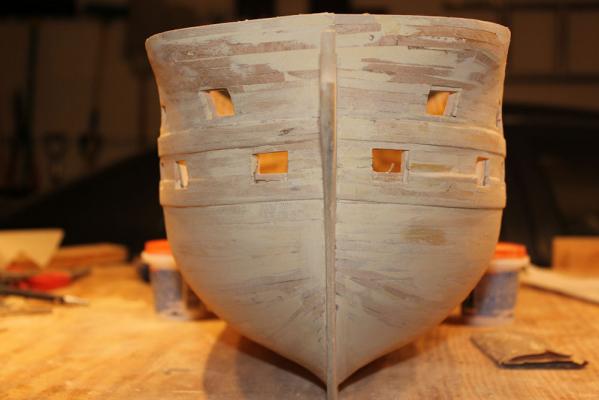
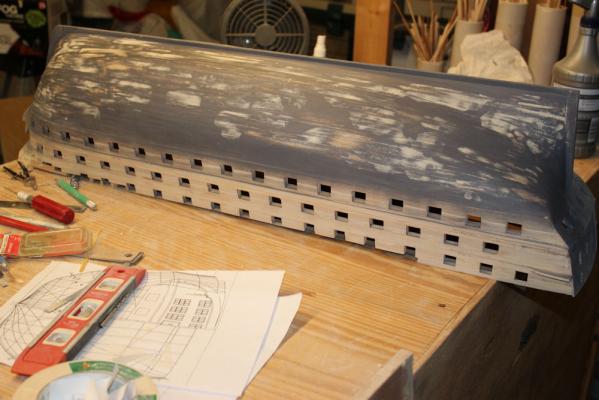
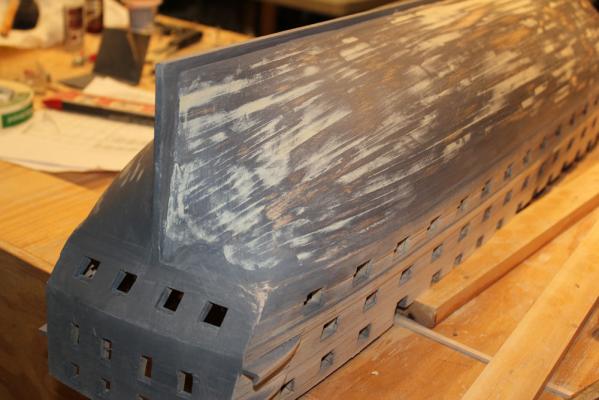
This is my second scratch build. The USS Pennsylvania being my first. I thought I had started a build log on this site of this ship, but, I could not find one (it). So here are SEVERAL photos of it's progress. There are subtle differences in some of the photos as I changed things to accommodate future building. Like where I removed a bow support because the bow sprit would pass right through it. I took out the deck supports in the bulkheads because I decided I wanted to put the decks in individually. It would be easier to work on the lower deck without all of the deck ribs in the way. I did not cutout a door in the quarter galleries as the windows would have curtains on them and hide it anyway. The original framing of the quarter galleries was removed and I redid them when the side hulls were planked. It was more accurate and easier to put the windows and stern gun ports in. In the unpainted stern gallery photos, planks cover some of the window openings. In the primed photos you can see where I started the quarter gallery floor and ceiling. The cannon are left over from my Pennsylvania build. This model will have all of the cannon run out. The Pennsylvania only had a few on each side. The armament on the ships was almost identical. Pennsylvania had 18 pounder long guns on the spar deck, the Columbus had 42 pound carronades. The lower deck guns on both ships were mostly 32 pound long guns with 8 6 inch shell guns in the mix. I do not know where the shell guns were mounted, but, I am not putting them on anyway. Instead the lower deck gus will all be 32 pounders.


-
Columbus by threebs - 1/72 Scale - 74-gun
threebs replied to threebs's topic in - Build logs for subjects built 1801 - 1850
Now that my Pennsylvania is all but done, I will be working on this ship more and more. Have one side about 2/3rds done now. It is actually going pretty fast. If nothing interferes, I think I could have the entire hull planked by Christmas. -
Pennsylvania by threebs - 1/72 scale
threebs replied to threebs's topic in - Build logs for subjects built 1801 - 1850
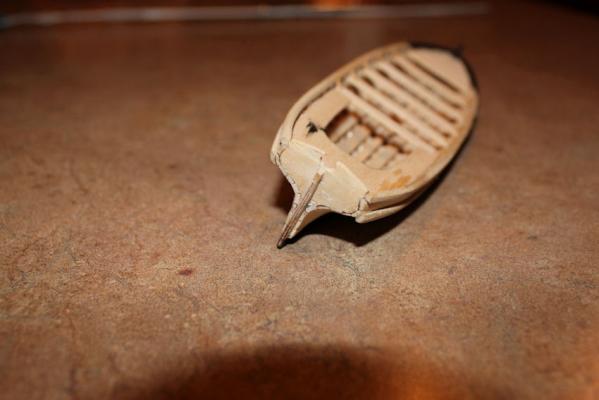
Did anyone notice I had the gudgeons and pintles reversed on my second launch? I just finished fixing it. Started planking the lifeboat. -
Pennsylvania by threebs - 1/72 scale
threebs replied to threebs's topic in - Build logs for subjects built 1801 - 1850
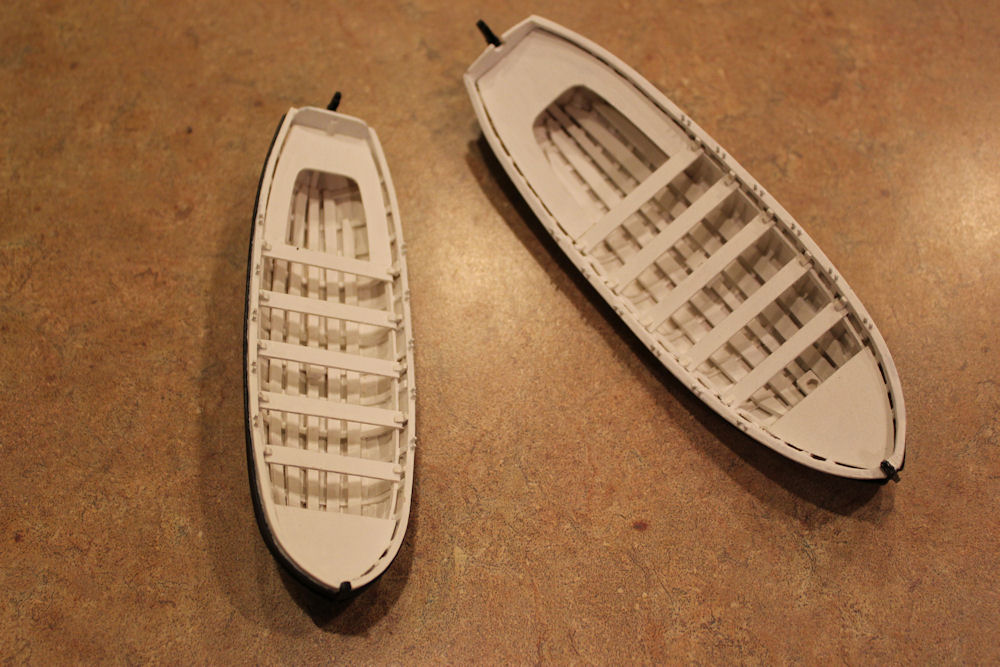
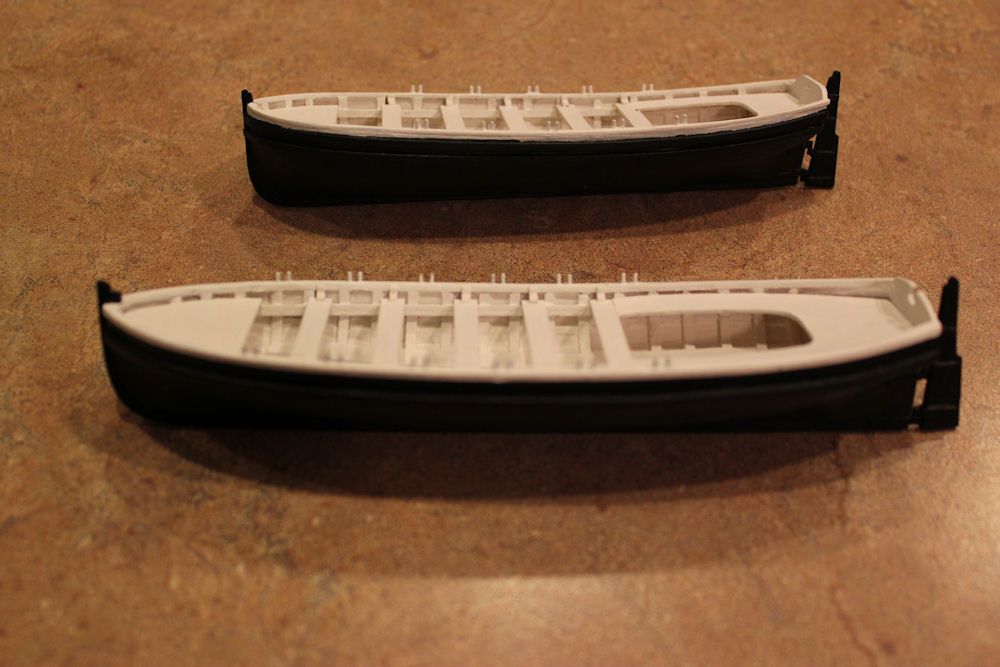
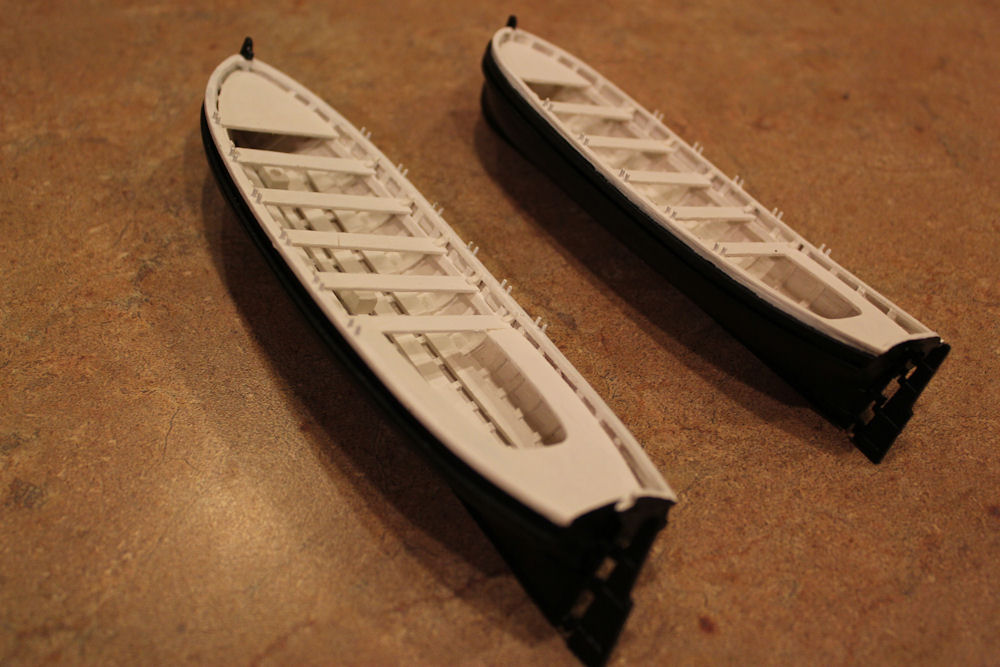
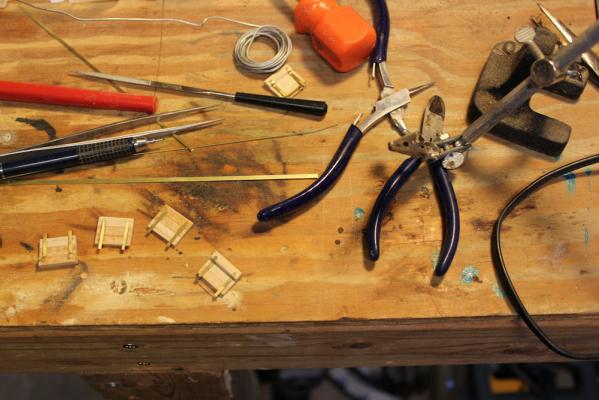
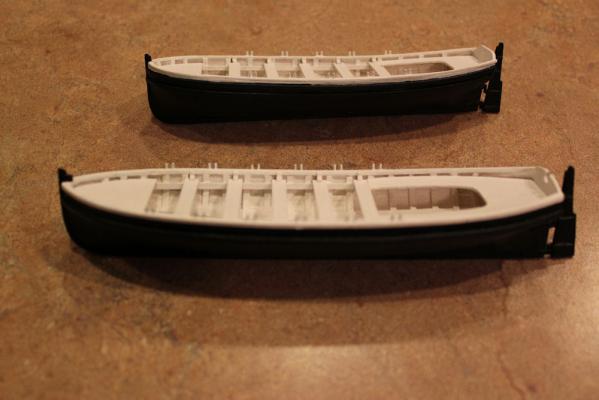
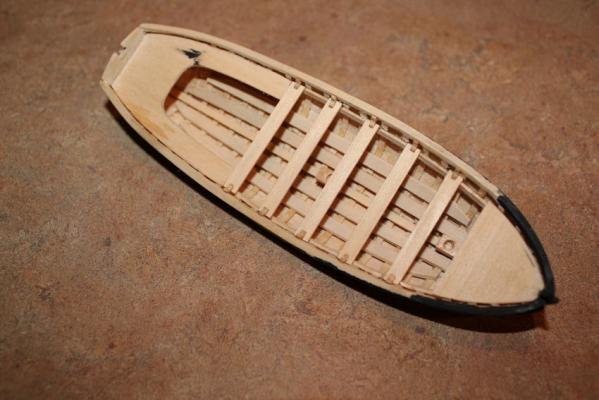
Here are a few photos of the two boats I have done, and two forms for a second cutter and a second launch. I am going to make a small gig/life boat and a barge yet. That should be enough. I may build a case for it, will see. Only have some misc. repairs to chains, copper plates, and make safety railing/netting on the mast platforms. Then it will be done!!

-
Pennsylvania by threebs - 1/72 scale
threebs replied to threebs's topic in - Build logs for subjects built 1801 - 1850
Are the boats oars and other paraphernalia stored in them or below decks until needed? -
Pennsylvania by threebs - 1/72 scale
threebs replied to threebs's topic in - Build logs for subjects built 1801 - 1850
As for clinker built boats, I am going to attempt one with one of the gigs or cutters. This ship only had one voyage, and it was across a bay to it's berth. I would imagine it did not carry more than 4 to six boats. So, I do not think so for this ship. However I will be doing one or two for the USS Columbus which I am currently planking. -
Pennsylvania by threebs - 1/72 scale
threebs replied to threebs's topic in - Build logs for subjects built 1801 - 1850
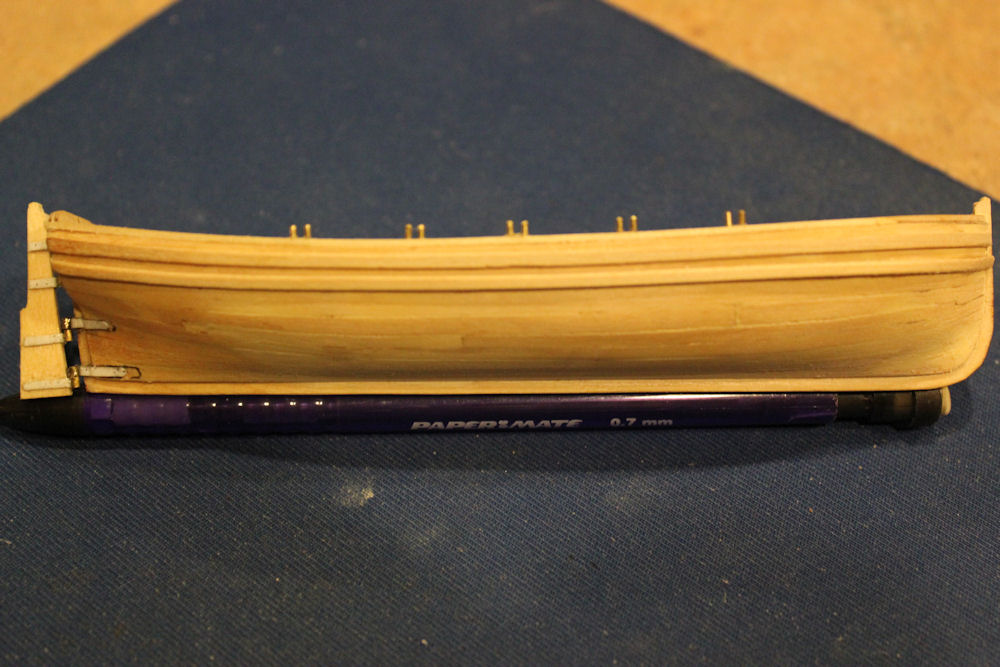
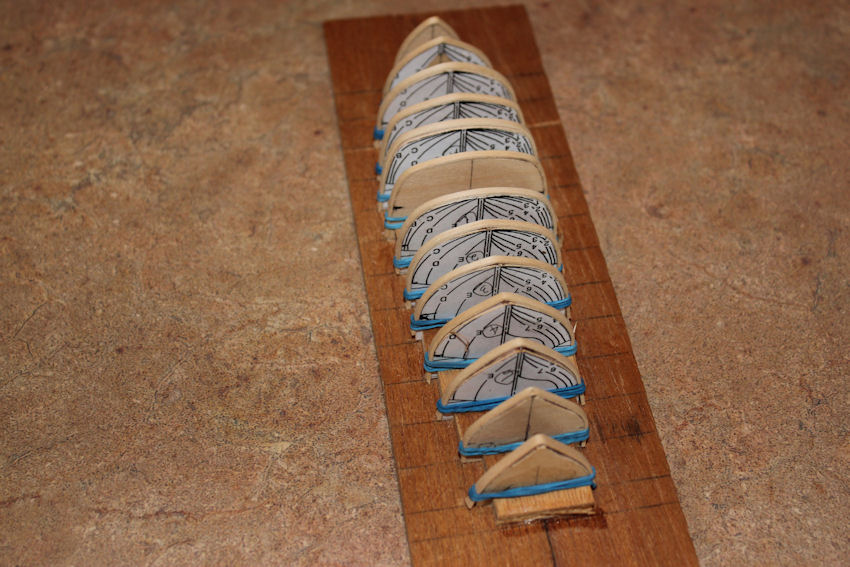
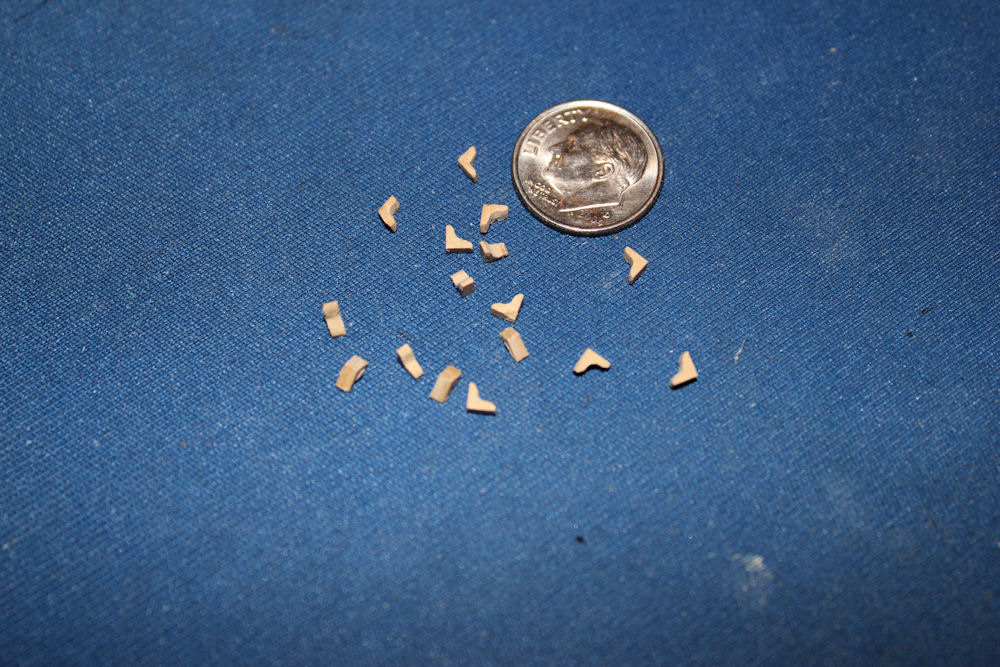
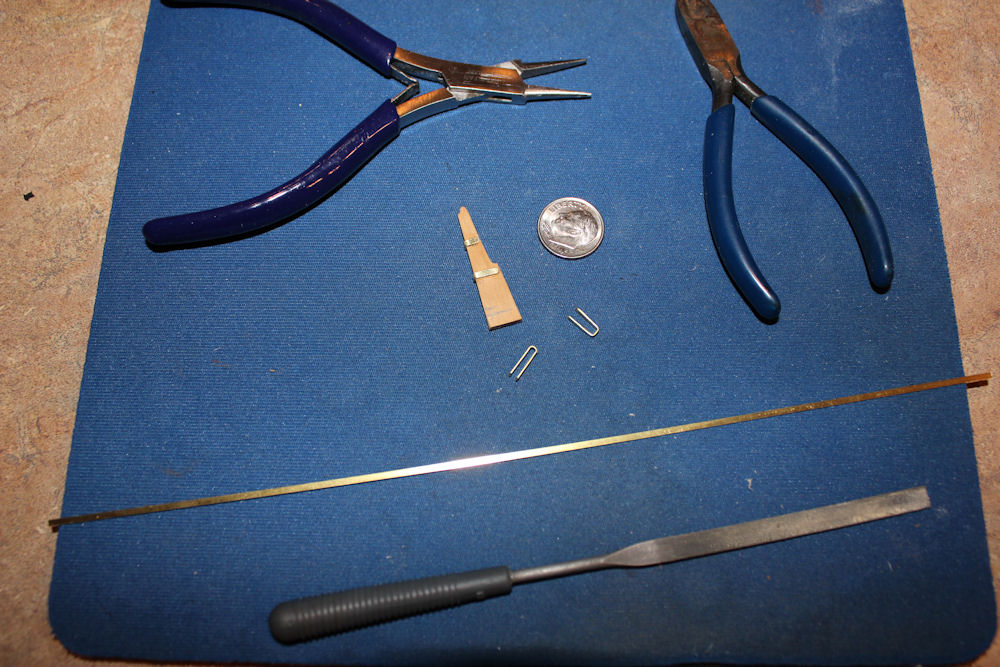
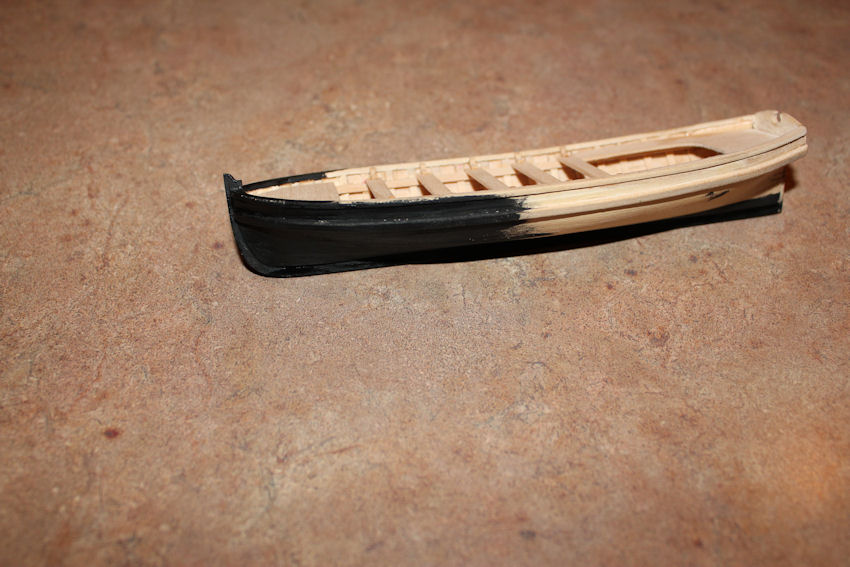
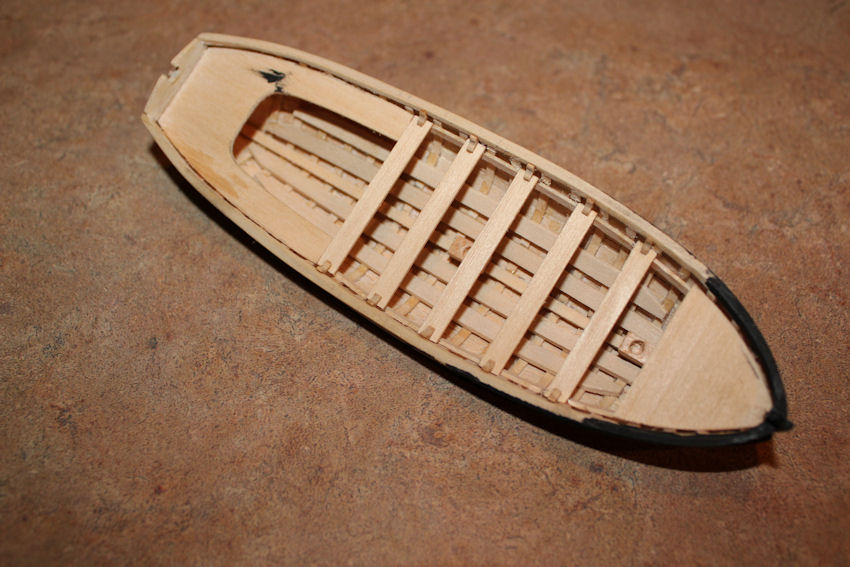
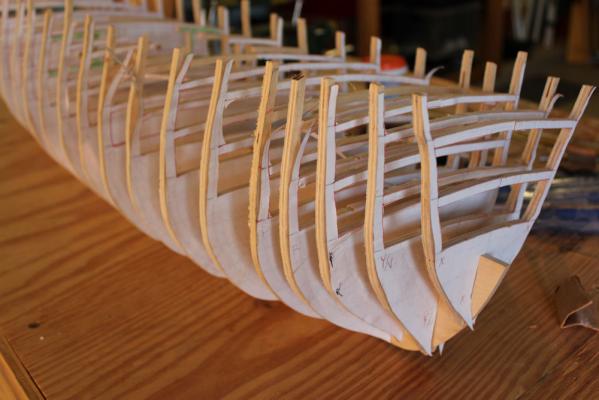
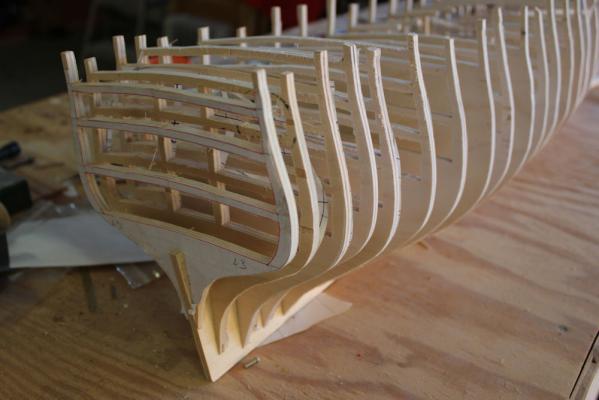
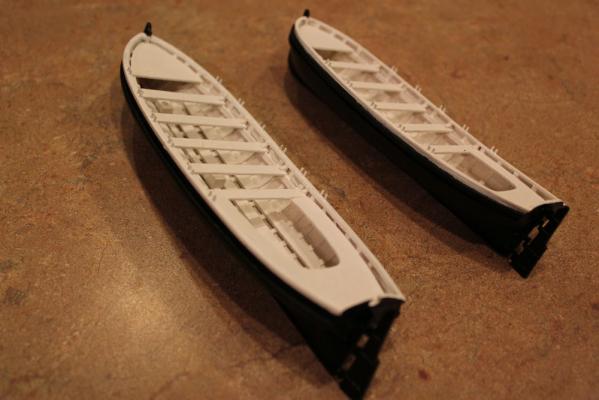
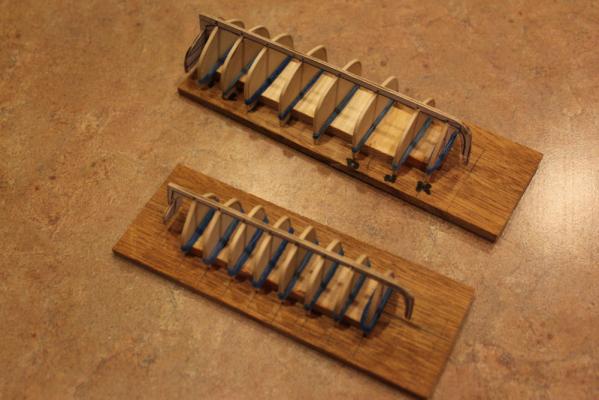
Thank you for the compliments! I screwed up my first planking attempt on the launch. Forgot to put "ribs" over the frames! got about half way on both sides when it occurred to me, "Wait a minute! How do I get this thing off the frames when it is done?!!" Looked at the builds I had been viewing to get some pointers on how to proceed and noticed the "shims" bent over the frames and held down with rubber bands. Photos of the frames of the cutter I am starting show what I mean as opposed to the previously posted photos of the launch frames WITHOUT the ribs. I go into brain freeze sometimes and simply space out on some things I know I haven't painted the whole boat, but, I bought enamel paints at the hobby store the other day not realizing thry were not the acrylic version of the same color (see previous sentence!), and wanted to see what it looked like. It will be fine. Took me almost an hour to file the knees for the seat braces. Let me know what you think. It looked bad right off the frames, and, I was a little disappointed I had not done a better job. However, I persevered and it doesn't look half bad at all. Once ALL the ribs were in place and the floor in it really looked much better and I was much happier.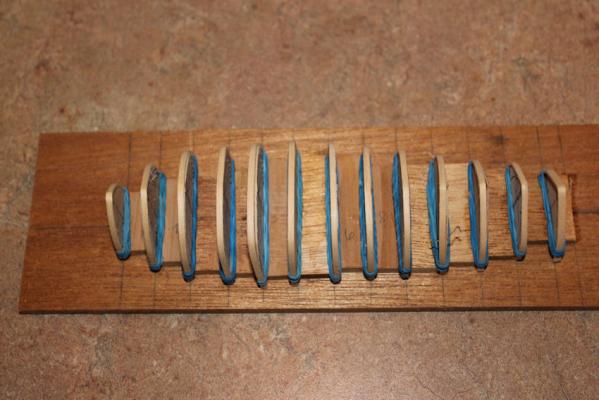


-
Pennsylvania by threebs - 1/72 scale
threebs replied to threebs's topic in - Build logs for subjects built 1801 - 1850
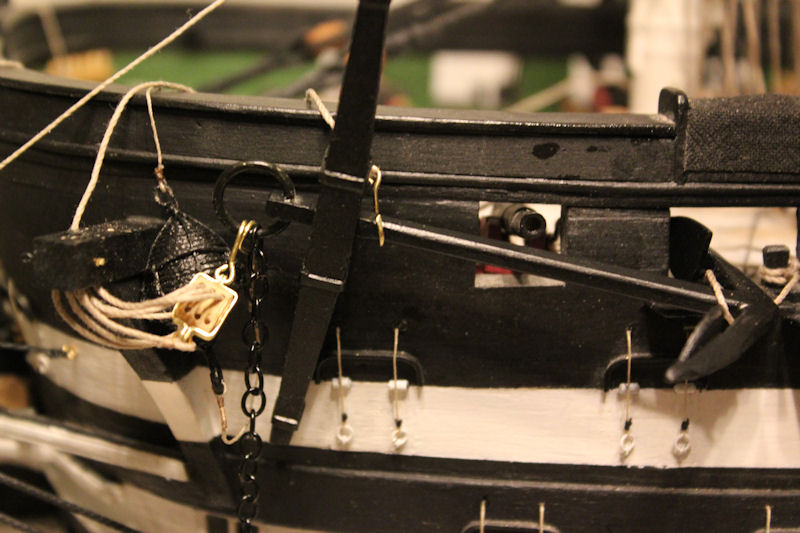
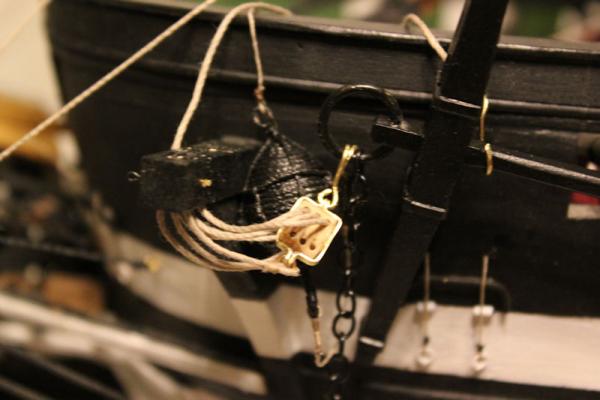
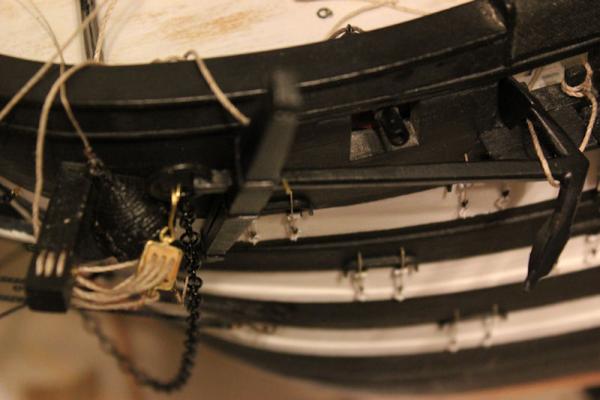
Here are some photos of my anchor area. Have the other side and the sheet anchors to do yet. Also, I did find a couple of ship boat sites, I will also try the ones you have mentioned. Any way here is my first attempt.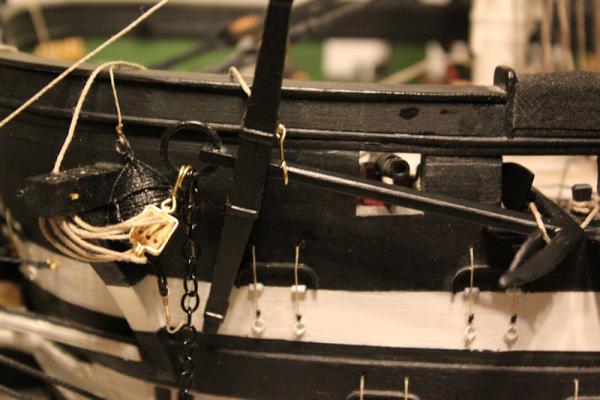


-
Pennsylvania by threebs - 1/72 scale
threebs replied to threebs's topic in - Build logs for subjects built 1801 - 1850
OK, thanks. But, isn't the "base", octagonal in this case, on the fore mast chain wale up against the hull or, on the hull abutting the chain wale, it appears so in Lee's book on masting and rigging? OH! Am I glad I checked your Constellation build? I was just racking my brain as to how to proceed in building my ship's boats! This is great, everything I need is right there. I book marked the page right away! I am going to search for Glen's Constitution build to see his posts on the boats. I am not so good at searching this sight, seems I get something different from what I want every time I try. -
Pennsylvania by threebs - 1/72 scale
threebs replied to threebs's topic in - Build logs for subjects built 1801 - 1850
As I have been working on the anchors and buoys, I have been reading up about the fish davits. Not many photos of ships using them. Is it safe to say the are only used to drop, lift and stow the anchors and are otherwise stowed away themselves? As I am rigging the anchors in a stowed position, do I really need to make them? -
Pennsylvania by threebs - 1/72 scale
threebs replied to threebs's topic in - Build logs for subjects built 1801 - 1850
Made a mistake about Victory's lower gun deck battery. She has 32 pounder long guns, not 24's. Even so the height difference is only 1-1/2". -
Pennsylvania by threebs - 1/72 scale
threebs replied to threebs's topic in - Build logs for subjects built 1801 - 1850
yes, I was afraid of that. I did some divider measurements (which I should have done instead of eye balling it) of a buoy in an article in Ships in Scale volume XXI number 3 May/June 2010. I compared the length of the buoy to the height of a gun port. The article is about making anchor's and is where I got the plans for the anchors I made. The HMS Warrior (the ship in the article for which the anchor's were made), carried 24 pounders on her lower gun deck, as did Victory. With a caliber of 5.84 inches, using a formula of 6 times the diameter of the shot, a 24 pound gun port is about 35 inches, just short of 3 feet. Using that measurement, in photo above and the diorama photo in the article. it looks like the buoy is somewhere between 4 to 4-1/2 feet, or 1-1/2 times the height of the port. I placed a 3/4"X1/2" piece of scrape in place of the 1" buoy I made and it looks way better in proportion. I am going to make new buoy's 4-1/2' or just over 3/4". Thank you for your input, it is very helpful to get other views and suggestions!!