


SawdustDave
-
Posts
1,770 -
Joined
-
Last visited
Content Type
Profiles
Forums
Gallery
Events
Everything posted by SawdustDave
-
 Your advise makes a lot of sense Ken. I appreciate your input. Please jump in if you think of anything more to pass on. The "clove hitch" reminder, I could have gone all day without.
- 742 replies
-
- 5
-

-
- constitution
- frigate
- (and 1 more)
-
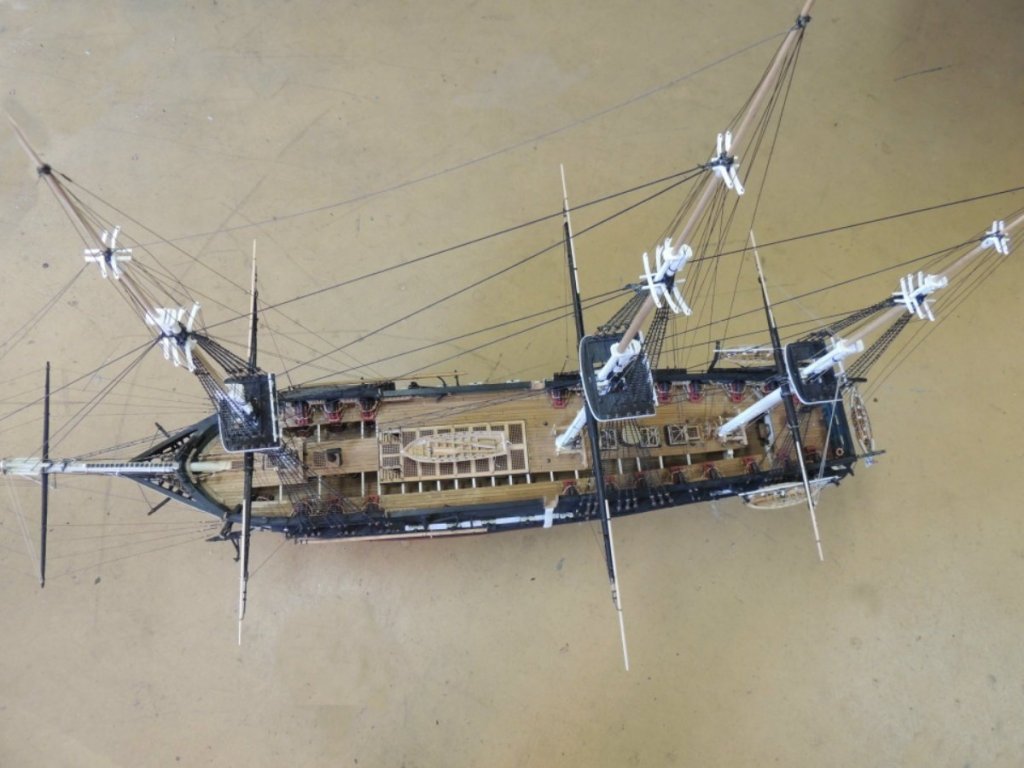
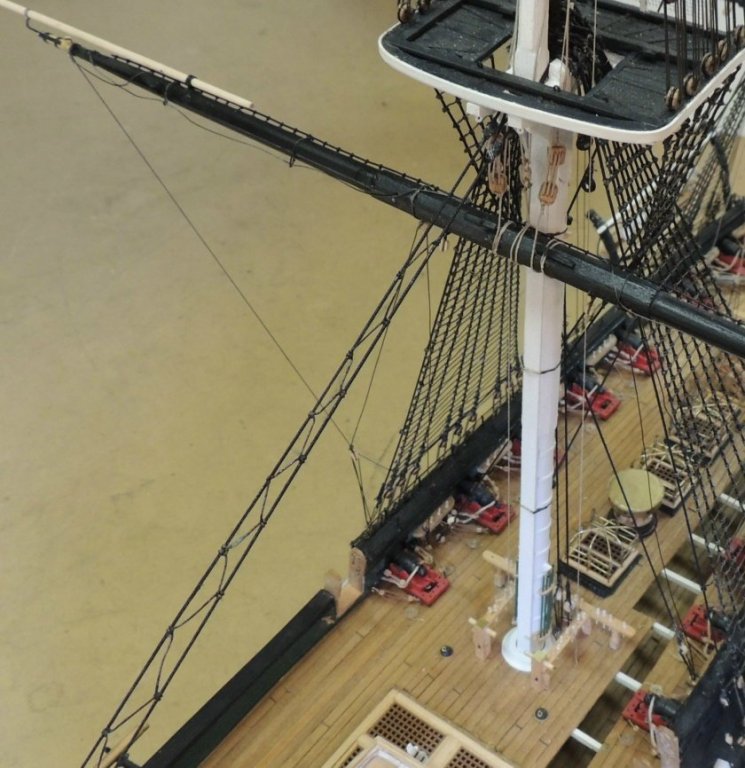
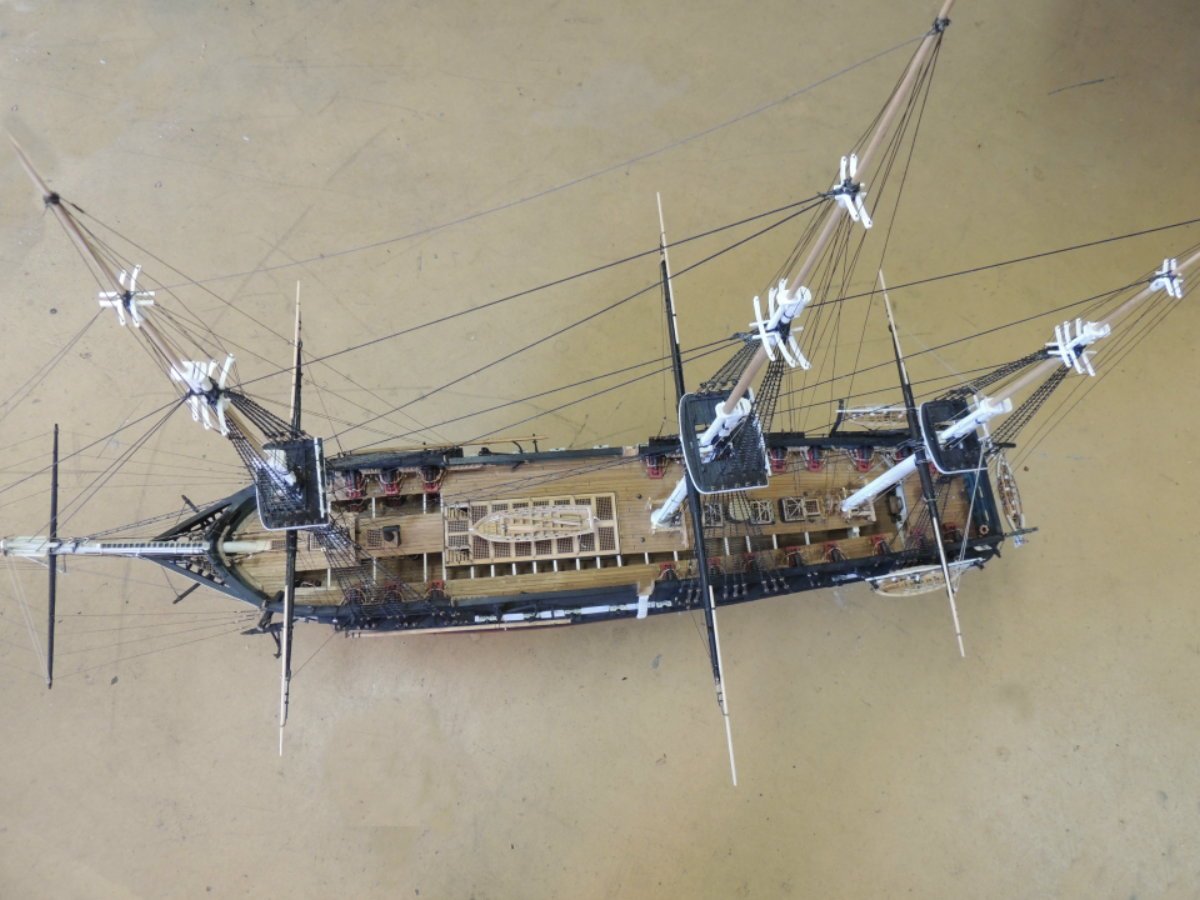
UPDATE.... RIGGING THE YARDS: Getting the lower yards hanging level completed. Each secured with halliard tackle after hanging with slings and jeer blocks. Reaching in to work with tools without damaging all the standing rigging is giving me a lot of heartburn. So far, no harm done.
- 742 replies
-
- 14
-
-
- constitution
- frigate
- (and 1 more)
-
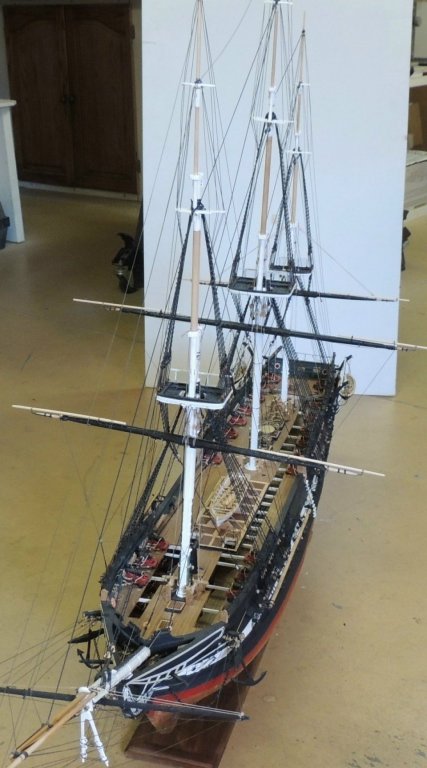
Question for Tom, Ken, or any others with opinions on rigging sequence of this model. While still working on preparing the yards.... now adding foot ropes.... I have begun studying the rigging plans in more detail. The question, for those, traveled this road before me.... Best starting point. Fore to aft? Top-down yards, or lower-up? The standing rigging and bow sprit pretty much completed long ago..... any advise as to which spars I hang first? Happy New Year All Dave
- 742 replies
-
- 4
-
-
- constitution
- frigate
- (and 1 more)
-
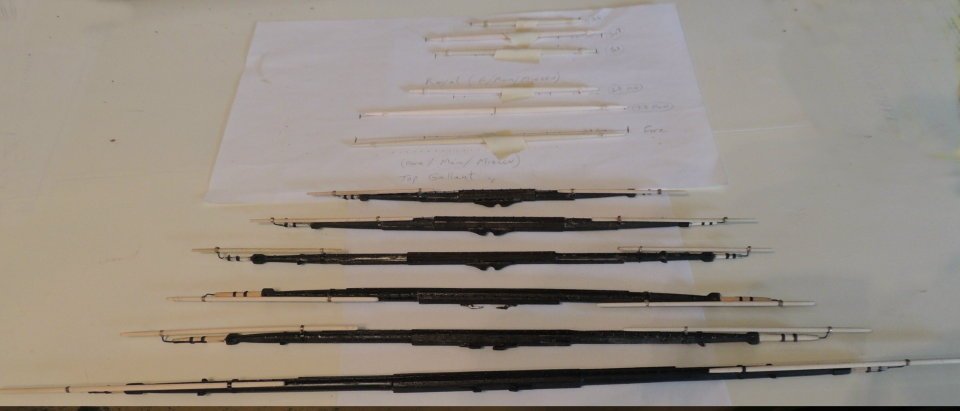
UPDATE..... Thinking, a few friends may be wondering if I'm actually back to this build after taking a little "fun break". Well here's your evidence..... and a good laugh to go with it. Finishing up the Cross Jack Yards, and the Topsail Yards went pretty well since I had already shaped them and had them ready for the eyebolts and iron works. It didn't take long for me to regain the silver soldering technique required to complete the iron works. The laugh comes when I moved on to shape the Royal and Topgallant yards. Got them all turned and, the ones with eyebolts and iron works were finished.... something just didn't seem right. When laid along with the longer yards, the LENGTHS did not fit my eye. Checked all measurements against the drawing specs..... everything was perfect. RECHECKED..... still perfect. Then it hit me..... When I took the specs and made the layout sketch, I had not re-scaled them from 1:72 to fit my 1/60th scale!!!! After a few choice words I cannot repeat here.... Back to the lathe. Think we got it right this time. This, along with all the holiday activity, and trying to remove a mountain of oak tree leaves from my yard has kept me occupied. Happy New Year all!
- 742 replies
-
- 9
-
-
- constitution
- frigate
- (and 1 more)
-
Glad to hear your surgery was a complete success Jon. Sounds like you've been through a major ordeal, but the worst is now behind you (no pun intended). Dave
-
So here we are again, all refreshed after taking a little break to build my little Jag. Picked up where I left off building the spars.... dozens of jackstay eyebolts to install on five more spars should keep me occupied for a few days. Cheers
- 742 replies
-
- 6
-
-
- constitution
- frigate
- (and 1 more)
-
Thank you all for visiting and commenting on this fun project. Needless to say, it has been a nice little break from the modelers burn out I was experiencing with over three years of intense scratch building major ship models. Now it's time to bring Old Ironsides back to the work bench. See you there.
-
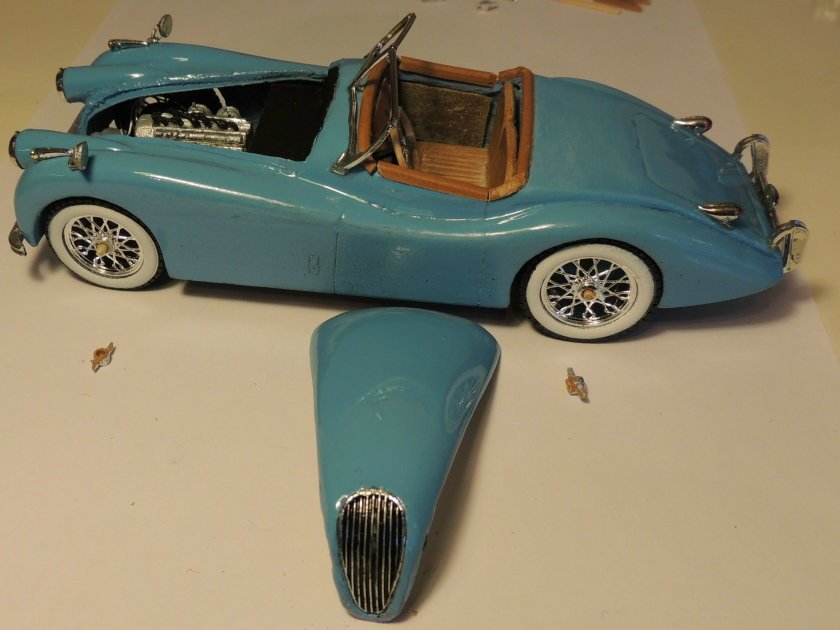
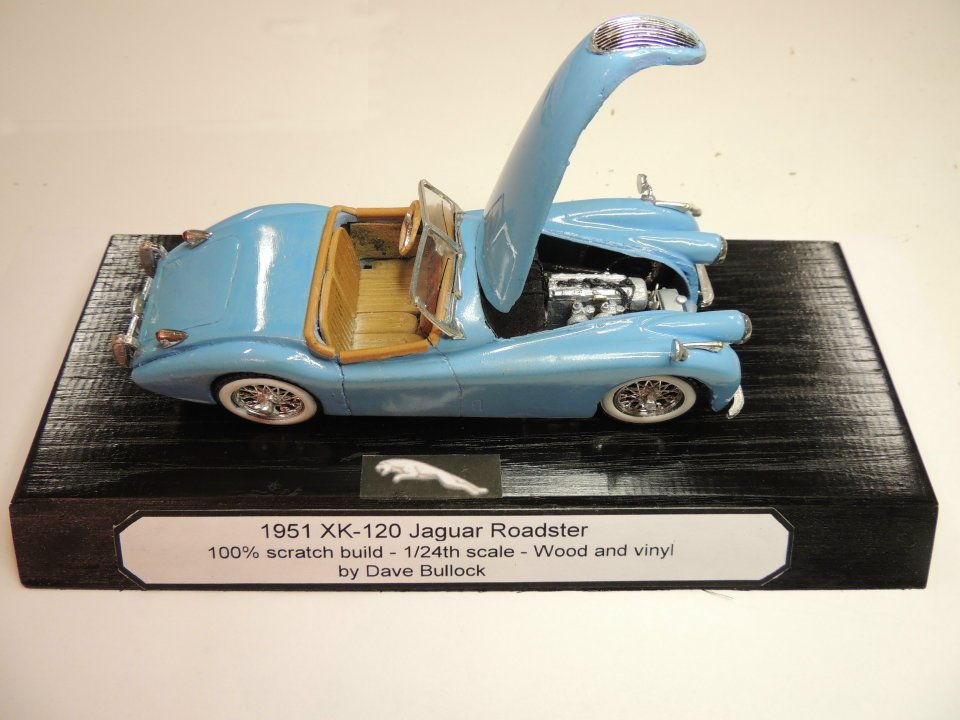
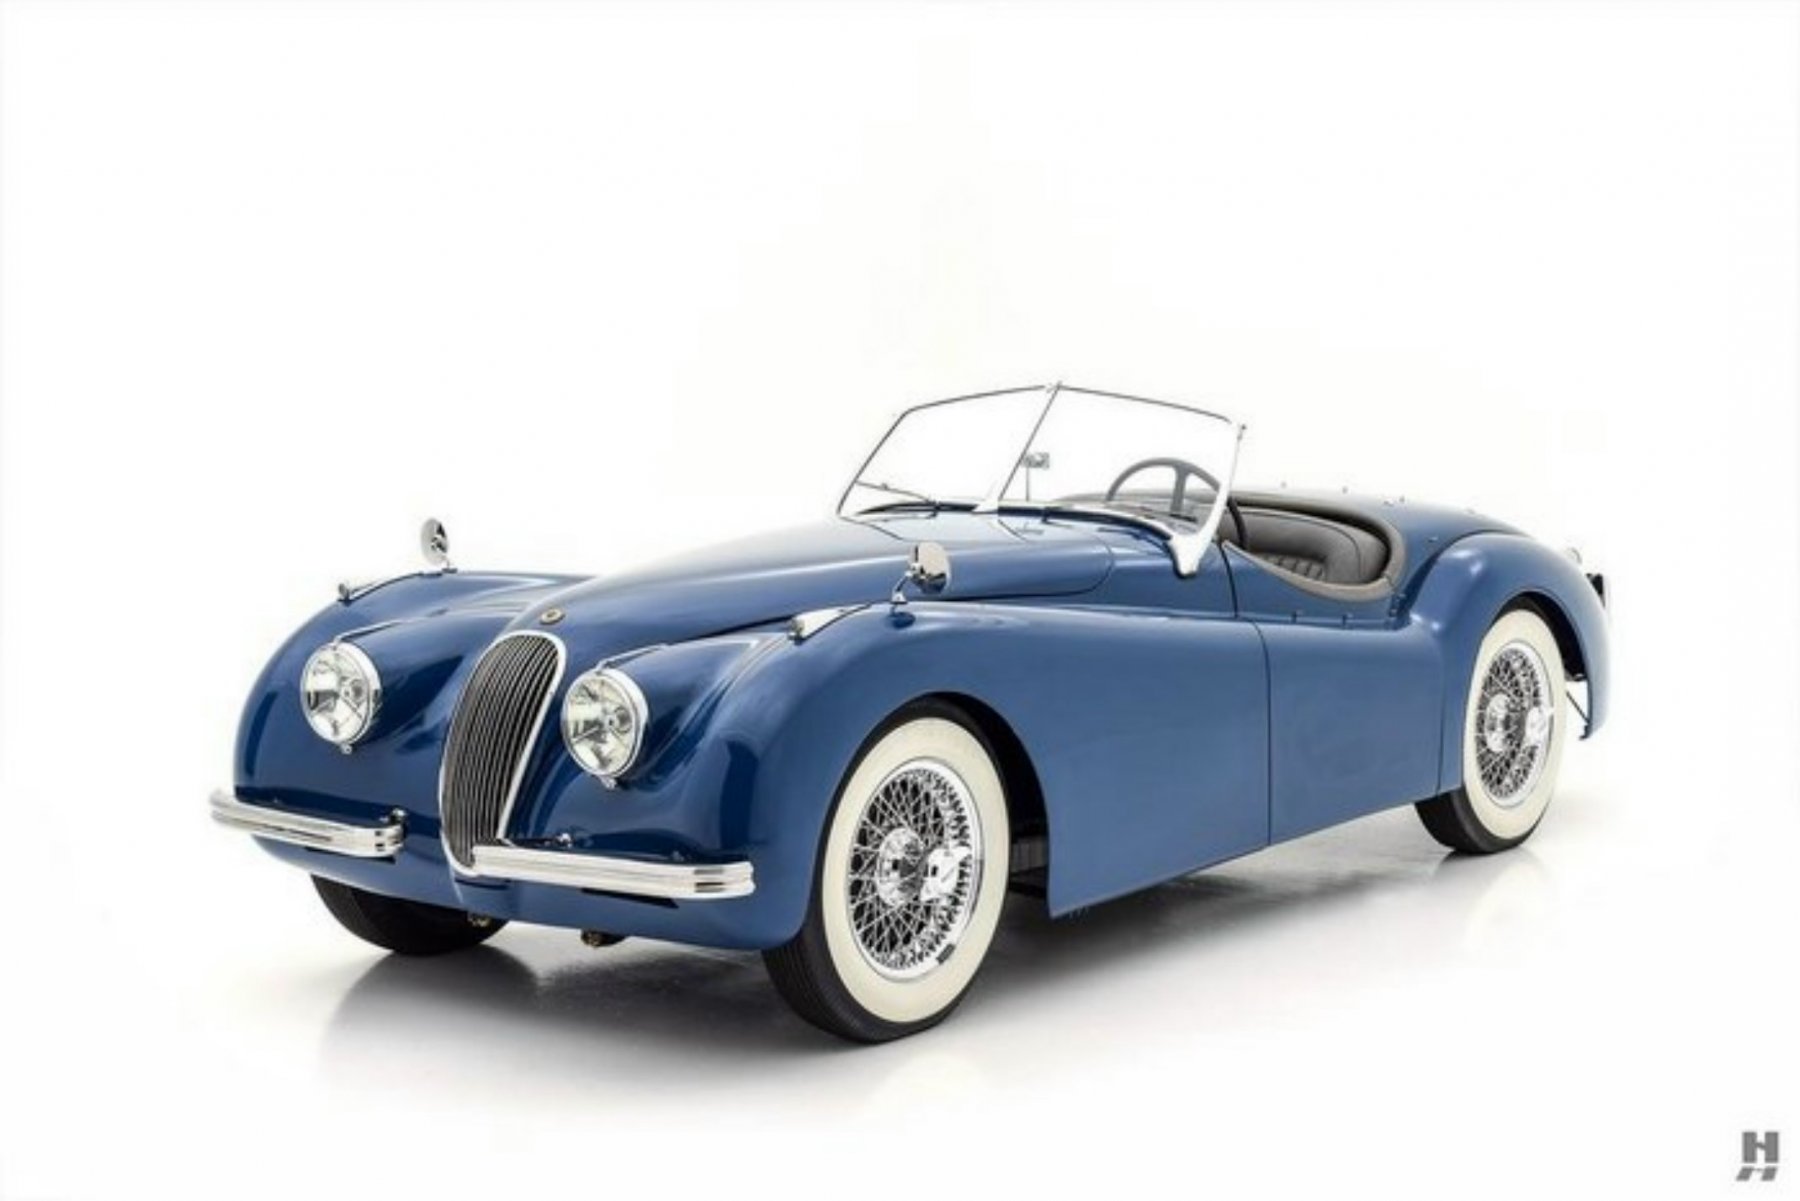
FINALLY FINISHED..... I tried to take a photo this morning with close to the same angle as the internet photo used to create this model. Not exact but close enough for hand grenades and horse shoes.... Still a few tasks to work on underneath, but nothing worth including here in closing this little fun build log. Thanks all for sharing your input.


- 74 replies
-
- 15
-
-
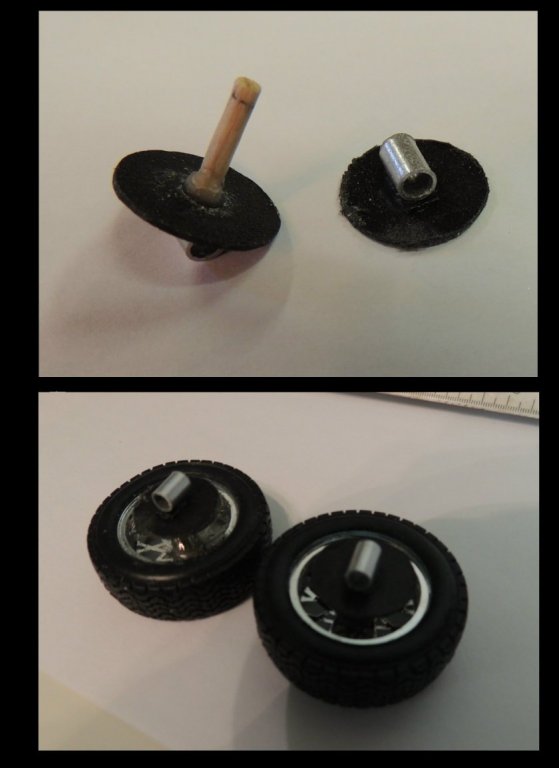
FINISHED? Not really. But I did get my first look with the wheels dry fitted this morning. Note the rolled trim around the cockpit as well... Still a few things to wrap up .... wind shield and wiper blades - and exhaust system being primary.
-
Believe me Mark.... neither had I, but, with winter coming on, figured I could always use it for firewood. 🤪
-
Thanks Nick and Niles. Hope to have more progress soon. Dave
-
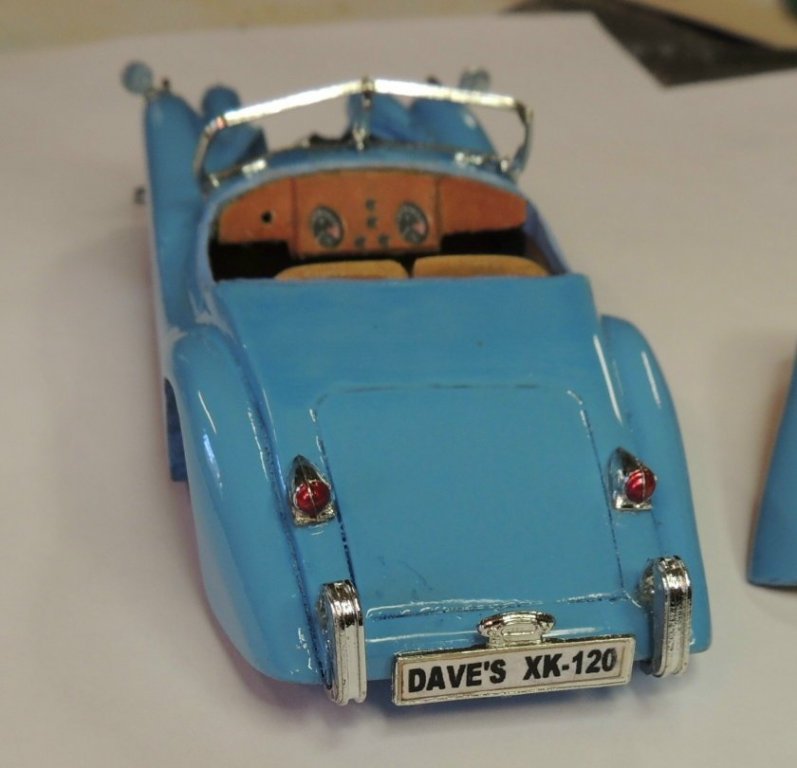
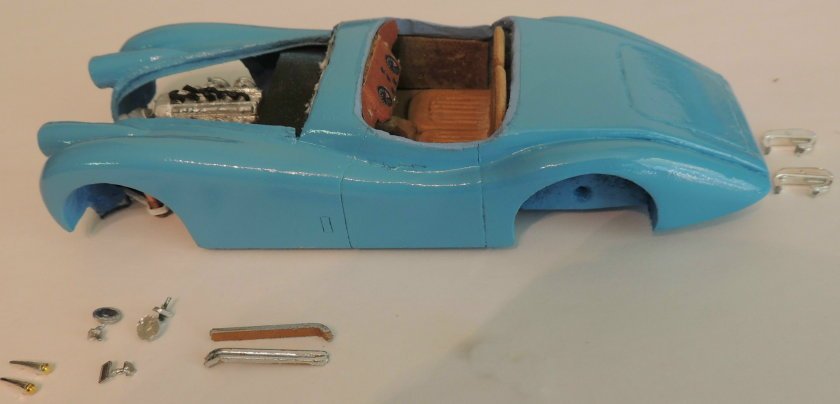
Pretty big morning...... A week of creating accessory parts and applying Molotow chrome. Spent yesterday mounting the accessories. Last night, finally shot the Jag with four coats of Testers High Gloss Clear. HOLY CRAP! Having never used this stuff before, I held my breath as I opened the shop this morning. Also, this is the first time I've seen her with all the masking tape removed. Guess I'll need to register the license plate with the state of NC.
- 74 replies
-
- 12
-
-
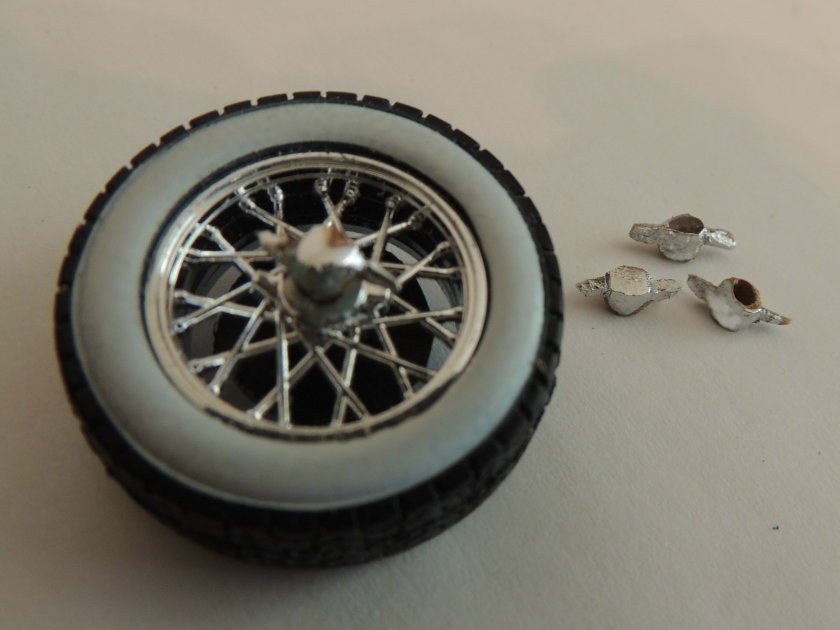
The winged knock off hubs...... So tiny, just holding them while carving was kinda testy.... band aid on my finger as evidence.
-
Since the body paint was applied only three days ago, I can't handle it for another four days before I begin to polish it out with 1,000 grit and begin shooting it with clear coat spray. So I began creating the many accessories .... bumpers, mirrors, turn signals, tail lights, etc) The Molotow pin is amazing!
-
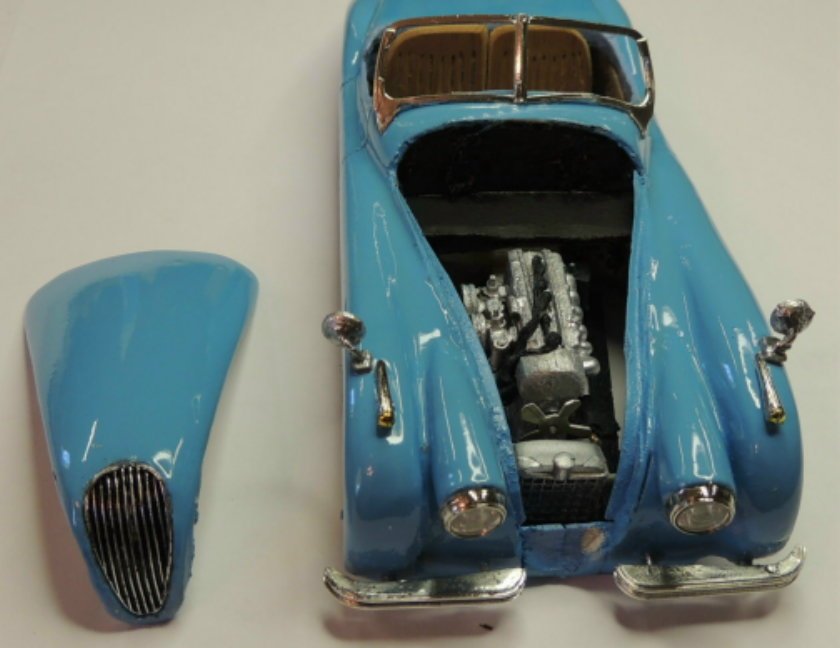
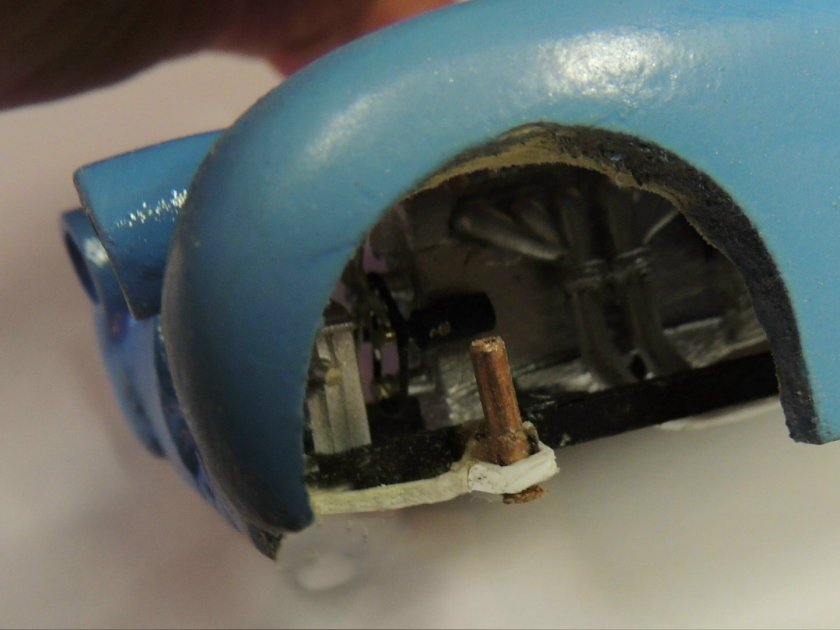
Progress.... Several things going on right now. First this shot of the engine installed.... Note the spark plug wires running to the distributor ..... Next, developing the front end for mounting the wheels. Since we're not building a pine wood derby car here, I'm using brass tubing to create a mounting that will allow the front wheels to be turned by turning the steering wheel. I'm sure I will not be able to create a Rack and Pinion steering system, but I have a fair idea how to emulate the mechanism. Worth a try.....
.thumb.JPG.a08d7567d200ccbed6c7fd6a468342d1.JPG)
-
Marker will work great for me since the parts are so small.
-
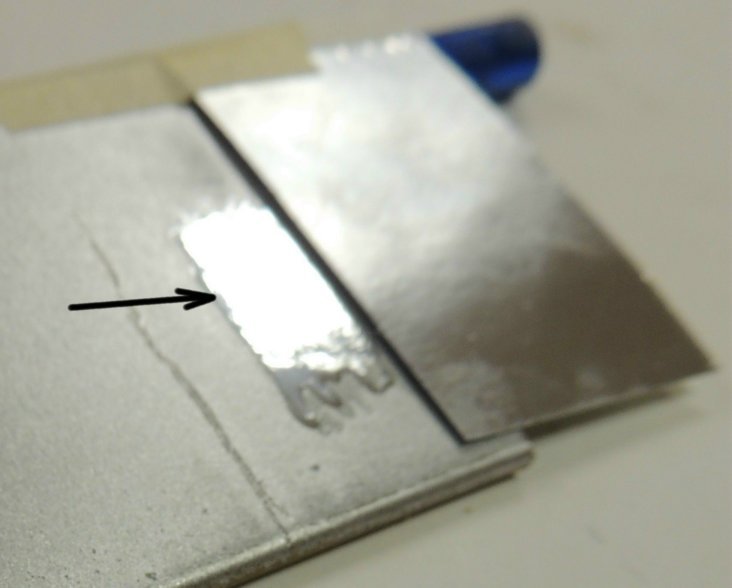
Thanks Lou.... Sorry bout the camera focus. I was mainly trying to get the light reflection to show up.... which it did. Looks like we have a winner at this point. The decal sheet you suggested looks great and I’ll keep an eye out for it. Nikbud.... my camera angle didn’t catch the foil’s shine very well, but, by comparison, it wasn’t even close. Keep in mind, this was a simple test on a scrap that had been painted silver. The liquid chrome will look even deeper when applied over gloss black enamel paint. You guys are great. Dave
-
CHROME..... nikbud.... "To get a chrome effect have you tried "Bare Metal Foil" ? I've used it on a few 1/24 scale cars and it works a teat. IIRC you can get it in bright or dull chrome and aluminium and copper." Yes I did give it a shot, as well as Ken's suggestion of kitchen aluminum foil..... Here's a shot of the testing of the Molotow Liquid Chrome I purchased yesterday evening.... The foil seen in this comparison is the product you referred to. You make the call.
-
Ken my friend.... I must tell you, although I will never come close to your amazing skills, I have come to look at everything I do with you in mind. As you know, your Connie log is my primary "go to" resource for my own attempt to build her. As for your Jag restoration..... mind blowingly awesome! I will meet you half way for an opportunity to take her for a spin. Let's say Austin.... next June. Great to hear from you mate. Thanks for sharing your Jag. Dave
-
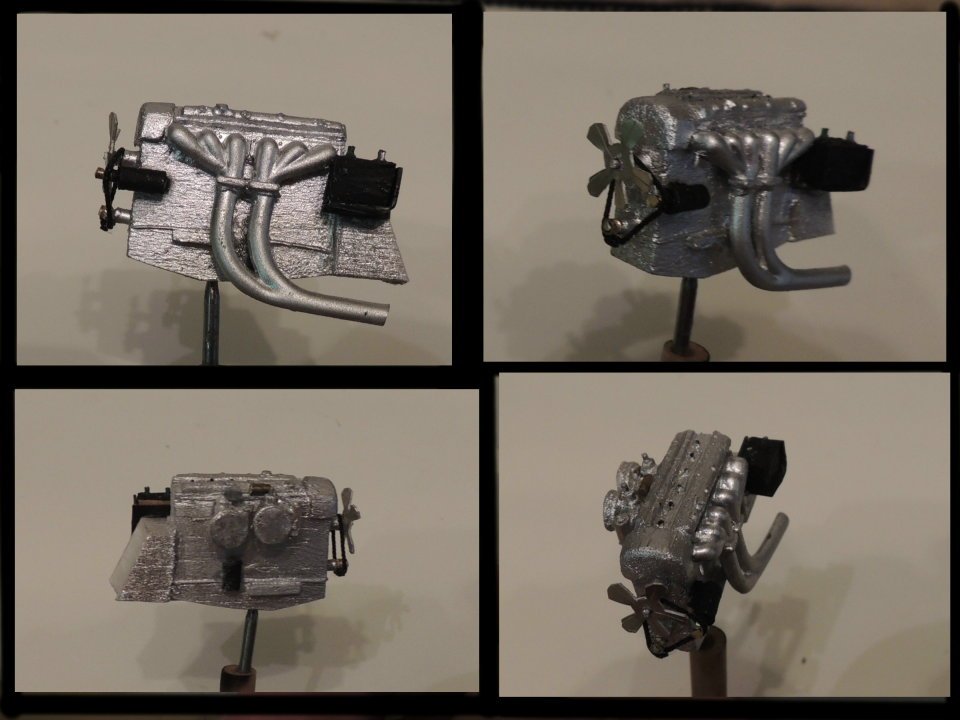
Engine Ready to Install.... Headers, carbs, battery, fan, alternator, etc all mounted..... ready to be fitted after I mount the radiator. Dyno test results........ 4.2 hp
-
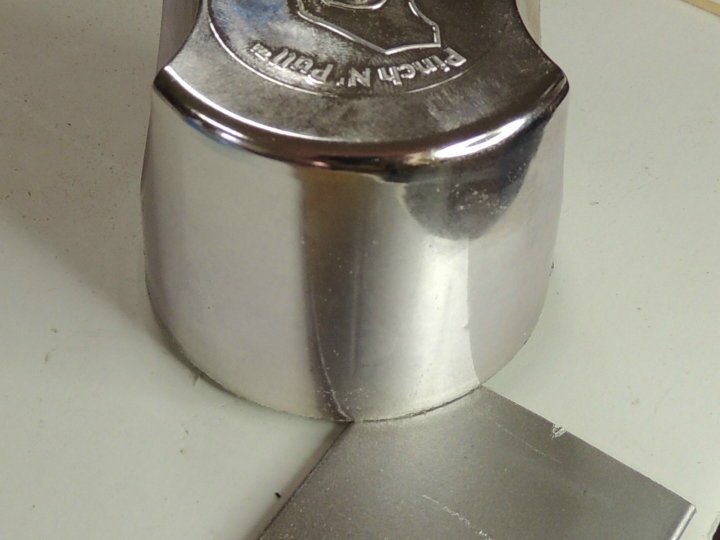
Thinking ahead.... Tried to polish up a test spot of the Krylon Metallic Brilliant Silver spray paint.... very bad results. A few small accessory parts will eventually be created which will need to have a chrome finish.... bumpers, tail lights, grill, windshield frames, to name a few. Did not like what I read about some of the special chrome painting projects, but, if necessary, was prepared to give it a go. Then the thought.... The big cap used to cover the nozzle of the can has a beautiful chrome finish..... falsely representing what the paint will look like. I decided that the parts will be so small, I believe I can create them by cutting up the can lid into shapes and applying a little heat as necessary. Hmmmmm If this fails, I have no choice but try Alclad, which I have never used, but may have to go there. FORGET ALL THAT! A modeling pro (close friend) just told me about "Molotow".... available at Hayes Hobby House. I will have it before the day is over..... Oh Yea!
-
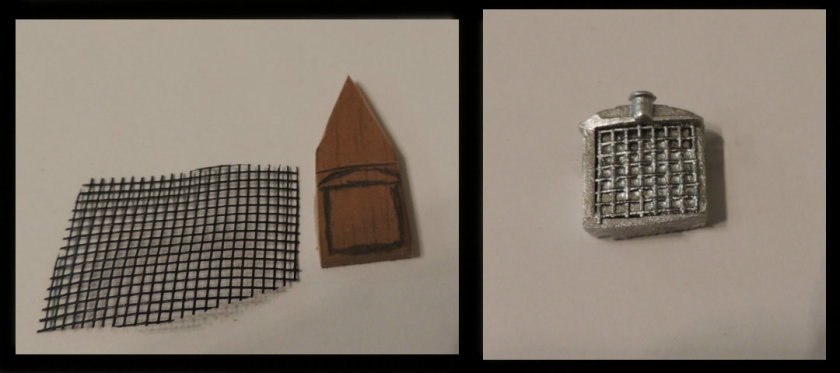
Getting closer to installing the engine...... first we need a radiator - right? Used a piece of the faux wood vinyl I love to use for very small detailed carvings to create this with a small cut out of window screen to simulate the texture. Wish I had something smaller, but decided it will work since the area will hardly be visable once installed. Turning now to creating a little battery and mounting box......
-
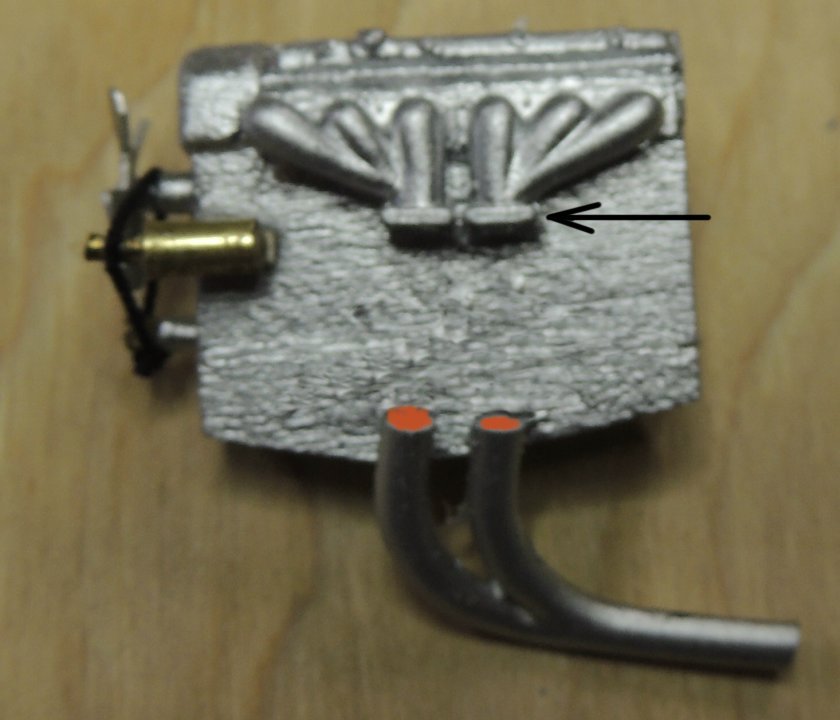
After mounting the painted manifold to the engine block it just didn't look right.... realized there was no joint plate for sealing the collector pipes to the headers. I remember because I had to replace the gaskets on my own Jag years ago. Easy fix.... I cut the lower pipes and mounted blocks to simulate the exhaust joint plates. Good to go....
-
Thanks Lou. Mark, you know me well my friend. “Traditional” definitely not in my wheel house. Dave


.JPG.29ec04080c2ca257423e315efd953ae8.JPG)
