
HOLIDAY DONATION DRIVE - SUPPORT MSW - DO YOUR PART TO KEEP THIS GREAT FORUM GOING! (Only 66 donations so far out of 49,000 members - Can we at least get100? C'mon guys!)
×

MarisStella.hr
-
Posts
479 -
Joined
-
Last visited
Content Type
Profiles
Forums
Gallery
Events
Everything posted by MarisStella.hr
-
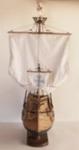
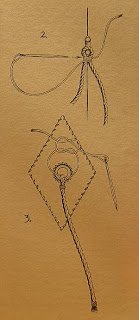
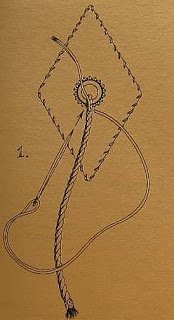
 Hi Mr. Mike... there are separated ropers for fastening the sail to the yard: each hole on the sail - one rope ... Each rope is fastened around the yard, the knot is on the top of the yard... the ends of the rope fall free down the sail ... The knots are the simple overheand double knots ... Zoran
- 204 replies
-
- 1
-

-
- trajta
- marisstella
- (and 1 more)
-
Hi Mr. Mike ... are You sure this nettle is the same long as the ones at the drawing ? ... The sail could be shorten by banding the nettles around the yard. The yard with the shorten sail could be put in many positions, but the most common one is to put the yard into the same position as the ful sail is on ... The sail could be furled, so the complete sail is bound to the yard with the nettles. The nettle should be long enough ... The sail looks great, Bravo !! Regards, Zoran
- 204 replies
-
- 1
-
-
- trajta
- marisstella
- (and 1 more)
-
I picked it up from the internet, so they are not to print or share actually... I used them to realize the nettles completely years ago ... So they are helpfull at this moment as well ... :):) we should not take somebody else's pictures, but it was handy at this moment ... I am sure You can make the same ones ... Regards, Zoran
-
Bravo Mr. Mike ! You see, it was not so hard to do ... We never ask too much from the modeler :):) but it is not too easy as well ... Bravo once again ... Regards, Zoran
- 204 replies
-
- 2
-
-
- trajta
- marisstella
- (and 1 more)
-
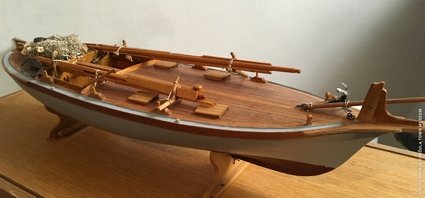
At the real Stilac it is a cabin for the crew... it is higher then the main deck ... At this model it is all closed... Zoran
-
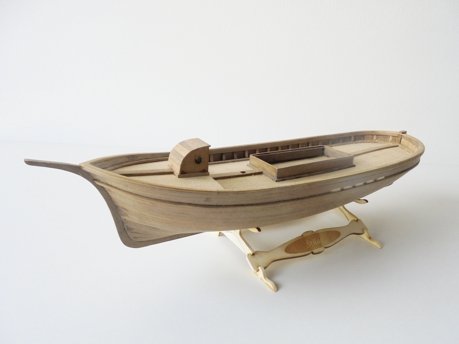
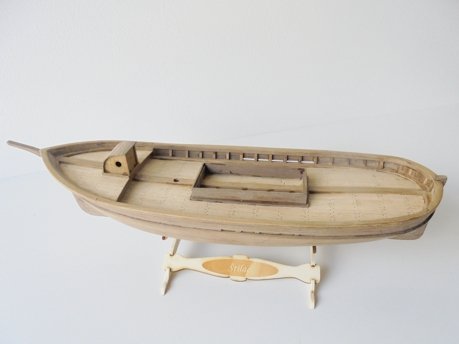
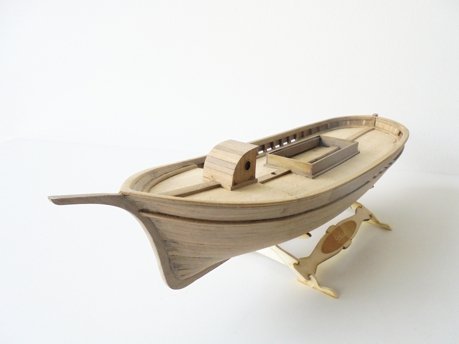
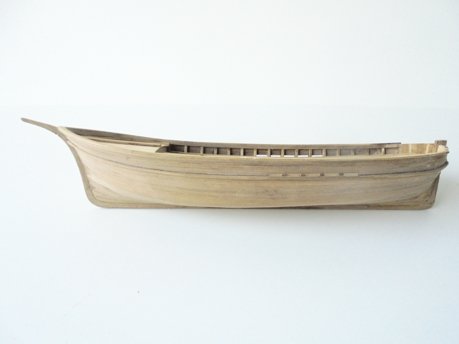
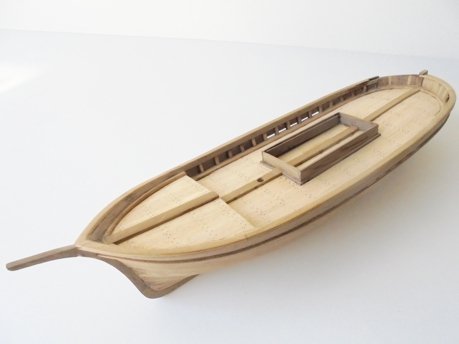
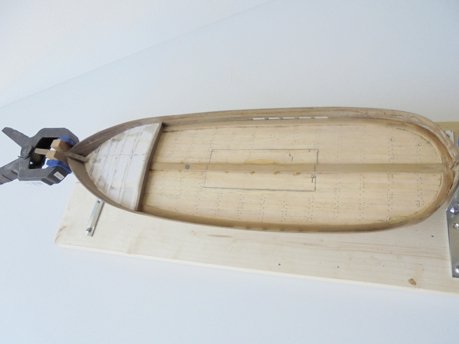
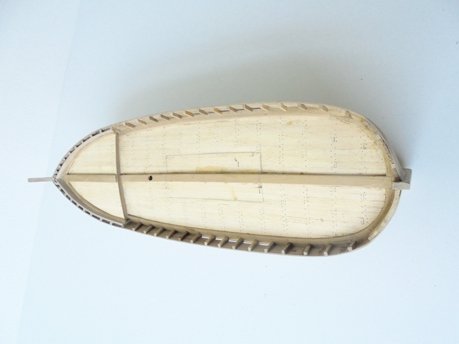
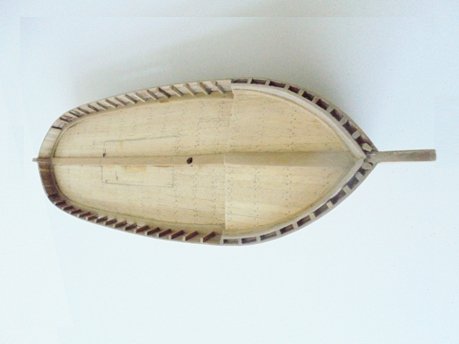
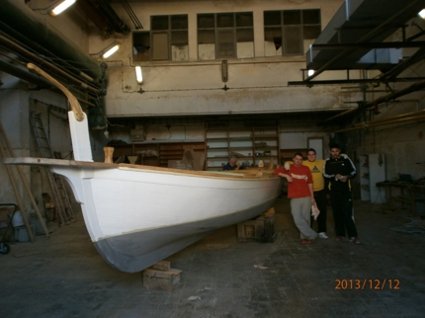
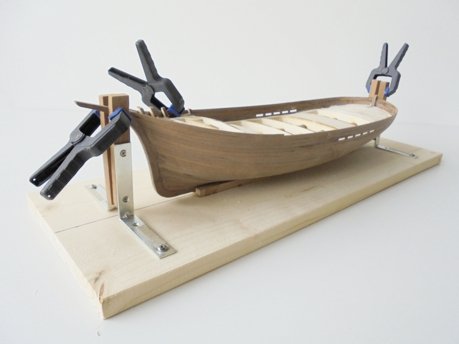
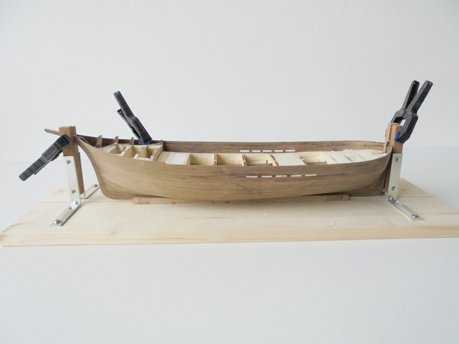
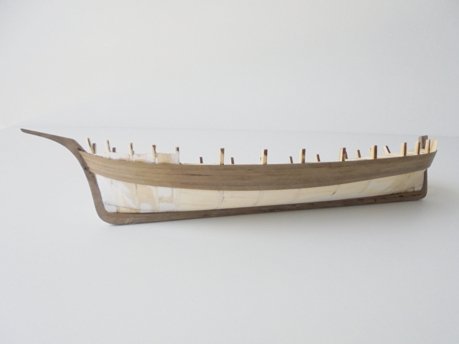
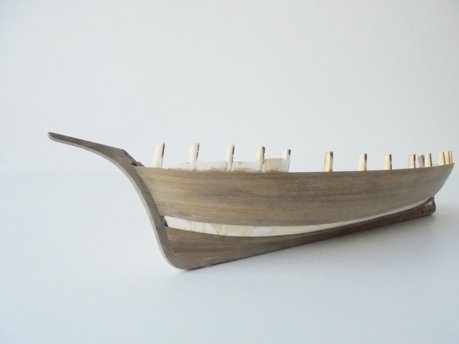
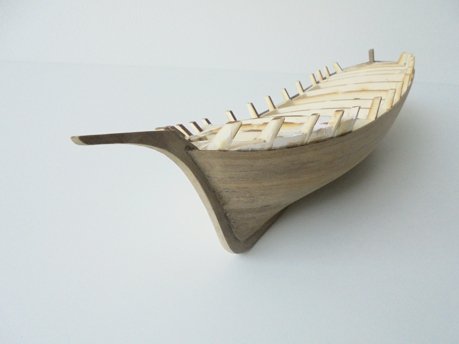
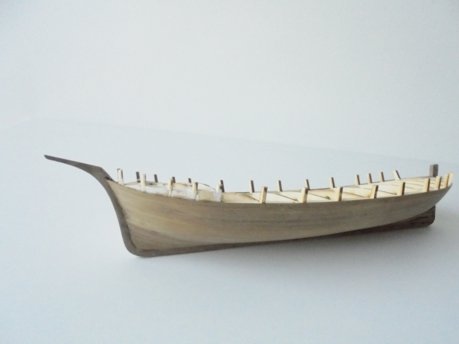
Thanks Mr. Mike ... and here are some photographs of the completed hull... after this, the deck equipment follows:
-
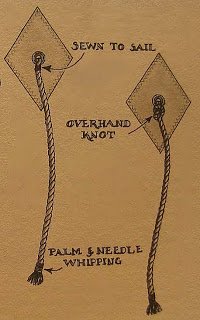
It is fold , fold, and then sew... Those ropes are called 'nettles' ... each of them is a single rope going through the sail ... There are two ways of setting them ... here are the pictures:
- 204 replies
-
- 1
-
-
- trajta
- marisstella
- (and 1 more)
-
Yes, it should continue... The edge of the sail is to be fold once, and then the second time (so simple)... The stitching is all the trouble, but it is very easy to master (at once I would say) ... Zoran
- 204 replies
-
- 1
-
-
- trajta
- marisstella
- (and 1 more)
-
Hi Mr. Jack ... this deck looks brilliant! The last three photos look much better ... Zoran
- 190 replies
-
- 1
-
-
- ragusian
- marisstella
- (and 1 more)
-
Hi Mr. Mike ... one end of the rope that runs through the block is attached to the yard and the other one is tied to the bitt at the mast... Then there is a parral made of rope. It is just a simple loop thet tightens the rope from the yard to the mast. This way the yard is tightened to the mast ... ... Waiting for more ... this is ok !! Zoran
- 204 replies
-
- 1
-
-
- trajta
- marisstella
- (and 1 more)
-
After the deck and stanchions are set, the topgallant rail is the next and this model is starting to look as a Stilac… The frame for the main hatch is on its place as well …
-
Yes, after the deck base, the deck is coming next! But the king plank and the covering board first… So, the king plank and the covering board are laser cut elements and they need to be glued onto the deck base… Then the deck planks are to be cut and placed between these elements… The main deck goes first and the forecastle deck after it … There is the inner planking at the forecastle deck, so the stanchions are to be set onto the covering board… Altogether, there are the photos:
-
Mr. Mike, all ropes that go from the mast begin with a loop. The shrouds are the separated ropes; each shroud is made individually for itself... The rope with the block goes onto the shrouds, in the end, beginning with a loop as well... Zoran
- 204 replies
-
- 1
-
-
- trajta
- marisstella
- (and 1 more)
-
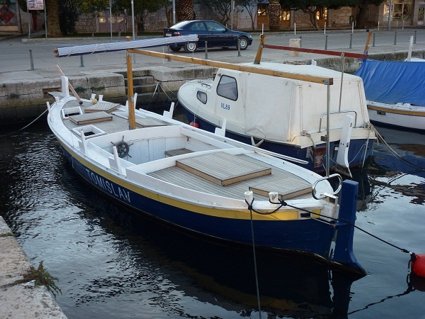
Hello Mr. Mike ... Here are some samples.... Regarding the coloring of this type of a boat, people in the past were using the colours they had in that moment. They were fisherman and the only thing they were worried about was the functionality of the boat... Zoran

- 204 replies
-
- 1
-
-
- trajta
- marisstella
- (and 1 more)
-
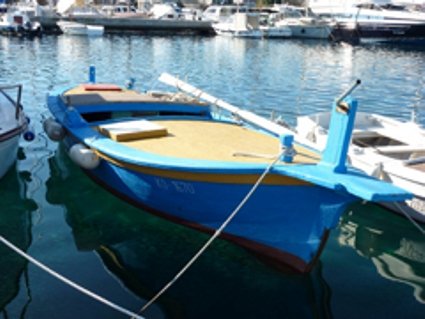
Mr. Mike, please, try with a little bit lighter blue than that one You have is ... (Anyway, the one You have is good already...)... I am with blue .. Zoran
- 204 replies
-
- 1
-
-
- trajta
- marisstella
- (and 1 more)
-
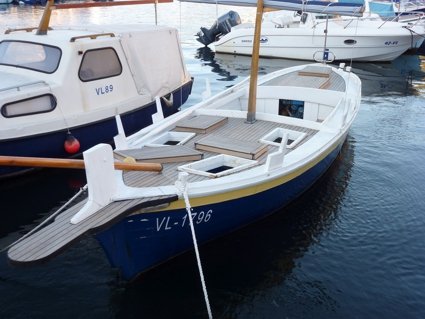
Hi Mr. Mike ...The rudder has to be completed with a piece of the strip remain, for the strip at the bottom ... Triangular part is to be glued at the right side of the hull, at the stern (P1 and P6). It is the foot support when walking into the boat ... Zoran
- 204 replies
-
- 3
-
-
- trajta
- marisstella
- (and 1 more)
-
Mr. Mike, it looks good to me... Thes light blue is the right one ! ... Yust go up to the topgallant rail (leave the topgallant rail unpainted, as well as the deck and everything inside the boat... Would You make some example of a tiny bit lighter blue, just to compare it ... ?? The rudder needs to be finished with a strip at the bottom ... then painted in the same colors as the model. Under woterline green, up to the level of the topgallant rail light blue and unpainted to the top (the tiller unpainted)... Regards, Zoran...
- 204 replies
-
- 3
-
-
- trajta
- marisstella
- (and 1 more)
-
Hi Mr. Mike... May I suggest to color the hull, between the waterline and the topgallant rail, light (really light) blue ... What is You opinion ? Regards, Zoran
- 204 replies
-
- 2
-
-
- trajta
- marisstella
- (and 1 more)
-
Hi Mr. Rick, thanks for stopping ... These are challenging comments; I wish we had more time for developing the kits and to serve all of You with the new ones at some faster tempo... Regards, Zoran
-
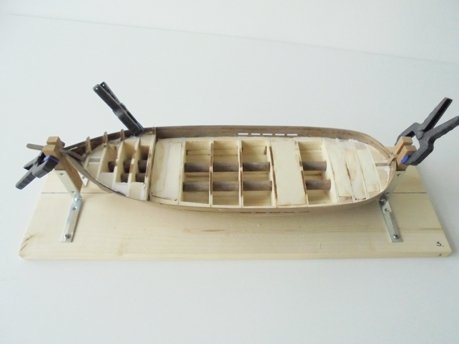
So, the freeboard (the planking above the deck) is to be installed next. The tops of the bulkheads, the parts of the bulkheads that had the task to form the freeboard while planking, need to be cut off, removed… The inner walls of the freeboard are to be grind and polished next, the glue remains have to be removed completely… At this model the base for the deck have to be installed before placing the deck planks. There is a curvature of the deck that has to be followed when sanding the top edges of the bulkheads and the curvature is shown into the drawings (this cannot be seen here at the log)… The deck base is made of several wood pieces placed between the bulkheads’ tops. Pieces of some soft plywood are ideal for this purpose…

-
Thanks Ross, It is a pleasure to present the modelling techniques... This is the one I have been told to use, it is specific for the area at east Adriatic coast. The precision of making is great in this way and the planking is very easy to do... We recommend this way of making structures to the modellers from the beginning of their gaining experience, but as I mention before, the perfectionists experts do this very gladly because of the high precision... Regards, Zoran
-
Mr. Mike, Yes, the Leudo (Trajta is a type of Leudo) was painted dark green as well, so this is ok... But, under waterline there was used the tar in the beginning, but later on some other colours were in use: so the hull under water line could be painted dark red, dark green or brown (in this case the hull should be natural wood, matt black, light blue etc.)... The deck was natural wood because it was the working area (for handling the fishing tools, nets etc.)... Regards, Zoran
- 204 replies
-
- 3
-
-
- trajta
- marisstella
- (and 1 more)
-
Hi Mr. Mike ... About the mast rake: the waterline drawn at the drawing sheet no 1 is perfectly horizontal... So, it is easy to determine the mast rake (if any) using this line... Just follow the drawing, You can not miss it... Regards, Zoran
- 204 replies
-
- 2
-
-
- trajta
- marisstella
- (and 1 more)
-
Thanks Mr. Mike ... The described varnishing procedure in the instructions is high rated.... Zoran
-
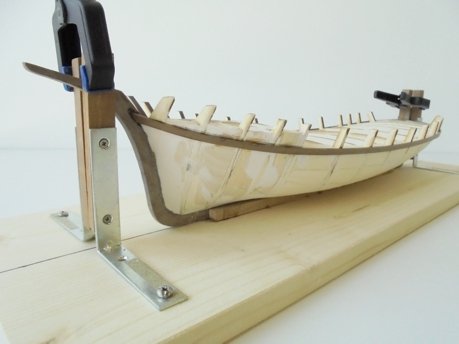
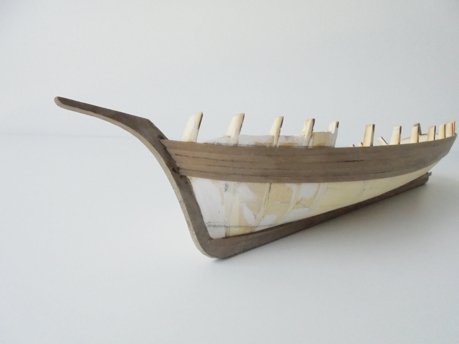
The planking is coming next…. The initial planking strip is the one at the level of the covering board (or at the level of the deck rail in the other words)… This strip will determine the line of the planking strips, the proper curvature of it. The Garboard strake is the second planking strip to be installed. After Garboard strake, there are some more strips next to the initial one and then follows the closing of the hull. Drop in planks are to be avoided, but it is not mistake to use them … In the end there is the hull closed completely… The freeboard is to be installed in the end of the planking process…
- 221 replies
-
- 10
-