HOLIDAY DONATION DRIVE - SUPPORT MSW - DO YOUR PART TO KEEP THIS GREAT FORUM GOING! (Only 66 donations so far out of 49,000 members - Can we at least get100? C'mon guys!)
×


MarisStella.hr
-
Posts
479 -
Joined
-
Last visited
Content Type
Profiles
Forums
Gallery
Events
Everything posted by MarisStella.hr
-
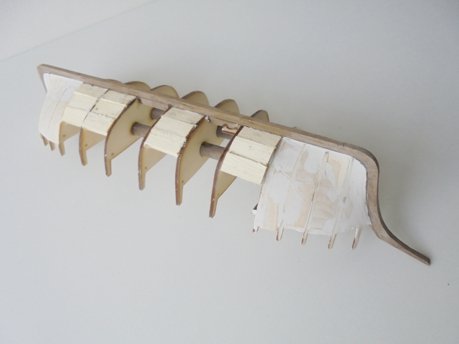
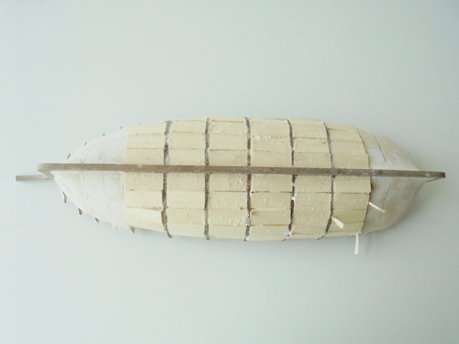
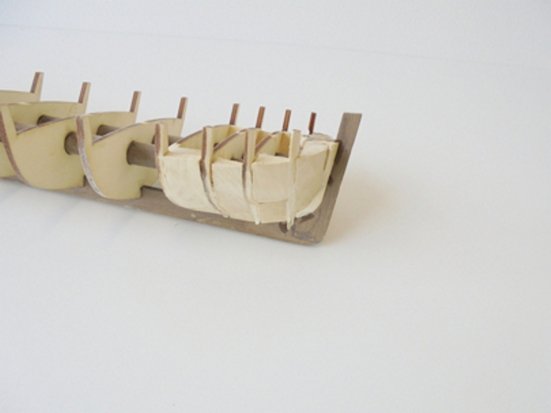
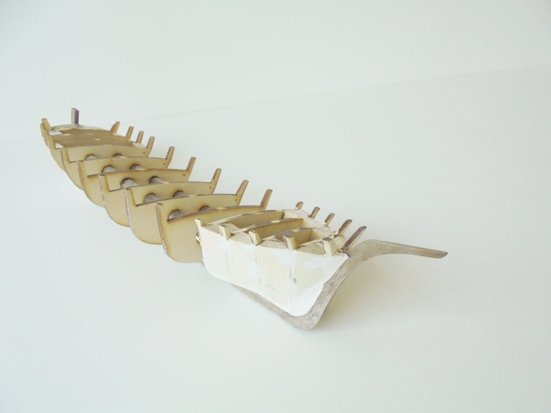
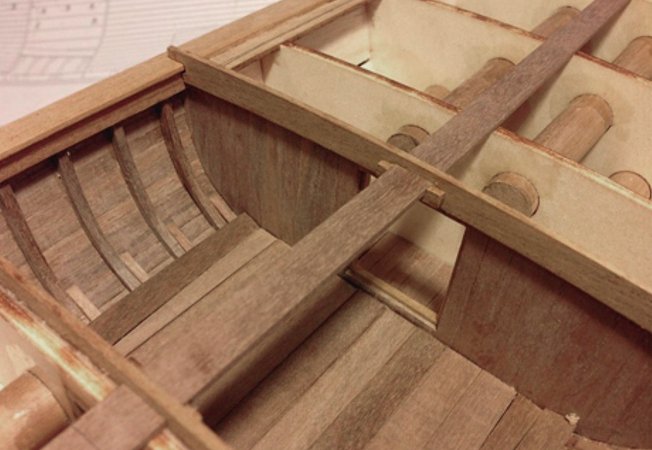
 … Here is something very interesting for the beginners as well for the experts perfectionists! The spaces between all of the bulkheads could be filled up with the filler blocks made of some soft wood. We use the lime tree for this purpose, it is soft to fast and easy shaping, but it is still hard enough to carry on the tension of the planking… After the spaces between the bulkheads are filled up with the filler blocks, the entire construction needs to be sanded and polished. The shape of the full should be perfectly done in this phase of model’s development… It is good to treat it with putty and to polish it, leaving no any gaps… In this way the beginners will be able to set the planking strips very easily and the experts will be able to set the planking getting the perfect shape of the hull… This method is highly recommended by MarisStella…
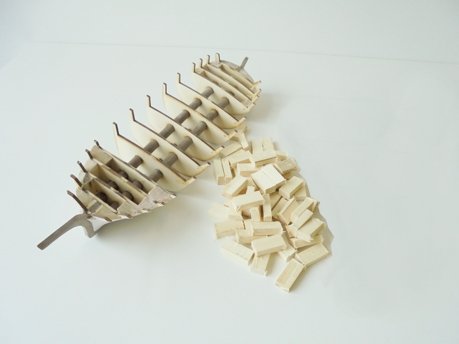
-
Mr. Mike... I have just illustrated and wrote a booklet about handmade molds for the shaping the strips by bending. It is a part of the Beginner set Level 3 booklet about Santa Maria reconstruction. This text needs to be reviewed before showing it around, so please for a bit of patience... Don is guilty for the English language connected with this ... Anyway, the molds for the strips are very simple to make and it is a real pleasure to make and use them ... You will see this very soon ... Regards, Zoran
-
Hi good fellows !! I have just seen this posts so I decided to fill it up with this stuff : At this Stefano model the covering board width varies from 3 (3.5)mm to 6mm. So here is the space for forming it and cutting… It is , let say, impossible to bend it to the shape at the stern. So You have to cut it. The covering board is , in reality, composed of several independent pieces. This is not a single plank. It is put together of two or more narrower planks fixed to each other. Here AT THE STERN is to do next: use 1,5x7mm strip and make two or three narrow strips by cutting it. Make fragments about 10cm long. 2 or 3 mm width. Then bend the fragments, glut the fragments at the round hull planking and the deck at the stern. Glue the fragments one to the other. Get the shape of the covering board as in the drawing… polish it and it is it !! So remember: the king plank (in the middle of the deck) and the covering board are NOT the single piece planks. They are composed of several narrower planks put close one to the other. They are the same sort of the planks, so in the end, the connections are not visible … Regards, Zoran
-
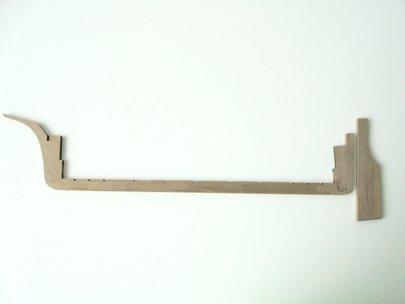
Hi Mr. Mike ...There is a groove for the mast step 1.1 at the keel … You just cannot miss !! Zoran
- 204 replies
-
- 1
-

-
- trajta
- marisstella
- (and 1 more)
-
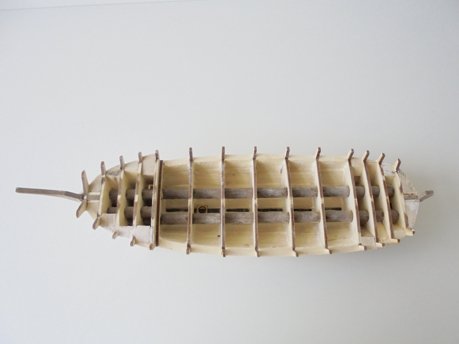
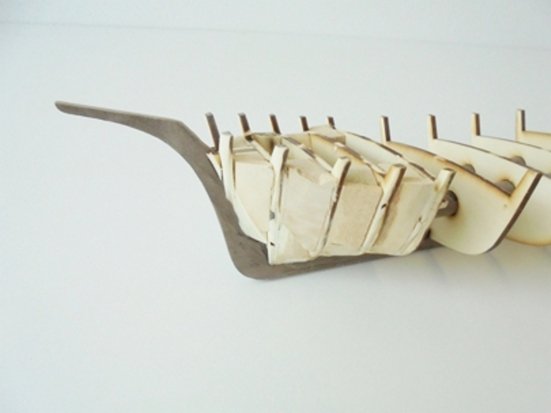
When the construction is firmly connected, it is the time for the fillers blocks. The blocks at the bow and stern are the main ones and it is mandatory to set them up. After some beveling is done, the spaces between the bulkheads at the bow and stern are to be filled with blocks of some soft wood… After this, the preciously sanding is required. The preciously beveling comes with this phase of development of the model…

-
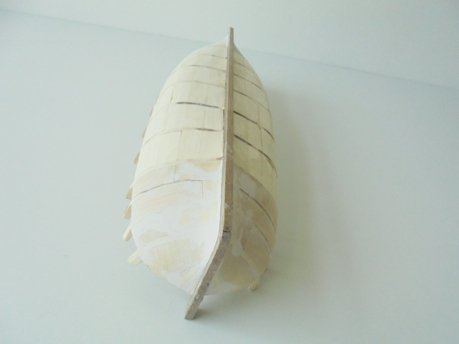
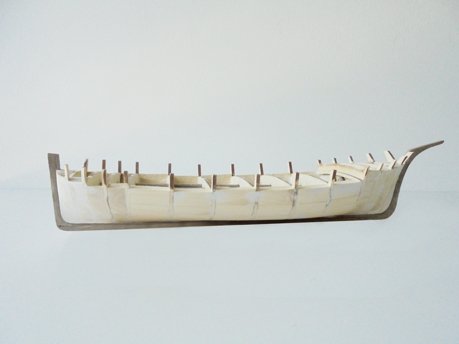
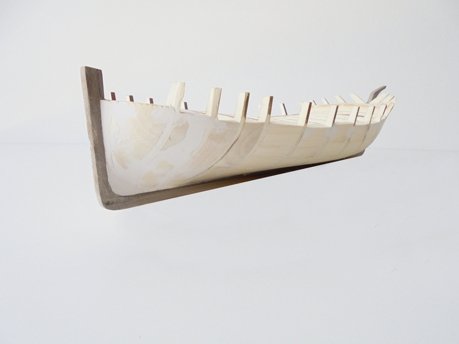
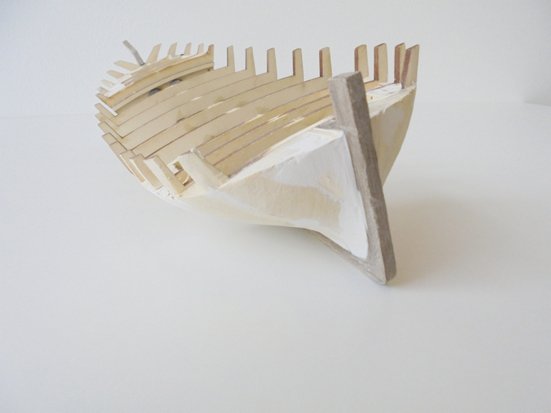
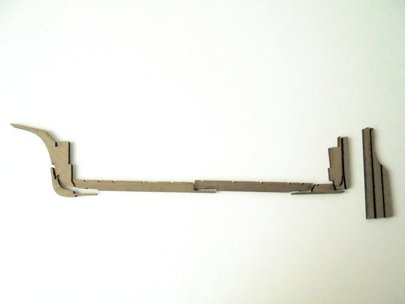
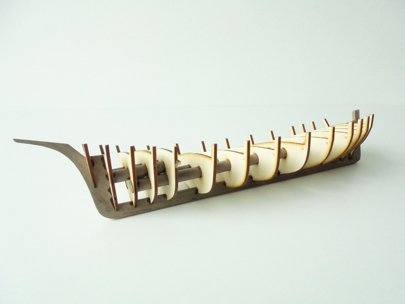
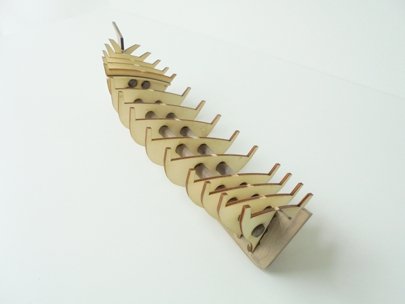
So, let me continue with this topic please. I am very sorry for letting you be waiting for such a long time... Let's continue with Stilac ...As the beginning of this log, I would say that this is a model made for the intermediate skilled modellers. The main thing here is to master the round stern. This kind of the stern demands a special care. This is why this model is, if I may say, dedicated to it... In the beginning there are the constituent parts of the keel and the posts ... Separated and then glued together... After this, there is the models construction put together. The round bars, dowels, are the ''trademark'' of the MarisStella constructions... When the construction is put together and when the dowels are onto its place, the frames are to be put into right positions and the glue is to be applied with a brush to the points of the elements' connections...
-
Hi Mr. Mike... the boats in reality have many different deck plank color patterns, this depends on the moment of creating the deck ... The builders used what they had in that moment... The most common is the simple, one colour plank pattern... This is, at the models, up to the modeller and his imagination... The planks need tapering at one edge, but working it at both edges makes no mistake... Regards, Zoran
- 204 replies
-
- 1
-
-
- trajta
- marisstella
- (and 1 more)
-
Mr. Mike, welcome to the deck planking mode! Different colours of the deck planking strips are the matter of the individual wishes and possibilities... This is not a part of the kit design... Please, just manage the pattern that You can get from the kit material... Organize the deck strip colors in the way You like ... Regards, Zoran
- 204 replies
-
- 1
-
-
- trajta
- marisstella
- (and 1 more)
-
just to make You happy, I would add a note that my colleague needs less than 10 minutes to form a strip like this one, using a bit of water and an ordinary pairs of pliers with a blunt top ... The practicing is all about ... Regards, Zoran
- 204 replies
-
- 1
-
-
- trajta
- marisstella
- (and 1 more)
-
Wow Mr. Mike, bravo, this is a really good thing to see. Please, continue to be persistent ... Thanks to Don, the right explanation helped ...
- 204 replies
-
- 1
-
-
- trajta
- marisstella
- (and 1 more)
-
Forming the strip by bending it is to be done slowly, when the strip is wet and the fibers are flexible... This procedure cannot be done at once, but several phases of bending are to be done at the same strip, repeating the procedure until the shape is correct.... Here is this part of the ship, done by an amateur... Regards, Zoran
- 204 replies
-
- 1
-
-
- trajta
- marisstella
- (and 1 more)
-
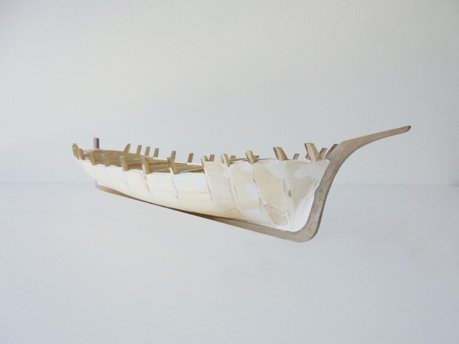
Hi Mr. Mike ... The bilge keelson, or the bilge strakes run from the stern to the bow over all the frames. This is construction with no interior, so only the part (of it) in the middle of the hull is visiable ... About the shaping the 3x3mm strips : try to use strip bender or simply: a pliers ... The point is to shape the strip, not to break it and this is to be done in several turns... Regards, Zoran
- 204 replies
-
- 2
-
-
- trajta
- marisstella
- (and 1 more)
-
Hello Mr. Jack, have a great year and many more ! The model turns into a real beauty, looking from here, the lines are completely correct and all is very clean... Thank You for sharing this build and to choose one of our favorite ! Best regards, Zoran
- 190 replies
-
- 1
-
-
- ragusian
- marisstella
- (and 1 more)
-
Hello respected gentlemen... Yes, there must be a smooth area with no any sort of jumps from the one level to the other... the hull should be done of a single smooth surface... the copper plates come over the hull, after the second planking ... Regards, Zoran..
-
Hi Graham , the website is on again... This was because of us... Thanks again ... Regards, Zoran
-
Hi Graham ... I checked this up ... Yes, You are right ! The page is currently not available , we are going to see what is going on... This seems to be about the server ... Thanks , I hope to fix this very soon ... All the best in this year and in the many next that follow ! Regards, Zoran
-
Merry Christmas and a happy New Year to You too and to Yours Mr. Jack ... Merry Christmas and a happy New Year to all of you ! Zoran
- 190 replies
-
- 2
-
-
- ragusian
- marisstella
- (and 1 more)
-
Merry Christmas and a Happy New Year to all of you wonderful people on the forum !! MarisStella. hr
-
Hi, brilliant clean work... the model looks fantastic, no words to describe the carving... Regards, Zoran
-
Hi Don... although expected, a pleasant surprise... Fantastic work ! Regards, Zoran
- 653 replies
-
- 4
-
-
- trabakul
- marisstella
- (and 1 more)
-
Hi Max .... ... You wrote :''the Berlin grows and grows. ''... Well the fact is that You are the growing one at the ship modeling !! This is a very nice work ! Best regards, Zoran
-
Hi Mr. Jack ... Regarding P5 illustration : is it simetrical or is it looking deformed at the posted picture only ? ... It should be simetrical and it shows the way of the planking : the transom is to be planked first, then the sides of the model... P6 shows what is comming next, to remove any questions about the order of assembly of the elements... Regards, Zoran
- 190 replies
-
- 2
-
-
- ragusian
- marisstella
- (and 1 more)
-
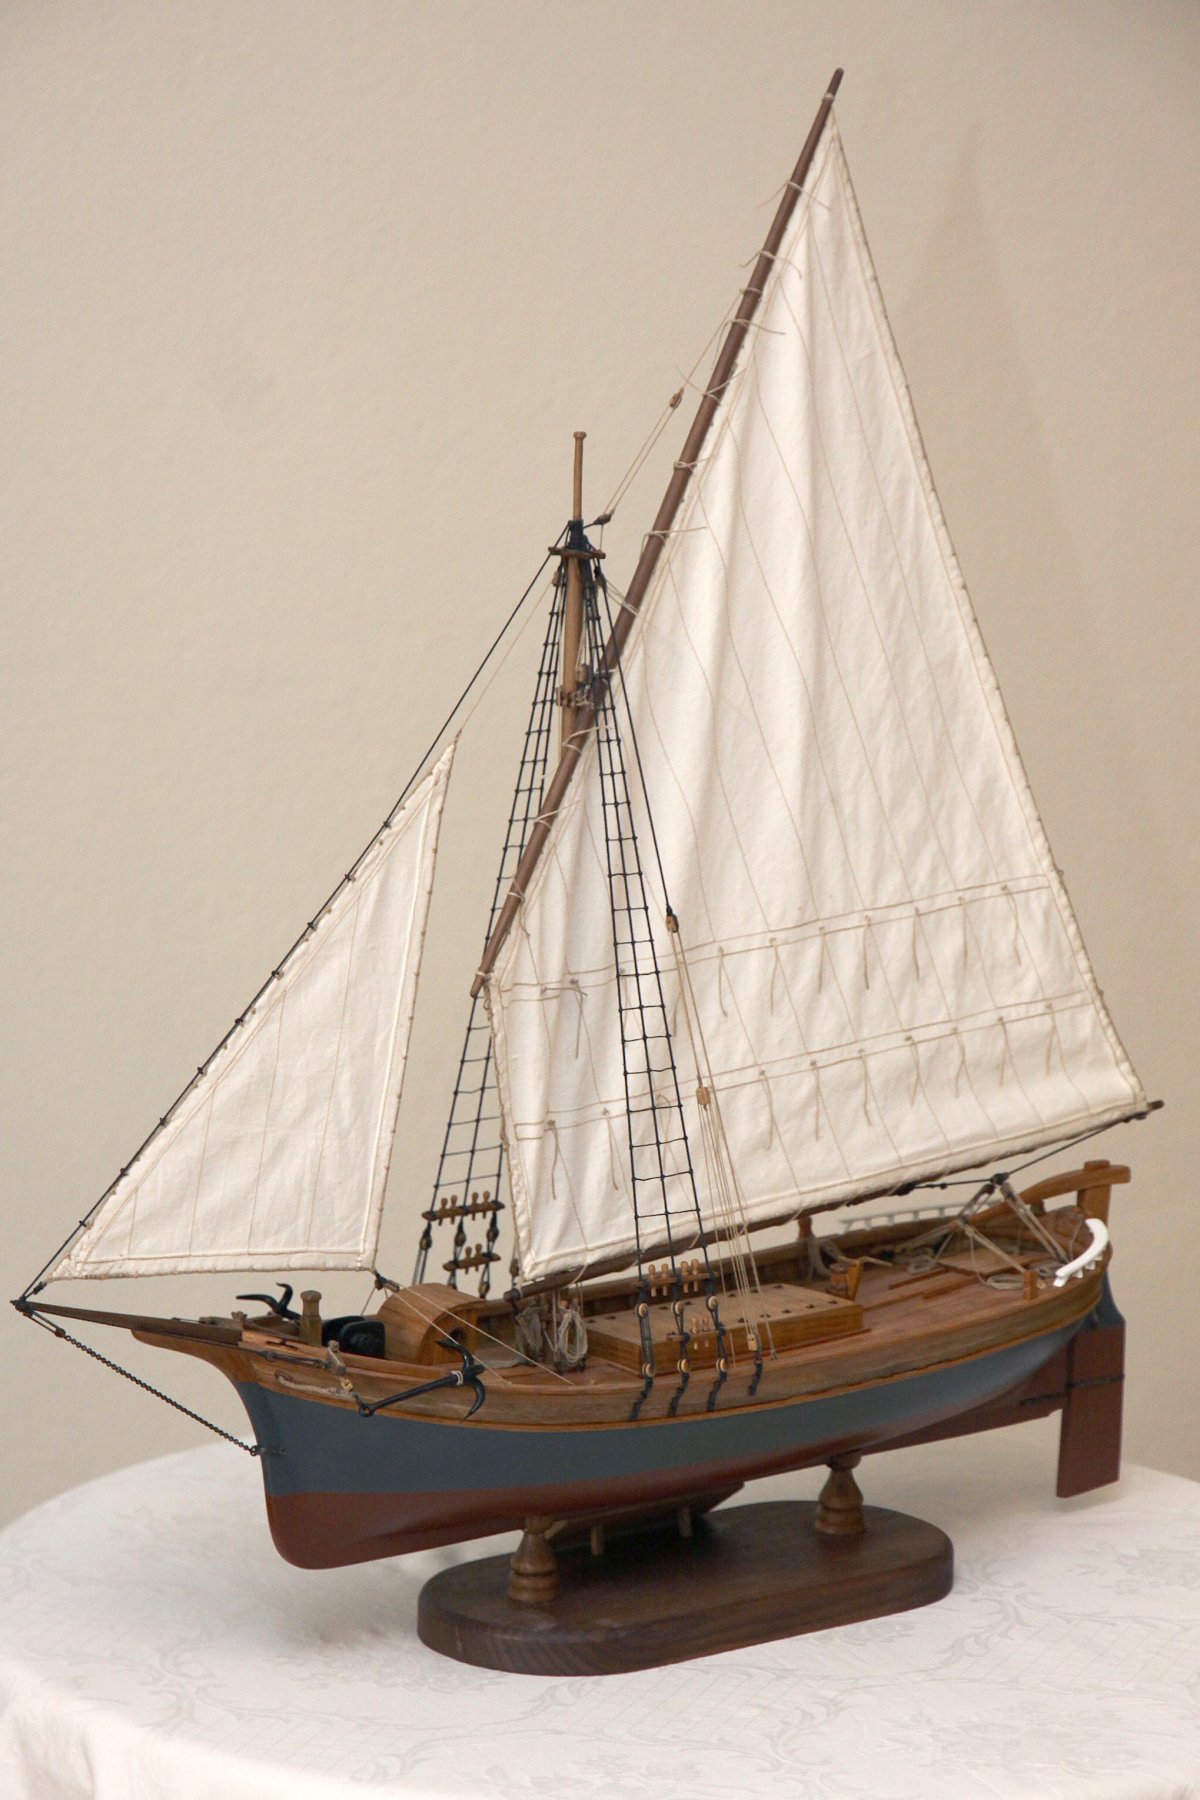
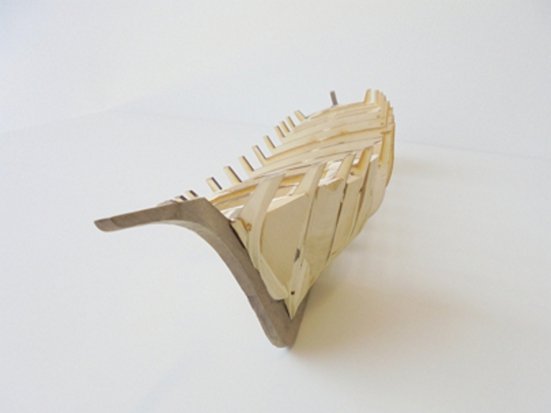
Finally , I finished some drawings and I can continue with this topic without pressure : Dear friends, I would like to present MarisStella ''intermediate level'' model : Stilac.. This type of the ship is describet at our website like this: ŠTILAC is a ship of recent times, namely of the 19th century, is welcomed by a large number of boat builders. She is built along the east coast of the Adriatic Sea to transport a wide variety of products linking the islands to the mainland. To explain and present this simple design, between the coastal people there is “a deep rooted” expression for the construction of the ship - well done. The stern and sails were taken from Bracera, the bow by the logger. This ship can be from 12 to 20 meters long. ŠTILAC still sails today, obviously with an engine and without sails and is used for the transport of passengers and for the extraction and transport of marine sands. The keel and the posts of this model are made of solid walnut wood, like all the elements of the deck and sides. The sails are embroidered on the cloth. The structural elements are laser cut.

- 221 replies
-
- 13
-
-
Hi Mr. Ian, this is very nice to hear, thank You very much, You are welcome... I was looking at Your Brazzera build, briliant, very very good one !! (Sorry for not answering earlier, just been runing for everyday's duties)... I hope to see more from You, specially MarisStella models ...