HOLIDAY DONATION DRIVE - SUPPORT MSW - DO YOUR PART TO KEEP THIS GREAT FORUM GOING! (Only 66 donations so far out of 49,000 members - Can we at least get100? C'mon guys!)
×

MarisStella.hr
-
Posts
479 -
Joined
-
Last visited
Content Type
Profiles
Forums
Gallery
Events
Everything posted by MarisStella.hr
-
 After the planking of the hull it is a very good time for planking the deck... The upper parts of the bulkheads need to be removed and the top surfaces of the bulkheads should be beveled to get a proper curve of the deck ...
-
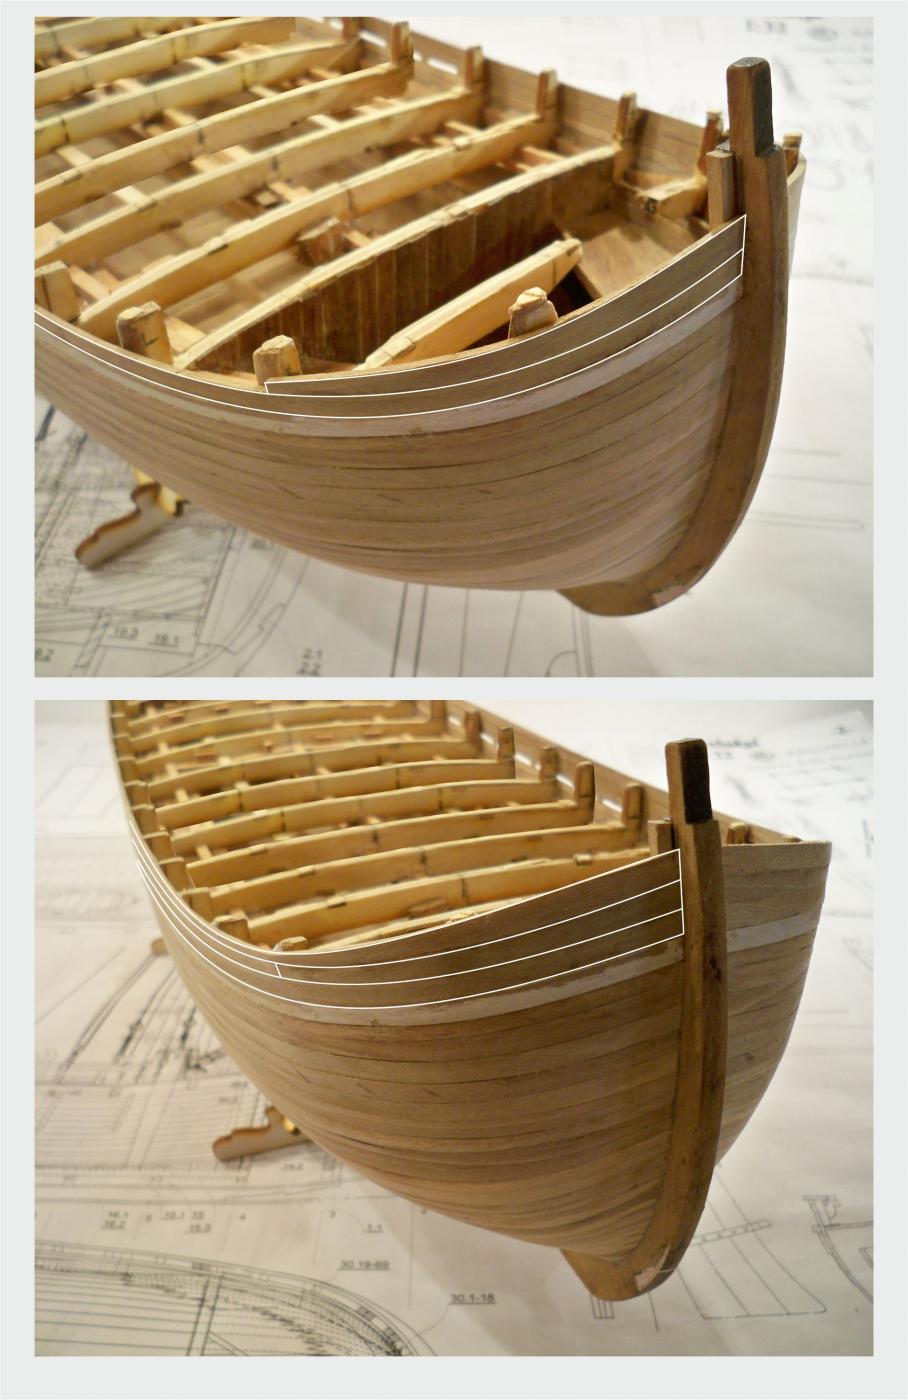
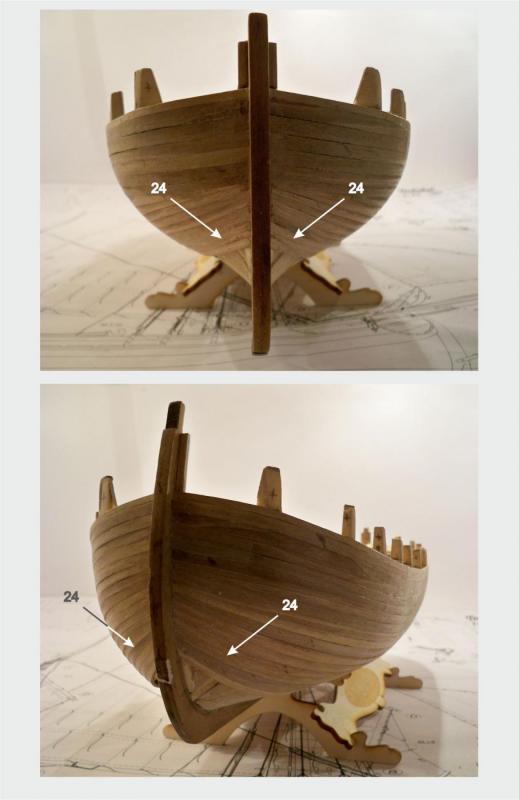
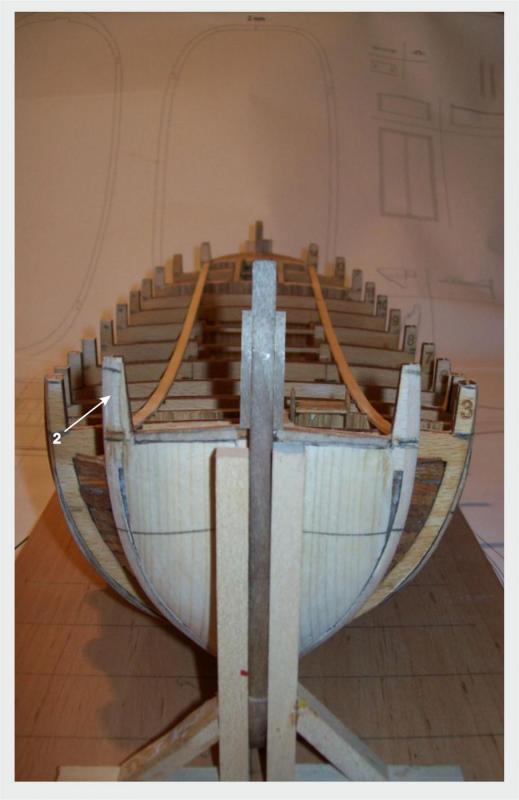
Hello everyone... It is time for planking the freeboard of Brazzera... in the other words it is the time for the bulwark planking... So, this is the planking of the rest of the hull starting from the initial planking strip upward. The widths of the planking strips need to be adjusted in the same way as it was done in the step before, throughout their entire lenghts, according to the bulkheads' unplanked area. At the first planking strip from beyond you need to cut the freeing ports (openings for discharging water from the deck). Note here : the bow of Brazzera is higher then the middle of the ship, so there is a need to insert the drop plank, or to insert a short plank that is wider at its front end. This is noted on the photographs ...


-
Hi Jack, thank You very much, You are welcome... By the way I should say we are doing complete instructions in better English and adding Italian language to all products... We are doing this very fast so many of the kits are finished by now... Besides, the old English versions were not so bad , but improving and perfecting is always actual, this is my personal motto :) ... Best regards, Zoran
- 174 replies
-
- 2
-

-
- gaeta falcata
- marisstella
- (and 1 more)
-
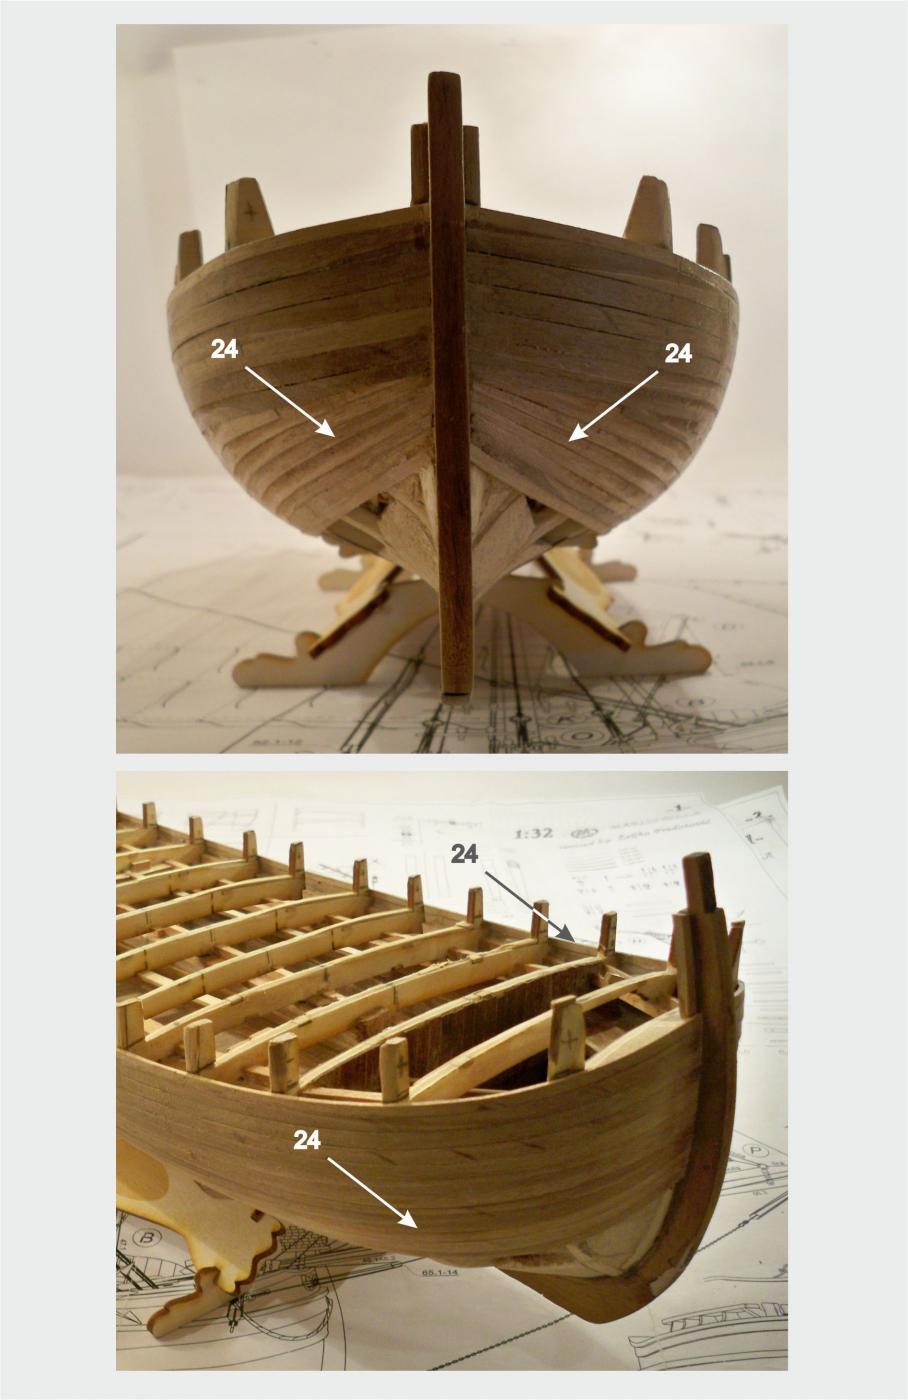
... So, get back to the Brazzera... When the upper part of the planking is put, the lower part needs to be put on the hull... these strips need to be cut according to the bulkhead width... Nothing new, just an ordinary process... This phase looks like this :


- 221 replies
-
- 11
-
-
Hi Cristiano, I have been following this amazing project of yours from the very beginning... You have done really a very good work here, brilliant ! I was delaying to comment this, but now I felt some kind of desire to see this all over... really good stuff ! Regards, Zoran
-
Thanks you all for reading this and for the likes... Don, thanks for the comment, I hope this will make the Adriatic and Mediteranean maritime culture closer to you all ... I would be really happy to see more of you bulding this models... Regards, Zoran
-
Dear Ladies and Gentlemen, I would like to inform you that there is the ''Modeller's workshop'' in Montreal, Canada. There you could, if you wish to,and if you think Europe is to far away , get all of MarisStella models... This thanks to Mr. Rick, the owner of this place... All of the other informations you could get here : http://modellers-workshop.com/category/maristella-wood-ship-kits/ Dear friends, thanks to all of you... Best regards, Zoran
-
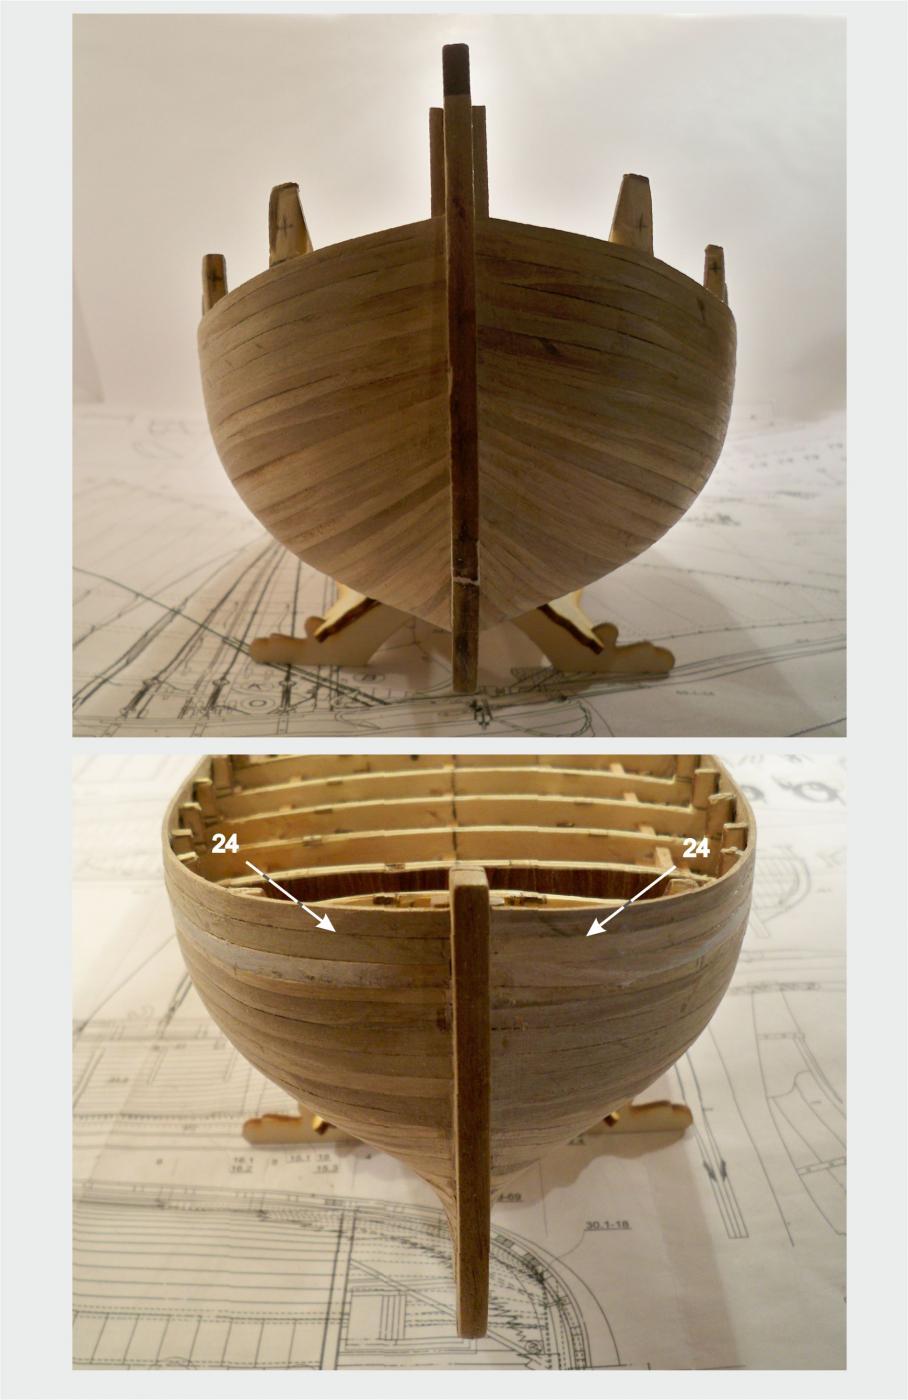
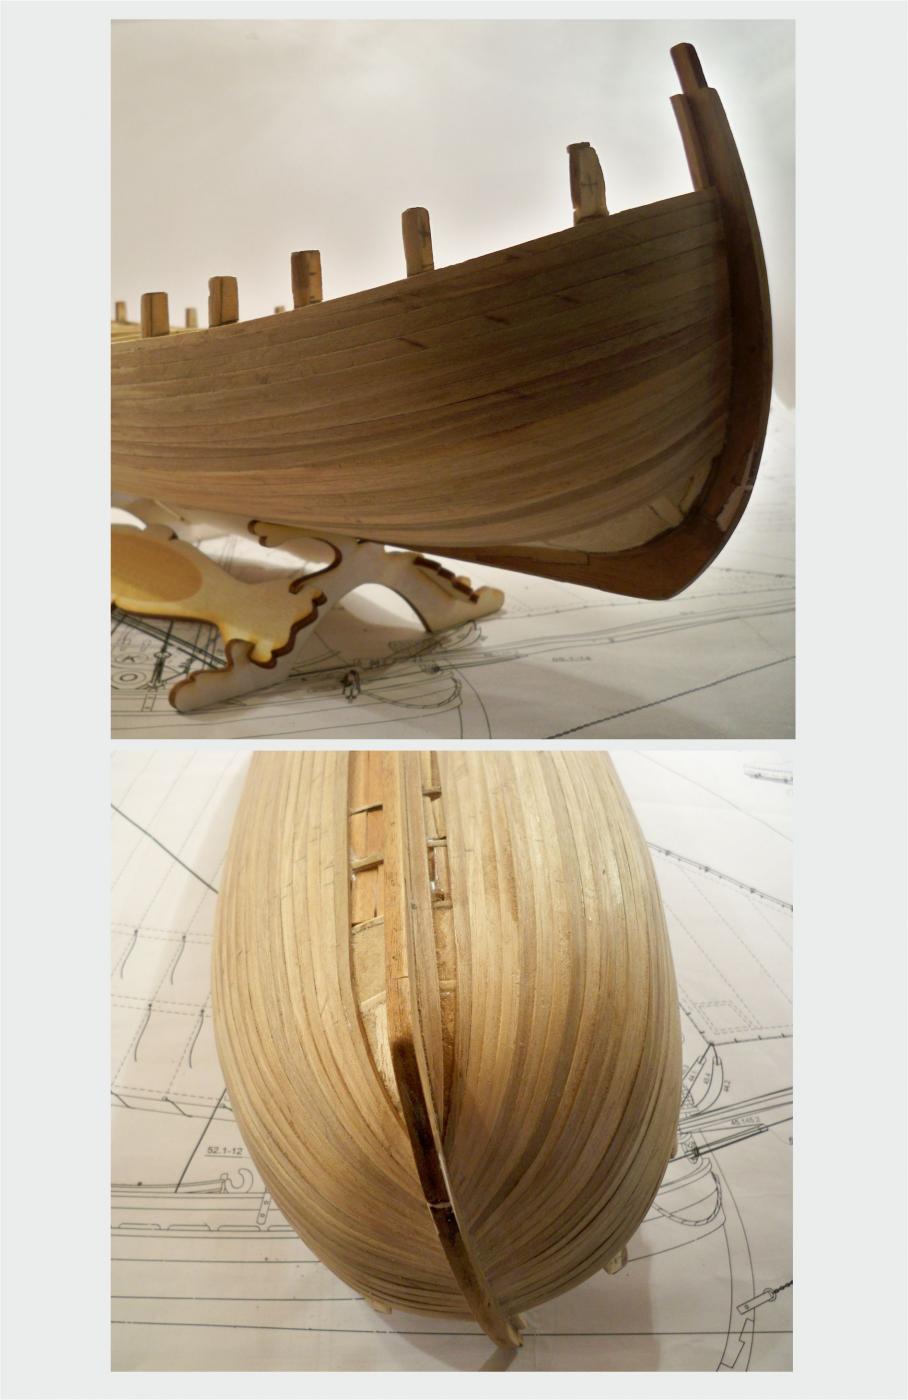
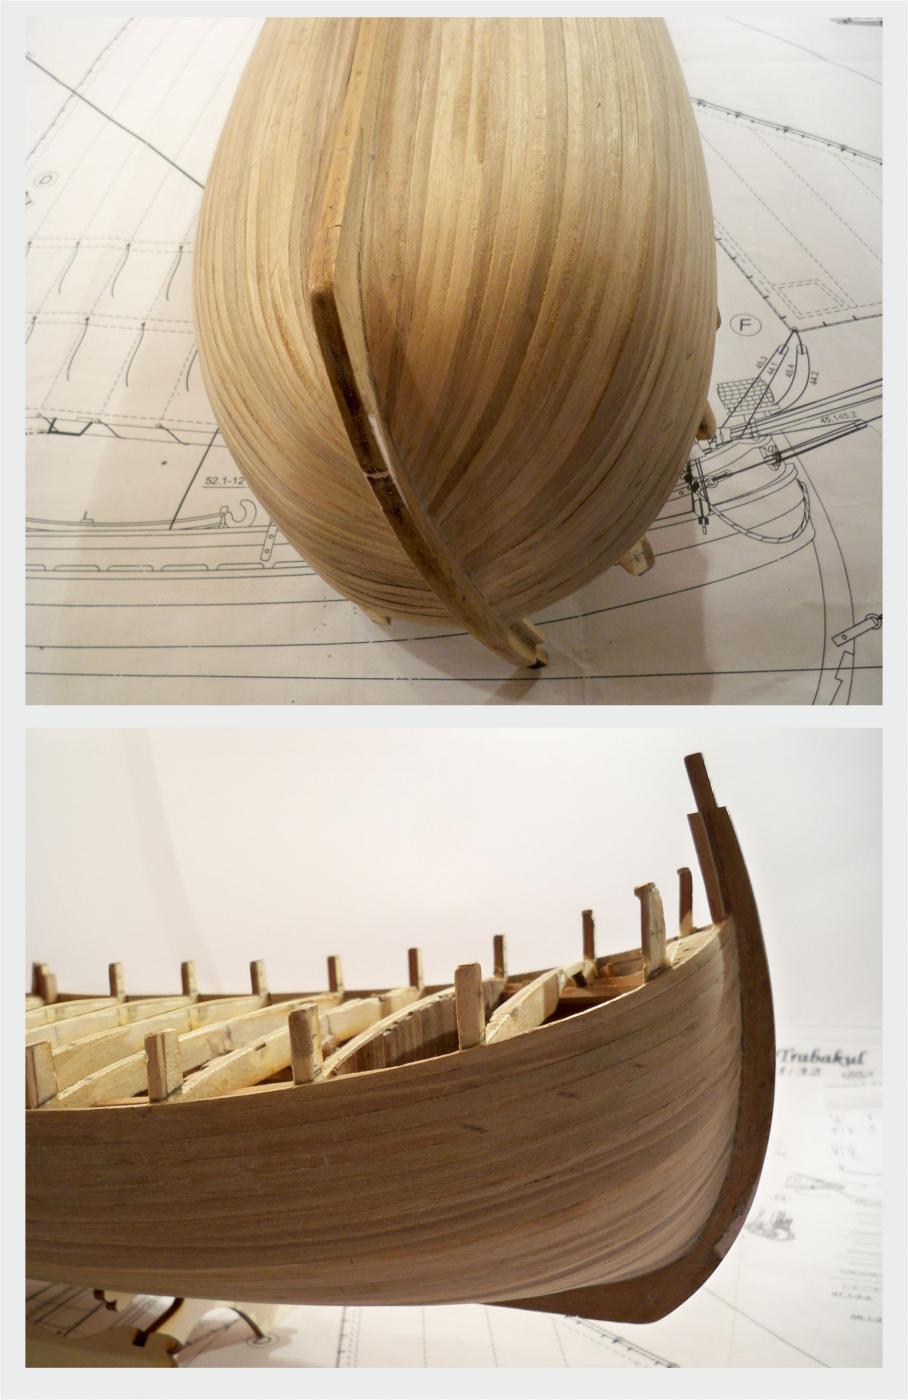
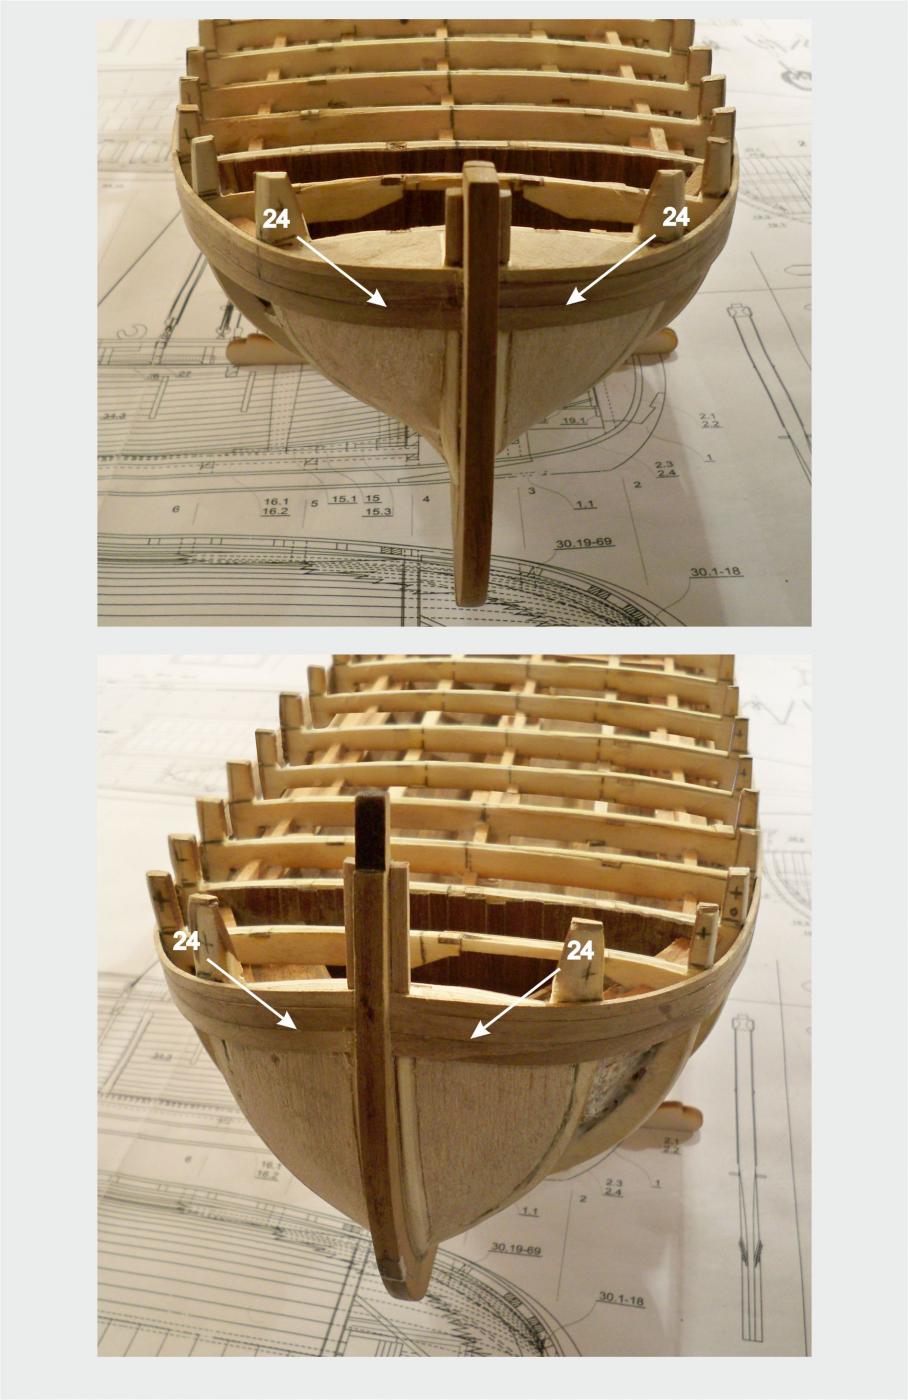
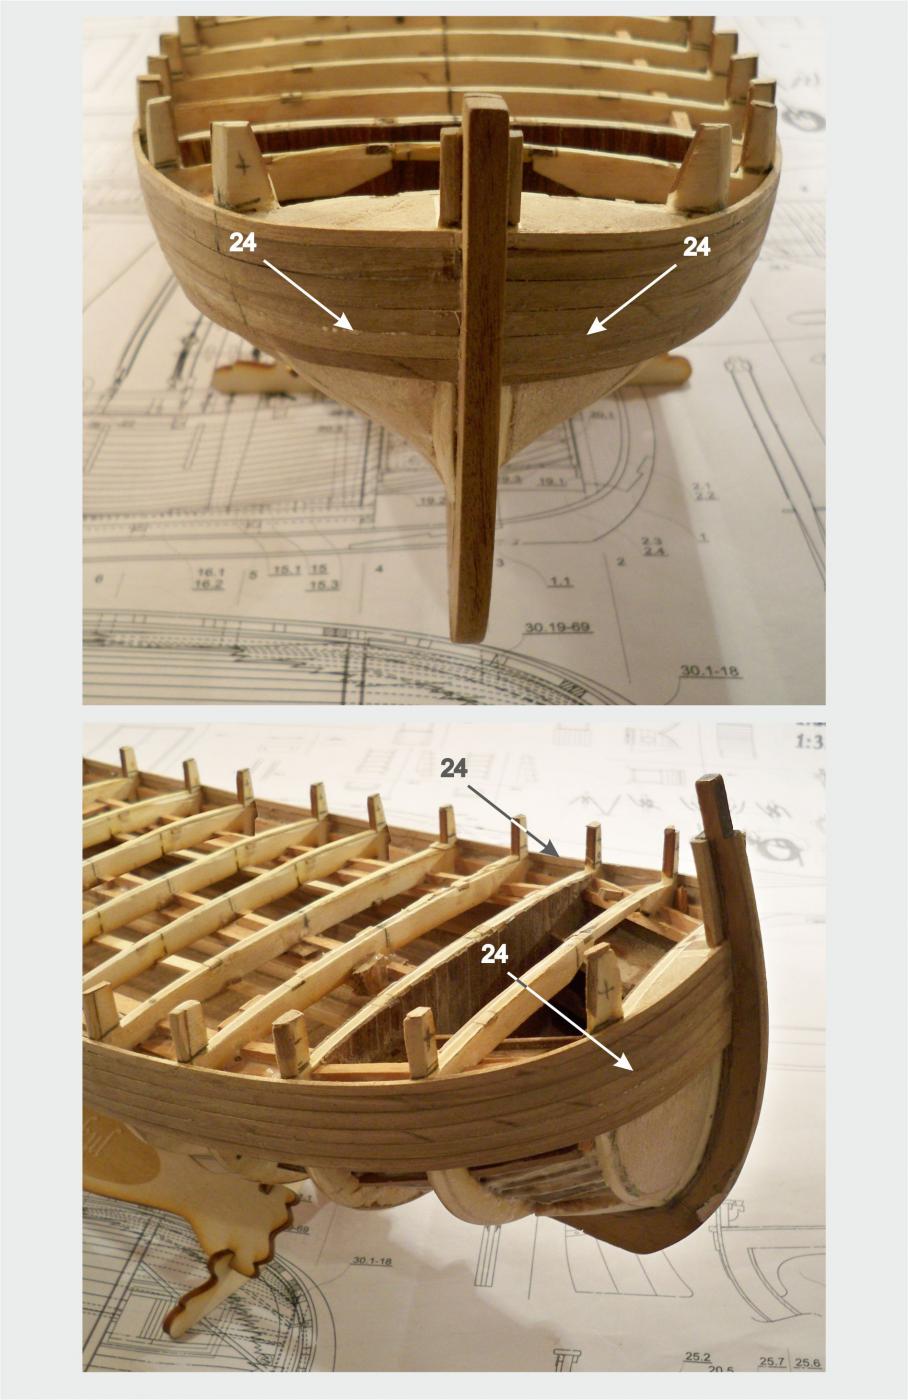
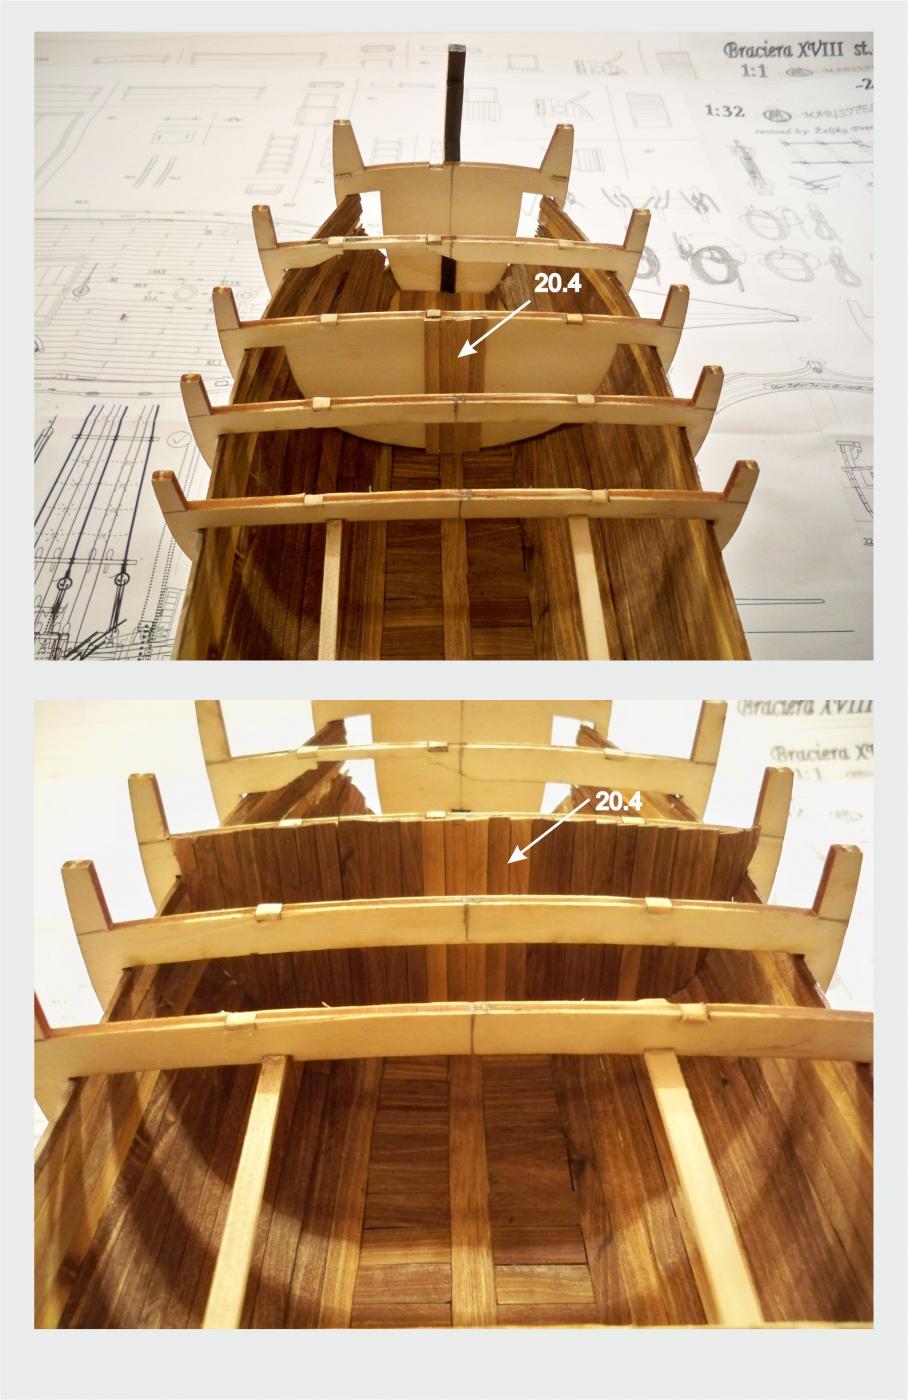
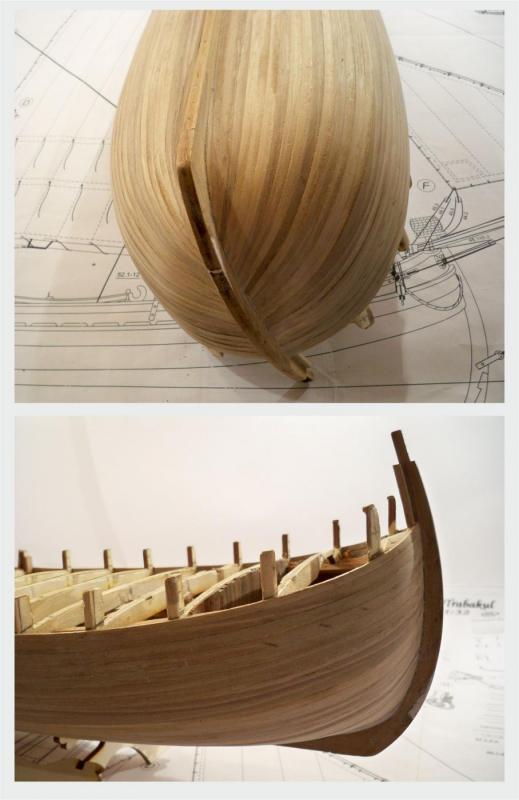
Thanks Mark, I really appreciate it.. Thanks all for the likes, I hope you find this logs interesting, this is why I do this... ... Let me continue please... So, after fairing, as it is usually, the hull planking comes... At this model it is necessery to place the first one, the guiding strip first. It is the one at the level of the deck... This one should be 3mm (or 4mm) thick all along... Another five more strips come below this one. Those, each of them, are 5mm thick all along. They need to be sunk into the water, so they could be formed properly... After this you get the proper base for the rest of the planking... And of course, this should be done at the both sides of the hull...

-
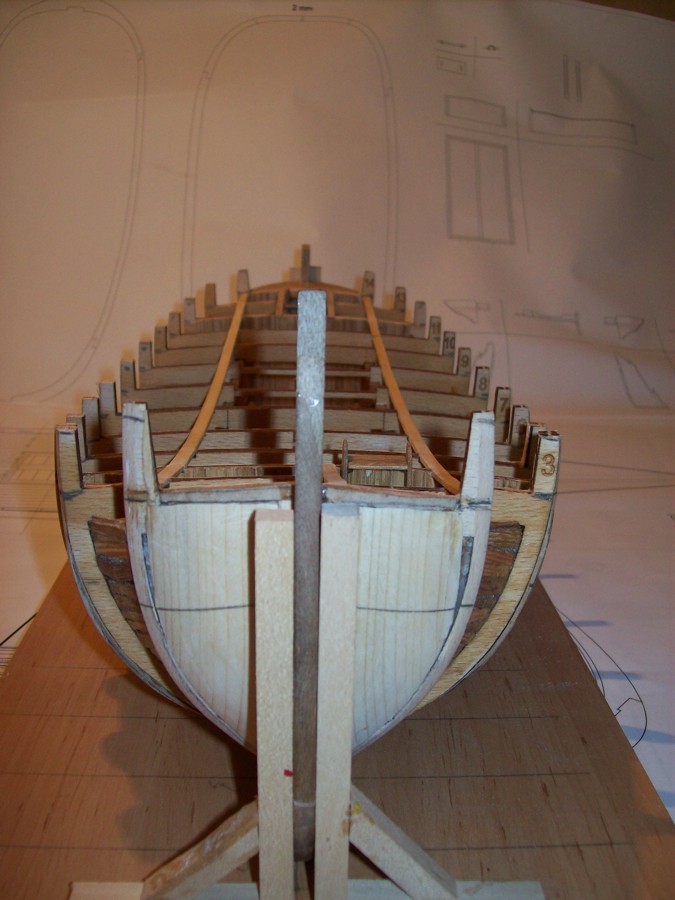
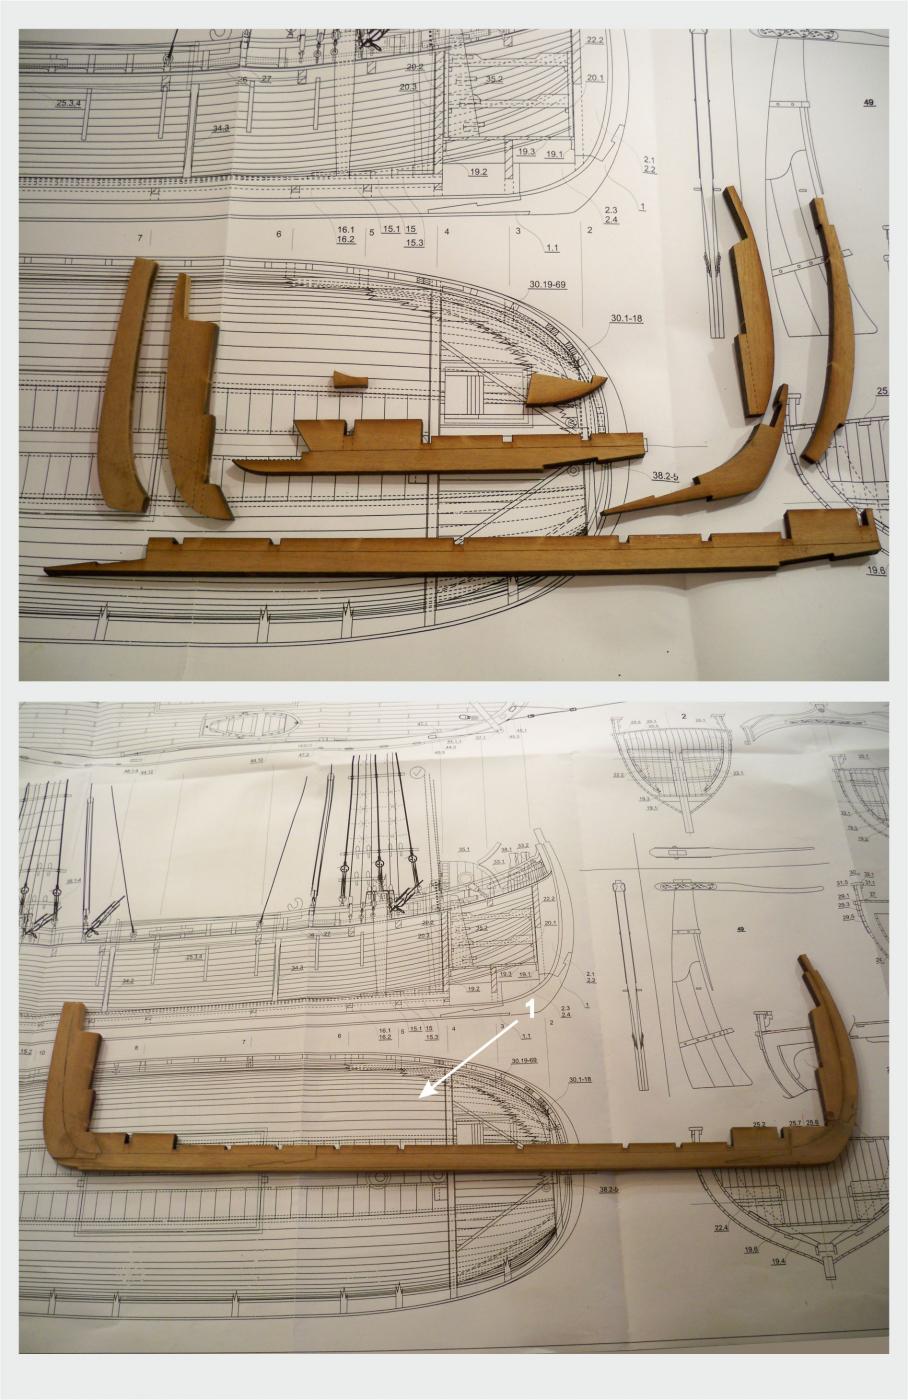
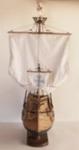
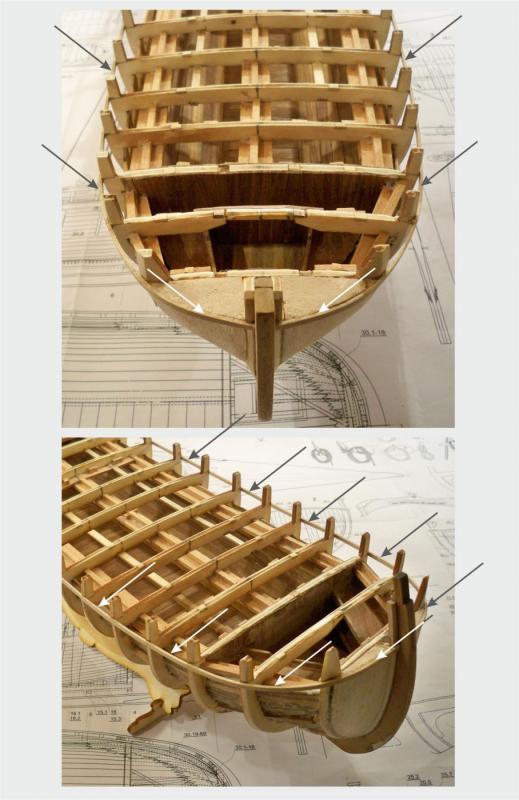
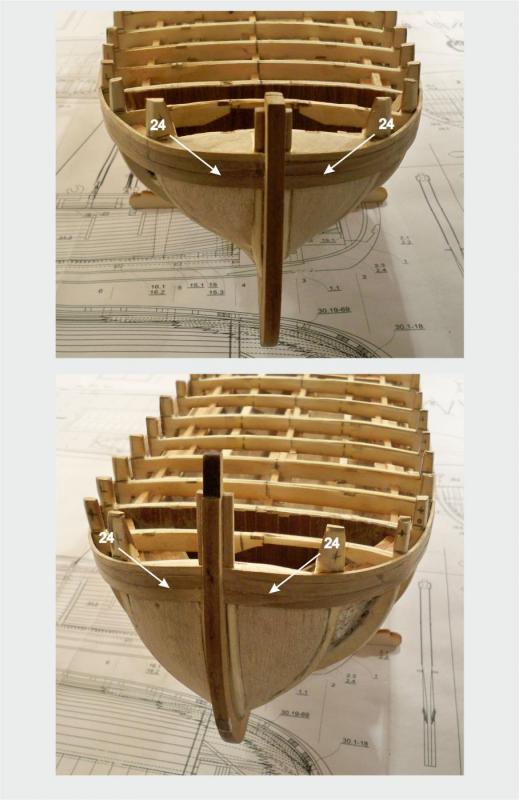
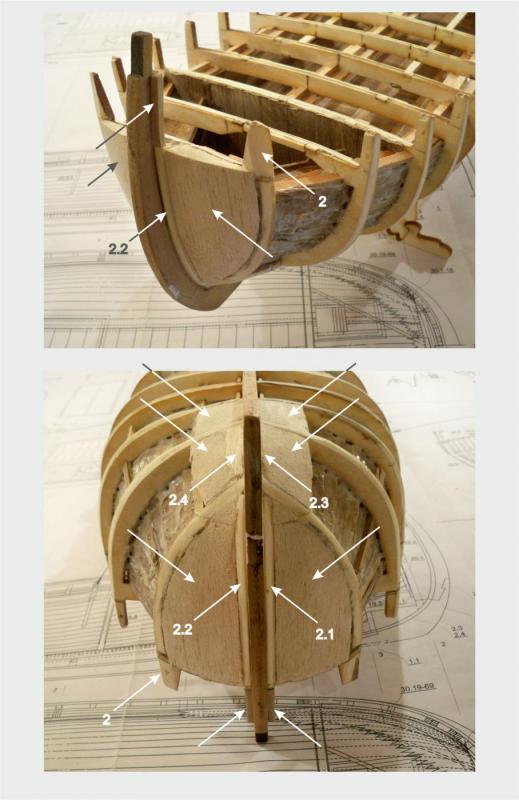
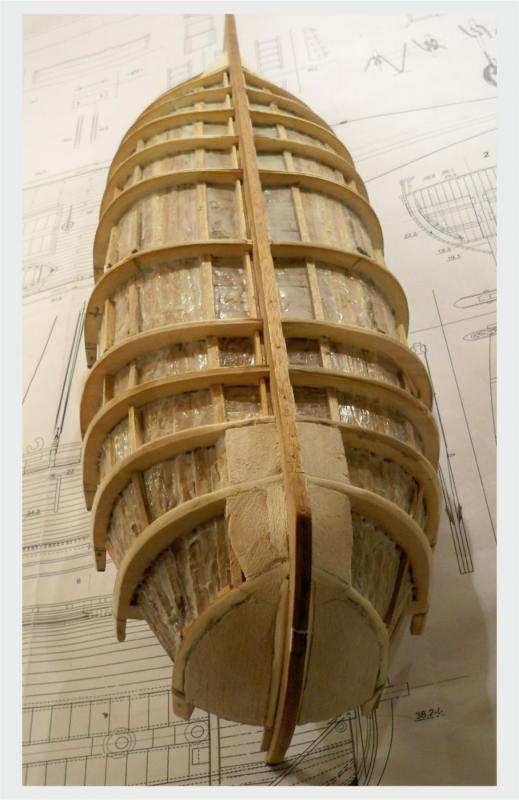
Hello Dear Friends ... here it is... the monday again, and guess what ... I love it !!... I noticed you read this topic quite a lot and I really enjoy that... but just a few of You posts some comments here ... and I think this is about my terrible English ... but please, do not be afraid of this ... I used to it :) ... if you have nothing to say or ask, it is OK too, I will keep writing and you keep reading... it is a very good solution too... So, get back to the model... After the interior is finished it is the time for 'fairing' the bulkheads. this is a very usually procedure... after 'fairing' it is time for putting the filler blocks to the bow and stern ... and everywhere where you feel you will need it to make the planking easier ... In our version it looks like this : (here are the photos) : Good luck !!


- 221 replies
-
- 11
-
-
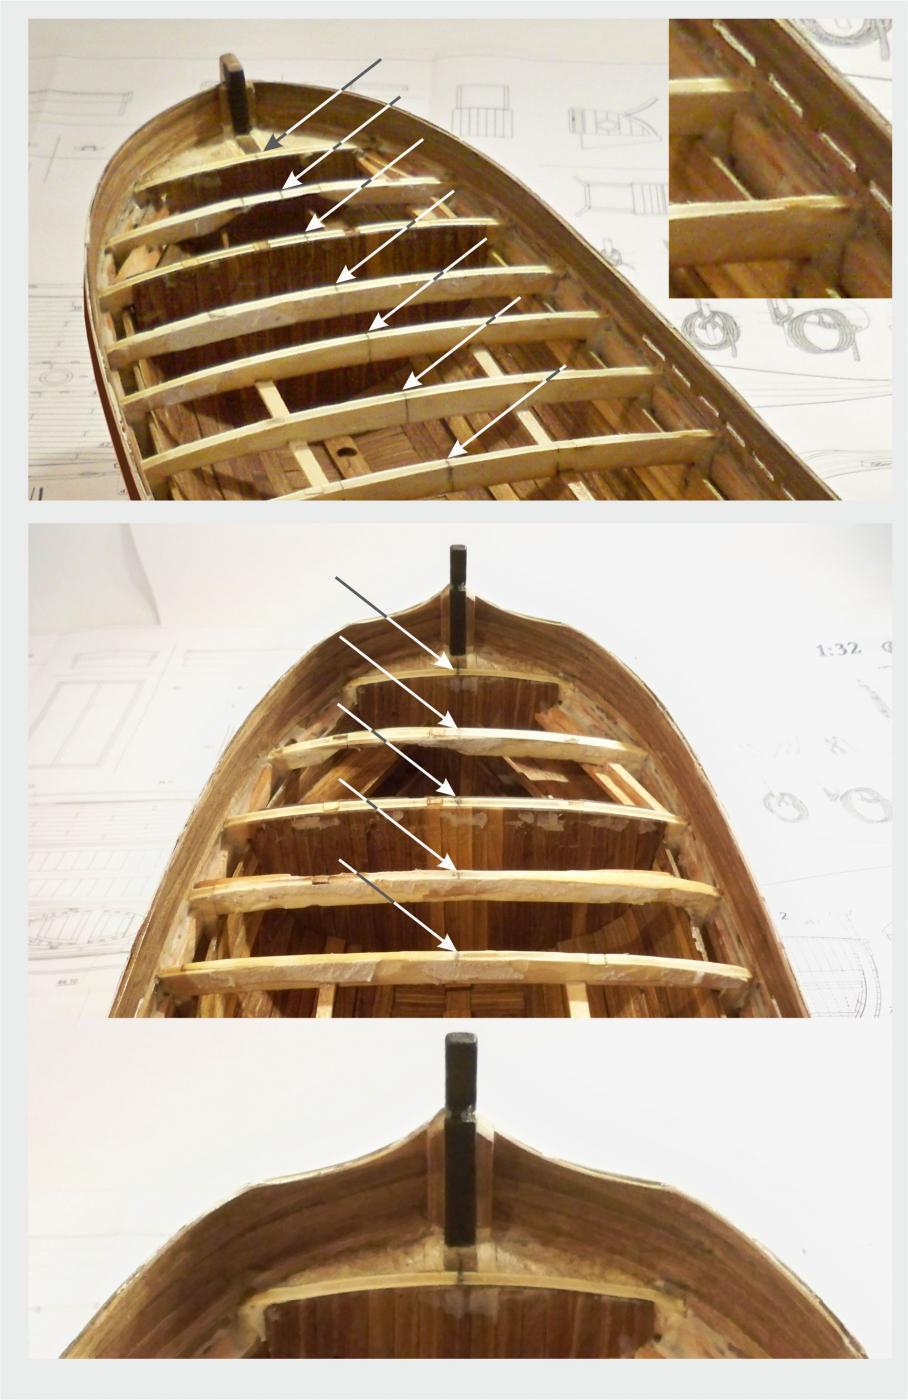
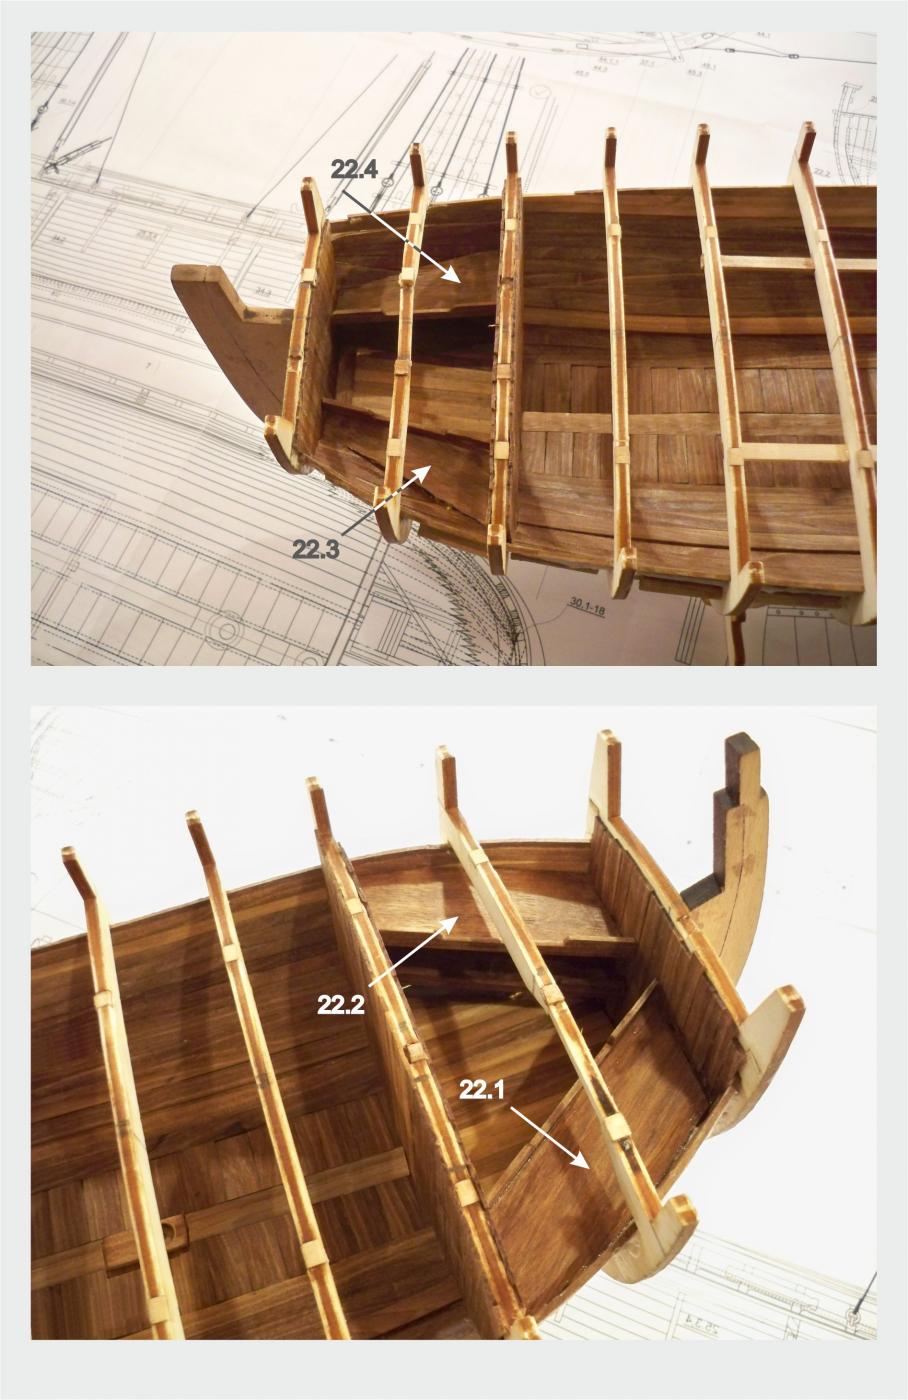
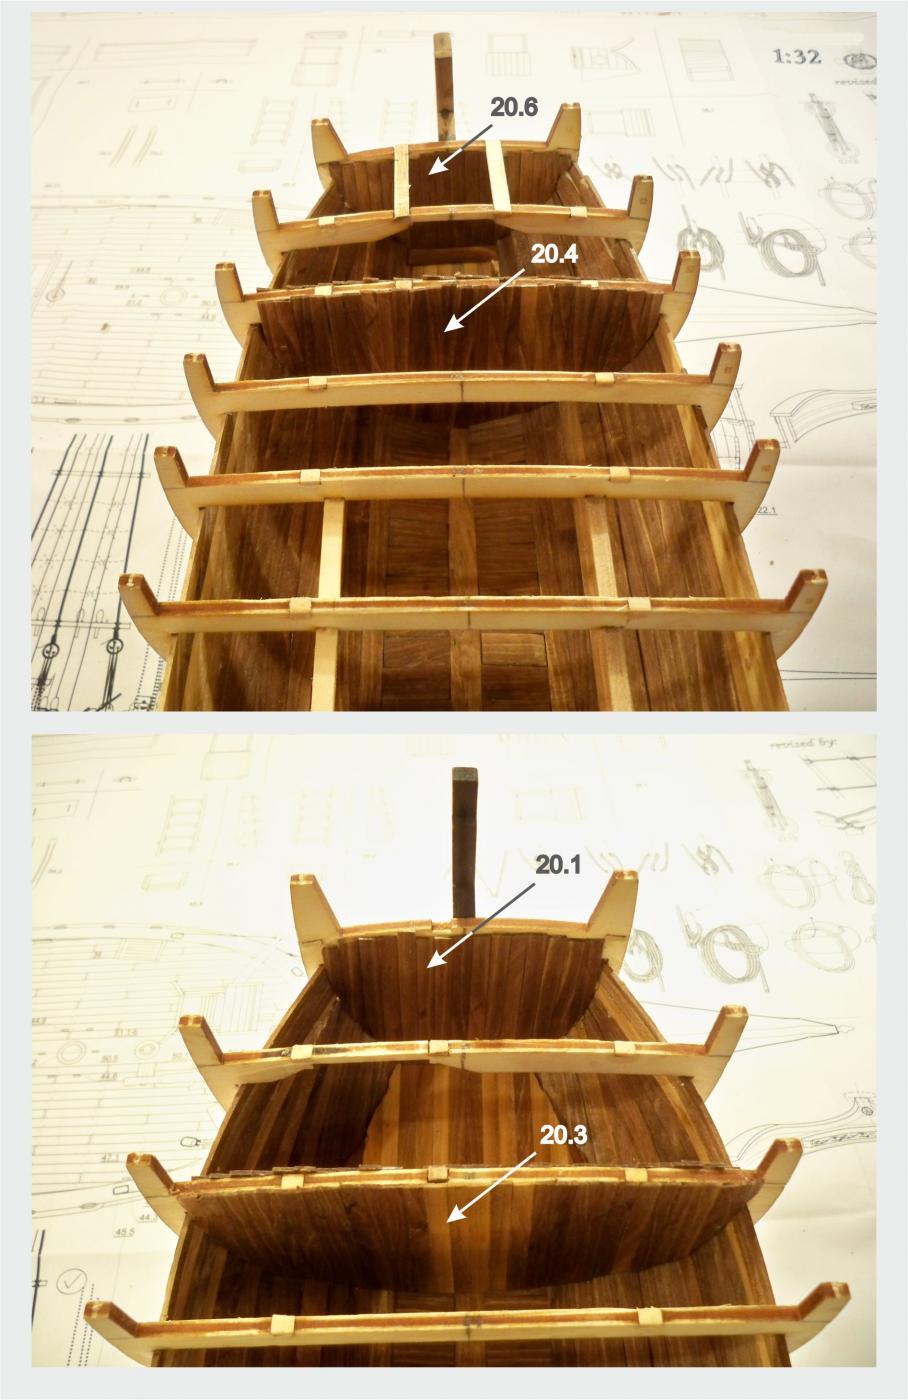
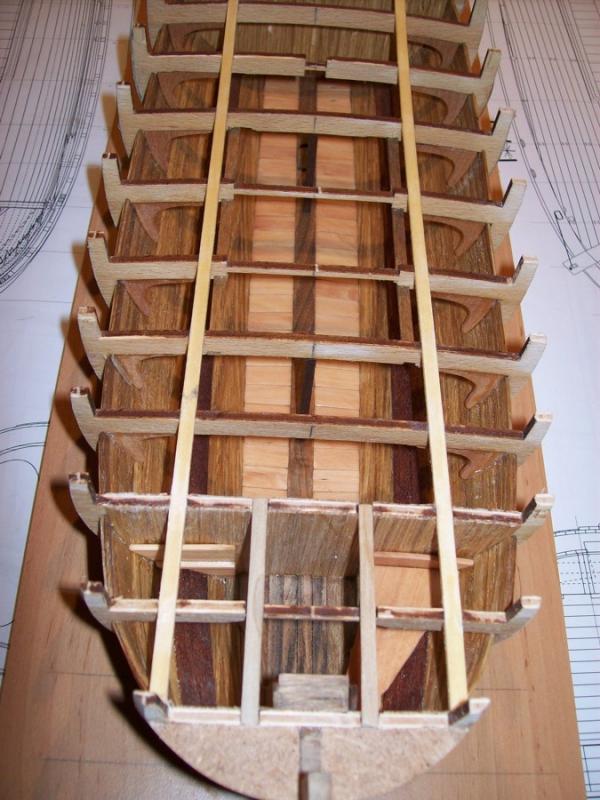
... placing of these elements is the next : mast step and the beds in the cabins... there are two bads in the aft cabin and four in the bow cabin ... So, with this, the interior is finished... all we should do about this is polishing and varnishing with matt colorless spray varnish ...


-
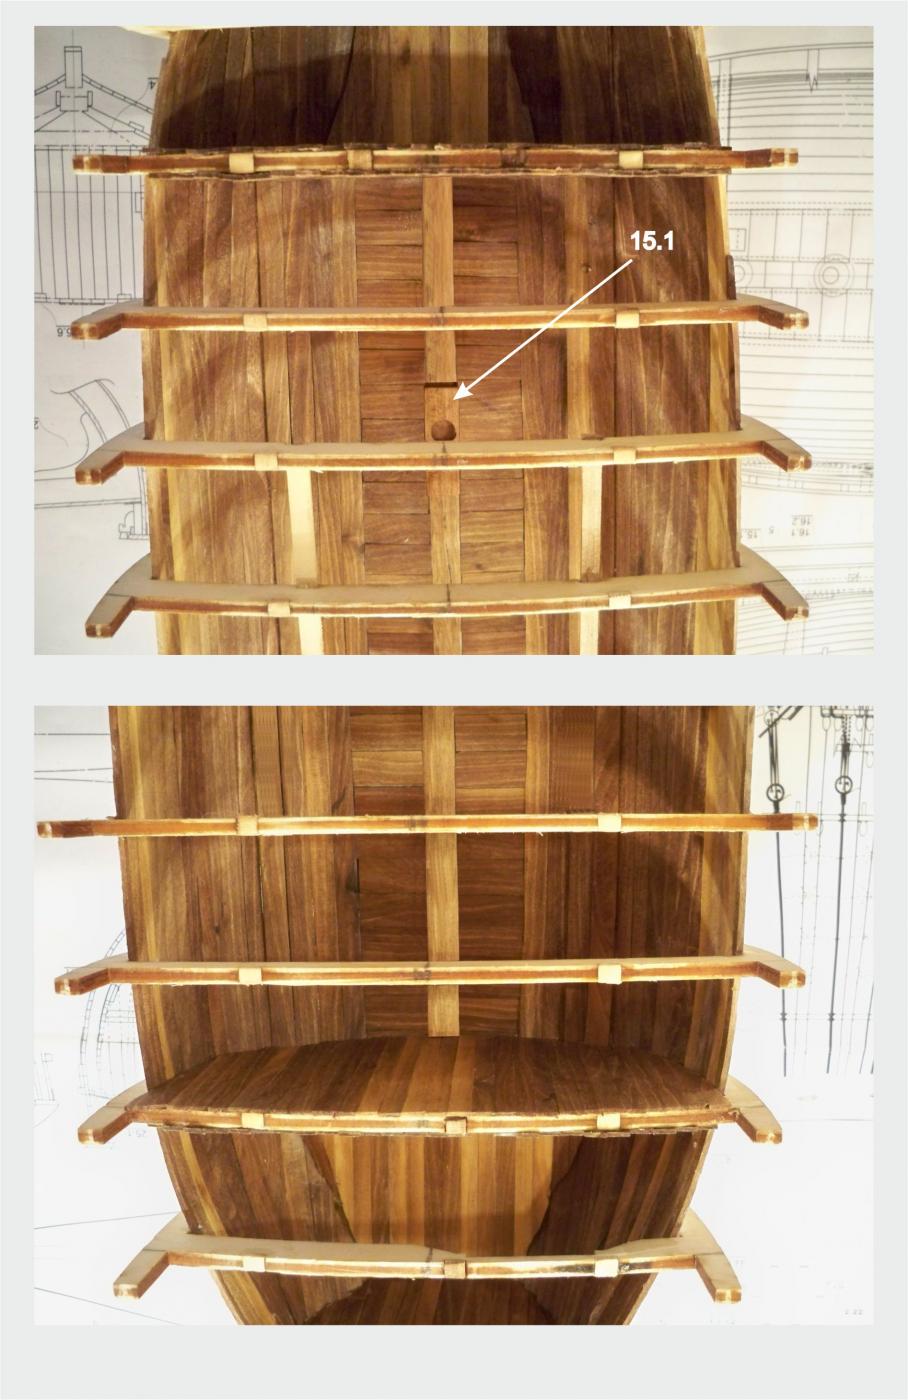
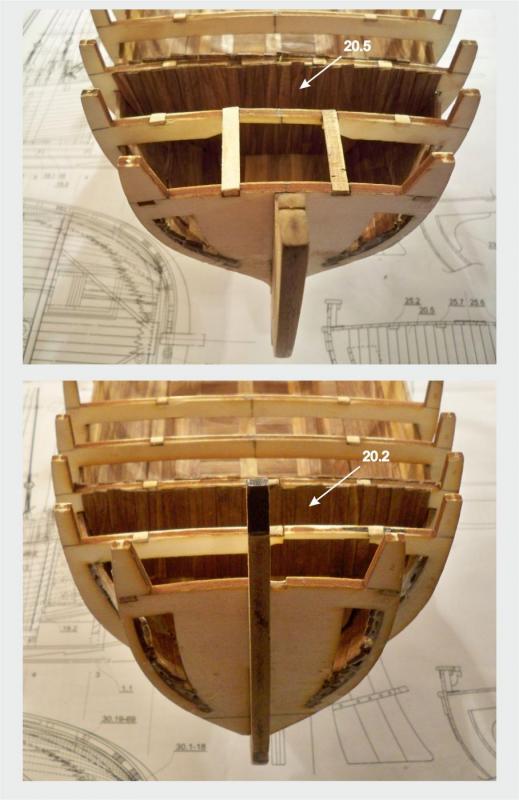
... then planking the bulkheads... this is to be done with 0,5x5mm strips...


-
after this, interior needs to be planked to the top, this means - up to the deck :

-
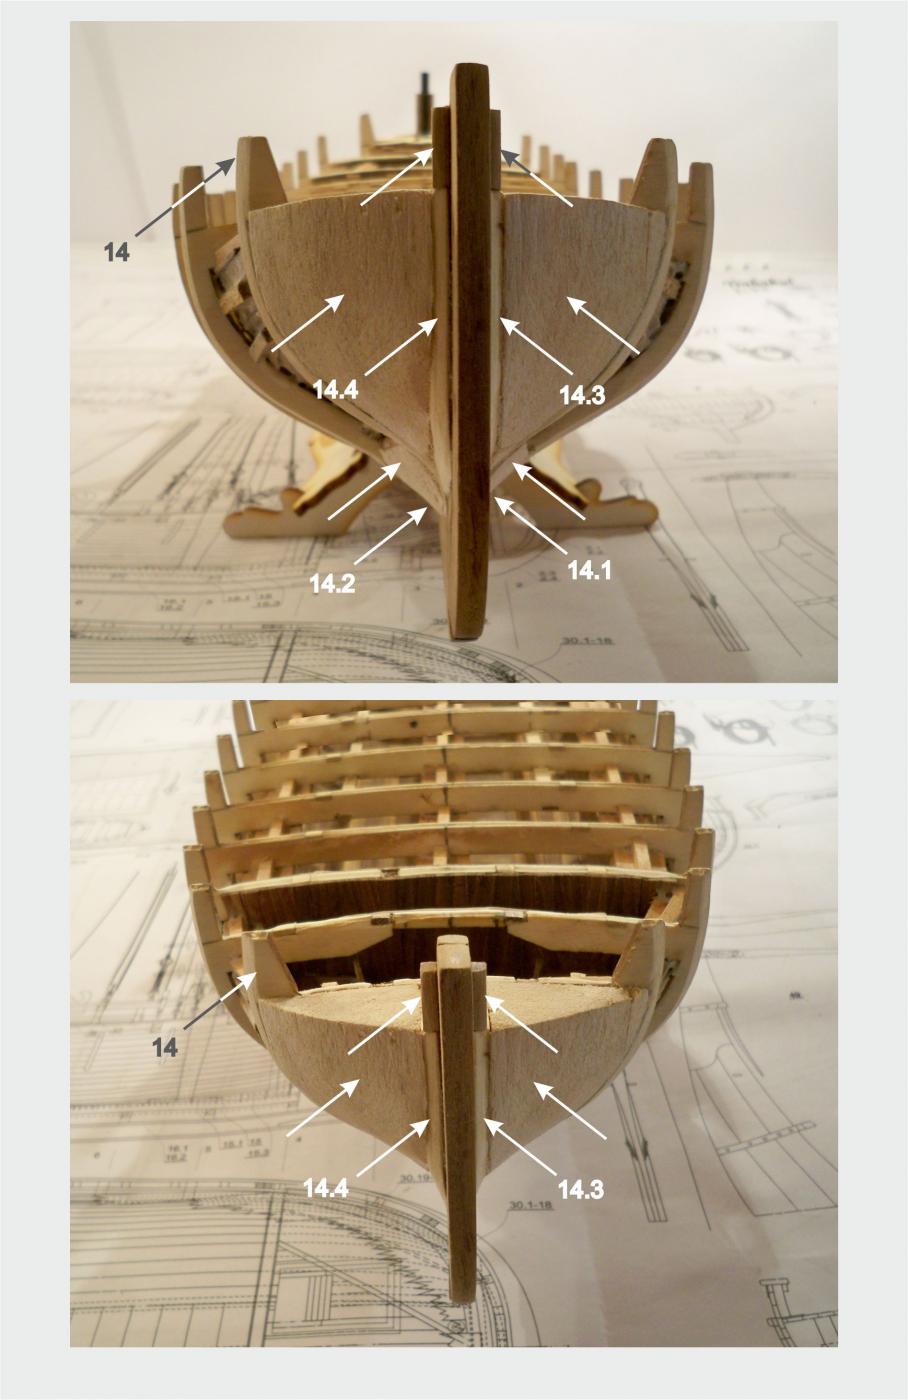
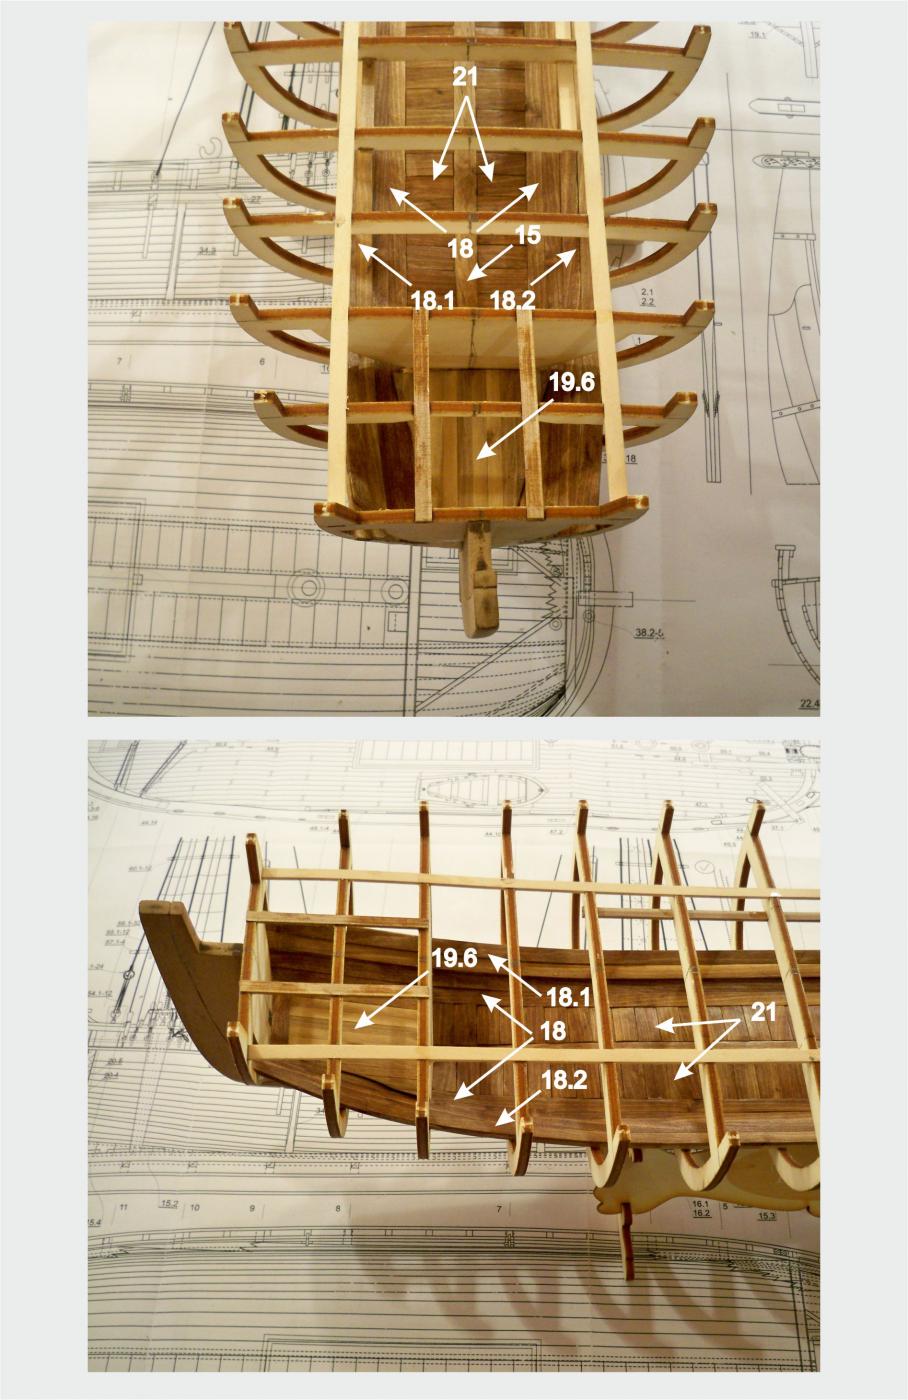
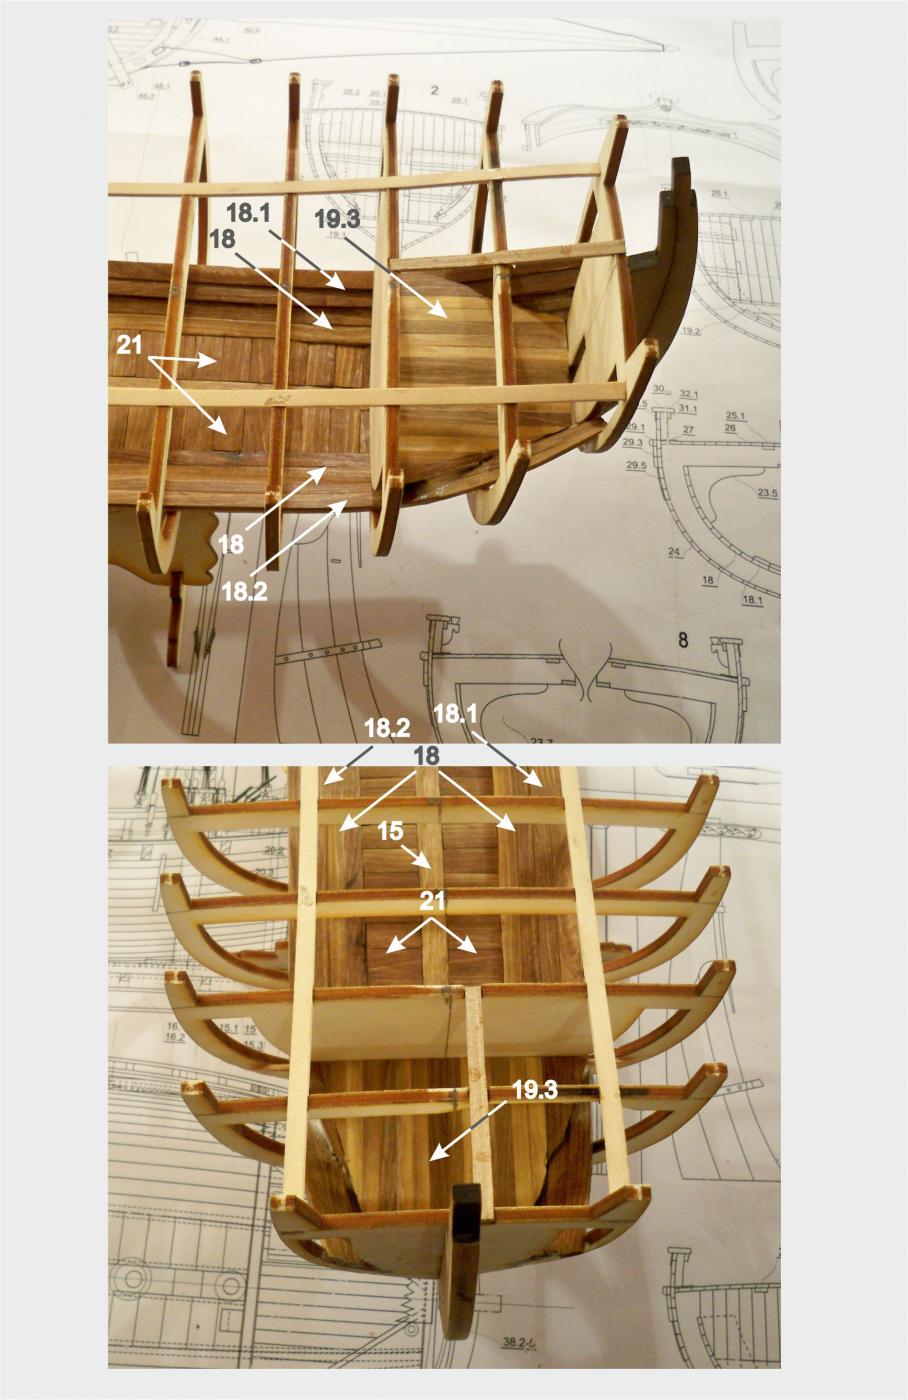
When approx the half of the hull is planked (from inside), the bilge and the flooring need to be made of the strips and glued to the place... the floorings in the middle of the ship and those in the cabins to the stern and bow :


-
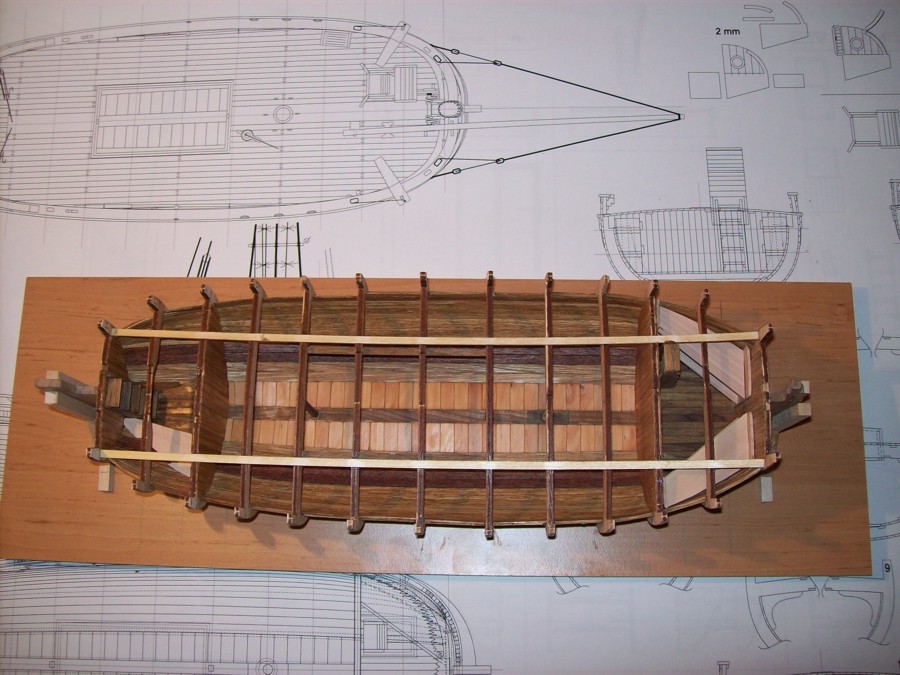
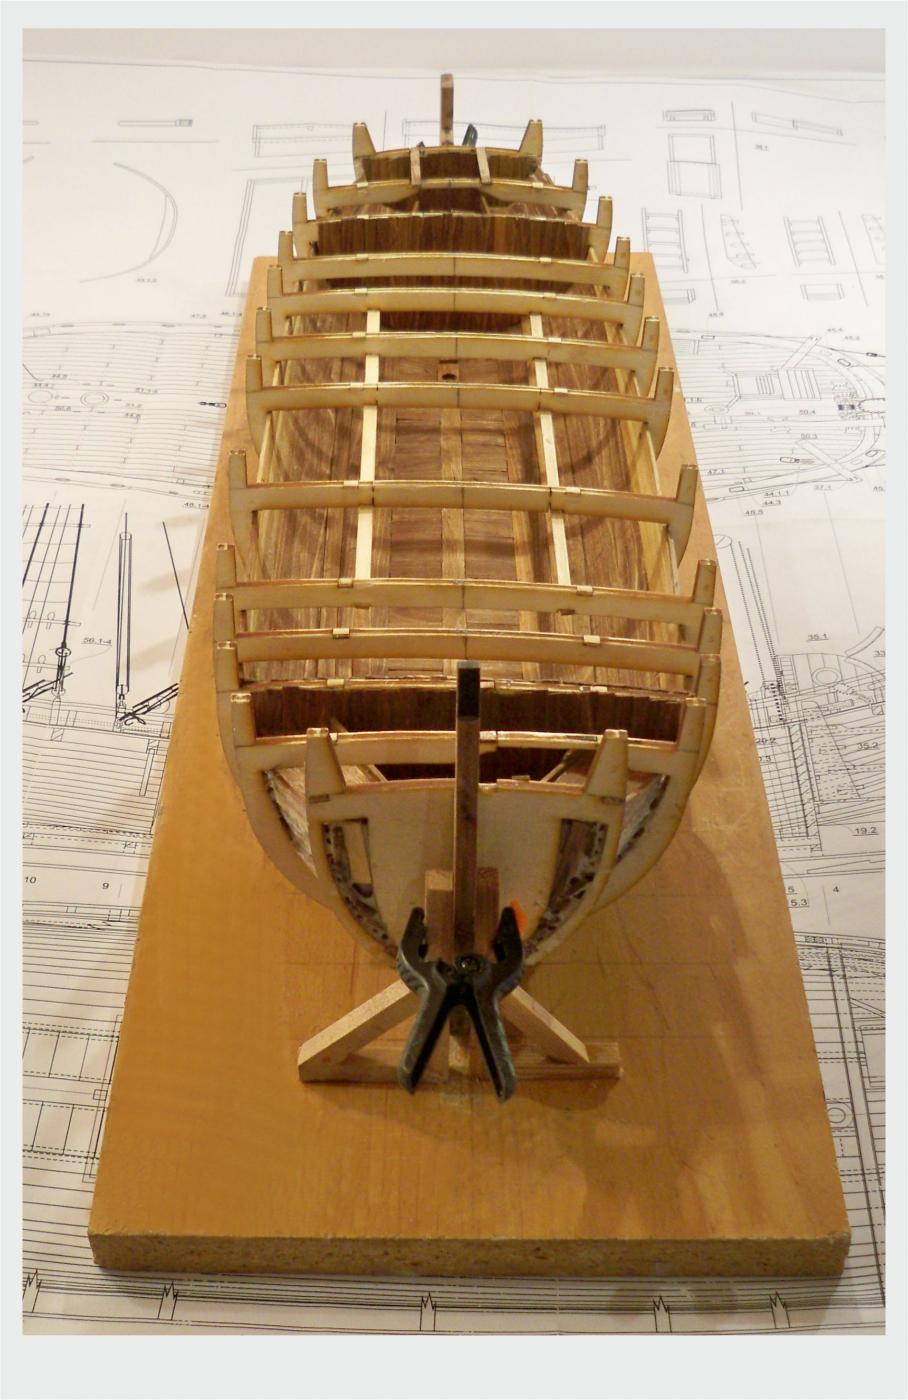
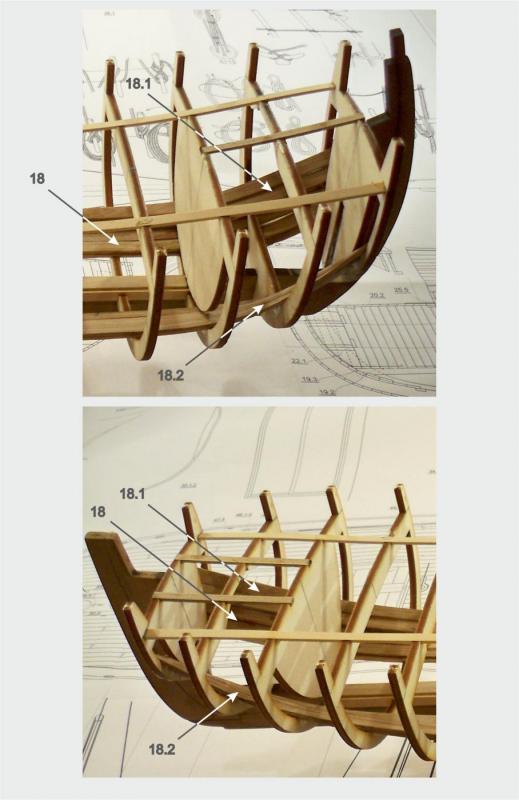
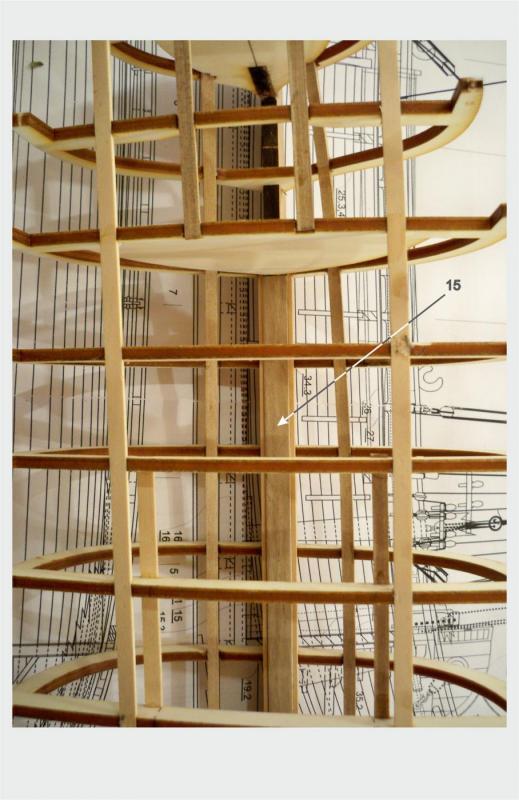
So, after putting the construction together, after putting it into the keel clamp, there is the final adjustment of all the elements demanded... And now something interesting... You have to take a brush and glue for wood... and to apply the glue with a brush to the every place of the element's connections... it is the way to glue them together ... ... when the glue get dry, you get the perfect connected construction, there is the false keel to be glued to the keel... The interior is coming next ... the strips are to be put from the keel upwards ...


- 221 replies
-
- 11
-
-
Hi Mr. Al... THIS IS THE BRIDGE !! IT LOOKS GREAT ! You are right, the spindles (the pillars) are not included in the kit as the fittings because they are not the same... There is a dowel 4mm in the kit... the main idea is to make the different pillars by a hand or using the lathe ... but this You have done is great ... Thanks Al for sharing this with us... Can't wait to see the rest of this work.. Regards, Zoran
-
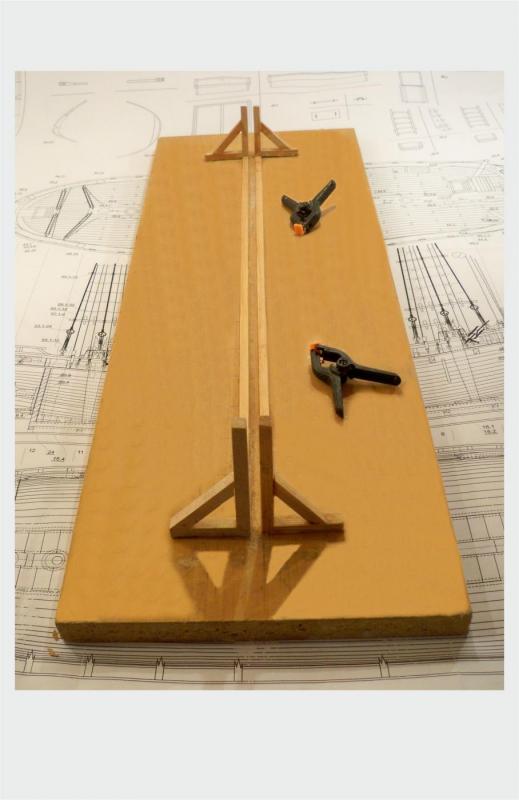
So, the next step is the 'keel clamp' -or - the 'work stand' ... the purpose of this clever thing is to make a stable table for working at the model... once, when you put a model into this clamp, you do not separate it until you put a model on to the decorative stand... in the instructions we had to separate models off the clamp to show particulary stages of the work, other ways we would never do this... ...so, at MarisStella we love to describe the work stand like this : ... Create a stand in which you will hold the model during its making. Use a flat board as a base, and two flat strips that you should glue on it. They will act as a rail for the keel. It is good too, to make even the stem carrier and stern post carrier, also of straight vertical strips and fix them to the lower, horizontal strips. The whole stand for the realization of the models should be stable and the model on it must stand there tightly and set so that the keel and the posts are vertical to the base itself. This is the only way to work on a model properly. ... There is a photo of a classical work stand ... there are the photos of Brazzera and Trabaccolo during their realizations...


-
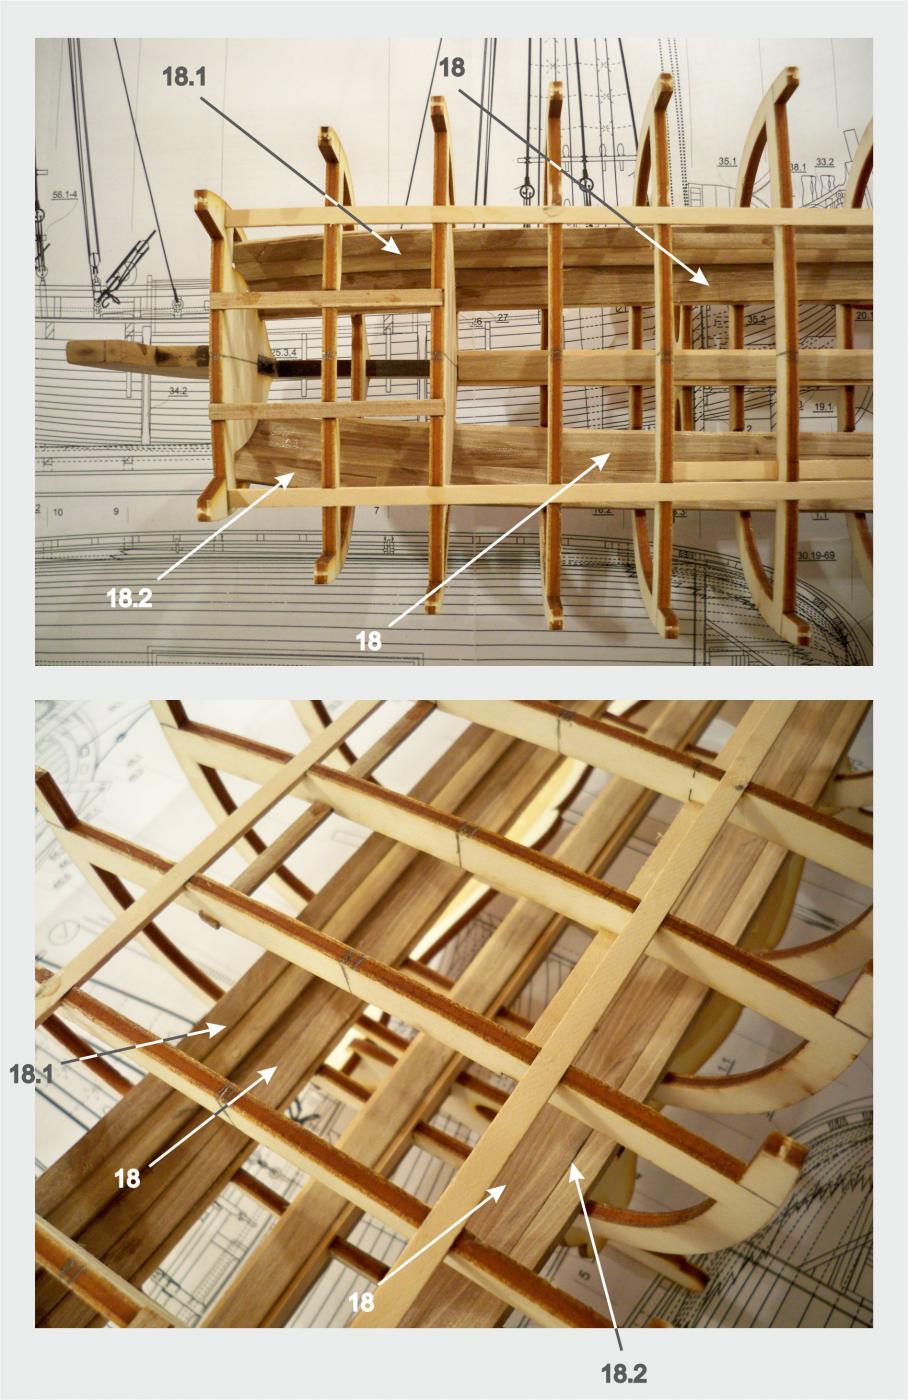
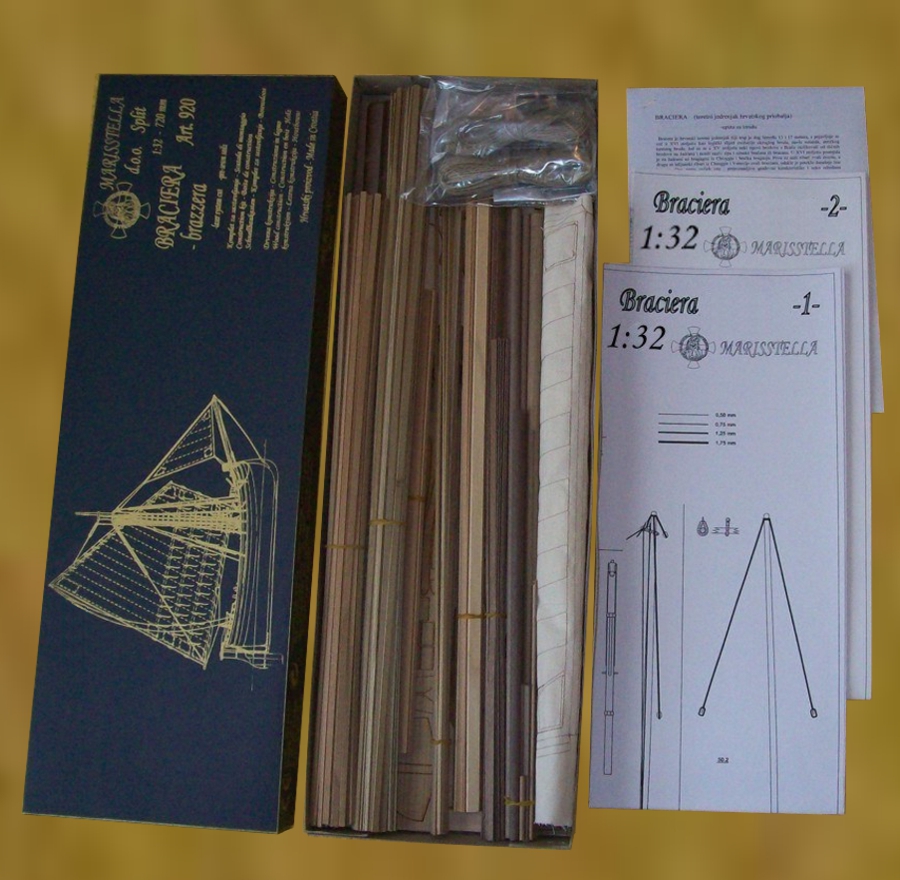
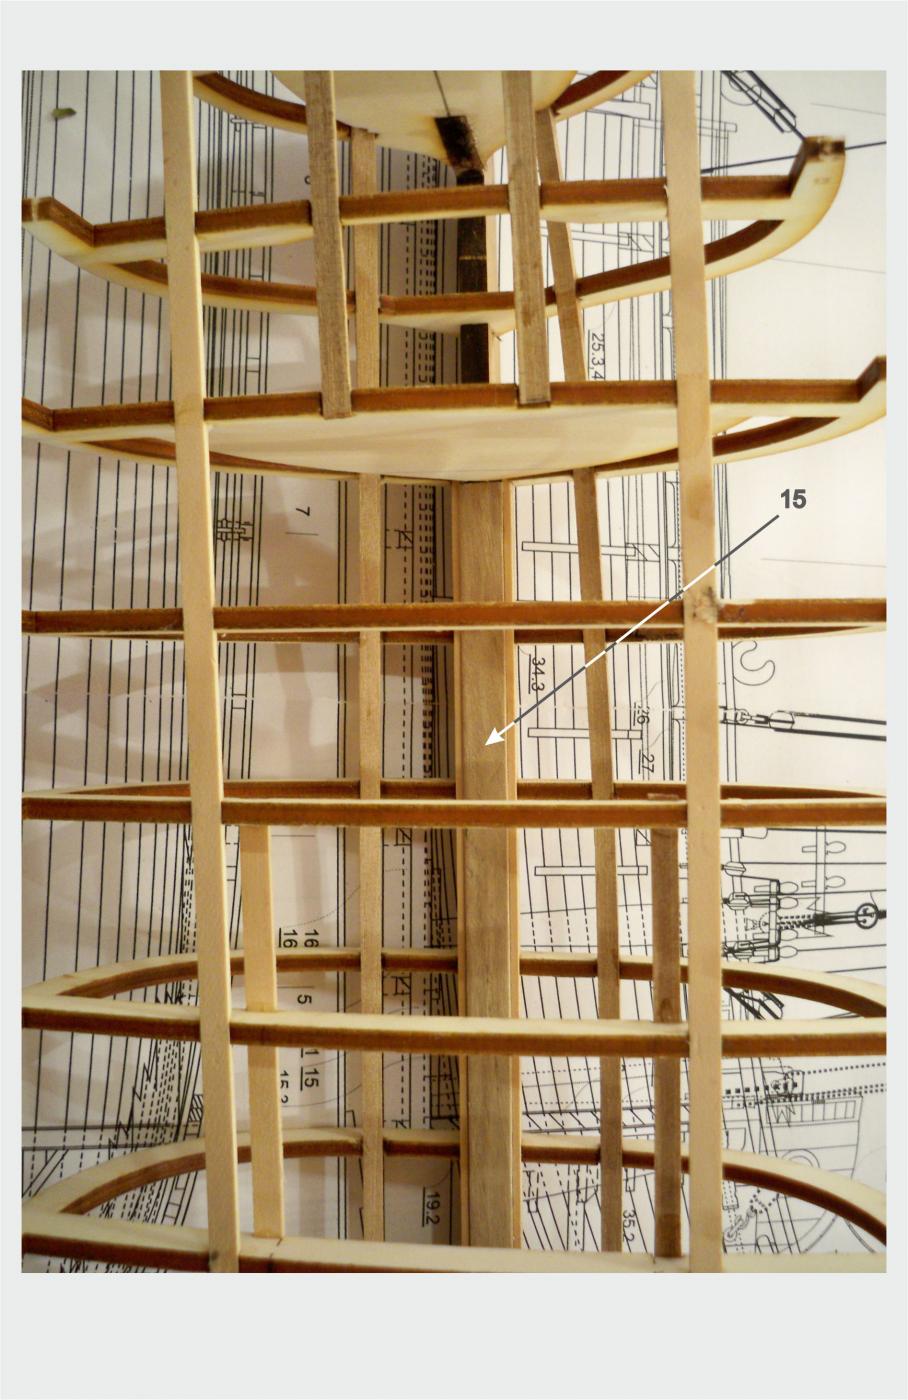
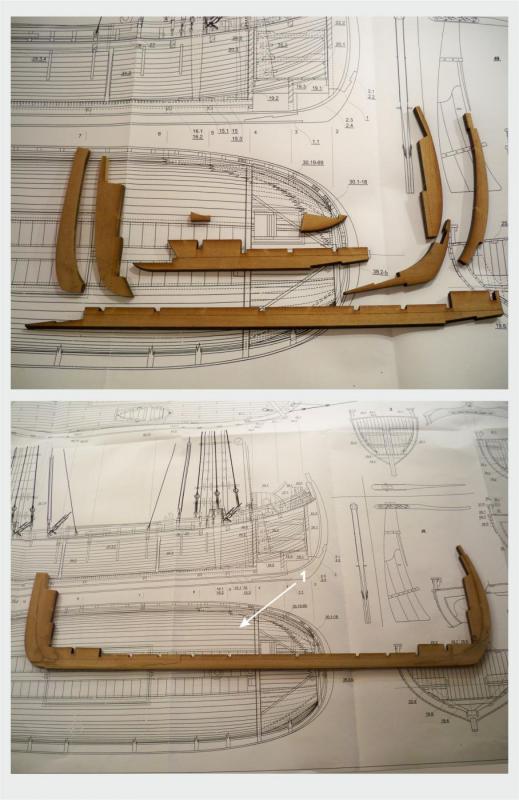
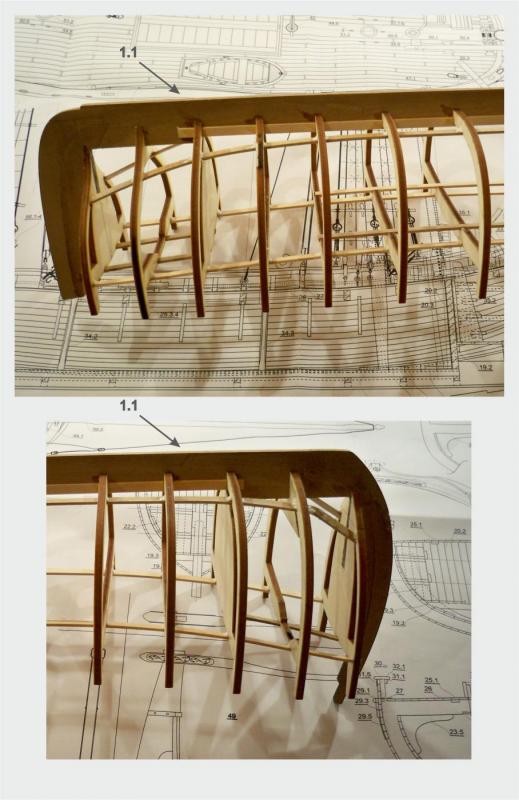
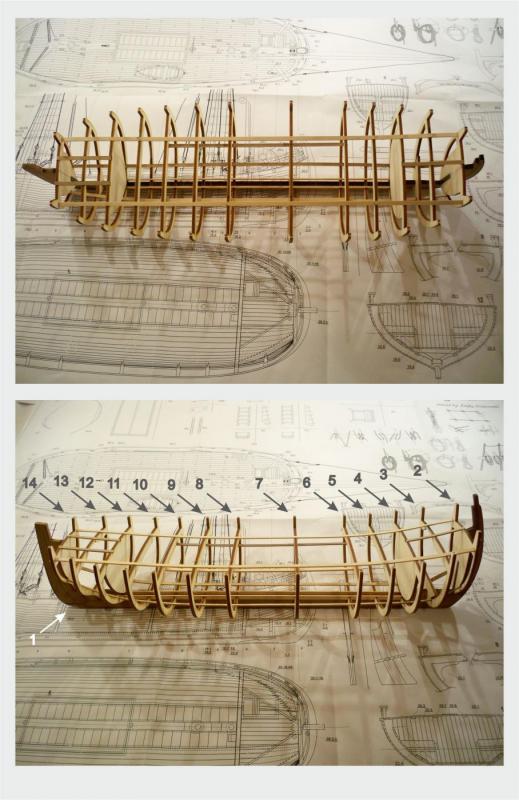
Hello everyone ! Sorry for being off for several days.... first off all, regarding the kits, i have to say something about materials, which is nothing new actually,... The picture below shows our old Brazzera box... It is really full of very expensive and very good materials... below this plenty of strips are the laser cut panels, mostly of solid walnut wood... so, everything that goes to this ship is made of solid walnut wood... bulkheads are made of high quality plywood, and it is easy to form by sanding... The keel and the posts are walnut wood... as you can see below... bulkheads has the openings, because this model has completely arranged interior... ...All of the bulkheads automaticly come to the correct position when the supporting strips are put (very easily)... any glue is not aplied in this phase of work, so it is more easer to put all of these things together... ... To make the things simpler, I put the last picture that shows the Trabaccolo construction...


- 221 replies
-
- 12
-
-
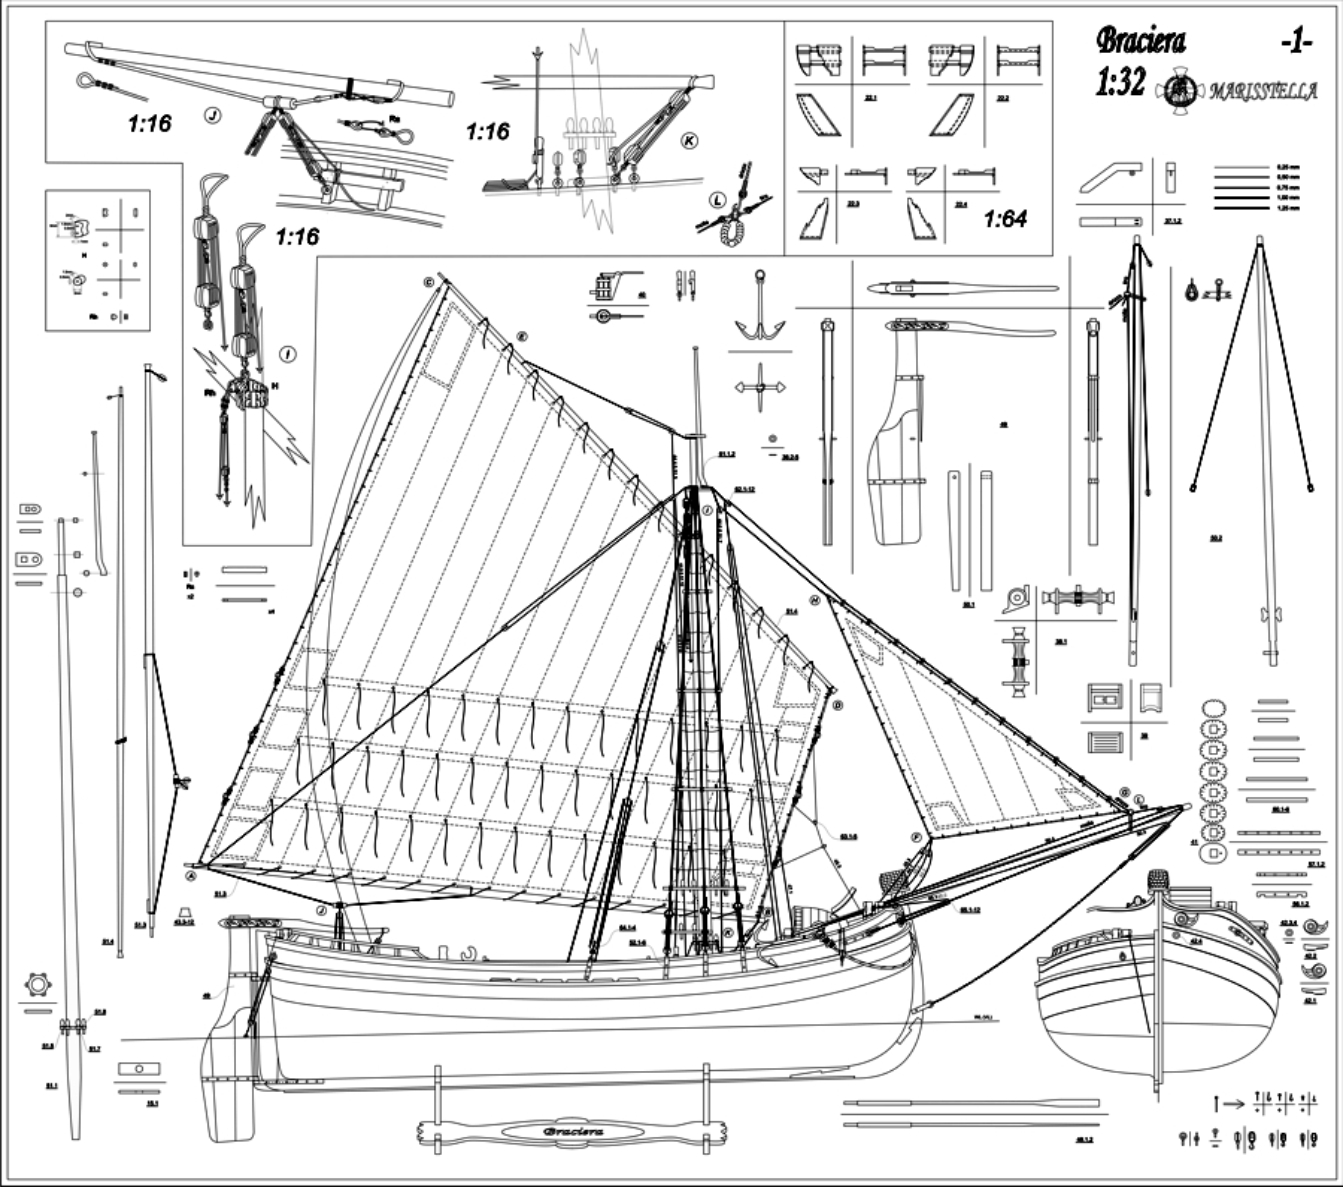
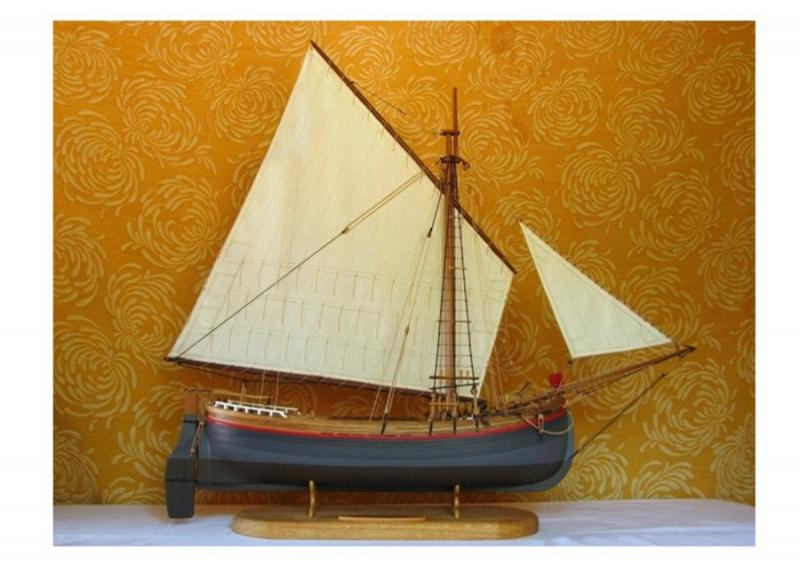
So, after several days off this topic, I get some free time to come back to you all my friends, dear ladies and gentleman... After finishing some generally introduction of Brazzera and Trabaccolo, I have to get back to Brazzera... ...It took almost two years of research business, very pleasent job, to determine the shape and equipment of the Brazzera we built... We get so close to the traditional shape, so I just can not beleive we made any mistake about any detail... The drawing was made in one year, the first model in nine months... And bingo !! It won the bronzed medal in a very tough competition ... This drawing below is what MarisStella Brazzera is looking like, and the photos show the first model made after this drawings... The model is 72 cm over all ... she has completed interior ... so she looks like this :


- 221 replies
-
- 11
-
-
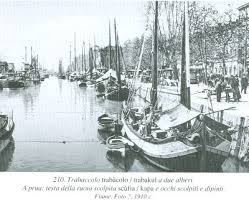
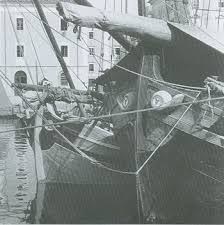
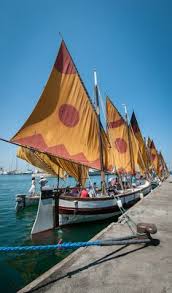
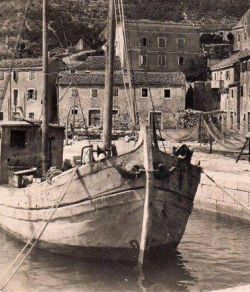
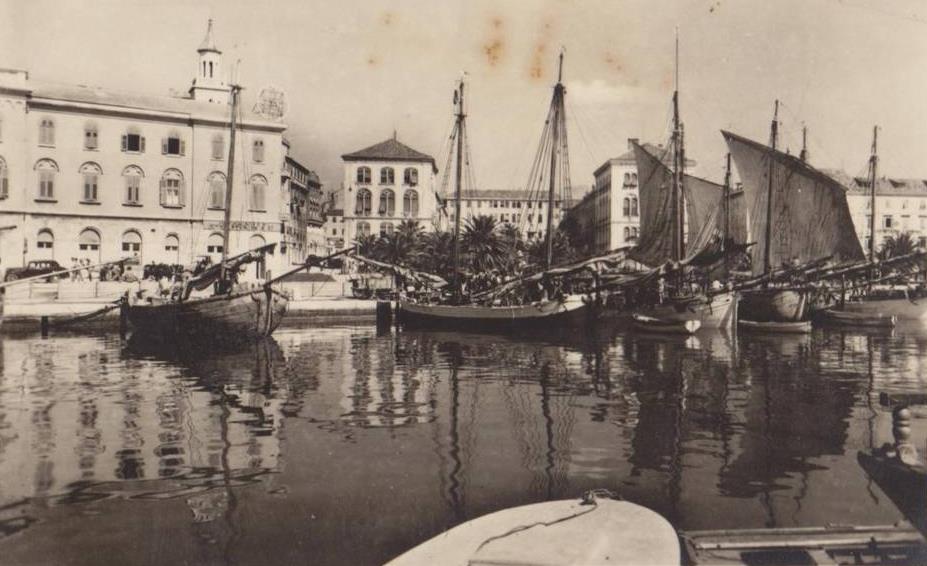
So, the last thing I would like to say about Trabaccolo before starting on description of this two kits and build logs, is something about Trabaccolo generally : Trabakul, trabakuo and trabakula are different names for the same vessel of the Croatian people. This is a typical two-masted sailing ship intended for sailing on the Adriatic coast, rarely seen outside the Straits of Otranto. The name itself coms from the Arabic word tabaquah, roof. It's up to 30m long, up to 6m wide and her draft is up to 2m. It can take from 60 to 200 tons. Undoubtedly a descendant of navis rotunda, round antique boats, designed exclusively for the transport of merchandise. Easy to equip, maintain and handle, was used for several purposes but these days is rarely seen, equipped with drive motor, dedicated renovated for tourism purposes. This picture below shows her in the real old fashion way. This is the original Trabaccolo :
- 221 replies
-
- 11
-
-
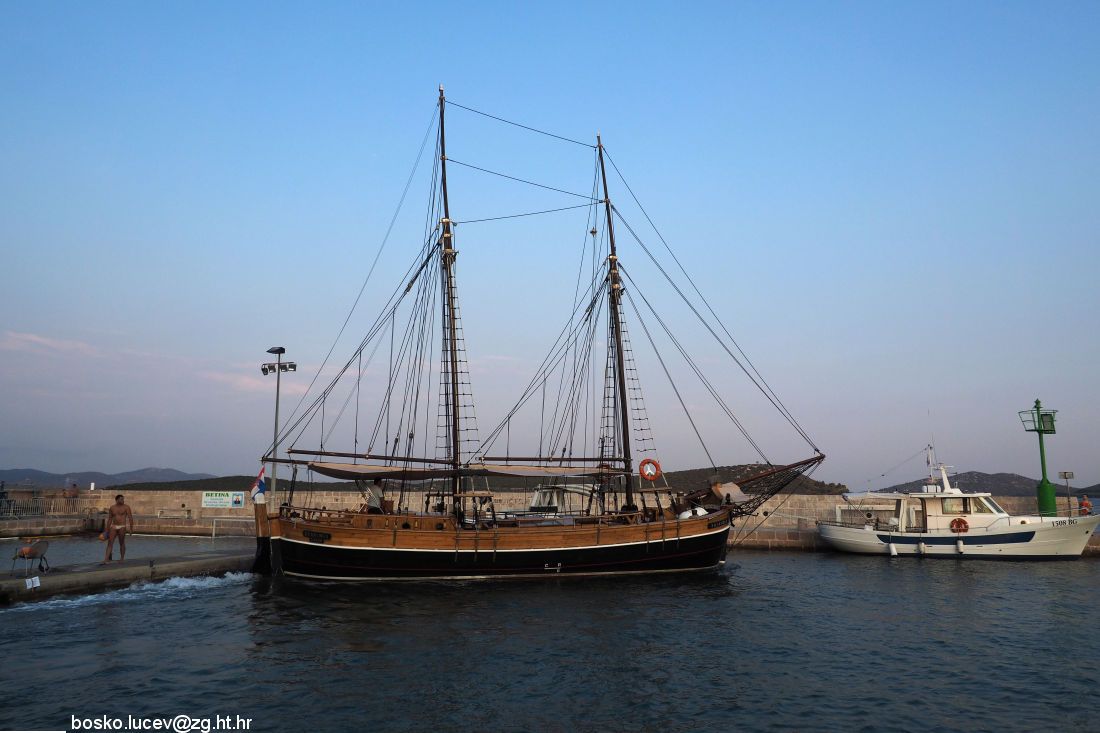
Thanks Nirvana, a lot of Americans move here around S.Coleman, no she is not in any trouble... She was docked here in the left, then turned right at the sharpest angle and put some power on. This caused to turn right and is ready to sail away ... This is normal maneuver at the situation like this ... Don Robinson, here are some more of the photos, as You wish , but do not worry, Your Trabaccolo is the best sample of her. Looking all of those pictures You could get confused because there are some unusually ways of the build present. You are building A TIPICAL TRADITIONAL NON CHANGED SORT OF HER, I am going to present her here soon... Regards, Zoran
-
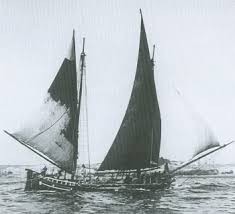
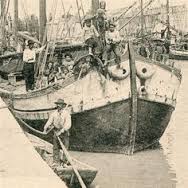
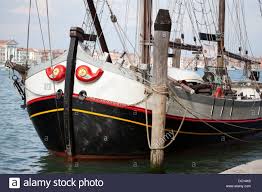
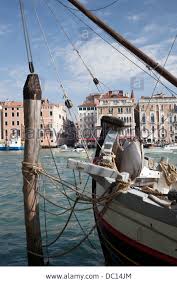
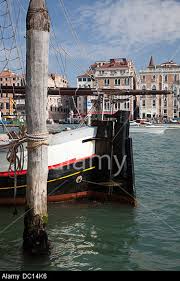
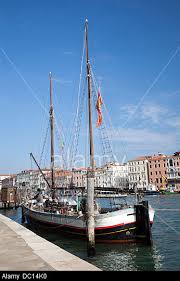
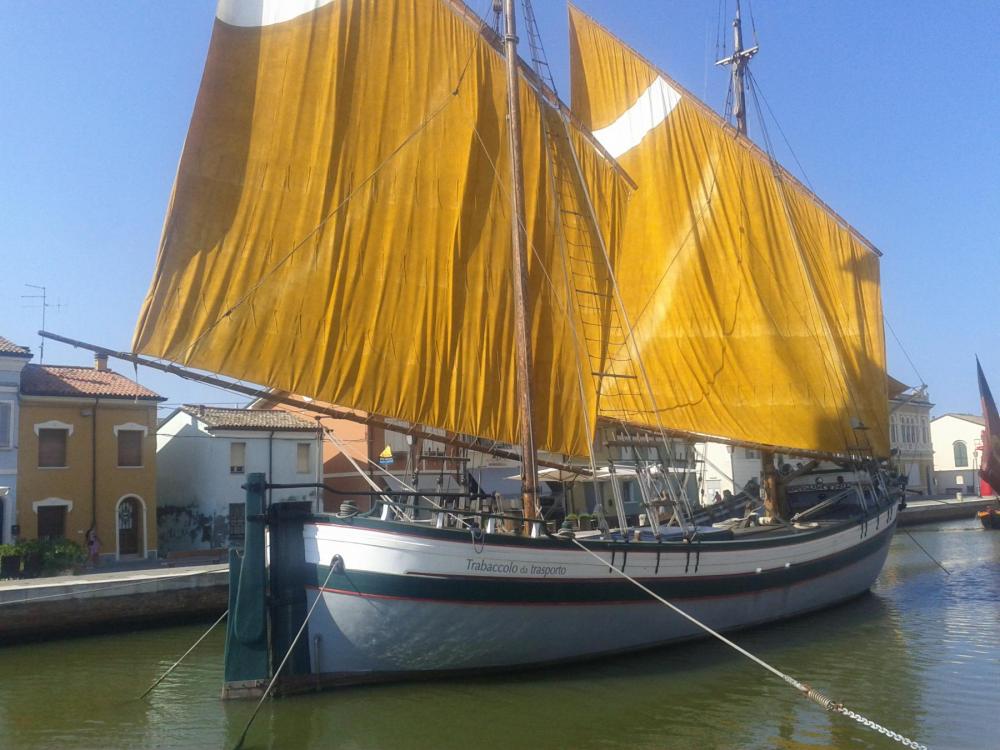
So, I would like to show you some photos of Trabaccolo now… This old lady was the beauty of Adriatic coast… She belongs to Croat and Italian sailors and ship owners. The fact is that, many seaside families was owners of one or more Trabaccolo . The ‘head’ at the bow was the unique sign of the family who owned the ship. It was the recognition object: each family had a specific type of the ‘head’. There were no two equal heads… Italians used to colour the sails at their Trabaccolo, but the Croats were not doing this. So this was the sign of recognition of Italian and Croatian ships… Trabaccolo was always painted in many bright colors, but the hull was coated with tar very often. The upper part of the hull was painted bright. Often, there were samples composed of white, red, yellow, light blue or green colour. The sails at both Trabaccolo masts were the Lug sails. She has one or two jib sails … She had two cabins. The crew was up to four men.
- 221 replies
-
- 10
-
-
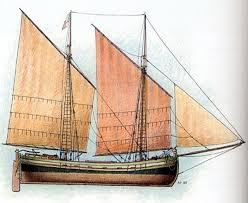
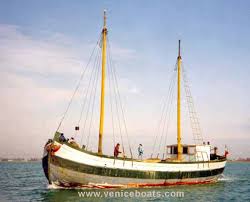
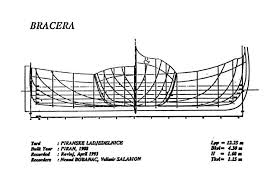
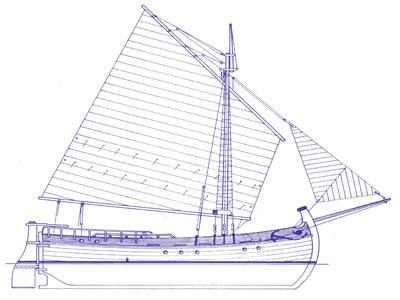
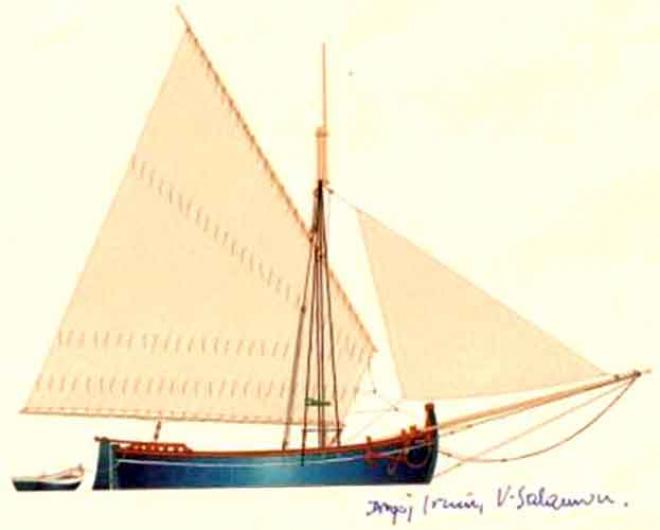
Hello everyone, thanks for reading this stories and thanks a lot for the likes... Ian, thanks for saying nice words about our products... Regarding the lateen sail on Brazzera, it is quite possible. You could use two dowels (that usually use for the Lug sail, all You need is to trim them to the size)... When making the sail, take care of the dimensions, just use the upper picture of Brazzera, it is totaly well done... She will be nice looking that way too... use the same pins for the rope binding . This picture below shows the typical Brazzera , her waterline and the hull shape. The modifications in practice are minor ...
-
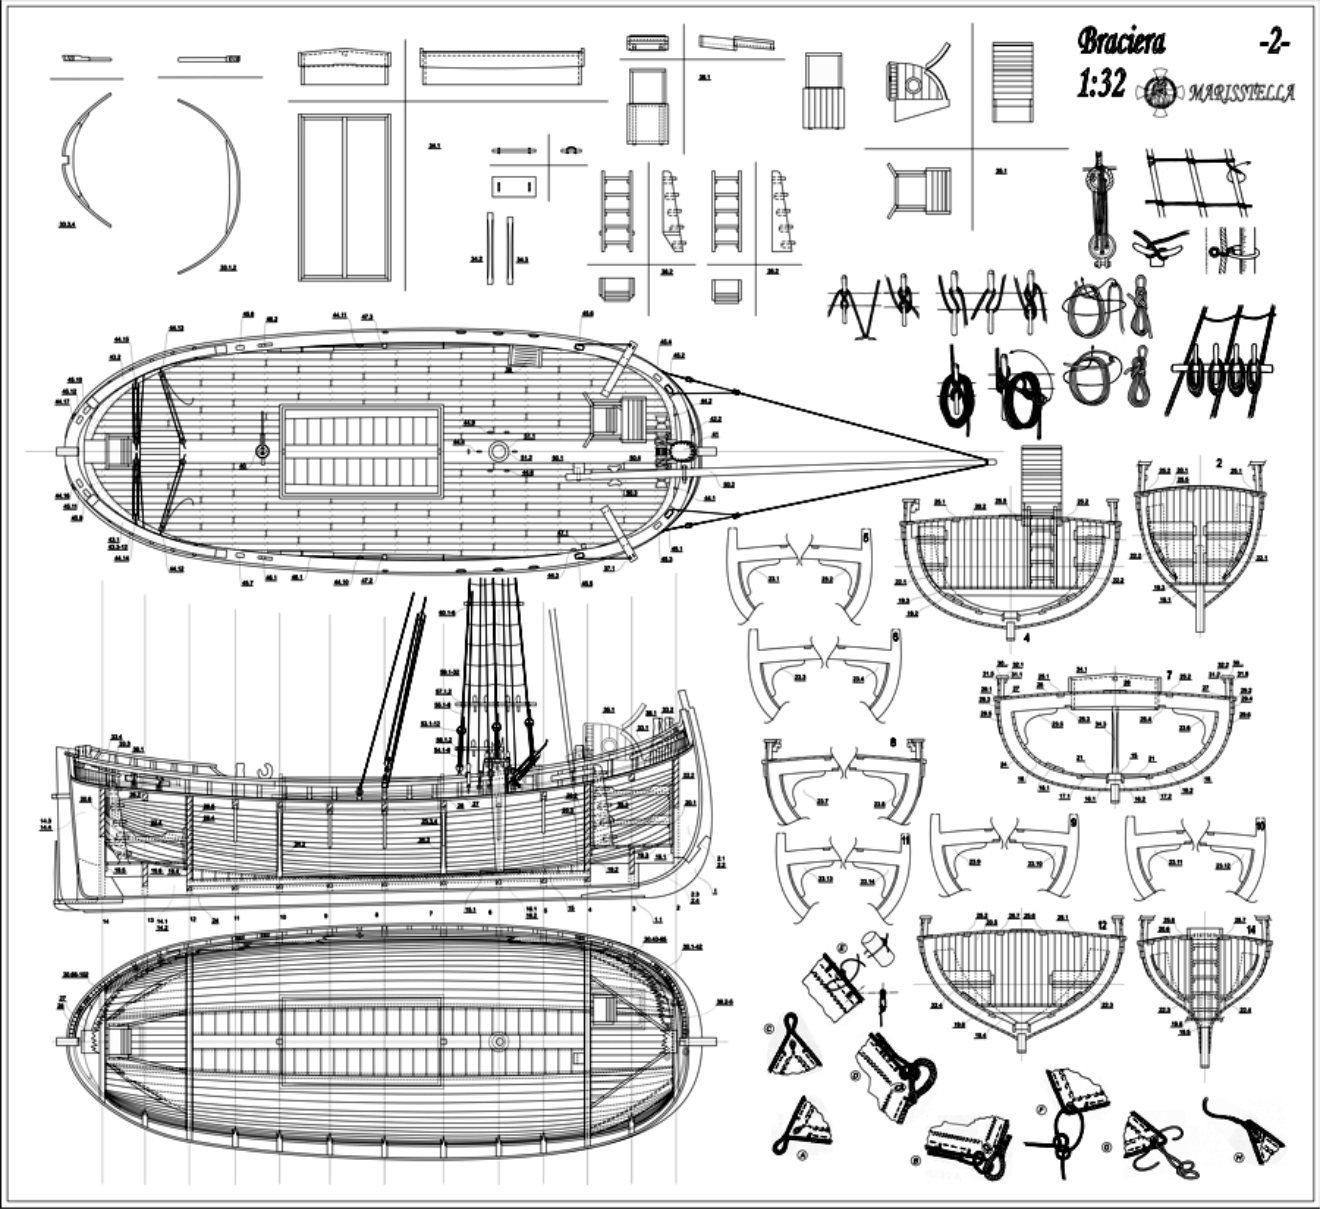
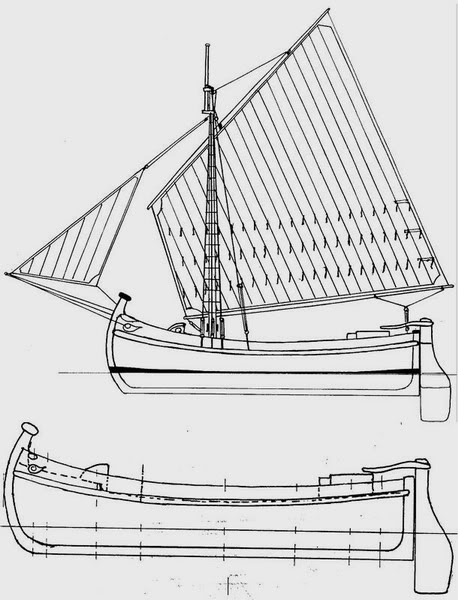
Dear Ladies and Gentlemen, before I present you the Trabaccolo and build logs of those two models, I would like to show you some parts of drawings of Brazzera, just to note variations that appeared during the centuries…

- 221 replies
-
- 10
-
-
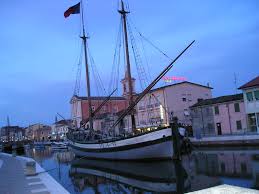
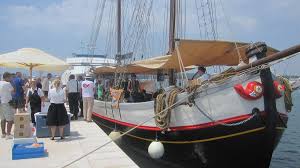
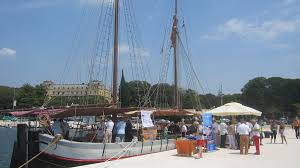
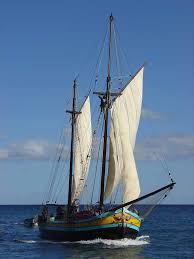
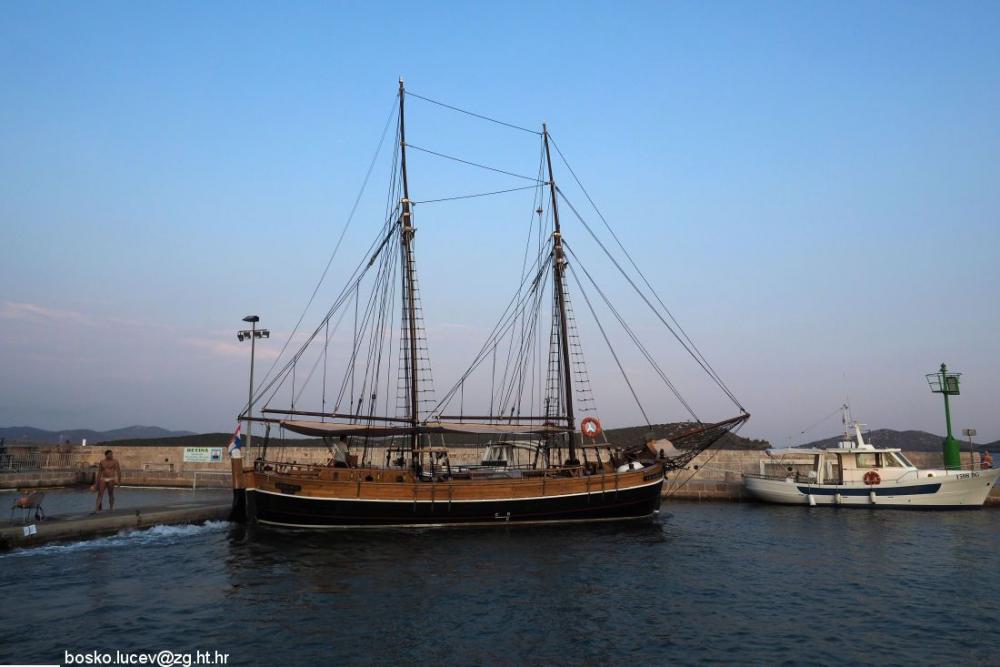
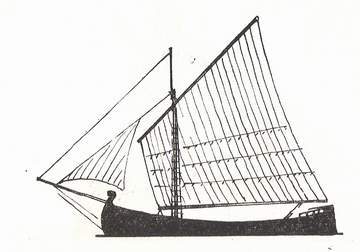
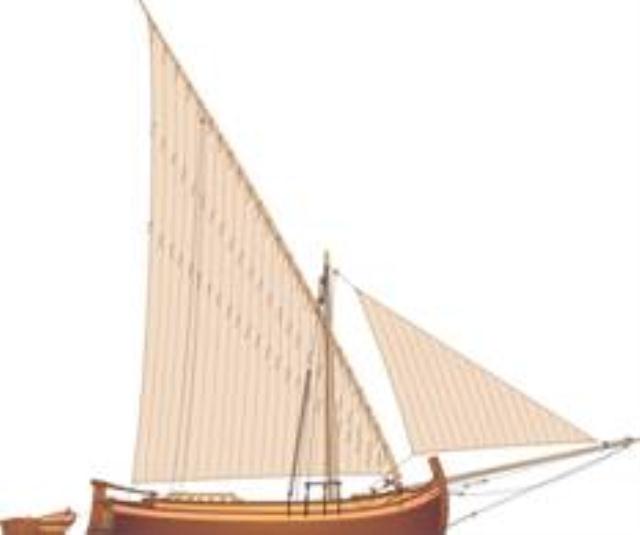
The Brazzera, the temptress of Croatian coast, unfortunately is built no more… Her place took ships with the modern lines and engines… Don, this one is replica built specially for the tourists and, as I can see, is not typical one, she is not completed. There are some differences built in and the way of building the hull is not old fashion way. But still, this is a good picture of her… The photos above are showing her exactly as she was... This is Brazzera... Here were two types of her : Brazzera with lateen sail and Brazzera with a Lug sail , that is much more present (many people never heard of some other type of her)... These colored pictures will say much more than me (with my English which I do not speak well ...) So, this lady, with two faces defied the time for centuries :
- 221 replies
-
- 10
-
-
Thanks Ian... complete Croatian coast looks like this, some of the places still have the natural look ...