HOLIDAY DONATION DRIVE - SUPPORT MSW - DO YOUR PART TO KEEP THIS GREAT FORUM GOING! (83 donations so far out of 49,000 members - C'mon guys!)
×
KLarsen
-
Posts
127 -
Joined
-
Last visited
Content Type
Profiles
Forums
Gallery
Events
Everything posted by KLarsen
-
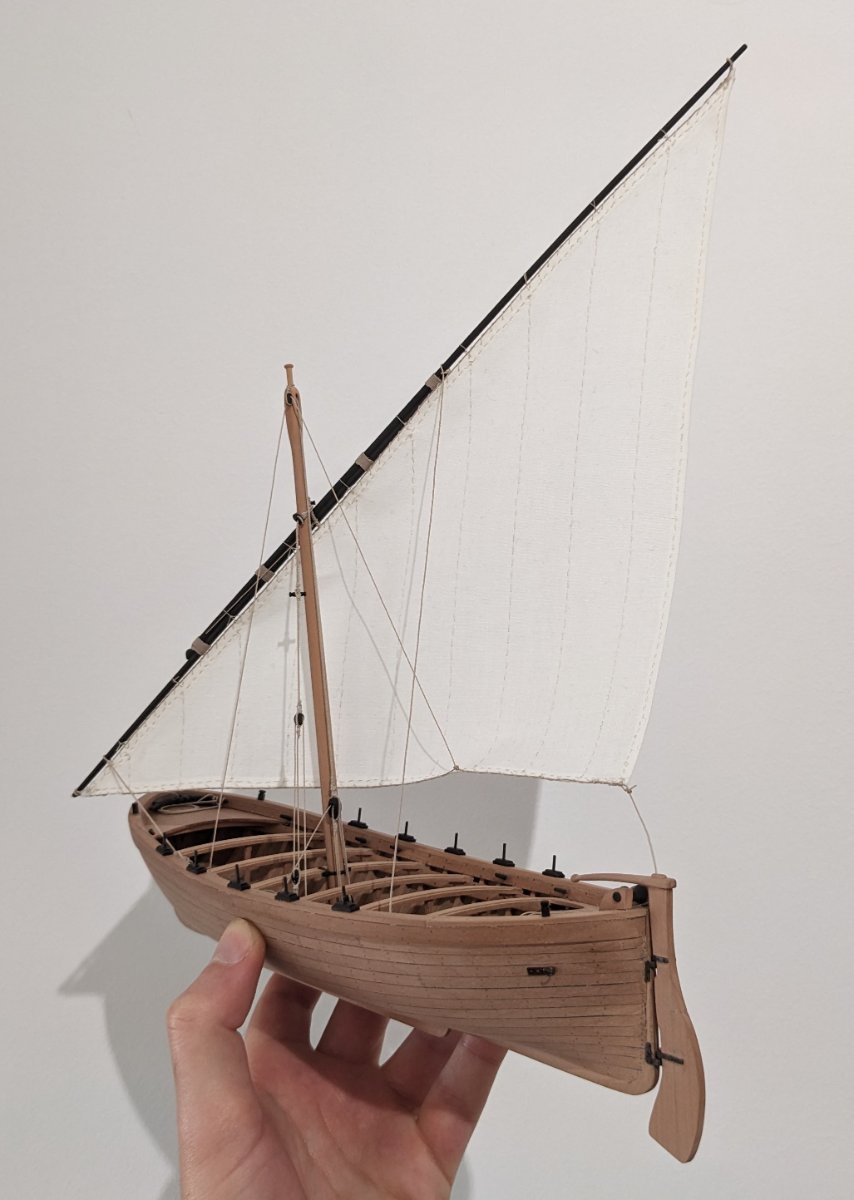
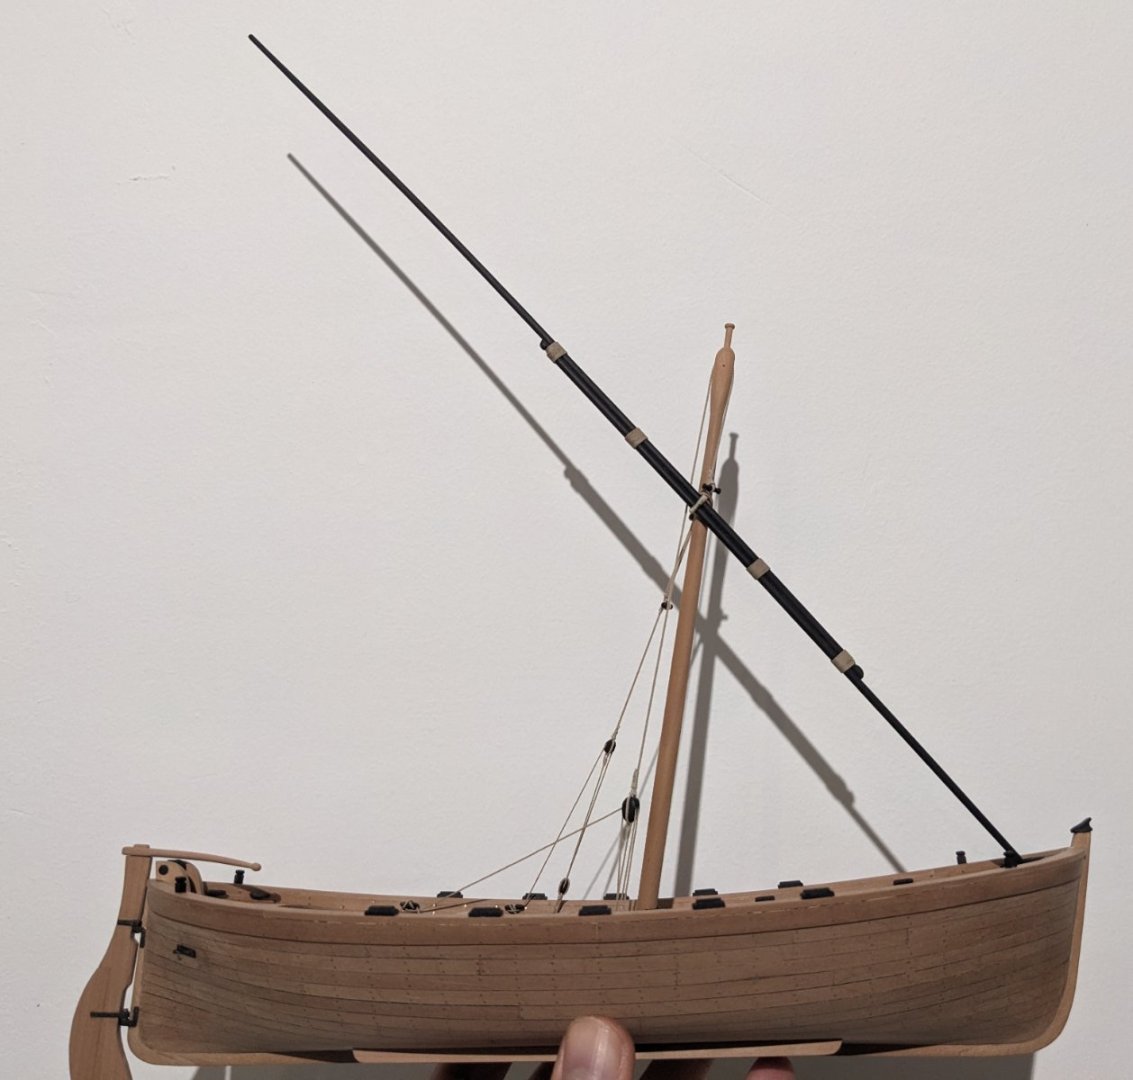
 Thank you! Yeah a lateen rig ought to look elegant. I could have gone for an even longer antenna but I'd have had to make the mast longer too. I think what I ended up with is just right for a fishing boat. The antenna is roughly 1,4 times the length of the boat, it should be between 1,2 and 1,8 with 1,5 being the normal. Oh and by the way, the monograph is 0,9 which is just way too short.
- 61 replies
-
- 2
-

-
- ancre
- Santa Caterina
- (and 1 more)
-
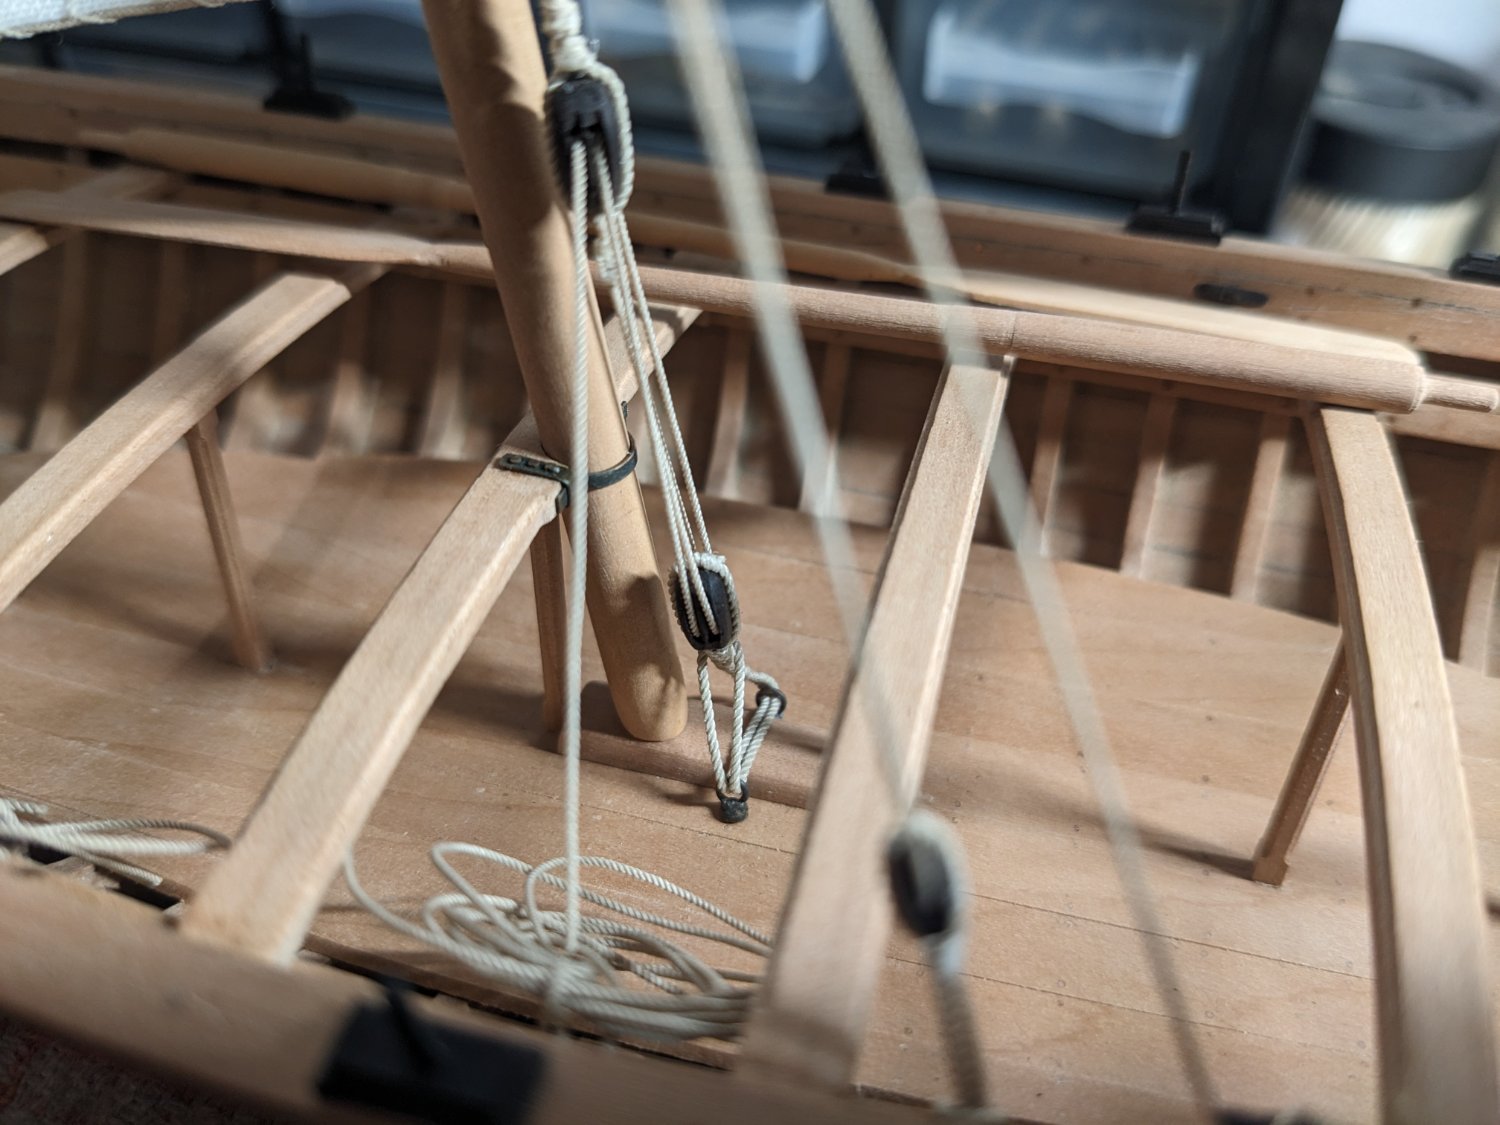
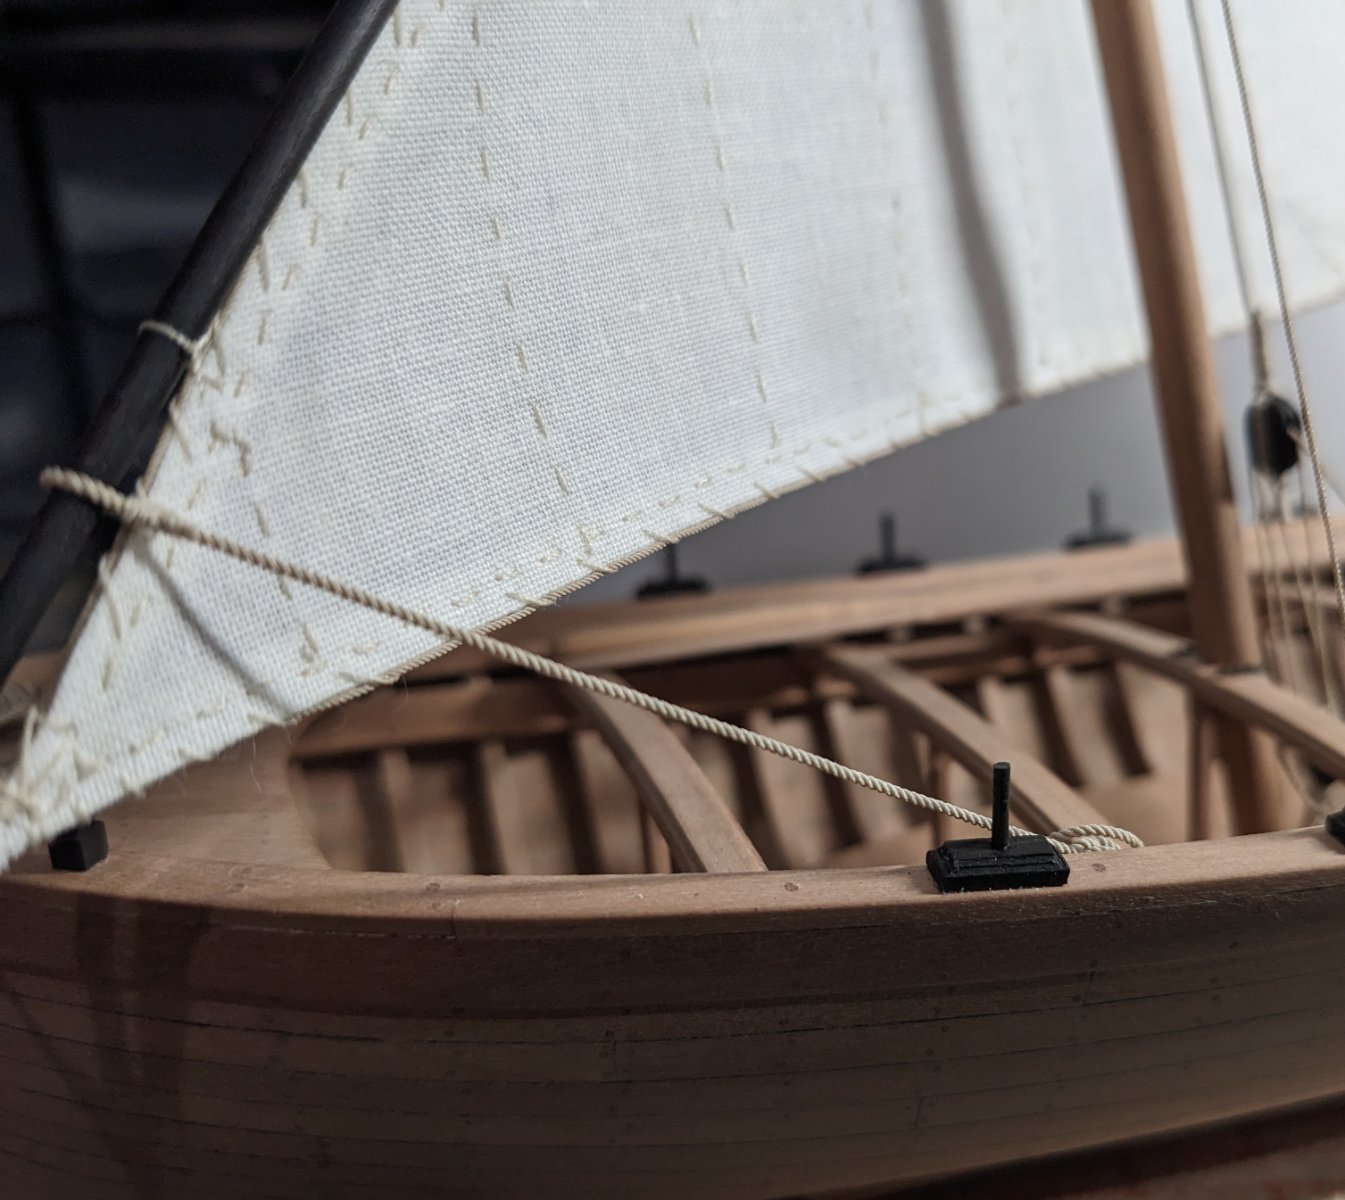
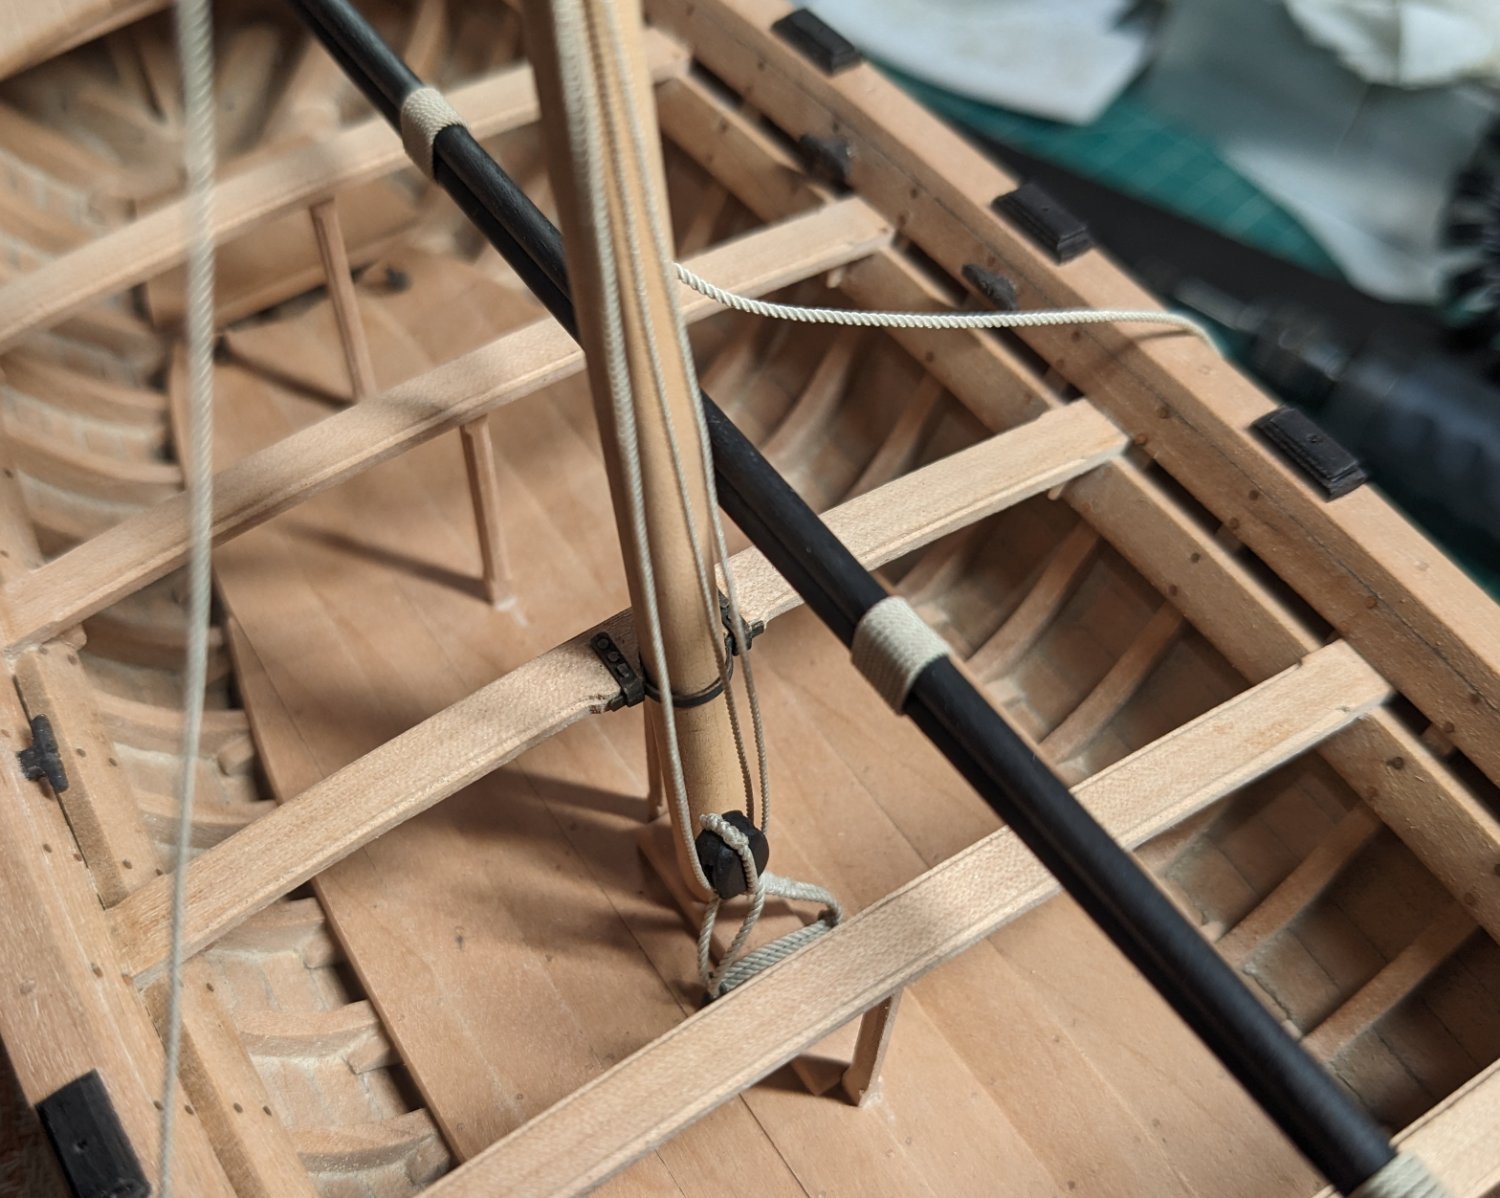
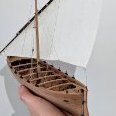
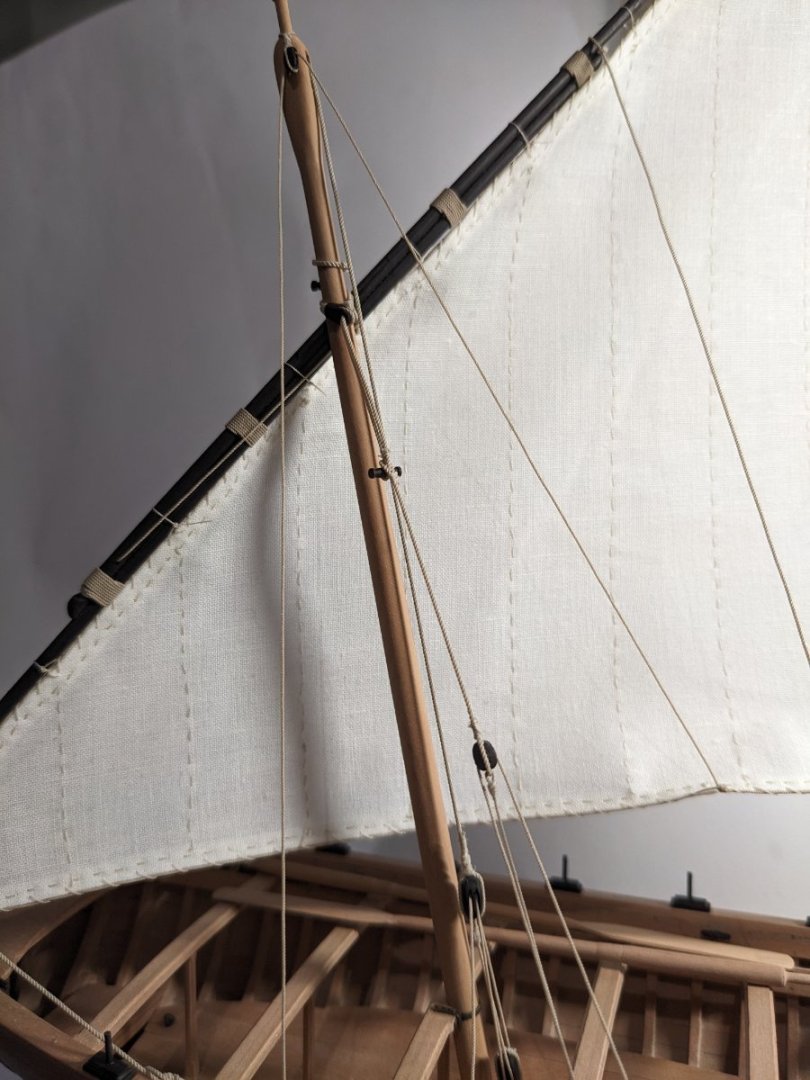
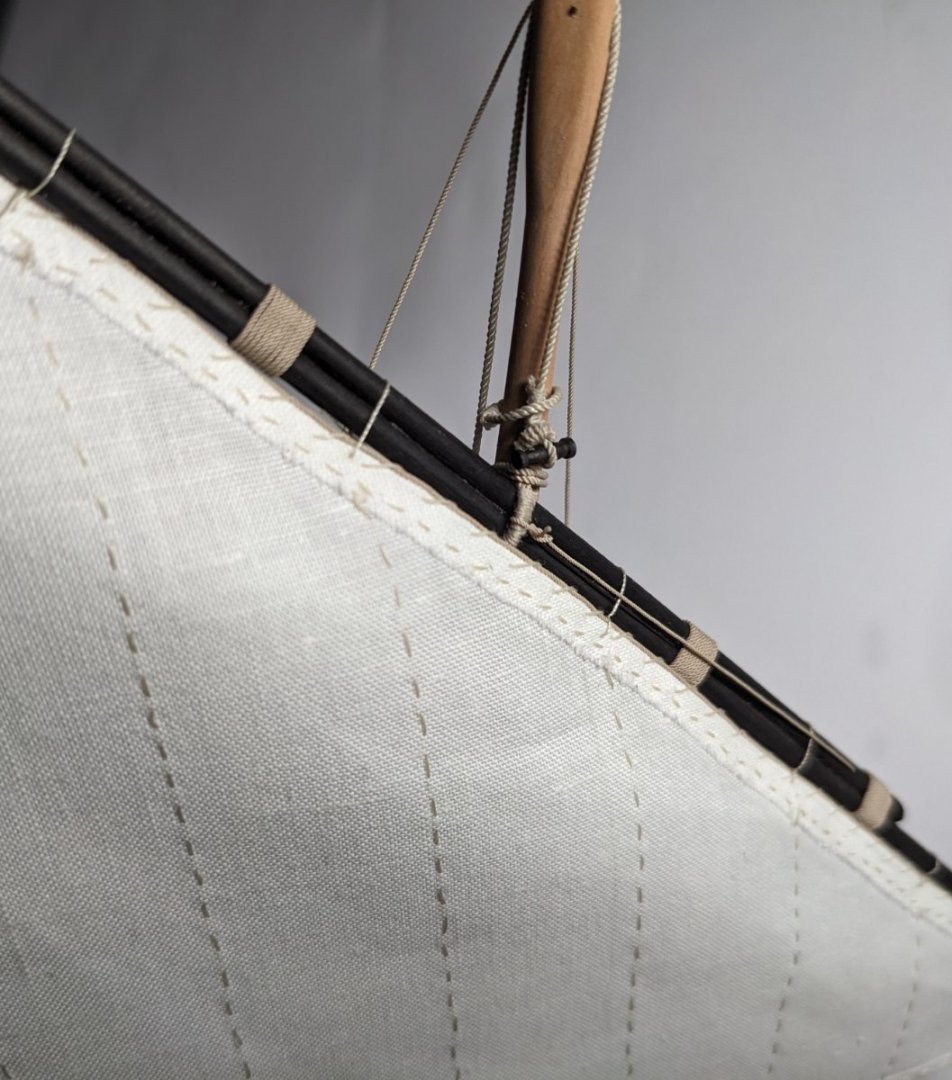
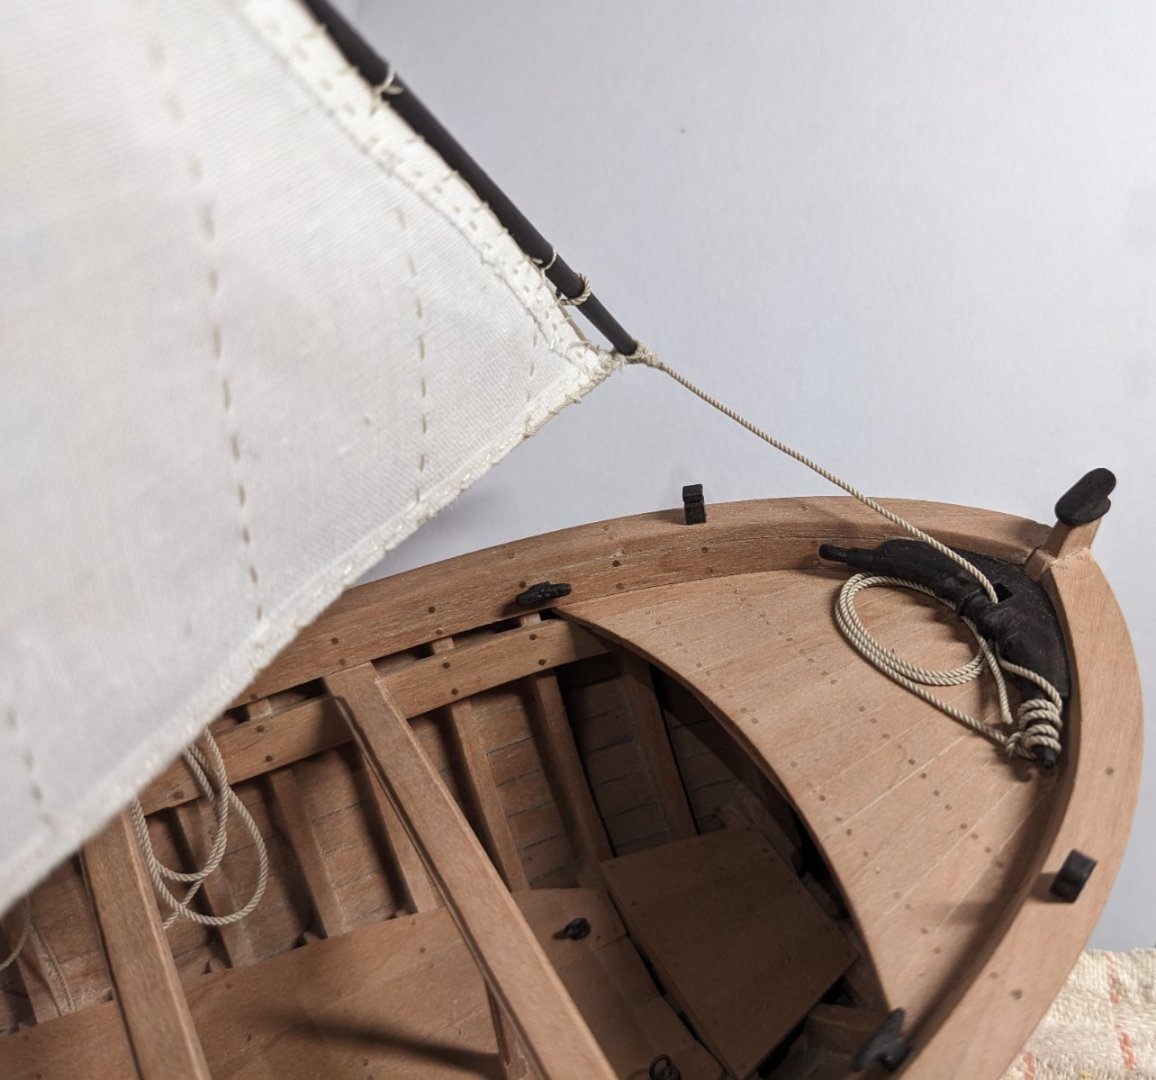
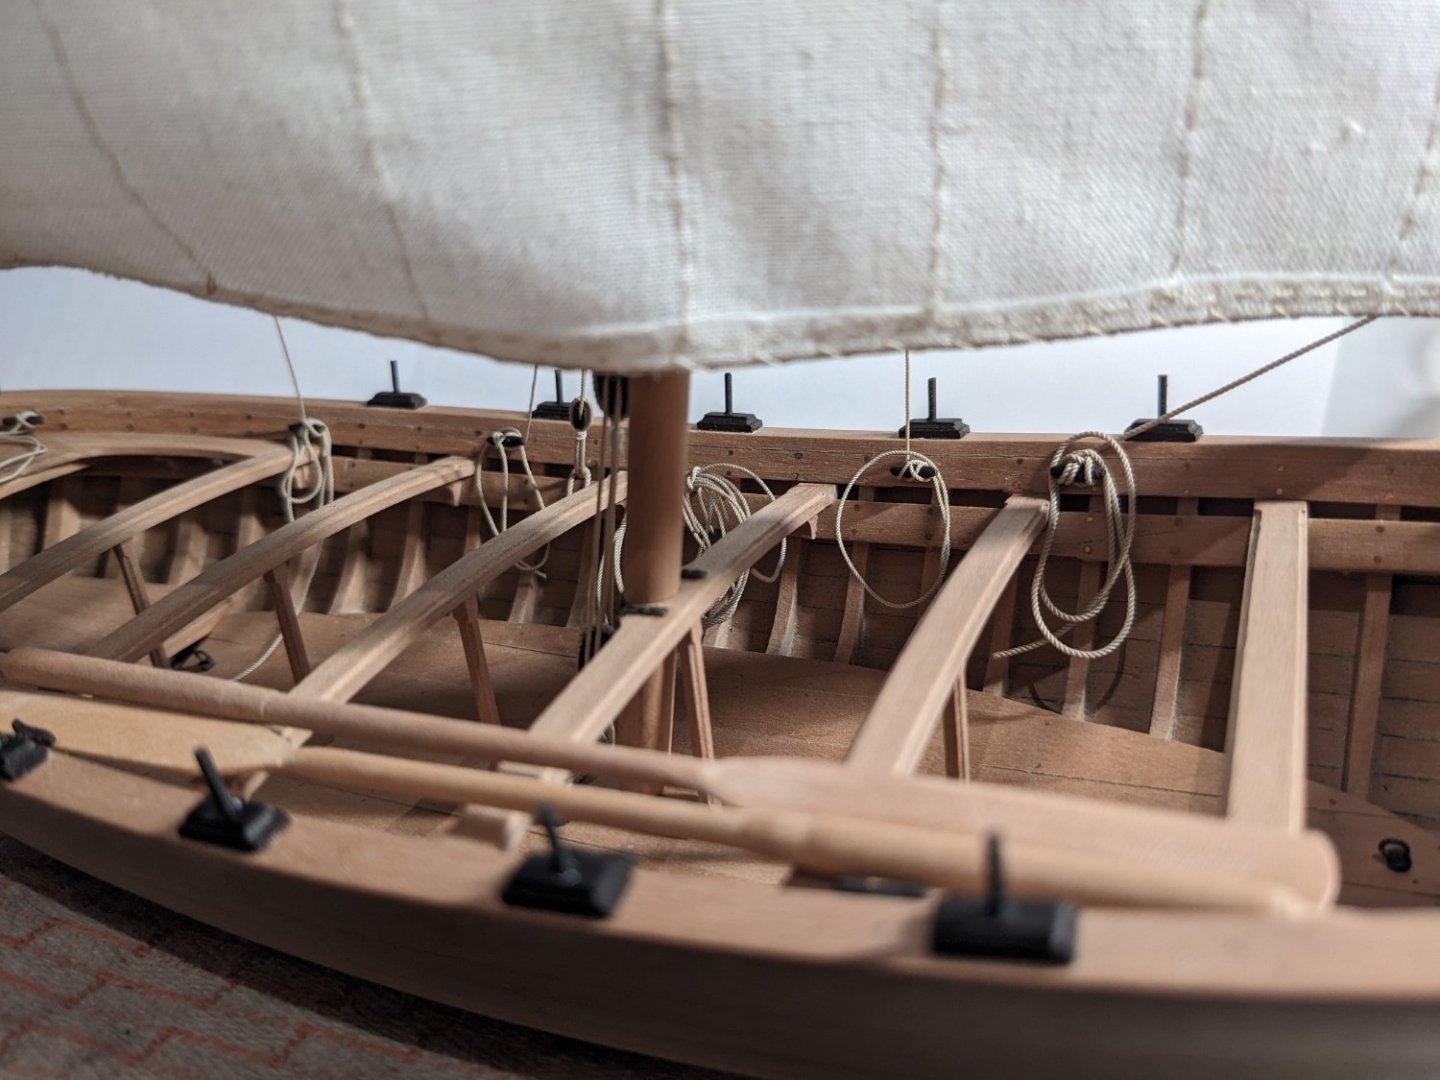
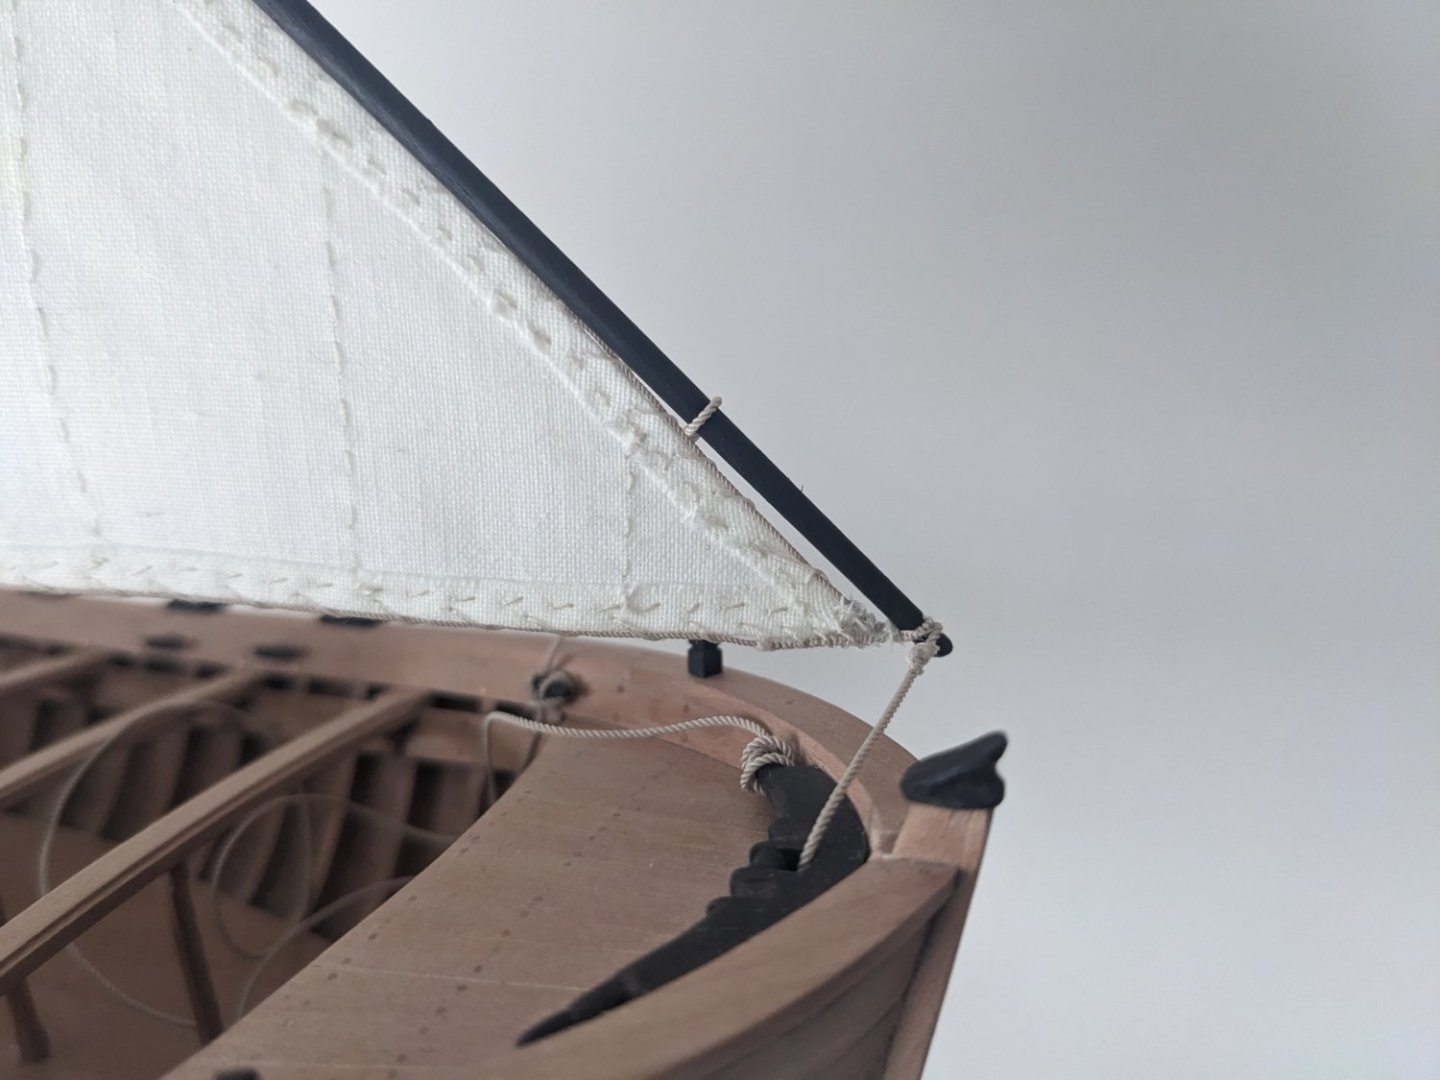
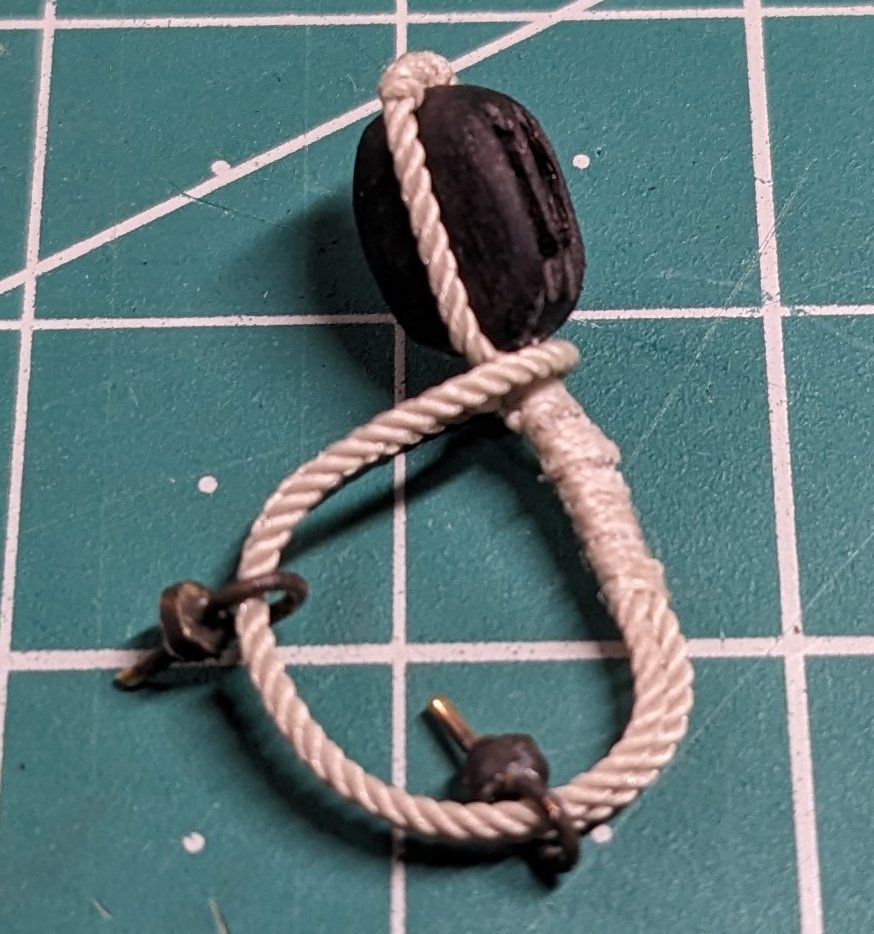
I'll attempt to document the changes I've made to the rigging, especially where I've deviated from the monograph. I only know the names of the rigging in Spanish, and Google Translate isn't of much use with nautical terms, so I hope you can accept the names not being translated. Tackle for the antenna As I've already commented earlier, the blocks for the antenna are over dimensioned in the monograph. I've replaced them with double blocks. The way they are attached isn't much different. Troza This is the assembly that can be seen below: a loop that goes around the mast and antenna and tightened via a block. It's attached to the side of the boat with a pair of single blocks (only the upper one is shown). This part is basically correct in the monograph. Davante This is the rope that holds the lower part of the antenna down, maintaining the angle with the horizontal. In the monograph this rope is doubled and runs through a single block, belayed to both sides of the boat. I don't think that's correct because it'll only allow the antenna to rotate a little from the longitudinal; in reality it can go as much to 90 degrees (perpendicular to the keel). Orzapopa This is the rope that rotates the antenna from the longitudinal according to the wind and course. This is completely absent from the monograph (possibly confused with the davante above). Escota Not much to say here really, I think this one is self explanatory. It's completely correct in the monograph, except it should go around the stern post. Falsa troza This is the closed loop of rope seen below. It's used to prevent the antenna from seperating too much from the mast when you loosen the rope that holds it tight (the troza), when maneouvering the antenna. It isn't shown or mentioned in the monograph. Traba This one can be seen both on the photo above and below. It's a thin rope that is fastened to the sling holding the antenna, running through a sheave in the butt of the antenna, and back to the other side of the sling. It prevents the antenna from slipping and falling down. This isn't shown in the monograph either. Osta This is the long rope running from the antenna to the side of the boat. It serves as reinforcement for the antenna during strong winds, preventing it from breaking. In the monograph there's one each side and the text says it's to angle the antenna, which in reality is done by the orzapopa. It wouldn't make sense to try and angle the antenna at this point, it would require a lot more force than using the orzapopa in front. Cenal Shown above to the left of the osta, it's used to raise the sail. This is correct on the monograph. Amantina This one I've left out. It's a tackle attached to the rear of the antenna and the top of the mast. It's used in heavy seas to help keep the angle of the antenna. According to my sources it was only used occasionally. The monograph has this attached to the front of the antenna, not the rear. This doesn't seem correct to me as the heavy part of the antenna is the rear, which would naturally want to fall down. Other differences Compare my rigging to the one of the model in the monograph. This one has a shroud each side of the mast, which I believe was never used on small boats (the troza with its tackle serves as a shroud). There's also a tackle to the very rear of the antenna, maybe for a flag? It also uses a lot more blocks which in my view would be more correct on large ships. And lastly, a photo of the belaying points. The ropes need a bit more tidying but they won't cooperate. 😂 I hope this is useful! Please keep in mind that I am not an expert at all, most of my knowledge comes from the book Nuestra Vela Latina mentioned above. It's quite possible that I've completely misunderstood the lateen rig and my model is not correct. Still I believe it's an improvement on the monograph. Edit: Seems that I had a left-over photo. Instead of removing it I'll let you enjoy it. 😜


- 61 replies
-
- 14
-
-

-

-
- ancre
- Santa Caterina
- (and 1 more)
-
Thank you! 😊 Don't worry, I'll document the rigging here, though it might be some weeks until I get time for it.
- 61 replies
-
- 2
-
-
-
- ancre
- Santa Caterina
- (and 1 more)
-
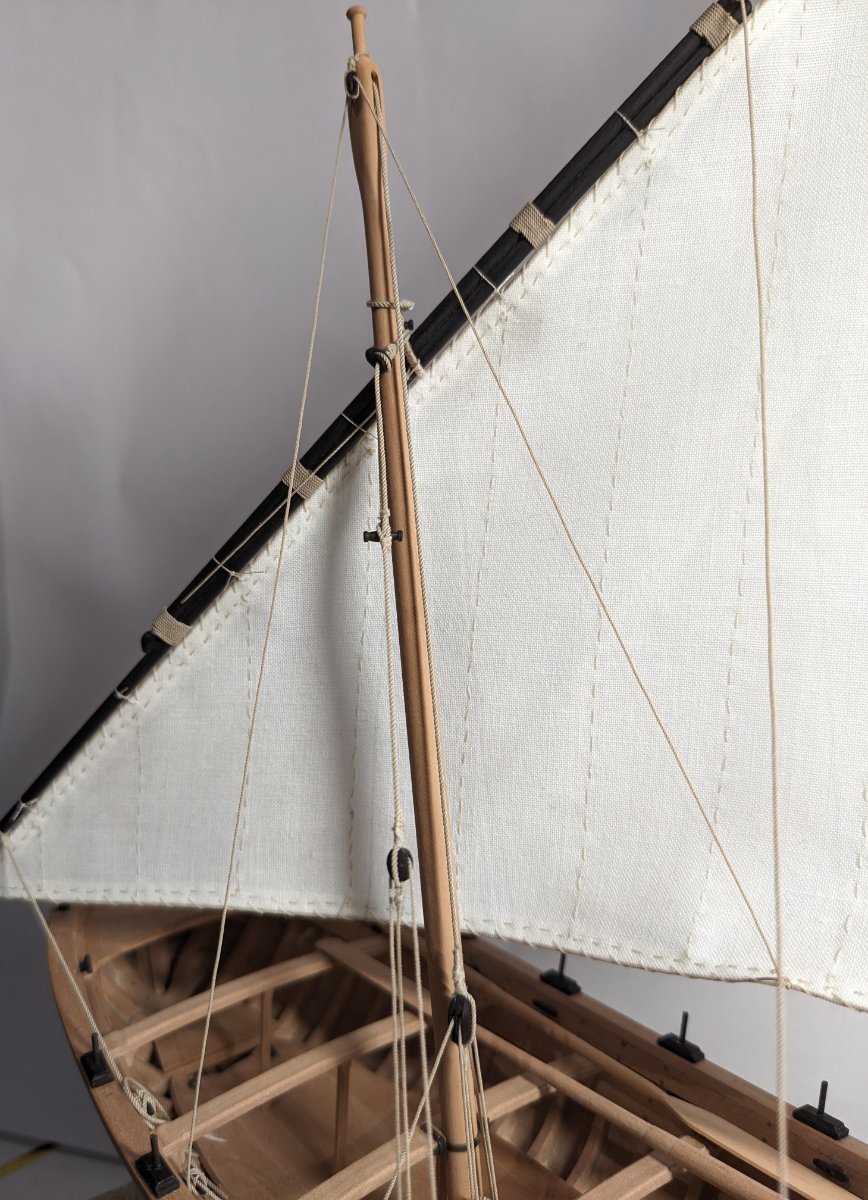
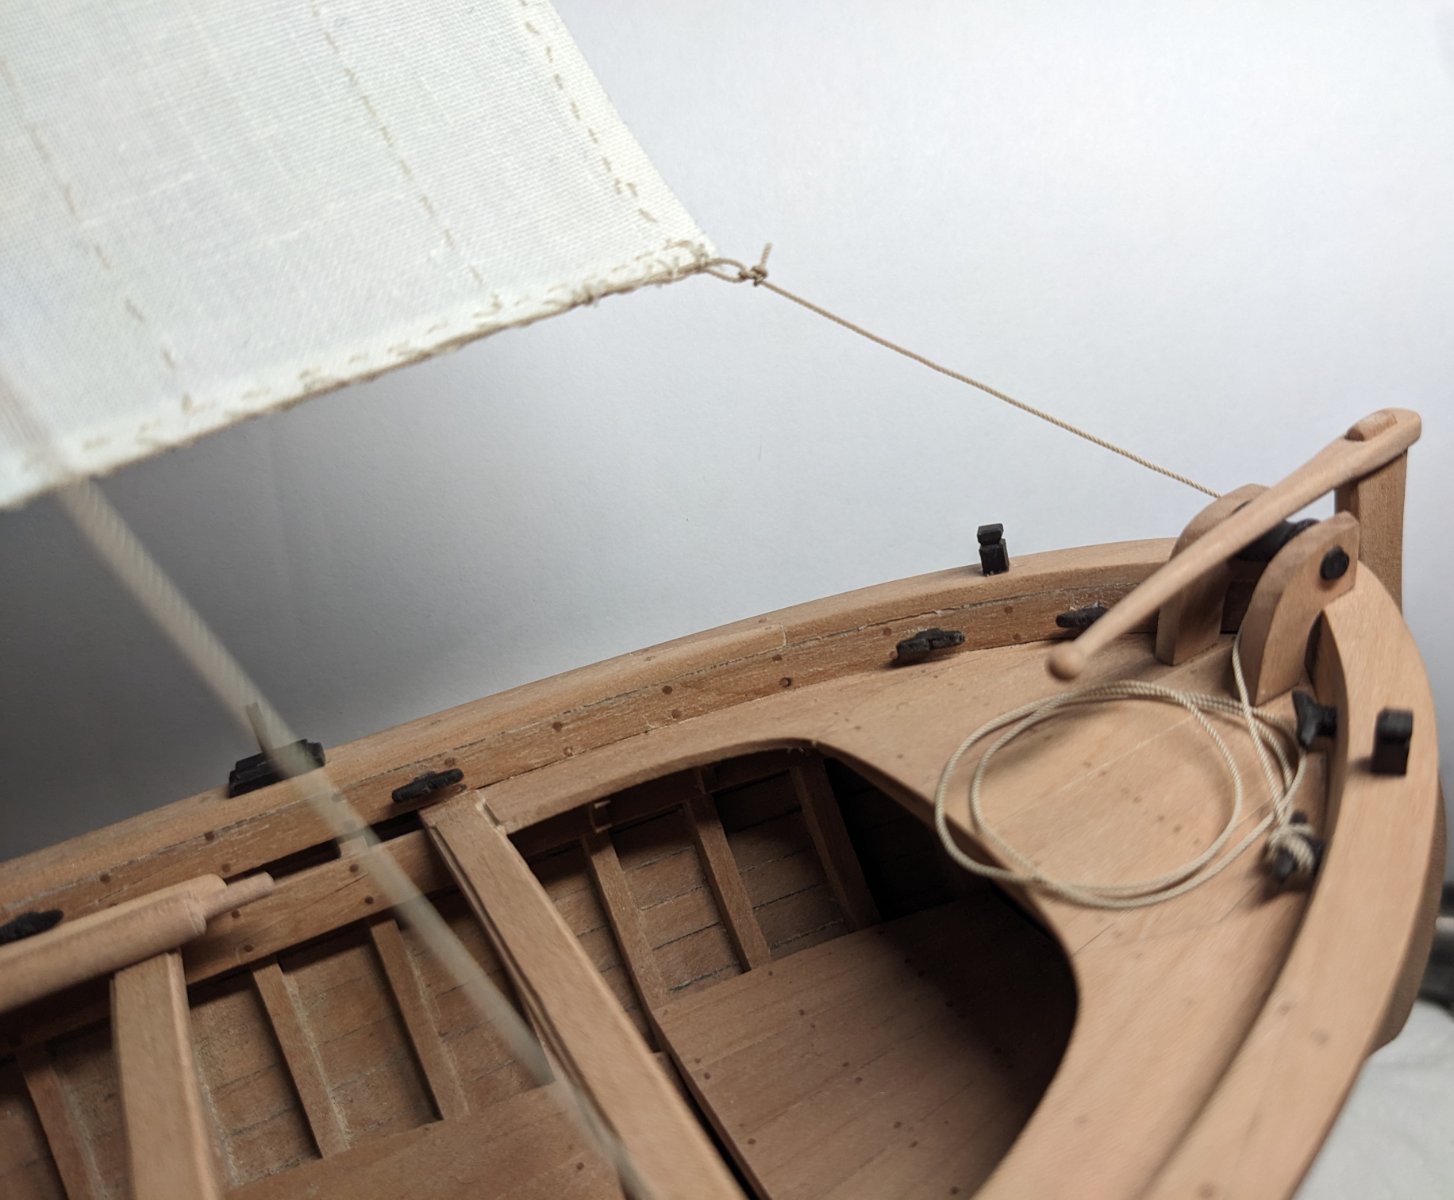
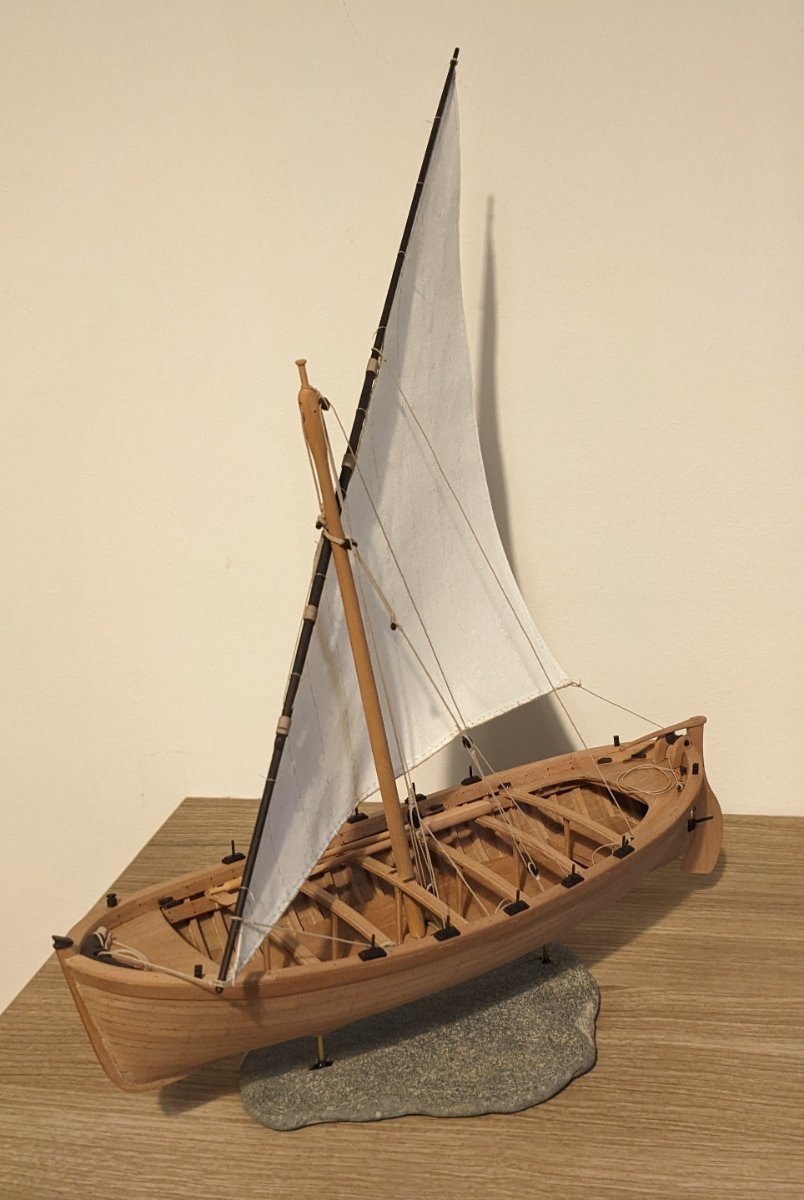
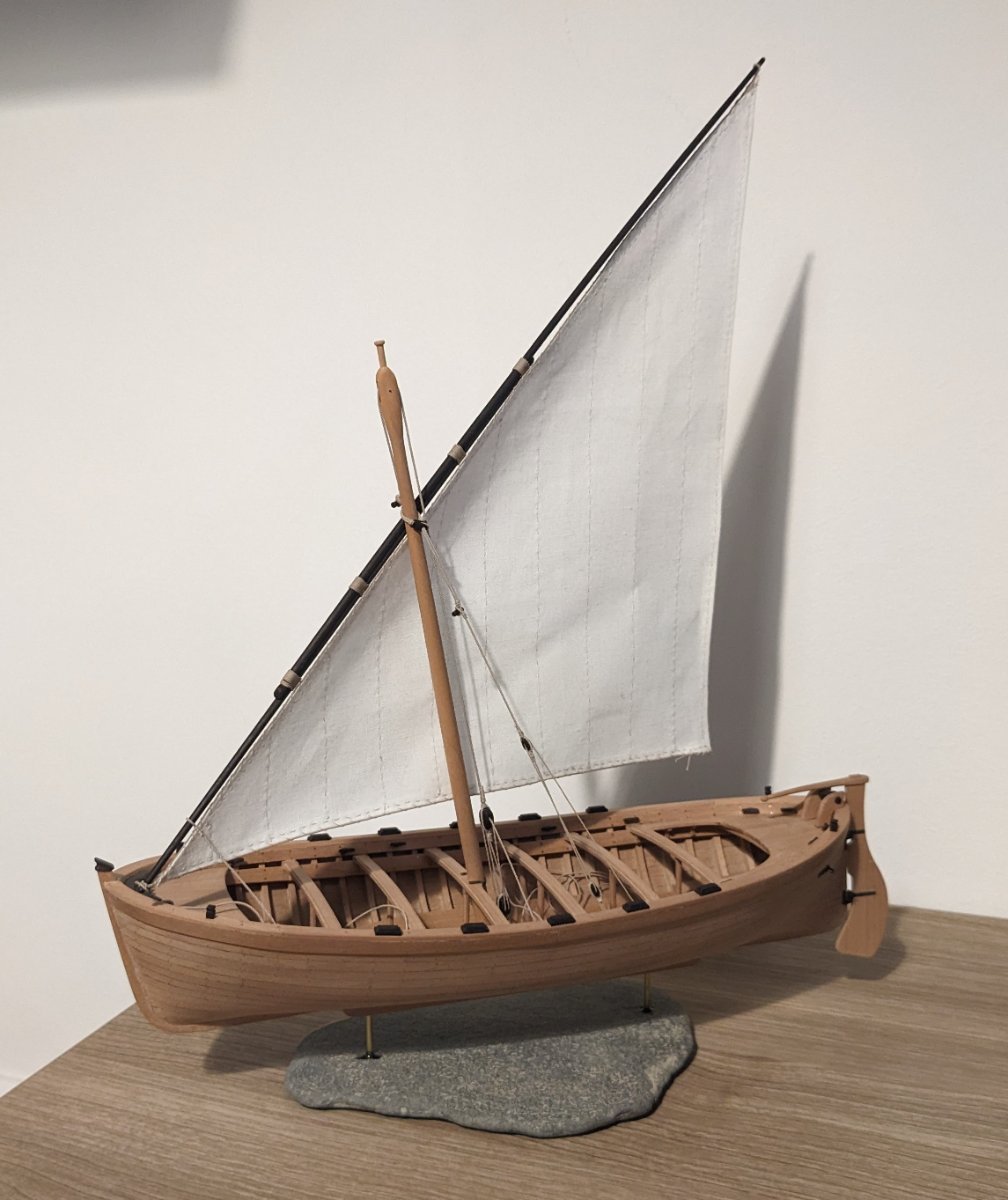
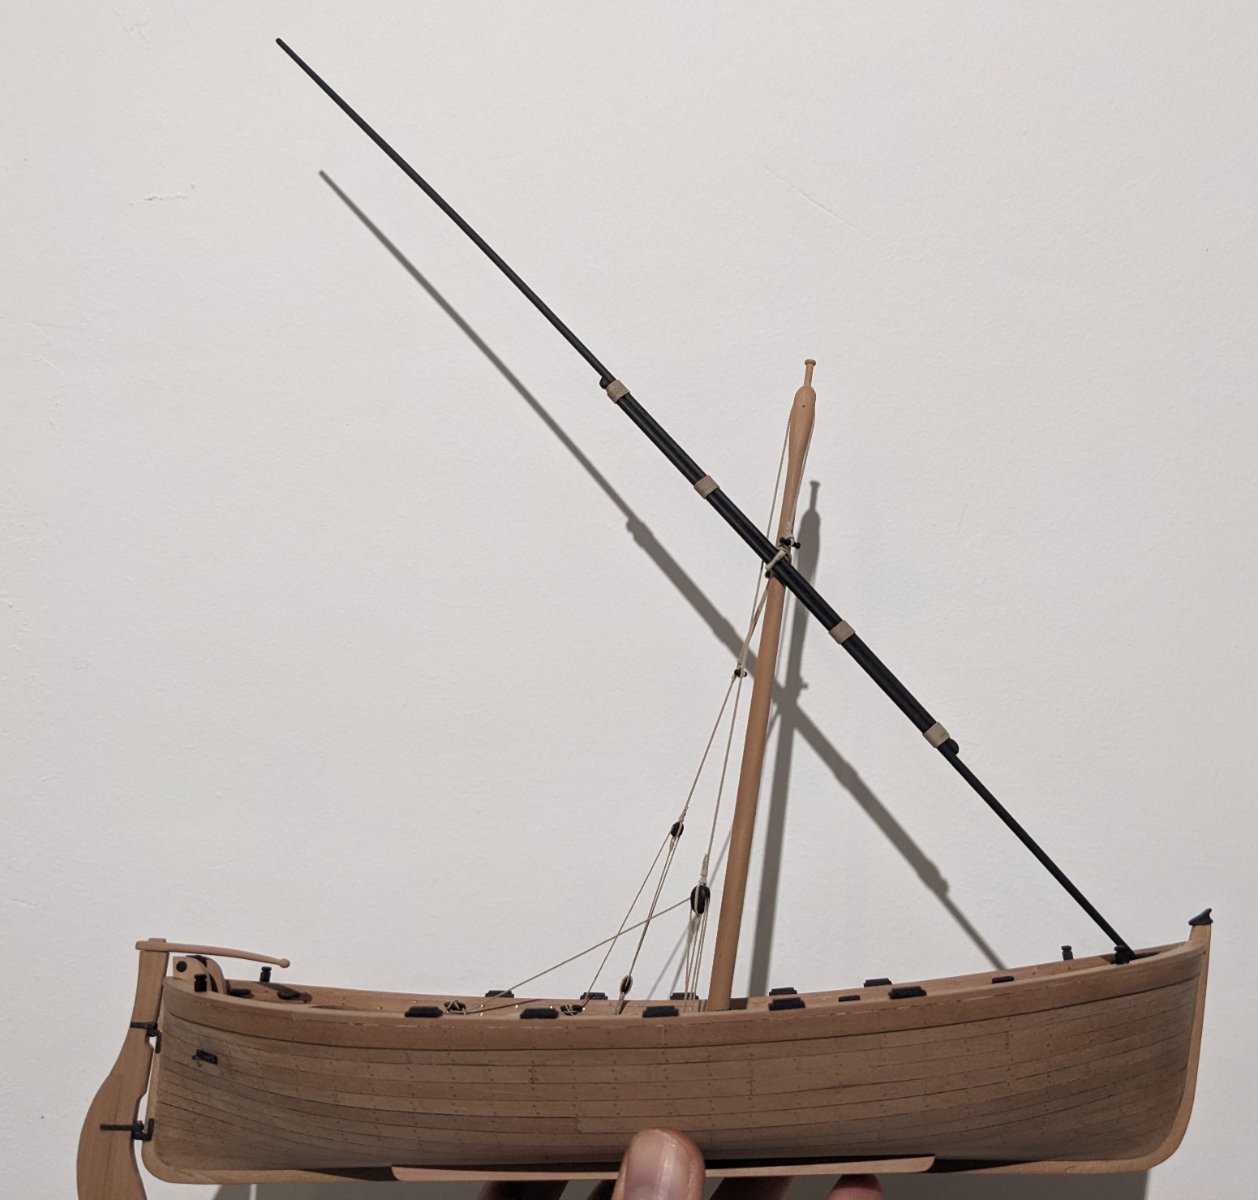
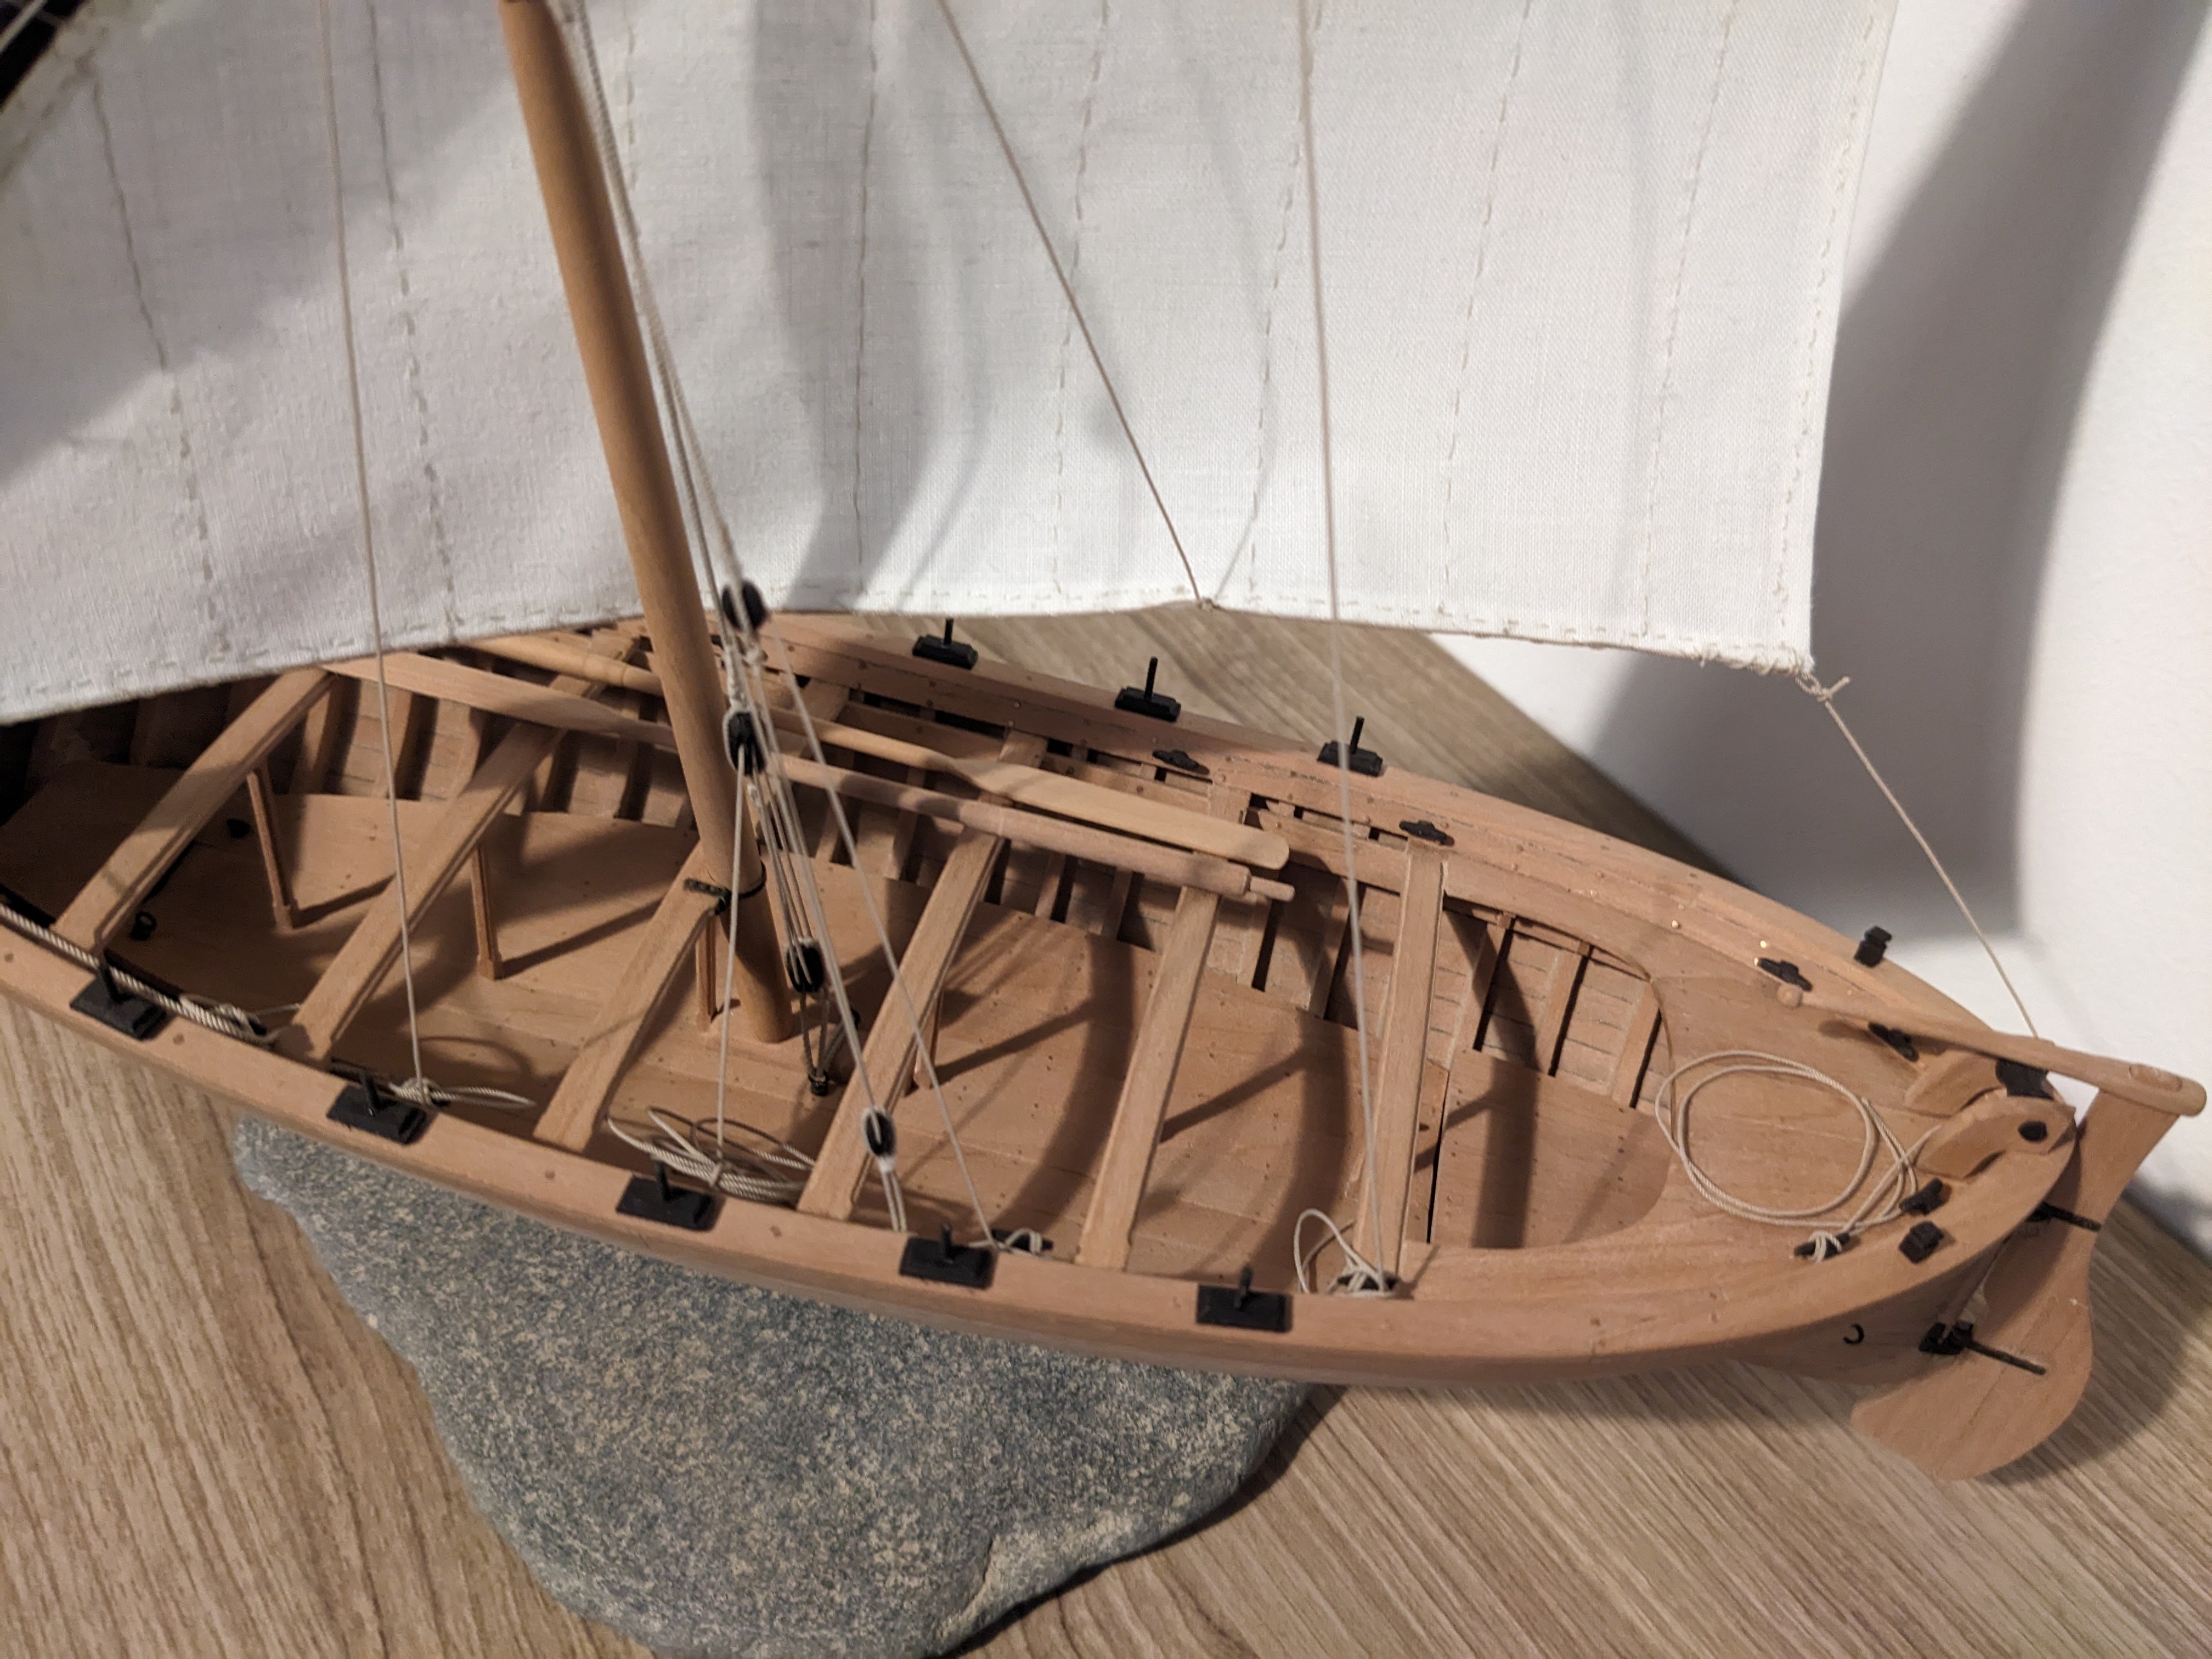
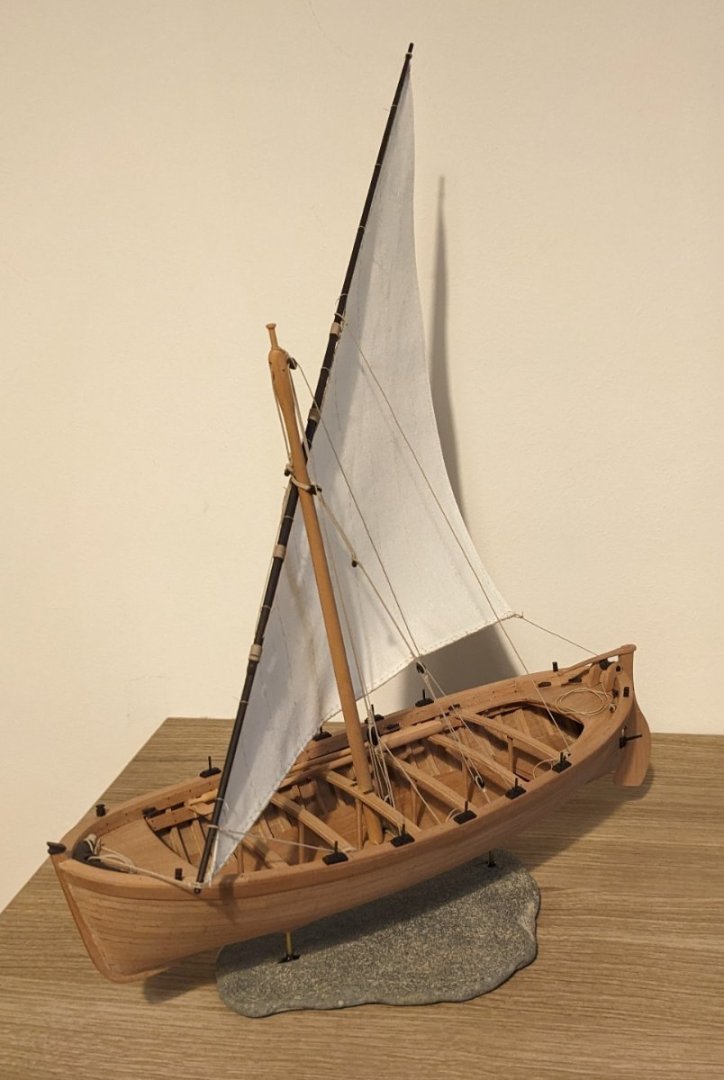
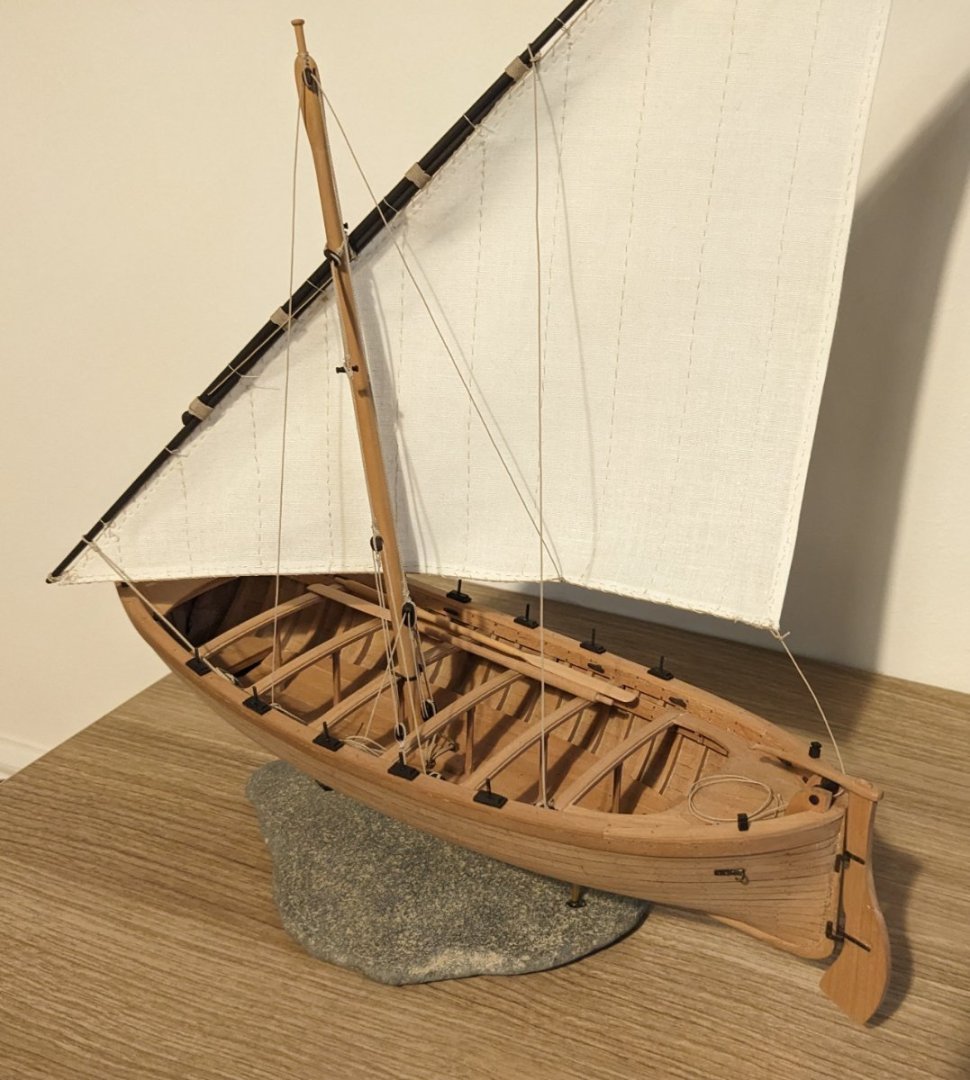
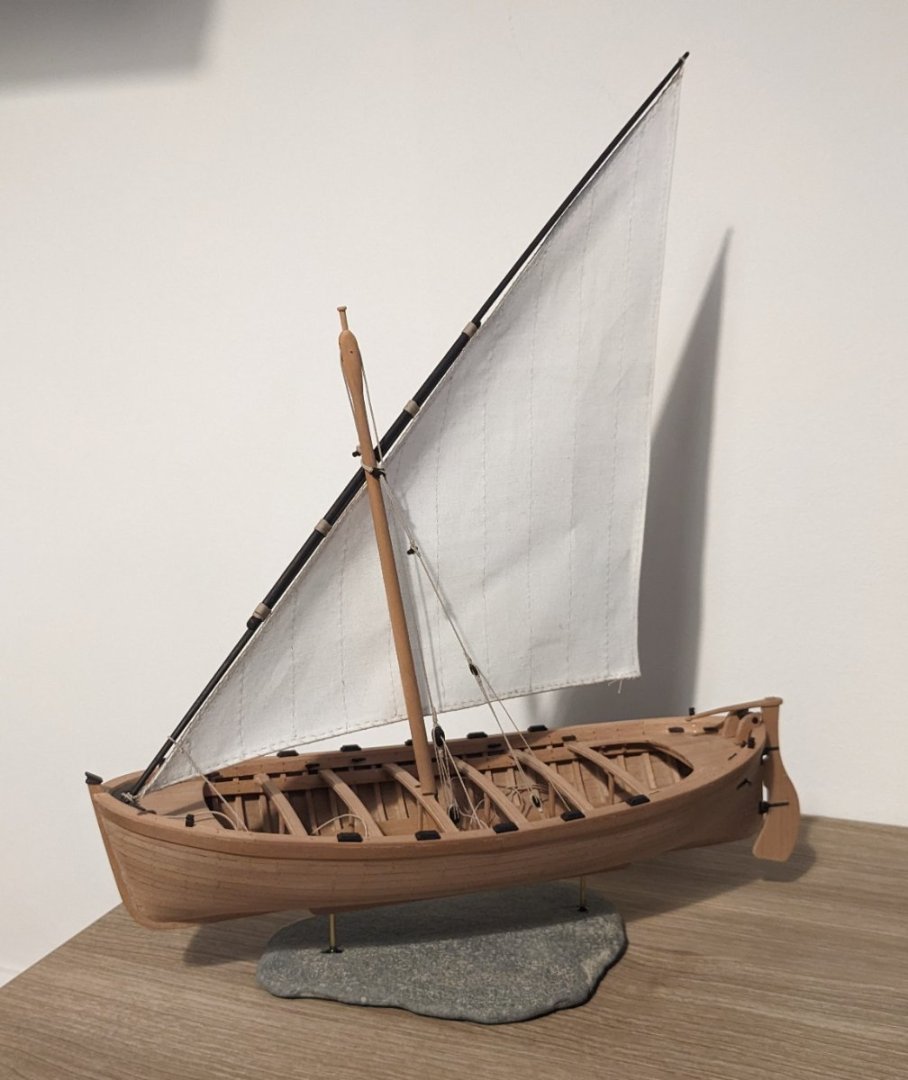
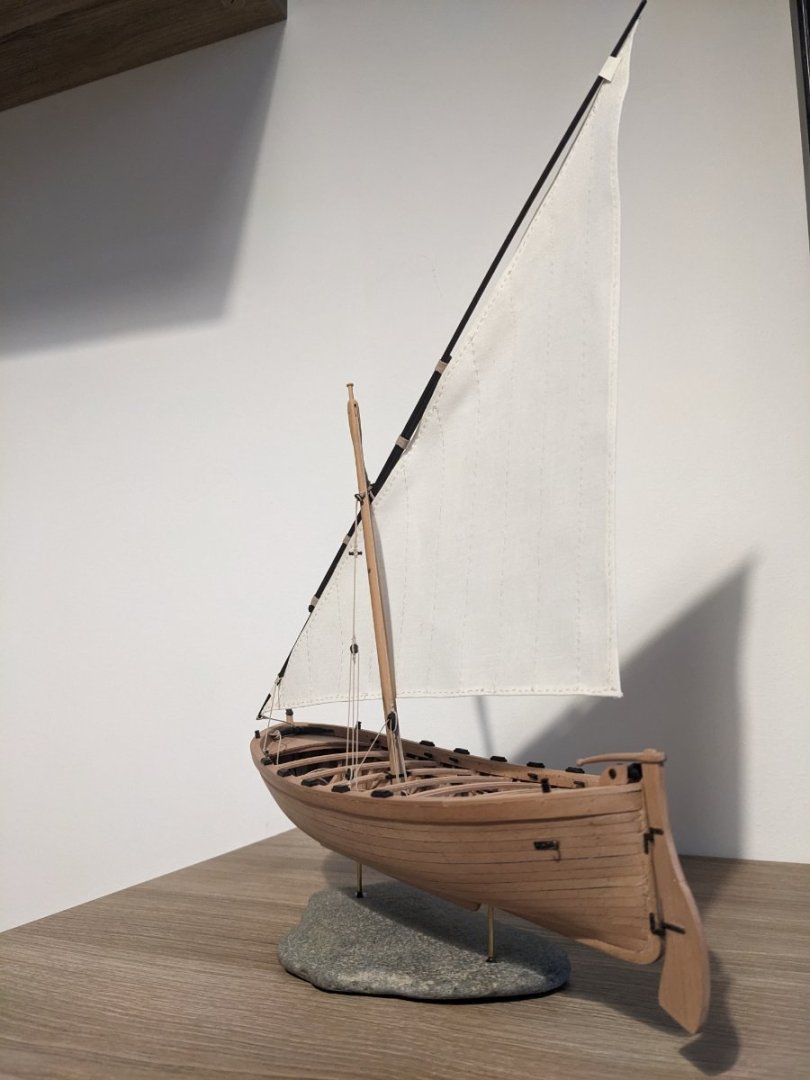
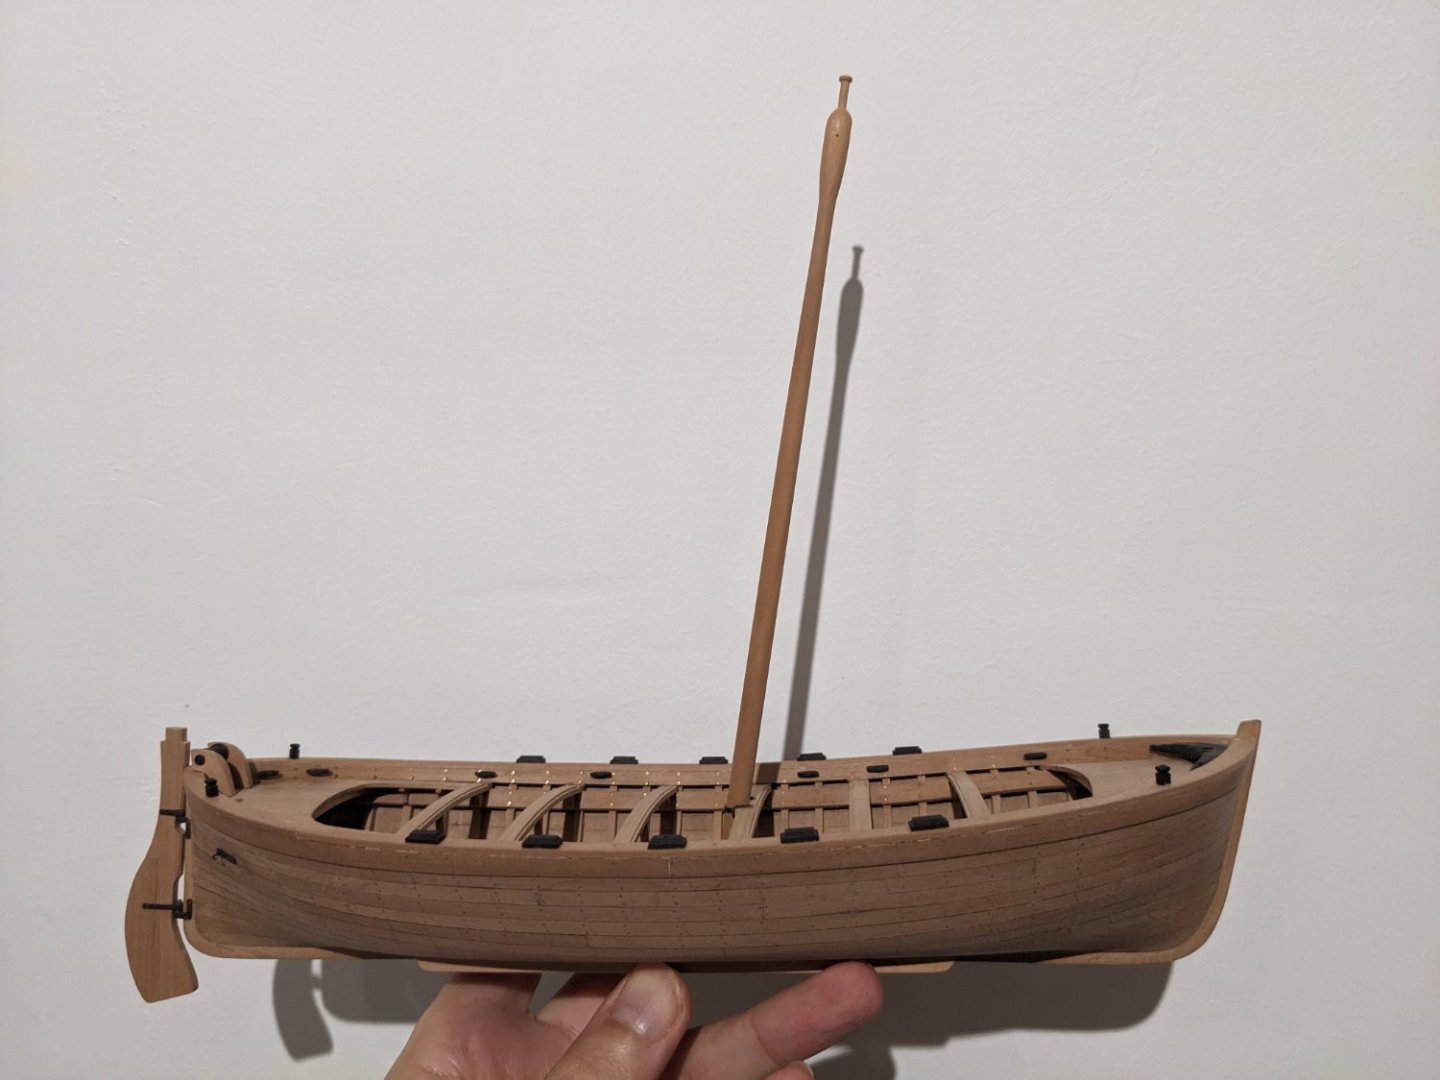
I have more or less finished the boat now. I most likely won't make the bowsprit because apparently it was almost never used on boats smaller than around 9 meters. Also, I wouldn't be able to set the sail in a way that would be realistic like I've done with the main sail. I'm also not sure if I'll make an anchor or other equipment. I don't want the boat to look too cluttered. I'll still need to tidy the ropes a bit more and make a name plate for the stand. And there are probably a few things to touch up here and there. If anyone is interested I can go over the rigging and compare it to the monograph, it might be useful for others thinking of building this boat? Please let me know if it would be of interest! And of course here are a few pictures. I'll take better ones when I have better light. It's been a fun project, and I'm really happy with the result! I still feel it's only 99% complete though, like I've forgot to add something. So this build log isn't finished yet. 😉

- 61 replies
-
- 11
-
-
-
- ancre
- Santa Caterina
- (and 1 more)
-
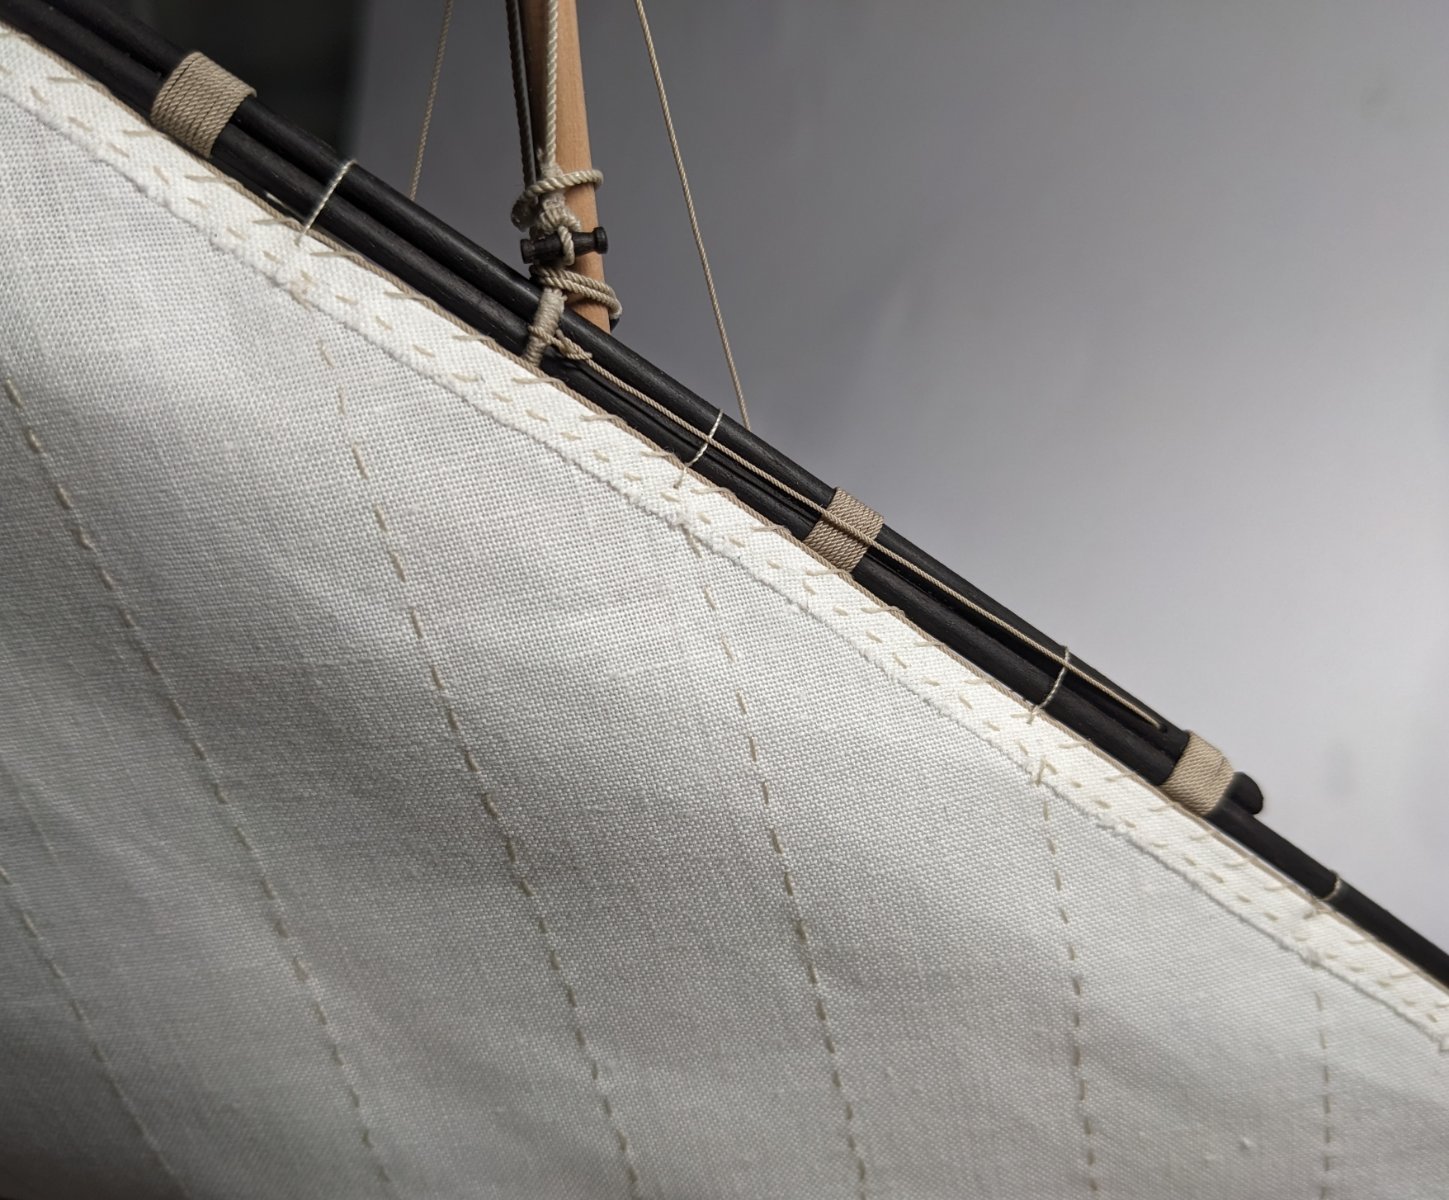
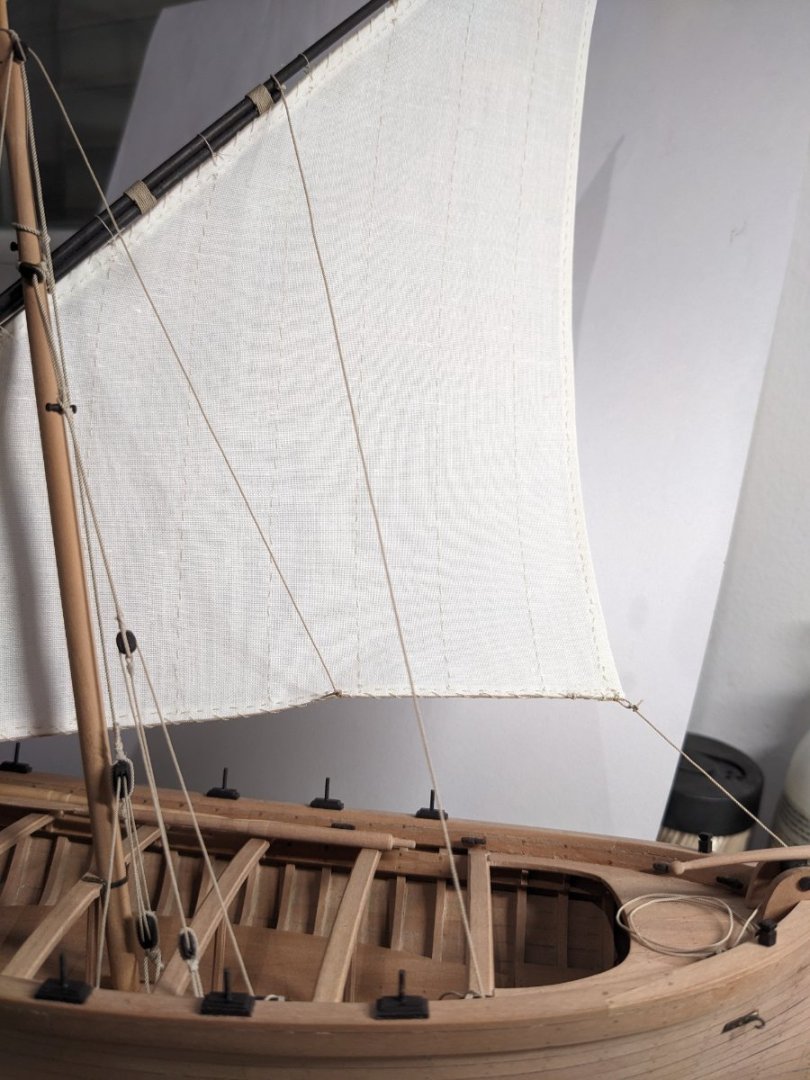
Today I sew the bolt rope onto the sail which means it's almost done, it just needs reinforcements at the corners and the ropes that attaches it to the antenna. It's not perfect but for a first attempt I think it's fine. I'll definitely keep it as it is.

- 61 replies
-
- 13
-
-
- ancre
- Santa Caterina
- (and 1 more)
-
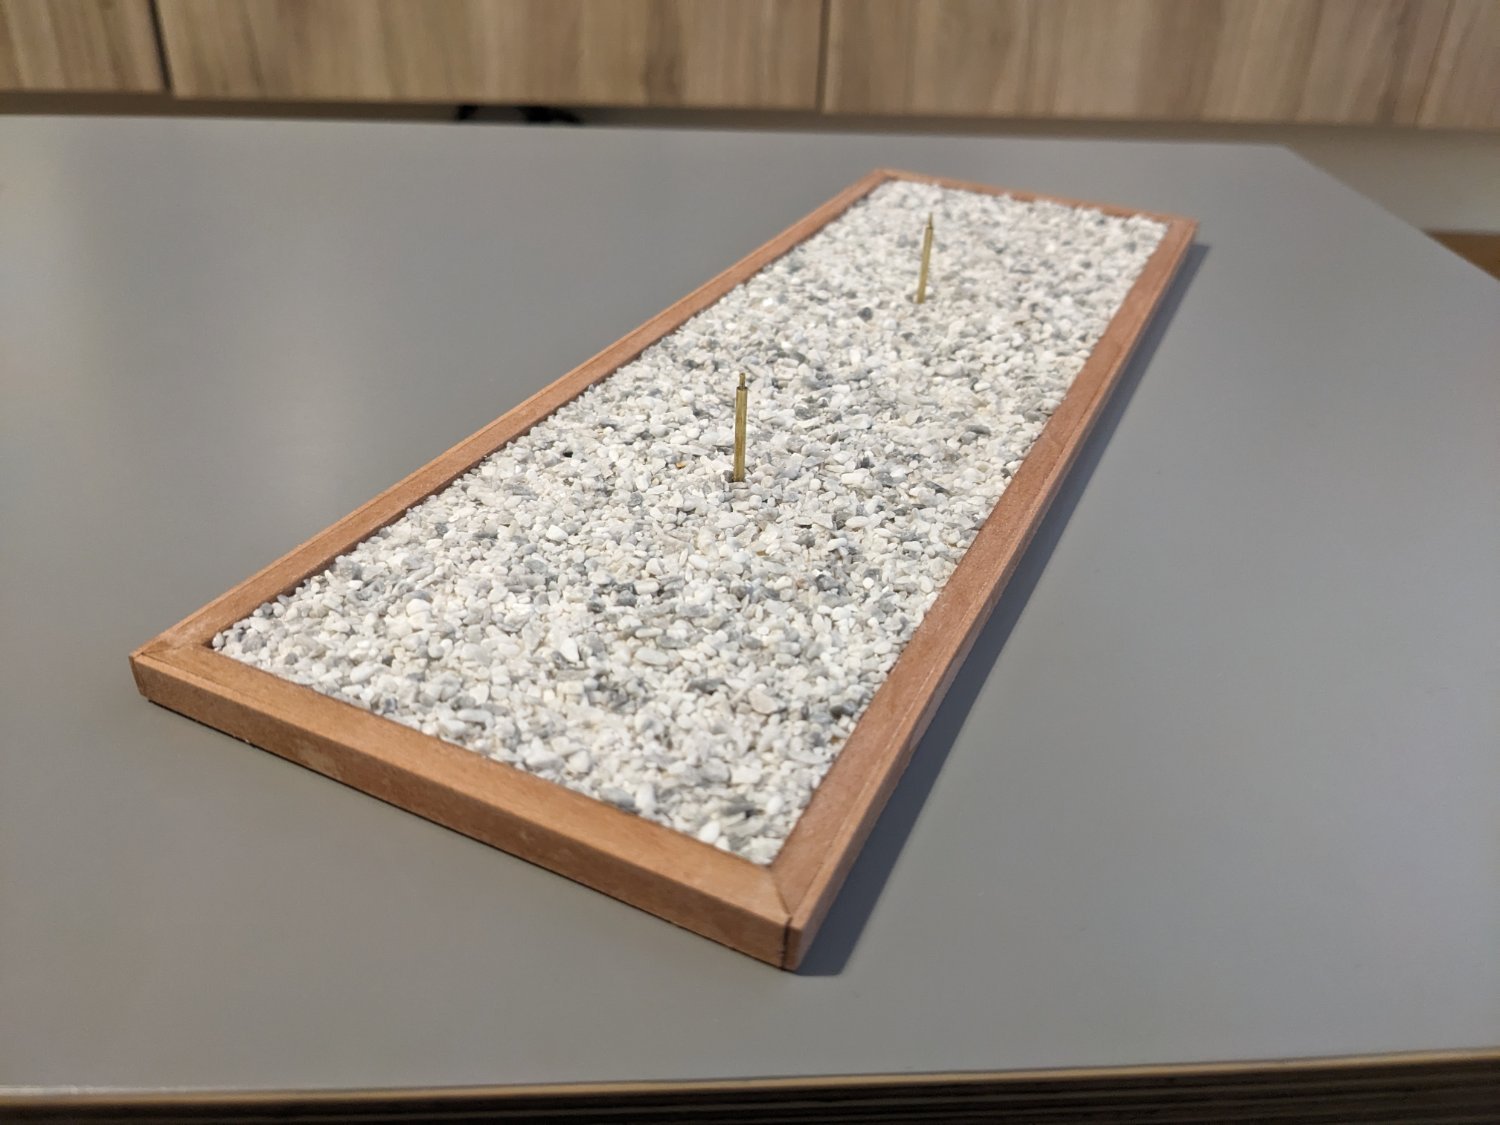
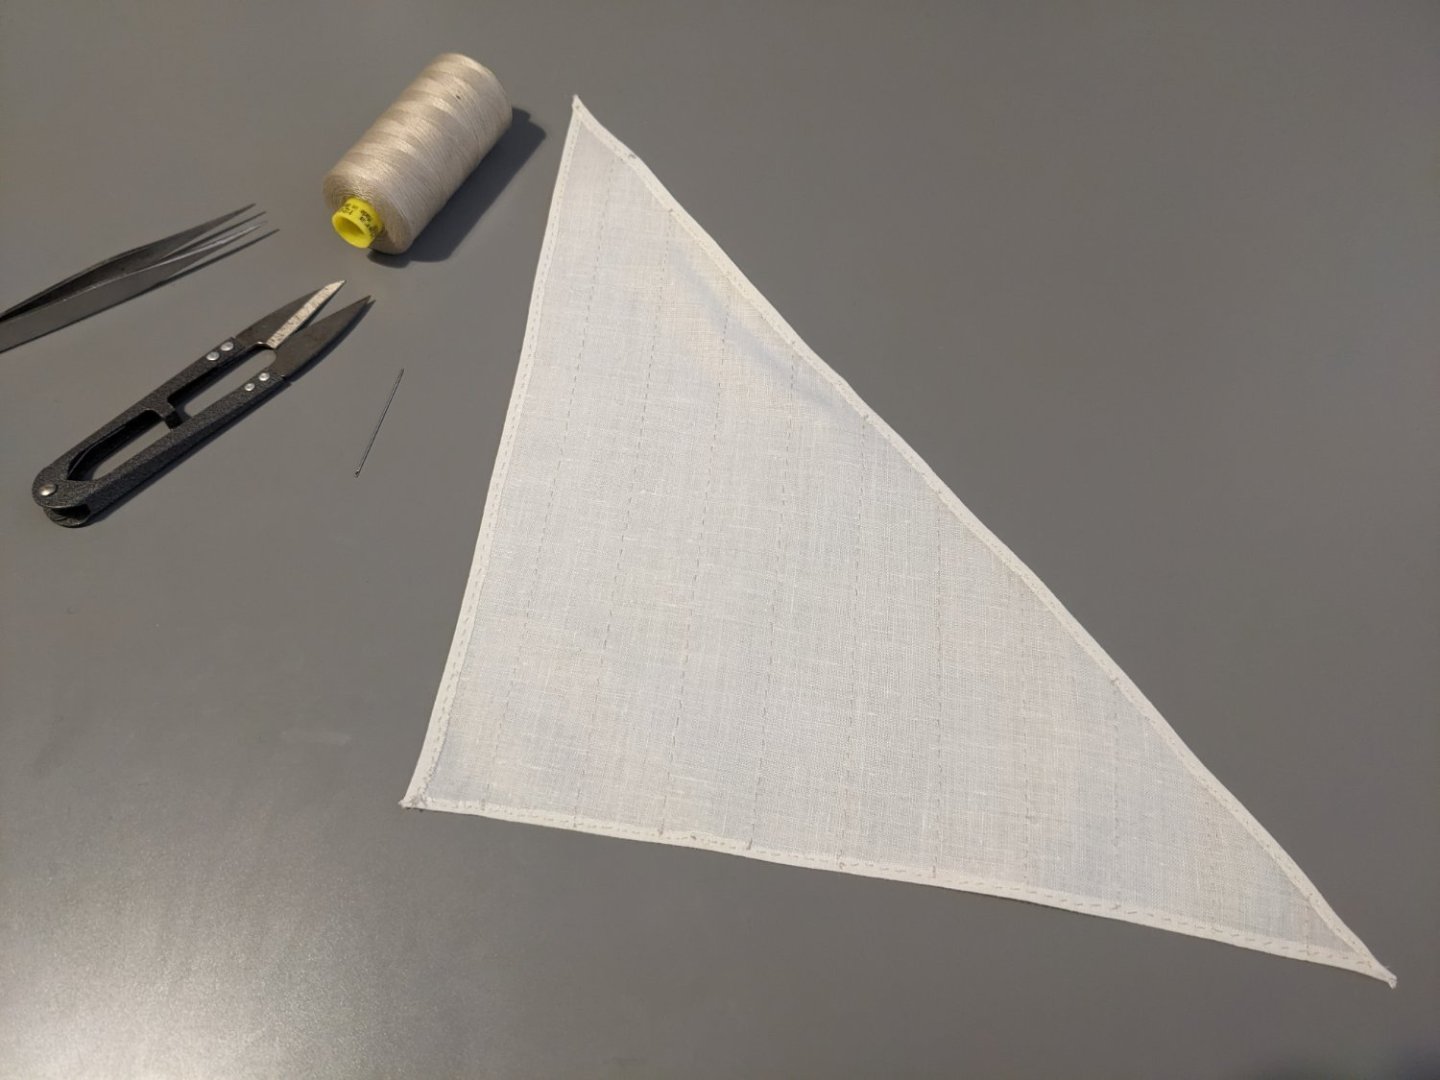
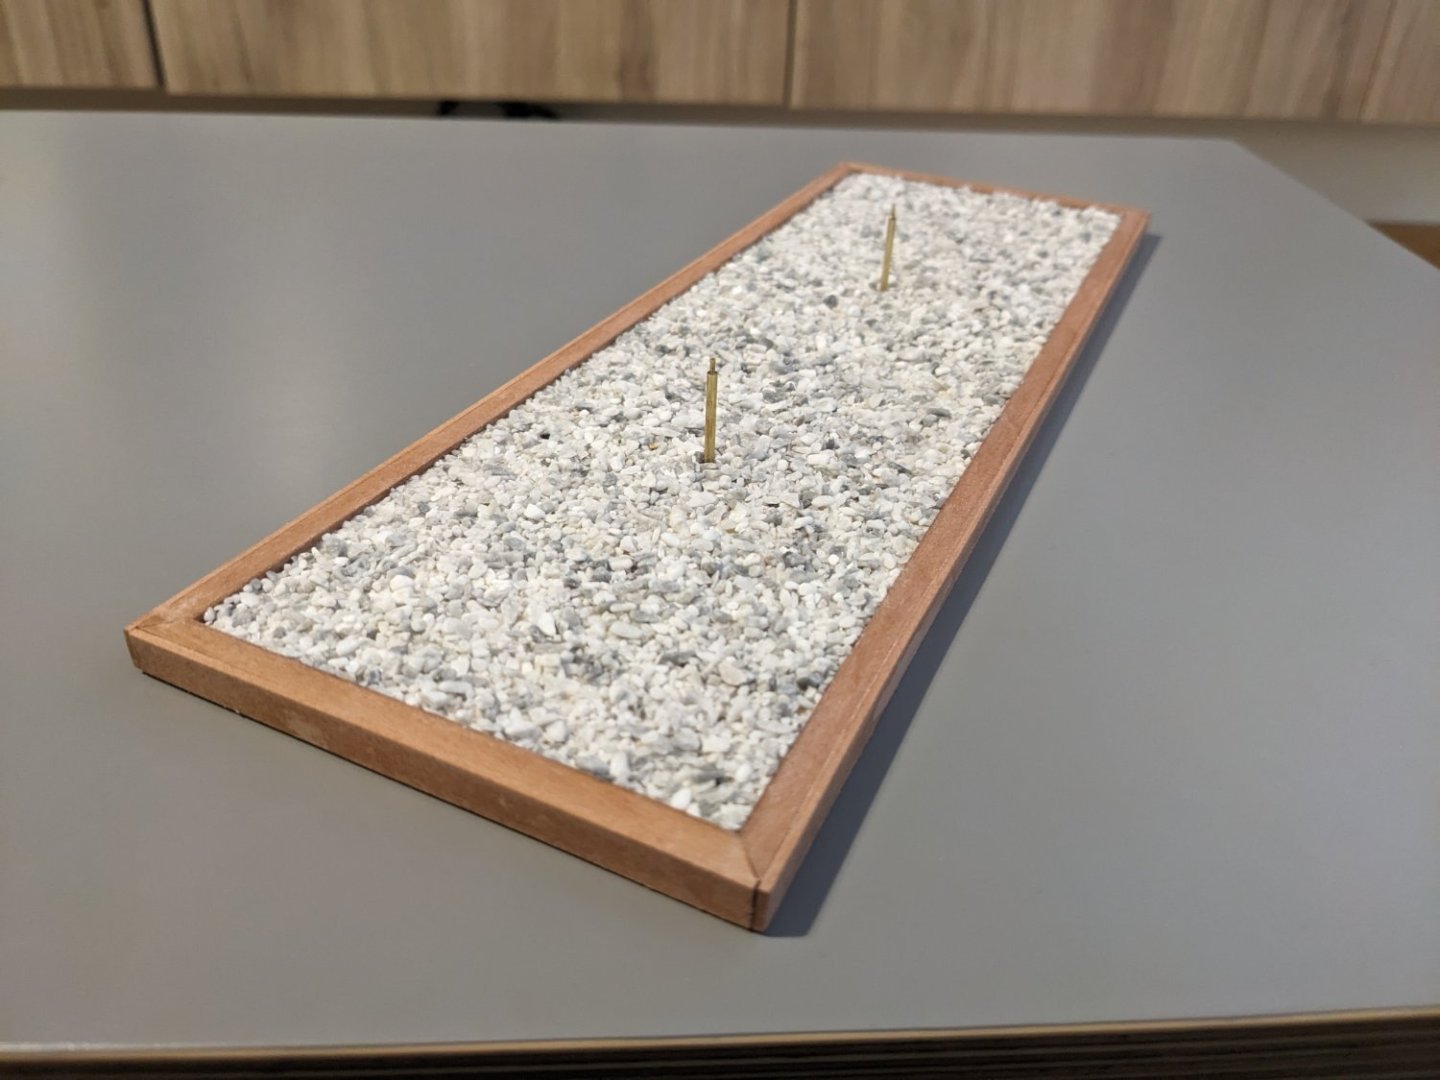
This is my first time making sails. It's made from cotton and hand sewn (because I don't have a sewing machine). I know the stitches are probably too big for the scale but still I think it turned out fine. In my opinion the boat looks better with sail than without. Taping the sail on to get an idea of how it'll look:Also I tried making a stand that turned out absolutely awful. I used too much watered down glue for the gravel so the edges split:So instead I settled for a more minimalist stand from a stone I picked up last time the local river was dry:This stand has the added benefit that I can put a name plaque on it if I ever get around to making one.

- 61 replies
-
- 13
-
-
-
- ancre
- Santa Caterina
- (and 1 more)
-
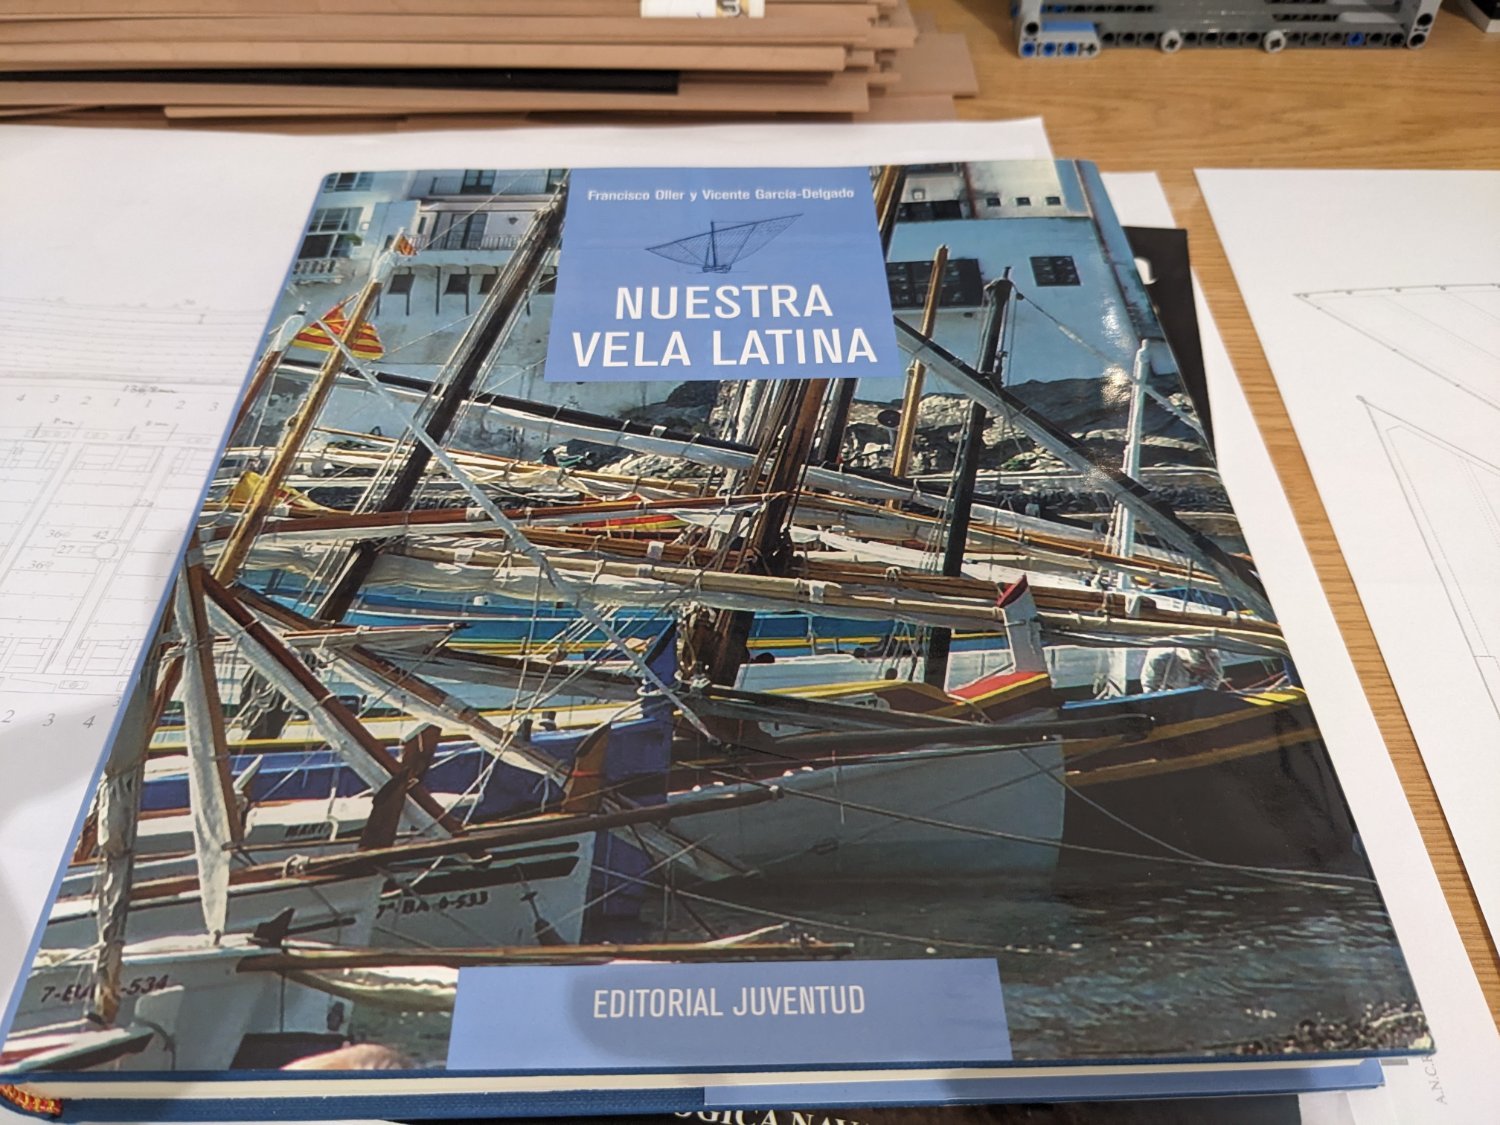
Enjoy it! It really is a great book with some lovely drawings.
- 61 replies
-
- 2
-
-
- ancre
- Santa Caterina
- (and 1 more)
-
From what I can see on the Ancre site the rigging for the N.S. del Rosario is the exact same as for the Santa Caterina. The dimensions might be more correct for a ship of that size, but there are still errors. To mention a few (from the Santa Caterina monograph): The antenna is simply too short, and not rigged correctly. It should be rigged at 2/5 its length, but on the monograph it's rigged at the halfpoint. It's upside down. 🙃 The rigging at the lower point of the antenna is completely wrong. There should be a line to hold the antenna at an angle (the davante) which is missing, and a line to move it sideways. That one's kinda there but completely wrong. The "lift" to hold the antenna at an angle should be behind the mast (the heaviest part) and not in front as on the monograph. Having it in front makes no sense, you want to lift the heavy part of the antenna, which due to the triangular shape of the sail is behind the mast (also 3/5 of the antenna extends behind). And then the monograph has several lines which serve no purpose. Some of them might on a heavier ship, though, my knowledge doesn't extend that far. I wouldn't have known any of this if I hadn't read the book 'La Vela Latina' and double checked with photos of real lateen rigged boats.
- 61 replies
-
- 3
-
-
-
- ancre
- Santa Caterina
- (and 1 more)
-
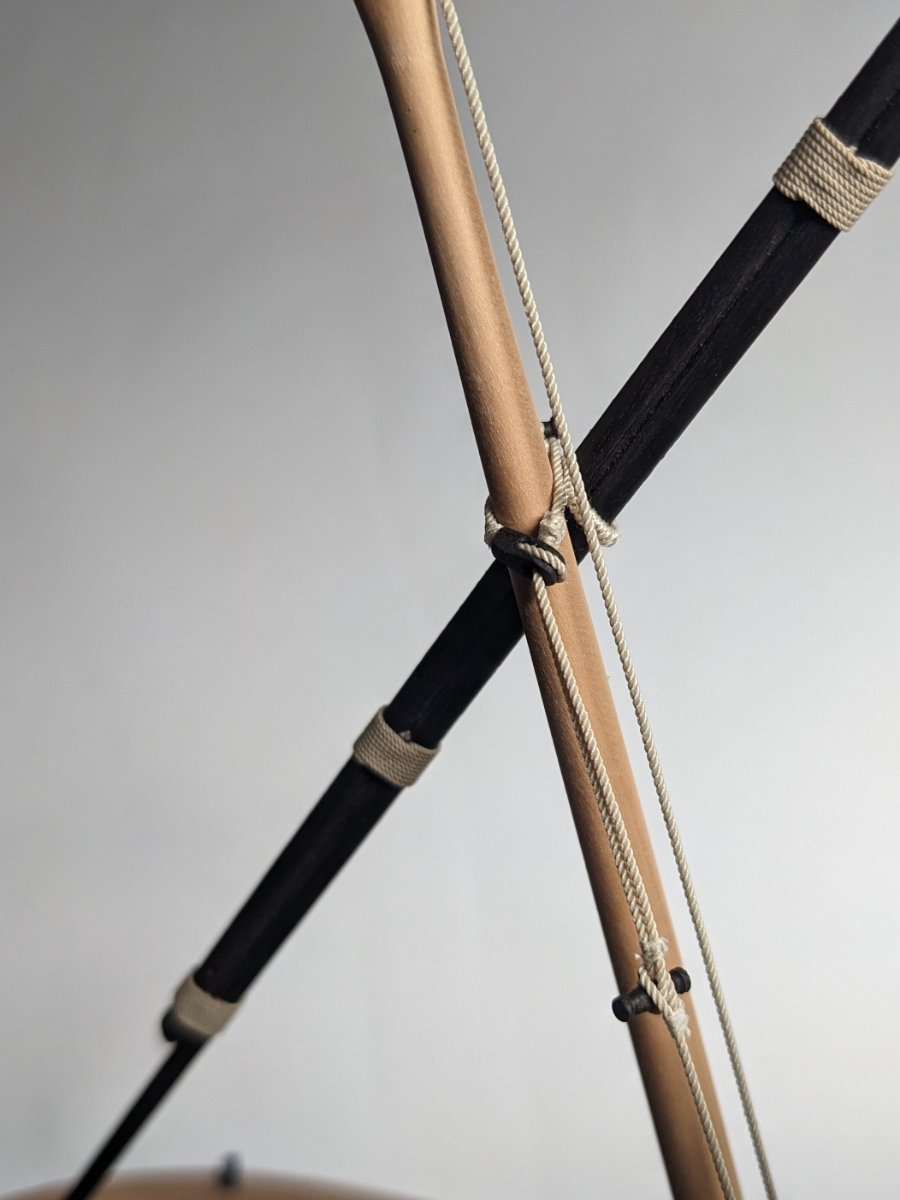
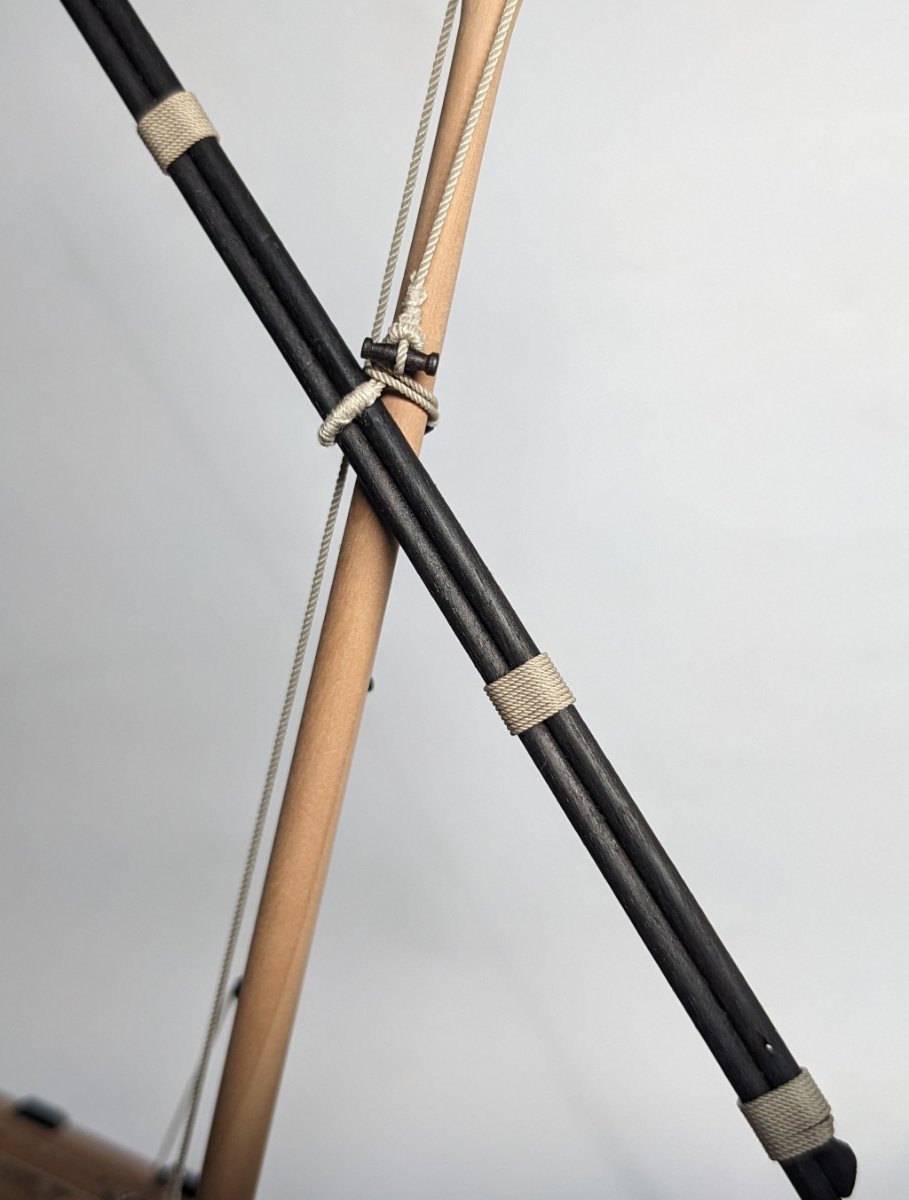
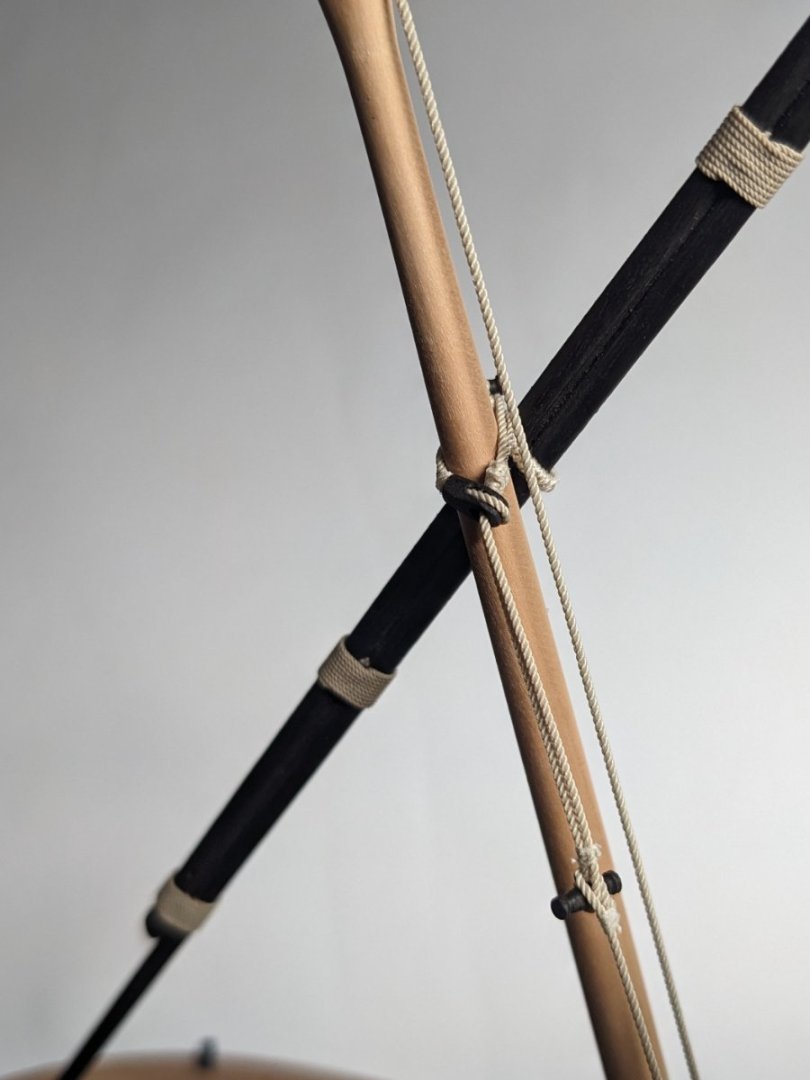
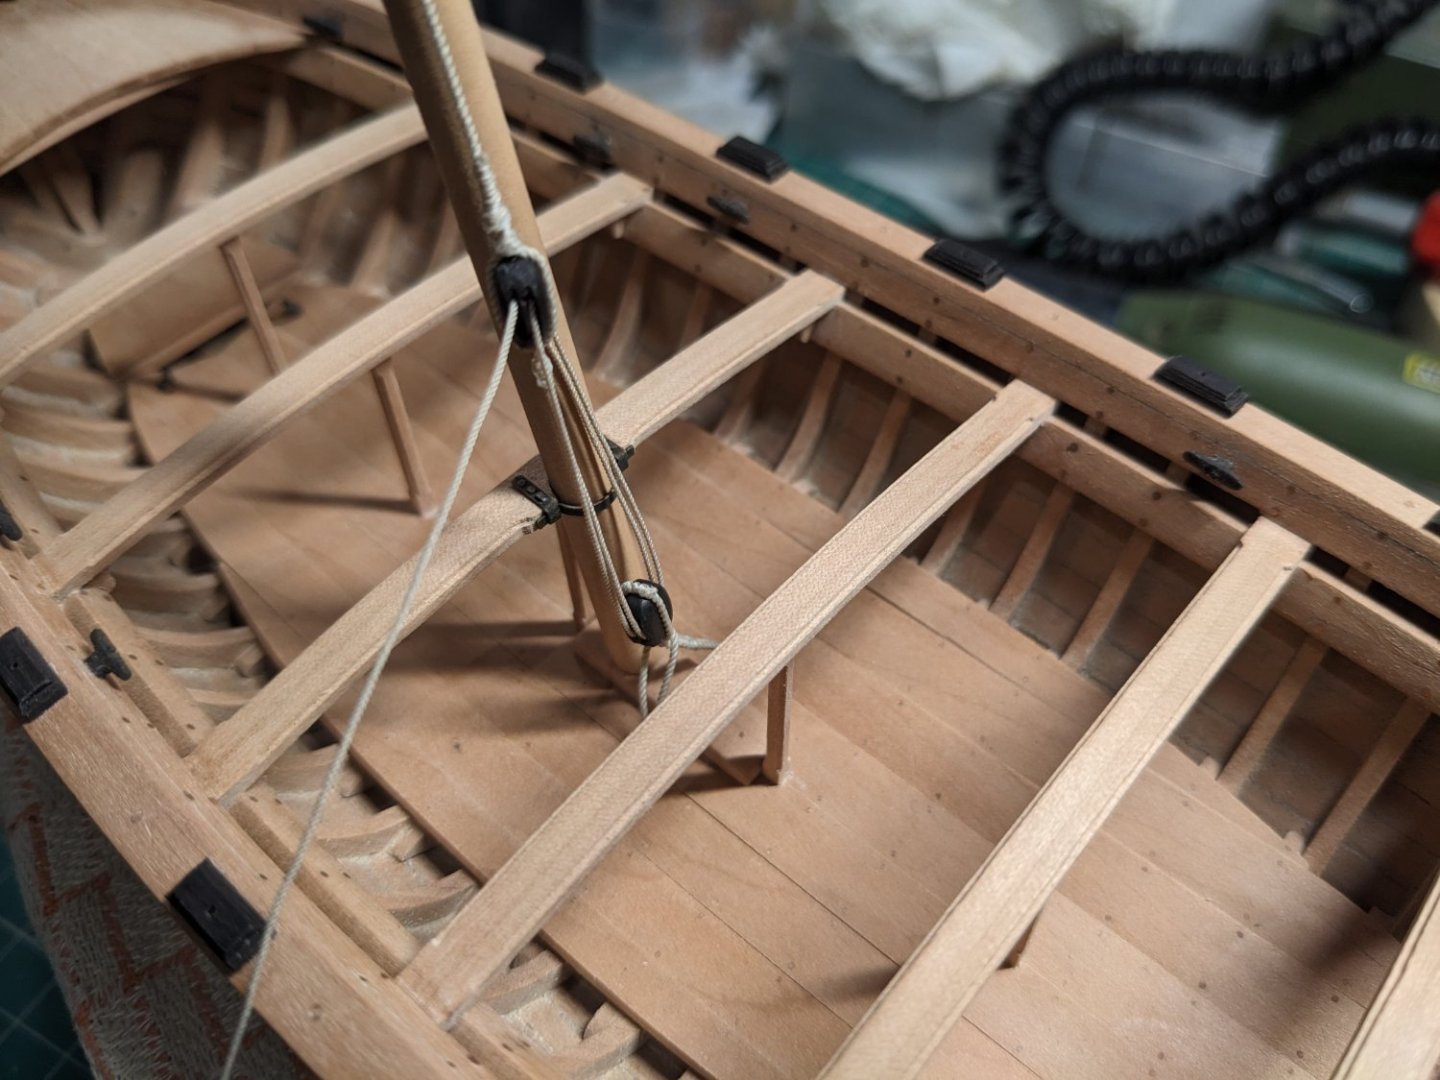
More rigging. The book I'm using 'Nuestra Vela Latina' es basically my guide at this point. The cross where the antenna is mounted. And from another angle. This is more or less the angle I'll be displaying the antenna at. Of course I'm also going to make the sail if I can. Next will be the rigging to move the antenna sideways. The monograph is completely wrong at this point, I'm honestly surprised how bad it is. The part describing the construction of the hull is great, but the rigging leaves a LOT to be desired. I'll see if I can describe all the issues later, maybe writing a full review of the monograph (which I still very much recommend!).

- 61 replies
-
- 12
-
-
-
- ancre
- Santa Caterina
- (and 1 more)
-
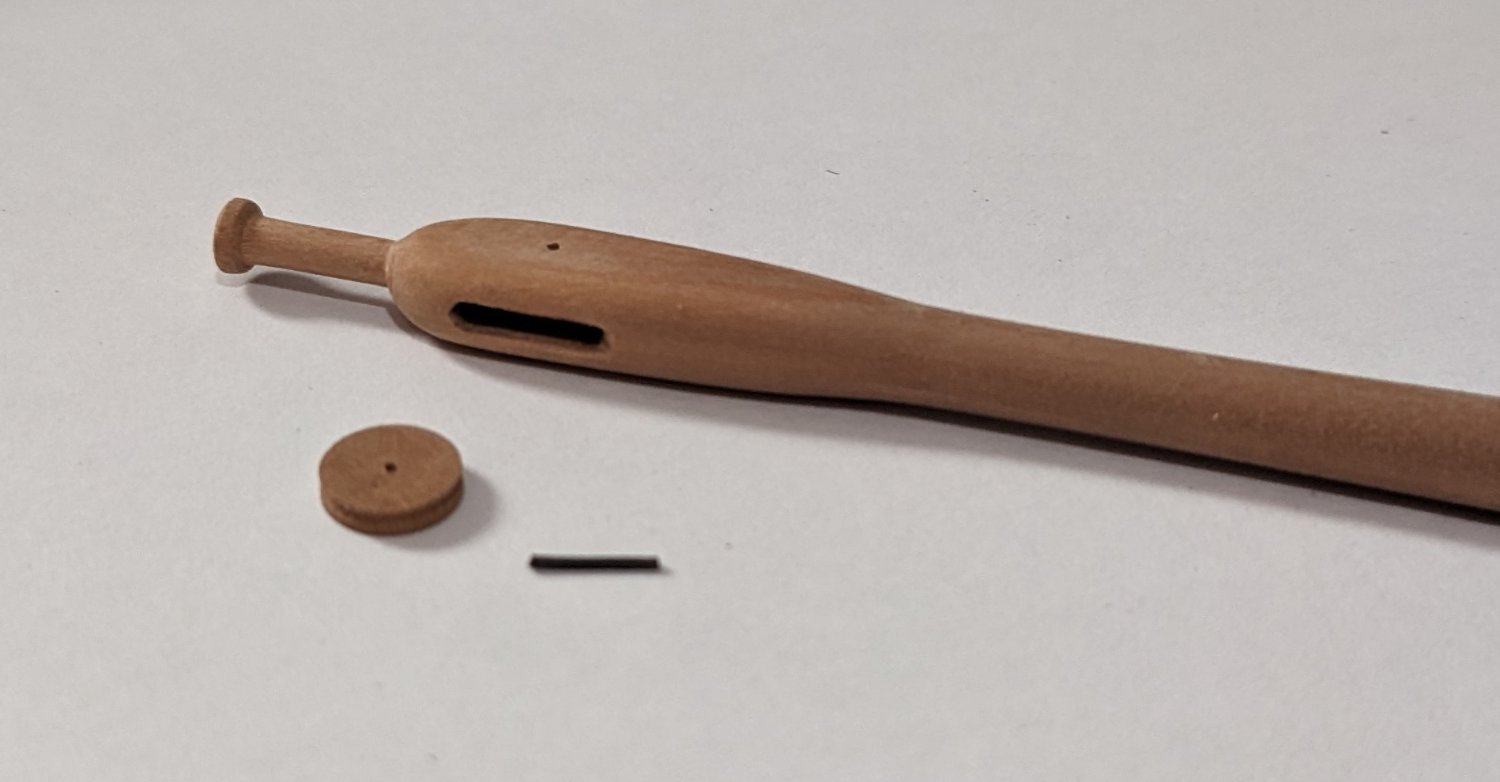
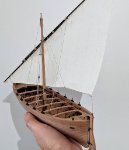
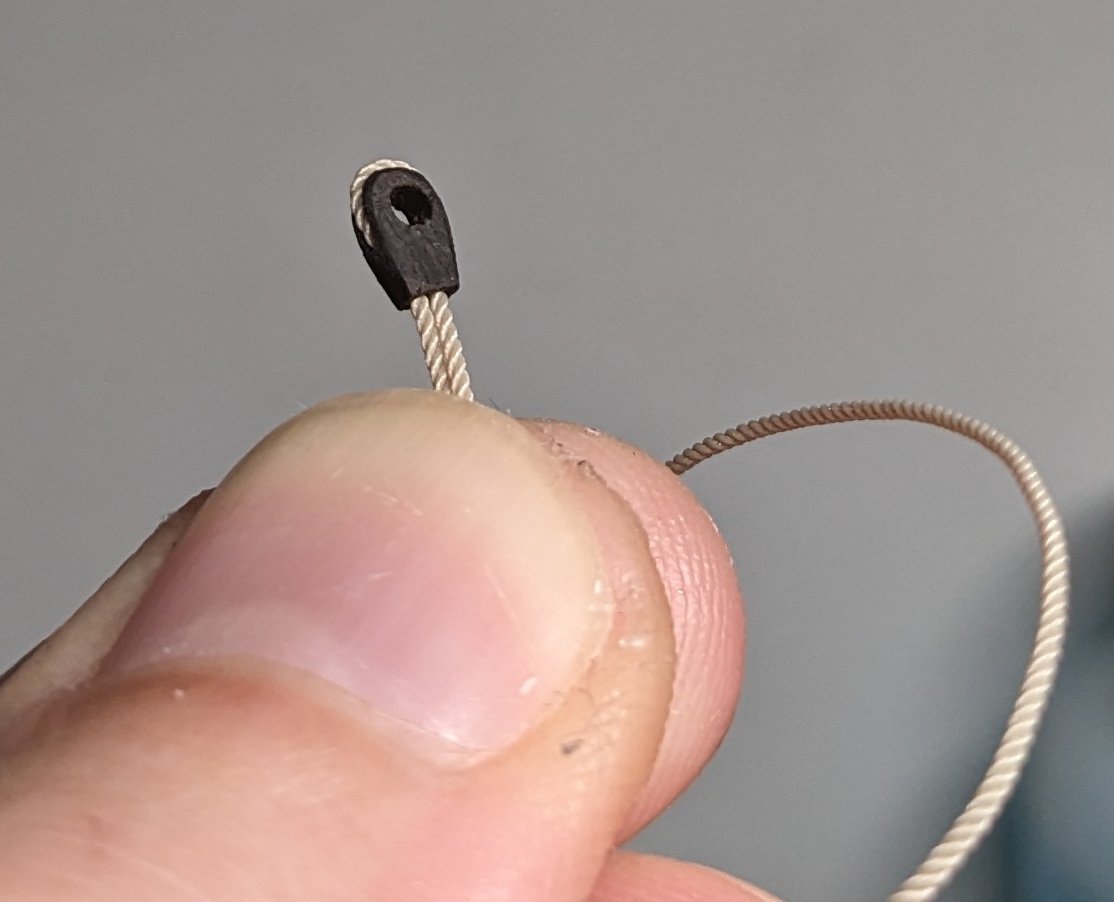
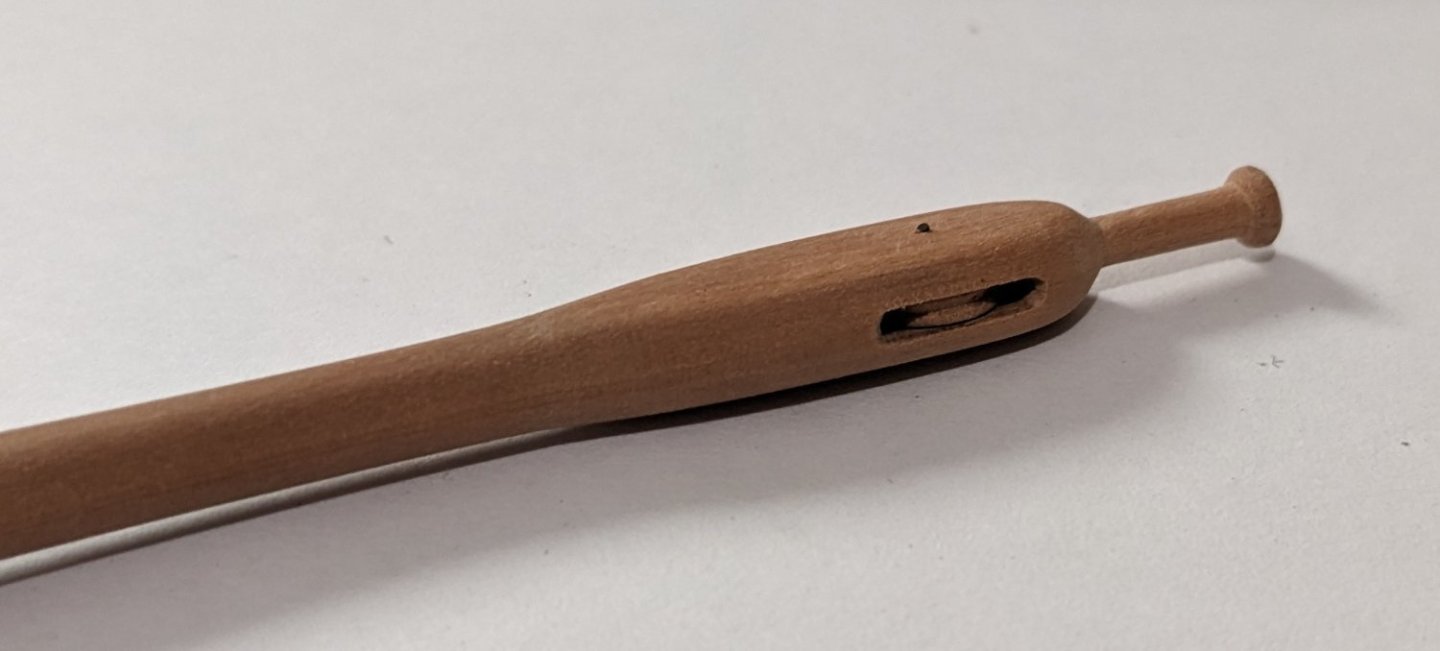
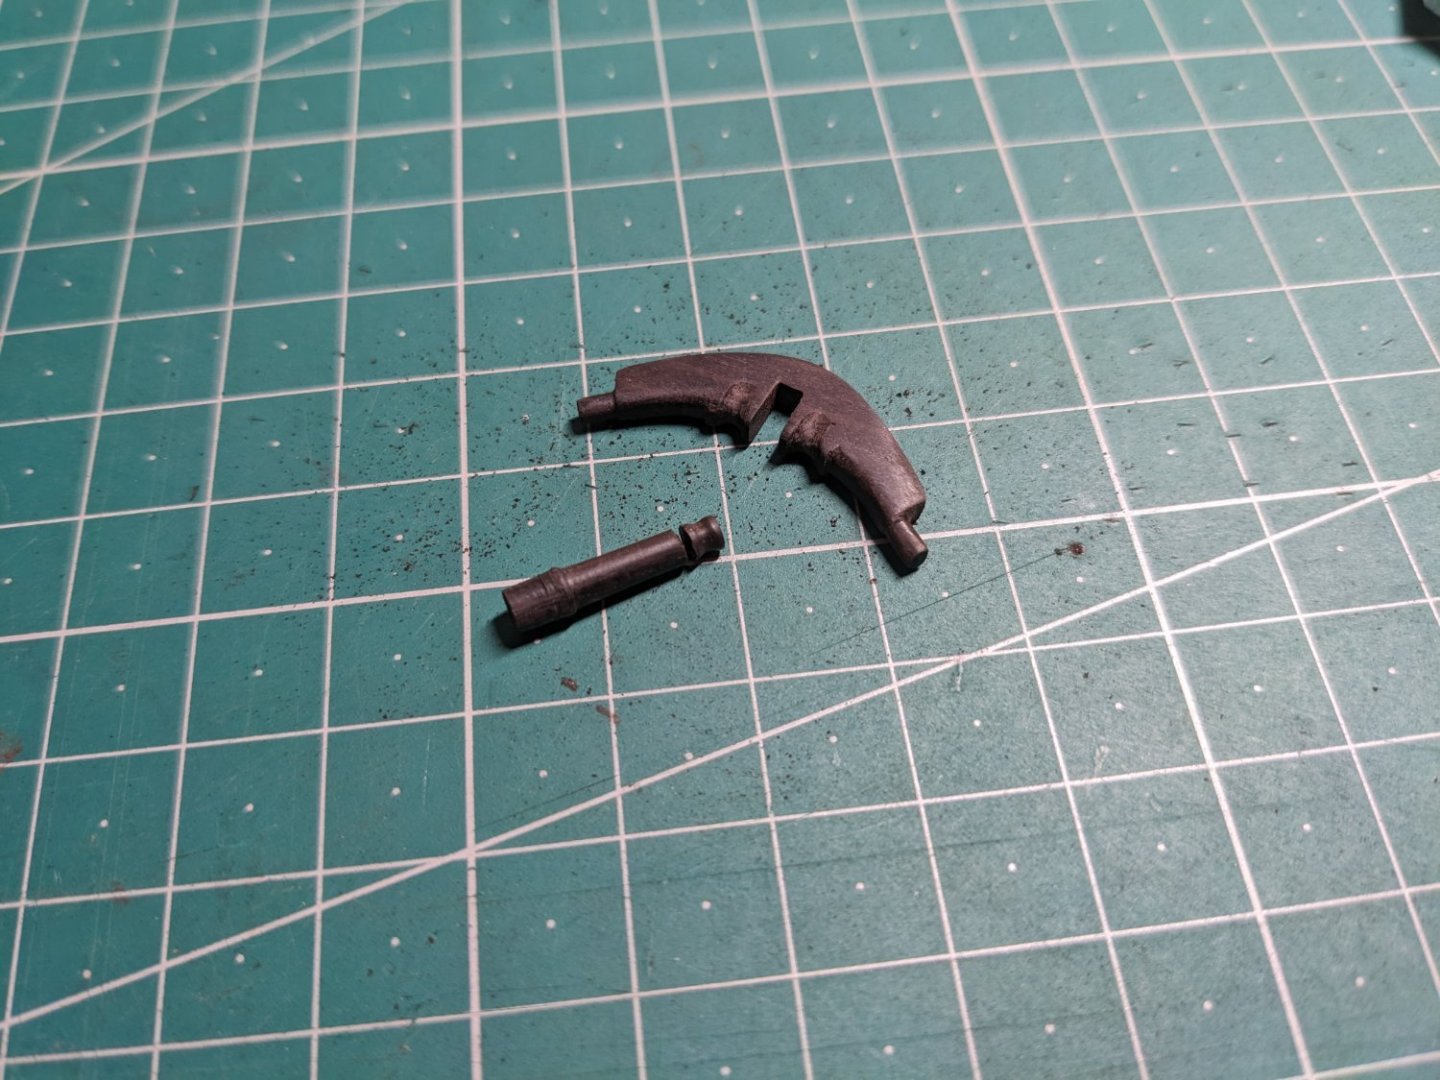
Getting started on the rigging. I'm using rope from Ropes of Scale, it looks absolutely amazing! The blocks are made from black hornbeam. I tried making working pullies for the double blocks but it was impossible for me to cut them at 0,5mm, they simply disintegrated, and I couldn't find any metal pullies at that size to buy. So the tackle is not as smooth as it could be, but it still works. The tackle for raising the antenna is again simplified compared to the monograph, which uses blocks with 5 and 6 pullies. This block is for seizing the antenna to the mast. Standard thumb for scale (I'm not a giant!). I'm actually surprised I was able to make that on my first try...

- 61 replies
-
- 13
-
-
-
- ancre
- Santa Caterina
- (and 1 more)
-
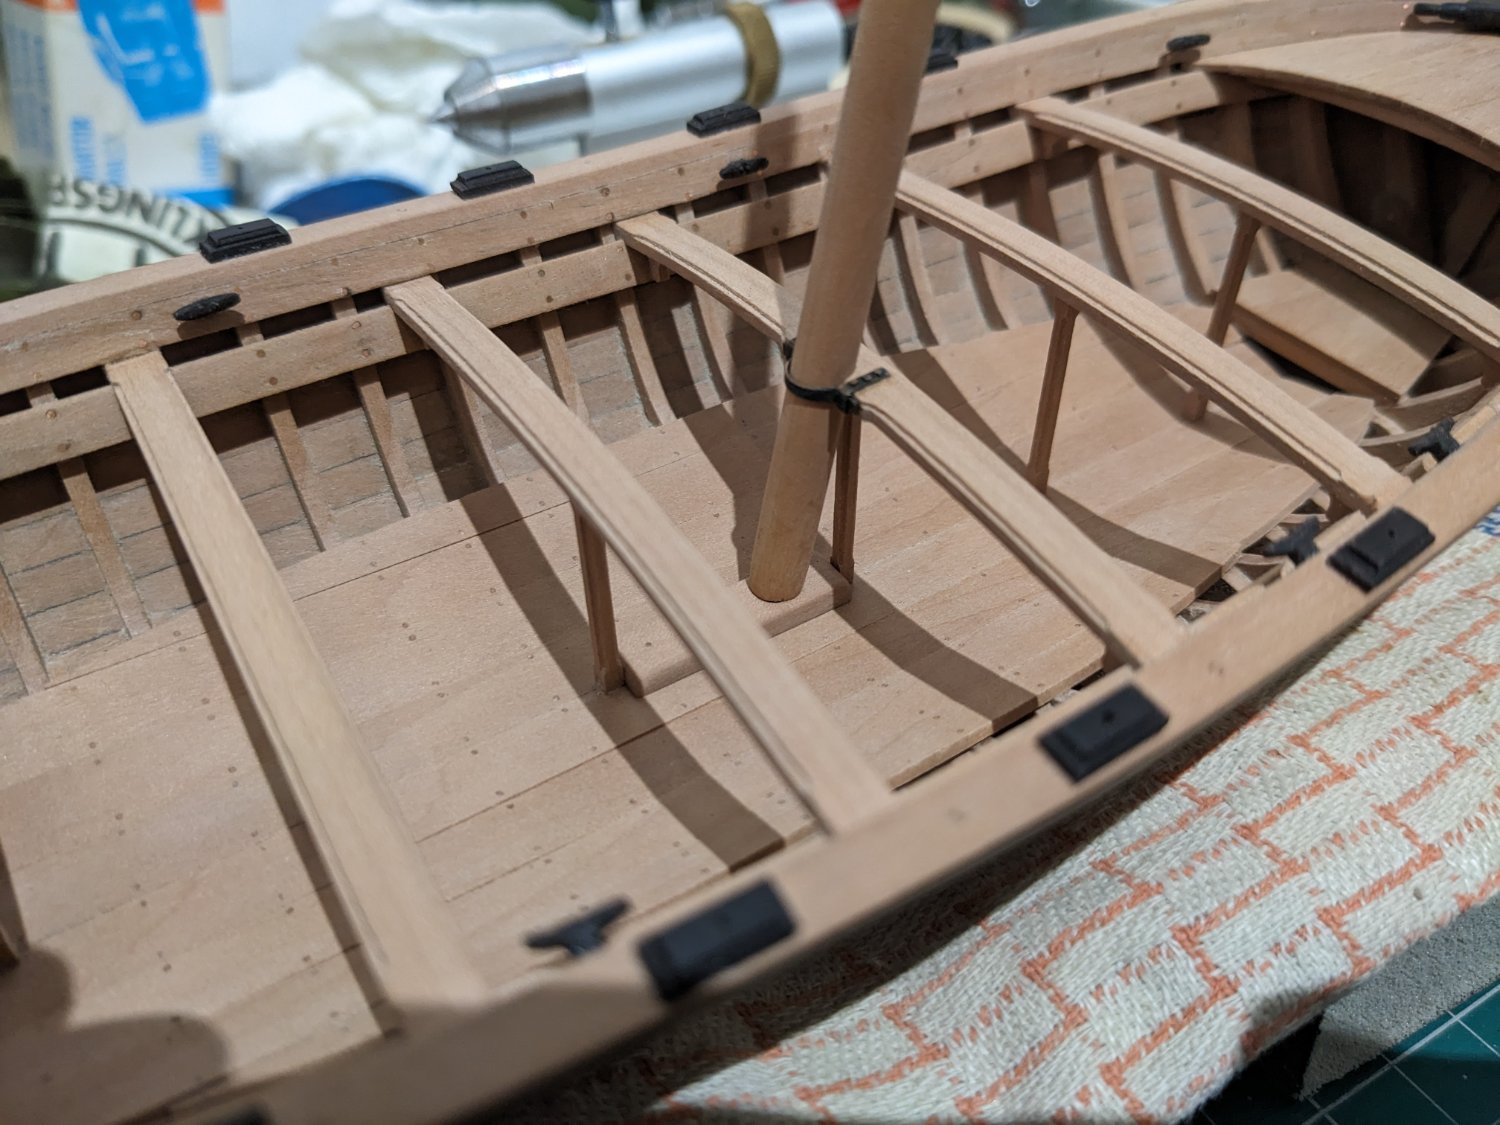
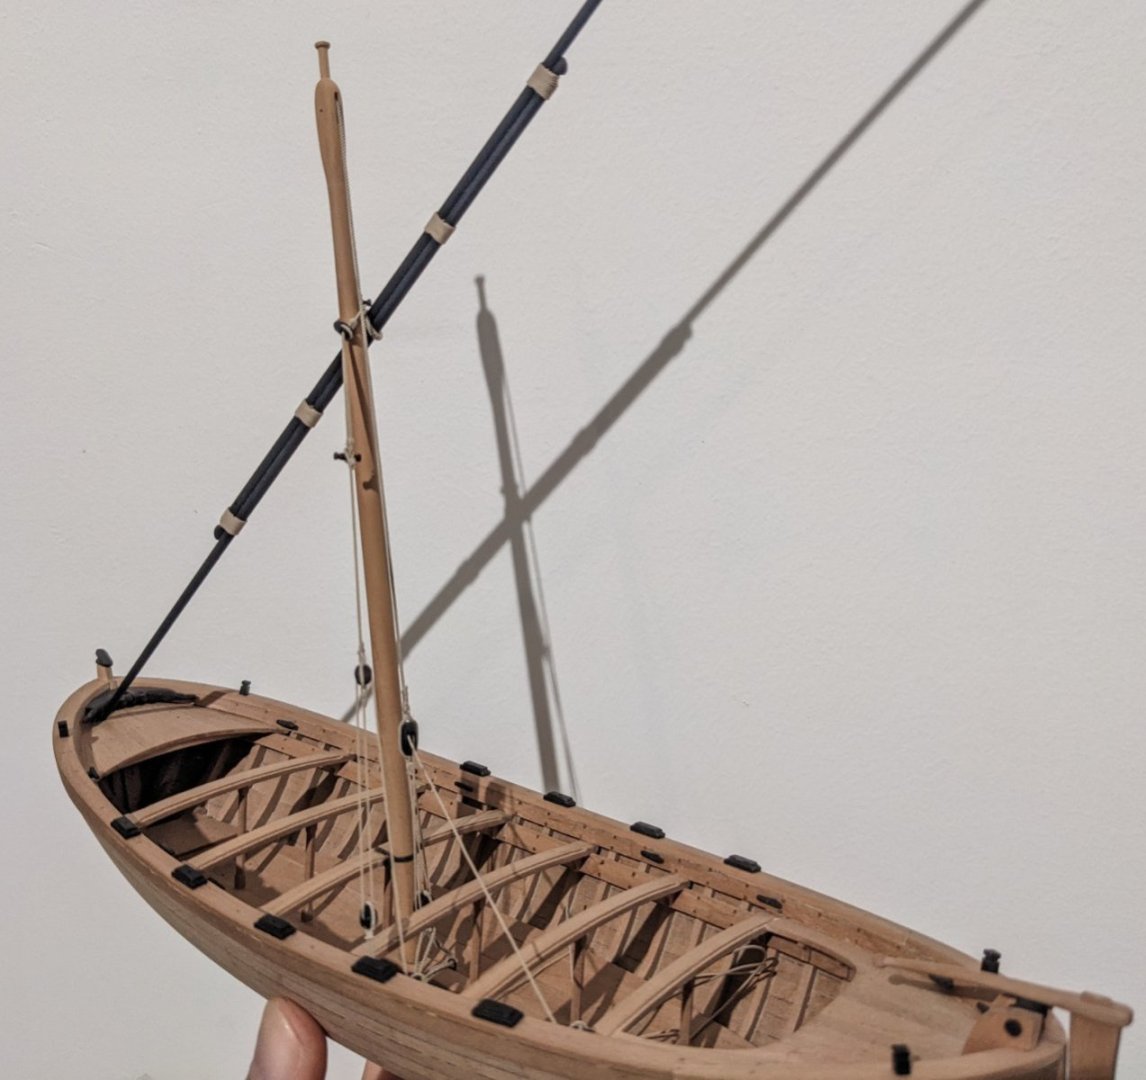
I'm progressing a lot these days, I just installed the mast and started on the antenna. The way the mast is installed according to the monograph is almost correct, it just needs to be slanted a few more degrees forward (again, because the antenna is longer). I slightly reworked the mast foot since it's supposed to spread over 3-4 frames. It should probably extend further forwards too, but the oar bench support is in the way and I don't want to rework that; it's "good enough" as it is. 😂

- 61 replies
-
- 10
-
-
- ancre
- Santa Caterina
- (and 1 more)
-
No, unfortunately it doesn't, though it does explain the construction but not in enough detail to construct a boat. Good luck with your project!
- 61 replies
-
- 2
-
-
-
- ancre
- Santa Caterina
- (and 1 more)
-
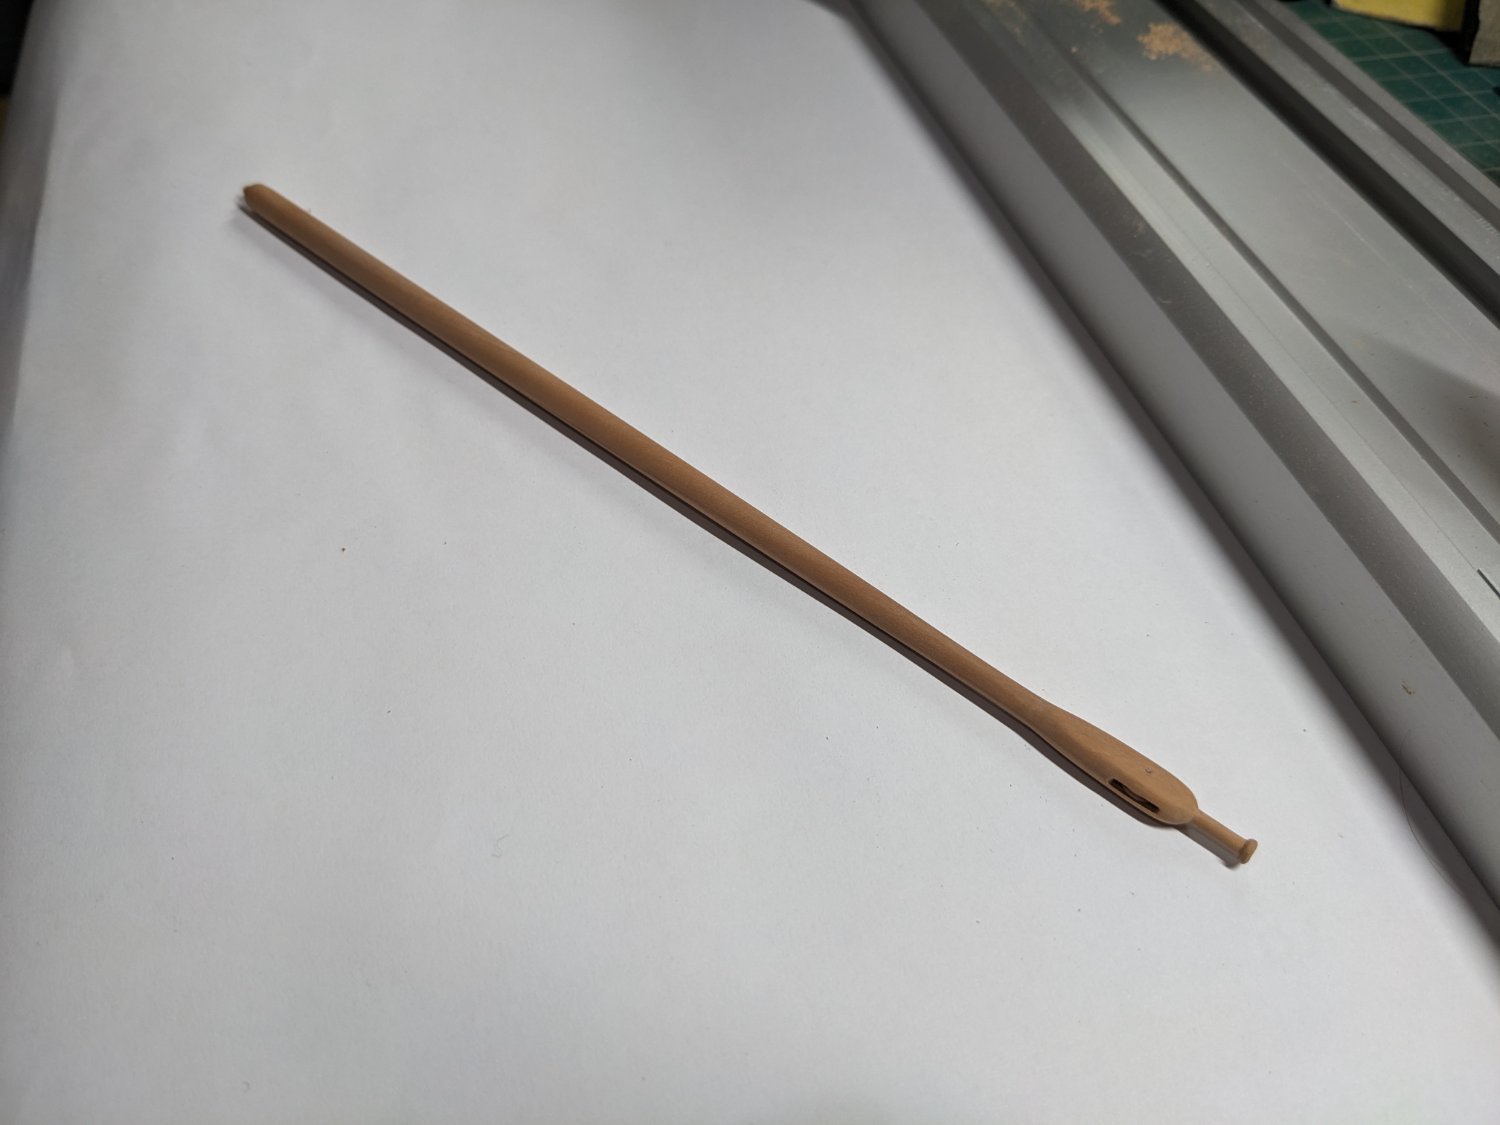
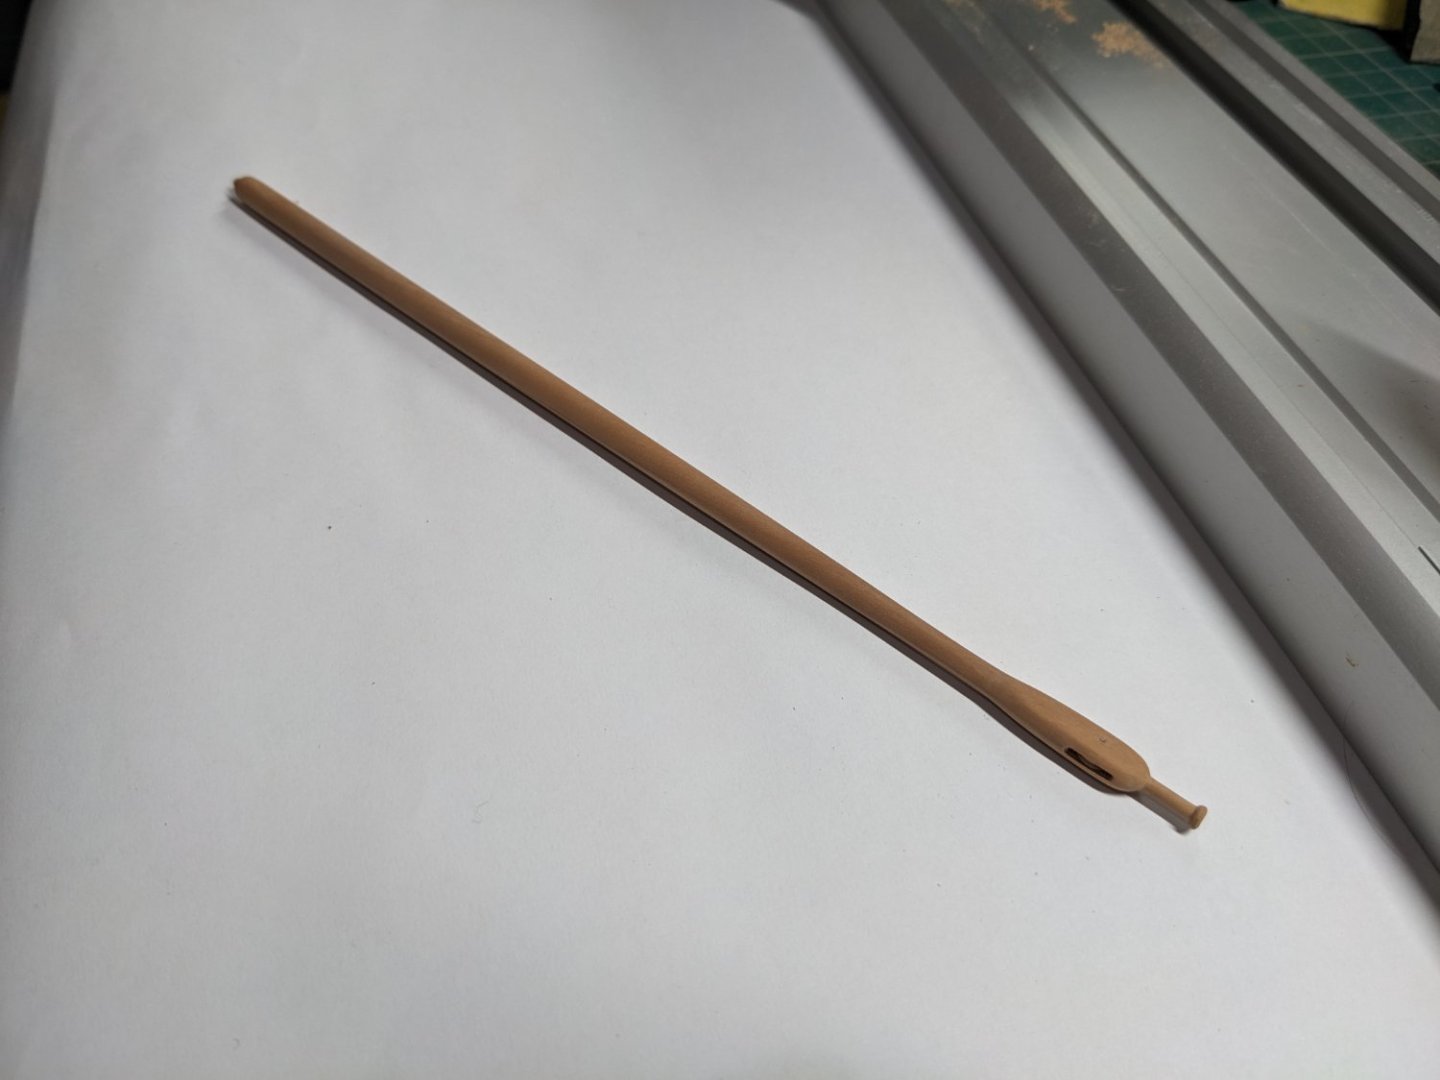
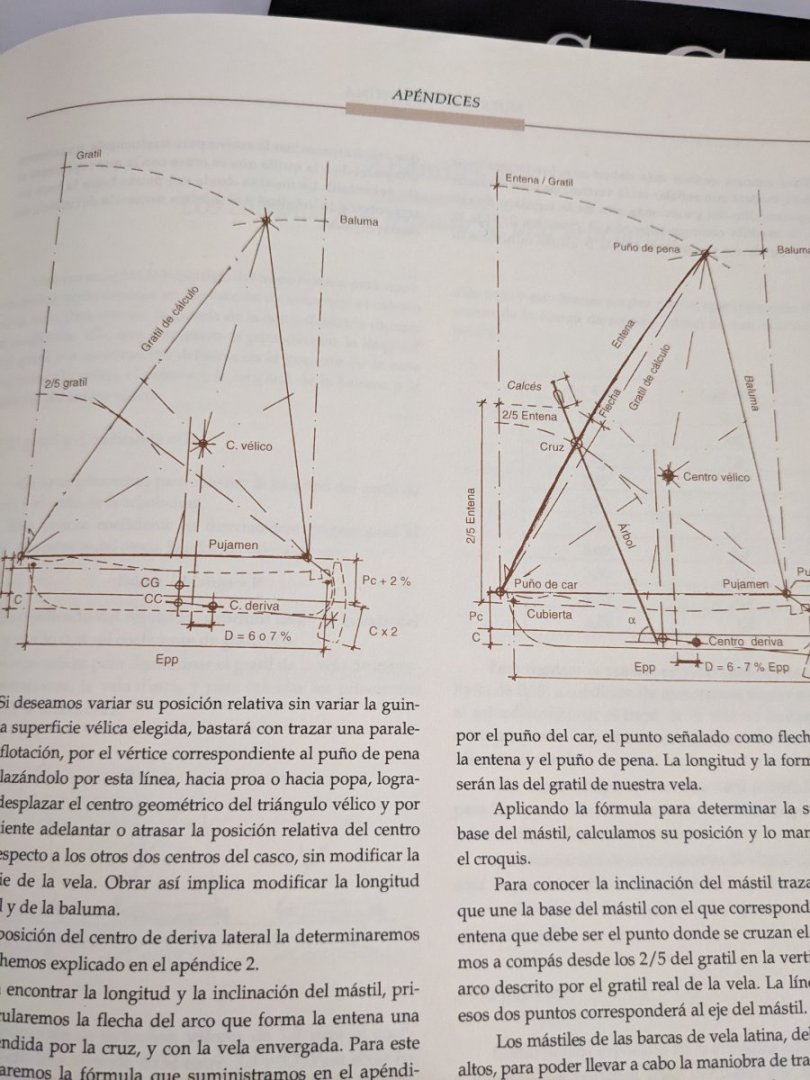
This week I started on the mast. It's very different from the one shown in the monograph, which is more adecuate for a large xebec. My mast is simpler, has only one sheave and is about 1cm taller. It took me a few hours to make on my Proxxon lathe. The sheave is from pear and fully works. If anyone is interested, this is the book I'm using which explains how the lateen rig works. As far as I know it's only available in Spanish, but if you can read that I highly recommend it. It goes over the history of the lateen sails, how the boats are (and were) constructed, and how to sail them. It mainly focuses on Catalan boats but is useful for any small lateen rigged boat. The appendices are especially useful since they go over the calculations required to rig a boat.


- 61 replies
-
- 6
-
-
- ancre
- Santa Caterina
- (and 1 more)
-
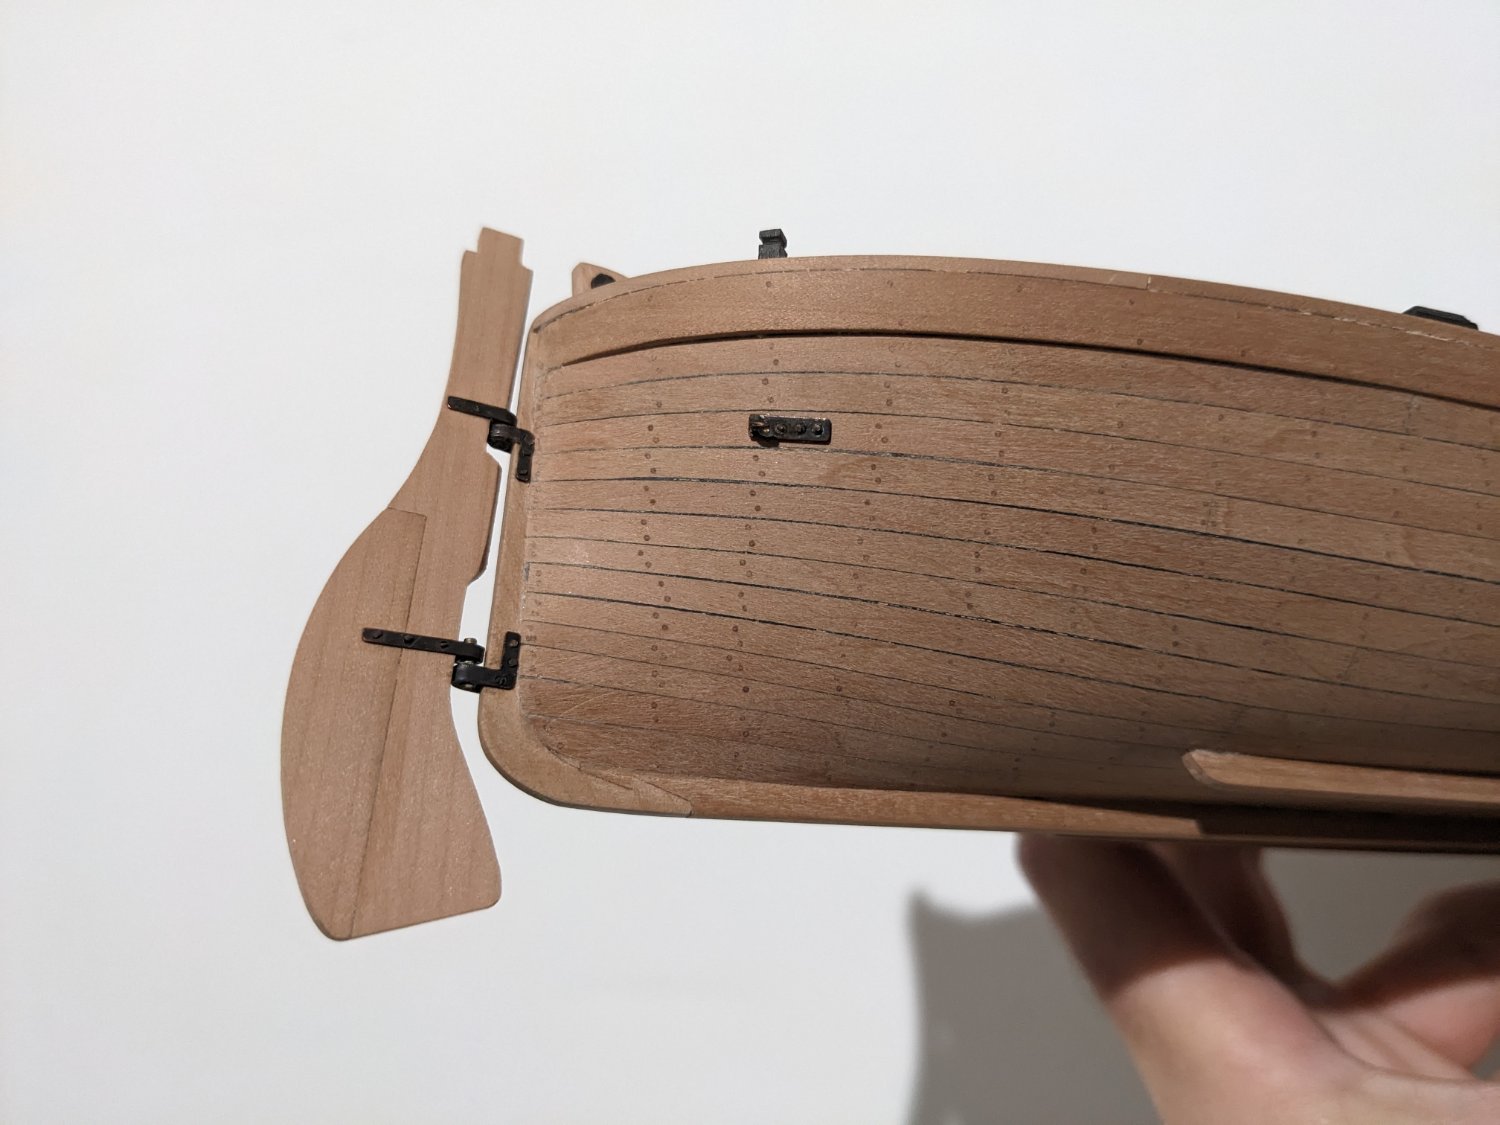
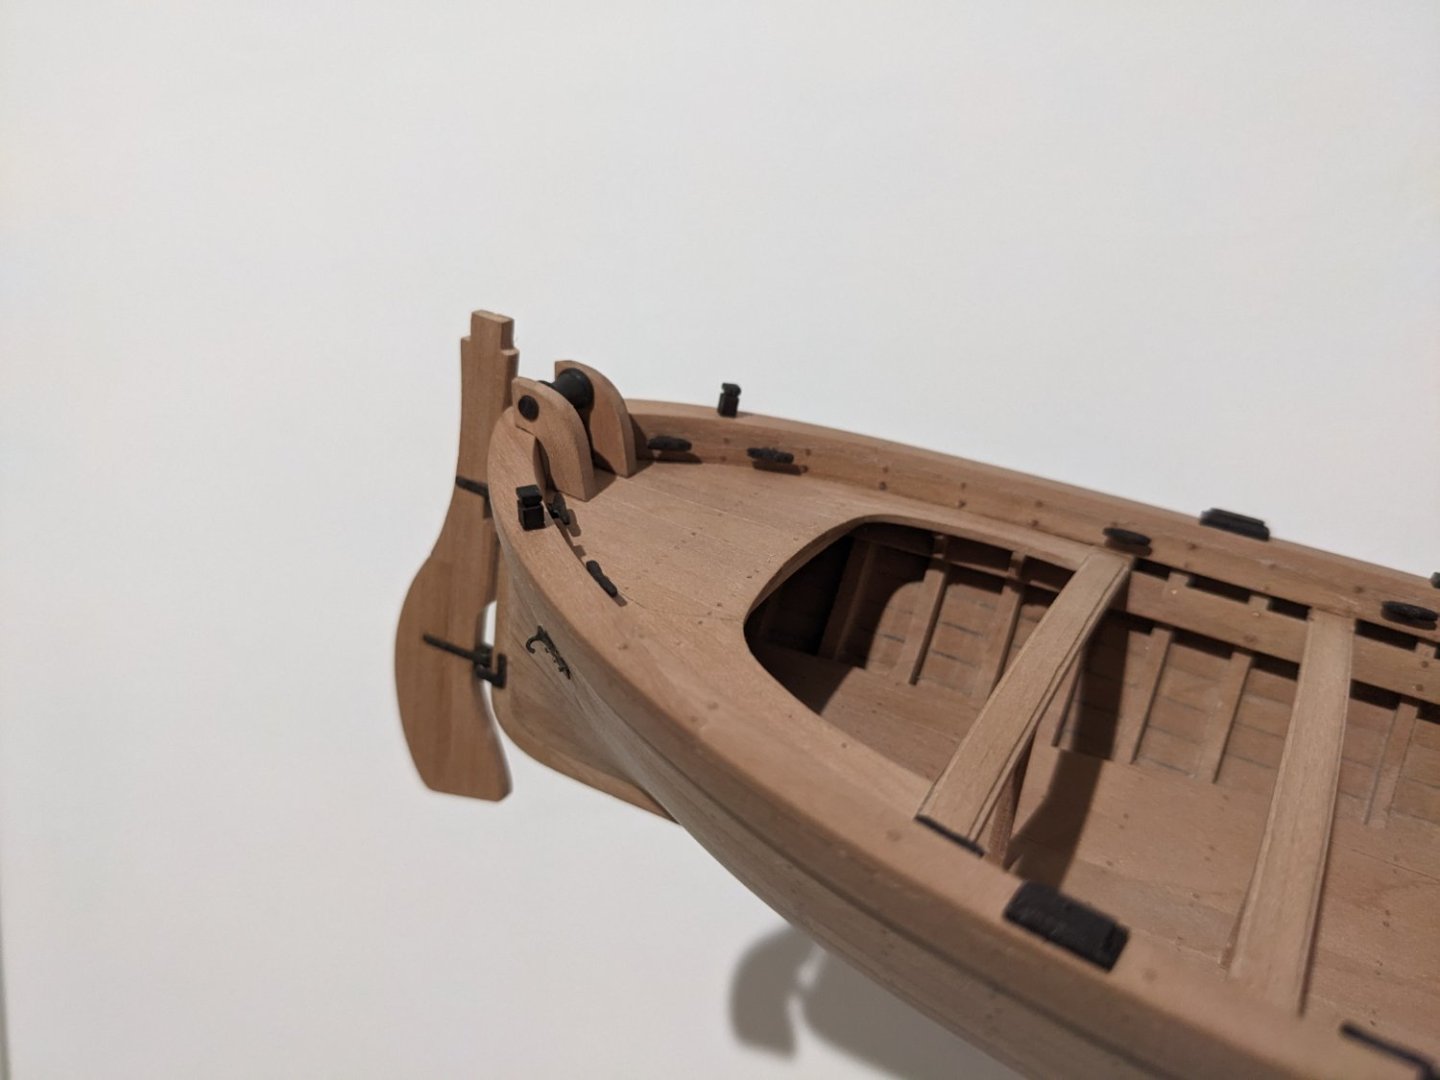
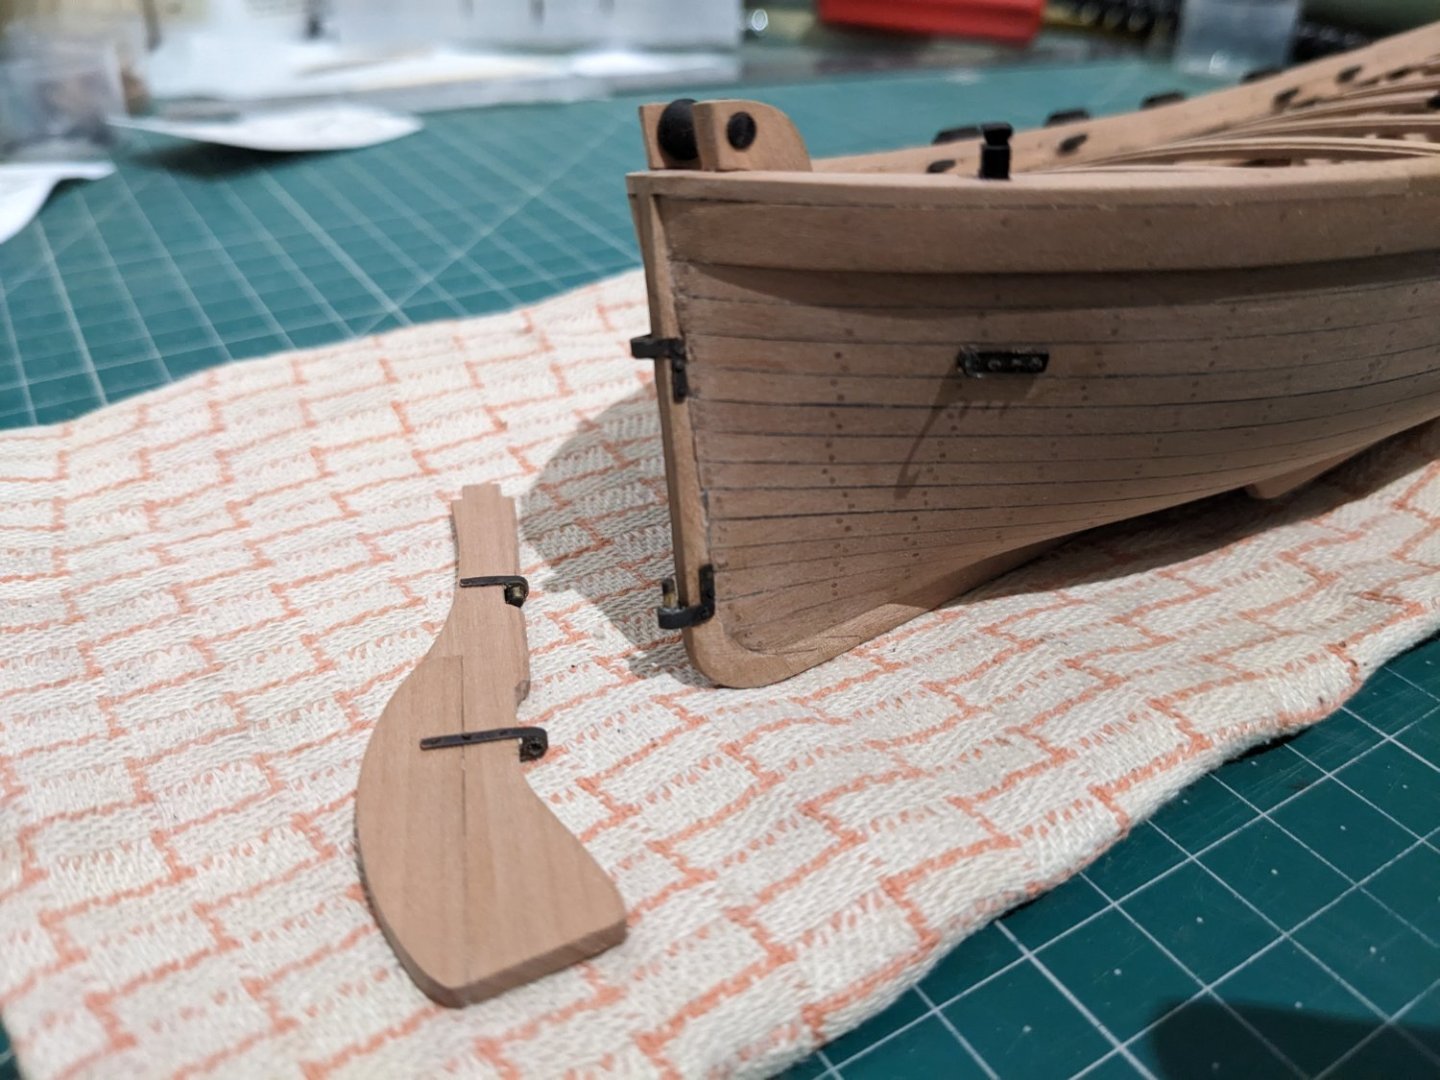
Speaking of the rudder, this afternoon I finished and attached it. The hinges were difficult to make but I think they turned out fine. I would have wished the rudder to sit a little closer to the stern post, but I'm happy with the result. Since I intend to put a longer antenna and sail on the boat, the rudder needed to be longer (at least according to my research). As you can see, it extends below the keel. It should have been even longer (twice the draught), but I settled for a little less. in the photo above you can also see the side keels which are necessary for a lateen rig, and the hooks to haul the boat onto the beach. The rudder turns freely on the hinges and can be detached. I've yet to make the tiller. Now I can get started on the mast and rigging!

- 61 replies
-
- 13
-
-
-
- ancre
- Santa Caterina
- (and 1 more)
-
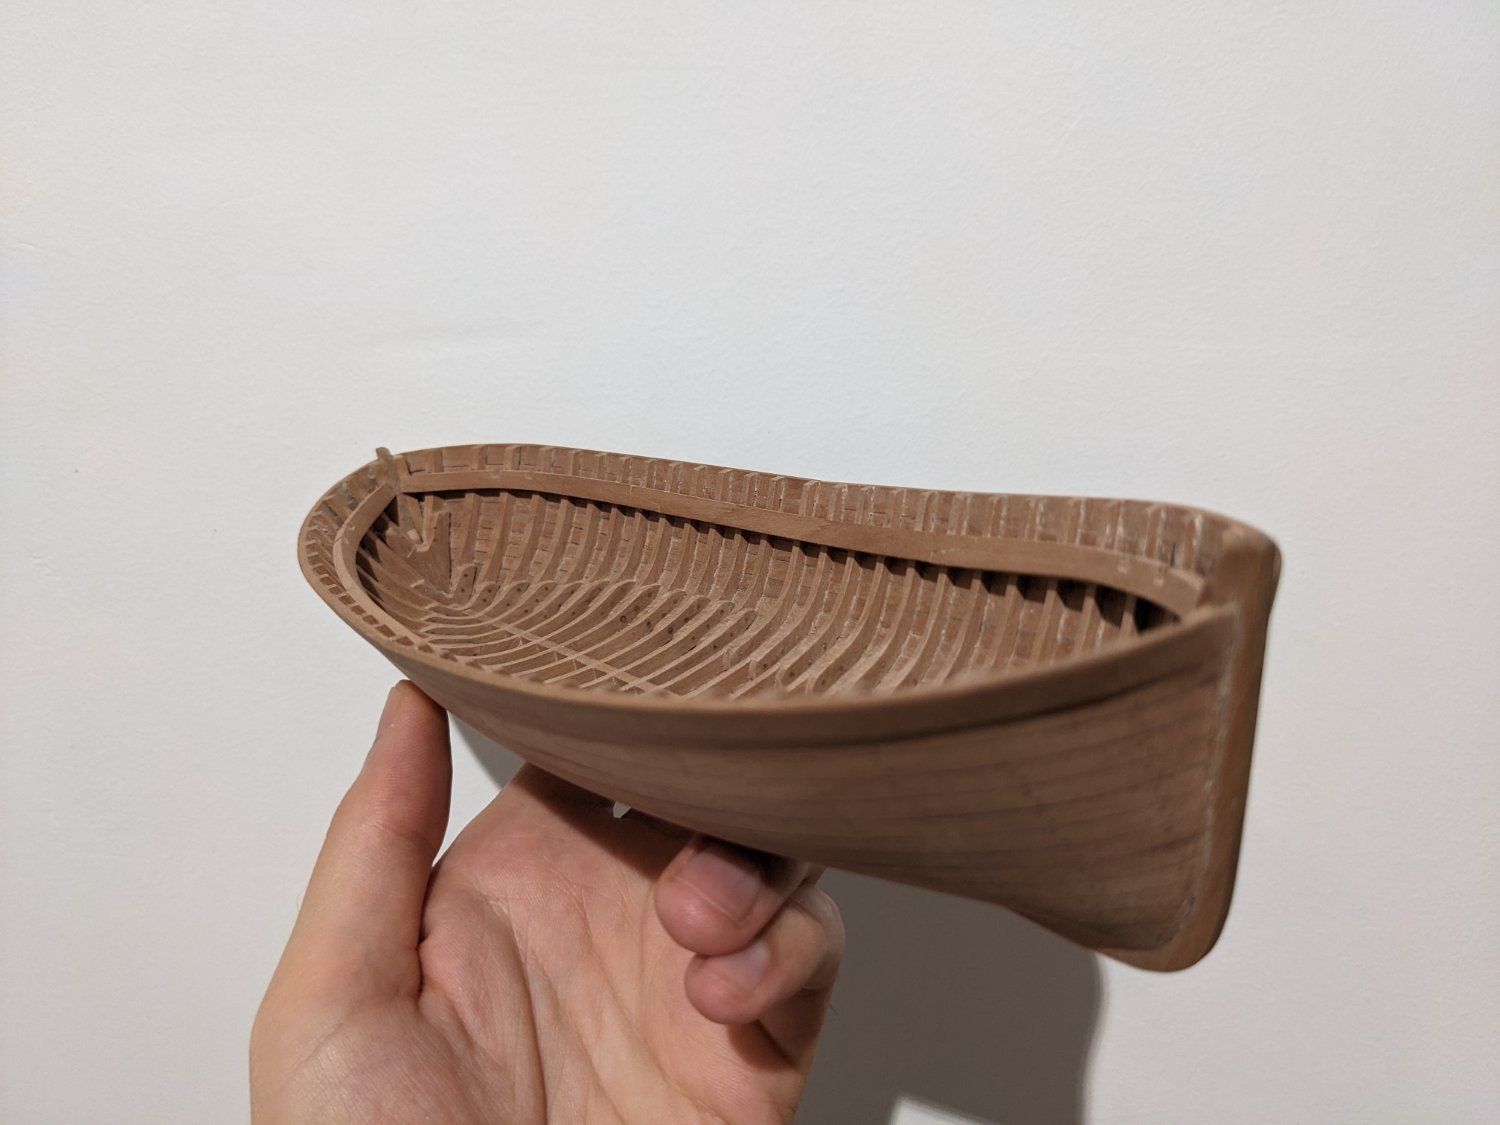
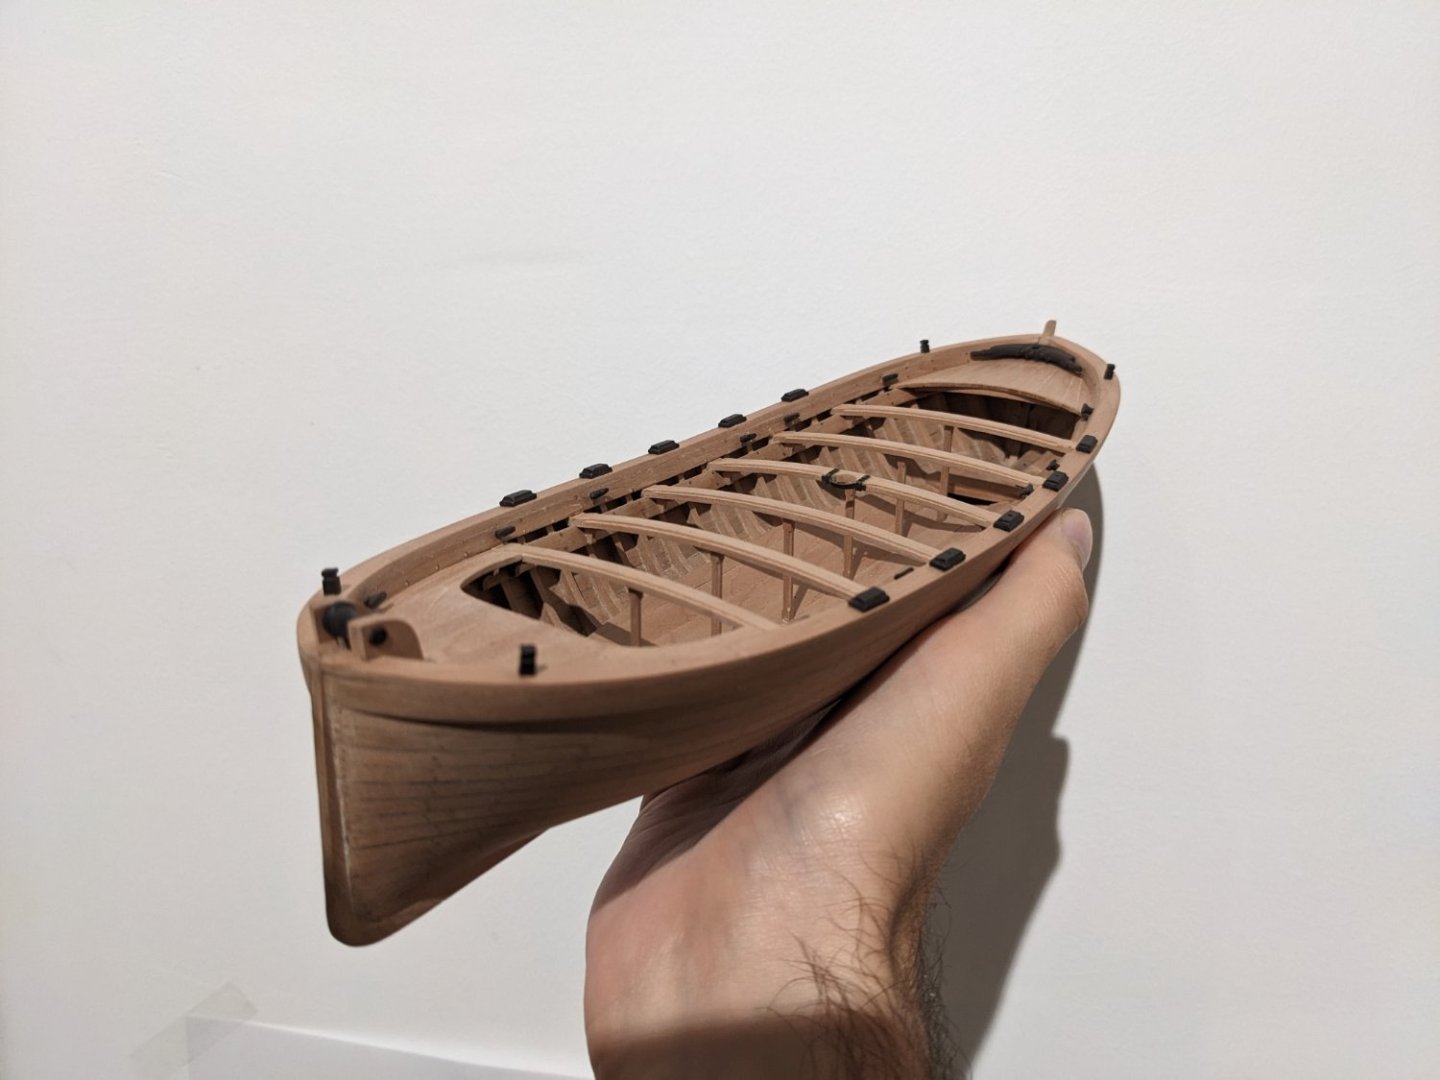
Hi Cnemo, The hull with the rudder is 29 cm long and 9,5 cm wide at the beam. This is 2/3 the size of the monograph. When I finish this project I'll make a stern cross section of the Spanish frigate La Mahonesa in 1/48 scale. The wood is already on the way so I'll probably start on it in a few months. I'll be sure to make a build log here!
- 61 replies
-
- 1
-
-
- ancre
- Santa Caterina
- (and 1 more)
-
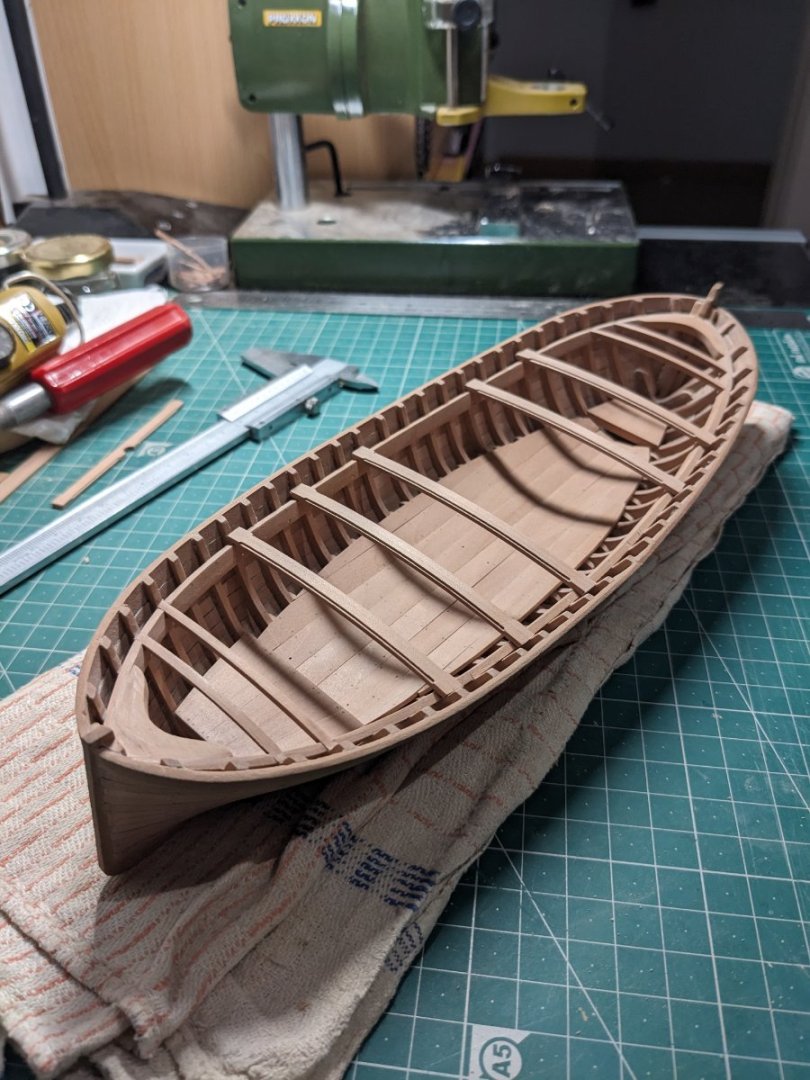
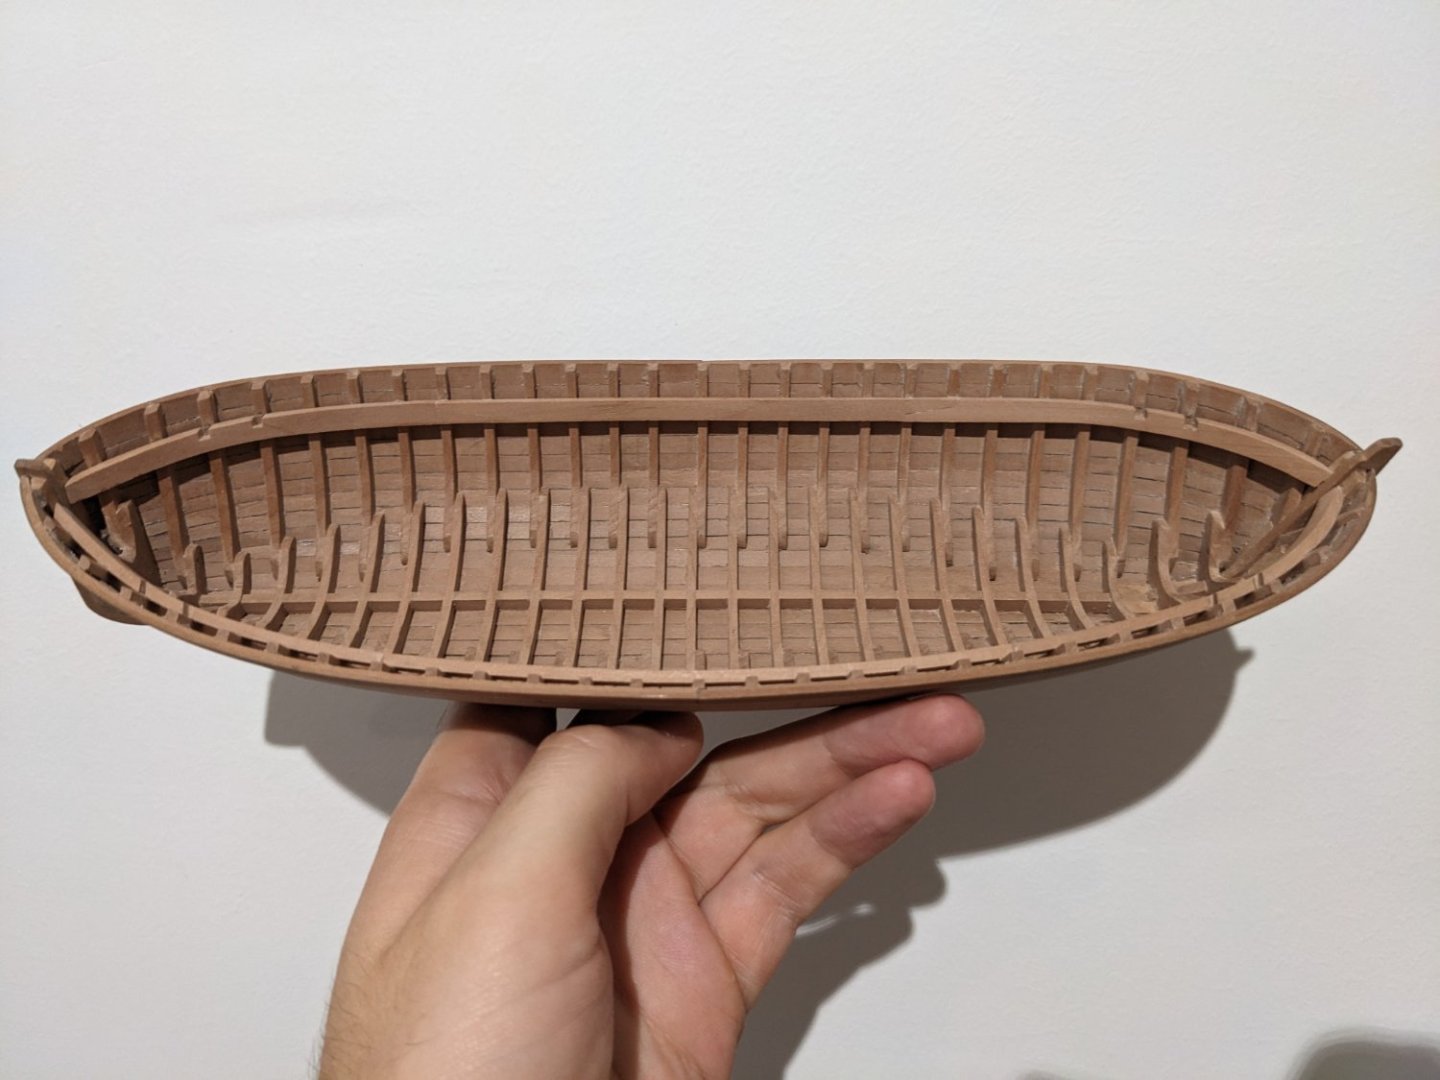
At this point the boat is almost complete, just missing some iron work and the rudder. Then I can start on the mast and antenna, which as I mentioned before will be different from the monograph. I should be finished with this project in a few months, then I can start on my next project which will also be an Ancre monograph.
- 61 replies
-
- 14
-
-
-
- ancre
- Santa Caterina
- (and 1 more)
-
My progress has been pretty slow lately as I've been travelling and studying, but I'm finishing up the hull with all the small details. I'm using black hornbeam for the items that are supposed to be tarred black. I've never worked with this wood before but I like it, it doesn't hold an edge as well as swiss pear but the finish is really nice. Also, it's a bit like carving chocolate... 😋 (I haven't tried tasting it!).

- 61 replies
-
- 11
-
-
-
- ancre
- Santa Caterina
- (and 1 more)
-
Cap rail finished, but not yet treenailed. I deviated a bit from the plans here; the scarf joint was supposed to be midships, but that would have resulted in the wood grain running perpendicular to the rail at the ends, as there was no way I could bend it 90 degrees. Instead I made a joint at each end of the boat which seems more natural to me. Now I can start on all the details and then it's on to the rigging, which I've completely reworked. I'm now certain that the monograph has copied the rigging from a much larger ship, at one point it mentions that the antenna and sail would have weighed 4 tons and that the sail has an area of 45m² - the boat itself is less than 6 meters long!
- 61 replies
-
- 10
-
-
-
- ancre
- Santa Caterina
- (and 1 more)
-
Progress is rather slow lately due to the summer heat and travelling. Still, I've finished the two small decks and most of the oar benches. Looking ahead, I've found several issues with the way the rigging is represented in this monograph, and I frankly don't understand the author's basis for rigging the boat this way. The two biggest issues are: The antenna and sail are too small. According to the research I've done the antenna should be at least 1,2x times the length of the boat for a winter sail, which is the smallest. On the plans, it's less than 1,1x. The rigging and blocks are very heavy duty, much more than required for a 5-6m long boat. I suspect this has been directly copied from the monograph of Le Requin, a xebec which is a much larger ship with heavier antennae. The tackle for the antenna has 4 pullies, other latin-rigged boats of this size has 2. While I'm anything but an expert of latin rigs I intend to completely rework the rigging of this boat, deviating a lot from the monograph. I'll keep the mast almost as it is but will make a longer antenna and rig it differently (and simpler).
- 61 replies
-
- 11
-
-
- ancre
- Santa Caterina
- (and 1 more)
-
Welcome Jesús, I am also from Spain, very close to you (Granada). You Victory looks amazing, and good choice on going scratch building. What kind of wood do you use for building?
-
Oar banks, hooks and beams. Nothing much to comment here regarding the plans, they're pretty good. However, I feel the prototype model in the monograph has too much curvature for the oar banks (or whatever the long perpendicular beams are called), so I reduced it quite a bit. On the other hand, the plans hardly show any curvature at all here.
- 61 replies
-
- 9
-
-
- ancre
- Santa Caterina
- (and 1 more)
-
Thanks! I'll continue preparing the planks according to the plans, then.
- 61 replies
-
- 1
-
-
- ancre
- Santa Caterina
- (and 1 more)
-
I have a question regarding planking: I learned a long time ago that planks should never be tapered to a point since they'd quickly rot. However, the deck planks on the Caterina are supposed to be tapered like that according to the plans. I suppose that since these are planks that could quickly be changed if they rotted tapering them like that wouldn't matter much? Or are the plans wrong and I should not taper them that much?

- 61 replies
-
- 6
-
-
- ancre
- Santa Caterina
- (and 1 more)
-
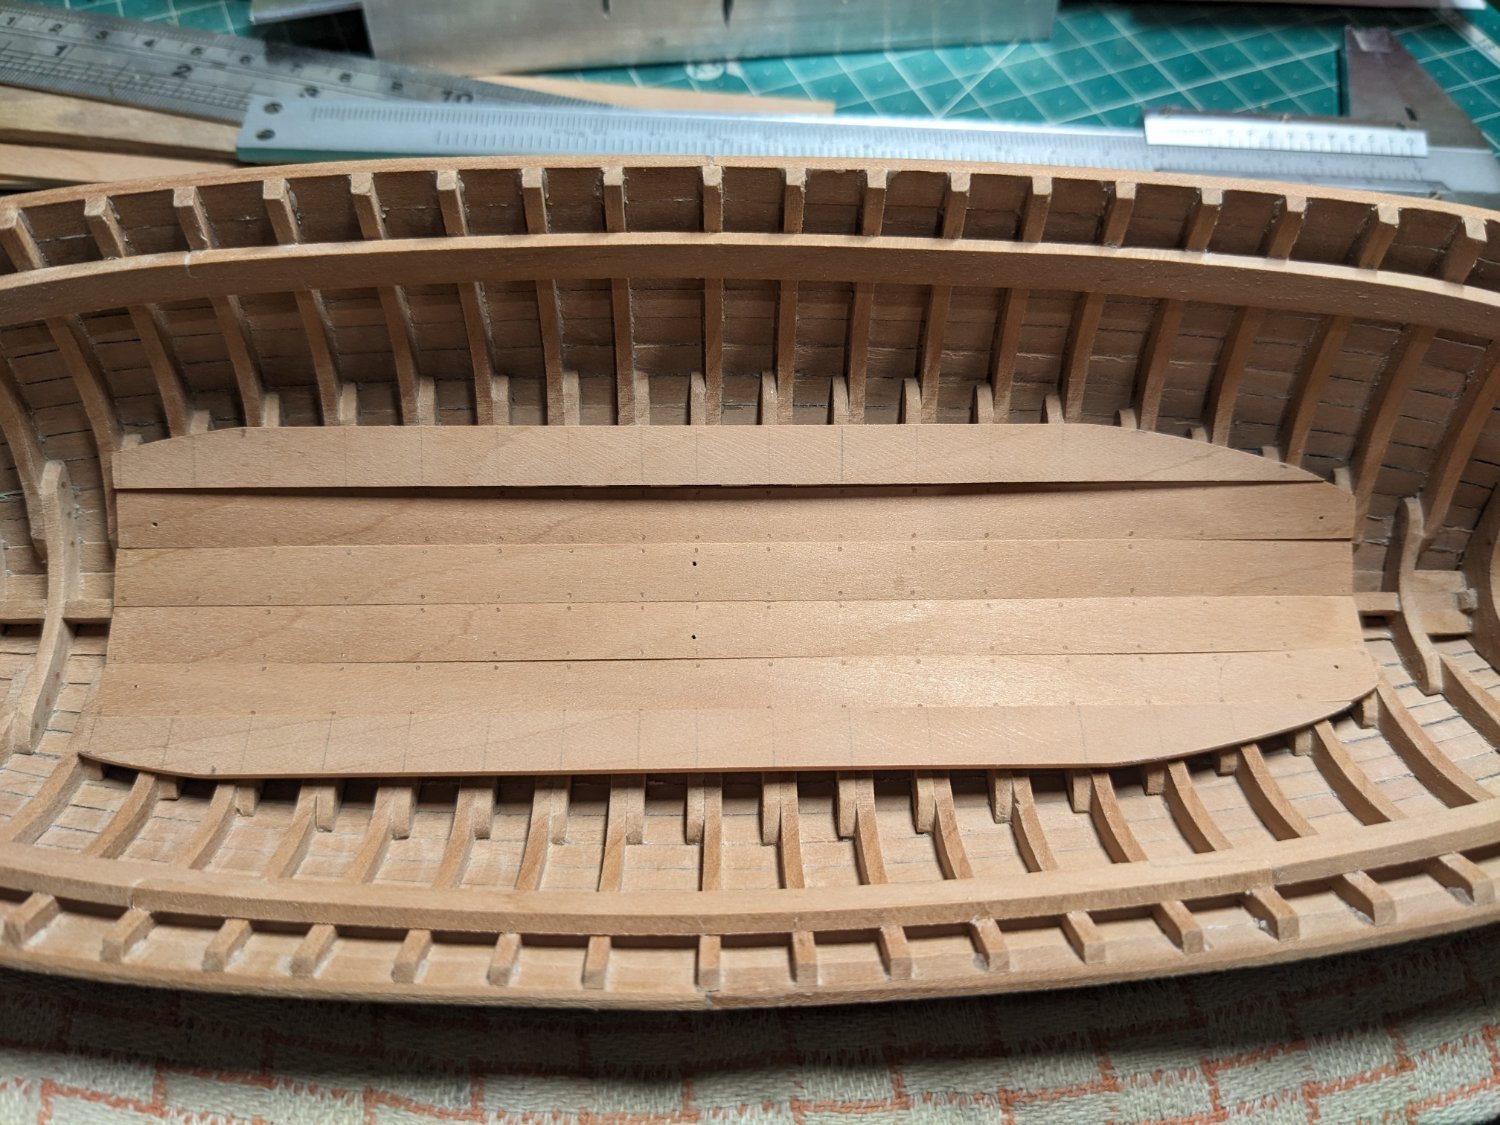
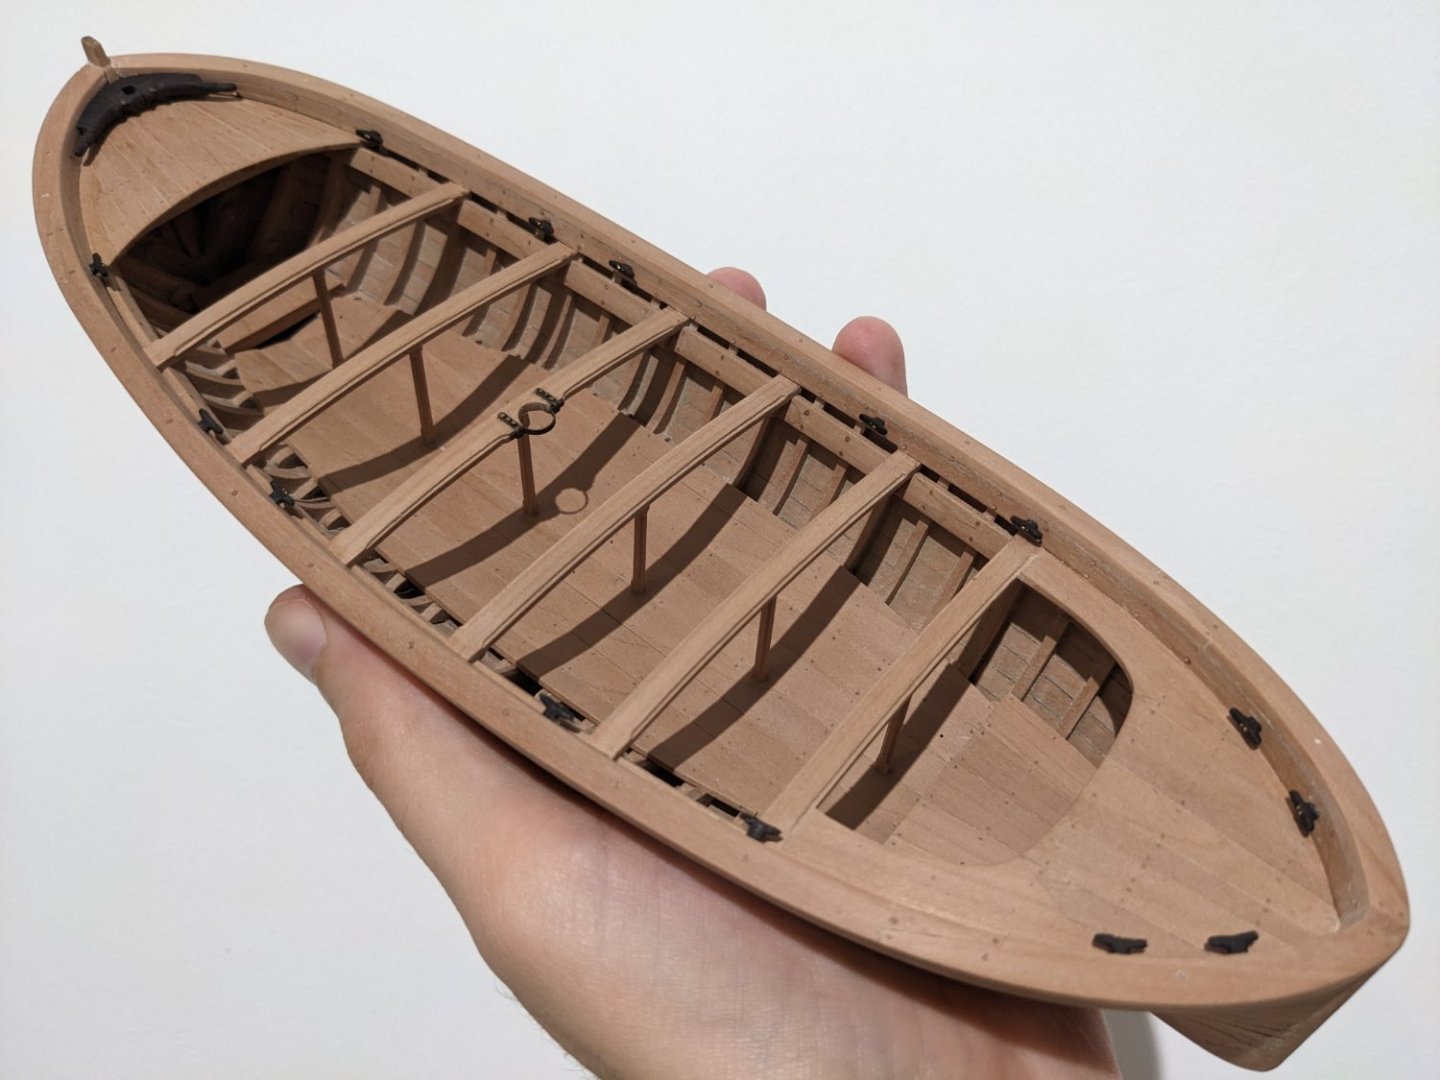
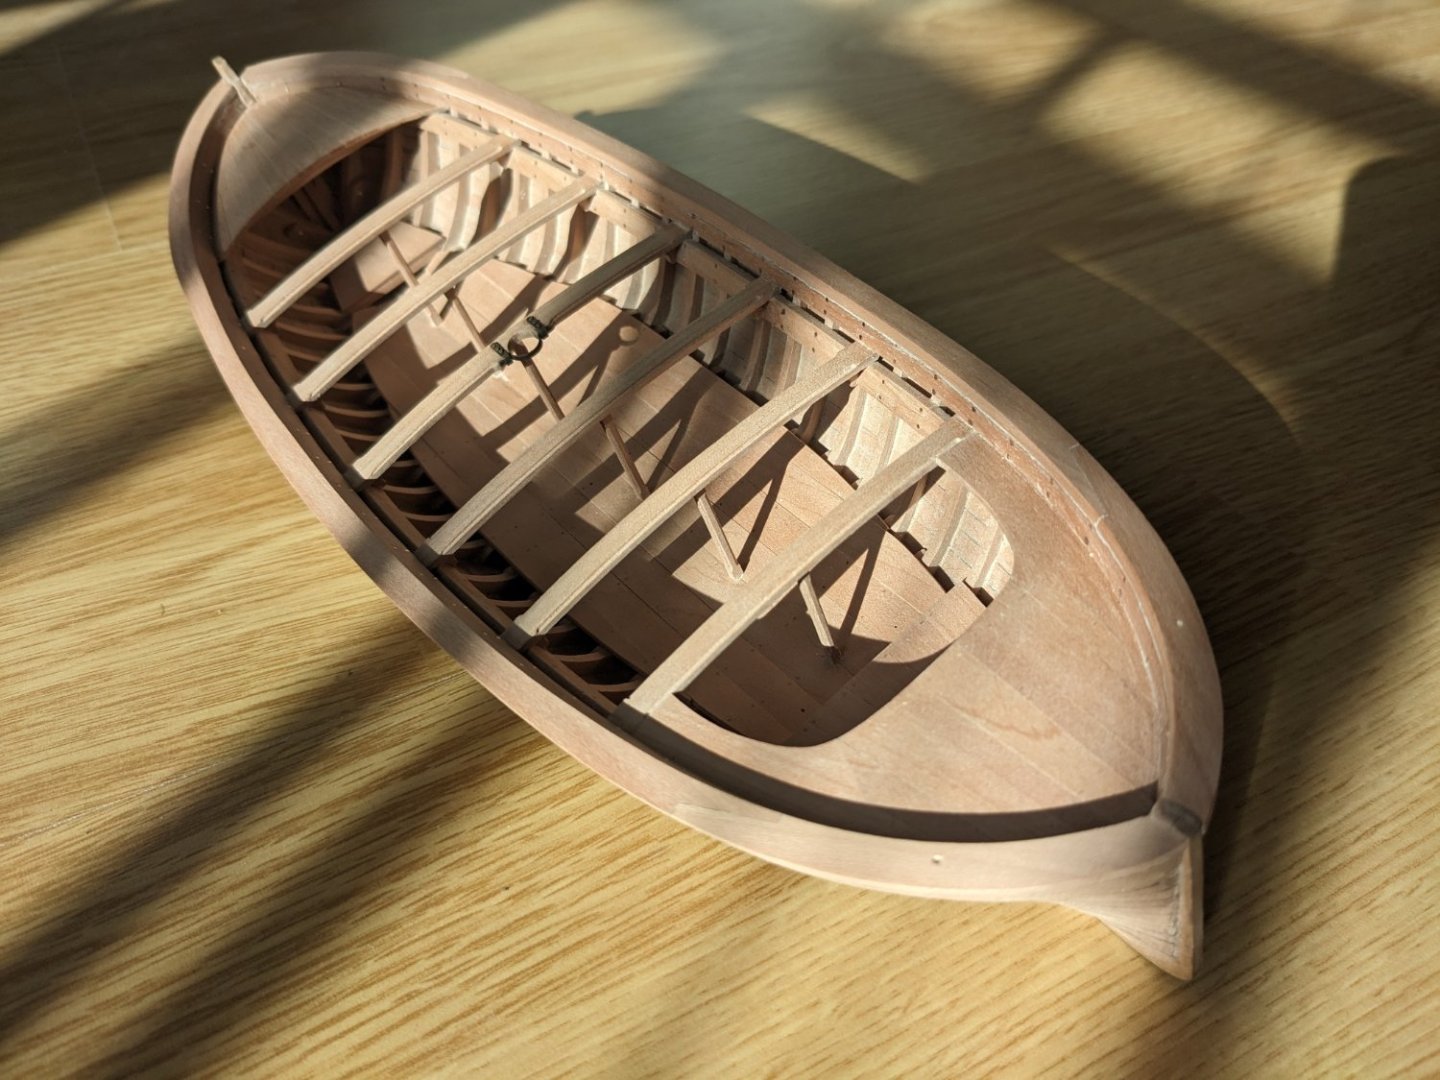
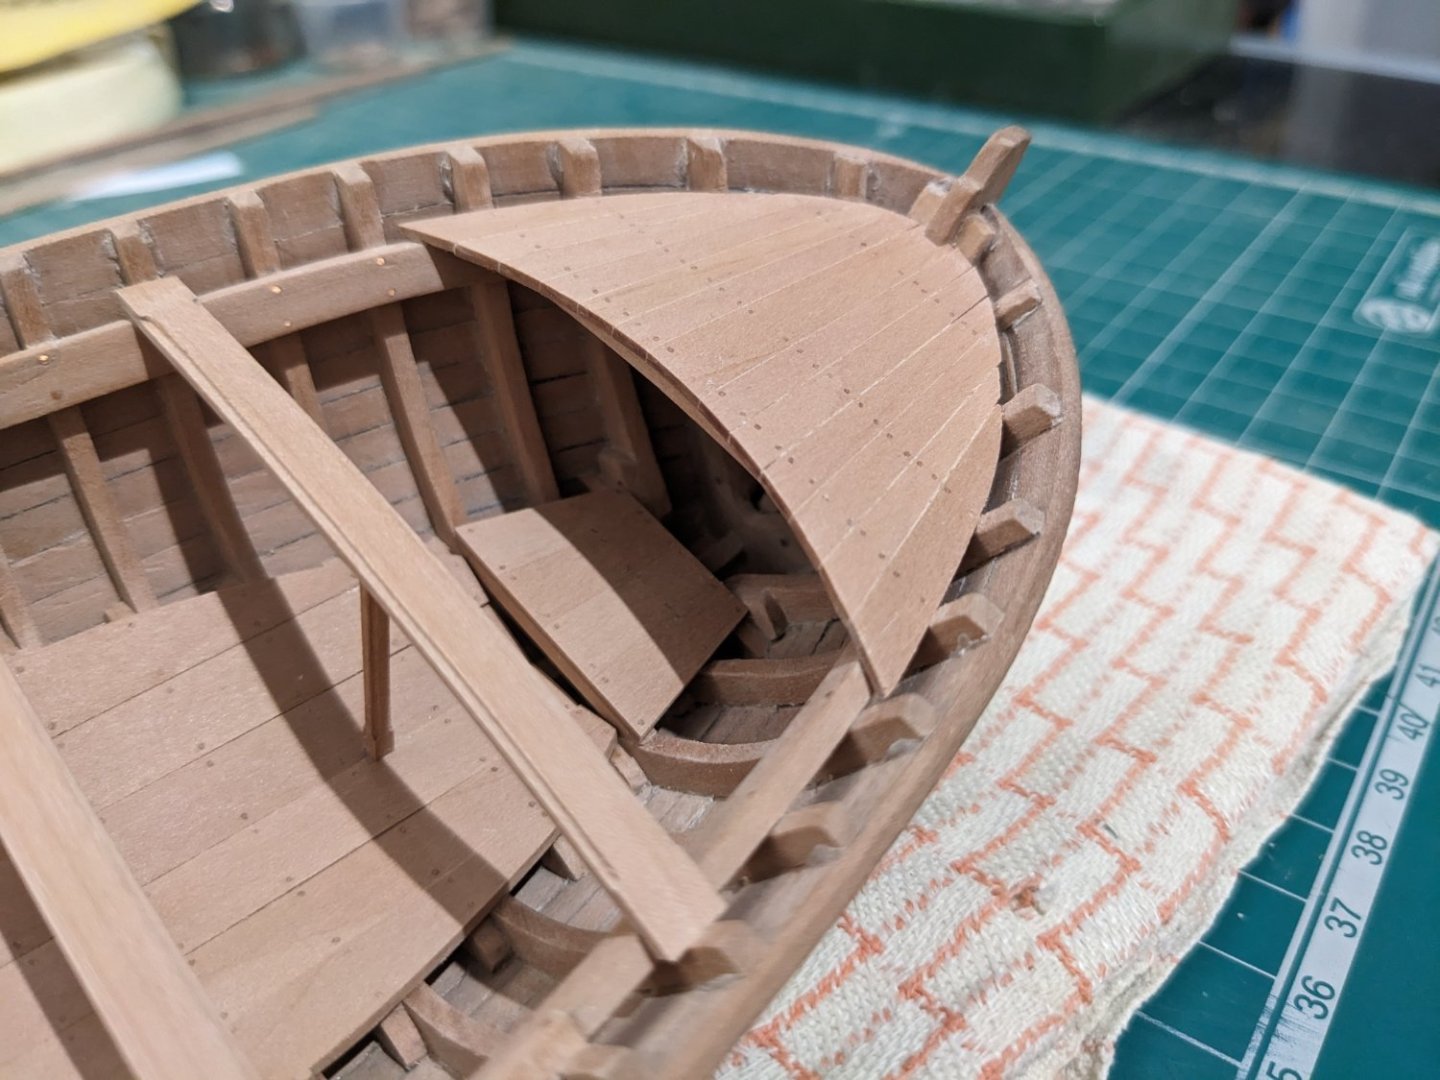
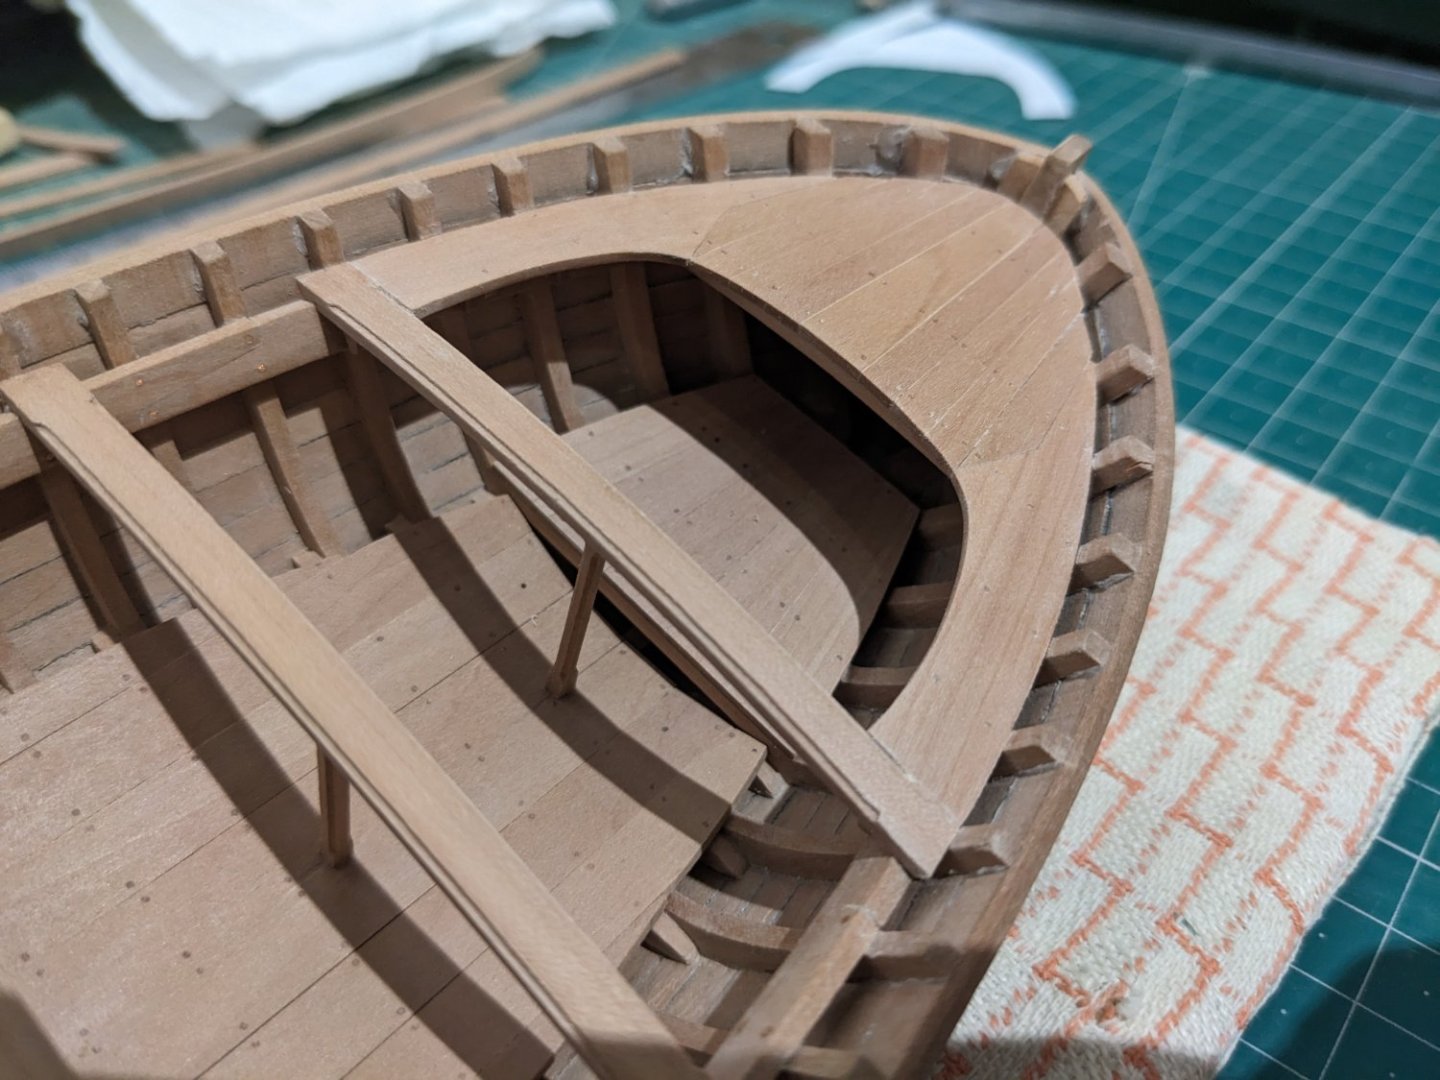
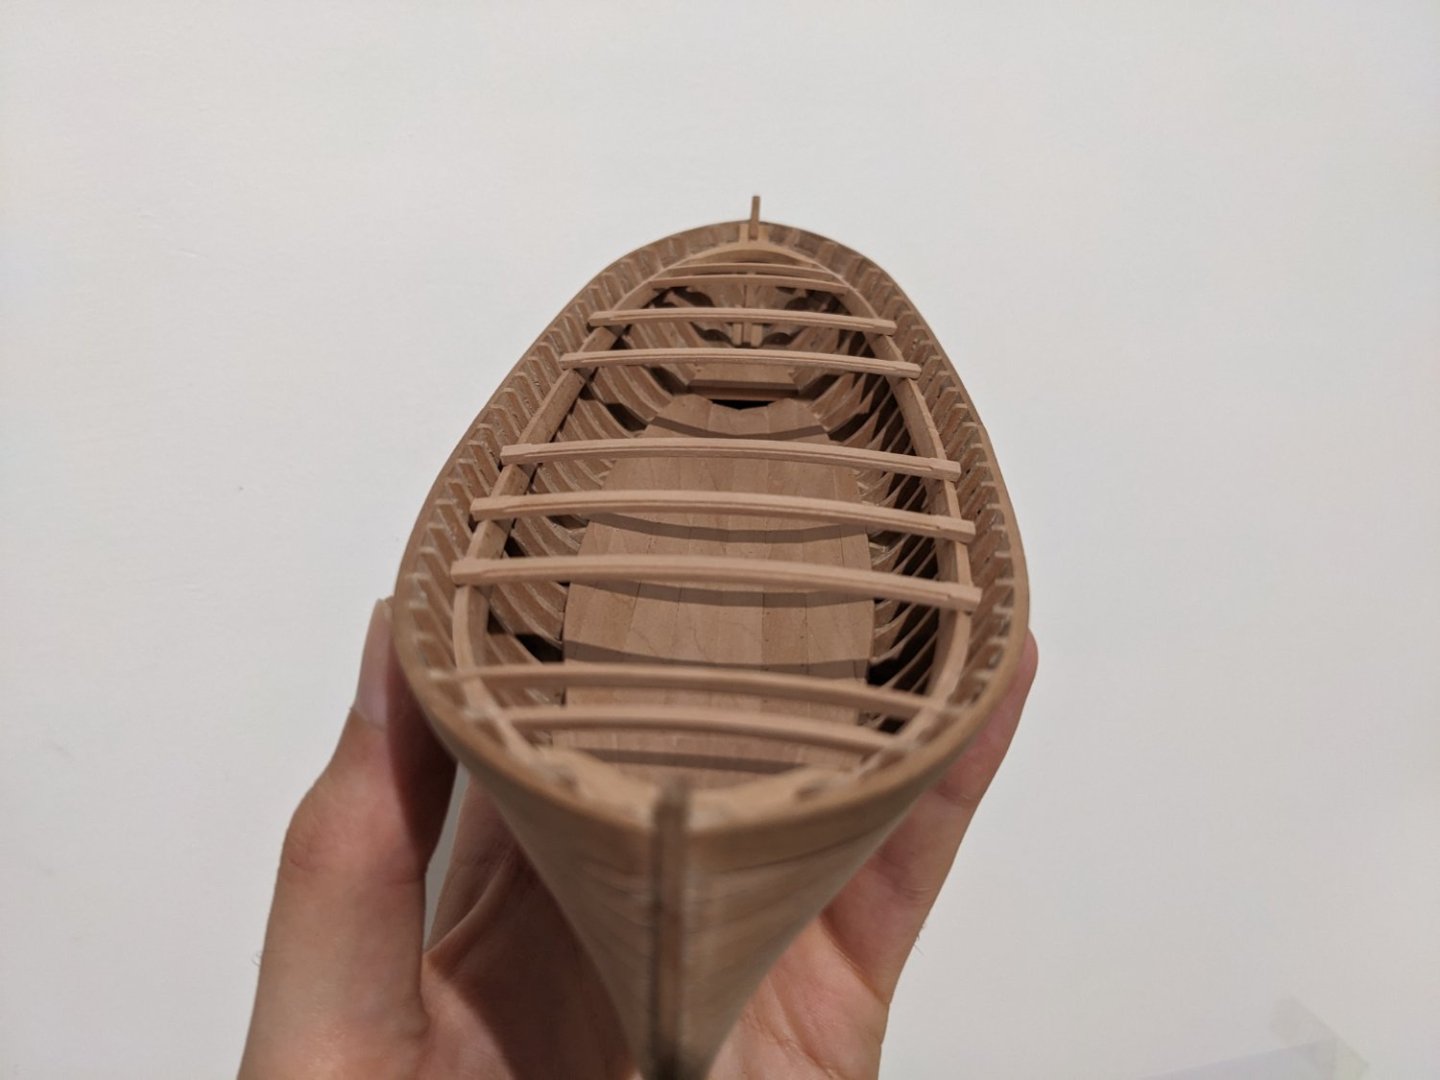
I have mostly finished the outside of the hull and can now work on the inboard details. I just installed the inboard strake (not sure what the technical name is) which is joined with a z-joint. Next will be the floor boards. I've decided not to seal the wood since I really like the look of swiss pear. I was initially considering using linseed oil but it darkens the wood considerably. What I will do instead is sand the wood with fine sandpaper and scrape it with a razor blade, which gives a very smooth finish and somehow seals the wood.


- 61 replies
-
- 14
-
-
-
- ancre
- Santa Caterina
- (and 1 more)