KLarsen
-
Posts
127 -
Joined
-
Last visited
Content Type
Profiles
Forums
Gallery
Events
Everything posted by KLarsen
-
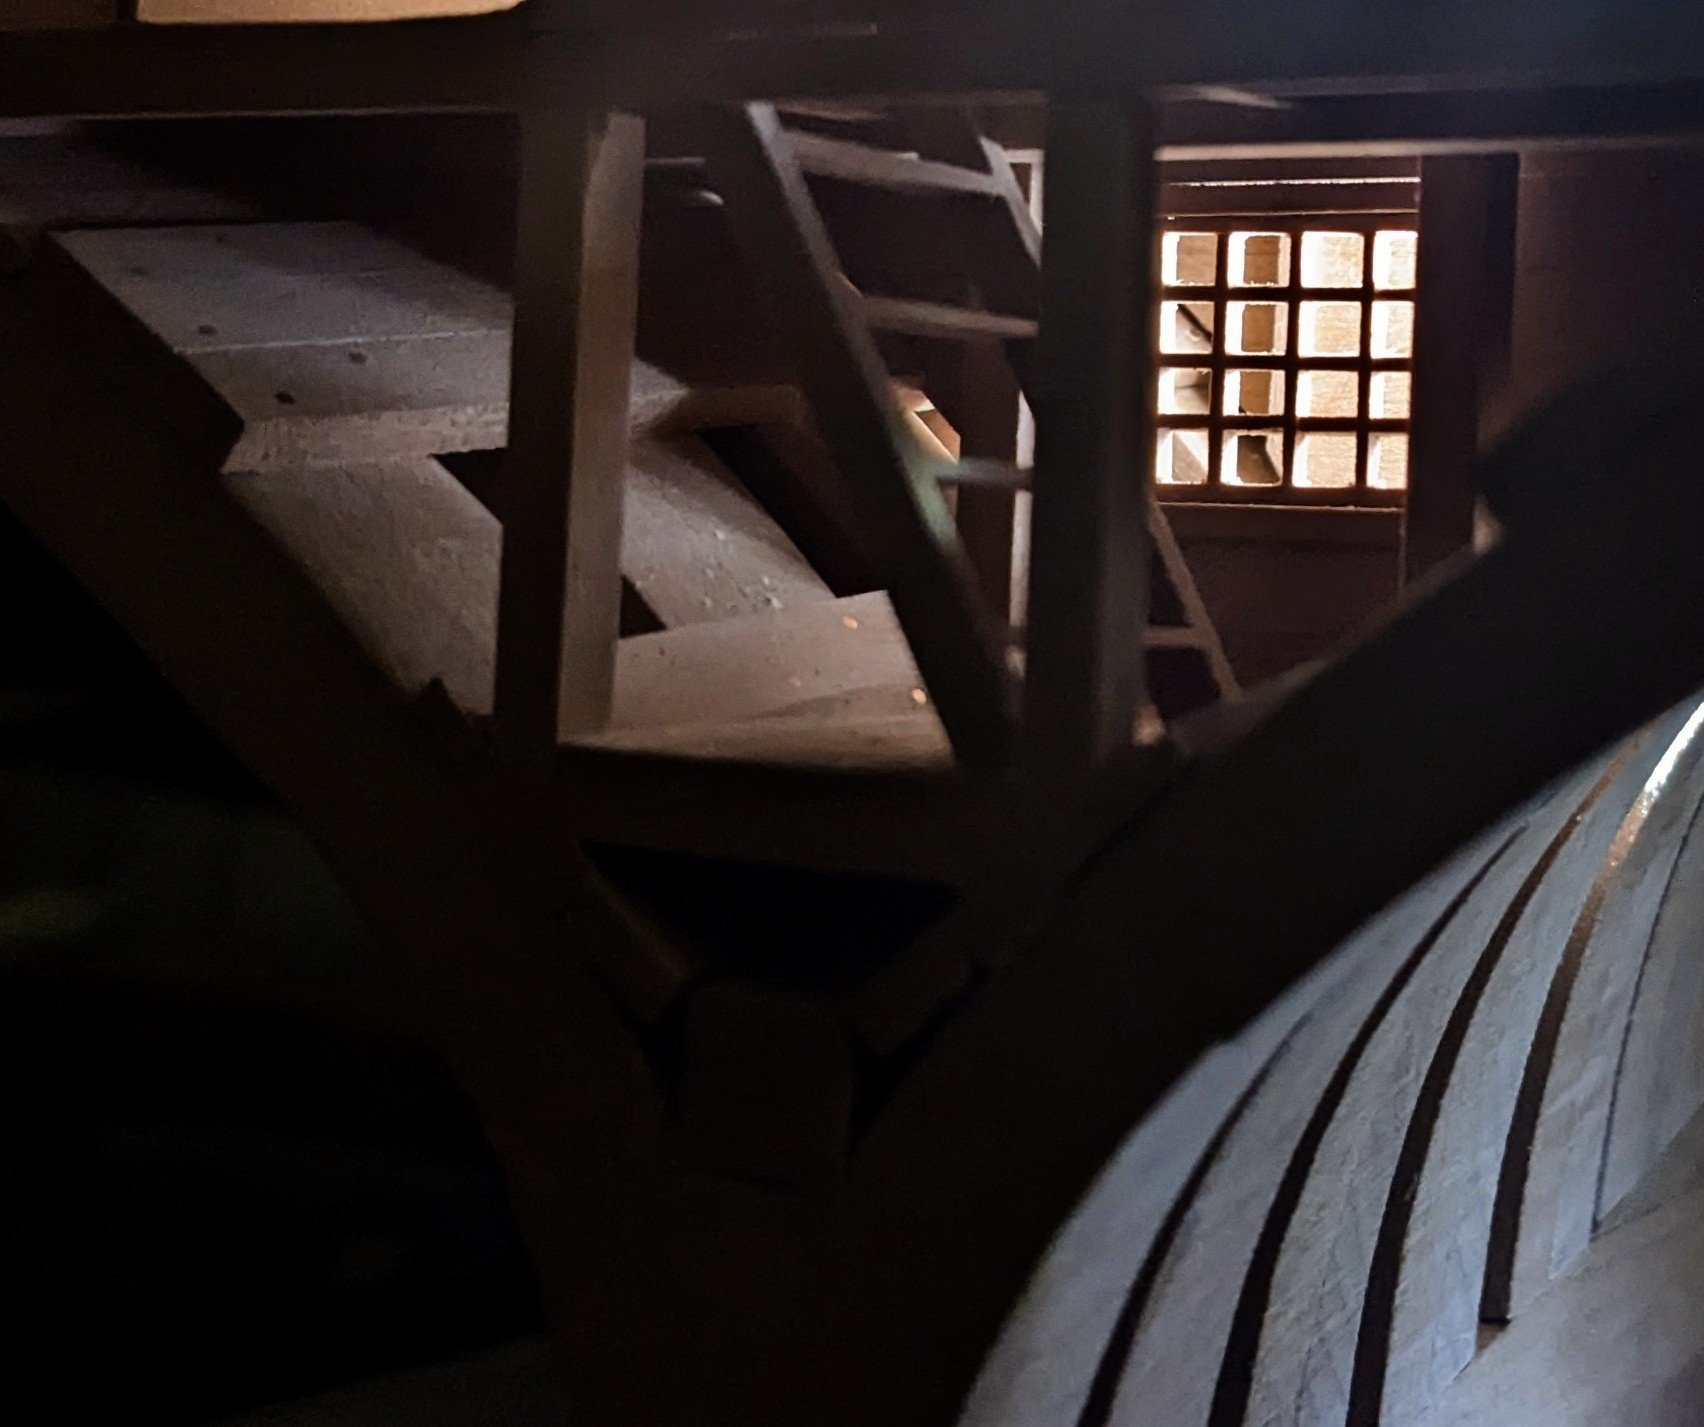
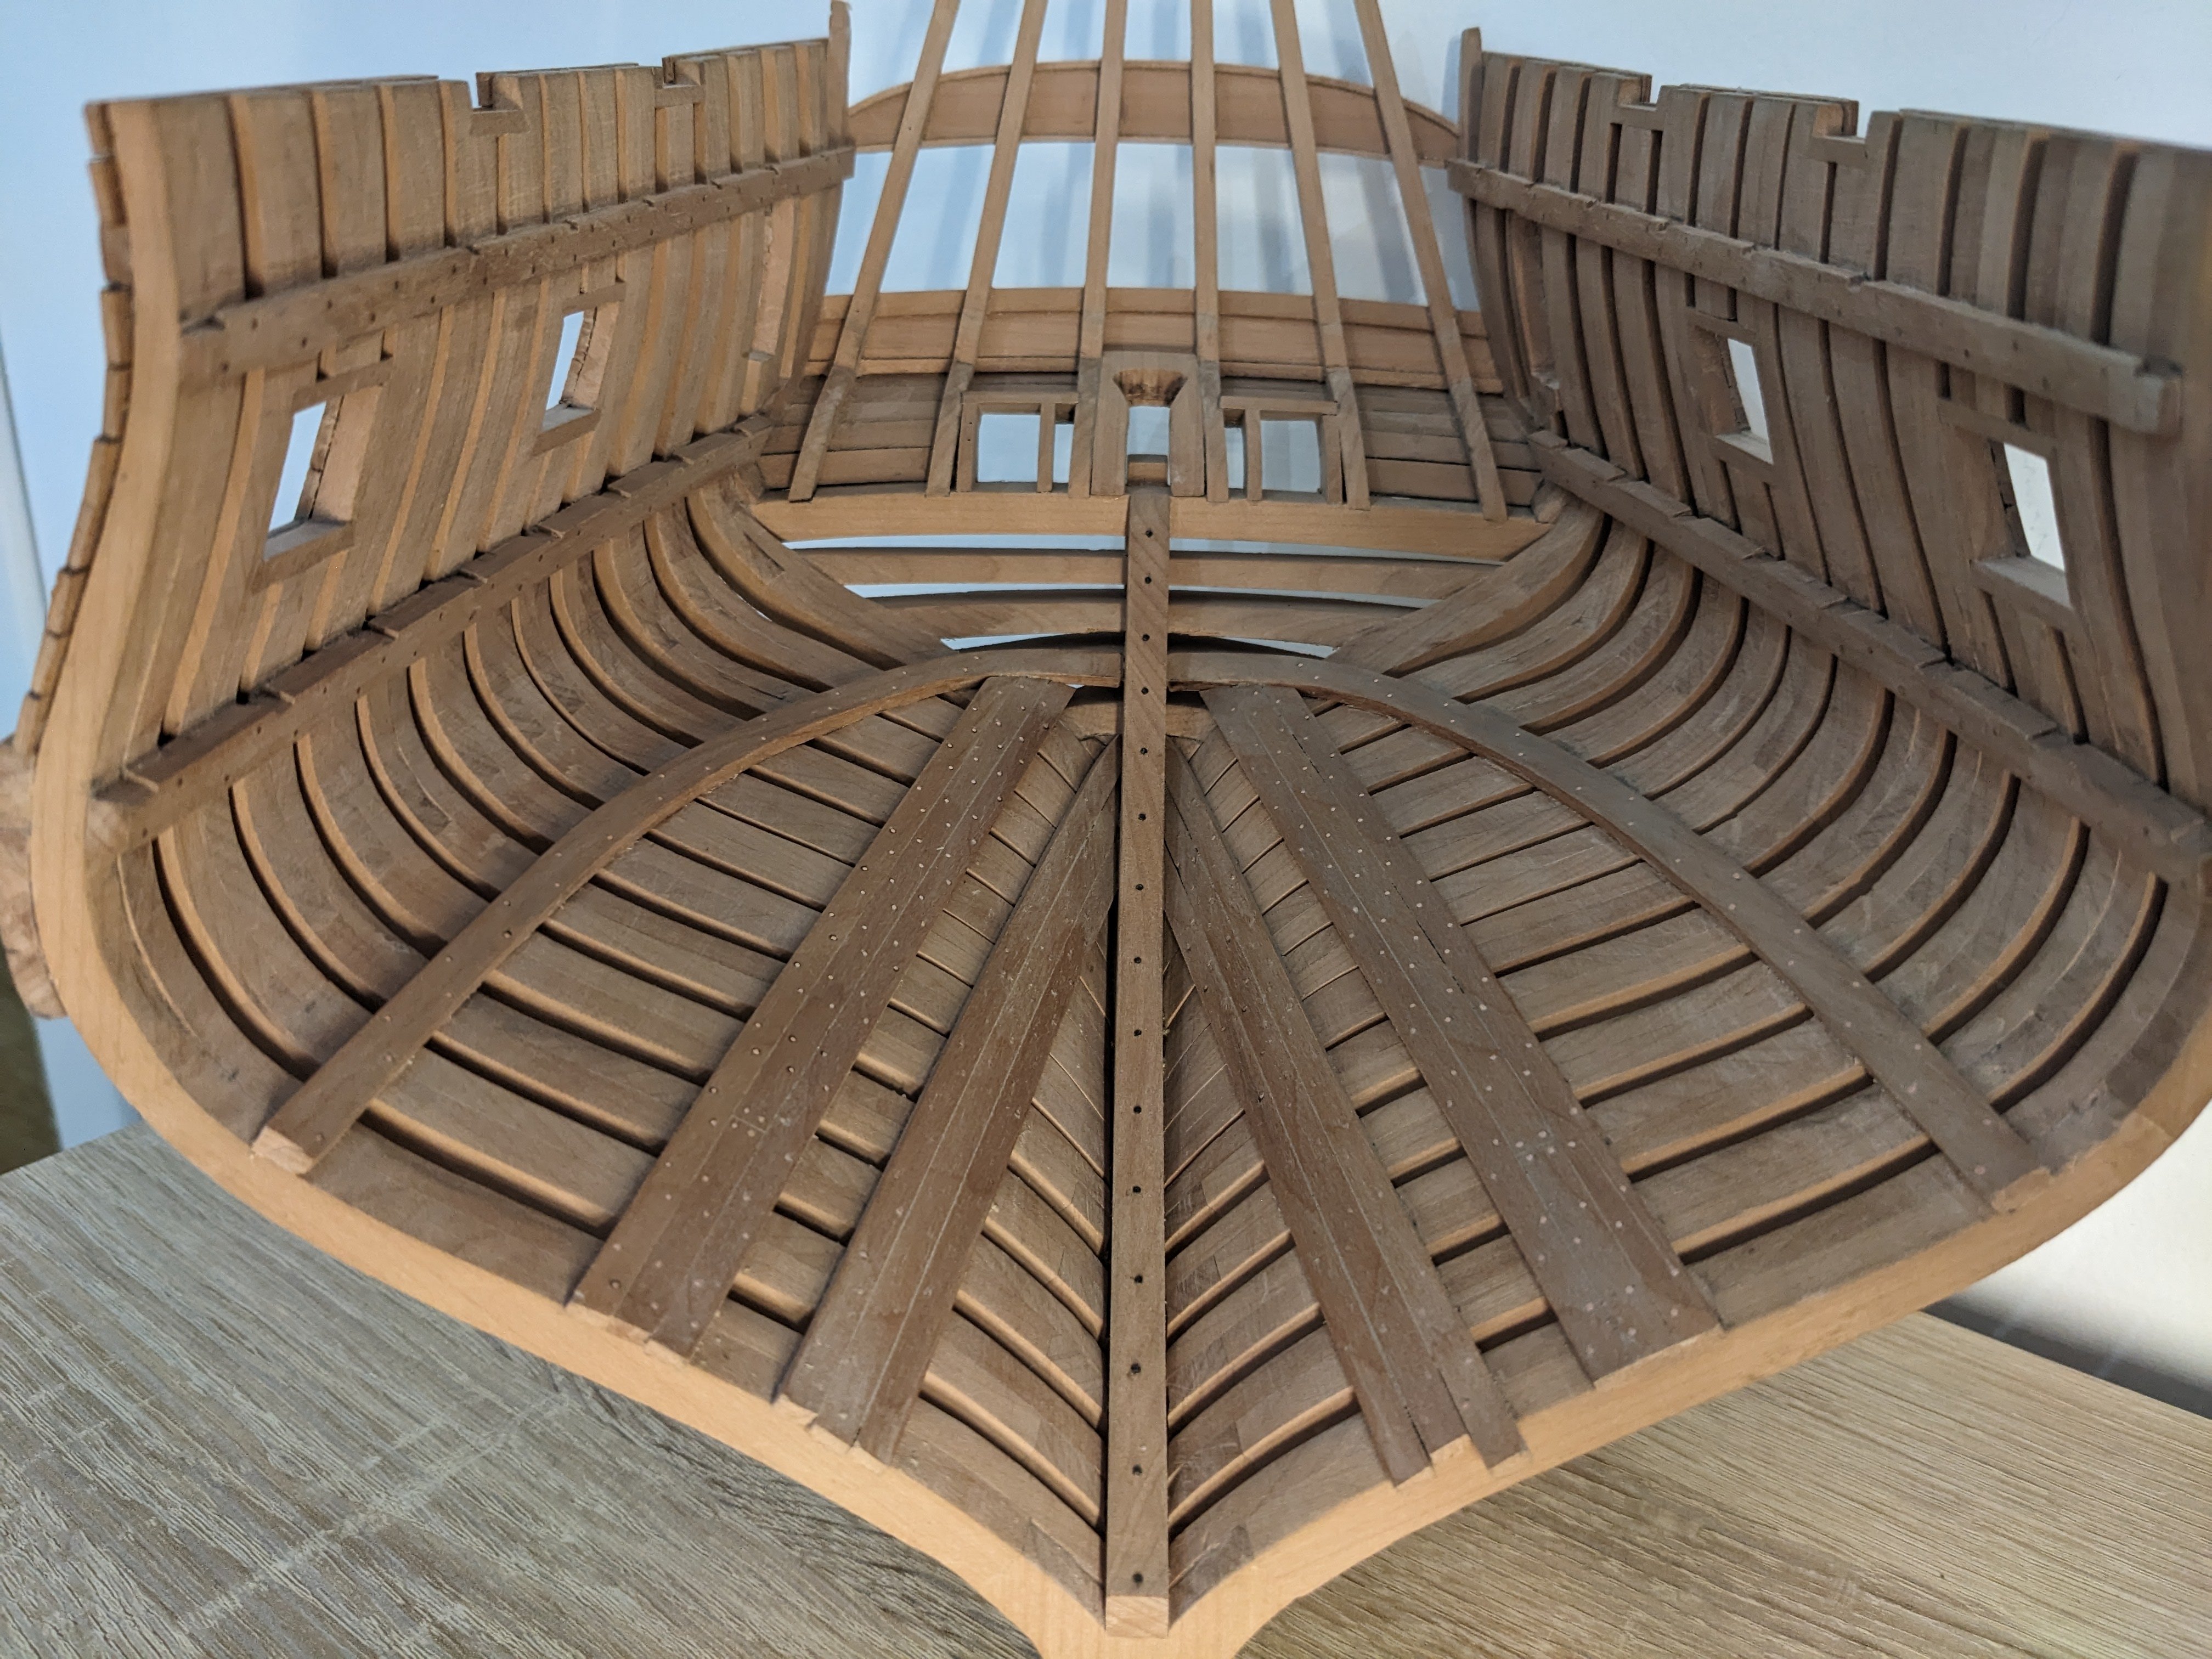
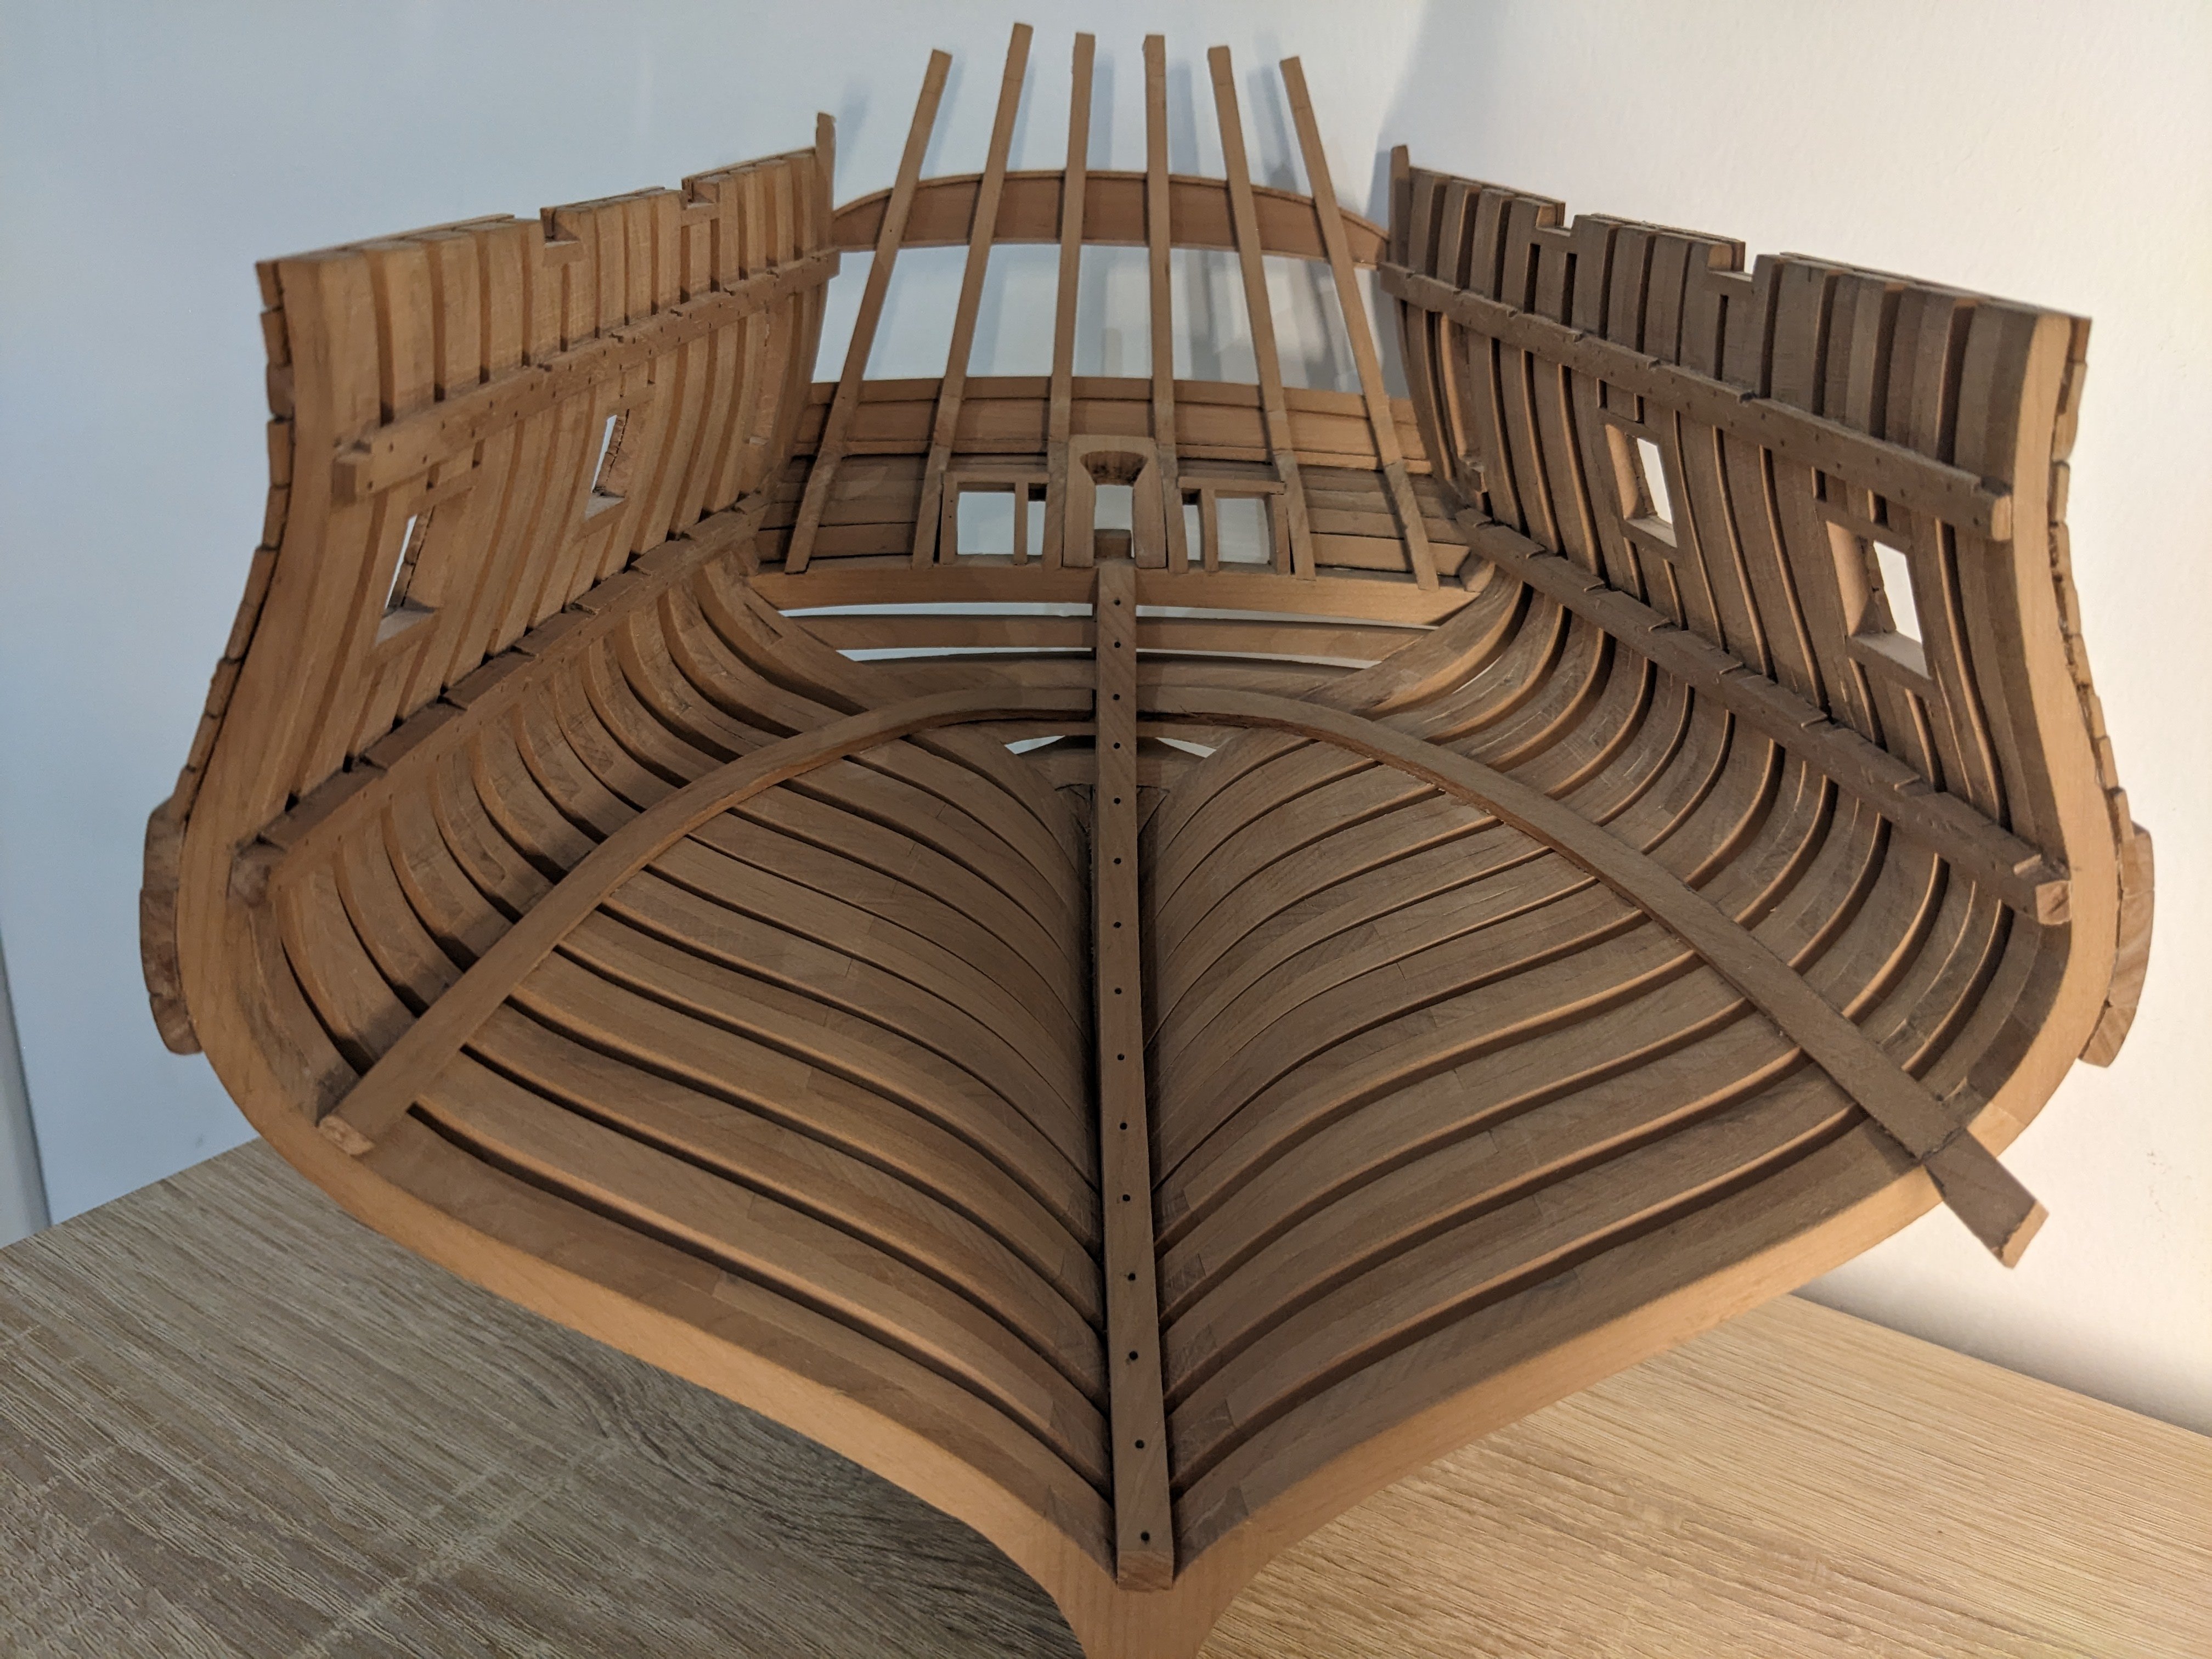
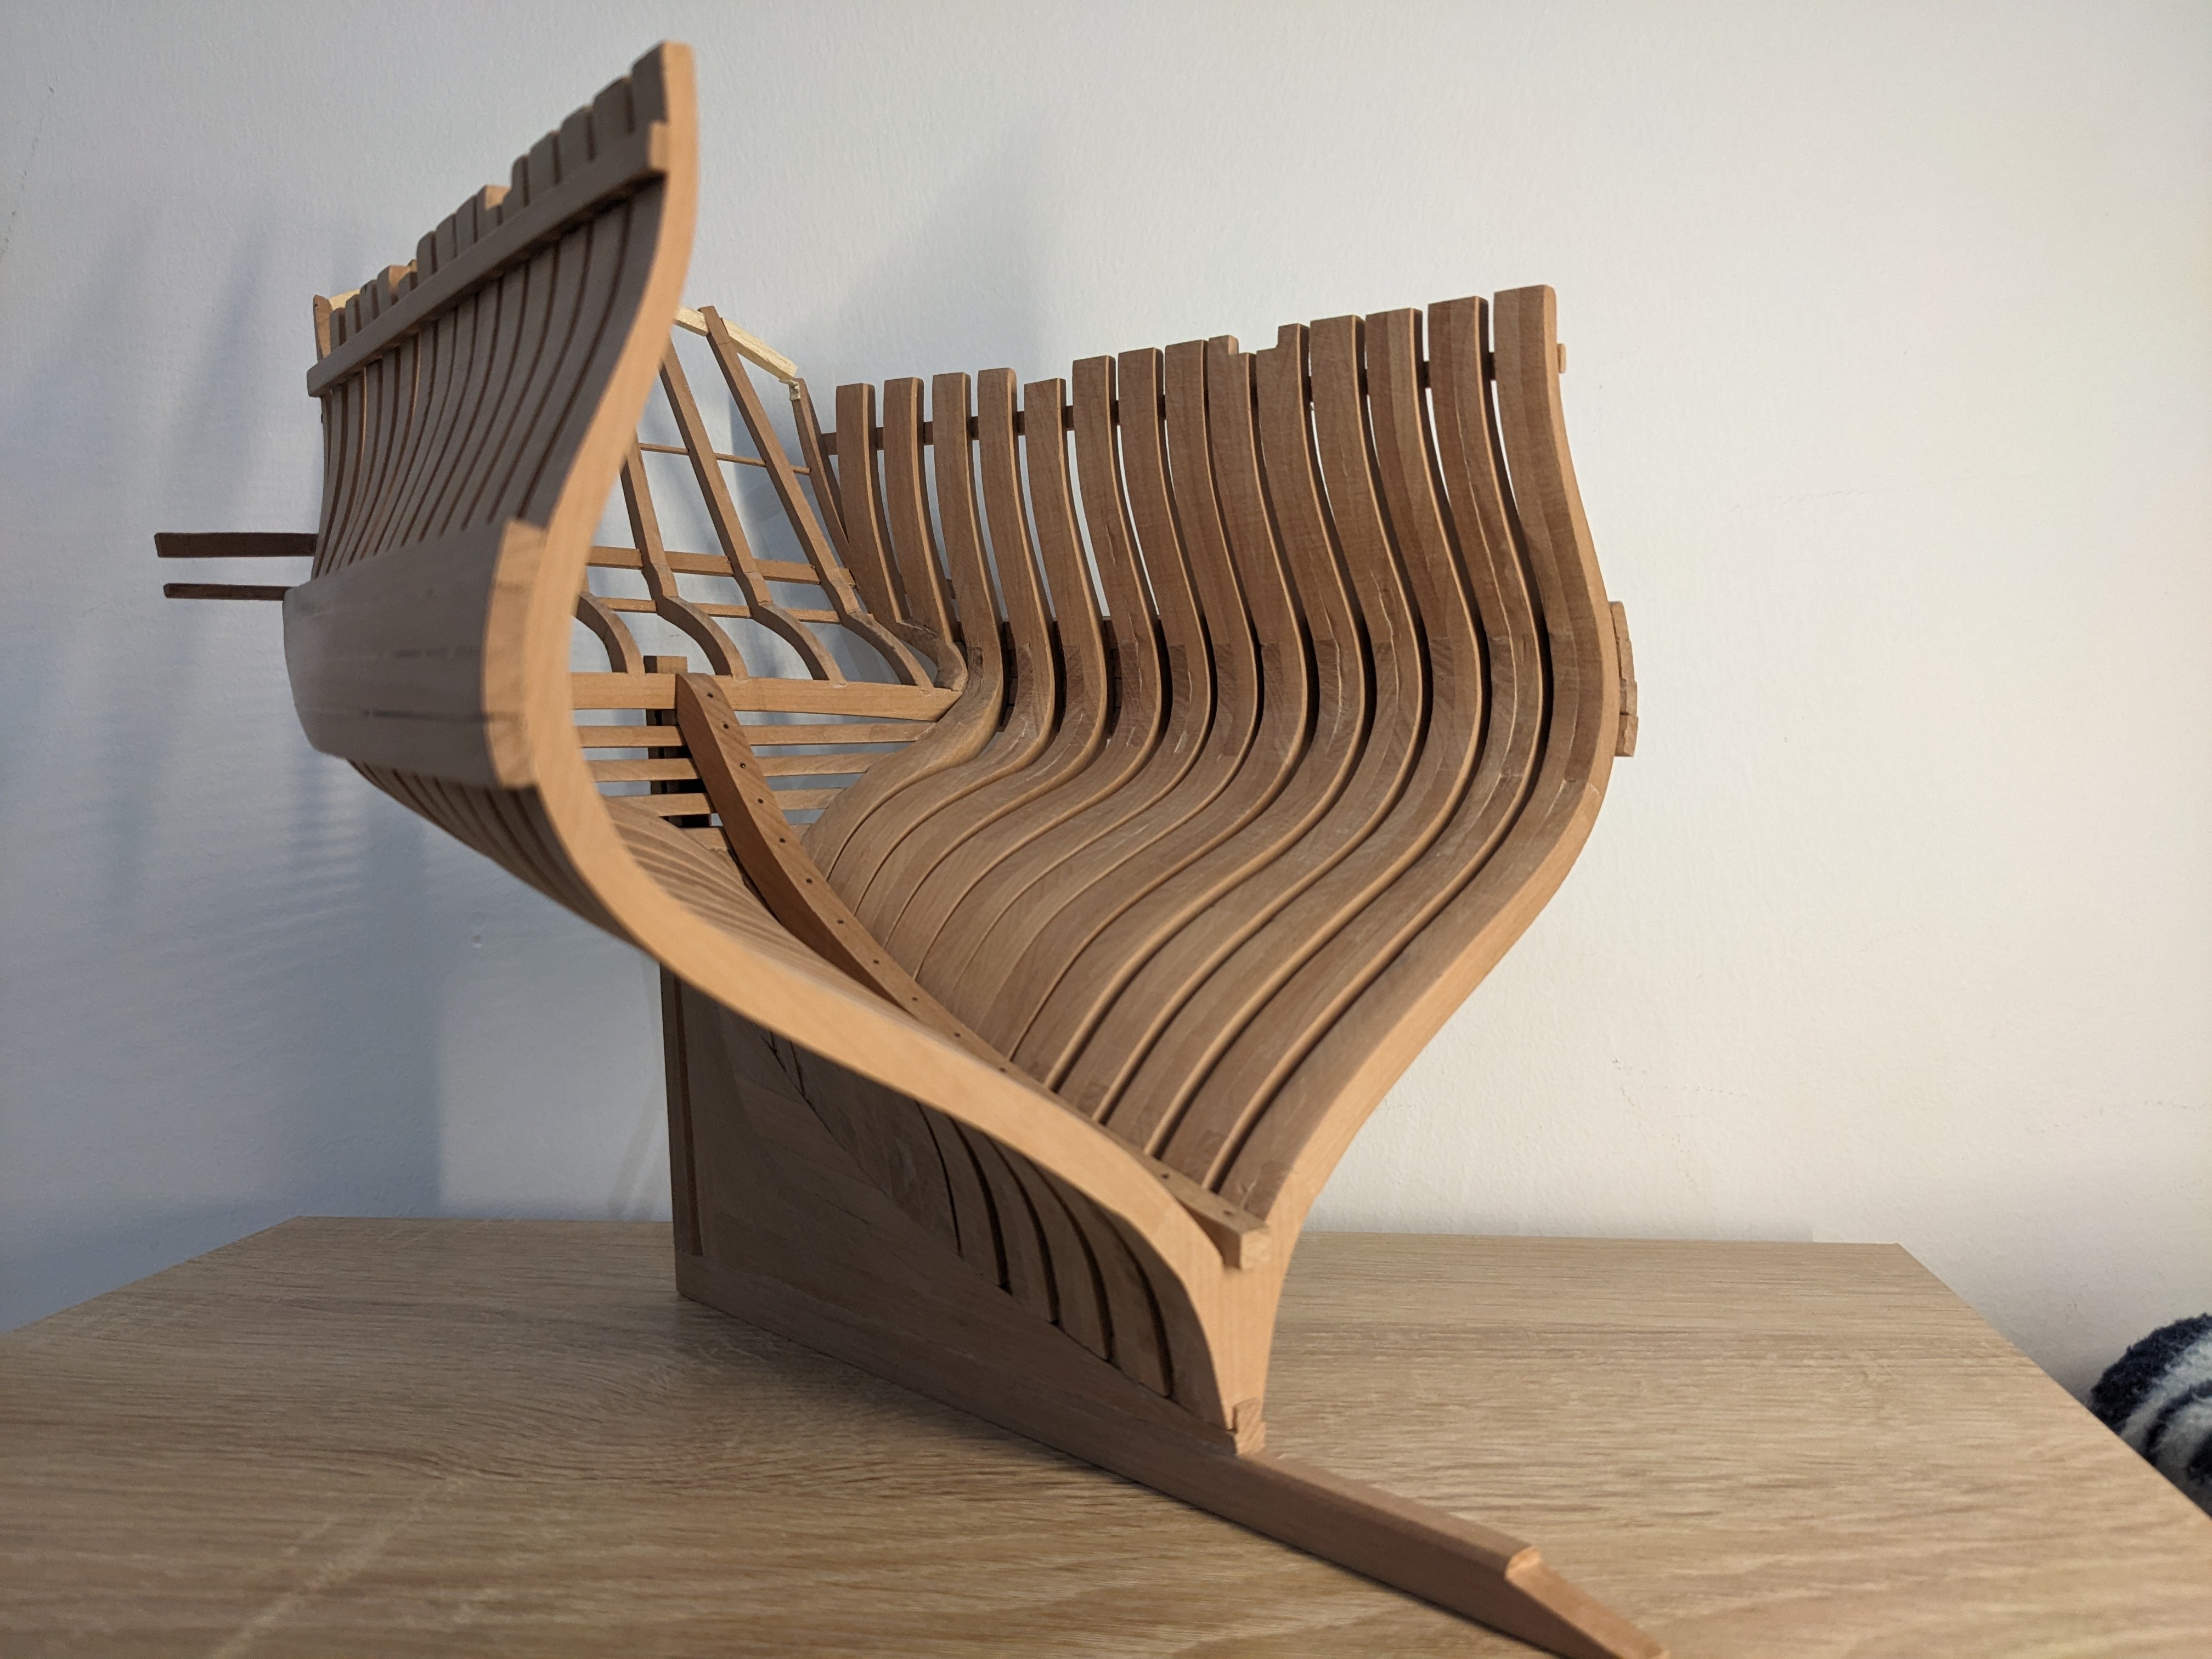
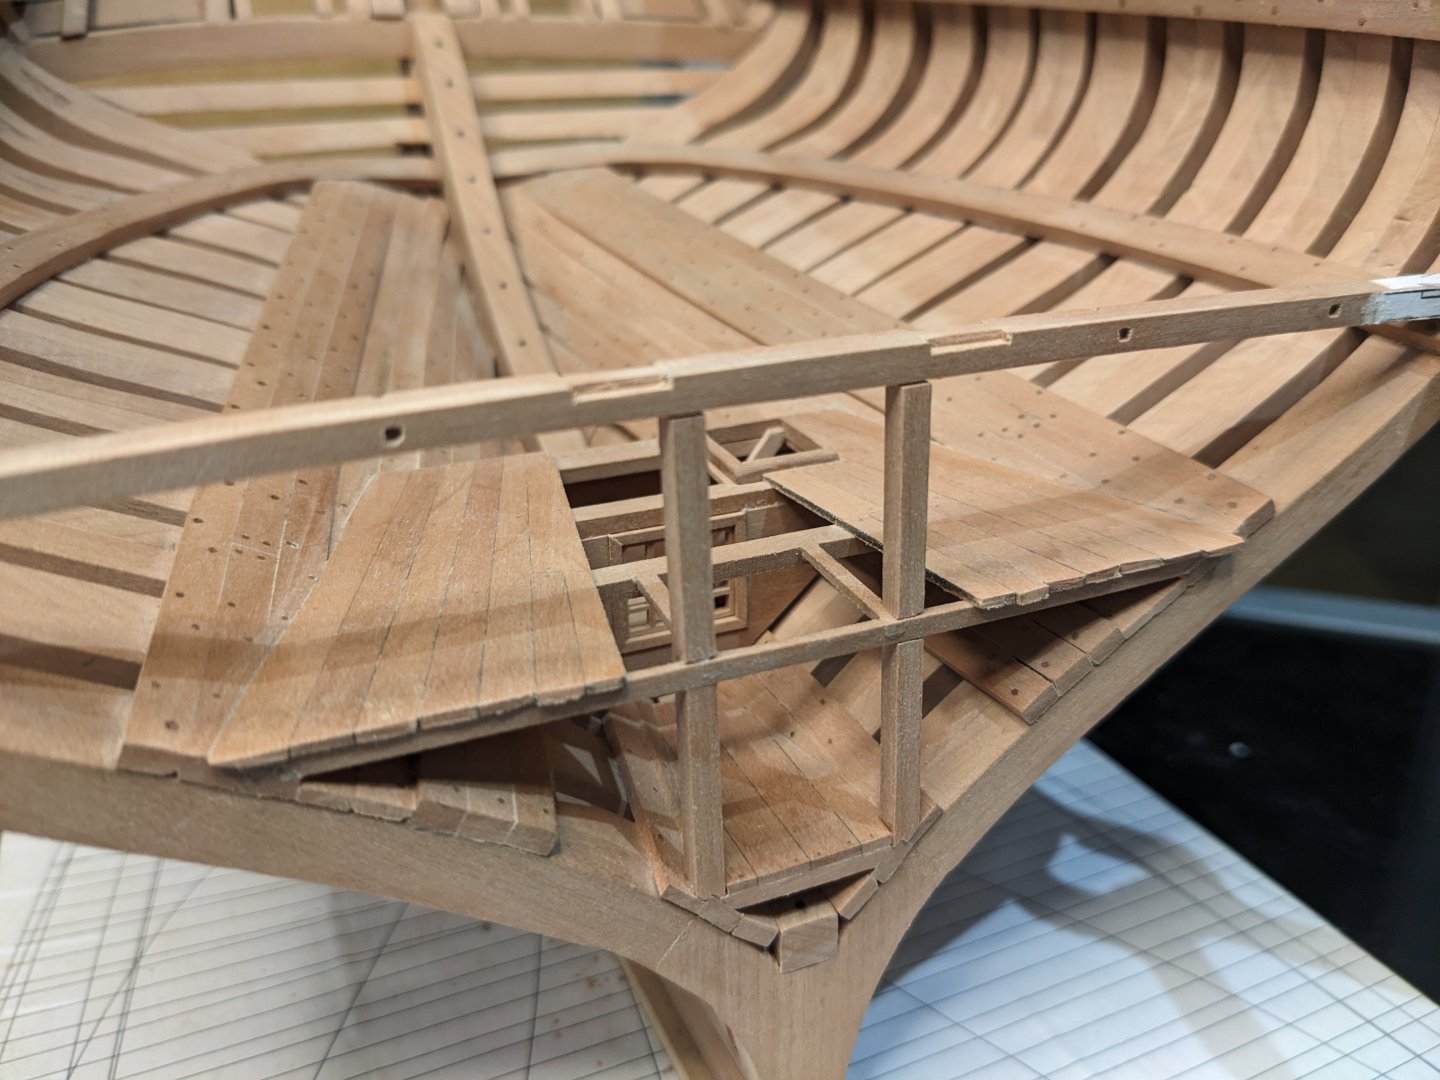
 While I won't be installing any LEDs I couldn't resist simulating the light coming from the light room. Also, I installed the last deck beams for the orlop deck. Now comes the difficult task of creating the crazily curved waterways. I'll probably have to cut it from a sheet as there's no way I'll be able to bend a strip to follow those curves at the stern.

- 99 replies
-
- 16
-

-

-

-
- ancre
- La Mahonesa
- (and 1 more)
-
My newest Challenge
KLarsen replied to James Flynn's topic in Building, Framing, Planking and plating a ships hull and deck
@James Flynn does it have to be that exact ship of would you consider building another similar one? Ancre has several top quality monographs (fully detailed plans and descriptions of construction) of similar French ships of the line. You could consider buying one of those so you don't need to do any lofting and a lot less research. -
My newest Challenge
KLarsen replied to James Flynn's topic in Building, Framing, Planking and plating a ships hull and deck
Another option would be to build a cross section of the ship to get a taste of what it involves. This way you could detail all of the interior without it being covered by the frames and decks. -
My newest Challenge
KLarsen replied to James Flynn's topic in Building, Framing, Planking and plating a ships hull and deck
I would strongly encourage you not to make a POF build, it's a HUGE undertaking (I'm not exaggerating). It requires you to have a good understanding of how the real ship was built. Take a look at the many build logs here to get an idea of what's involved. -
My newest Challenge
KLarsen replied to James Flynn's topic in Building, Framing, Planking and plating a ships hull and deck
It says: "Horizontal and vertical sections equidistant from the hull, outside [including] the planking". By "hull", I suppose it means the centerline. -
My newest Challenge
KLarsen replied to James Flynn's topic in Building, Framing, Planking and plating a ships hull and deck
The profile views on the left part of the plans only show one side because both sides have the same curve. The left part of the drawing is from midships aft, the right side from midships forward. The curved lines correspond to the vertical lines on the side view of the ship. You'll have to identify them one by one to see which corresponds to which if they are not identified. Regarding the "D" shape I suppose you're referring to the bow? By taking the lines as I explained above you should automatically get the bow shape, though you might have to extrapolate to get the intermediate frames not shown. Are you building the ships as plank-on-frame (POF) or plank-on-bulkhead (POB)? POF is quite difficult and requires you to do "lofting", getting the curve of all the frames using all the lines on the plans. -
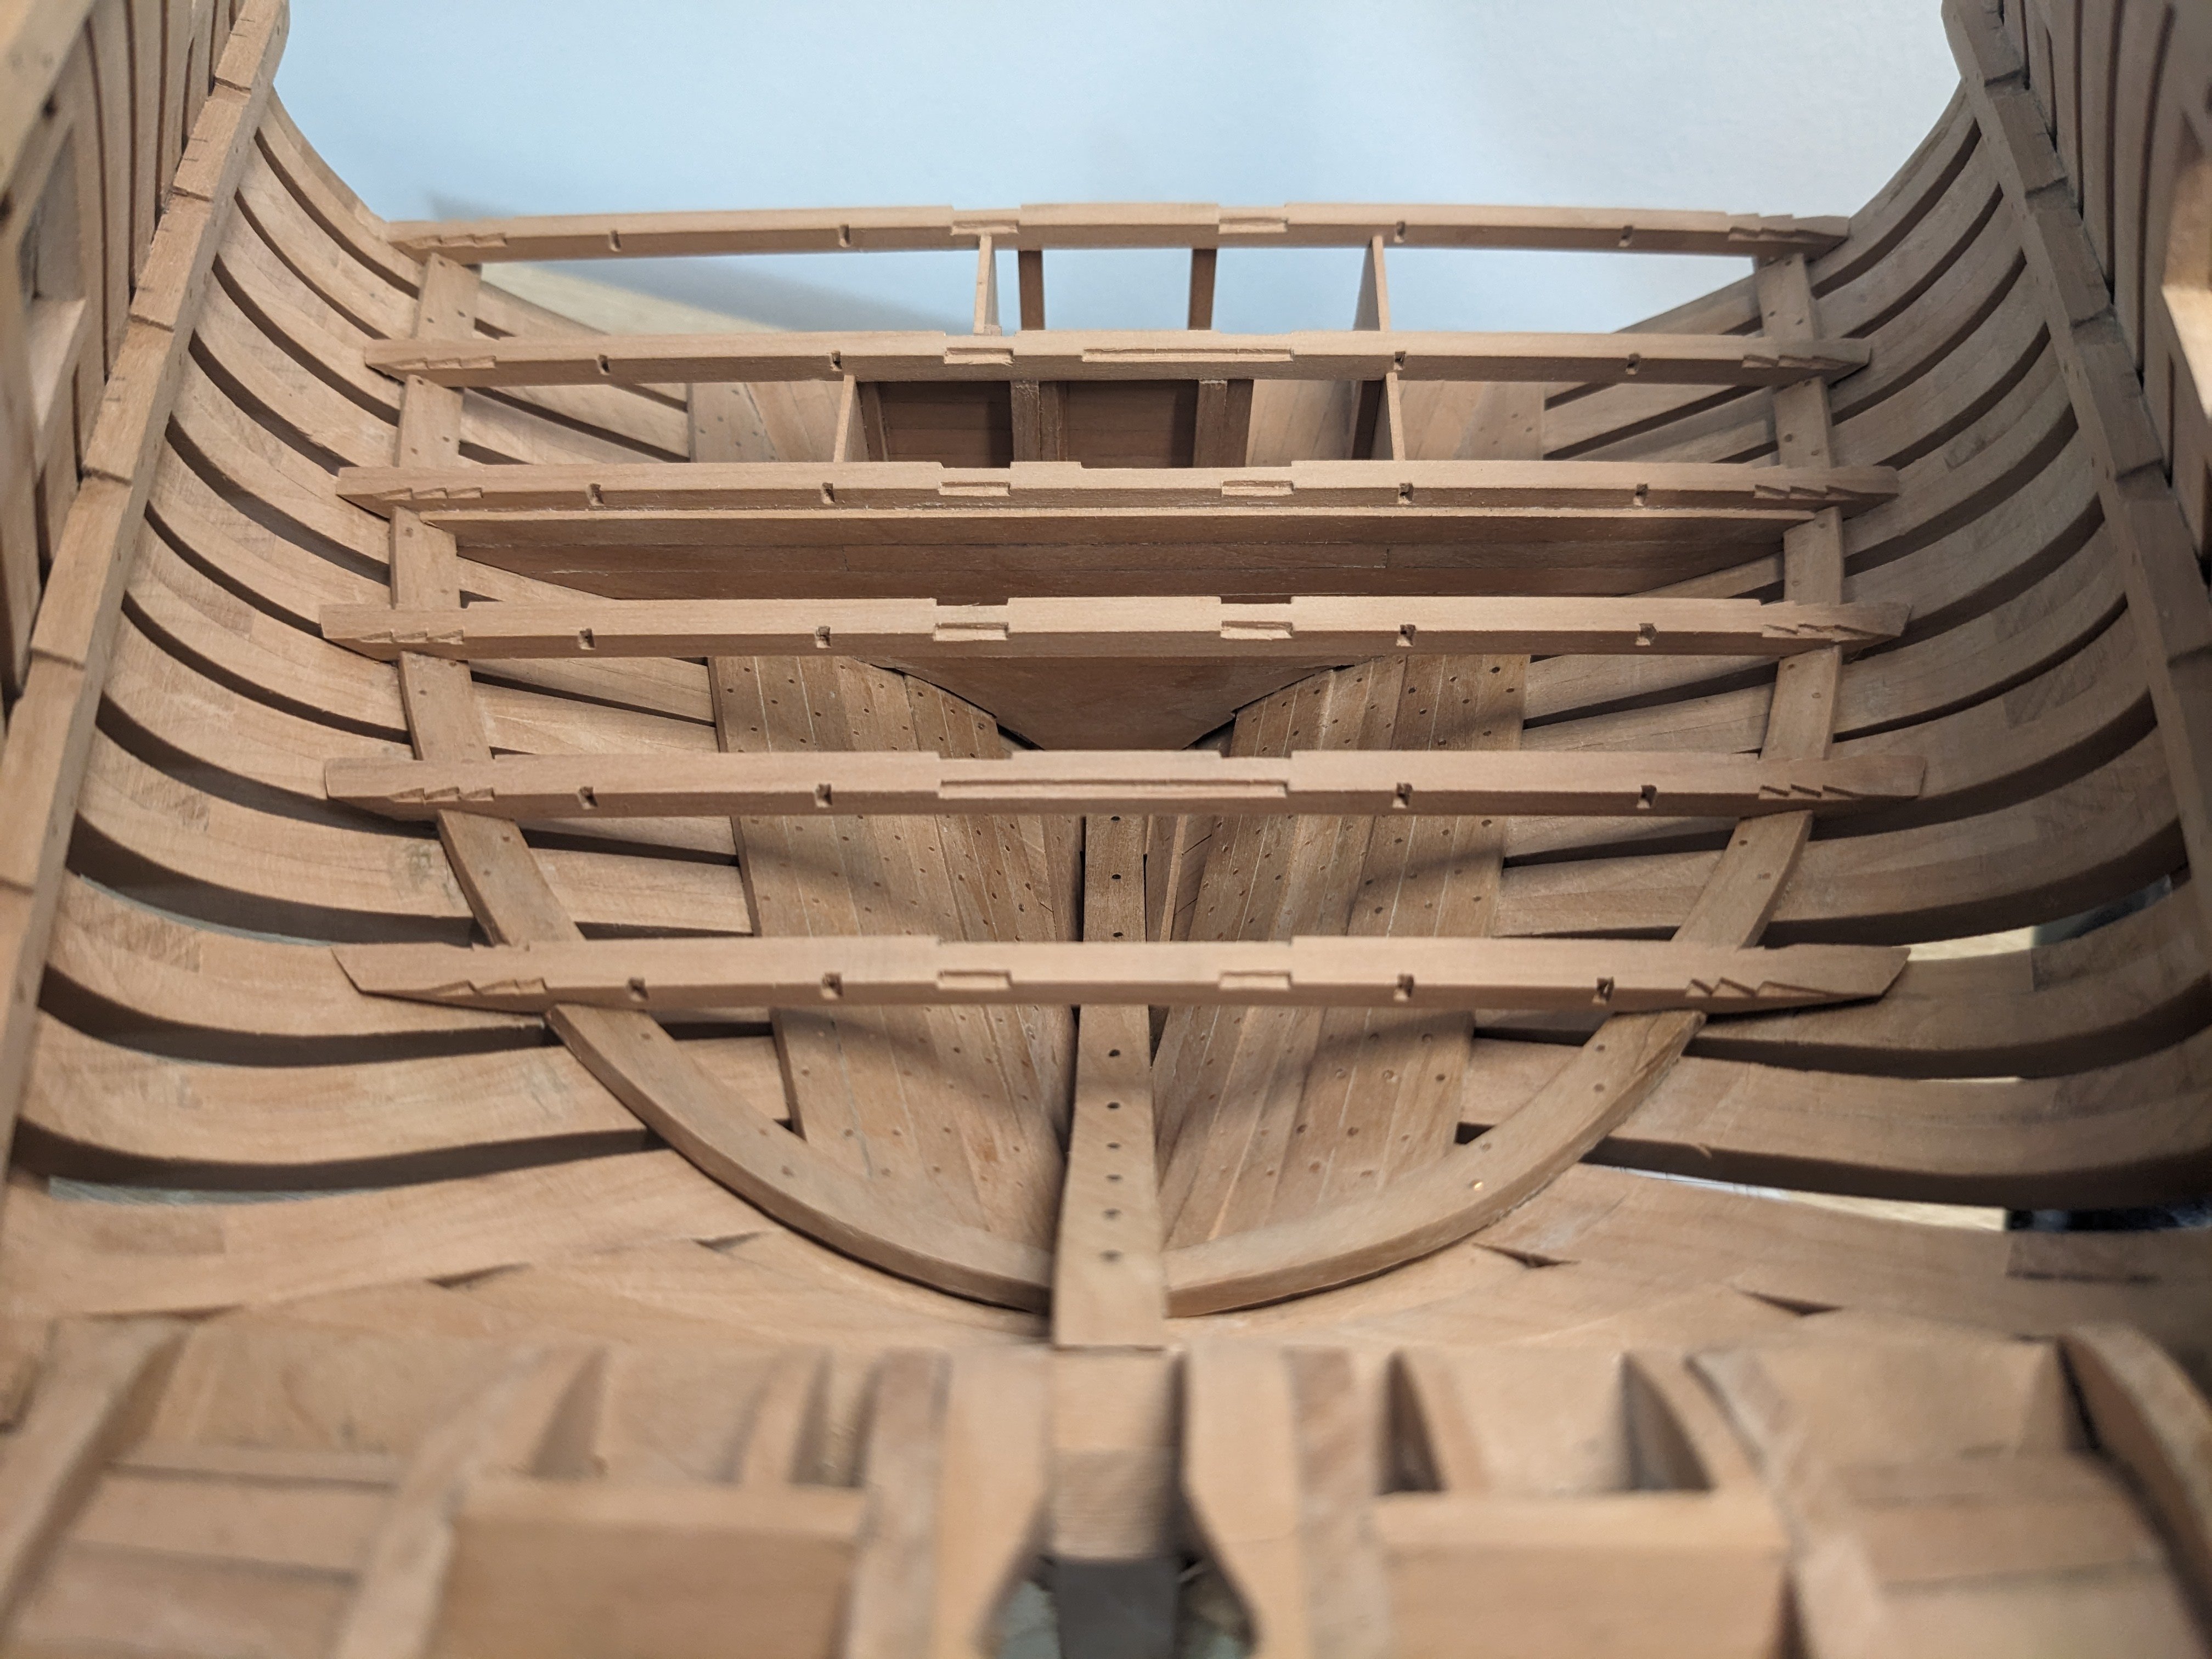
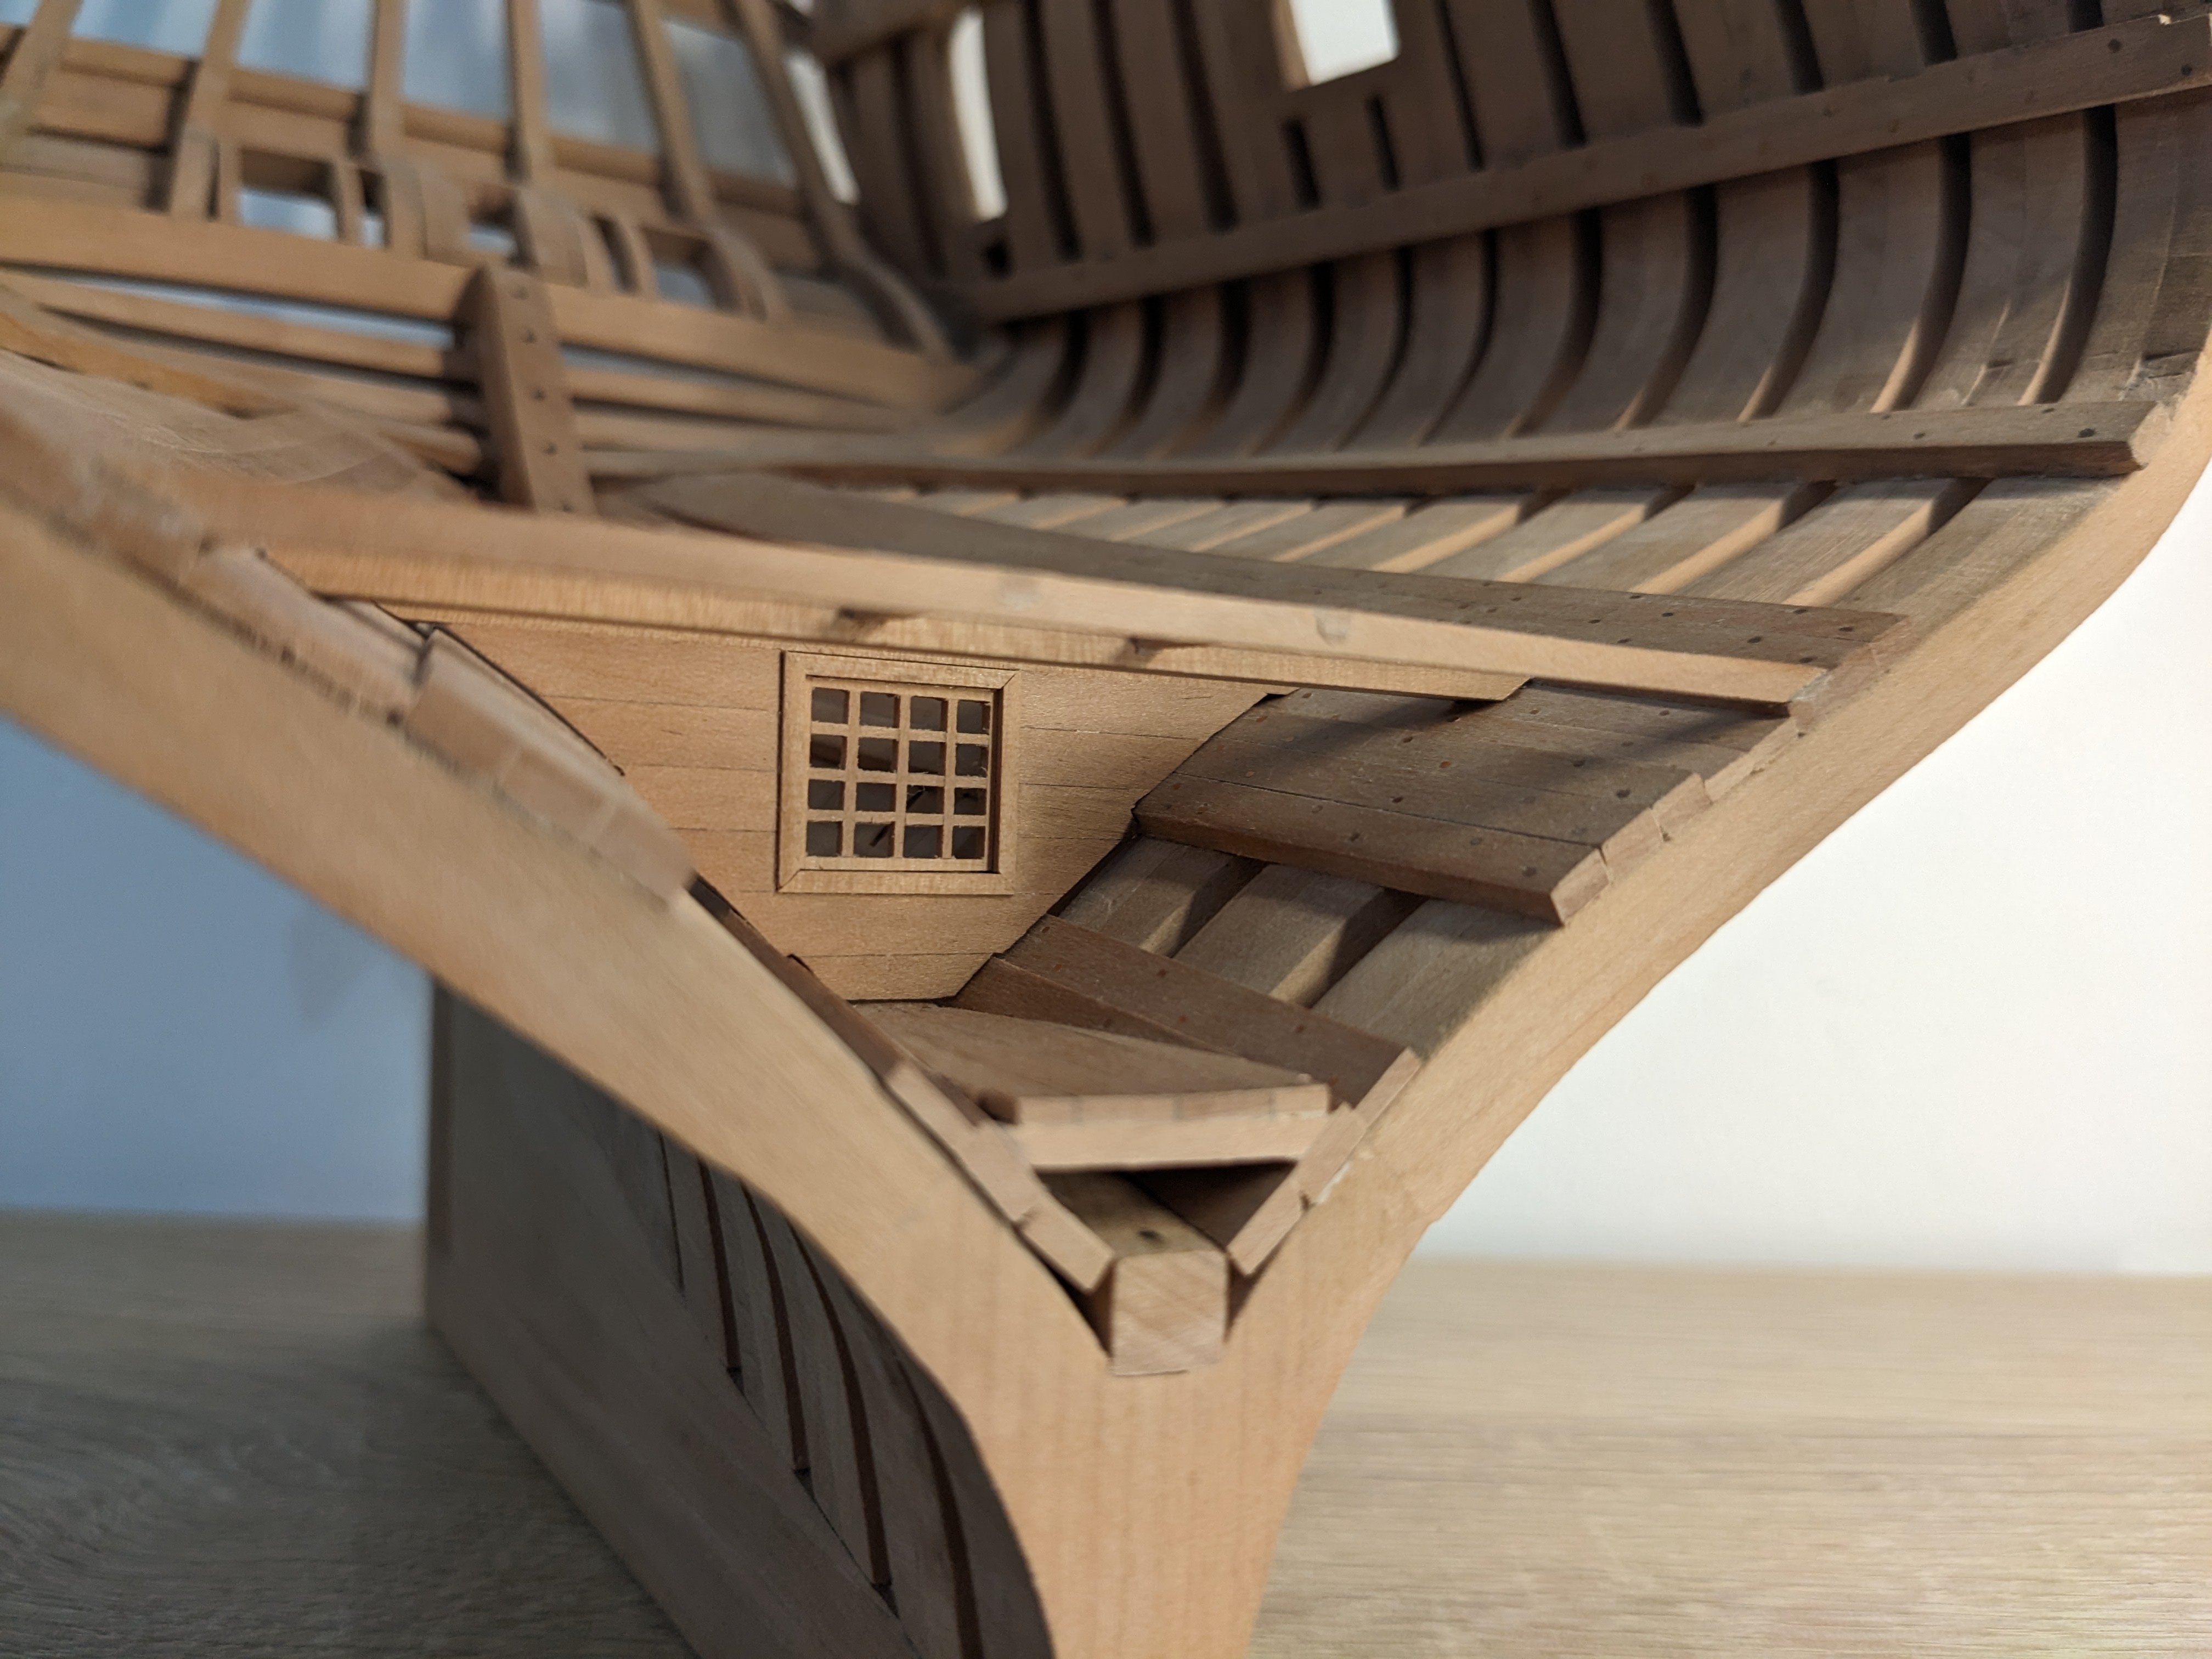
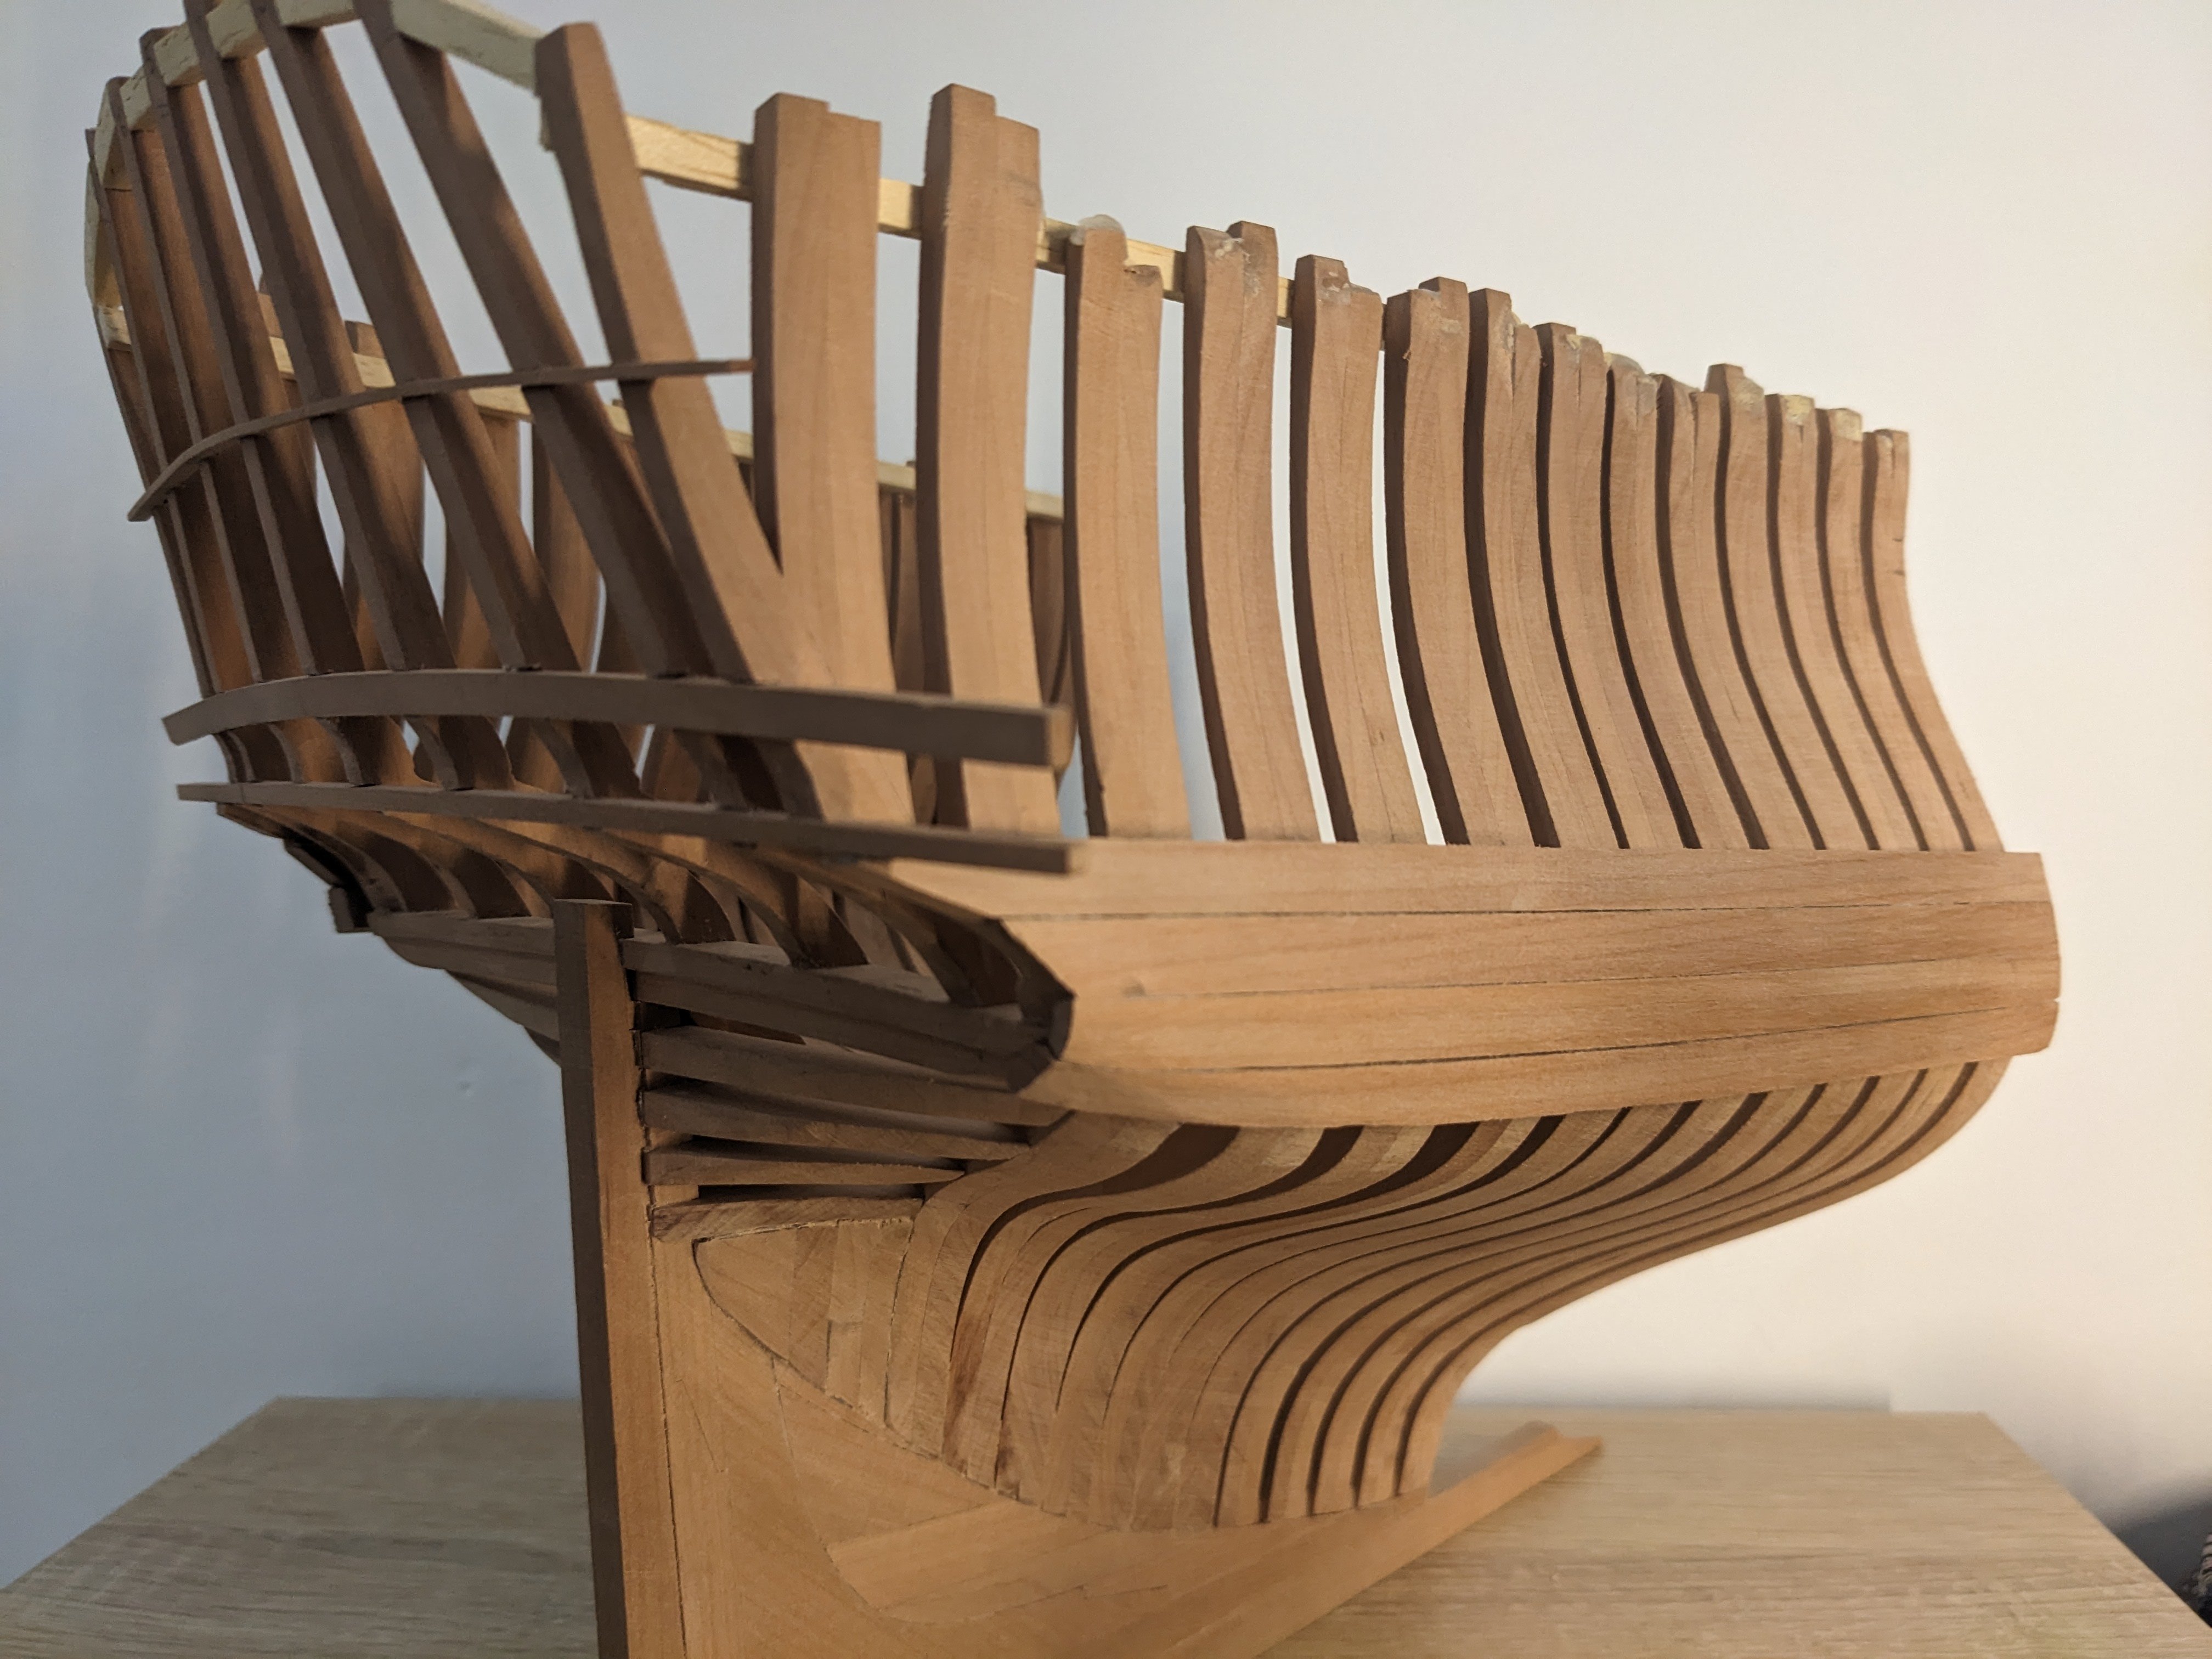
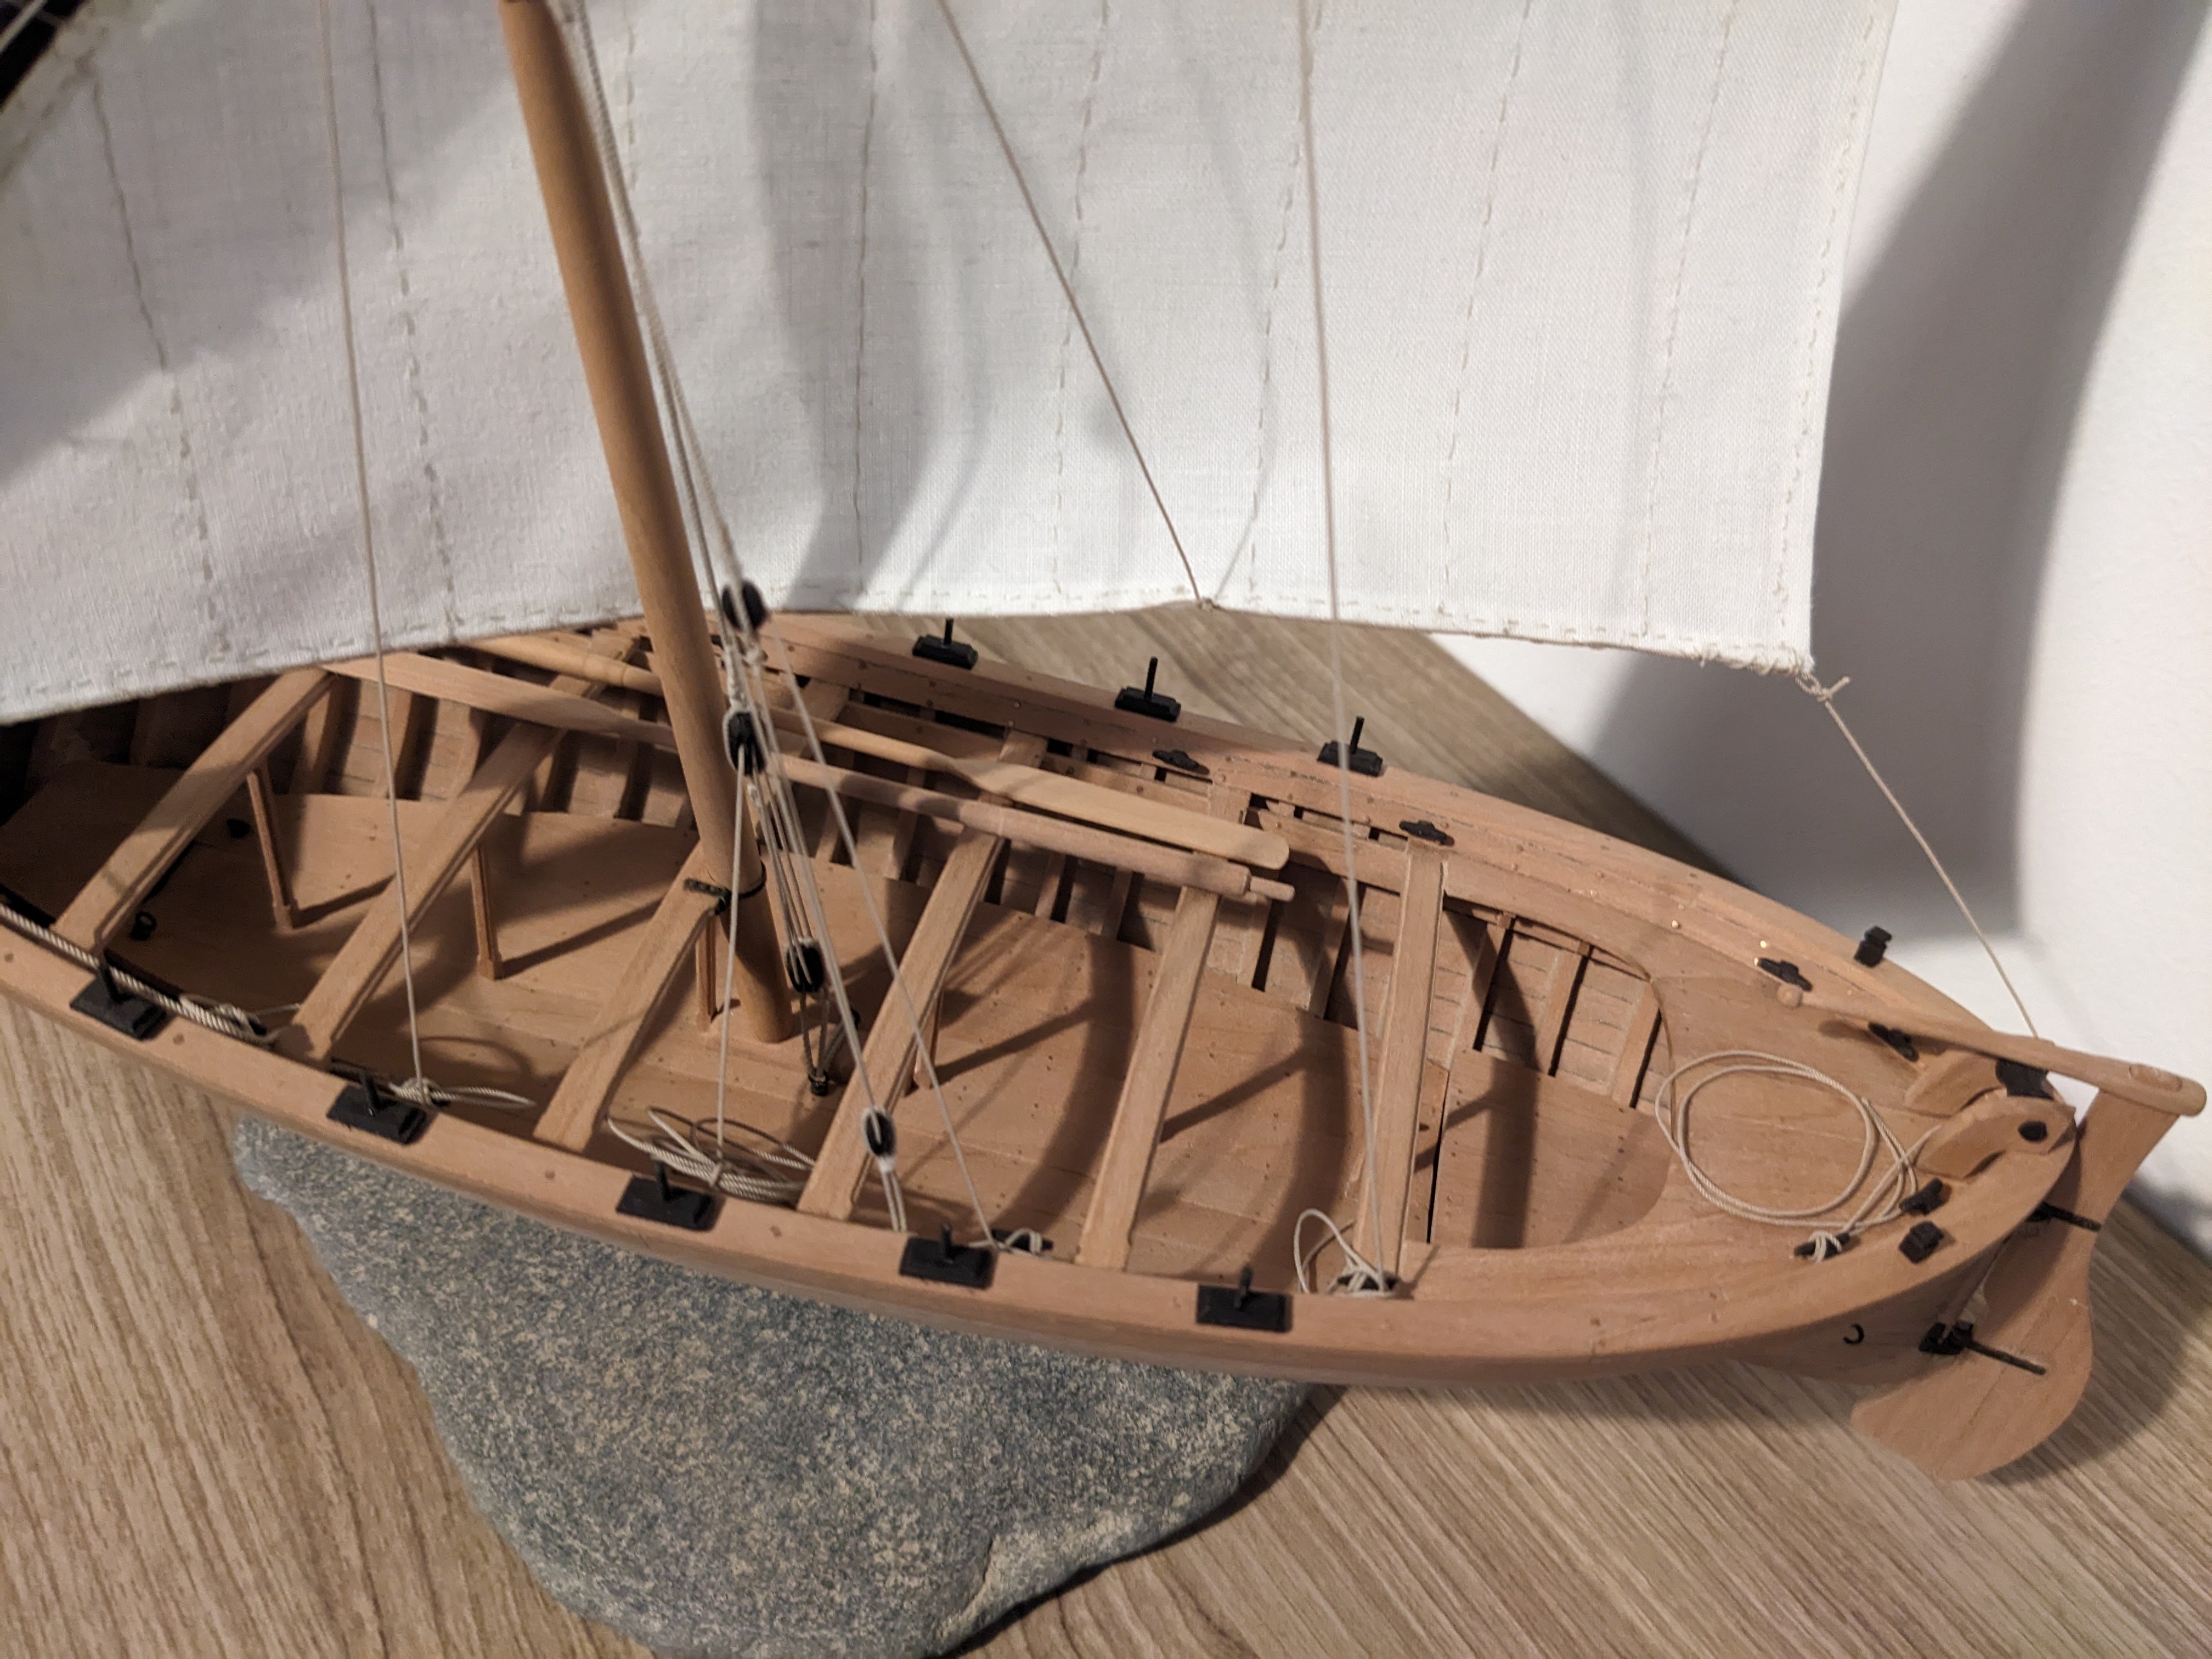
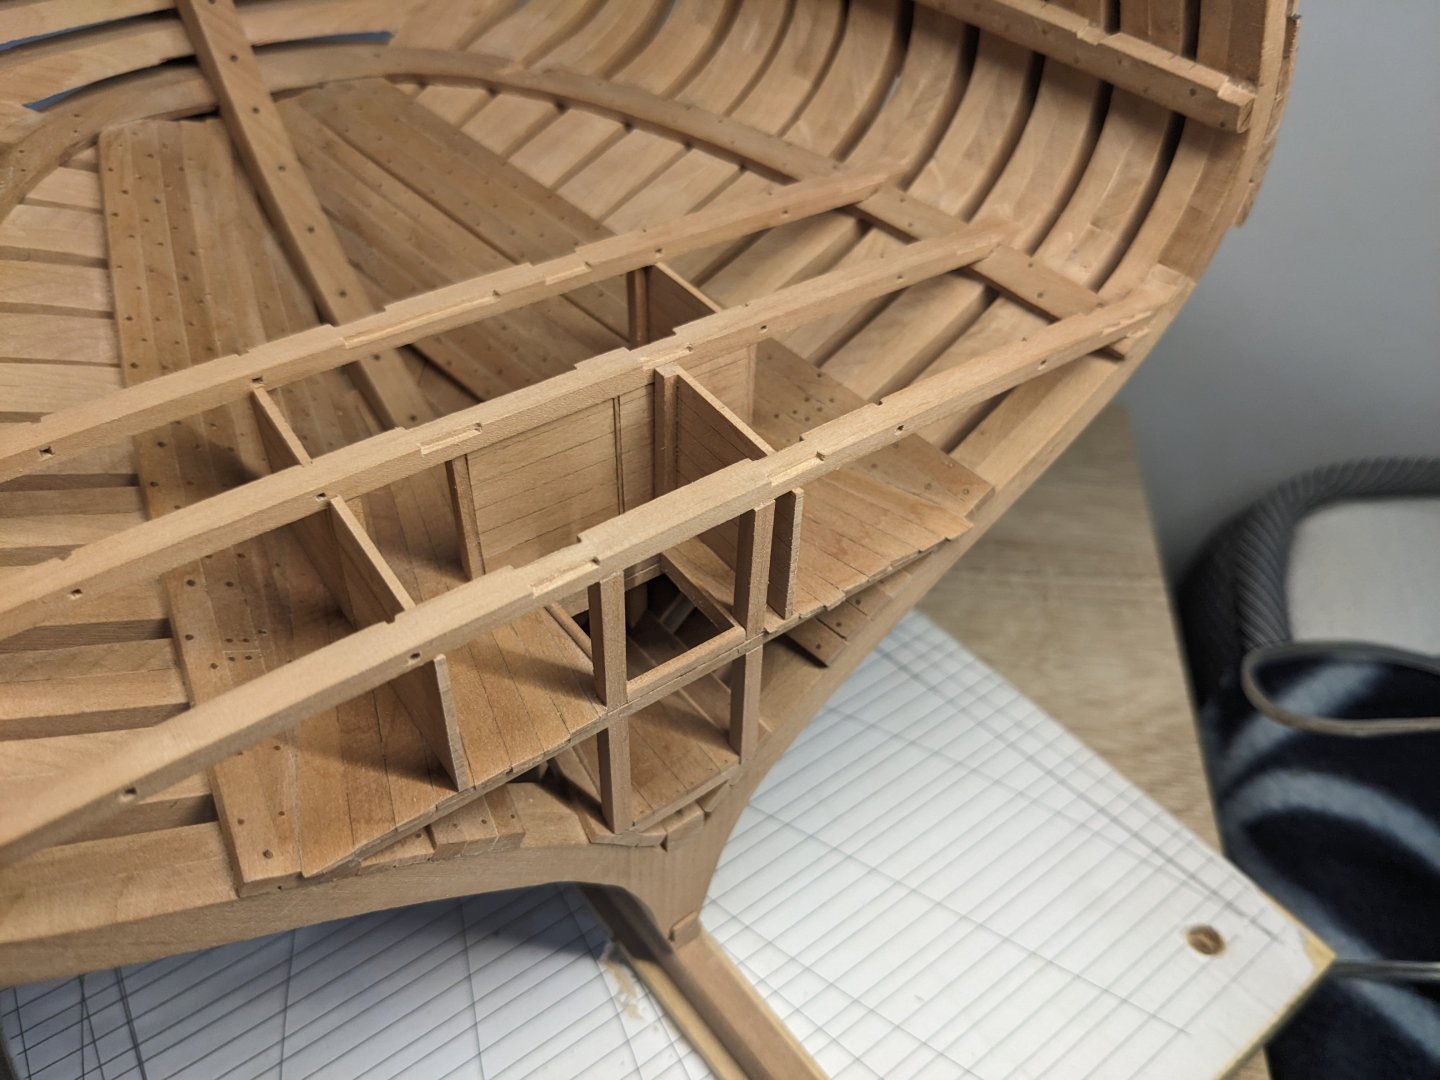
I decided to go ahead and fully plank the platform as well as install all the panels separating the rooms and corridors. I'm well aware that it'll hide a lot of the details like the lantern room, but it seemed the best way to show how cramped the ships interior was. I'll also install the bulkhead behind the platform (the lower plank is already in place) even though it will completely hide the sail room behind. With this, I can install the last deck beams for the orlop deck and decide how much to plank it, whether entirely or just a few planks.


- 99 replies
-
- 22
-
-
-
- ancre
- La Mahonesa
- (and 1 more)
-
I'm finishing the munitions and lantern room and planking the platform above them. I haven't decided if I'll fully plank that deck or not, planking it will completely hide the lantern room but will make it easier to install the bulkheads above. I'm also fitting the beams for the orlop deck which are necessary to install the pillars supporting the mizzen mast. It really is a puzzle finding out which pieces to install and when. The deck is planked with wooden nails but they are hardly visible (like on a real deck).
- 99 replies
-
- 15
-
-
- ancre
- La Mahonesa
- (and 1 more)
-
I've emailed them on a few occasions and they often take a long time in replying. Did you at least receive an automatic reply when you sent your email?
-
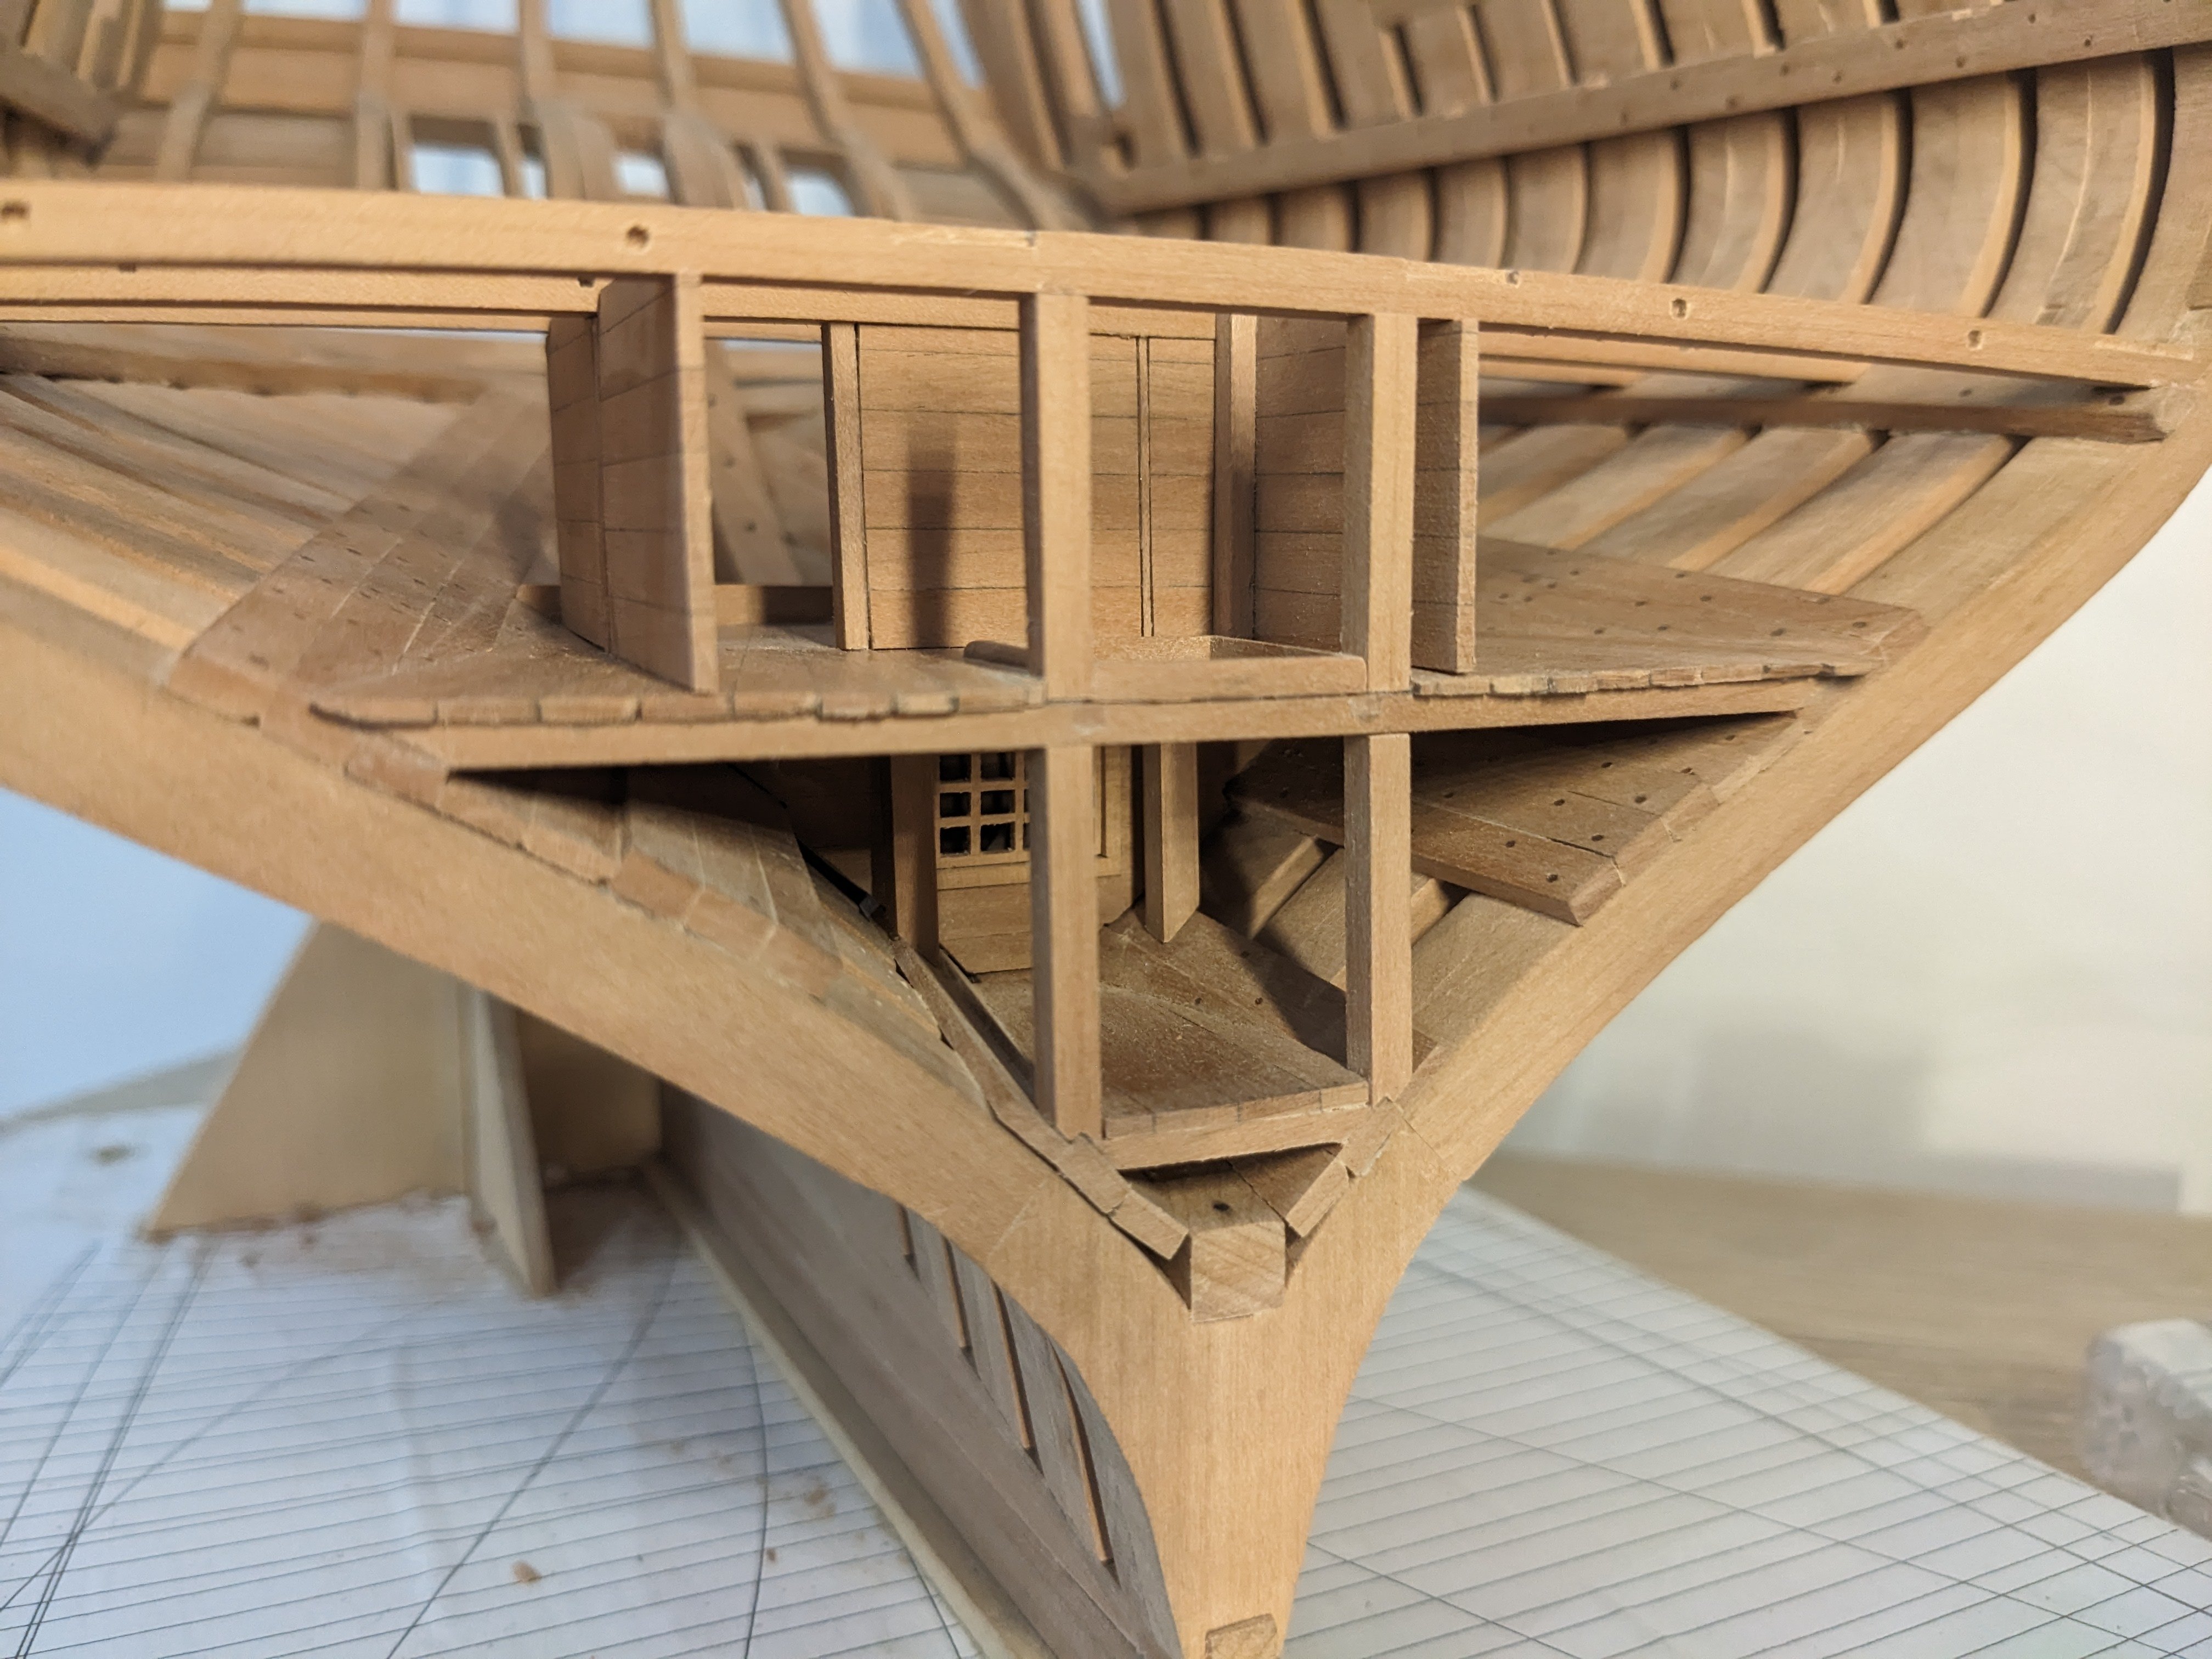
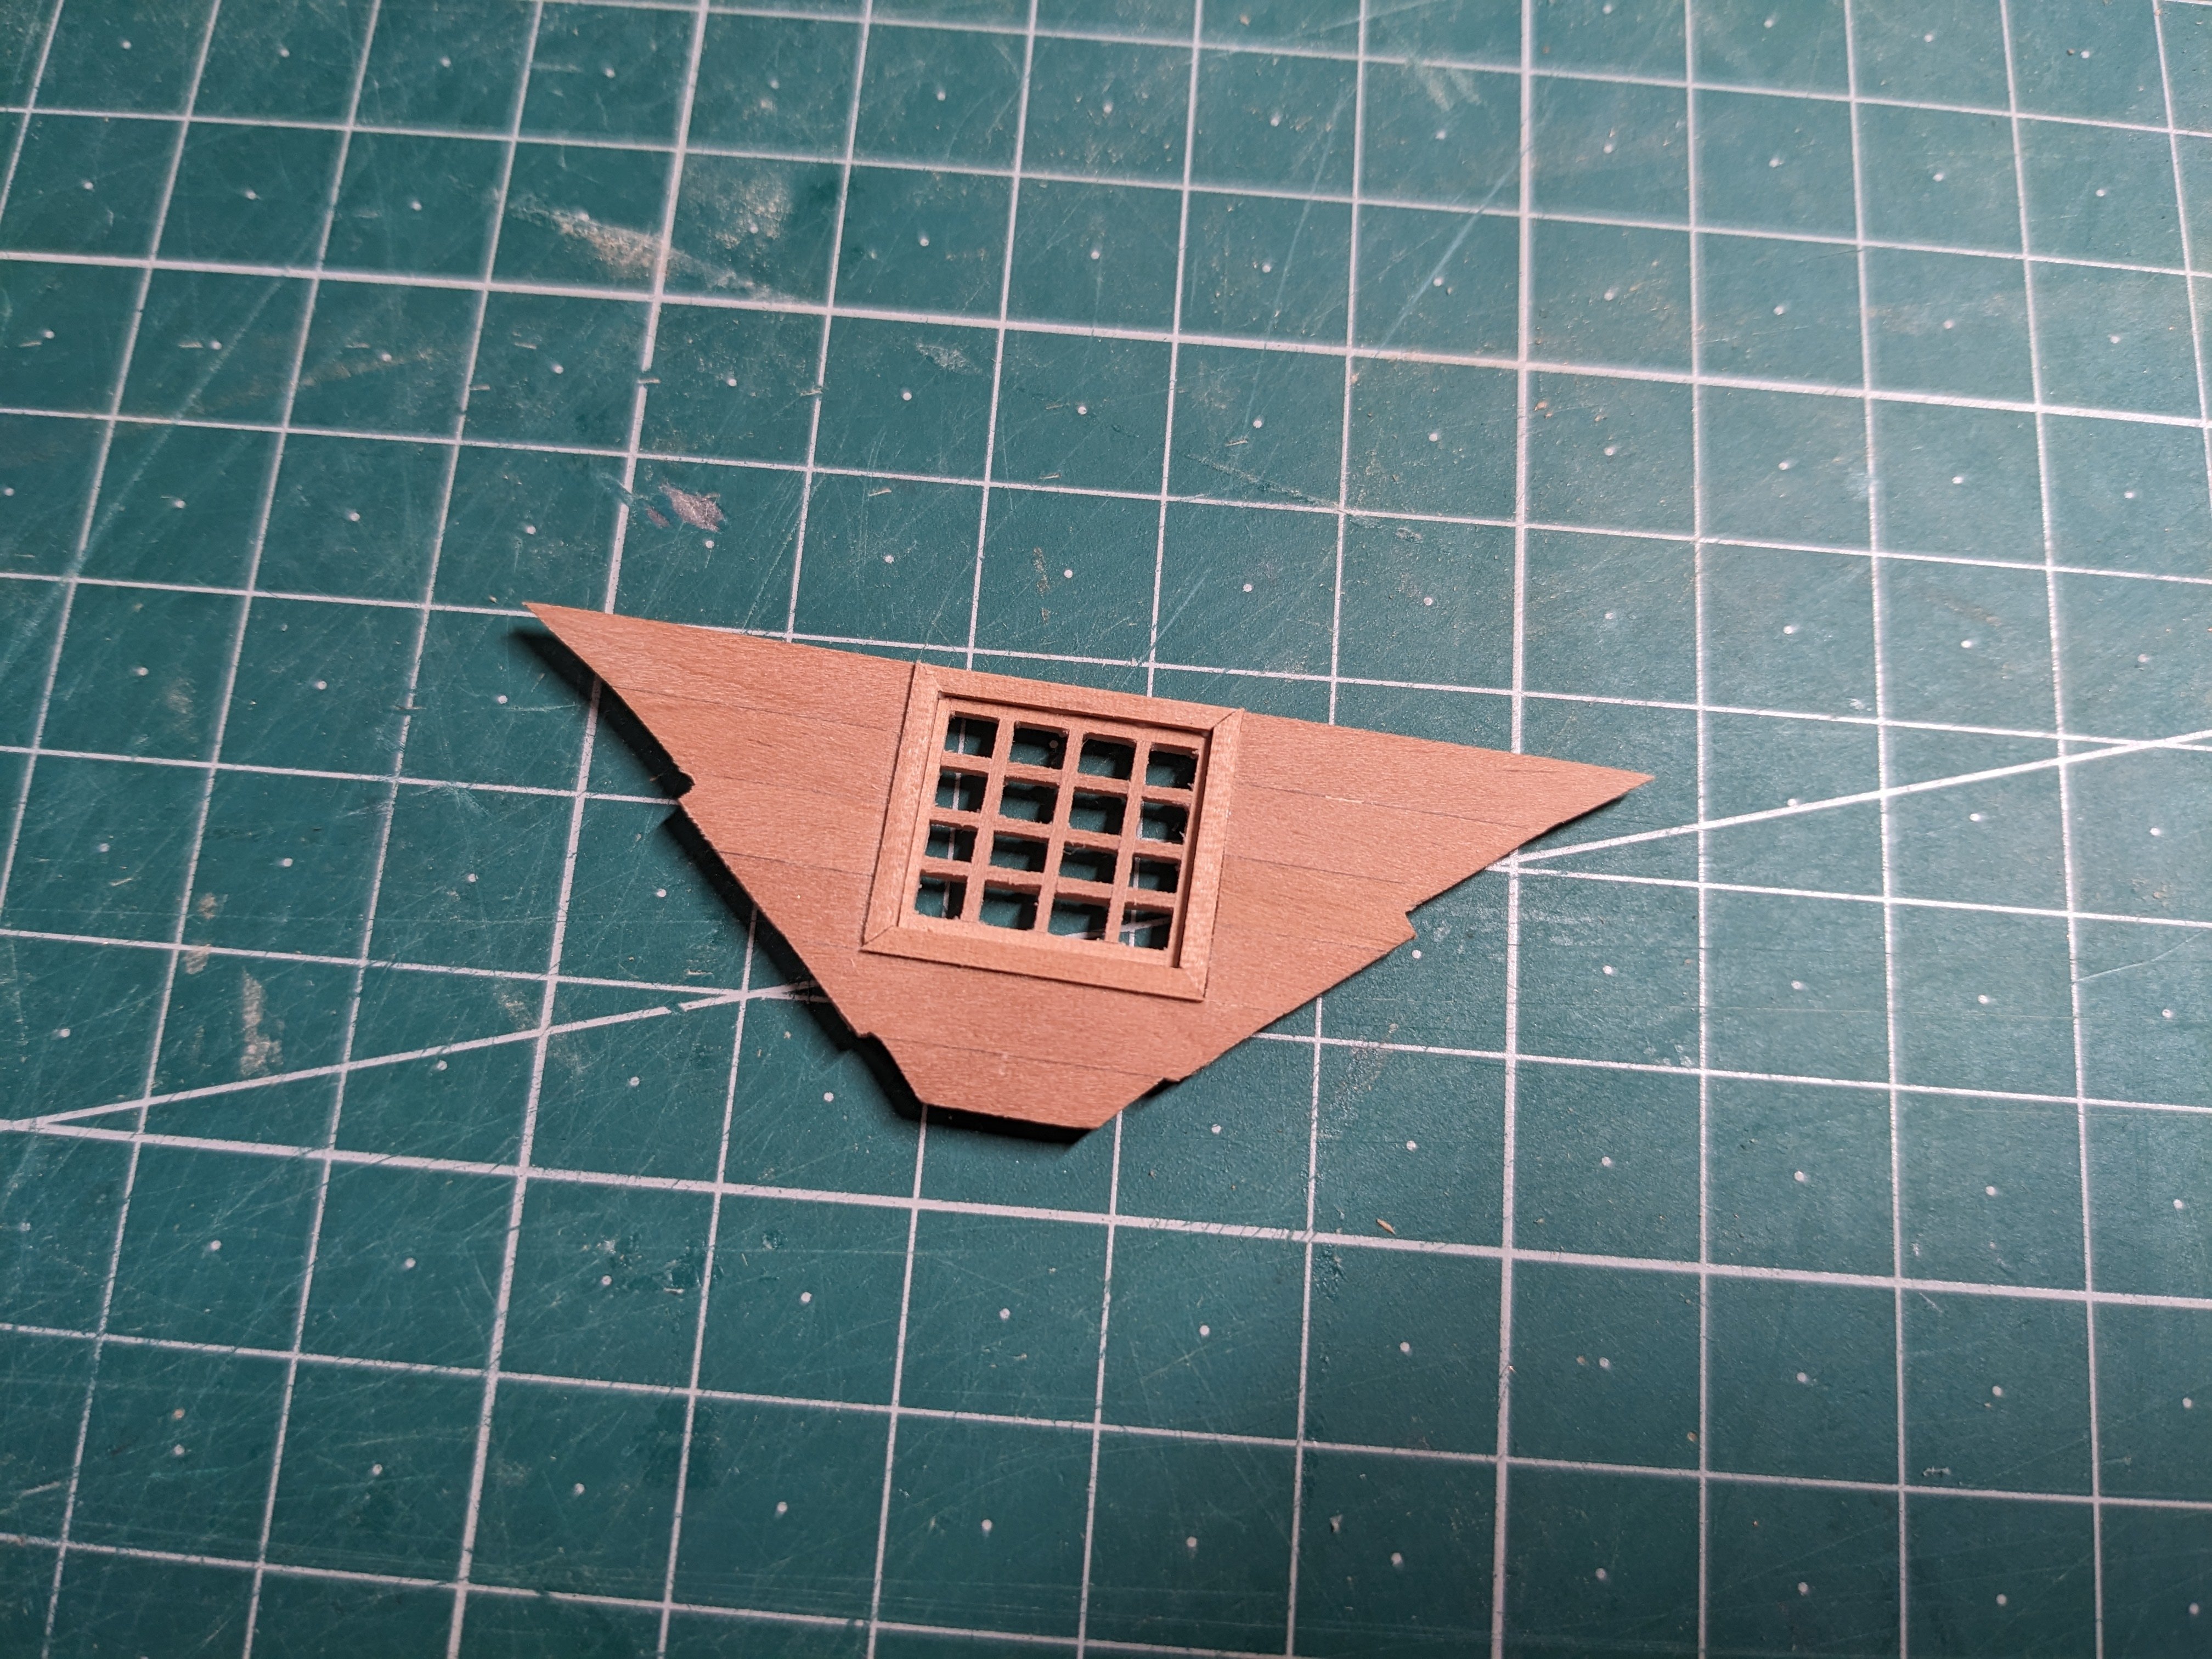
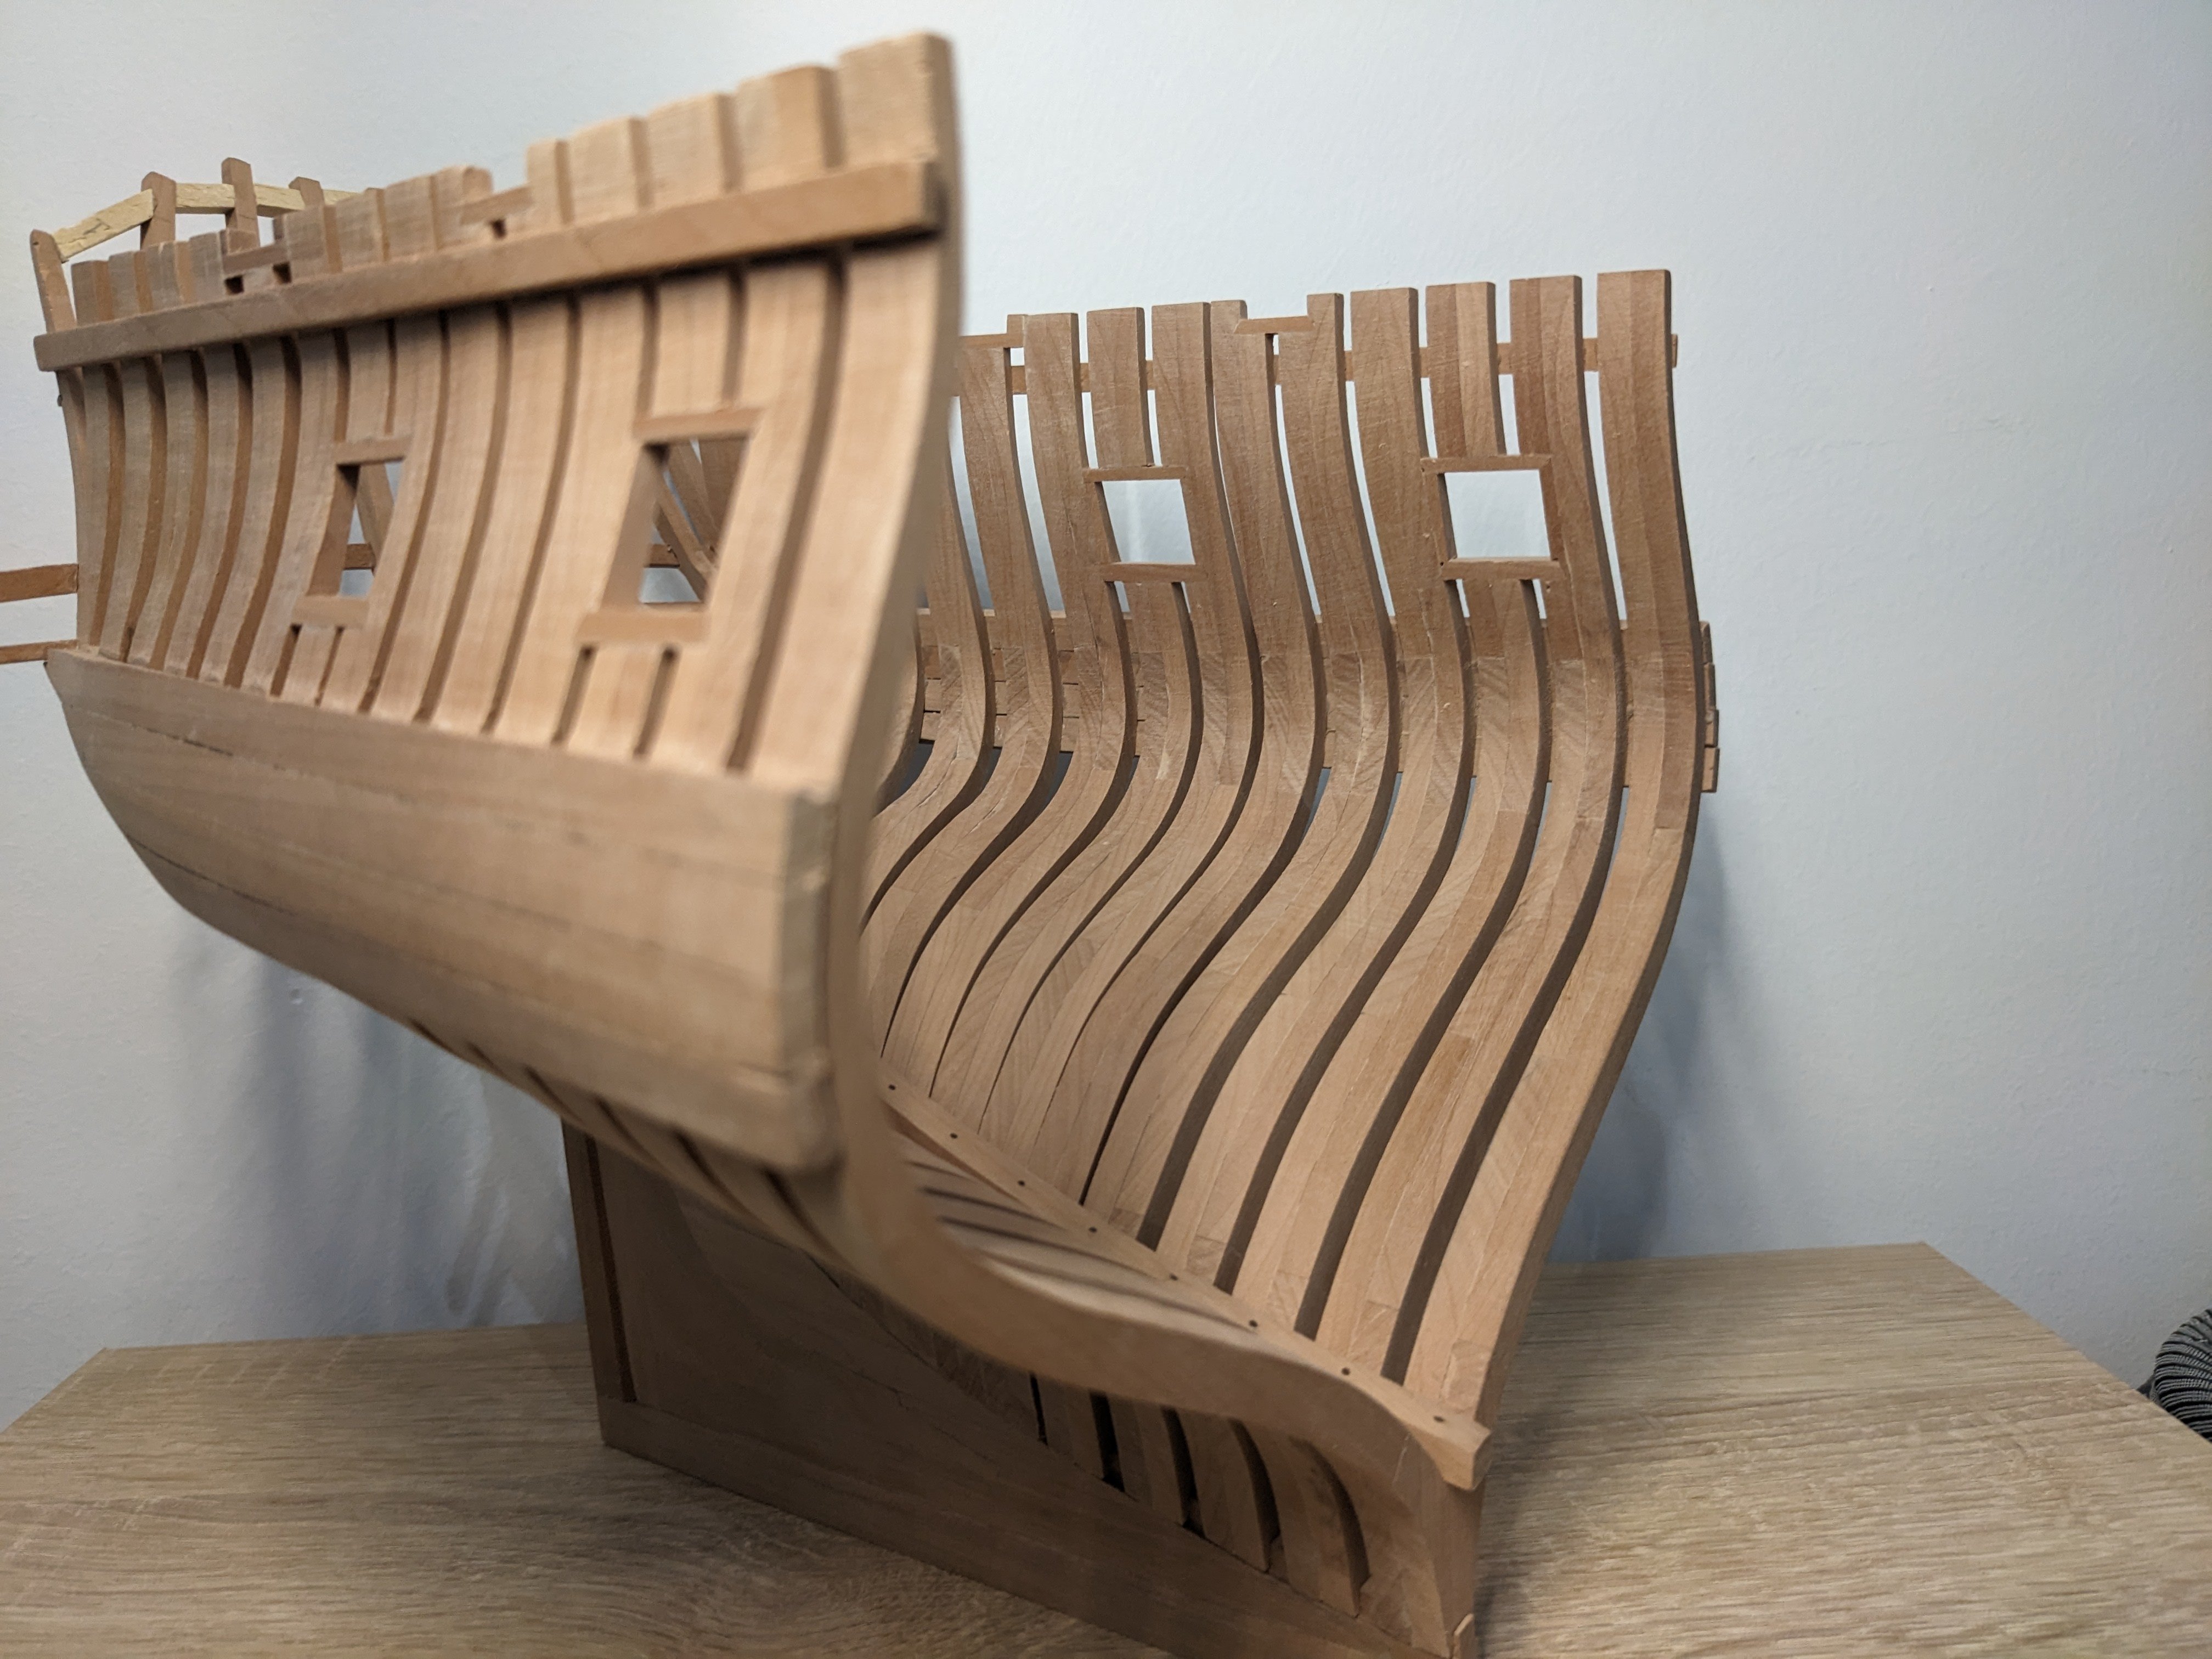
It's finally time to get started on all the interior stuff. I've installed the platform for the powder and munitions room, and today I finished the bulkhead between the powder room and the lantern room. I won't be adding any glass in the panes, I think that'll just distract from the look. I'm really happy with how the window turned out, if I can do as well with the big stern windows I'll have no complaints! The only thing I'm not happy with is how the inner planking terminates at the very stern; it was difficult to bend them and almost impossible to sand them there. However, most likely it won't be seen at all when the bulkheads and deck planking is in place. It's always nice when you can just hide your sloppy craftsmanship! 🤣


- 99 replies
-
- 14
-
-
-
- ancre
- La Mahonesa
- (and 1 more)
-
After posting the pictures the other day I found out I'd installed the lower decks clamps a little too high up, though I was able to remove them using a hair drier and reinstall them a little lower. I also installed the thickstuff (I think they're called?), the 2 x 3 planks running along the inside. This is most likely all the inner planking I'll add. I also added nails on the upper bulwarks. I used 0,3mm copper wire here, the 0,5mm I've used elsewhere seemed a little too think for these planks. With this I can get started on the decks, first will be the platform in the bottom where the powder room is. I've yet to decide how many bulkheads I'll install, I want the interior to be visible while also giving an idea of how cramped it was. Again, thanks everyone for the kind comments and likes, it's much appreciated! 😊

- 99 replies
-
- 14
-
-
-
- ancre
- La Mahonesa
- (and 1 more)
-
Hahaha, trust me, I've thought about it 😂 Most likely though my next project will be La Diligente, a french tartane from the Ancre monograph. Lateen sailed boats are my favourite so it's something I'd like to "specialise" in. Thank you! 😊
- 99 replies
-
- 3
-
-
- ancre
- La Mahonesa
- (and 1 more)
-
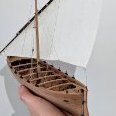
Thanks! That's exactly why I chose the stern, if I can build that I can build the whole ship 😄
- 99 replies
-
- 2
-
-
- ancre
- La Mahonesa
- (and 1 more)
-
Progress has been very slow the past couple of months, partly because the summer is very hot where I live (daily 40C), yet I managed to completely plank both sides of the ship above the wales and install all the deck clamps. The lower one was particularly difficult due to the double curvature, and while the result is far from perfect I think it's good enough.


- 99 replies
-
- 15
-
-
-
- ancre
- La Mahonesa
- (and 1 more)
-
I usually scrape the joints with a sharp knife, that makes it perfectly flat. If you leave a little more wood around the piece and create the joint first, it doesn't matter too much if you have to make any corrections. When the joint is done, sand the rest of the piece down to shape.
-
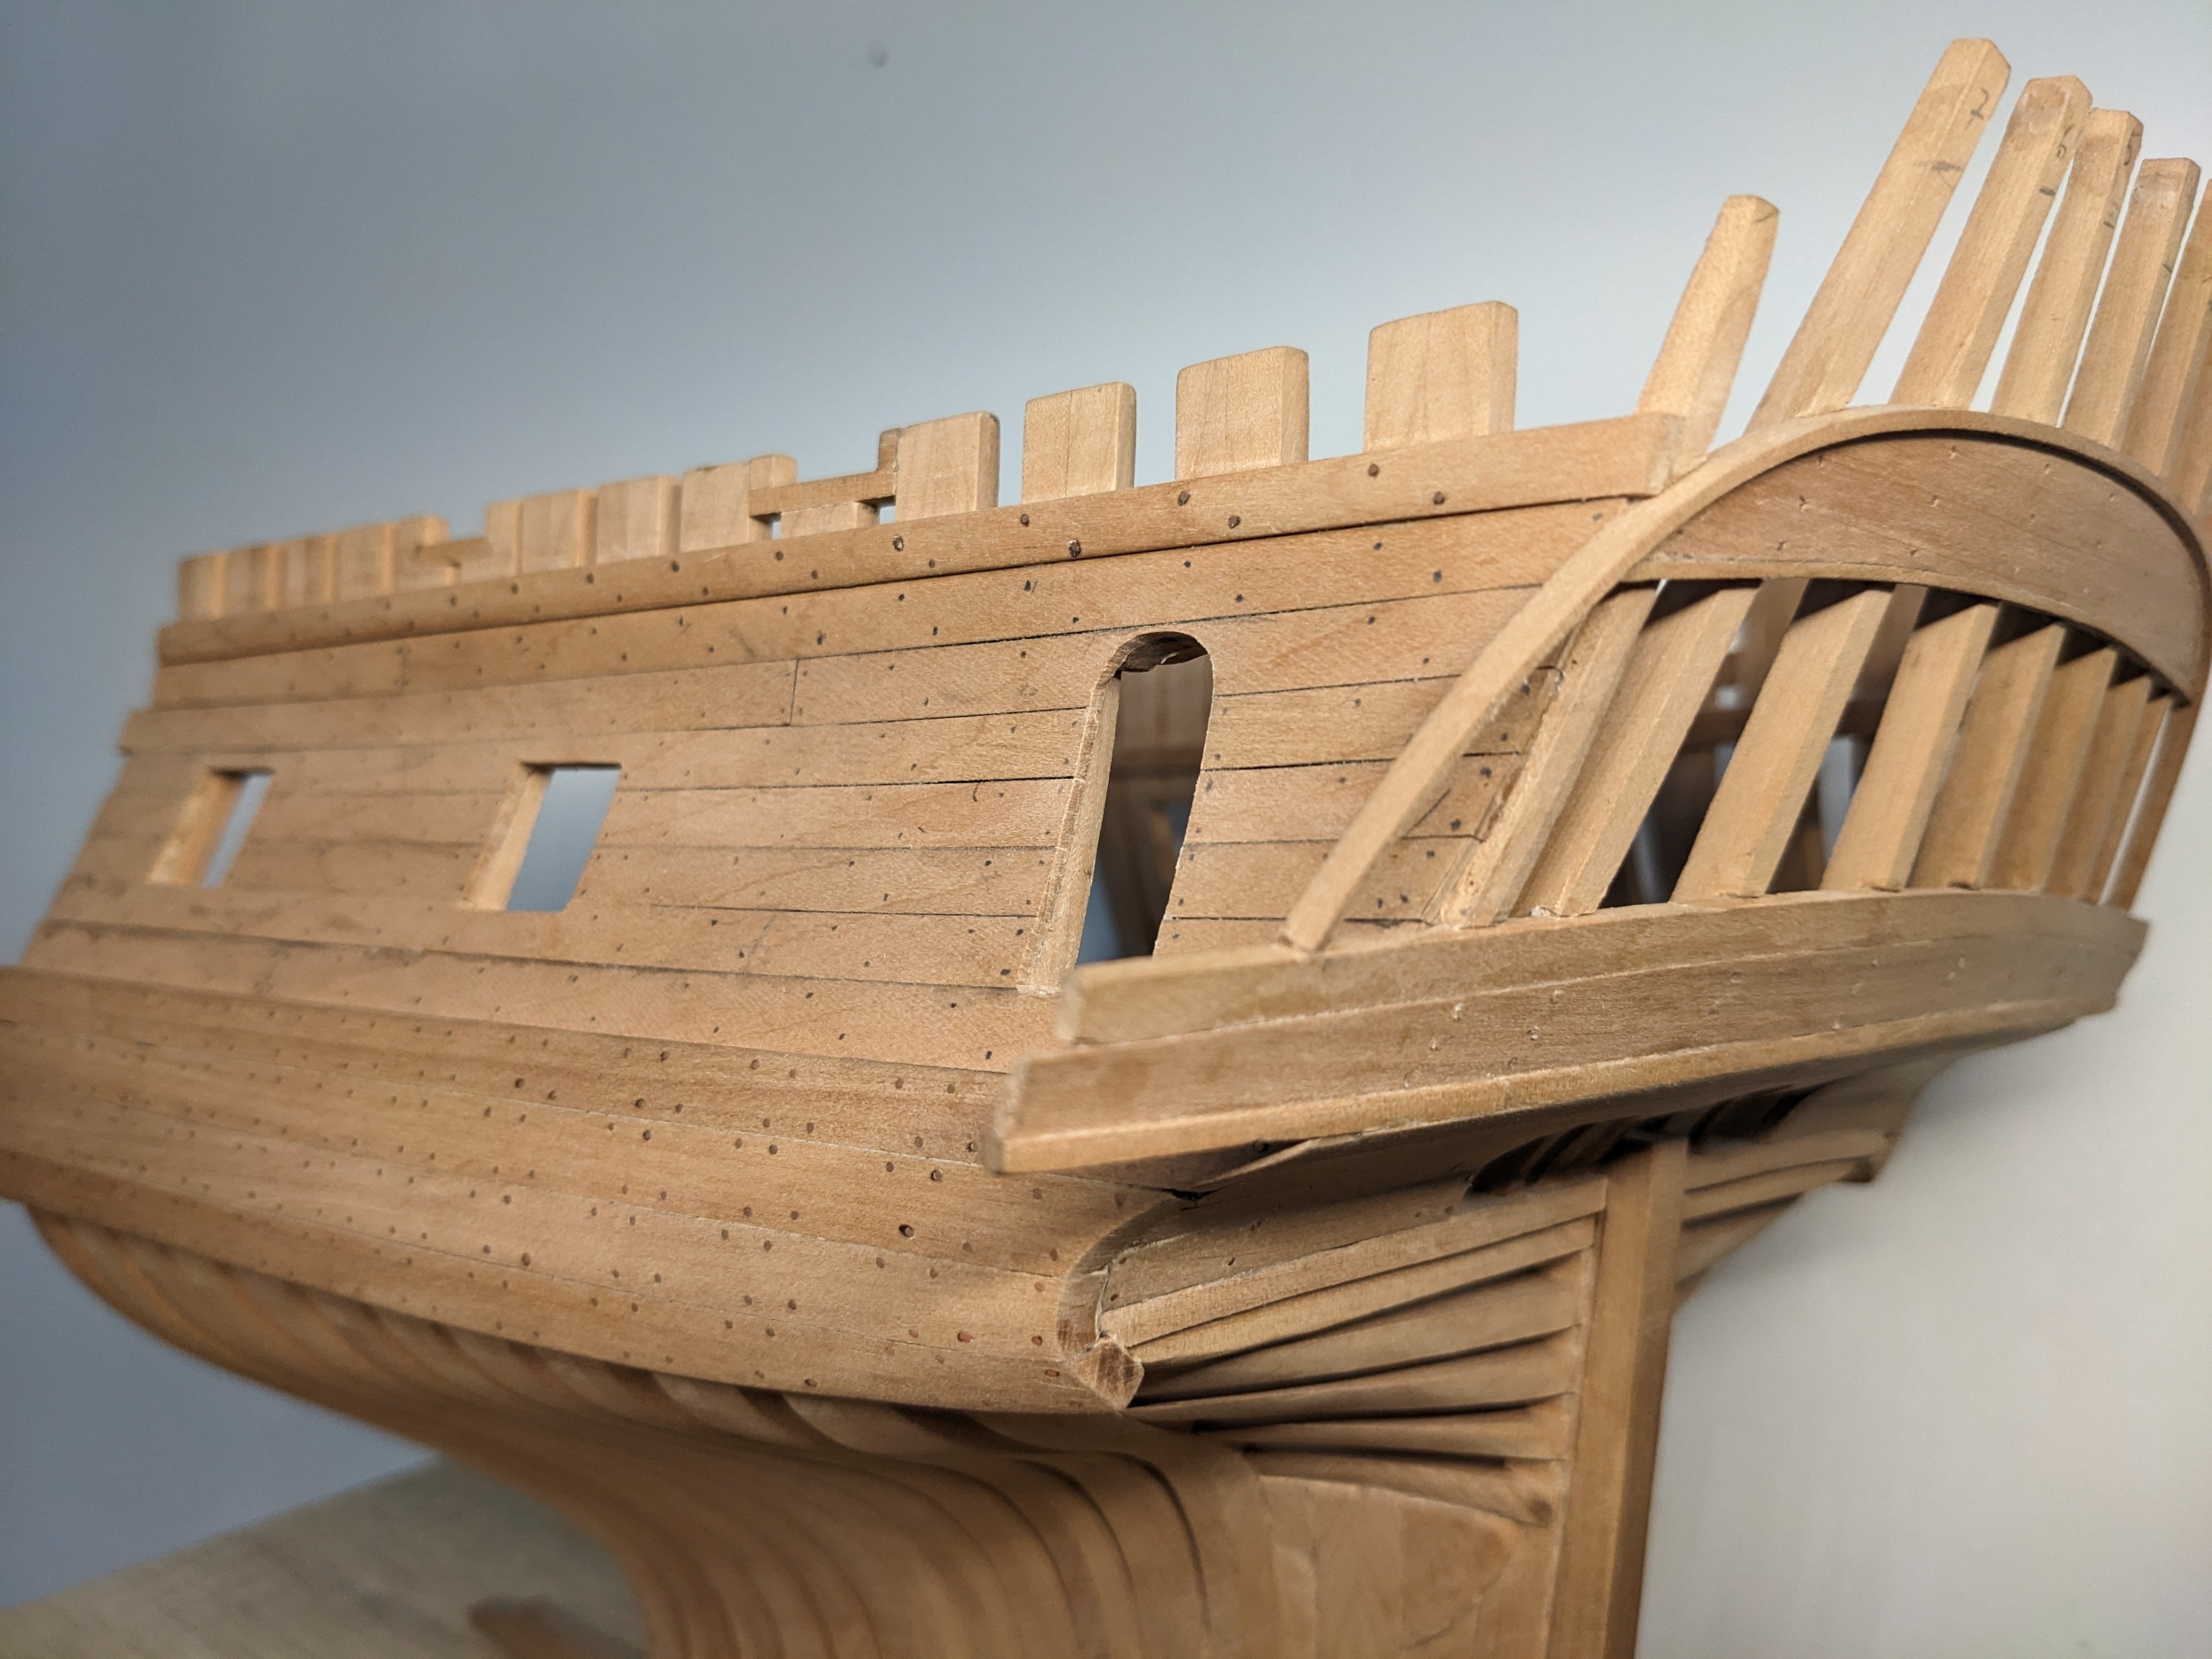
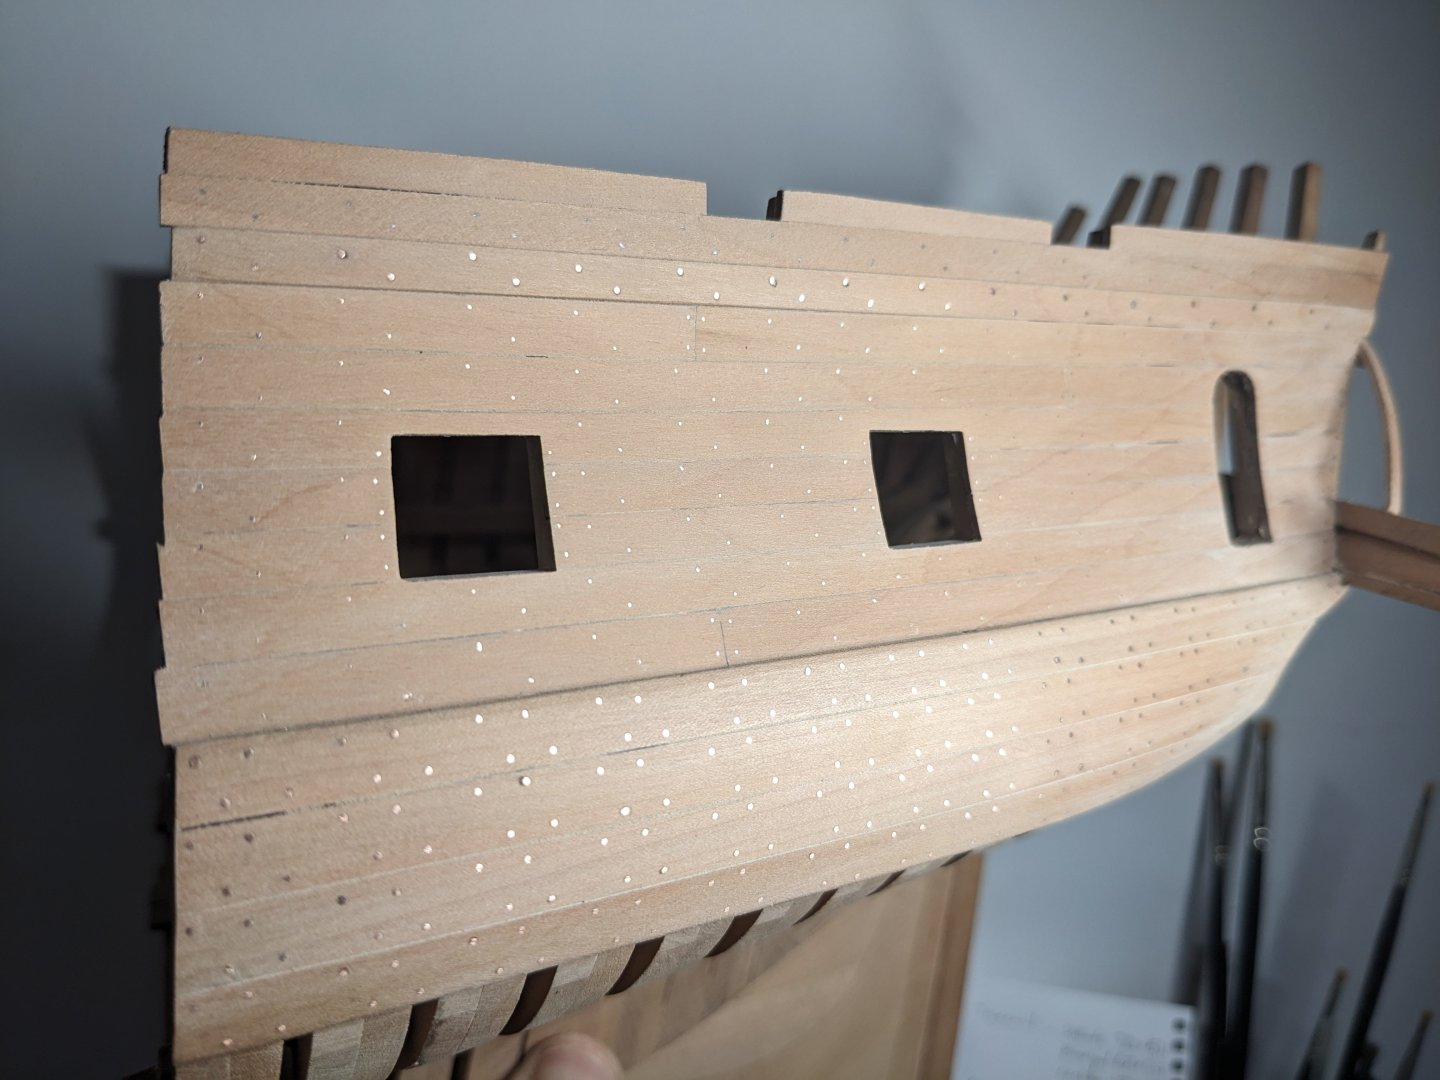
Thanks! 😊 I went ahead and cut out the gunports and framed them. Not much to comment on that really, it was straightforward.

- 99 replies
-
- 11
-
-
- ancre
- La Mahonesa
- (and 1 more)
-
Some more progress. I've installed the wales, the lower one was difficult to bend at the stern but I got it done. I've also gone ahead and trimmed the frames to their (almost) correct height and made the cutouts for the upper gun emplacements (not shown on the first photo which is from a week ago). I'm now turning my attention to the interior, I installed the keelson and will start on the strakes on which the deck beams are resting.


- 99 replies
-
- 20
-
-
-
- ancre
- La Mahonesa
- (and 1 more)
-
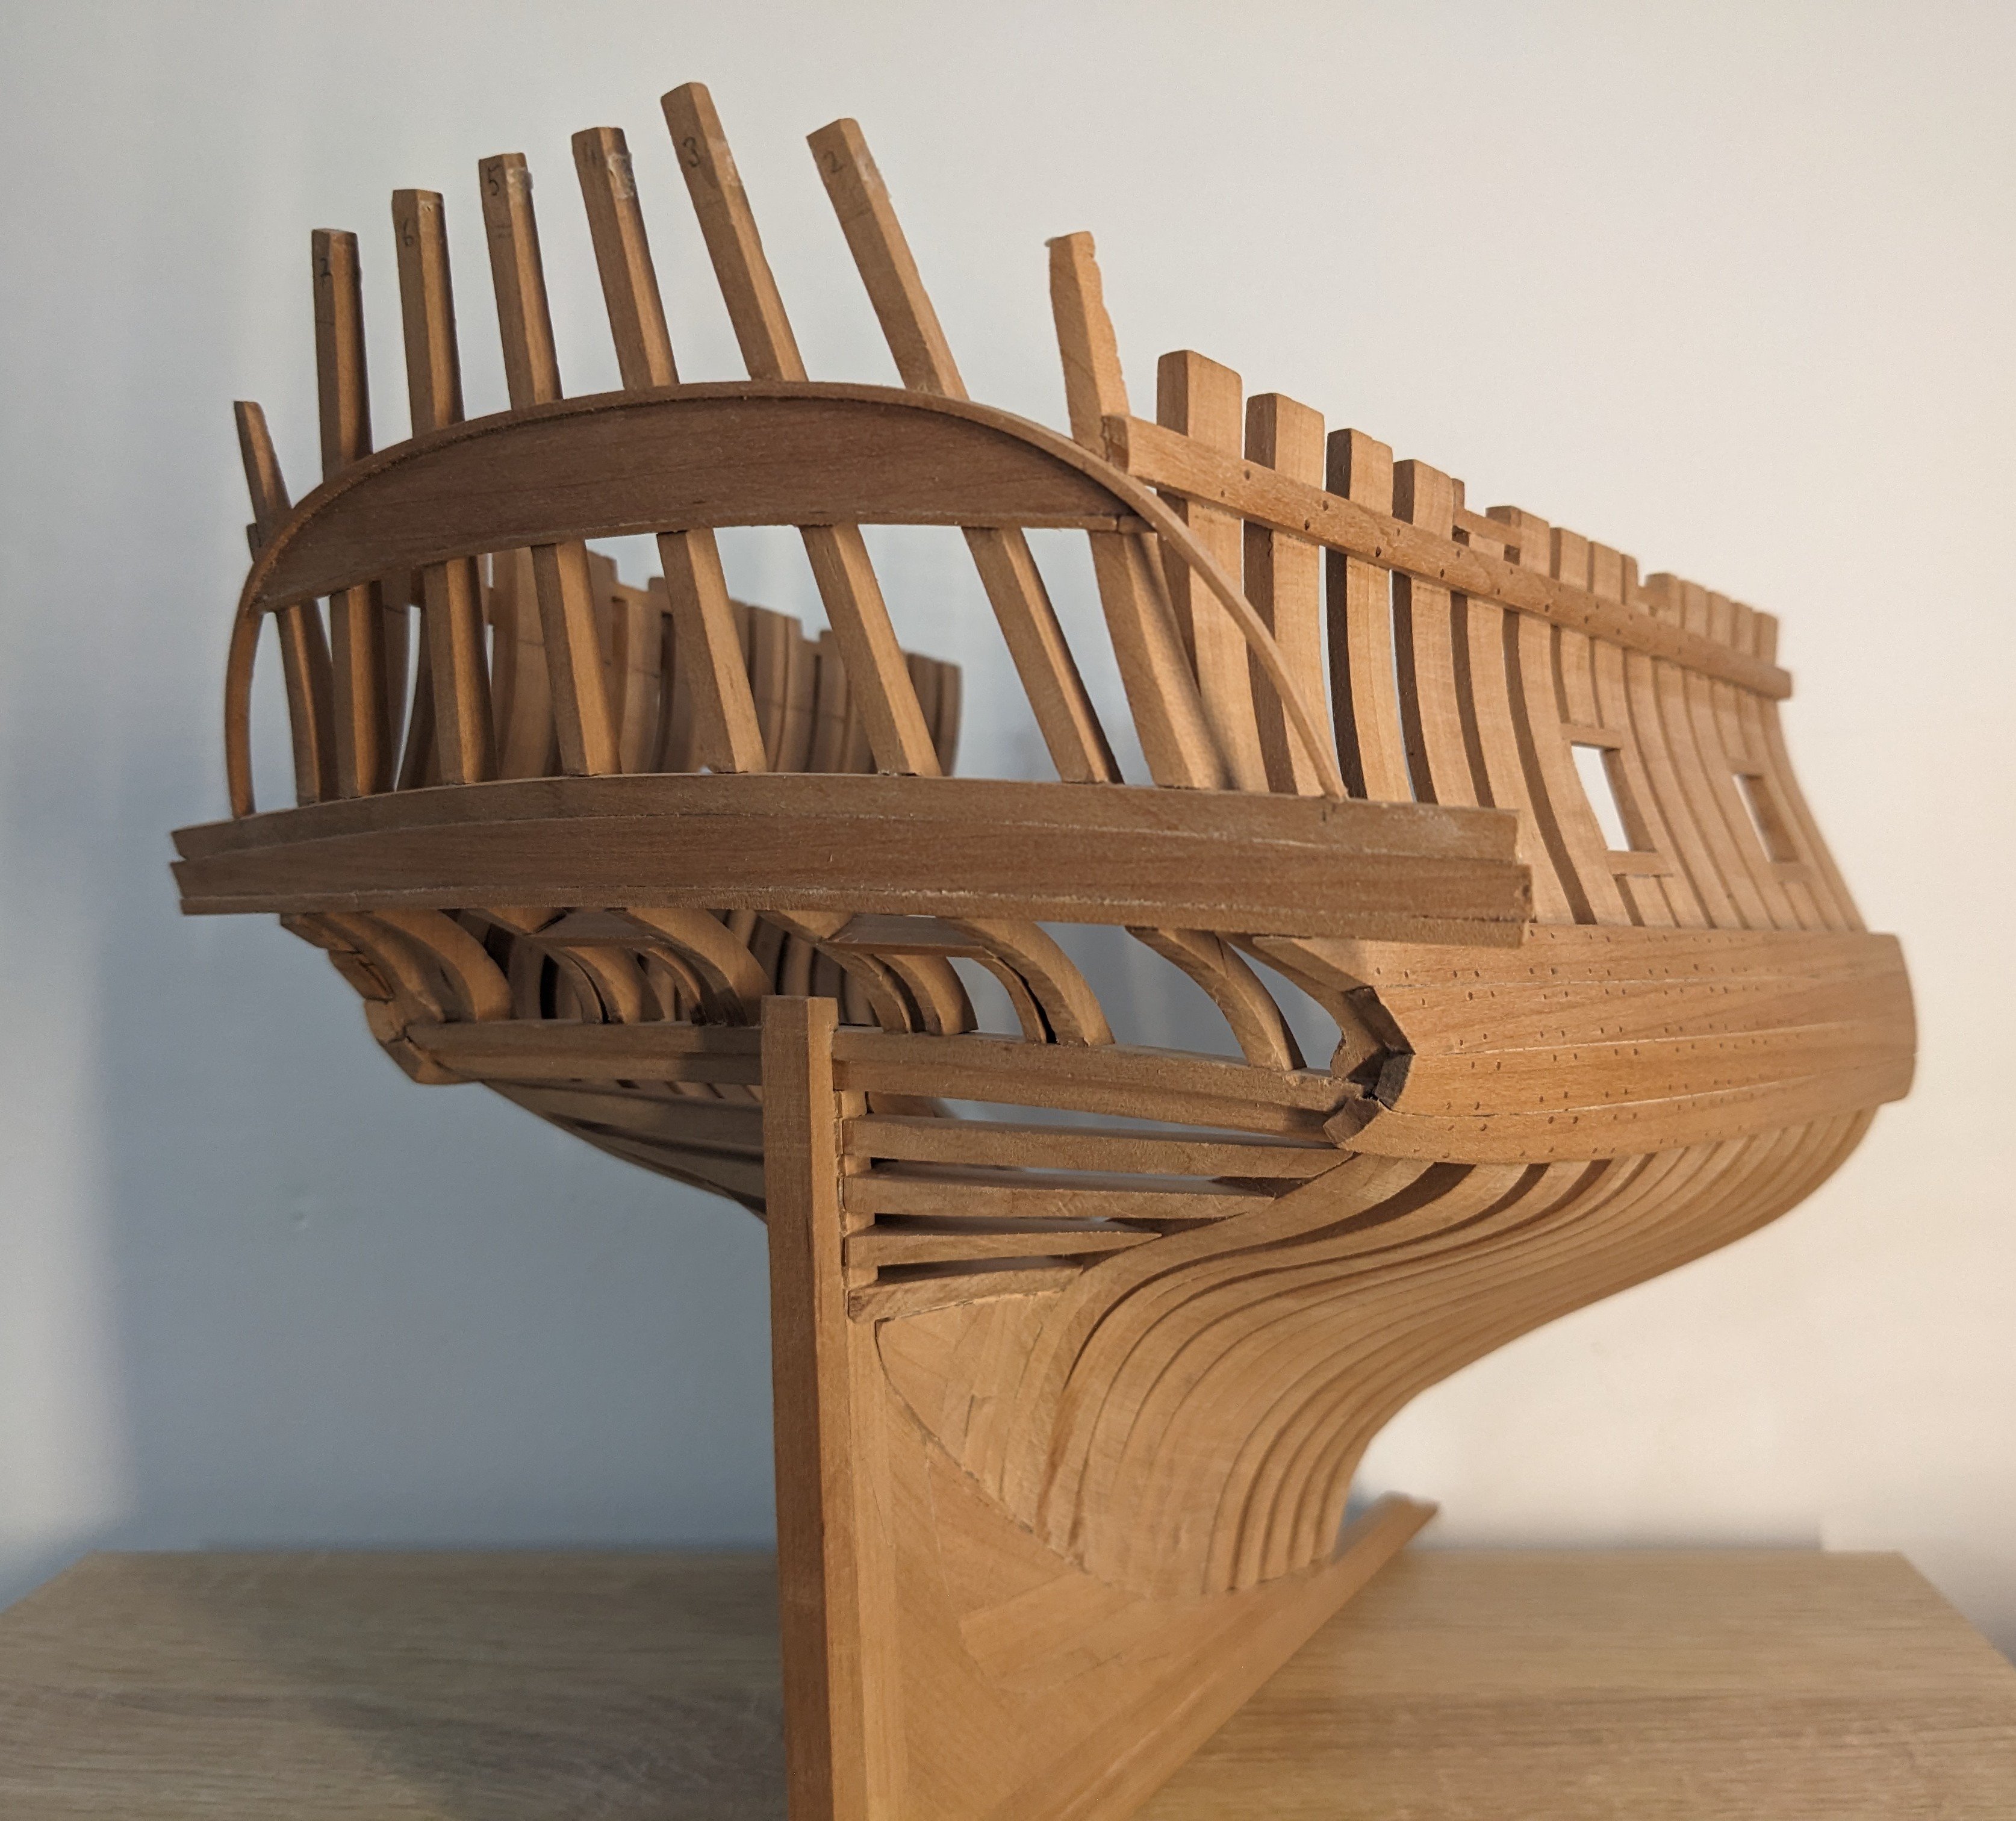
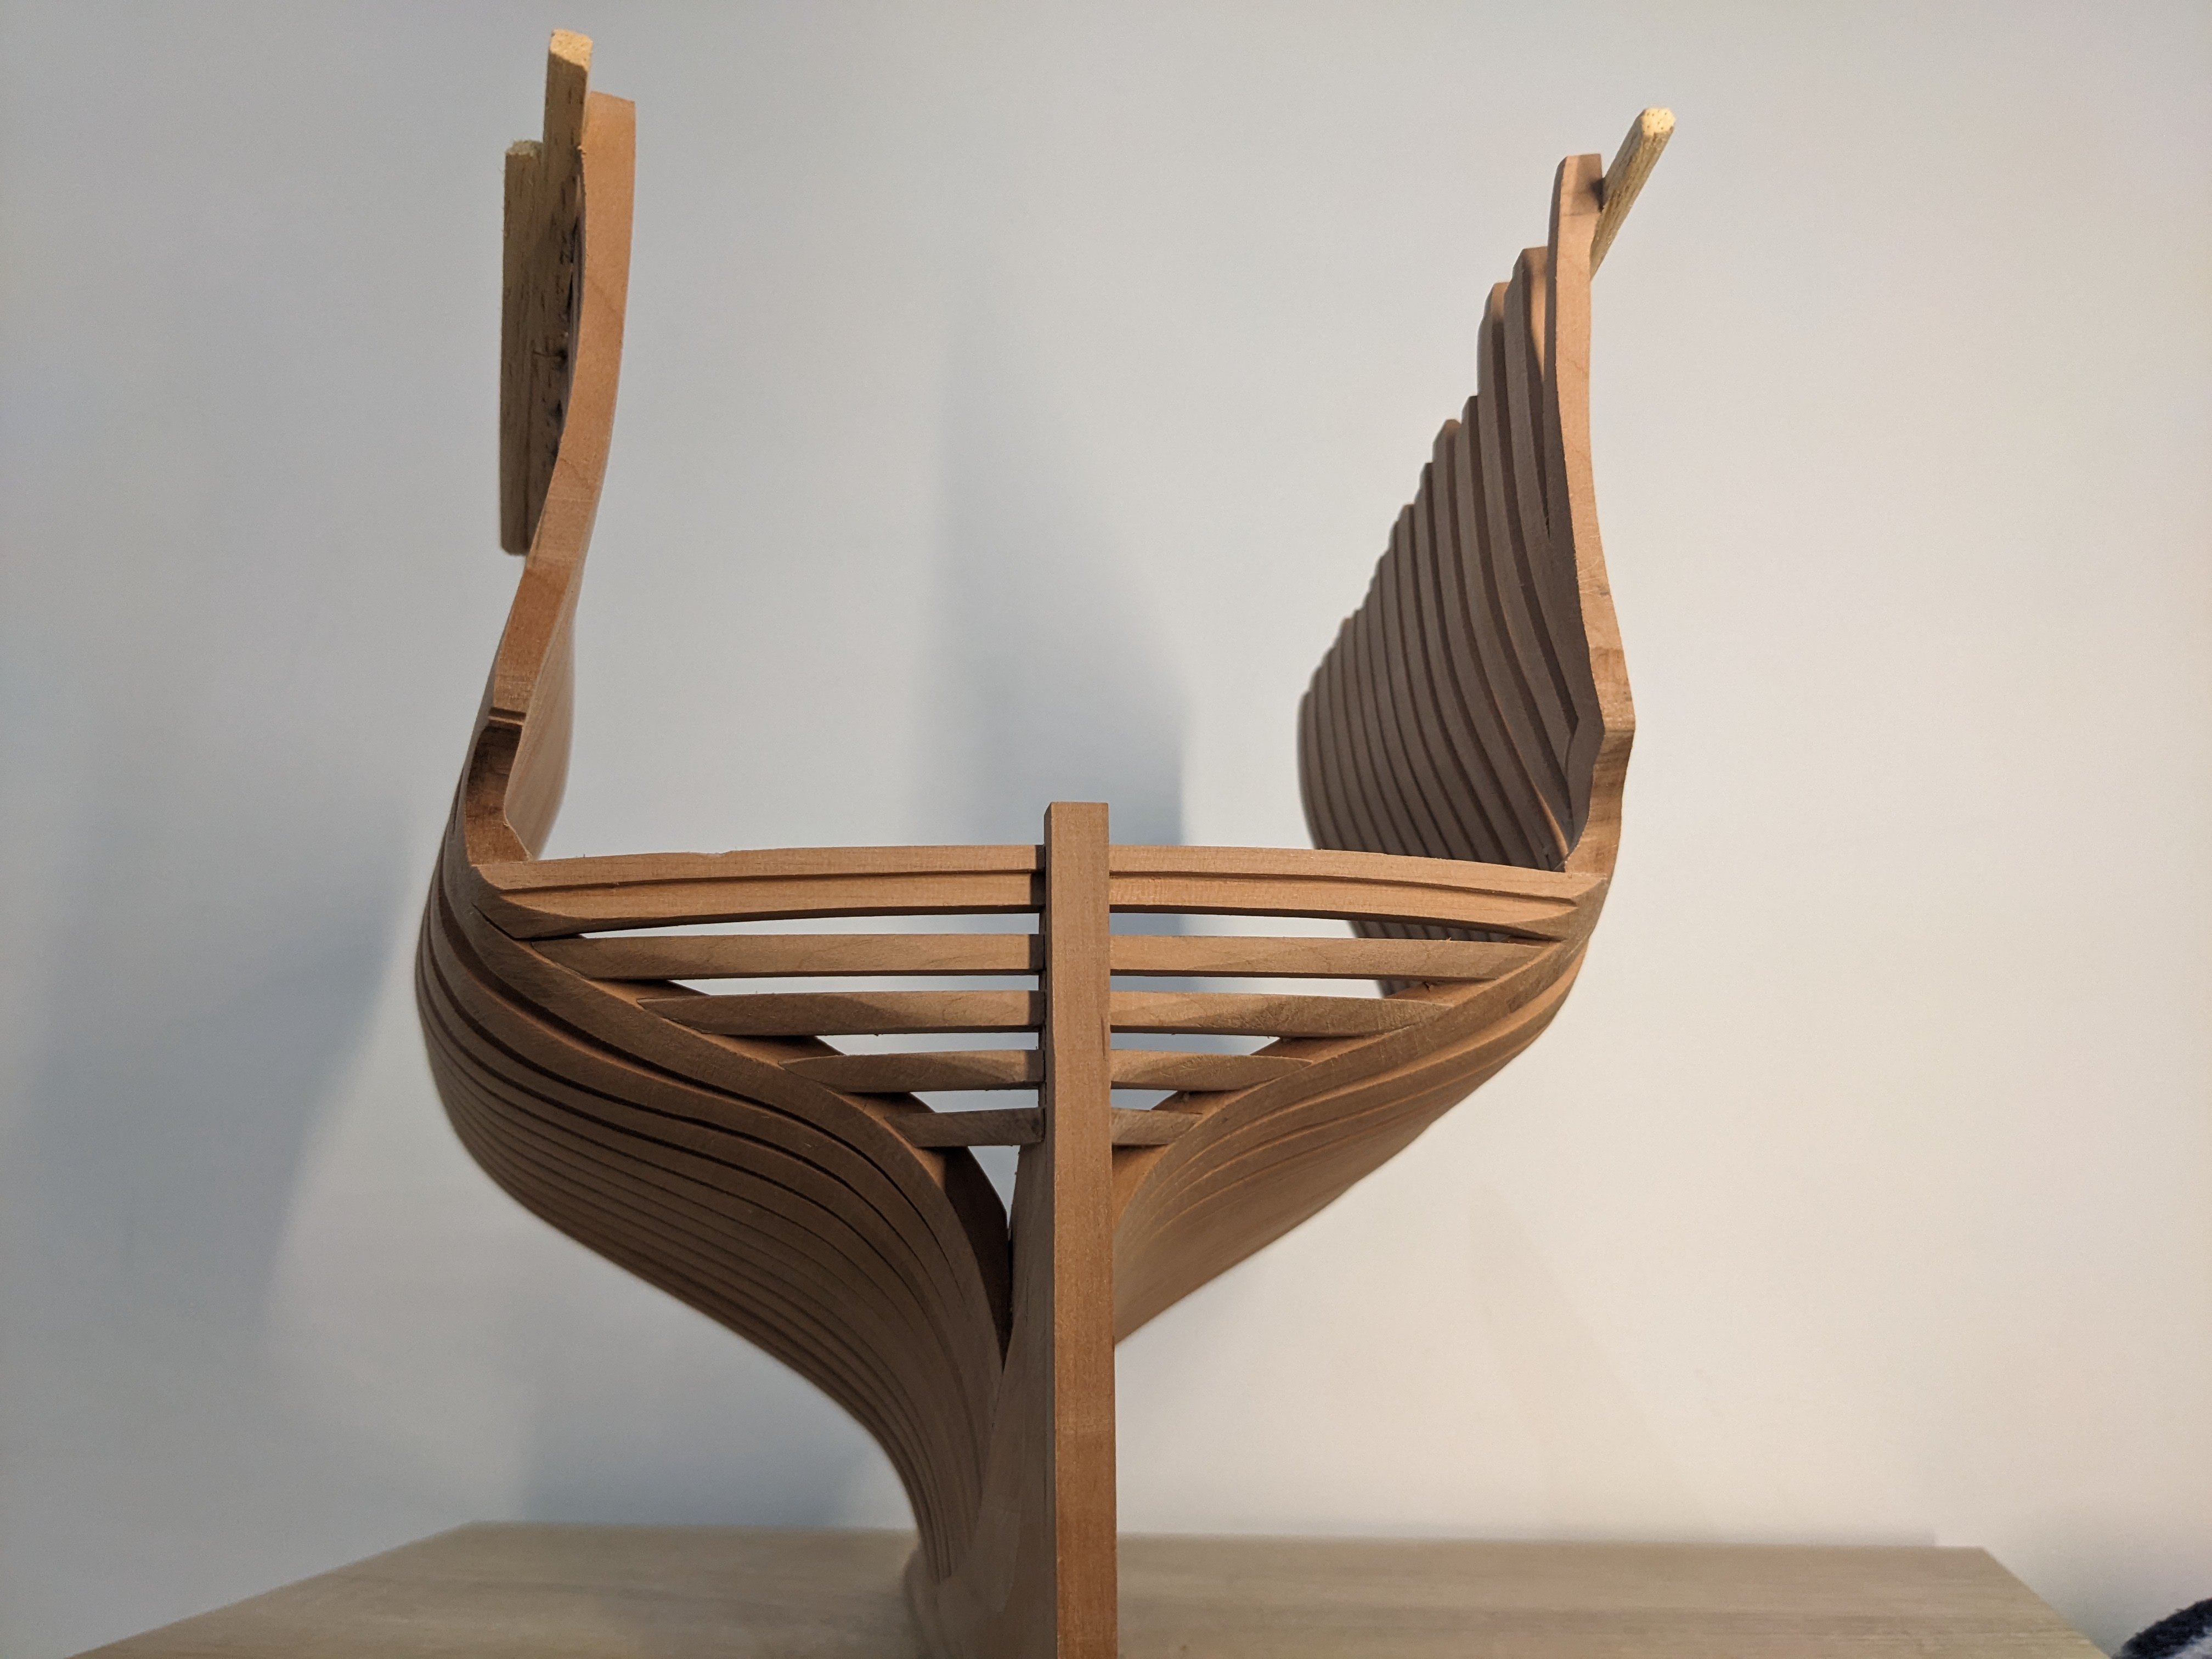
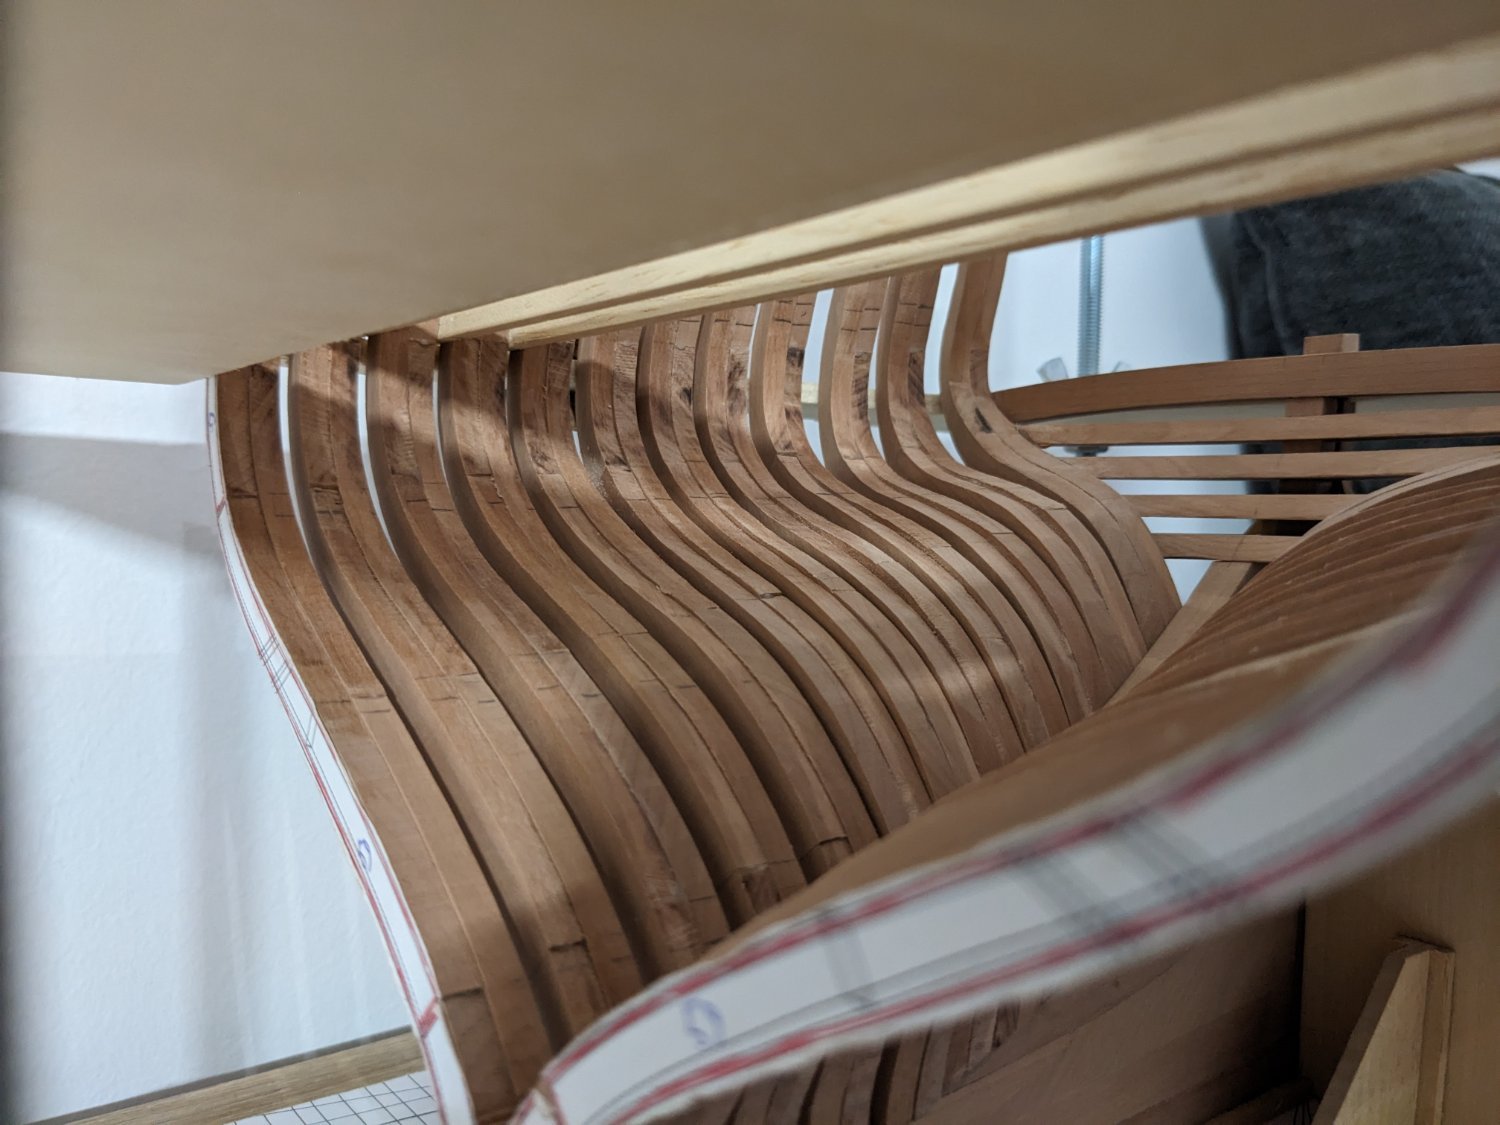
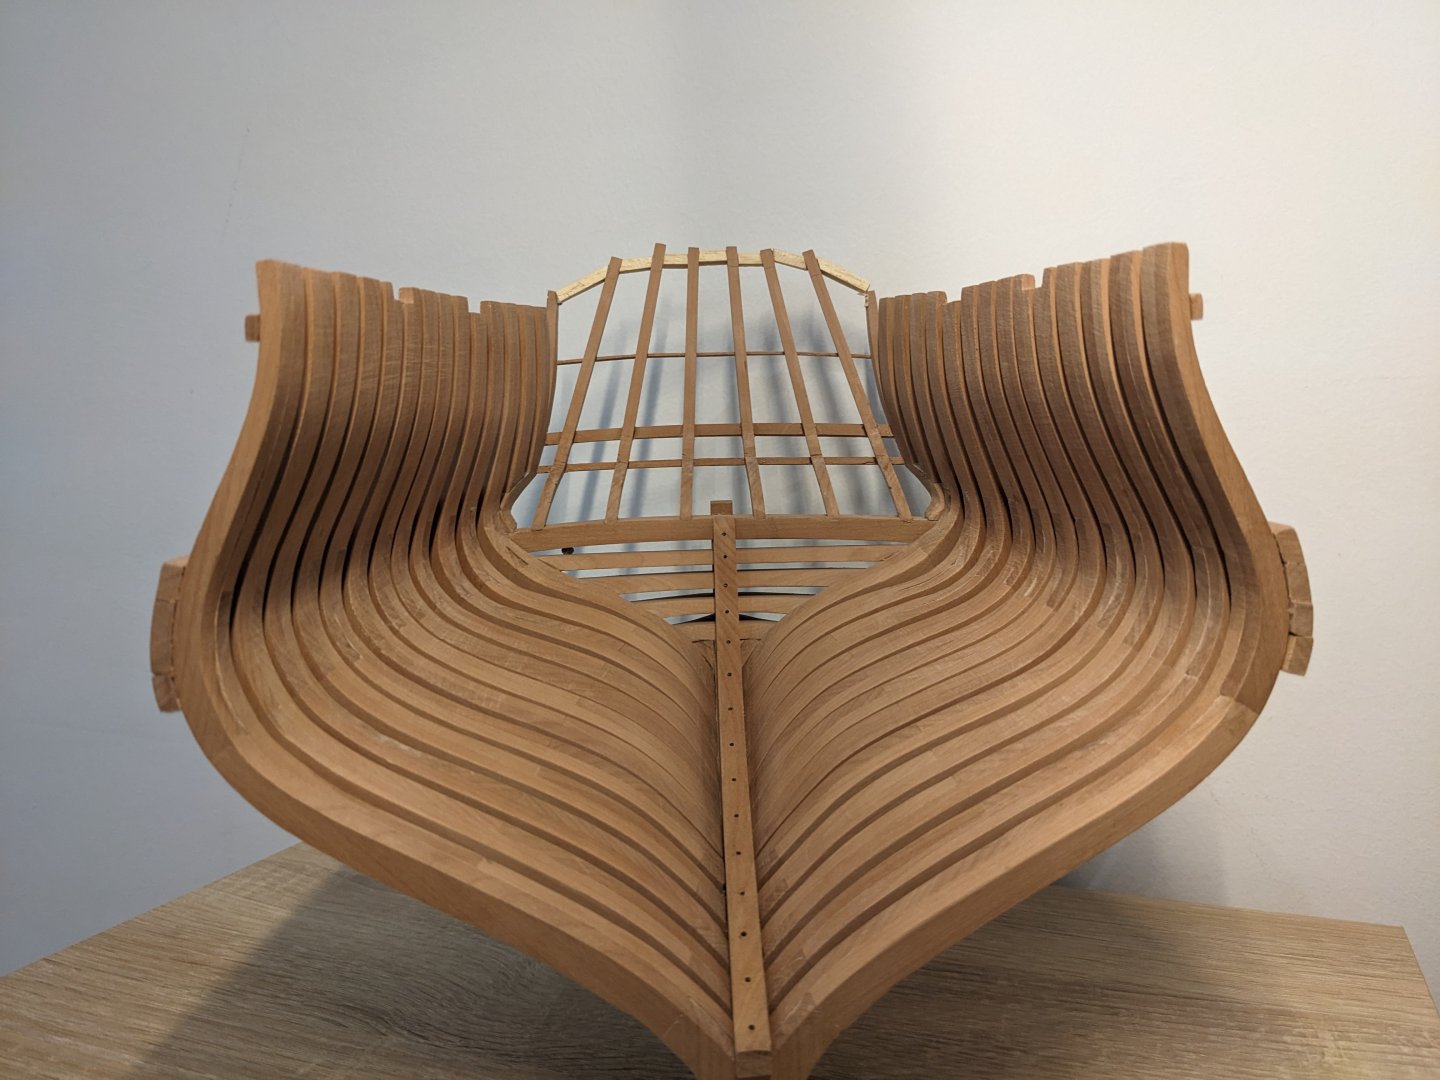
Continuing with the rear frames that will make up the stern gallery. Those stern pieces were a bit tricky to make, I ended up cutting them a few millimeters thicker and sanding them down to shape with the rest of the frames. I think it turned out pretty well! Most of the rough sanding is done, but there's still a lot to be sanded. Sadly I just gouged the yoke a bit this afternoon when sanding the stern, not much I can do about that now though. Also I need to fill out that triangular area below the wing transoms and then sand it all flush.
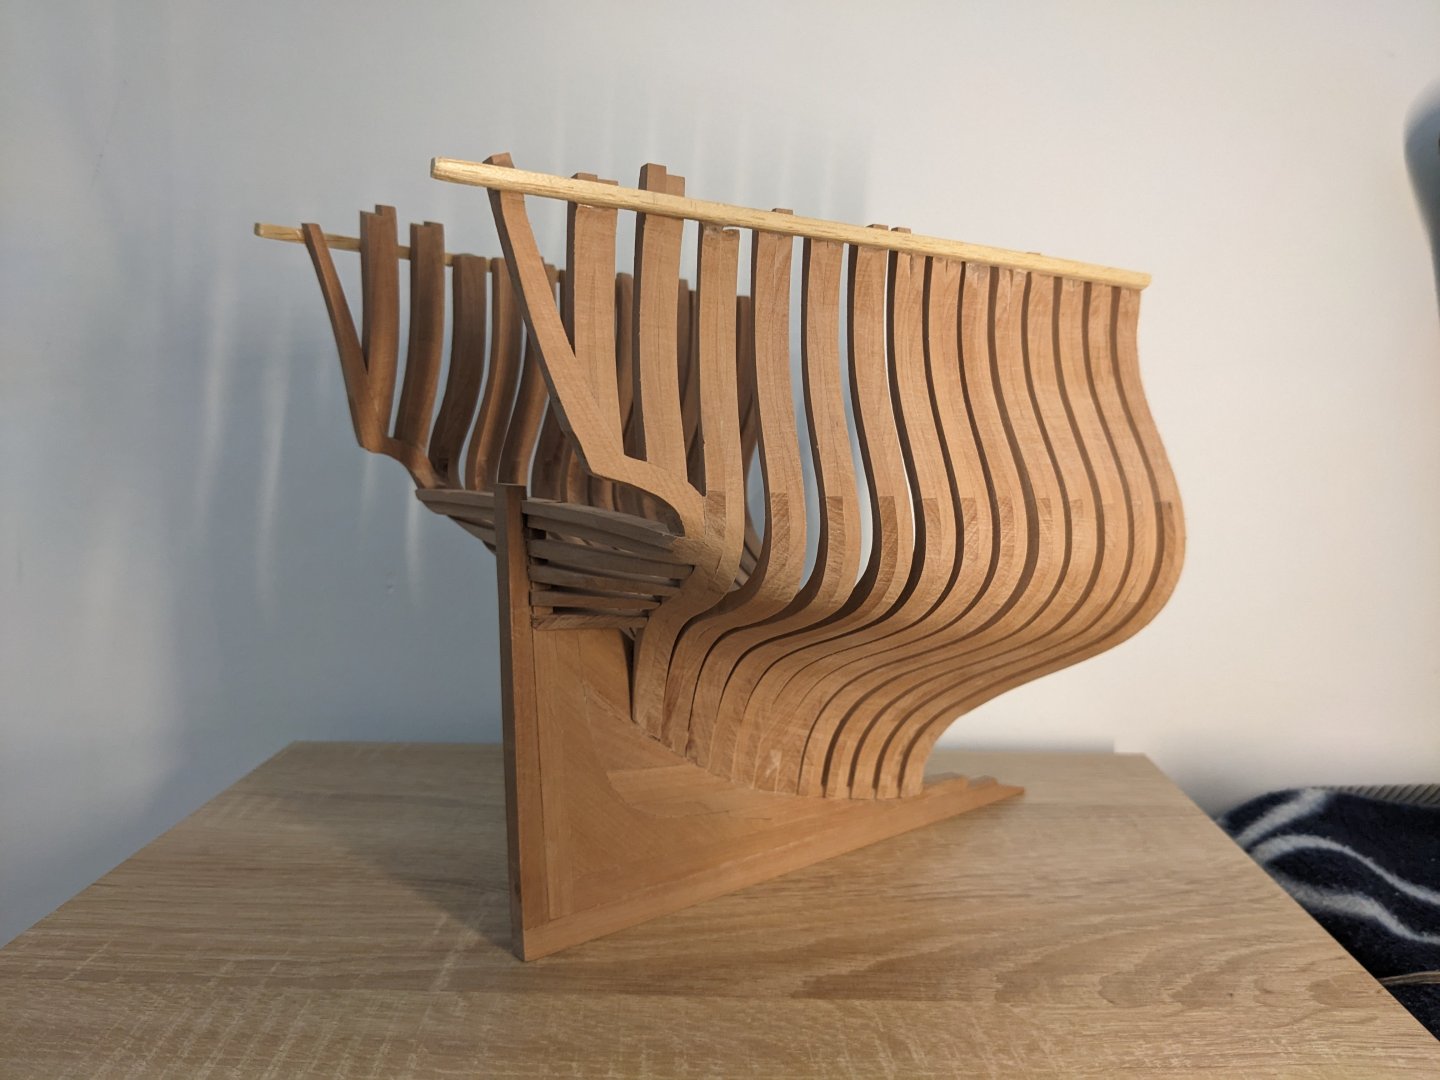
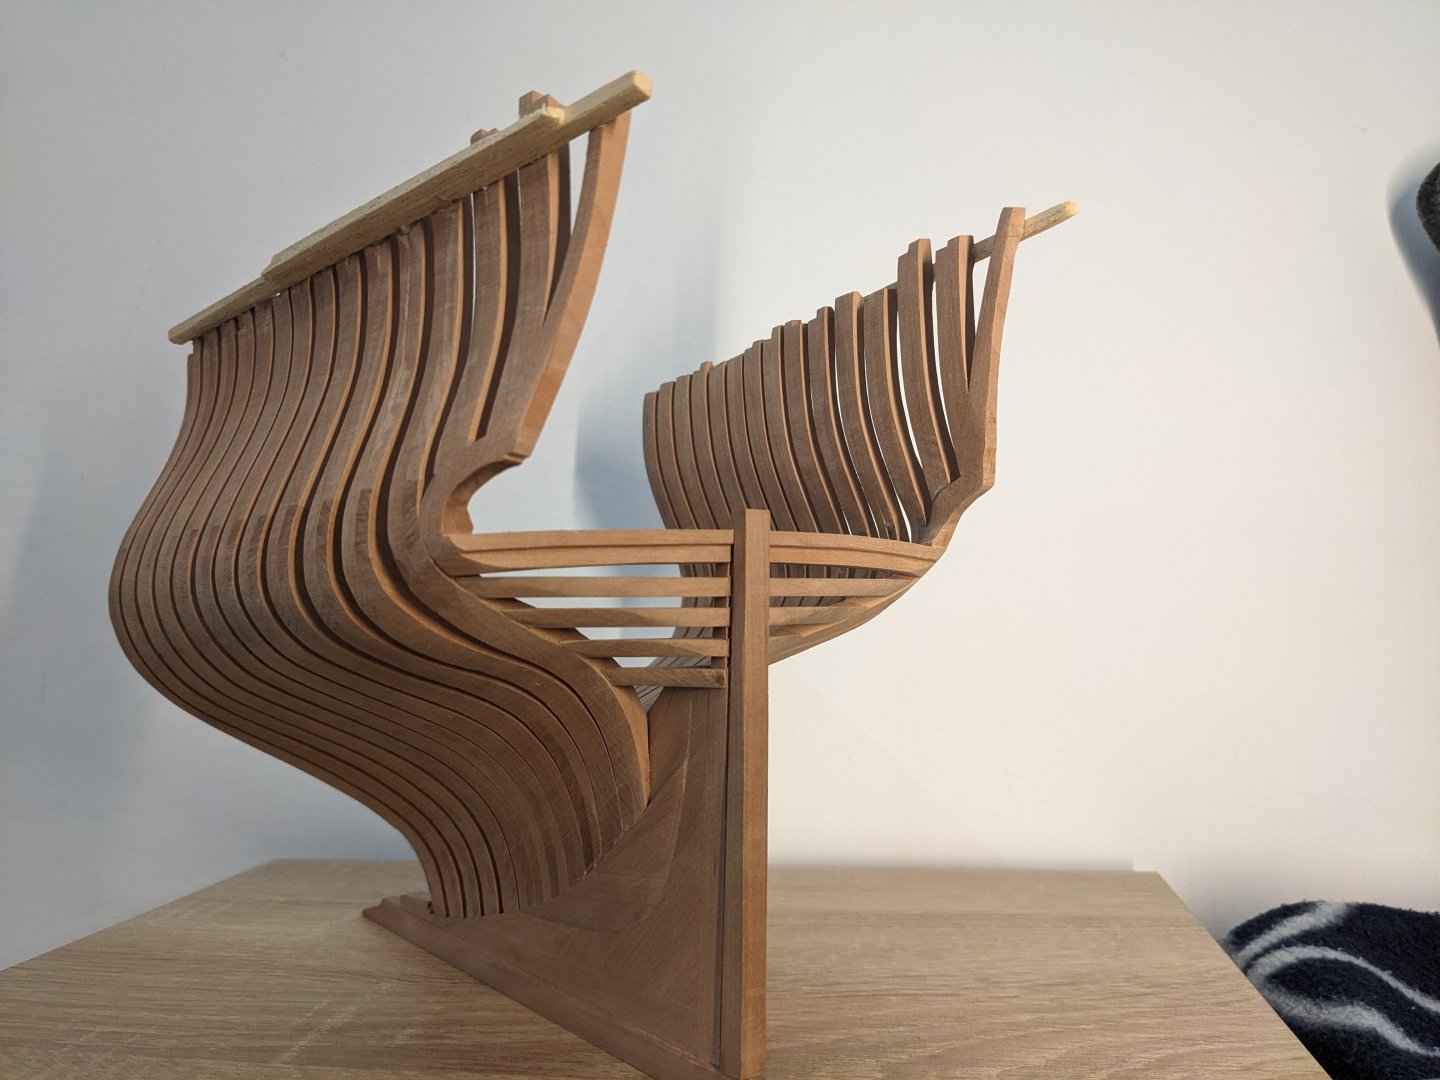

- 99 replies
-
- 19
-
-
-
- ancre
- La Mahonesa
- (and 1 more)
-
It looks amazing!
-
Well that turned out much better than I'd hoped! The hardest part of the frames were sawing all the pieces out by hand, but I eventually got it done (with a sore arm!) and the installation went very well. It definetely helped having a disc sander with a tilting table which allowed me to sand the angle at the foot of the frames with great precision.


- 99 replies
-
- 18
-
-
- ancre
- La Mahonesa
- (and 1 more)
-
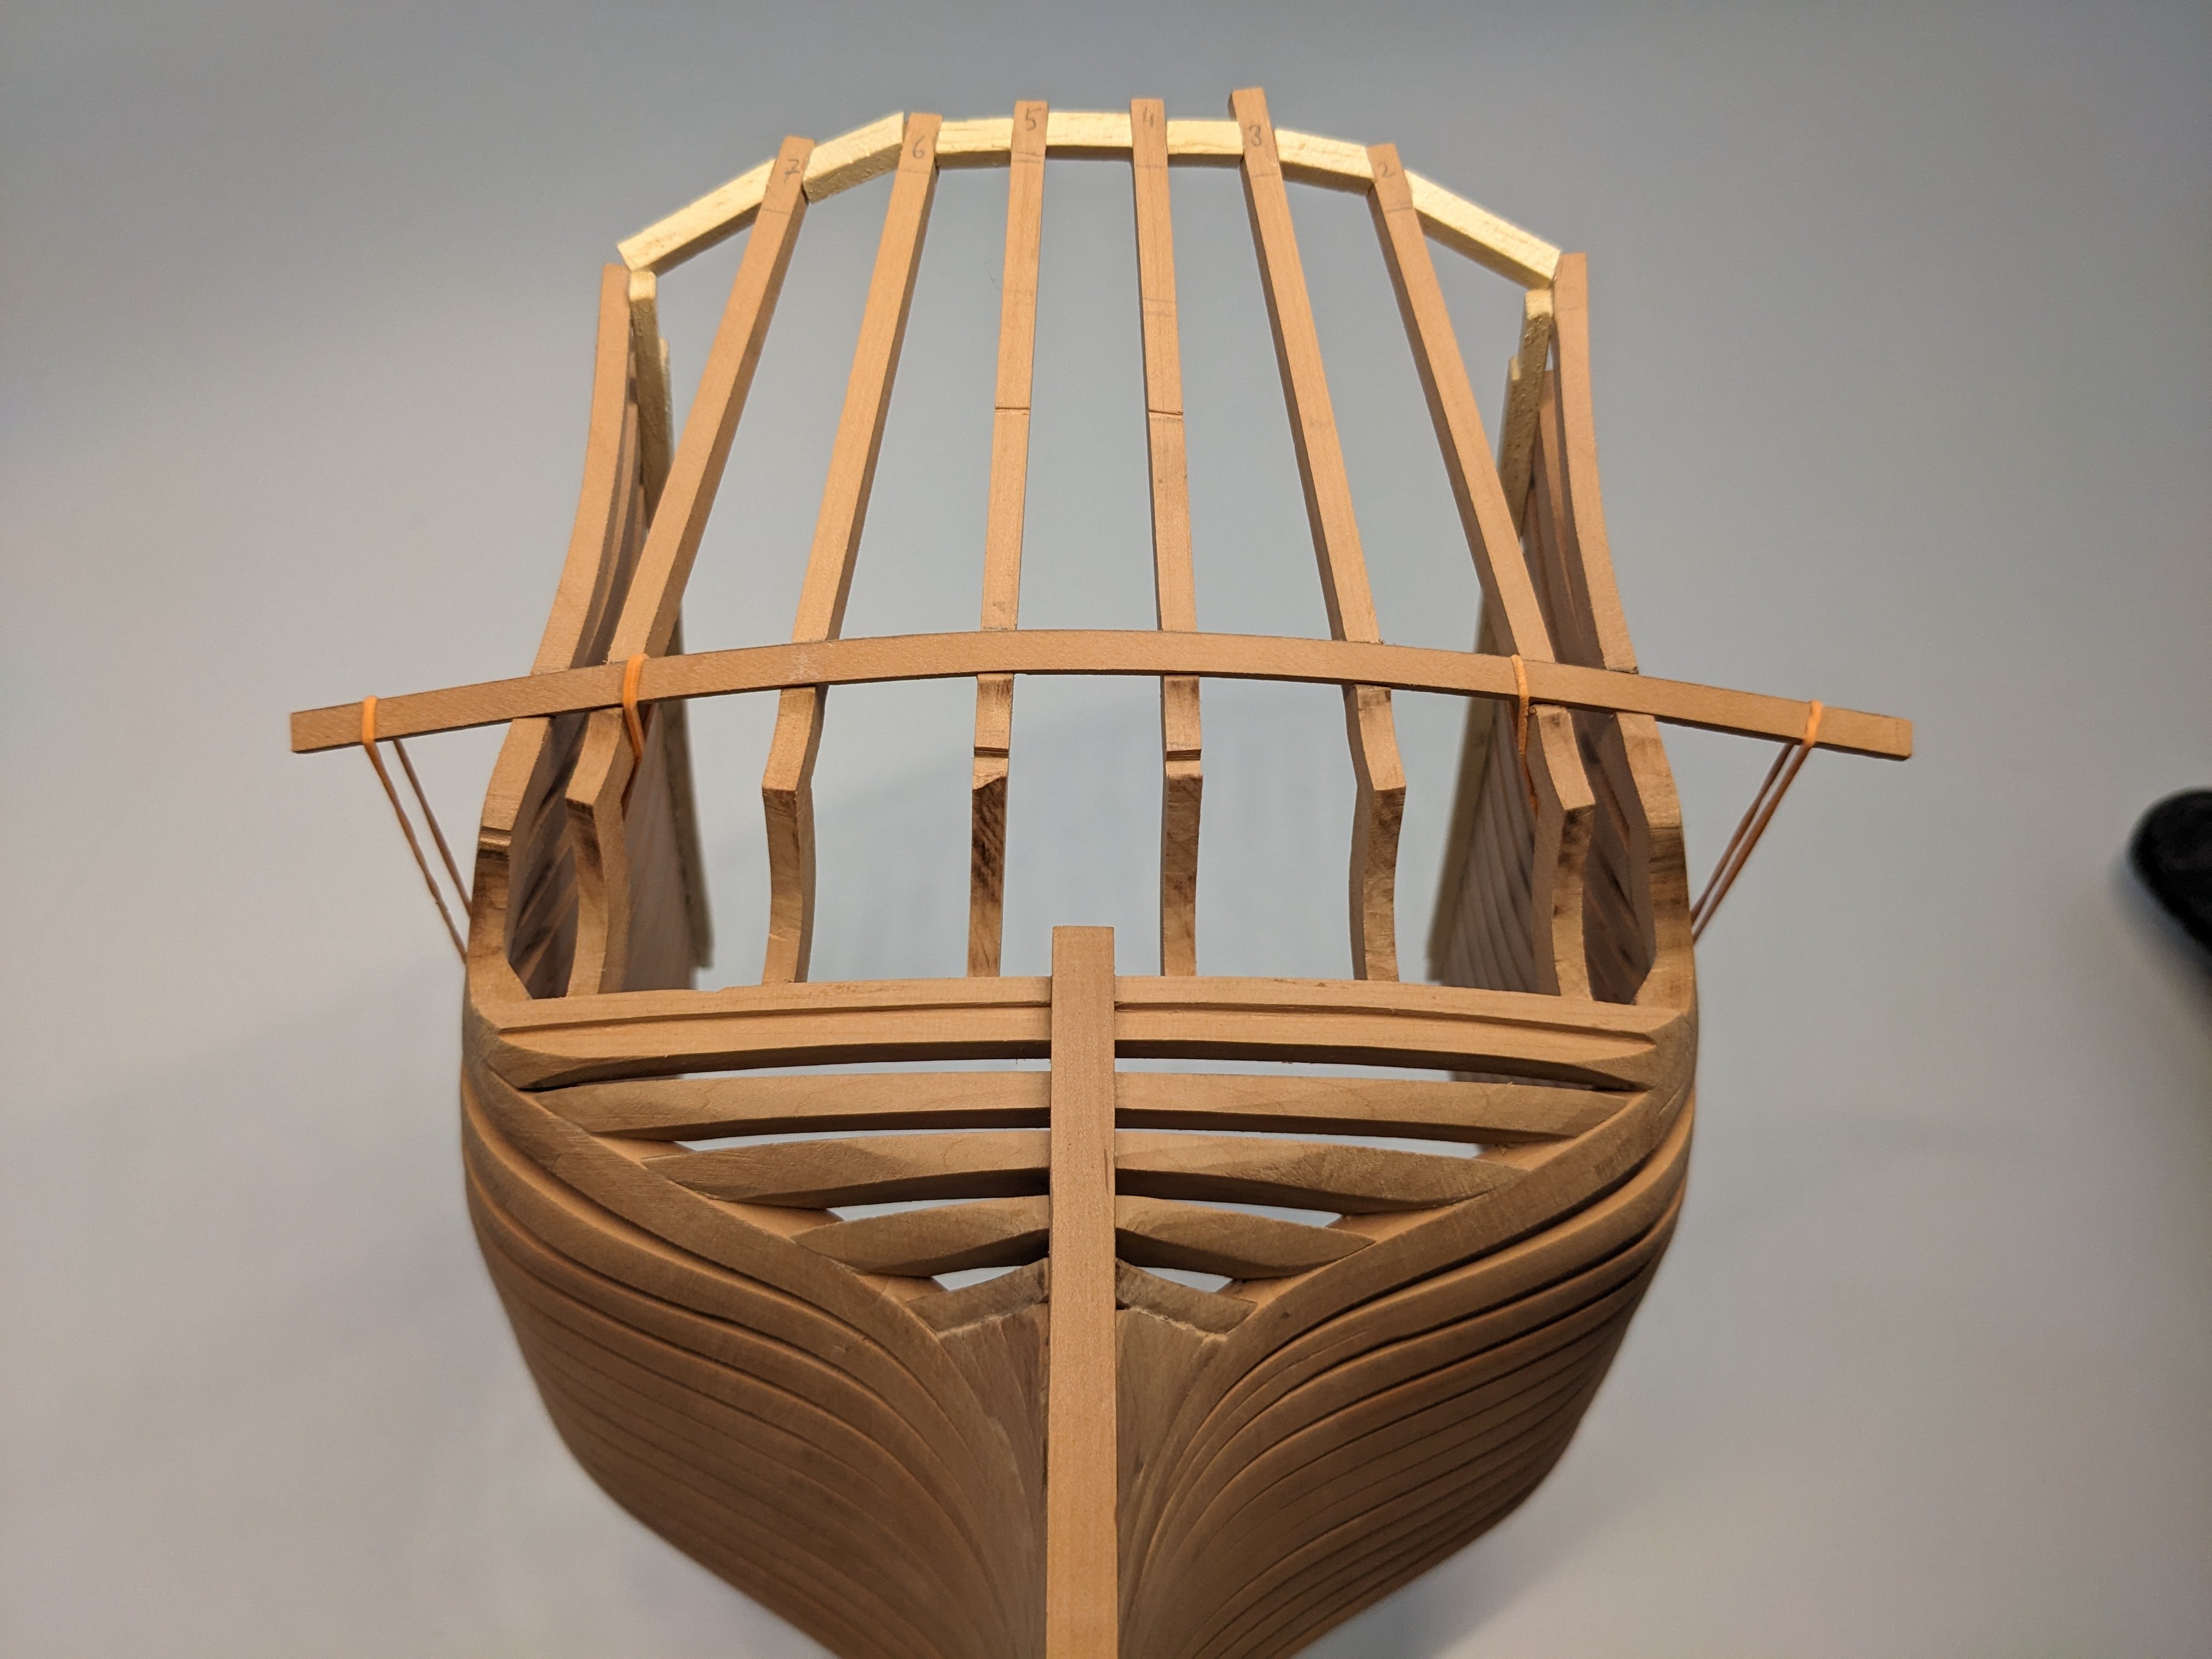
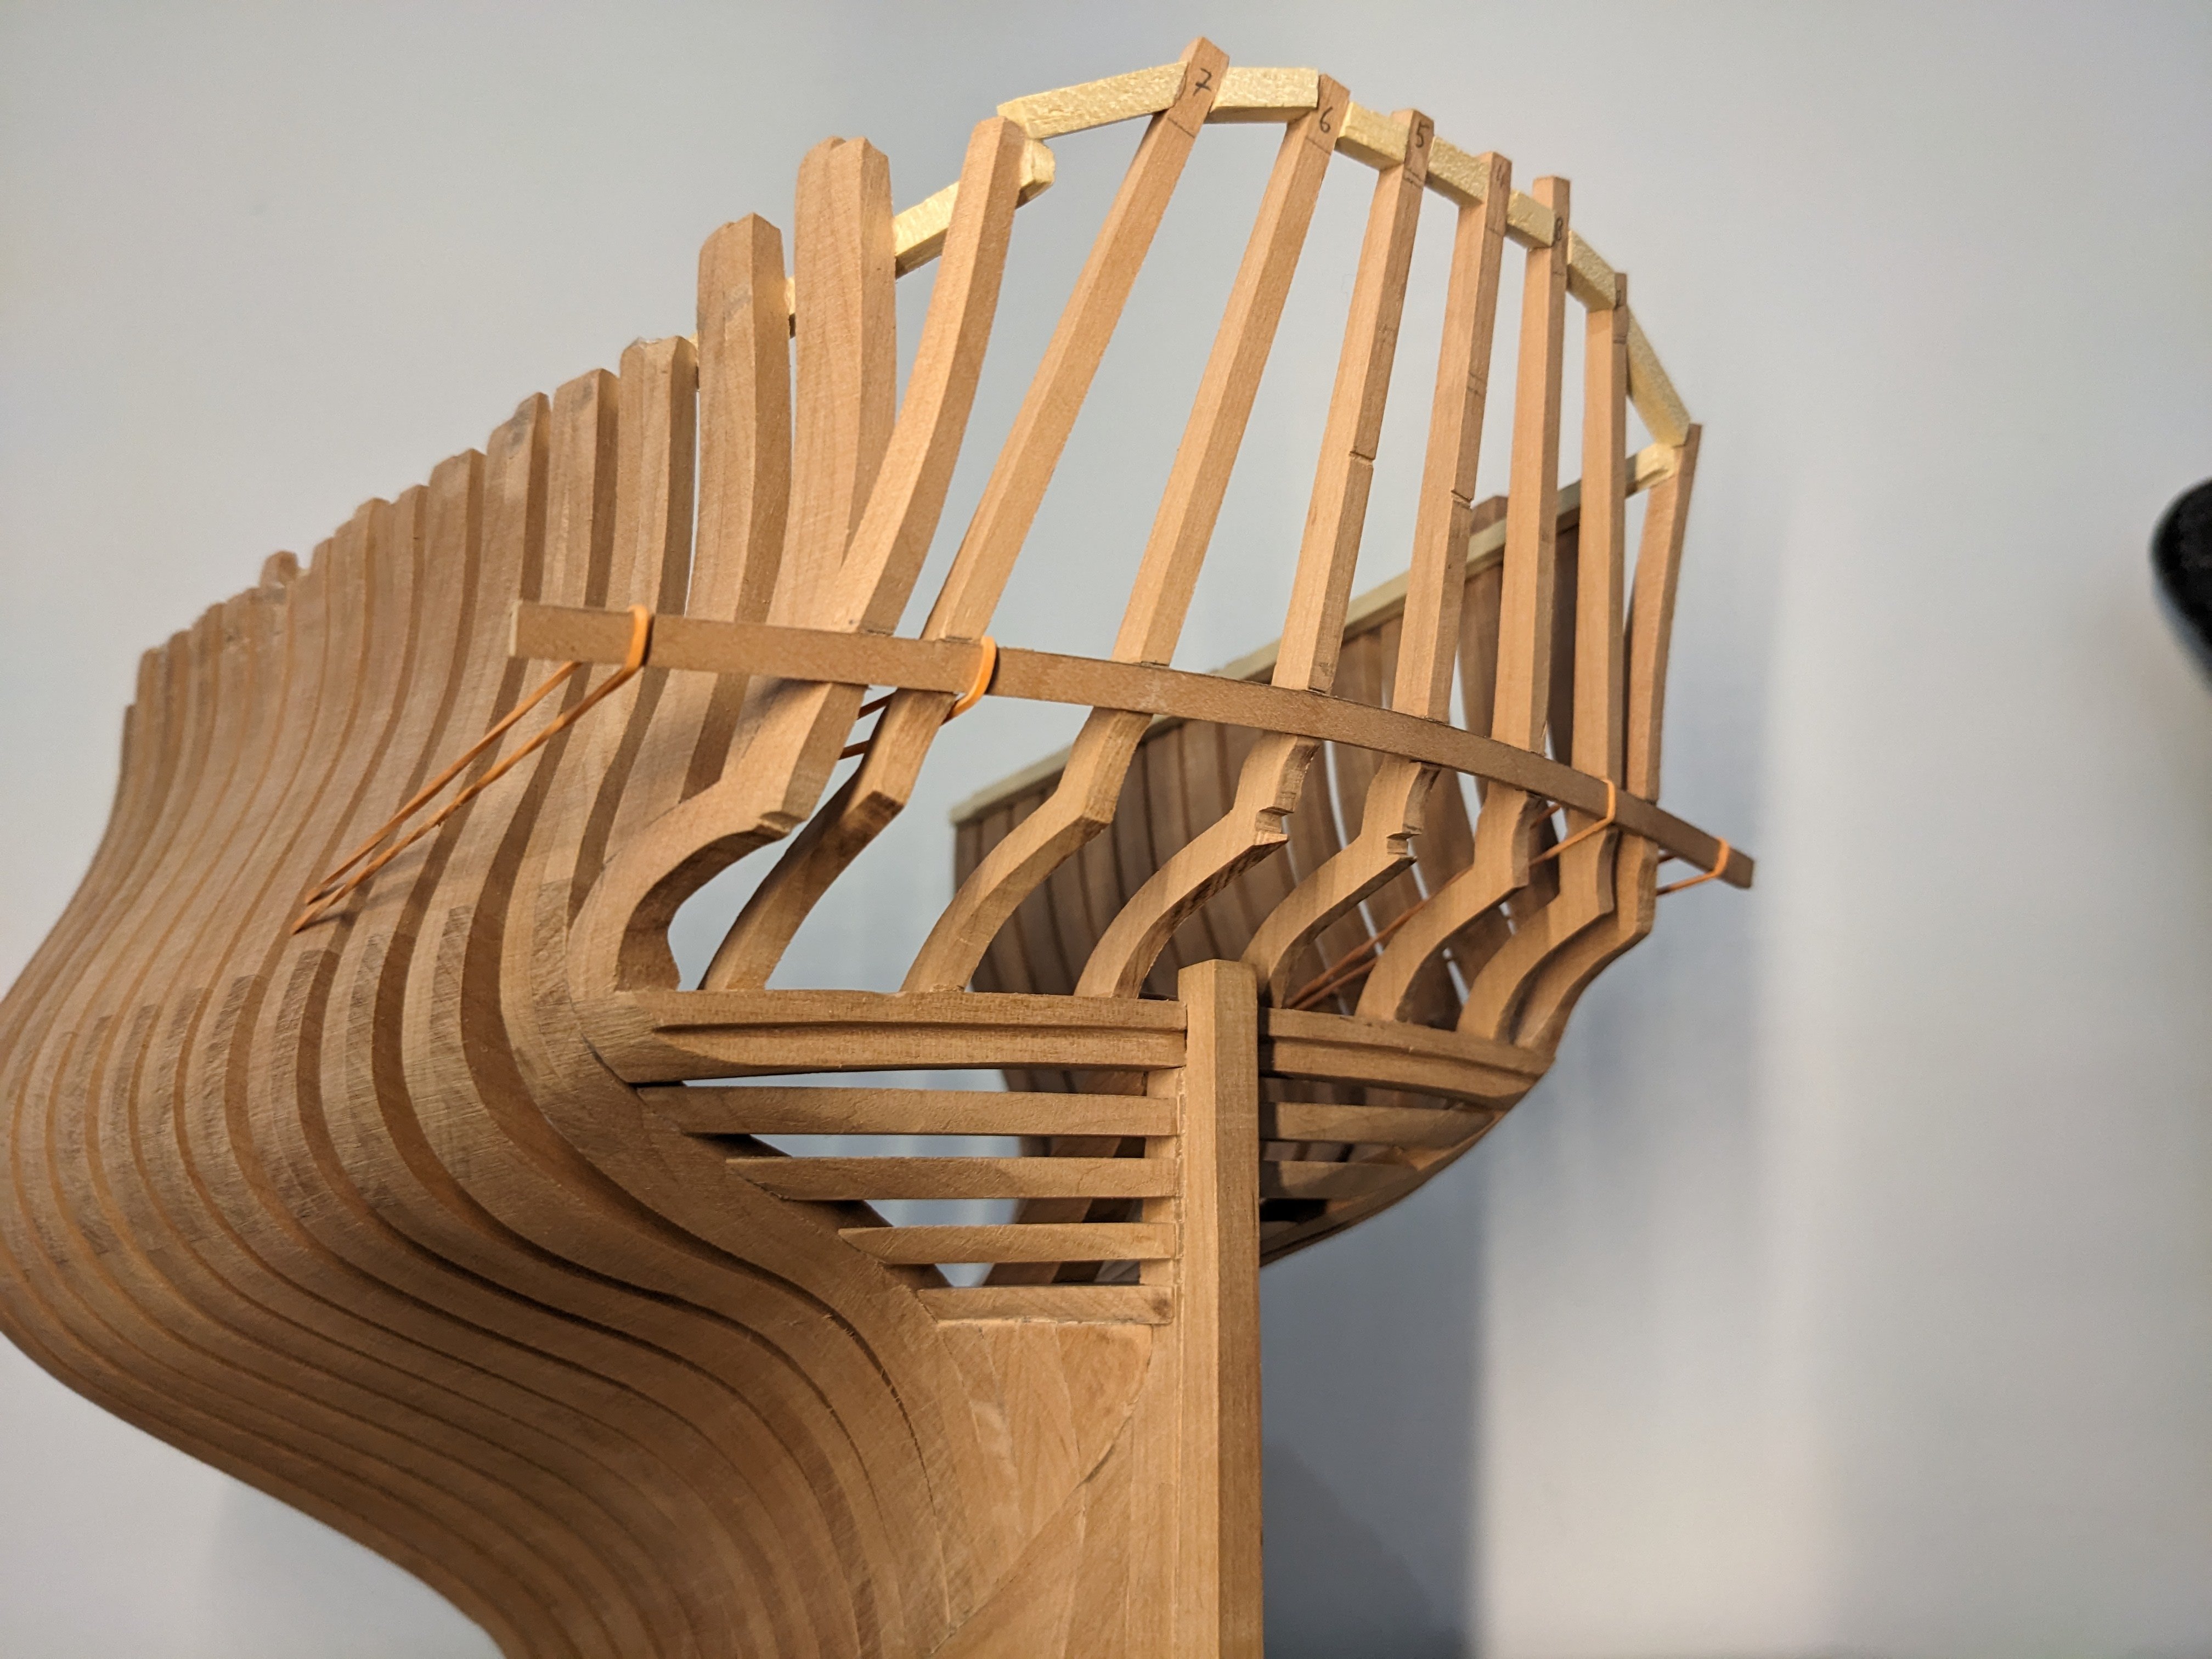
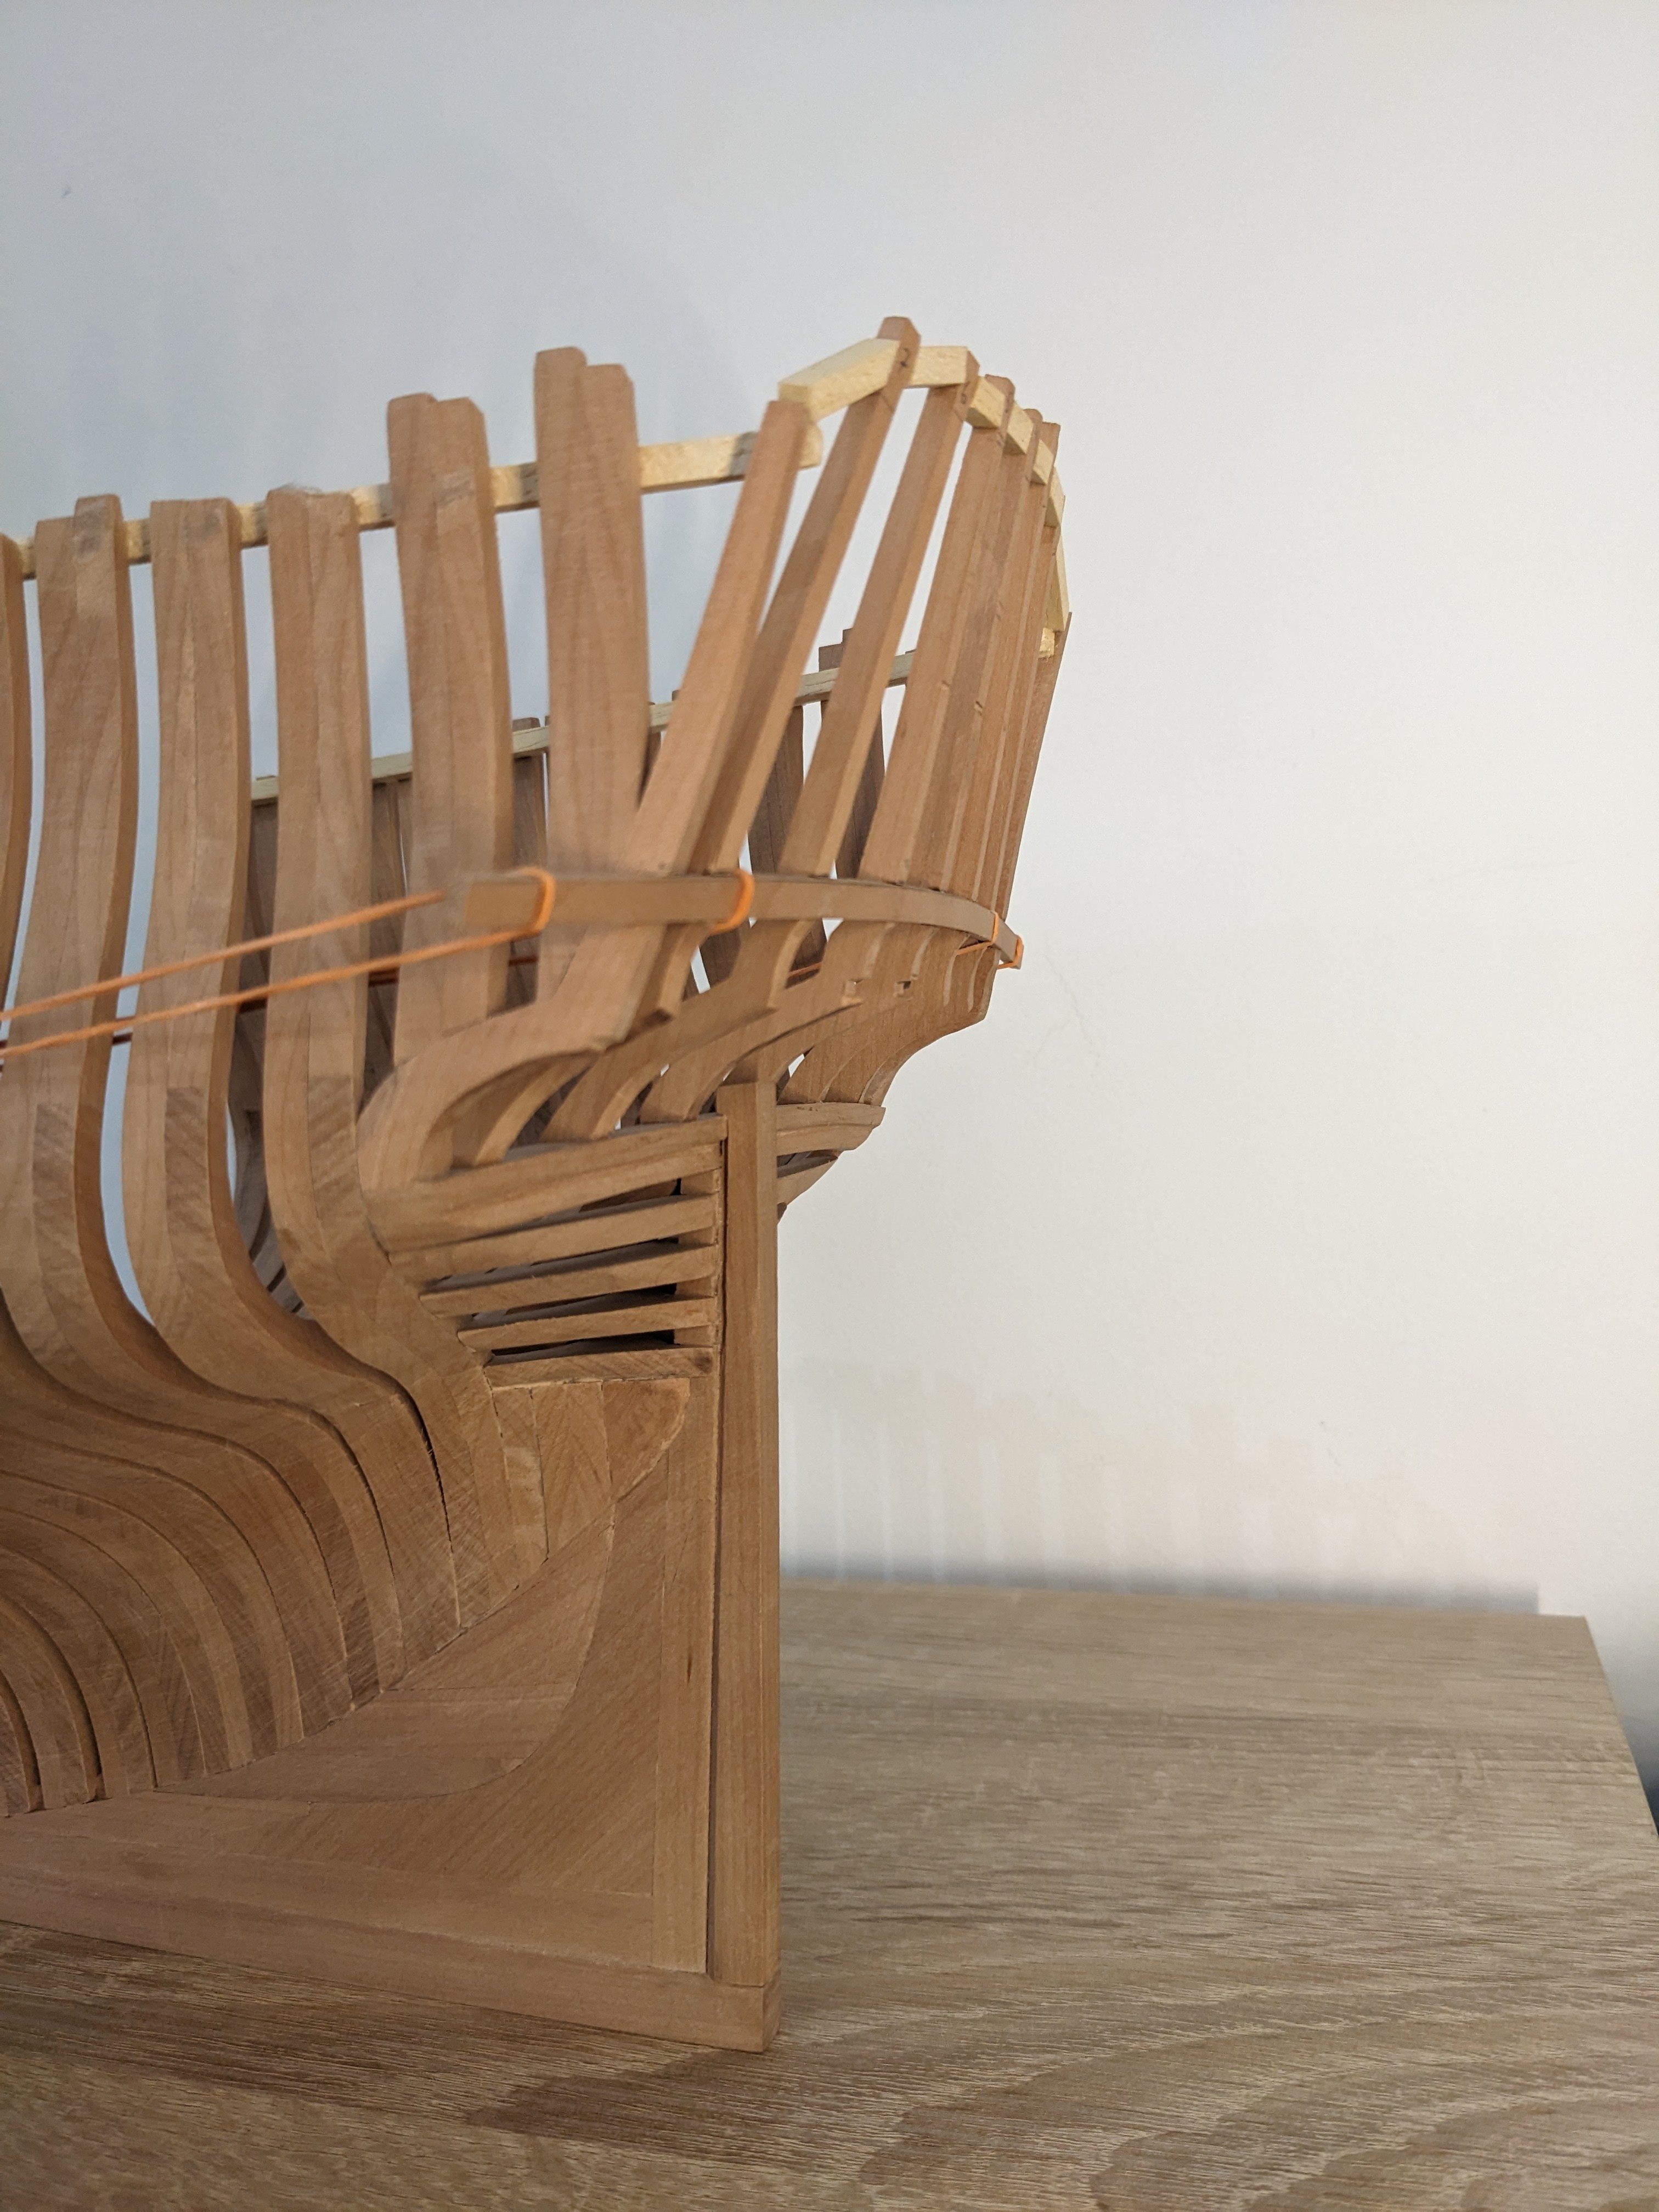
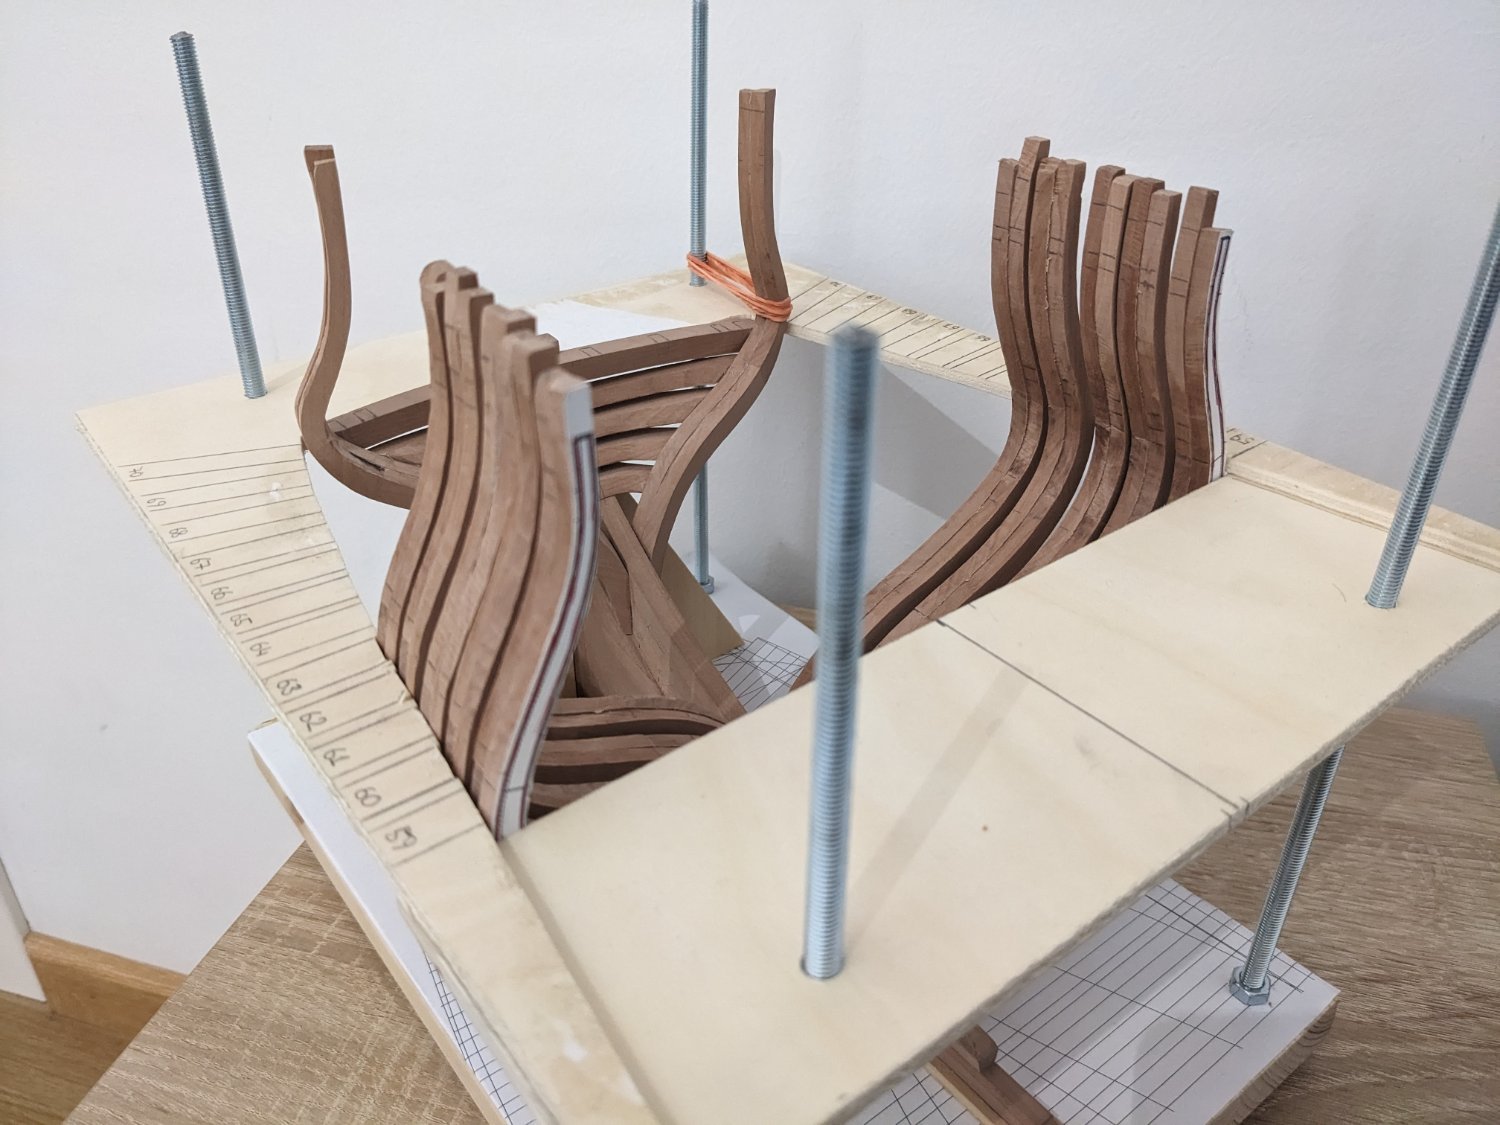
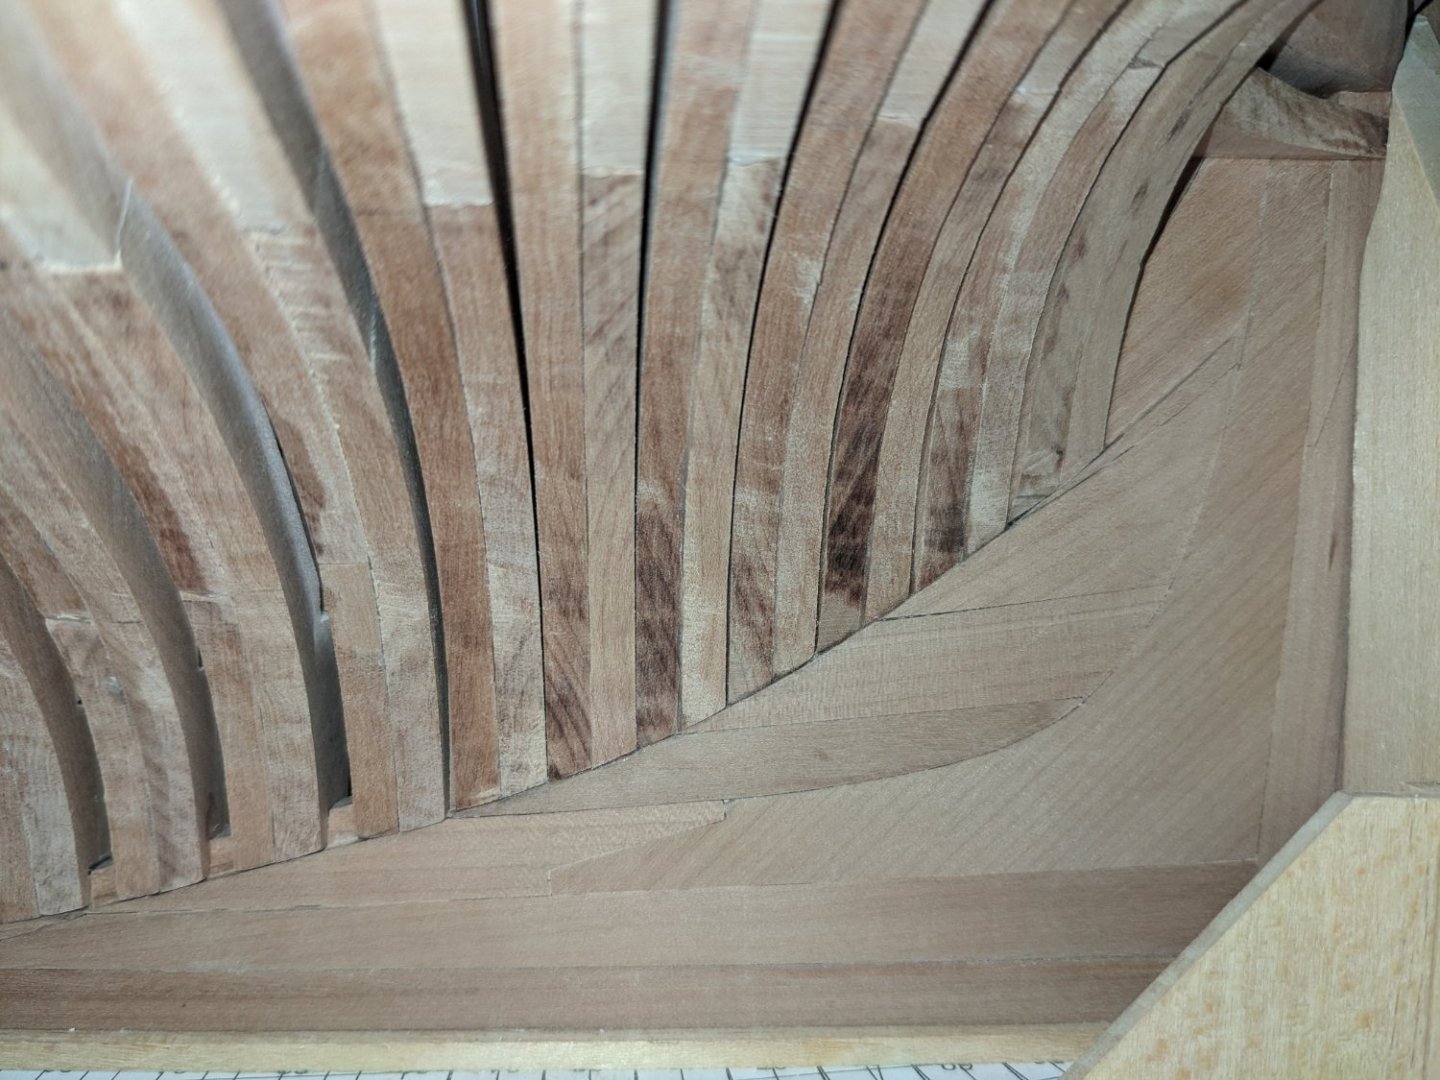
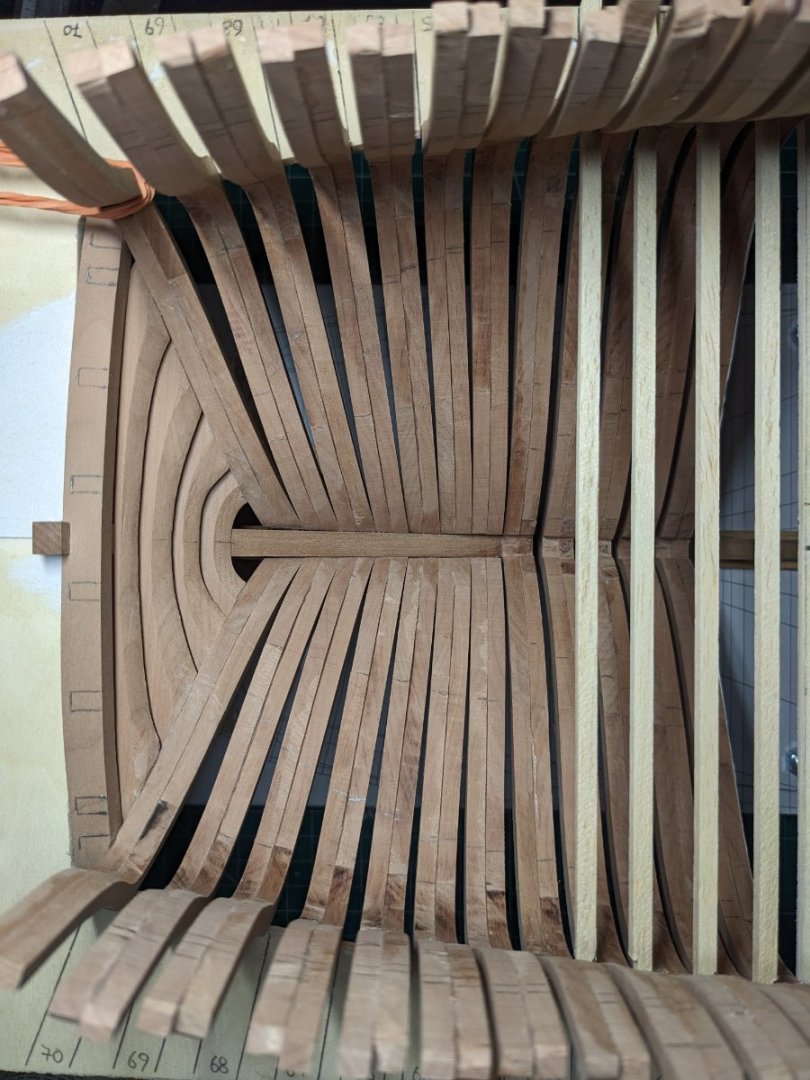
Not much progress lately, only that I built the cradle / building board to attach the frames. Unfortunately I didn't install the last cant frame perfectly well, it's about 1-2 mm off compared to the other side. Probably not much I can do about that now though. I'm using rubber bands to try and force it back a little, maybe when I install the rest of the frames and keep them together with the wales it'll stay in the correct position without warping the whole model. Or maybe not... Honestly I don't feel like starting all over so I'll have to accept it as it is. After all I chose this model to learn how to build plank-on-frame, and this is one of those lessons. Now I'm kind of scared to glue the 5 full frames in, in case I mess it up. 🙃

- 99 replies
-
- 11
-
-
- ancre
- La Mahonesa
- (and 1 more)