HOLIDAY DONATION DRIVE - SUPPORT MSW - DO YOUR PART TO KEEP THIS GREAT FORUM GOING! (Only 13 donations so far - C'mon guys!)
×


etsinko
-
Posts
94 -
Joined
-
Last visited
Content Type
Profiles
Forums
Gallery
Events
Everything posted by etsinko
-
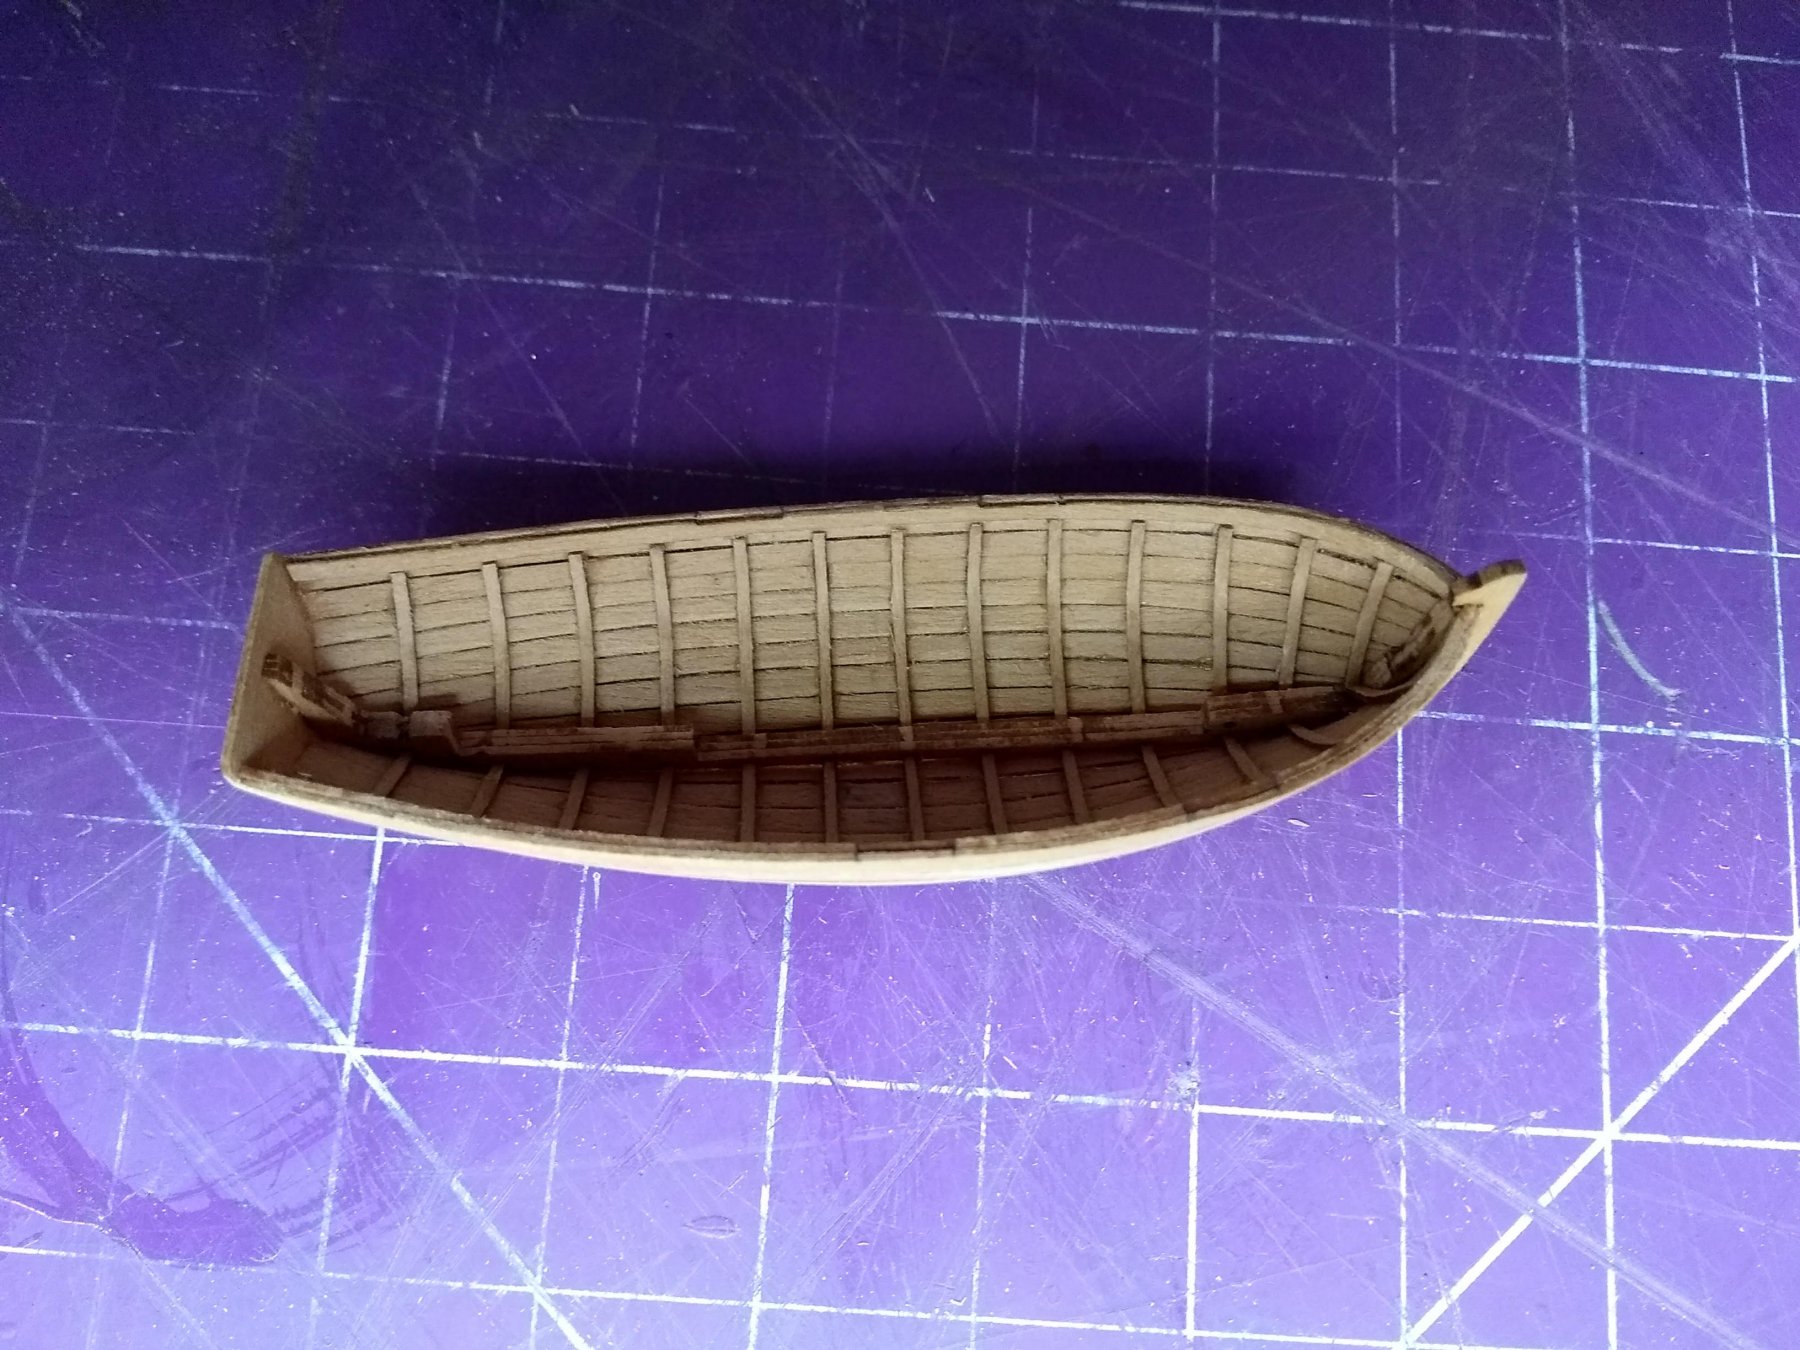
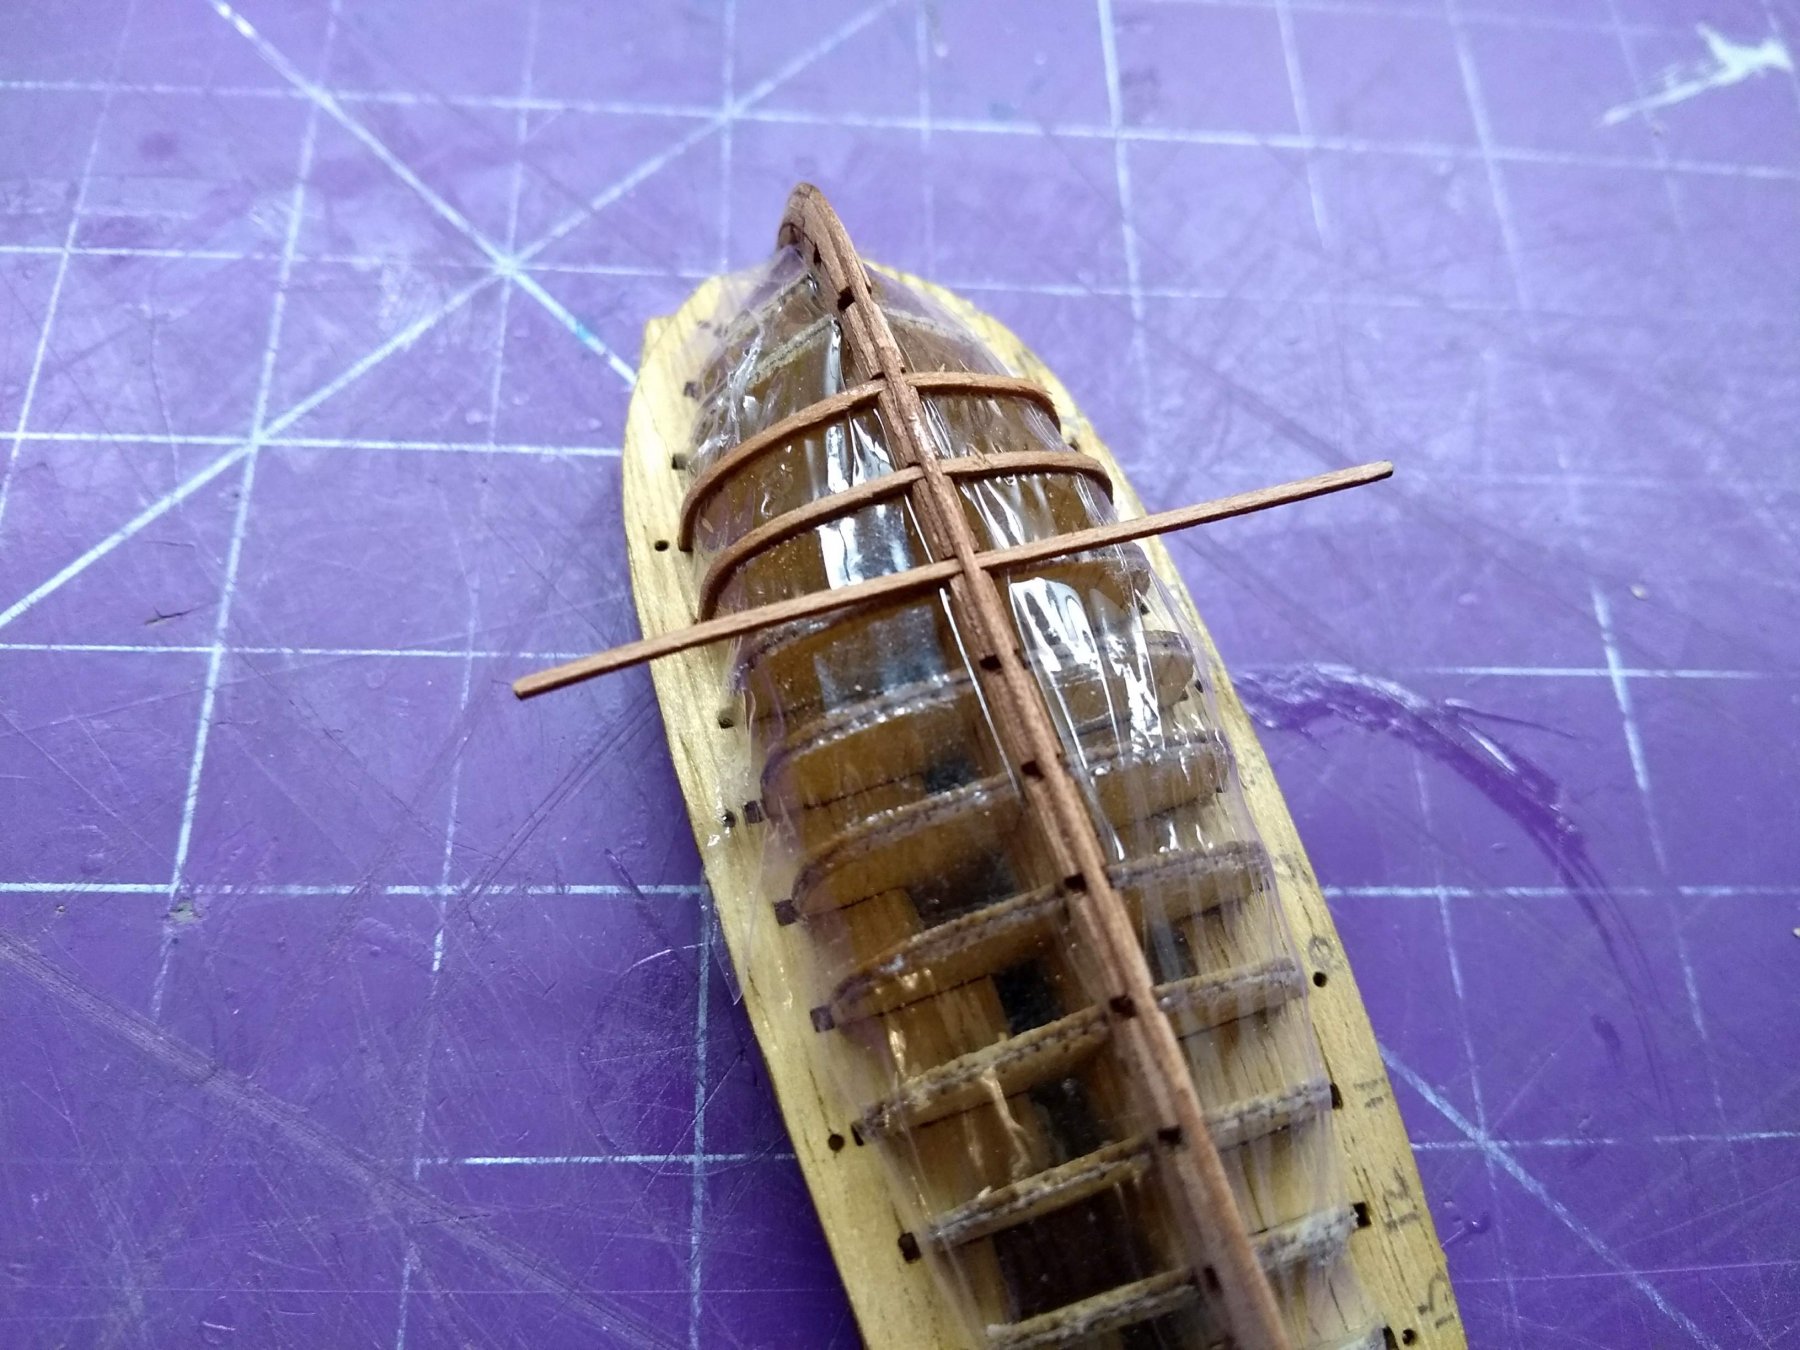
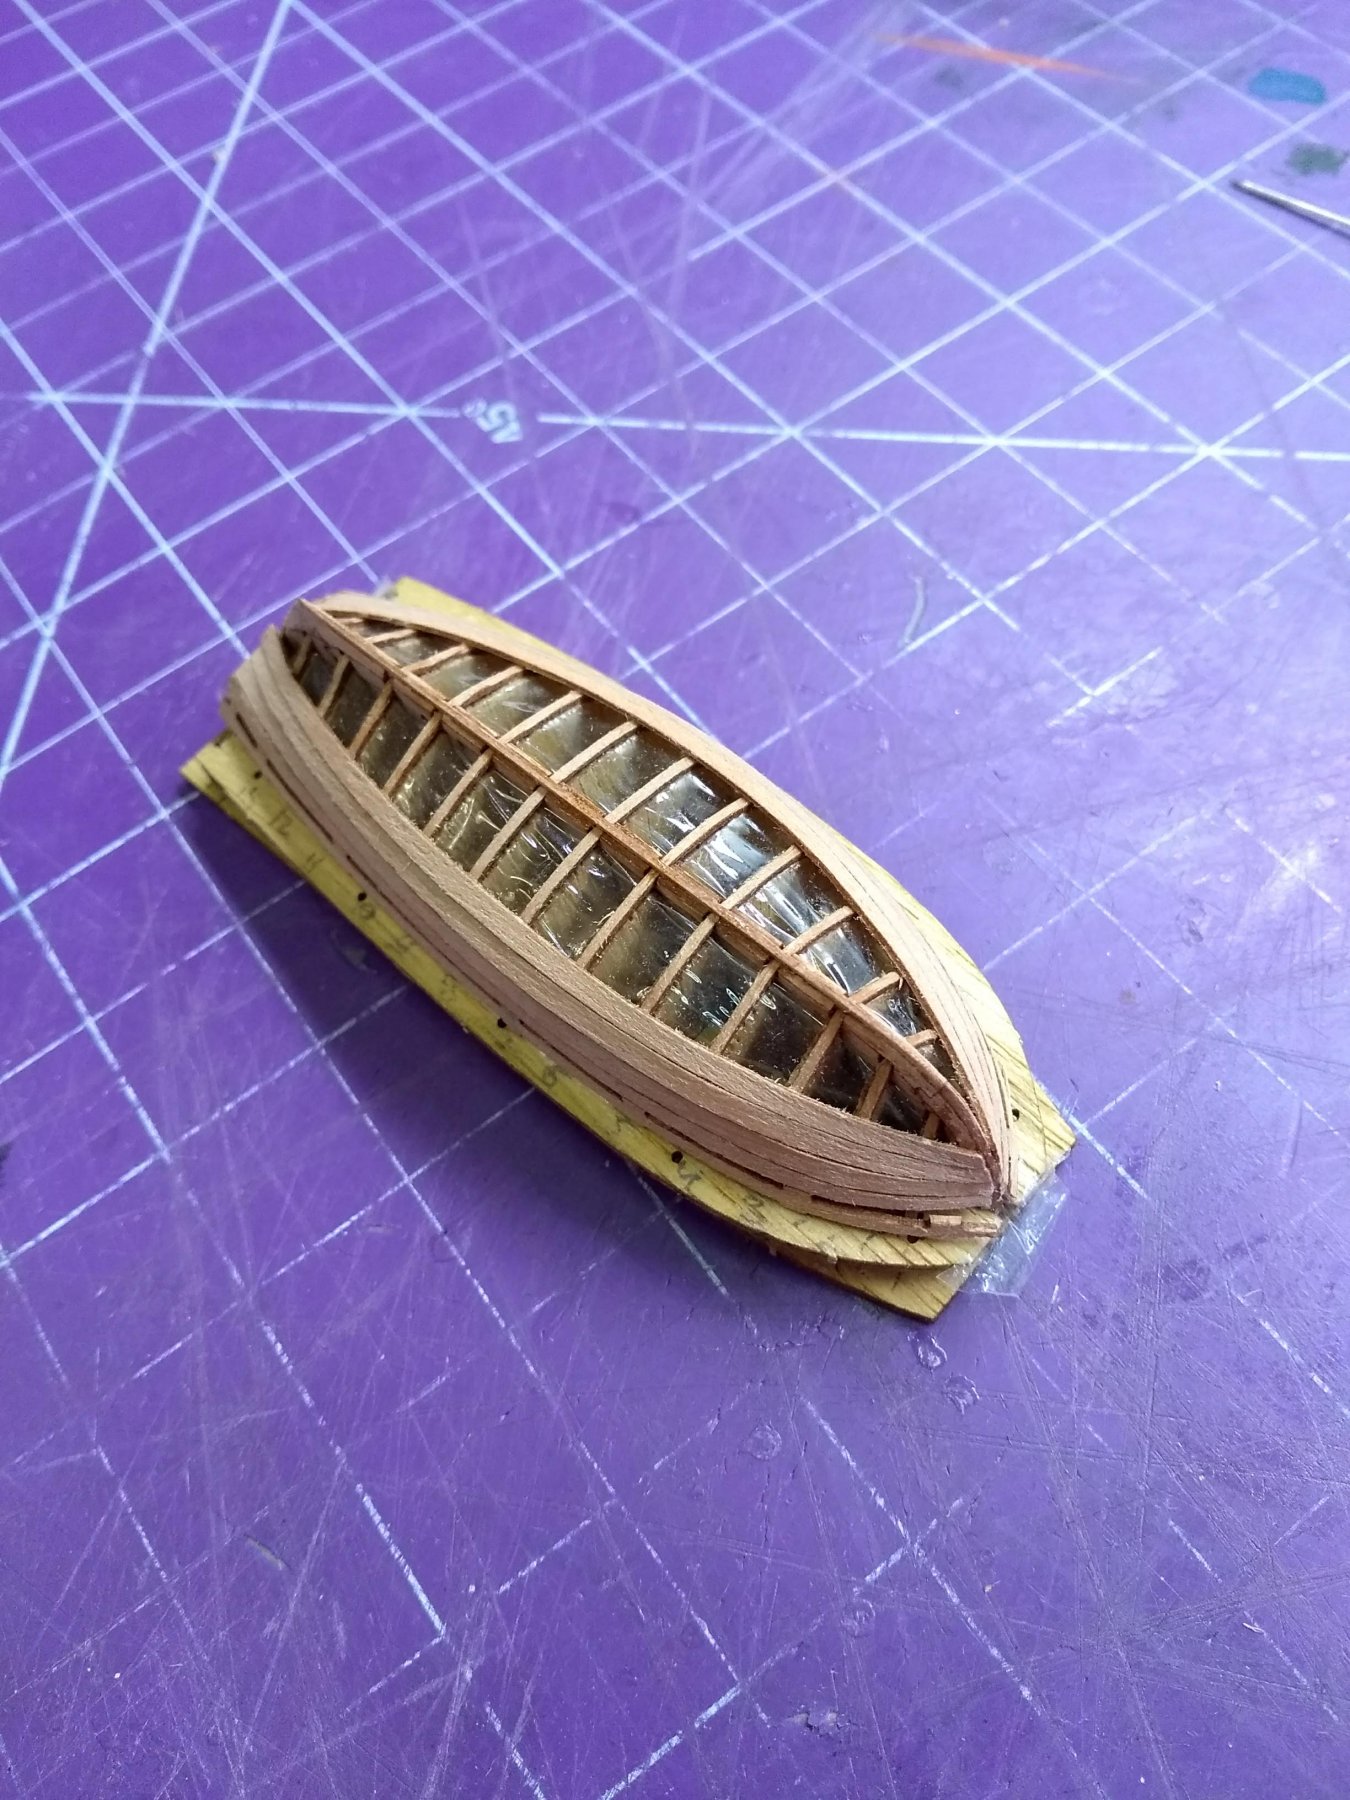
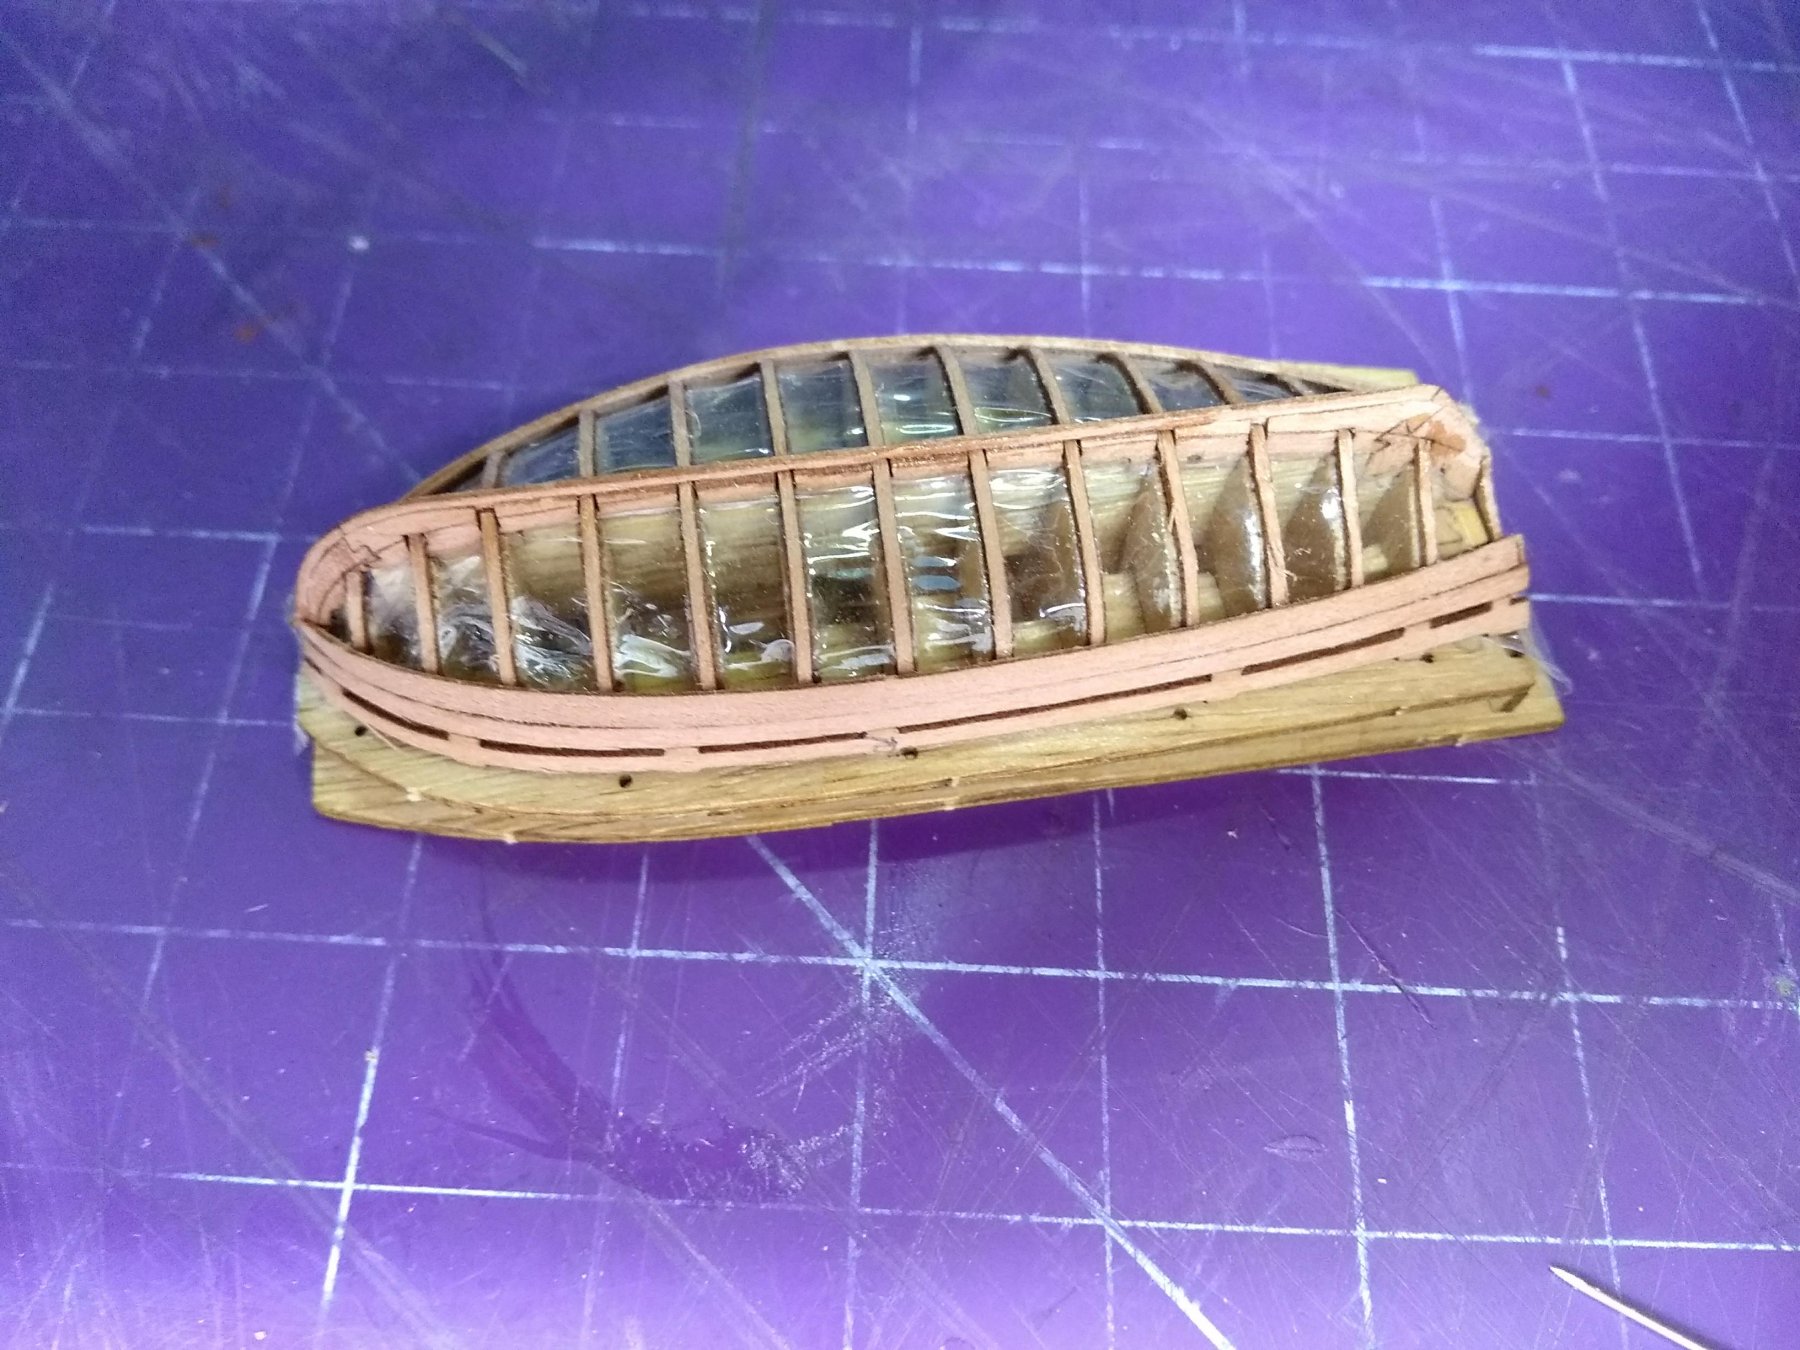
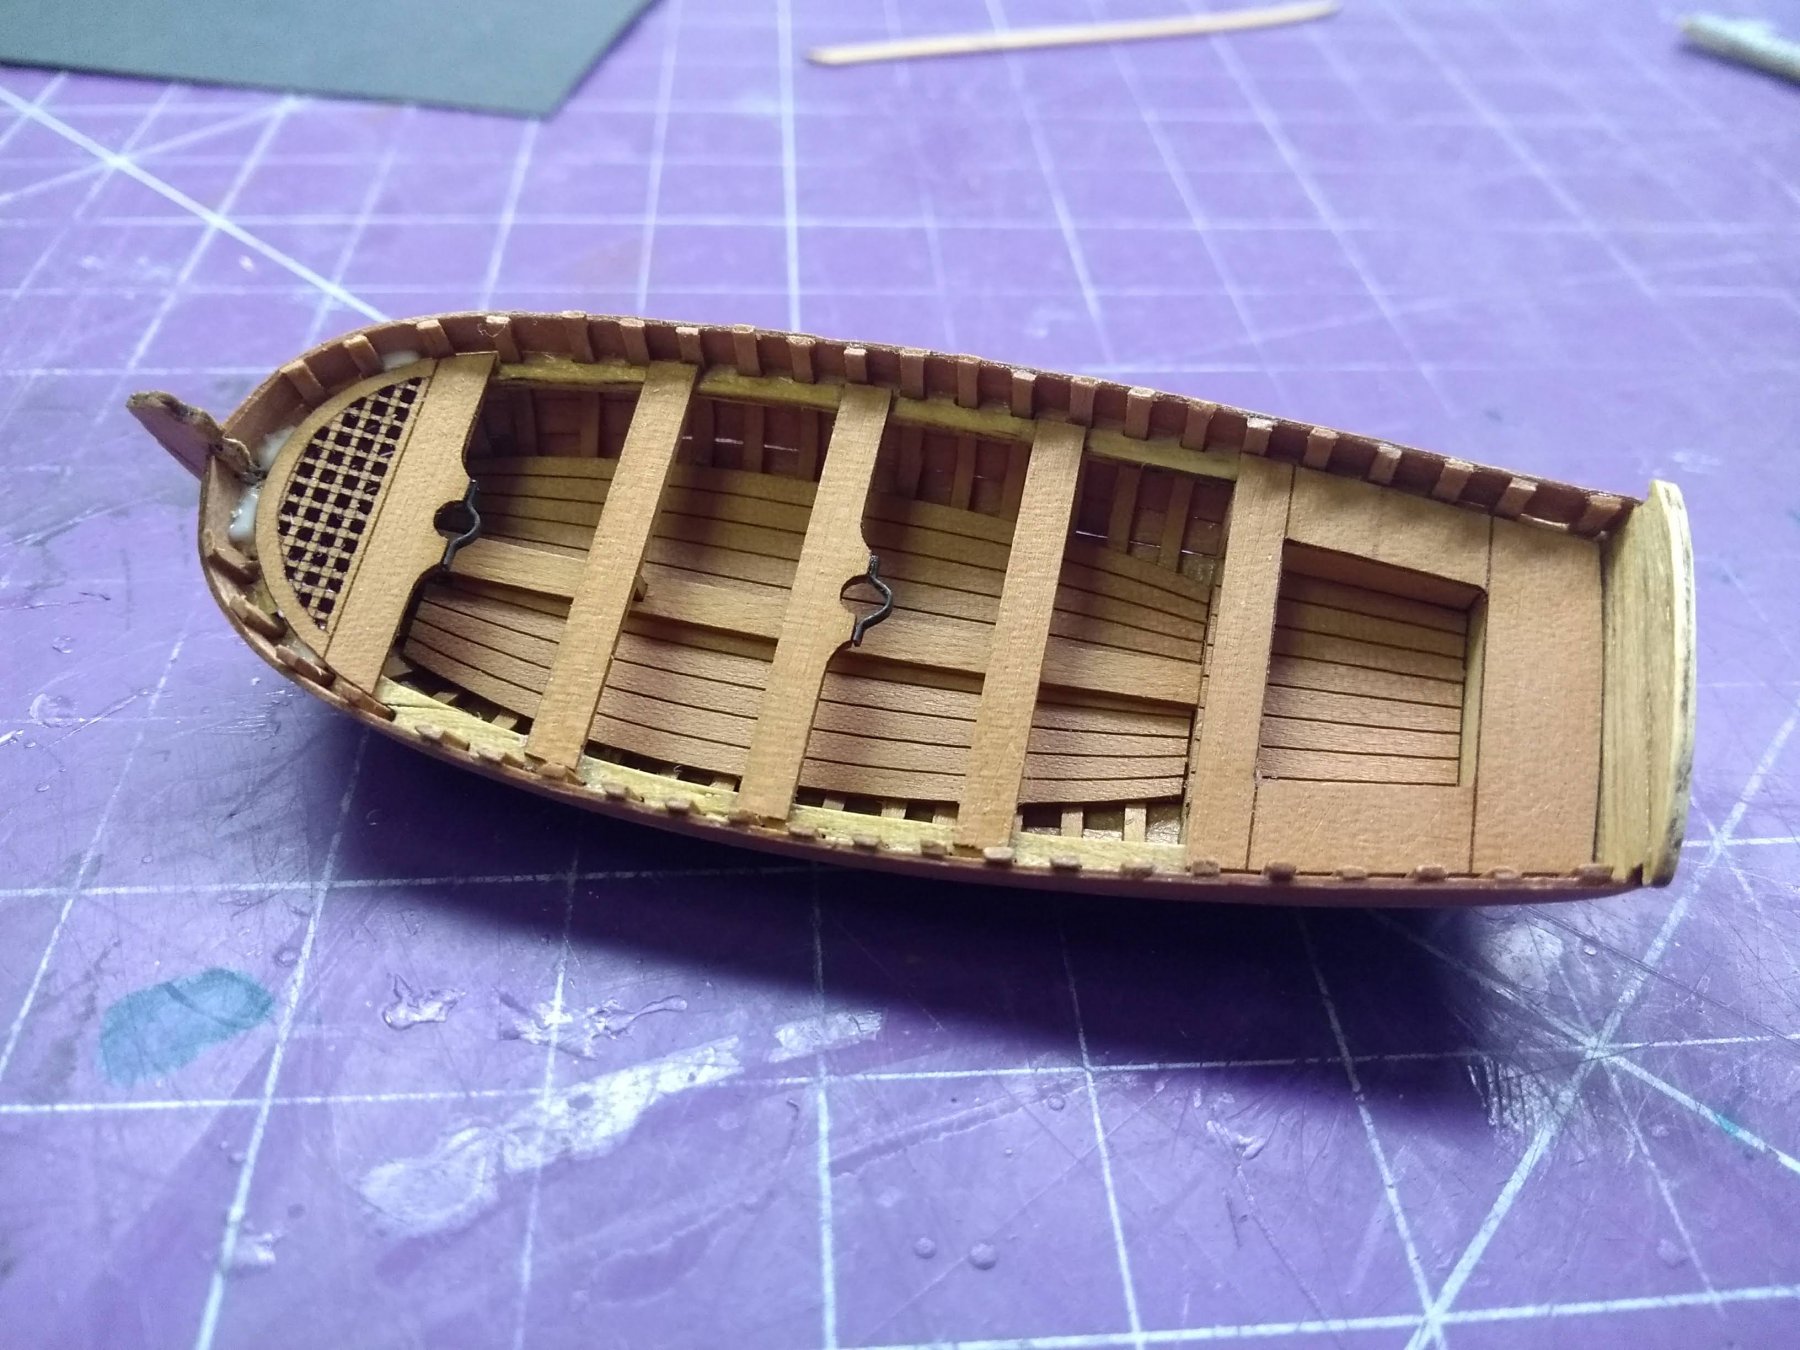
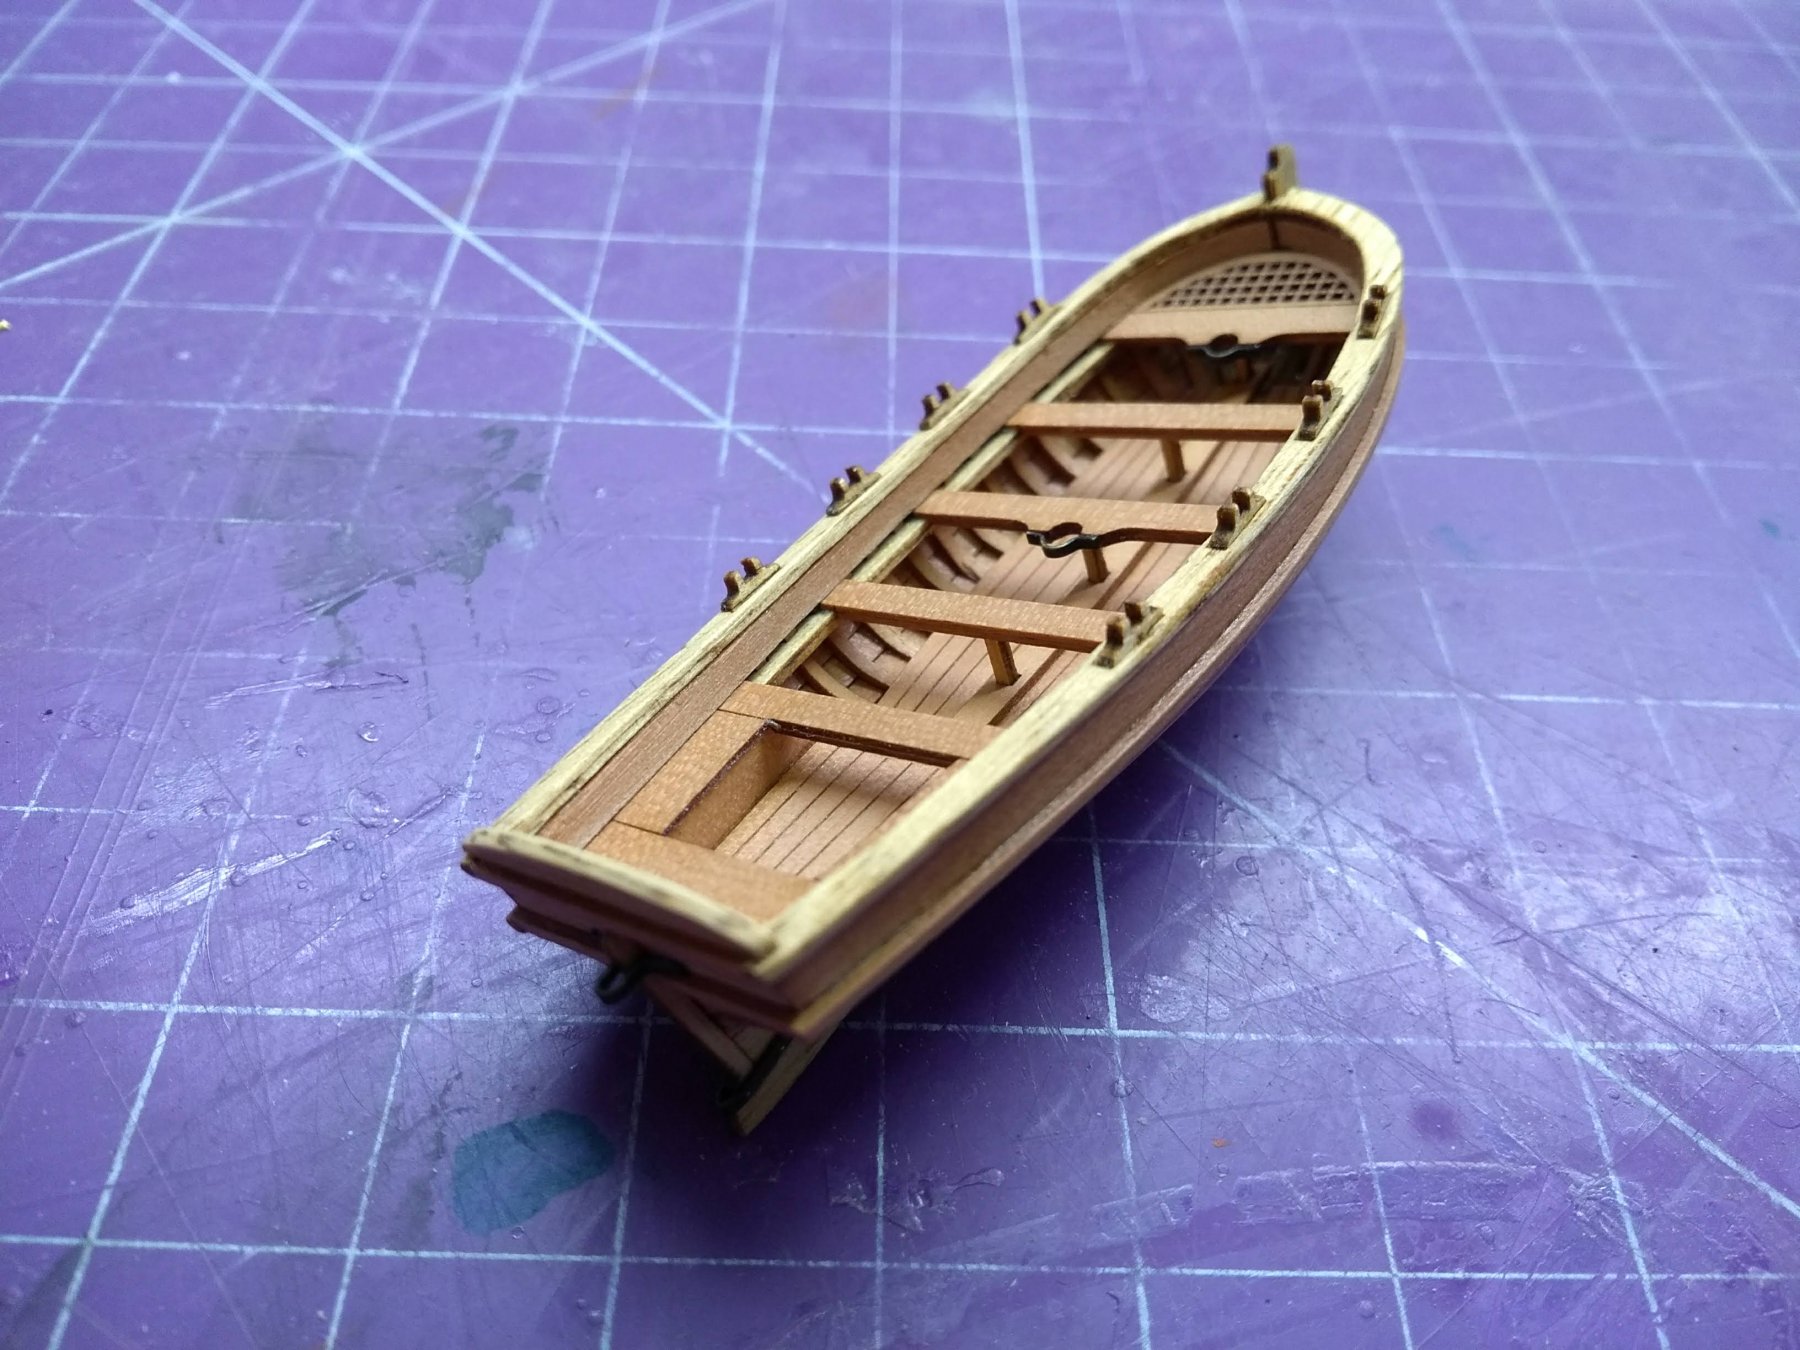
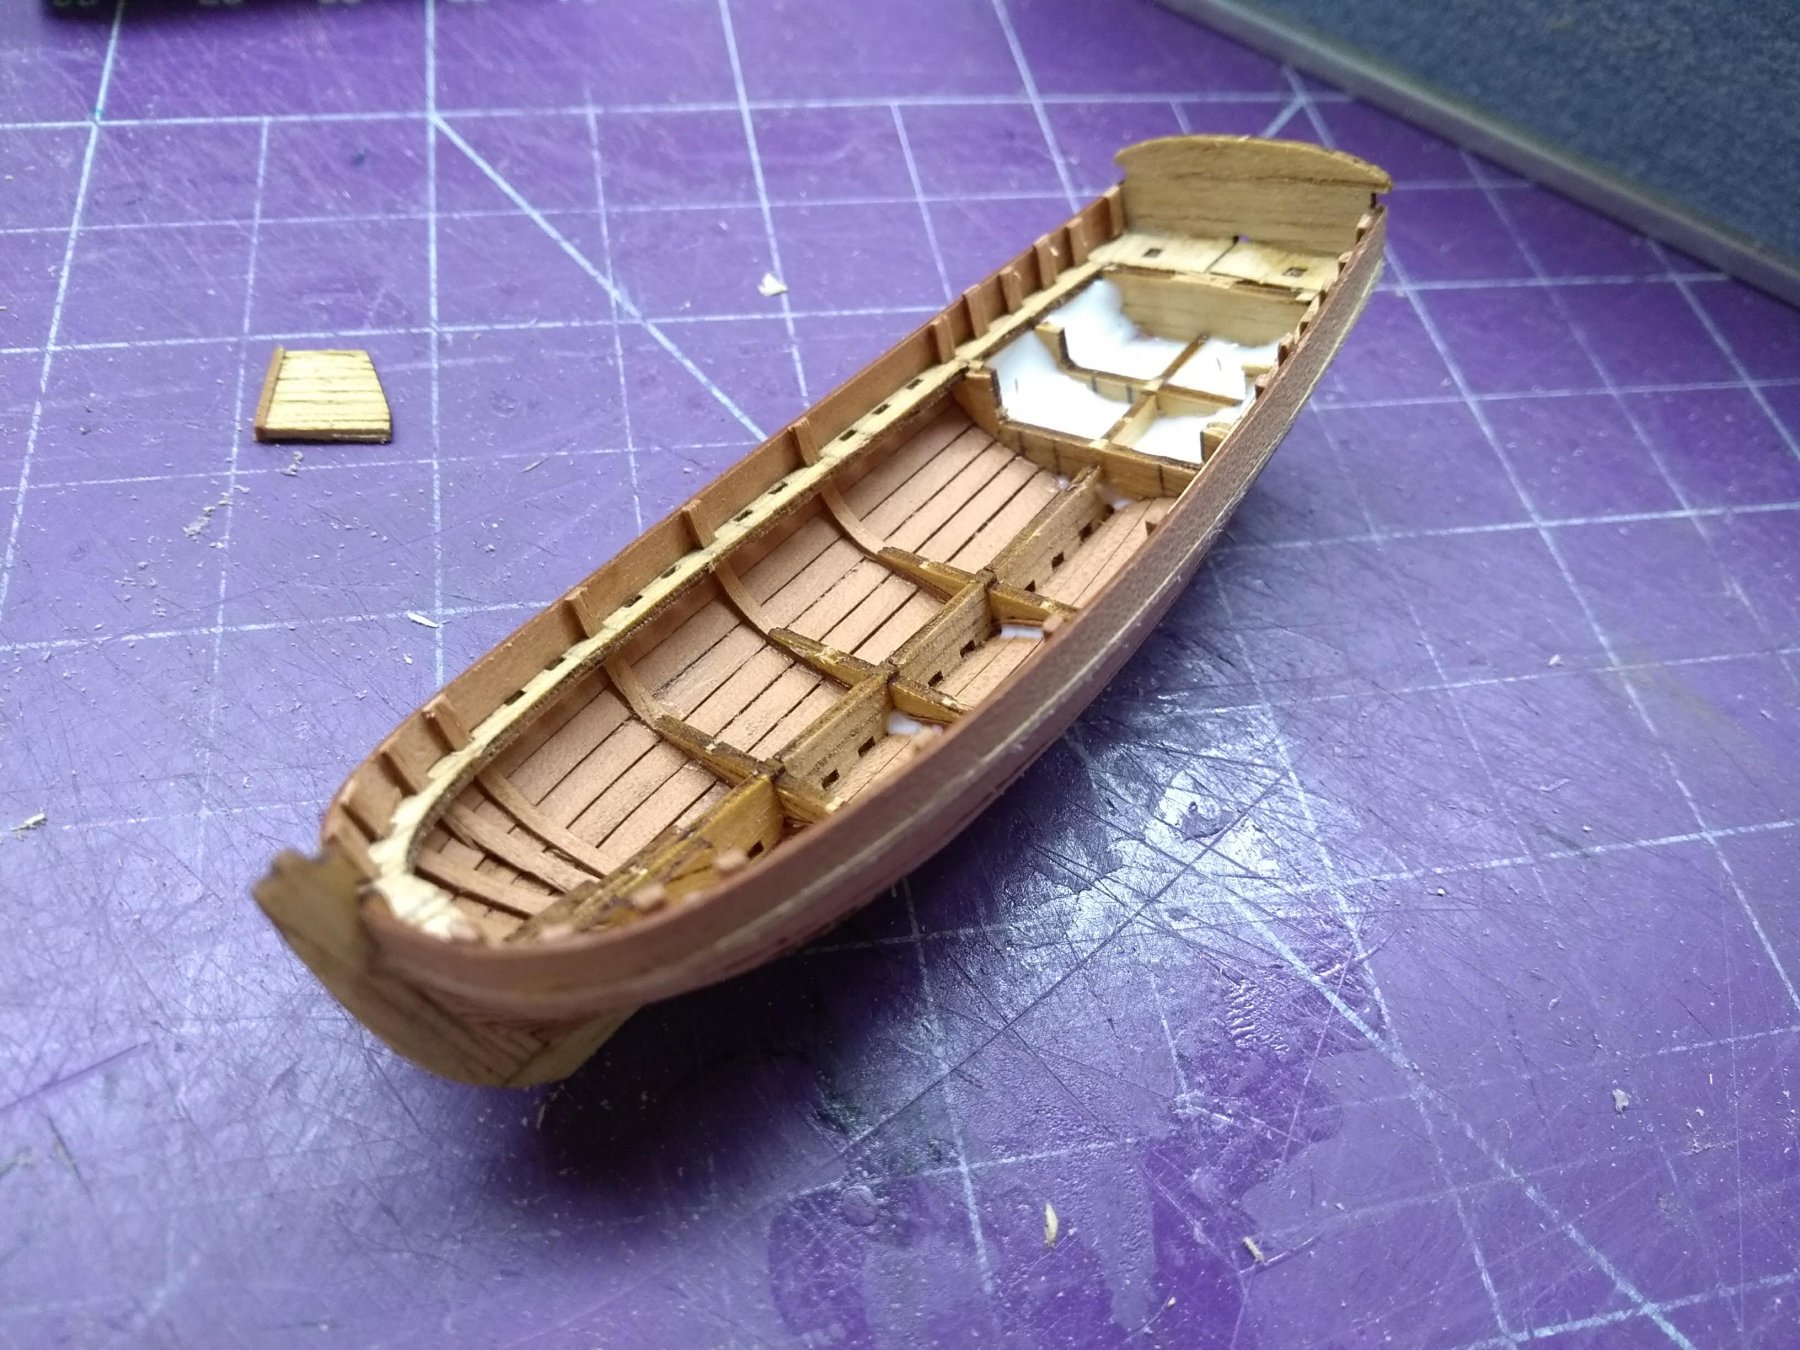
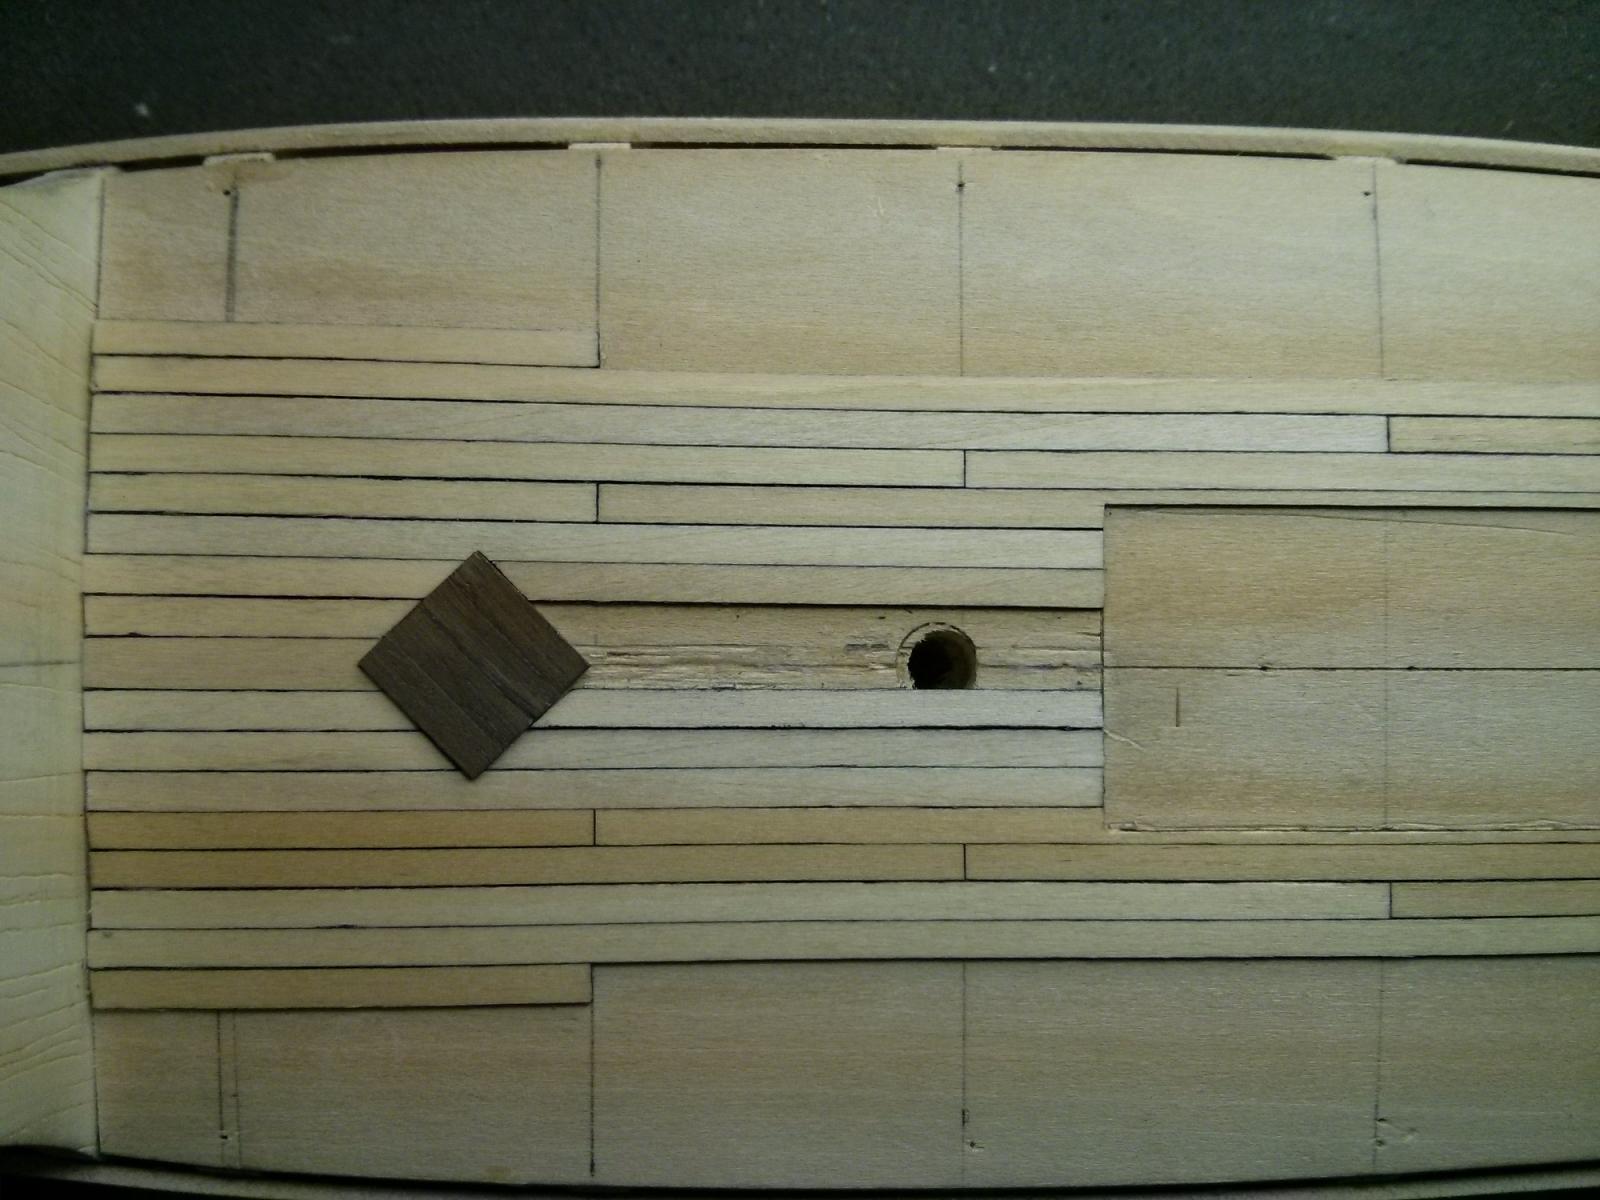
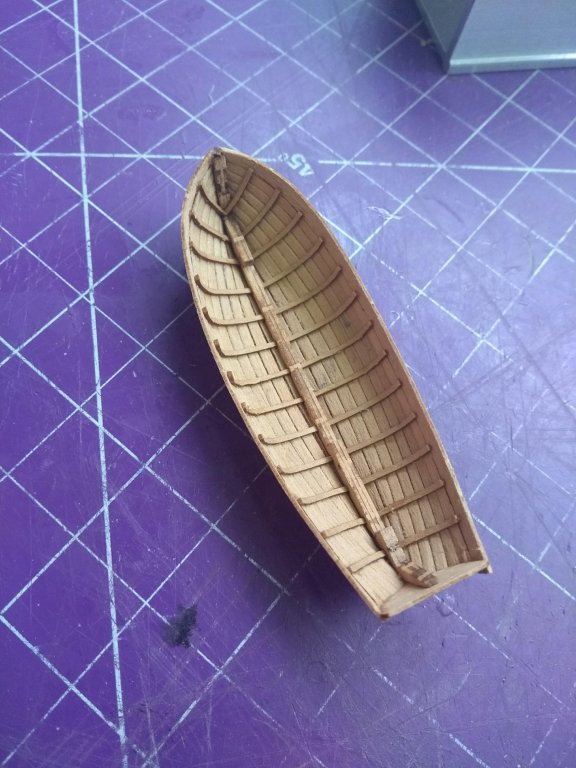
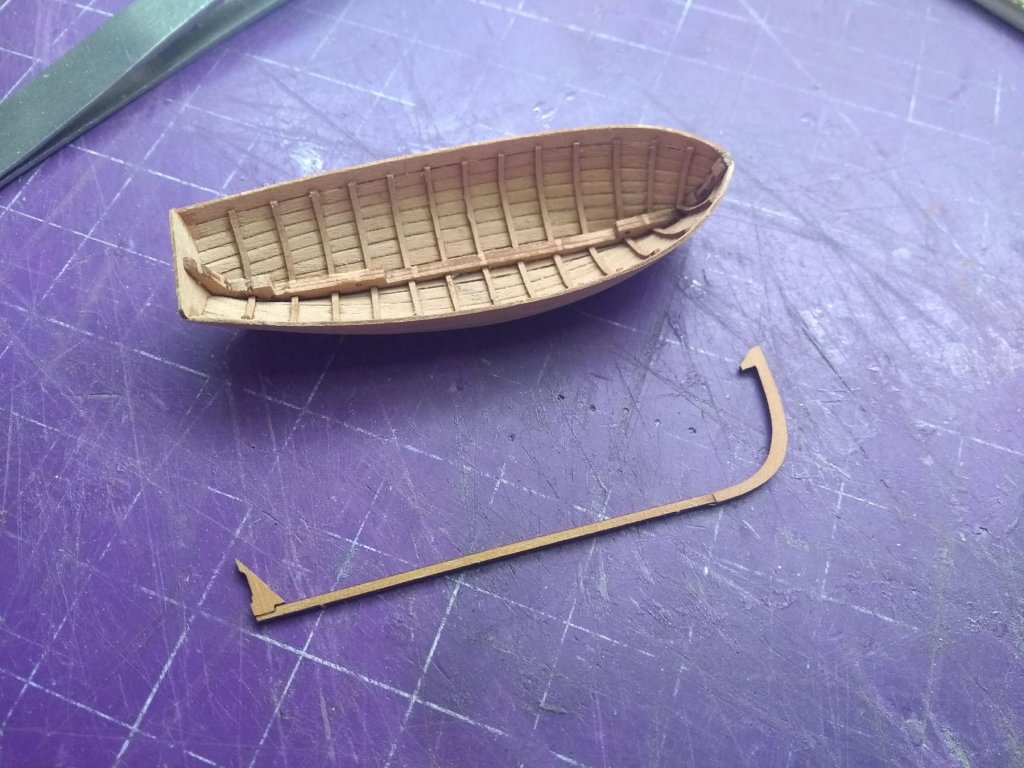
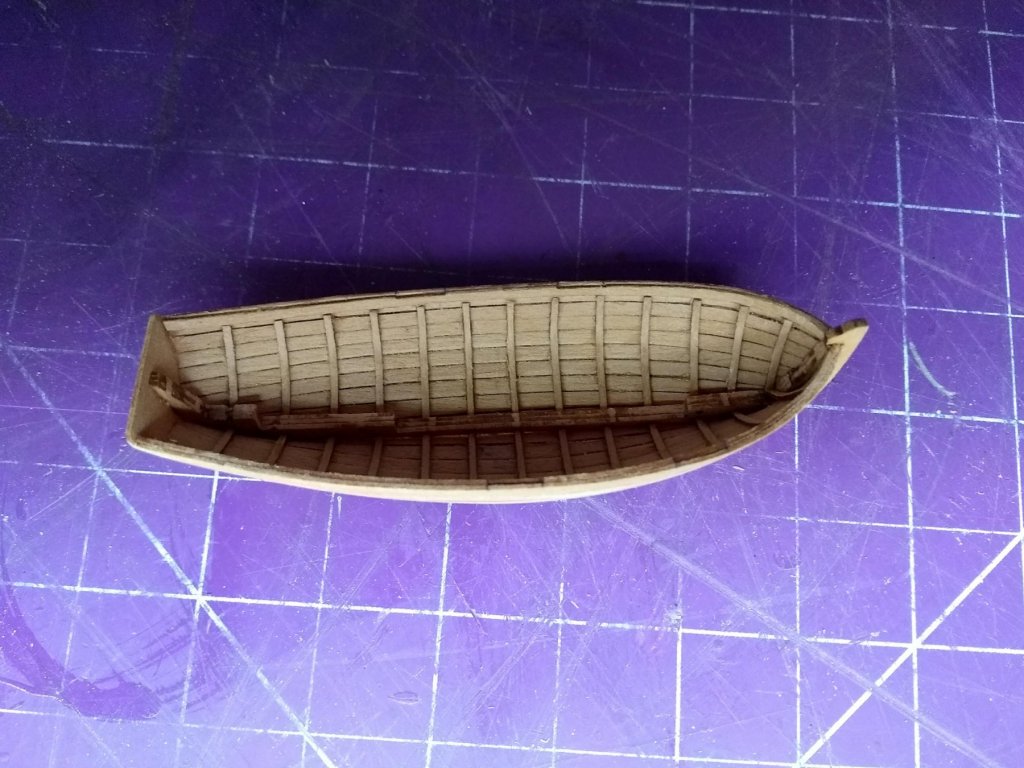
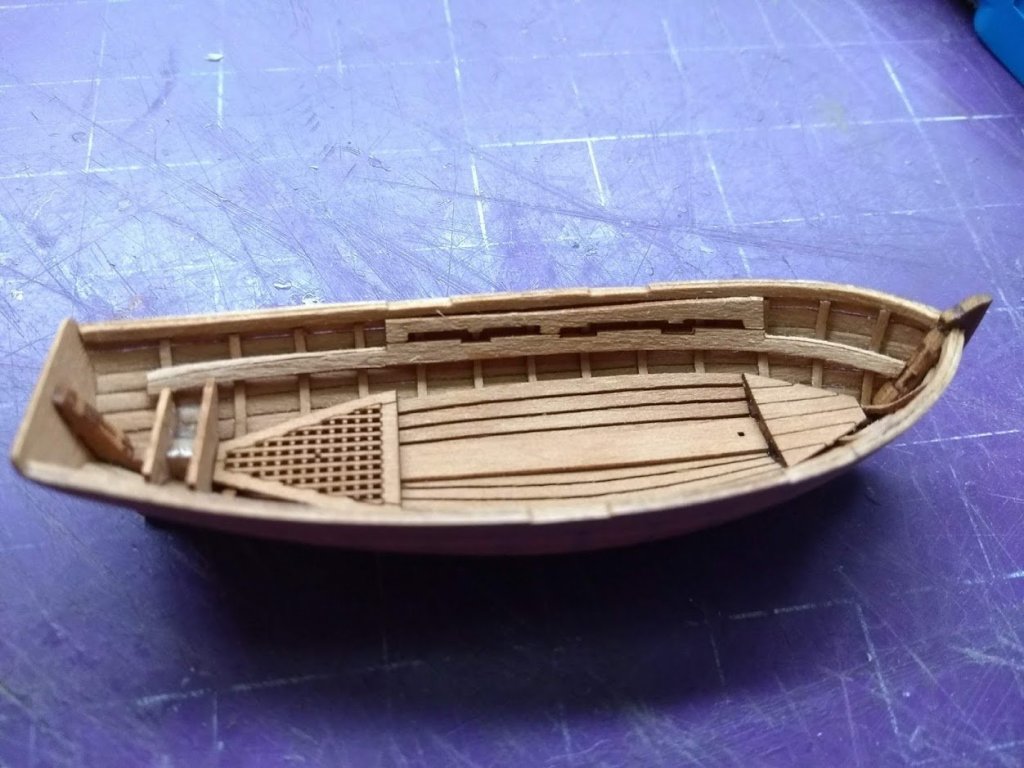
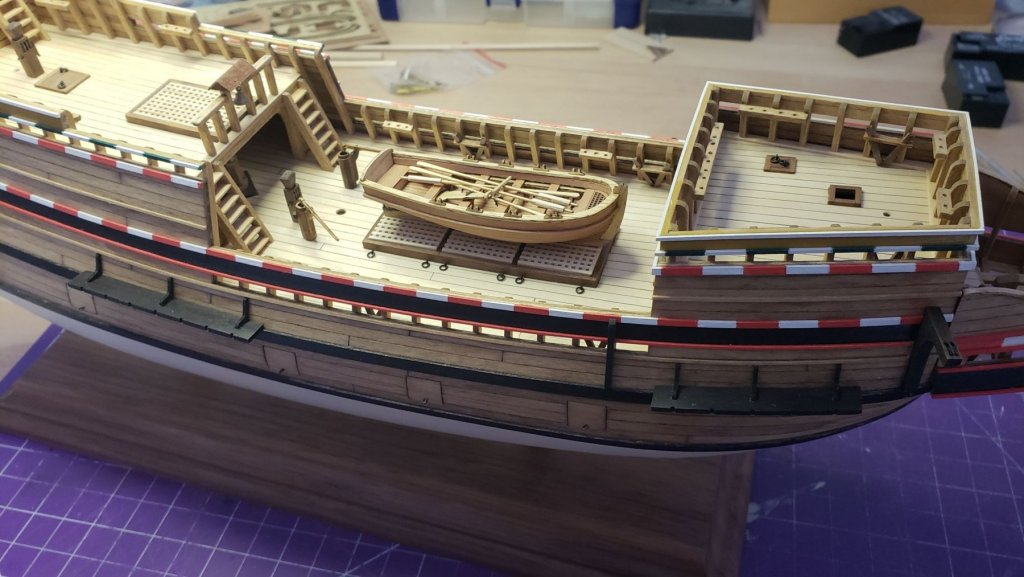
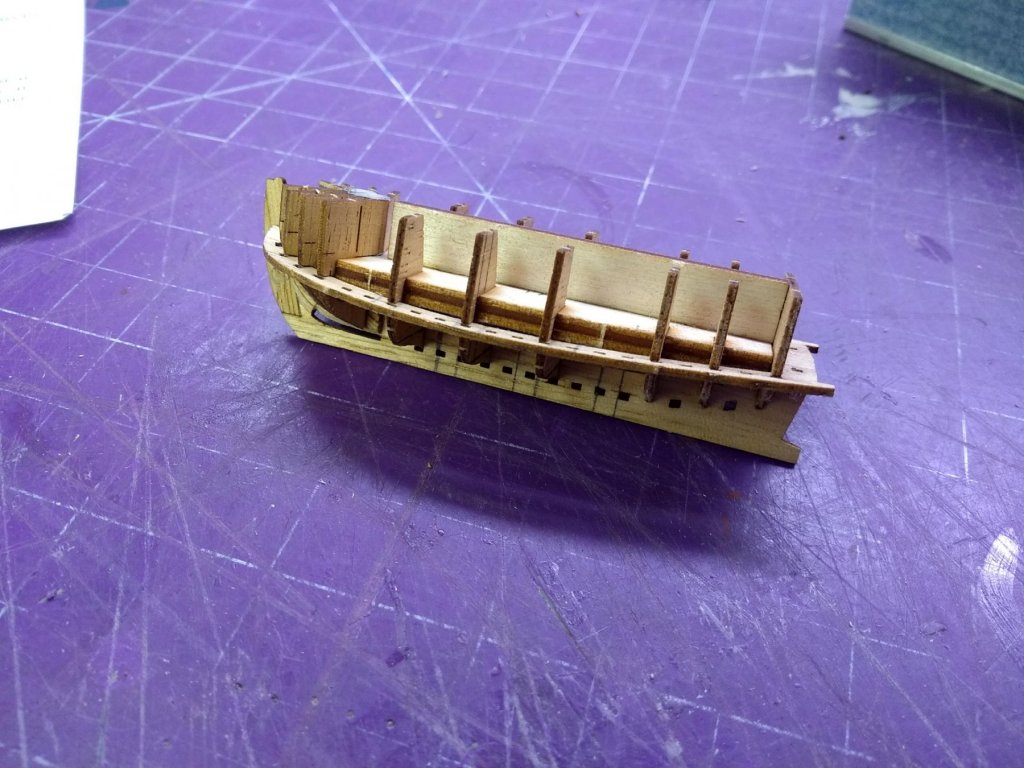
 7. The next step was not too straight forward. First, I cut free the "jig portion" of the top plank. Next, I cut notches in the ribs and glued a sheer strake plank to the protruding edges of the ribs and, finally, removed the hull from the jig: 8. The hull was sanded smooth and the center keel was assembled. The keel consists of 3 tiny pieces that are glued together: 9. After the keel had been glued, I started assembling the interior details. Sheer clamp was glued first: Then the bulkheads and foot wailings were installed: Then the risings, note that each one has a positioning jig attached to it. The jig is not glued to the hull! Finally, I installed all the thwarts, side benches, the backboard, the knees, the fore grating and the breasthook:
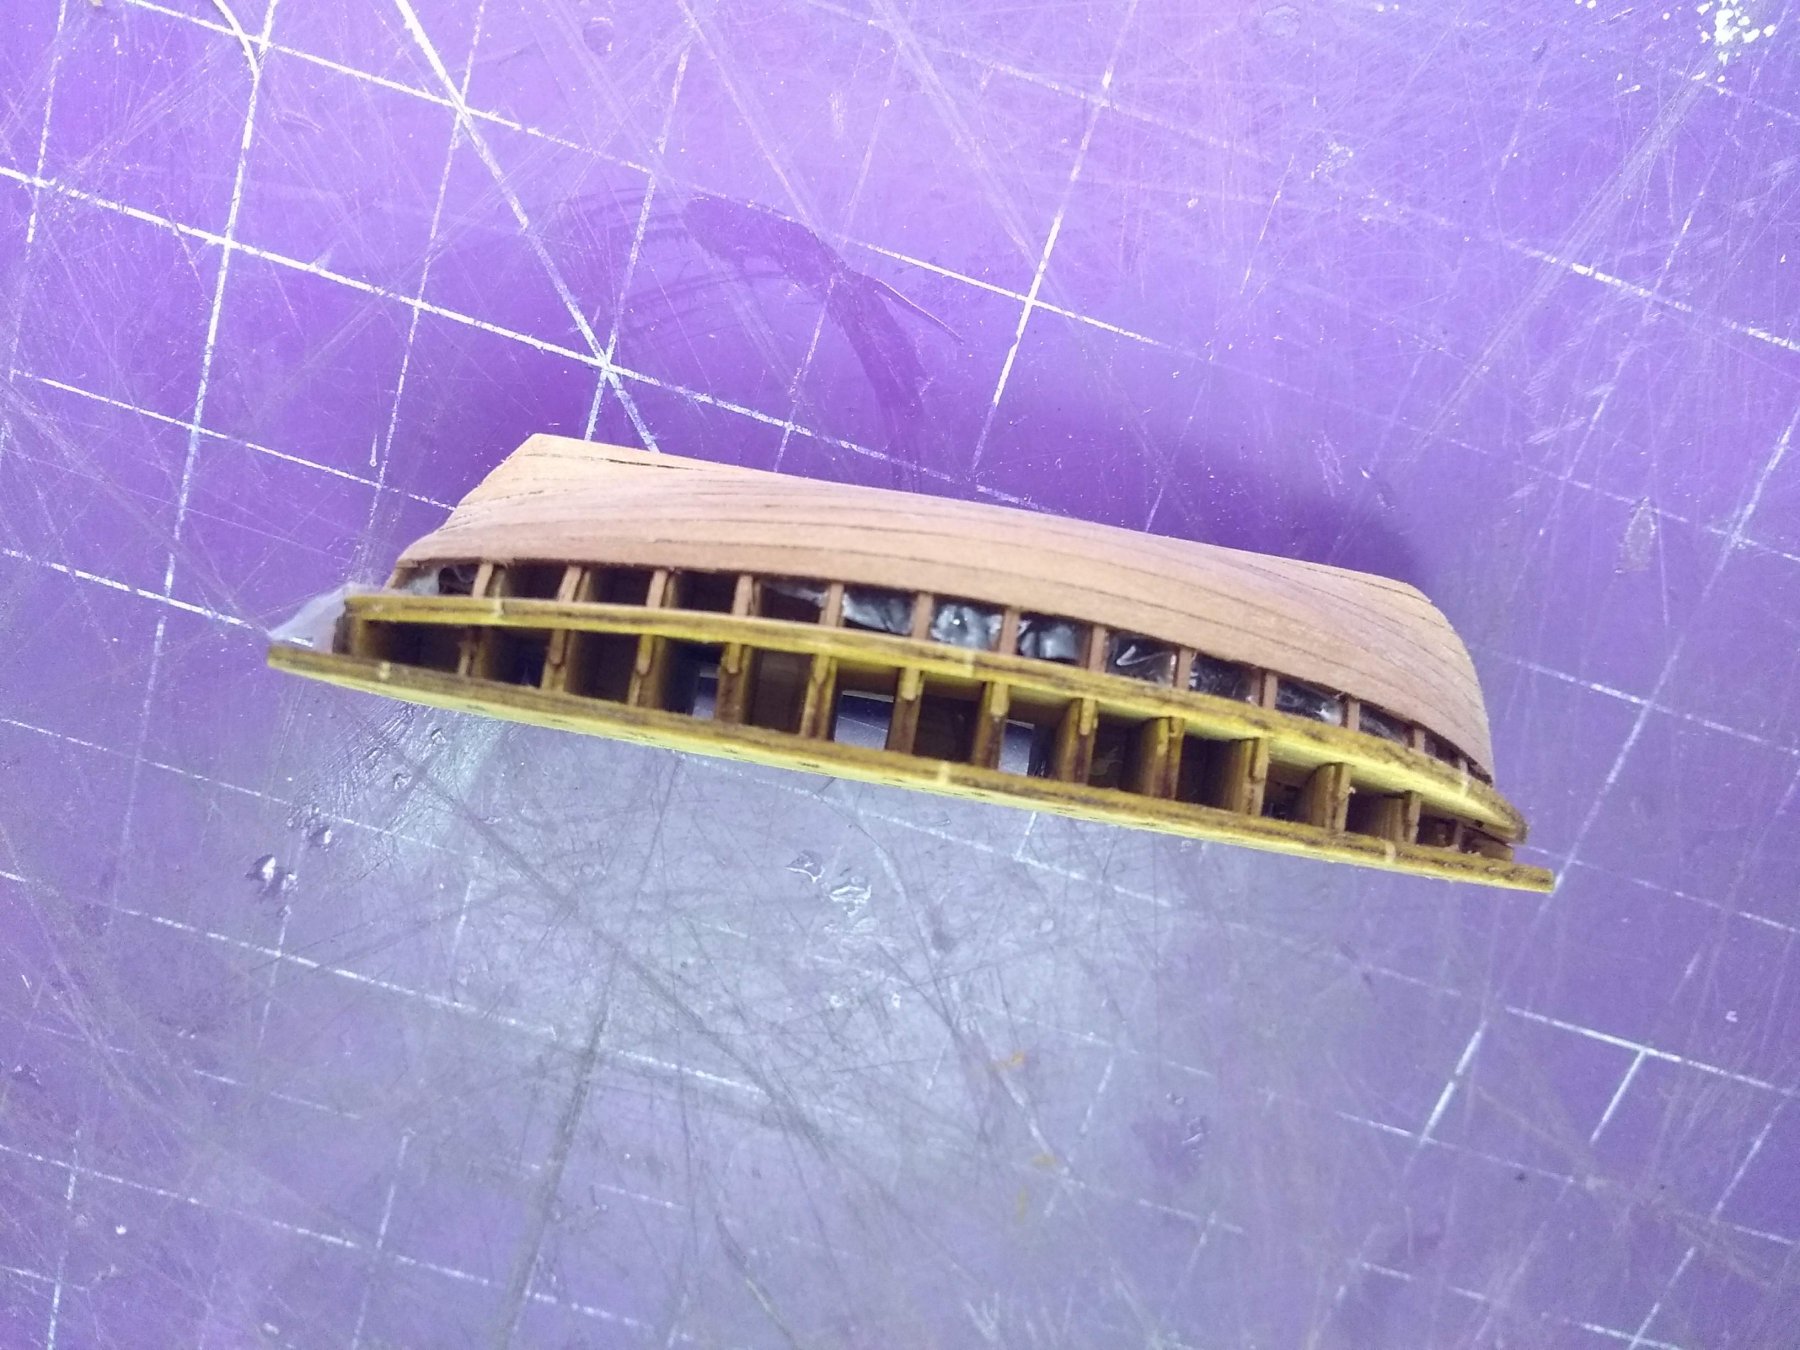
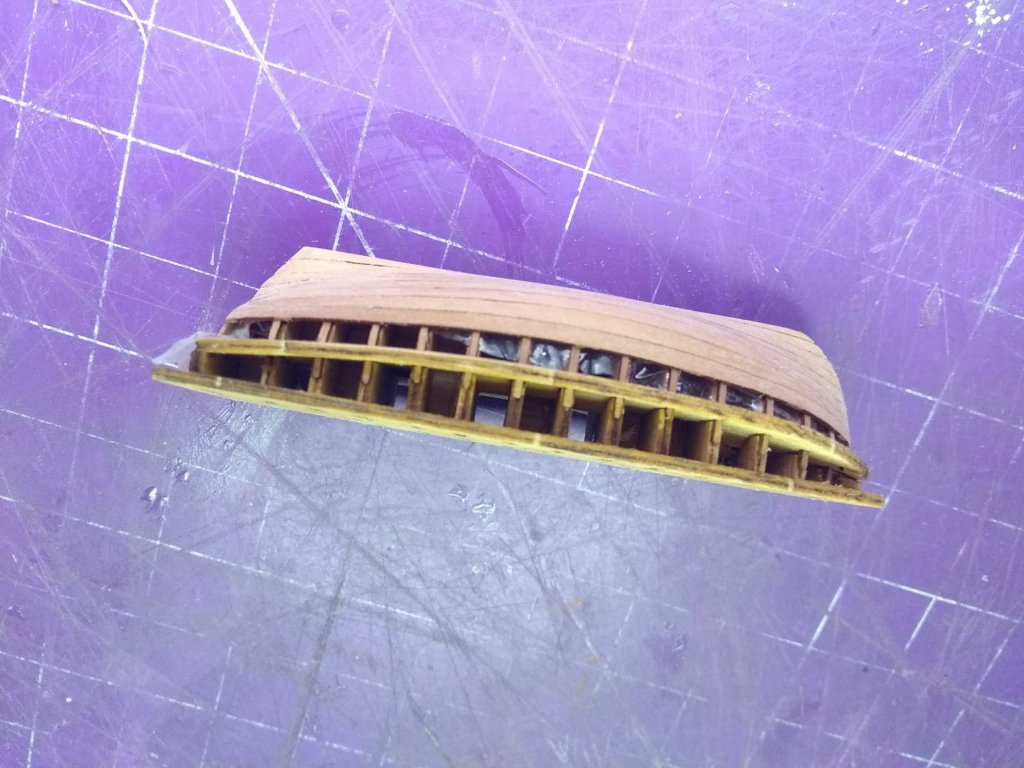


- 7 replies
-
- 7
-

-
- lifeboat
- master korabel
- (and 1 more)
-
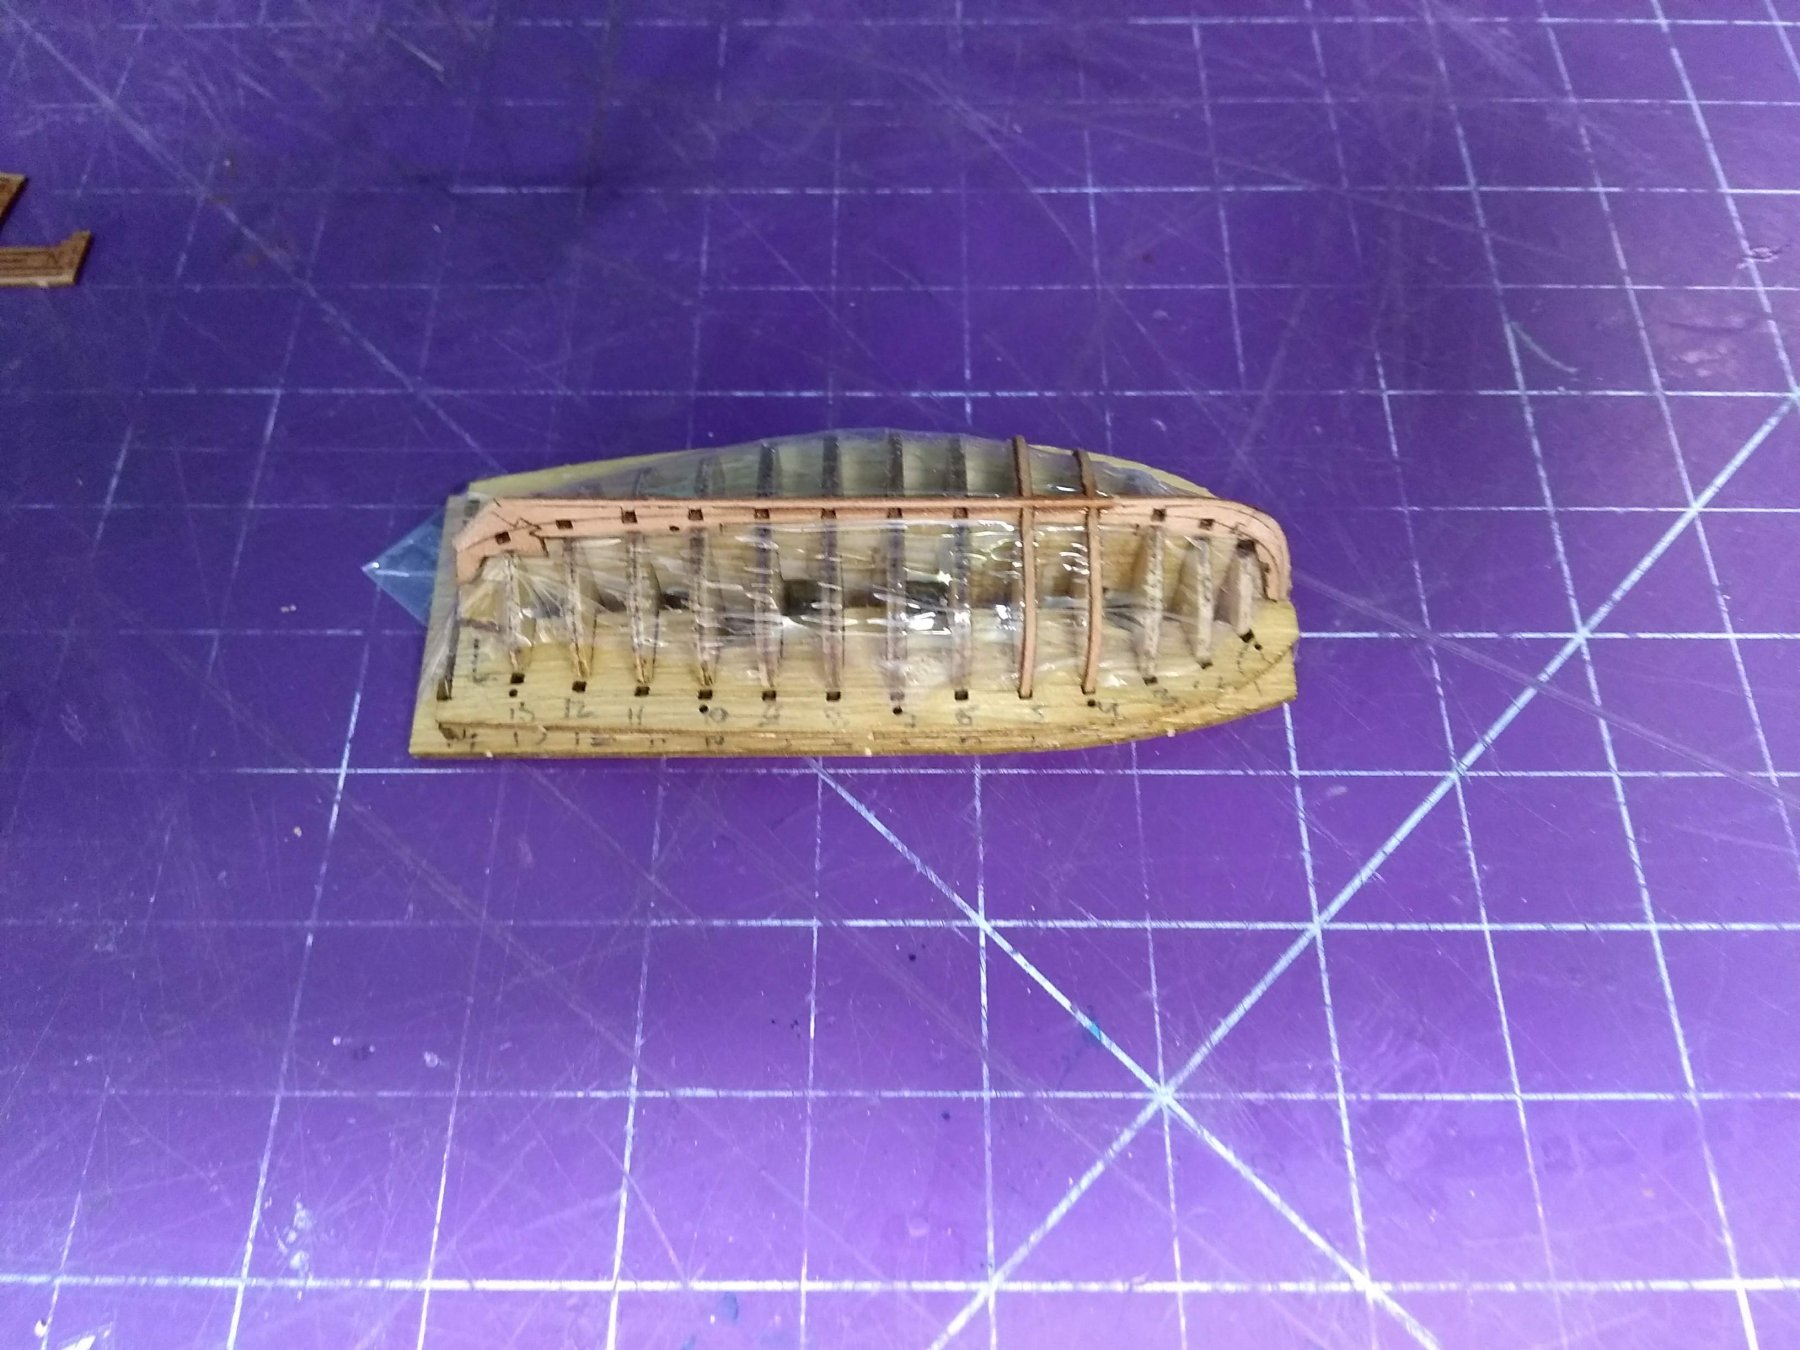
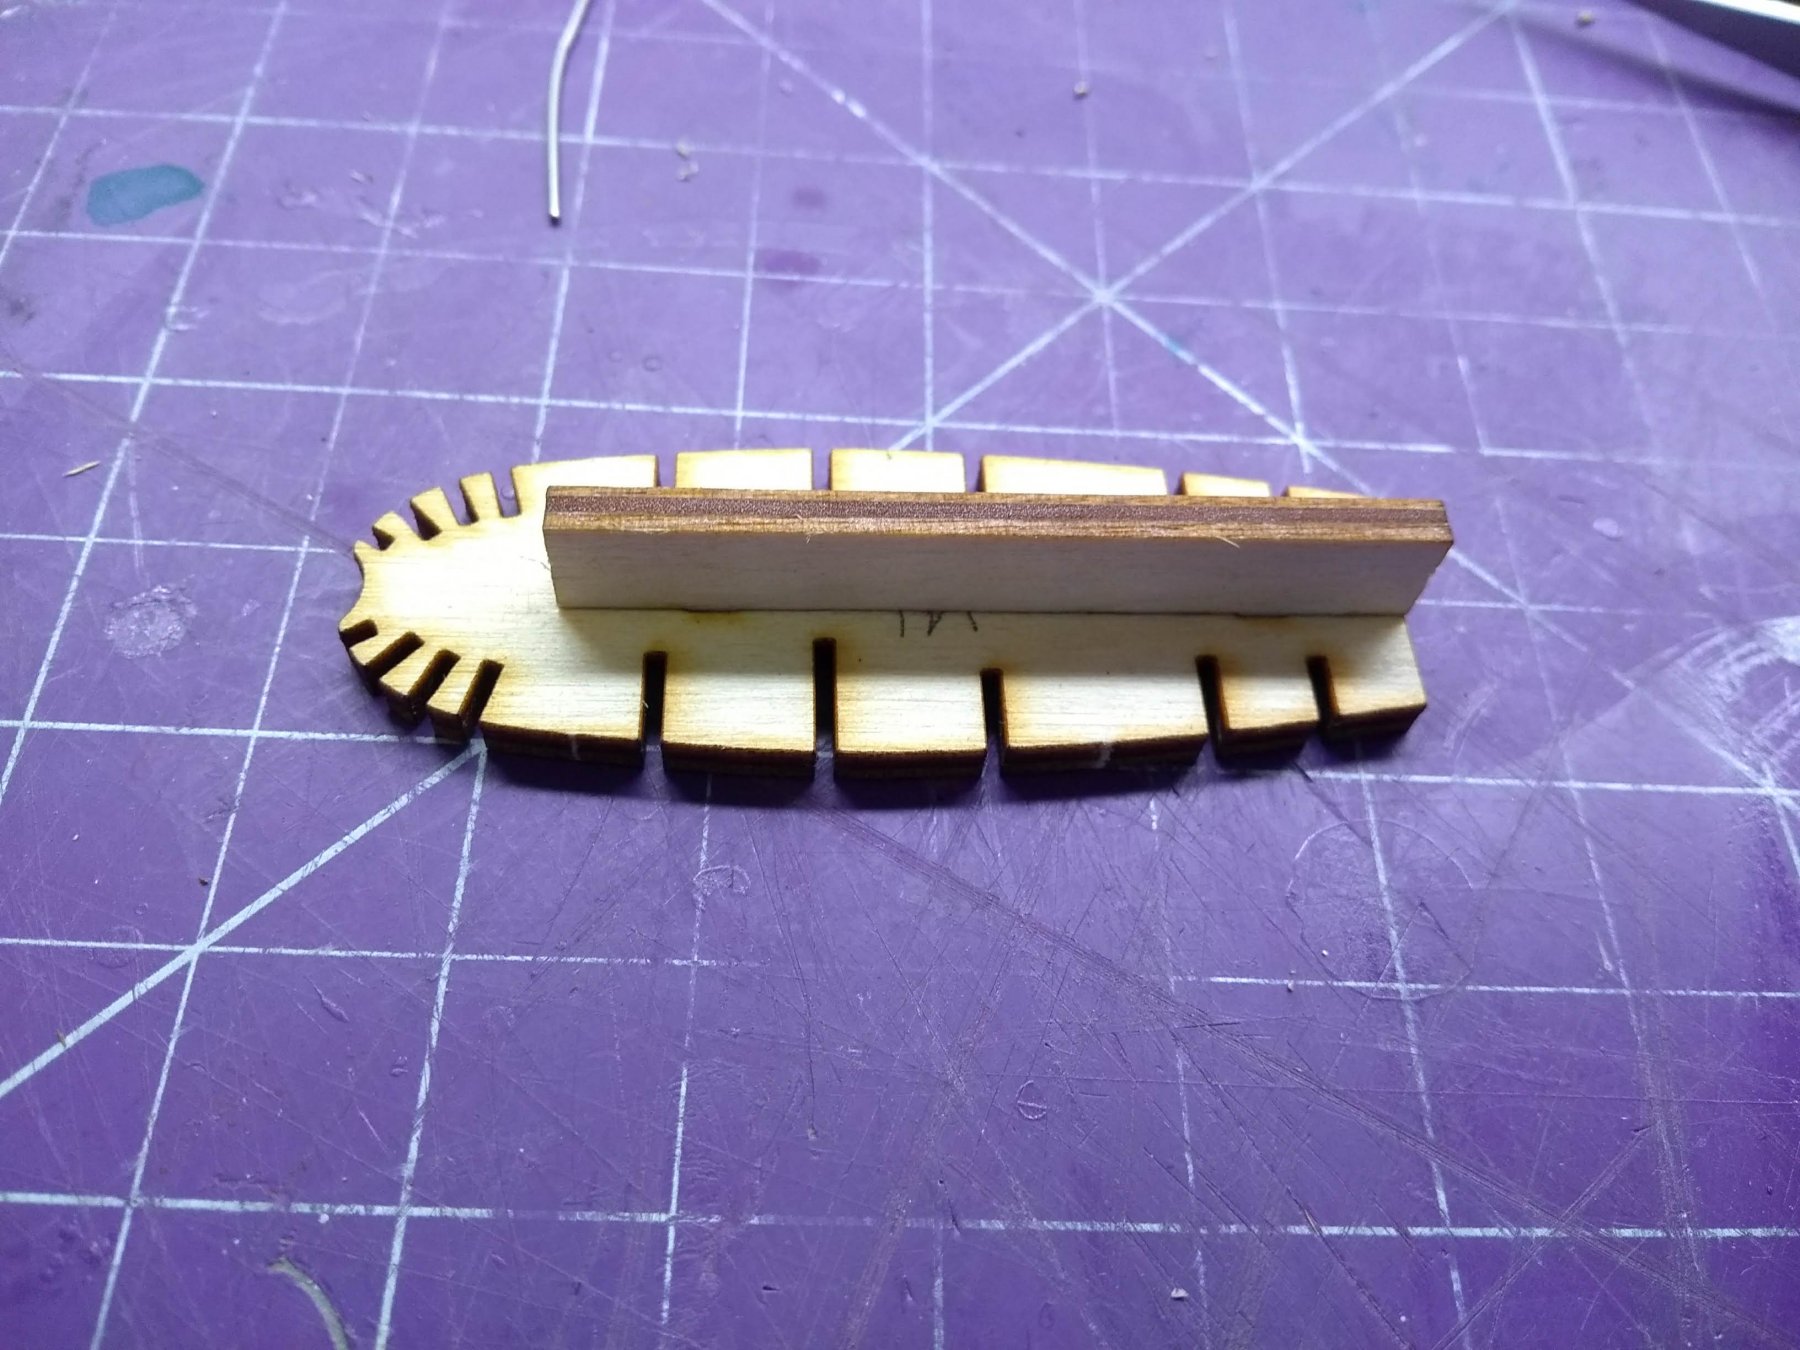
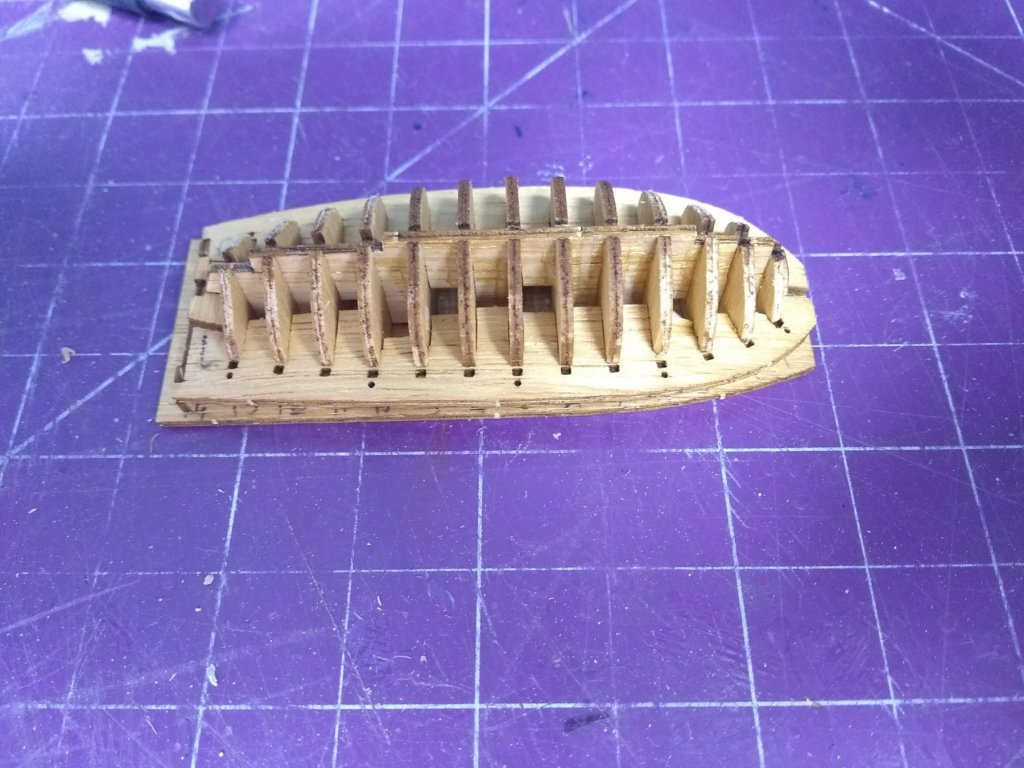
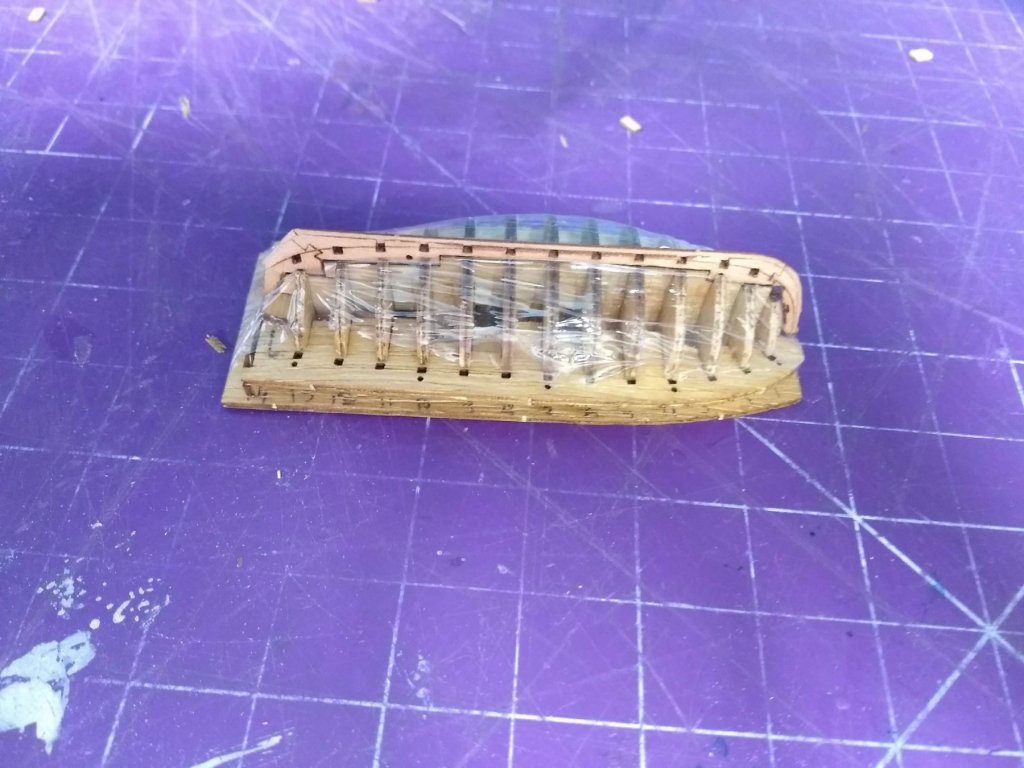
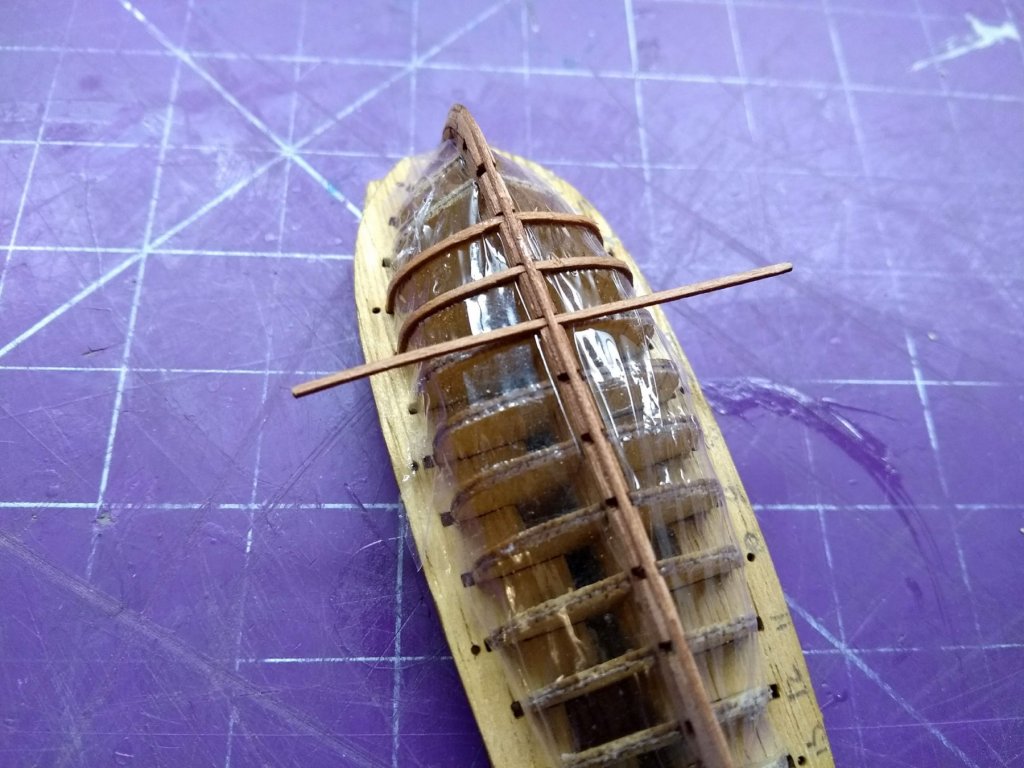
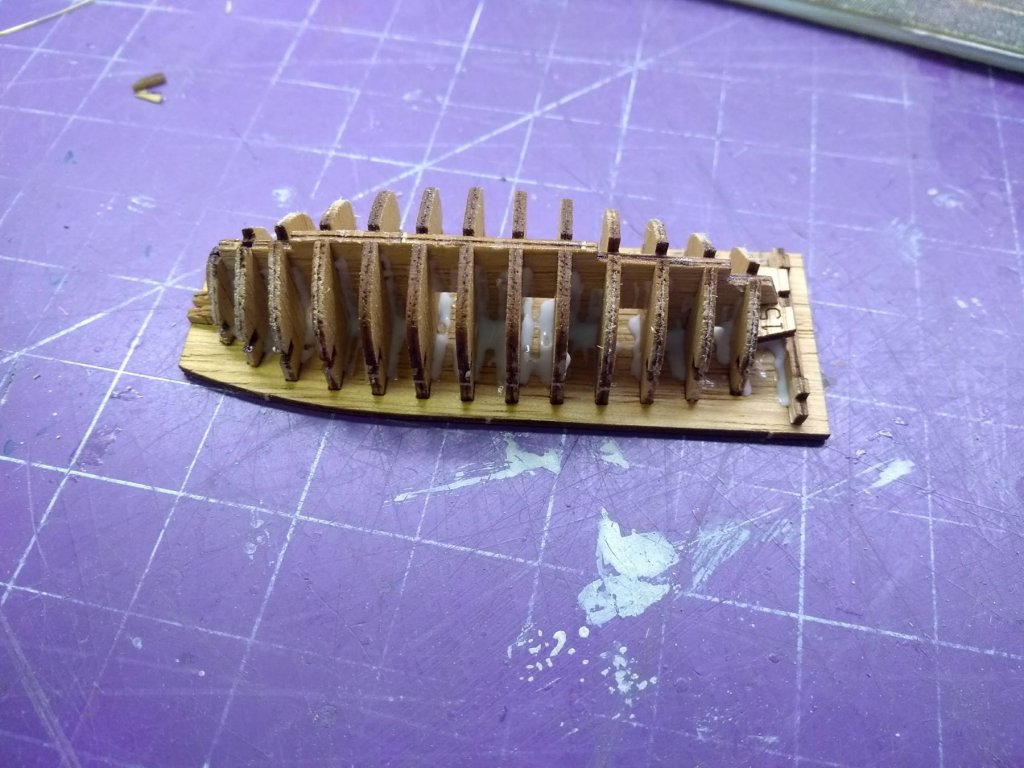
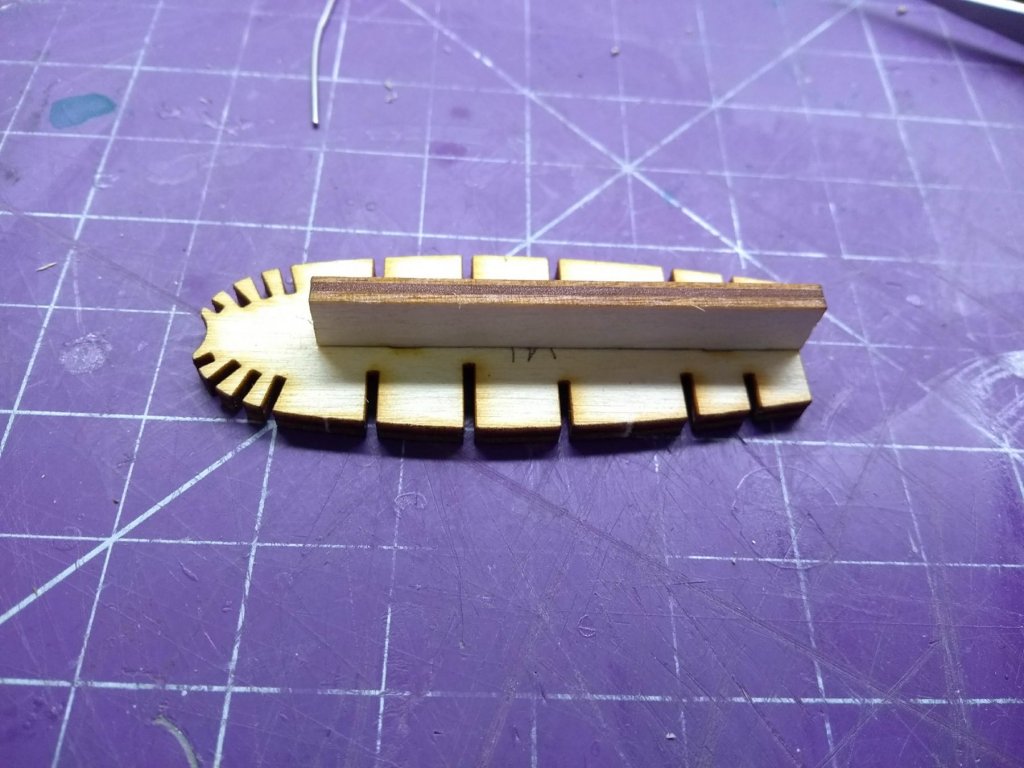
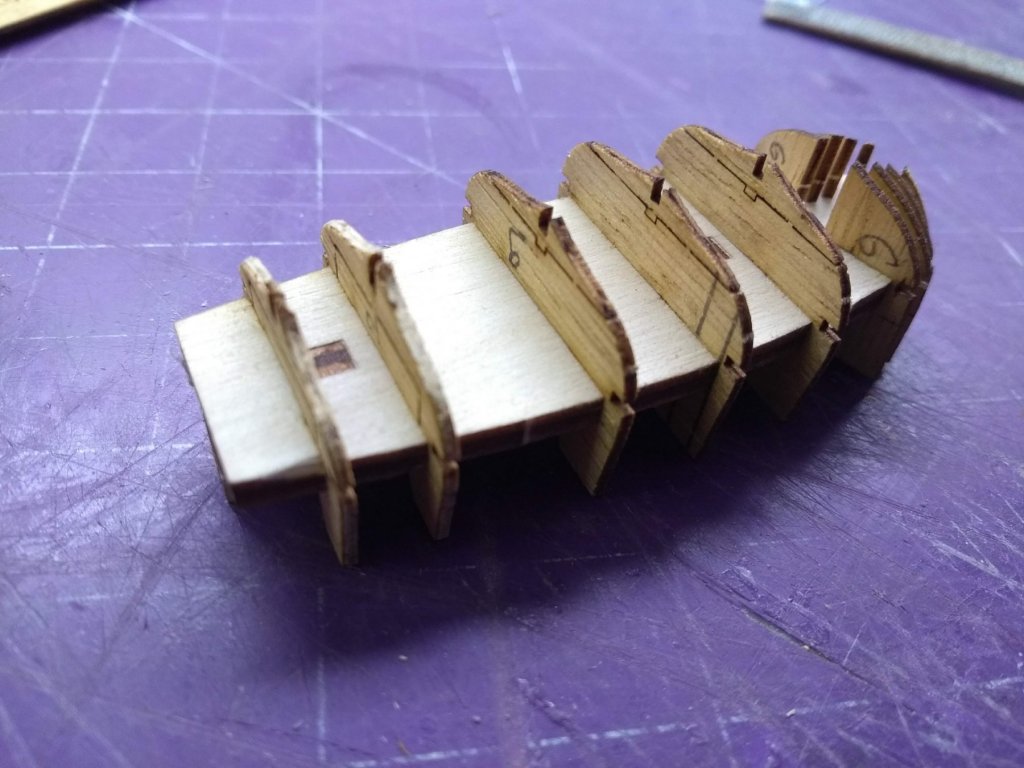
3. Next the instructions tell you to soak in water, slightly bend and insert the longitudal side supports into the jig. This was really hard to do. I didn't bother dryfitting these parts and after soaking they expanded a little, thus making it pretty much impossible to insert them into the notches. I ended up enlarging these notches with a knife and pushing the parts in. In the end, I was able to get them in. The lesson for me here is that I really should have dryfitted them first before soaking in water: 4. After that I covered the jig with plastic wrap to prevent glue sticking to it and installed the boat's center keel: 5. Compared to building the jig installing ribs was a trivial task. I soaked them in water, bent them slightly with hands and slid them through openings in the center keel and the jig. After that I applied tiny drops of CA glue in the areas where the ribs go through the center keel and on the outside edges where they touch the jig: 6. Once all the ribs were installed, I began planking. Planking was pretty straightforward thanks to the precut planks! I just needed to make sure that some parts of the plank are not glued to the ribs. All planks were soaked in water and their fore ends were slightly beveled:


- 7 replies
-
- 7
-
-
- lifeboat
- master korabel
- (and 1 more)
-
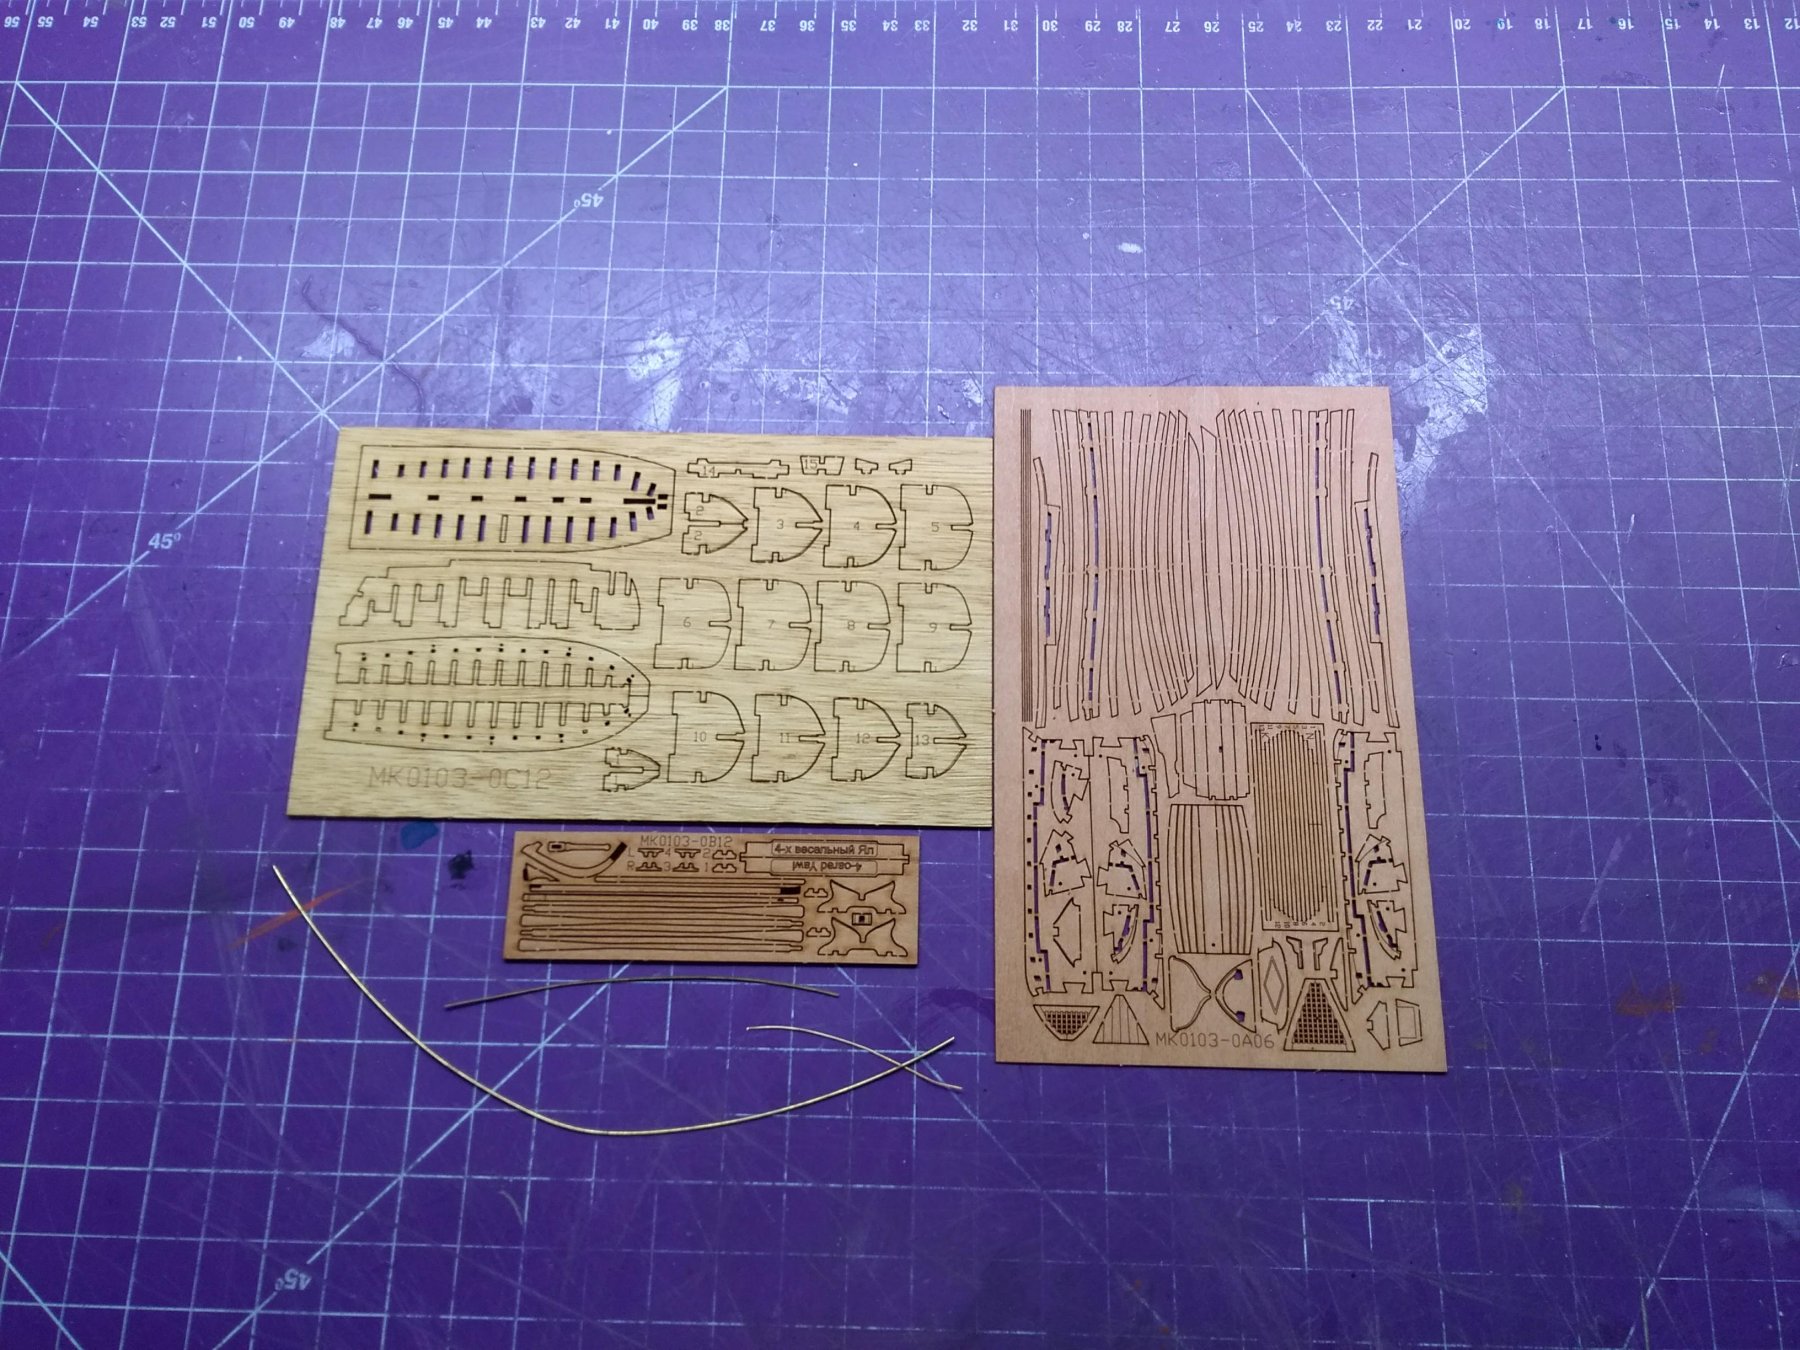
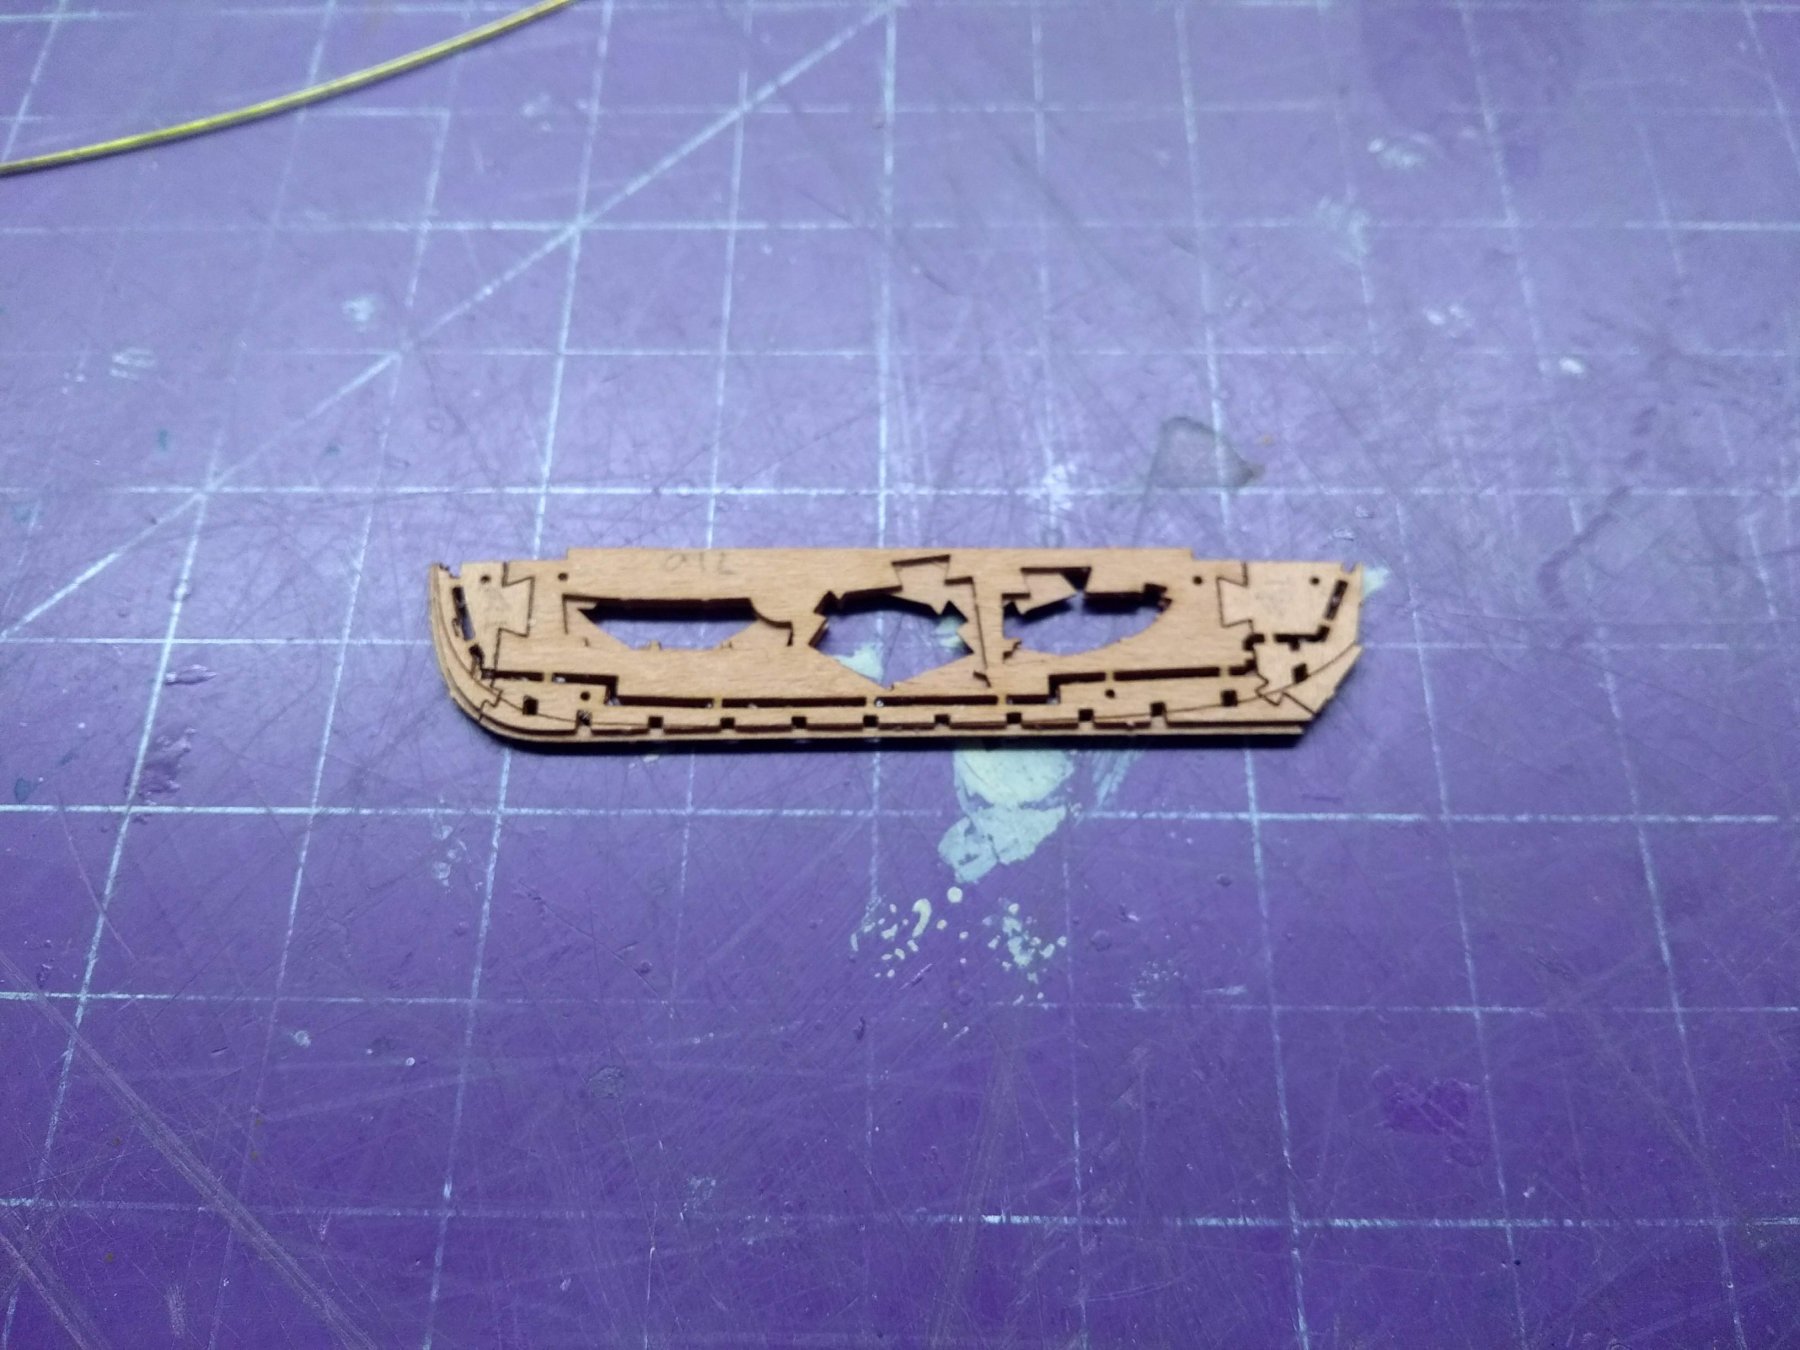
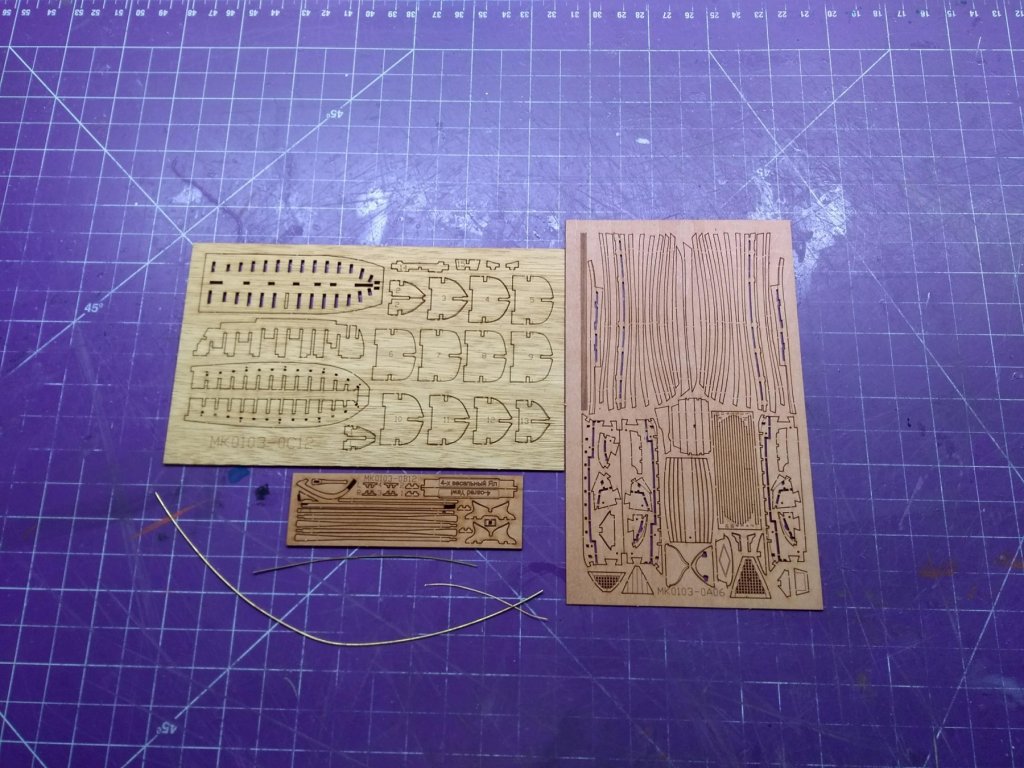
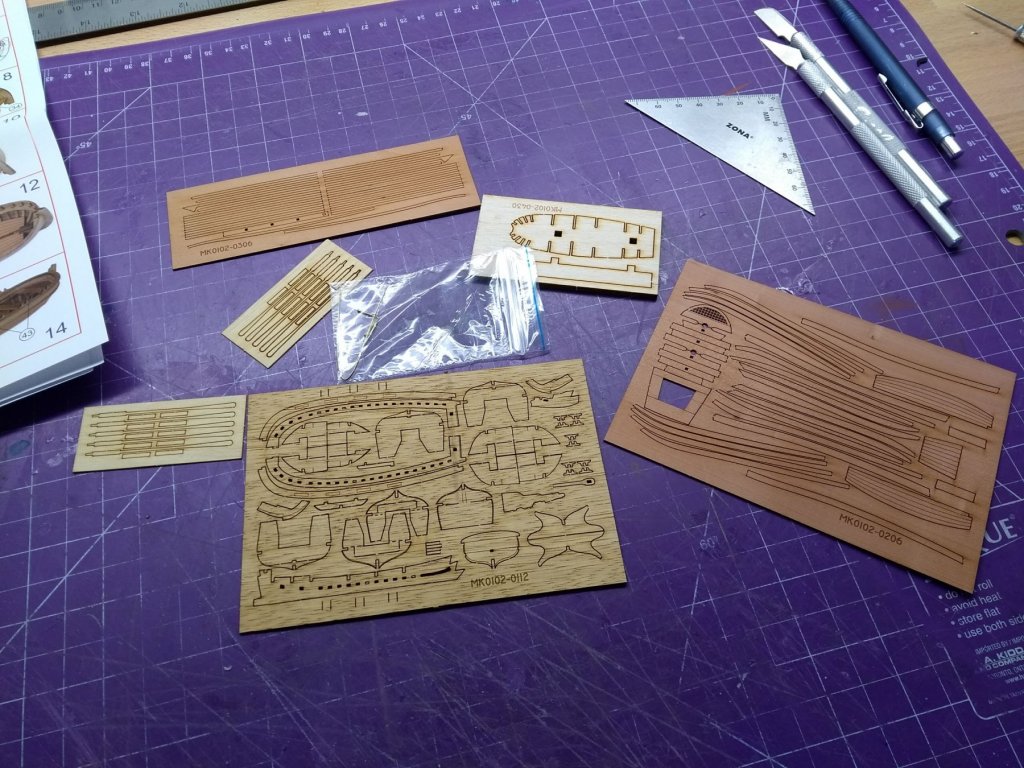
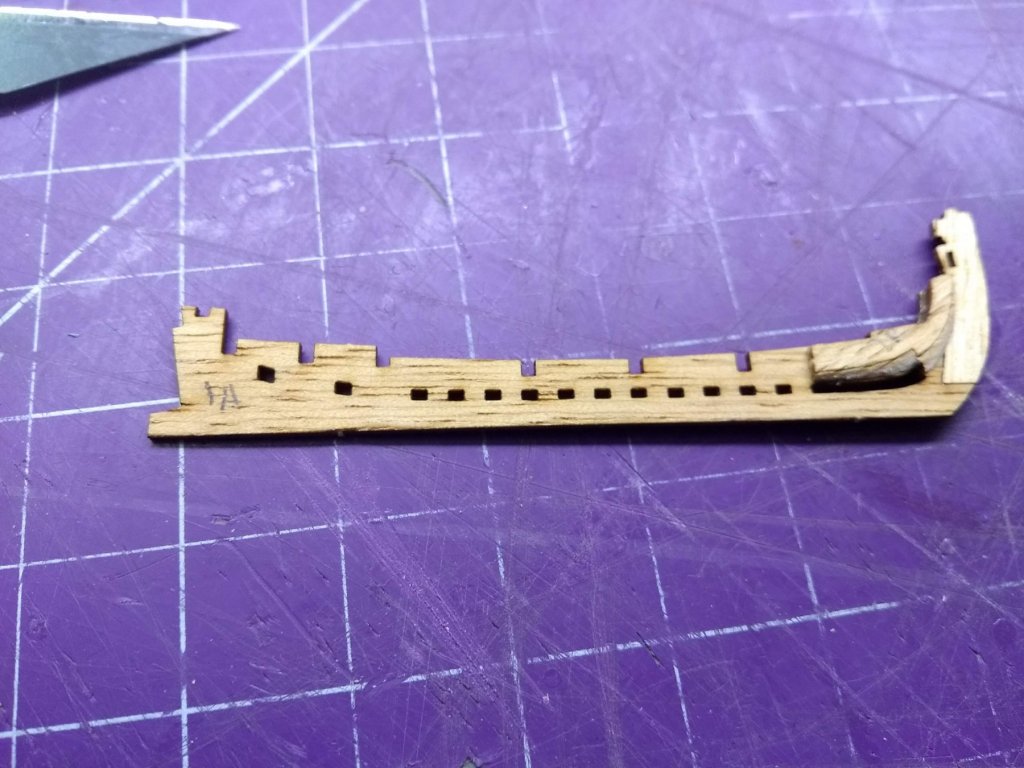
Hello everybody, this is a tiny build log that covers the assembly of the latest Master Korabel 1:72 lifeboat. I have never built this boat so, most likely, I'll make a few mistakes on the way but I hope those won't be fatal and I'll be able to fix them. The first thing I noticed is that Master Korabel used a new technique for this model - the jig is not a part of the model as it was with the previous MK boats. It is more like a "building berth", a completely separate entity. The kit itself consists of 2 pearwood billets and 1 plywood billet: All boat parts are made of pearwood, while the jig is made of plywood. This is an upgrade compared to the previous MK boats, where parts of the plywood jig were incorporated into the final model. 1. The boat's center keel is made of three pearwood veneer layers. I simply cut them out and glued together as per instructions: 2. After that I assembled the jig. So far this was the most difficult part for me - the plywood is very fragile and crumbles easily, especially in the areas of the fore and aft bulkheads that need to be beveled. To prevent this problem I covered edges of the bulkheads with thin CA glue and waited for a few seconds until the edges turned into plastic. After that I beveled them without any problems. Another woe was inserting the center longitudal element into the bullkheads. It was a very tight fit and when I tried to file the notches a little bit the part started crumbling apart. Again, I generously covered both of its sides with CA glue and waited until it dried. Only then I was able to file the notches without destroying the whole piece: Here is another thing which I found was not too clear in the instructions. The bulkheads have notches that are installed into the bottom flat piece and these notches have slightly different lengths. This is done so that the bulkheads are oriented properly:

- 7 replies
-
- 3
-
-
- lifeboat
- master korabel
- (and 1 more)
-
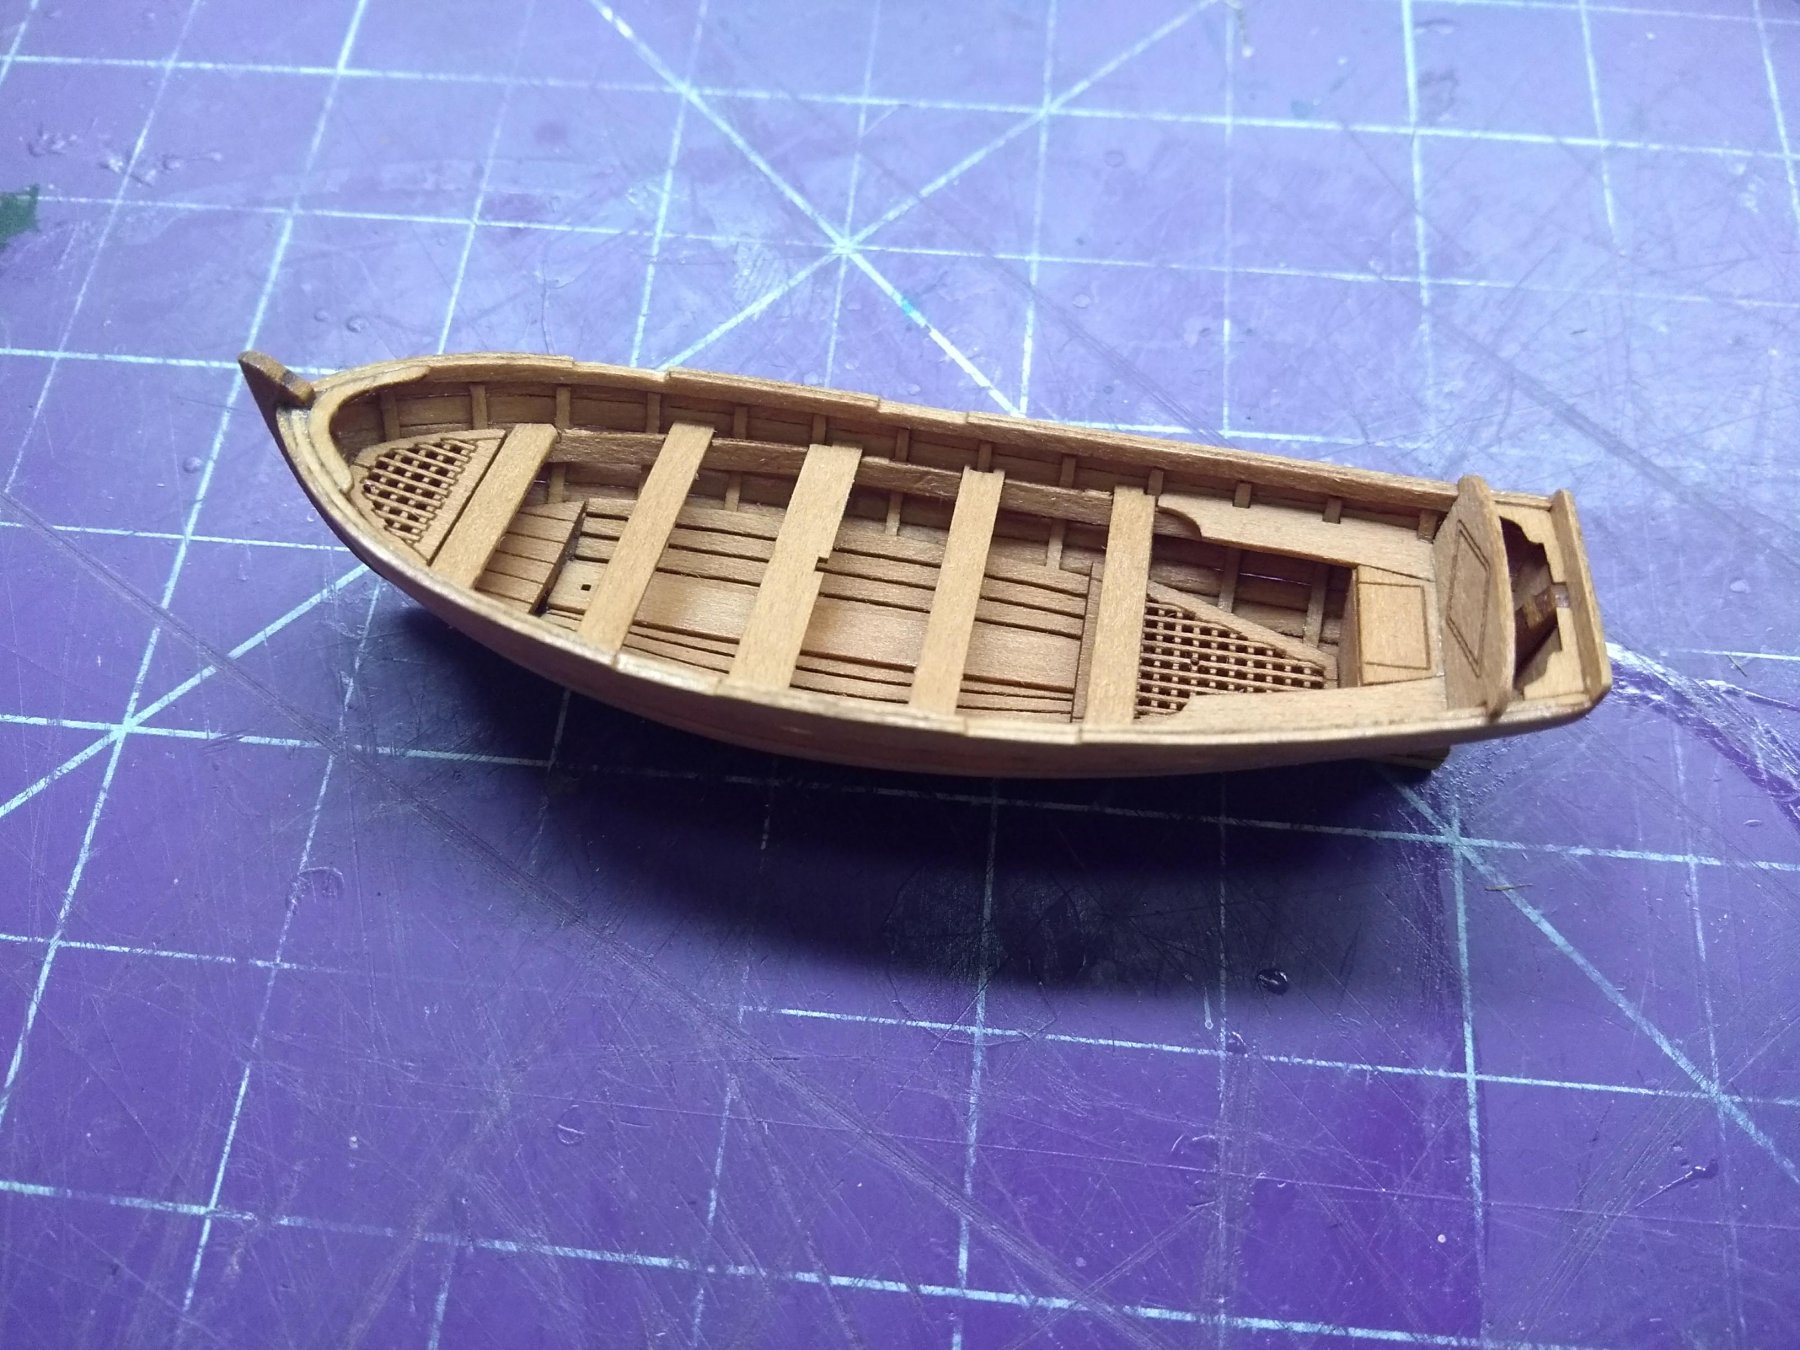
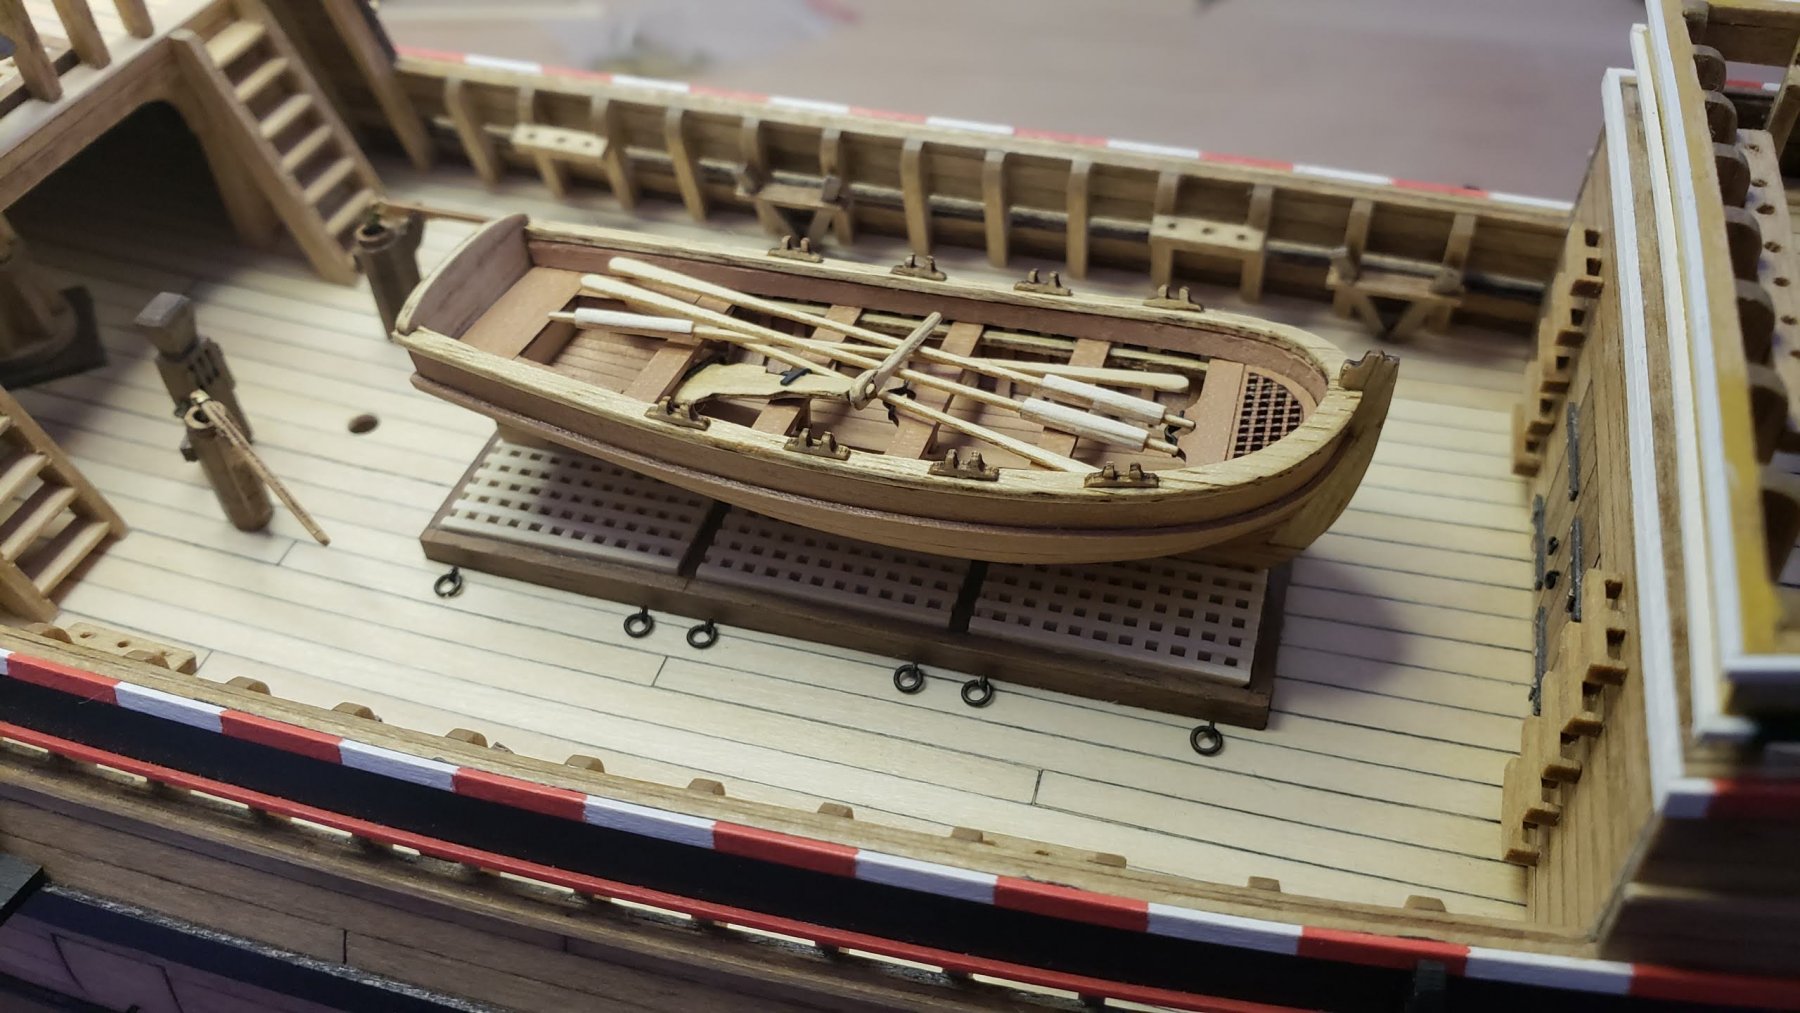
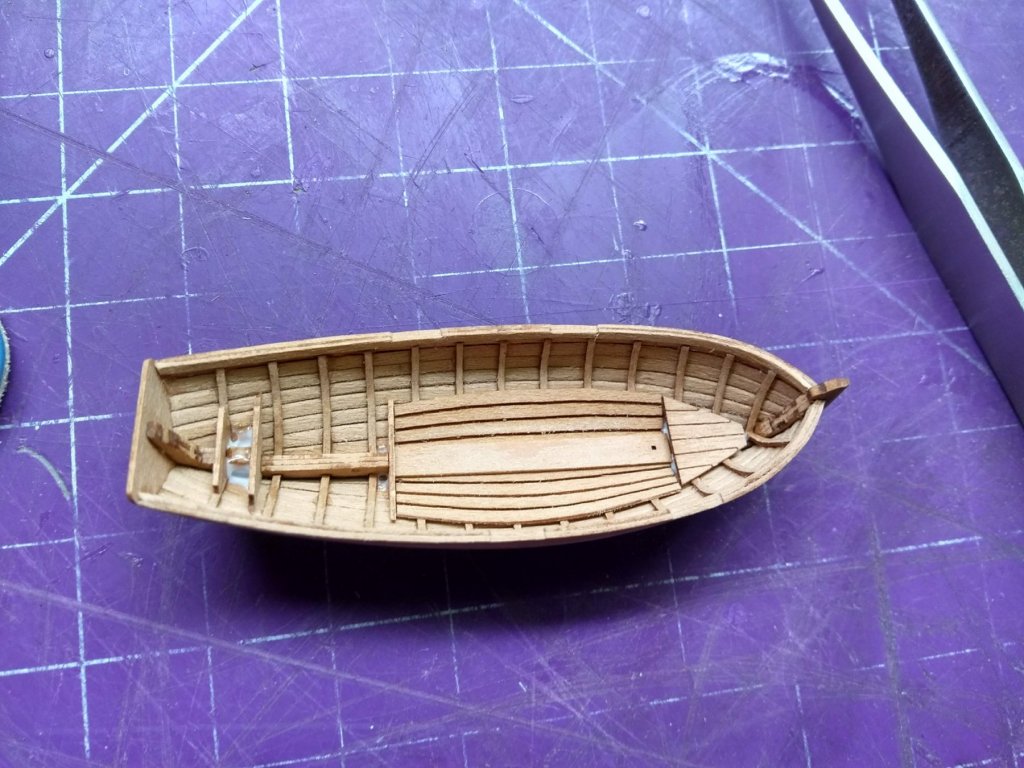
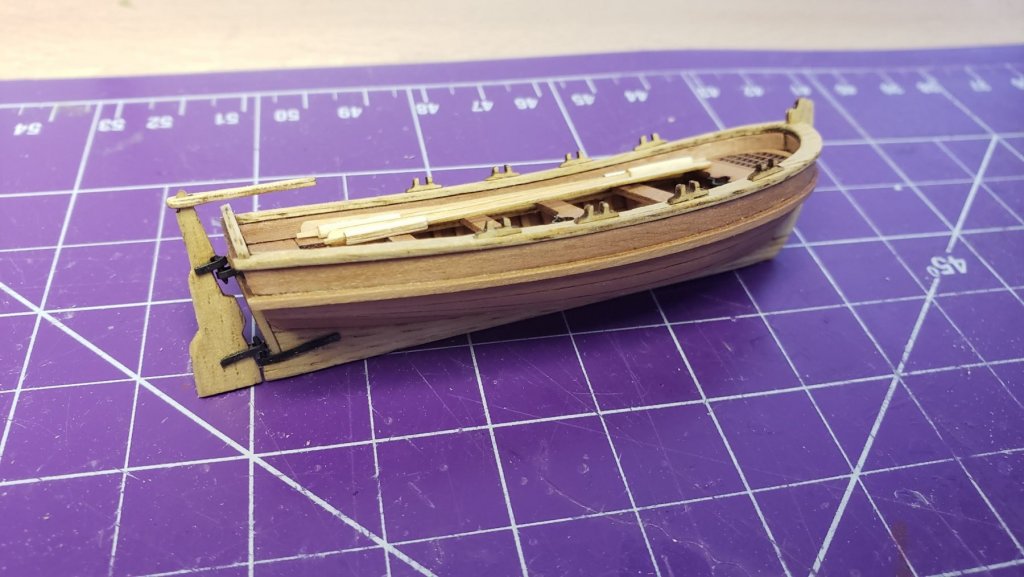
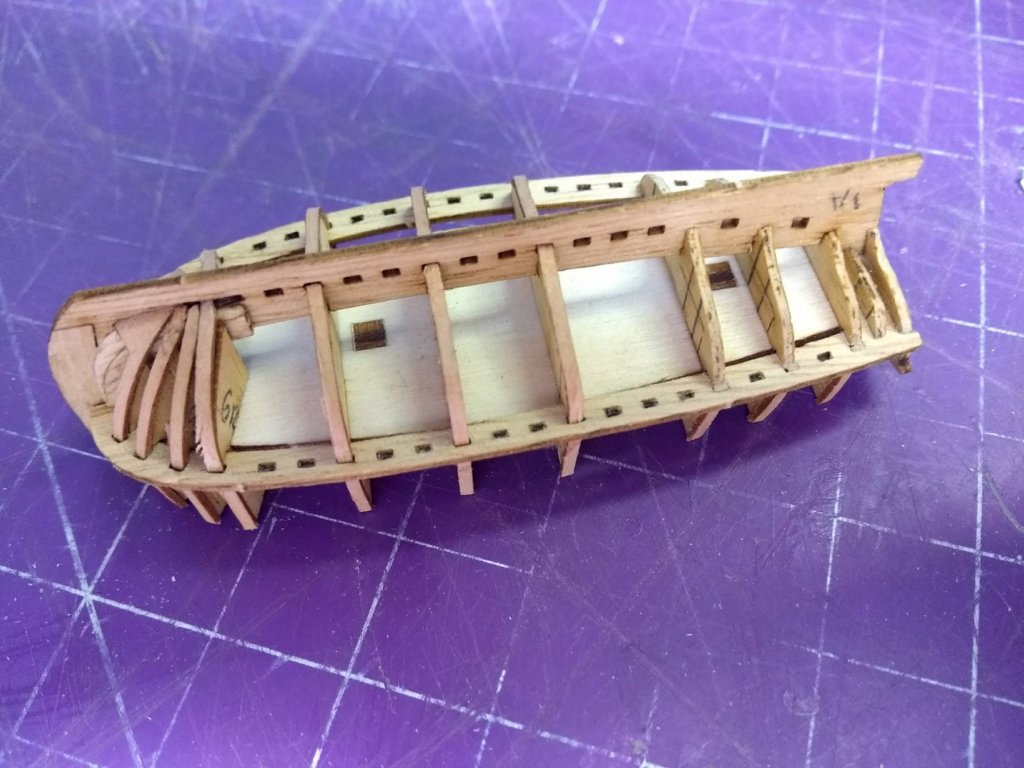
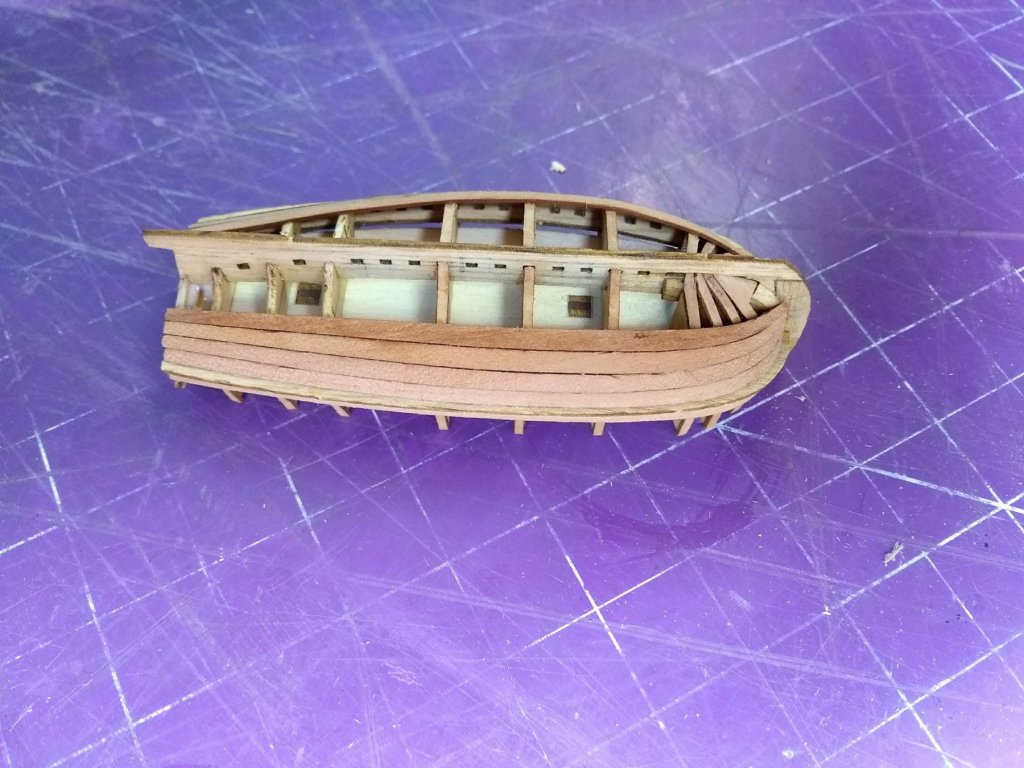
11. After that, all thwarts were assembled and glued to the boat, I decided to attach metal mast clamps to the thwarts before installing them on the model: 12. The rest was straightforward - I simply followed the instructions and added guard rail, gunwale, oarlocks and gudgeons/pintles: And made the rudder and oars: Finally the boat is done! This is how it looks on the deck of Mayflower:


- 6 replies
-
- 5
-
-
- lifeboat
- masterkorabel
- (and 1 more)
-
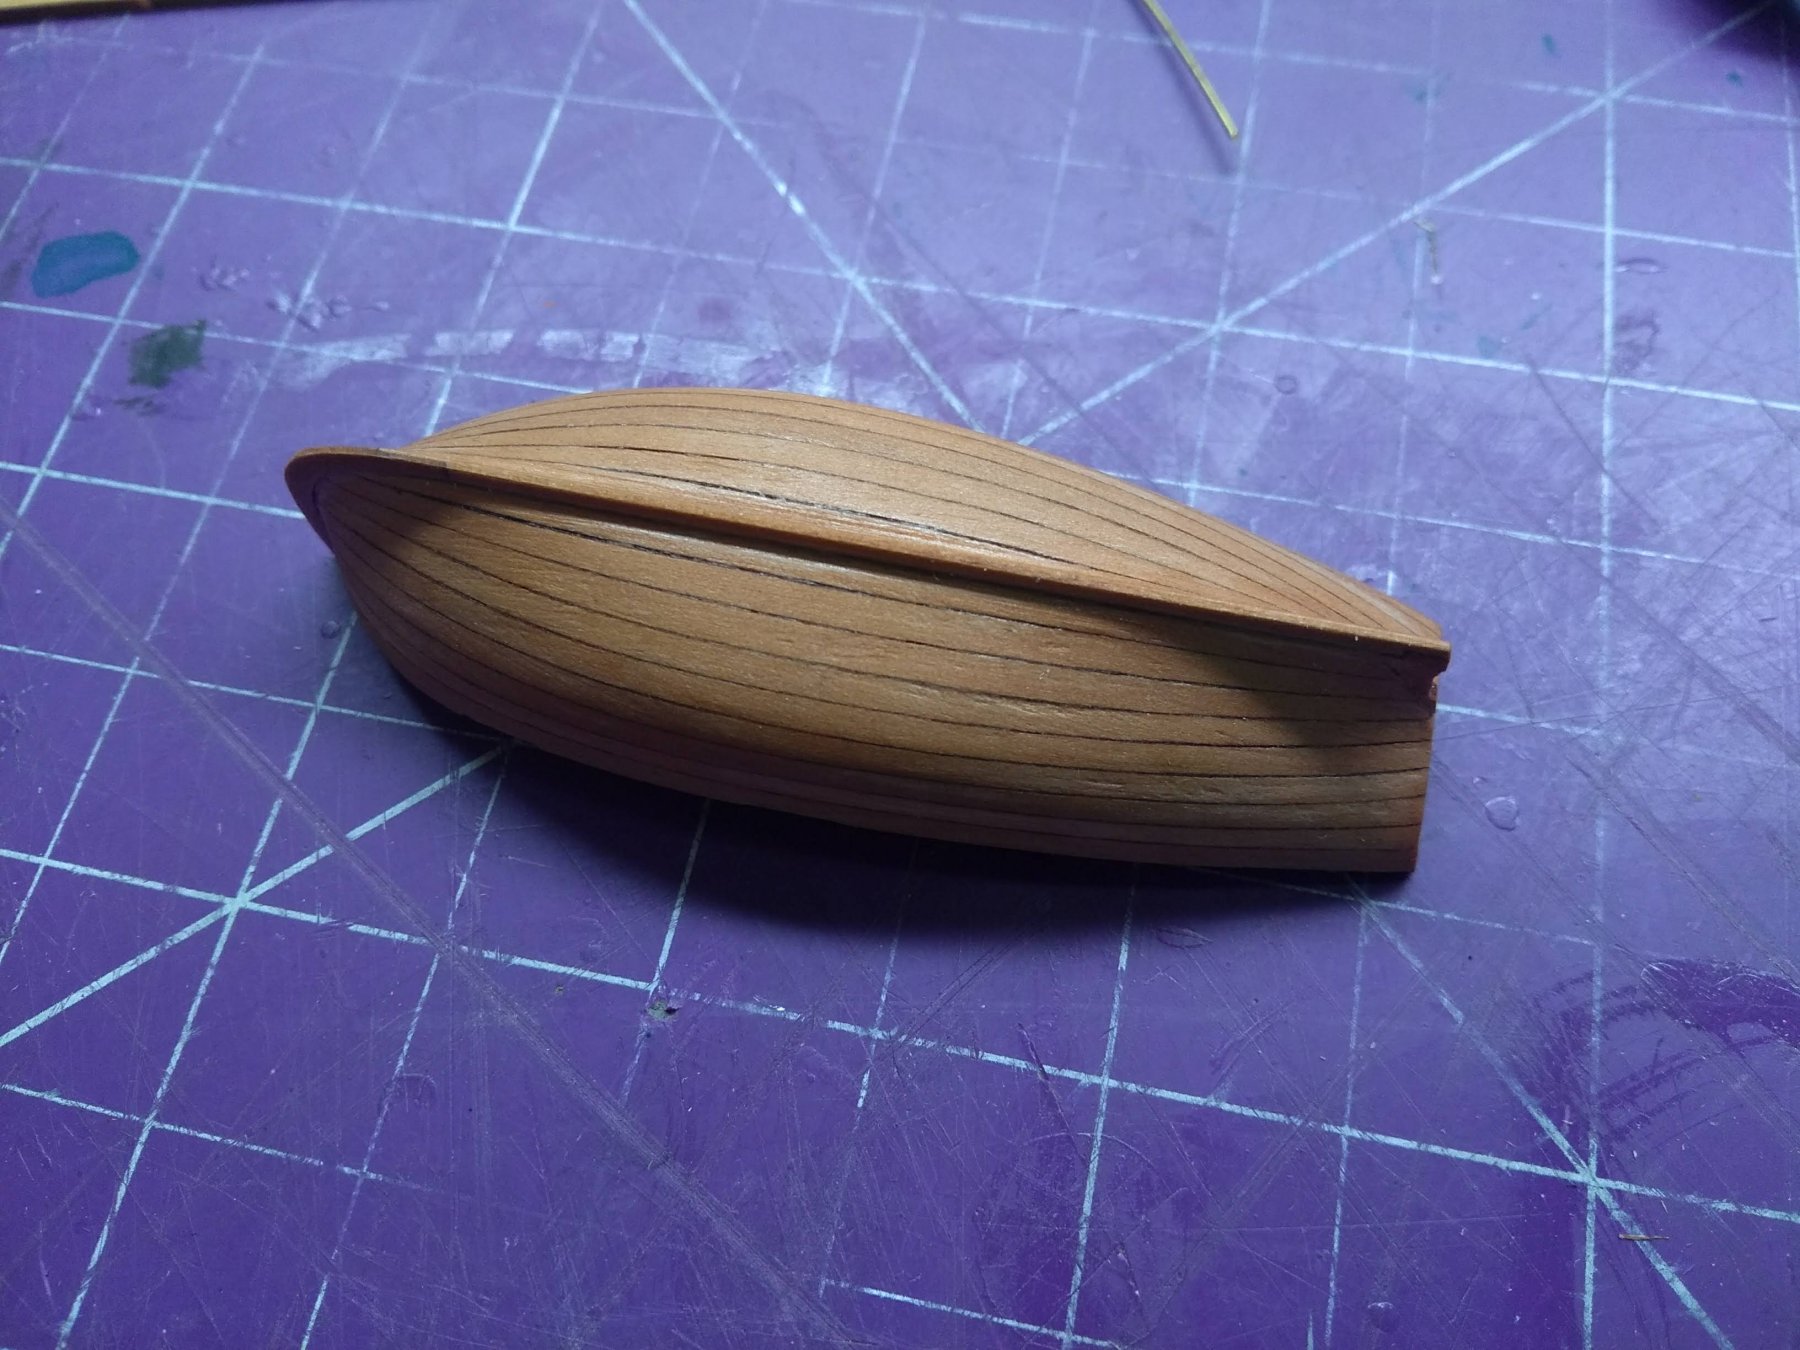
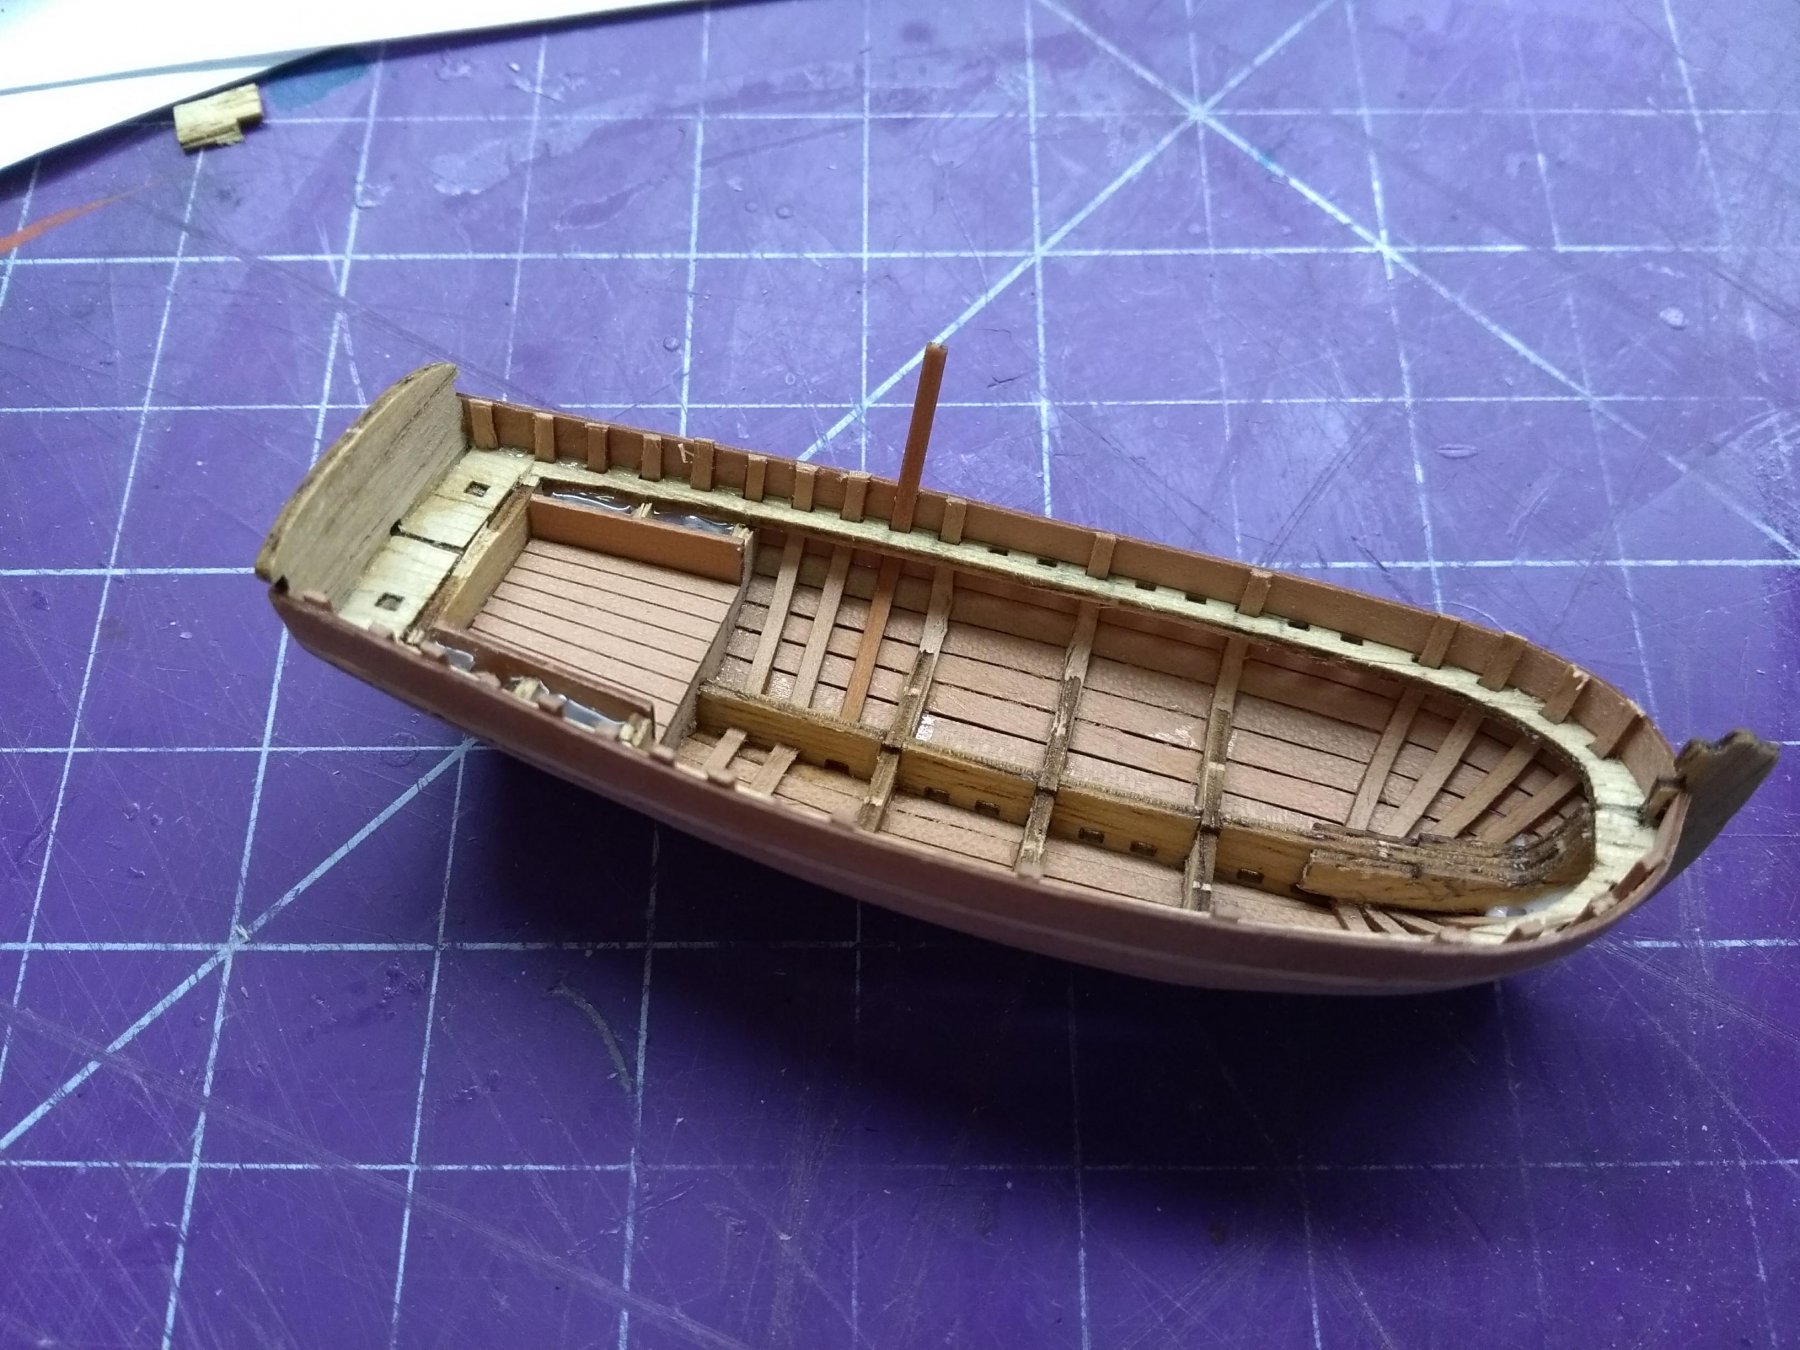
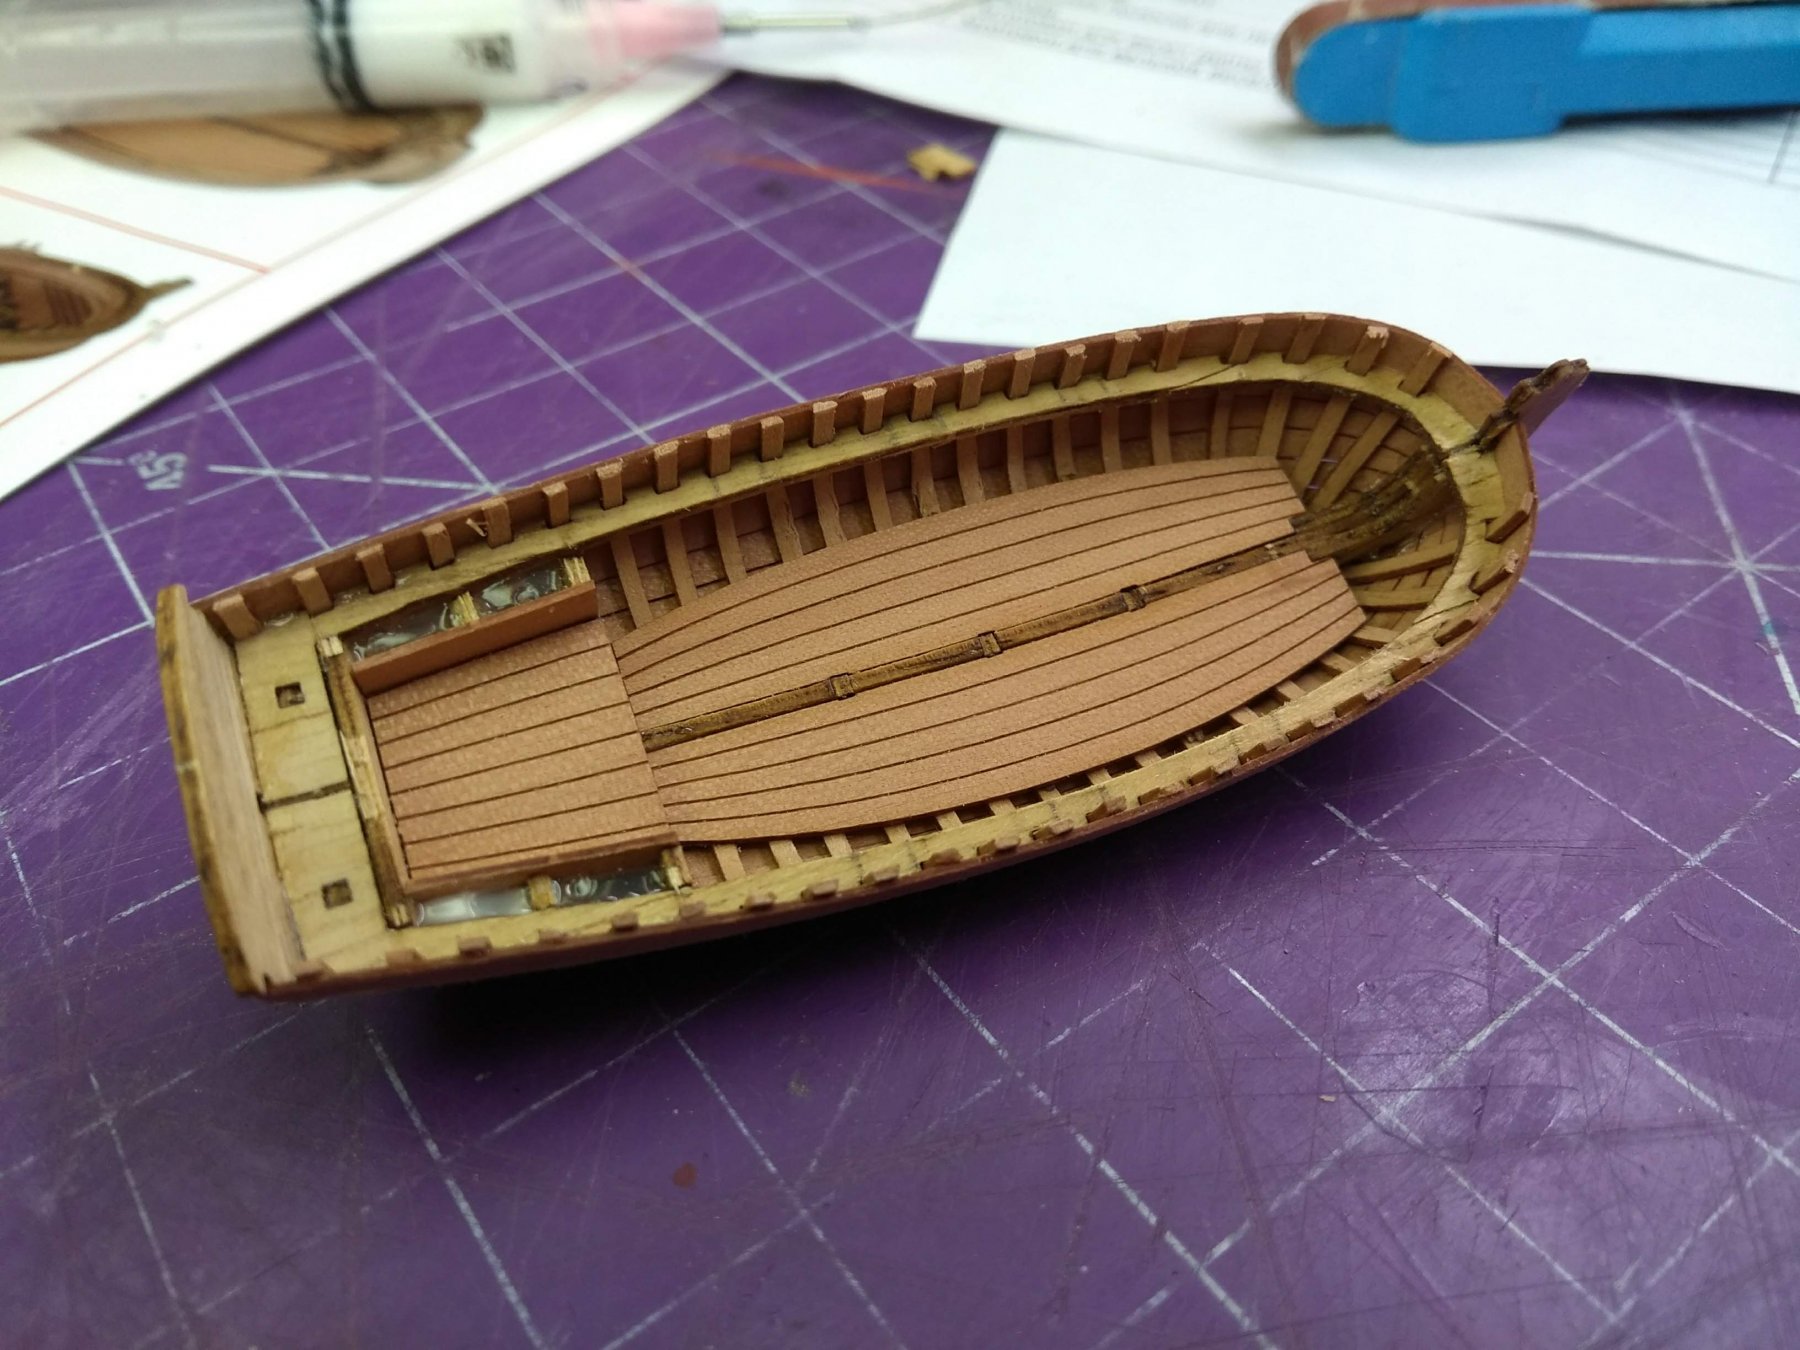
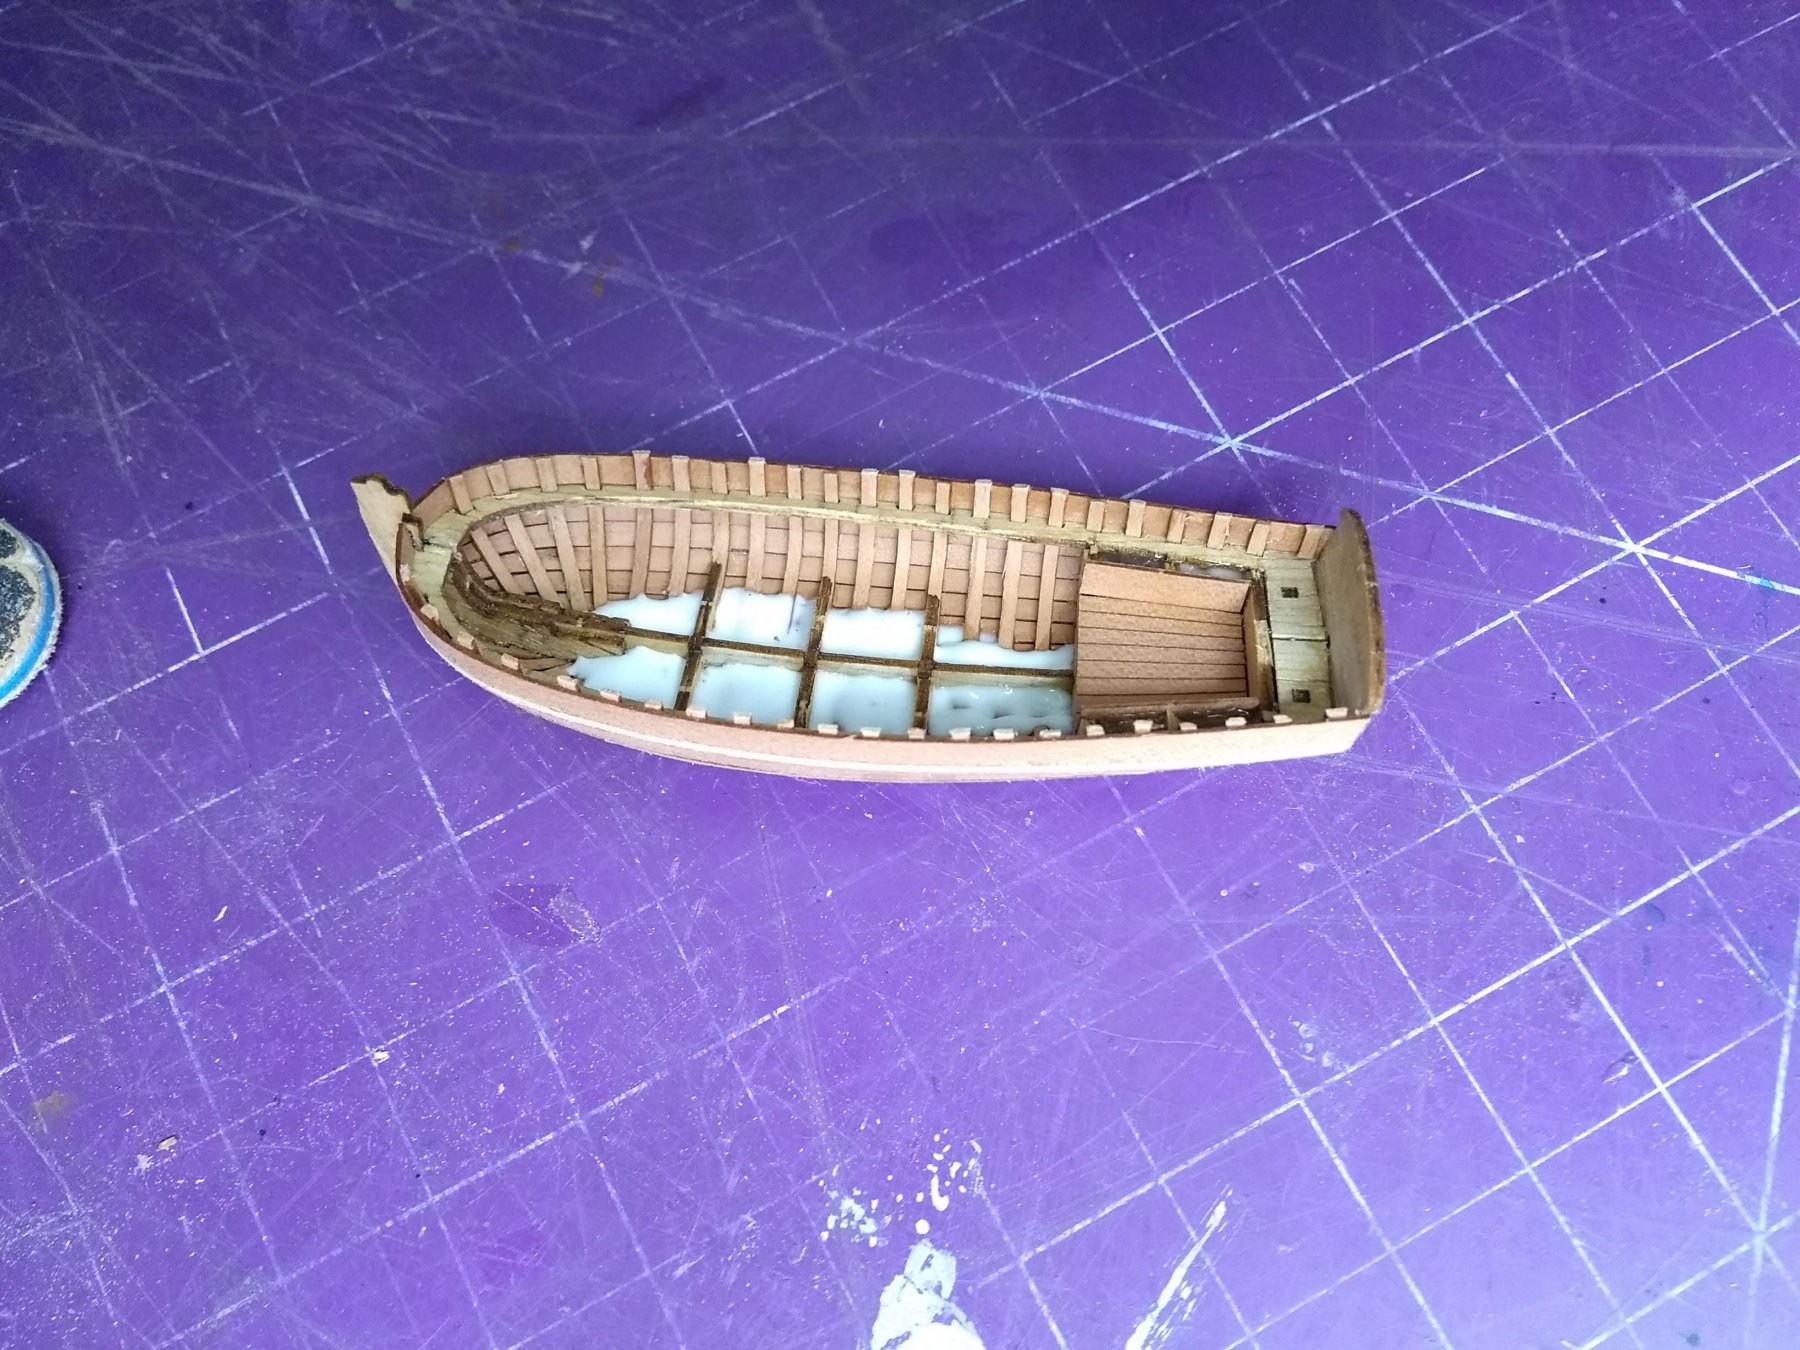
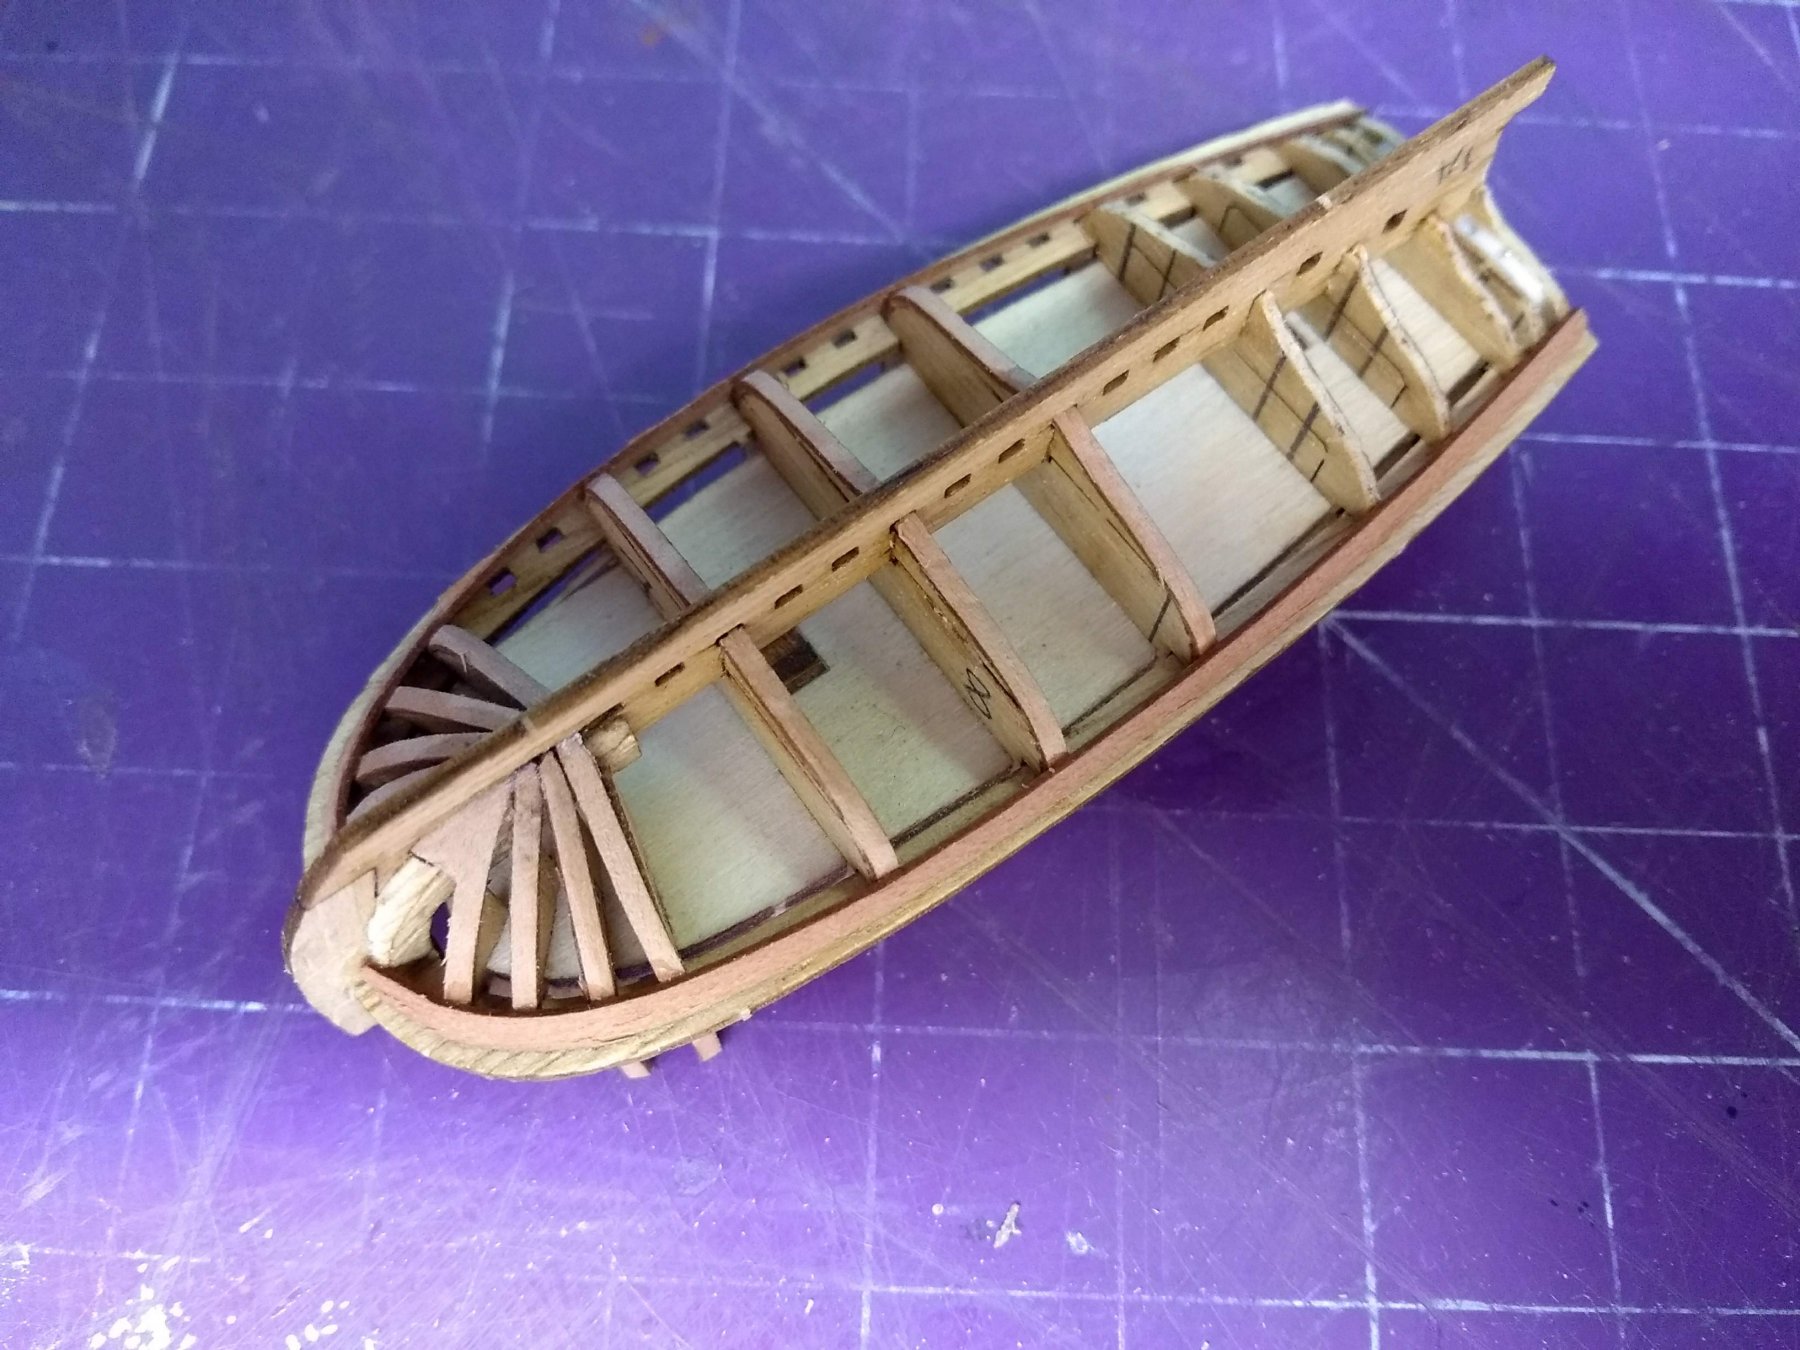
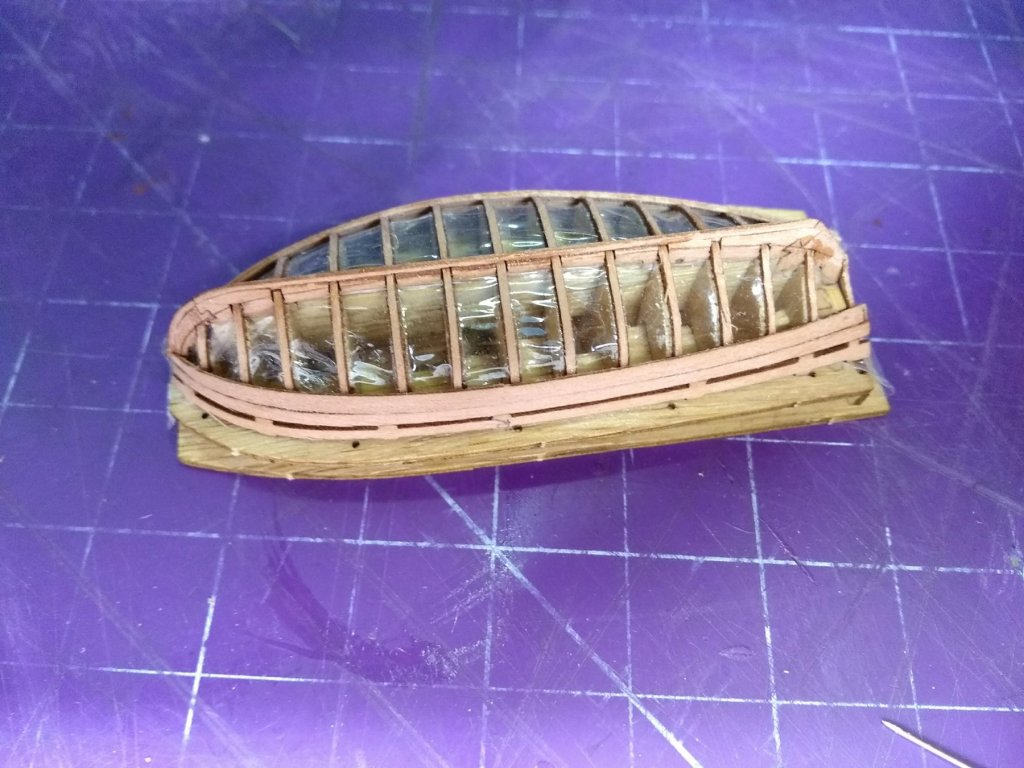
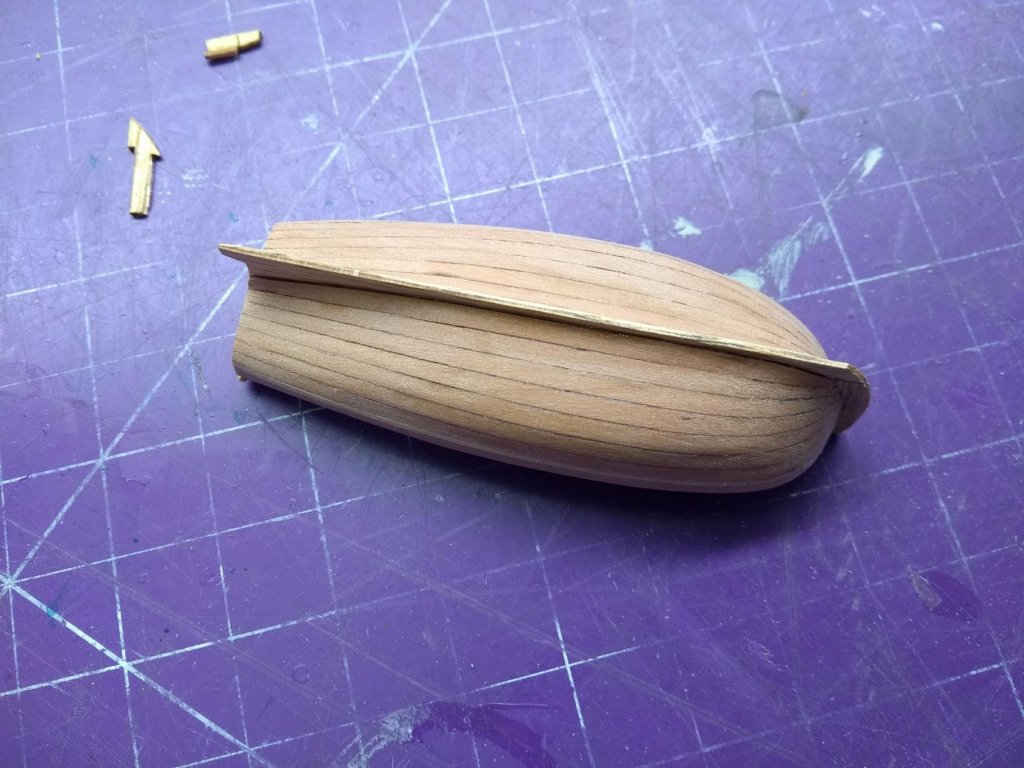
8. After the glue was dry I glued stern box covers and stern decking and started inserting timbers. I only slid them into the notches in the keel slightly and glued with a dab of superglue on both ends: 9. Once all timbers were installed I poured a lot of white glue into the bilge: After it dried I installed decking to cover it: 10. Once the glue was dry the hull was sanded:


- 6 replies
-
- 4
-
-
- lifeboat
- masterkorabel
- (and 1 more)
-
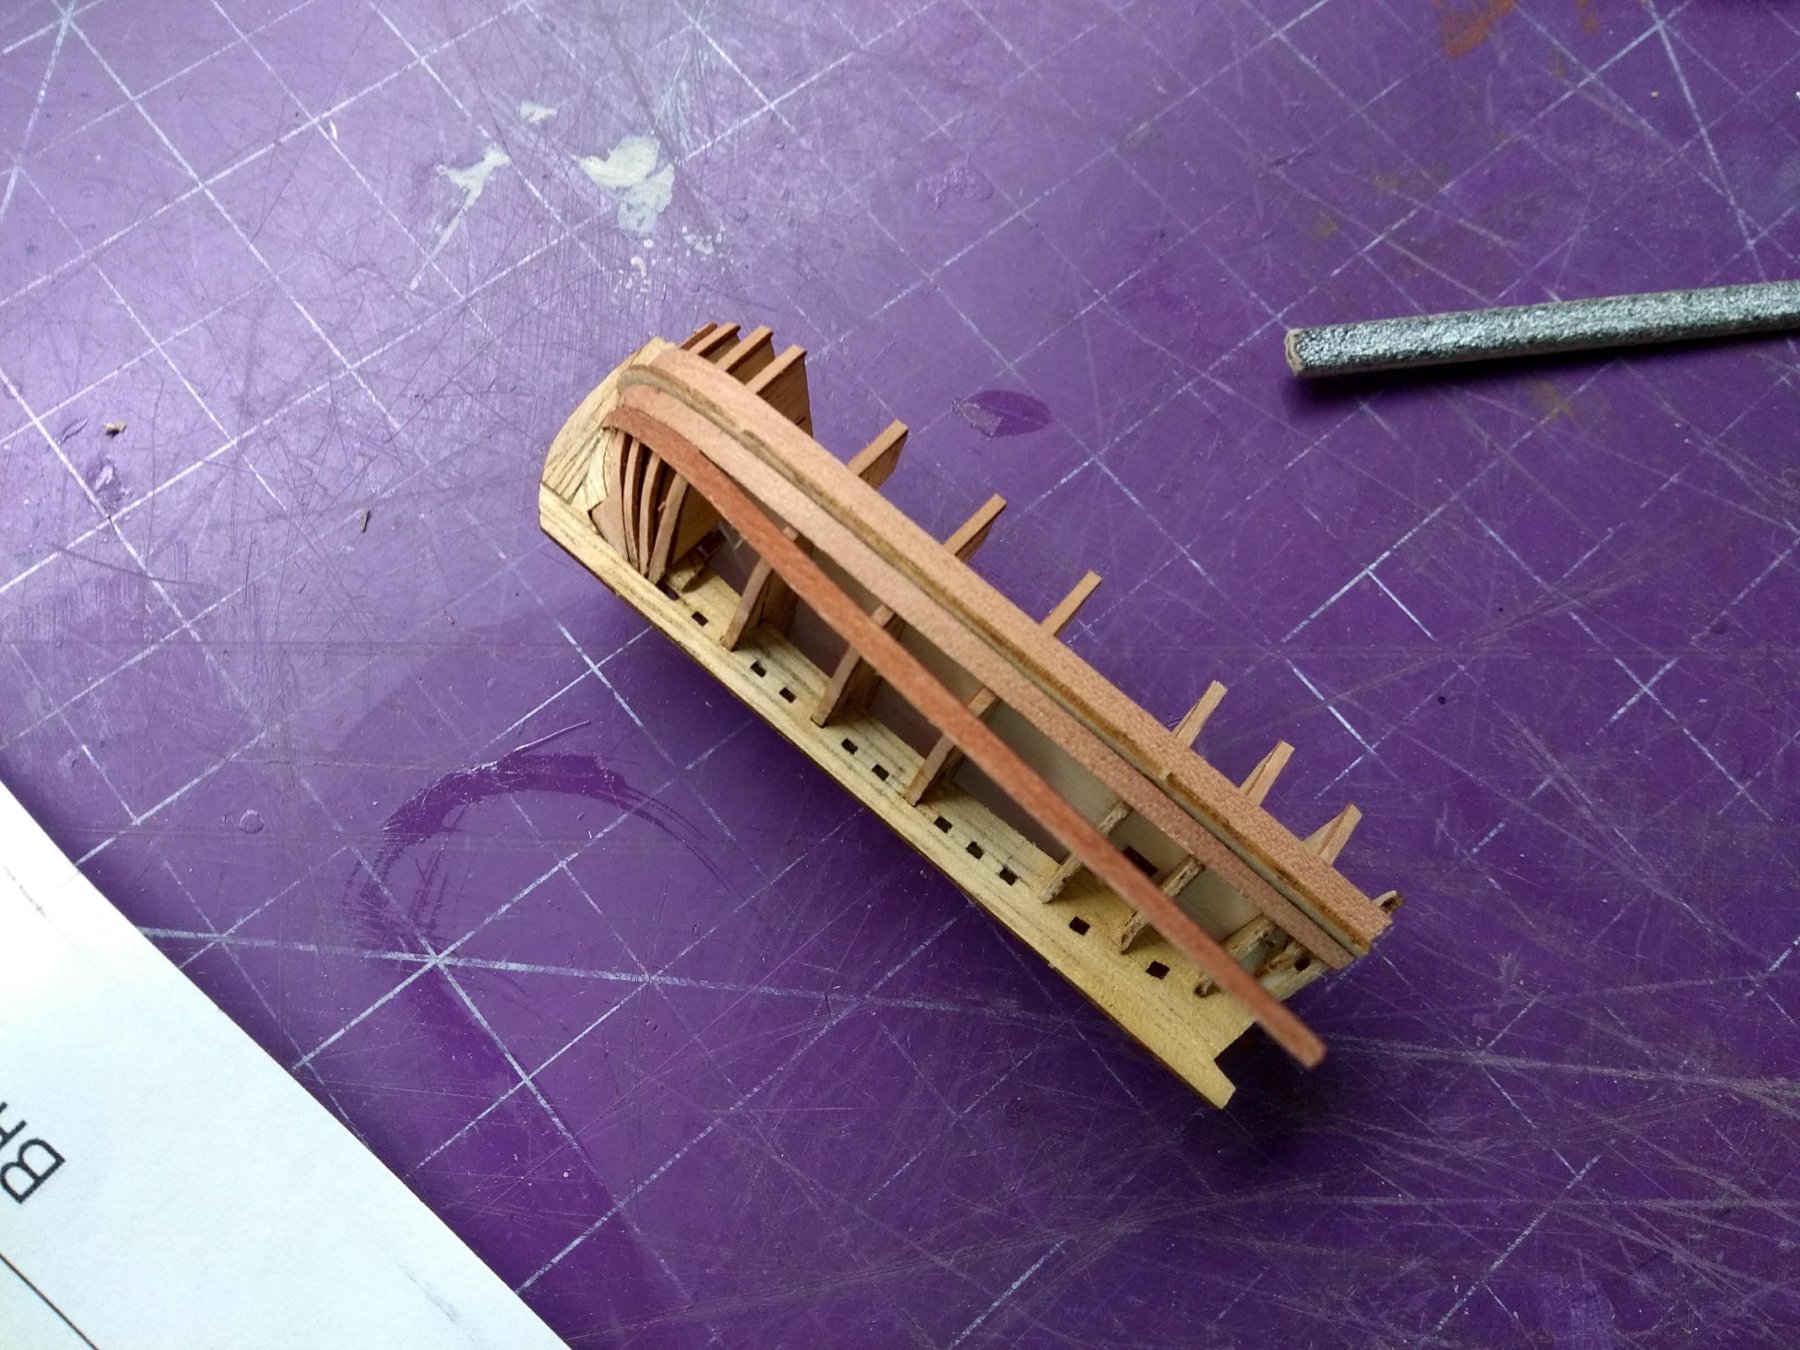
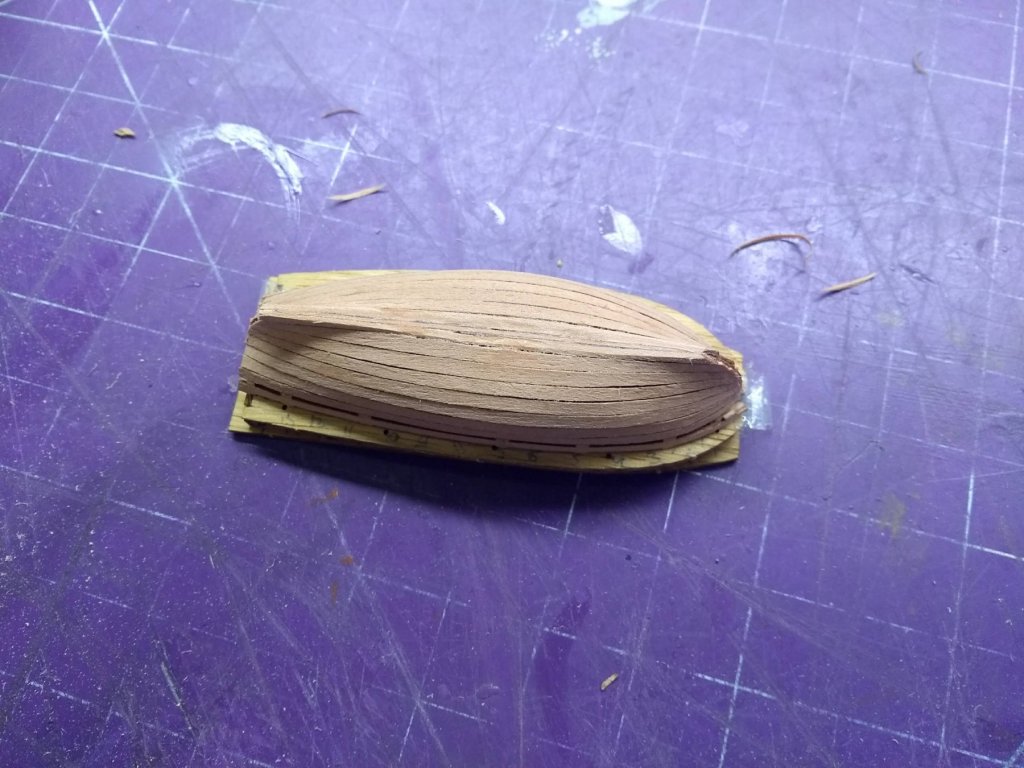
6. After planking is done, the manual says that you have to smooth and sand the hull. I decided to remove the jig first and add some glue on the inside for additional rigidity. The manual says that you simply need to snip protruding ends of the timbers. I decided to go further and cut the bulkheads as well, this should make removal of the jig much easier: 7. Next, I poured plenty of white glue in the aft section which will be covered by side benches and floor grating:


- 6 replies
-
- 2
-
-
- lifeboat
- masterkorabel
- (and 1 more)
-
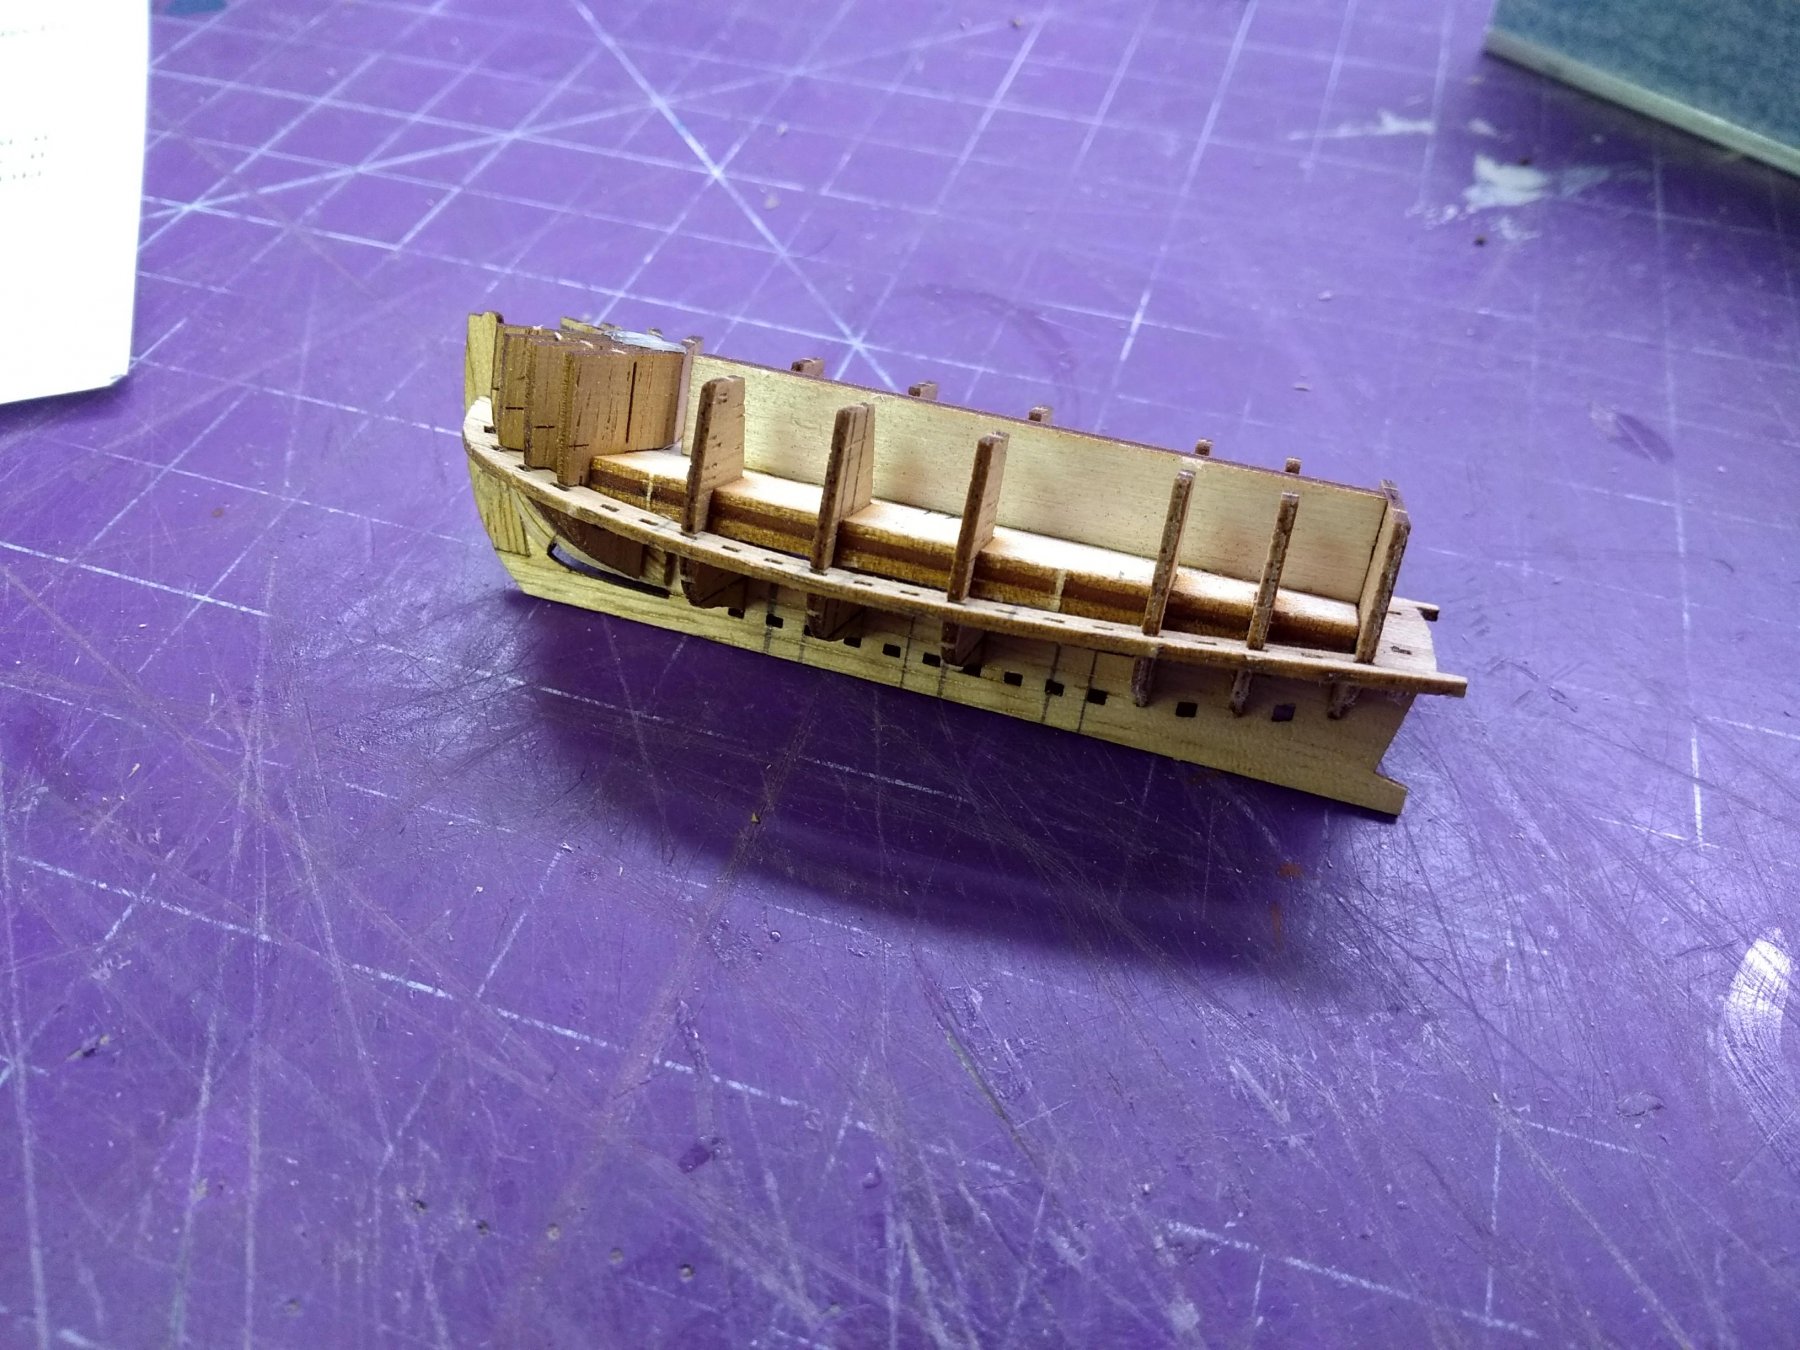
3. Once all the bulkheads were inserted into the jig I glued the center keel to the bulkheads (again, you can only glue it in specific spots!) and glued stern pieces 12 and 14 to the center keel (but not the jig!). I found that it was much easier to align them once the jig and the rest of bulkheads are installed. Finally I soak both port and starboard risings and tried to fit them into the notches in the bulkheads. This is where I pushed too hard again and both of the rising cracked a little. As before, iny drops of CA glue fixed the problem: 4. After that I followed the instructions, attached transom, soaked timbers and carefuly glued them. The timbers in the fore can only be glued to the center keel, while timbers in the midsection can be glued to the bottom portions of bulkheads. All timbers can be glued to the top sections of the bulkheads (above the gunwale notch). Note that the bulkheads in the aft don't have any timbers, the planks are glued directly to them: 5. Finally planking can begin! I deviated from the instruction again and glued the planks that go above the rising so the transom piece is firmly supported by them. After that I simply planked the boat as per instructions, starting with the strake right under the rising:


- 6 replies
-
- 3
-
-
- lifeboat
- masterkorabel
- (and 1 more)
-
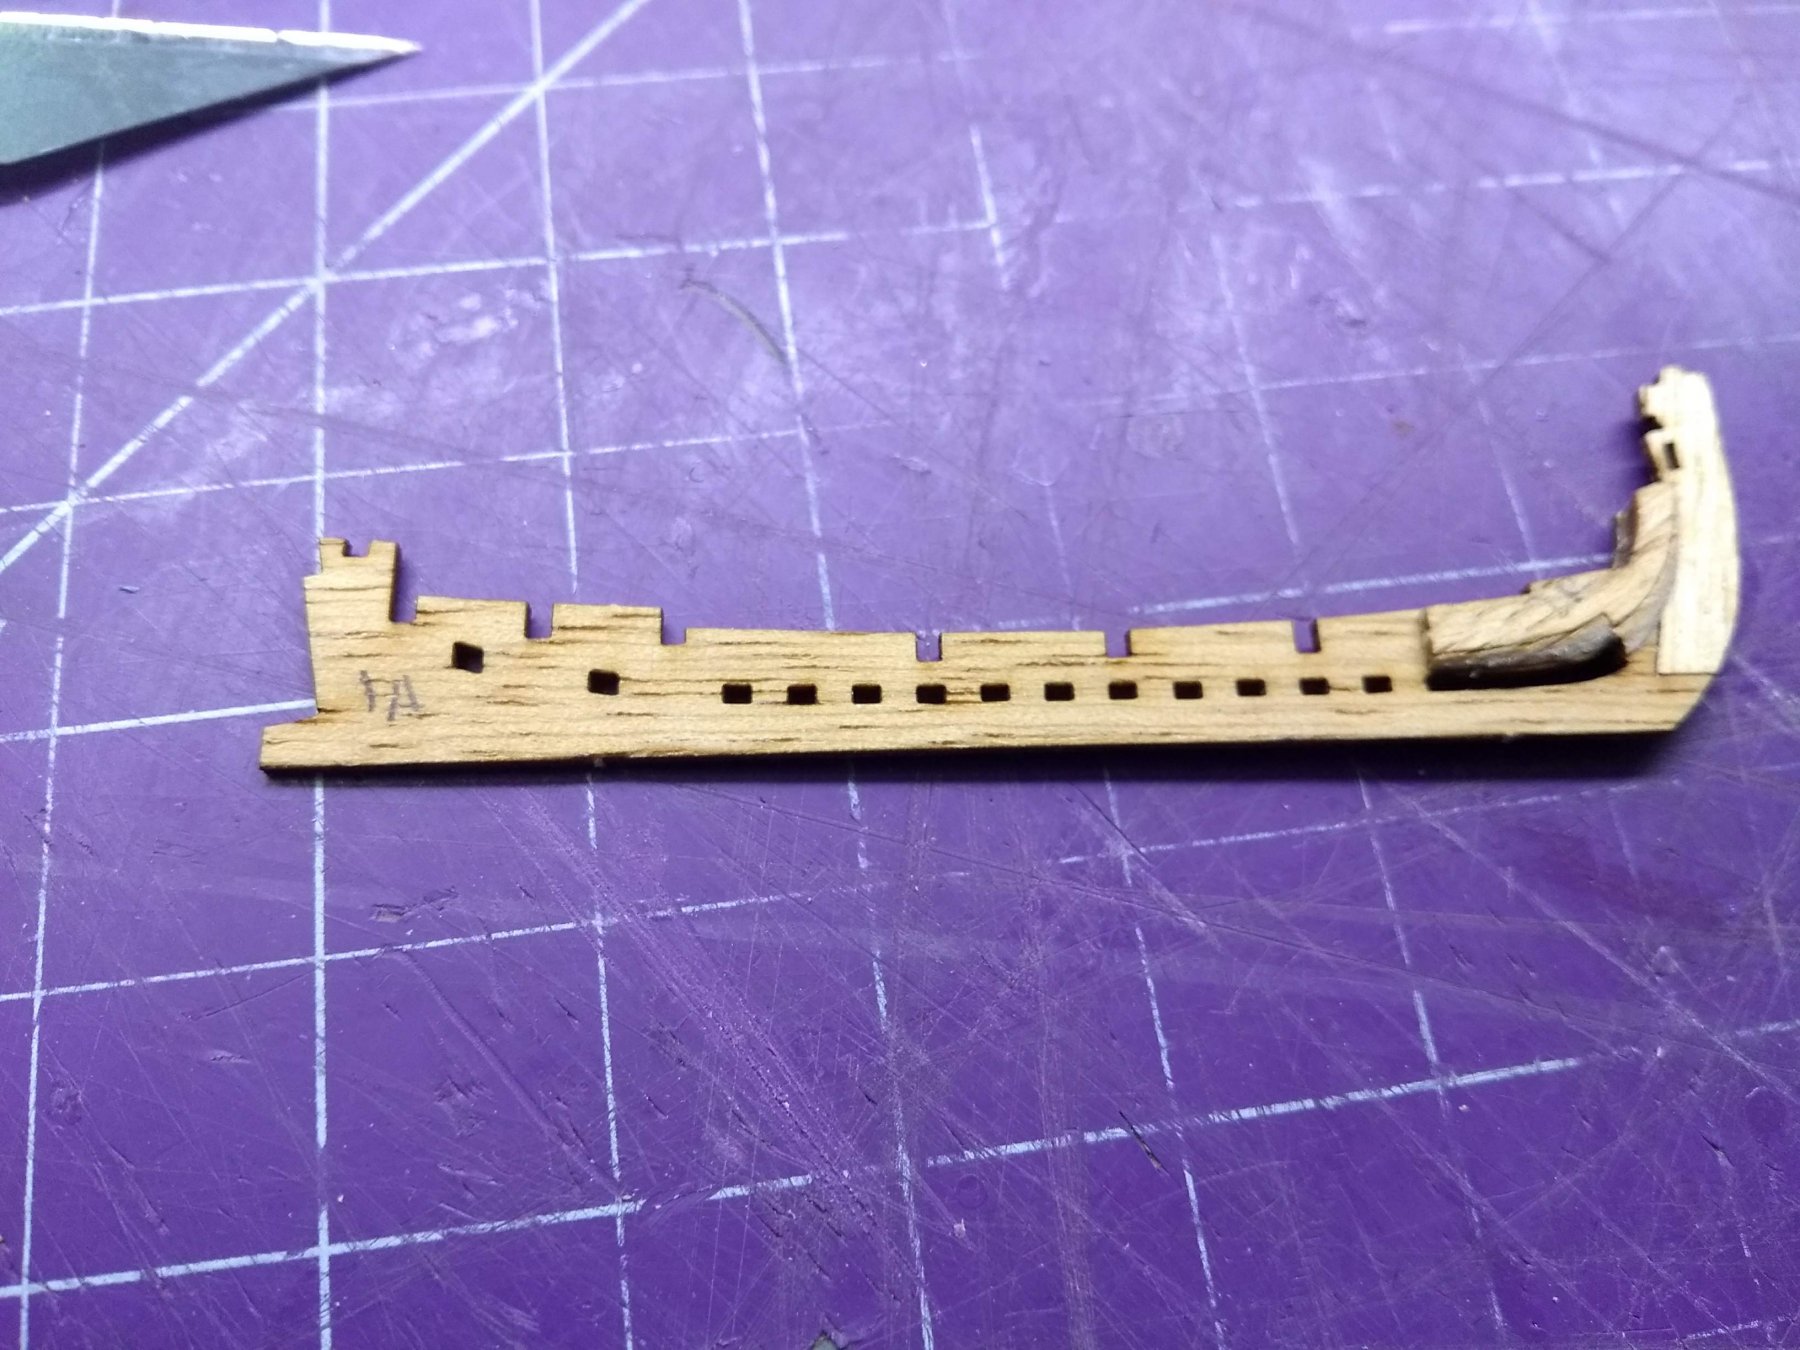
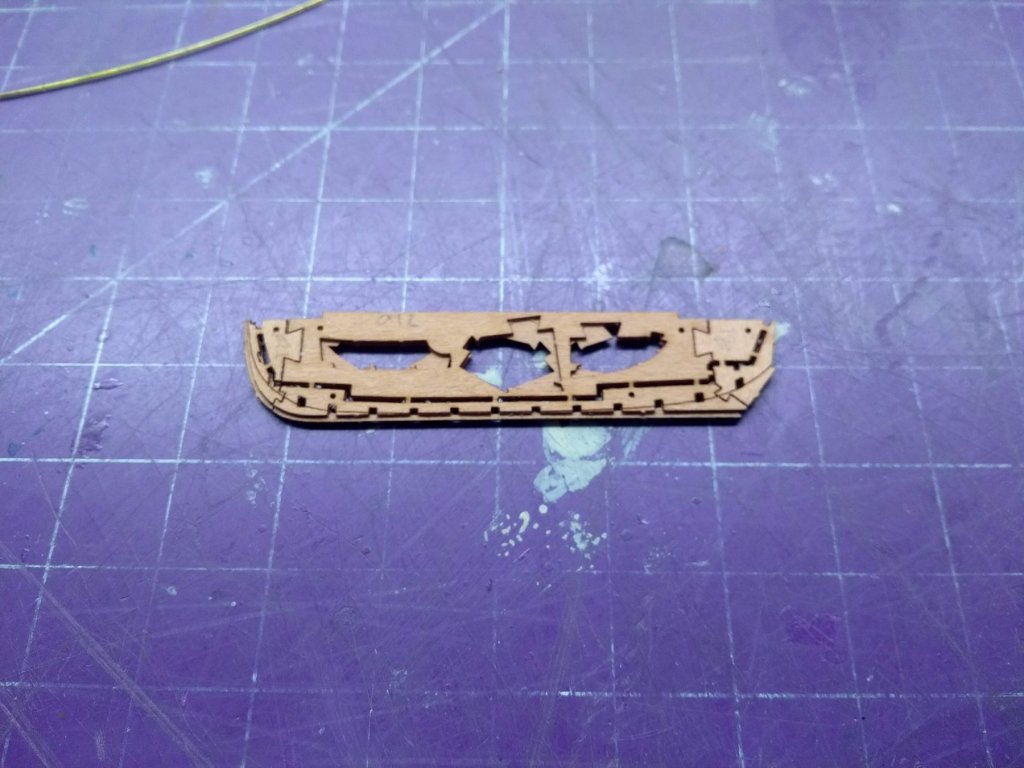
Hello everybody, This is an express build log for a 8-oared lifeboat made by Master Korabel. This is my second one, I have already built one of these for my St. Gabriel Model. The laser cut parts for these tiny boats are very delicate and fragile and I managed to break a couple of them. Fortunately these little mishaps didn't affect the result. Also, I deviated from the instructions a little bit and I think it made the assembly slightly easier. This tiny kit consists of a few veneer and plywood billets: First few steps, were straightforward and I simply followed the instructions: 1. I beveled and assembled the center keel. 2. Next, the instructions tell you to attach some stern pieces to the keel frame at this point. I decided not to do it right now and wait until a later stage. The reason is that it is really hard to align these stern pieces with the keel frame and make them perfectly perpendicular. Instead I skipped ahead and assembled the jig and inserted (but not glued!) all the bulkheads into it. The bulkheads are very fragile and I managed to break a couple of the rotating bulkheads in the bow section of the boat while dryfitting them. Simply gluing them back together with CA glue solved the problem:
- 6 replies
-
- 3
-
-
- lifeboat
- masterkorabel
- (and 1 more)
-
Staining basswod
etsinko replied to etsinko's topic in Painting, finishing and weathering products and techniques
Thank you guys! Is there a lighter shade stain that evens out the colors of the planks? I thought MinWax Natural would be the one, but it turned out that this stain doesn't change the color at all. Egor -
Hello everybody, I have a question about staining the deck. I'm currently building MS Mayflower kit which only comes with basswood as the only wood. As I started planking the deck I noticed that the color of basswod strips doesn't match, some strips are more yellow and others are more white. This results in a deck that looks uneven and not pleasing to the eye. Right now I see two options: 1. Tear apart whatever I've planked so far and start over carefully selecting strips so they all have same color. When deck is planked sand it and apply Min-Wax Wipe-on-poly. 2. Finish planking the deck without bothering about color mismatch and then stain it. My question is, has anybody had similar experience before and what they ended up doing? What kind of stain people use for decks and how the end result looks like? On my other model I only used MinWax wipe-on-poly on the basswood planked deck and it turned out very well (all the strips were similar shade though). Thank you very much, Egor