HOLIDAY DONATION DRIVE - SUPPORT MSW - DO YOUR PART TO KEEP THIS GREAT FORUM GOING! (Only 13 donations so far - C'mon guys!)
×


etsinko
-
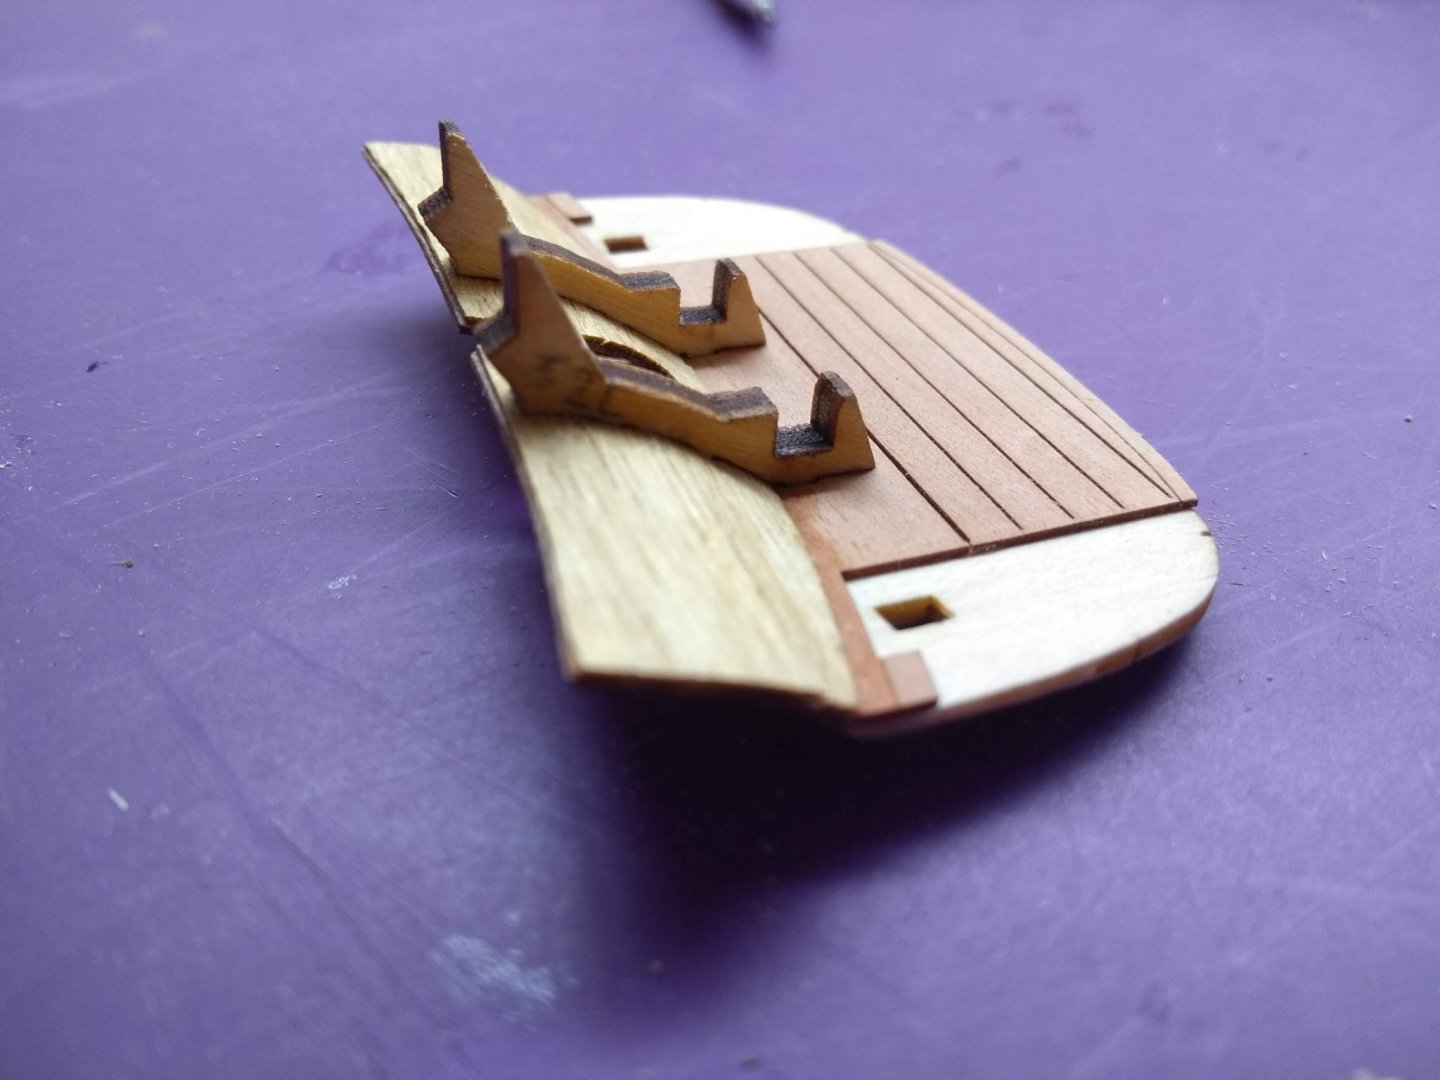
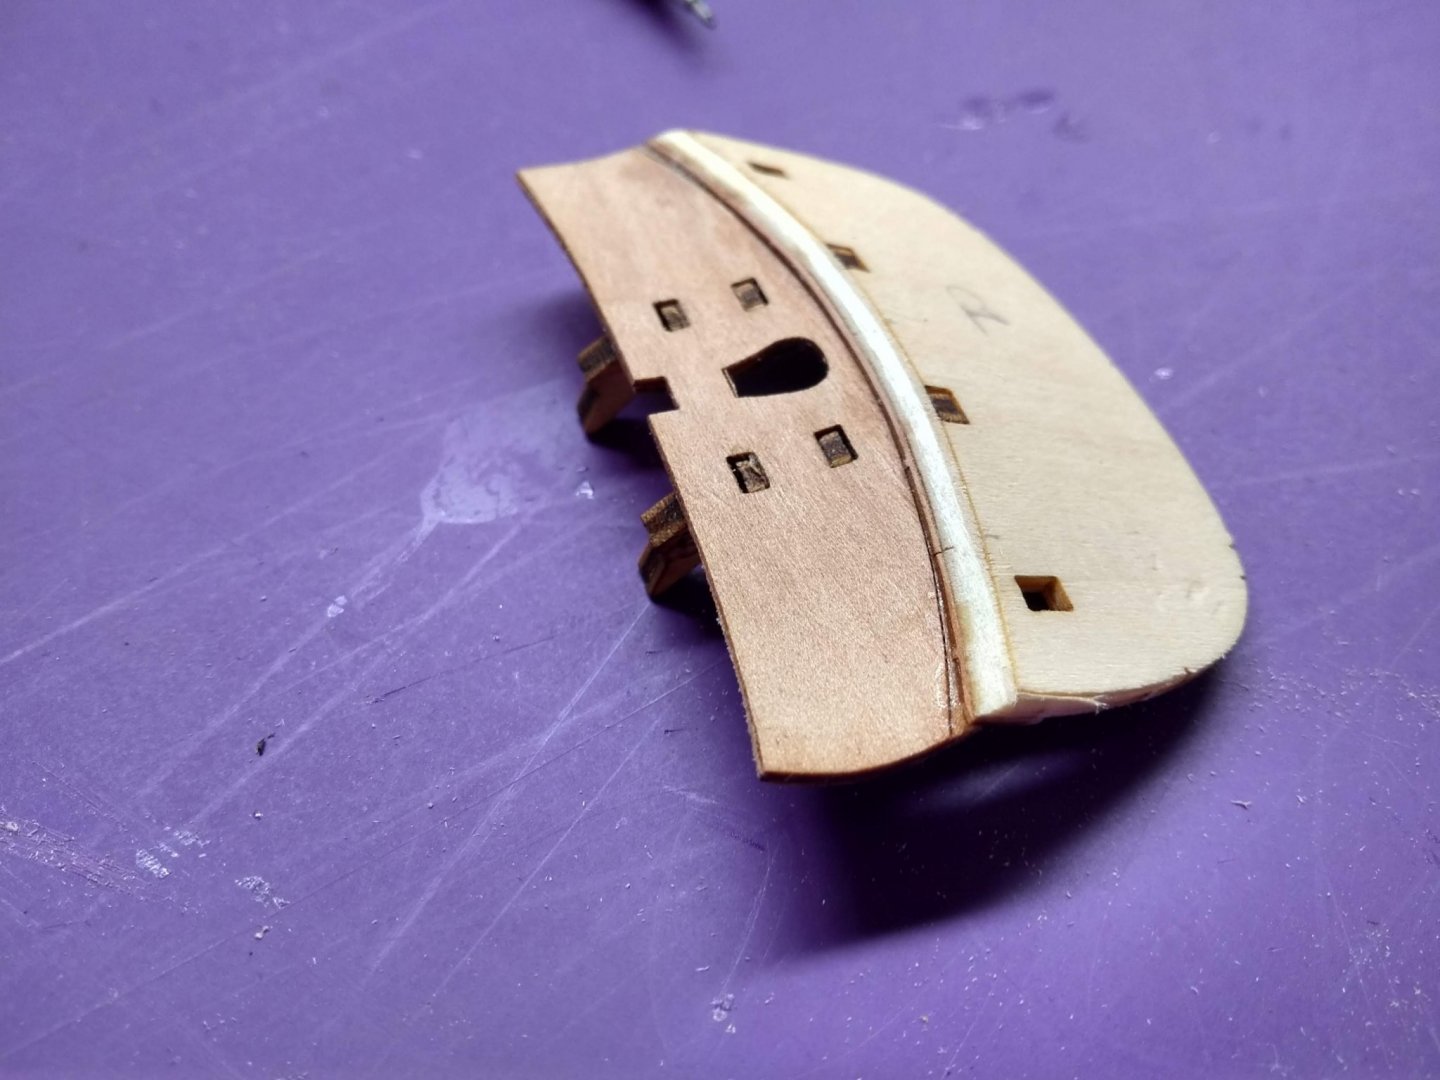
Posts
94 -
Joined
-
Last visited
Content Type
Profiles
Forums
Gallery
Events
Everything posted by etsinko
-
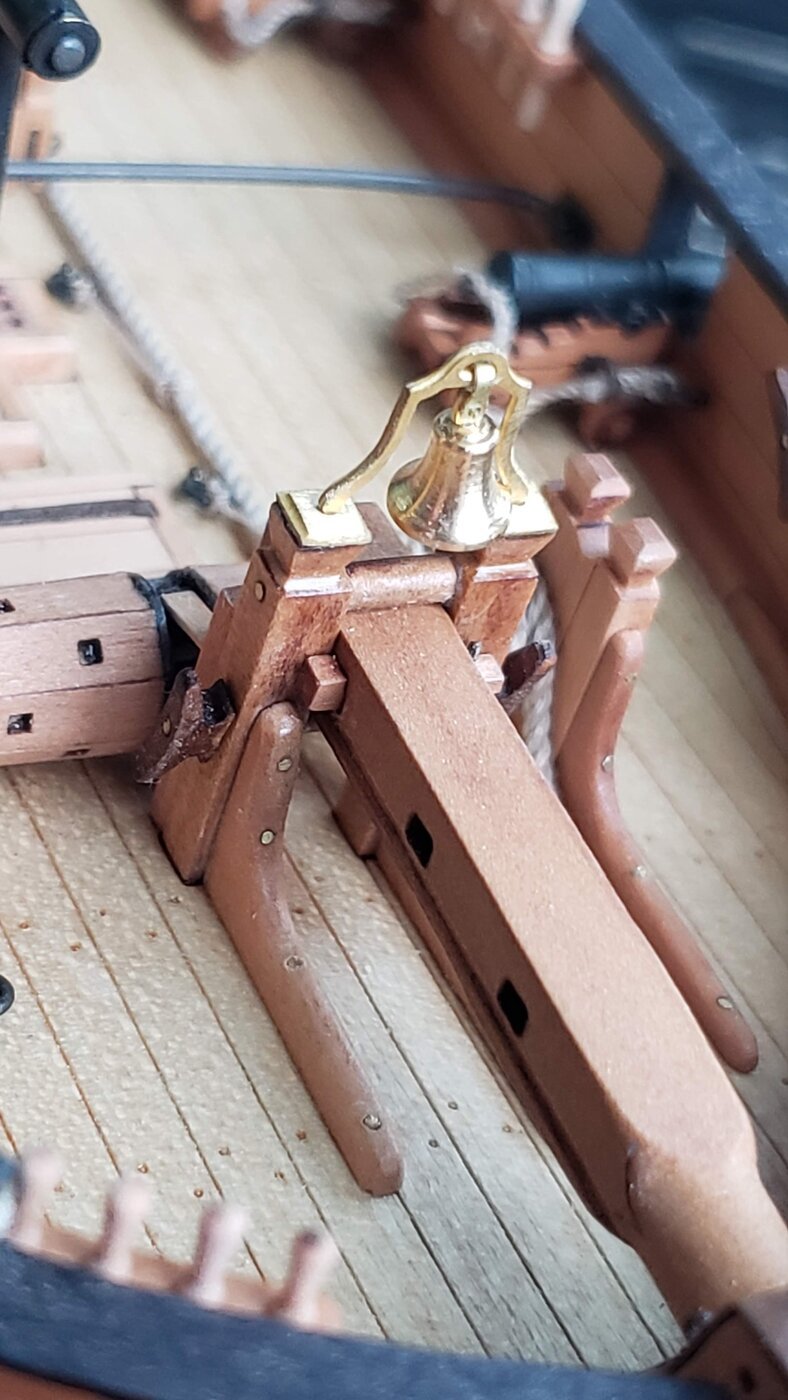
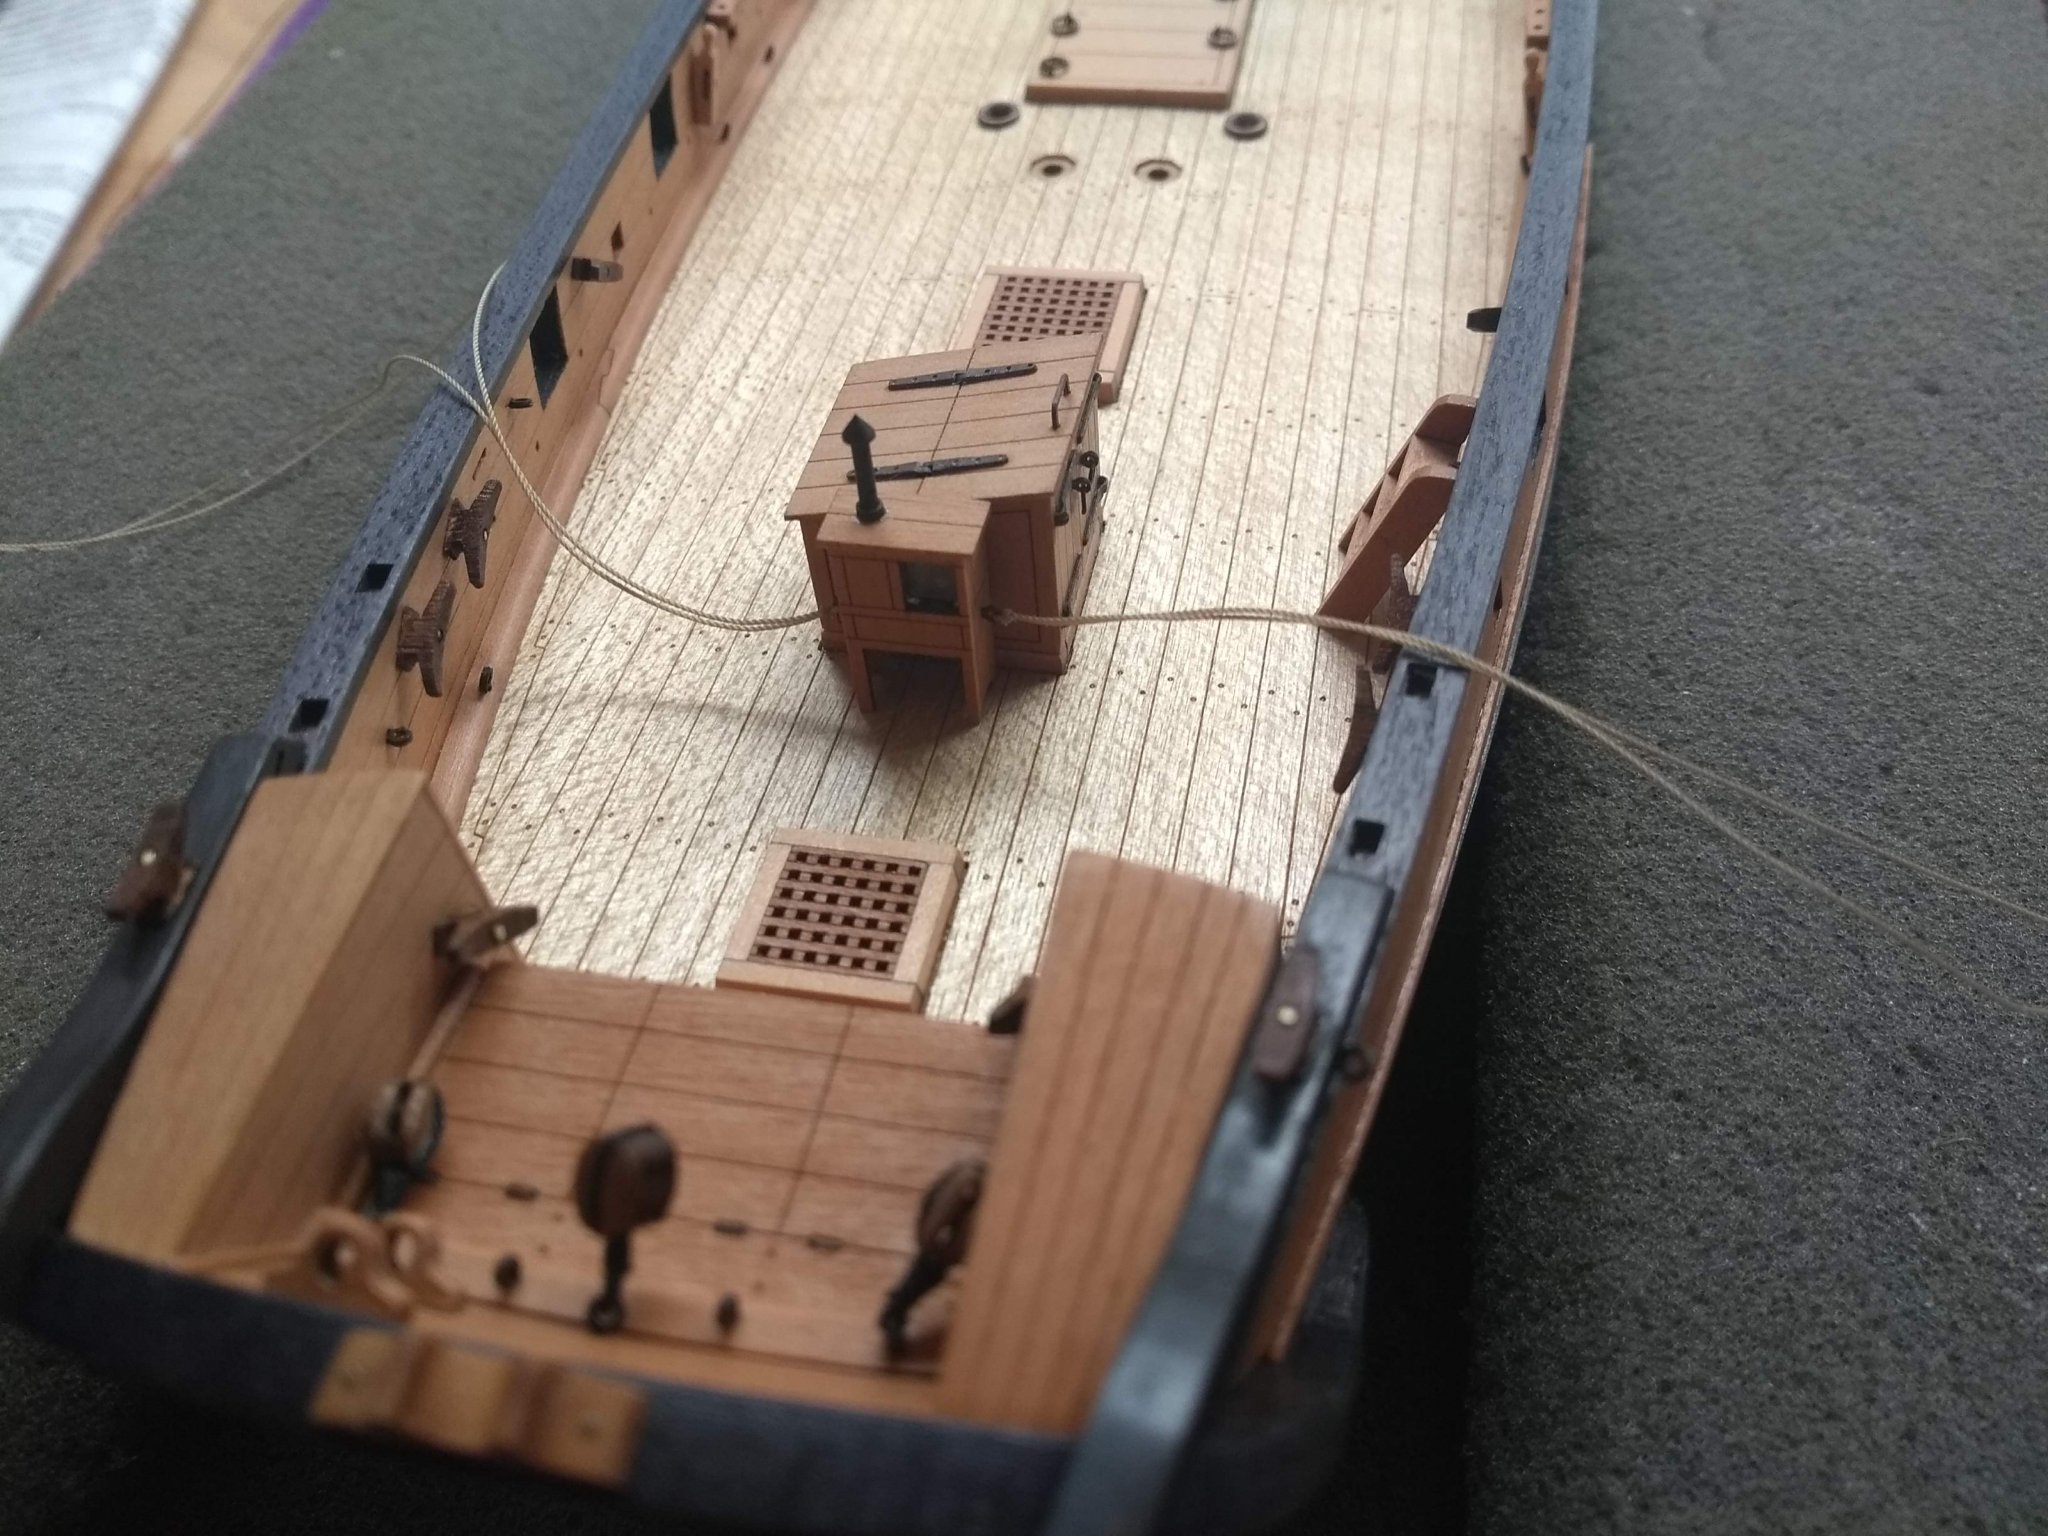
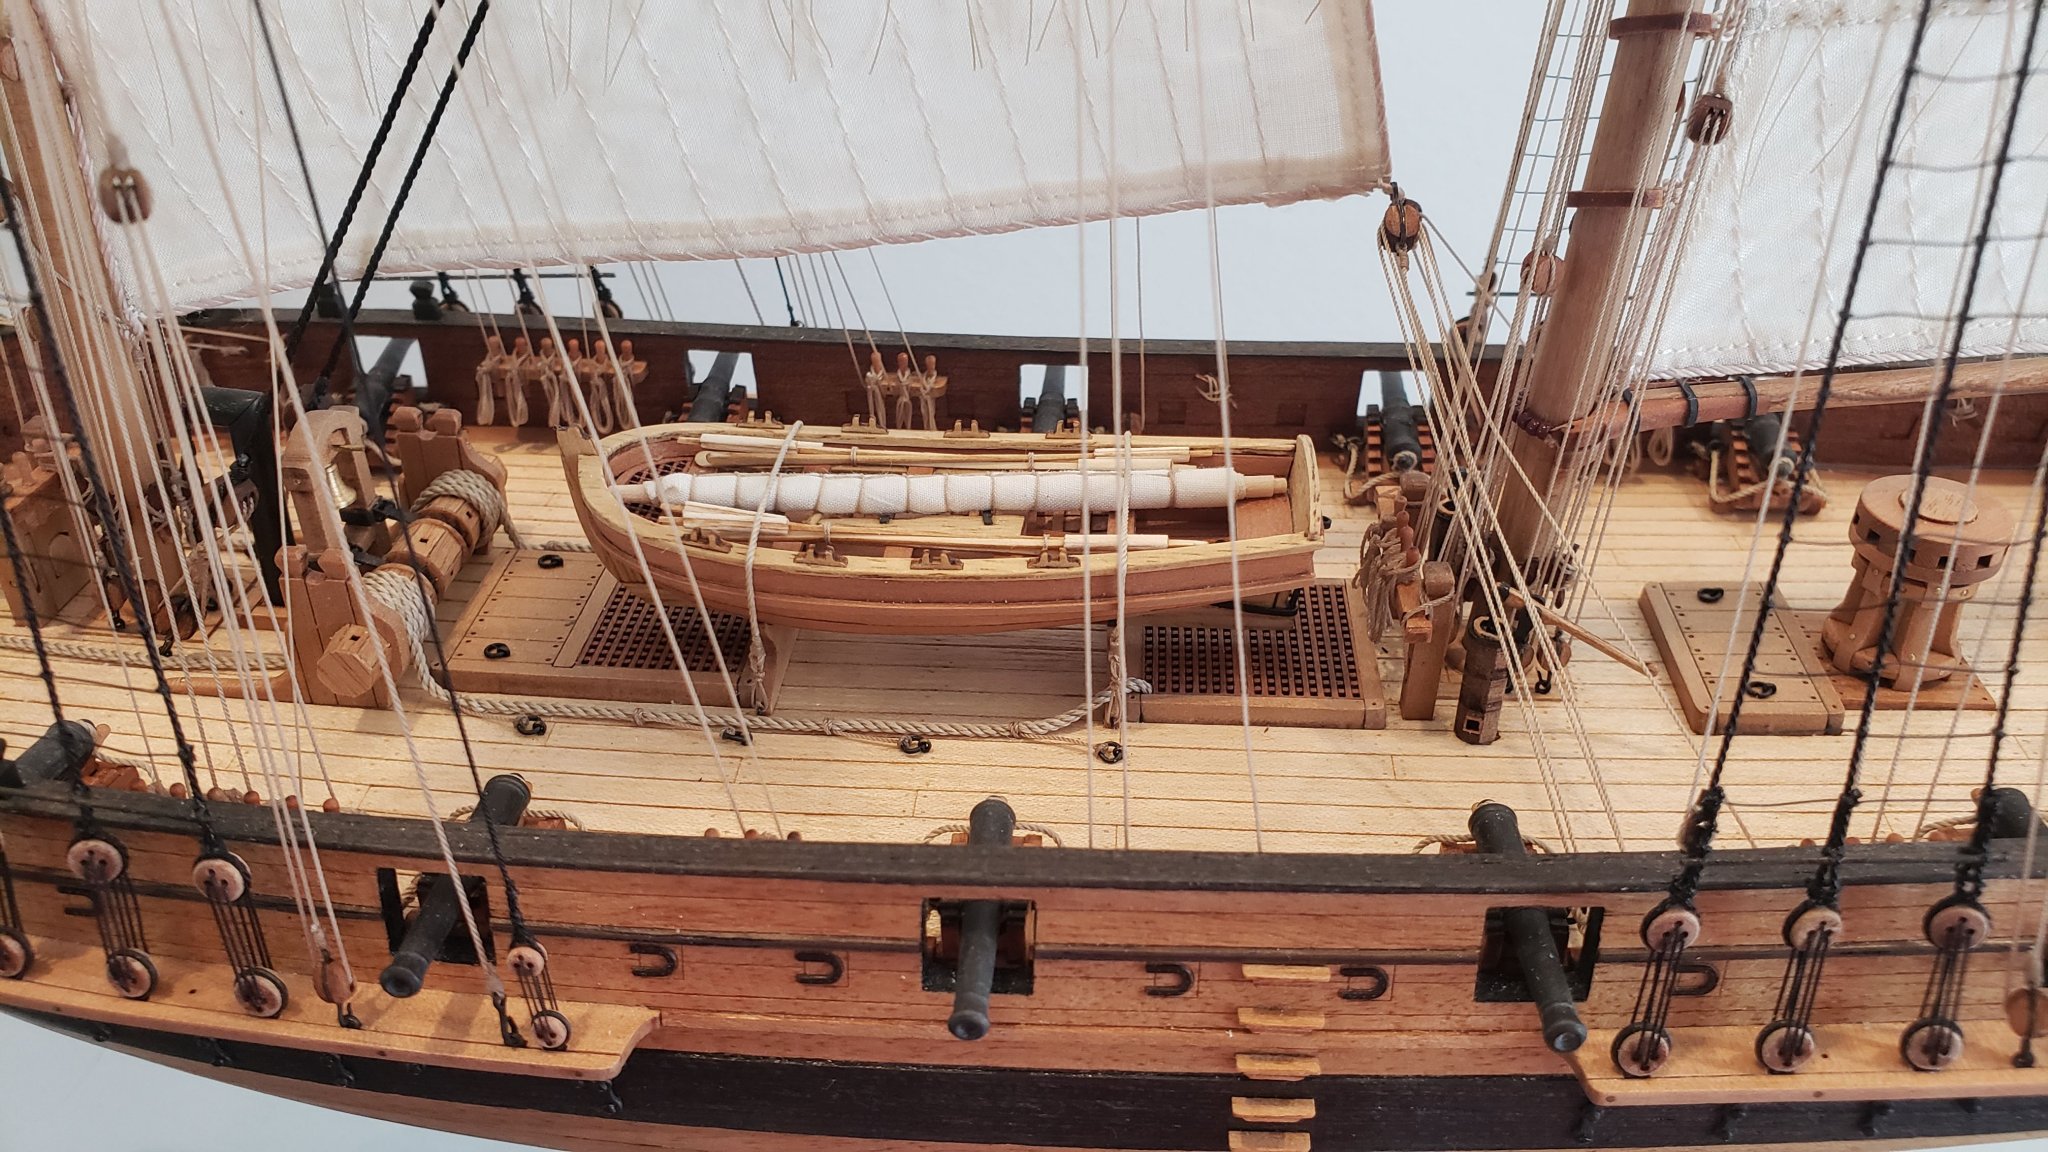
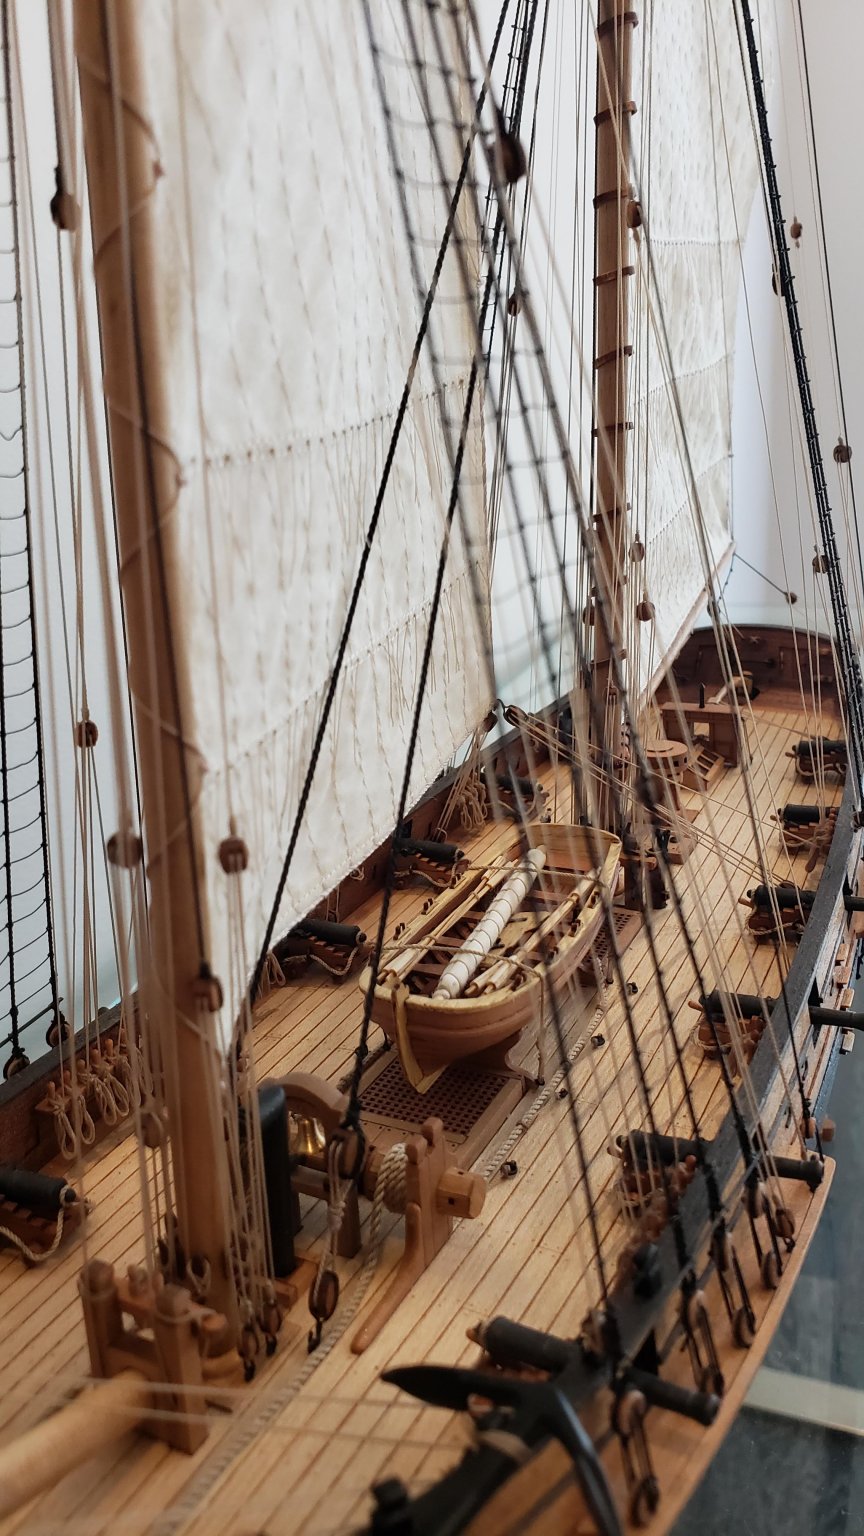
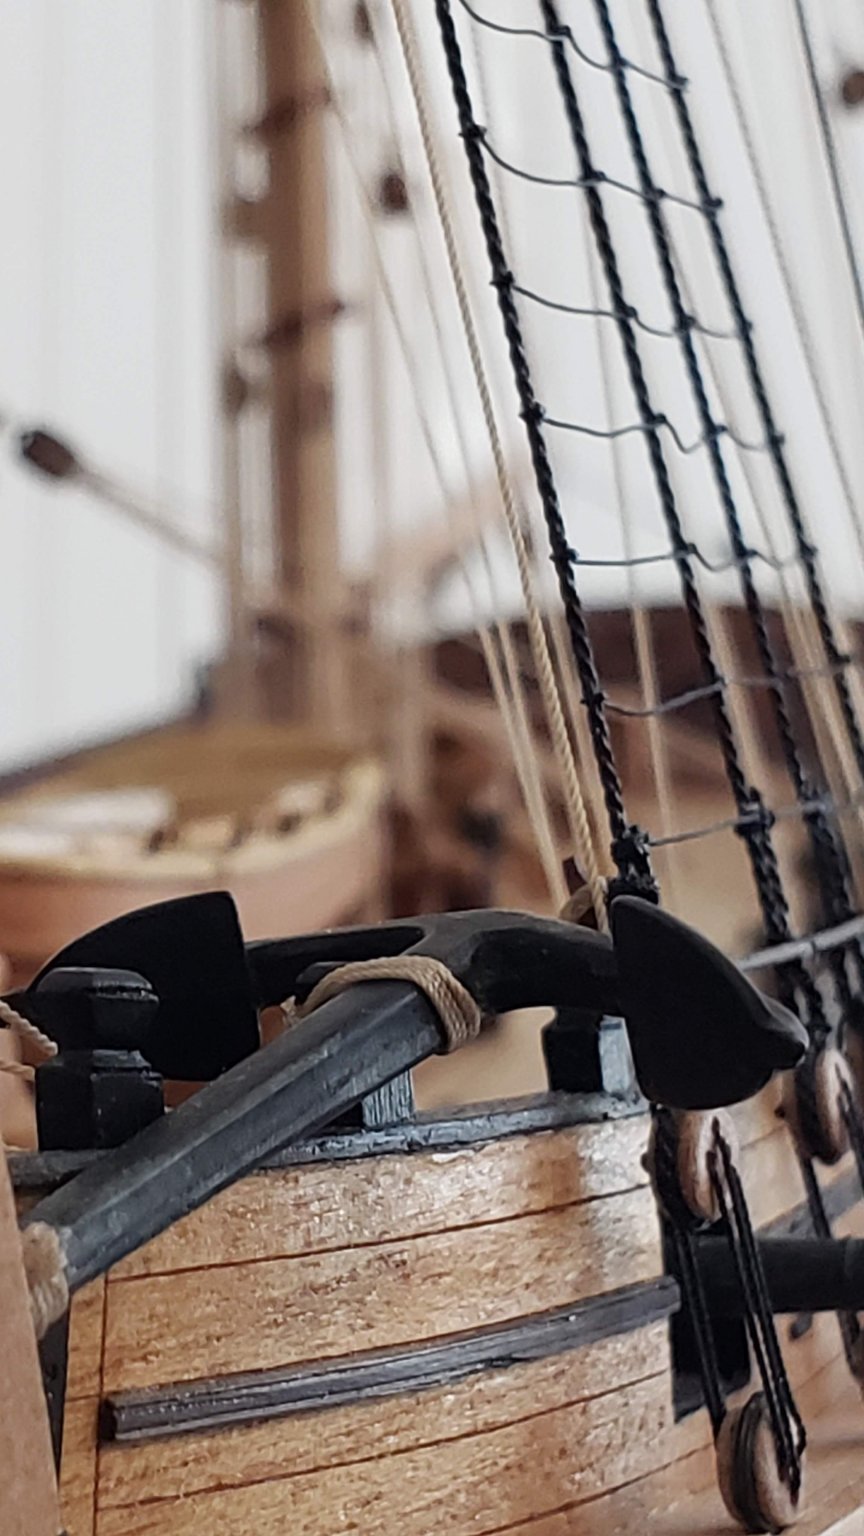
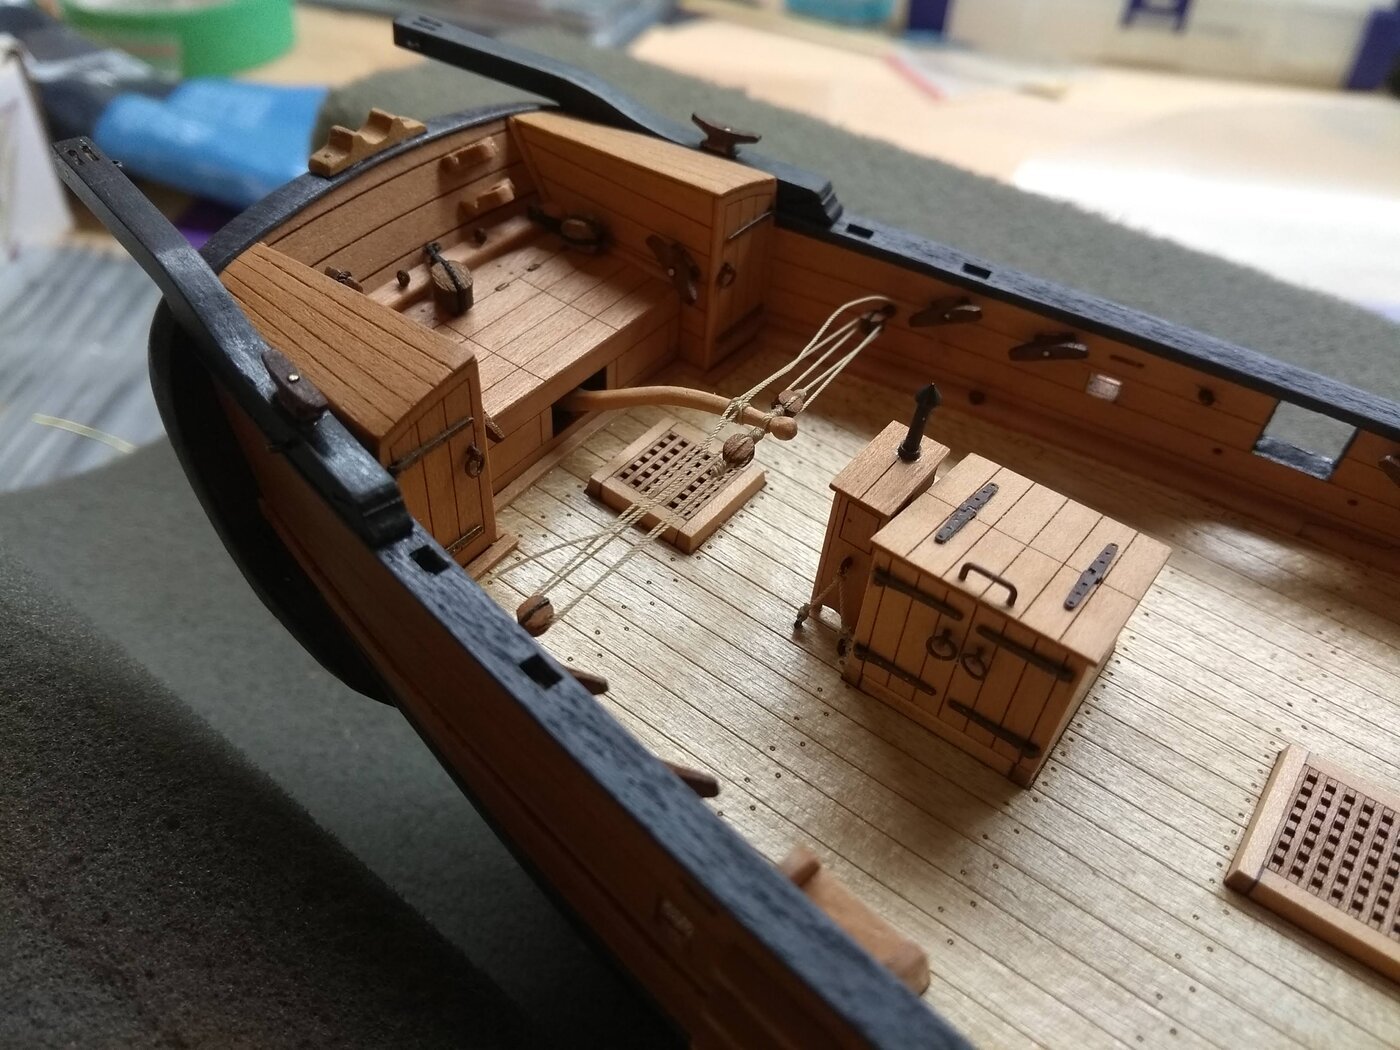
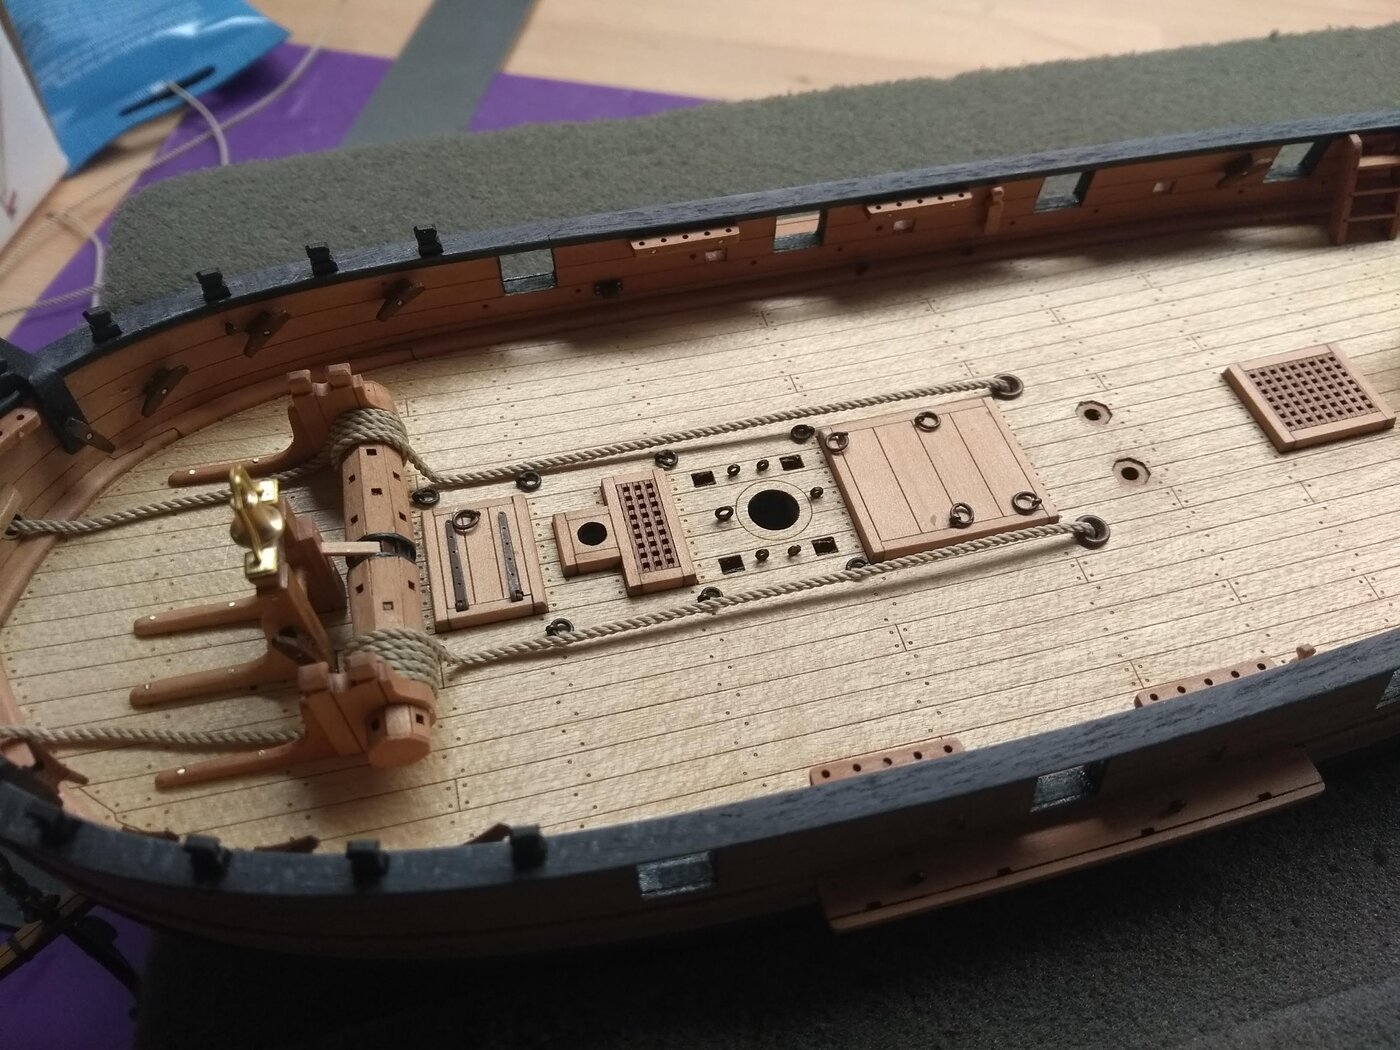
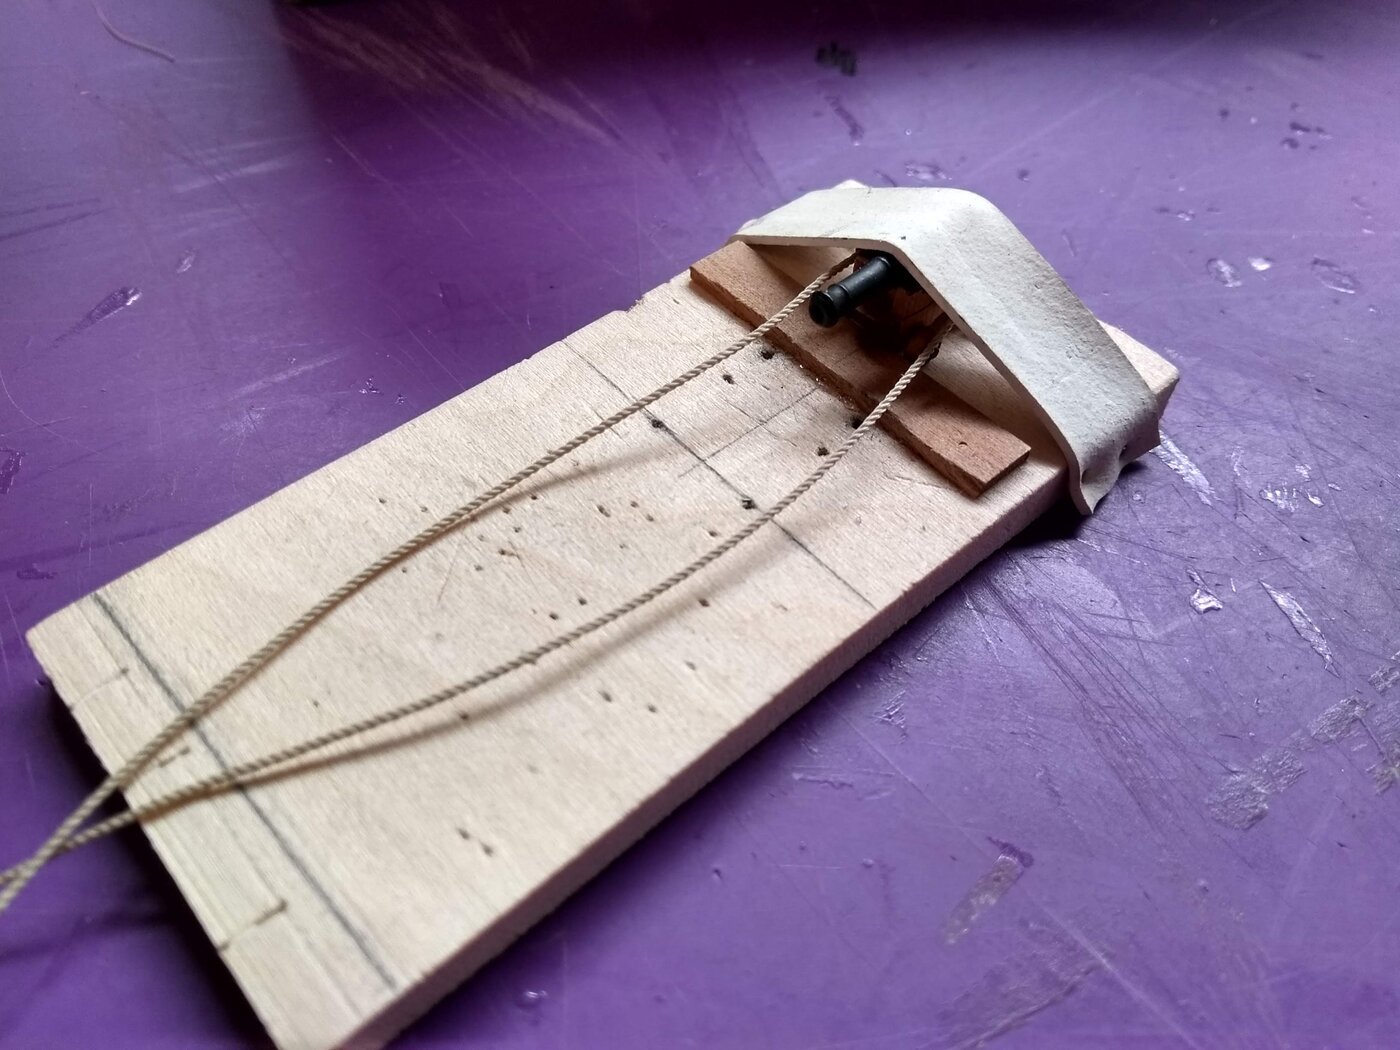
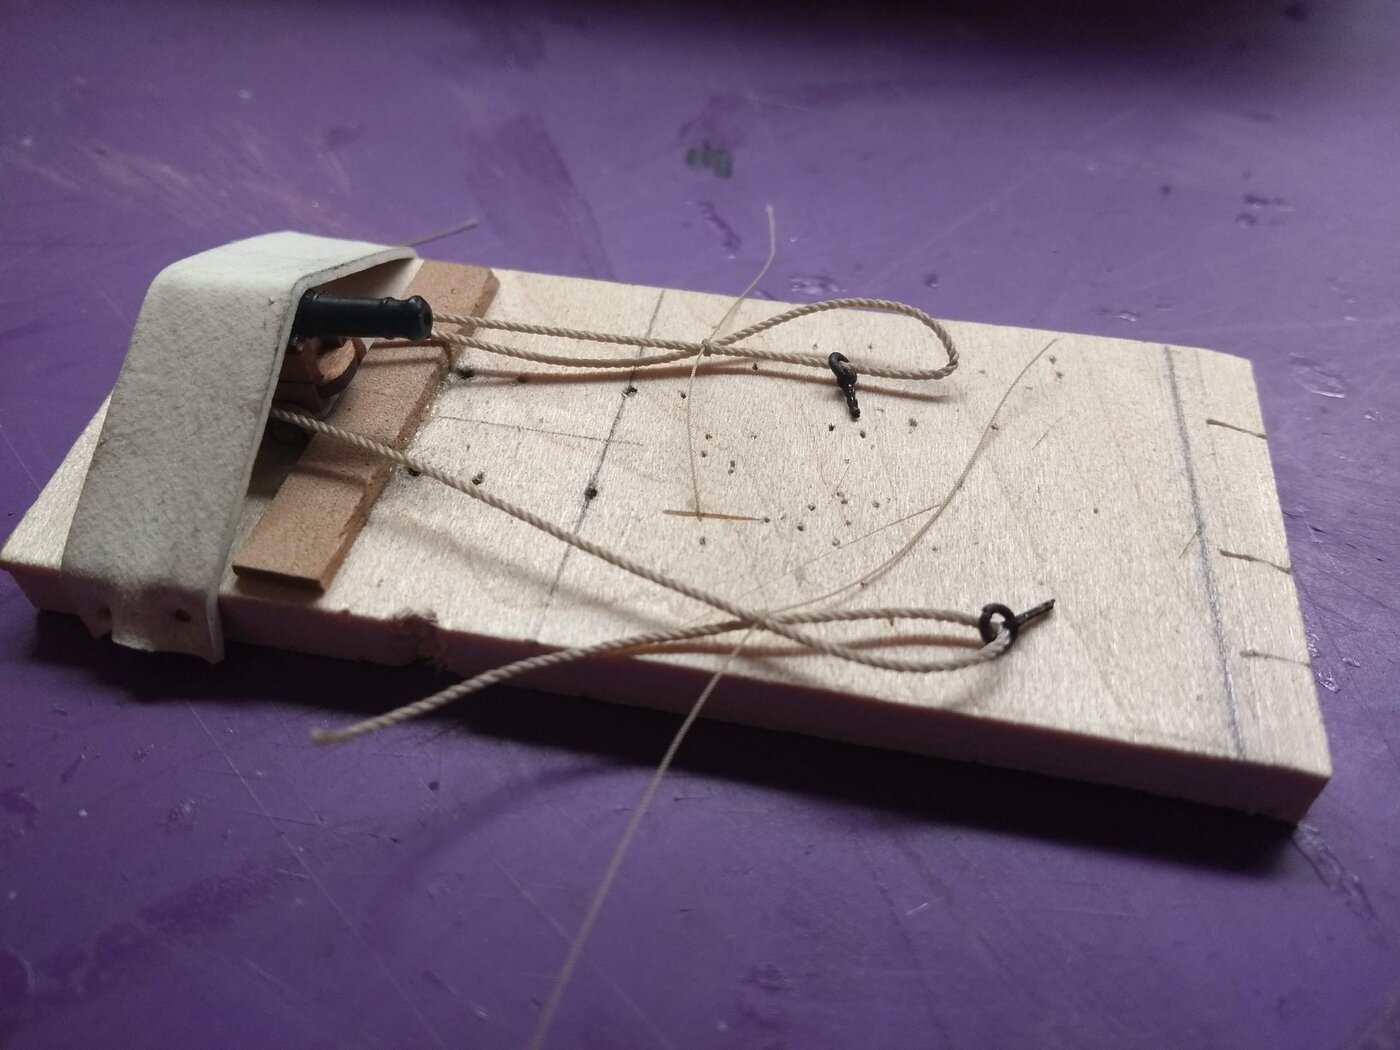
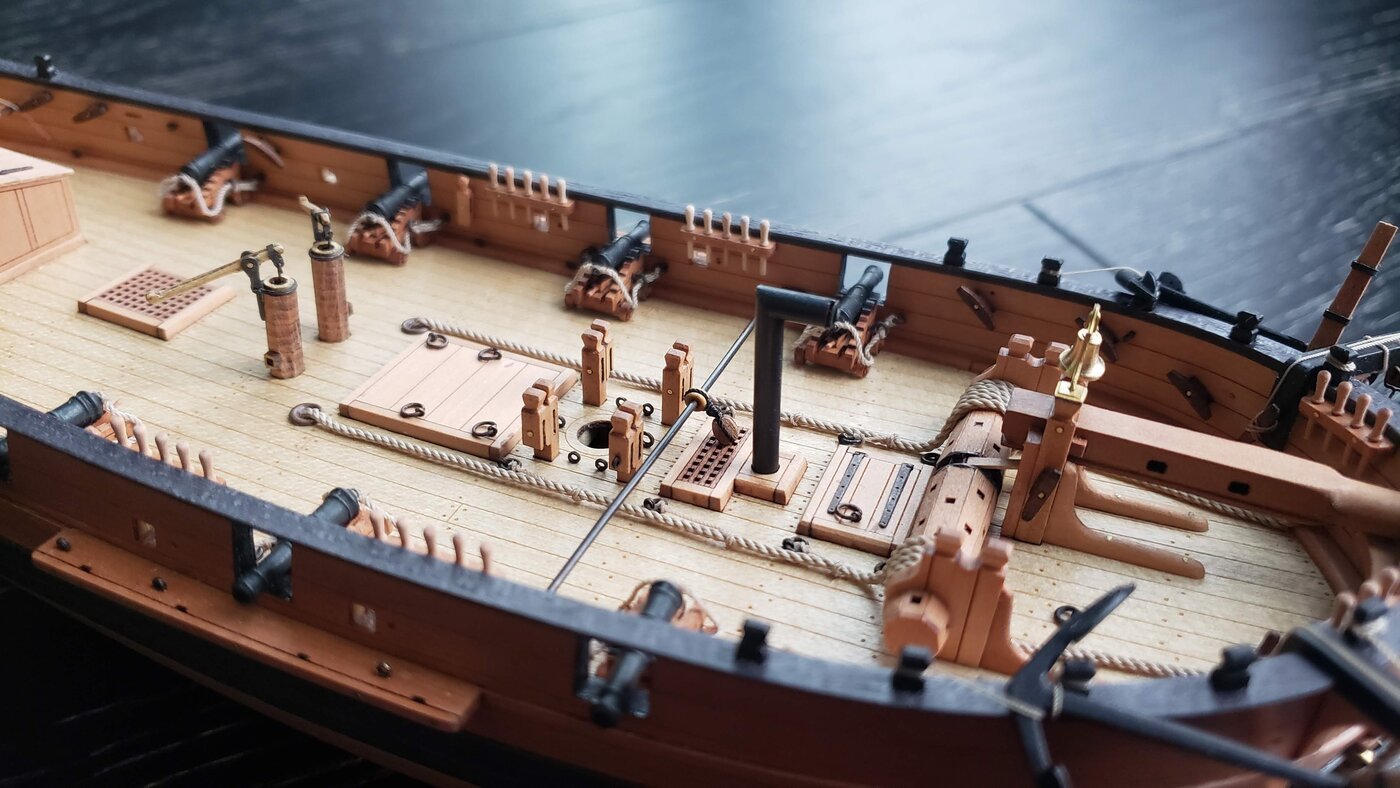
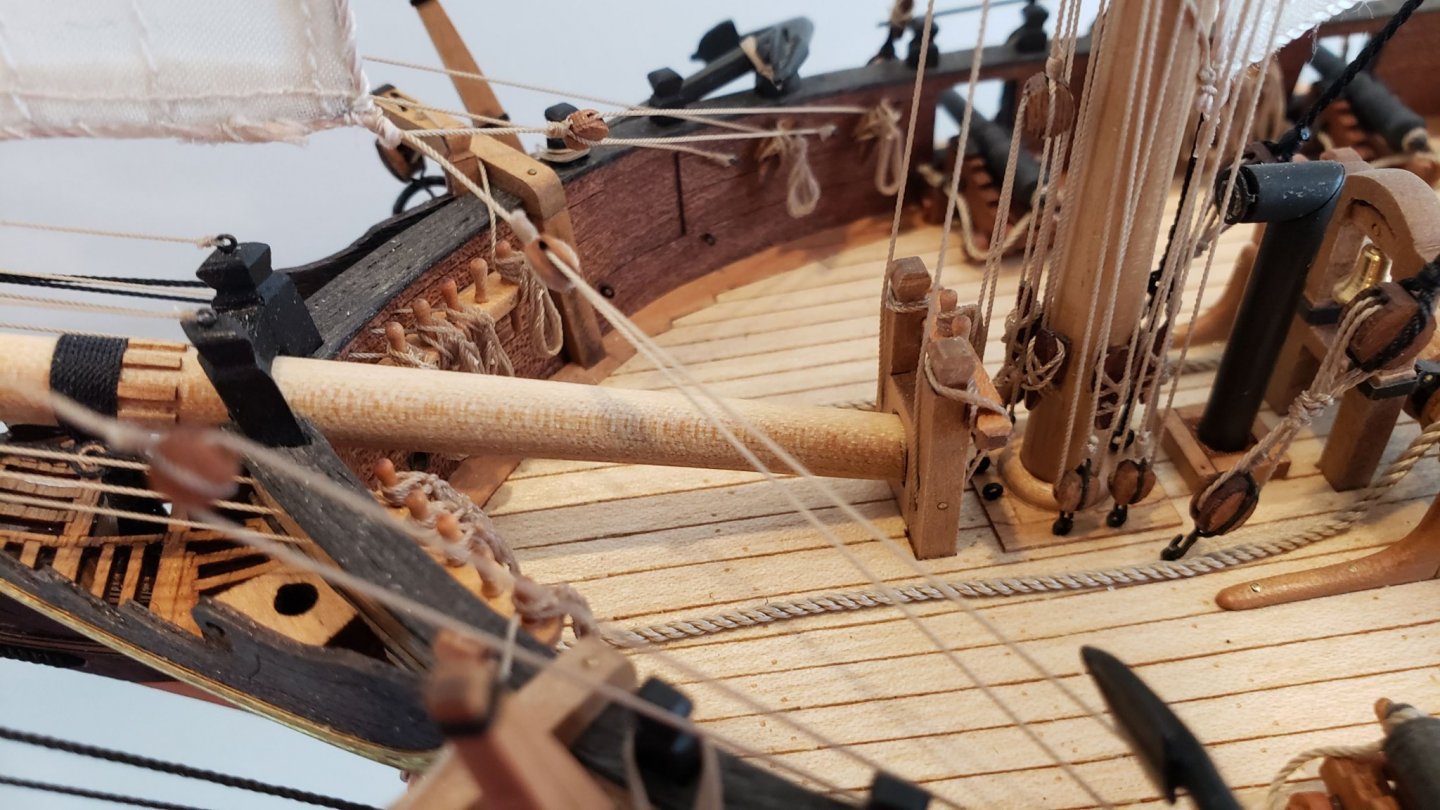
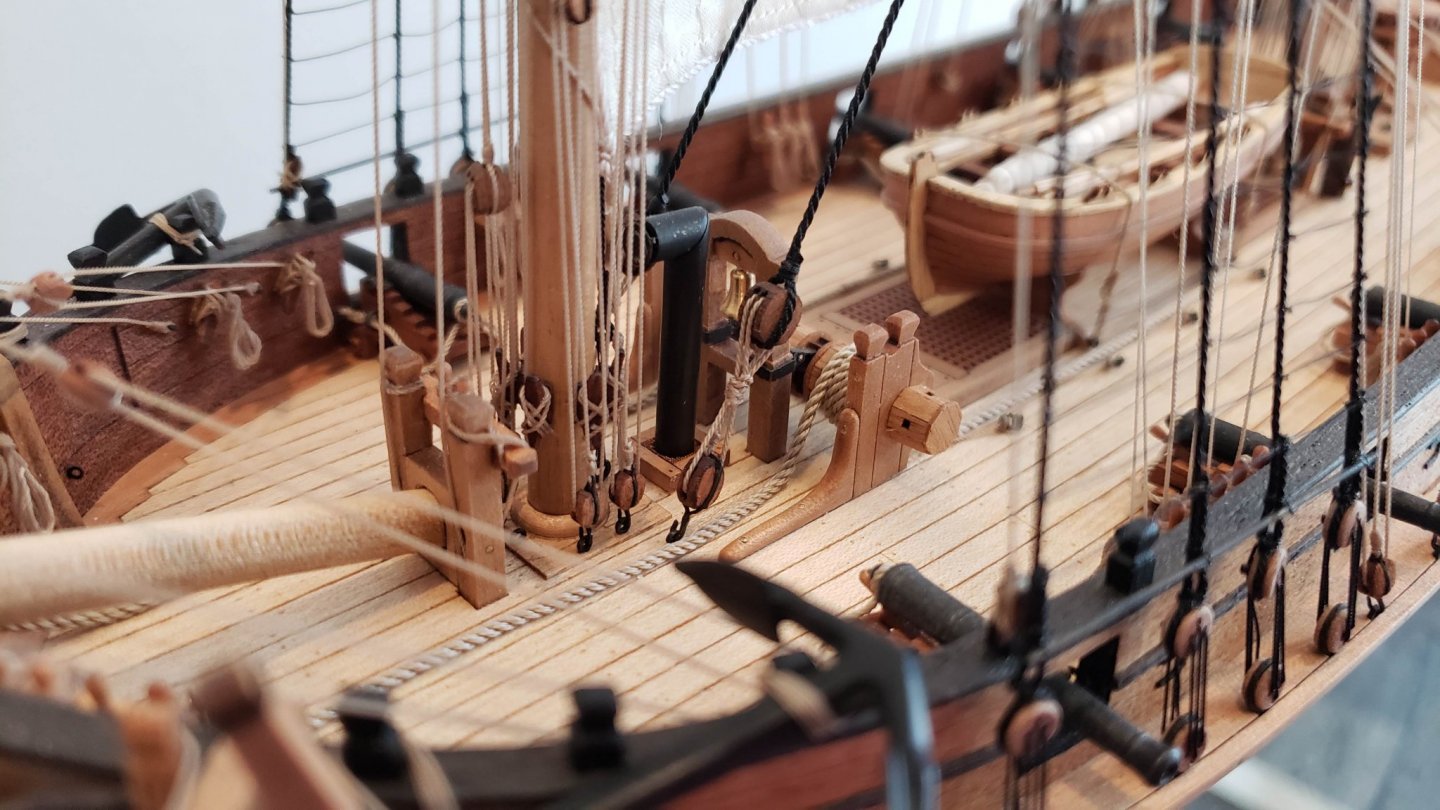
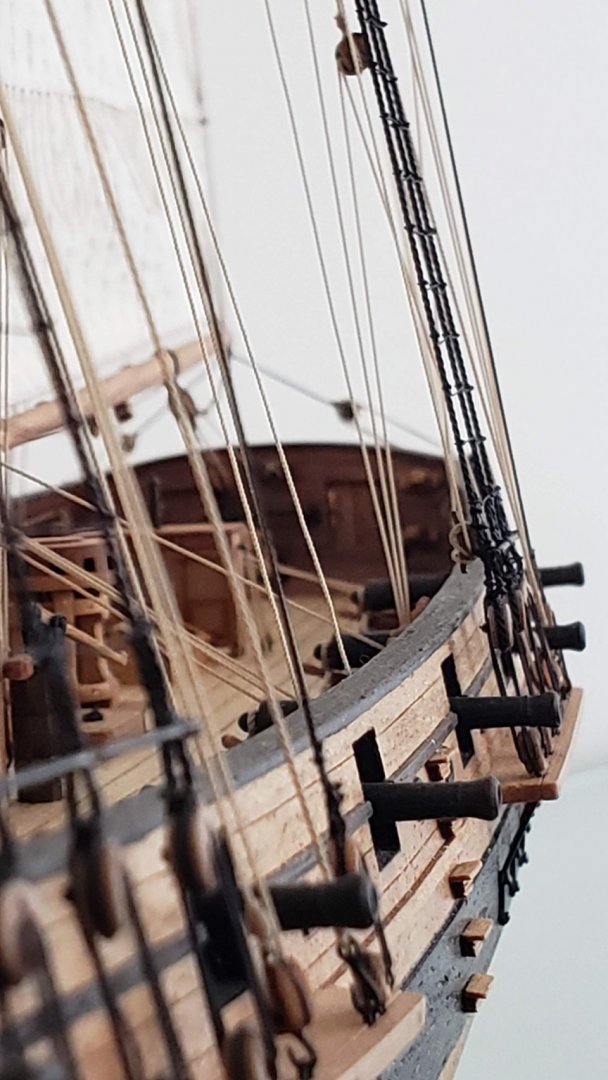
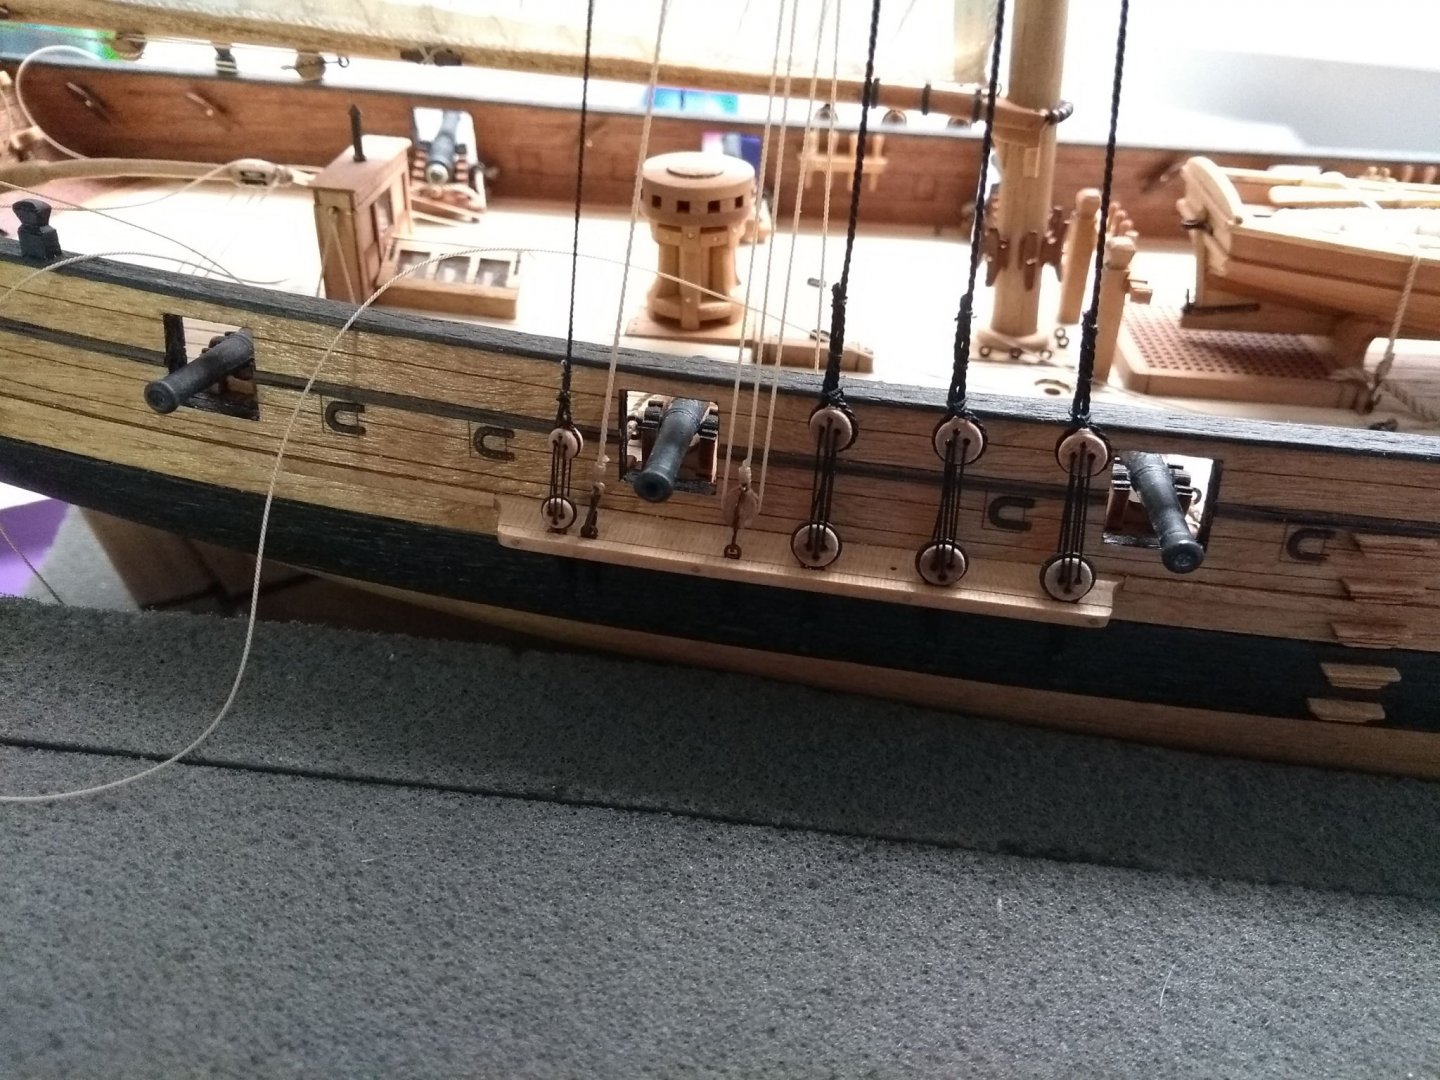
 13. The work continued with the rest of the deck fittings. Pin rails, cleats and the sail traveller: Tiller and its tackle: Windlass, anchors and anchor ropes: After most of the fitting were installed, I proceeded to assemble cannon carriages and cannon breech ropes. I used a very simple jig to prepare breach ropes. It is a small board with a few holes drilled into it and a rubber band on top. To make breech ropes I first attach a longer piece of rope to the cannon and then insert it under the rubber band: Then I loosely tie eyebolts to the protruding ropes: Finally I insert the eyebolts into pre-drilled holes and adjust the length of the breech ropes: After the knots are tied and a tiny drop of CA glue applied to them the cannon is removed from the jig, all that is left to do is to trim the ropes: Finally, after a lot of tedious work, all the fittings and cannons were installed: Now I can proceed to making the mast and the rest of the yards...
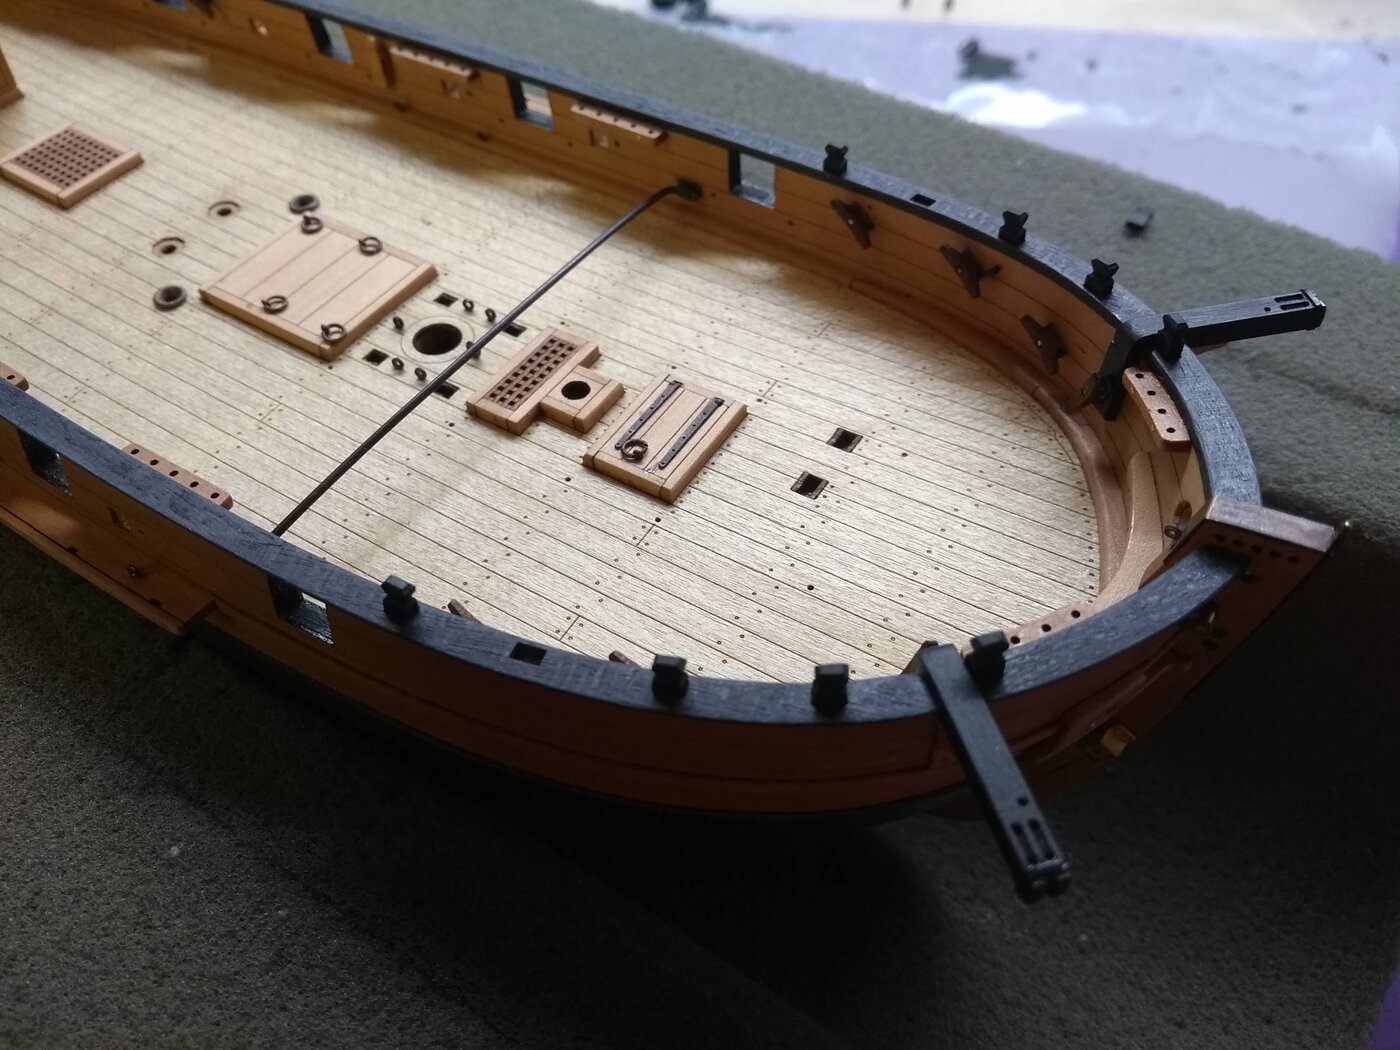


- 30 replies
-
- 9
-

-
- master korabel
- avos
- (and 1 more)
-
Thank you! This kit is great, I'm enjoying building it
-
Thank you! This kit is really of excellent quality and because of that a lot of usual planking issues are avoided.
- 30 replies
-
- 1
-
-
- master korabel
- avos
- (and 1 more)
-
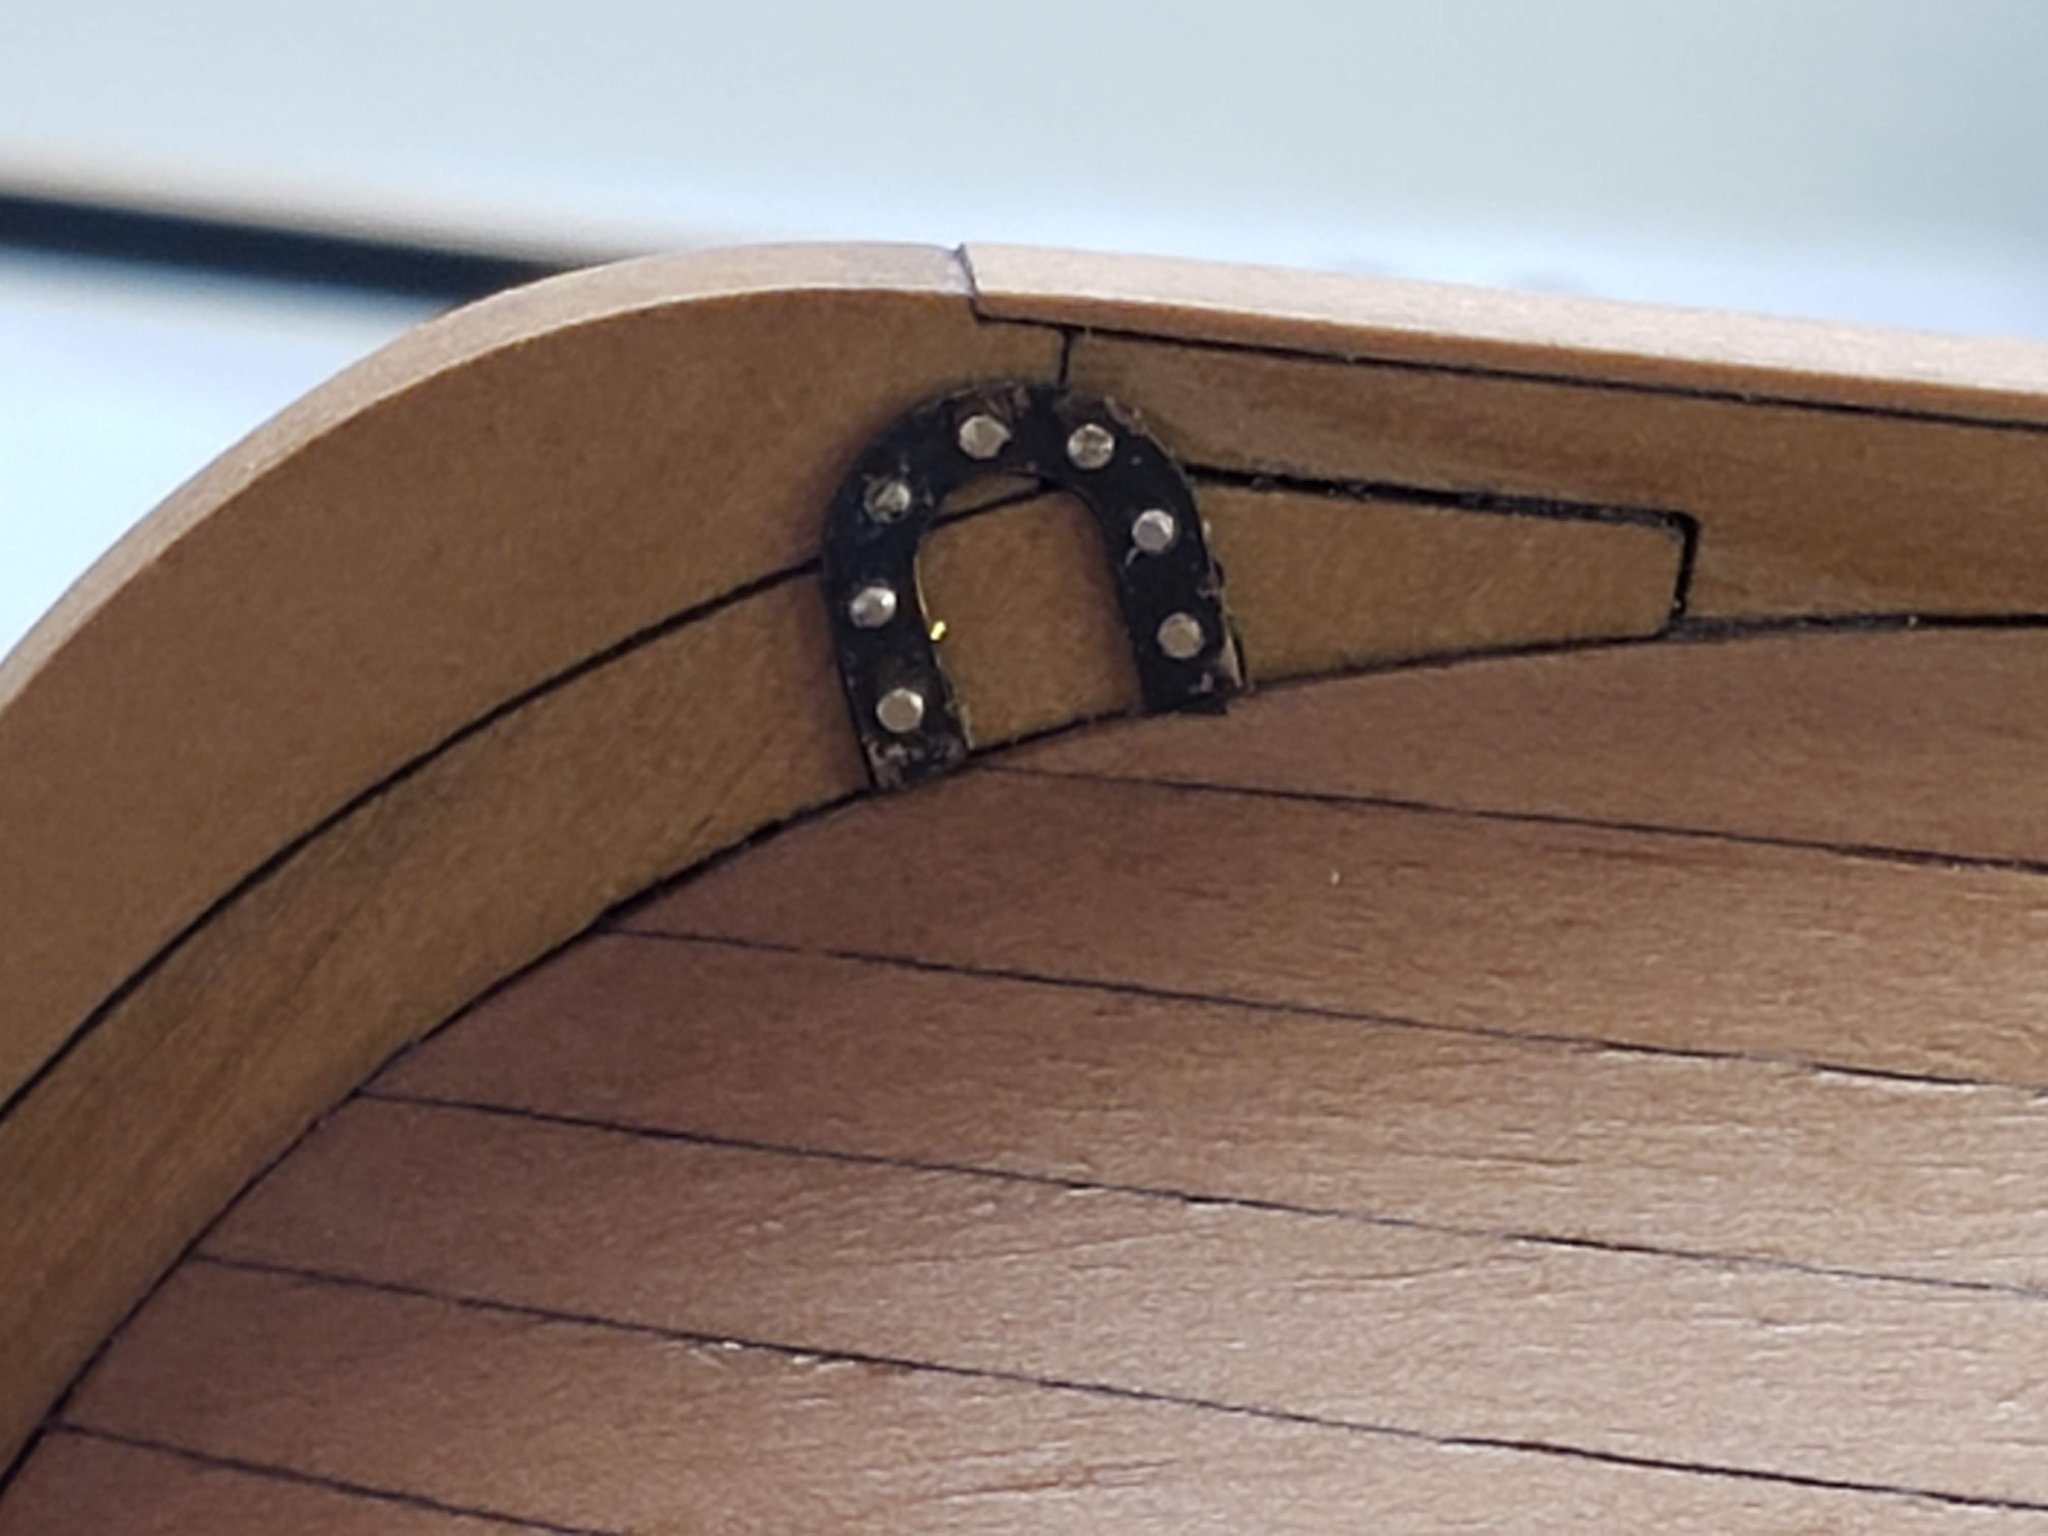
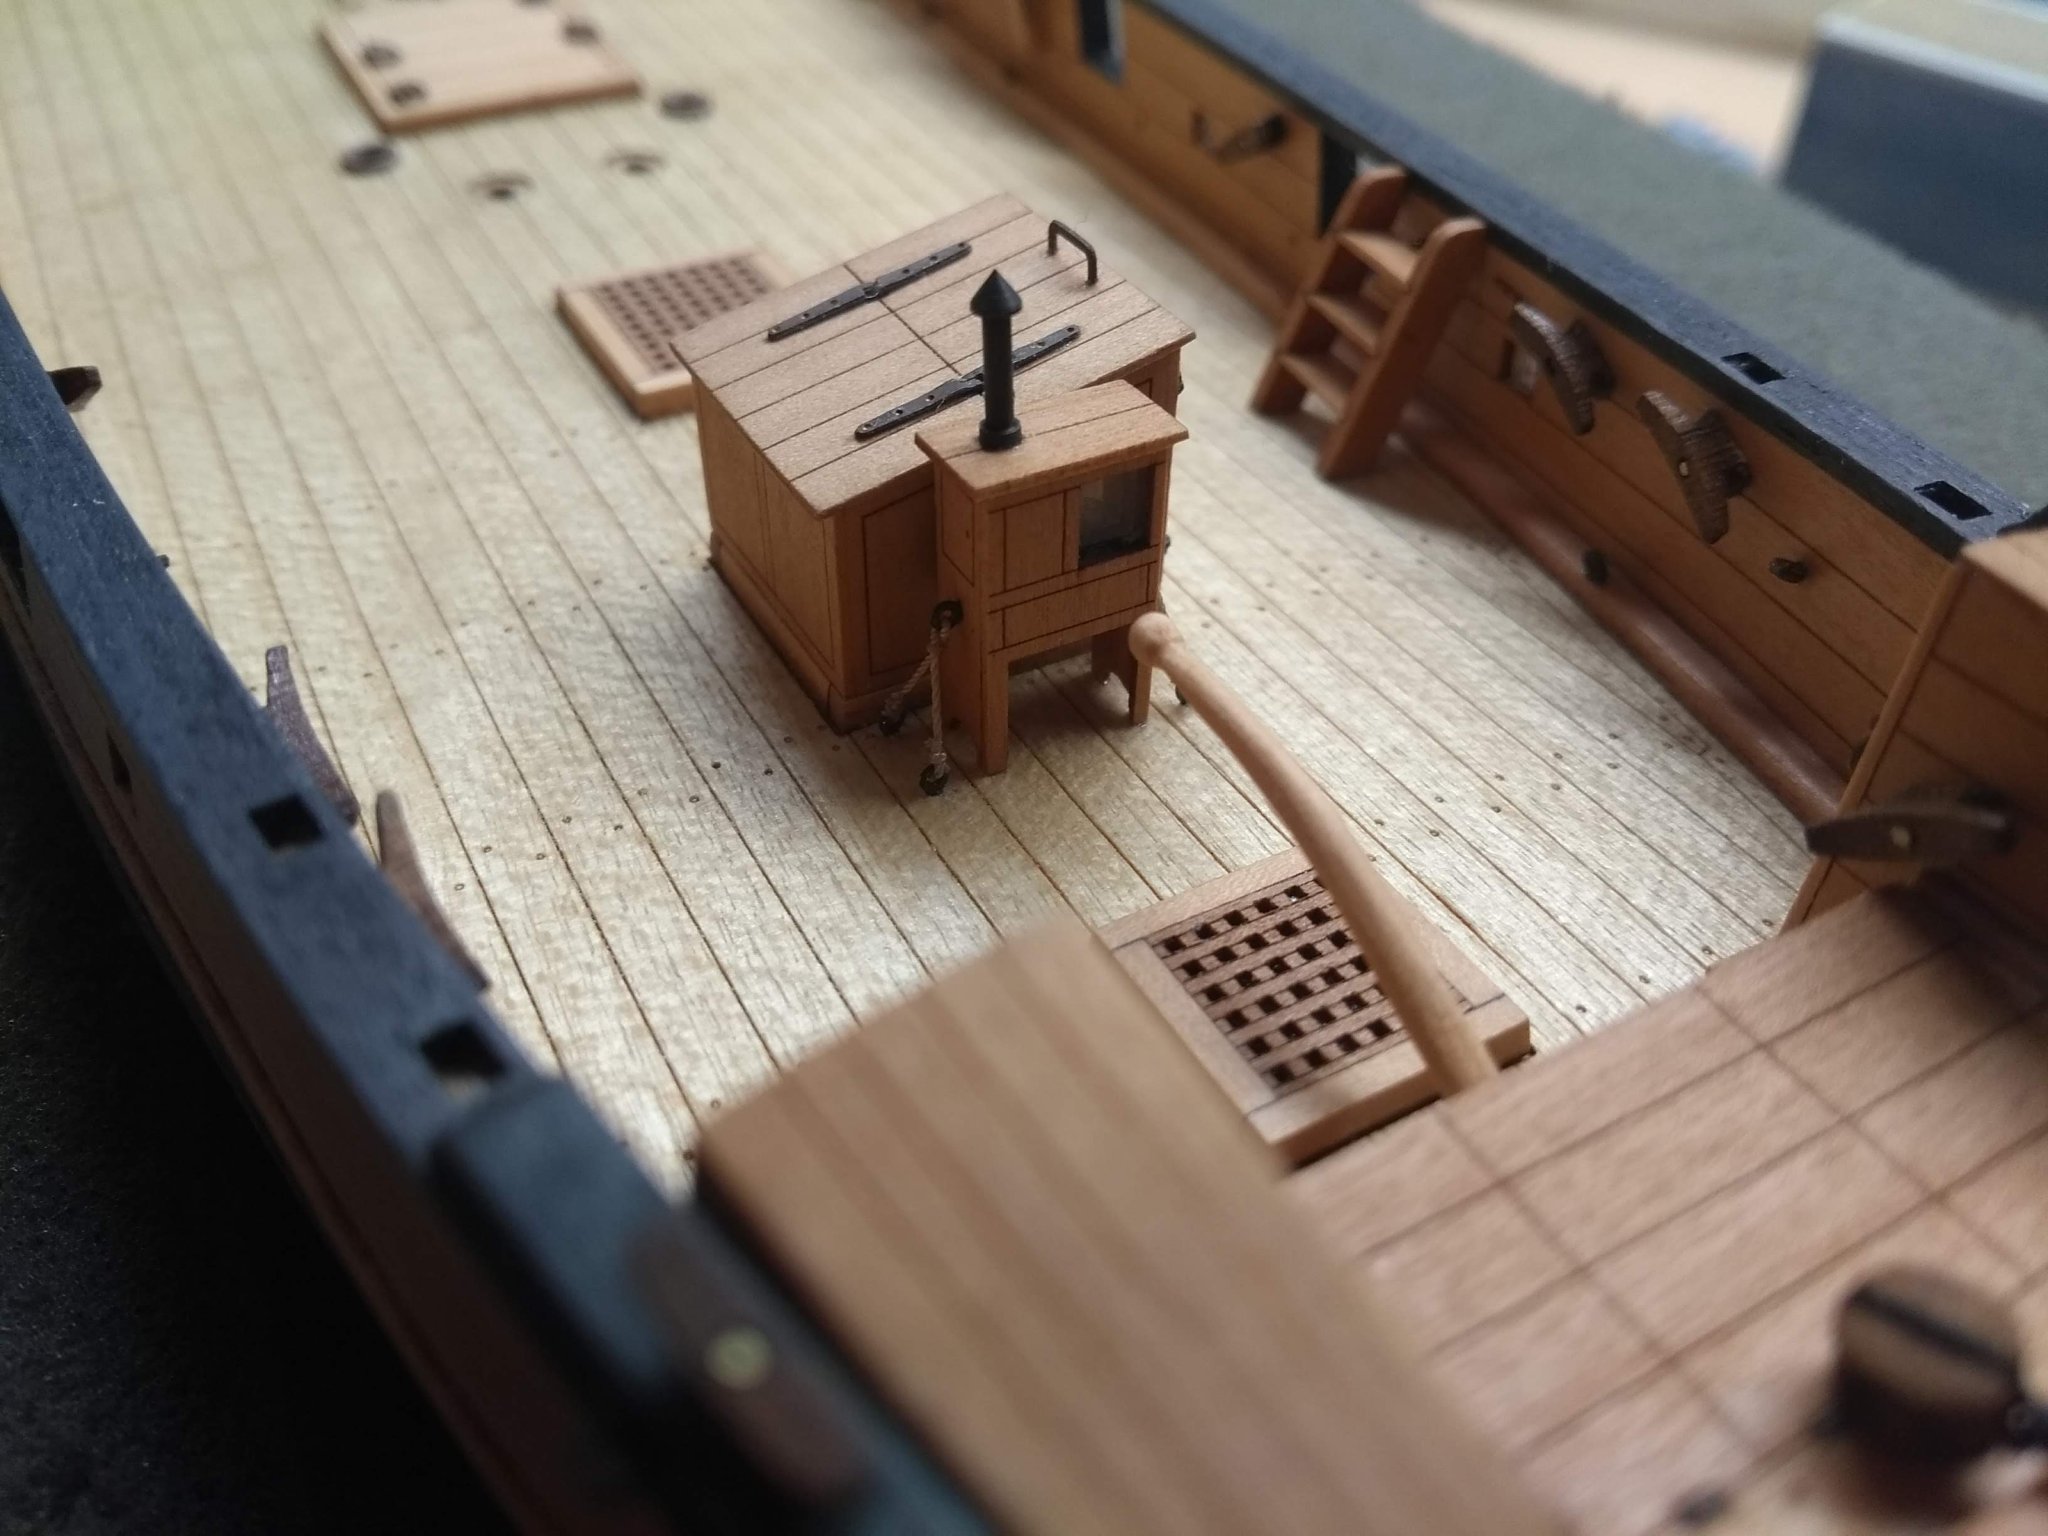
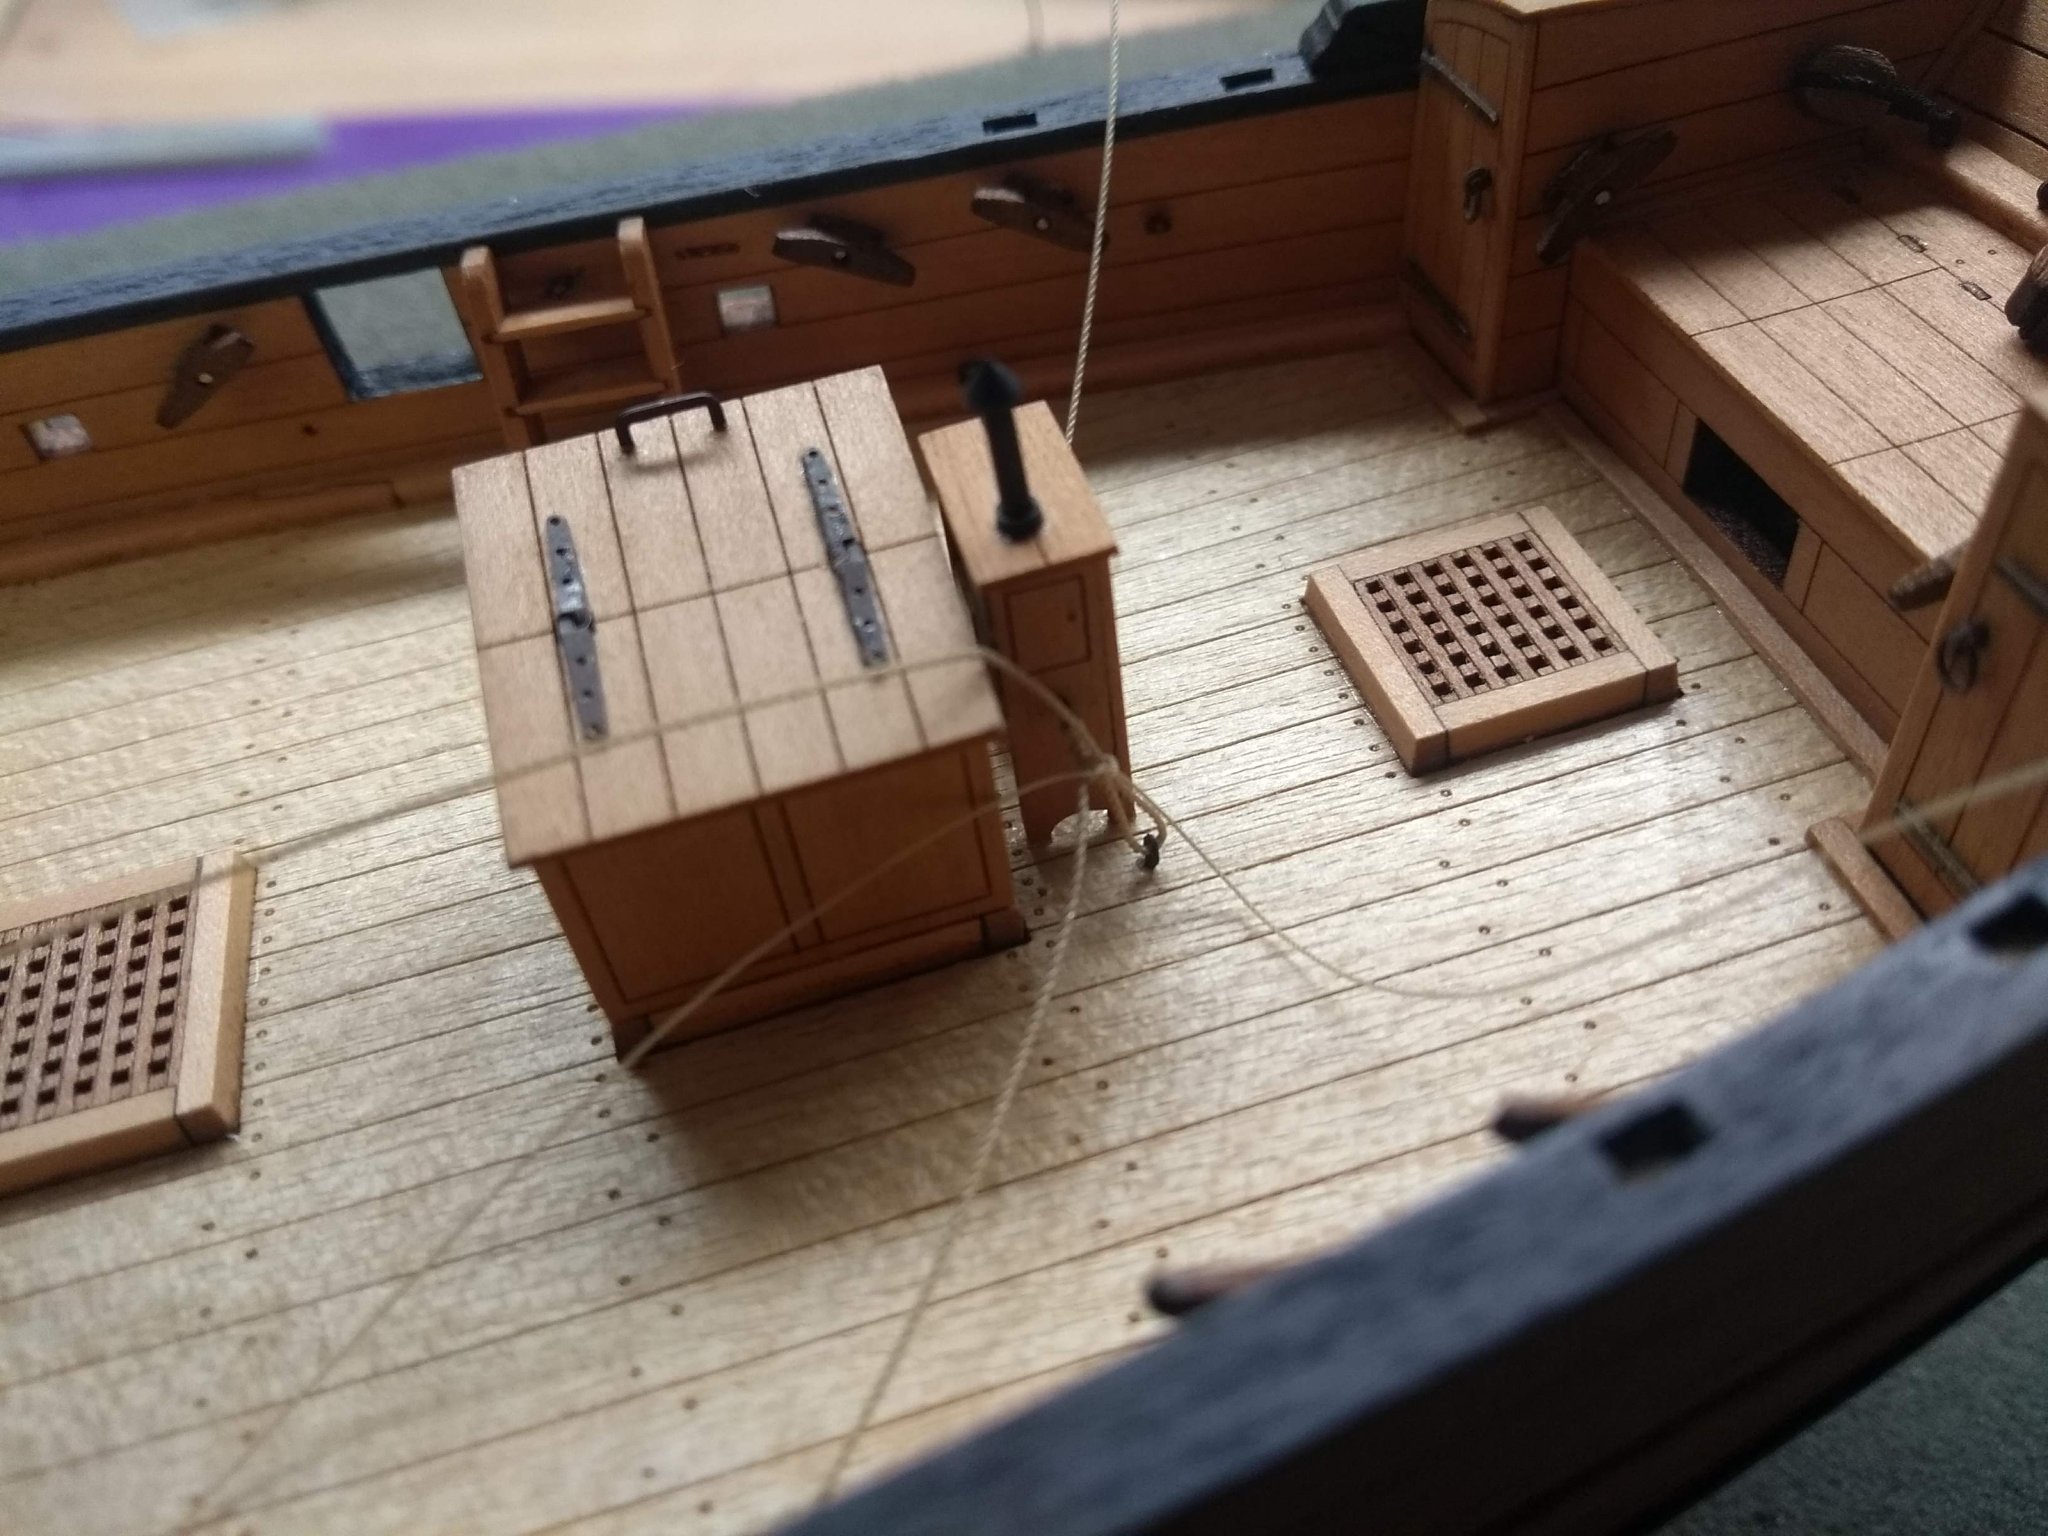
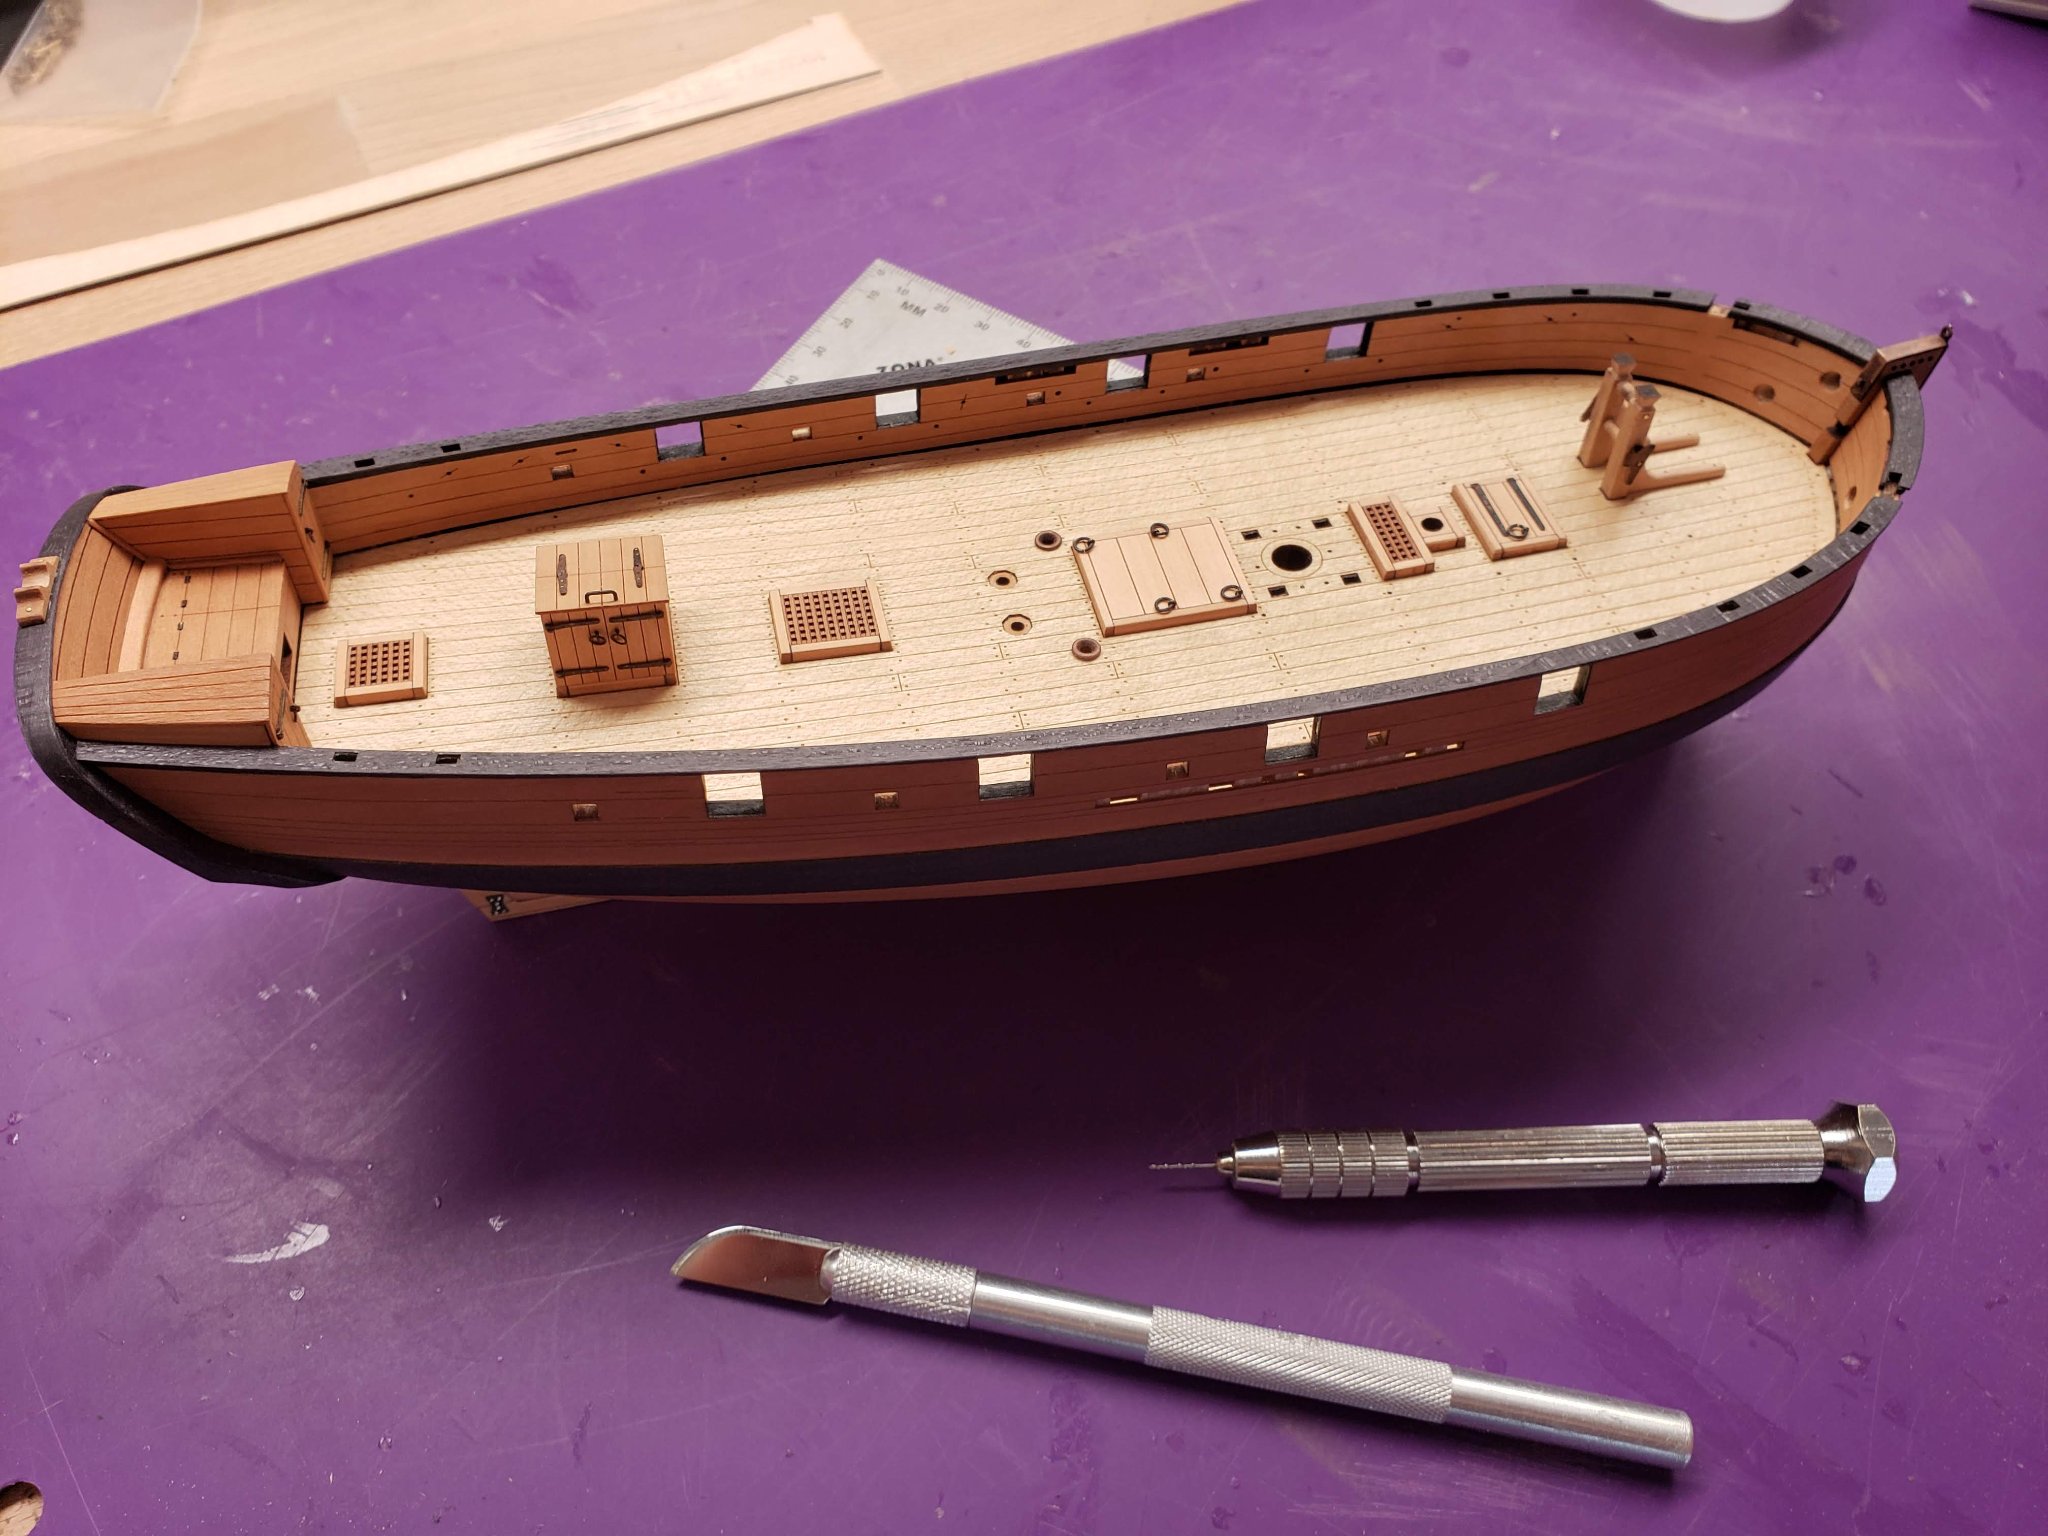
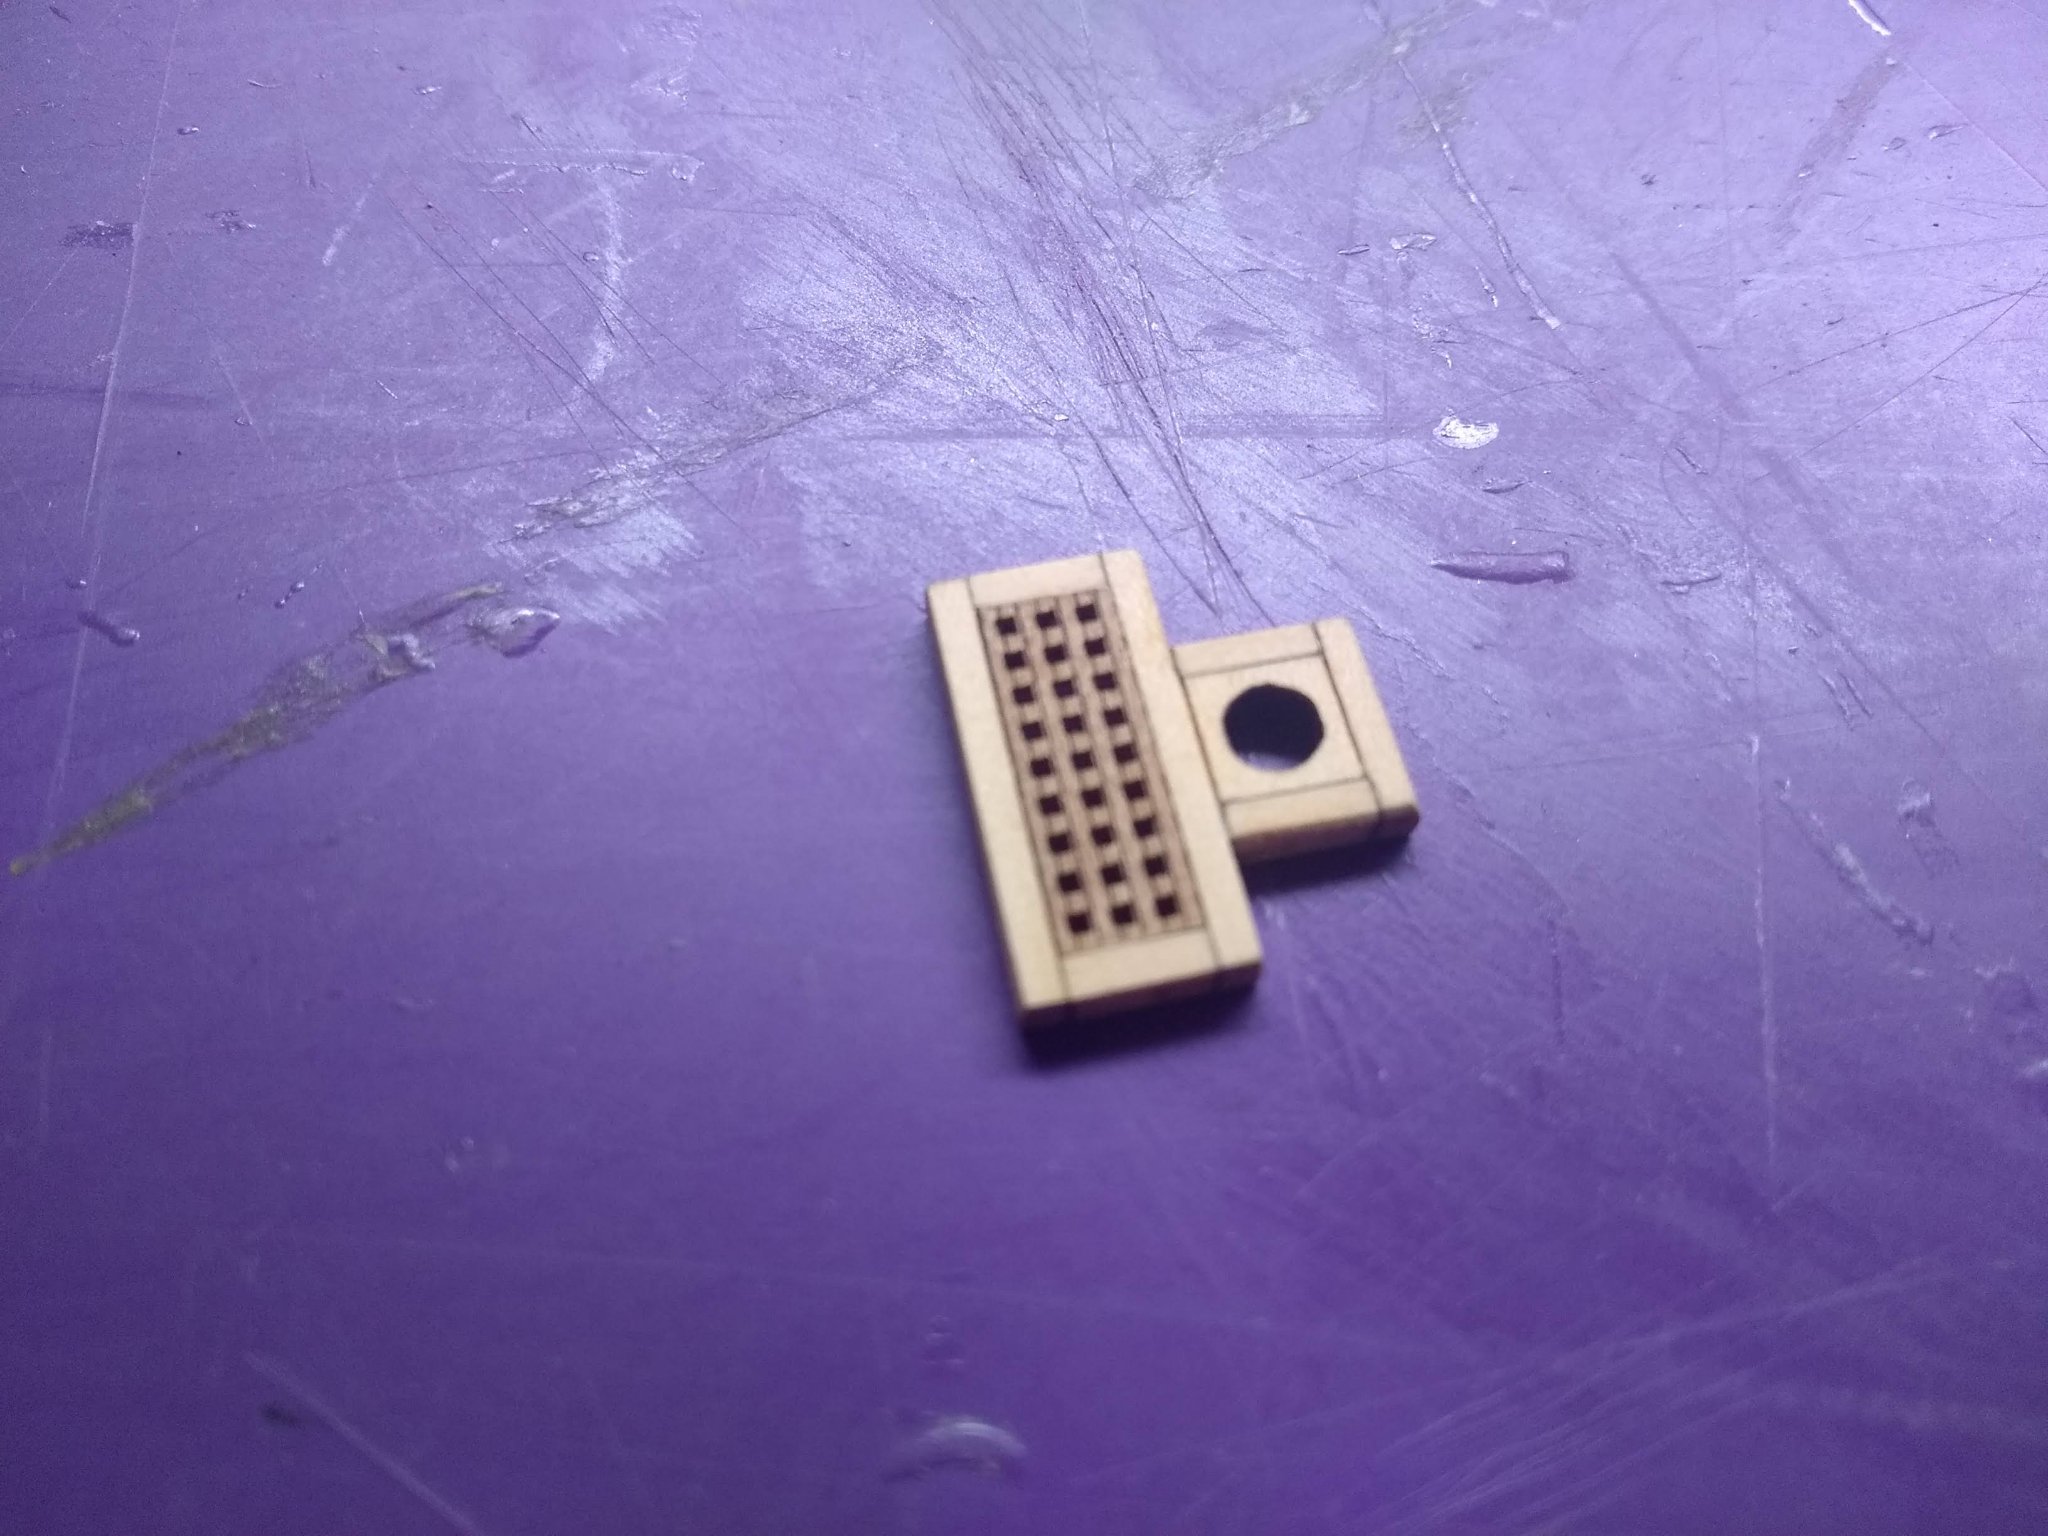
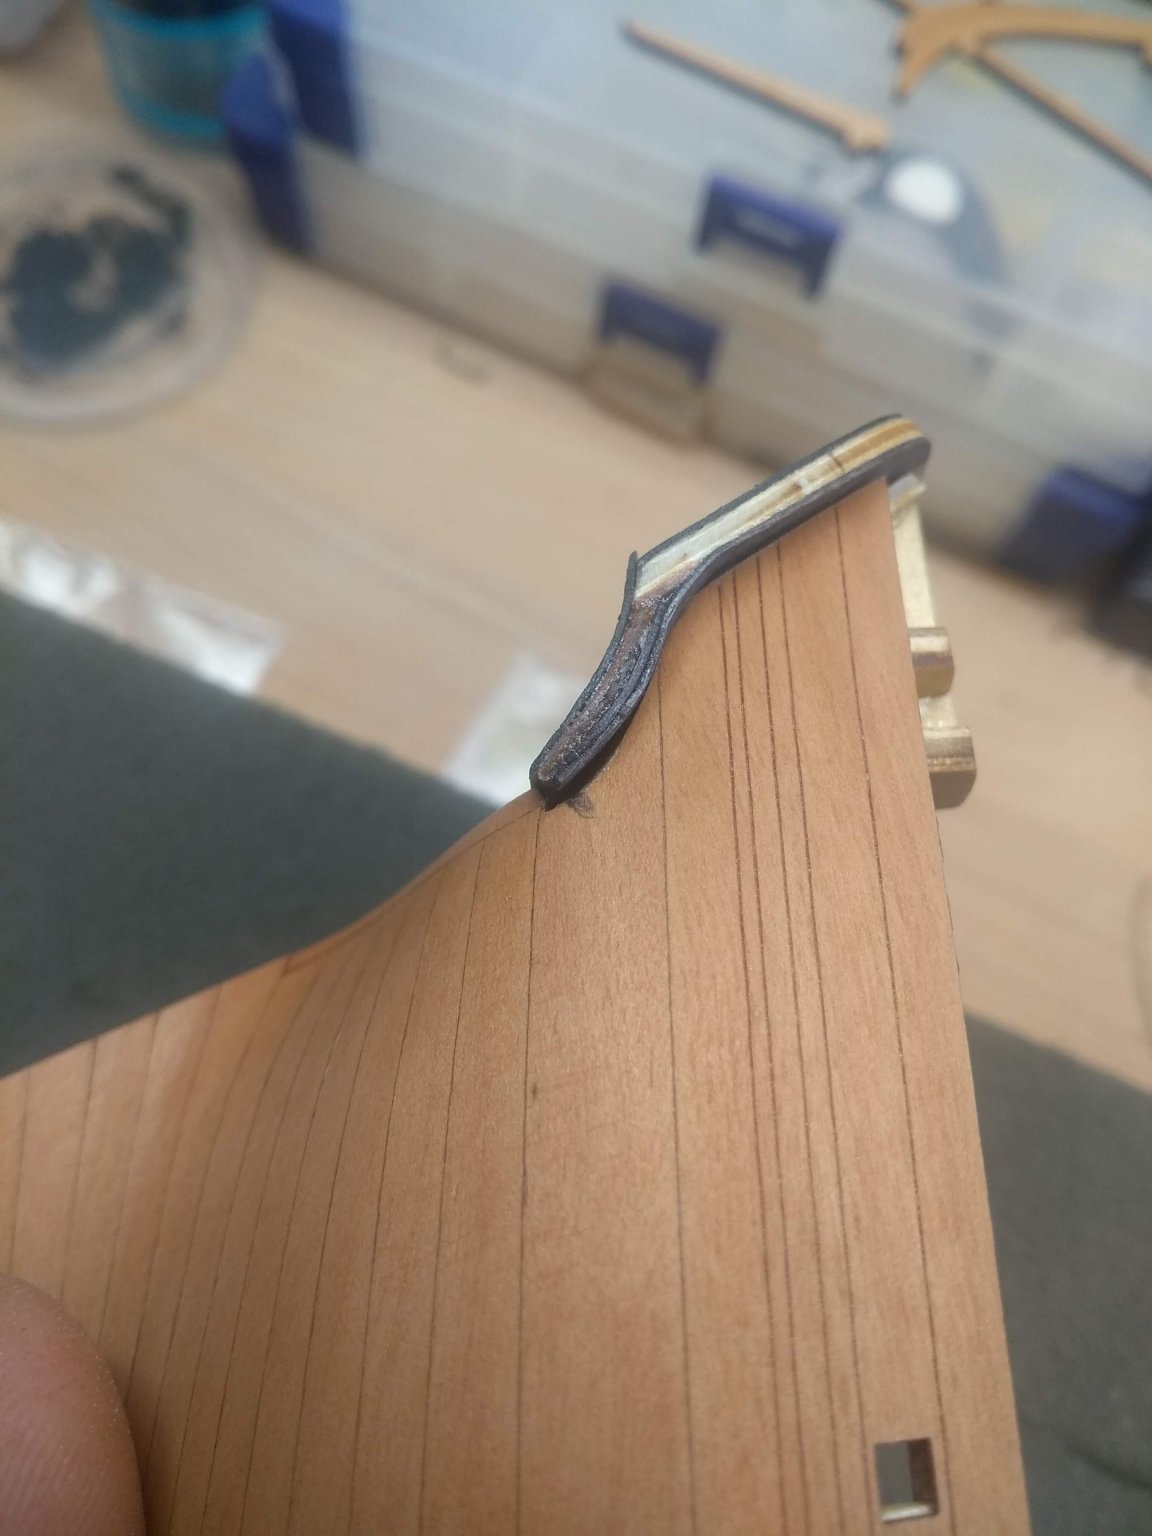
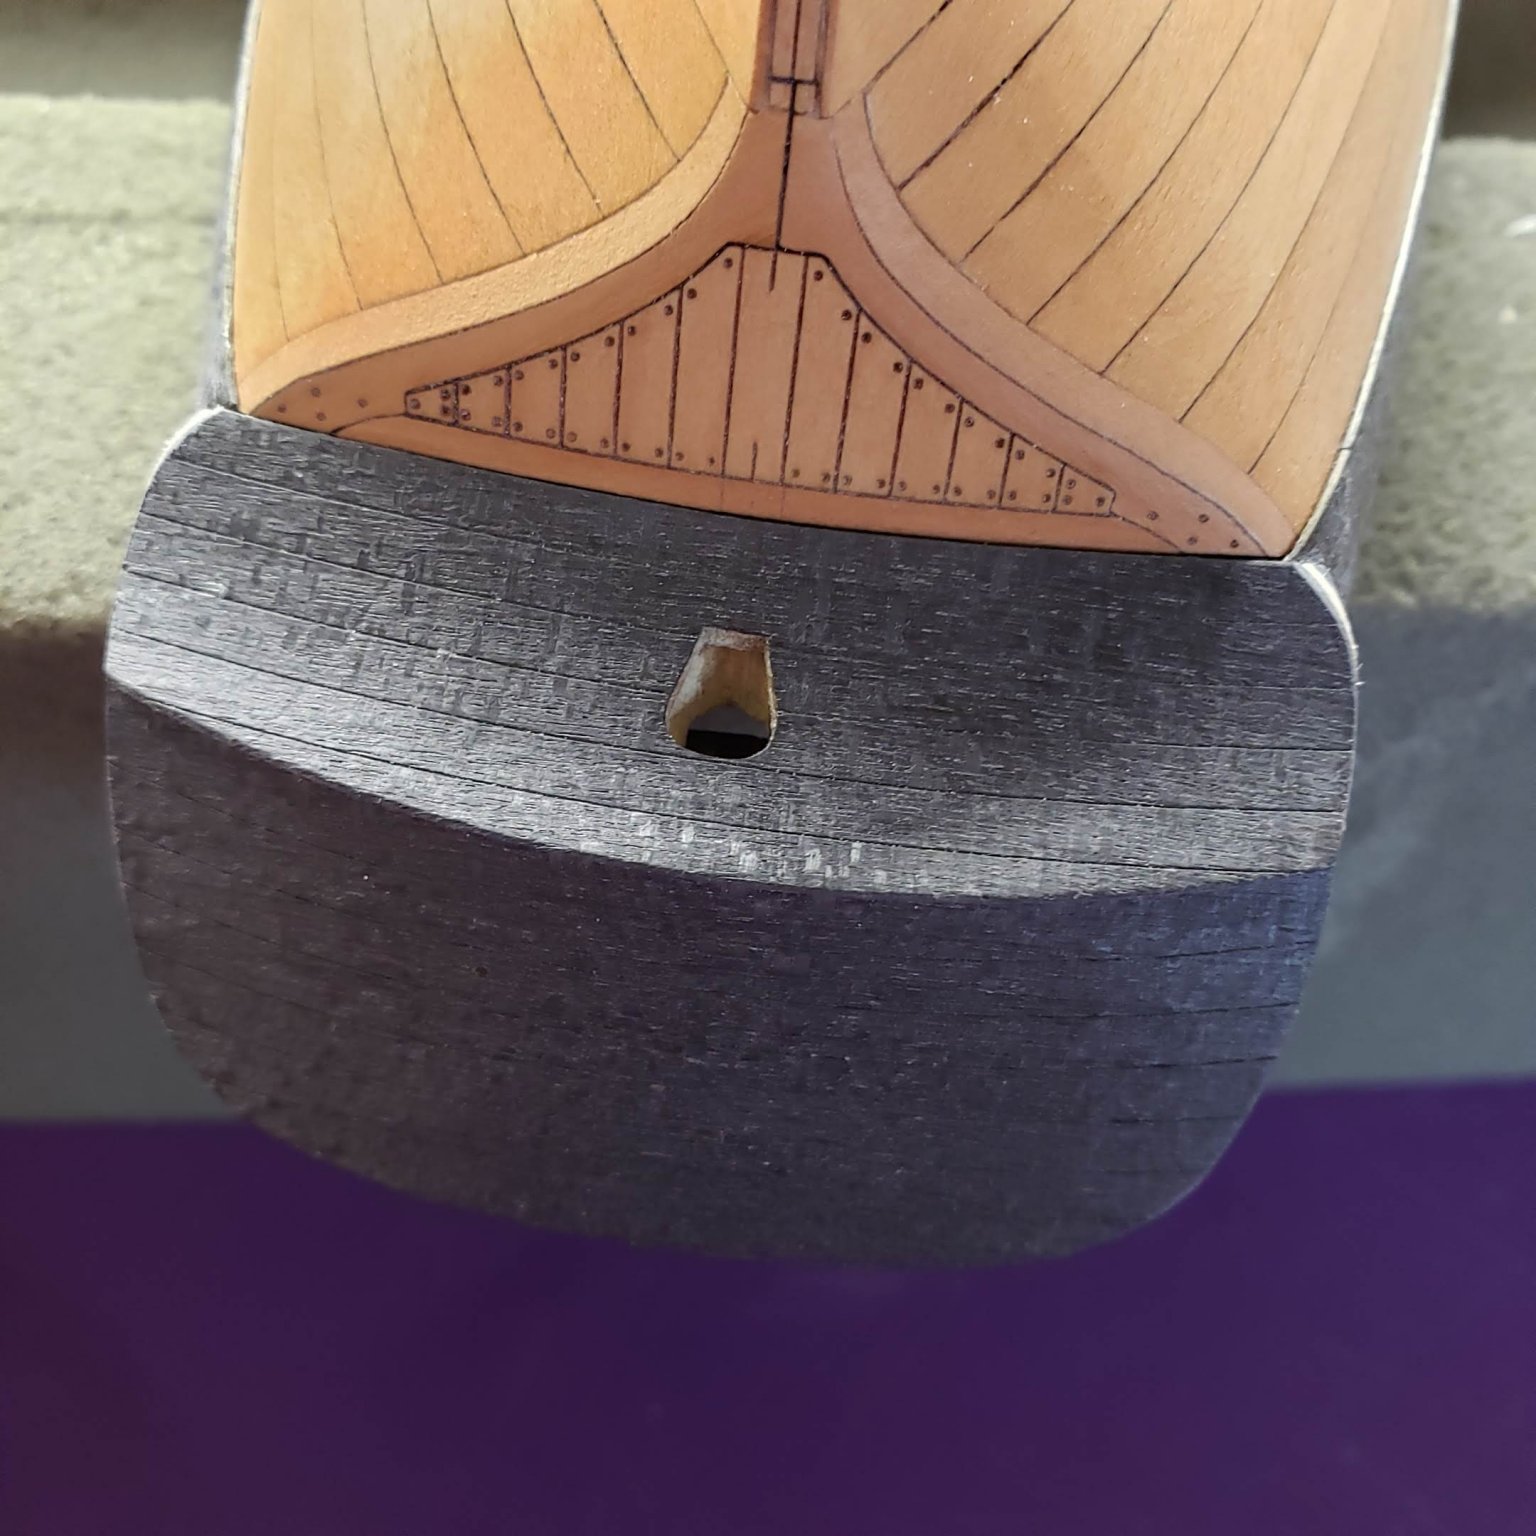
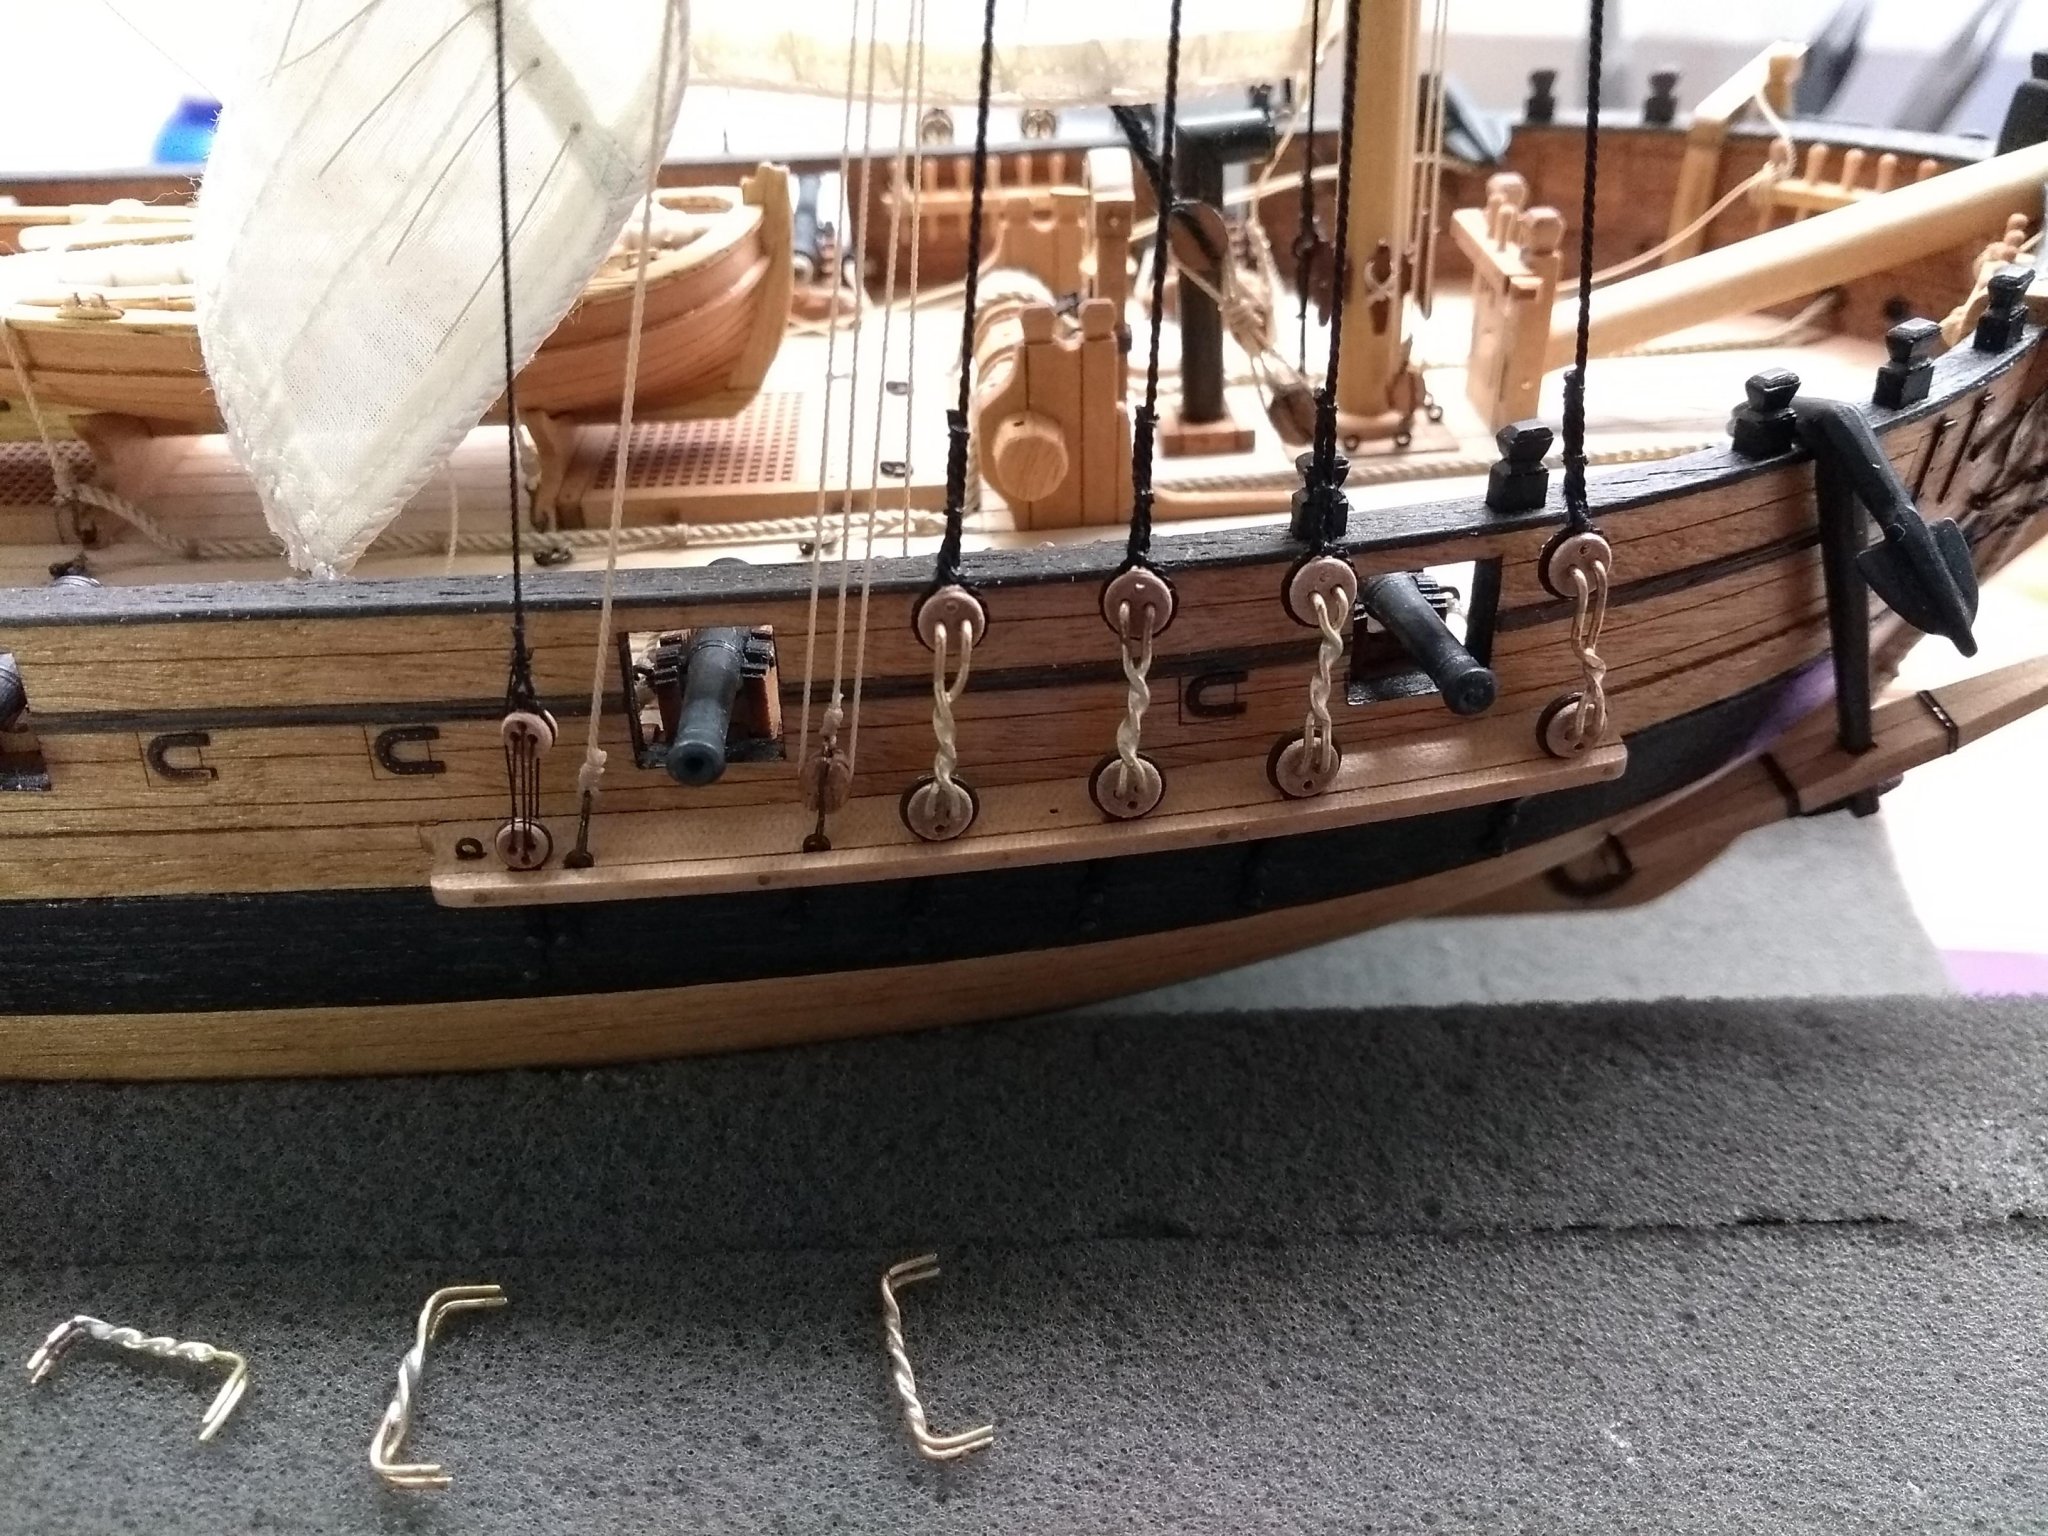
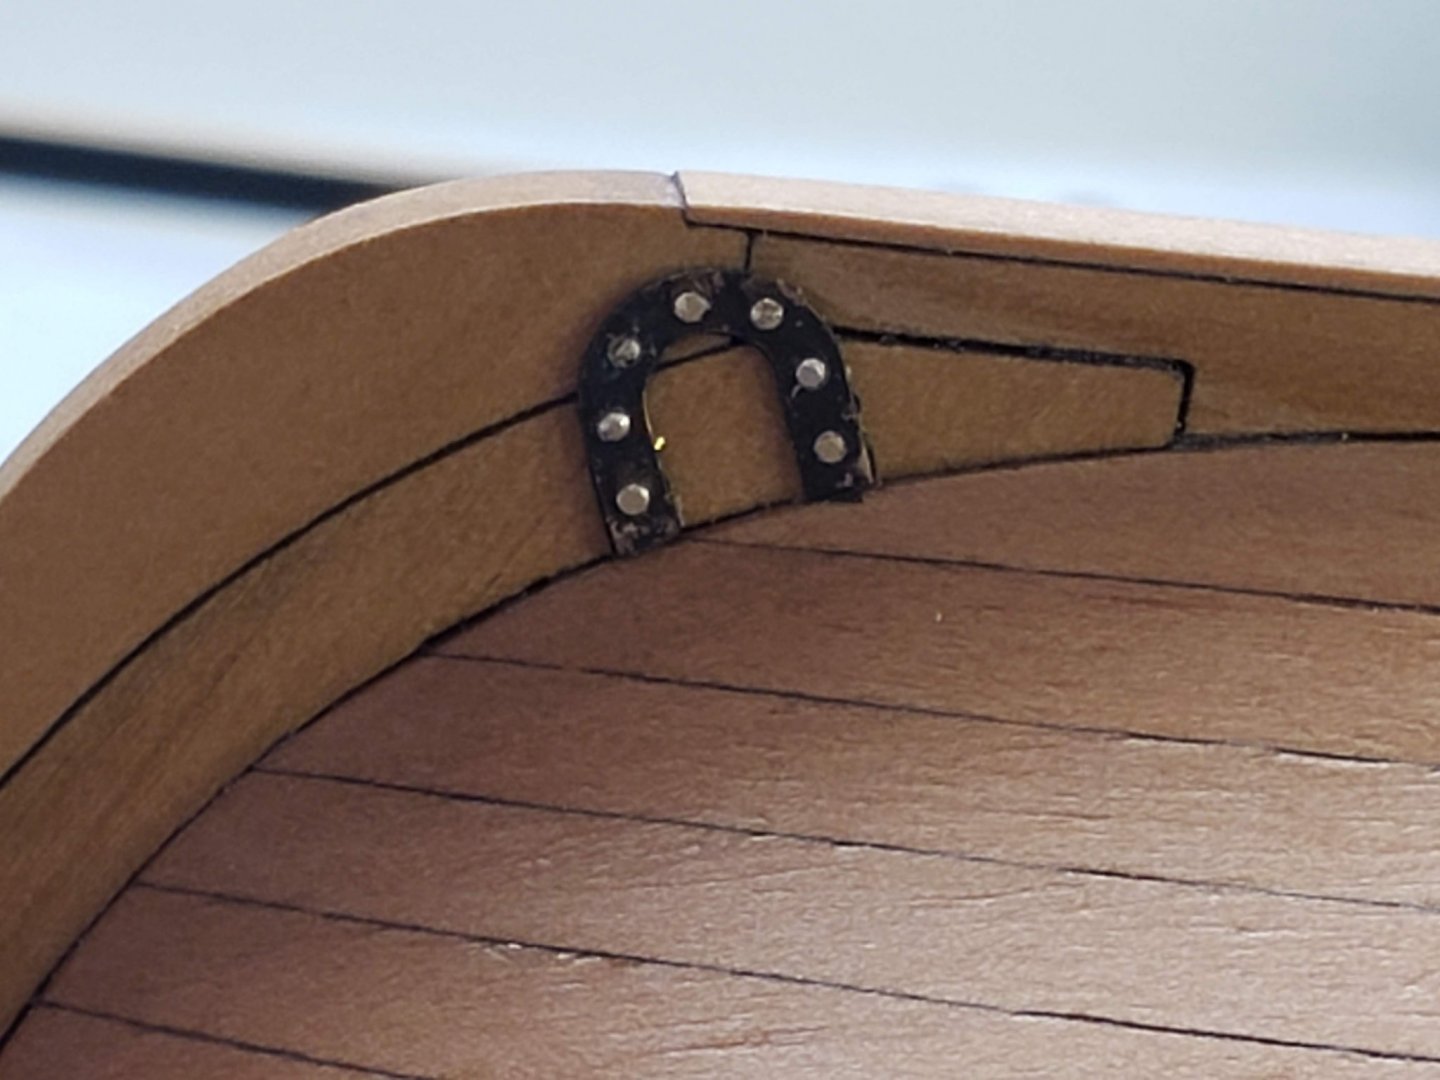
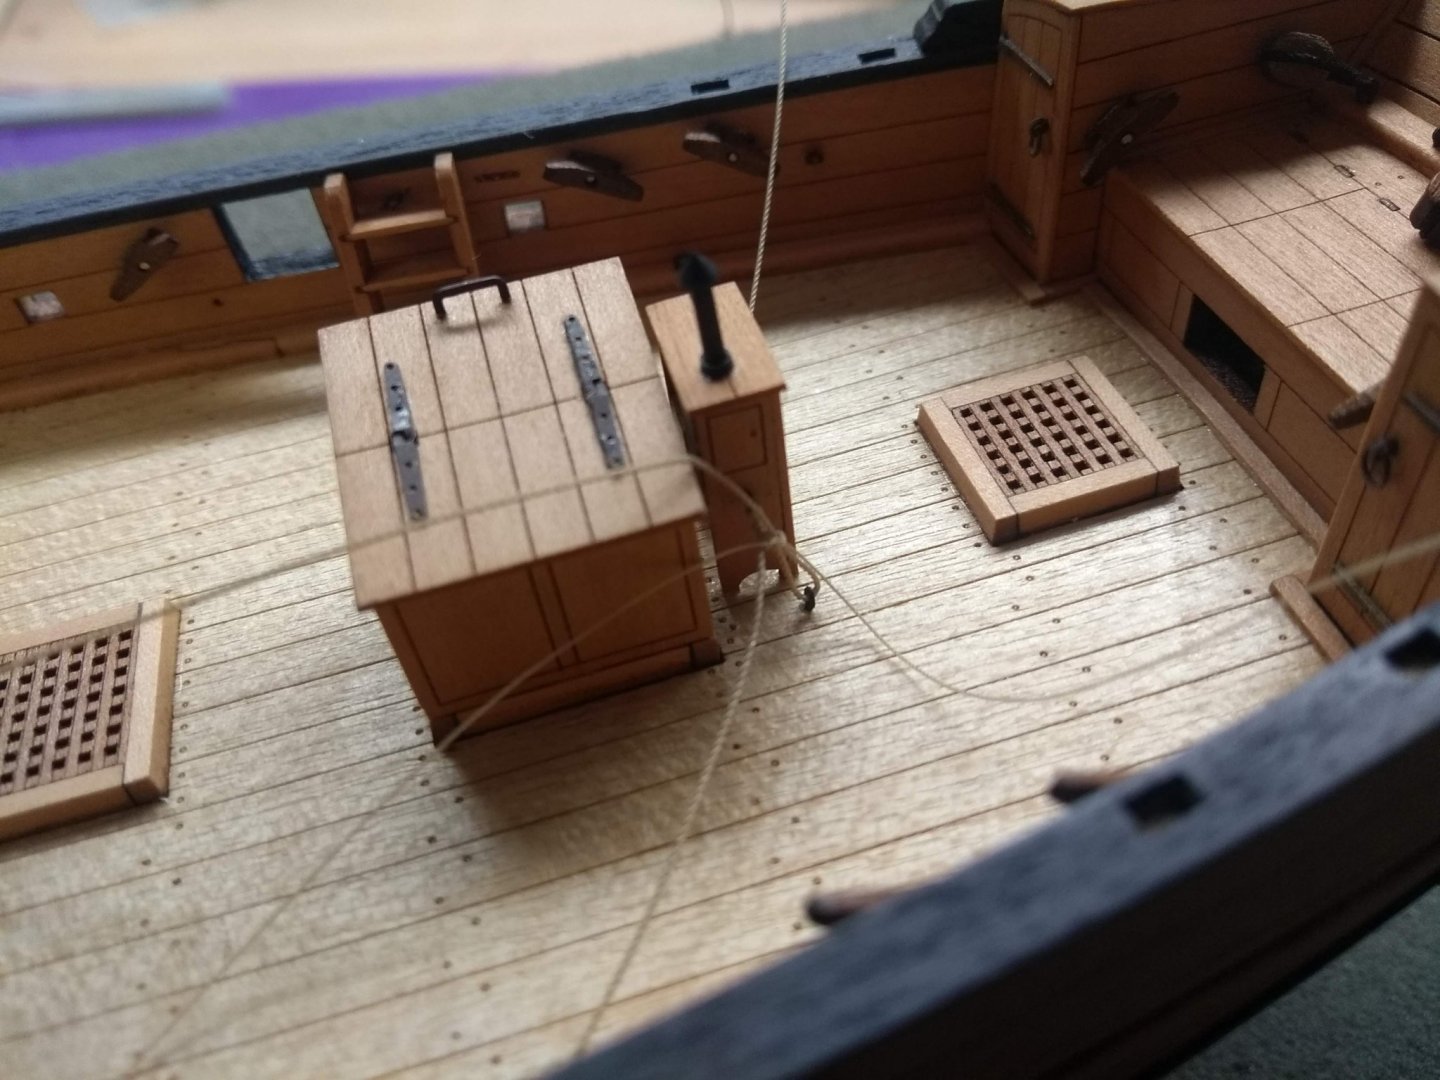
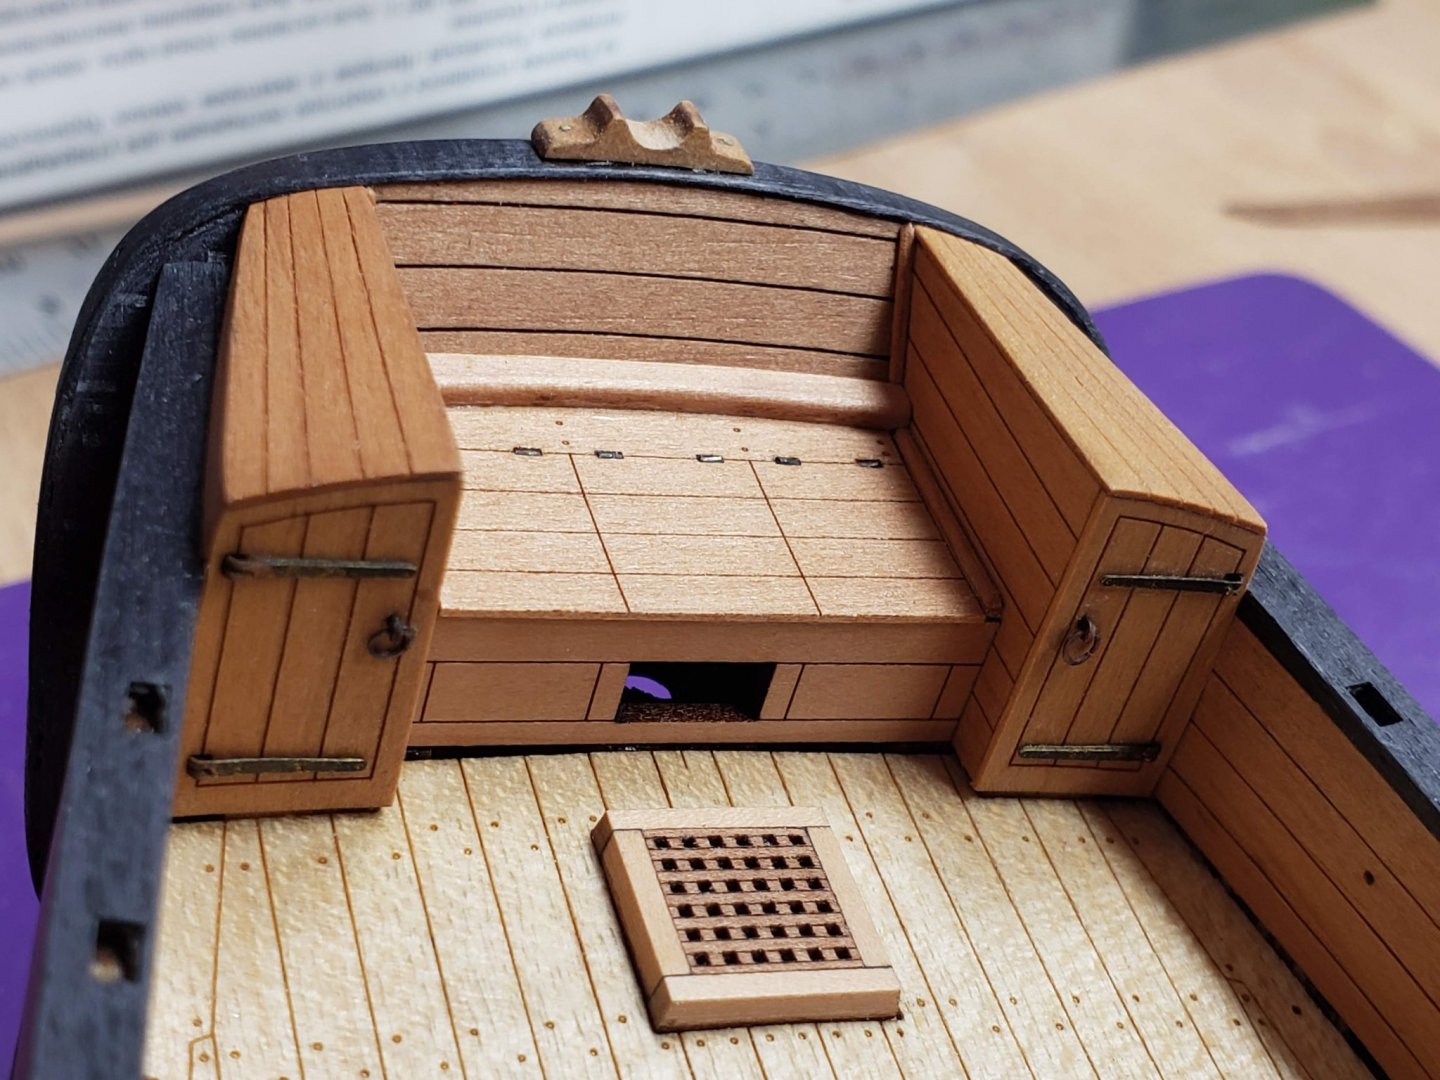
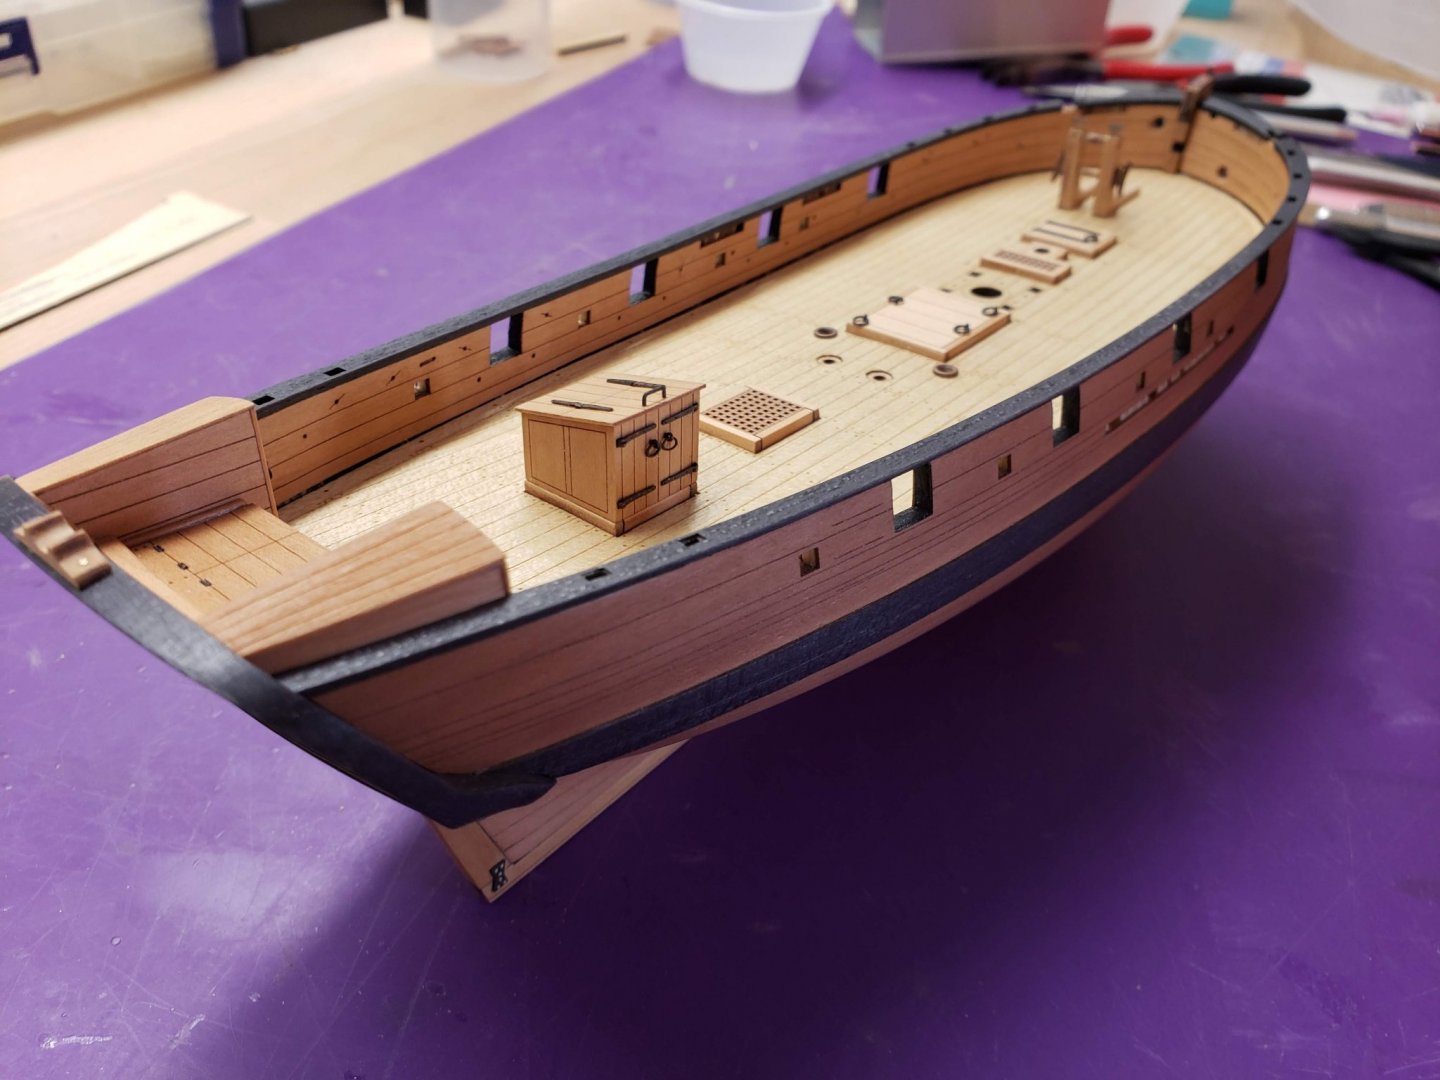
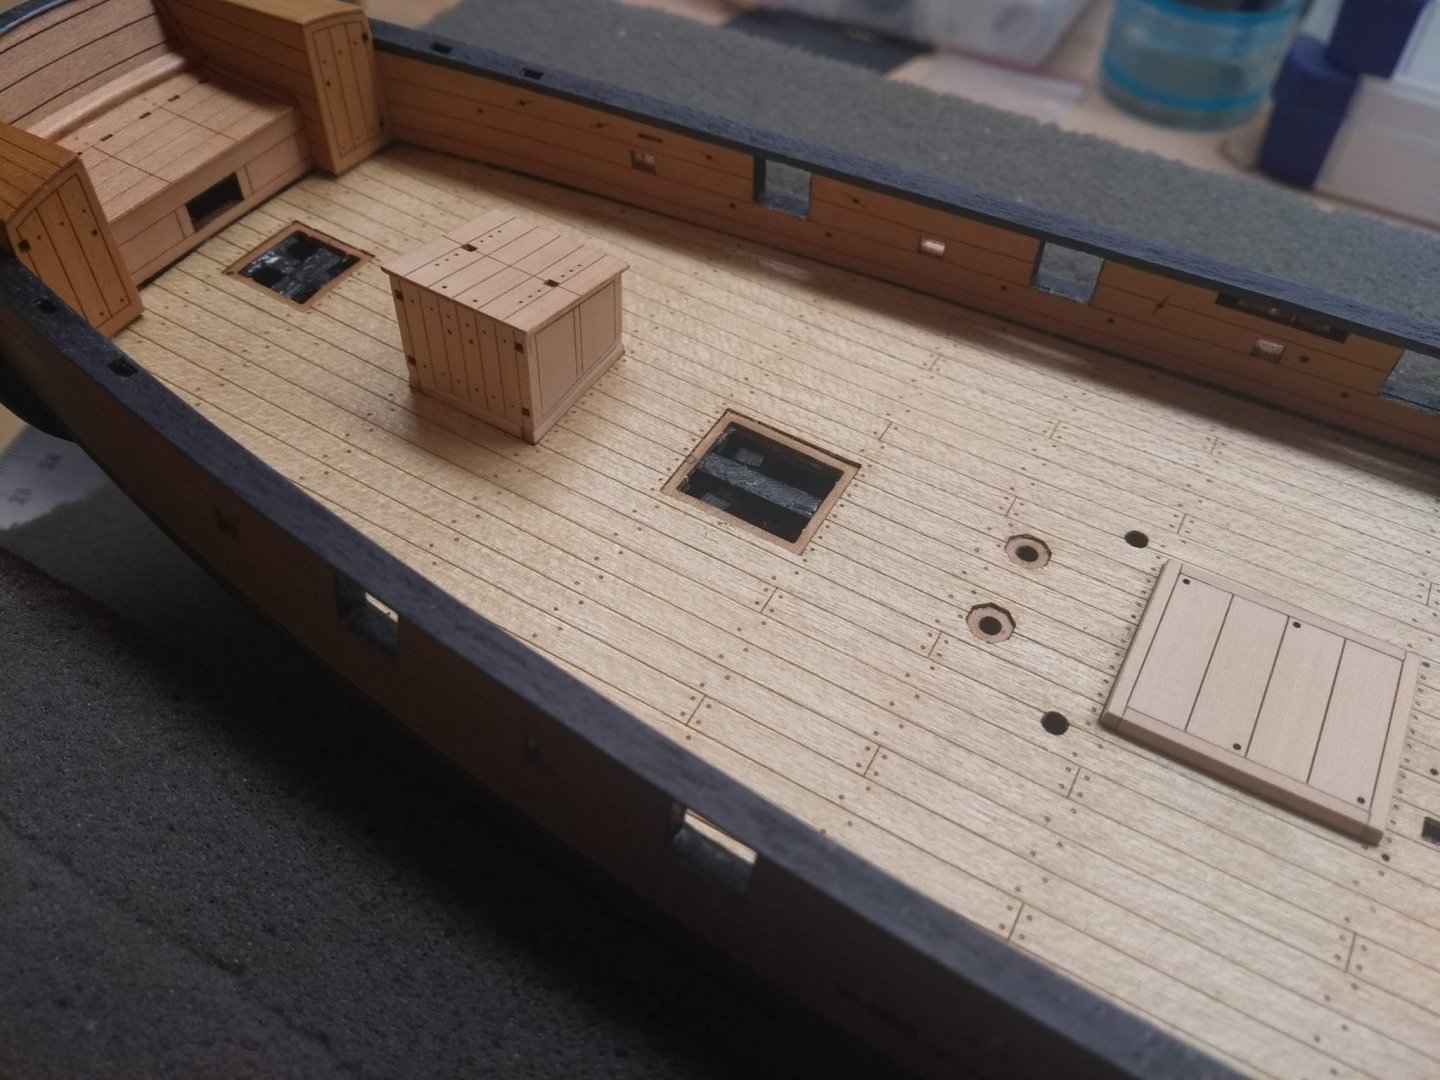
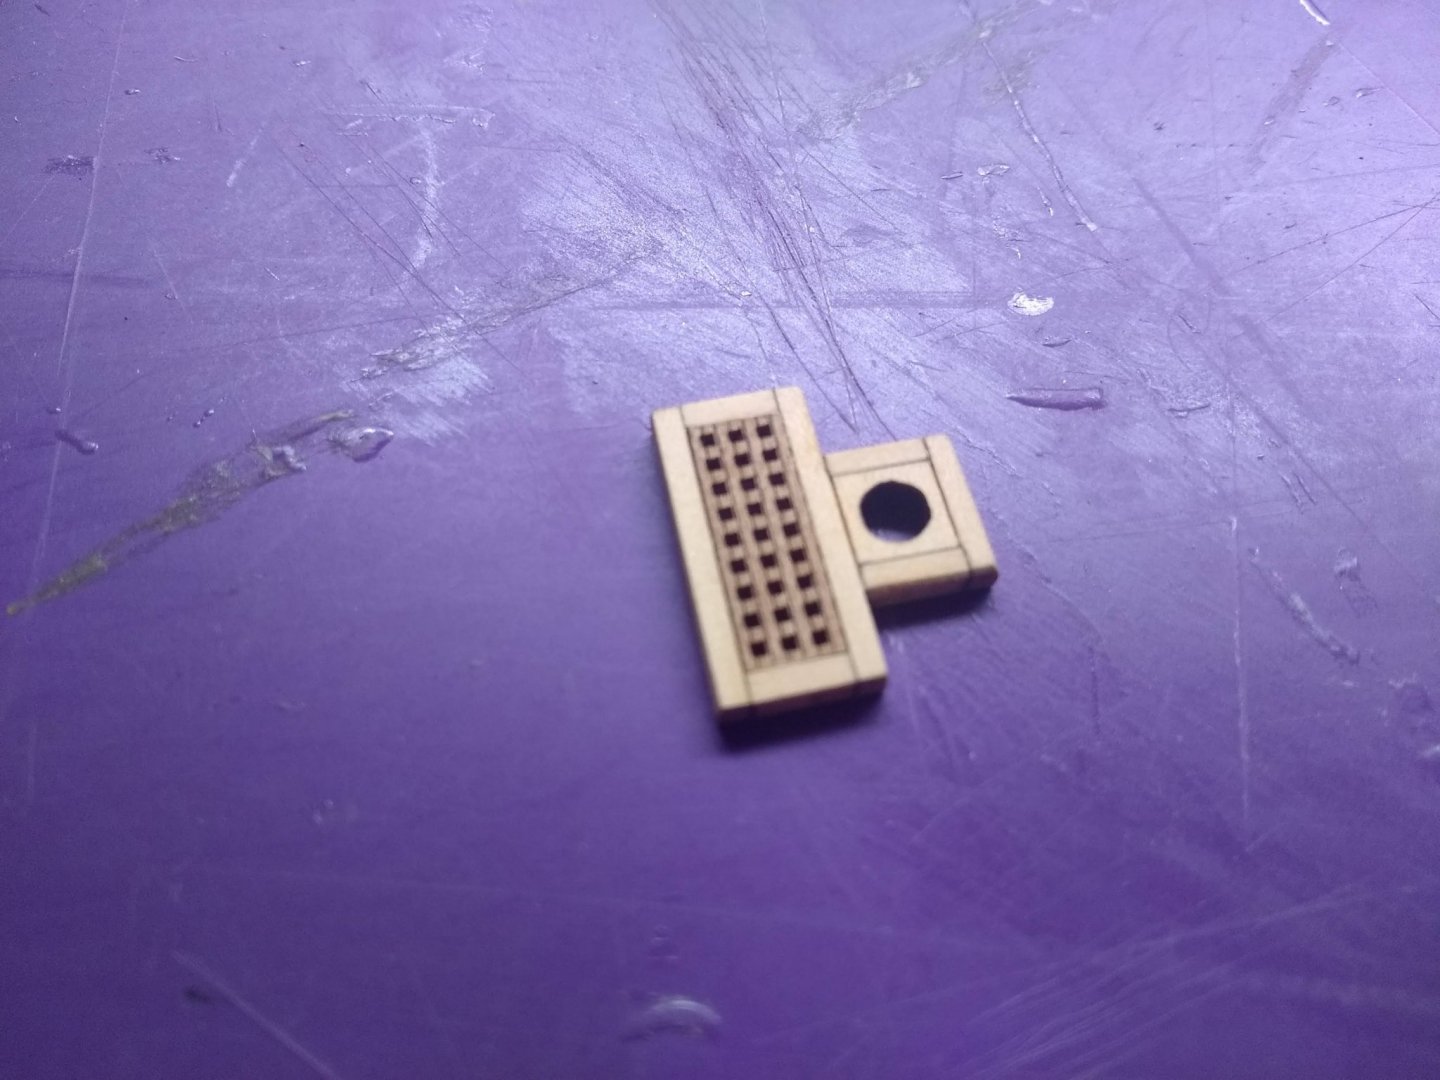
11. Before starting work on hatches I finished up some details on the keel. In the stern: And the horseshoe in the bow: 12. Once the hull was all done I switched to making all hatches, gratings and the companionway. I used an aftermarket lasercut grating instead of the kit provided one. I think they look much better at this scale: Once all these little parts were built I added hinges, handles and eyebolts: After that I attached all the cleats and the eyebolts to the hull (It is very important to secure all necessary blocks to the eyebolts before gluing them to the hull!) and added the binnacle:


- 30 replies
-
- 8
-
-
- master korabel
- avos
- (and 1 more)
-
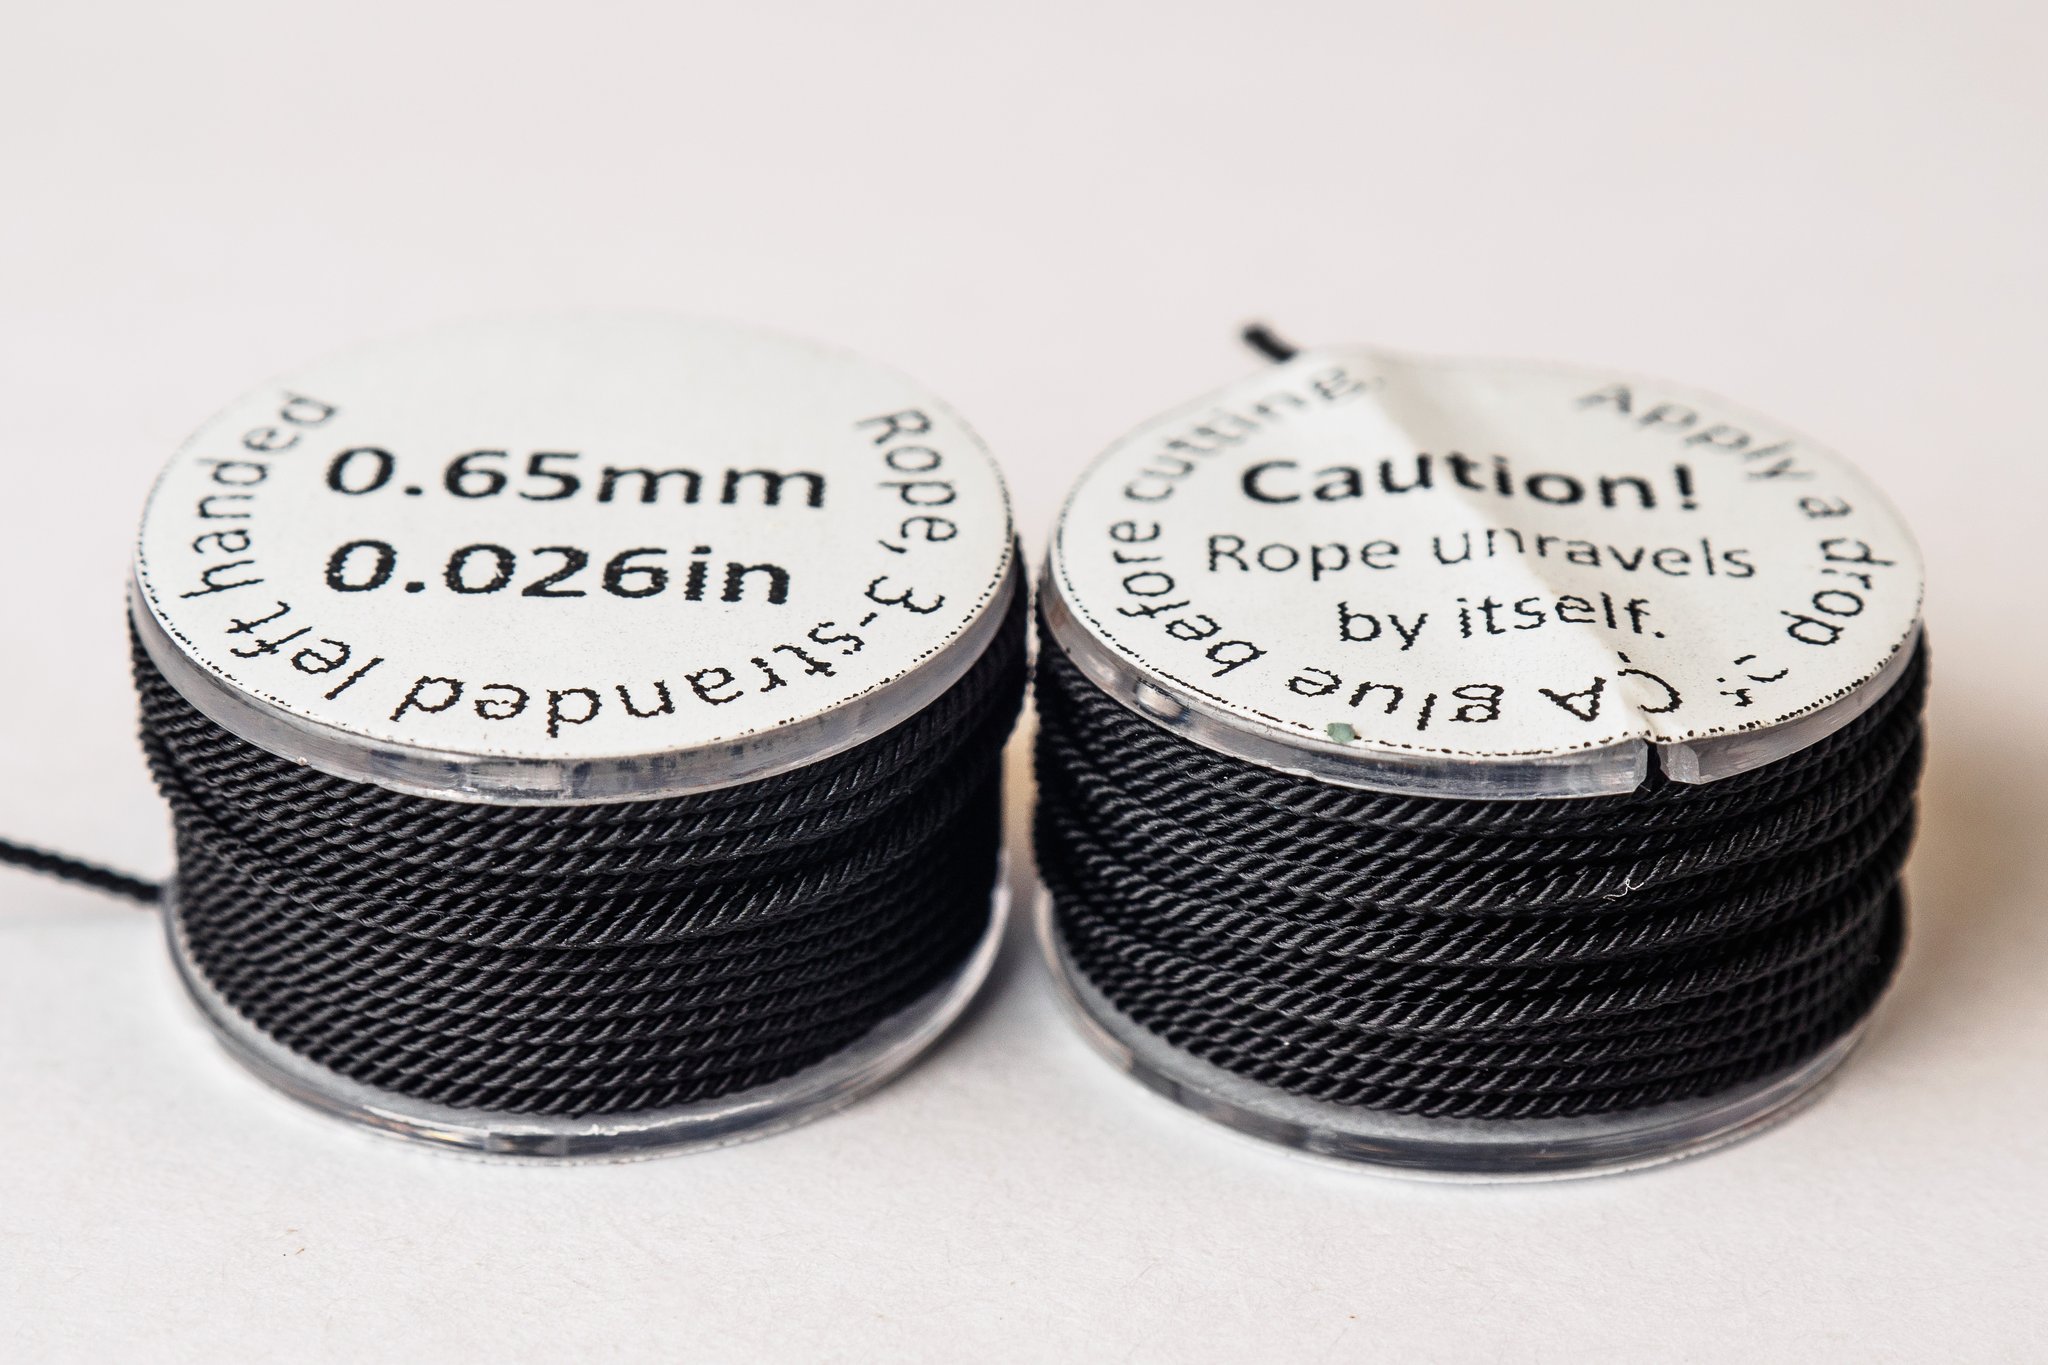
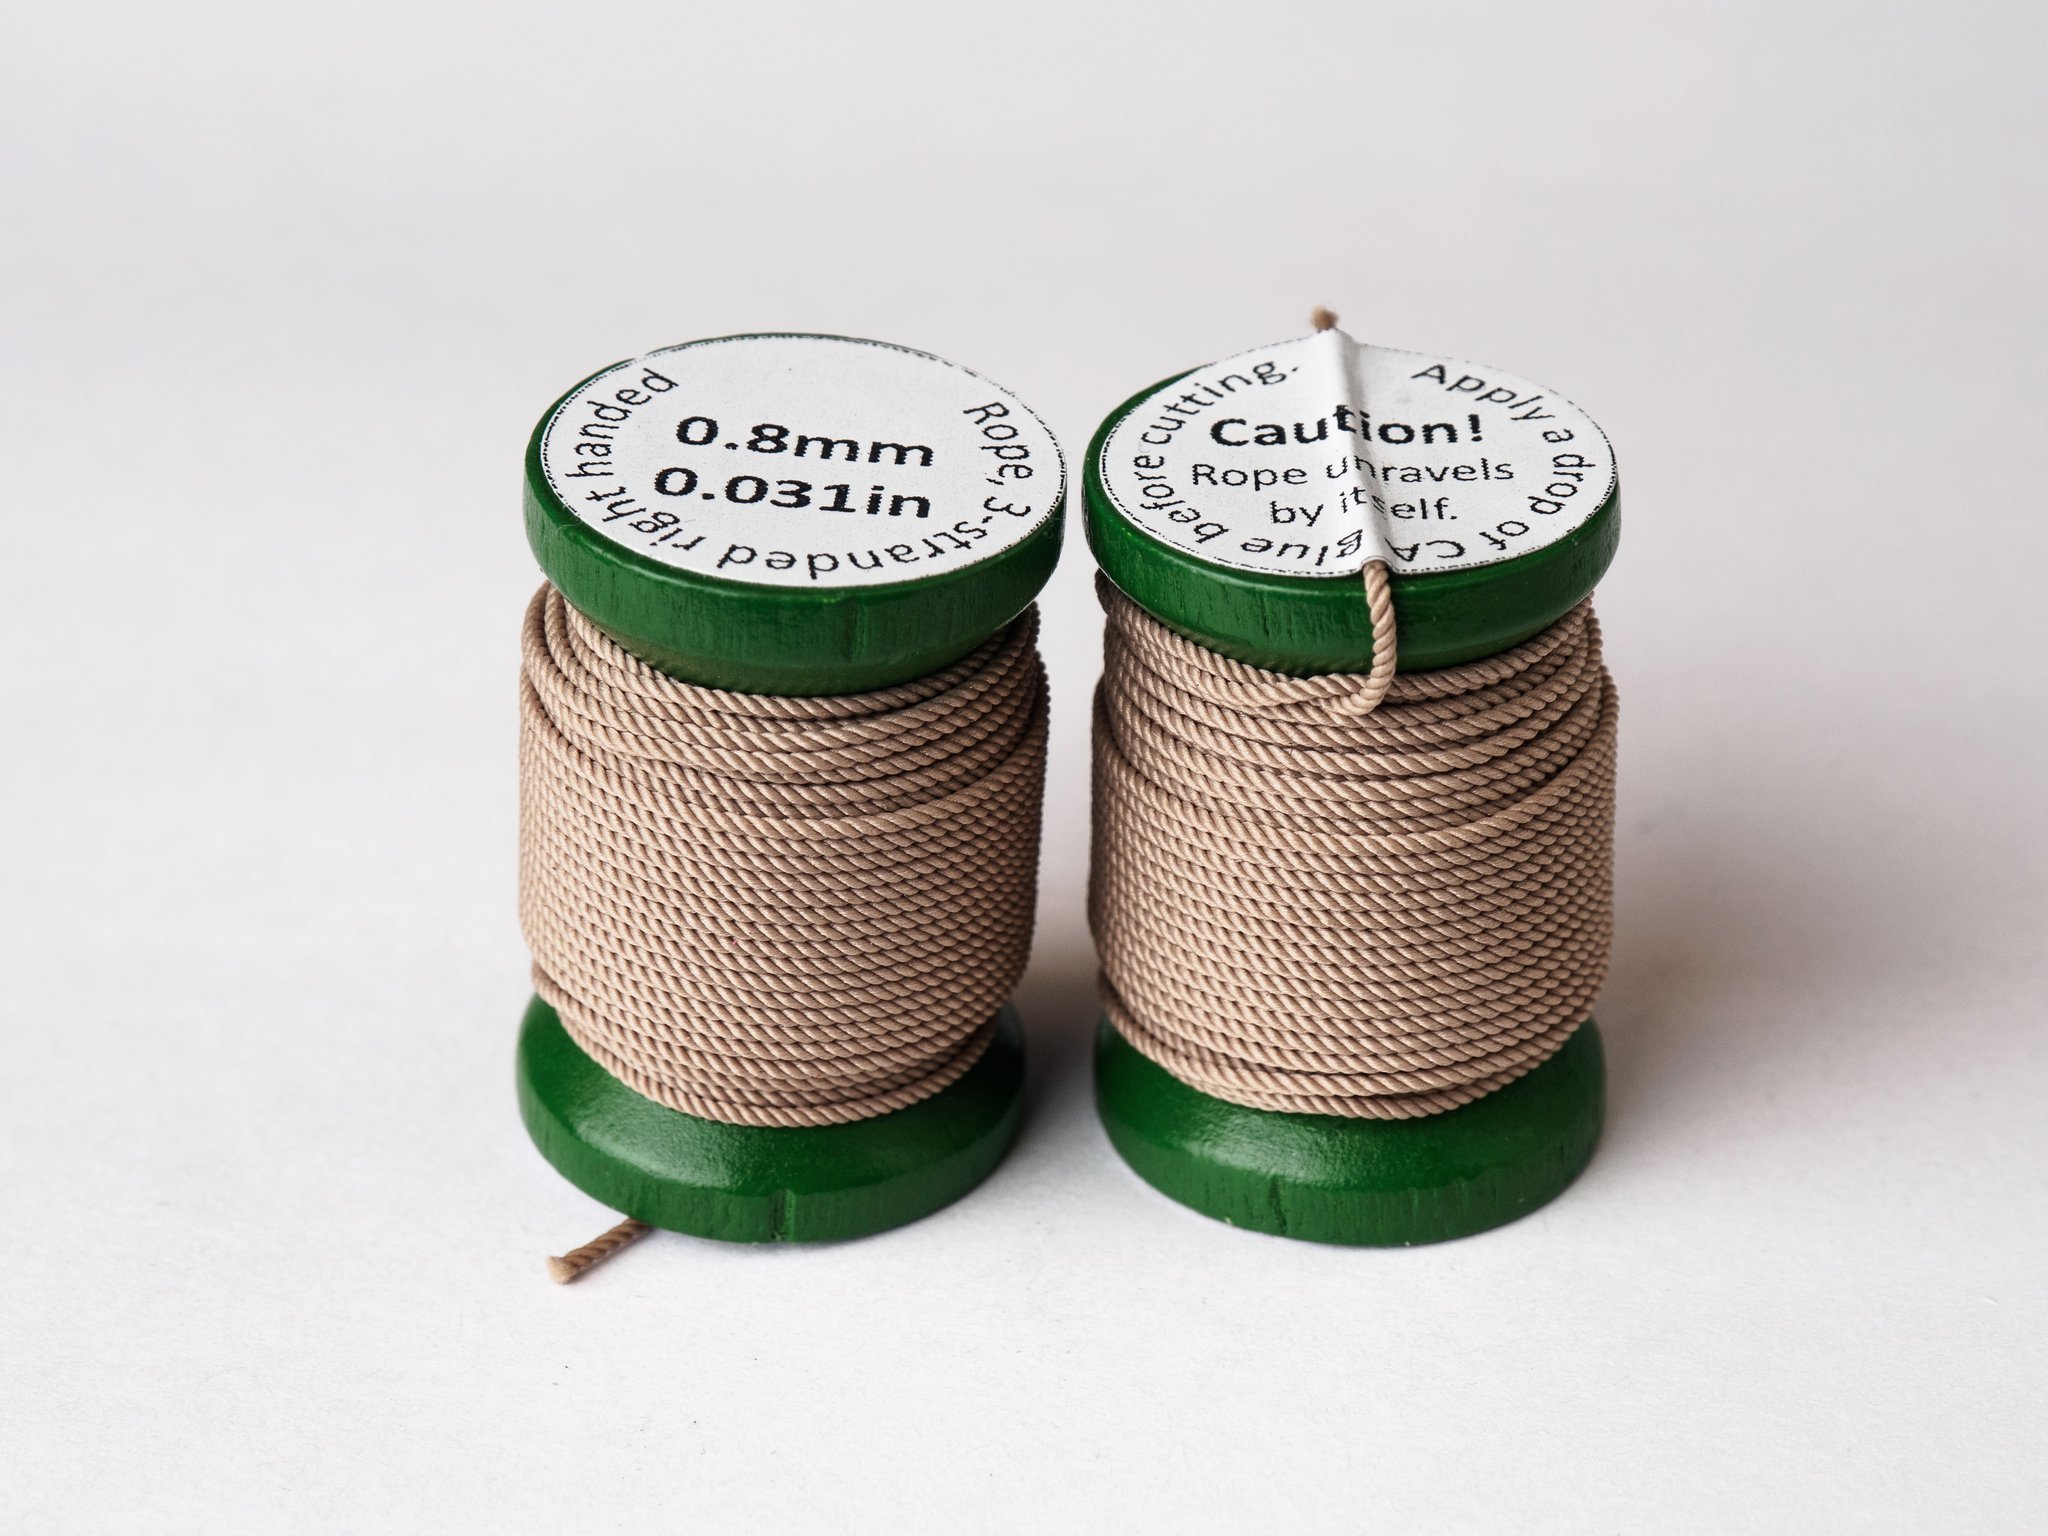
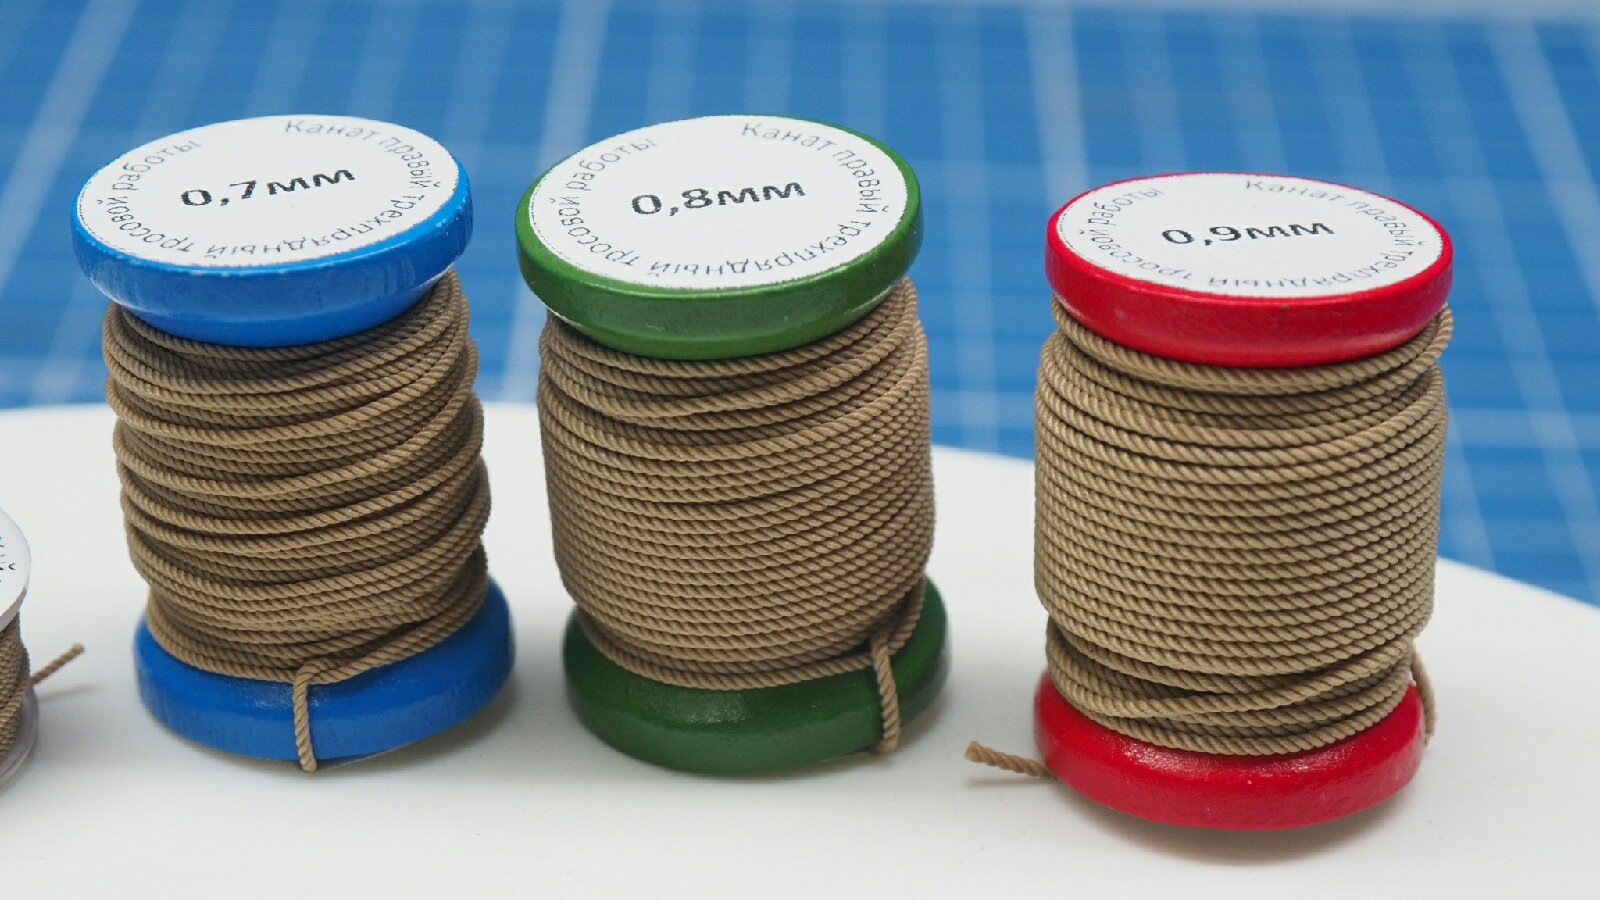
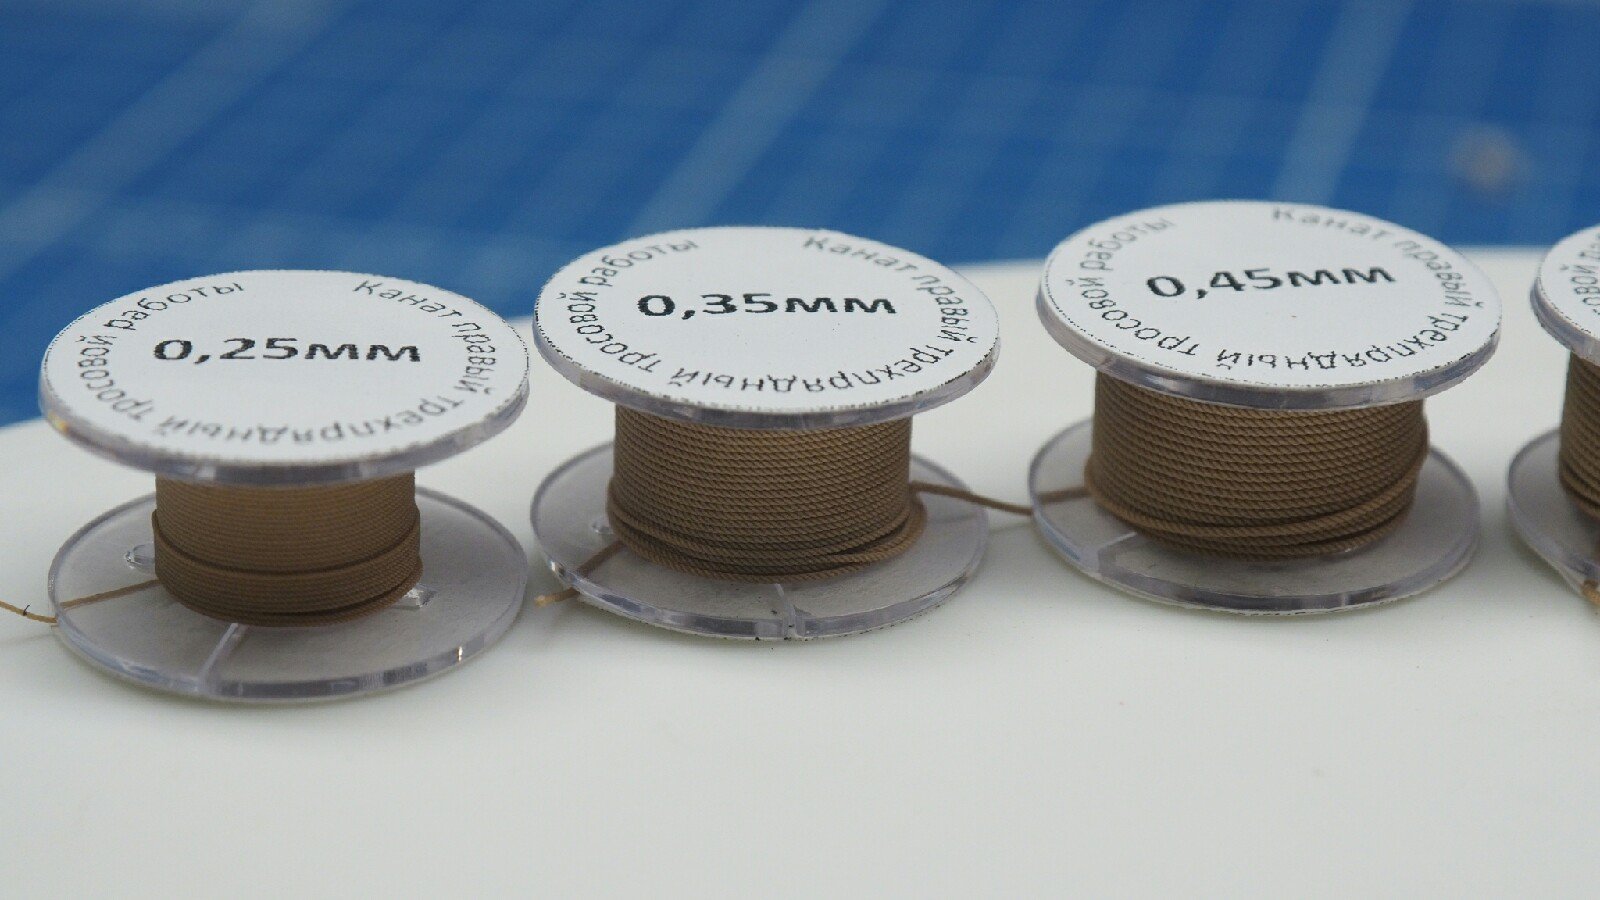
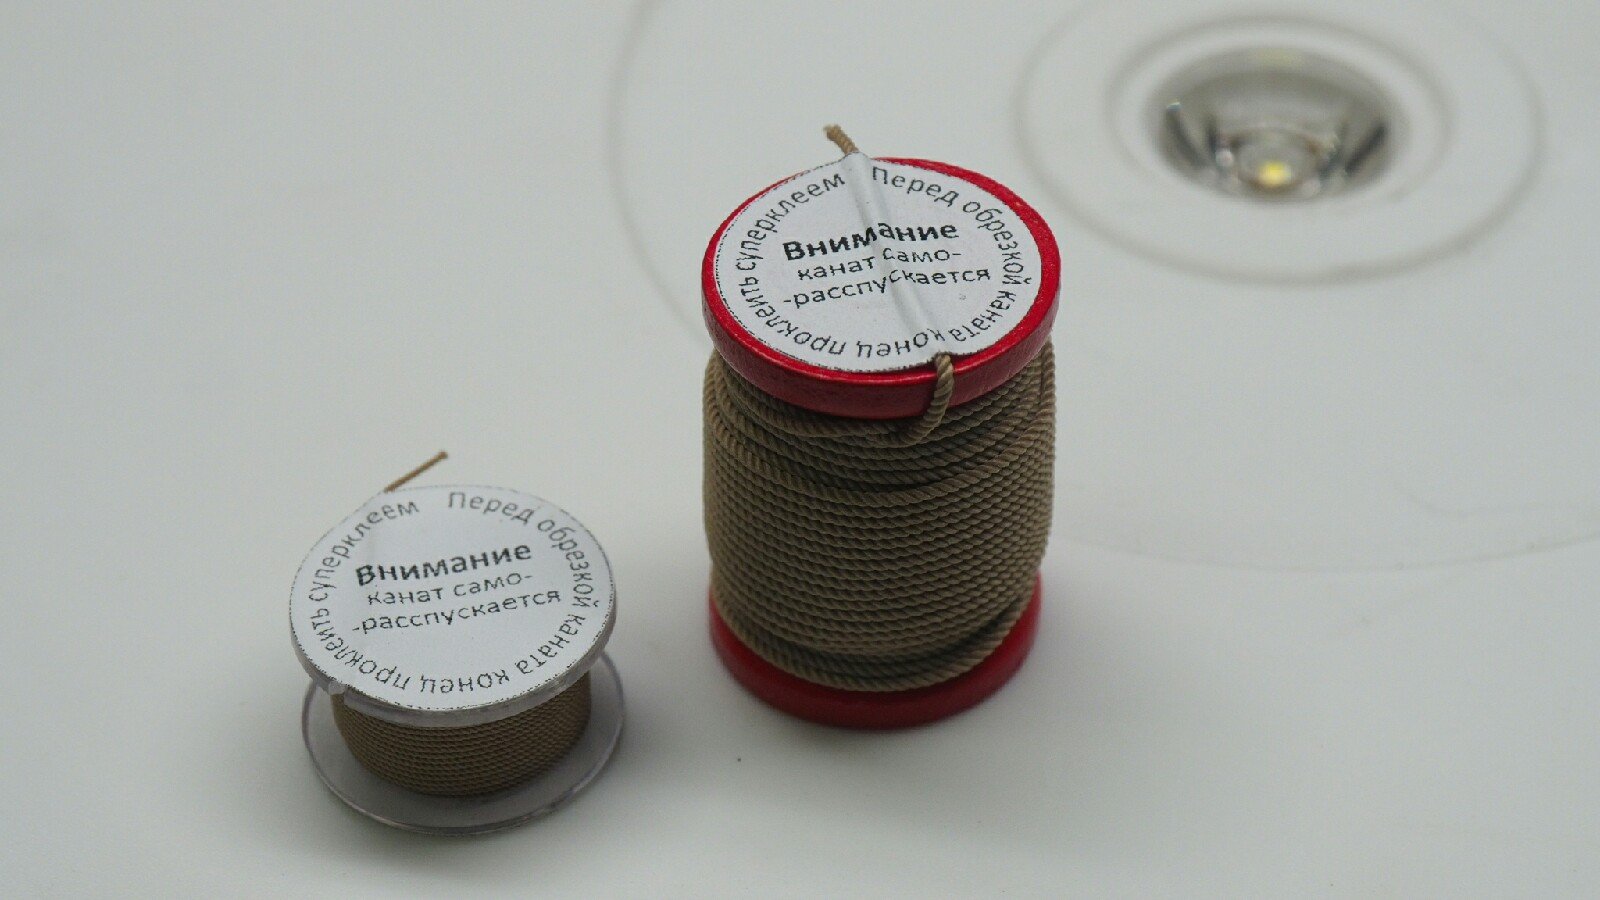
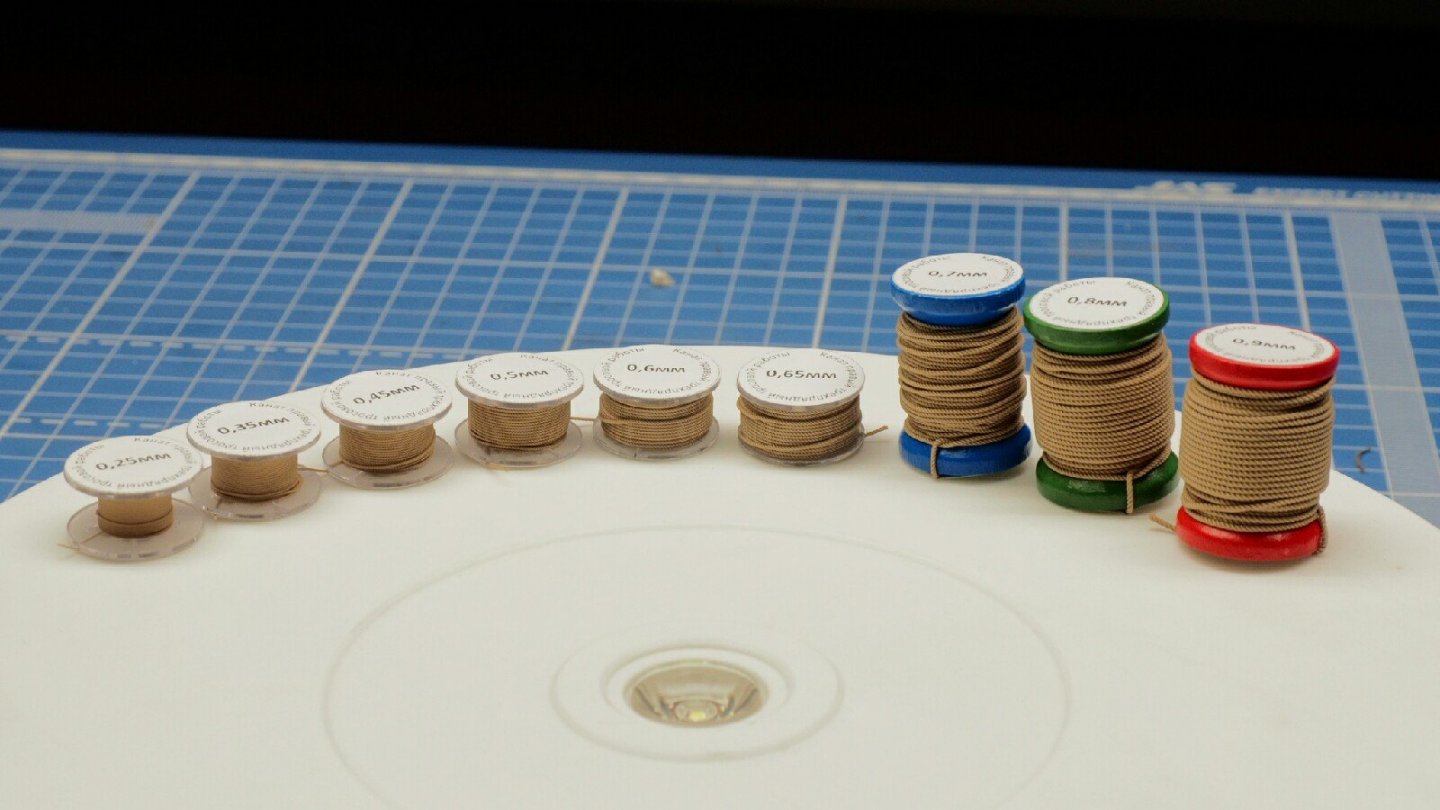
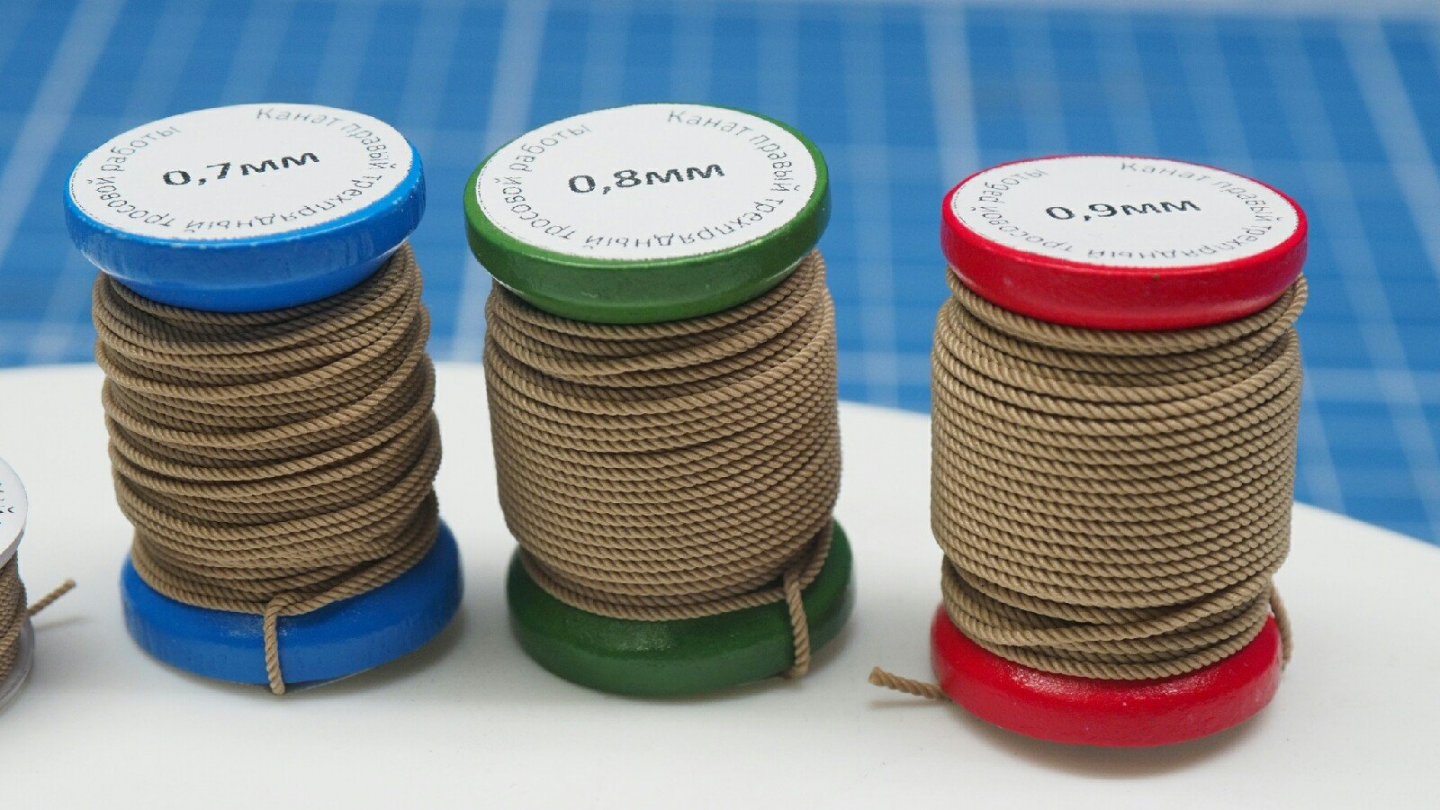
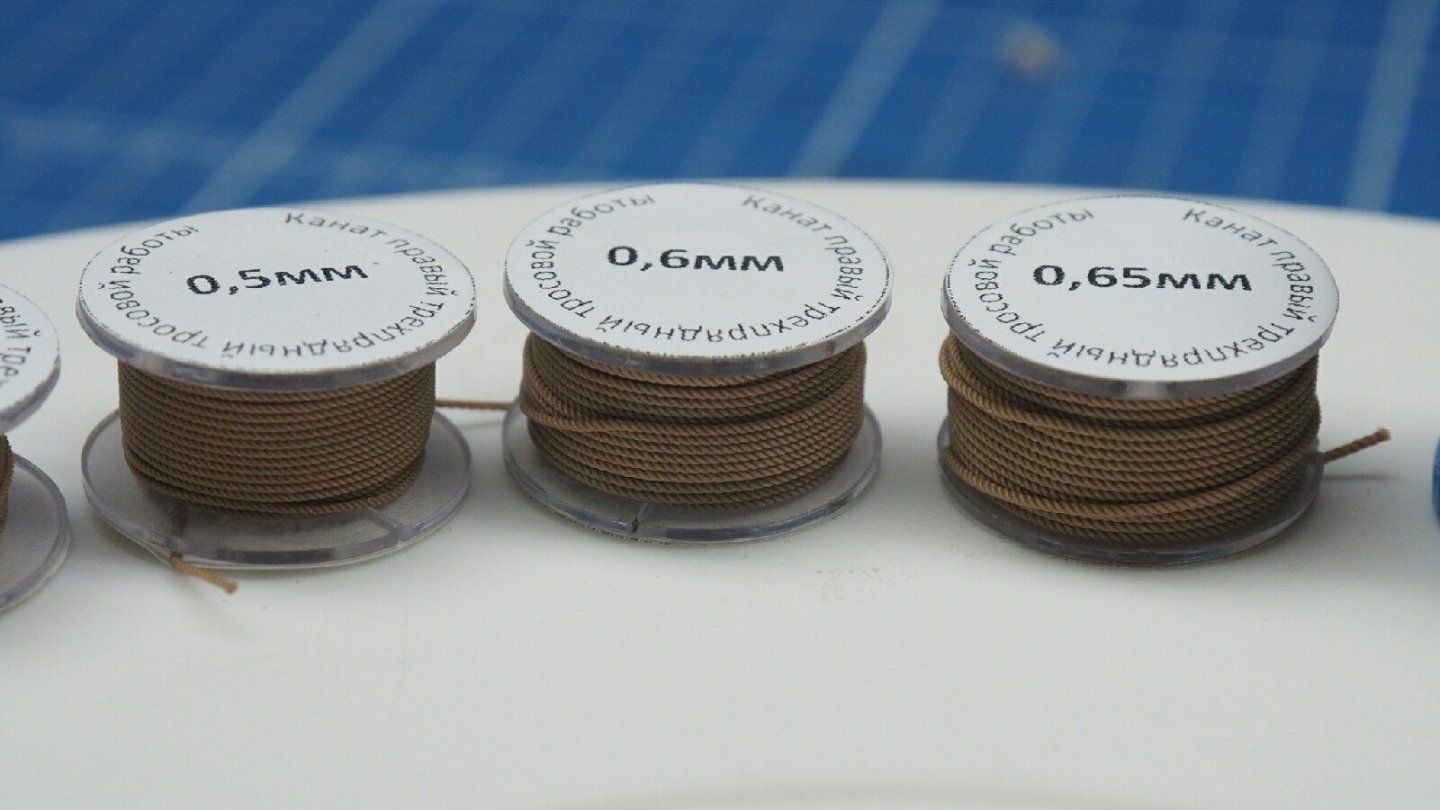
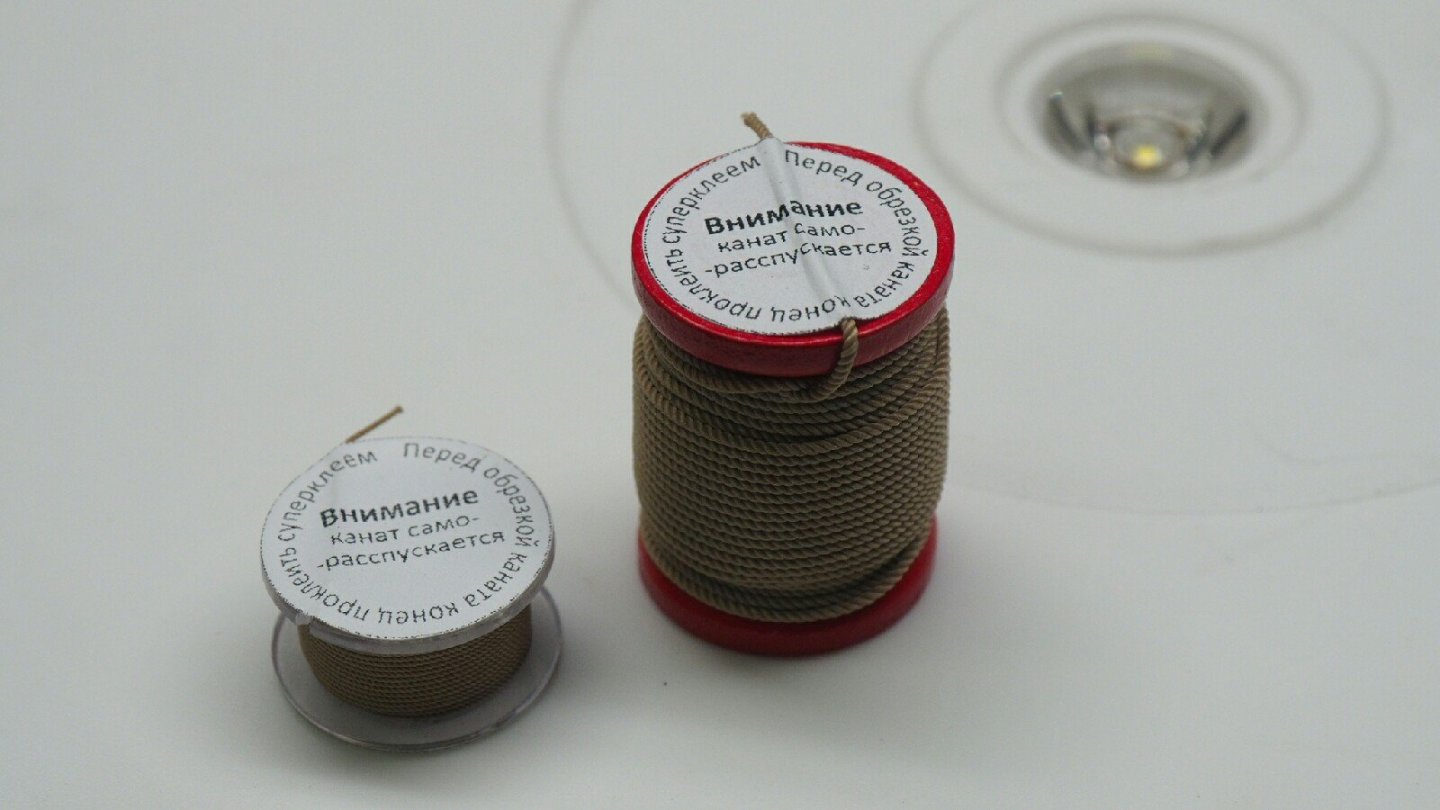
Finally we have Alexey Vikulaev's beautiful ropes in stock! Black Rope (0.25mm - 0.65mm) Handmade black ropes for standing rigging Length of each spool is 21 feet (6.5 meters) These ropes are made of 100% polyester Gutermann Skala 360 thread All black ropes are 3-stranded left handed VIEW Tan Rope (0.25mm - 0.9mm) Handmade tan rope for running rigging Length of each spool is 21 feet (6.5 meters) These ropes are made of 100% polyester Gutermann E121 thread All tan ropes are 3-stranded right handed VIEW


-
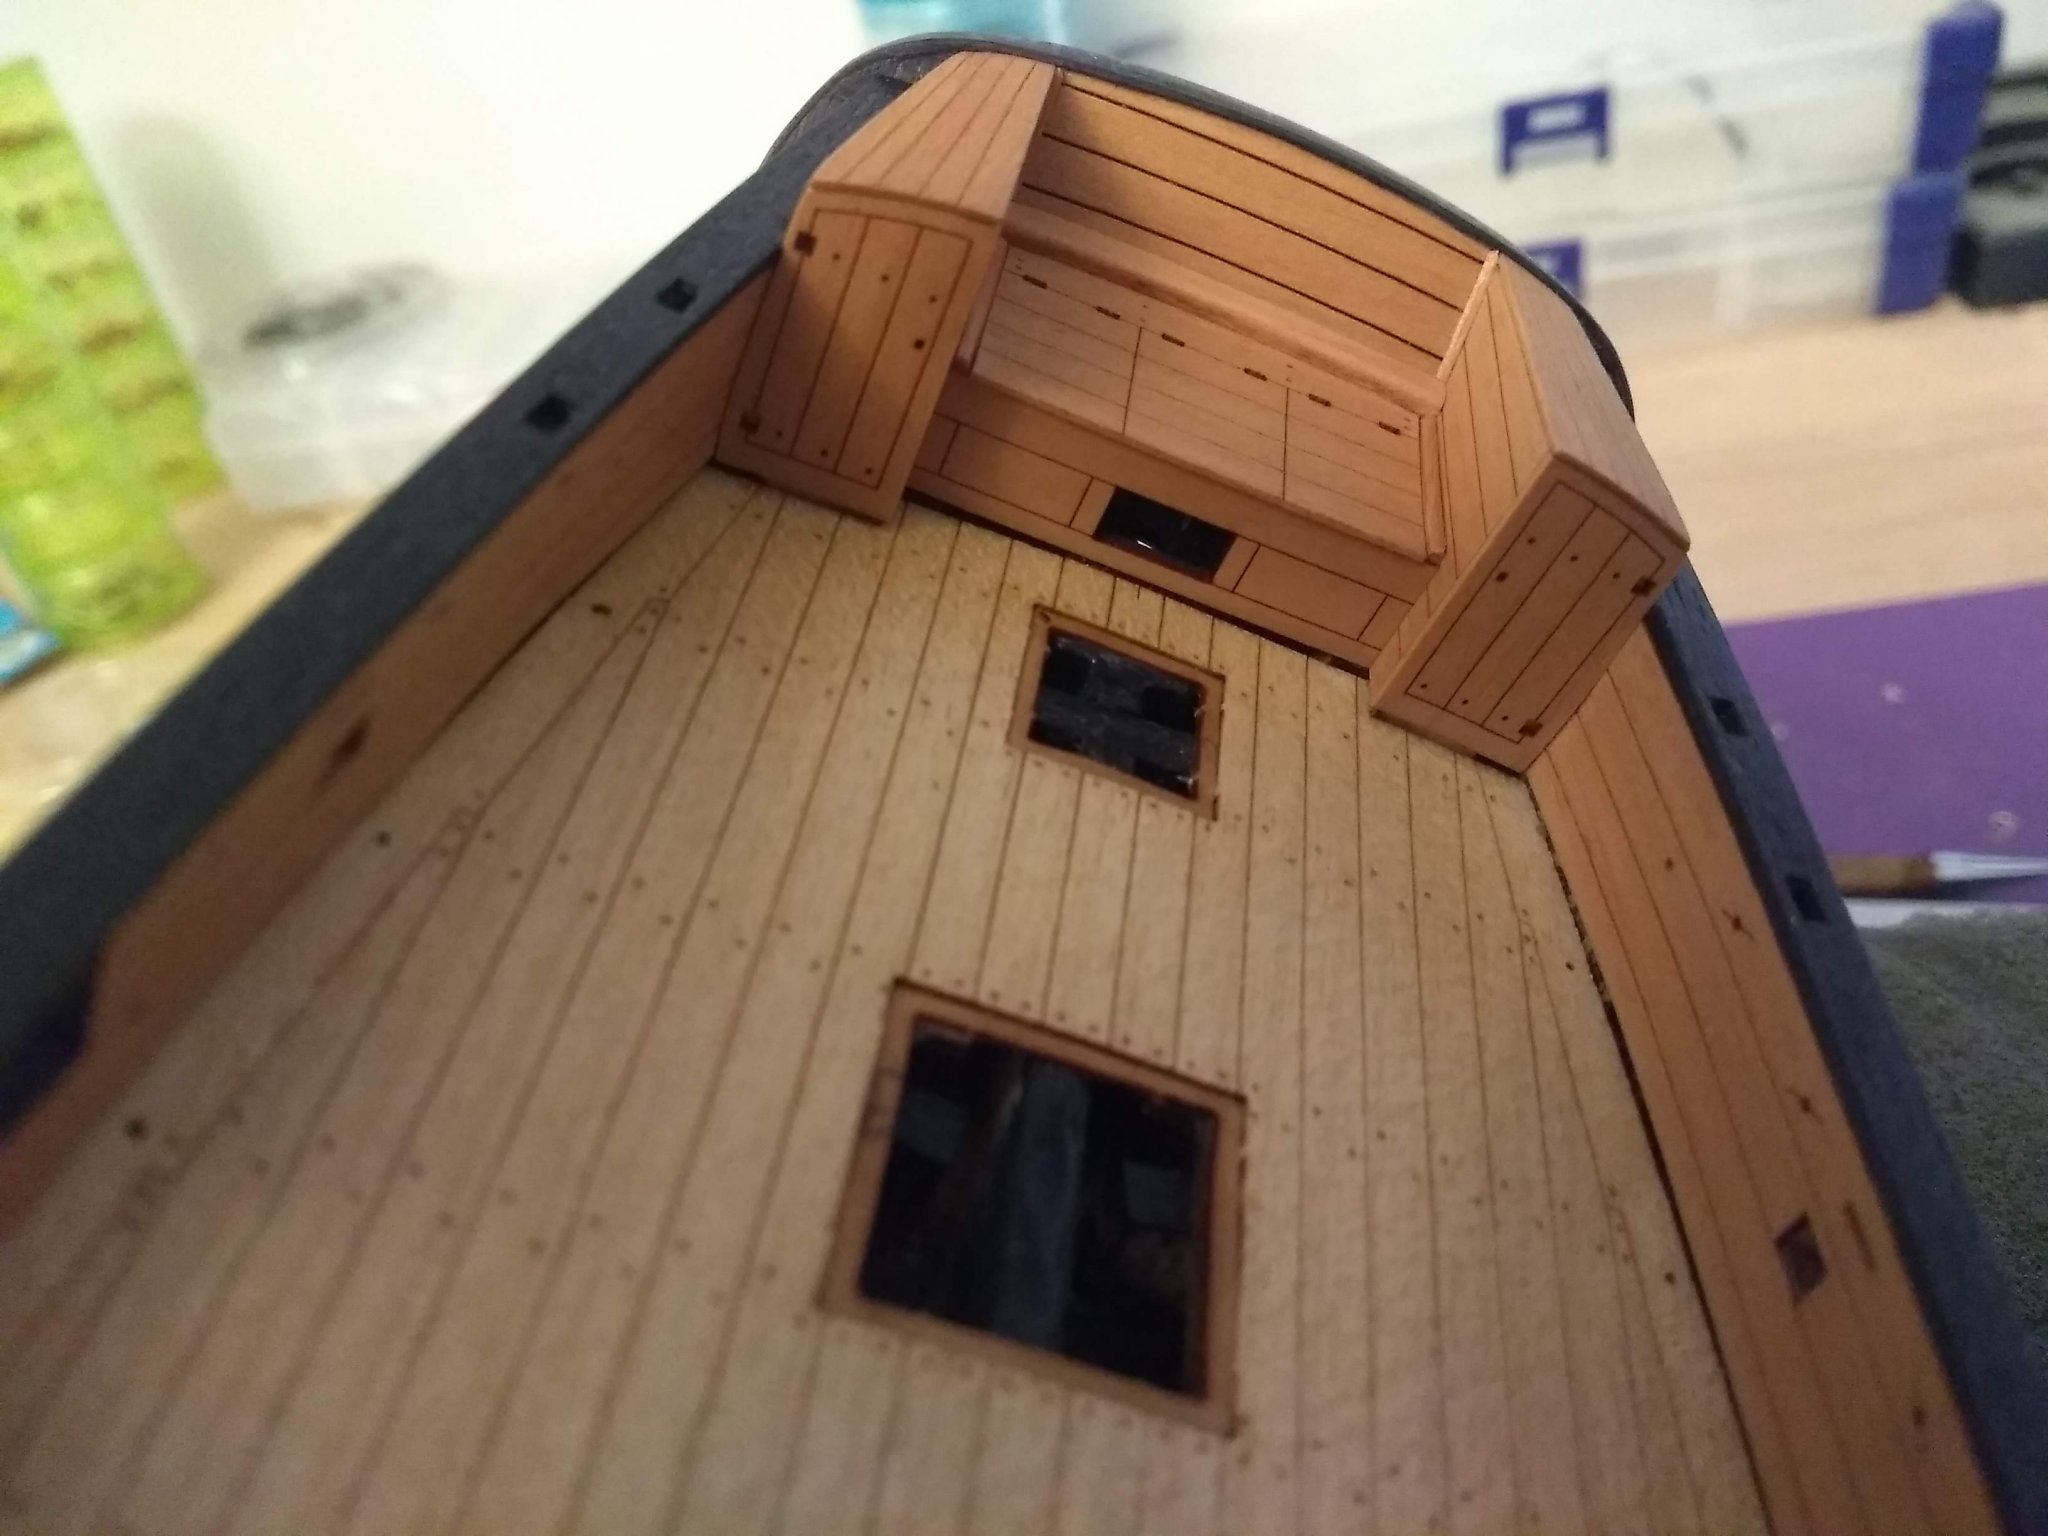
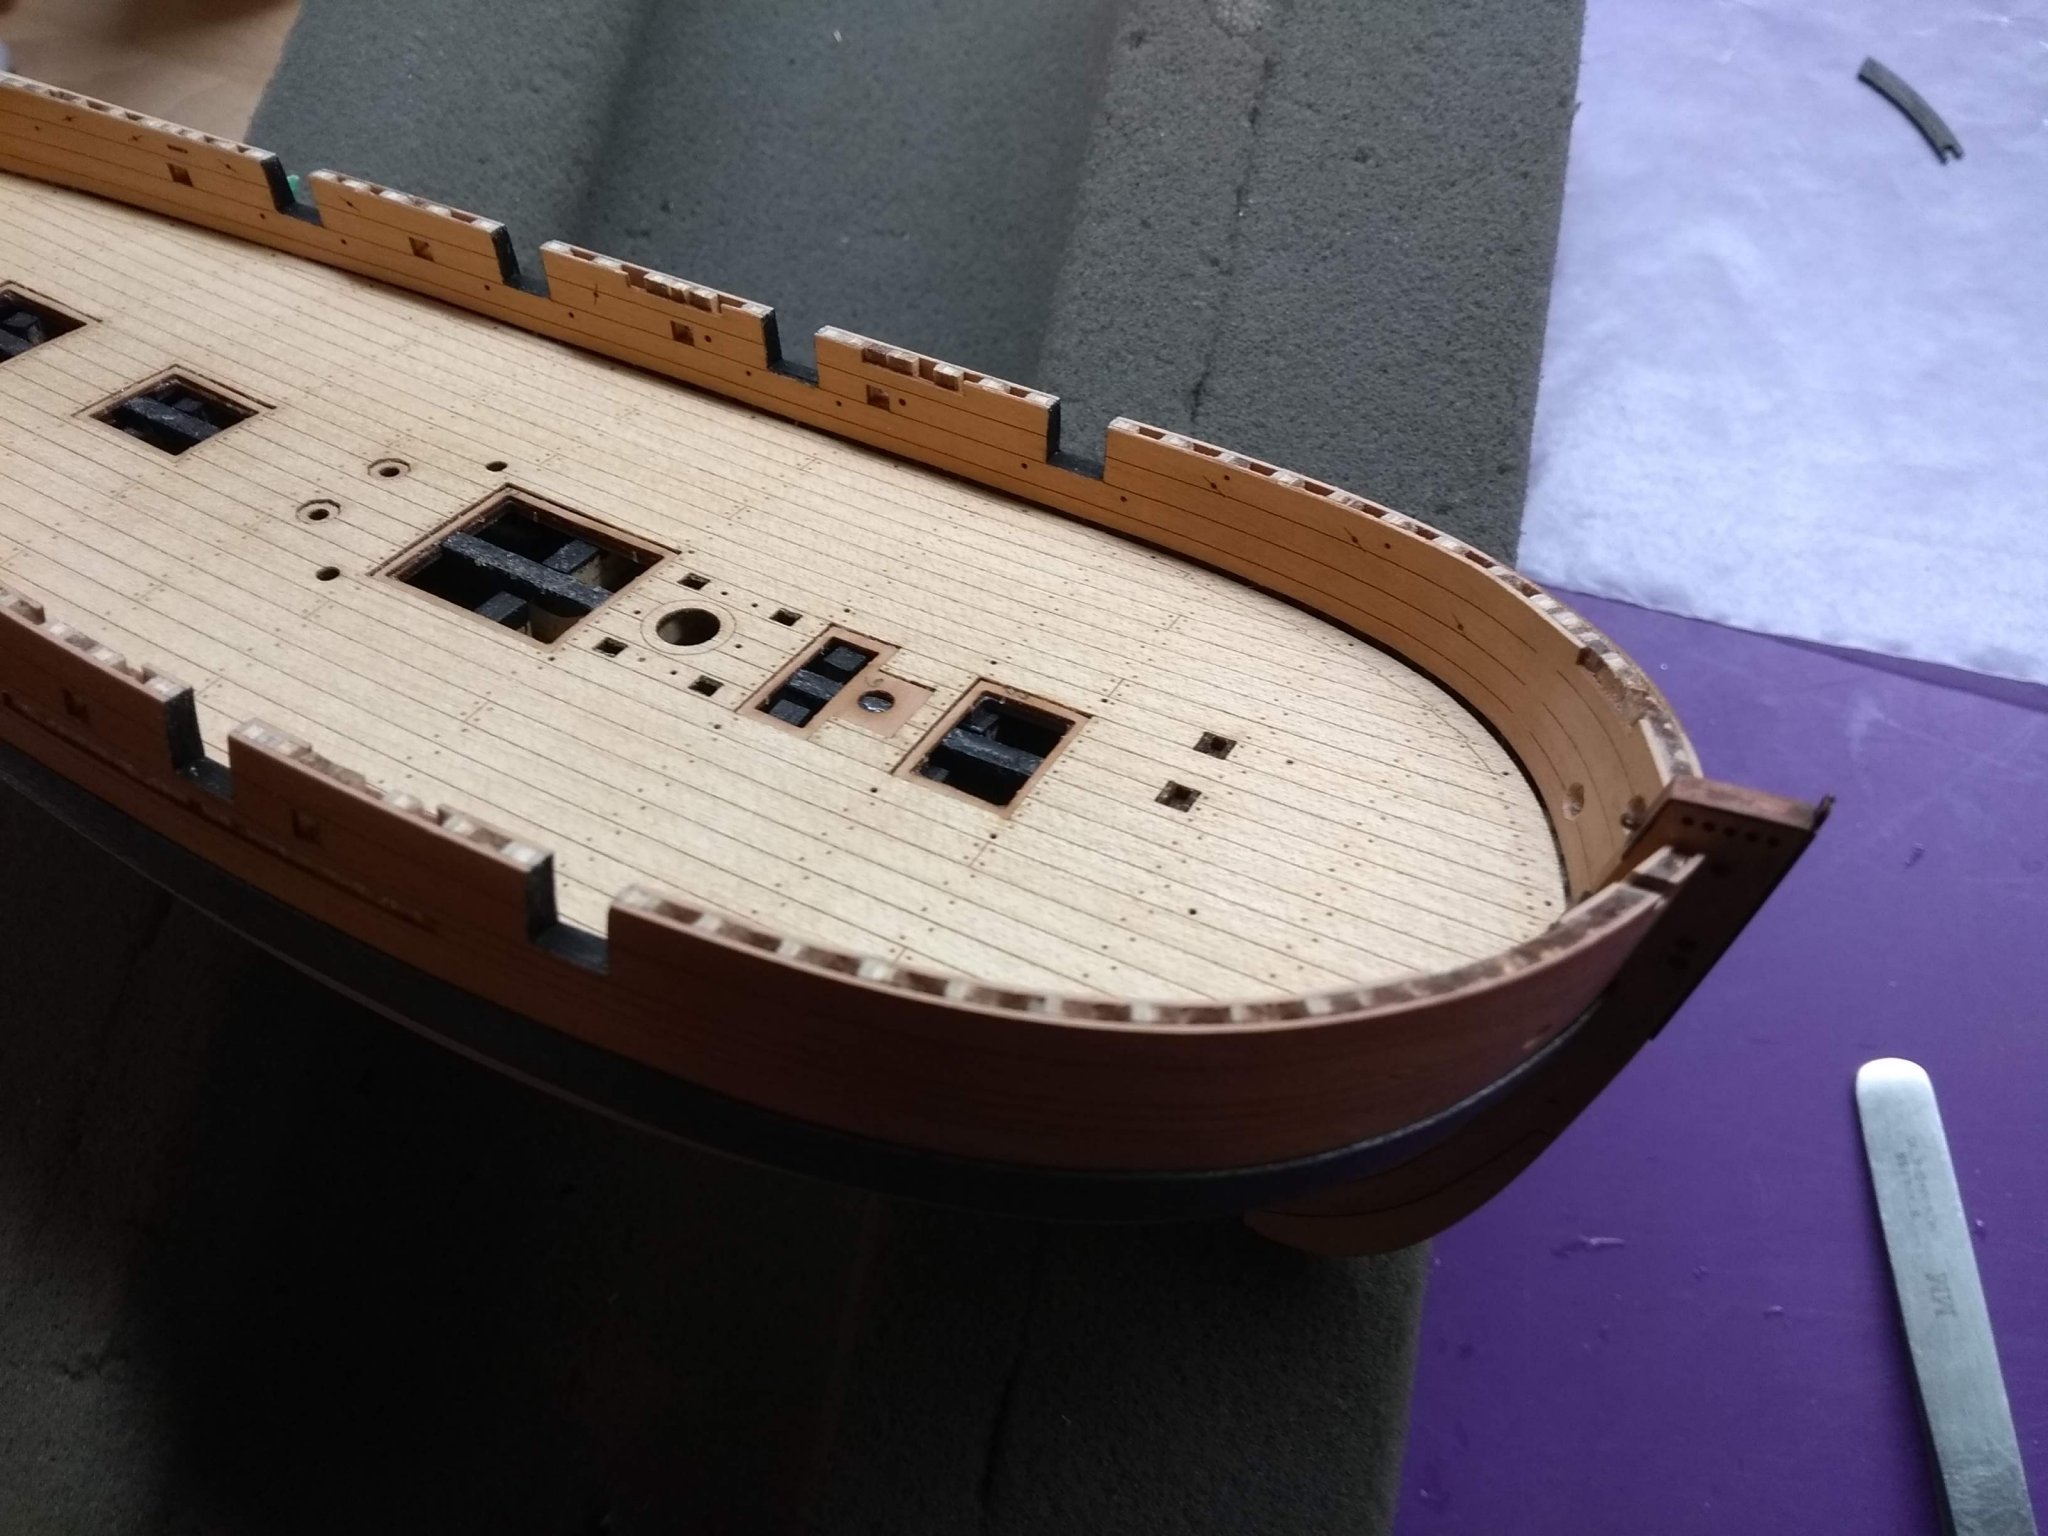
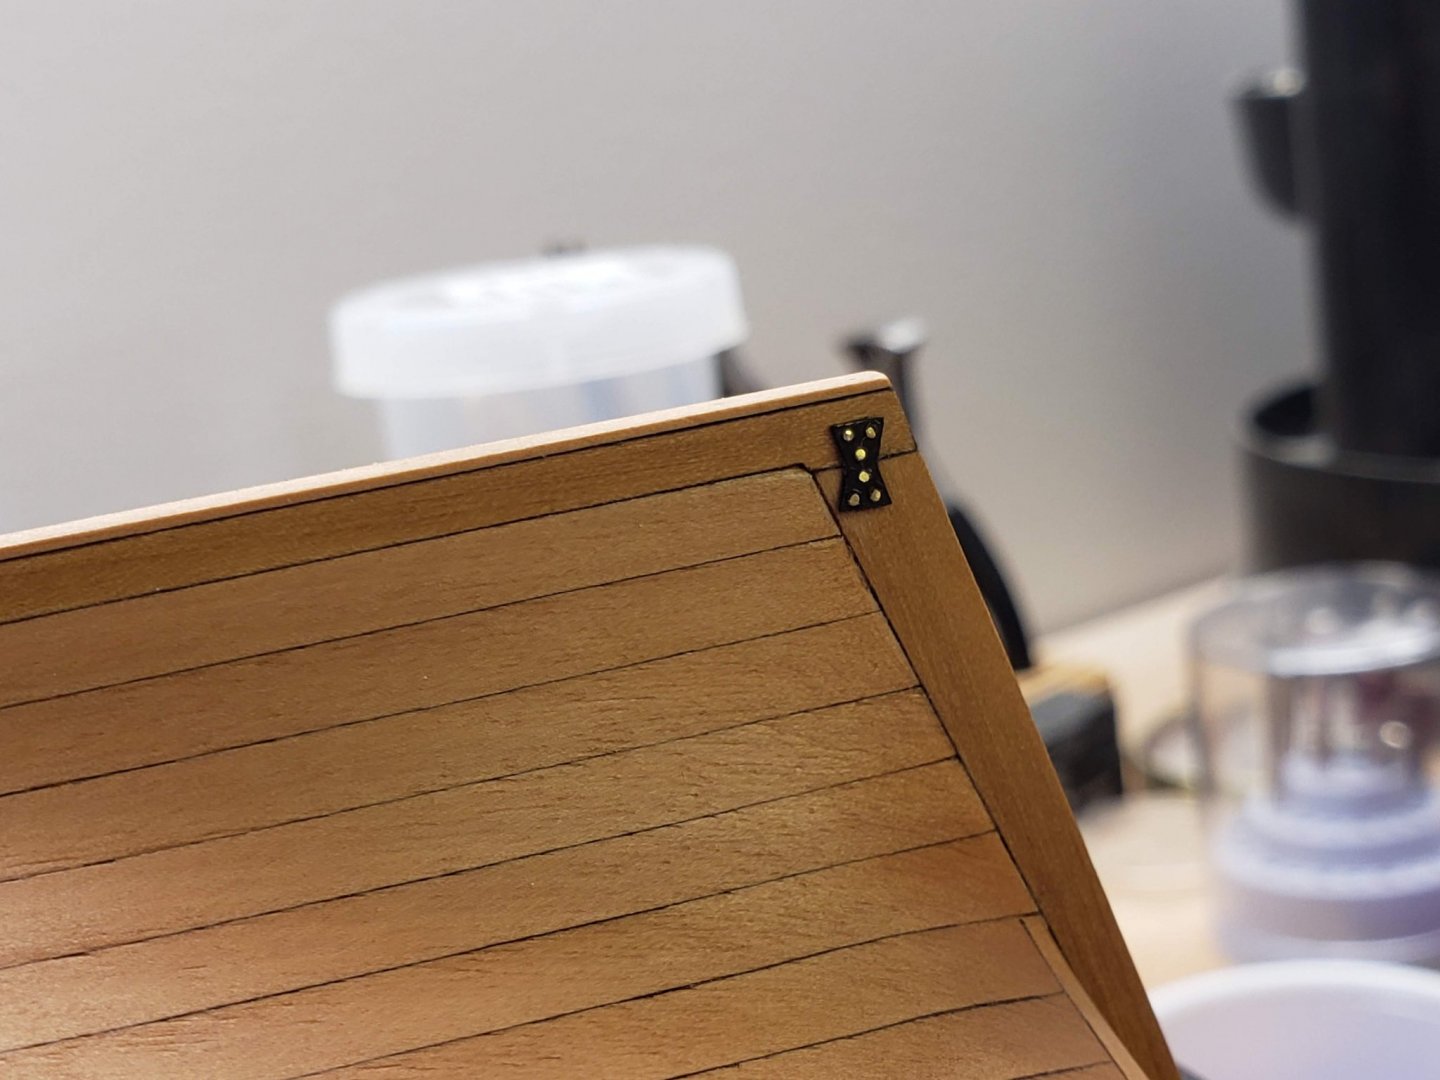
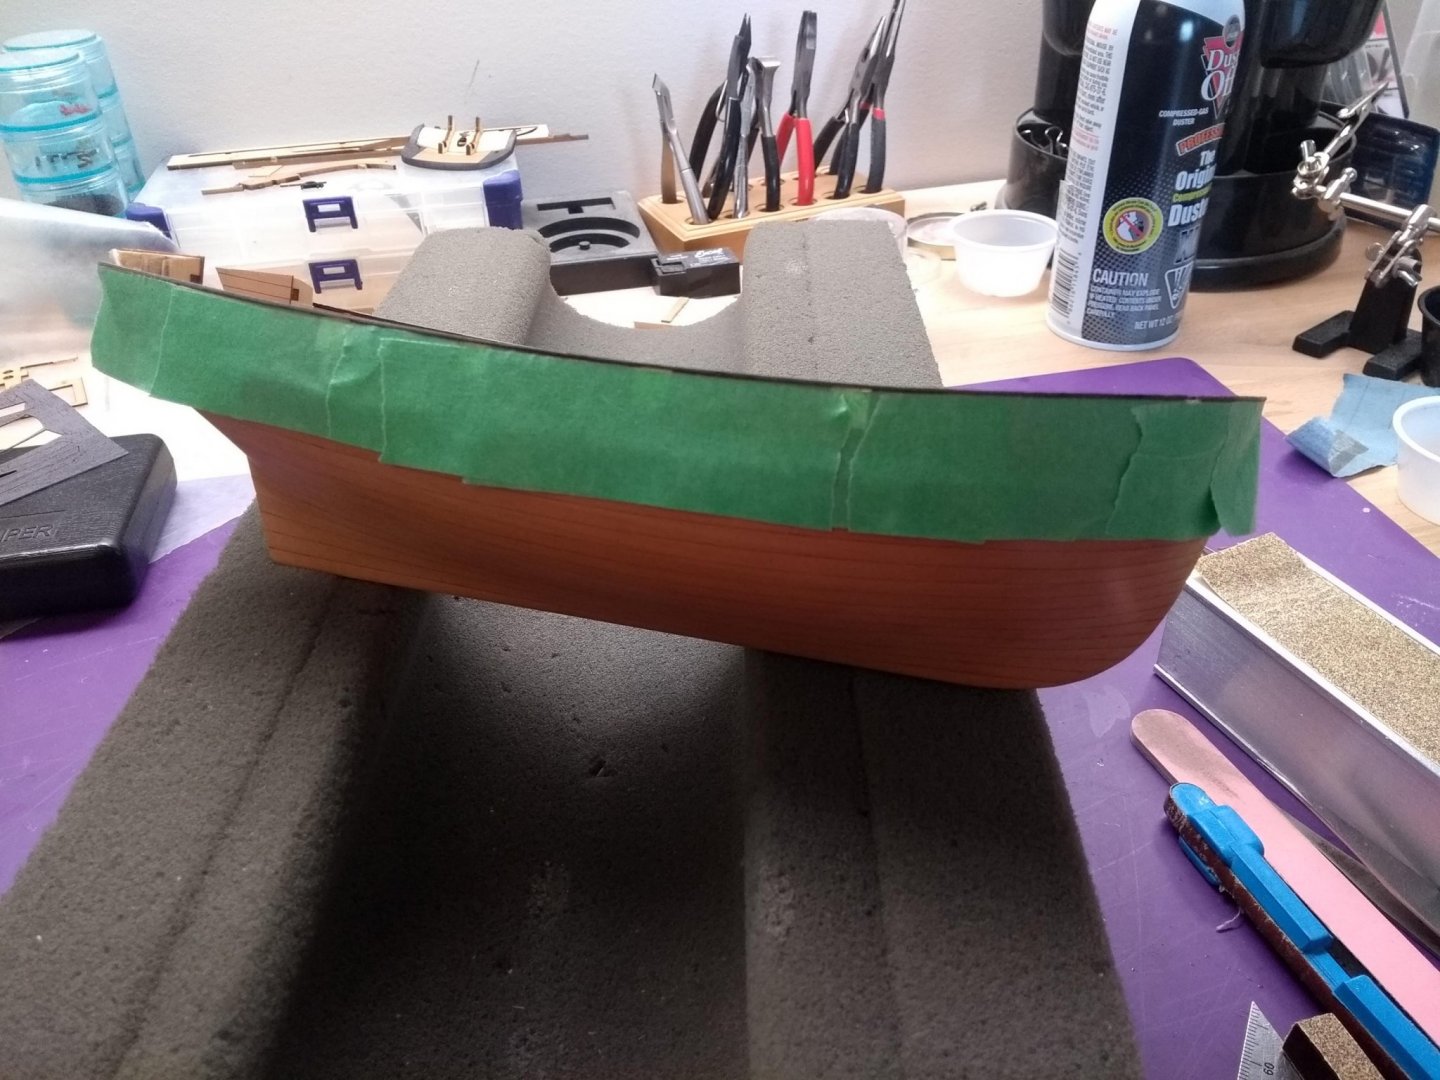
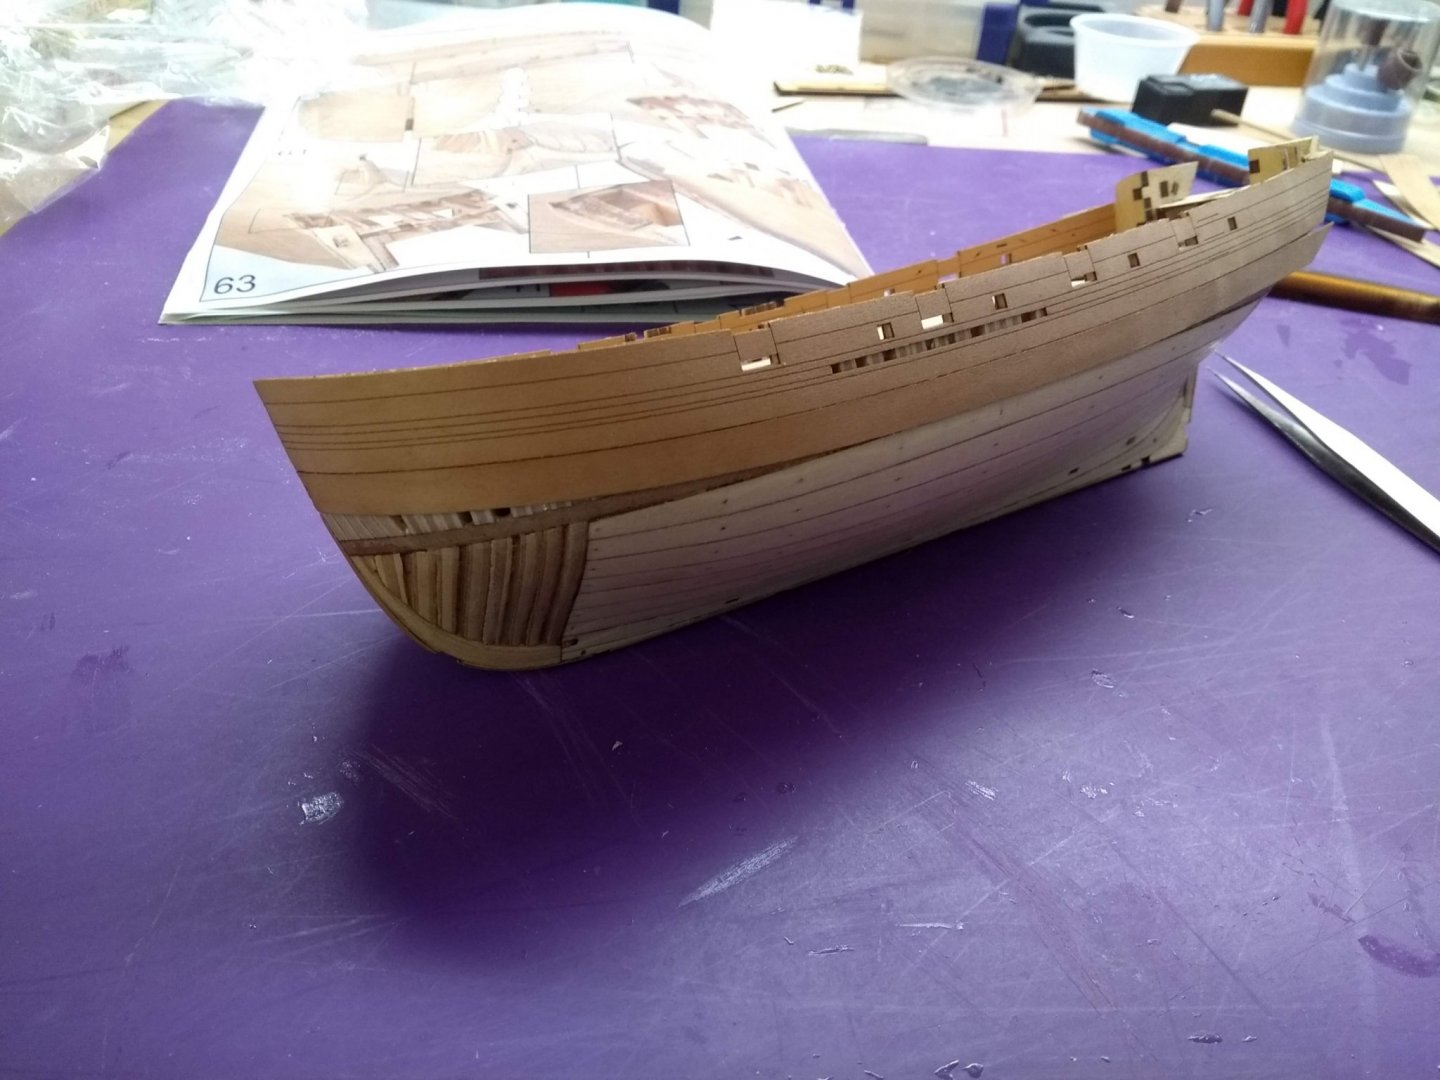
10. Next step was finishing up taffrail details and preparing bulwarks for gunwales: The tops of the bulwarks needed to be sanded flat: Finally gunwales could be glued. They consisted of two layers and gluing with hot iron was very useful here: Here is taffrail finally glued to the hull:


- 30 replies
-
- 9
-
-
- master korabel
- avos
- (and 1 more)
-
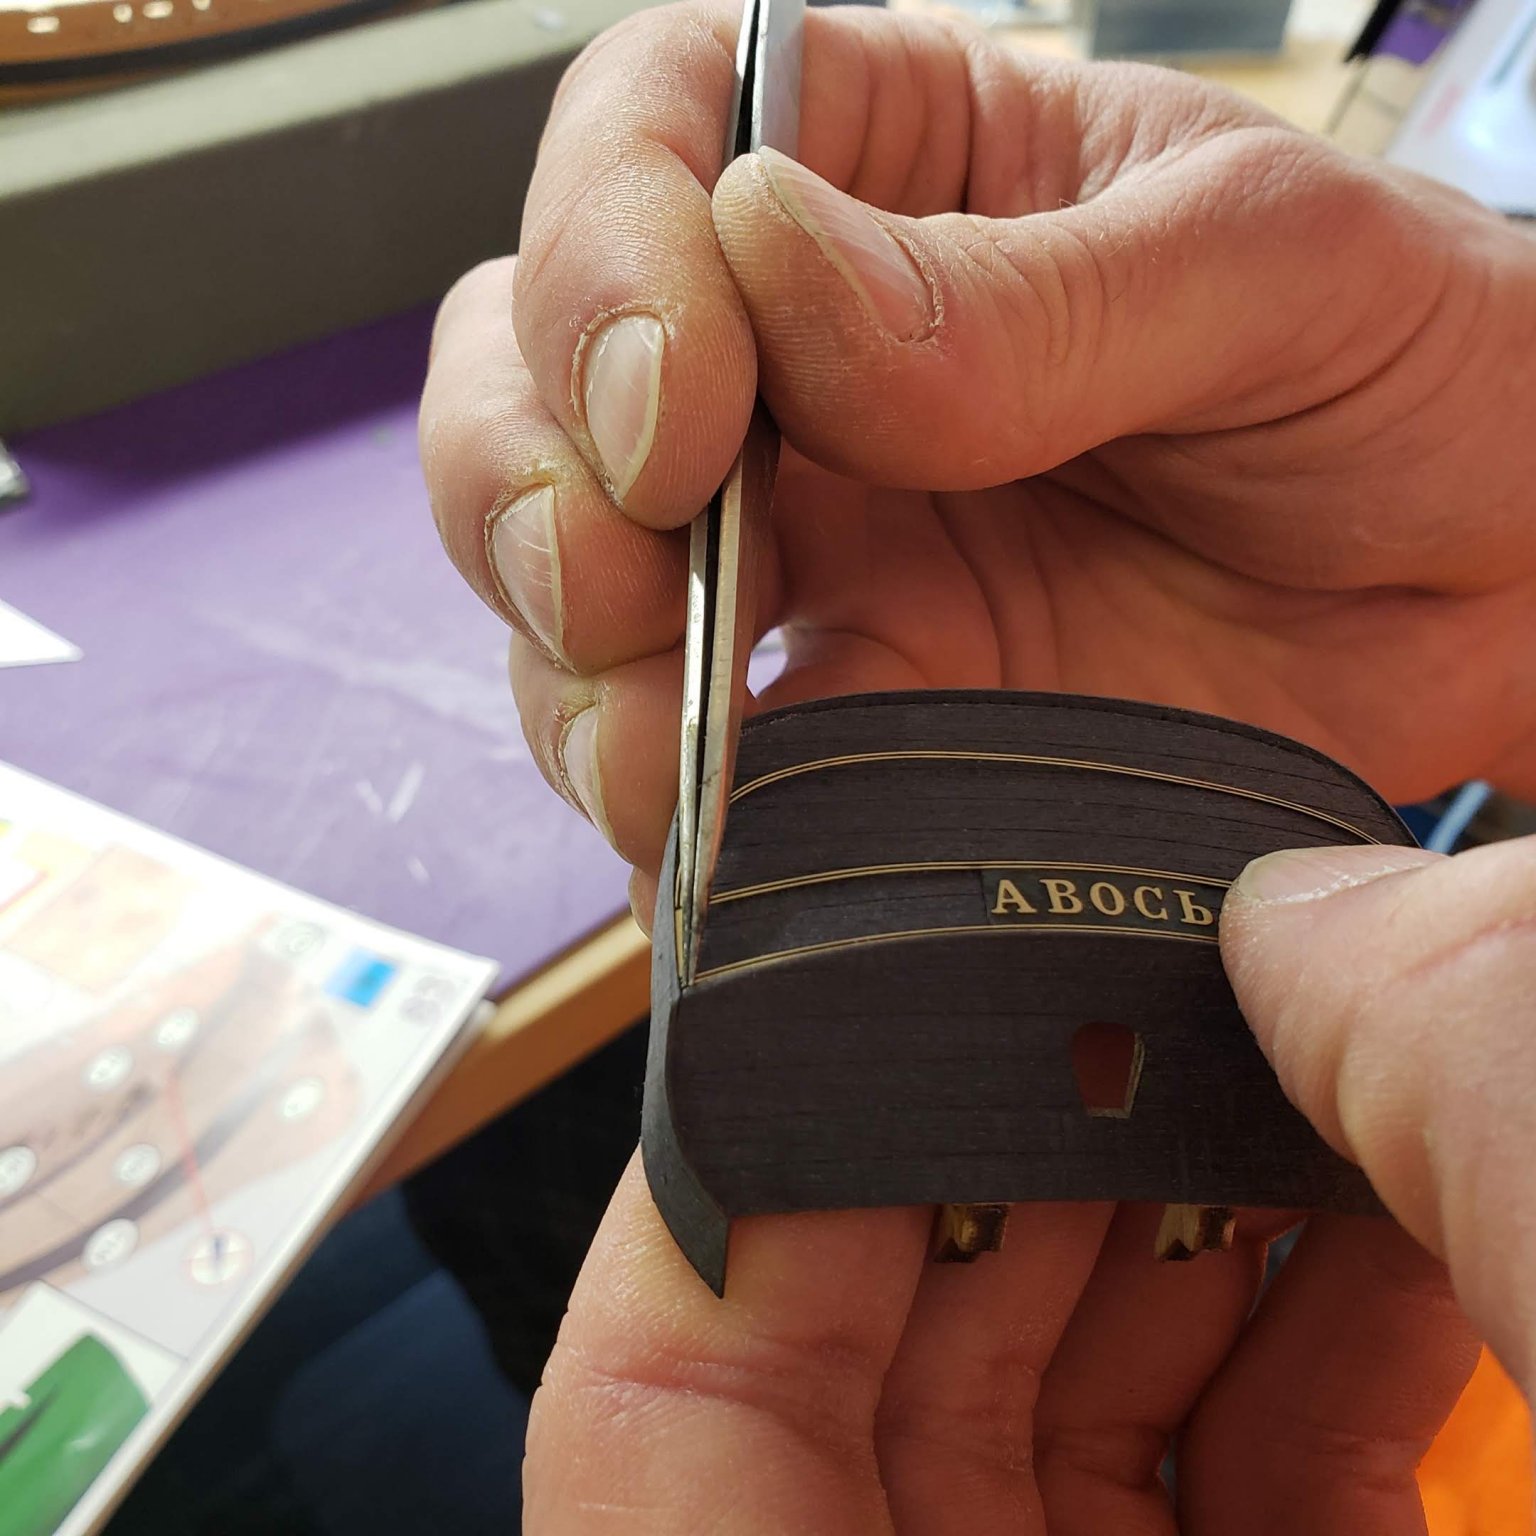
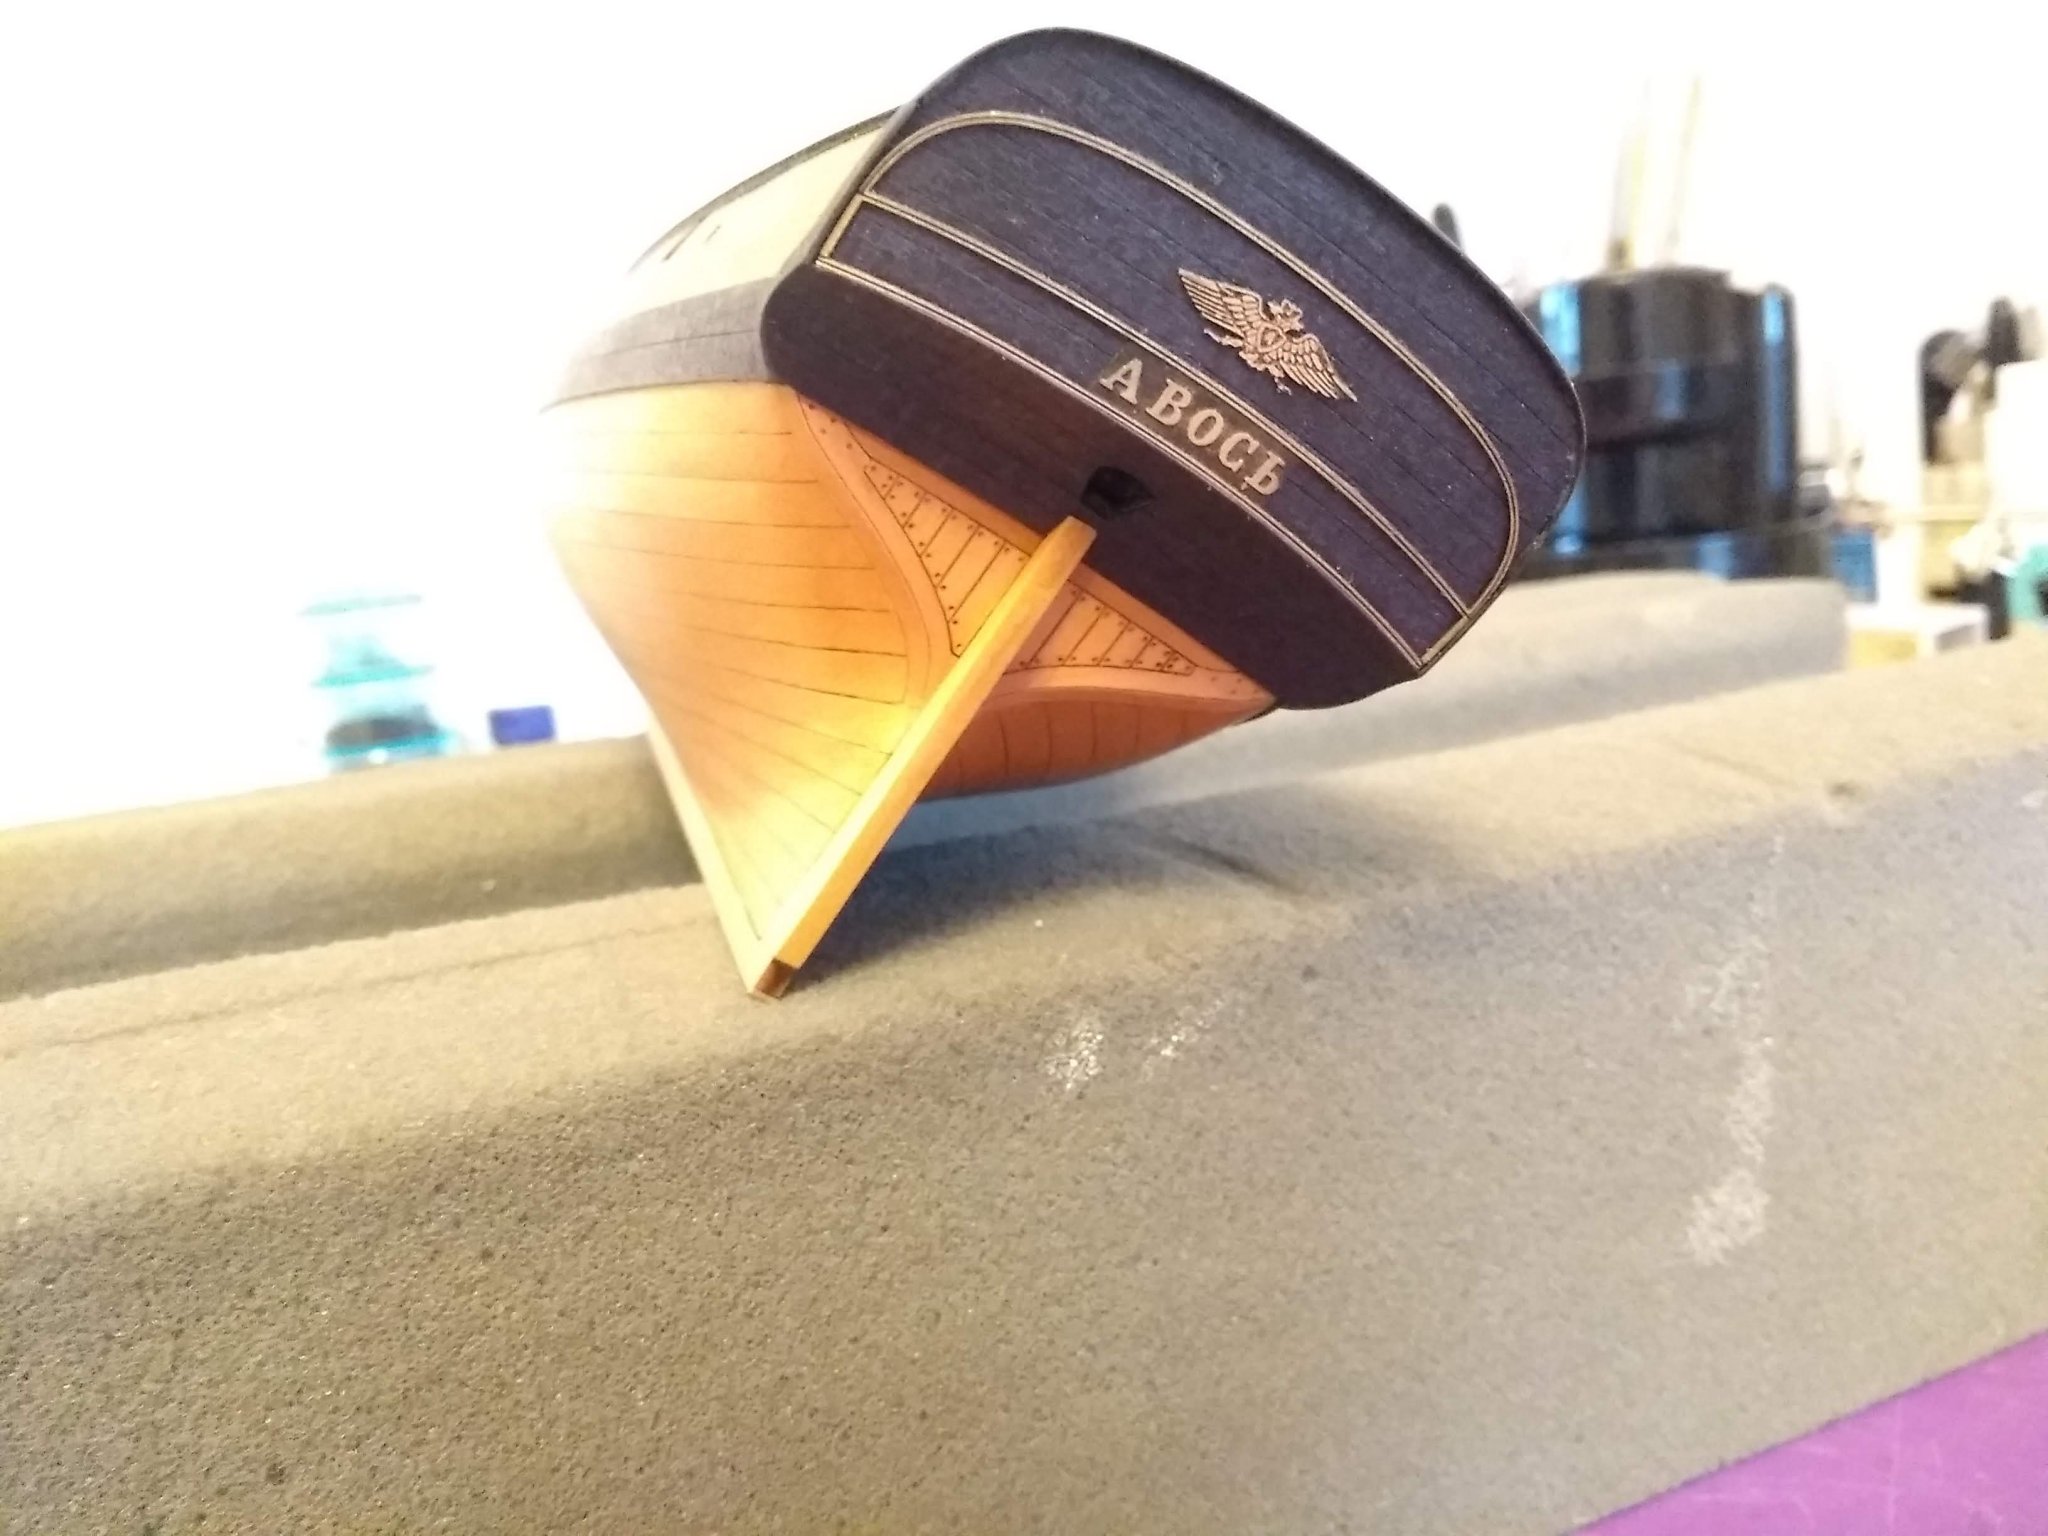
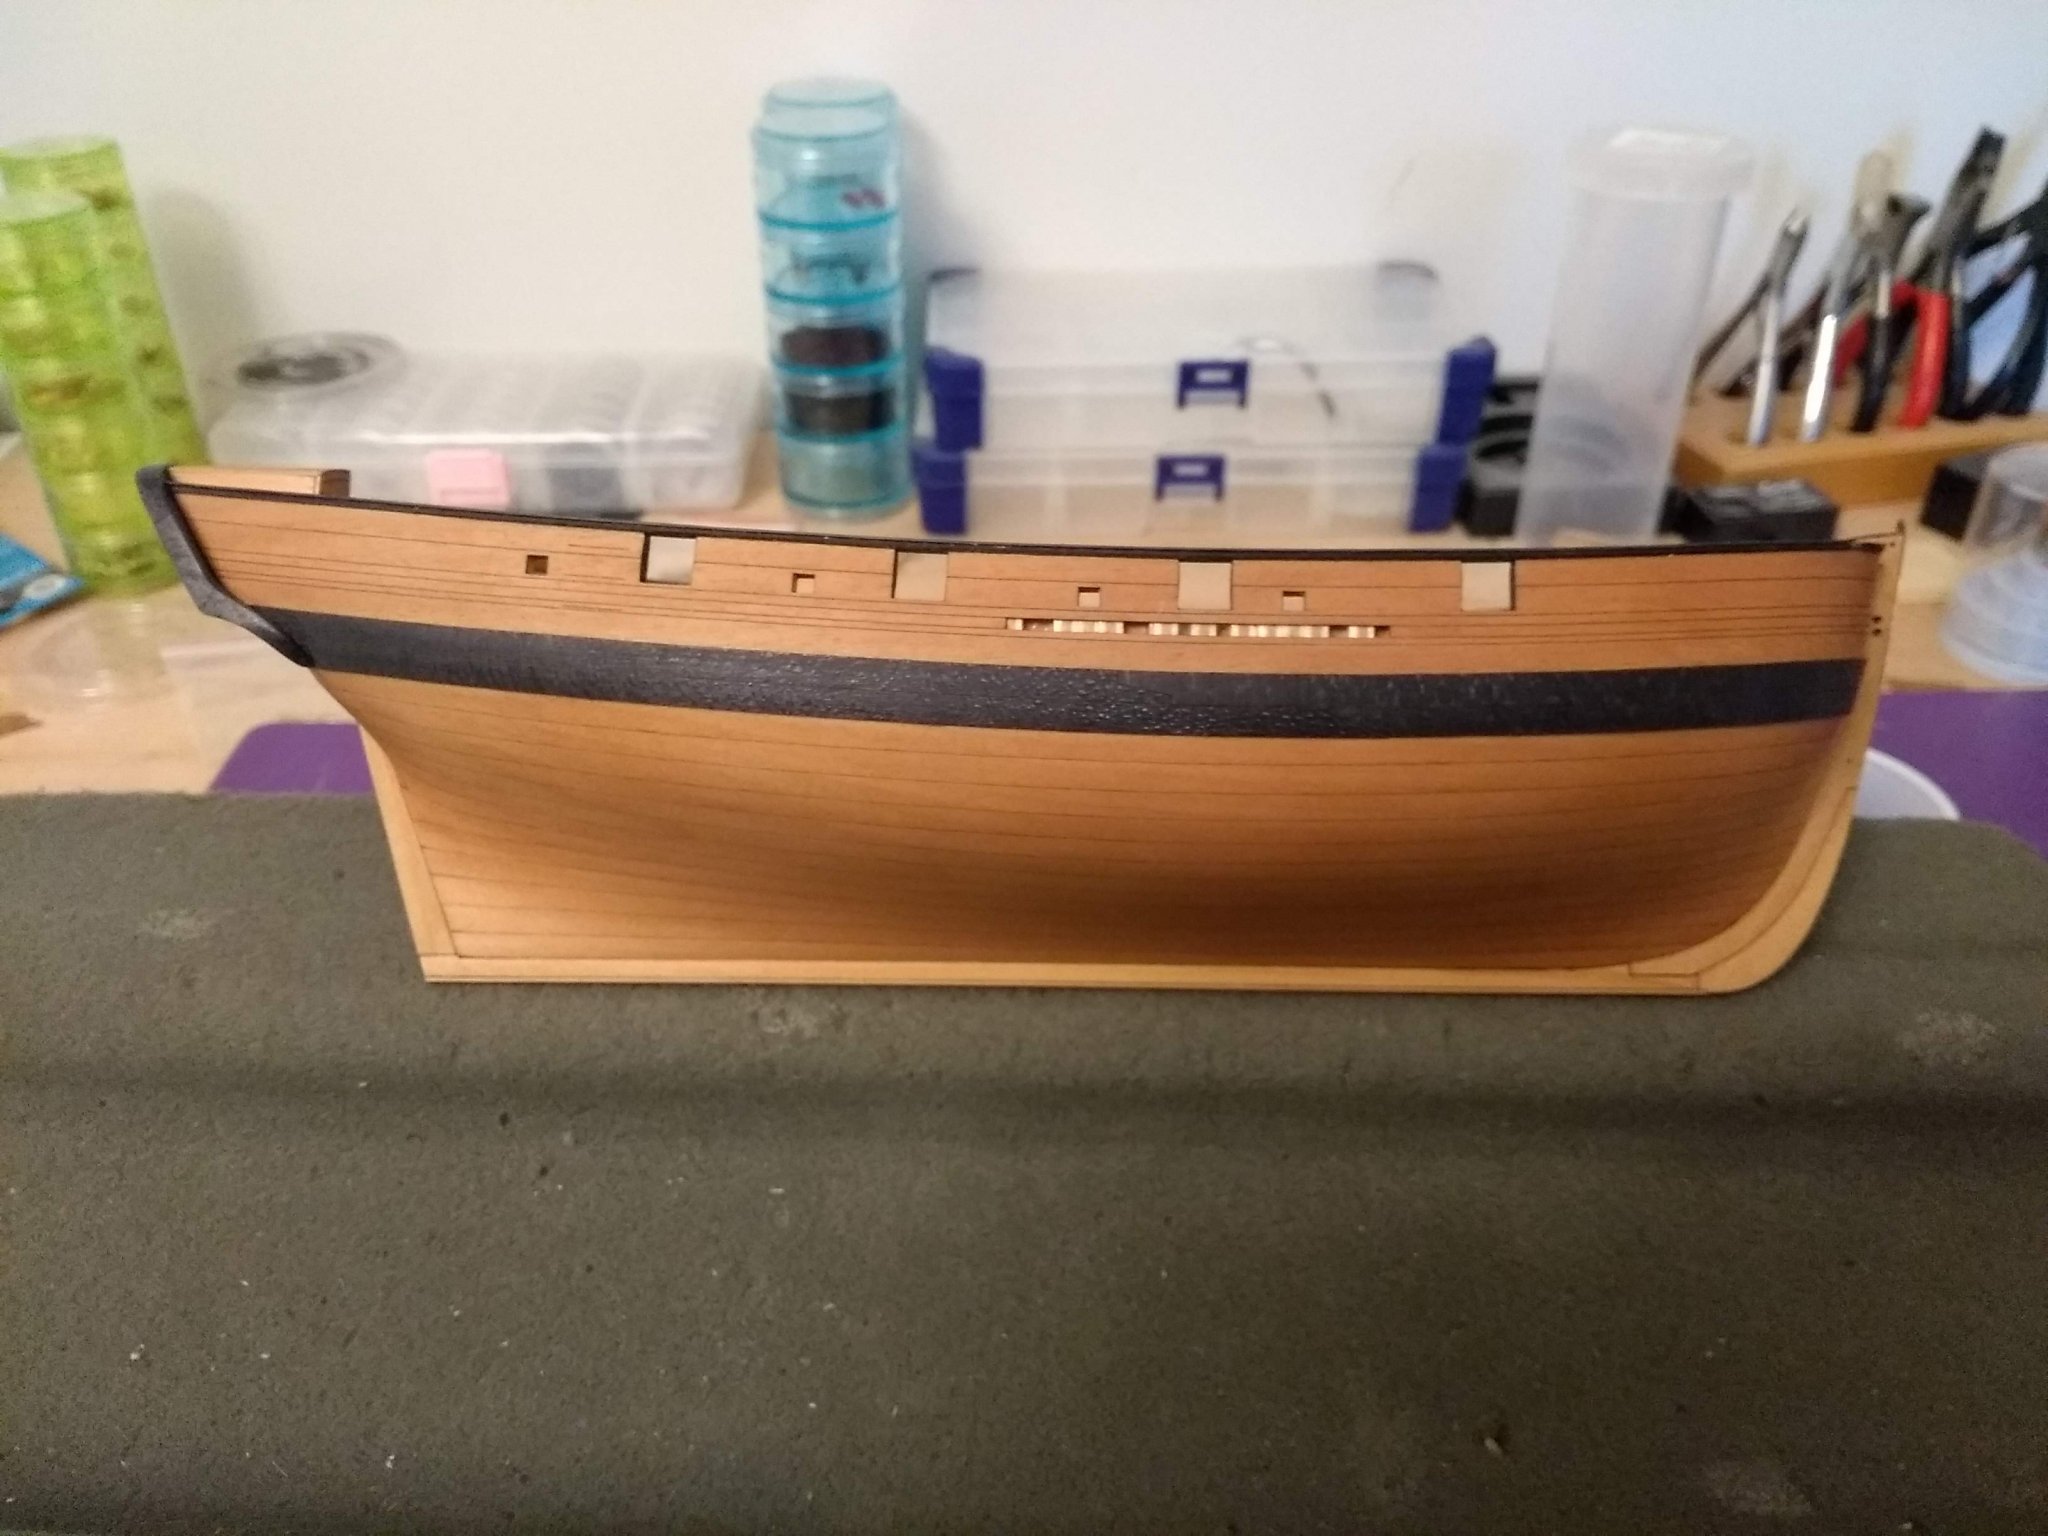
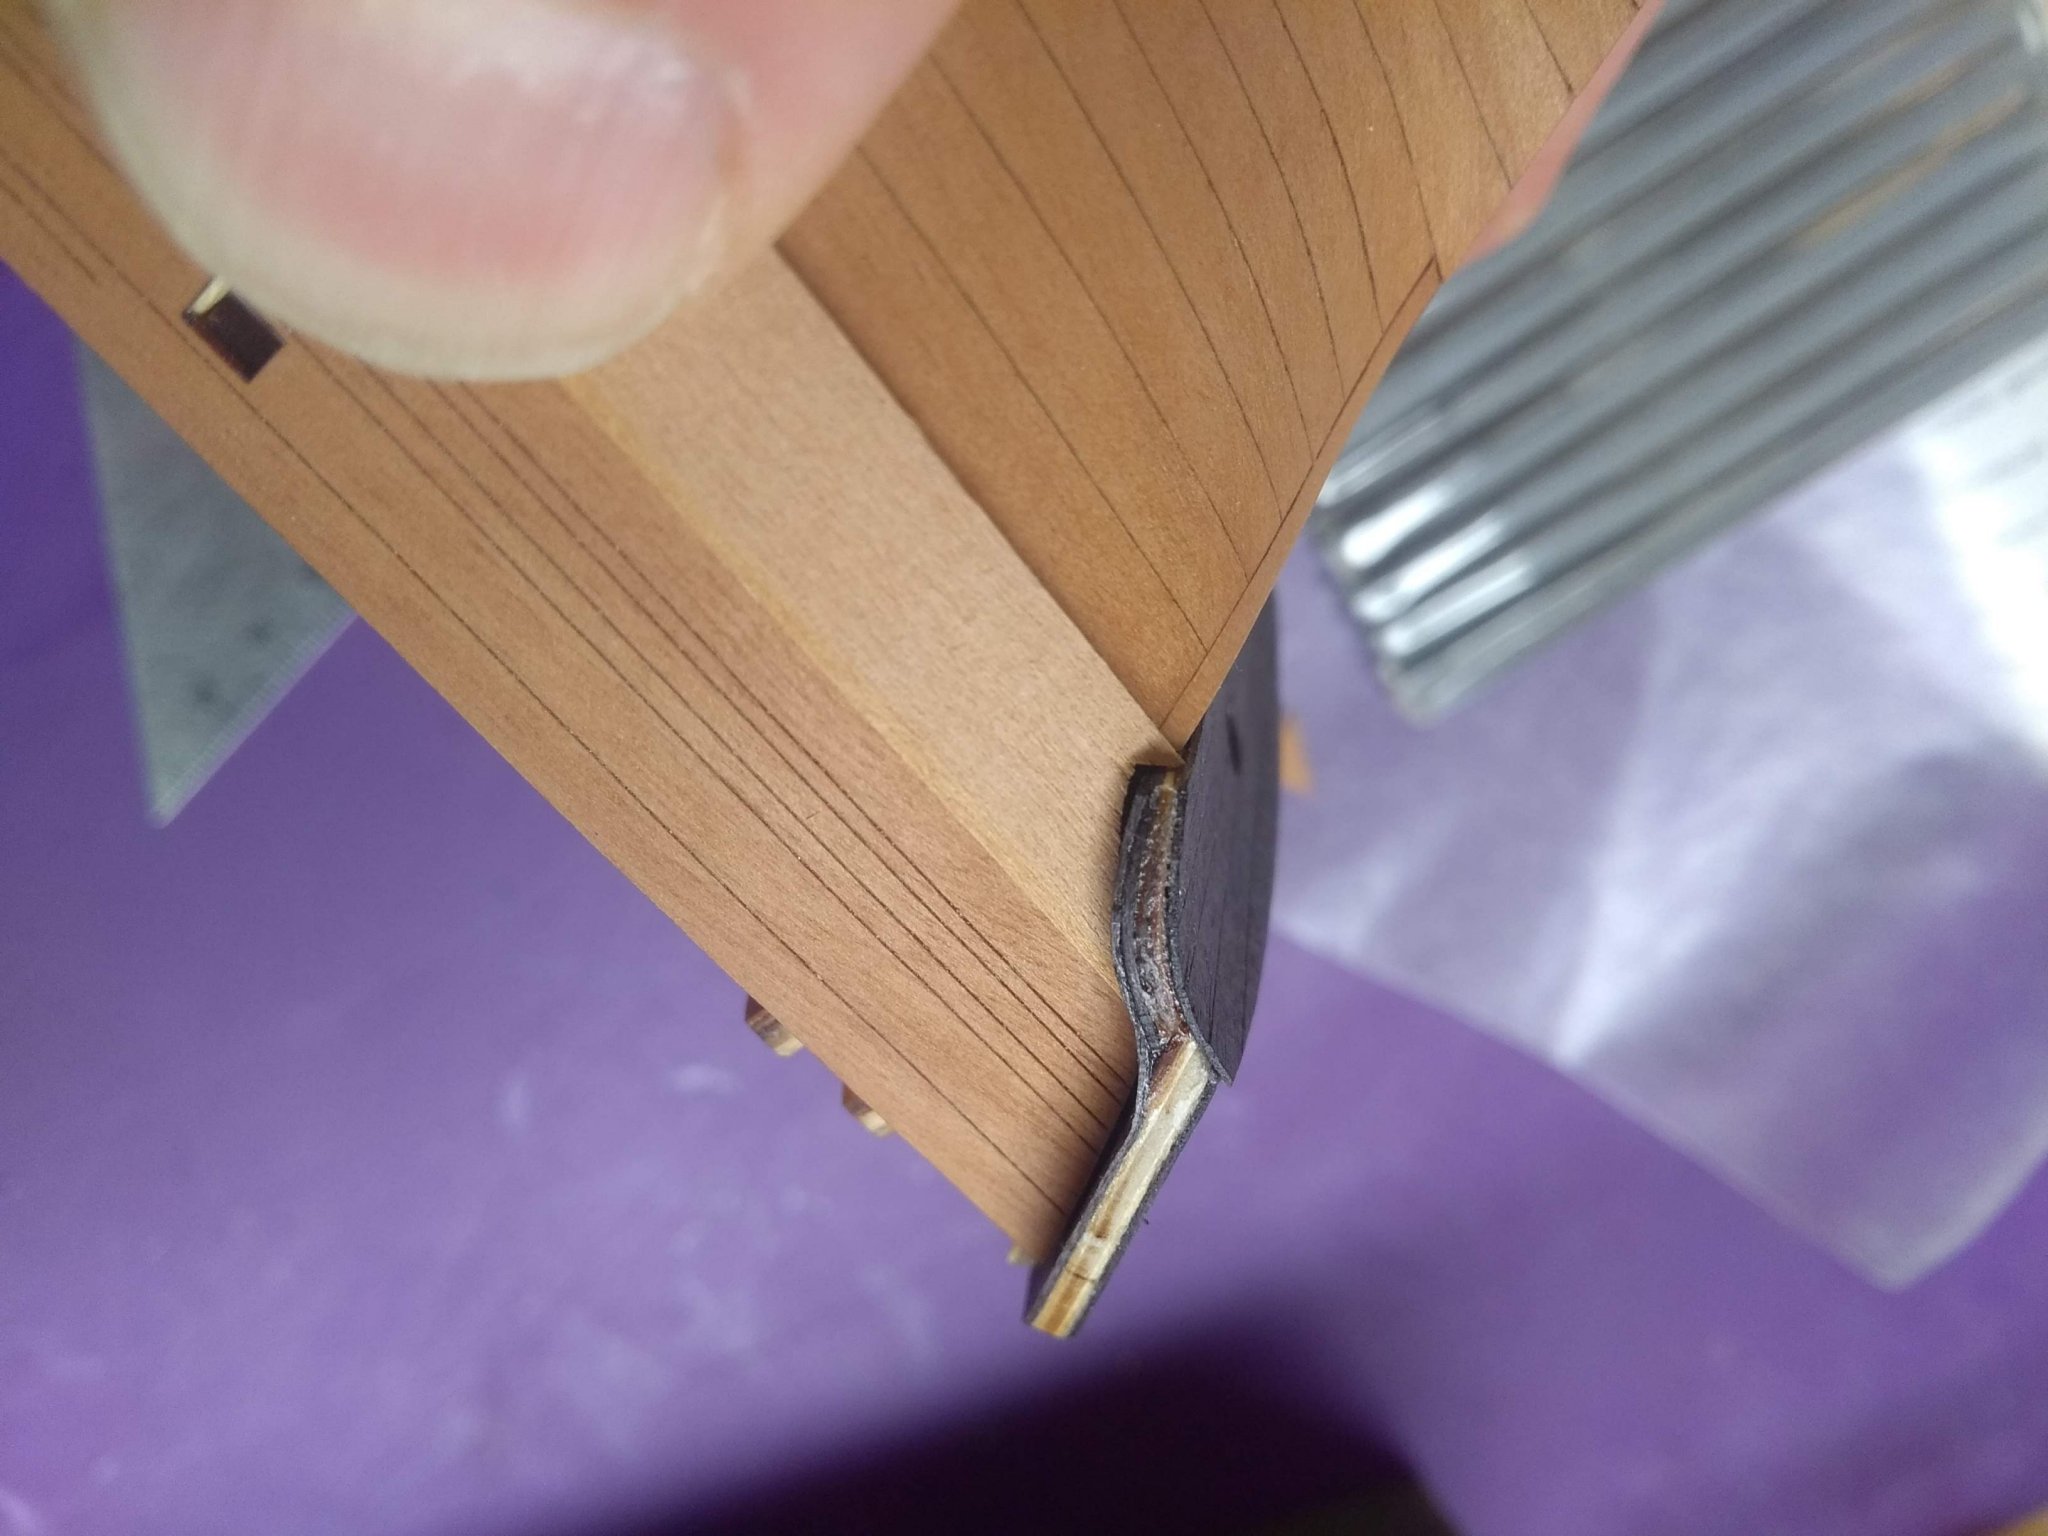
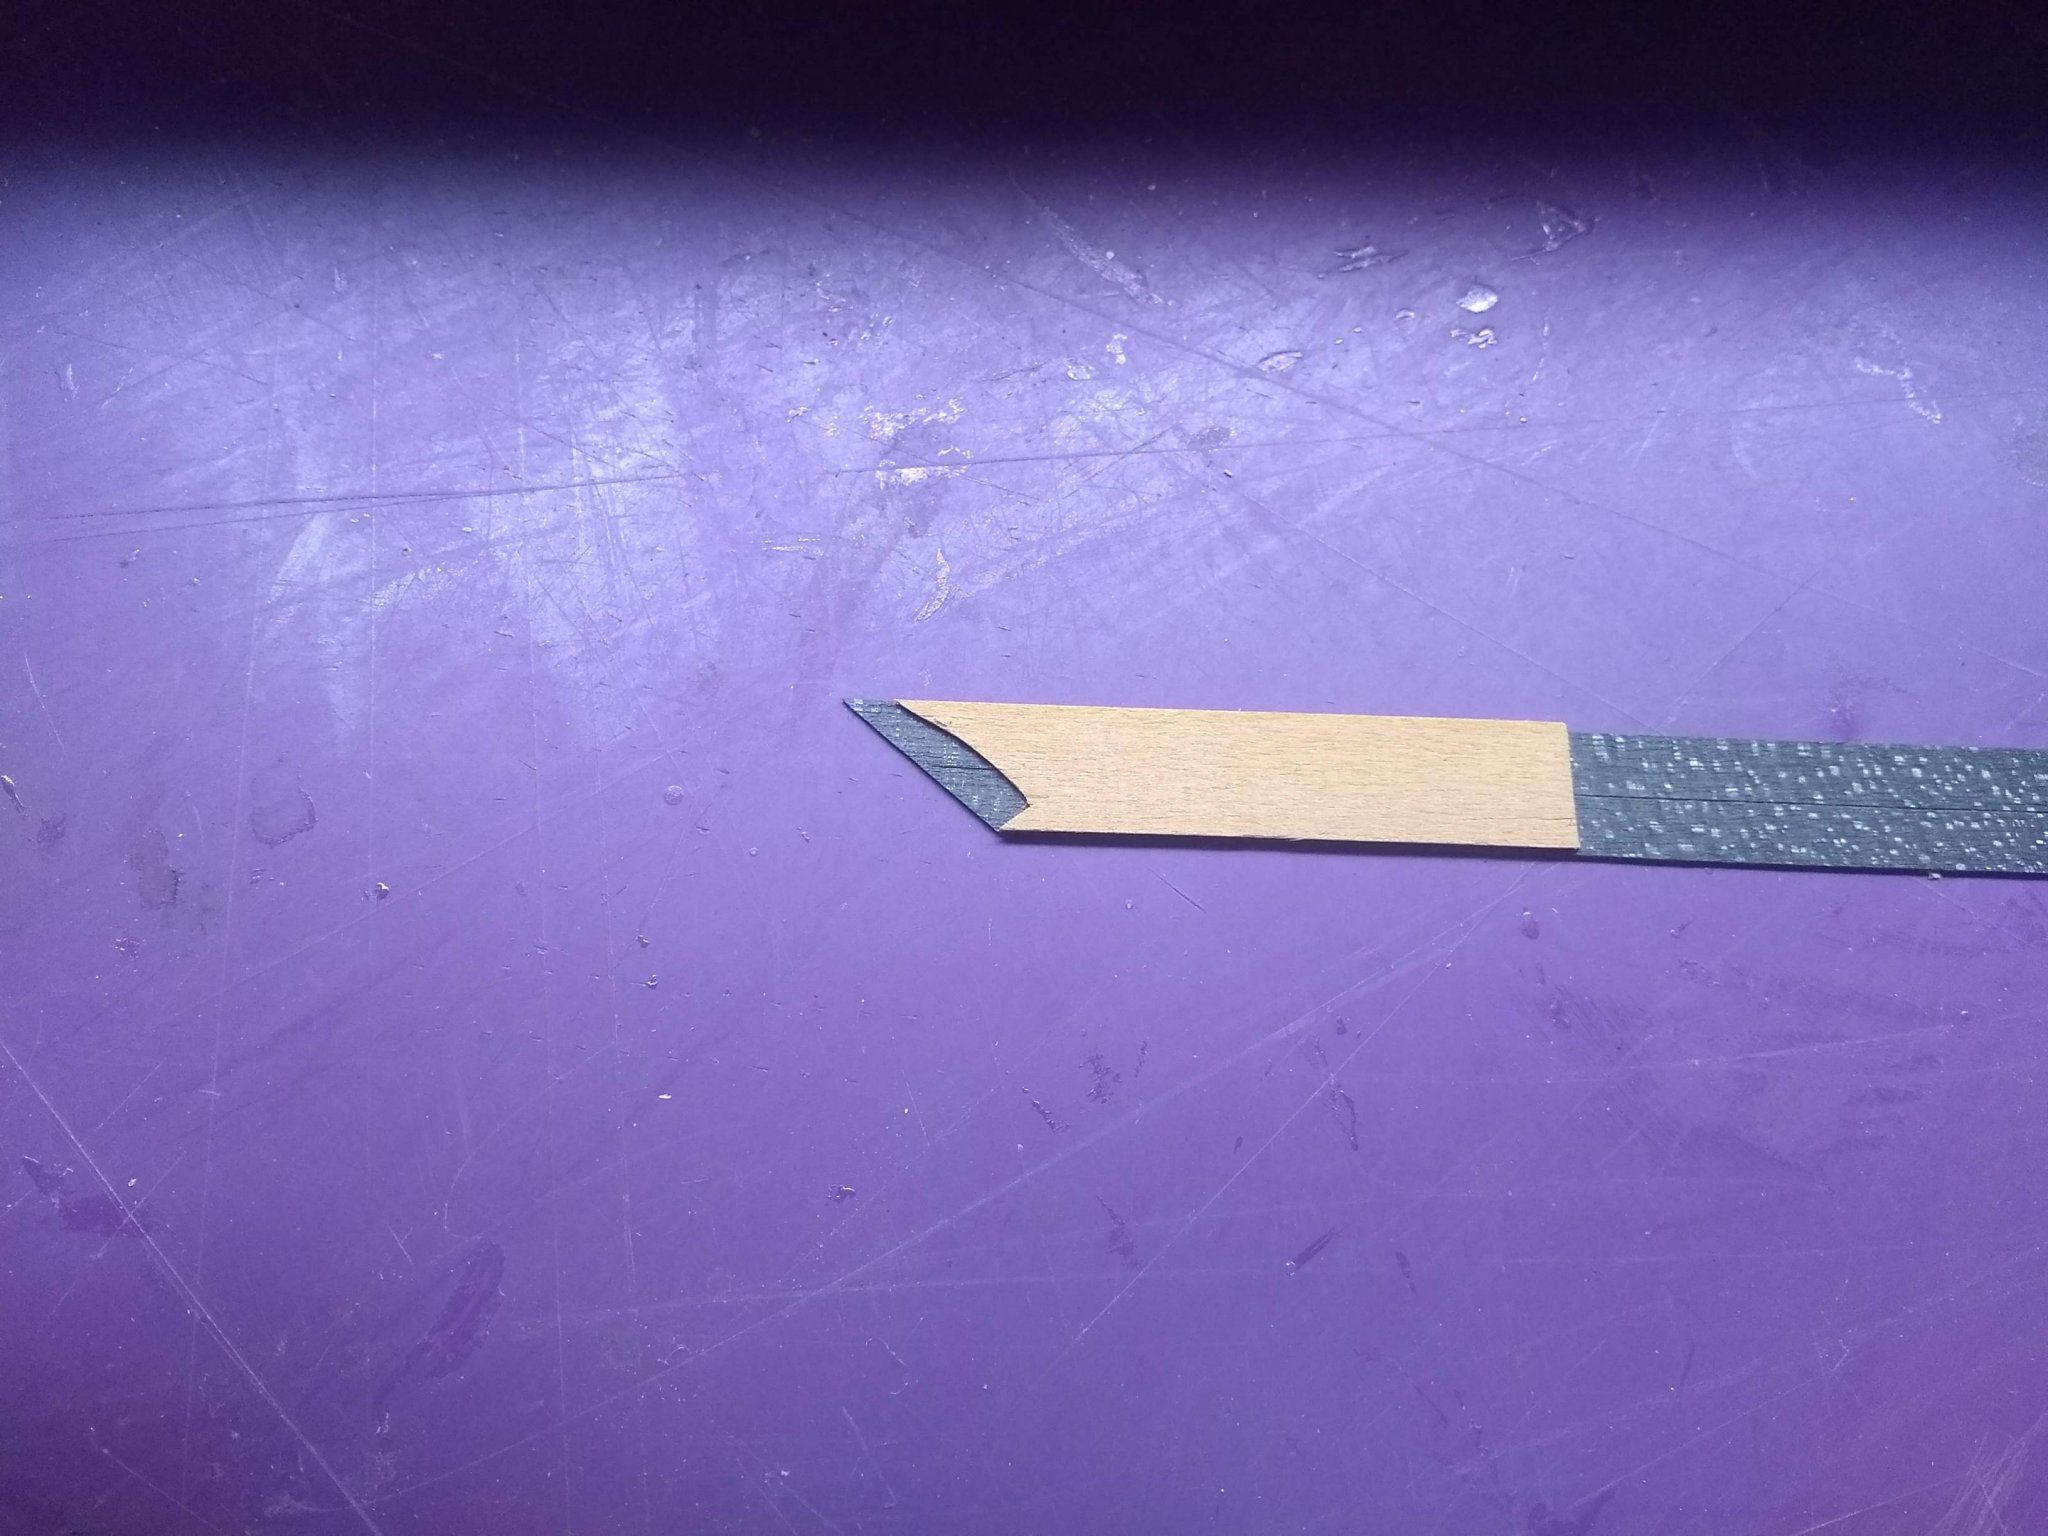
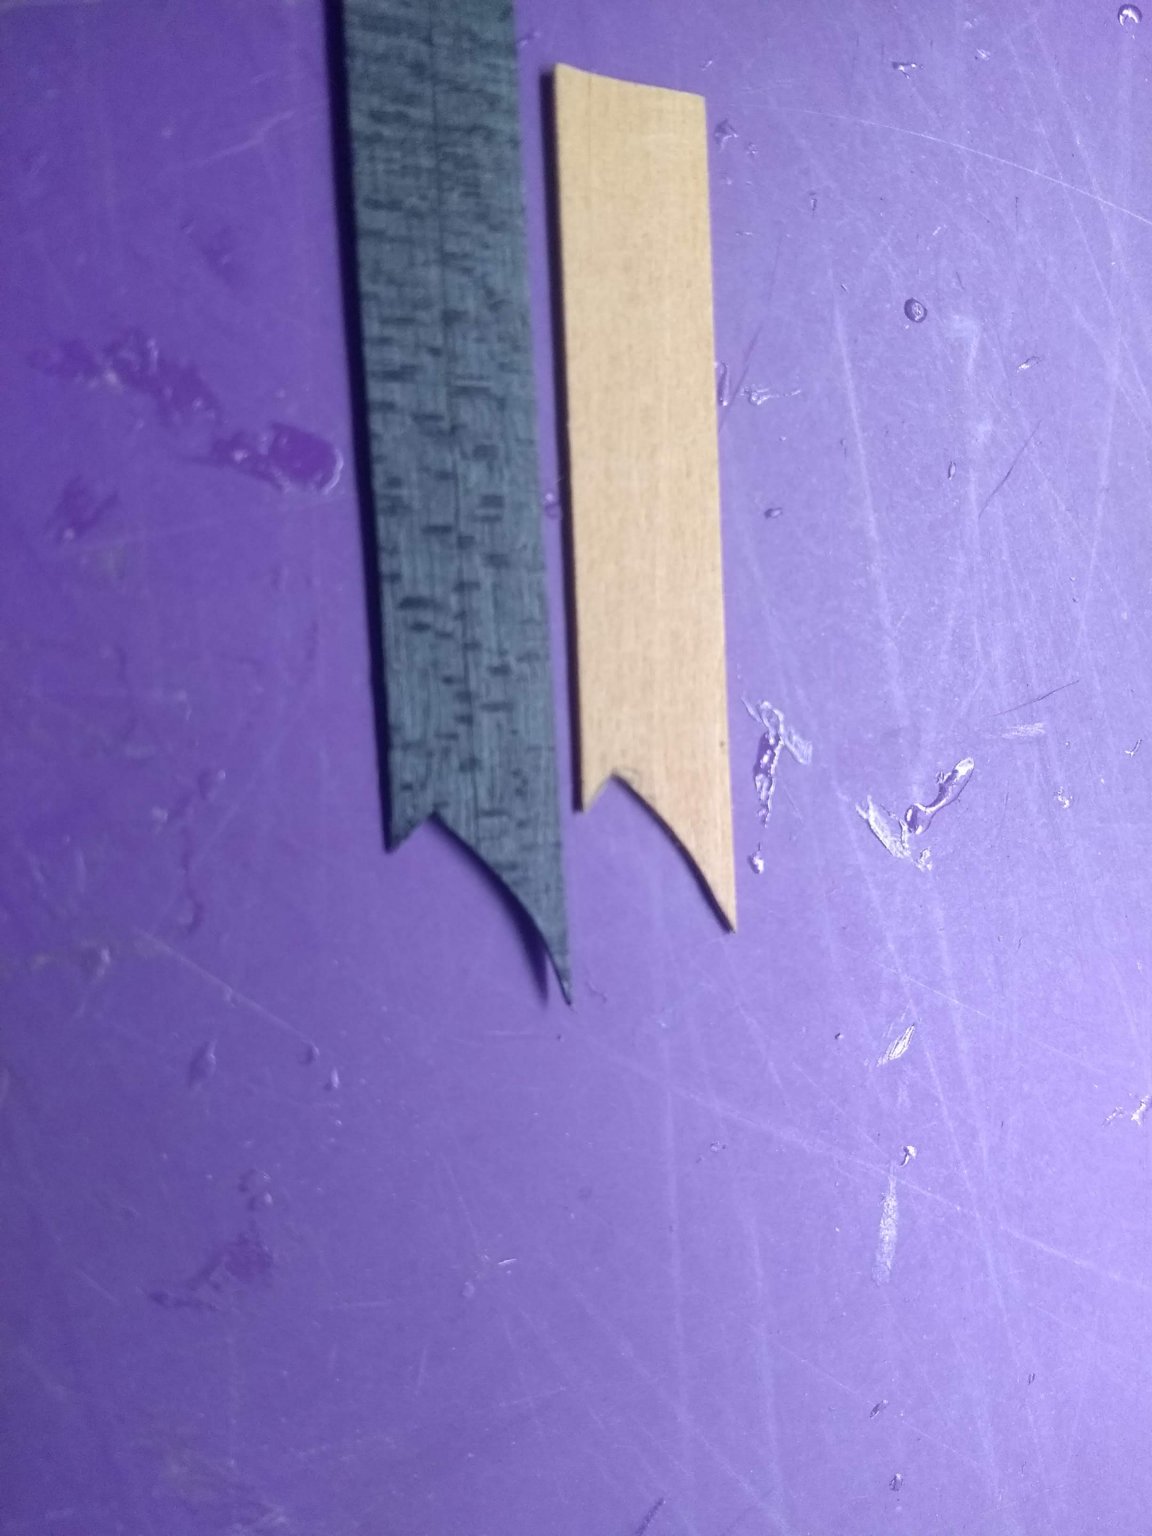
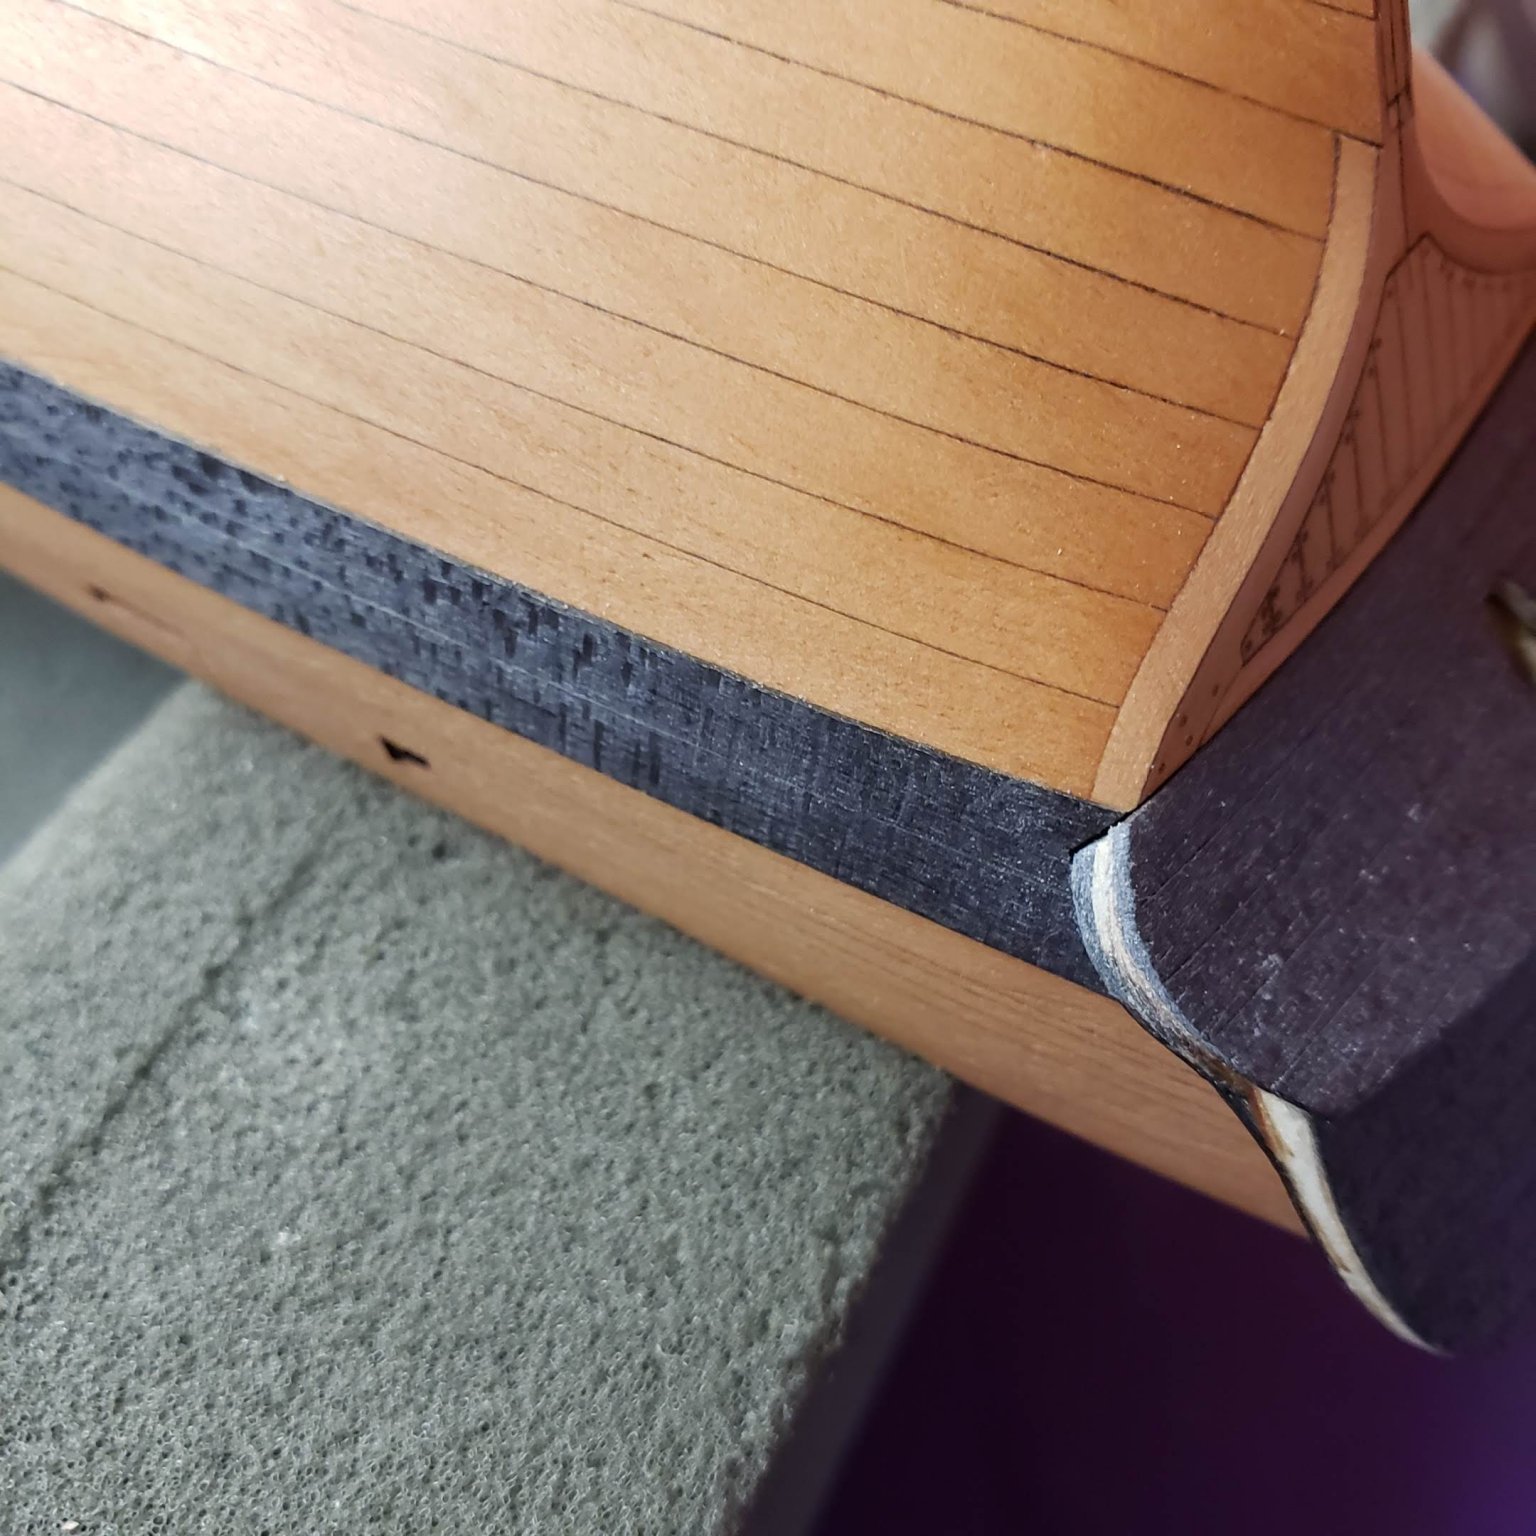
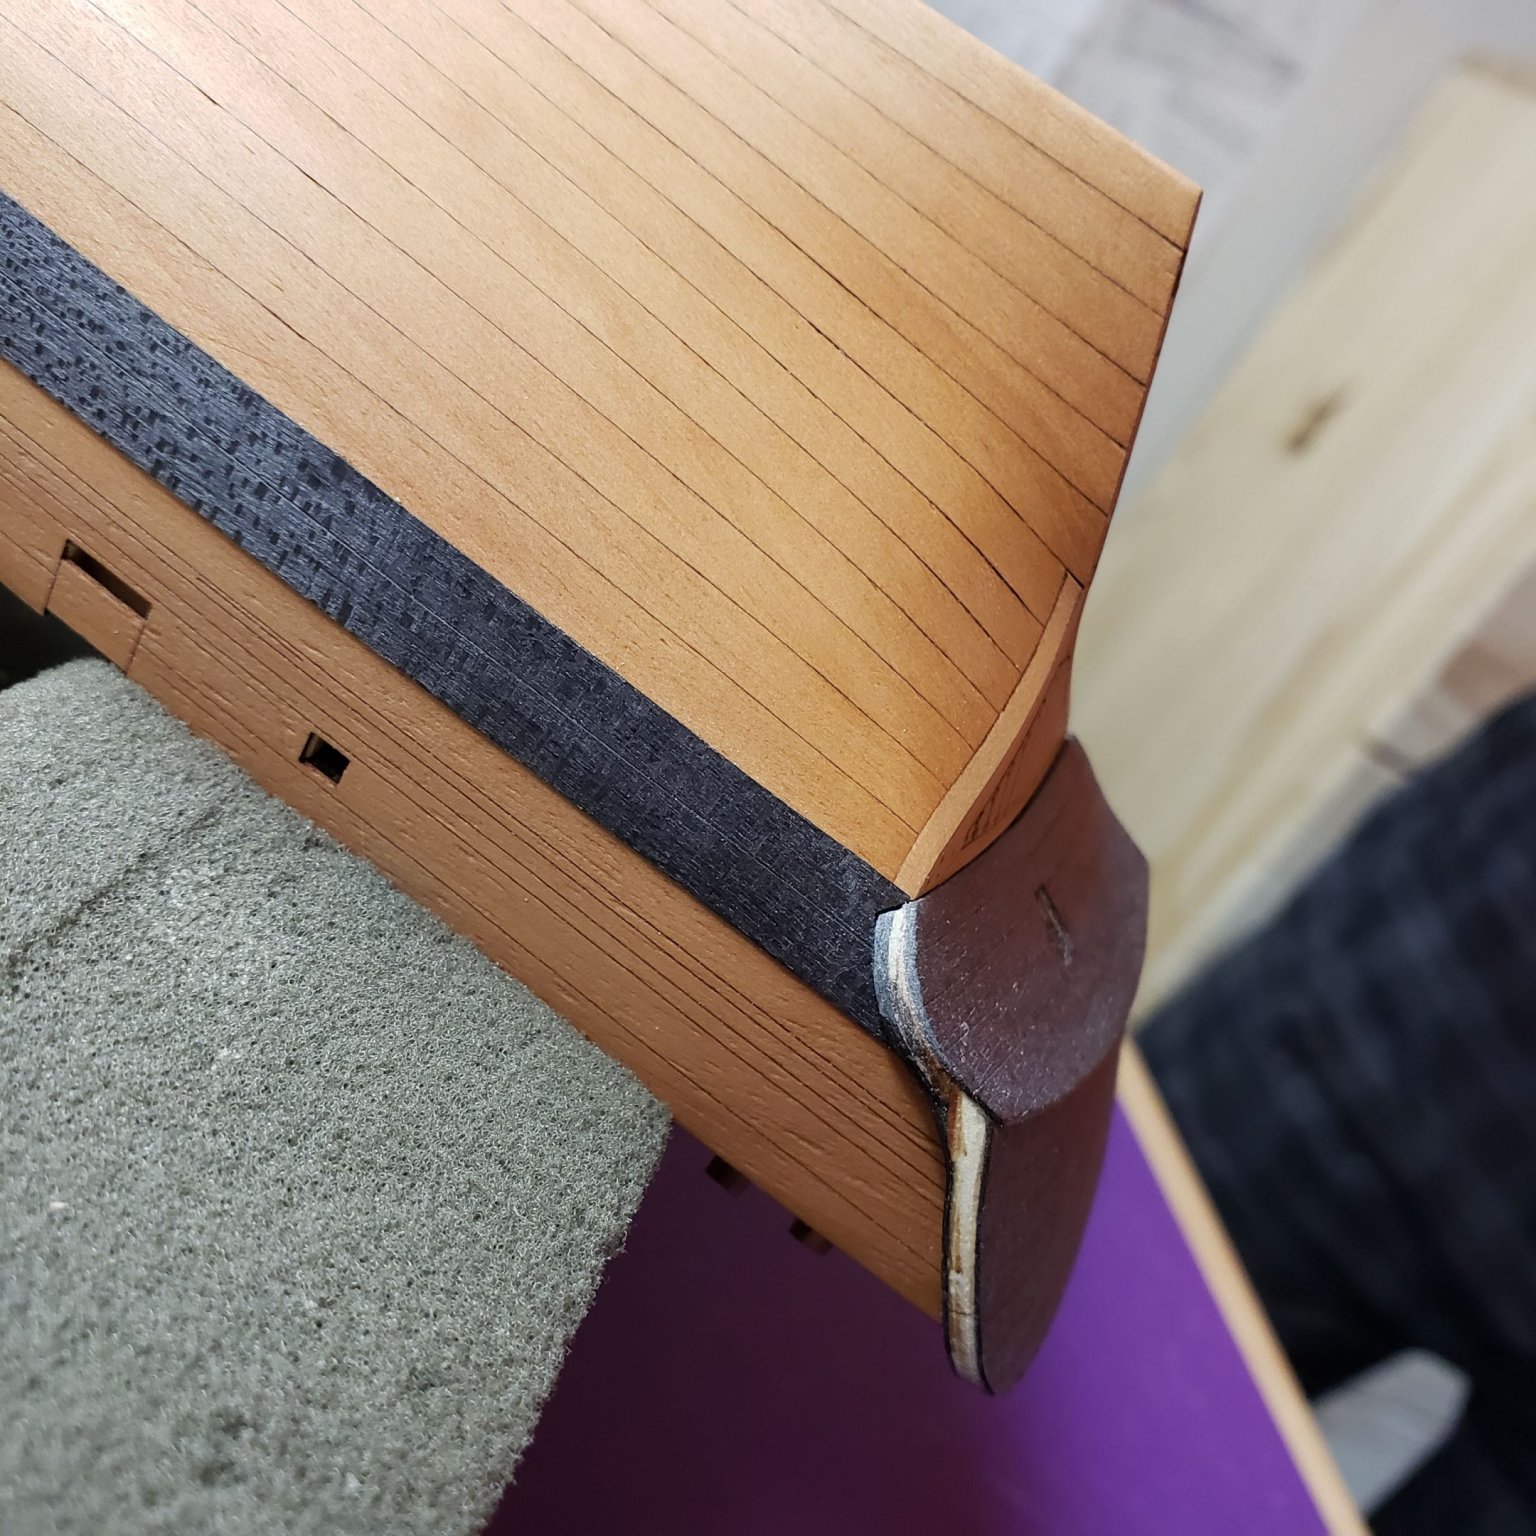
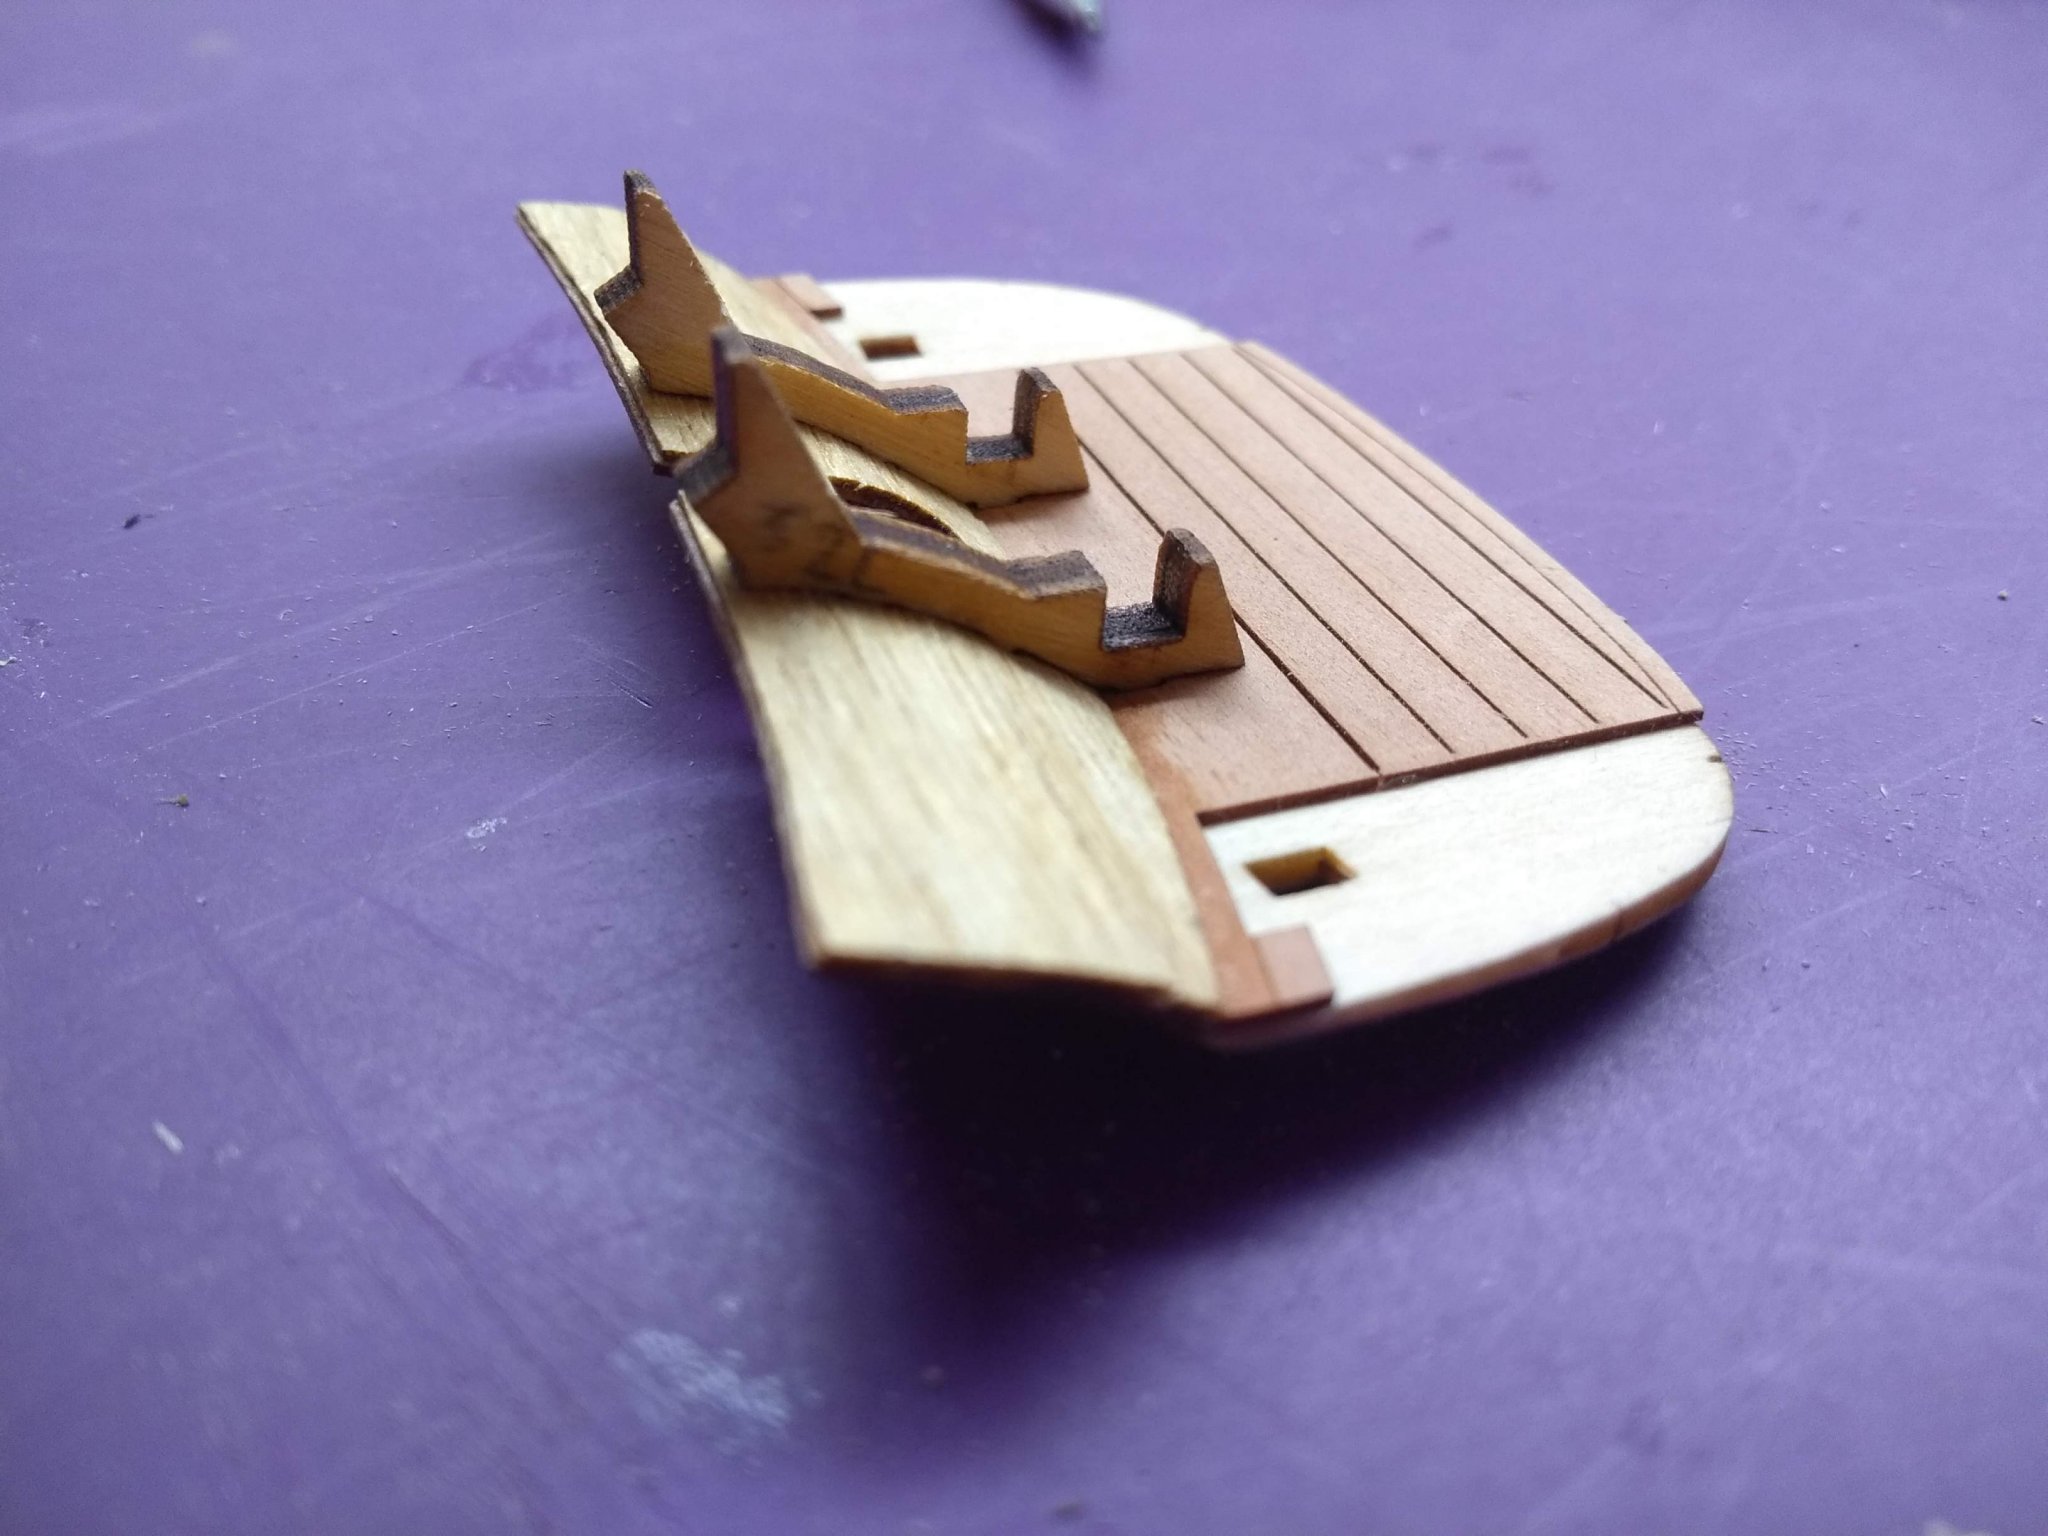
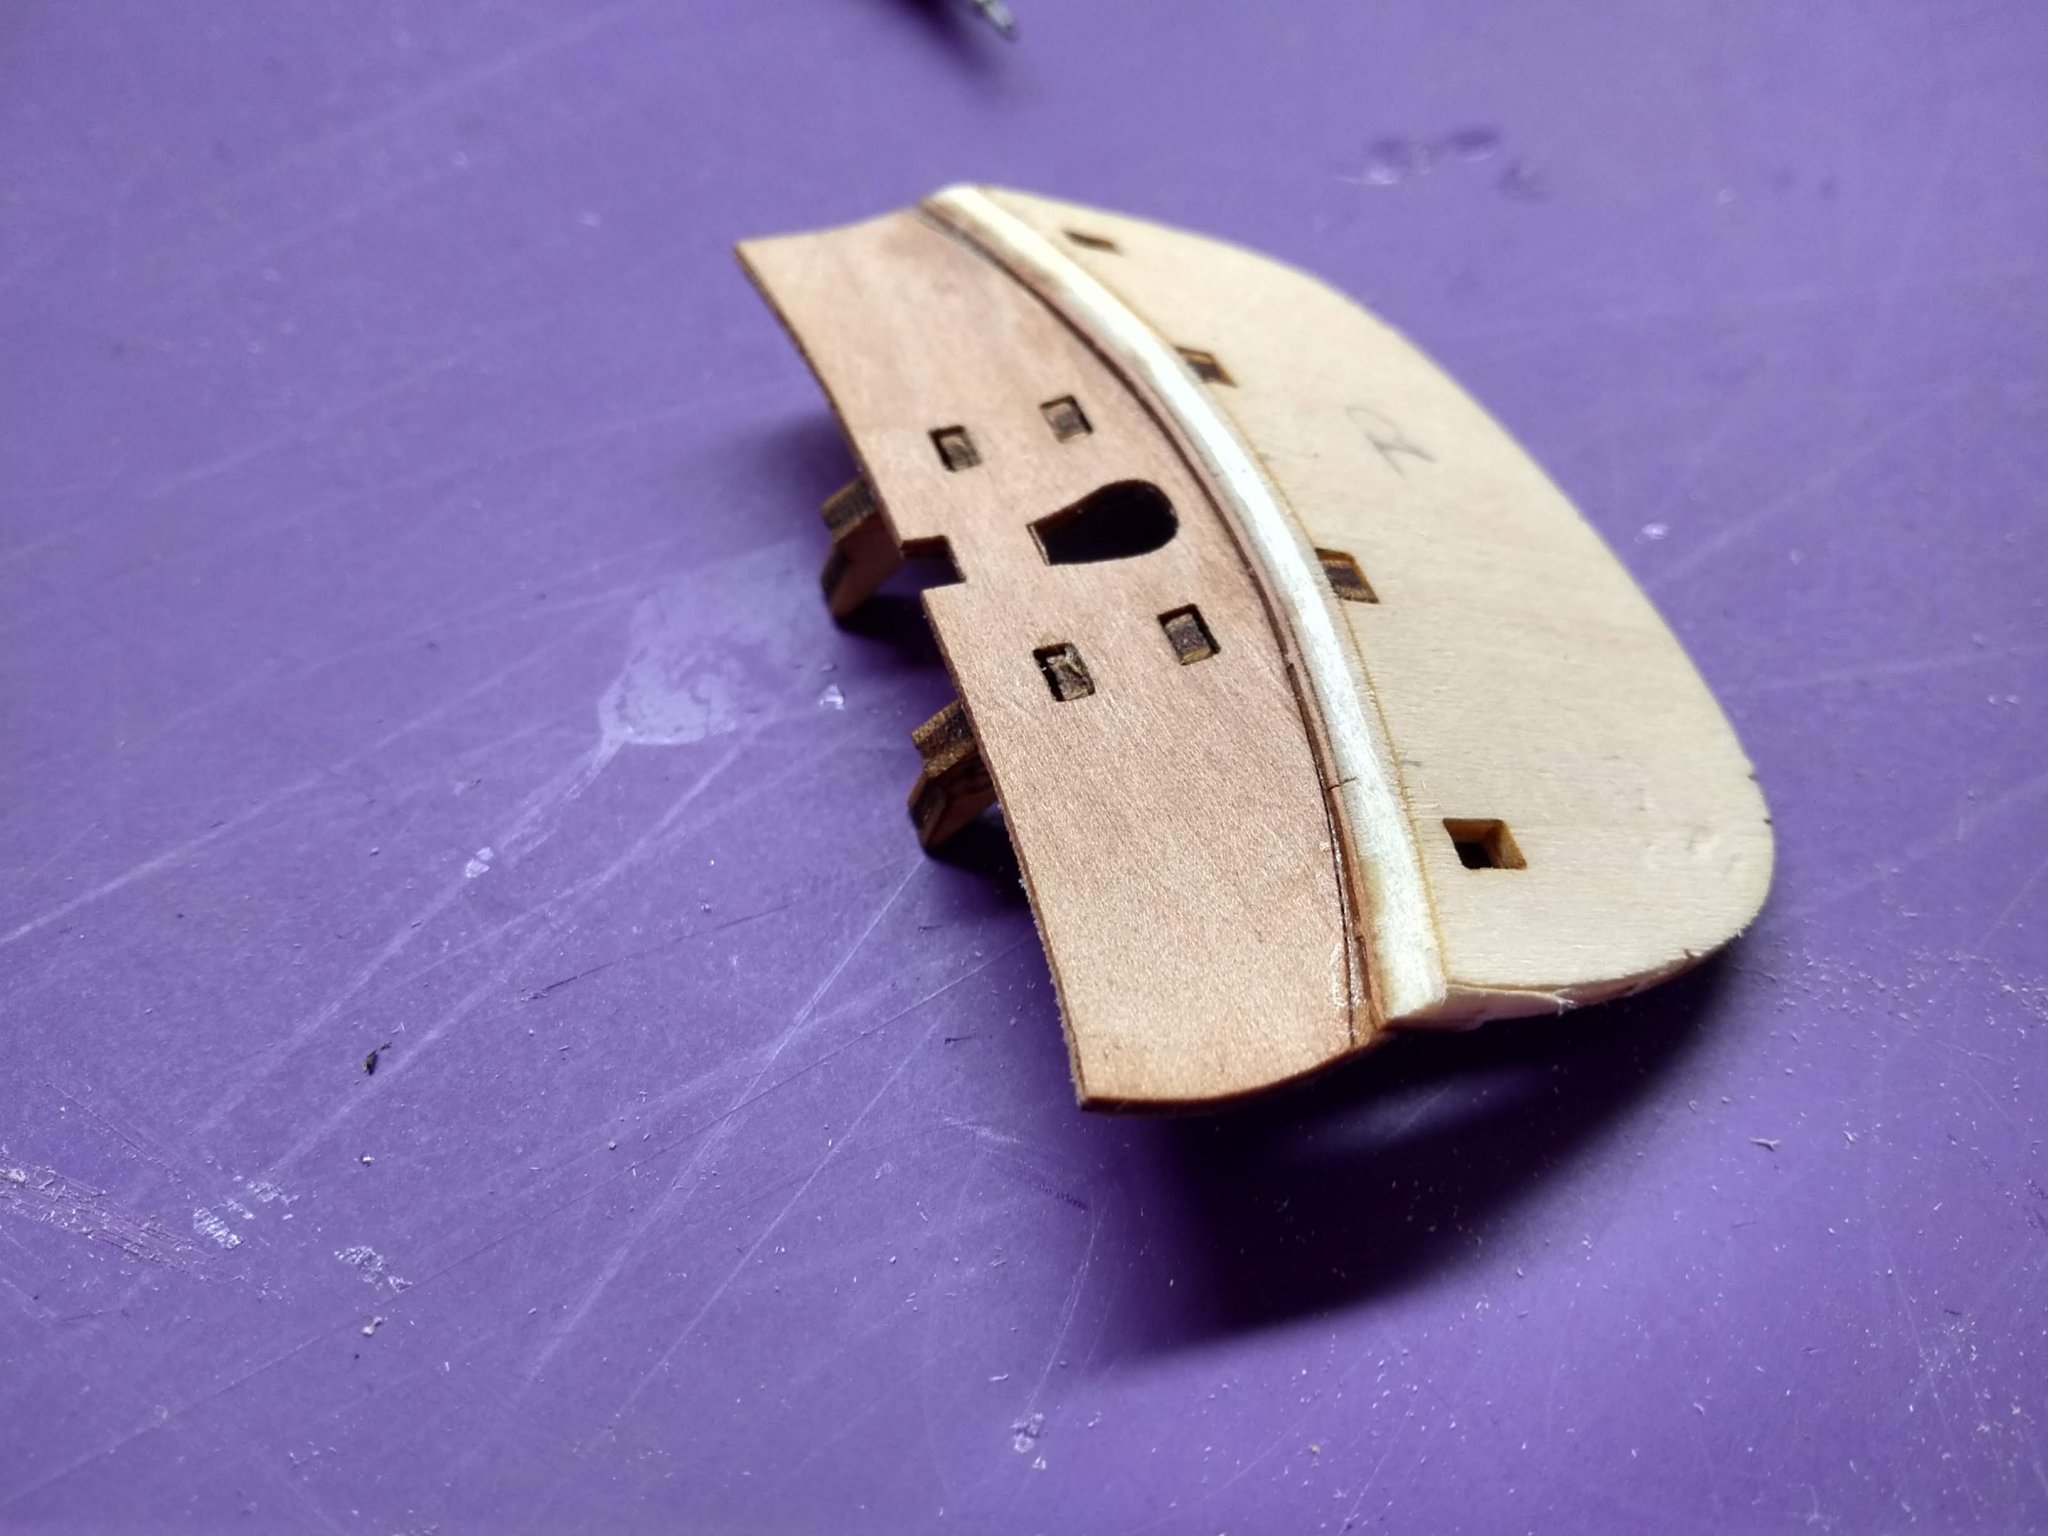
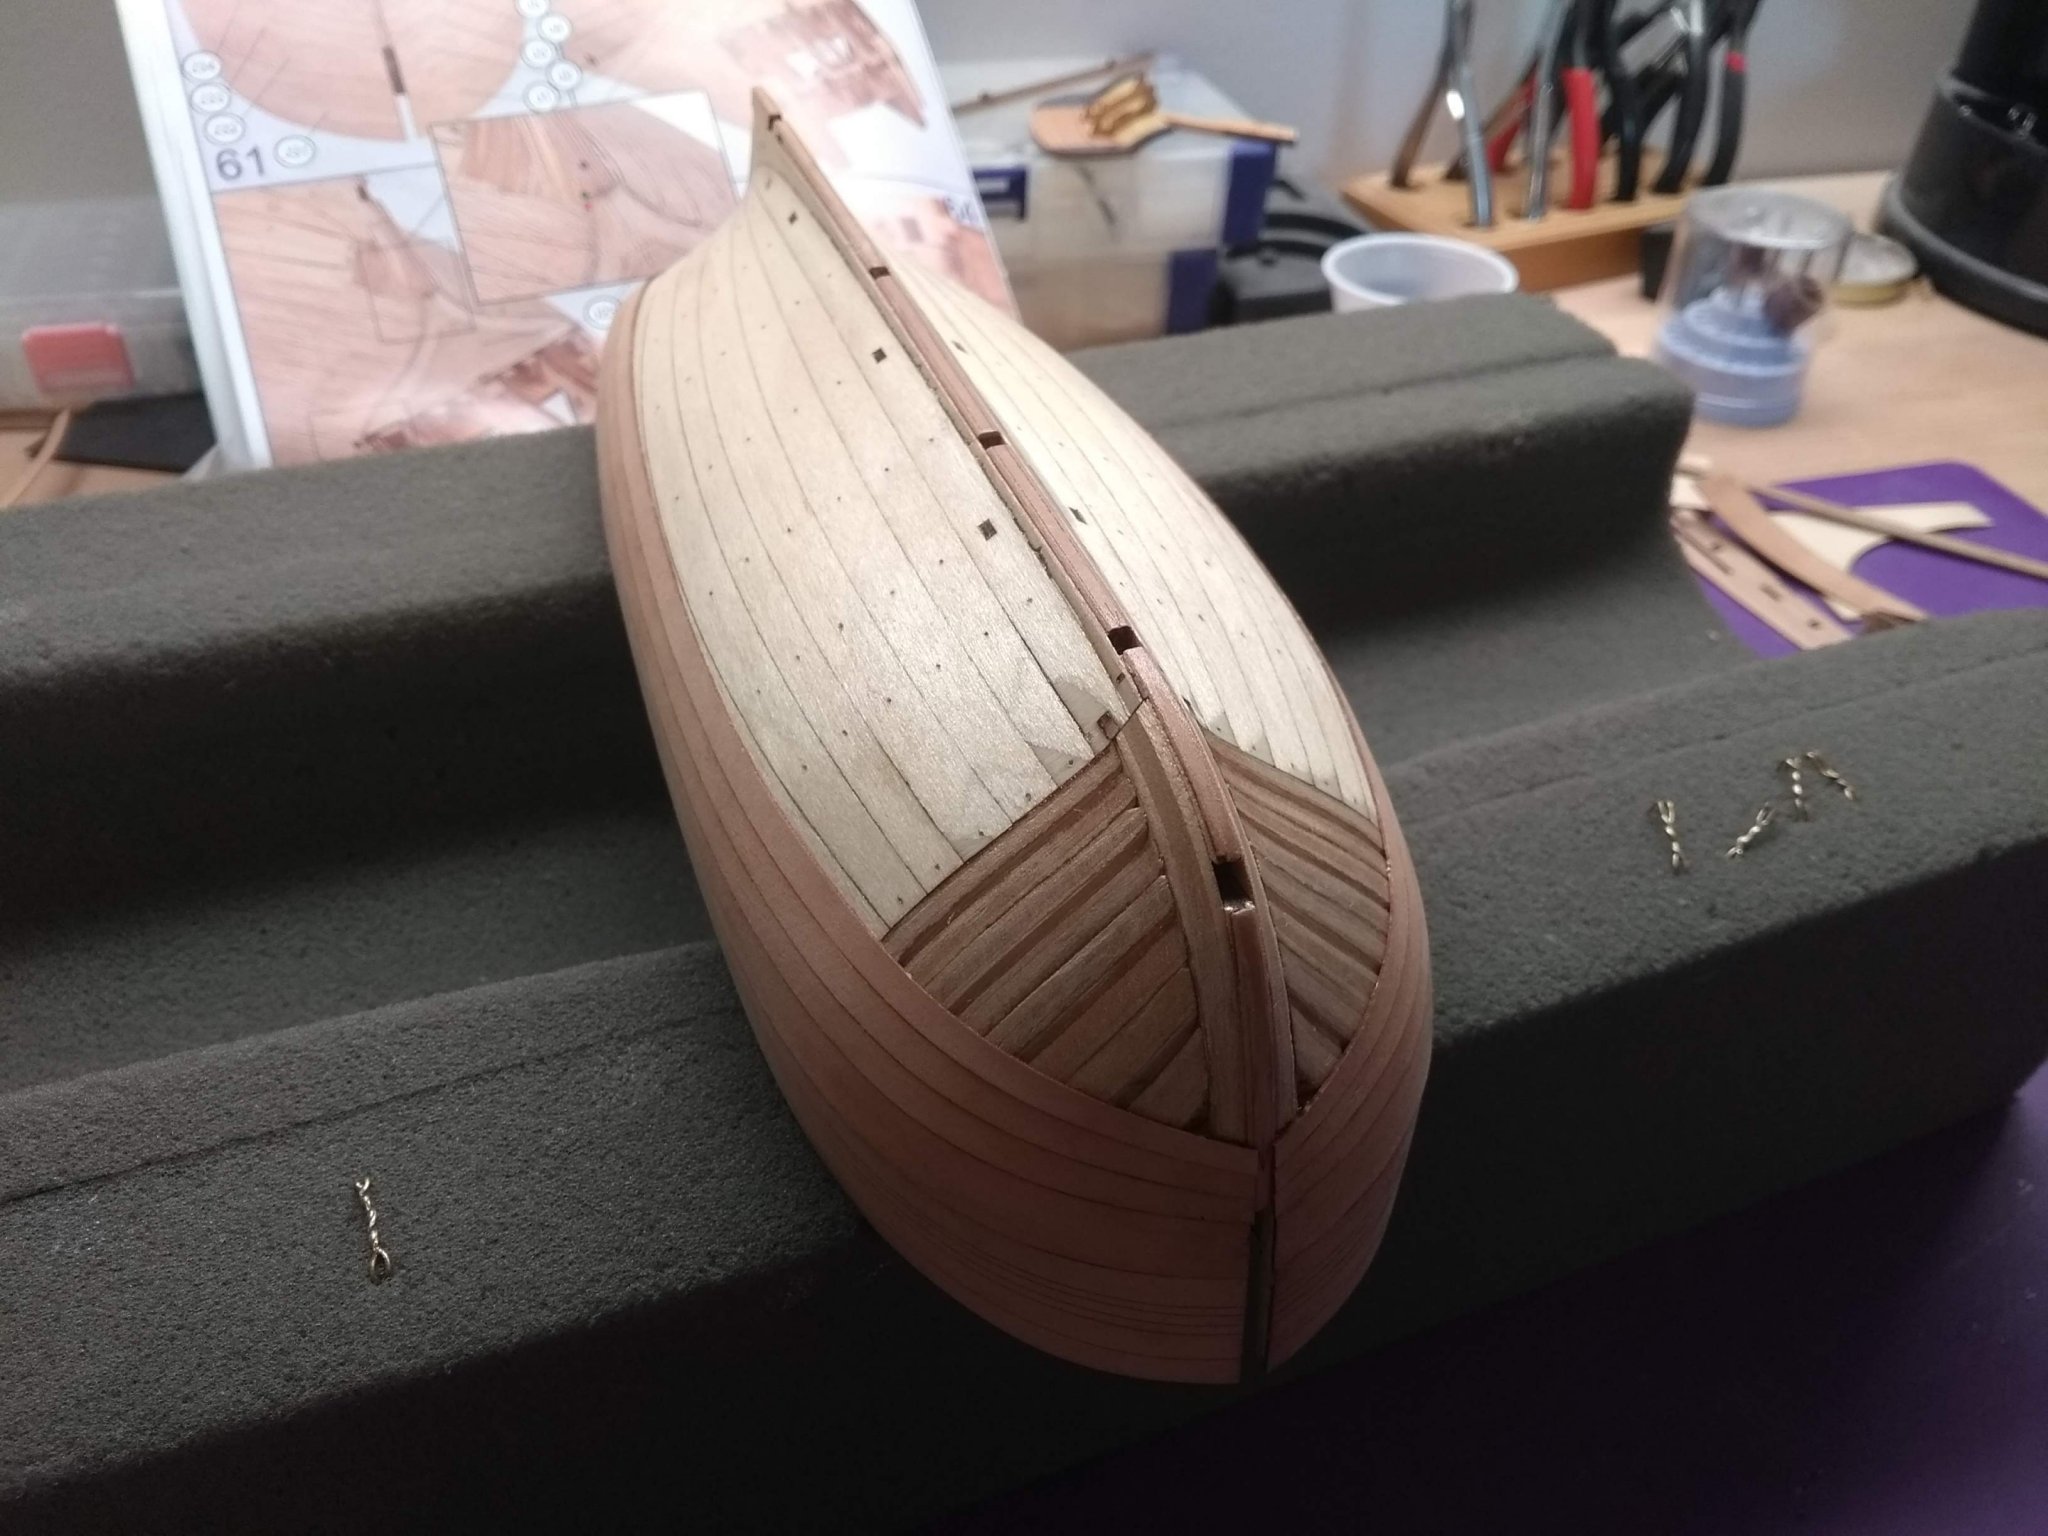
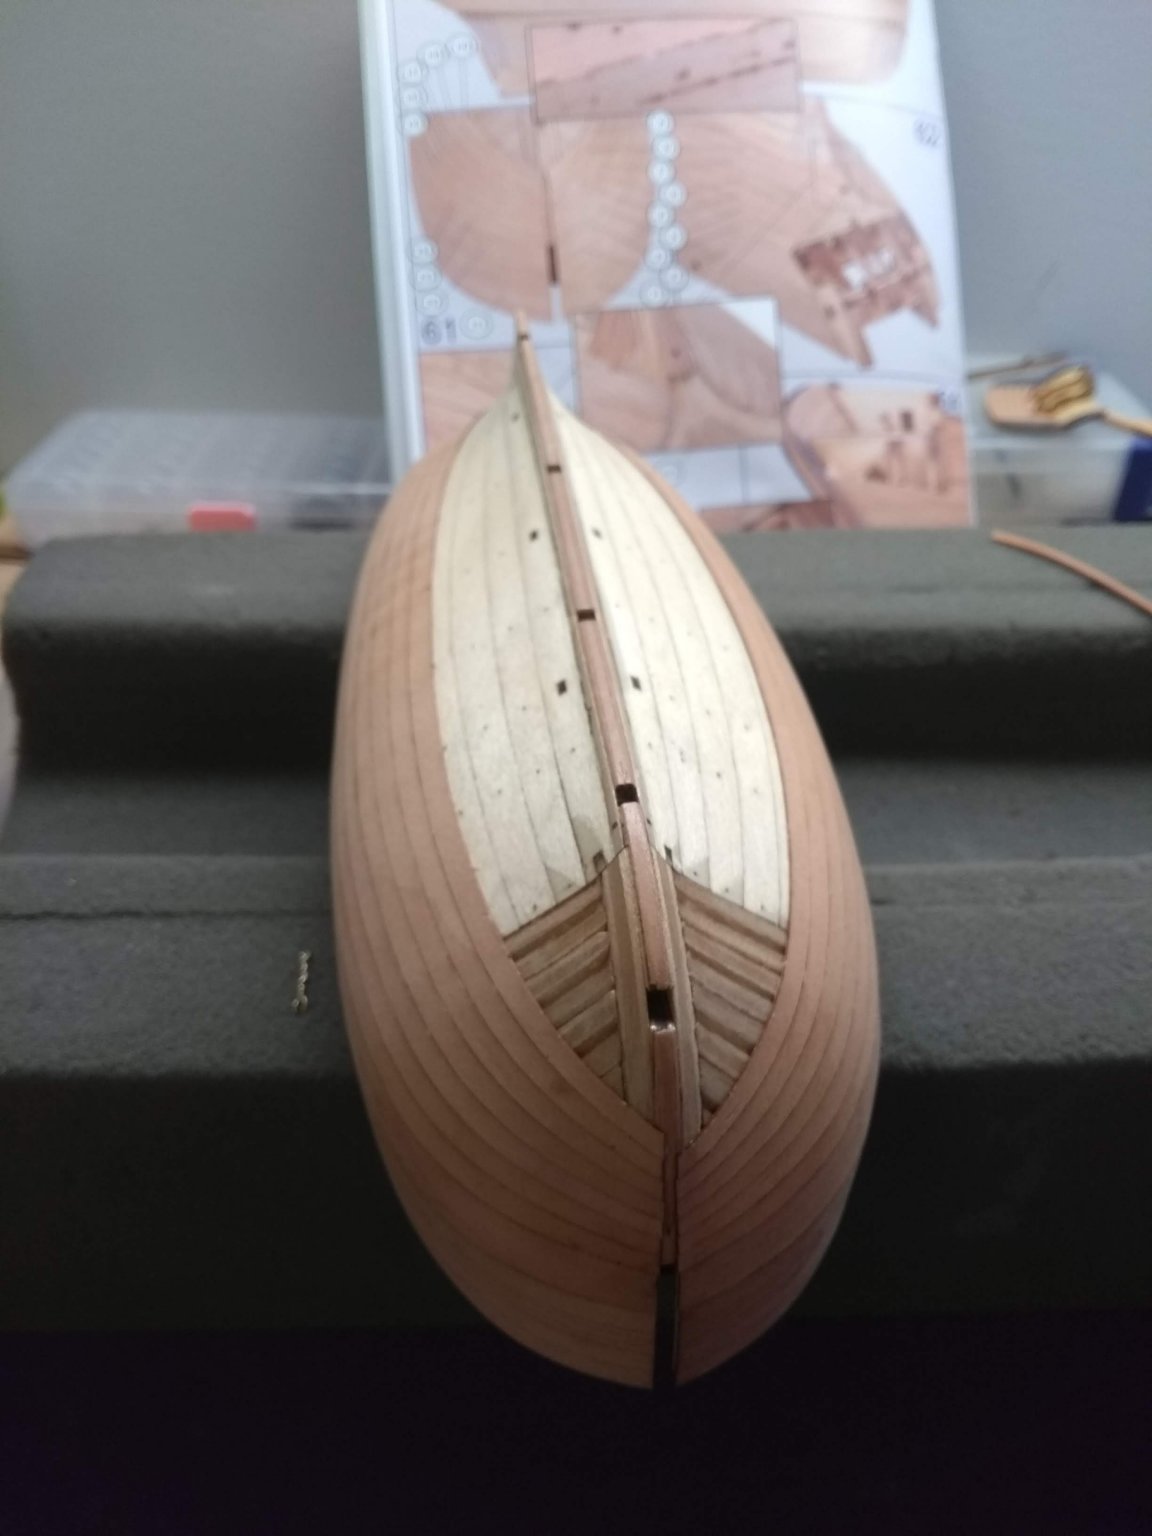
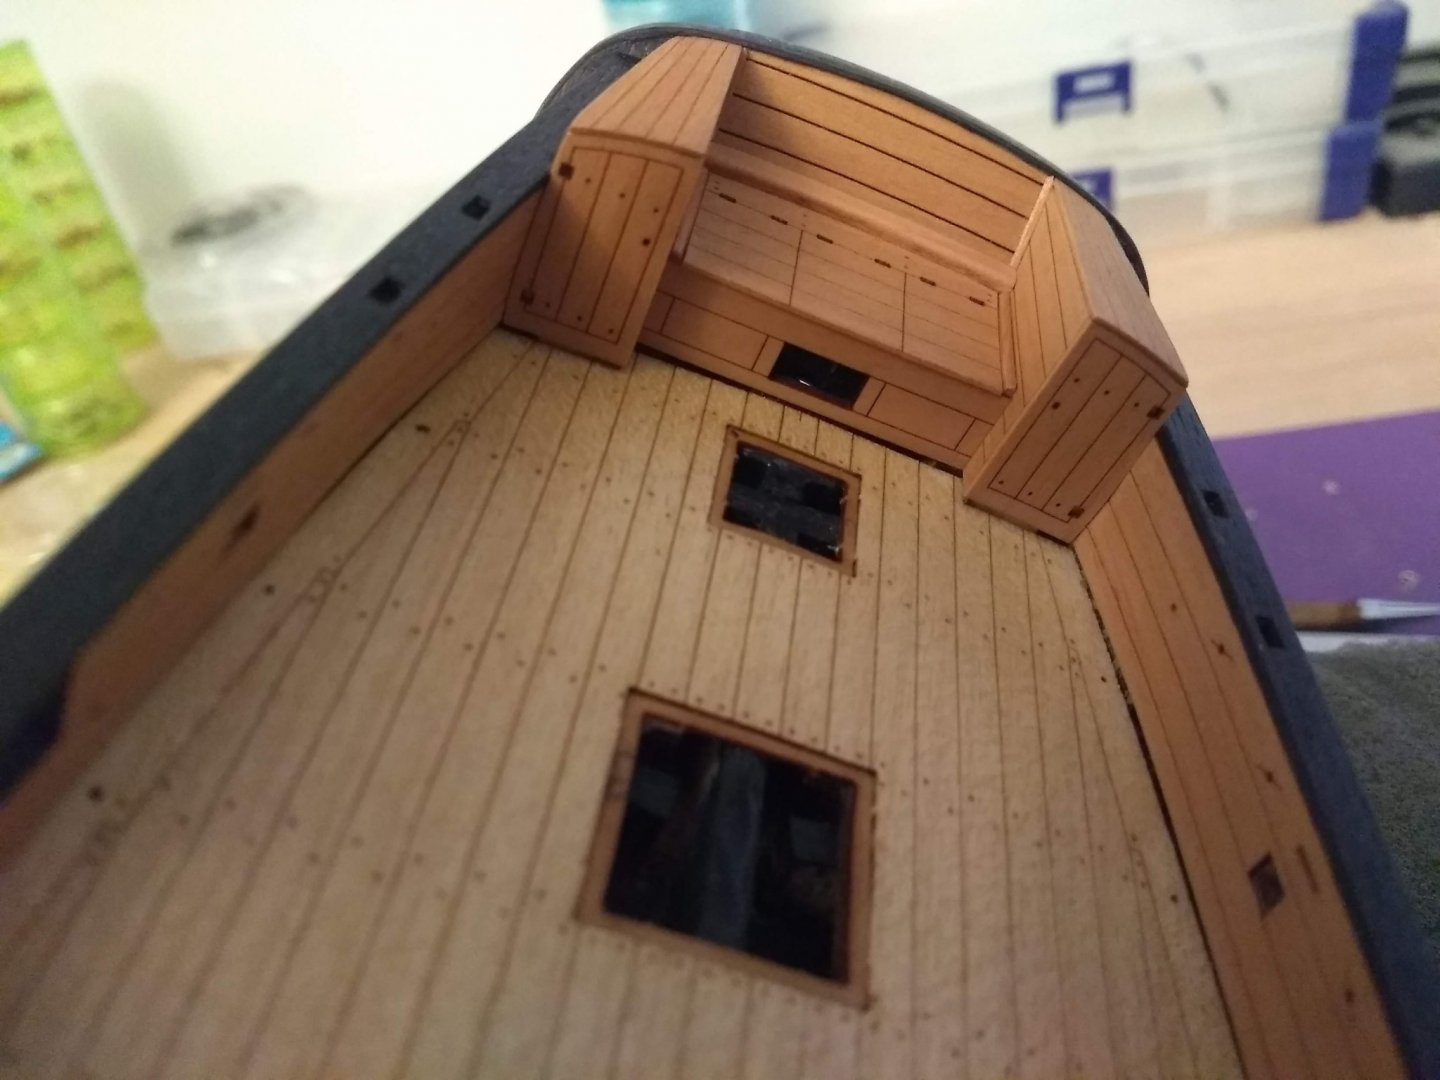
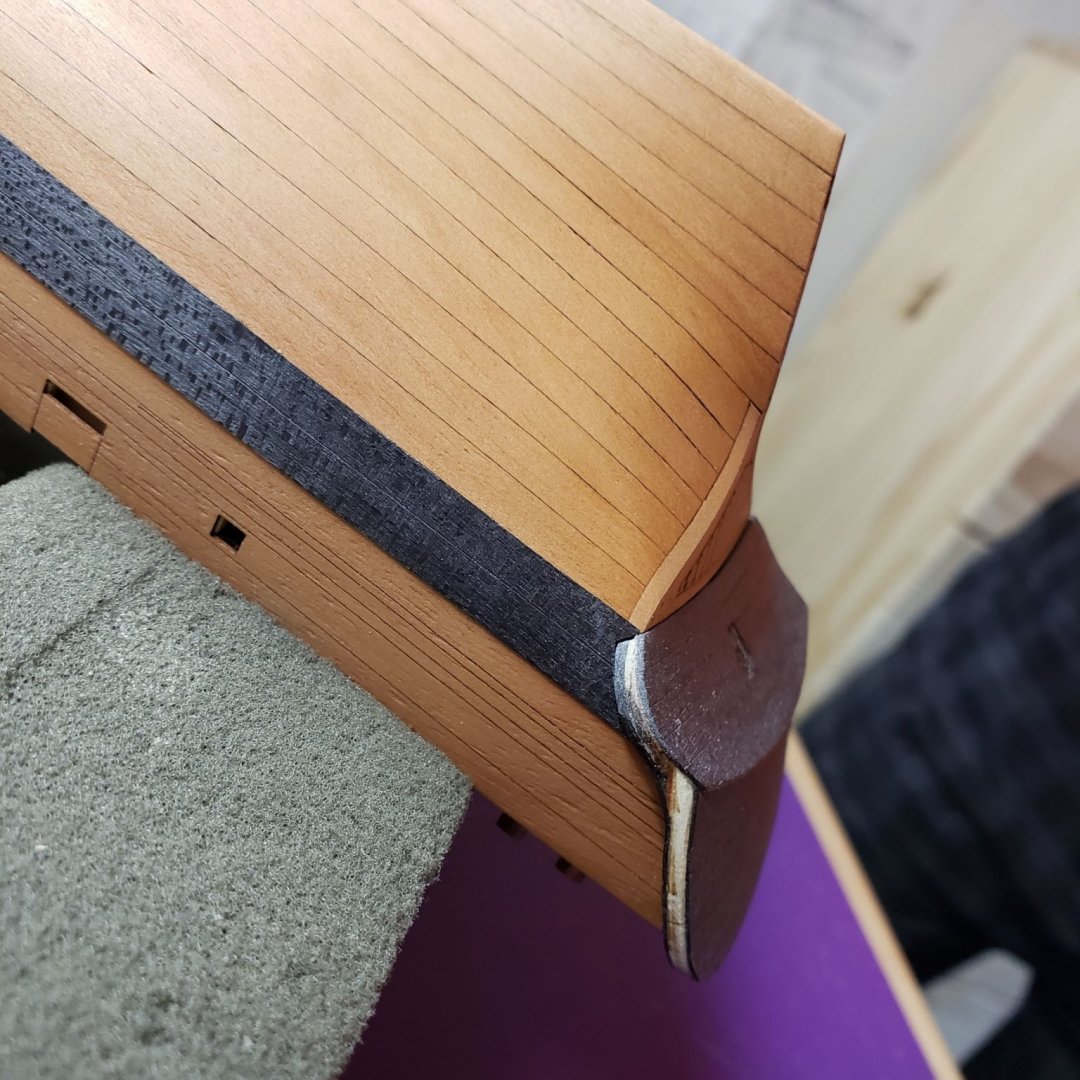
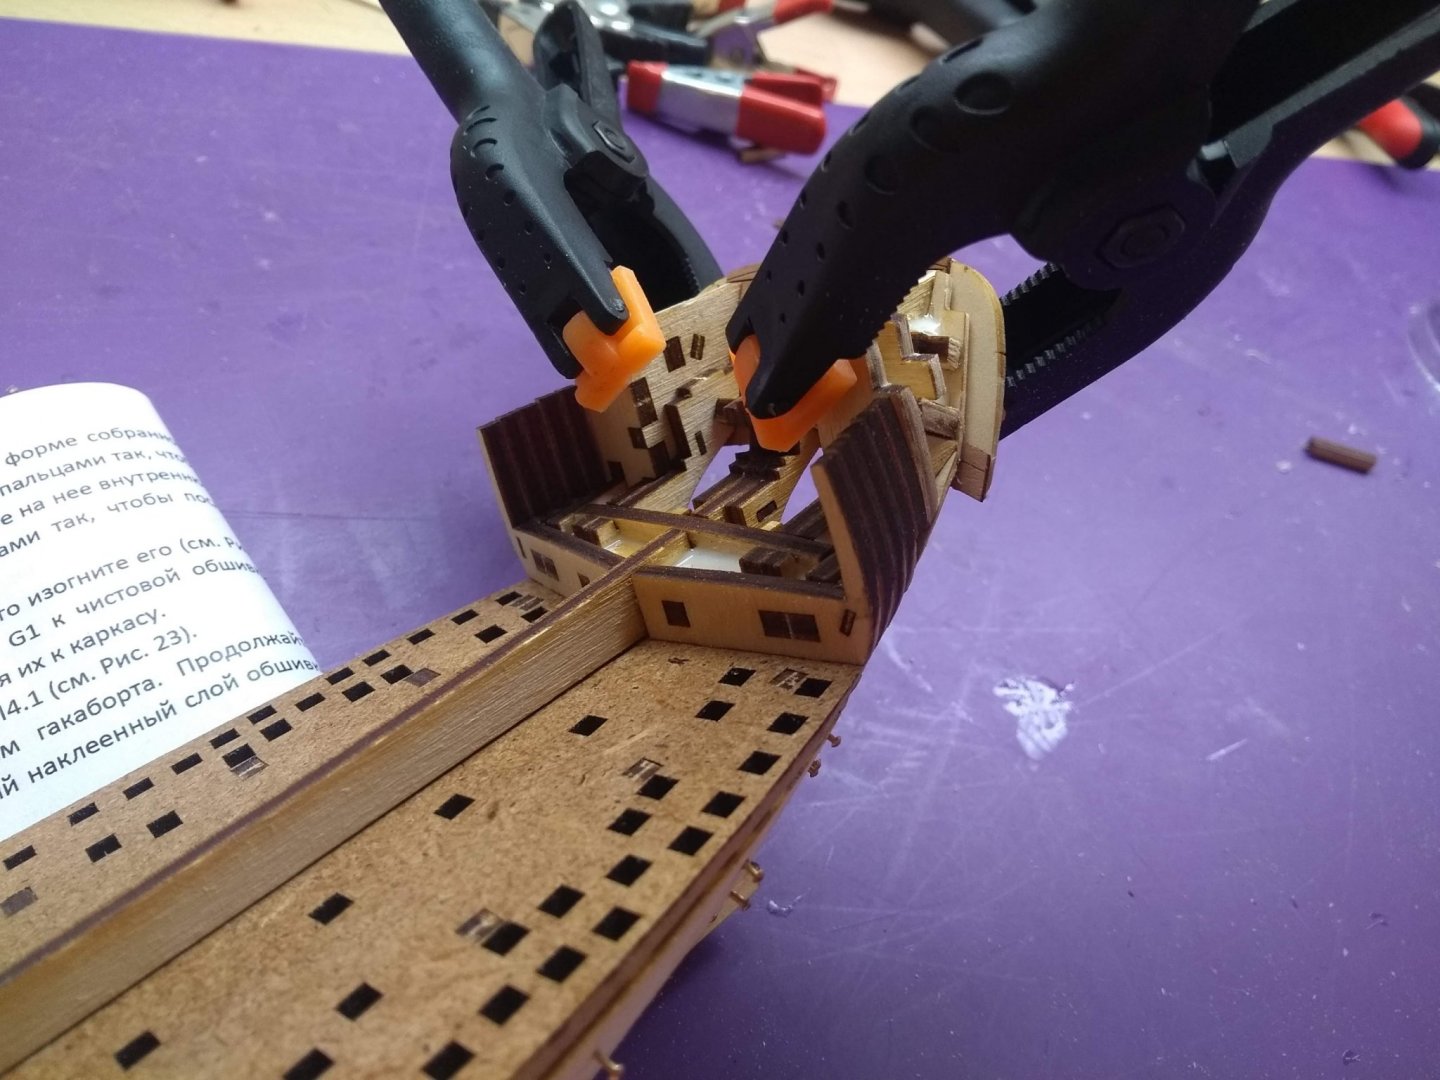
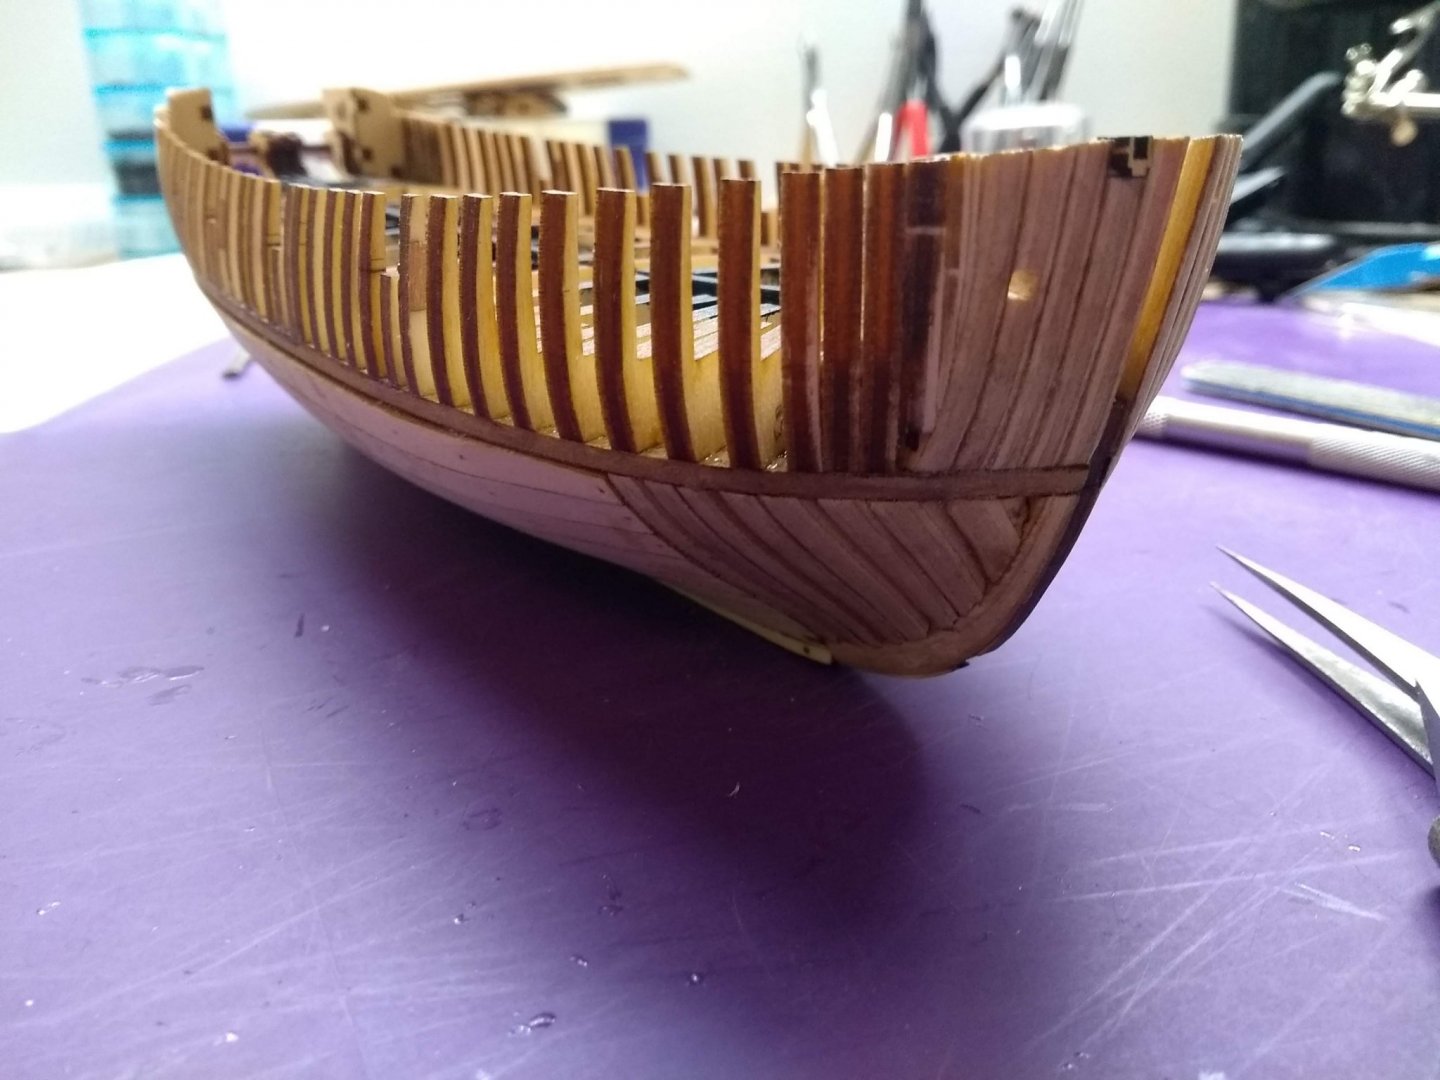
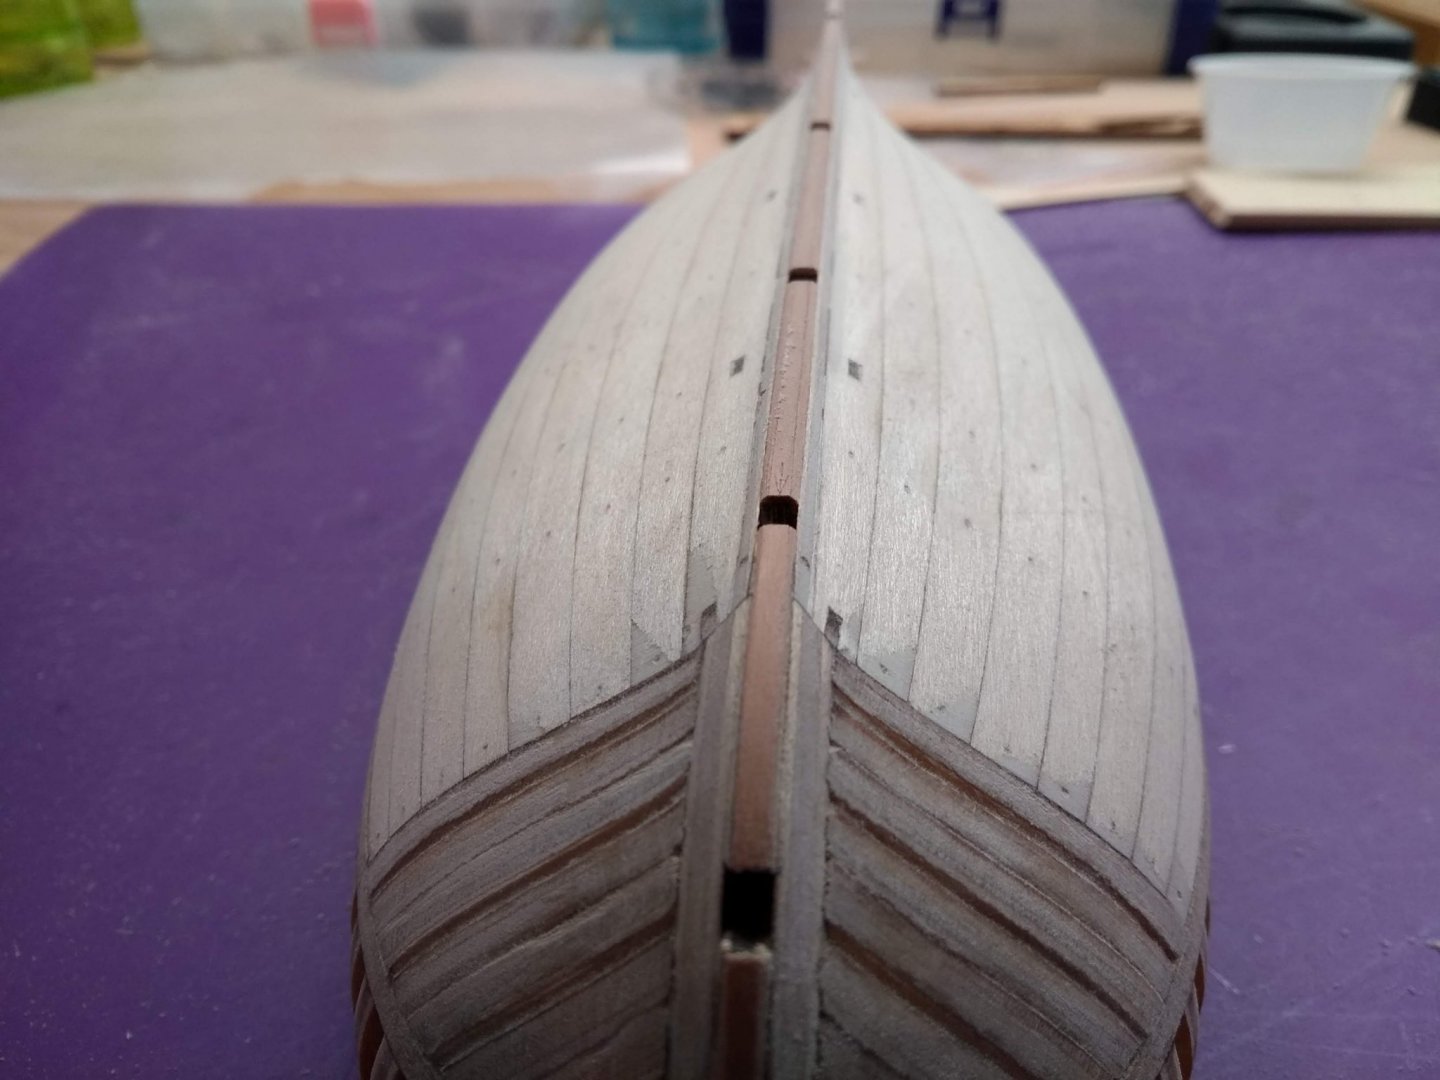
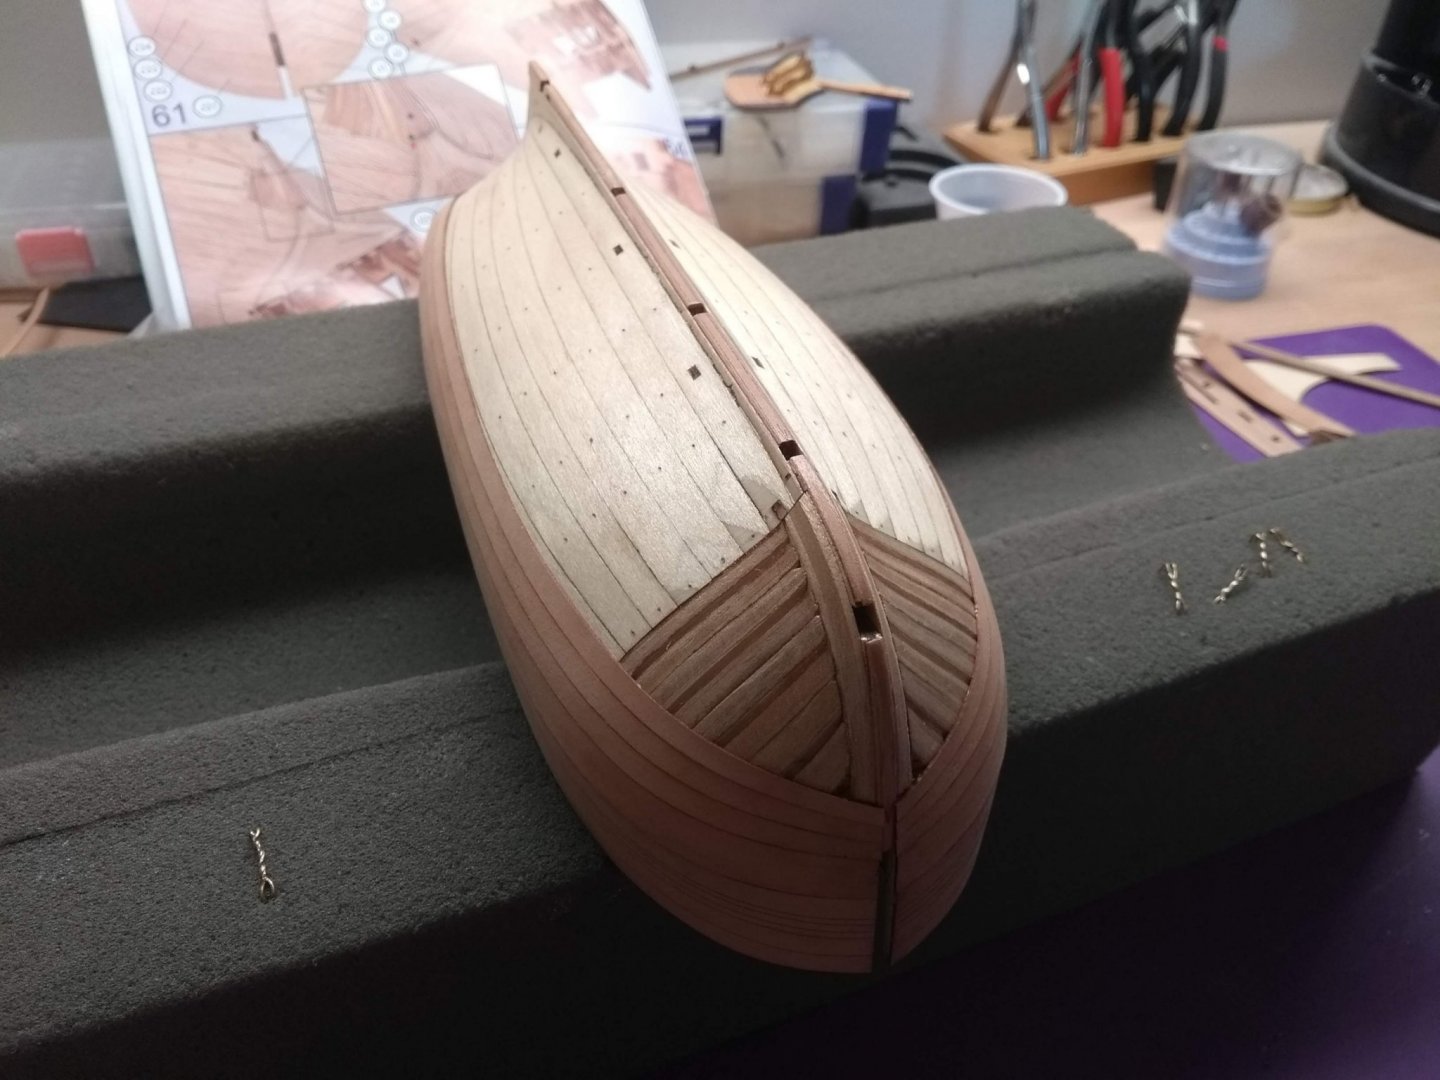
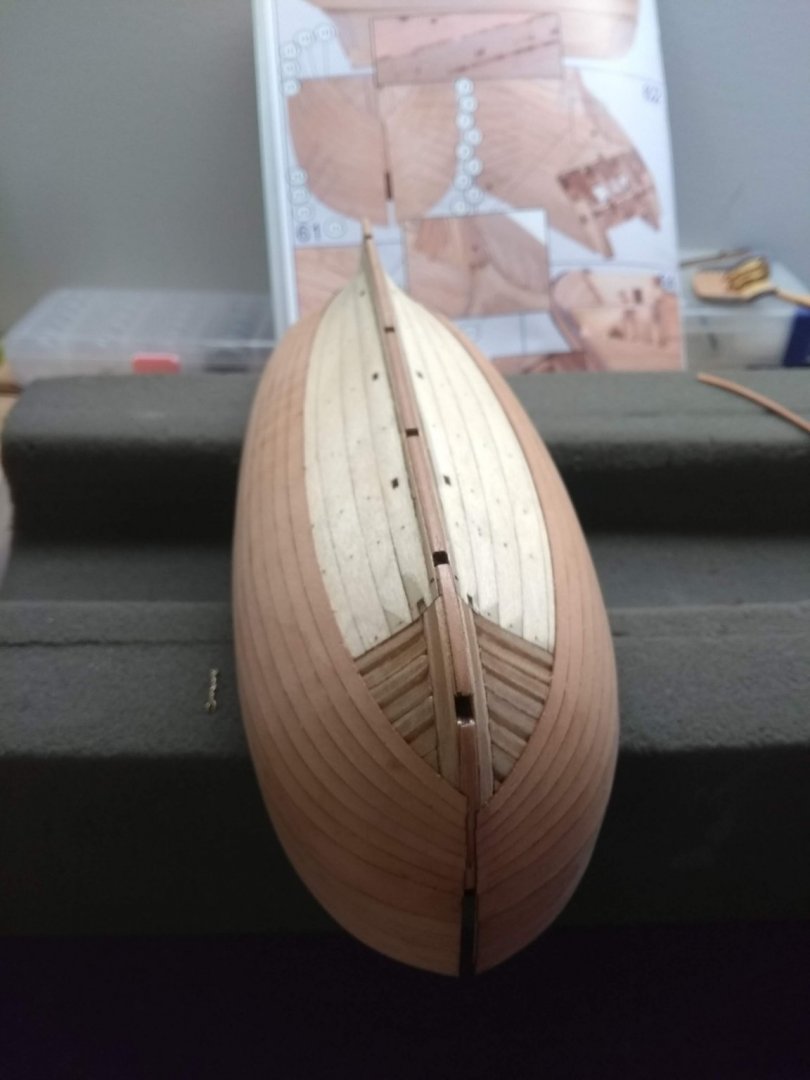
8. The interesting thing about this kit is that once you plank half of the hull you need to stop and do the transom. I would say that the stern area was the most difficult part of this whole build. There were a lot of curves that needed to be aligned symmetrically and nicely. First the planks in the stern needed to be sanded flush with the transom and the transom back piece was glued: Next the transom pieces were roughly shaped and installed: Finally the rest of the transom parts were installed and planking continued: Planking was finally done, all that was left was sanding: The hull was then carefully sanded and a couple coats of wipe-on-poly was applied: 9. Once the wipe-on-poly covered hull was dry, I proceeded to the final stage of planking. The wales needed to be trimmed to they fit counter perfectly. The first layer of wales was easy to do, because it had already been glued and it would be hidden behind the second final layer: The second layer was a lot more difficult. The manual simply said to carefully trim it, but I thought it was too easy to mess something up this way, so I cut a template plank from one of billets first: After all I was pretty happy how this difficult area turned out:


- 30 replies
-
- 9
-
-
- master korabel
- avos
- (and 1 more)
-
Ryland, thank you! All planks are pre-cut, so the planking looks nice thanks to Master Korabel
- 30 replies
-
- 2
-
-
- master korabel
- avos
- (and 1 more)
-
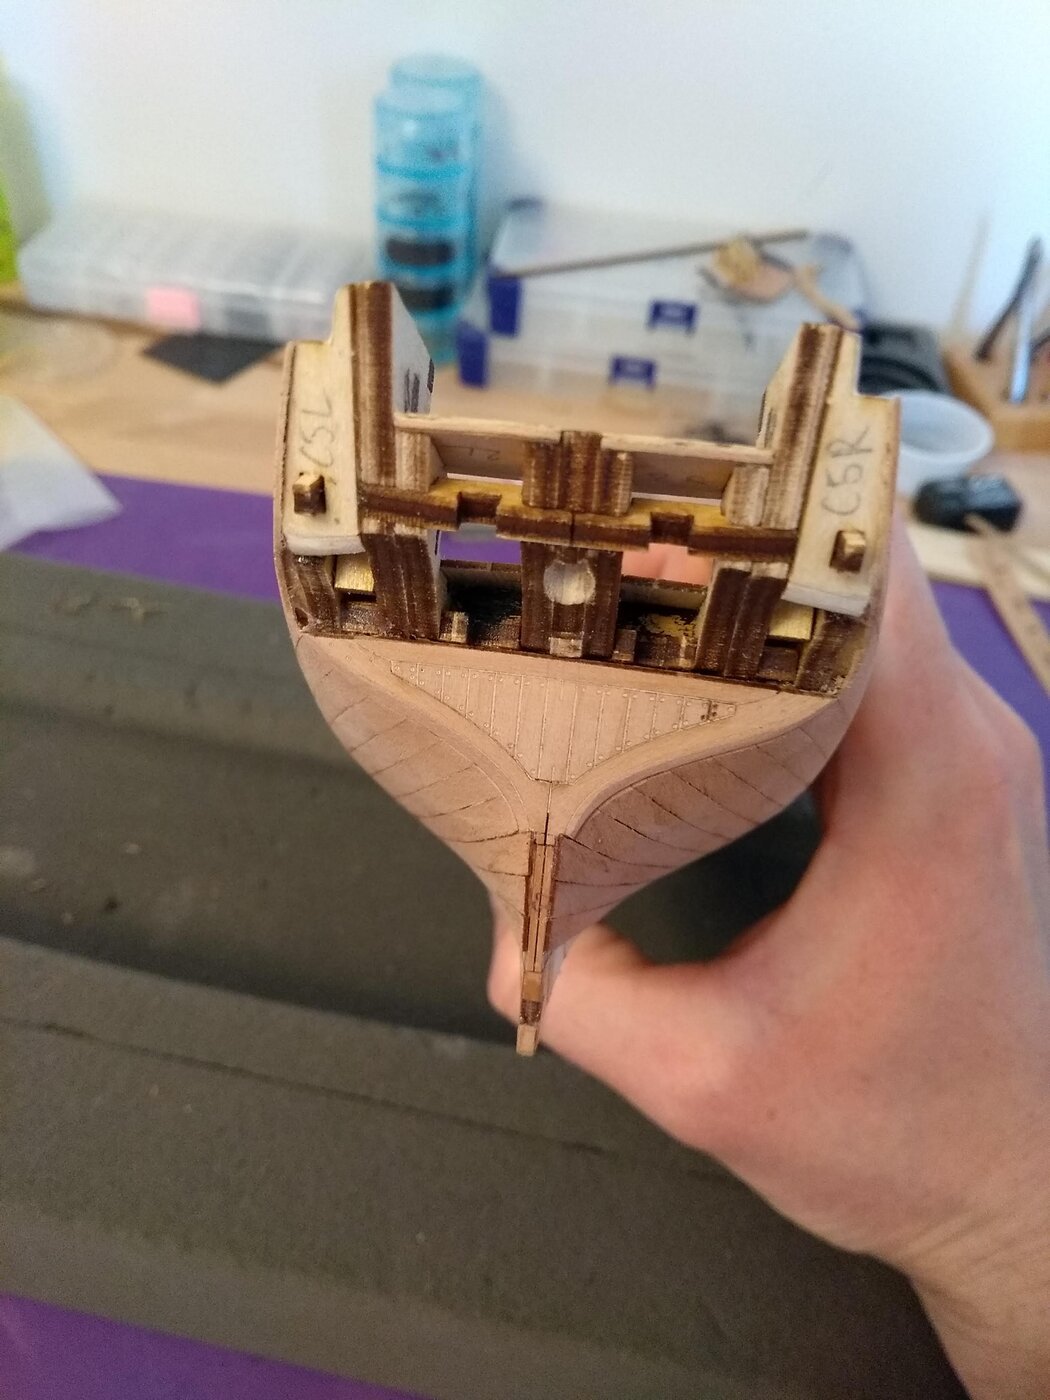
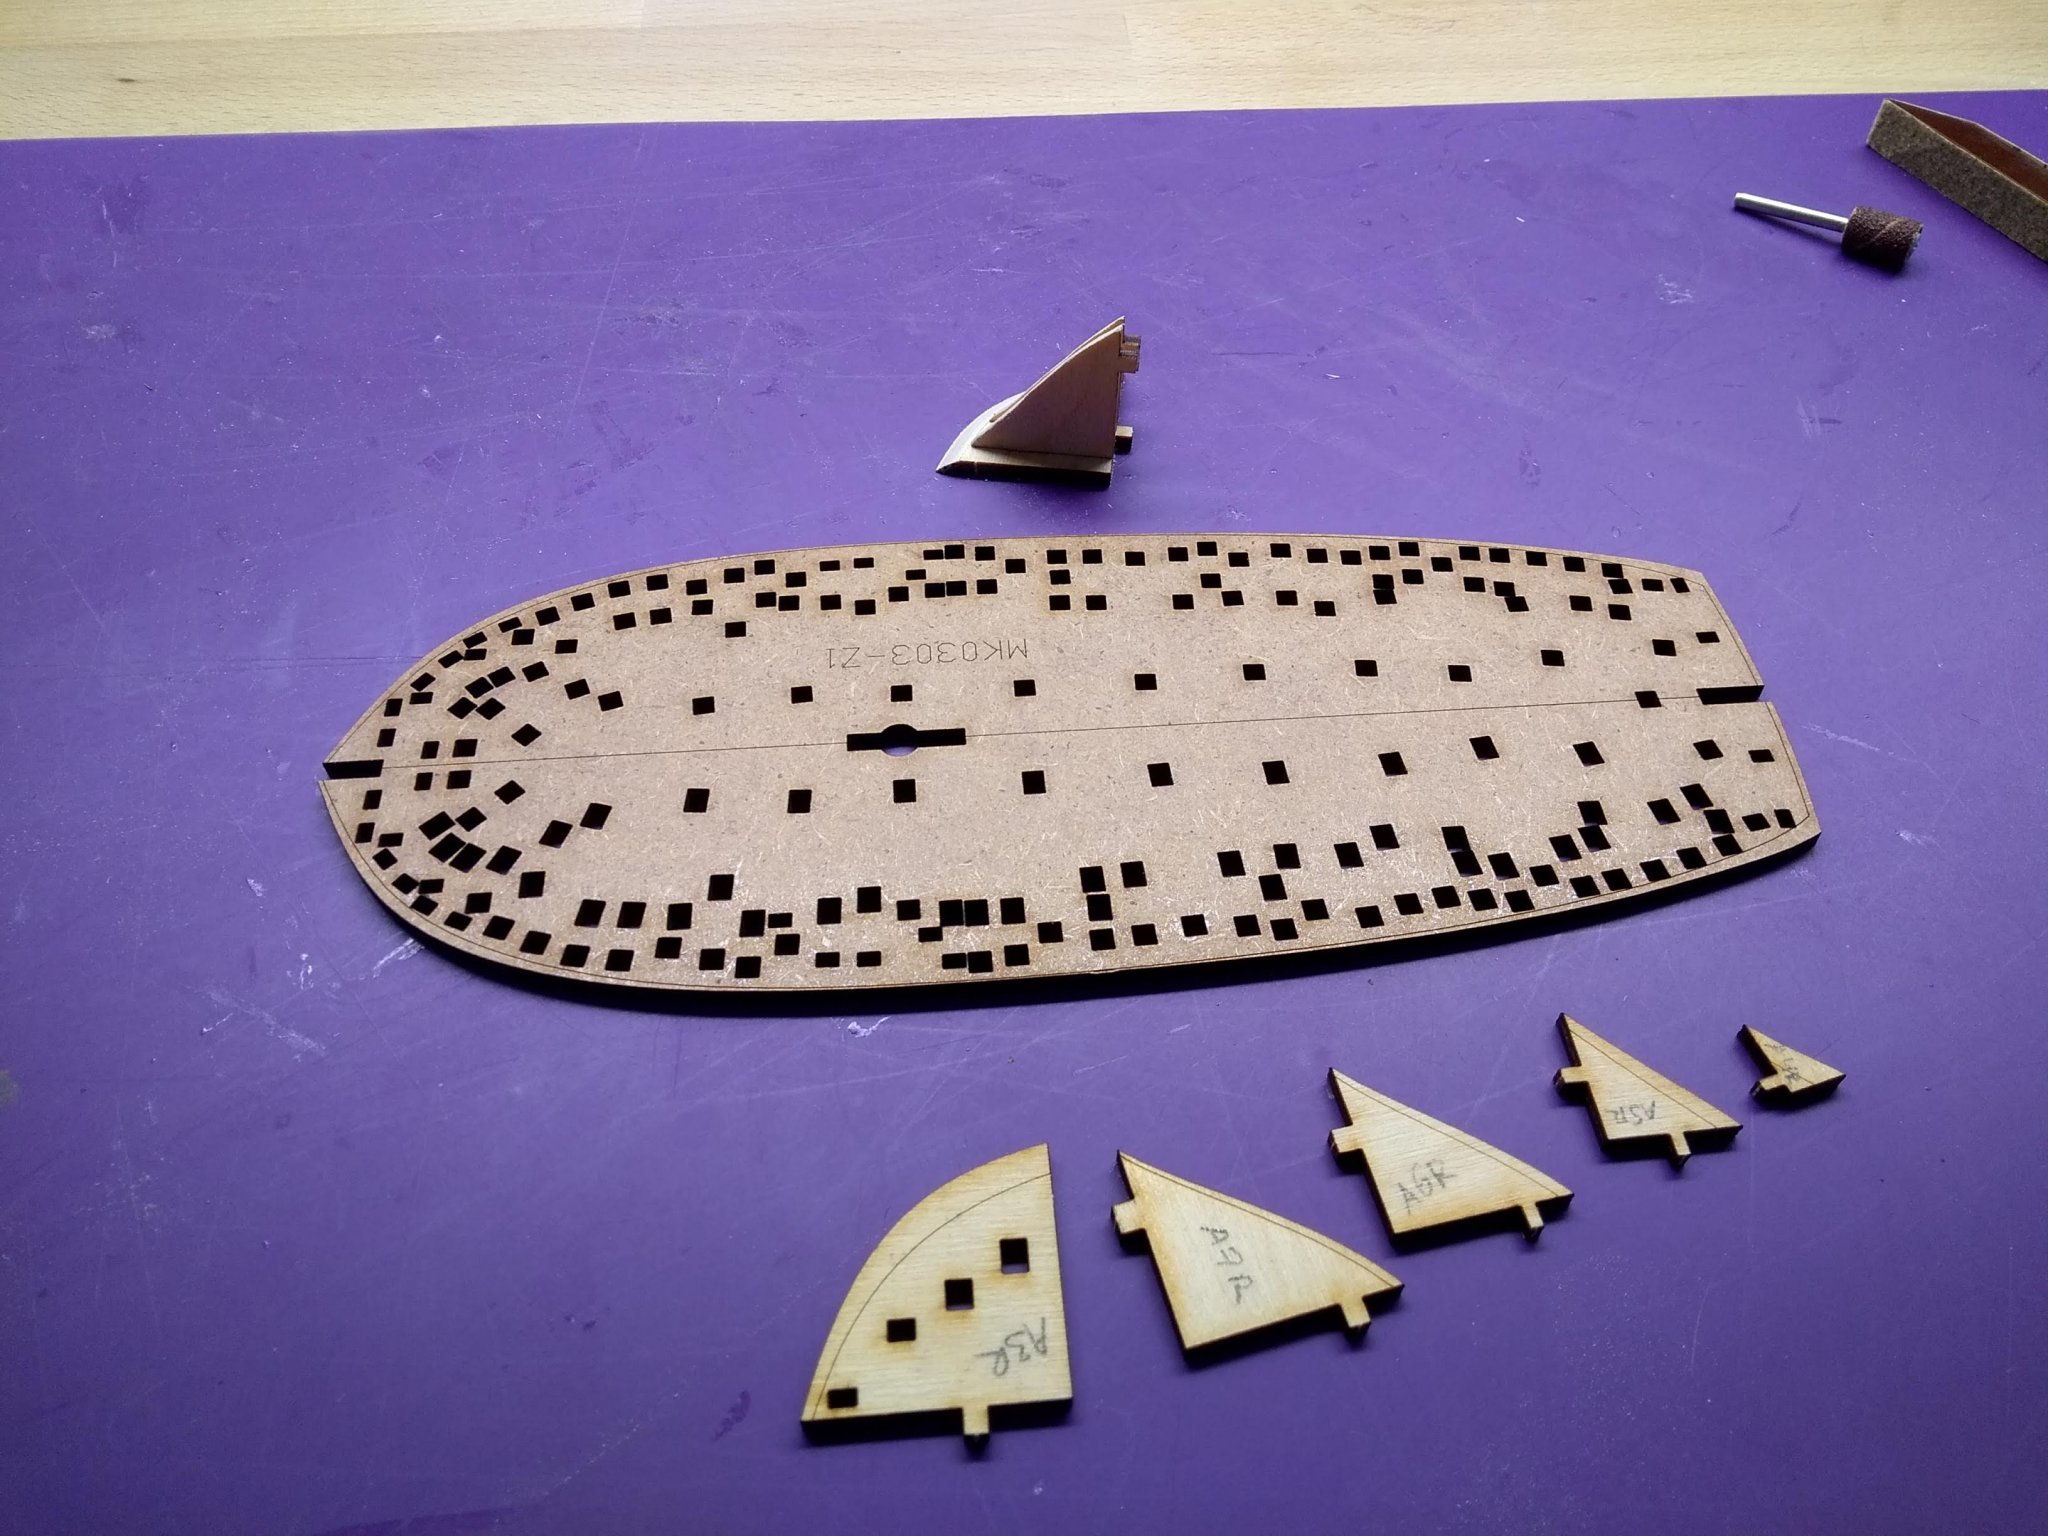
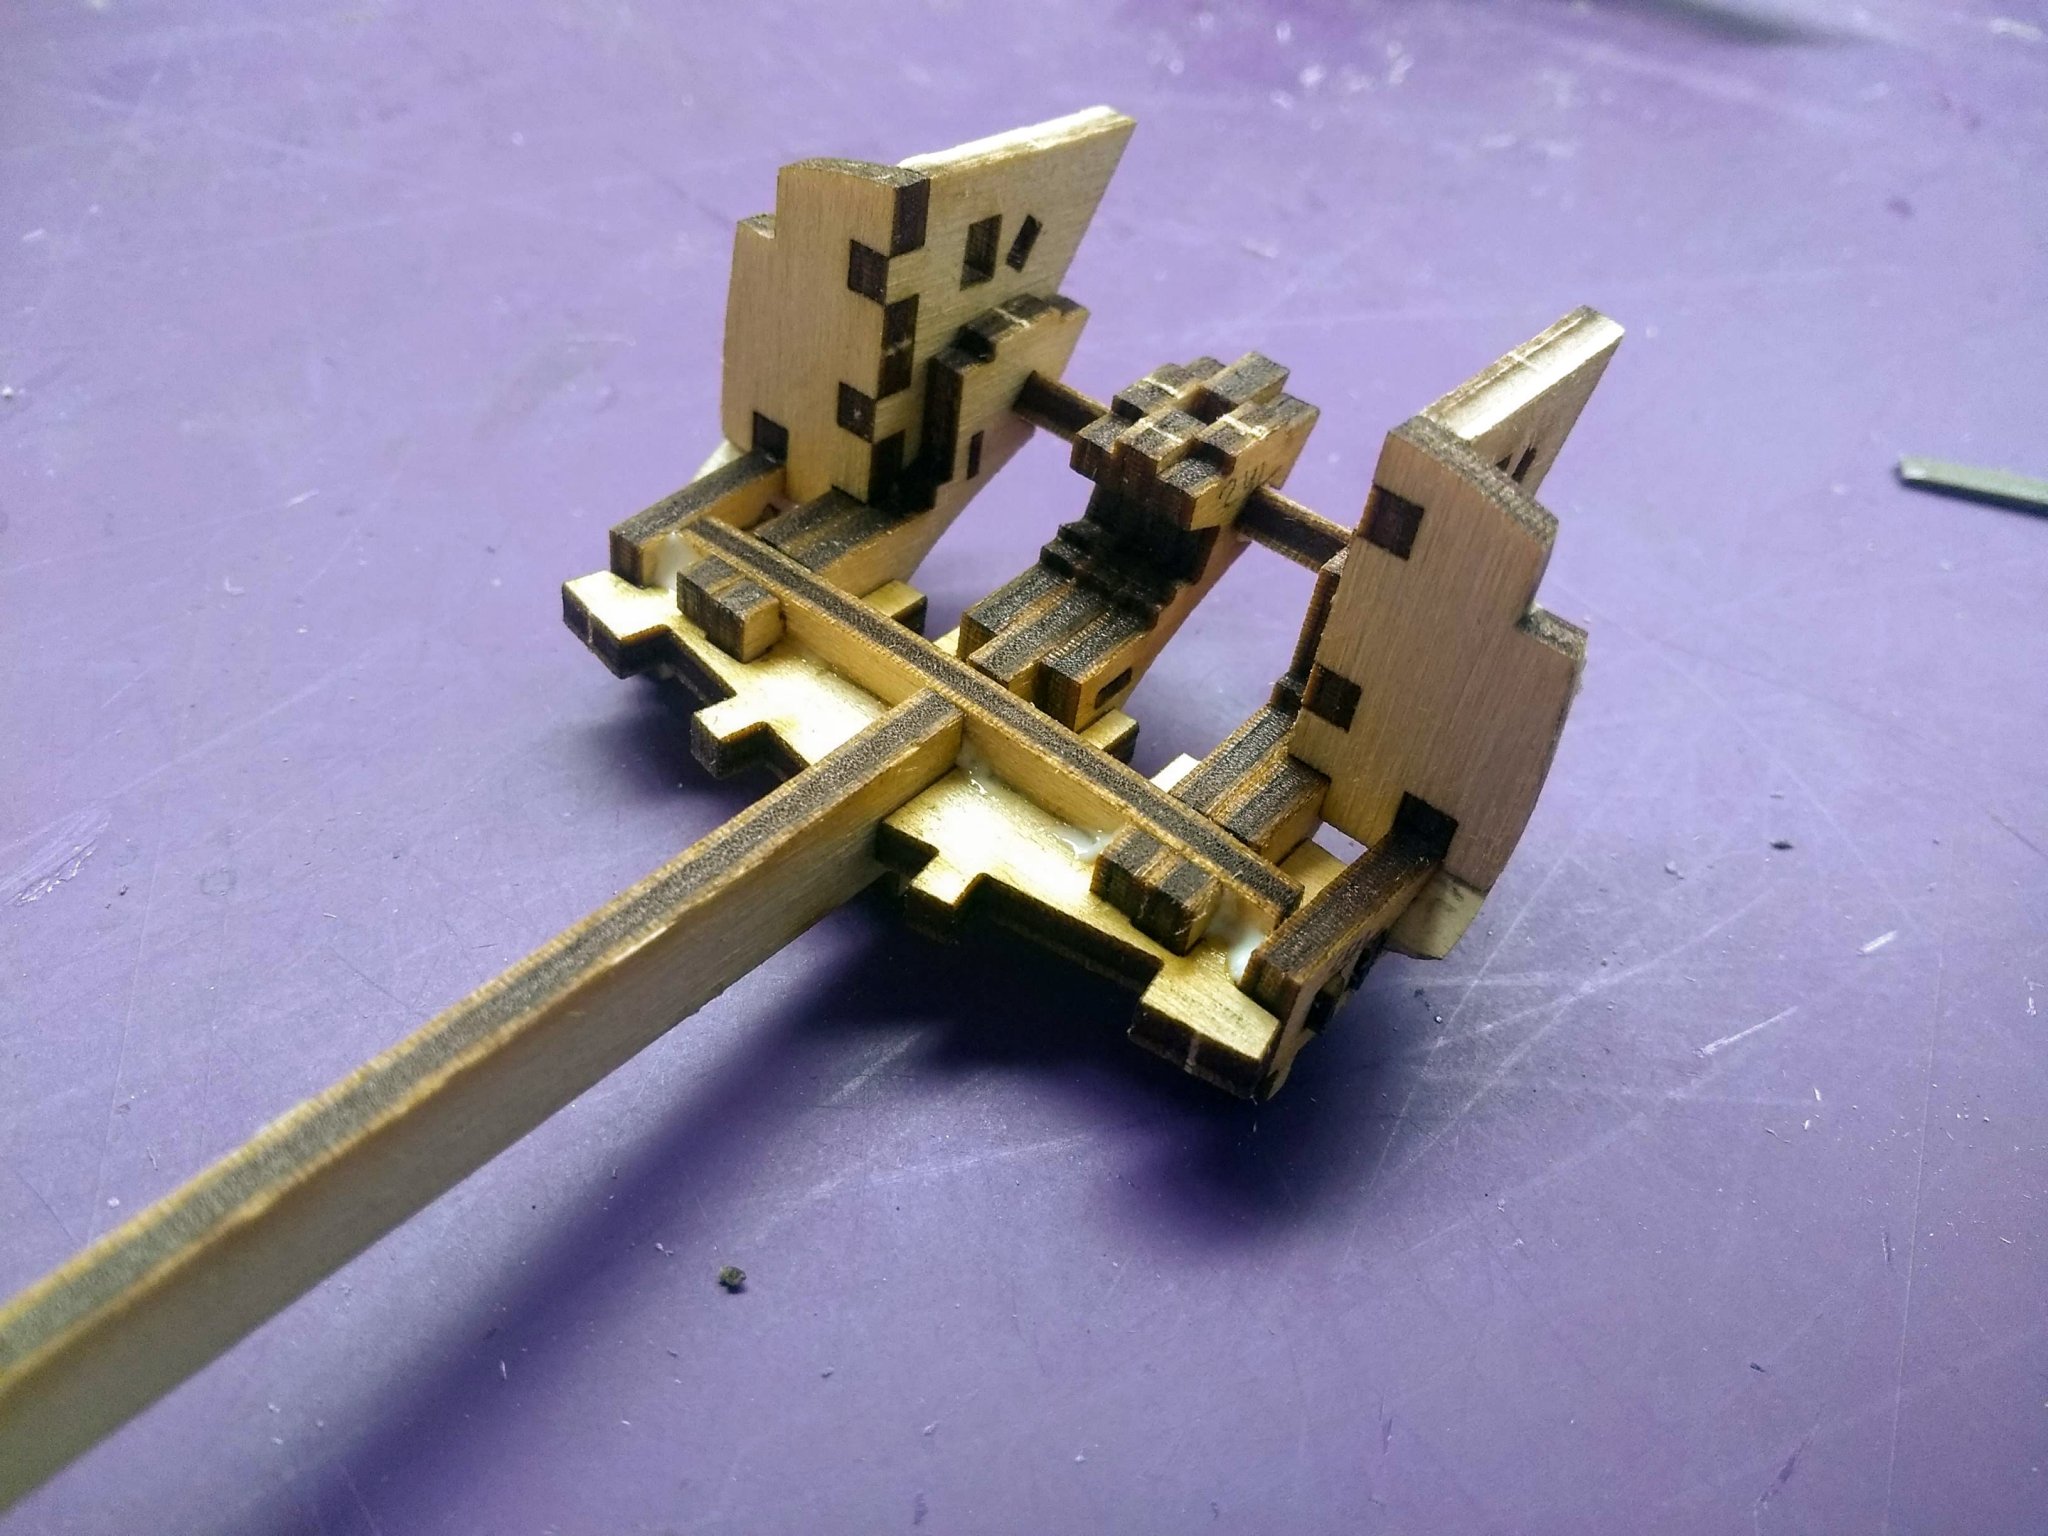
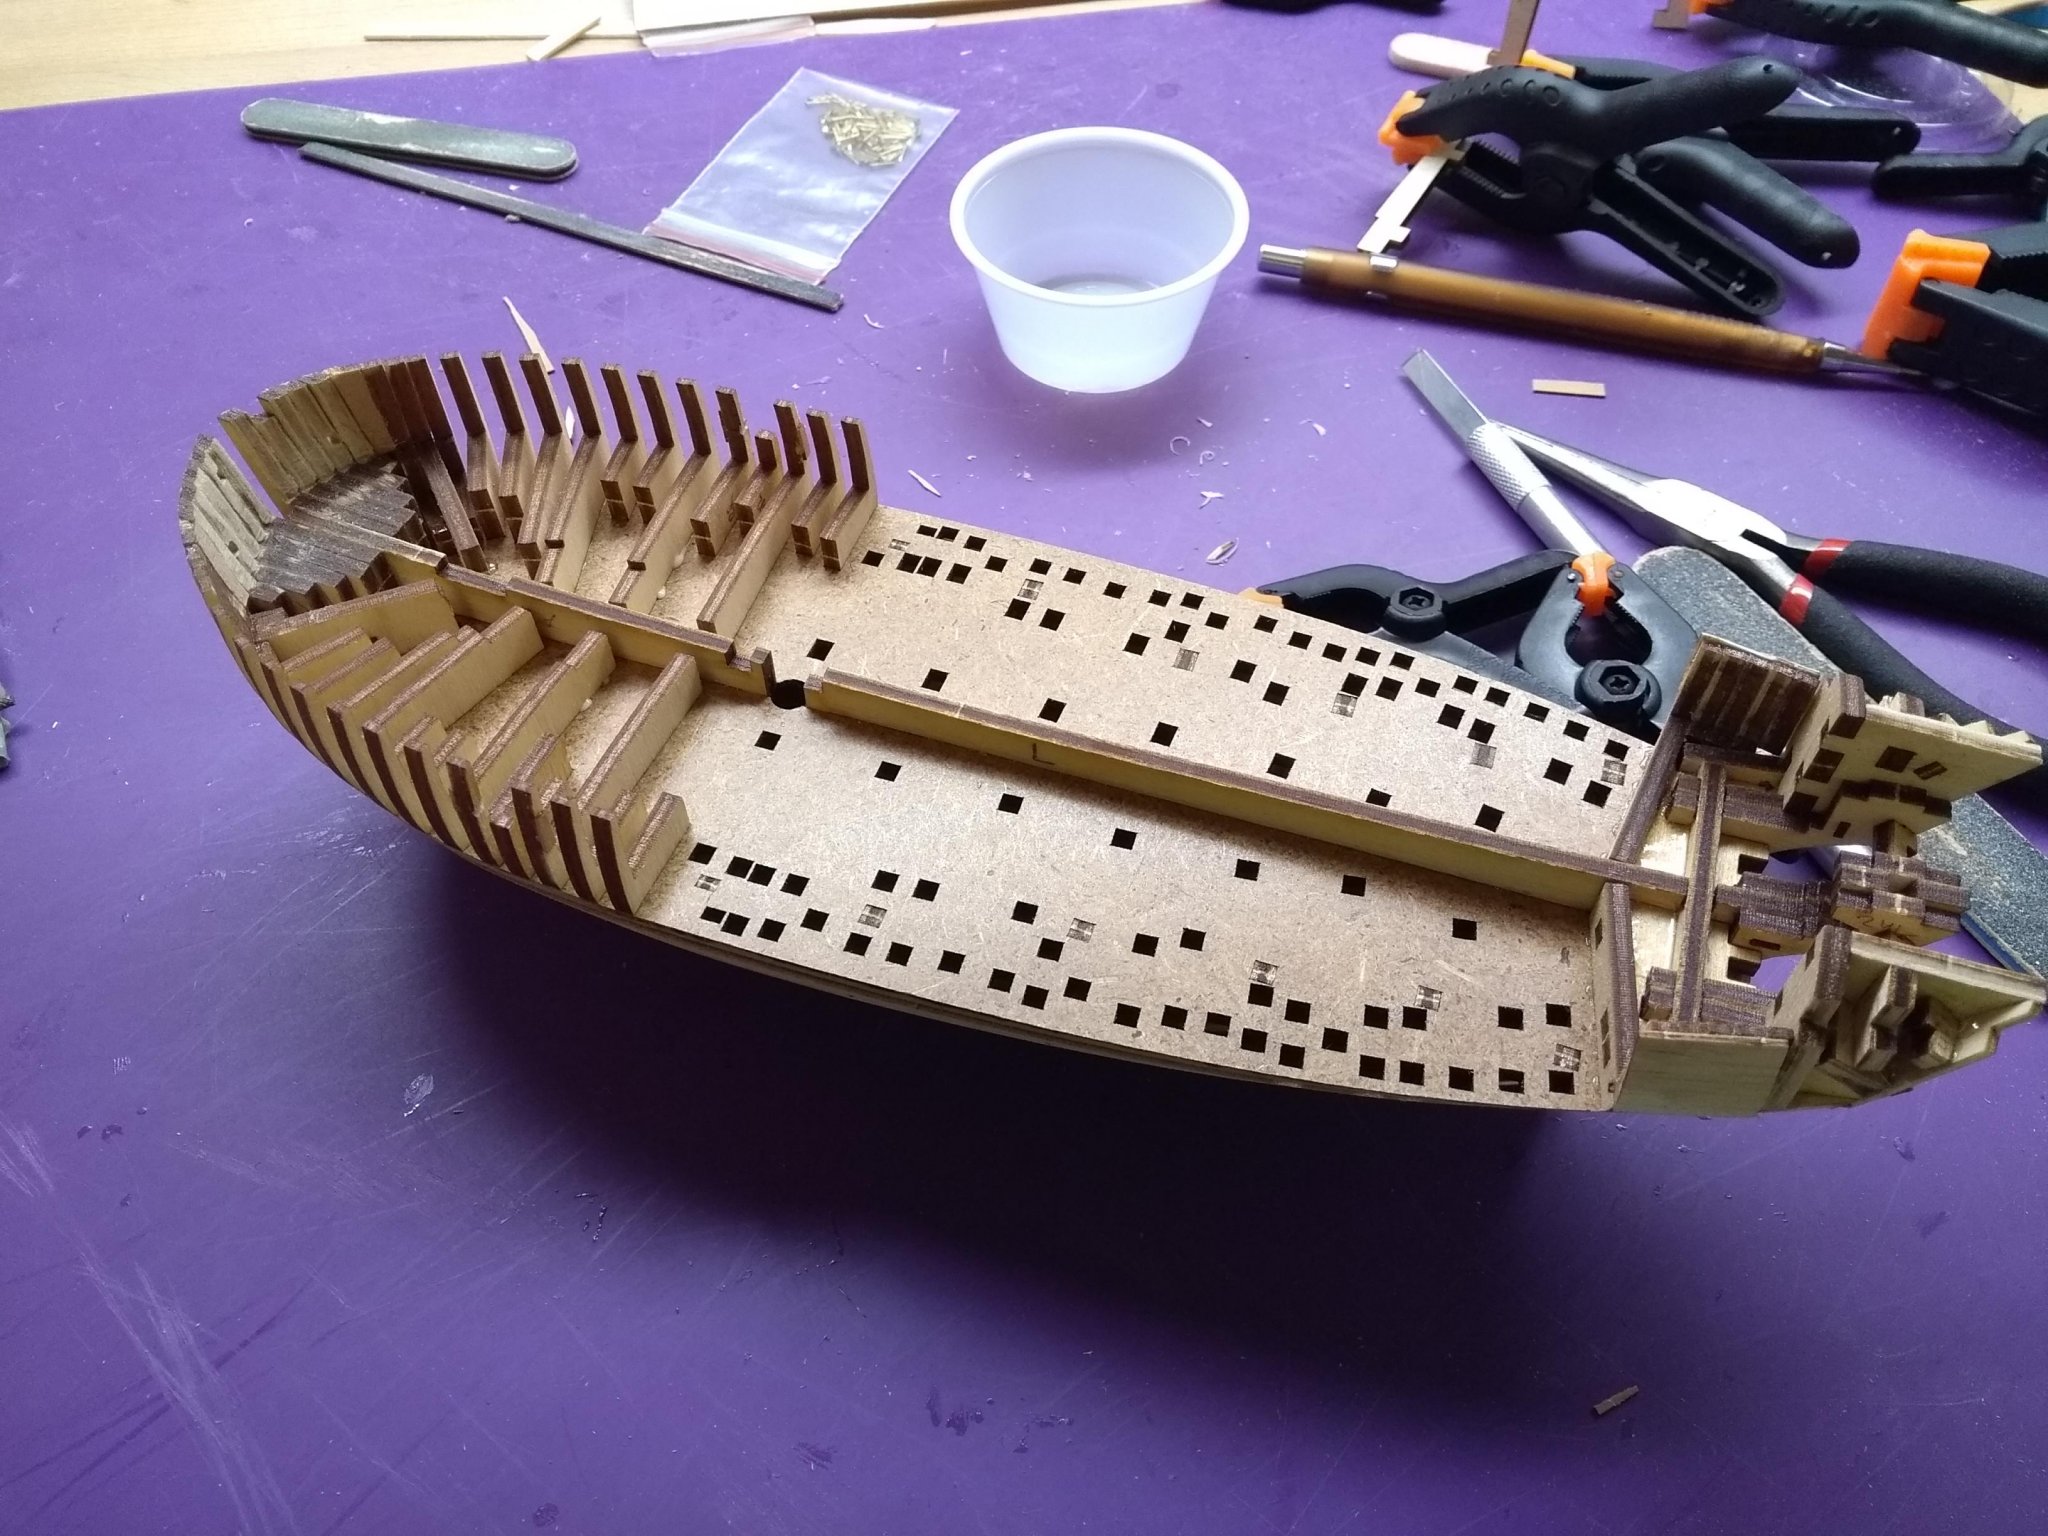
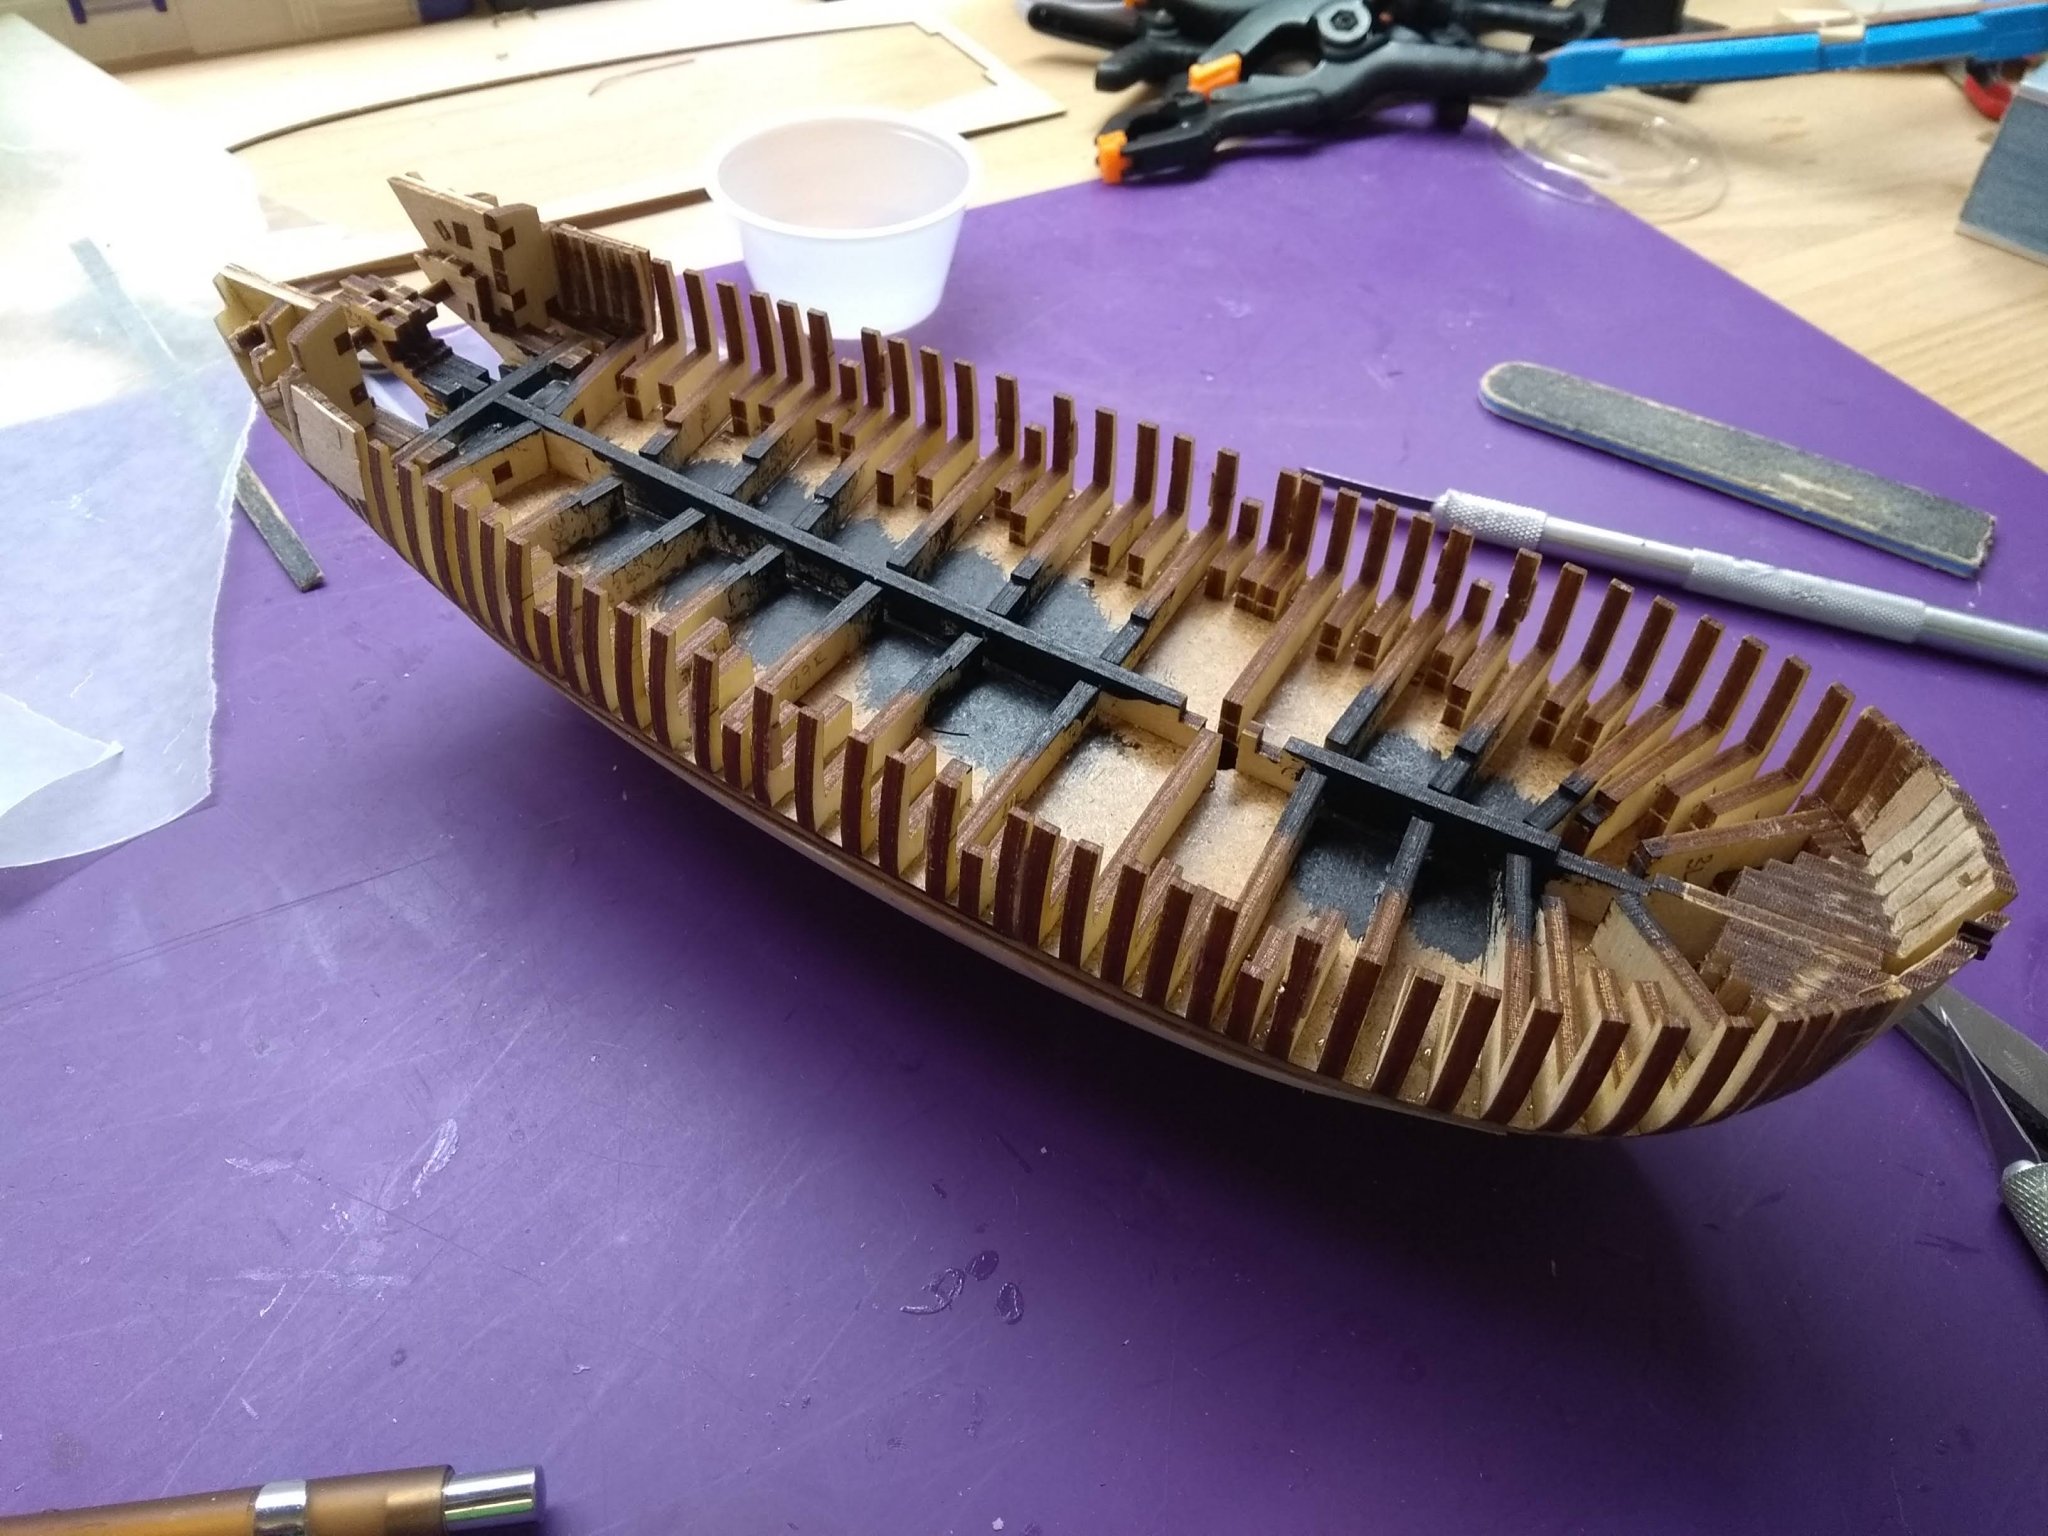
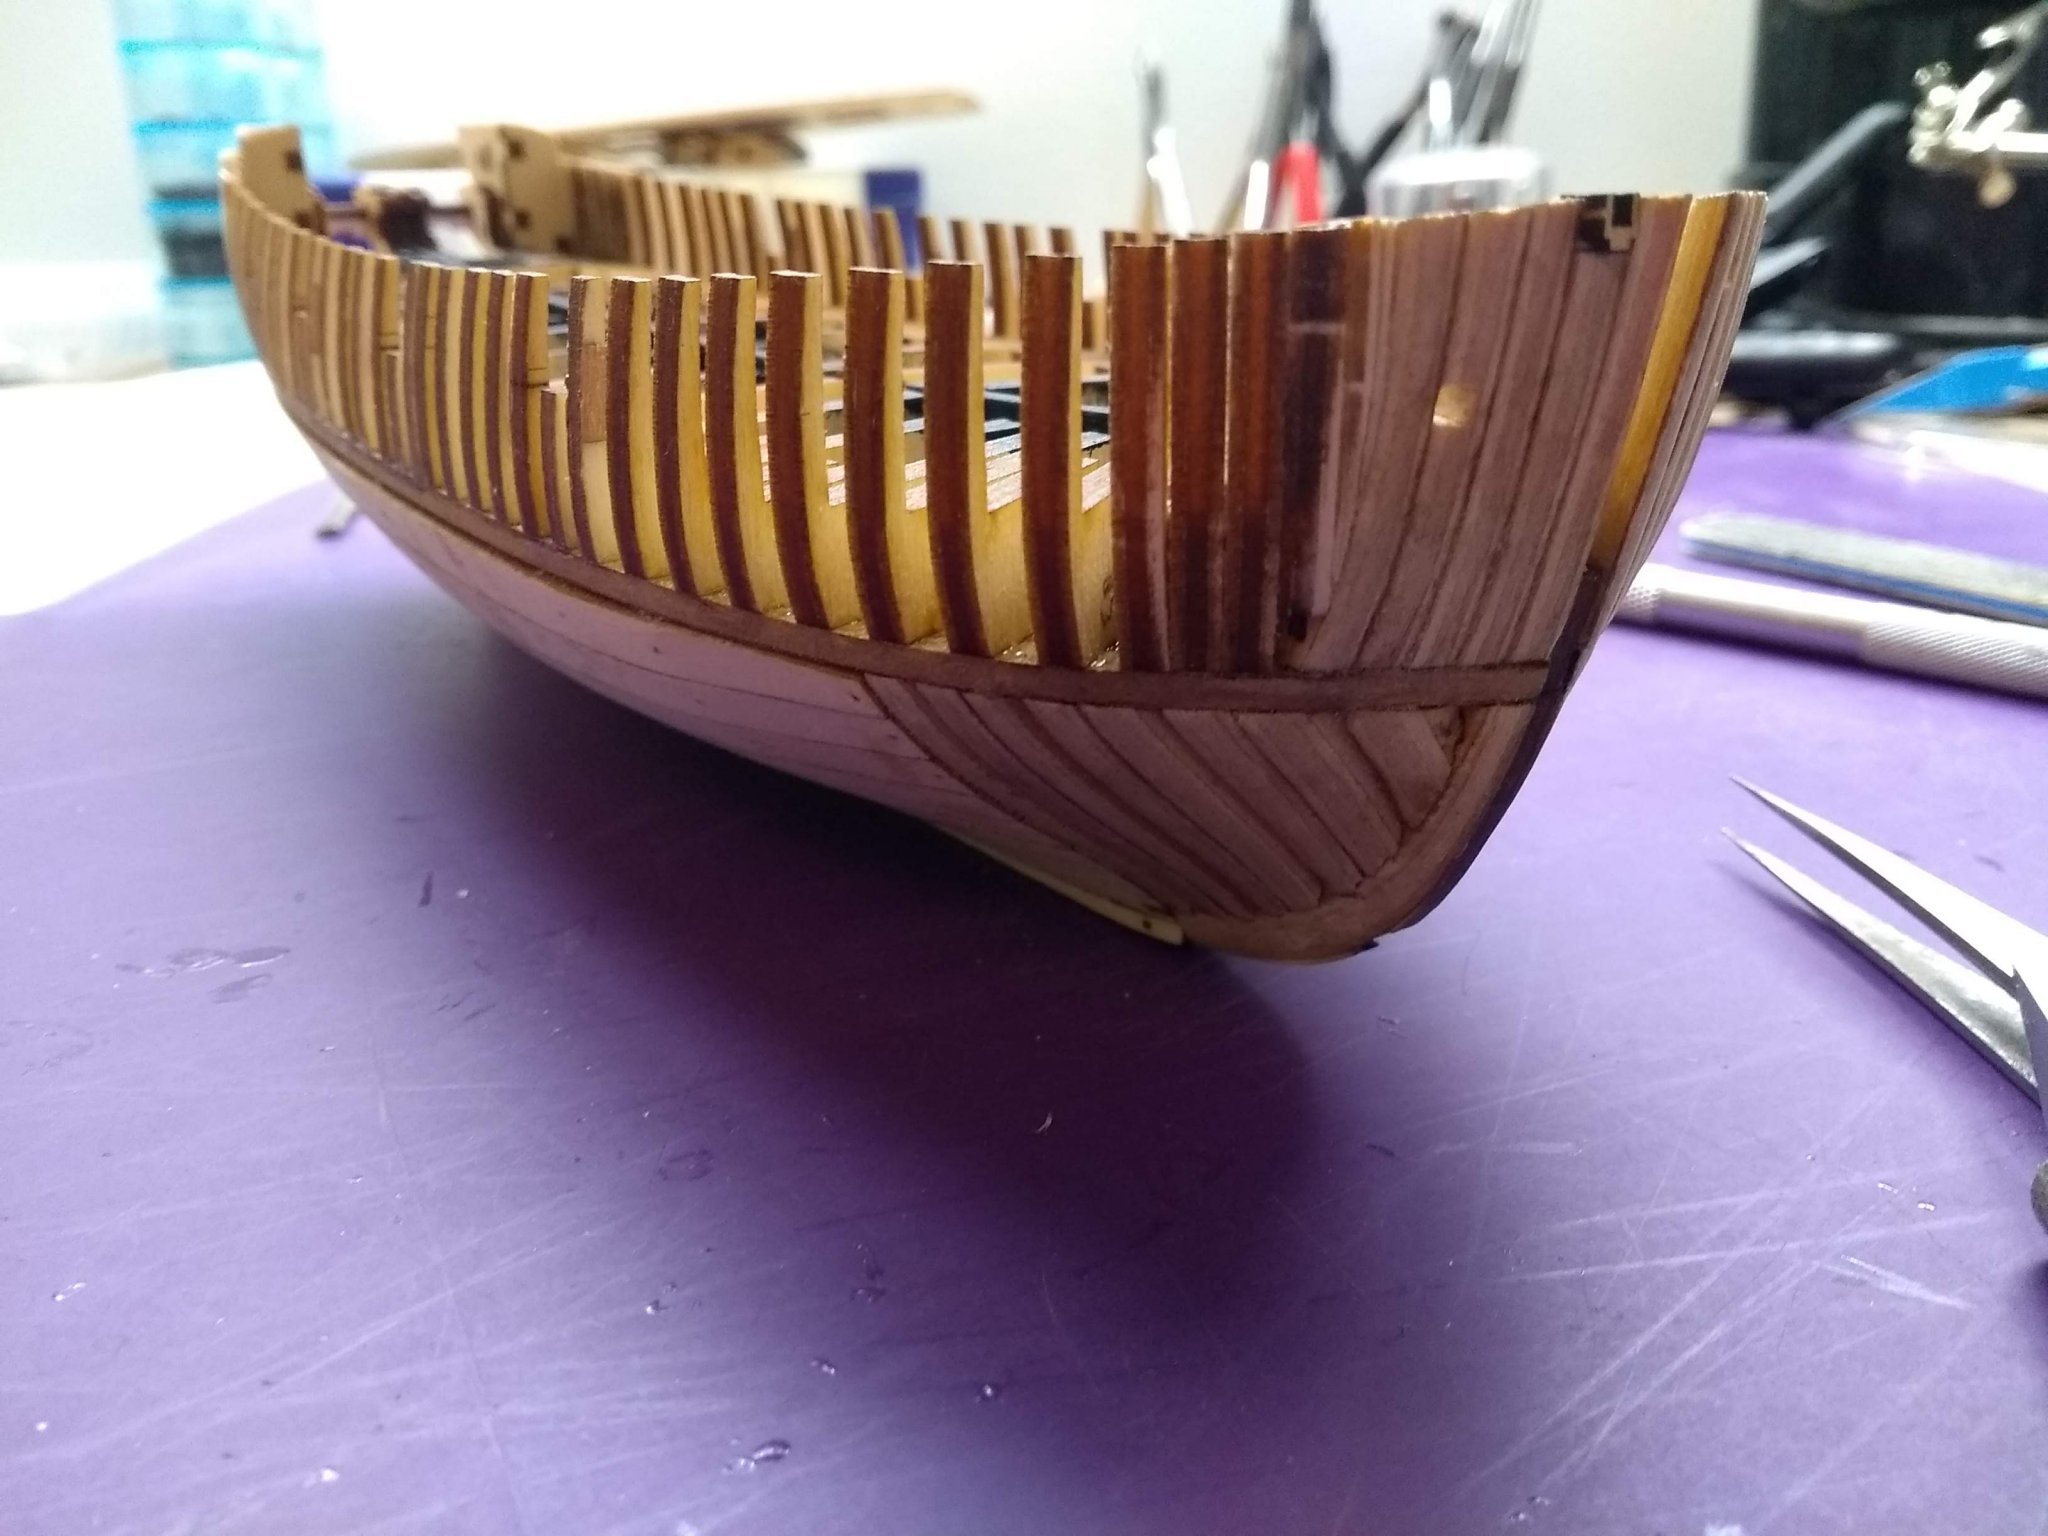
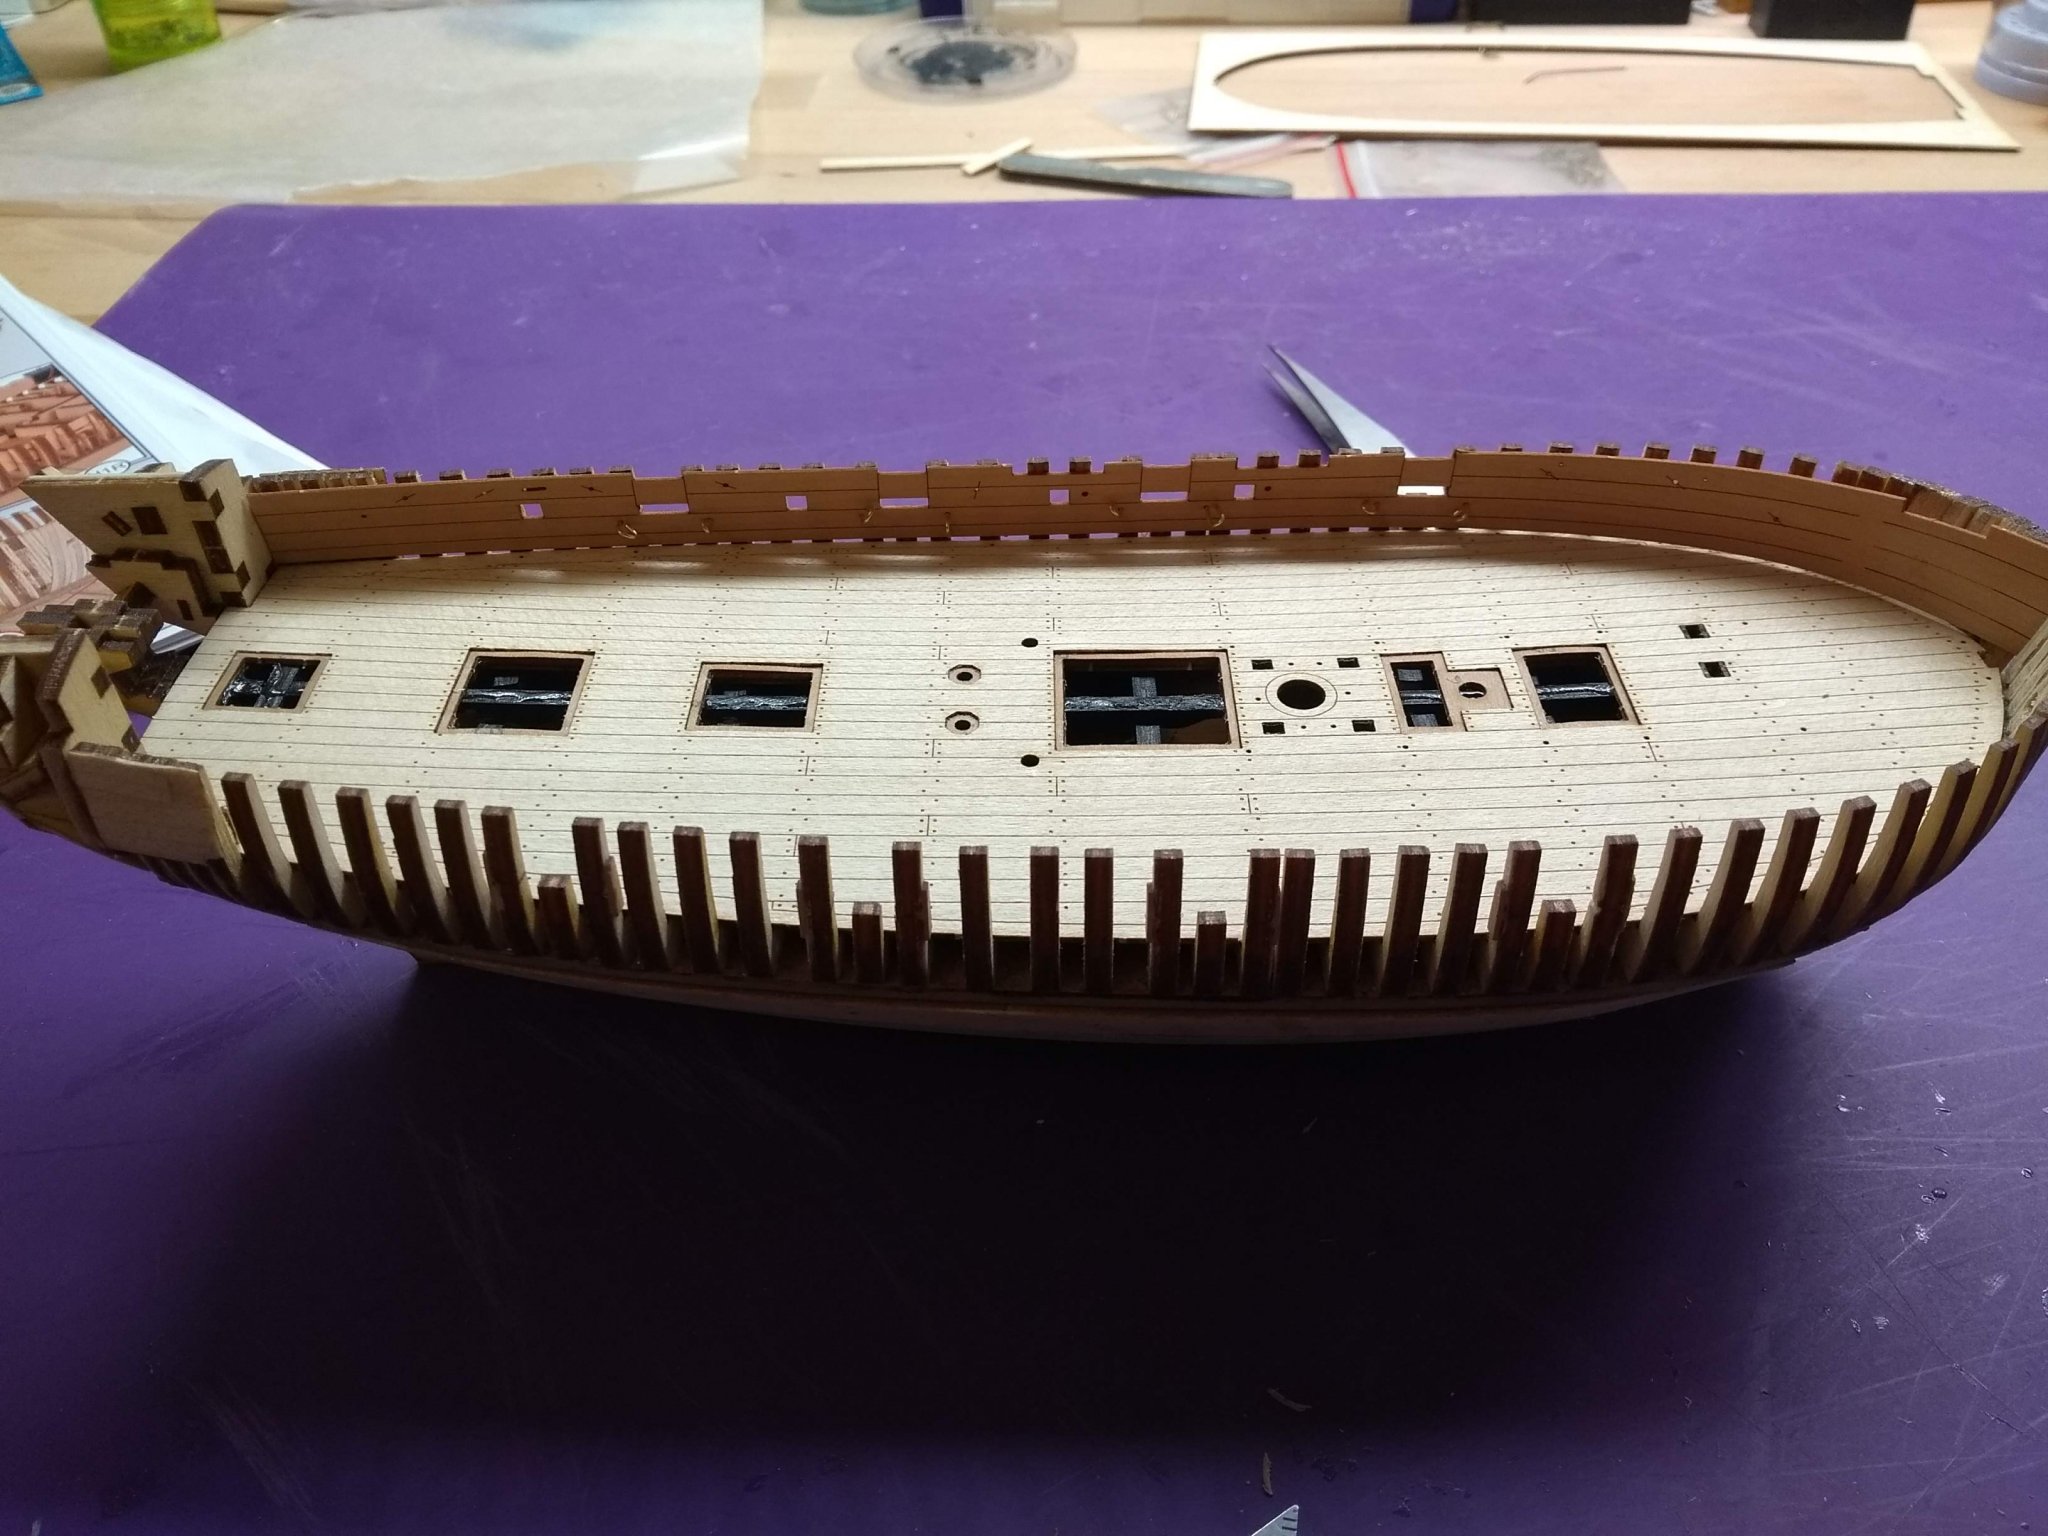
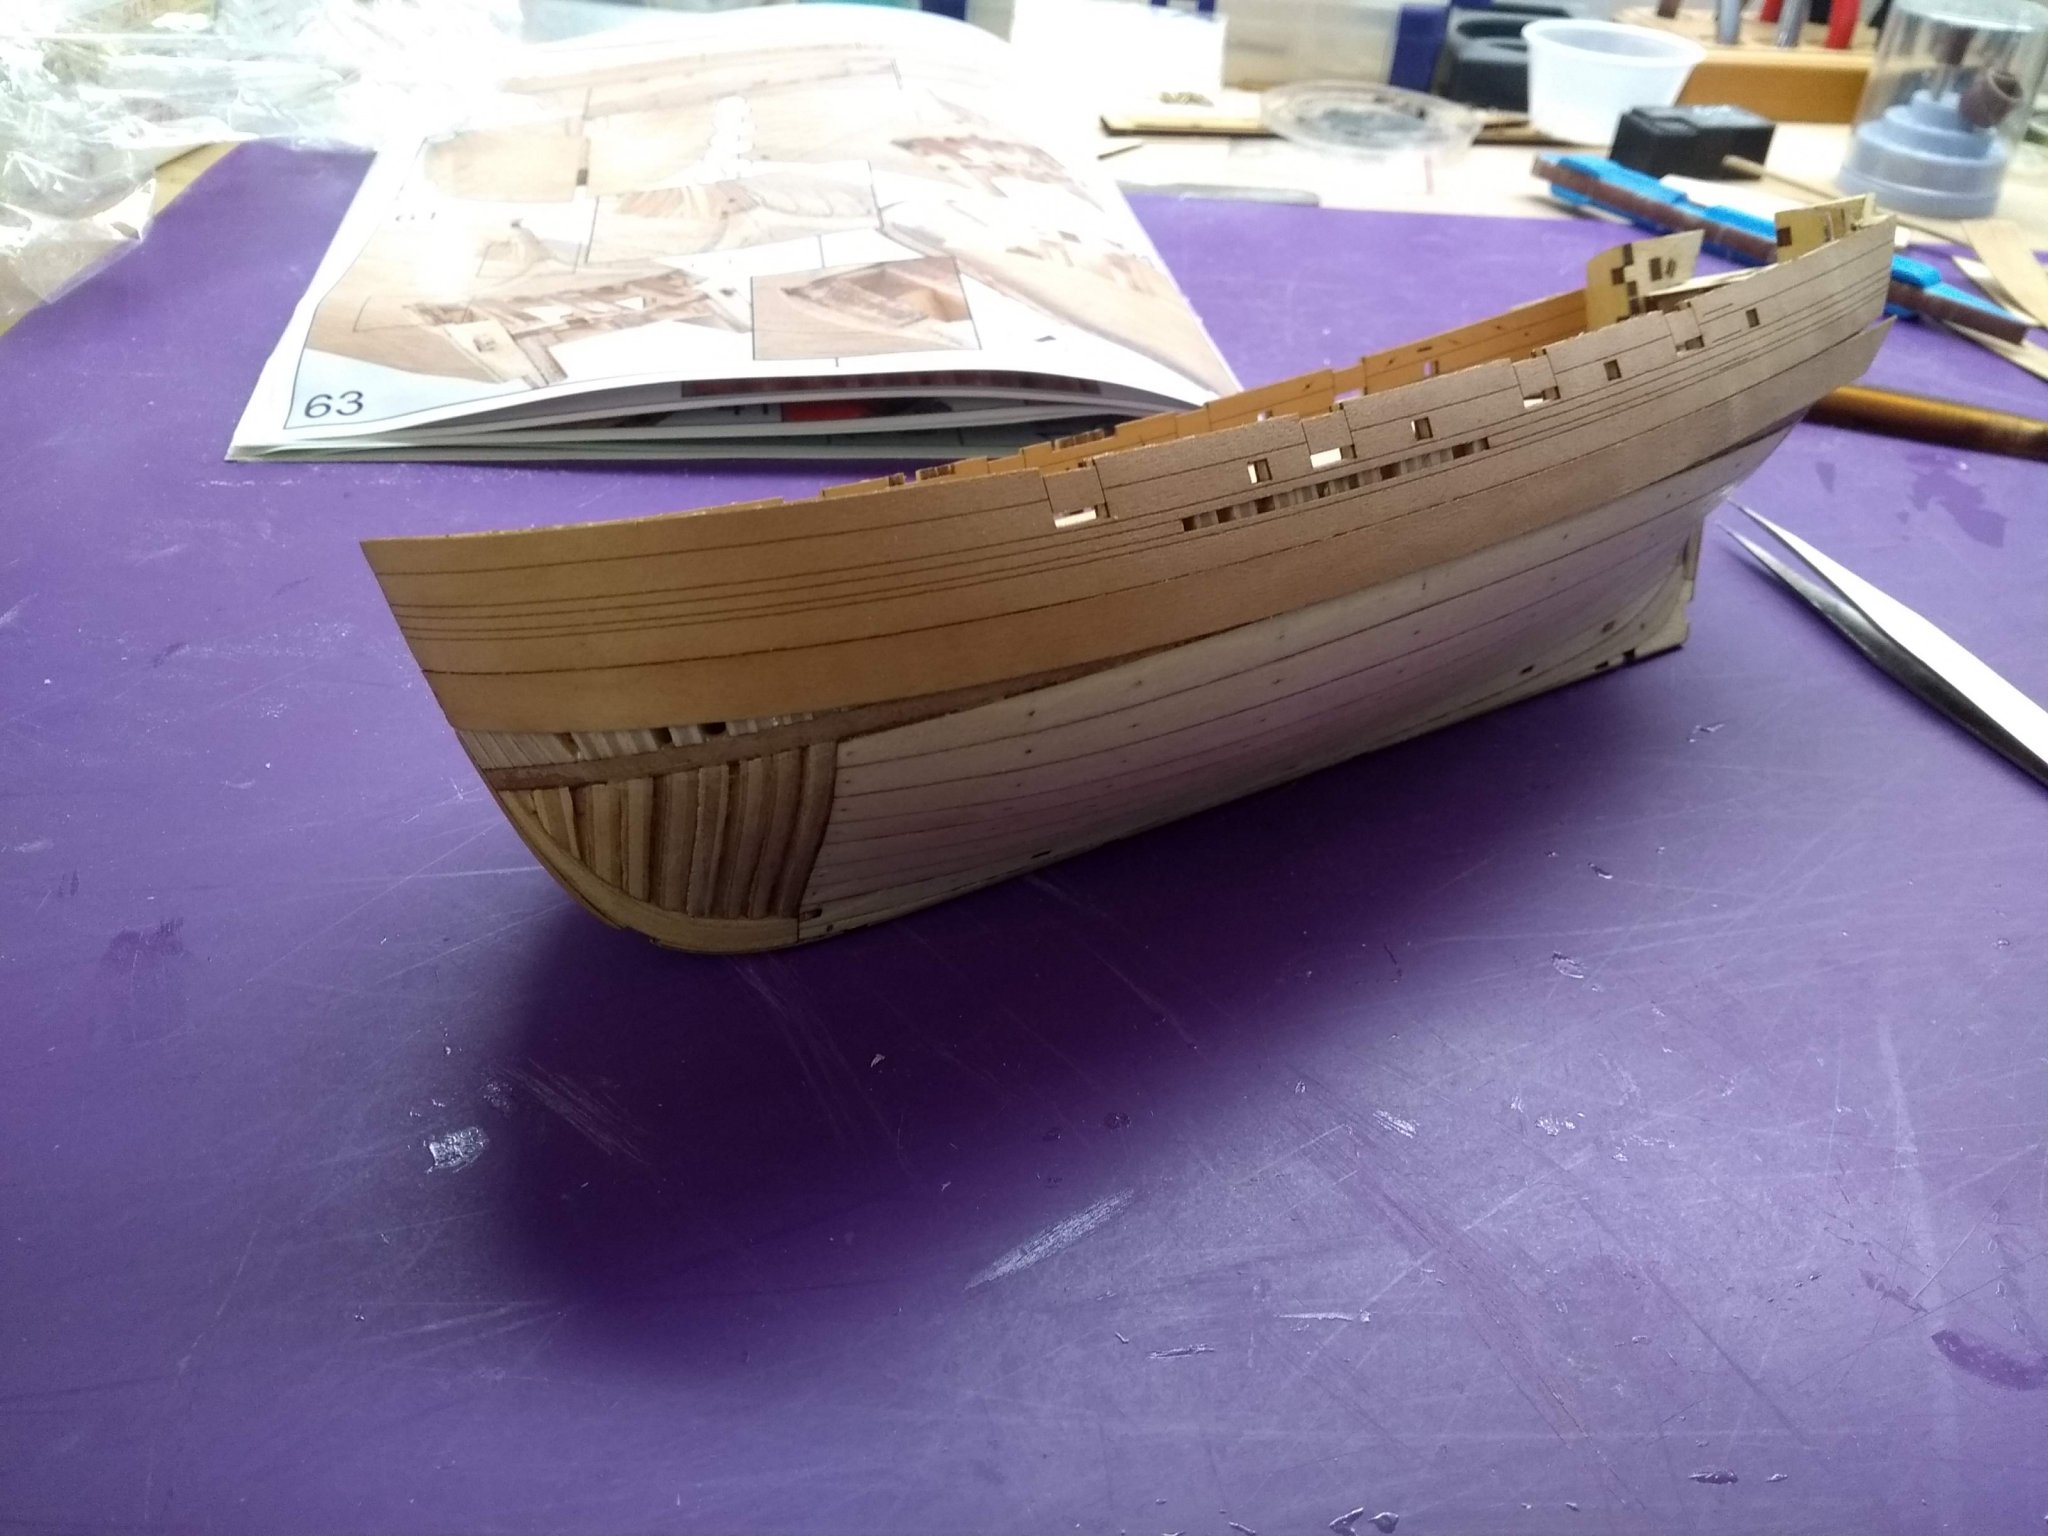
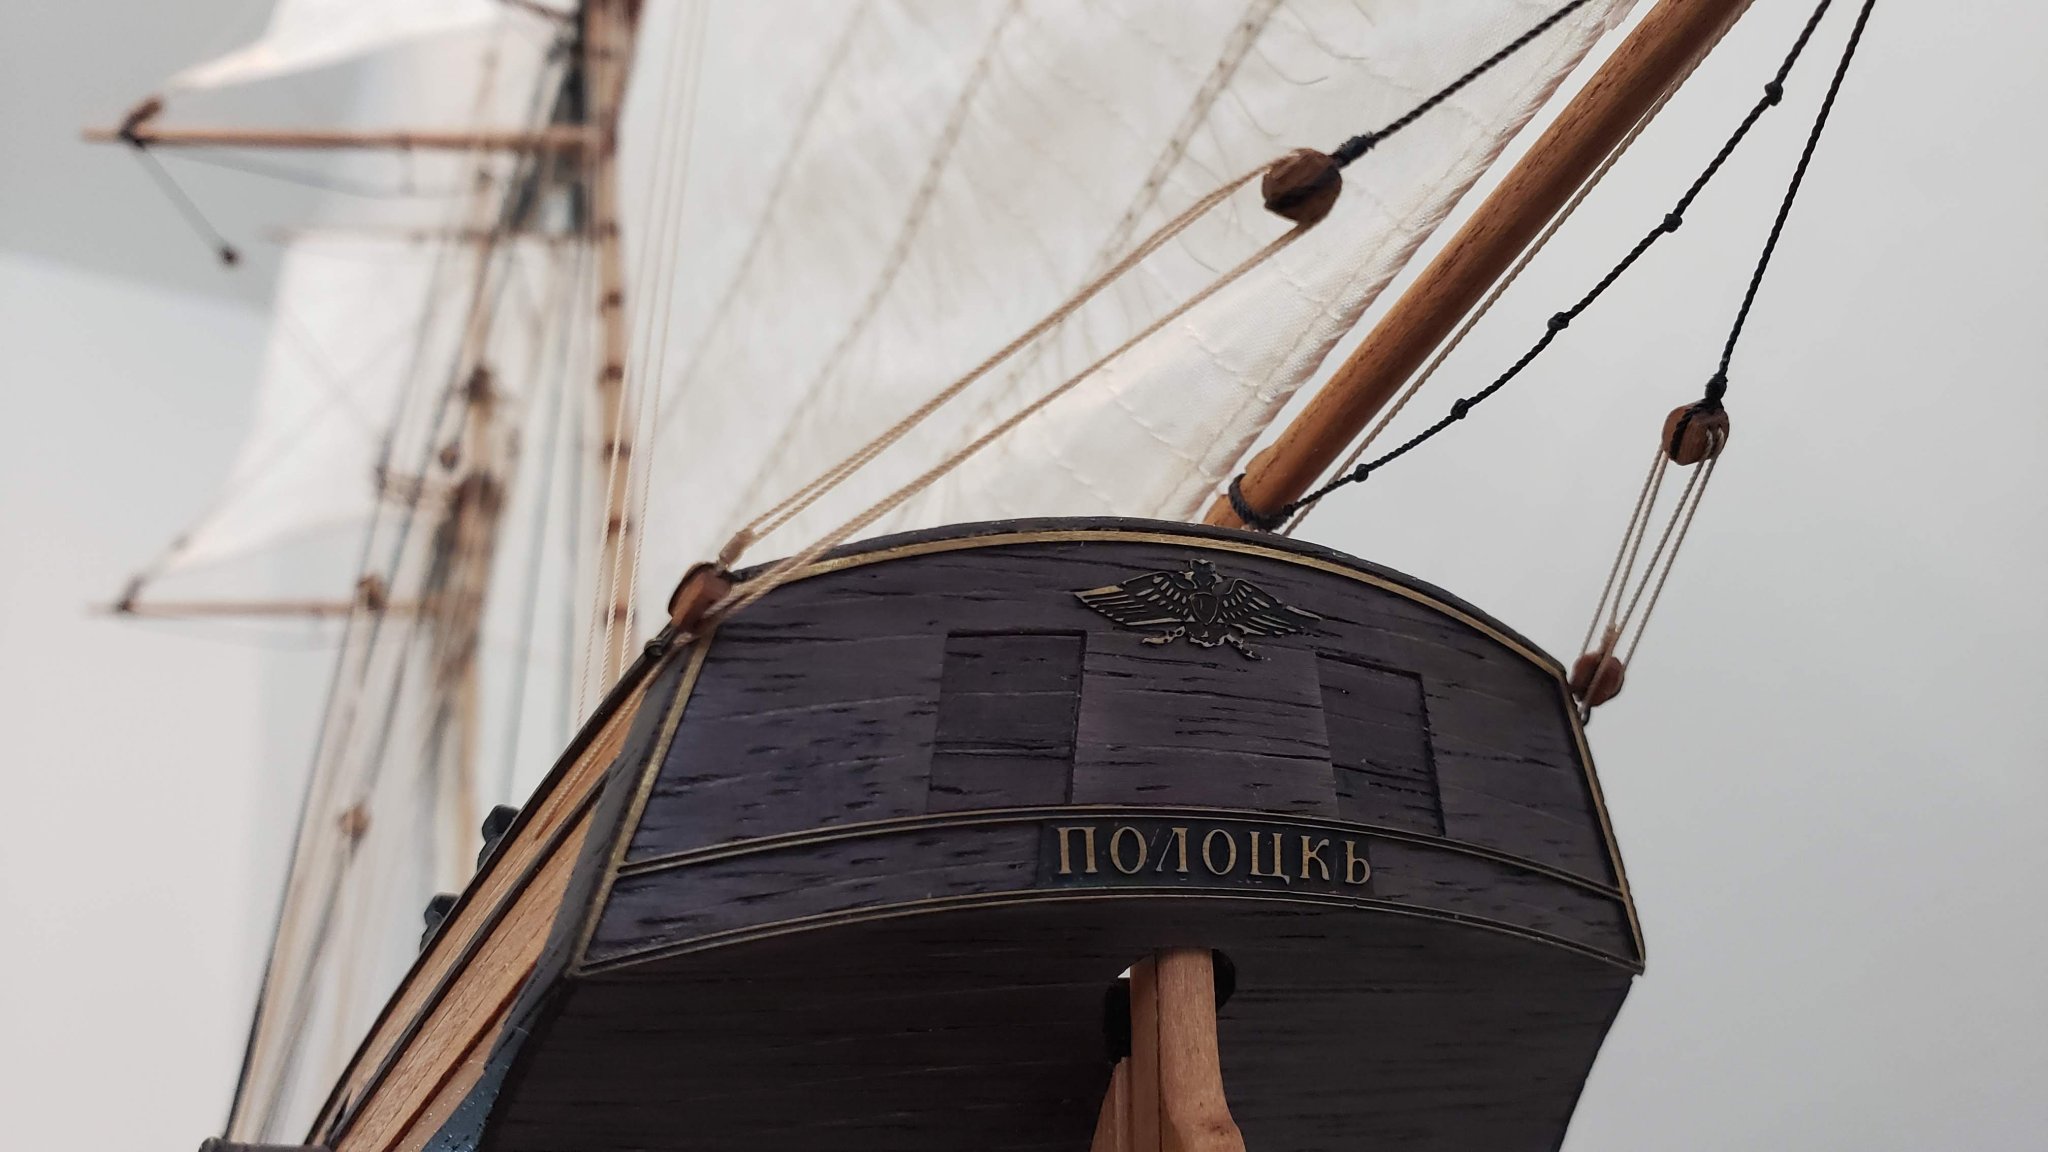
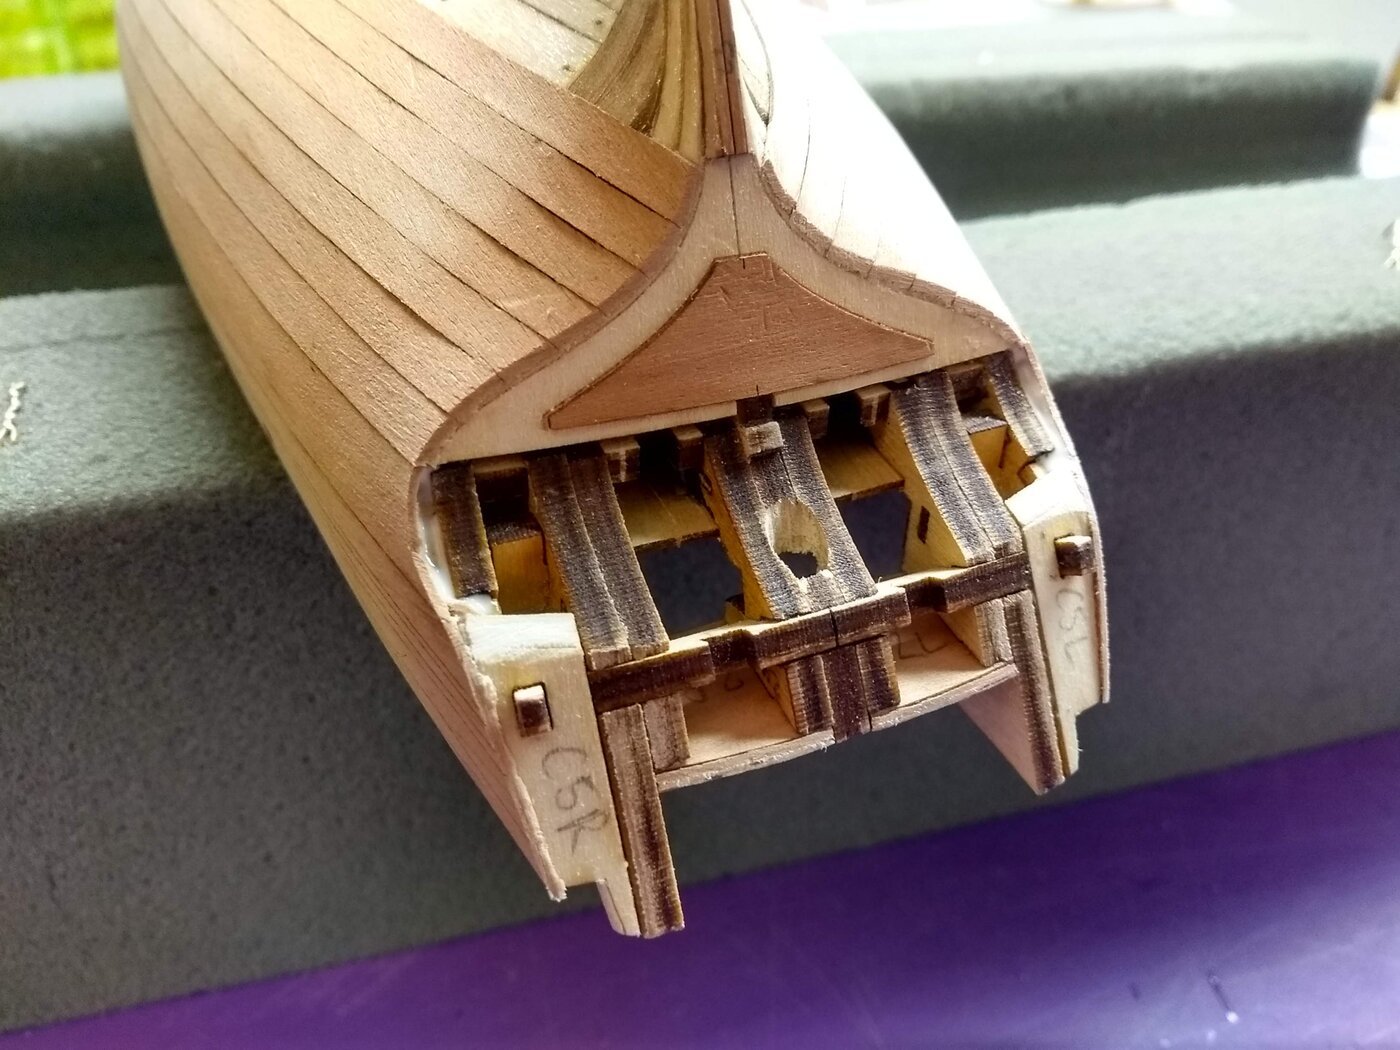
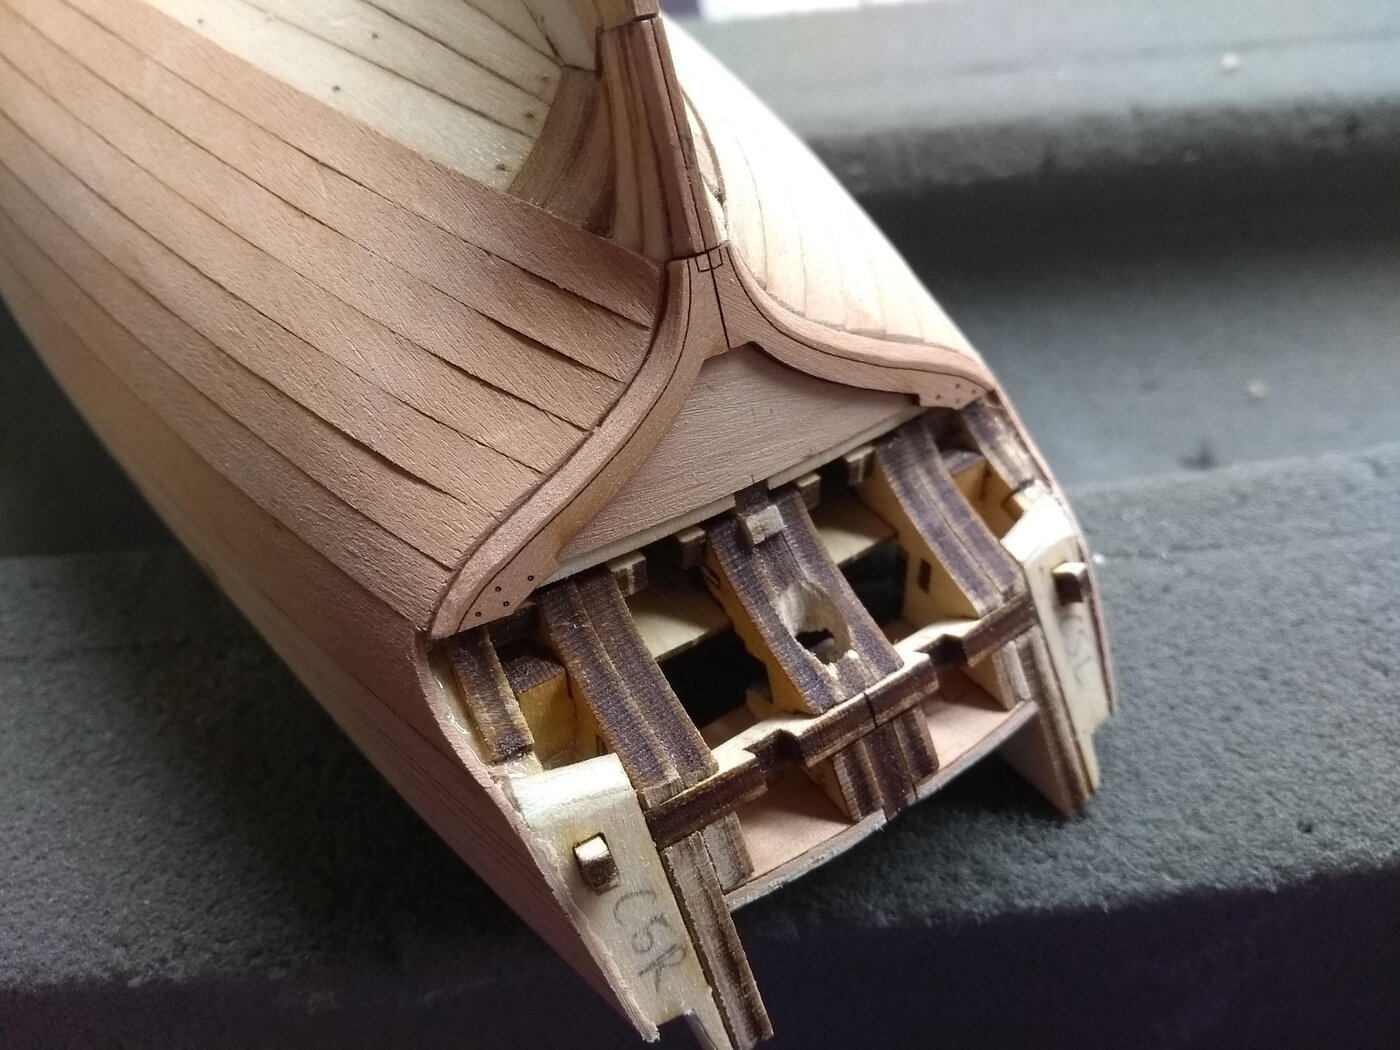
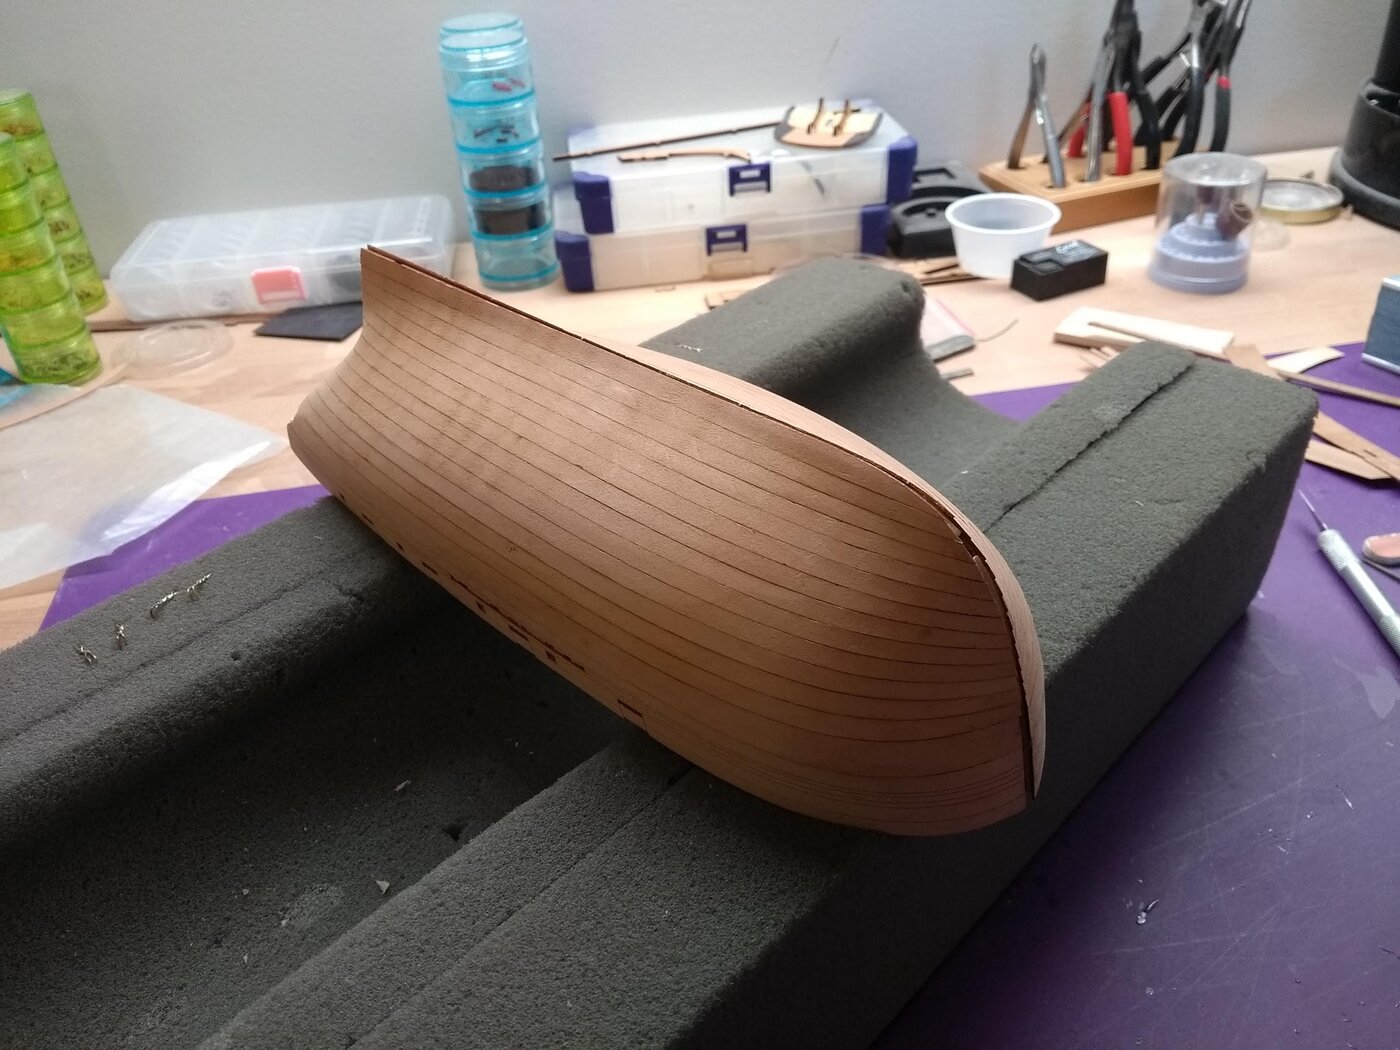
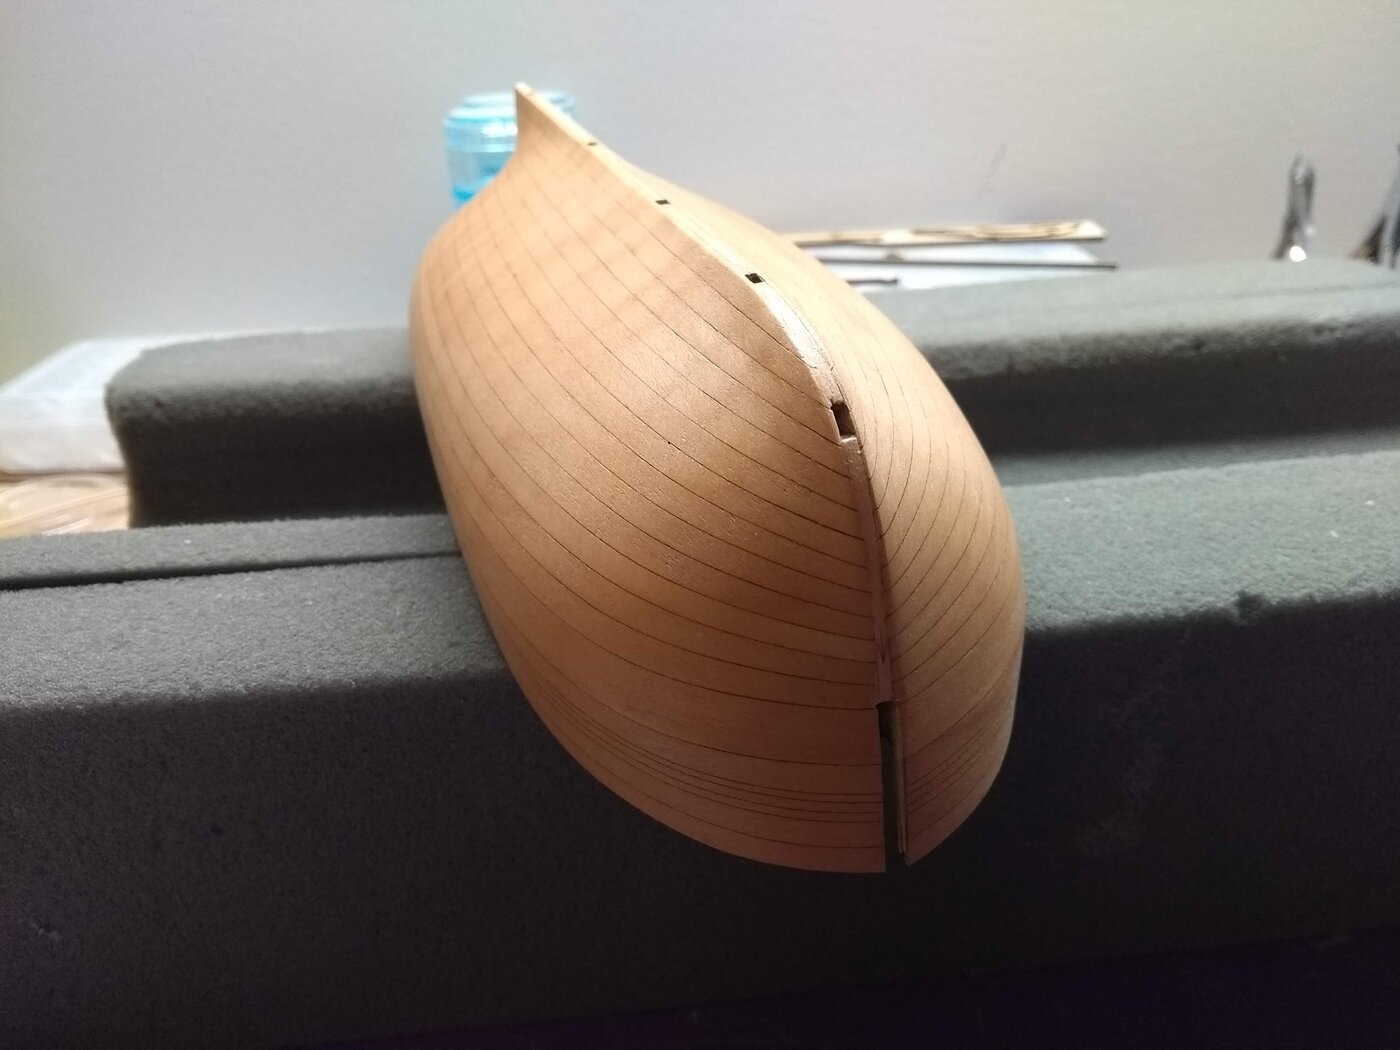
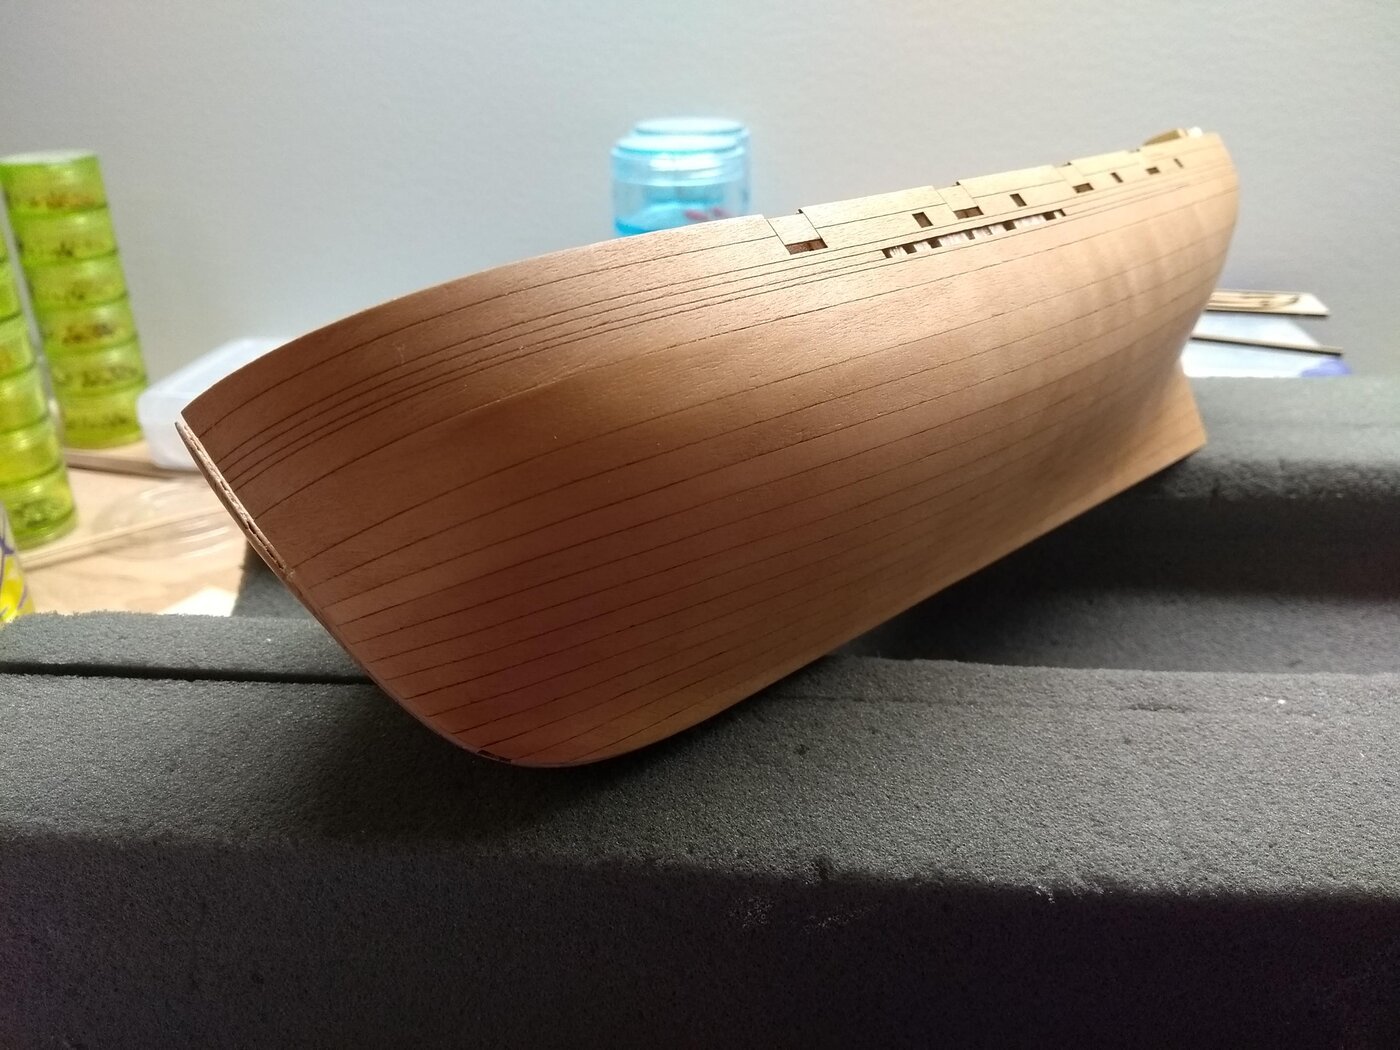
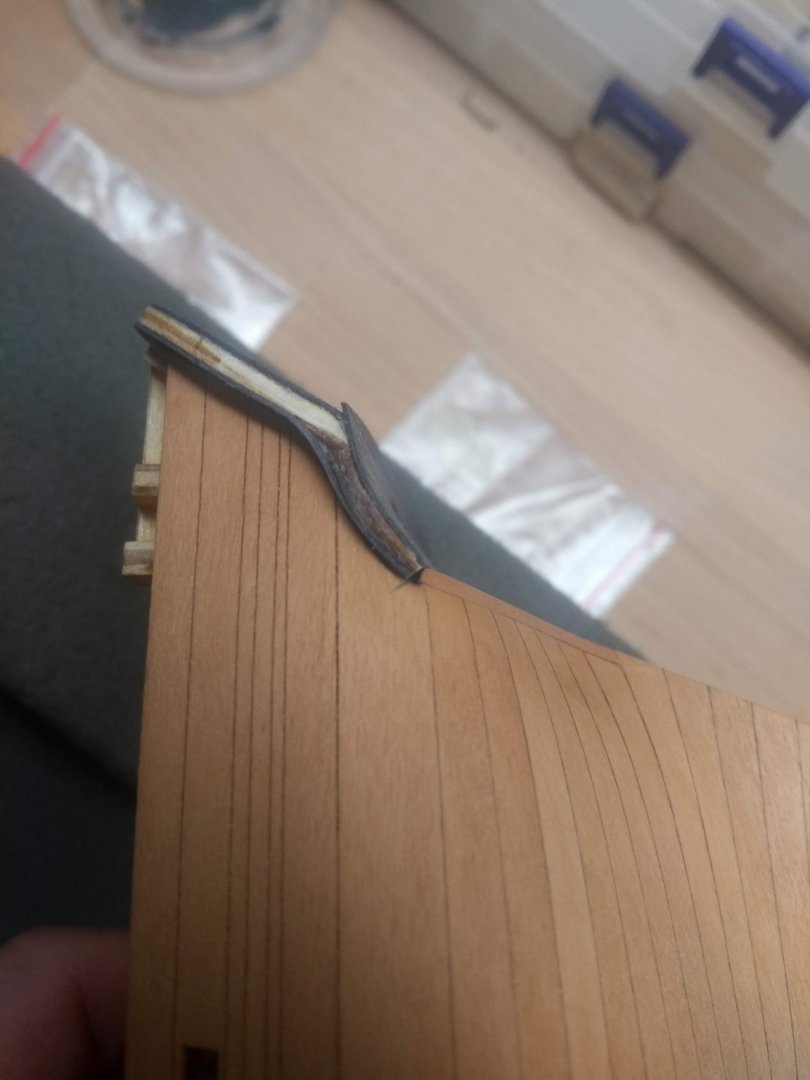
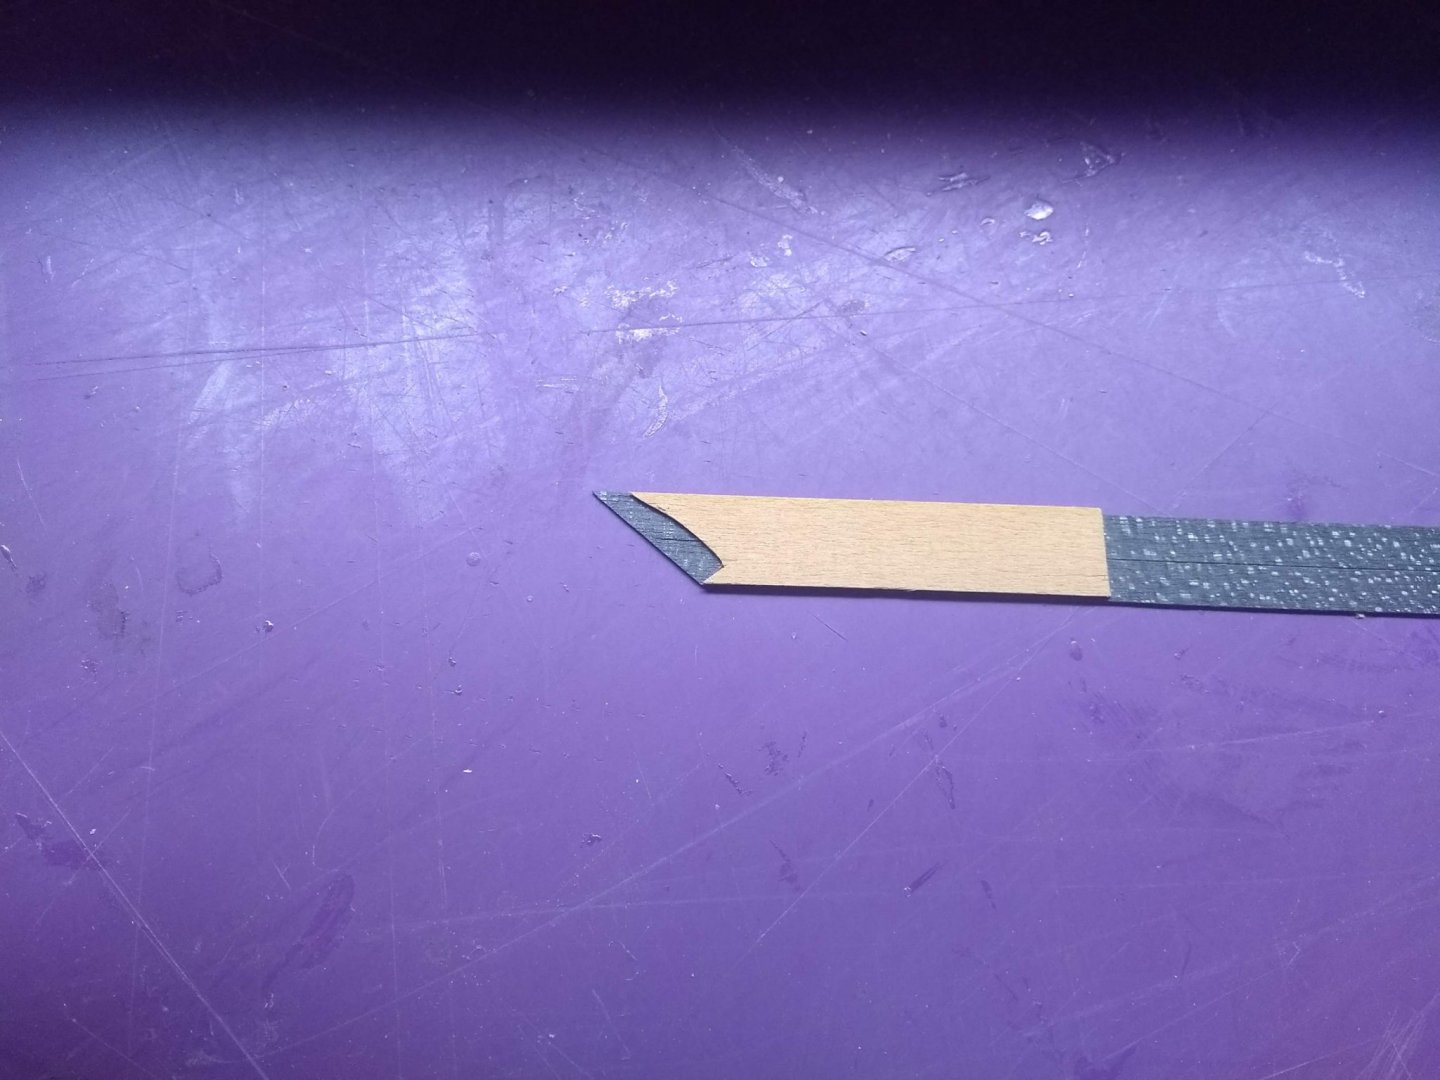
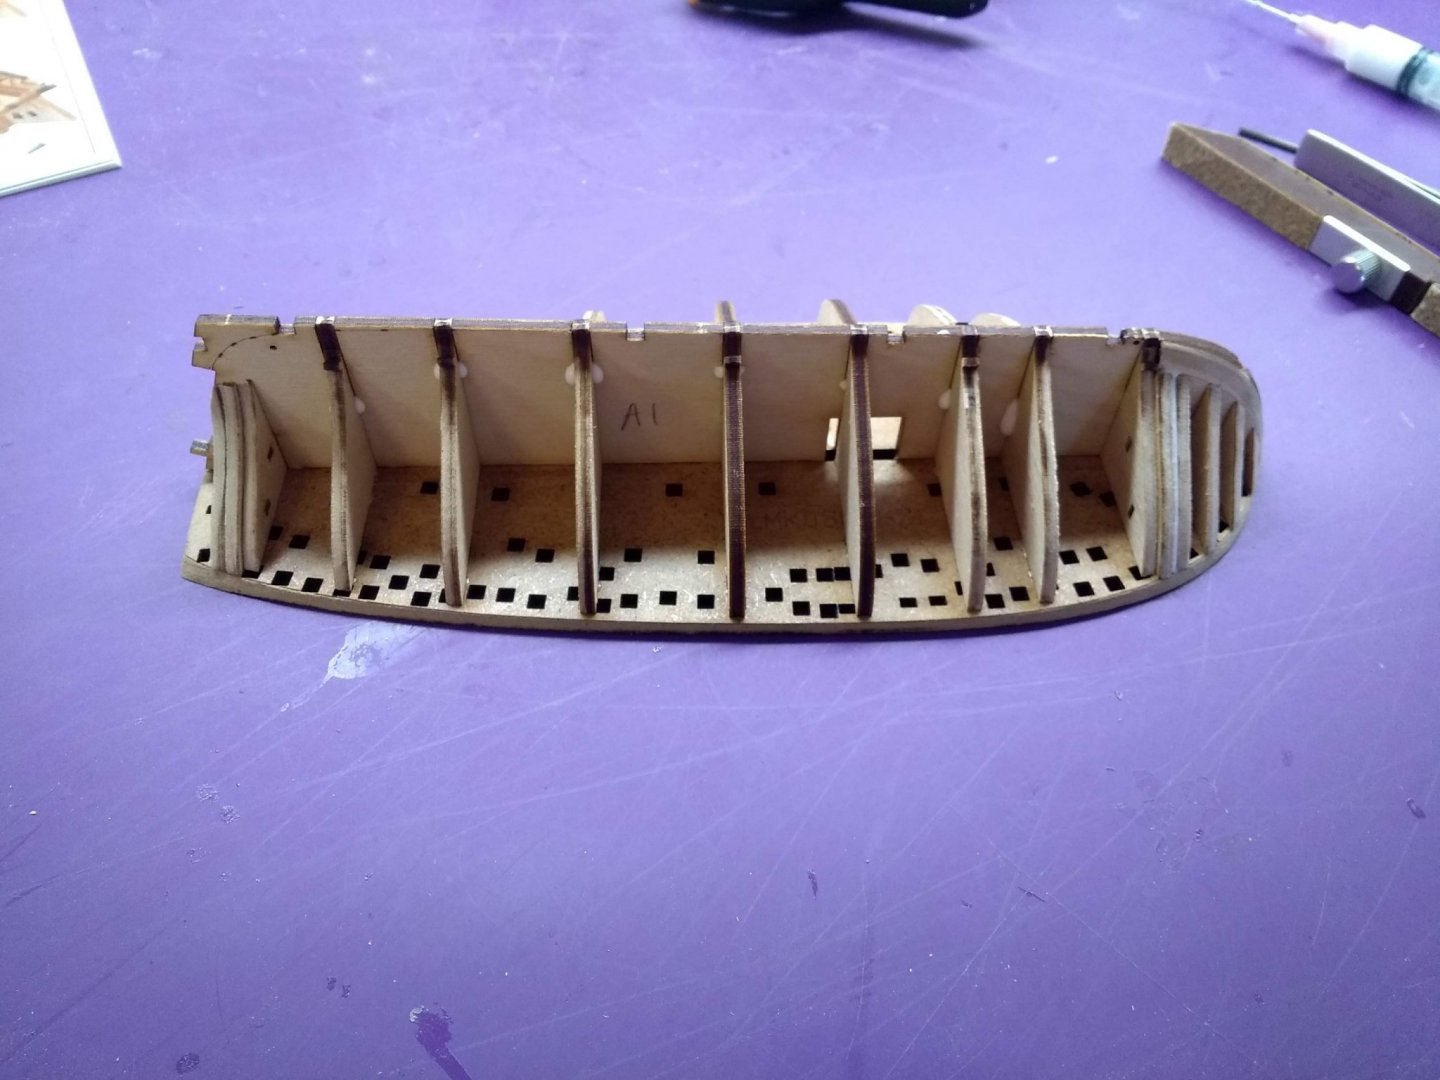
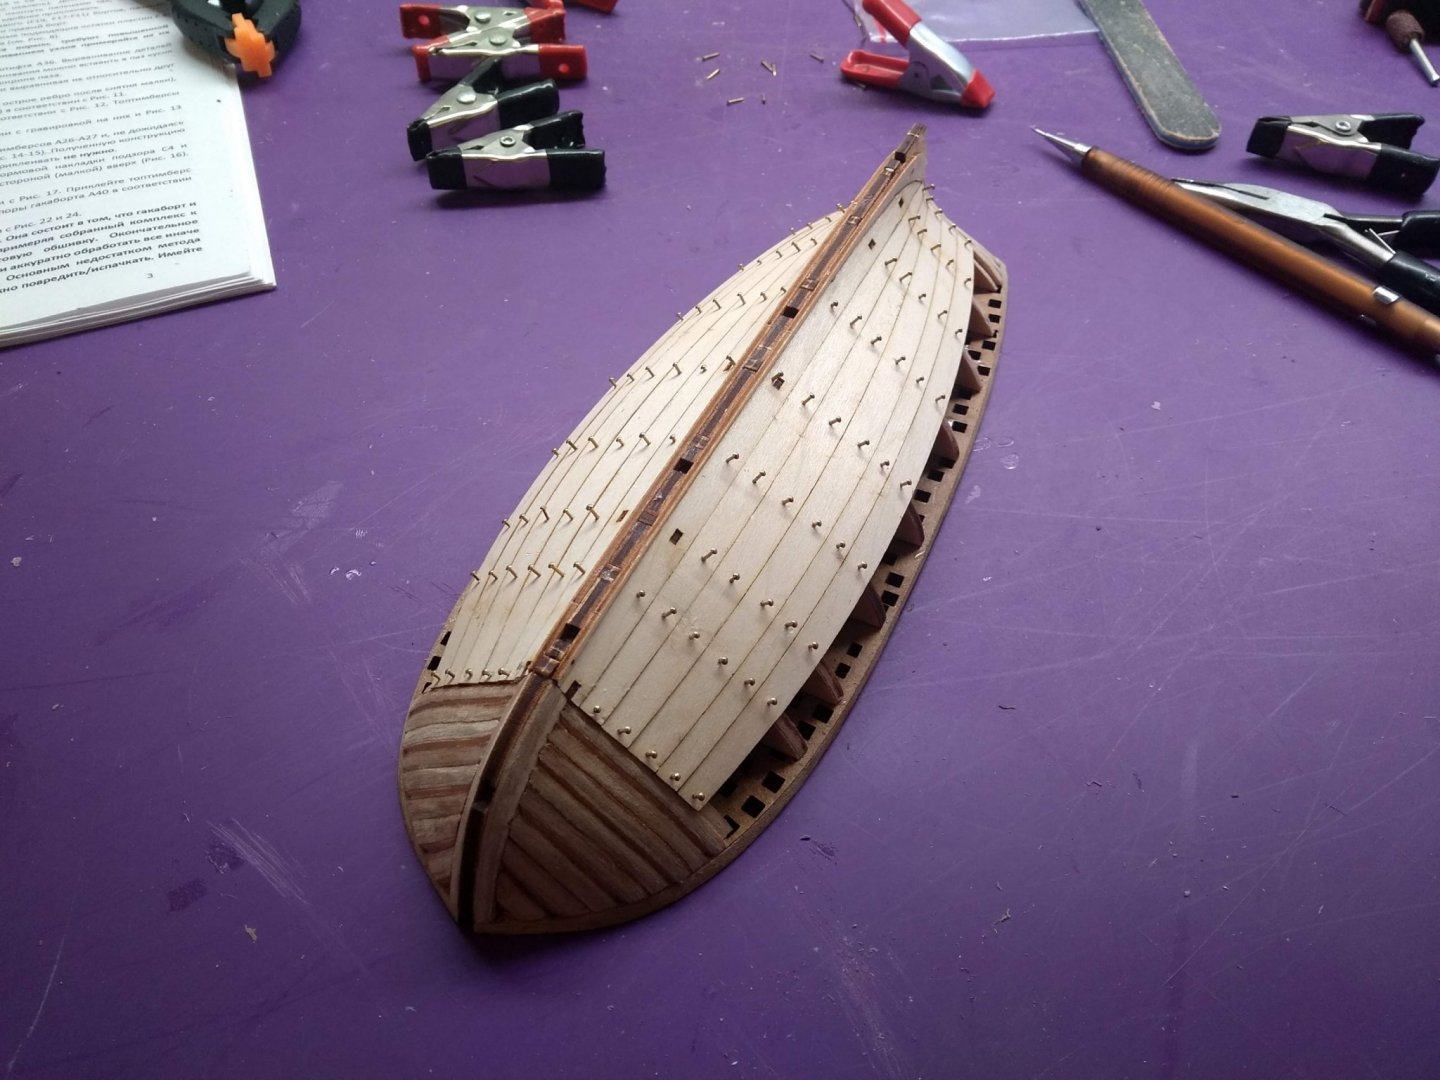
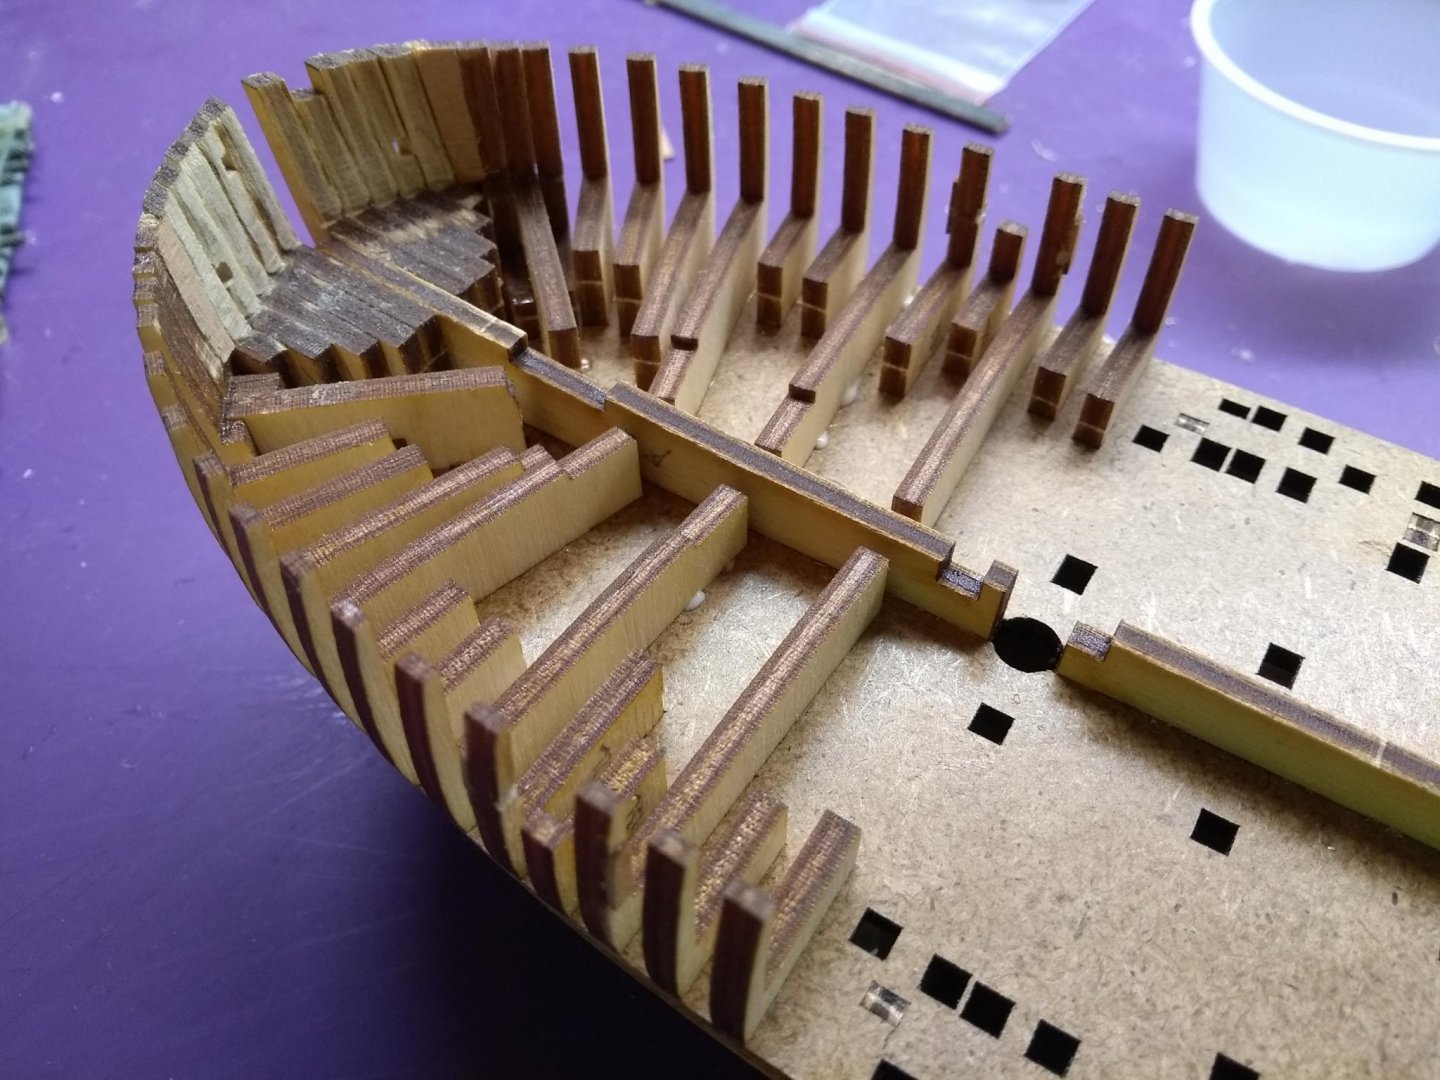
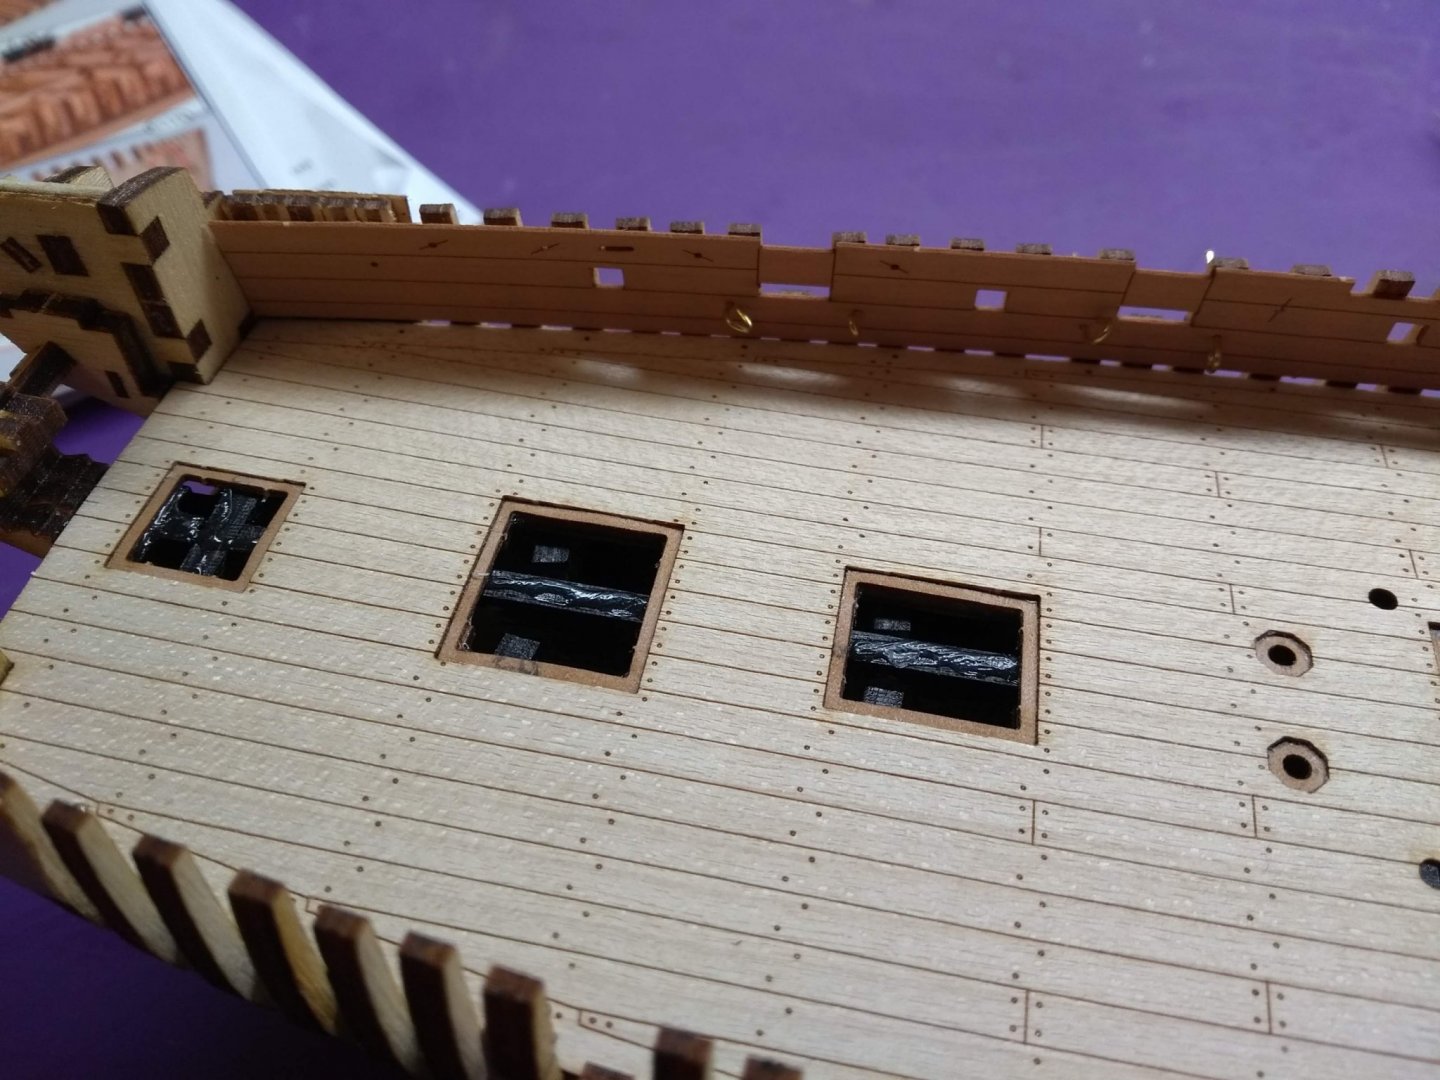
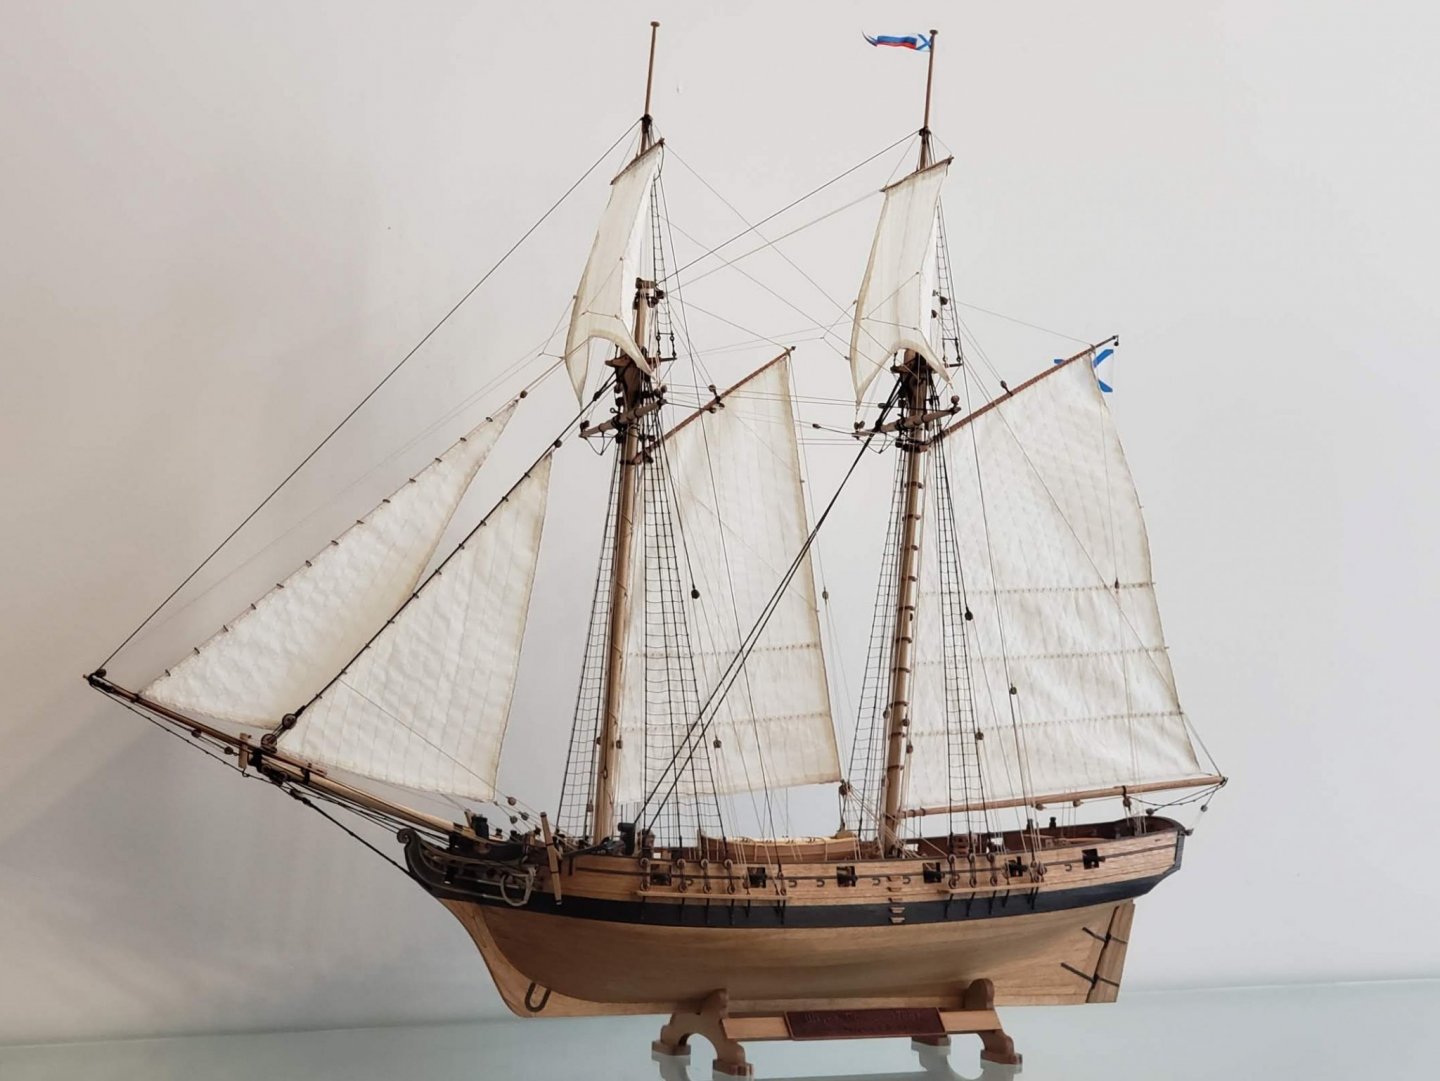
I started this build some time in May and currently I'm in the process of shaping yards. I'll be posting pictures and comment starting with the very beginning and hopefully I'll catch up to the build's current state. This is the model of Russian tender named "Avos". As far as I know this word only exists in Russian language and describes a world view when you don't know the outcome but hope for the best, citing Wikipedia: The Russian avos' (Russian: русское авось) describes a philosophy of behavior, or attitude, of a person who ignores possible problems or hassles and, at the same time, expects or hopes for no negative results or consequences. It is an attitude that treats life as unpredictable and holds that the best one can do is count on luck. This ship is well know in Russia because of "Juno and Avos" rock opera that was performed for the first time in 1981. It tells the story of a tragic love between Russian explorer Nikolai Rezanov and a daughter of the governor of Spanish California. "Avos" was a tender built in Novoarkhangelsk (present Sitka, Alaska) in Russian America in 1806. She was manned by a crew of 12 and was a part of an expedition to California headed by explorer Nikolai Rezanov that consisted of two ships, brigantine "Juno" and tender "Avos". They arrived in California in the same year, to get provisioning for starving Russian settlements in Alaska. During his stay in San Francisco, Rezanov met a 15-year old daughter of a Spanish governor Maria de la Concepcion Arguello. Maria fell in love with Rezanov and they got engaged. Unfortunately they could not get married because she was a Catholic and he belonged to the Eastern Orthodox Church. Rezanov had to obtain the Russian Emperor's permission to marry Maria. Promptly, he sailed back to Alaska and then to Okhotsk. From there he had to cross all of Russia east to west on horseback to get to St Petersburg. During this perilous trip he fell ill and died in Krasnoyarsk in 1807 at the age of 43. Maria did not believe the news of his death until 1842 when Sir George Simpson gave her a detailed account of Rezanov's death. She took a vow of silence and lived in a monastery in Monterey, California until her death in 1857. I was really excited about building a ship with such rich history. The kit is of the same great quality as all Master Korabel kits. Without further ado, here are my steps: 1. As always the first step is setting up the "skeleton" framework for planks. This kit is a plank-on-bulkhead type with two layers of planks. The interesting detail in this kit is that the whole frame is split horizontally by an HDF plate into two separate parts - top and bottom. First all bottom bulkhead and the center keel were installed into the HDF plate (which has asymetric notches so you'd never be able to mix up left and right bulkheads): 2. After all bulkheads were installed, I planked the first layer of the lower portion of the hull: 3. Next the upper section of the center keel need to be assembled along with the stern: 4. What I found really interesting about this build was that counter and taffrail were not glued to the stern. They were supposed to be shaped and assembled separately. Overal the counter and taffrail turned out to be the most difficult parts of the whole build. The first layer of counter split when I bent it, so I had to carefully reglue the sheet... 5. After that I went back to building up the bulkheads for the section of the hull above the HDF plate: 6. Once all bulkheads were installed (there were a lot of them!) the deck was glued. What I found interesting was that there was no subdeck on this model. The deck is a single sheet of maple veneer that is glued directly to the bulkheads. The inner bulwark installation was a breeze thanks to the guiding pins that were inserted into holes for gun tackles: 7. After the deck and the inner bulwarks were installed the hull was faired and planking began. Again, as with other Master Korabel kits it is a lot easier to plank using hot iron technique! (https://craftysailor.com/blogs/articles/planking-with-hot-iron😞


- 30 replies
-
- 7
-
-
- master korabel
- avos
- (and 1 more)
-
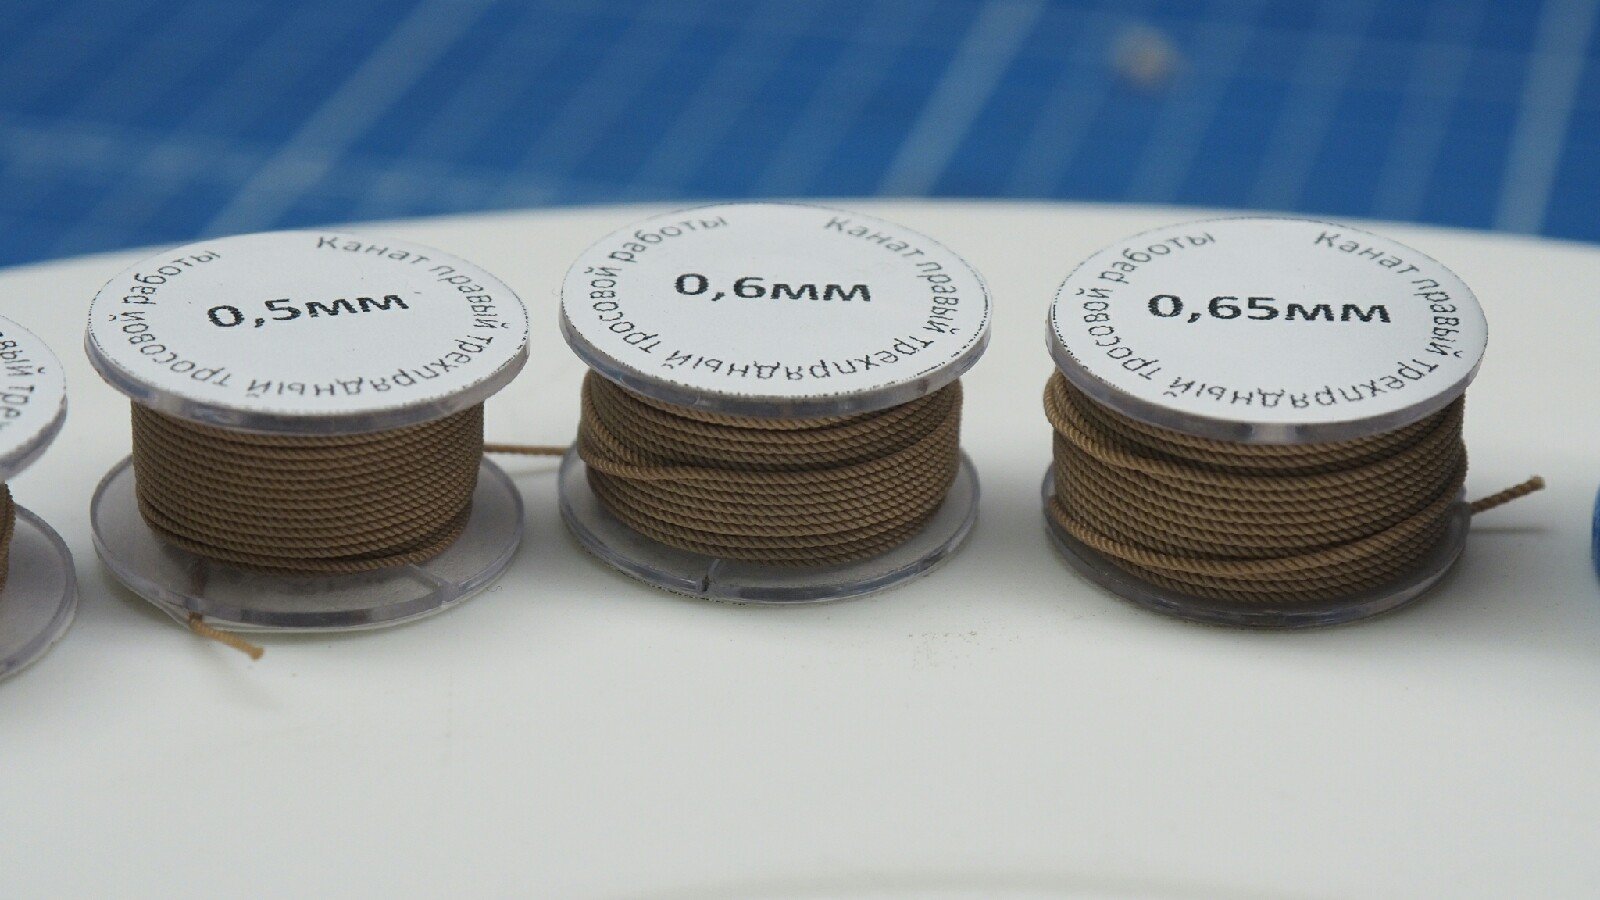
We are going to start selling ropes made by a Russian master modeller Alexey Vikulaev from Mini Shipyard (English version) sometime in late September. He makes his ropes from E-121 Gutermann threads. We will offer two colors: tan for running rigging (3-stranded right handed) and black (3-stranded left handed) for standing rigging. We are planning to carry the following diameters: .25mm, .35mm, .45mm, .5mm, .6mm, .65mm, .7mm, .8mm, .9mm. More sizes will come later. Each spool is 6.5 meters long. All labels will be in English. If you are interested in any particular size, please let us know and we'll make sure that we'll have it available!

- 20 replies
-
- 20
-
-
Hello all! In this thread I will be posting news and updates about Crafty Sailor Model Store. Vanguard Model kits are now in stock! These kits from the newest UK manufacturer Vanguard Models are designed, developed and made in the UK by Chris Watton. gdfgfd HM Cutter "Alert" 1:64 Exact scale model of HM Alert, a 10-gun cutter launched at Dover in 1777 and converted to a sloop in the same year. As part of the Royal Navy, the ship fought in several battles during the American War of Independence until it was captured by the French frigate Junon in 1778. Alert was reported as lost without trace on 15th of December 1779. View HM Brig-Sloop "Flirt" 1:64 Exact scale model of HM Flirt, one of the first of a new class of Royal Navy brig-sloops. The ship was launched in 1782 but was completed too late to see any significant service in the American War of Independence. She then spent most of the years of peace in British waters. A French privateer captured her in 1803 as Flirt was returning to Britain from a whaling voyage. View HM Brig-Sloop "Speedy" 1:64 Exact scale model of the famous brig-sloop depicted at the time of Thomas Cochrane's command from 1800-1801, when the Speedy took on the Spanish 32 gun xebec rigged frigate El Gamo and took her. View As always, all orders above $150 USD are shipped for free to the US and Canada!
- 20 replies
-
- 13
-
-
Ron, thanks! I should also mention that there were a few custom parts involved: 1. I used aftermarket lasercut grating 2. I made my own ropes 3. I used aftermarket wooden belaying pins instead of brass one that came with the kit
- 40 replies
-
- 1
-
-
- finished
- master korabel
- (and 2 more)
-
Thank you! I'll pass your comment to her! This will definitely make her day
-
She spent a lot of time searching for the right phone with the best photo taking capabilities. That was her main requirement.
- 40 replies
-
- 1
-
-
- finished
- master korabel
- (and 2 more)
-
She used natural light and some overhead light to set the scene. As for lenses, hmm, she used her cellphone for that Samsung Galaxy S9. Apparently those have extensive photo capabilities.
- 40 replies
-
- 1
-
-
- finished
- master korabel
- (and 2 more)
-
My wife took the photos. She is the creative side of our family
- 40 replies
-
- 1
-
-
- finished
- master korabel
- (and 2 more)
-
You are welcome! Sorry I kinda skipped a lot of rigging steps. Got carried away....
-
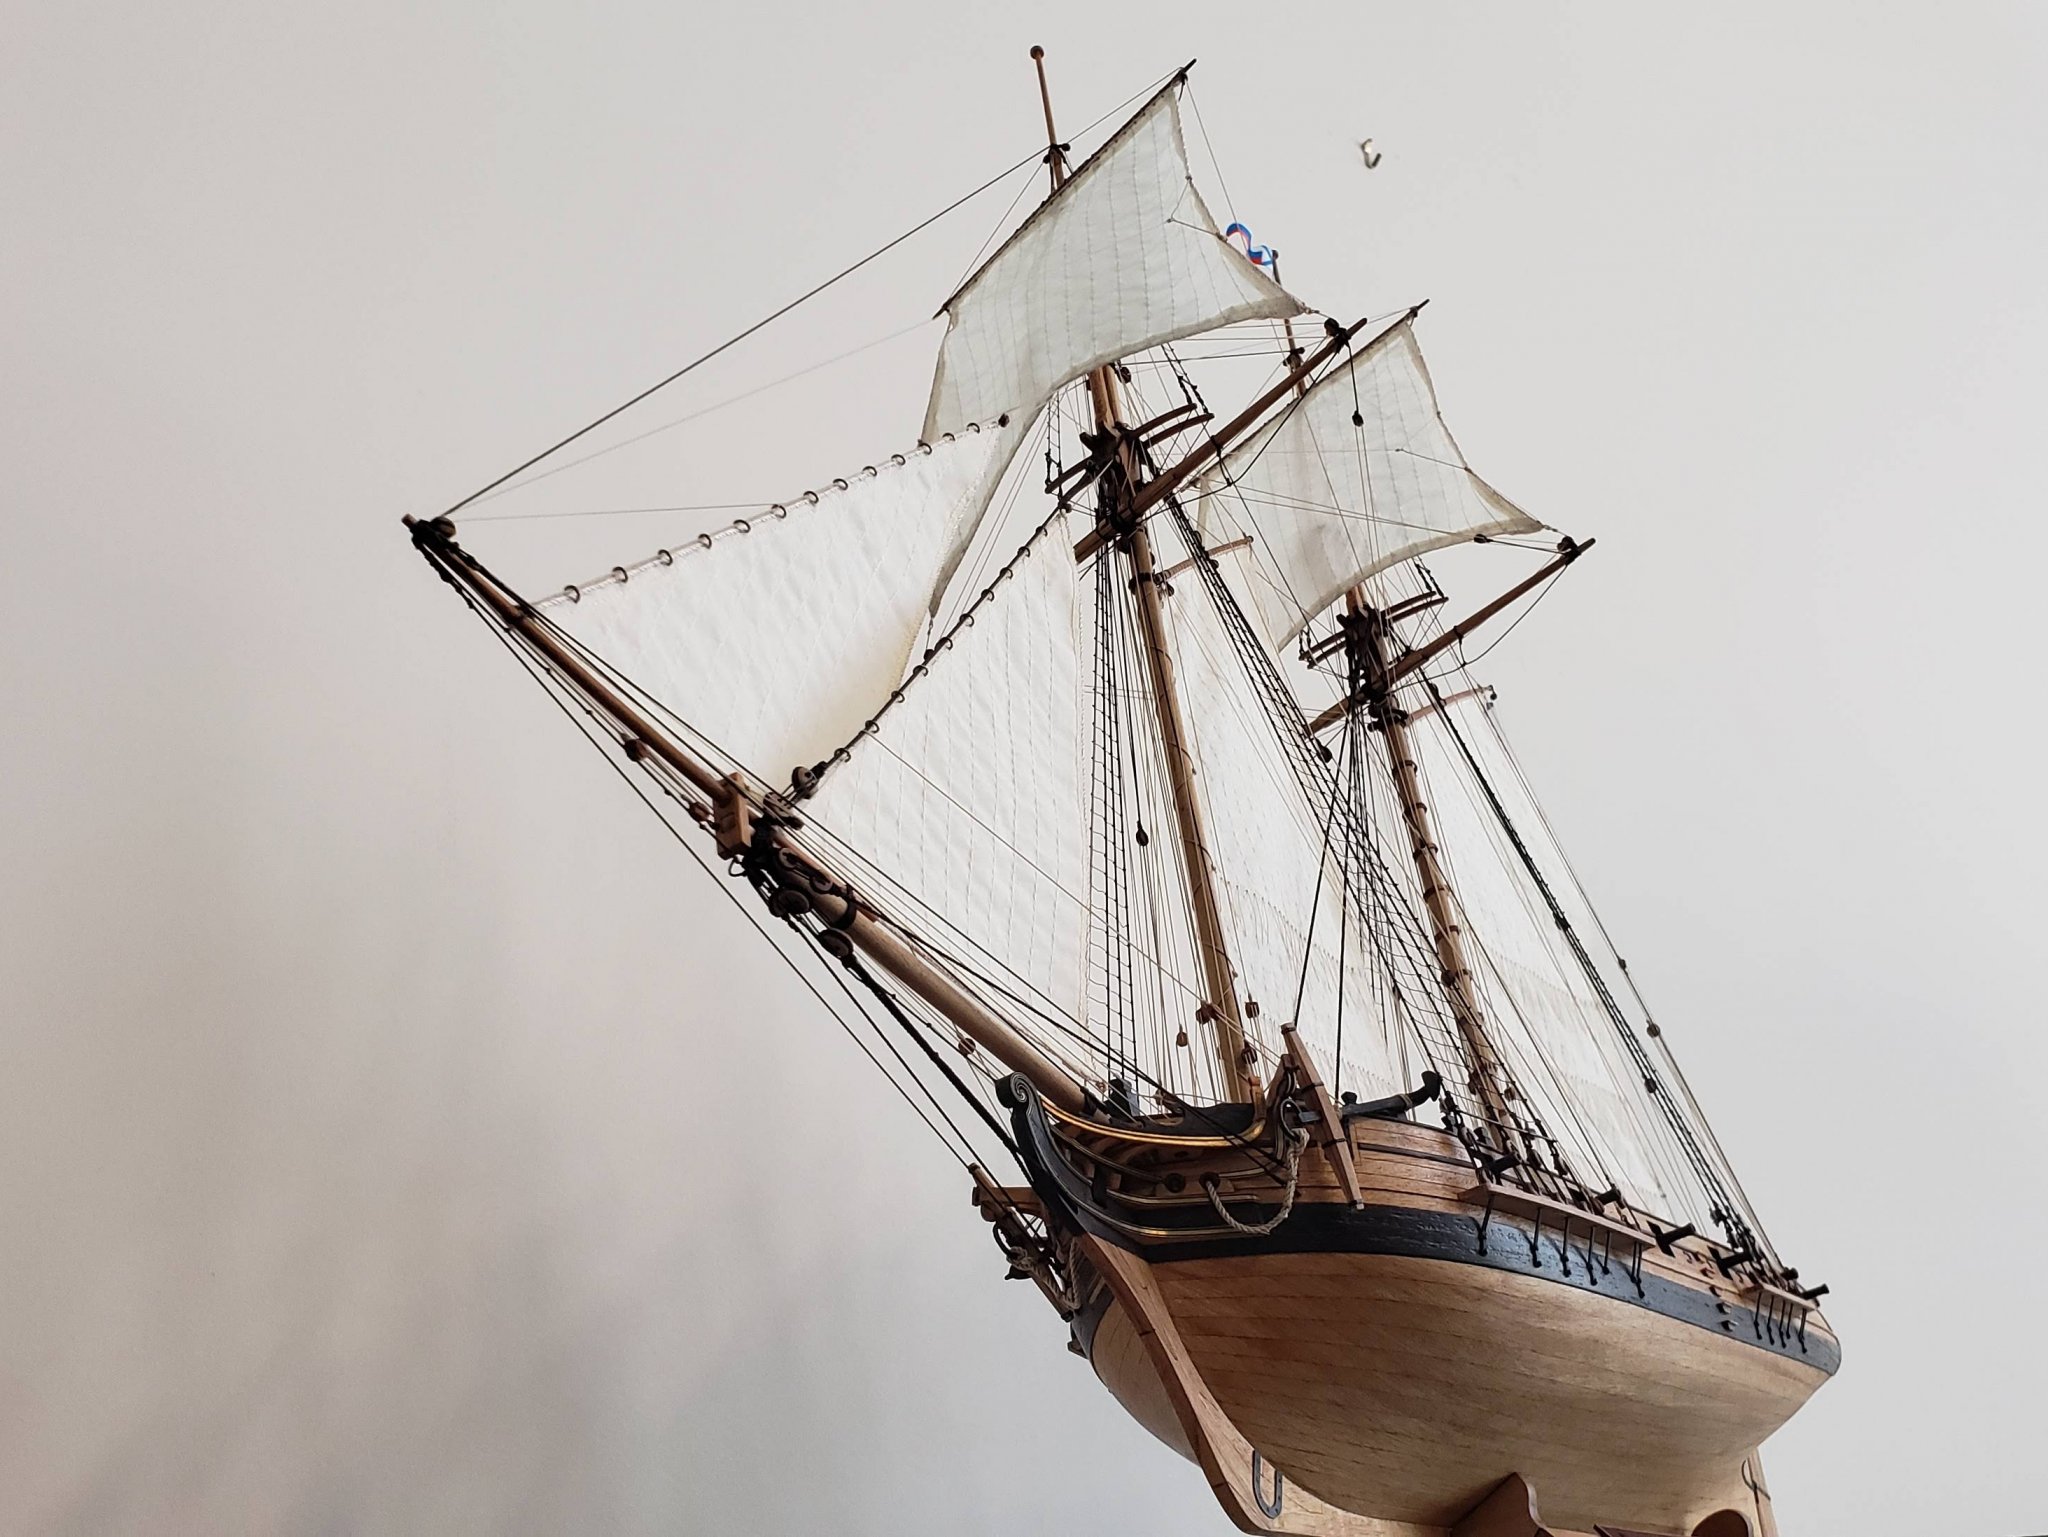
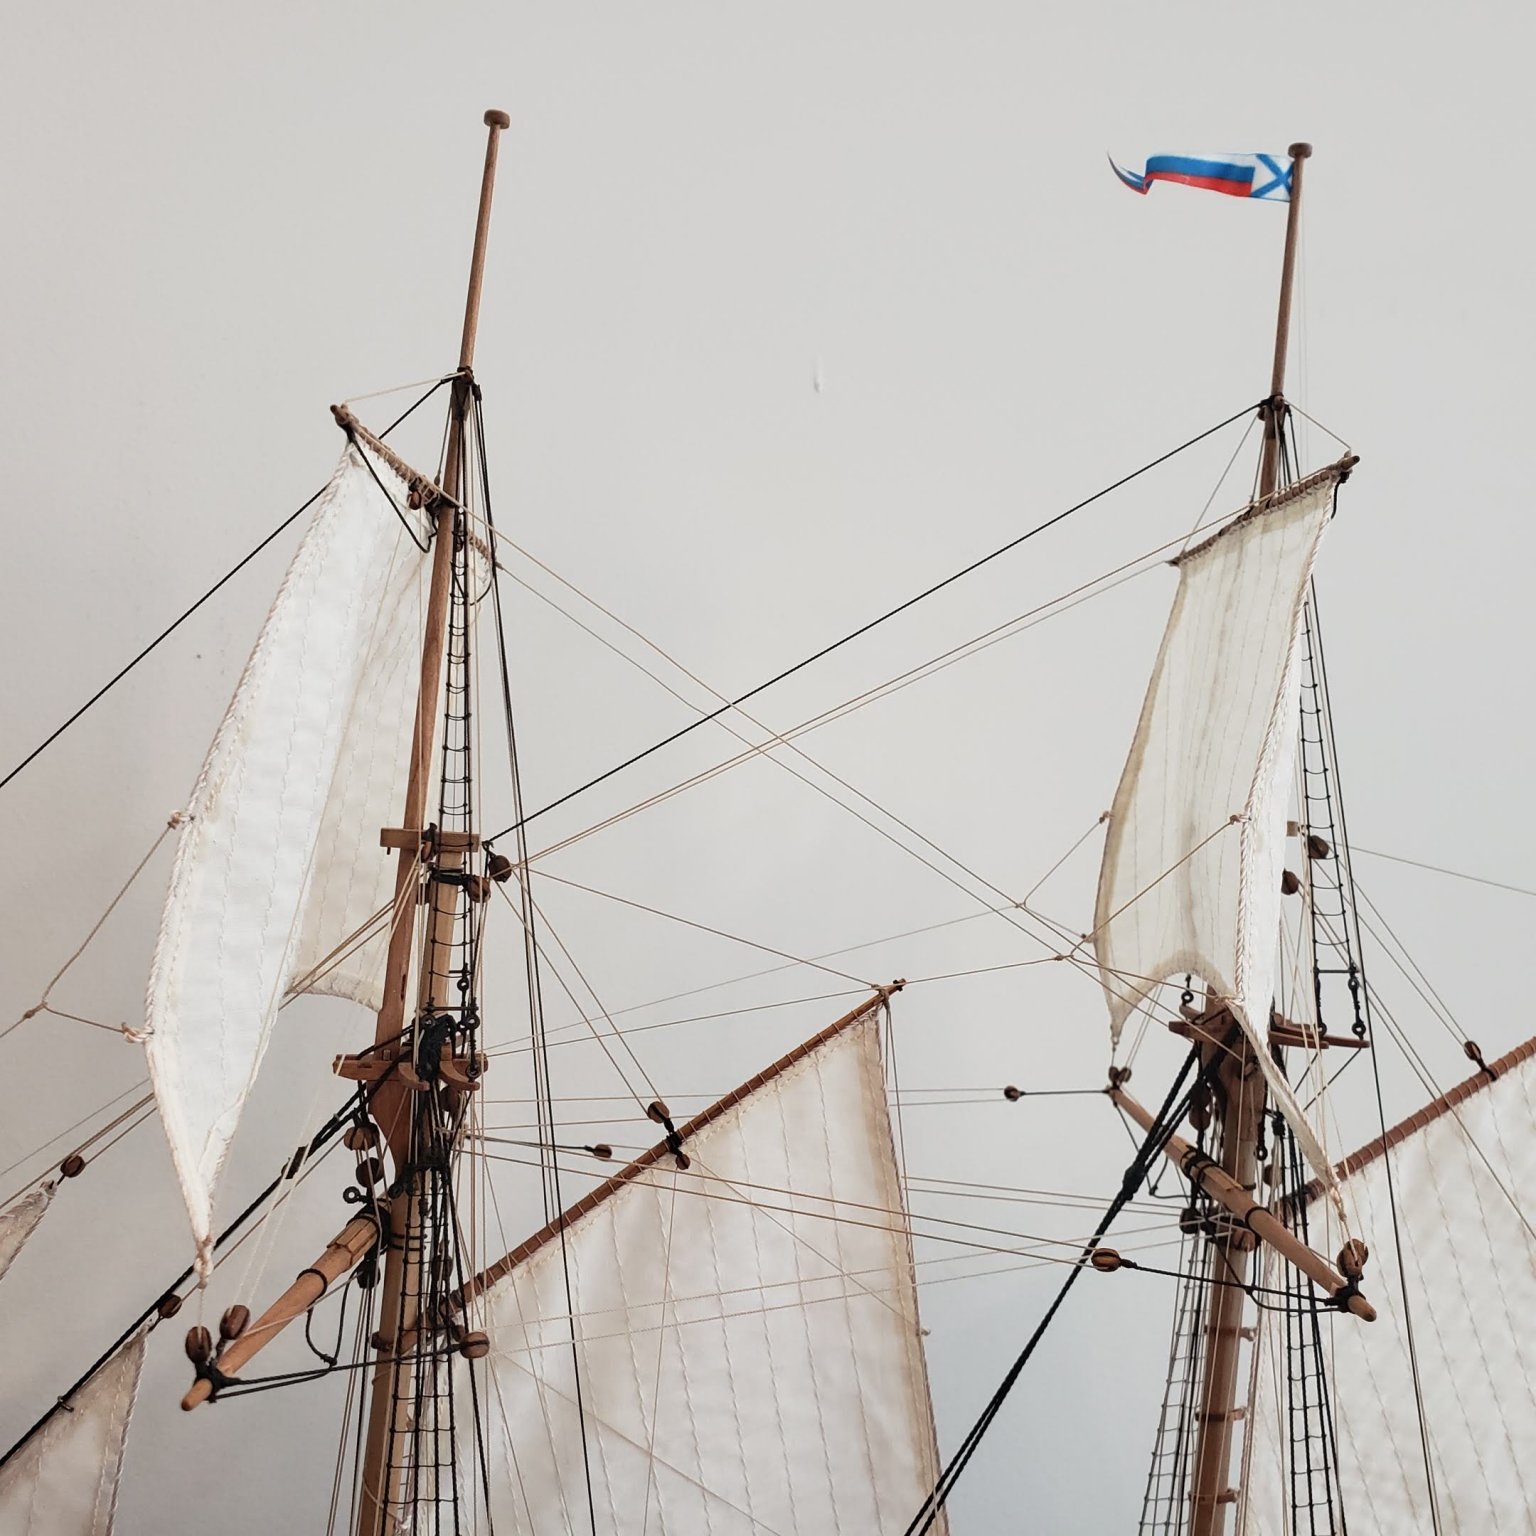
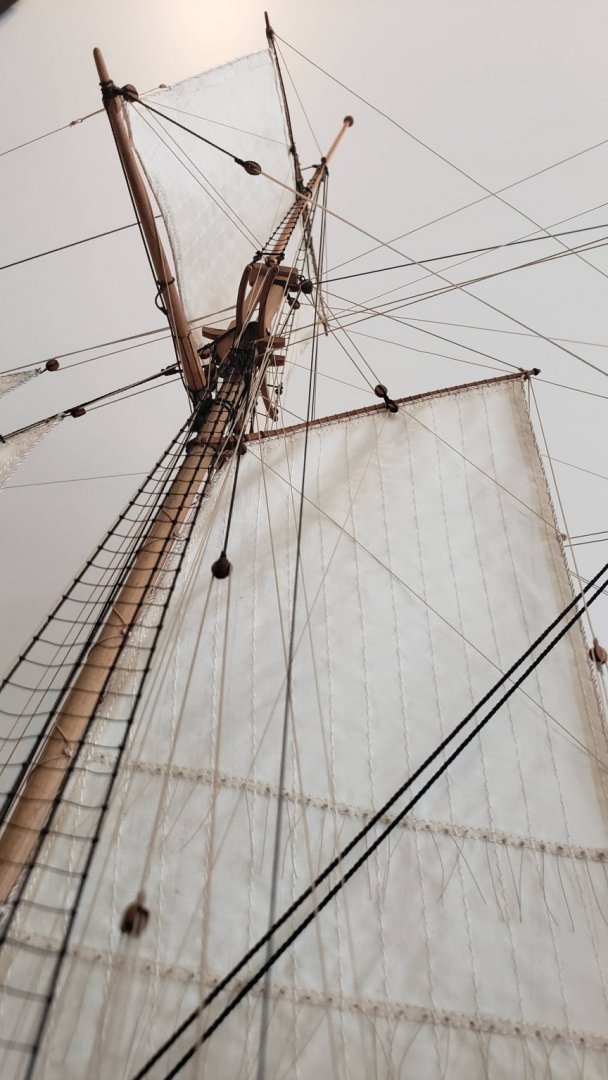
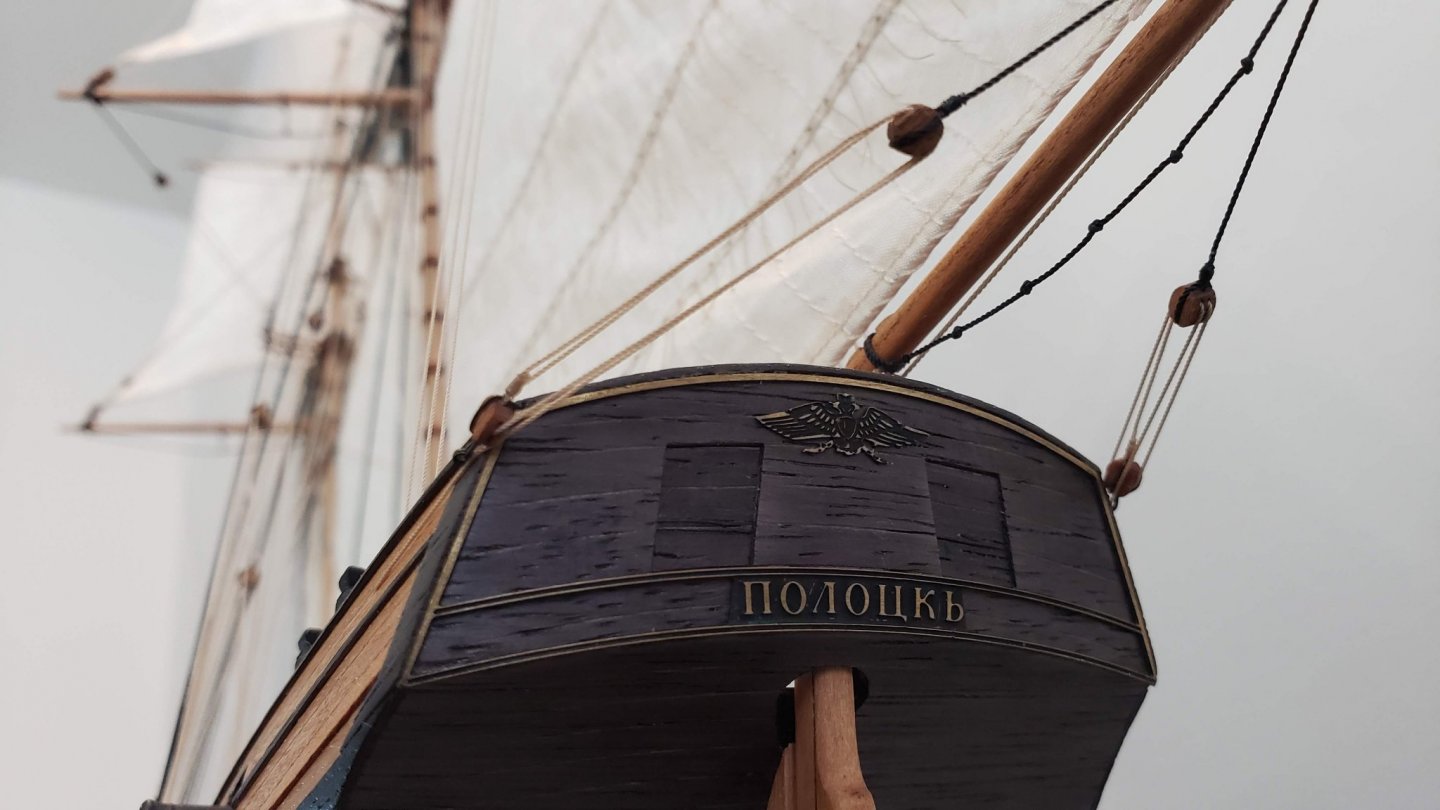
Finally after a long couple of years I can say that this model is done. The only thing left to do is to add a few more rope coils. Here are the final pictures:


- 40 replies
-
- 16
-
-
- finished
- master korabel
- (and 2 more)
-
This is a great kit. It's been a lot of fun building it.
-
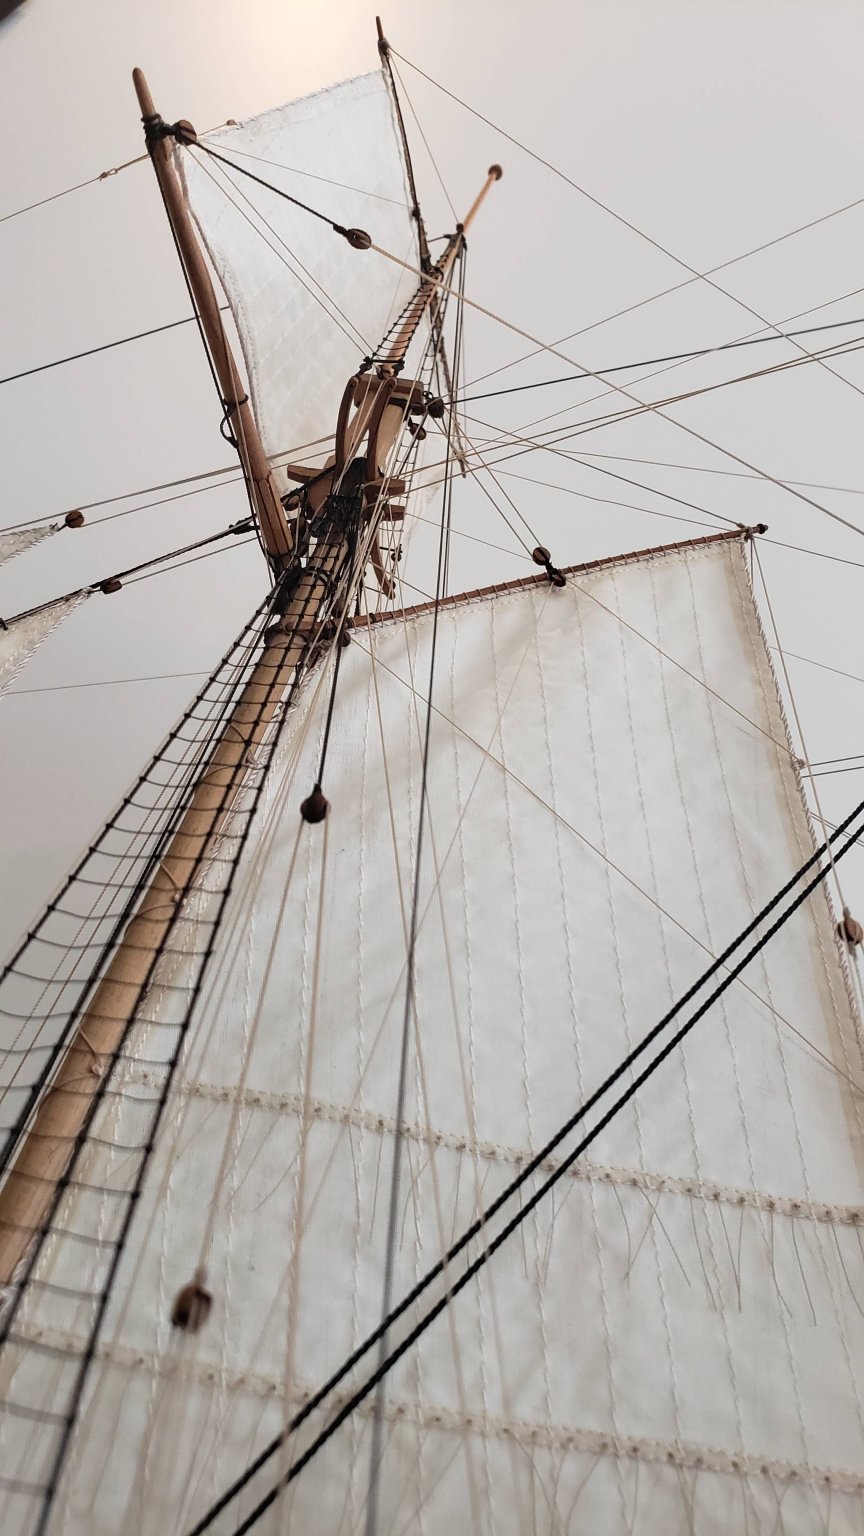
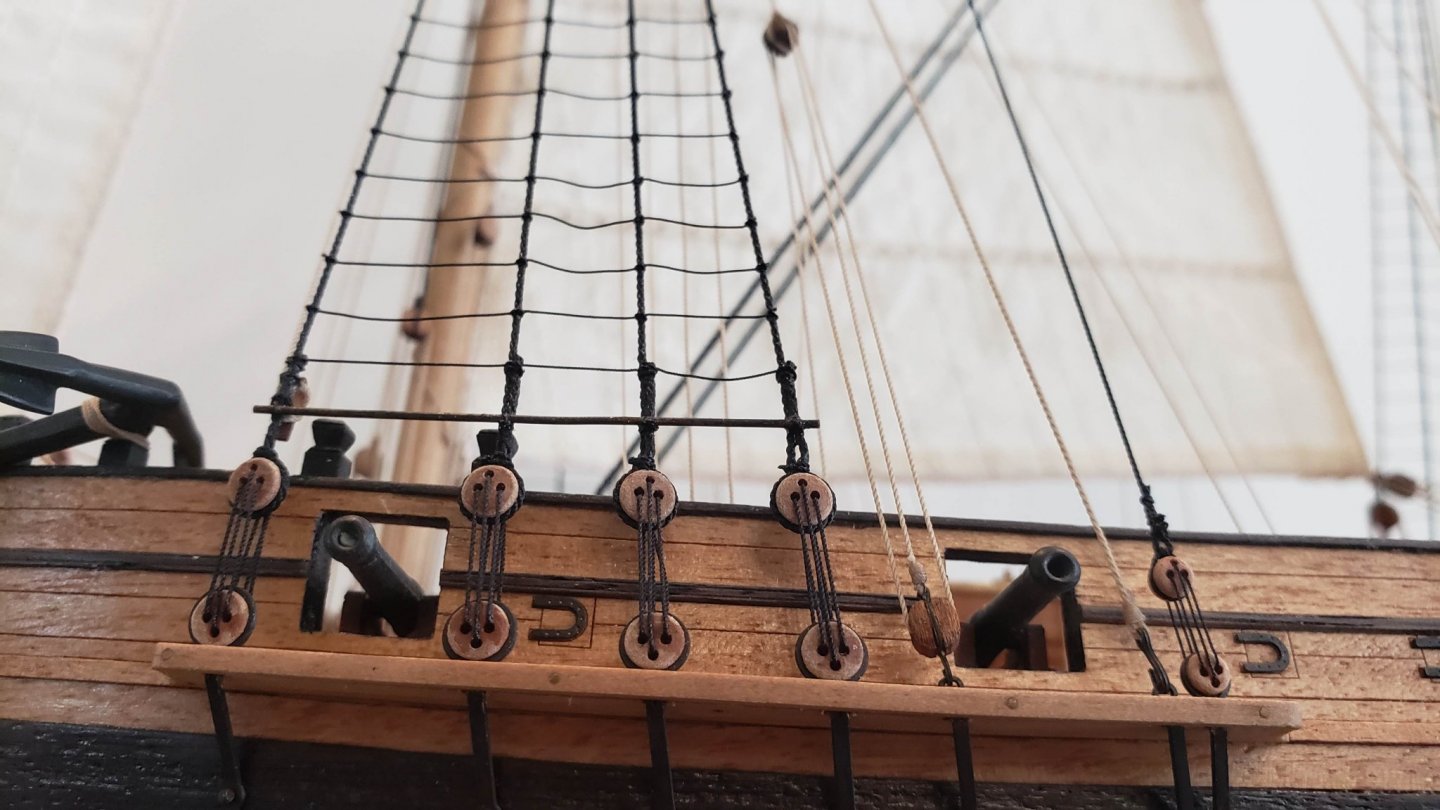
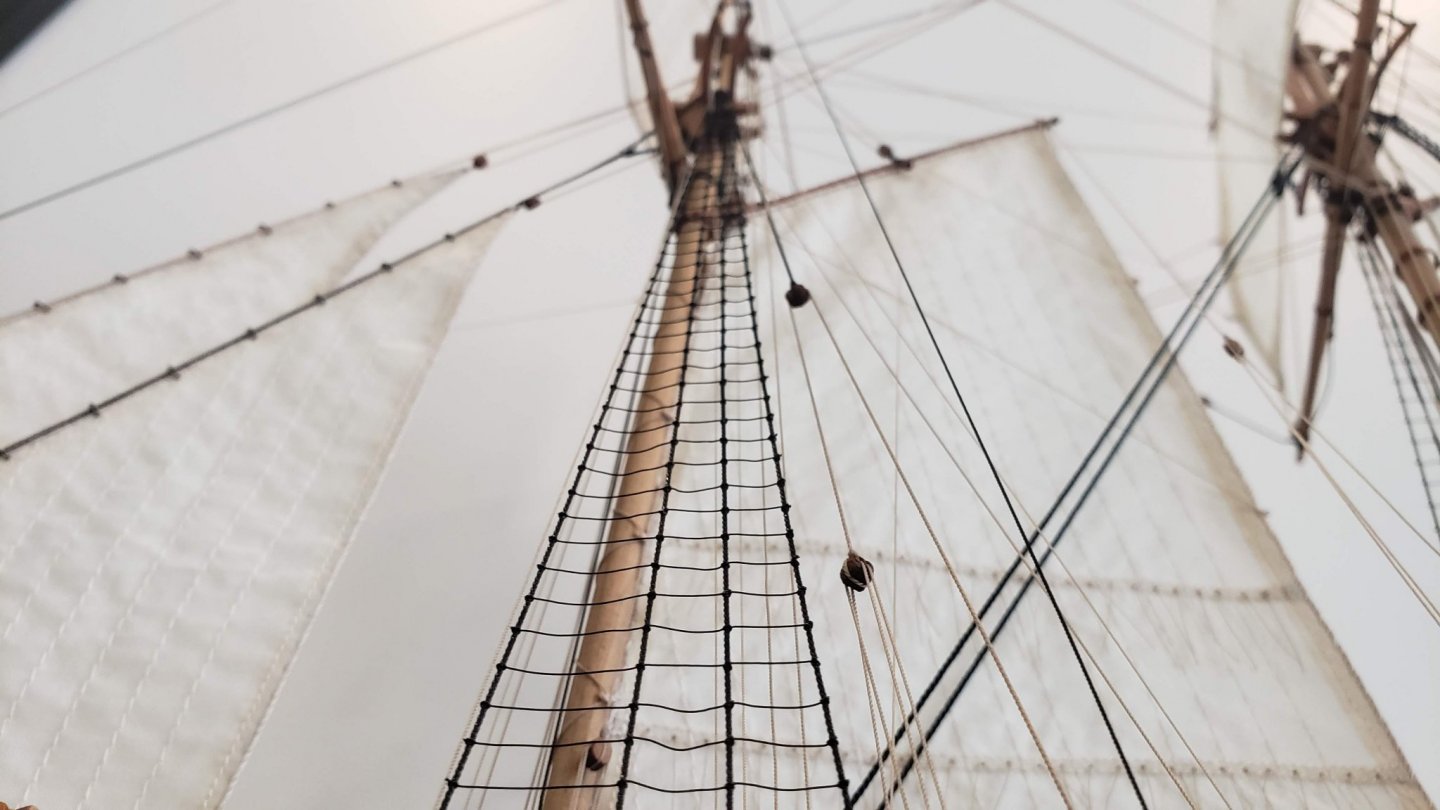
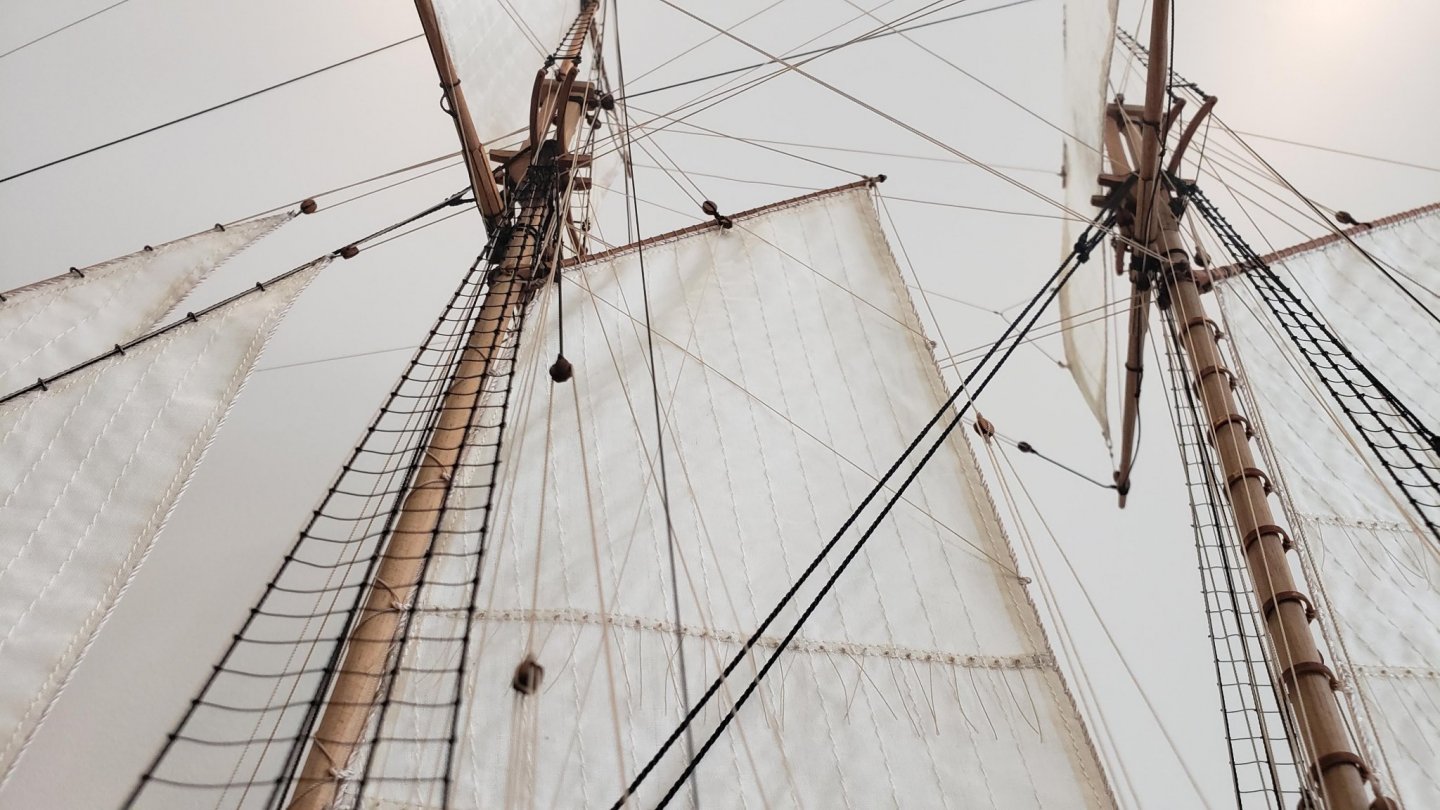
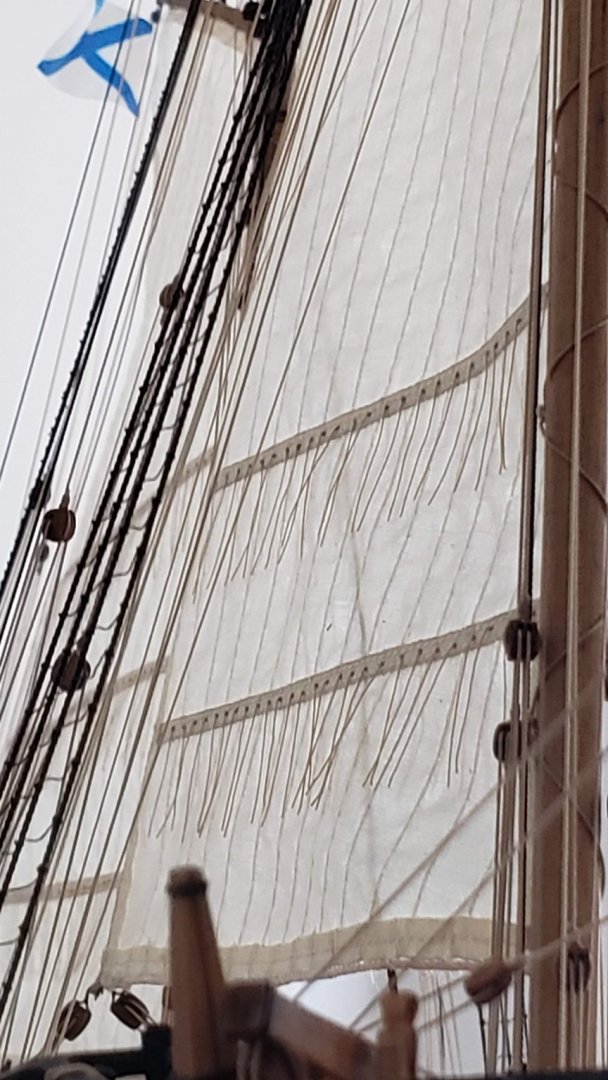
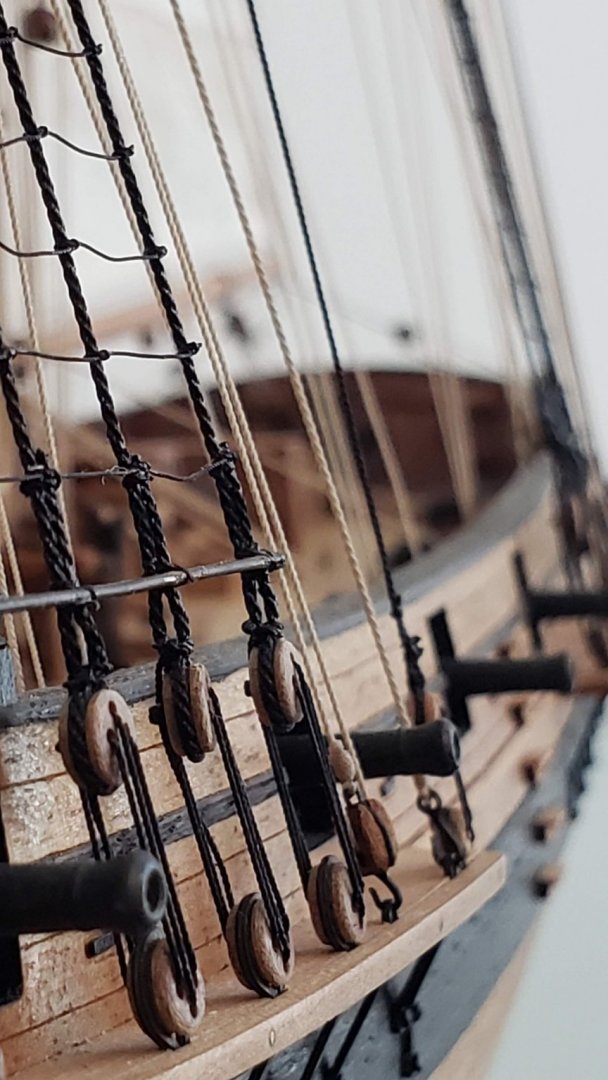
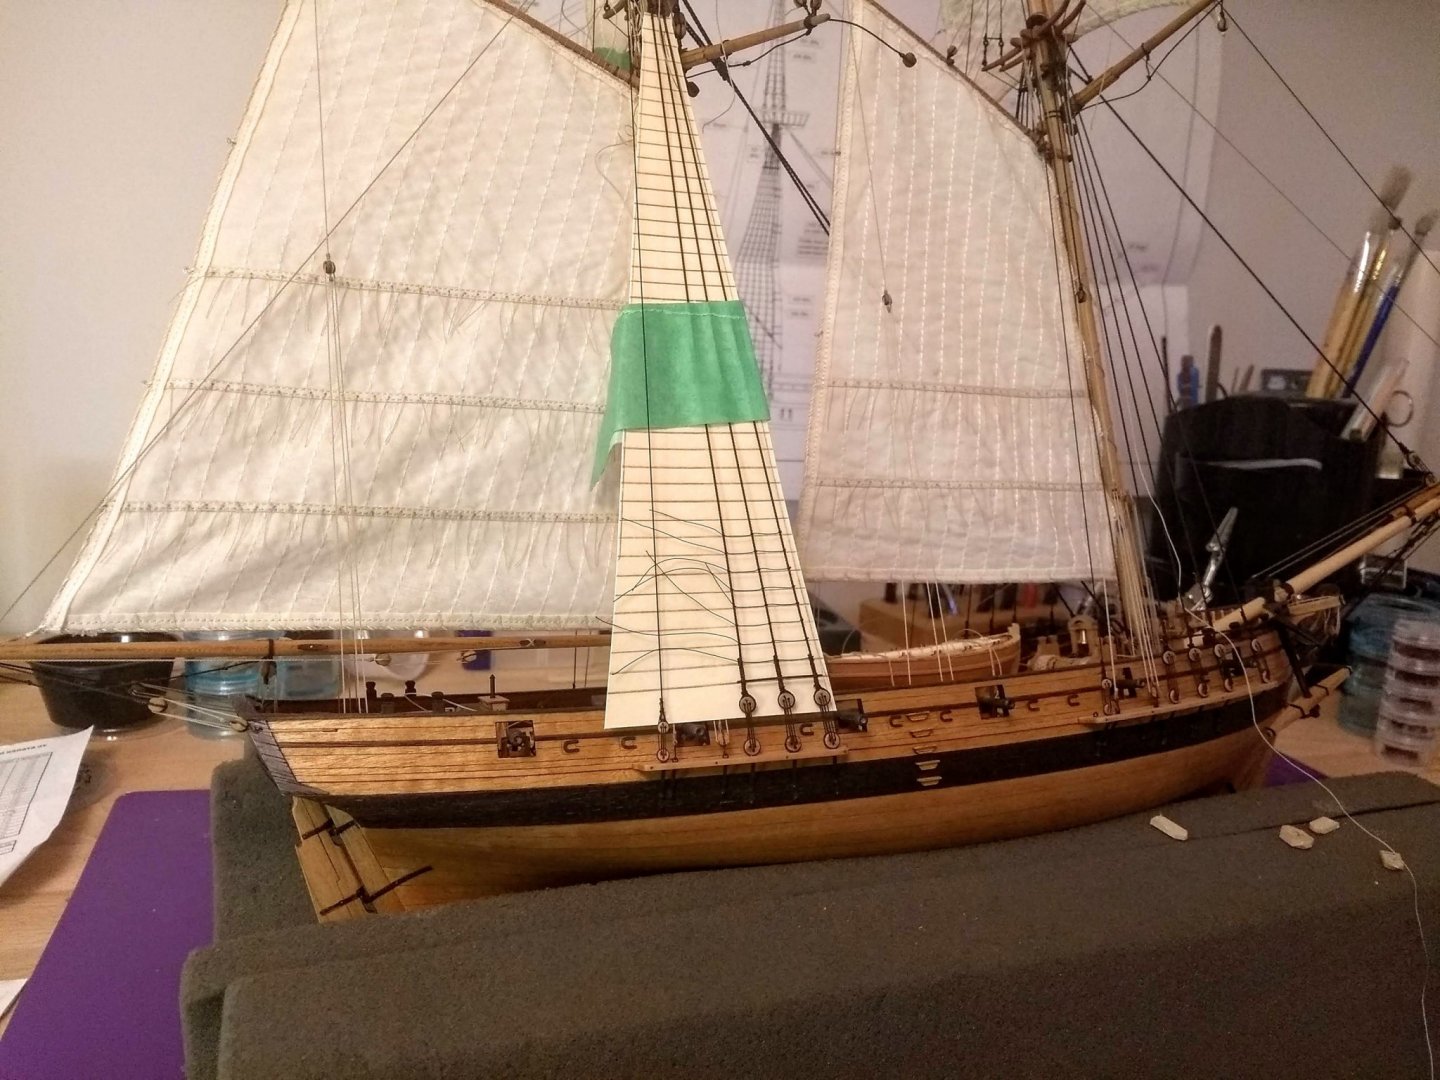
Unfortunately, I really dropped the ball with keeping this thread up to date. Even though I haven't been spending too much time building this model over the last year, but I'm already pretty close to finishing it. Here are the pictures I salvaged from my phone: 26. Once the chainplates have been installed I proceeded to rigging the model (honestly, this is the most difficult step for me as I find it is a lot easier to work with wood rather than with threads). Here are the jigs I made out of brass wire to carefully align deadeyes. I made 14 of those altogether(7 for port and 7 for starboard): As for the rigging order, I didn't follow the instructions booklet too exactly. I mixed standing rigging with some running rigging to simplify the workflow. I didn't want to end up seizing something to a yard amid a spiderweb of lines. This is the current state. The standing rigging is 100% done and the running rigging is 85% done (I completely rigged the boom and and both gaffs). Currently I'm working on setting up the ratlines:


- 40 replies
-
- 9
-
-
- finished
- master korabel
- (and 2 more)
-
Looks awesome! Better tell me when you are going to release it.
- 216 replies
-
- 3
-
-
- masterkorabel
- ships
- (and 3 more)
-
http://www.craftysailor.com will certainly have them in stock
- 216 replies
-
- 4
-
-
- masterkorabel
- ships
- (and 3 more)
-
Master Korabel has a few other kits such as Brigantine Phoenix or Schooner Polotsk. Both of them are great kits and should be no problem to you!
- 315 replies
-
- 1
-
-
- master korabel
- avos
- (and 1 more)
-
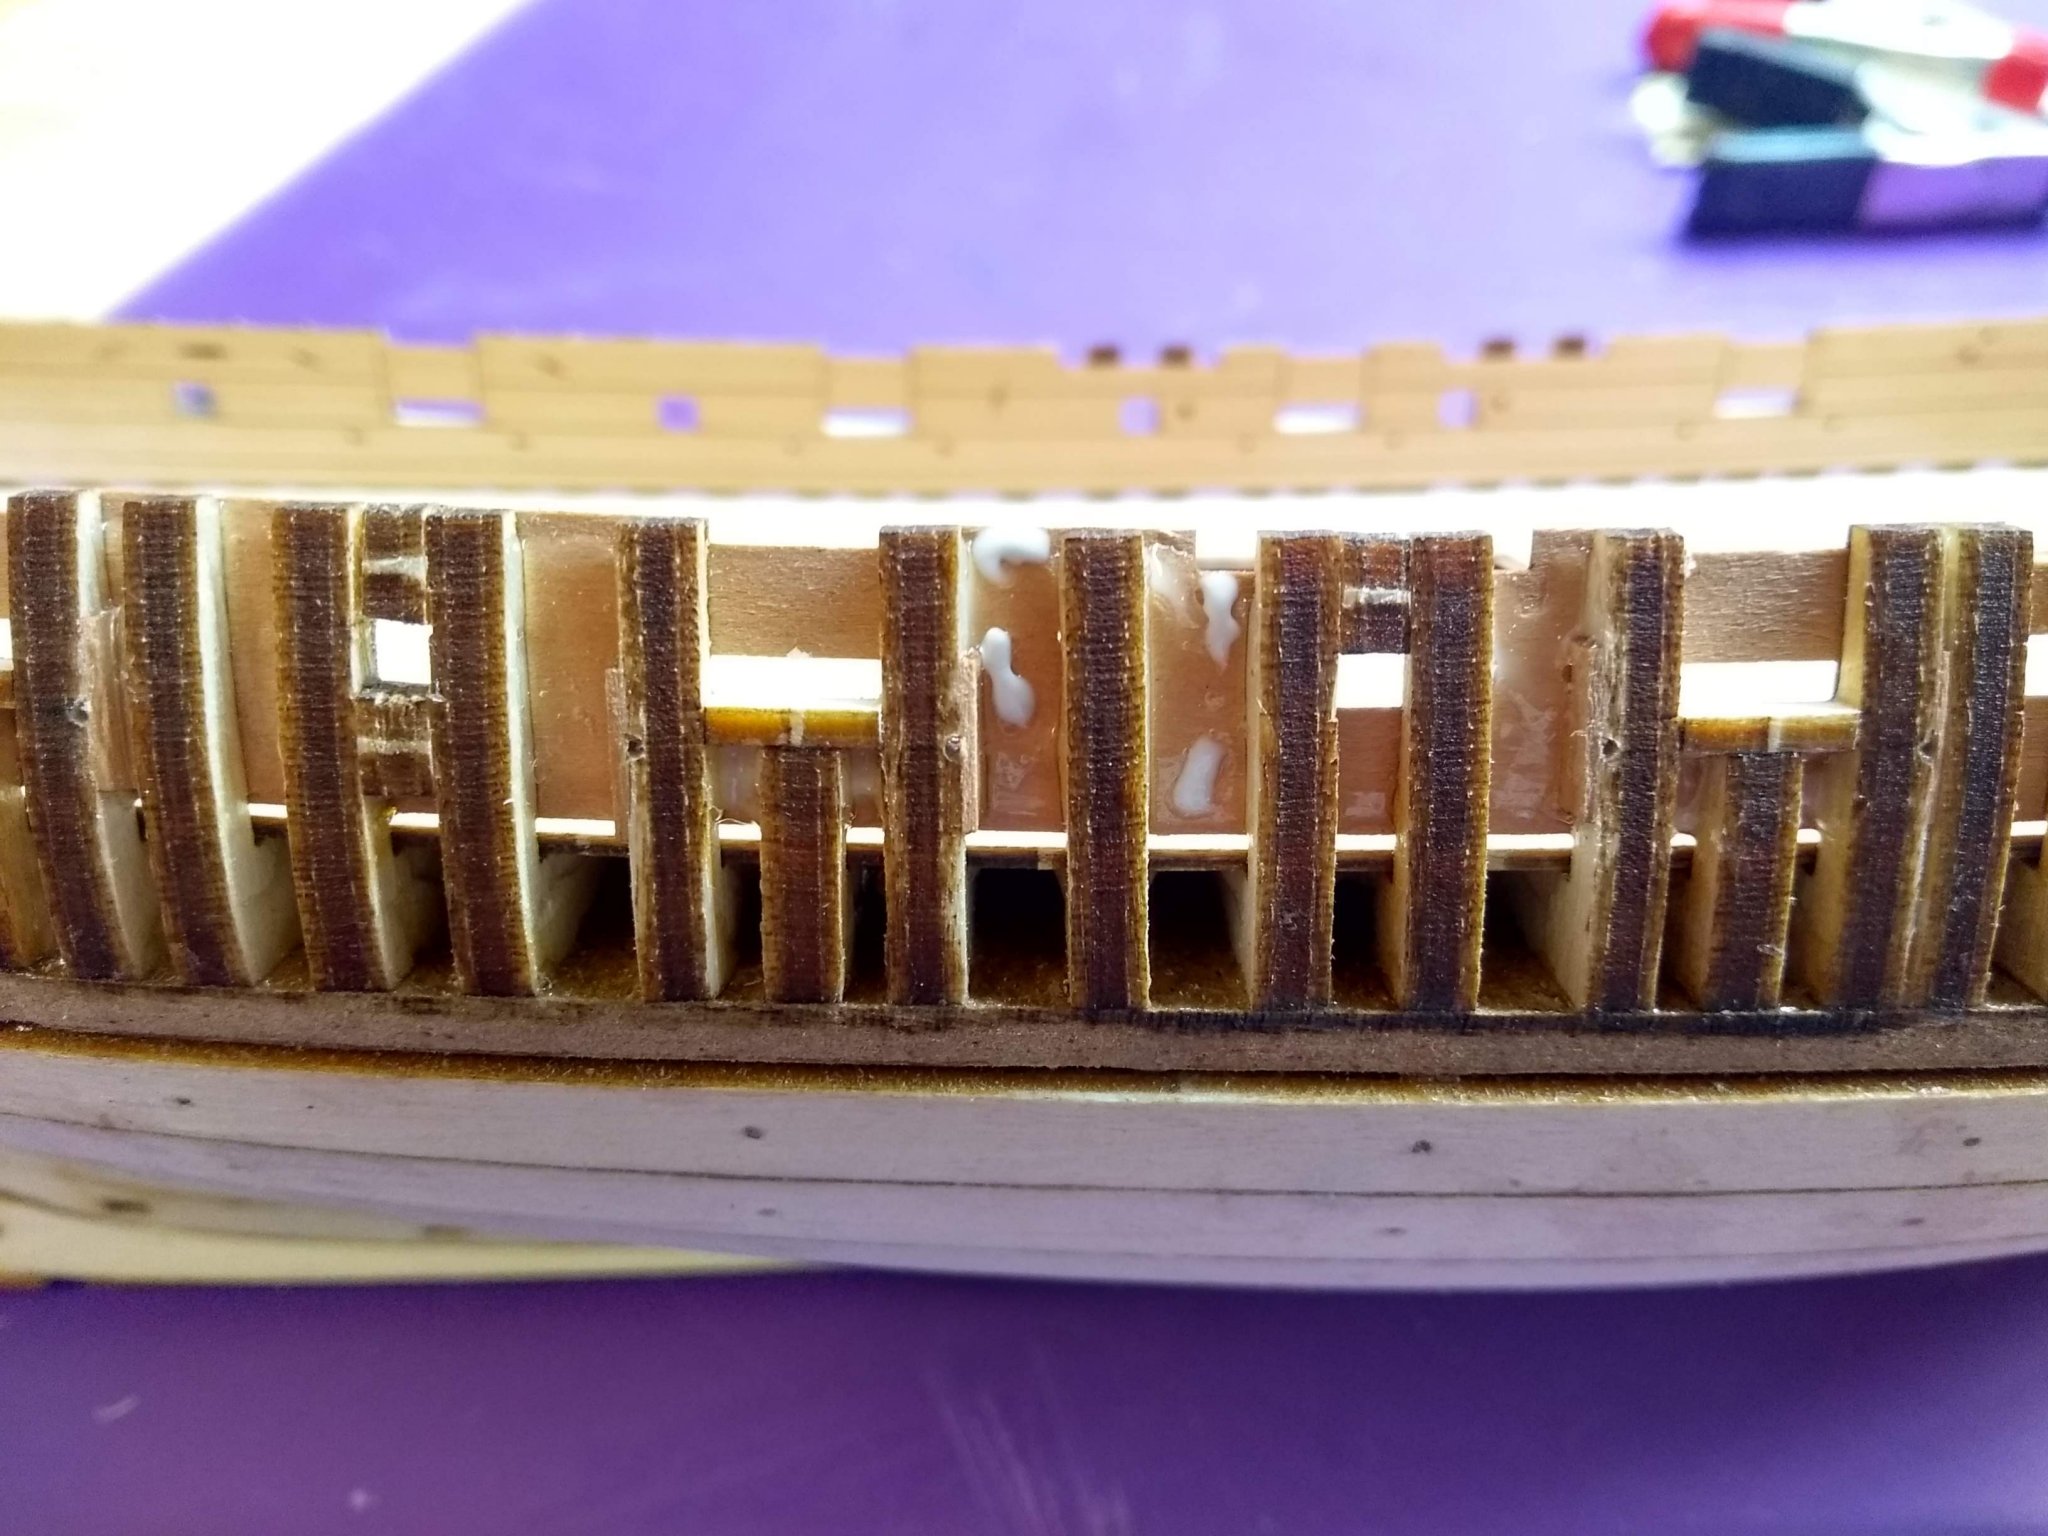
Hi Peta_V, The beauty of this method is that no superglue is required. I really takes a few seconds for melted PVA to become solid. And on top of that you can melt it again with hot iron if you need to adjust your planks.