DORIS
-
Posts
711 -
Joined
-
Last visited
Content Type
Profiles
Forums
Gallery
Events
Everything posted by DORIS
-

HMS ROYAL KATHERINE 1664 by Doris - 1/55 - CARD
DORIS replied to DORIS's topic in - Build logs for subjects built 1501 - 1750
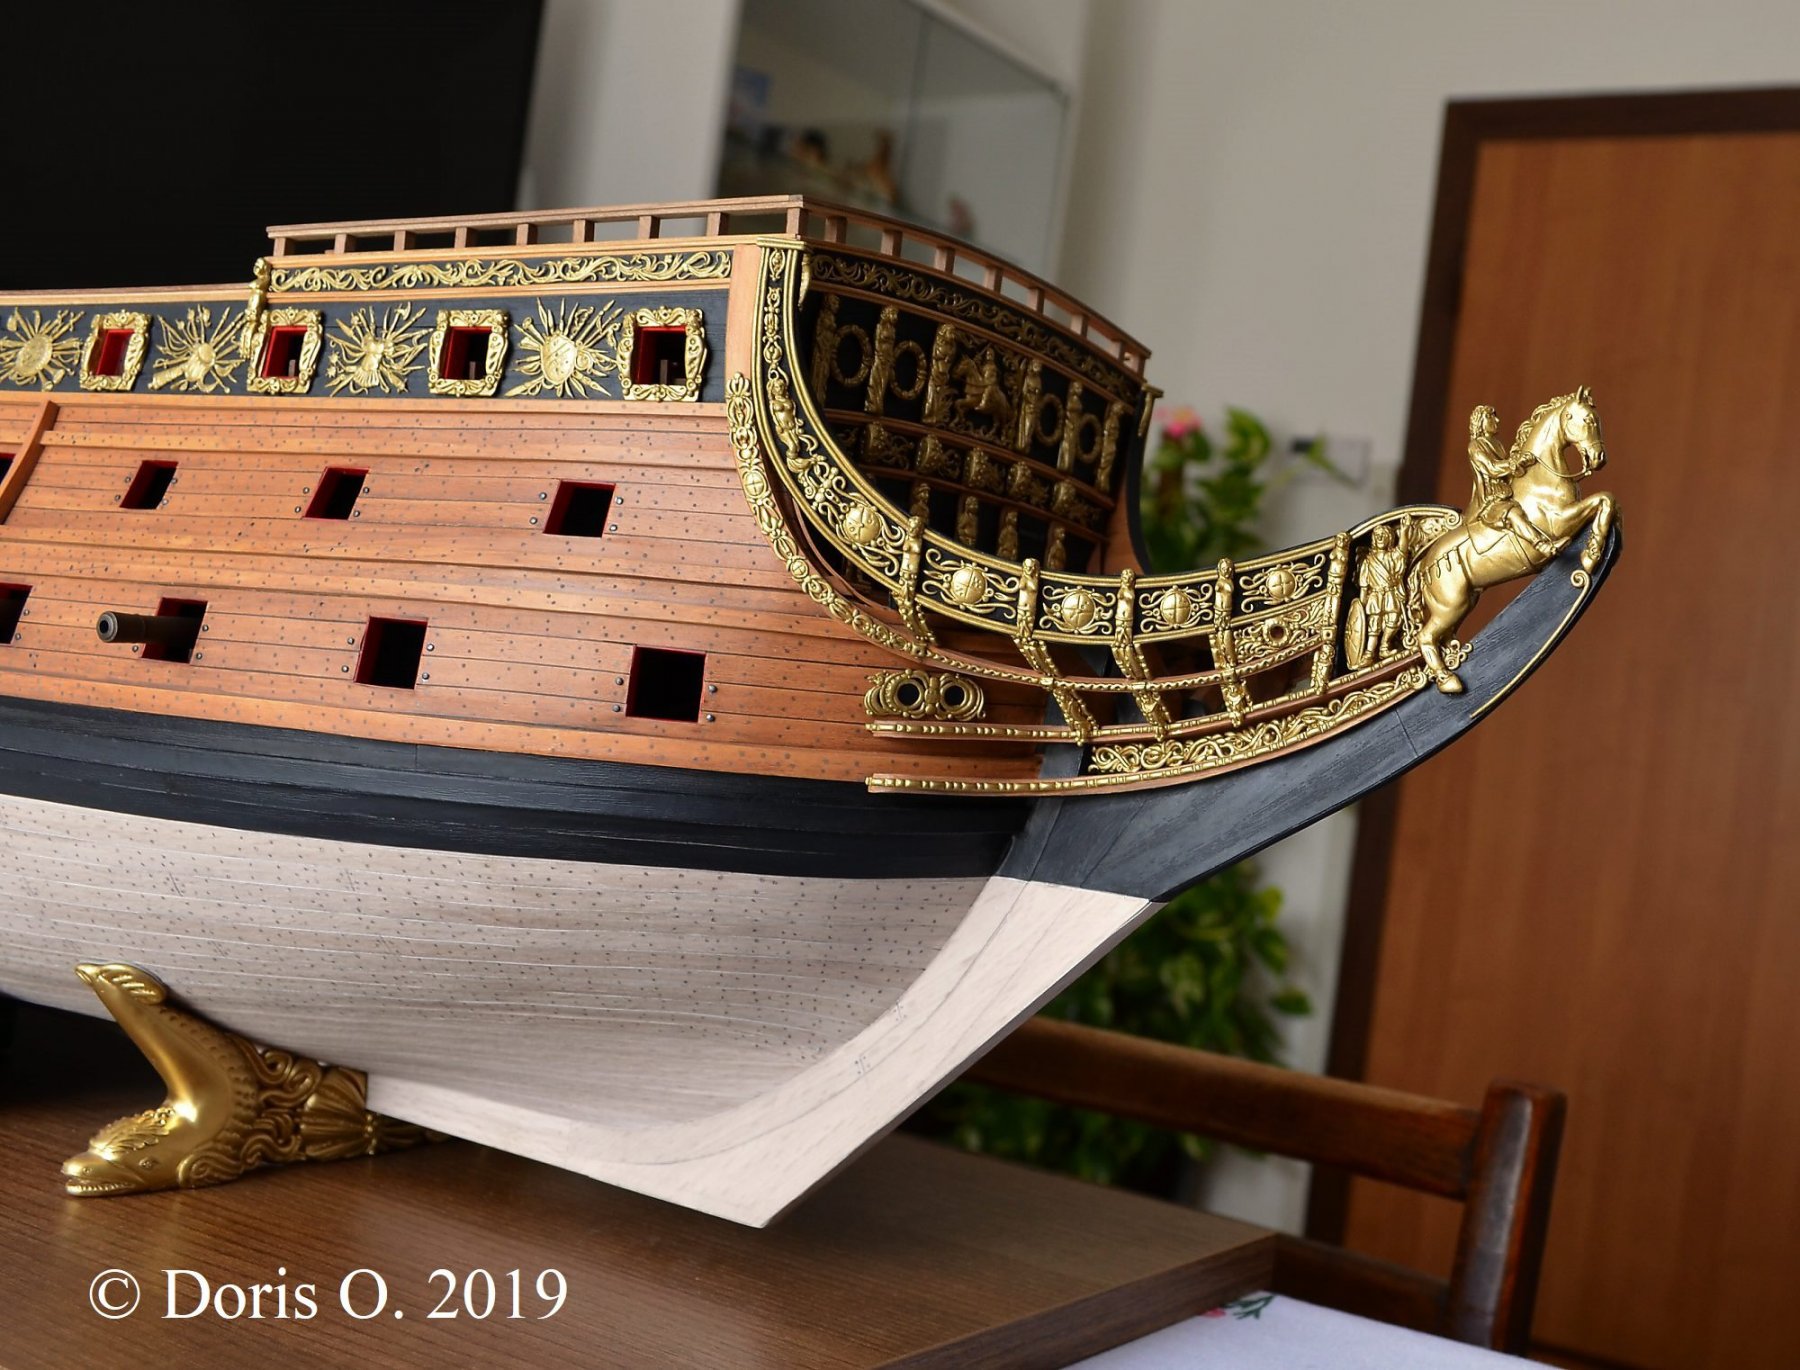
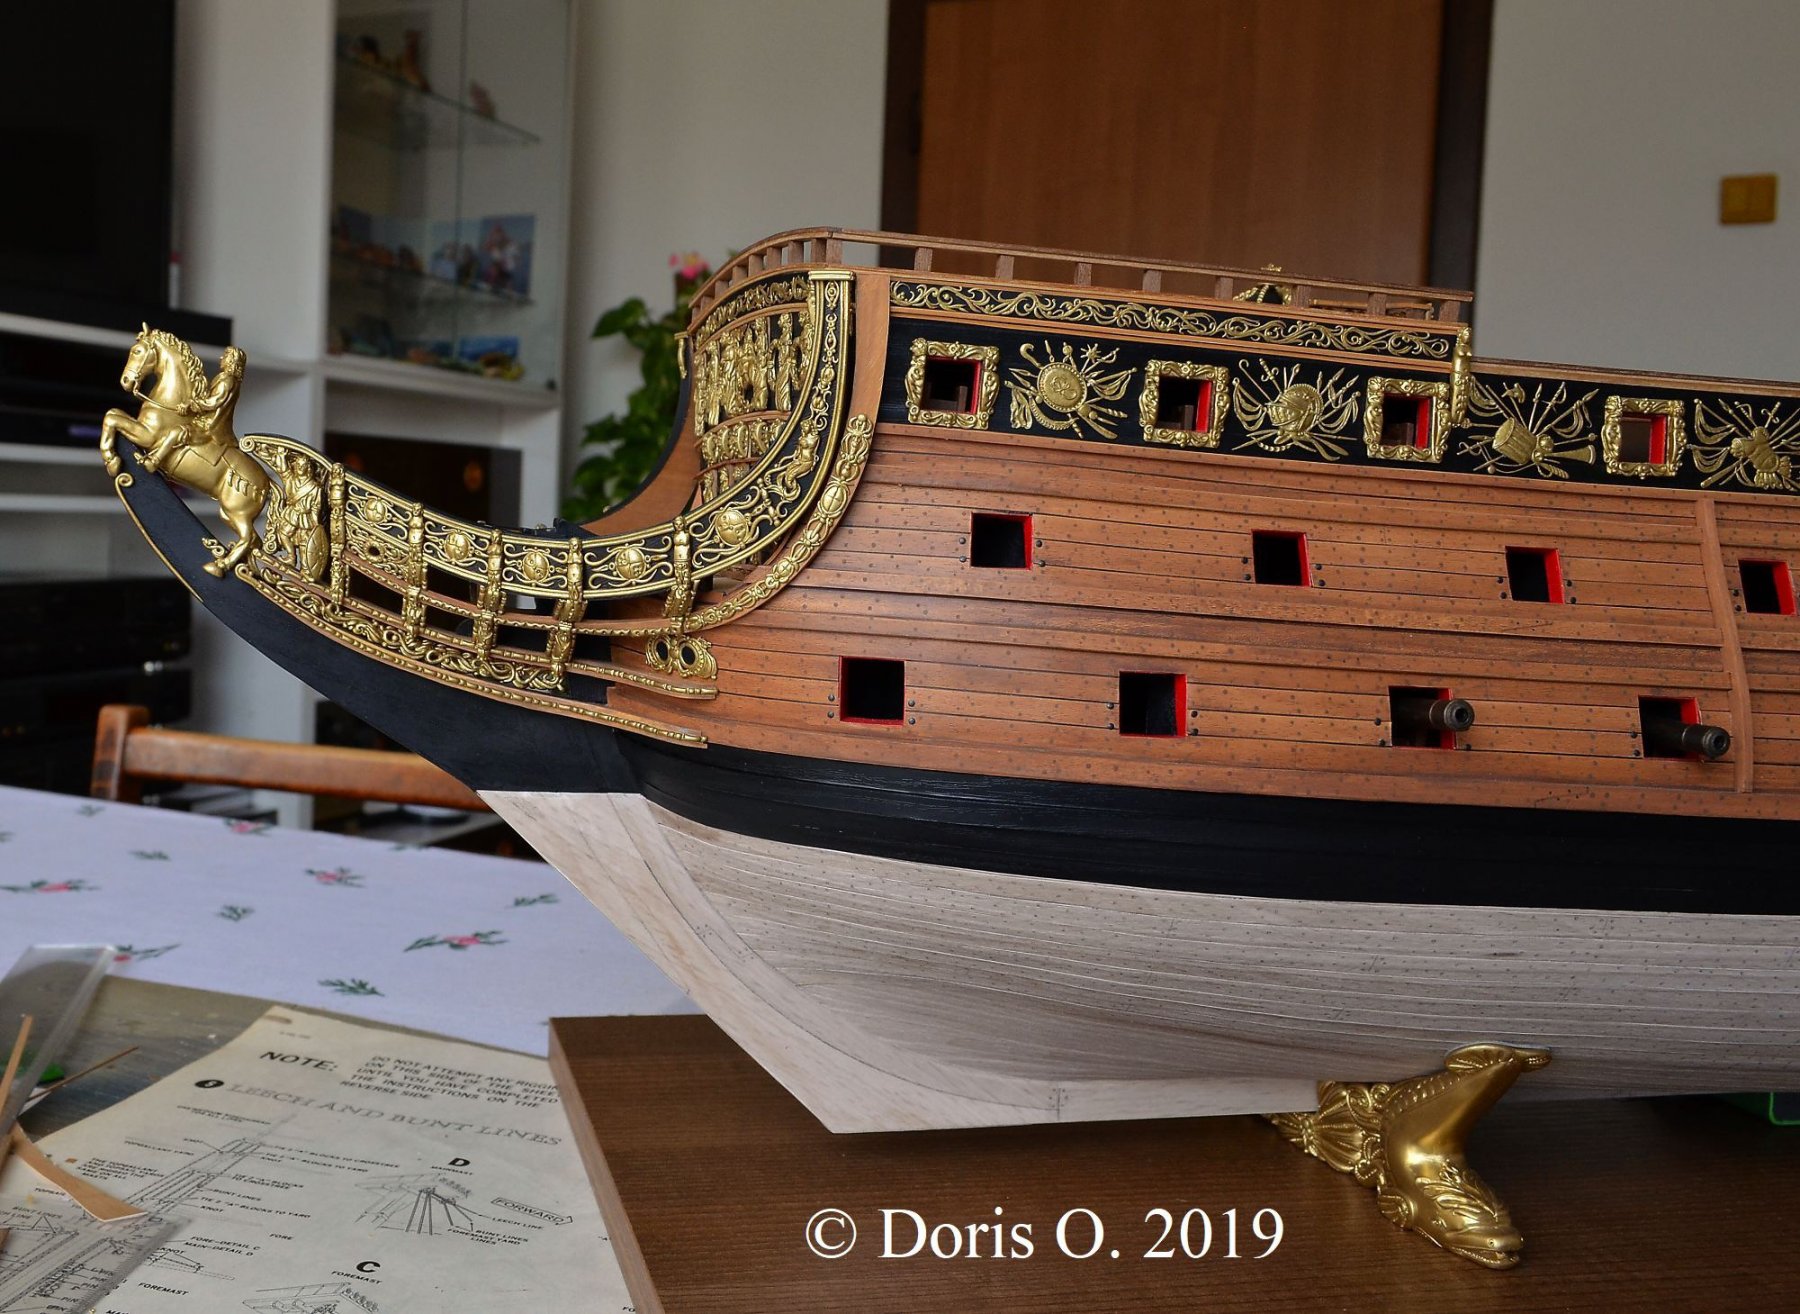
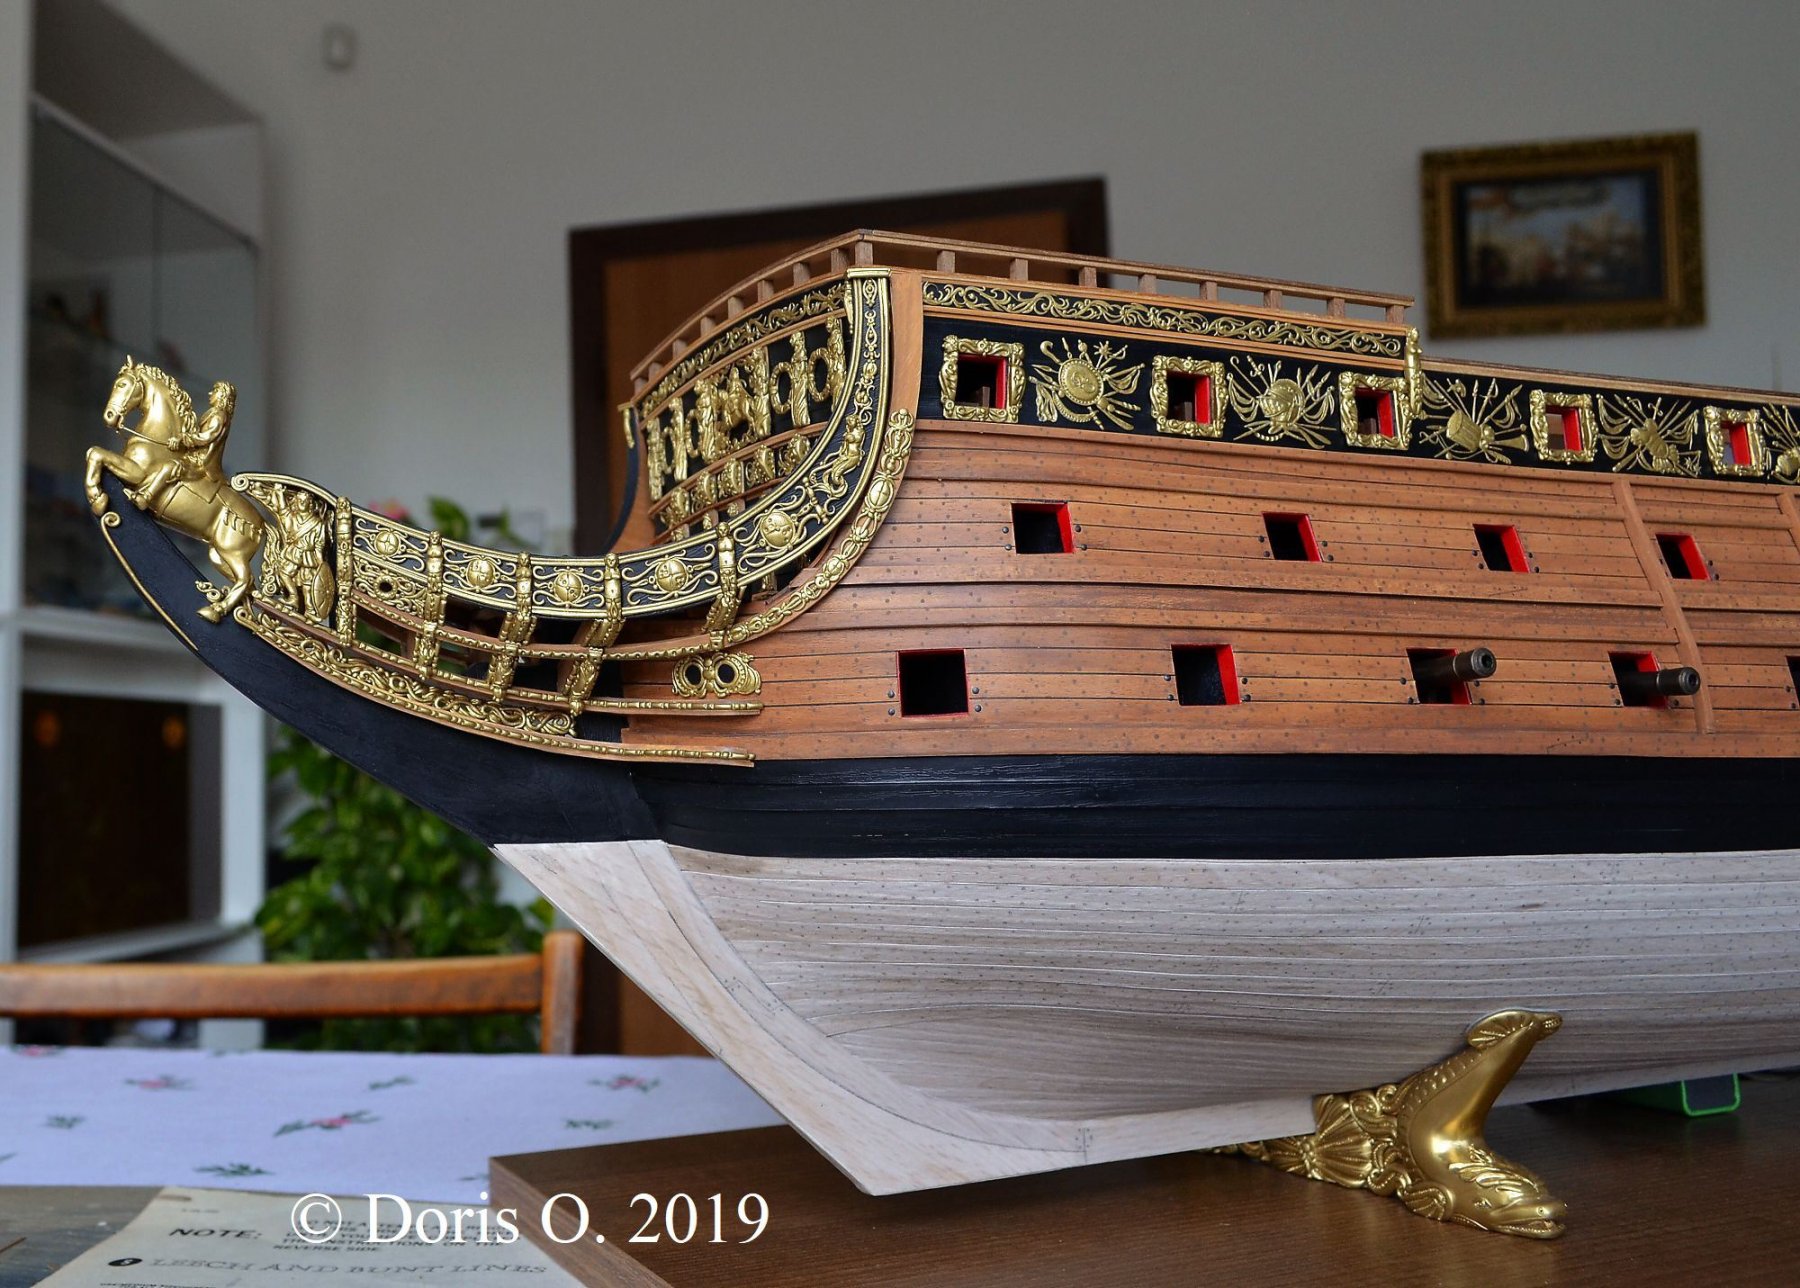
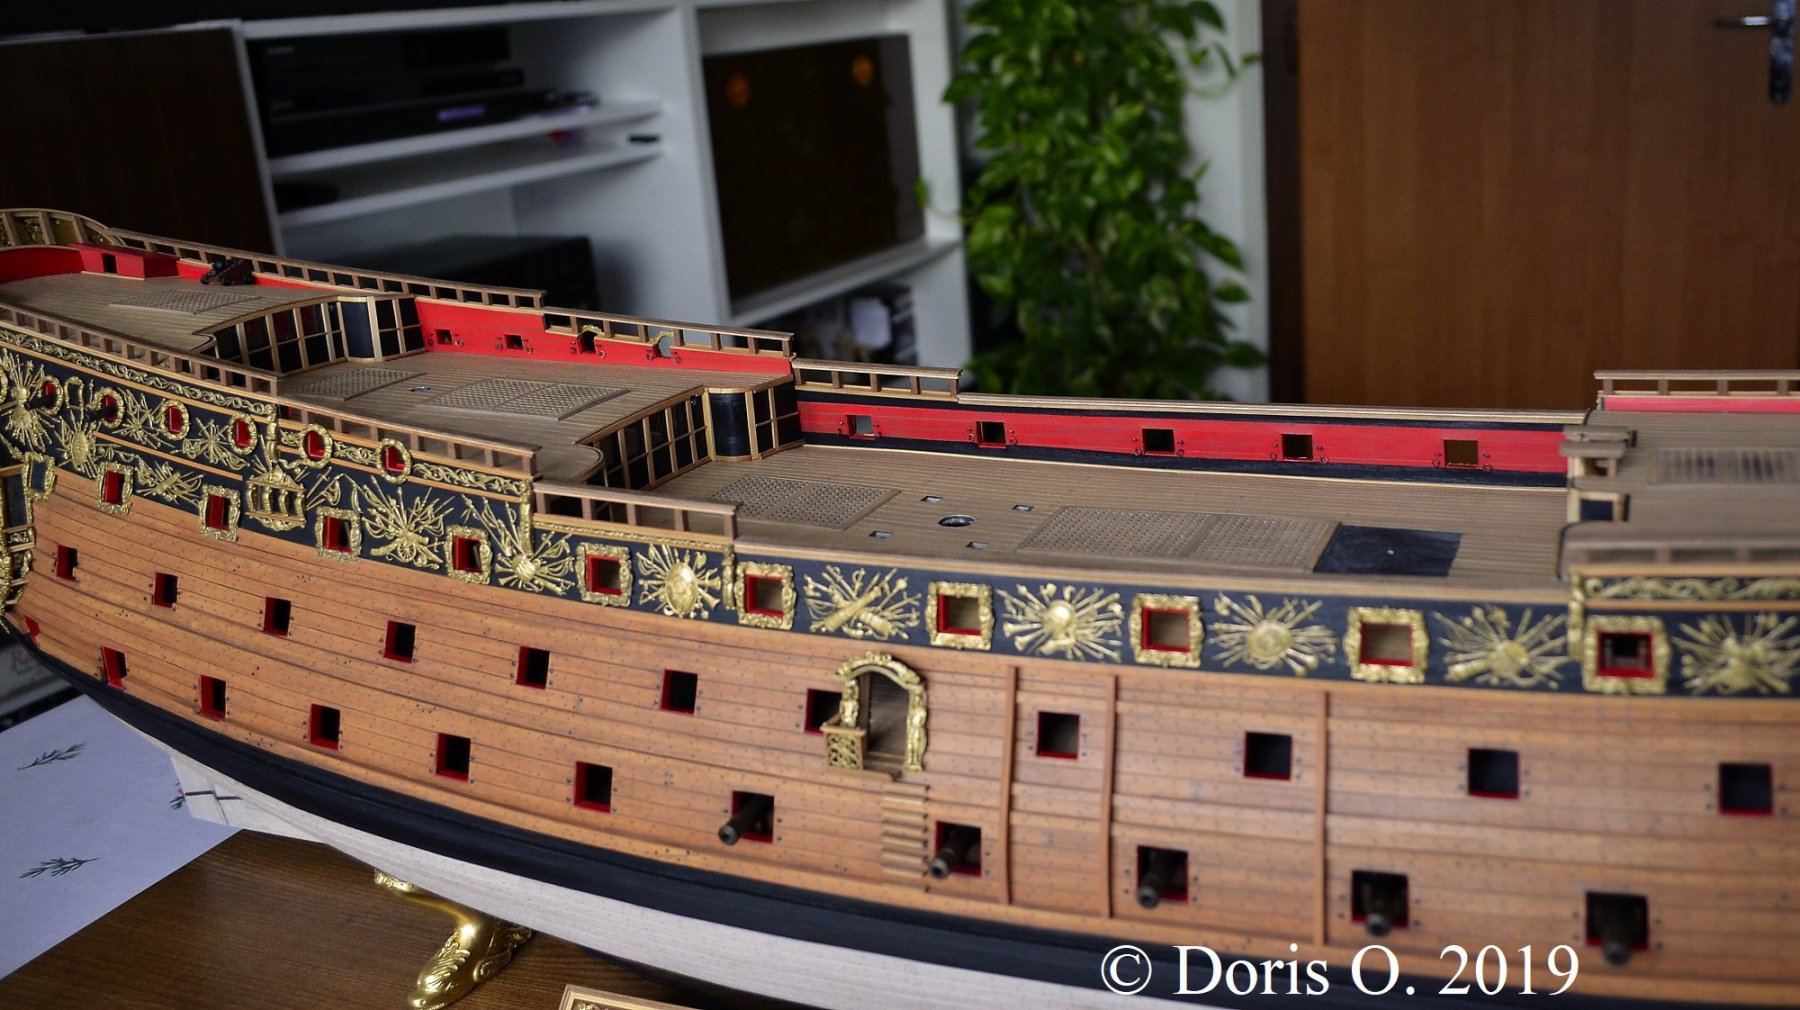
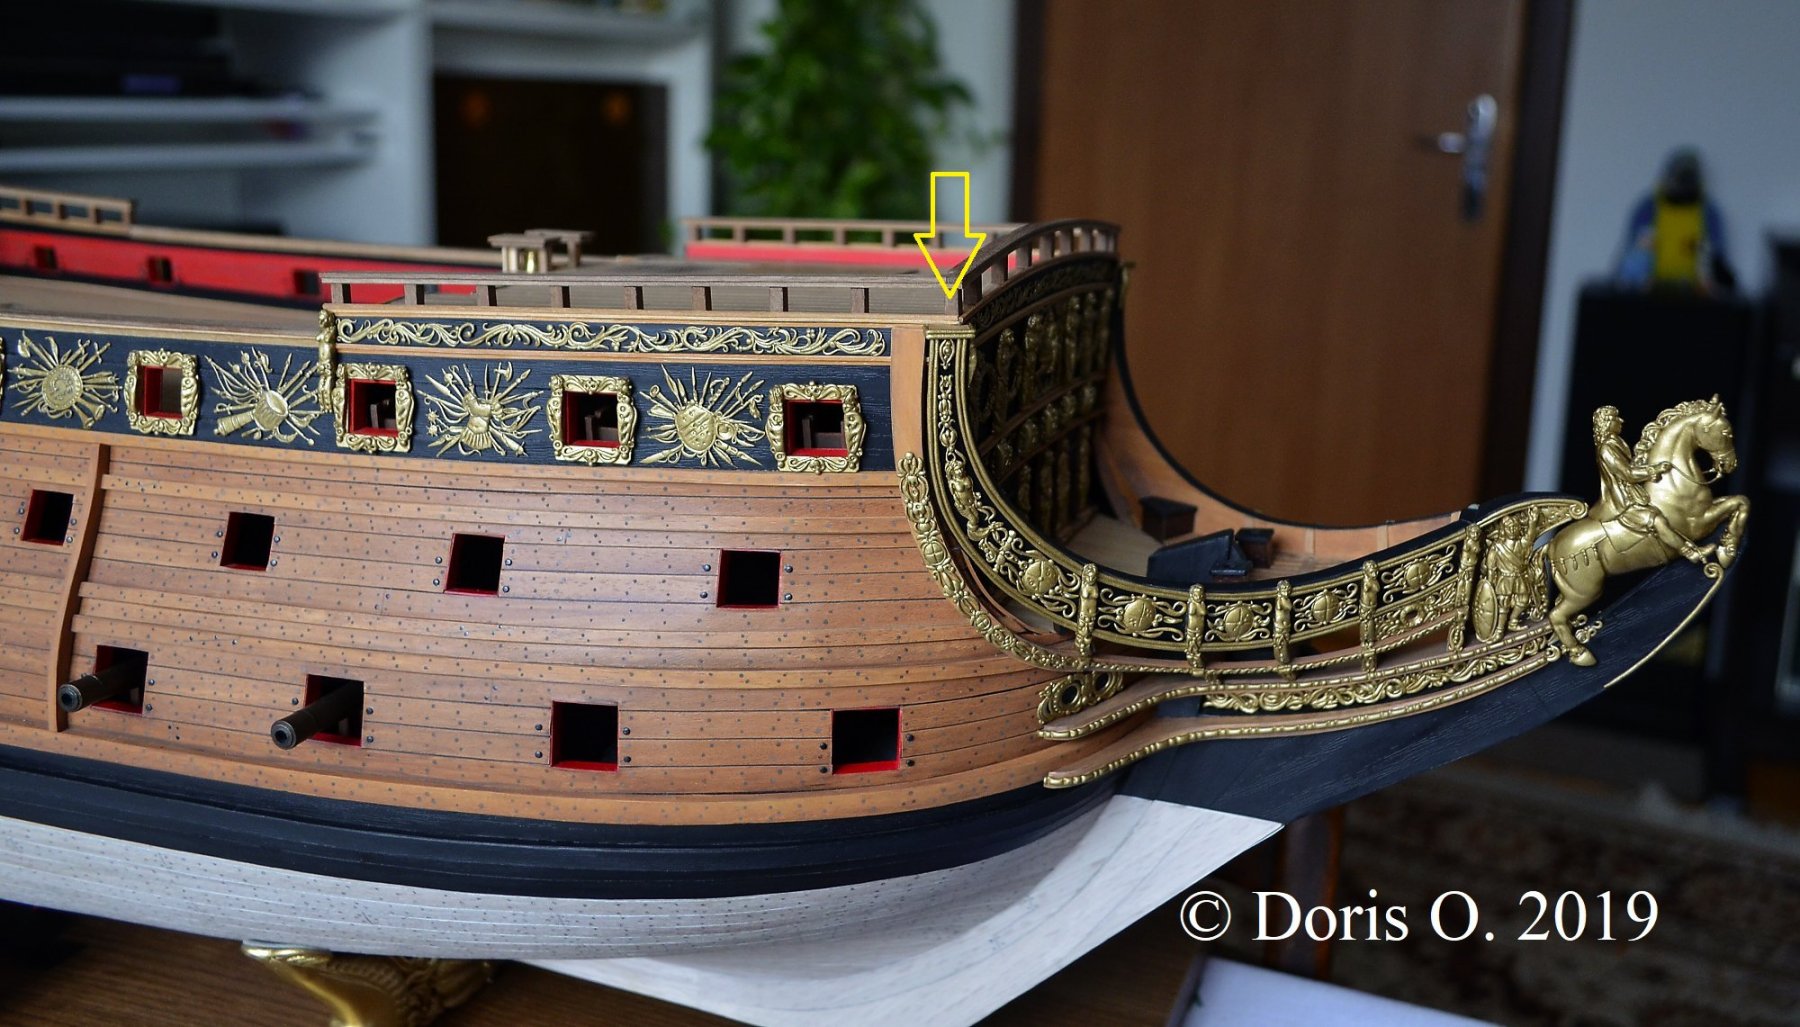
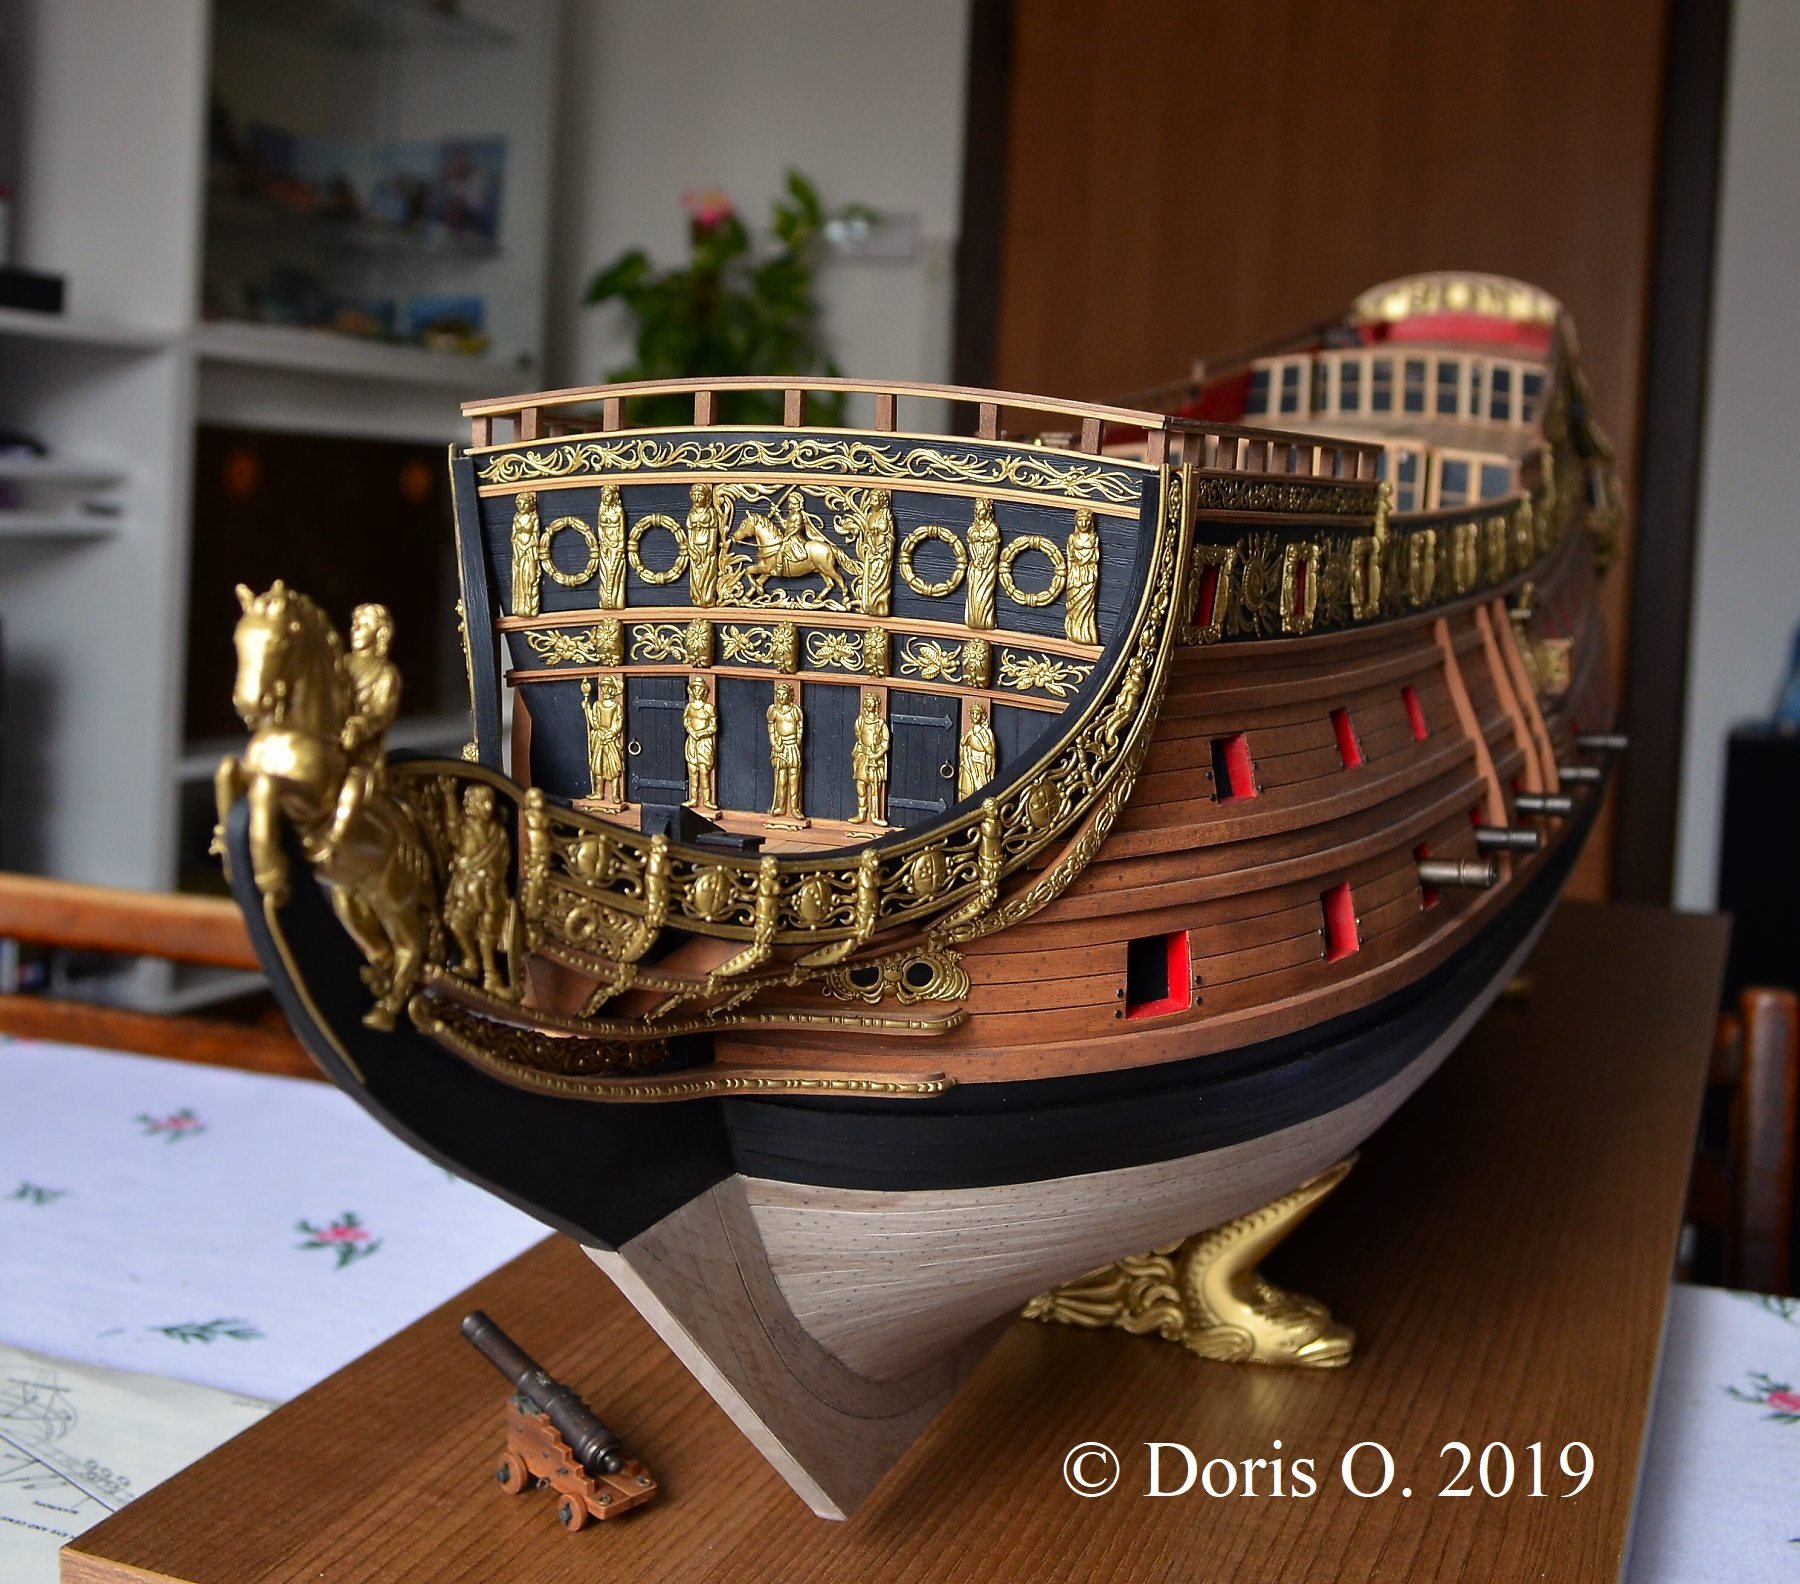
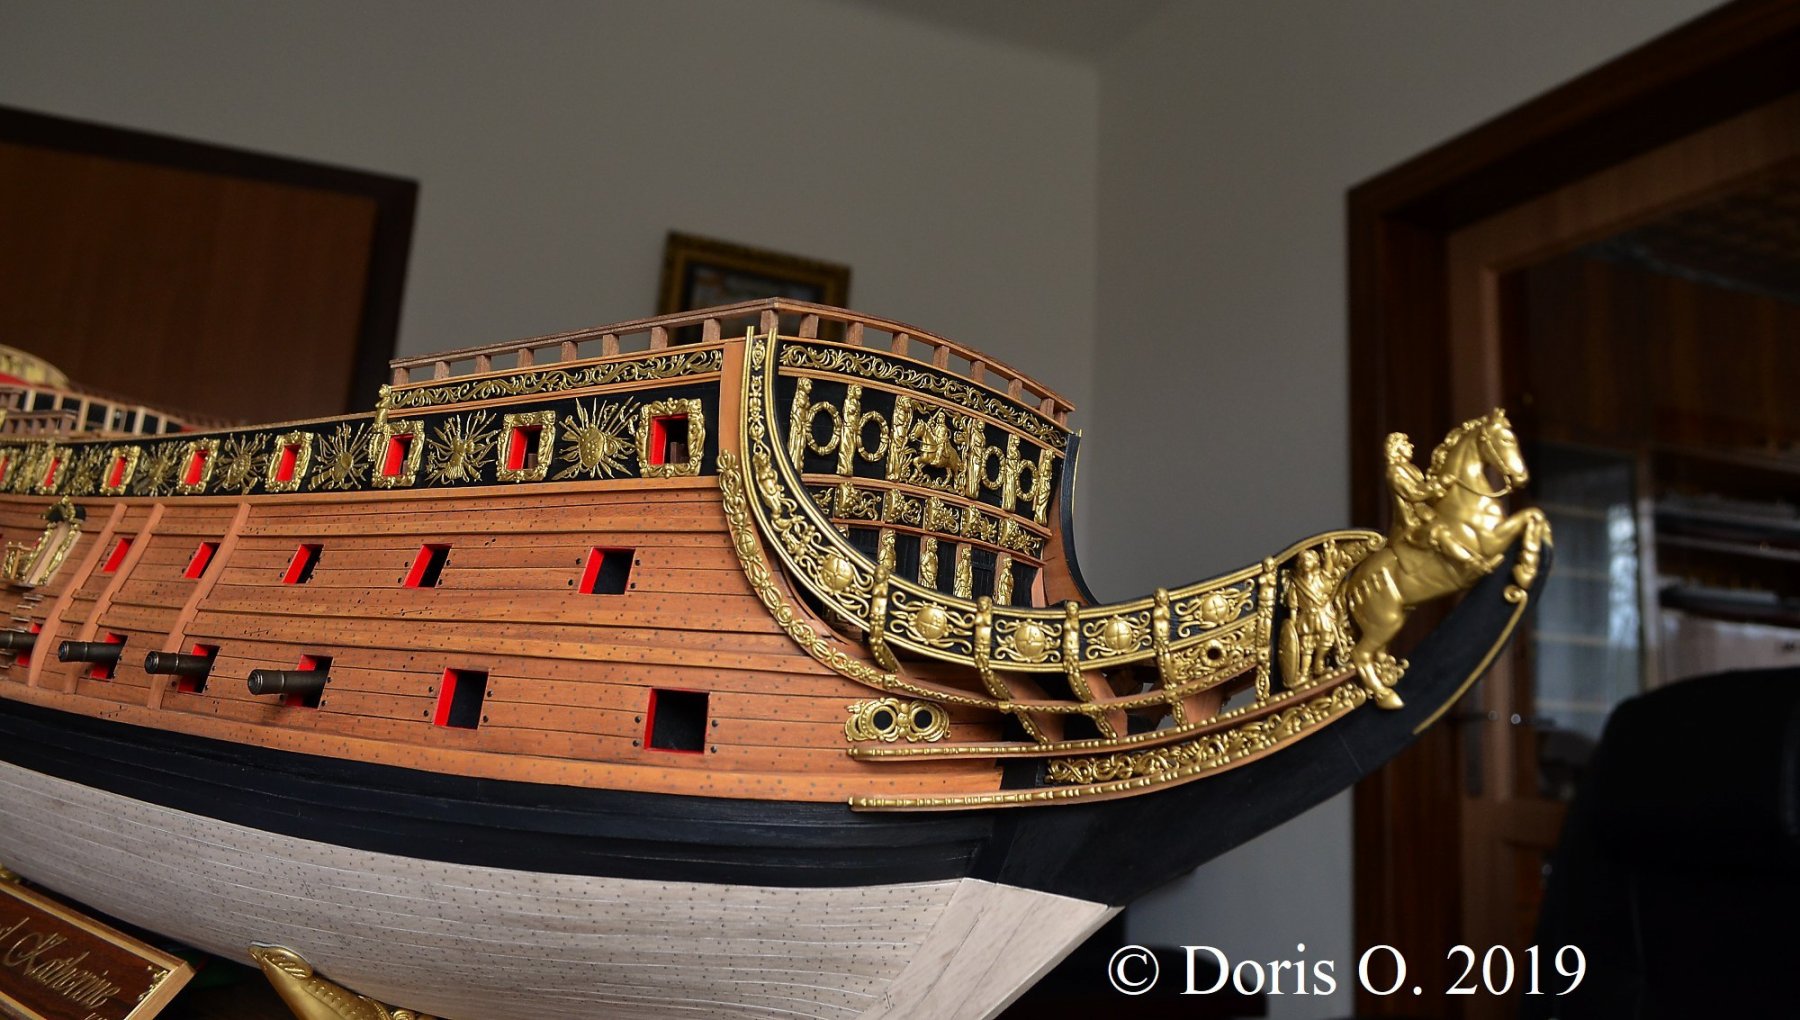
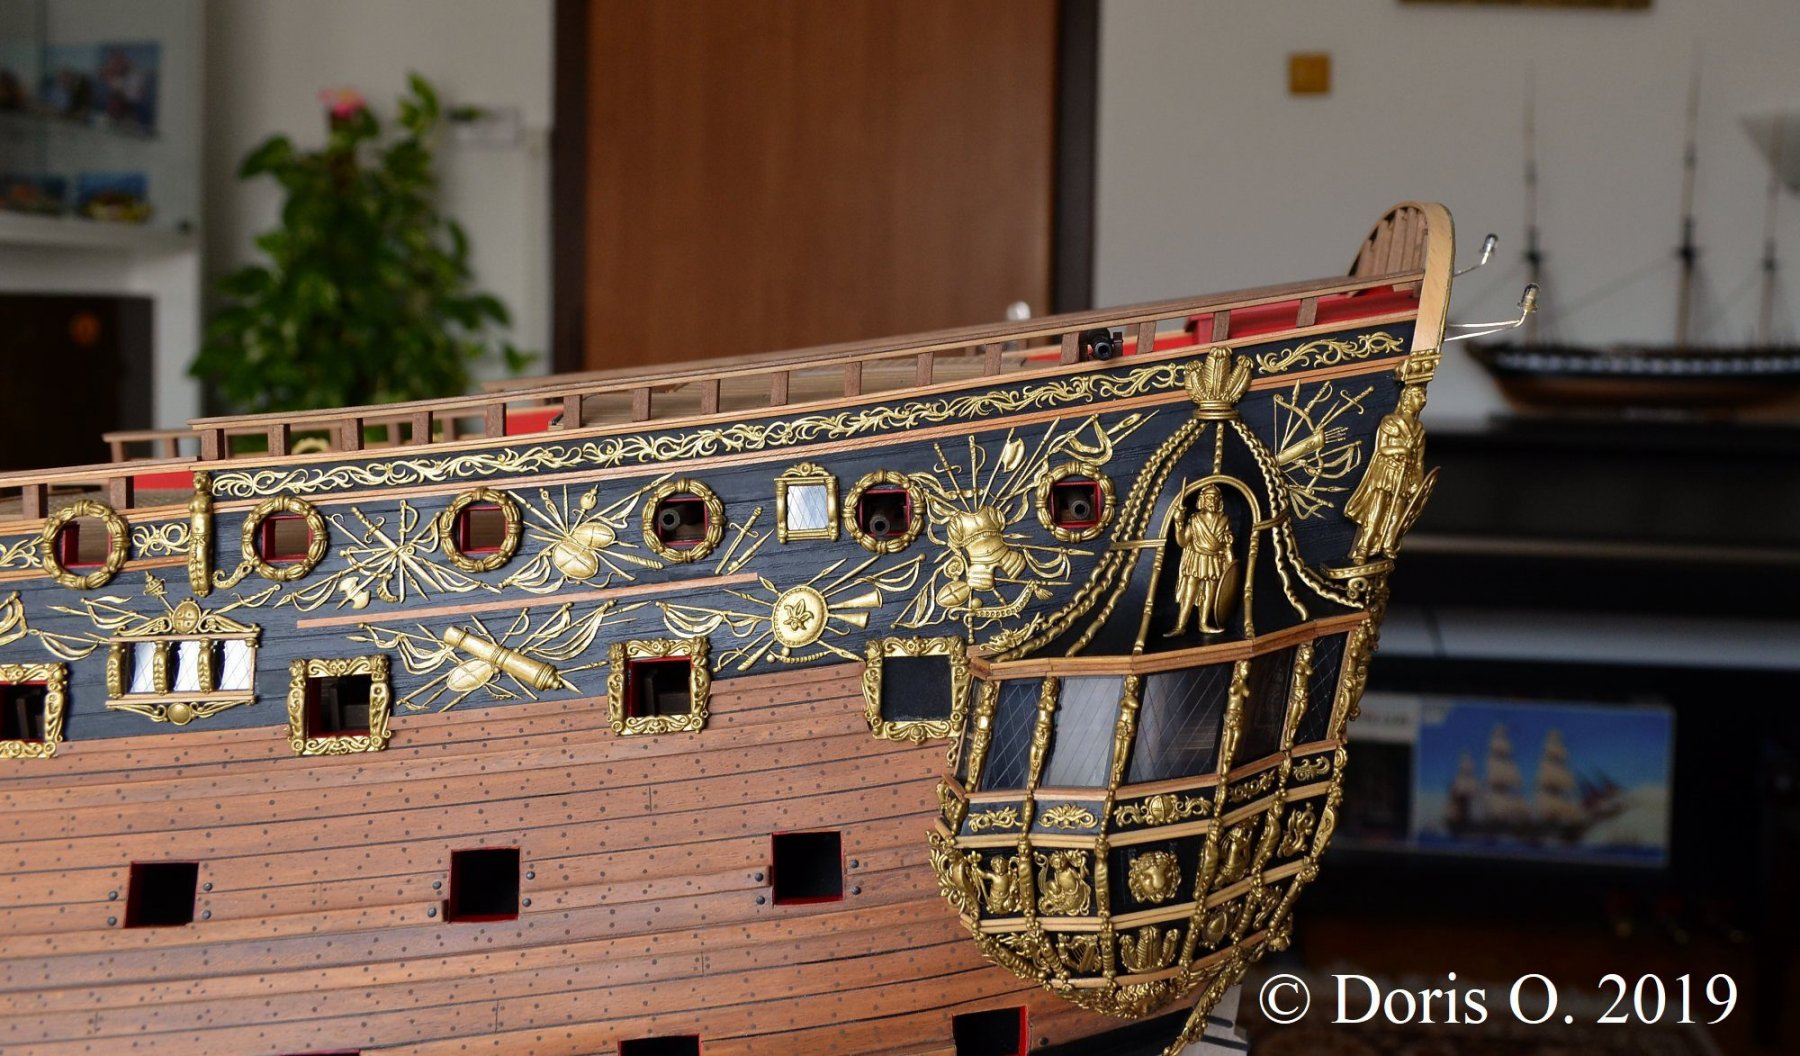
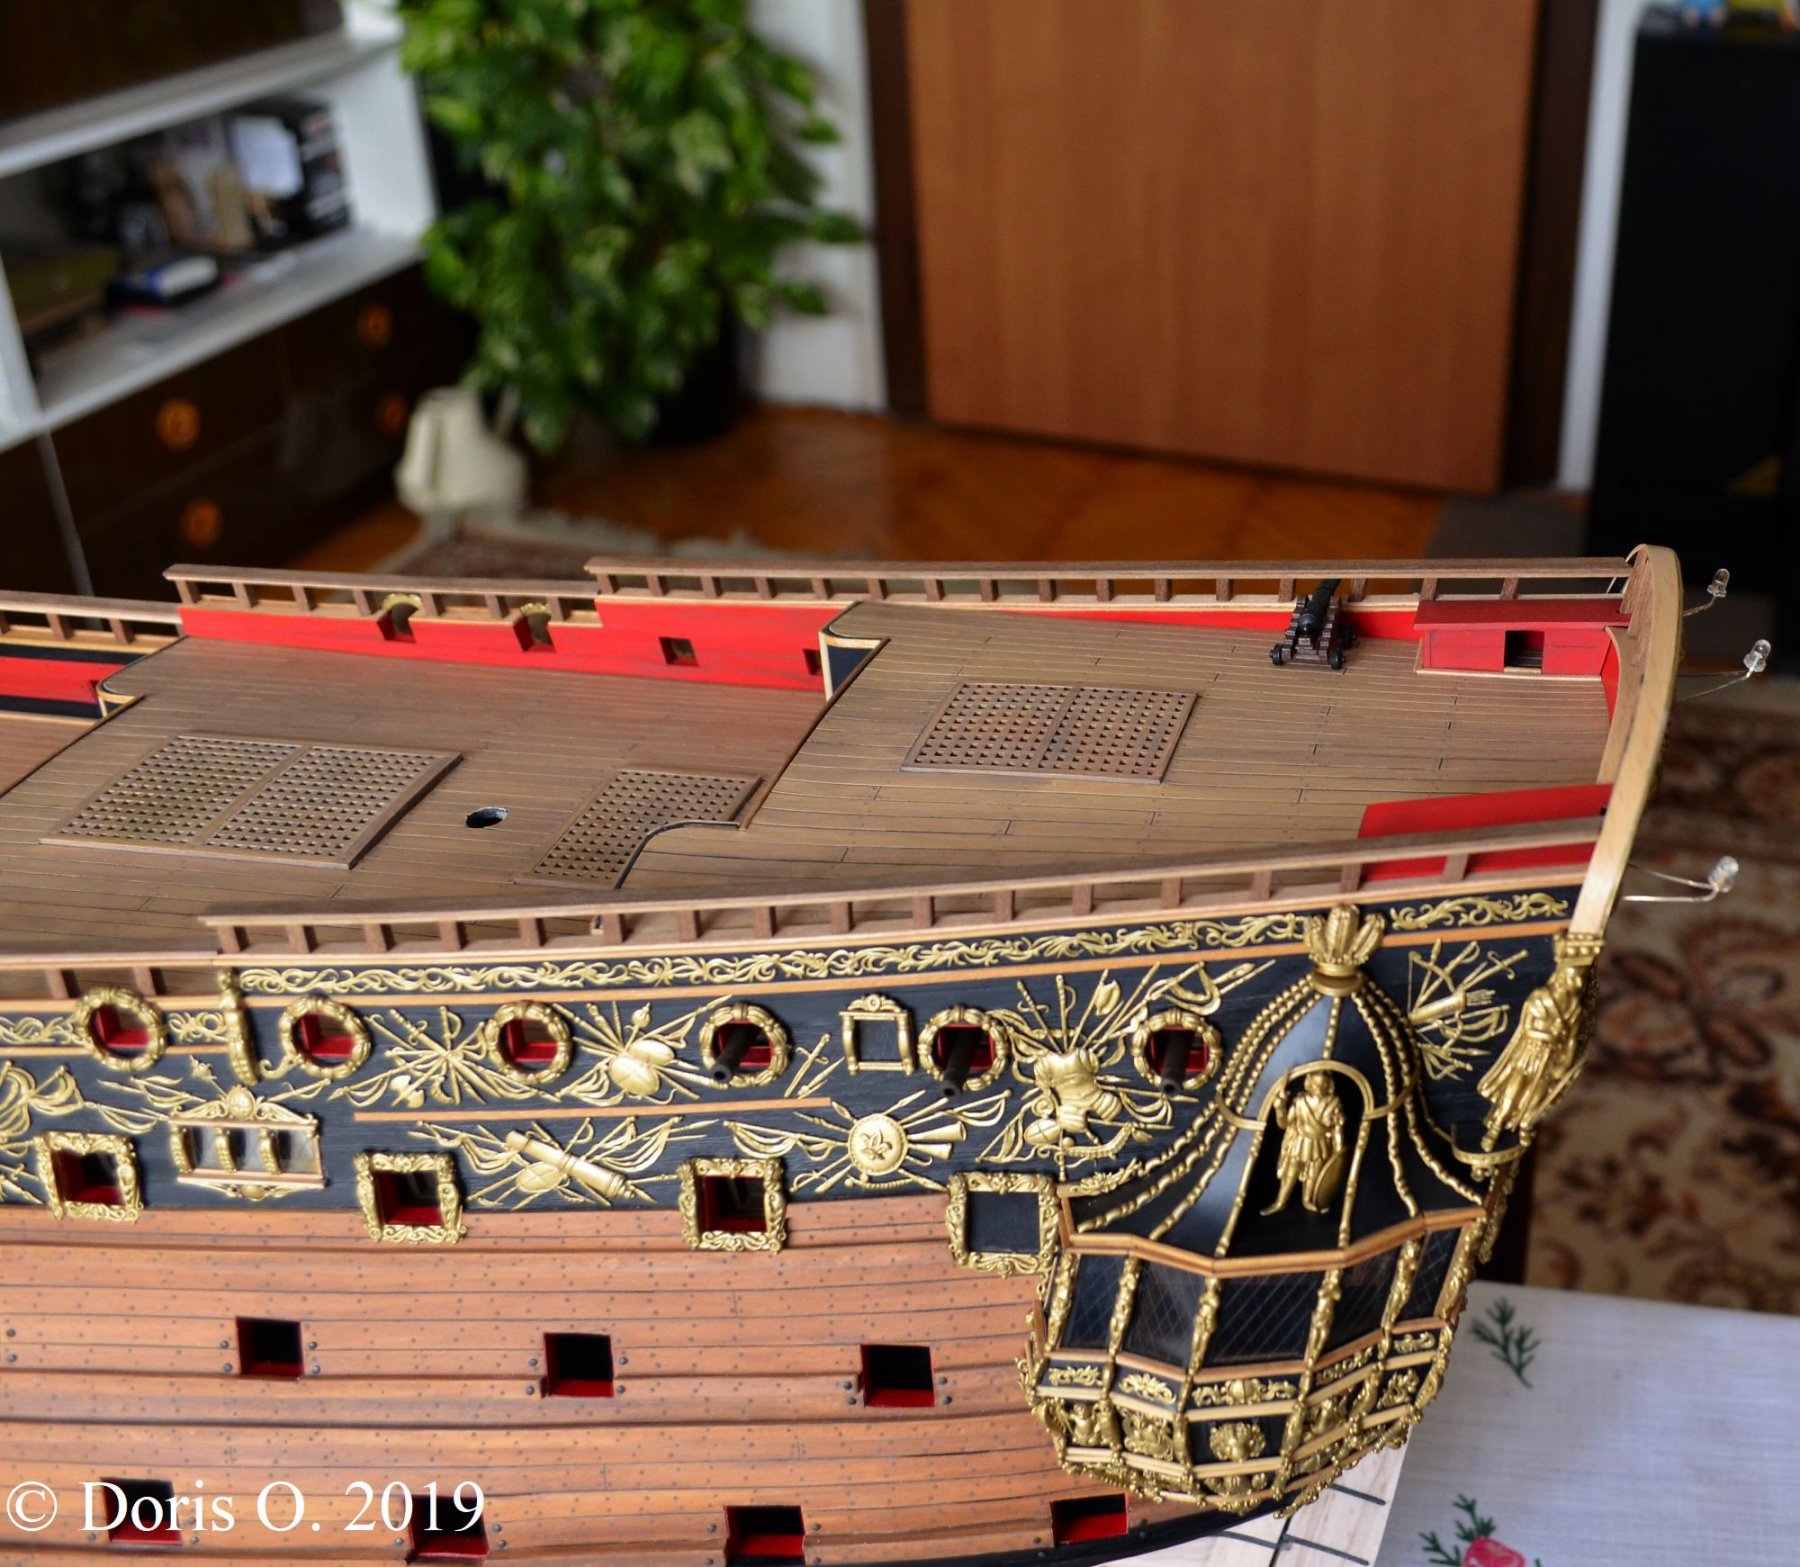
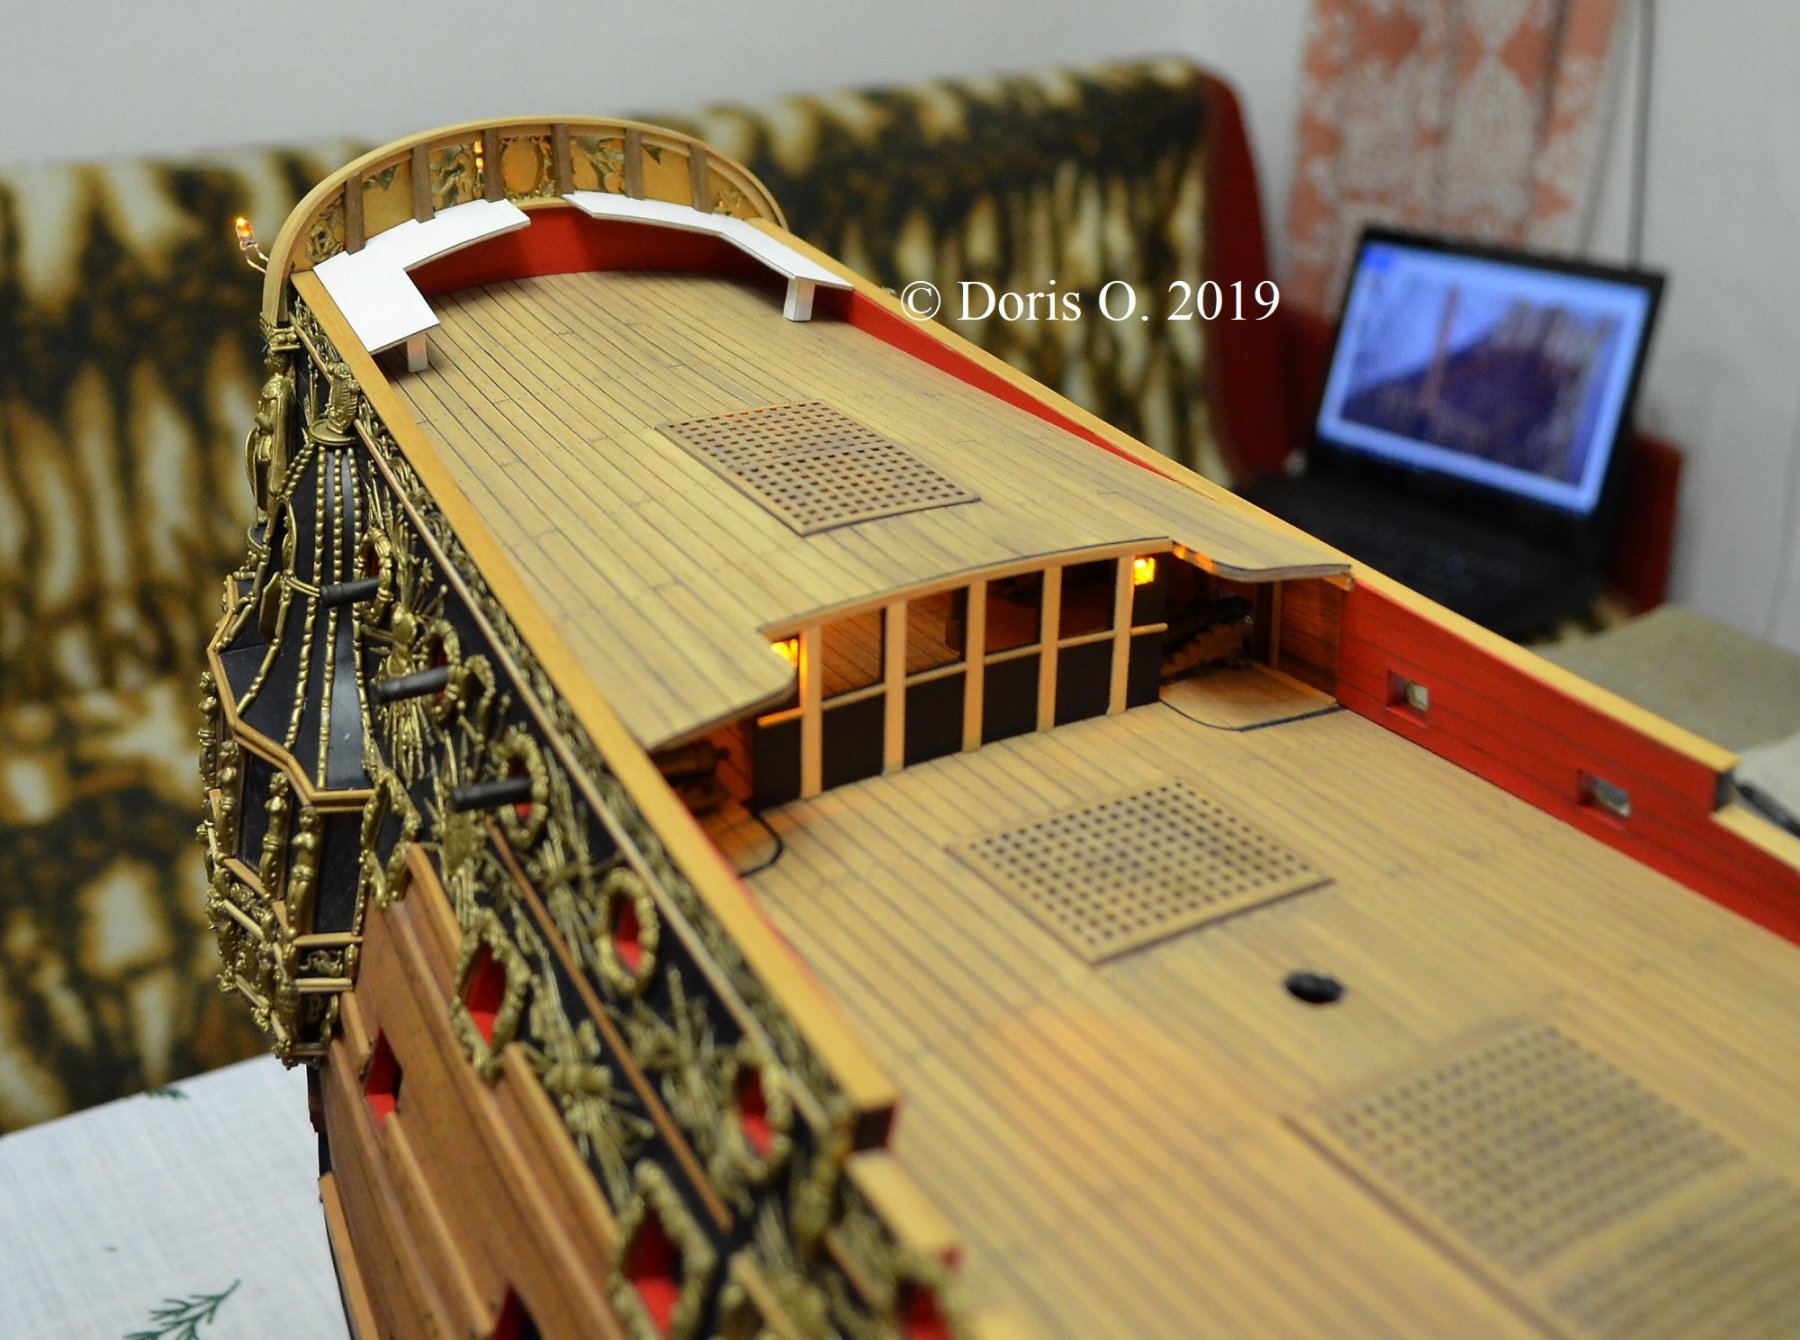
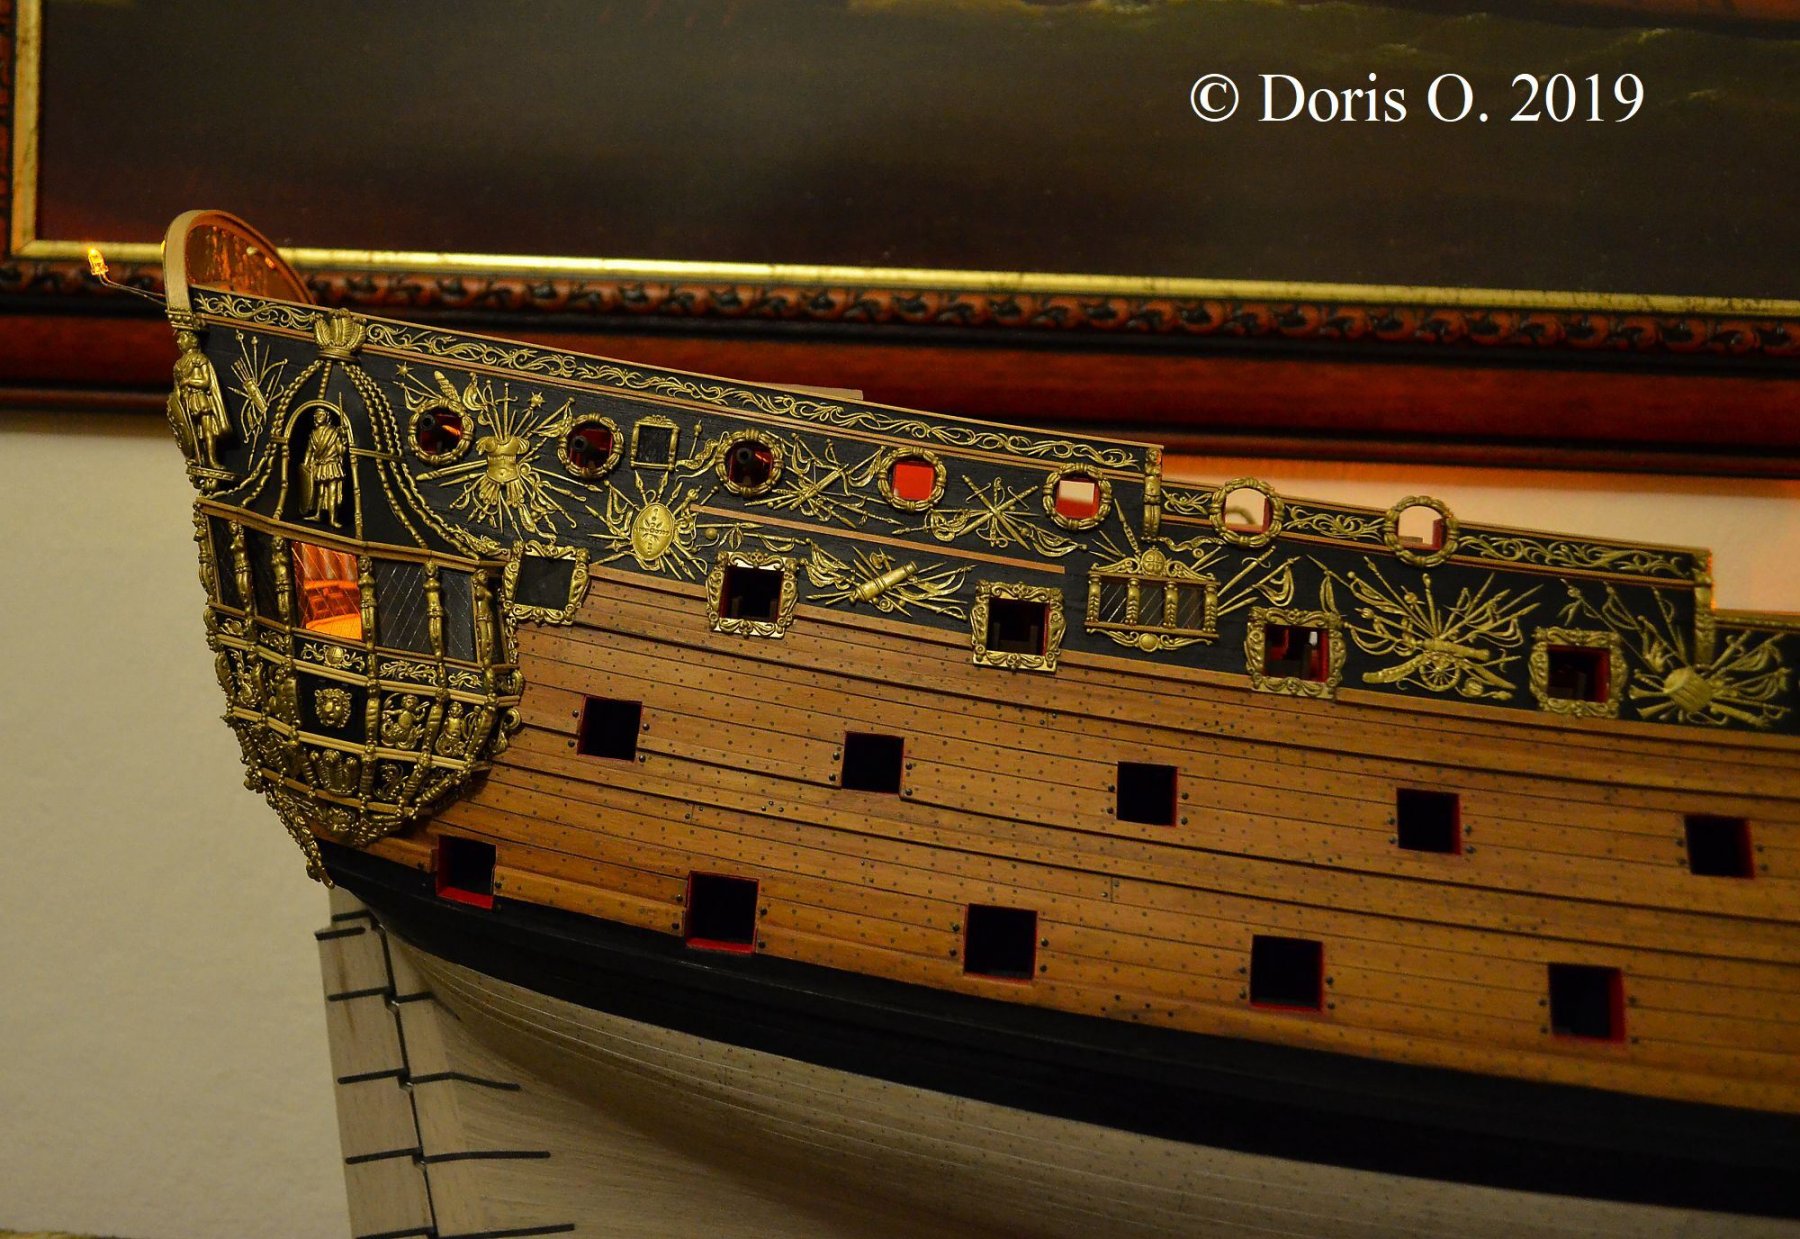
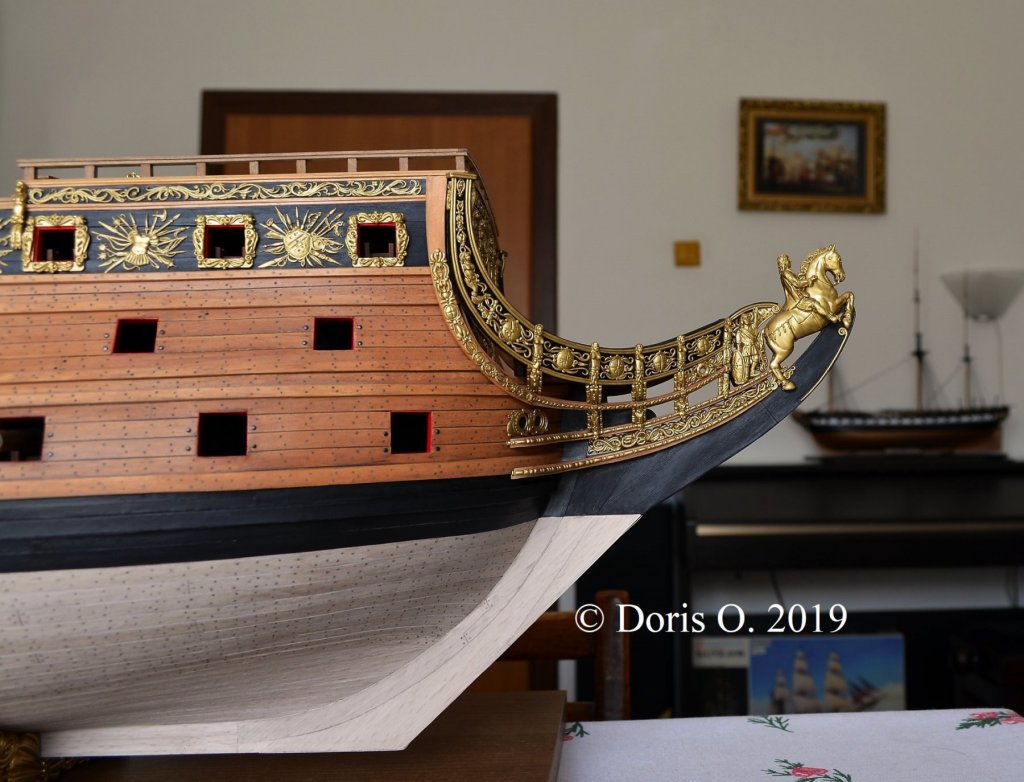
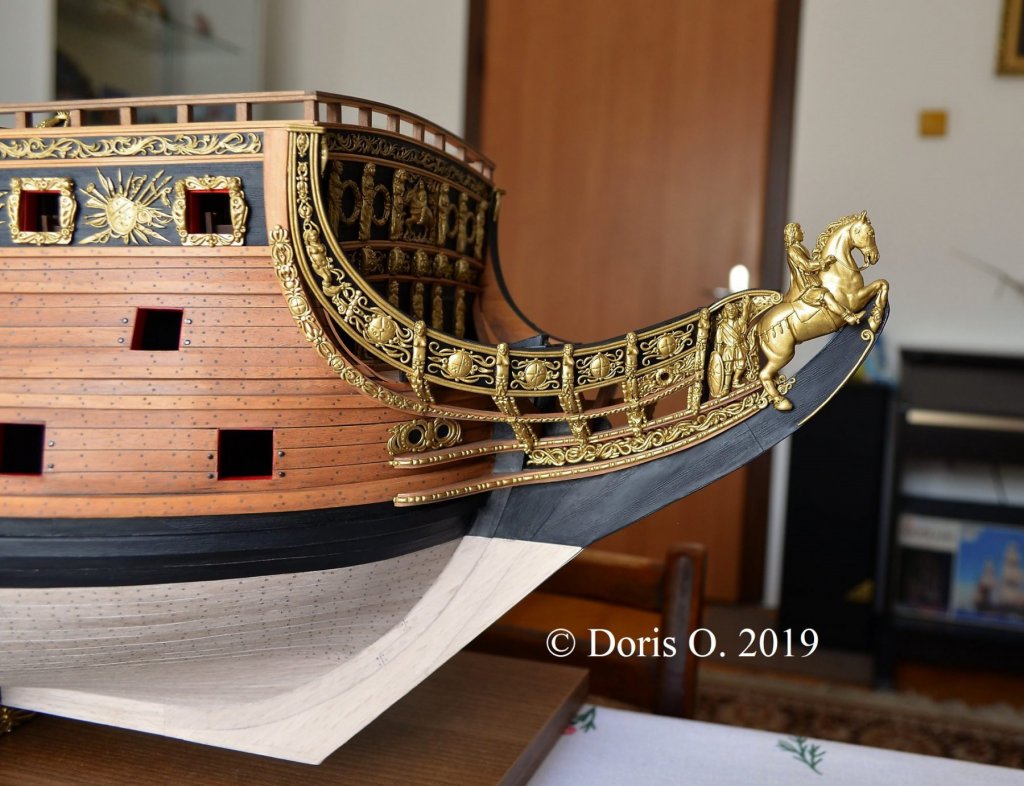
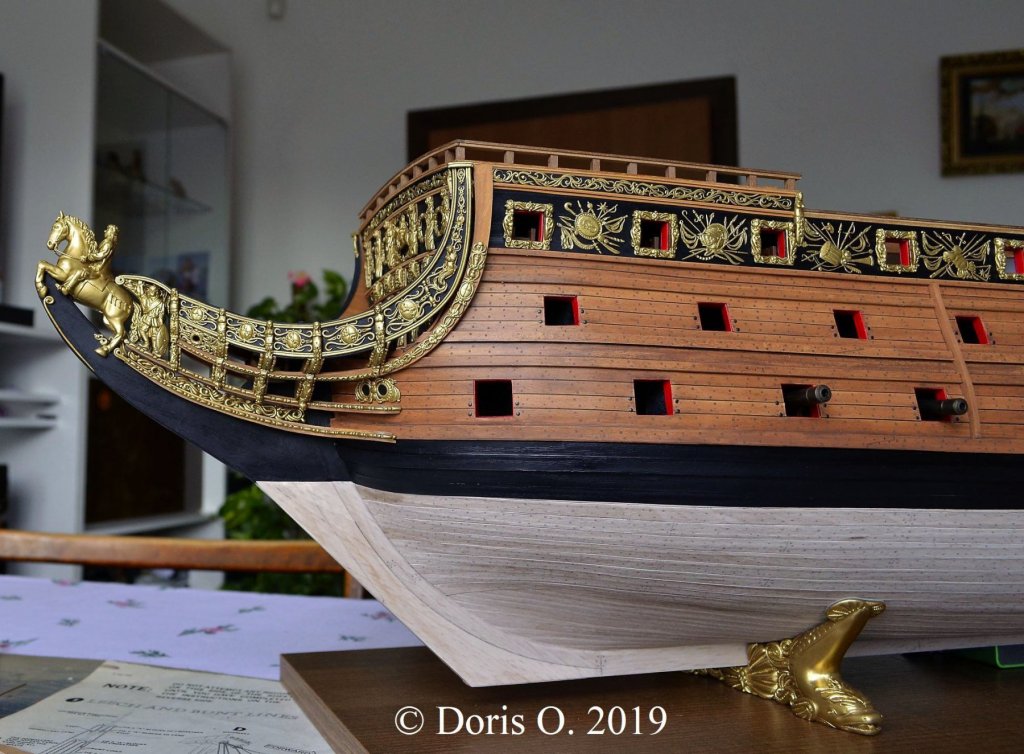
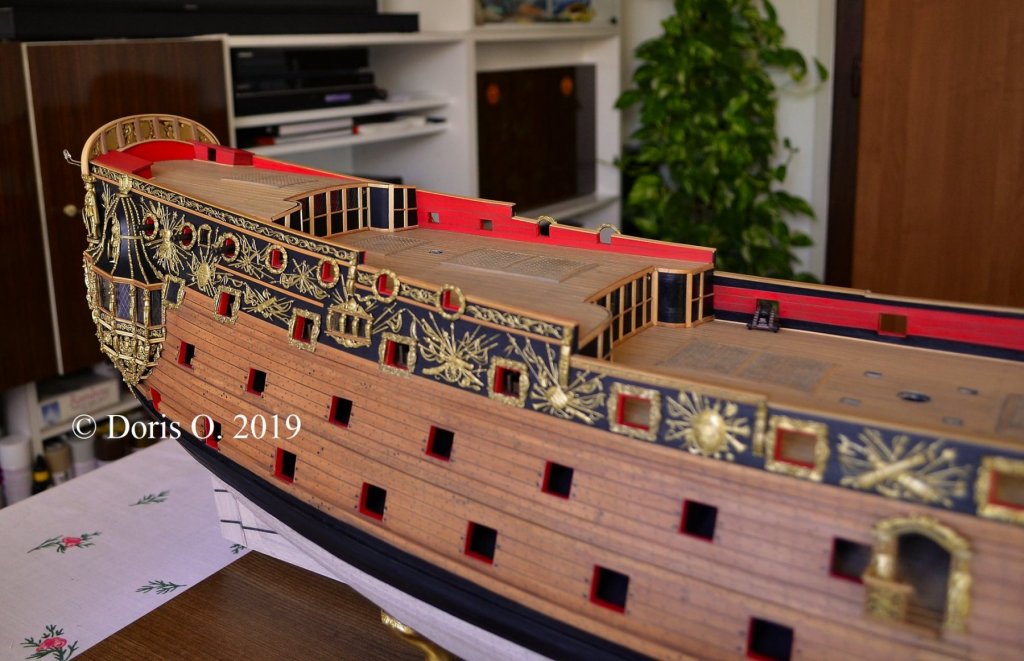
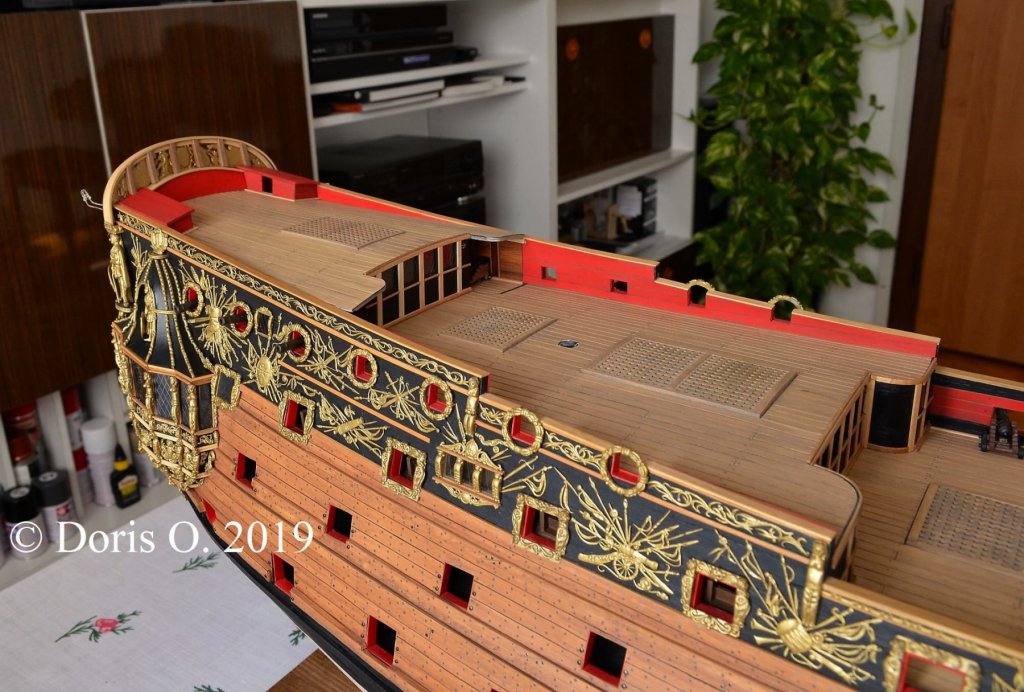
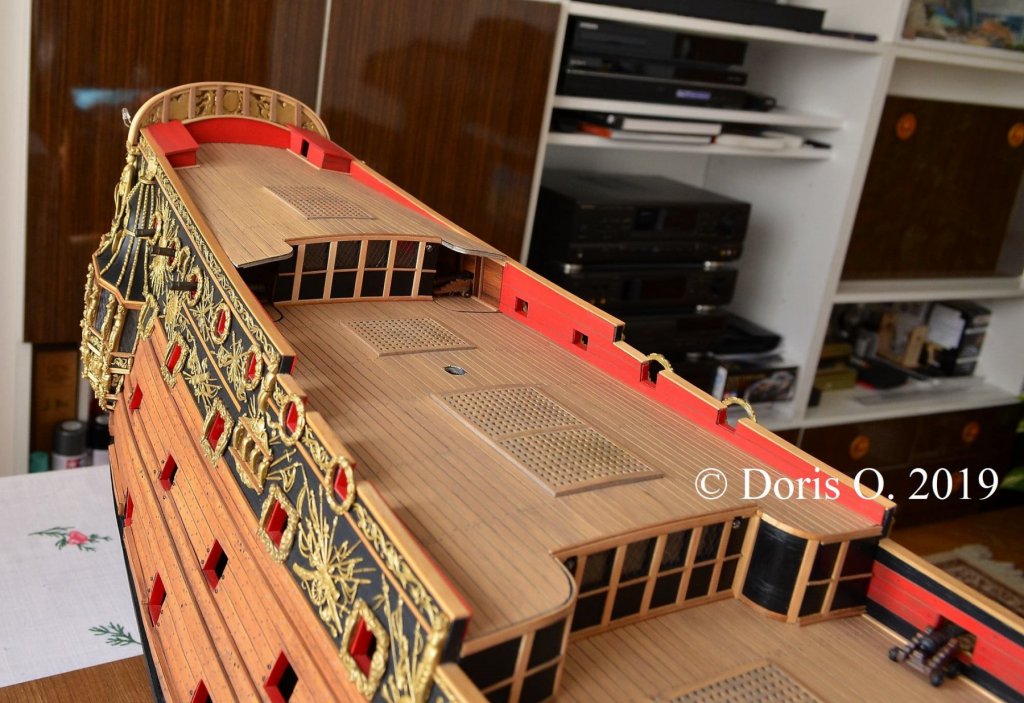
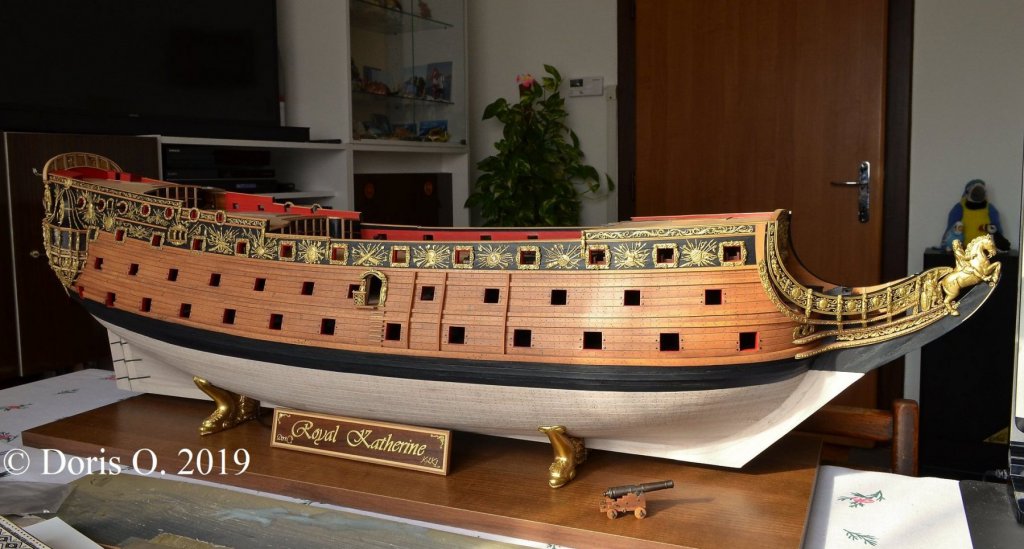
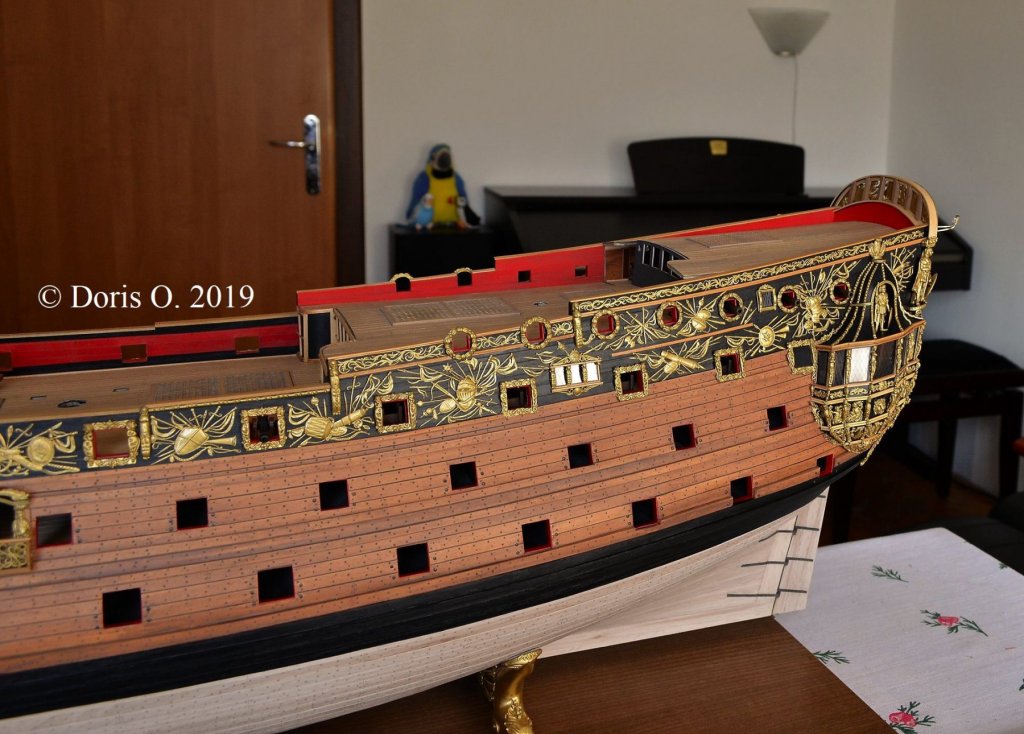
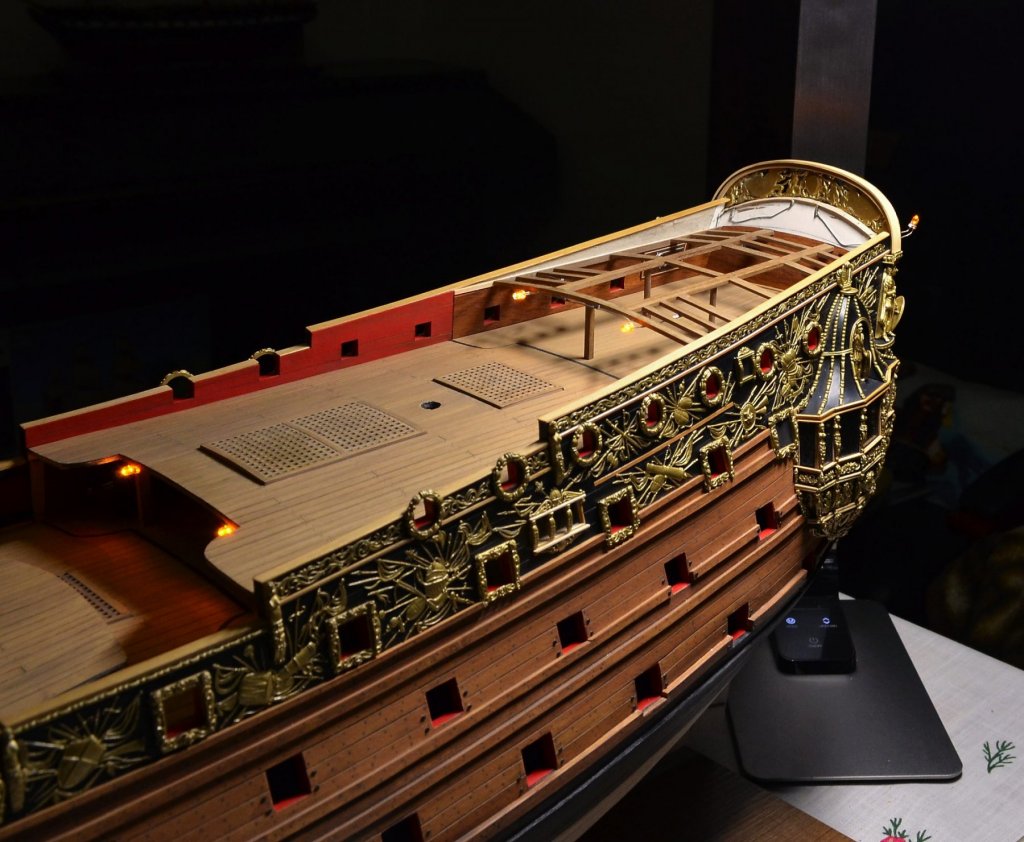
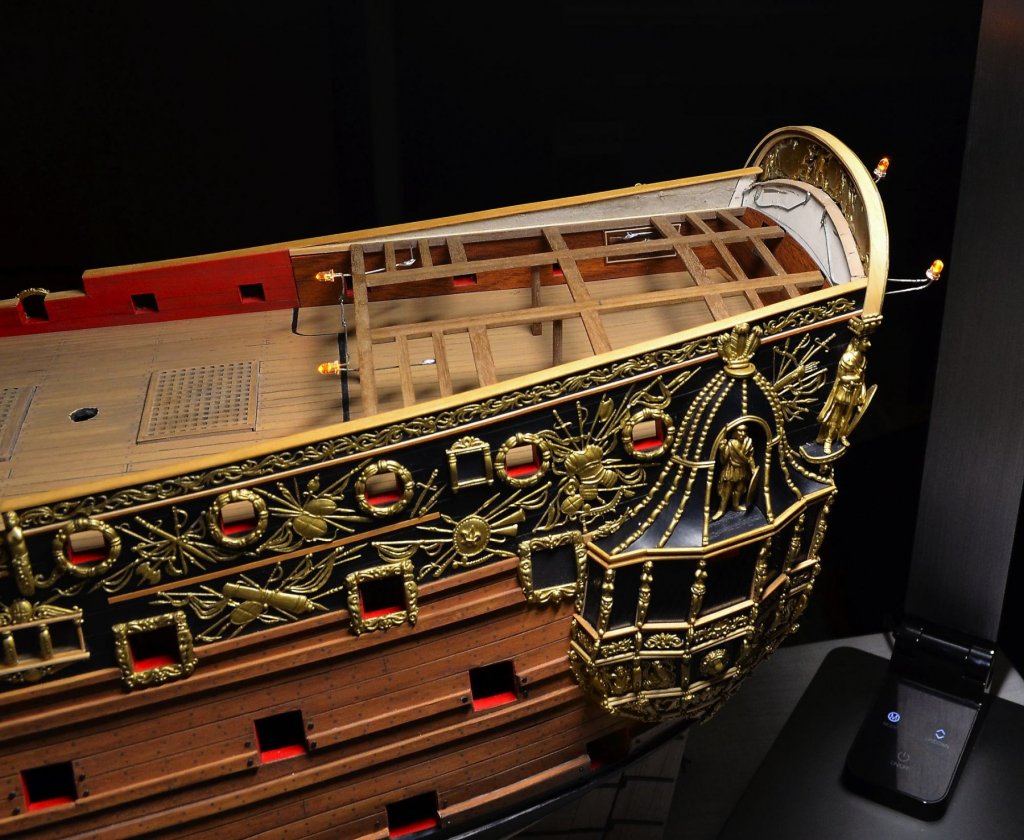
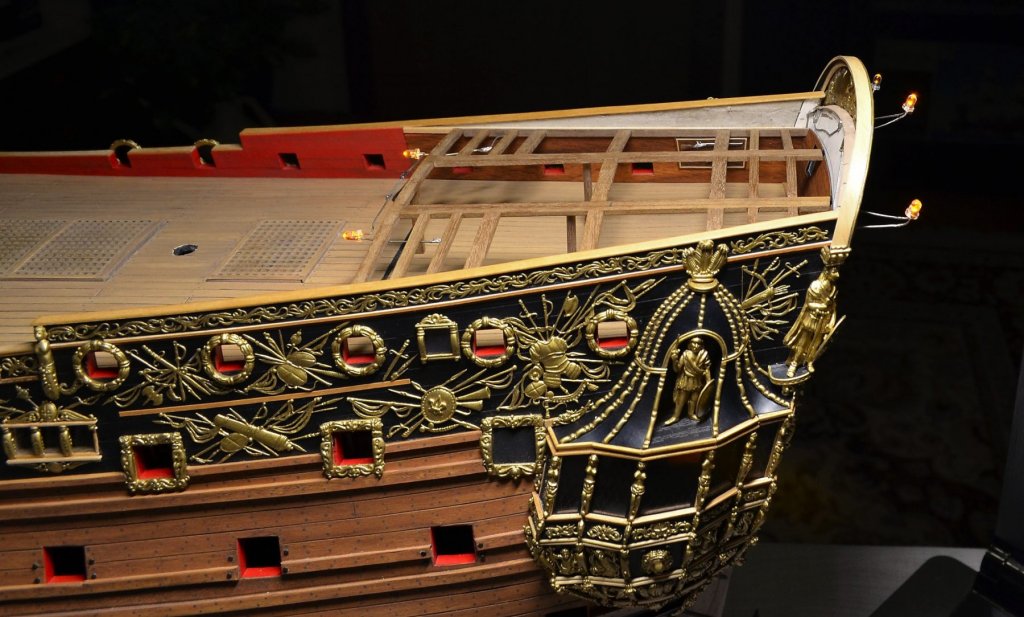
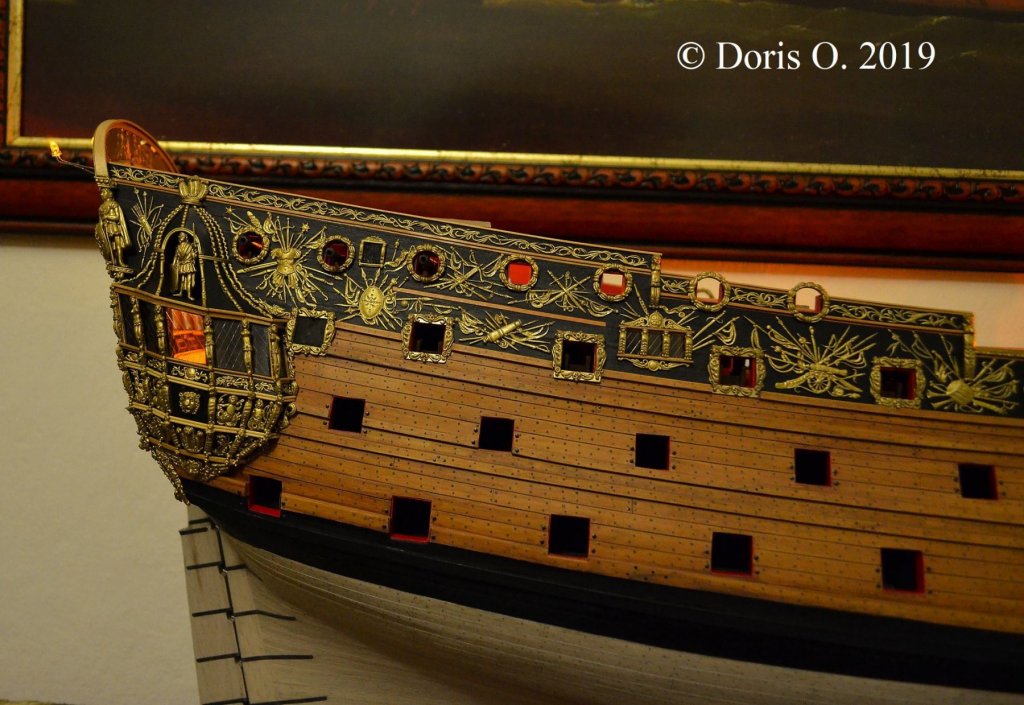
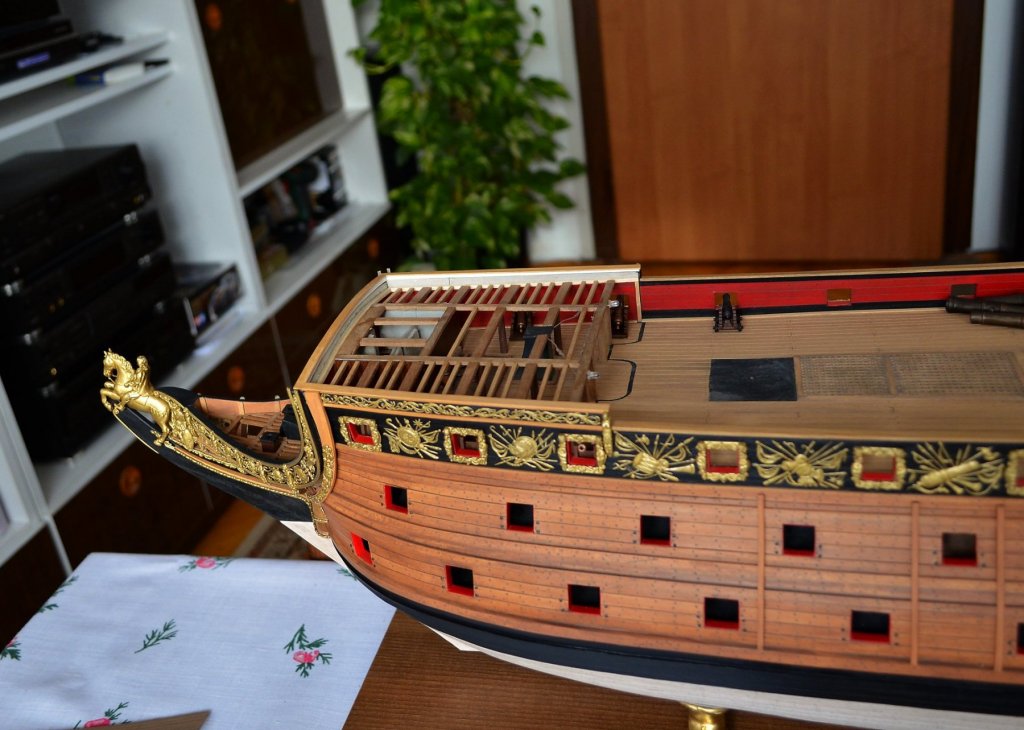
Dear friends, thank you very much for your praise and kind words, I do appreciate your support a lot. I am pleased, you enjoy the pics and like my work. Oh you mean this... Well I usually leave my signature on the frame/main rib. But on my older scratch-build model Sovereign of the Seas stayed my tears, cause I had some accidents and was sad also because of the problems and disappointment that life brought to me then.... *********************************** I have decided to improve decoration on the bow section and make larger/wider sculptures to achieve more realistic appearance. Lower pieces of decoration are completely new and they overlap the upper cheeks as you can see on many museum models from that period. I believe, this decision was good. Enjoy the pics and have a good time. Previous bow design: And here's the current design: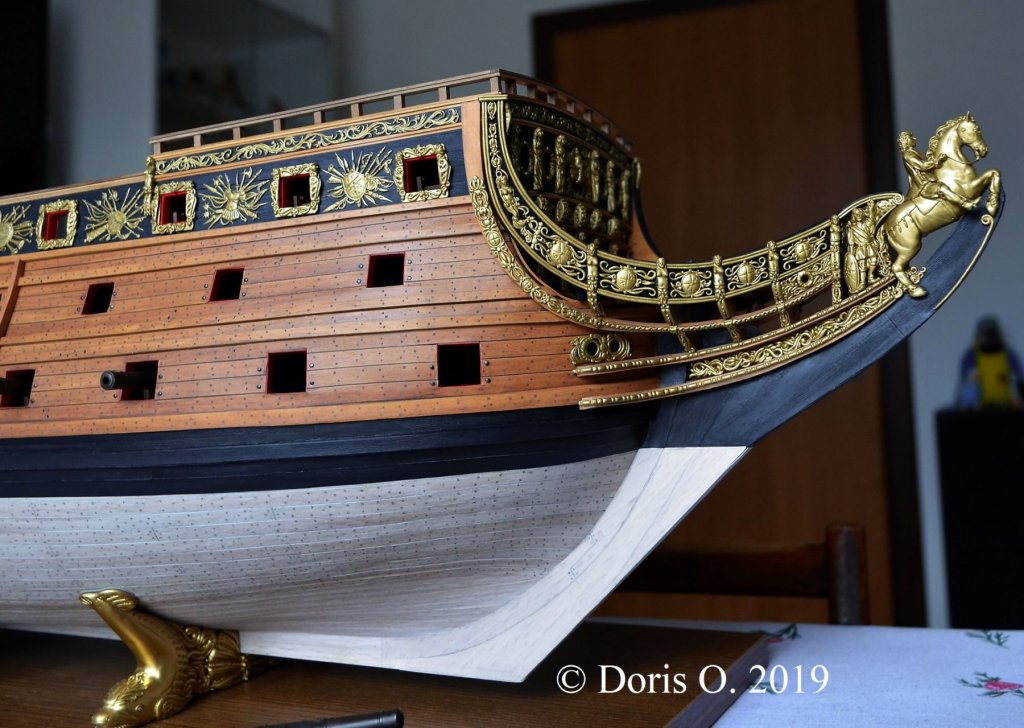

- 1,035 replies
-
- 51
-

-
- royal katherine
- ship of the line
- (and 1 more)
-
HMS ROYAL KATHERINE 1664 by Doris - 1/55 - CARD
DORIS replied to DORIS's topic in - Build logs for subjects built 1501 - 1750
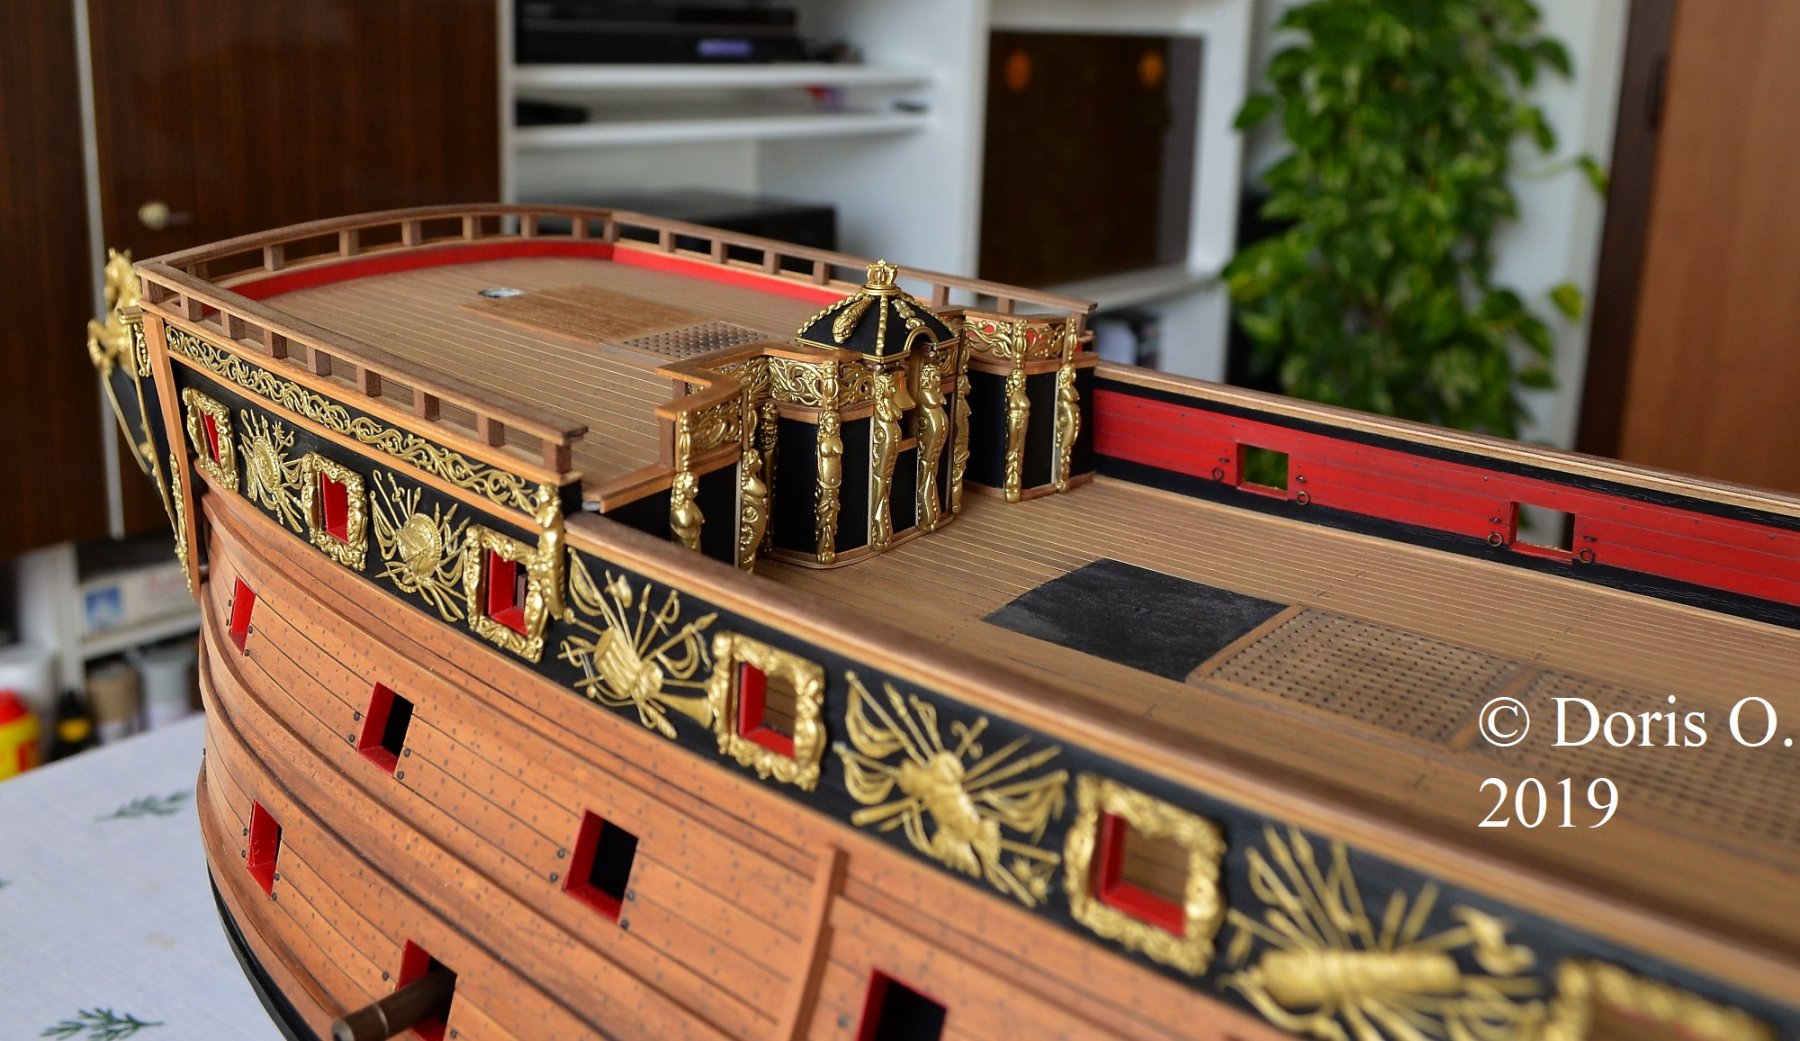
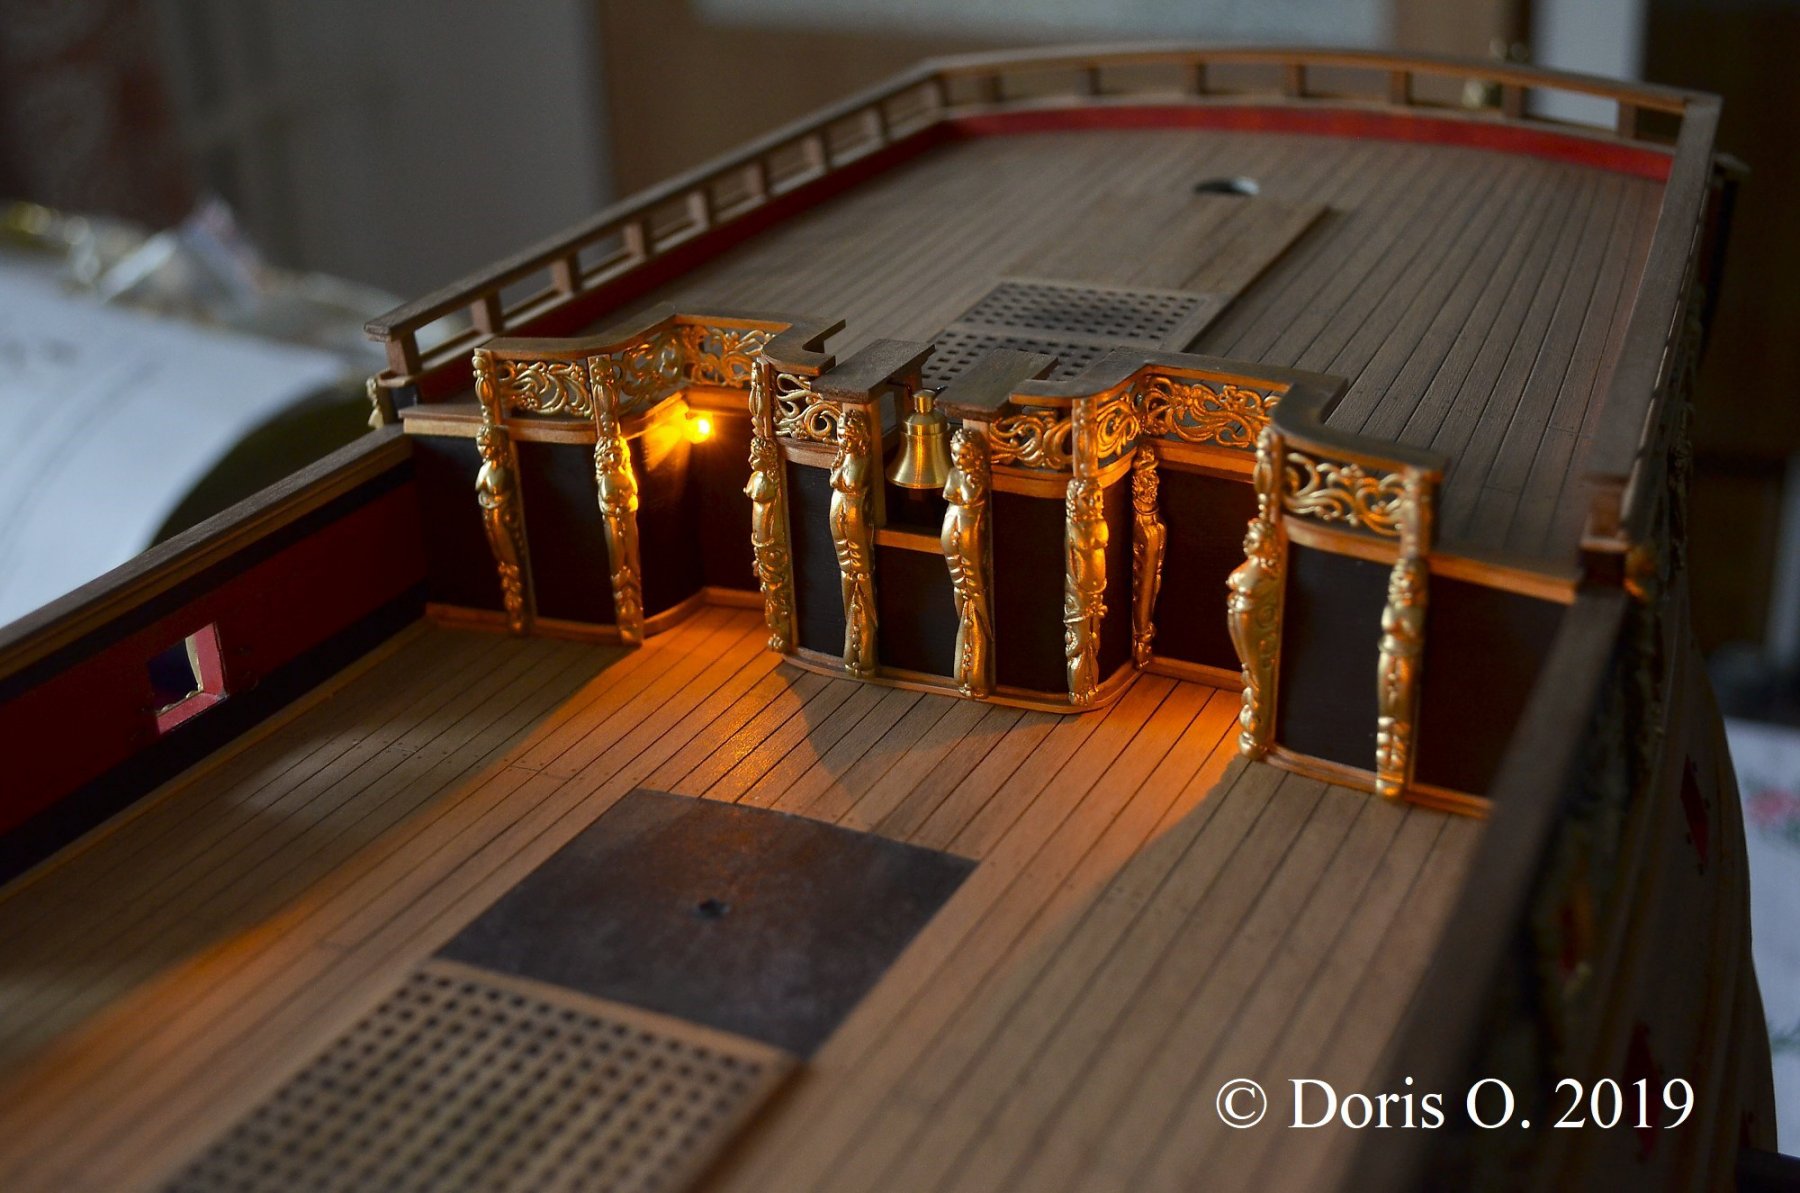
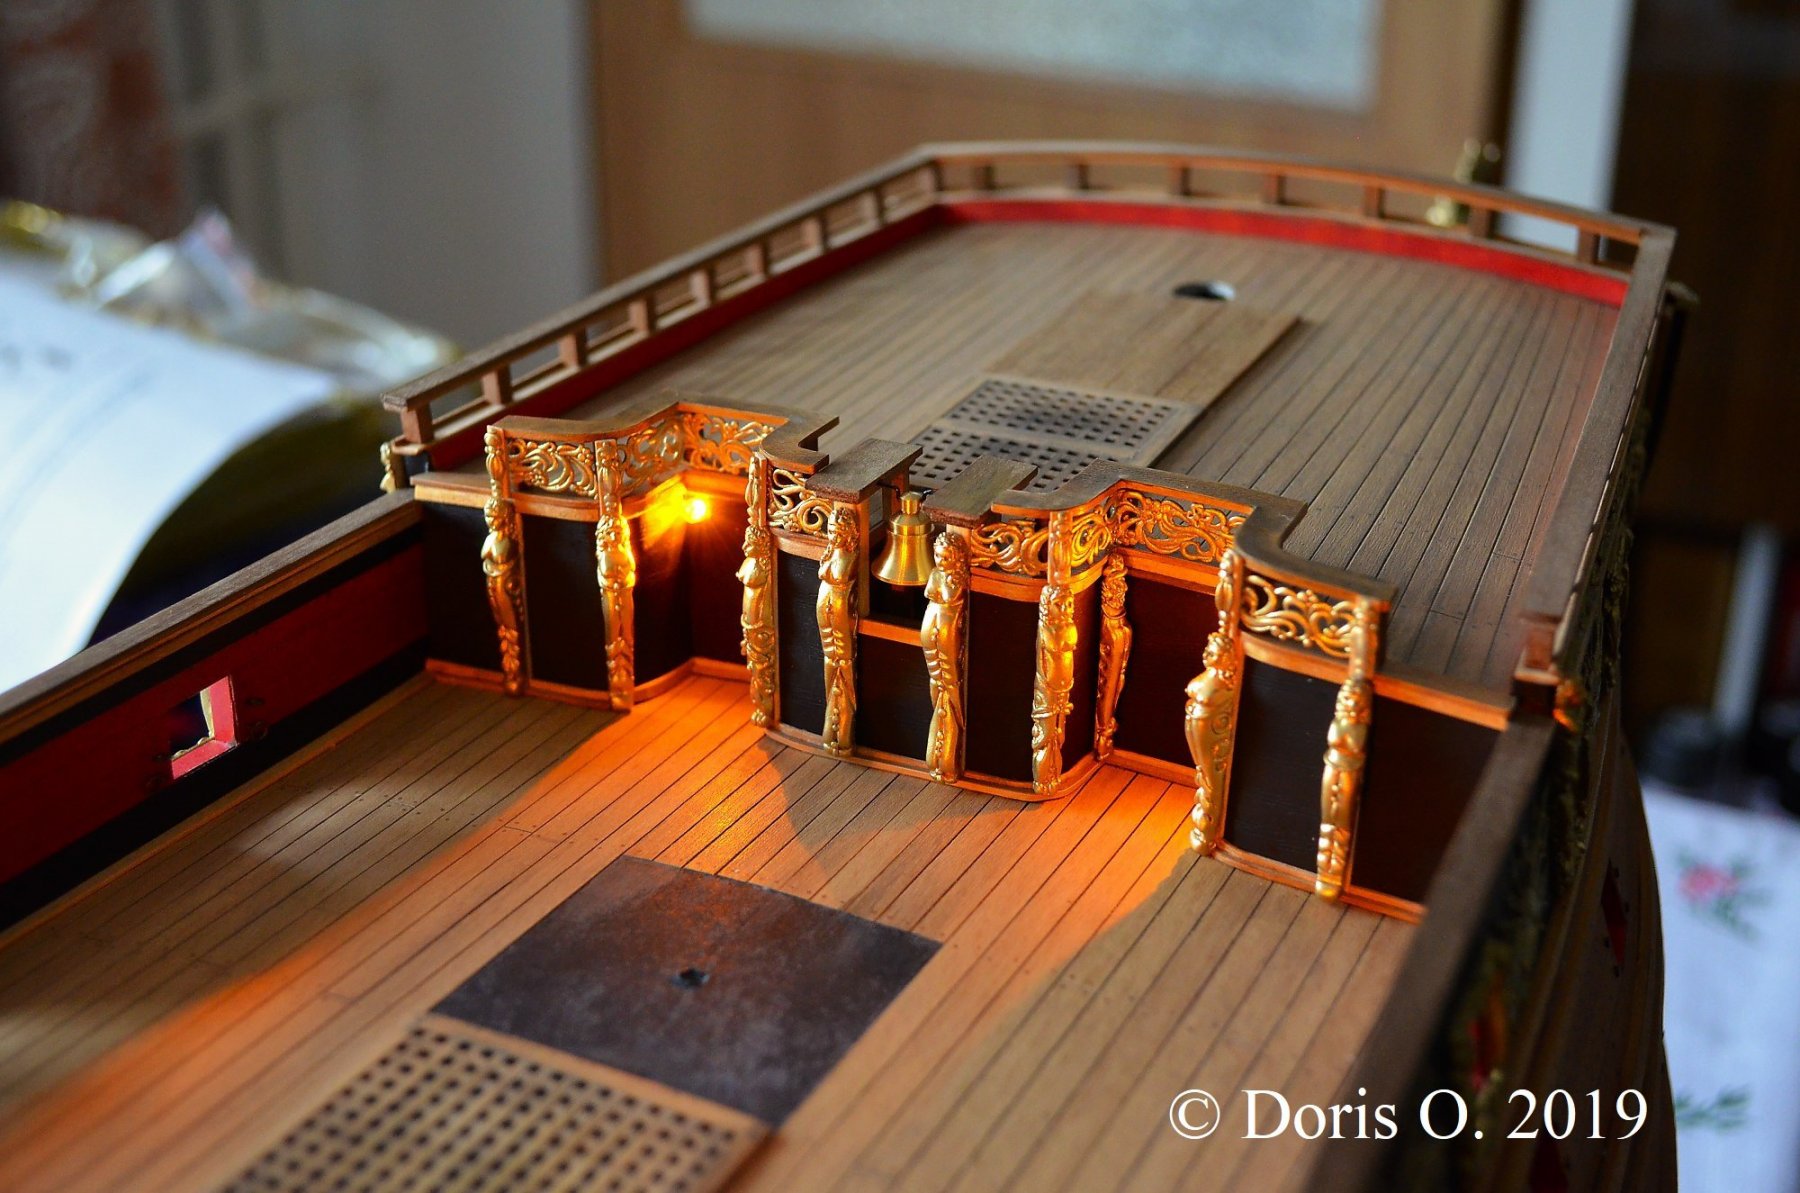
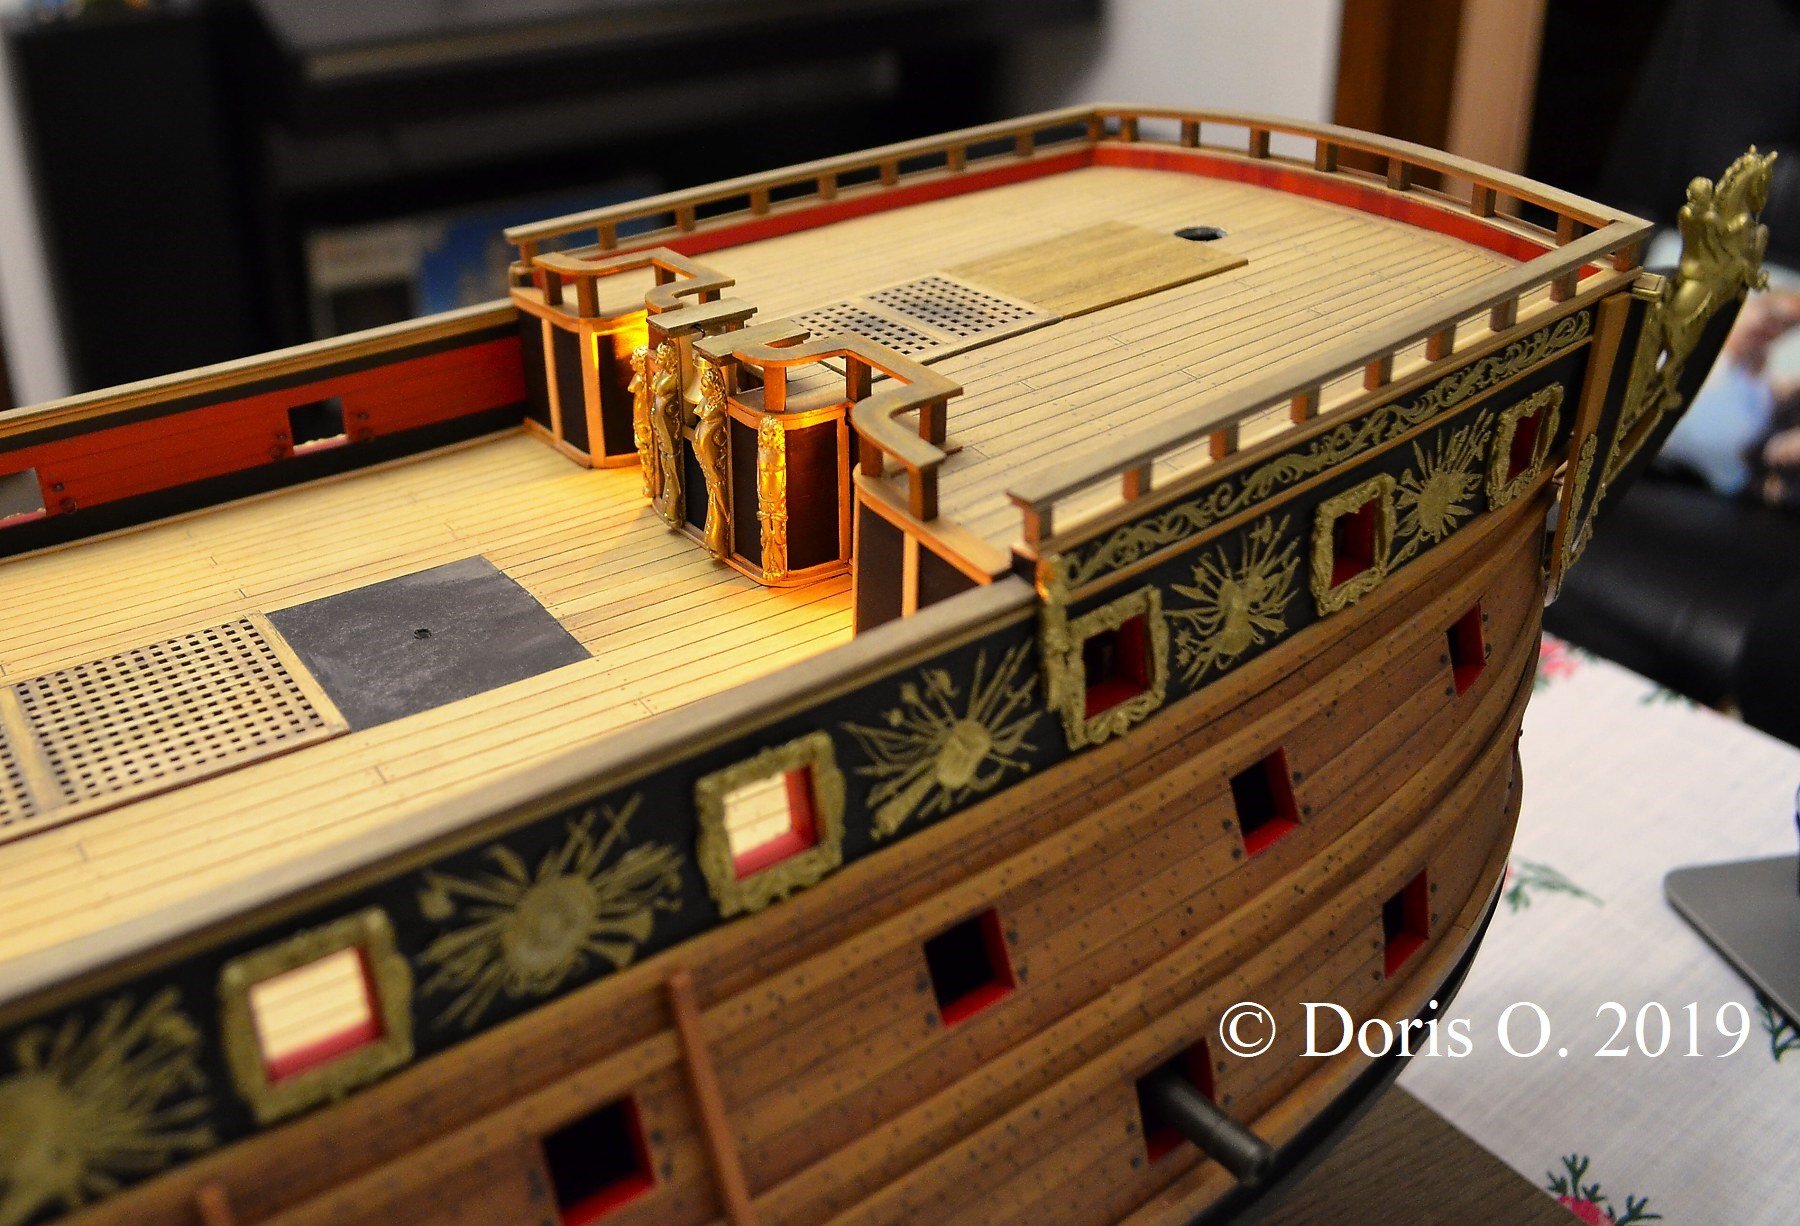
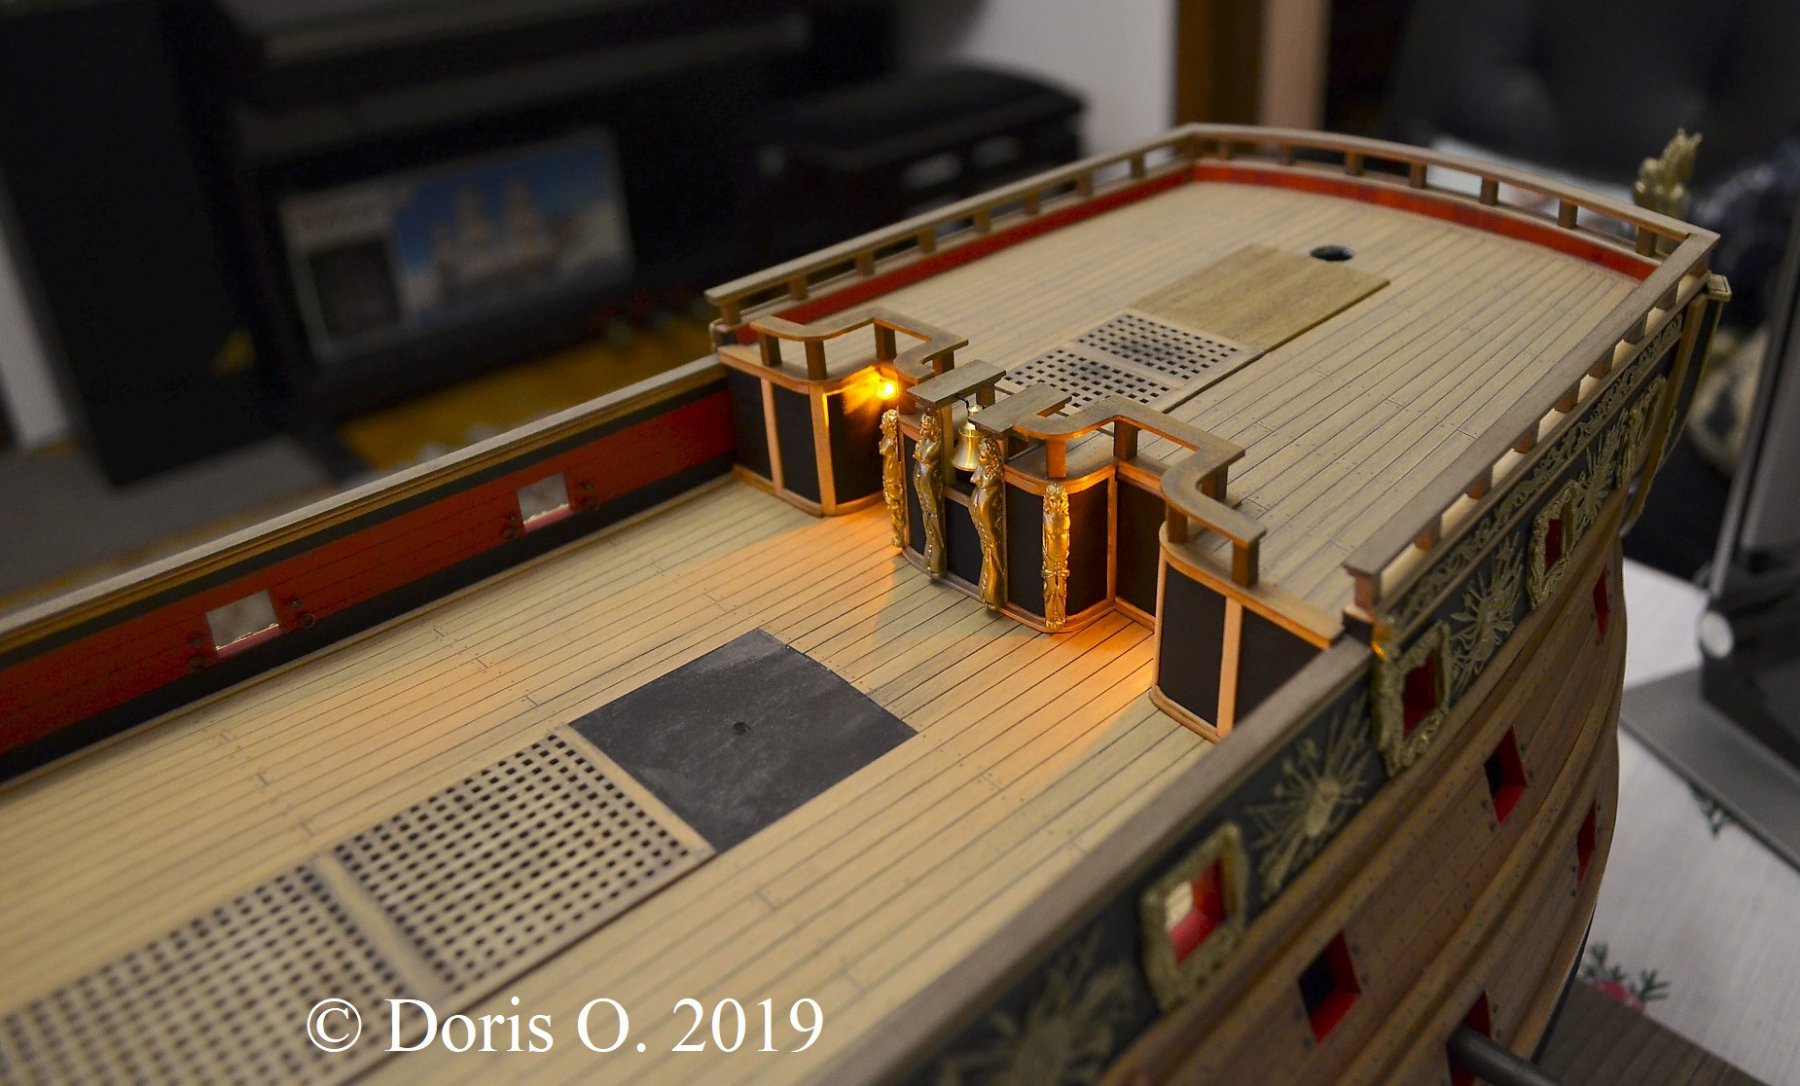
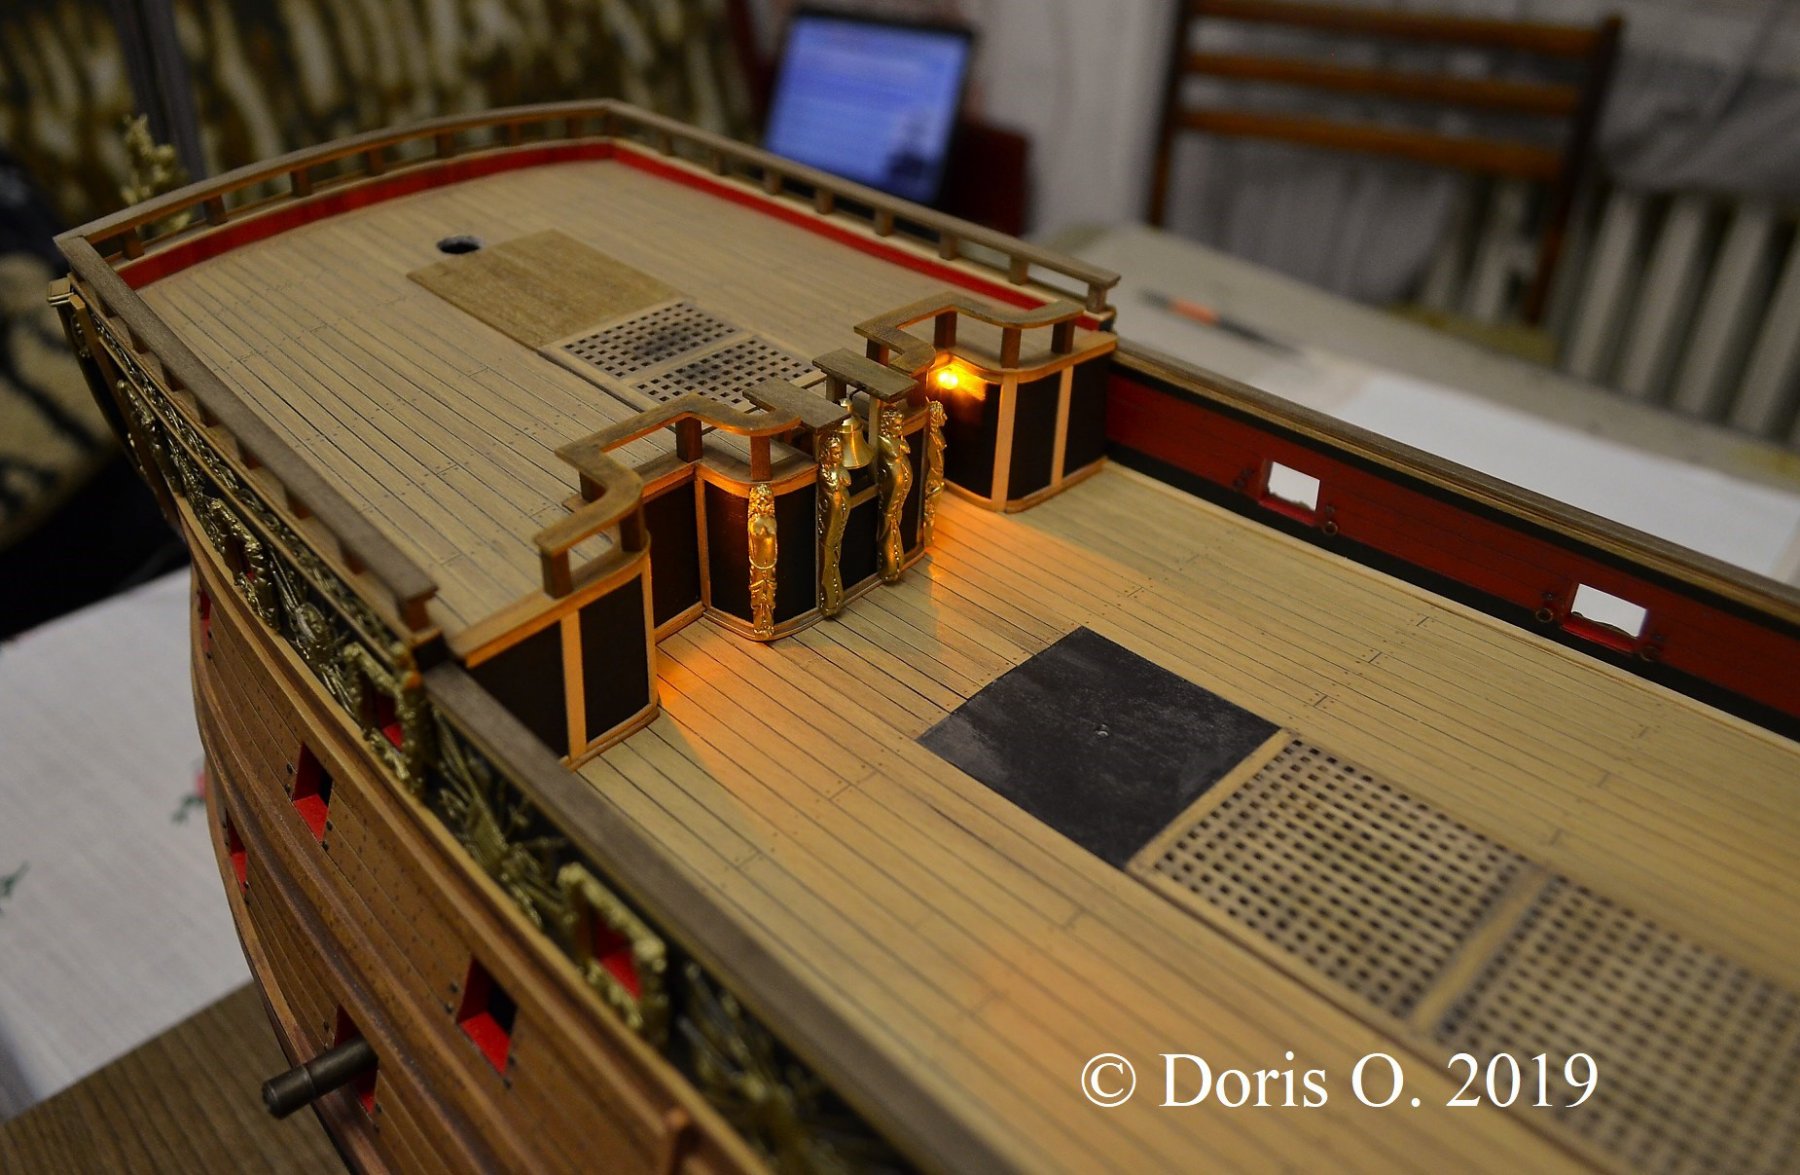
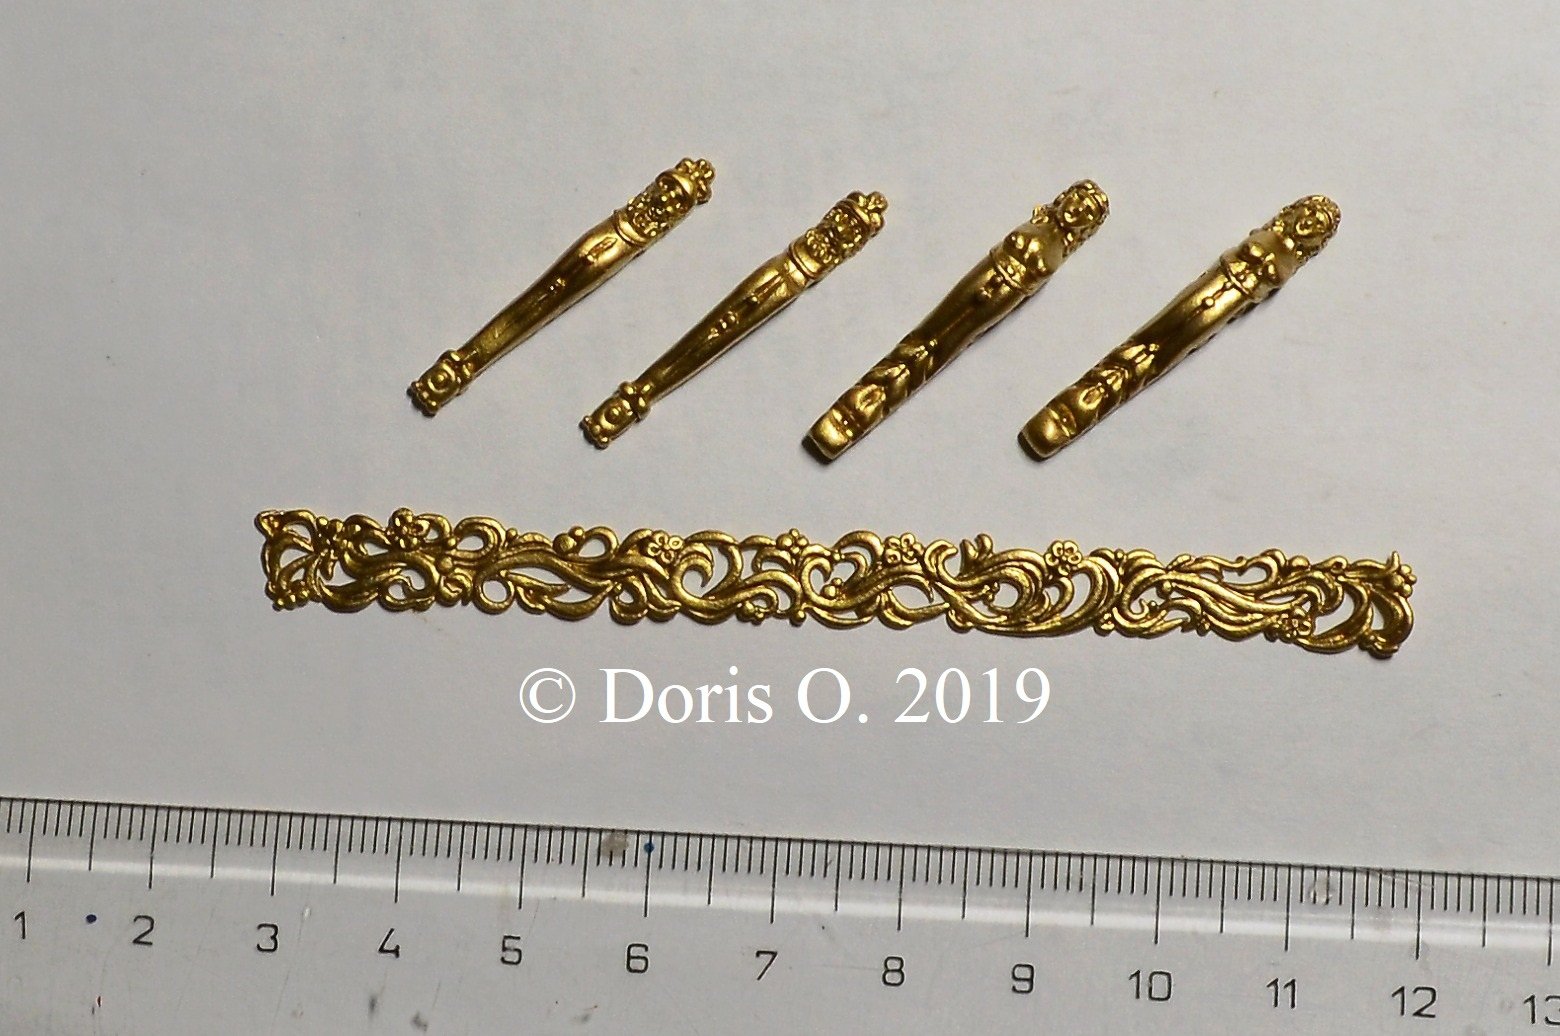
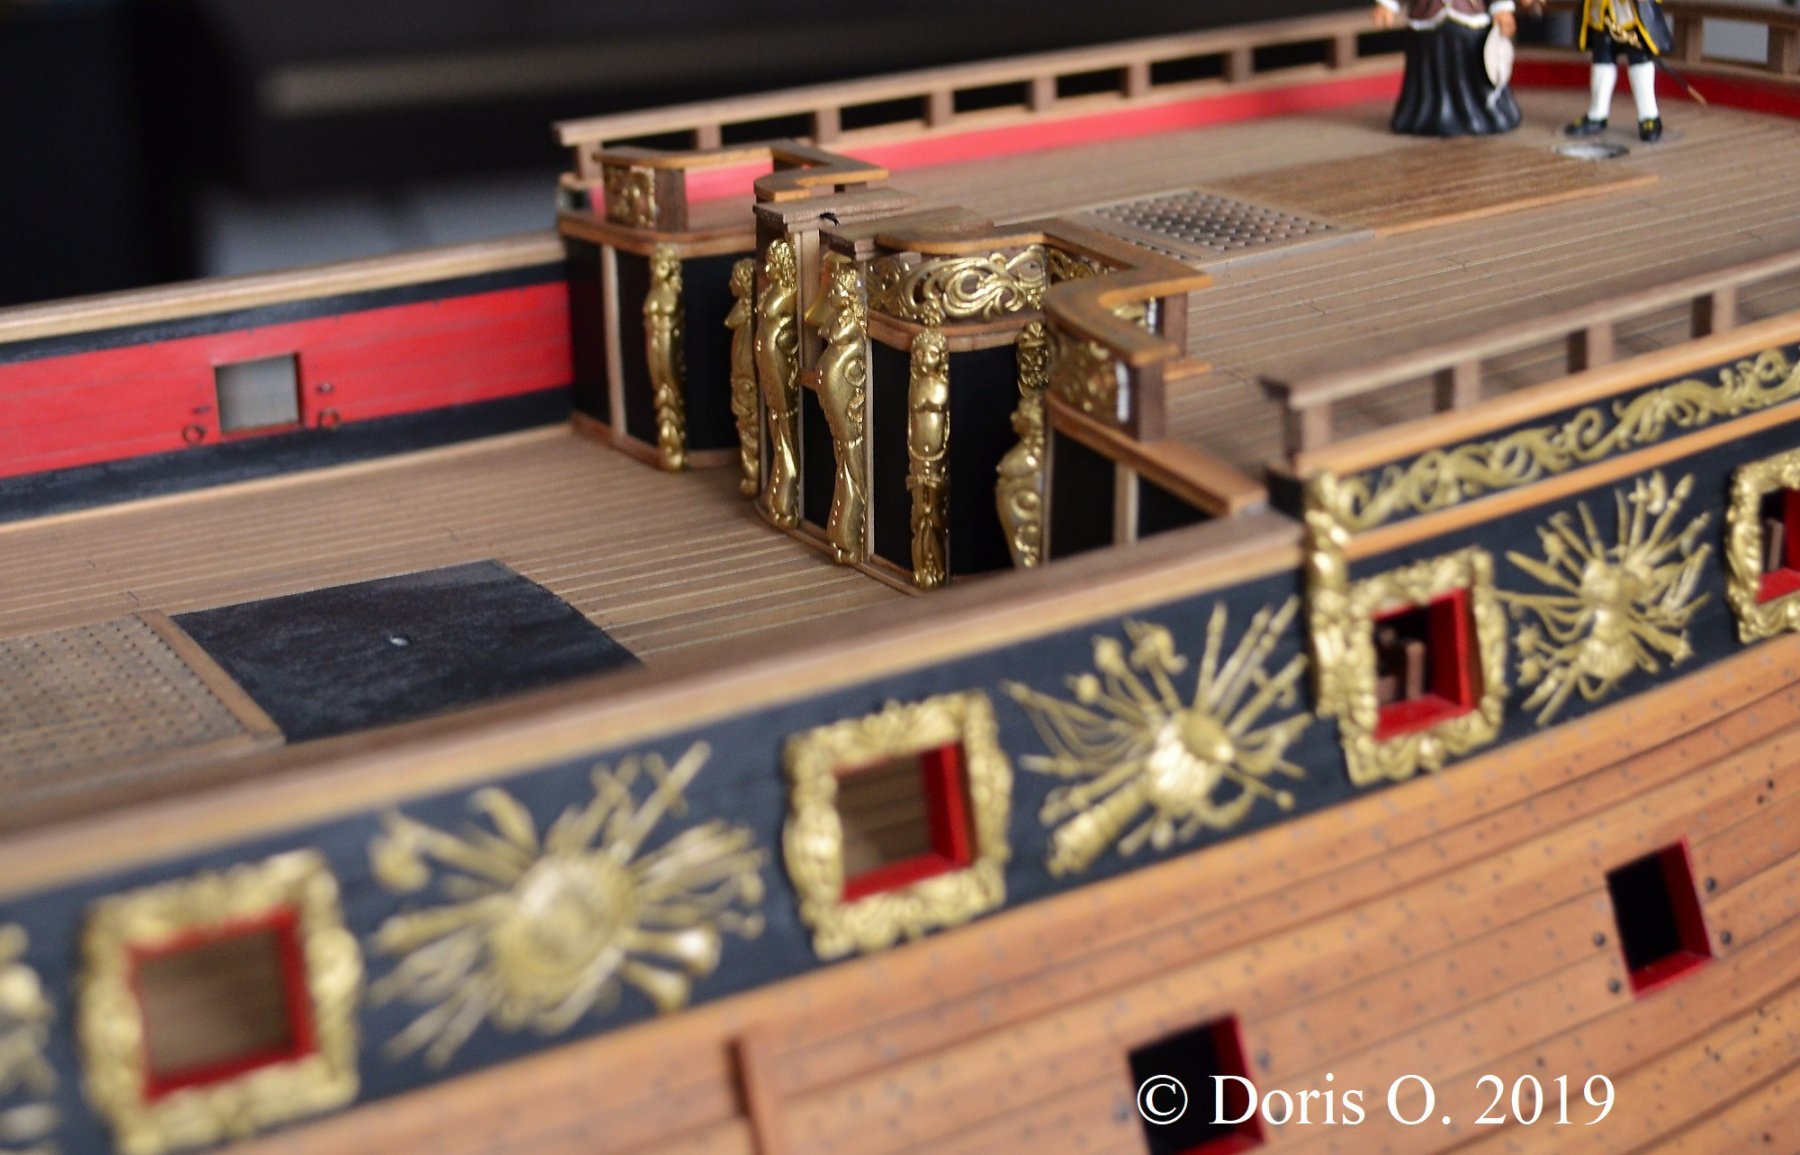
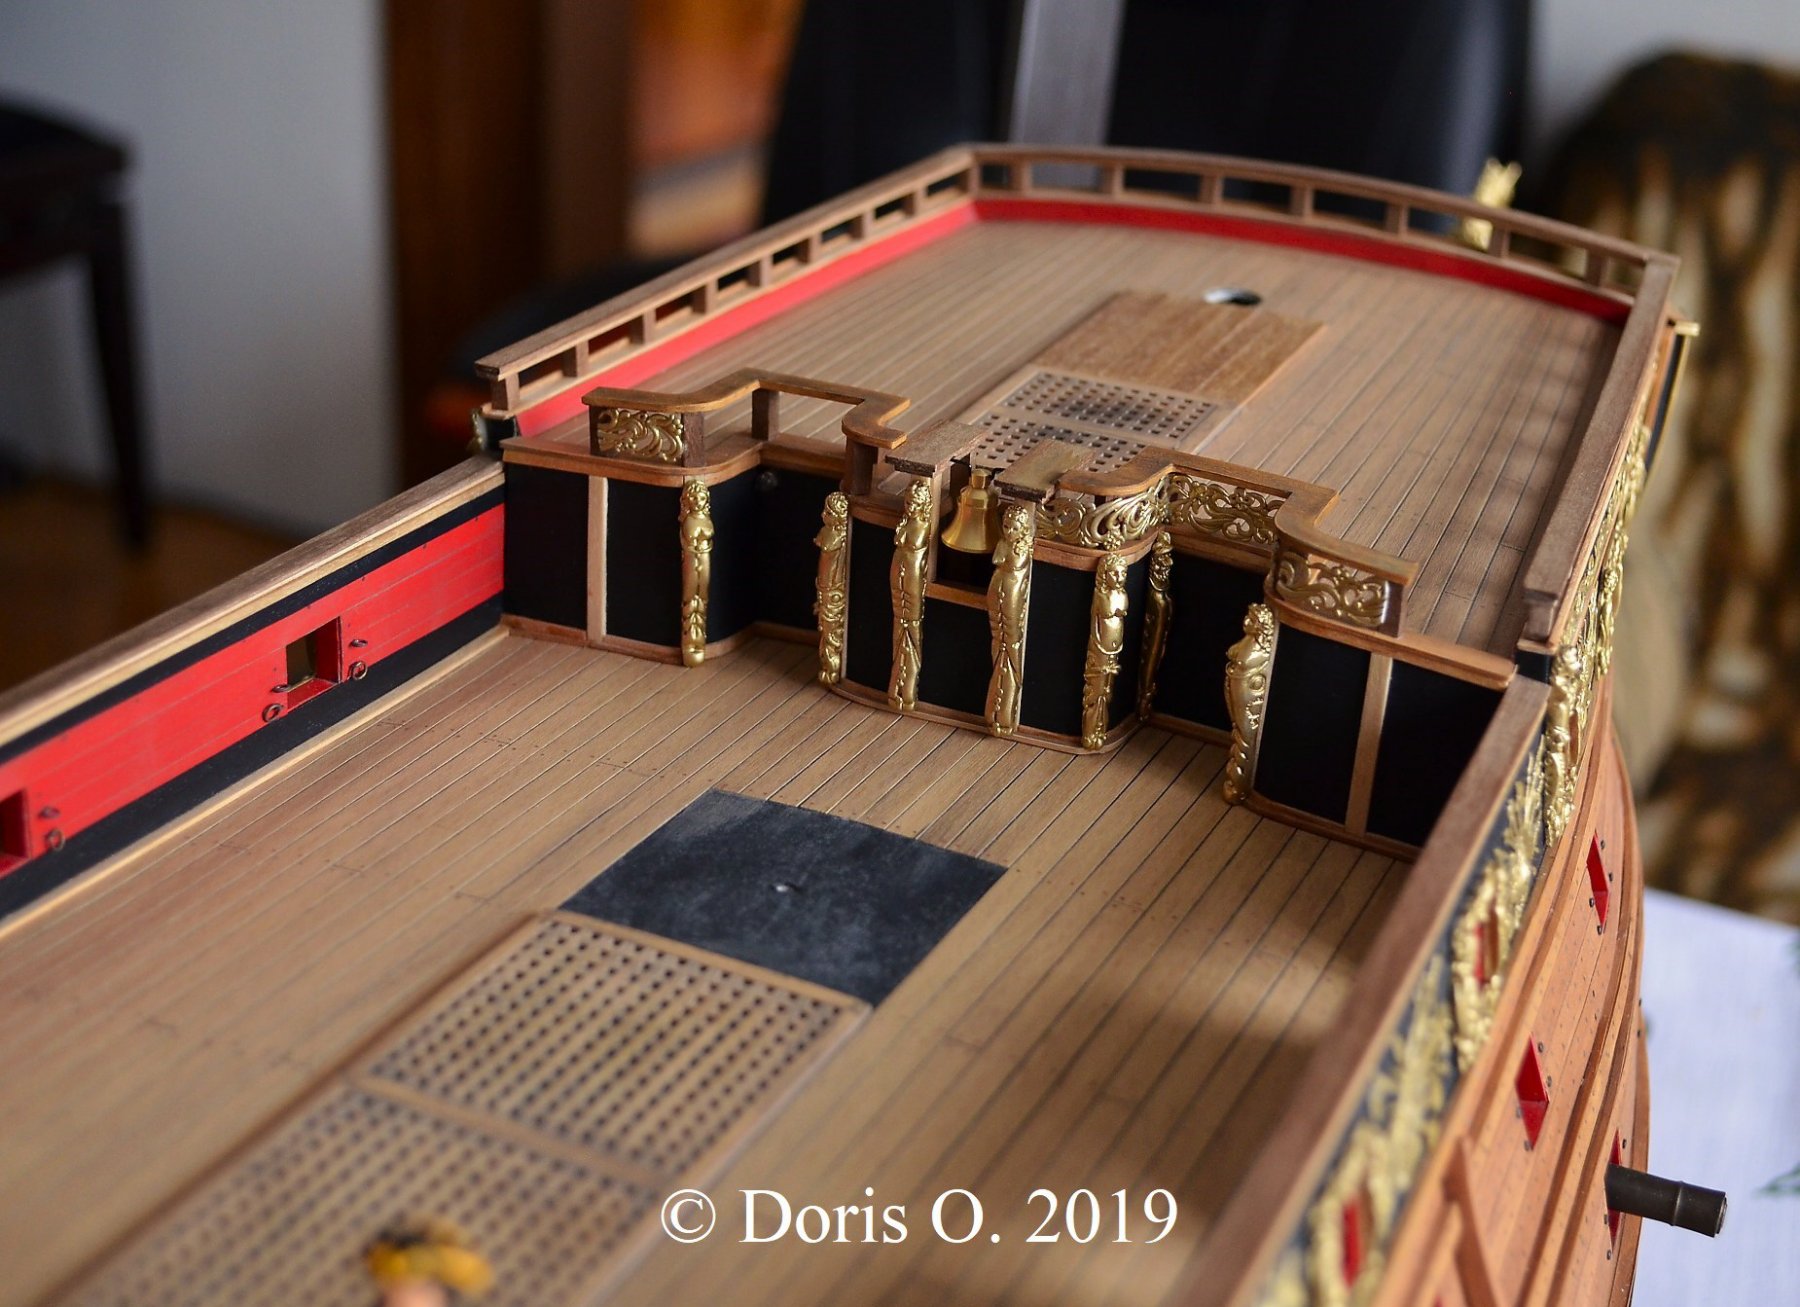
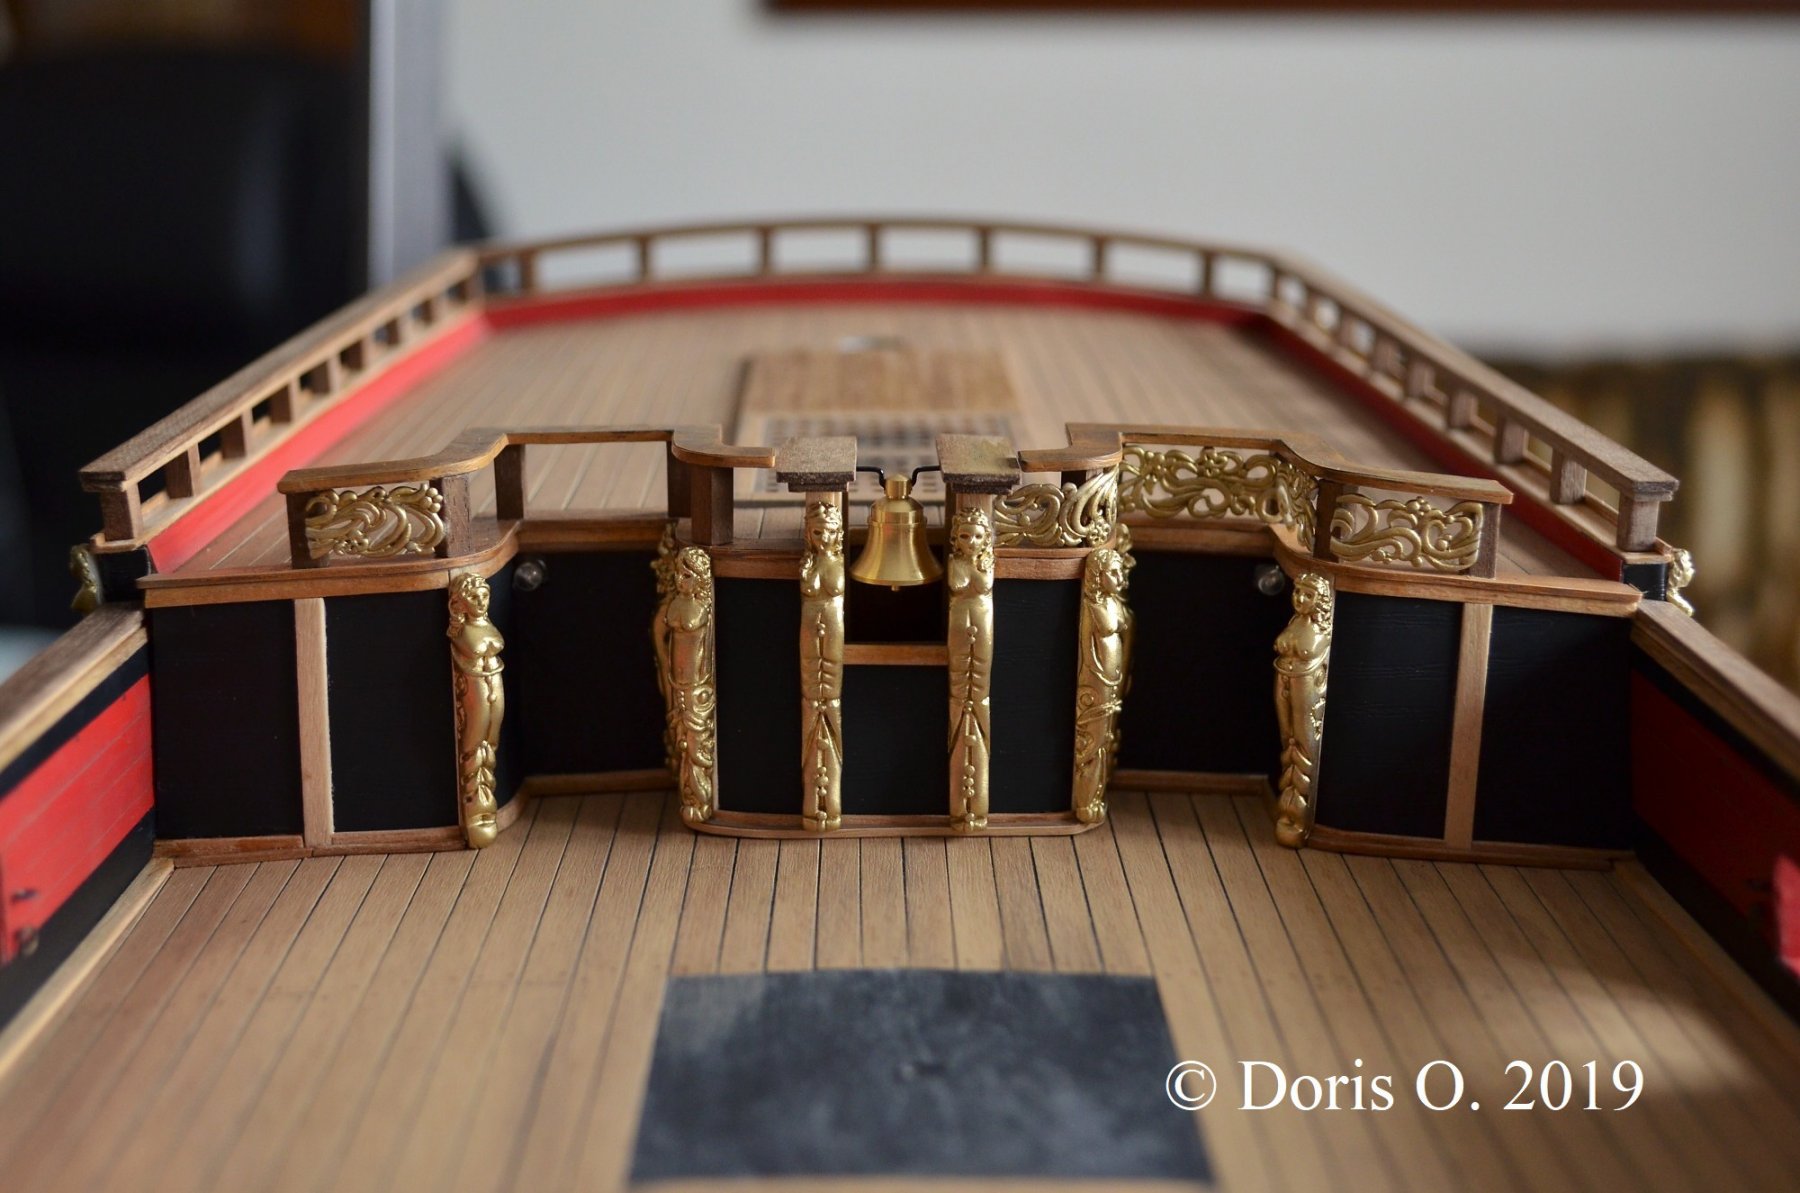
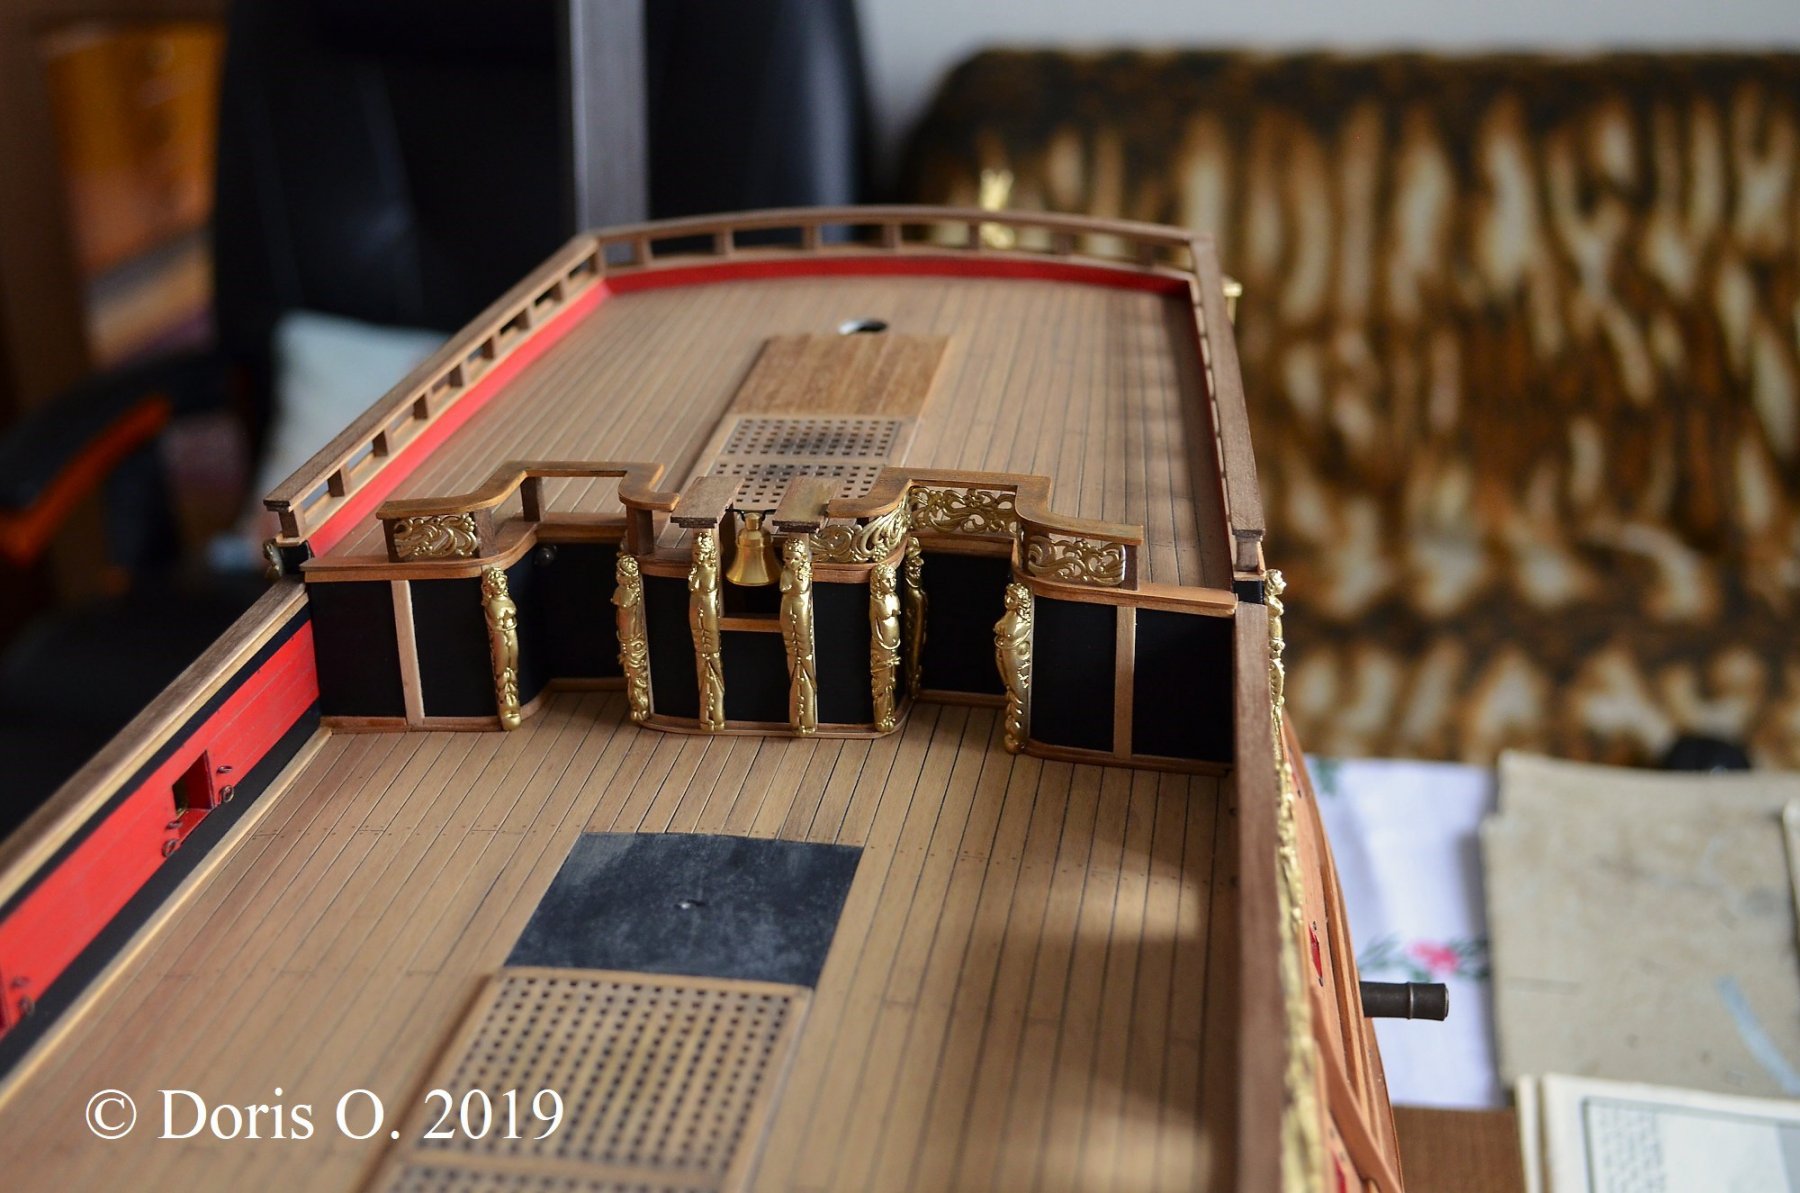
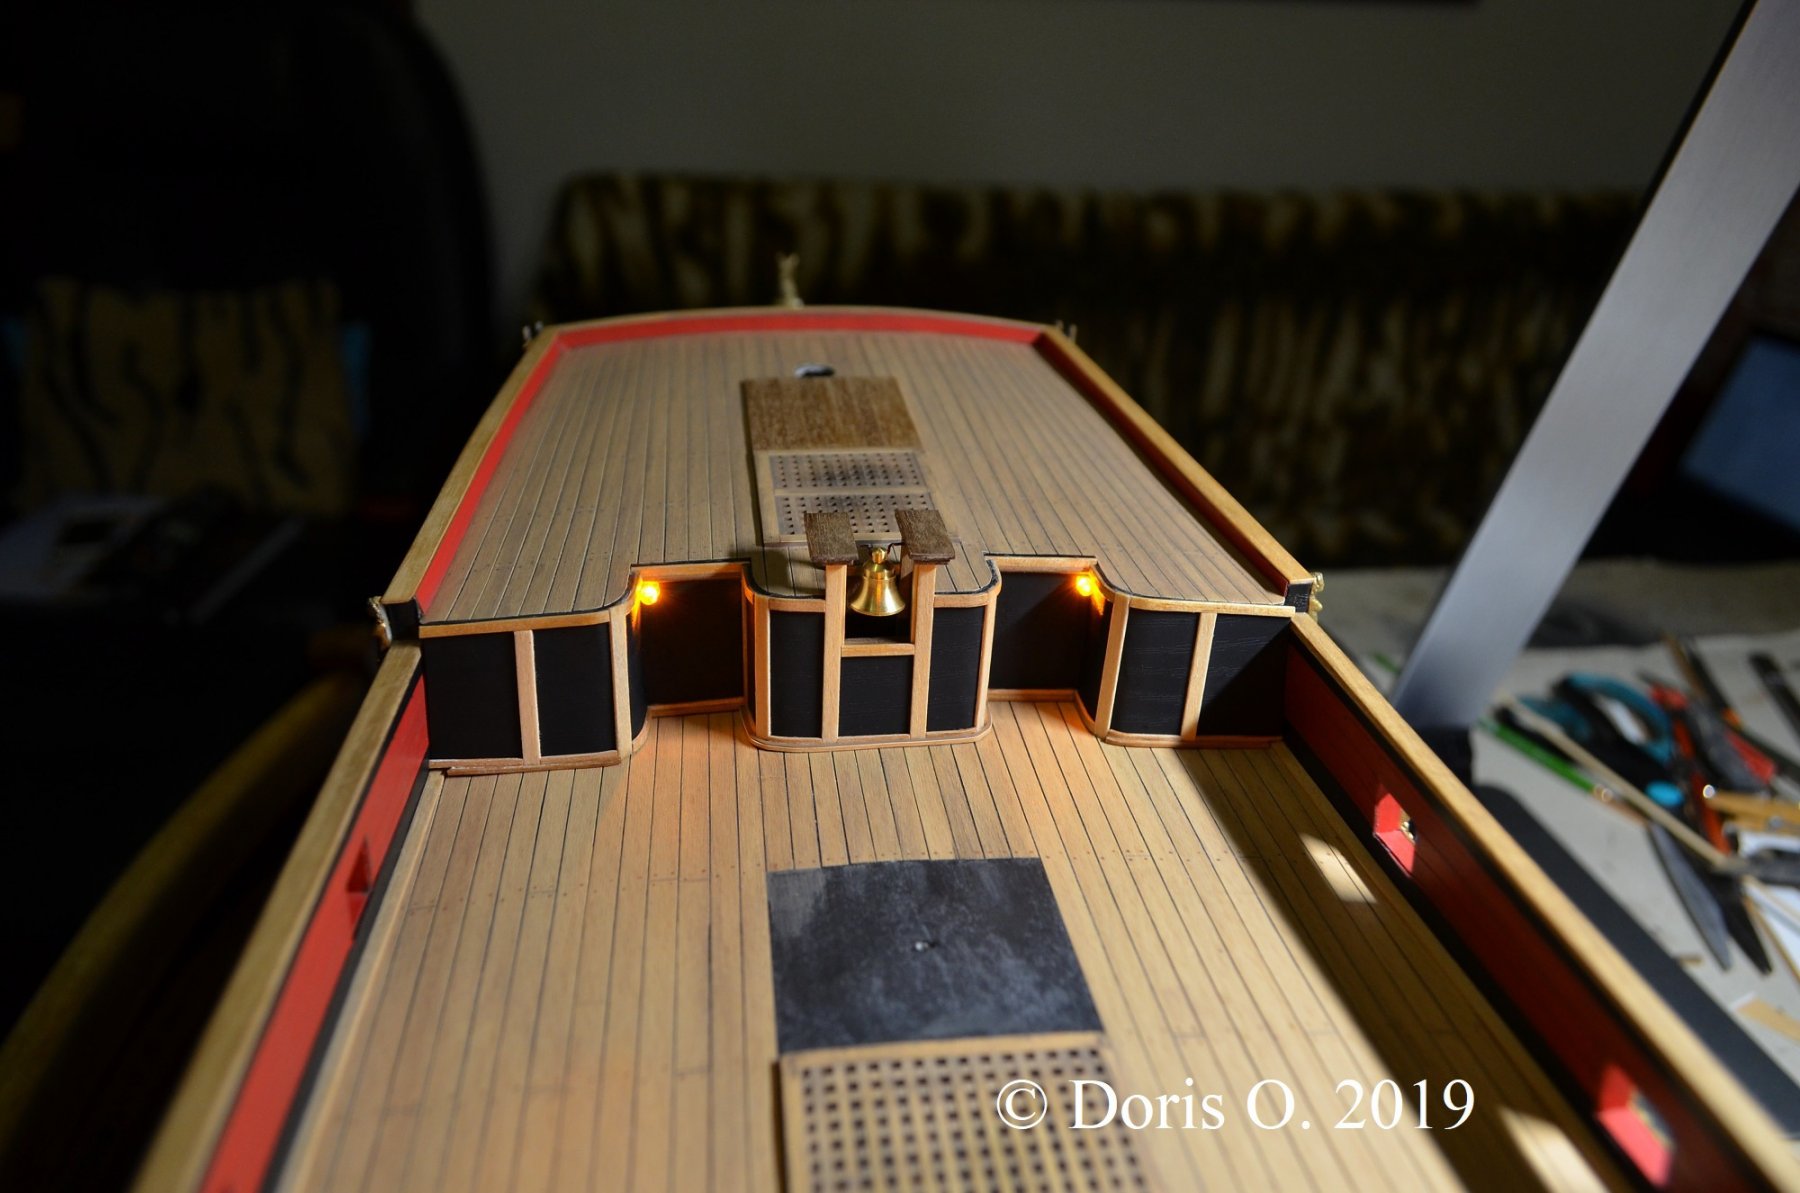
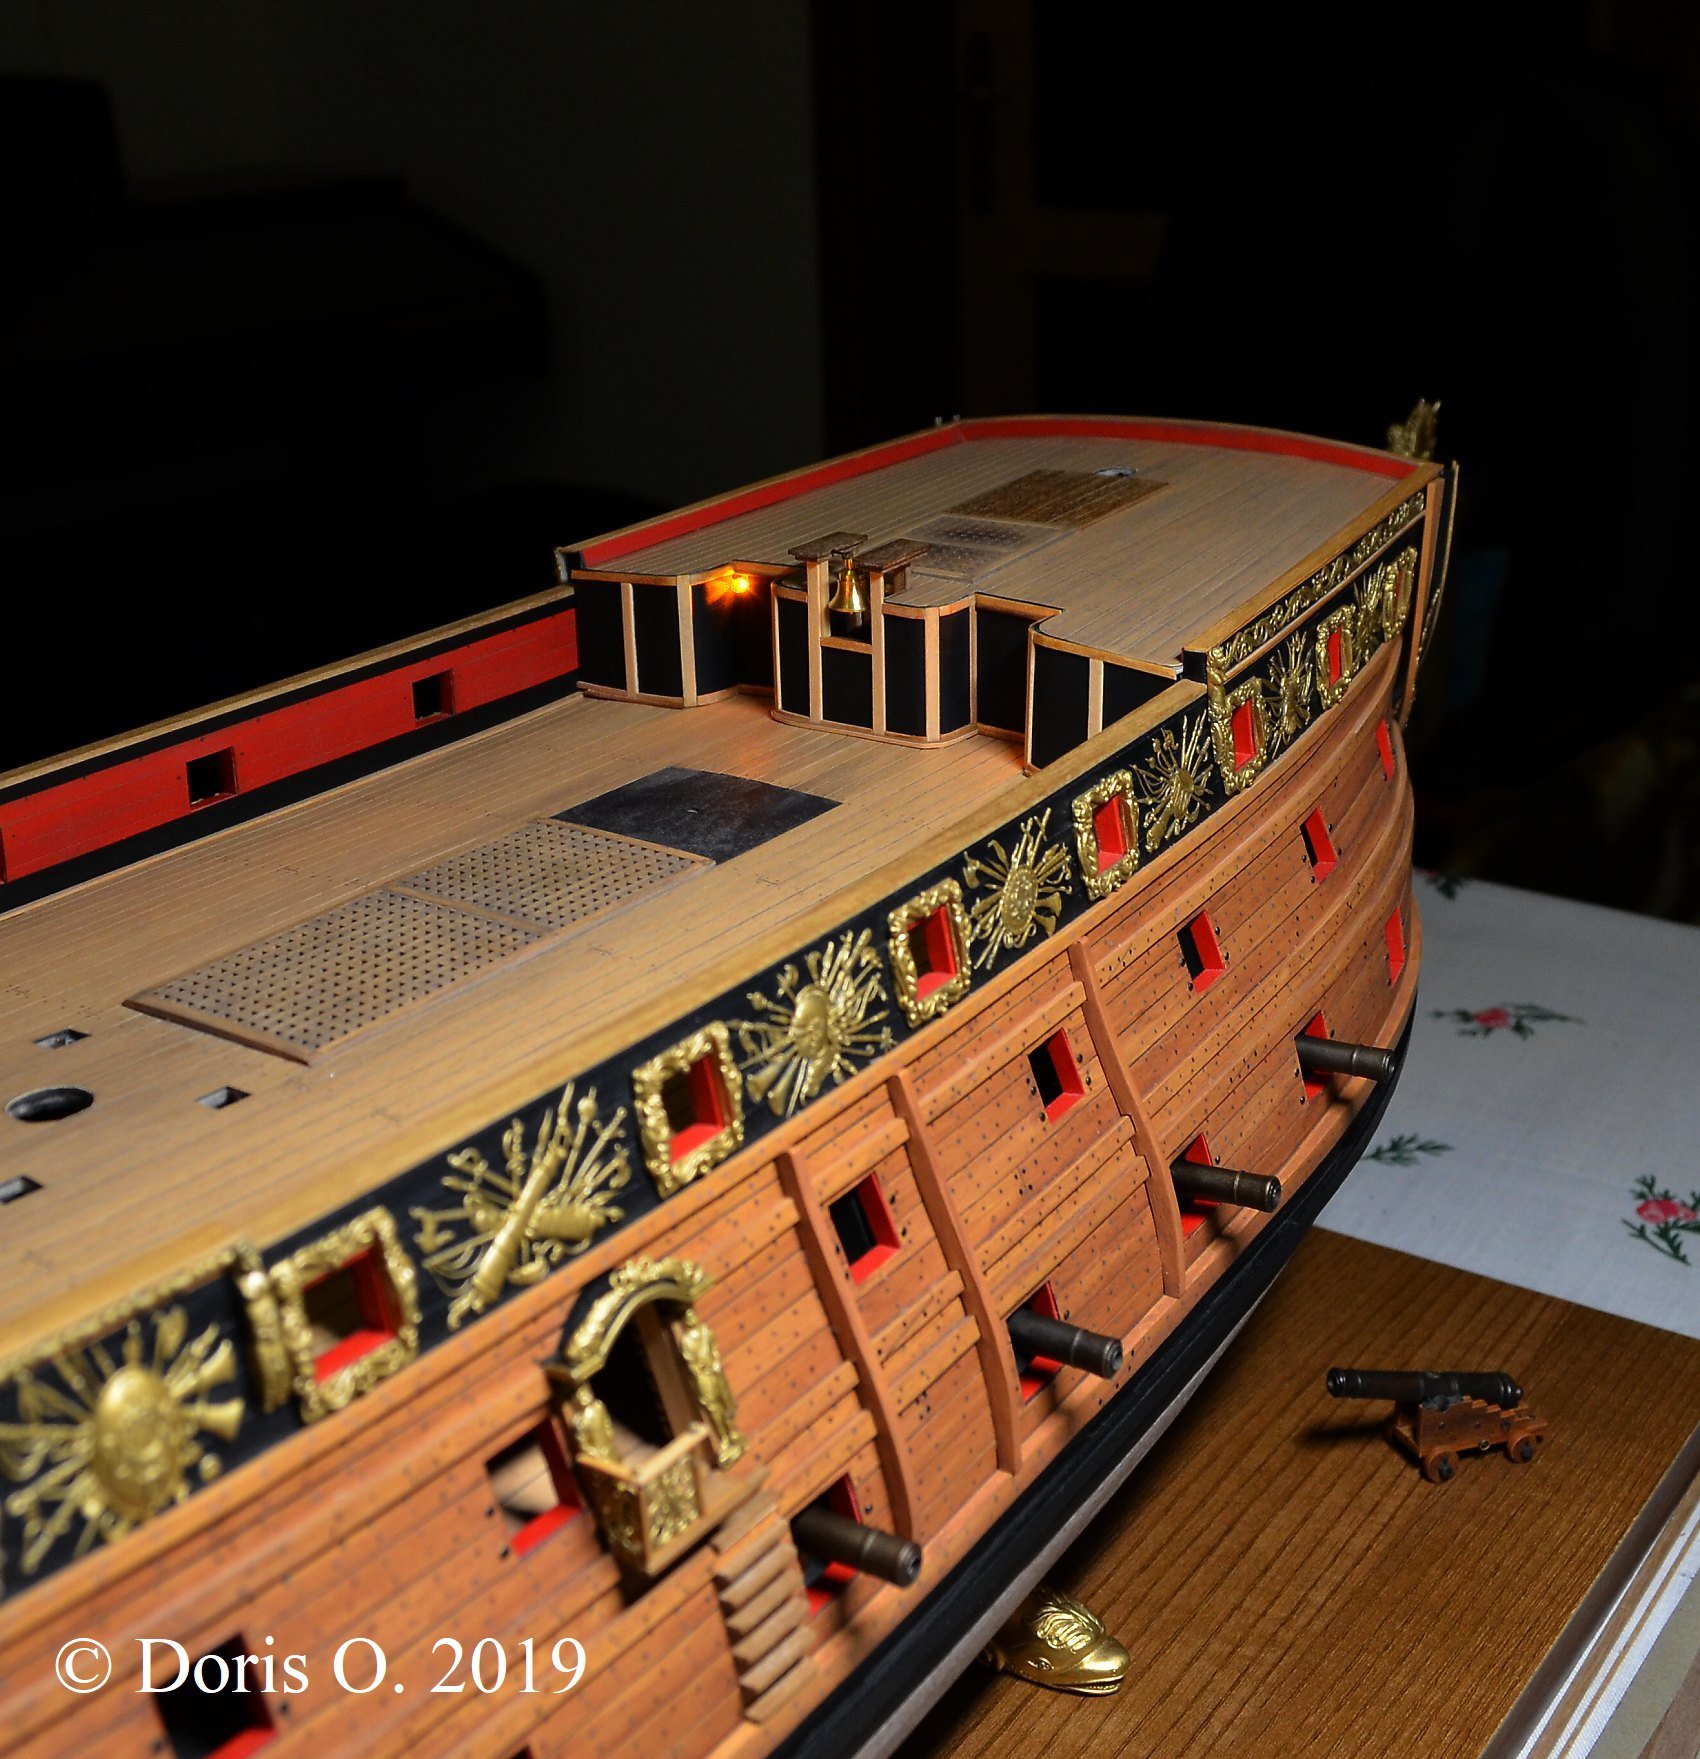
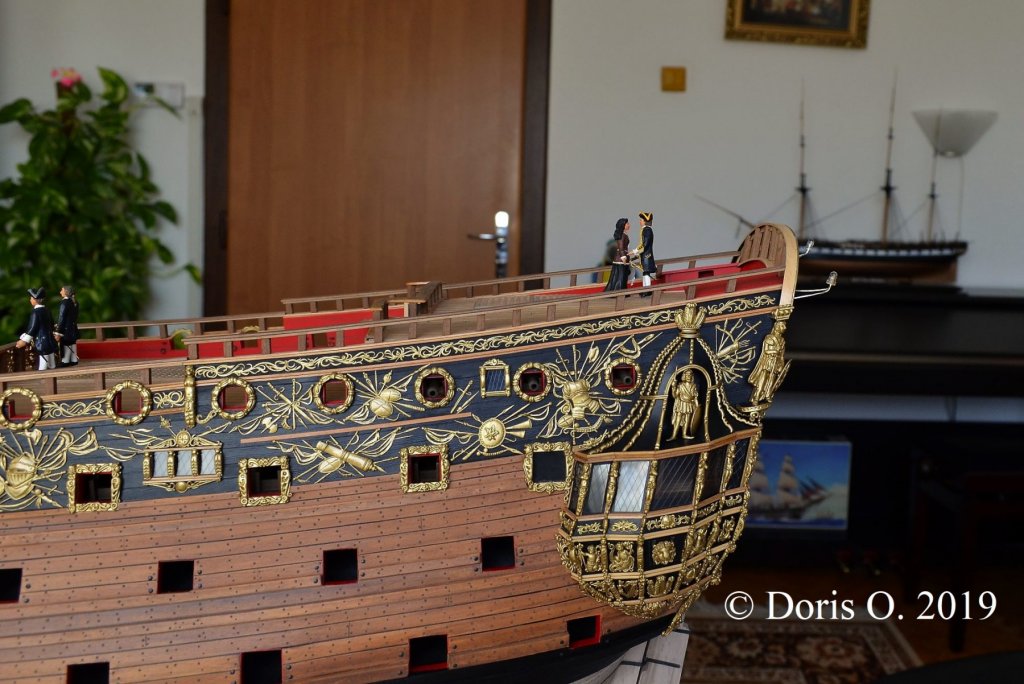
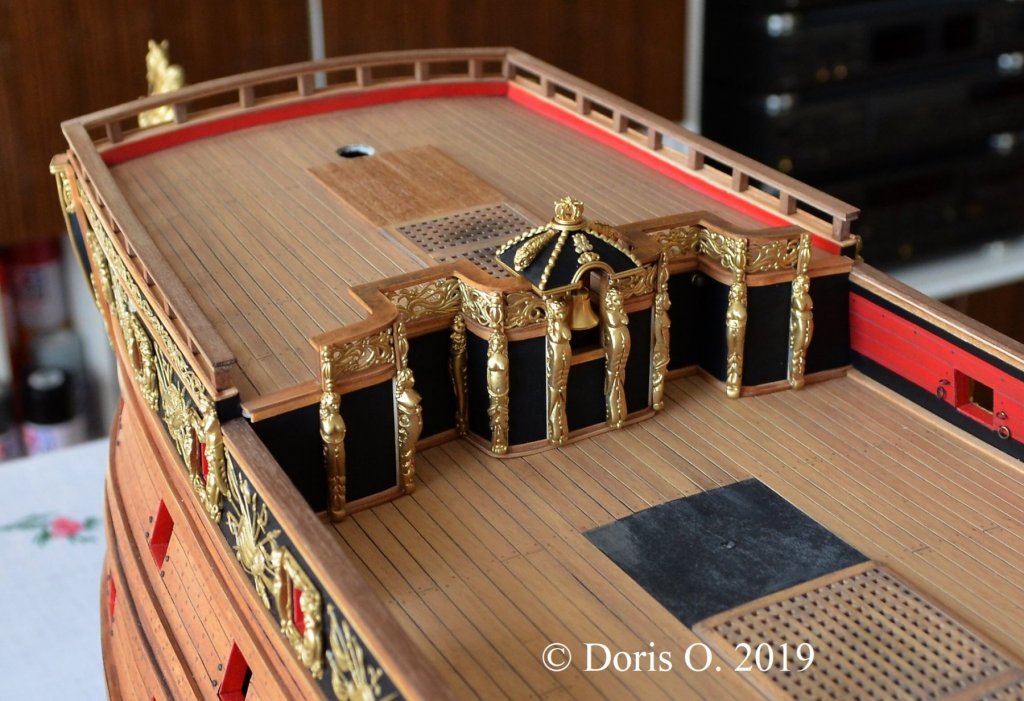
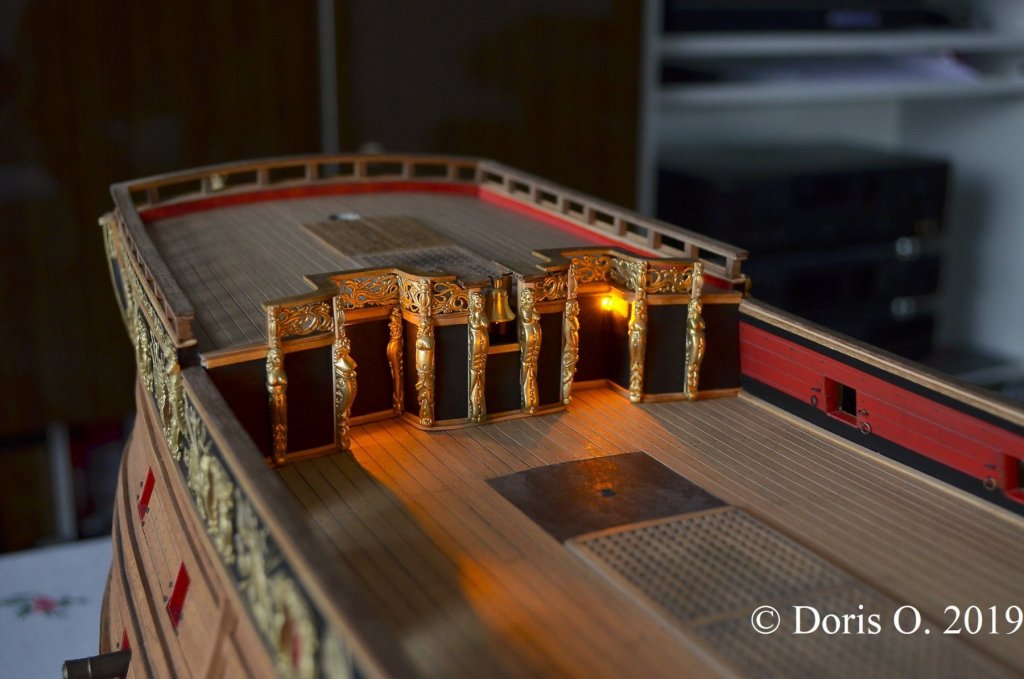
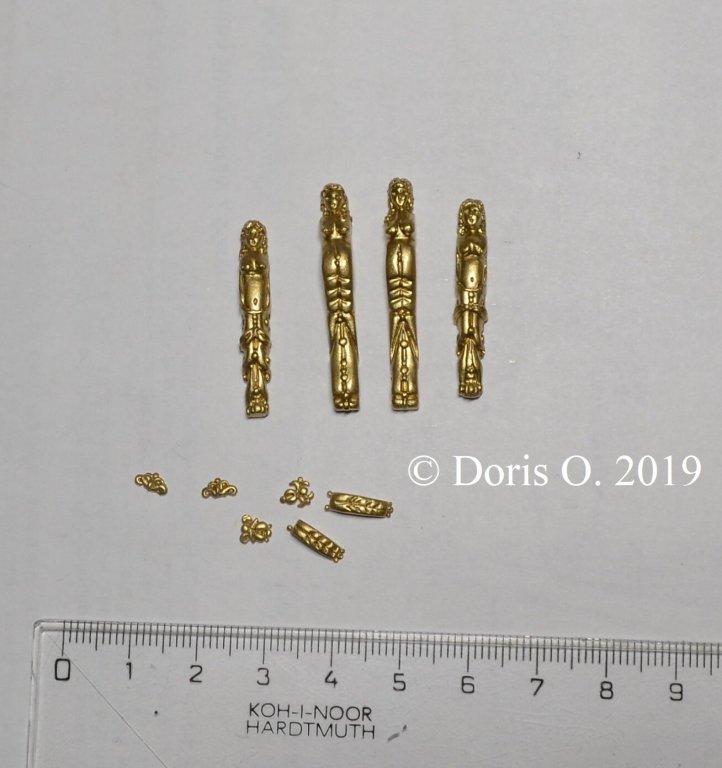
Hello dear friends, I am very grateful for your support and comments, your words mean a lot for me. I'm flattered and do appreciate your praise. Thank you all very much. I believe the Royal Katherine will be my best card model after finishing, but there are several things and details I should improve in the model and during the build I try to correct or do them better. I do not continue very fast although want to add something new on the model as often as possible. Well, I try to do realistic model, but have to say, it is really hard. Next time I am going to relax and build something according to complete building plans. The Royal Katherine is the most chalenging project I have ever realized. Wefalck: Plenty of my tutorials and videos have been posted here, so please look through my thread. I am going to add others in the future. I don't have experience with other materials, so I can't recommend anything else. I am satisfied with this one I use. I build card models more than 30 years.I am not sure if I understand well your second question ( unfortunately my English is not very good), but I try to devote my greatest effort to all parts of the model. I usually put also a "part of myself" into building these models - not only my modelling skills, but also "emotion" and "love". **************************************************** The belfry is finished and now I am continuing with other pieces of decoration on another railing... I try to create it according to museum models from that period to achieve more realistic result. Unfortunately there are no exact plans or drawings of these parts of the Royal Katherine, so I have to improvise a bit.....😉 Enjoy the pics and have a great time. Best regards, Doris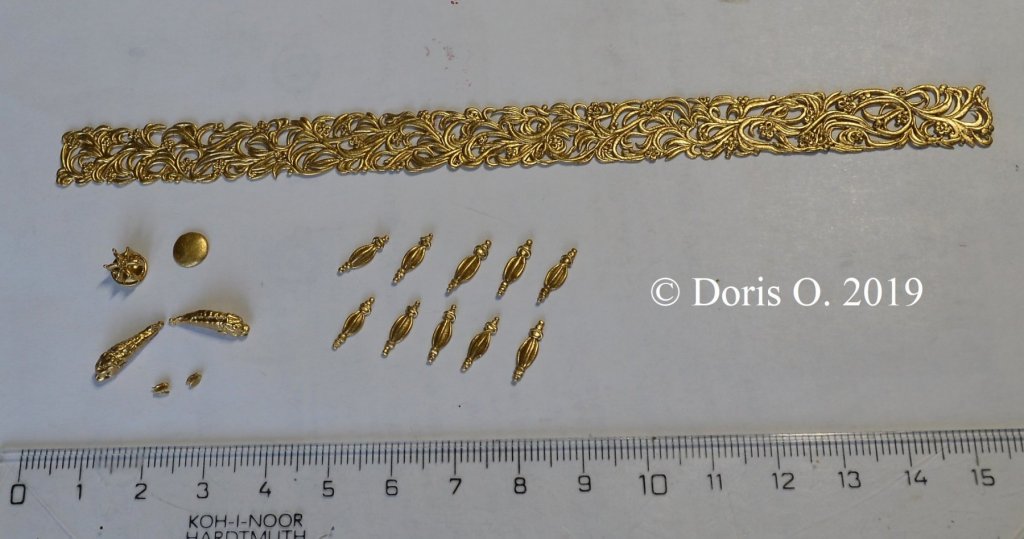


- 1,035 replies
-
- 43
-
-
- royal katherine
- ship of the line
- (and 1 more)
-
HMS ROYAL KATHERINE 1664 by Doris - 1/55 - CARD
DORIS replied to DORIS's topic in - Build logs for subjects built 1501 - 1750
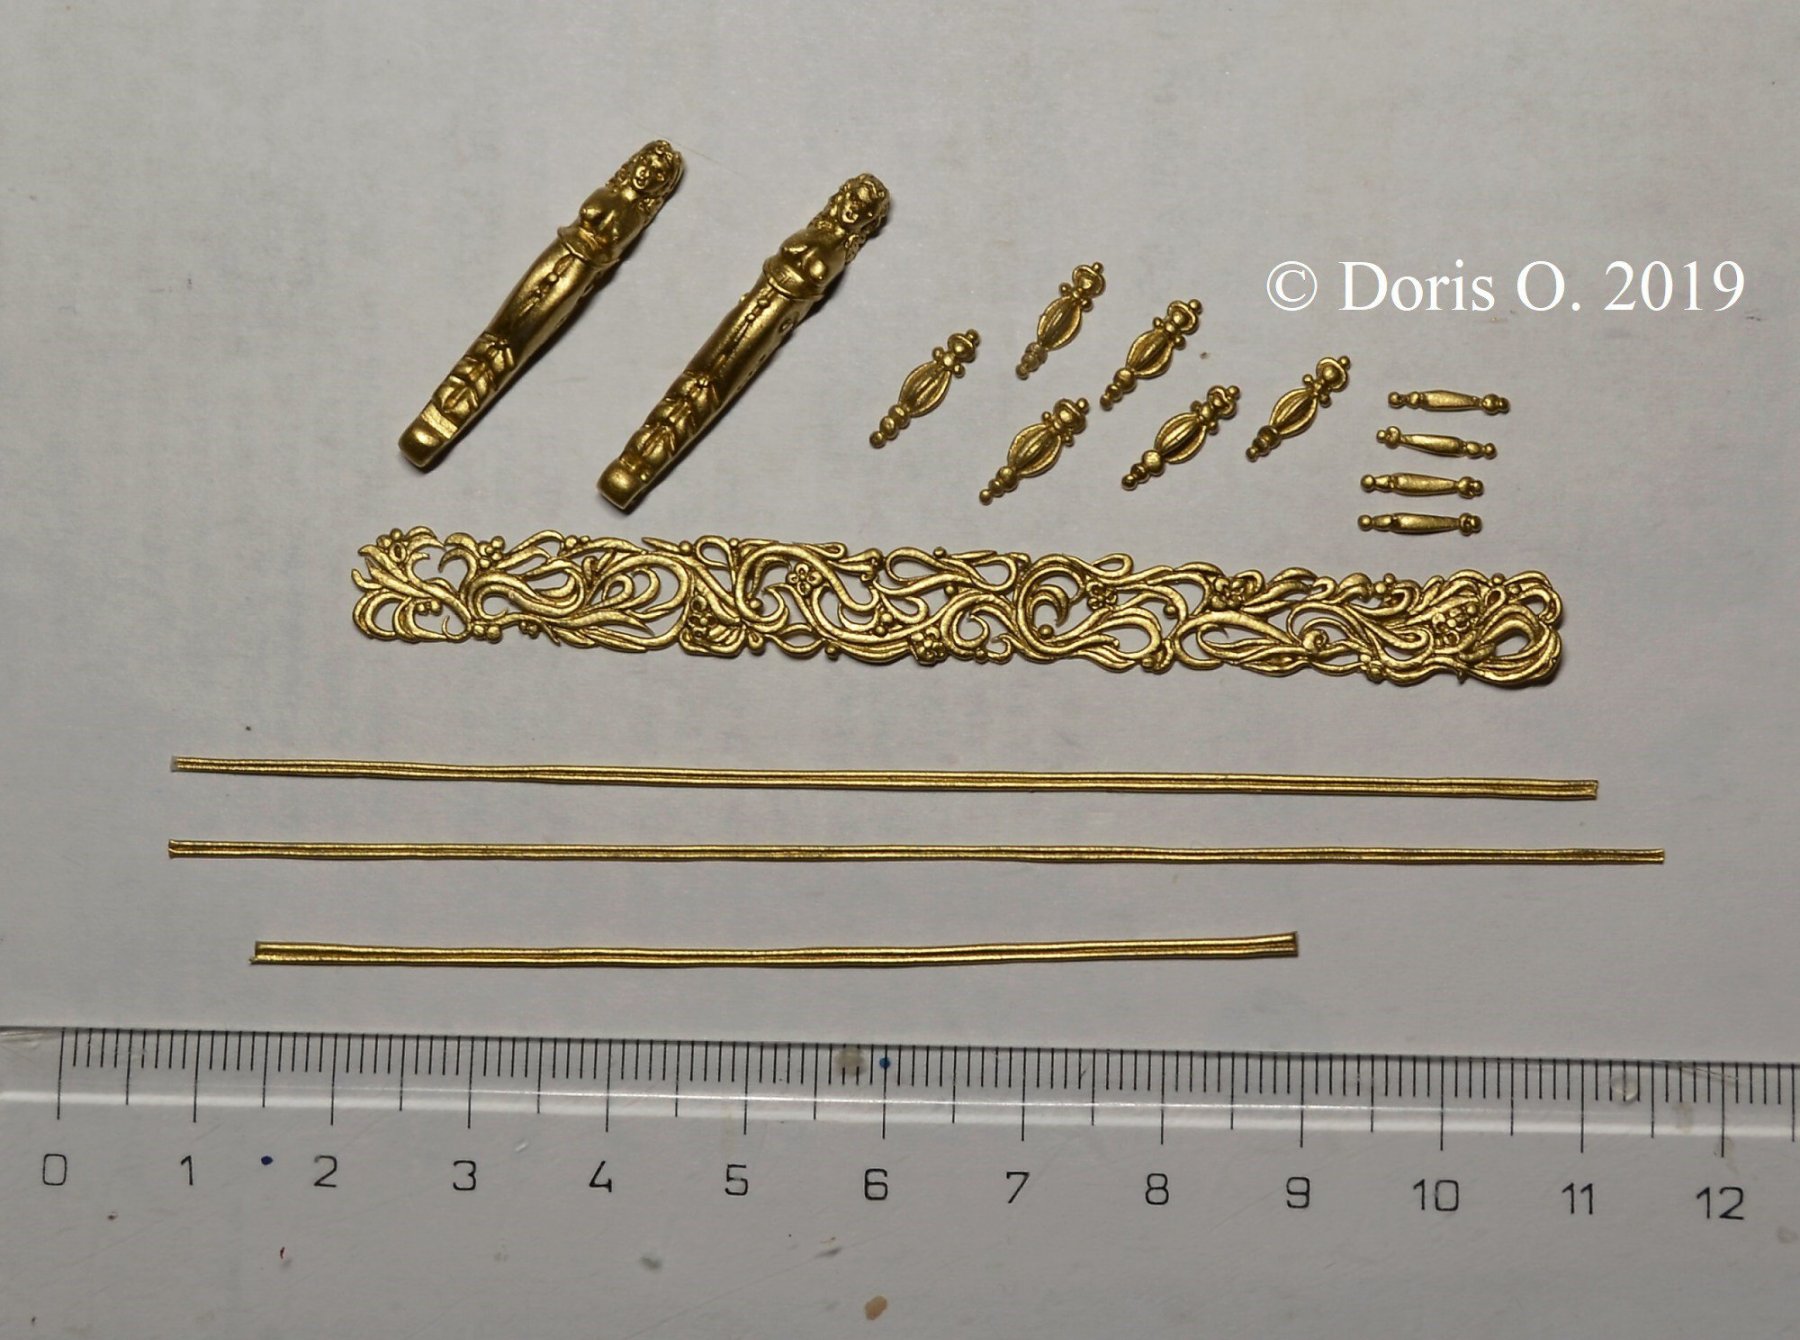
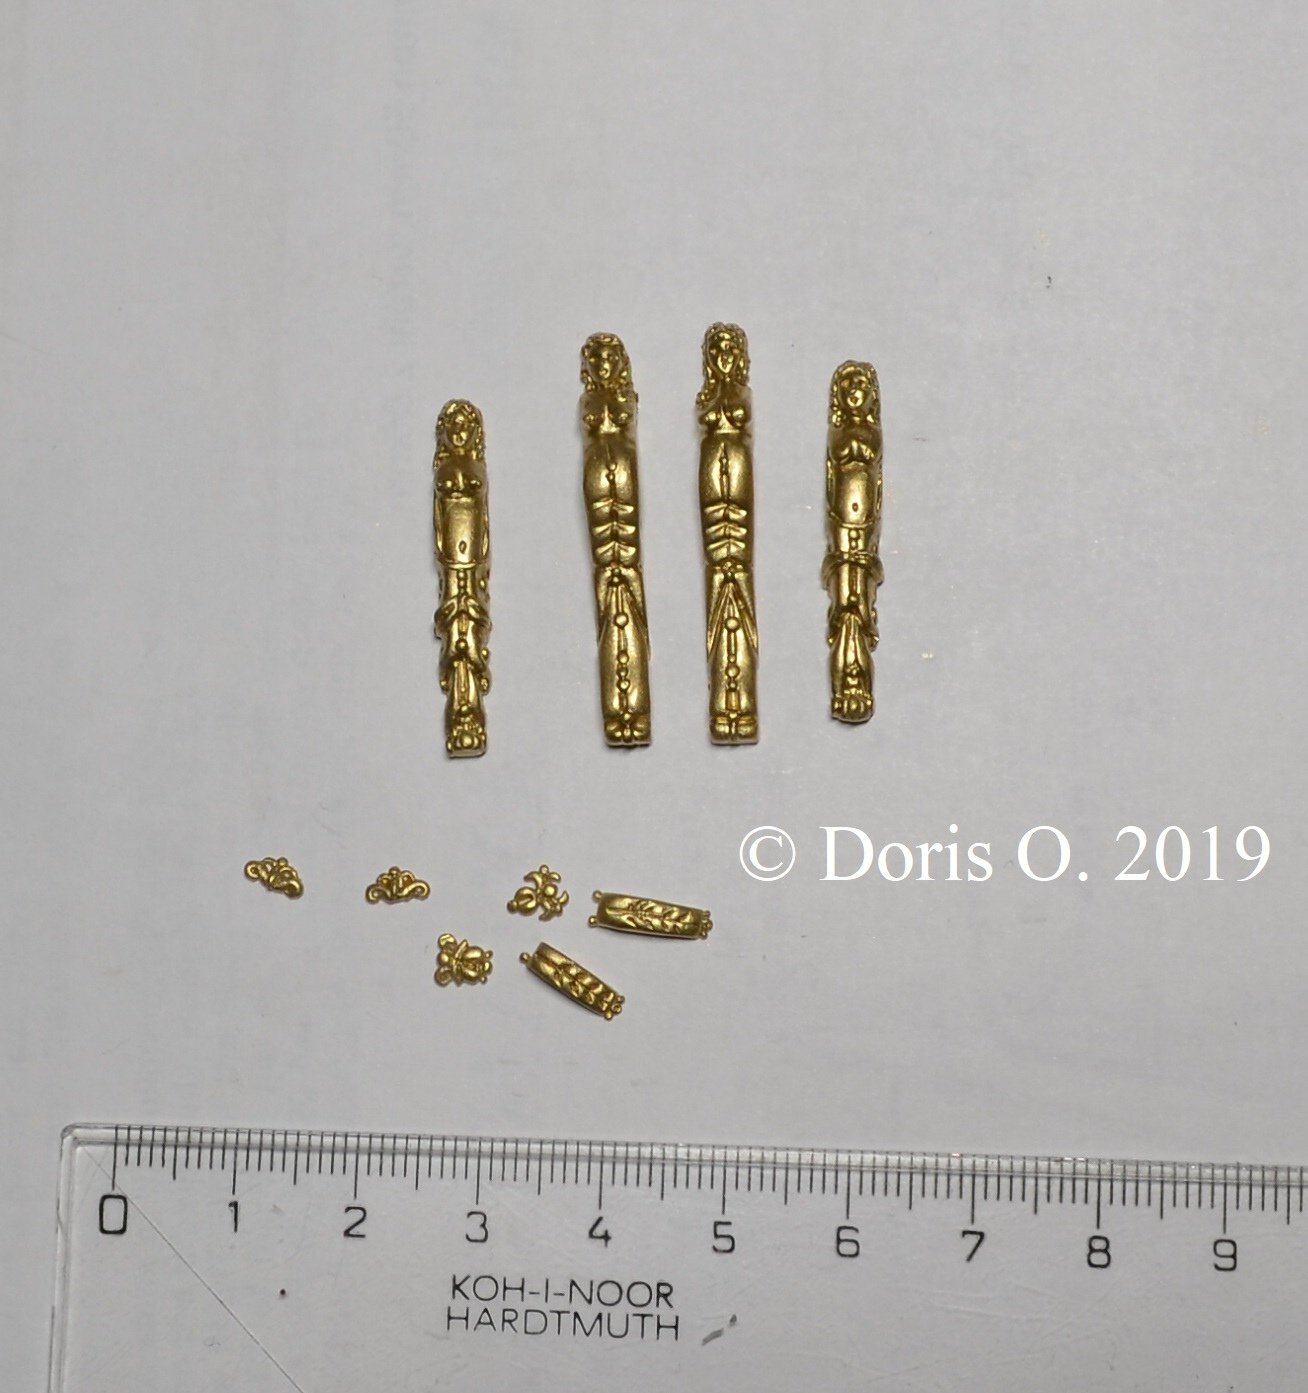
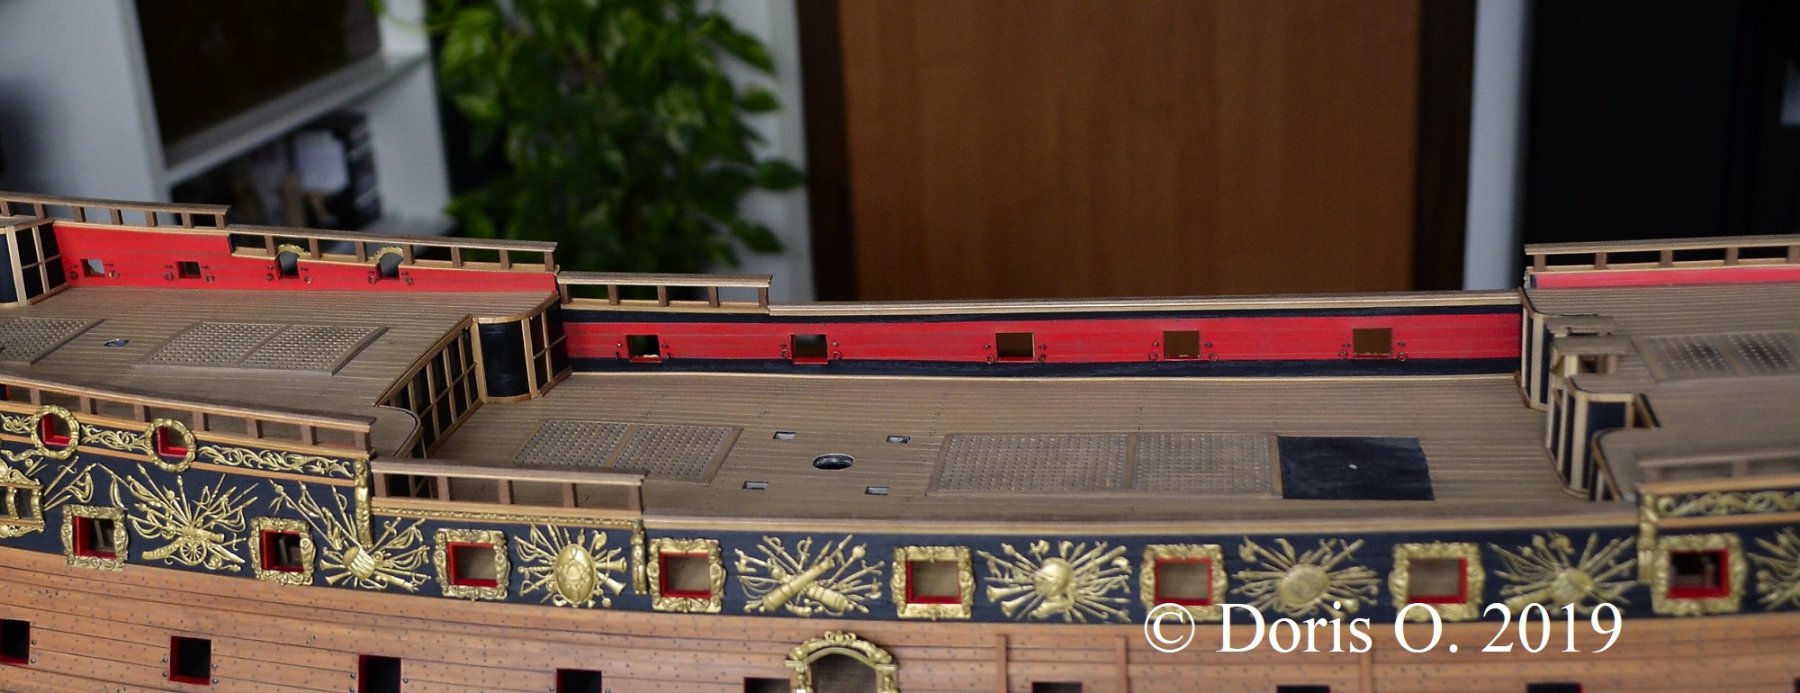
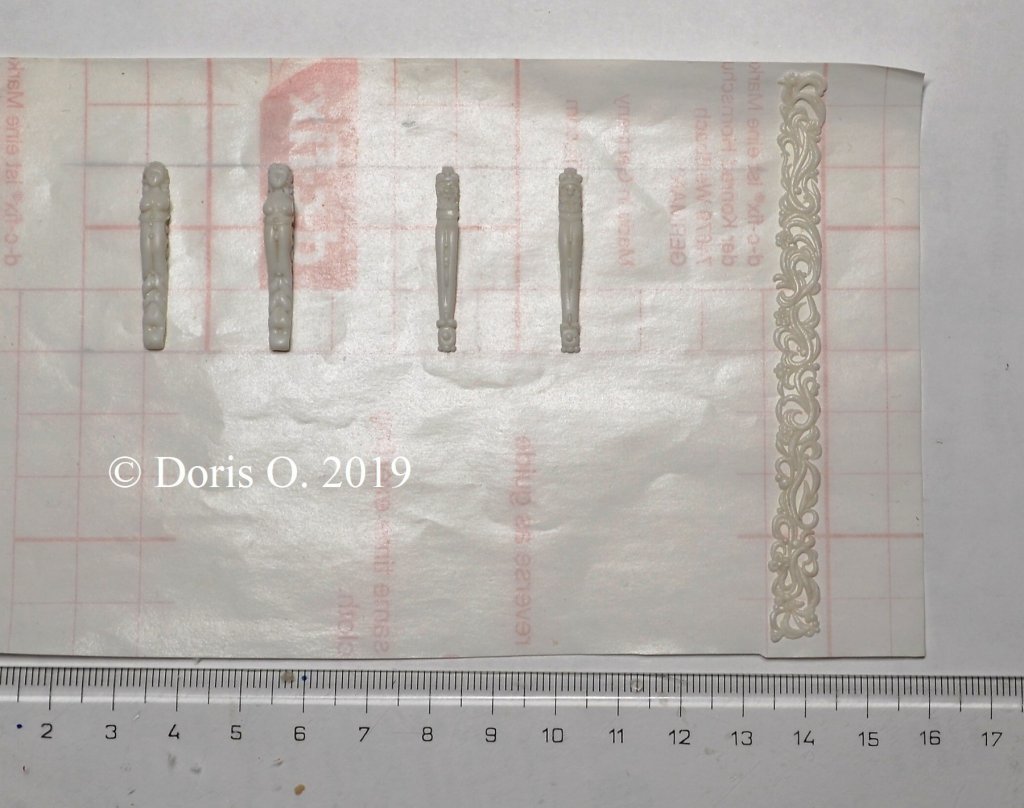
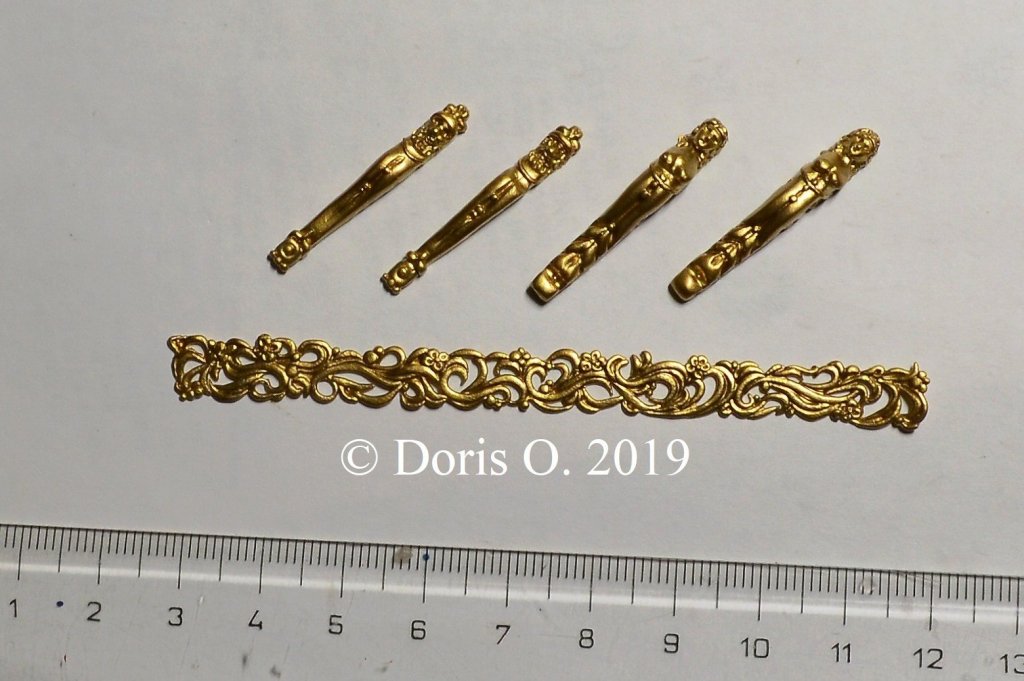
Here are current pics. I tried to create these pieces of decoration according to museum models from that period but wanted to achieve unique/original design as well.


- 1,035 replies
-
- 45
-
-
- royal katherine
- ship of the line
- (and 1 more)
-
HMS ROYAL KATHERINE 1664 by Doris - 1/55 - CARD
DORIS replied to DORIS's topic in - Build logs for subjects built 1501 - 1750
Did you miss my report on decorating work? Well, You can look forward to it cause it will continue again...😎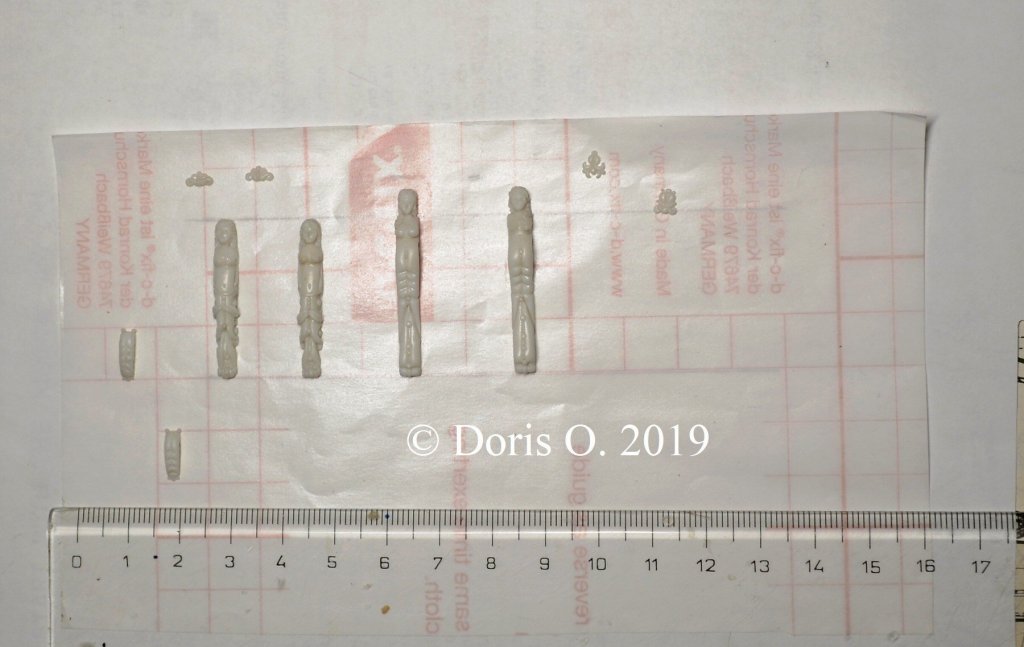


- 1,035 replies
-
- 36
-
-
- royal katherine
- ship of the line
- (and 1 more)
-
HMS ROYAL KATHERINE 1664 by Doris - 1/55 - CARD
DORIS replied to DORIS's topic in - Build logs for subjects built 1501 - 1750


- 1,035 replies
-
- 35
-
-
- royal katherine
- ship of the line
- (and 1 more)
-
HMS ROYAL KATHERINE 1664 by Doris - 1/55 - CARD
DORIS replied to DORIS's topic in - Build logs for subjects built 1501 - 1750
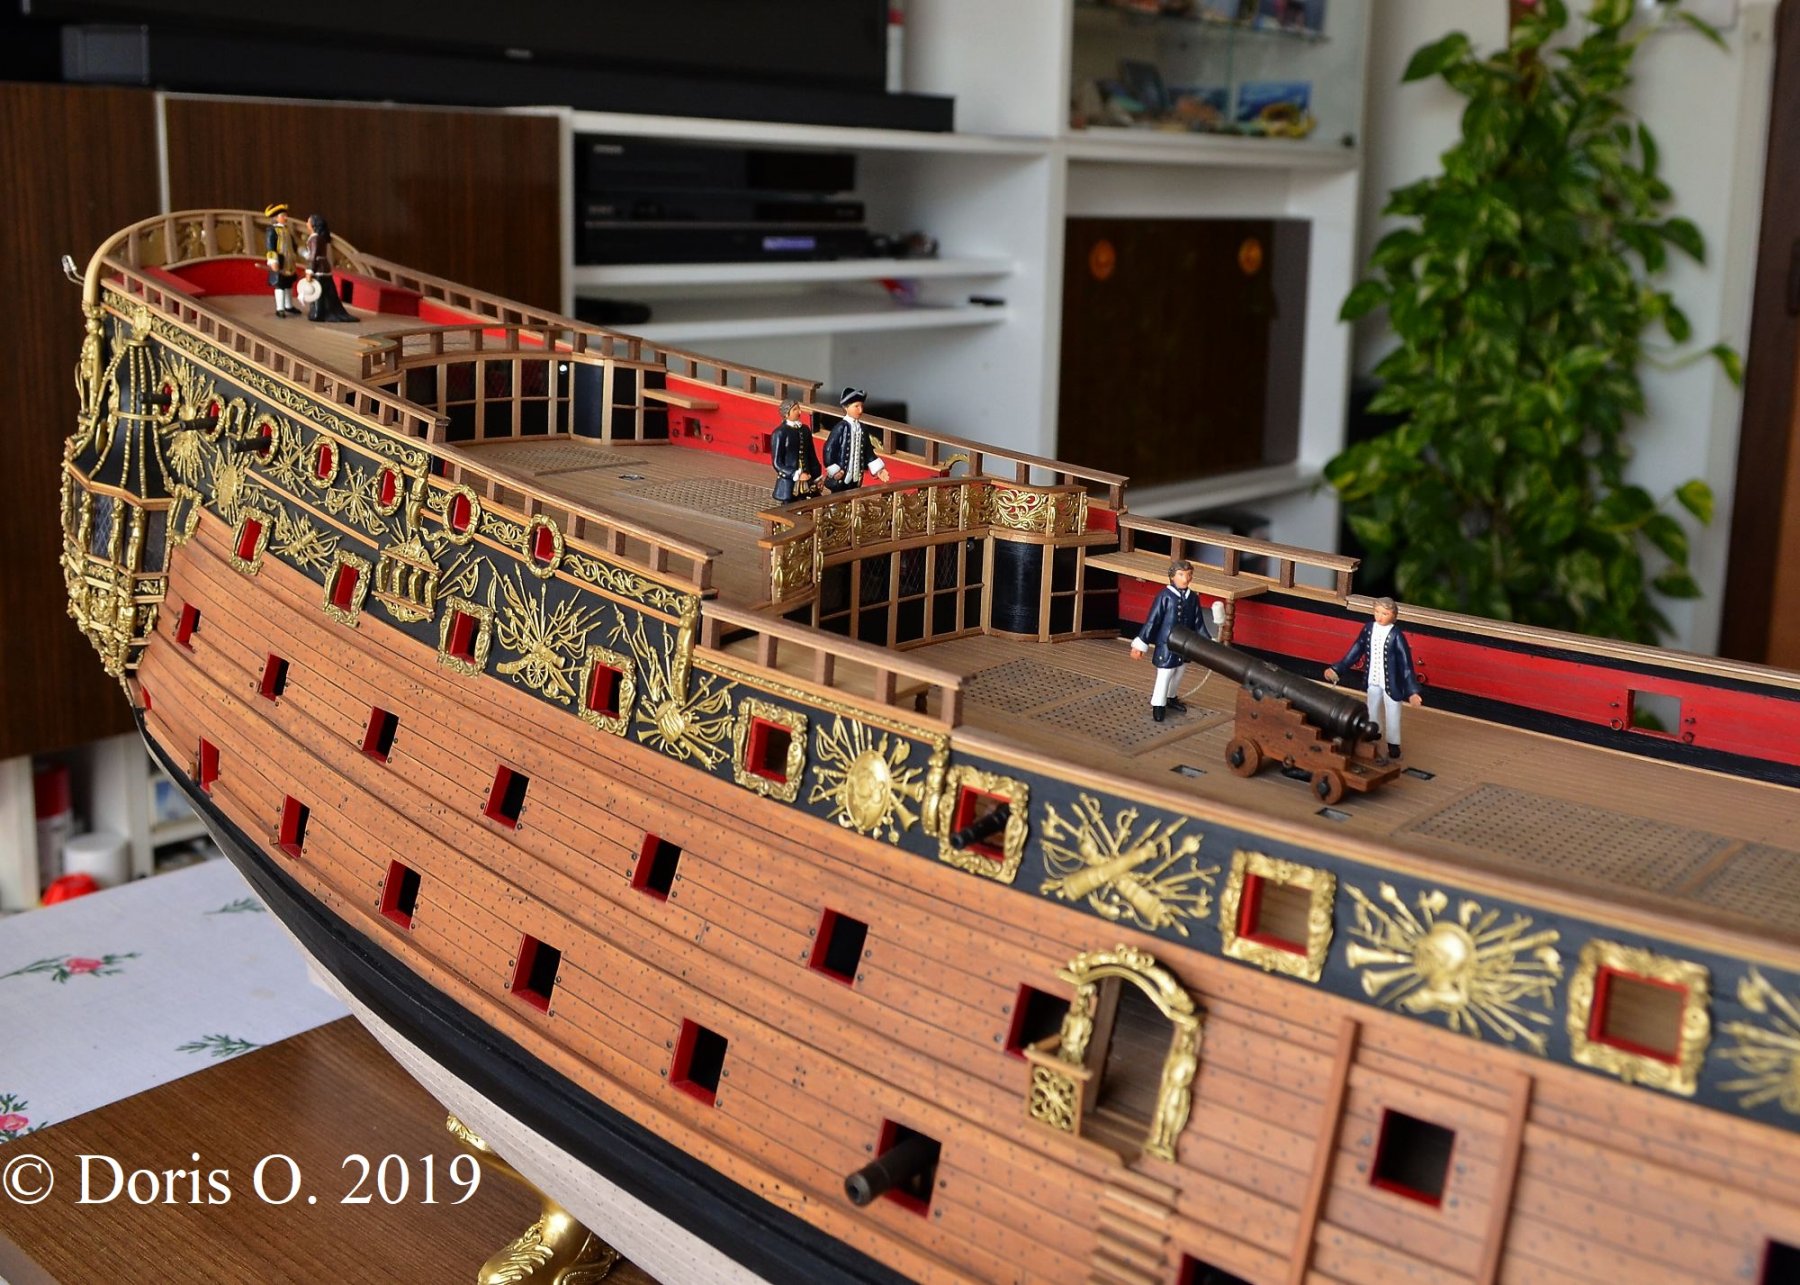
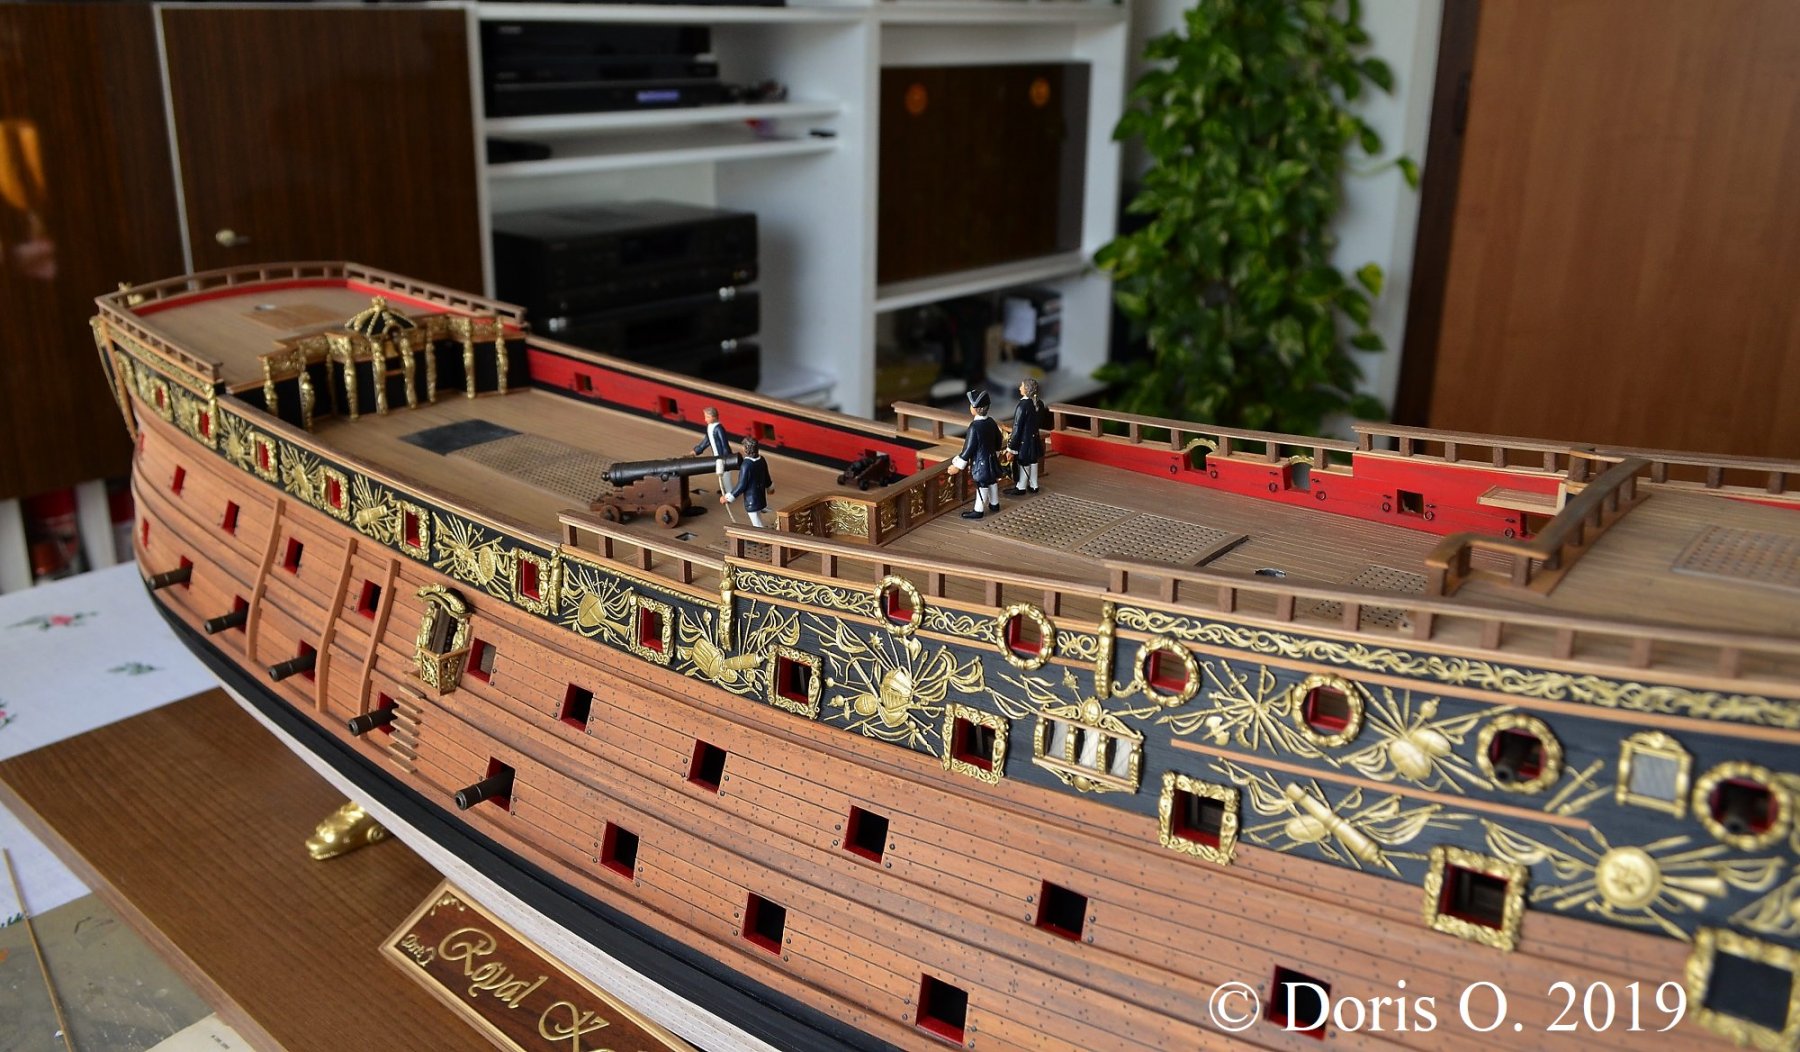
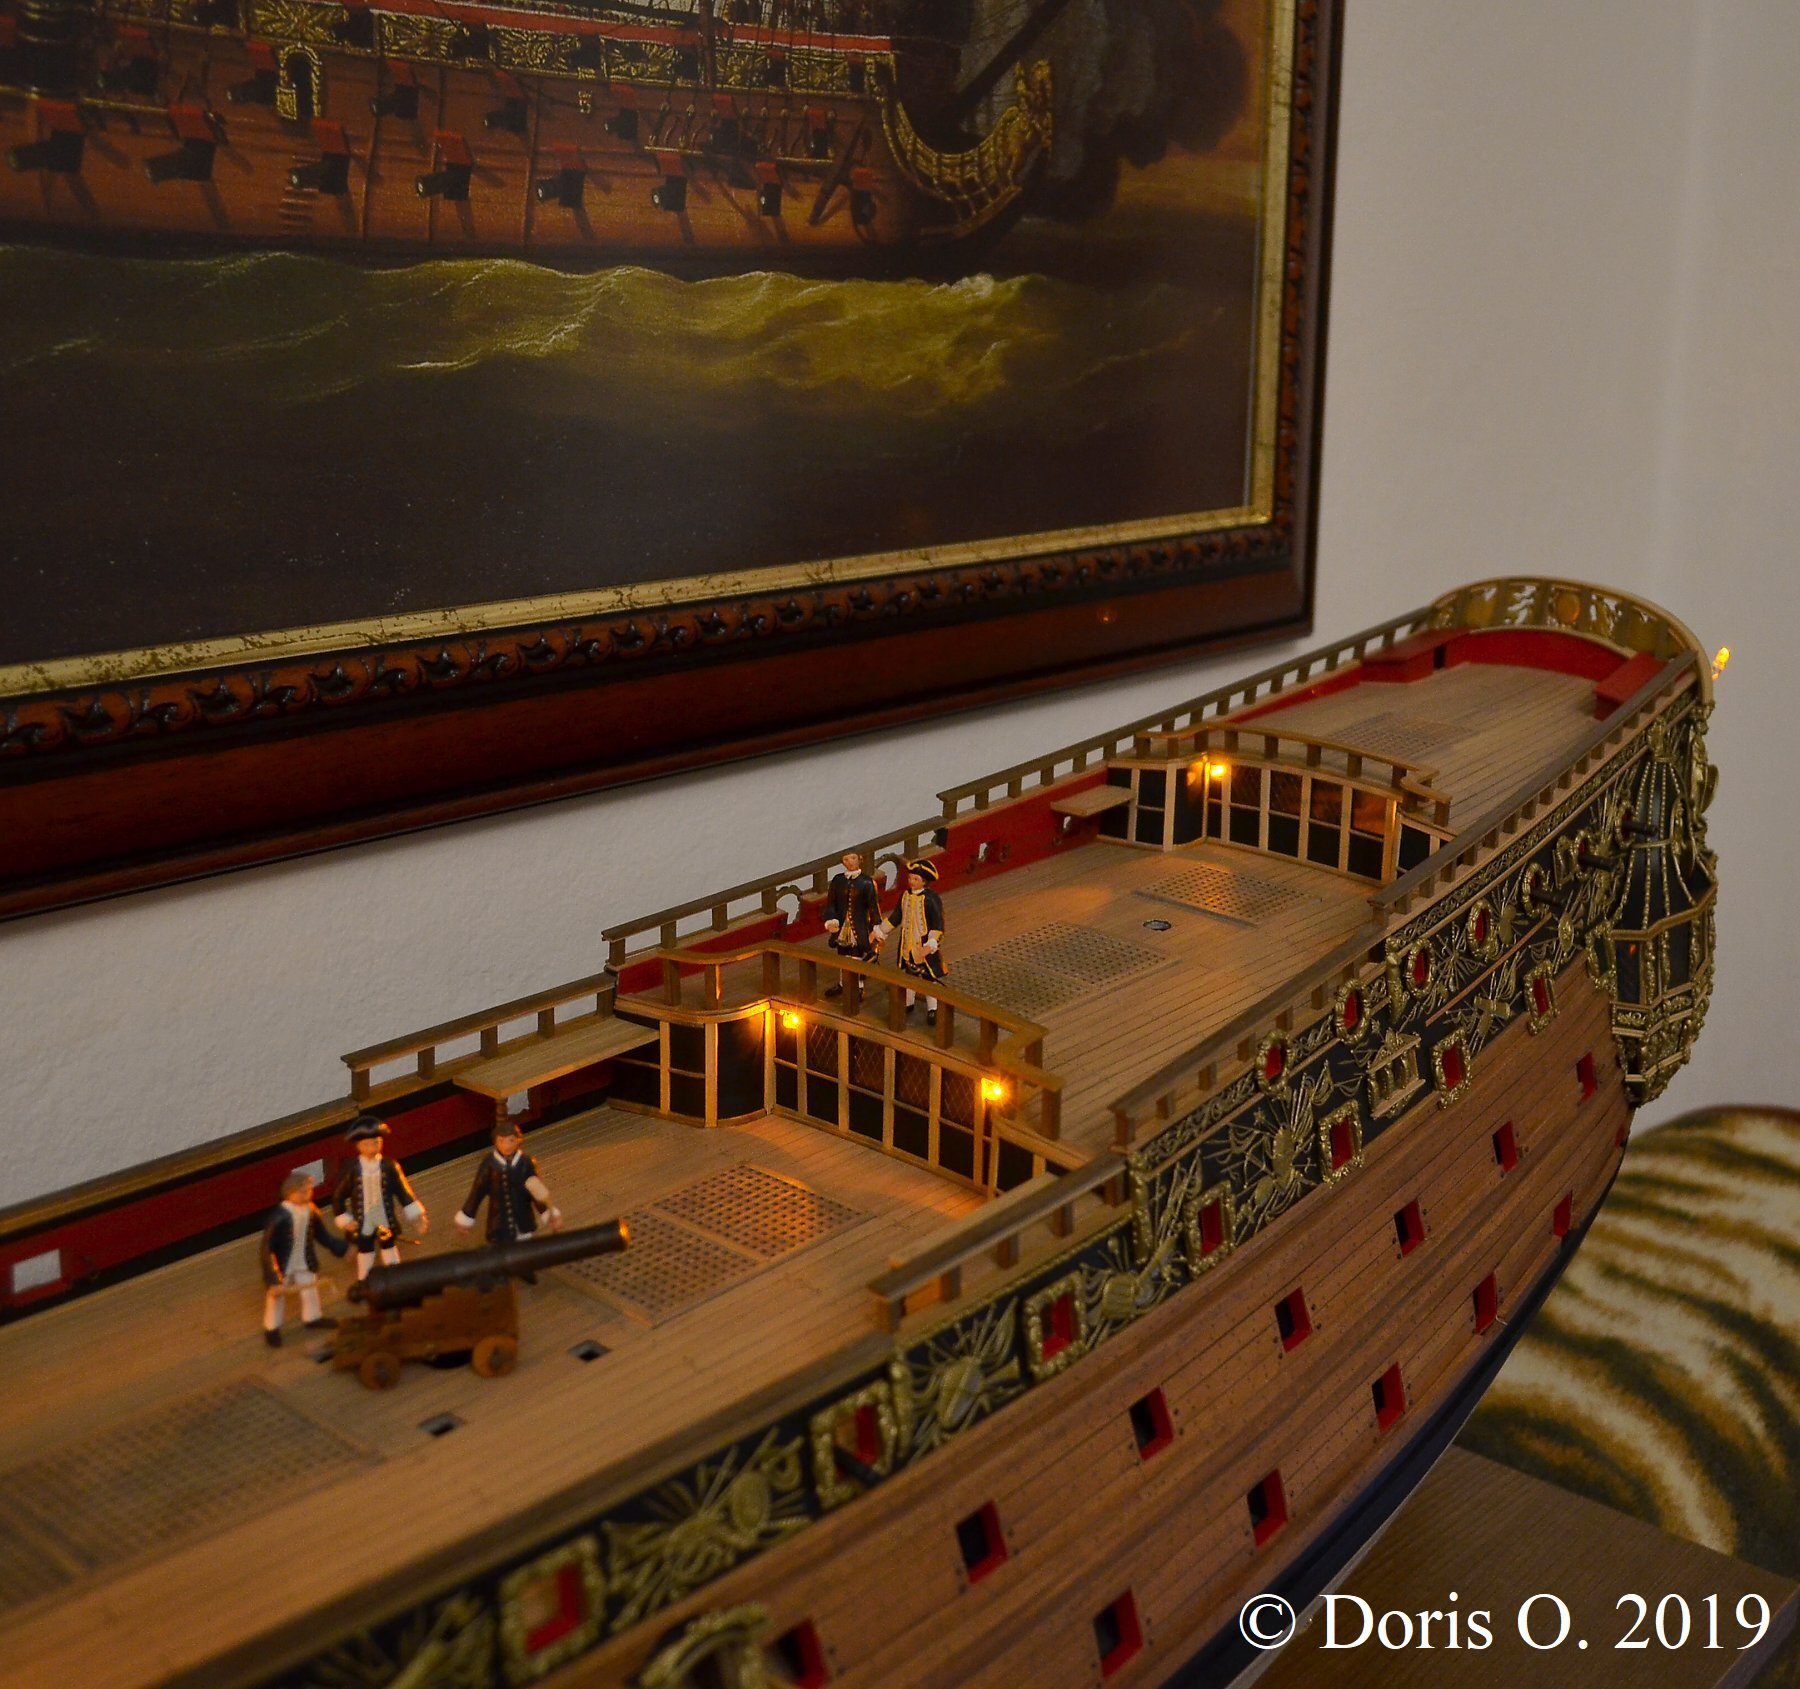
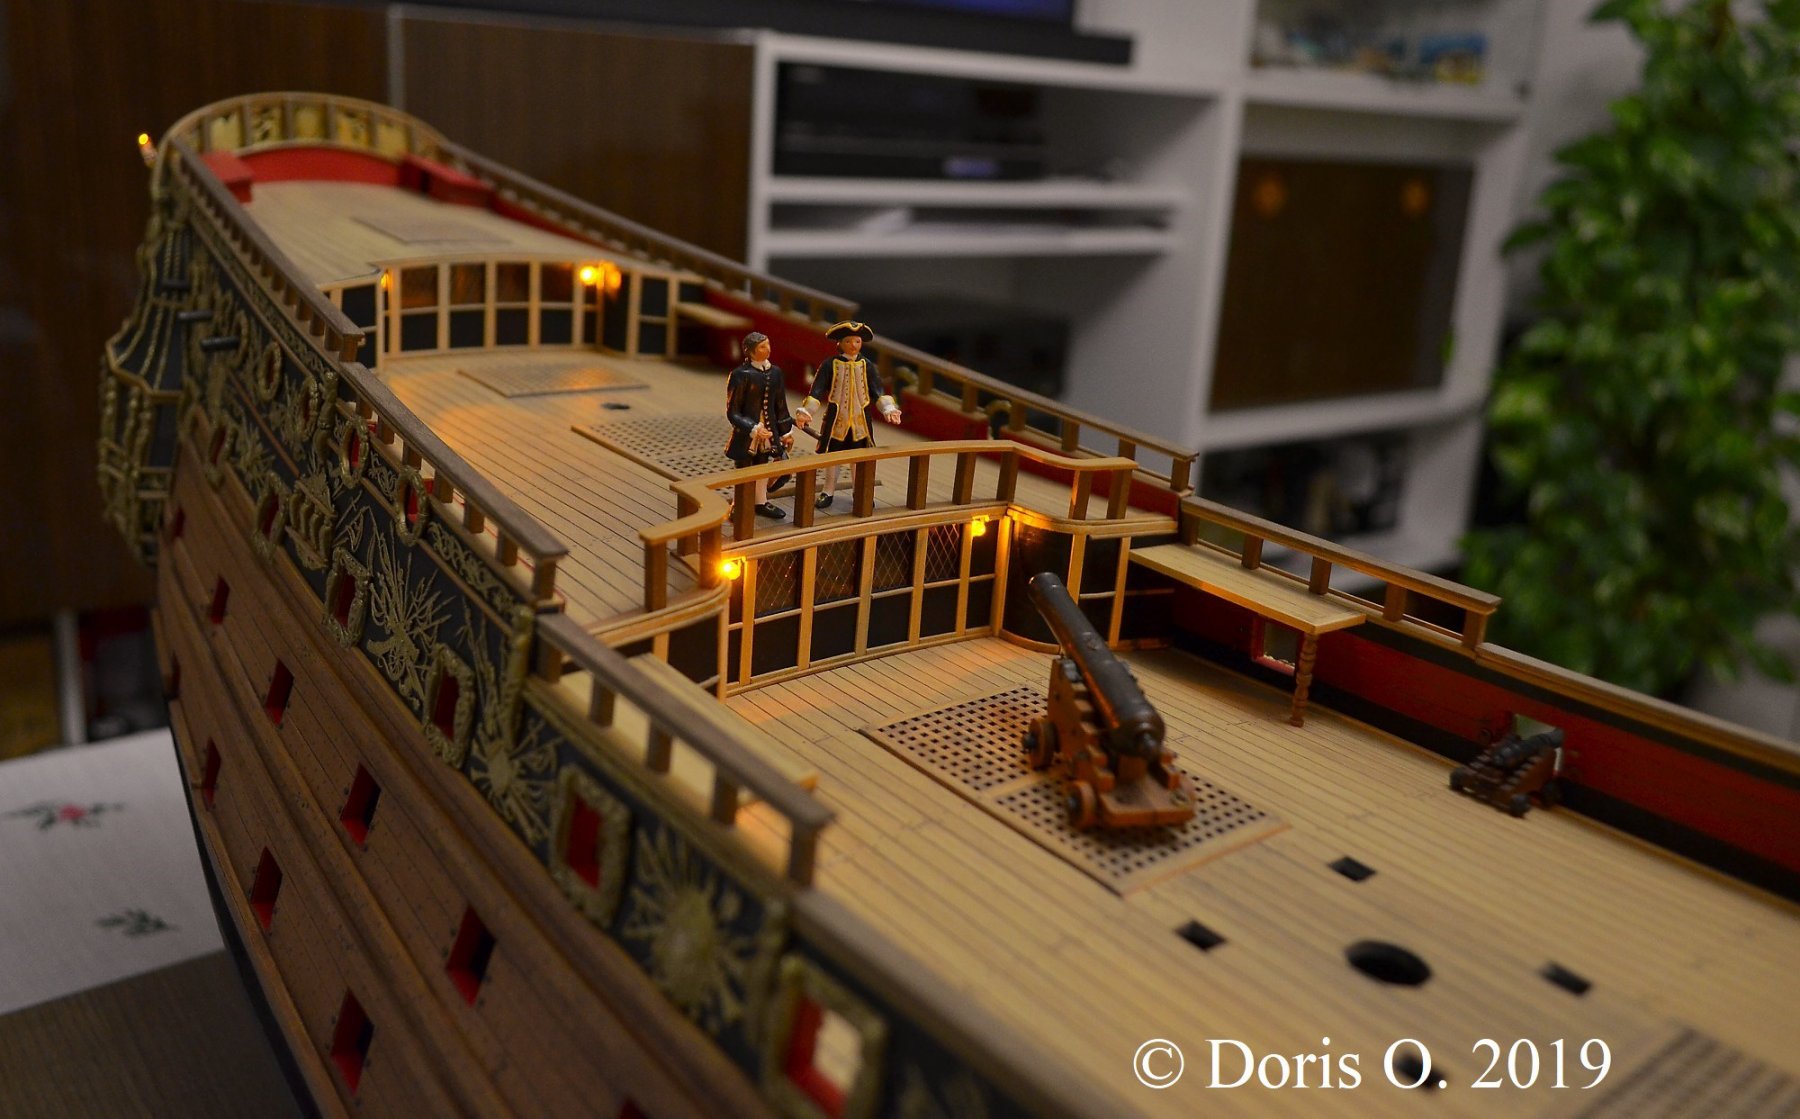
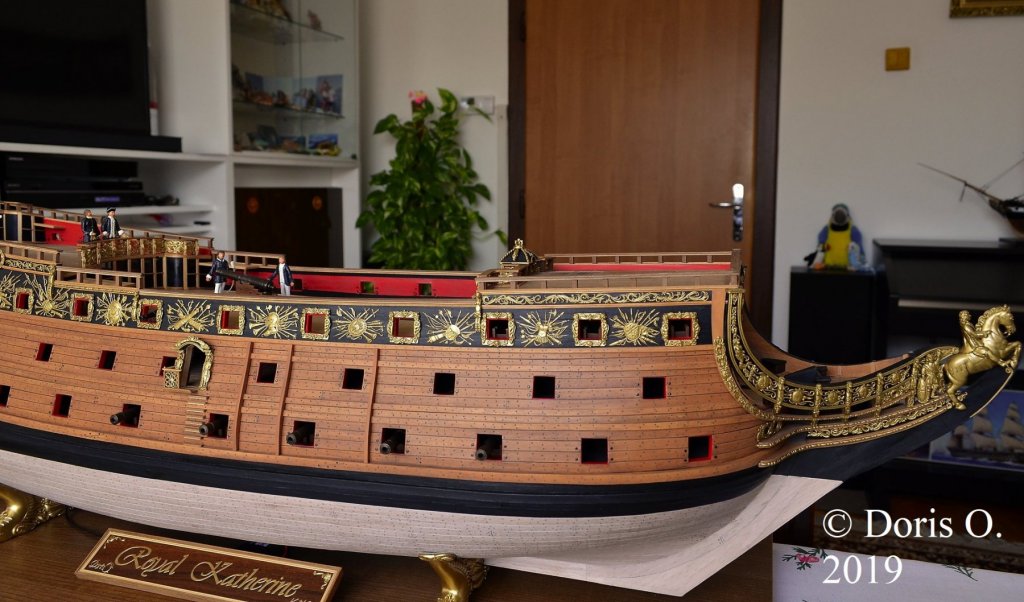
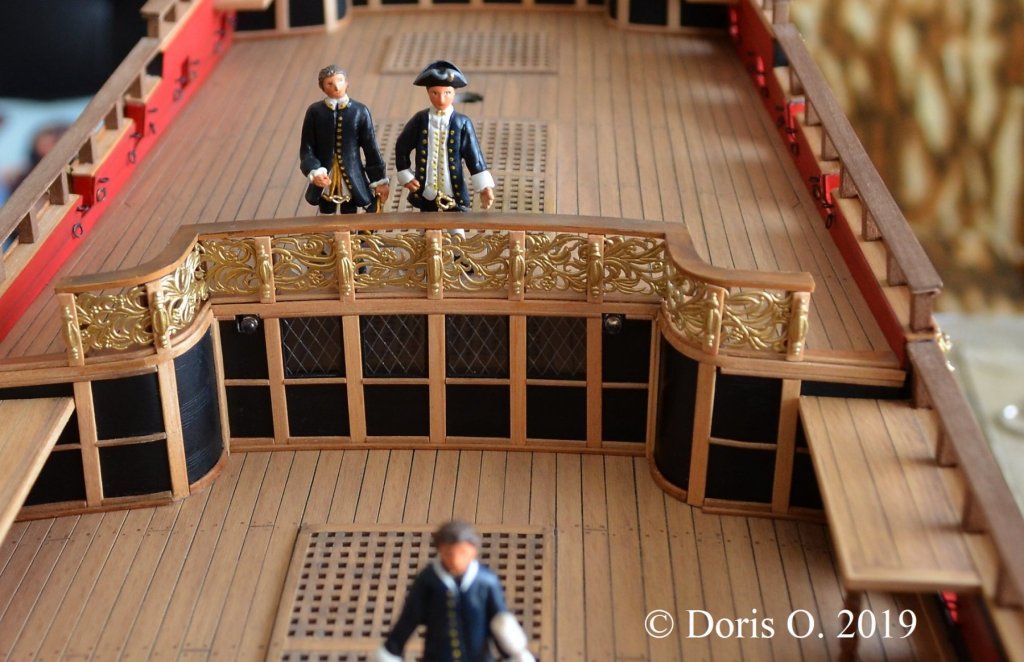
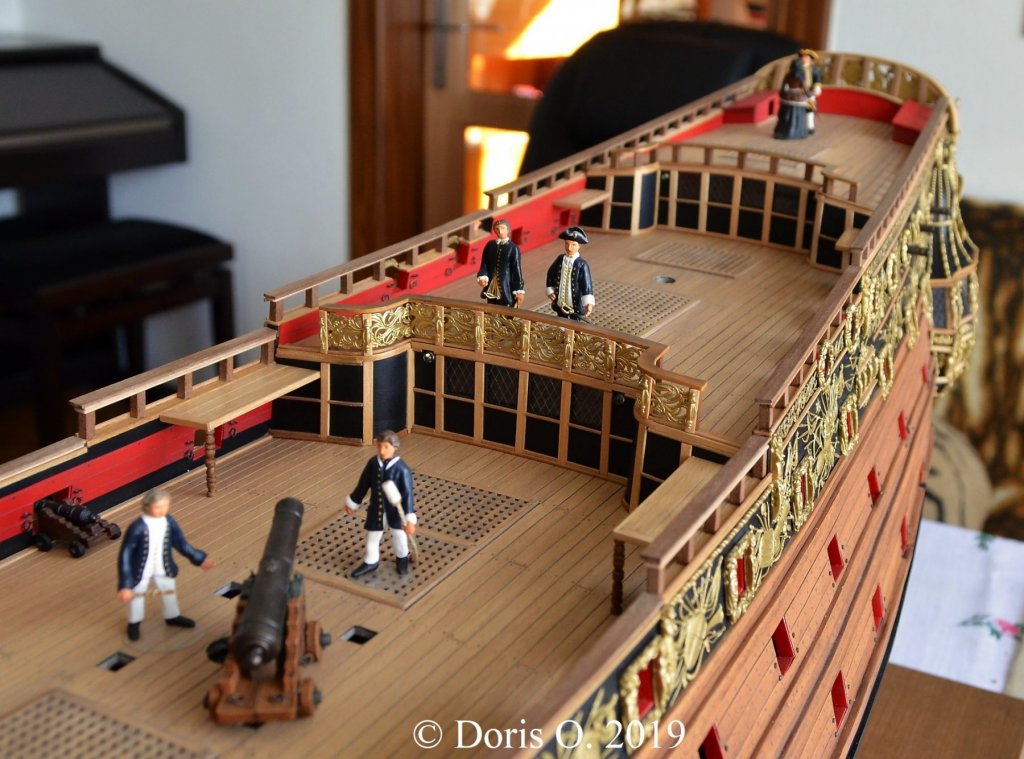
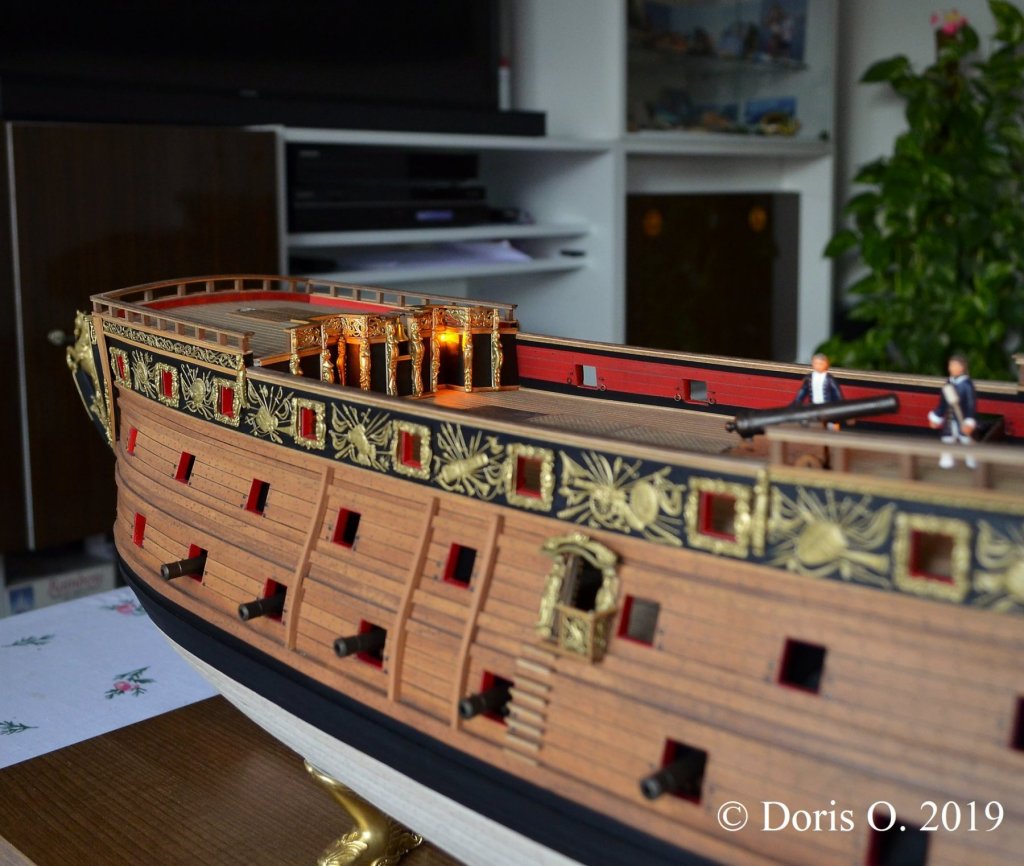
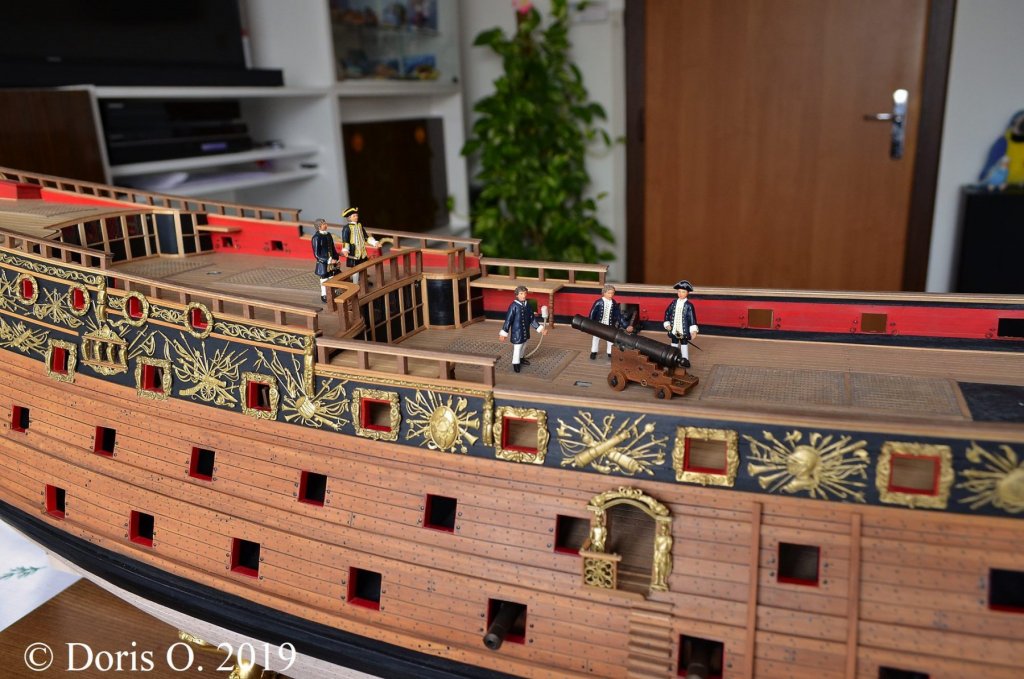
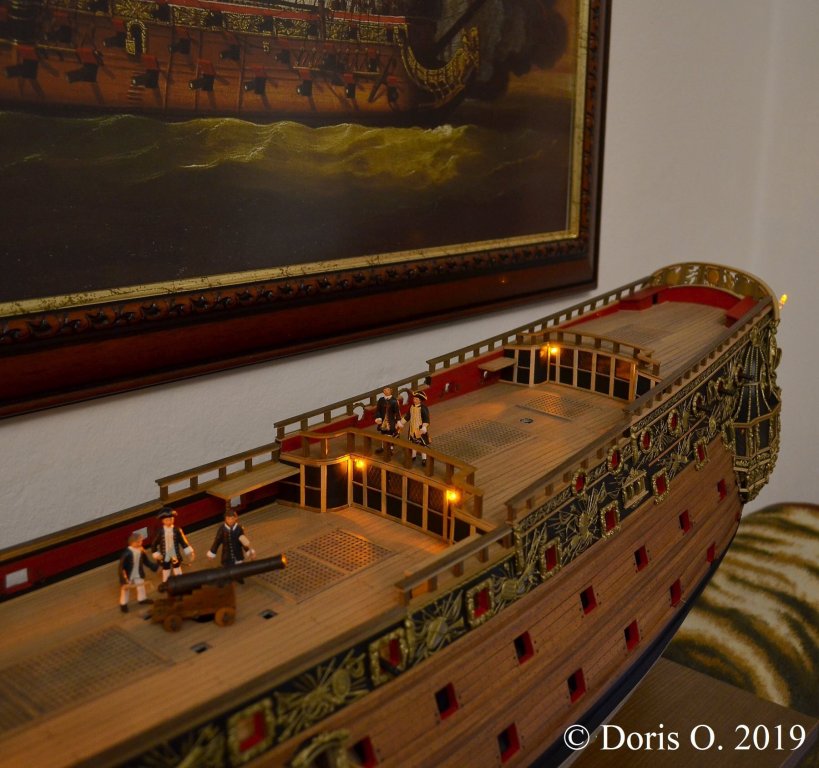
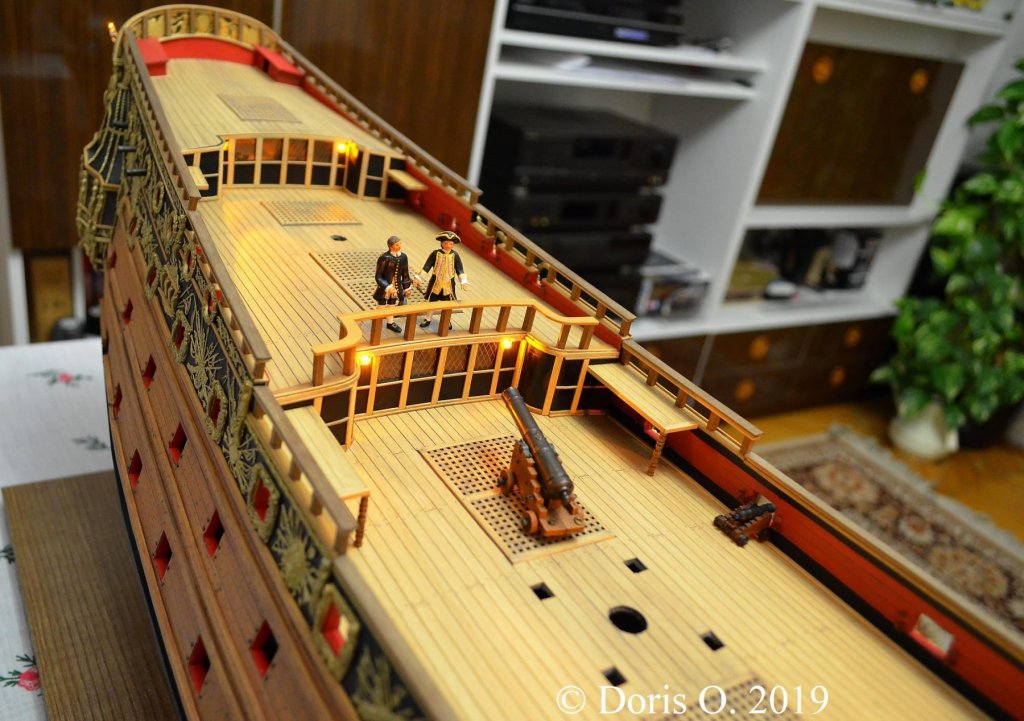
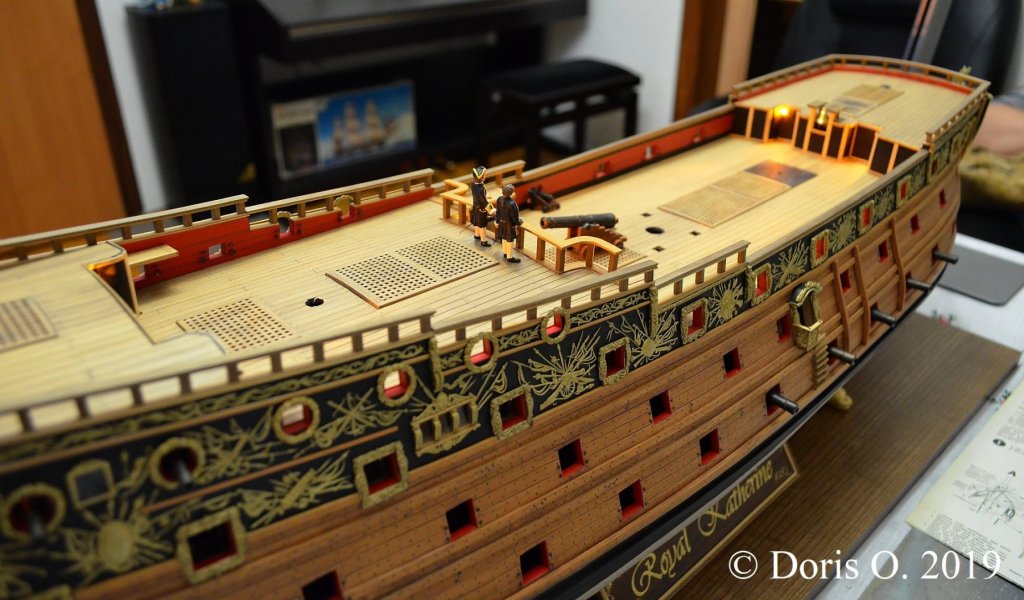
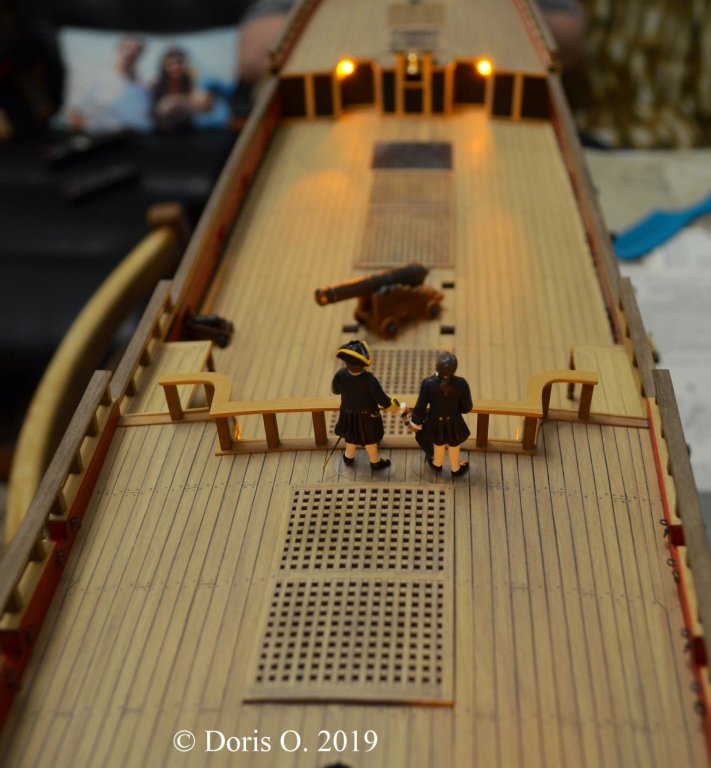
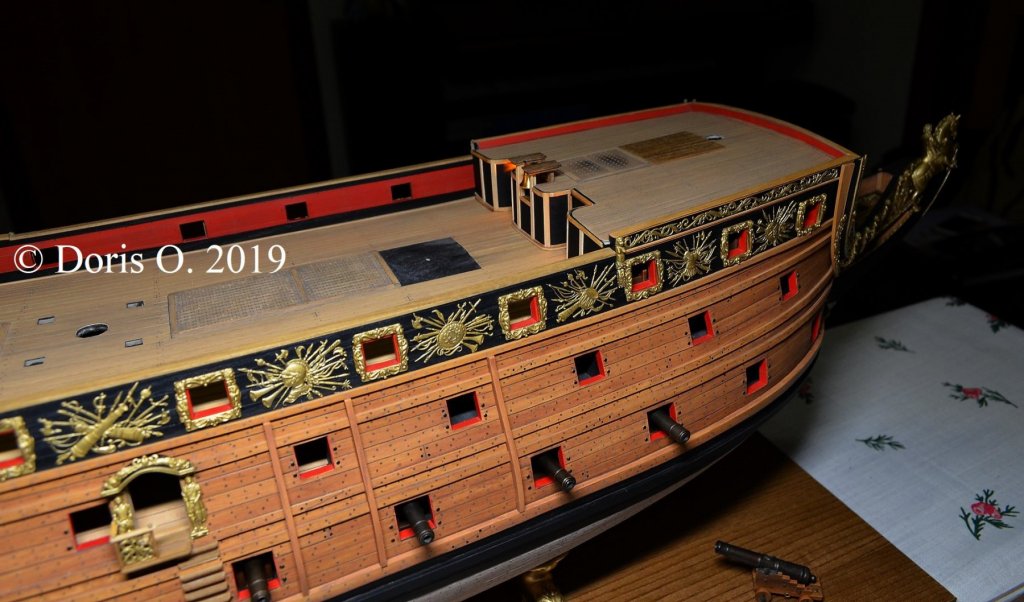
There were also added brass rings on the sides of gun ports for rigging and tackles. I finished other railing on bulkheads.The crew members come from yacht Royal Caroline and were made in a scale 1/40. They are here only for a short time for an excursion...😄


- 1,035 replies
-
- 29
-
-
- royal katherine
- ship of the line
- (and 1 more)
-
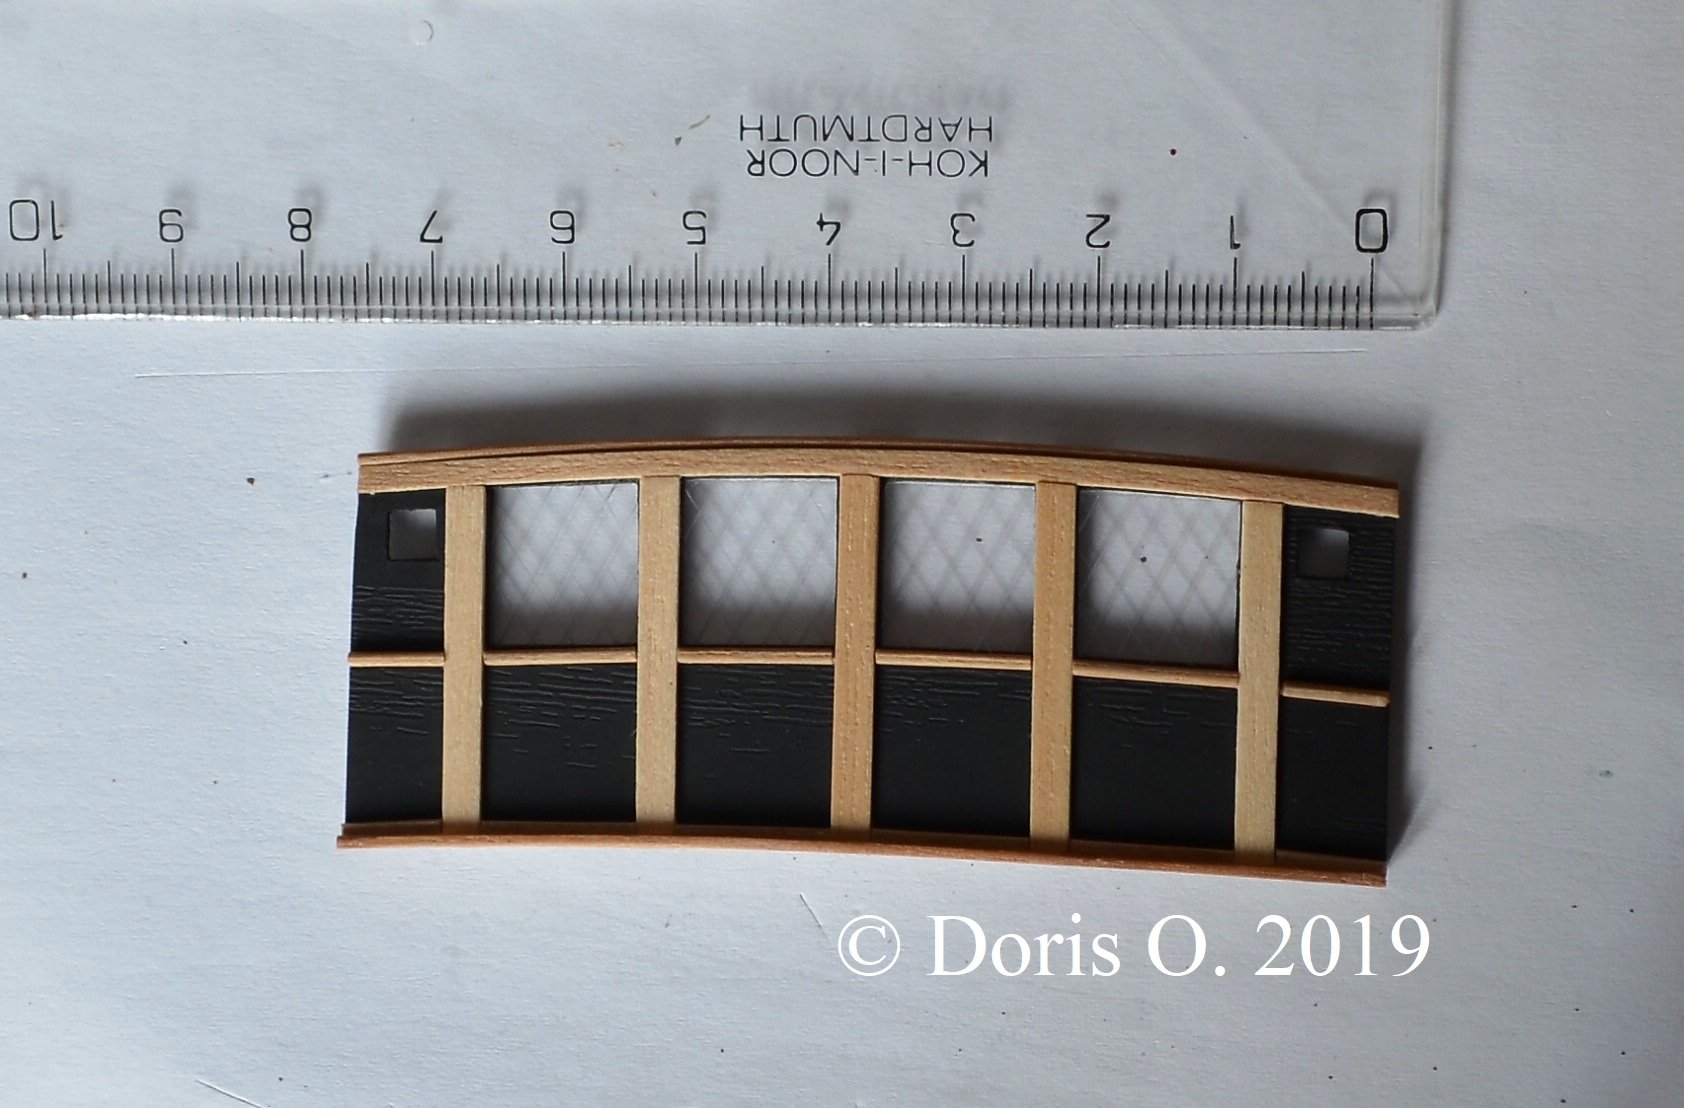
HMS ROYAL KATHERINE 1664 by Doris - 1/55 - CARD
DORIS replied to DORIS's topic in - Build logs for subjects built 1501 - 1750
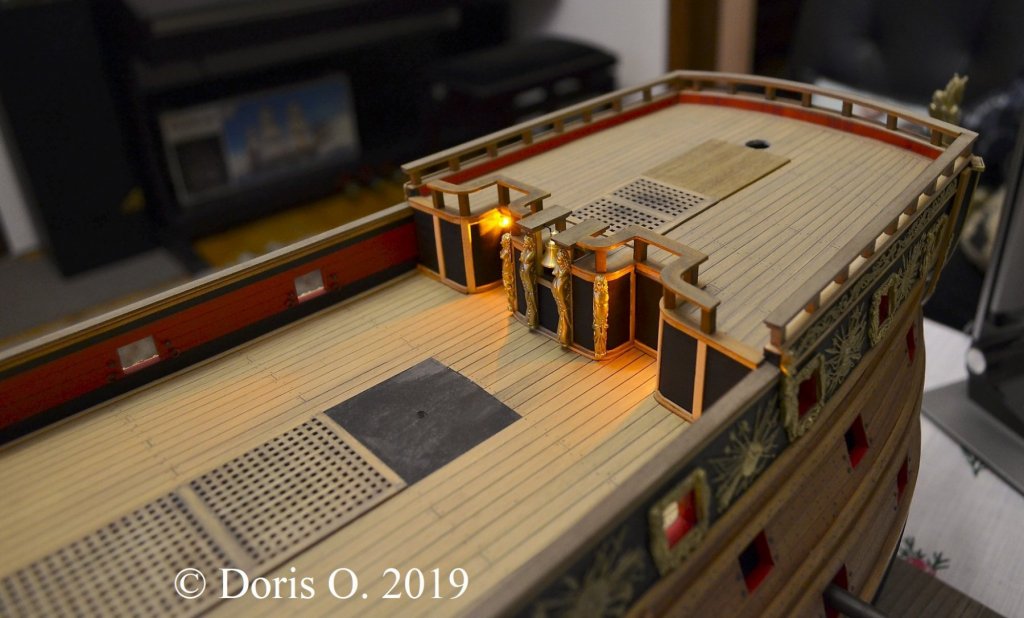
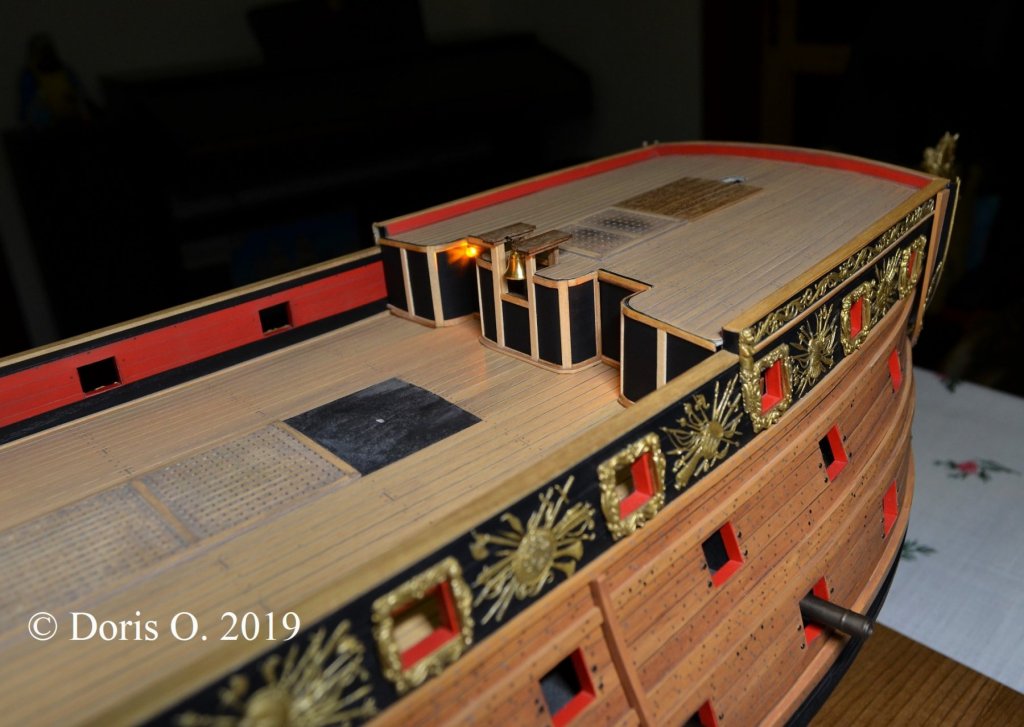
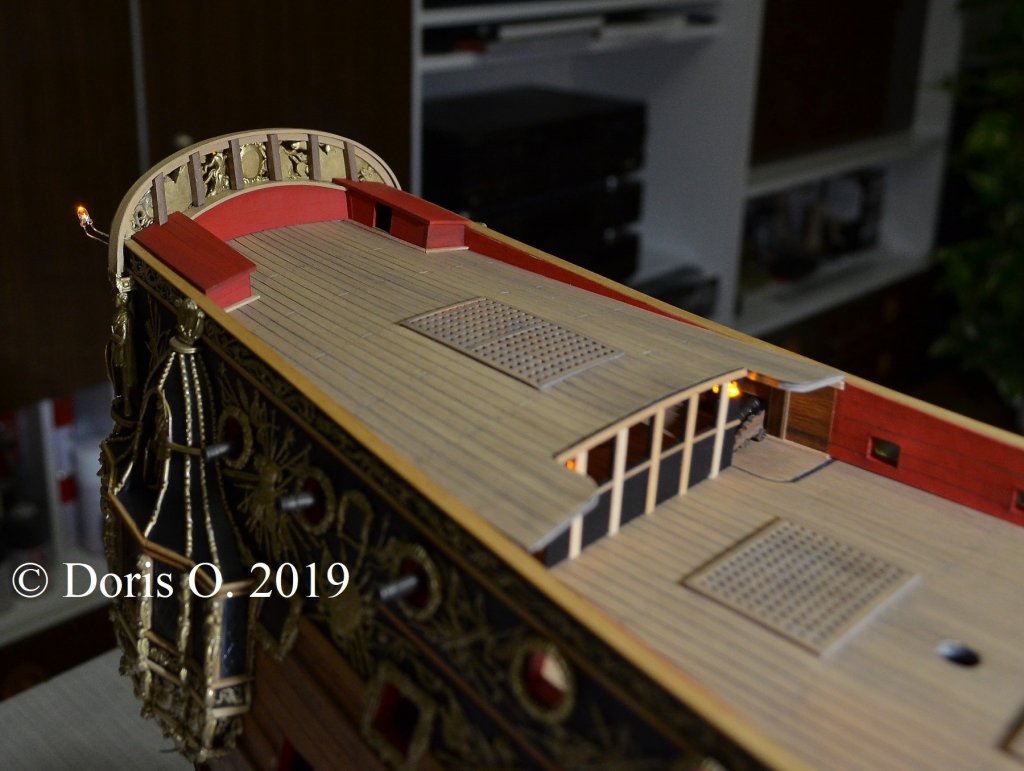
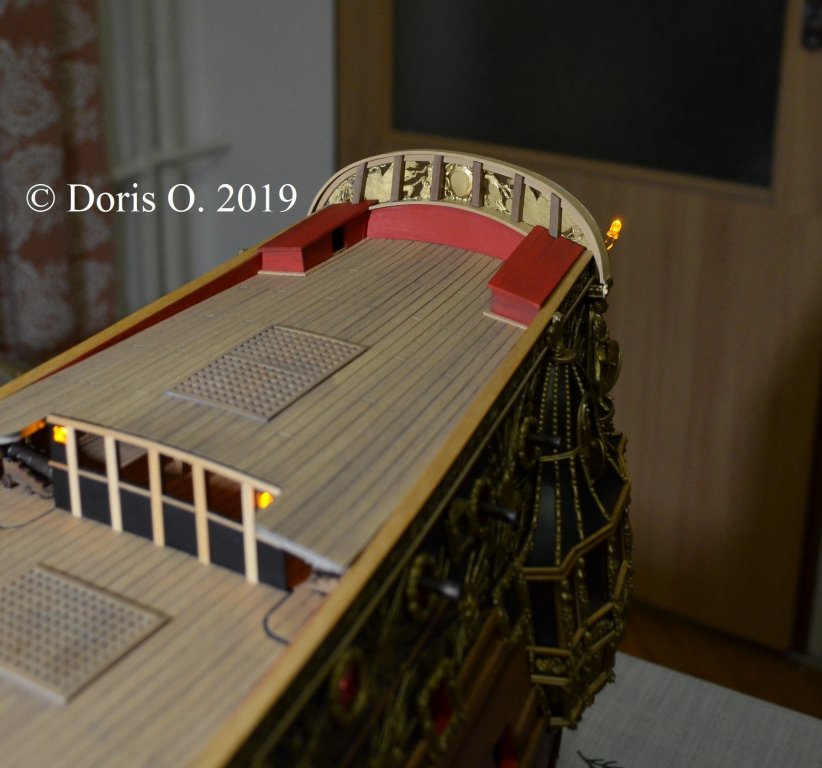
The low railing is completely made of wood due to its higher strength:


- 1,035 replies
-
- 33
-
-
- royal katherine
- ship of the line
- (and 1 more)
-
HMS ROYAL KATHERINE 1664 by Doris - 1/55 - CARD
DORIS replied to DORIS's topic in - Build logs for subjects built 1501 - 1750
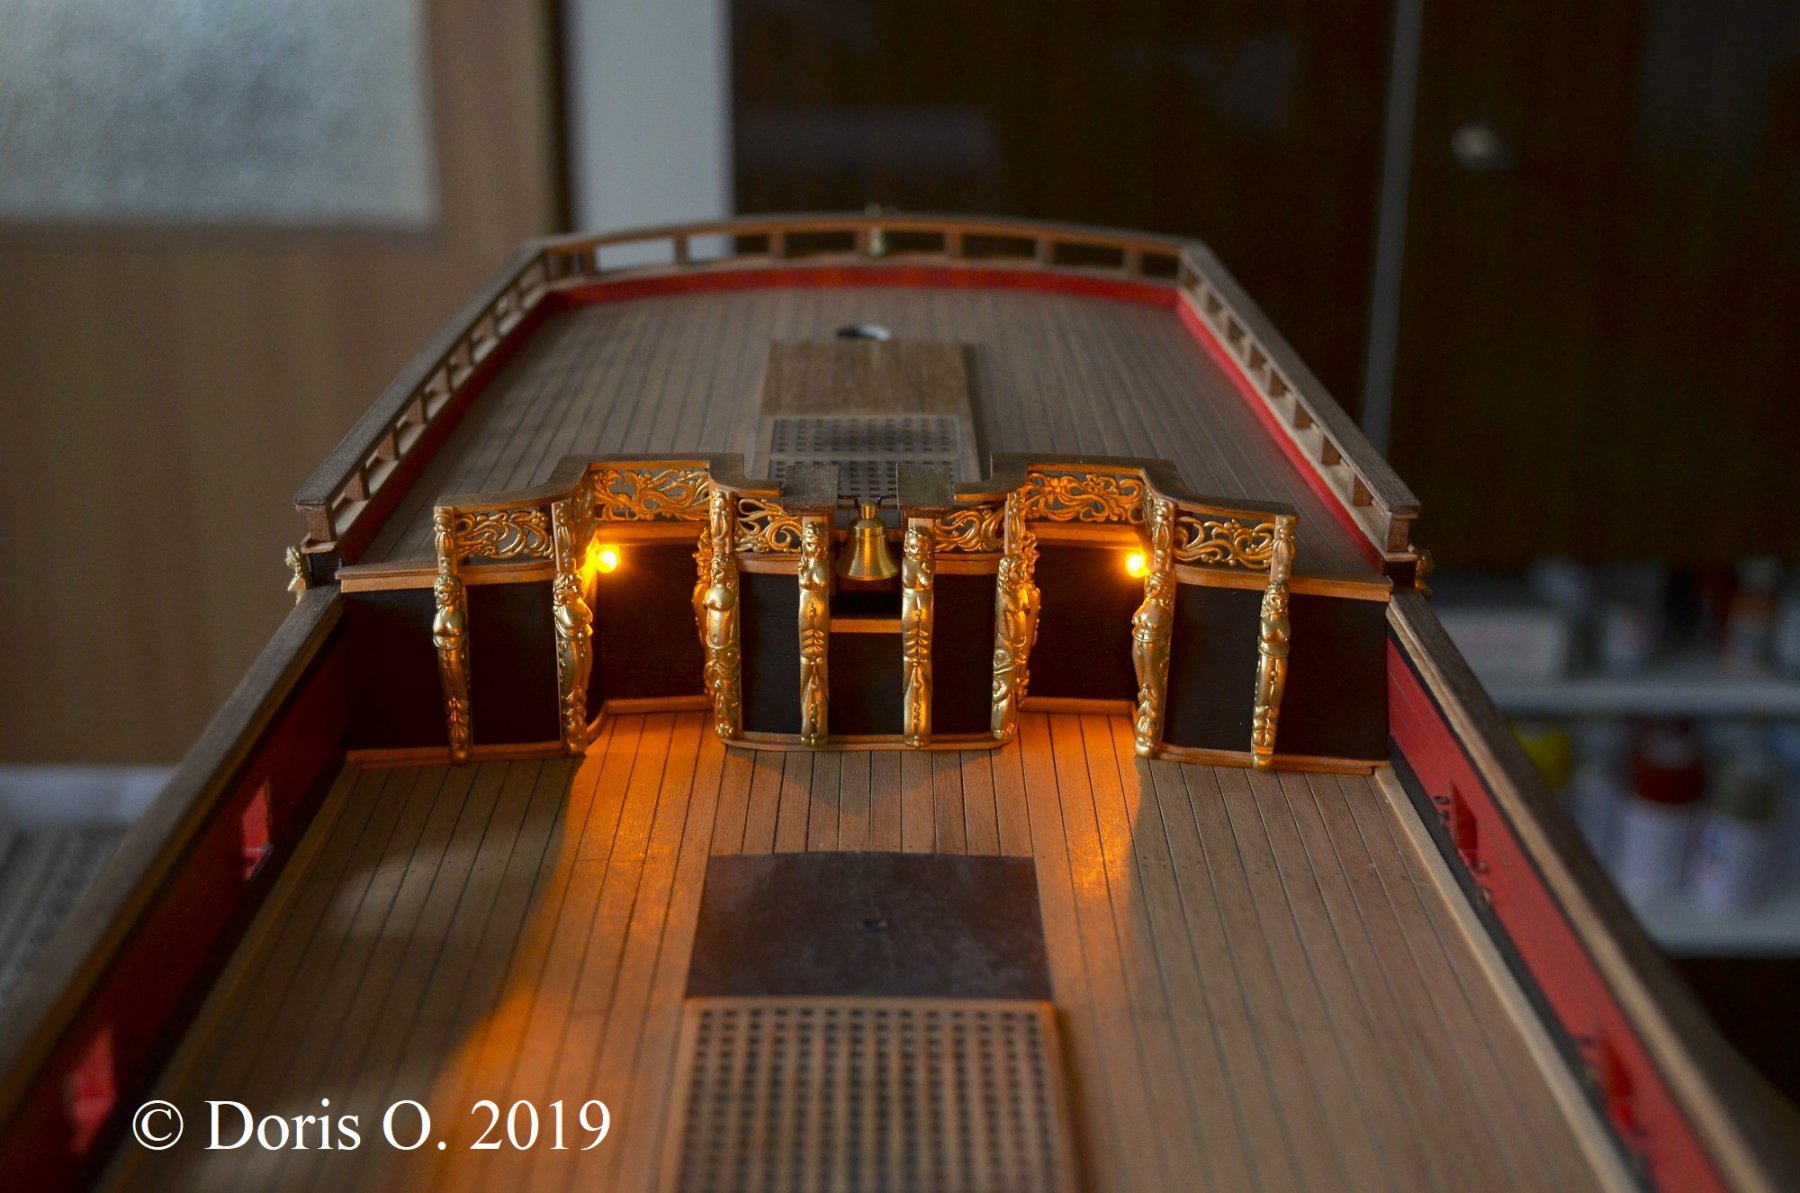
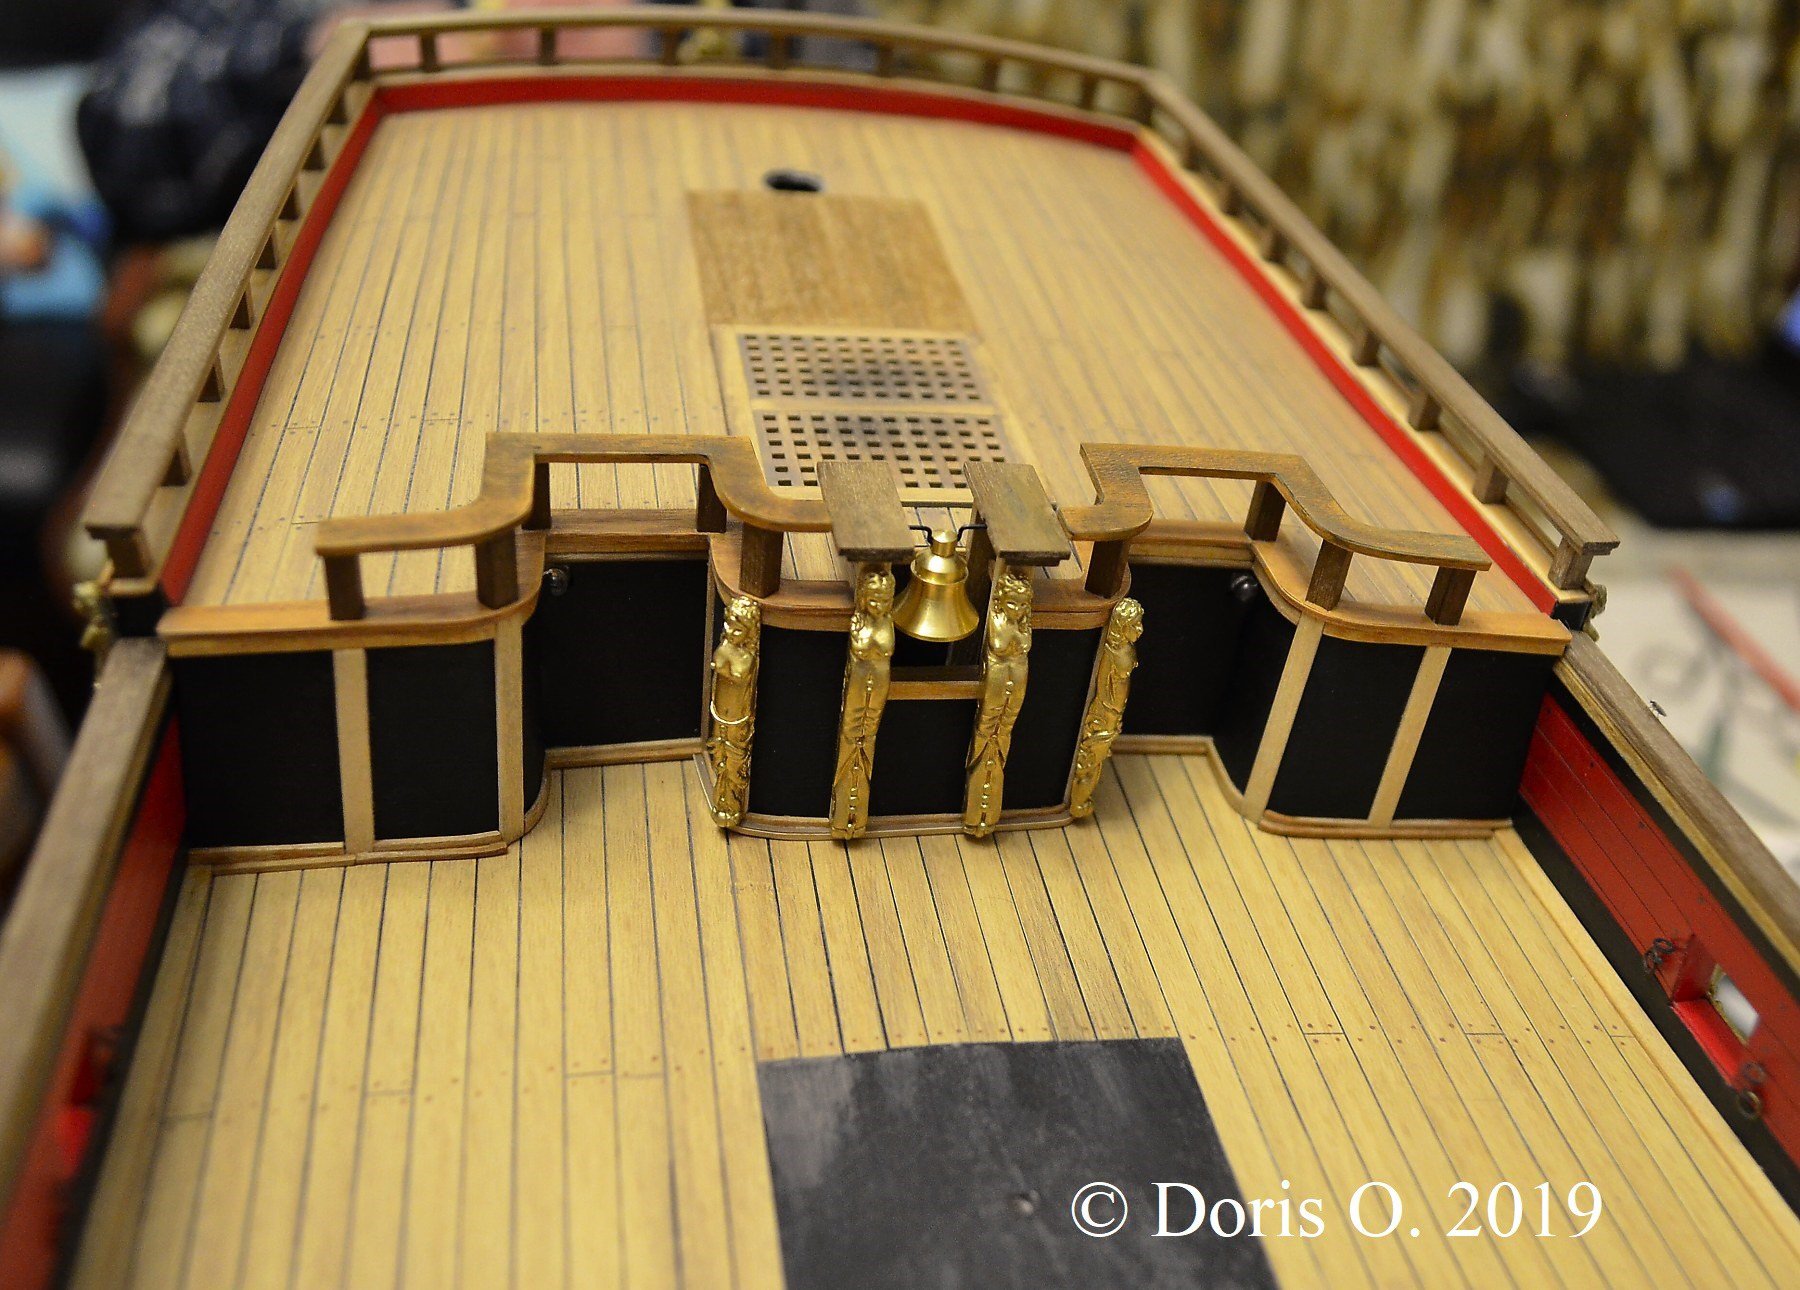
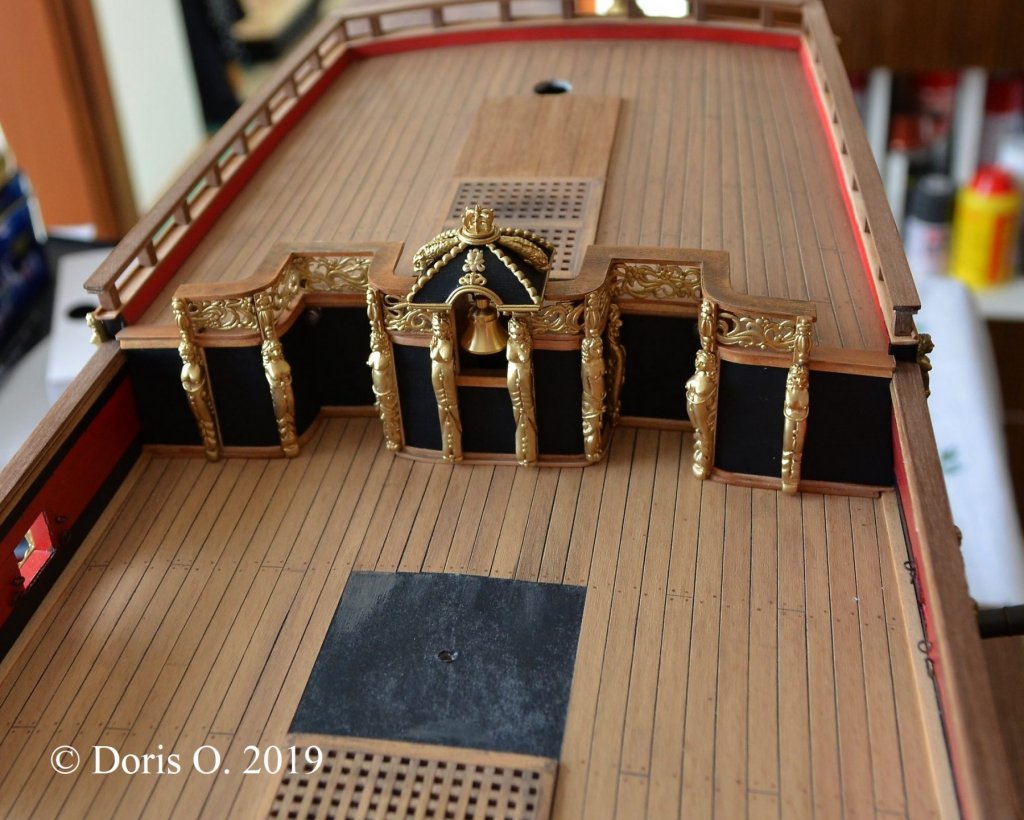
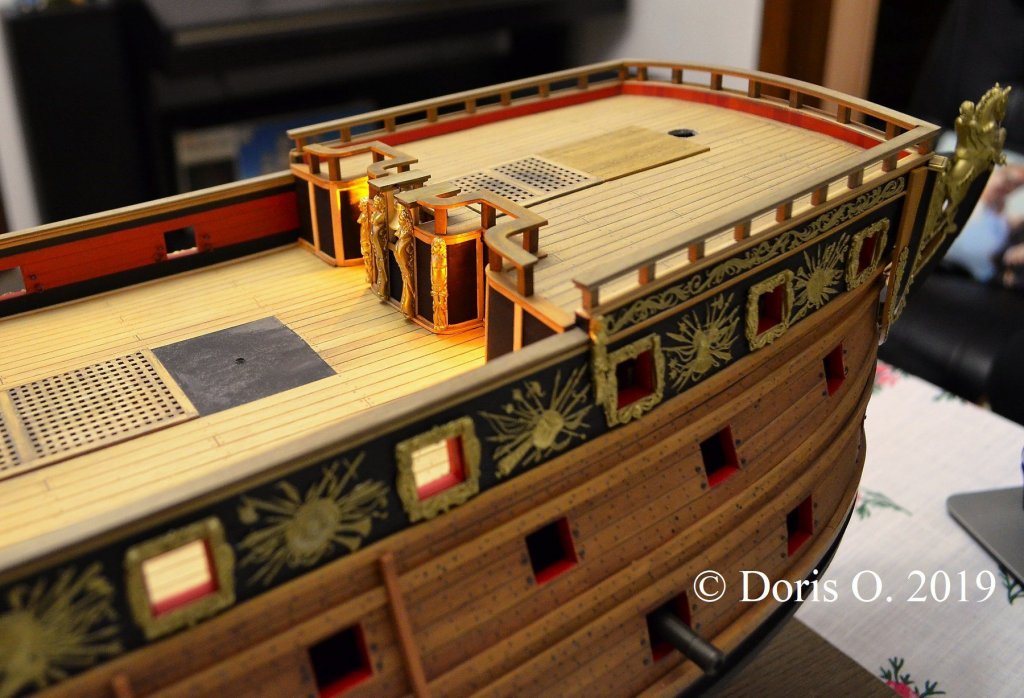
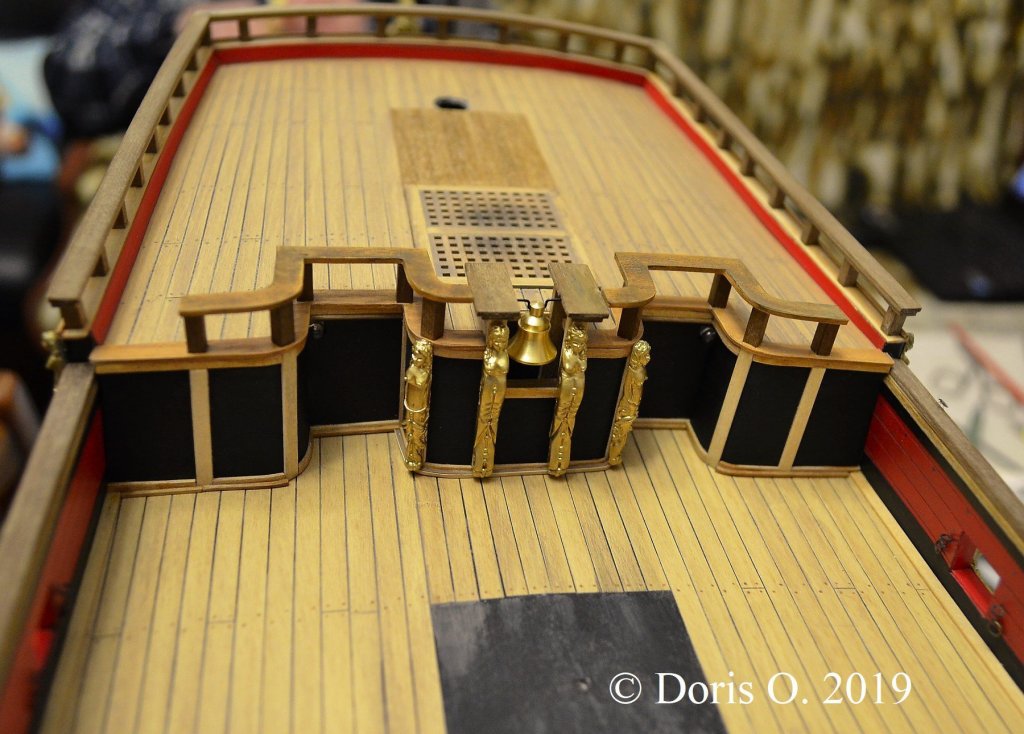
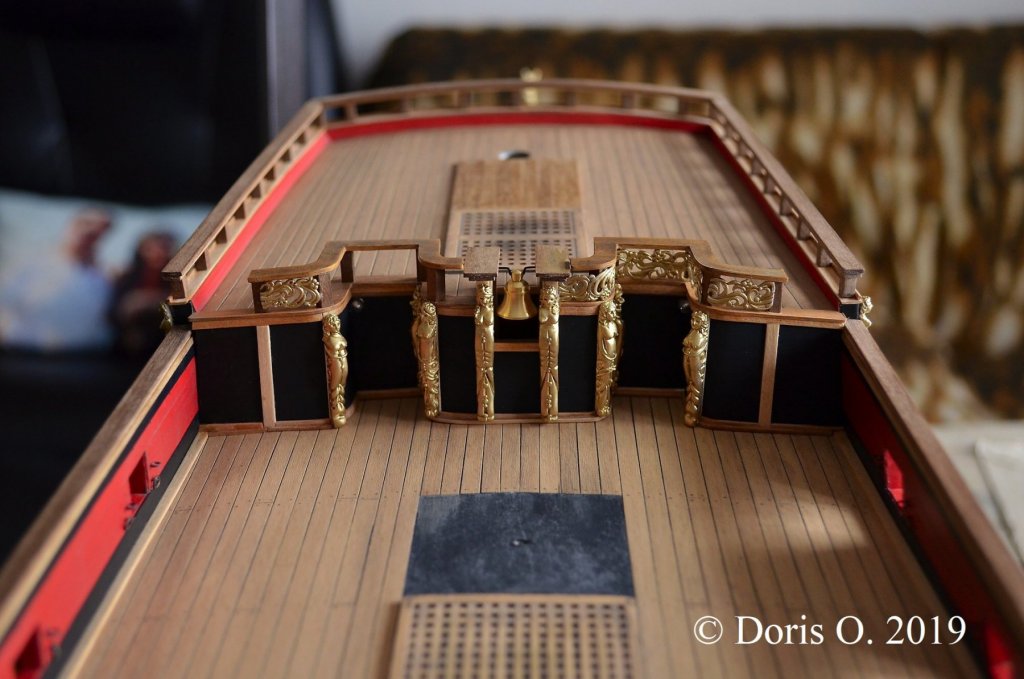
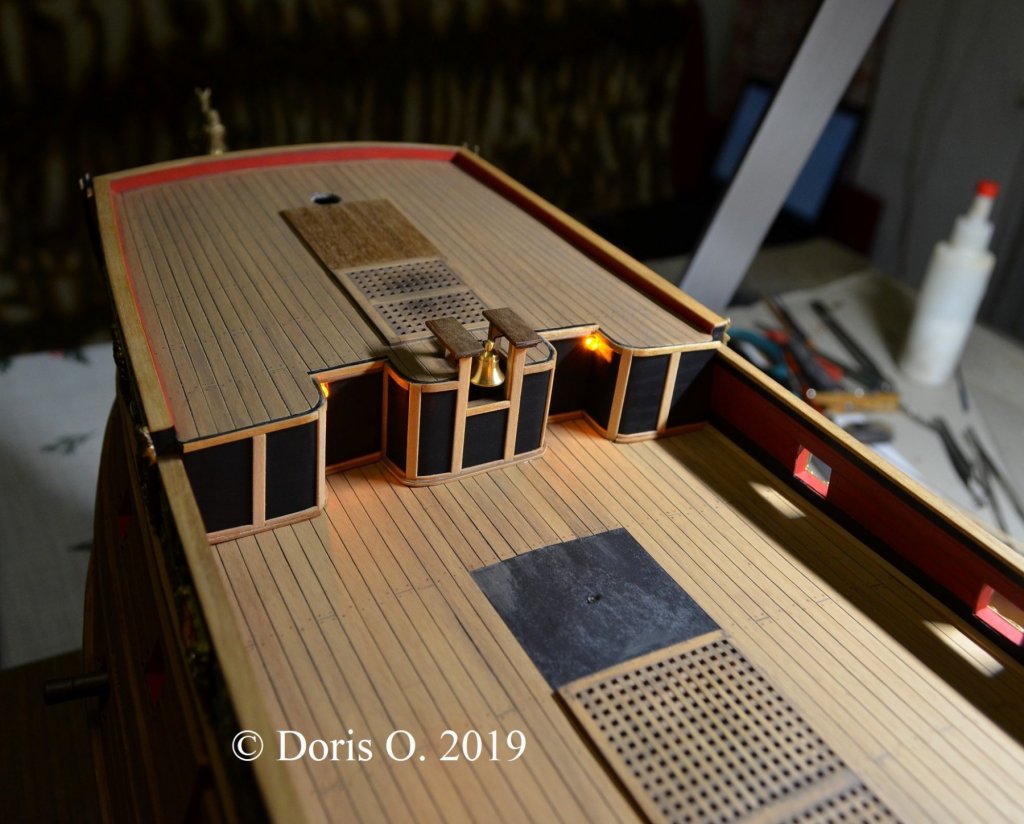
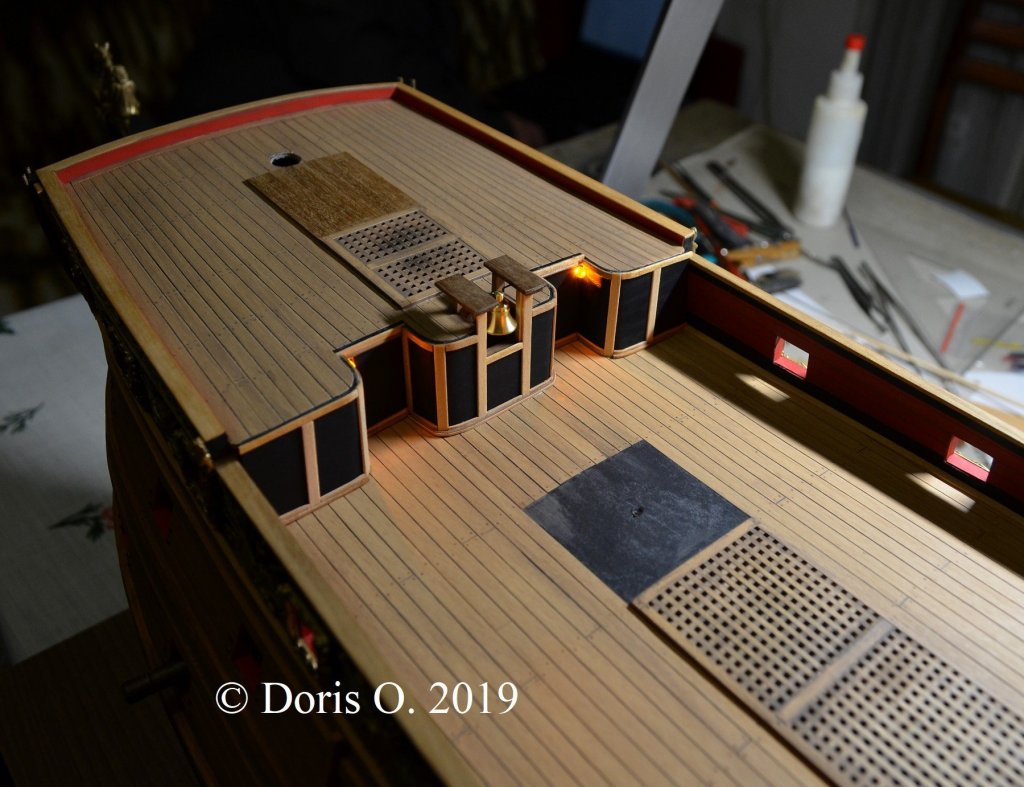
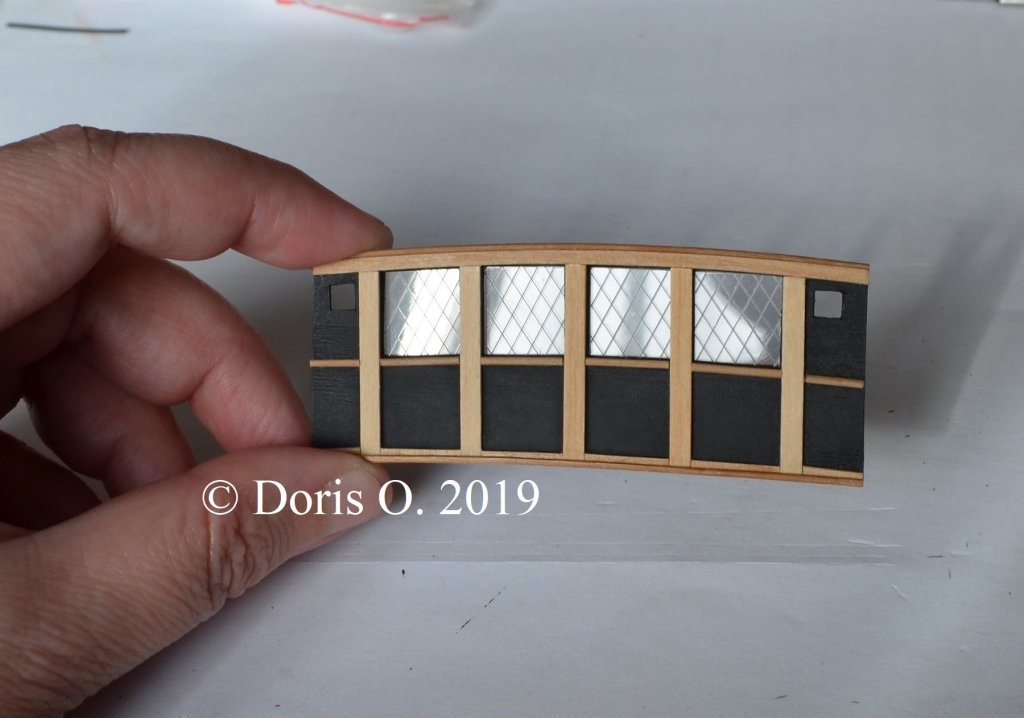
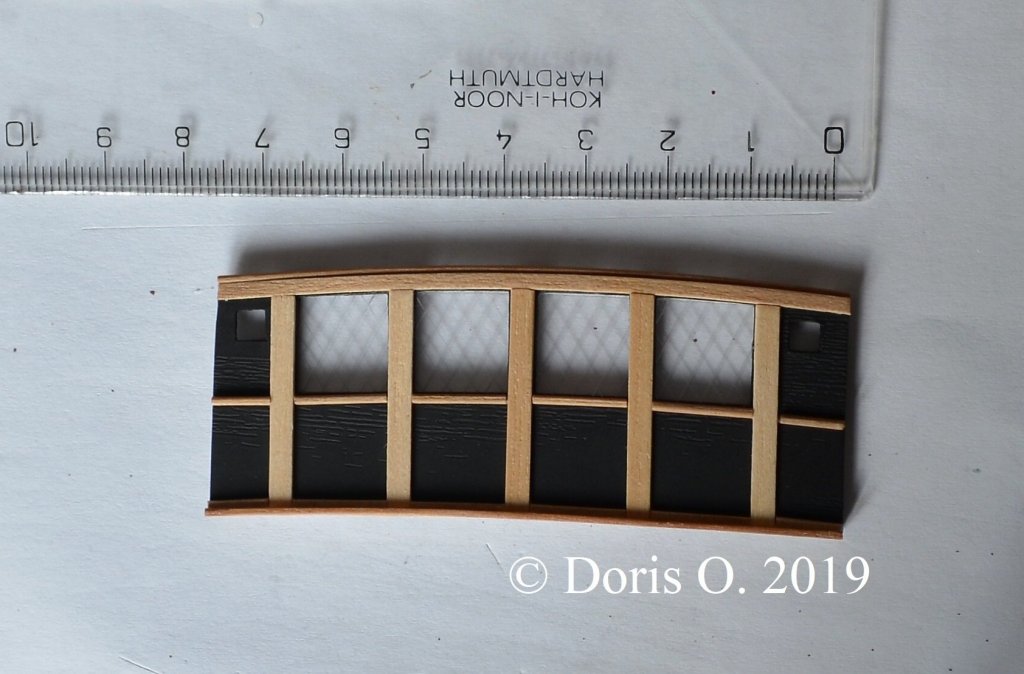
And another bulkhead completed and placed in model.... The brass bell is not my own product, it is one of few things on the model I have purchased as finished accessory.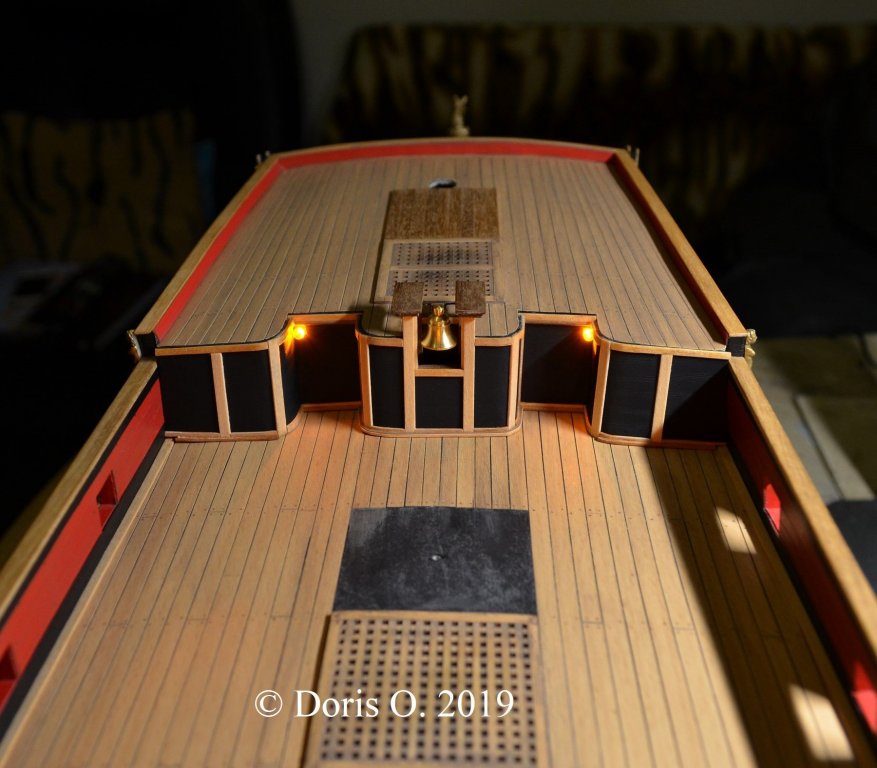


- 1,035 replies
-
- 30
-
-
- royal katherine
- ship of the line
- (and 1 more)
-
HMS ROYAL KATHERINE 1664 by Doris - 1/55 - CARD
DORIS replied to DORIS's topic in - Build logs for subjects built 1501 - 1750
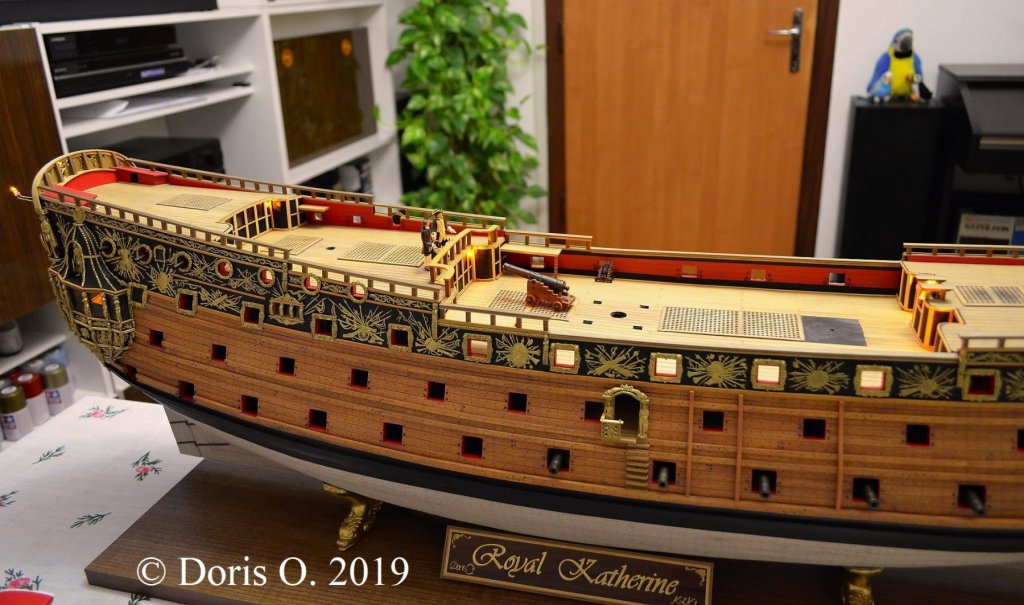
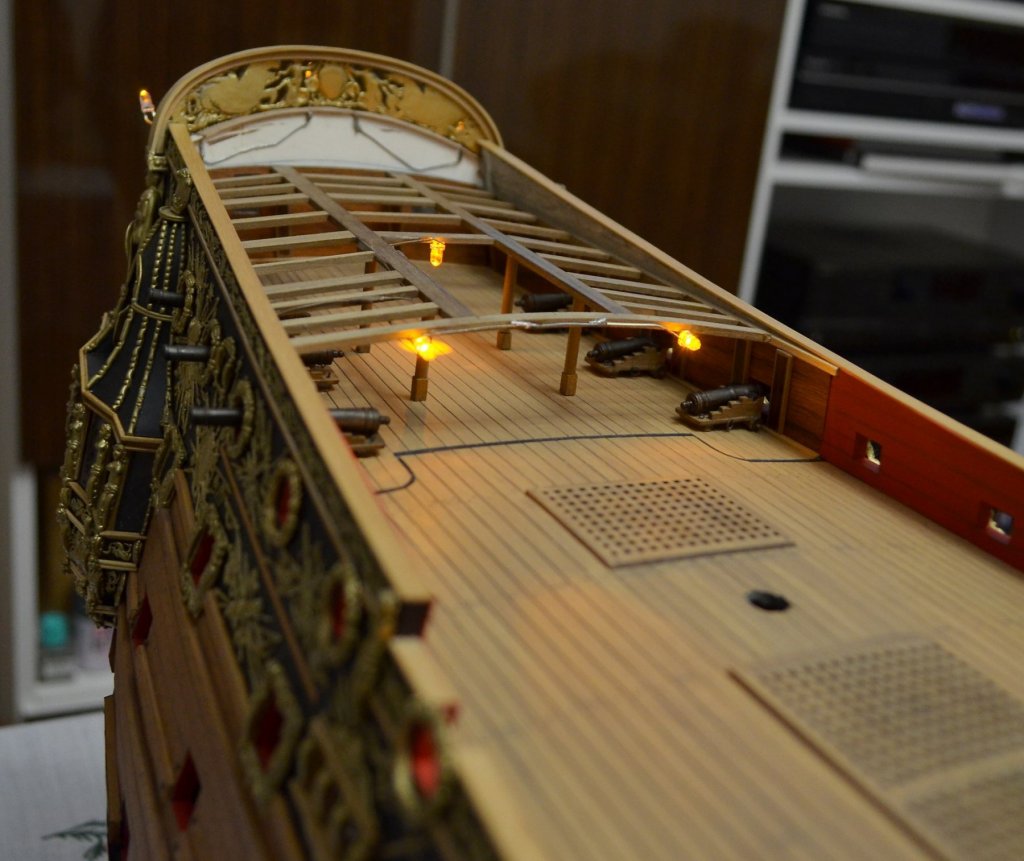
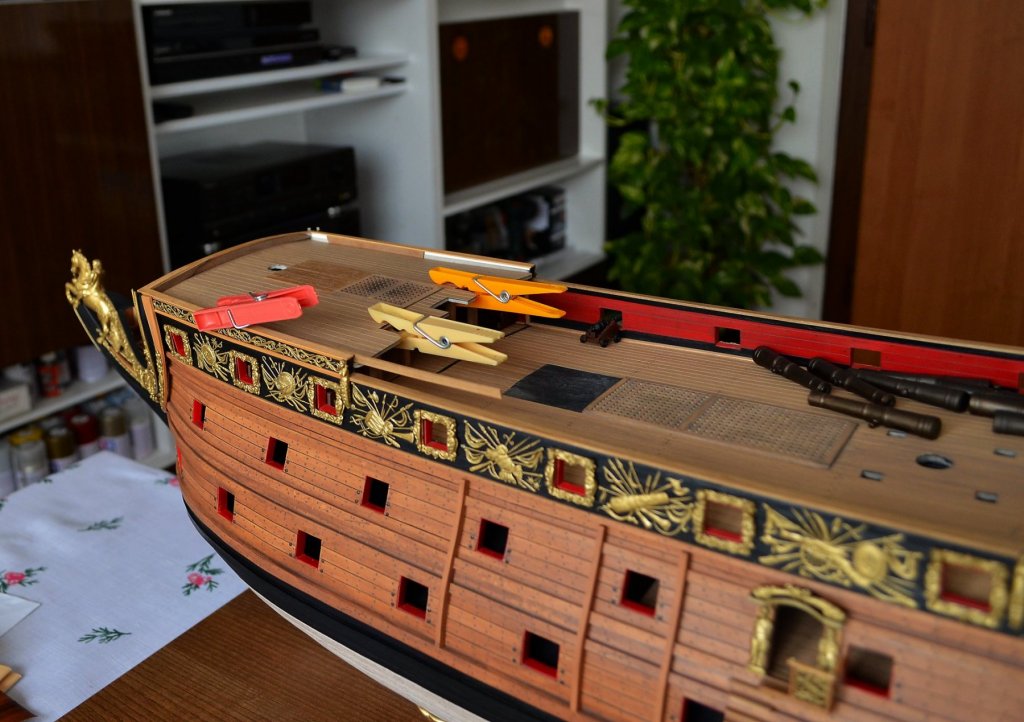
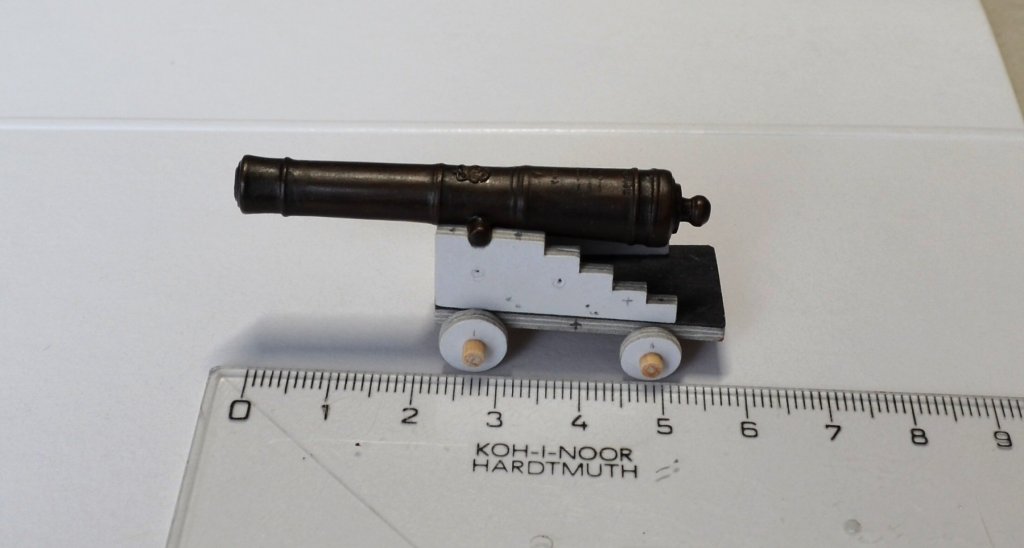
Placing the largest guns "cannon-of-seven" in the hull. The carriages were placed into the hull separately and then I added cannon barrels to them. It is possible to move and set them as necessary.


- 1,035 replies
-
- 25
-
-
- royal katherine
- ship of the line
- (and 1 more)
-
HMS ROYAL KATHERINE 1664 by Doris - 1/55 - CARD
DORIS replied to DORIS's topic in - Build logs for subjects built 1501 - 1750


- 1,035 replies
-
- 29
-
-
- royal katherine
- ship of the line
- (and 1 more)
-
HMS ROYAL KATHERINE 1664 by Doris - 1/55 - CARD
DORIS replied to DORIS's topic in - Build logs for subjects built 1501 - 1750


- 1,035 replies
-
- 17
-
-
- royal katherine
- ship of the line
- (and 1 more)
-
HMS ROYAL KATHERINE 1664 by Doris - 1/55 - CARD
DORIS replied to DORIS's topic in - Build logs for subjects built 1501 - 1750
Assembling bulkheads and railings: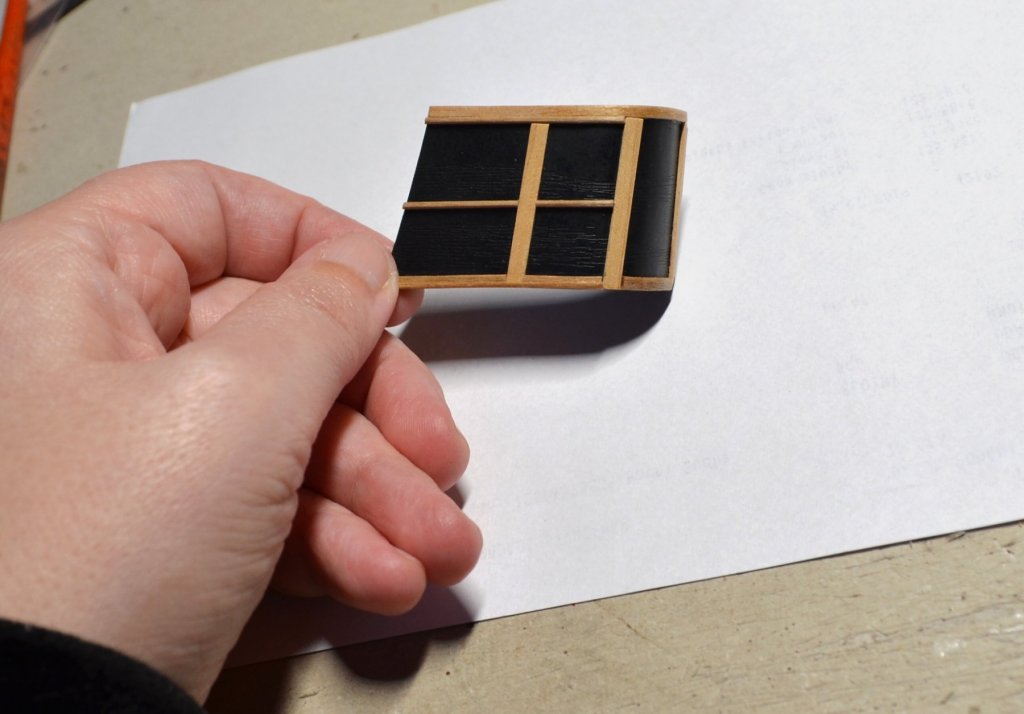


- 1,035 replies
-
- 20
-
-
- royal katherine
- ship of the line
- (and 1 more)
-
HMS ROYAL KATHERINE 1664 by Doris - 1/55 - CARD
DORIS replied to DORIS's topic in - Build logs for subjects built 1501 - 1750
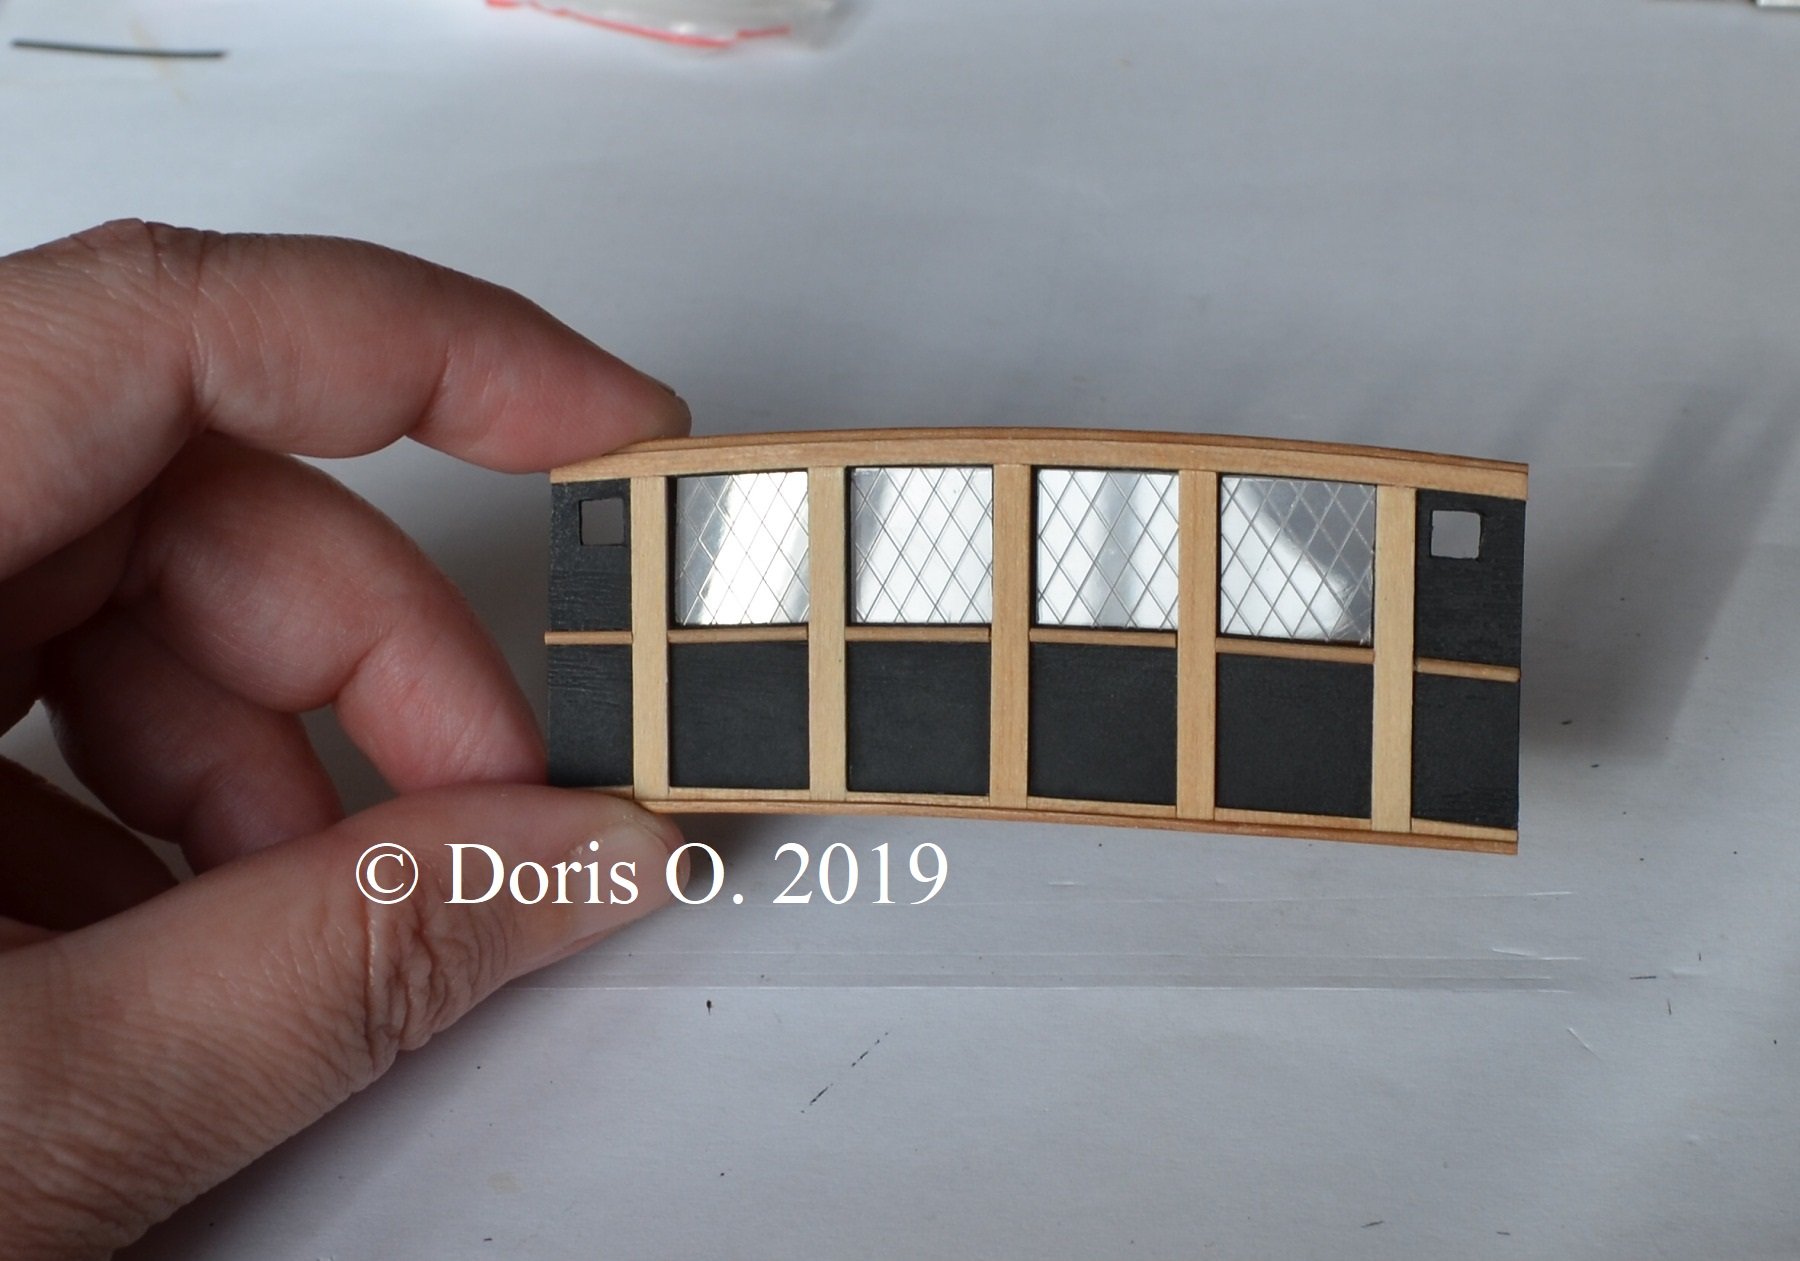
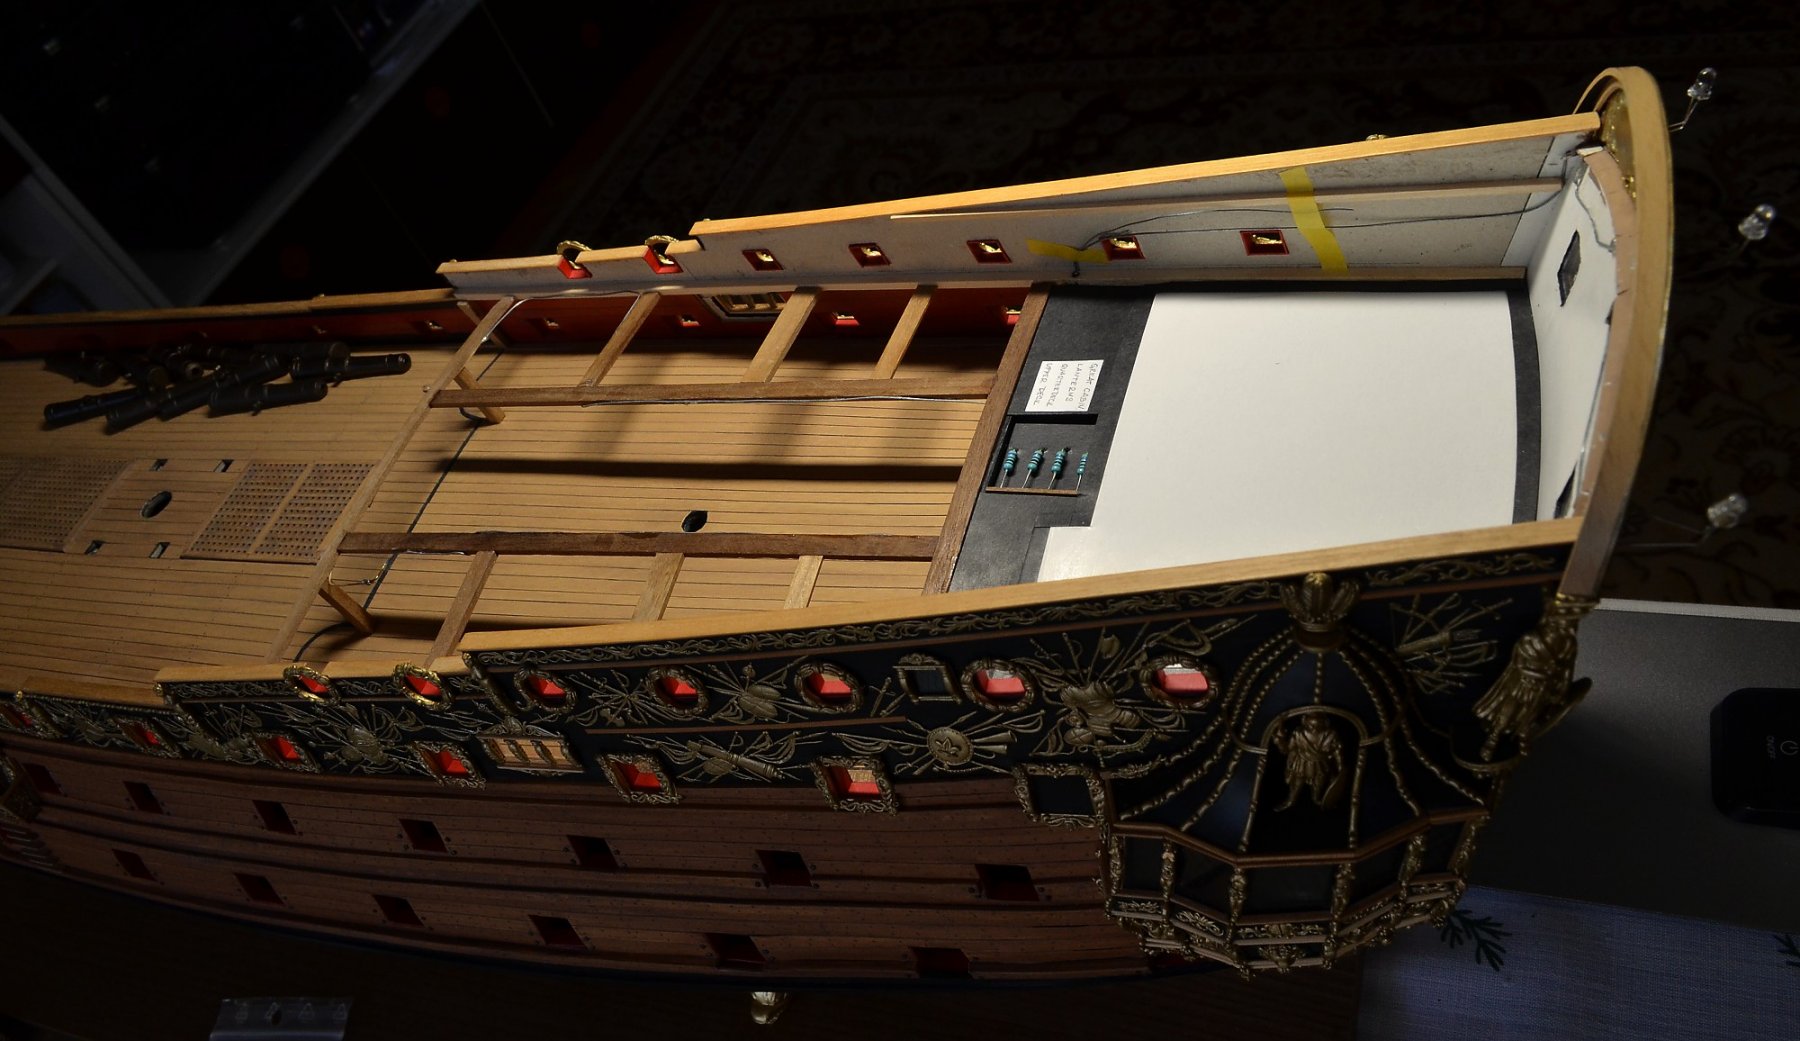
Poop deck and cabin: Guns and fitting: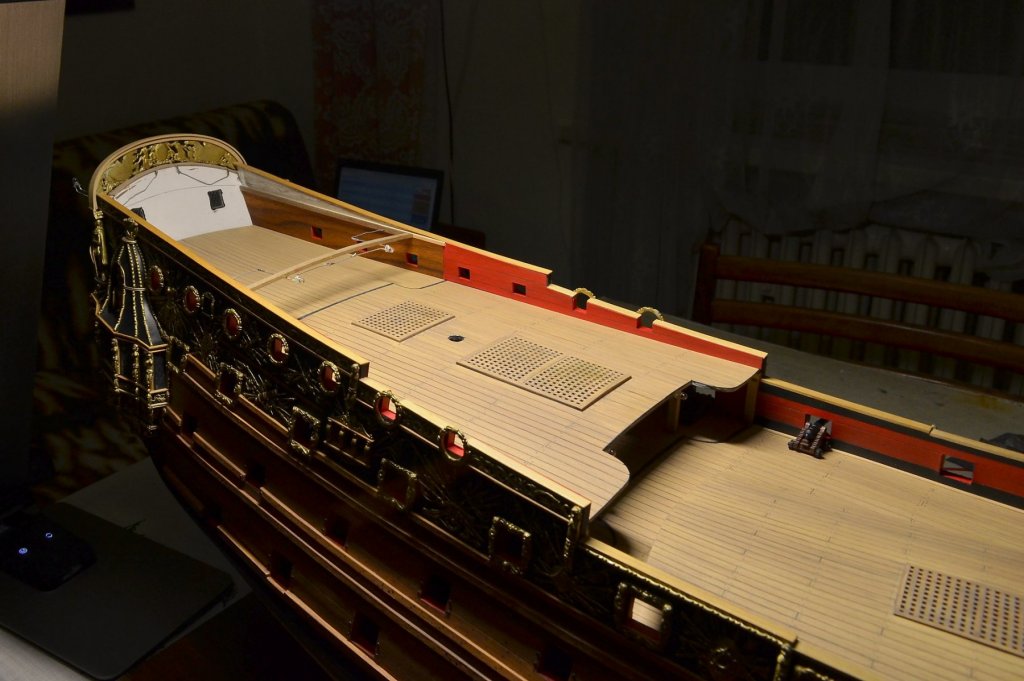


- 1,035 replies
-
- 21
-
-
- royal katherine
- ship of the line
- (and 1 more)
-
HMS ROYAL KATHERINE 1664 by Doris - 1/55 - CARD
DORIS replied to DORIS's topic in - Build logs for subjects built 1501 - 1750
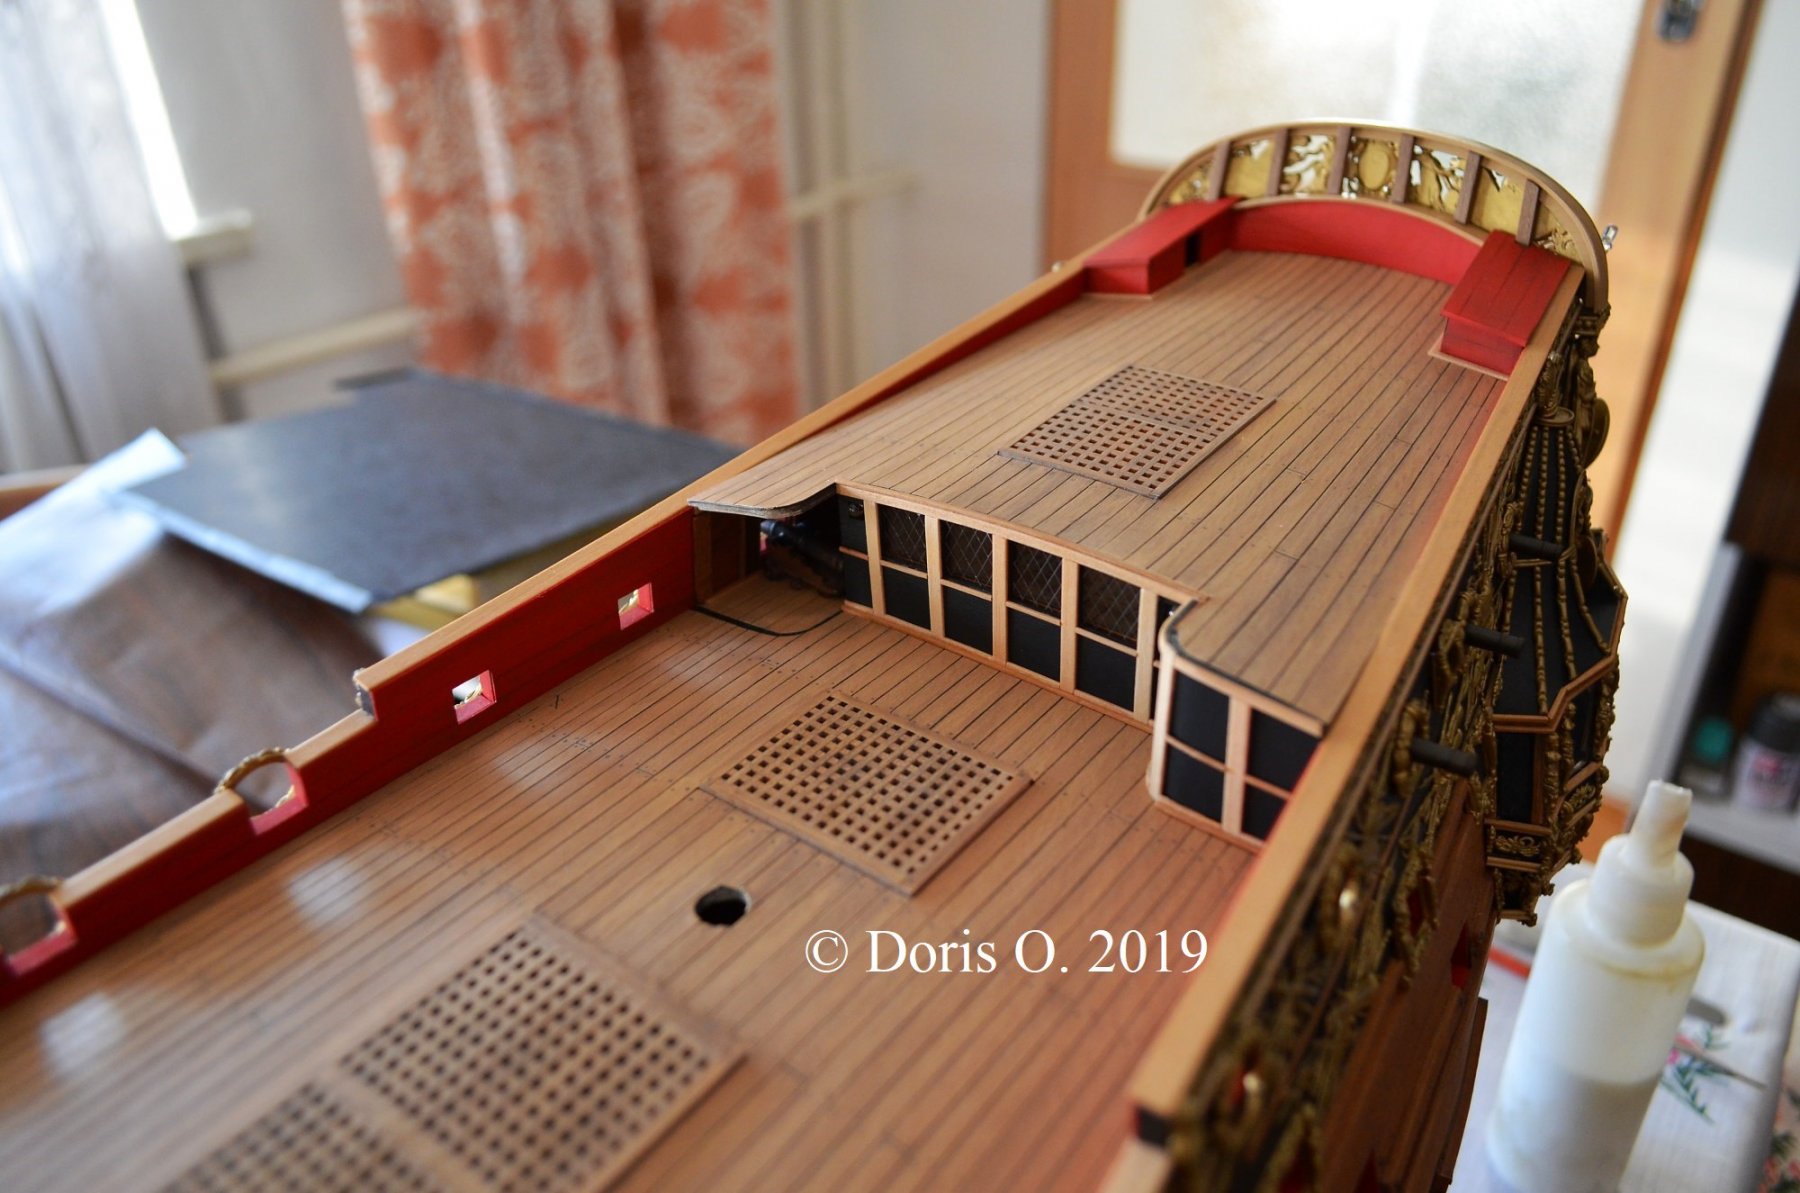
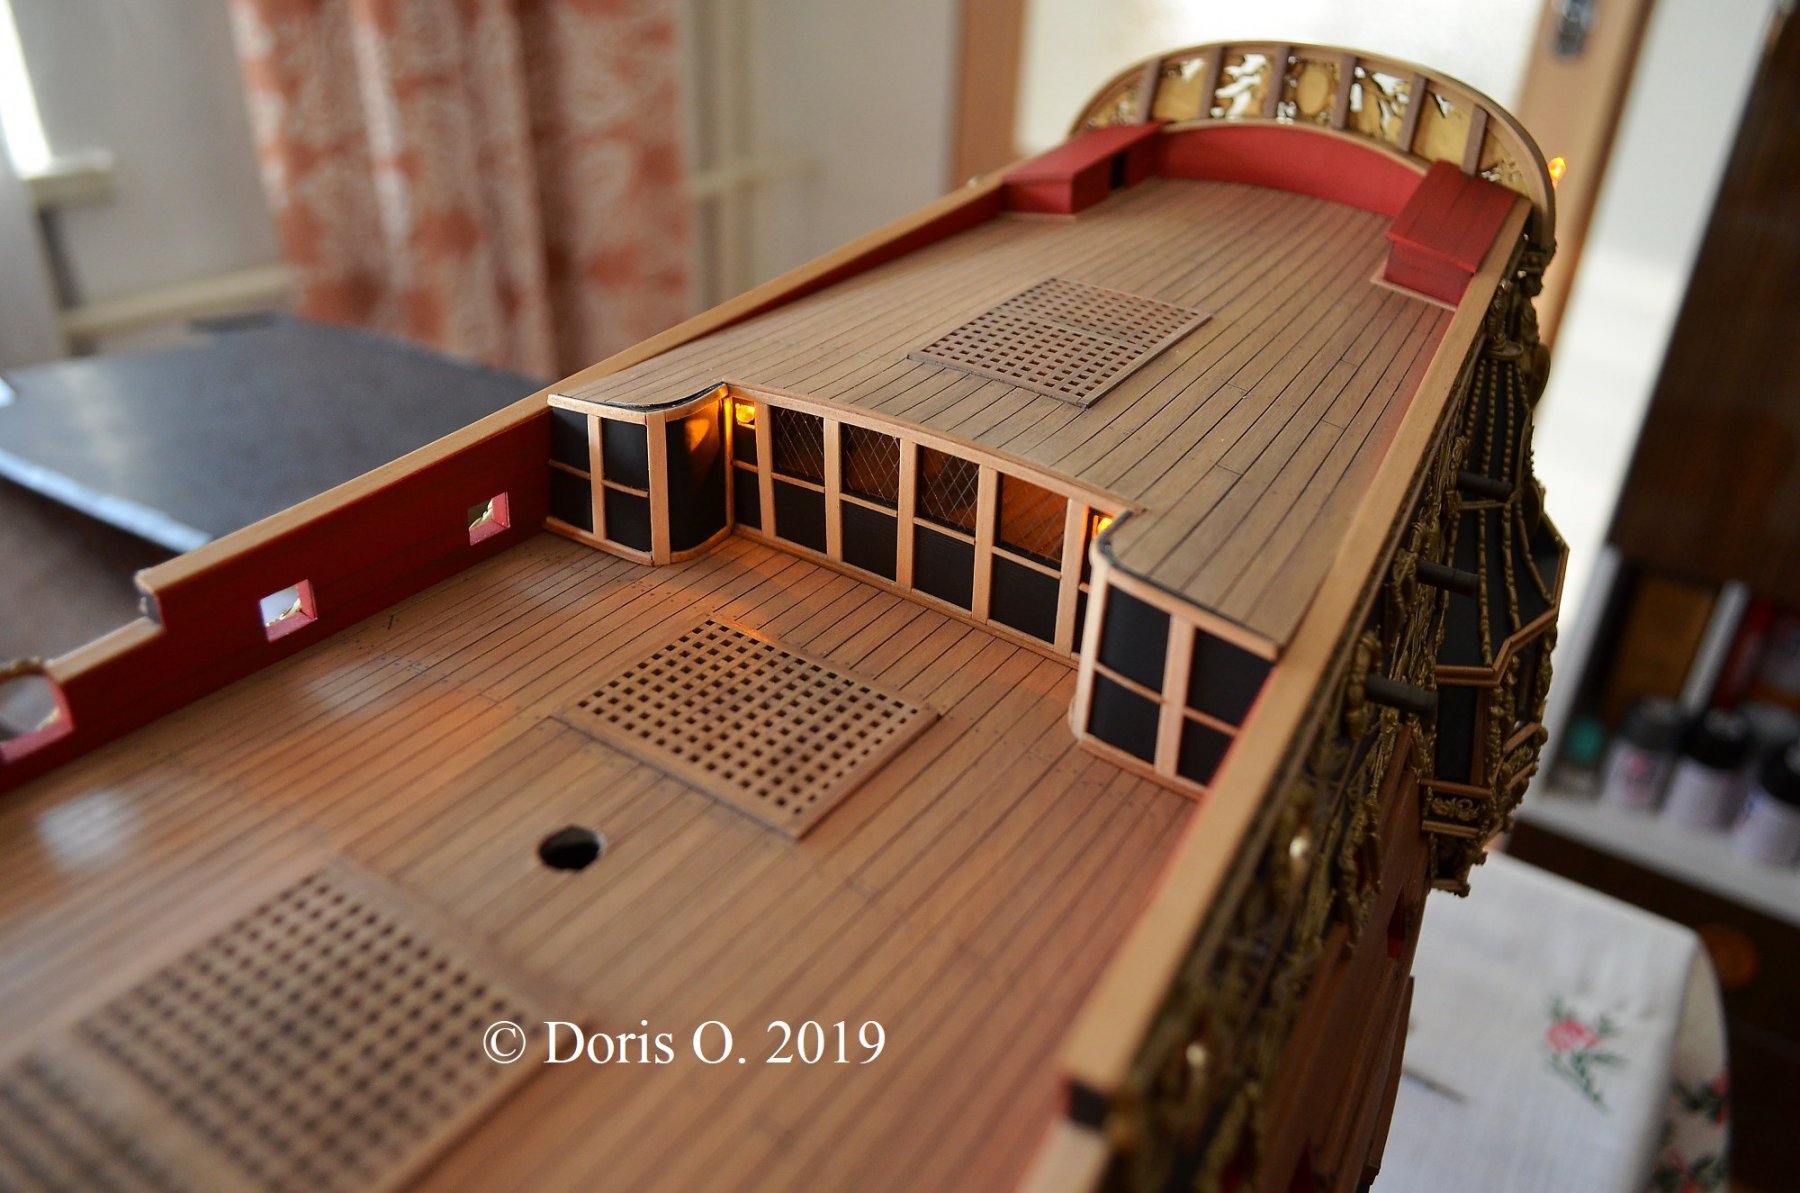
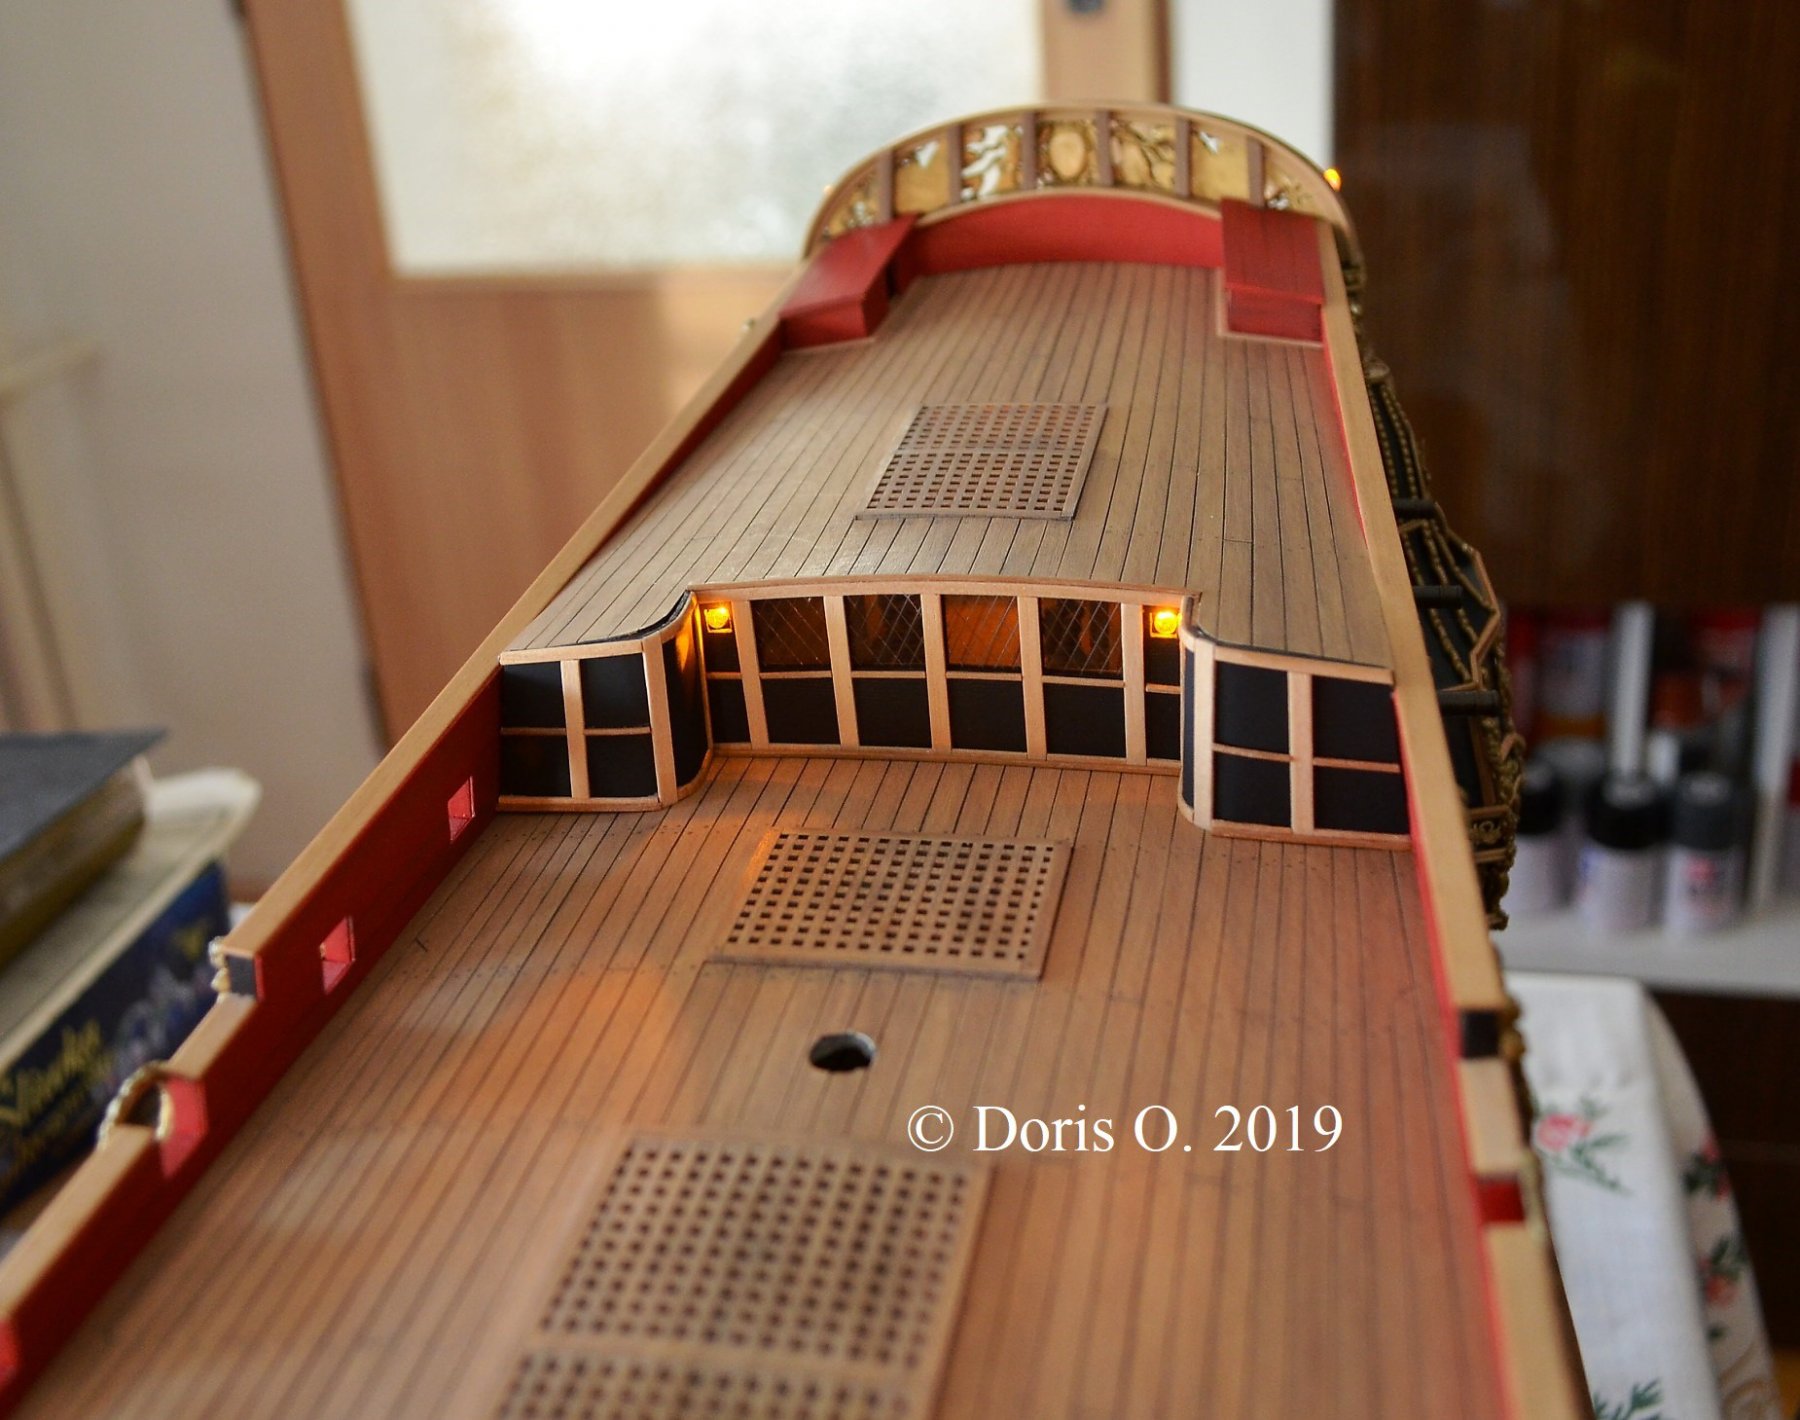
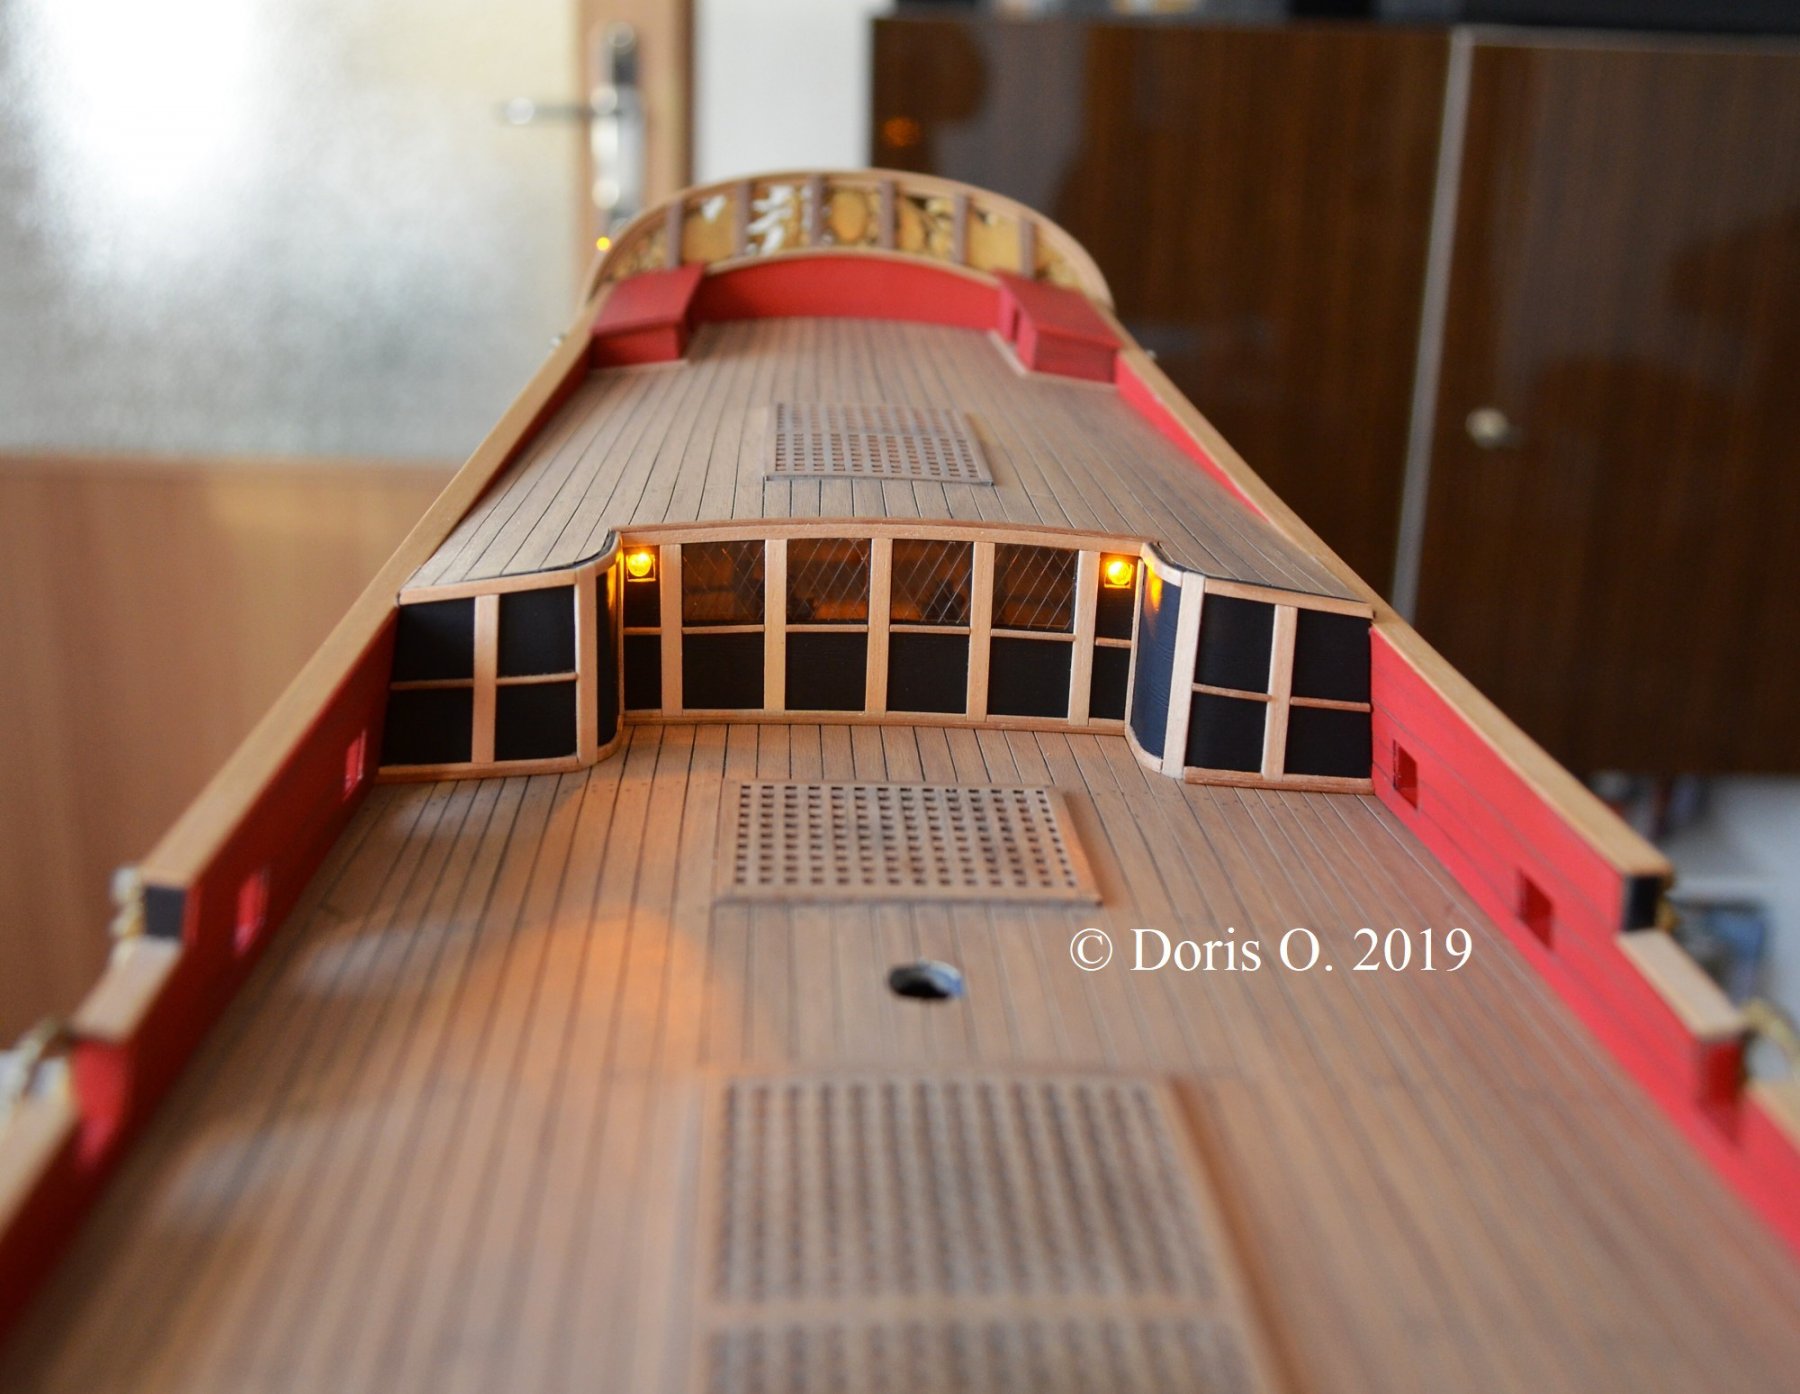
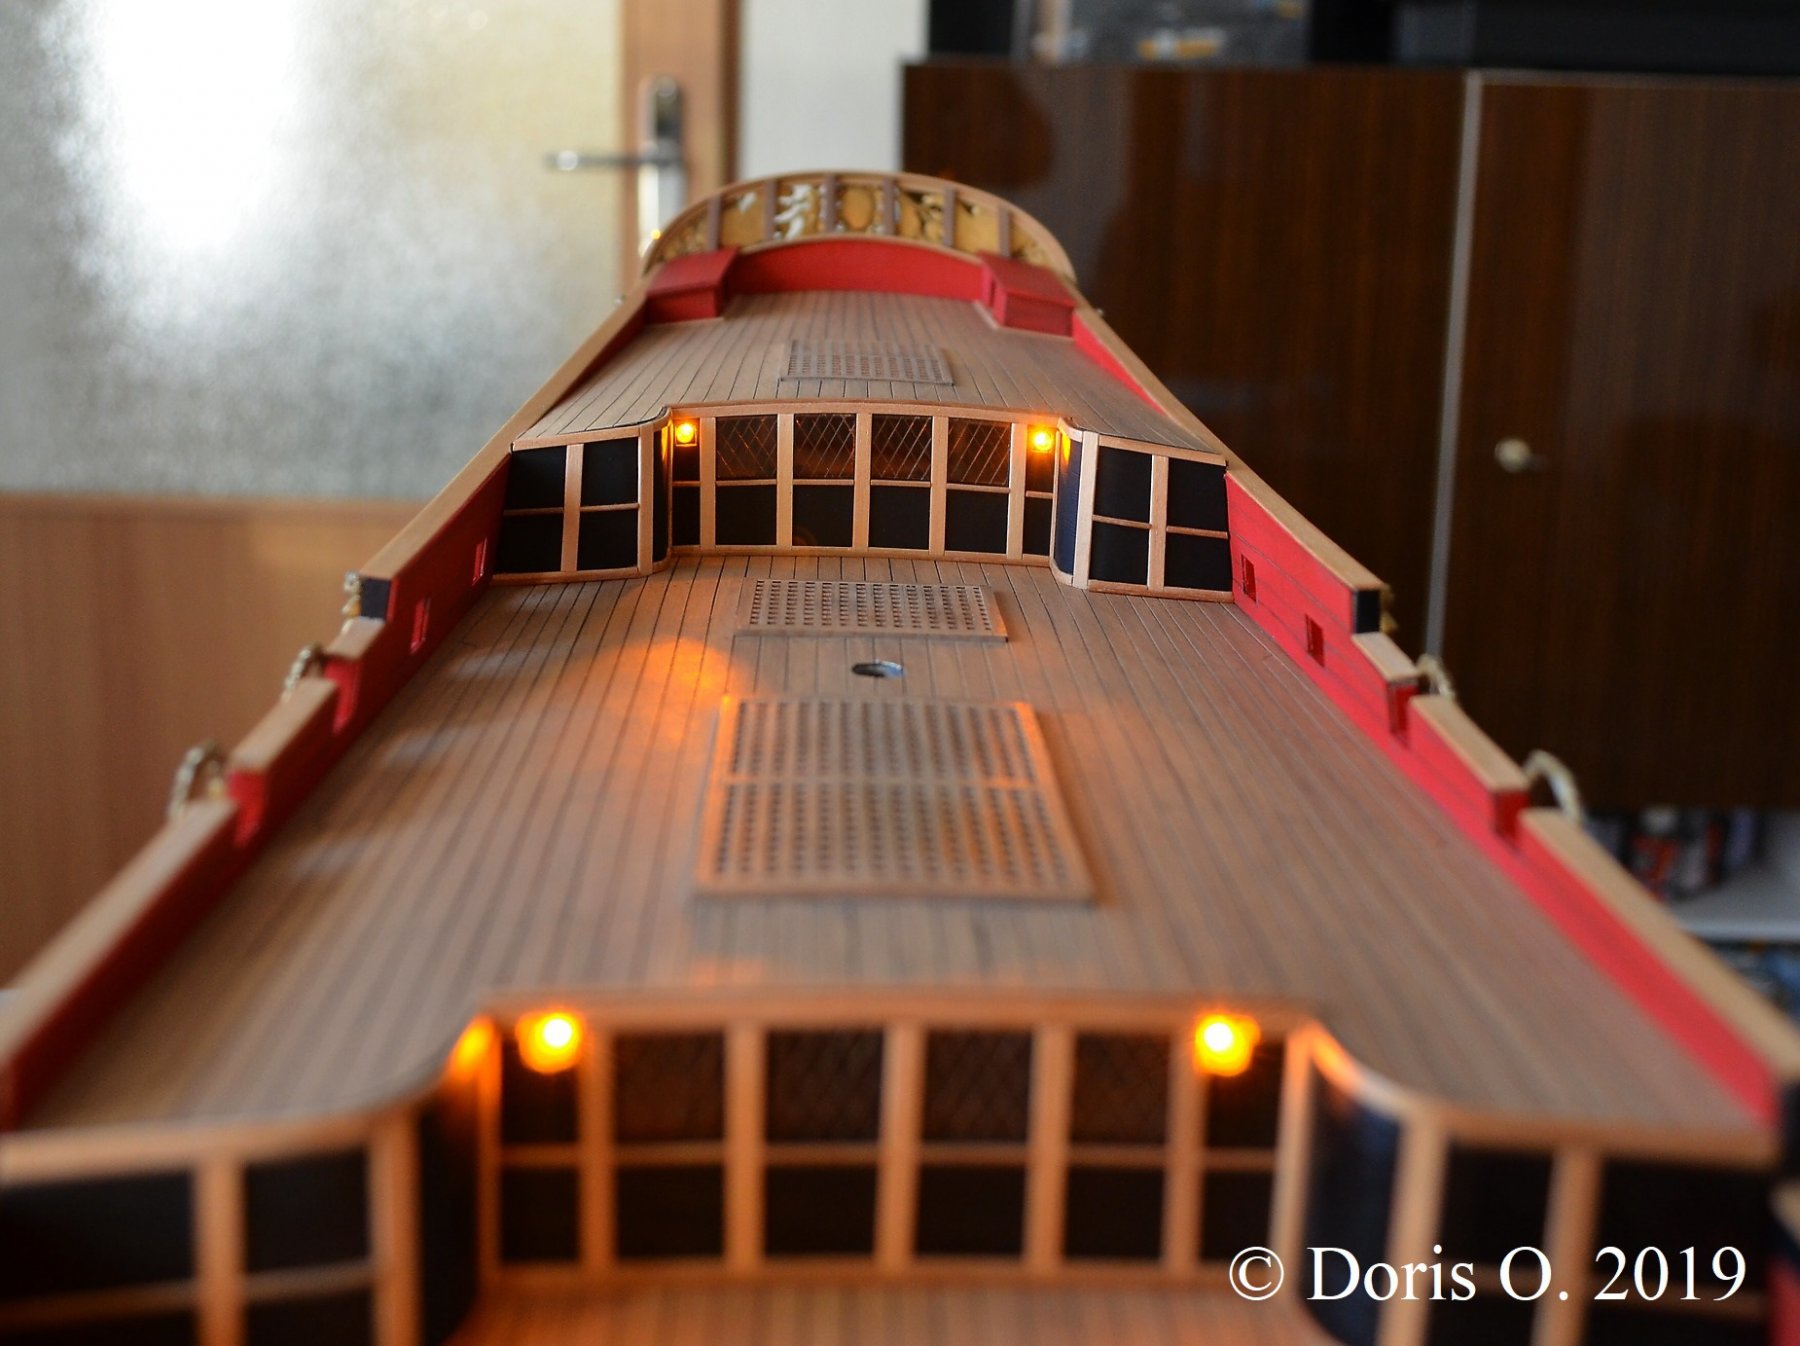
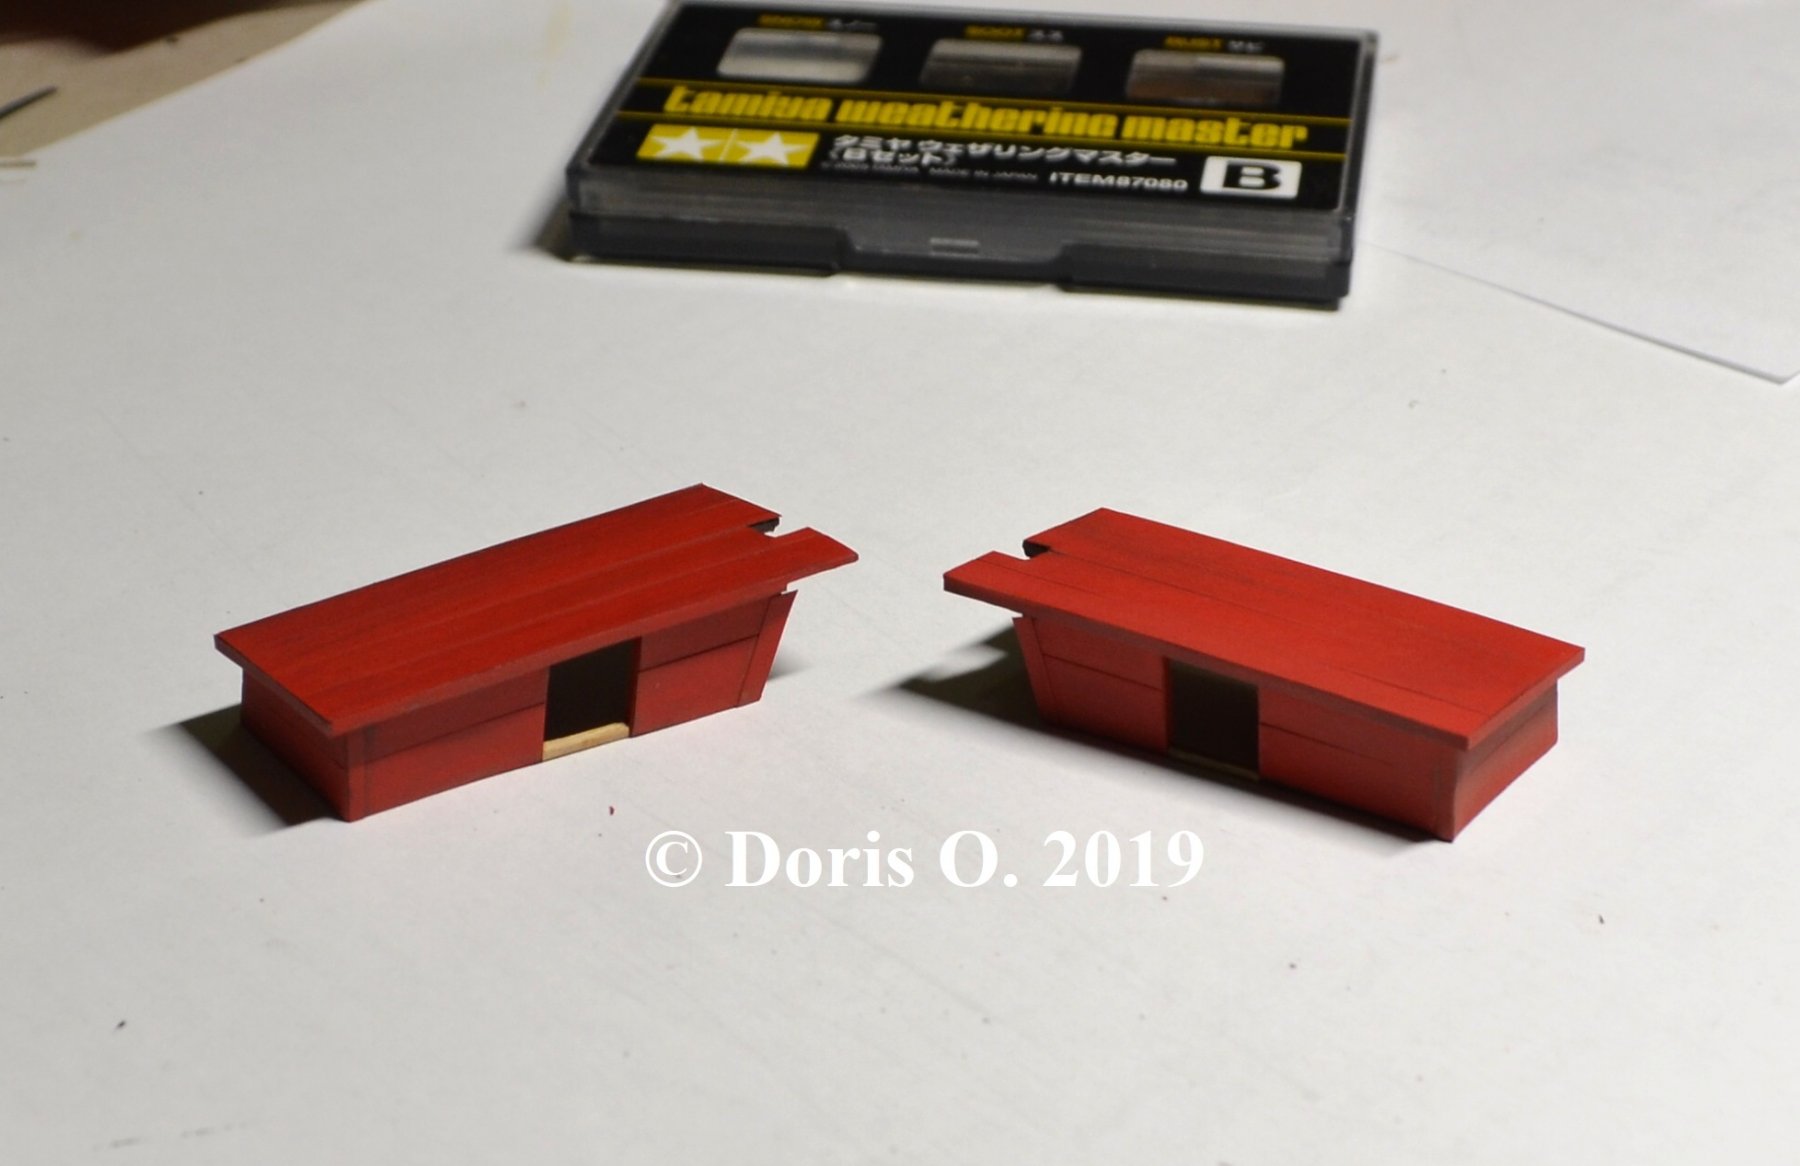
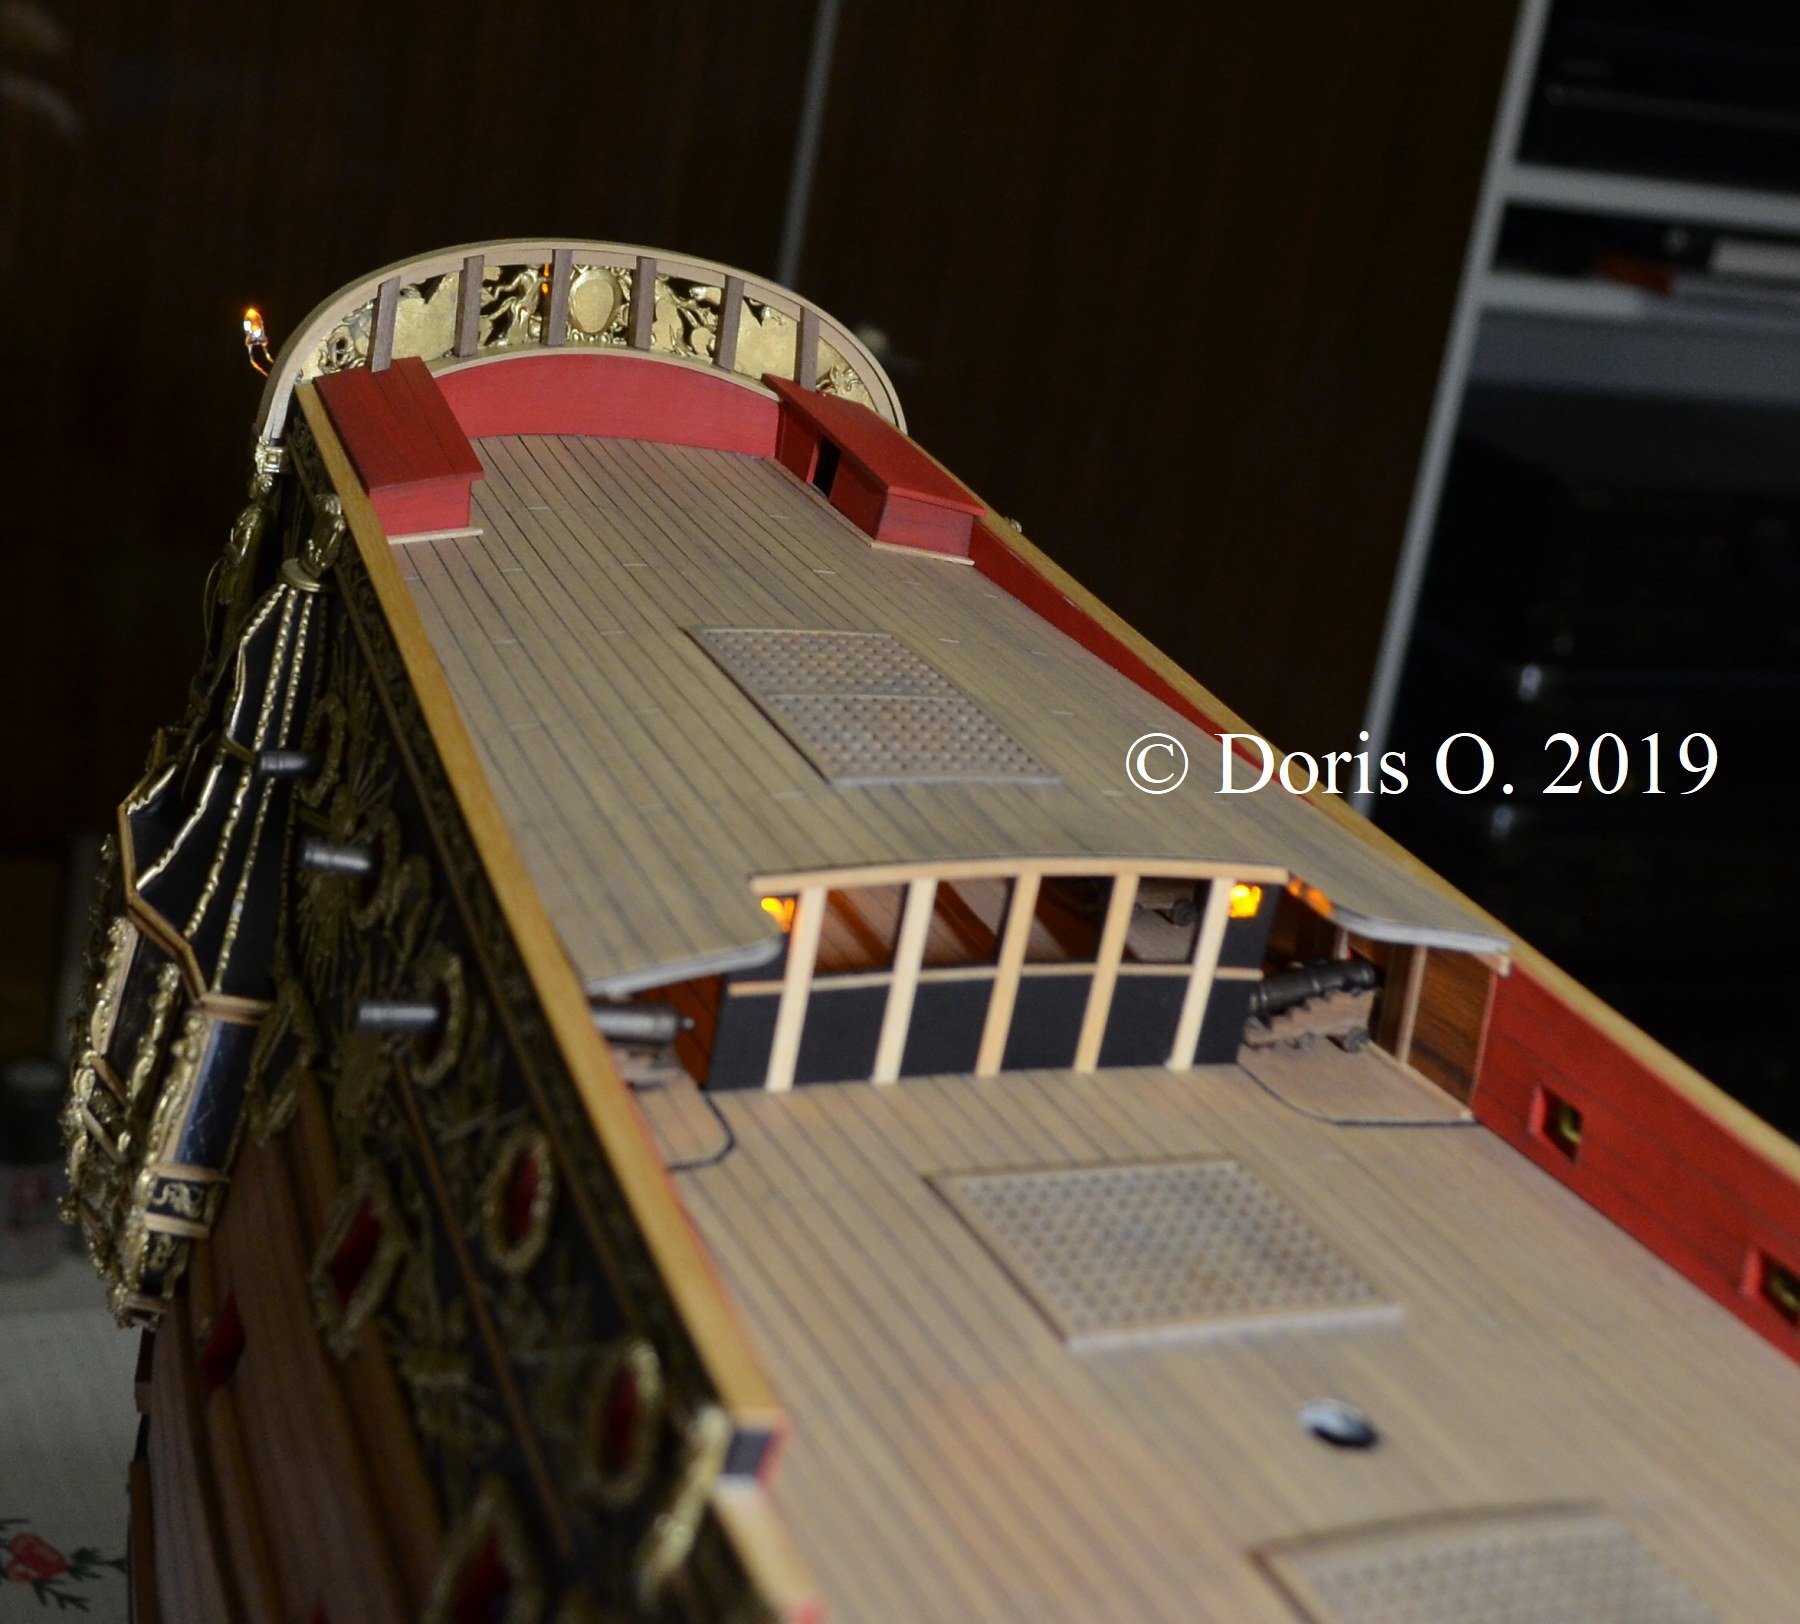
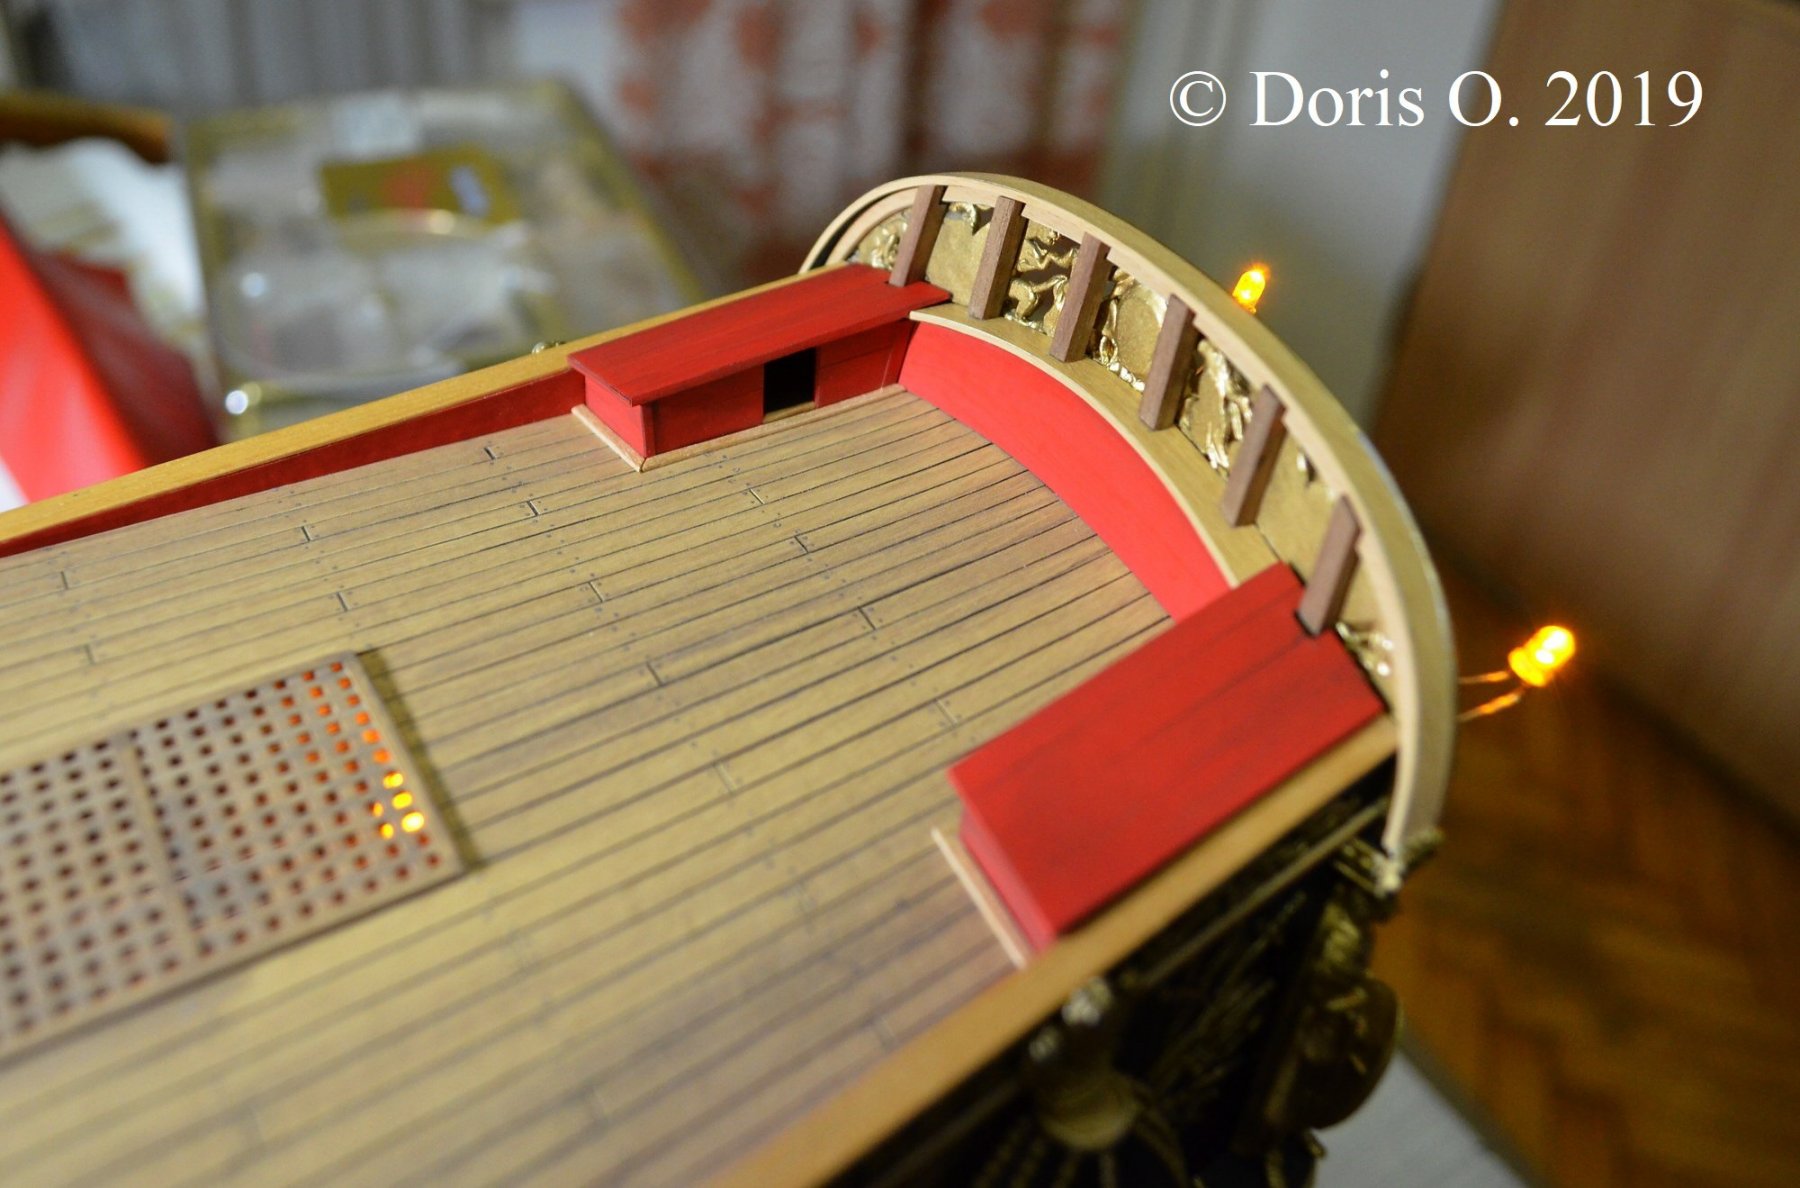
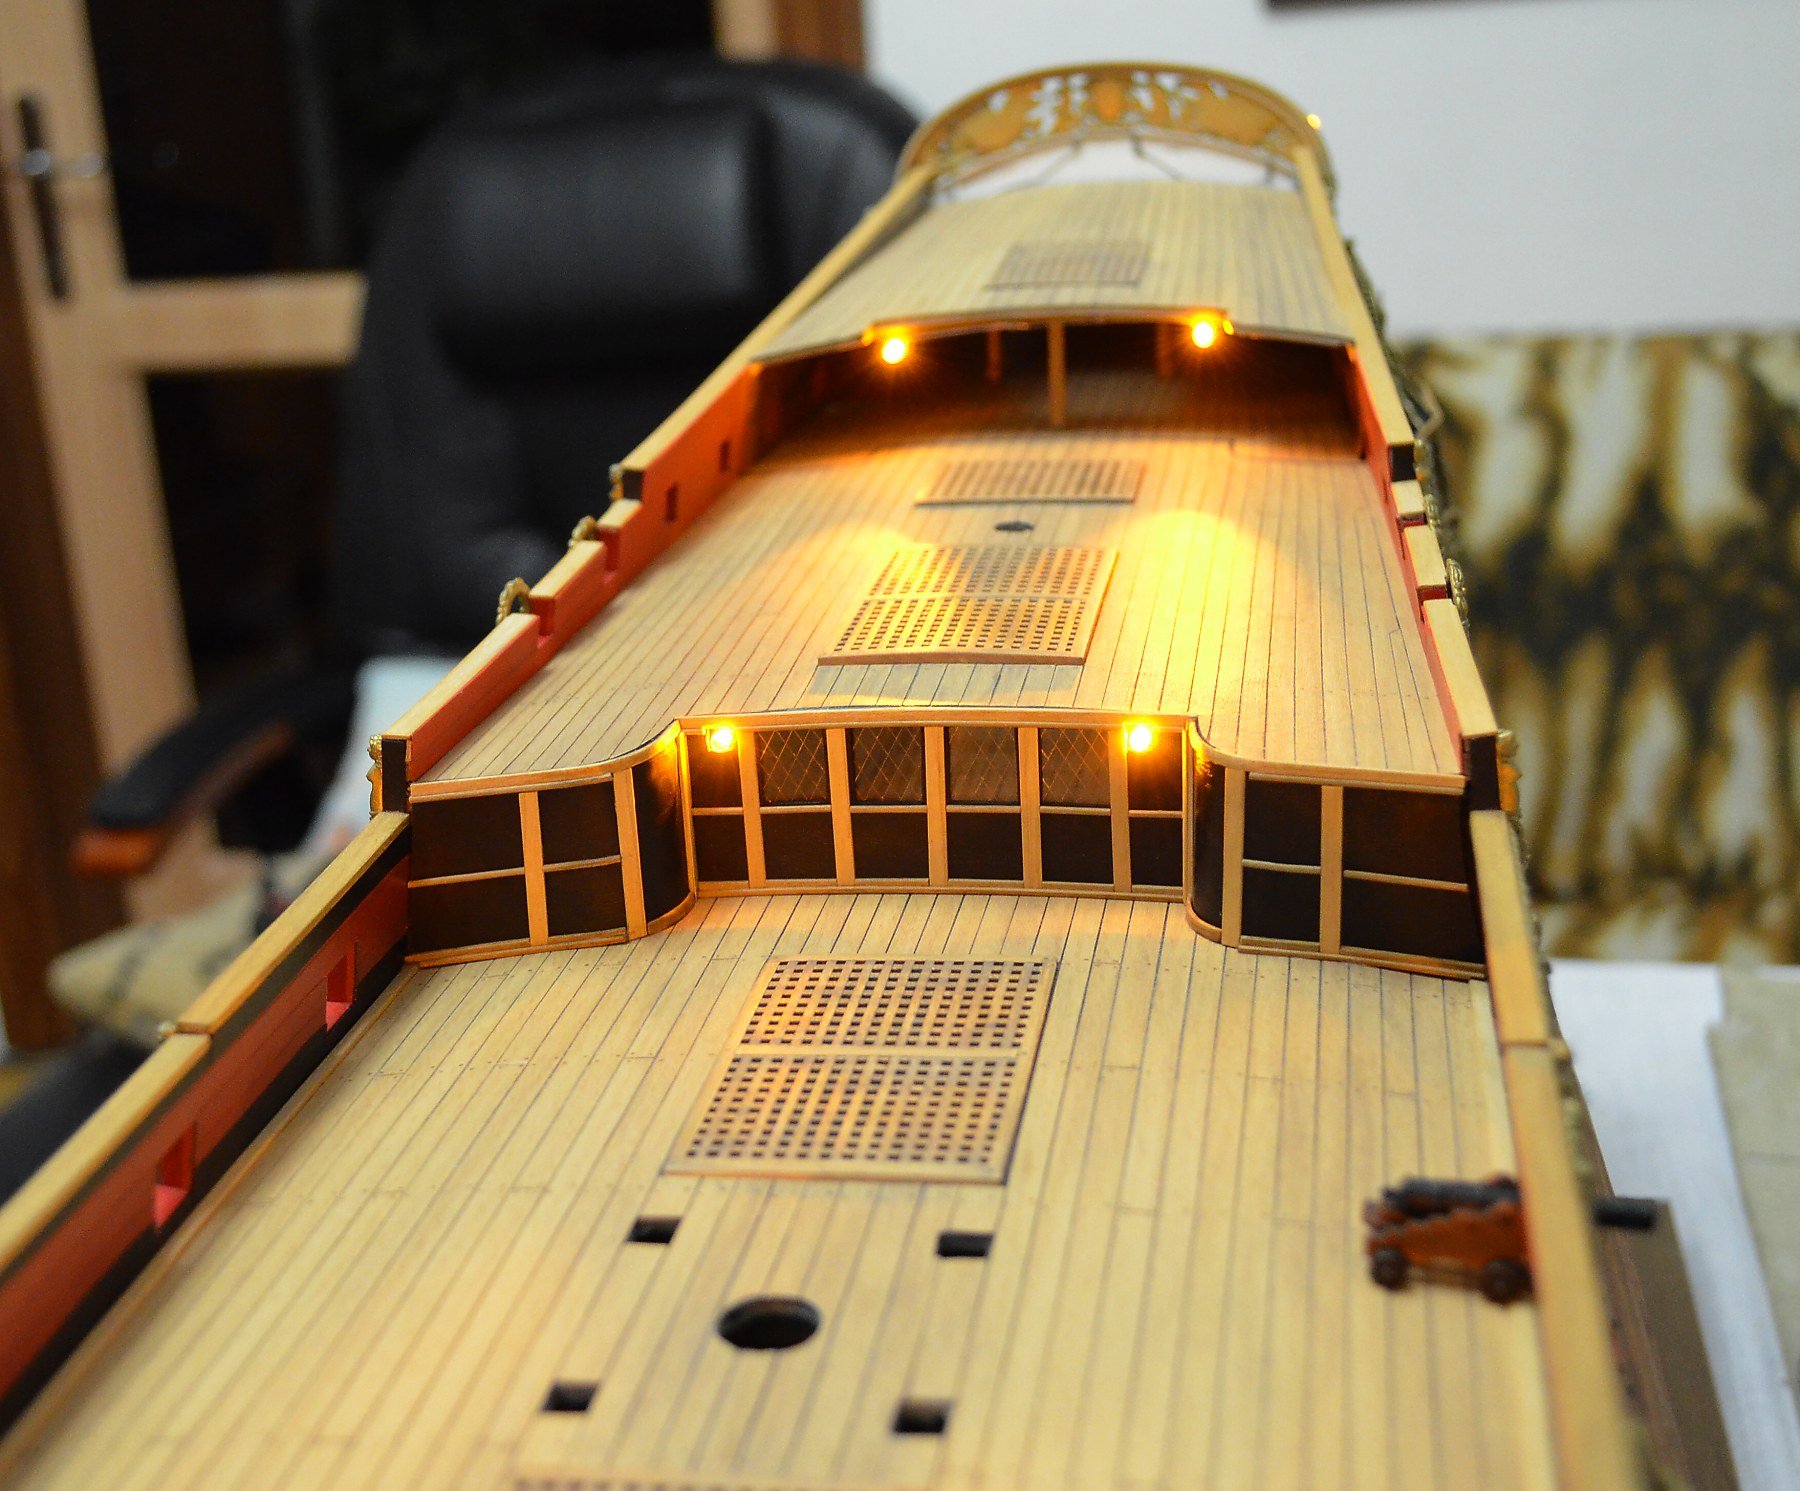
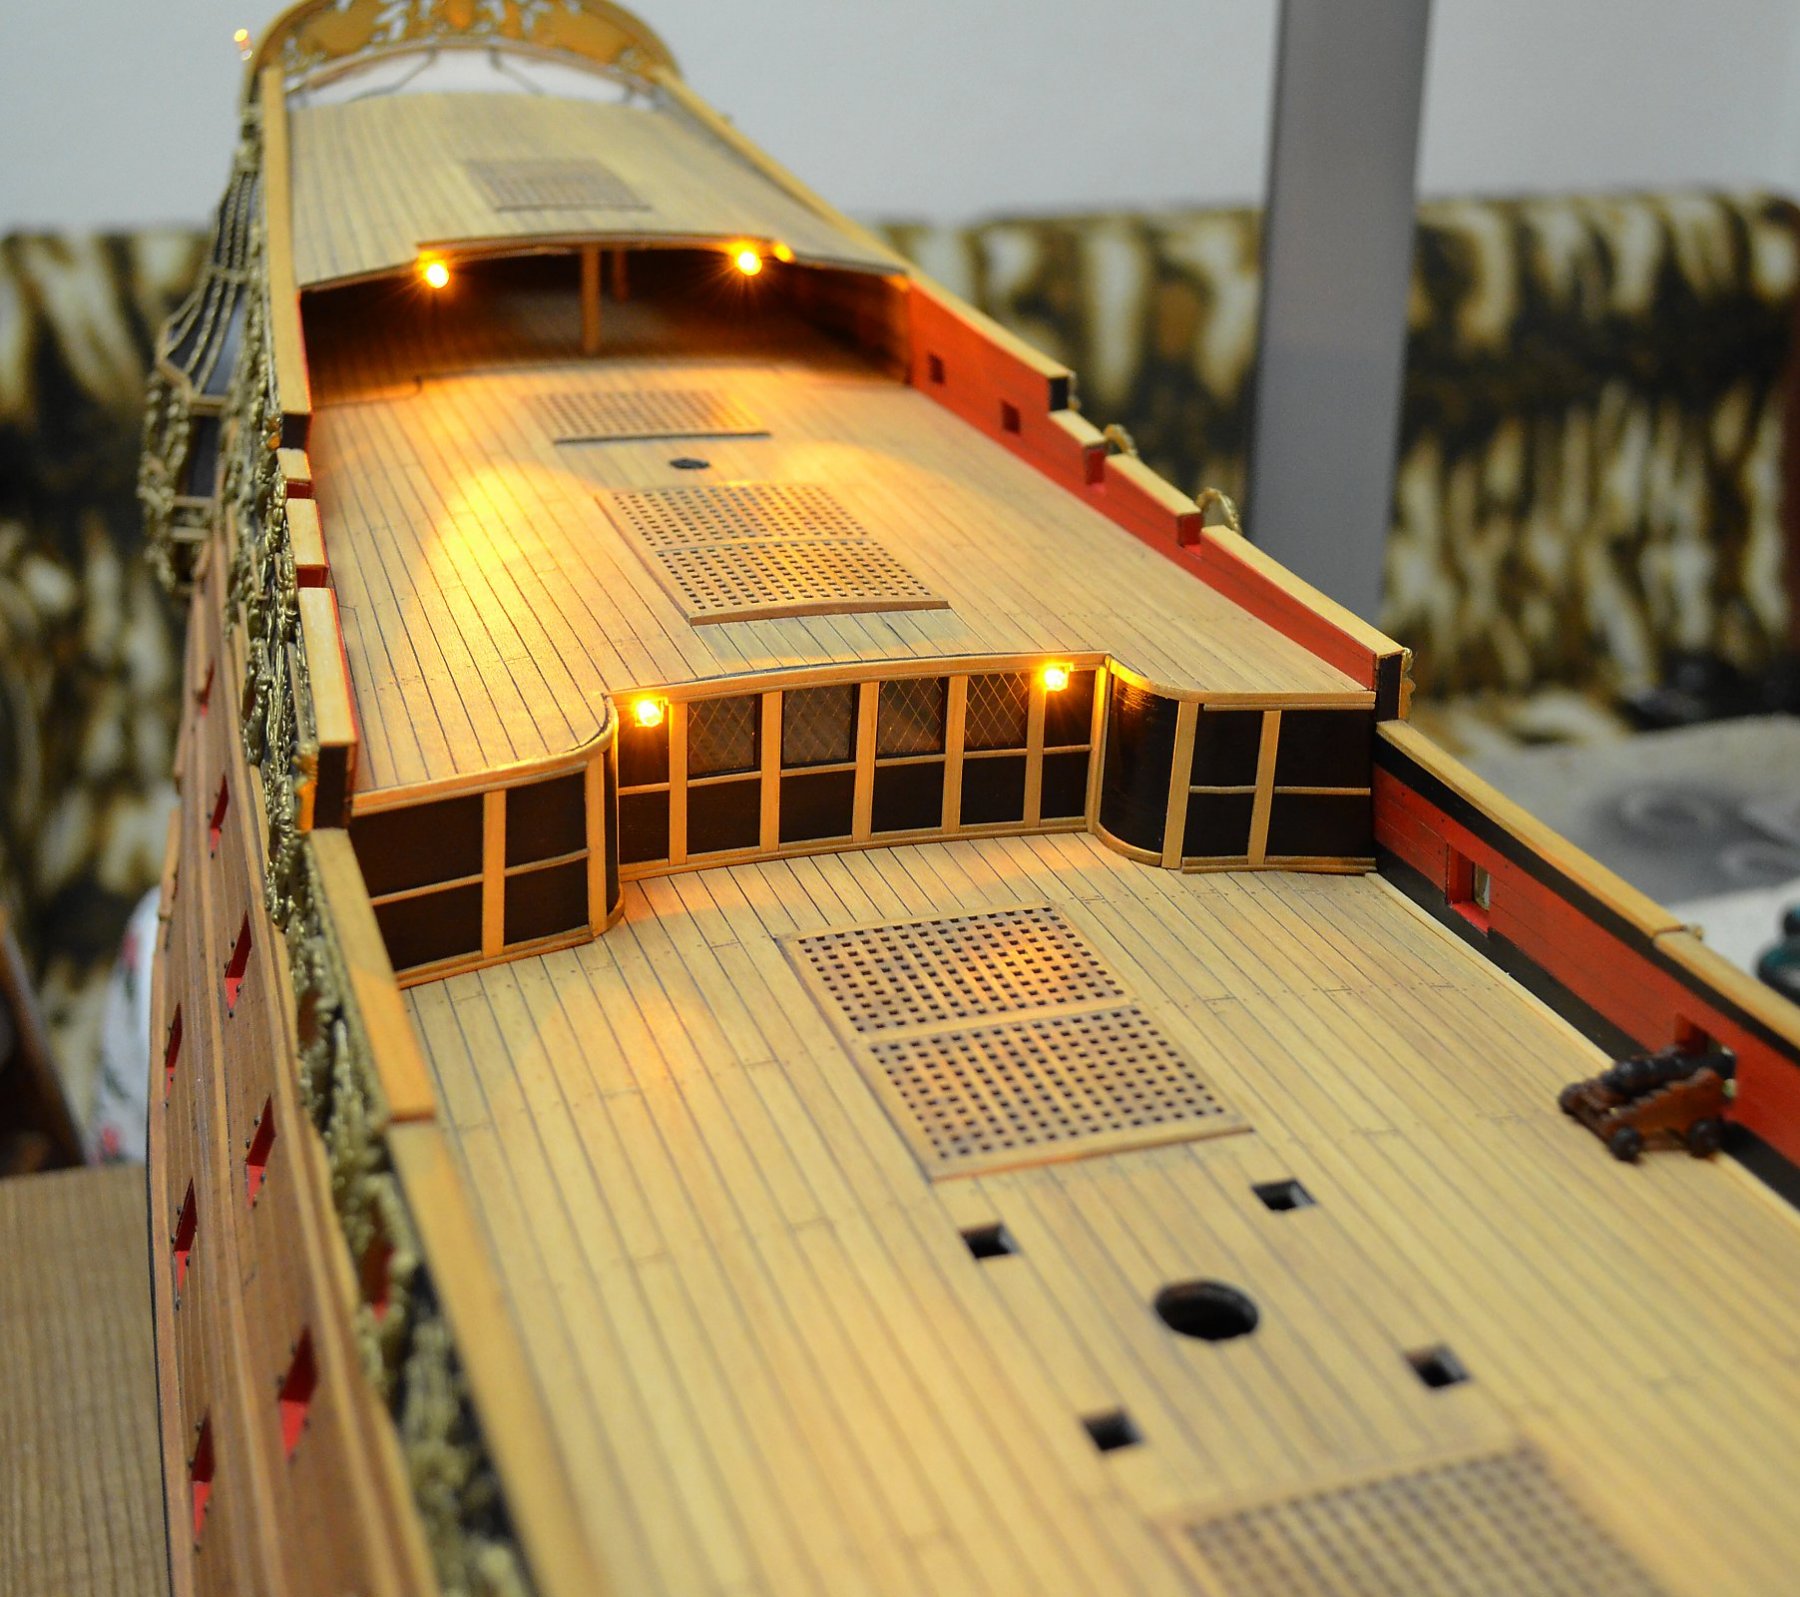
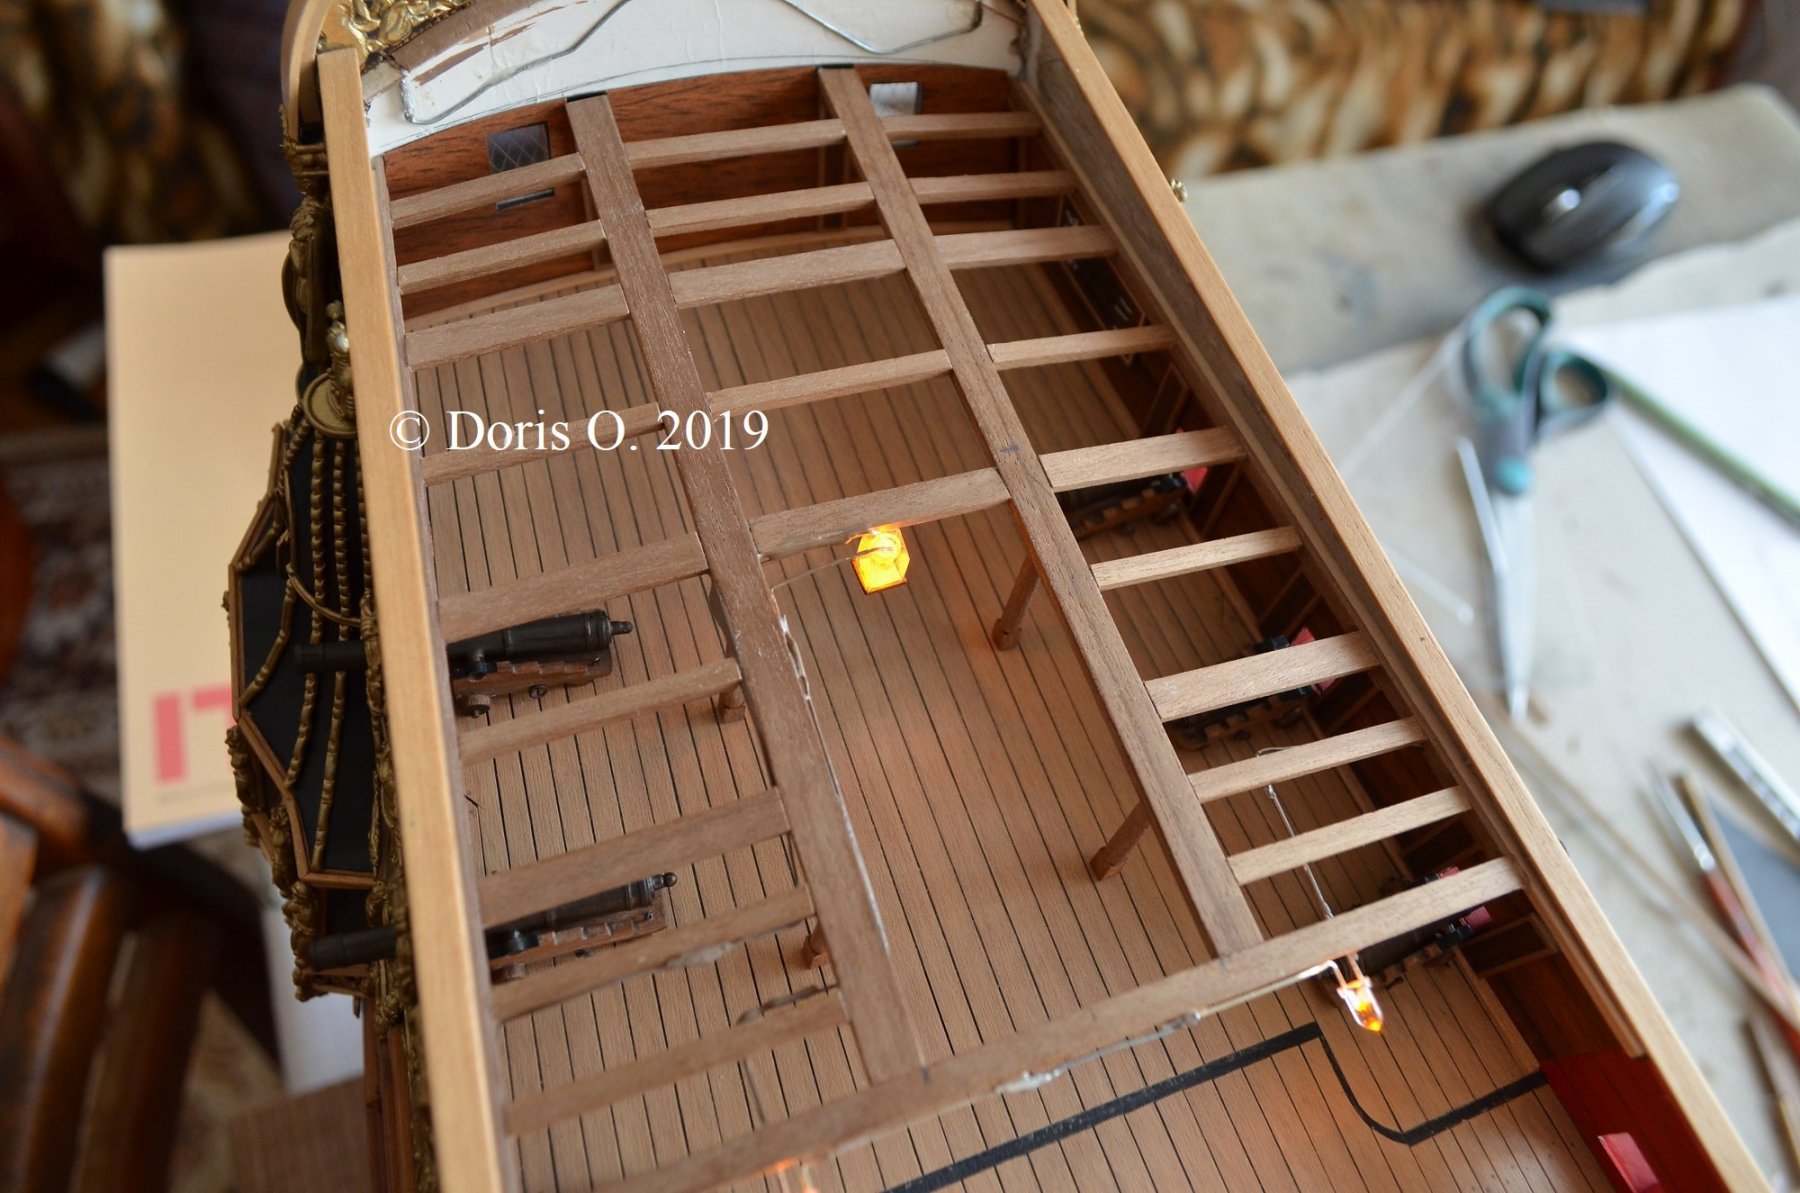
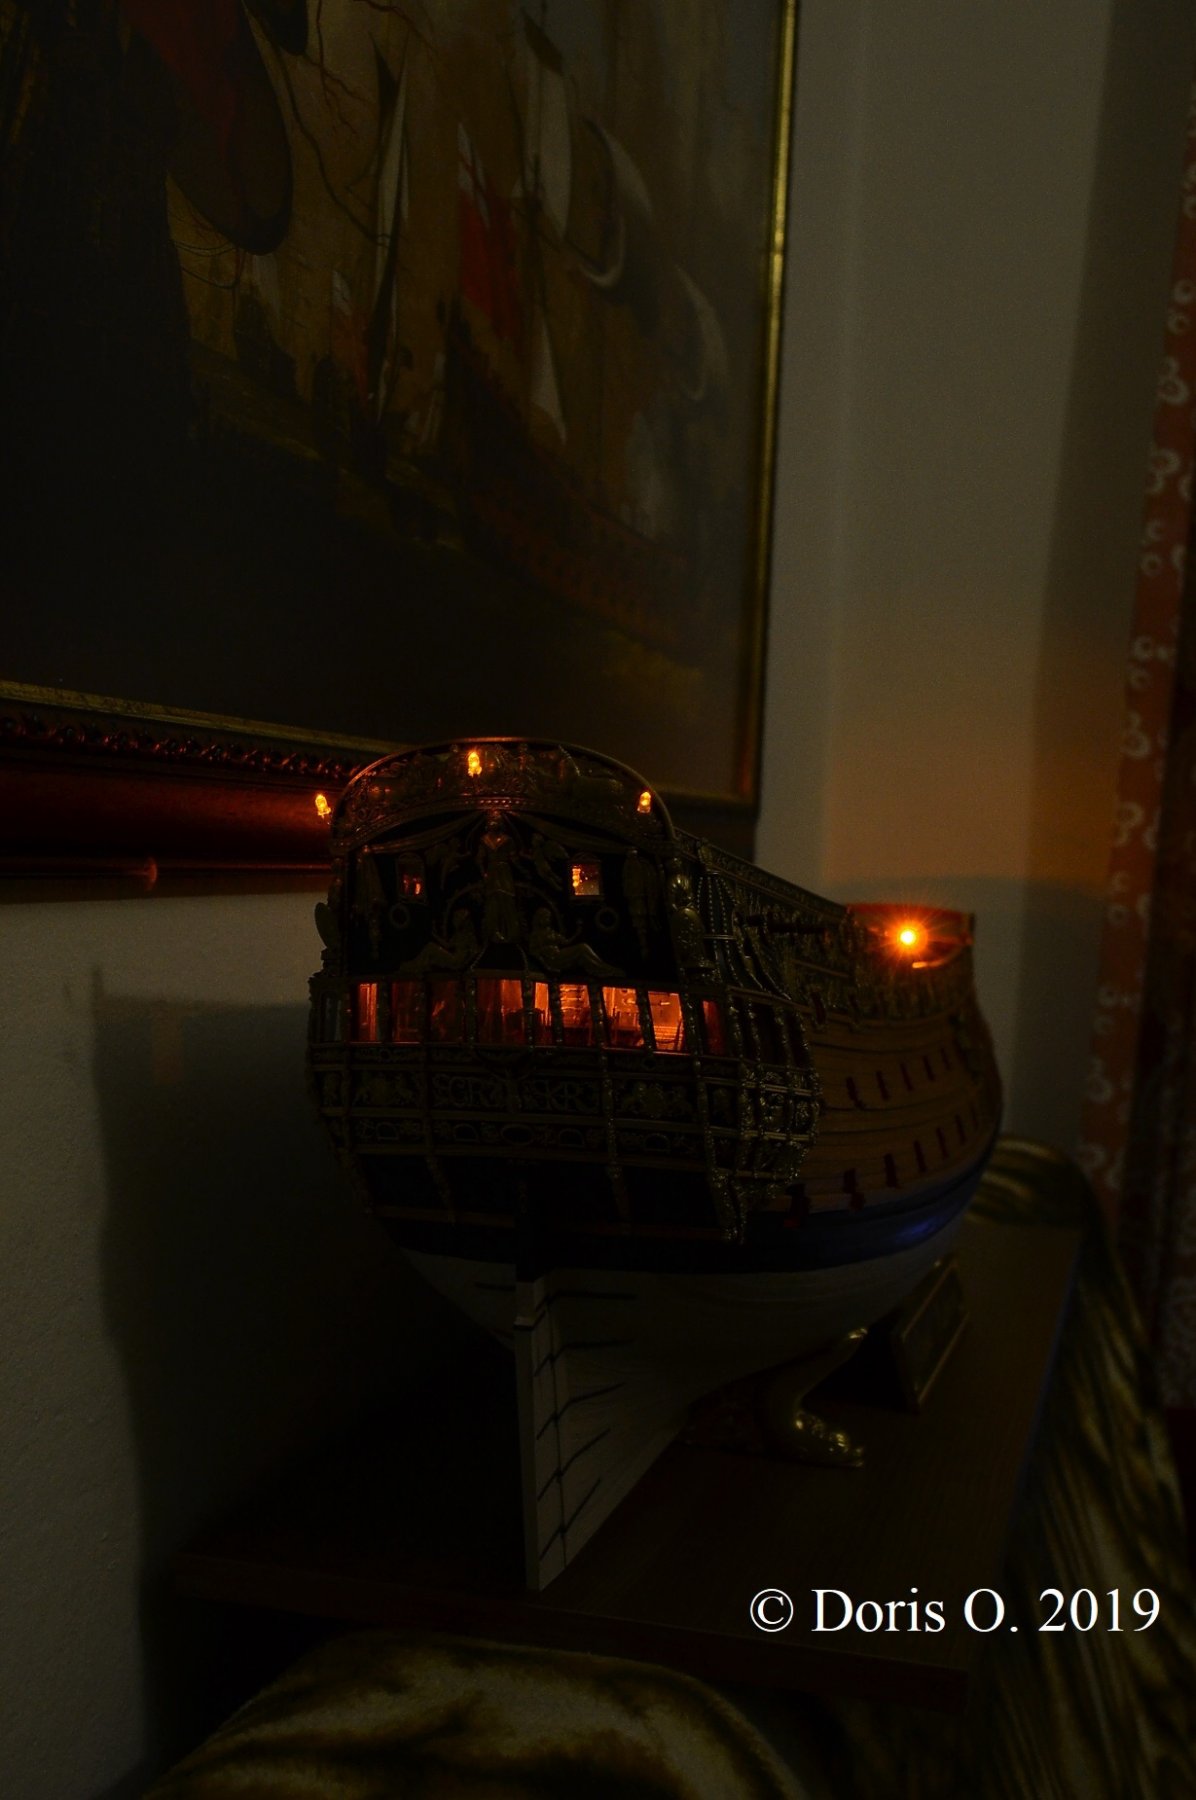
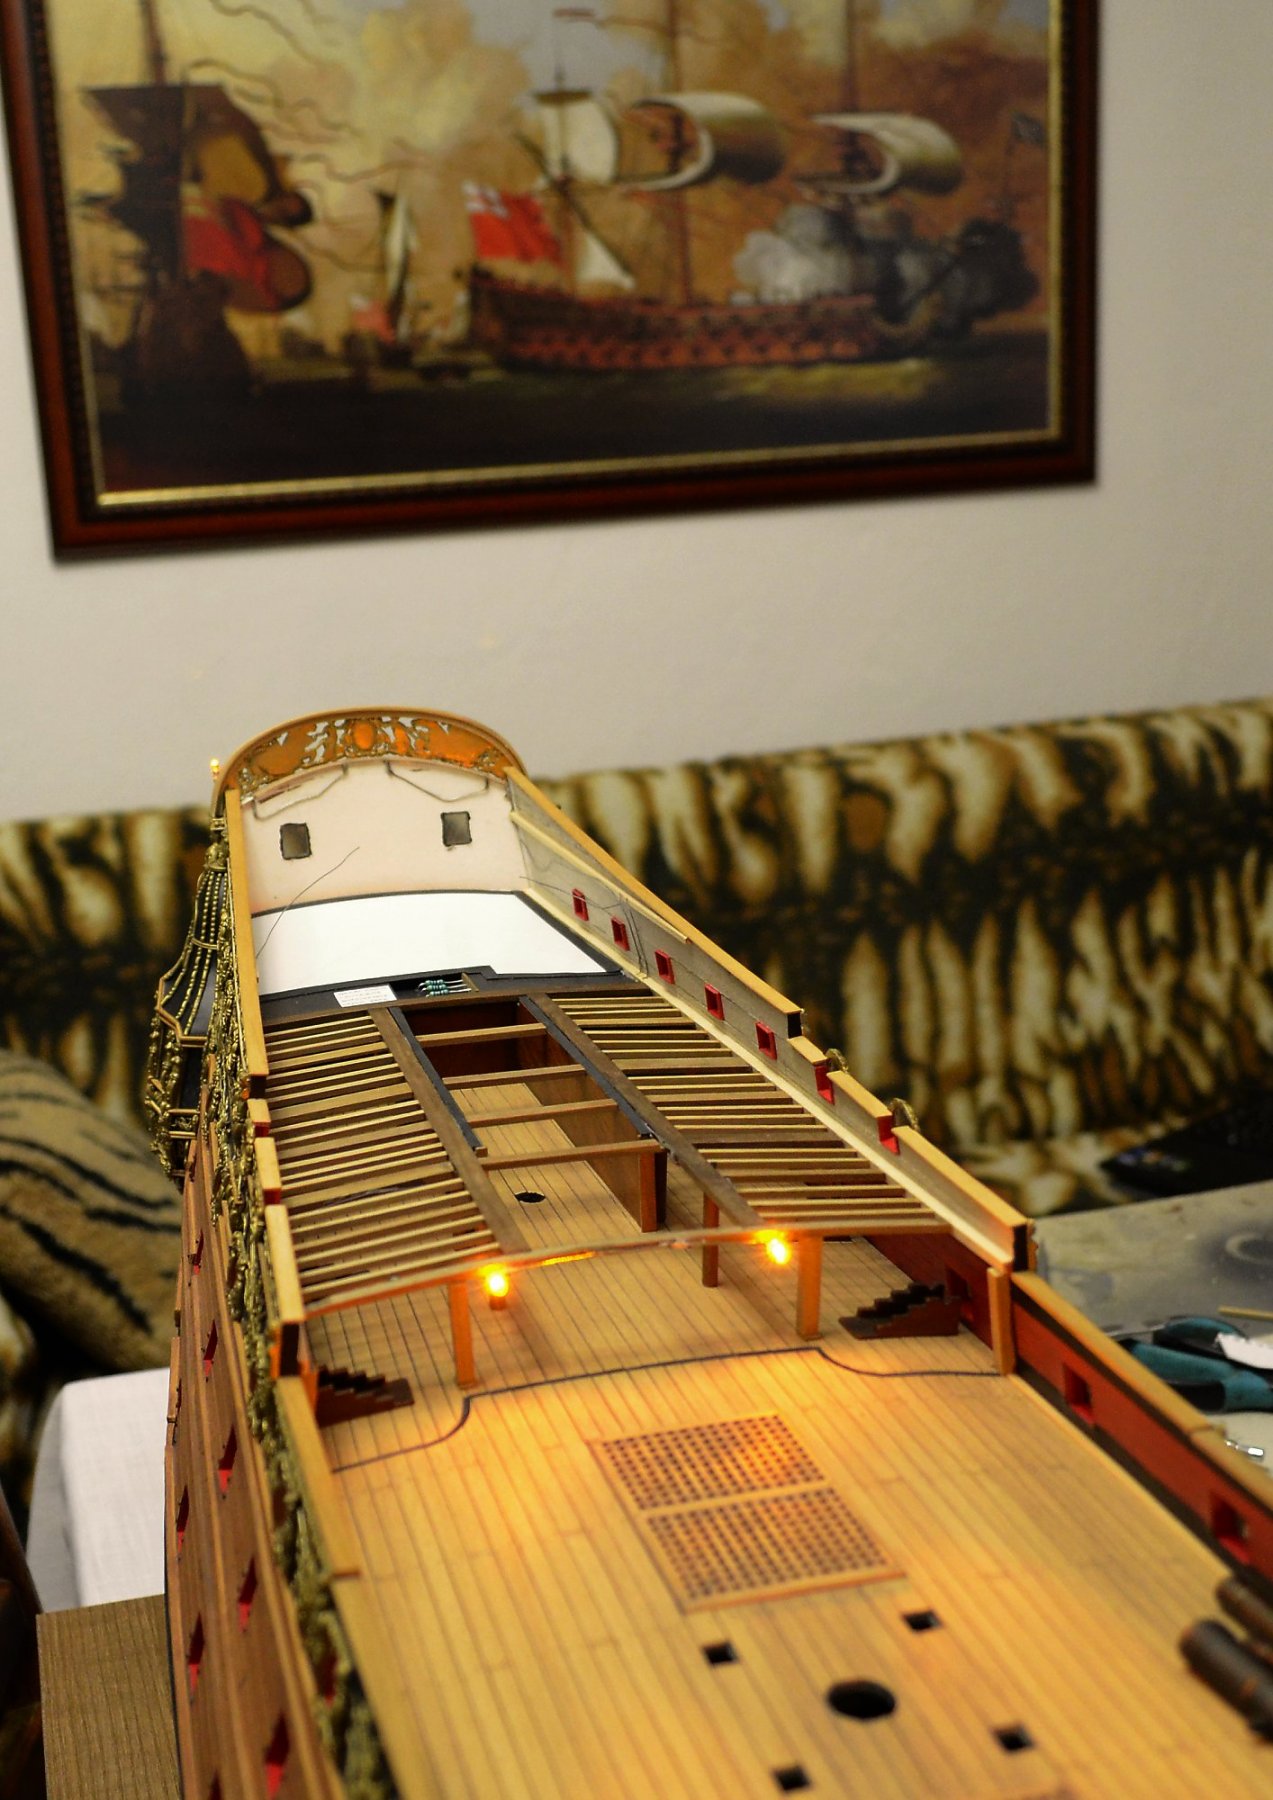
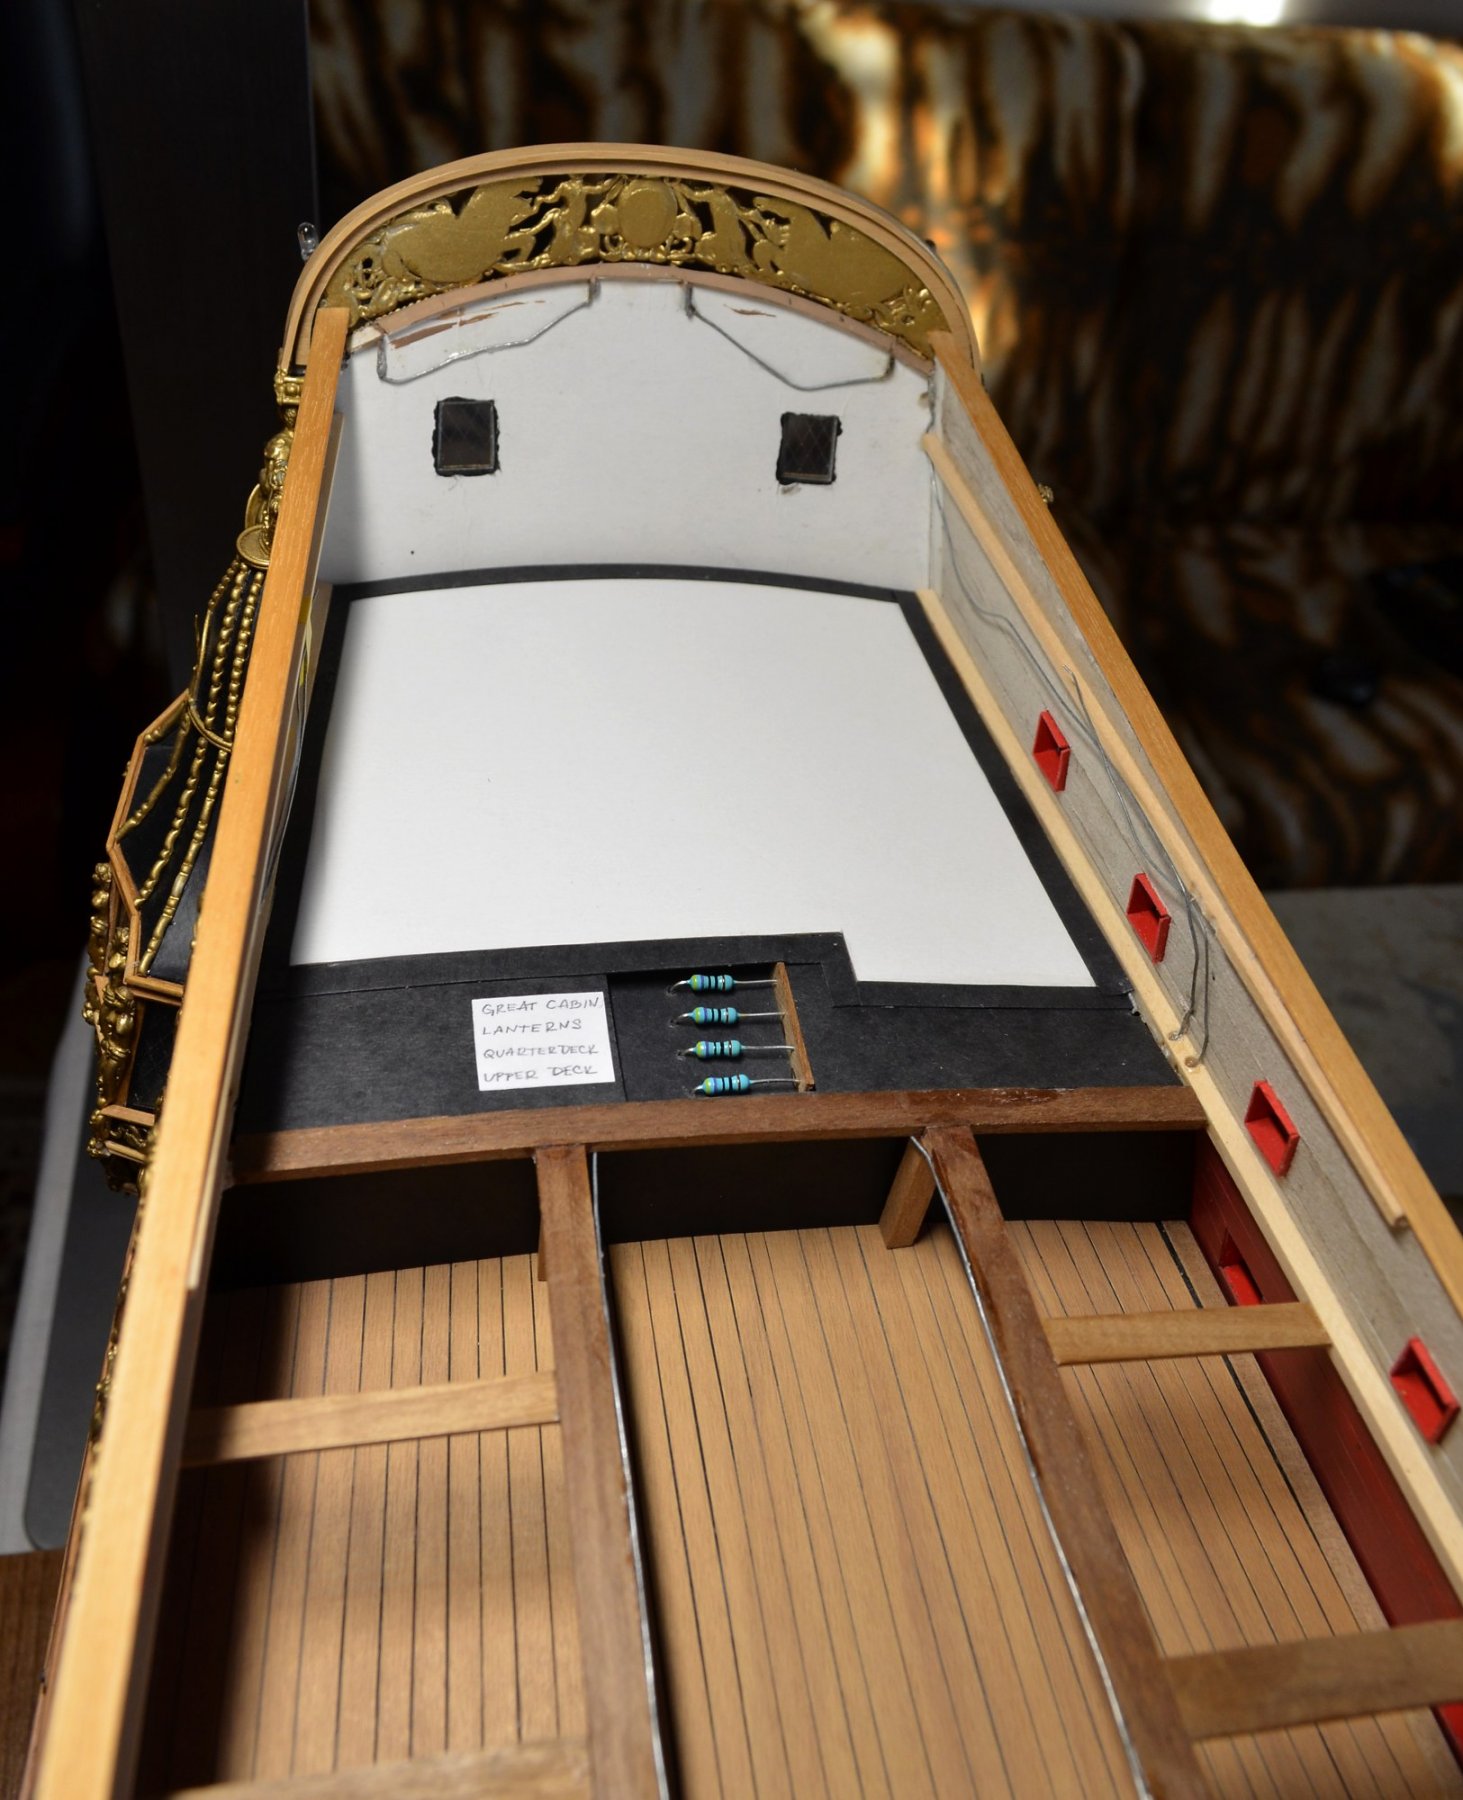
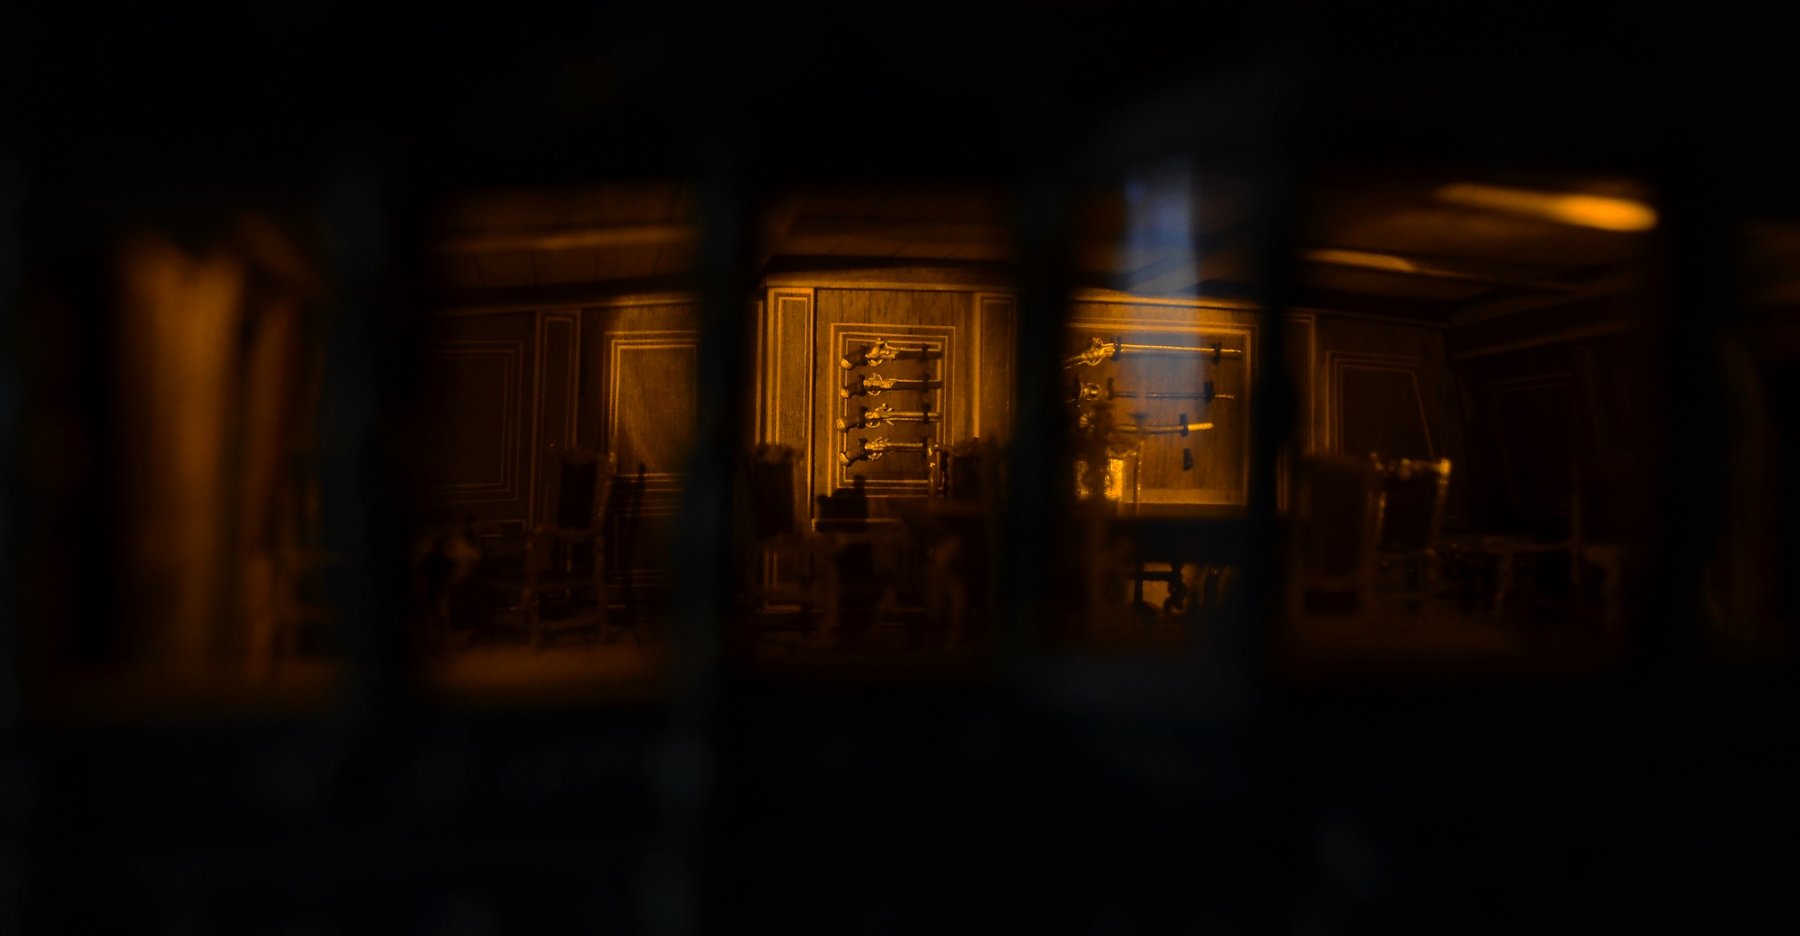
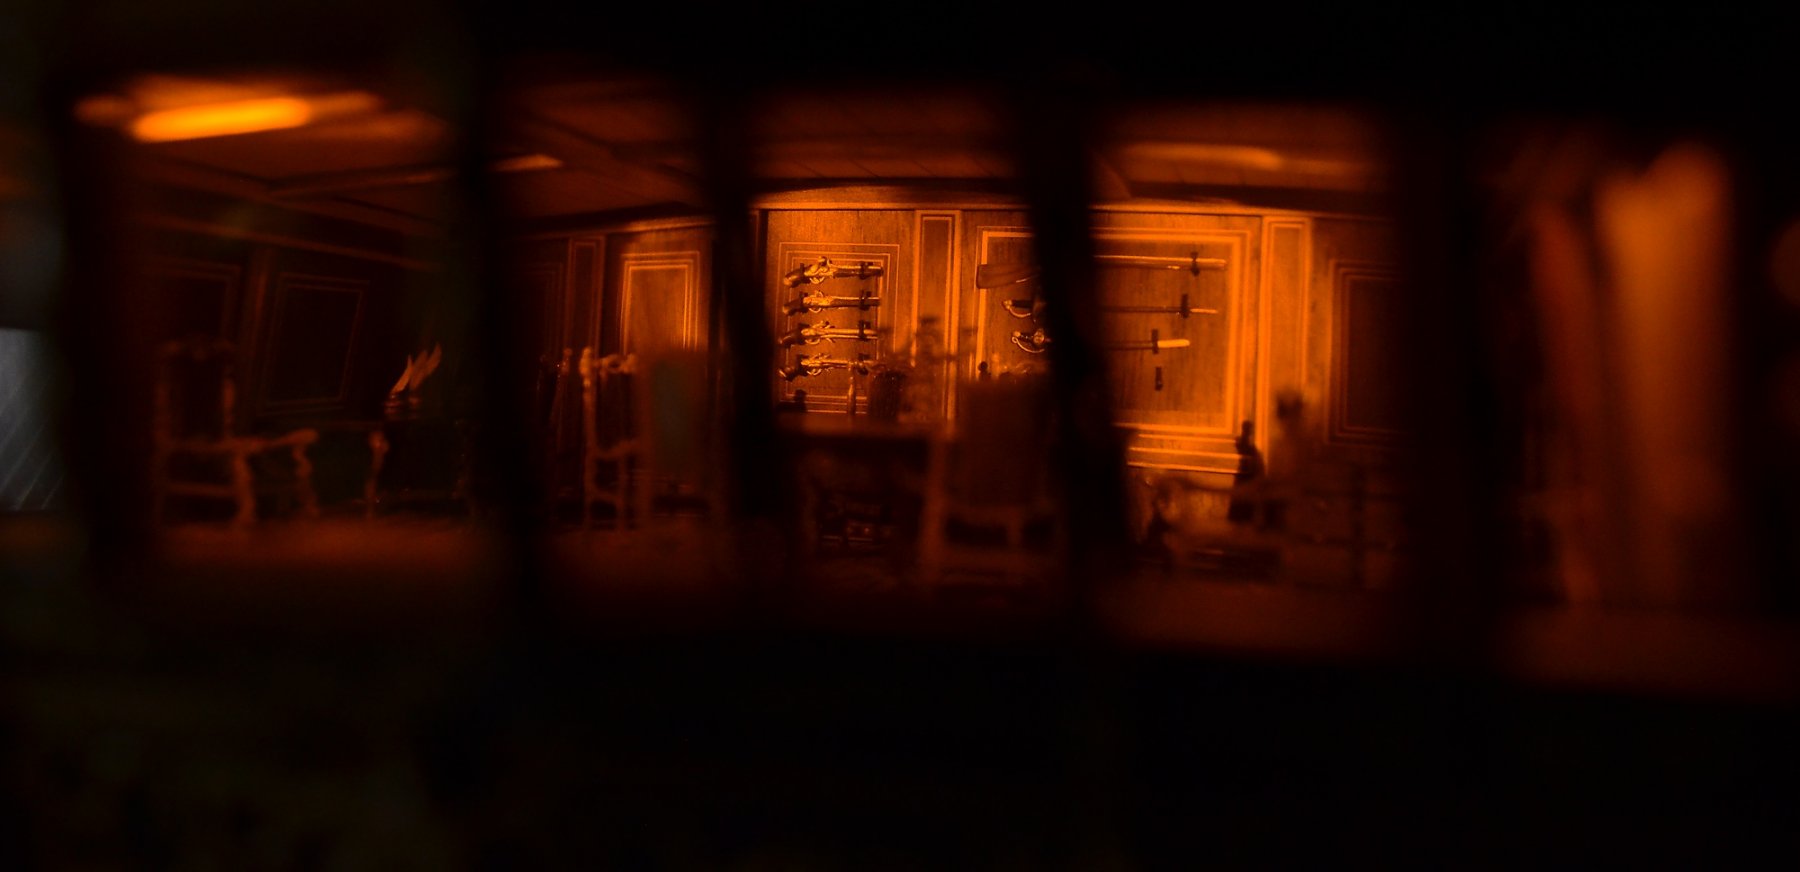
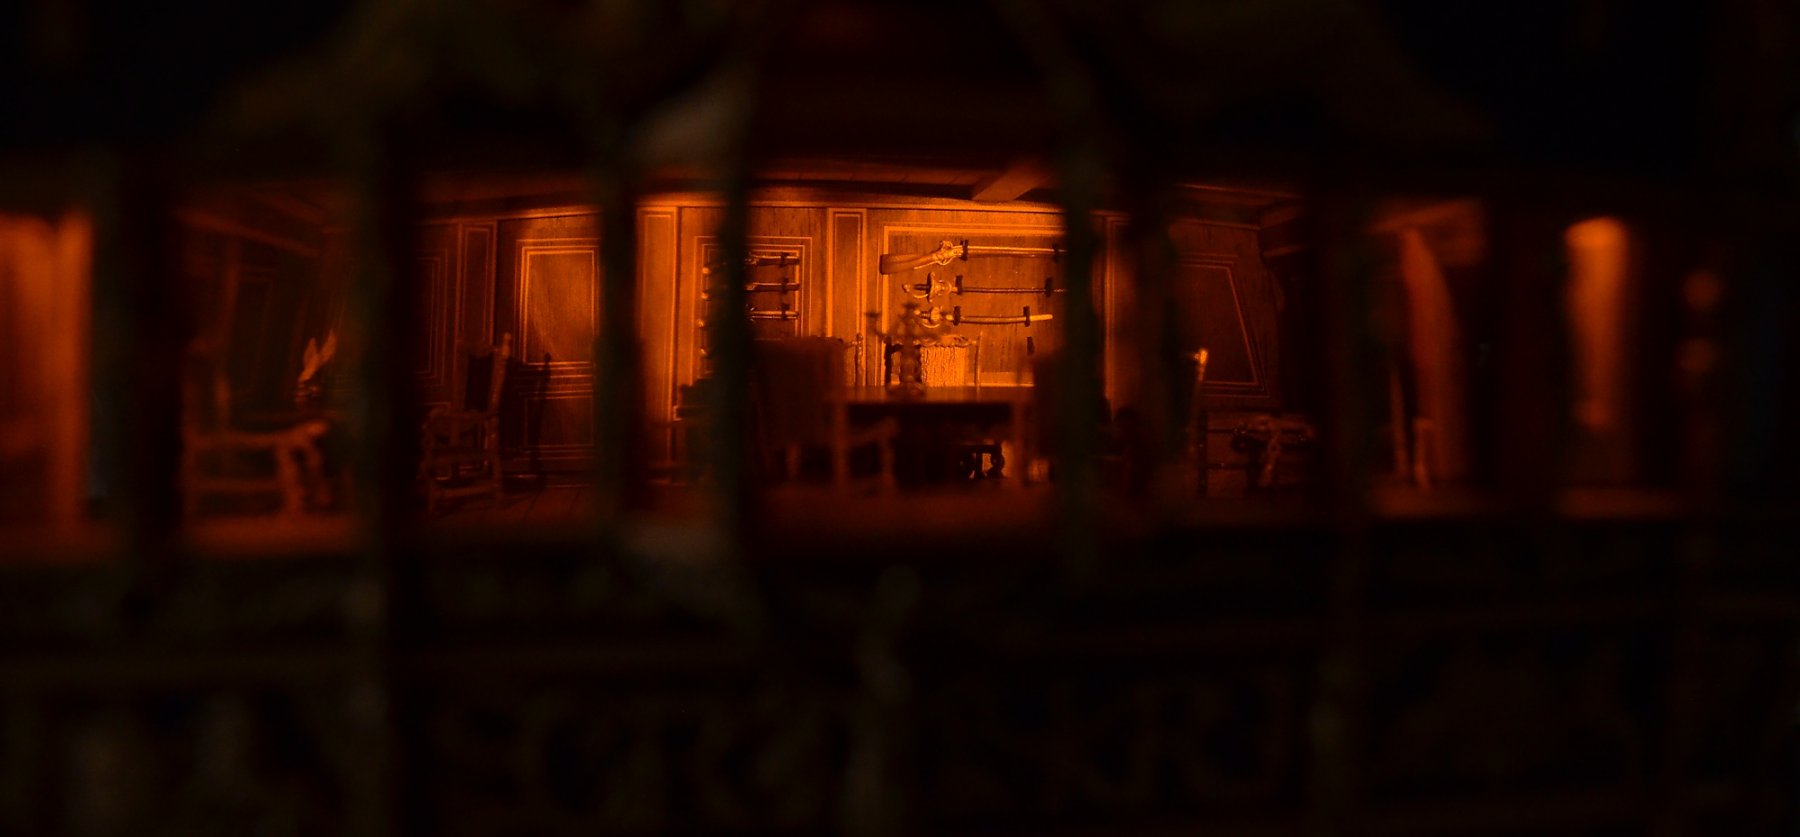
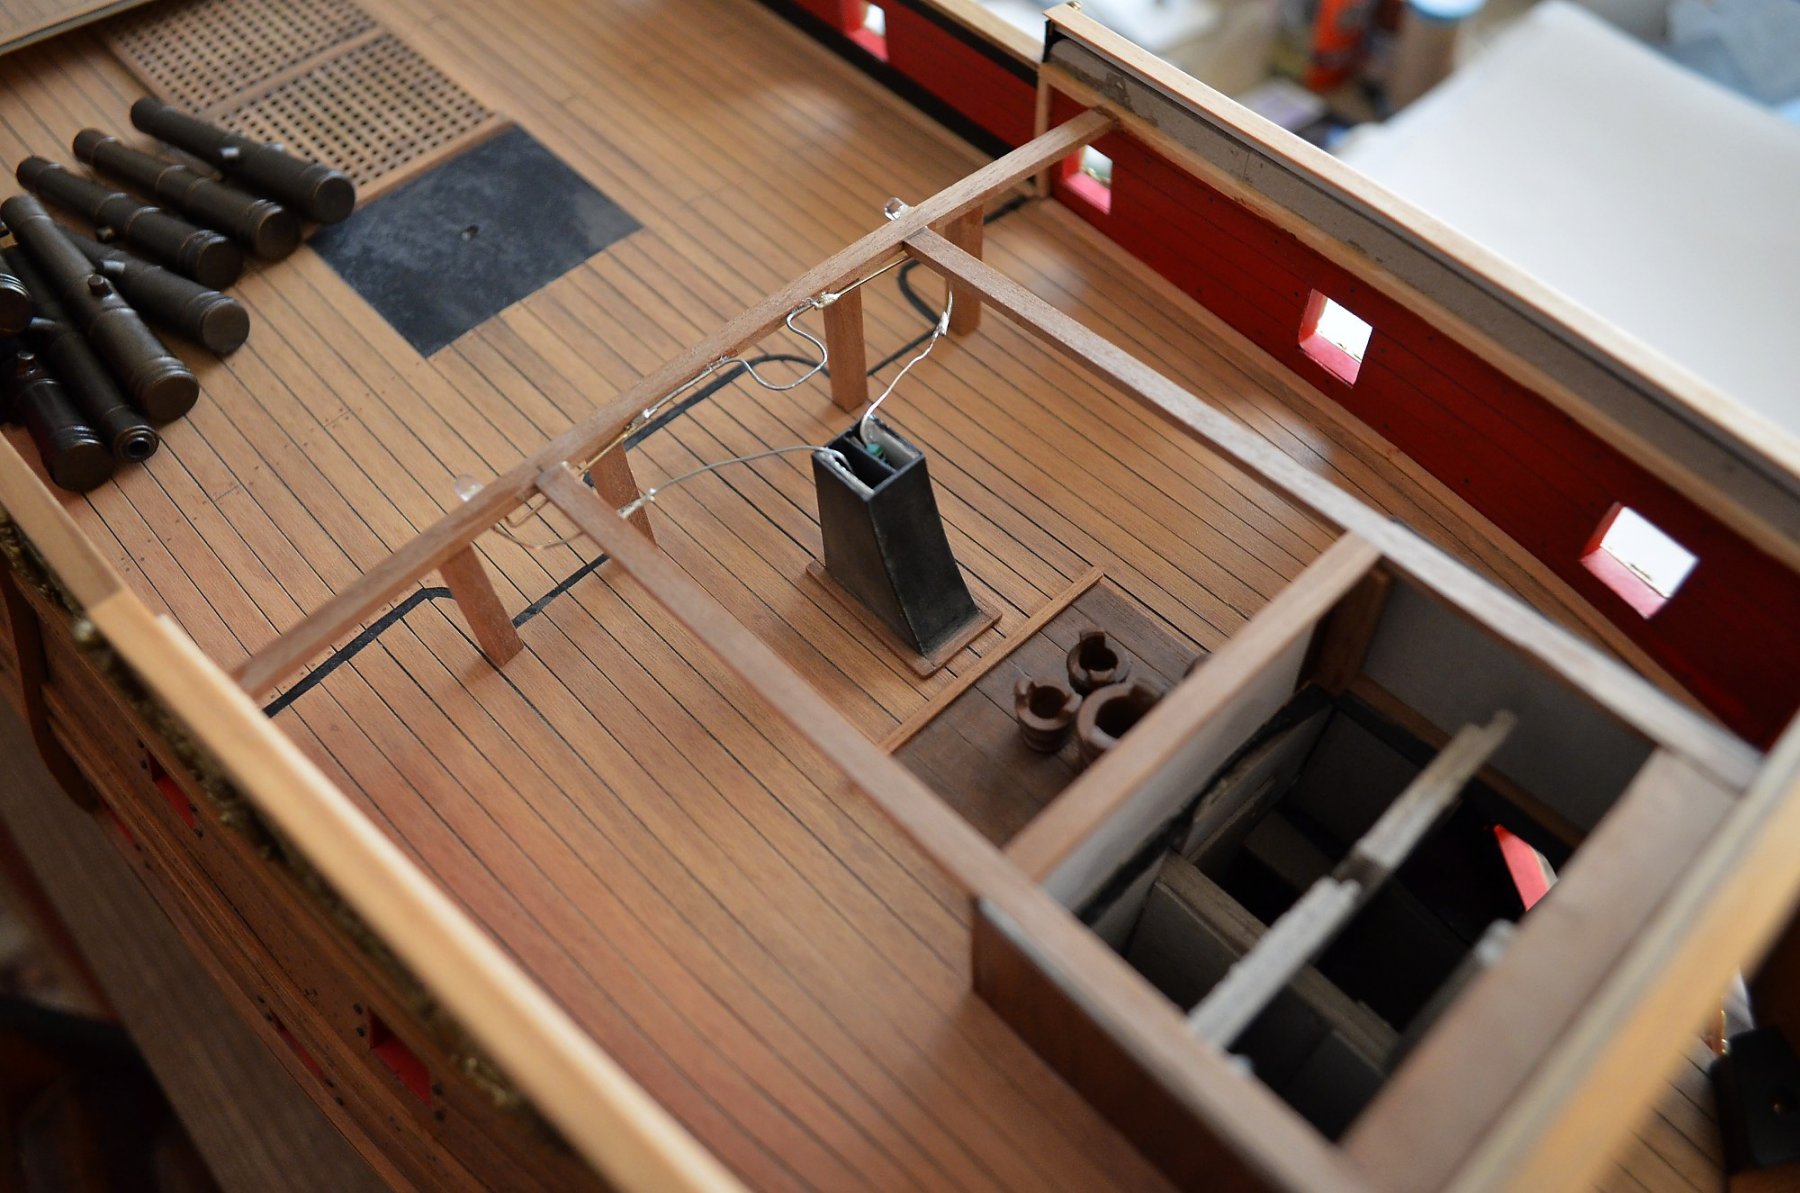
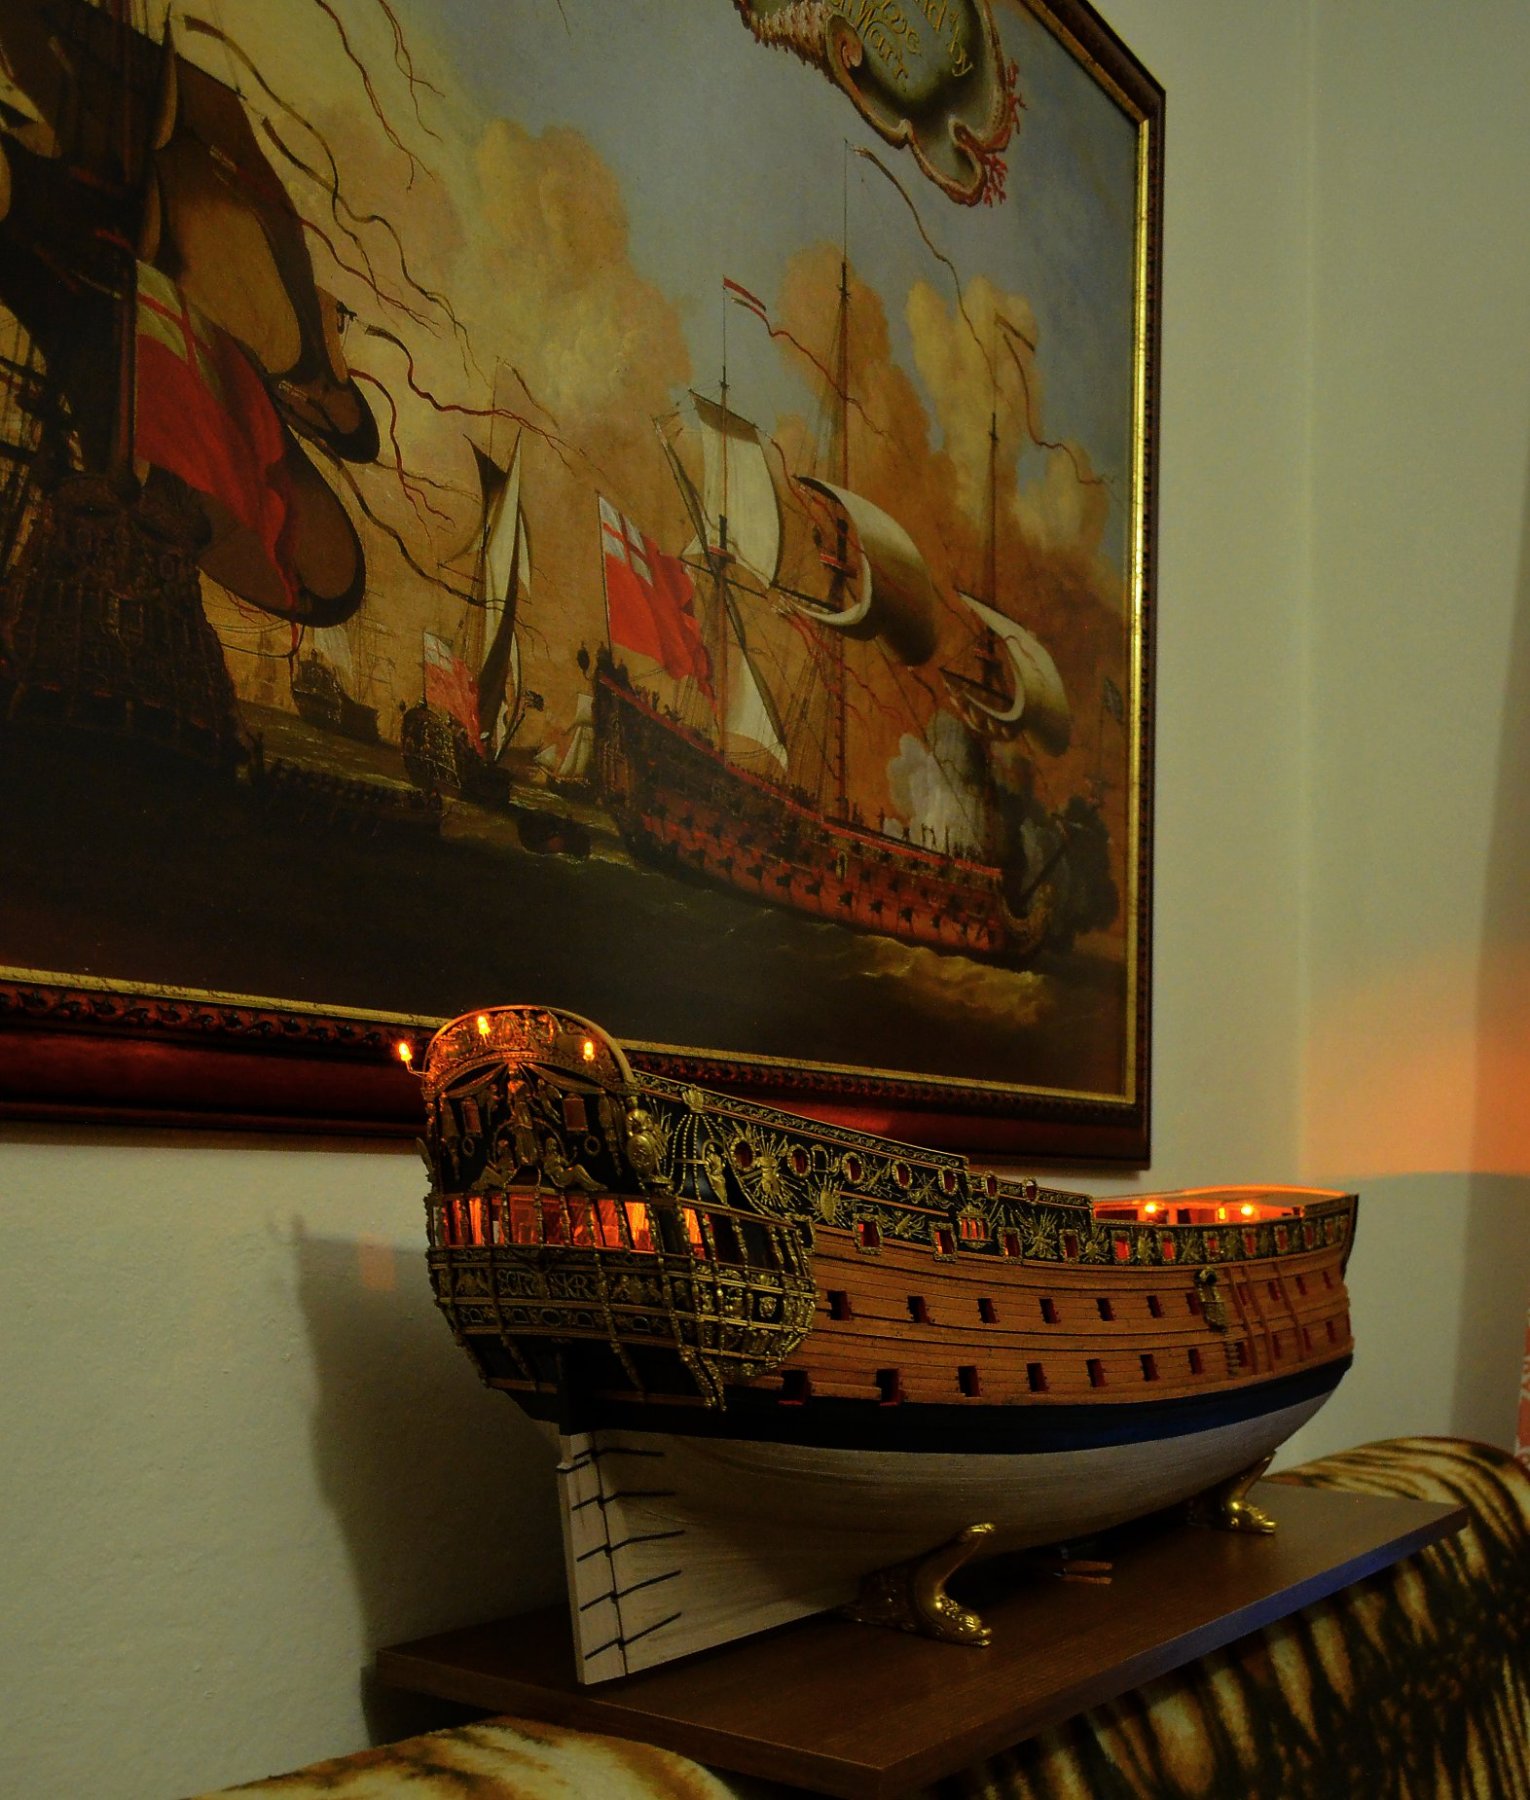
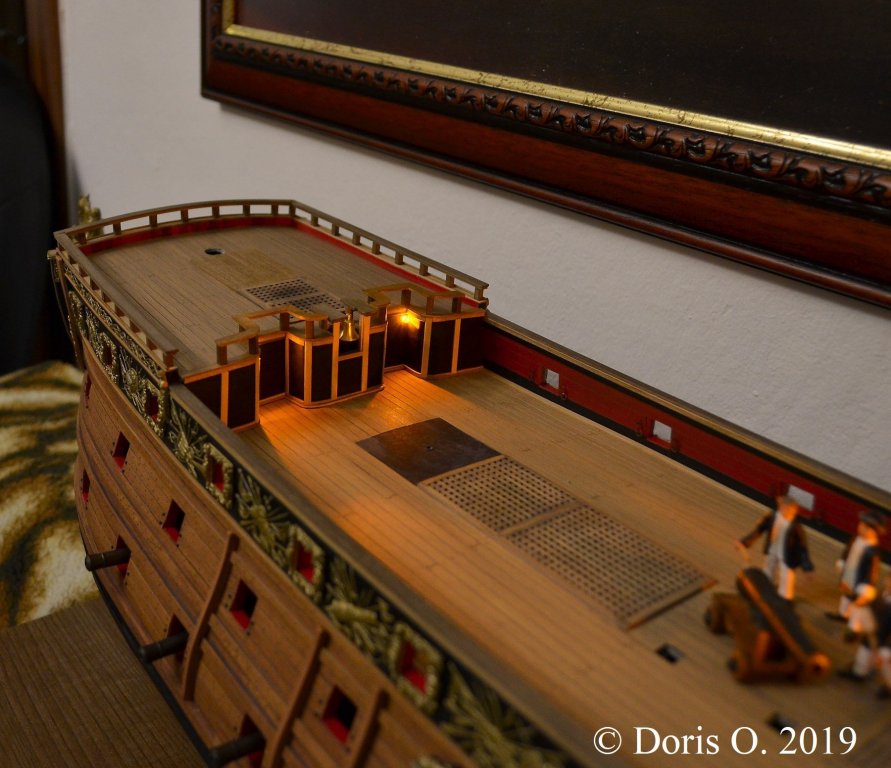
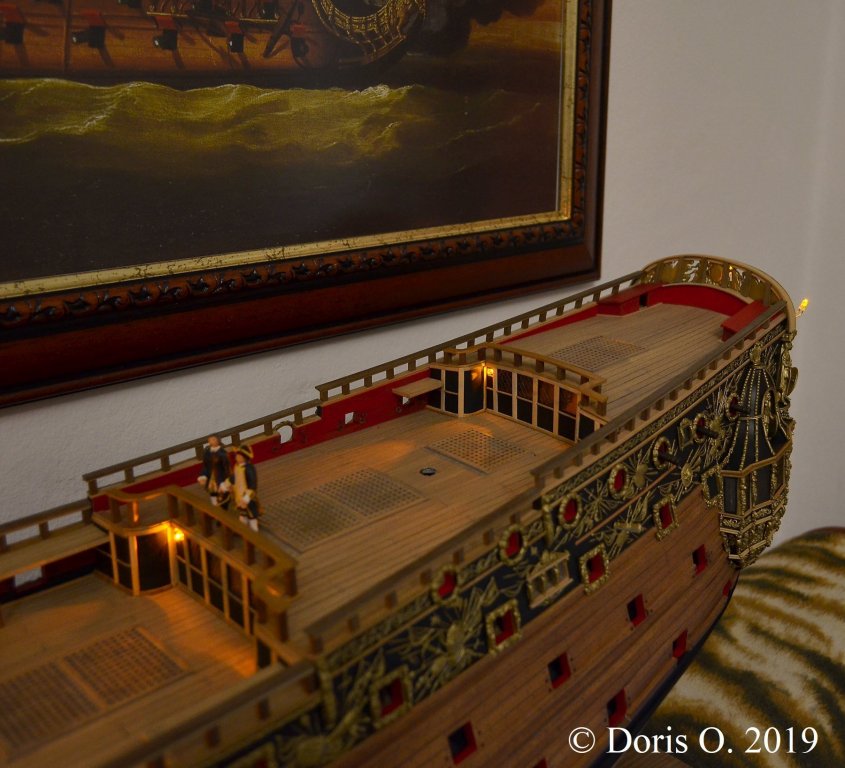
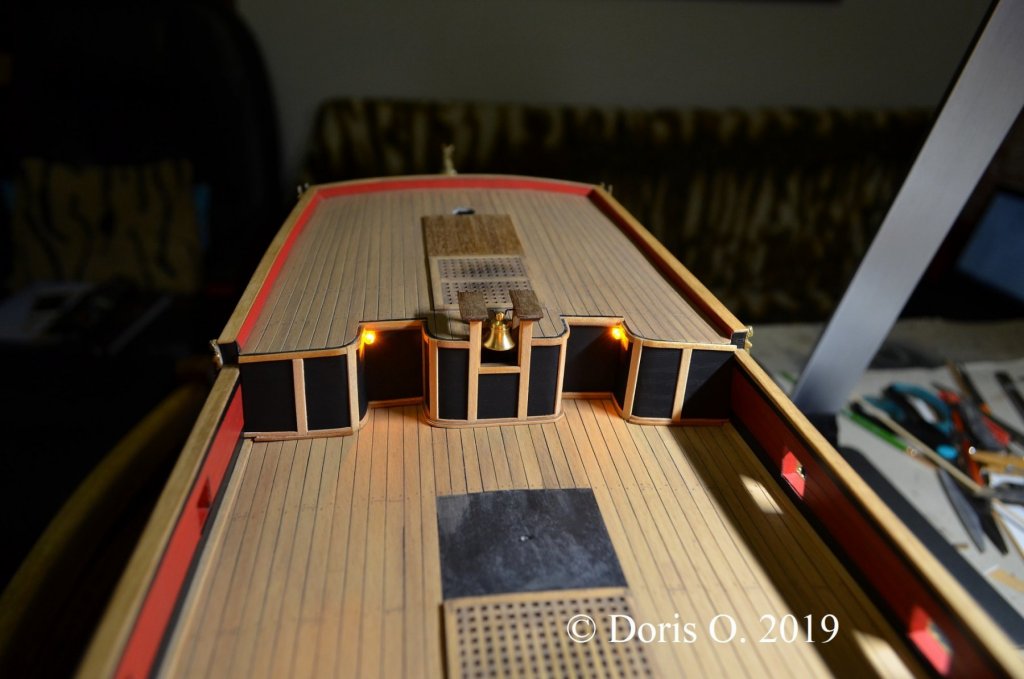
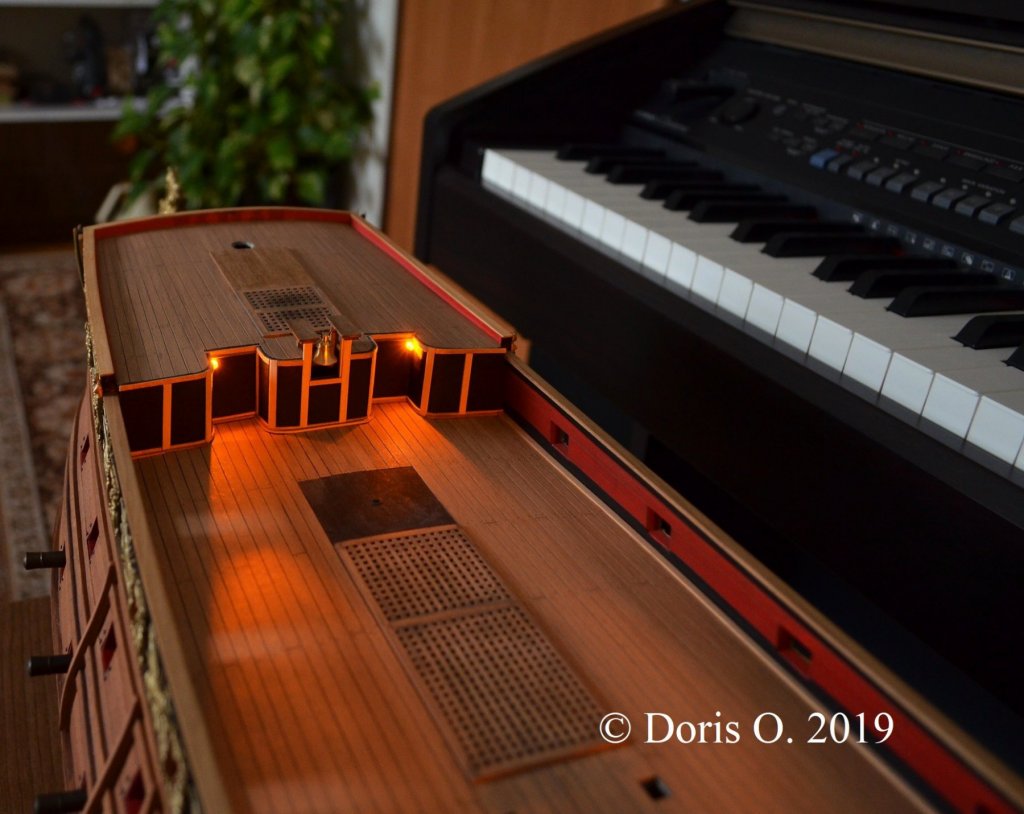
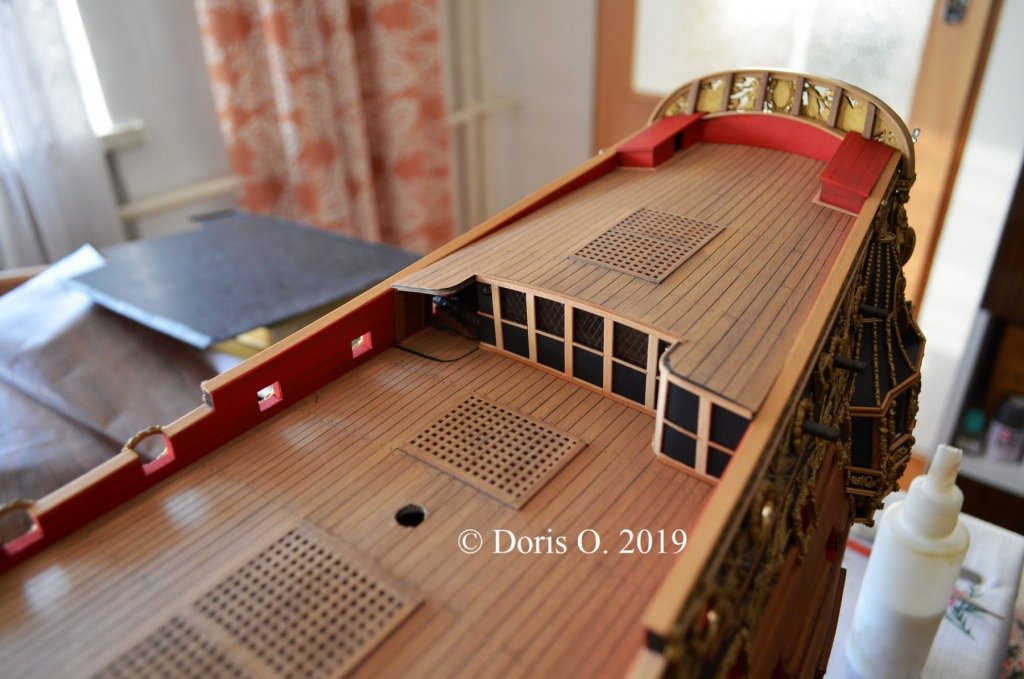
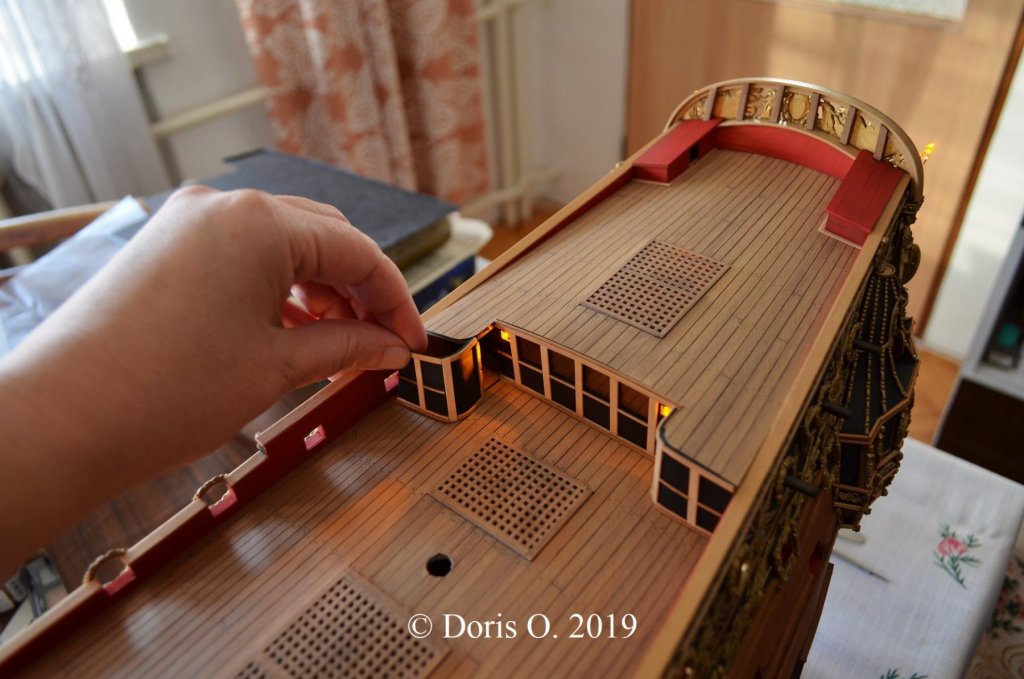
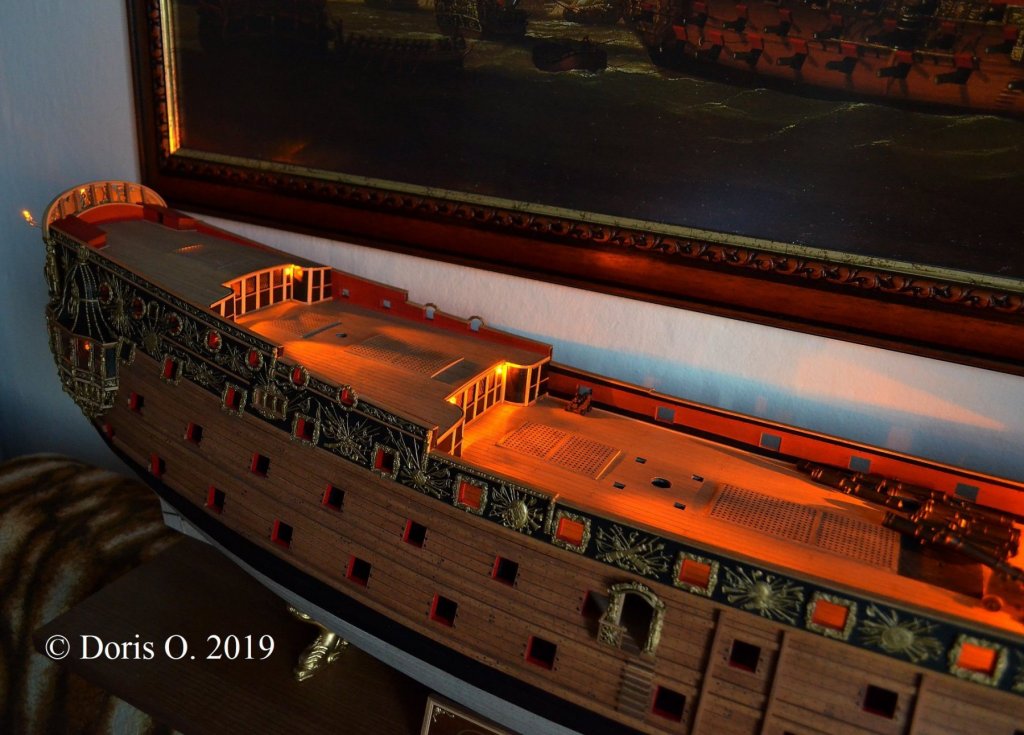
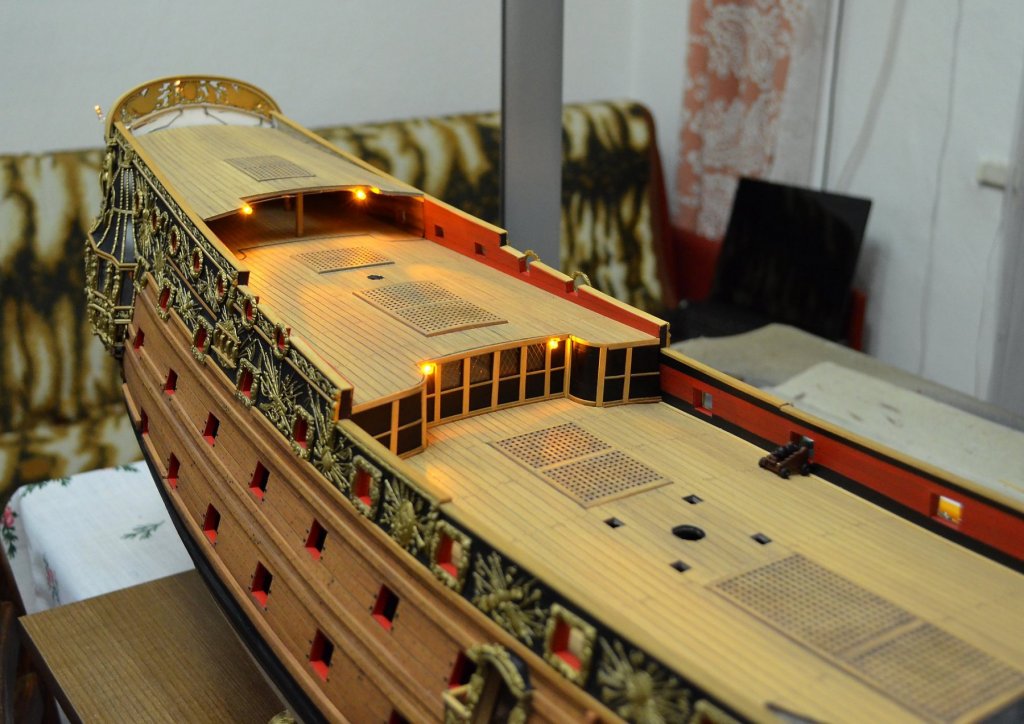
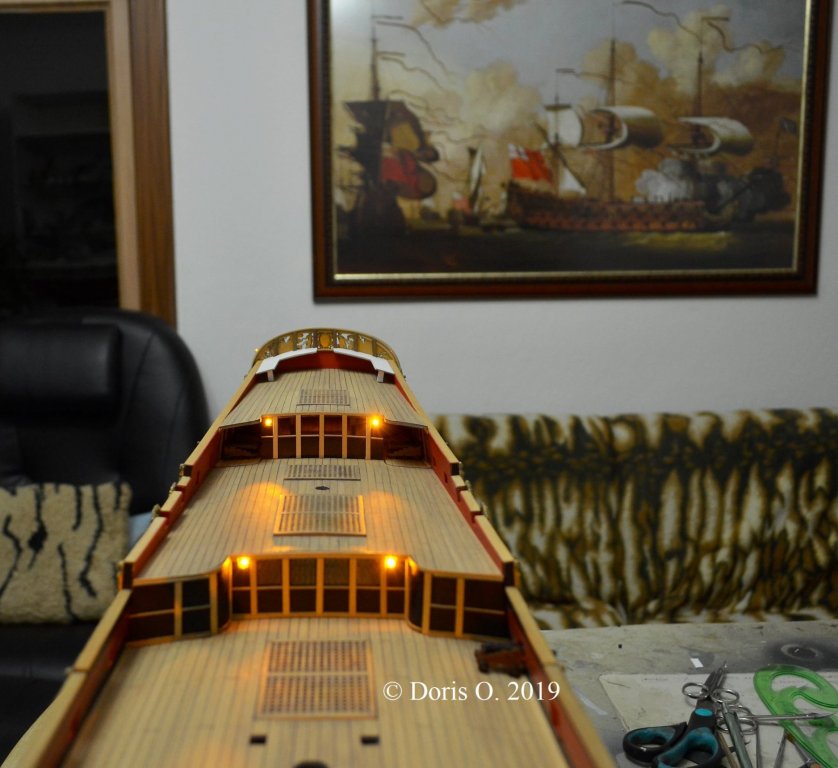
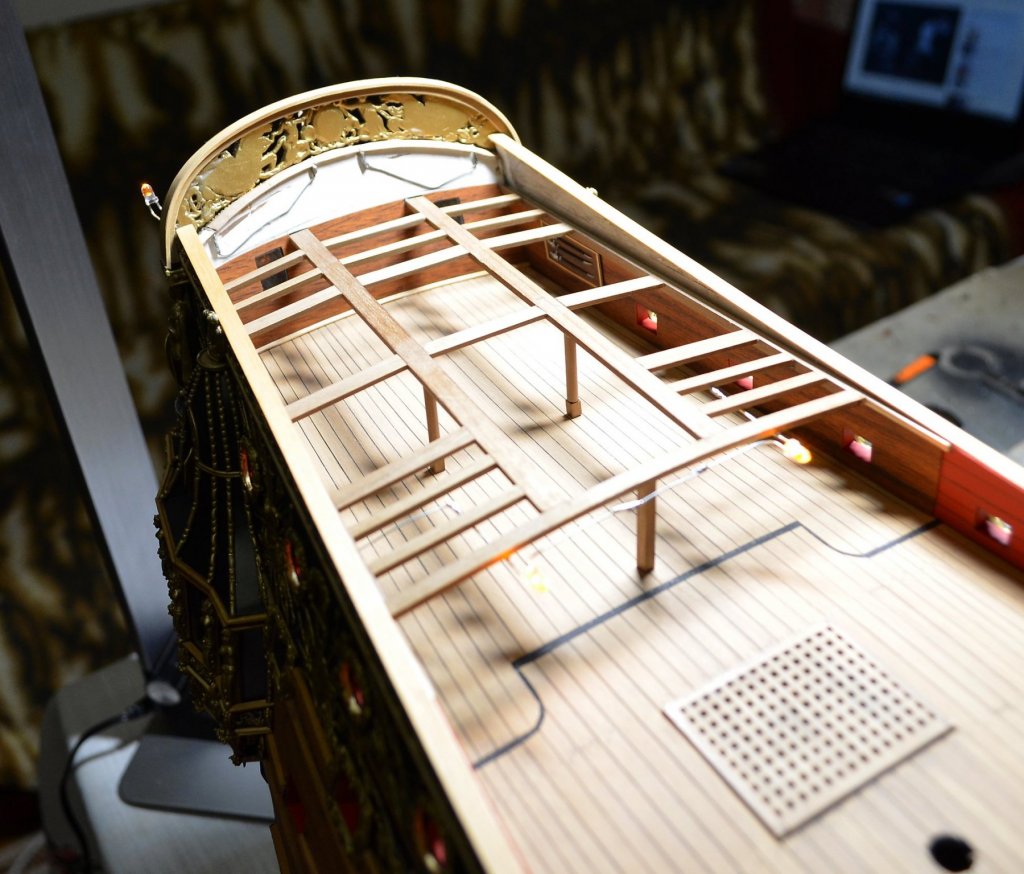
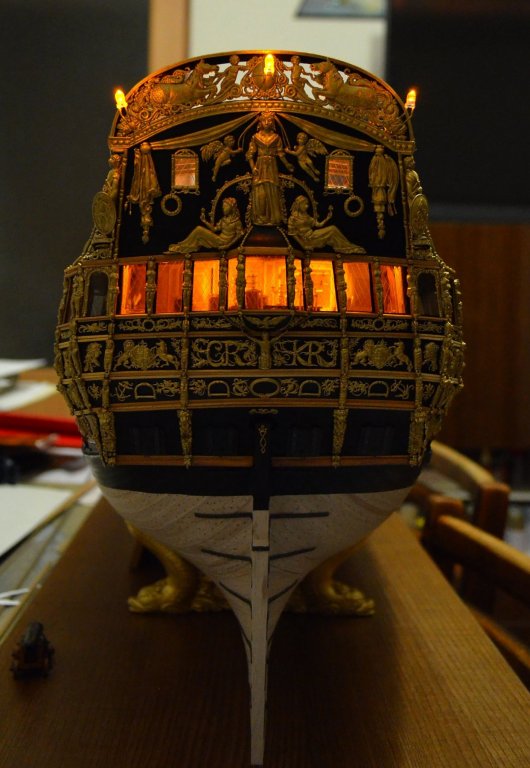
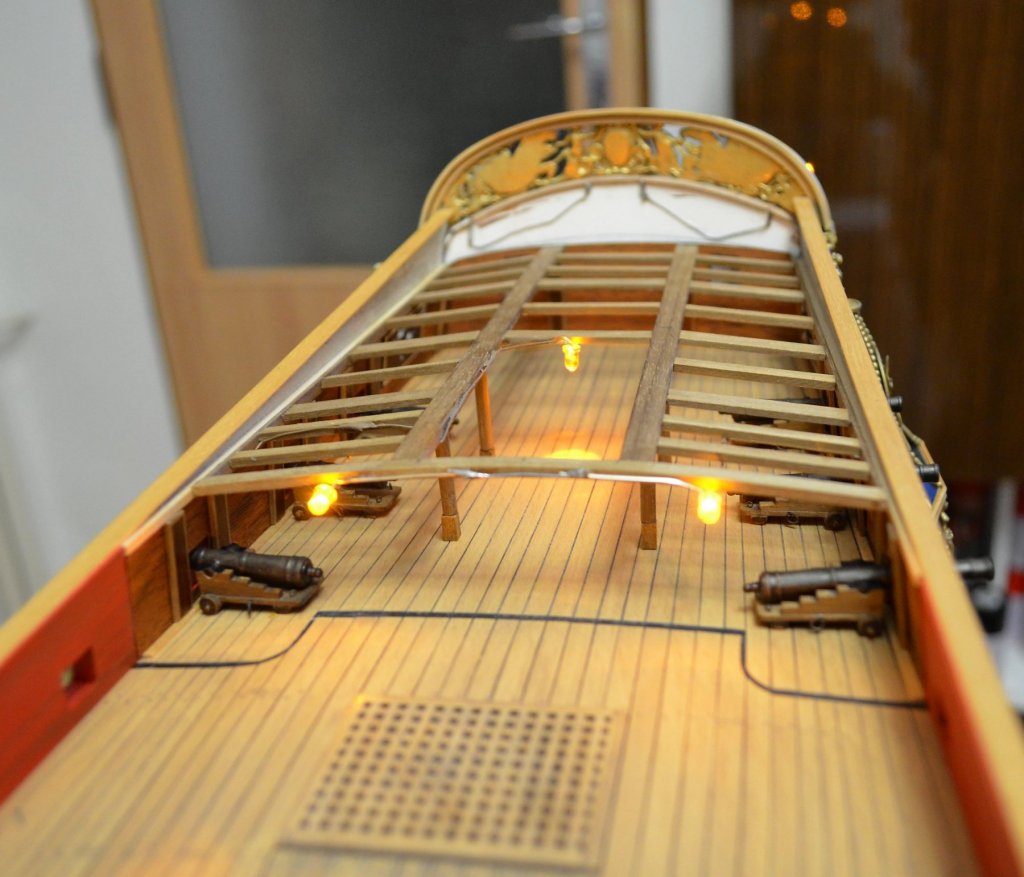
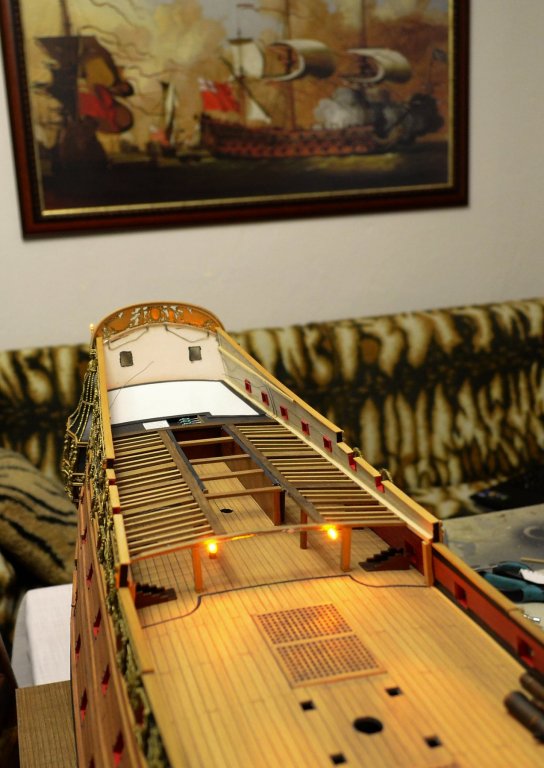
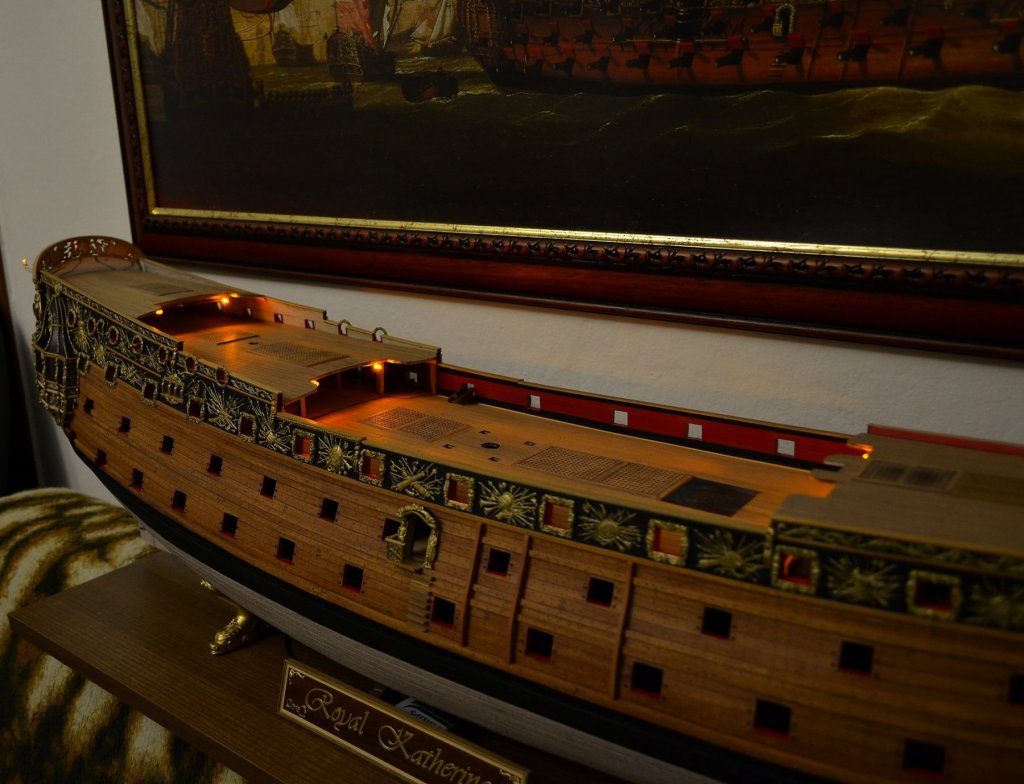
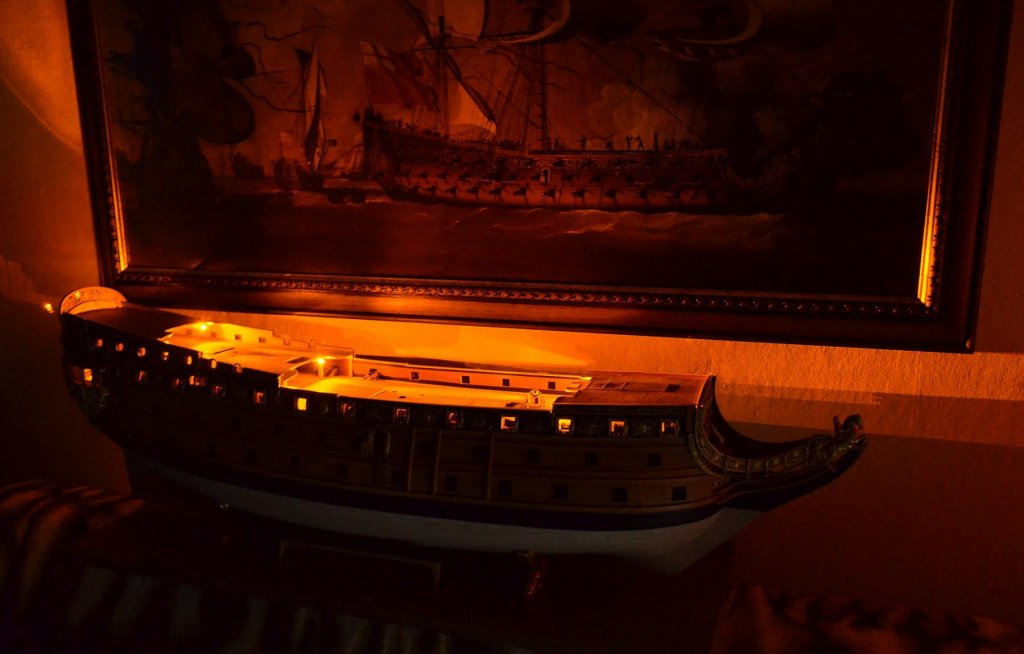
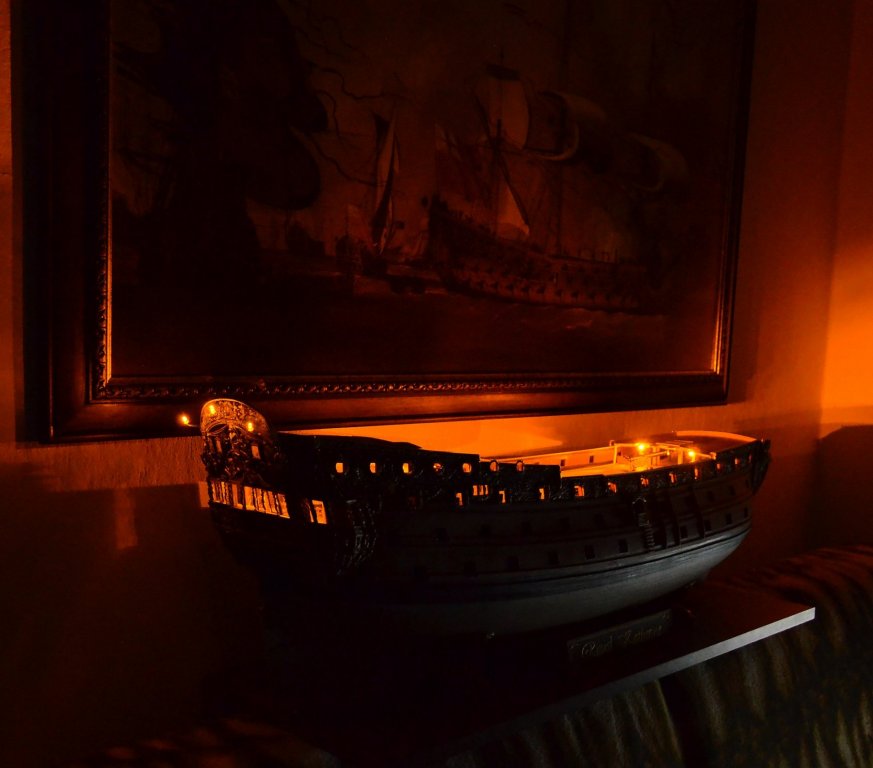
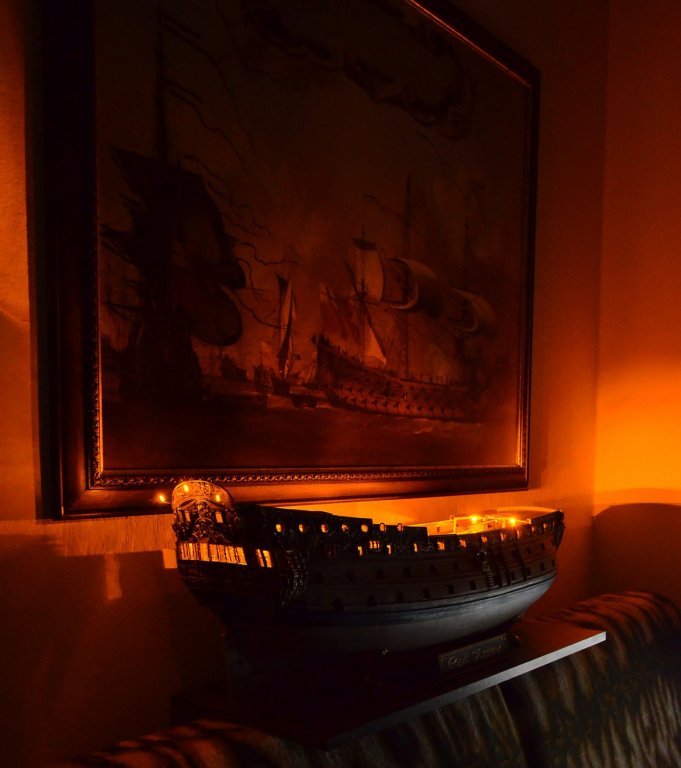
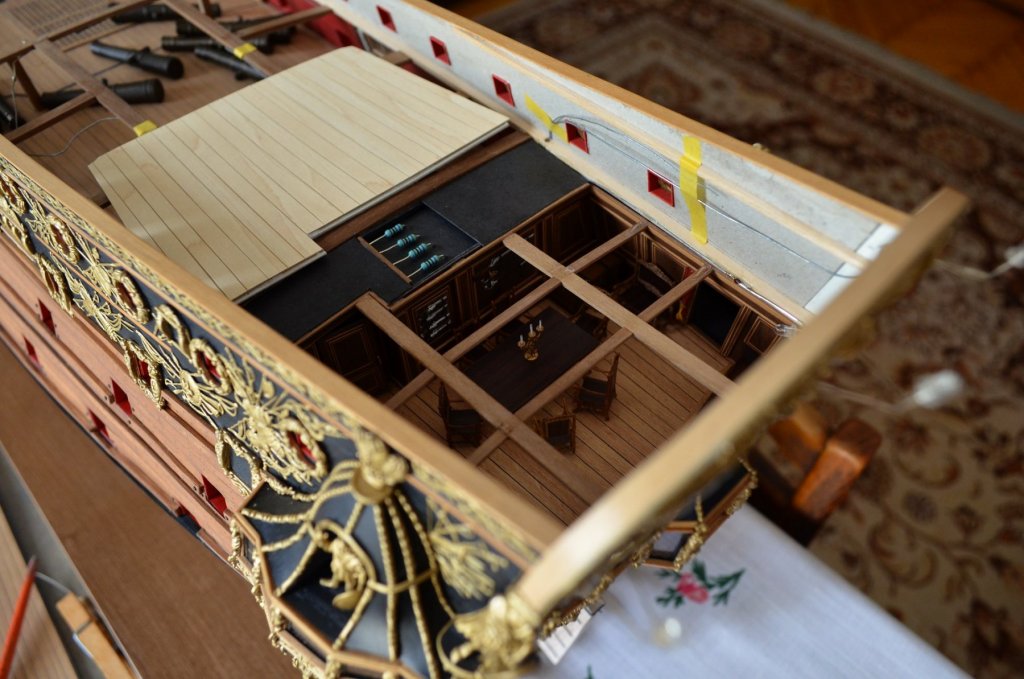
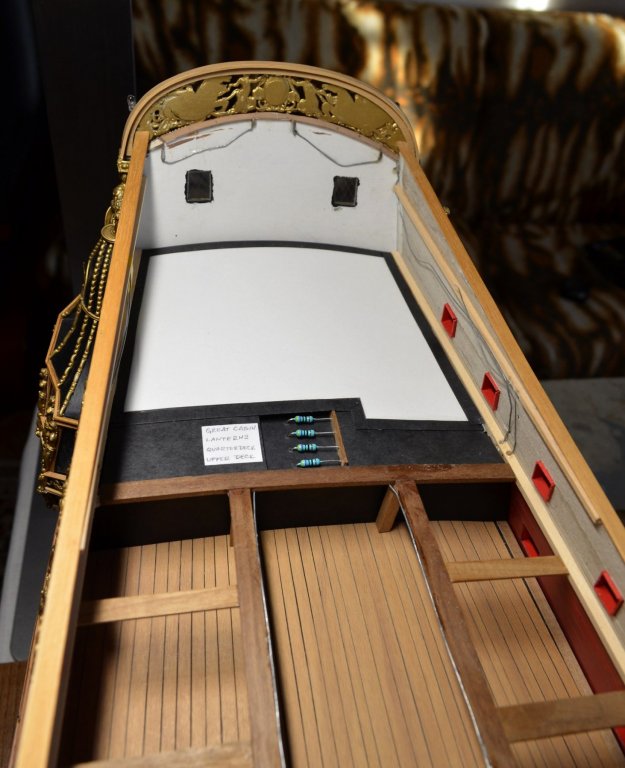
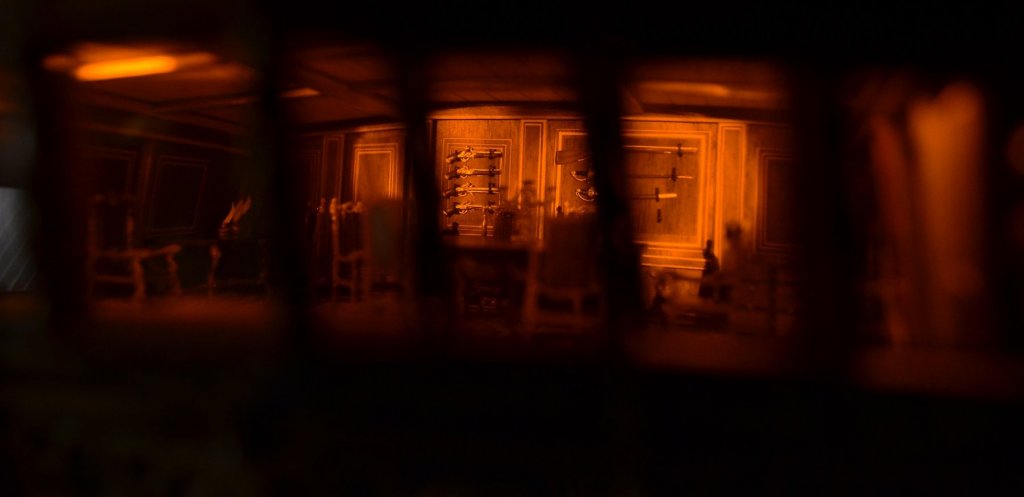
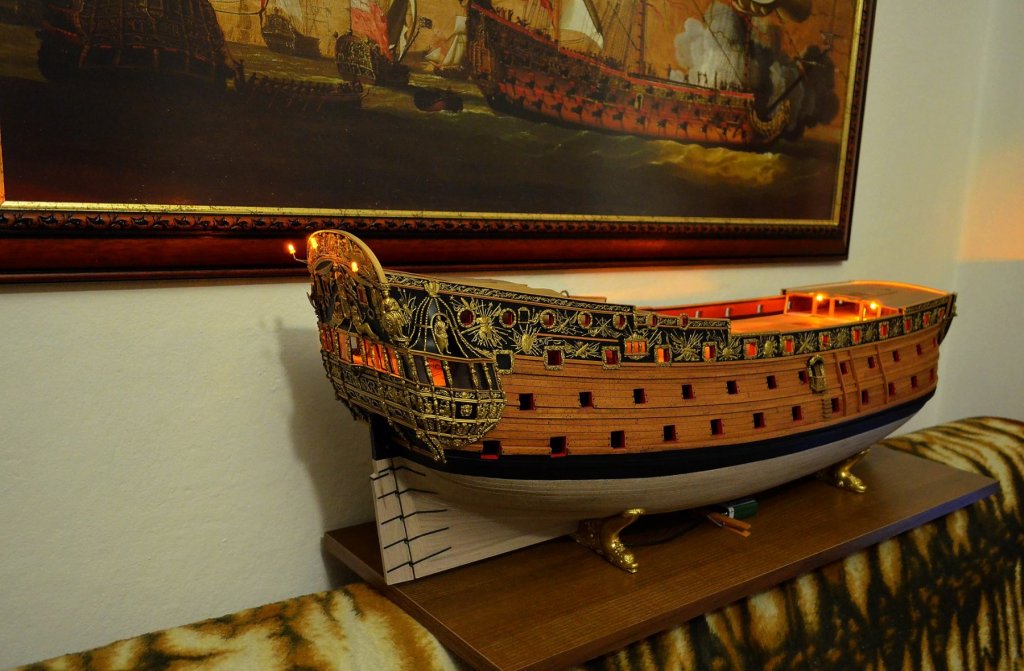
Quarterdeck: There was completed the lighting on quarterdeck and stern cabin as well:


- 1,035 replies
-
- 20
-
-
- royal katherine
- ship of the line
- (and 1 more)
-
HMS ROYAL KATHERINE 1664 by Doris - 1/55 - CARD
DORIS replied to DORIS's topic in - Build logs for subjects built 1501 - 1750
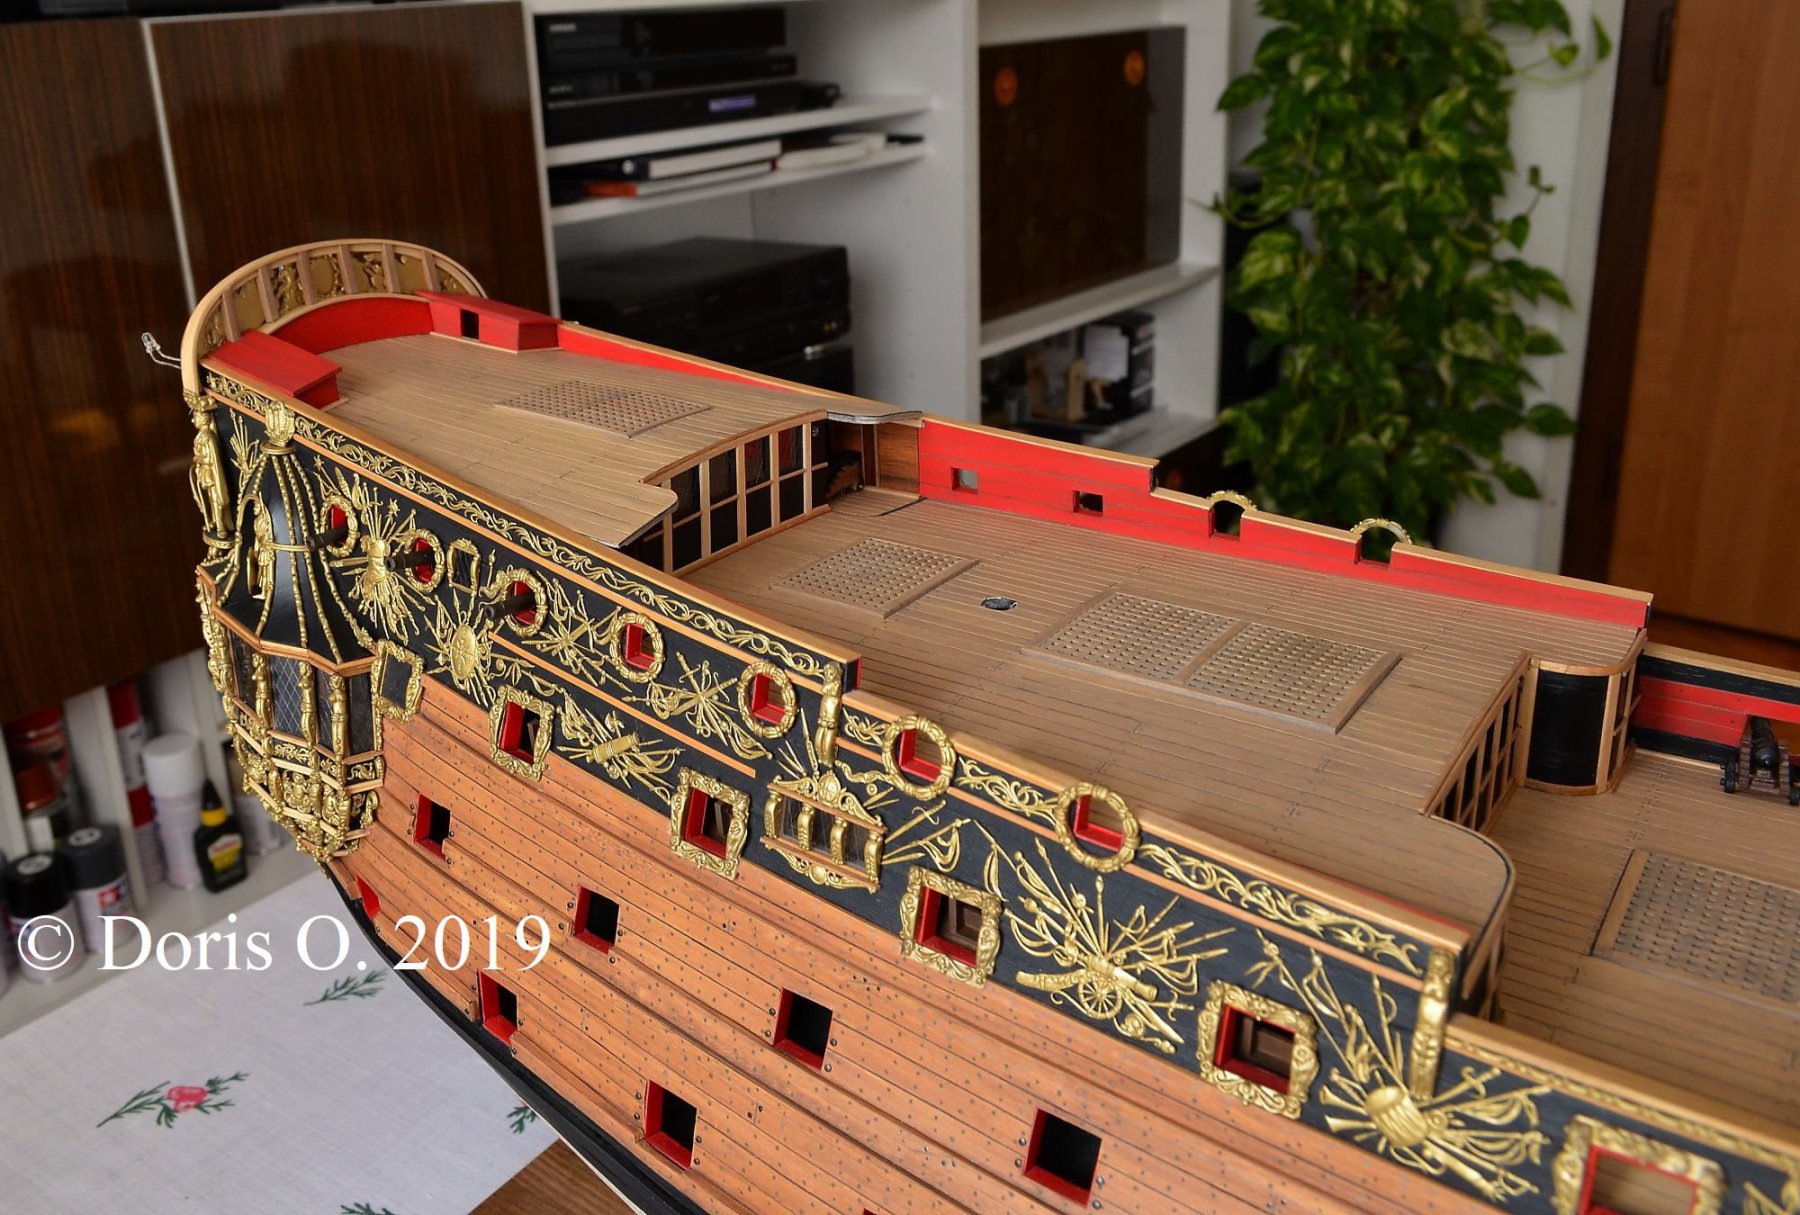
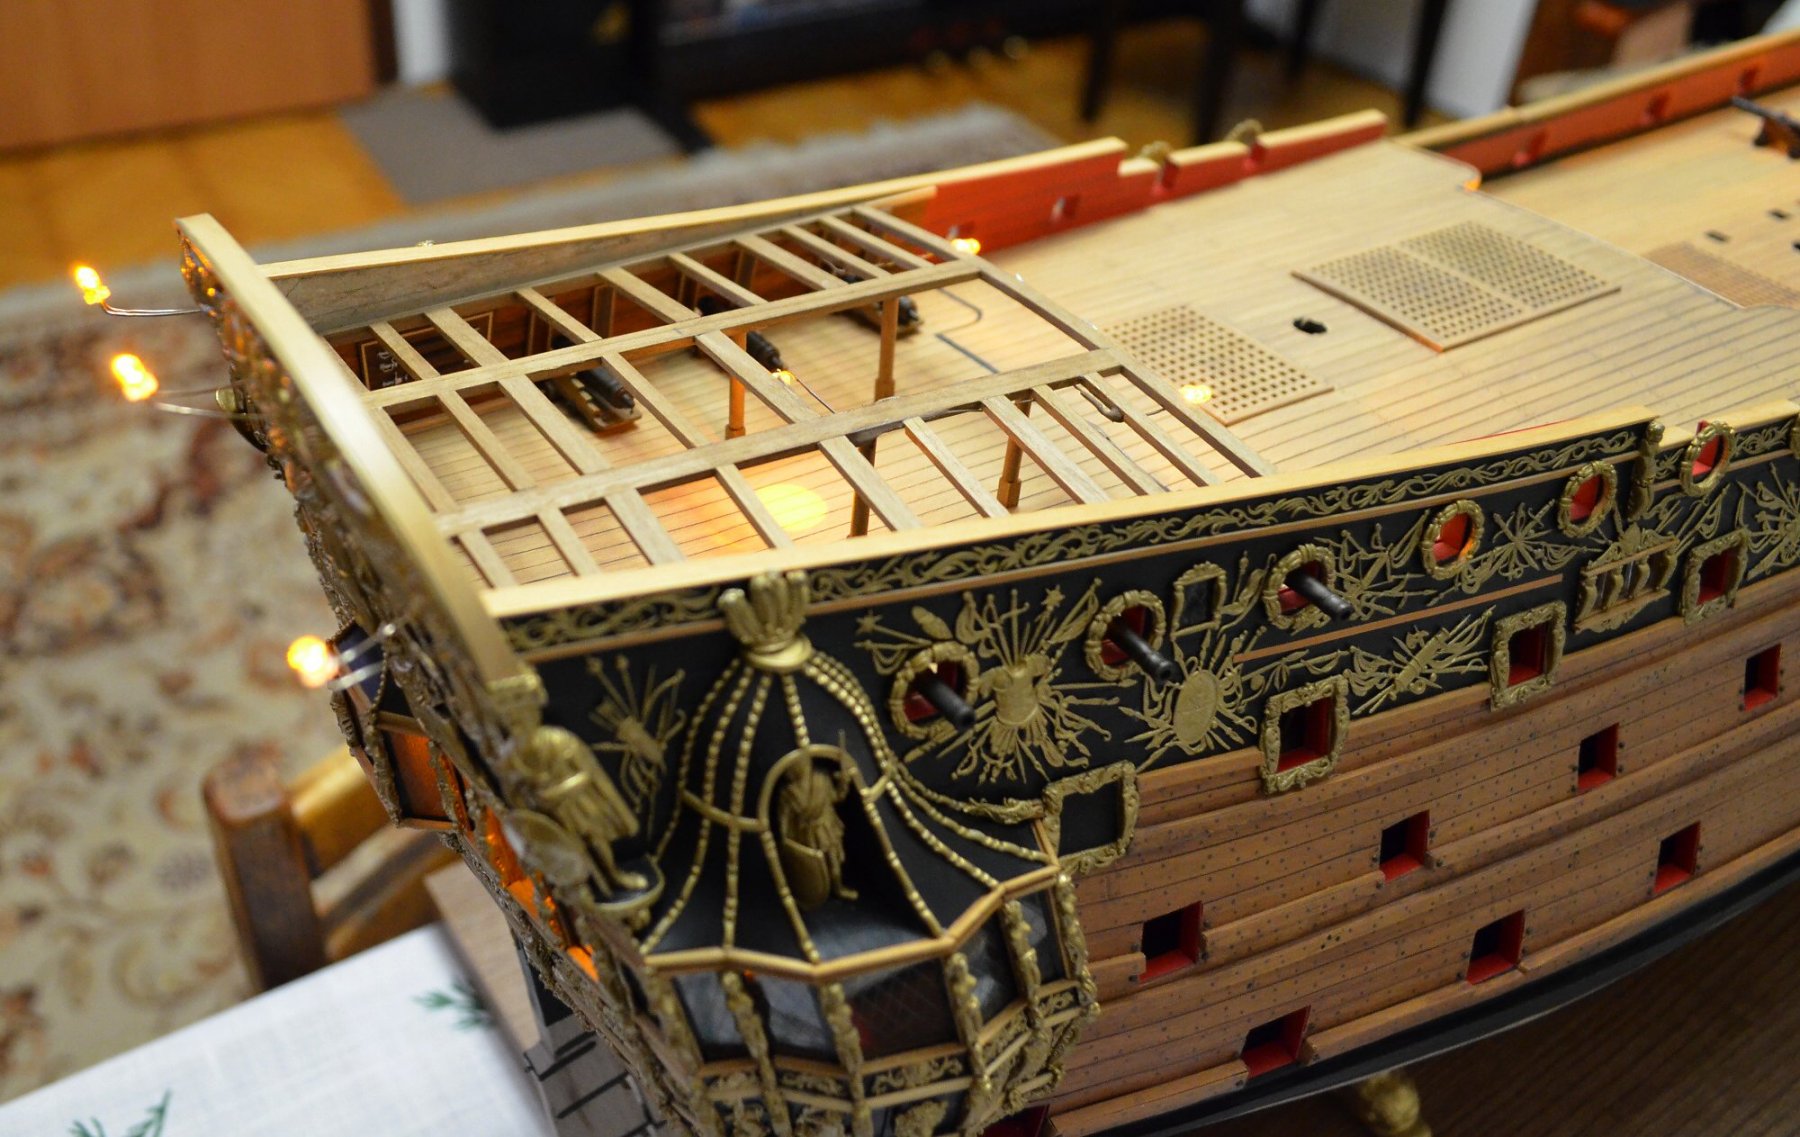
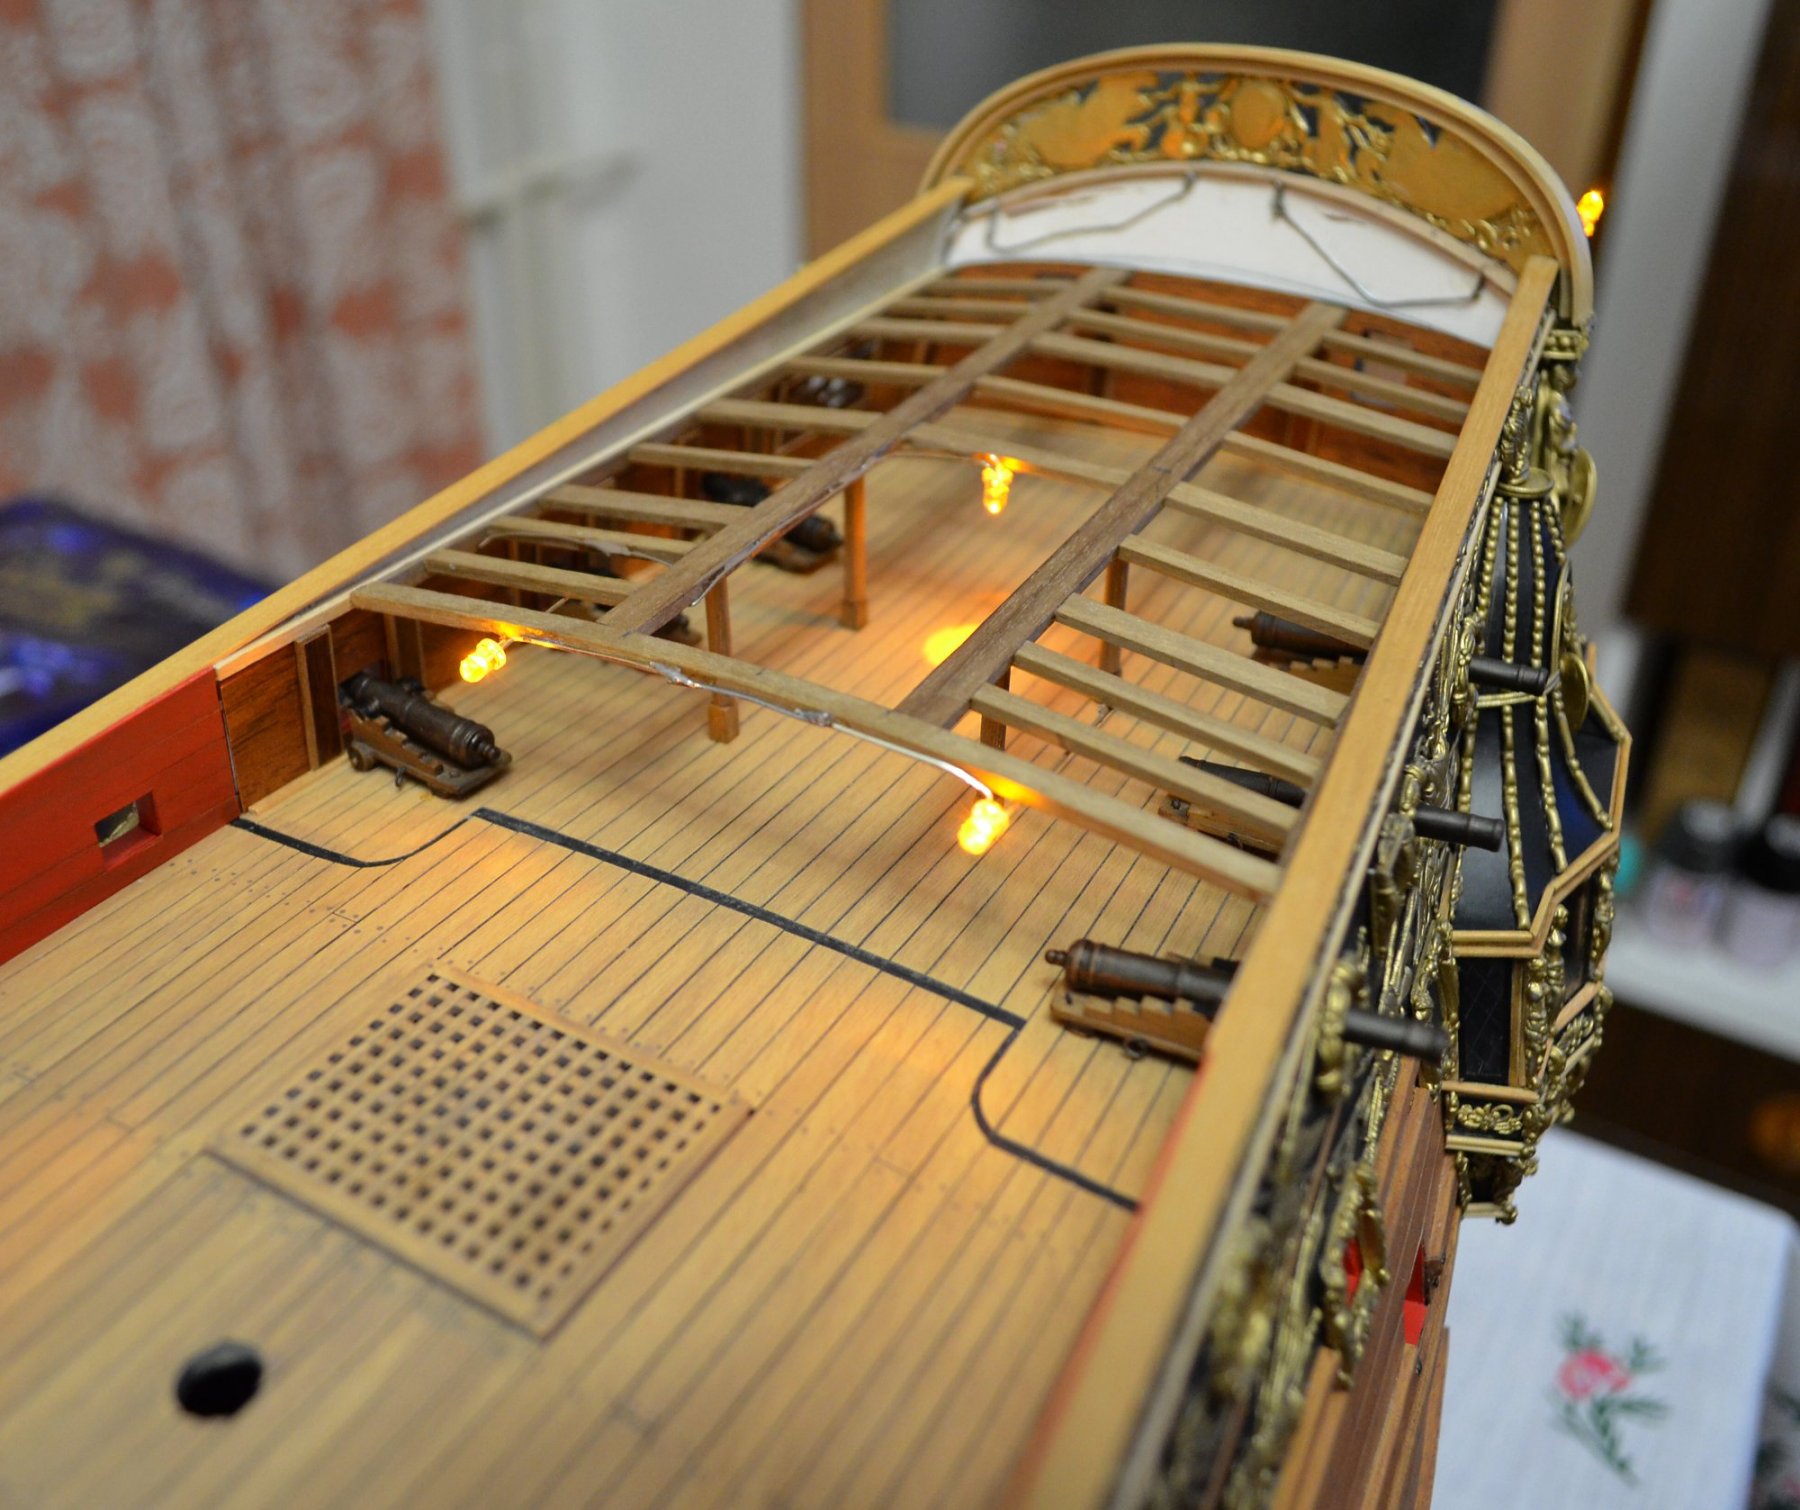
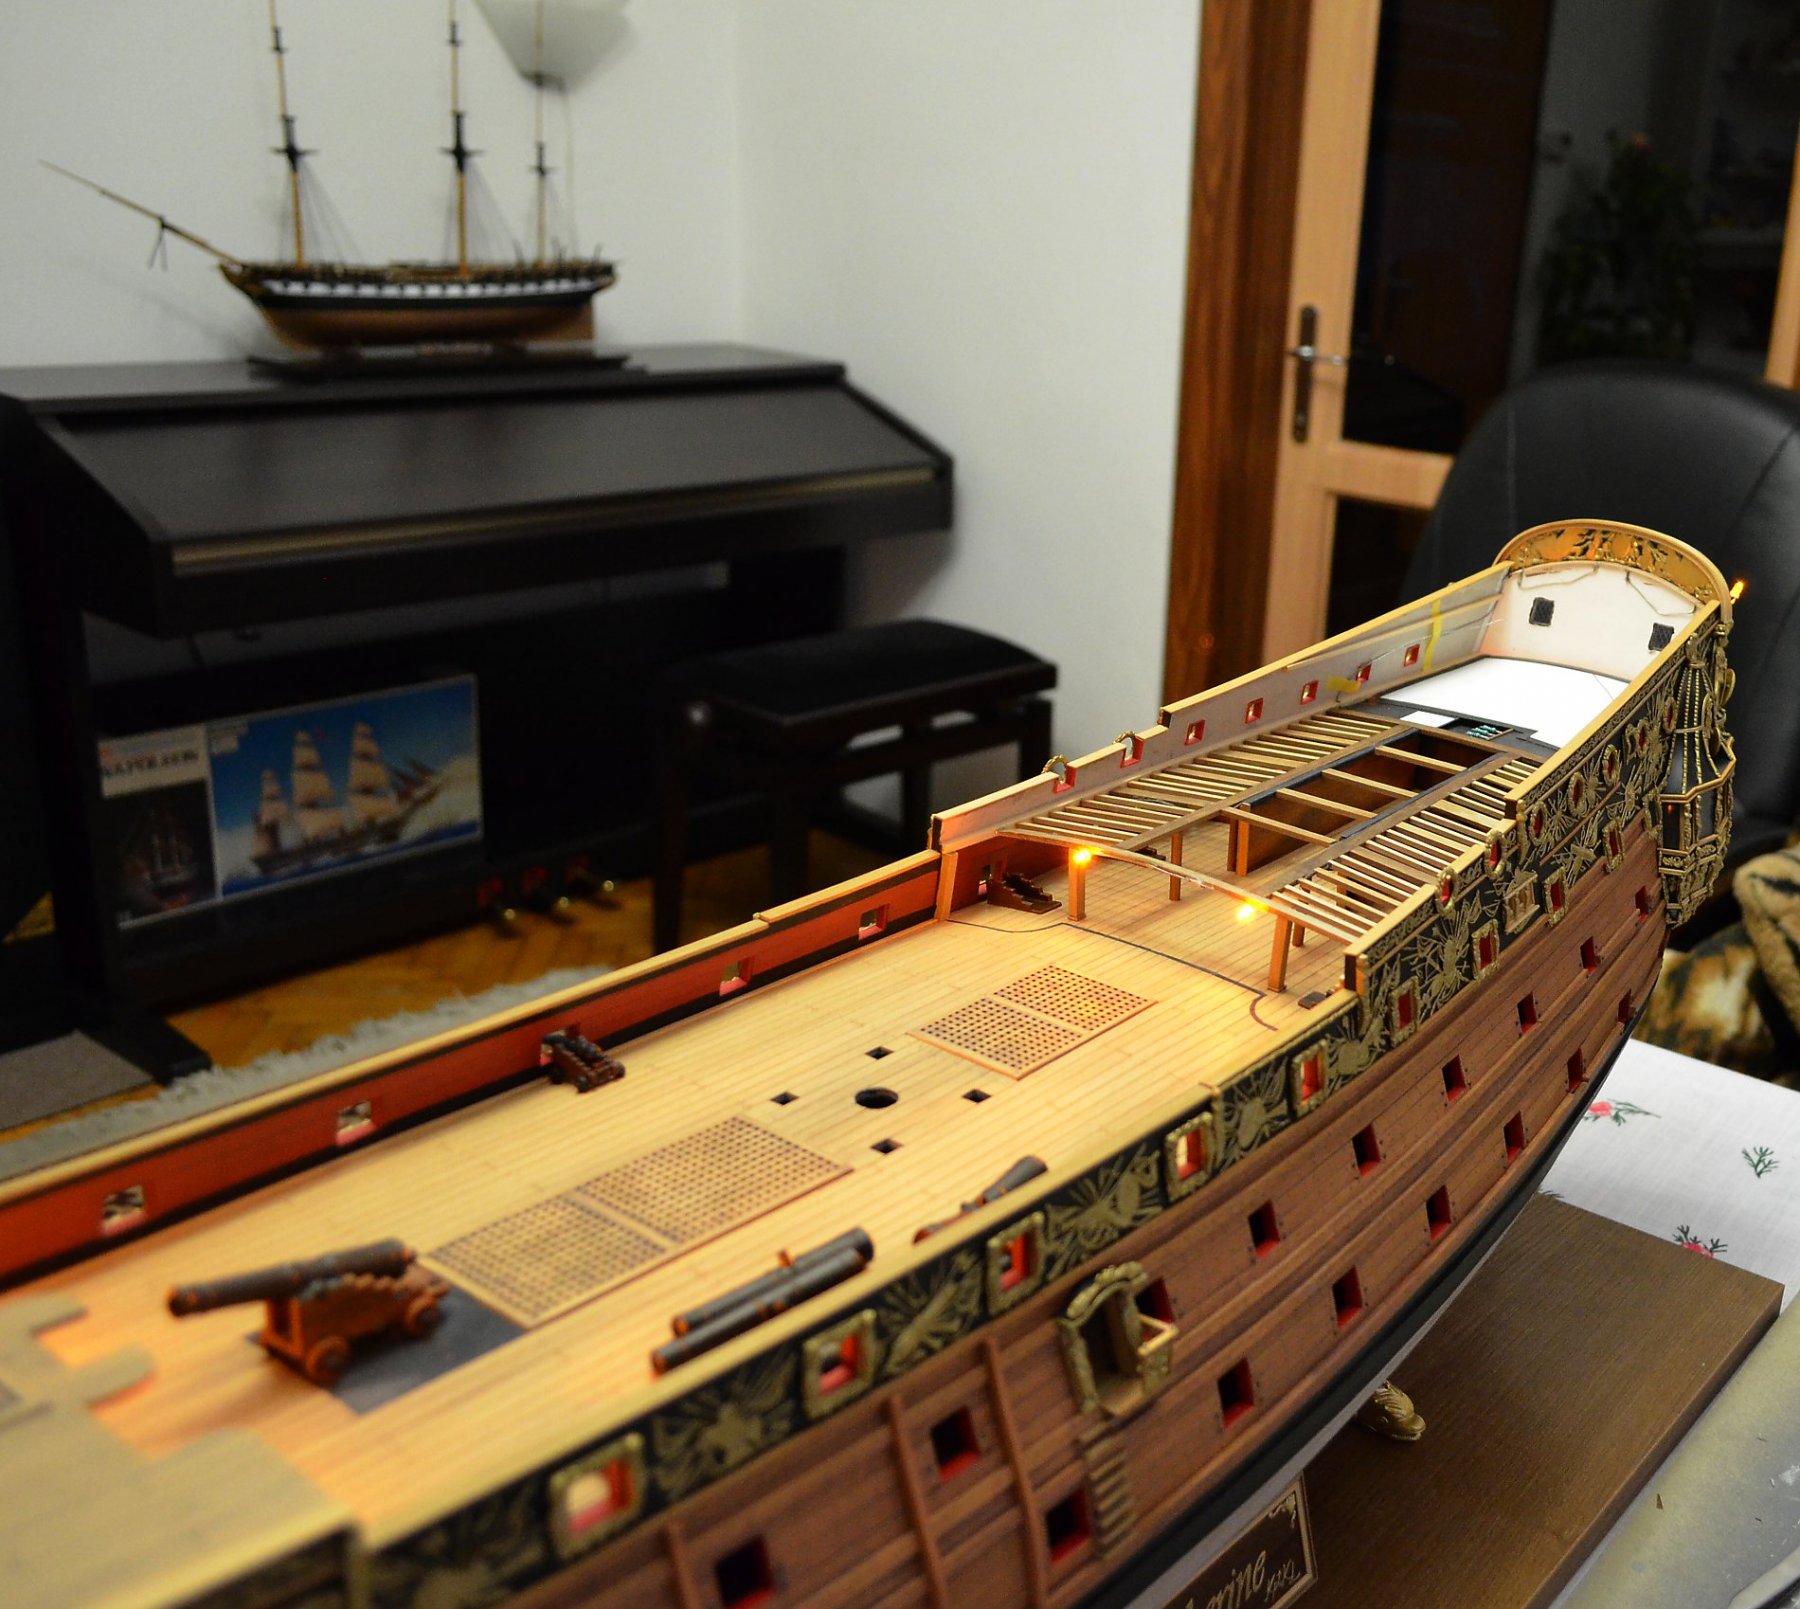
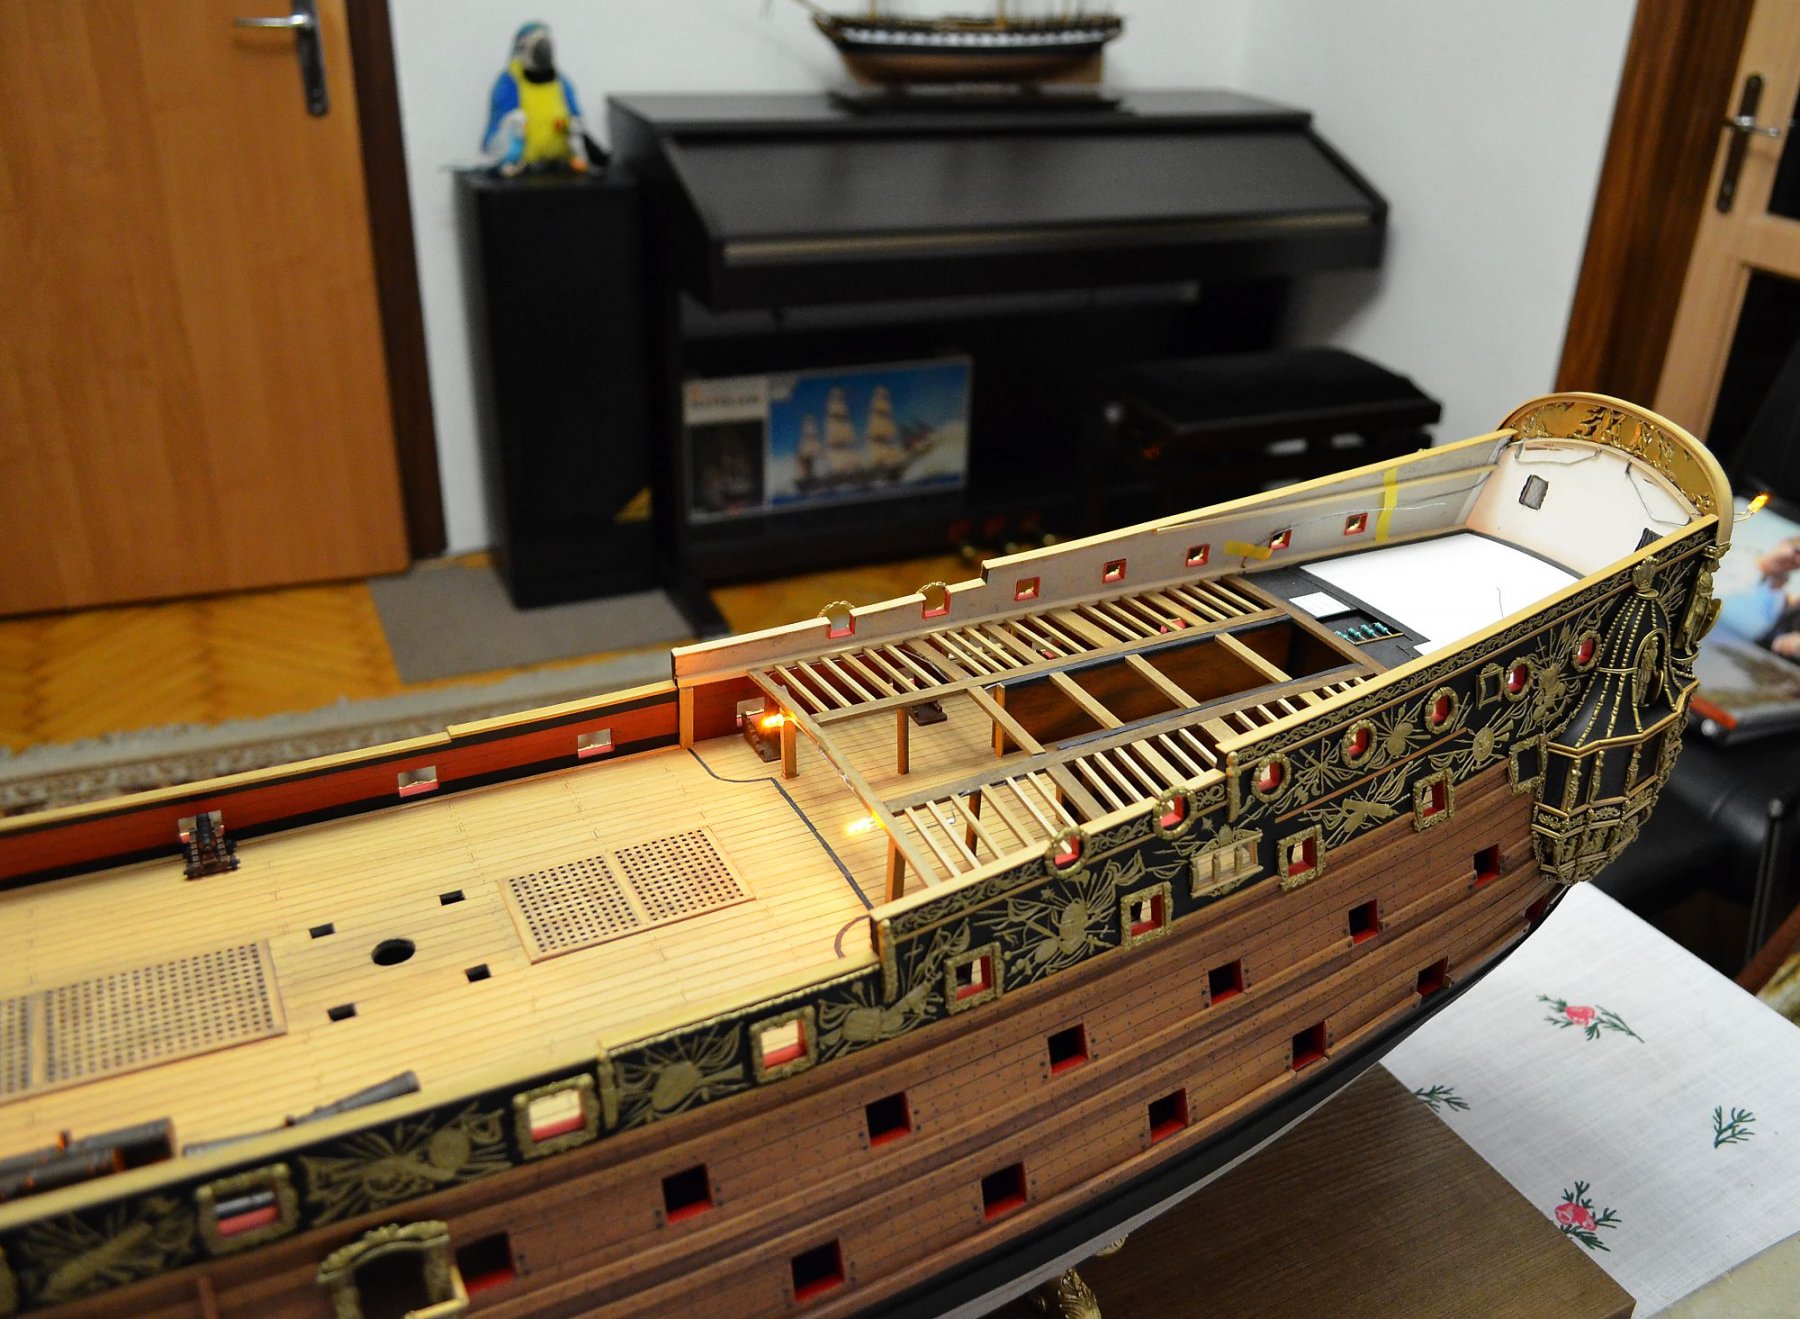
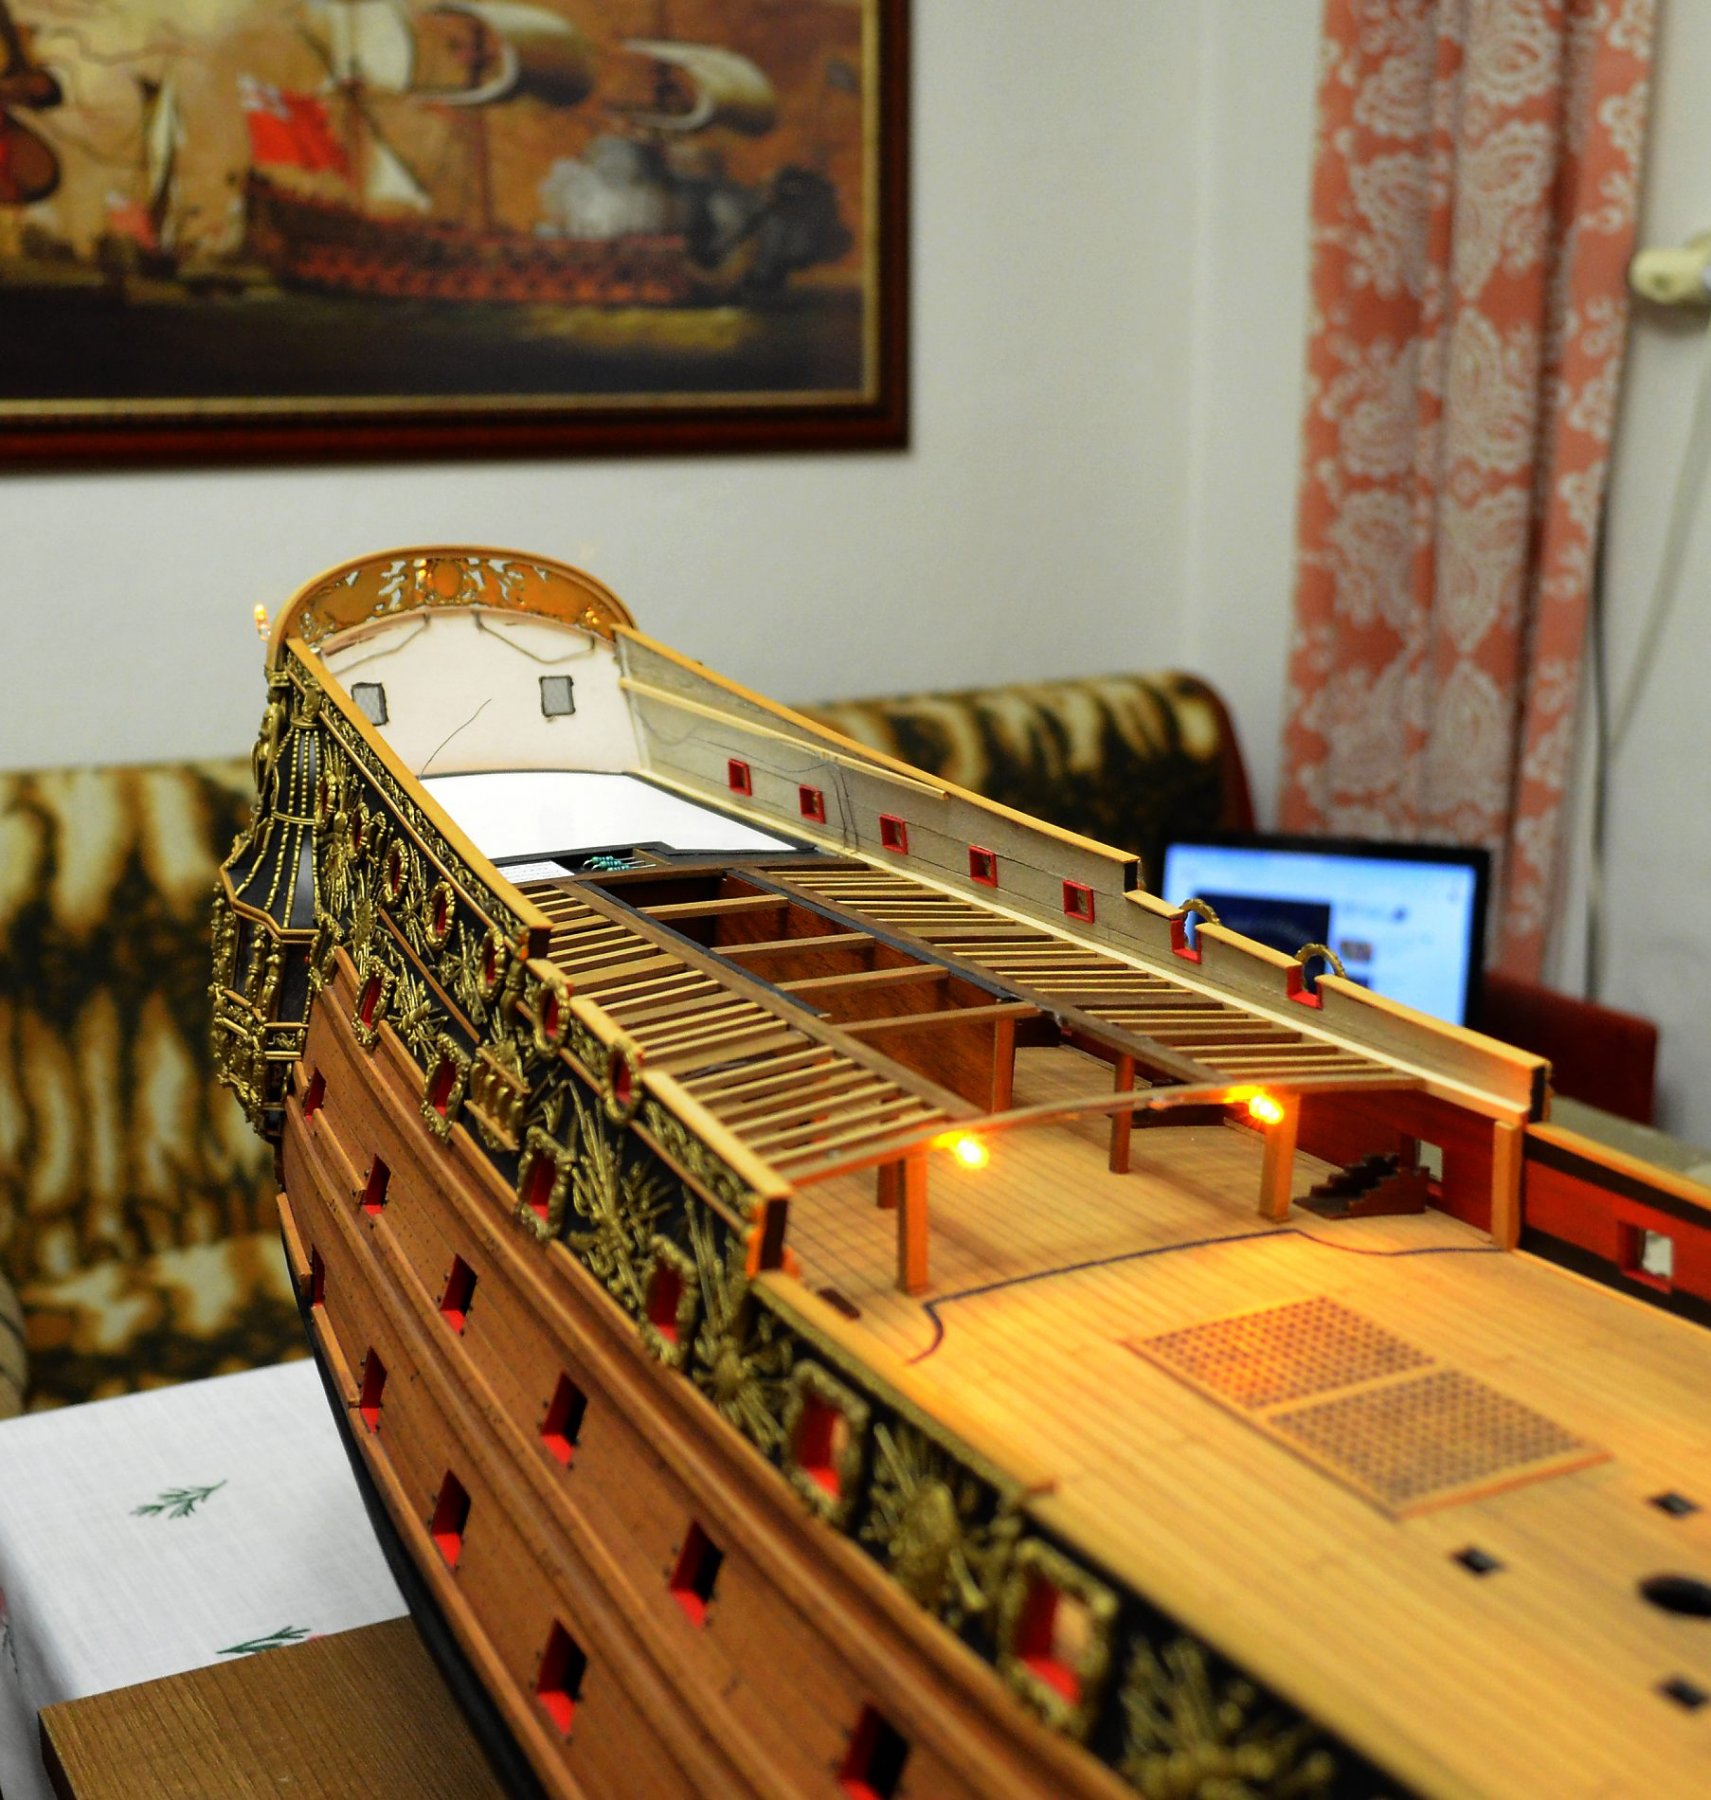
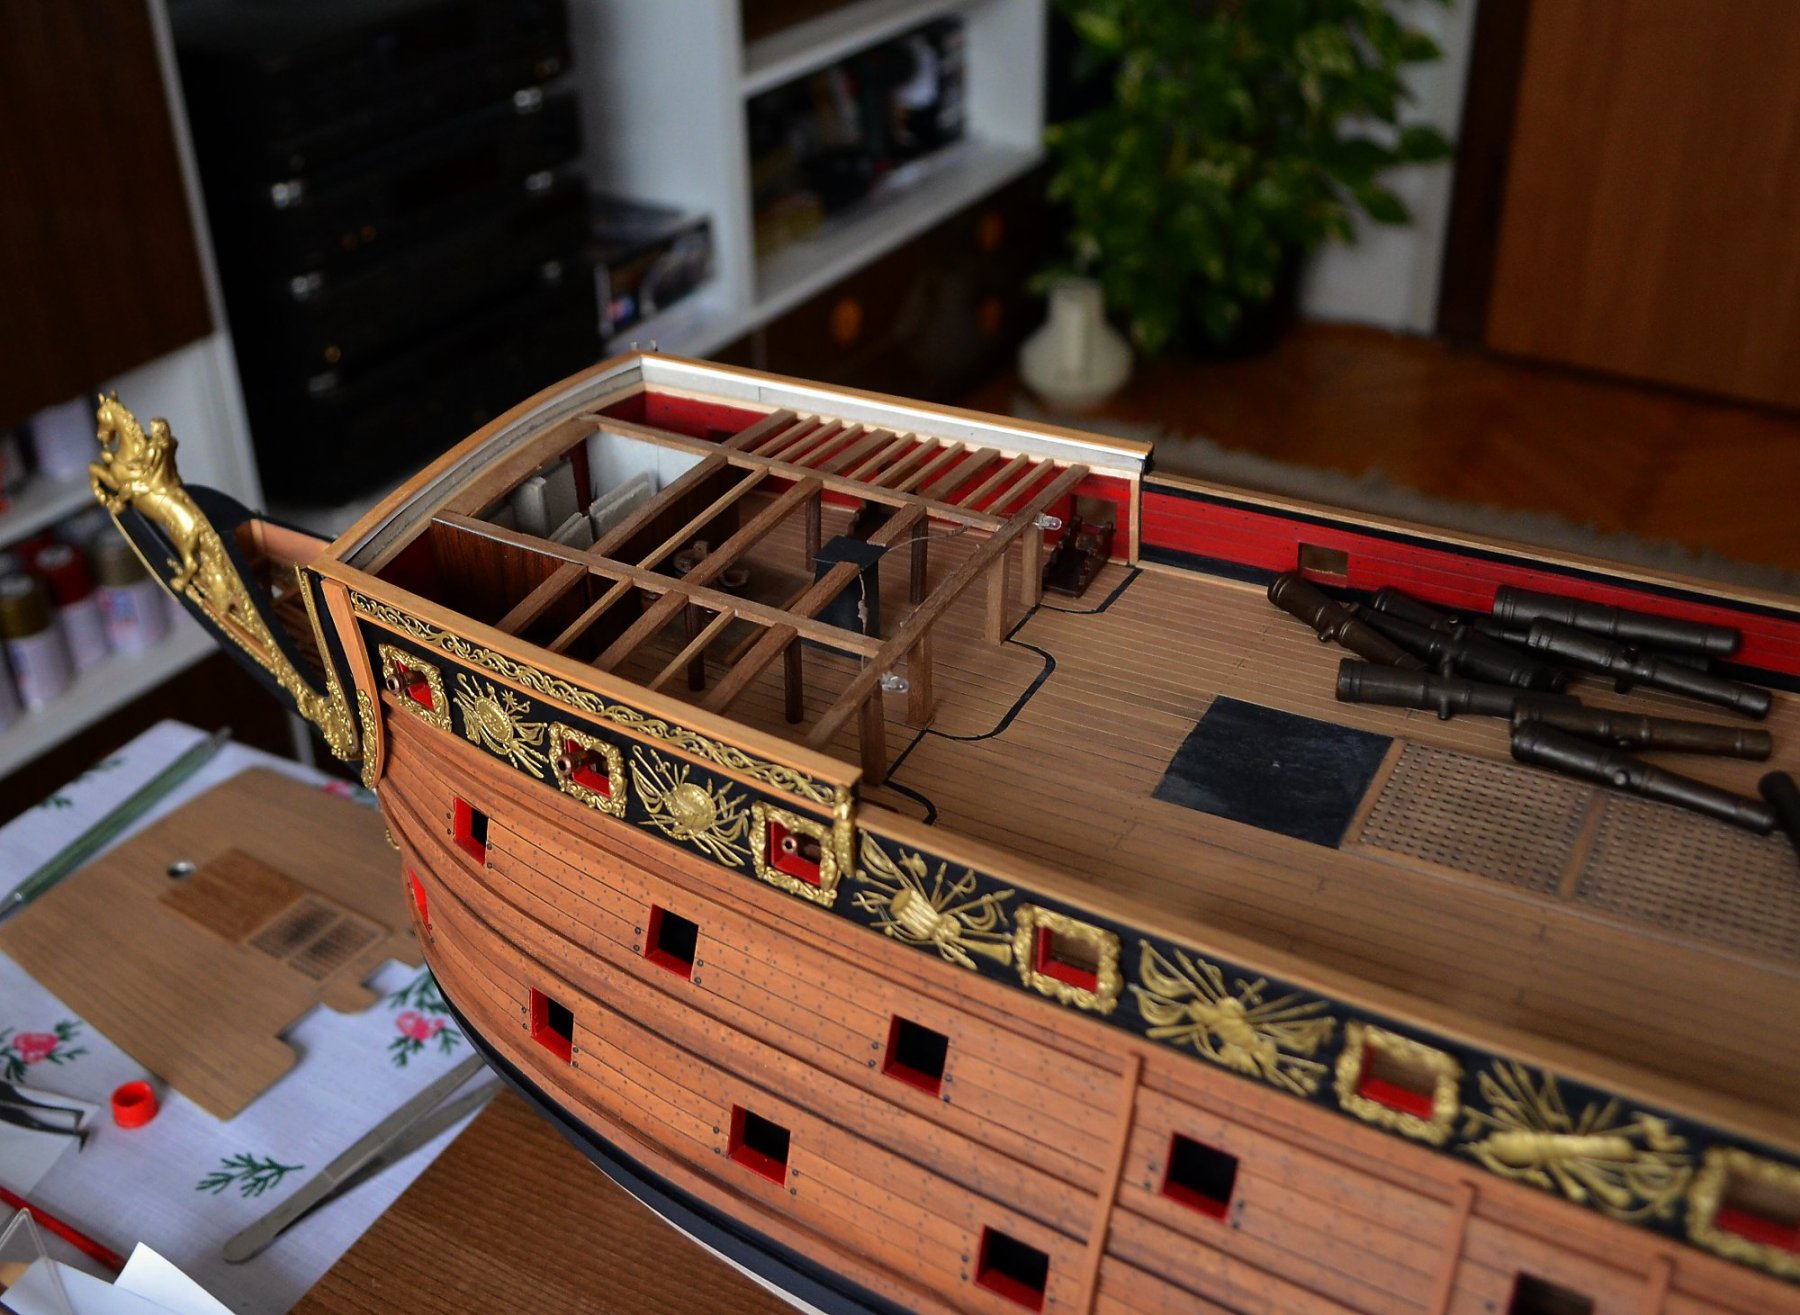
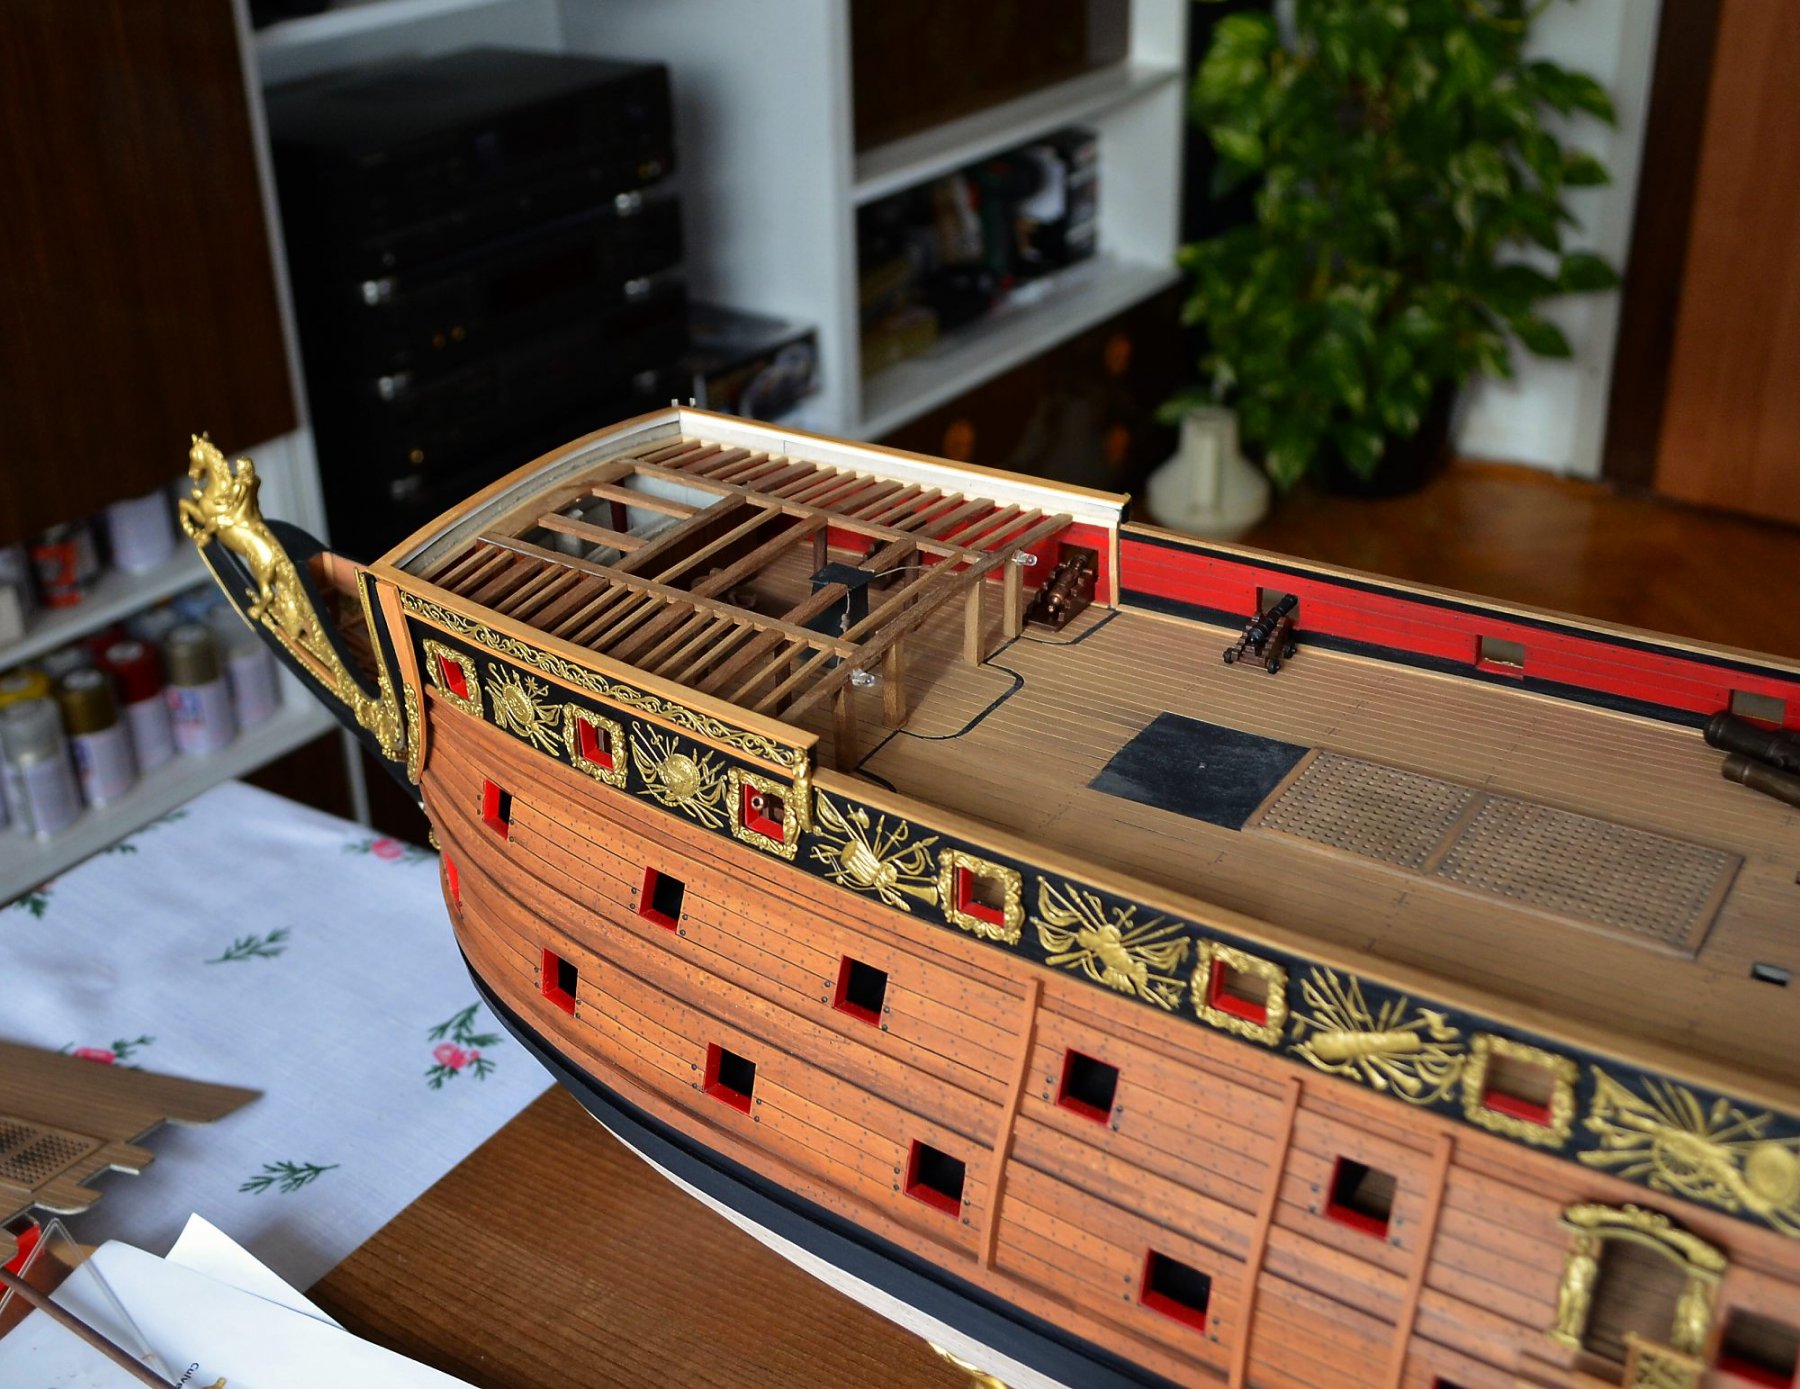
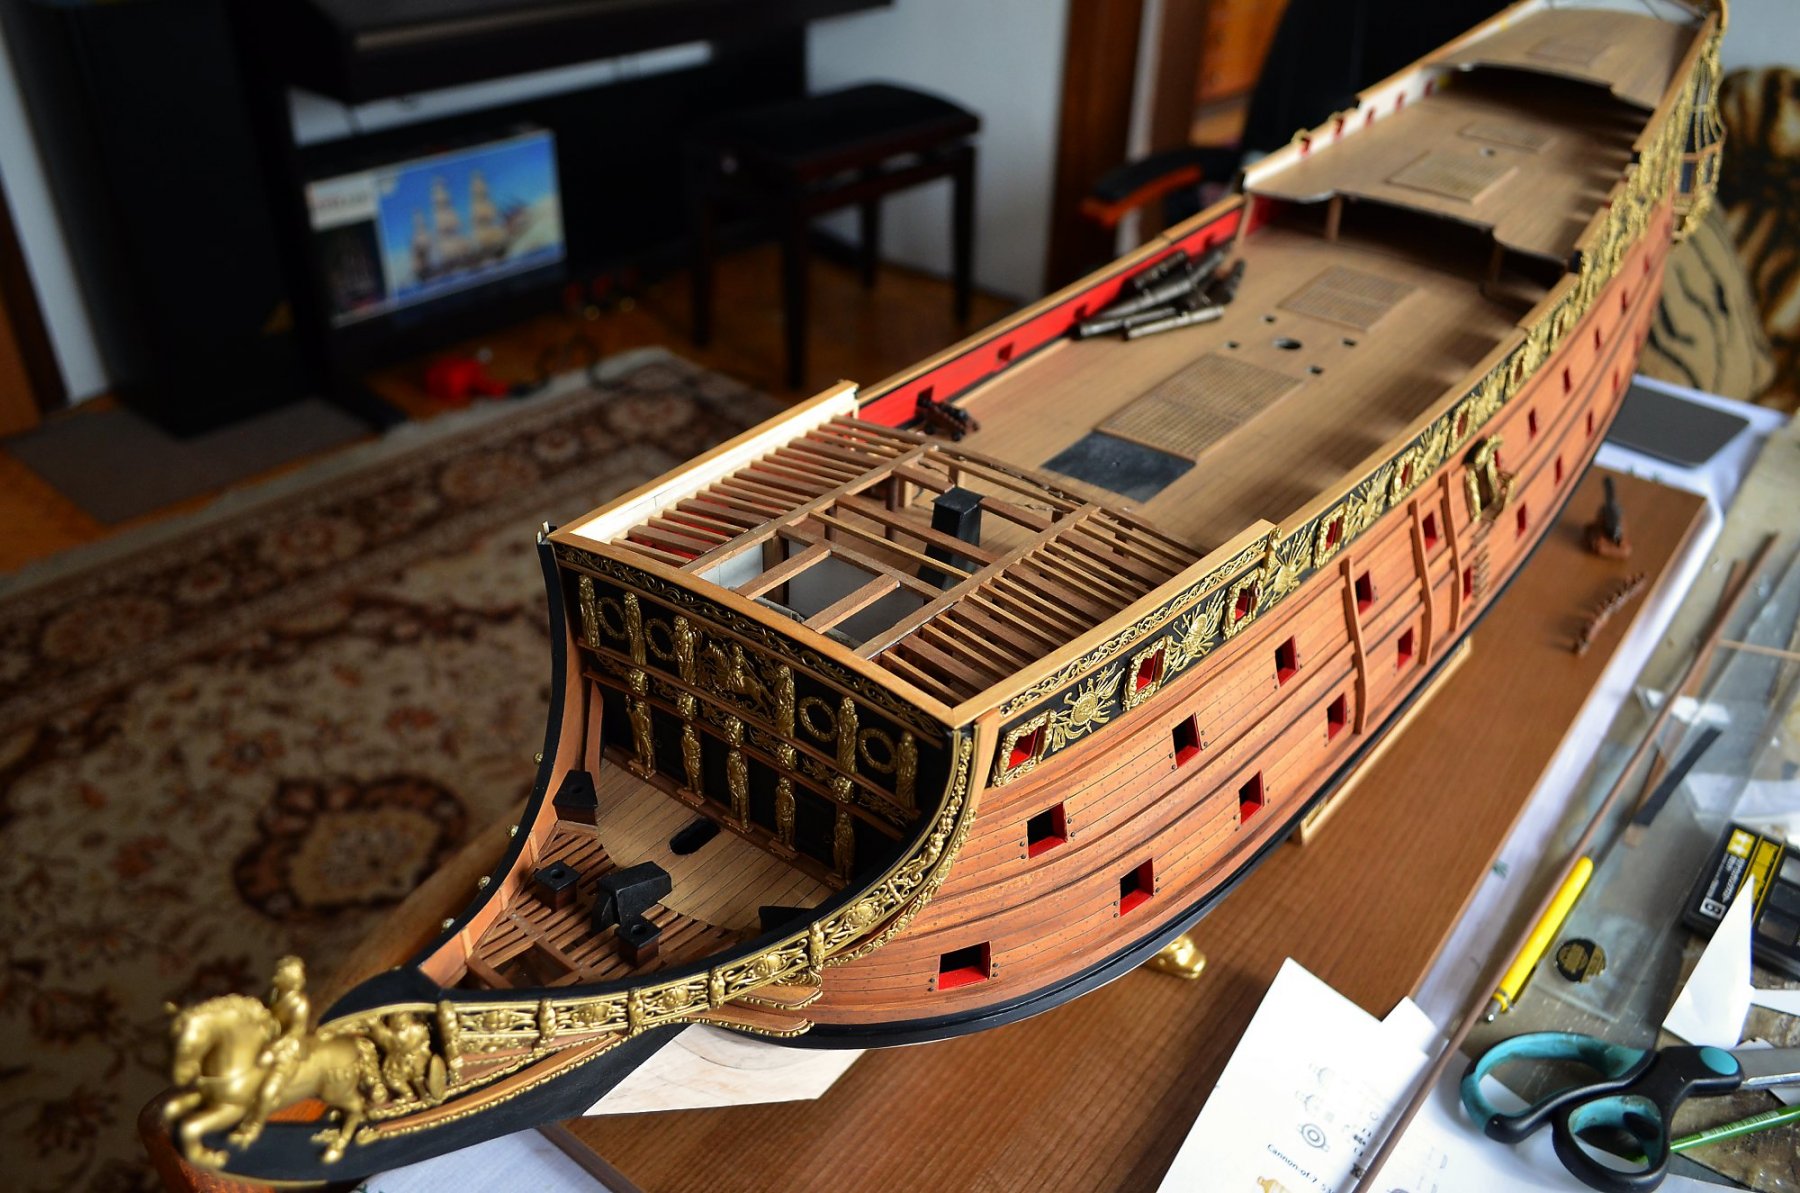
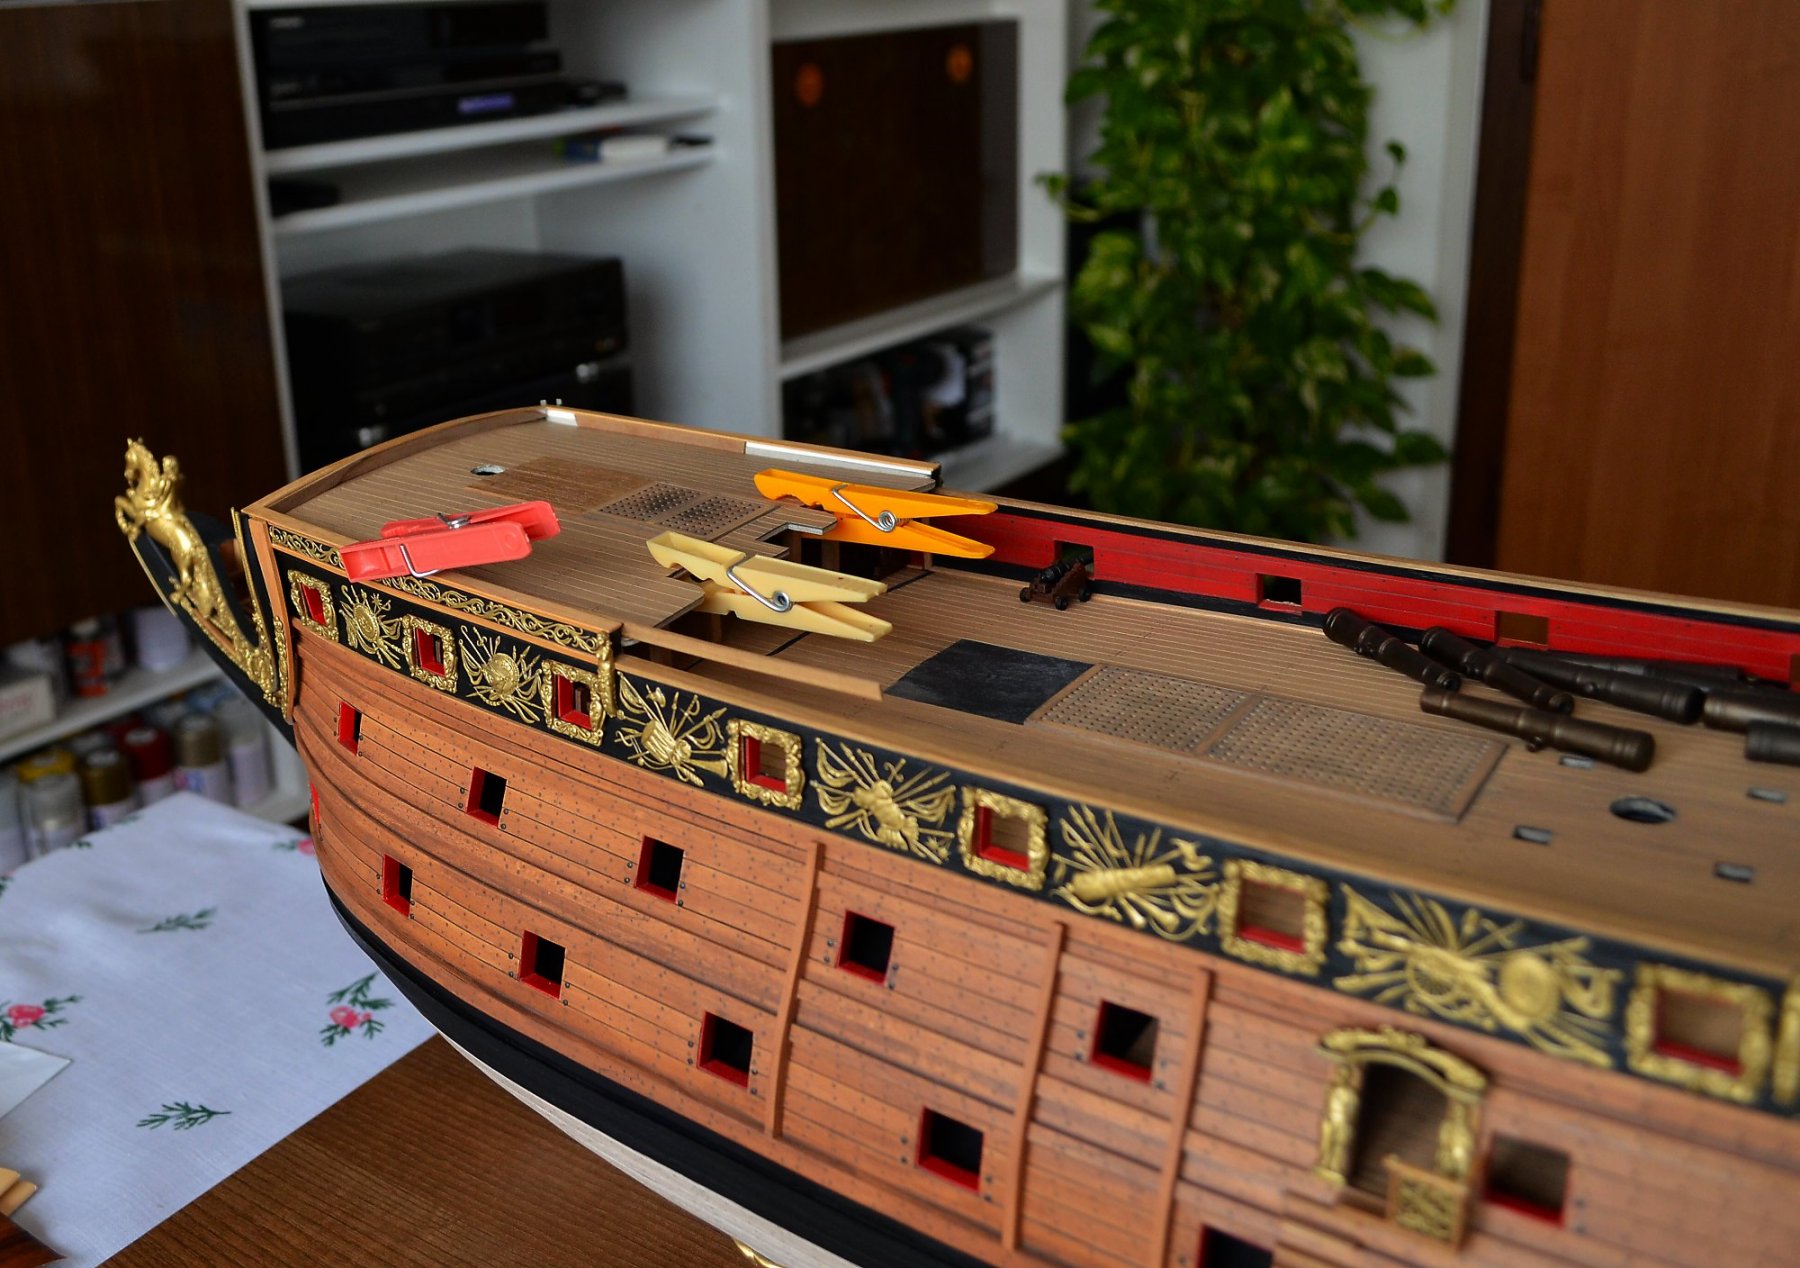
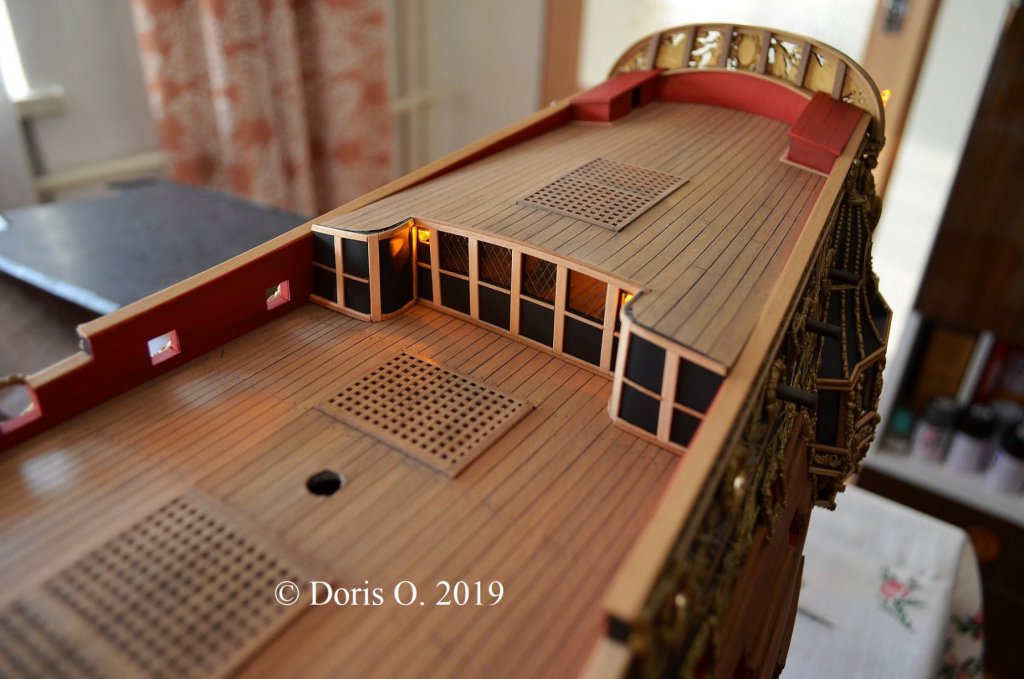
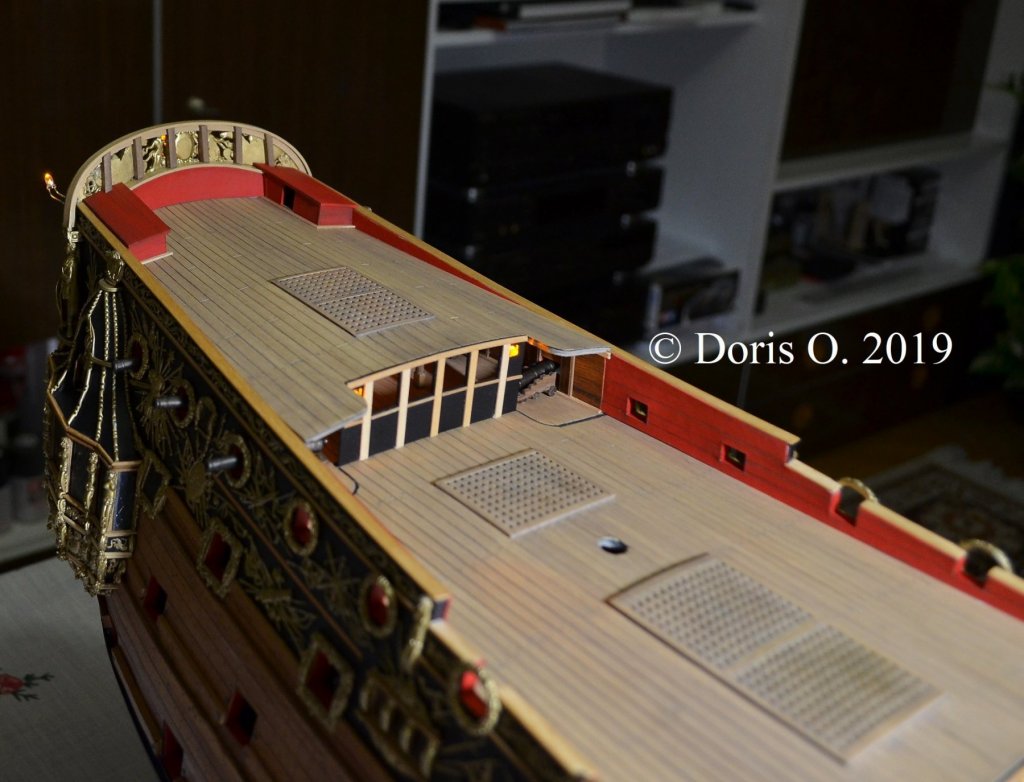
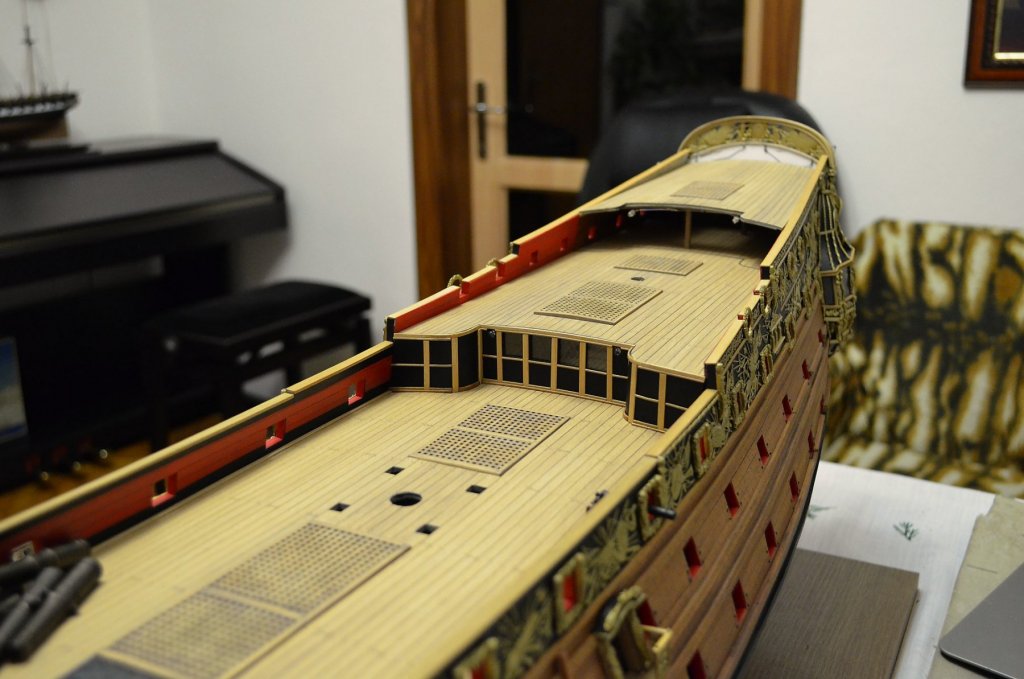
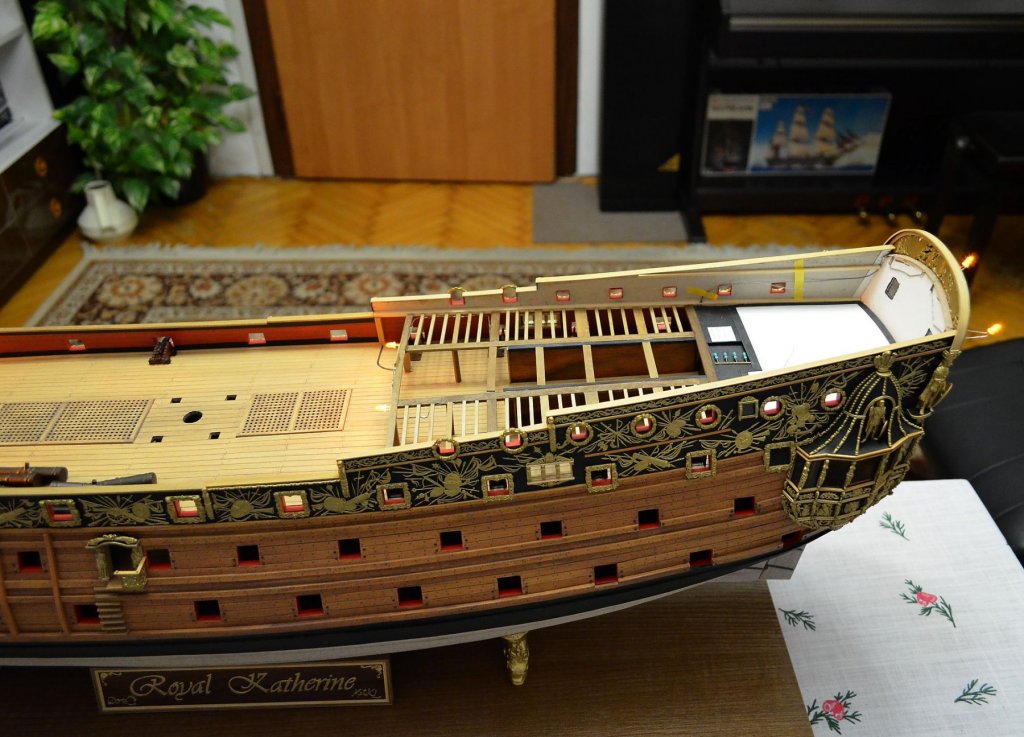
Hello dear friends, thank you all very much for your comments, praise and kind words. I do appreciate your support a lot and feel very honored. To Rob: I learned all my techniques by myself without any form of formal instruction or education but I was also inspired by the work of other people from whom I also learned many useful things. And still try to learn new ways to do things nicer and better. My skills are natural although it took many years to improve these skills and achieve such results. Nothing is withouth hard work and effort. No problem, I can take some pics next time and post here. In fact, the process is still the same as I mentioned here before, so you can have a look in previous posts, where you find some of my pics from applying these foils. ******************************************* There are plenty of new things on the model. I had to modify my pics and add my signature to protect them, cause some manufacturers used my pics for commercial purposes to offer their second-class goods. Customers have seen pictures of the finished model with my own decoration, but the manufacturer was selling them something completely different. Have a look at this - there is the stern of my model Sovereign of the Seas with my own hand-made sculptures and decoration, but the offer is for Amati products: http://www.hobbiesguinea.es/en/amati-models-spare-parts-and-fittings-for-naval-modellers/3591-amati-models-1831-sovereign-of-the-seas-decorations-set-for-naval-modelling.html They use photos without my permission and cheat customers this way. It pissed me a lot and at first I wanted to end up with a public presentation of my work. Here are the original pics of my model, compare: https://www.modelforum.cz/viewtopic.php?f=177&t=43575&start=330#p1026535 Unfortunately such things happen sometimes and one is not enough to wonder ...😢 ************************ Let´s continue.... All decks are finished and placed in the hull: The forecastle: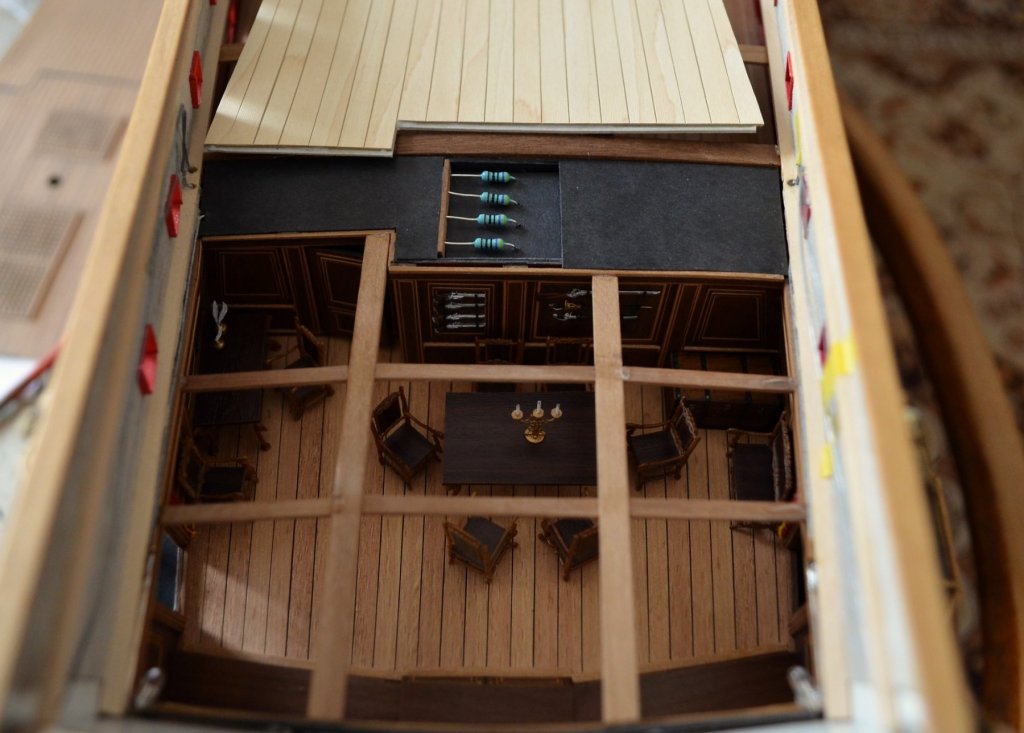


- 1,035 replies
-
- 18
-
-
- royal katherine
- ship of the line
- (and 1 more)
-
HMS ROYAL KATHERINE 1664 by Doris - 1/55 - CARD
DORIS replied to DORIS's topic in - Build logs for subjects built 1501 - 1750
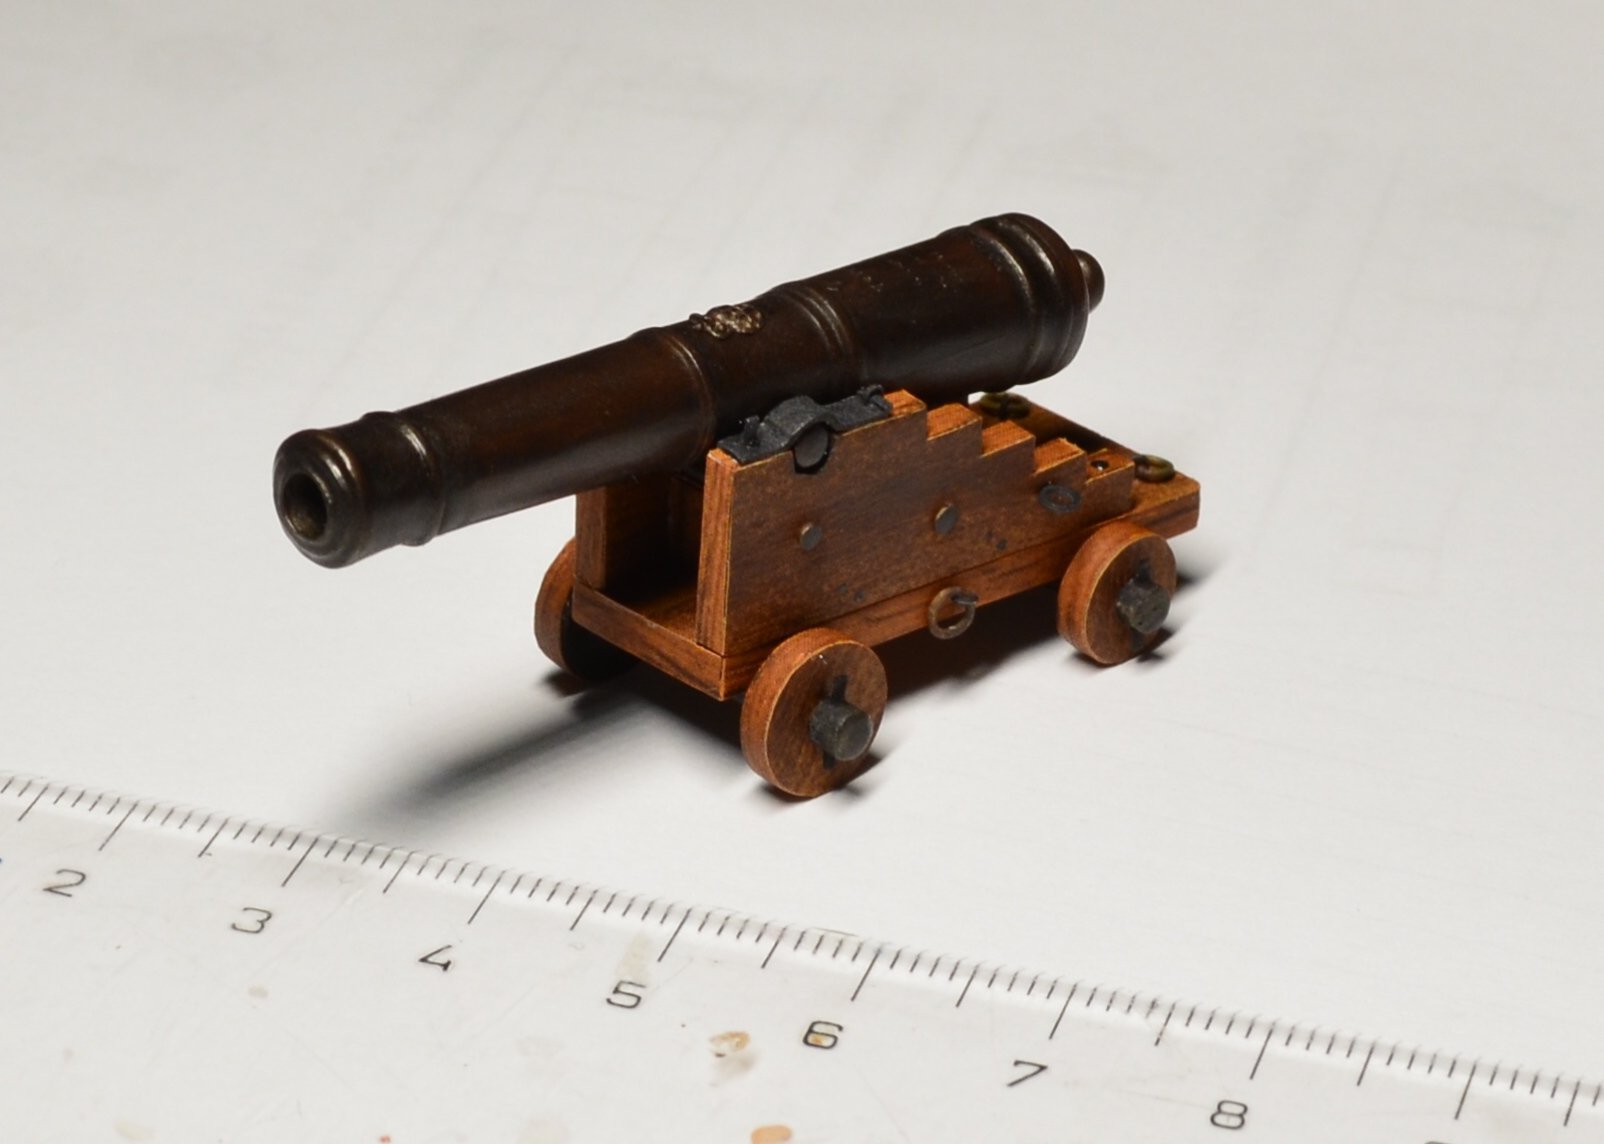
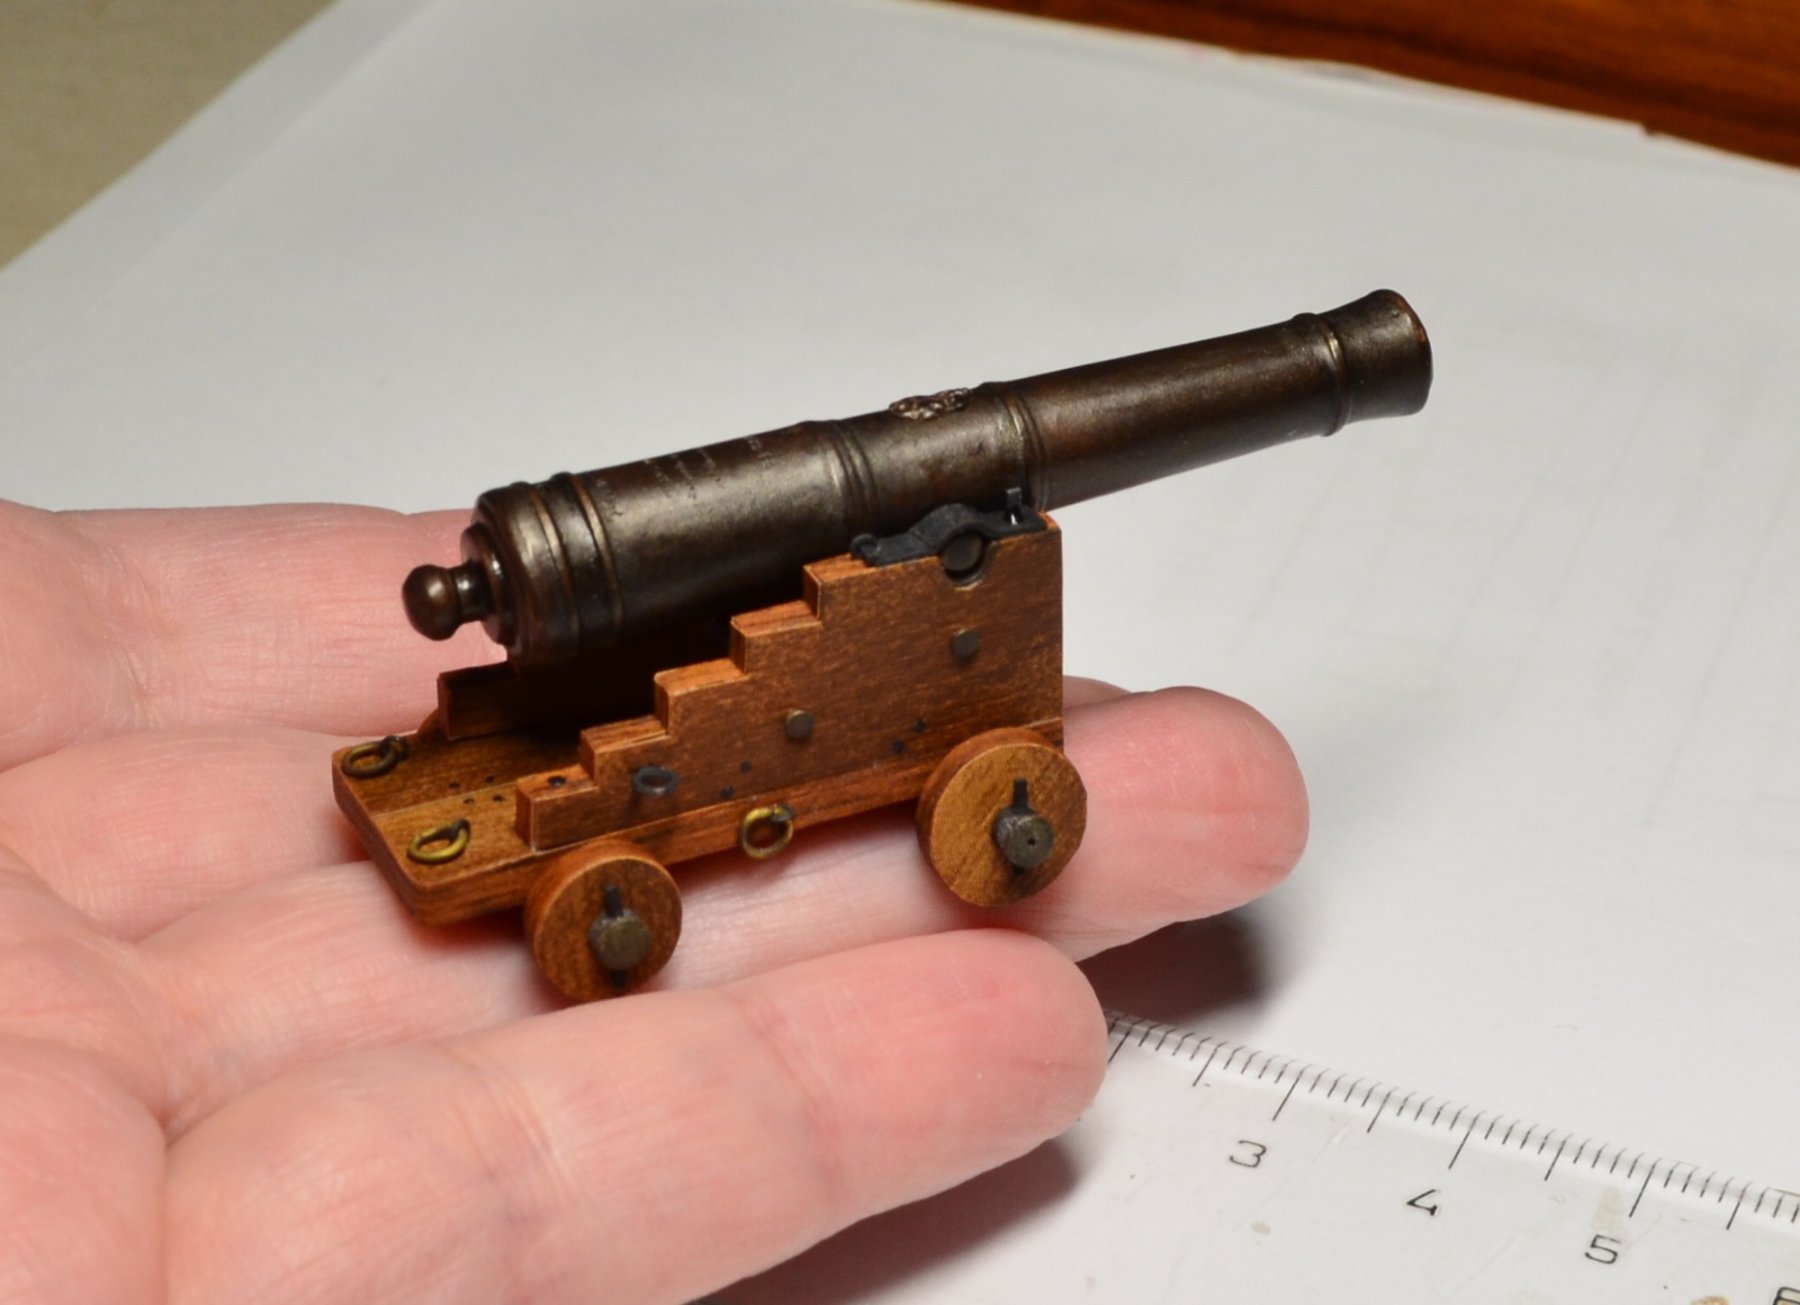
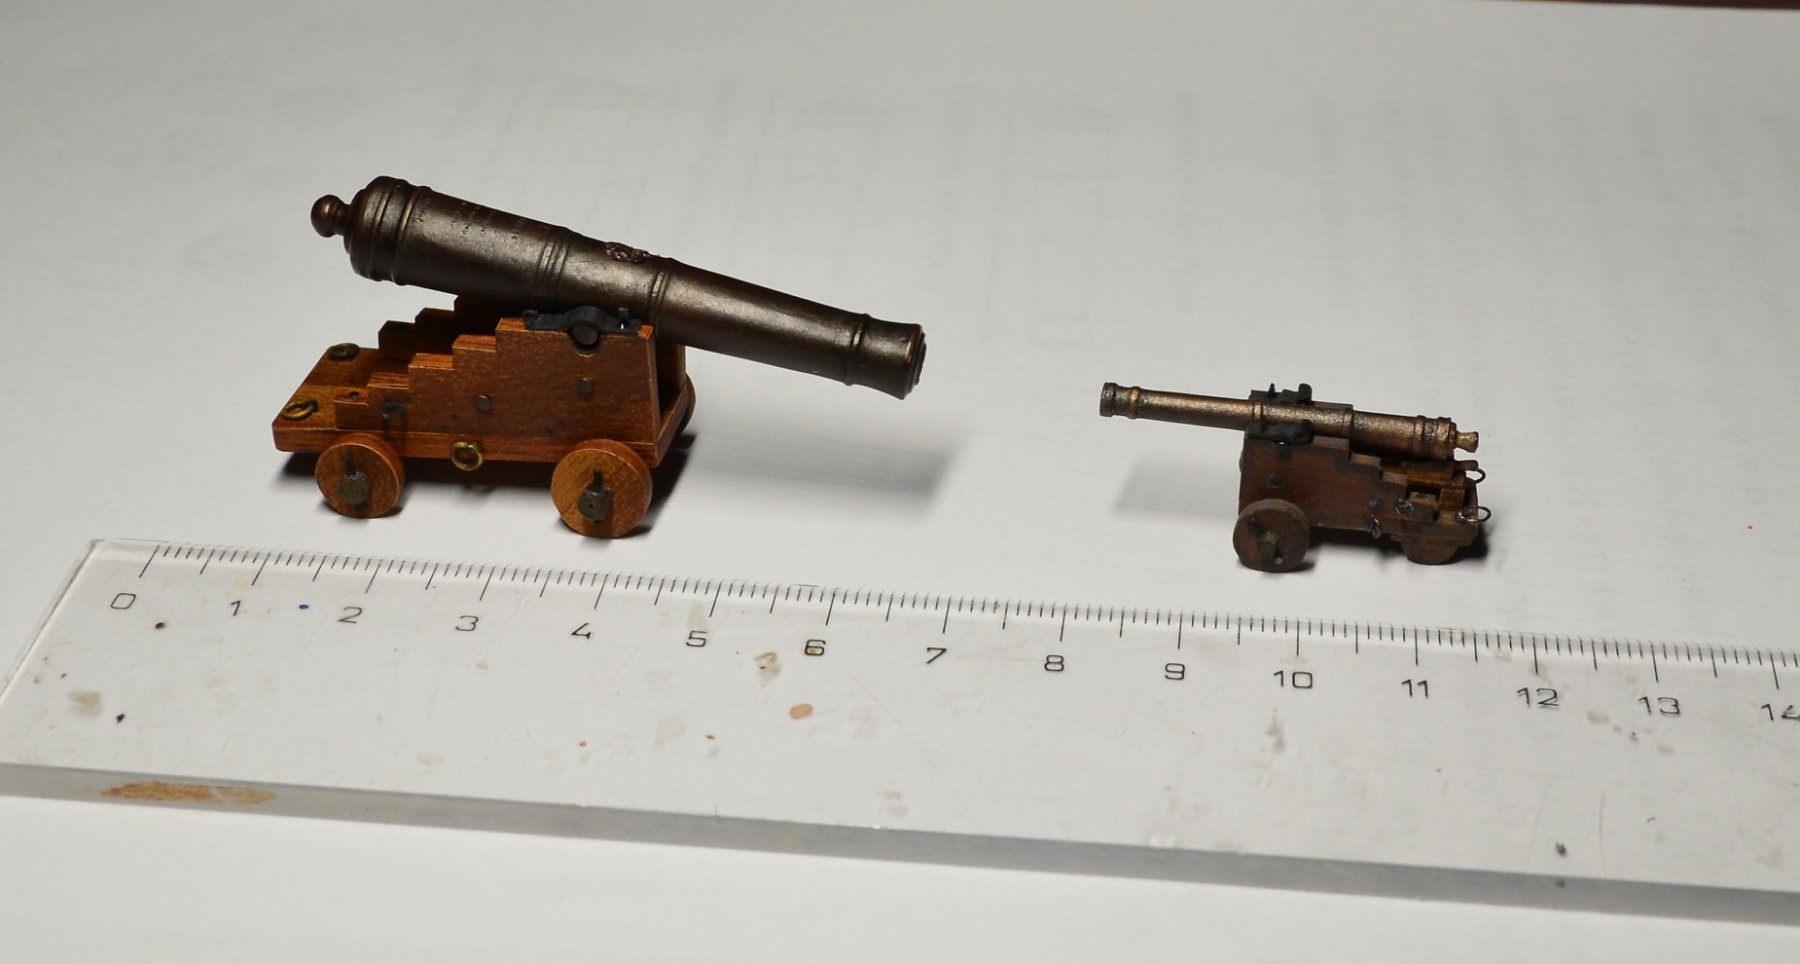
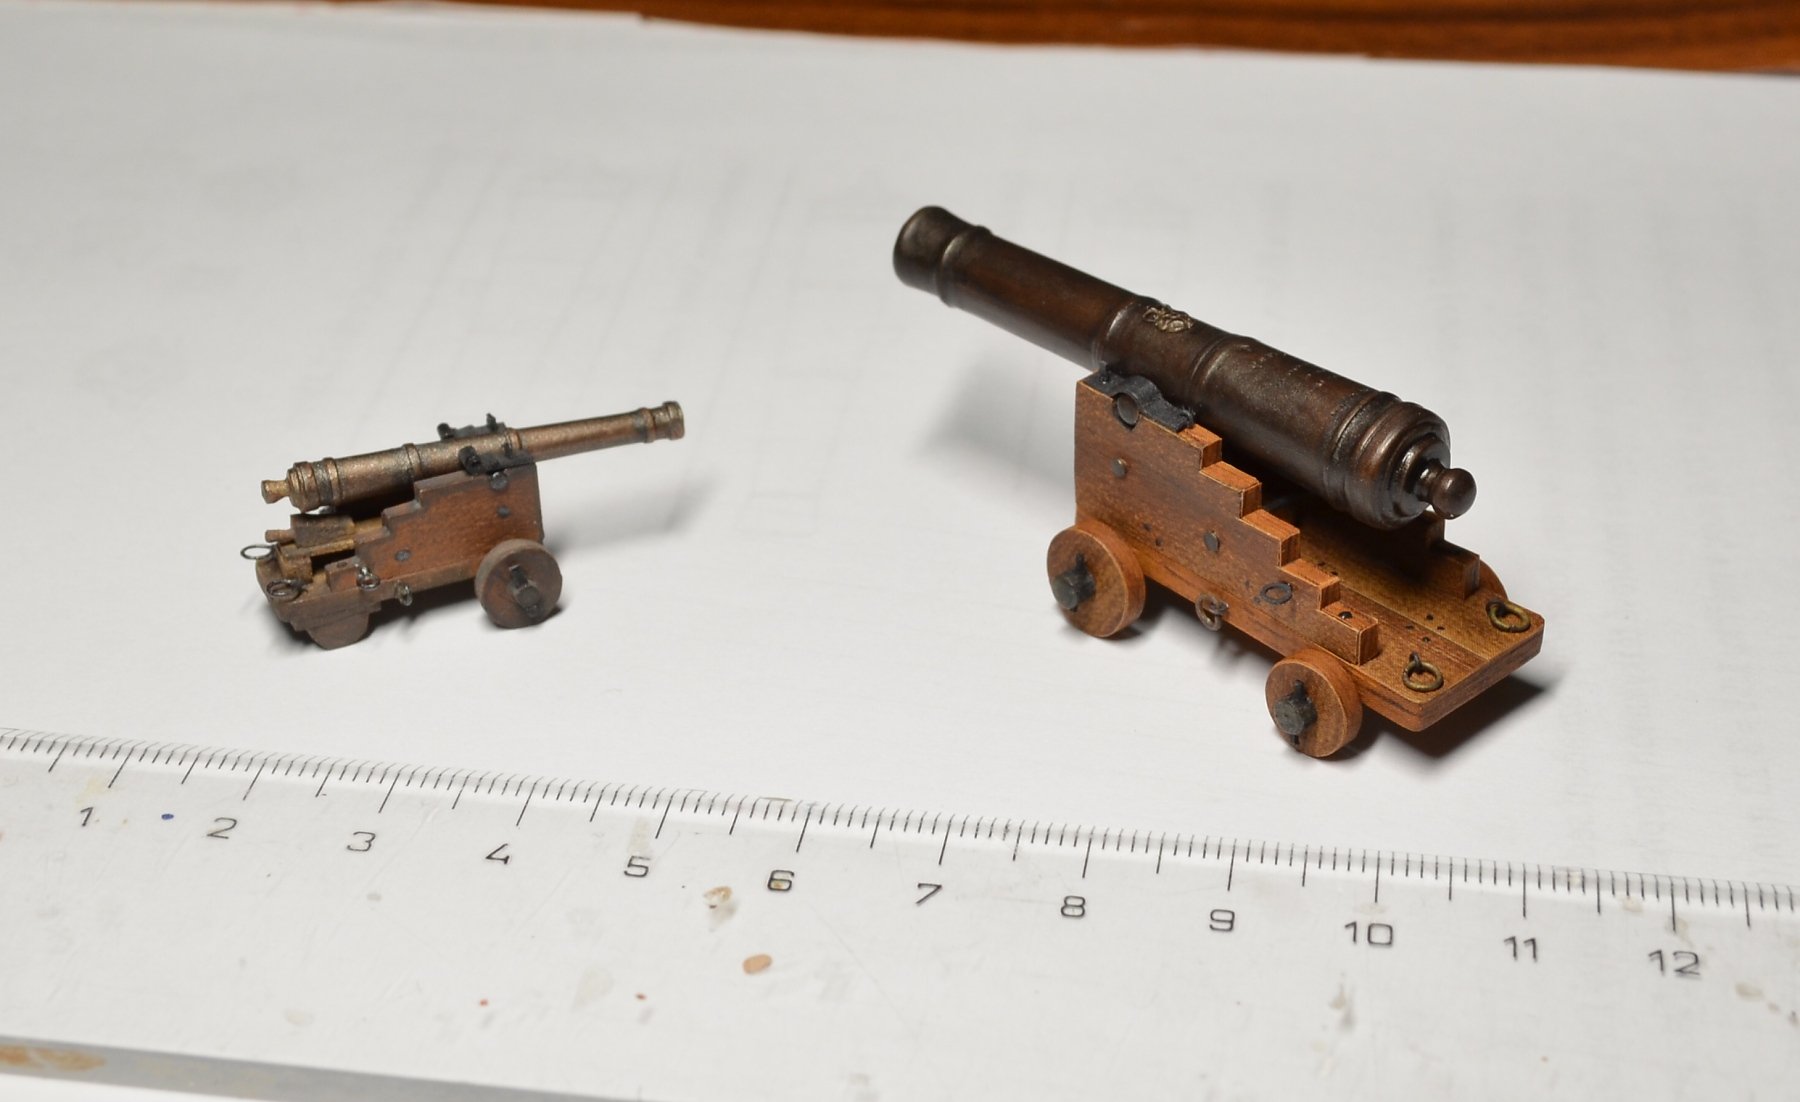
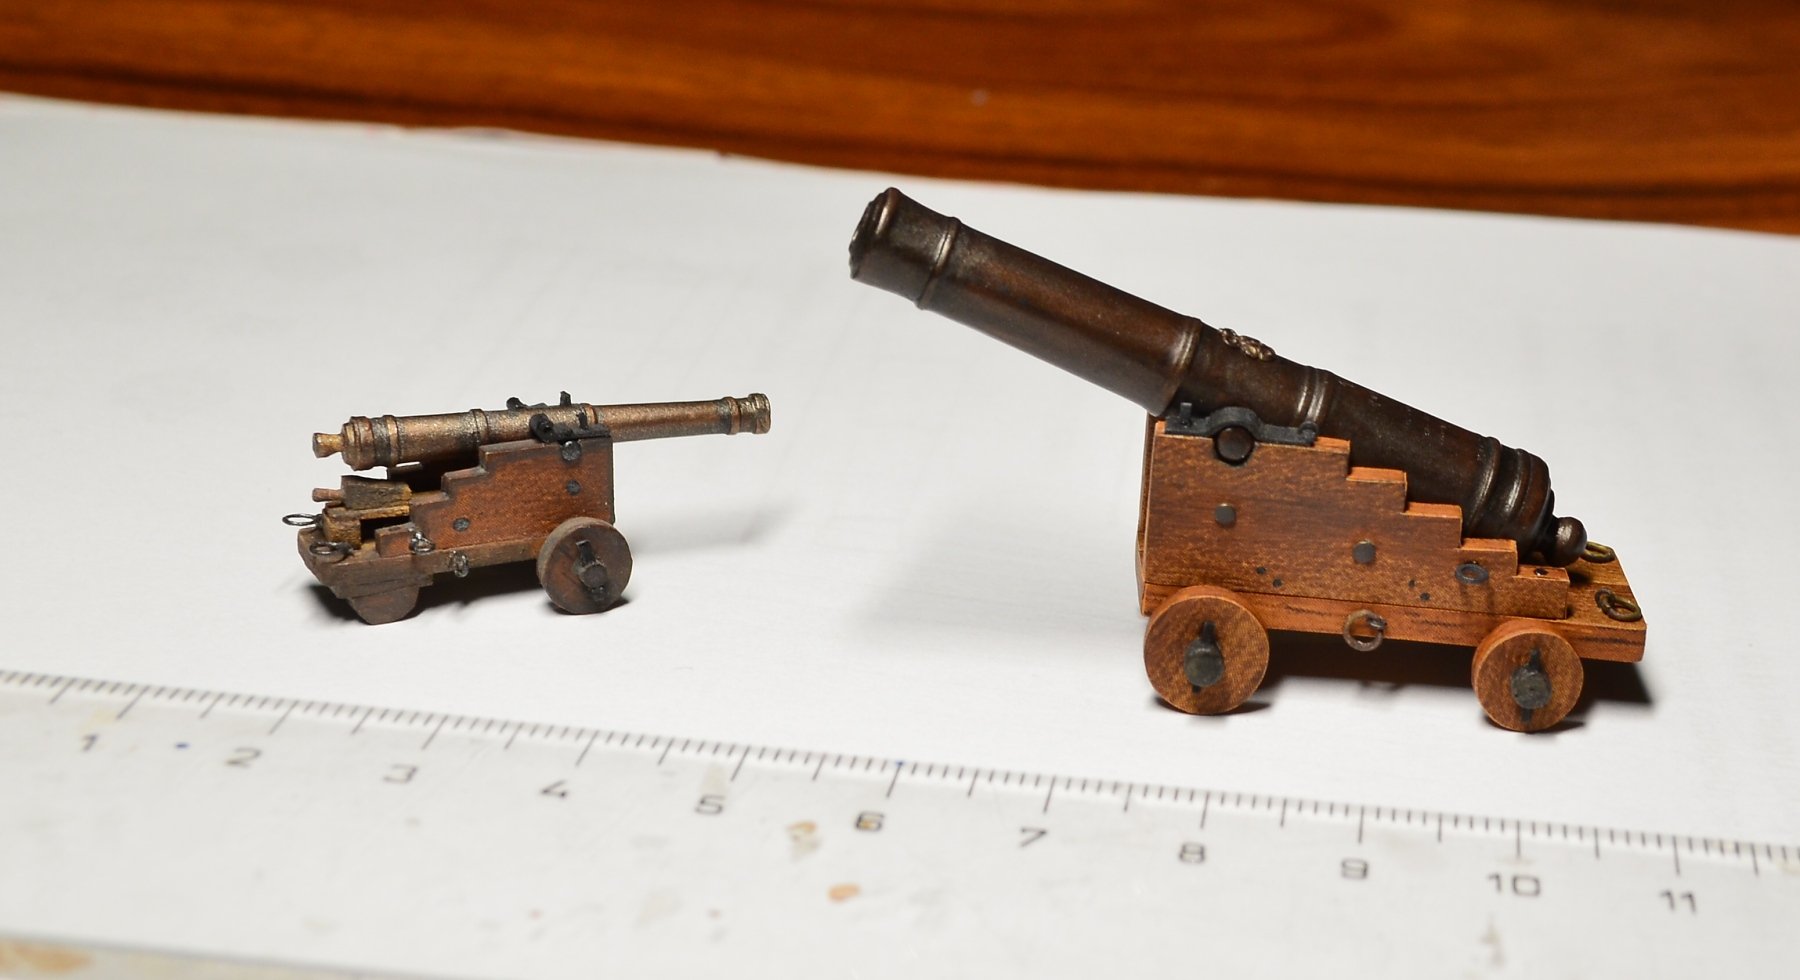
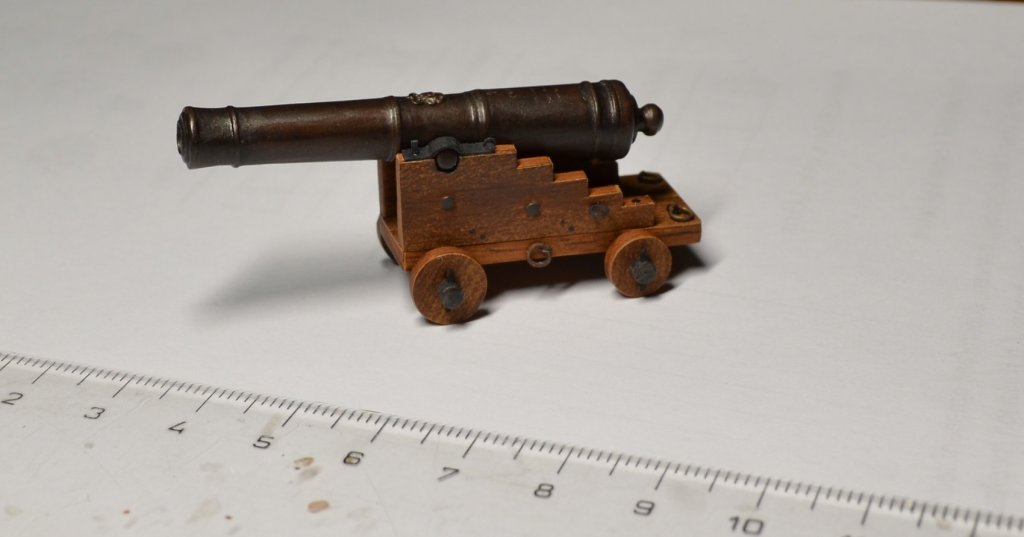
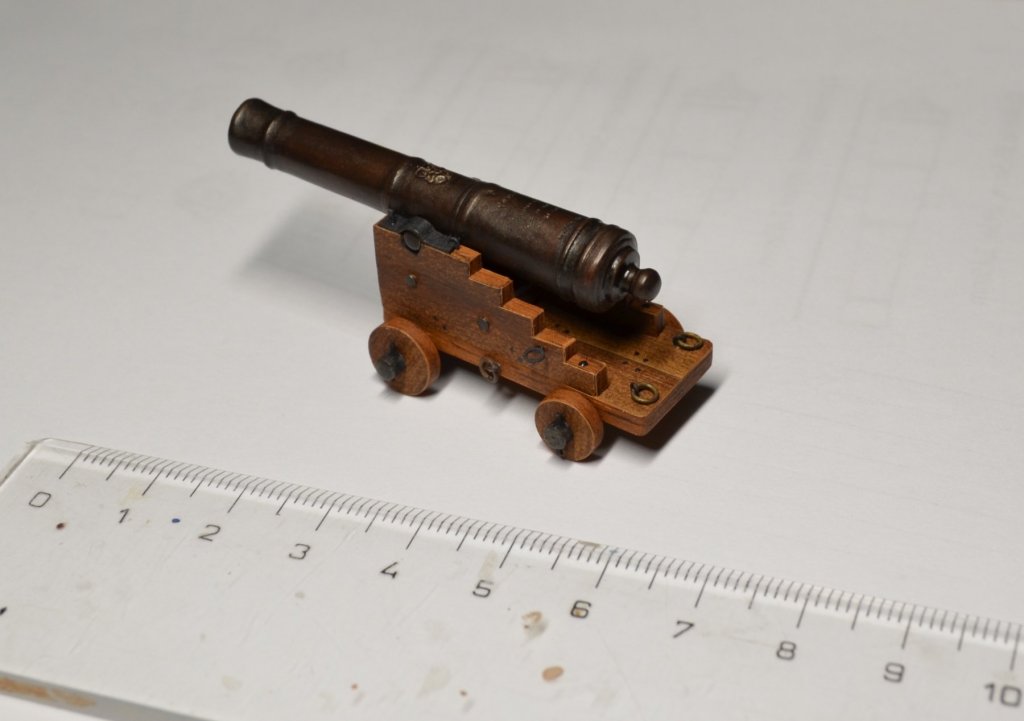
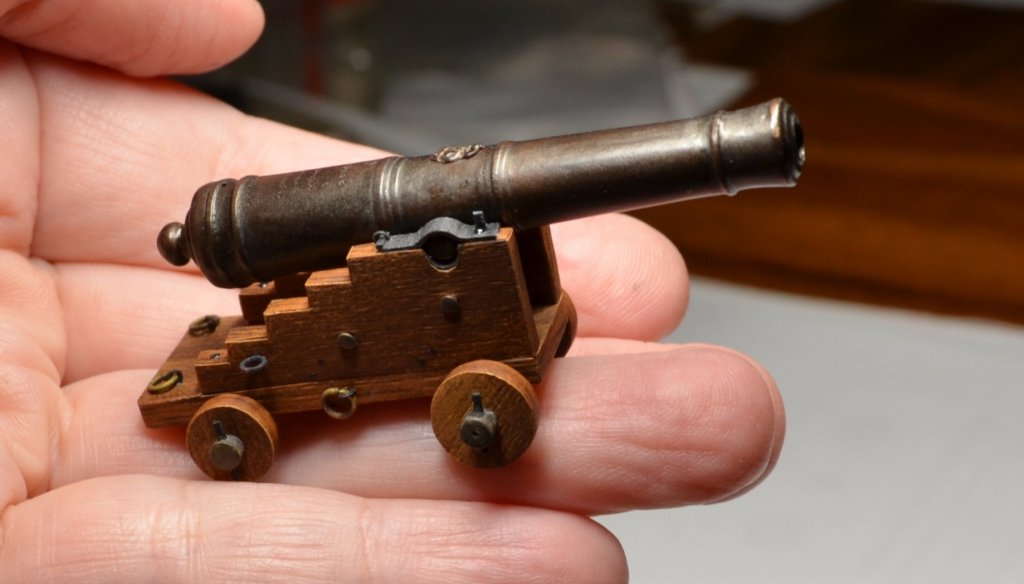
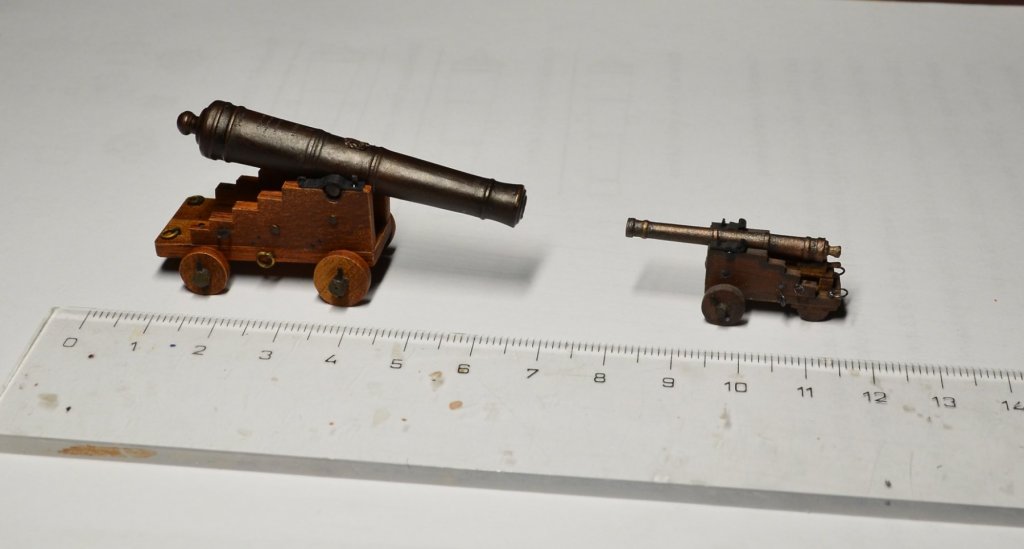
Final preparation.....😎 Done: The smaller cannon (demi-culverin drake) is from the upper deck of my Sovereign of the Seas - also a scratch-build and made out of card, but in a scale 1/90: Kind regards


- 1,035 replies
-
- 41
-
-
- royal katherine
- ship of the line
- (and 1 more)
-
HMS ROYAL KATHERINE 1664 by Doris - 1/55 - CARD
DORIS replied to DORIS's topic in - Build logs for subjects built 1501 - 1750
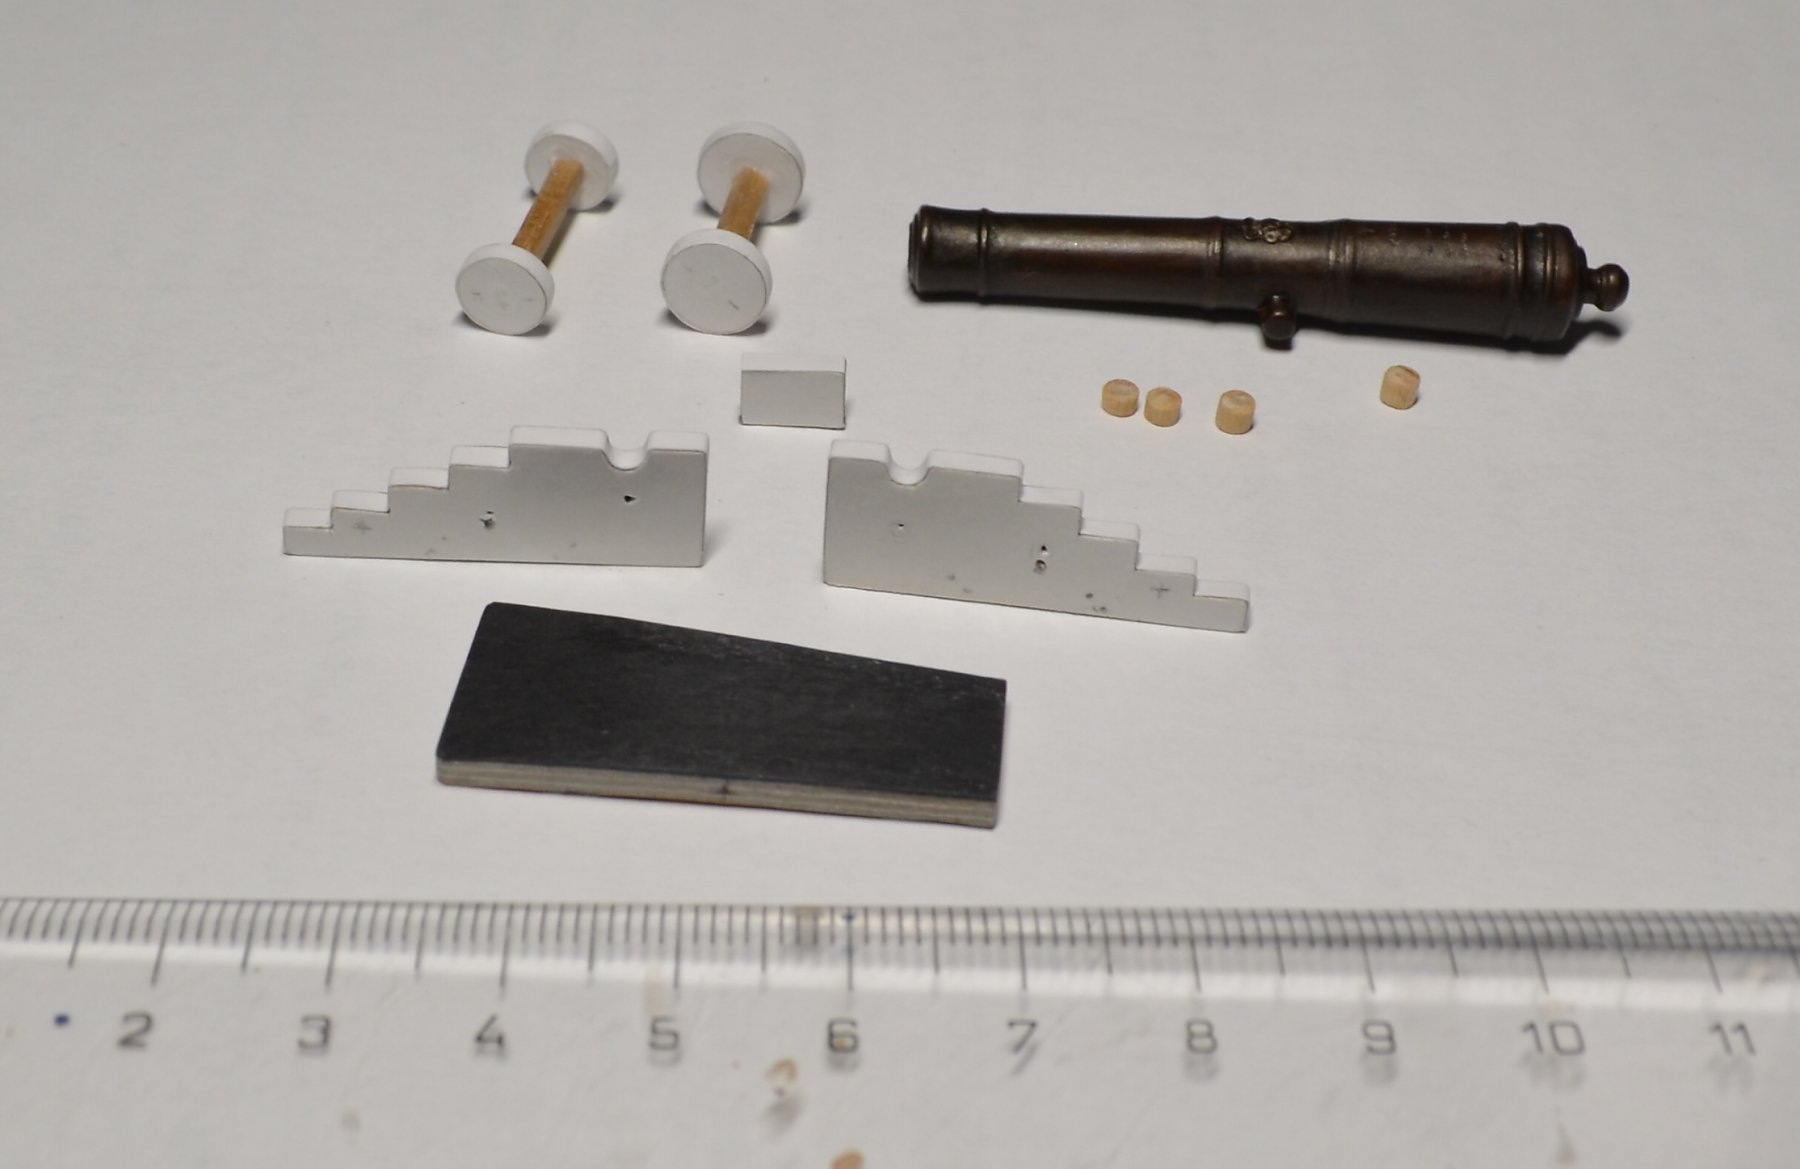
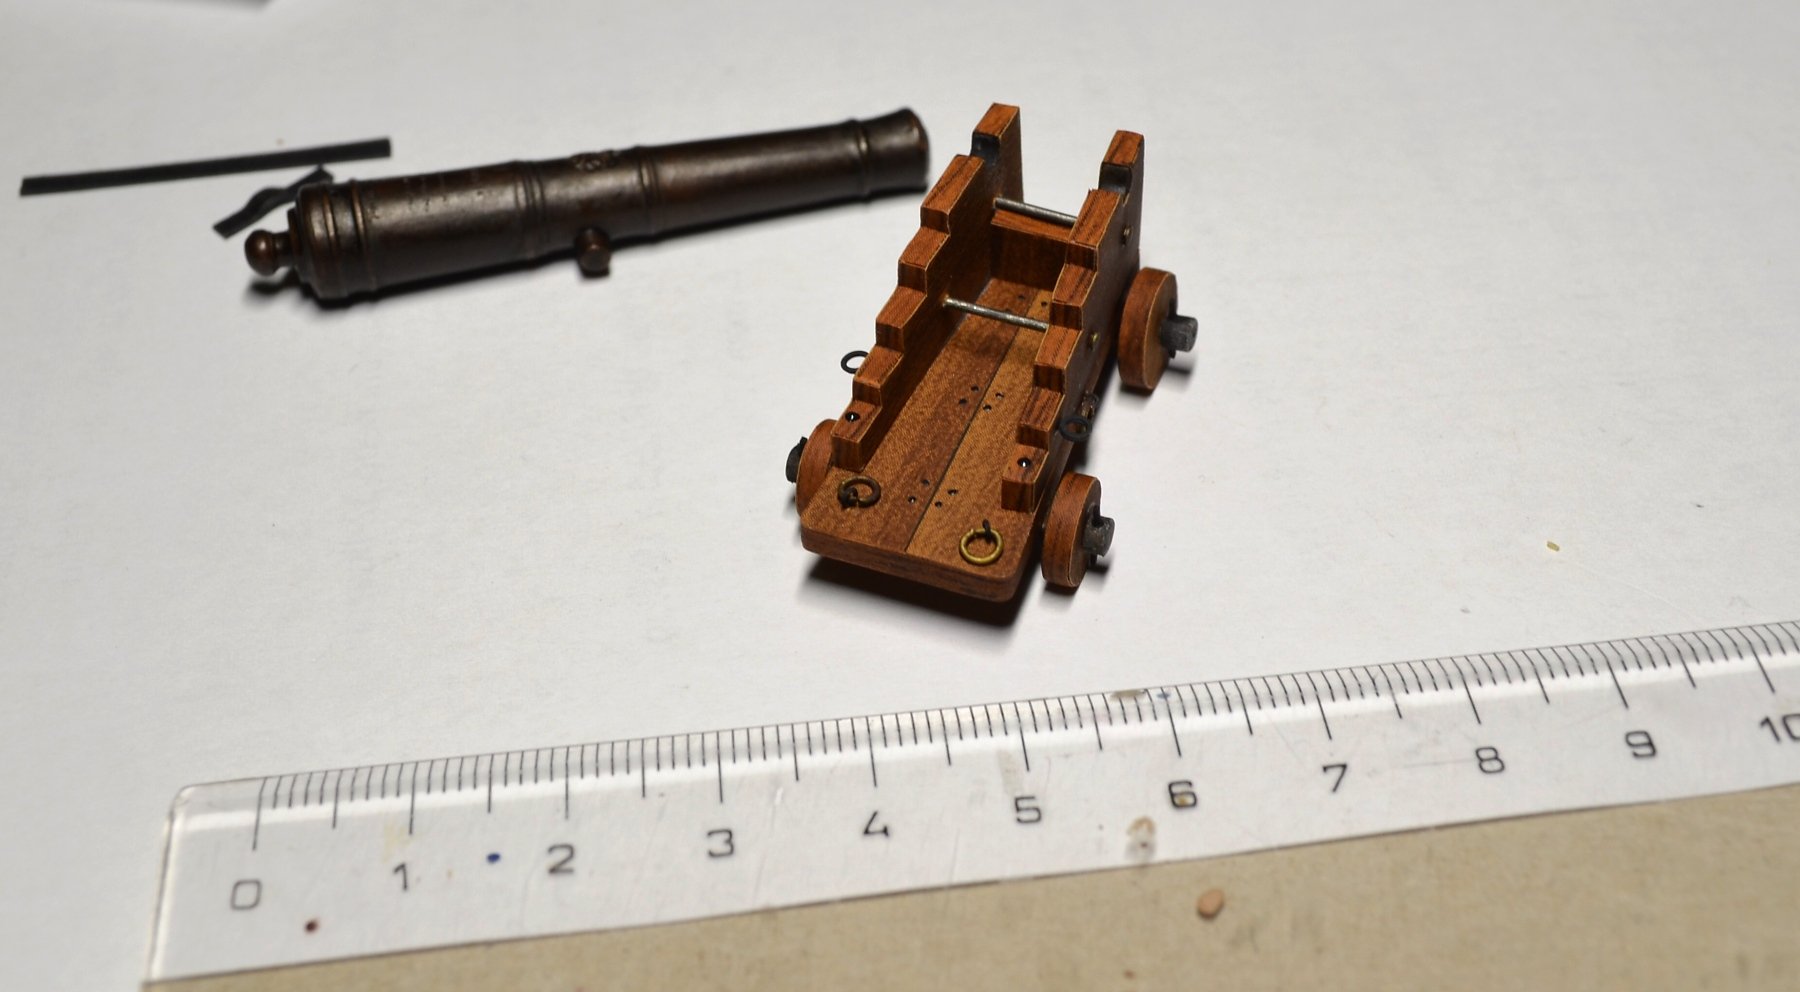
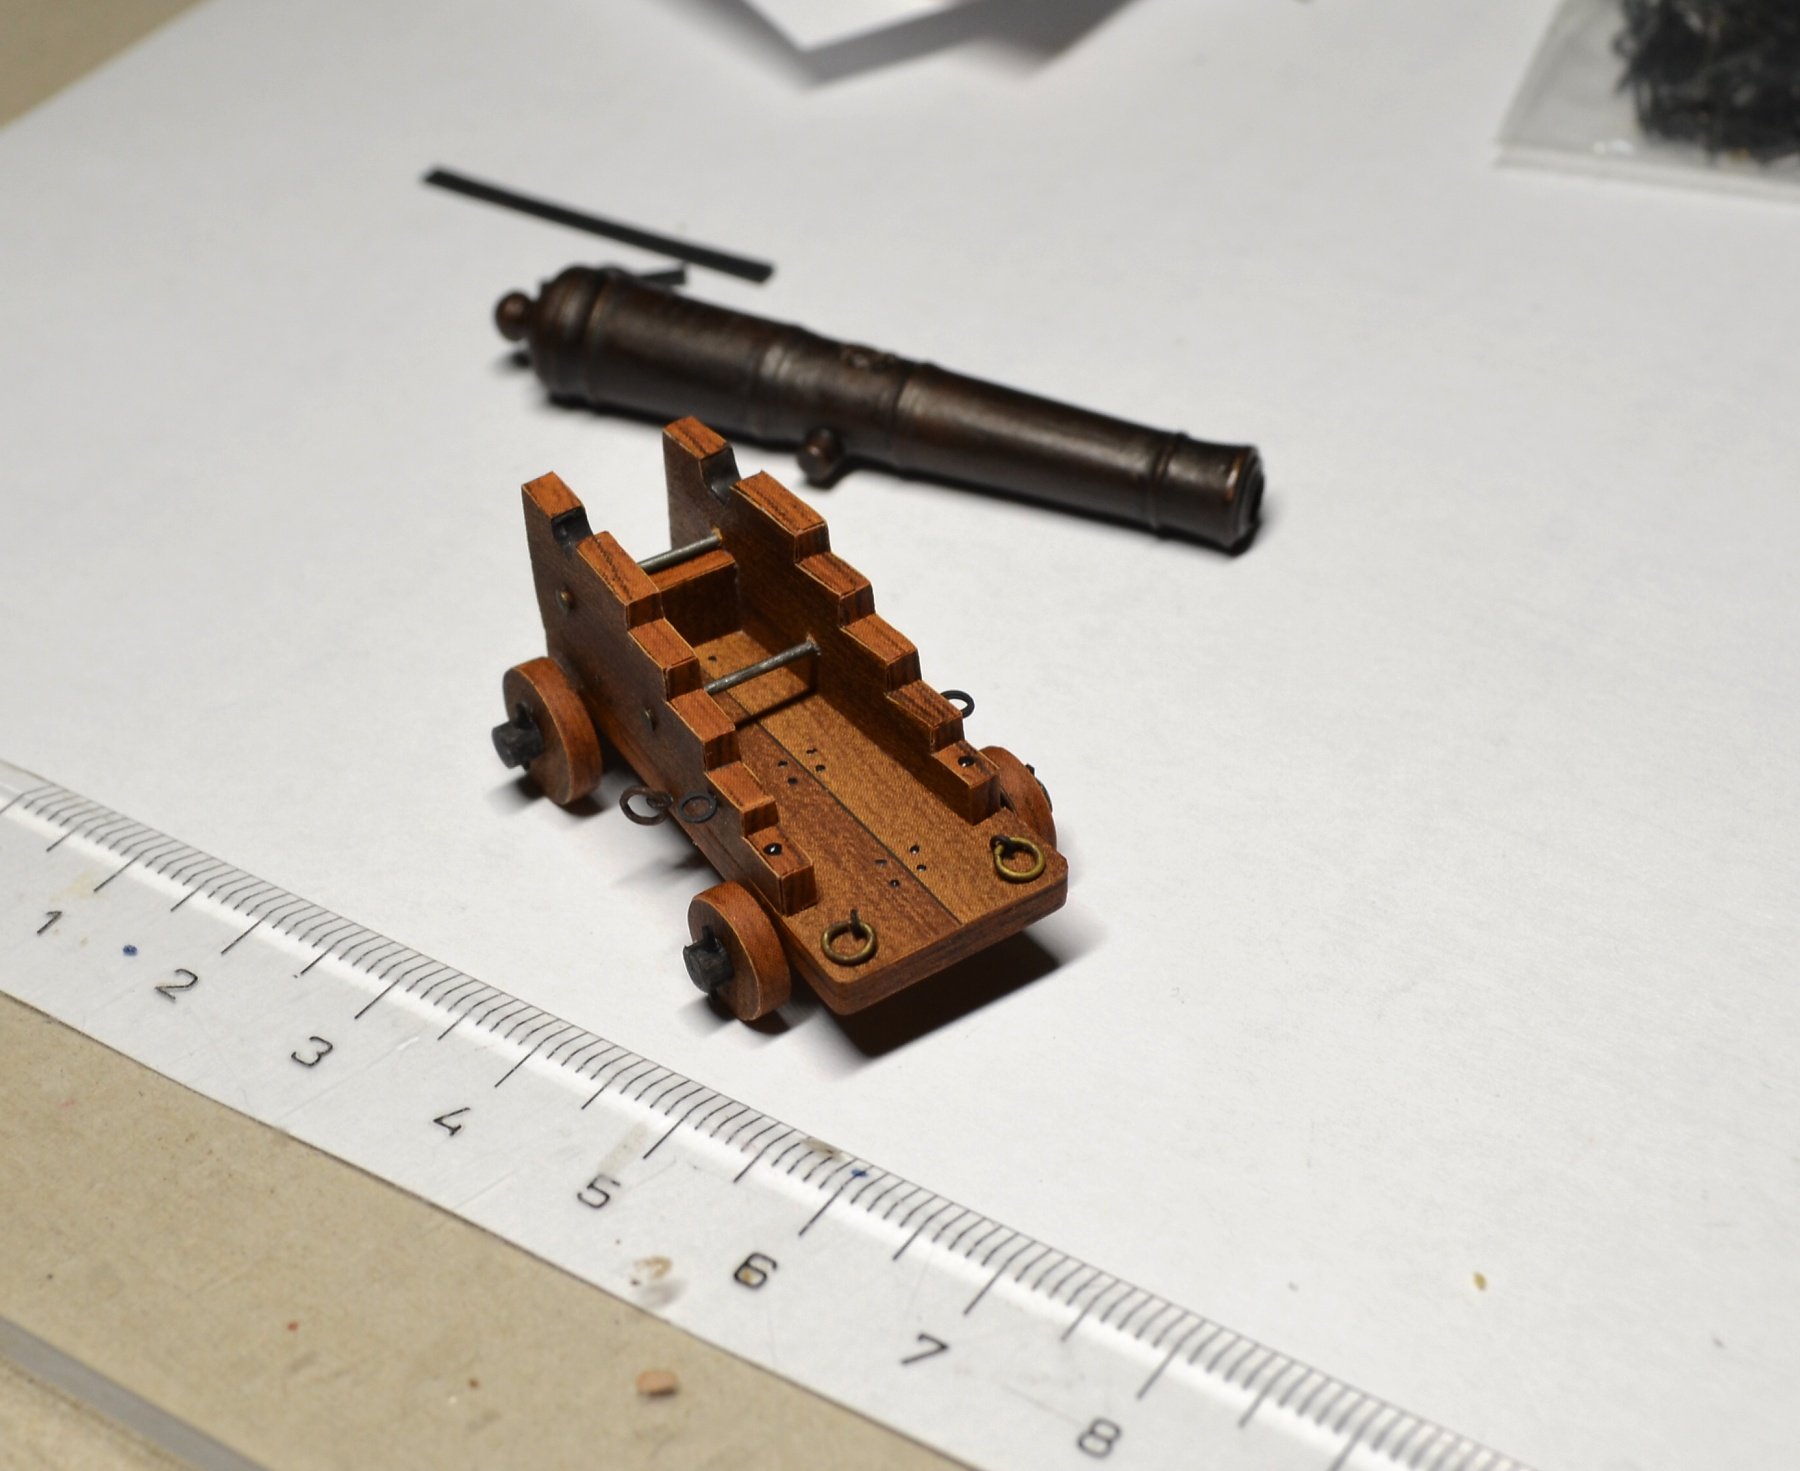
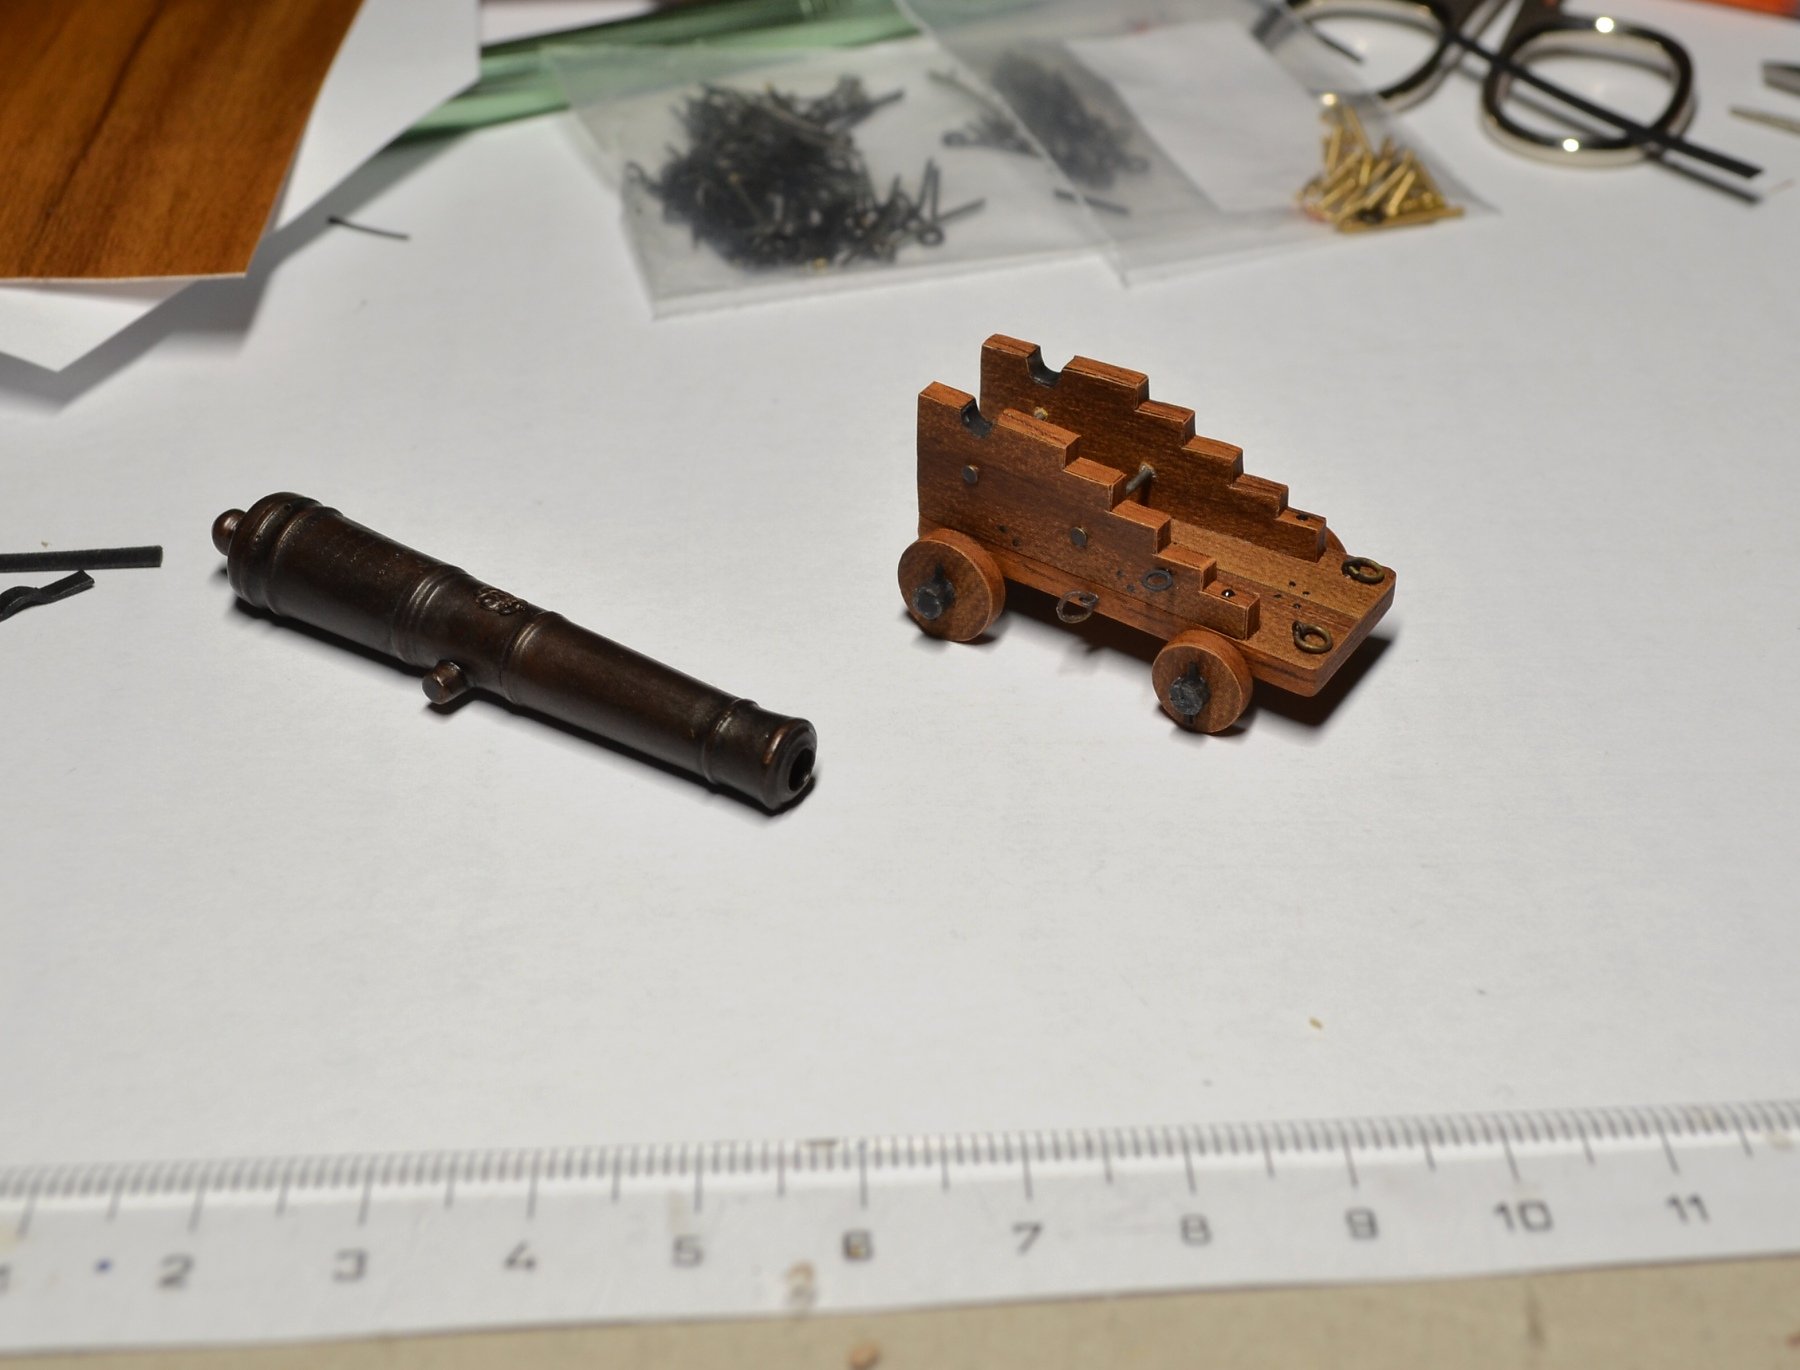
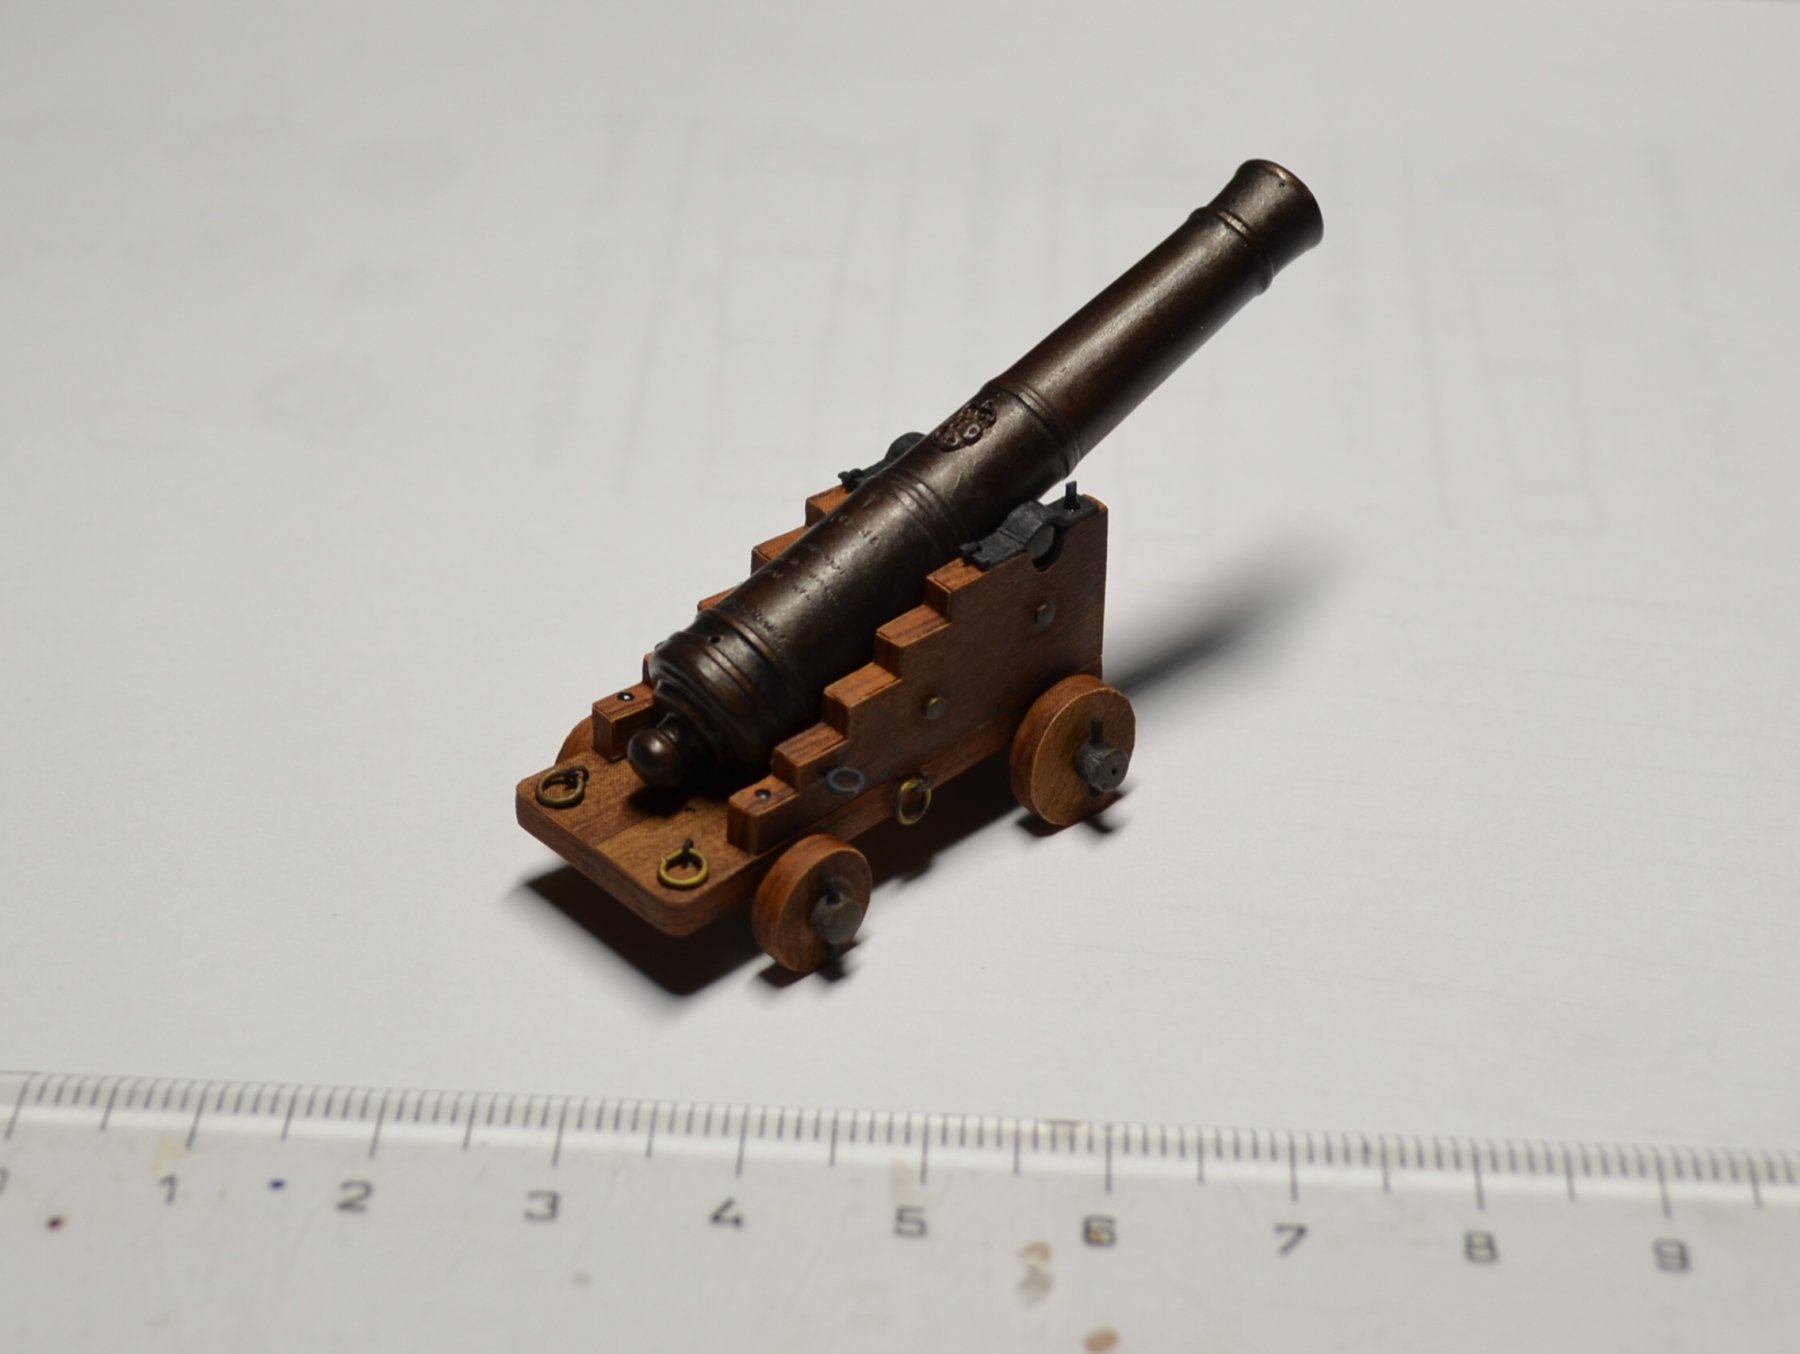
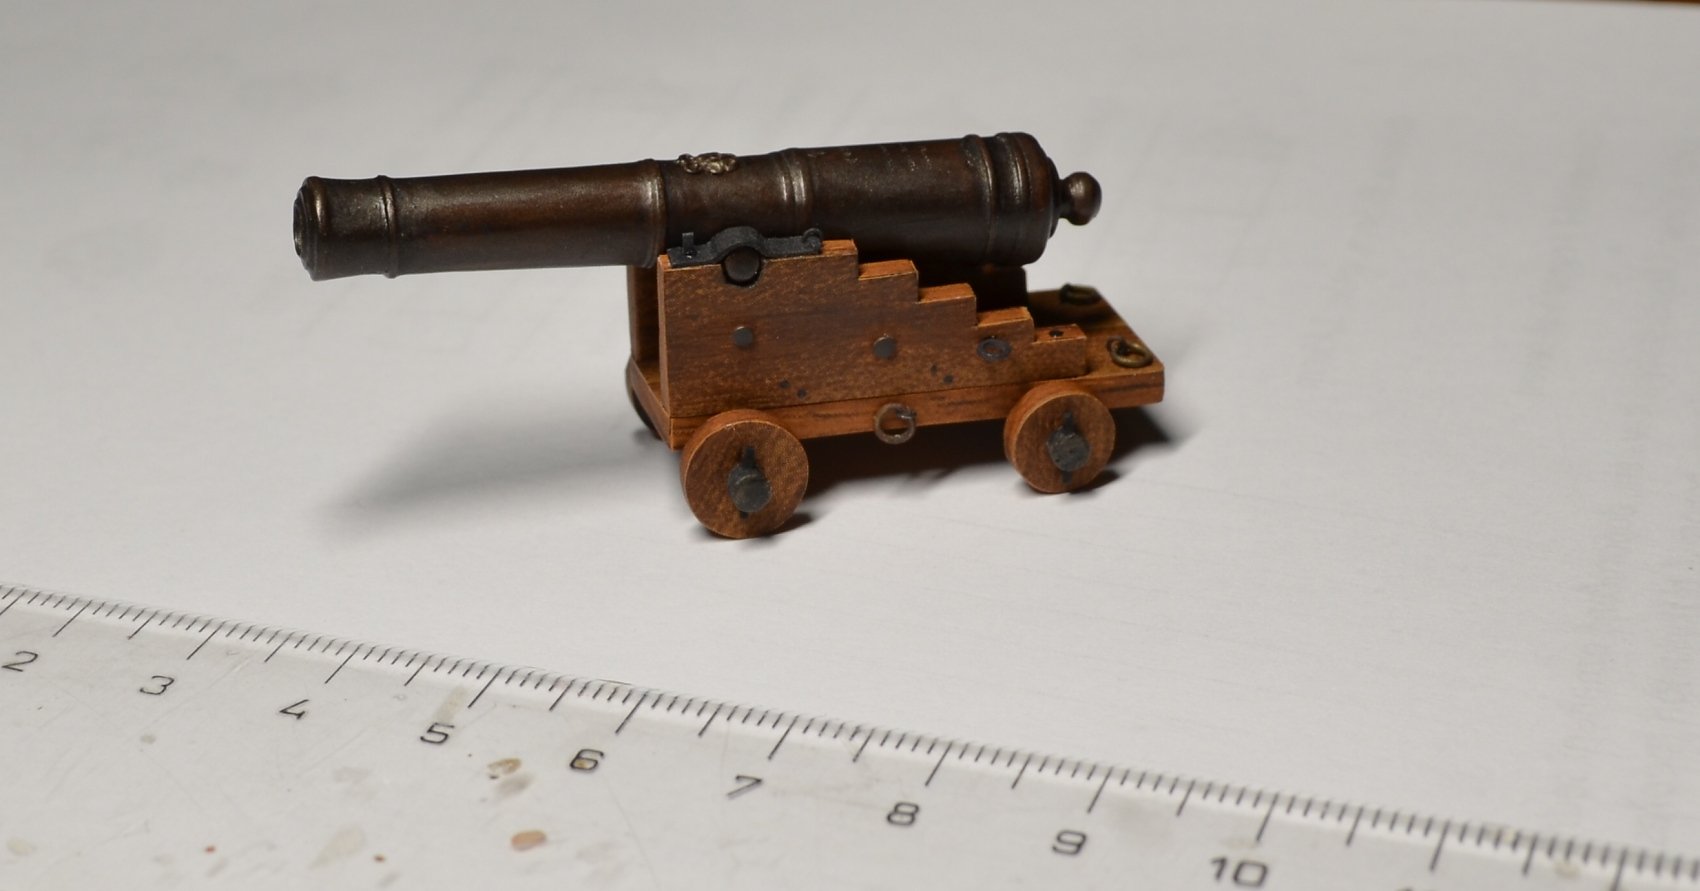
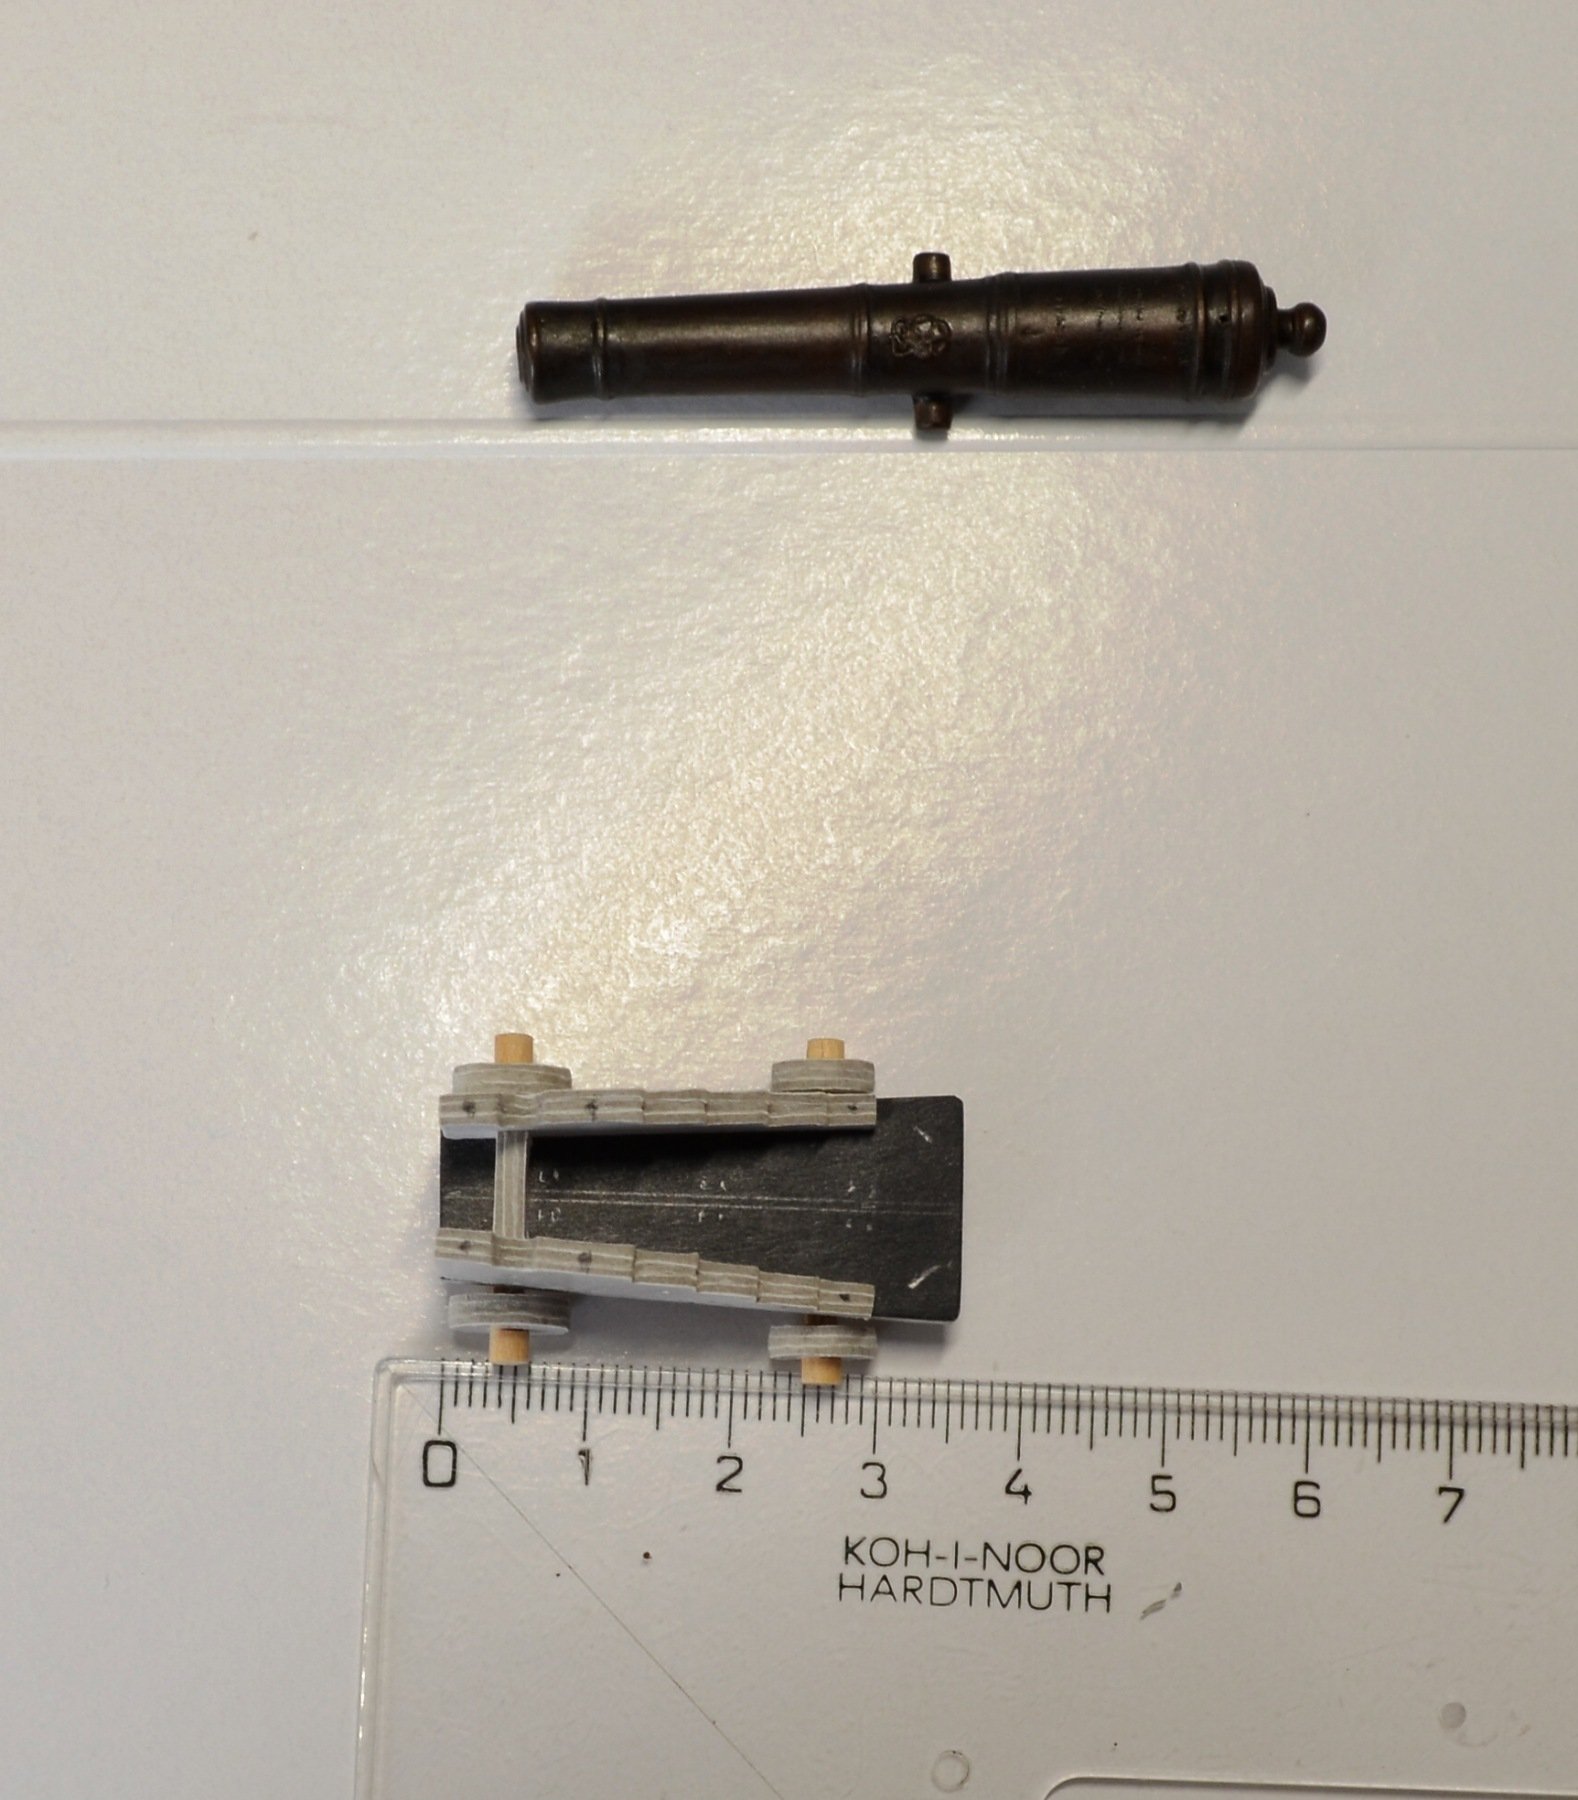
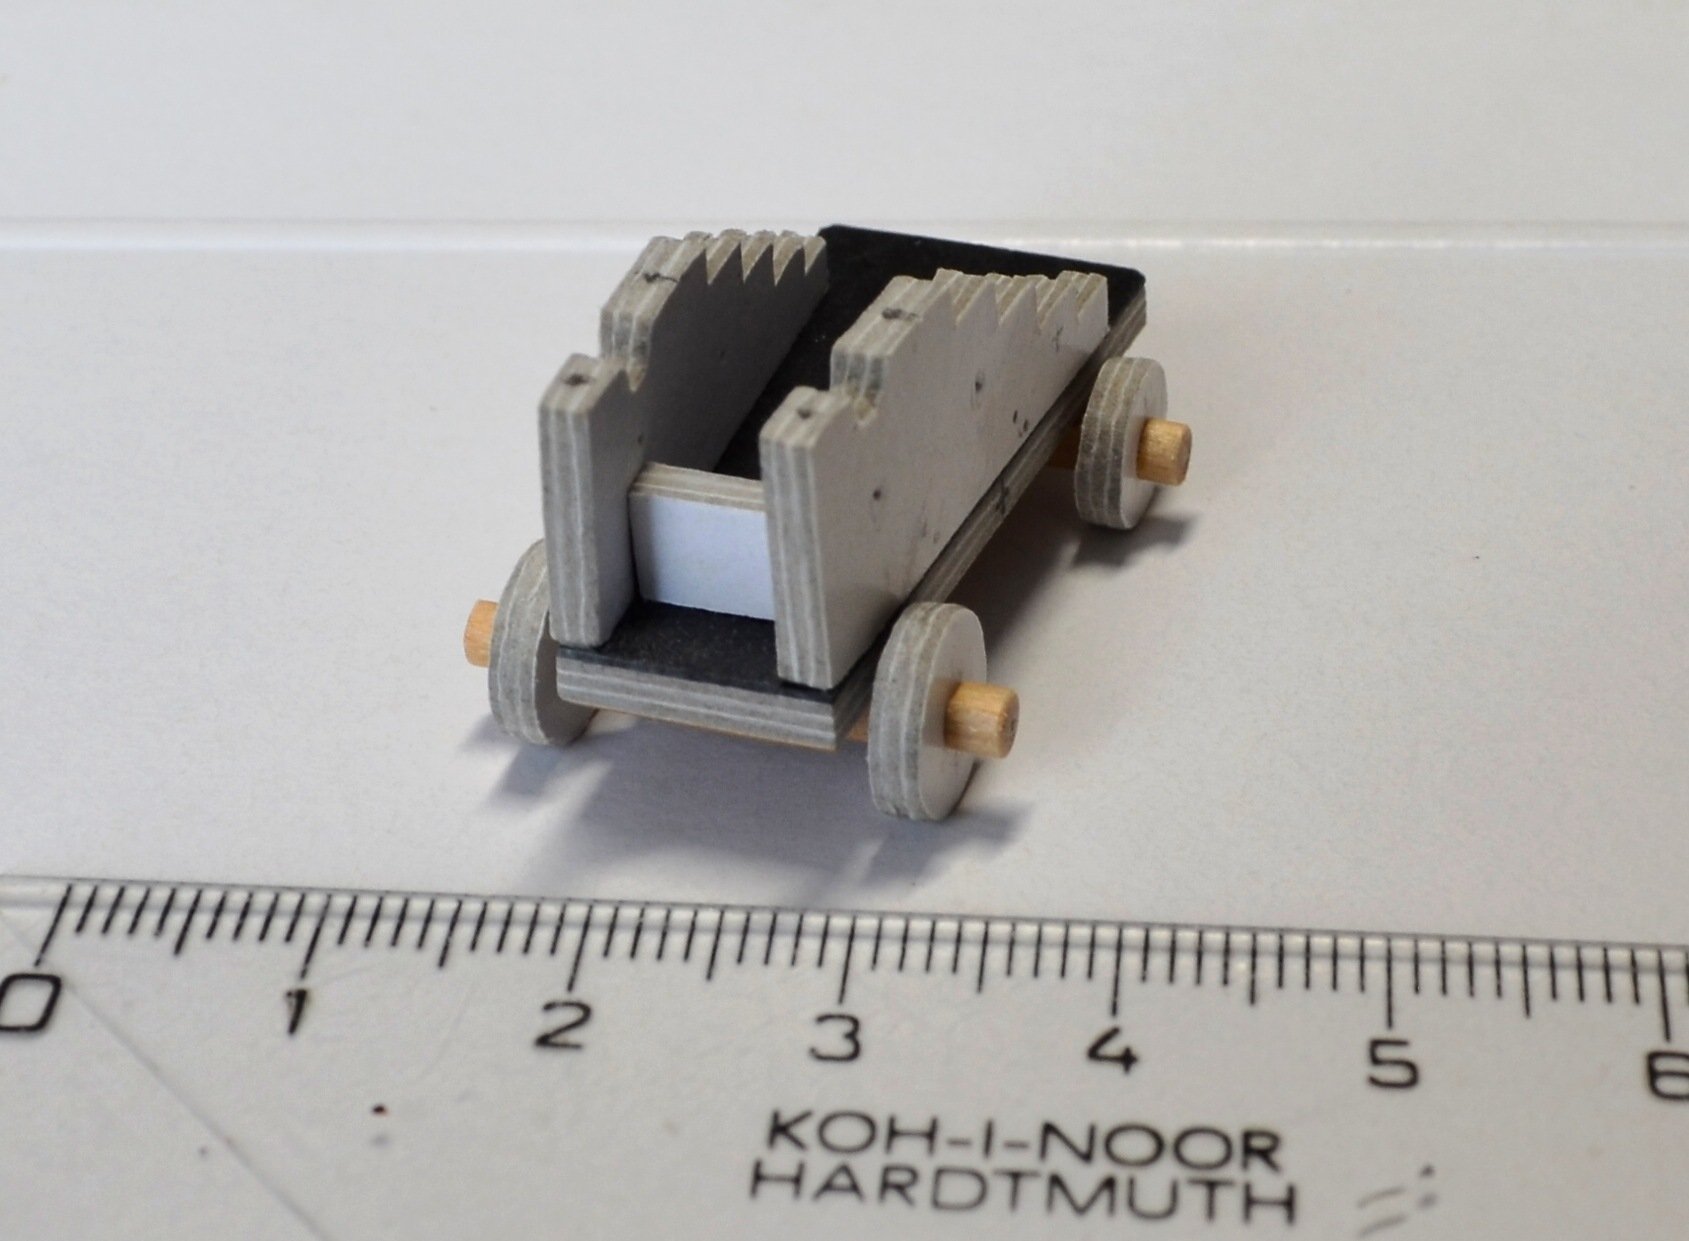
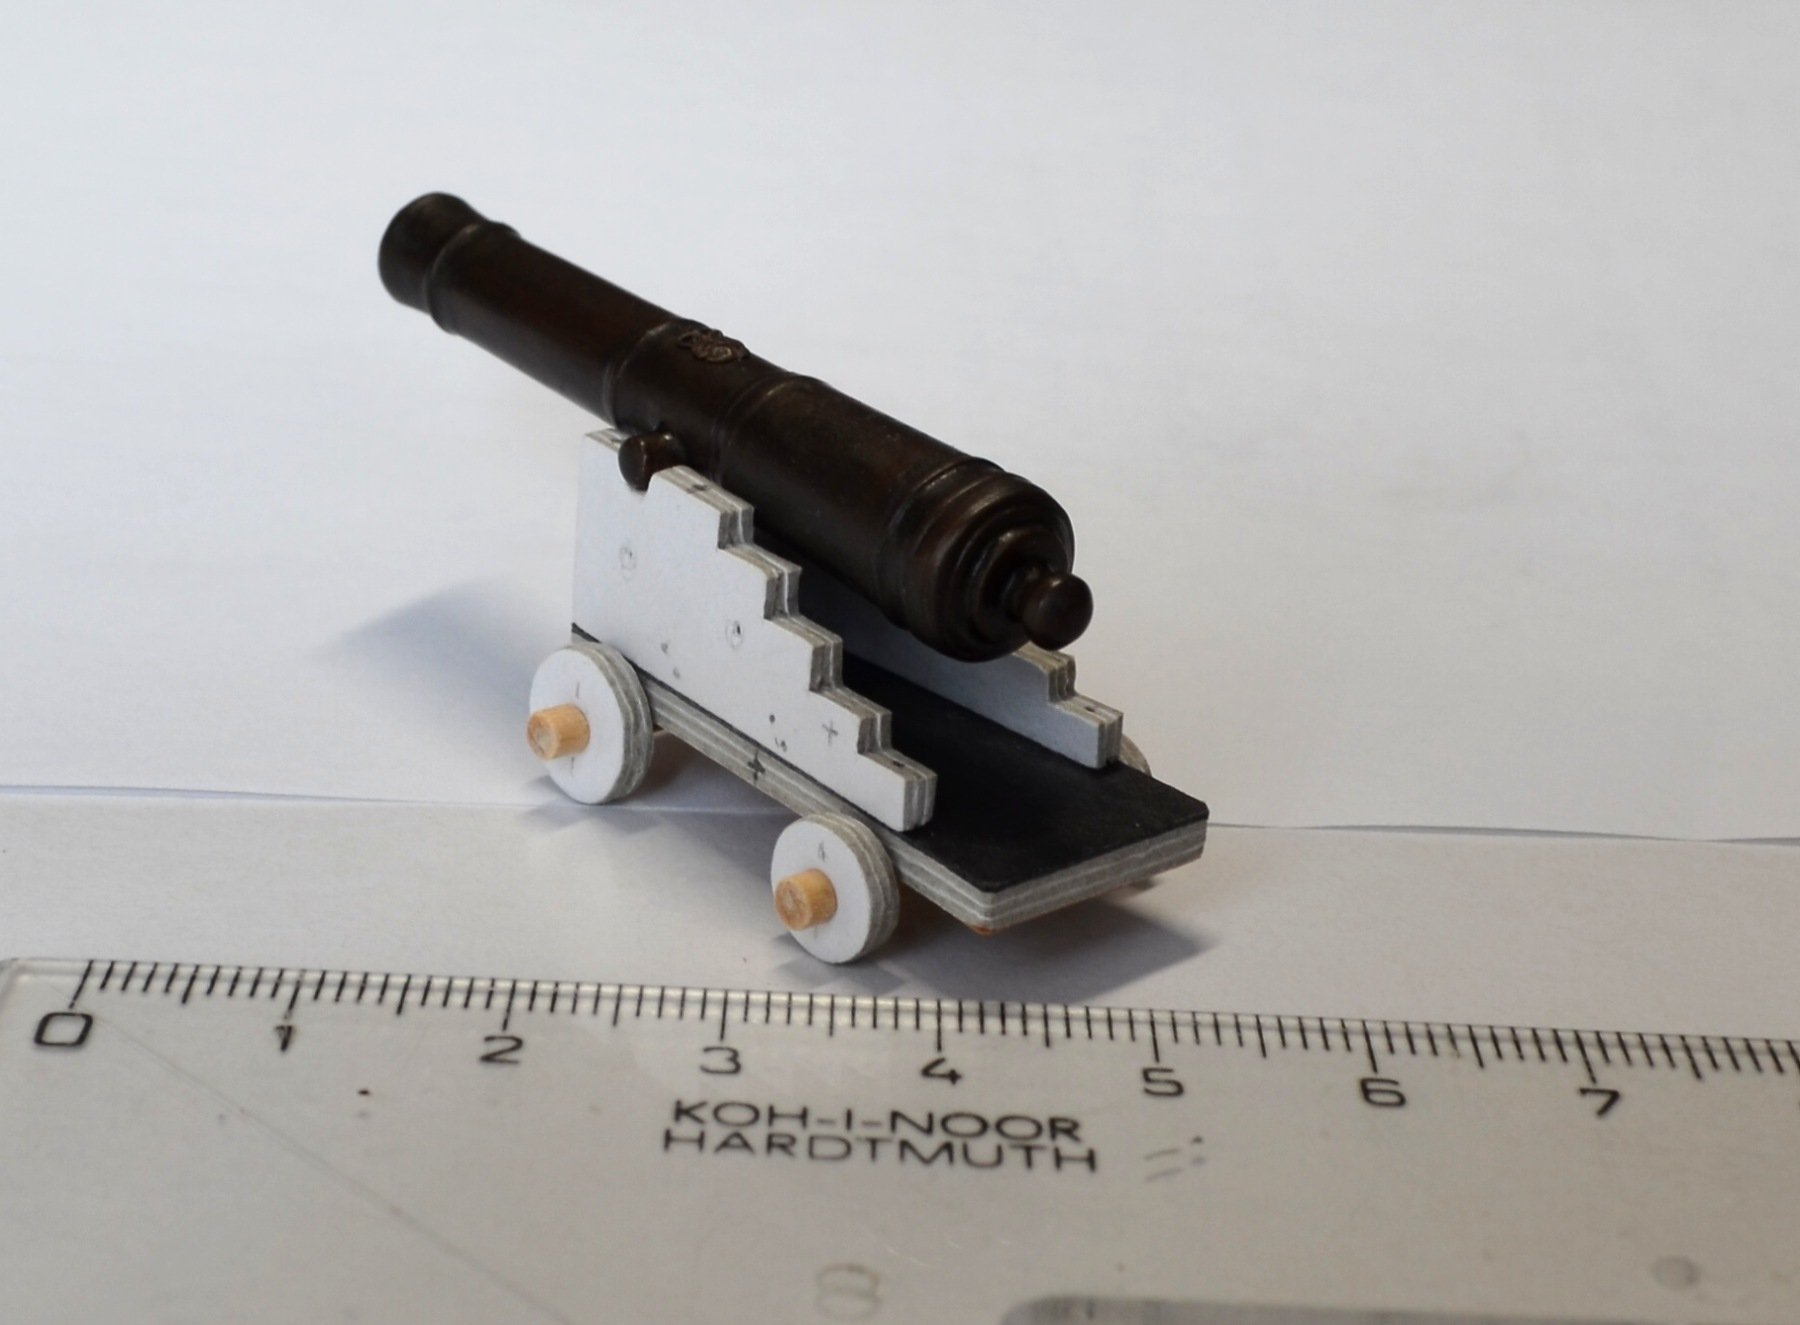
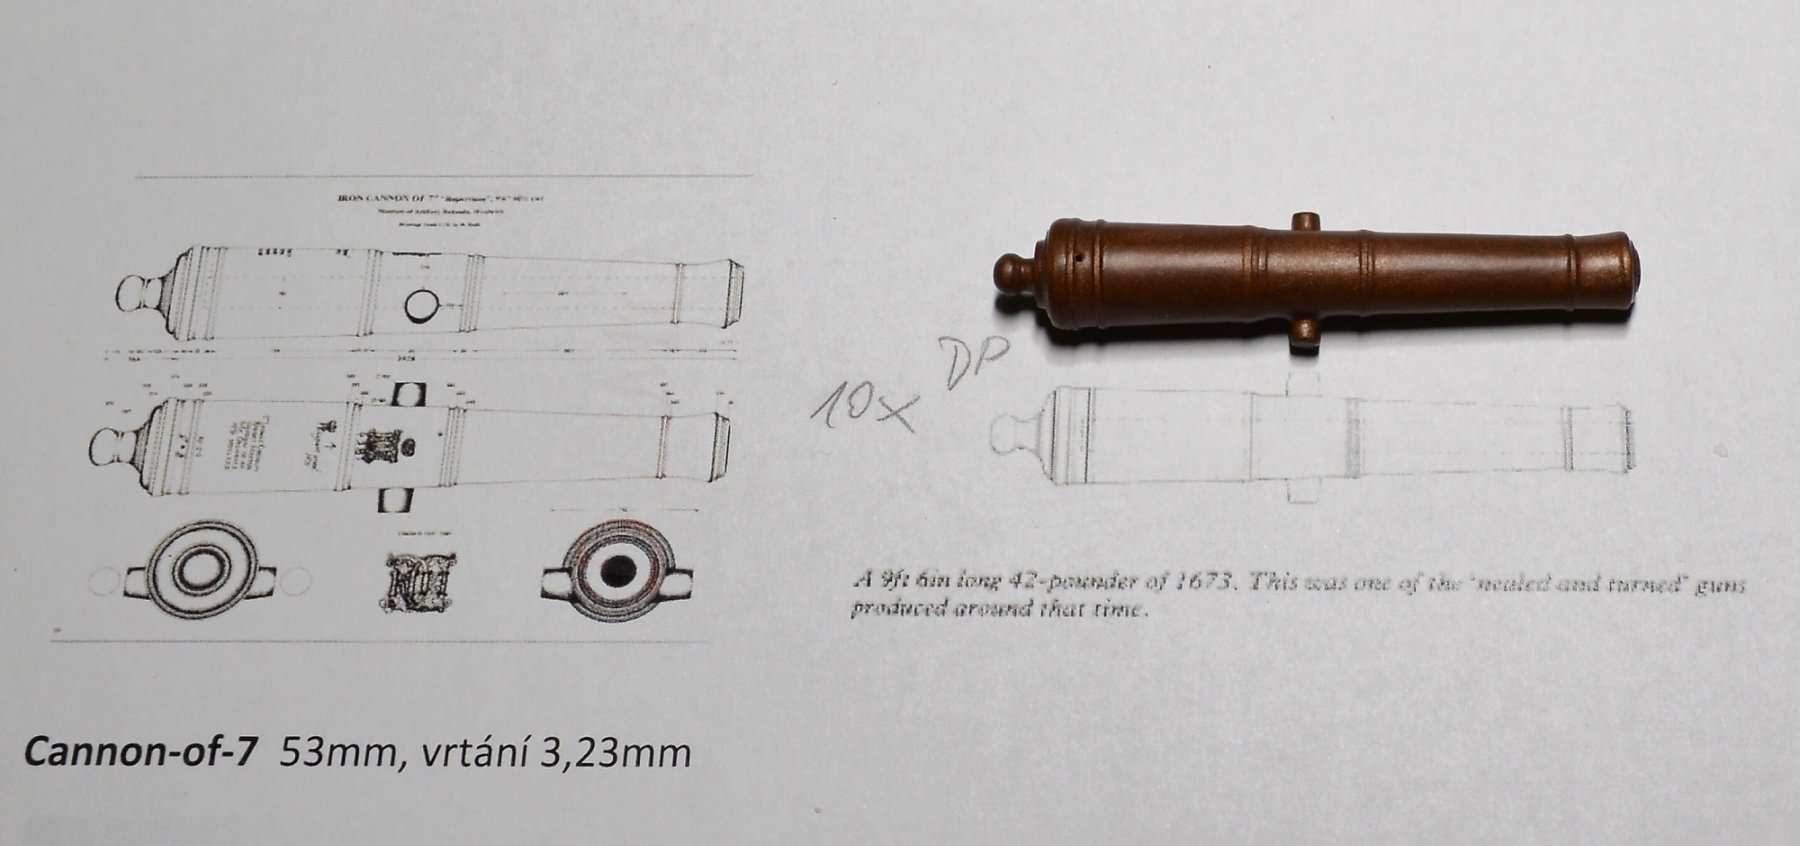
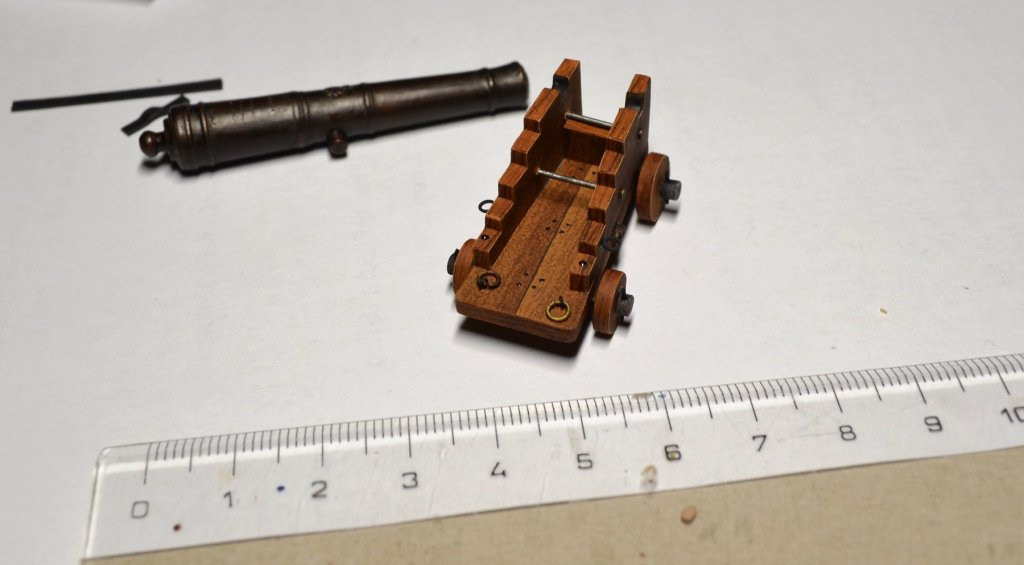
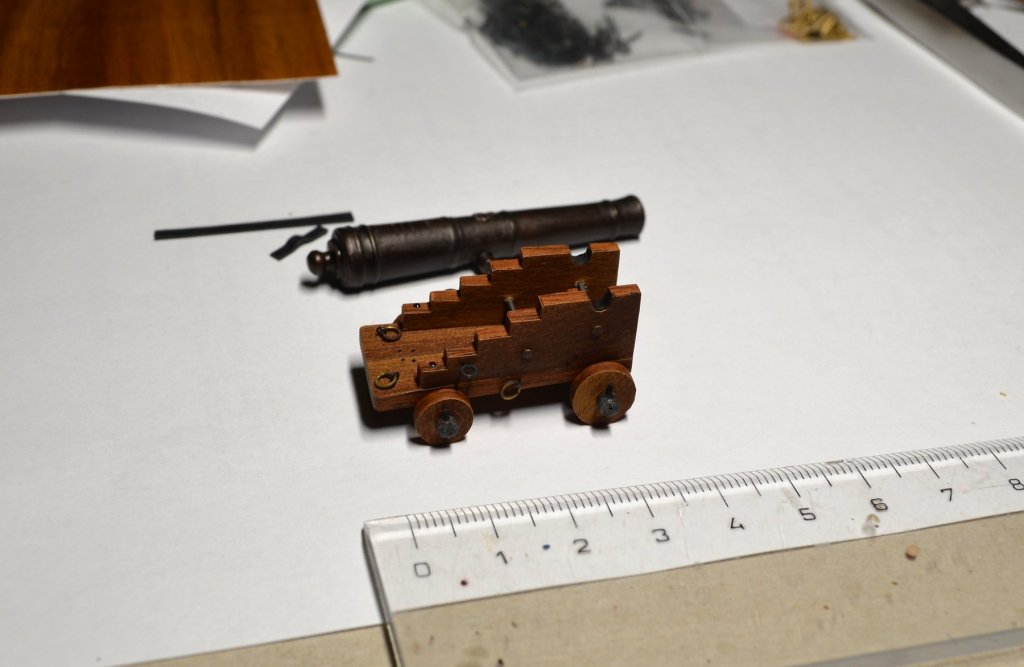
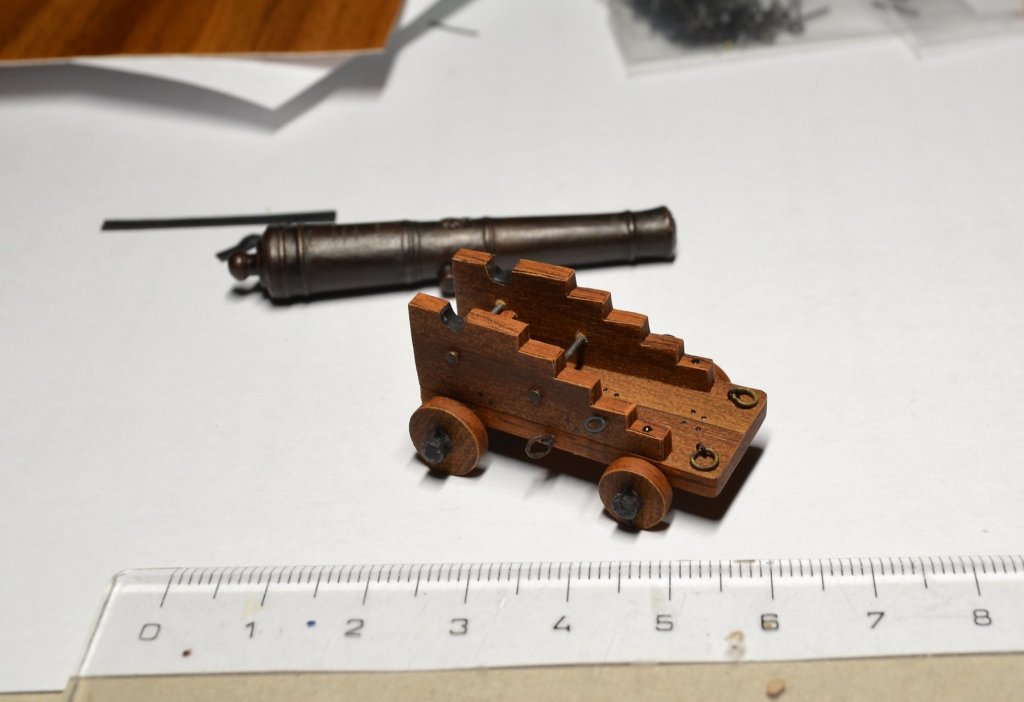
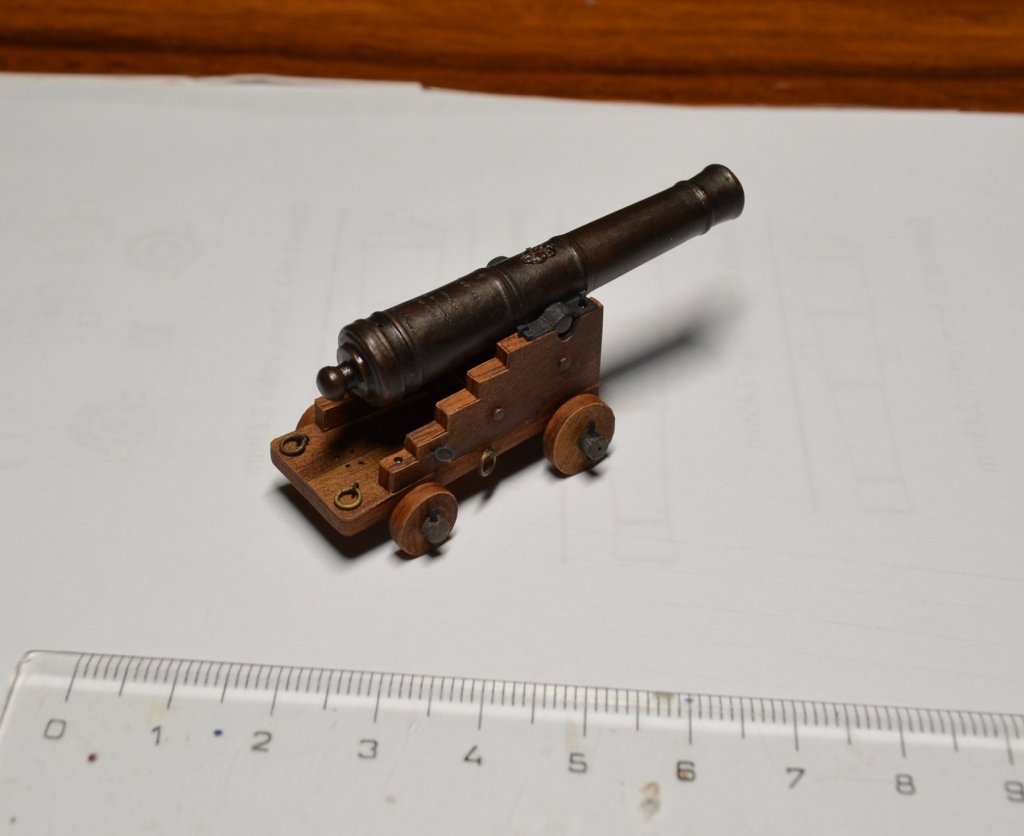
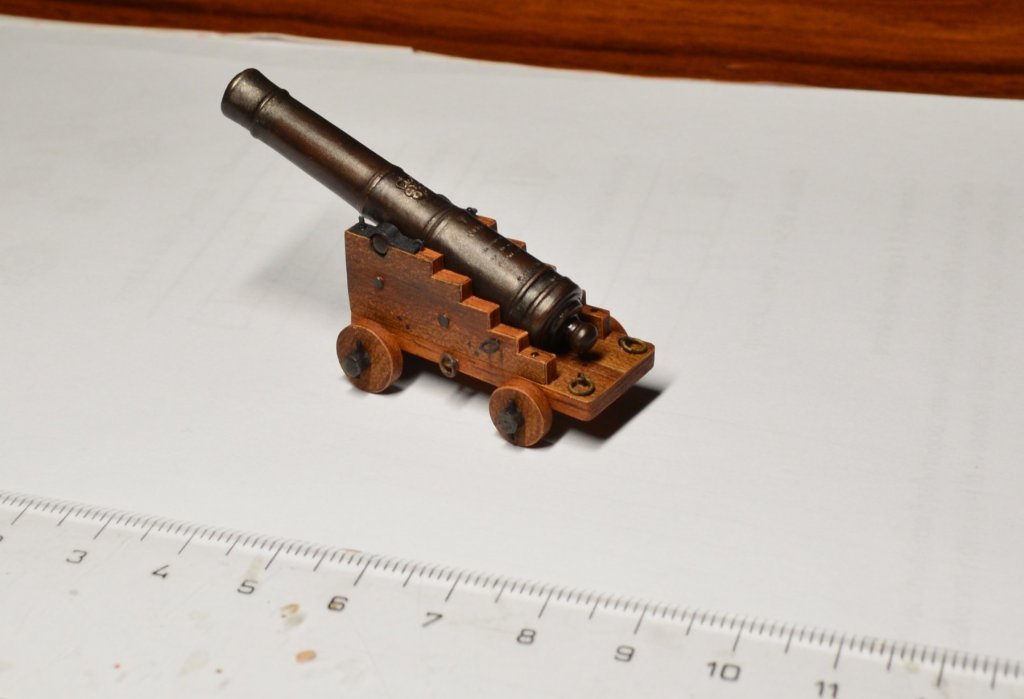
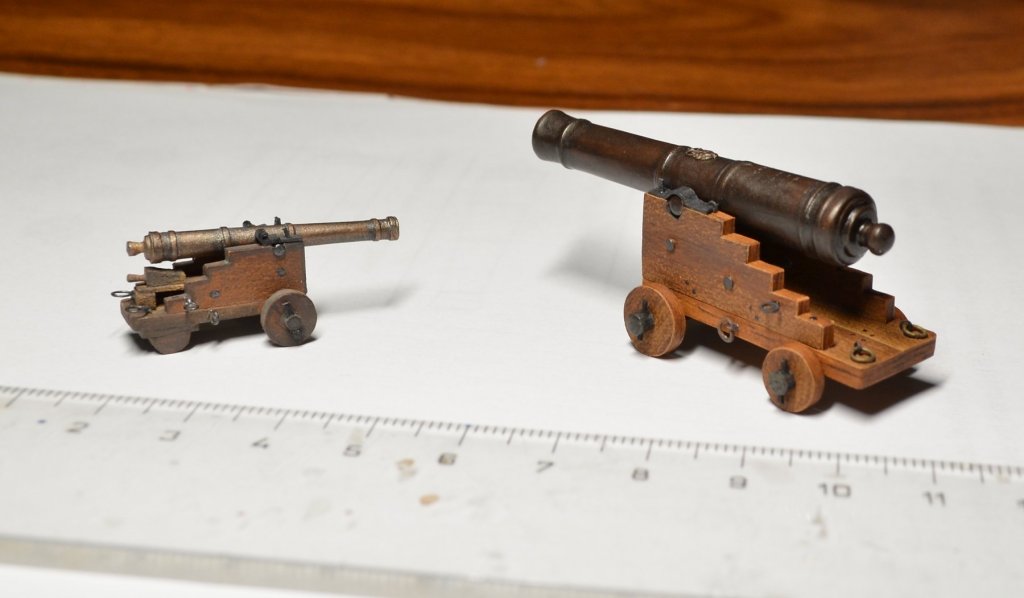
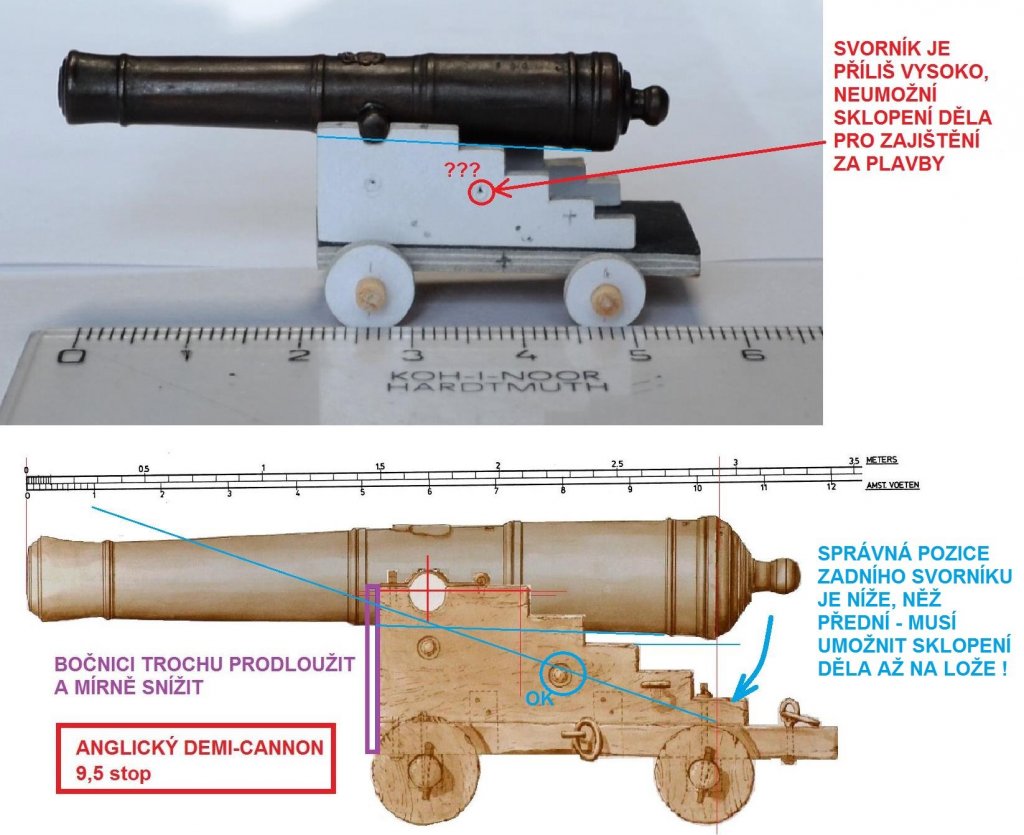
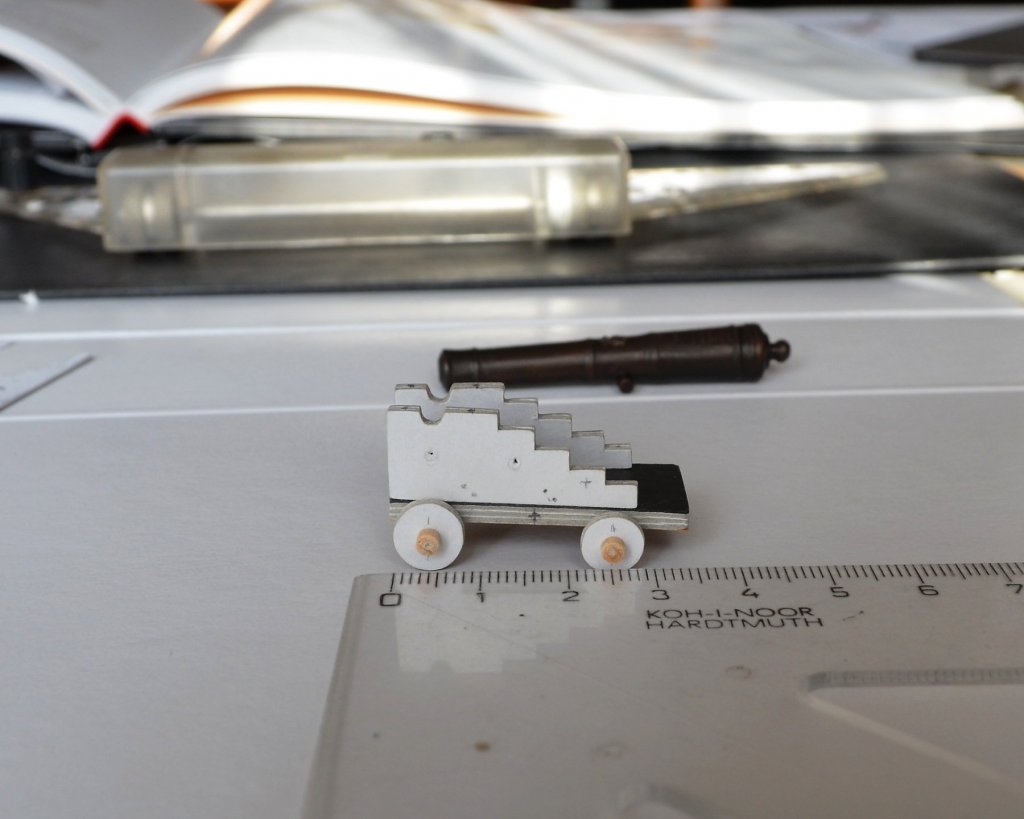
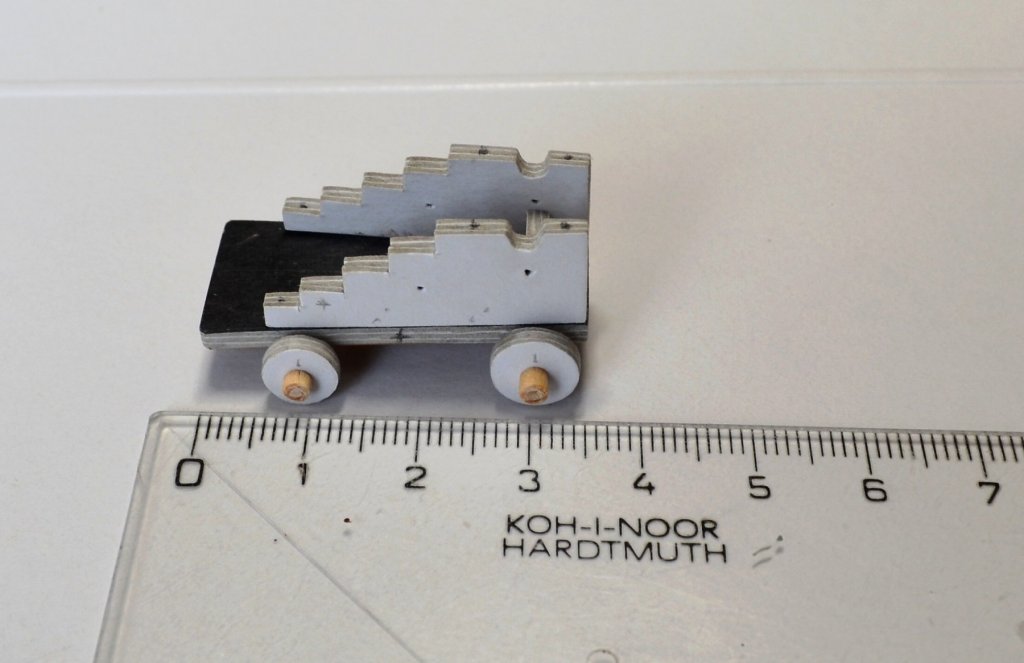
Dear friends, thank you all very much for your comments and praise, your words are much appreciated and mean a lot for me. I have just finished first carriage for cannon-of-seven, almost all parts are made out of card, only some details are wooden or metal. I made it according to documents prepared by Captain KL (there is also a comparison with the Dutch cannon), and also according to the pictures of carriage from the Endsor's book The Restoration warship. So enjoy the pics and have a great time.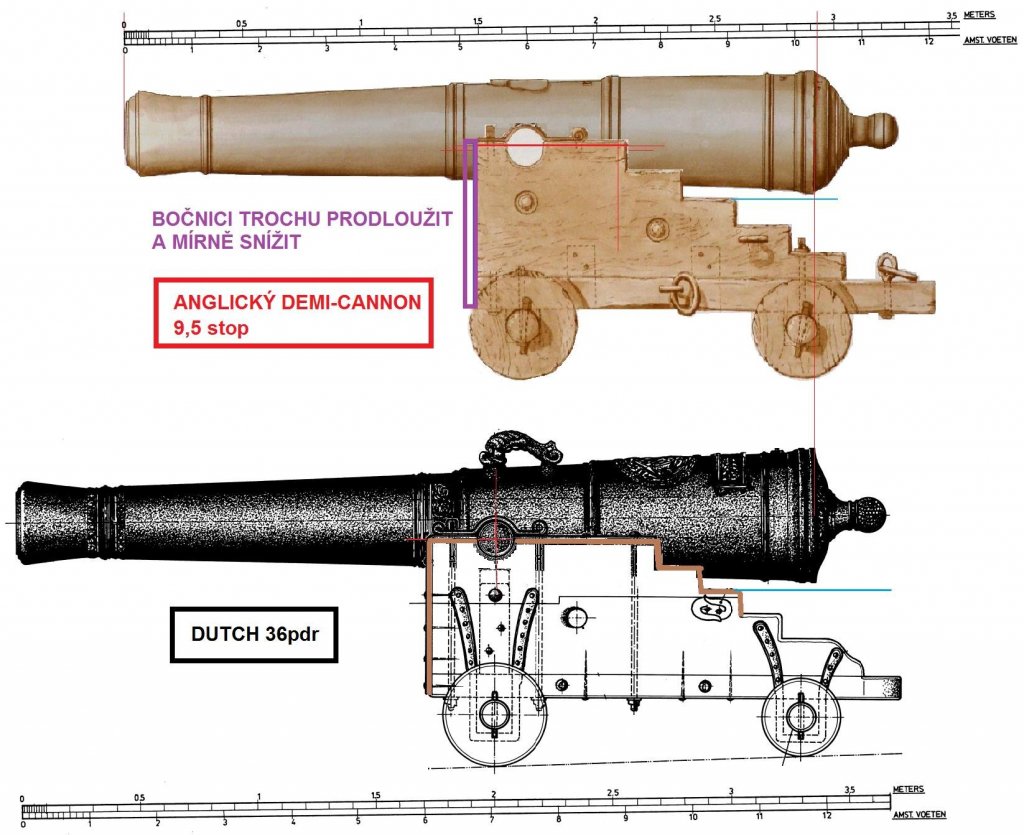


- 1,035 replies
-
- 25
-
-
- royal katherine
- ship of the line
- (and 1 more)
-
HMS ROYAL KATHERINE 1664 by Doris - 1/55 - CARD
DORIS replied to DORIS's topic in - Build logs for subjects built 1501 - 1750
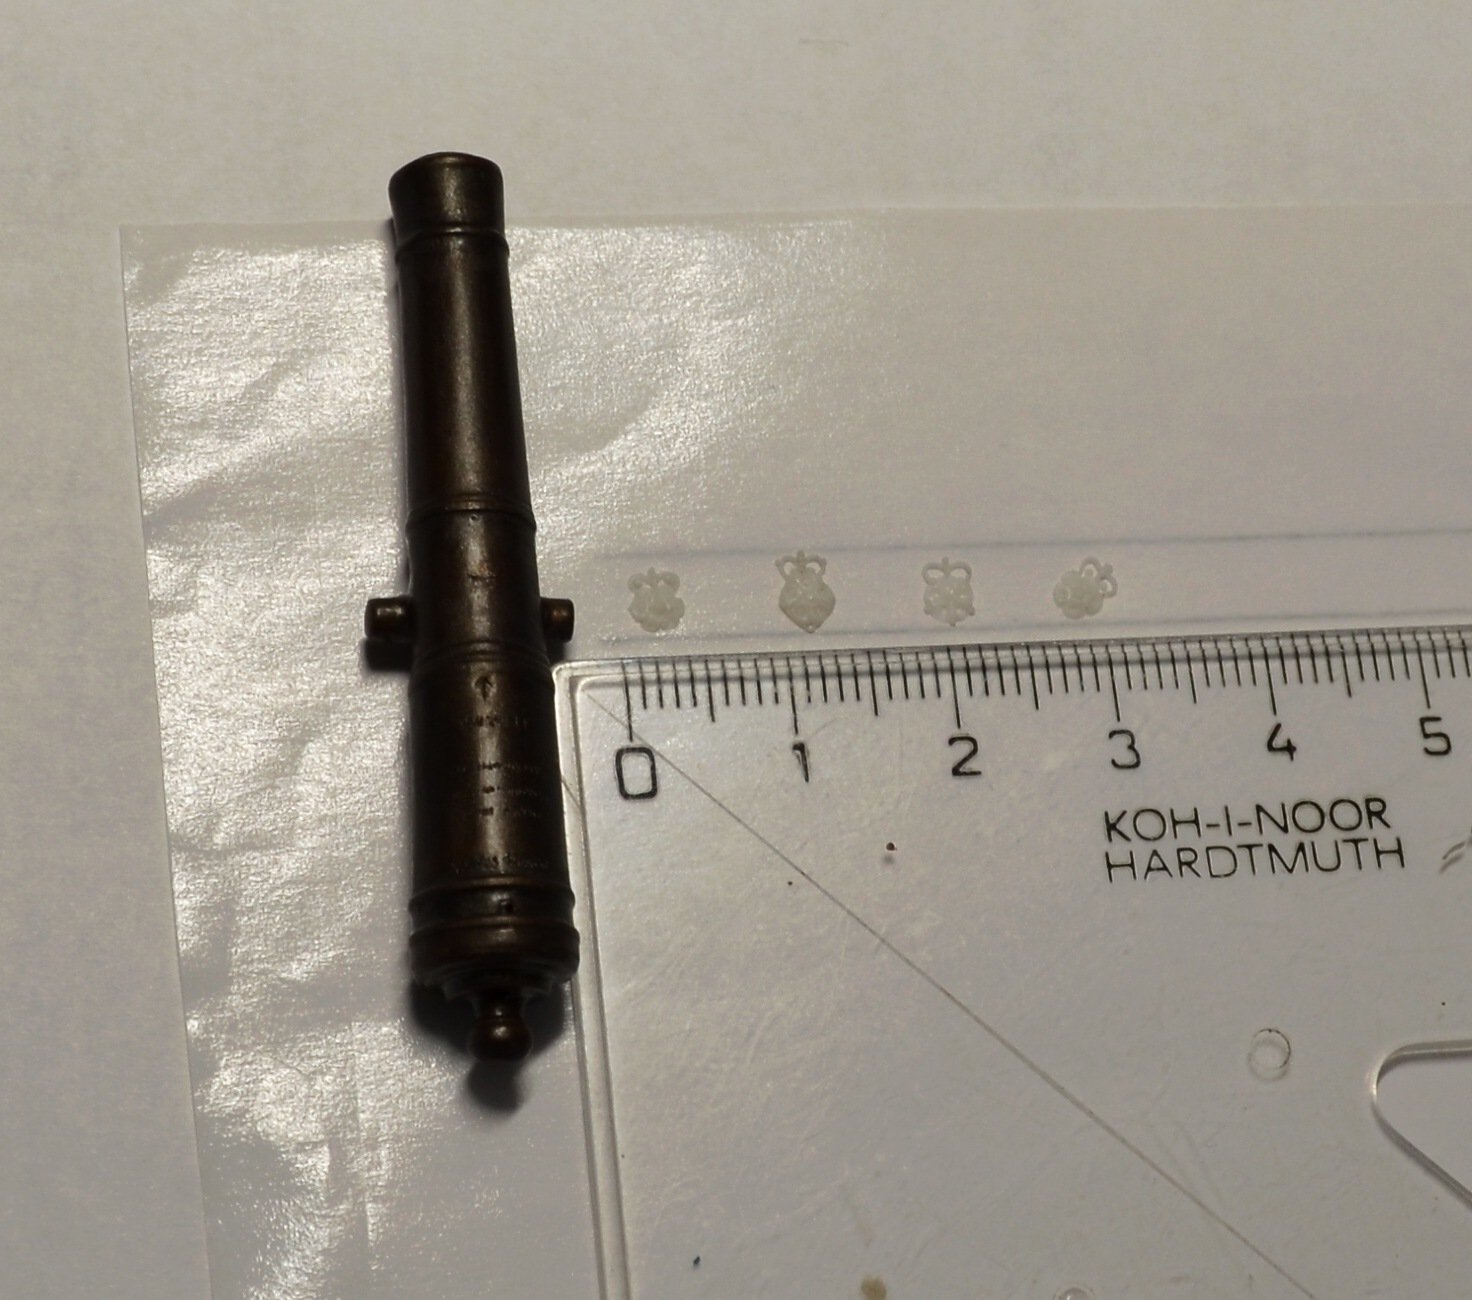
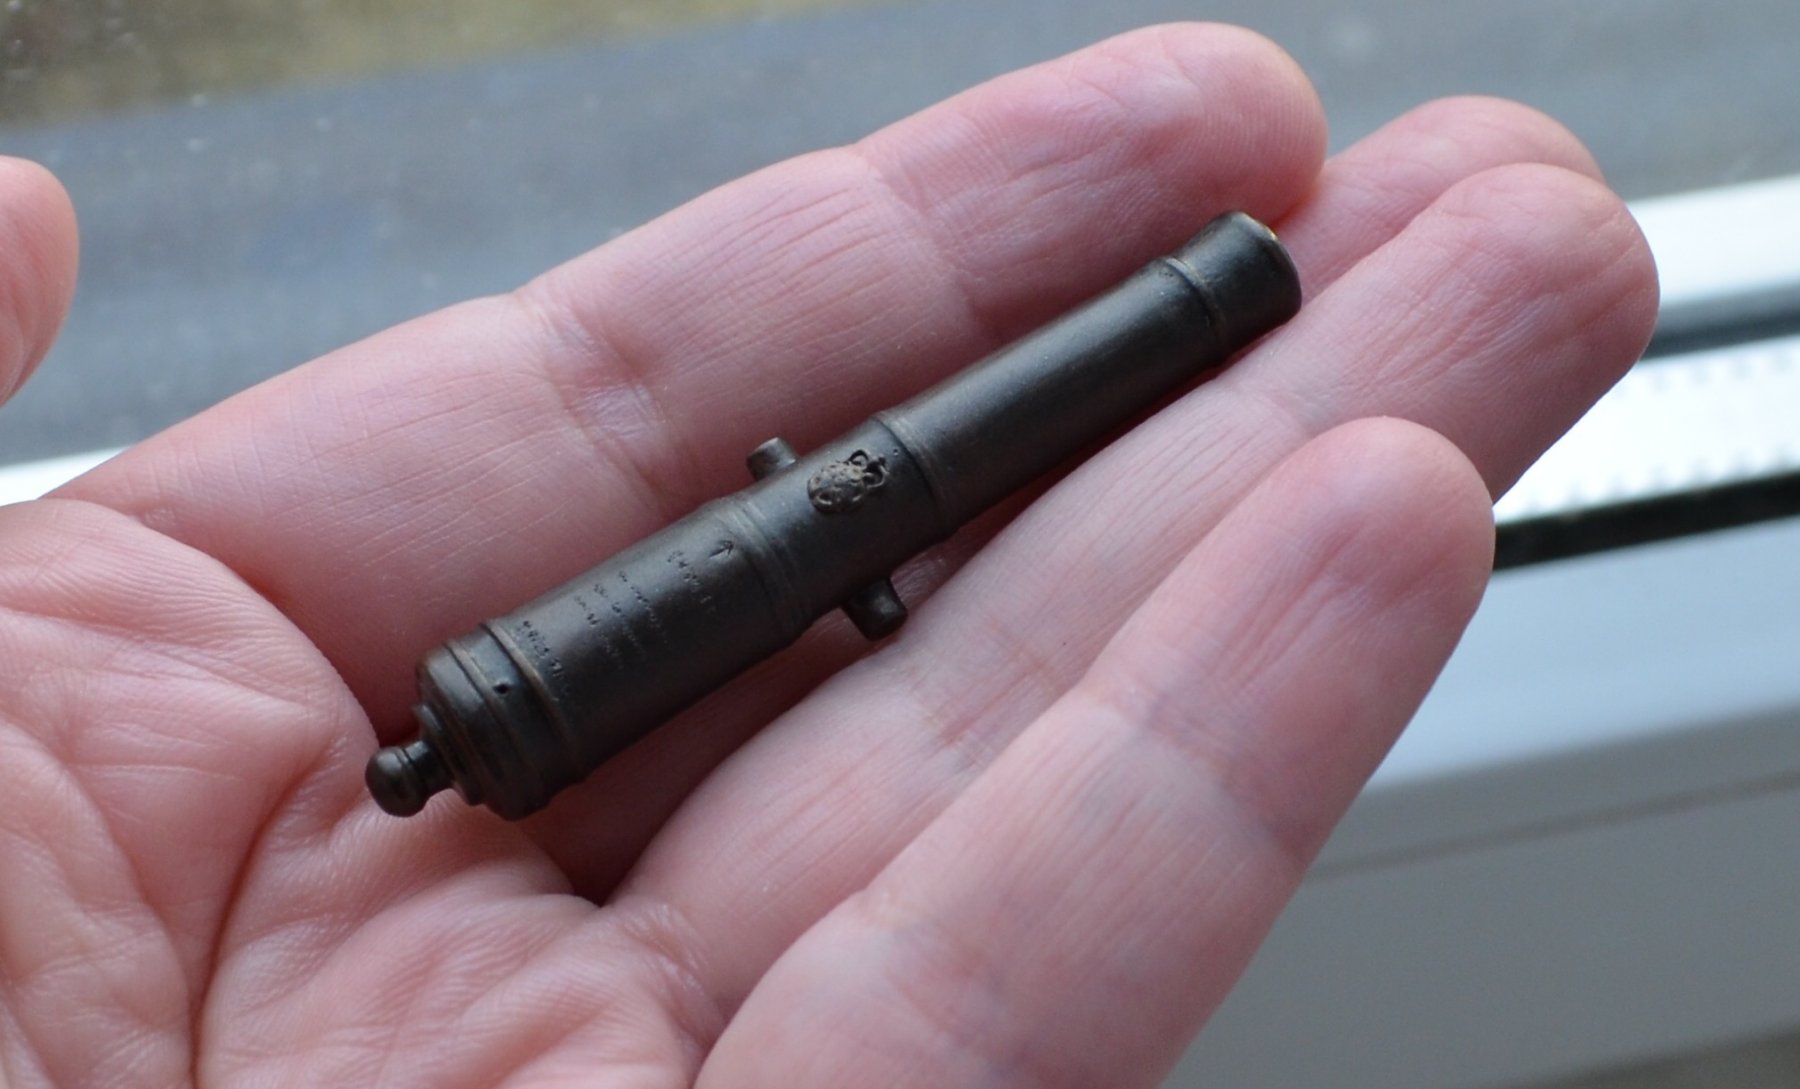
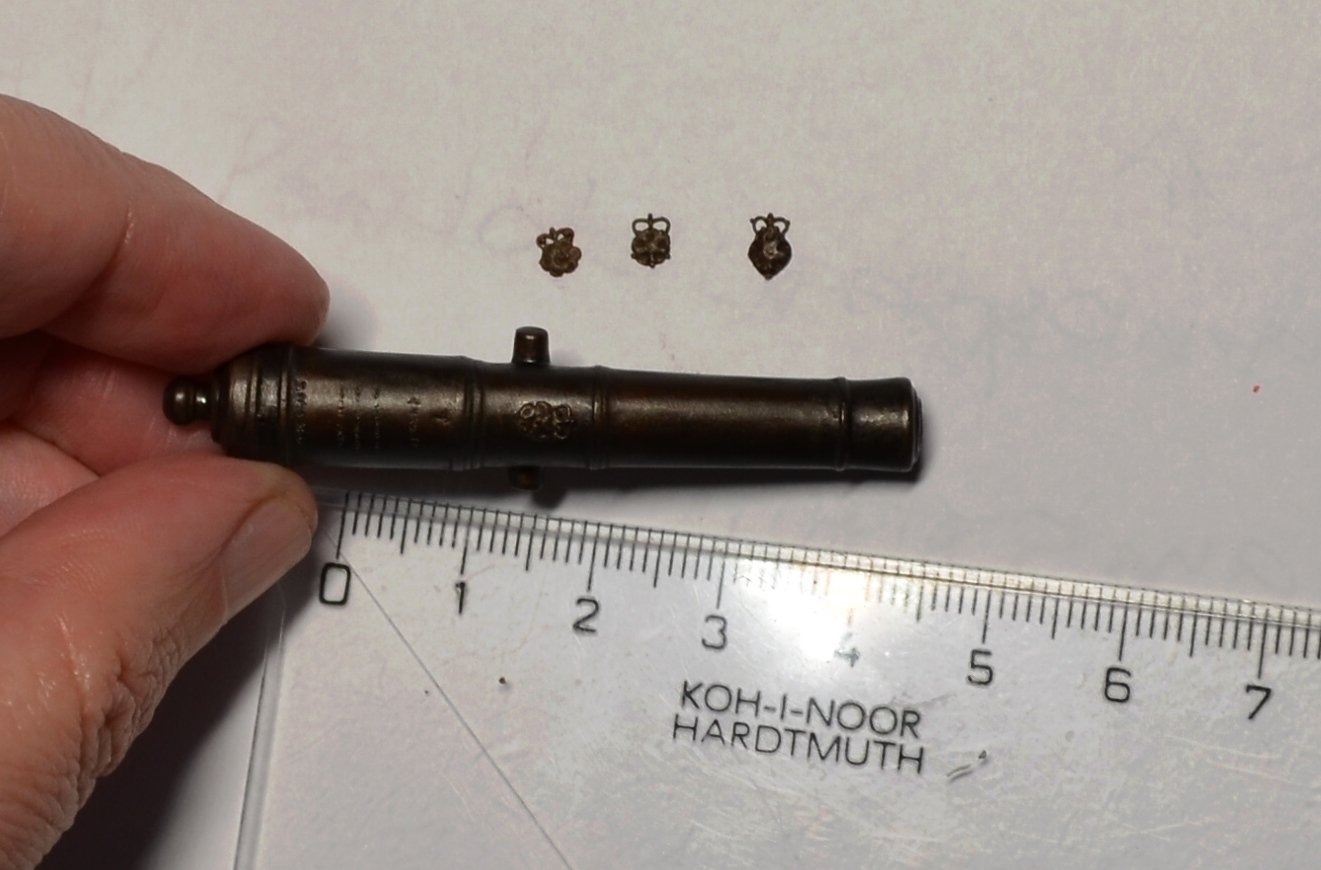
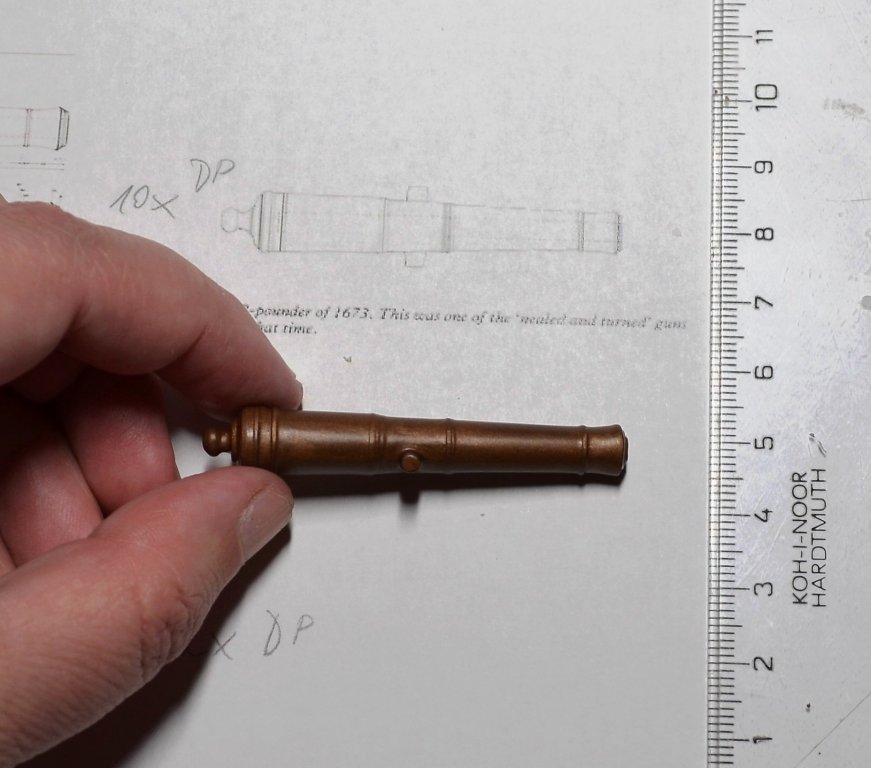
Dear friends, your words mean a lot for me and I am really honored. Thank you all very much. I tried to make cannons in this scale ultra realistic and also find the suitable ways, how to achieve such result. It was not so easy as usually, but I love great challenges and this one is really attractive. I have never made these details on previous ship models. I saw "Rose and crown"relief and various marks on cannons but in fact the main advice, how to do it correctly, I got from Captain KL, who described all information in perfect details and professionally in Czech forum. That is to a great extent his merit that I have done such details. His expert advice are priceless for me and many other people, who want to create realistic models and learn a lot of useful and interesting information about real ships and their history. https://www.modelforum.cz/viewtopic.php?f=177&t=110763&start=885#p2186774 https://www.modelforum.cz/viewtopic.php?f=177&t=110763&start=885#p2186883 https://www.modelforum.cz/viewtopic.php?f=177&t=110763&start=885#p2187430 Oh yes, but I cheated only a little bit. Next time I will be good, I promise.😊 Beautifully written. I have also imagined the men´s feelings on such warships. I like watching a video with HMS Victory broadside firing, it is awesome but also very terrible: https://www.youtube.com/watch?v=f_FpYLnNhVw- 1,035 replies
-
- 12
-
-
- royal katherine
- ship of the line
- (and 1 more)
-
HMS ROYAL KATHERINE 1664 by Doris - 1/55 - CARD
DORIS replied to DORIS's topic in - Build logs for subjects built 1501 - 1750
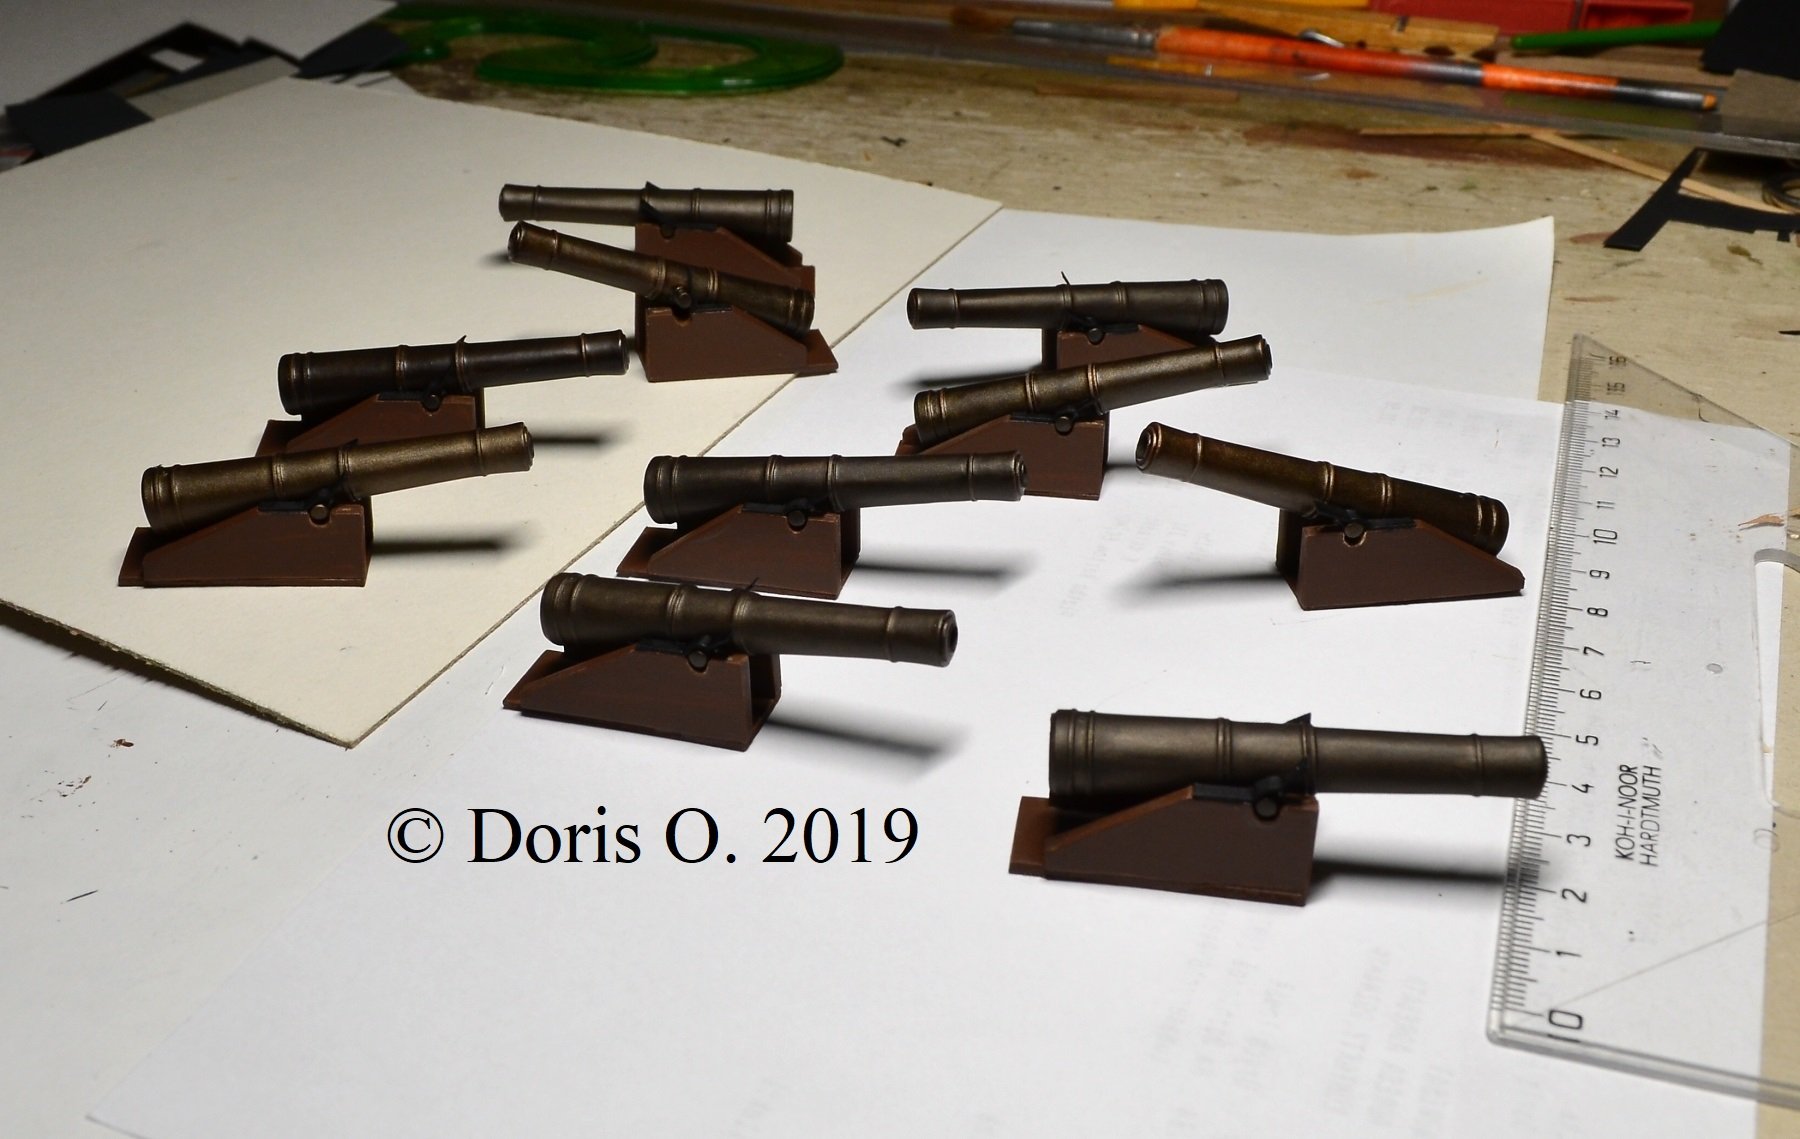
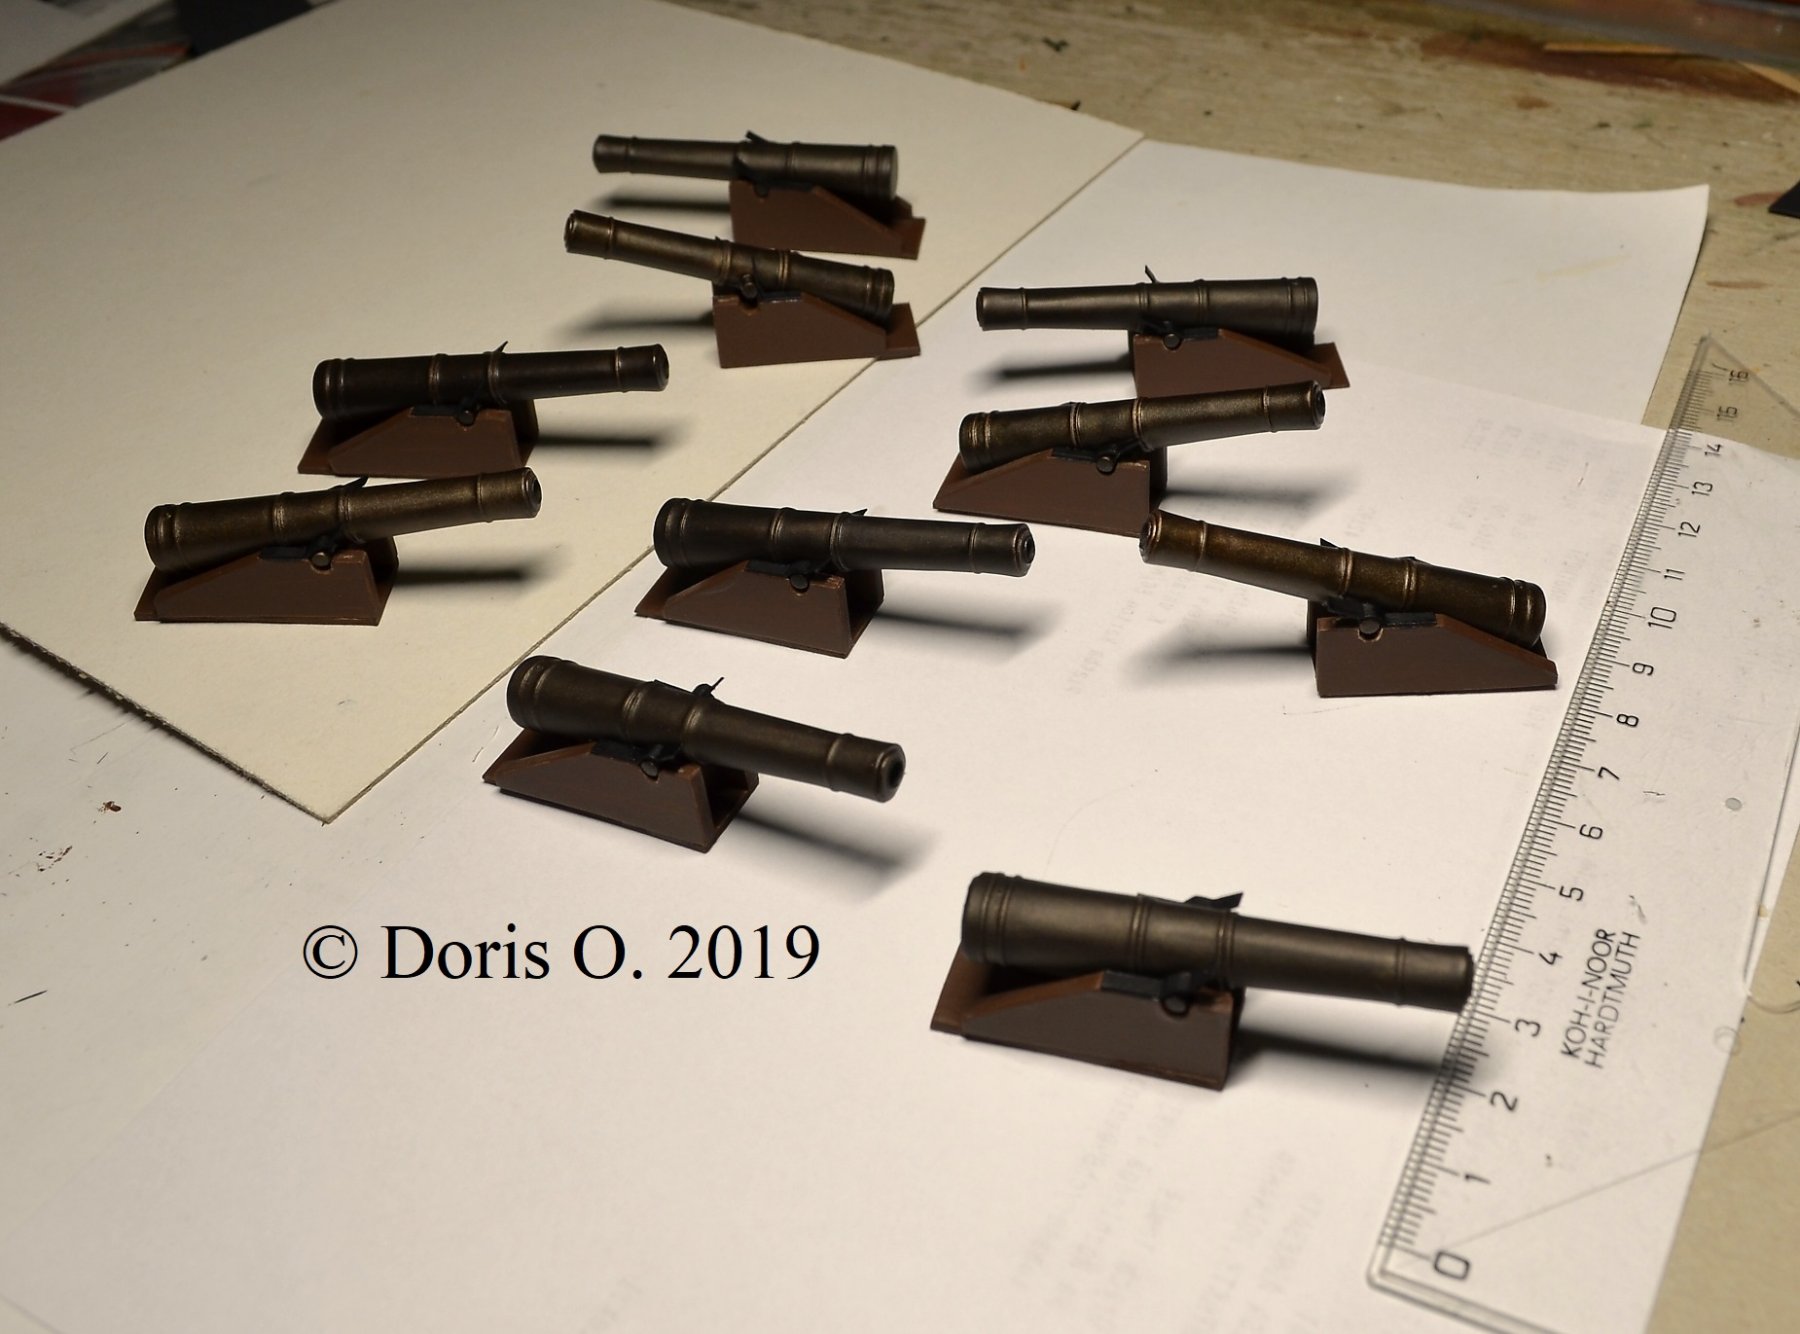
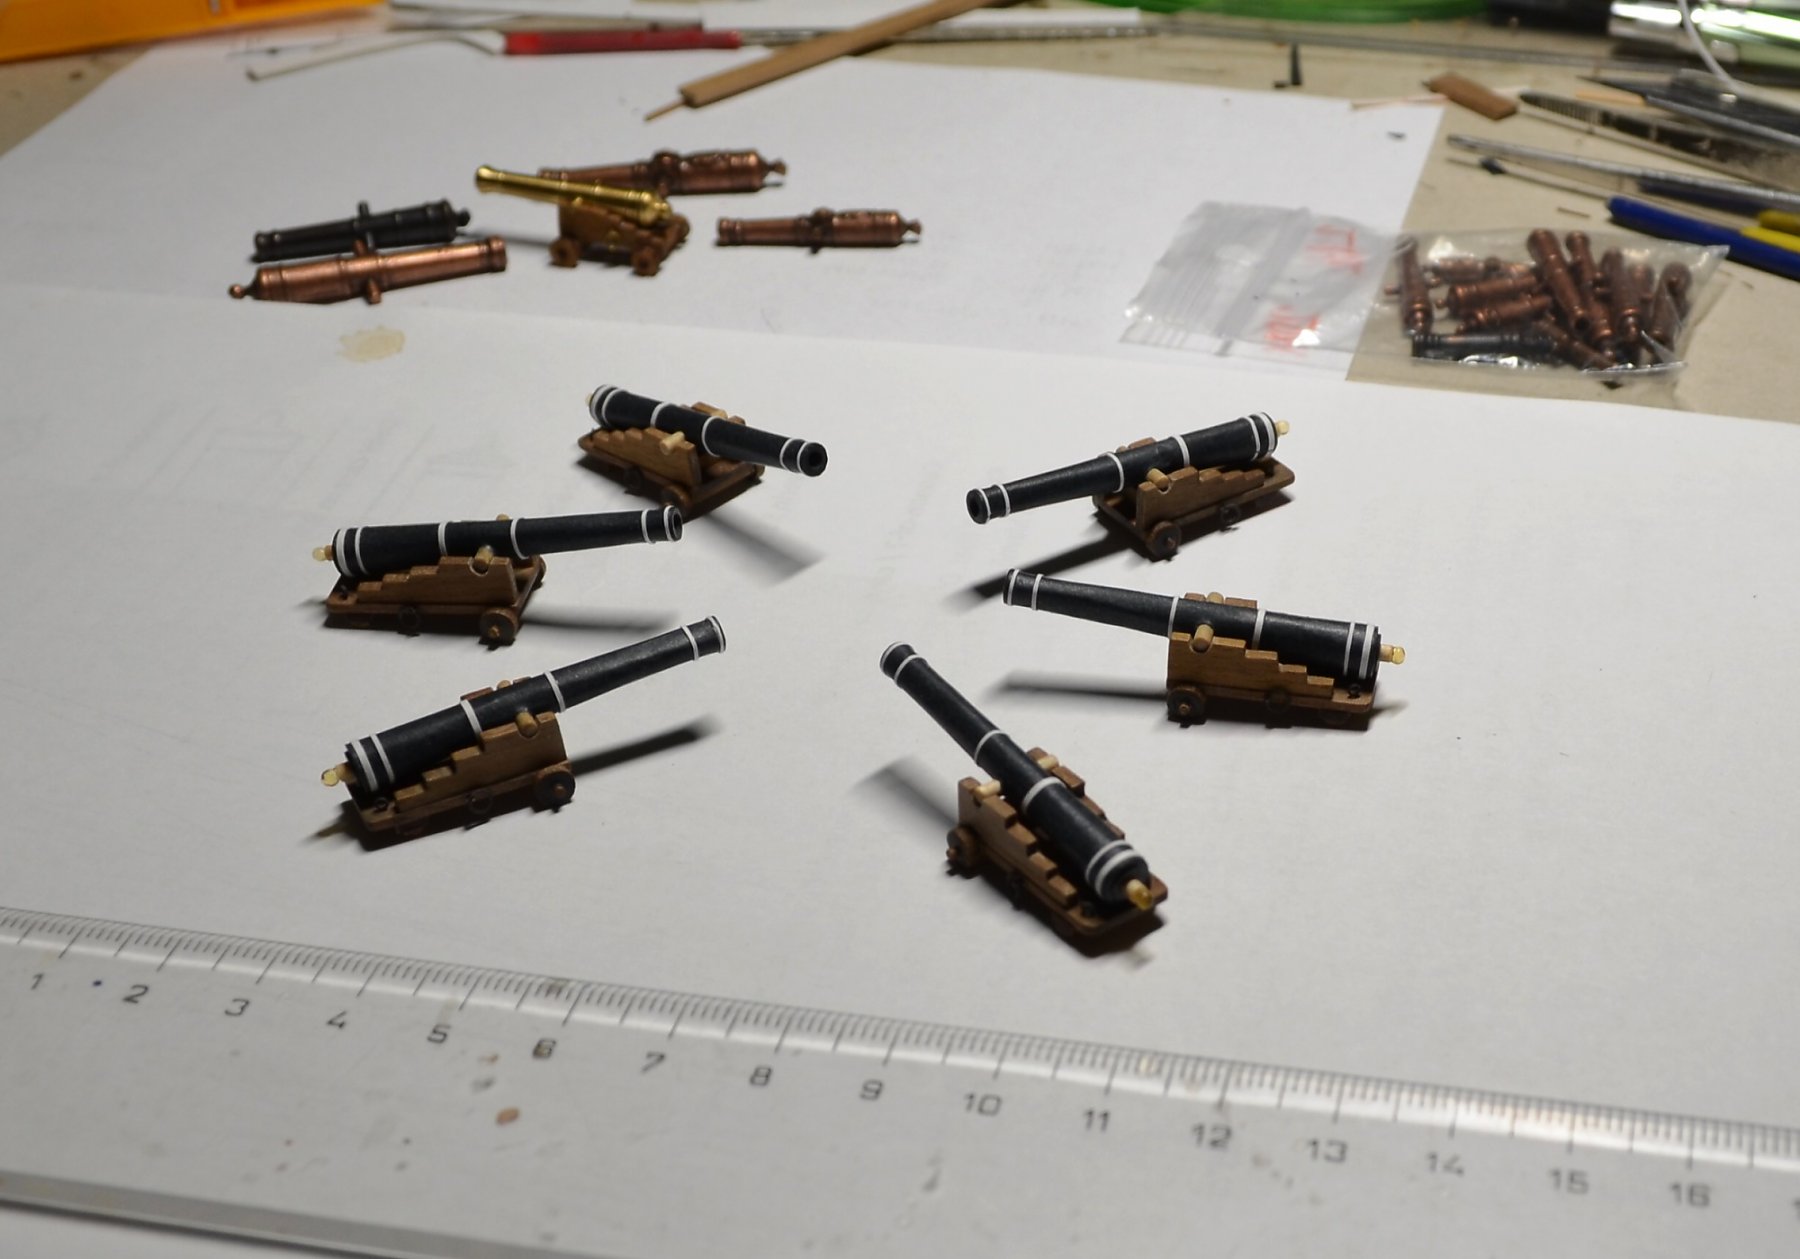
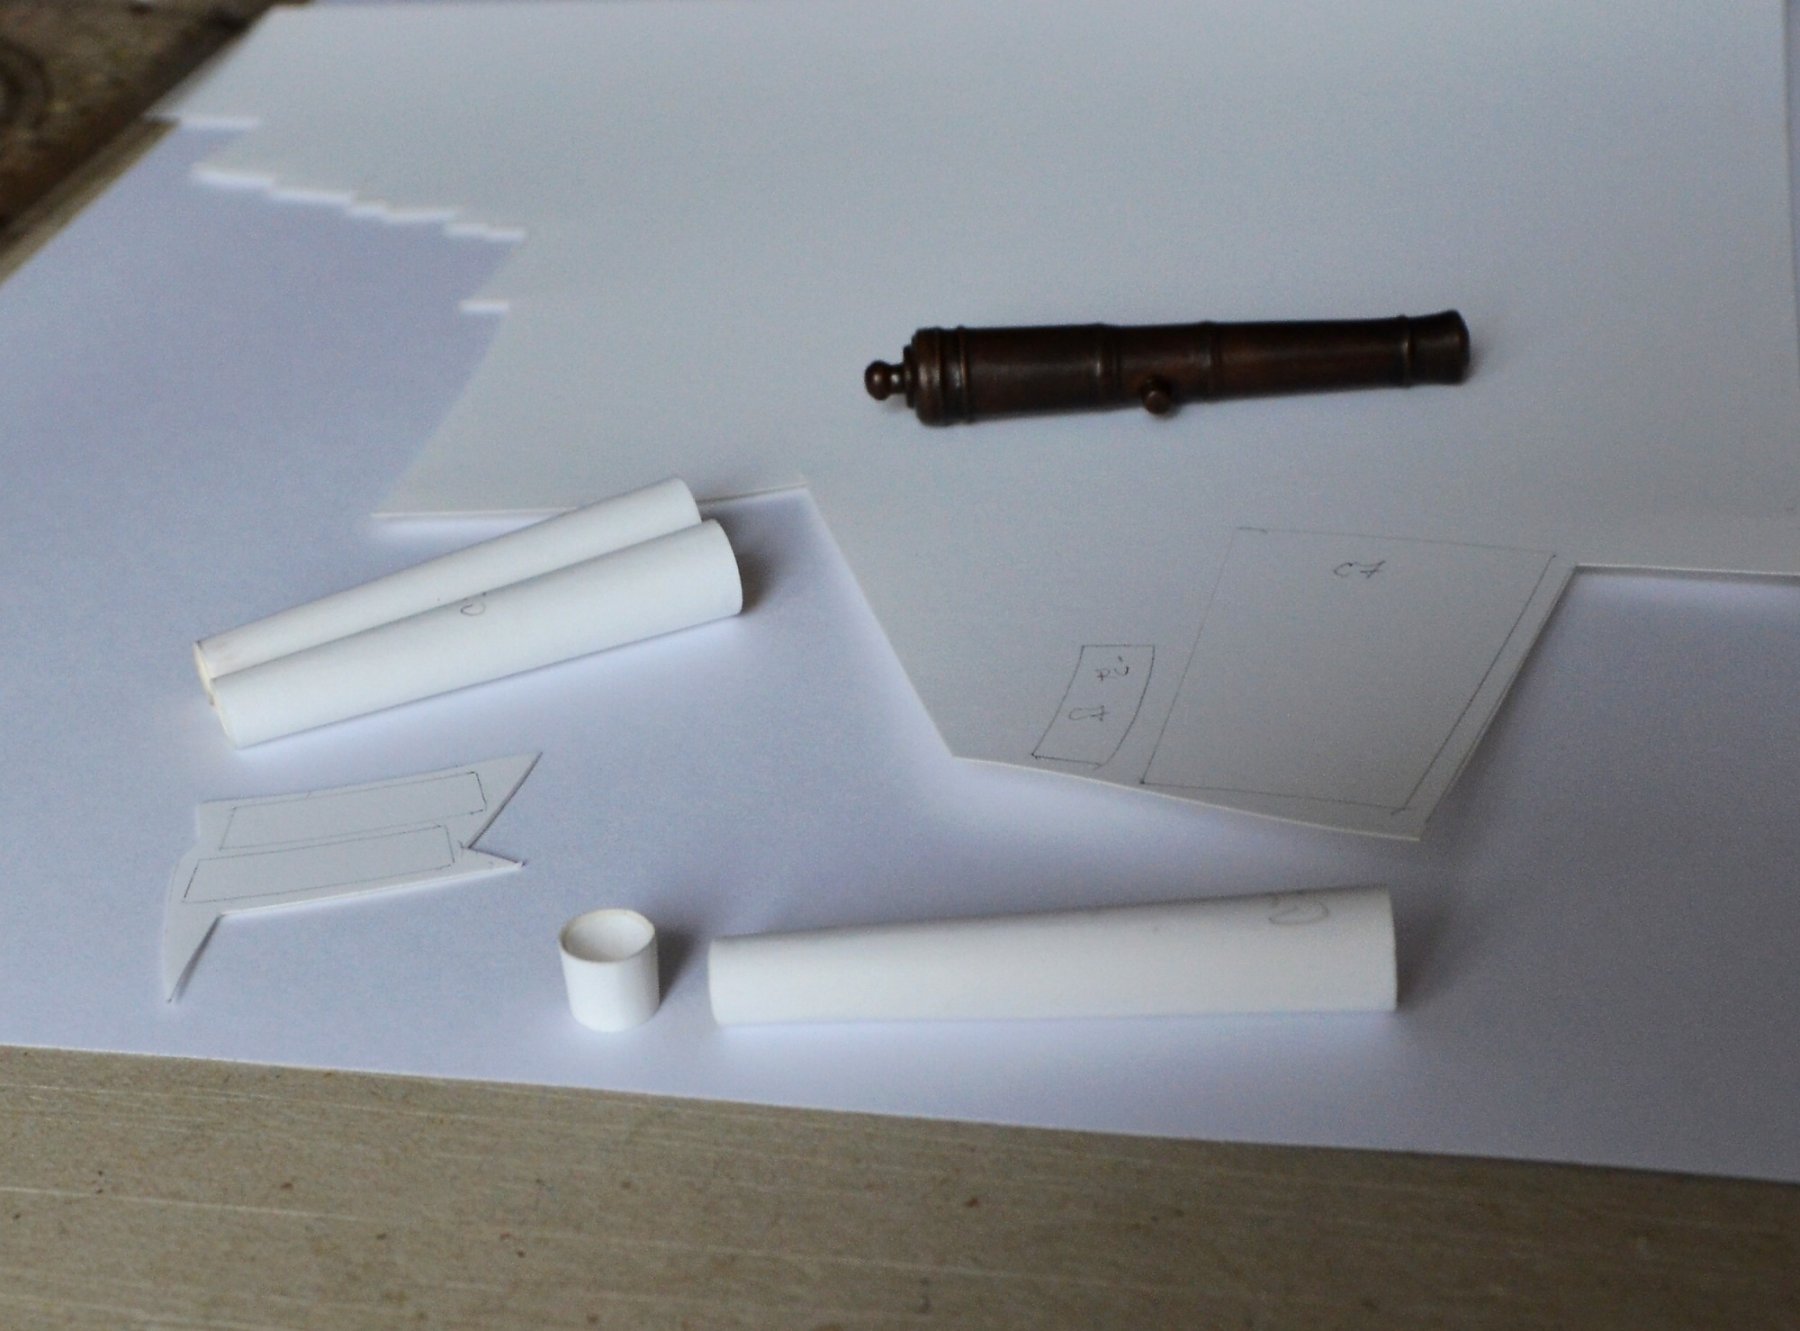
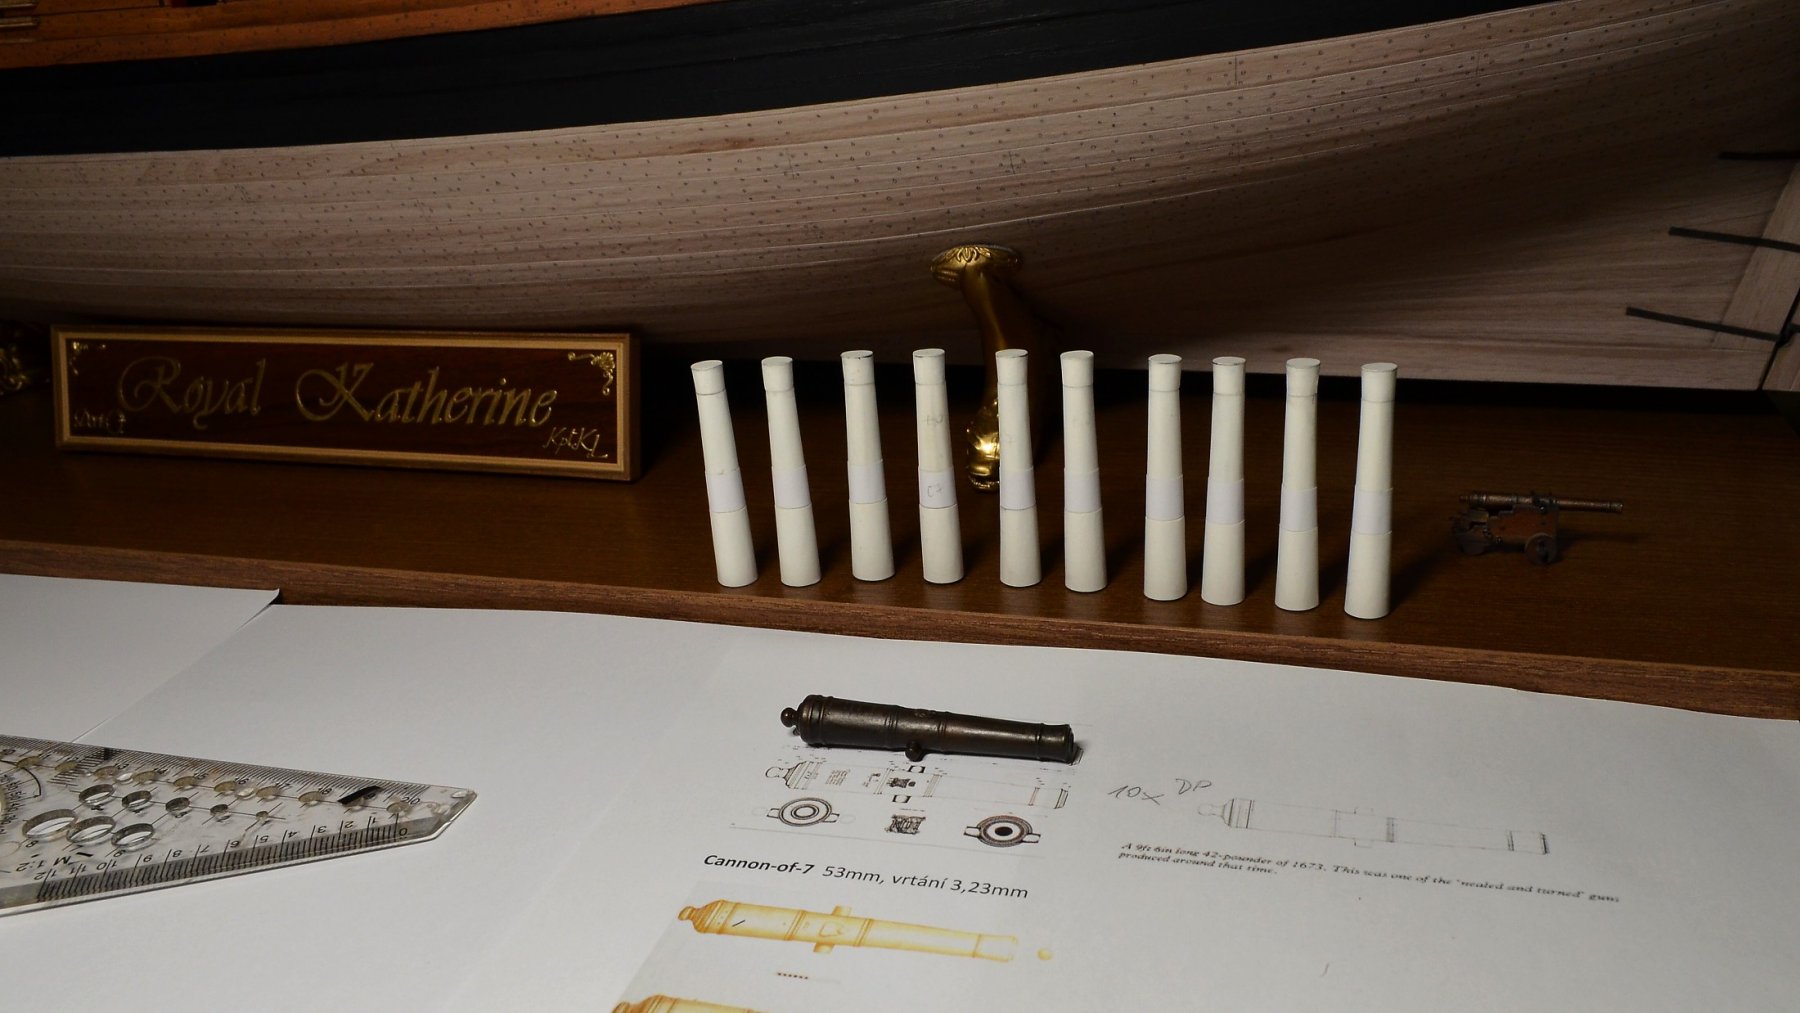
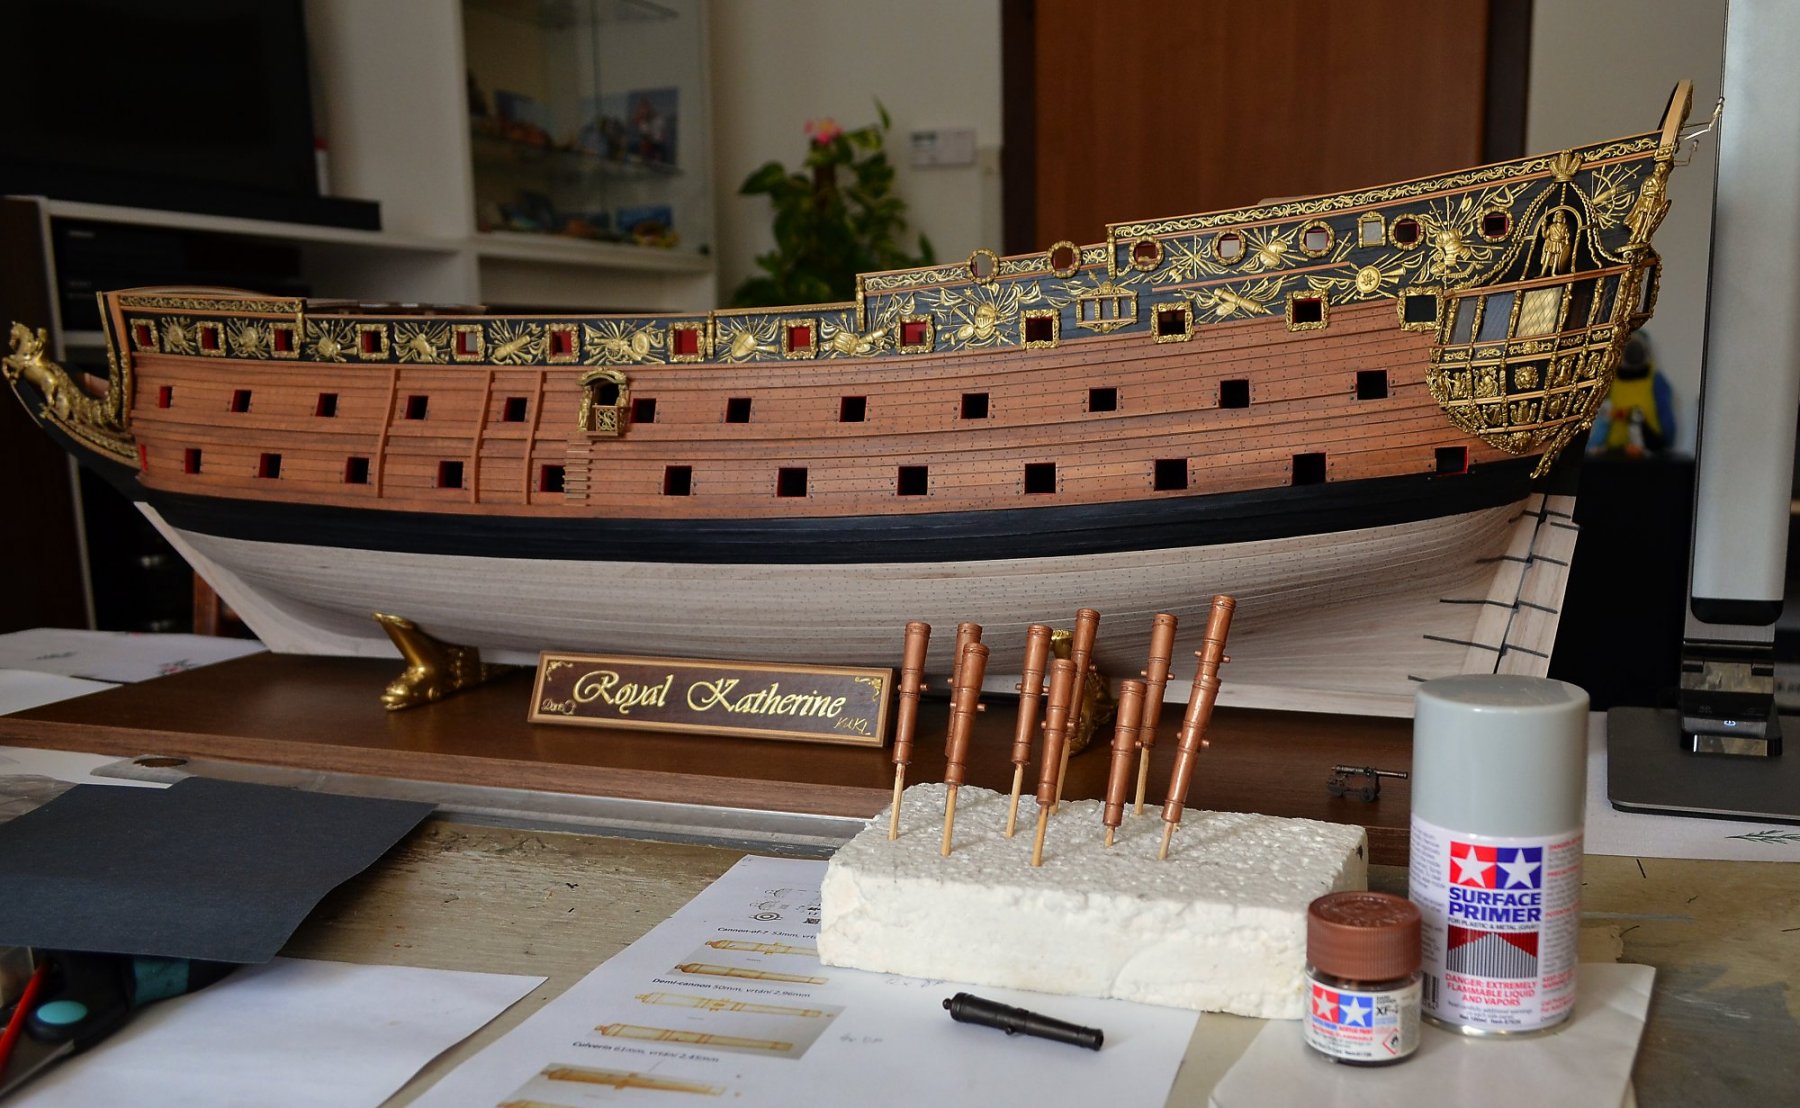
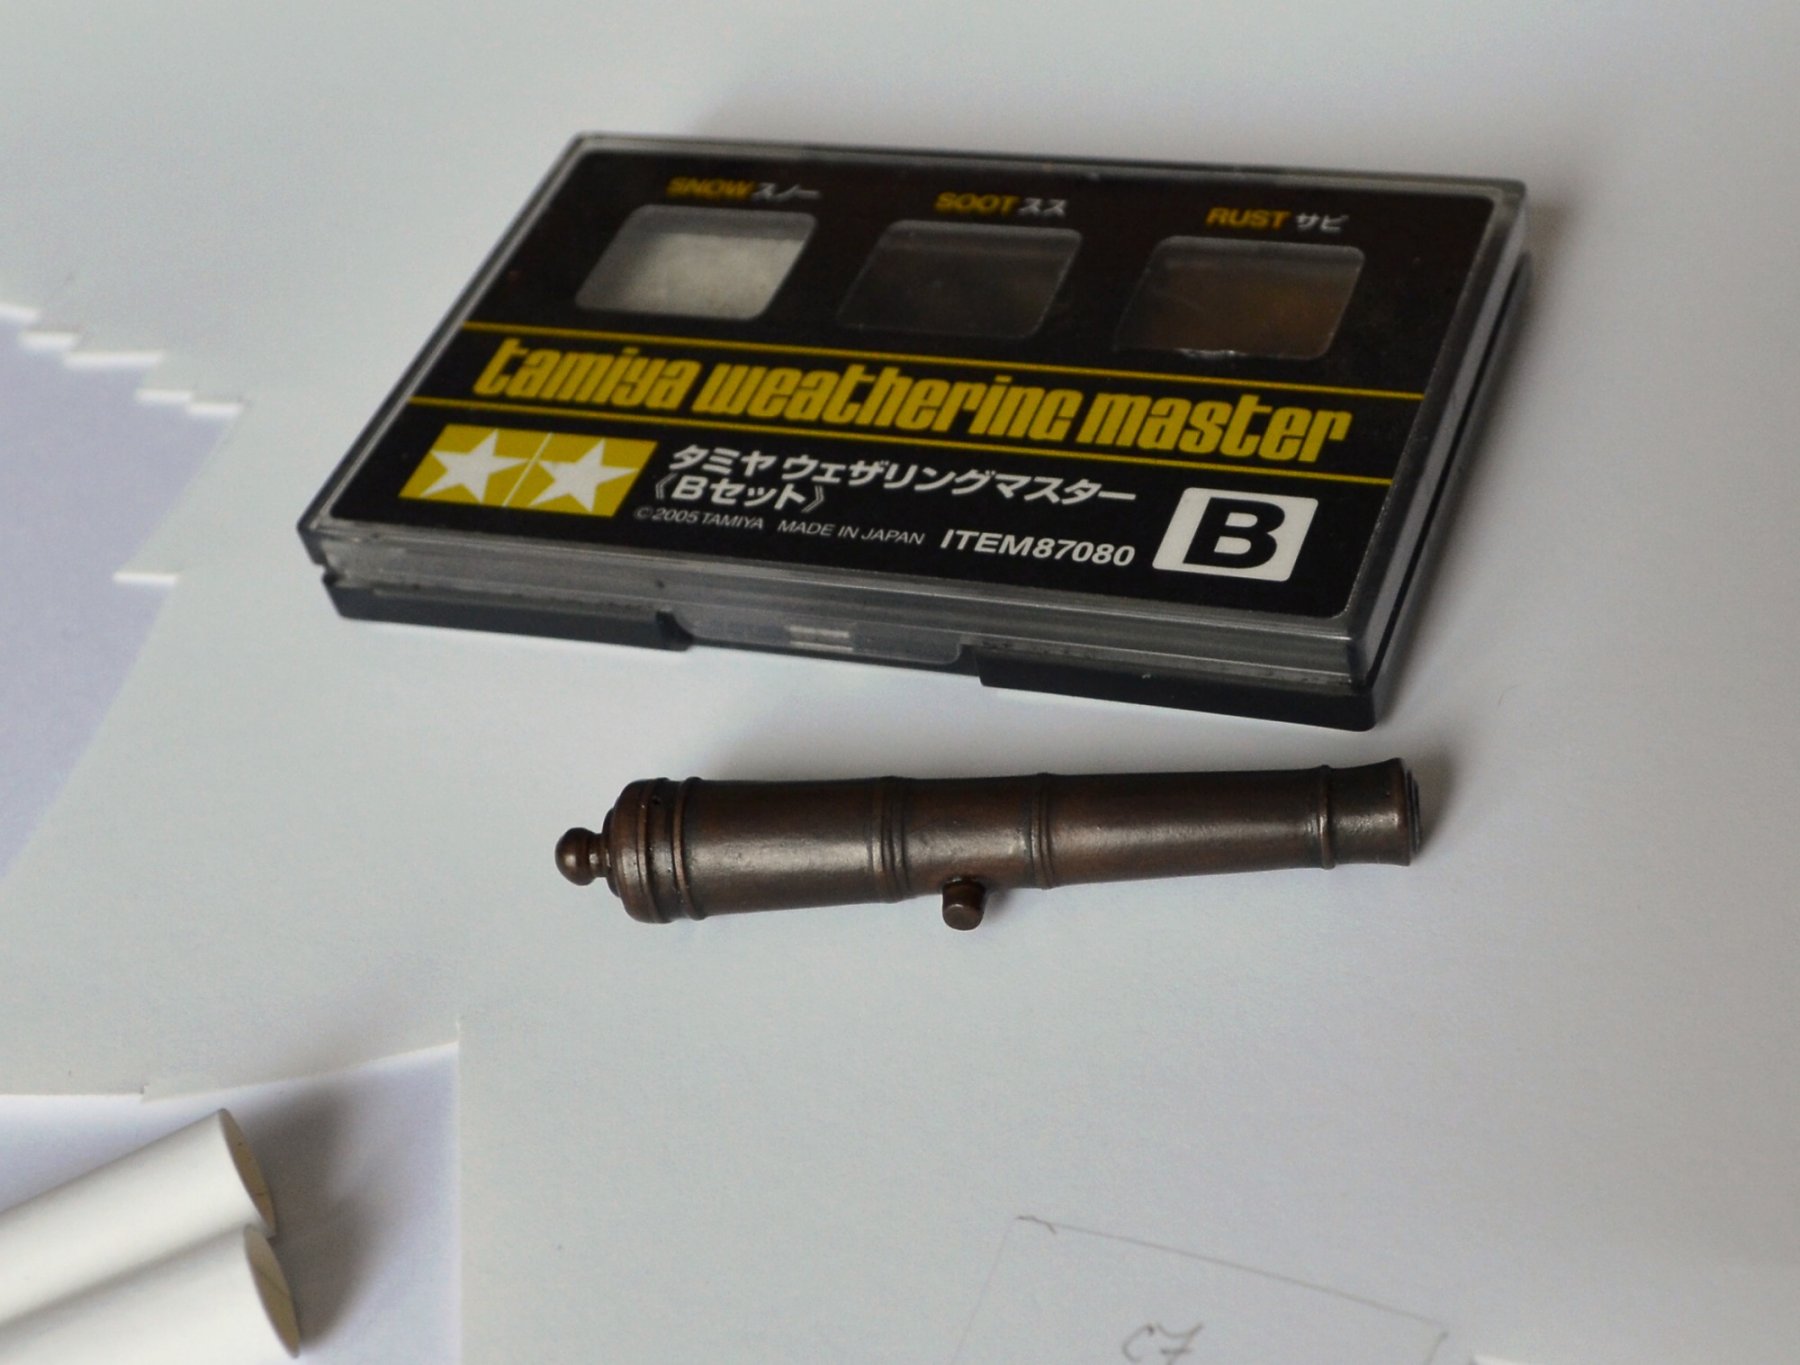
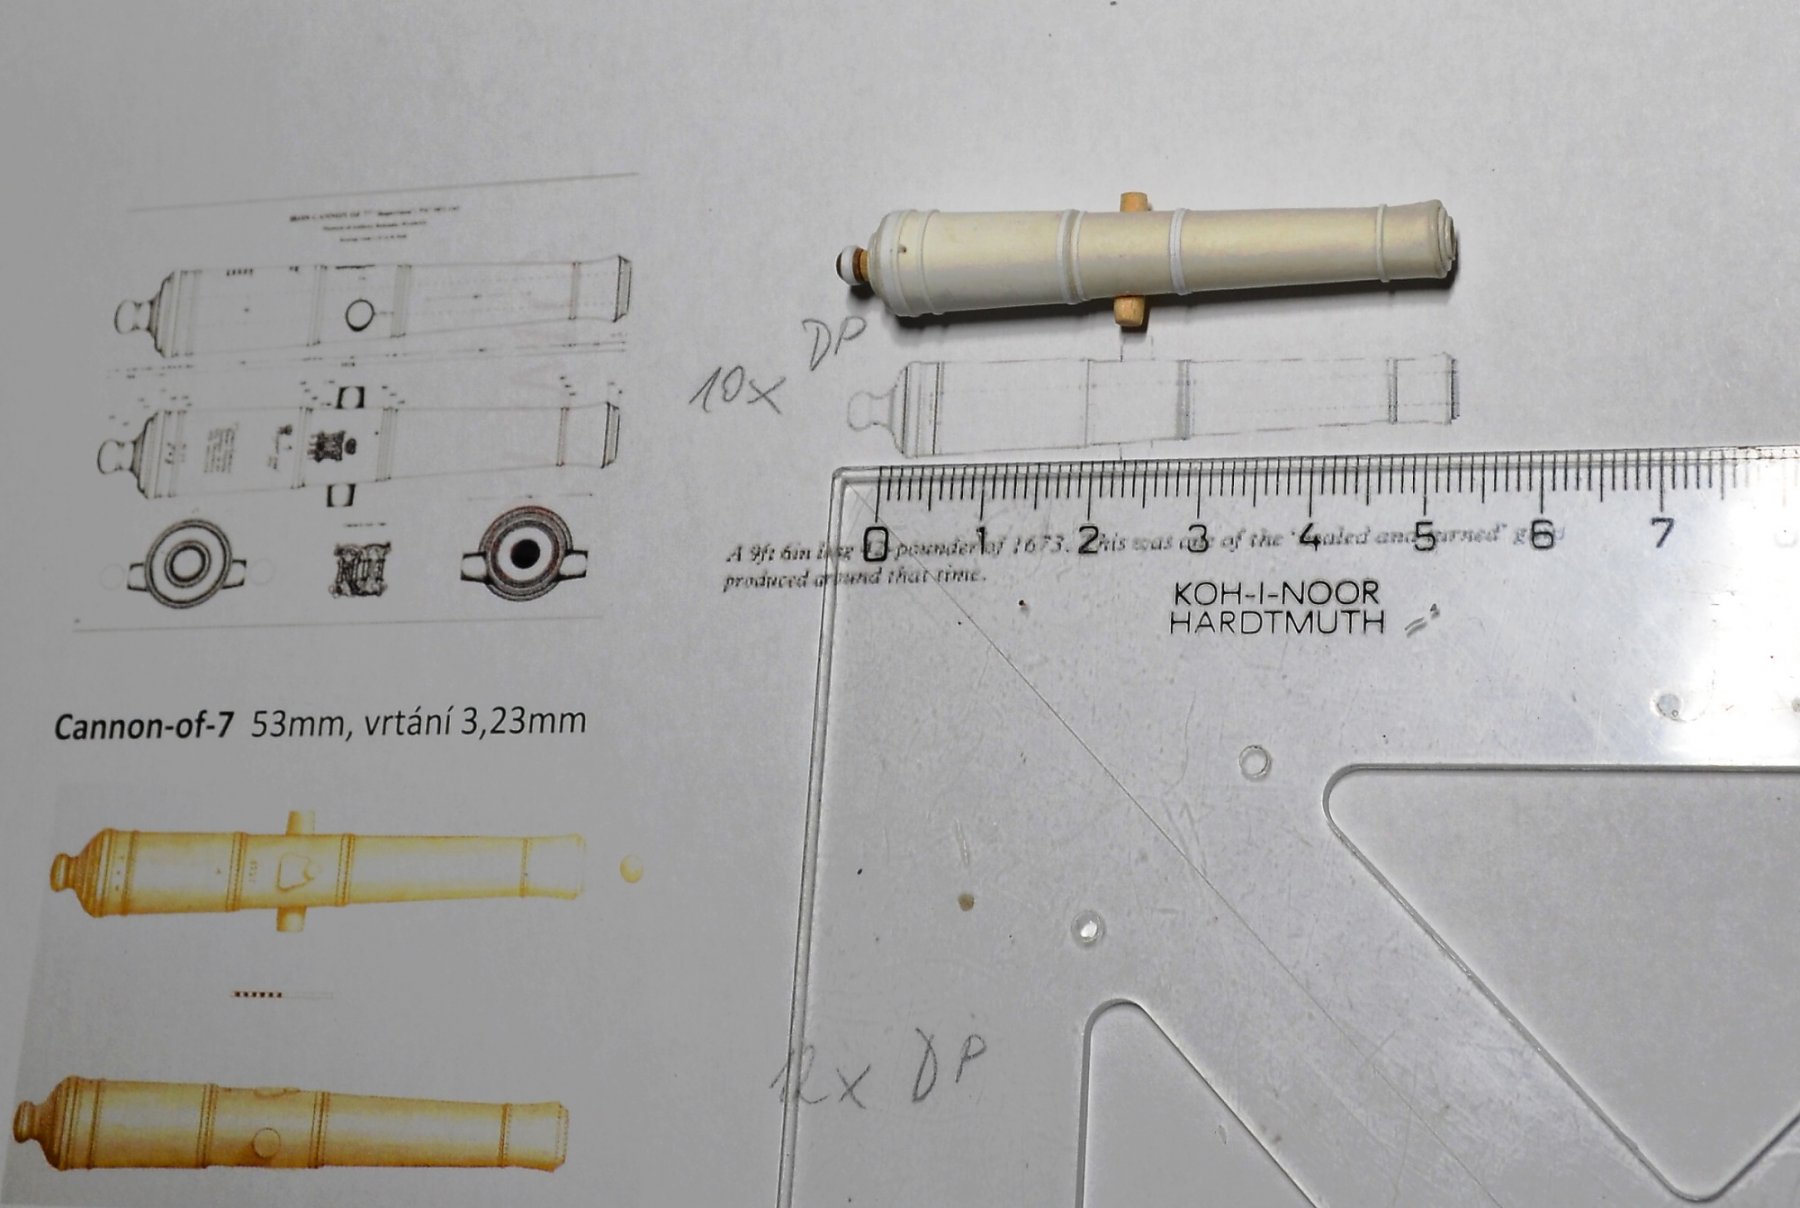
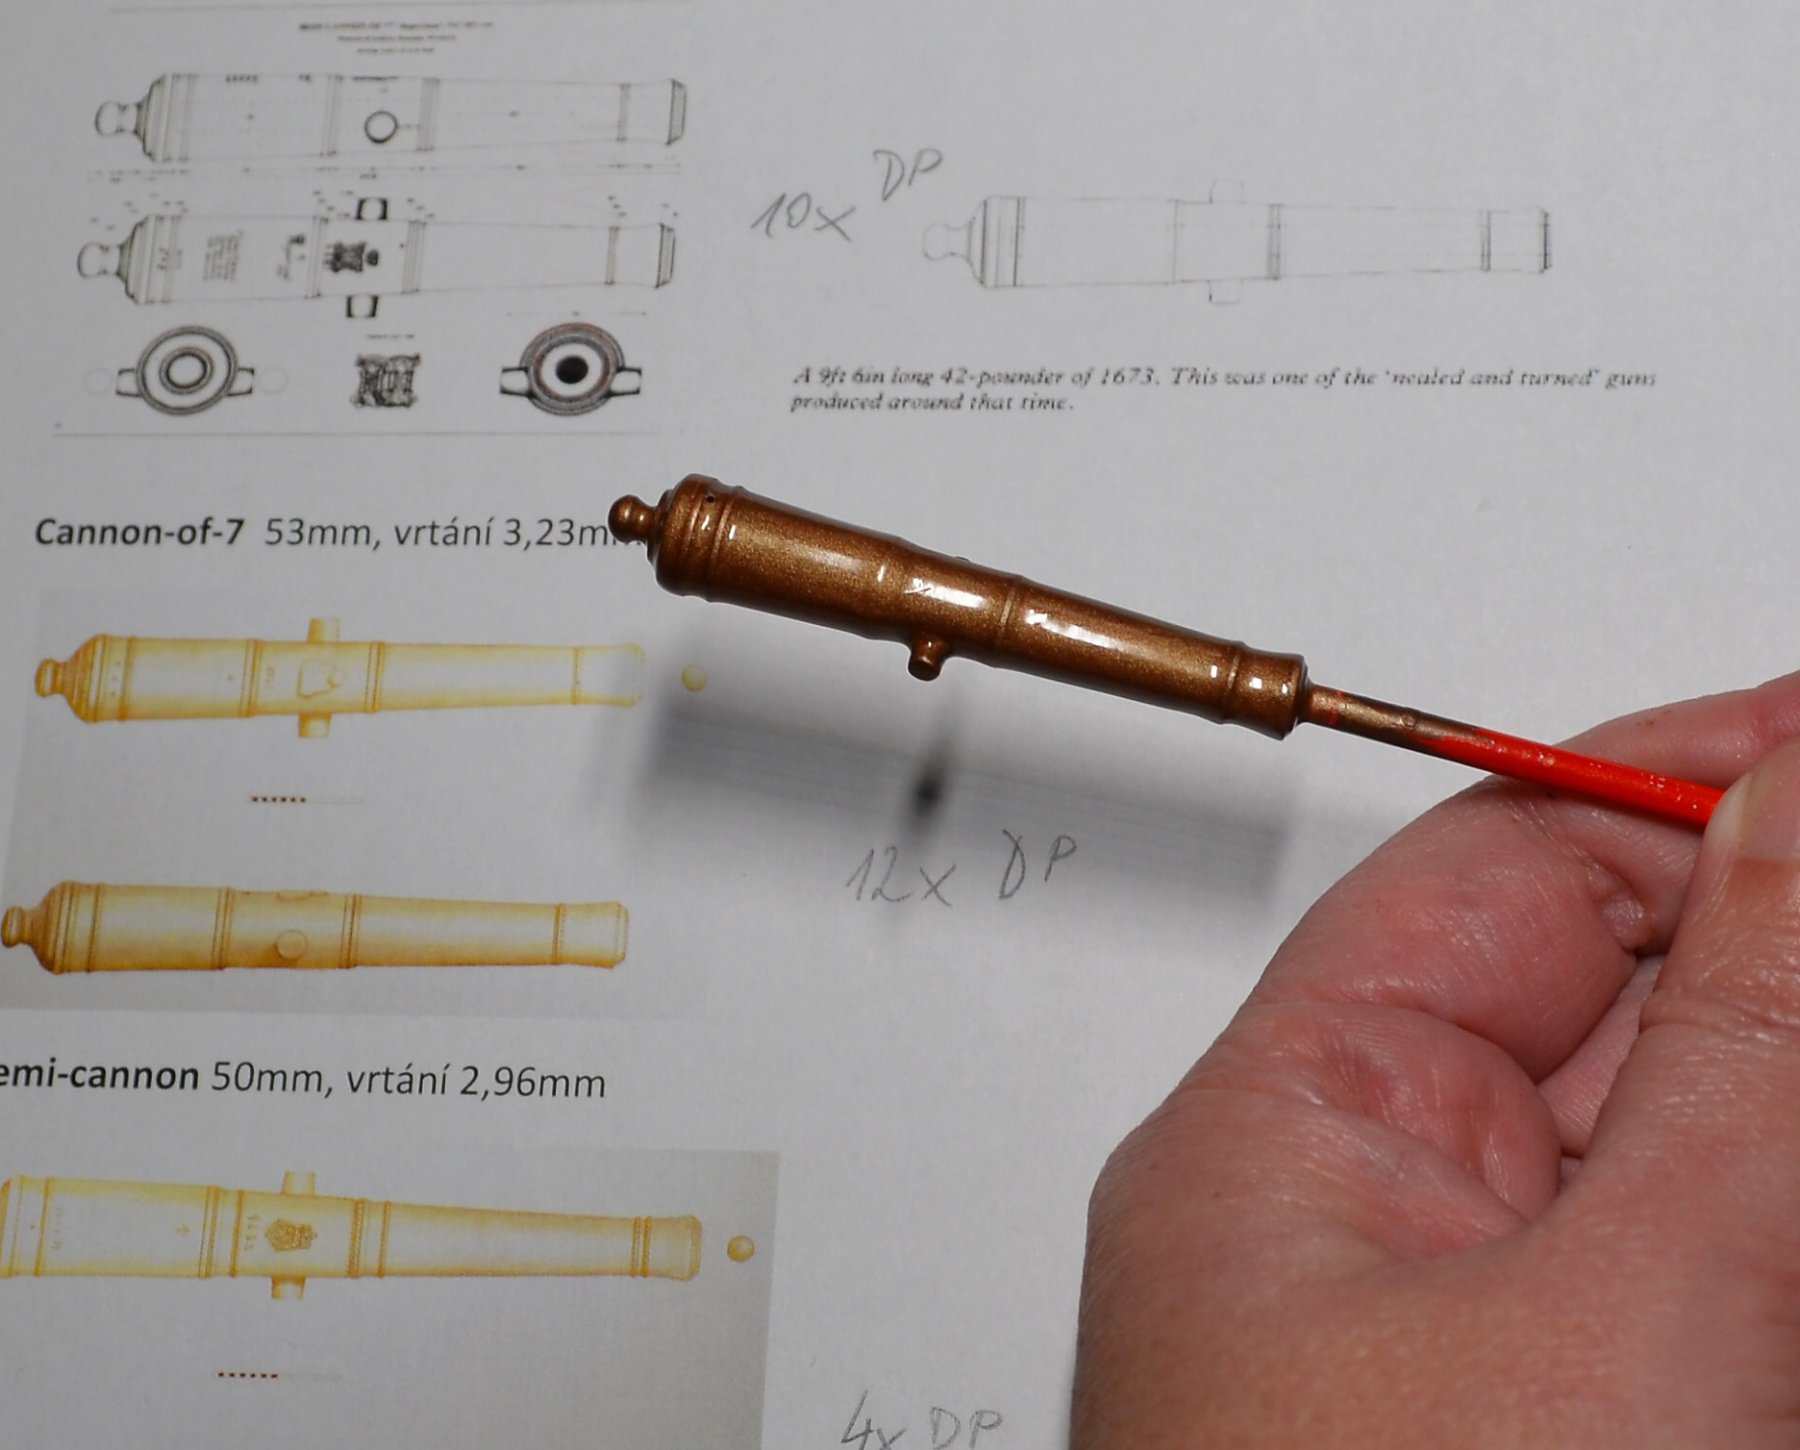
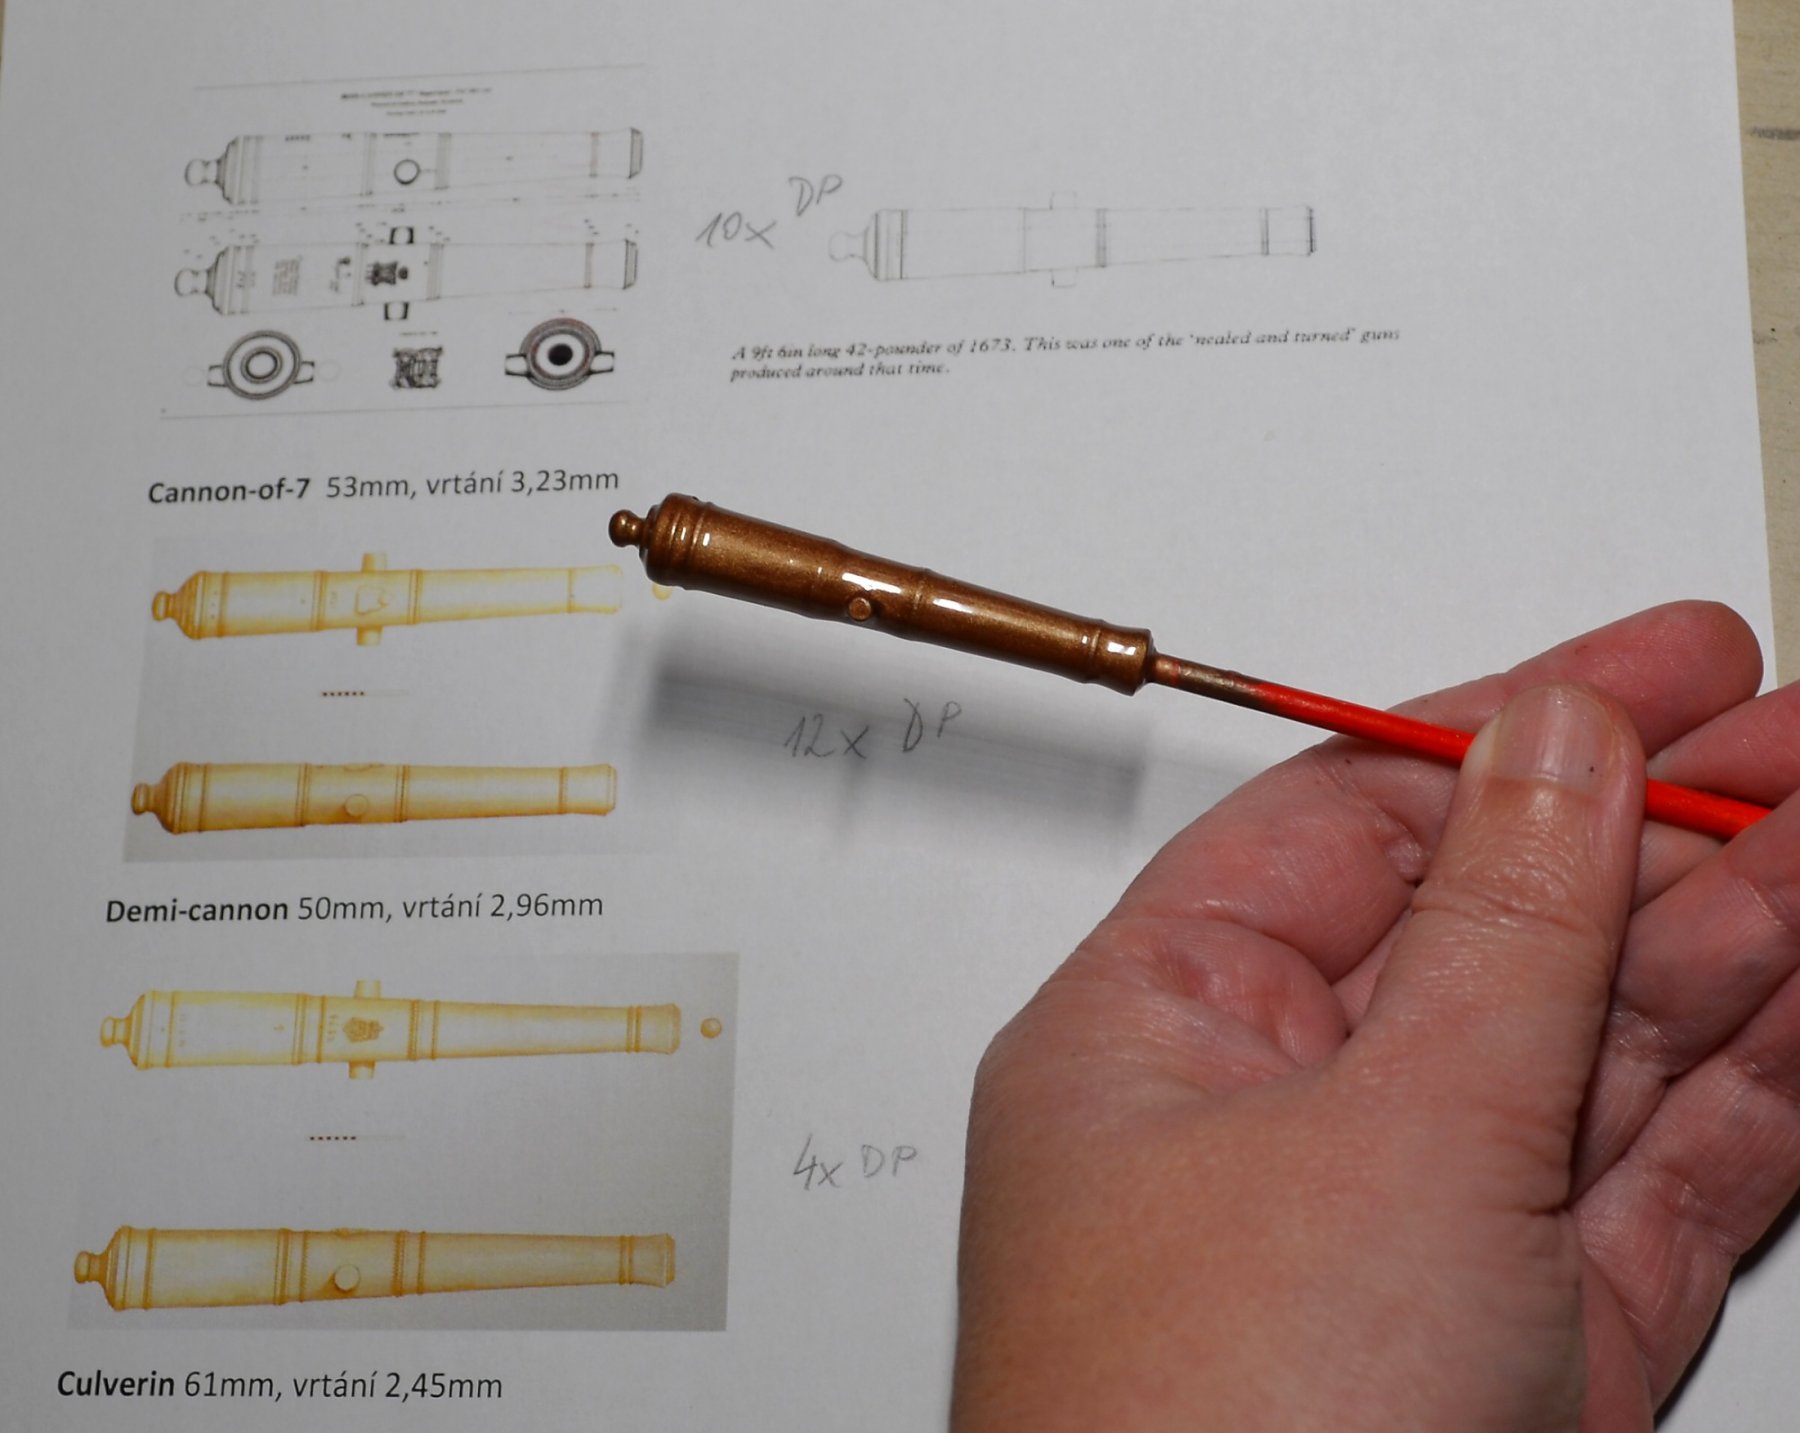
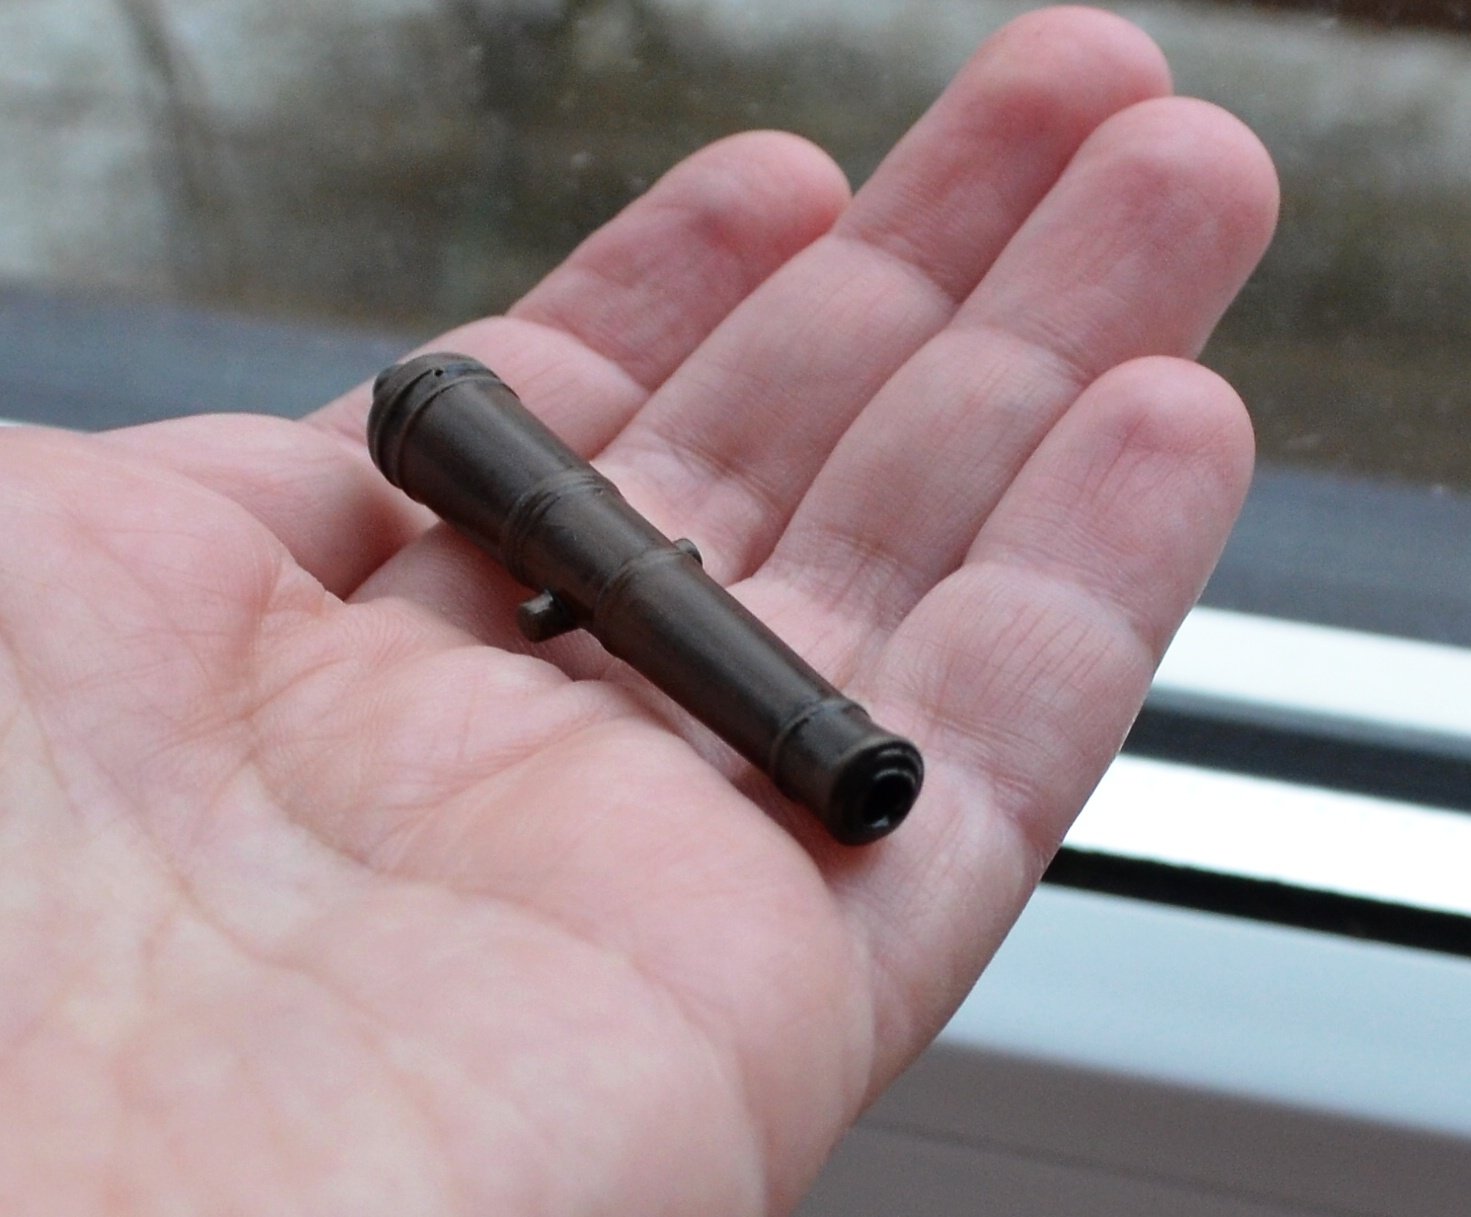
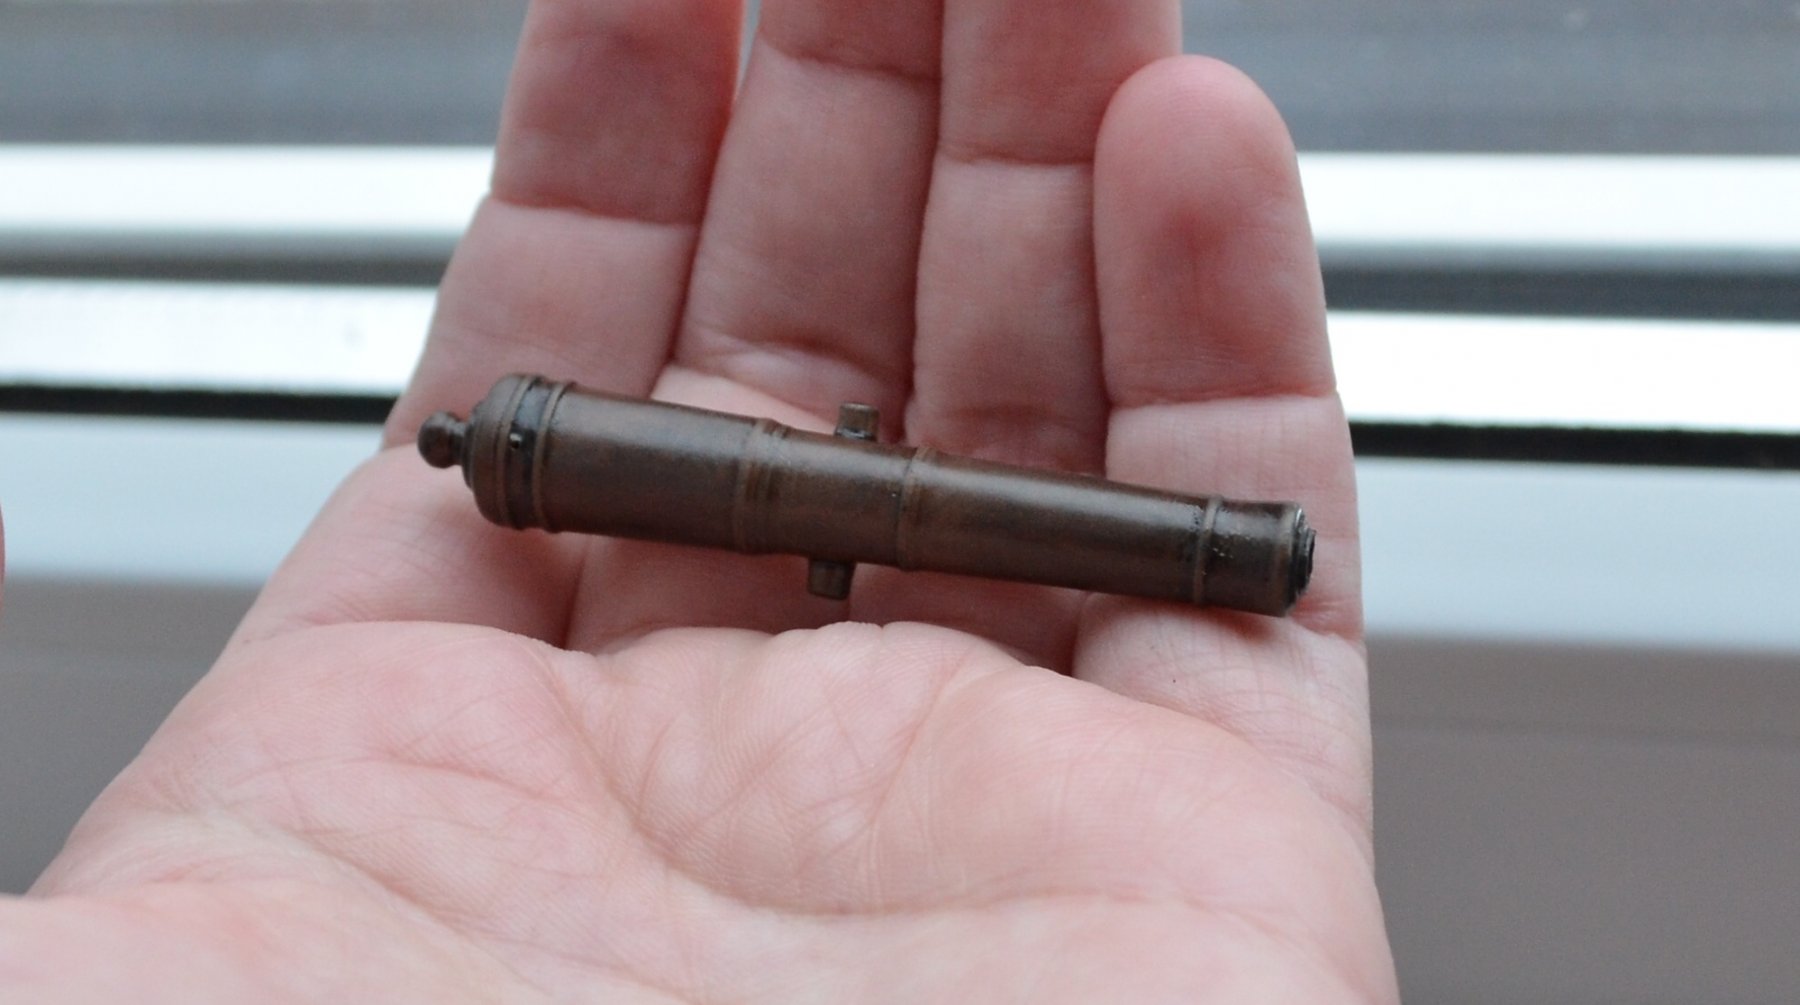
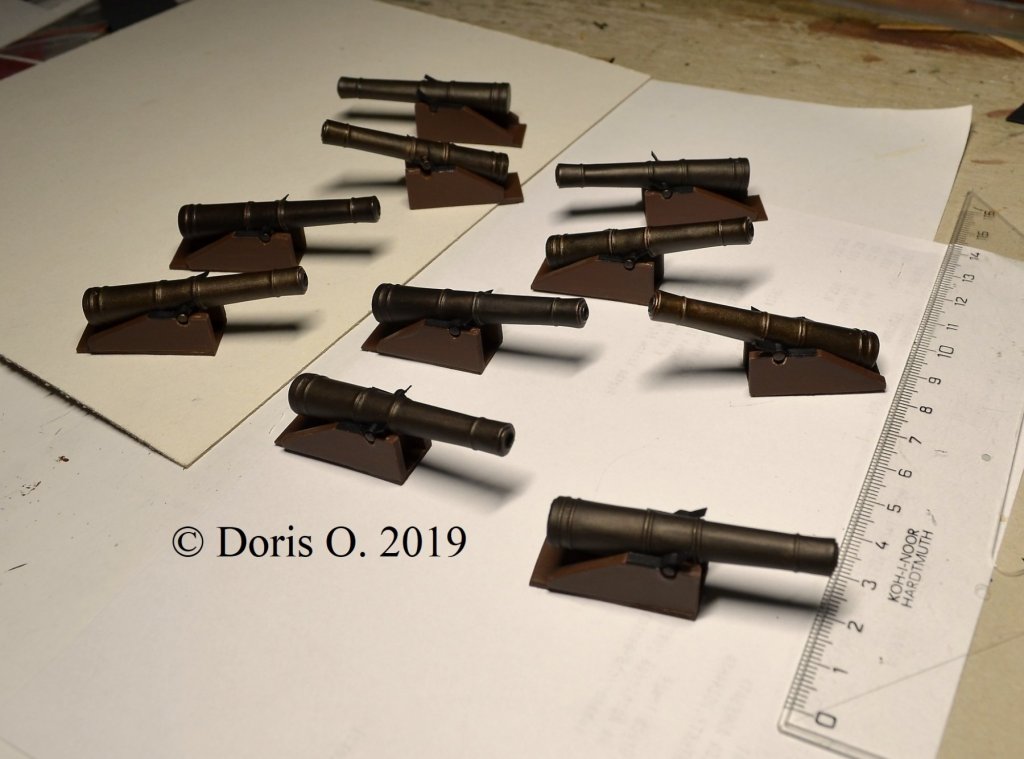
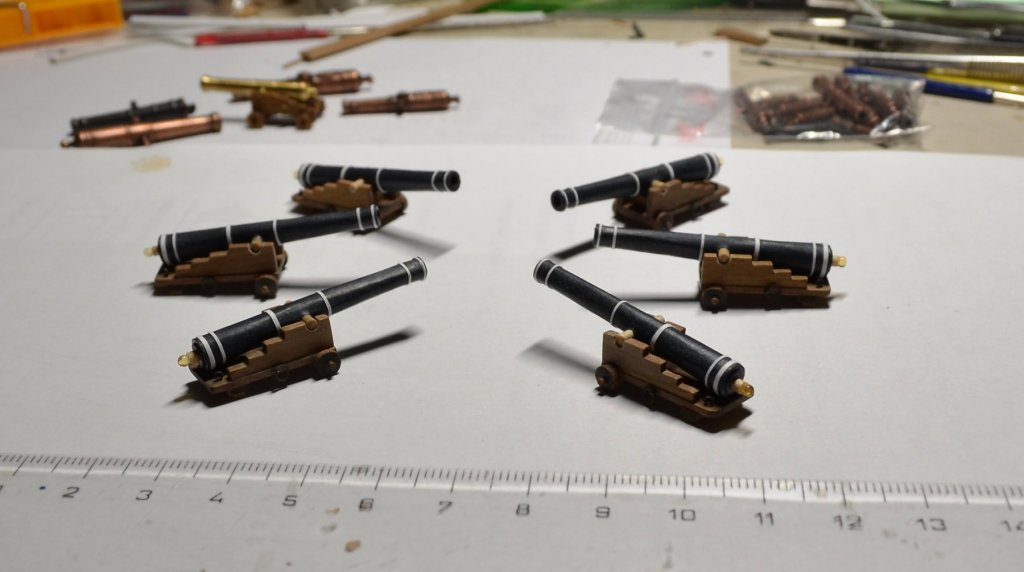
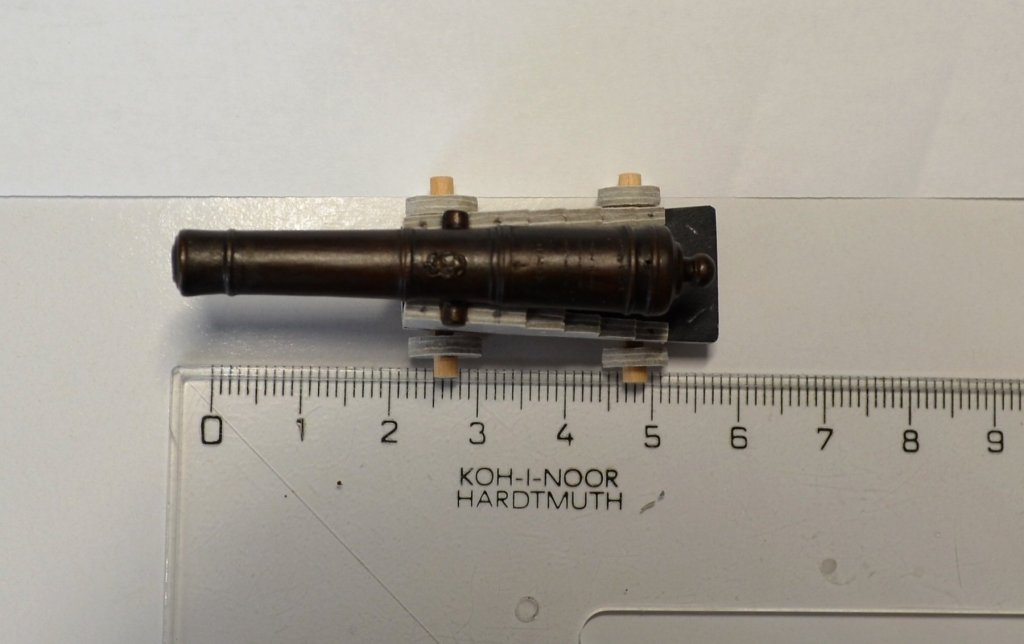
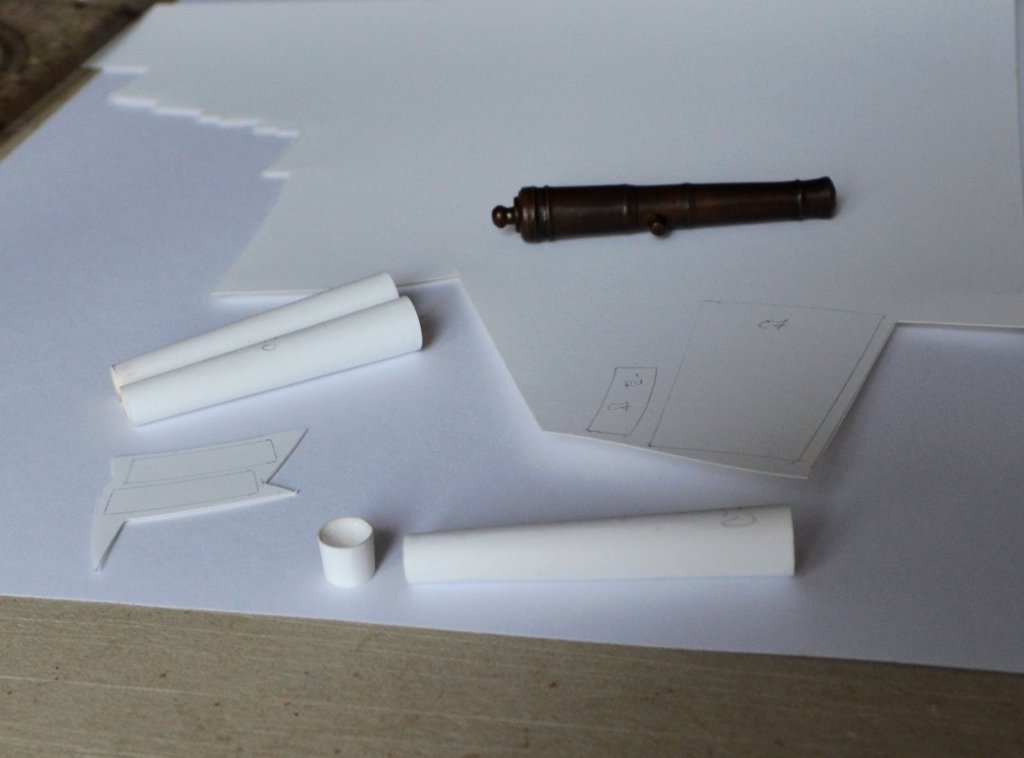
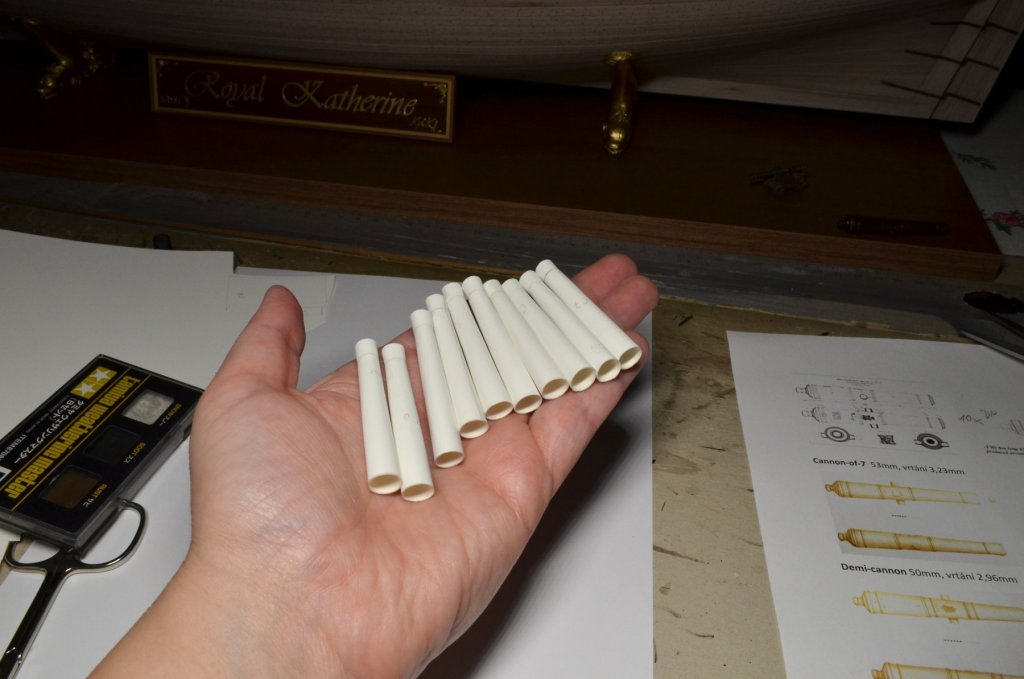
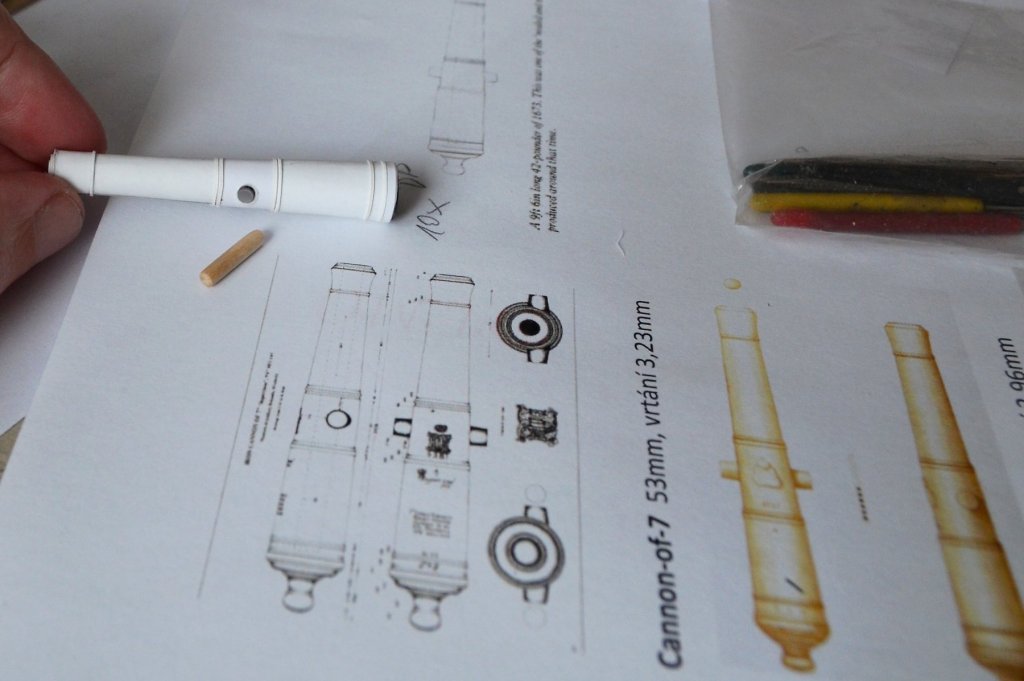
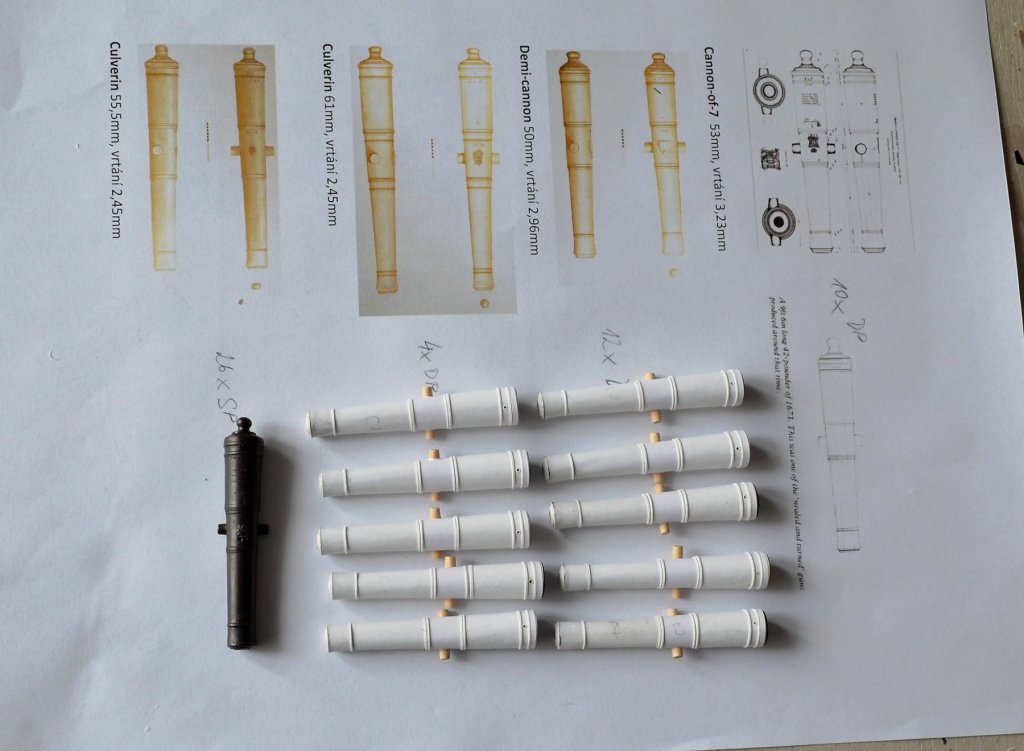
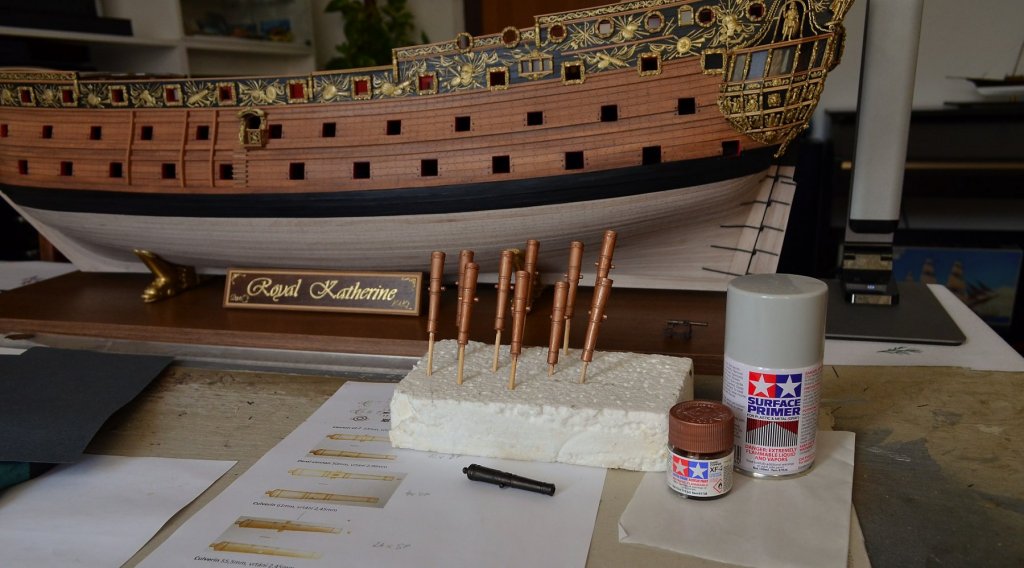
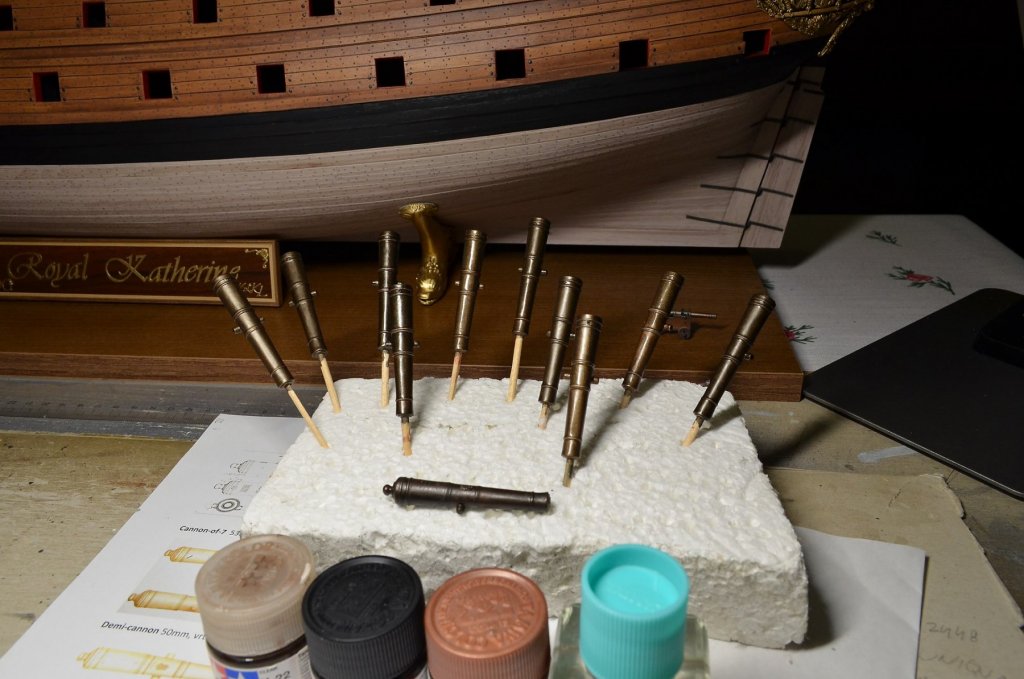
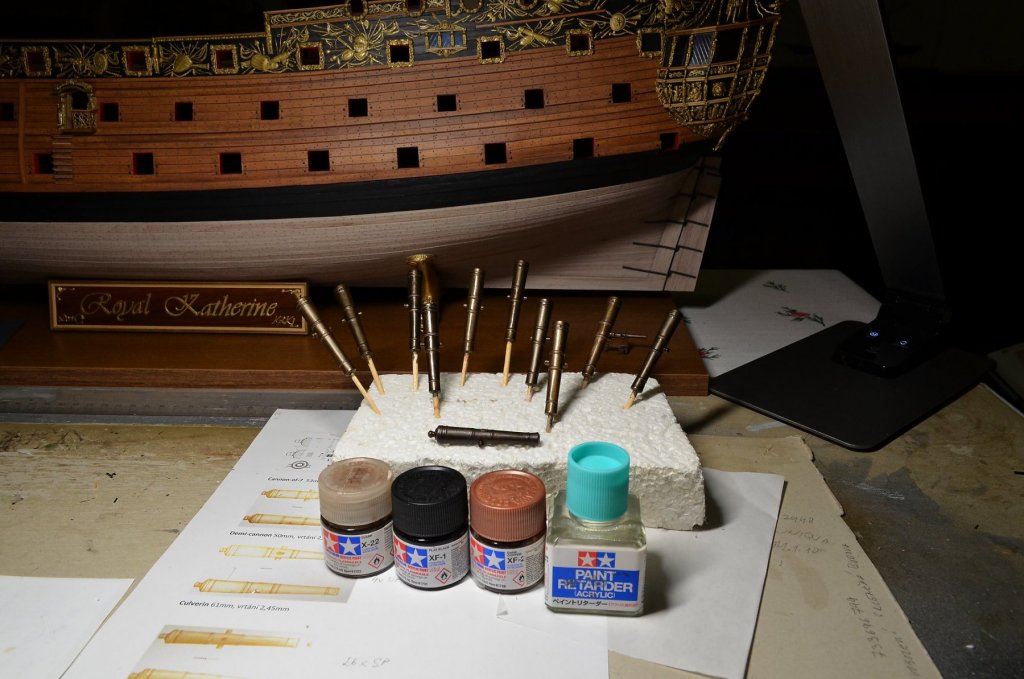
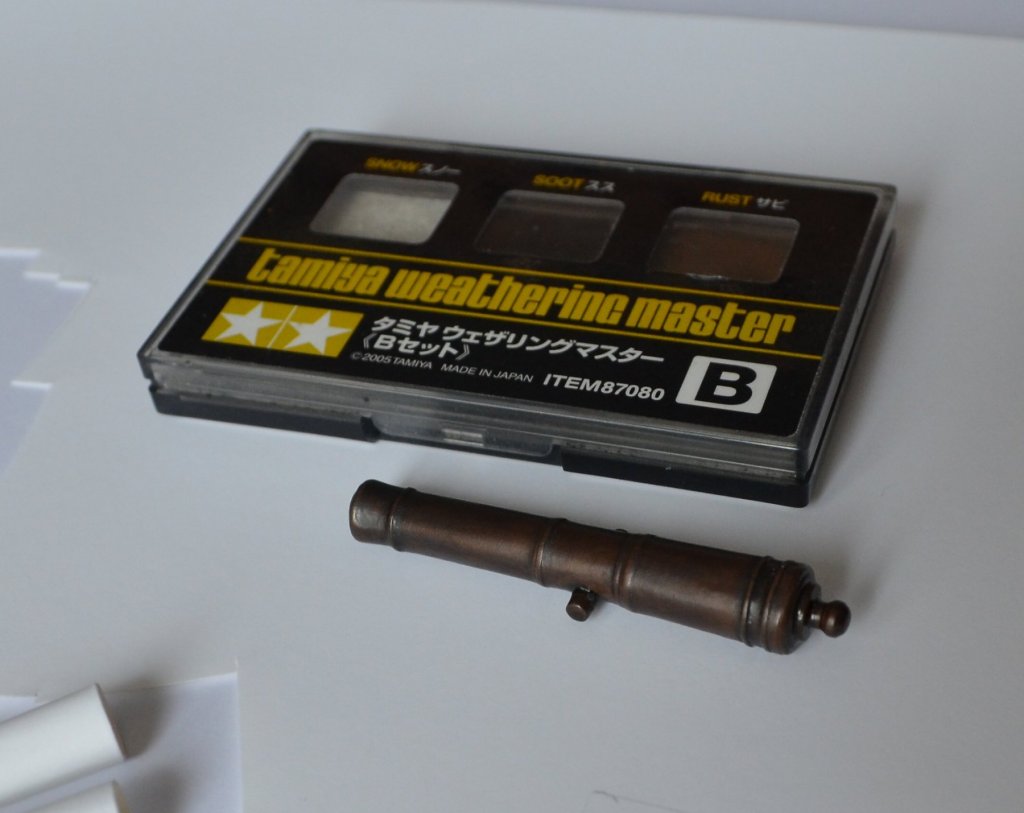
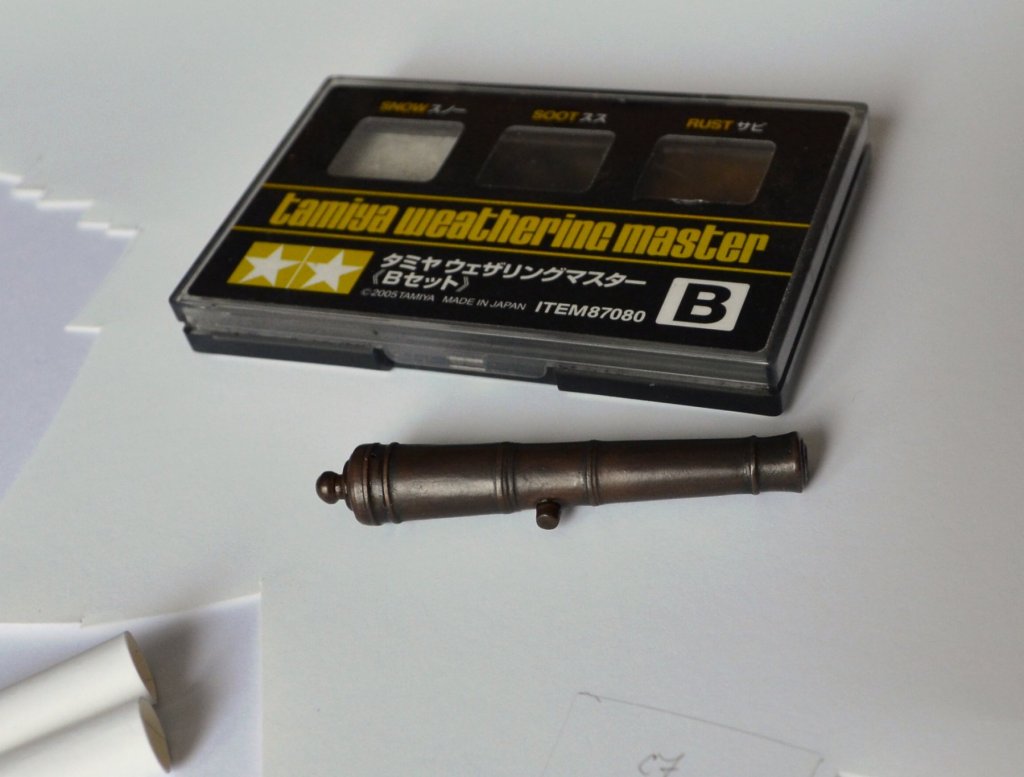
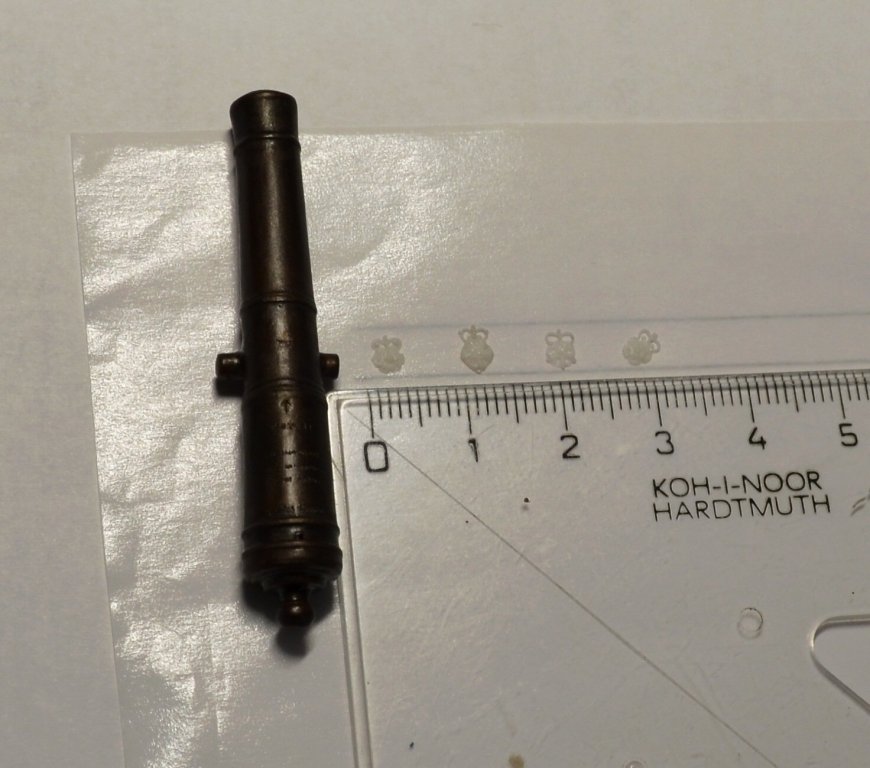
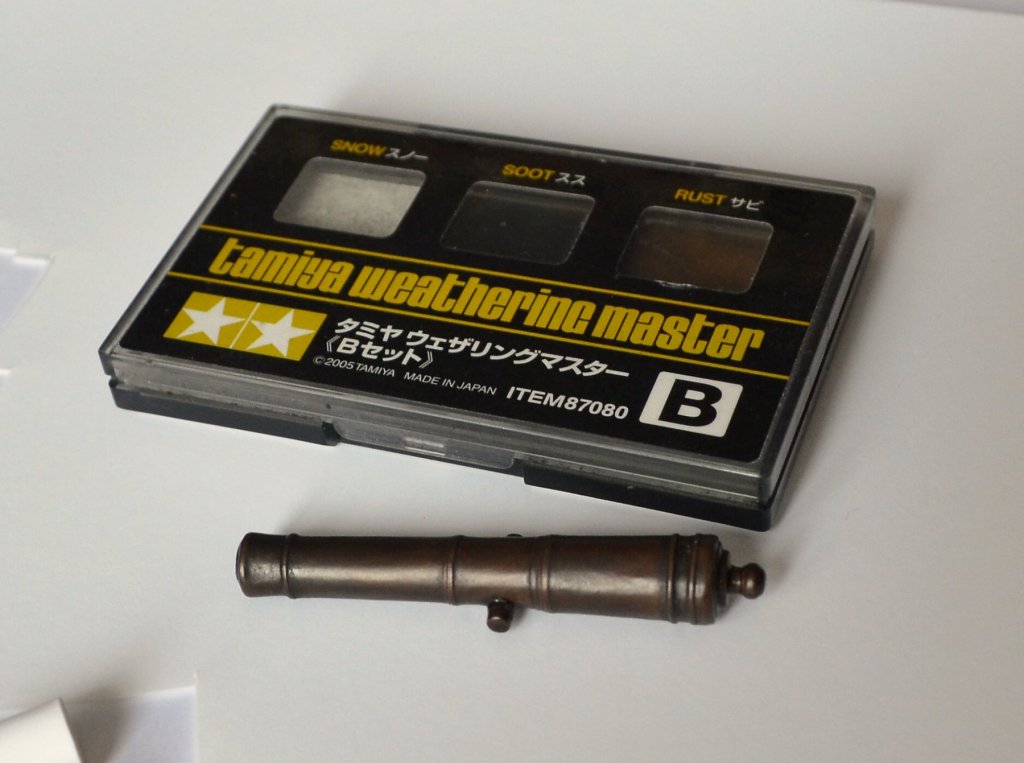
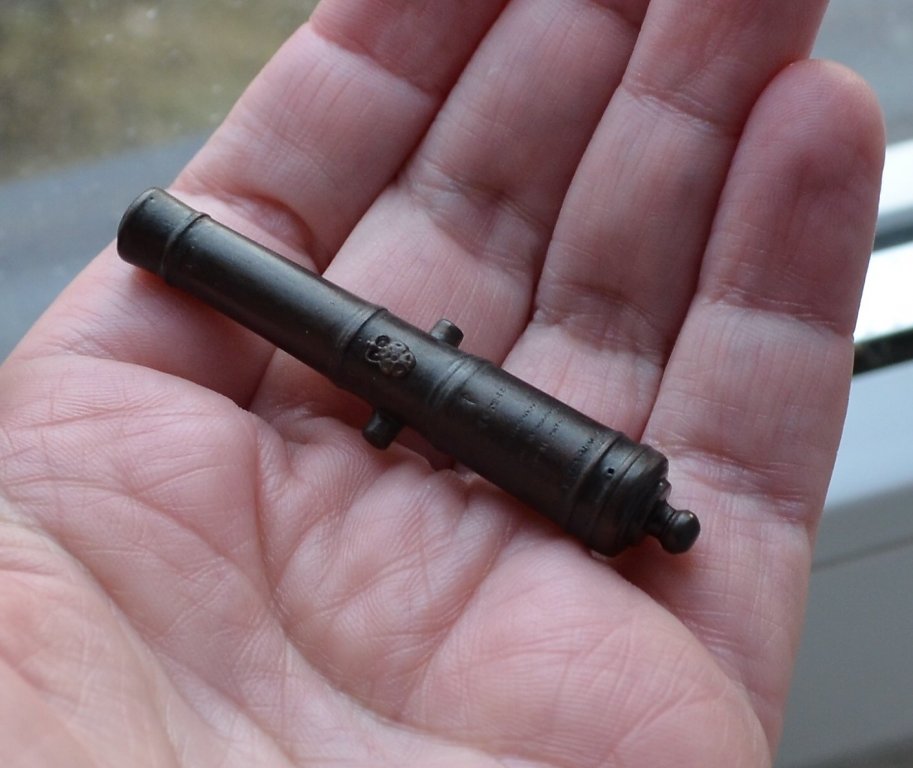
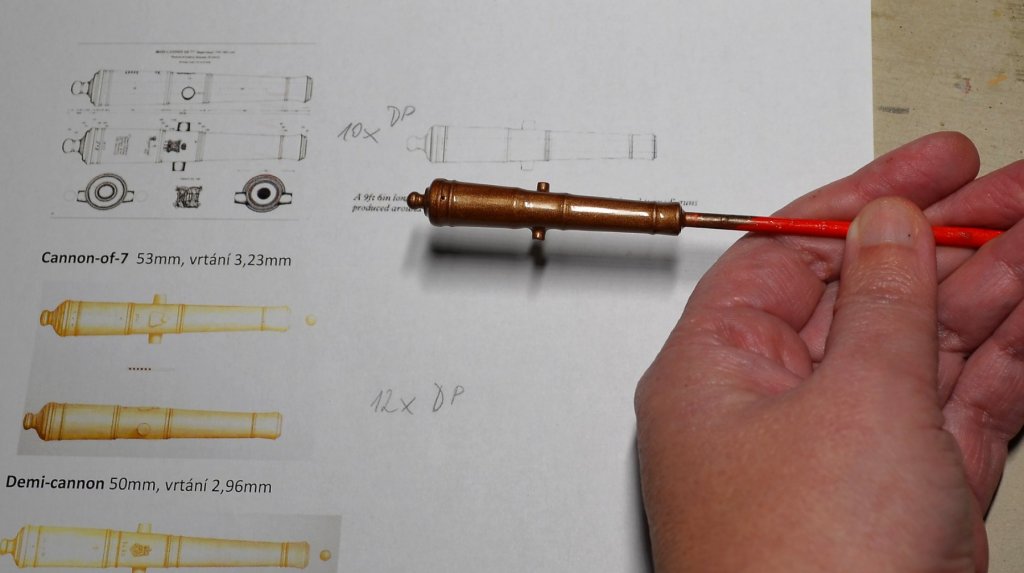
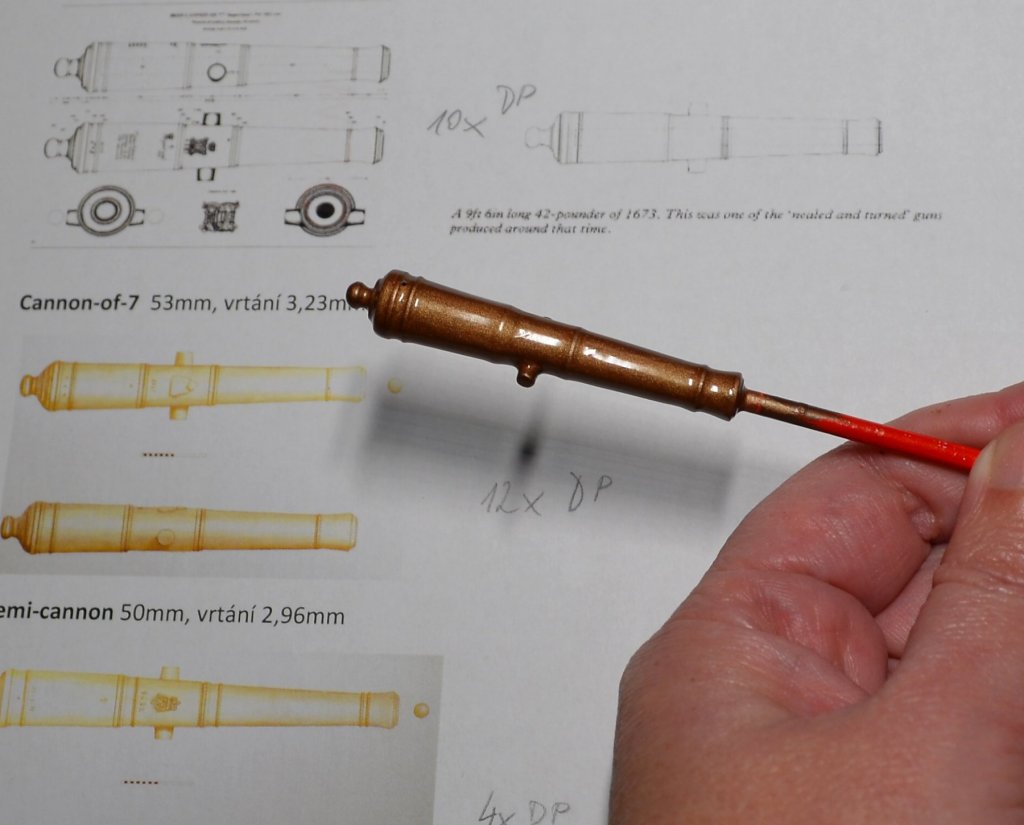
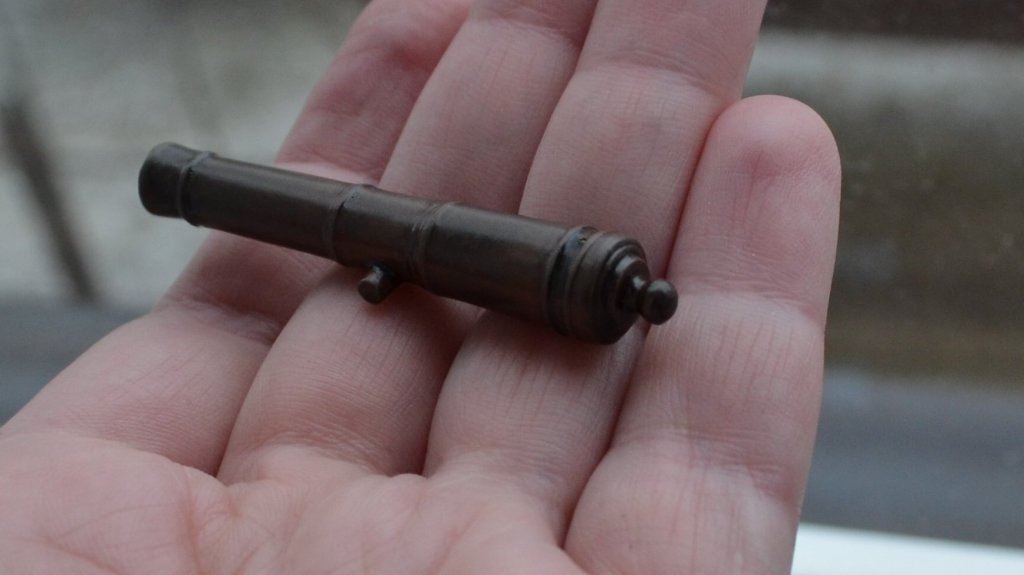
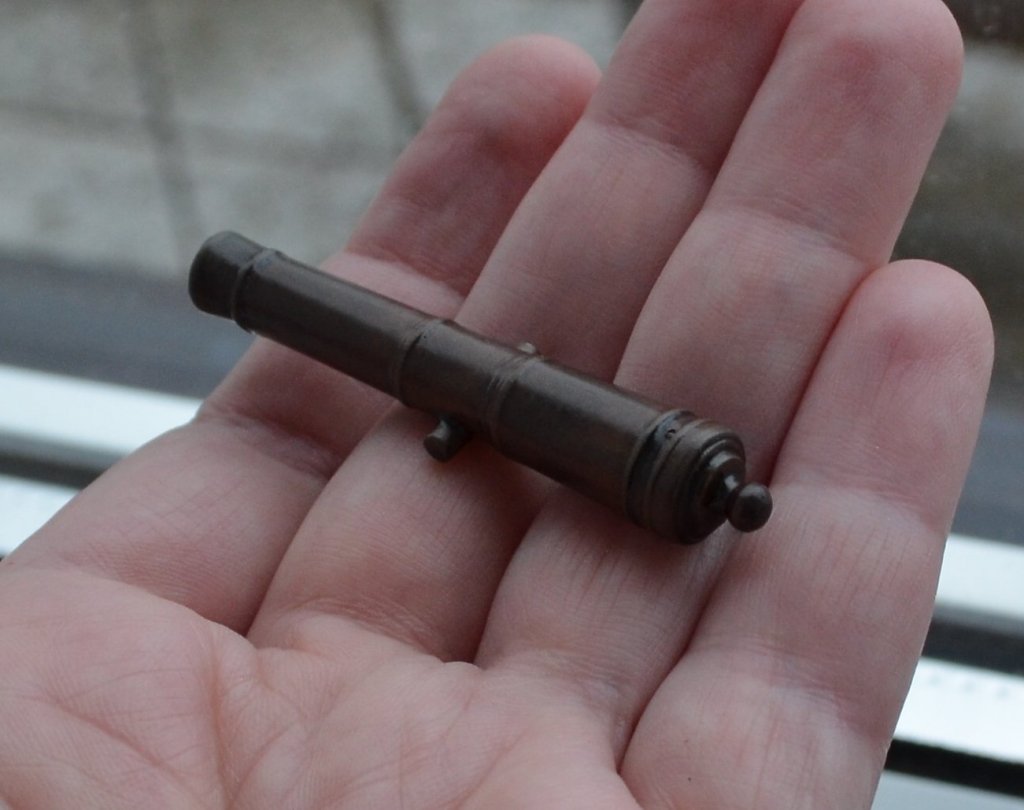
Dear friends, I am very grateful for your kind words and support. Thank you Valeriy, Druxey, Jorge and Keith four your comments. I am pleased you like my work. Well, this first piece took me about four hours, but I have improved the procedure and make more cannons together, so now I can save almost half the time. Yes, of course. I am posting plenty of pics from the process below and believe, you will understand how I achieve these results. I use various thickness of photo paper and shape it over steam. And here you can see, how I improved the first cannon using weathering. There were also created some details to achieve more realistic result according the real guns from that period.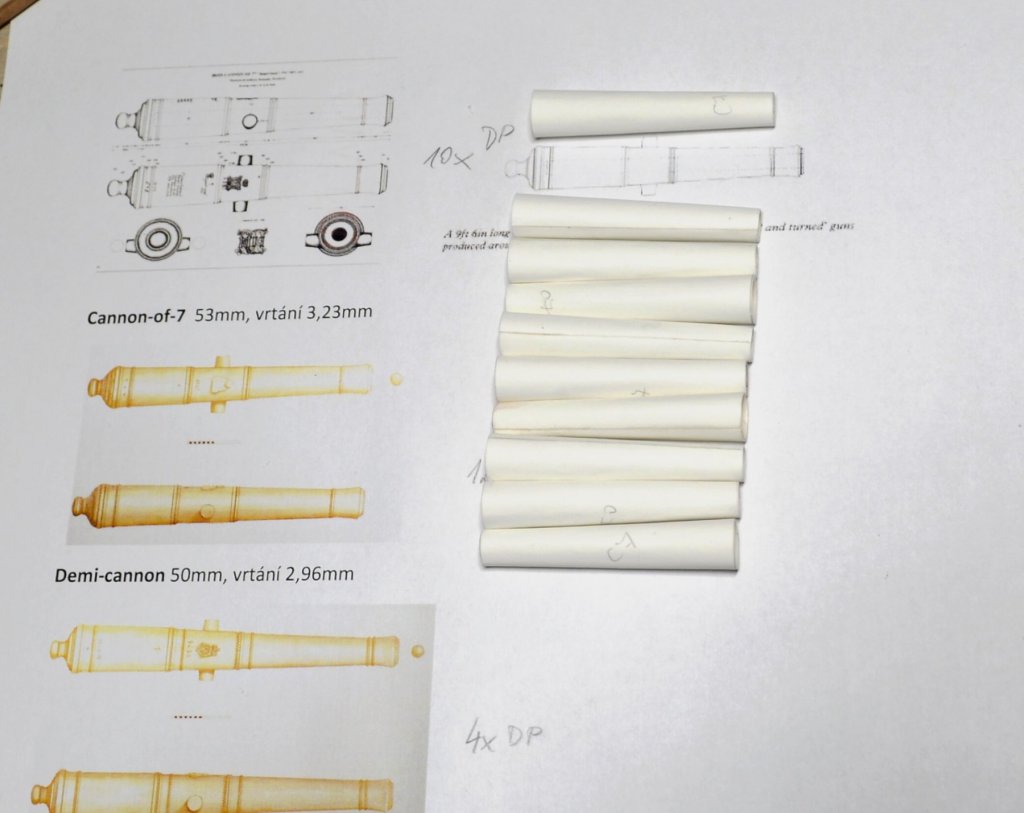


- 1,035 replies
-
- 37
-
-
- royal katherine
- ship of the line
- (and 1 more)
-
HMS ROYAL KATHERINE 1664 by Doris - 1/55 - CARD
DORIS replied to DORIS's topic in - Build logs for subjects built 1501 - 1750
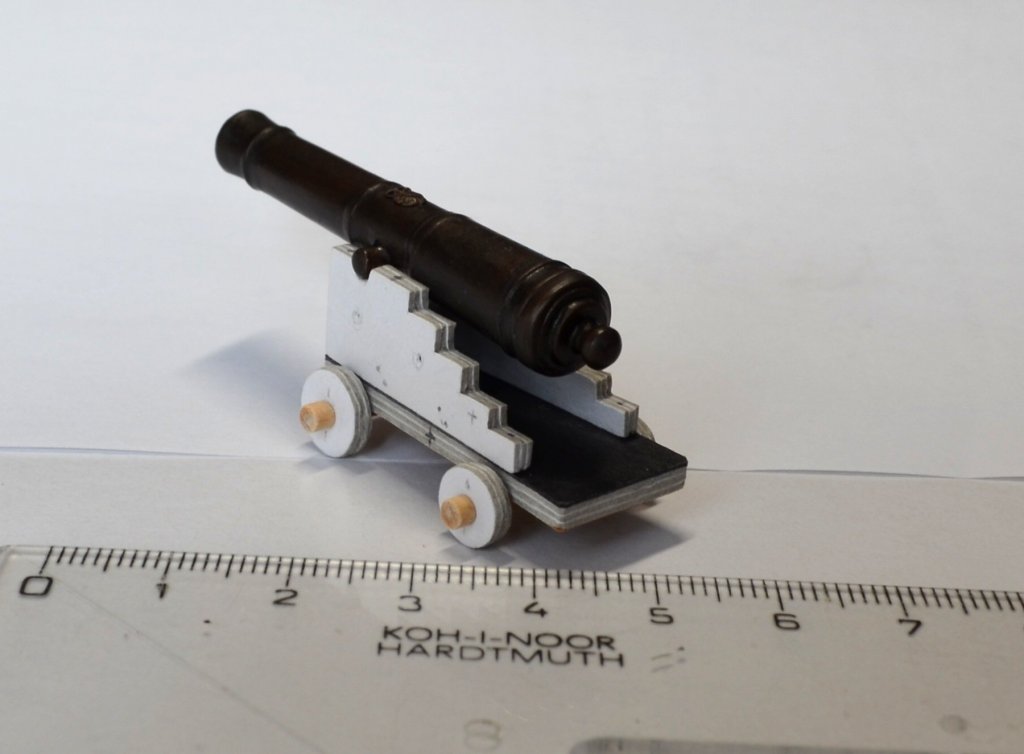
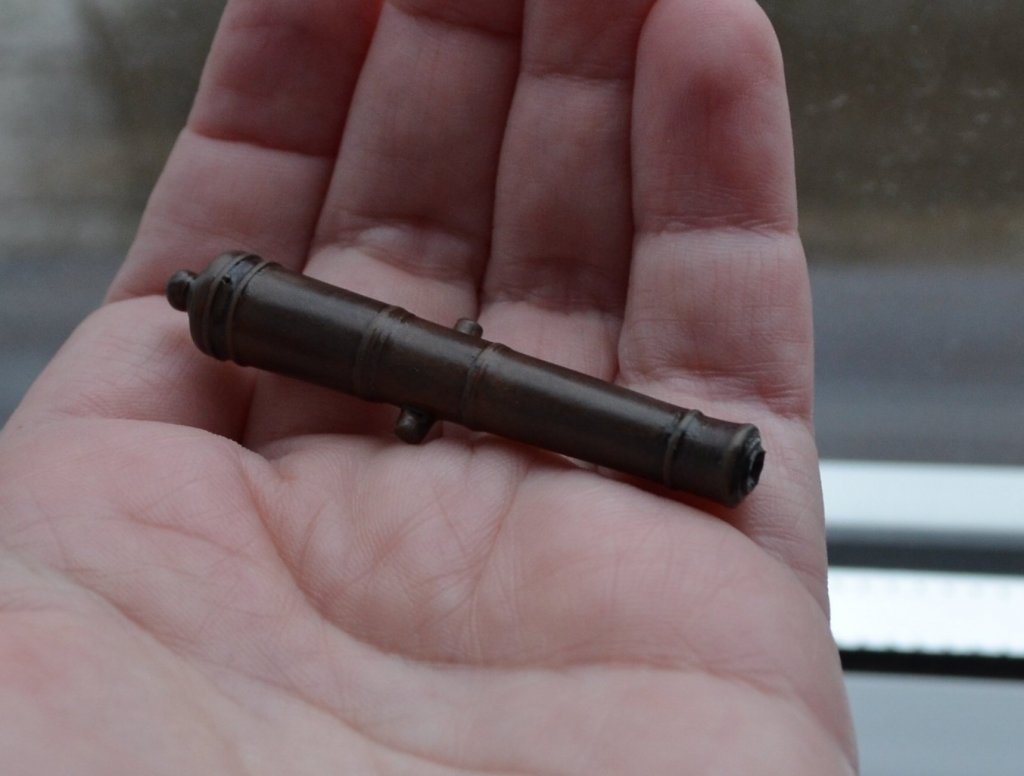
Hello G.L., oh yes, it is. Son I will bring tutorial, how I achieve such result. Here is the cannon freely placed in one of the gun ports in RK: Kind regards
- 1,035 replies
-
- 27
-
-
- royal katherine
- ship of the line
- (and 1 more)
-
HMS ROYAL KATHERINE 1664 by Doris - 1/55 - CARD
DORIS replied to DORIS's topic in - Build logs for subjects built 1501 - 1750
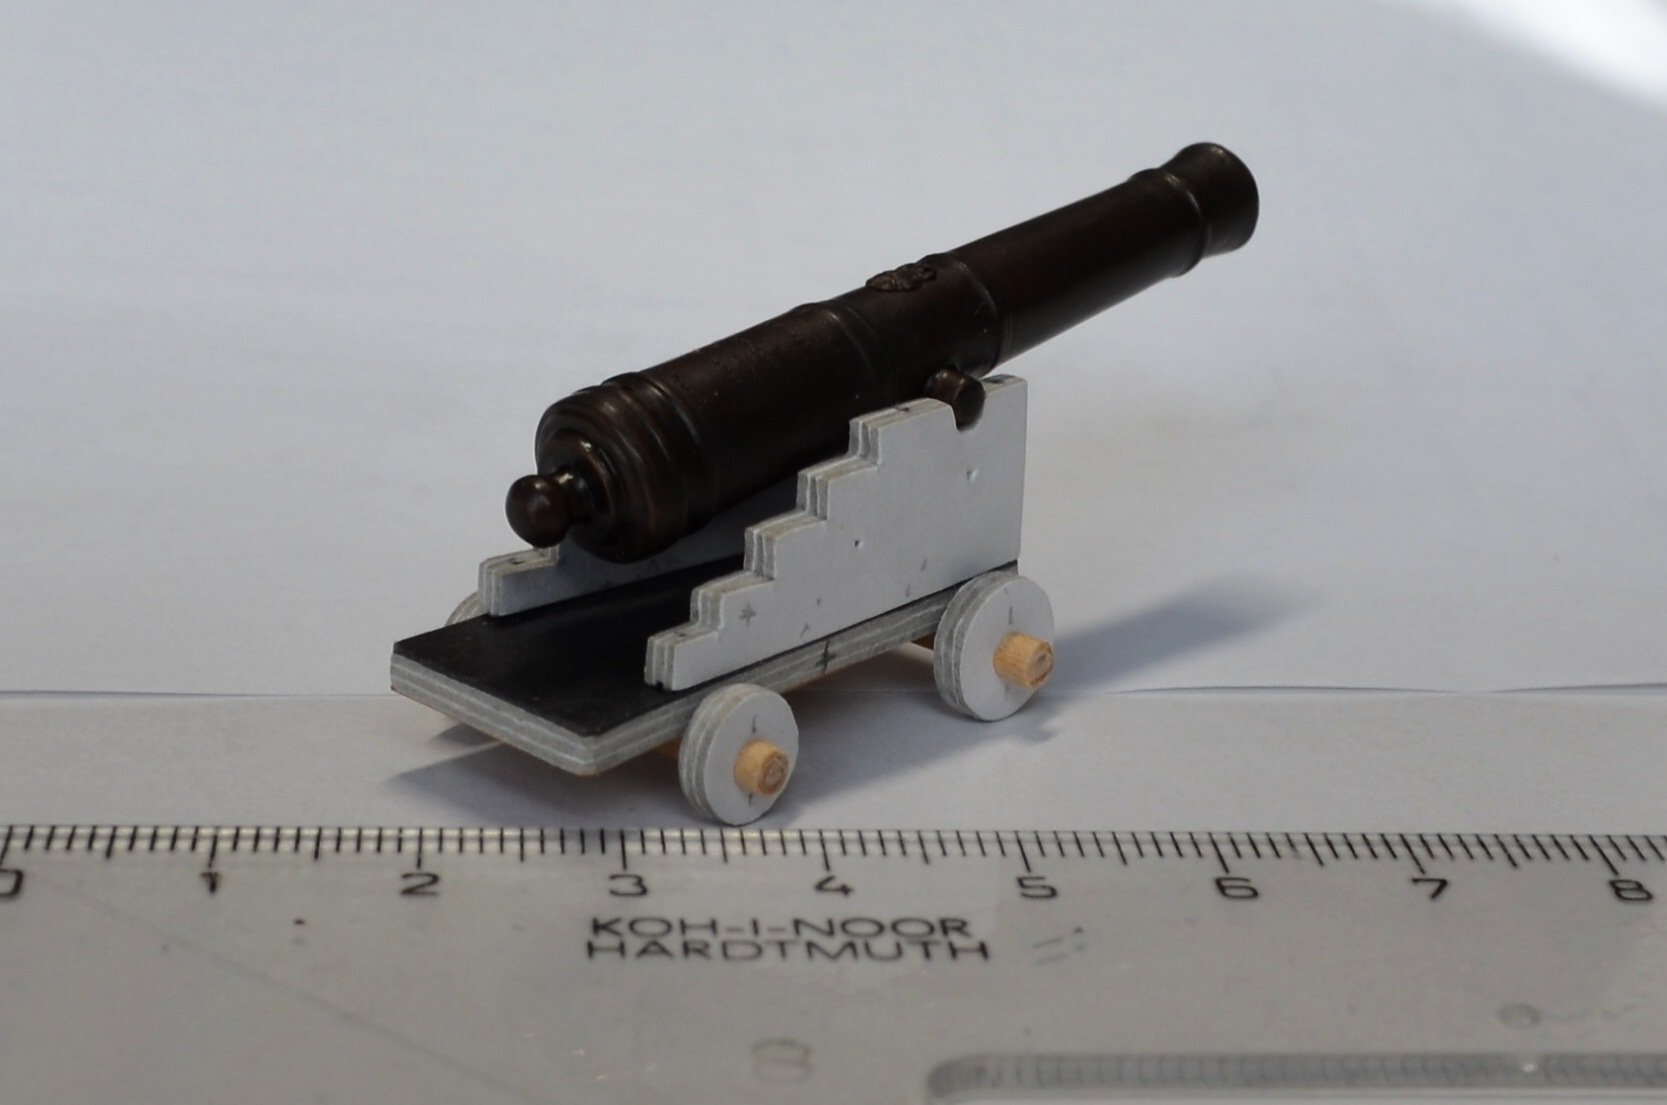
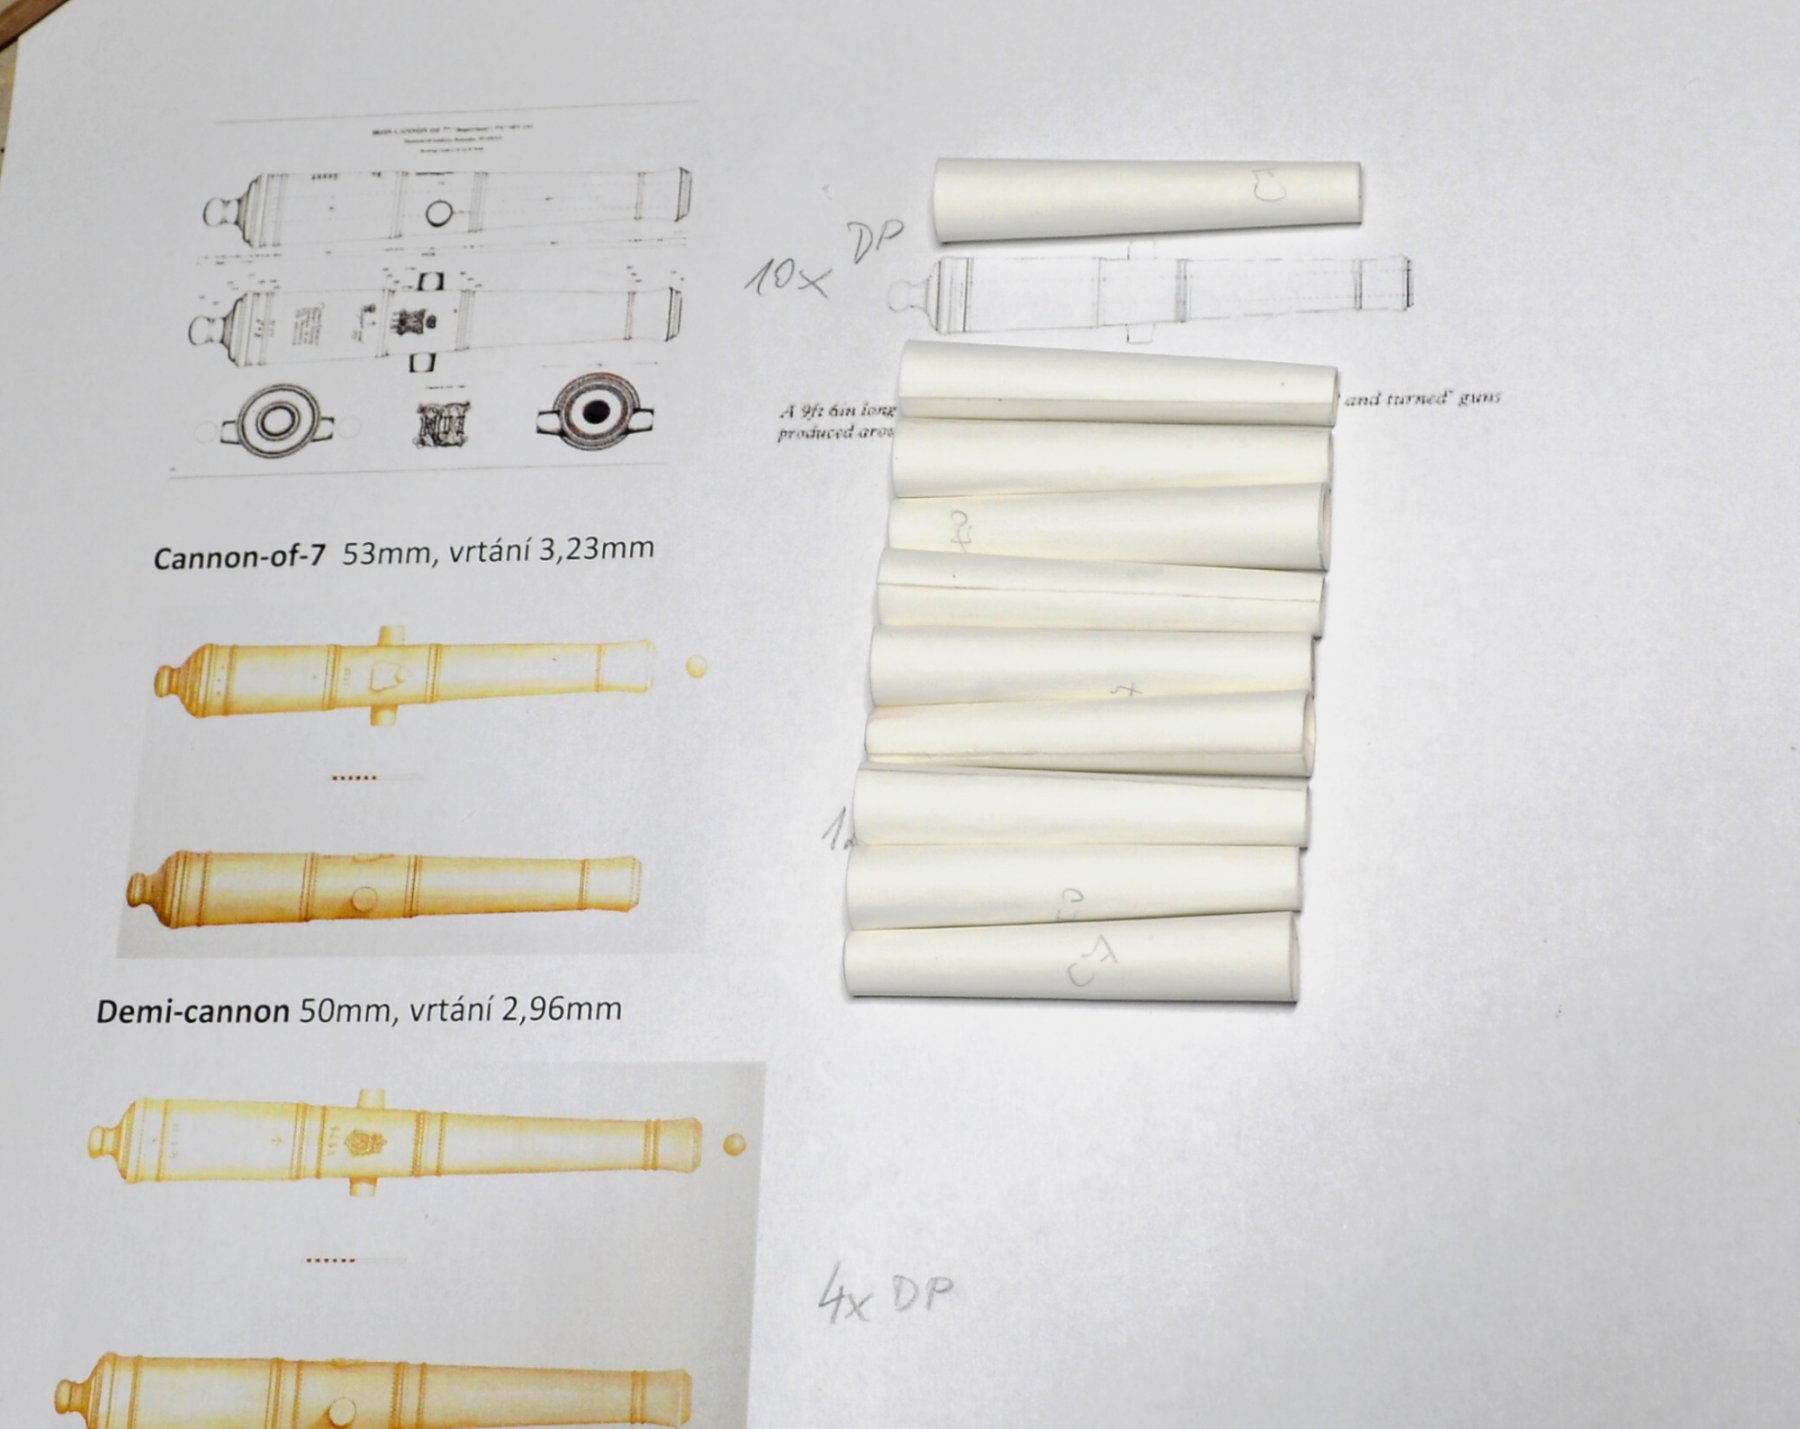
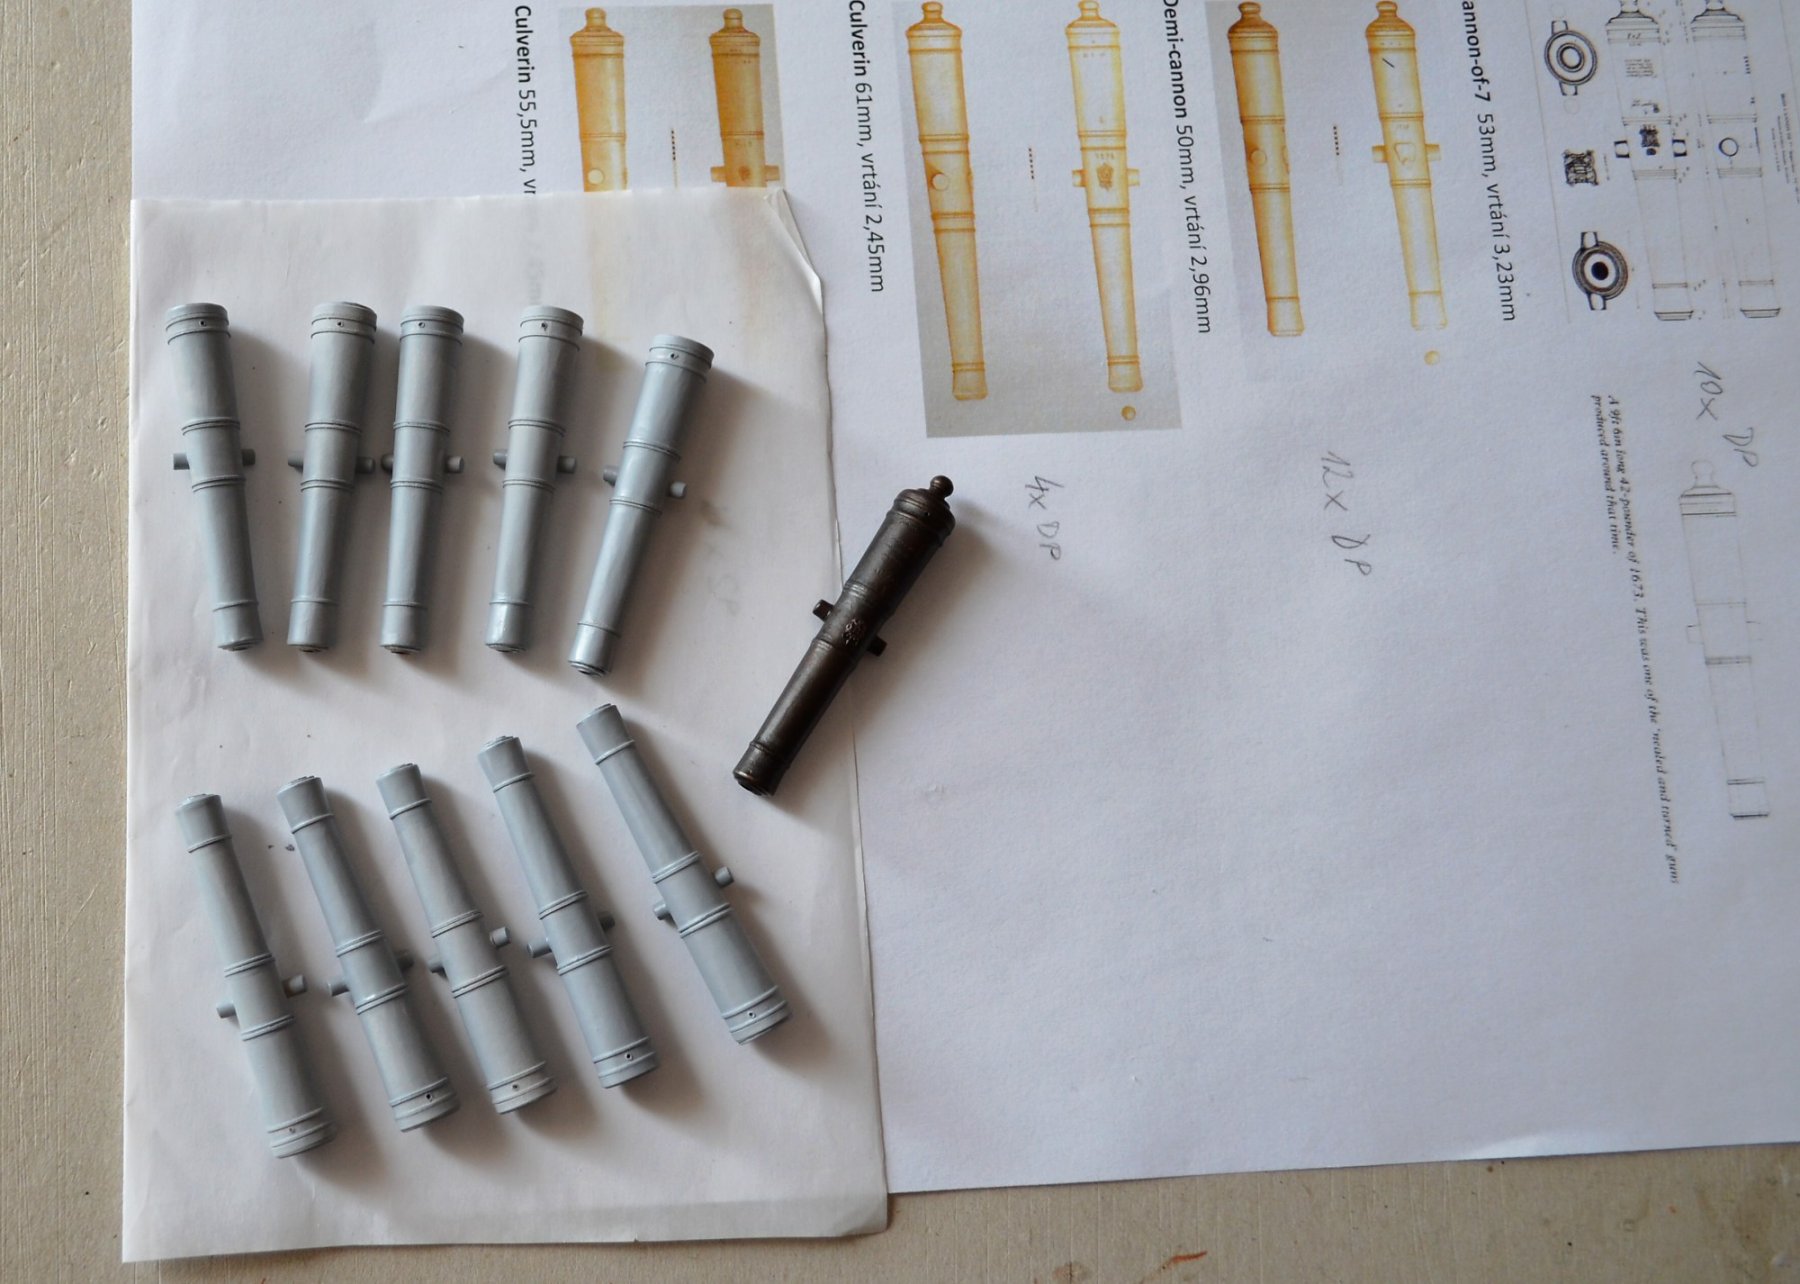
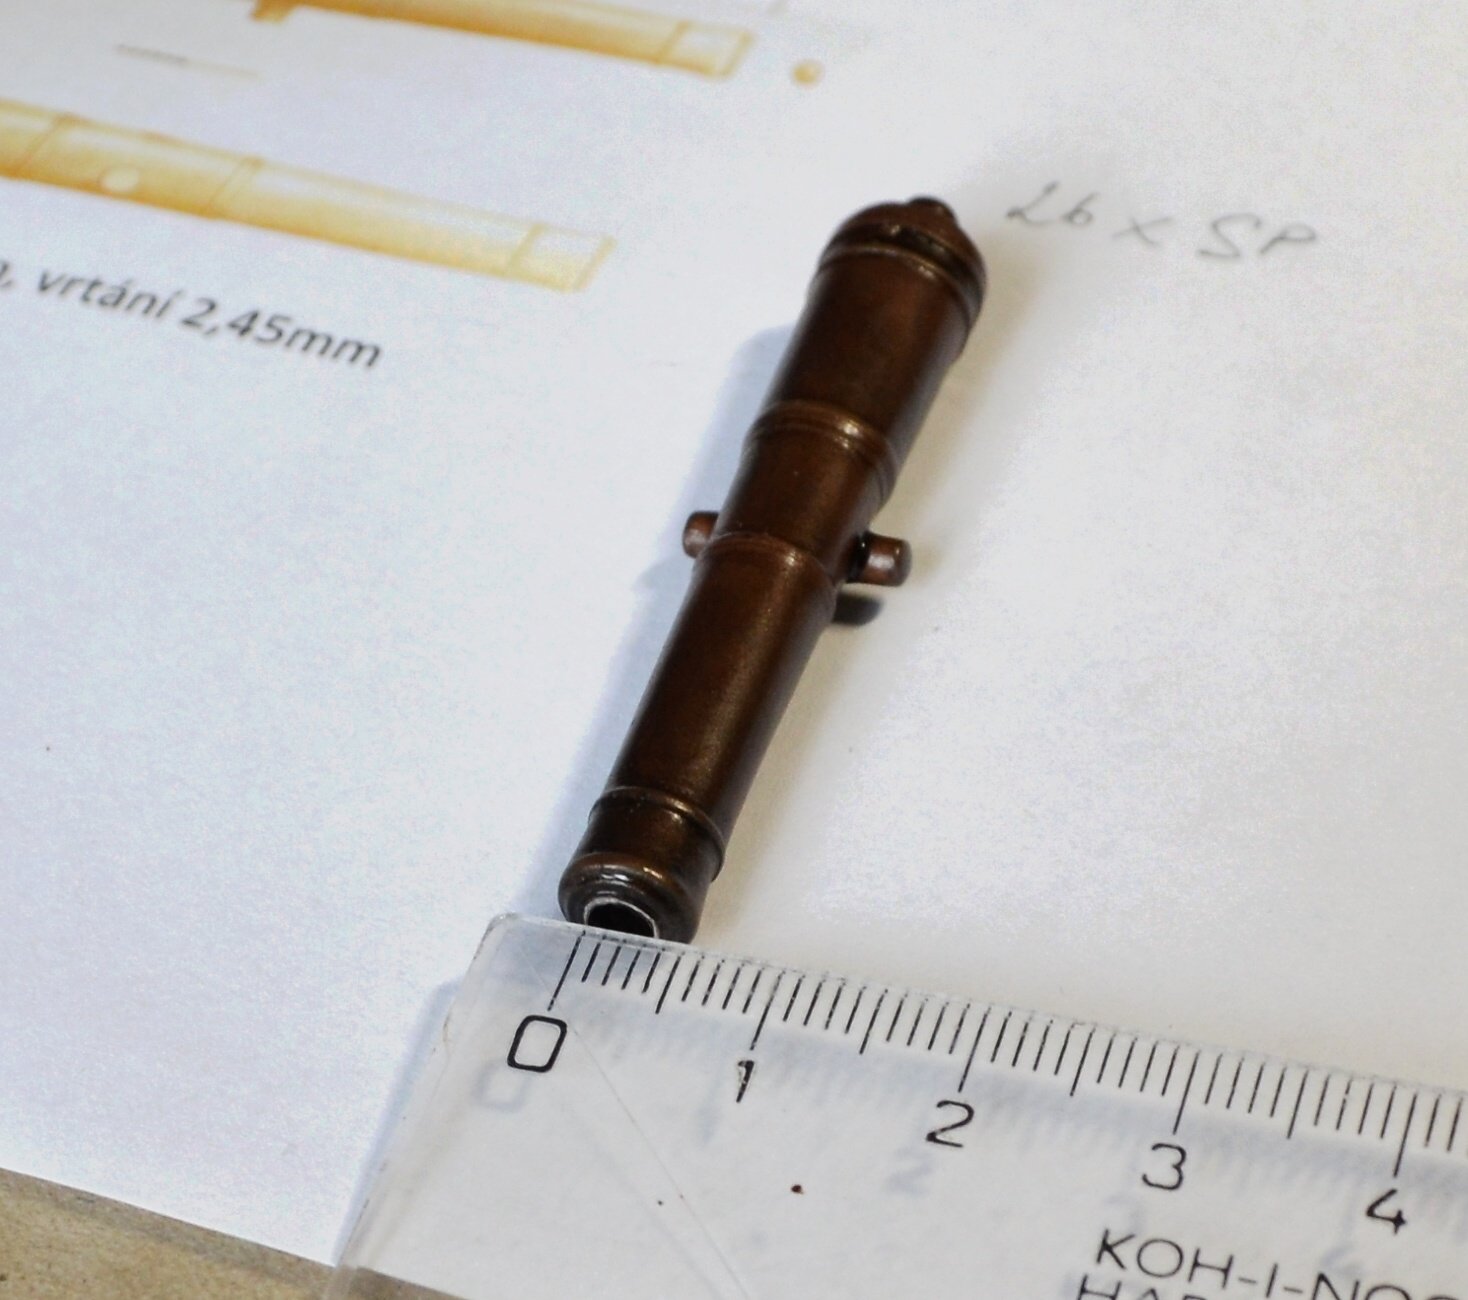
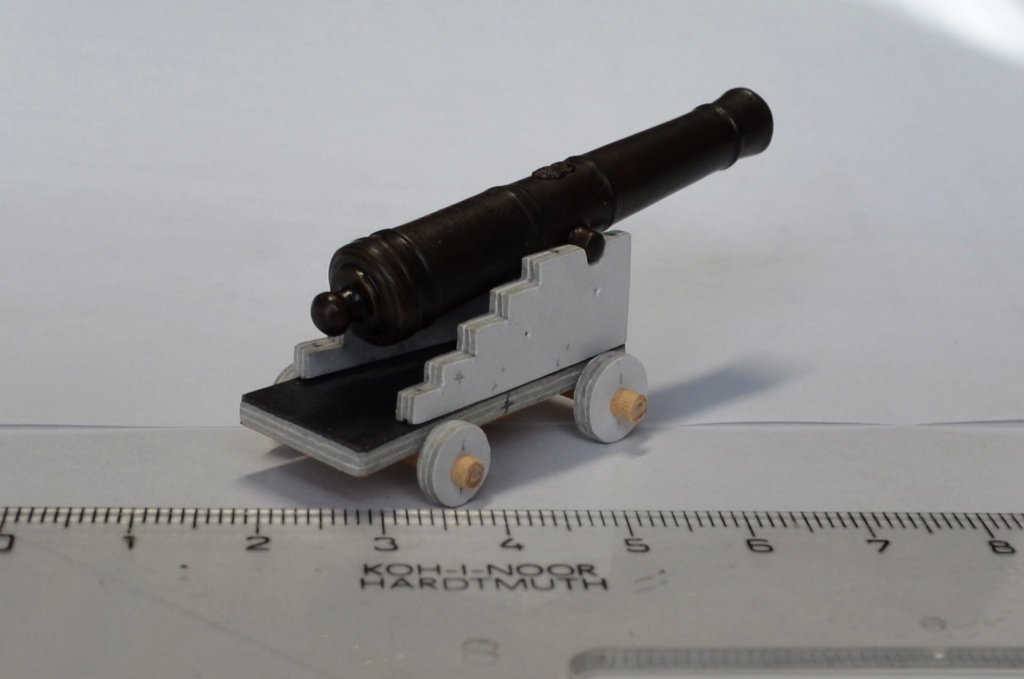
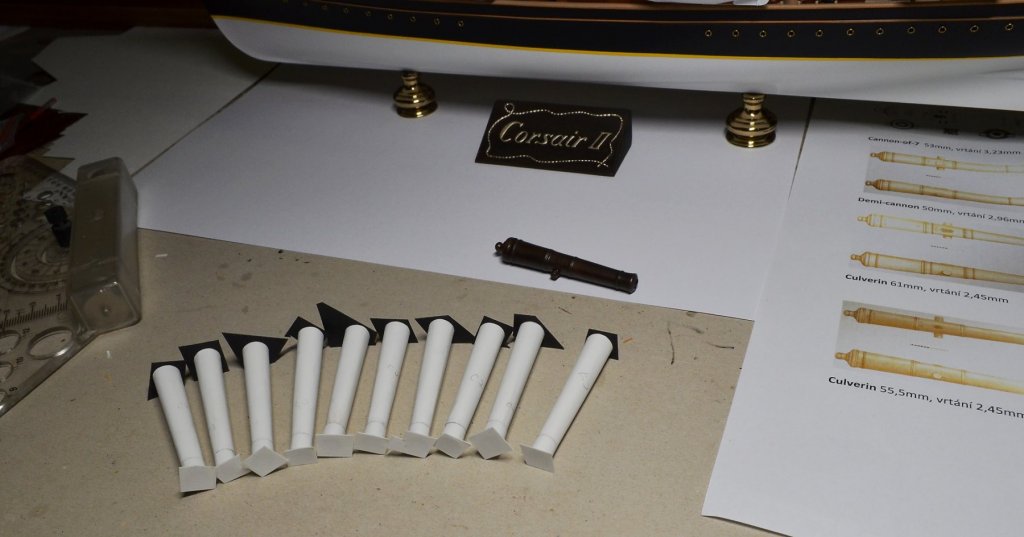
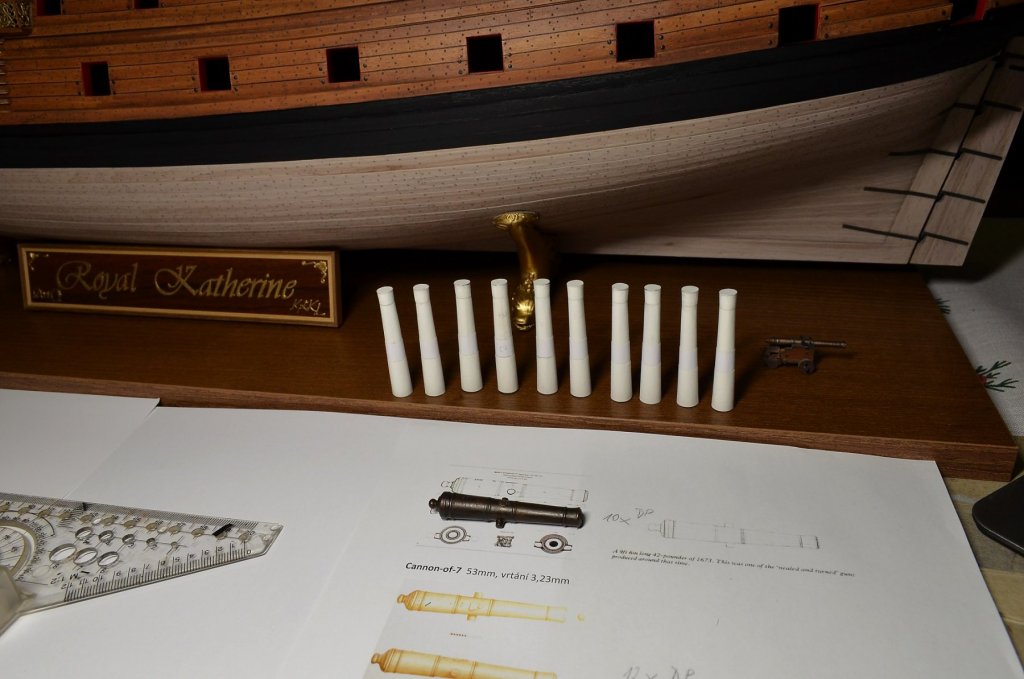
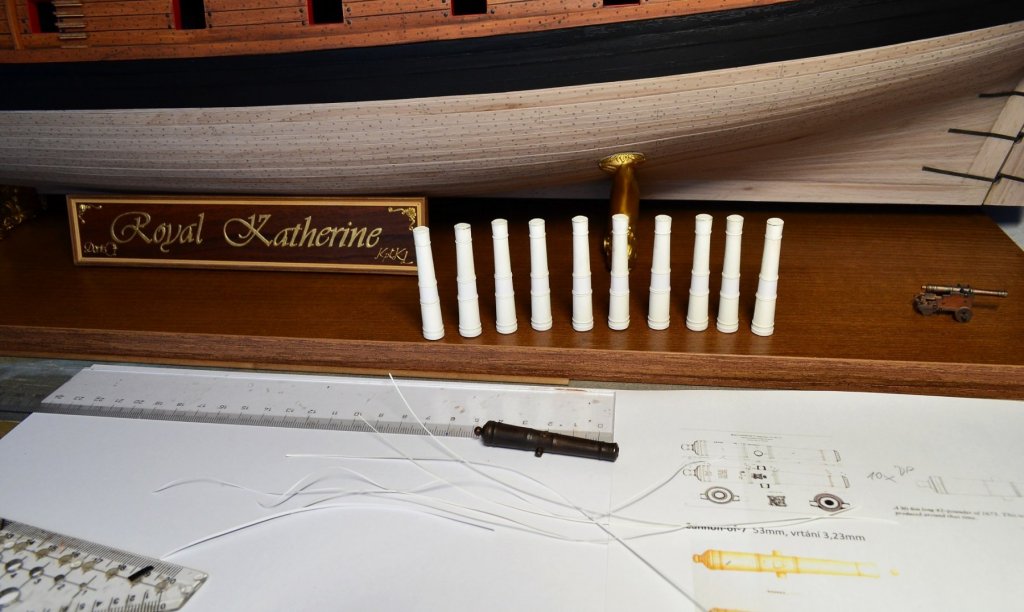
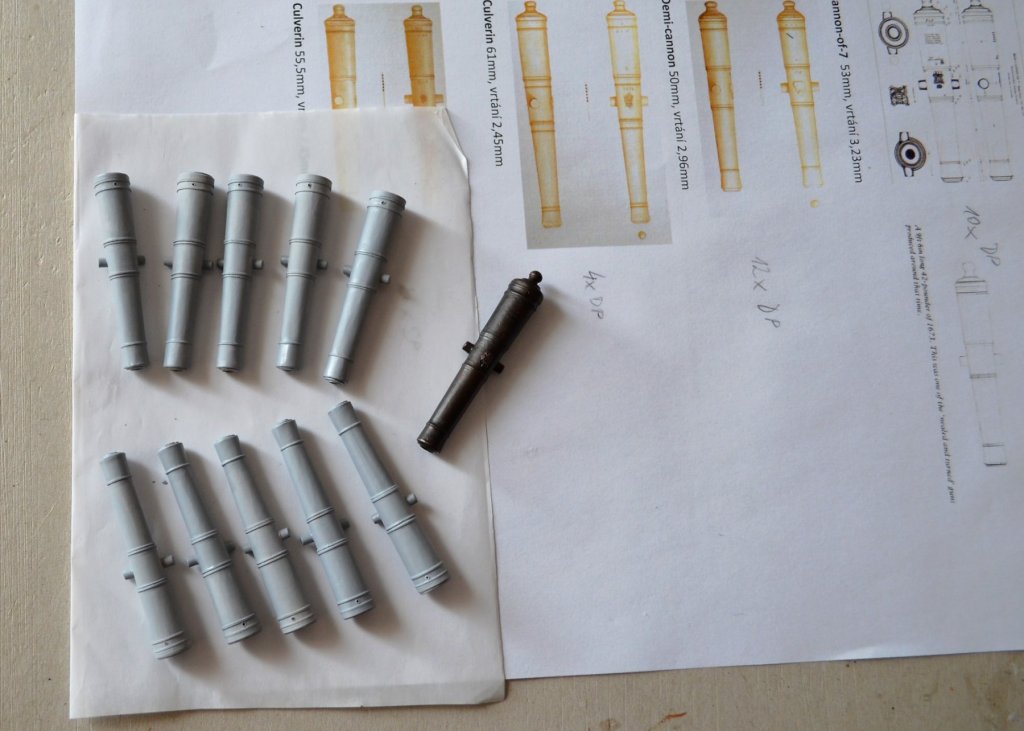
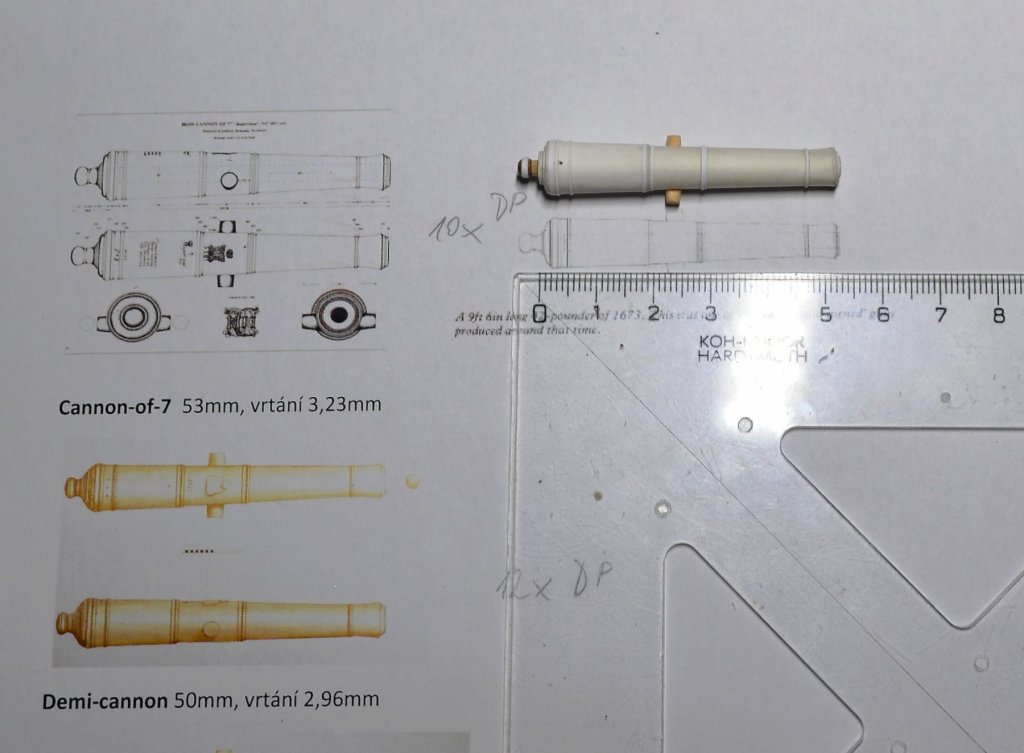
Hello dear friends, thank you all for your words and praise. That is a great honor for me and i do appreciate your feedback a lot. Thank you, Johann, zappto and Denis, I am pleased you like my work. In fact, it really is quite simple. I usually try to find easy ways how to make things with nice results, my techniques do not need any special tools or materials. Only plenty of patience, time and experience. I am pleased you find inspiration in my work. BTW, my friends and serious visitors have opportunity to see all my ship models by first hand, I have them exposed all year round at home in a special room. Hello Joe, unfortunately we do not have children, but in future I would like to devote my best ship models to museums or somebody, who will also enjoy them like me. Oh yes, you are right, making decorations from molds could save me a lot of time. In fact I like to create them from scratch and always enjoy very tiny and clear details. Maybe on next projects I will try to cast some equal parts. It will be something new for me. Thank you Piet, I'm glad you enjoy it. ********************************************************** In recent days, I have studied plenty of information about ship ordnance. A great help for me and also colleagues from Czech Modelforum is perfectly created information from Captain KL. You can also browse on Czech forum: https://www.modelforum.cz/viewtopic.php?f=177&t=110763&start=855#p2185603 I am going to make the guns out of paper/card, now I'm preparing first test pieces. For example here is my first cannon - of - seven for the lower deck of RK: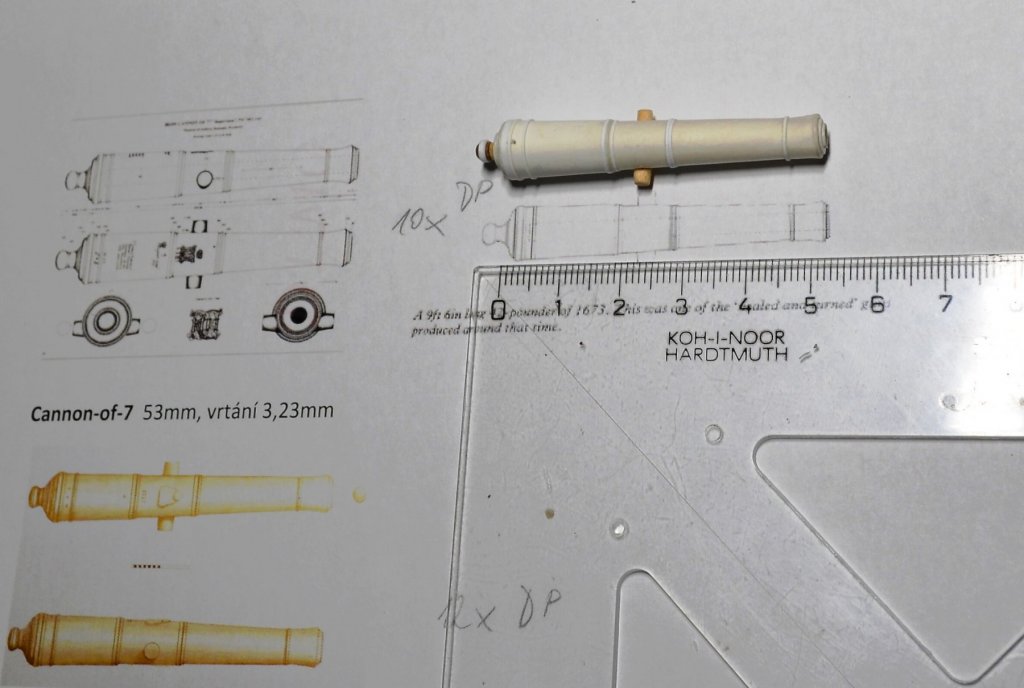


- 1,035 replies
-
- 30
-
-
- royal katherine
- ship of the line
- (and 1 more)
-
HMS ROYAL KATHERINE 1664 by Doris - 1/55 - CARD
DORIS replied to DORIS's topic in - Build logs for subjects built 1501 - 1750
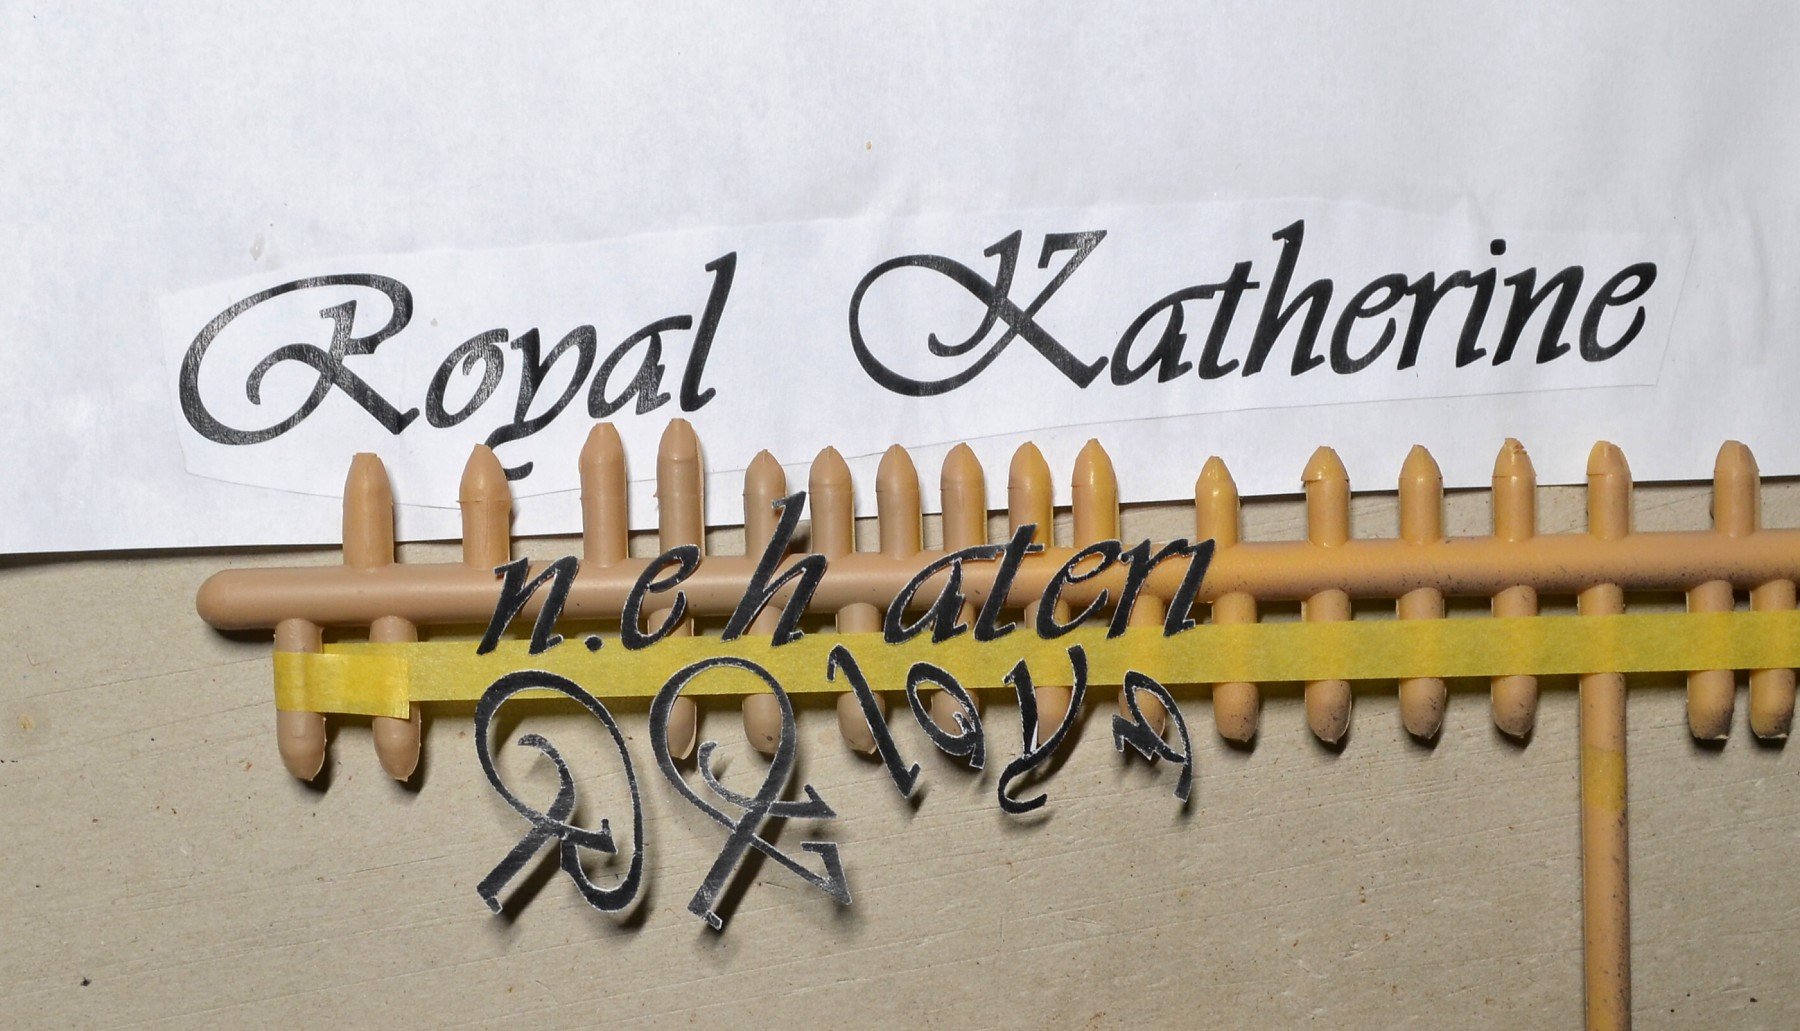
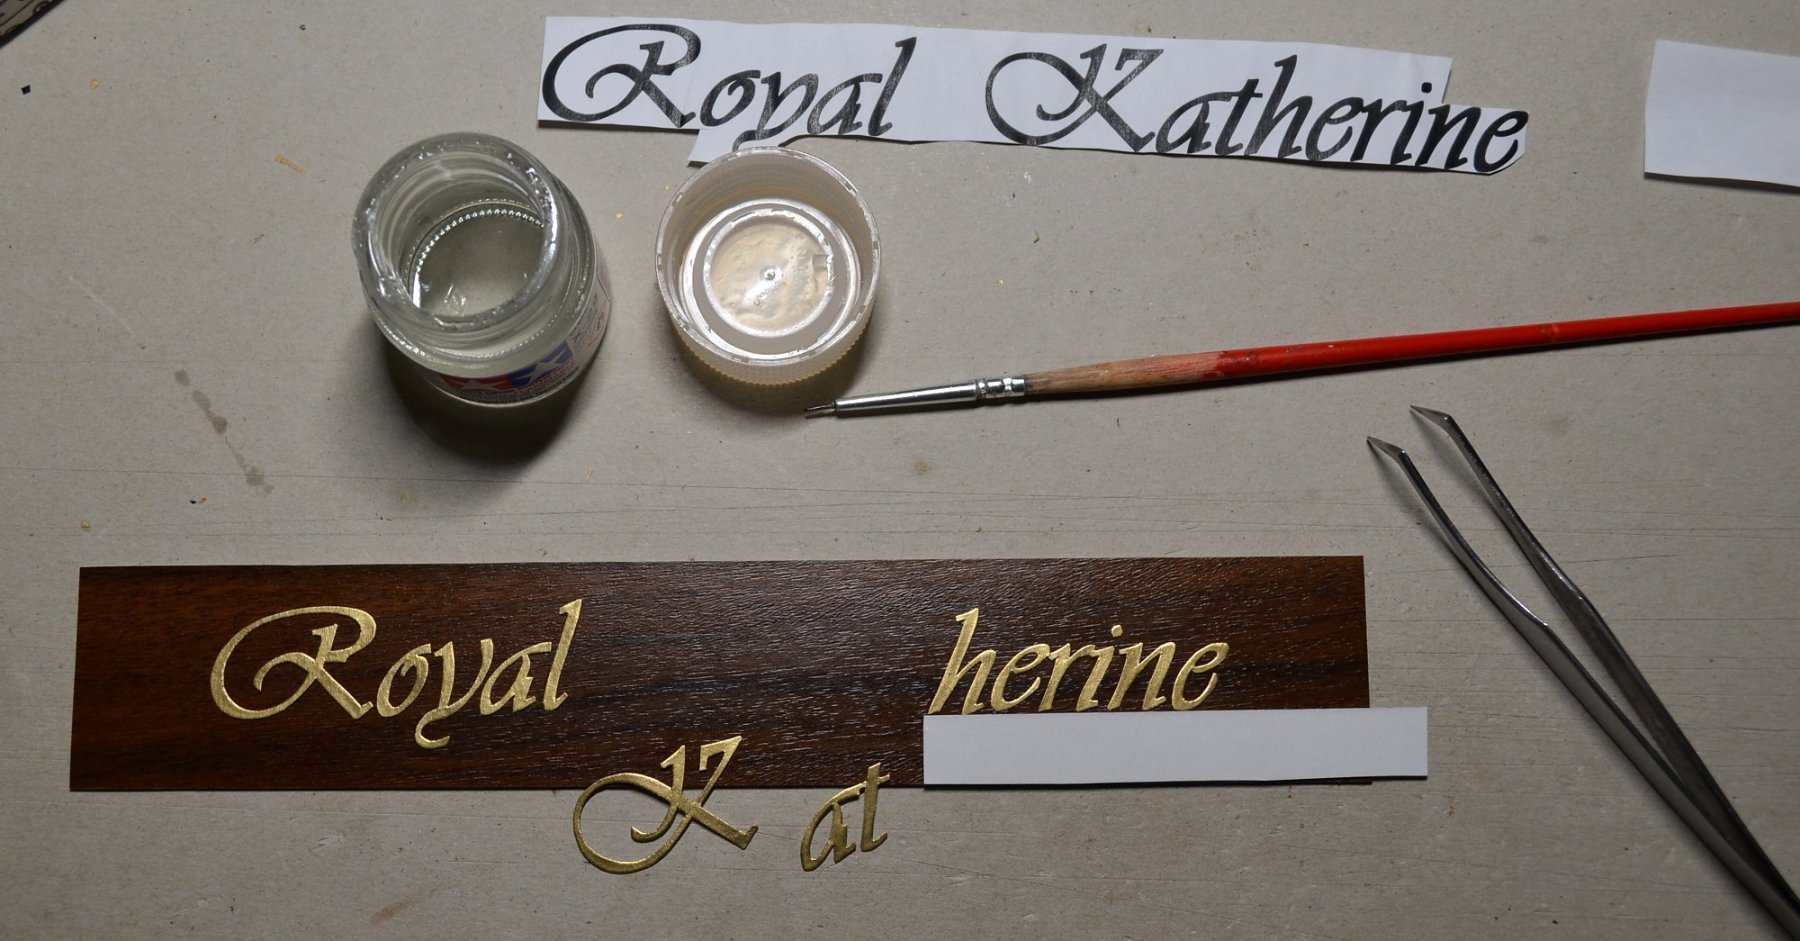
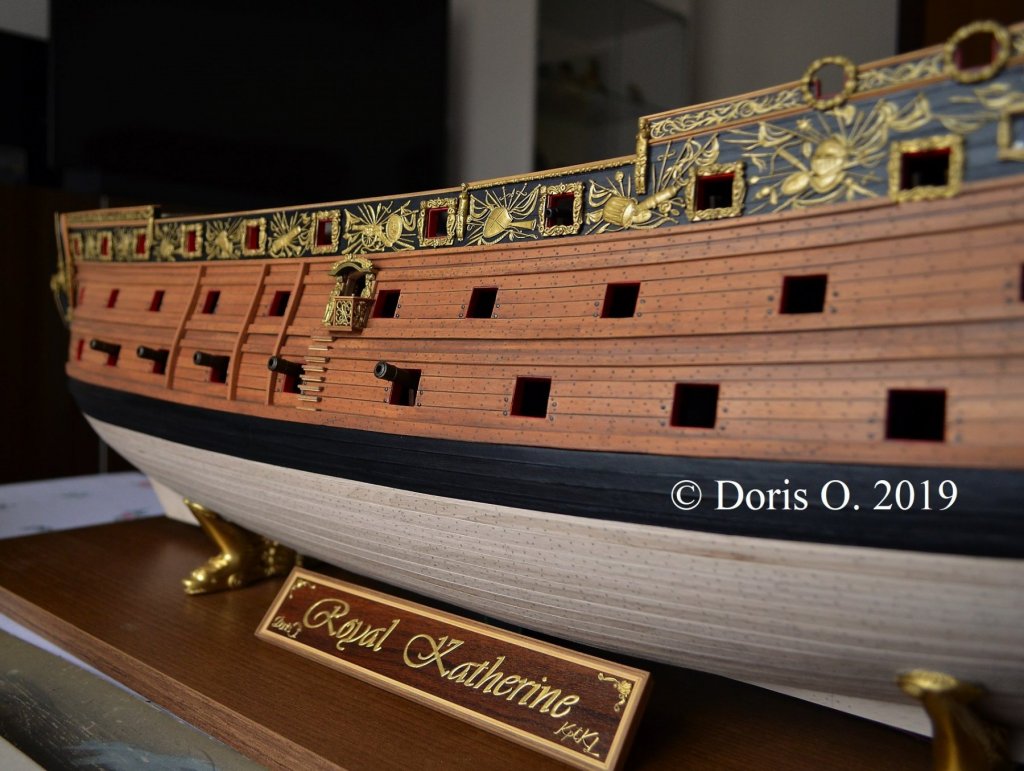
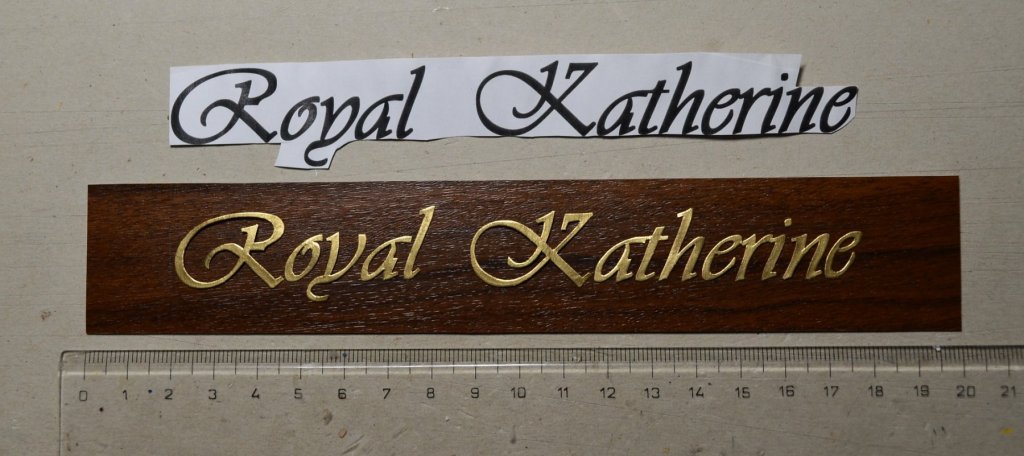
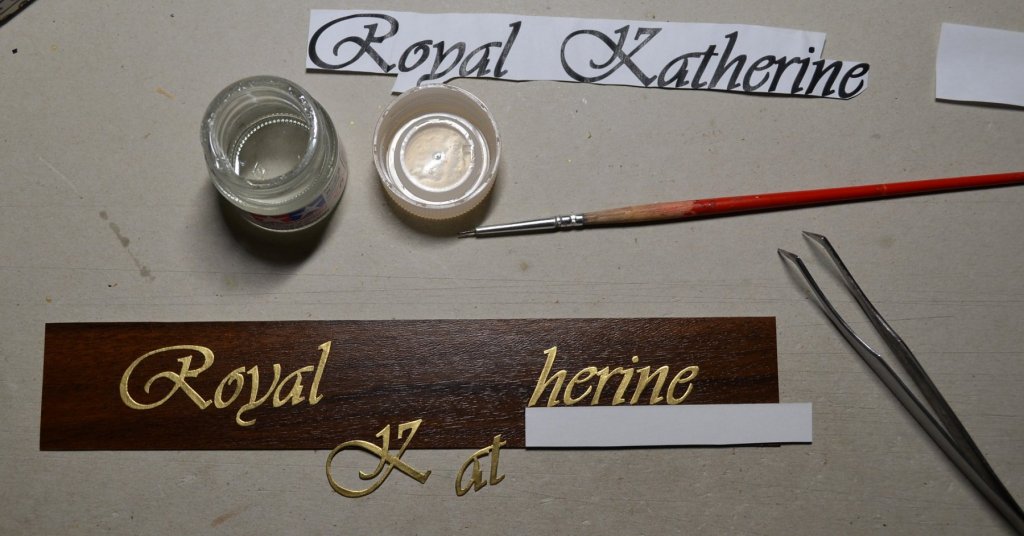
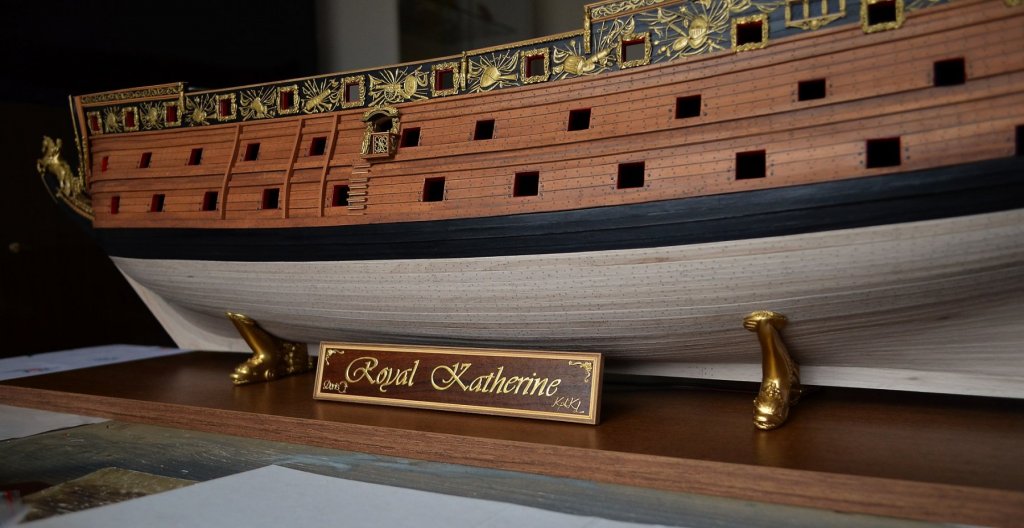
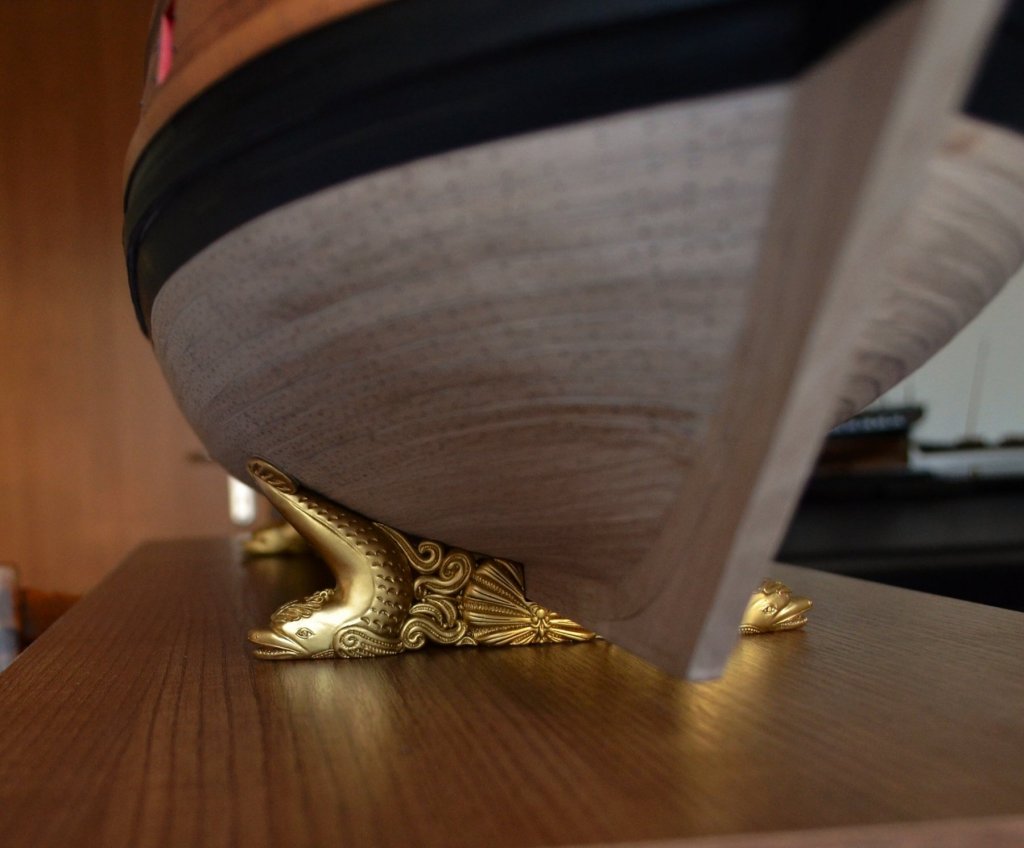
Hello Rob, Thank you for comment. Well, the pedestals are secured only gently in the middle section, so that they can be removed due to the additional painting of lower part of the hull. Yes, first I cut the letters (I also use quality scissors/the Solingen brand), put them on adhesive tape and oversprayed with gold paint/Tamiya TS-21. After the first layer, the surface is still harsh with plenty of imperfections. So I applied more spray layers and after drying and placing letters on the nameplate there were again added several layers of this paint - but here I applied it using small brush. In the end the letters are smooth and more plastic. Best regards- 1,035 replies
-
- 12
-
-
- royal katherine
- ship of the line
- (and 1 more)
-
HMS ROYAL KATHERINE 1664 by Doris - 1/55 - CARD
DORIS replied to DORIS's topic in - Build logs for subjects built 1501 - 1750
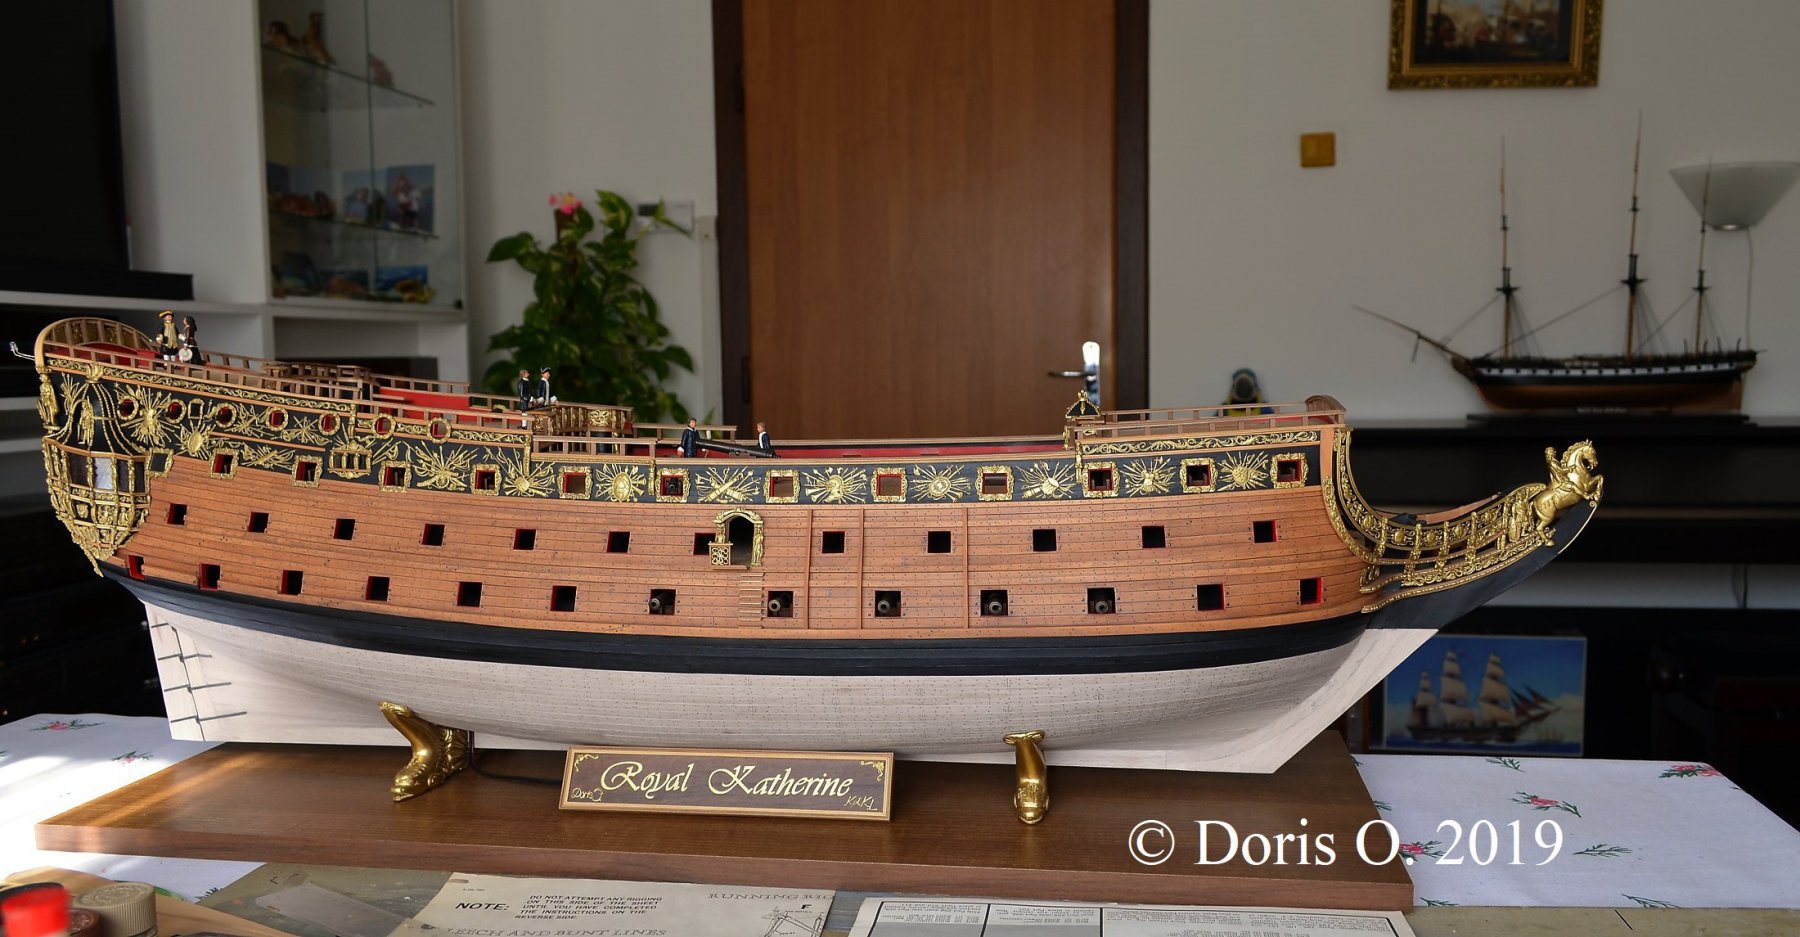
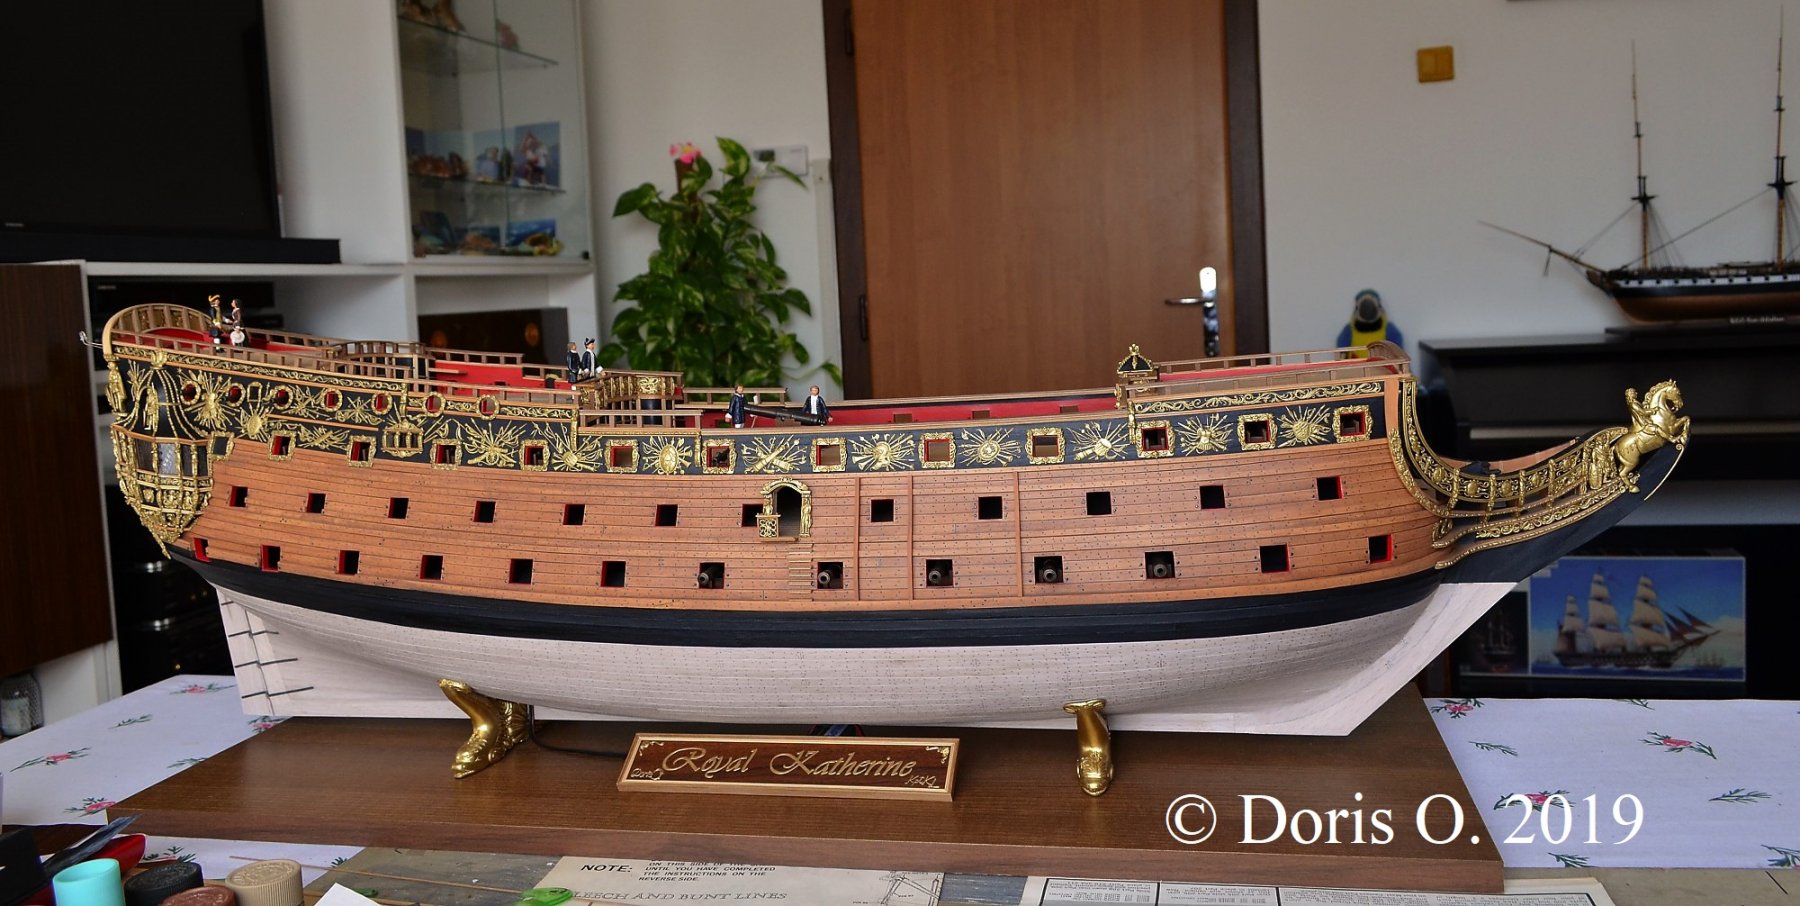
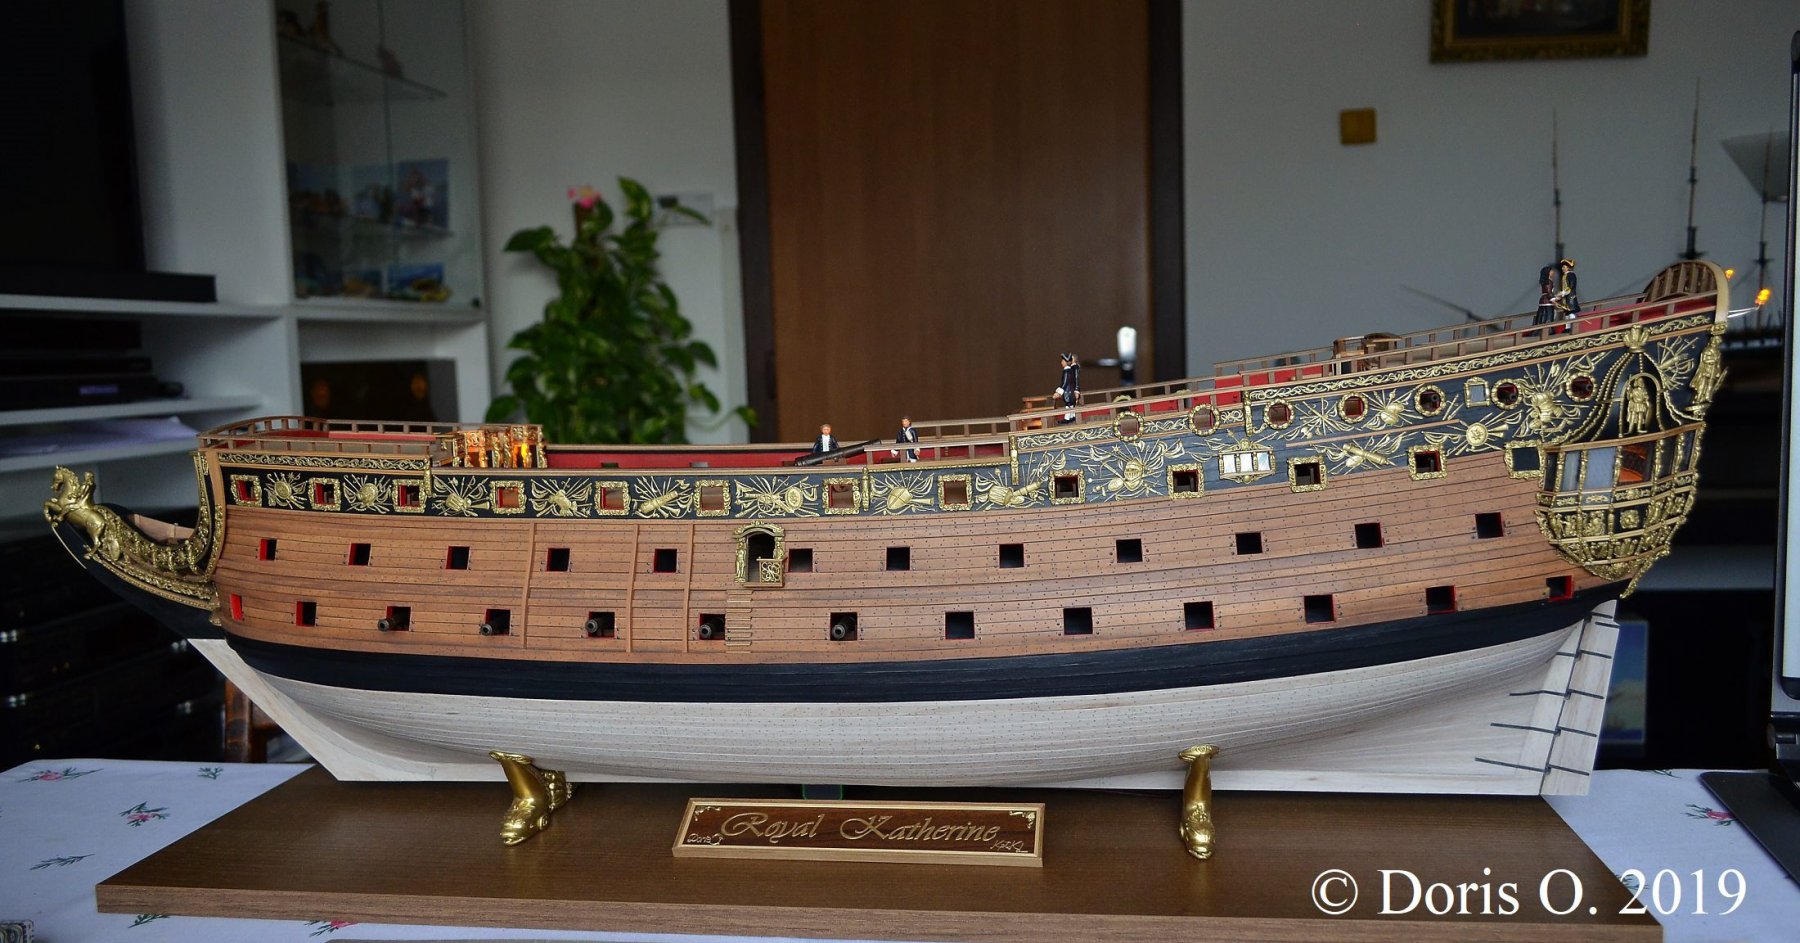
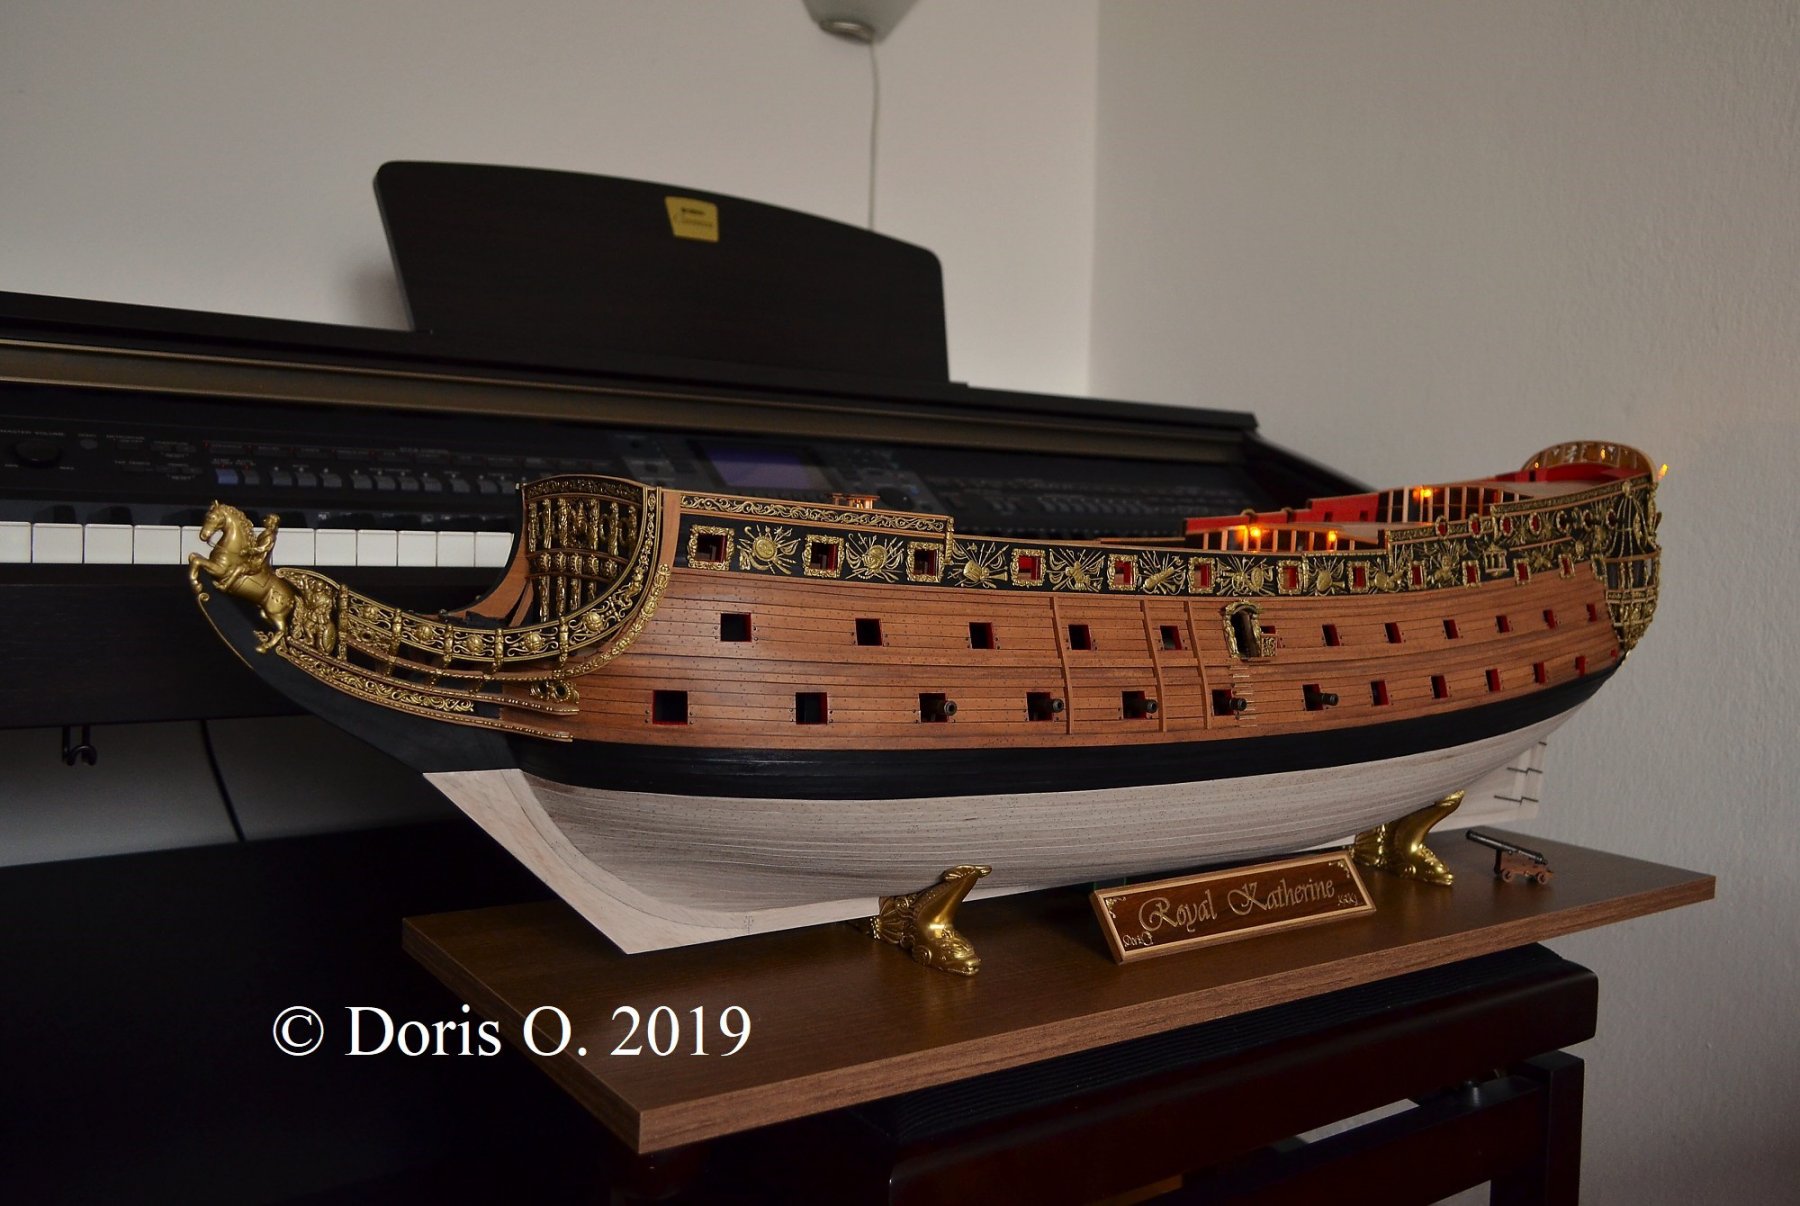
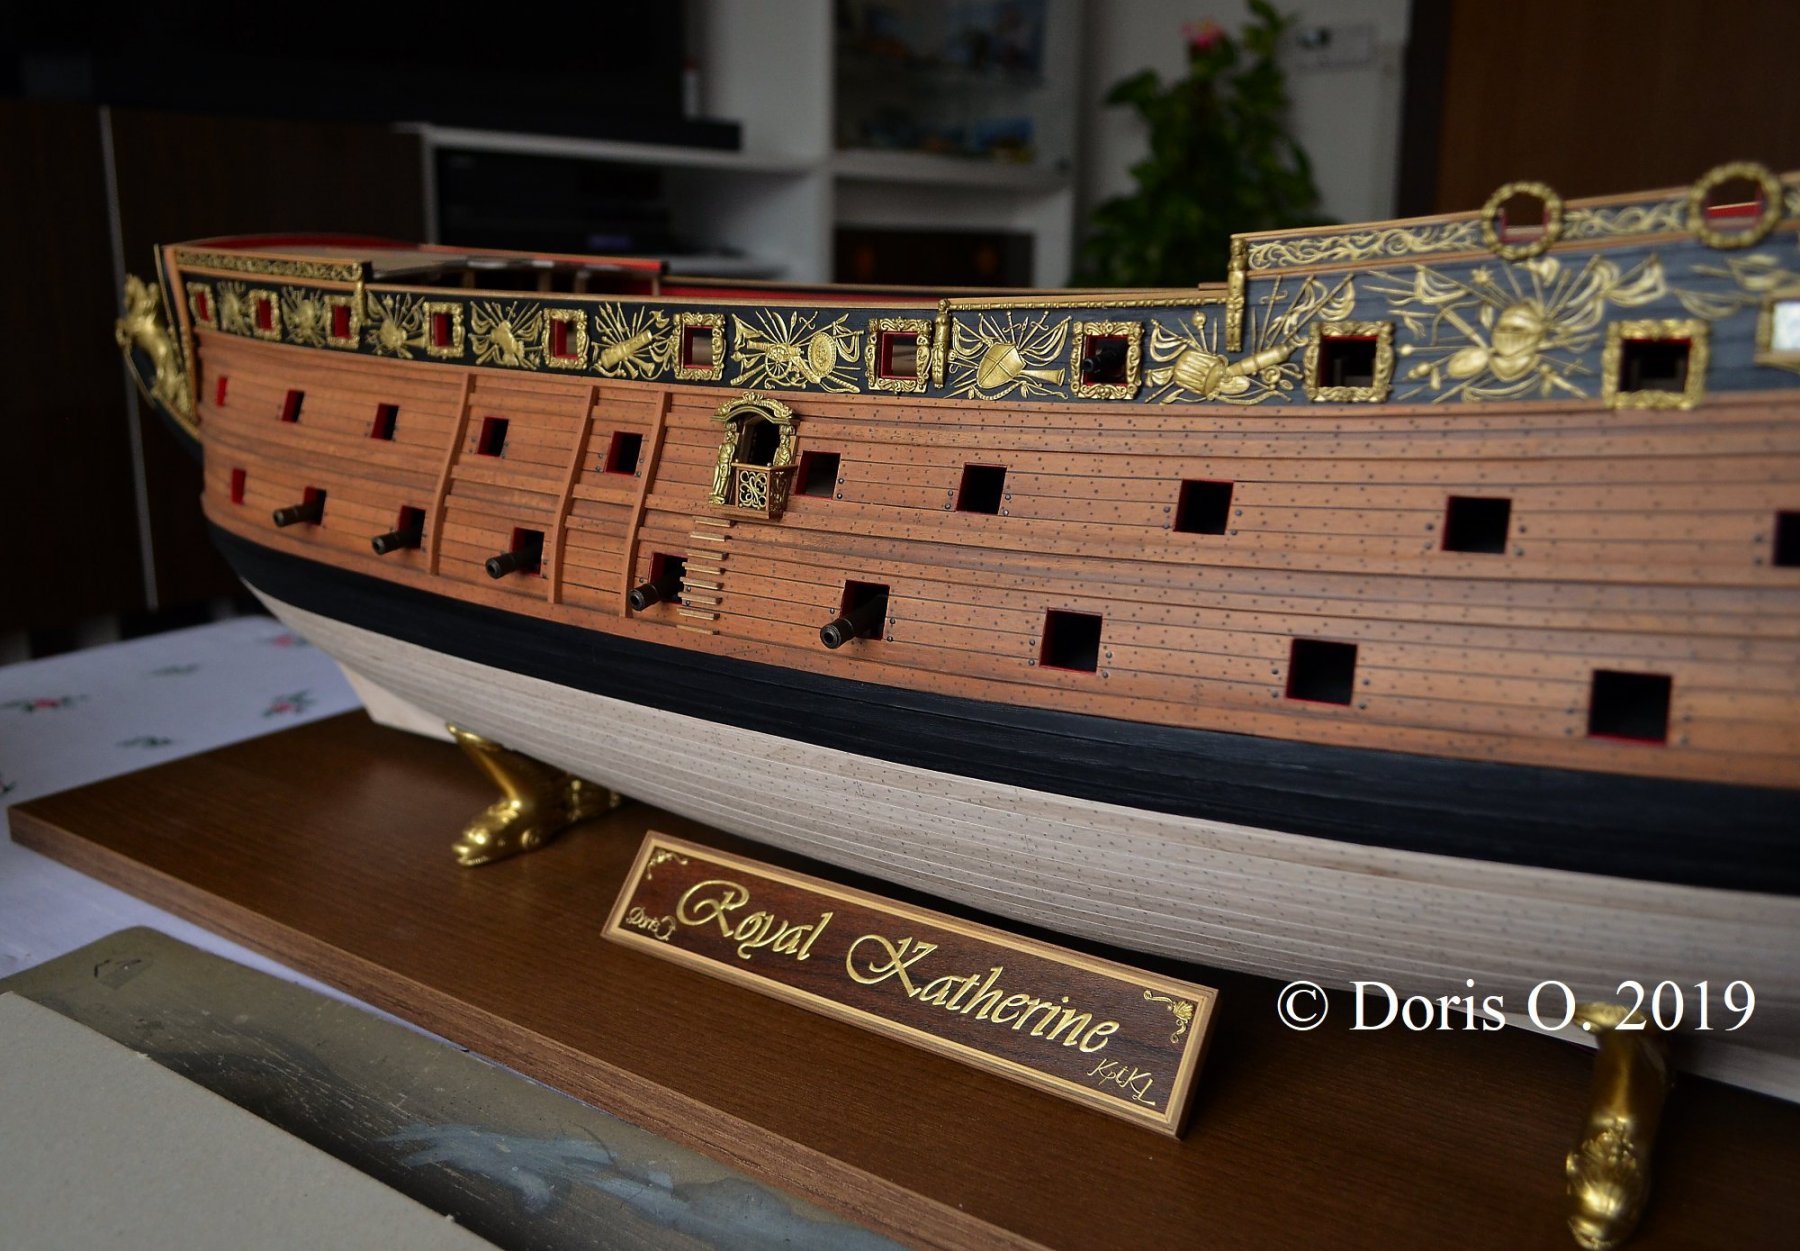
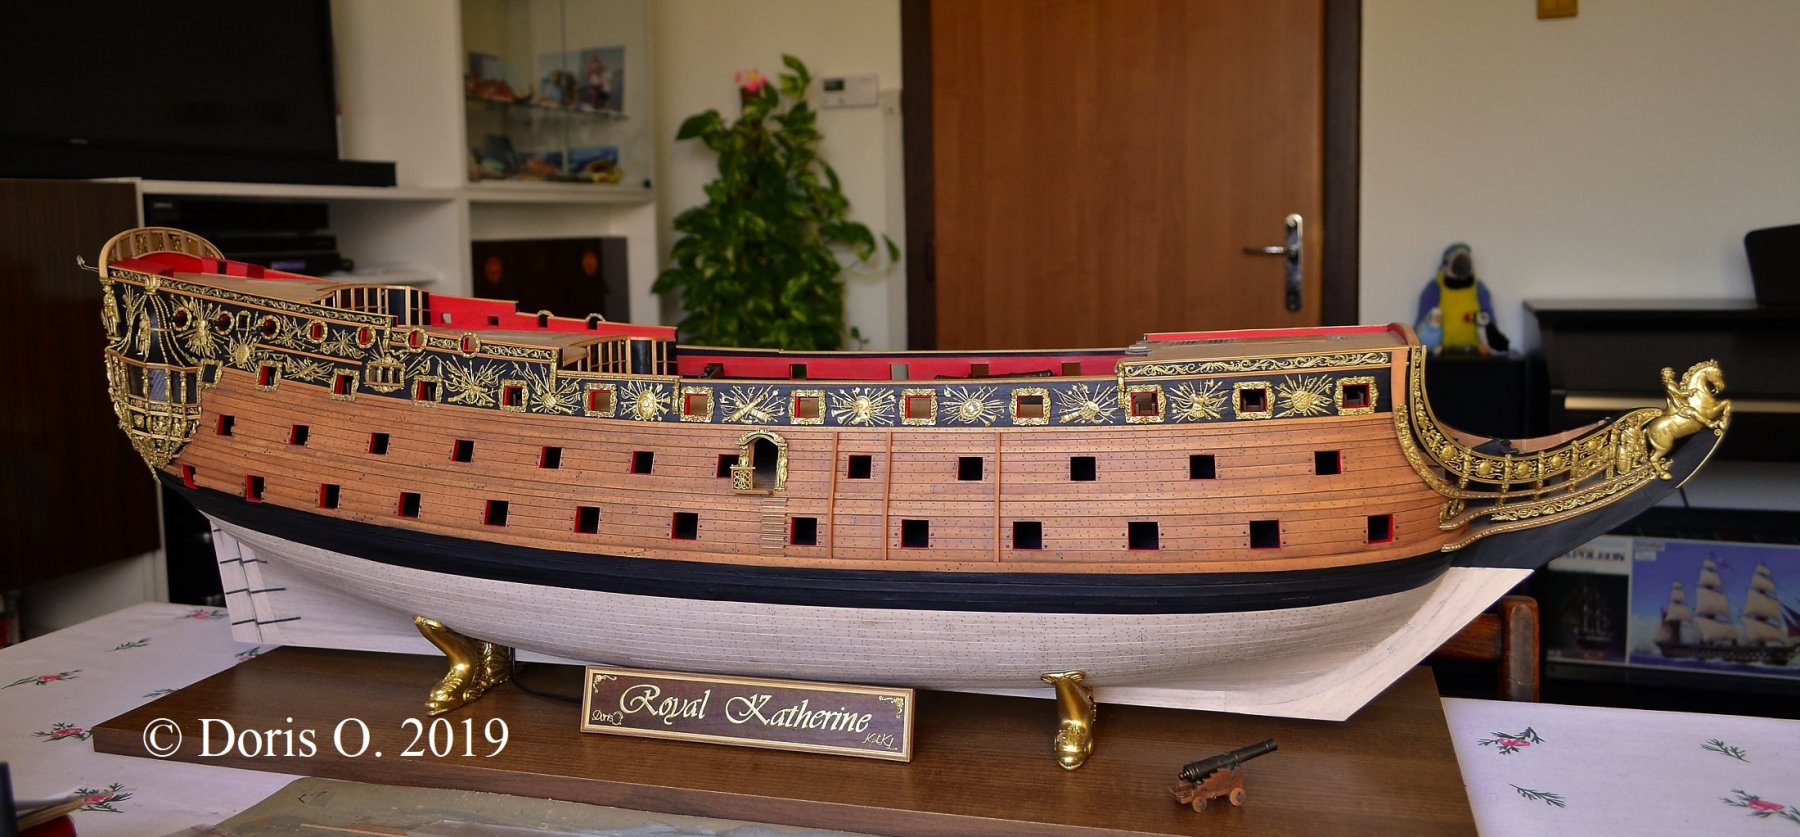
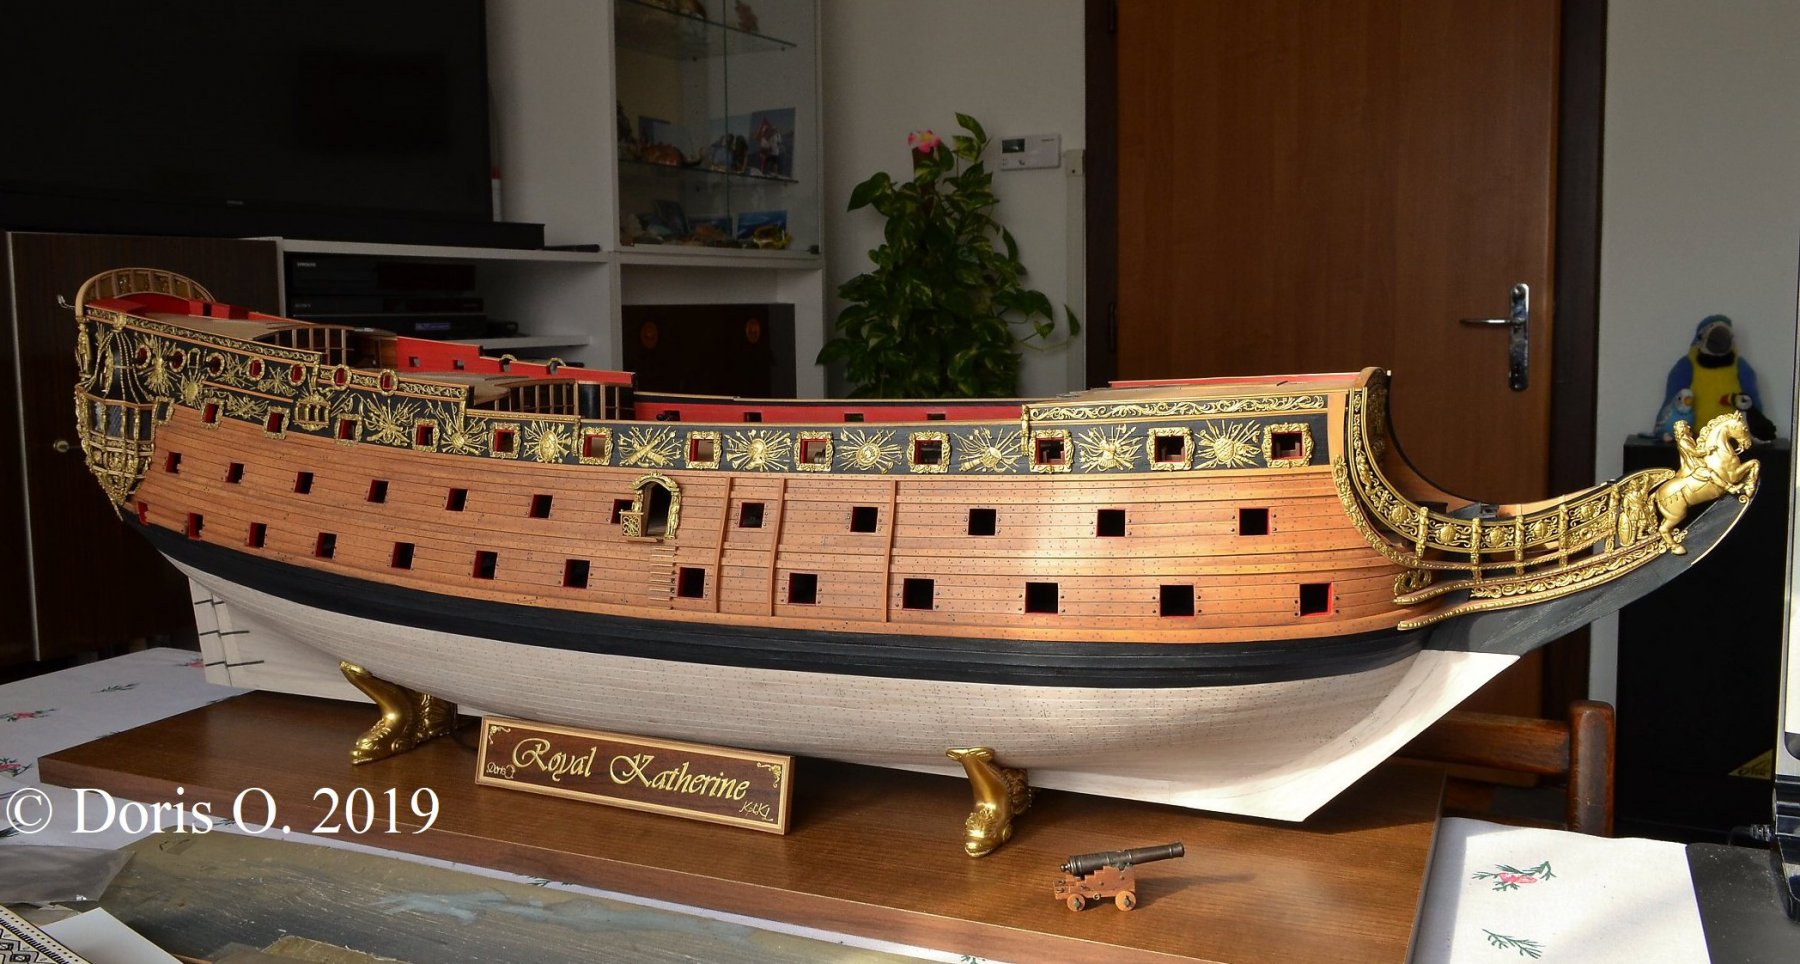
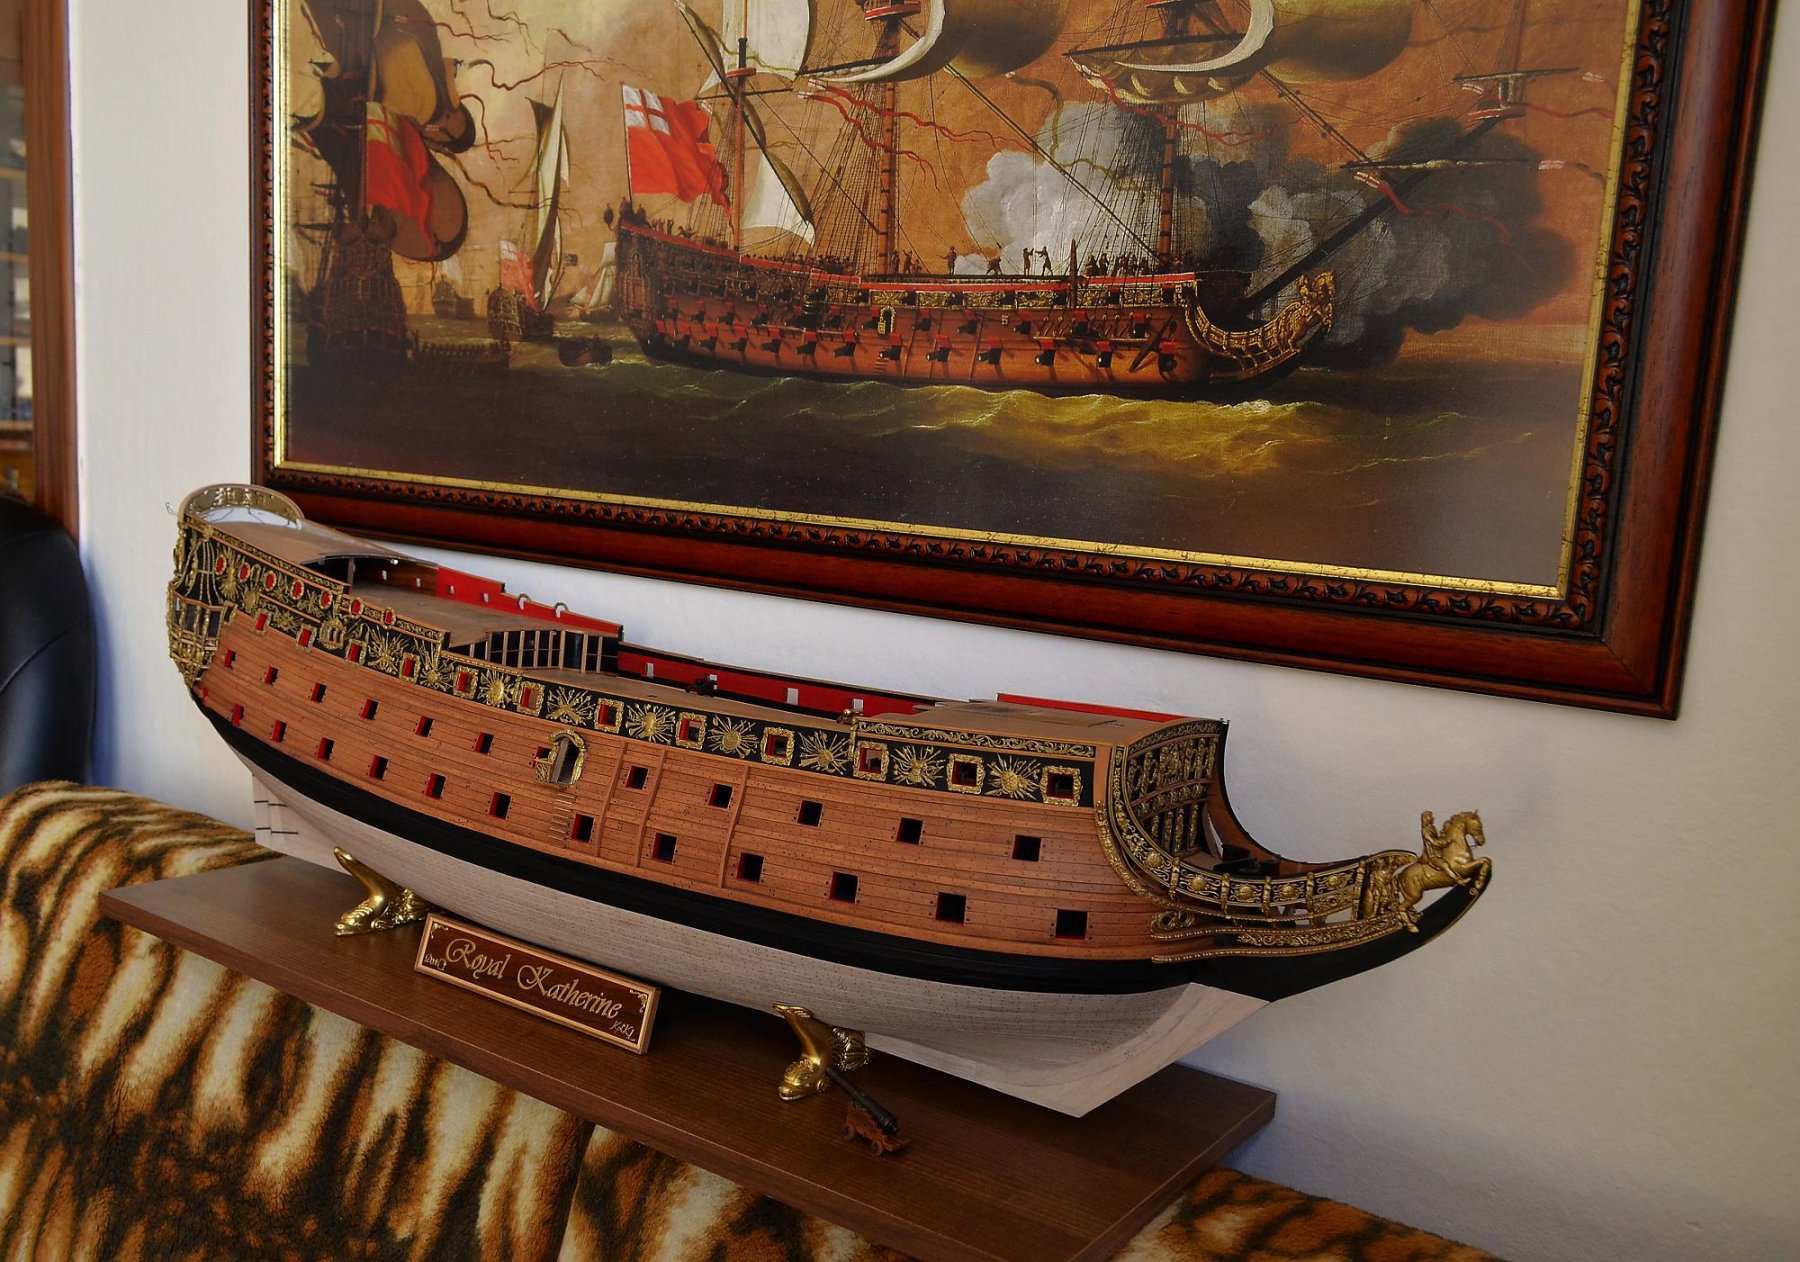
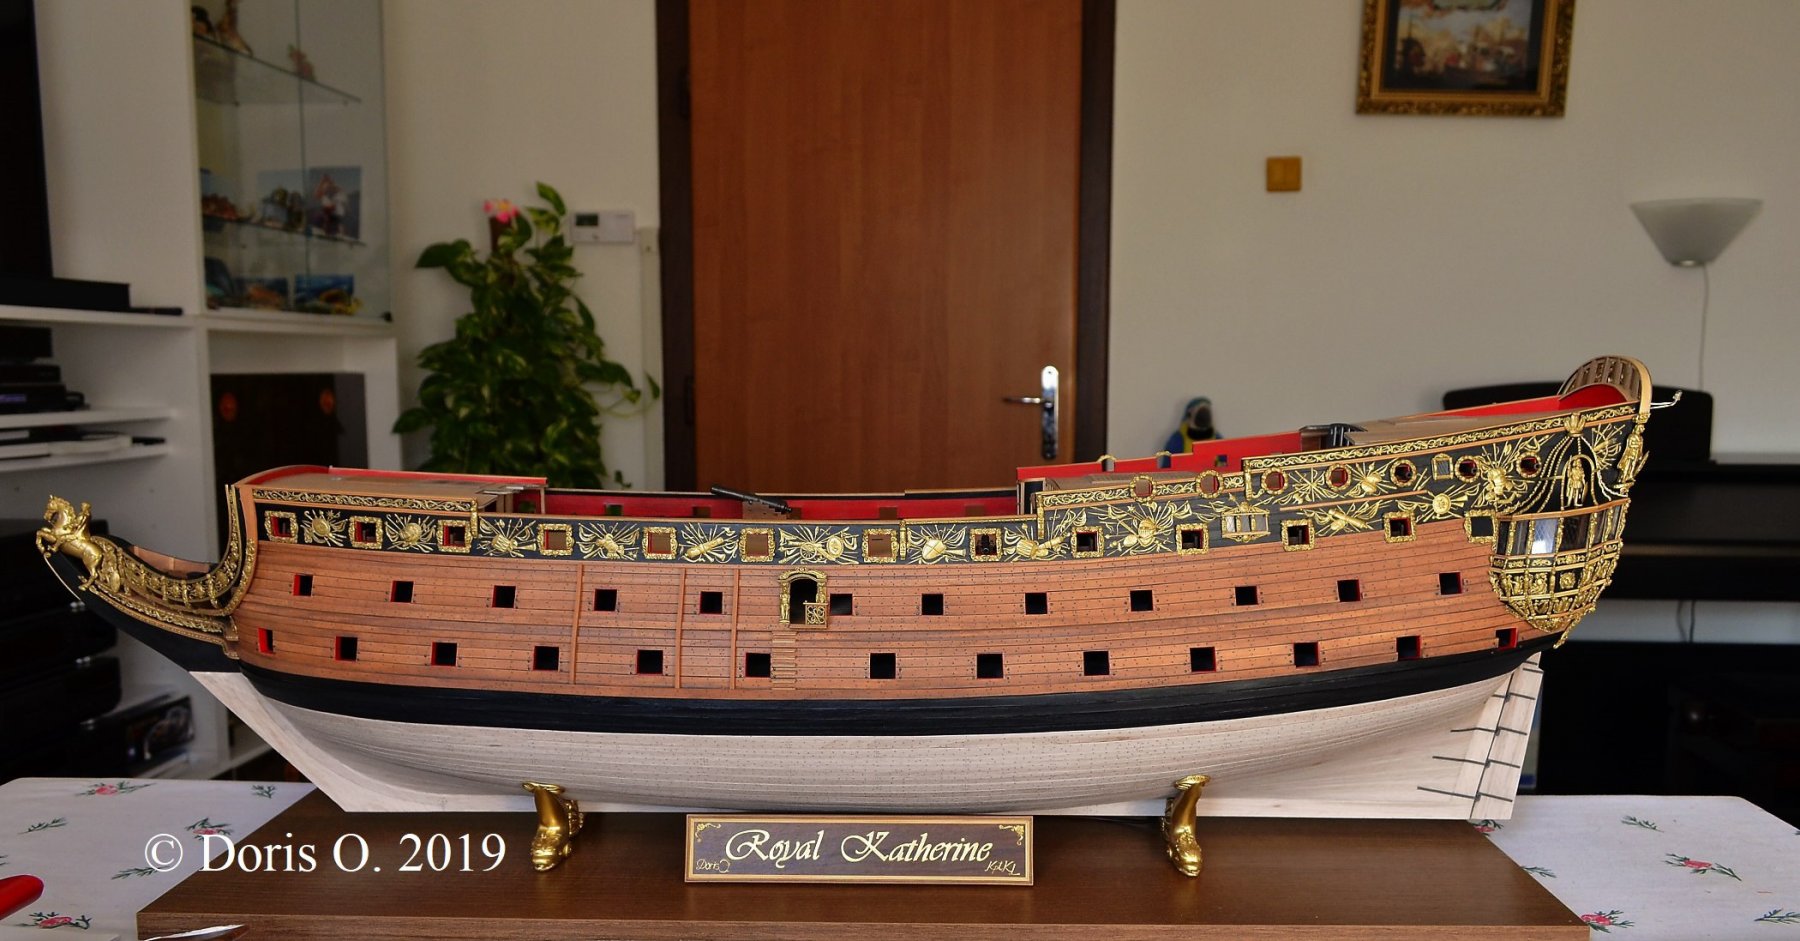
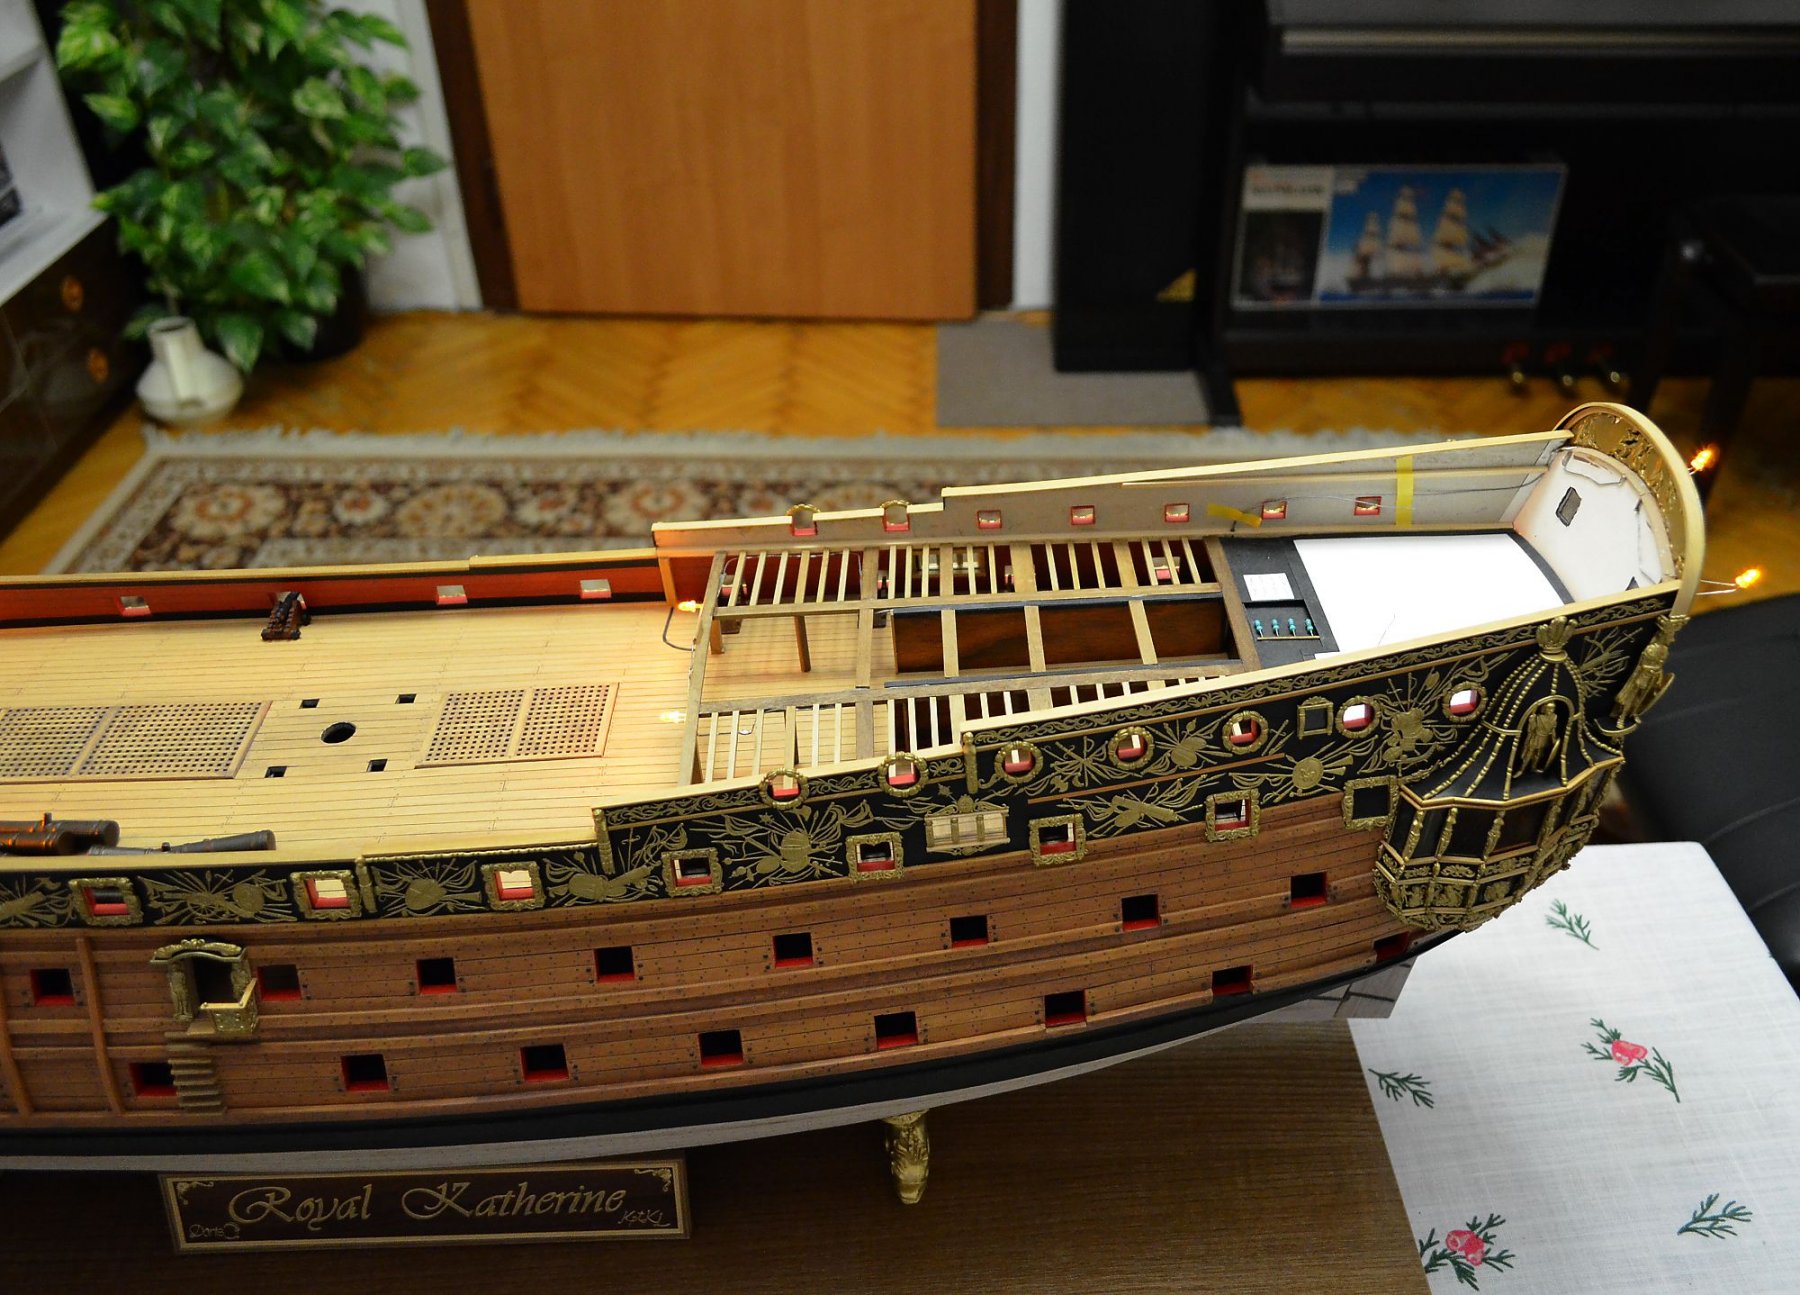
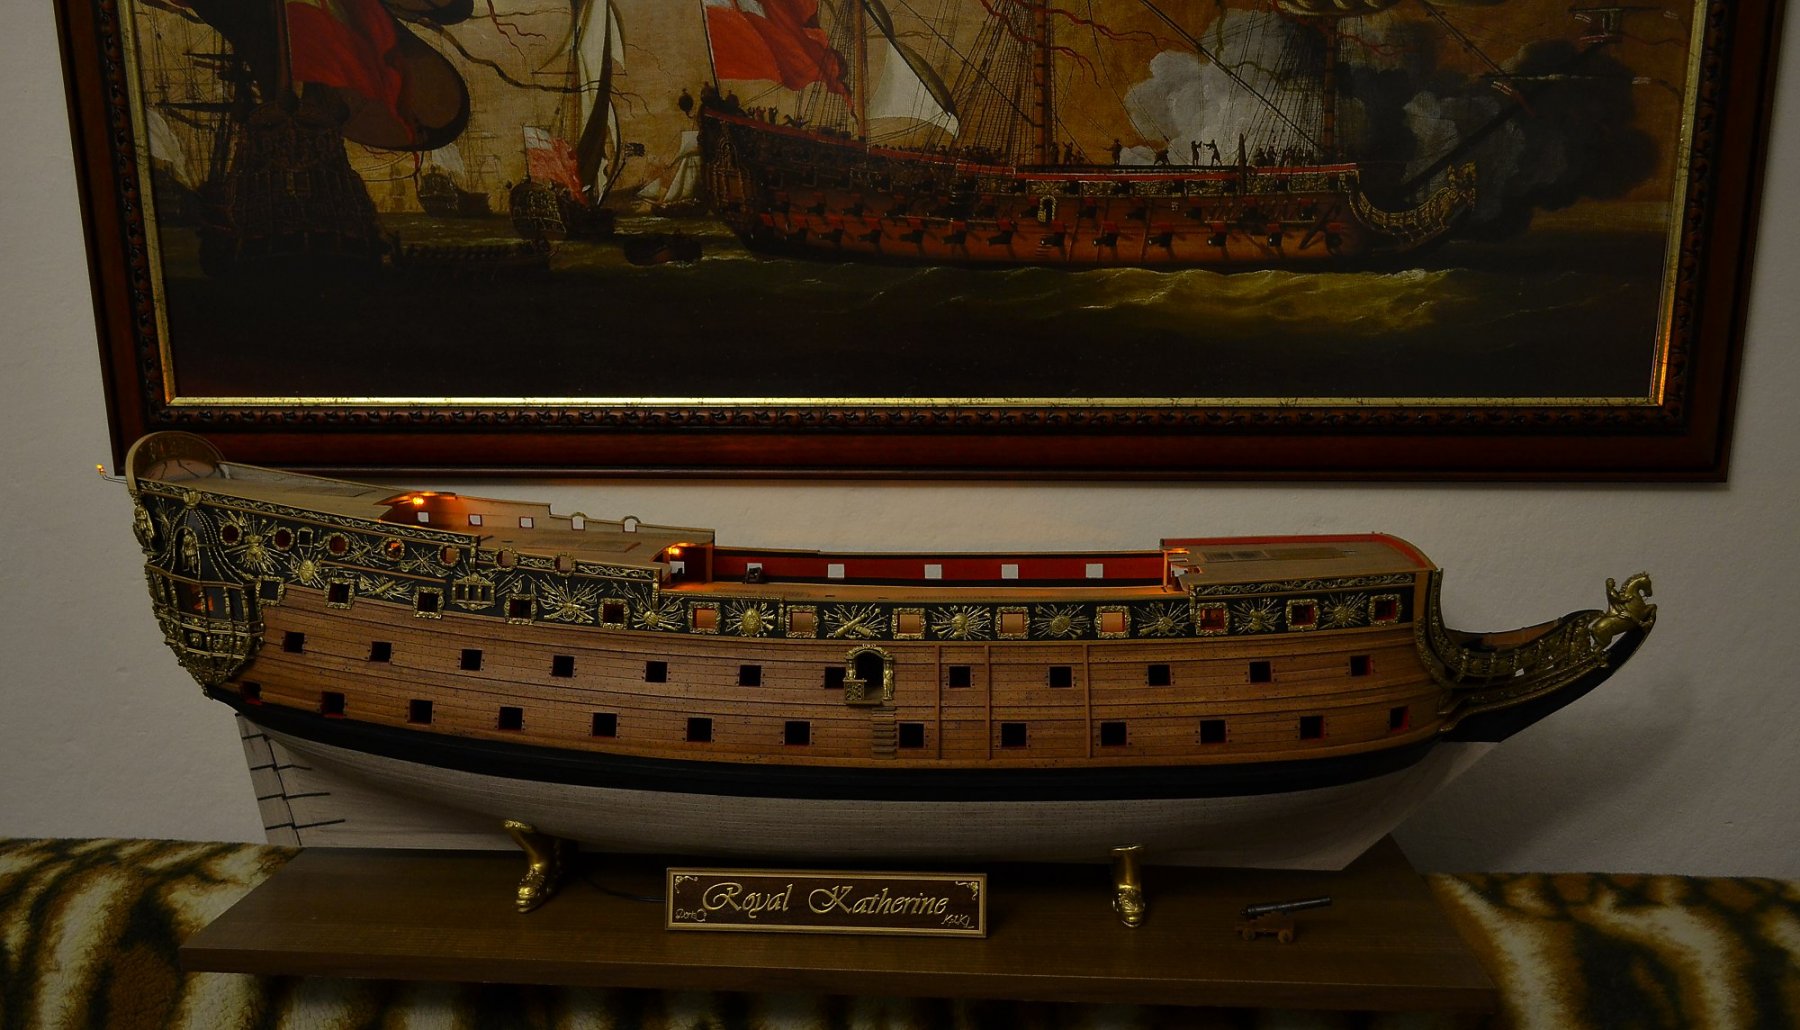
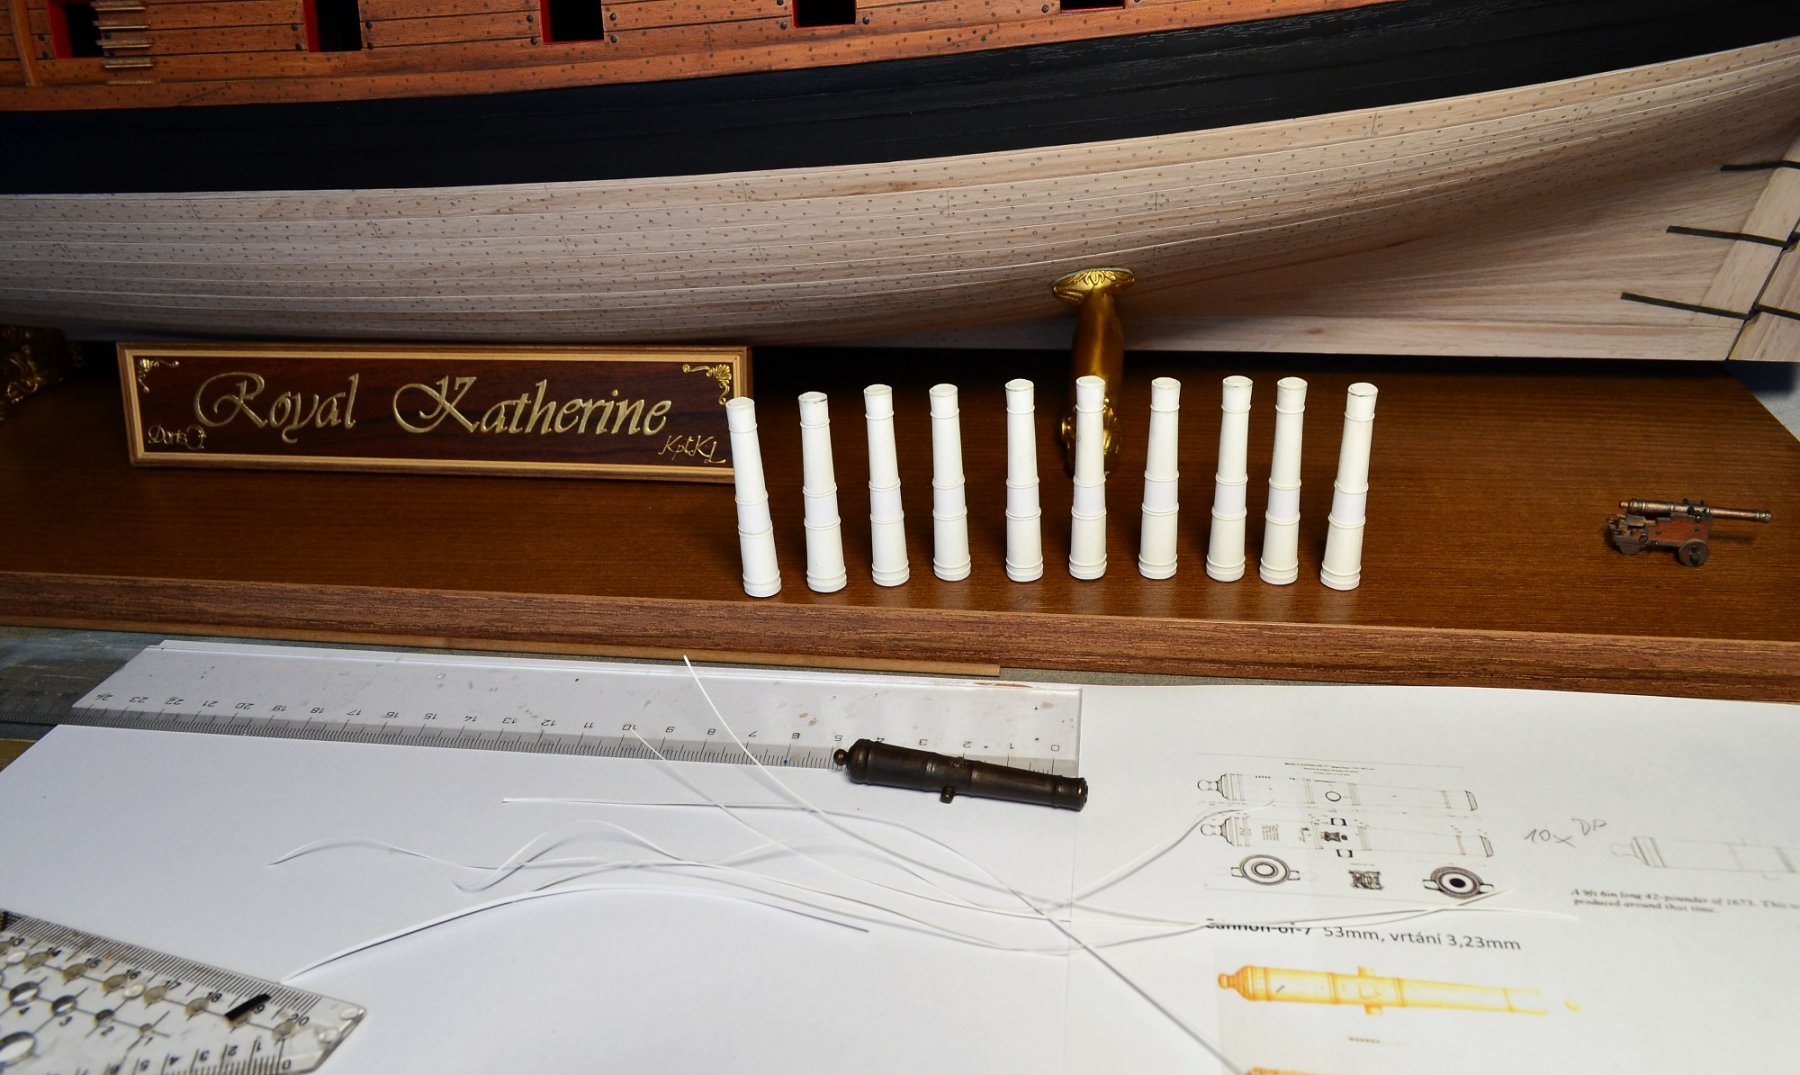
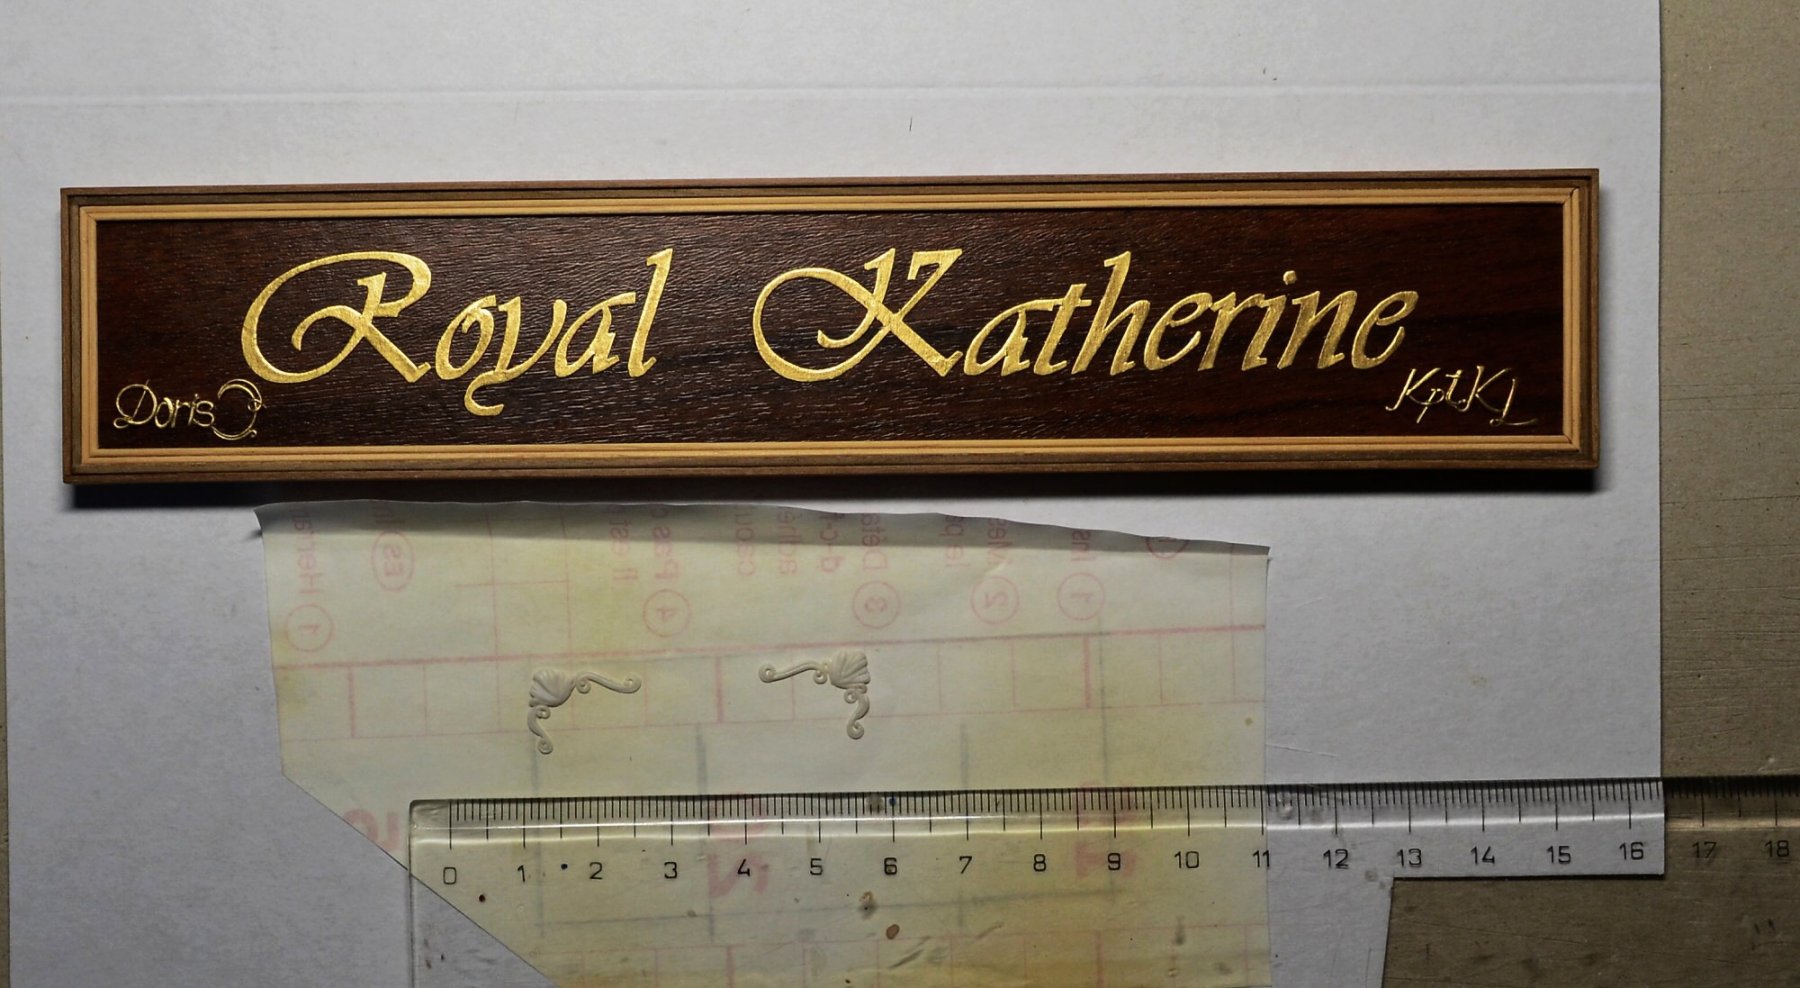
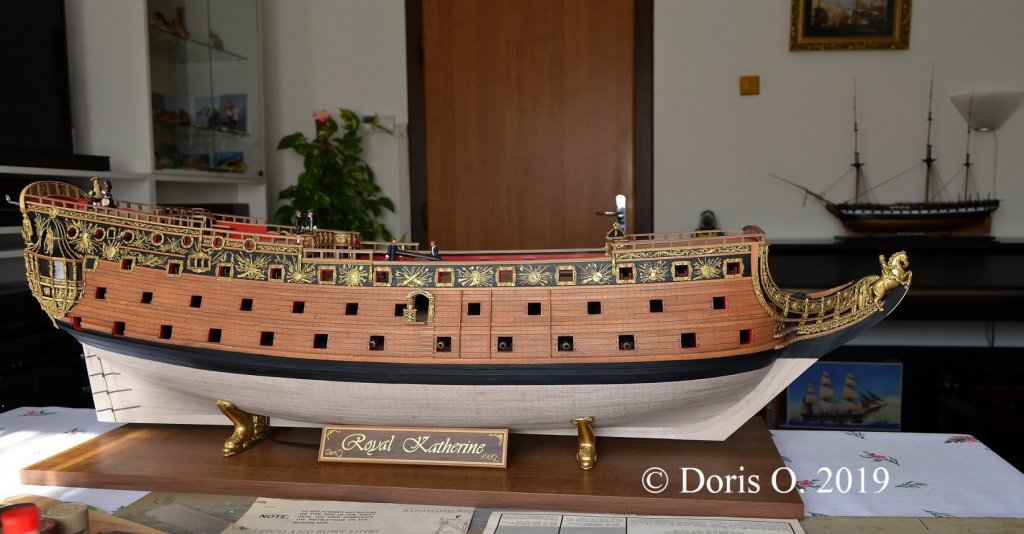
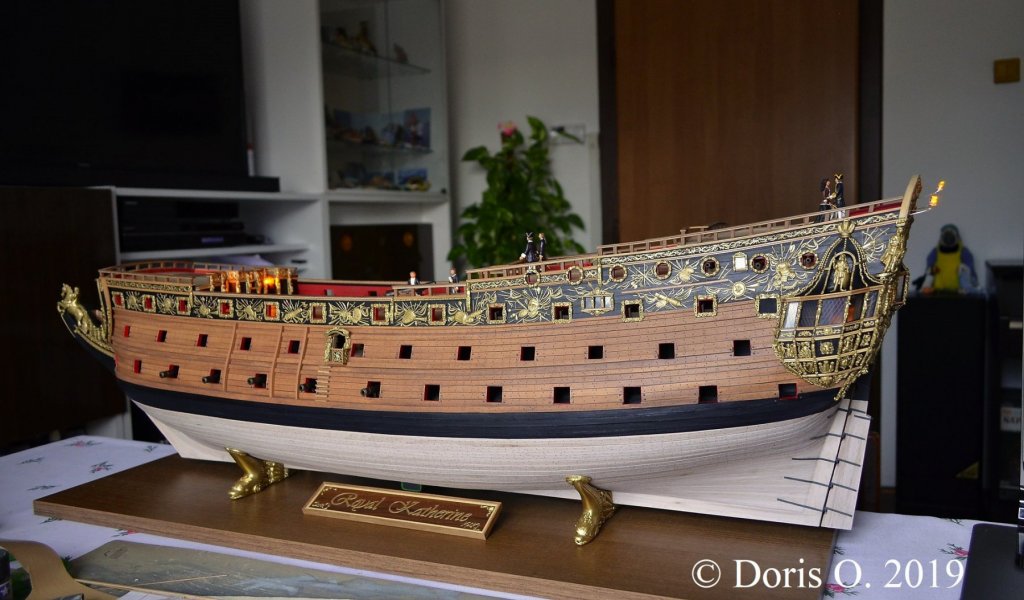
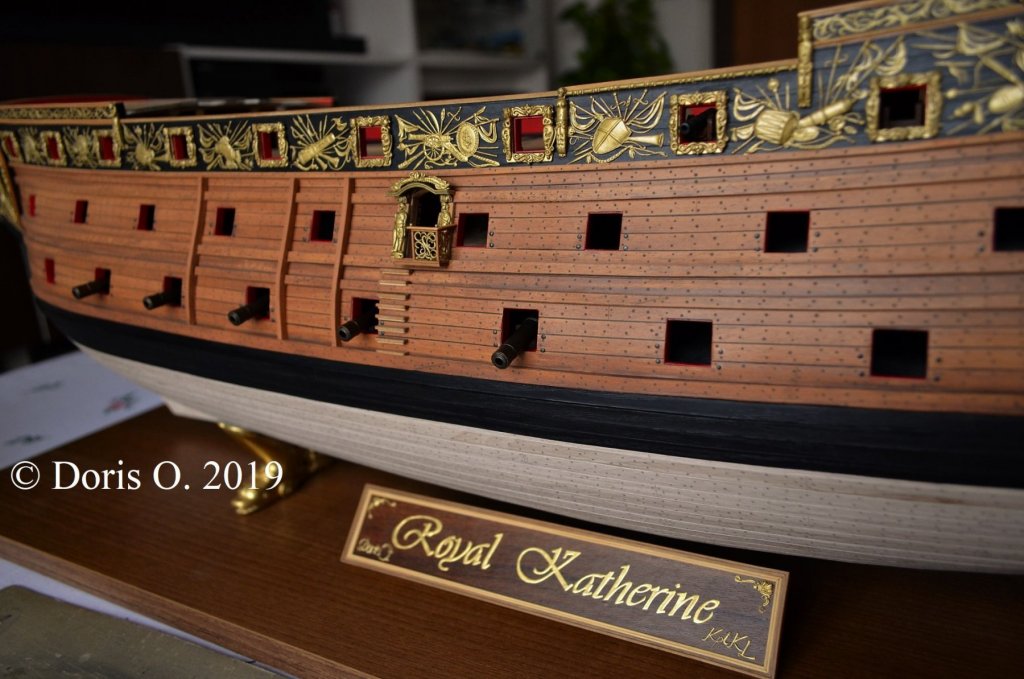
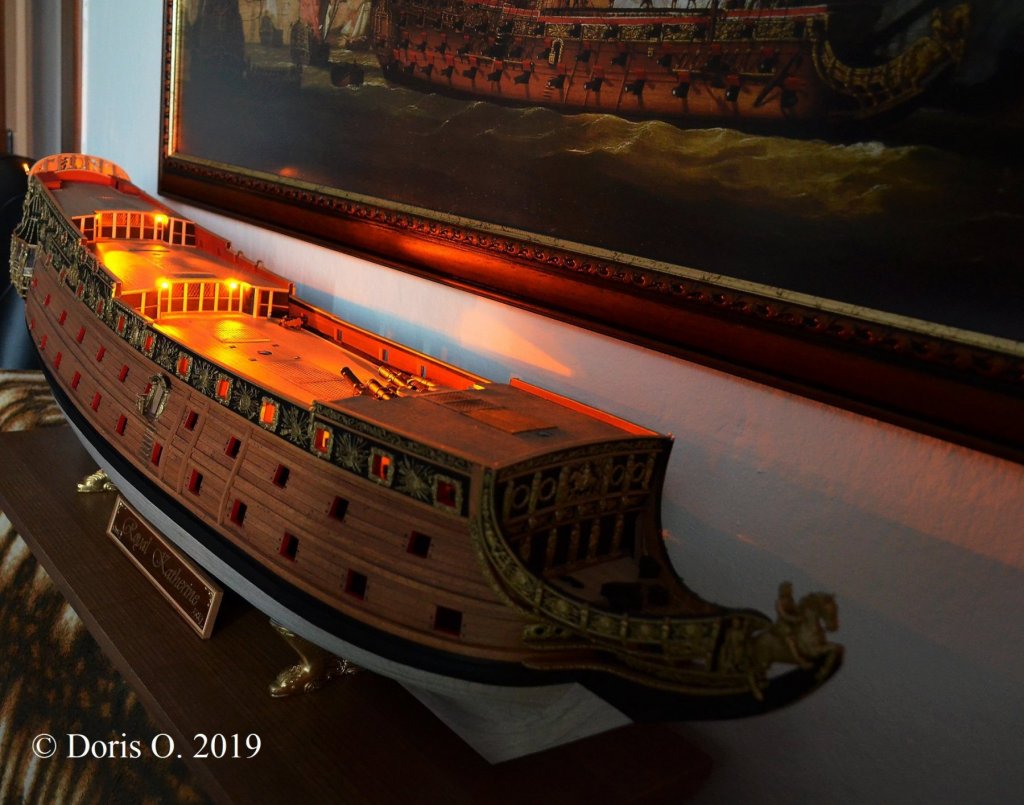
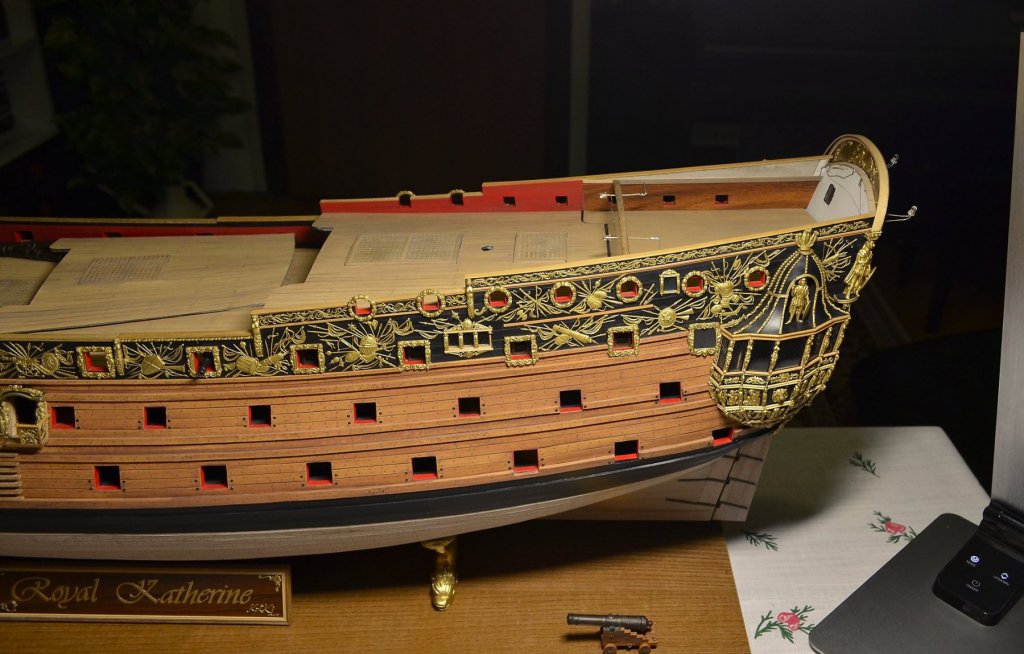
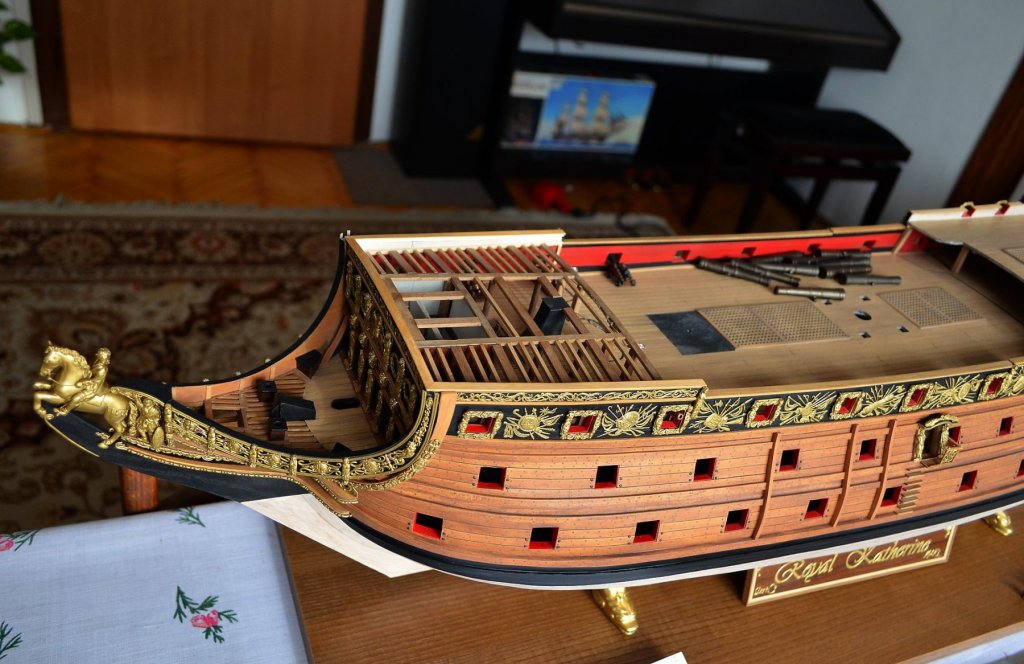
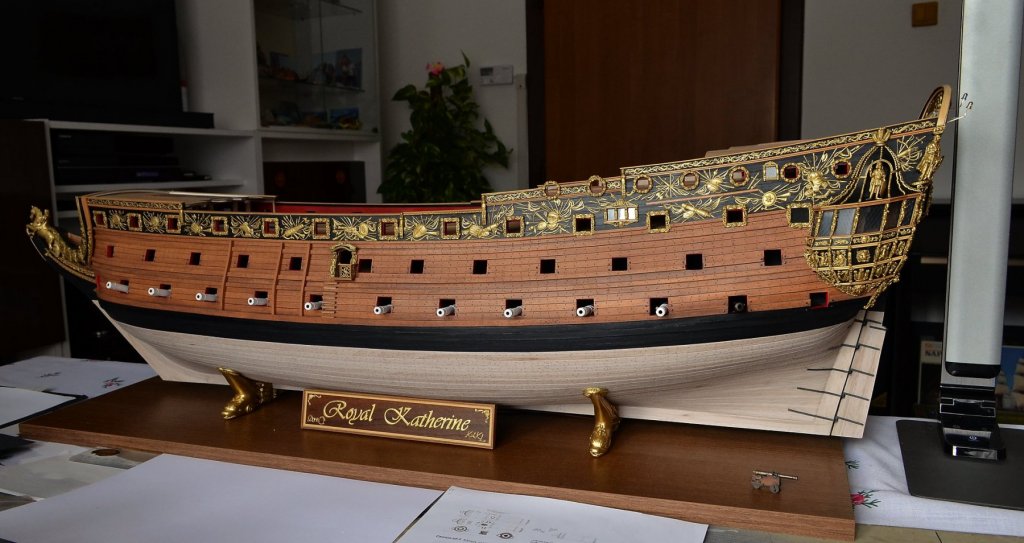
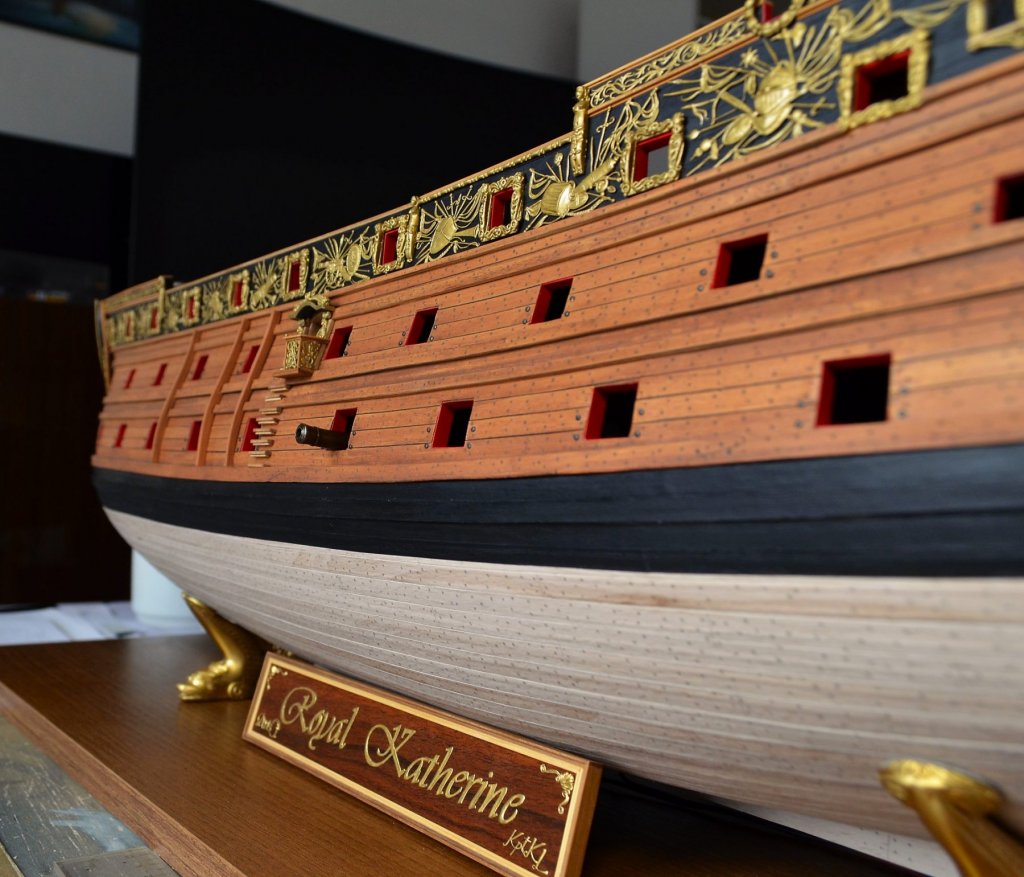
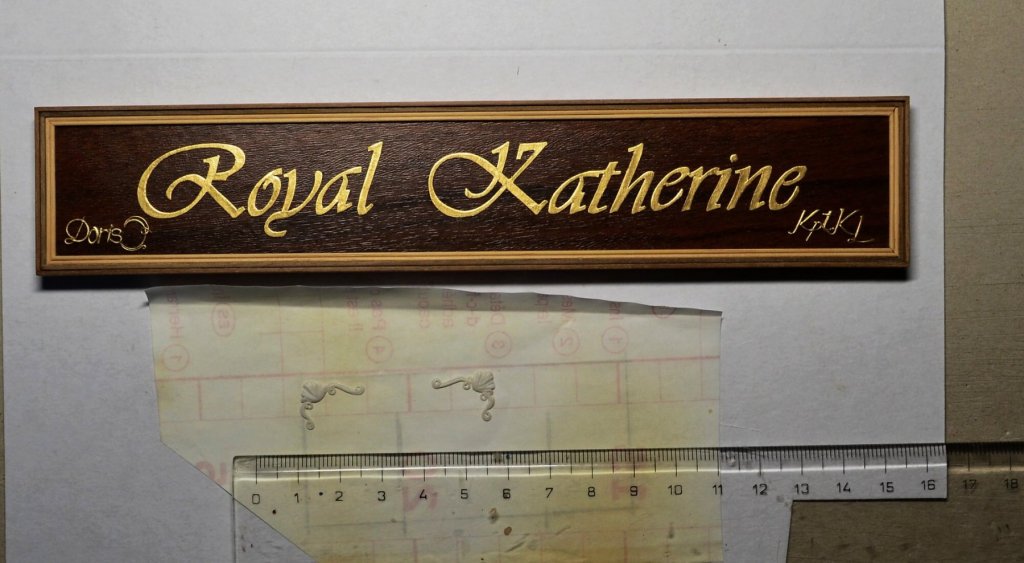
Thank you for your comments, Michel and E.J., and also to you all for the support and "likes". Today I have finished nameplate, its base and letters are made out of card, the frame is wooden. I tried to do it in the style of English Restoration approx 1670 (the frame and small ornaments) and you can also find there initials of authors - me and Captain KL who helps me to achieve more realistic results and gives me professional advice how to do things correctly and better. That's why you can watch here a completely different build of the Royal Katharine than those that are based on modeling plans - unfortunately, in many ways, fictional. So enjoy the pics and have a great time.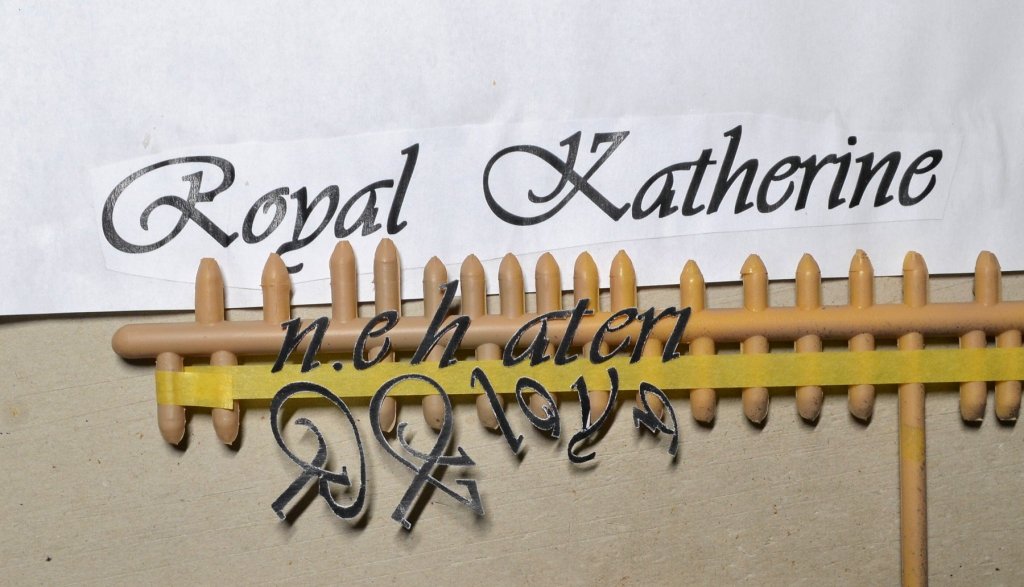


- 1,035 replies
-
- 41
-
-
- royal katherine
- ship of the line
- (and 1 more)
-
HMS ROYAL KATHERINE 1664 by Doris - 1/55 - CARD
DORIS replied to DORIS's topic in - Build logs for subjects built 1501 - 1750
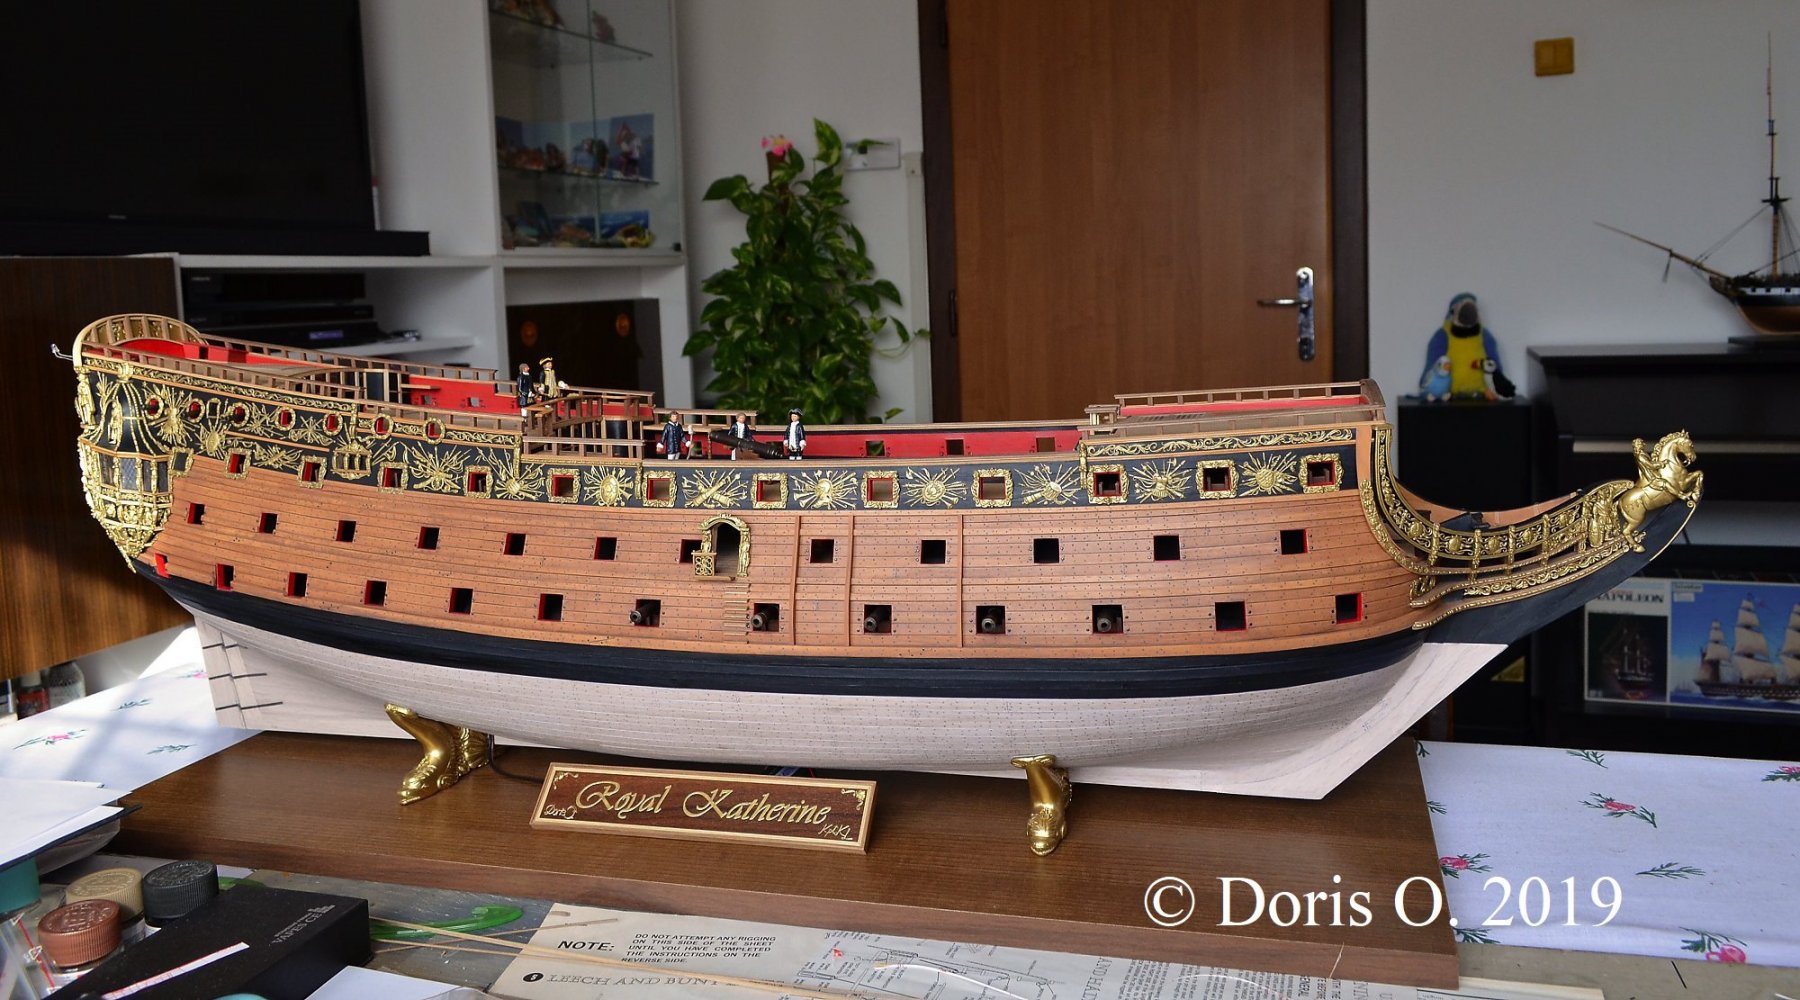
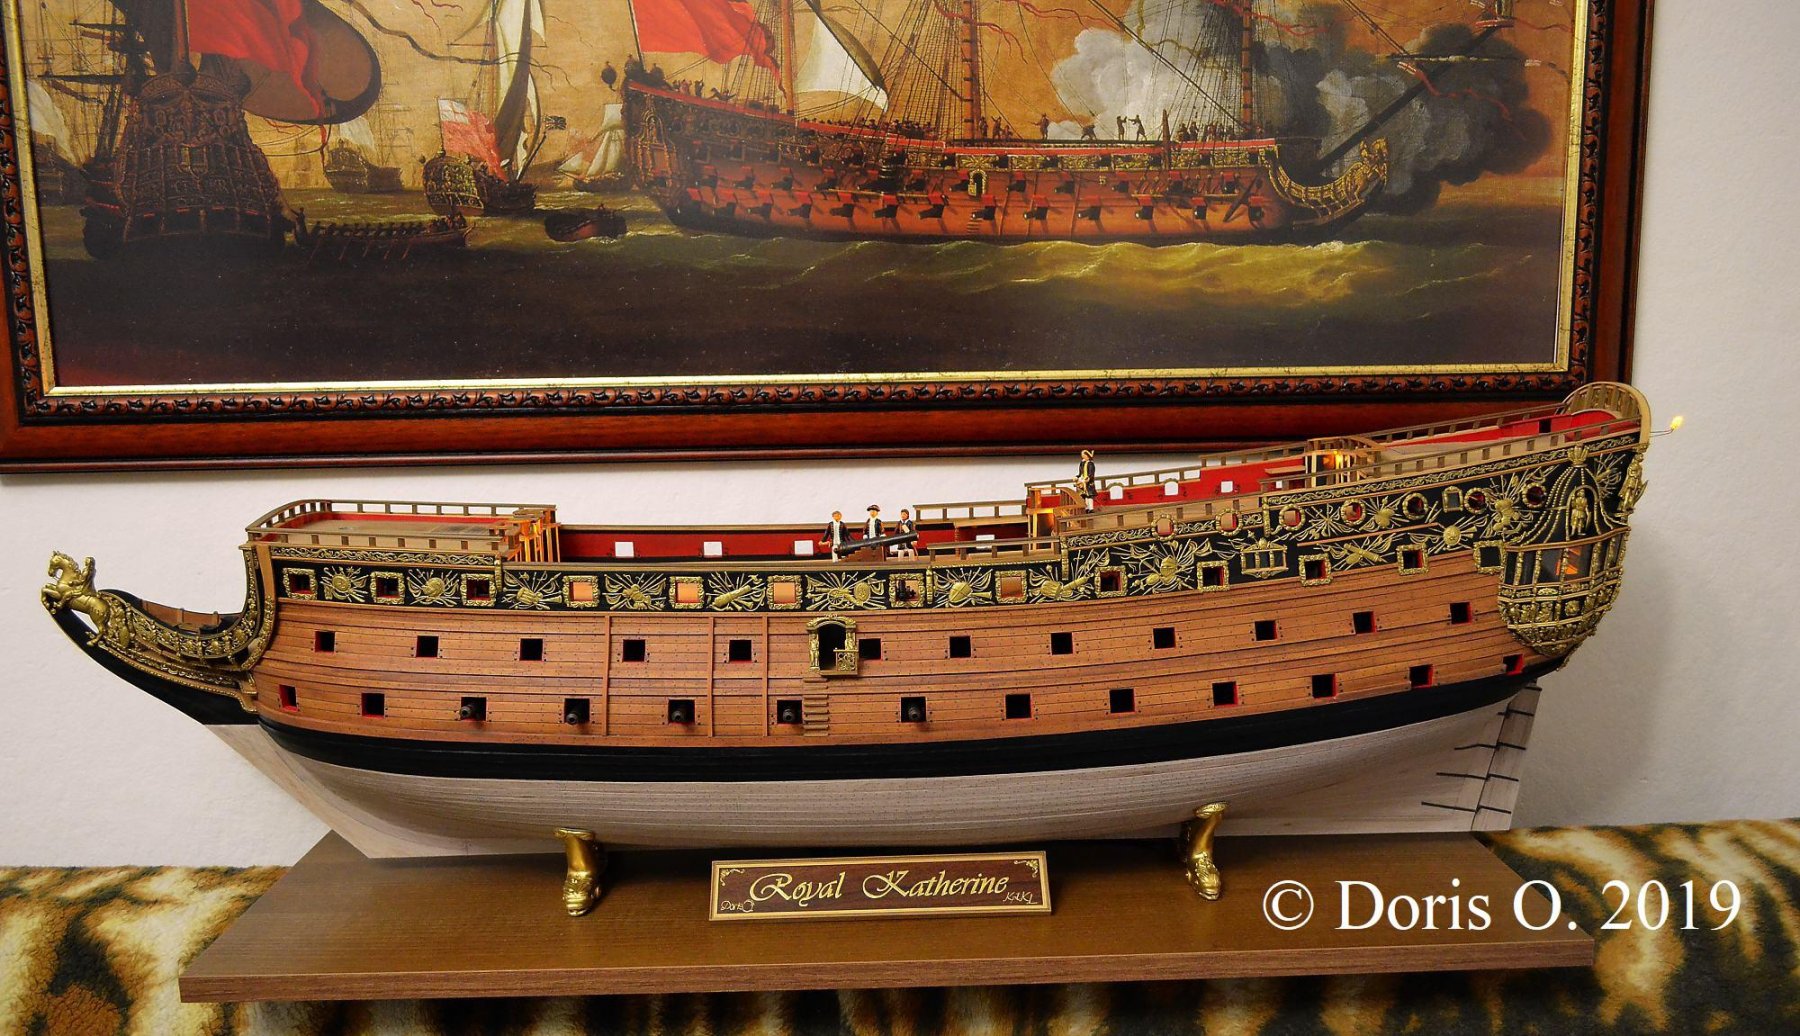
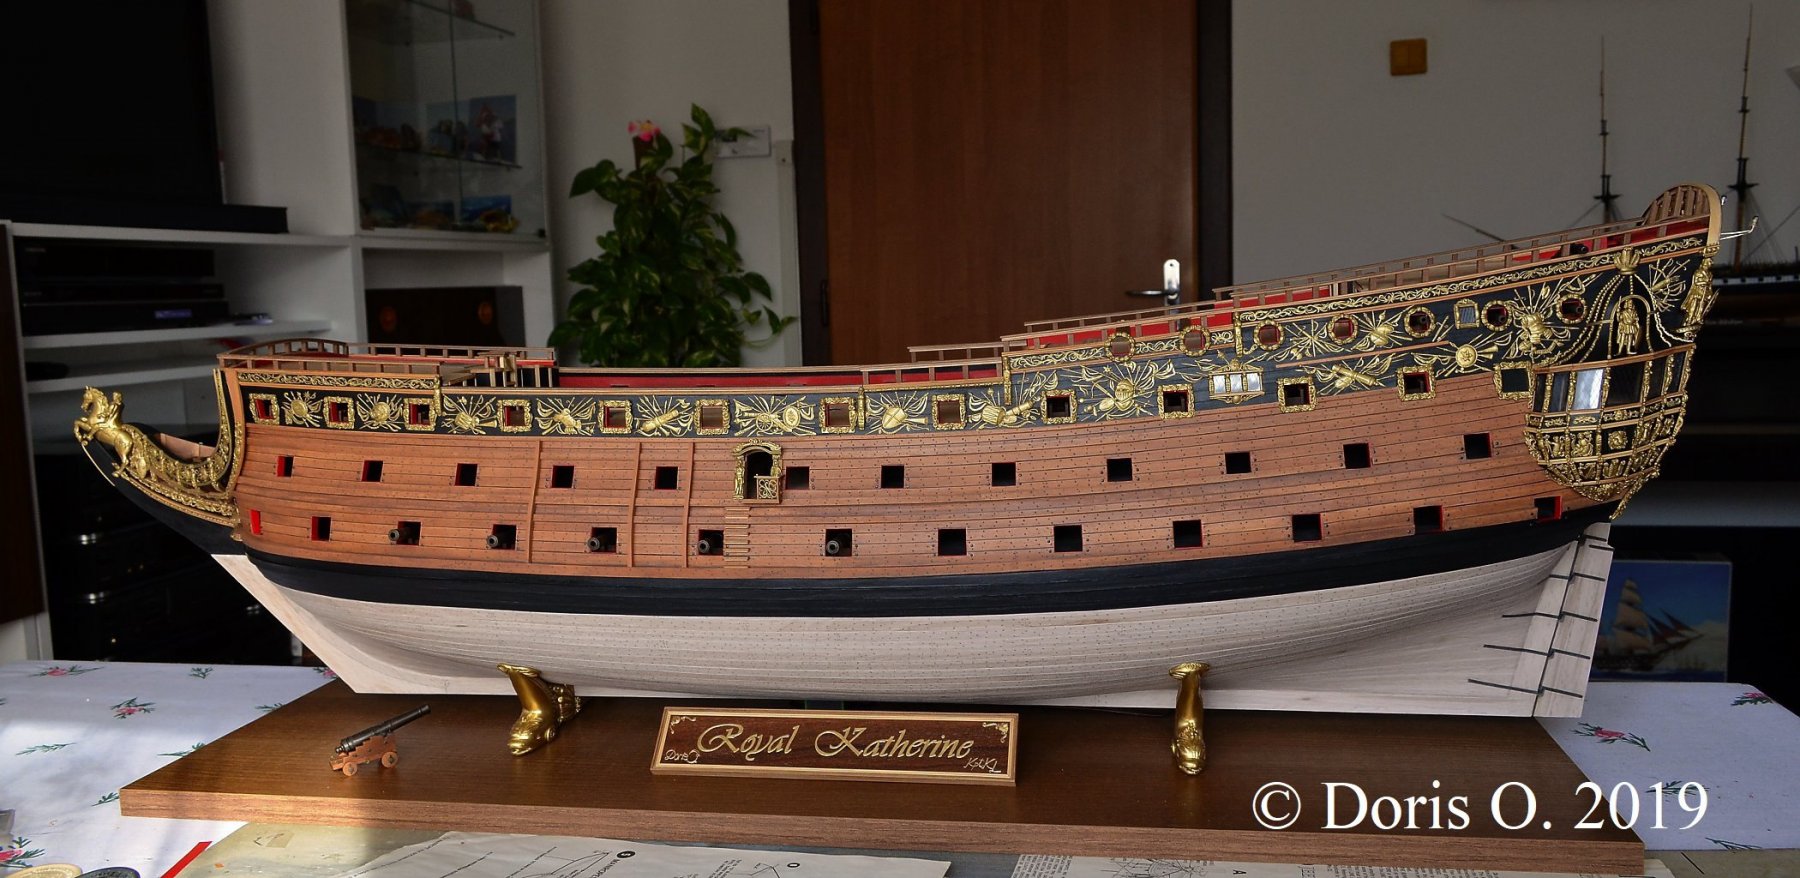
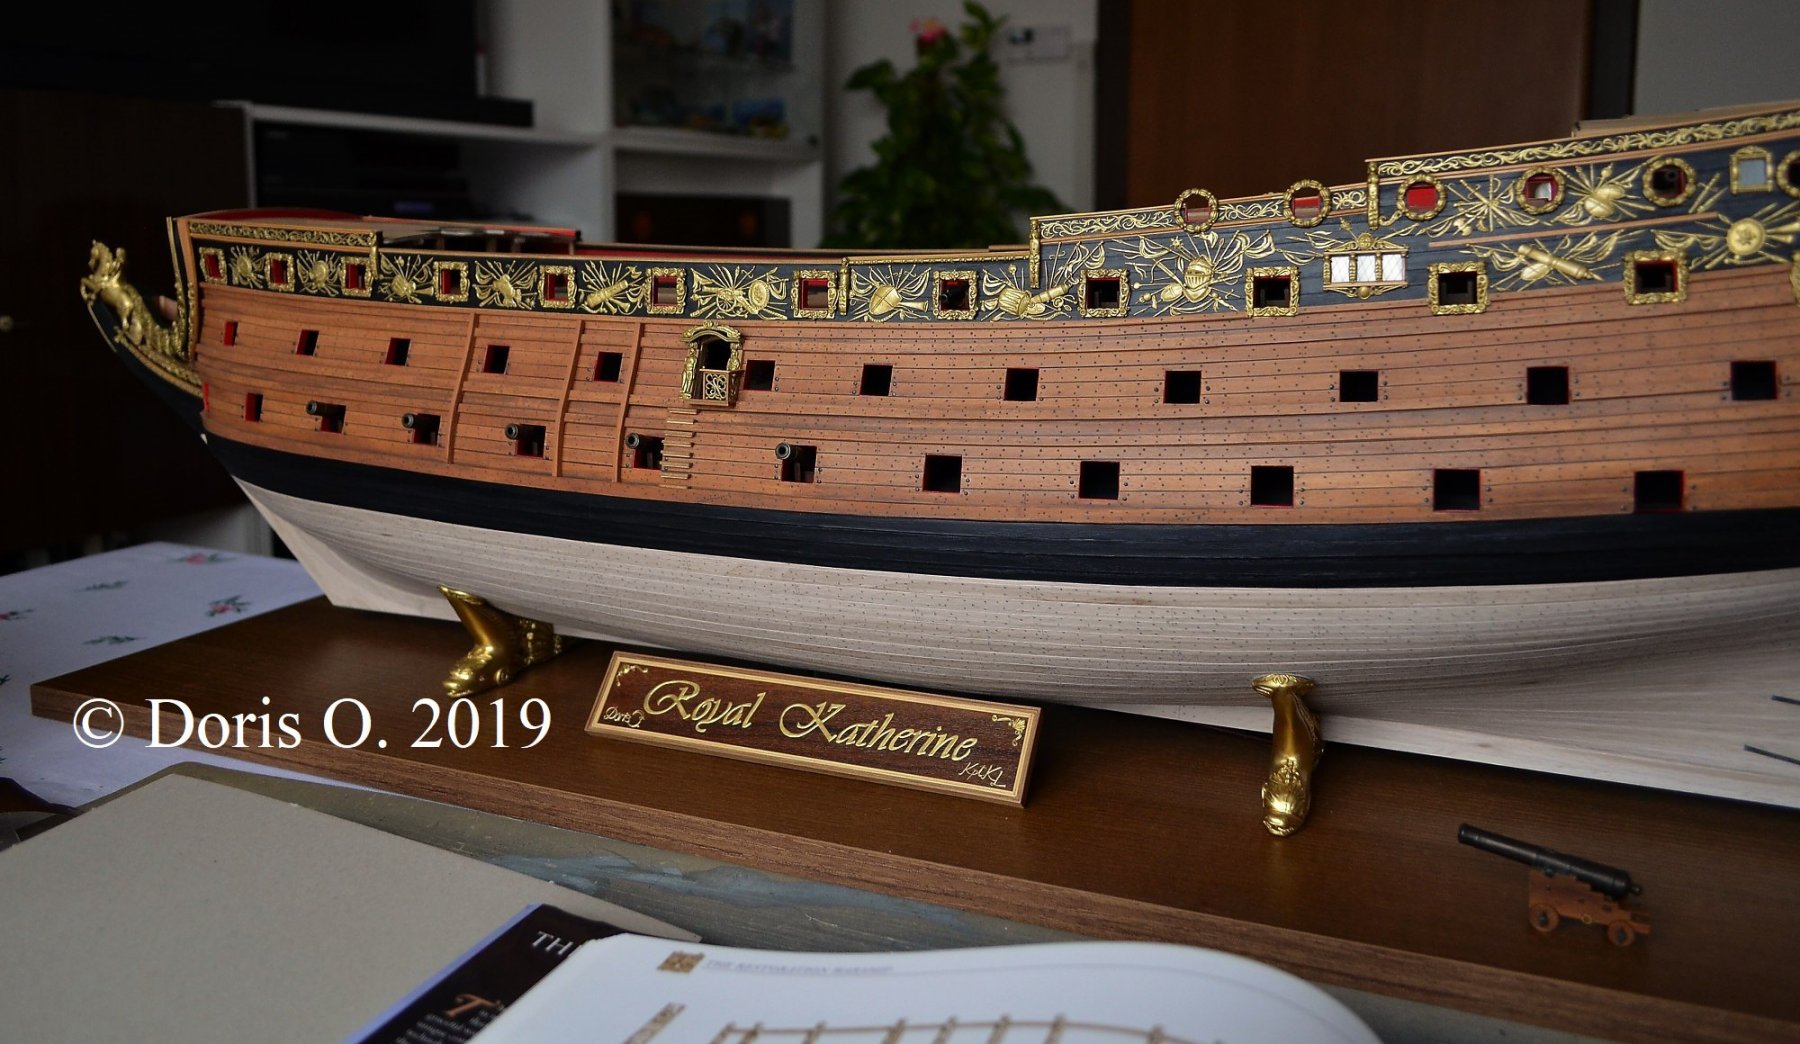
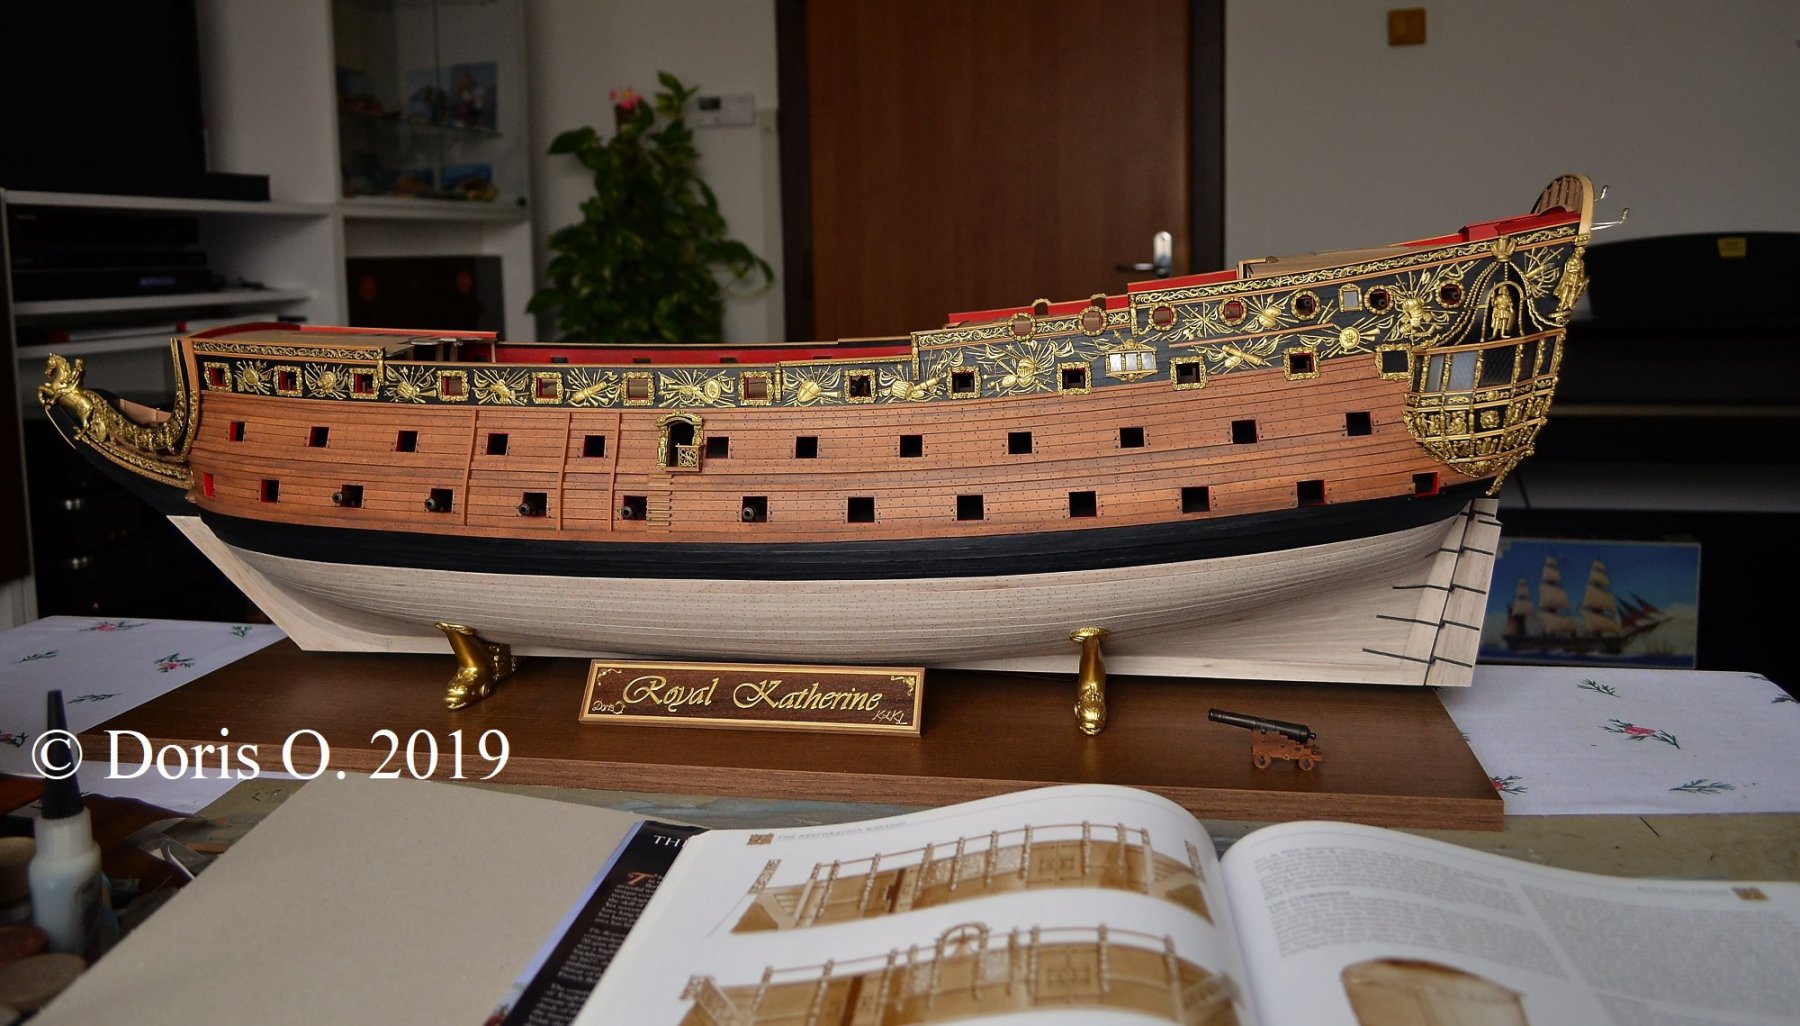
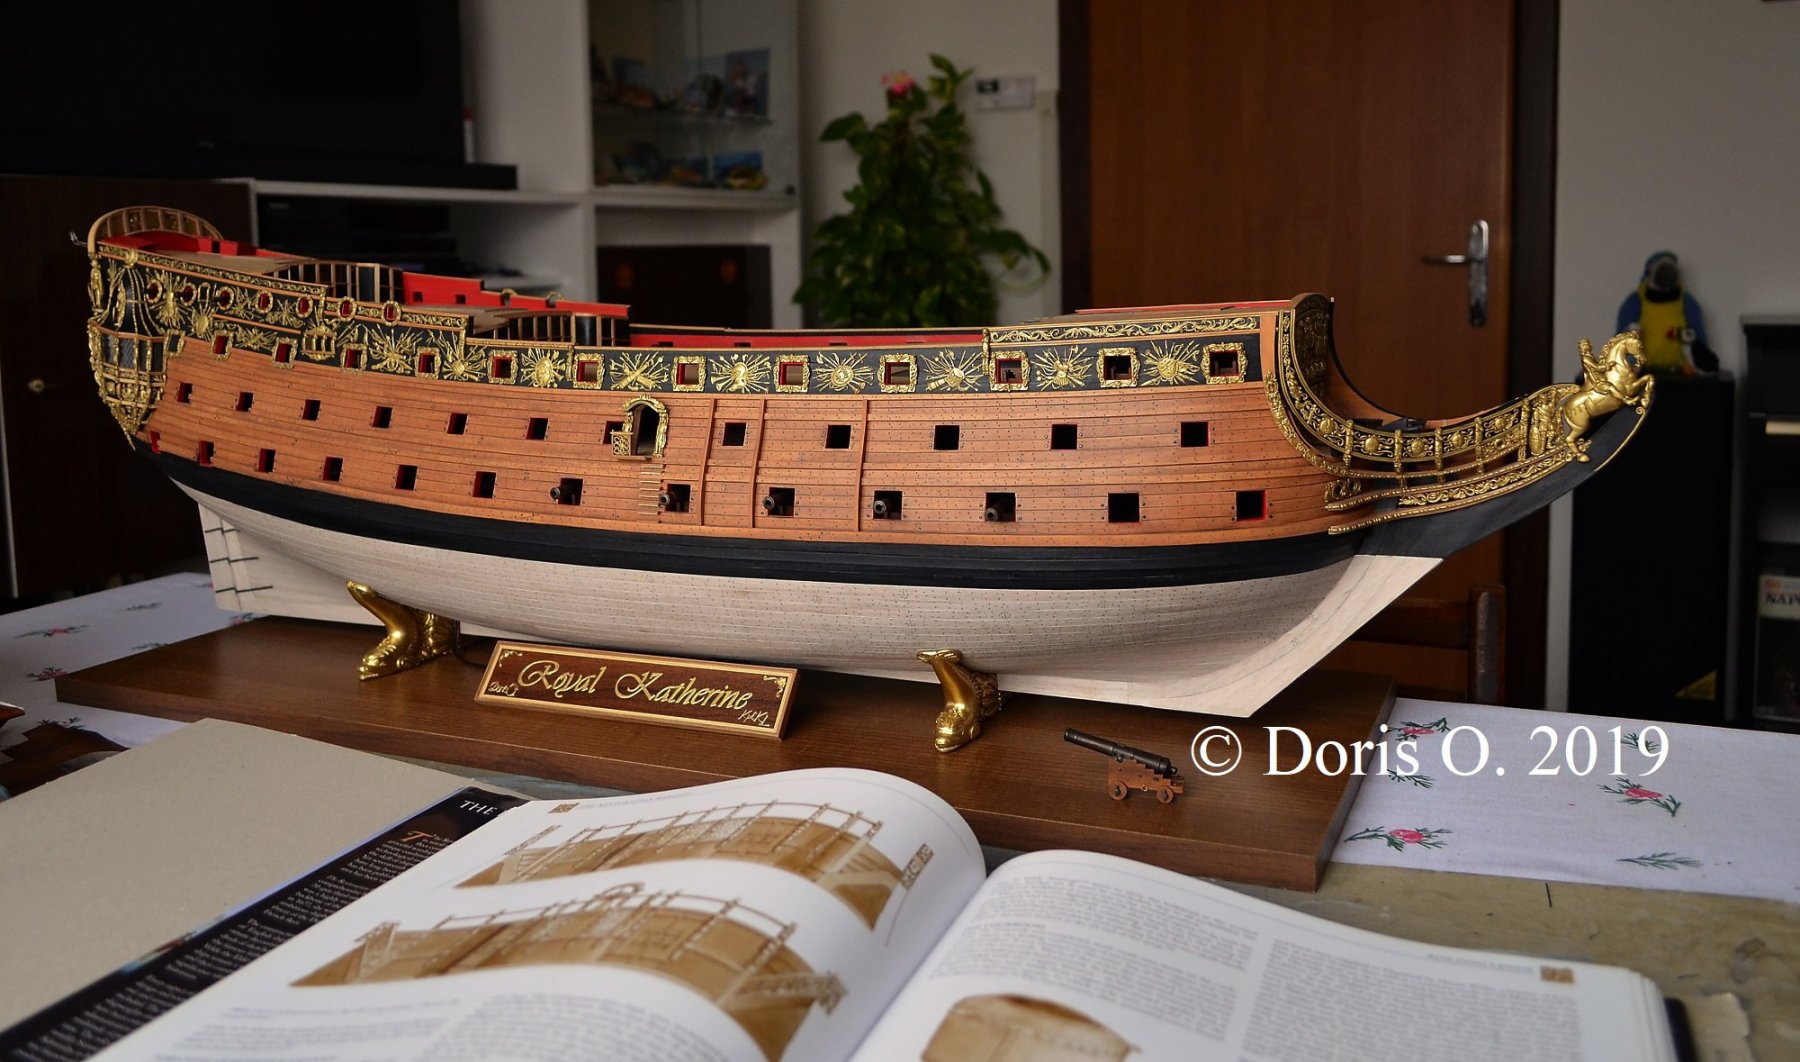
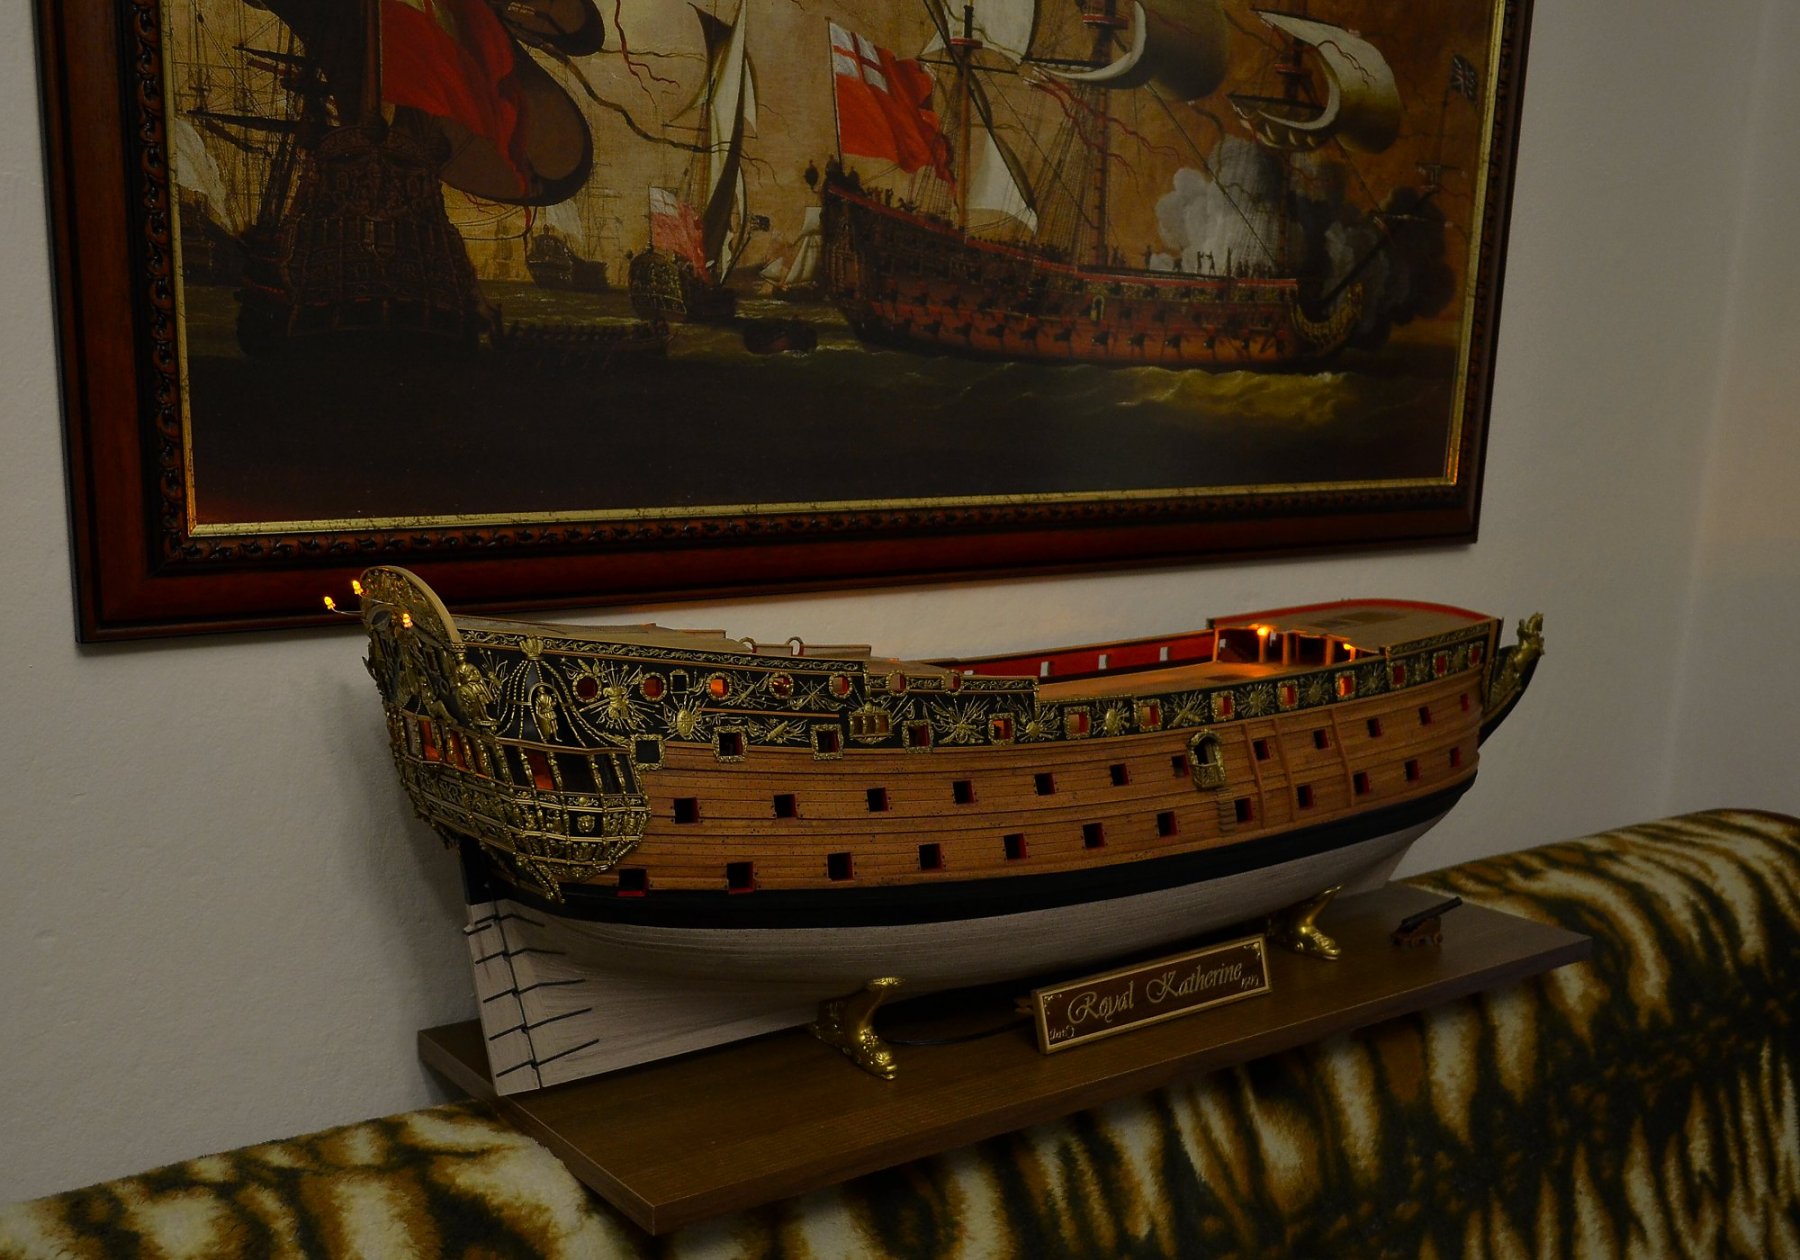
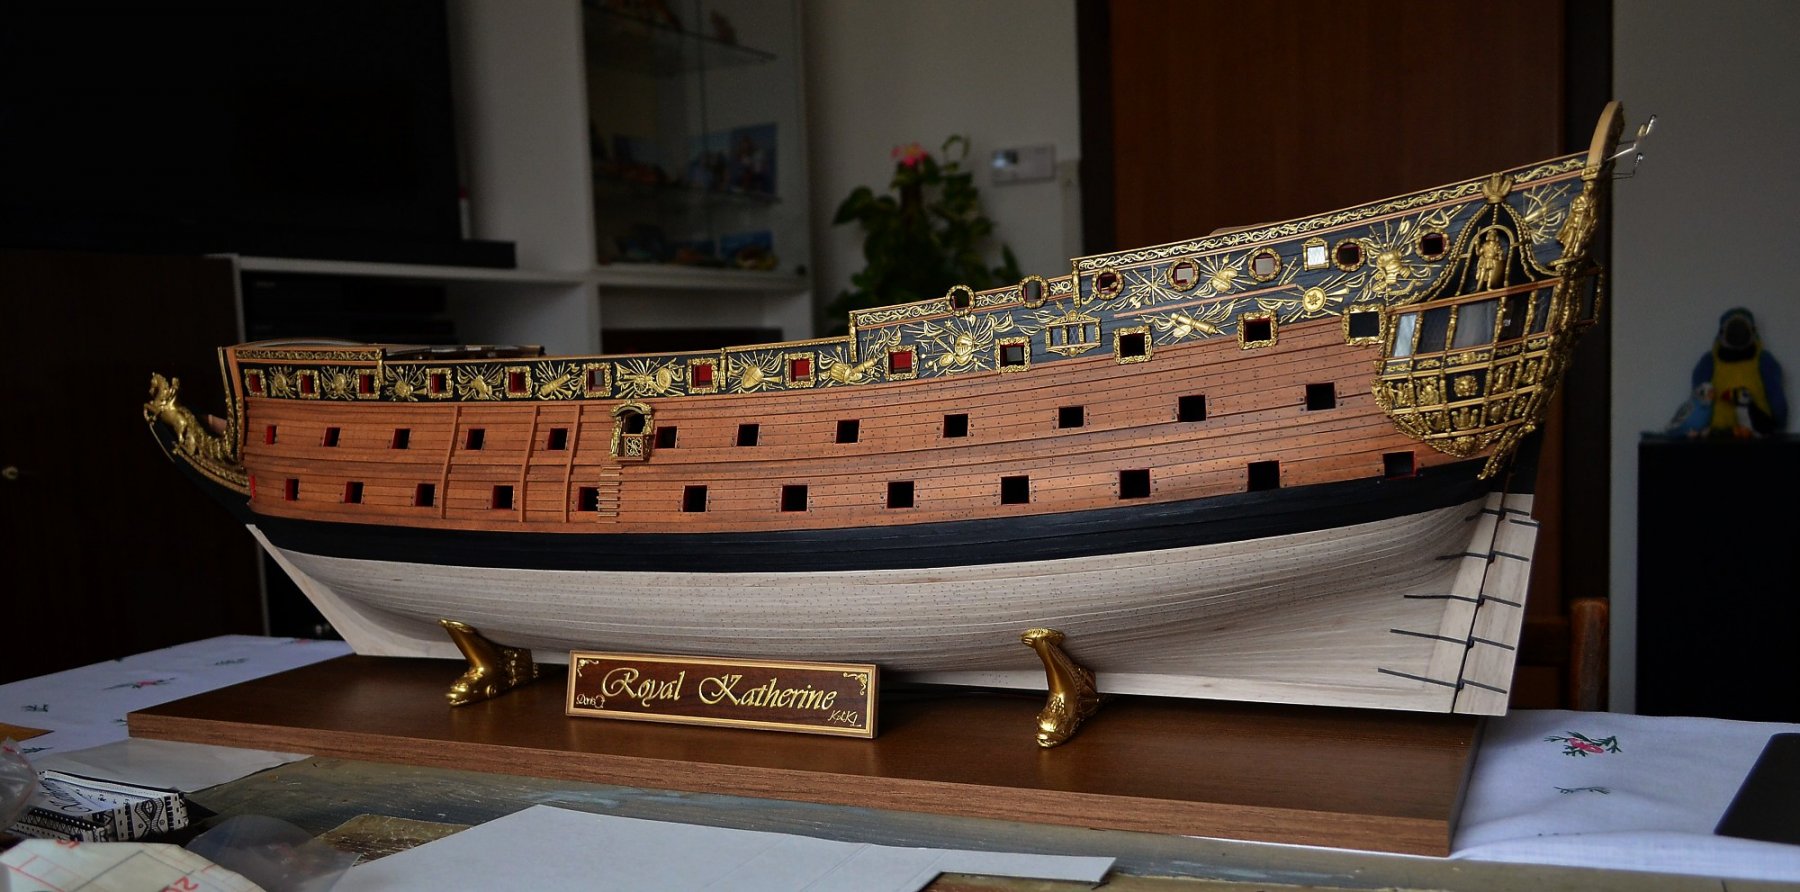
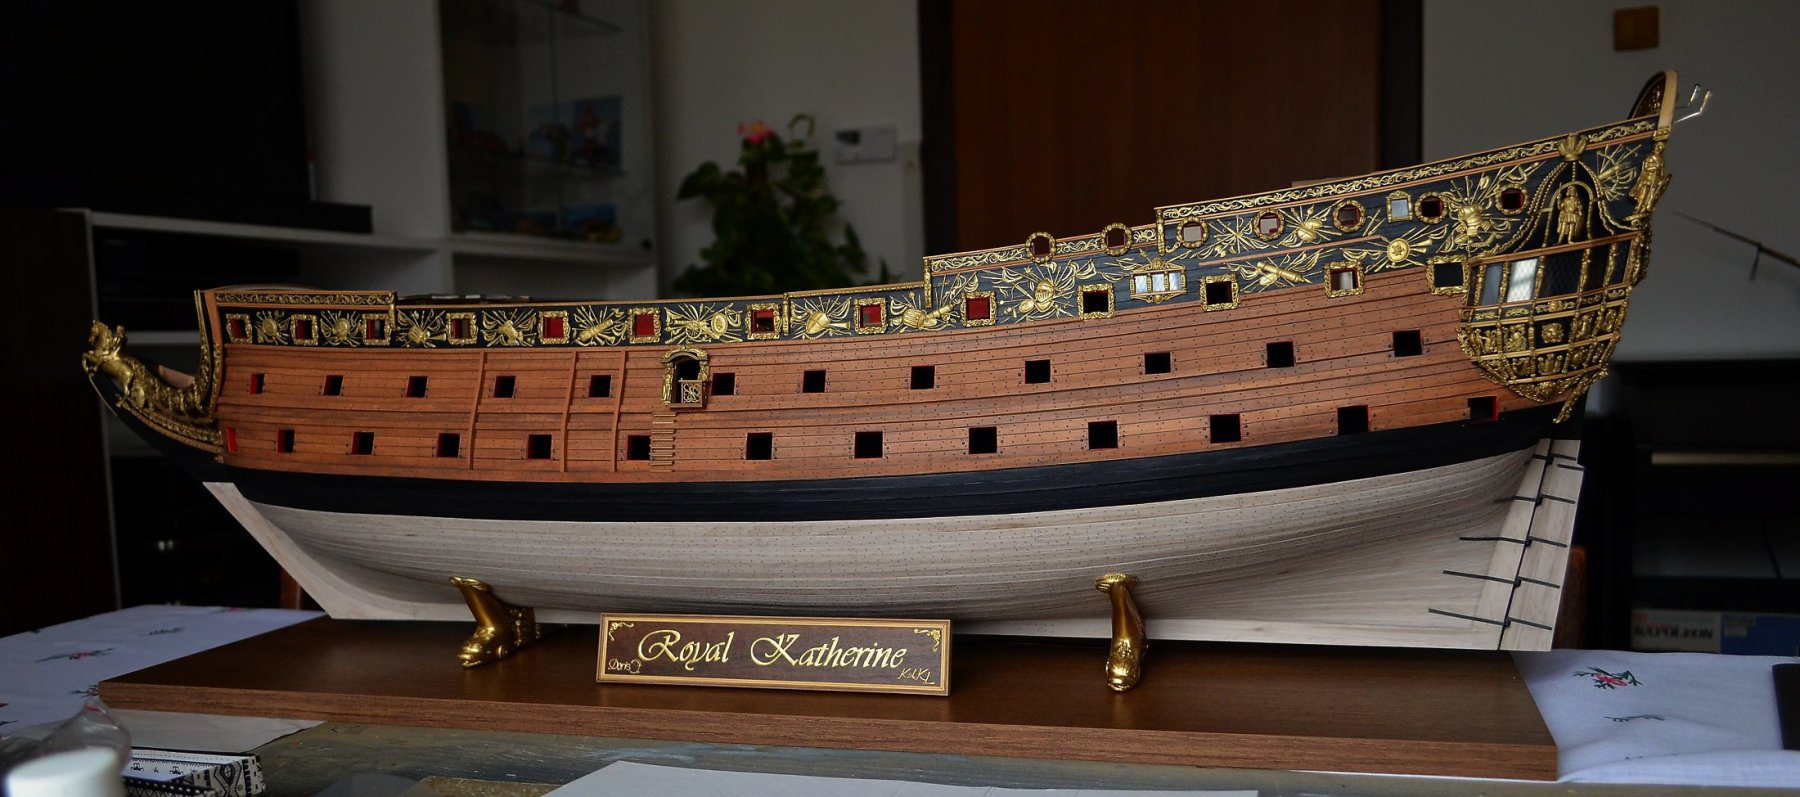
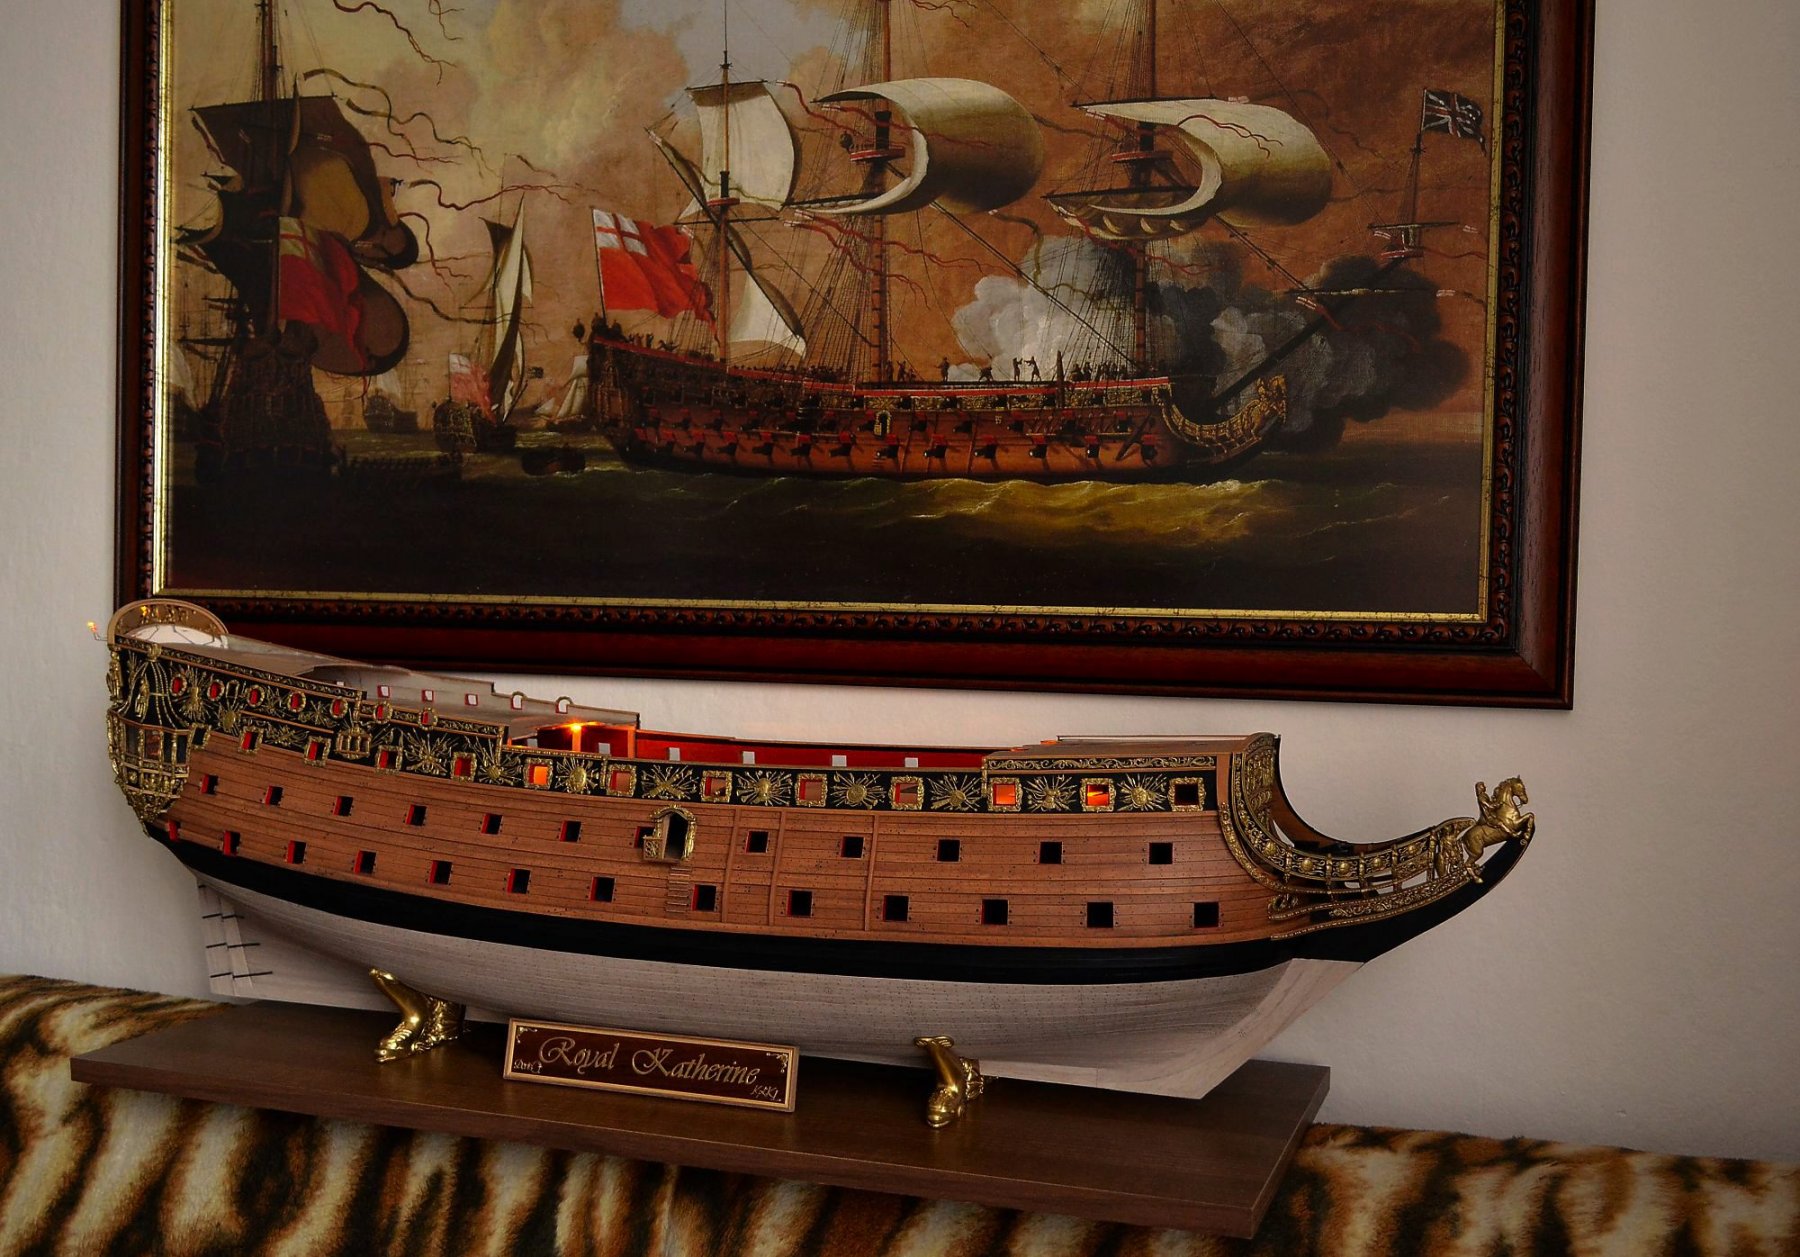
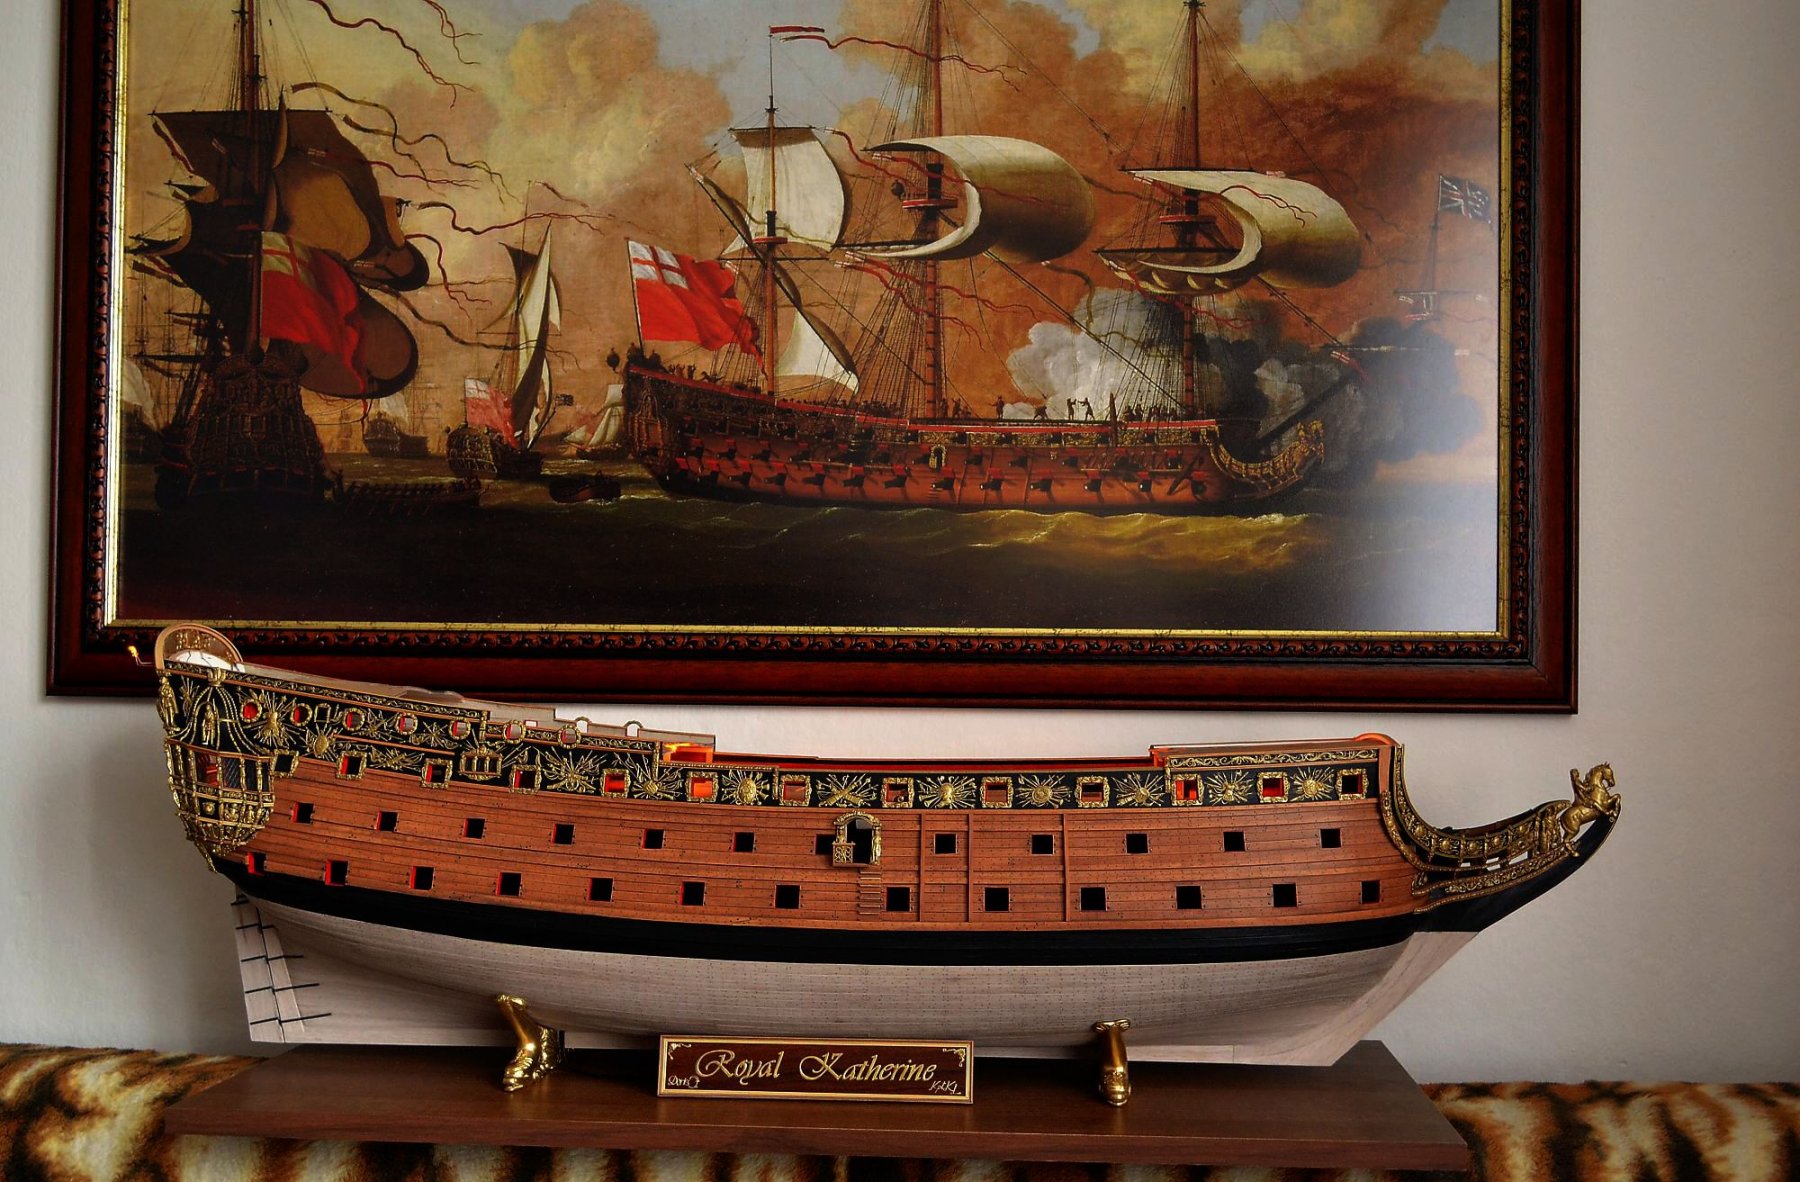
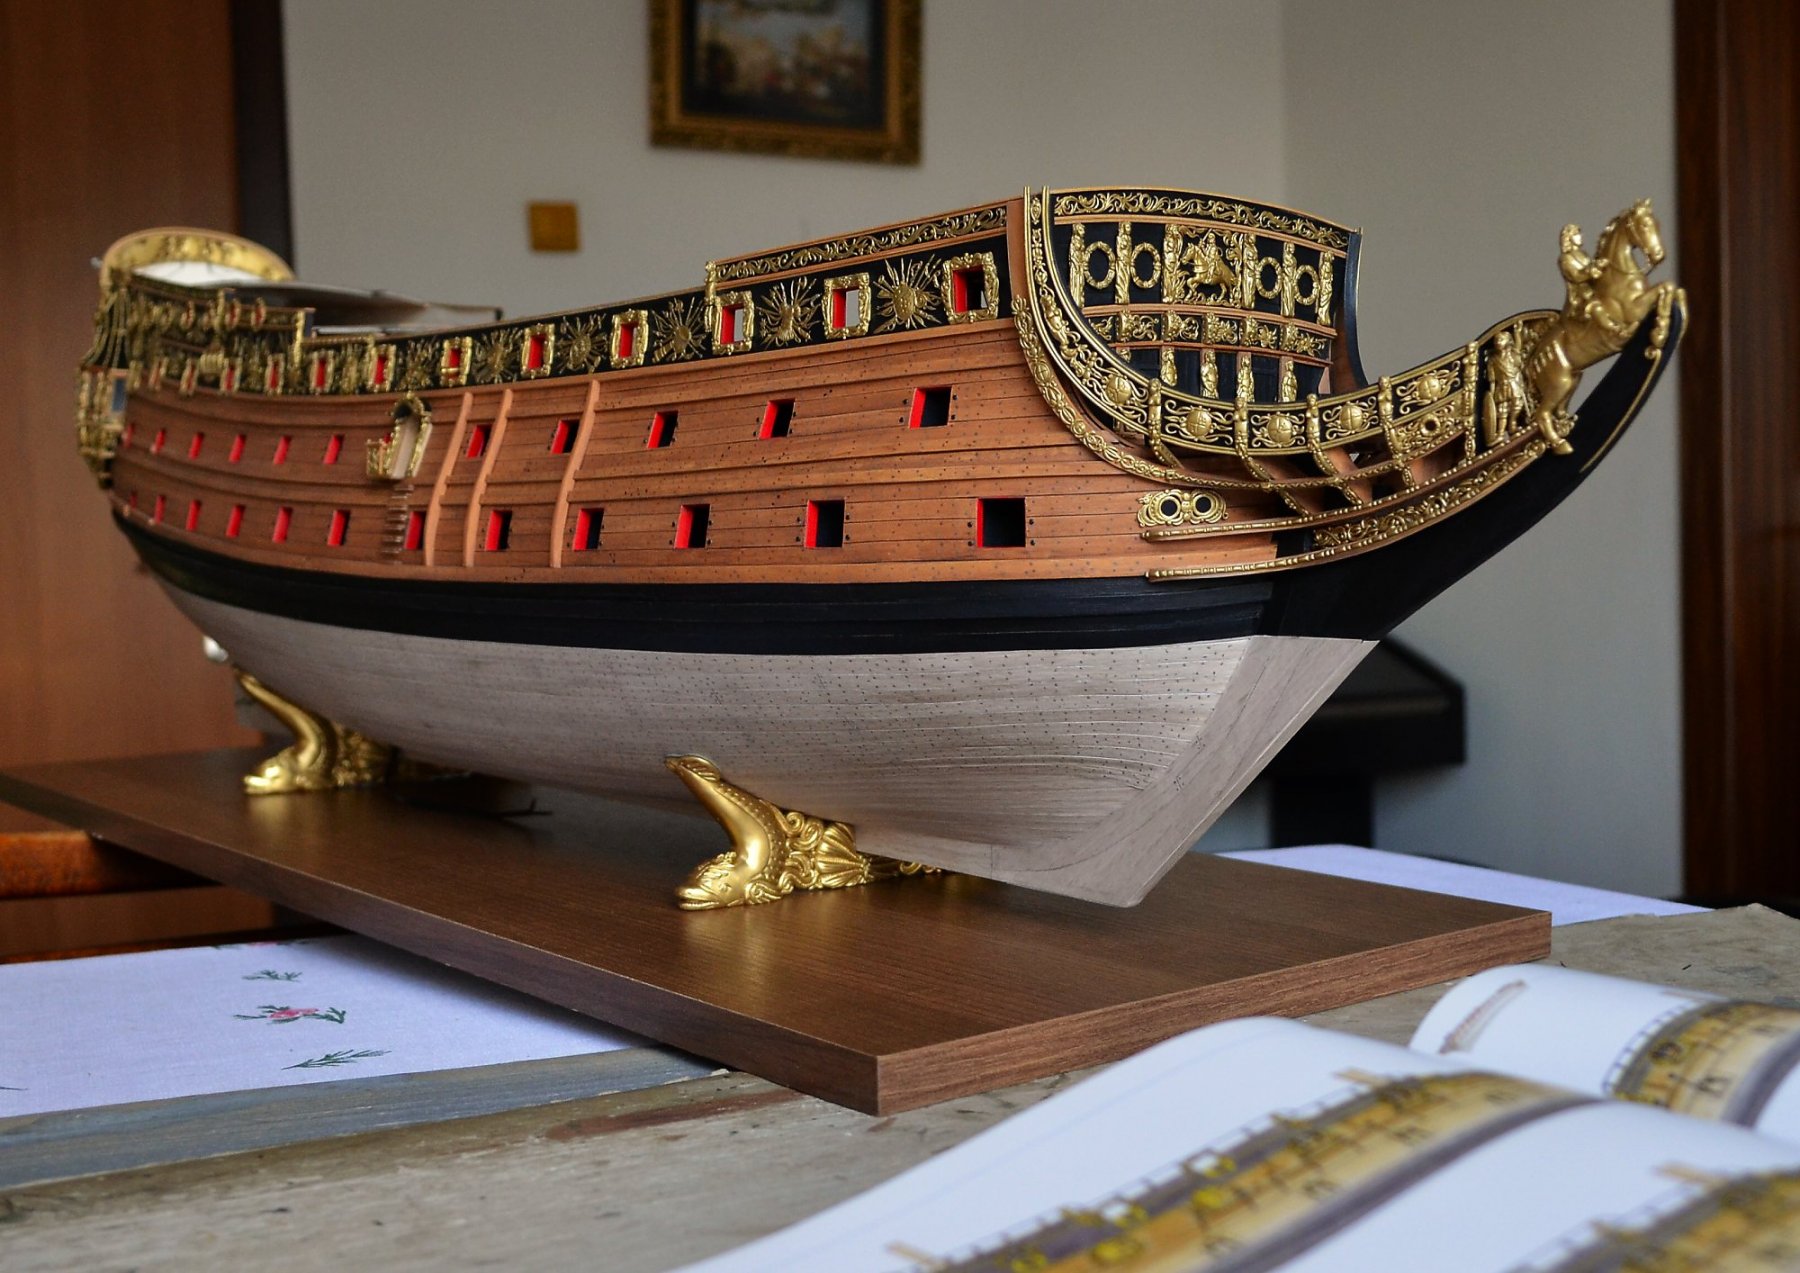
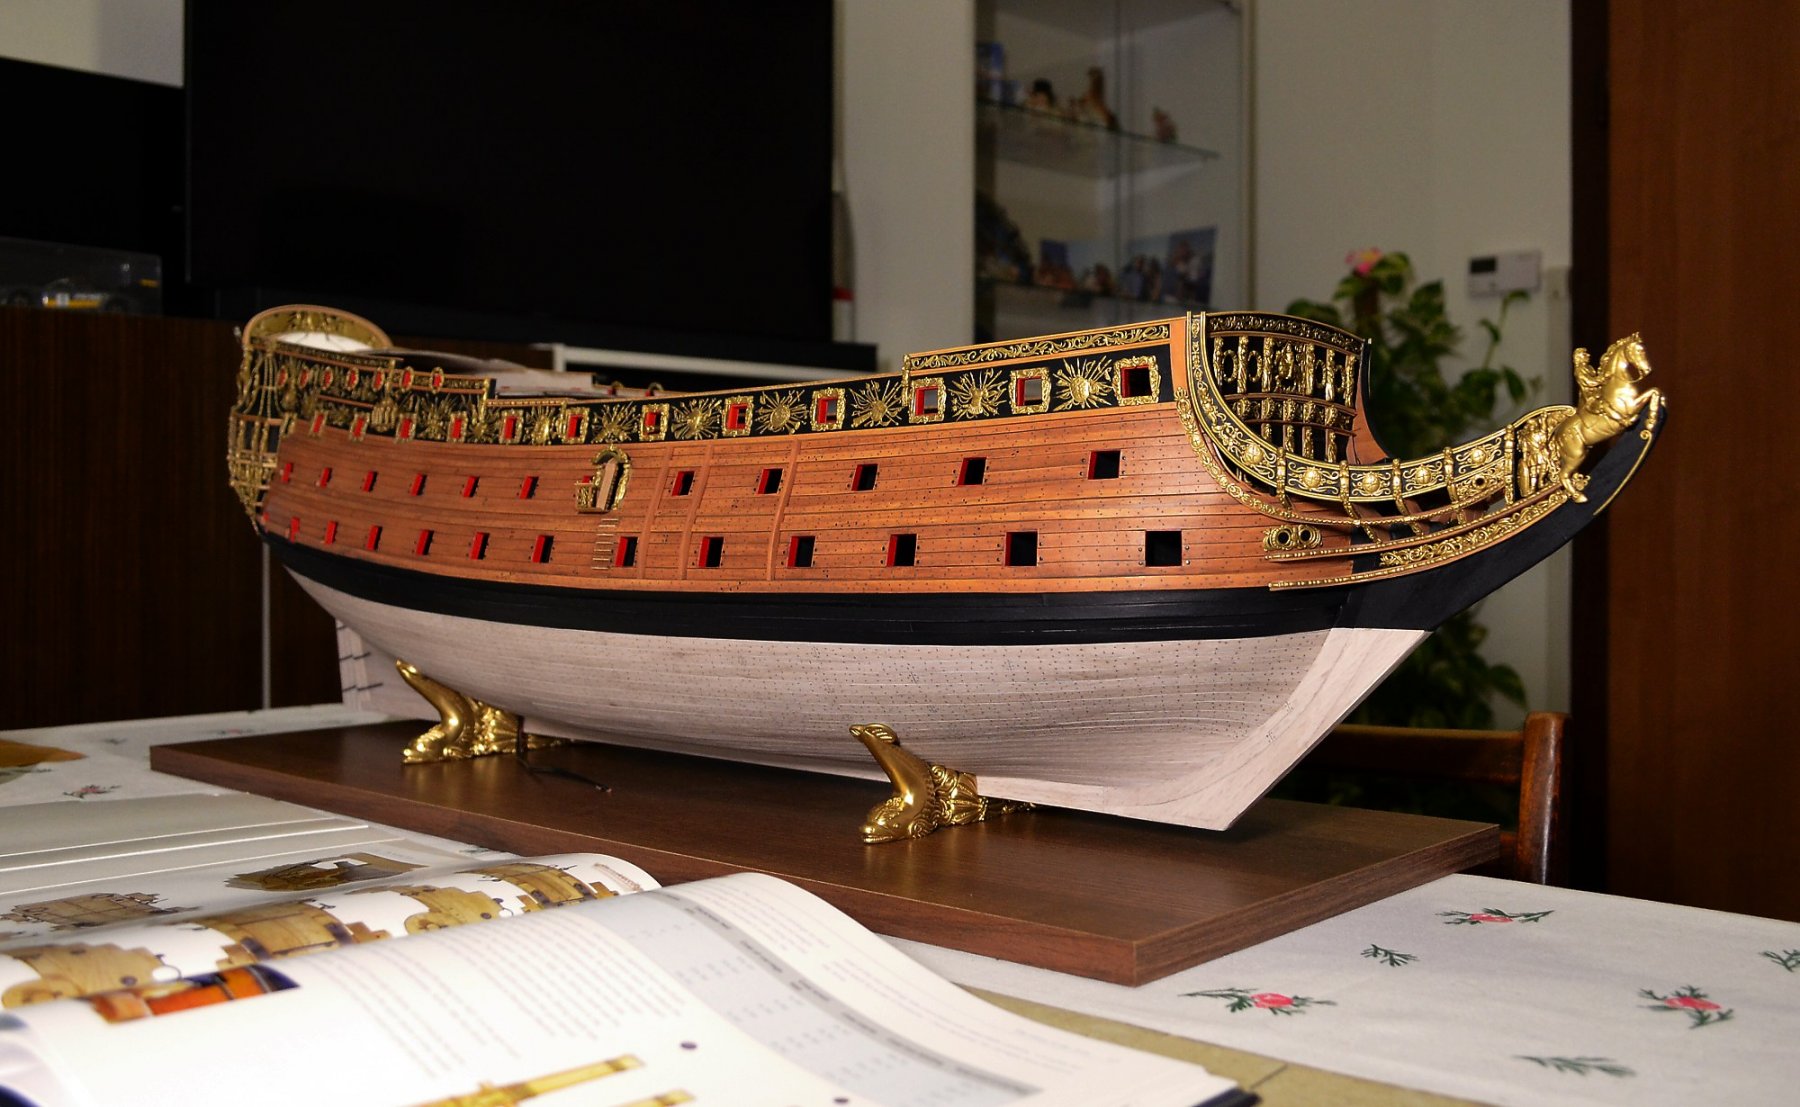
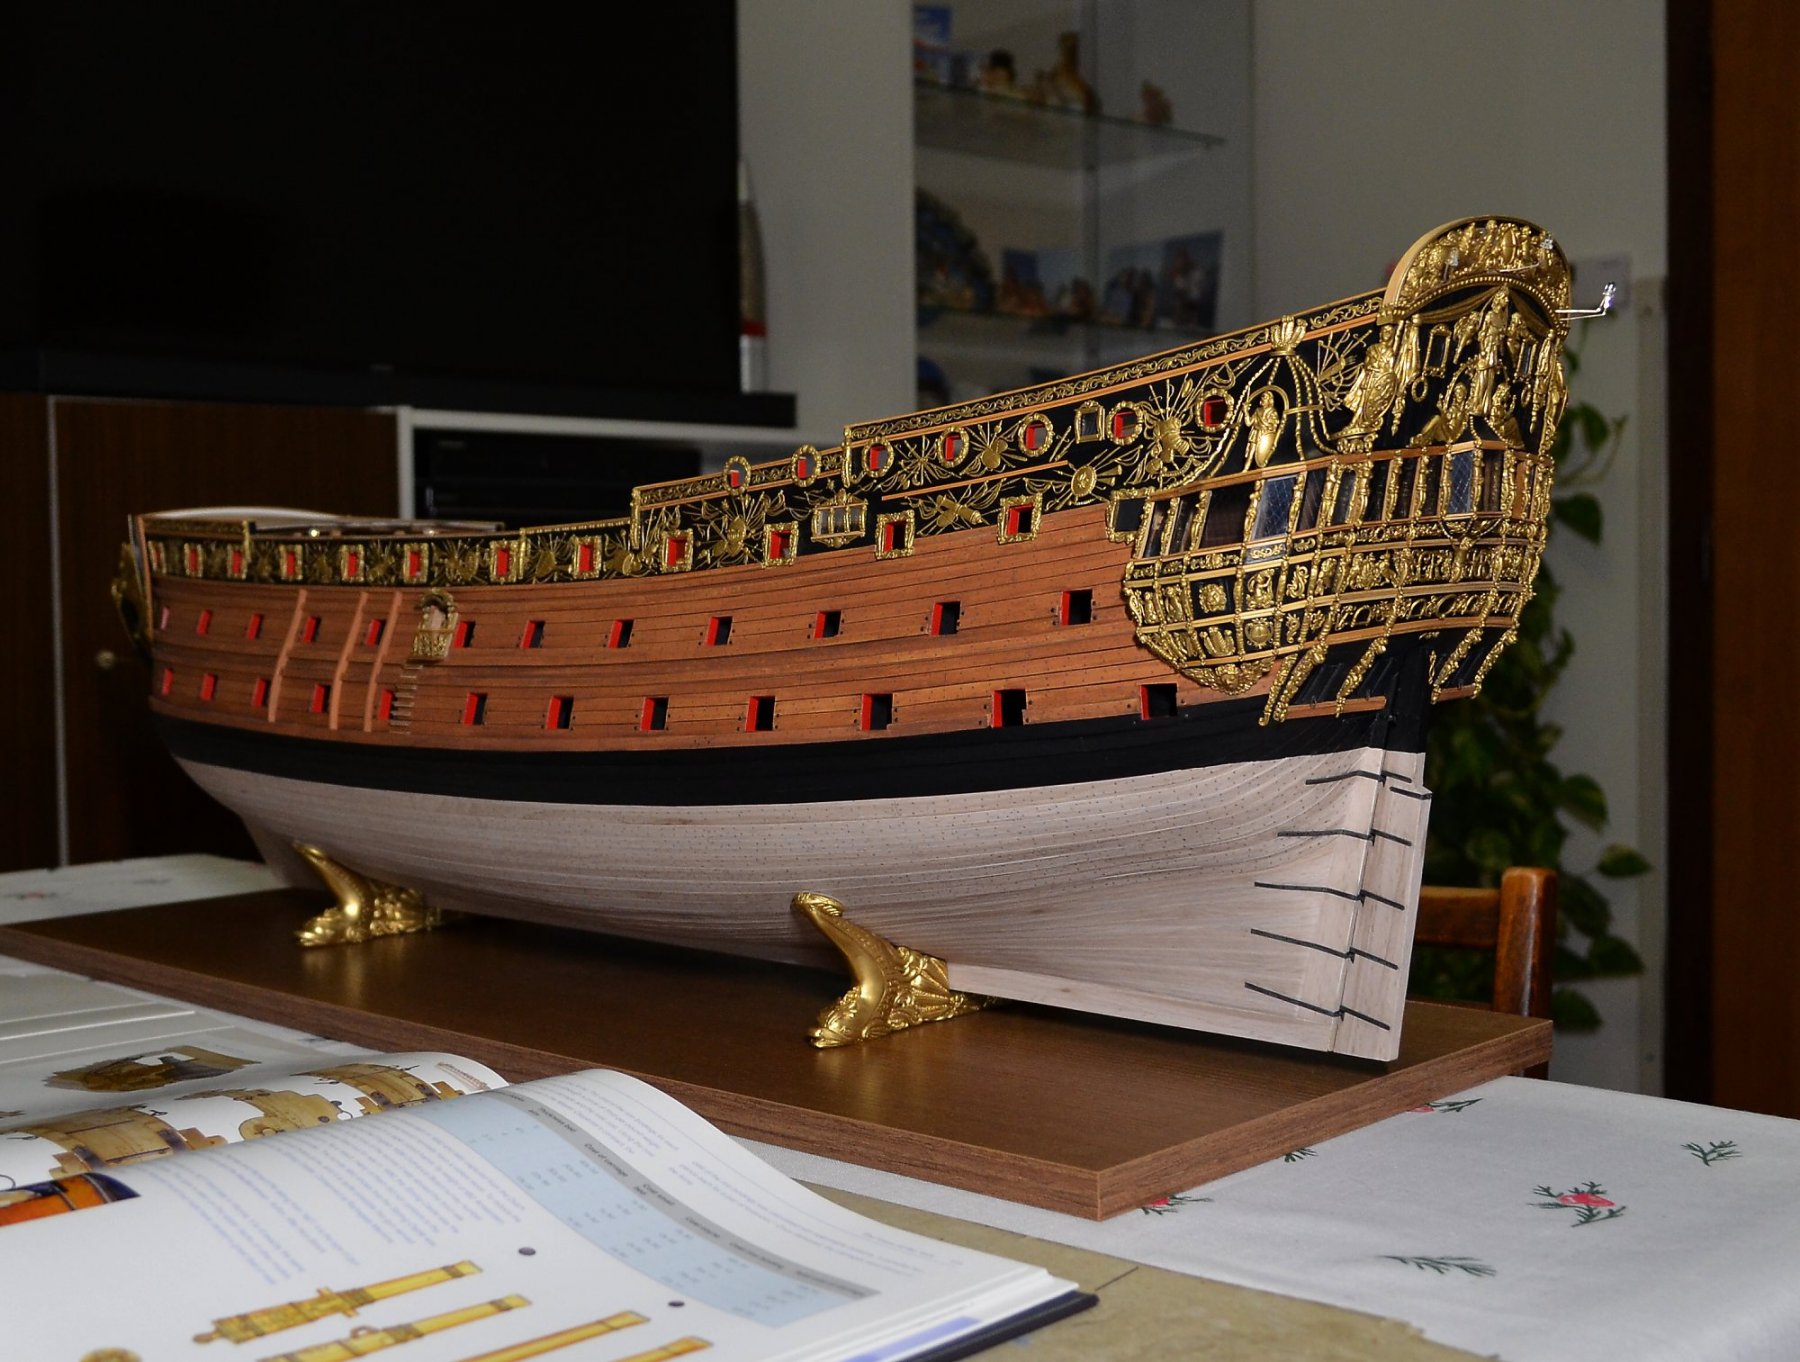
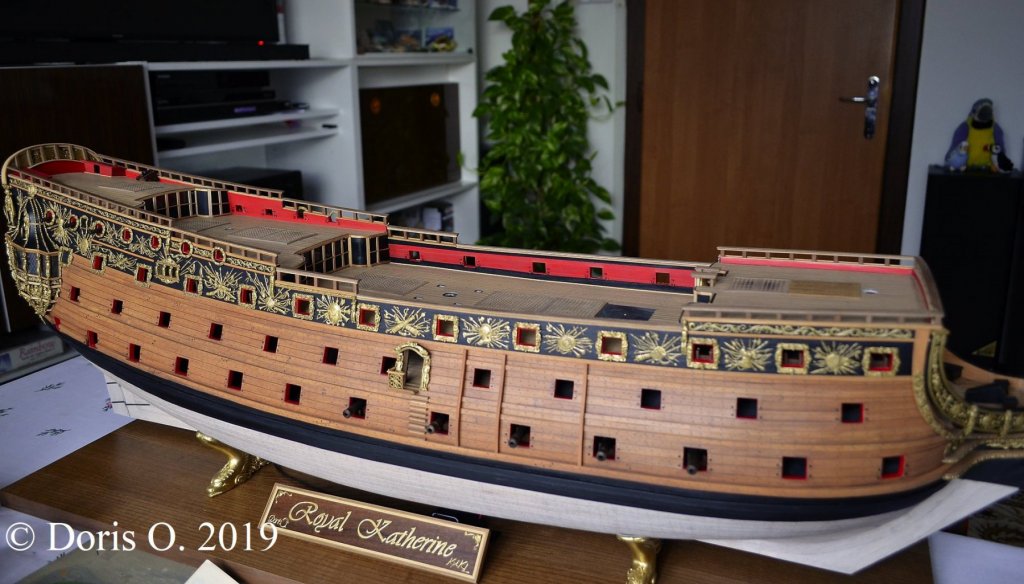
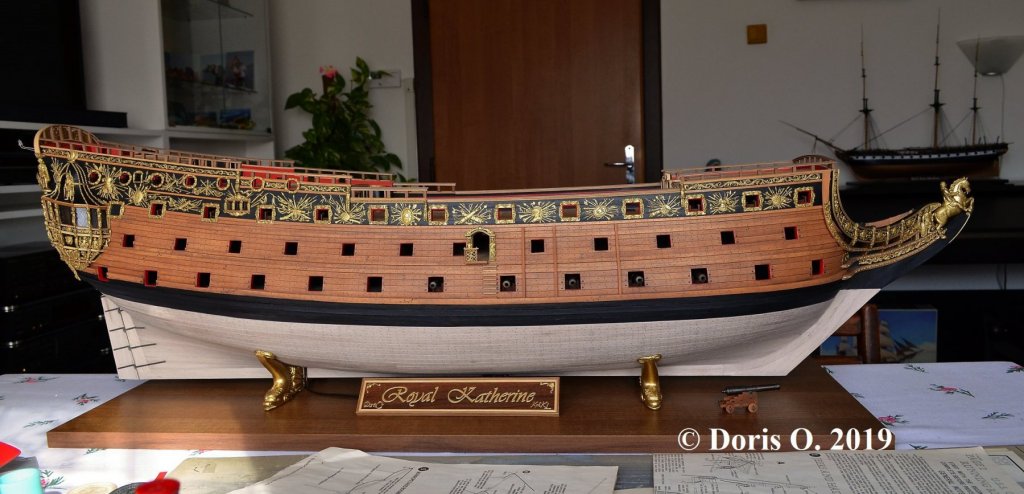
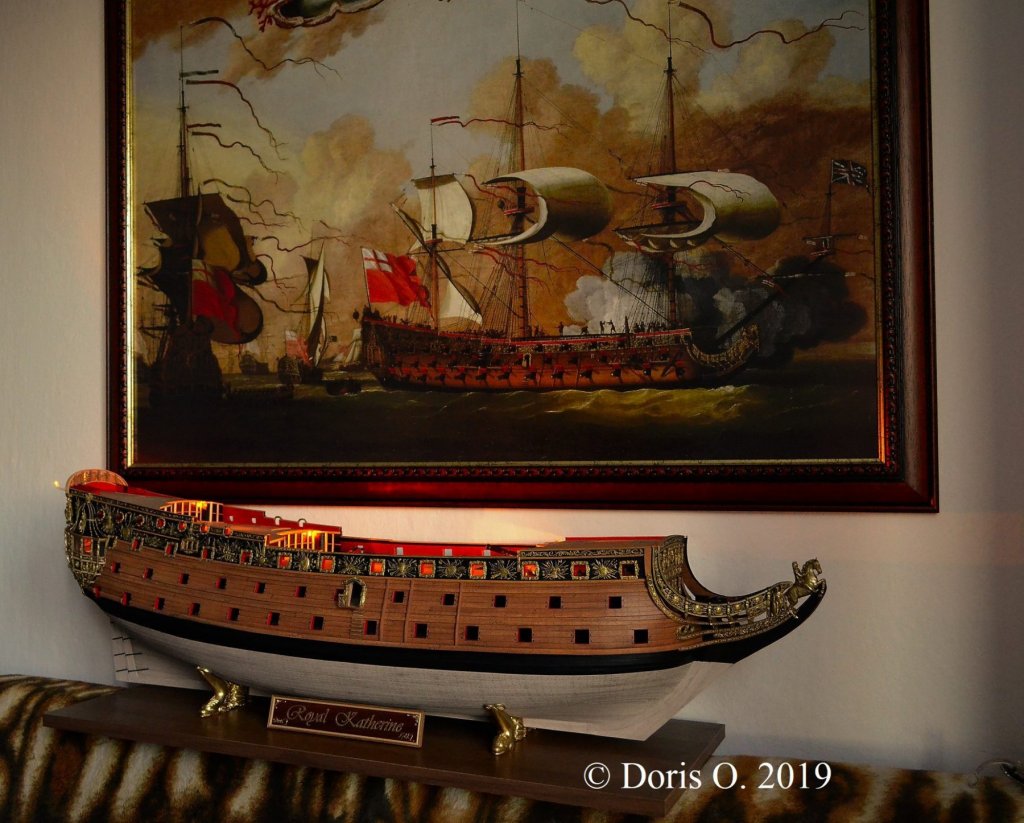
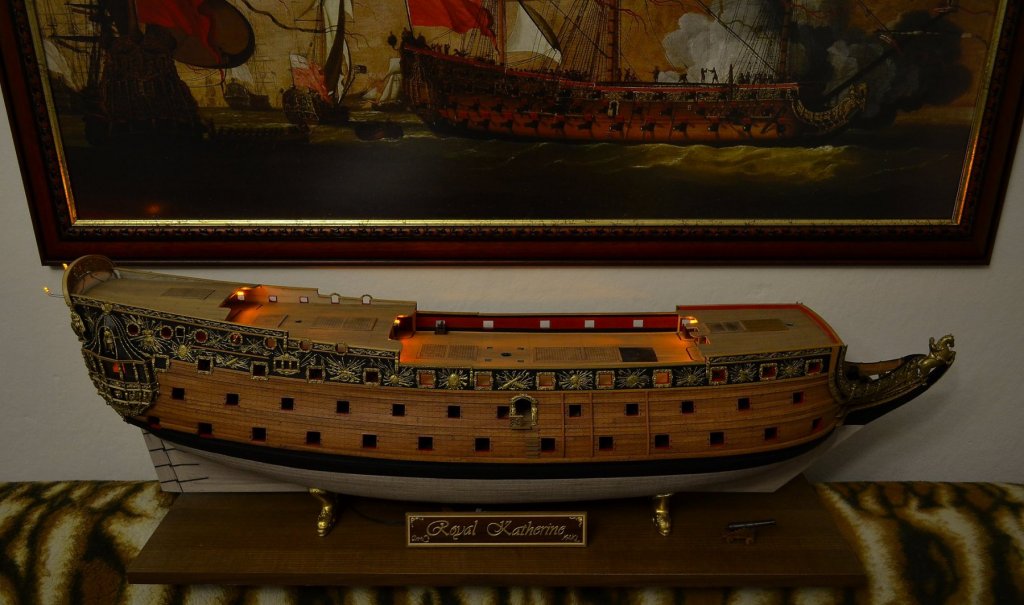
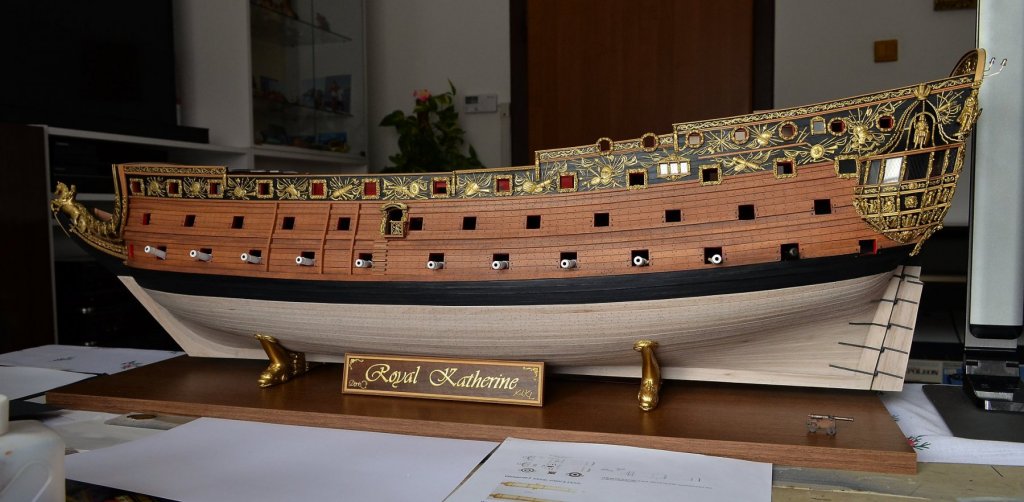
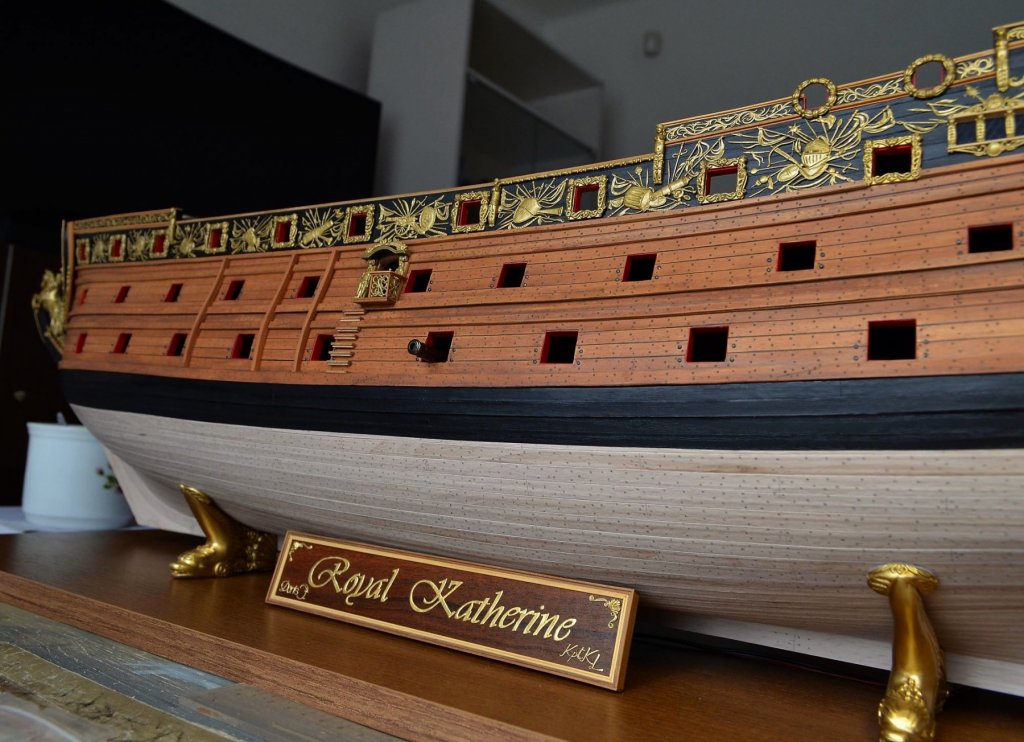
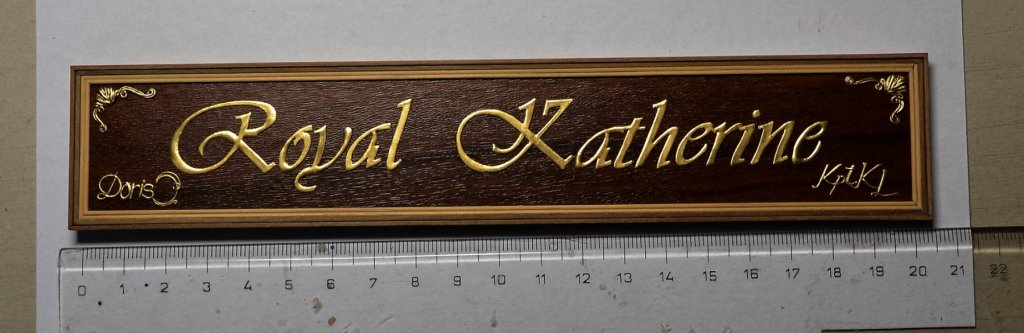
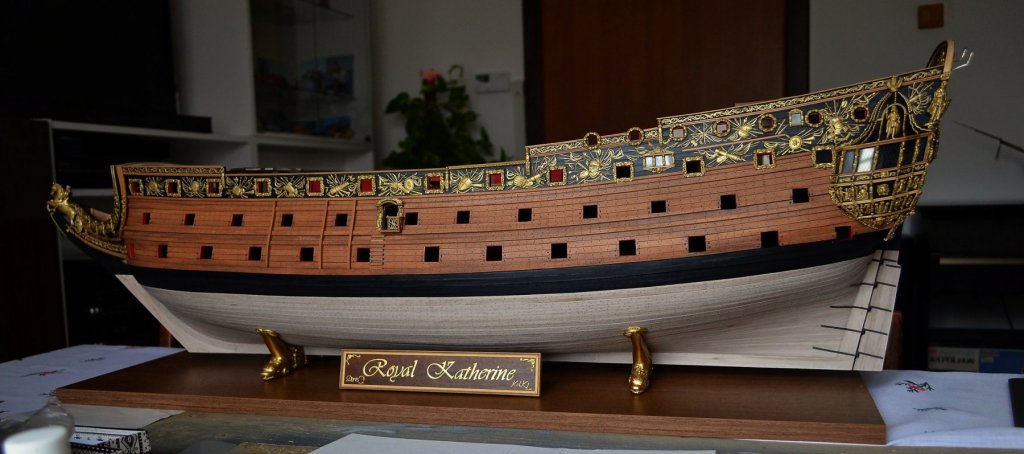
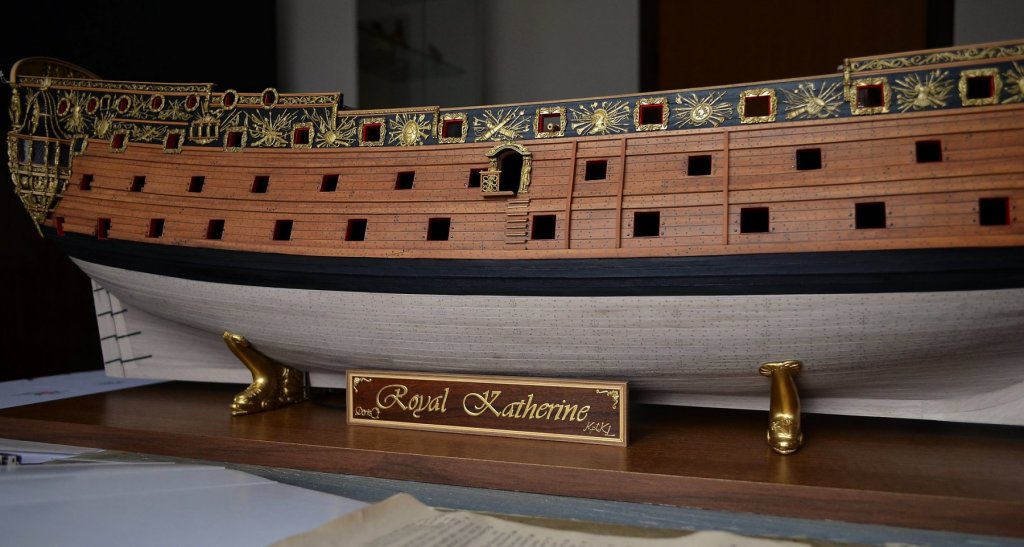
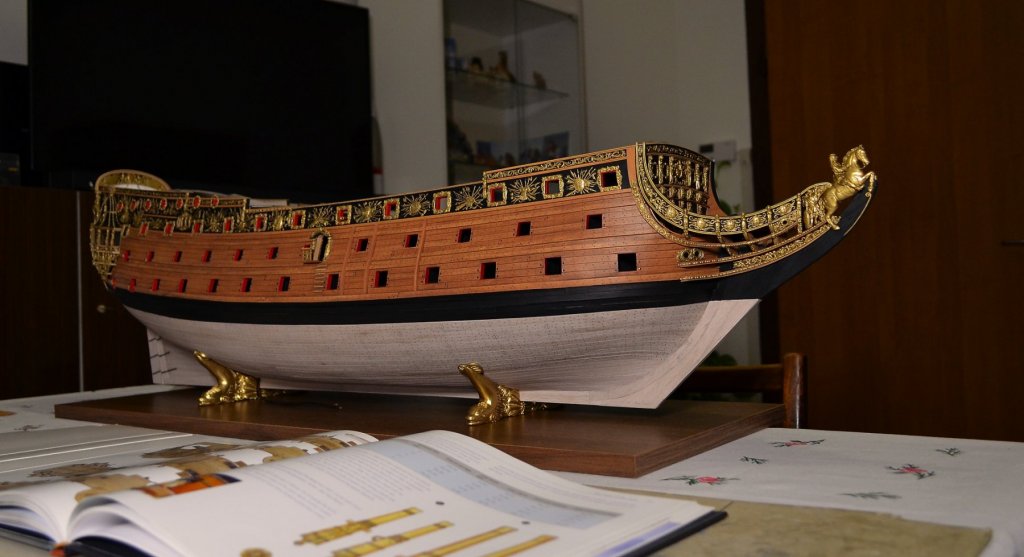
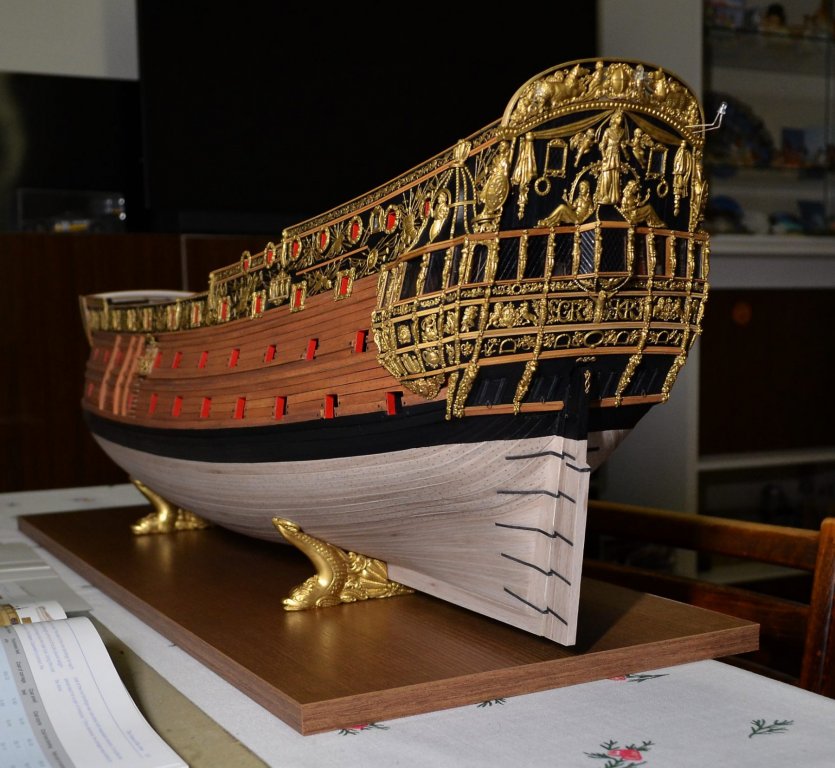
And here are other photos in real daylight colours: Best regards

- 1,035 replies
-
- 39
-
-
- royal katherine
- ship of the line
- (and 1 more)
-
HMS ROYAL KATHERINE 1664 by Doris - 1/55 - CARD
DORIS replied to DORIS's topic in - Build logs for subjects built 1501 - 1750
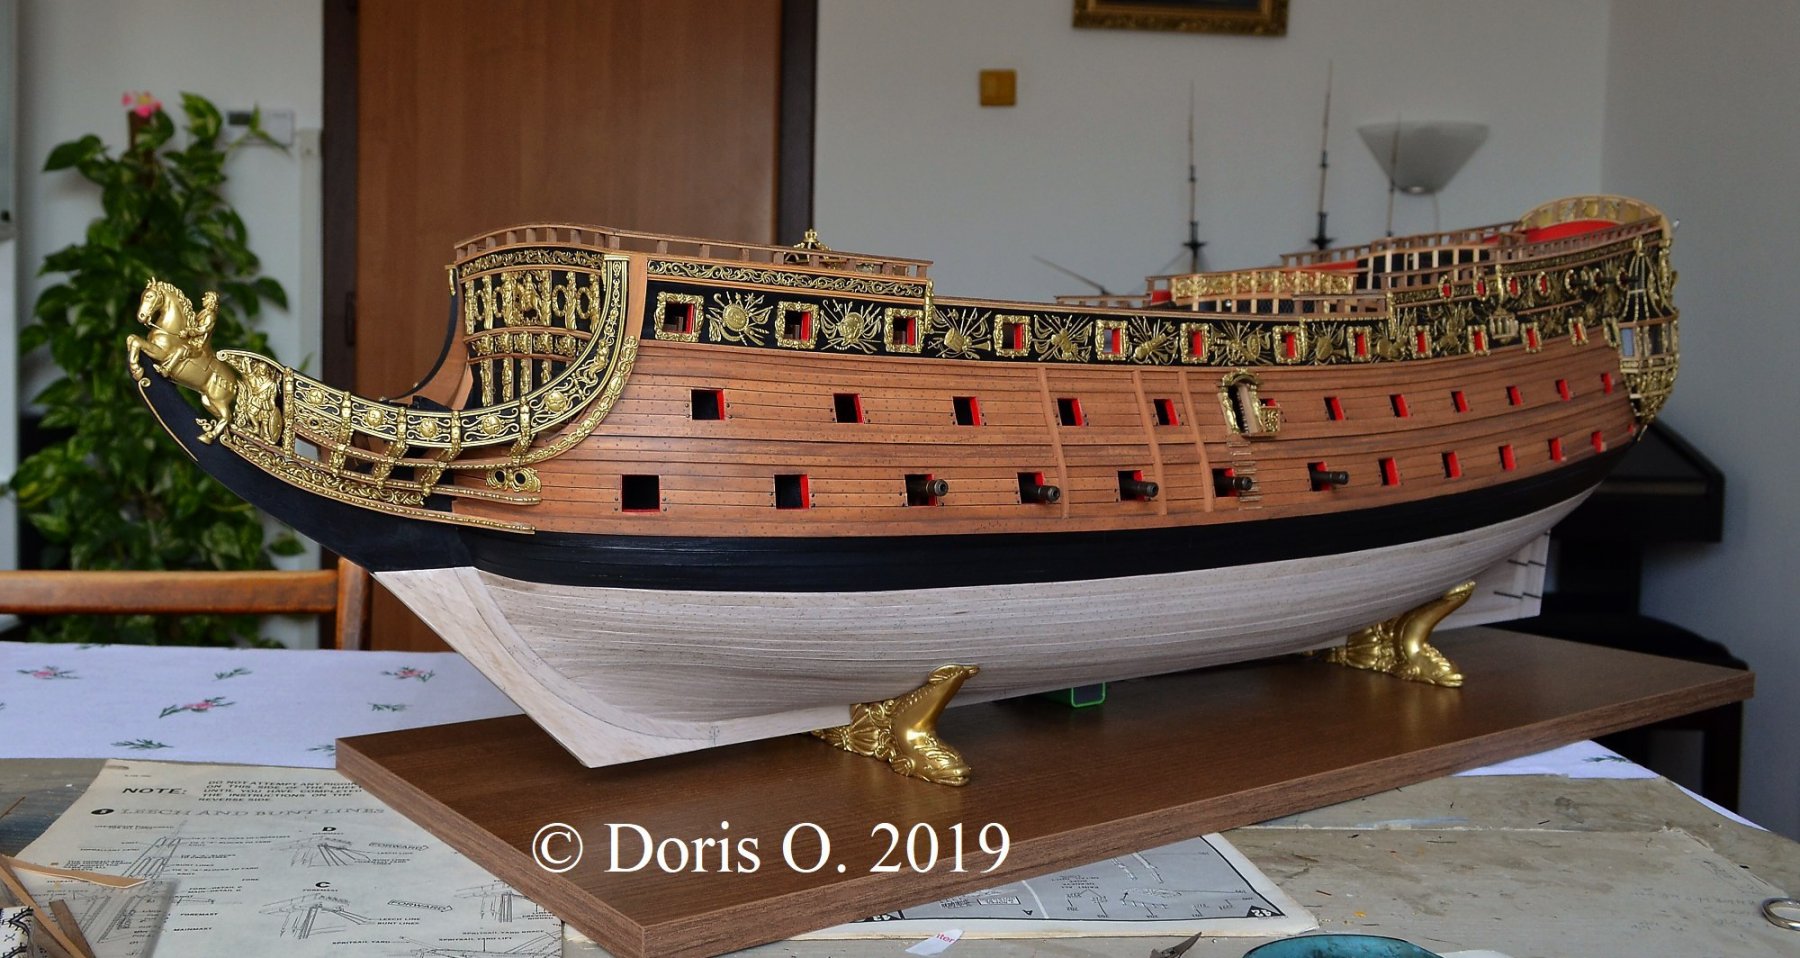
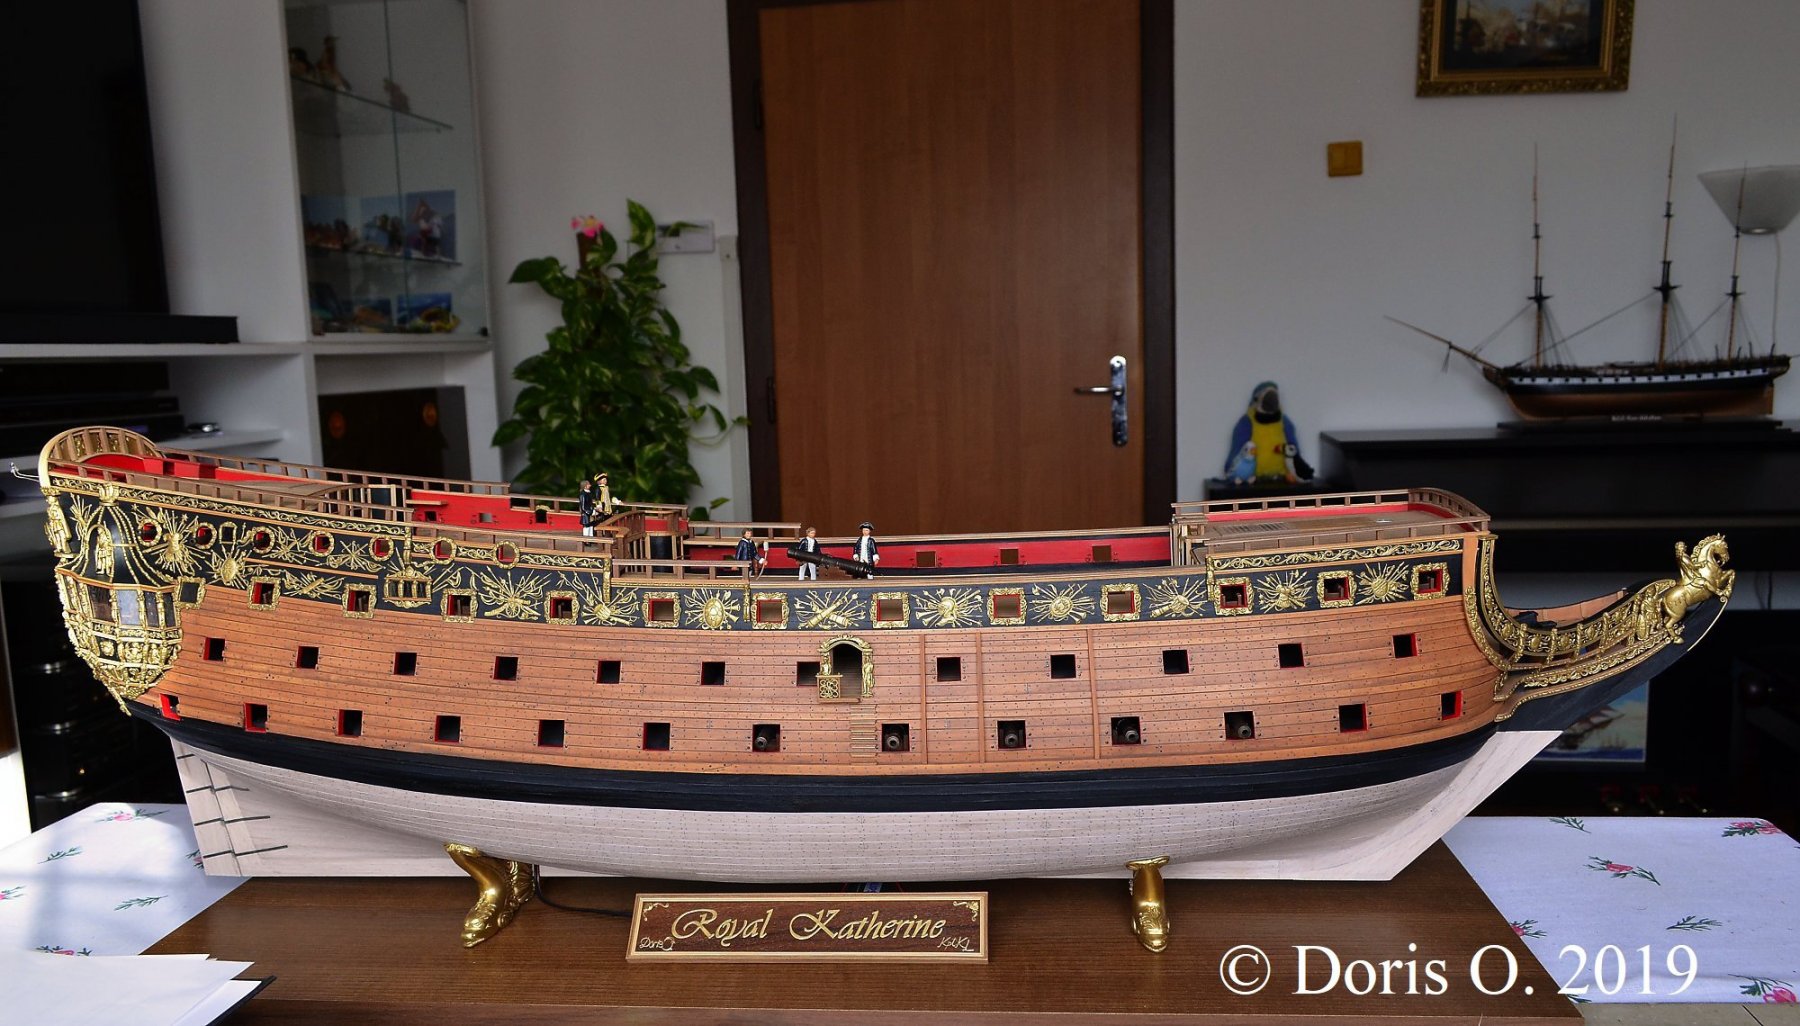
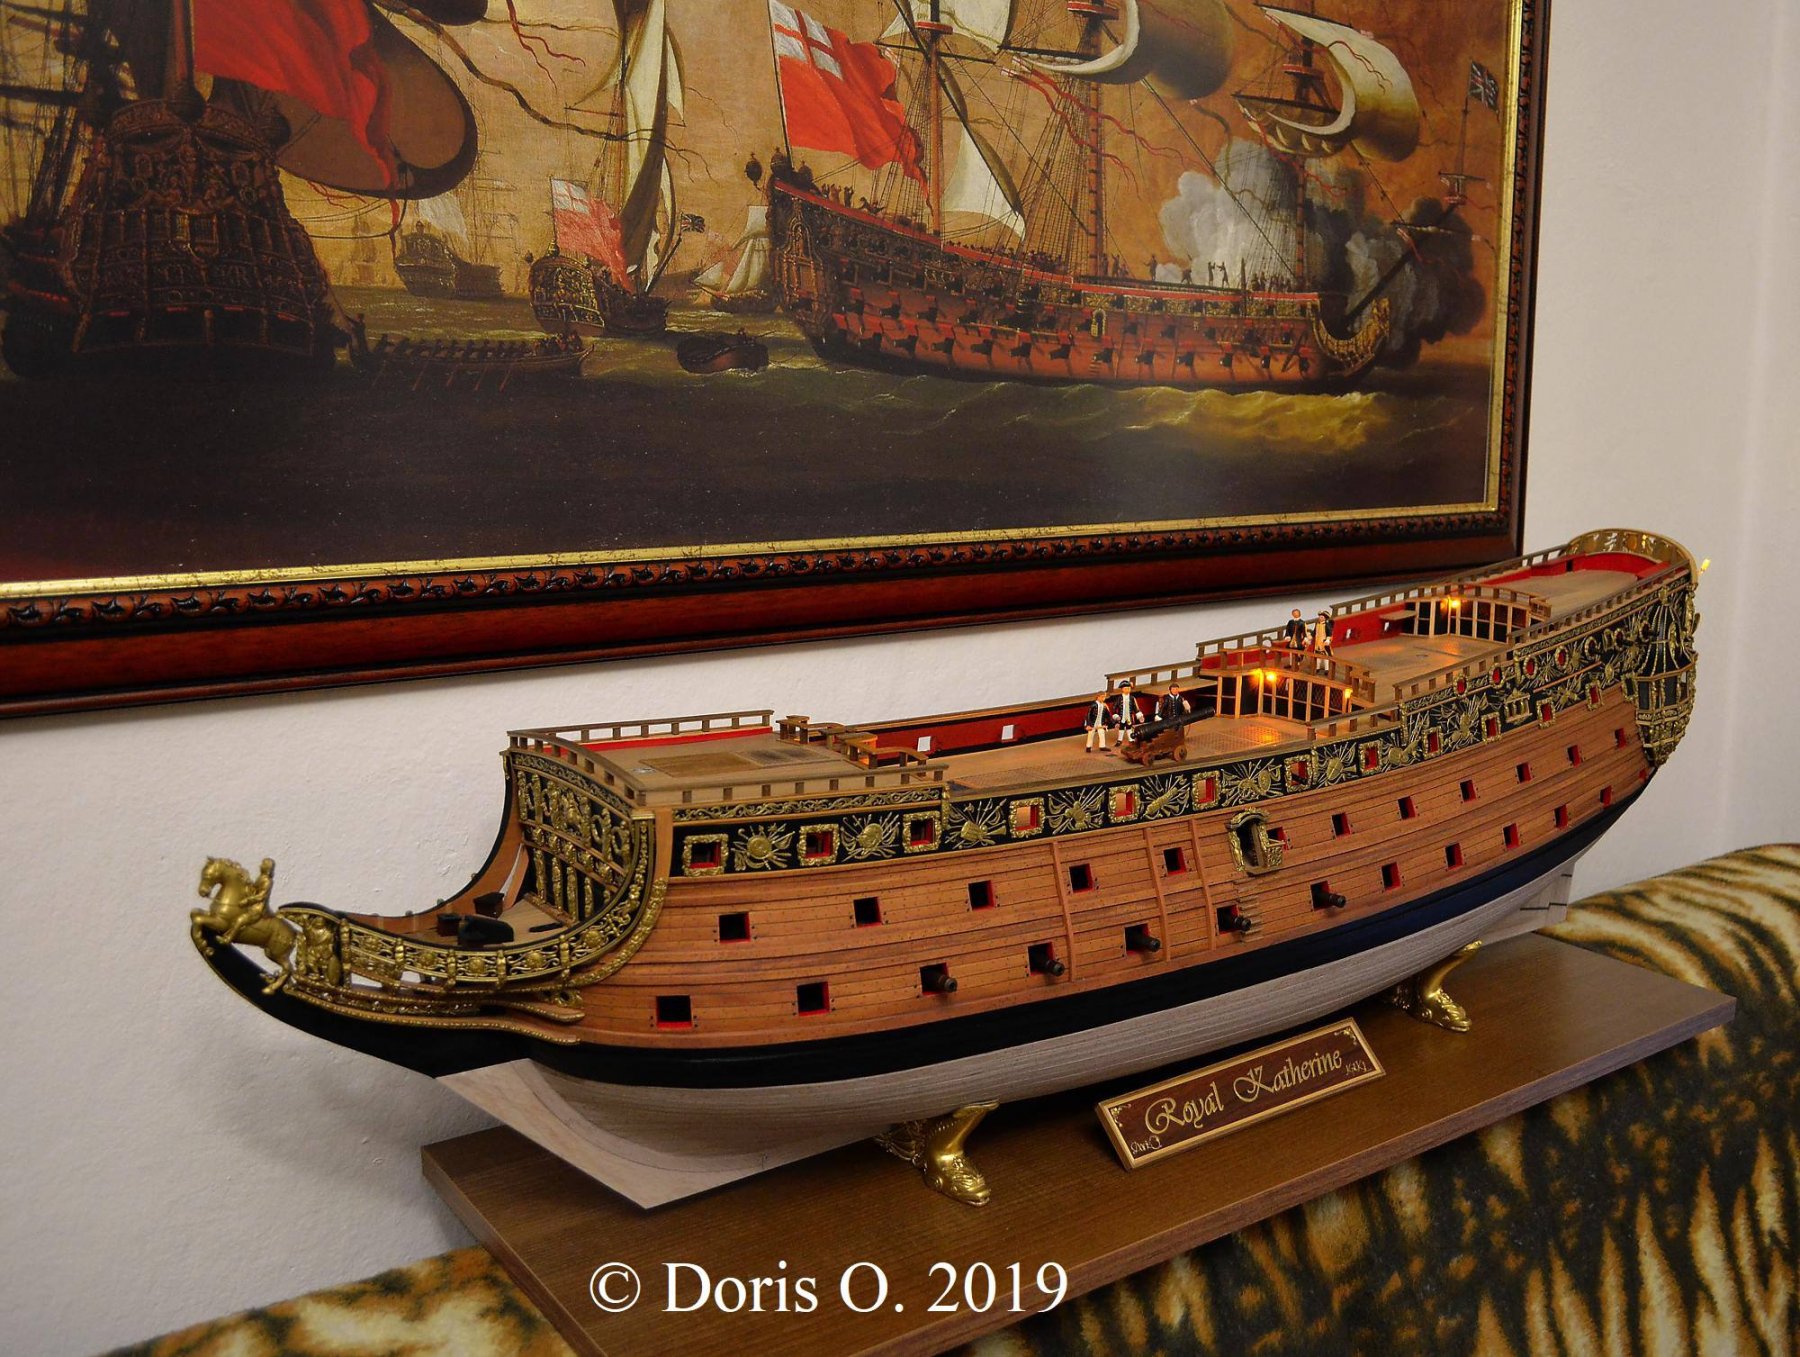
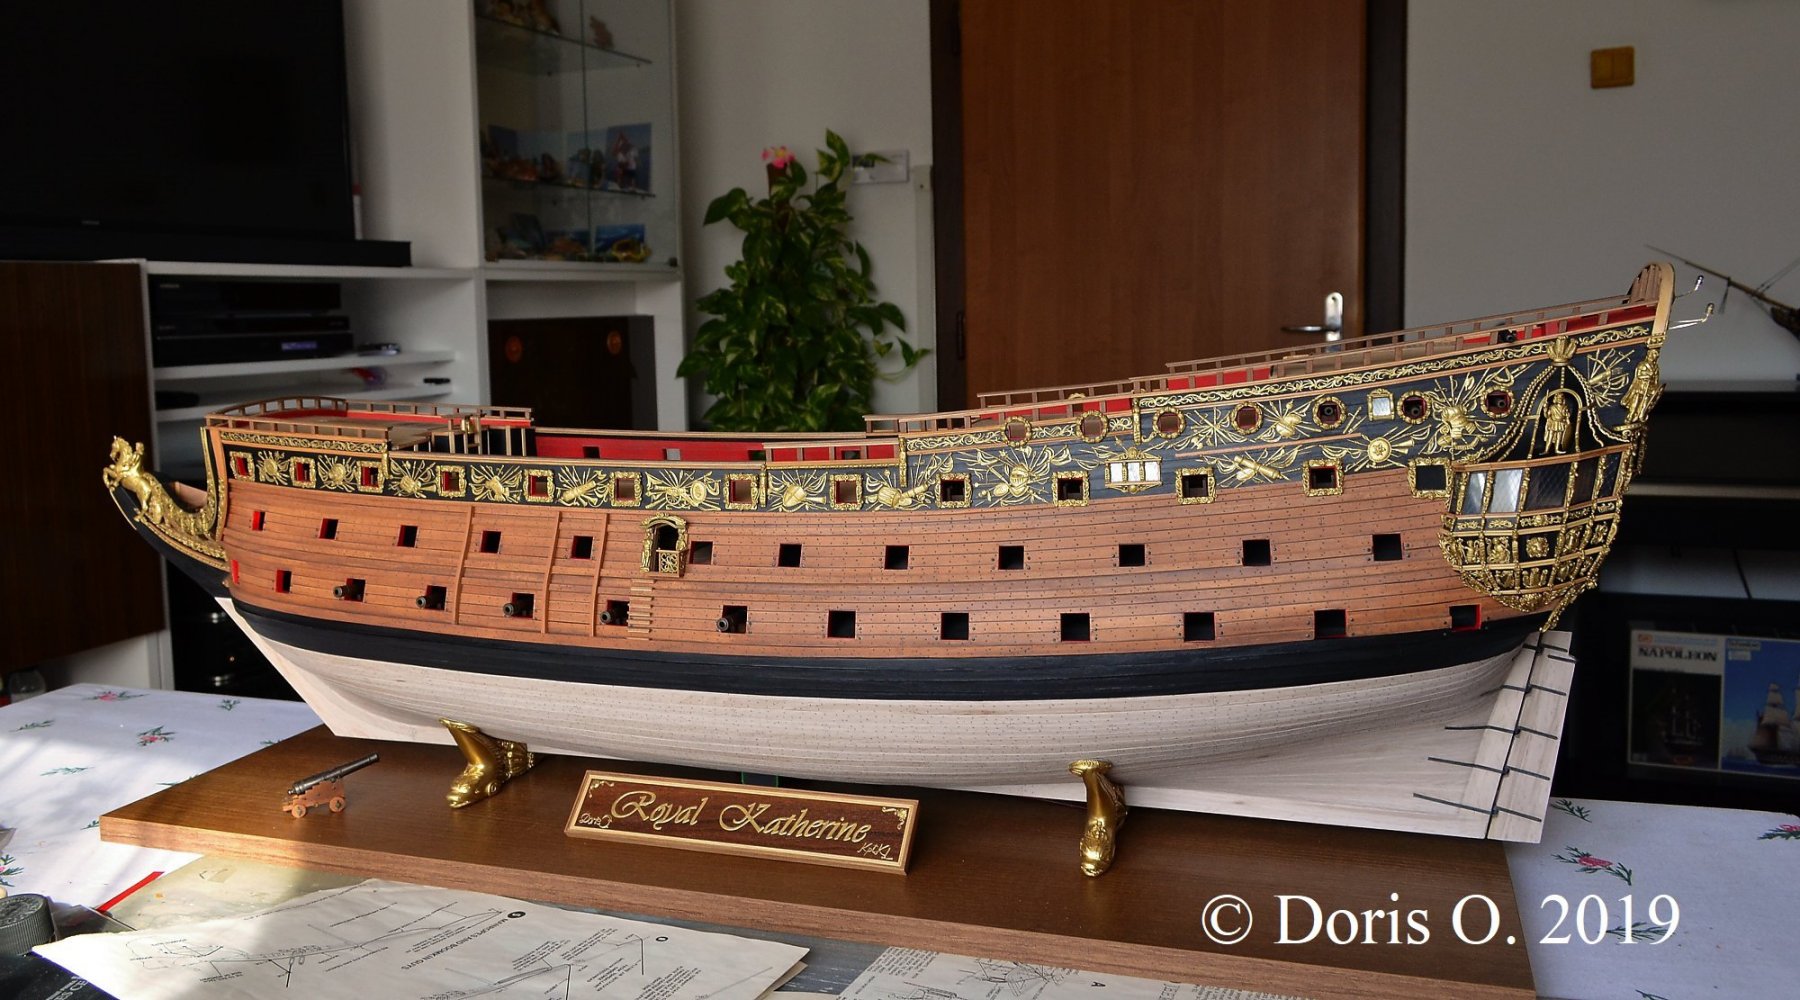
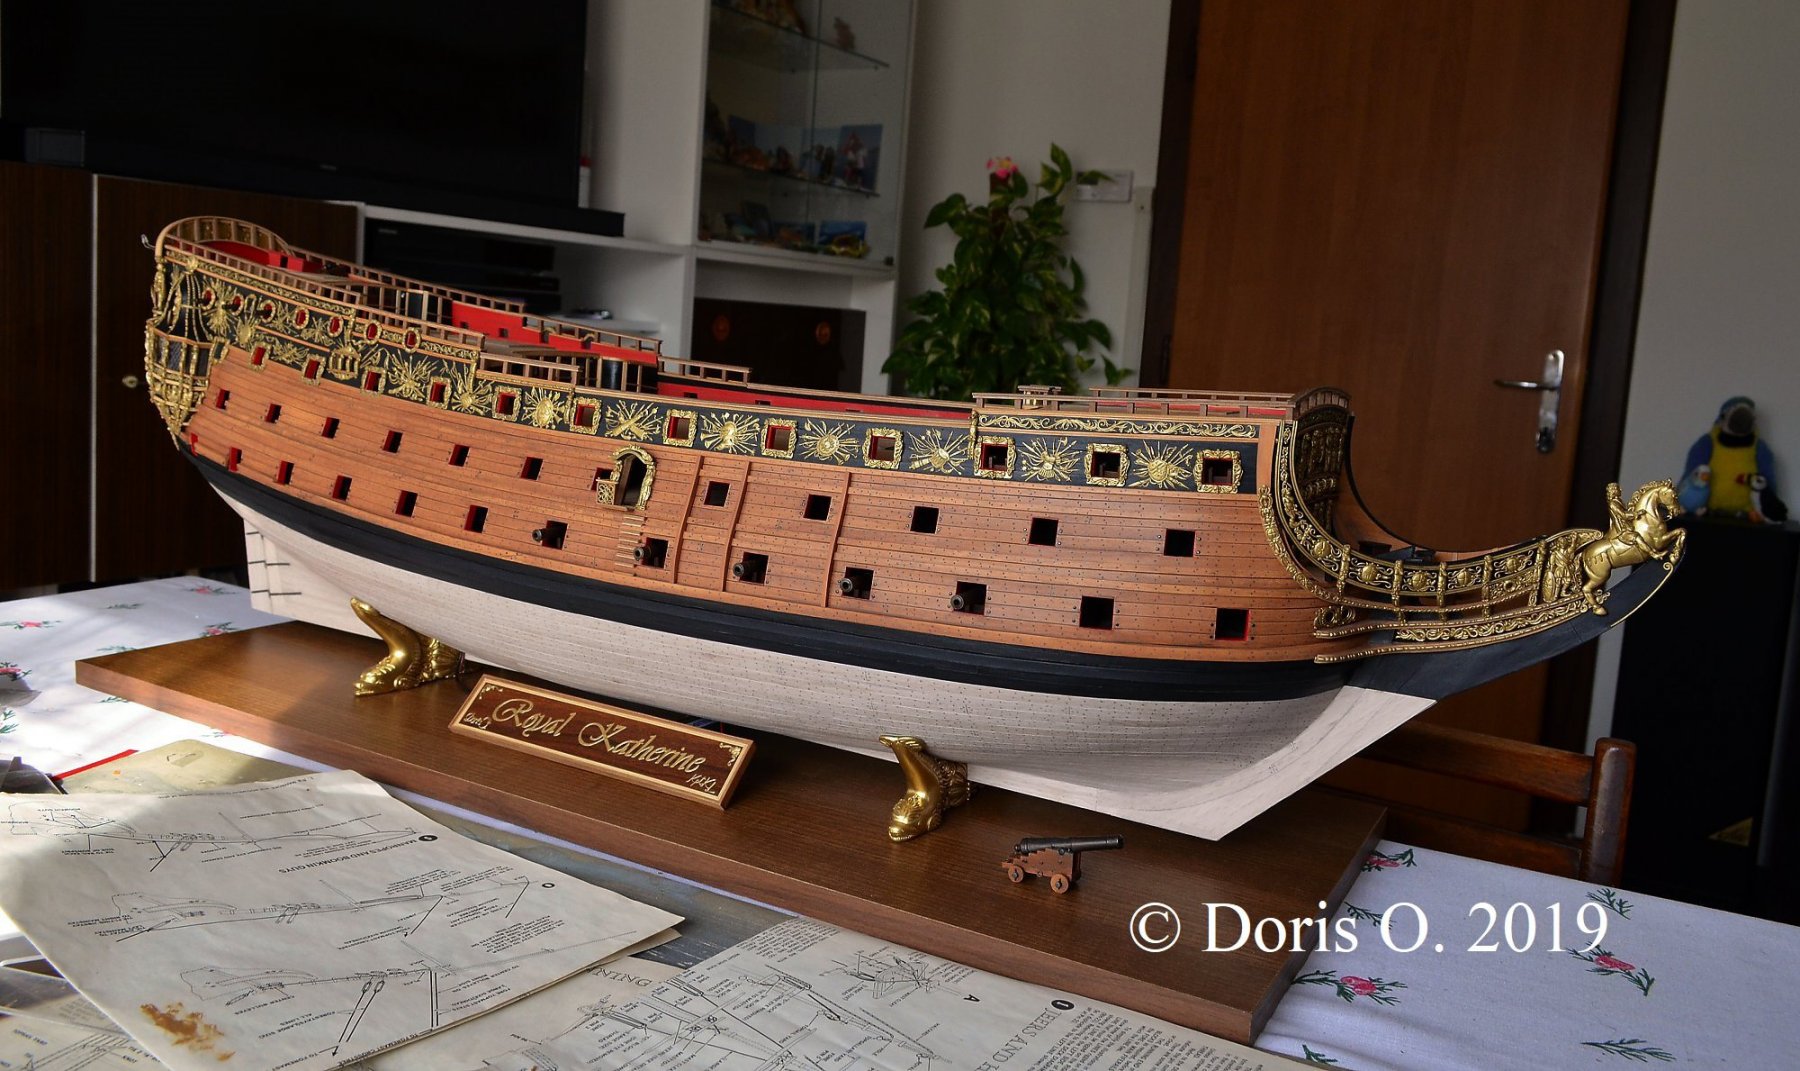
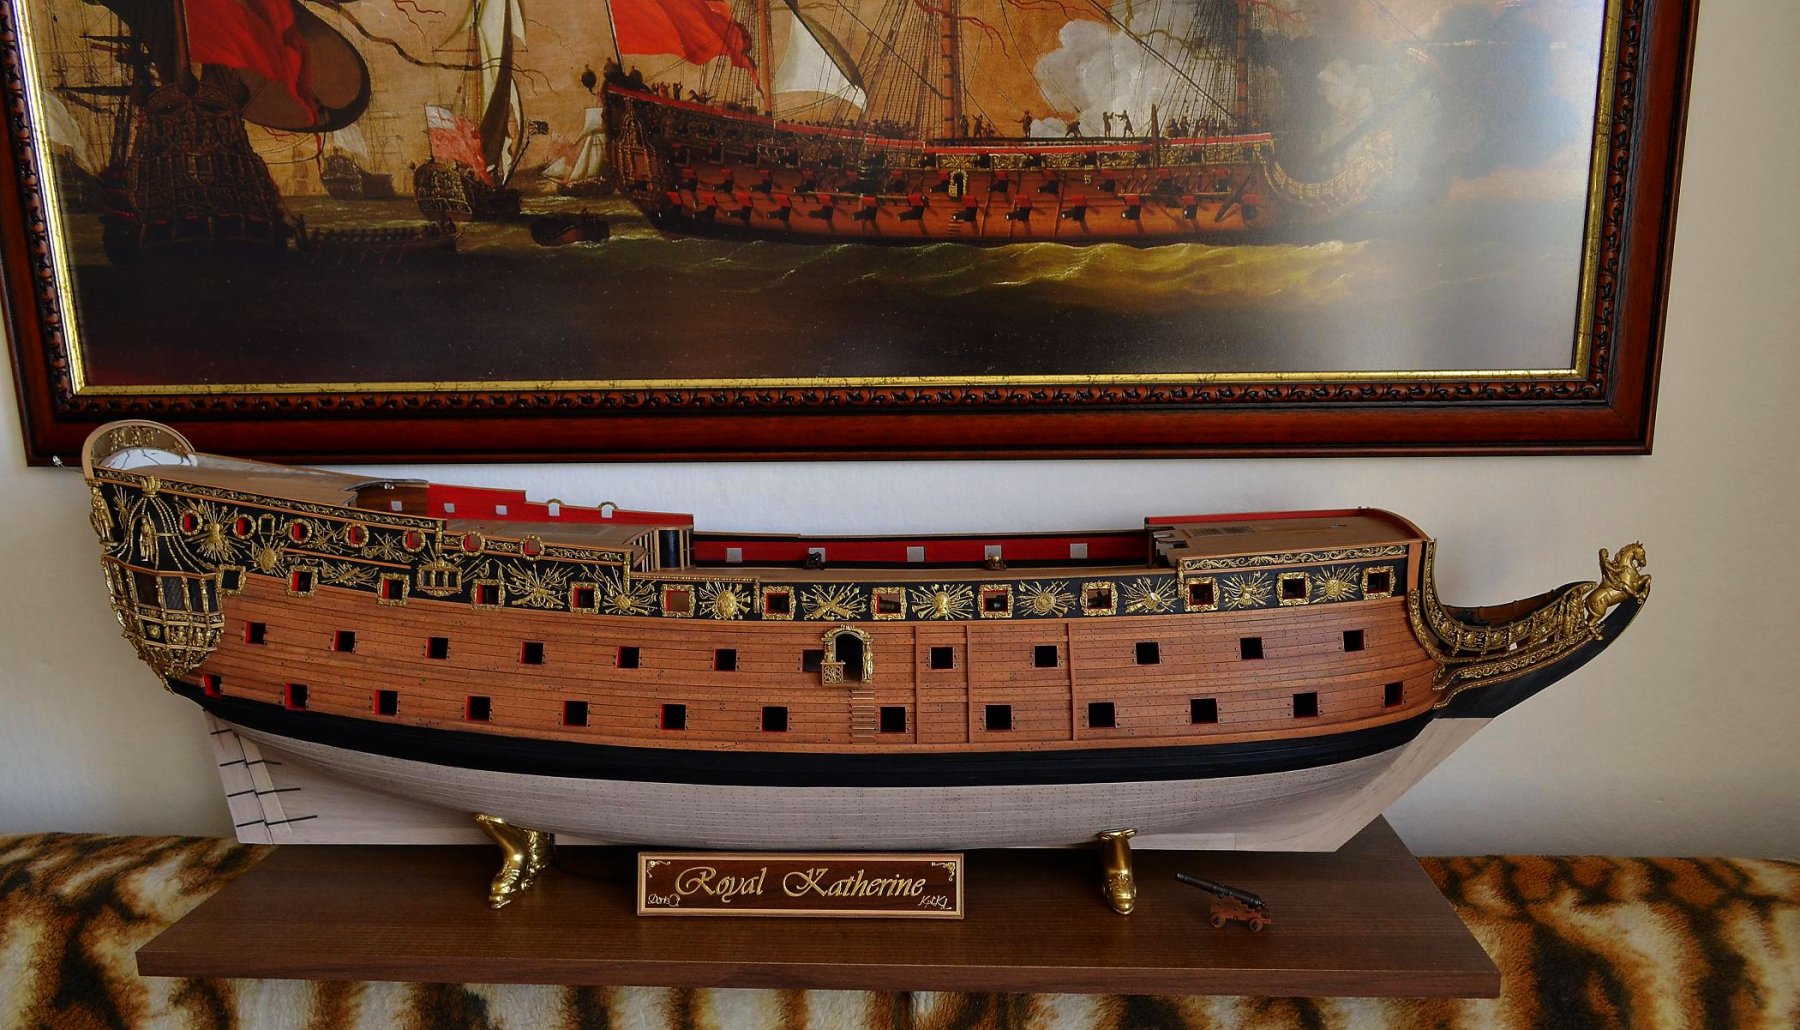
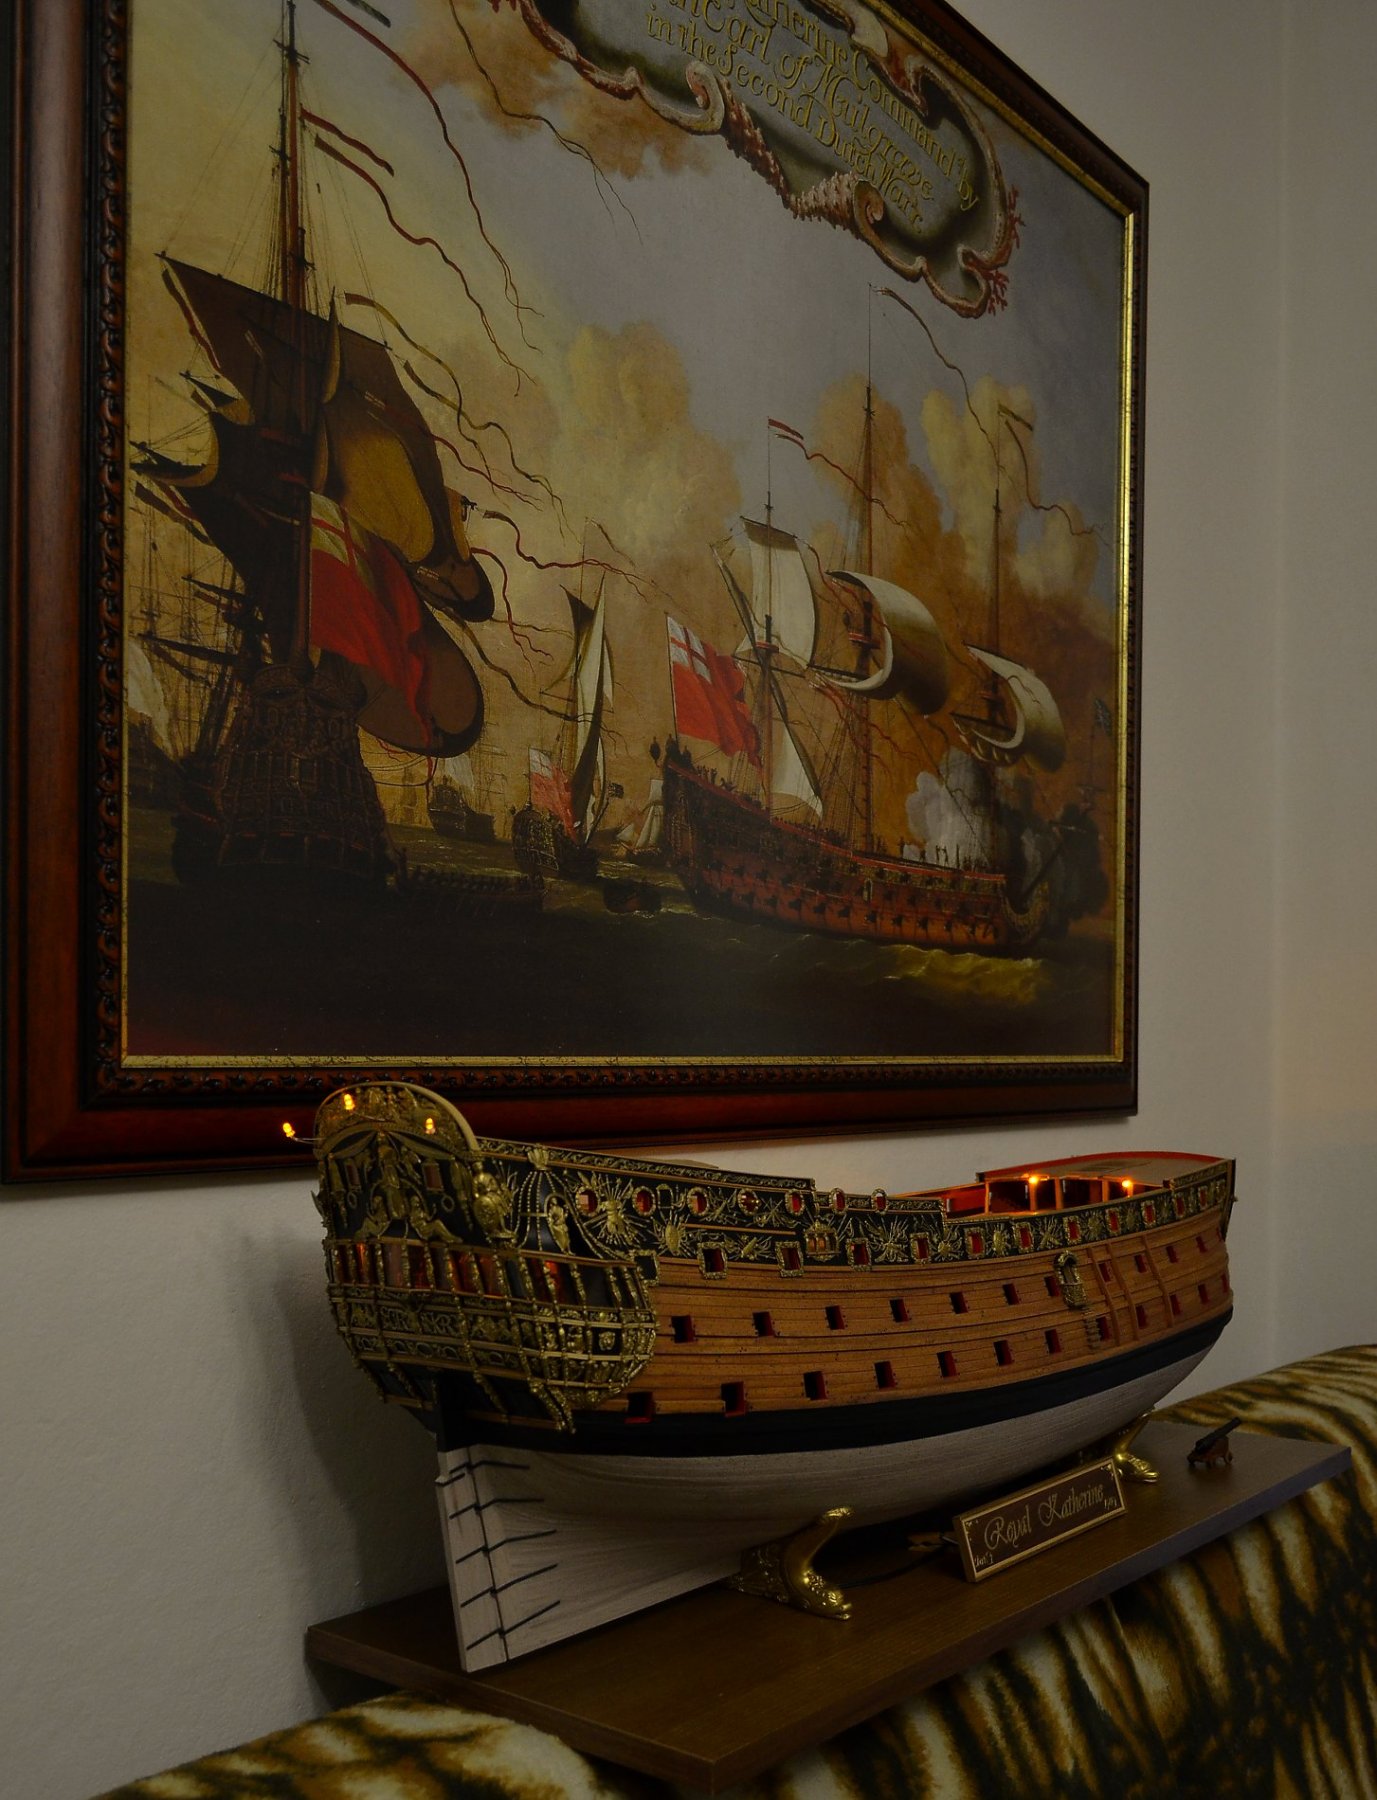
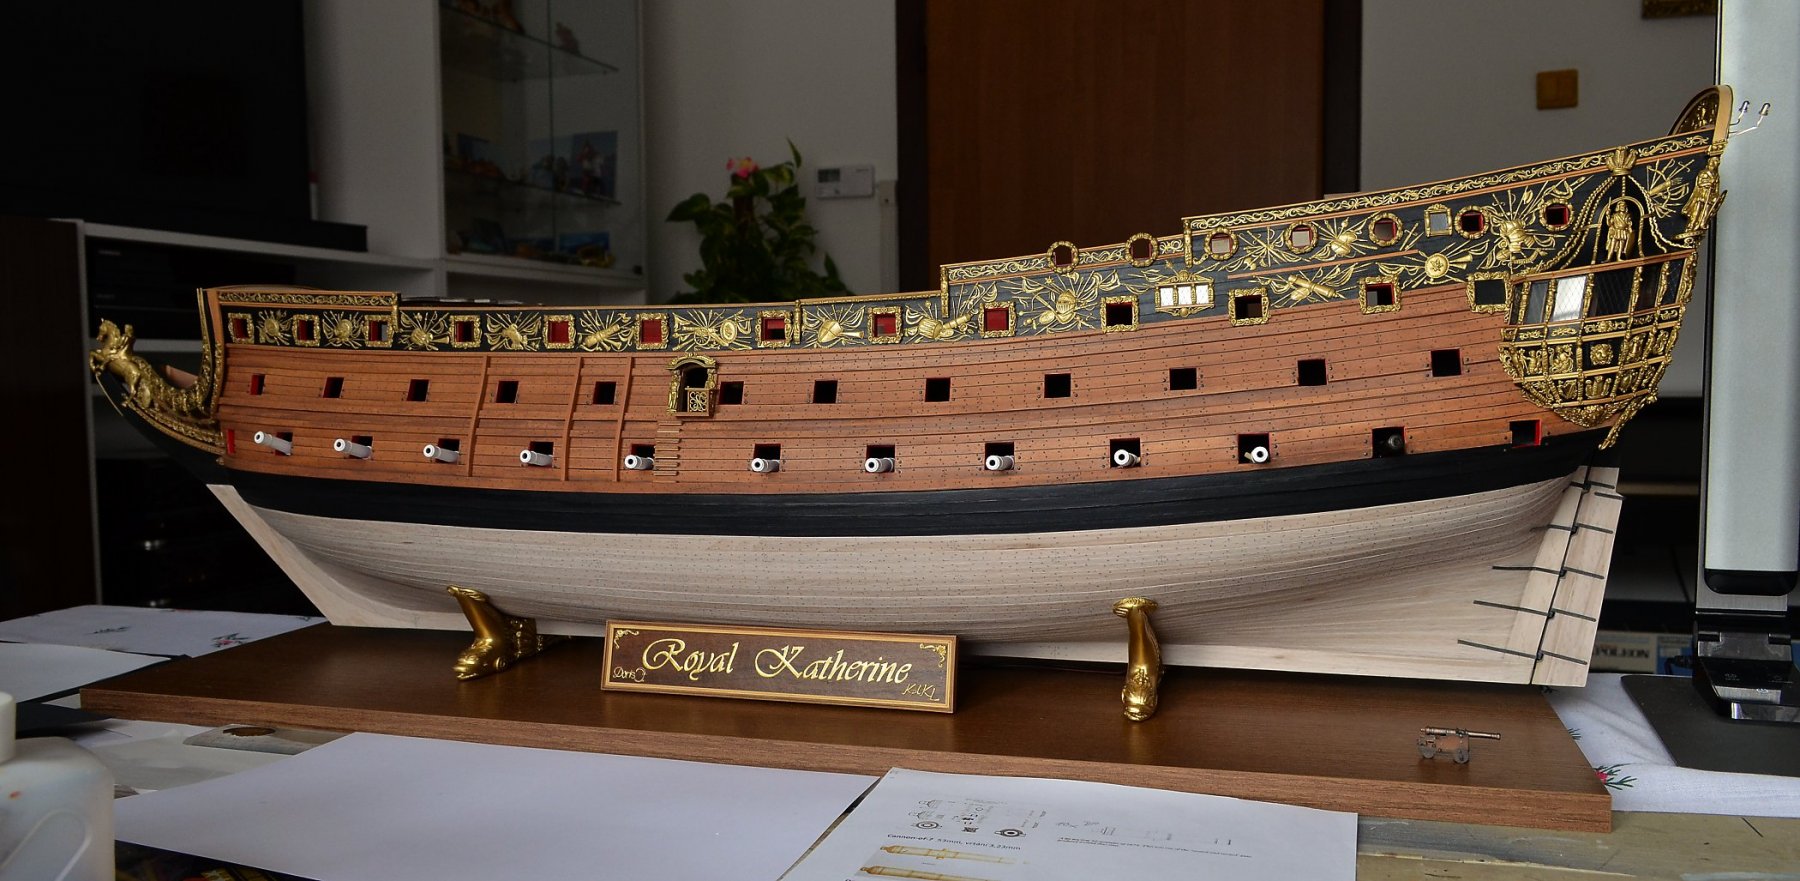
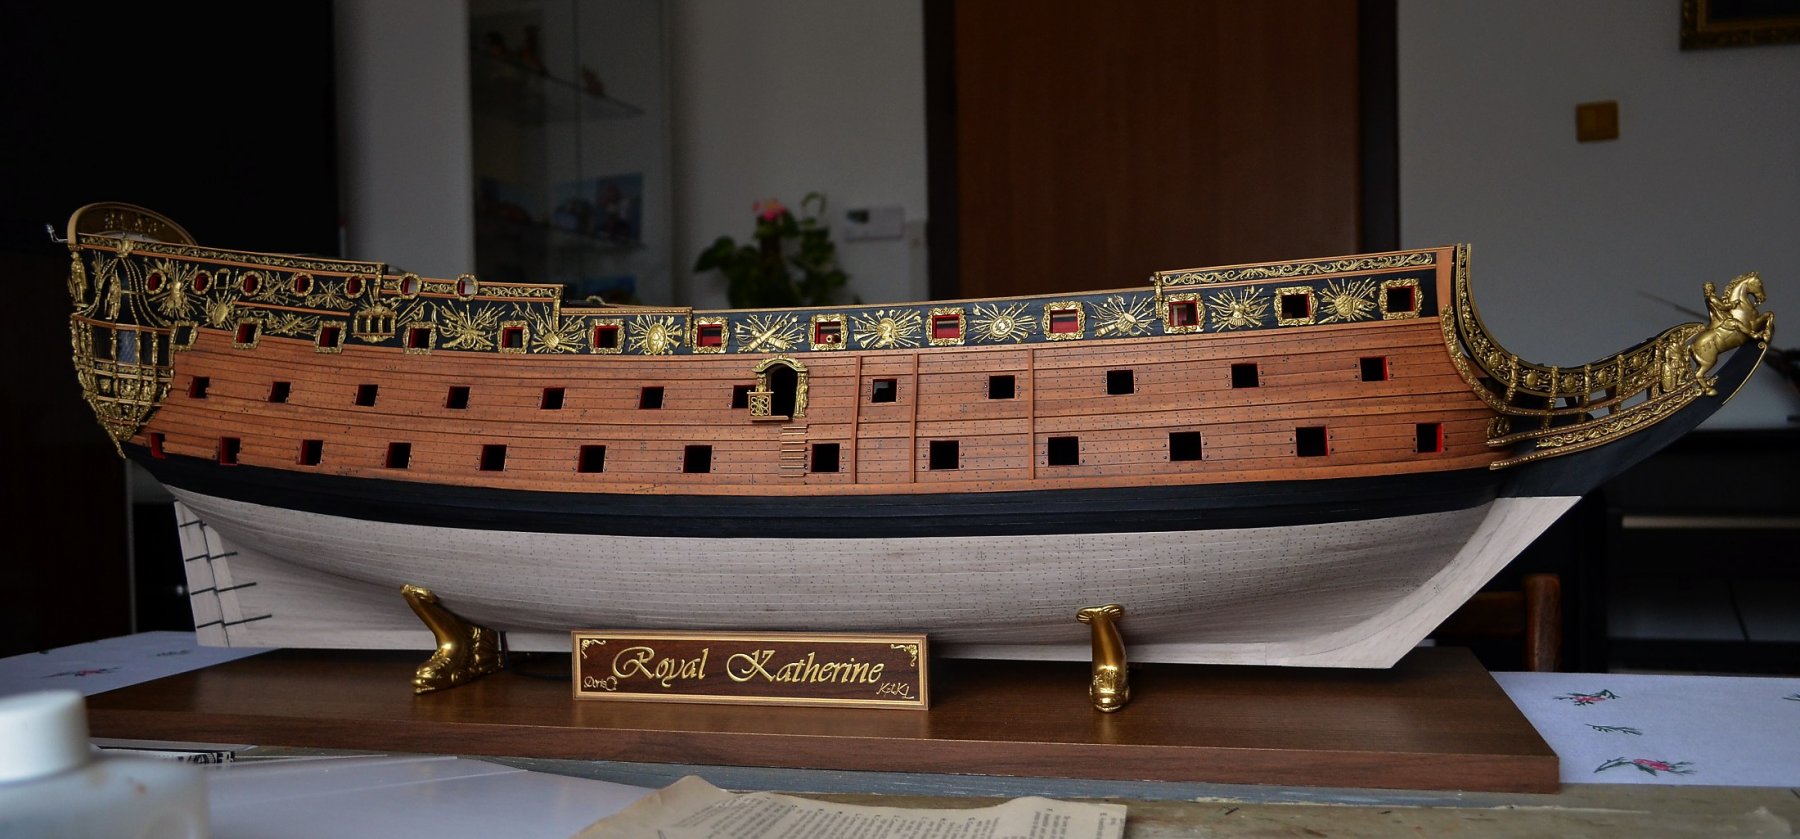
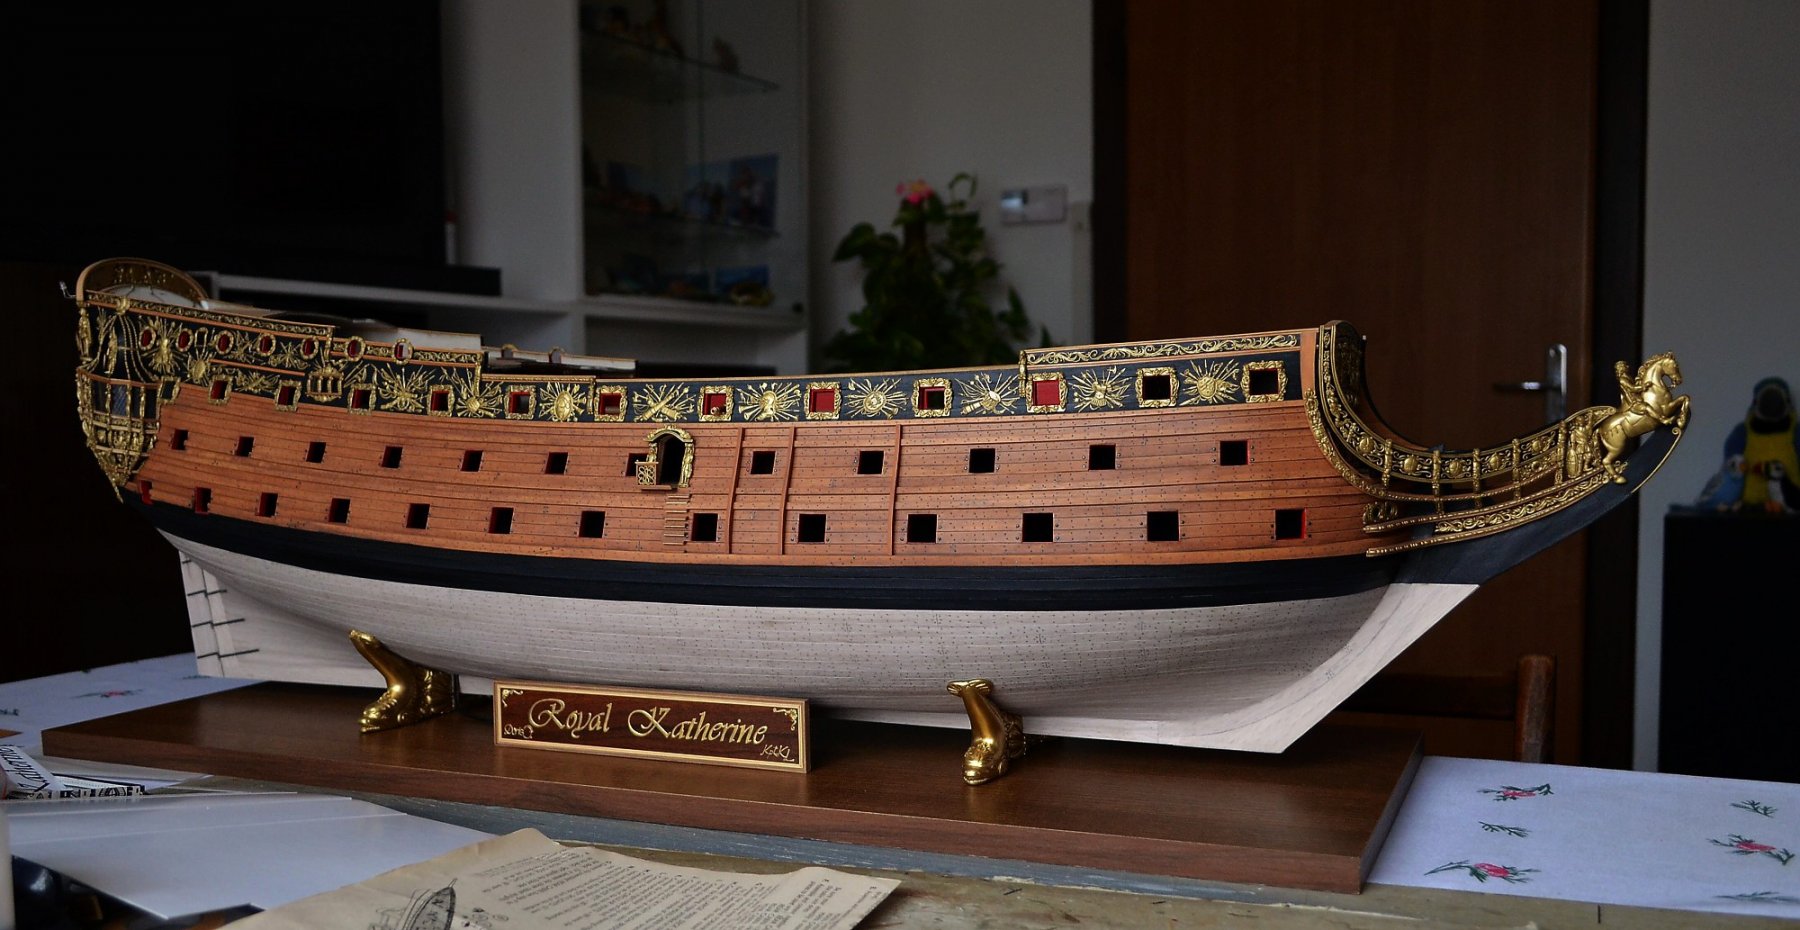
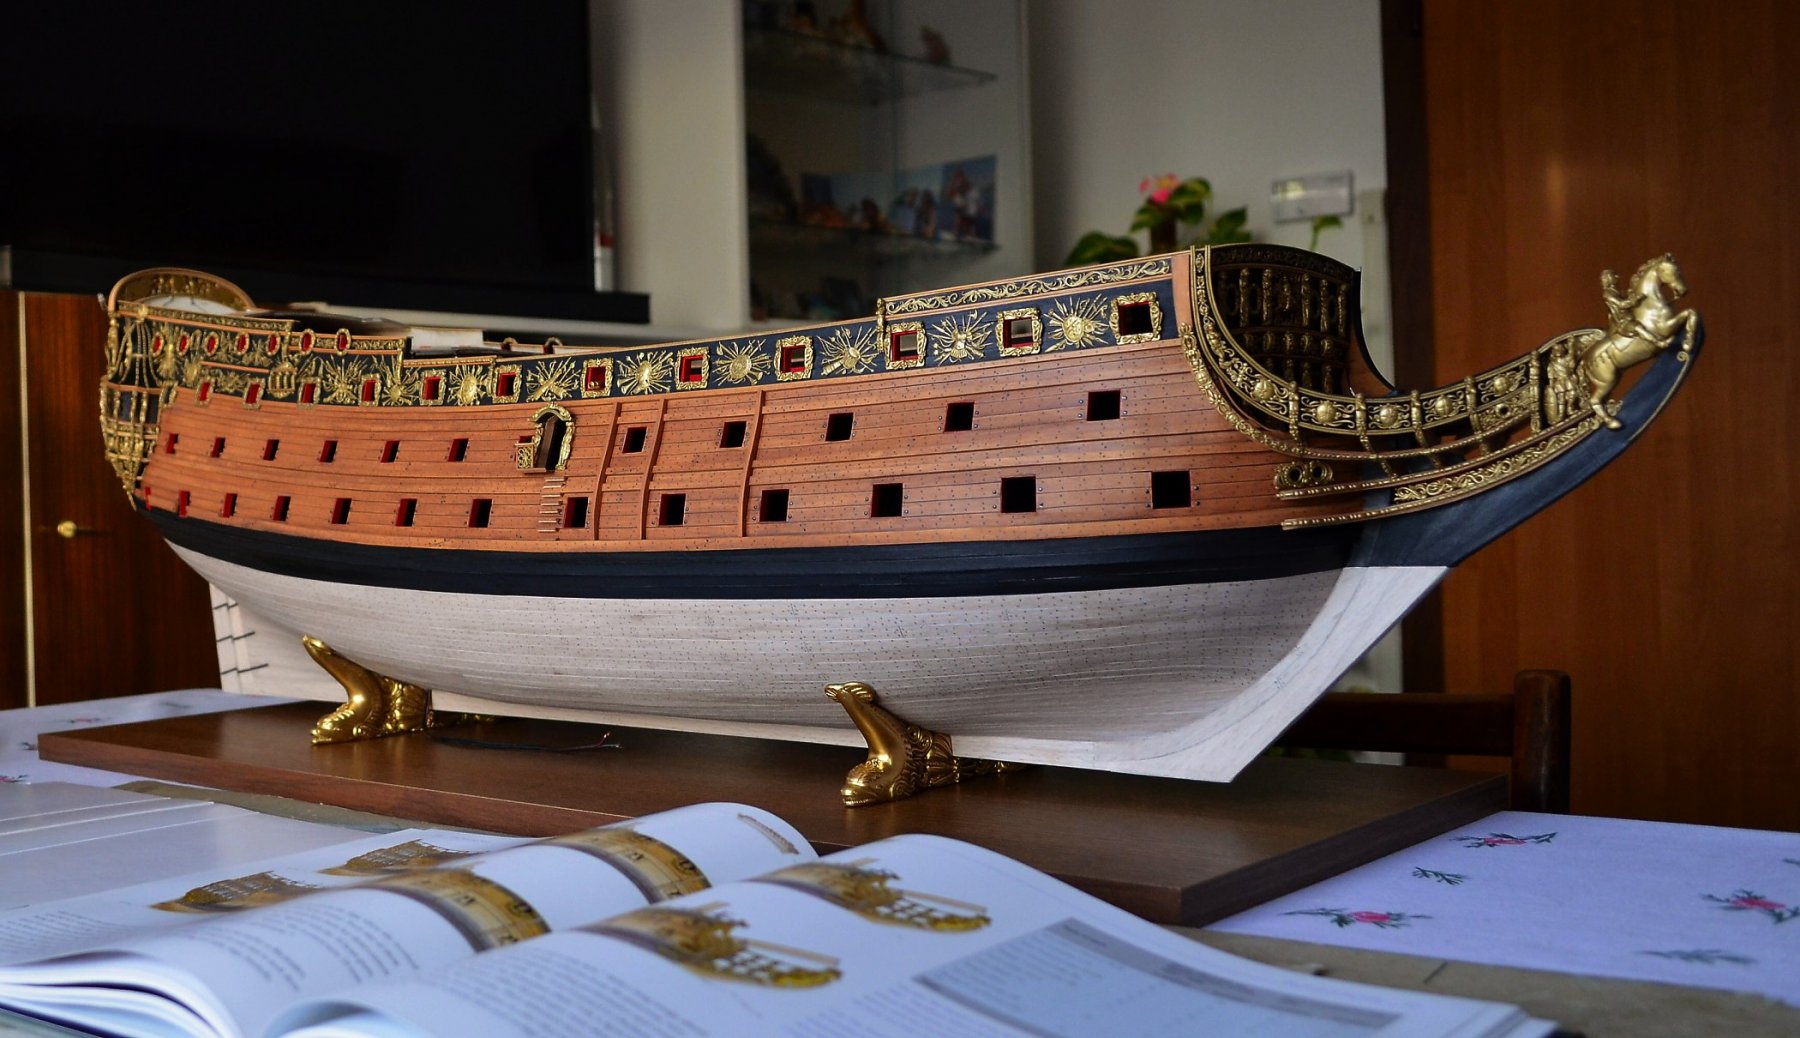
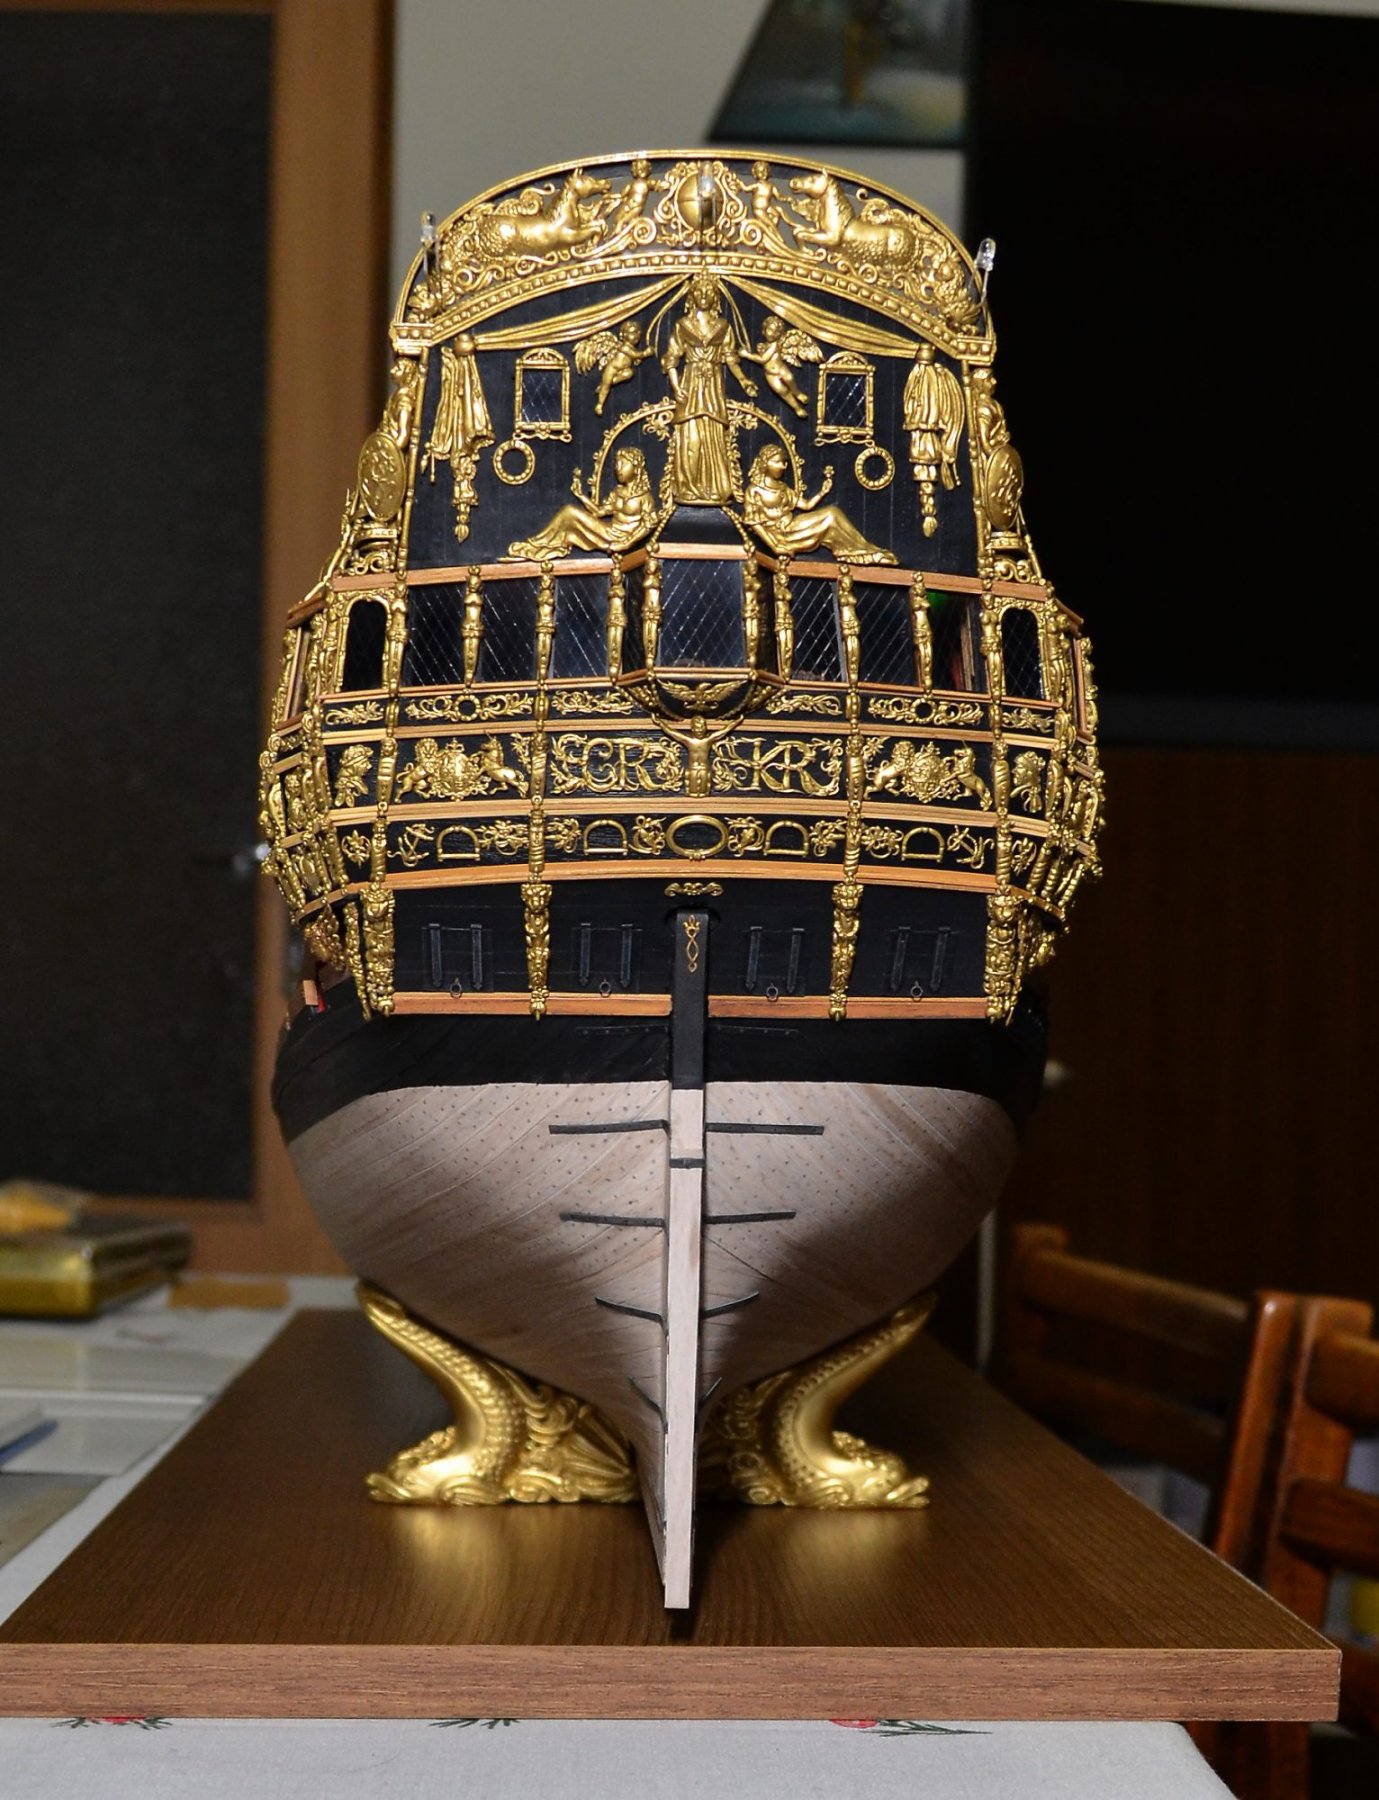
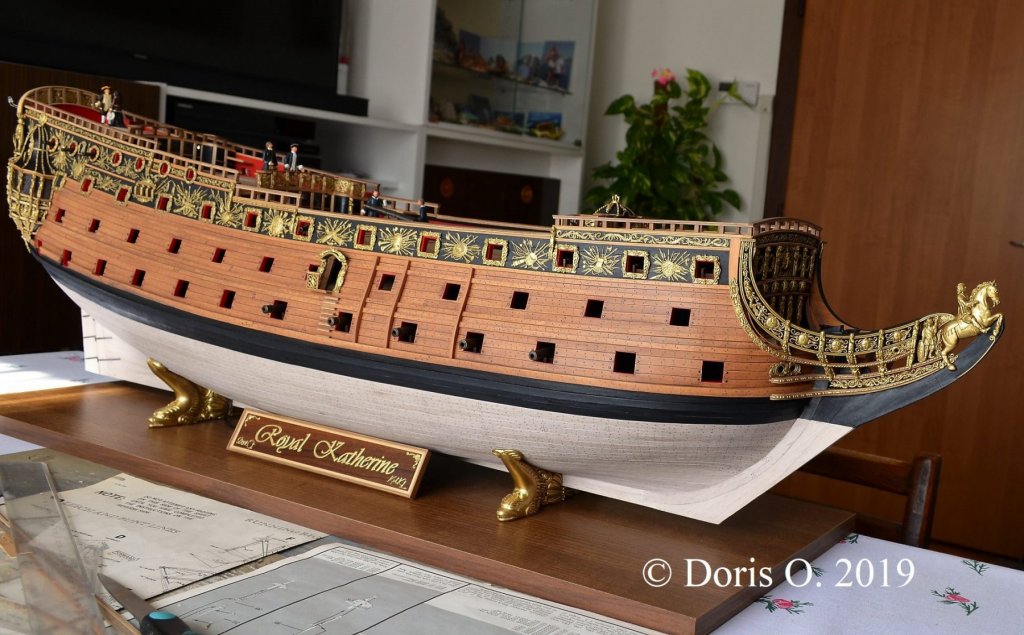
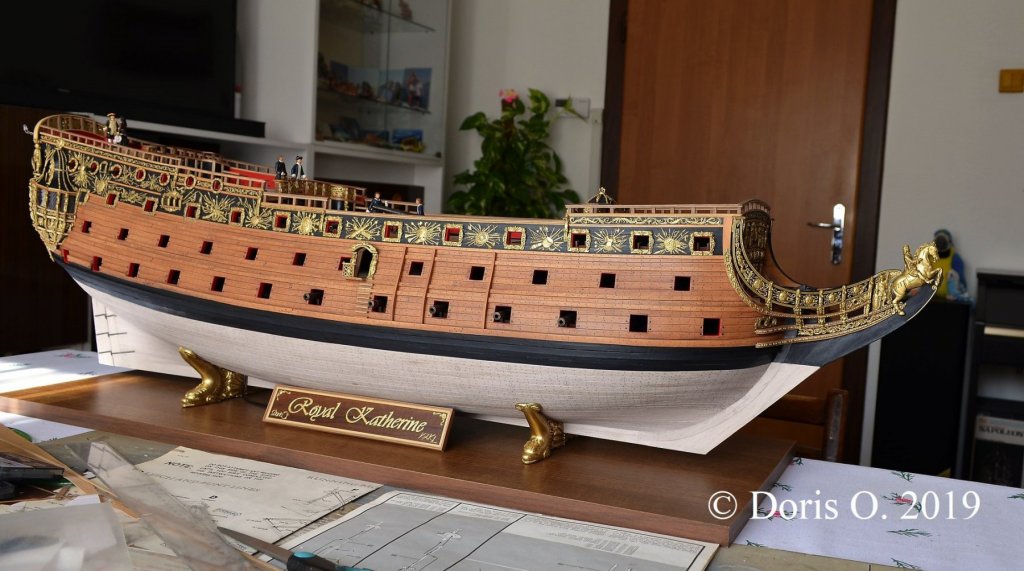
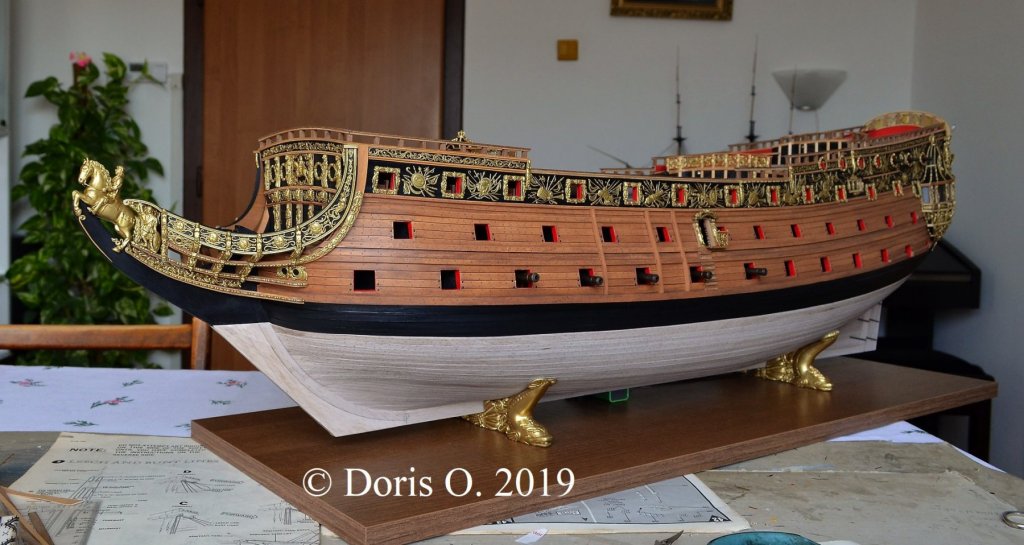
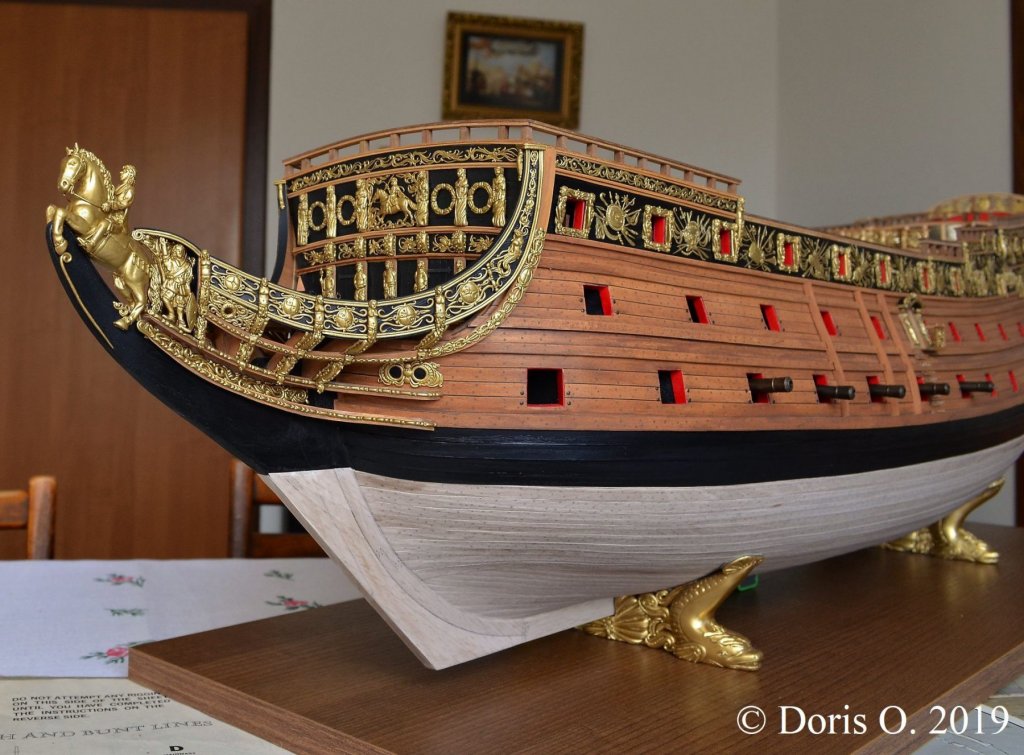
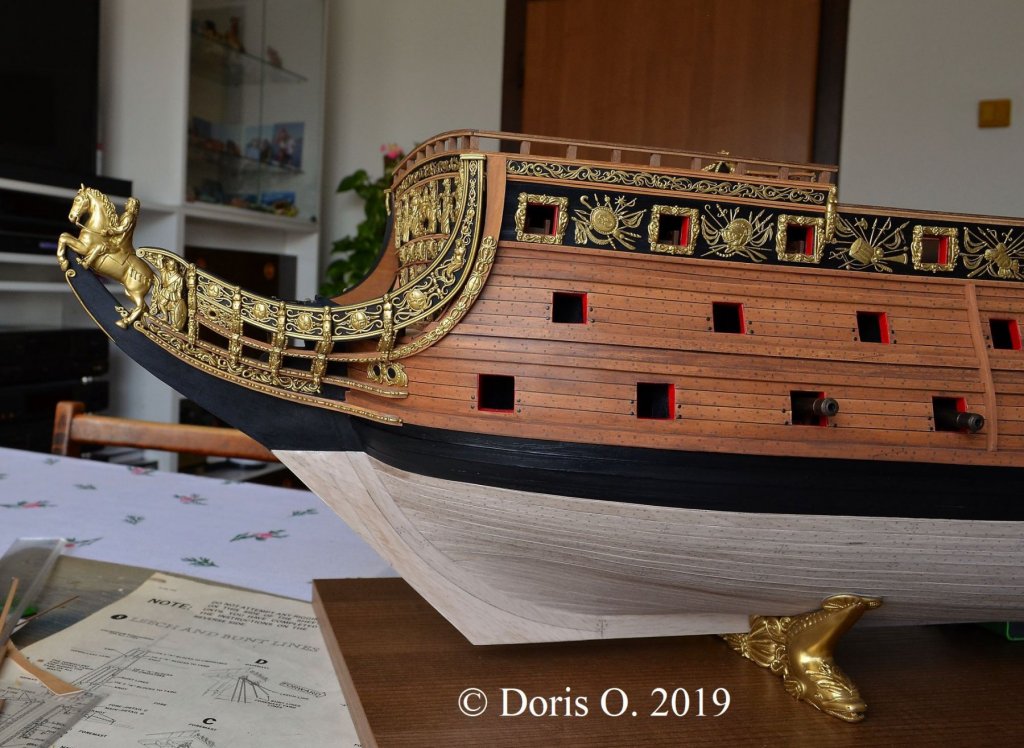
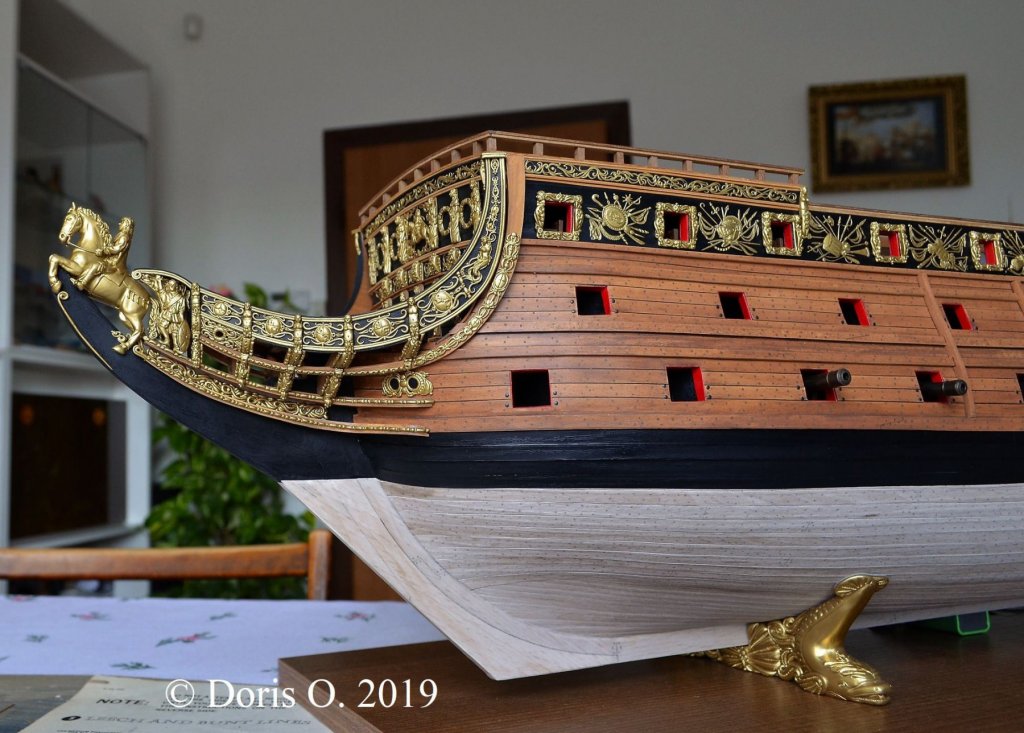
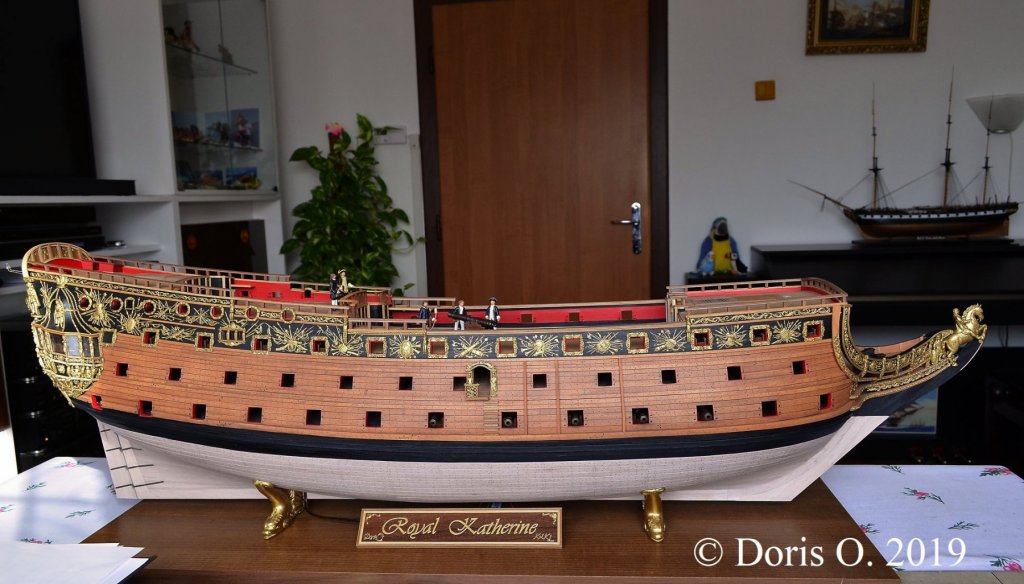
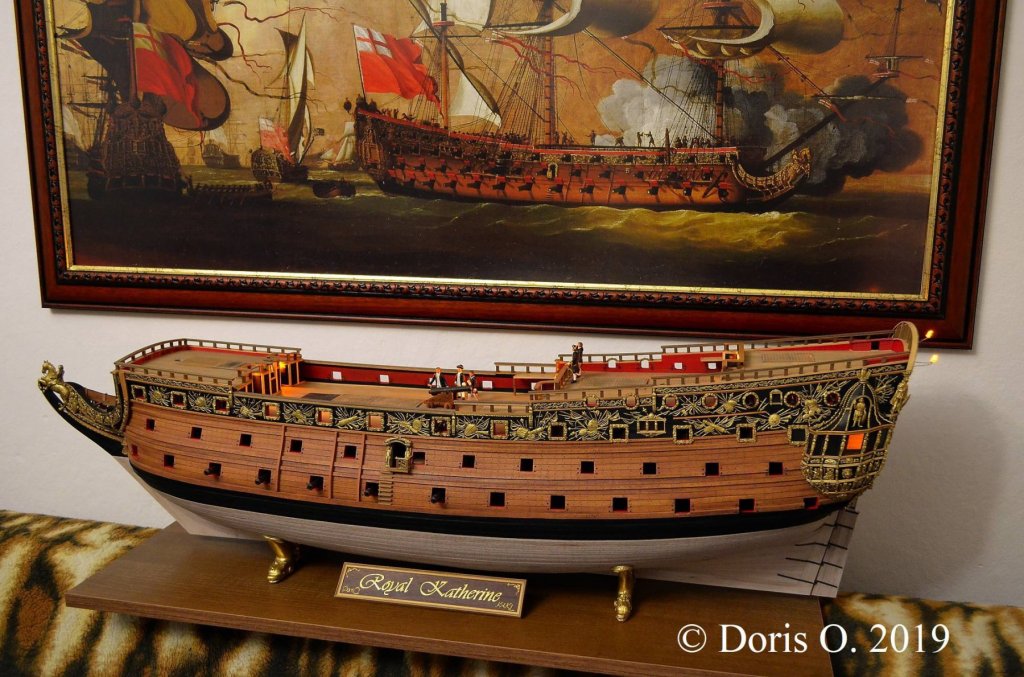
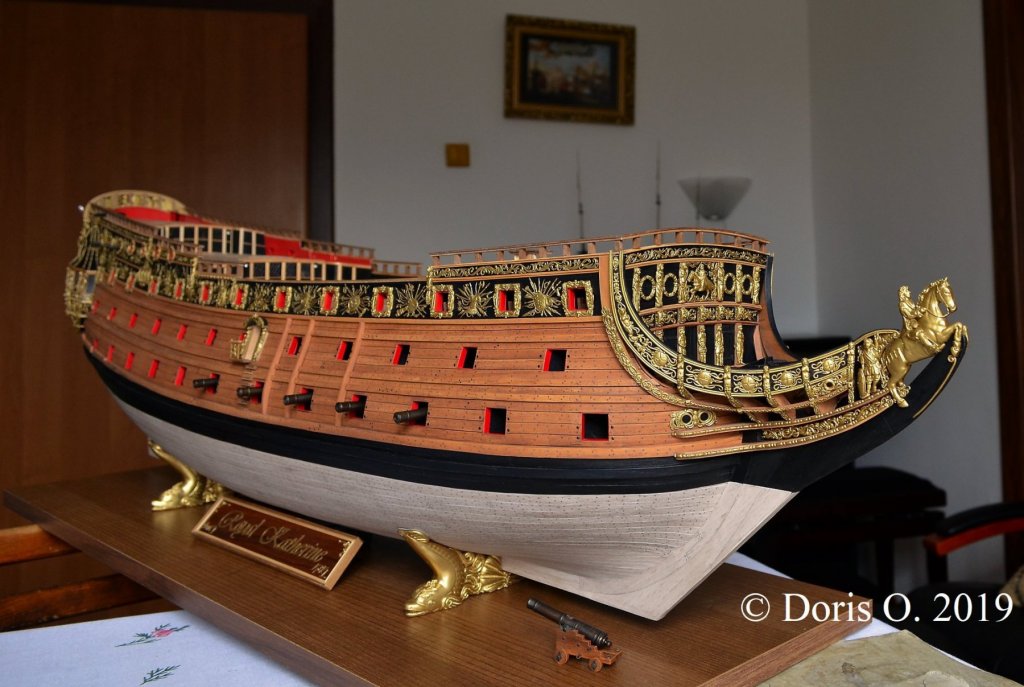
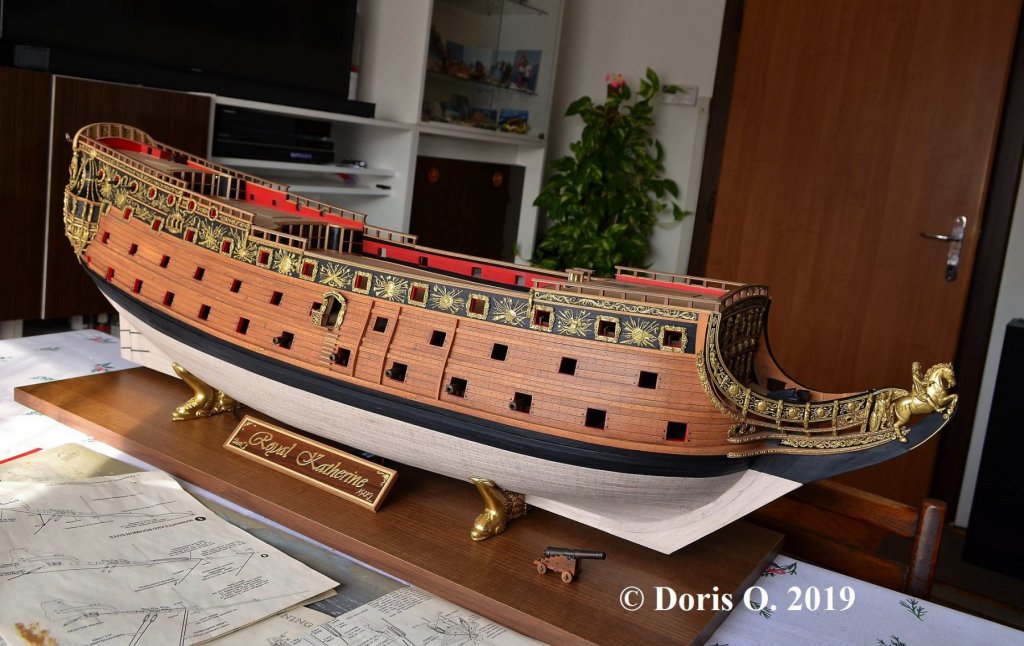
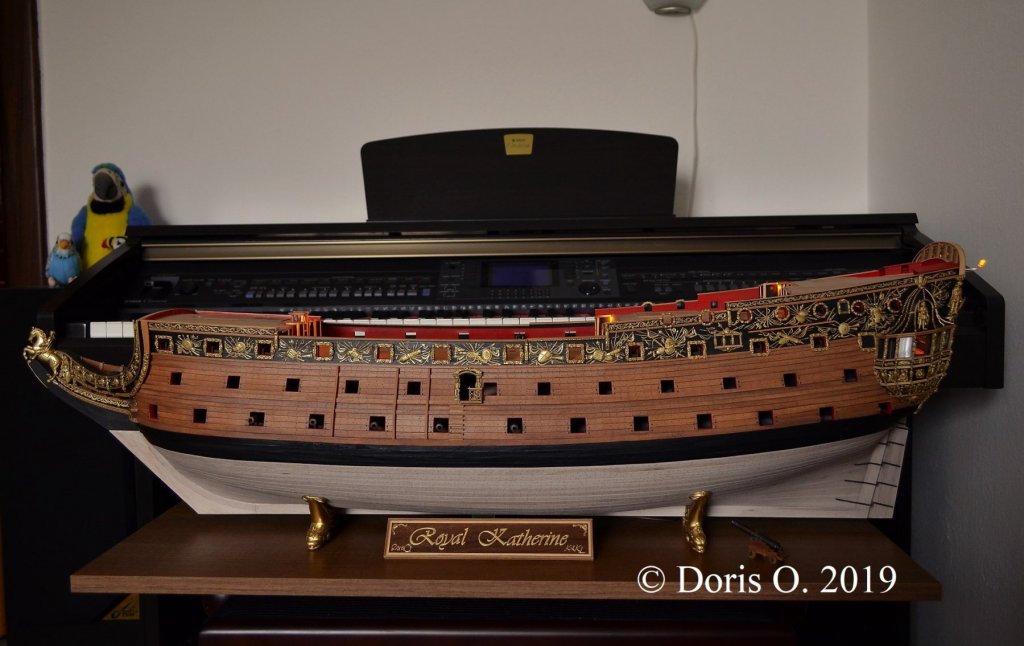
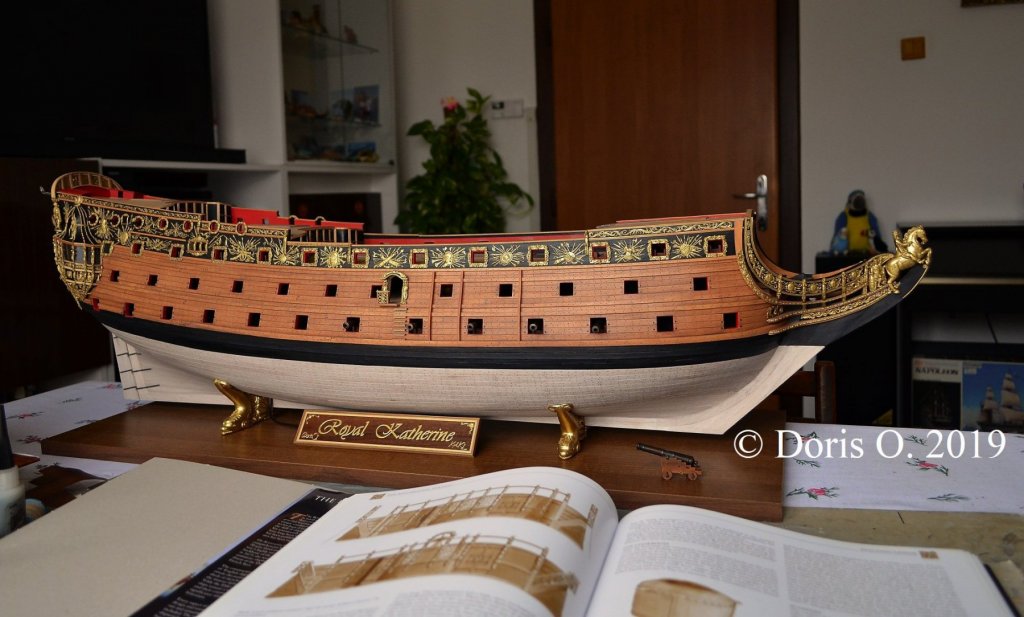
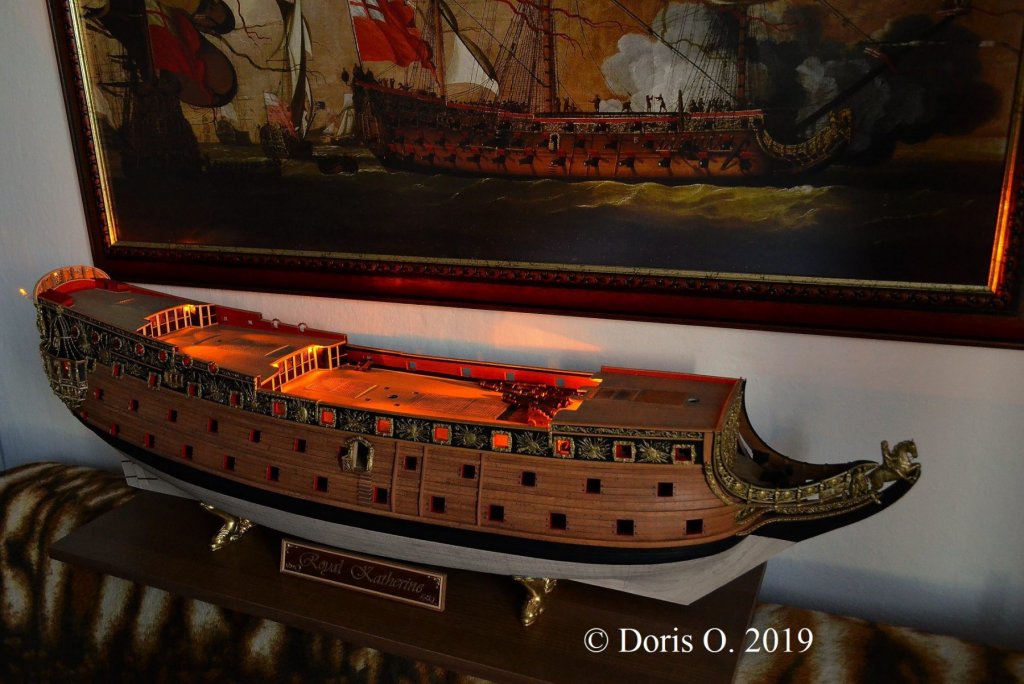
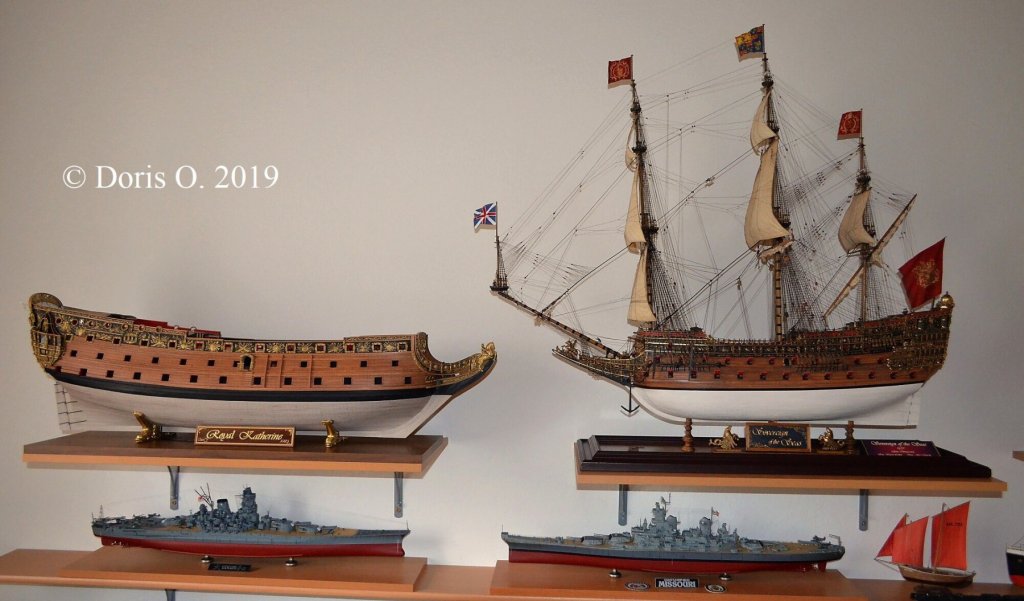
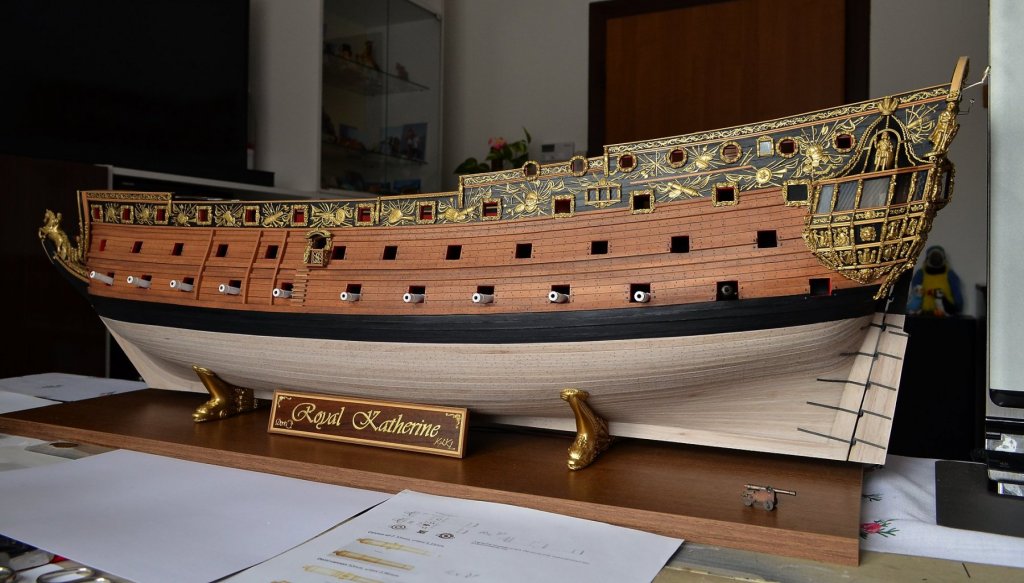
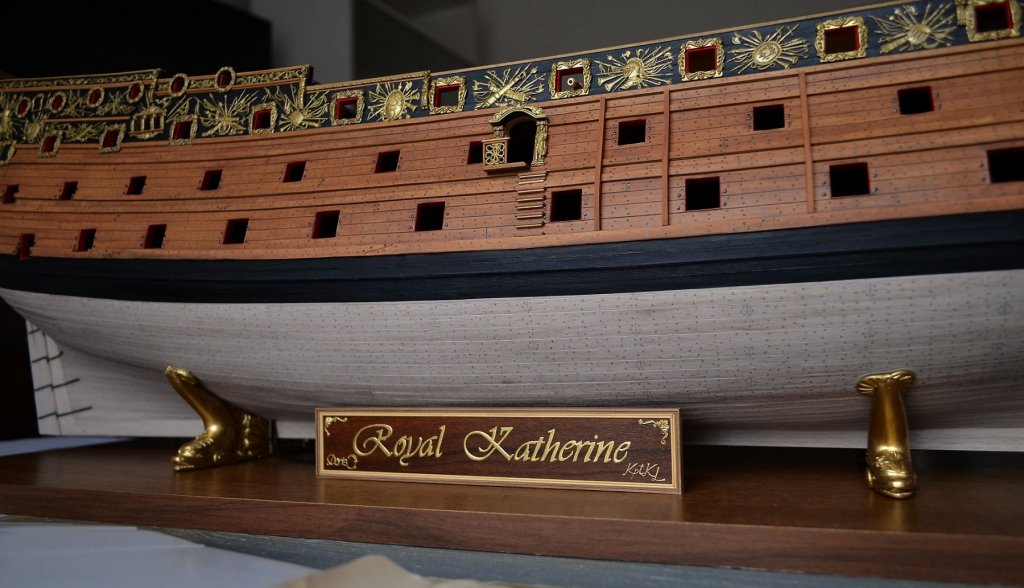
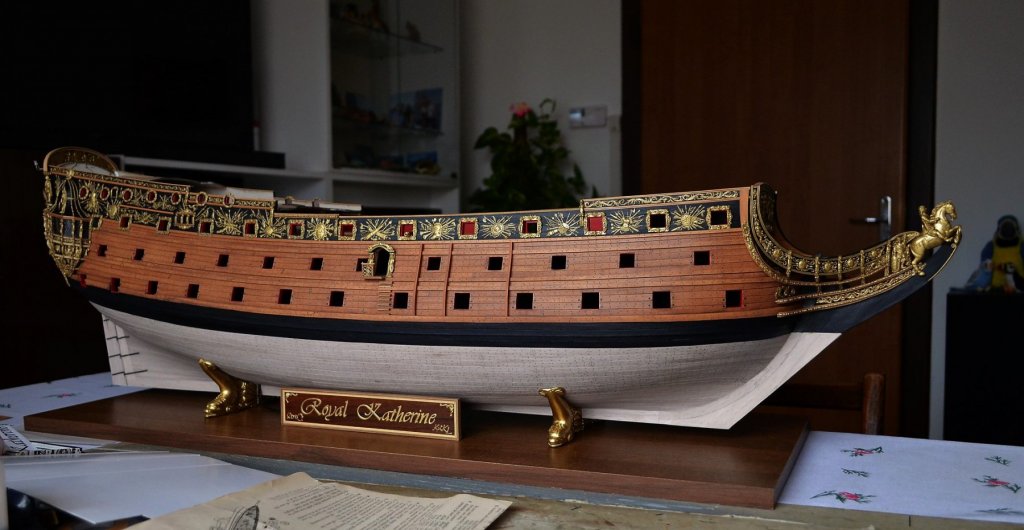
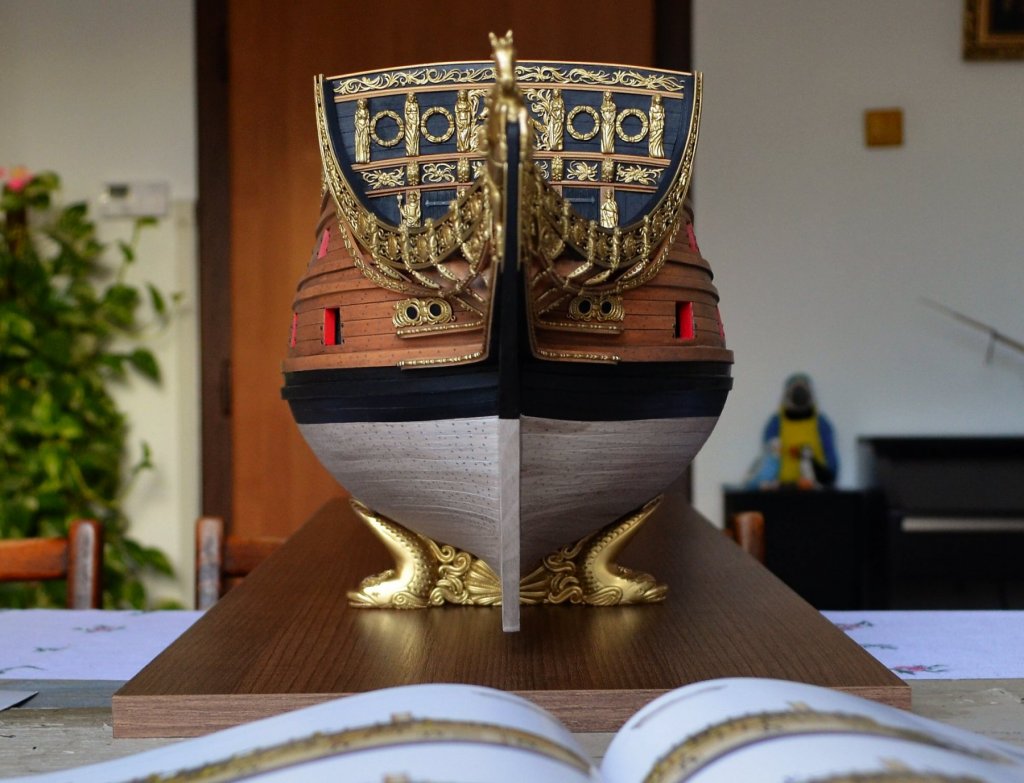
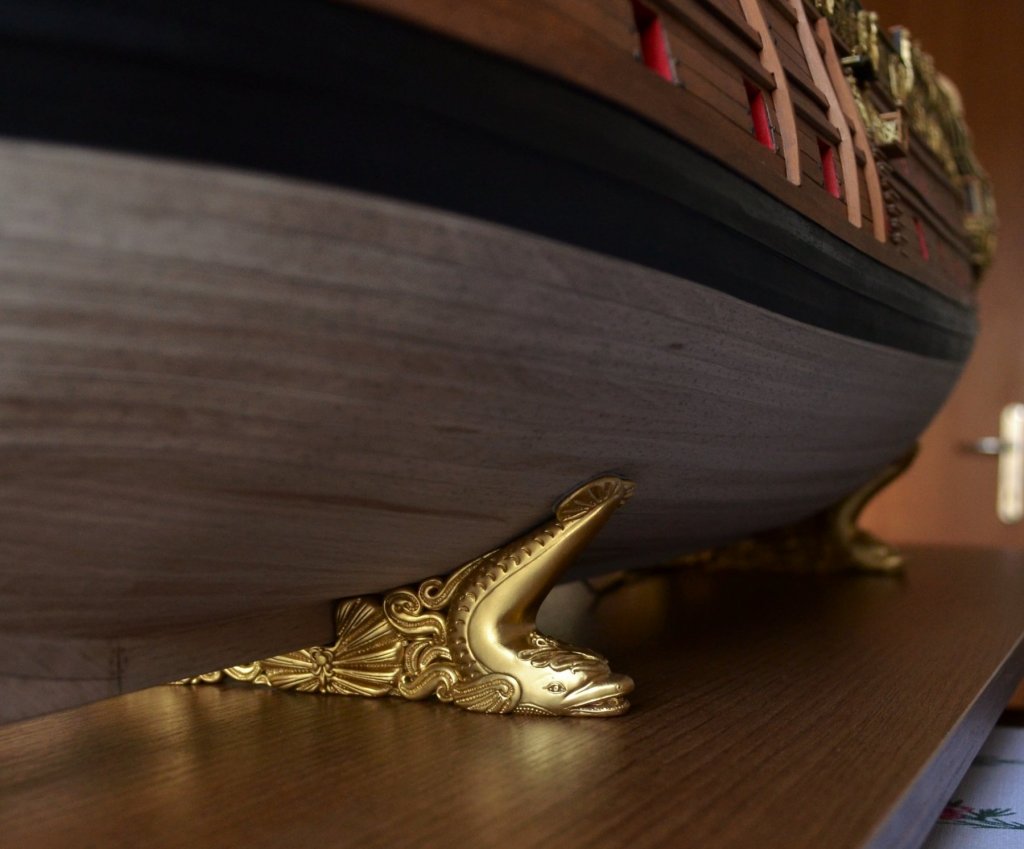
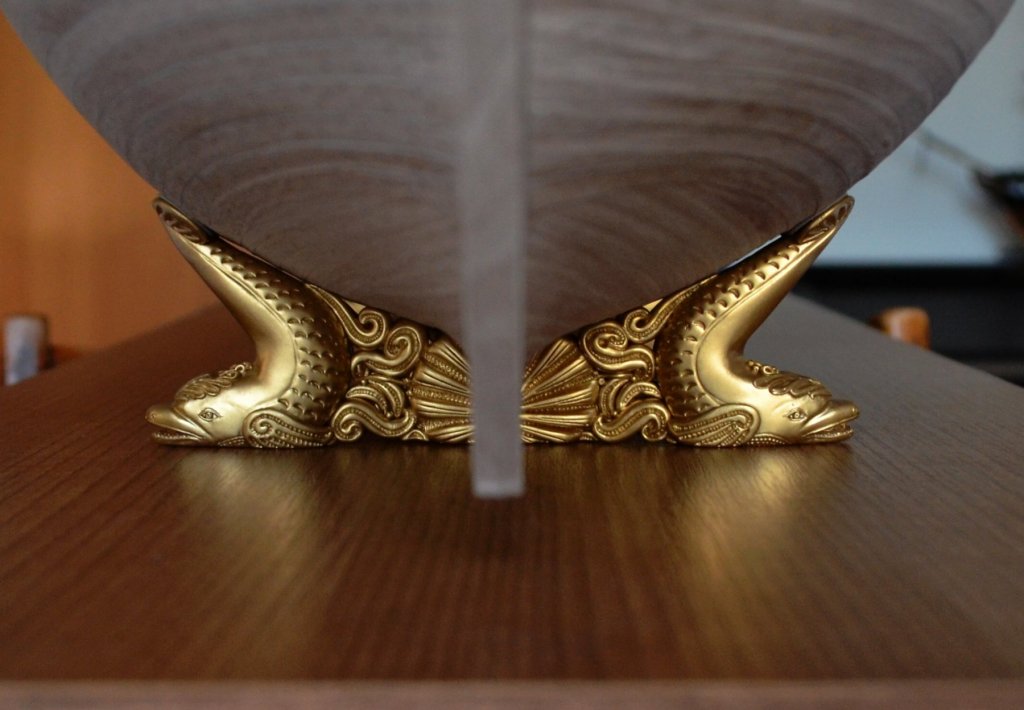
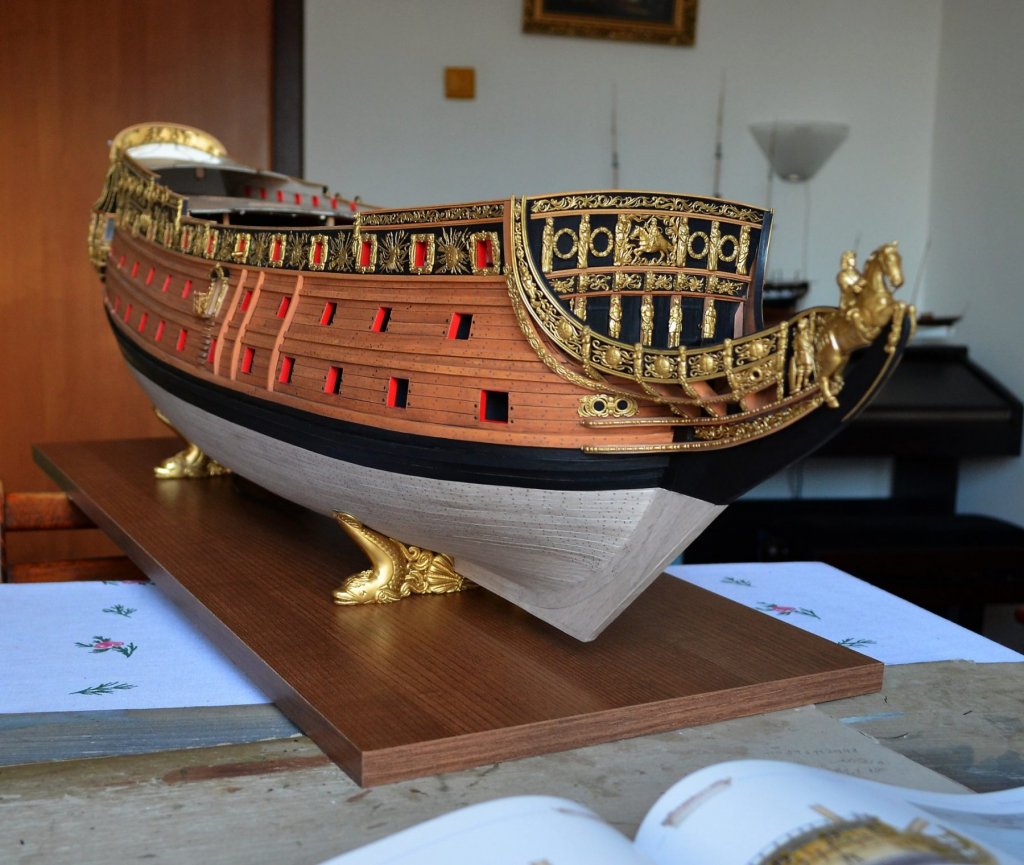
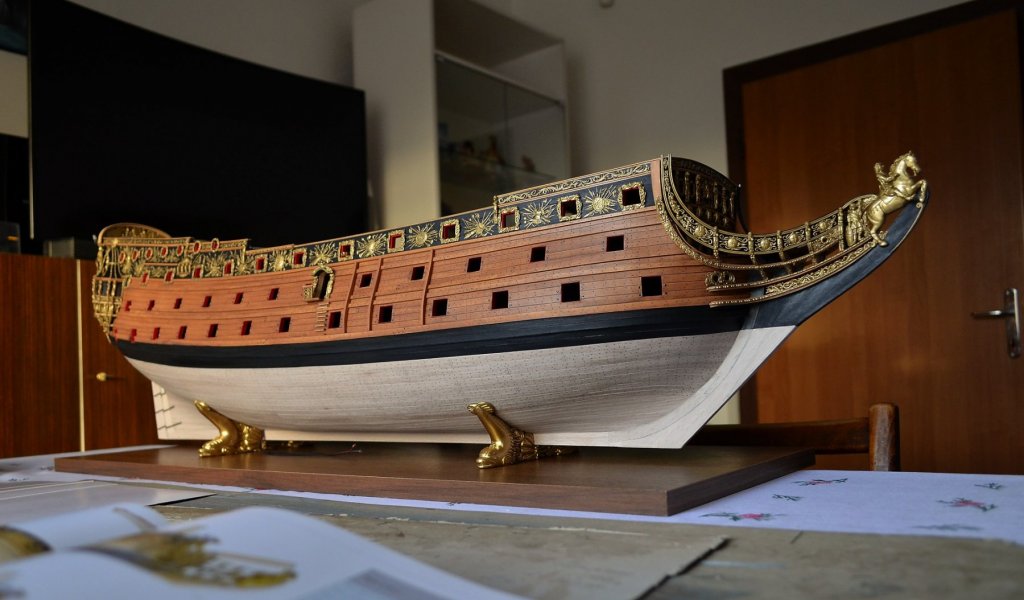
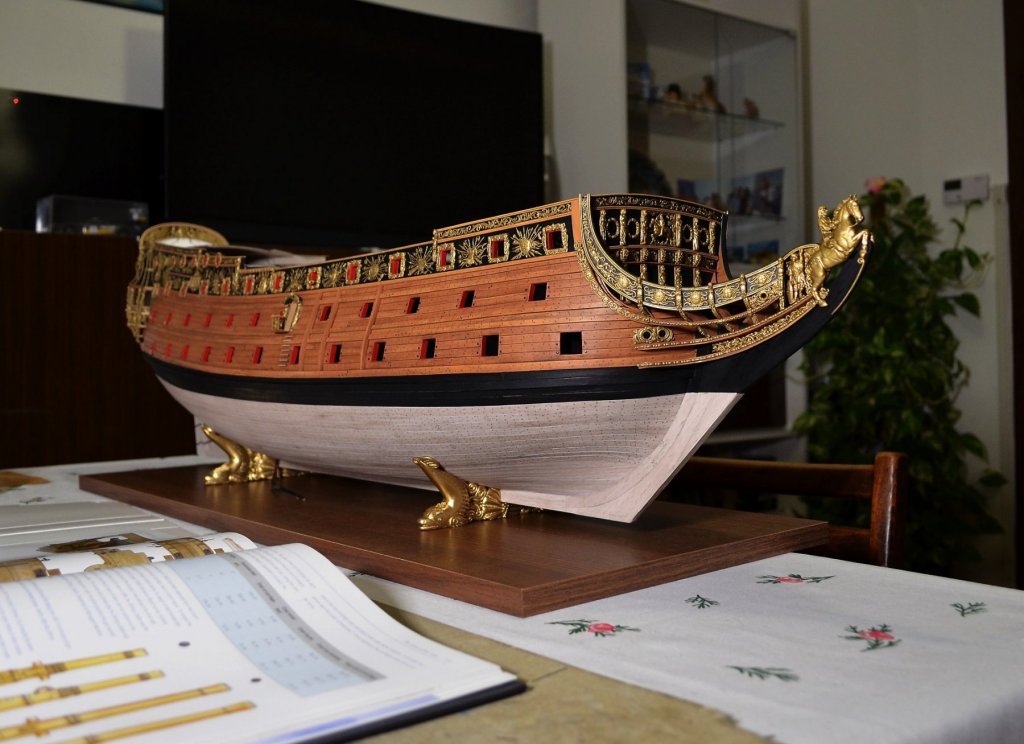
Dziadeczek: Thank you very much for your praise, I am pleased you like my work. Now the pedestals are finished and placed under the huge hull of the Royal Katherine. Enjoy the pics and have a great time.


- 1,035 replies
-
- 40
-
-
- royal katherine
- ship of the line
- (and 1 more)