DORIS
-
Posts
711 -
Joined
-
Last visited
Content Type
Profiles
Forums
Gallery
Events
Everything posted by DORIS
-
Admirable craftsmanship and perfect work, dear Amalio. Watching your build log is really pleasure and great inspiration for all of us. Kind reagds Doris
-

HMS ROYAL KATHERINE 1664 by Doris - 1/55 - CARD
DORIS replied to DORIS's topic in - Build logs for subjects built 1501 - 1750
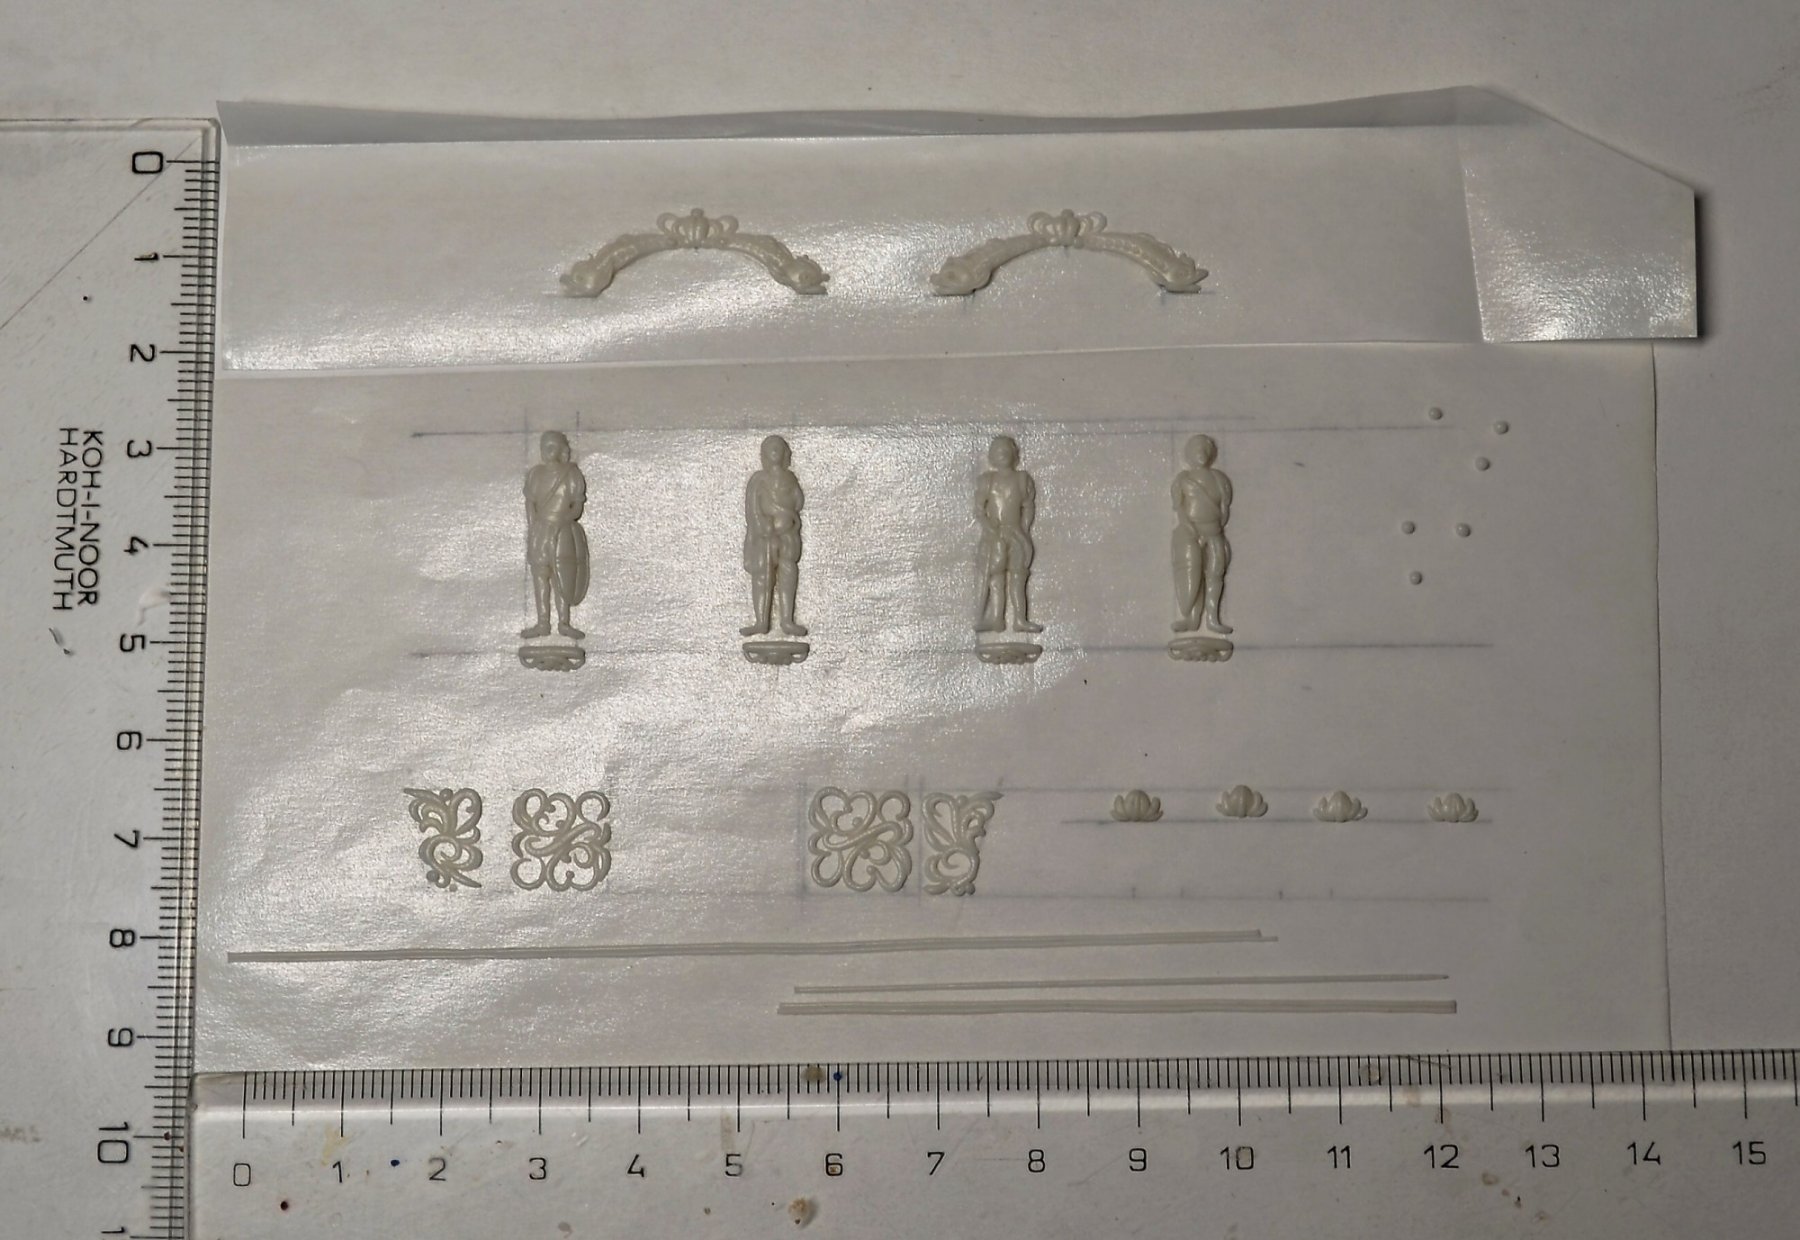
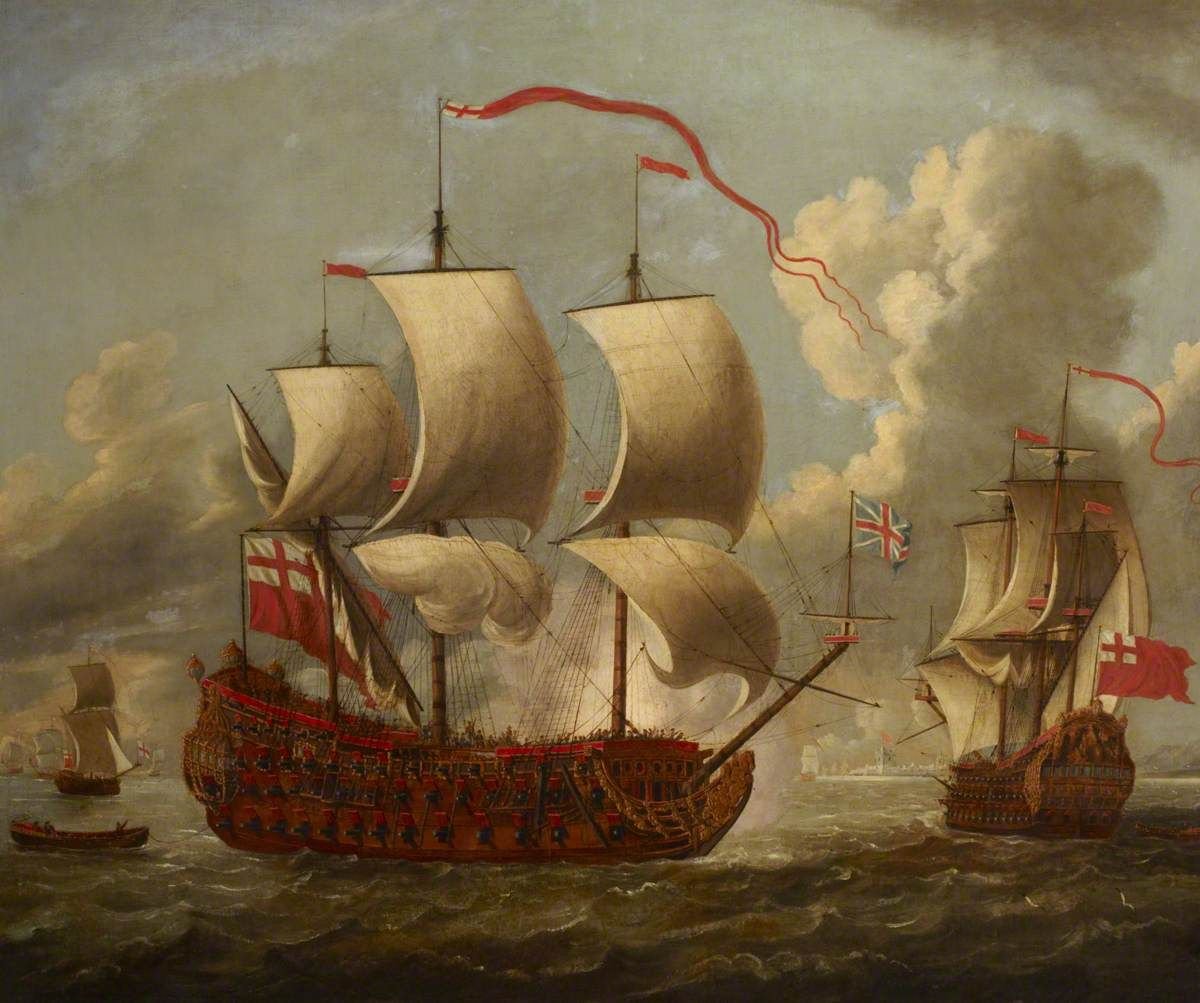
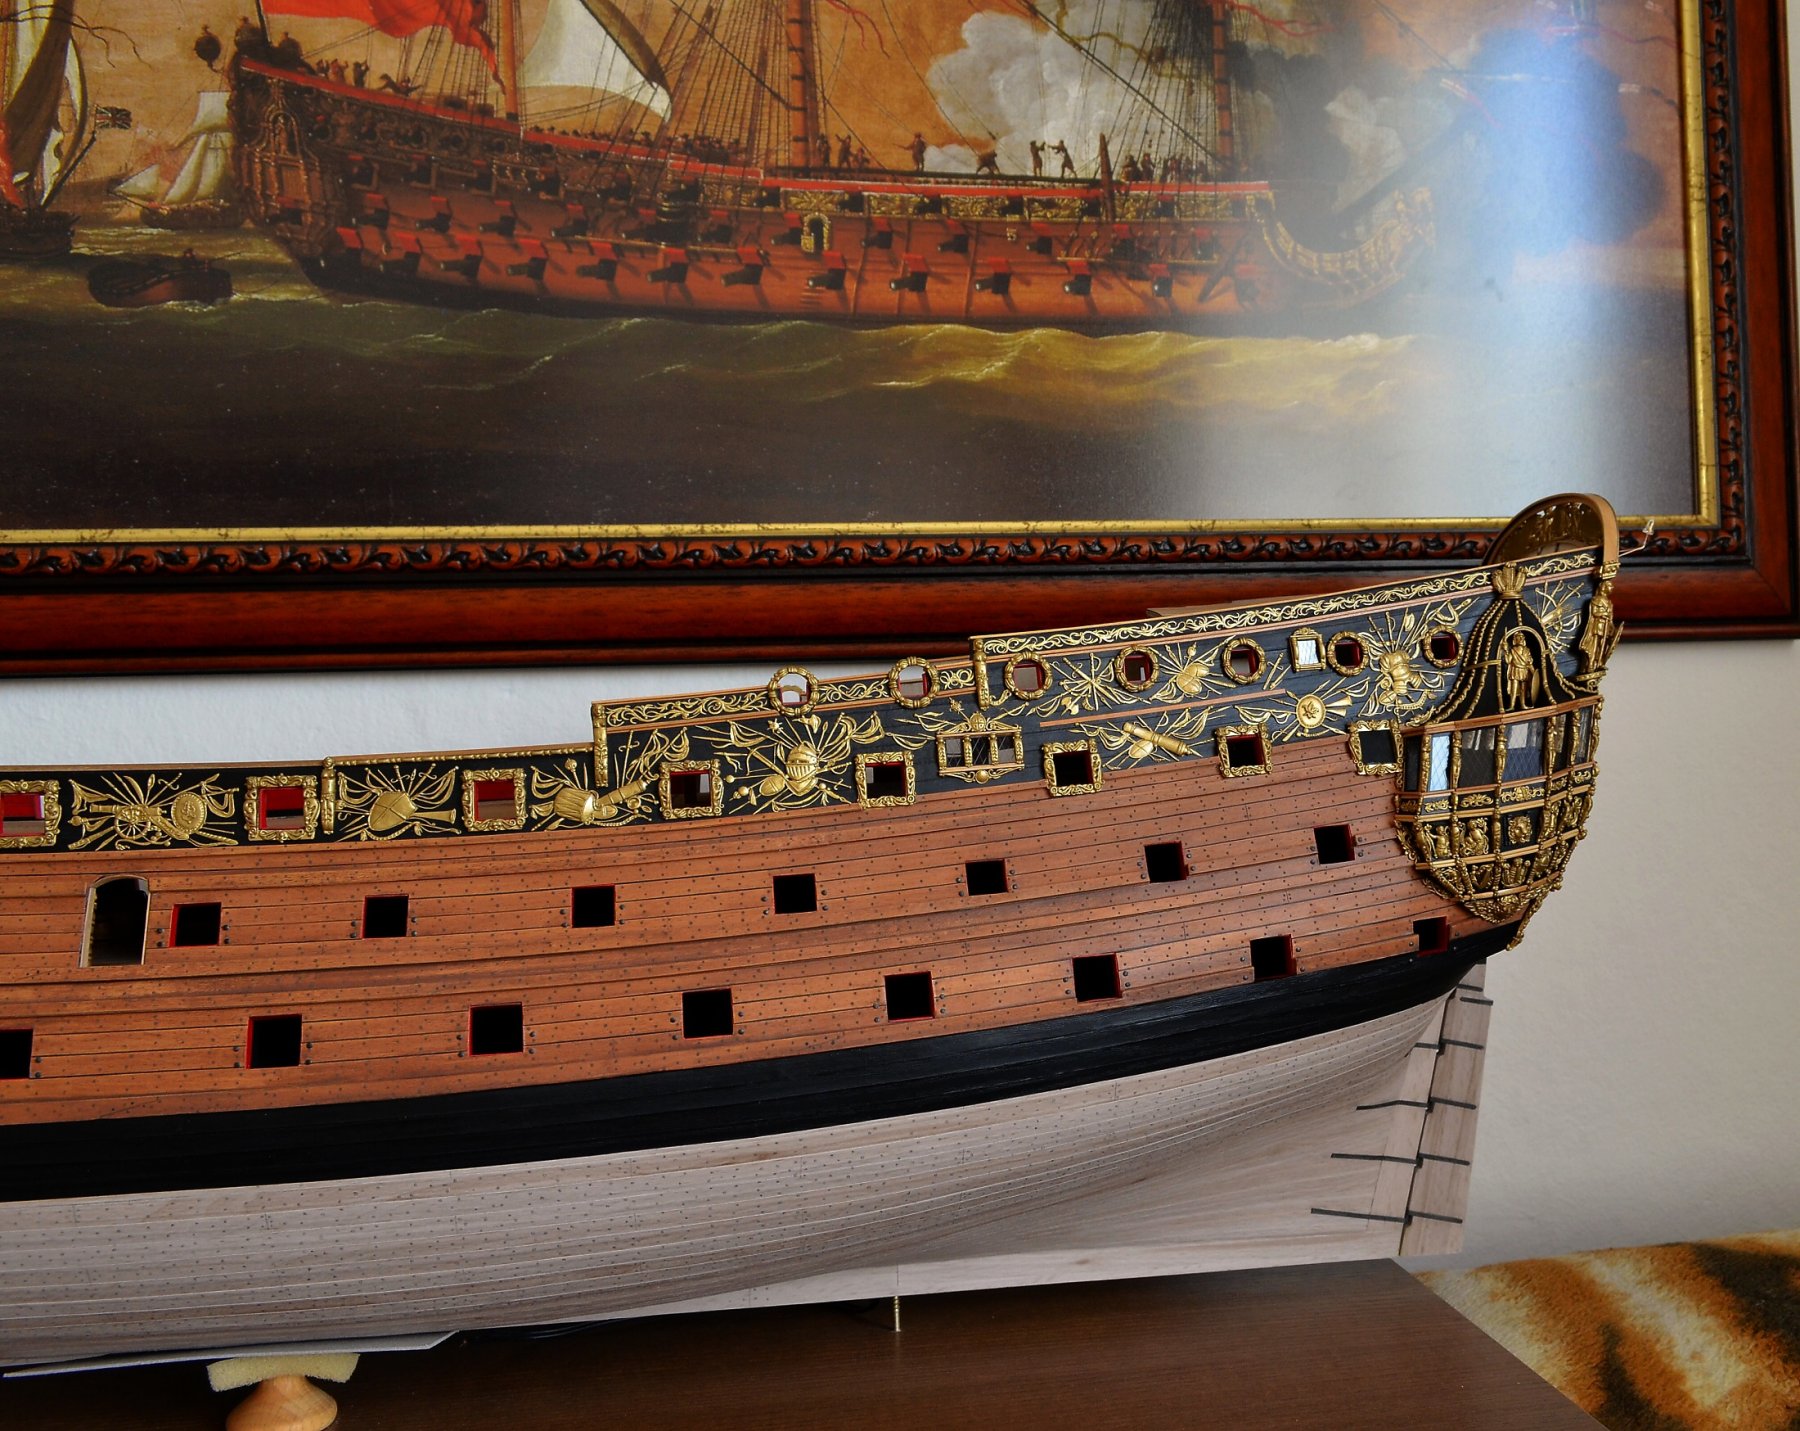
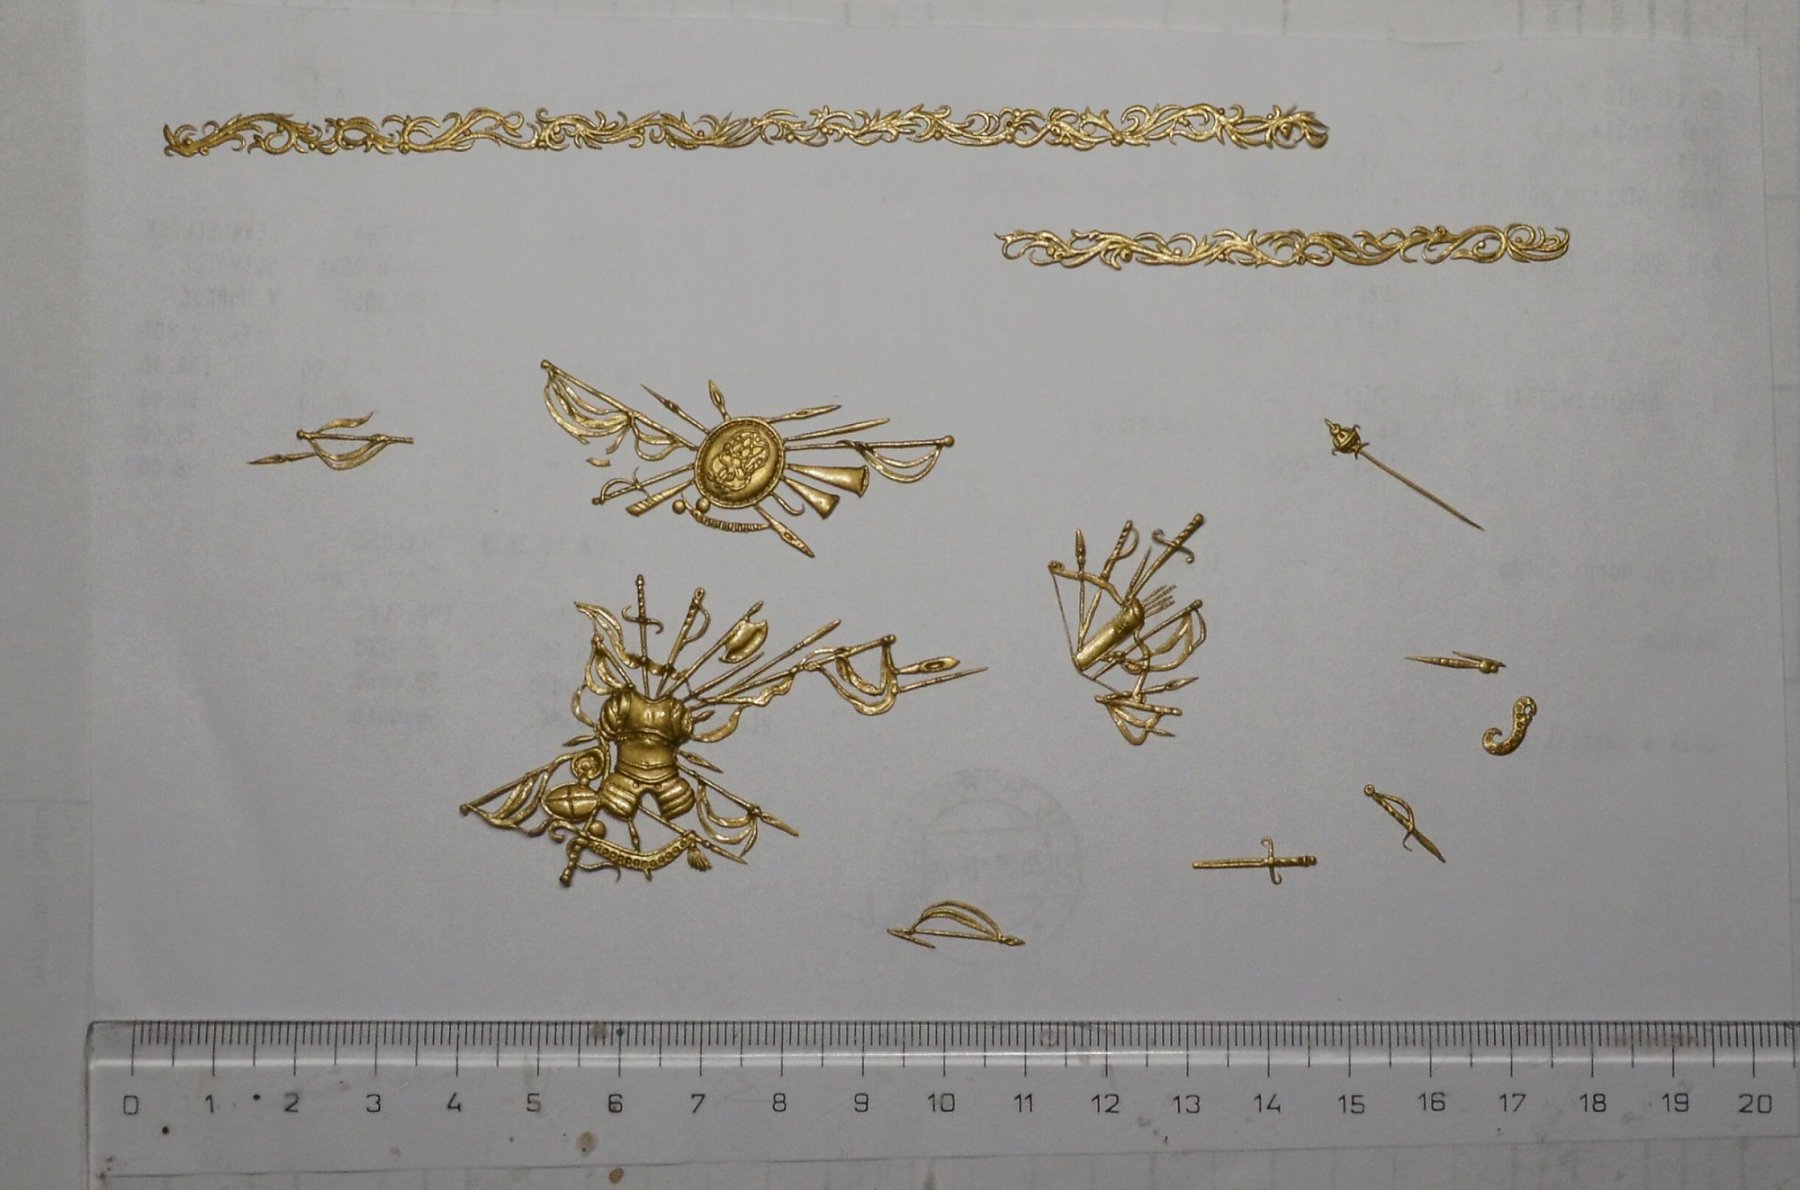
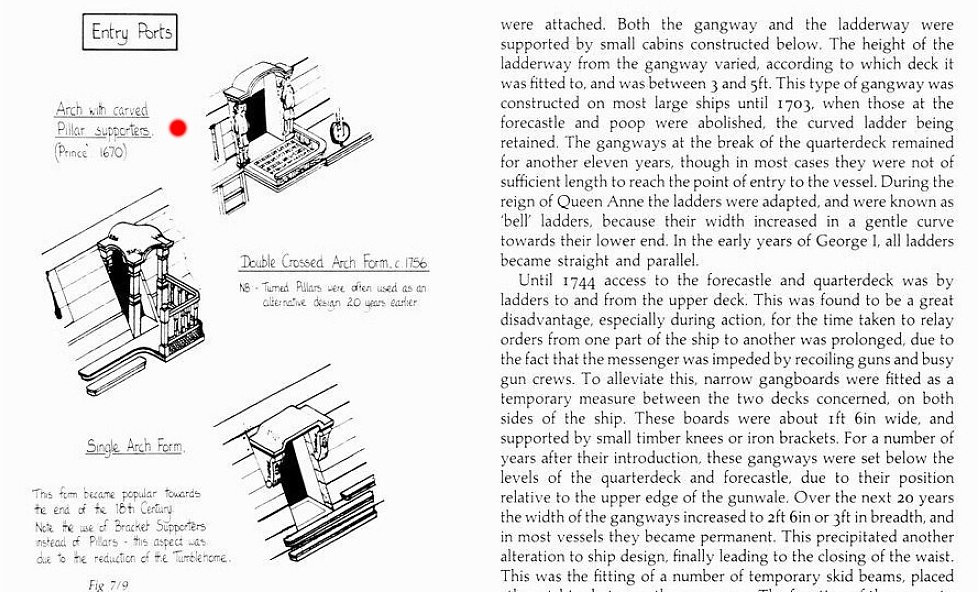
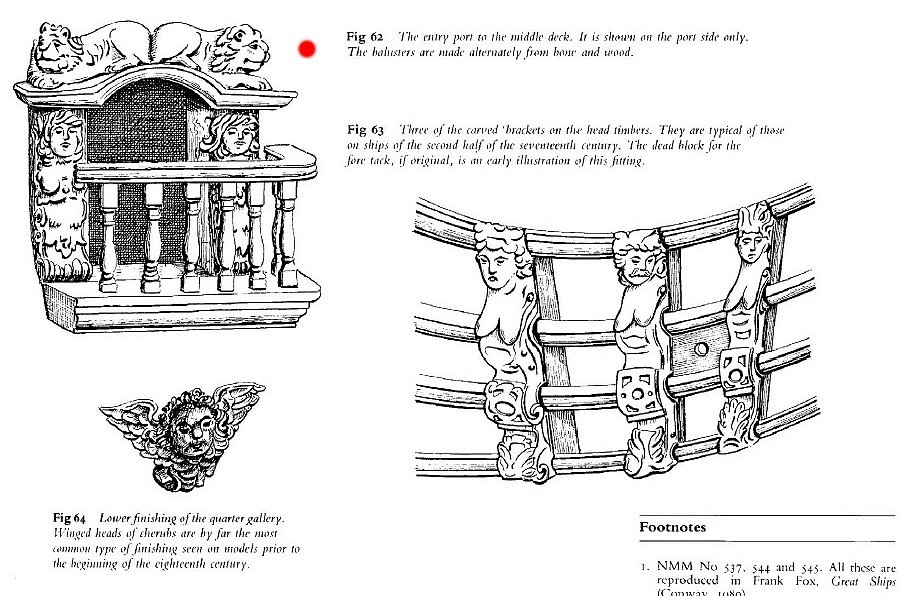
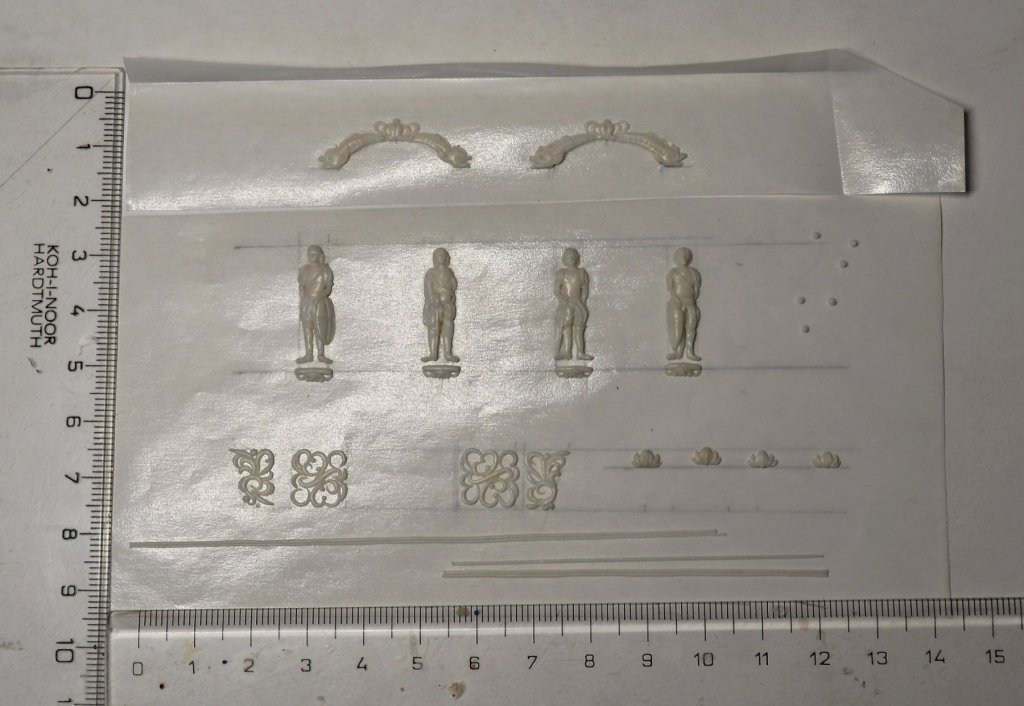
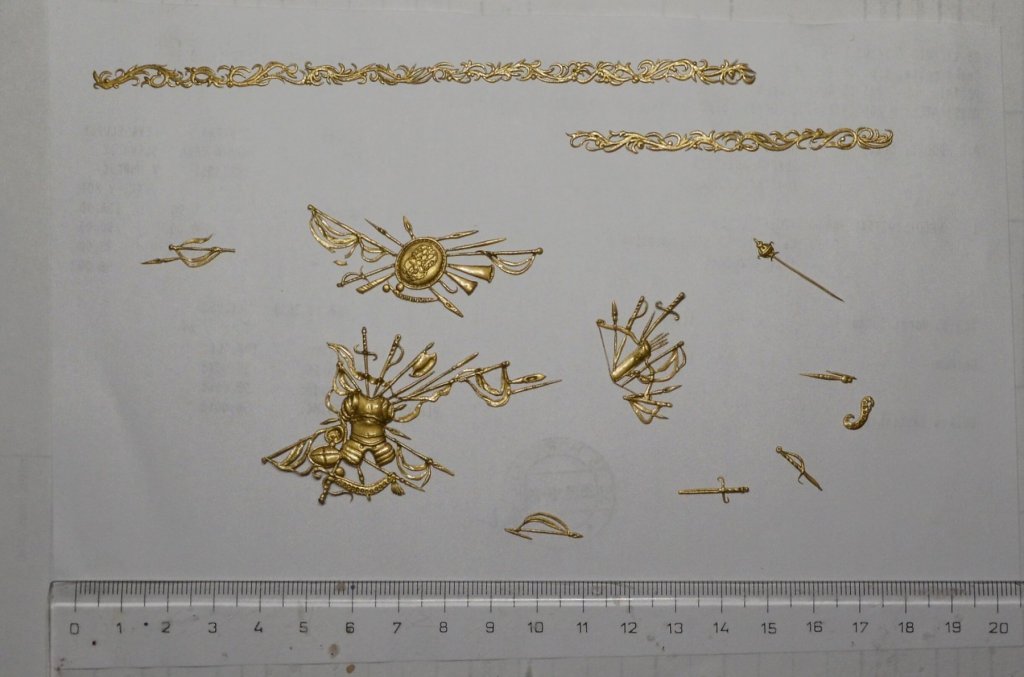
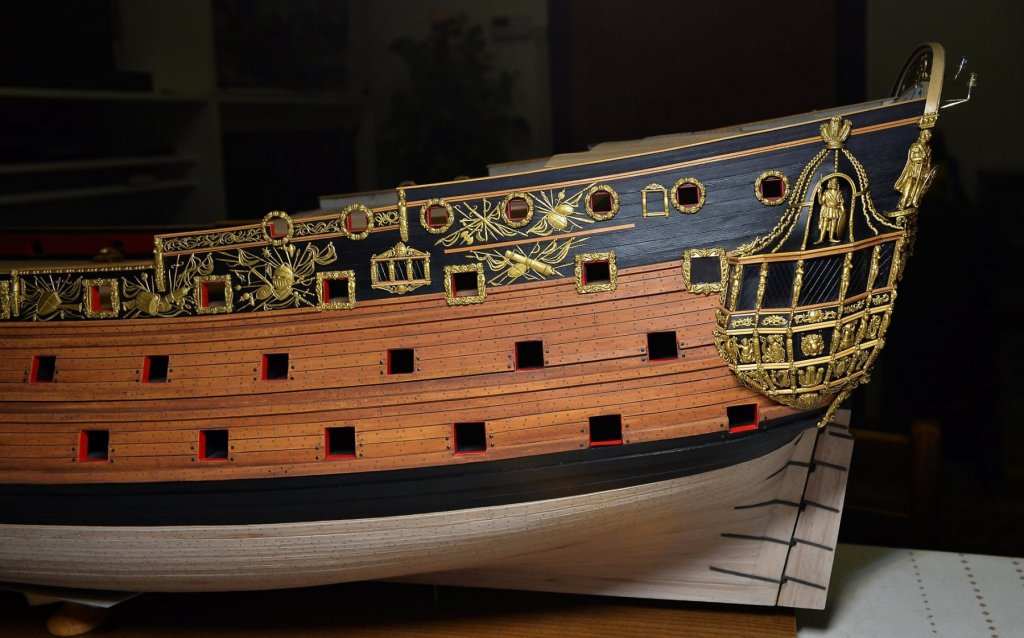
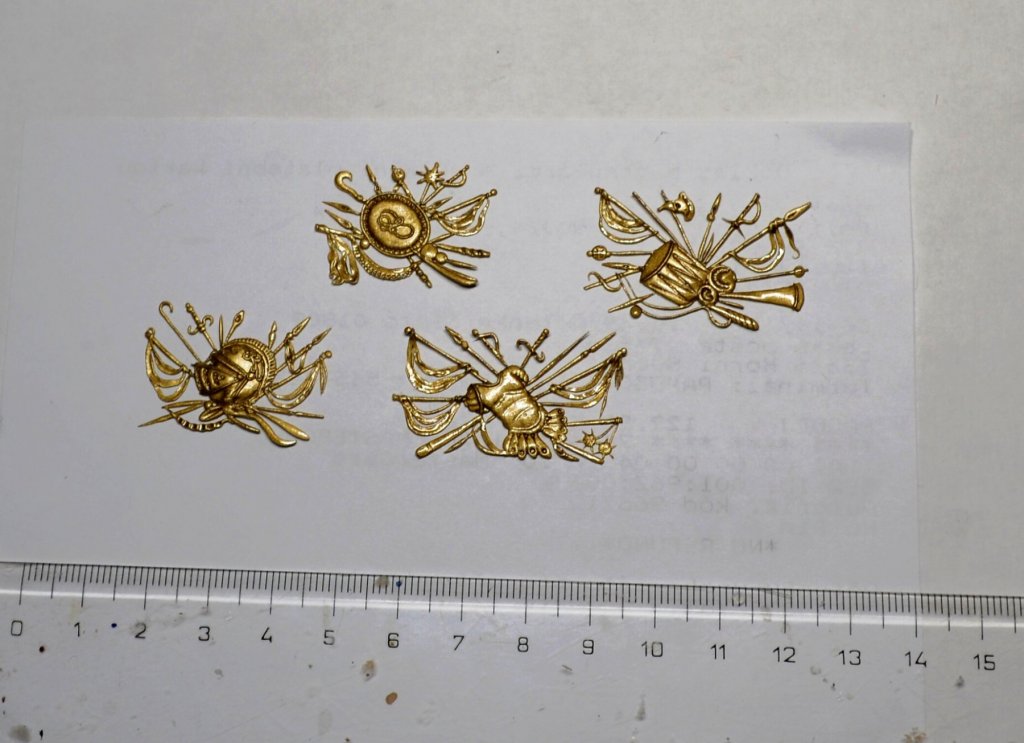
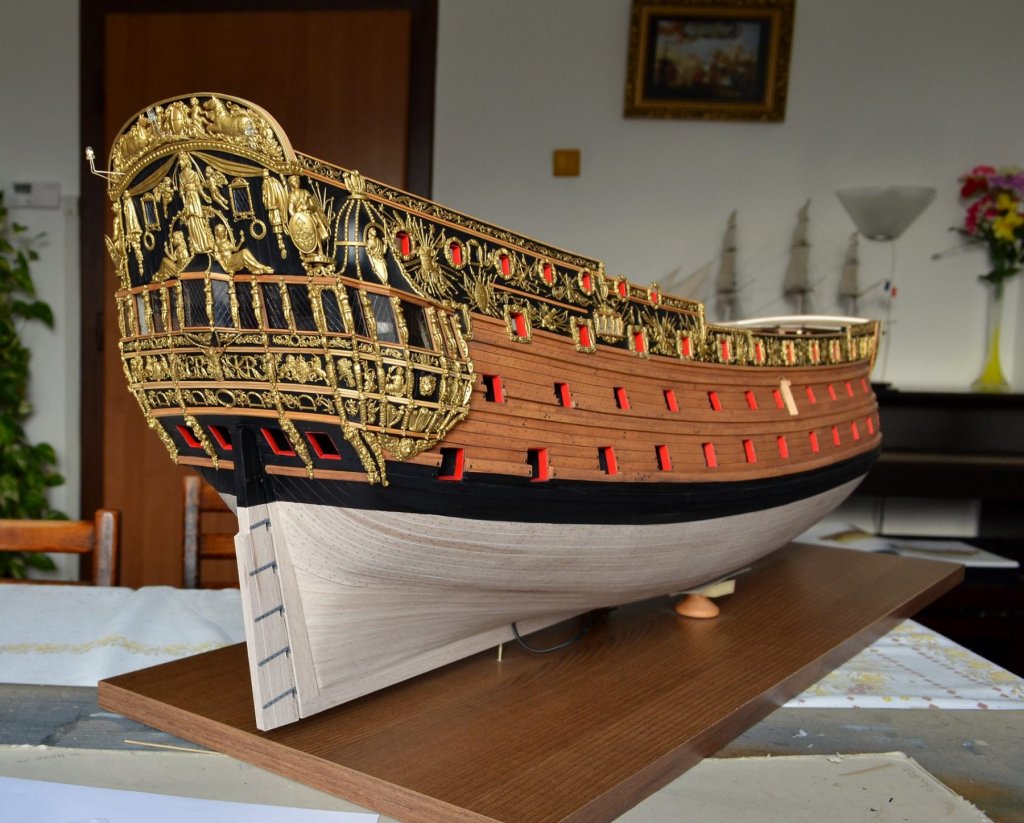
Dear Amalio, Thank you for your nice words and appreciation. I believe that in your great skills you would certainly have managed it. It's mainly about training and patience. Your work is amazing and I admire your craftsmanship a lot. Best reagards, Doris *********************** I have started with decoration and the completion of the entry ports. The details of the decoration in Vale's painting arequite well recognisable - the figures on the supporting columns and the stylized fish on the roof, the rail around the entrance has a carving filling as well: I found other information about the design of entry ports in these books: The Construction and Fitting of the English Man of War 1650-1850 (Peter Goodwin) Ship Models 1650-1750 (John Franklin): And here are almost all pieces of decoration I will use: Soon I will post the final result. Have a great time, Doris
- 1,035 replies
-
- 23
-

-

-
- royal katherine
- ship of the line
- (and 1 more)
-
HMS ROYAL KATHERINE 1664 by Doris - 1/55 - CARD
DORIS replied to DORIS's topic in - Build logs for subjects built 1501 - 1750
Hello dear friends, I do appreciate your comments, thank you all very much. Dear Nils, I am honoured reading your words.I make paper/card models more than 35 years and IMHO there are always possibilities to do things better, so with each new project I want to improve my skills and technologies. And making decoration is really one of the most enjoyable parts of the work. Hello Richmond, I have already posted here some tutorials as the colleagues mentioned above, but I will make some new tutorials from making sculptures for the base under ship hull. I believe, it could be useful and interesting for many people so I am going to post it here. Exactly Radek, first I make one half and after baking the other. There is no problem with re-baking the clay. Some complicated sculptures I have to re-bake 4-5 times. Best regards Doris- 1,035 replies
-
- 11
-
-
- royal katherine
- ship of the line
- (and 1 more)
-
Absolutely perfect work, very beautiful and clean result. My deep admiration to your workmanship, dear Karl. Kind regards, Doris
- 40 replies
-
- 3
-
-
- ancre
- Chaloupe Armee En Guerre
- (and 1 more)
-
HMS ROYAL KATHERINE 1664 by Doris - 1/55 - CARD
DORIS replied to DORIS's topic in - Build logs for subjects built 1501 - 1750
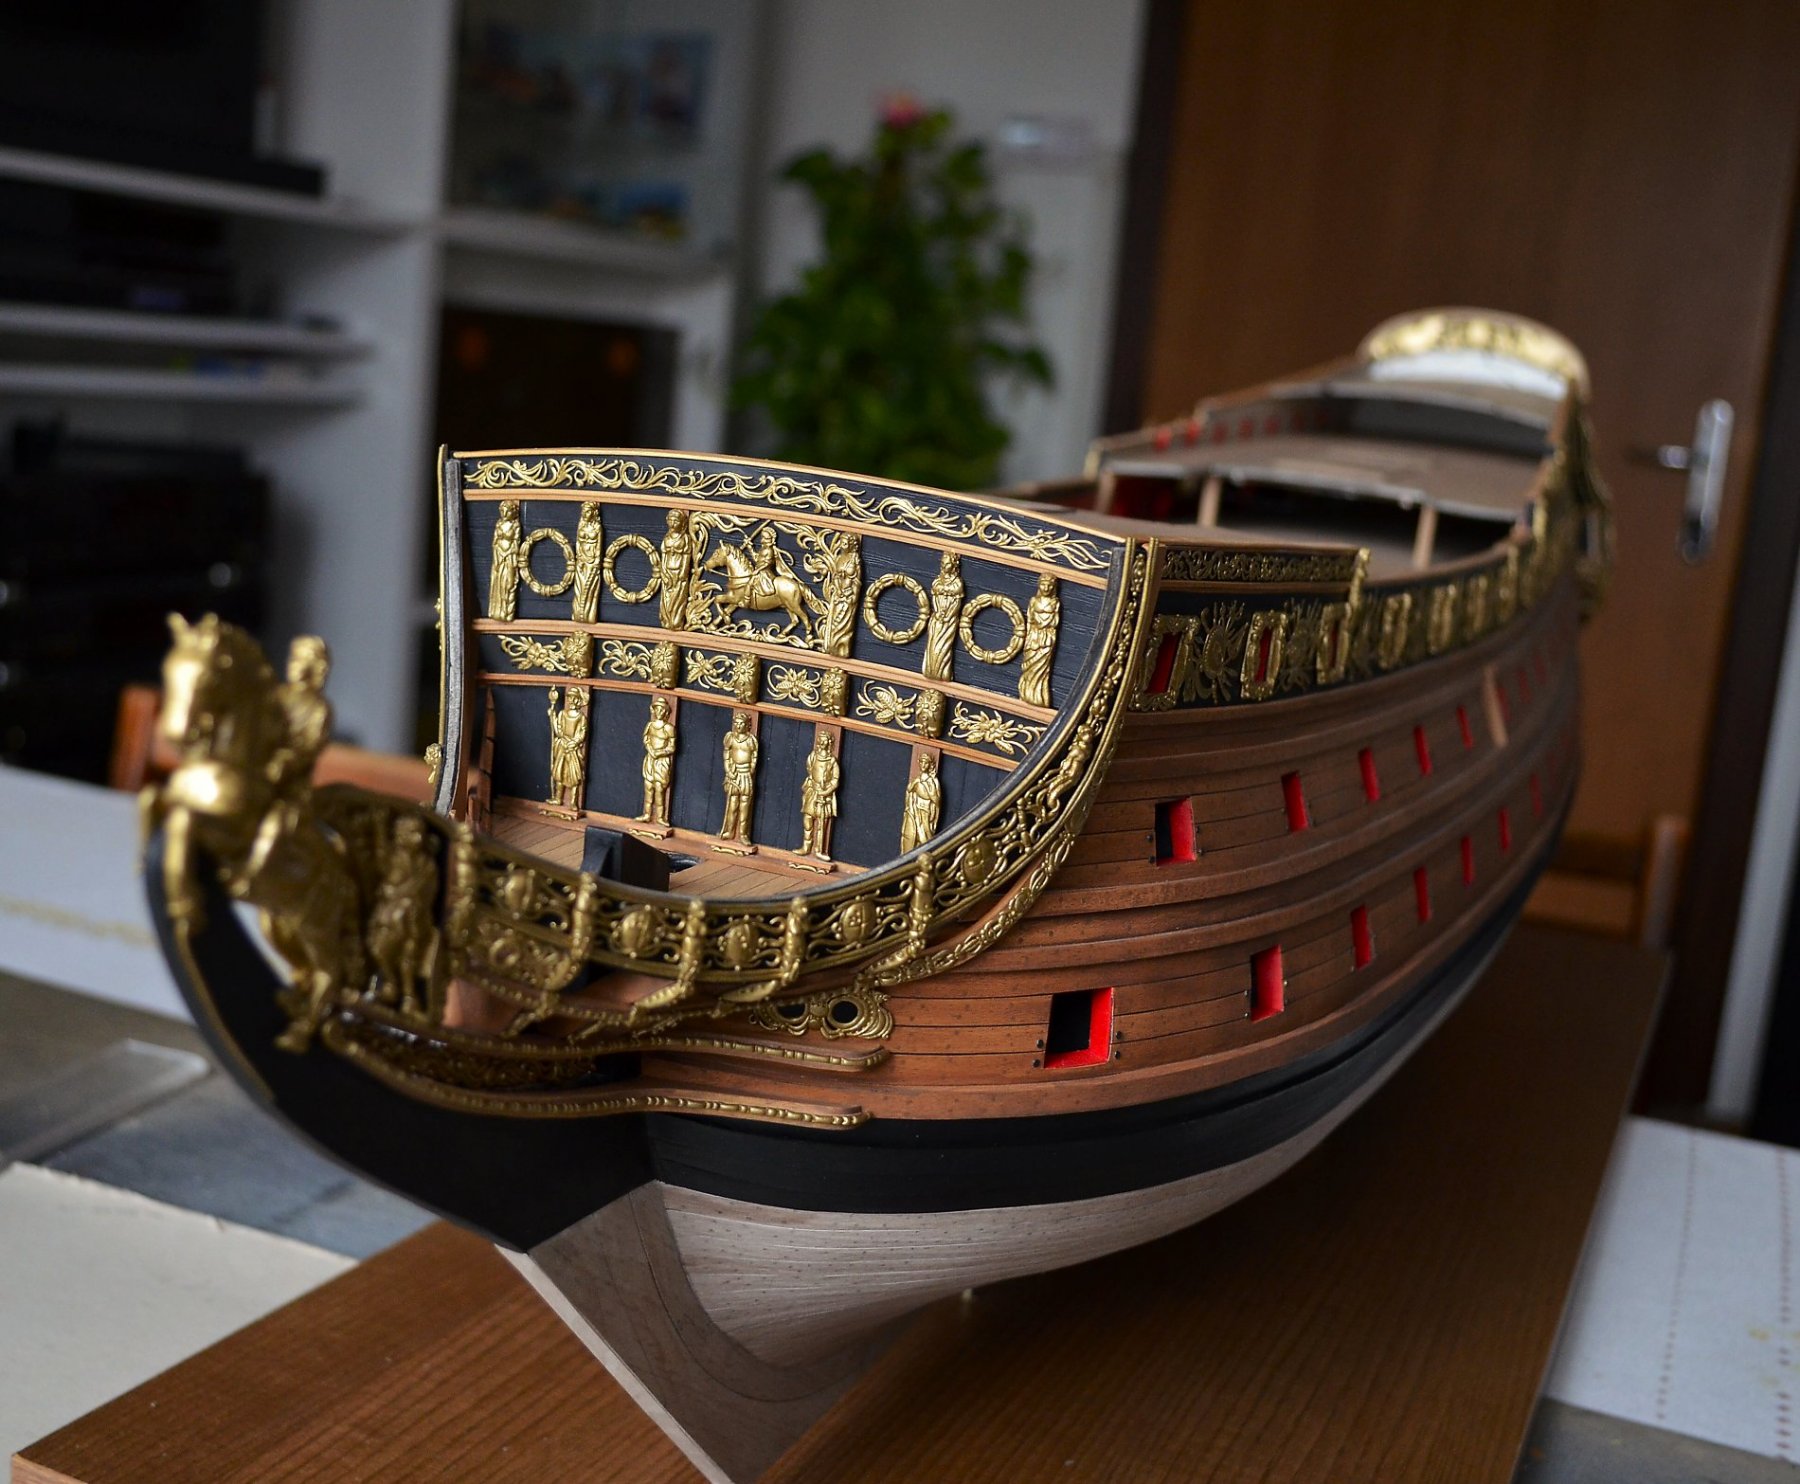
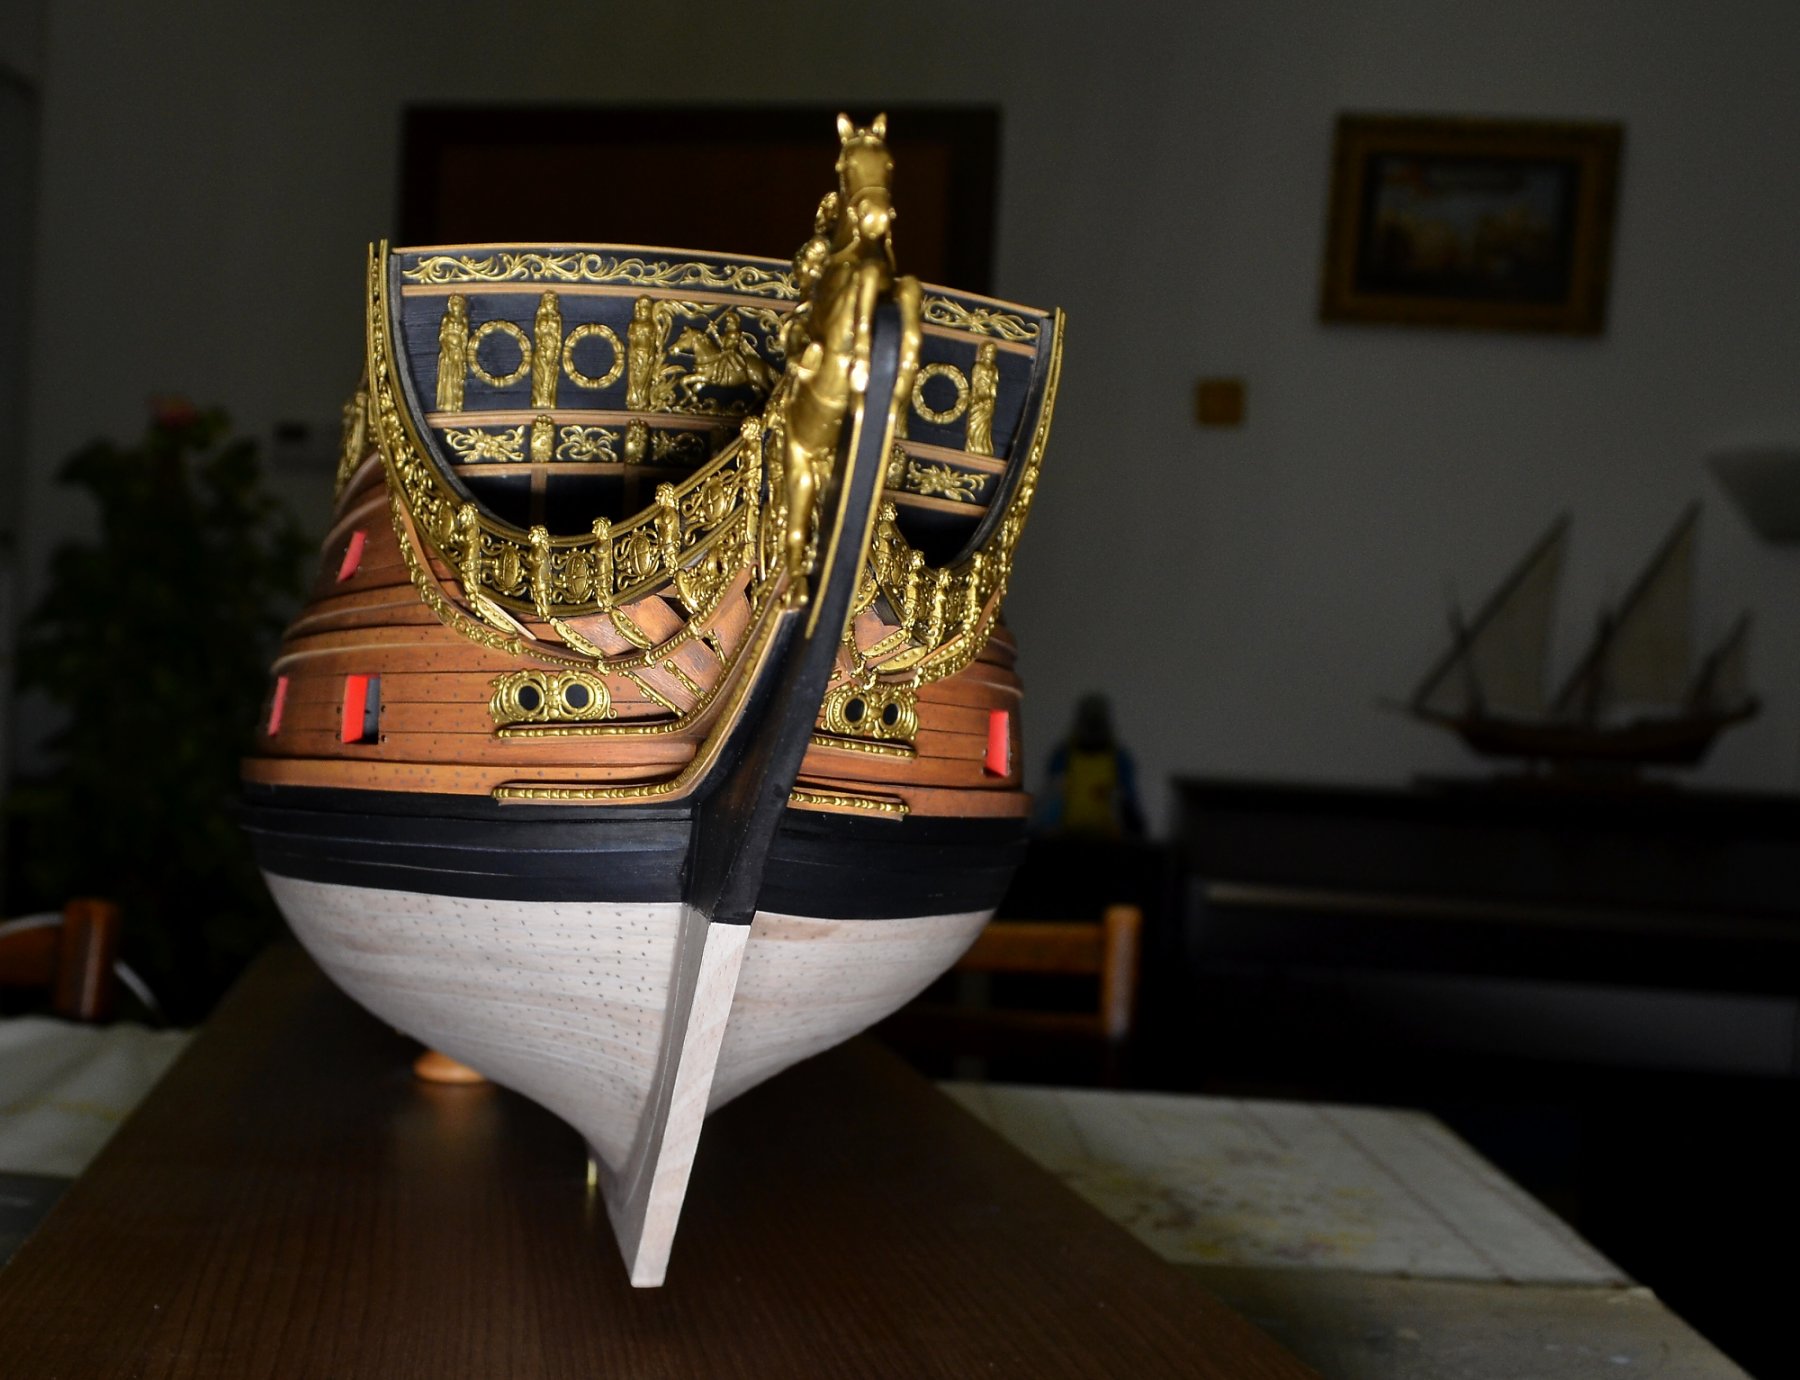
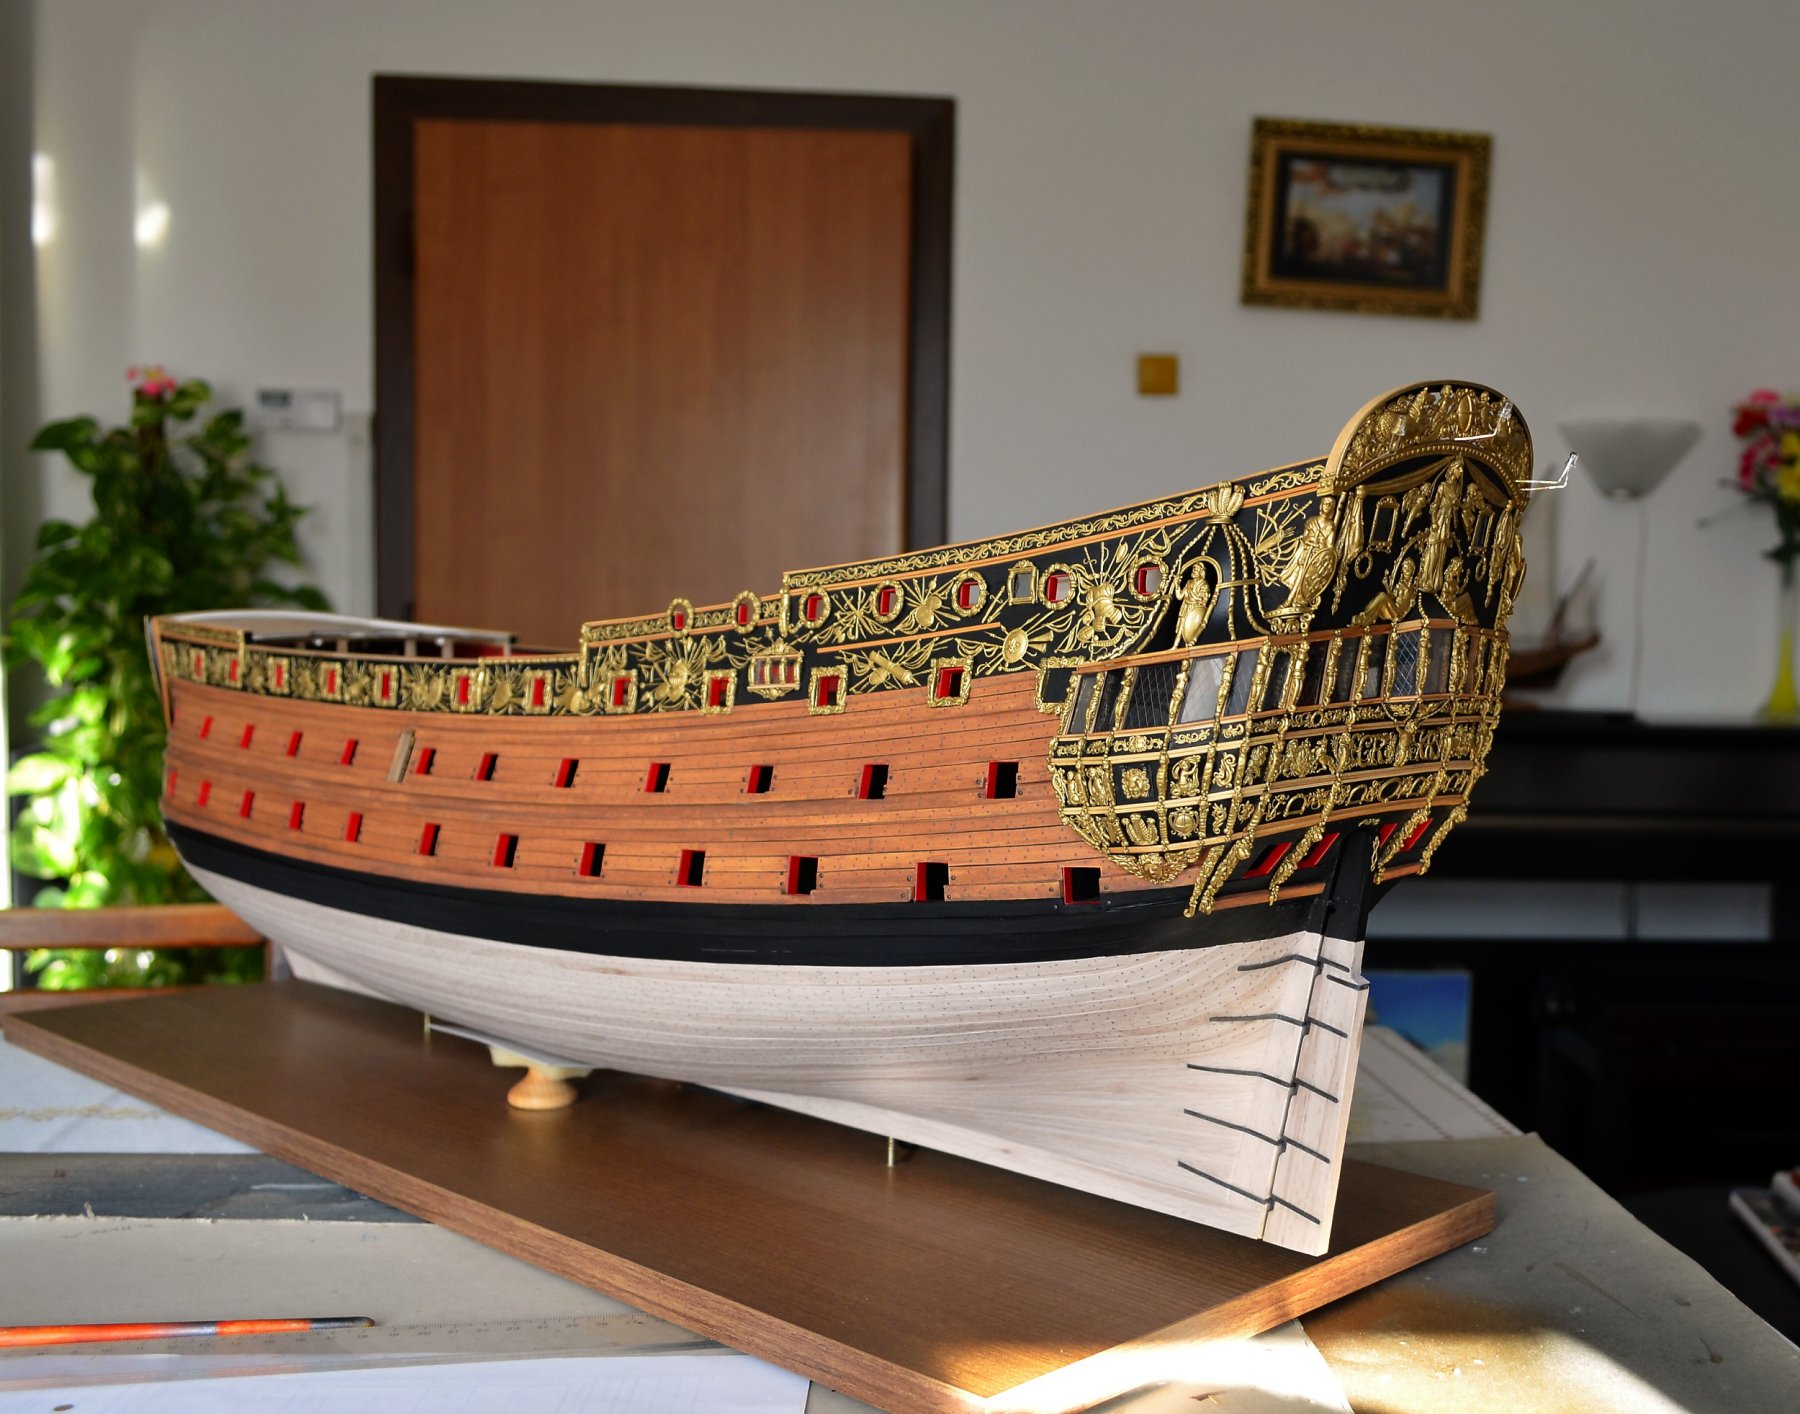
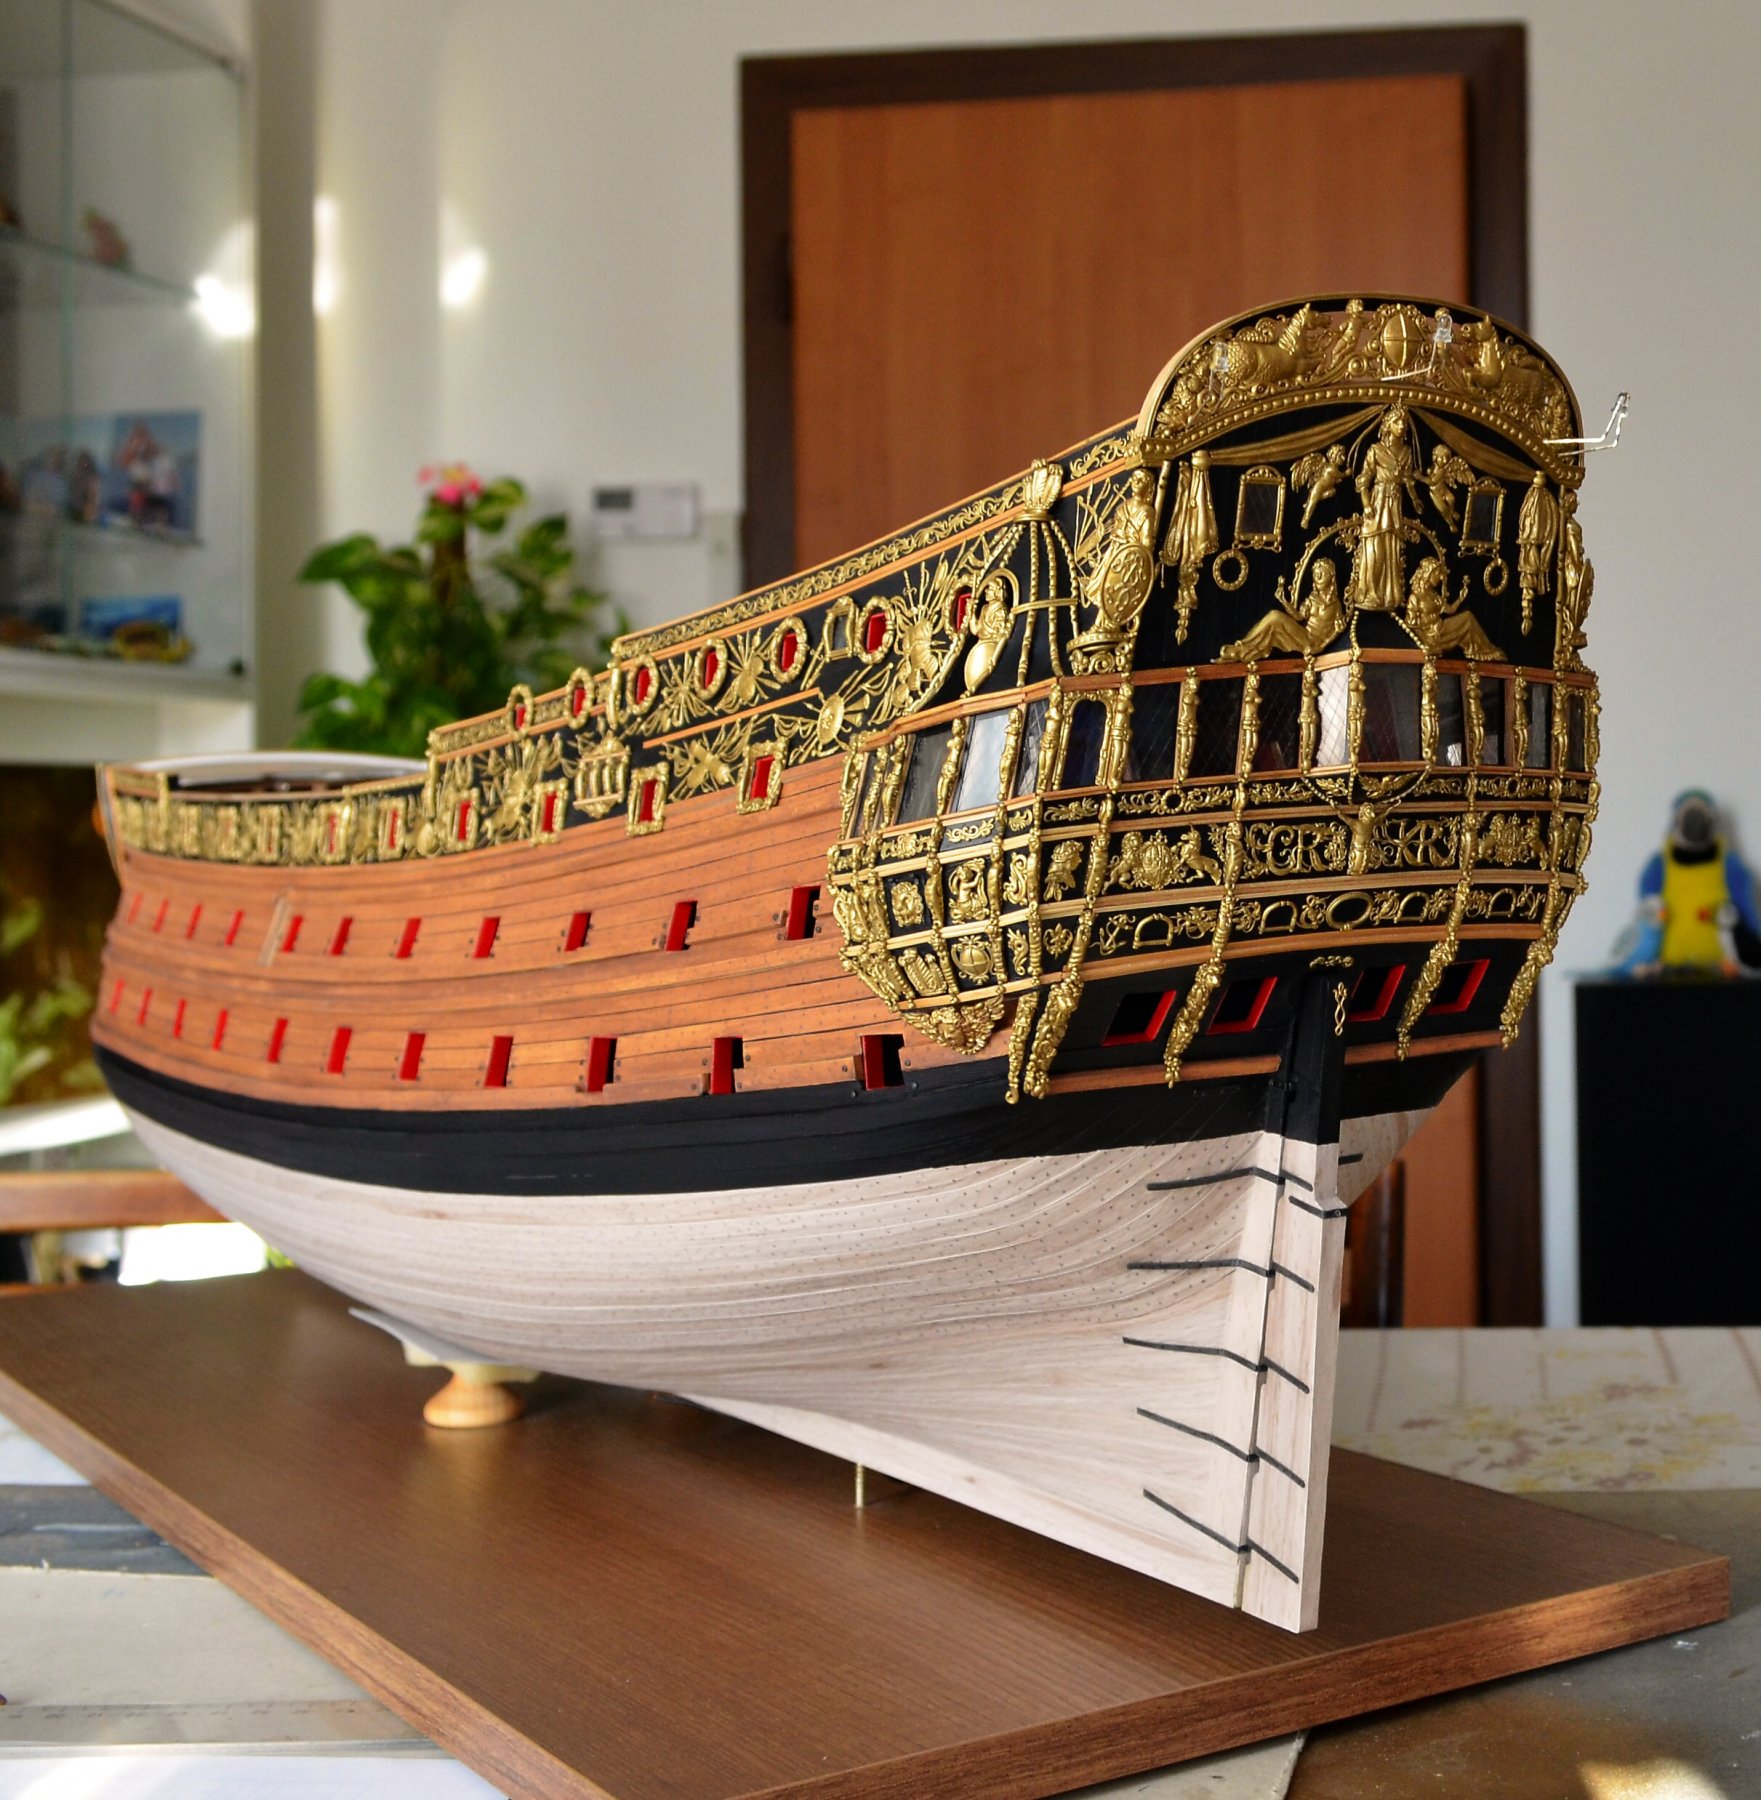
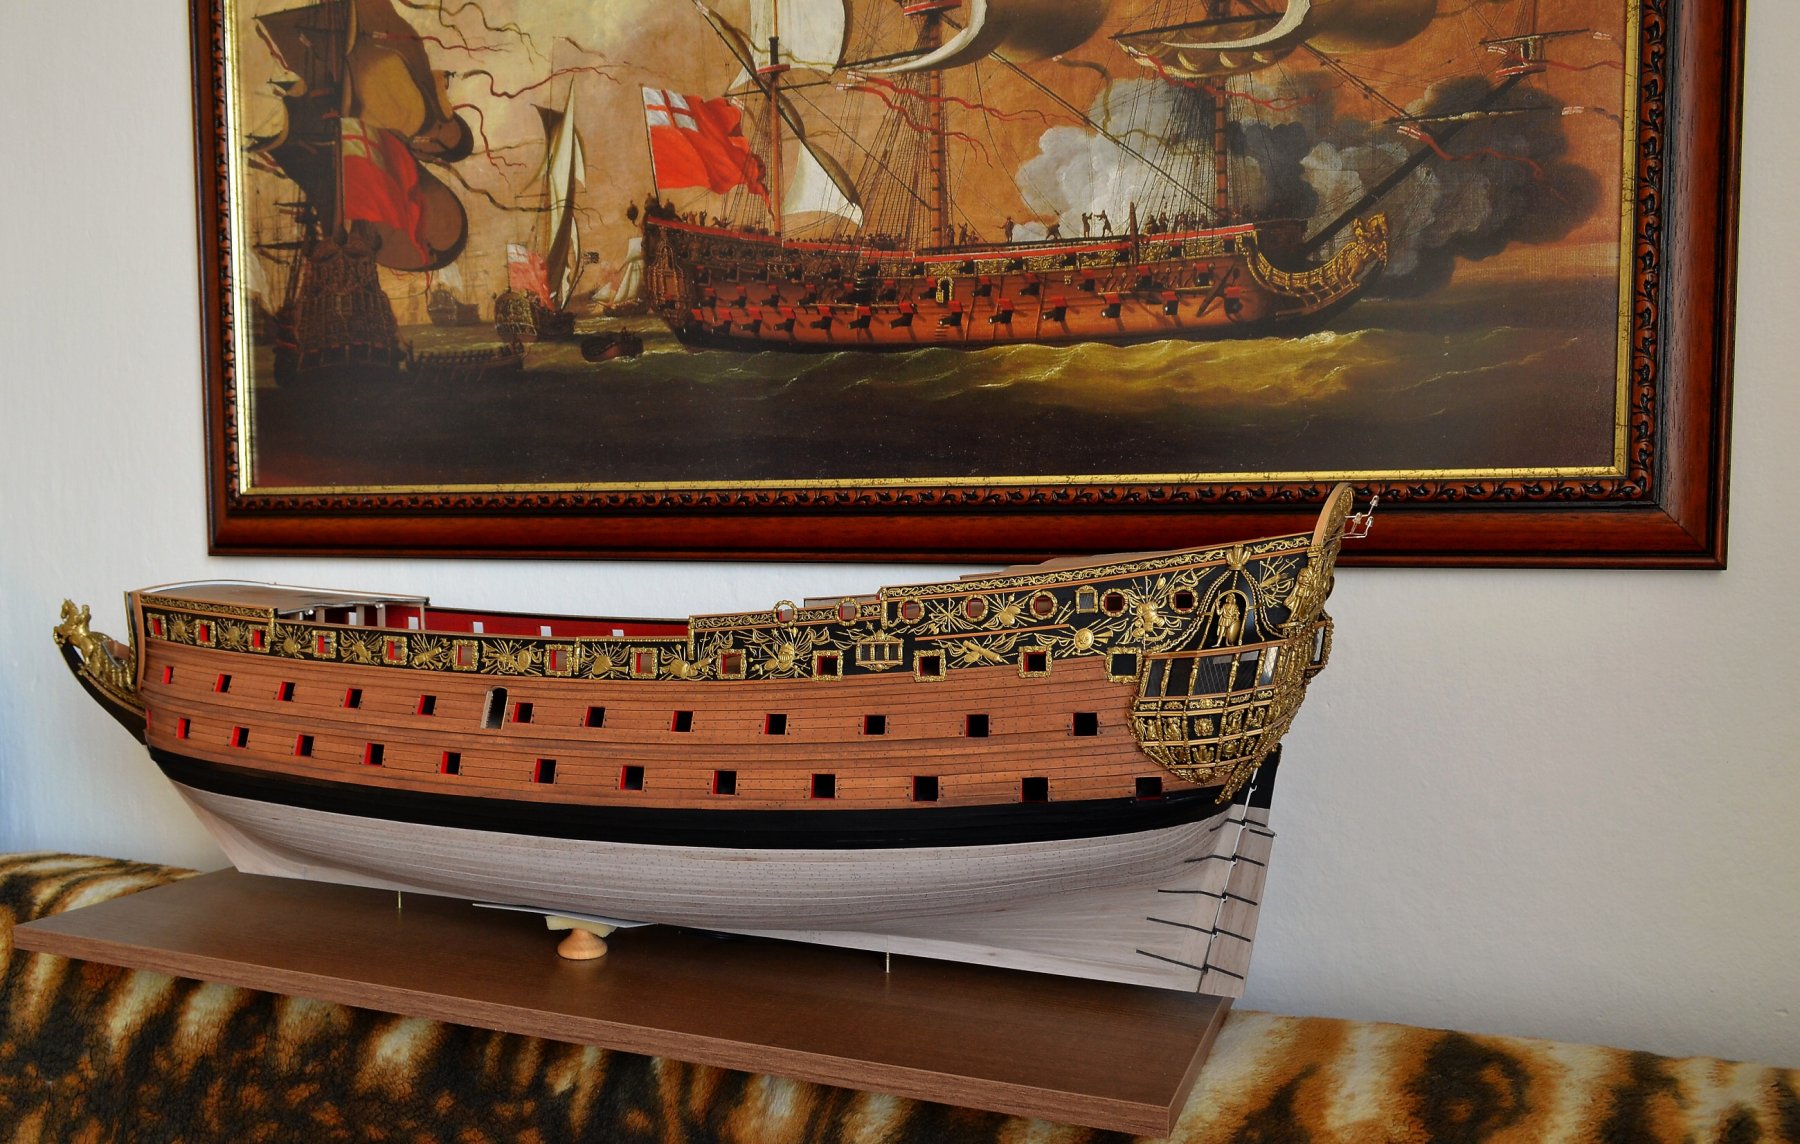
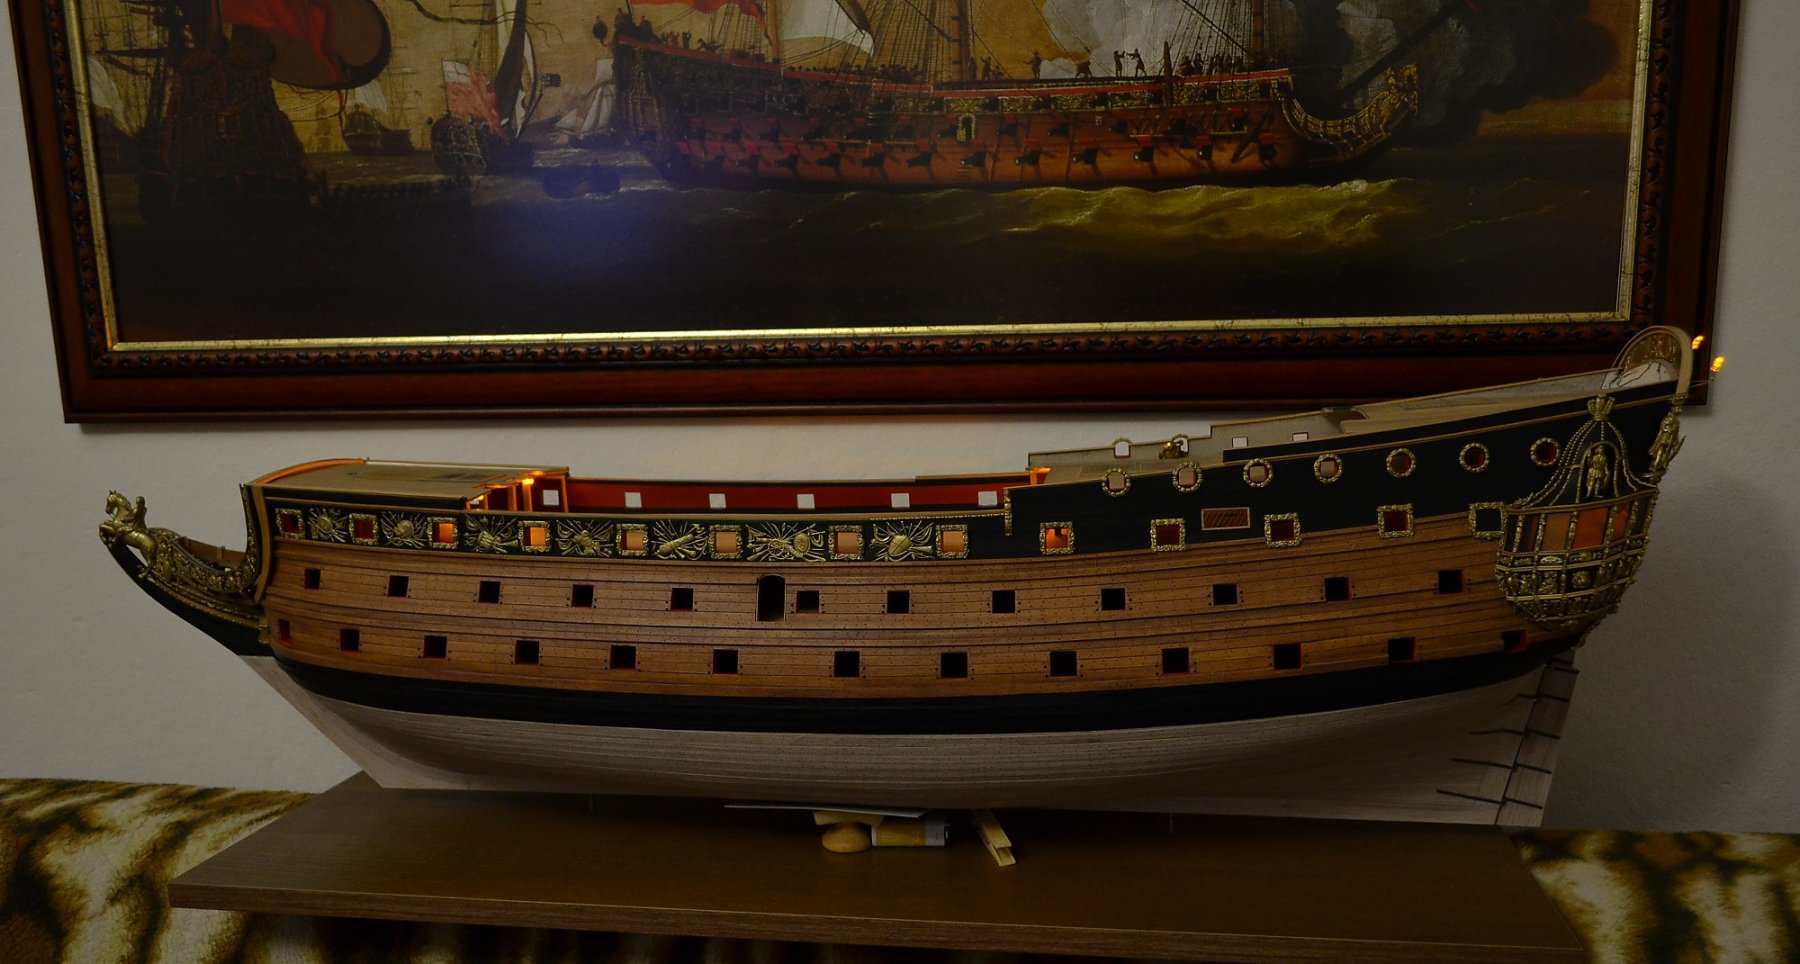
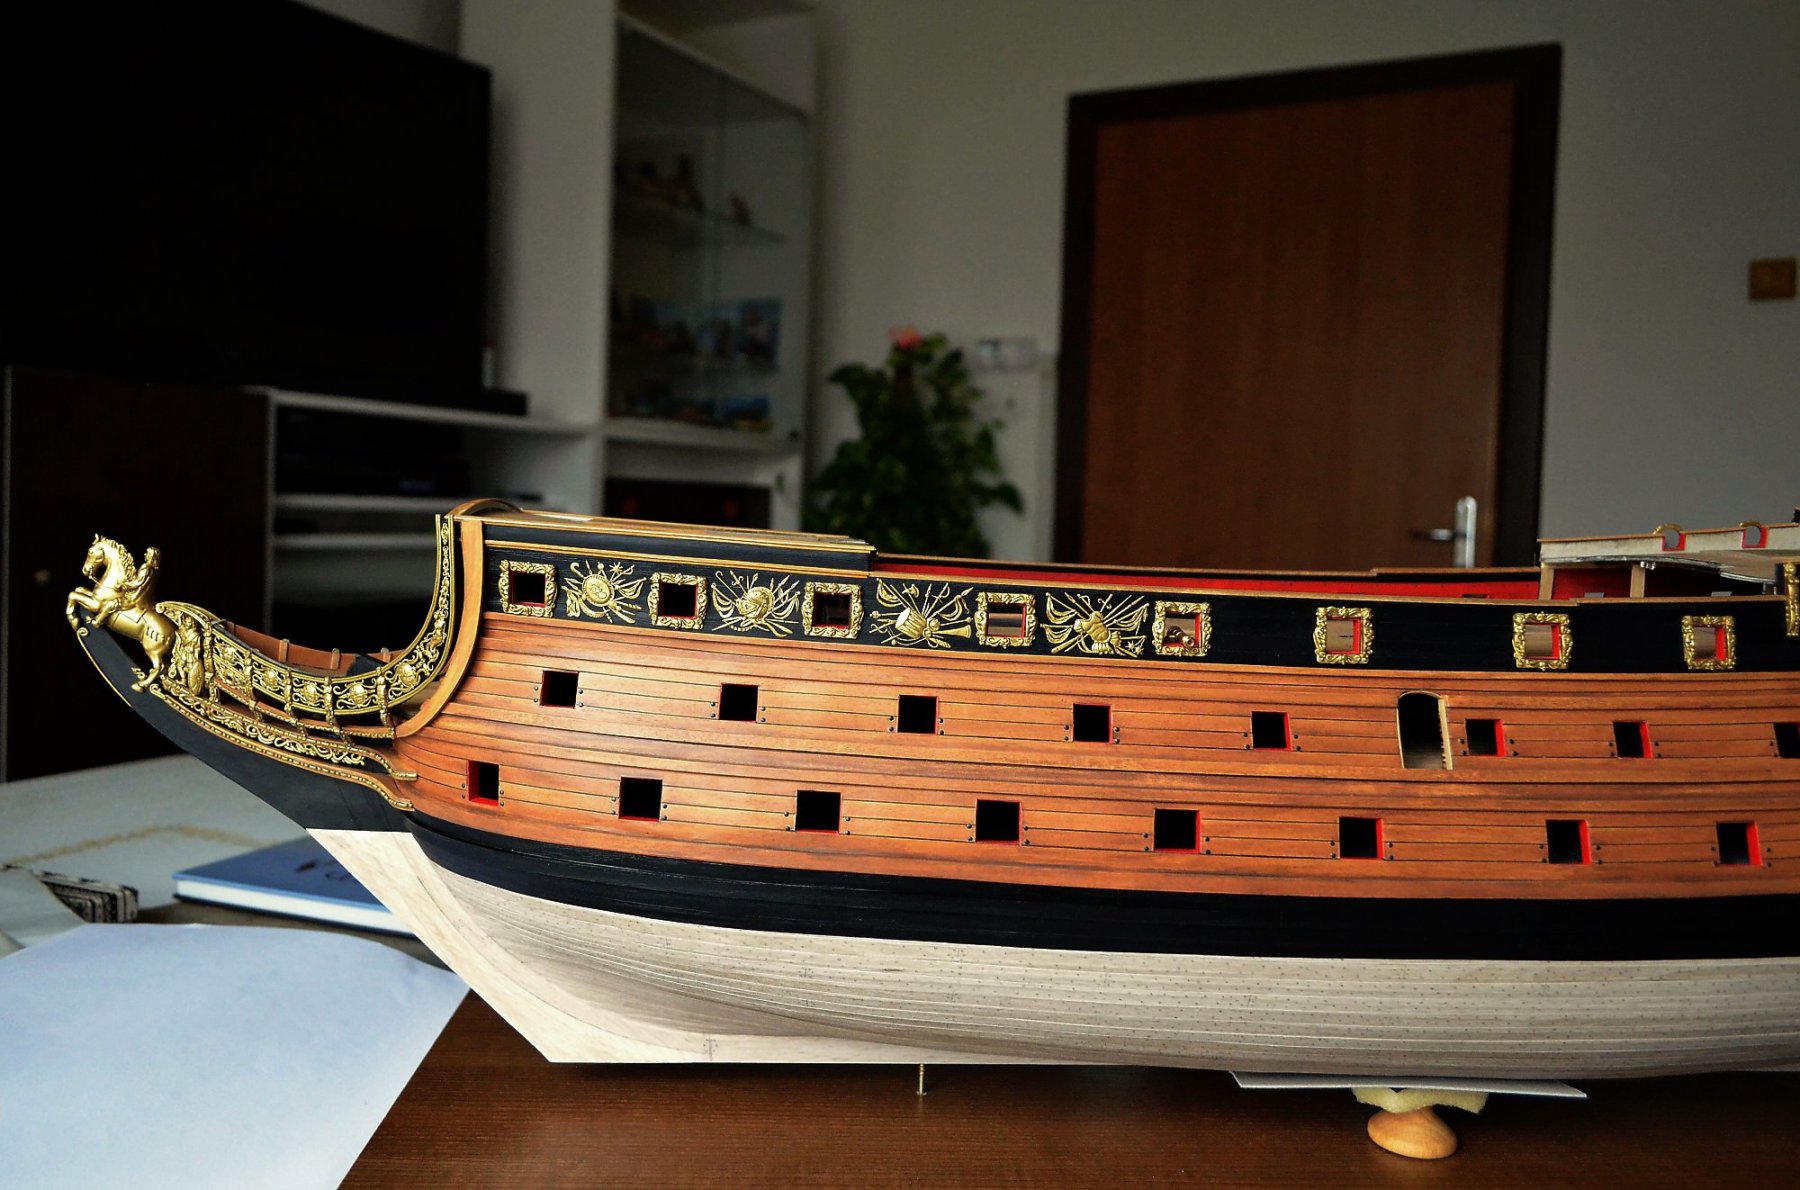
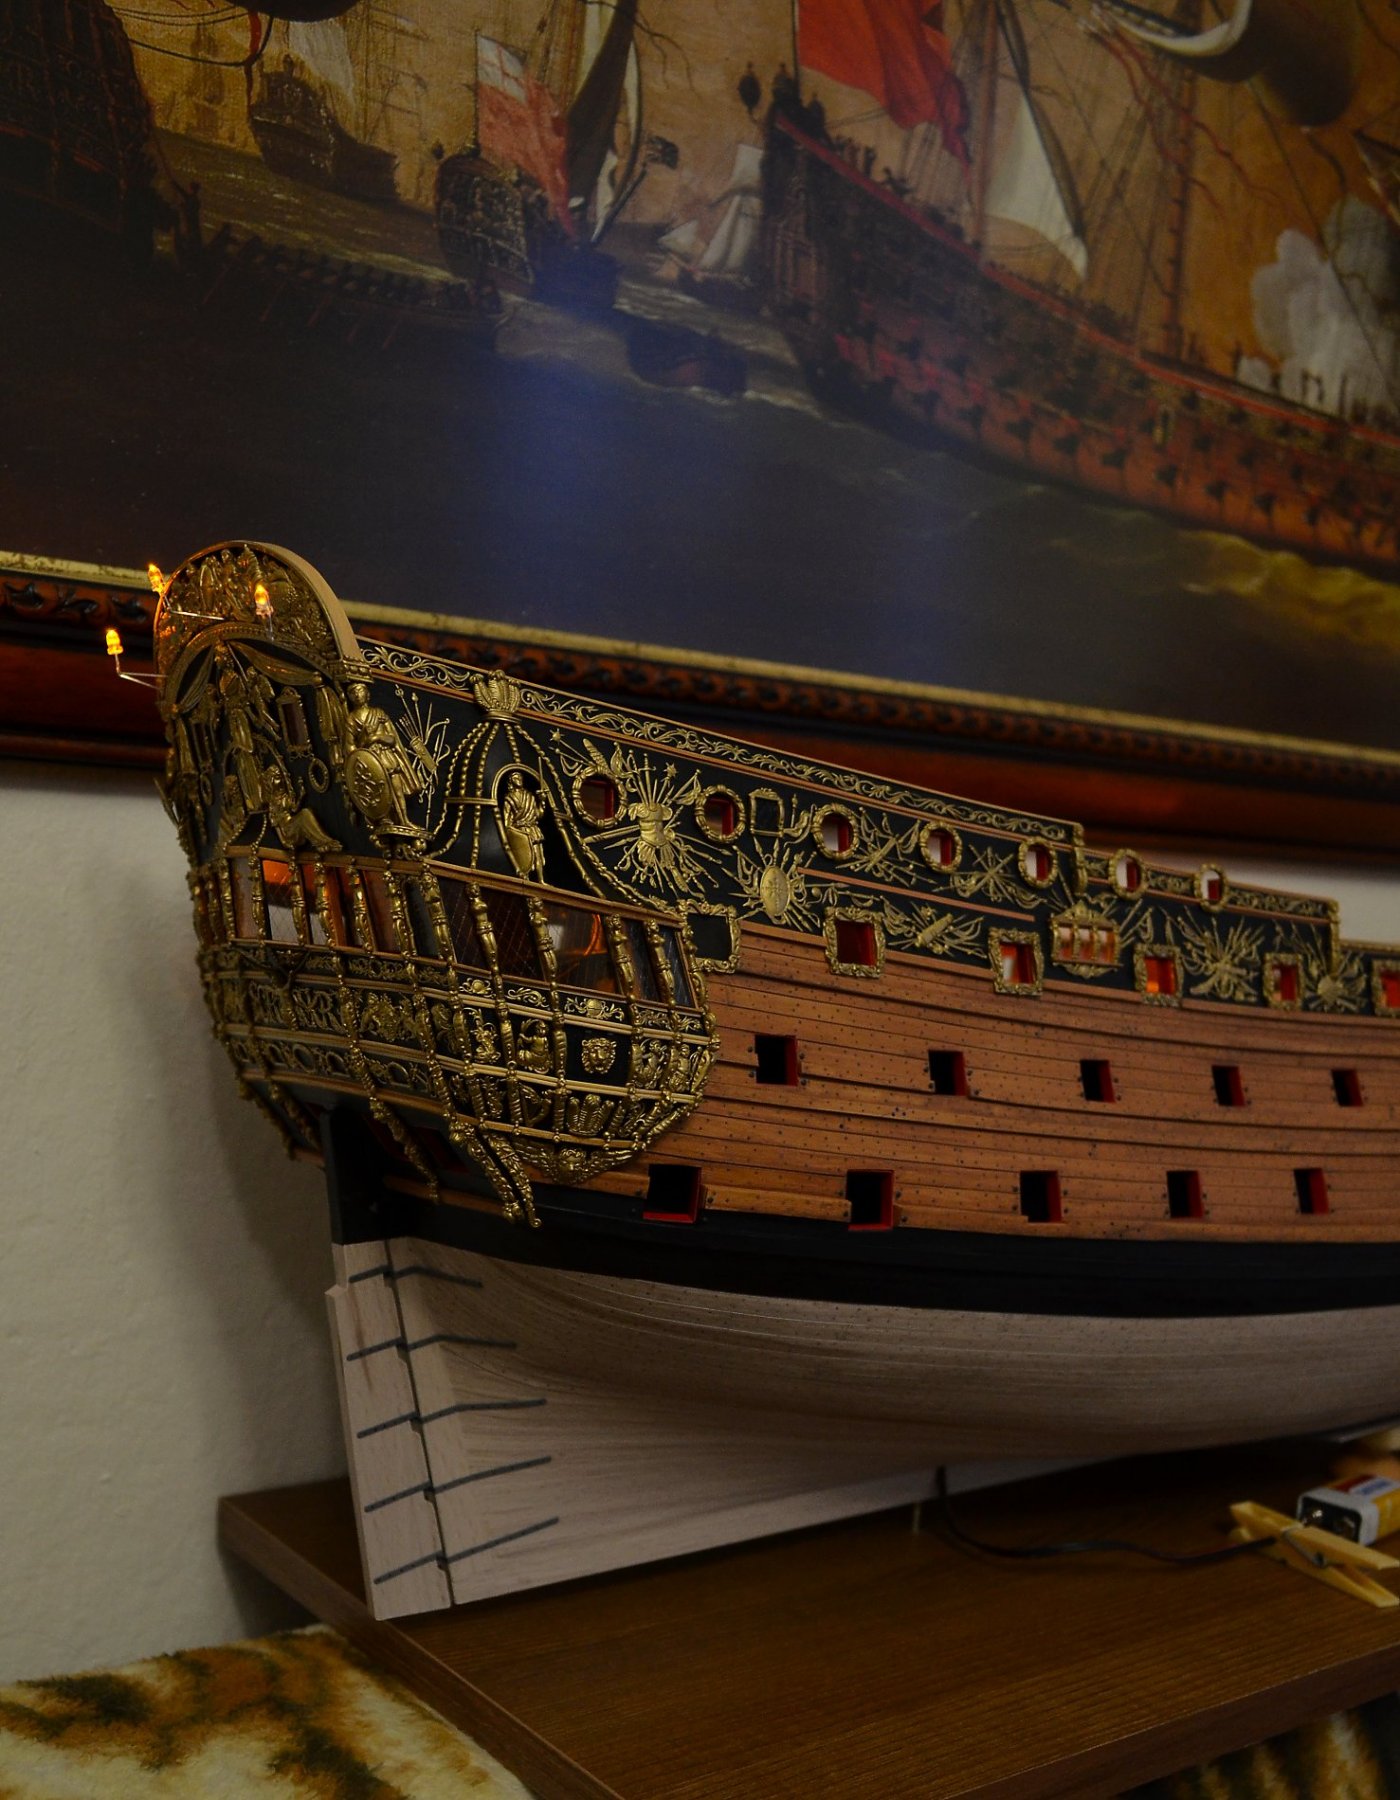
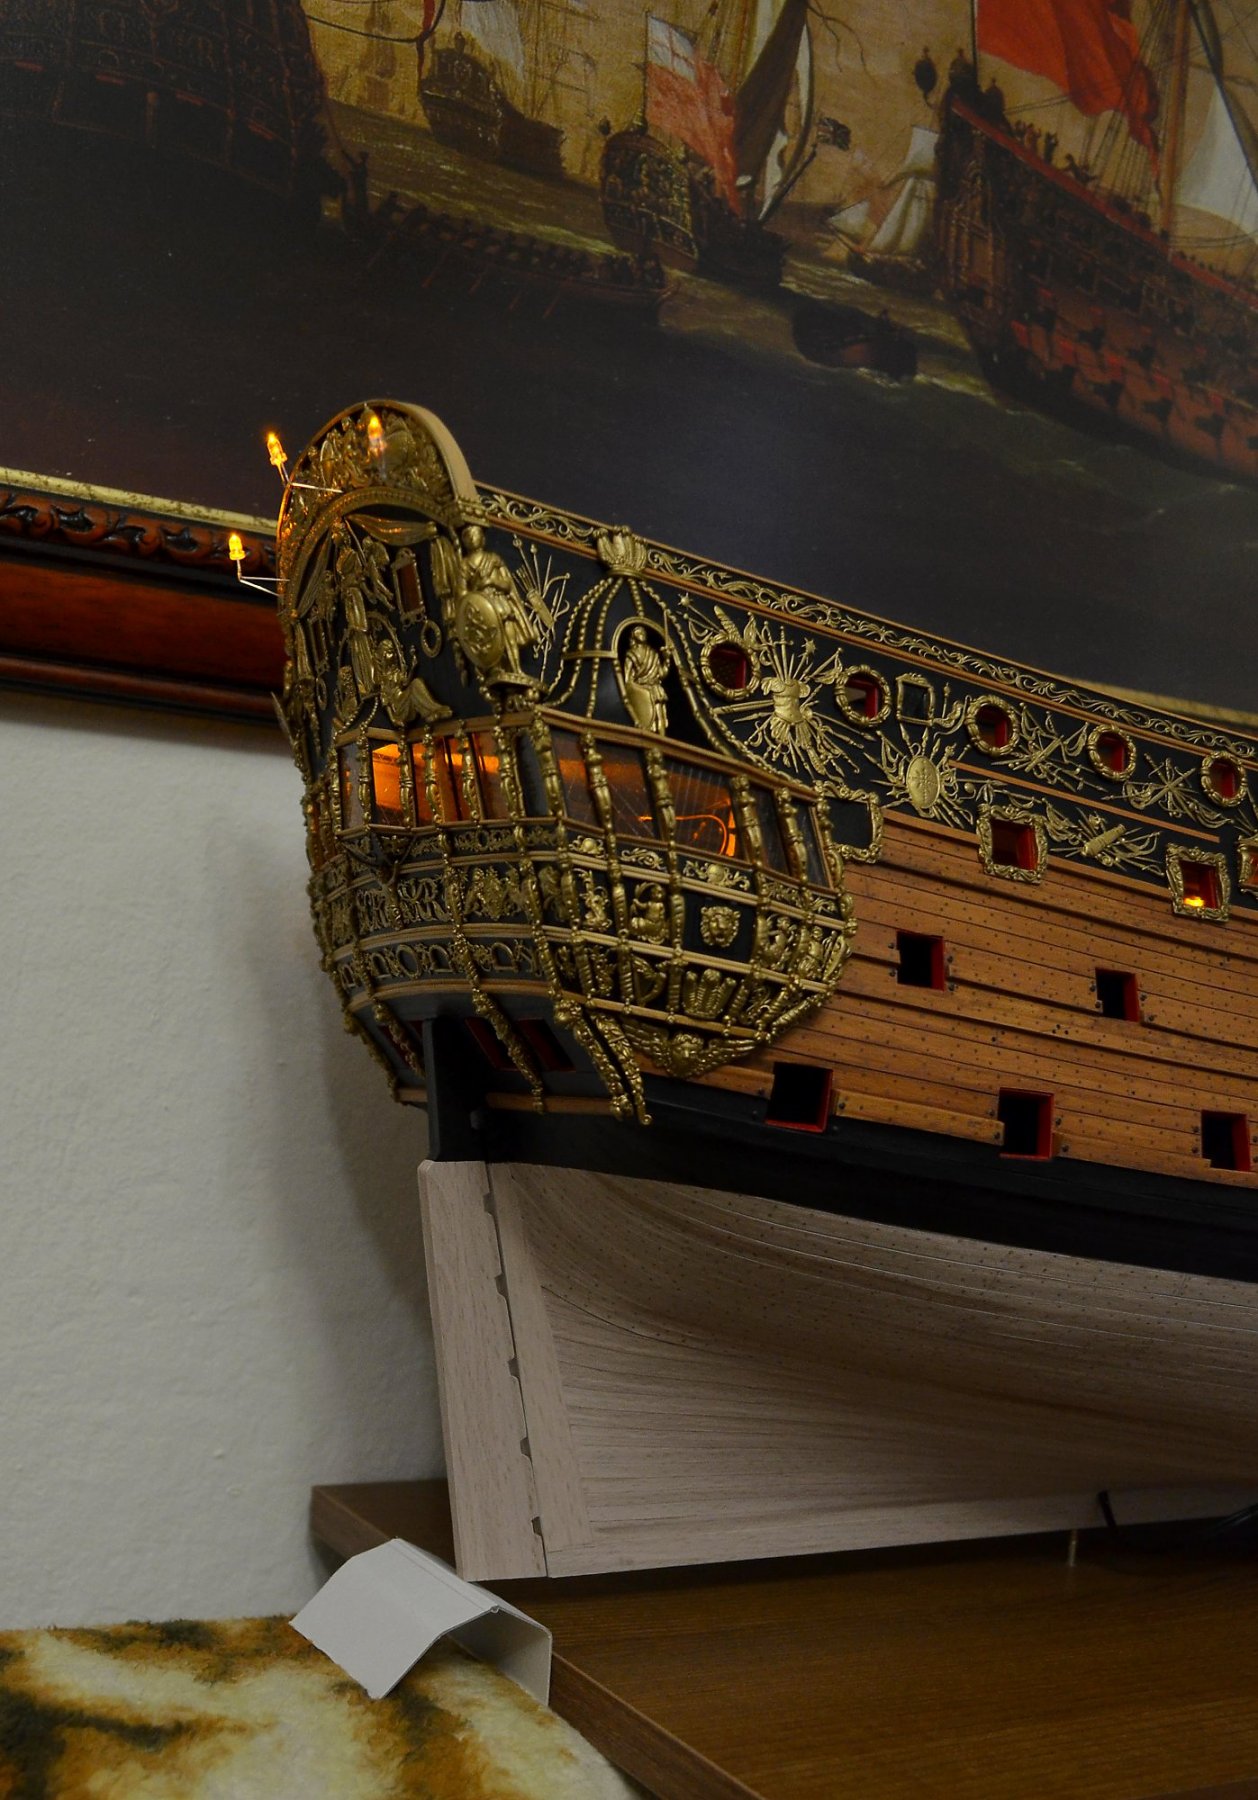
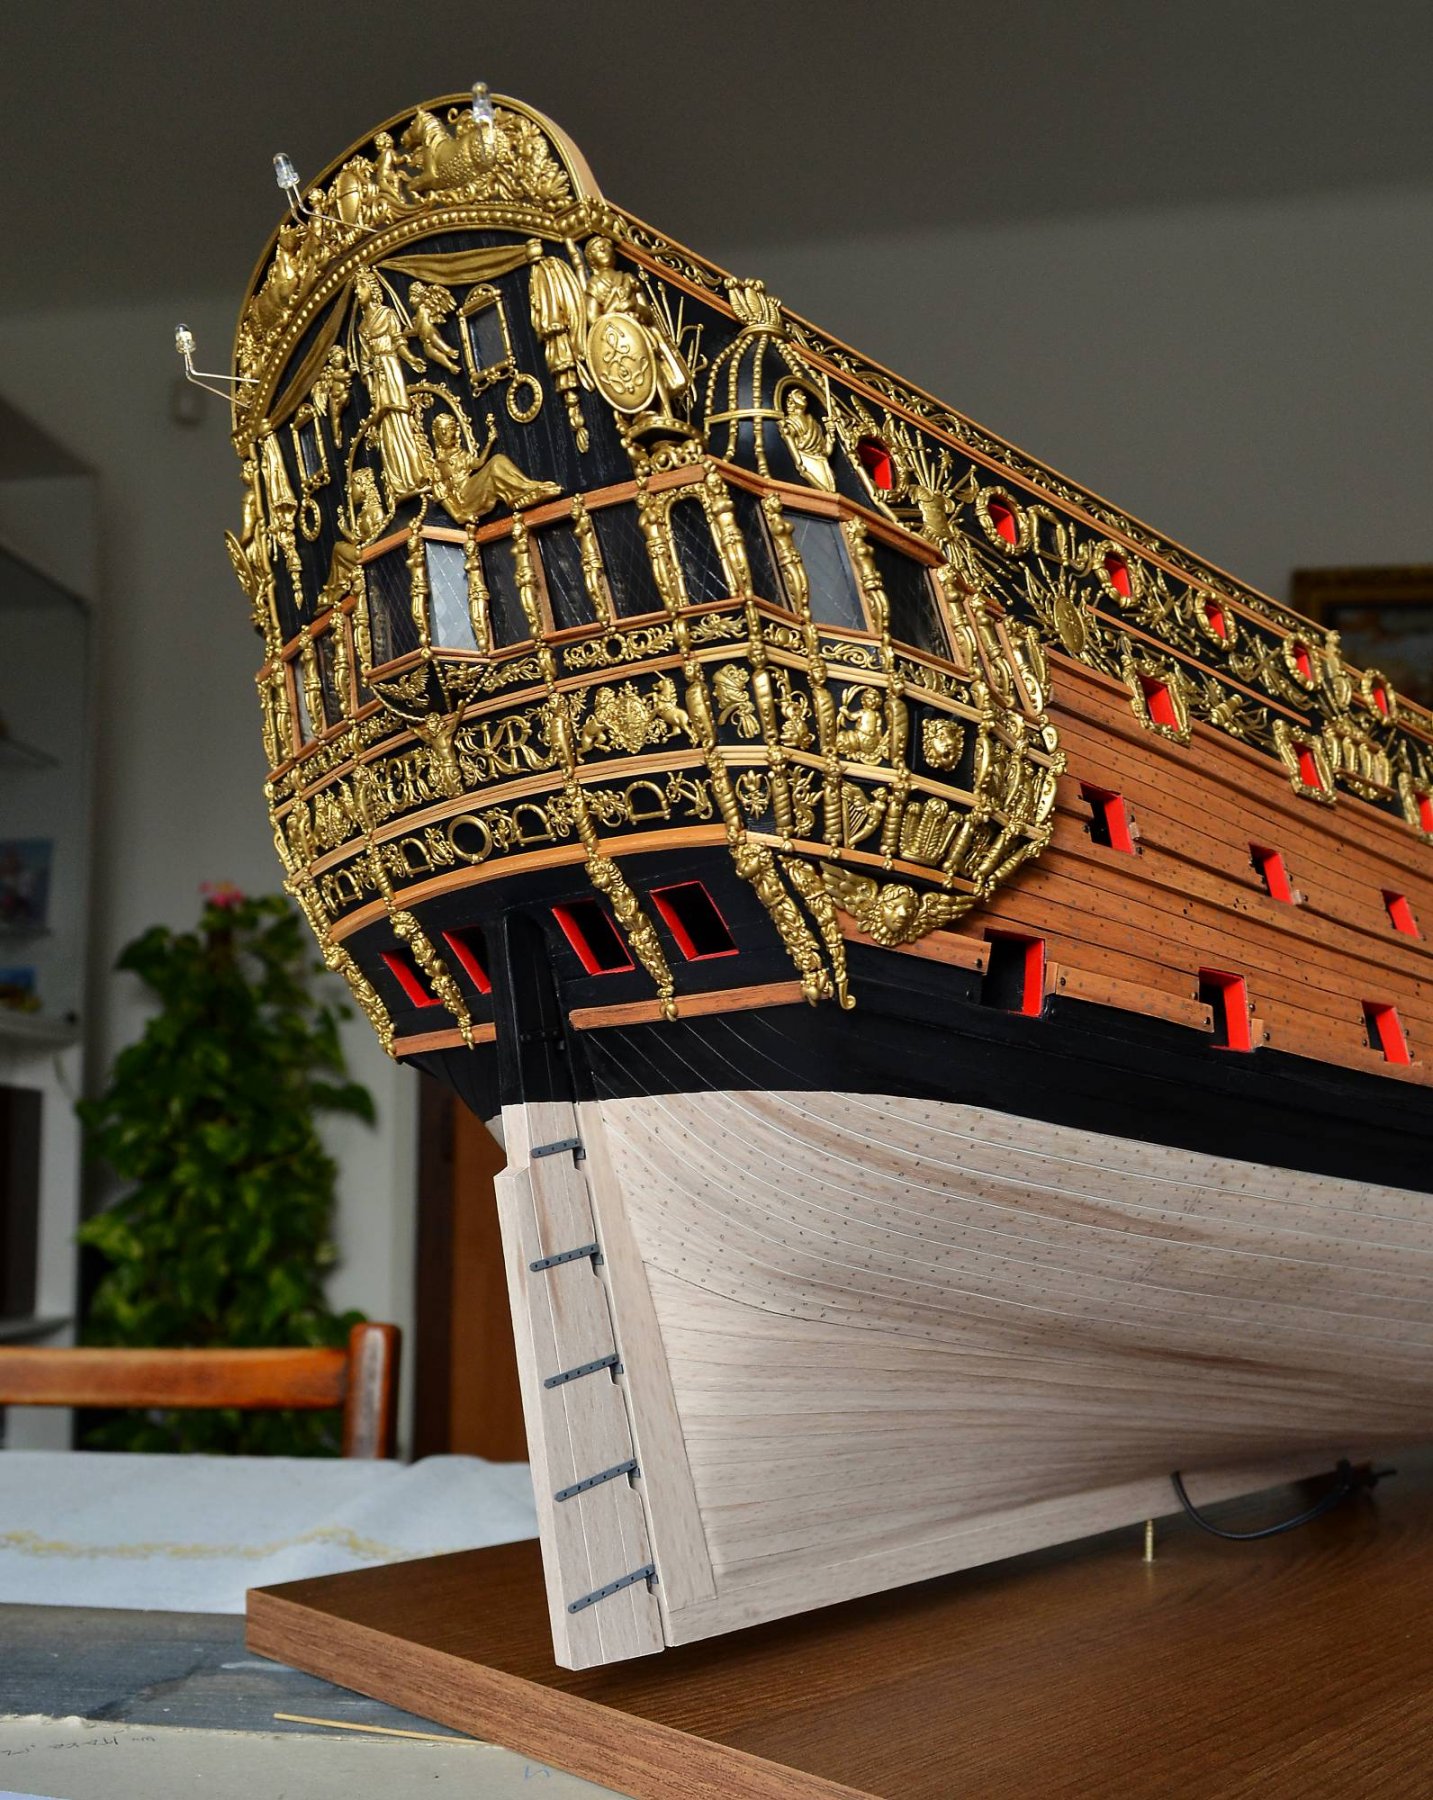
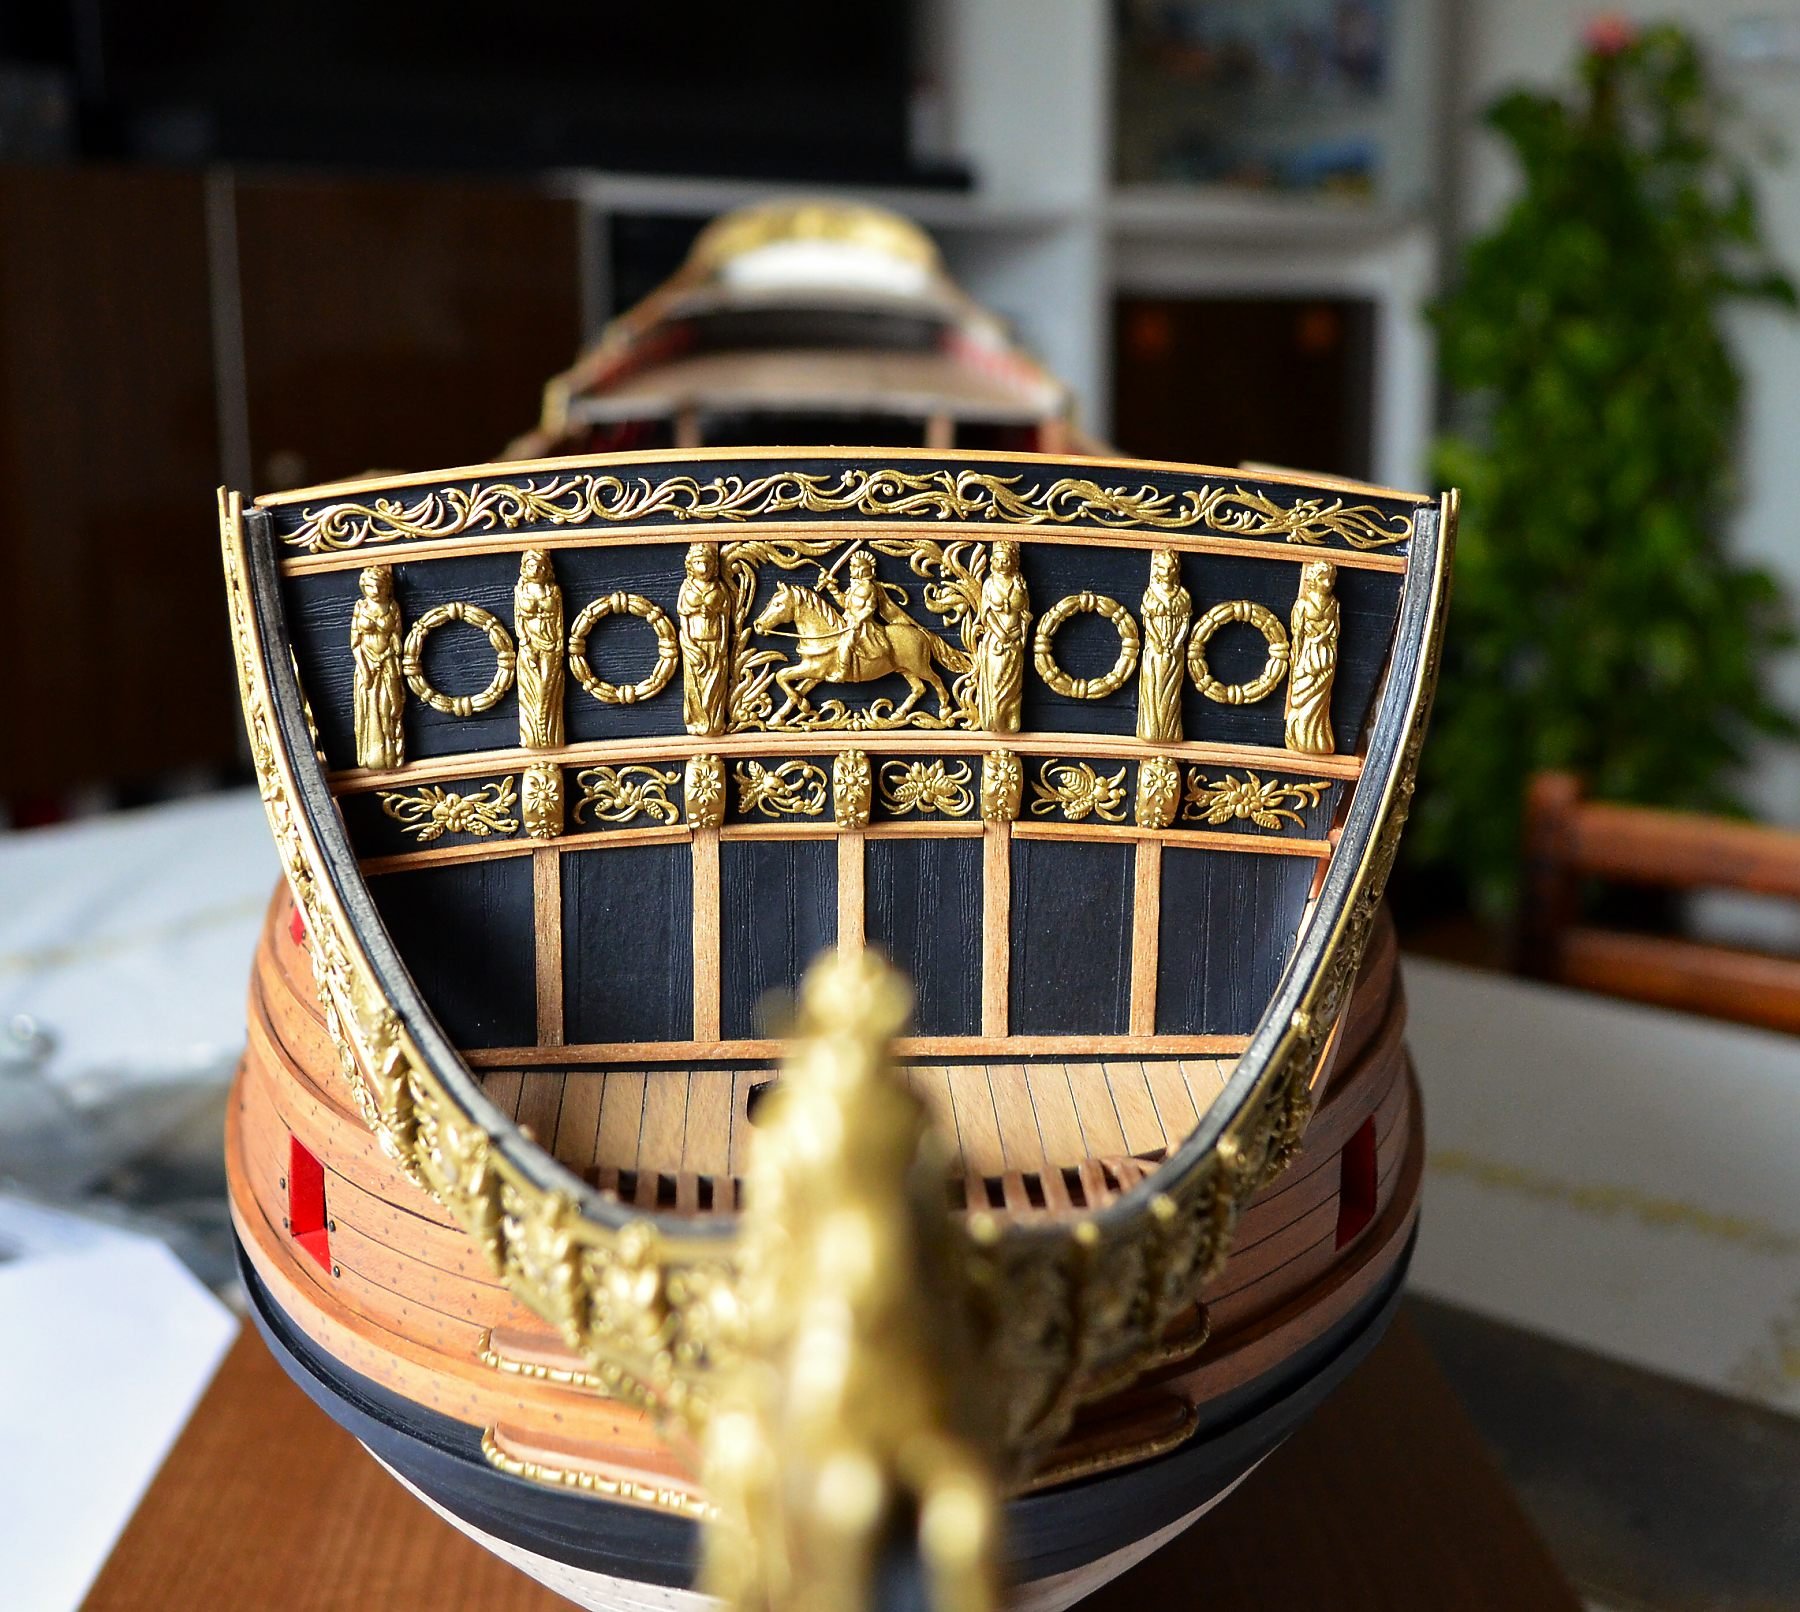
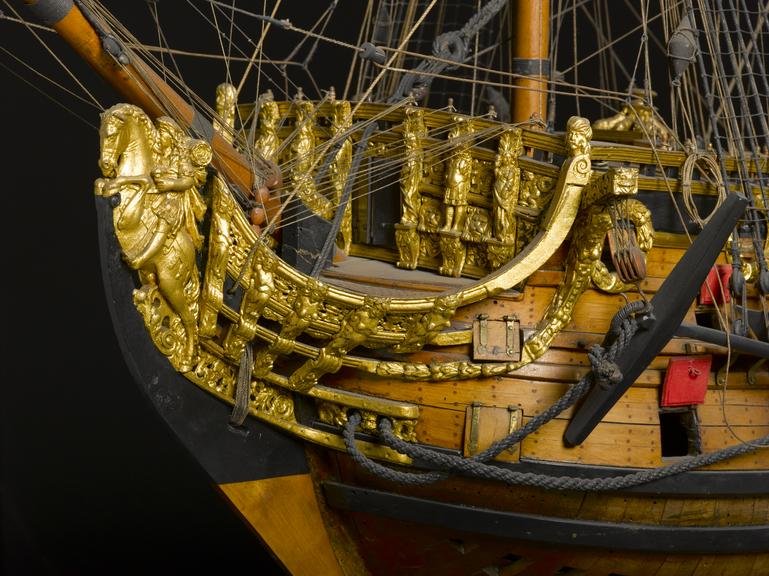
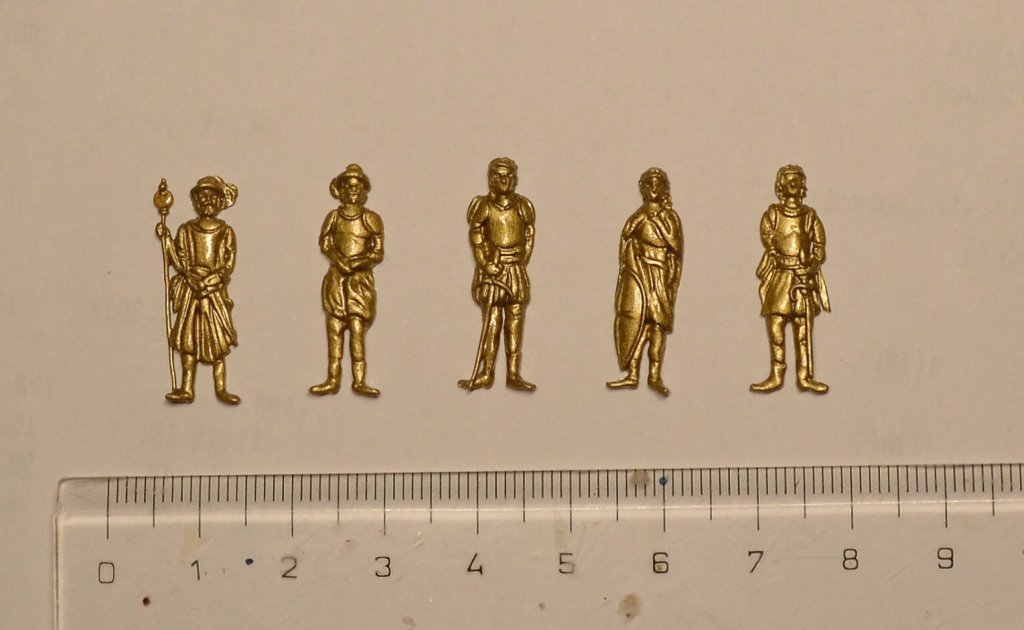
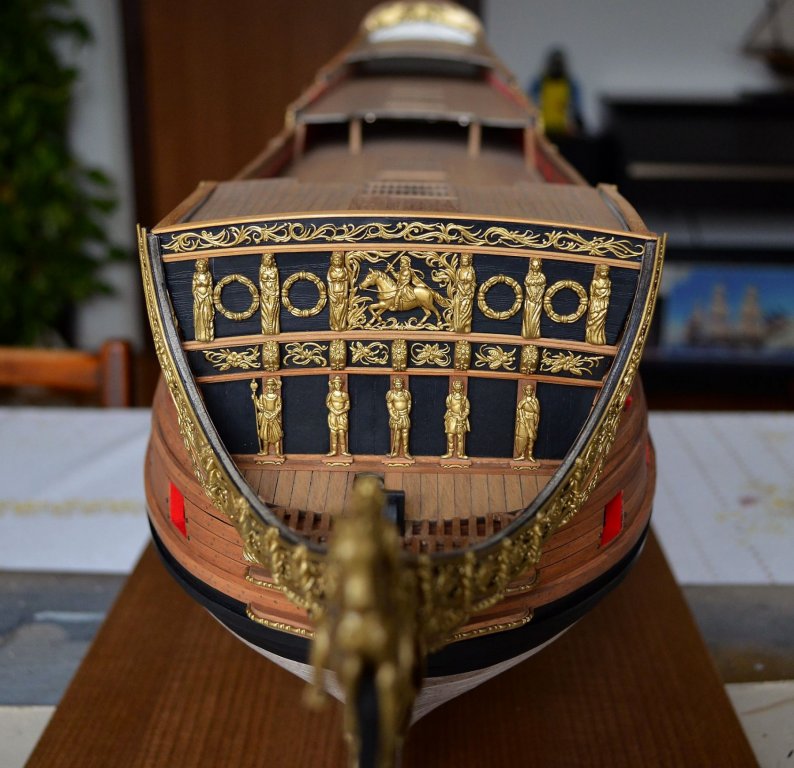
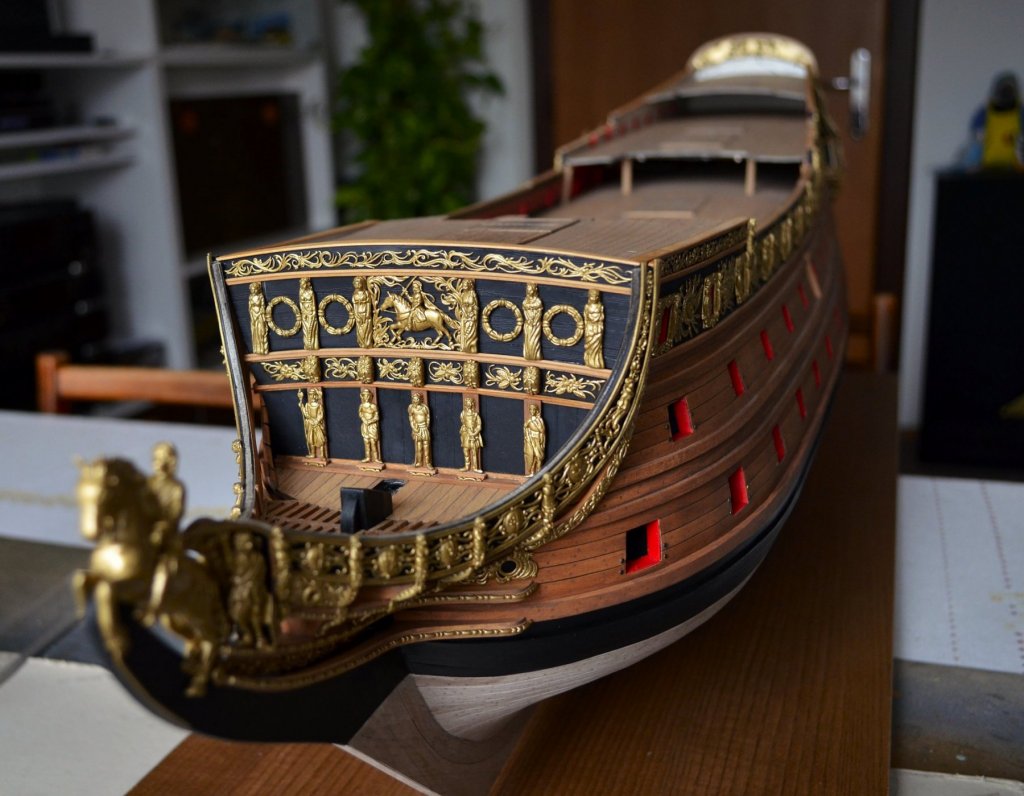
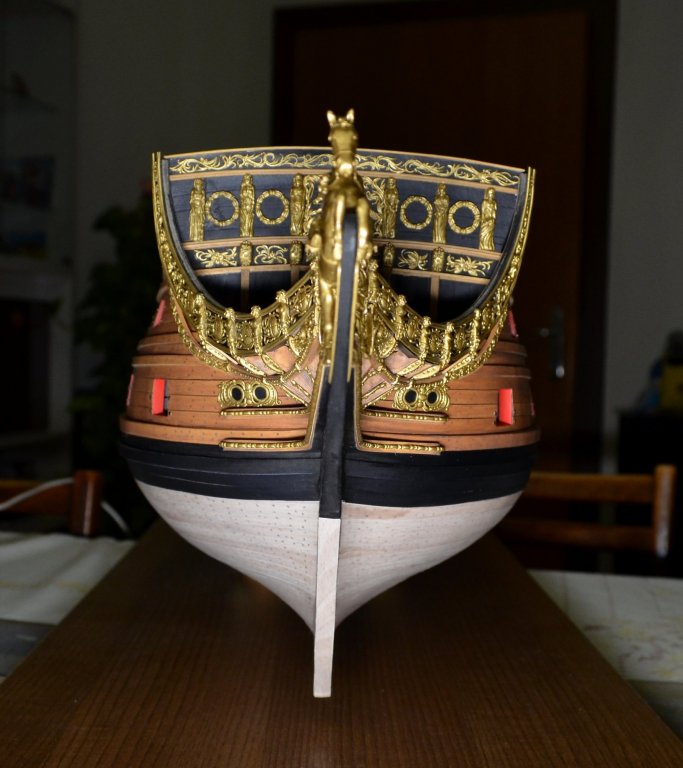
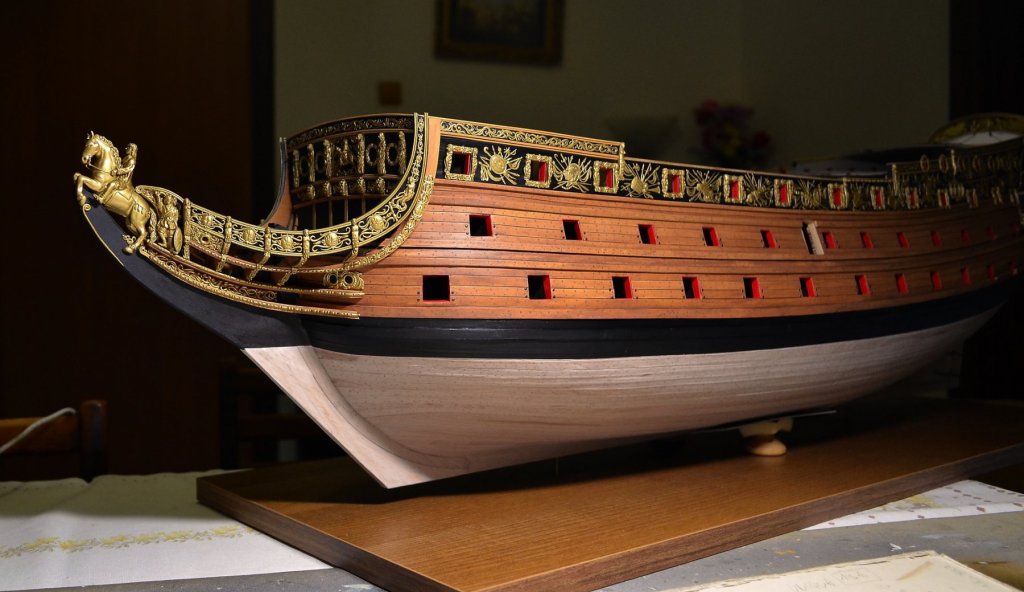
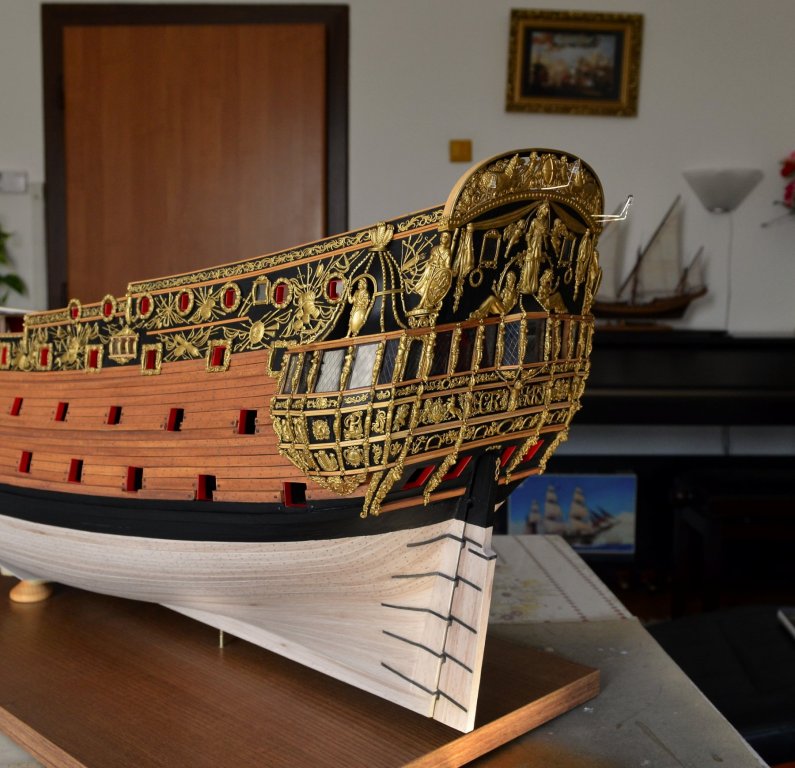
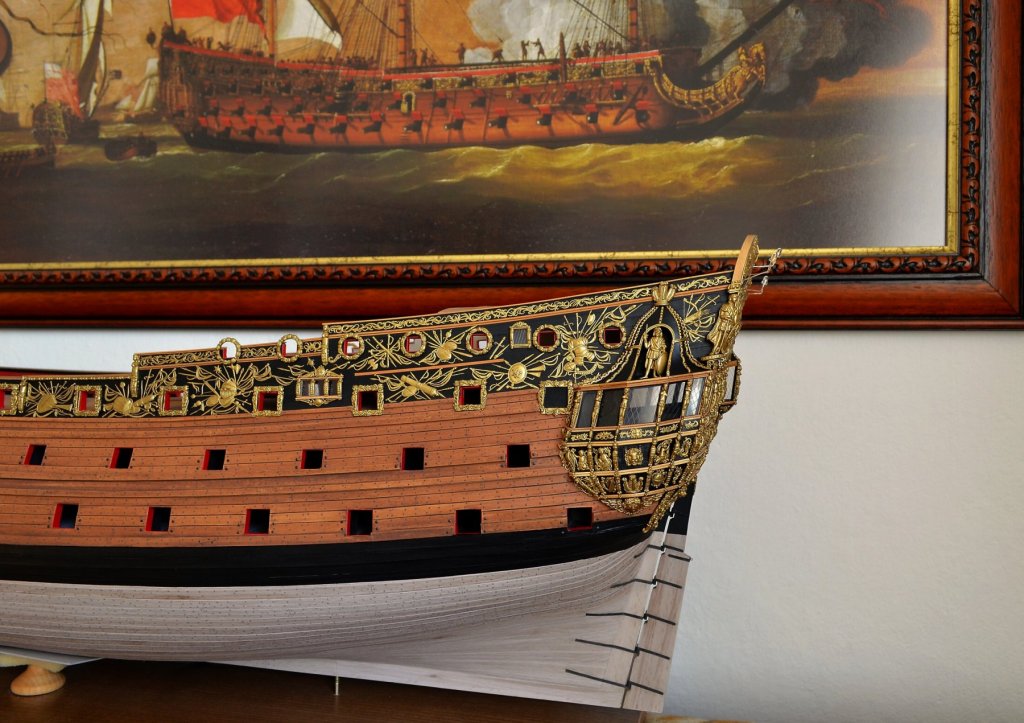
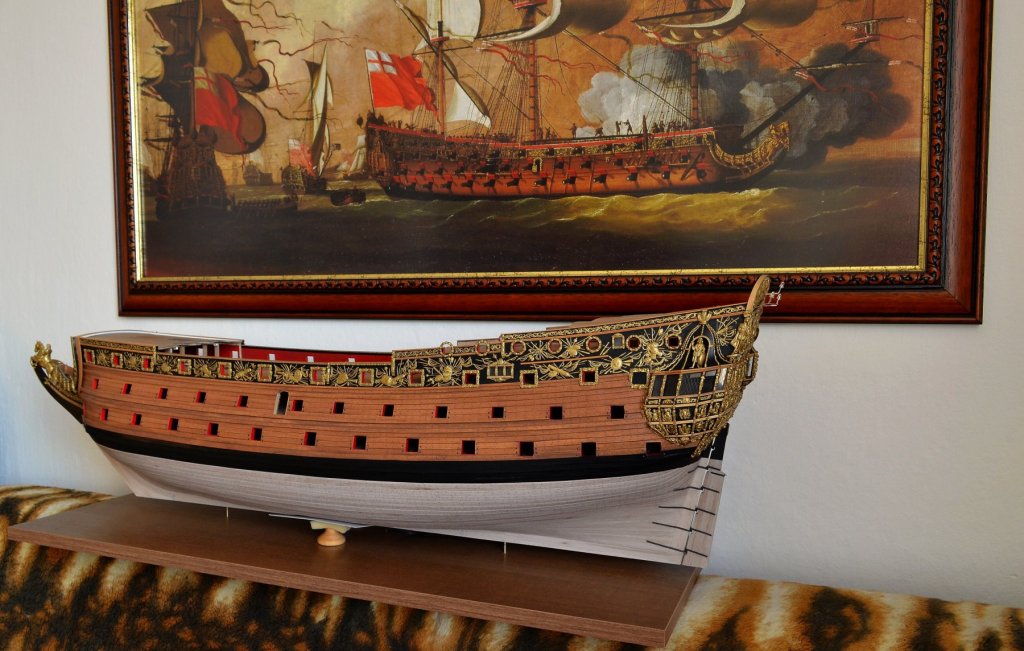
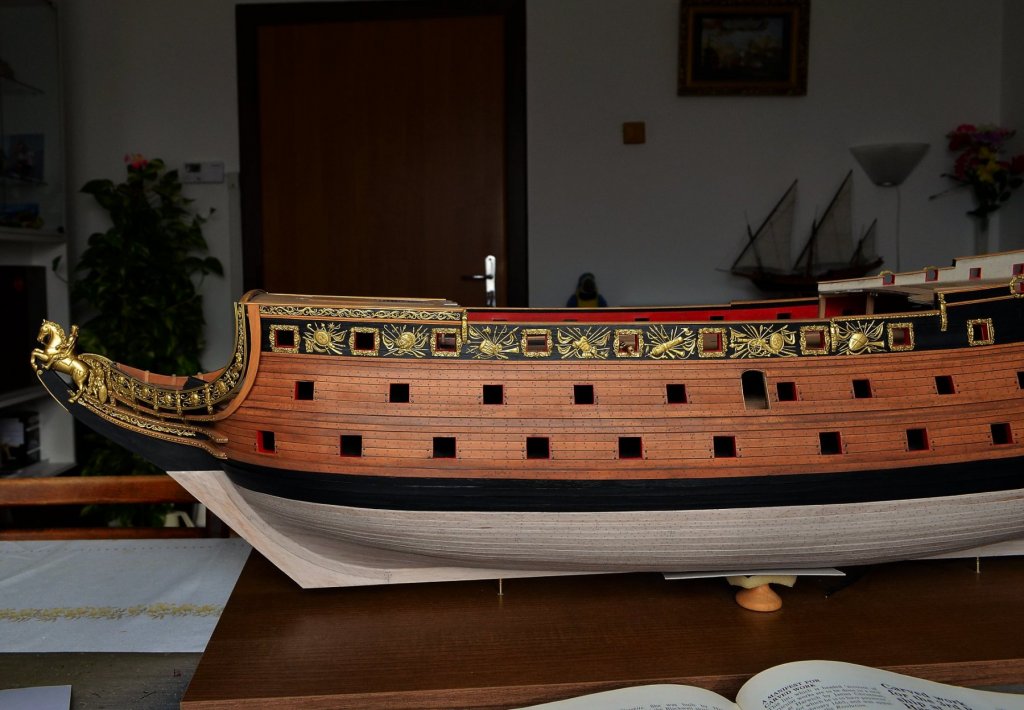
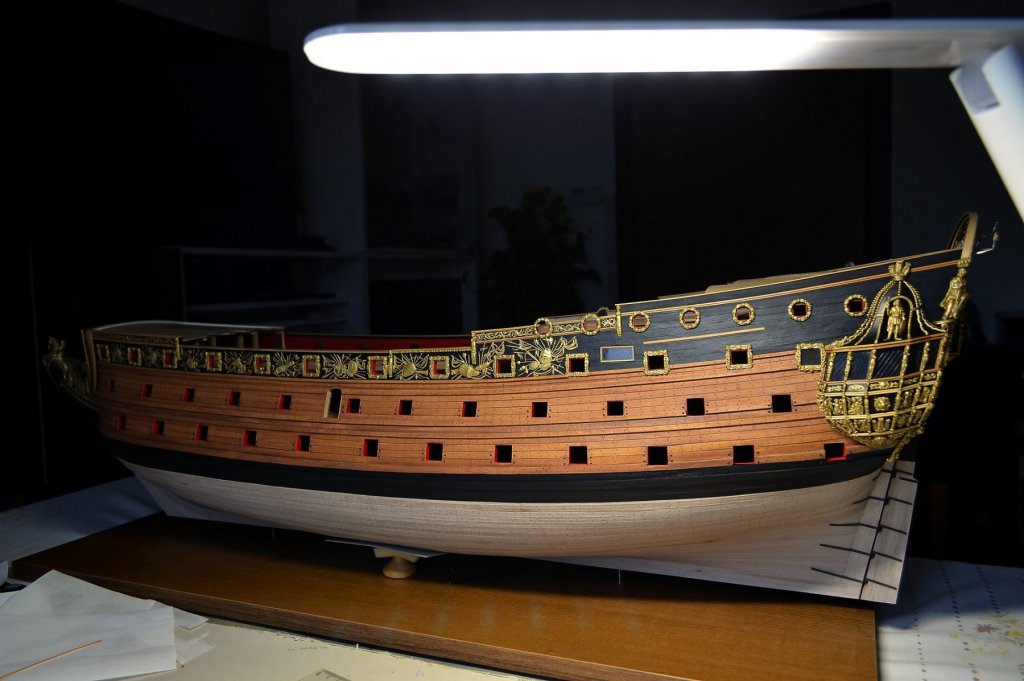
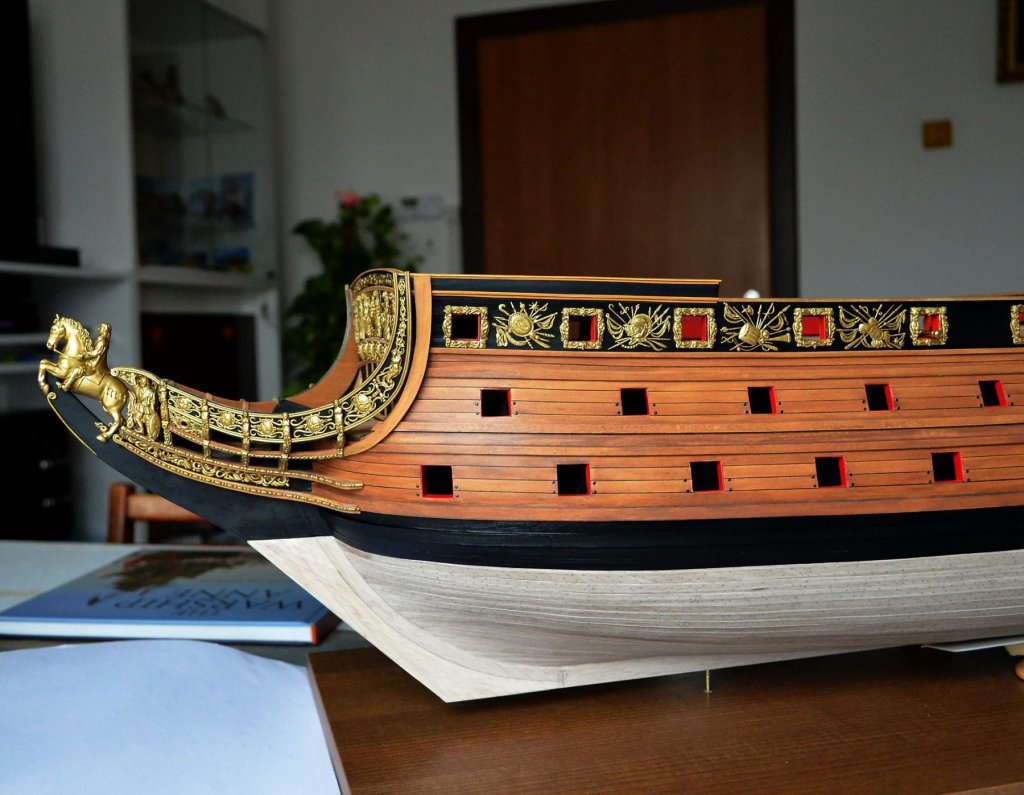
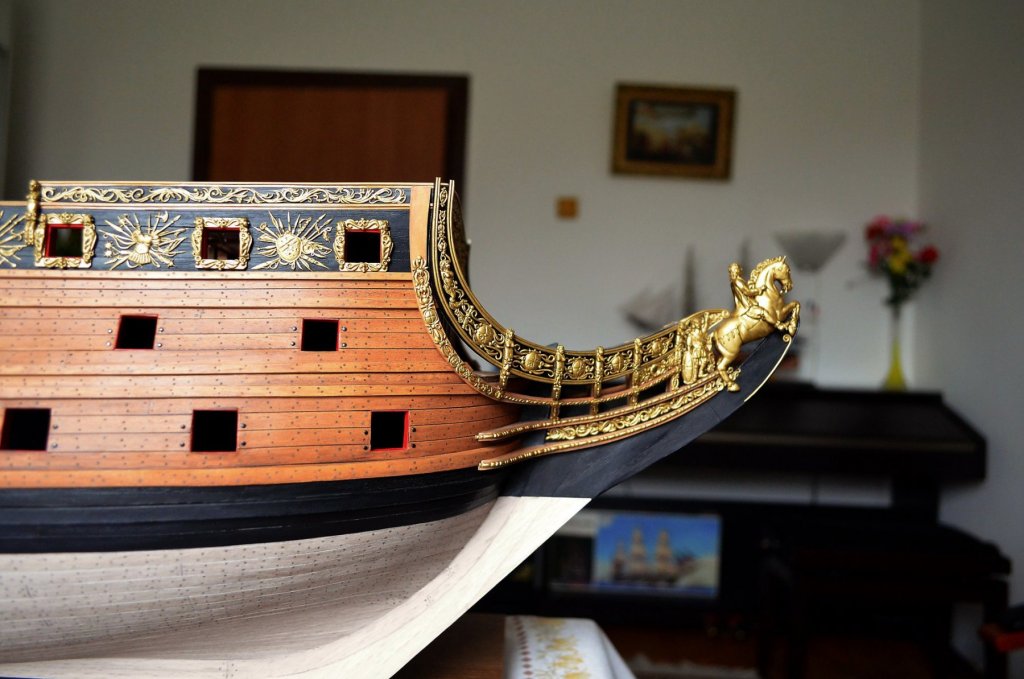
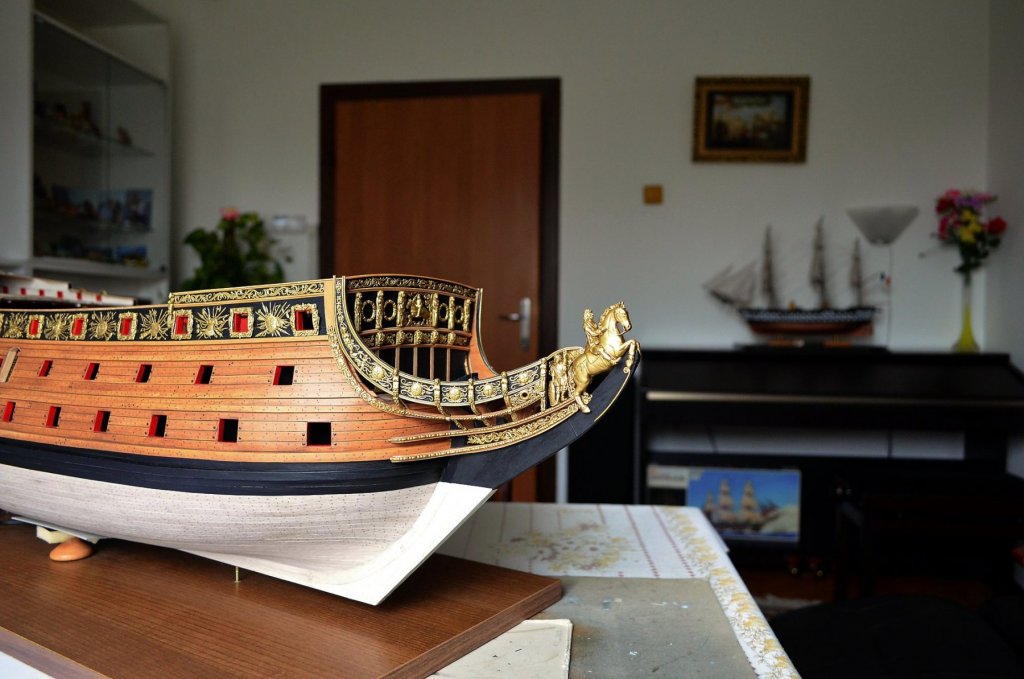
I have finished other sculptures and placed them on the front bulkhead. I tried to follow the original paintings od Royal Katherine from artists and also museum models - mainly HMS Prince (1670), where you can see similar sculptures. And here is my work: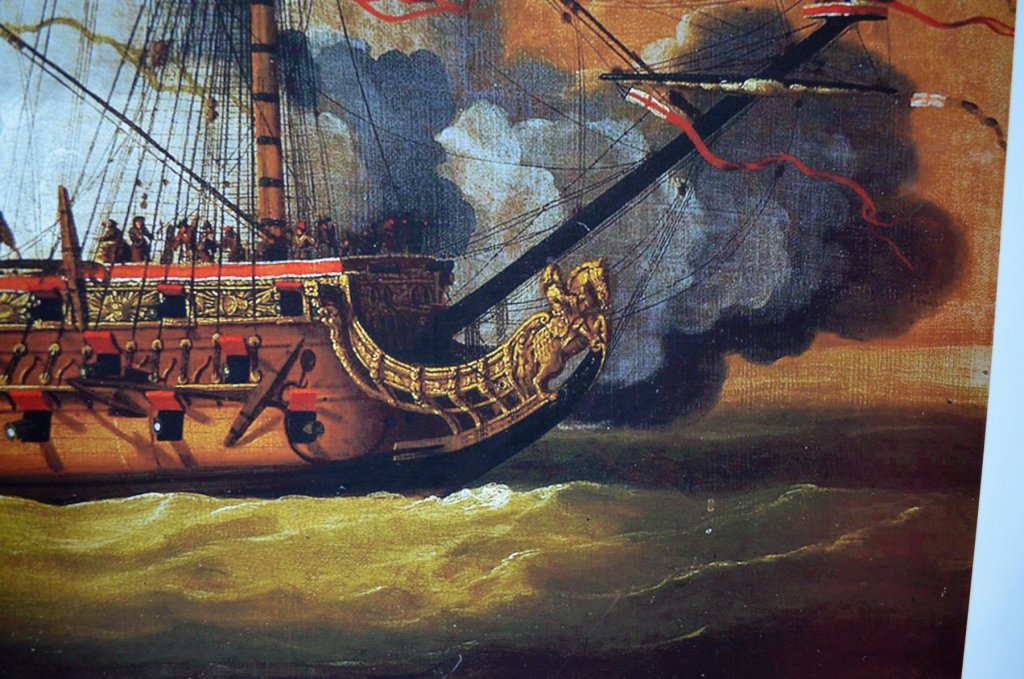


- 1,035 replies
-
- 29
-
-
-
- royal katherine
- ship of the line
- (and 1 more)
-
HMS ROYAL KATHERINE 1664 by Doris - 1/55 - CARD
DORIS replied to DORIS's topic in - Build logs for subjects built 1501 - 1750
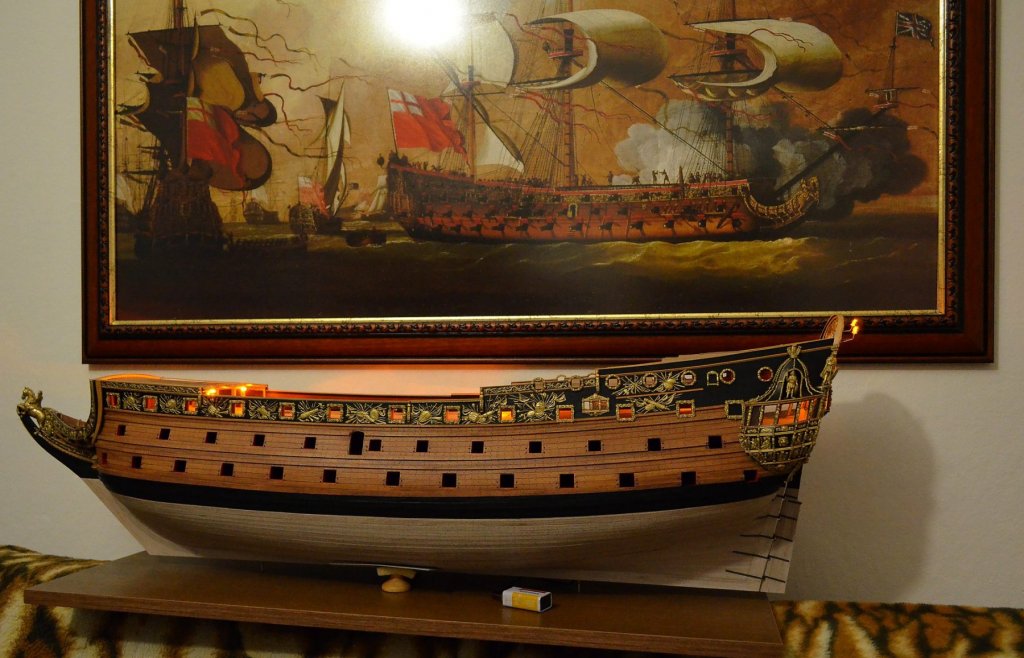
Dear friends, thank you all for your comments, praise and "likes", your words mean a lot for me and are much appreciated. Hello Amalio, I still try to improve my knowledge and craftsmanship to make better a more realistic models. I am very honoured reading your words. Thank you a lot. Well, I believe it may be even better in my future project if I build models according to quality plans. Sometimes I must remodeling or modify some parts on the Royal Katherine model, cause I have no exact plans or drawings of the ship. So it is necessary to improvise as well.😉 Hello Richmond, to be honest I use only one kind of gold acrylic paint so far, it creates a slightly darker shade in reliefs and slits. When I finish decoration completely I am going to do weathering using clear varnish with darker colours. Dear Karl, thank you very much for your kind words. Your work is also gorgeous and I admire your craftsmanship a lot. Each of us is unique. The most important in our hobby is to do things that we like. Oh yes, she is really heavy. The models with its base weights more than 7,5kg. I have sometimes problem to move it from the table to another place. Well, though I'm not too strong ...😊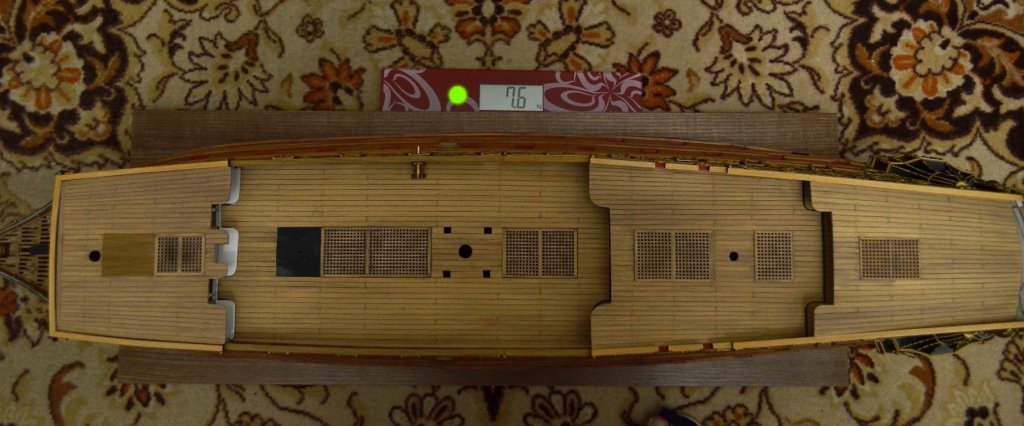
- 1,035 replies
-
- 14
-
-
- royal katherine
- ship of the line
- (and 1 more)
-
HMS ROYAL KATHERINE 1664 by Doris - 1/55 - CARD
DORIS replied to DORIS's topic in - Build logs for subjects built 1501 - 1750
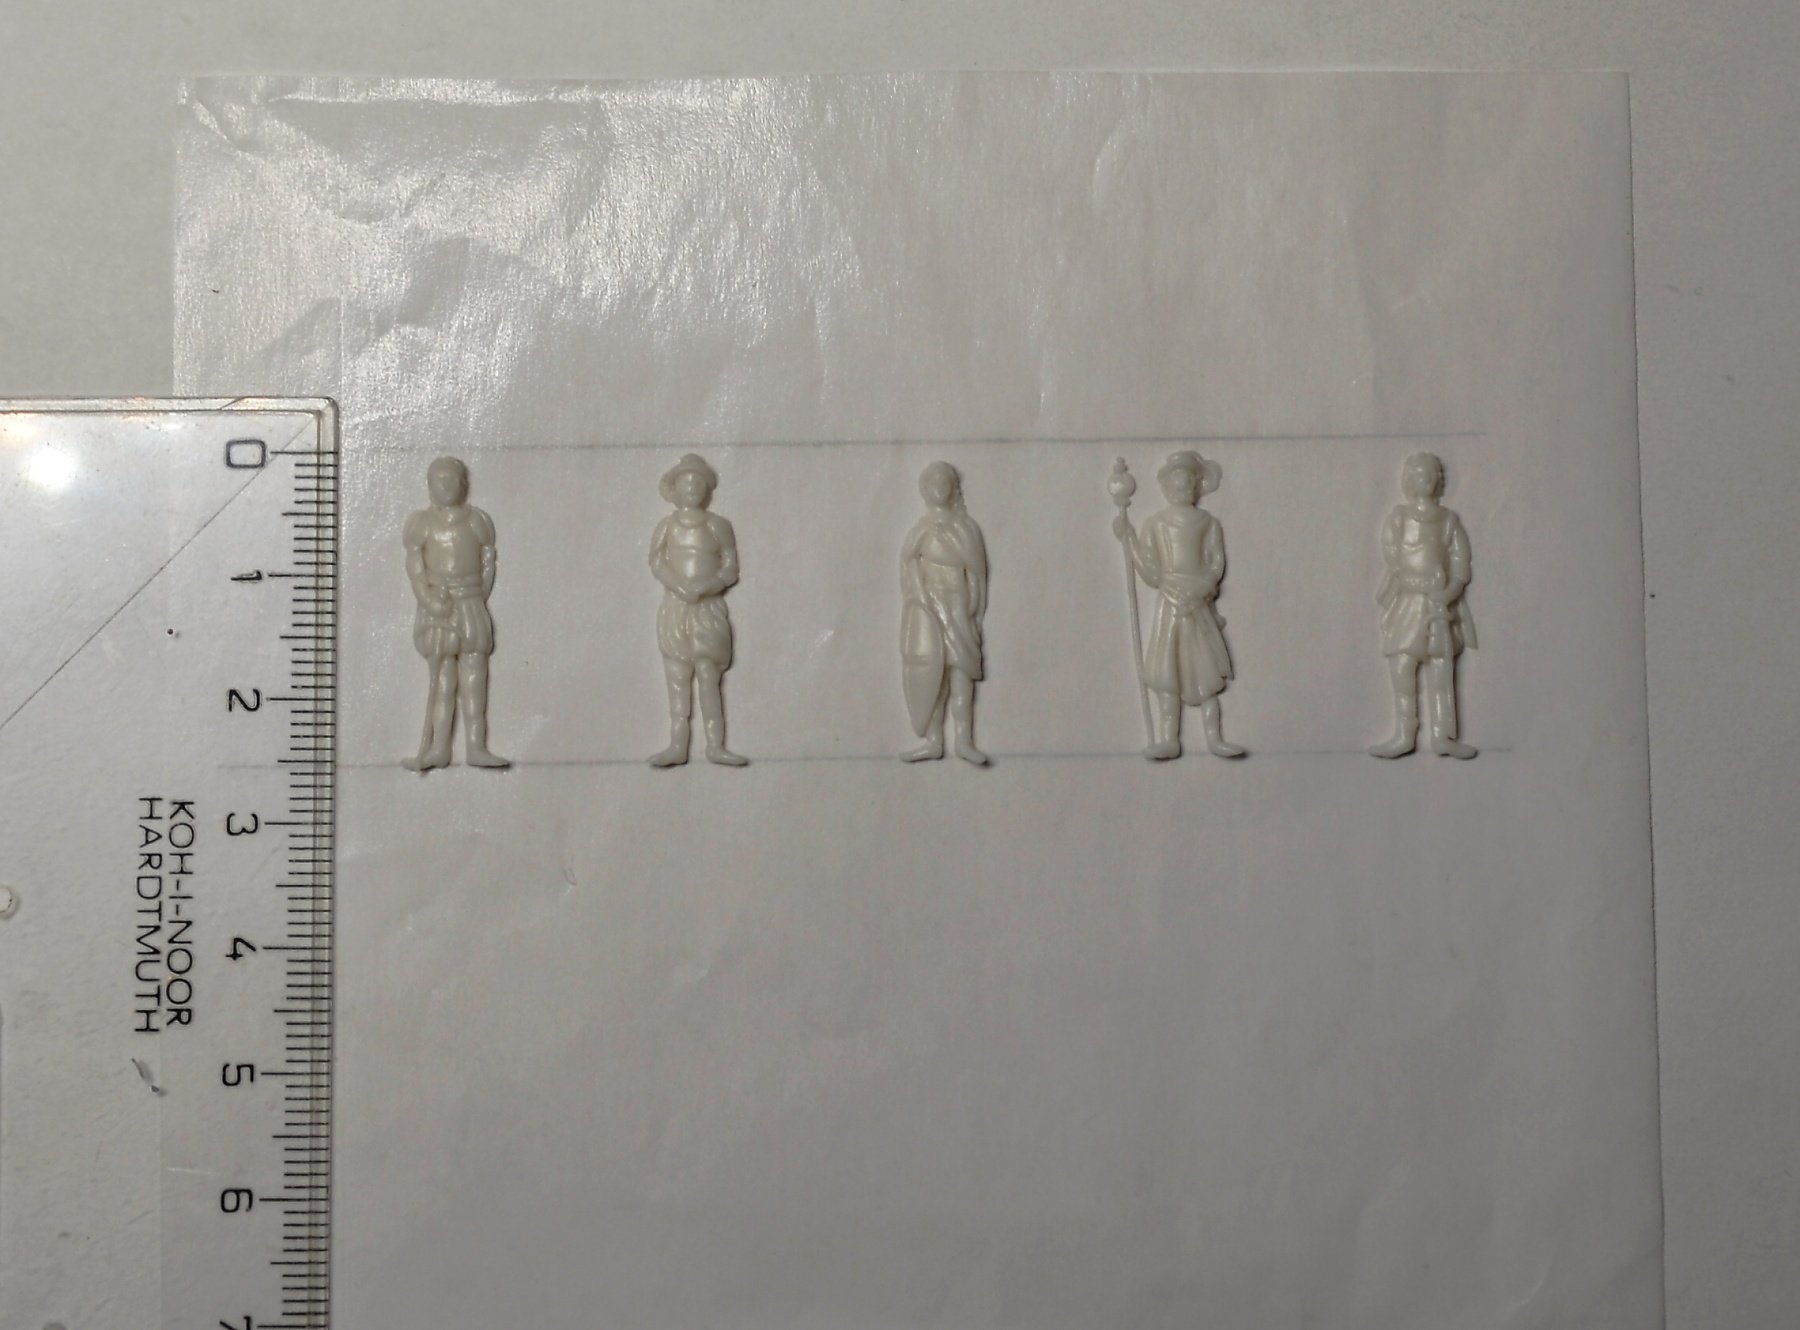
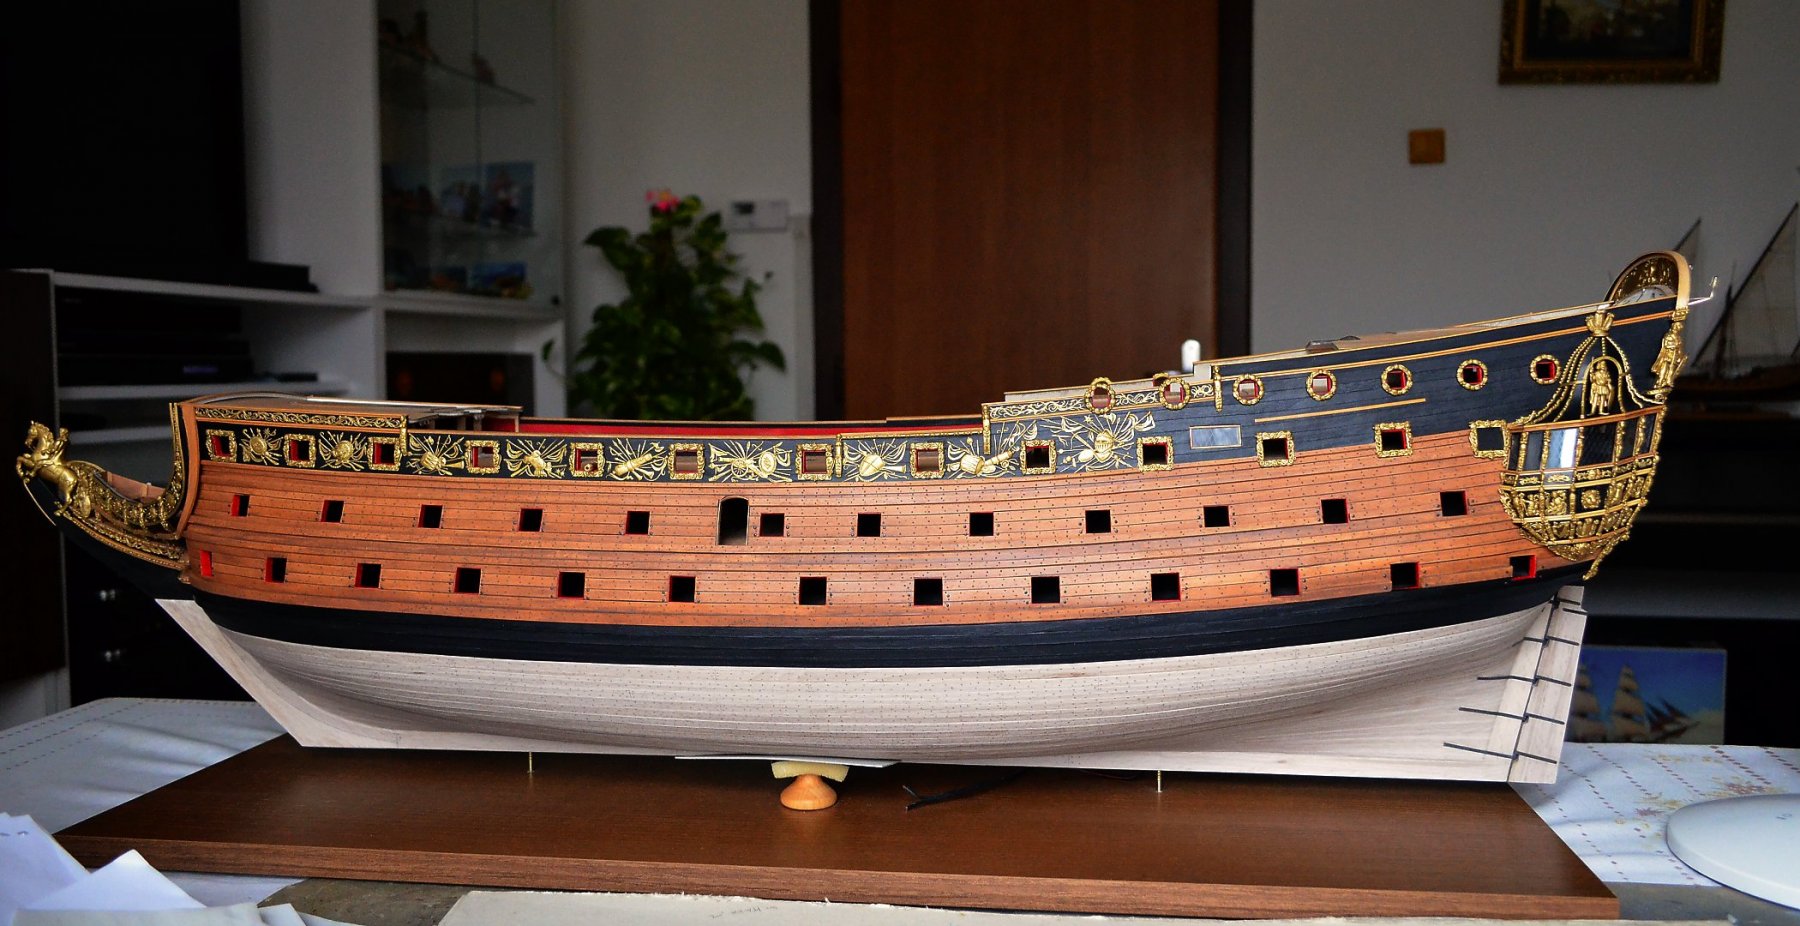
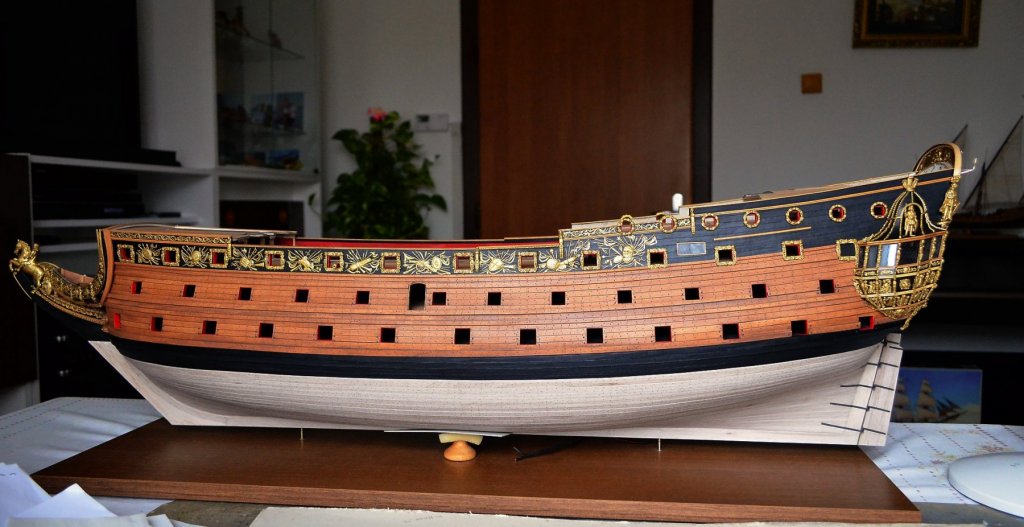
Hello Michael and John, thank you for your comments.That´s right, there are more types of modeling clays and each one has its typical properties. I also tried Fimo, but Modurit(modelit) suits me more. If it is baked, it remains flexible. But after being cooked in water it is brittle and crumbling. It is also necessary to keep clean hands during the work so that grease/sweat or impurities do not get into the clay. Today I am going to make other 5 sculptures on the front bulkhead. Here are some current pics in real colours on daylight: Have a nice day, Doris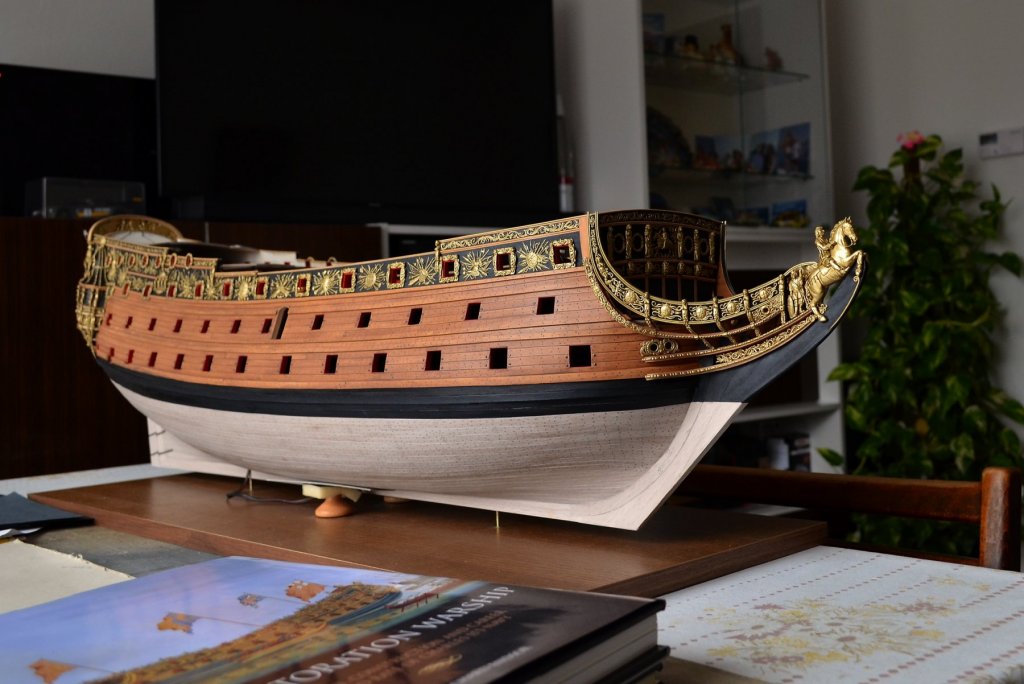


- 1,035 replies
-
- 26
-
-
-
- royal katherine
- ship of the line
- (and 1 more)
-
HMS ROYAL KATHERINE 1664 by Doris - 1/55 - CARD
DORIS replied to DORIS's topic in - Build logs for subjects built 1501 - 1750
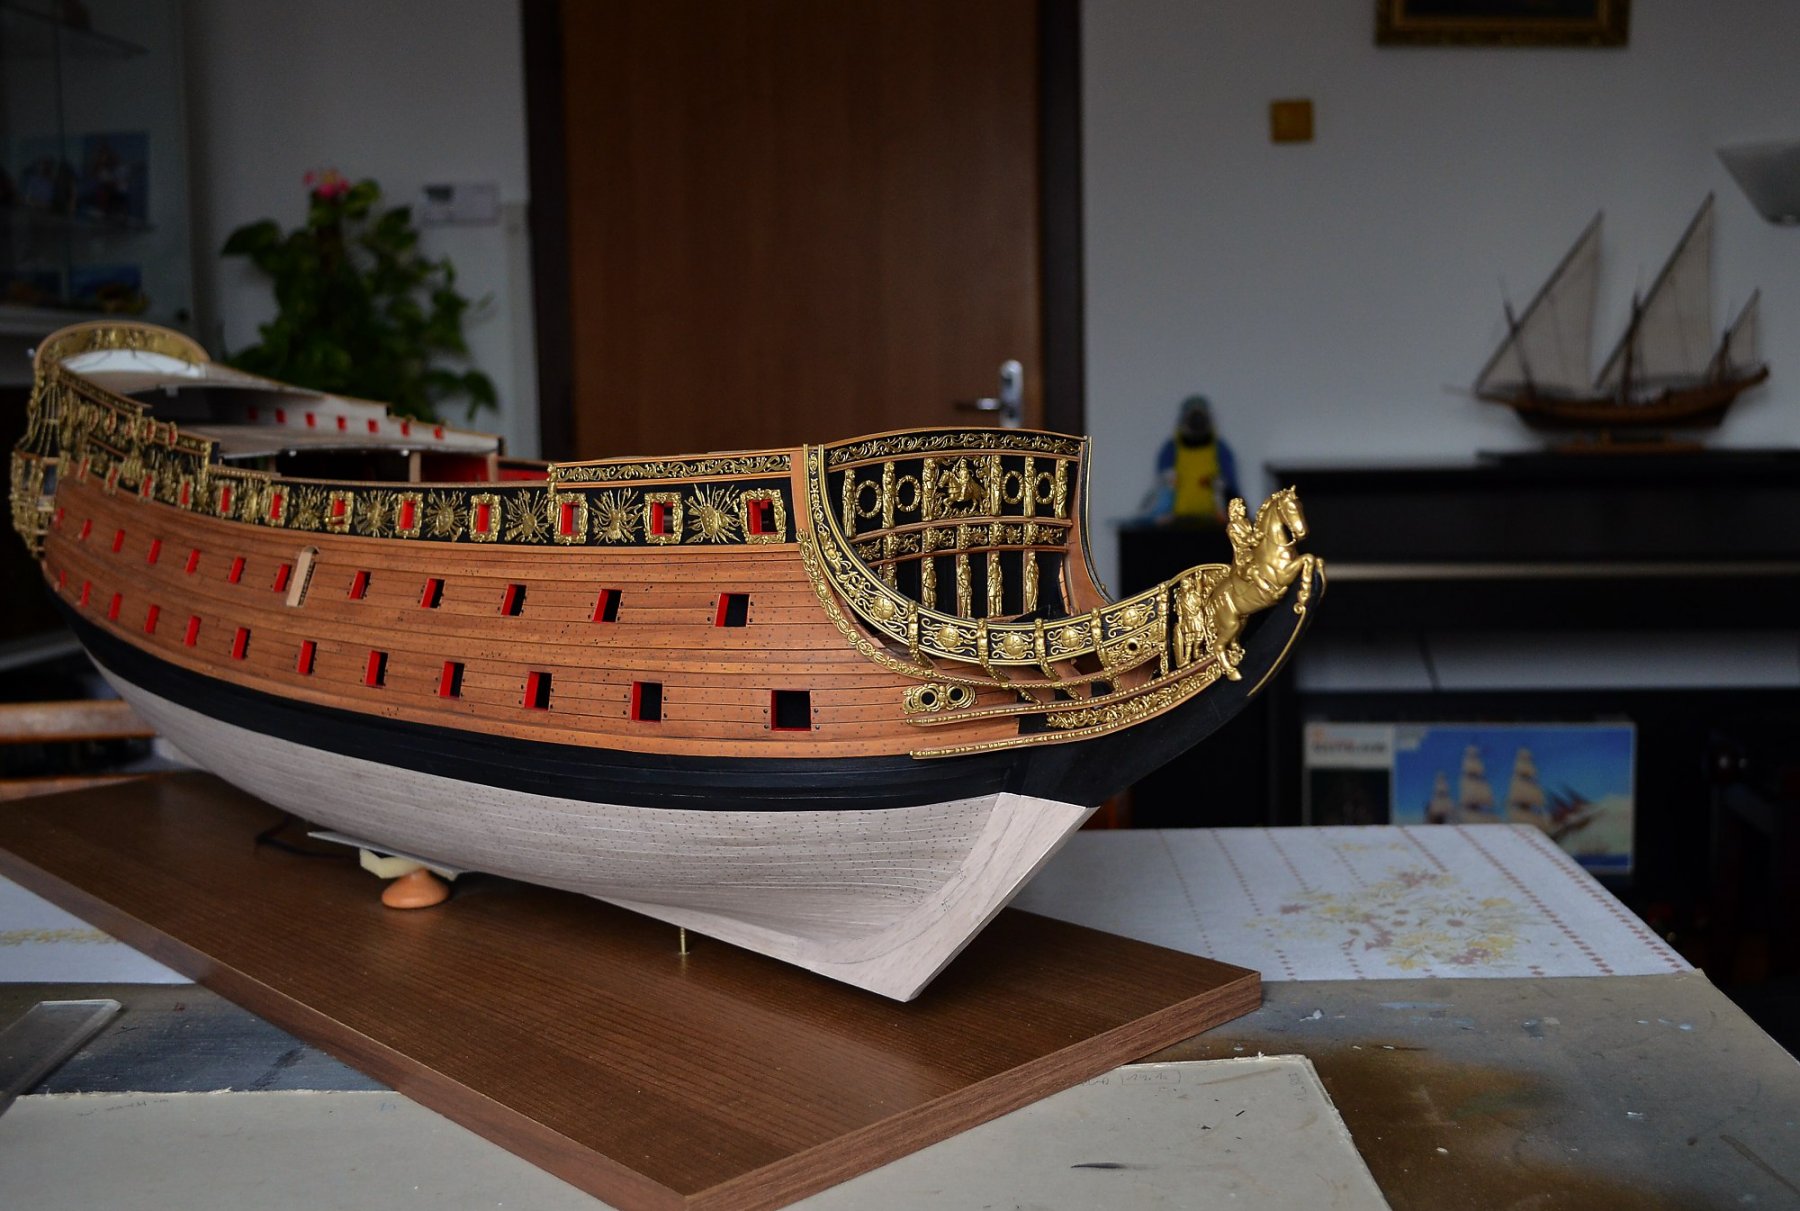
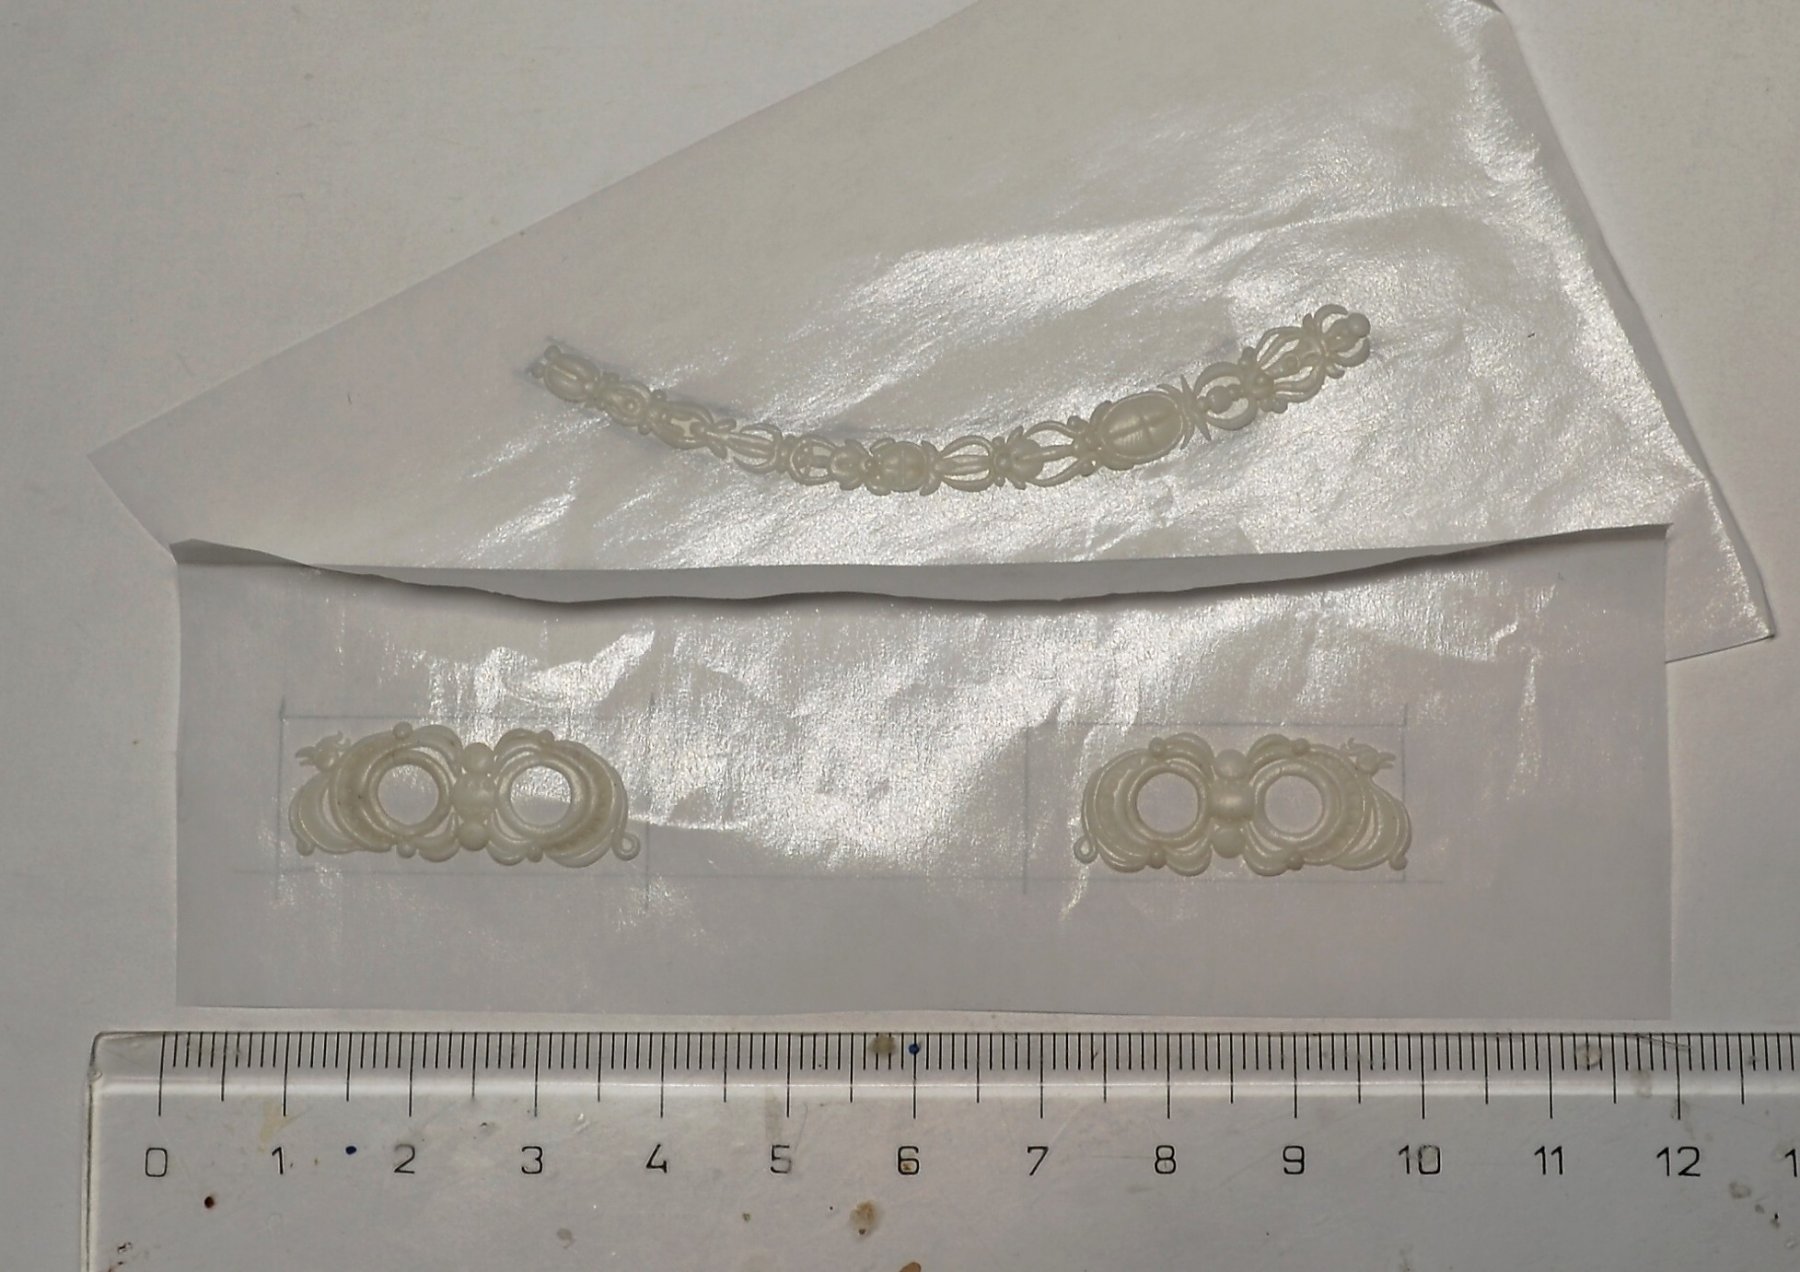
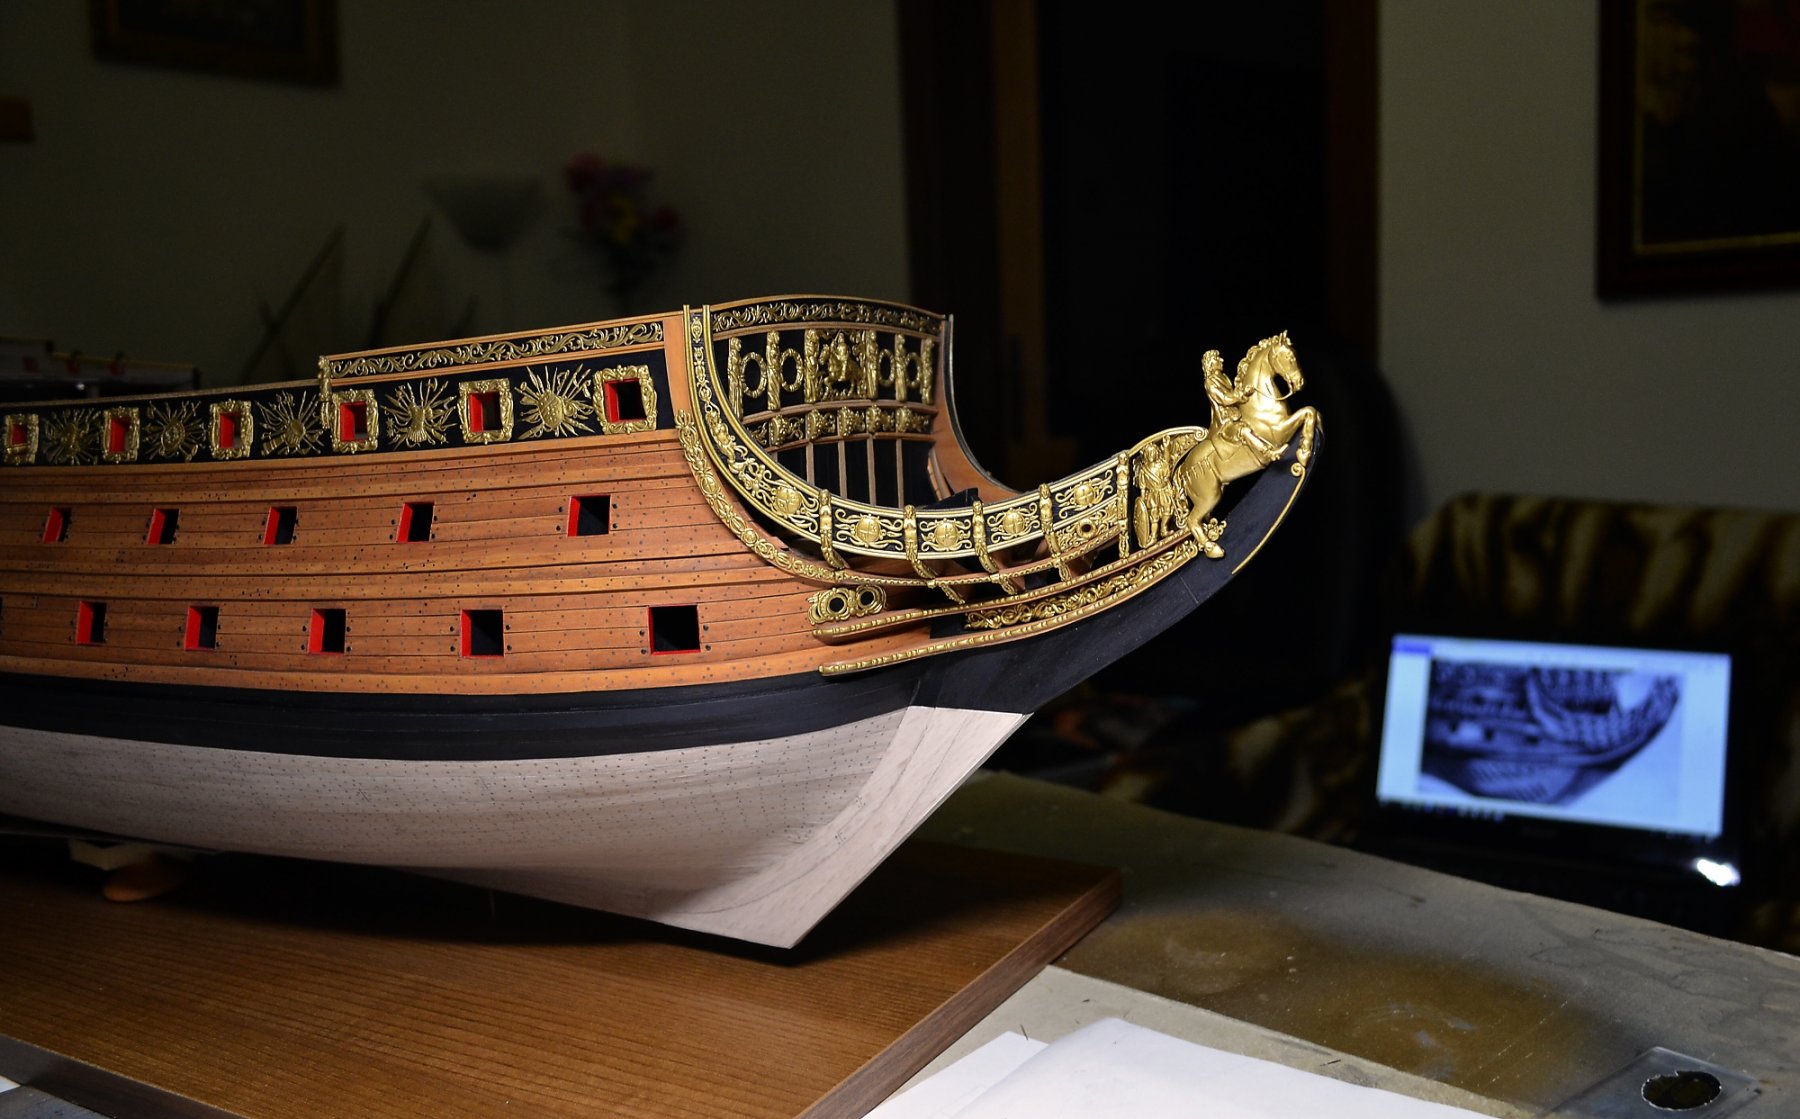
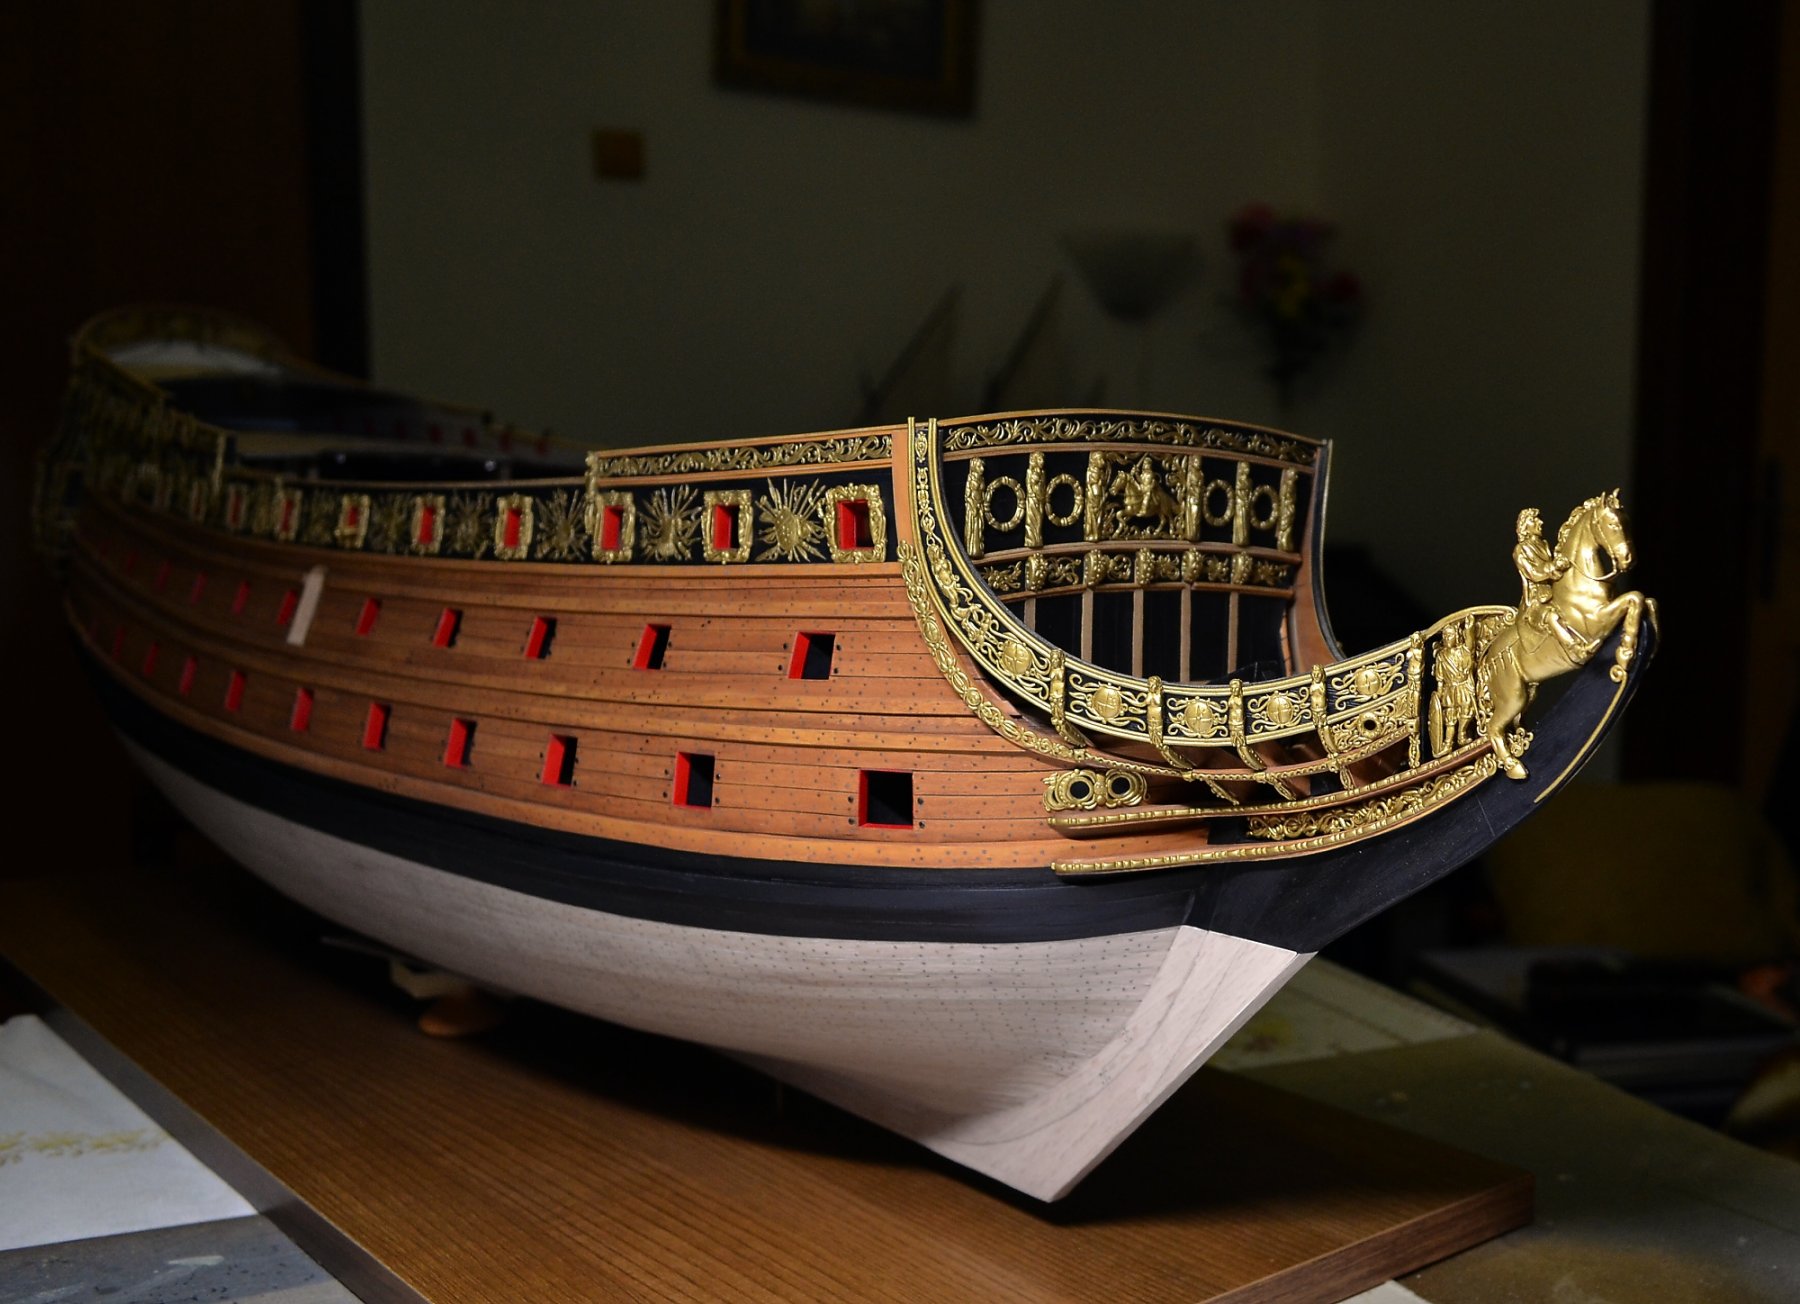
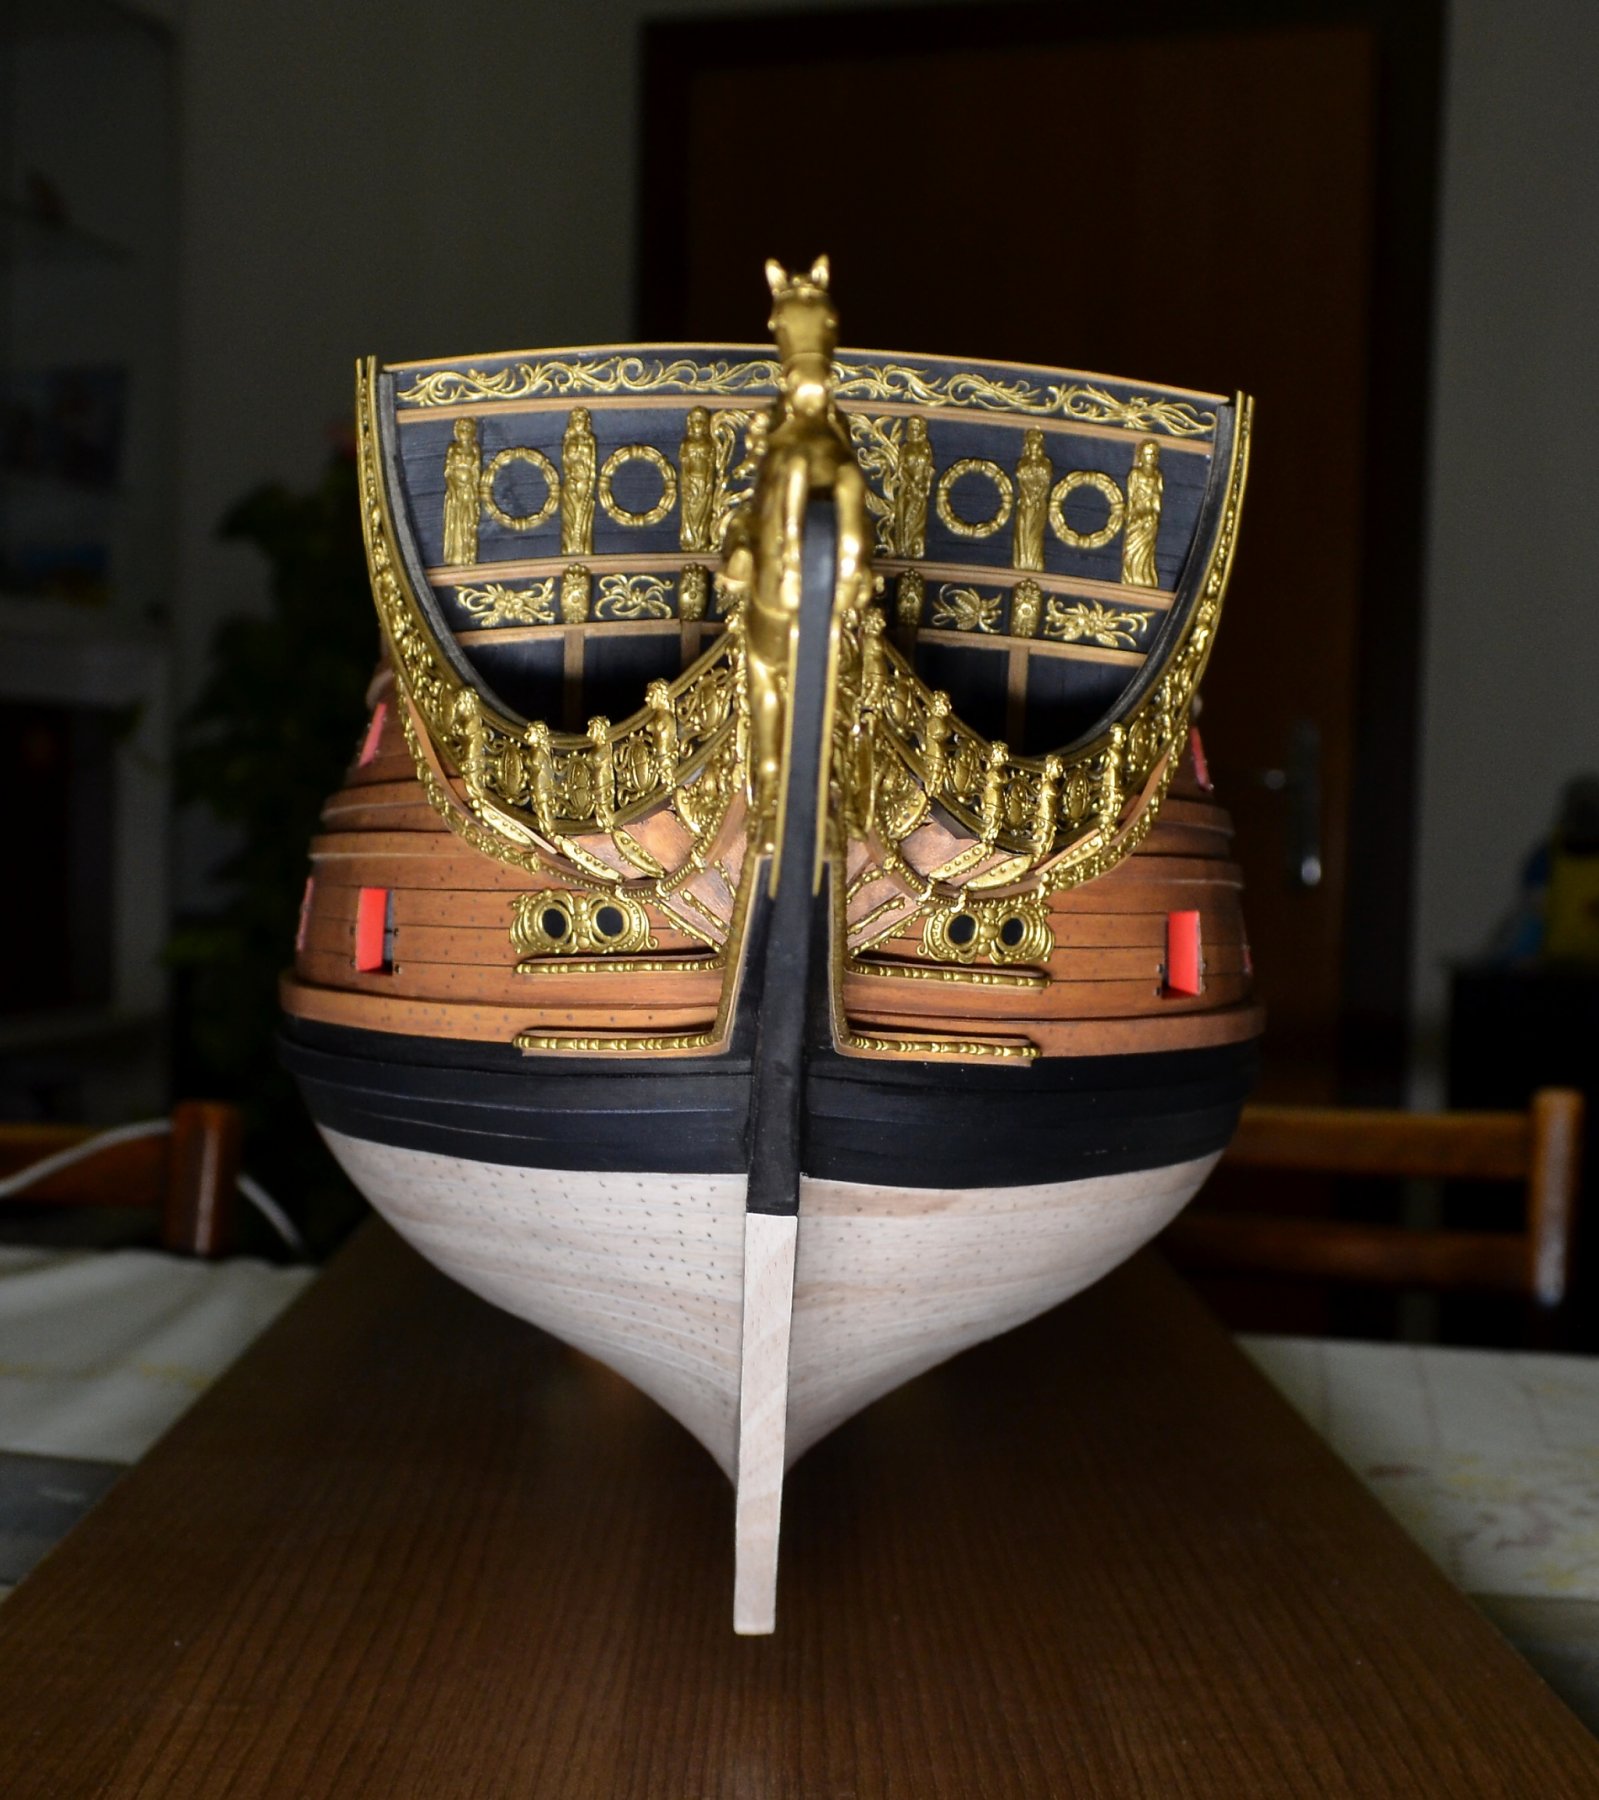
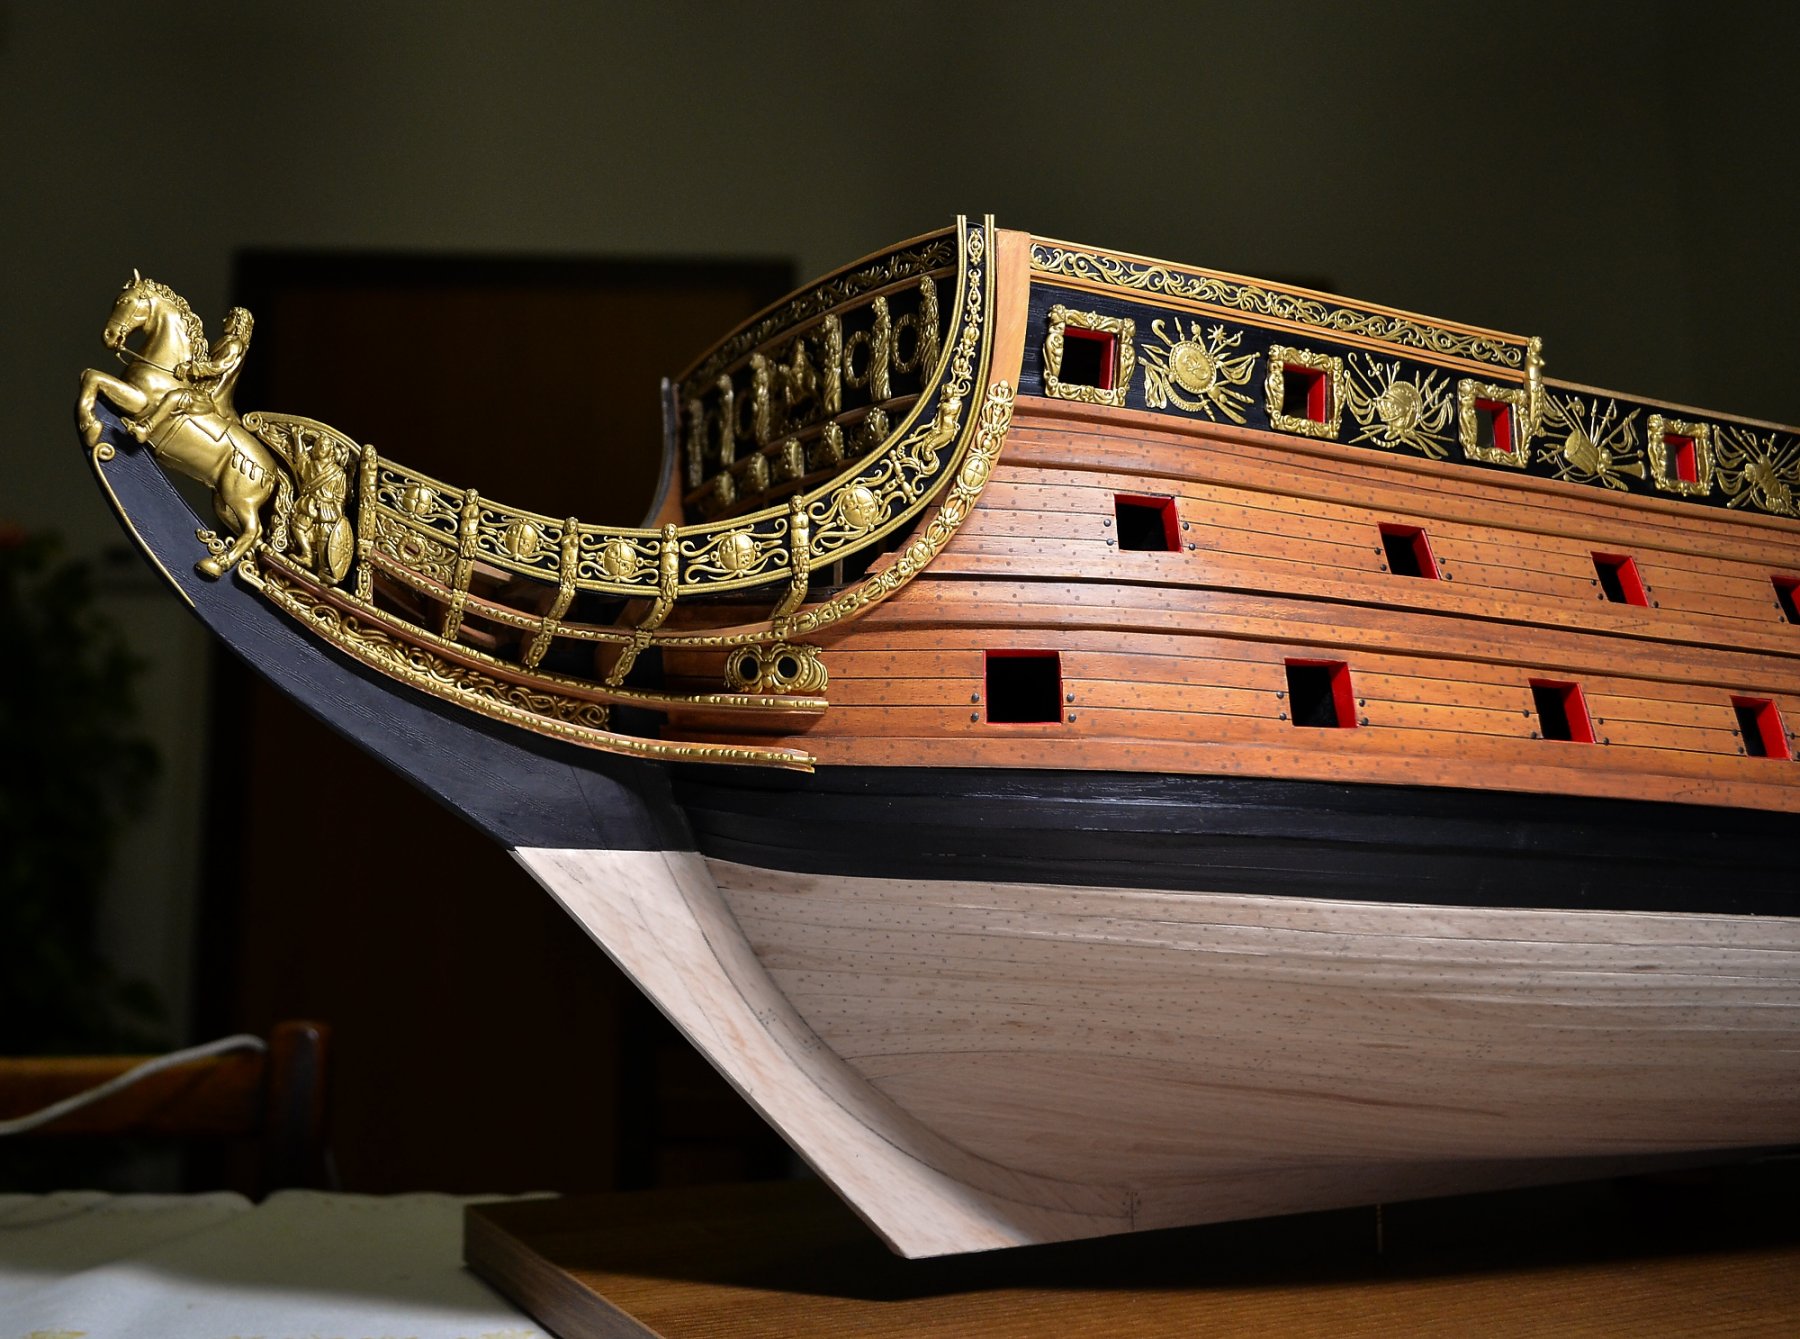
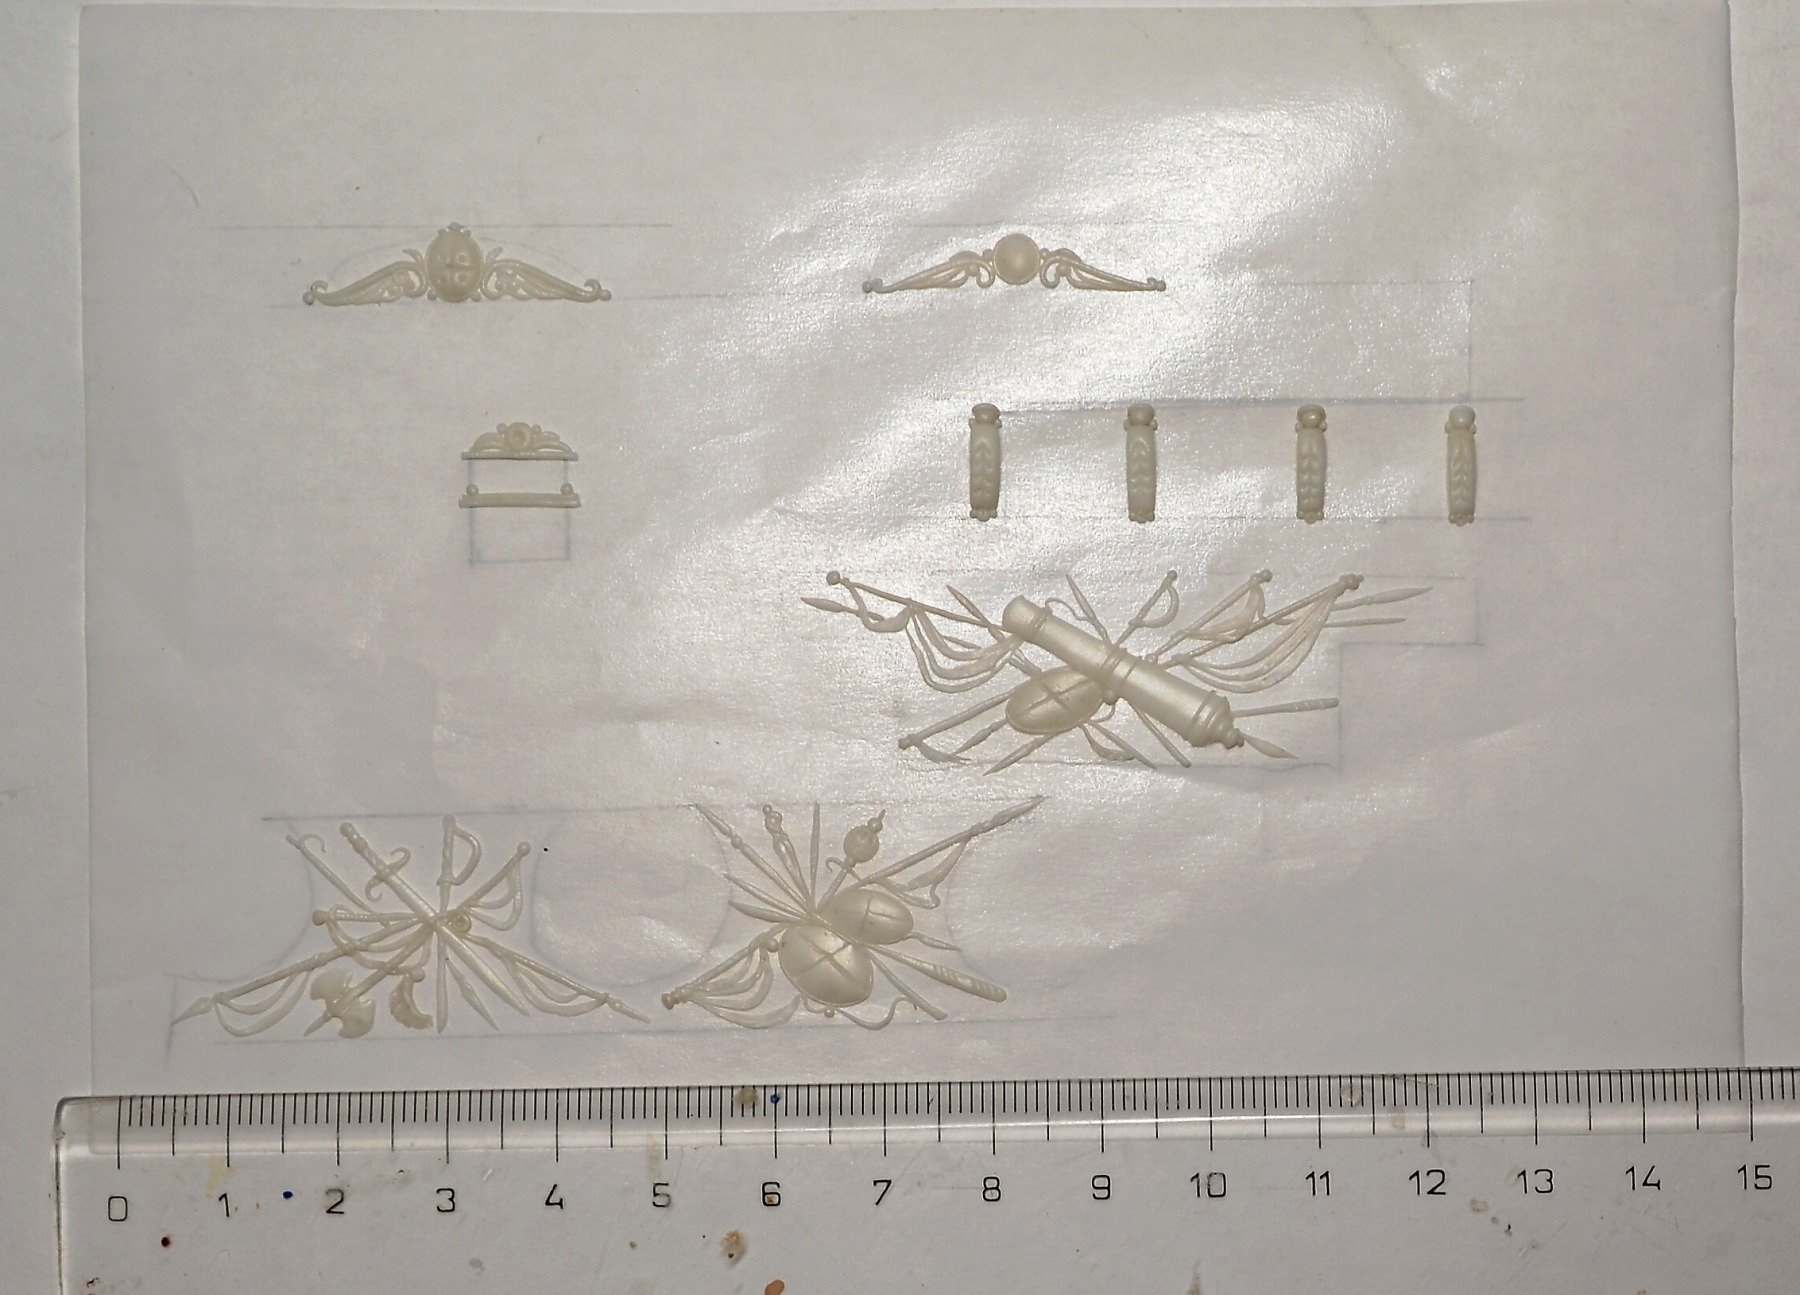
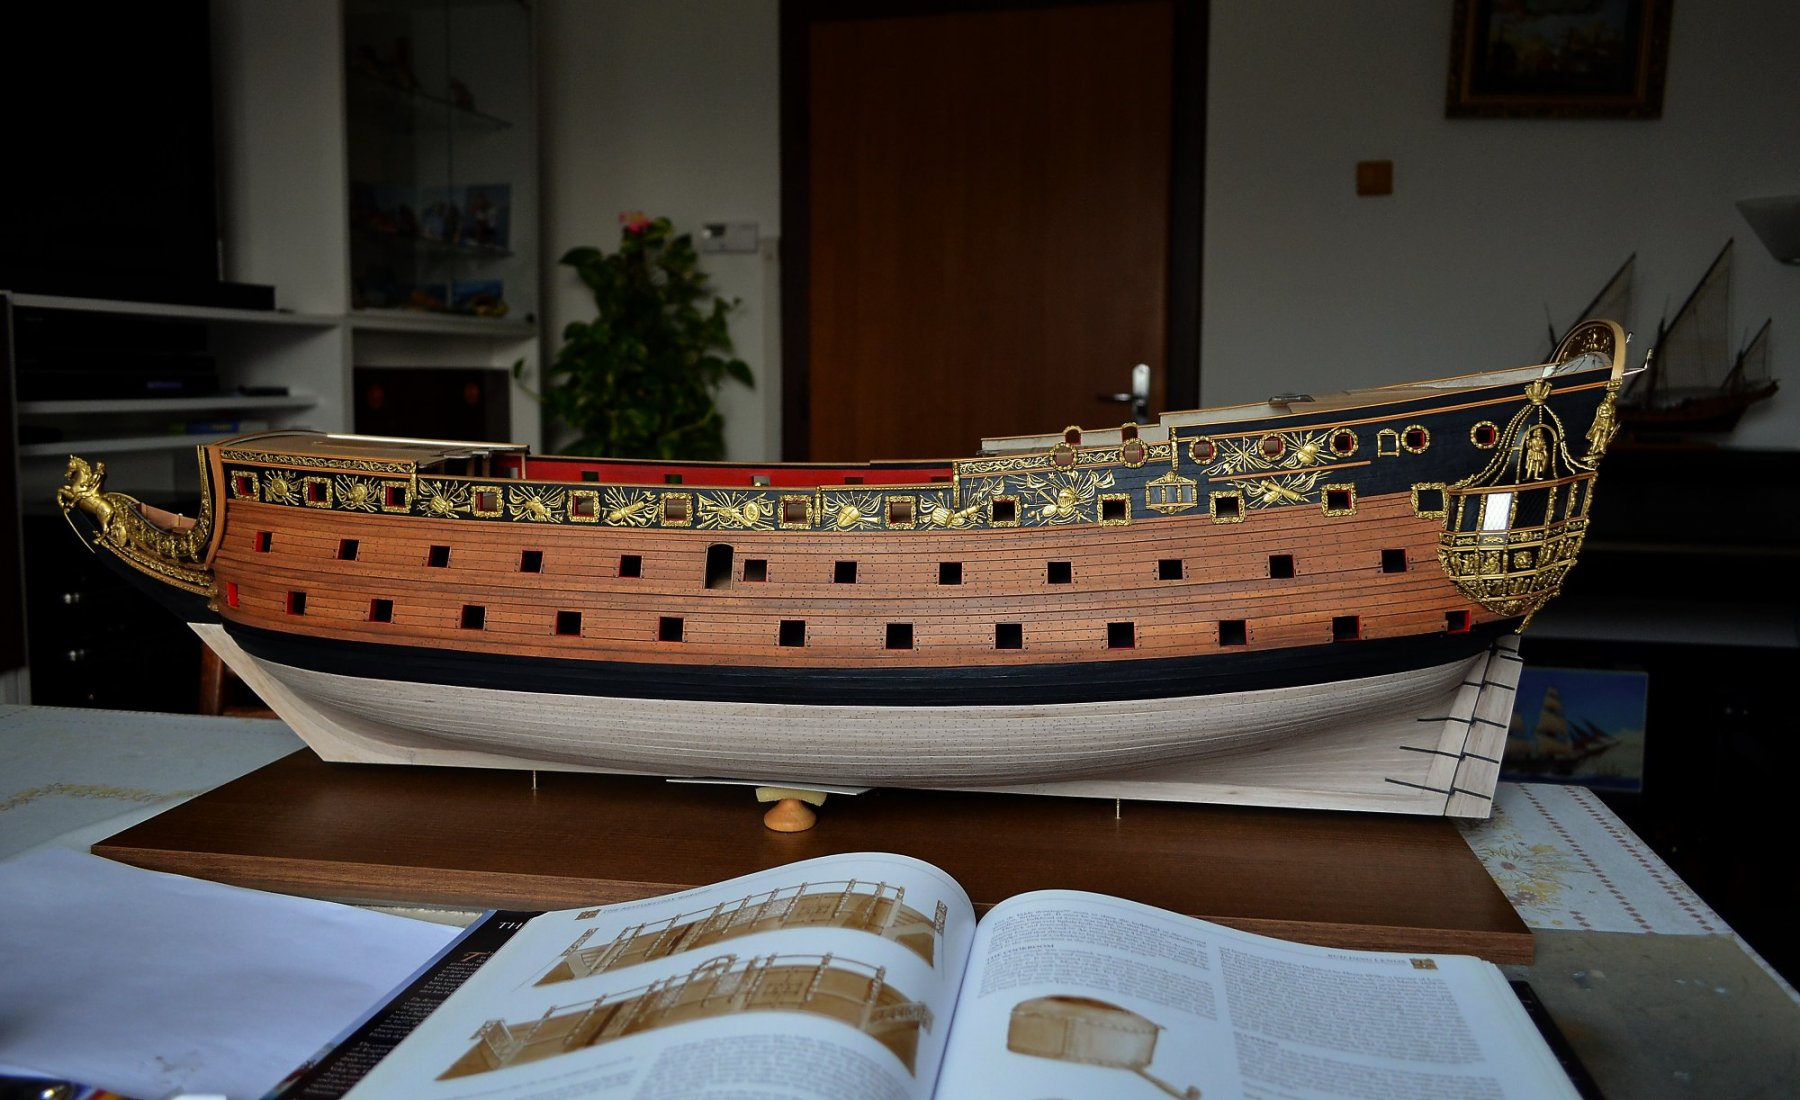
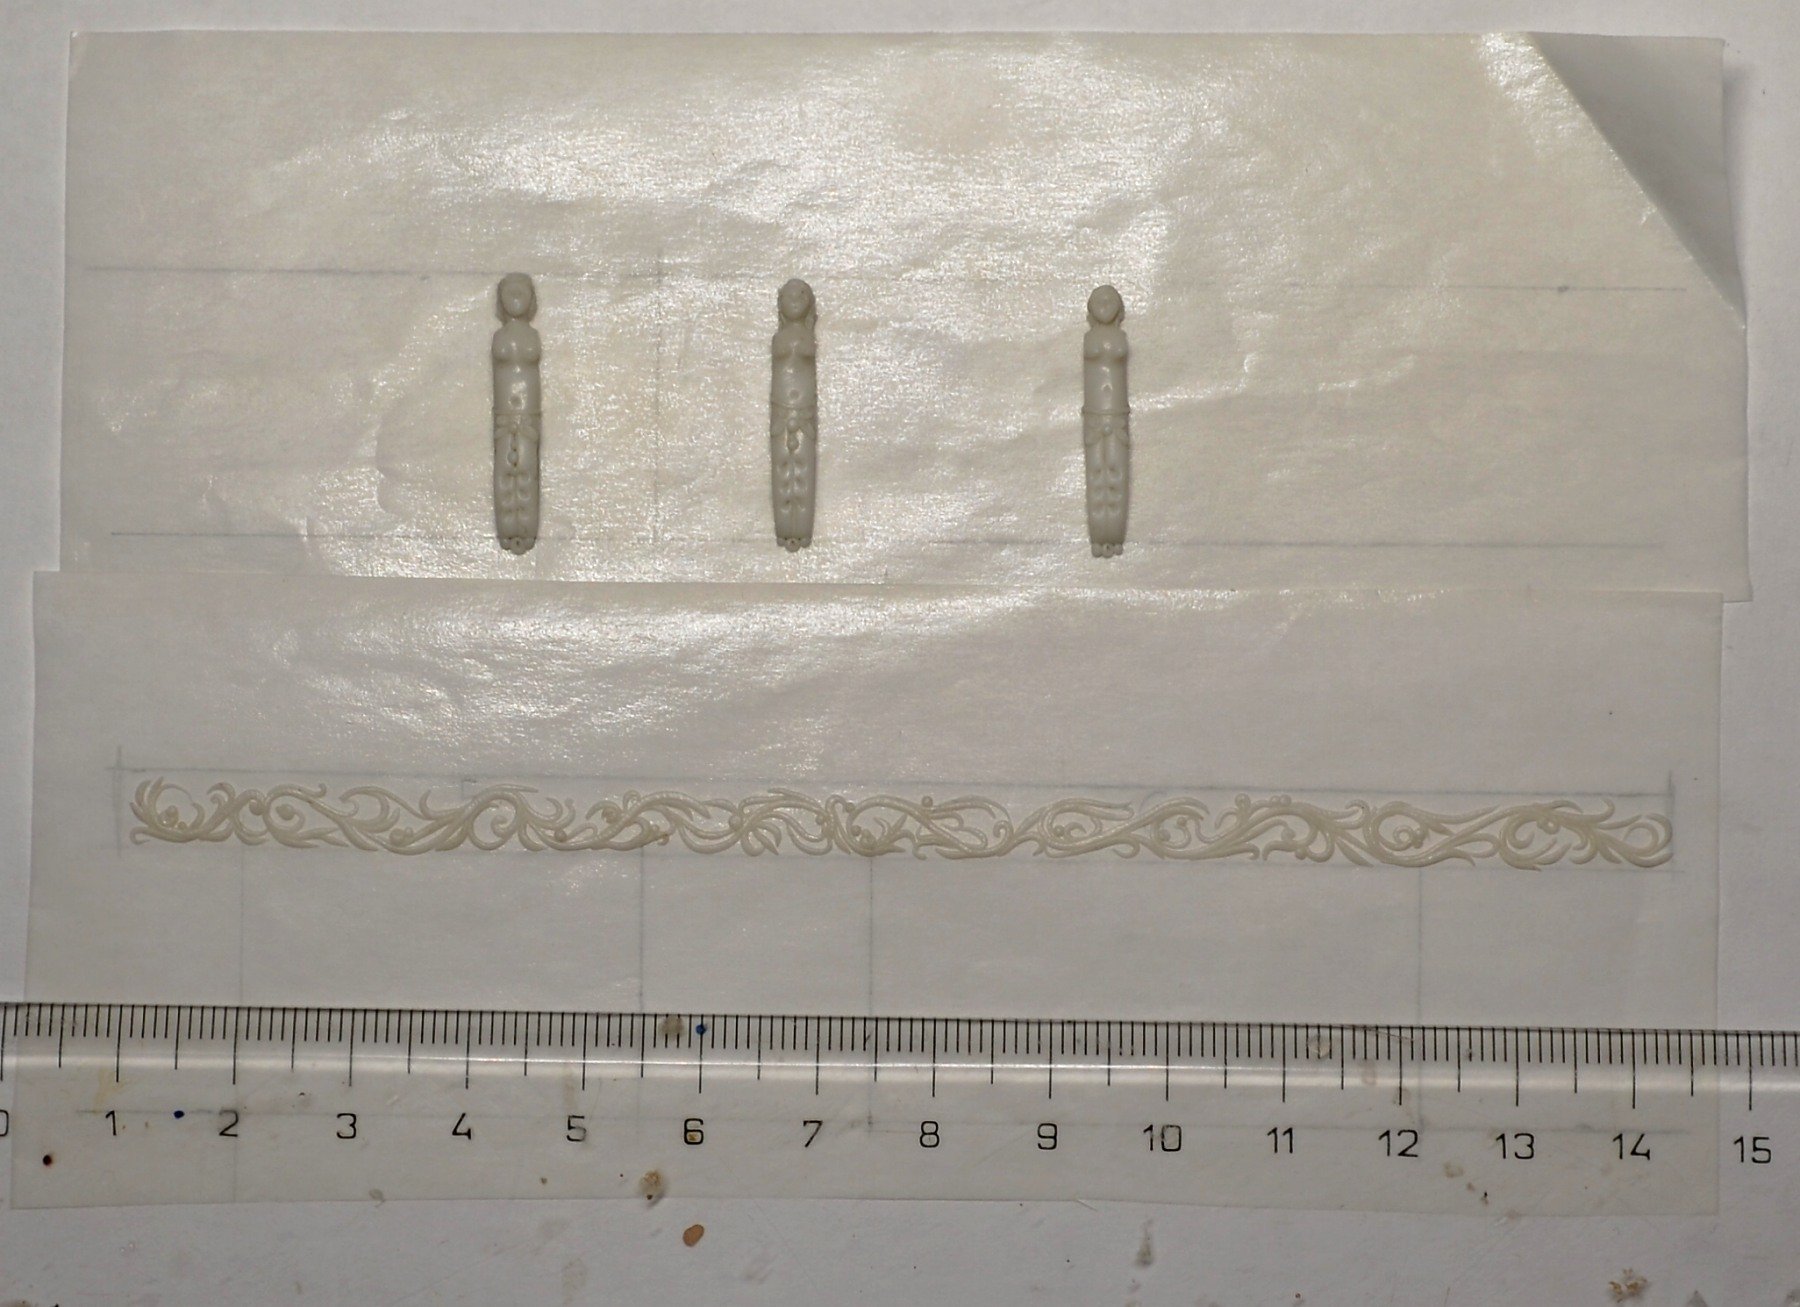
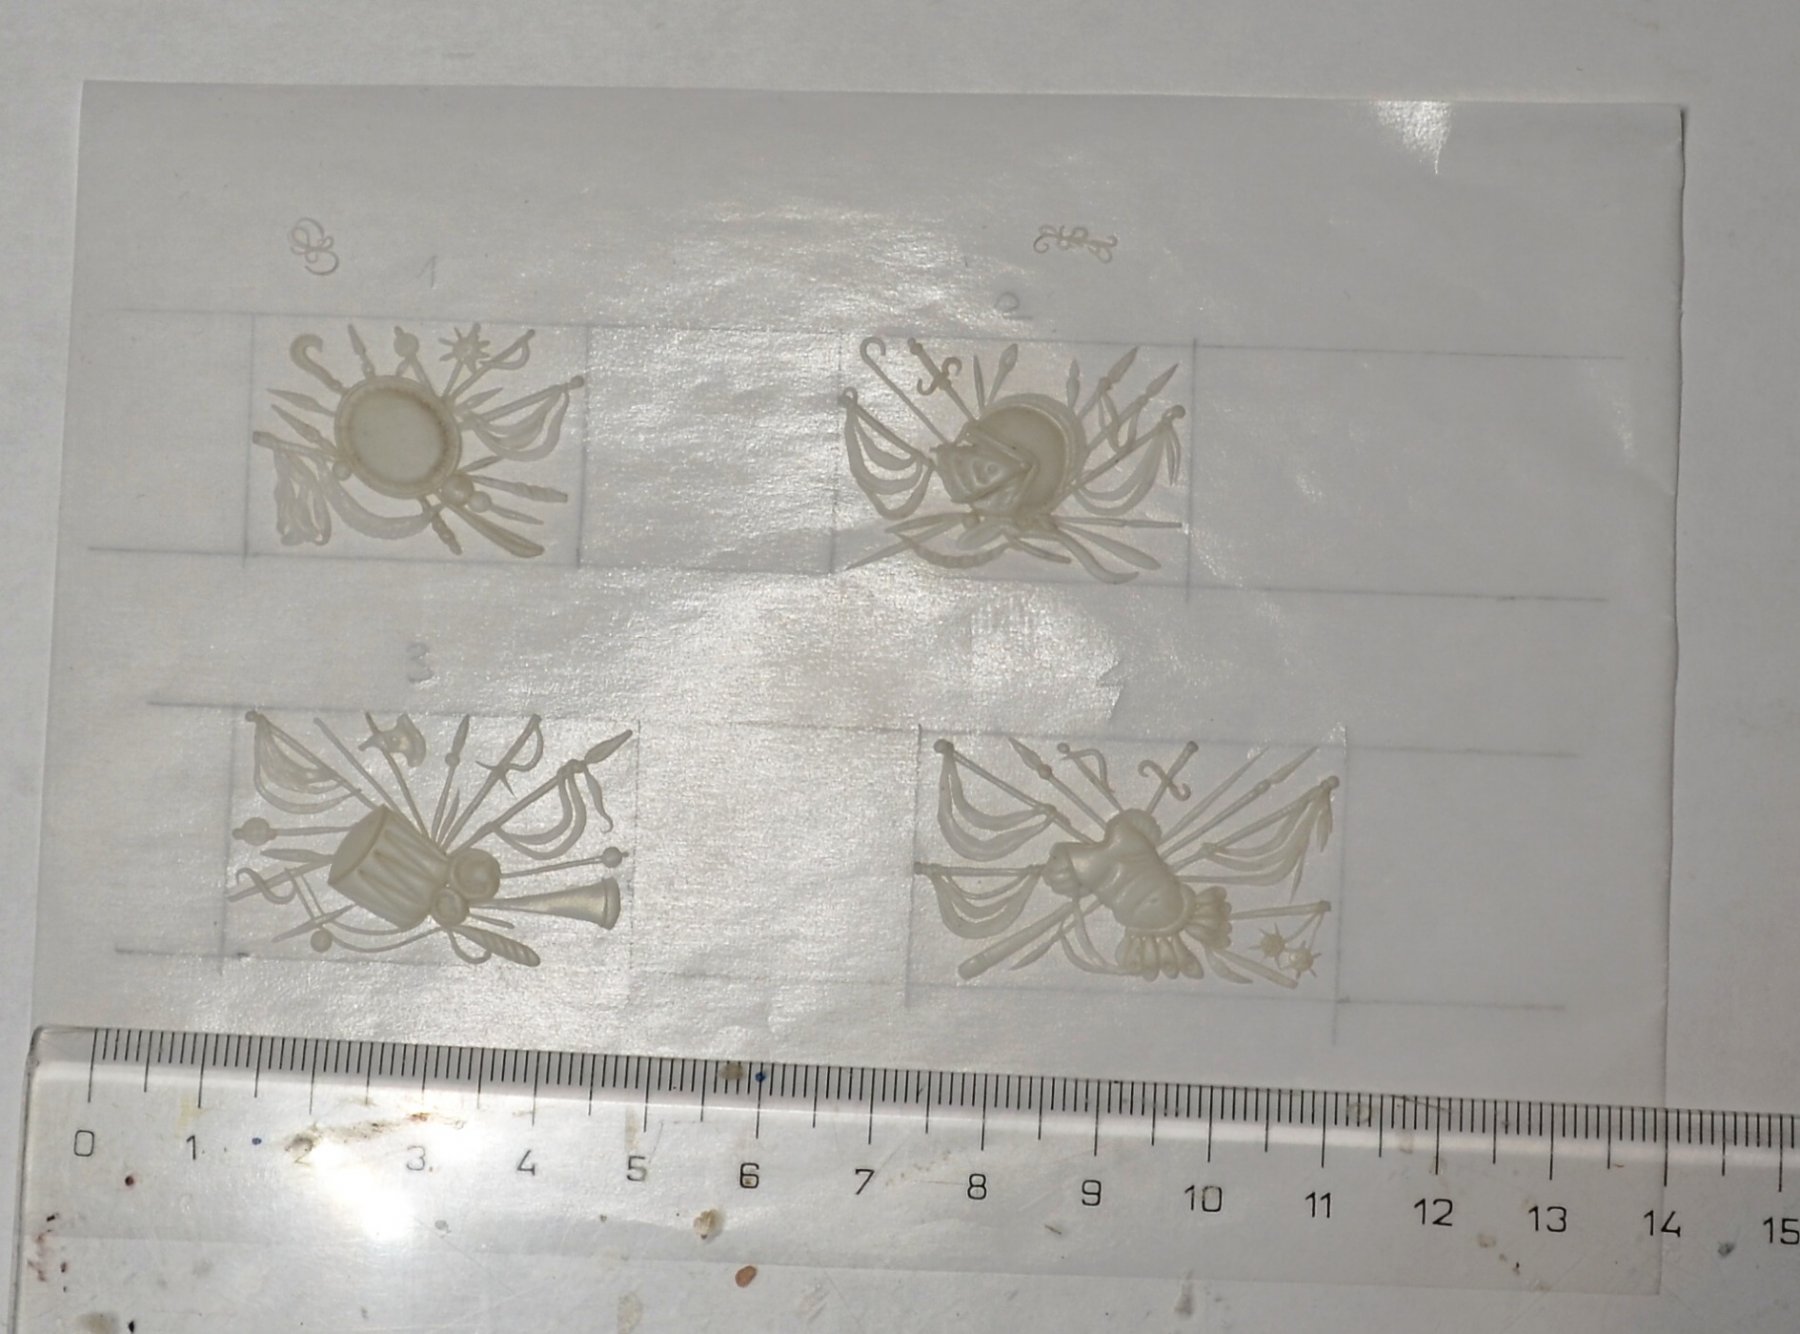
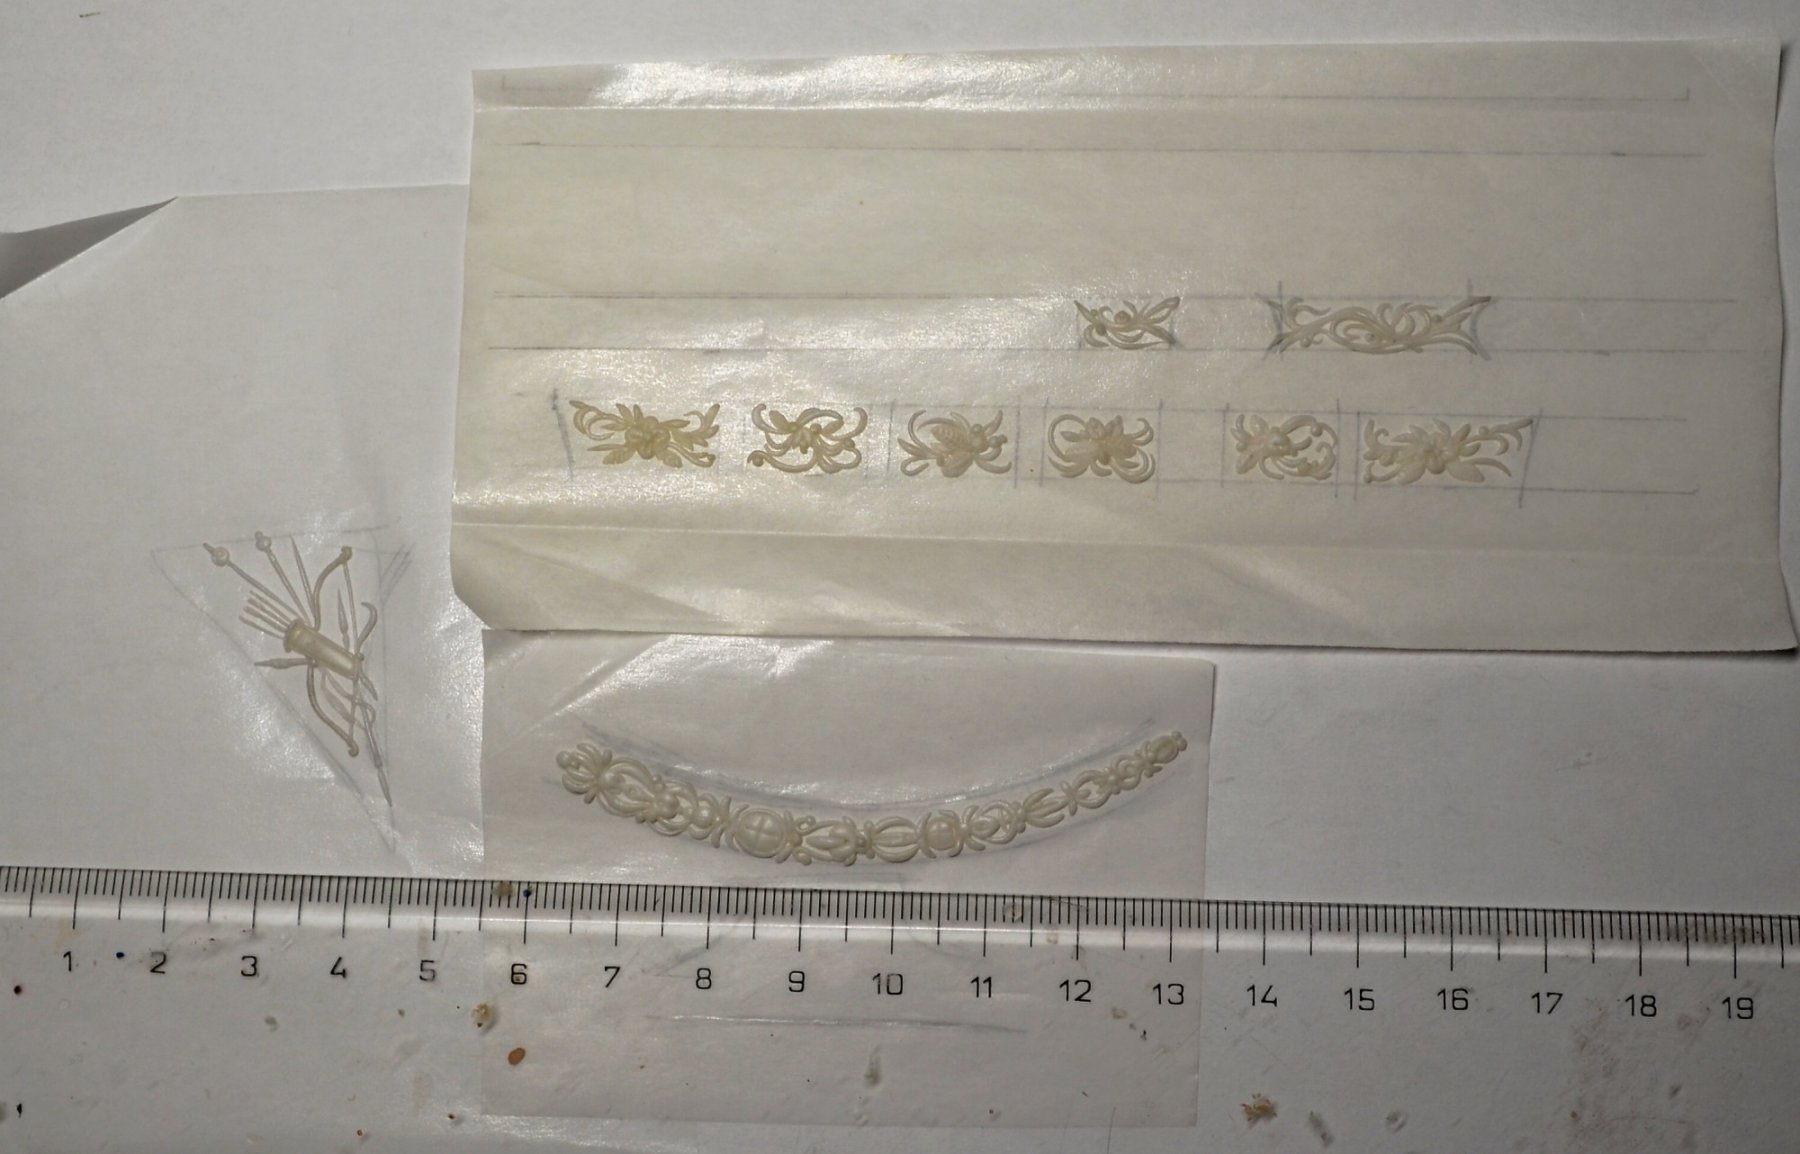
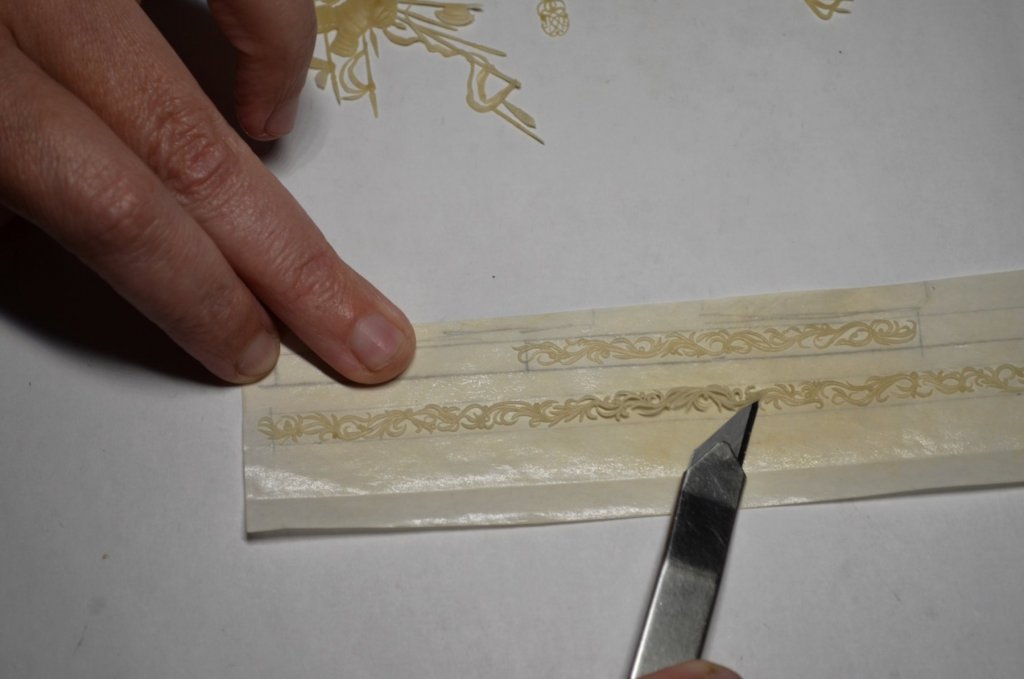
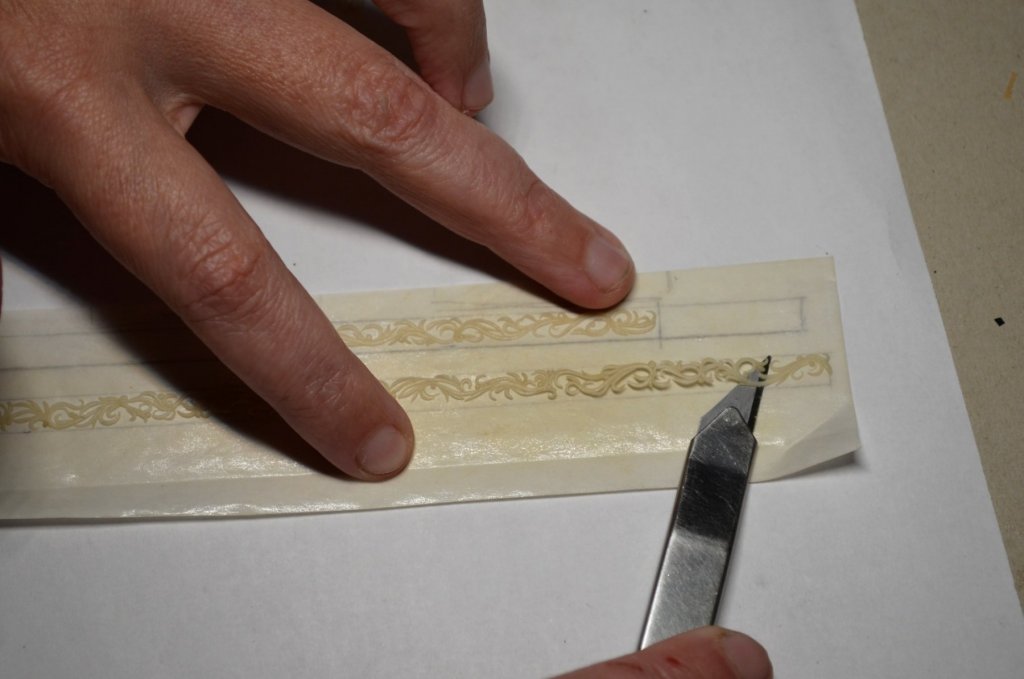
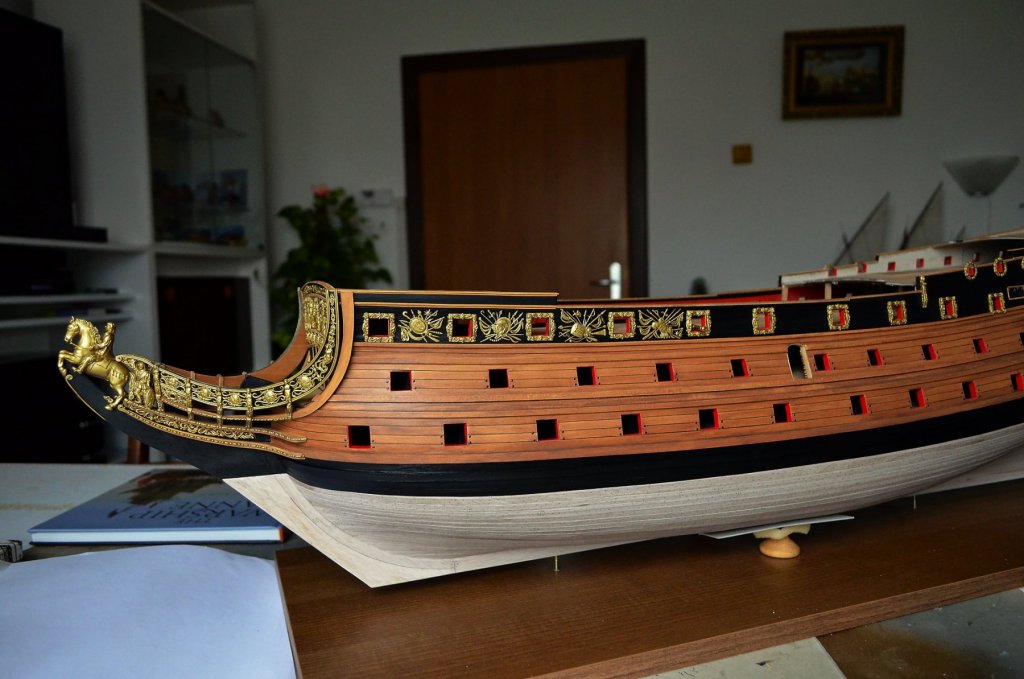
Good remark, Allan. There are more possibilities of course. I have good experience with this kind of wax paper and it is also easily available for me. The mass is baked in the oven at a temperature of about 130 ° C, so the wax paper endures without problems. I always use a new sheet of wax paper for next decoration. ************************************** Today I made new ornaments for bow section, two pieces are situated around holes for anchor ropes. Kind reagards and enjoy the pics Doris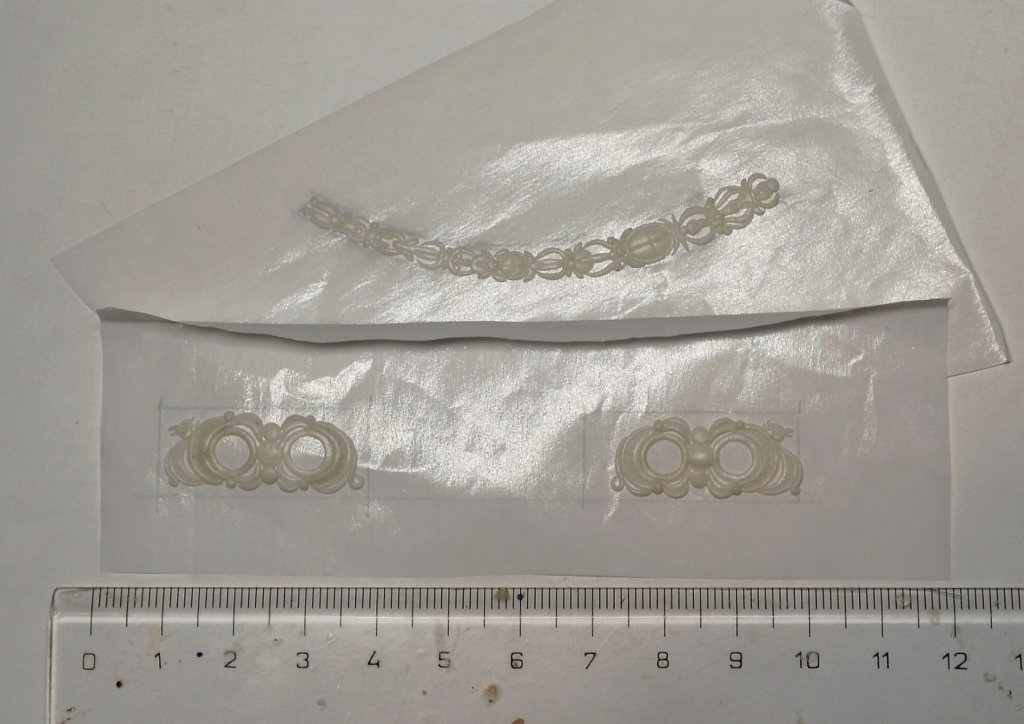


- 1,035 replies
-
- 28
-
-
-
- royal katherine
- ship of the line
- (and 1 more)
-
HMS ROYAL KATHERINE 1664 by Doris - 1/55 - CARD
DORIS replied to DORIS's topic in - Build logs for subjects built 1501 - 1750
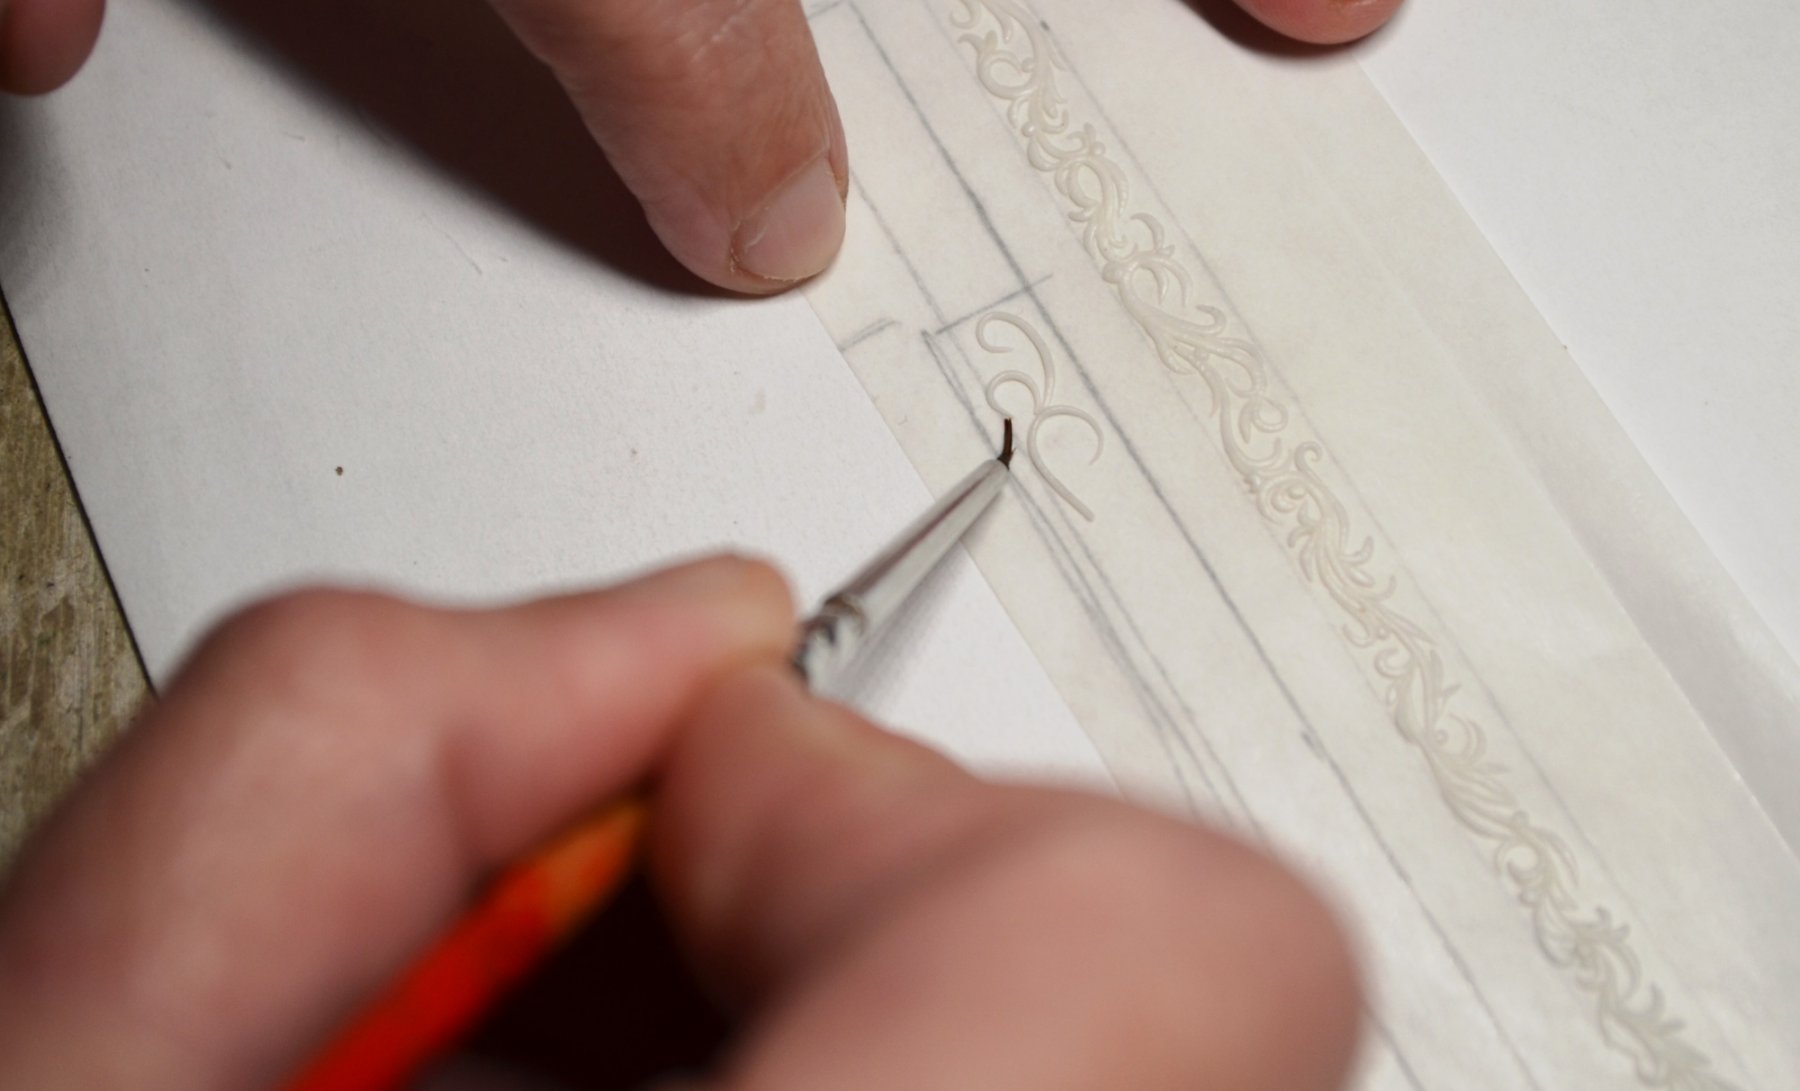
Dear friends, I do appreciate your kind words and praise, that is a great honour for me. Thank you all very much. I am pleased you like my tutorial and if anything interests you, just ask a question. My English is not very qood, but I will try to explain. I suppose I will devote my ship models to a museum one day. I believe, it would bring pleasure to many people. Now I feel happy having all these beautiful ships at home. I like sailing ships since childhood.😊 You are welcome, Radek. I recommend to keep the brush slightly wet, so that the mass does not stick to it. Temperature is also very important for shaping that mass. BTW, your Mayflower looks great. Best regards, Doris- 1,035 replies
-
- 6
-
-
- royal katherine
- ship of the line
- (and 1 more)
-
HMS ROYAL KATHERINE 1664 by Doris - 1/55 - CARD
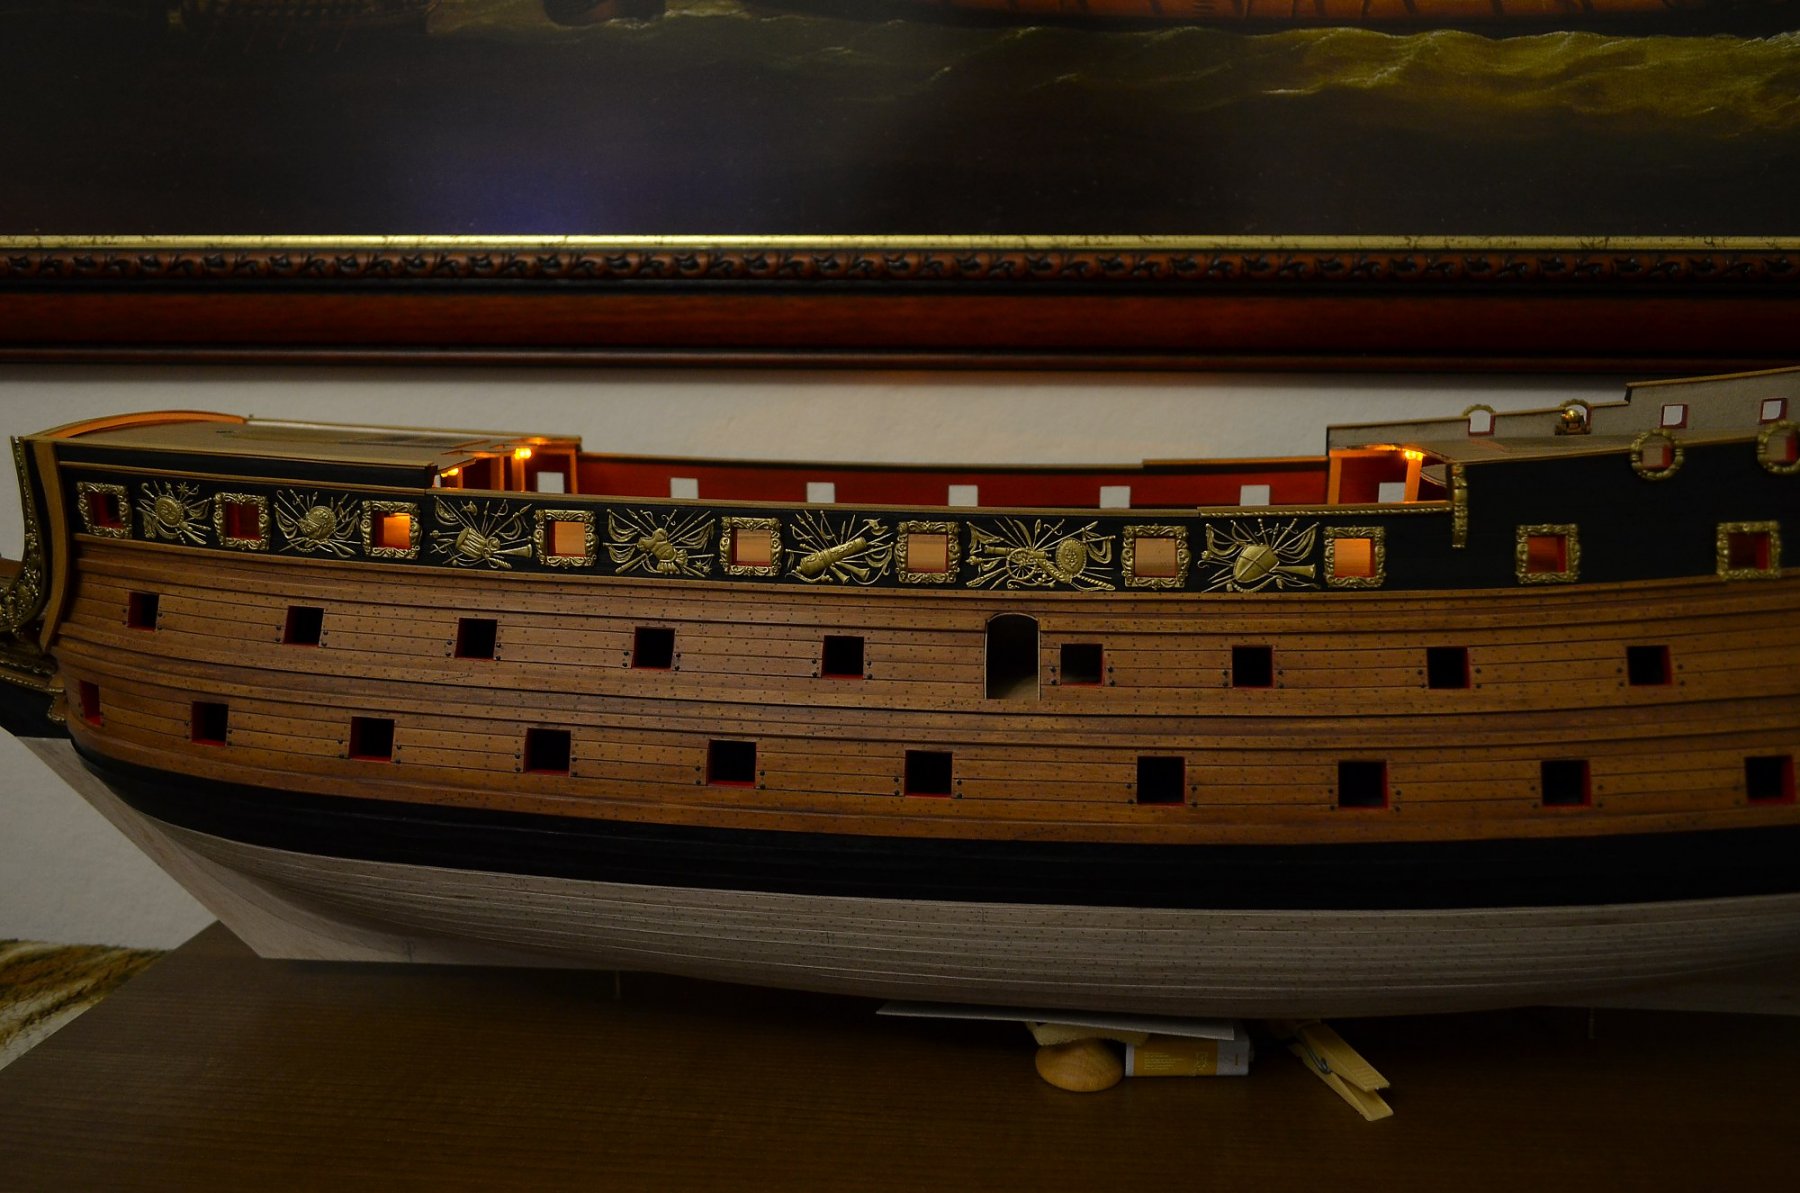
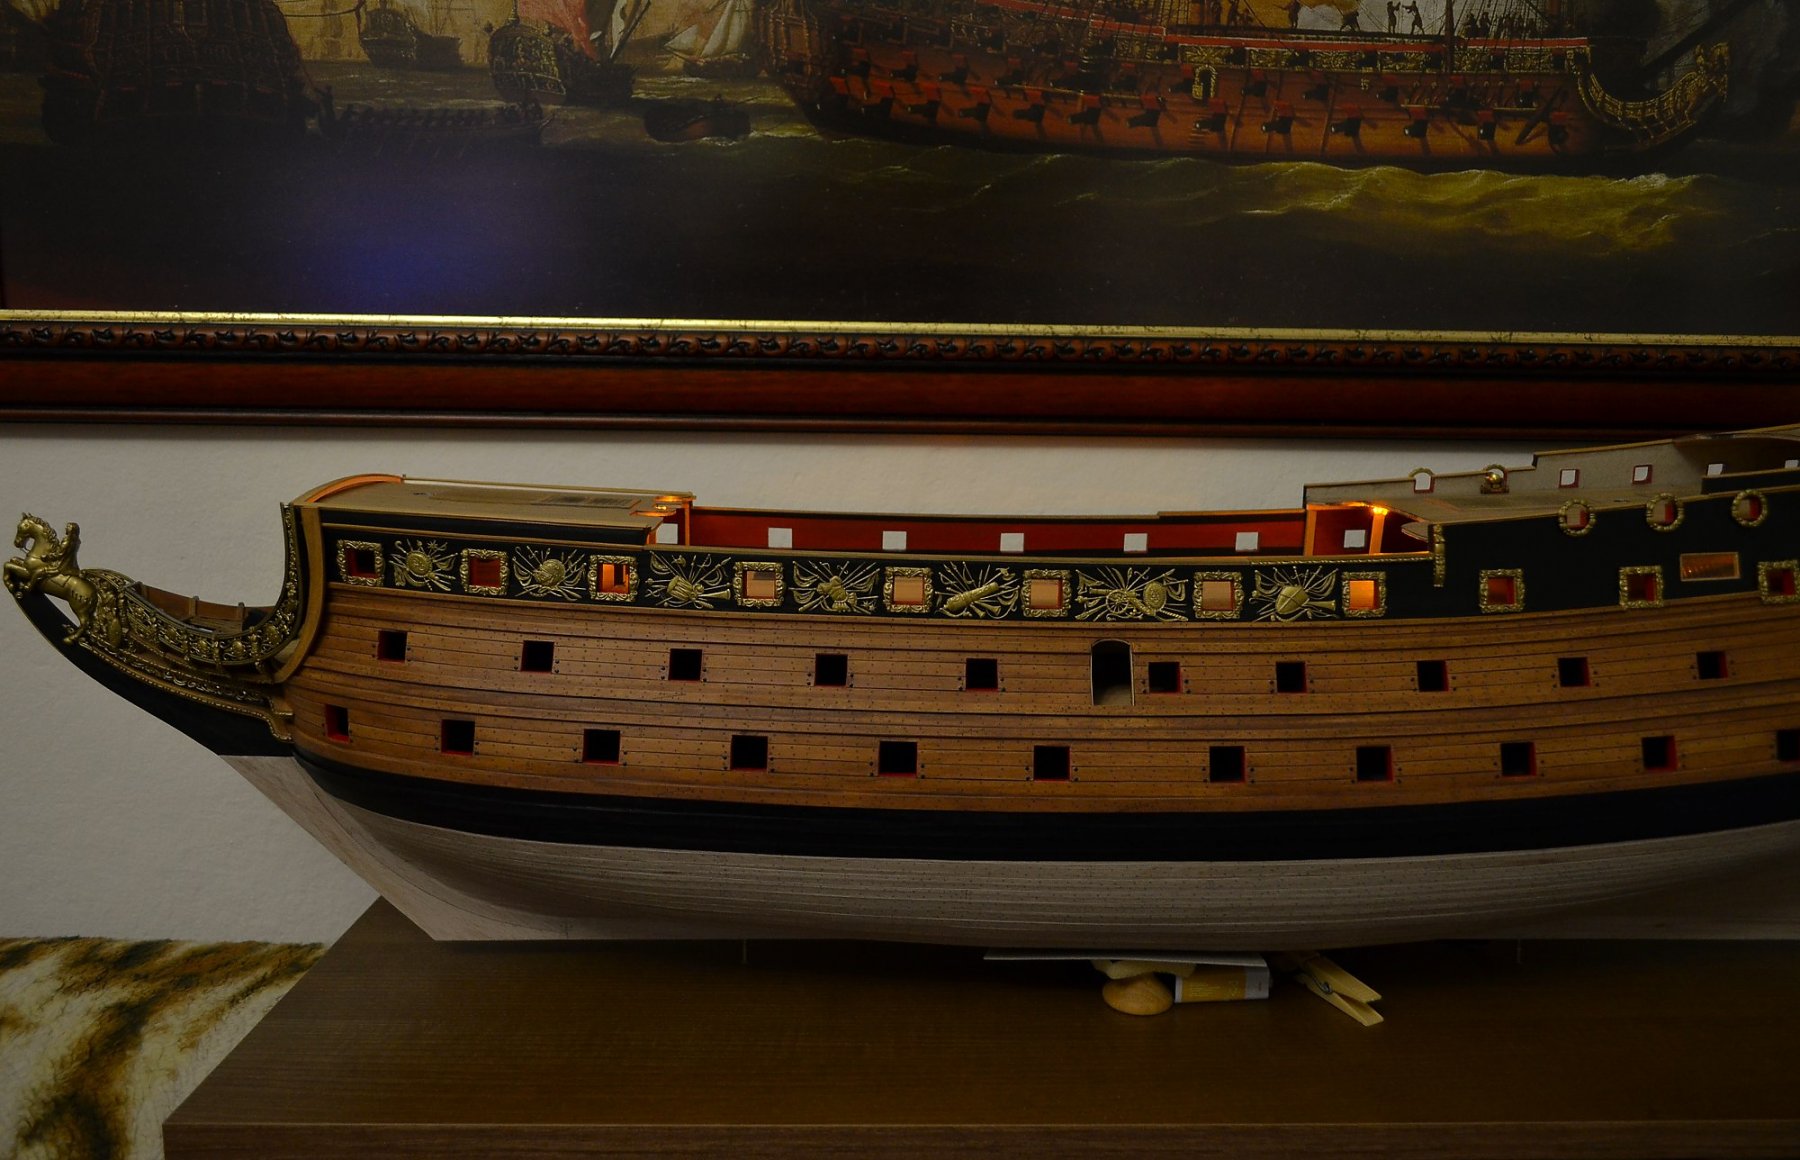
DORIS replied to DORIS's topic in - Build logs for subjects built 1501 - 1750
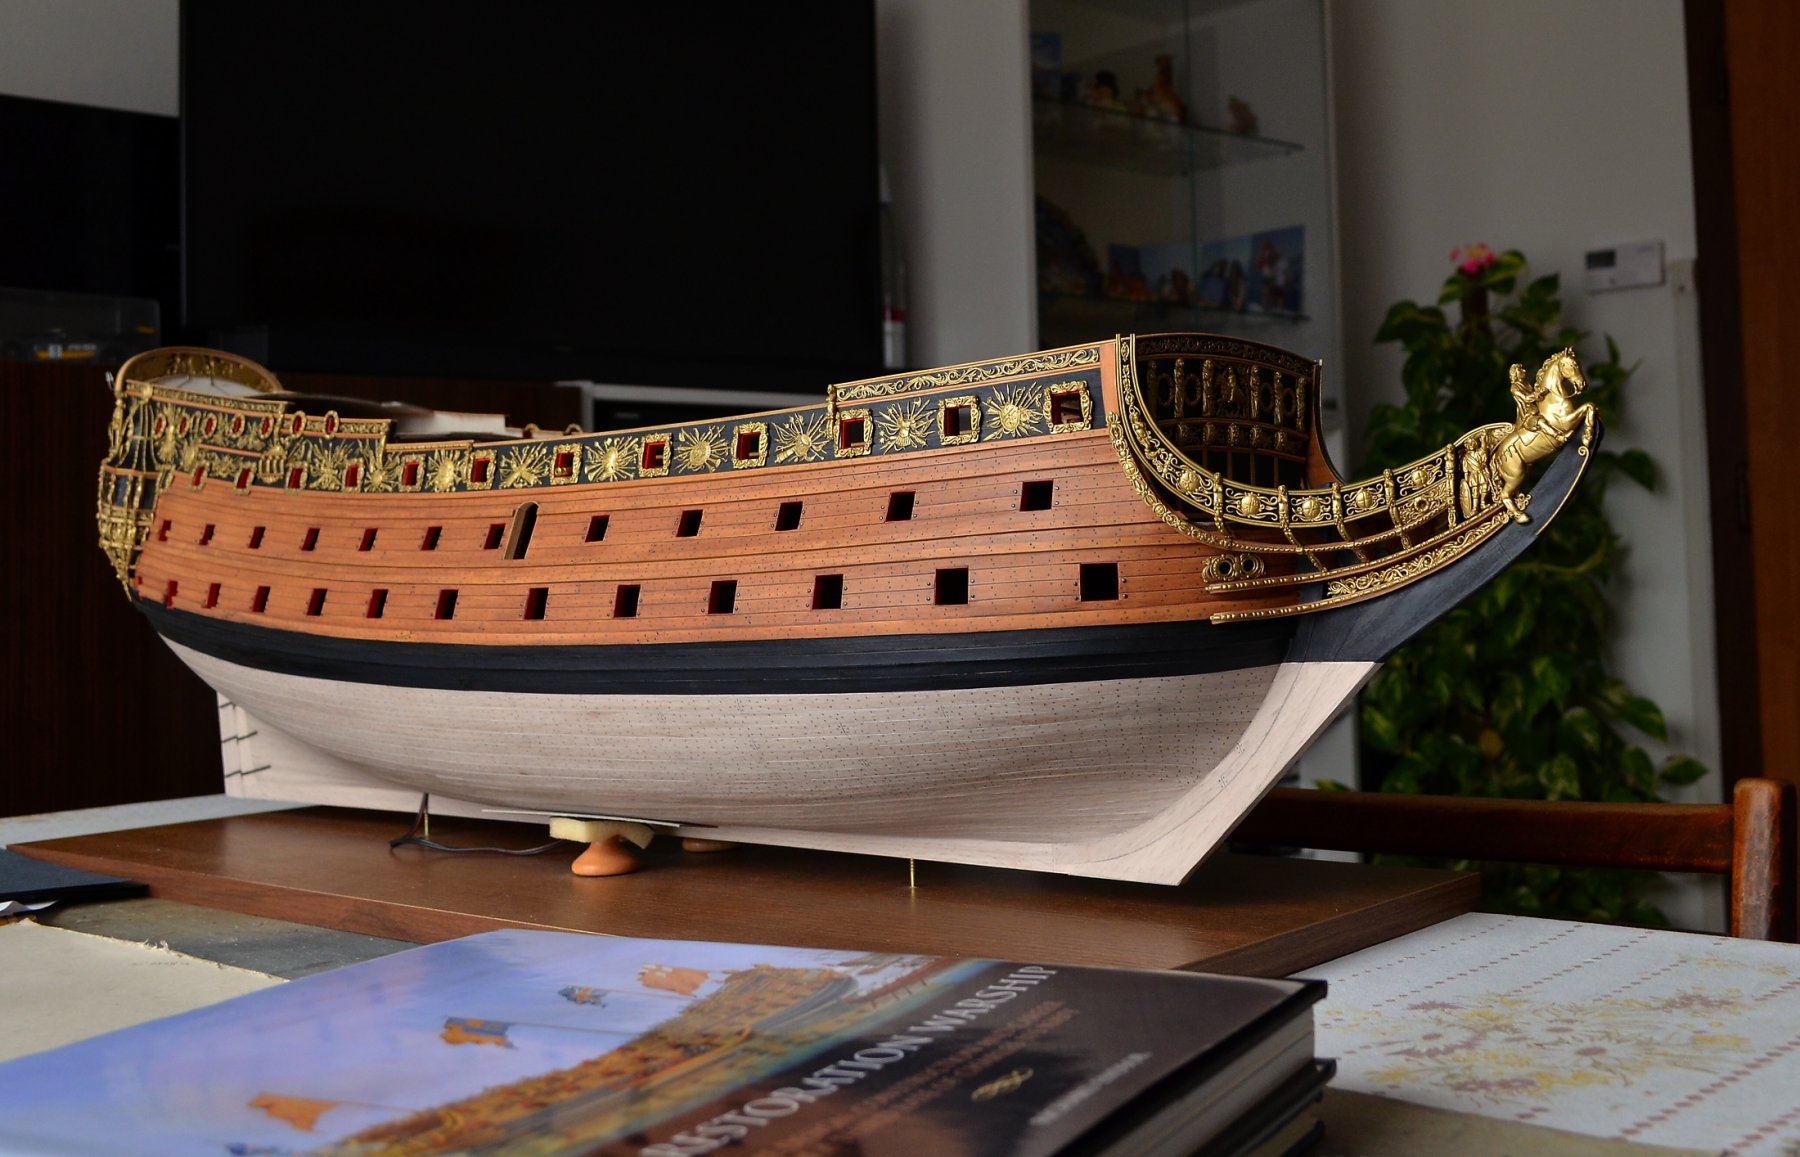
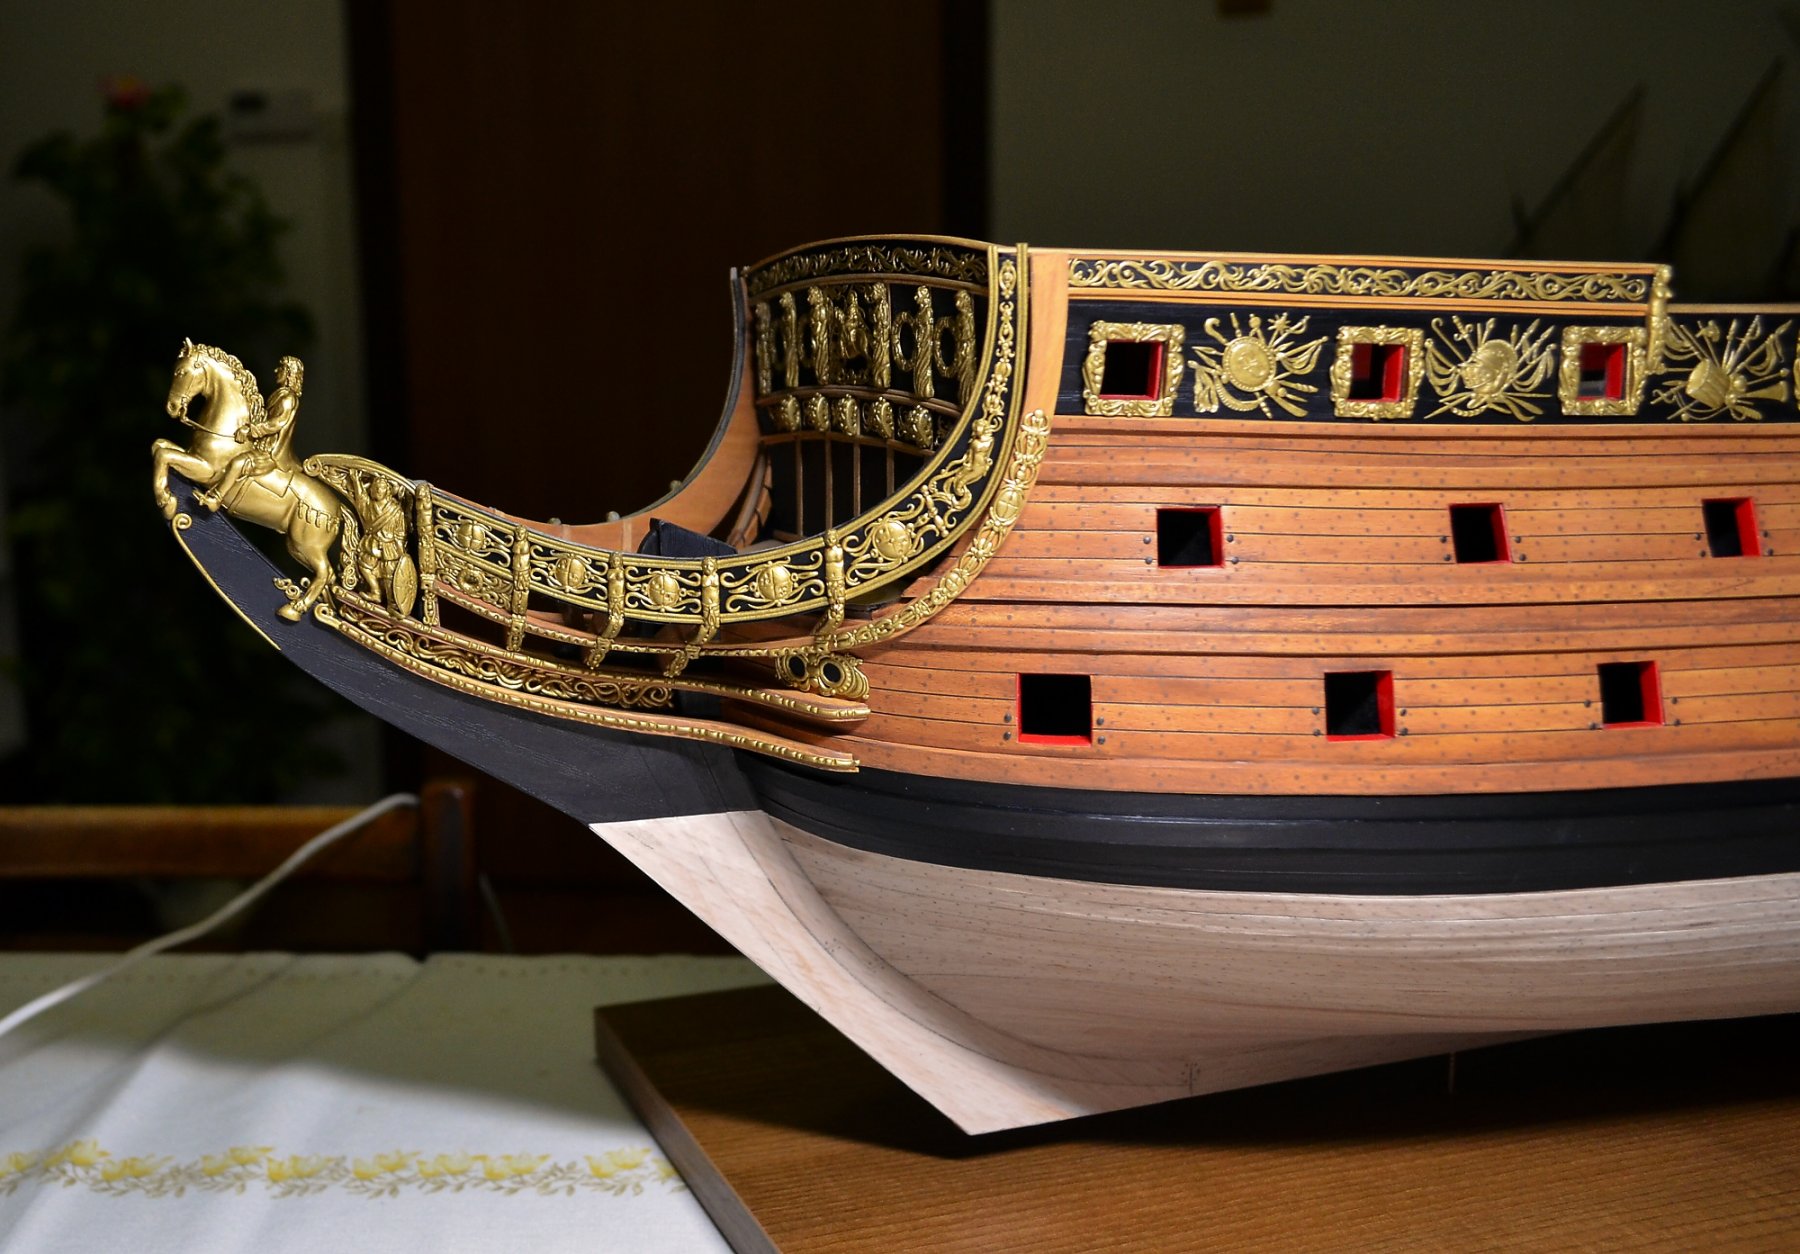
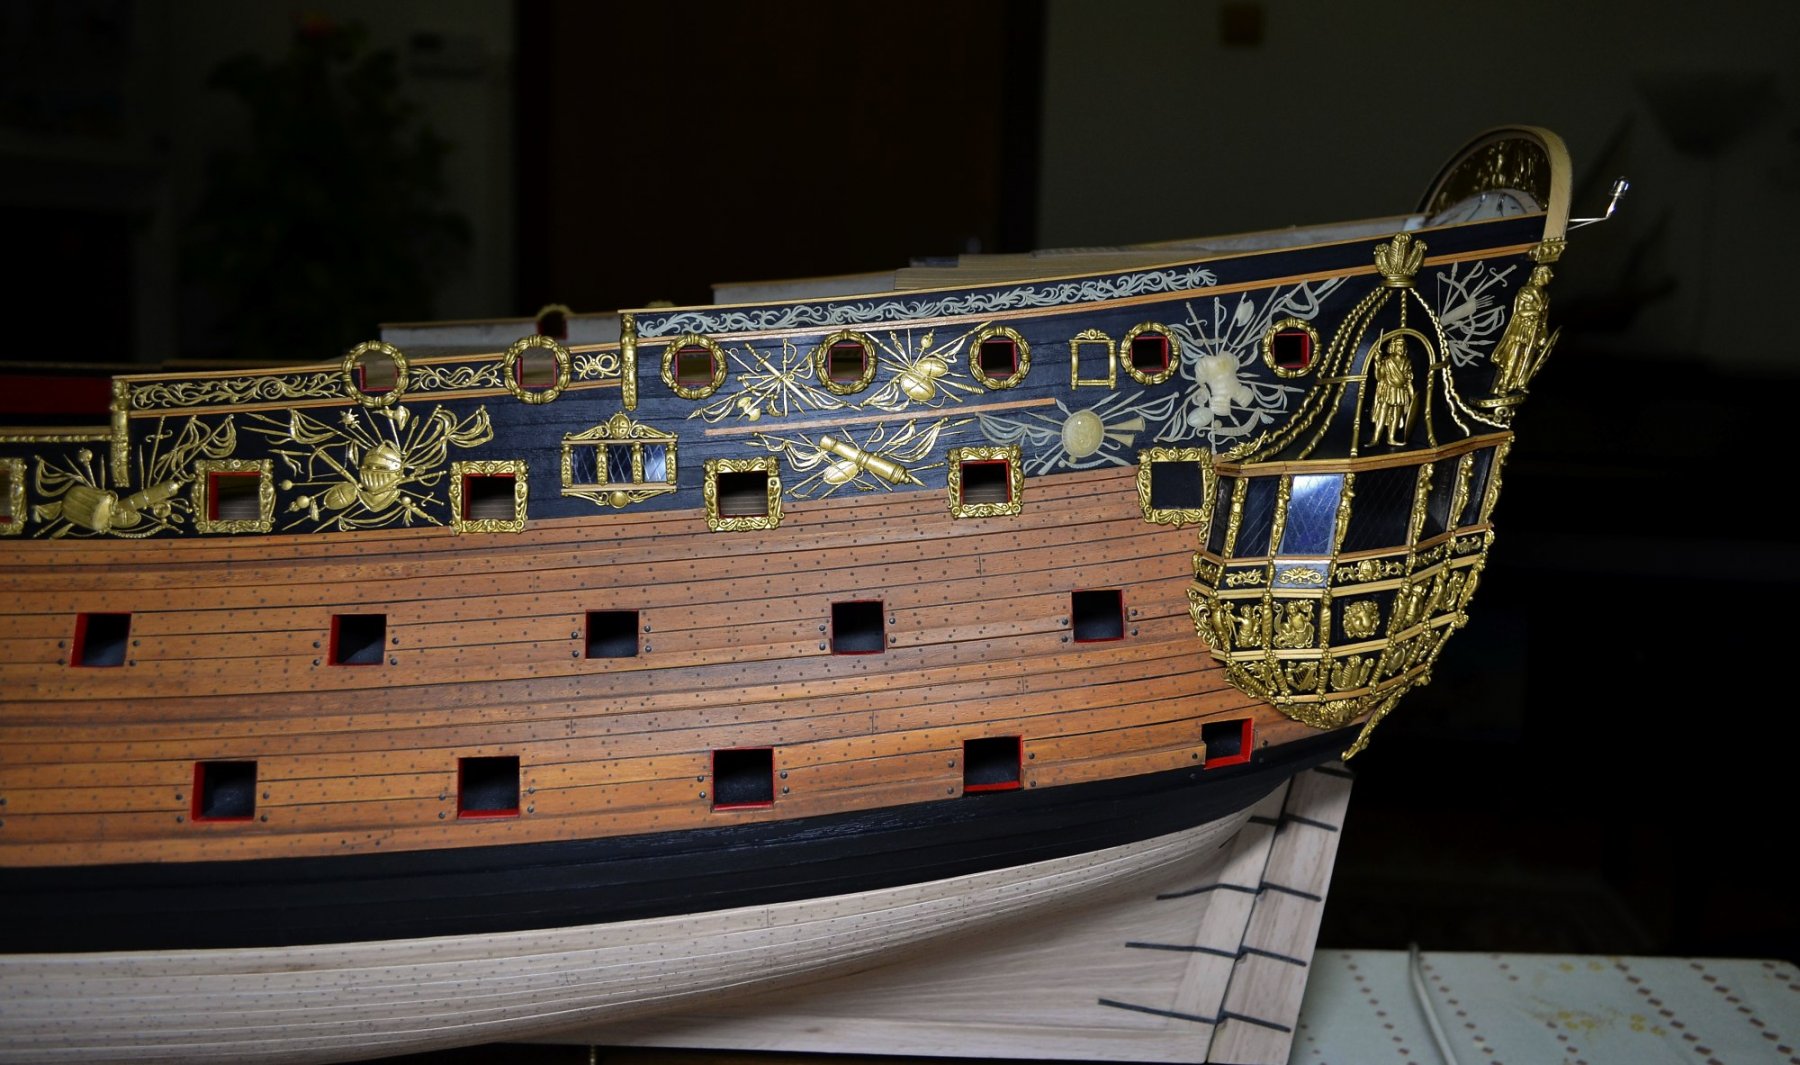
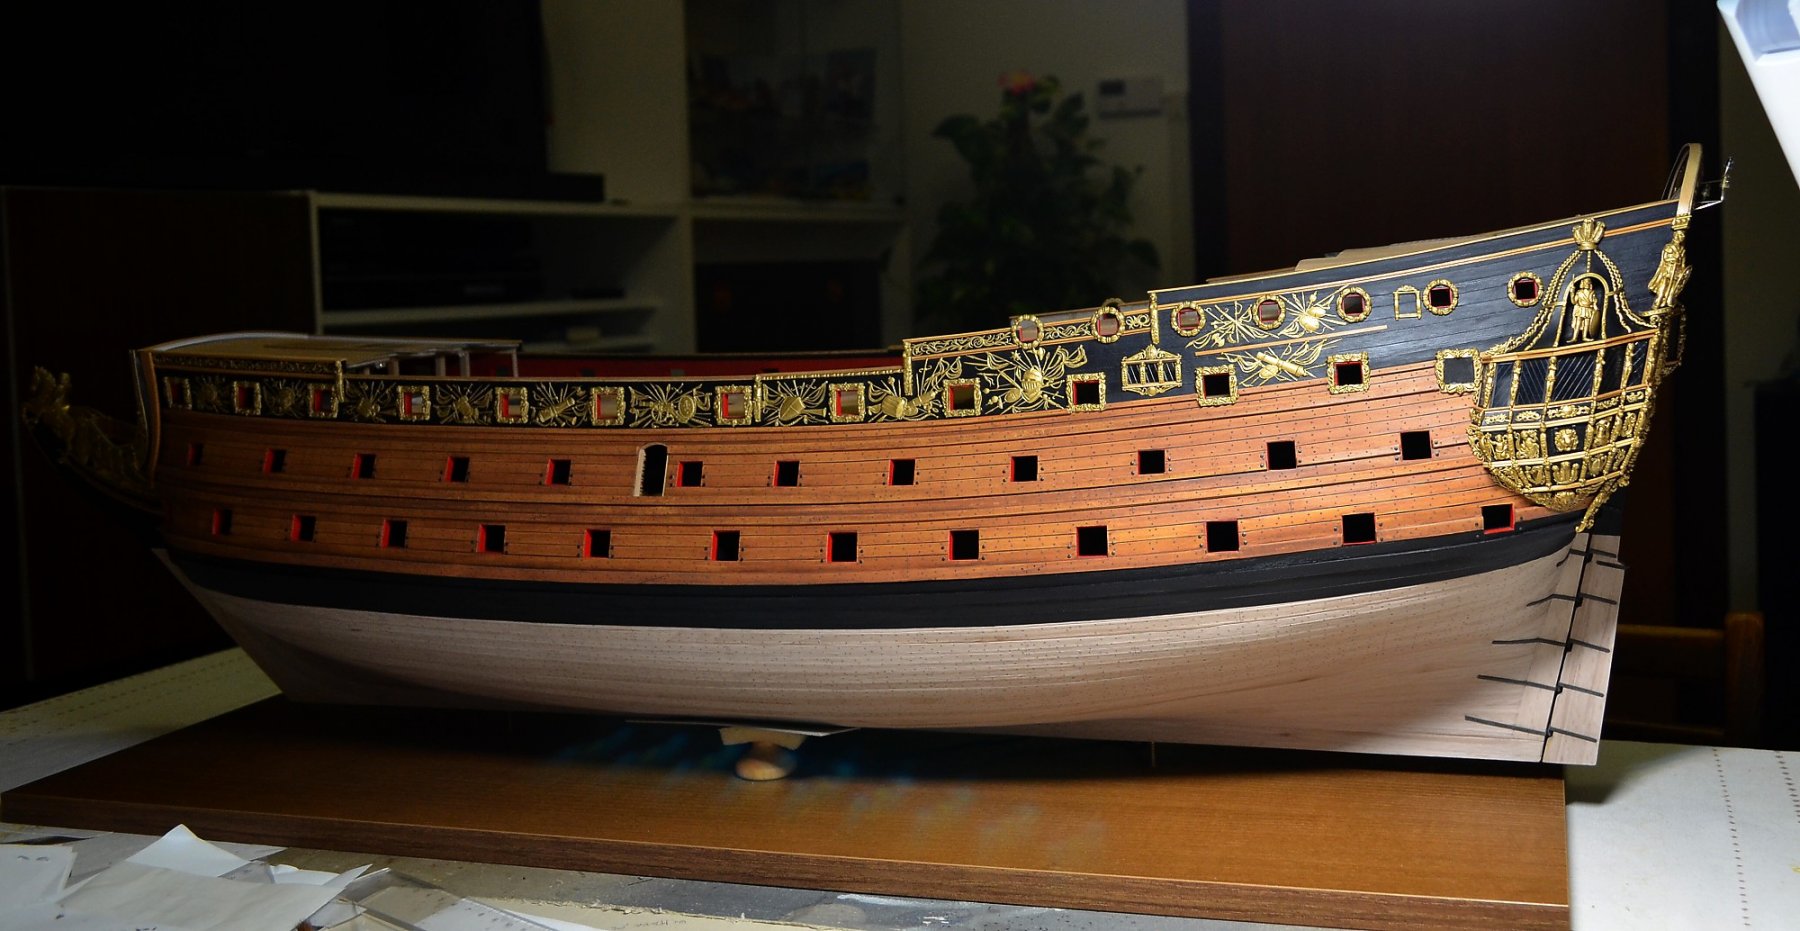
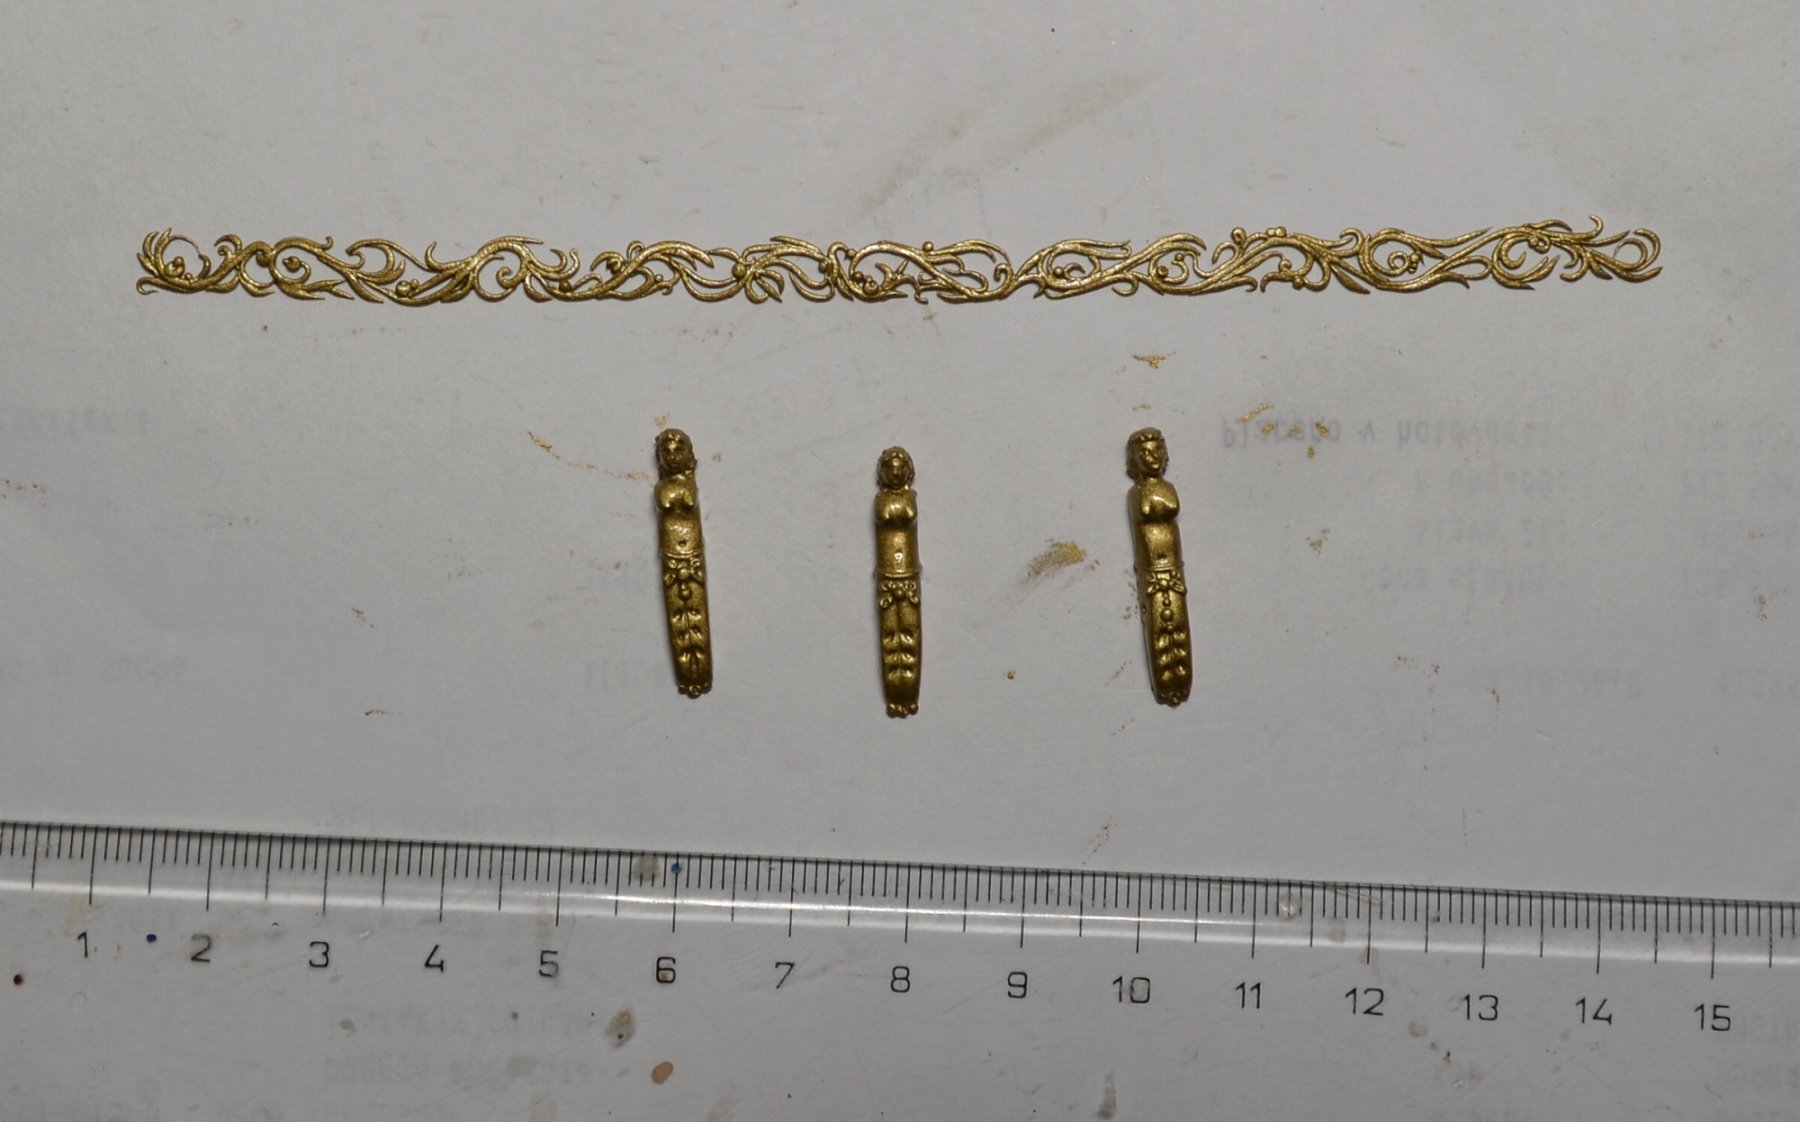
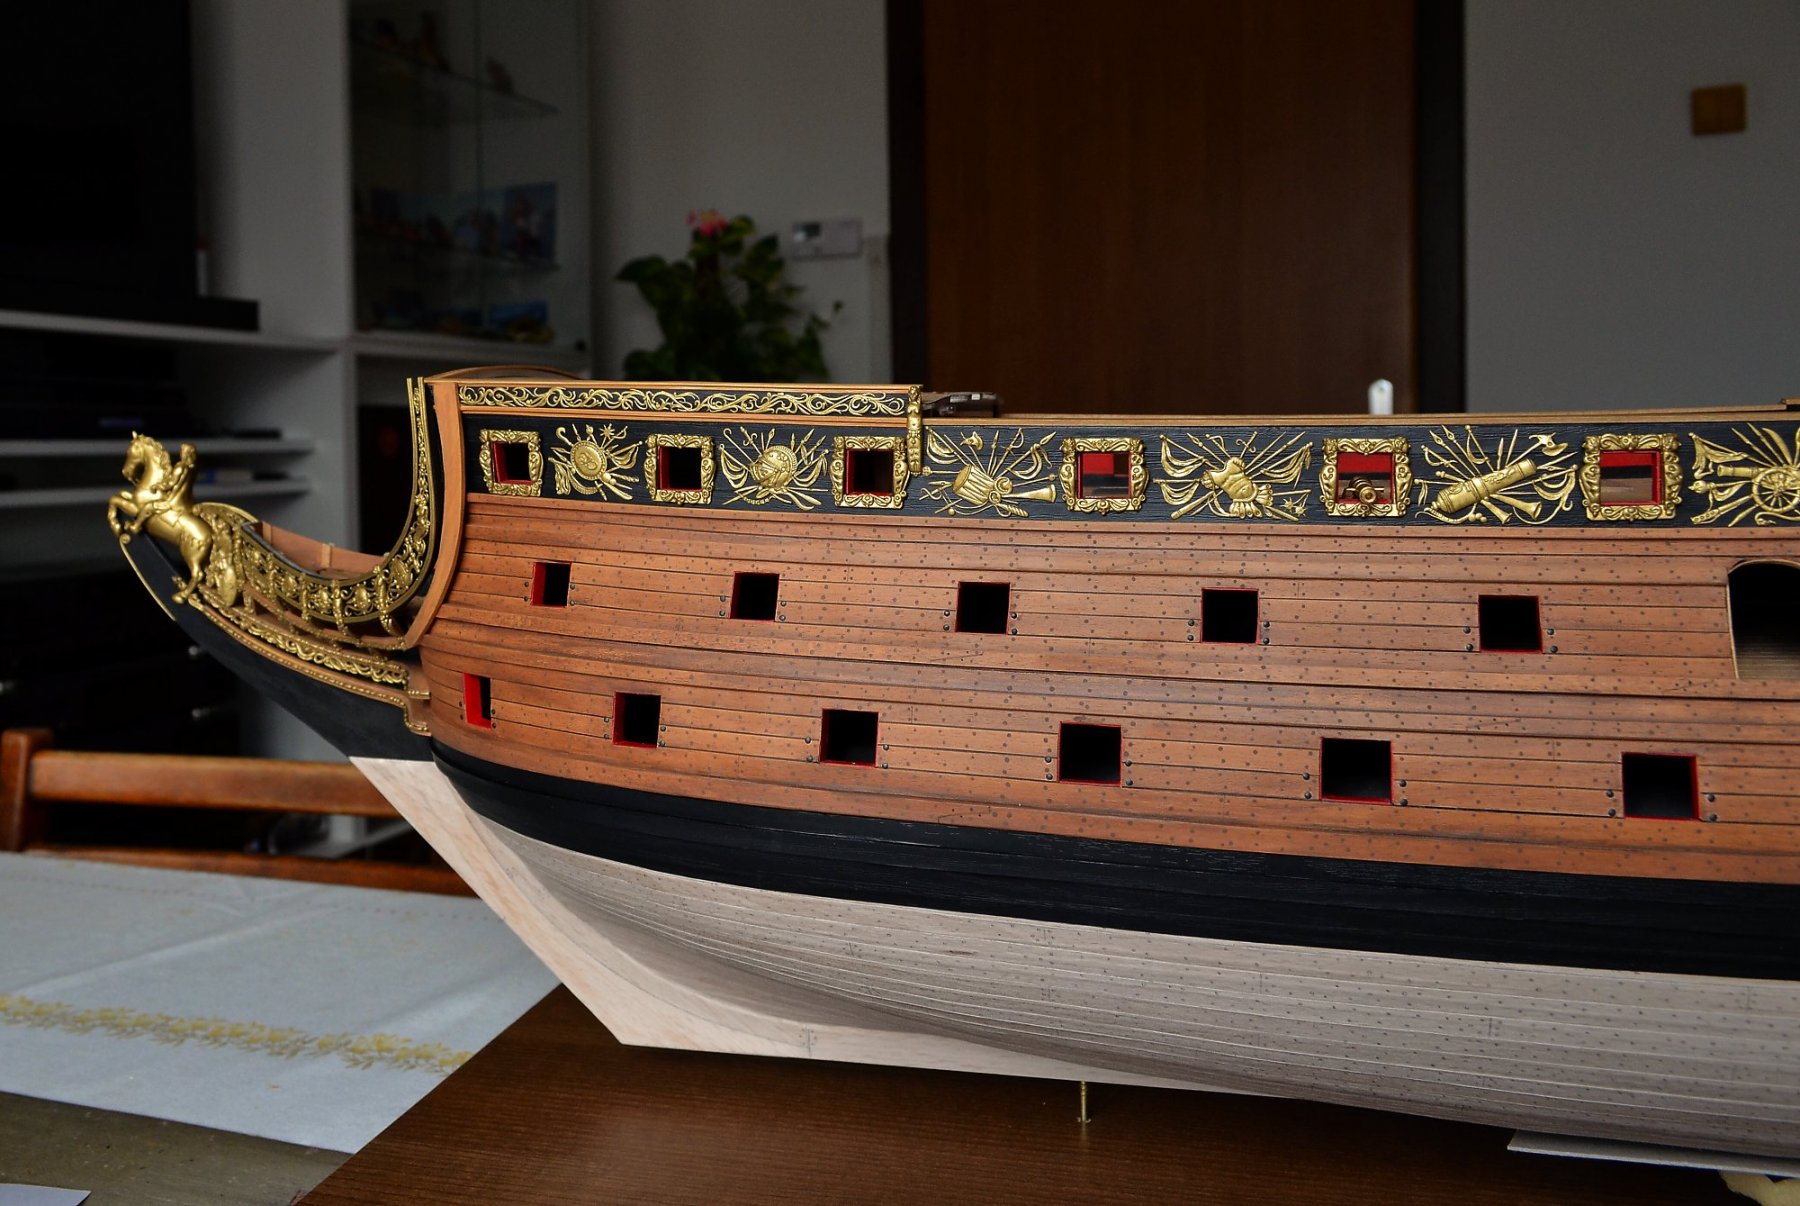
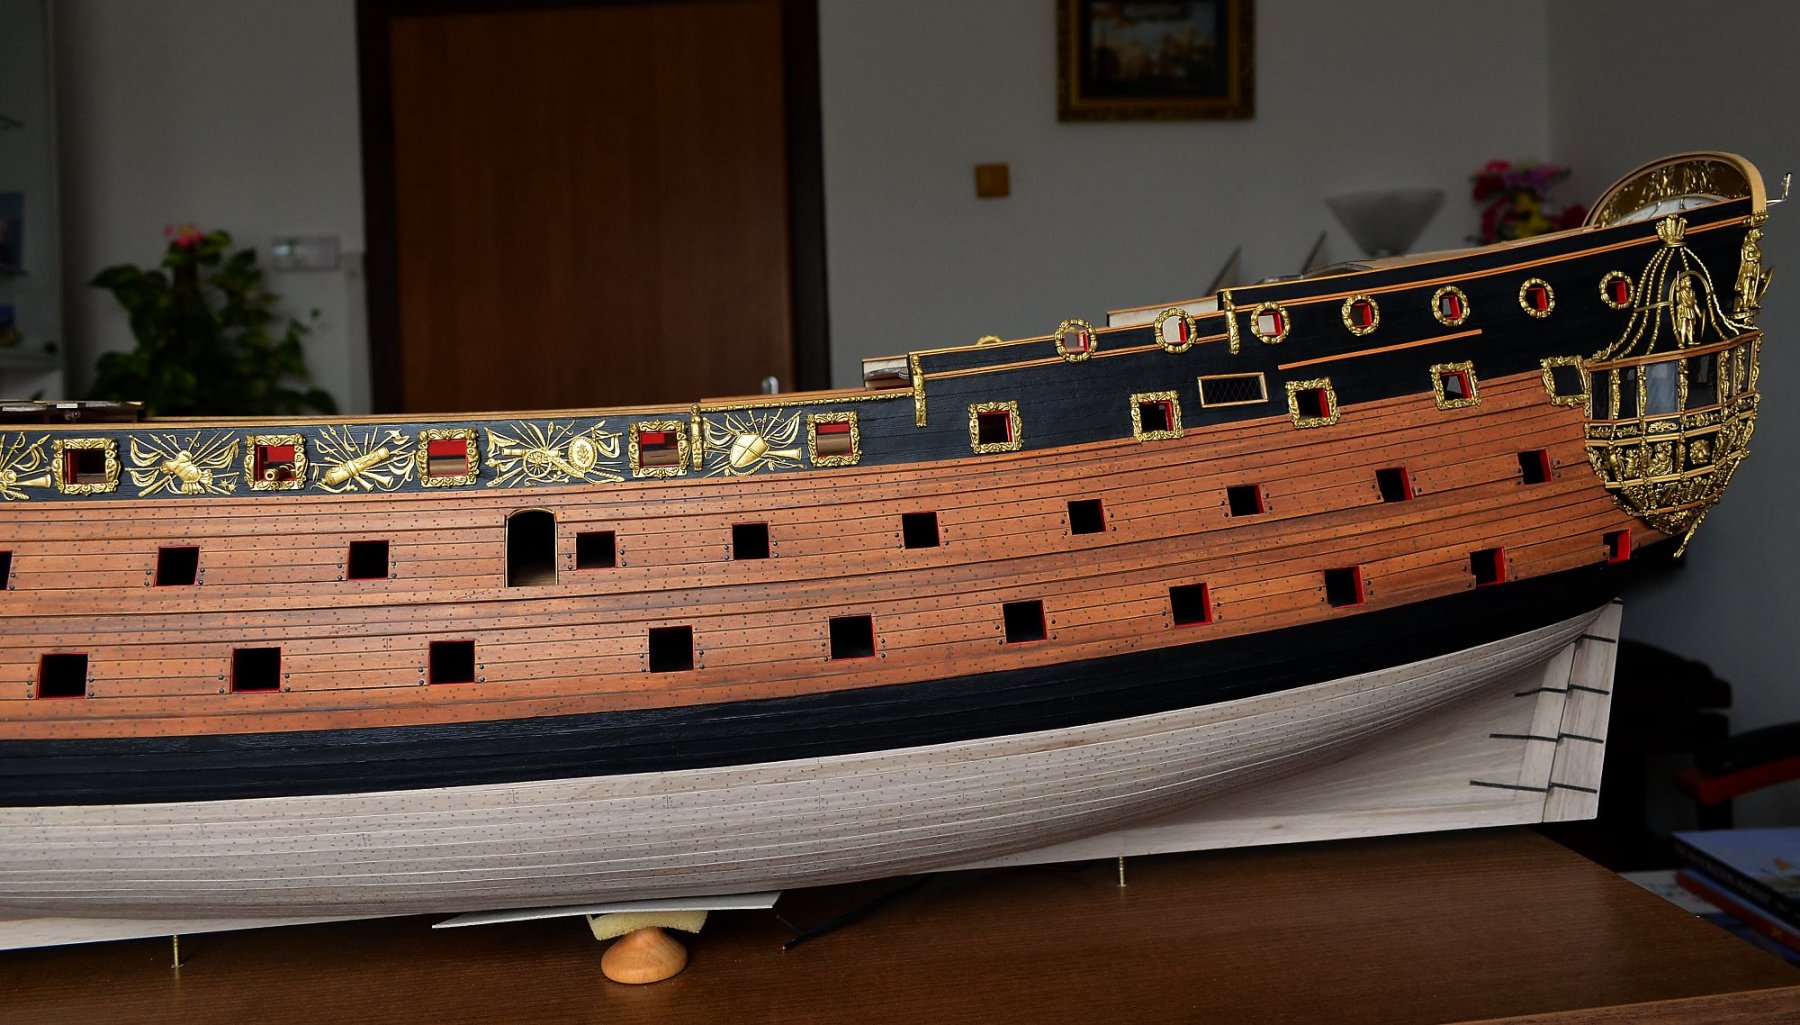
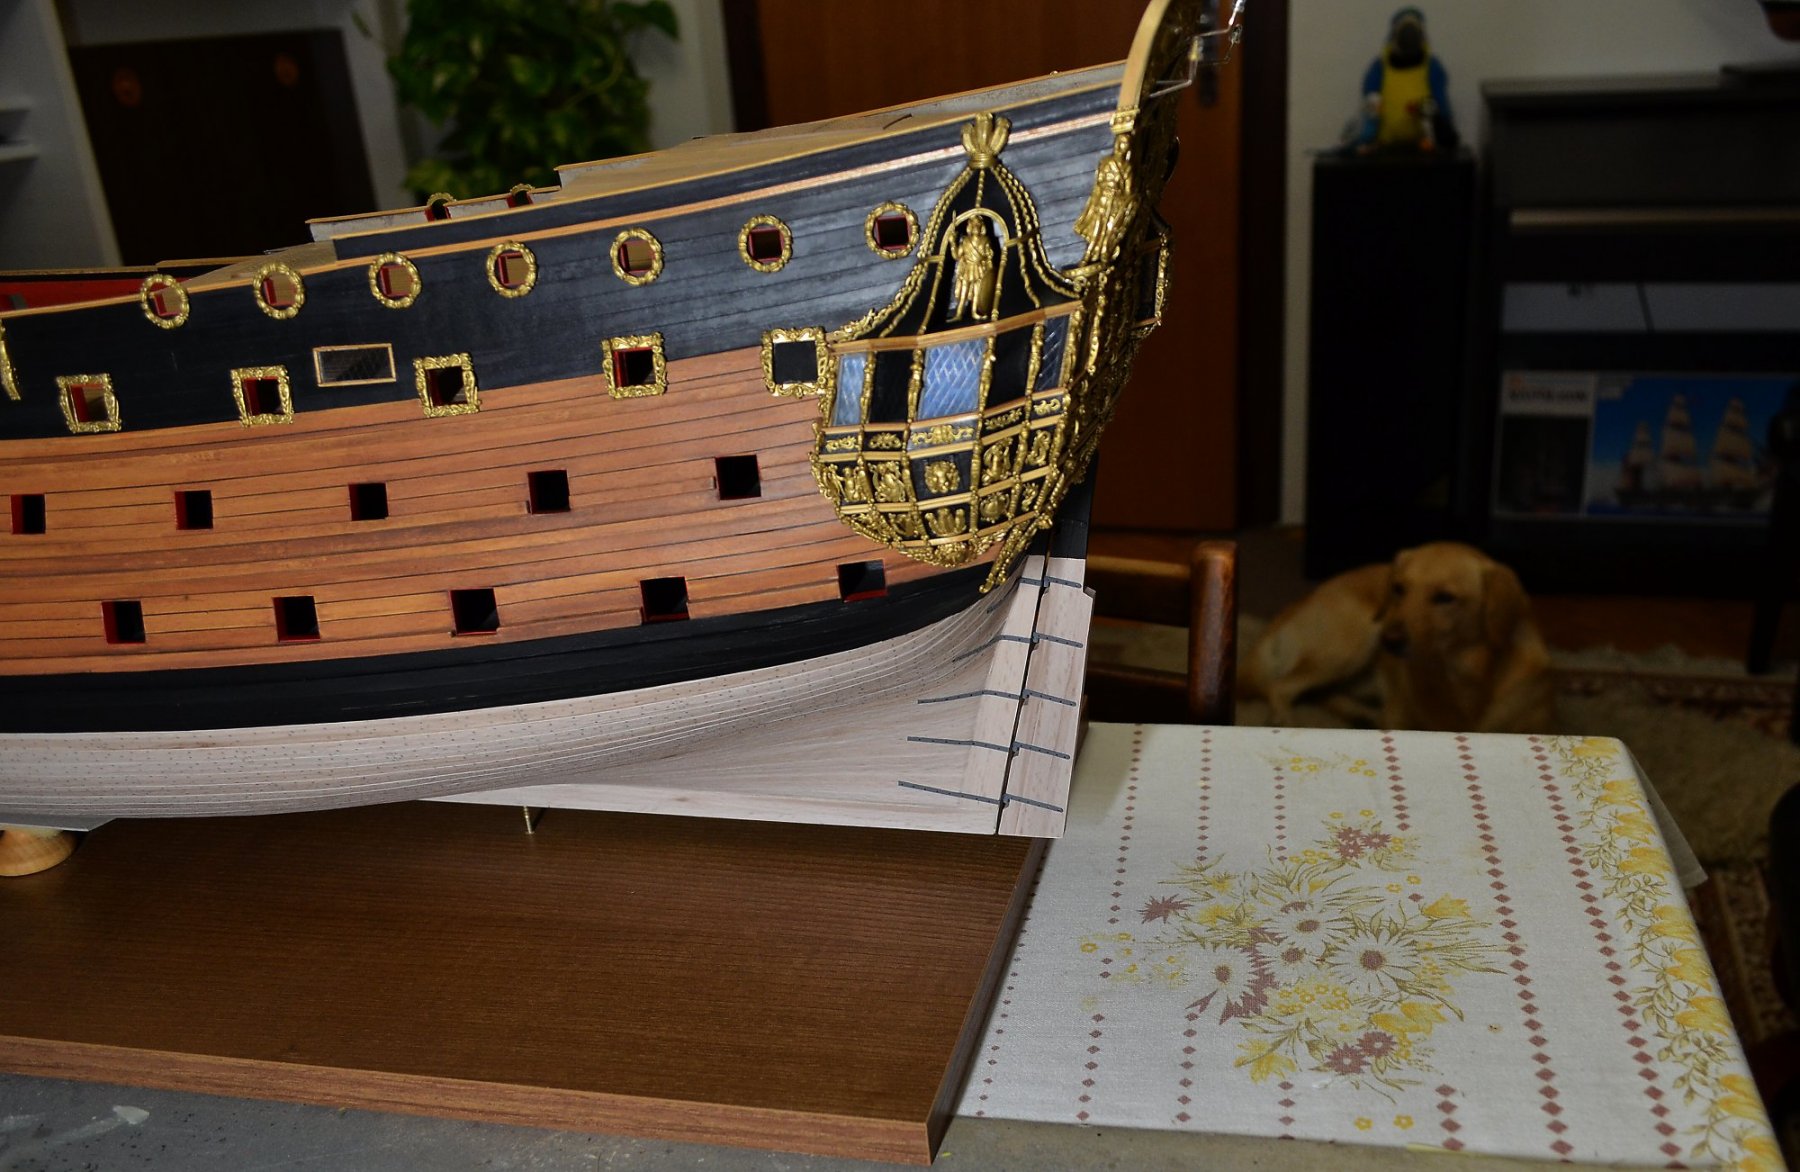
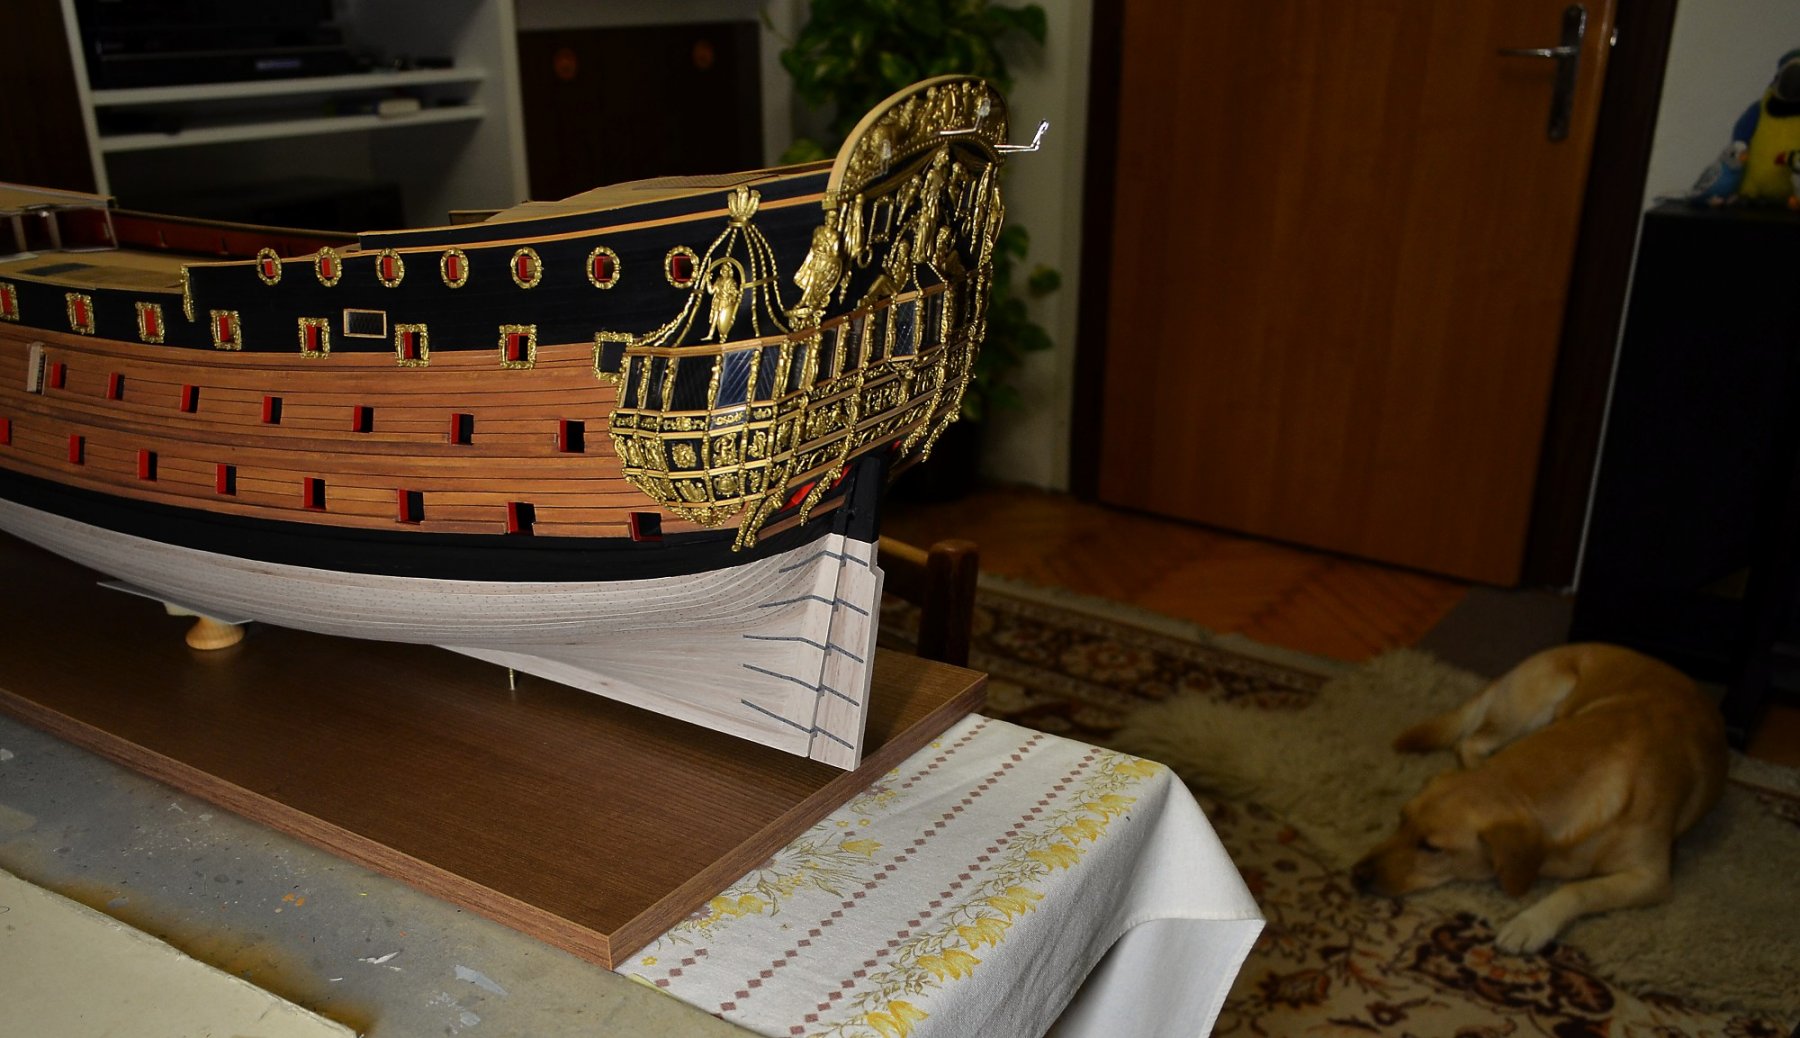
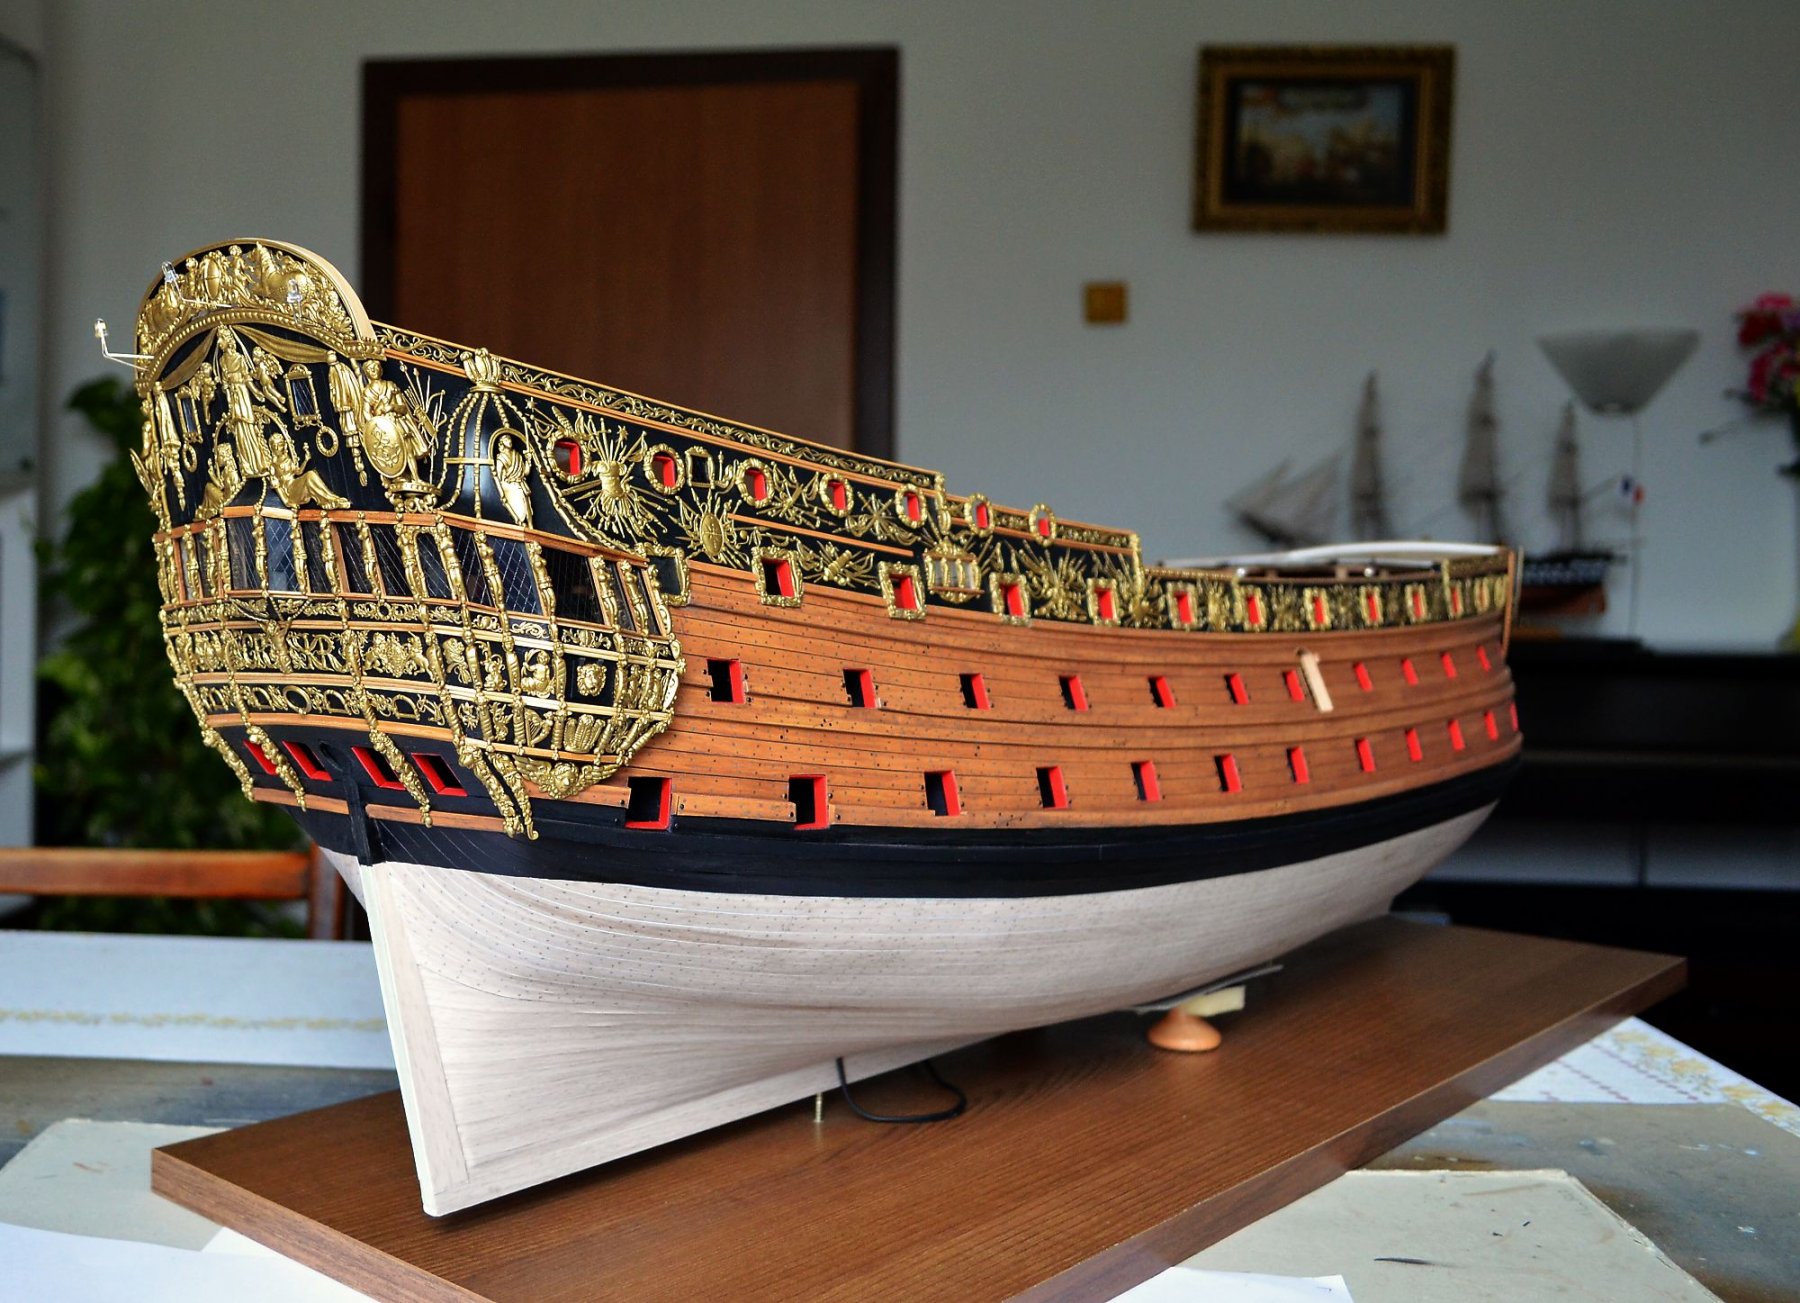
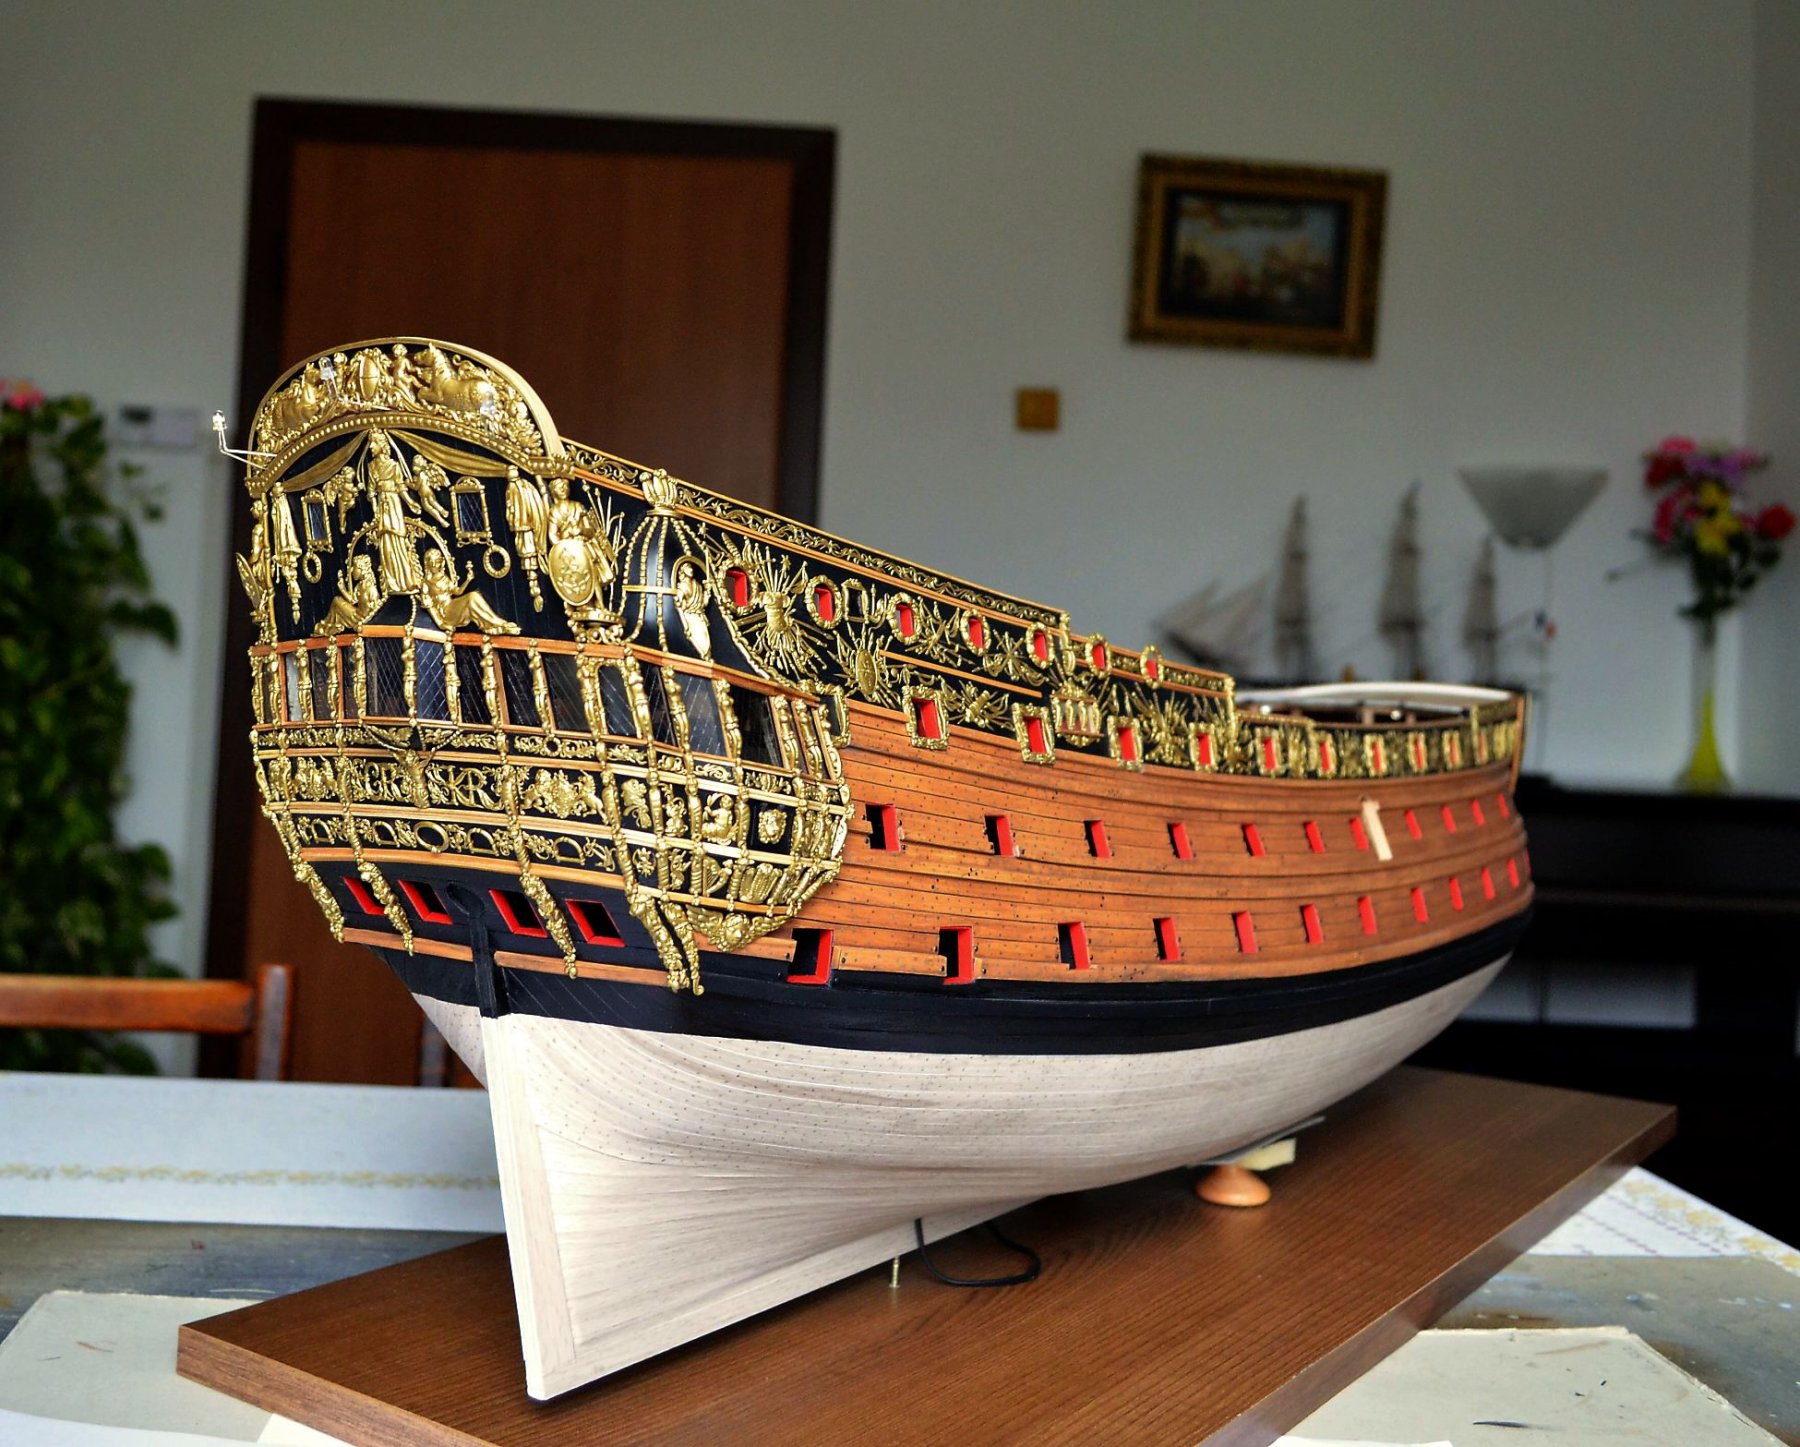
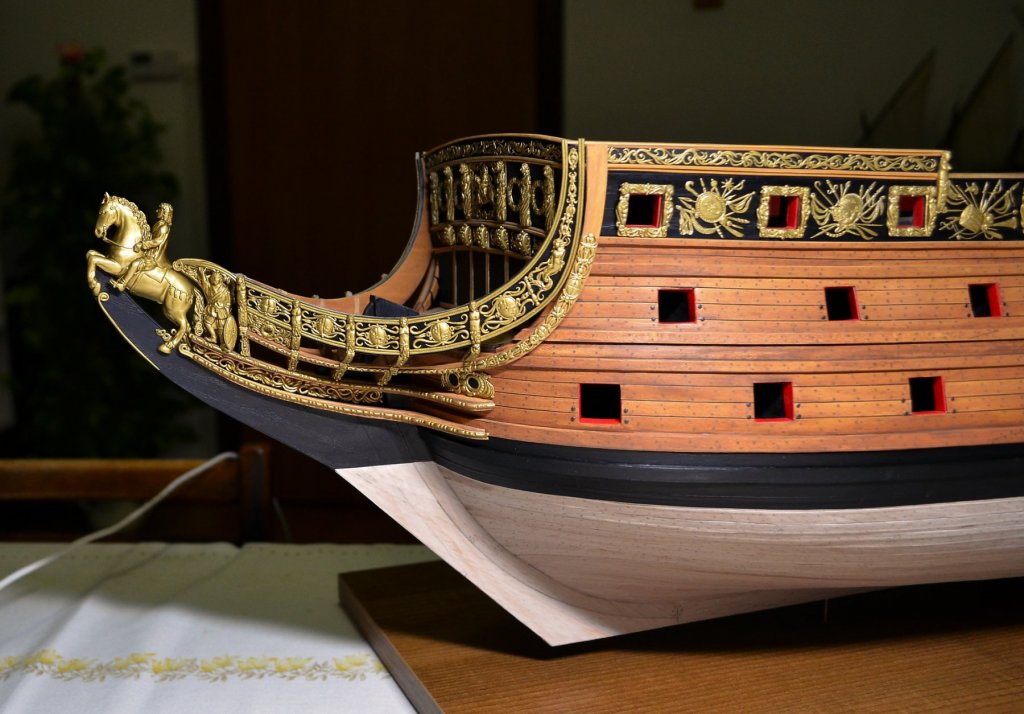
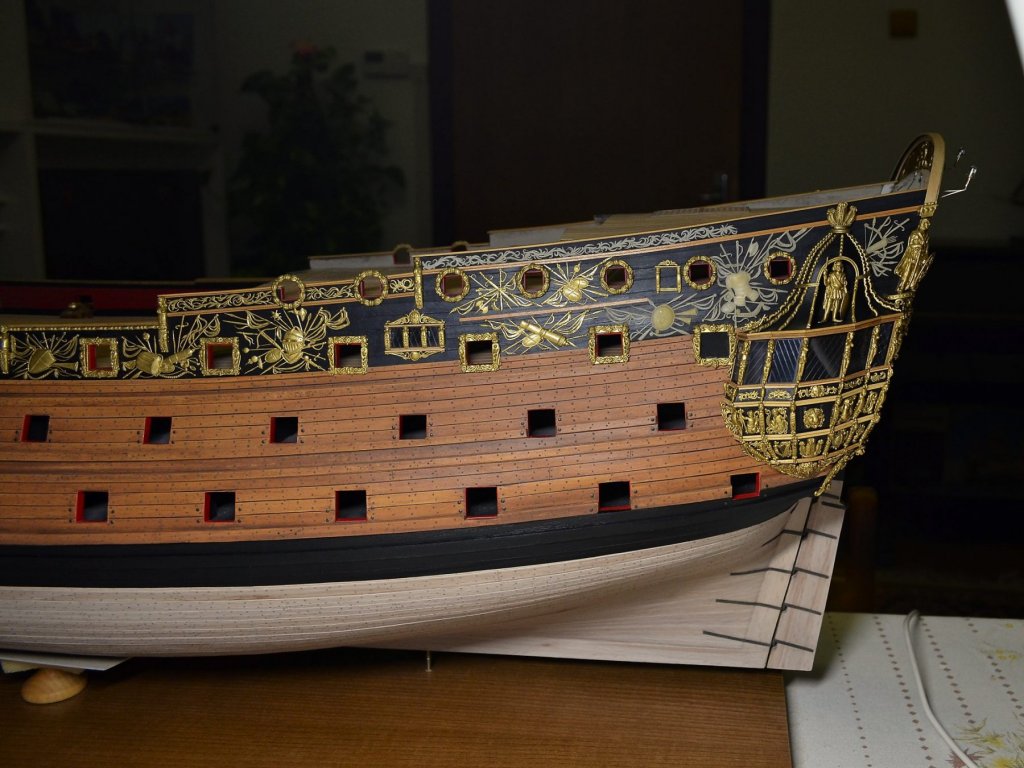
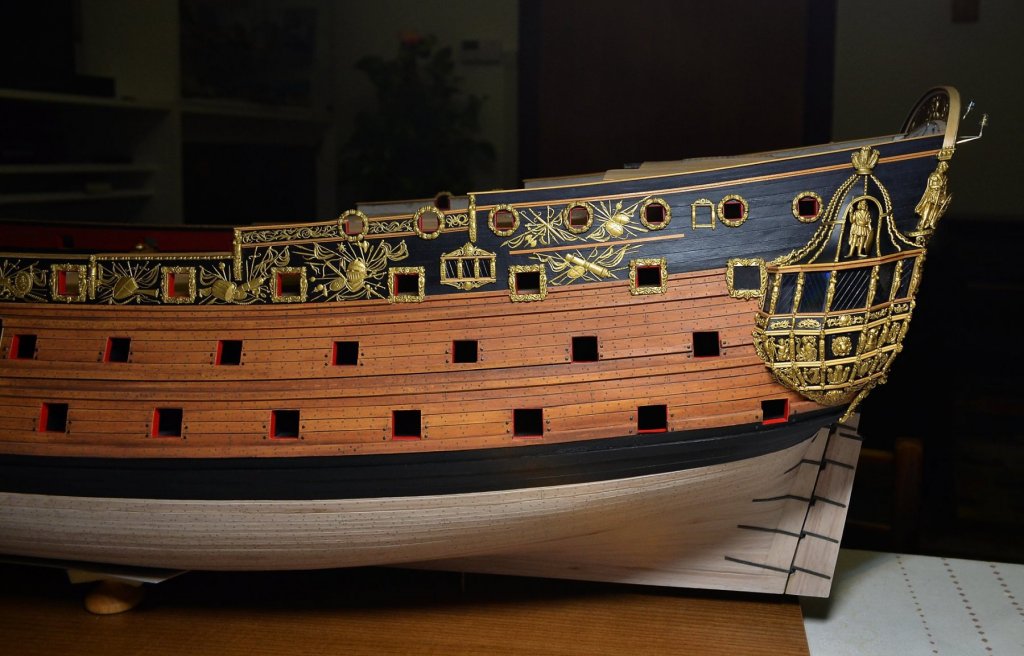
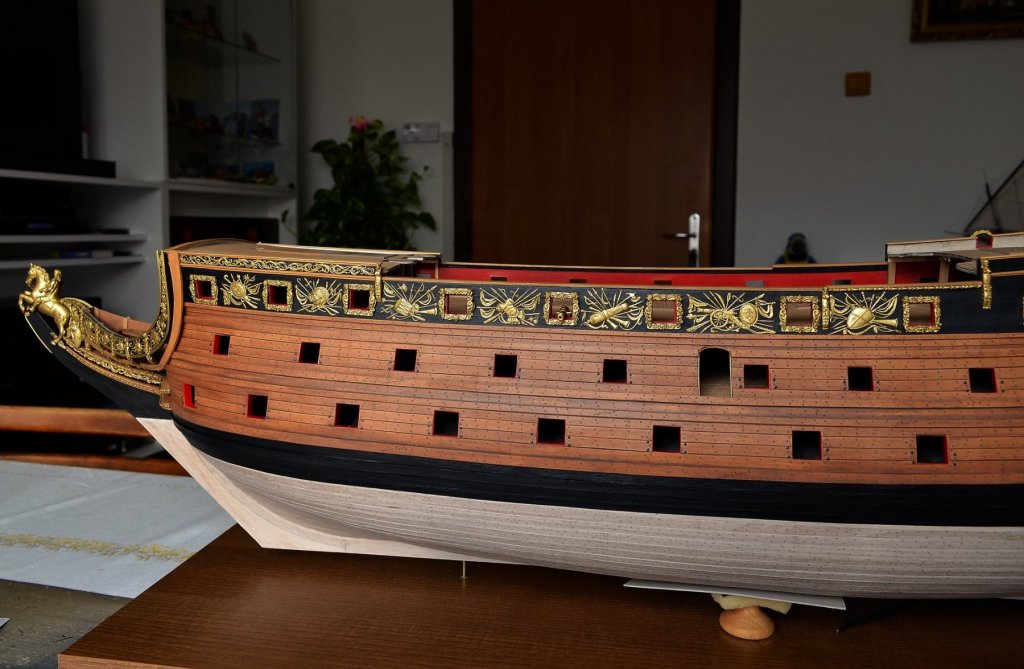
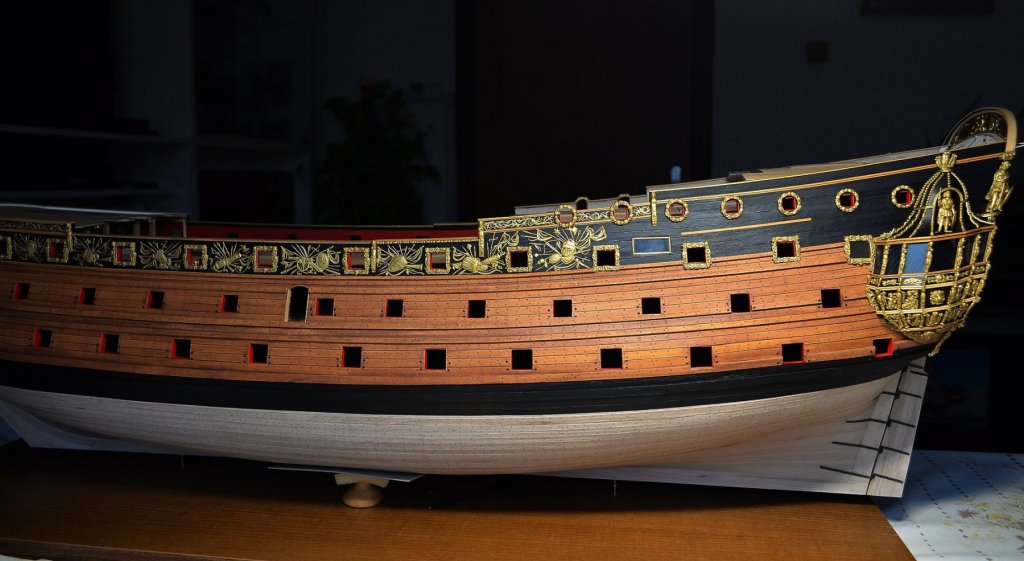
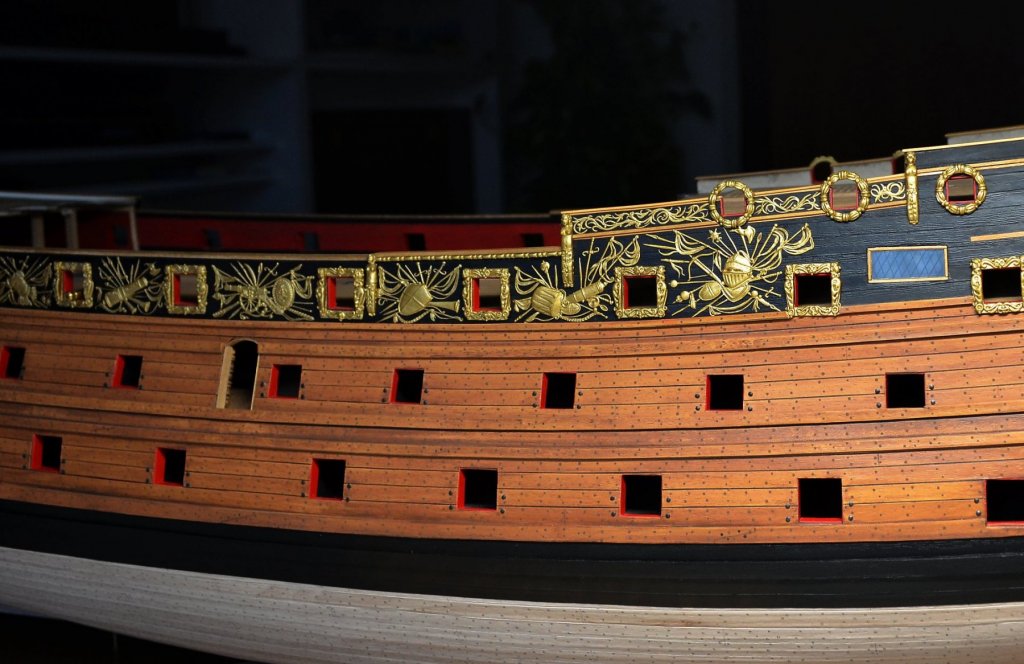
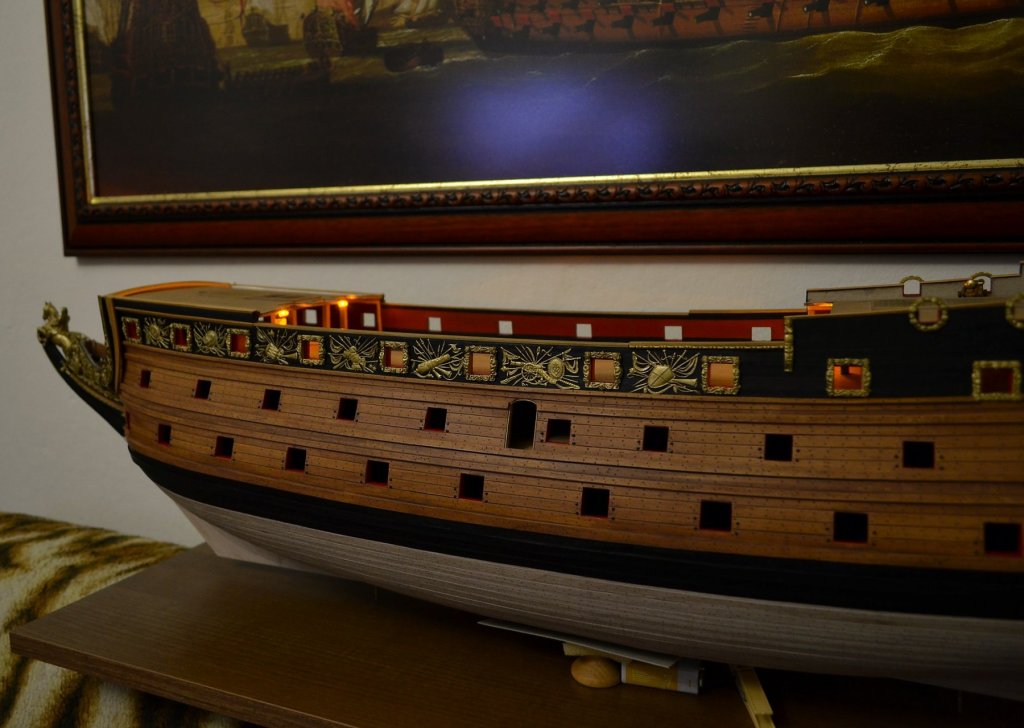
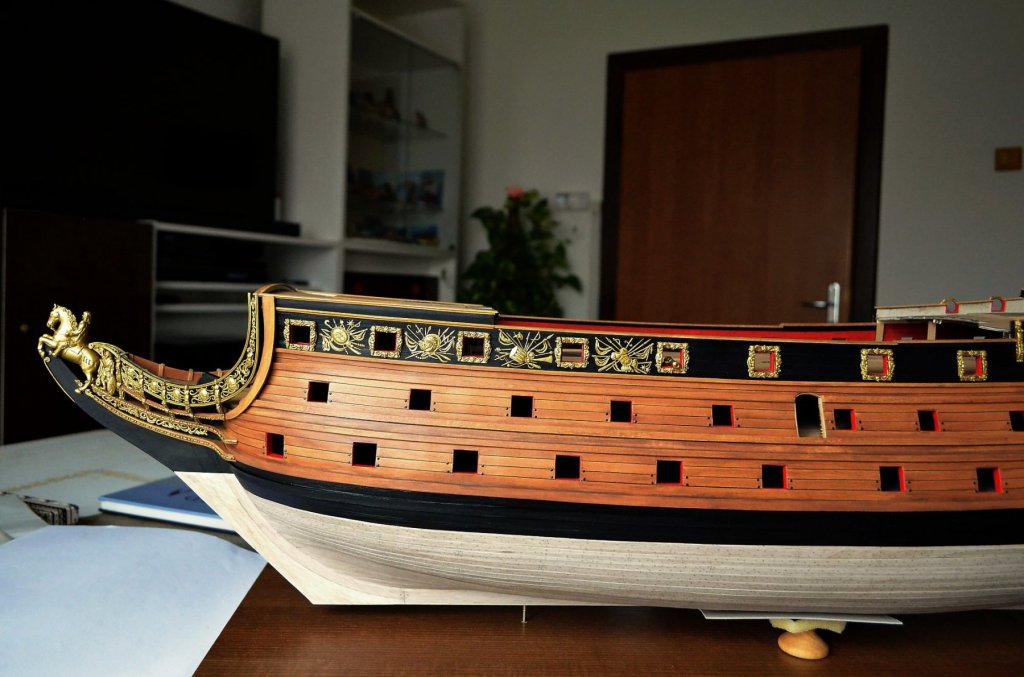
Dear friends, I am glad you like my tutorial and it is useful for you. Thank you for your comments and kind words. After drying I started to place decoration on model, it is attached with little amount of glue - I use medium dense Super glue (industrial quality). Here si the result, decoration on port is almost finished, the pics are in a higher quality, so enjoy them and have a great time: Kind regards, Doris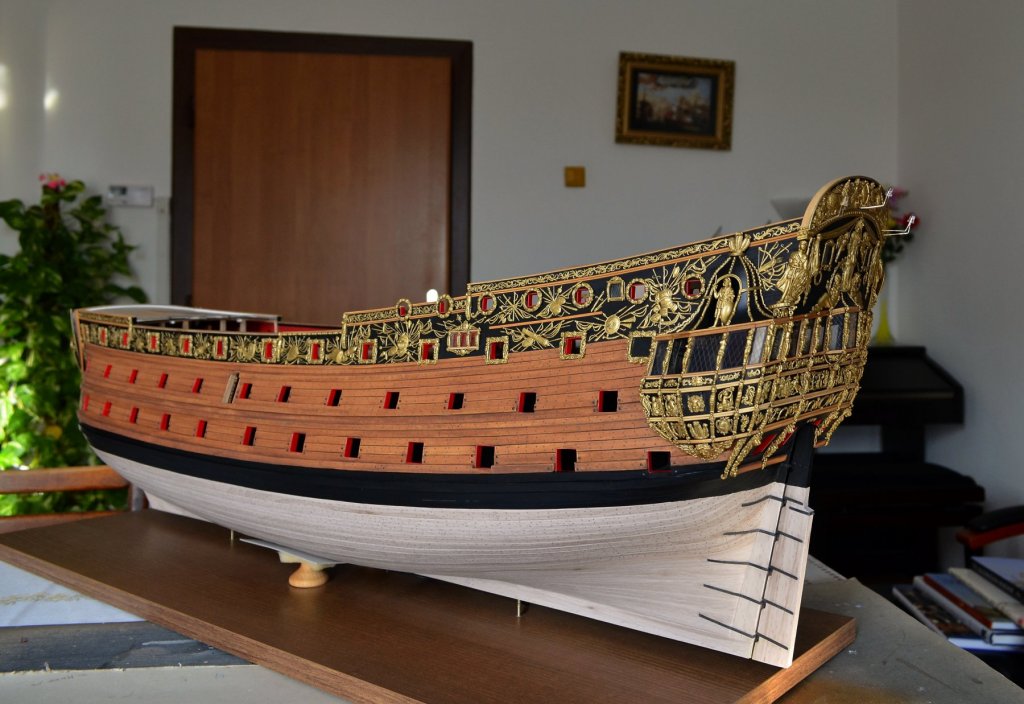


- 1,035 replies
-
- 23
-
-
-
- royal katherine
- ship of the line
- (and 1 more)
-
HMS ROYAL KATHERINE 1664 by Doris - 1/55 - CARD
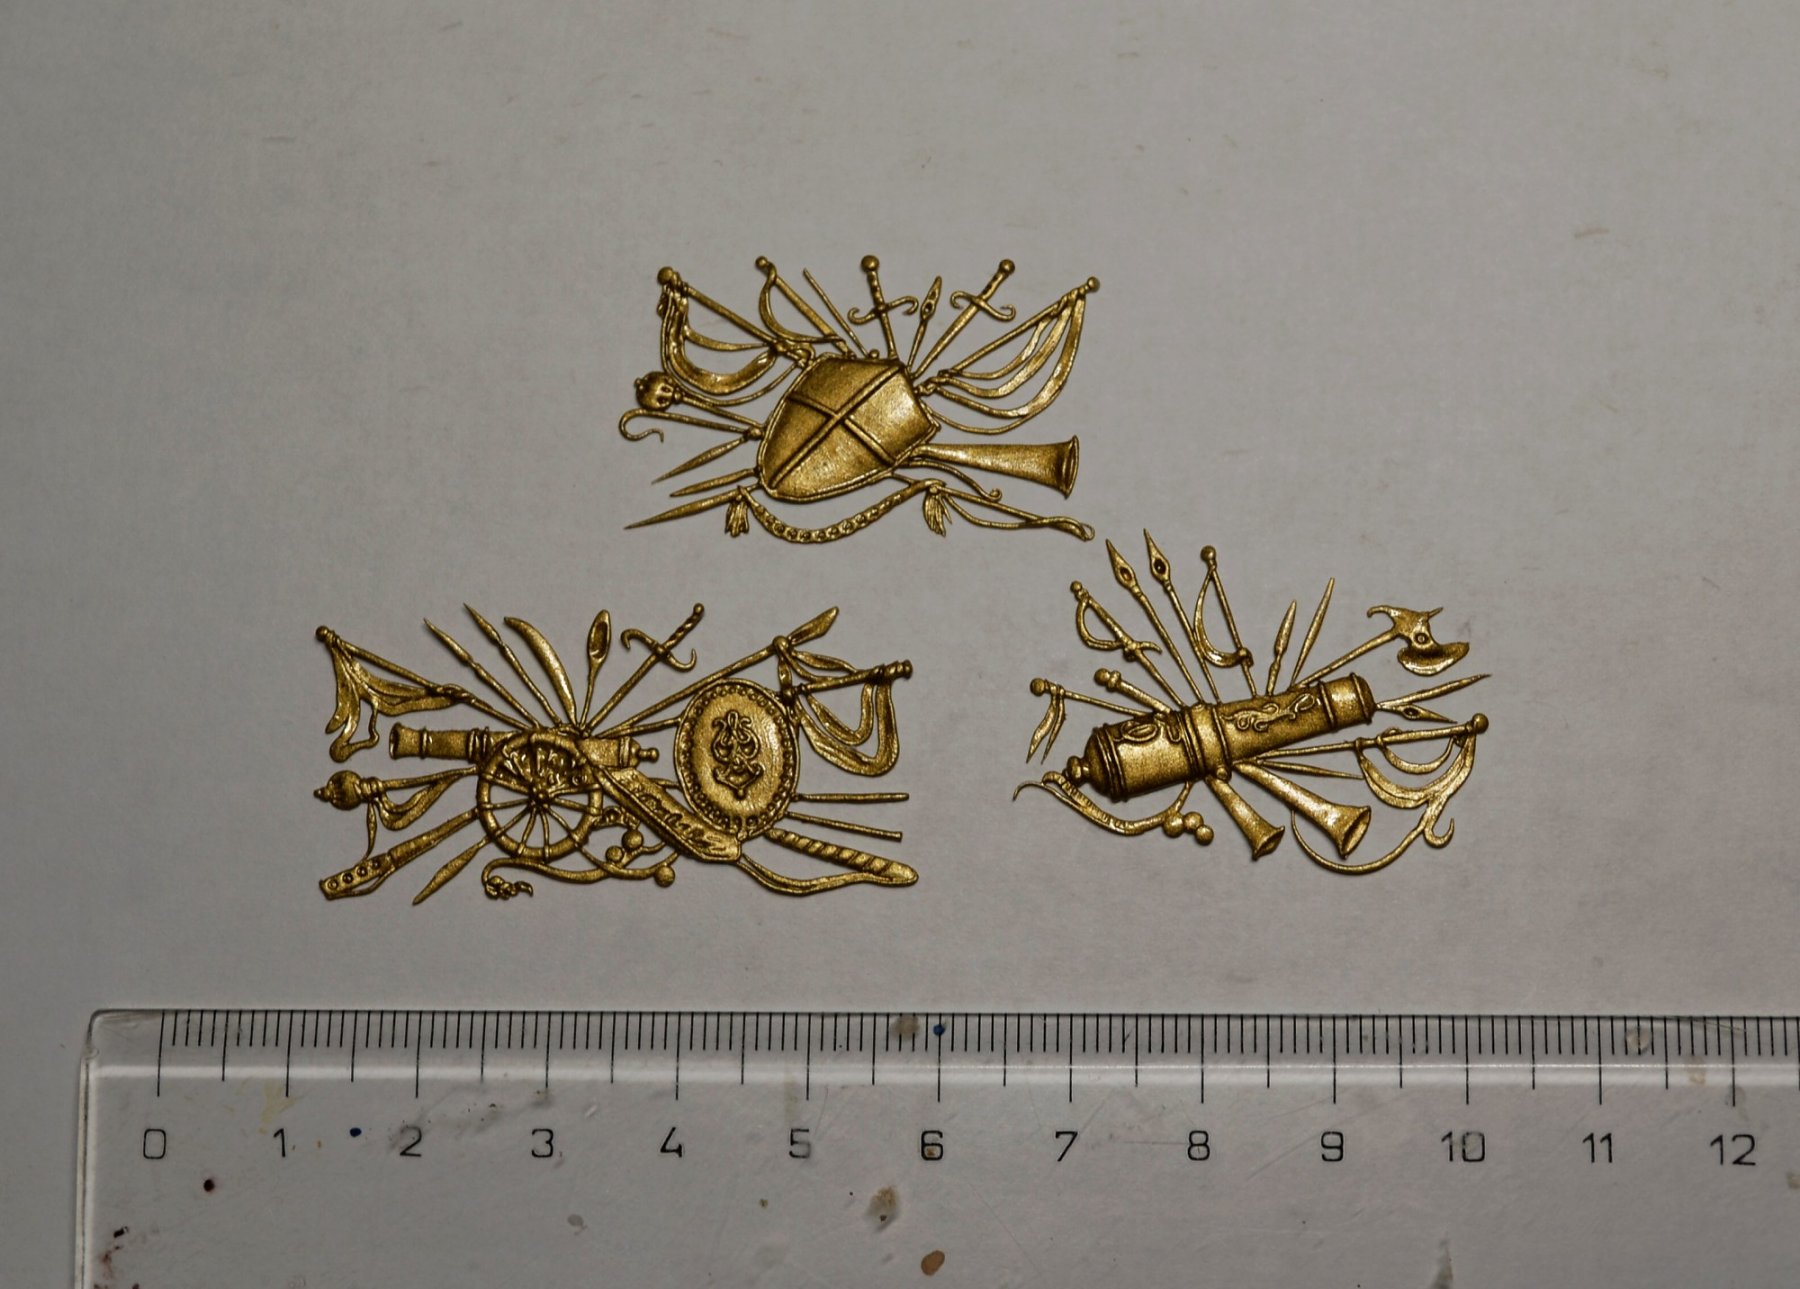
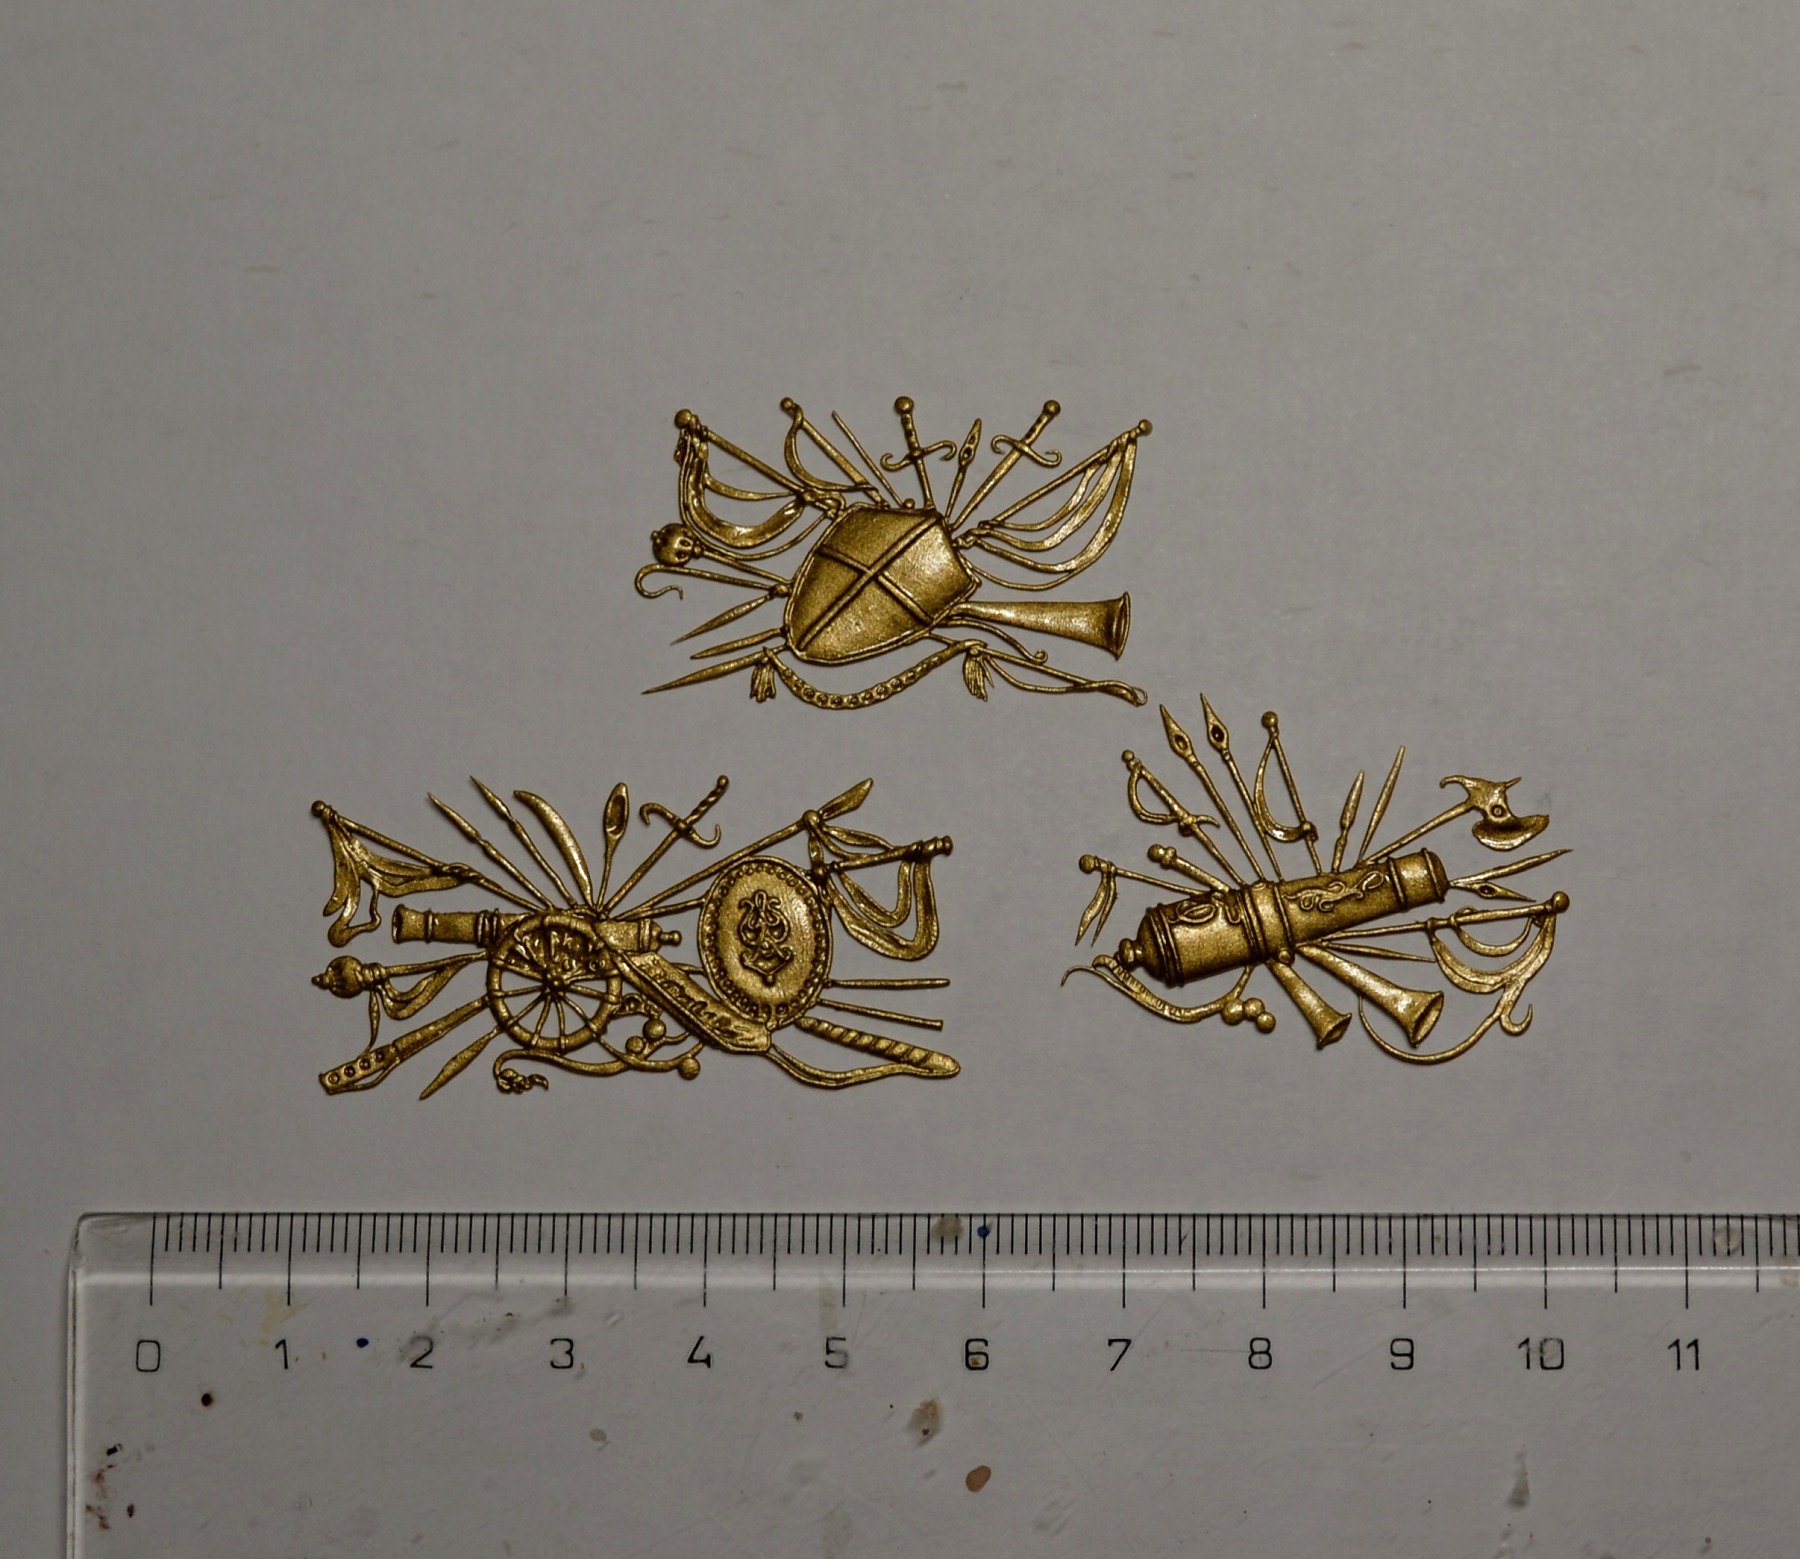
DORIS replied to DORIS's topic in - Build logs for subjects built 1501 - 1750
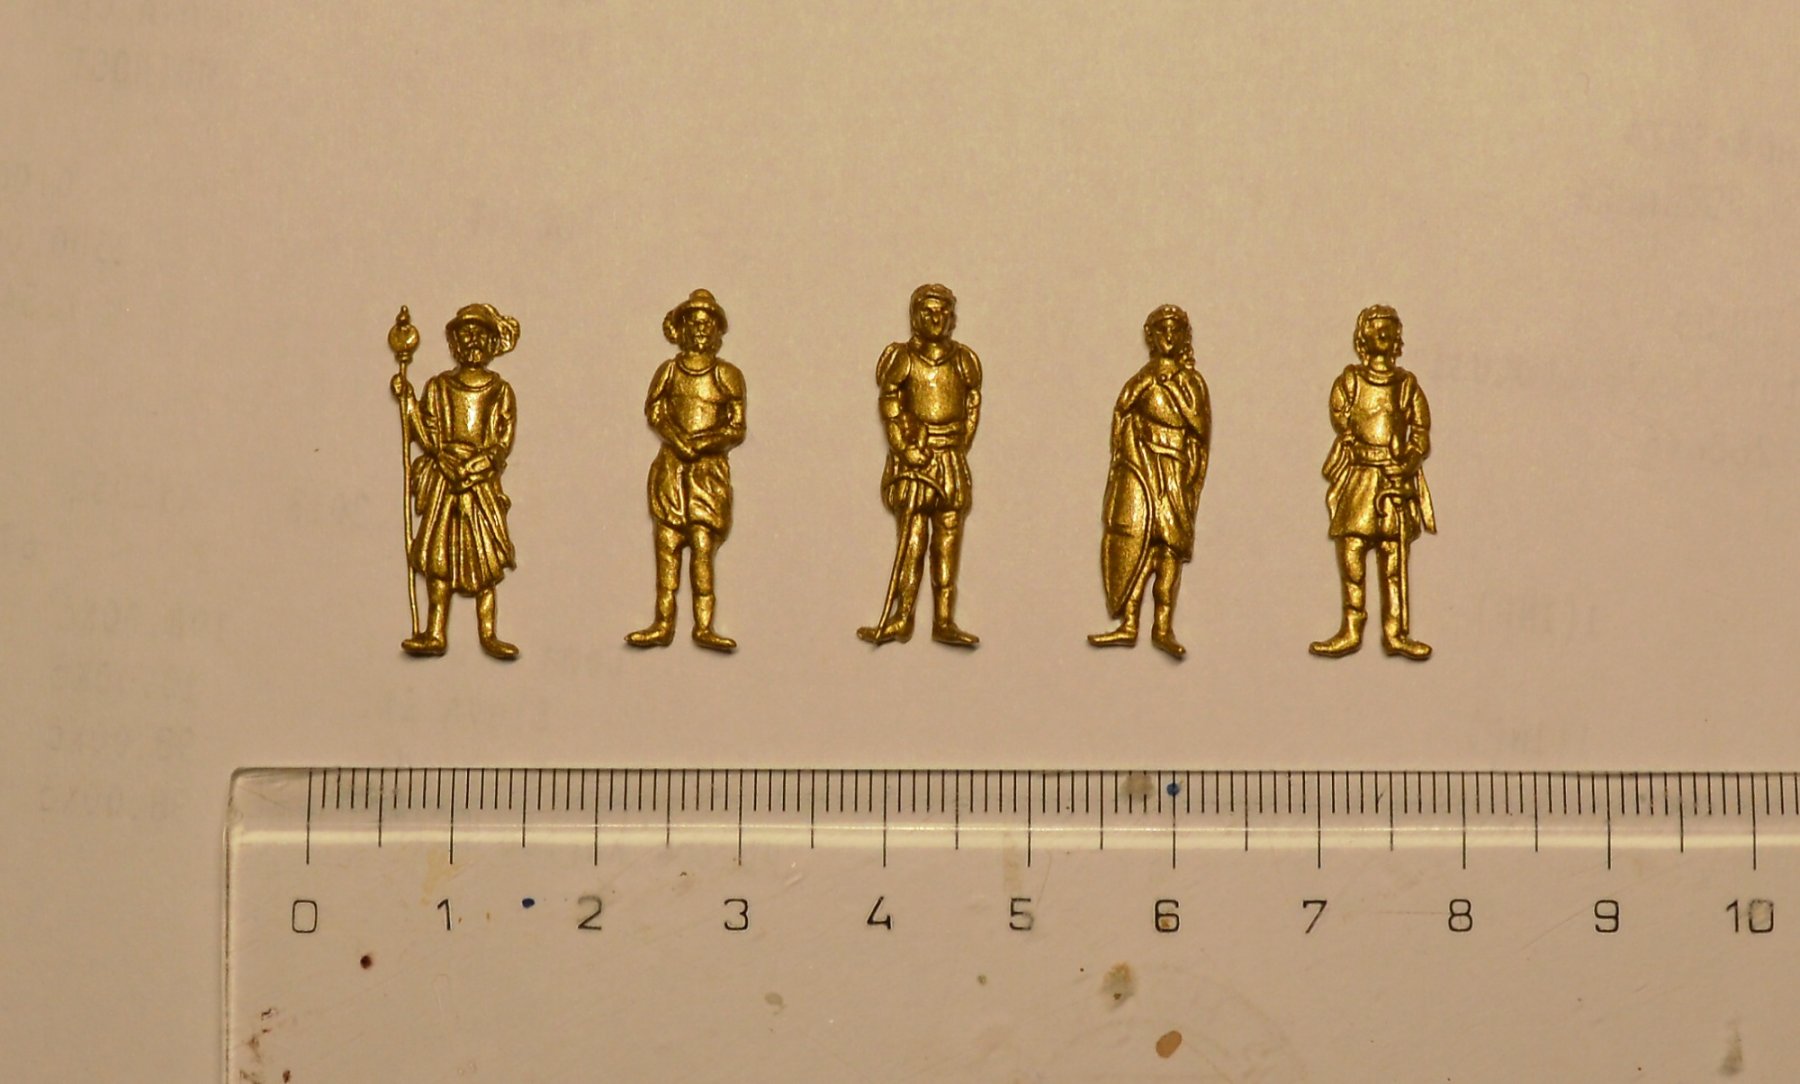
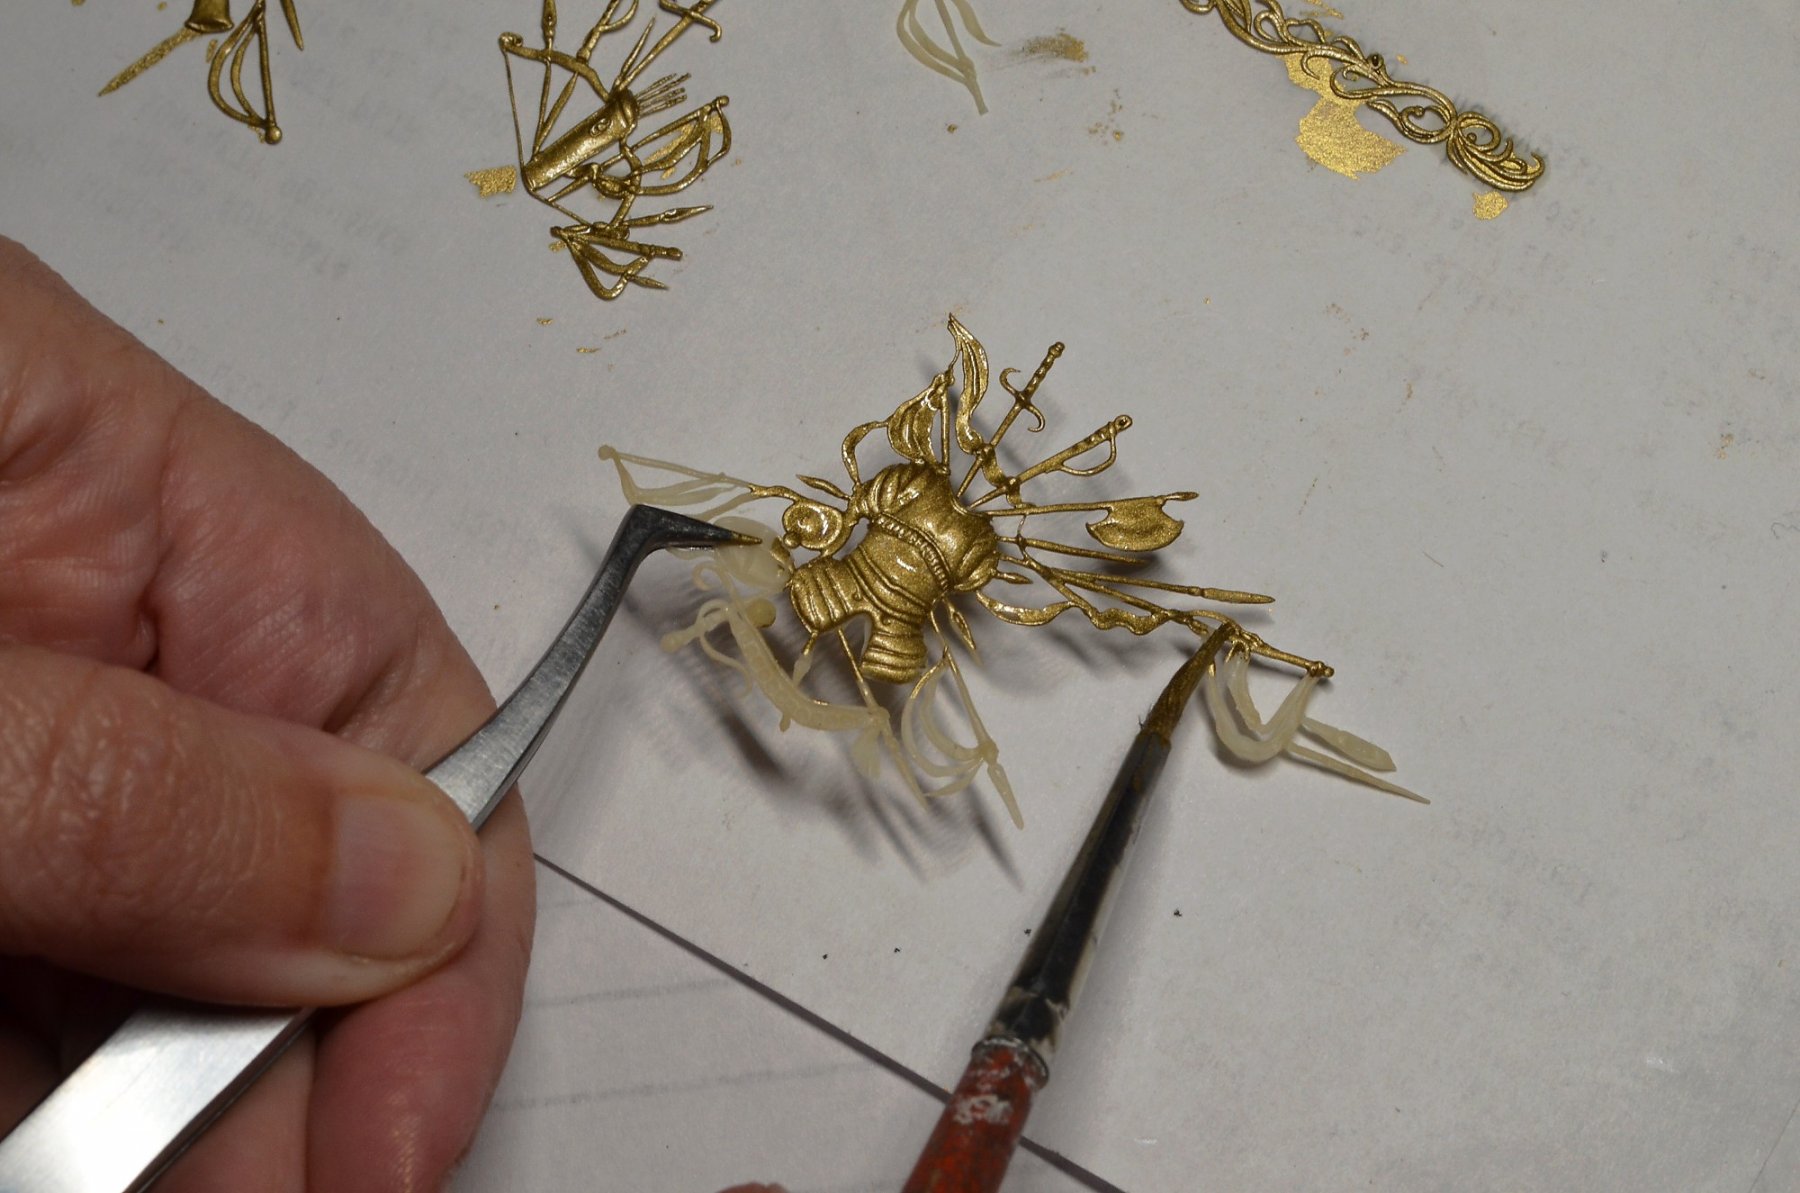
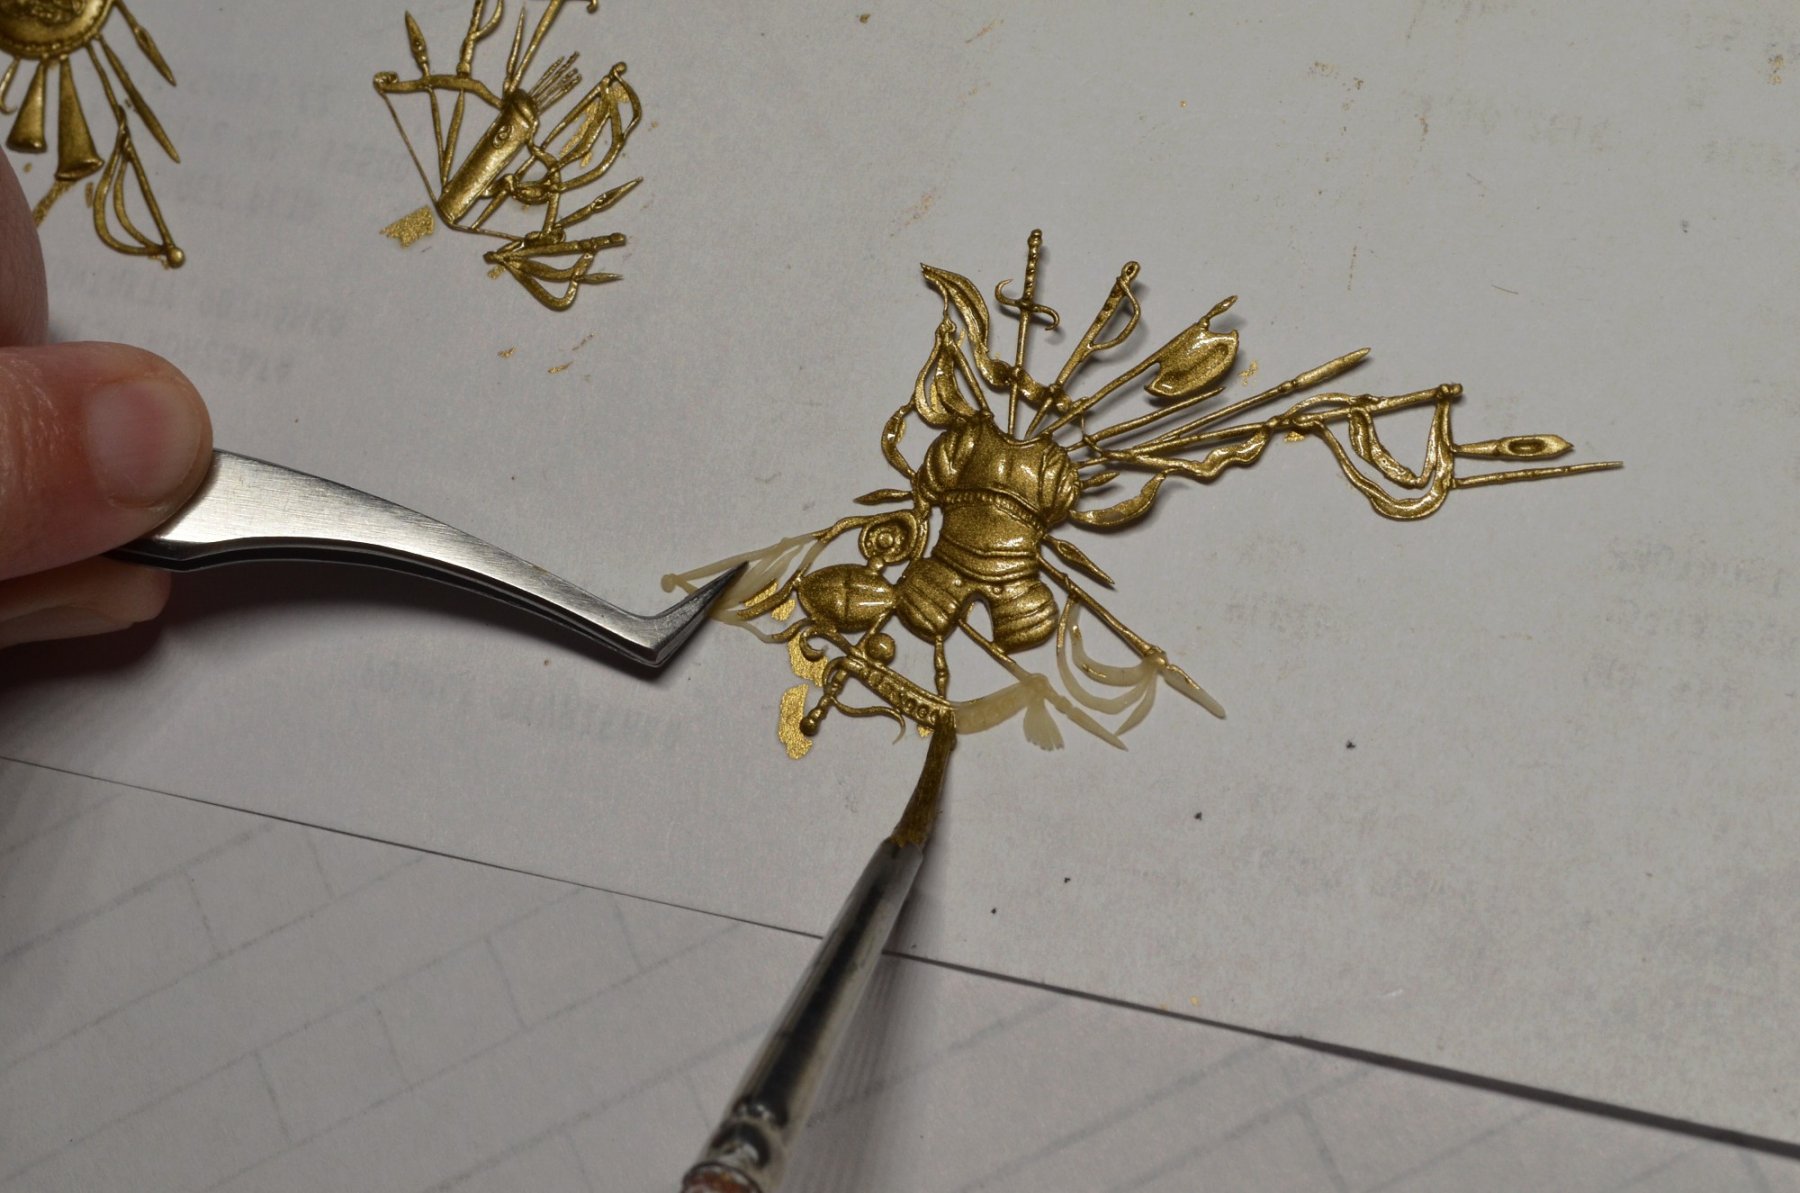
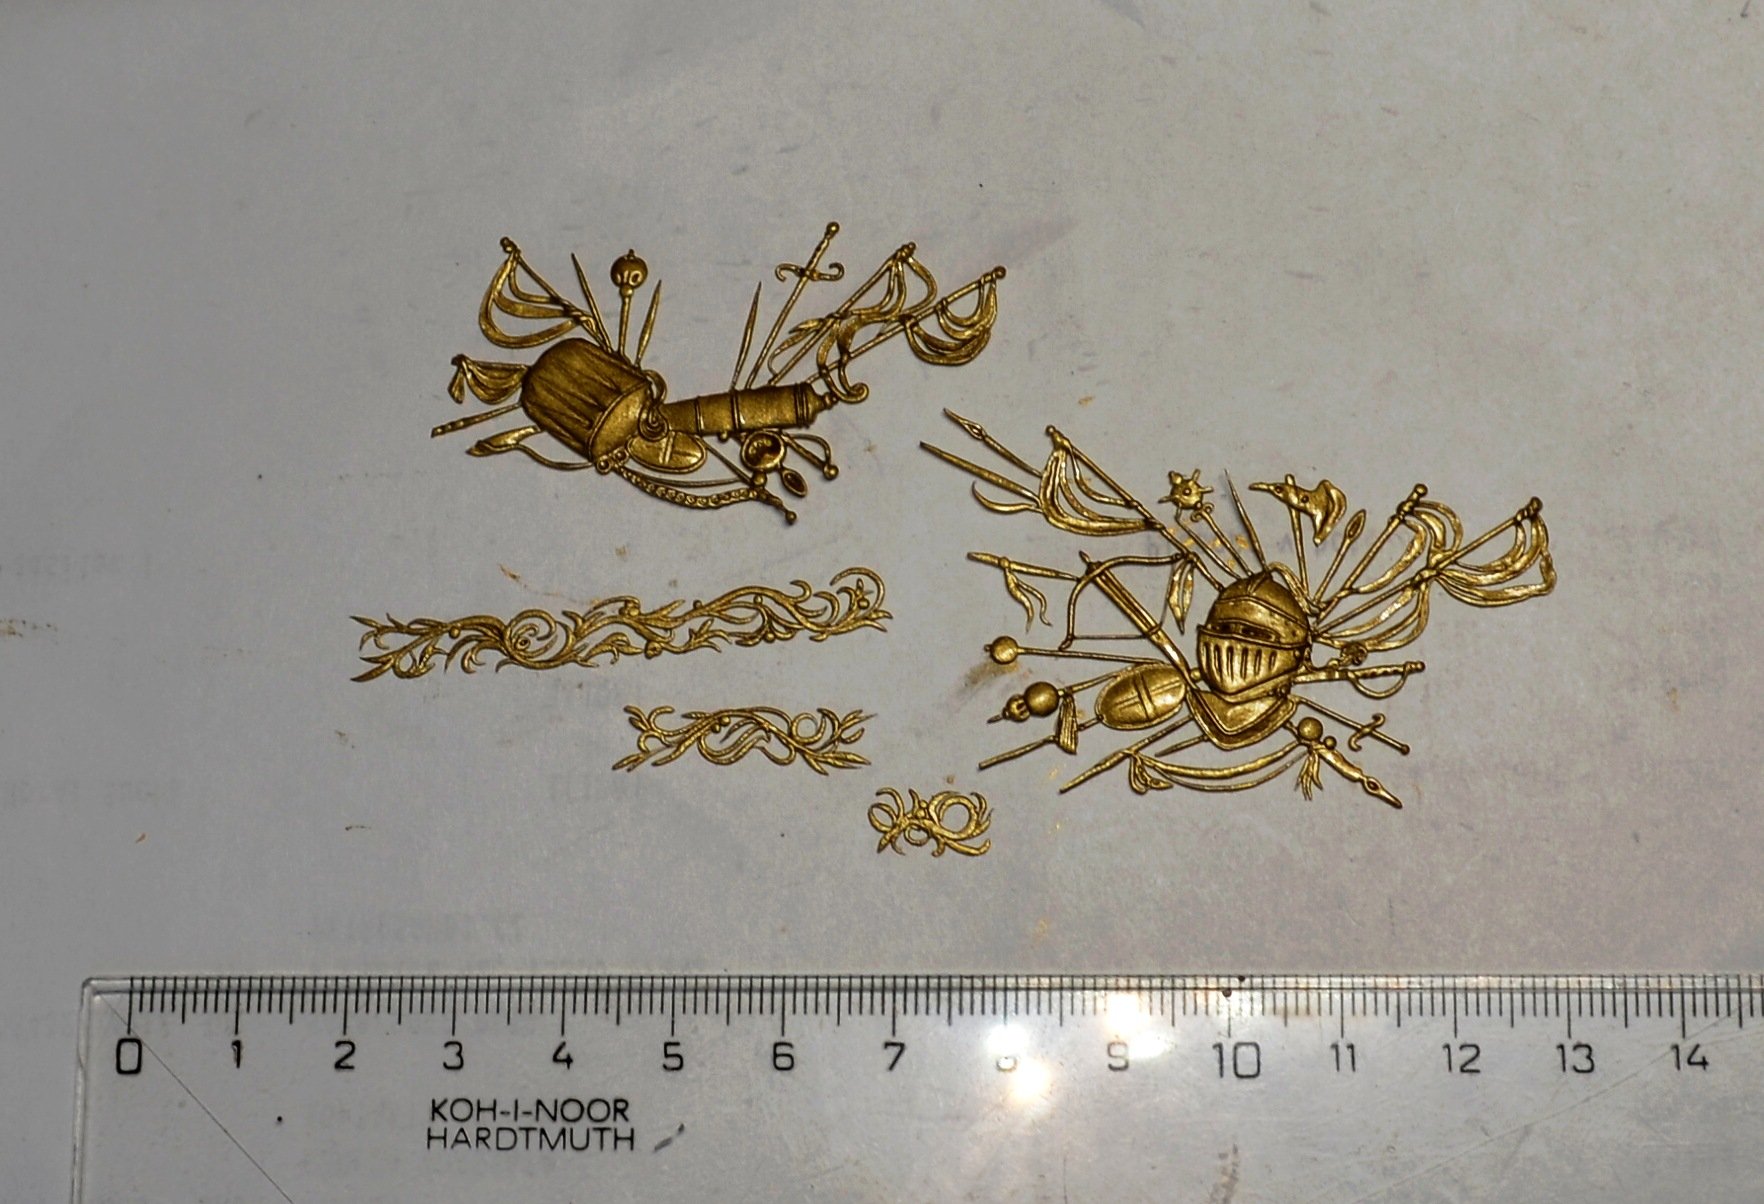
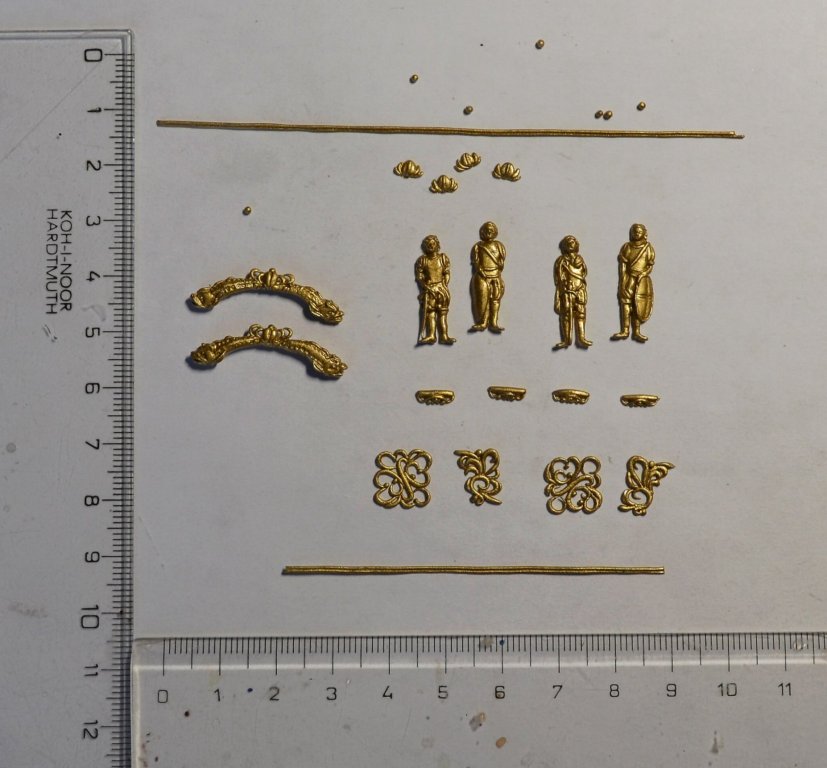
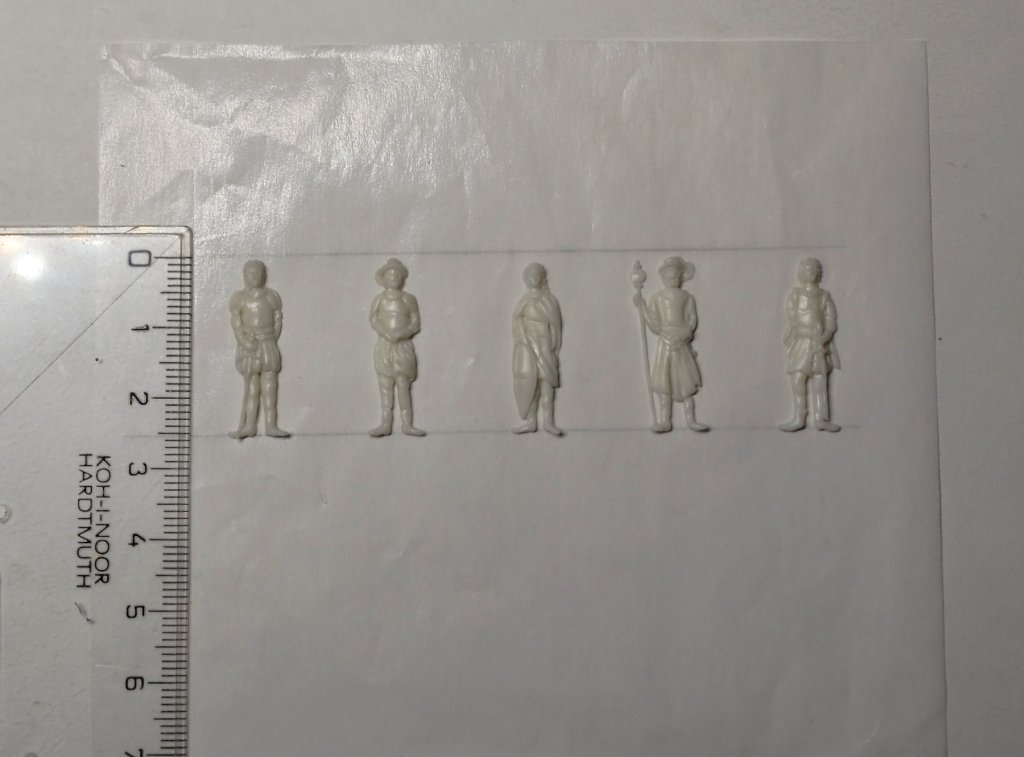
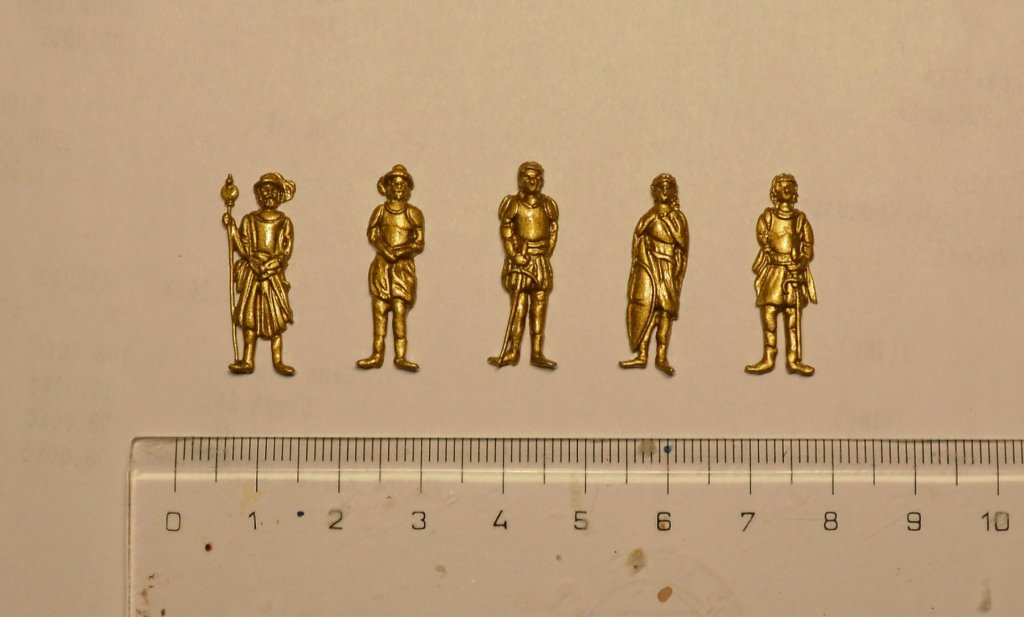
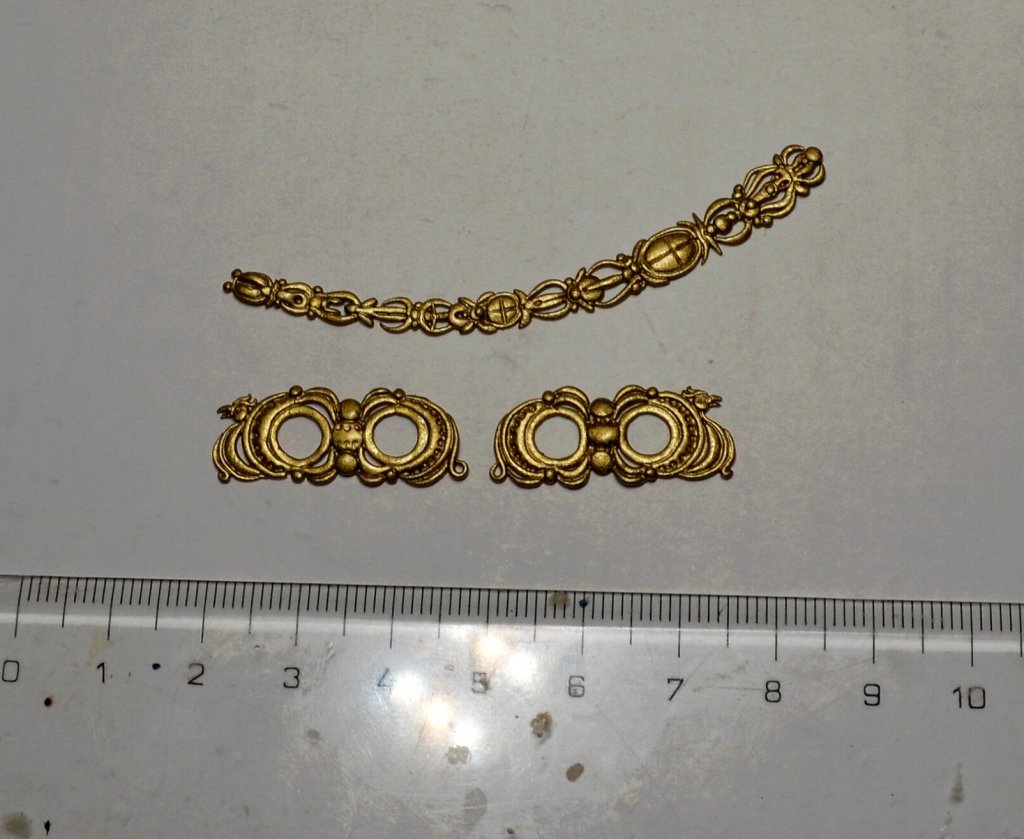
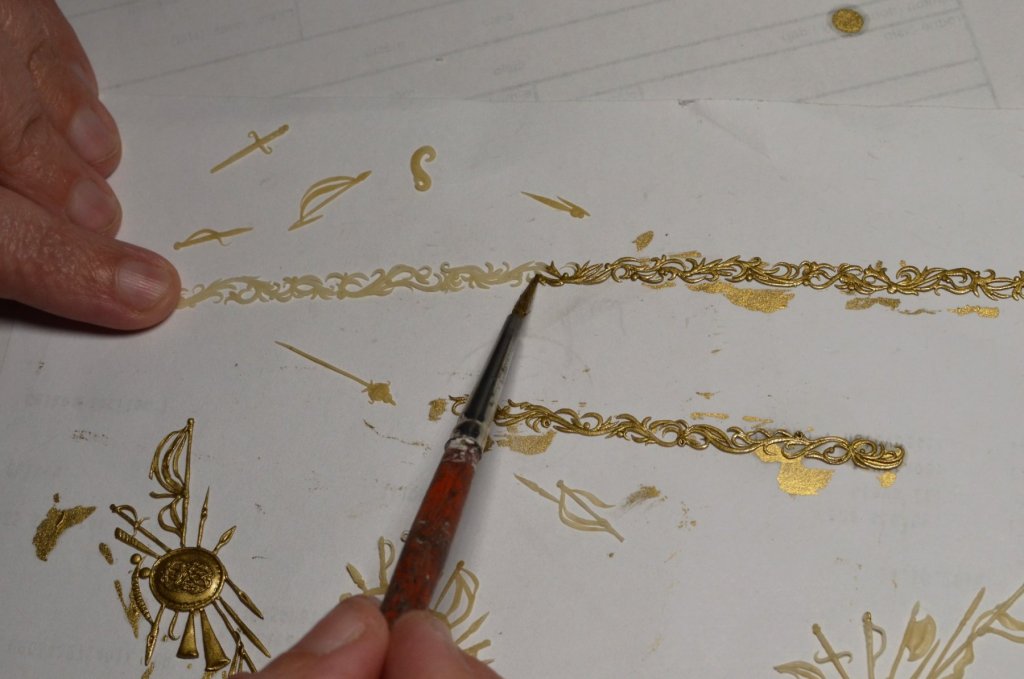
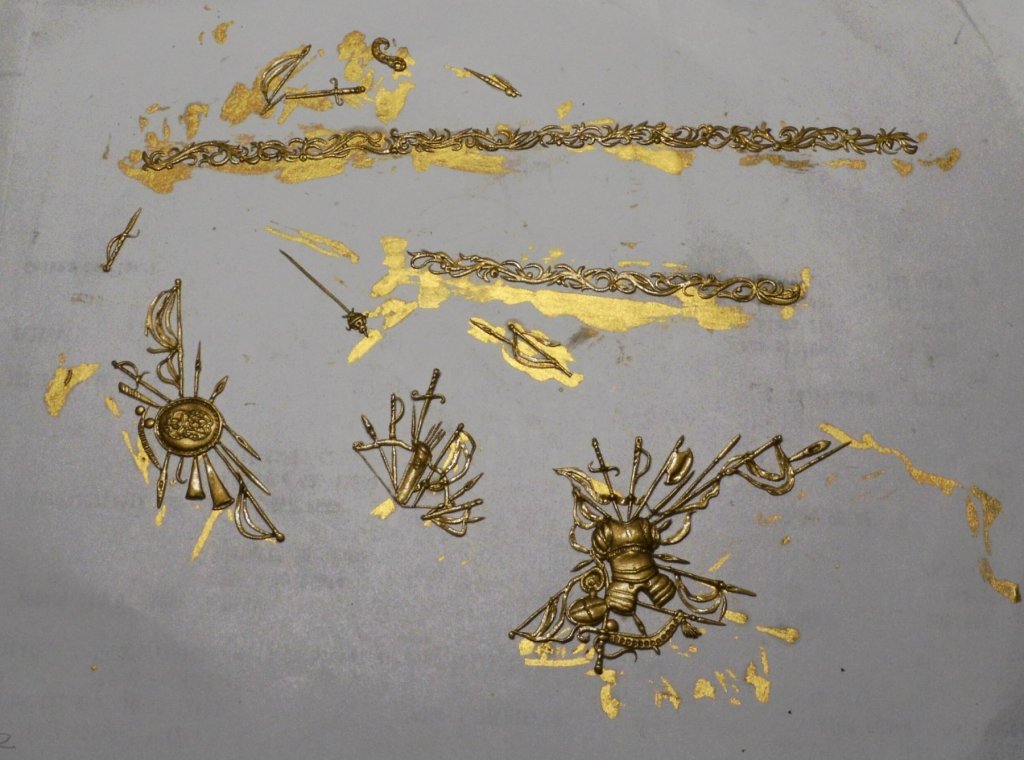
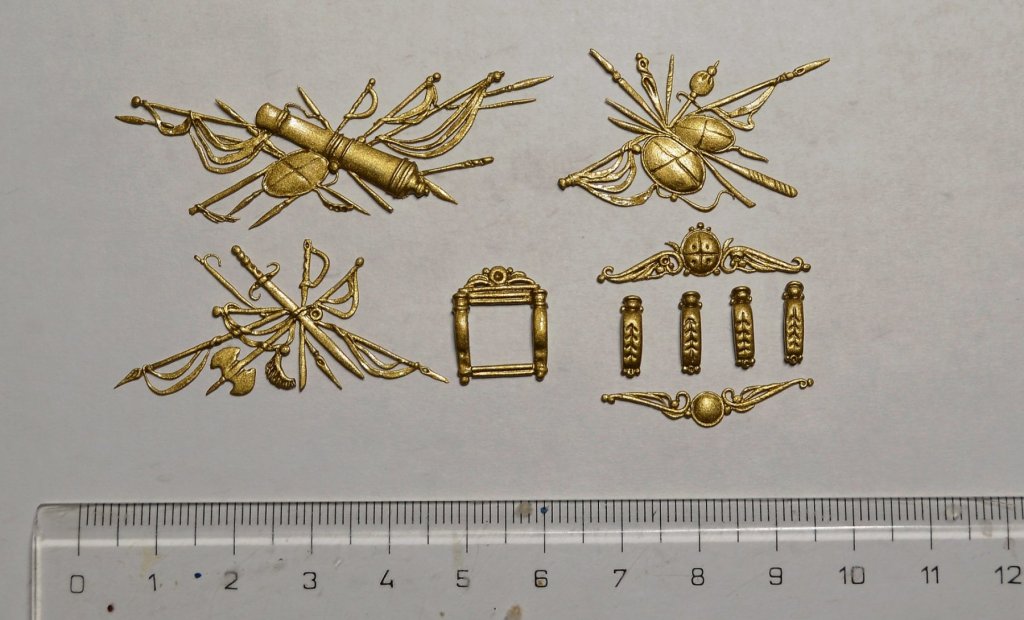
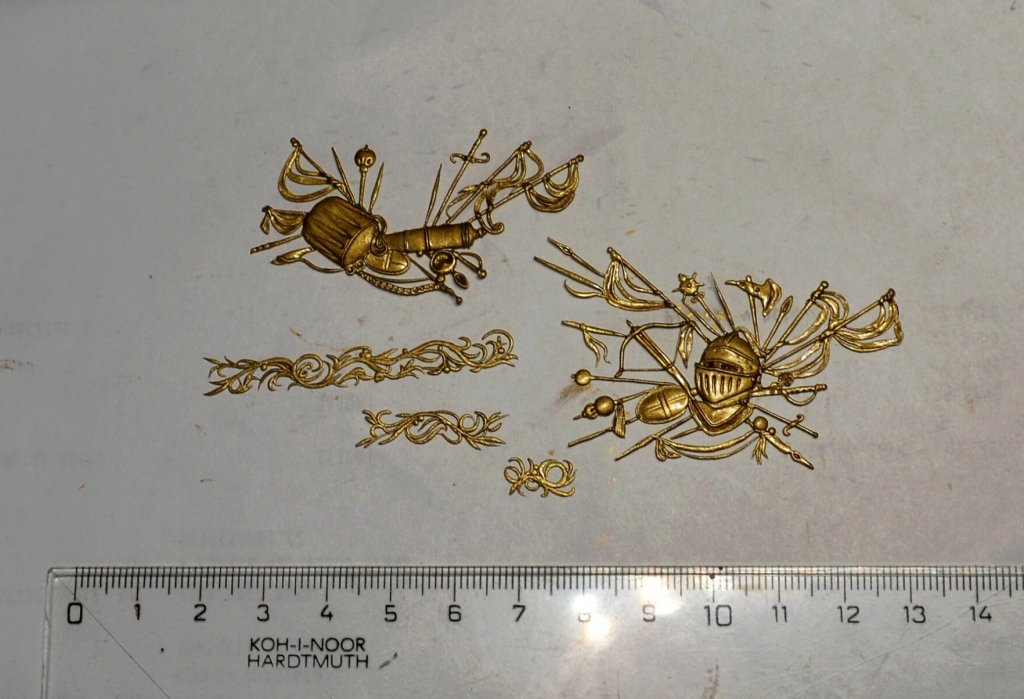
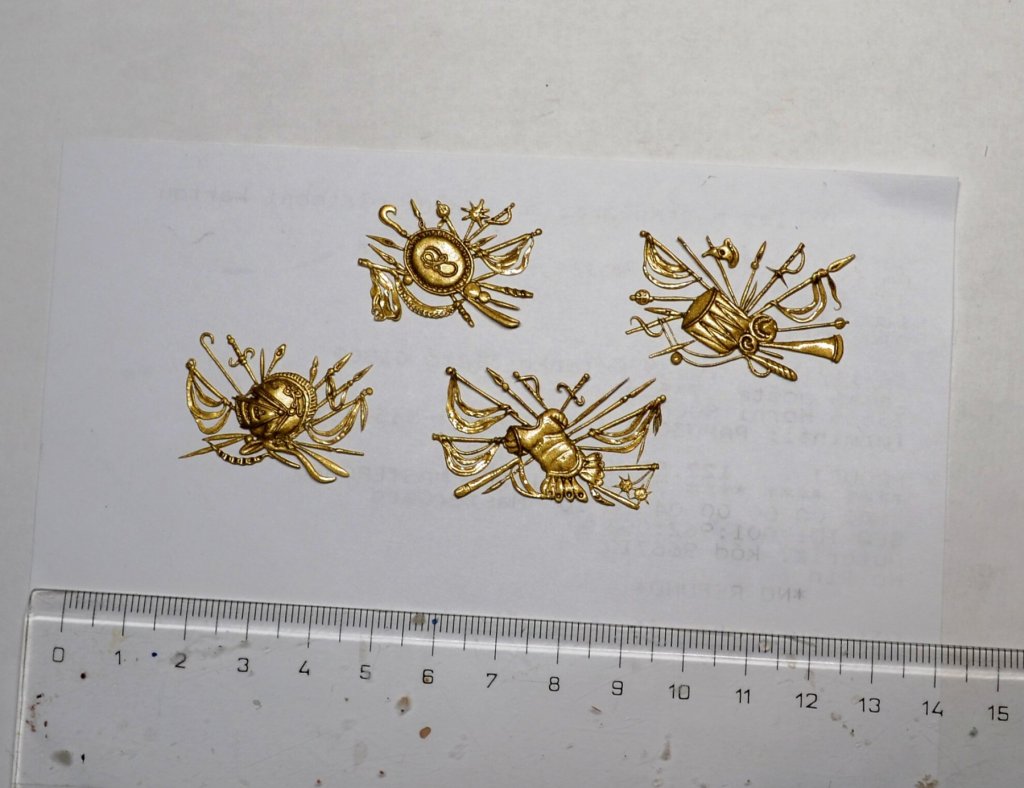
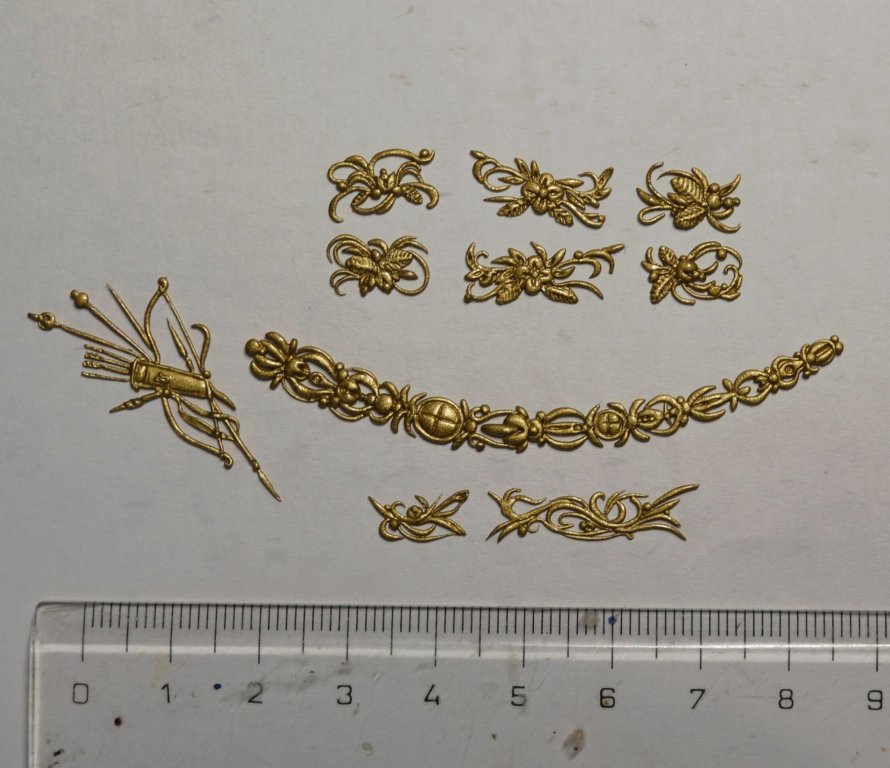
Before gilding I always try to attach each piece of decoration on the model to check whether it suits well: Gilding the decoration - I use golden acrylic paint: After gilding I relocate the ornaments to clean paper, where the paint dries. Soon I will bring other pics from the process, where you can see the final work. Excuse my unsightly hands, they are sore from hard work I did last days. Best regards


- 1,035 replies
-
- 32
-
-
-
- royal katherine
- ship of the line
- (and 1 more)
-
HMS ROYAL KATHERINE 1664 by Doris - 1/55 - CARD
DORIS replied to DORIS's topic in - Build logs for subjects built 1501 - 1750
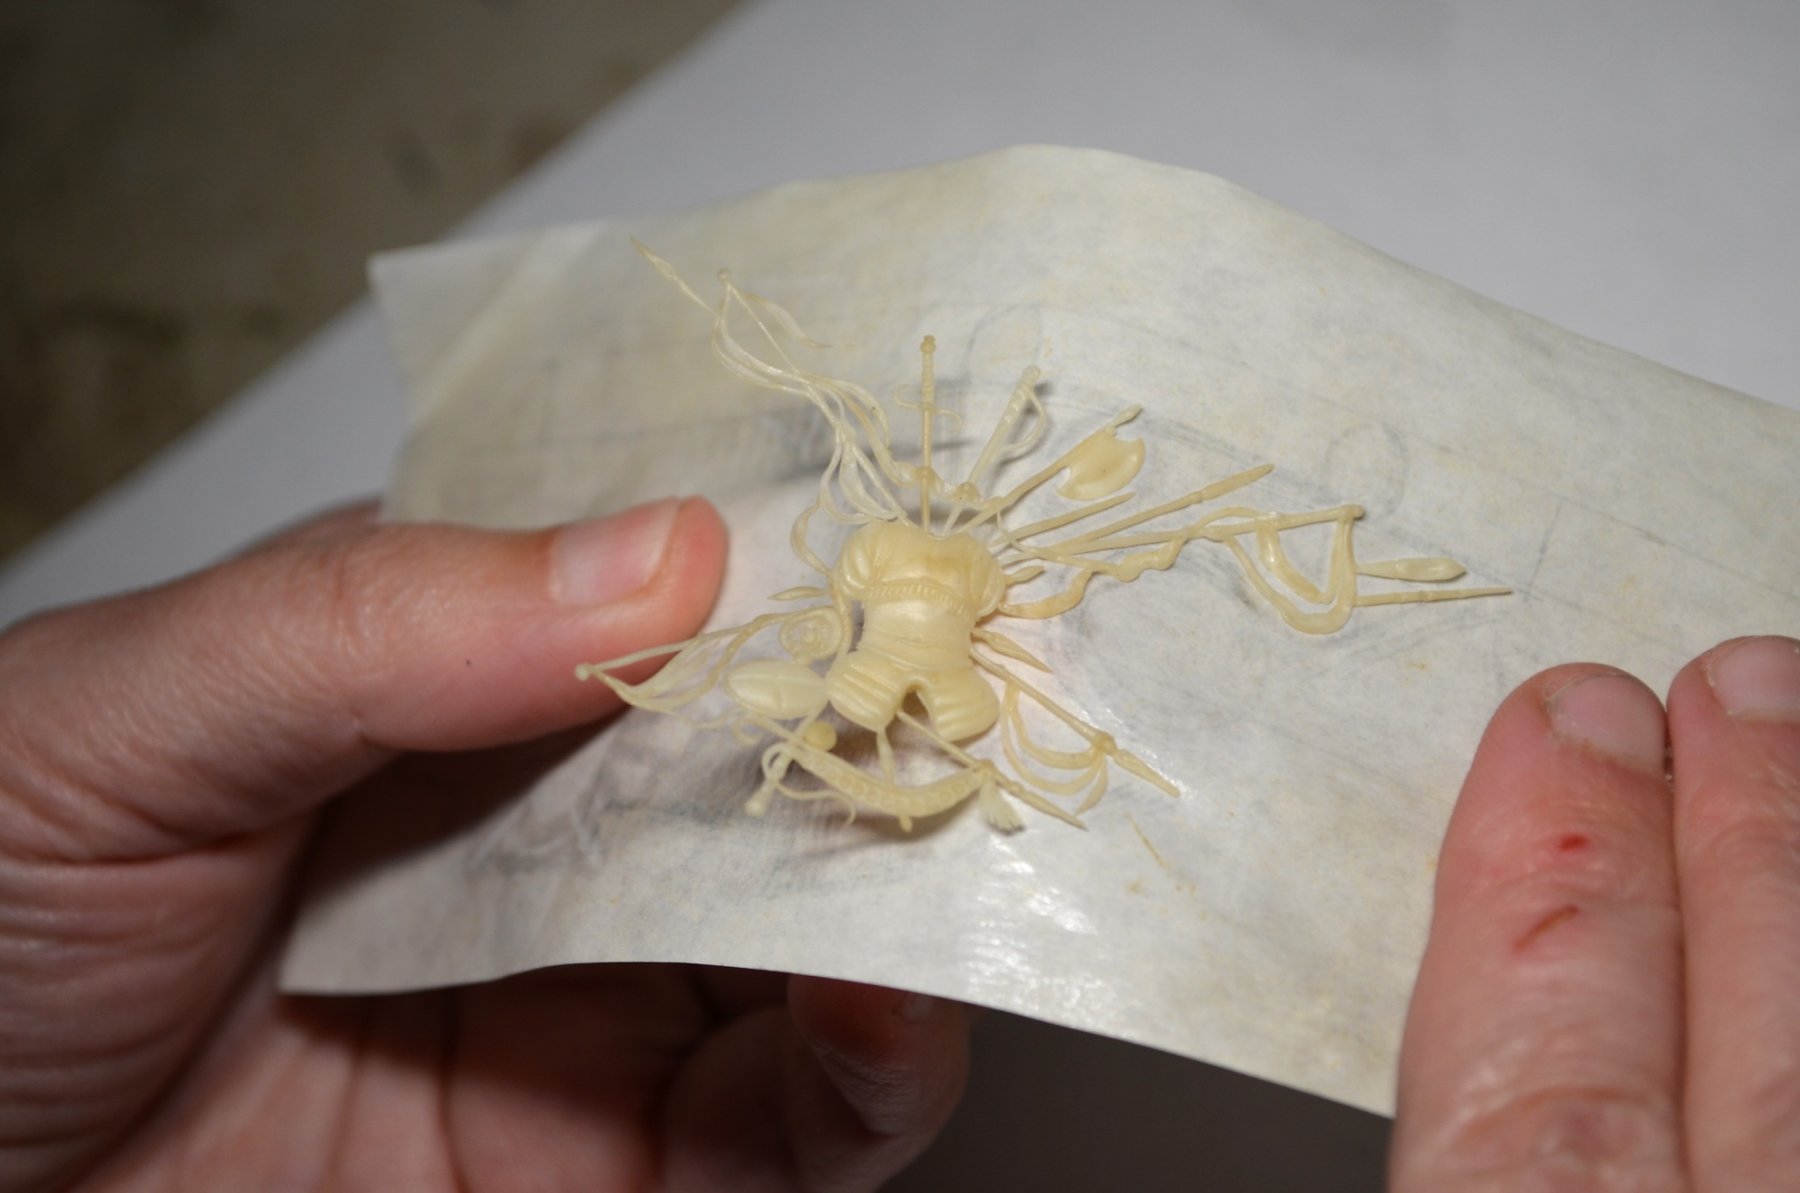
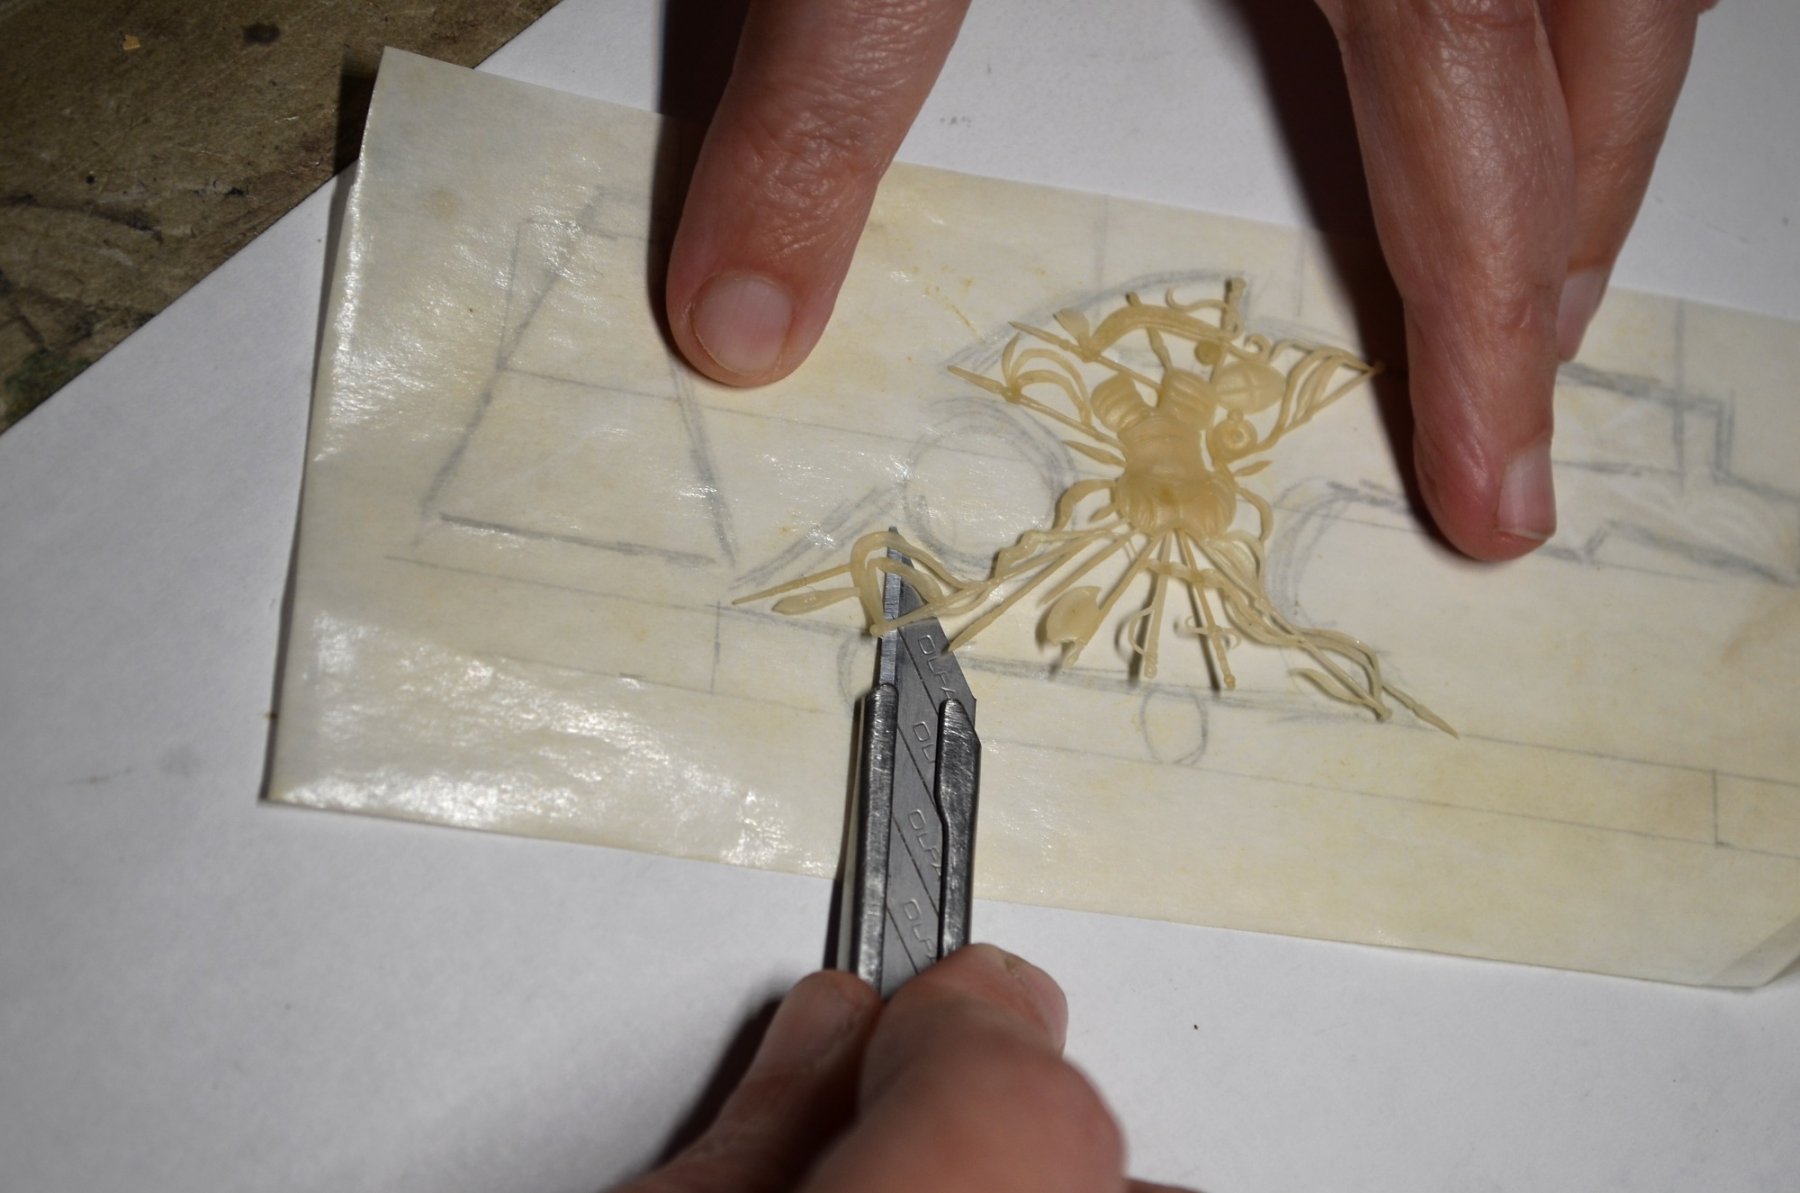
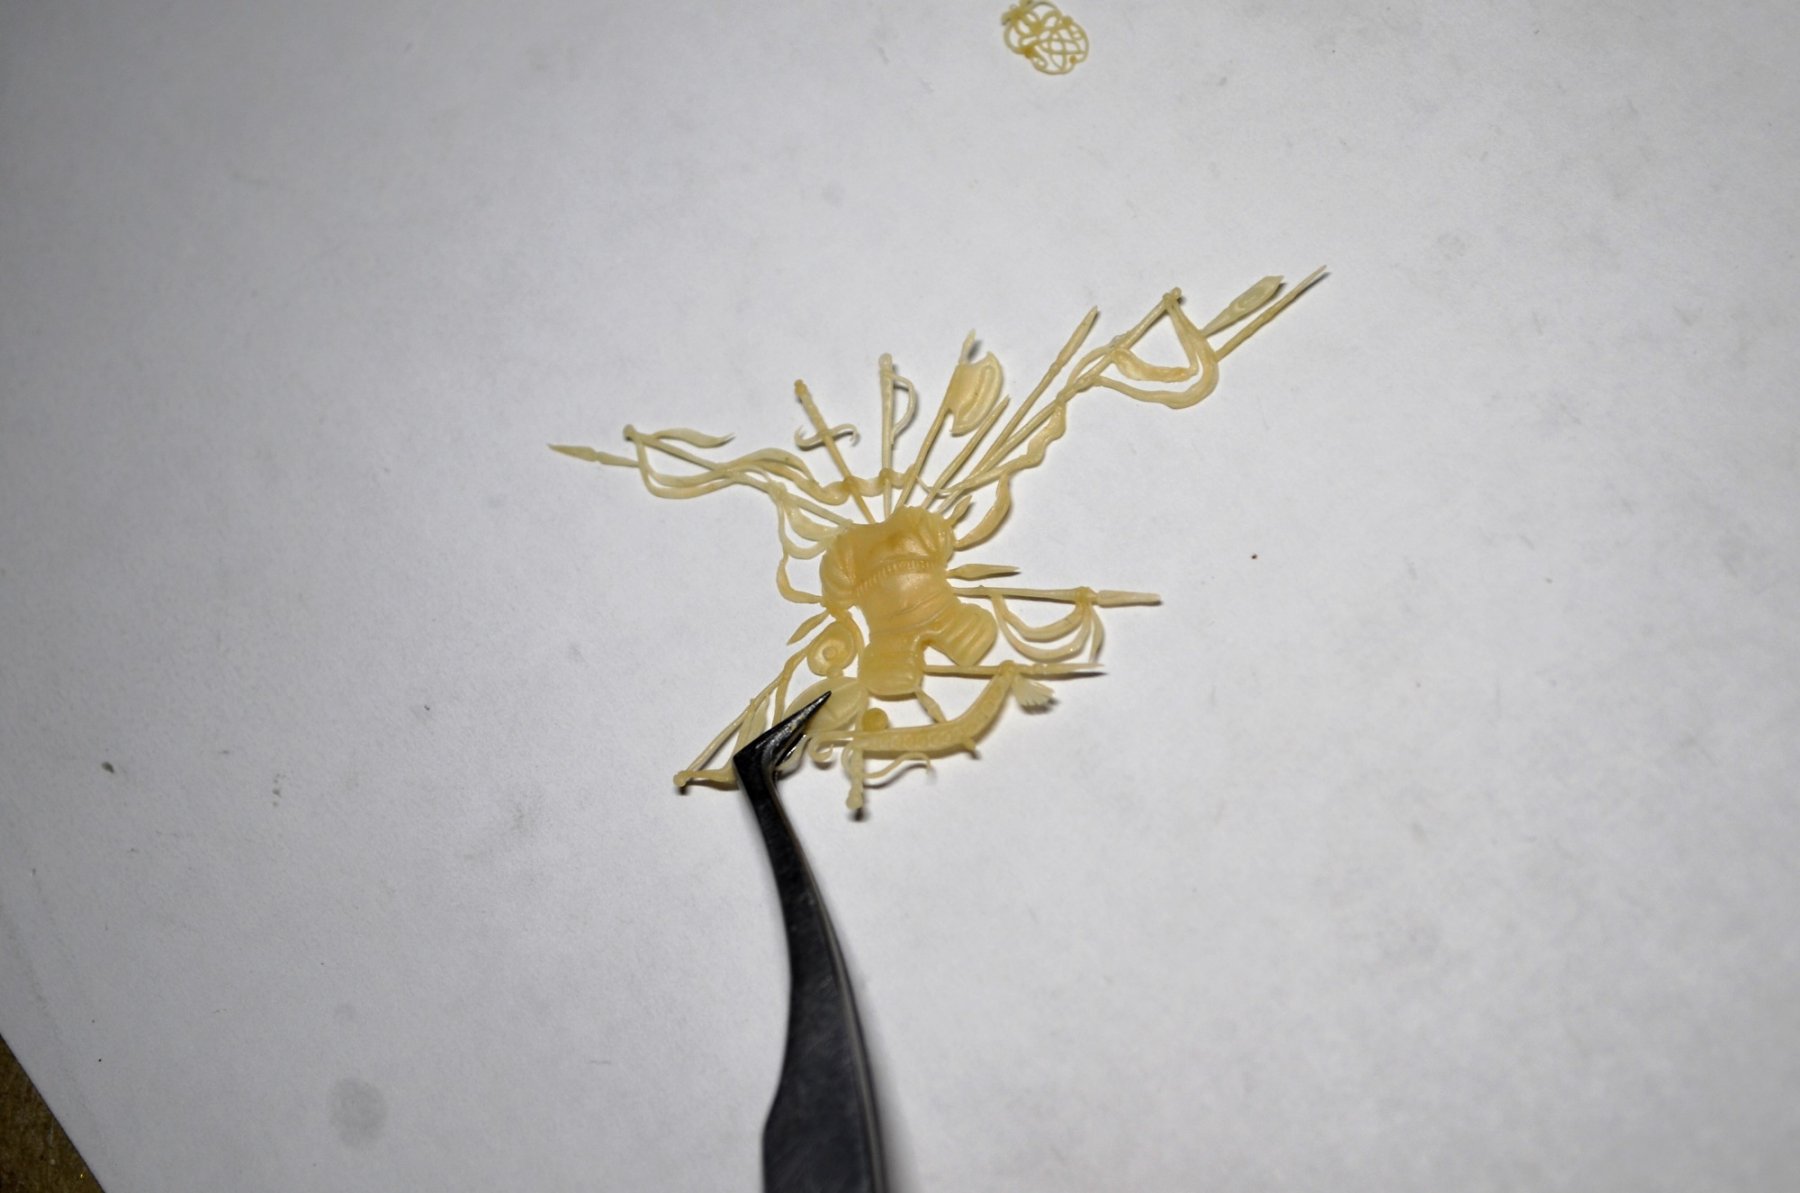
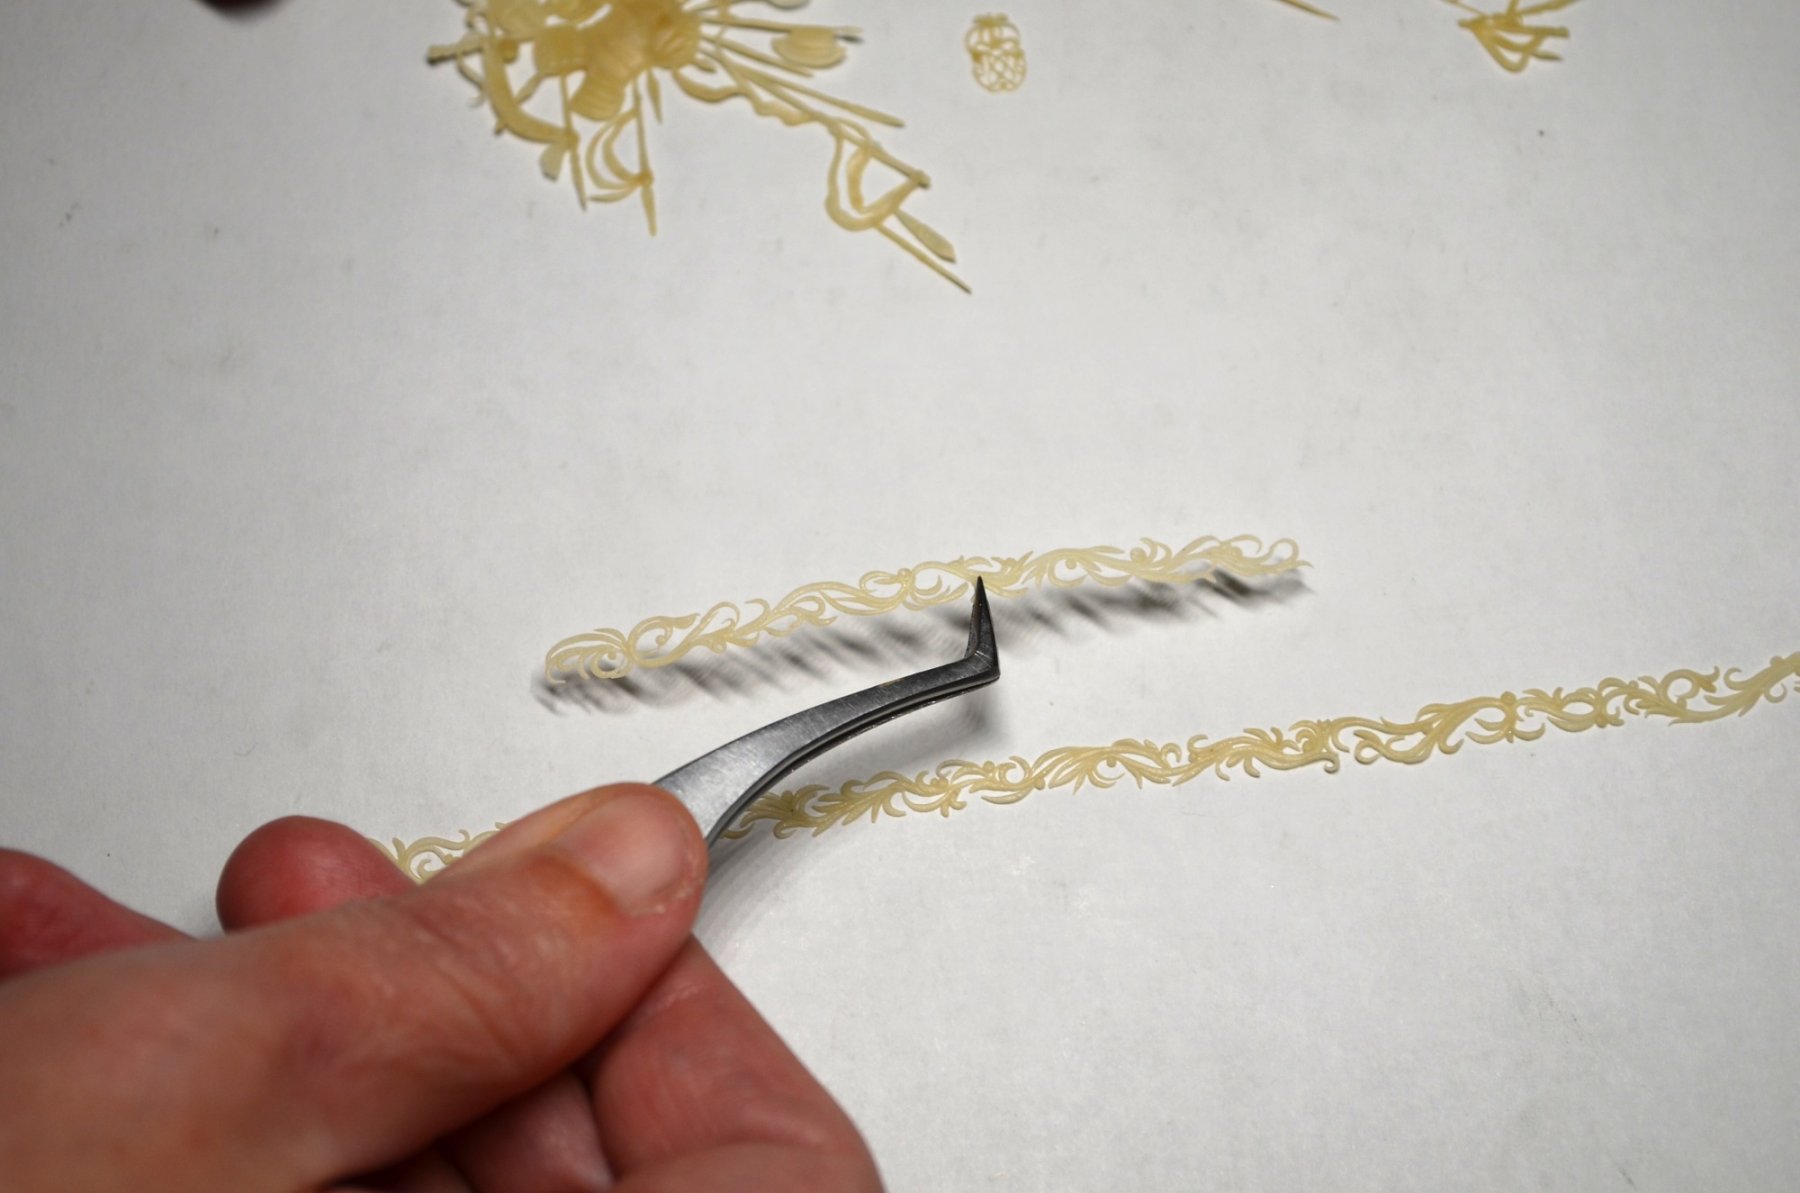
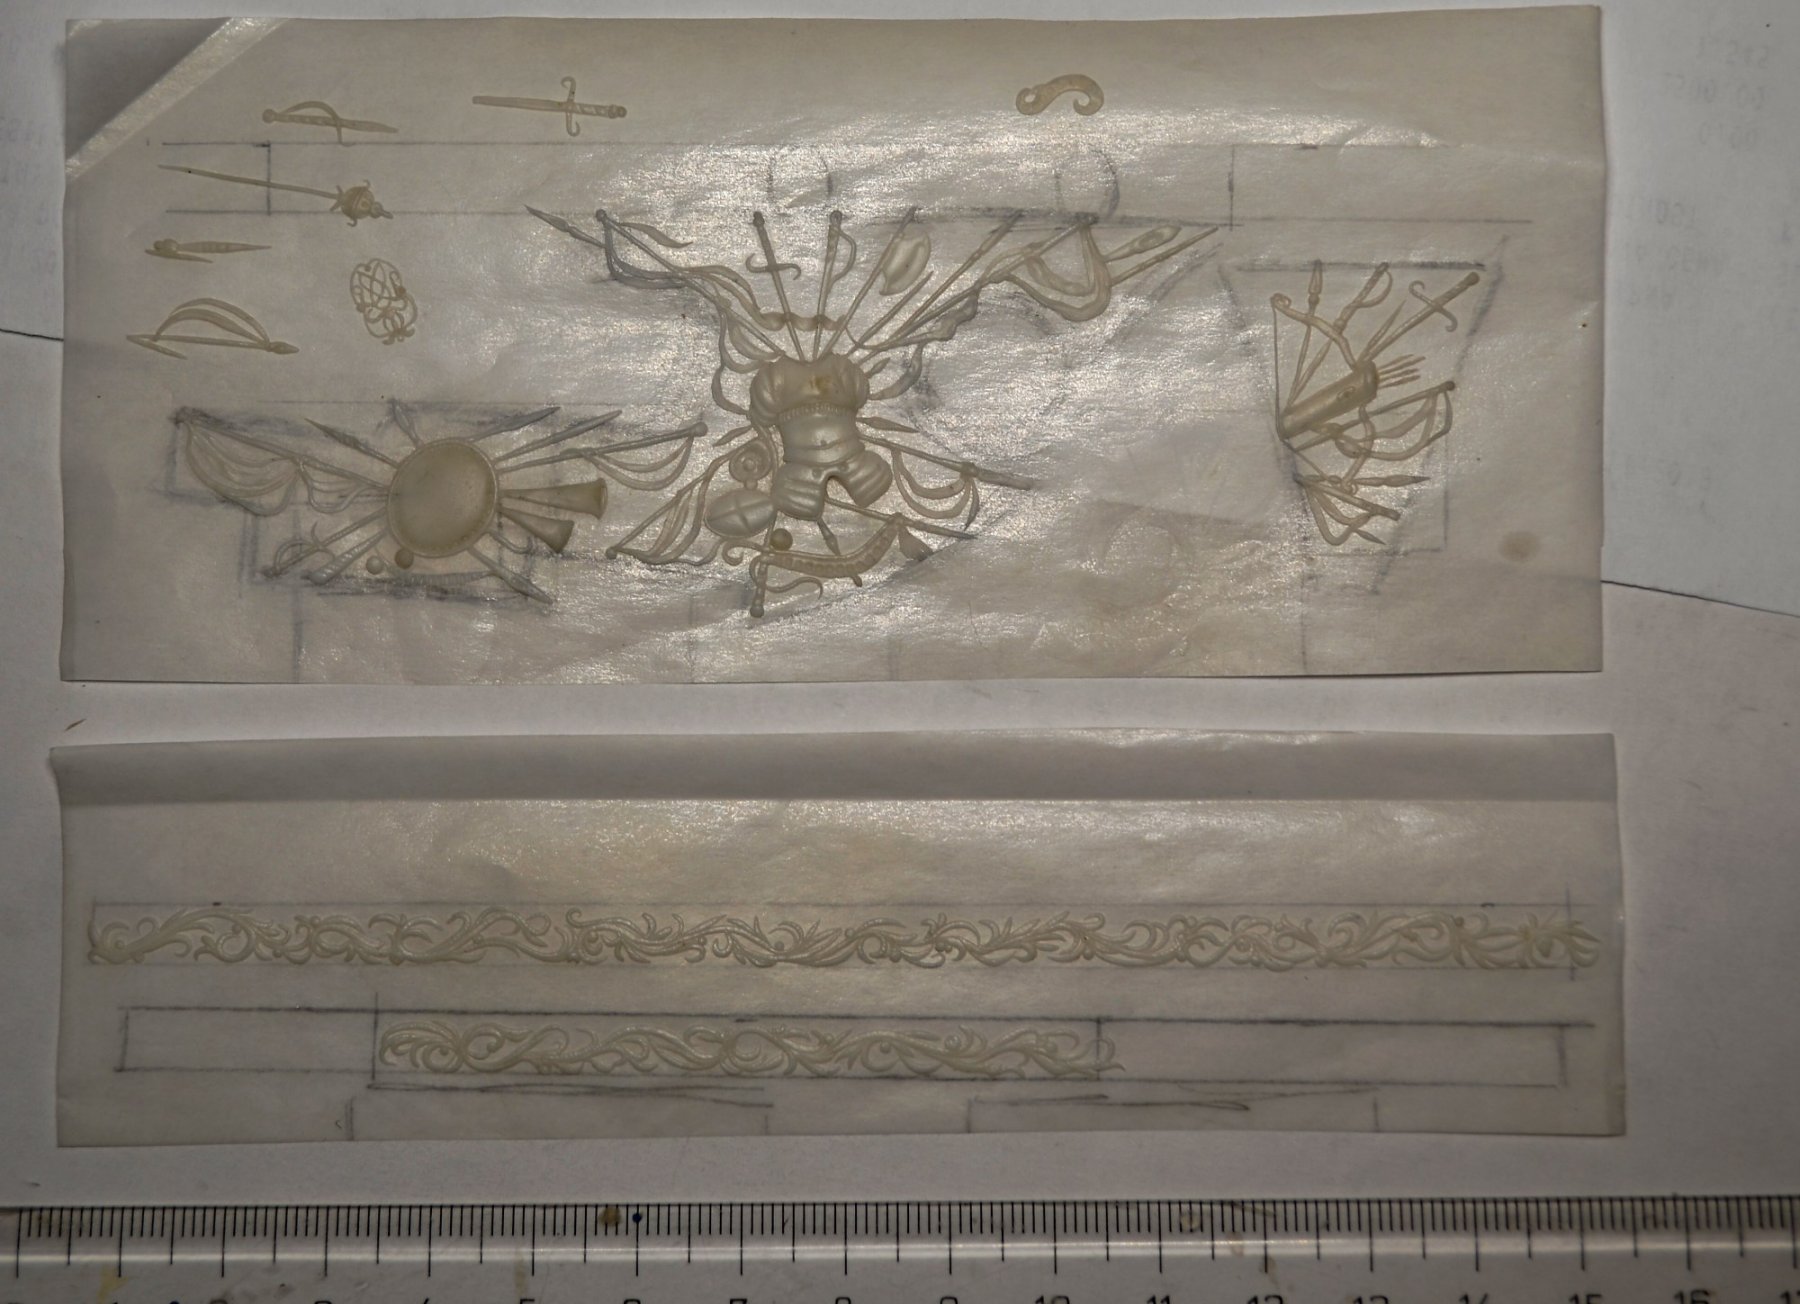
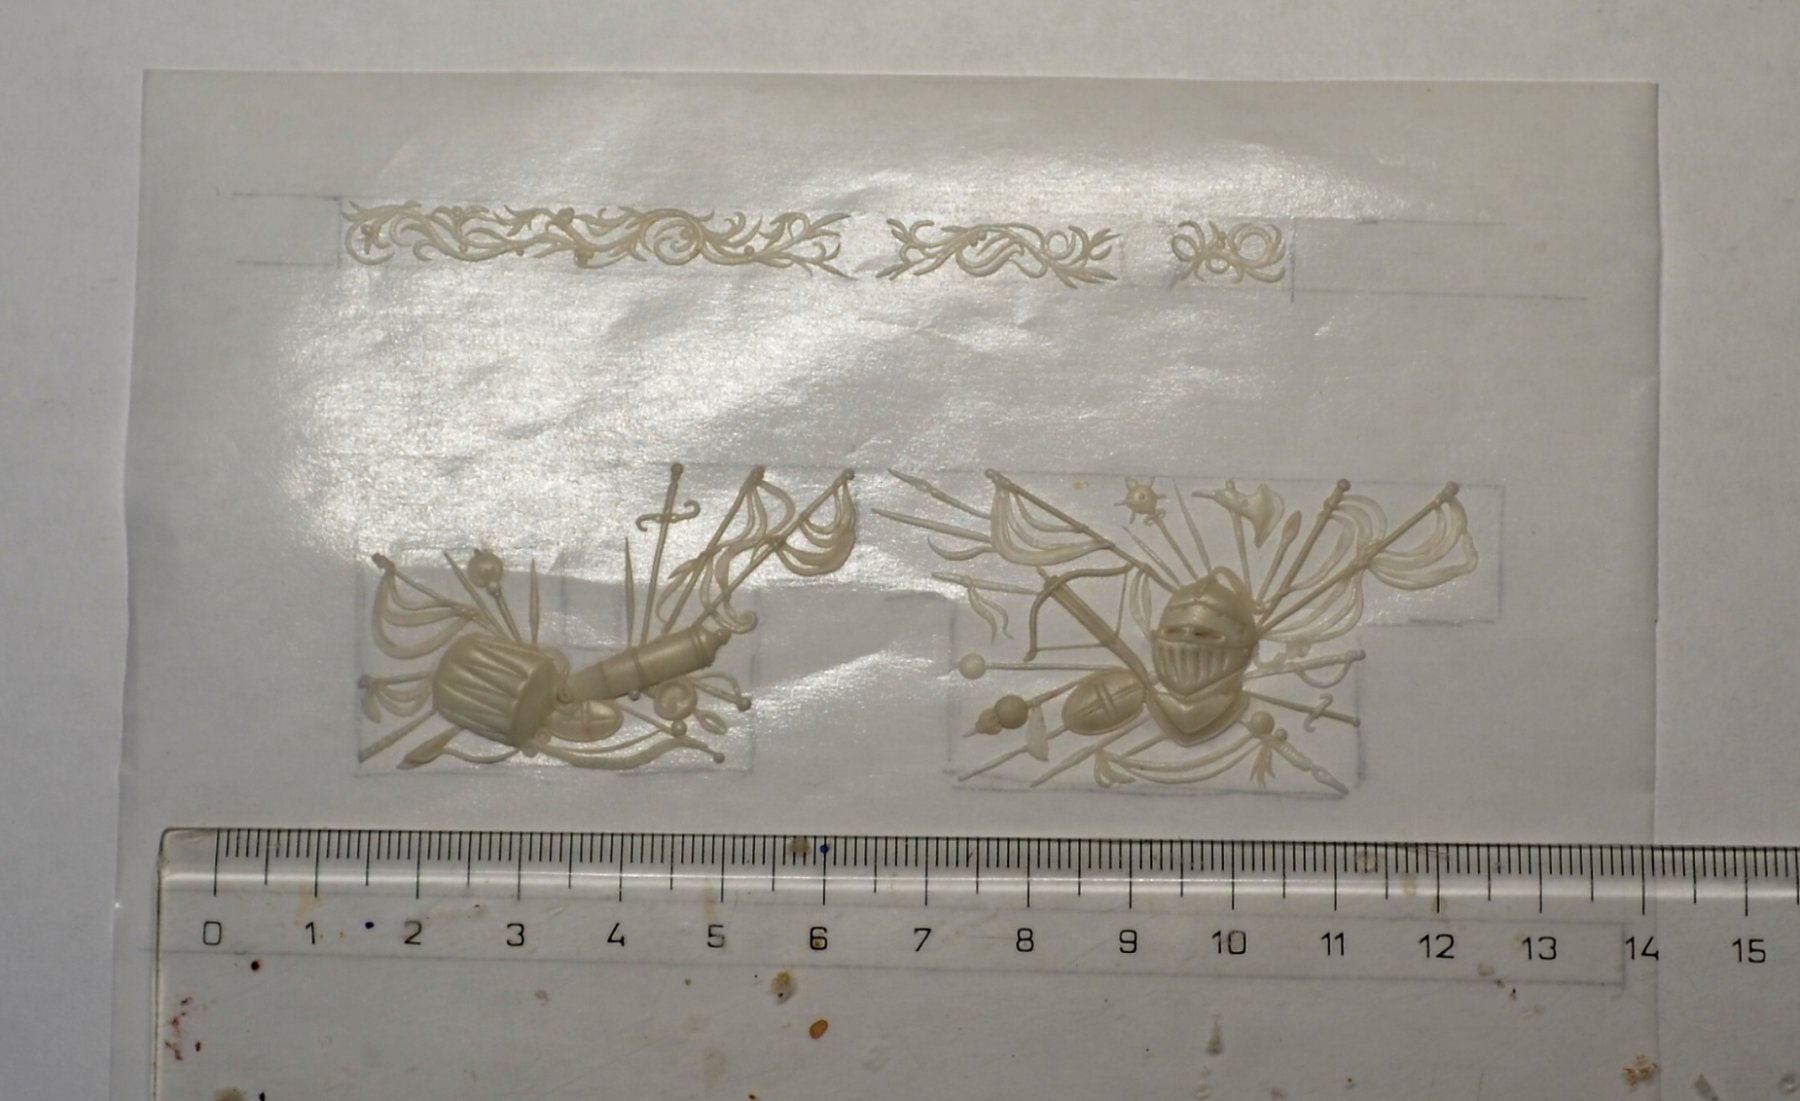
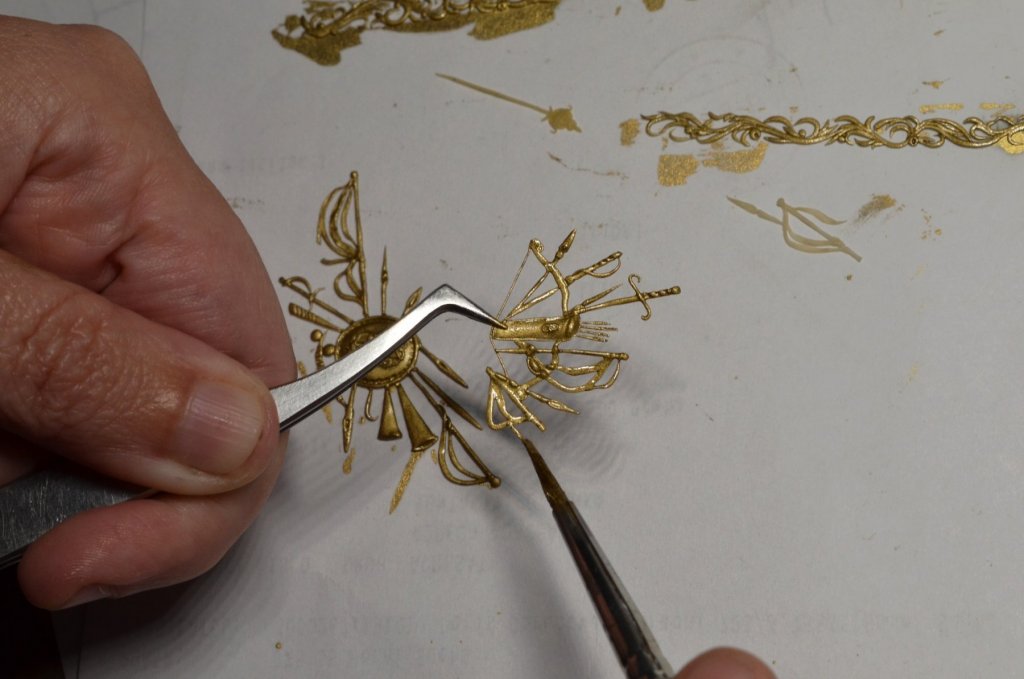
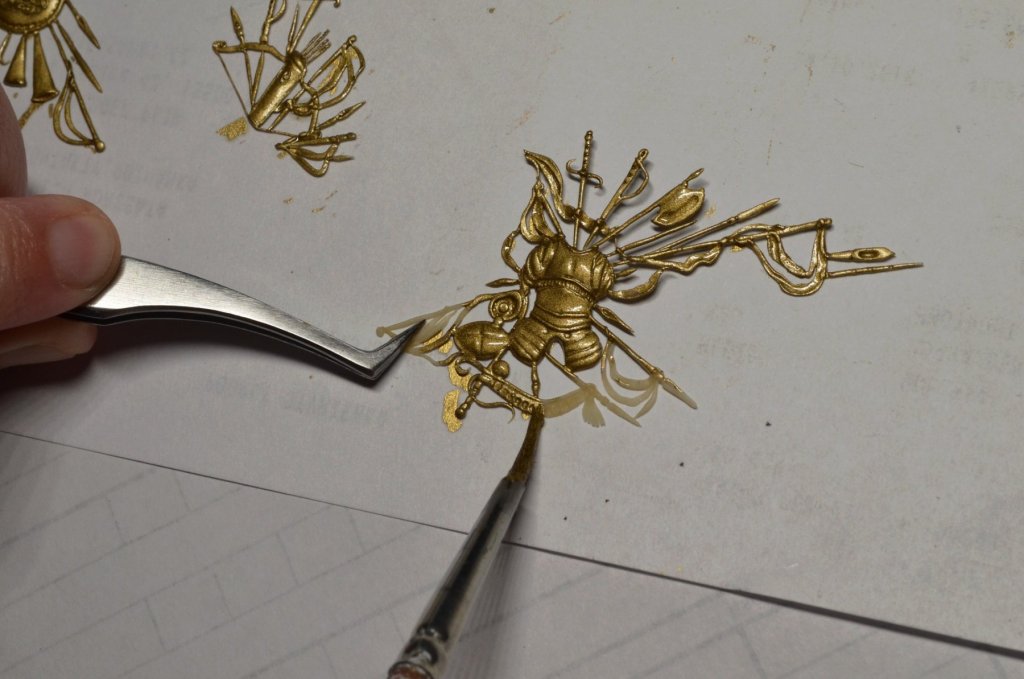
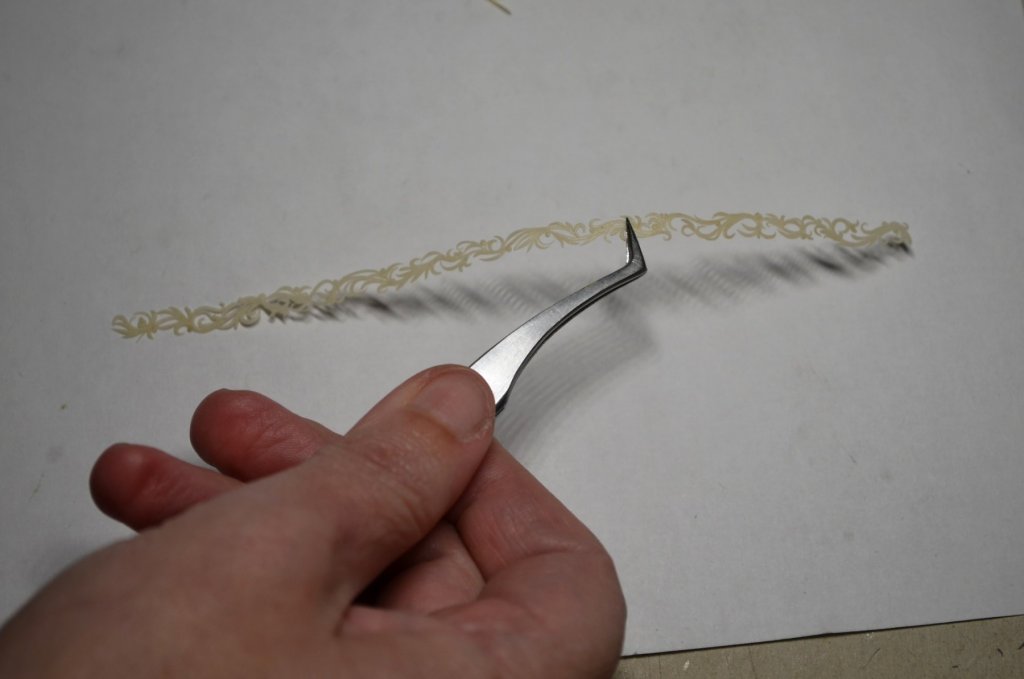
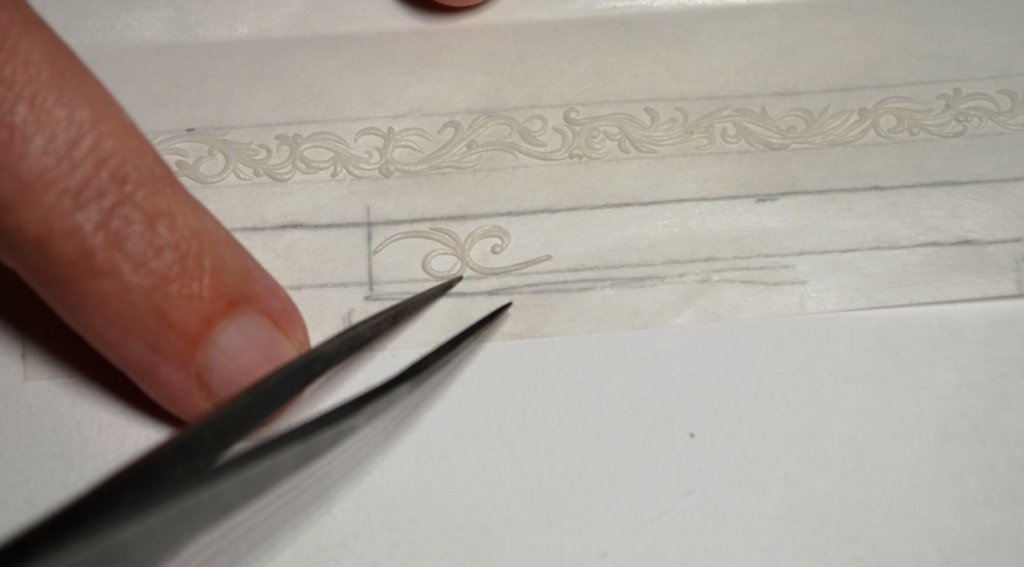
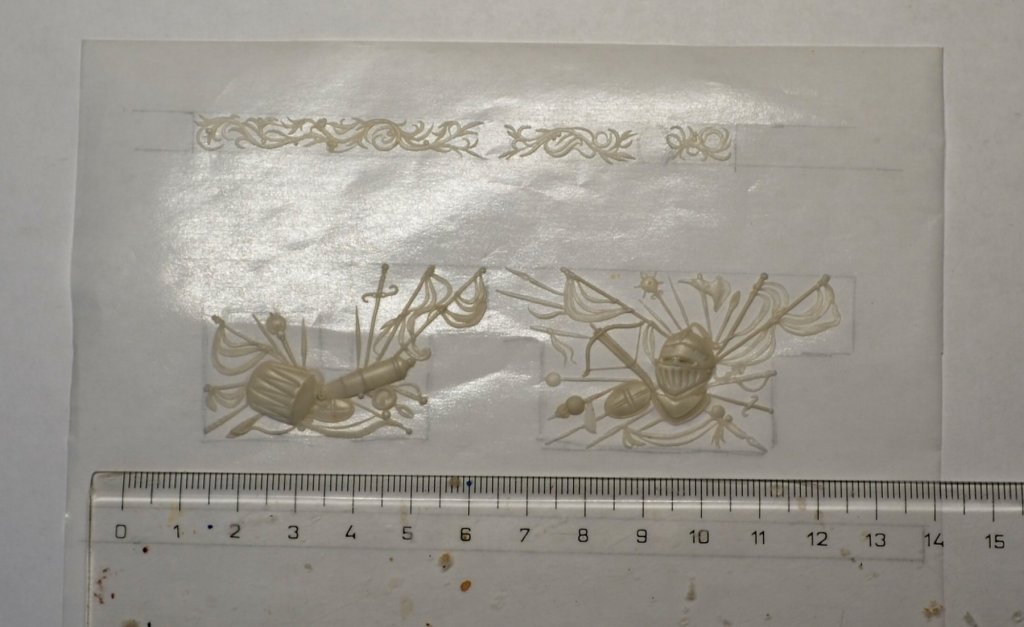
After baking the mass hardens but remains slightly flexible. I carefully separate each piece of decoration with a small sheet of paper or using a thin blade, but it is often quite easy to separate decoration only by bending the wax paper.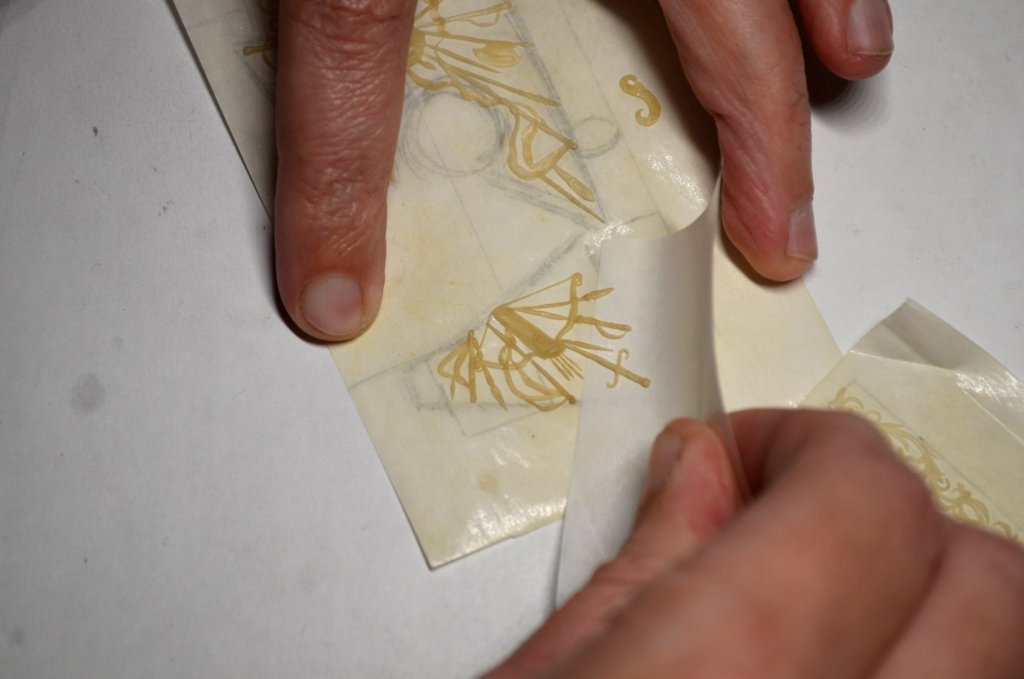


- 1,035 replies
-
- 30
-
-
-
- royal katherine
- ship of the line
- (and 1 more)
-
HMS ROYAL KATHERINE 1664 by Doris - 1/55 - CARD
DORIS replied to DORIS's topic in - Build logs for subjects built 1501 - 1750
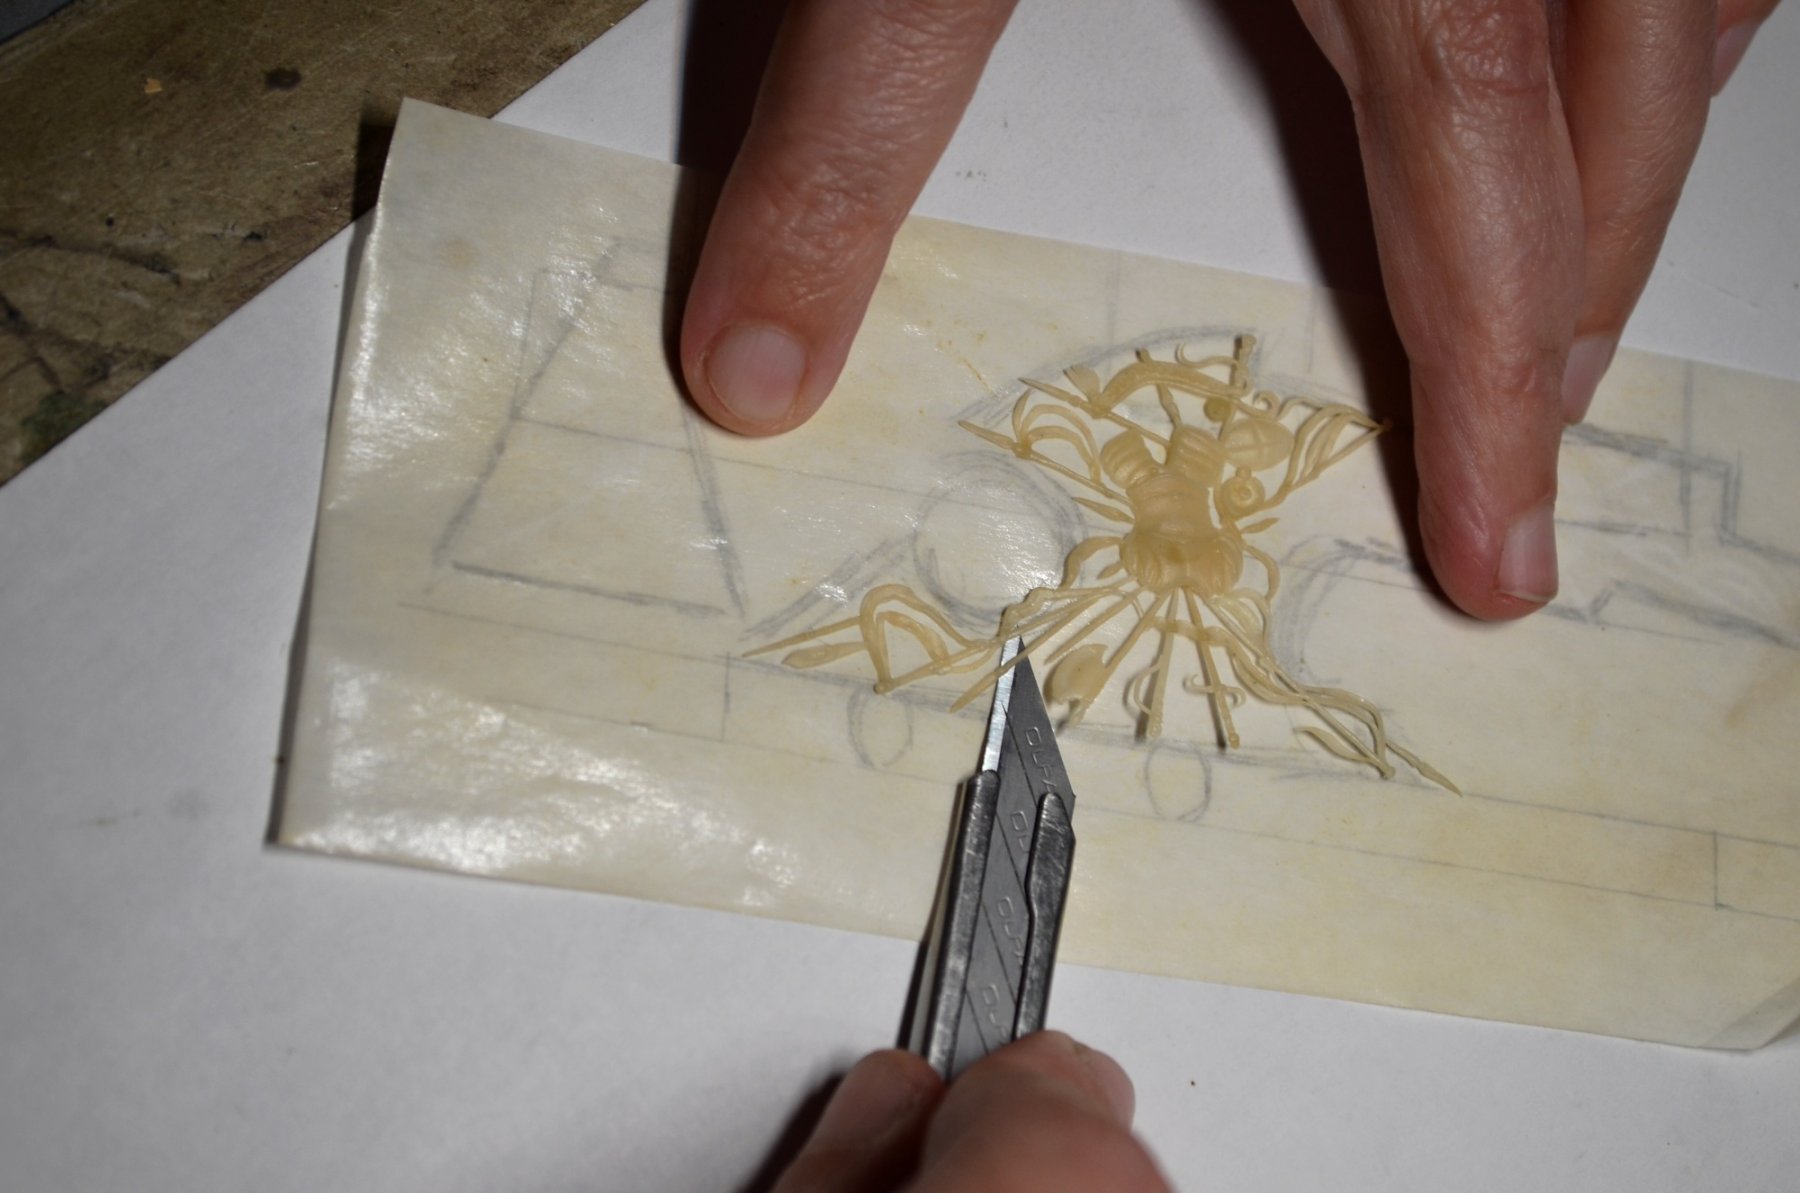
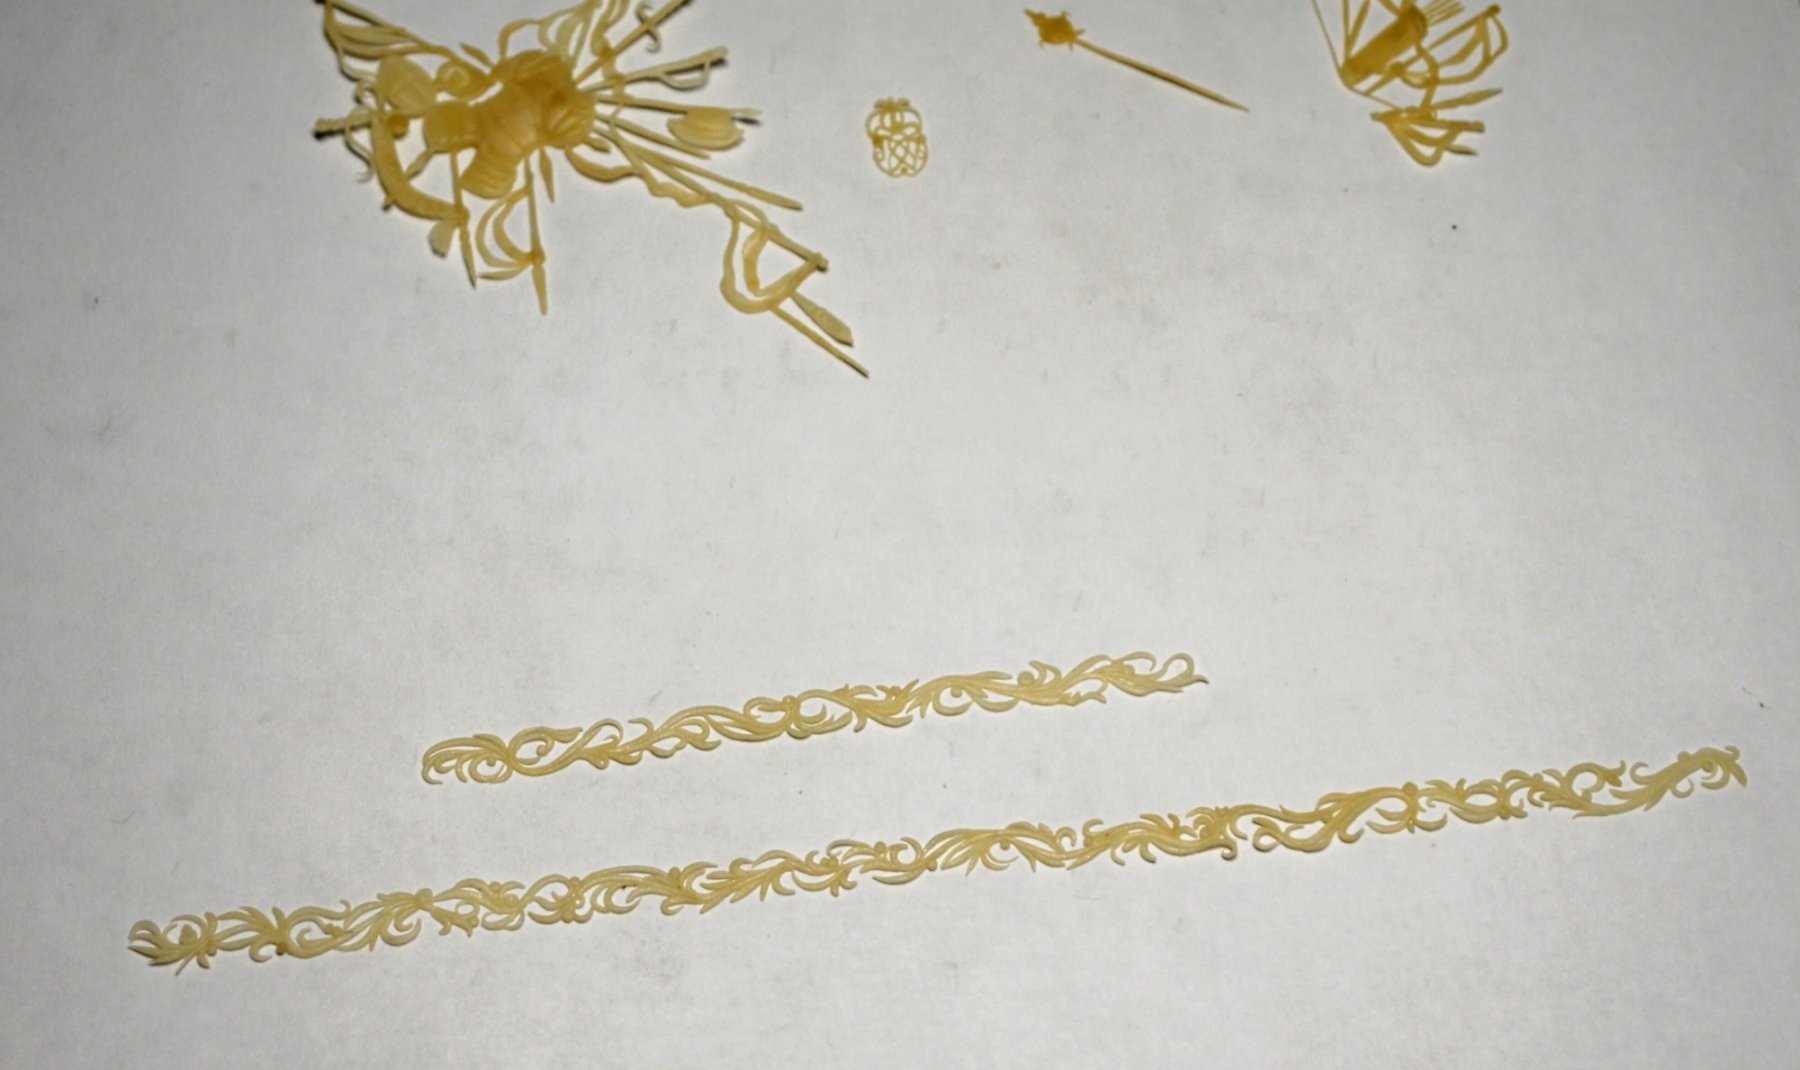
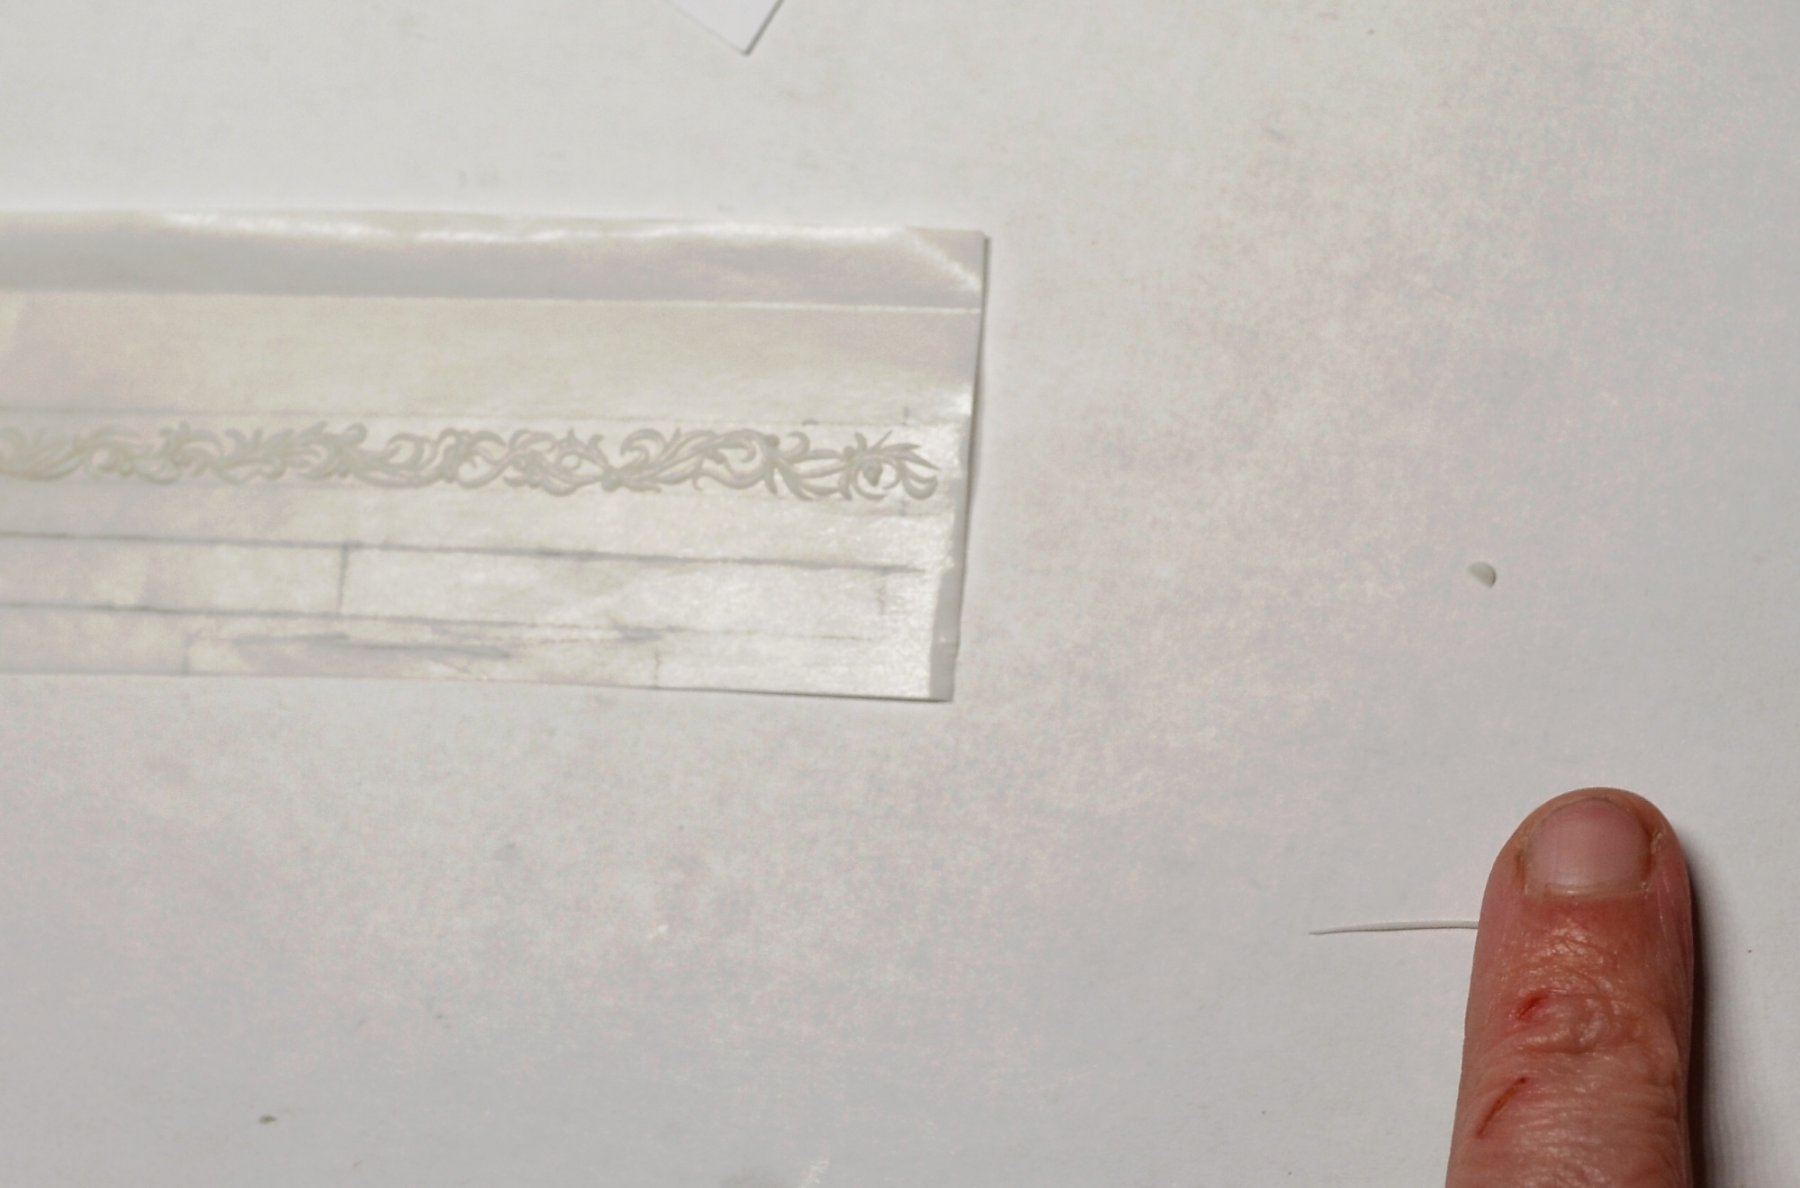
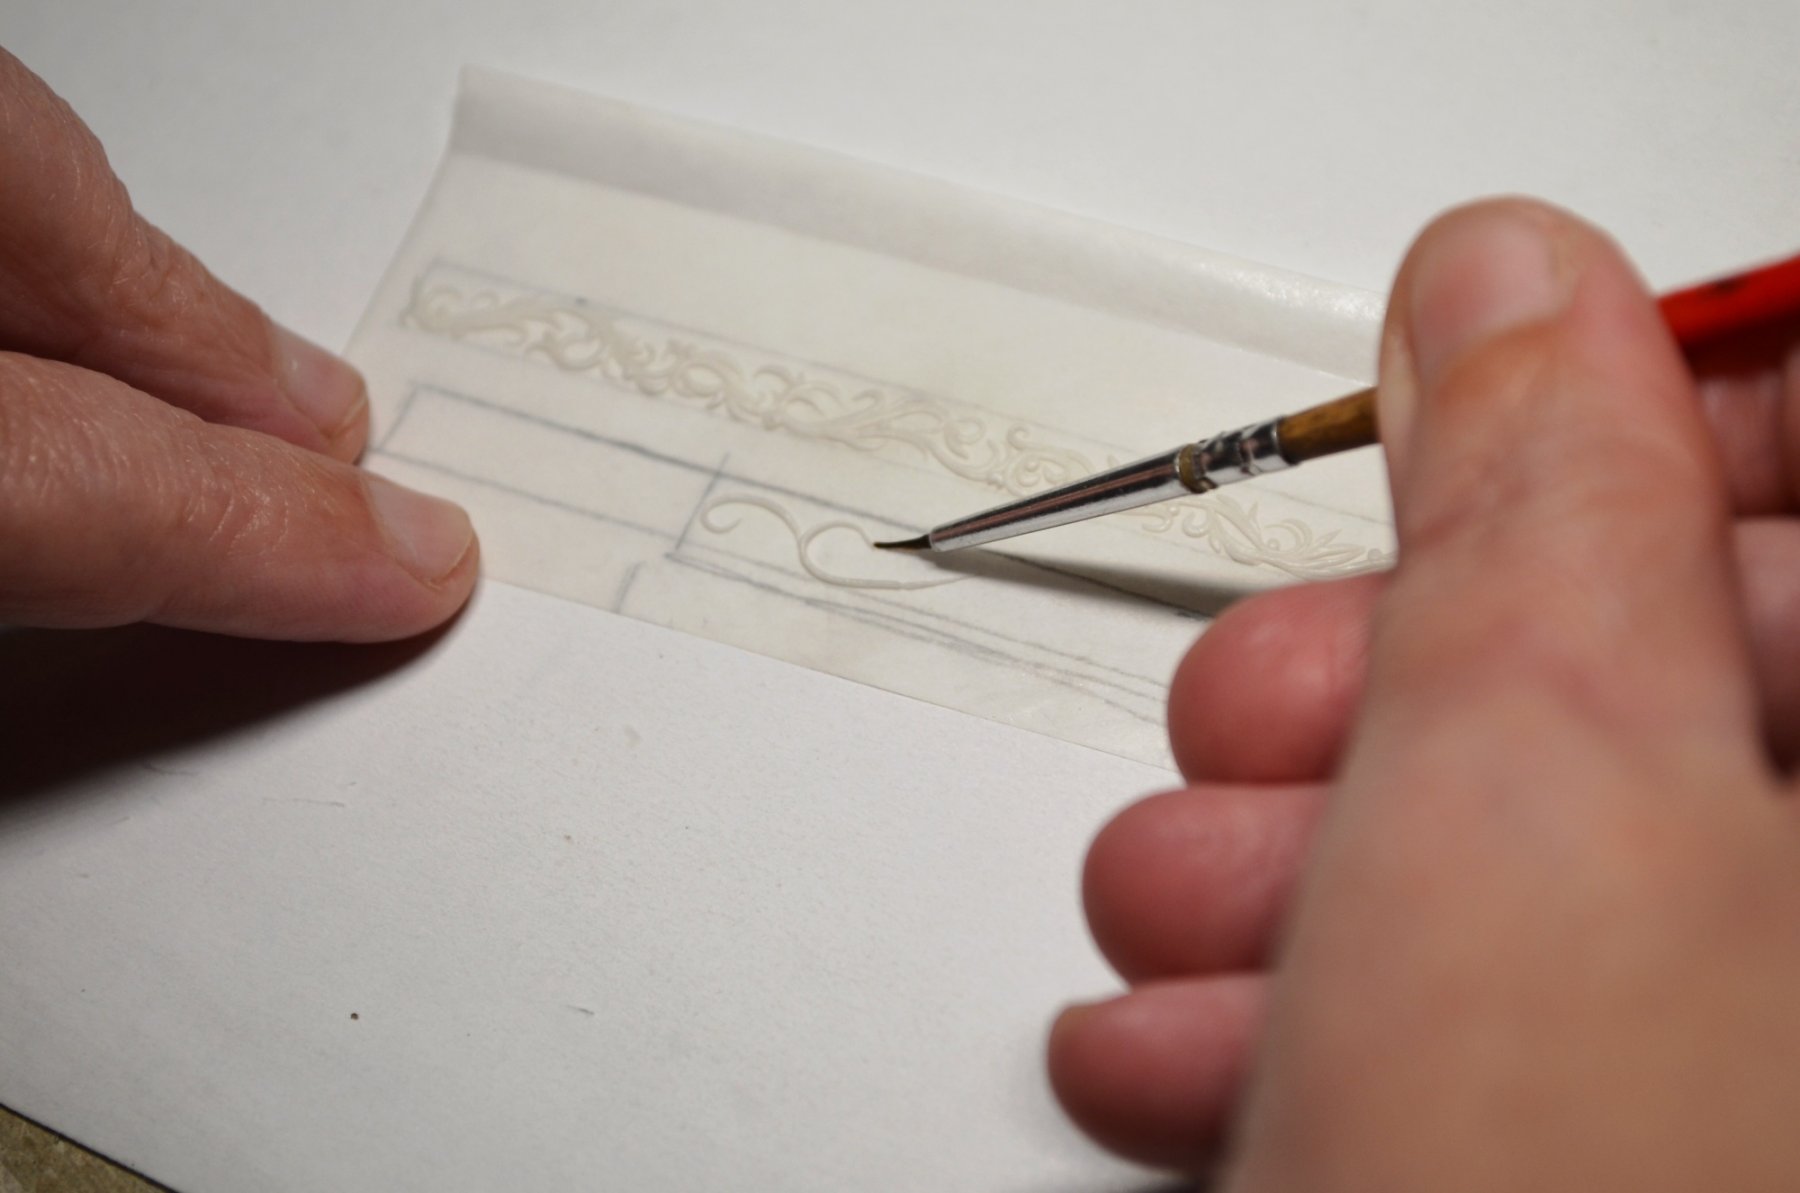
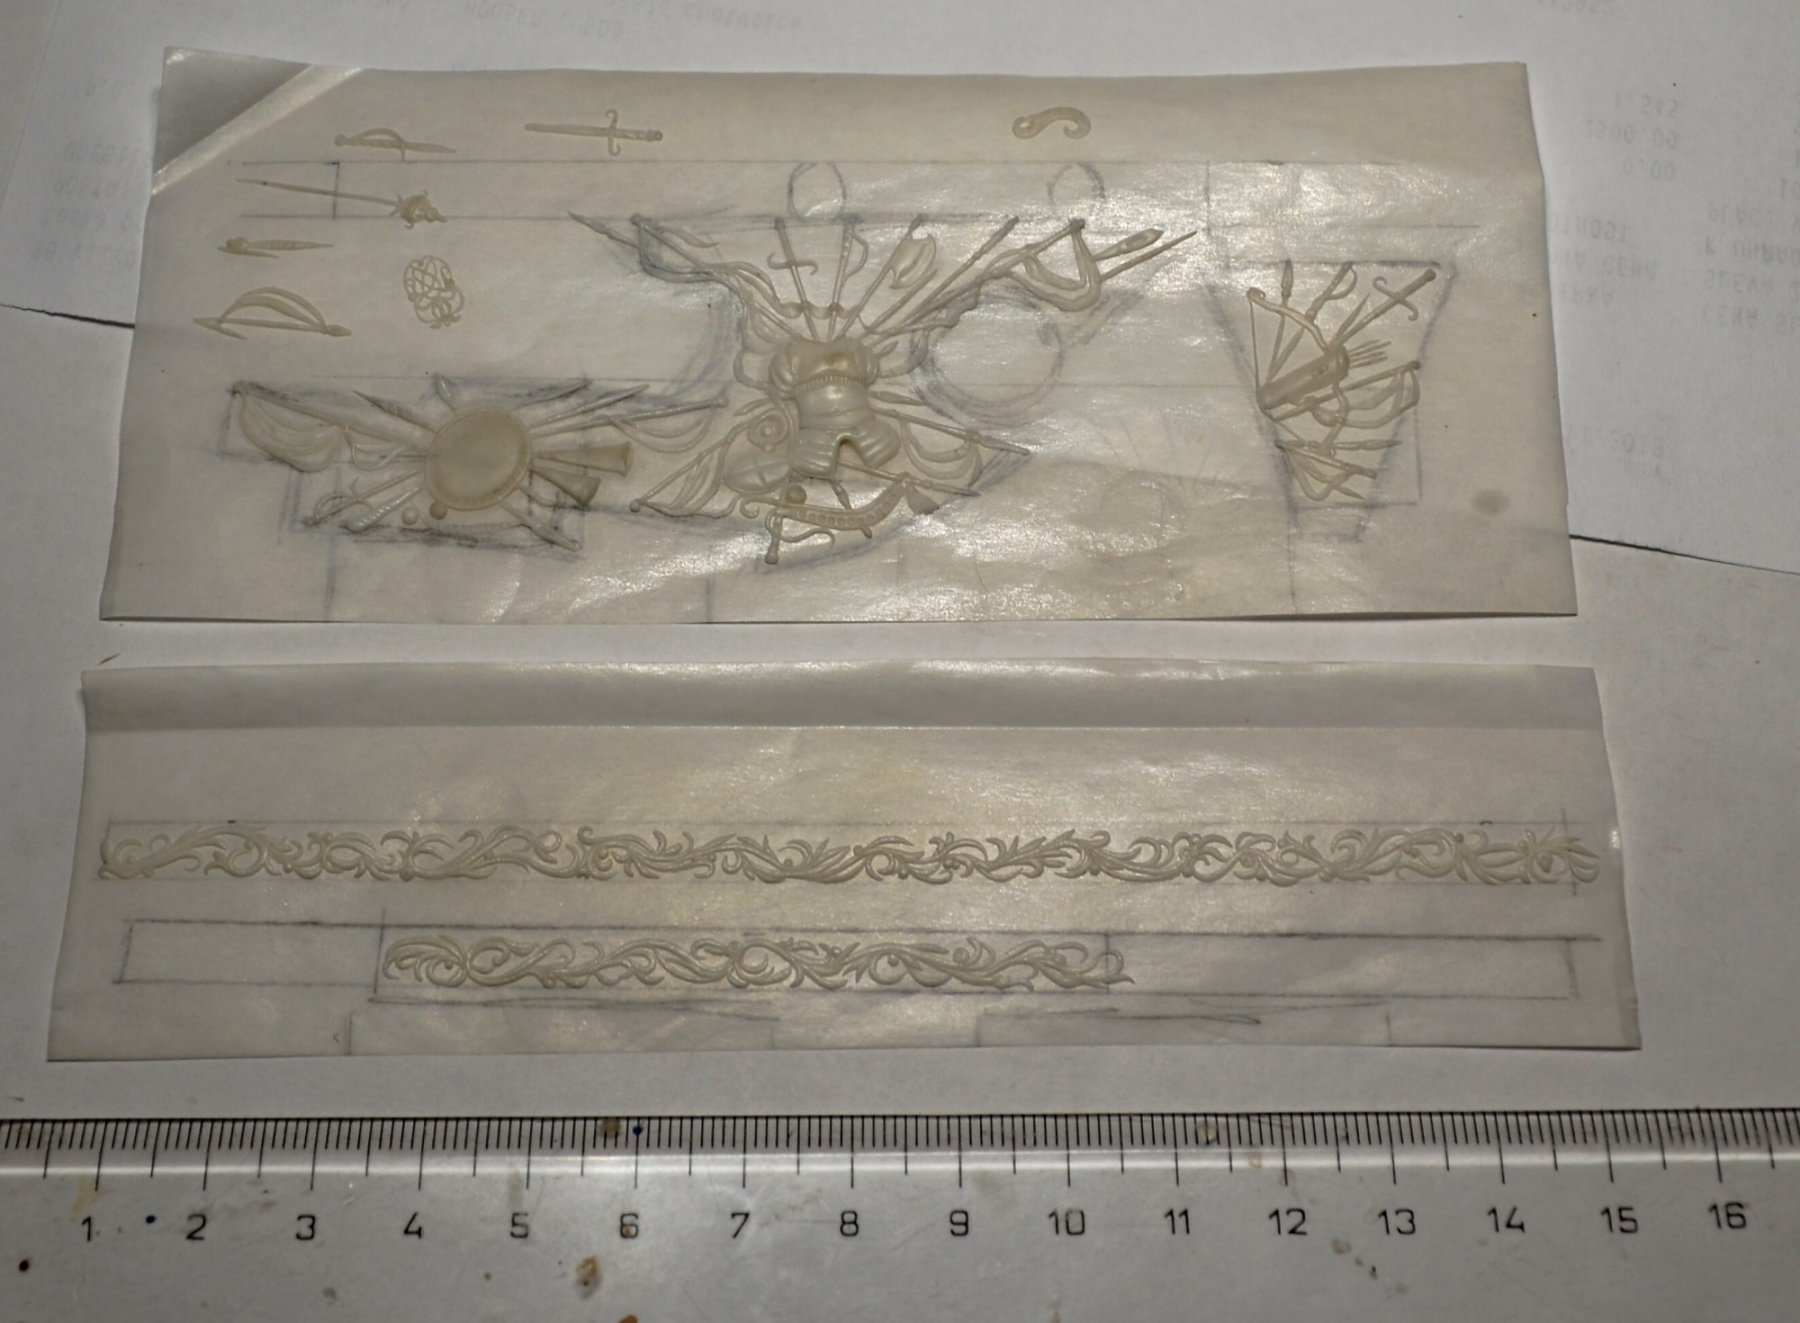
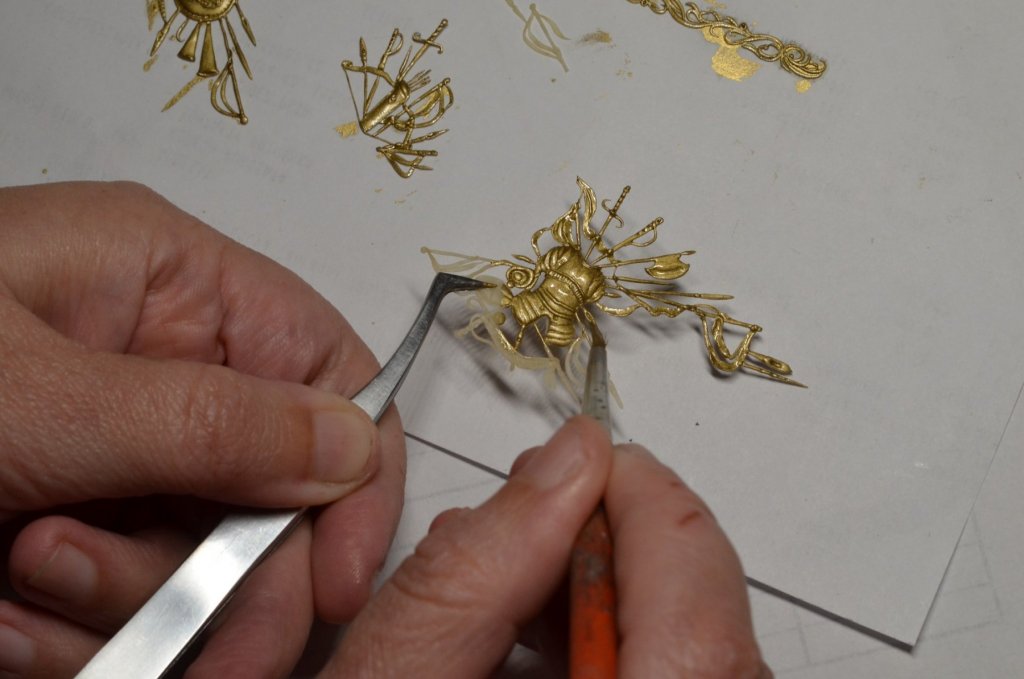
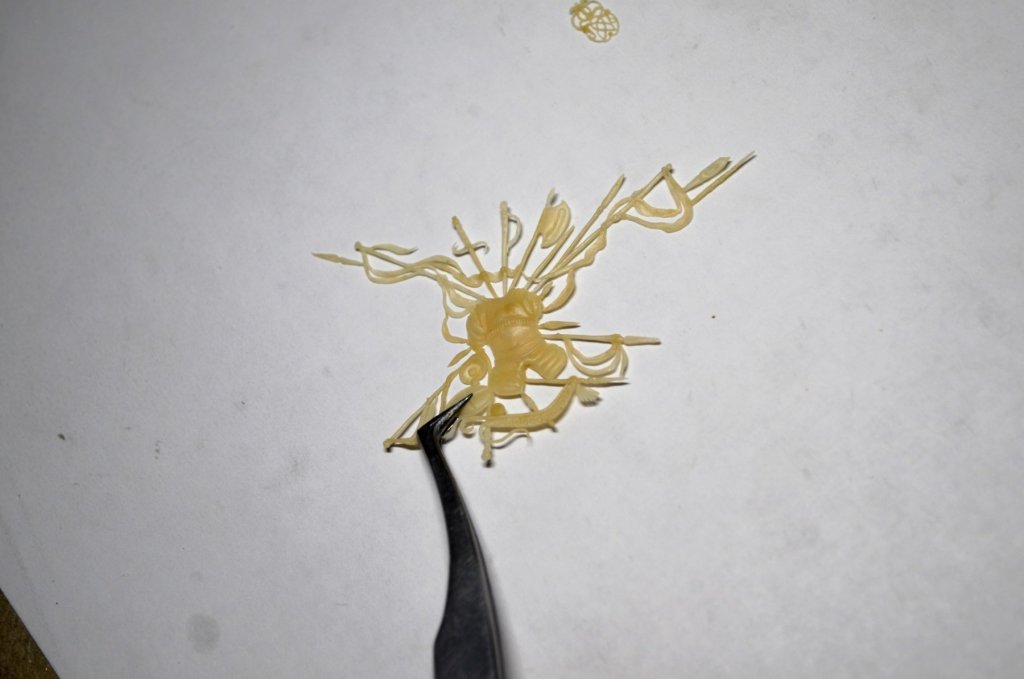
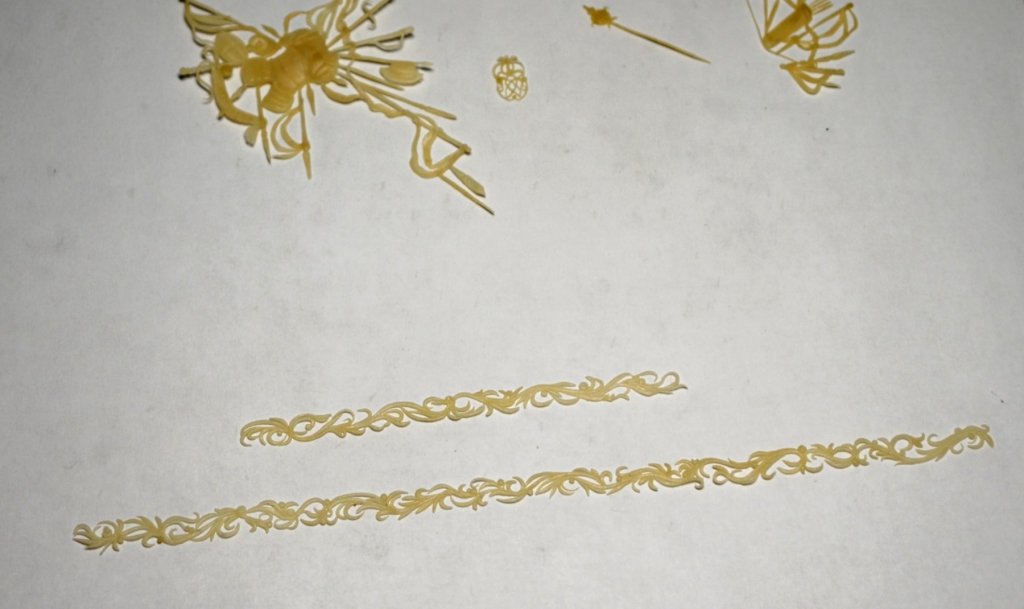
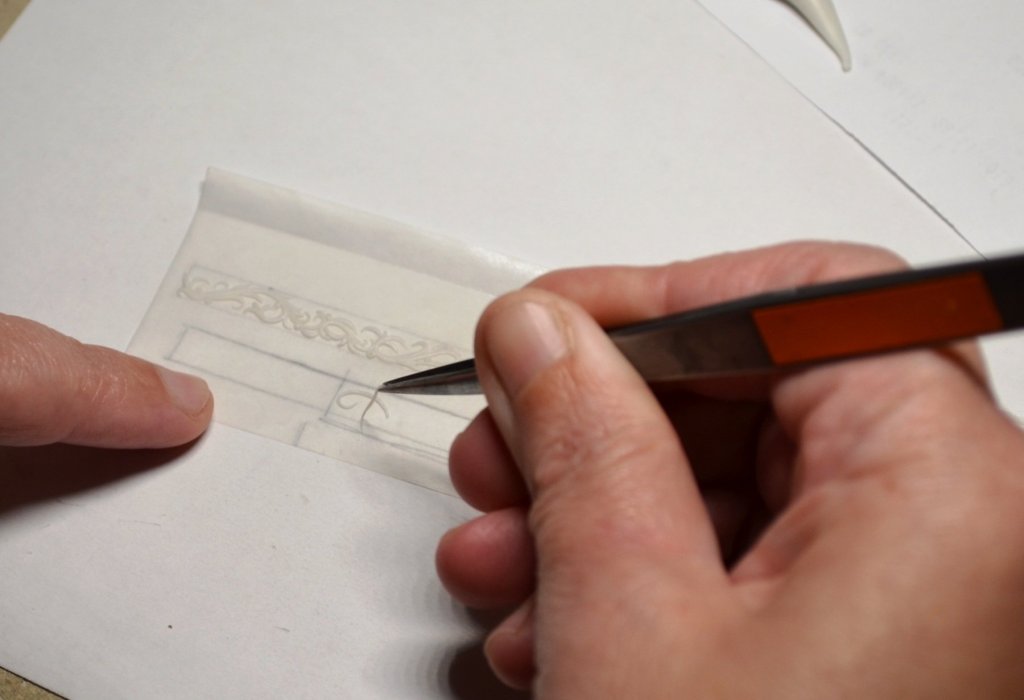
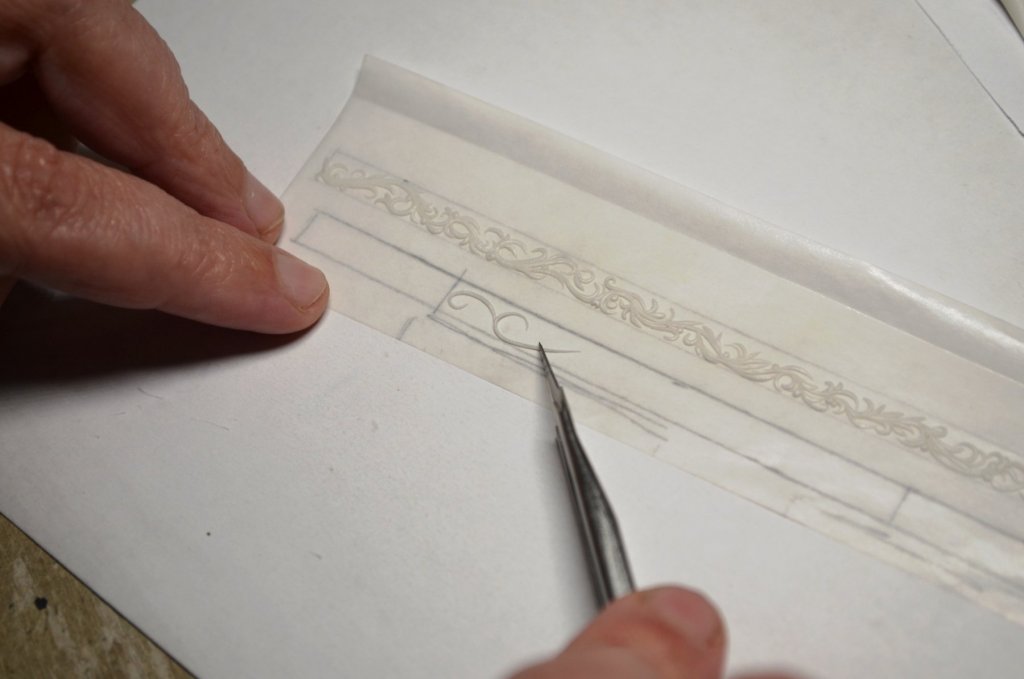
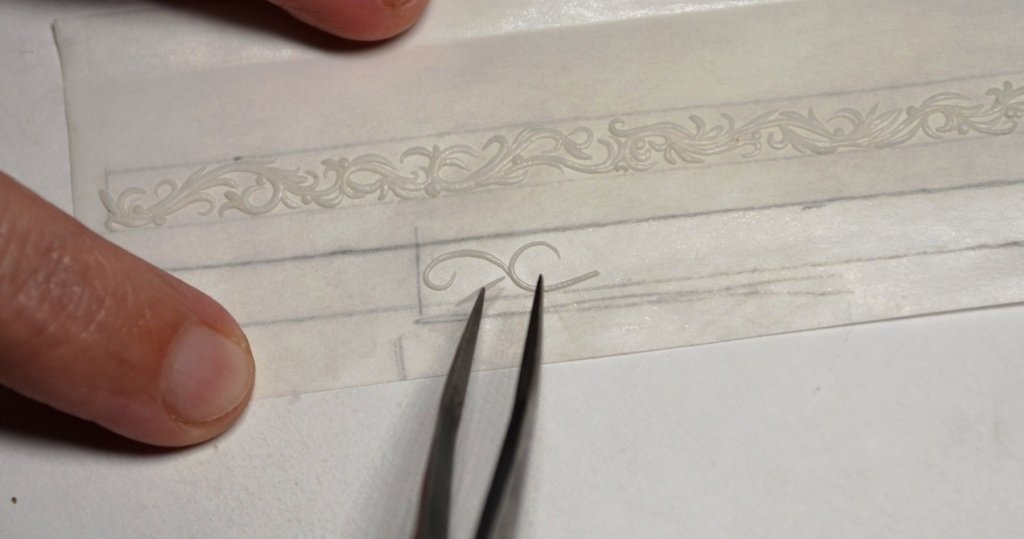
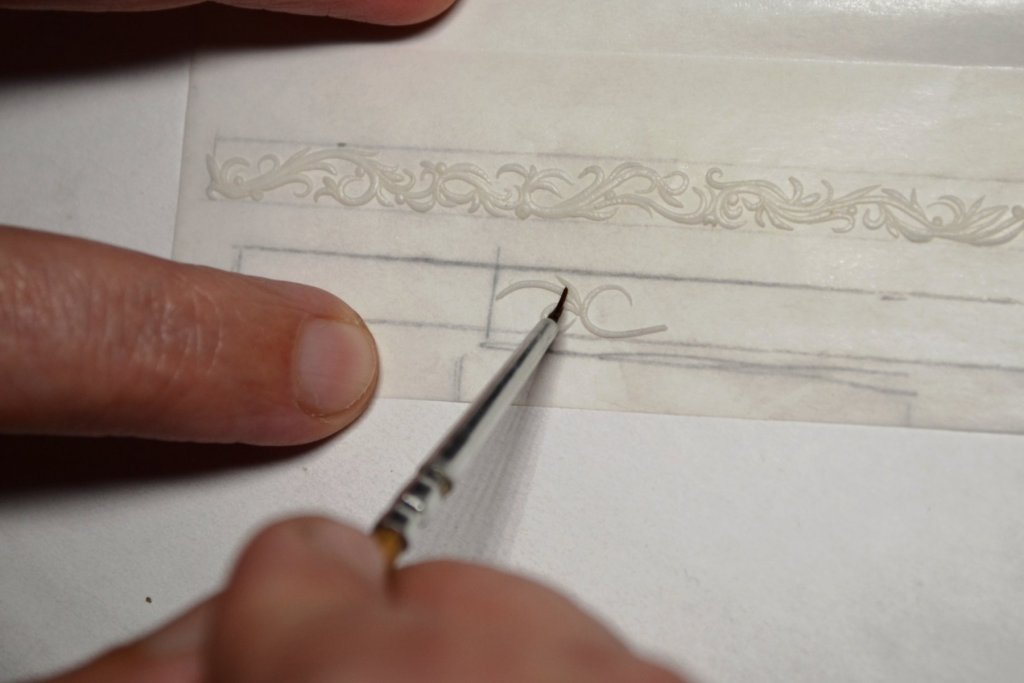
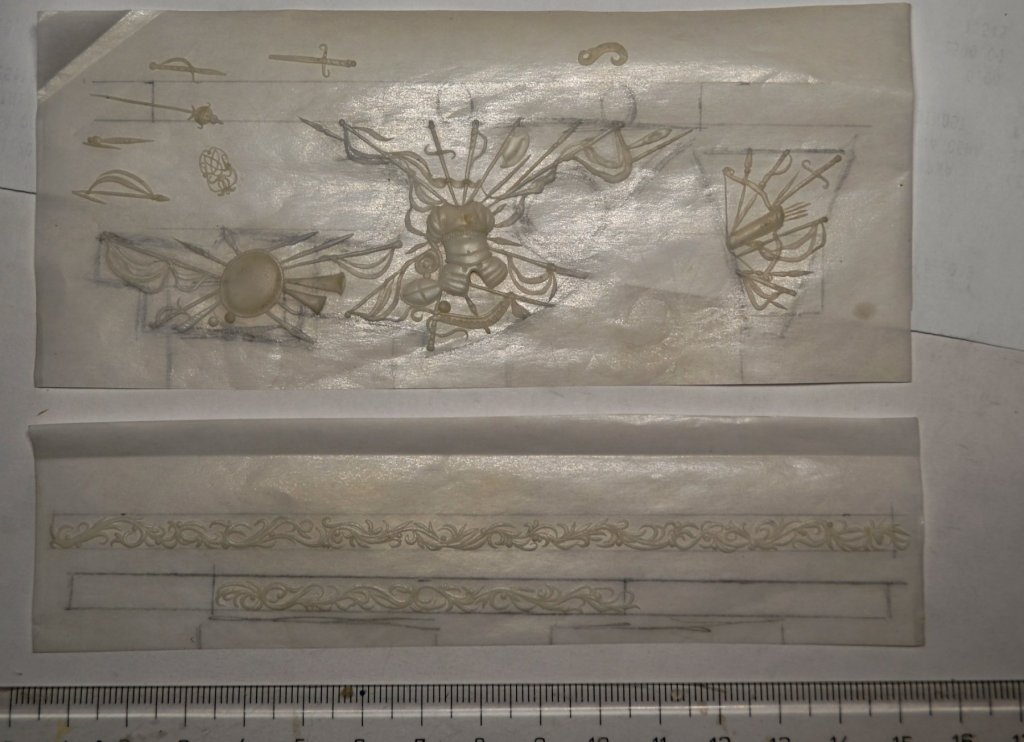
Hubac's Historian : You are welcome. Albert: Thank you very much, I am pleased you like my work. As I promised, I am bringing a tutorial how I make those fine pieces of decoration. Unfortunately, the video was unreadable - the decorations are so tiny that the camera cannot focus on them. So I could take only detailed pictures from the process. I gently roll thin tubes with a finger on the paper background, mainly use peaked tweezers and fine brush to shape the modeling clay (I have already written here about the kind of clay I use = in our country is called modurit/modelit, it is a polymer hardened by heat). I shape this mass on the wax paper, it is very important for easy separating pieces of decoration after baking from the background.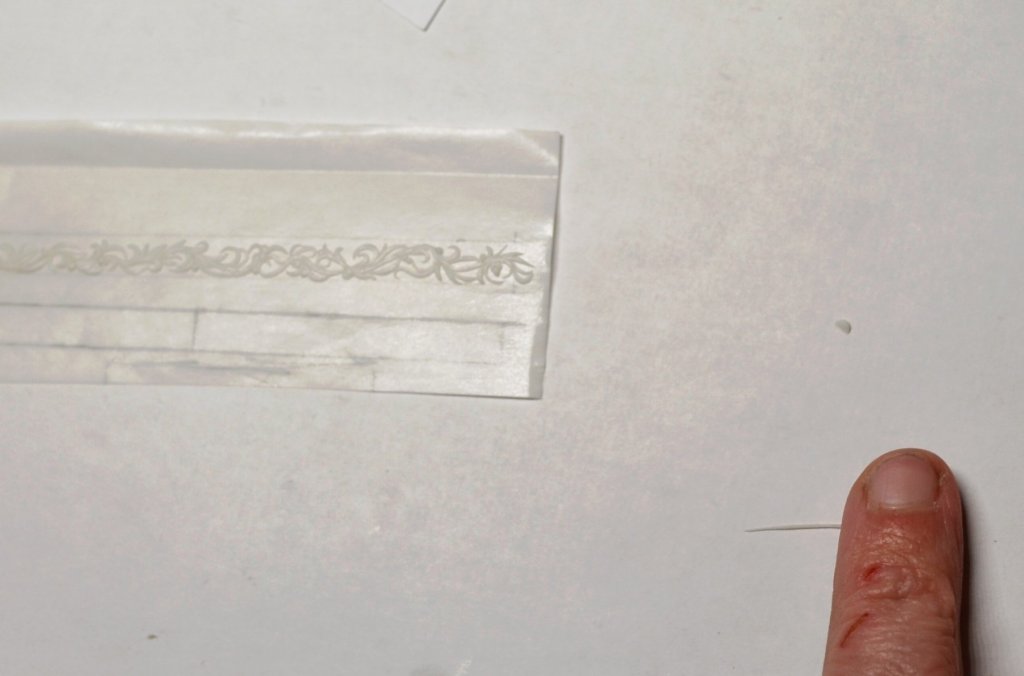


- 1,035 replies
-
- 19
-
-
- royal katherine
- ship of the line
- (and 1 more)
-
I admire your craftsmanship and skills, dear Michael. The model looks fantastic. I enjoy the pics from progress very much. Thank you for sharing your beautiful work. Best regards Doris
-
Congratulations Danny, you did a great job. Very impressive and neatness result. Kind regards, Doris
-
HMS ROYAL KATHERINE 1664 by Doris - 1/55 - CARD
DORIS replied to DORIS's topic in - Build logs for subjects built 1501 - 1750
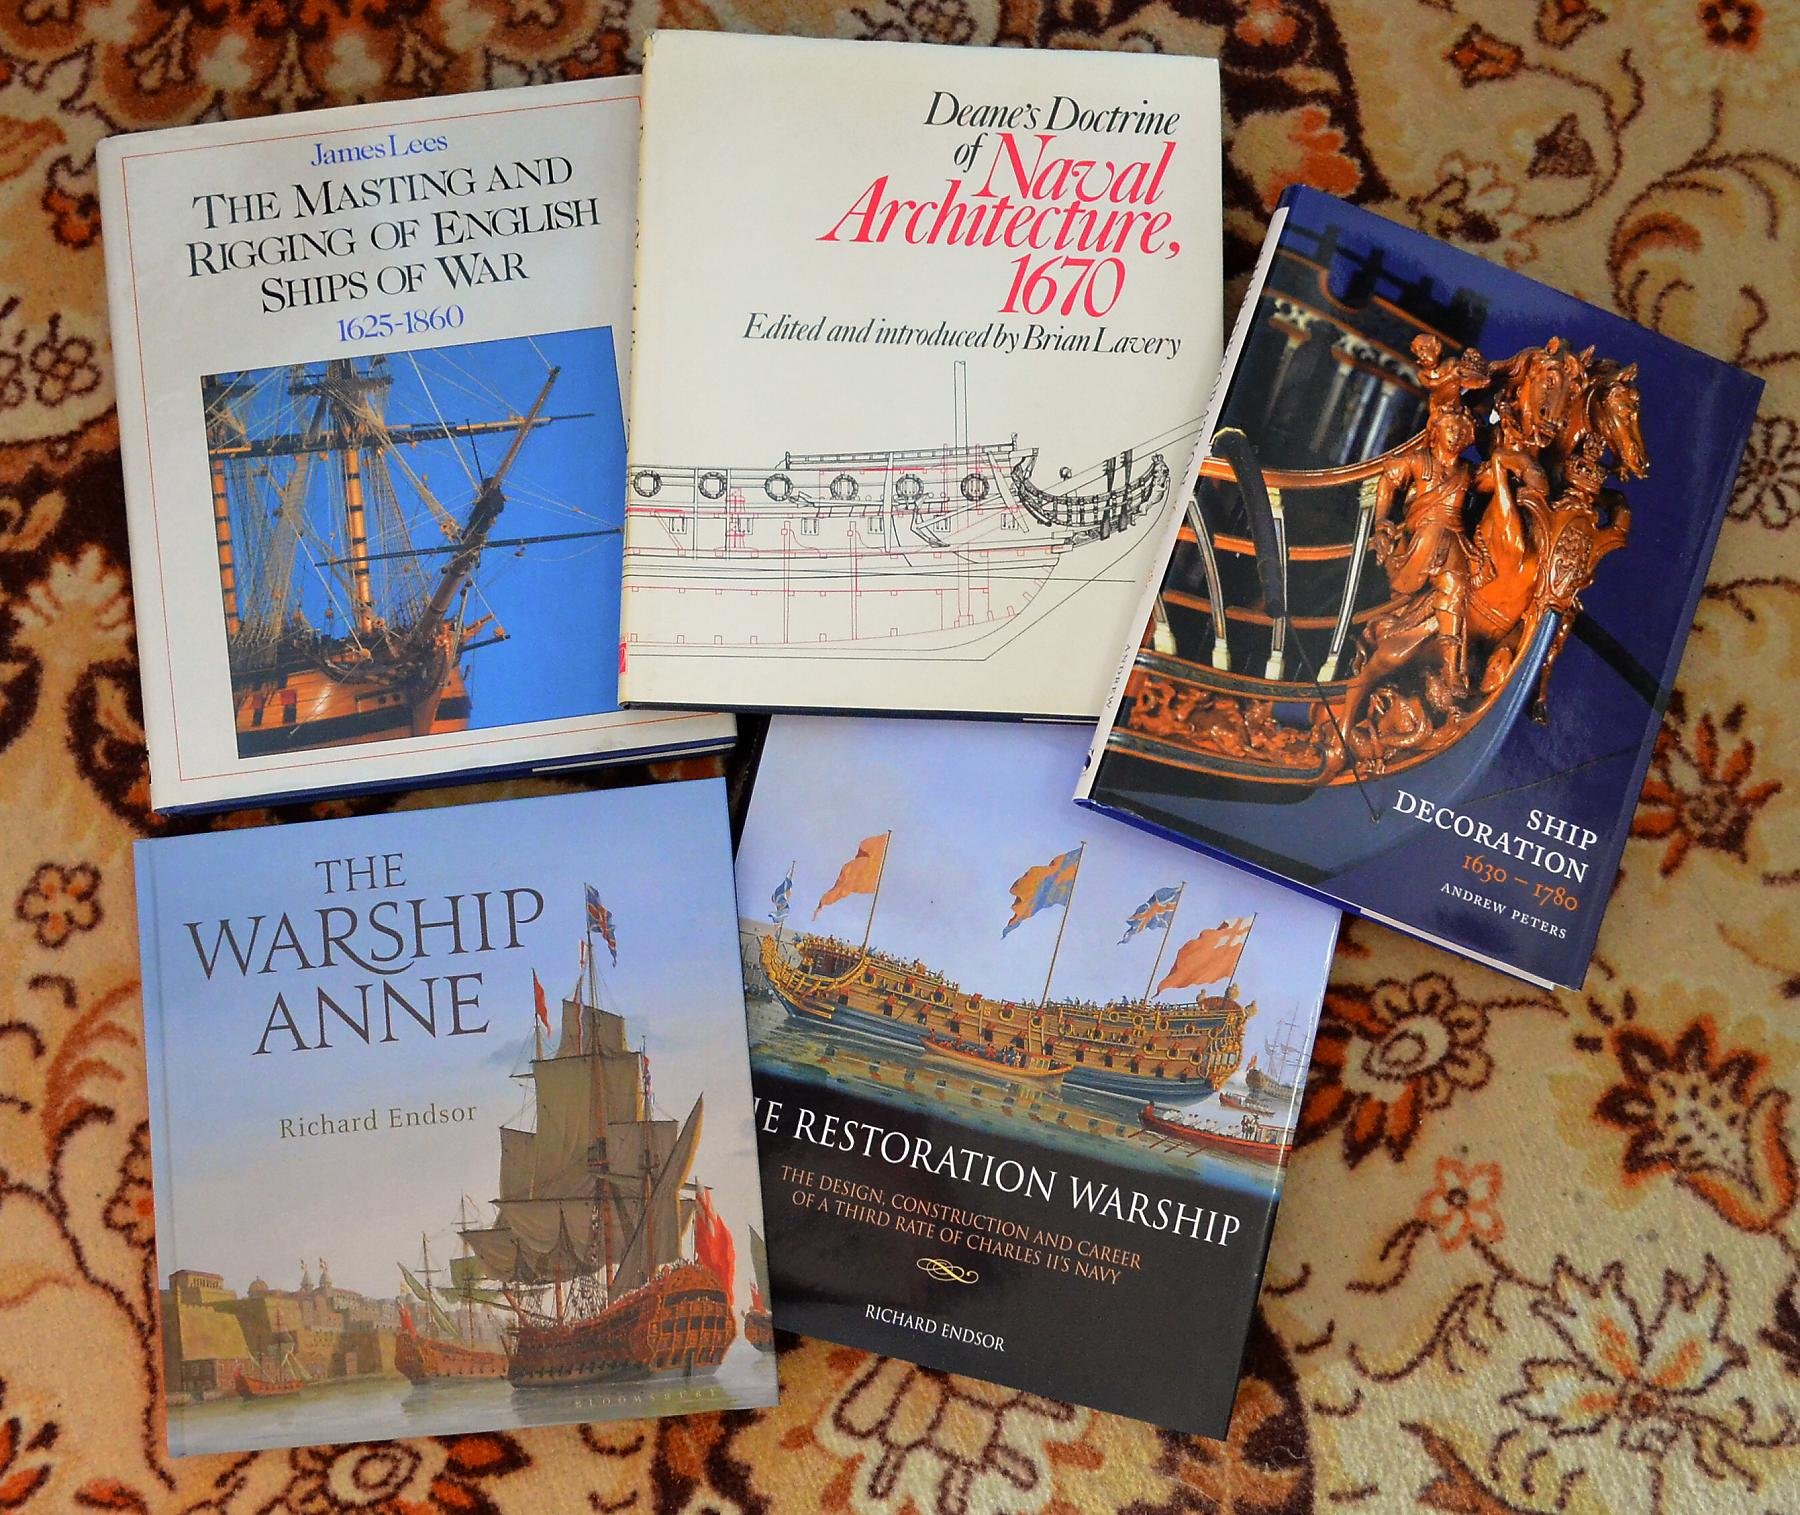
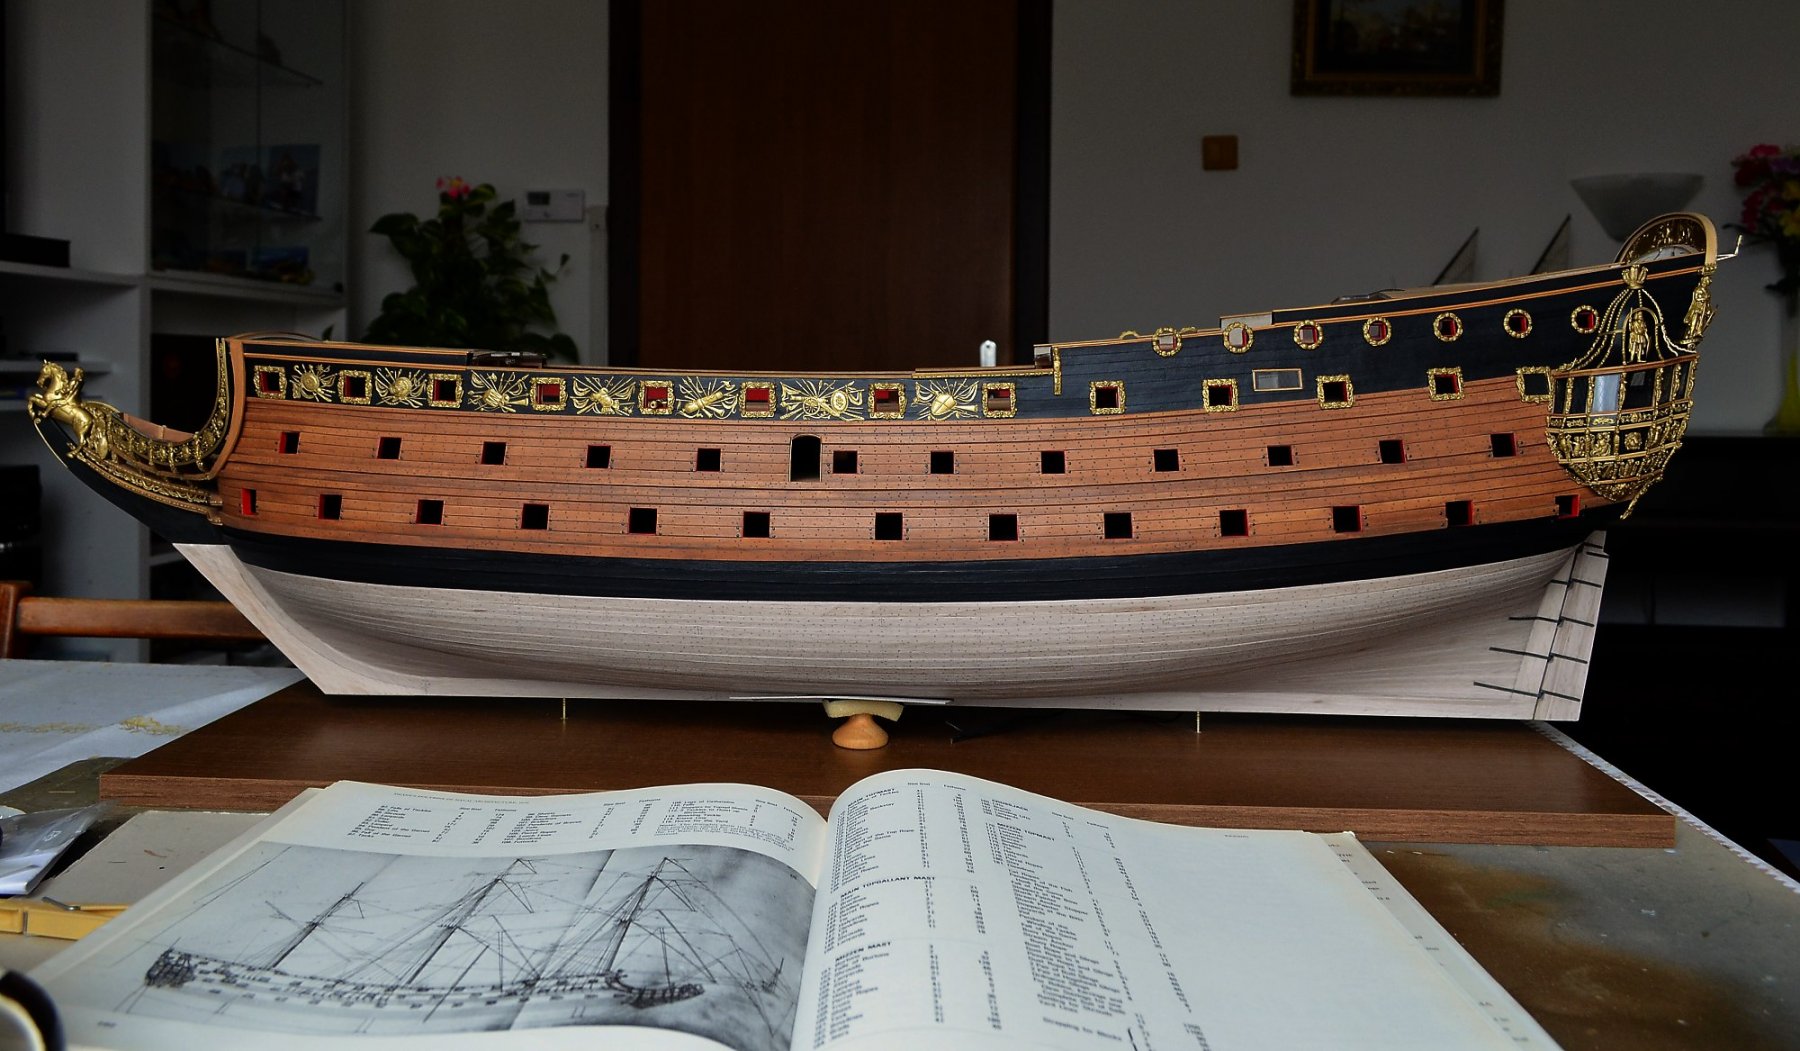
Hello dear friends, I do appreciate your kind words and comments a lot. Thank you all very much. Well, I followed the museum models from that period and information from the books. First, I made much less treenails, but then I added them in the right amount on all ribs as advised by my advisor and top expert Kpt.KL, who describes this theme very well on the Czech forum. Maybe it will help you, here are some links: https://www.modelforum.cz/viewtopic.php?f=177&t=107202&start=90#p2162392 https://www.modelforum.cz/viewtopic.php?f=177&t=110763&start=630#p2159976 https://www.modelforum.cz/viewtopic.php?f=177&t=110763&start=630#p2160401 I use these books: Goodwin, Peter: The Construction and Fitting of the Sailing Man of War 1650-1850. Lavery, Brian: The Arming and Fitting of English Ships of War 1600-1815. Lees, James: The Masting and Rigging of English Ships of War, 1625-1860. Endsor, Richard: The Restoration Warship: The Design, Construction and Career of a Third Rate of Charles II's Navy. Endsor, Richard: The Warship Anne: An illustrated history. Deane, Anthony and Lavery, Brian: Deane's "Doctrine of Naval Architecture 1670. Peters, Andrew: Ship Decoration 1630-1780. Anderson, R.C.: The Rigging of Ships in the Days of the Spritsail Topmast 1600-1720. It is not easy to describe my technology in words, so I will ask my husband to take a short video tutorial. I'll give the video here for you all.😎 Best regards
- 1,035 replies
-
- 16
-
-
- royal katherine
- ship of the line
- (and 1 more)
-
HMS ROYAL KATHERINE 1664 by Doris - 1/55 - CARD
DORIS replied to DORIS's topic in - Build logs for subjects built 1501 - 1750
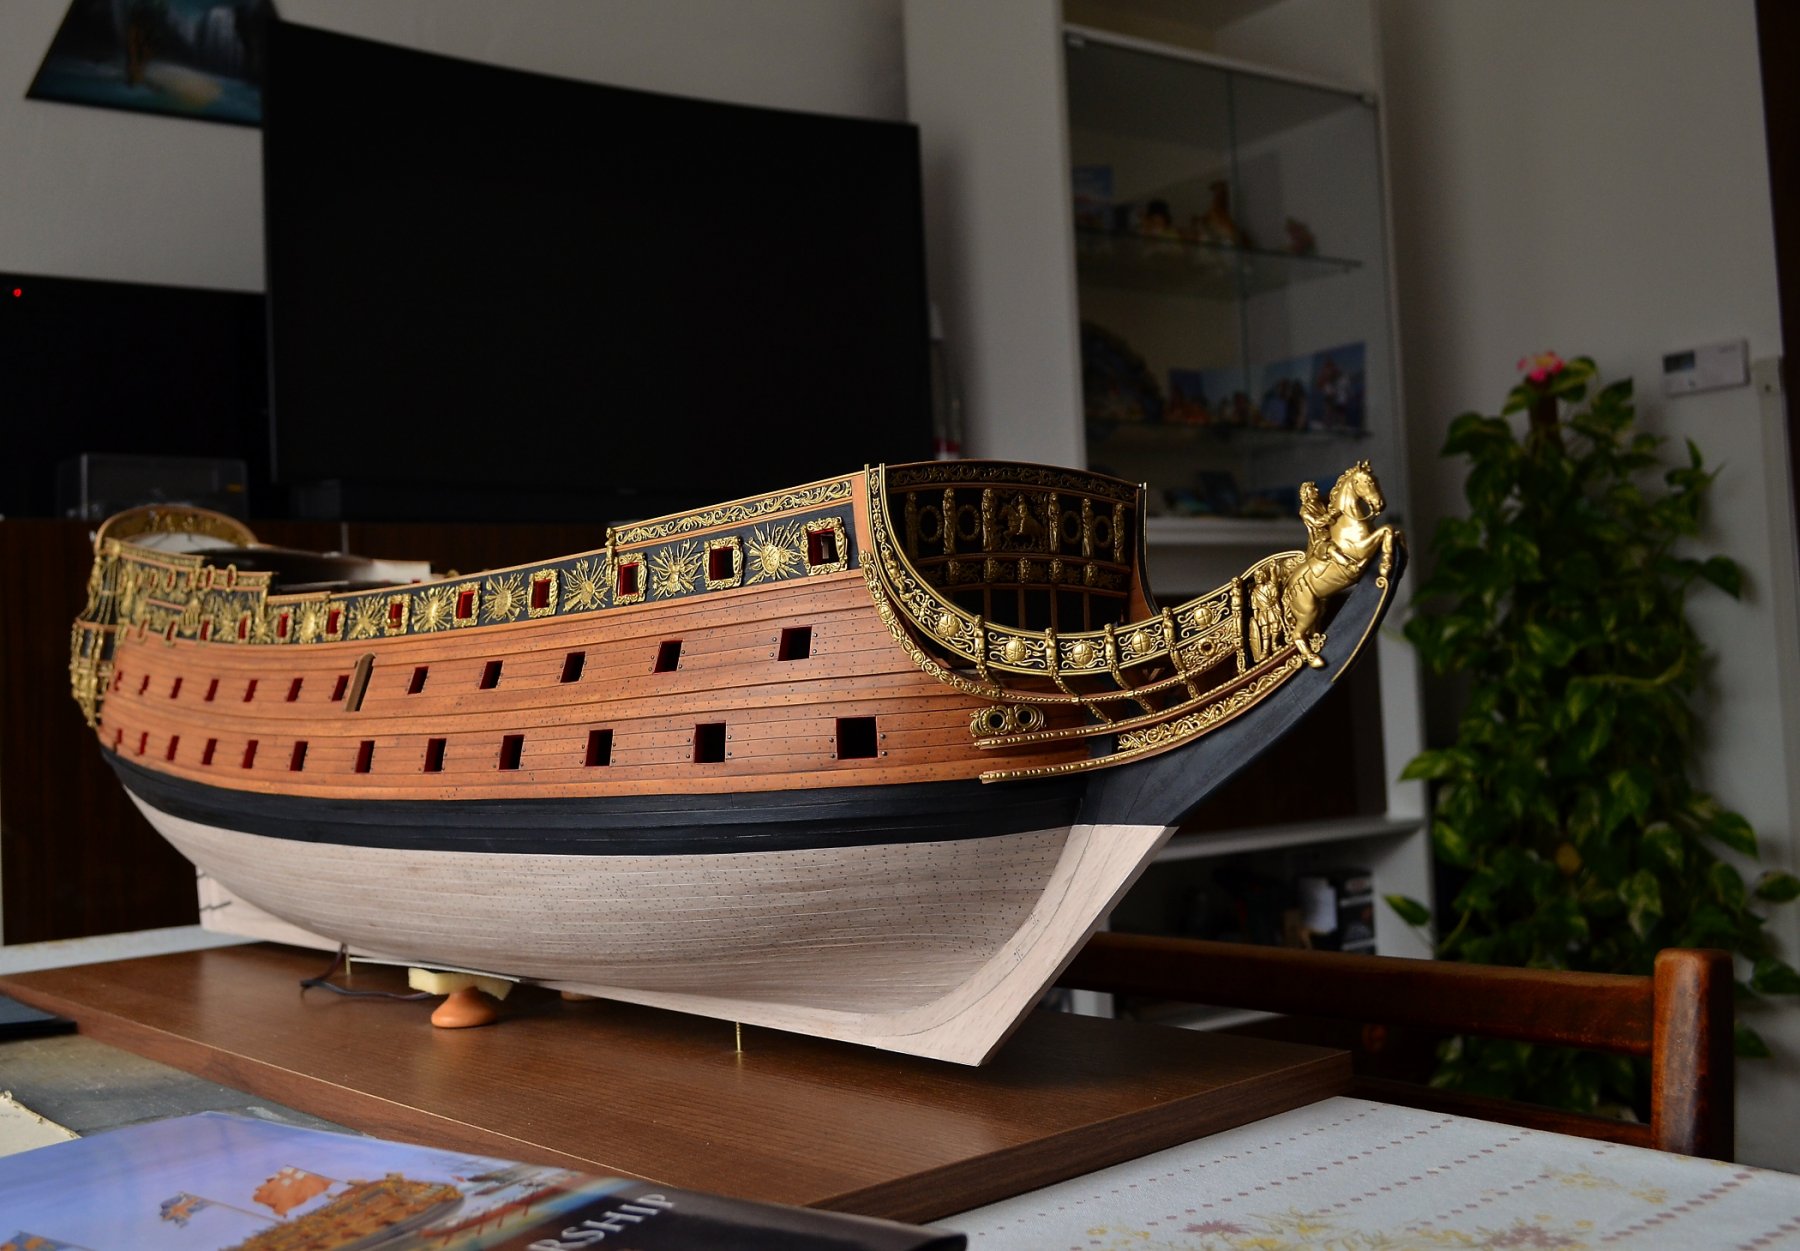
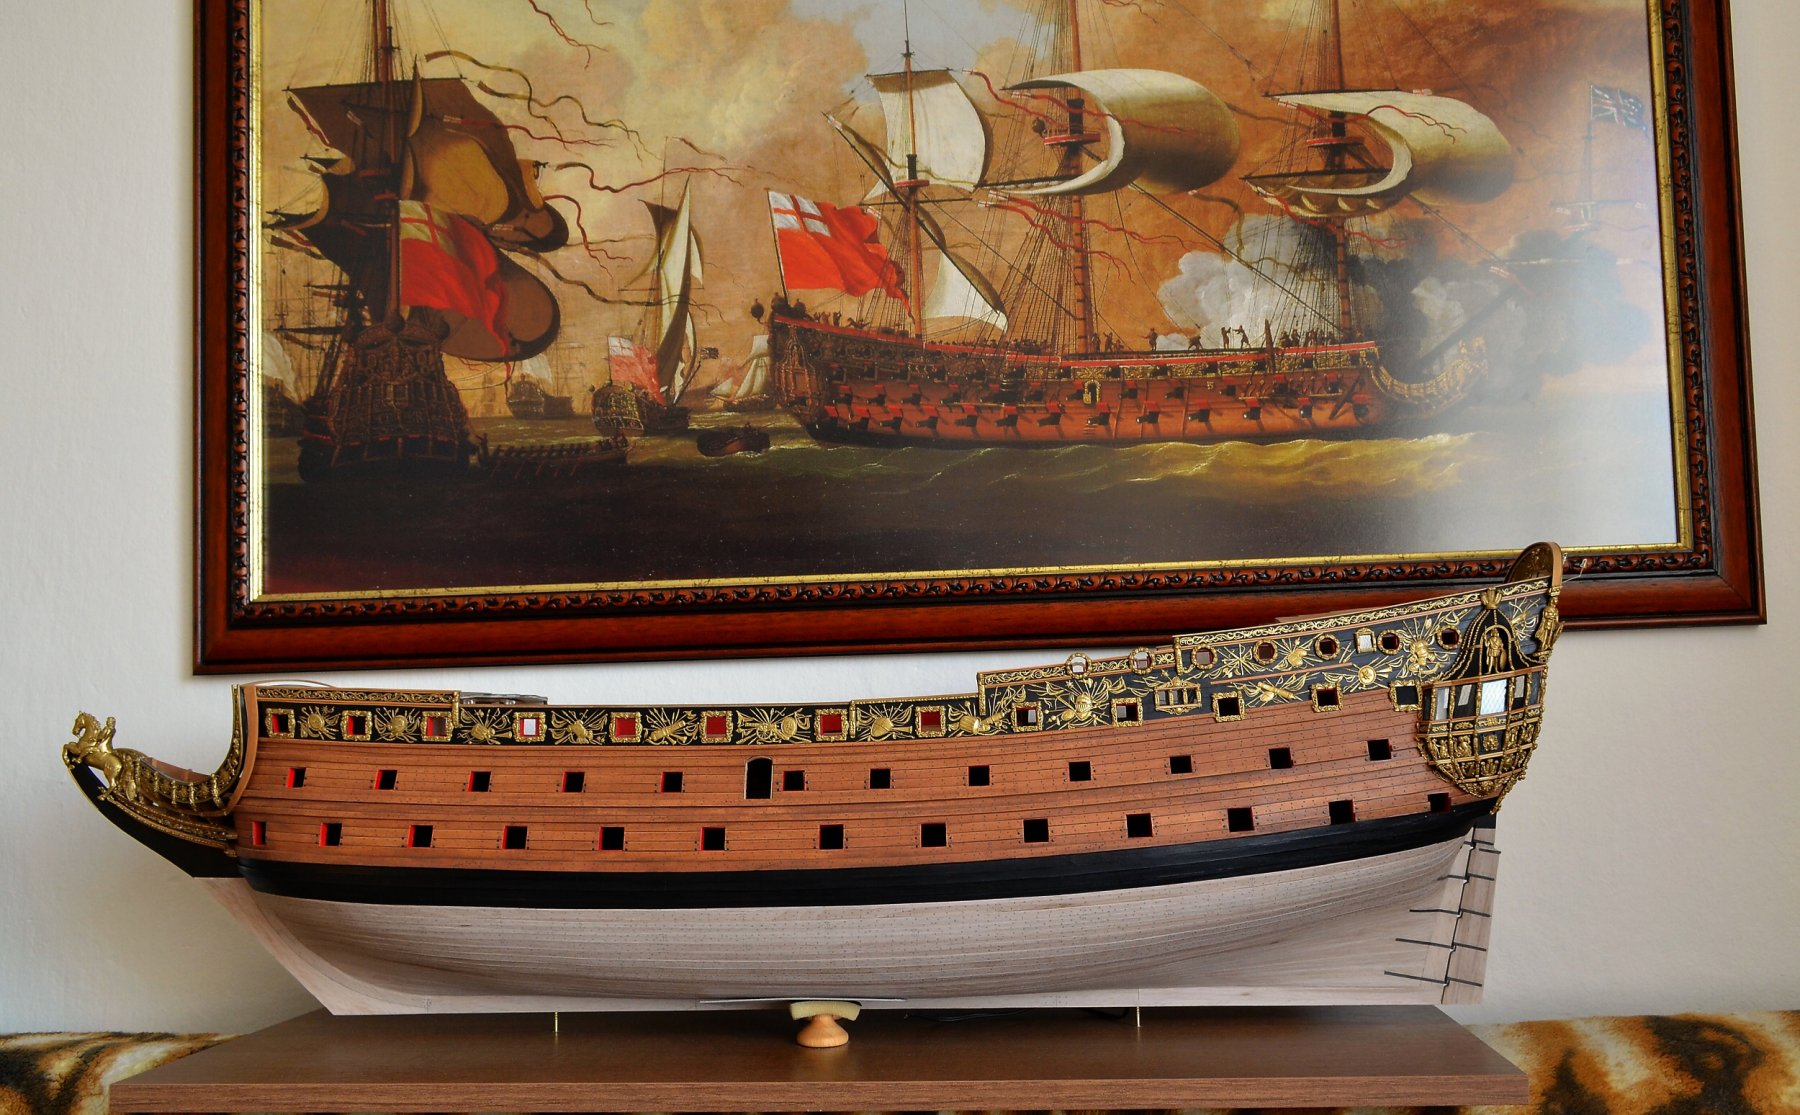
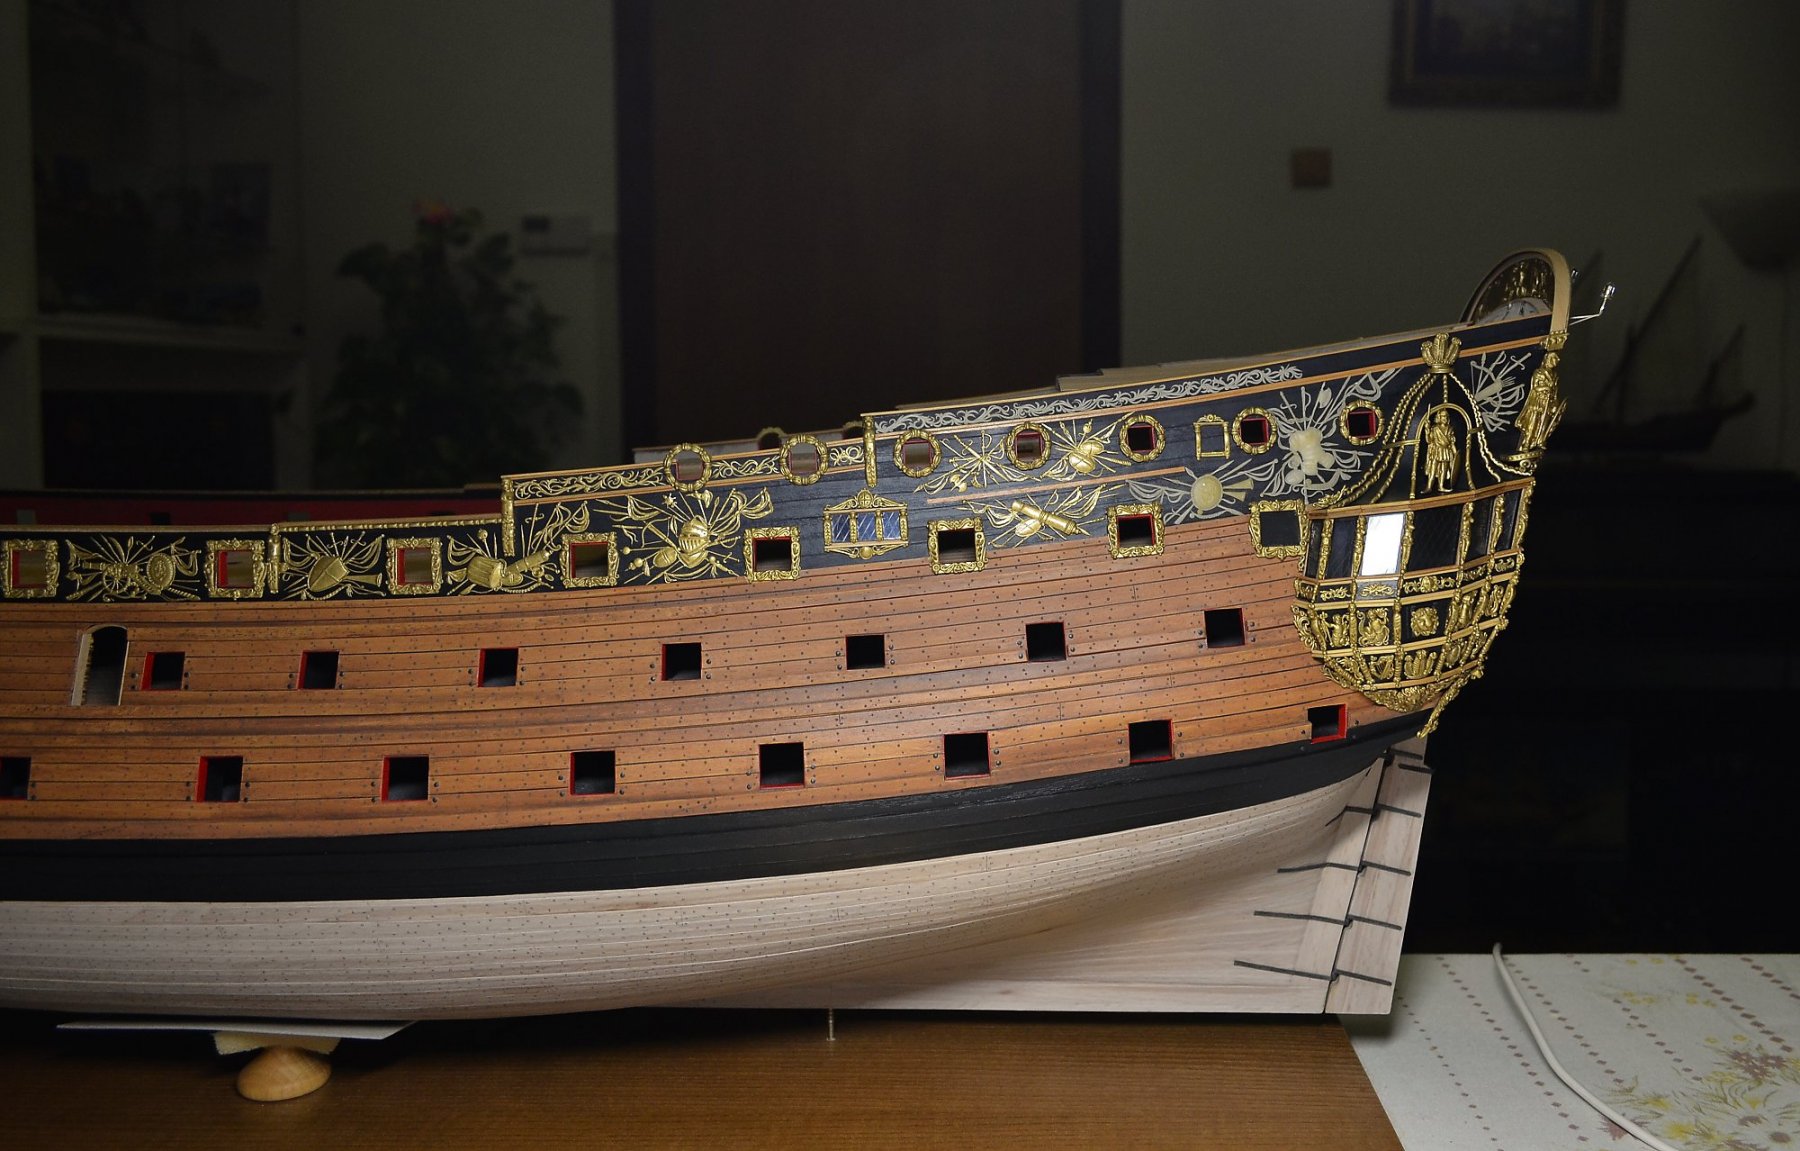
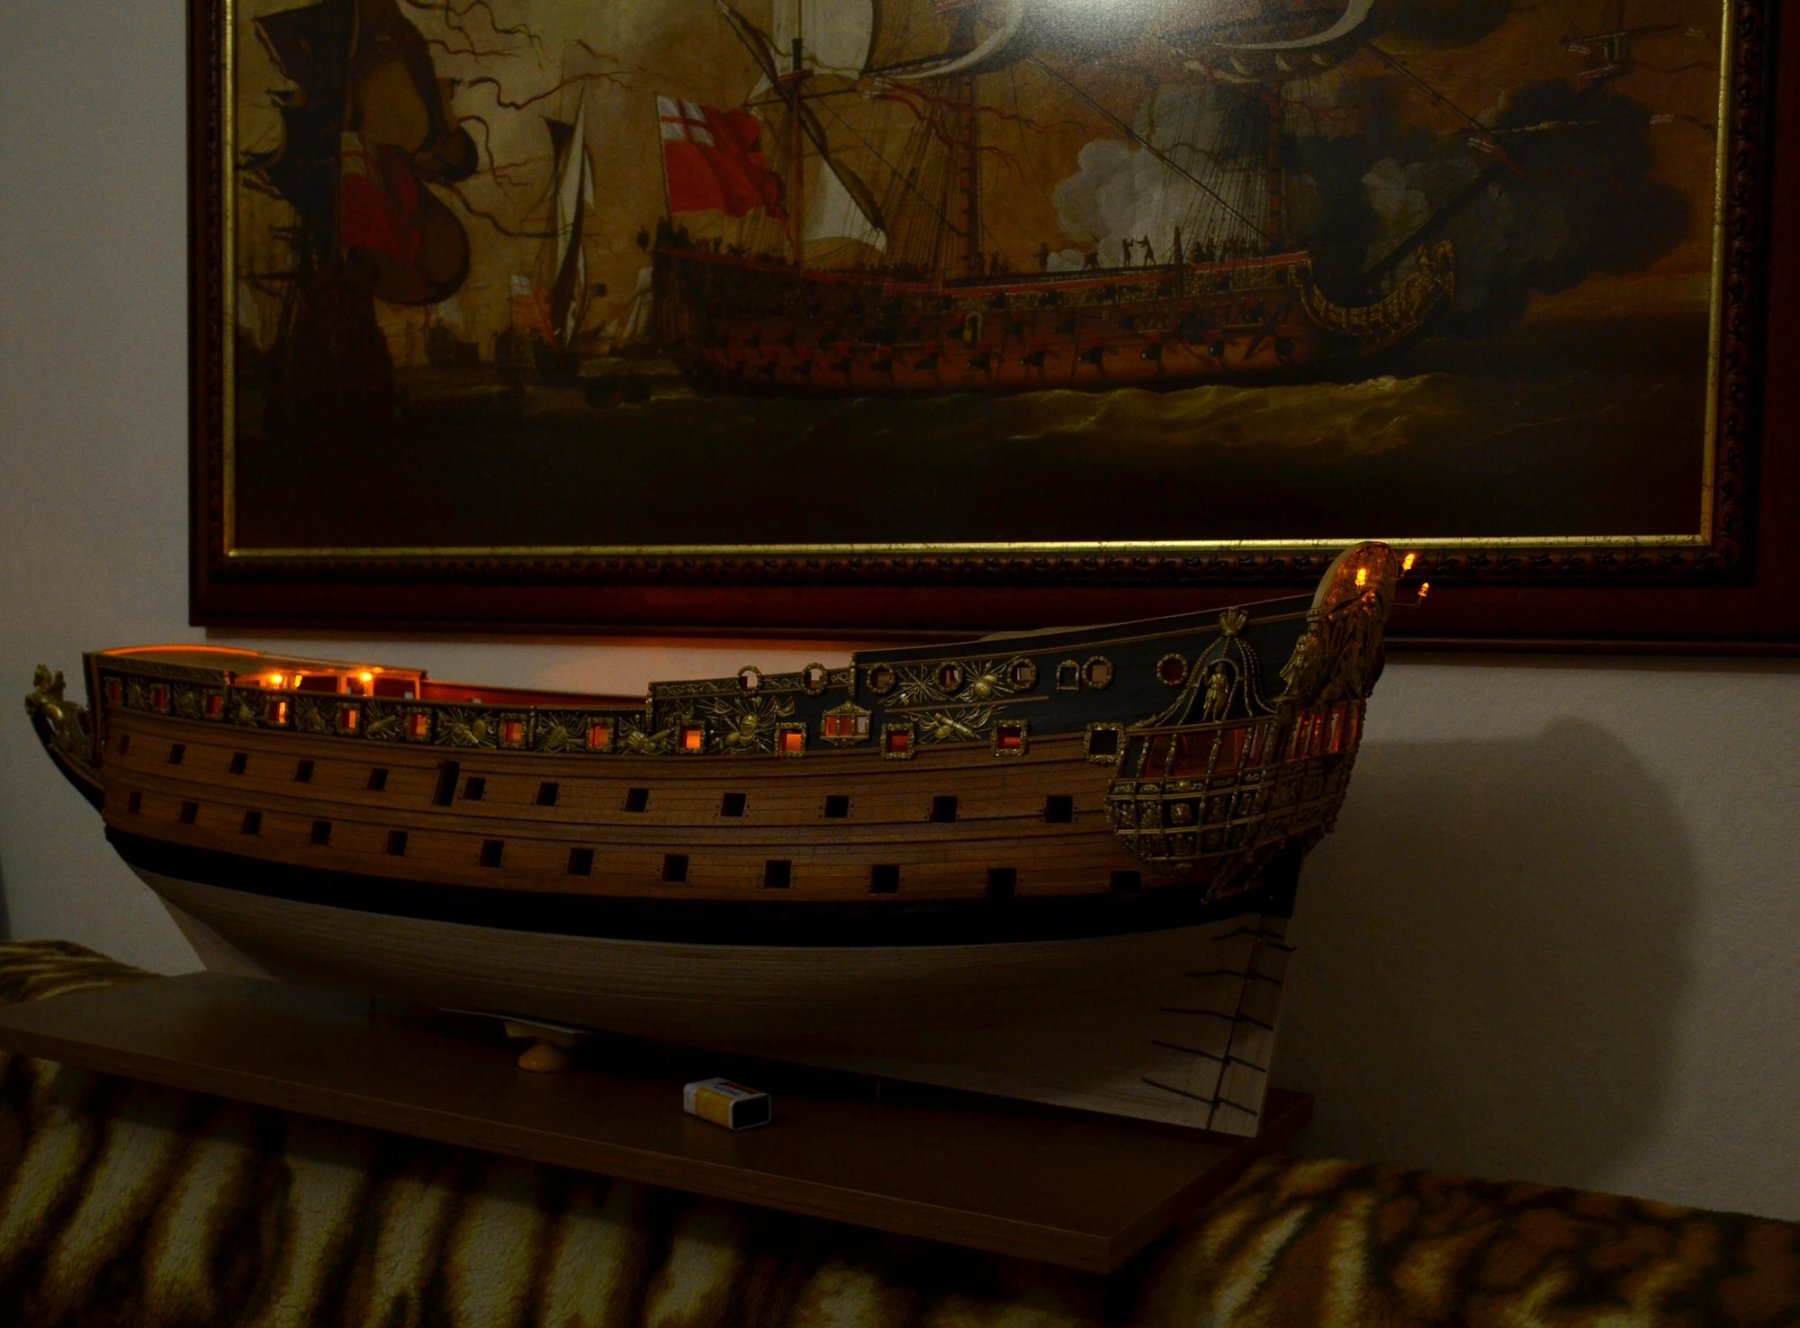
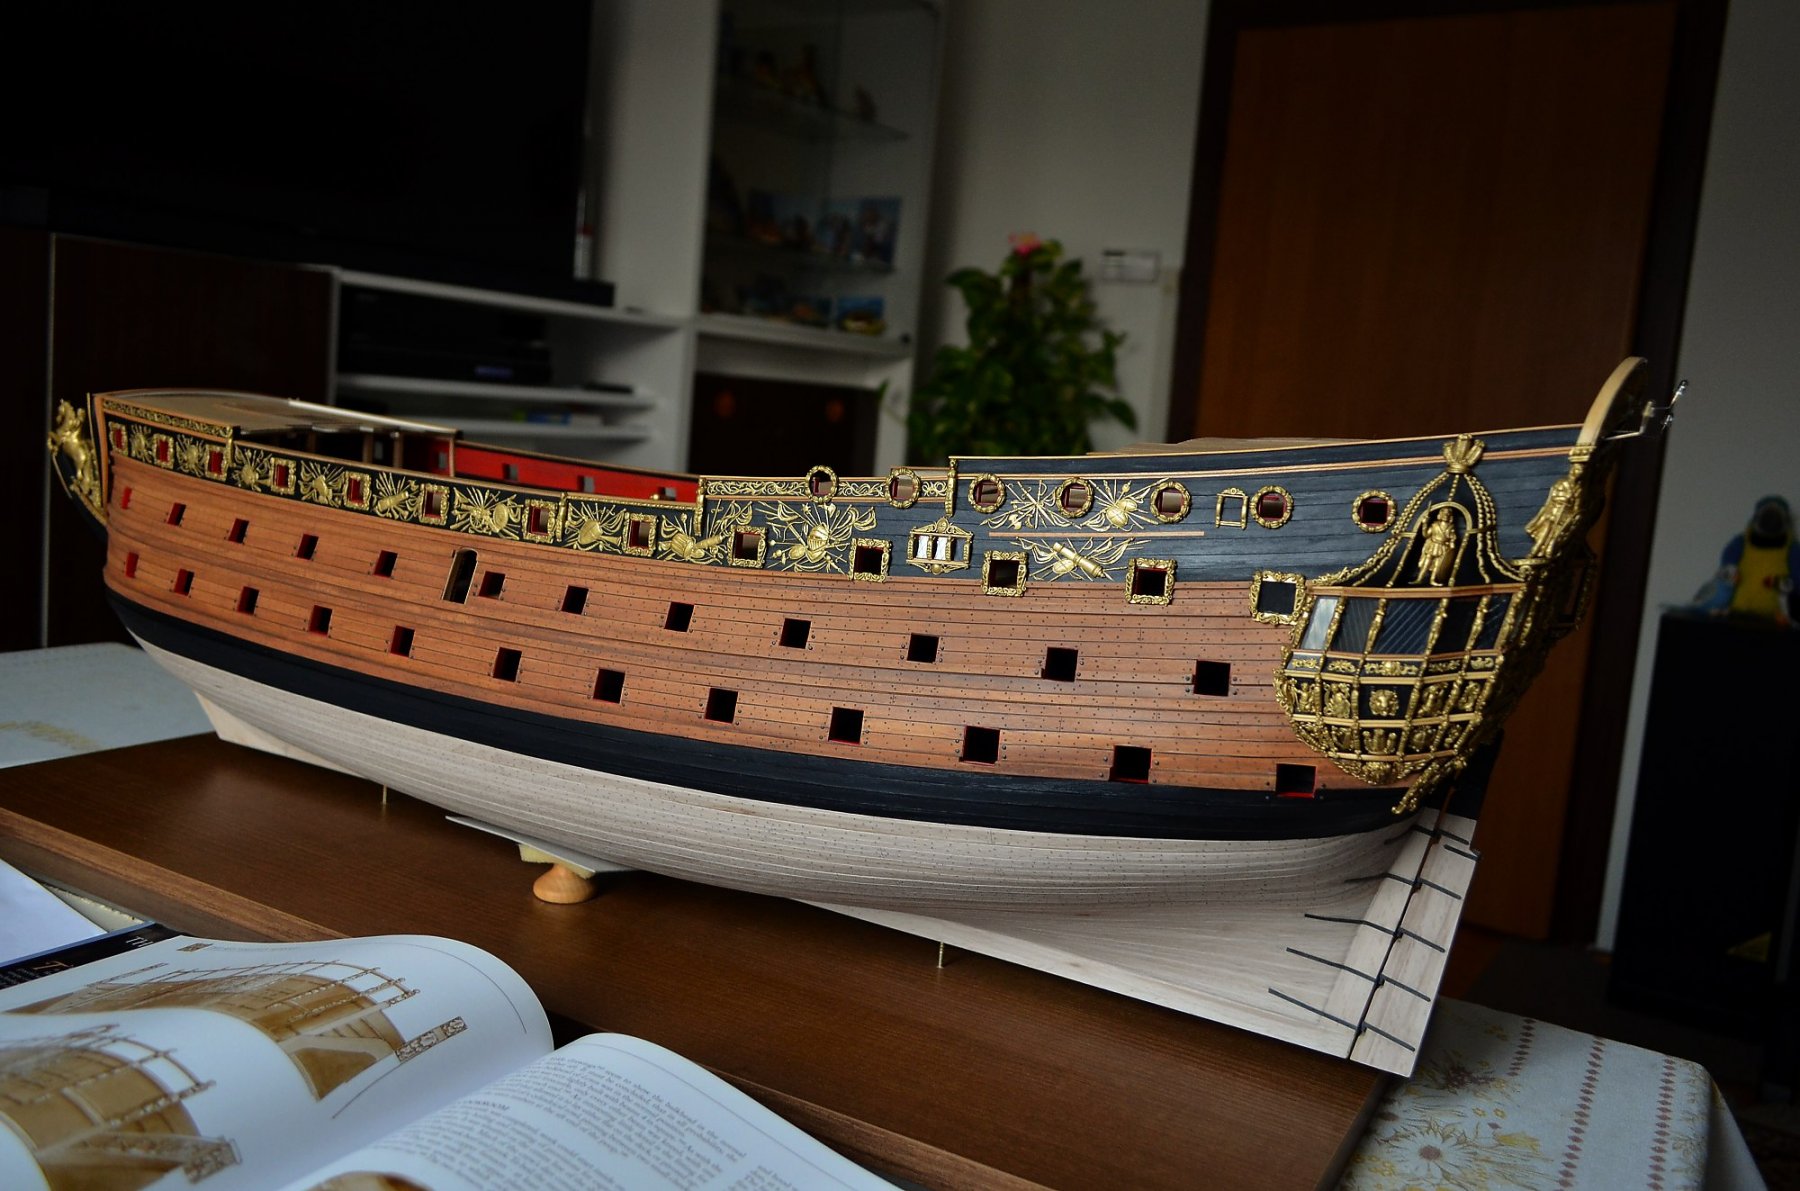
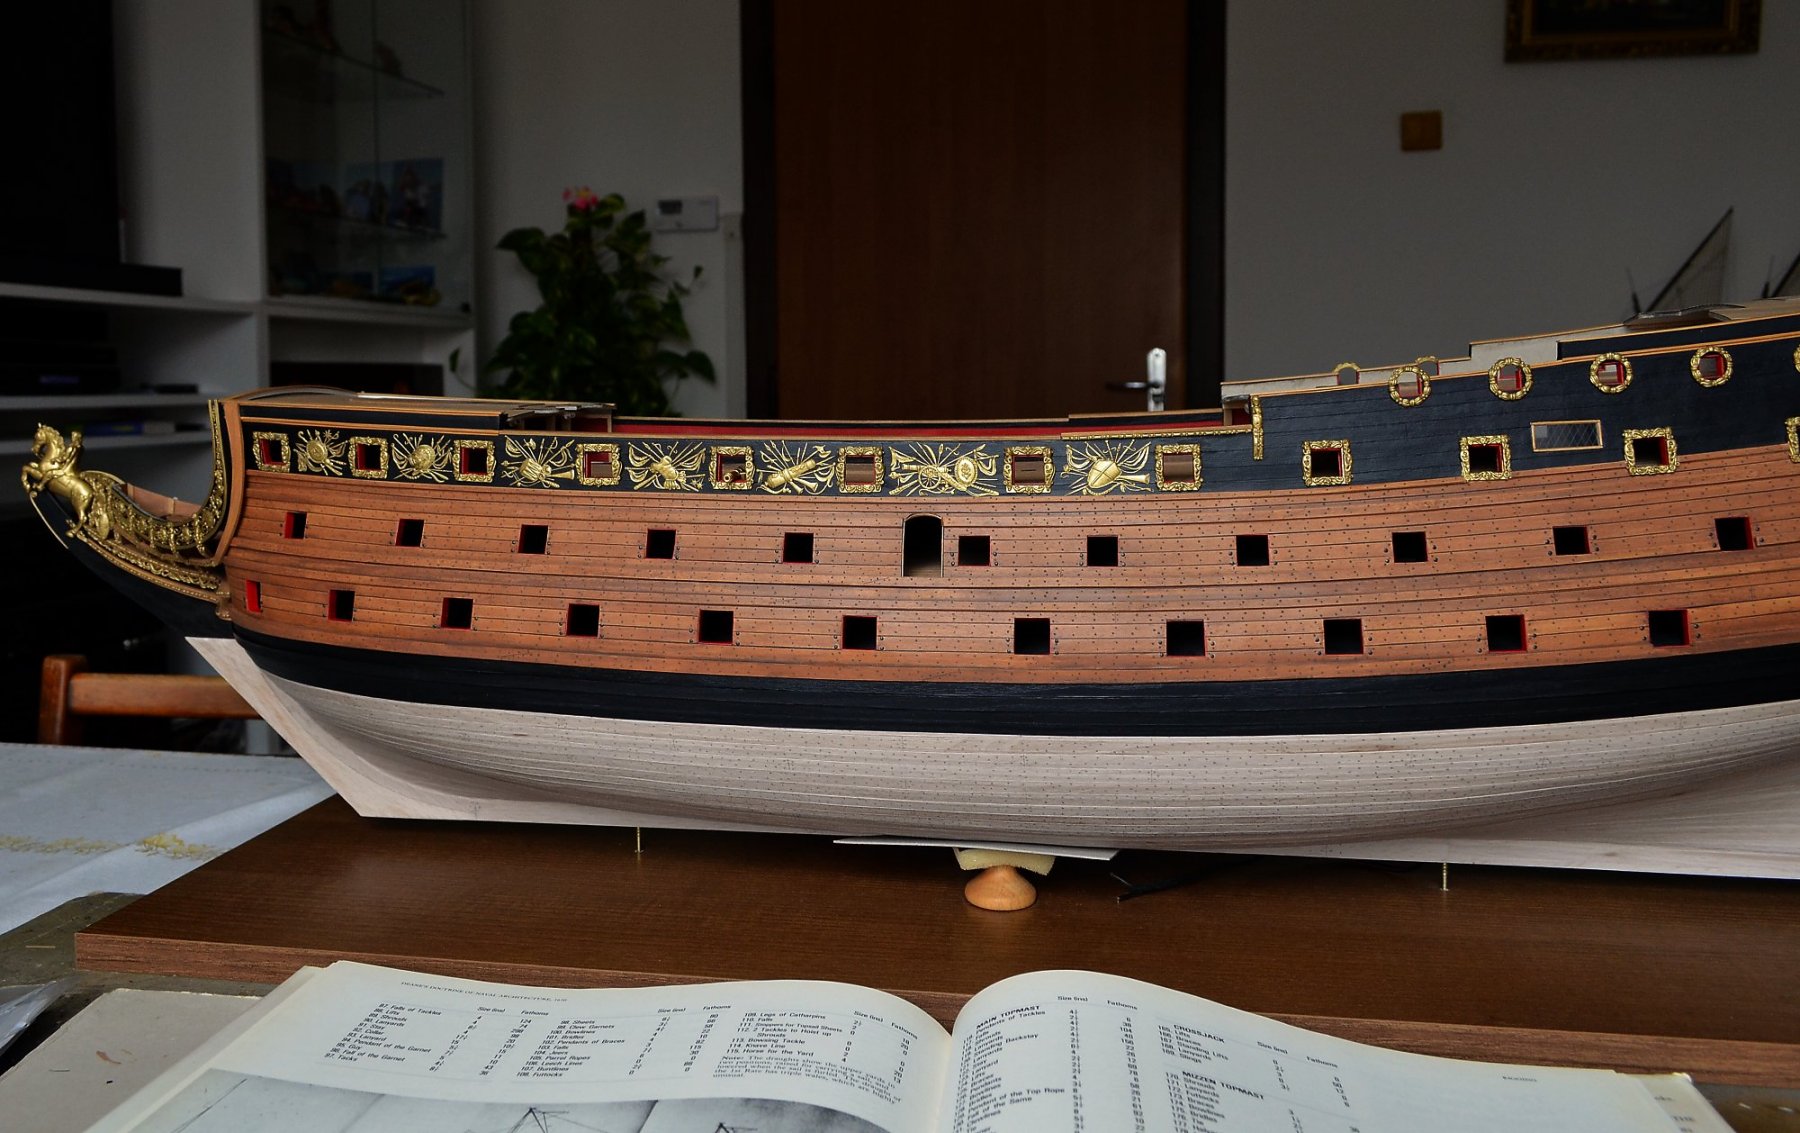
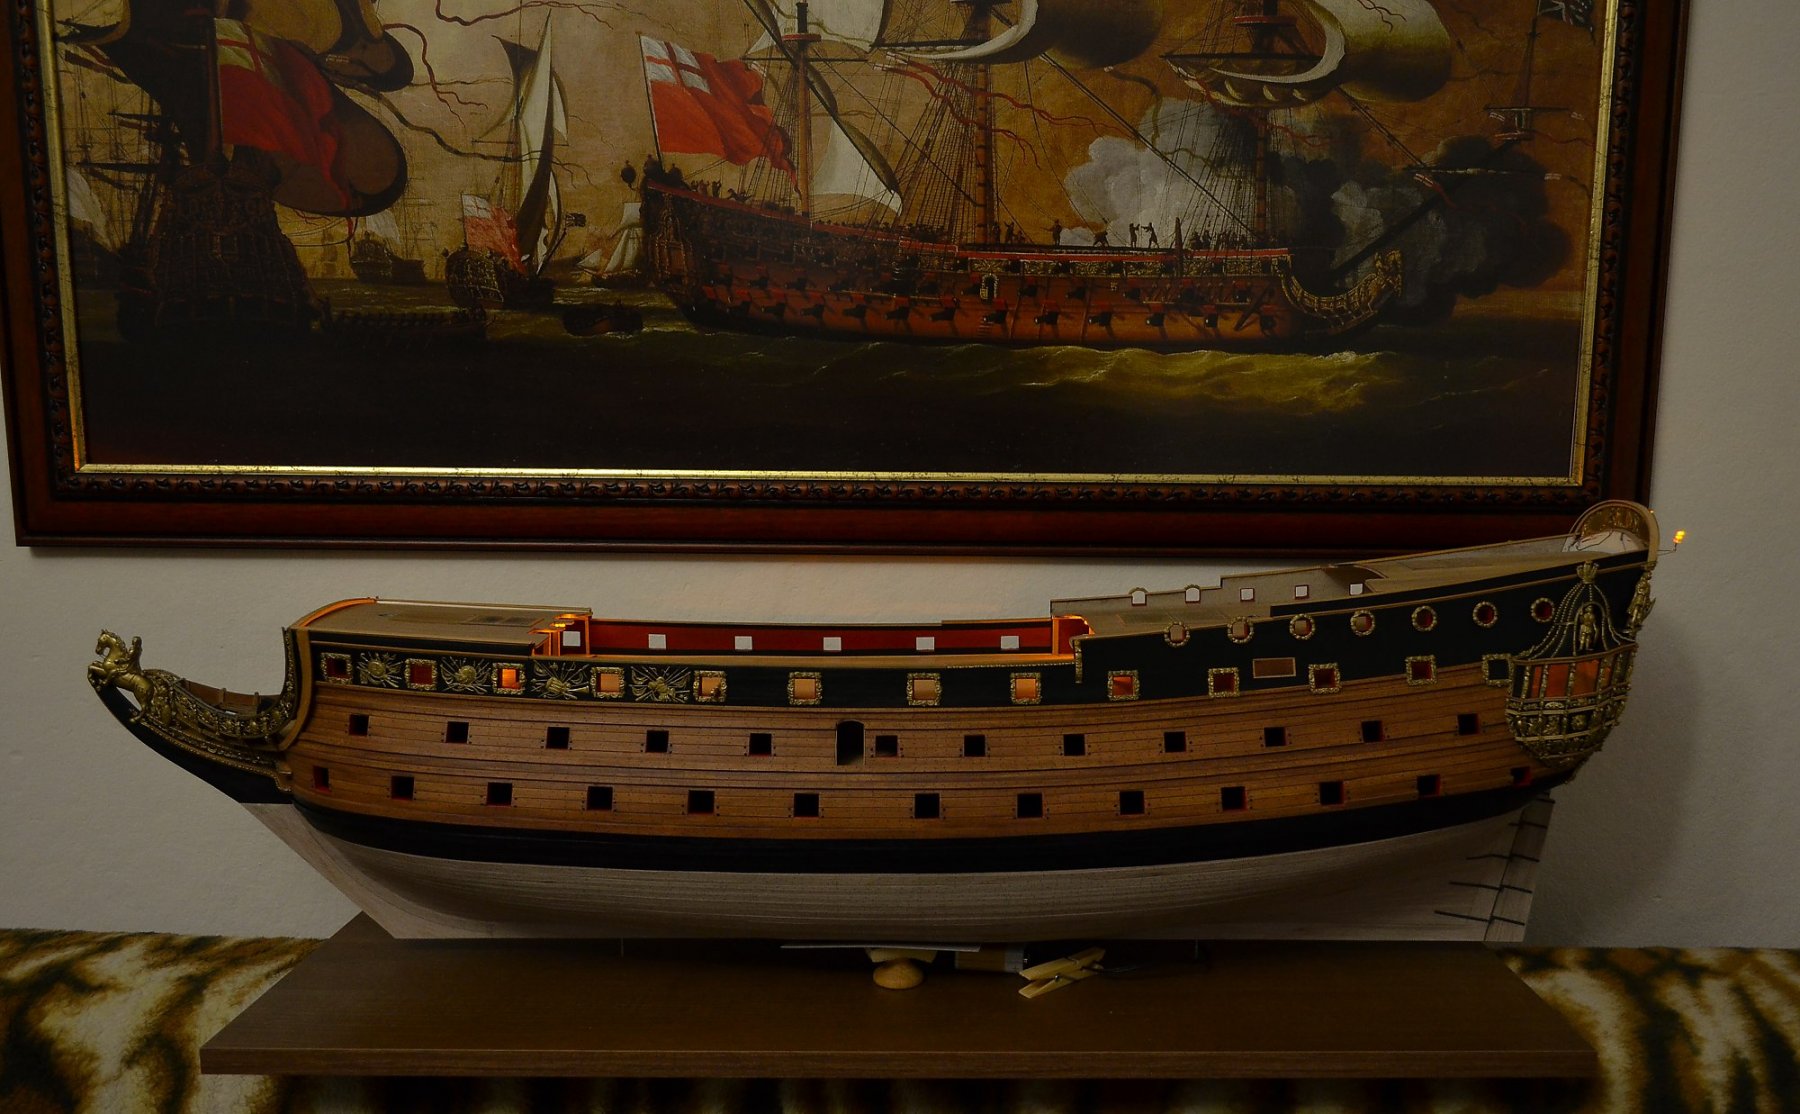
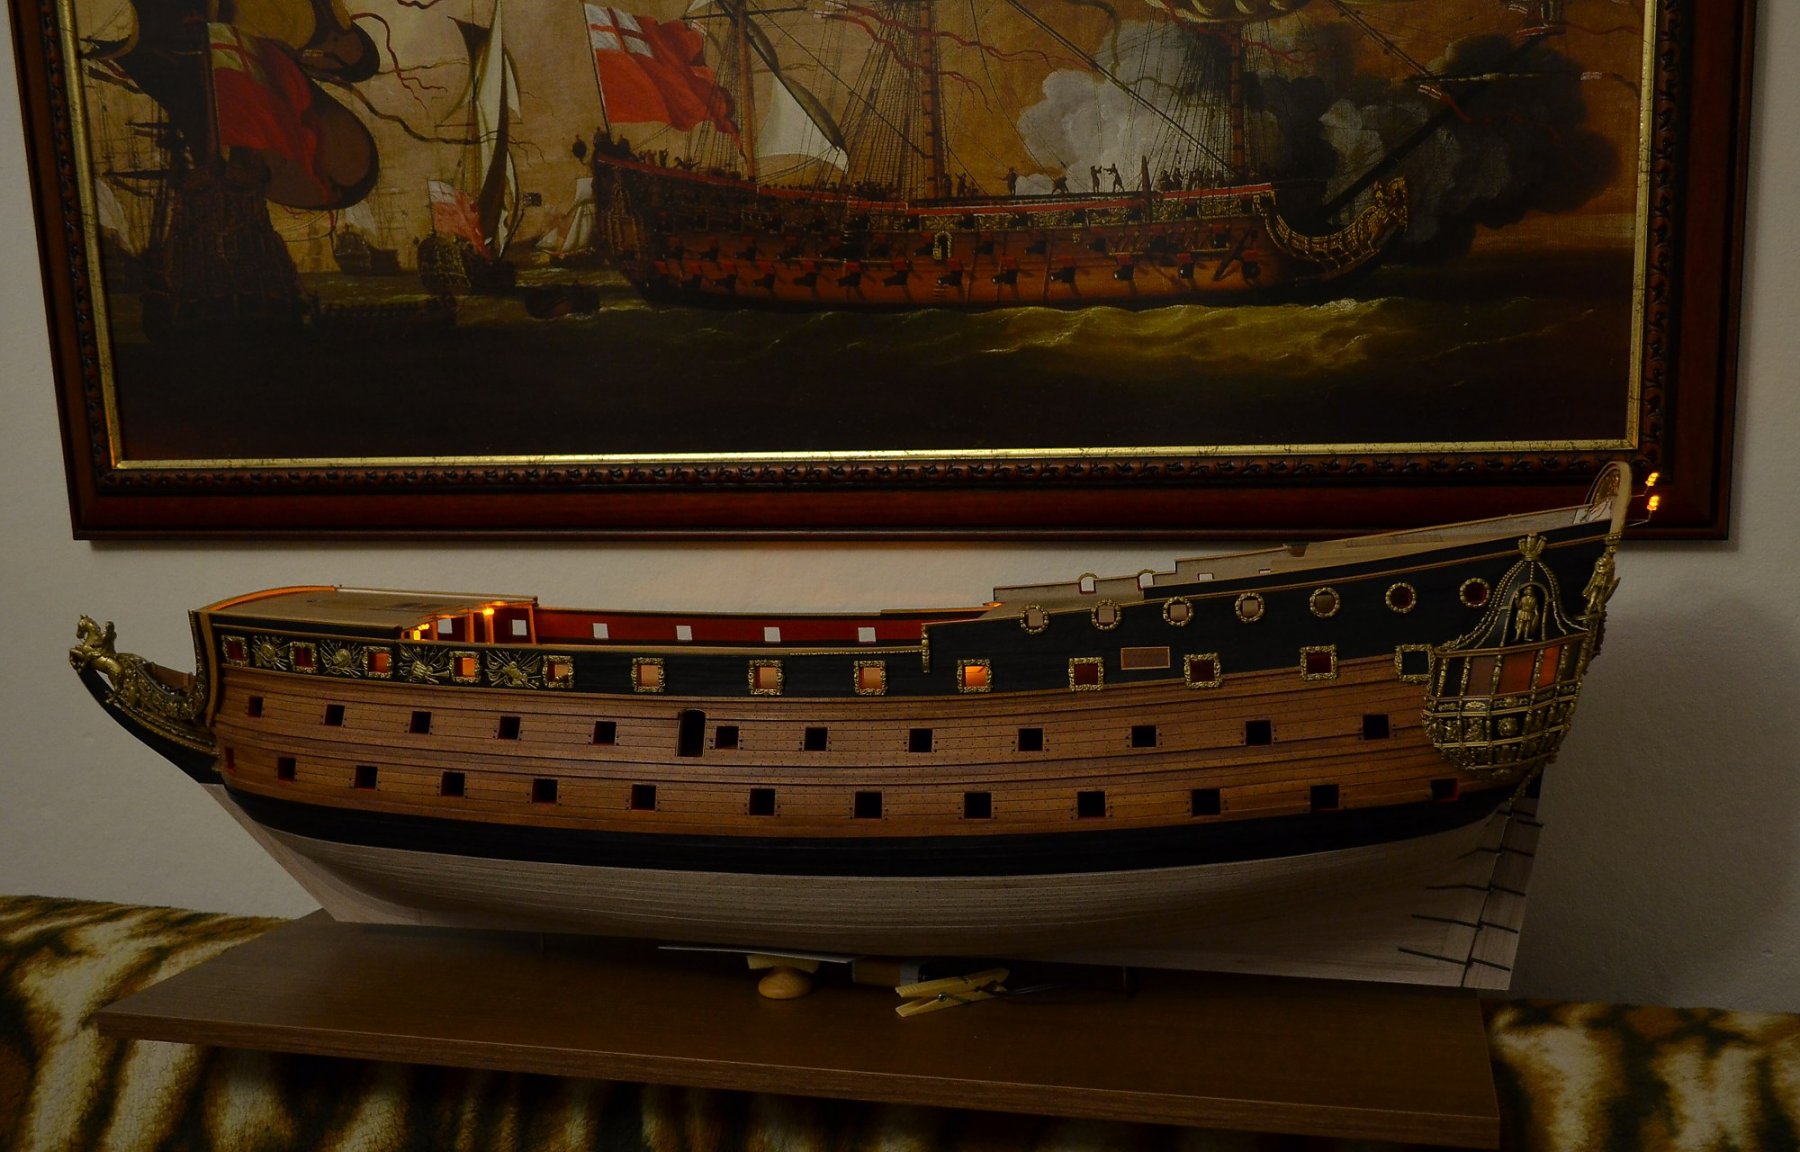
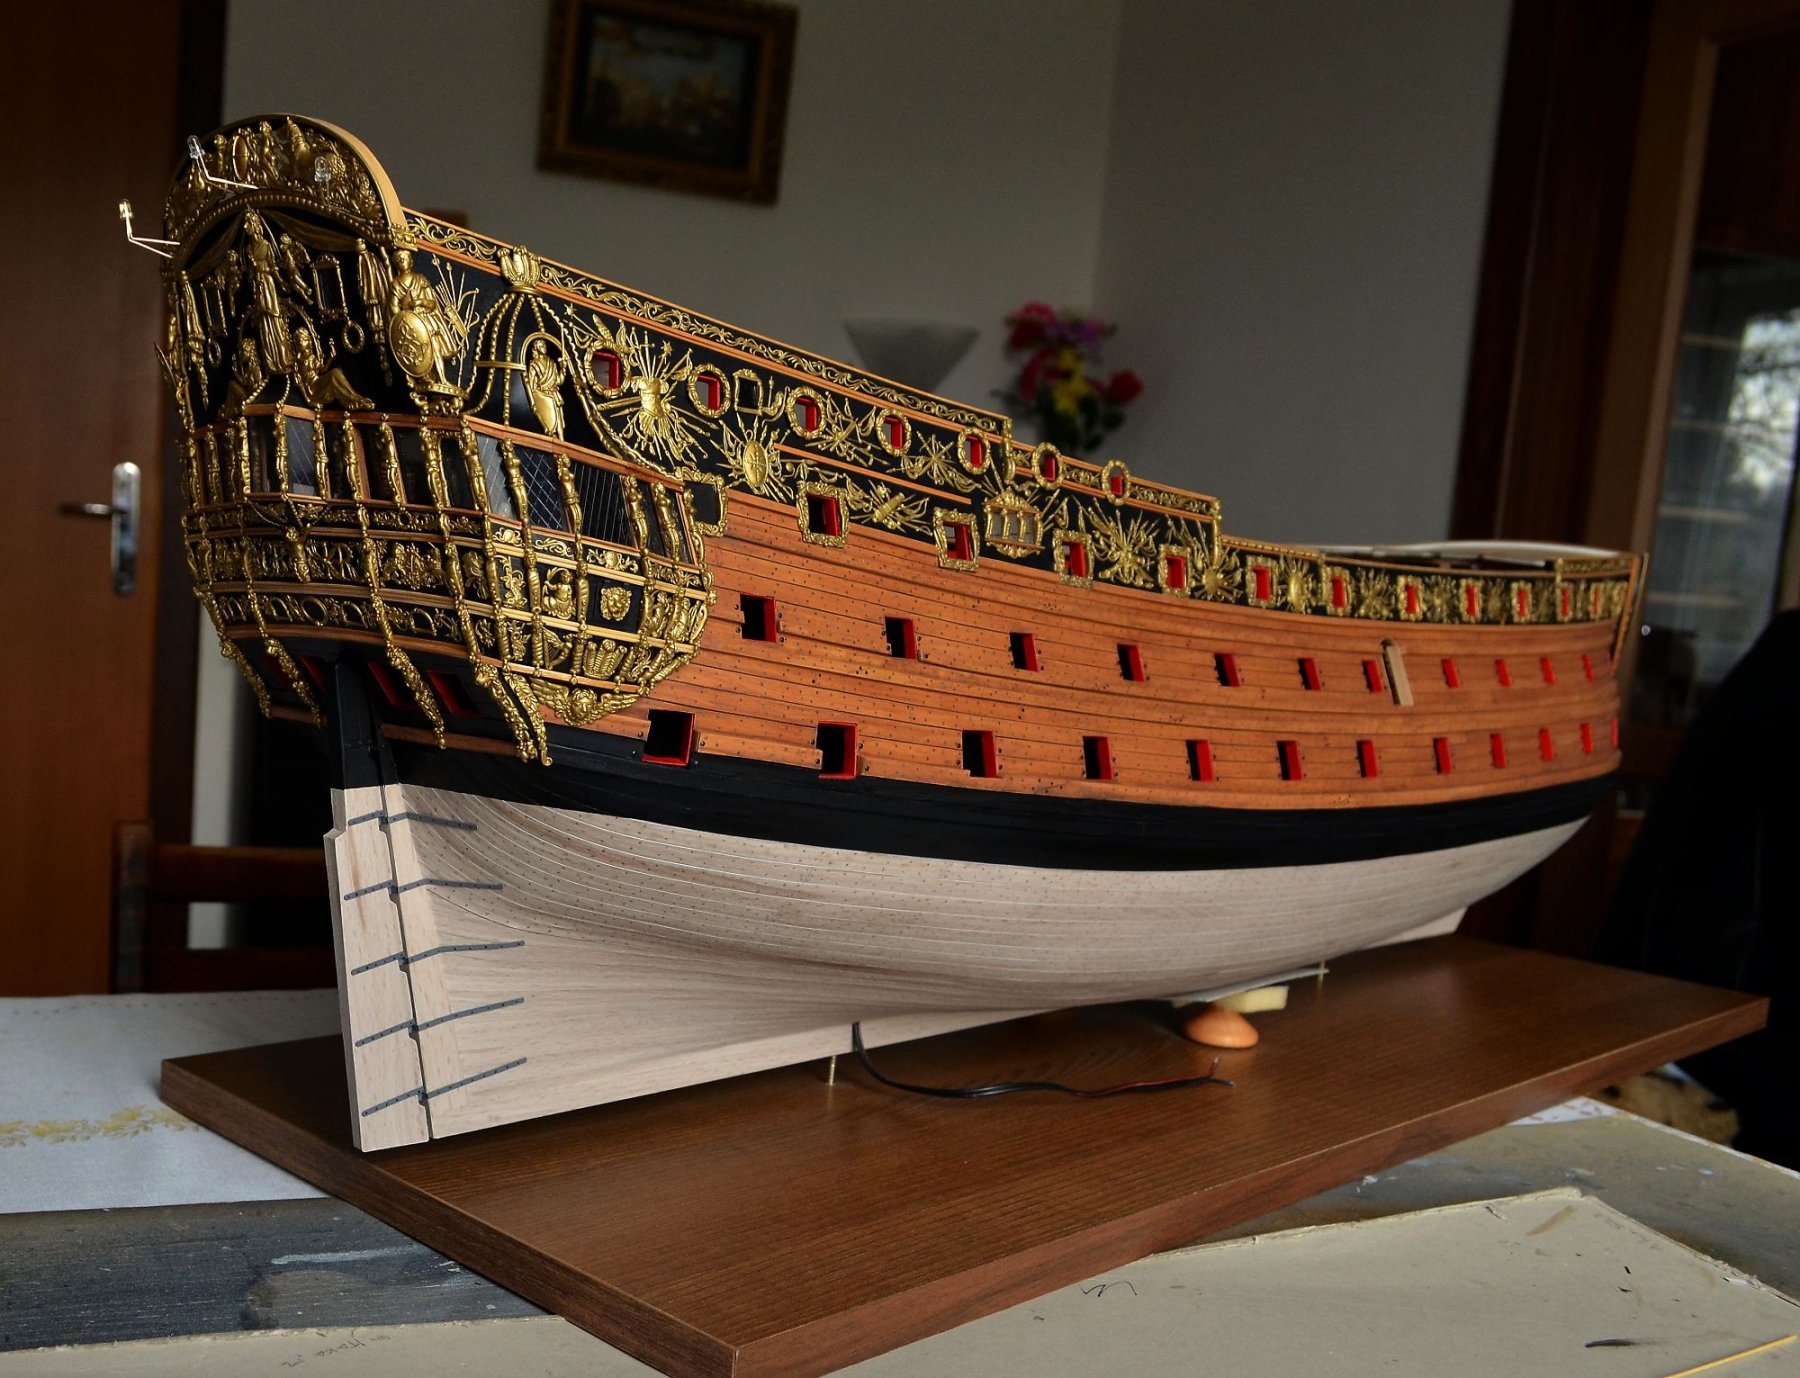
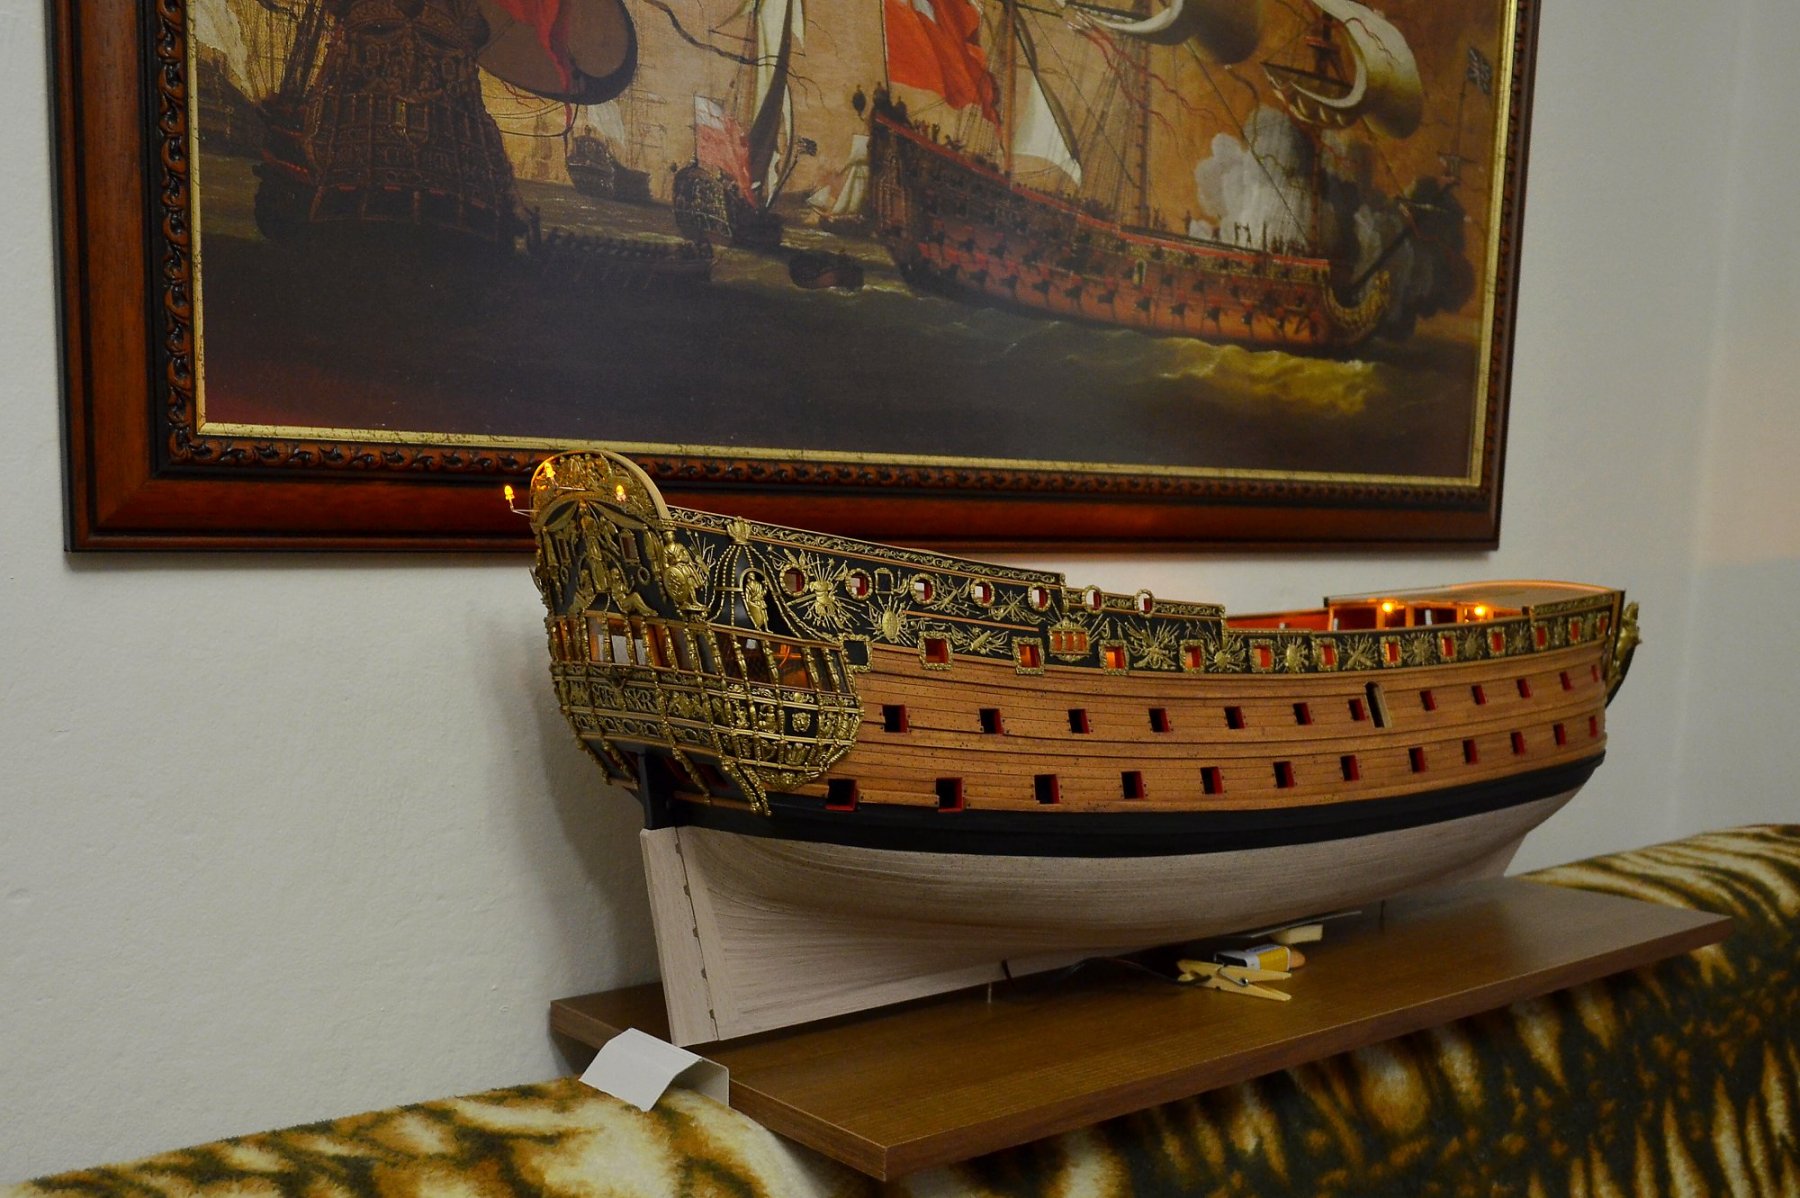
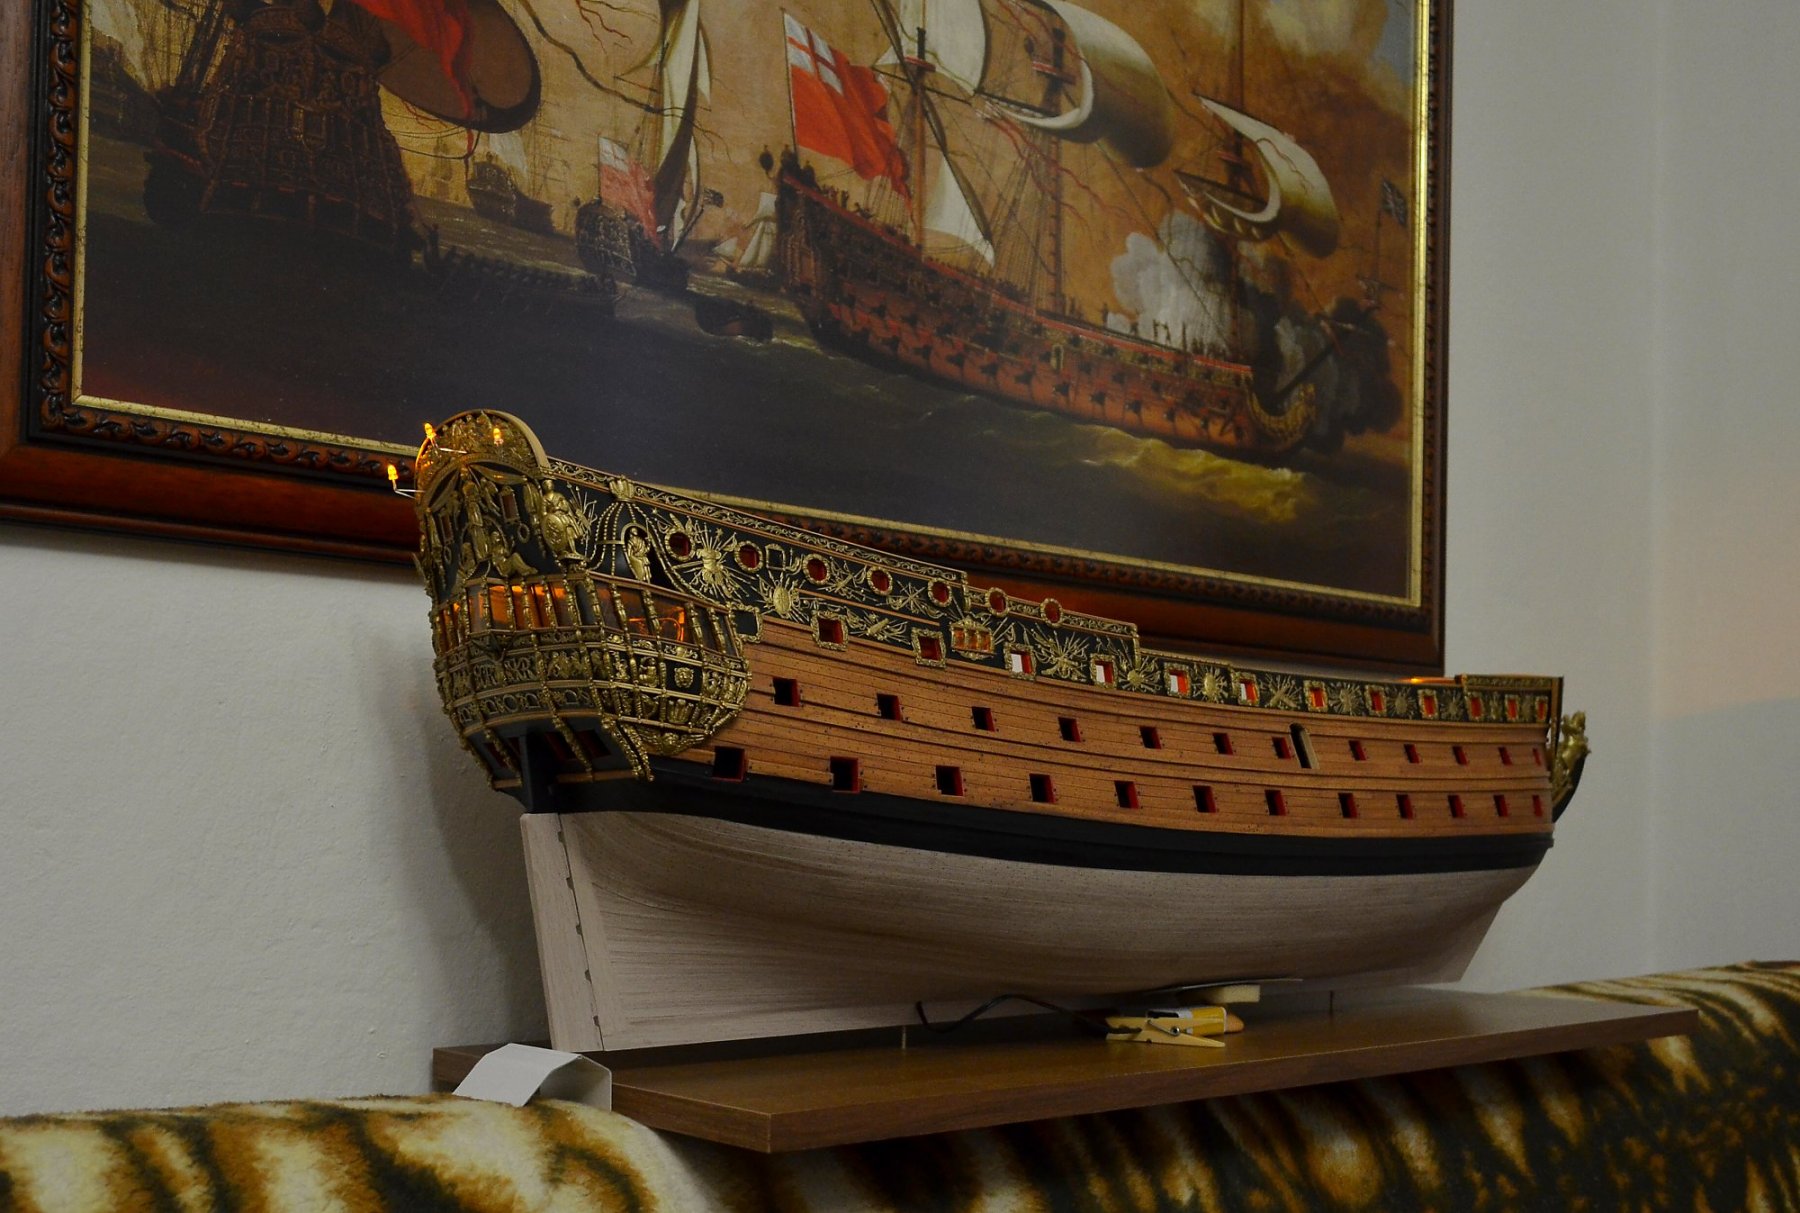
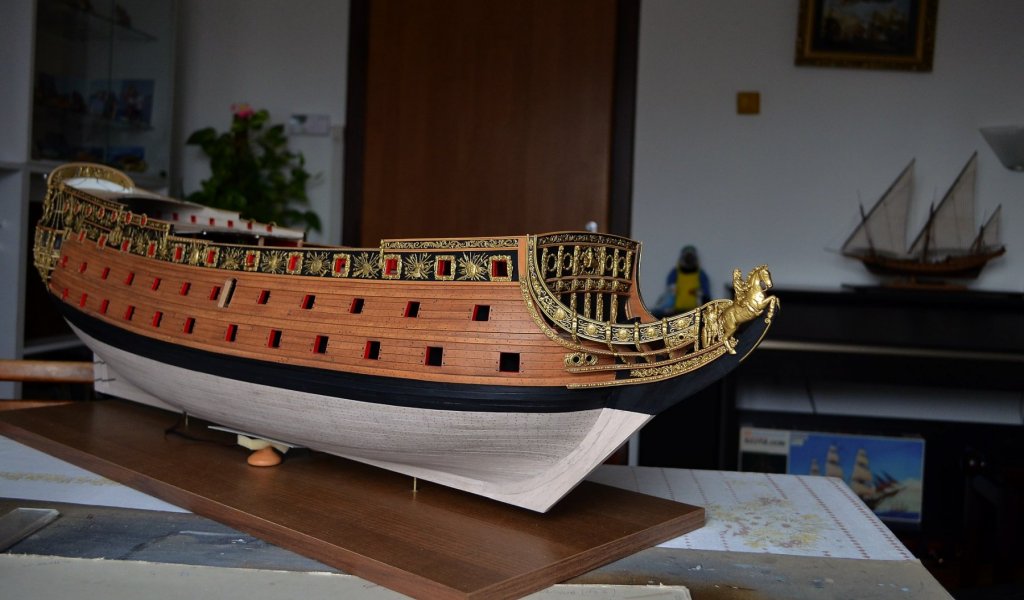
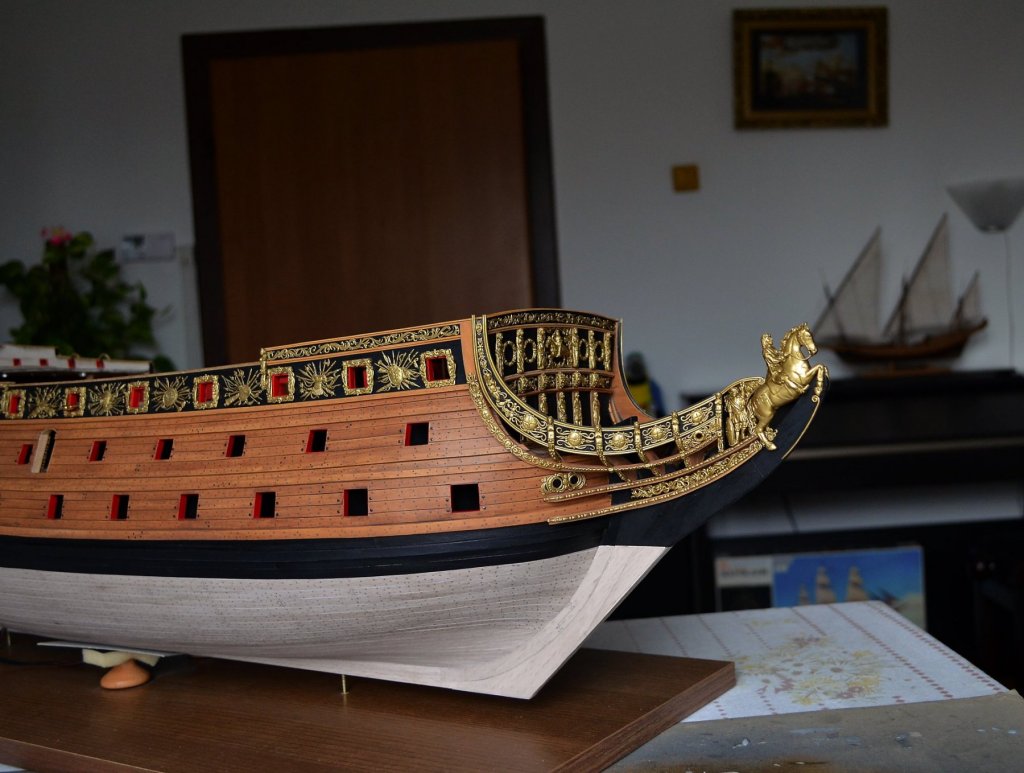
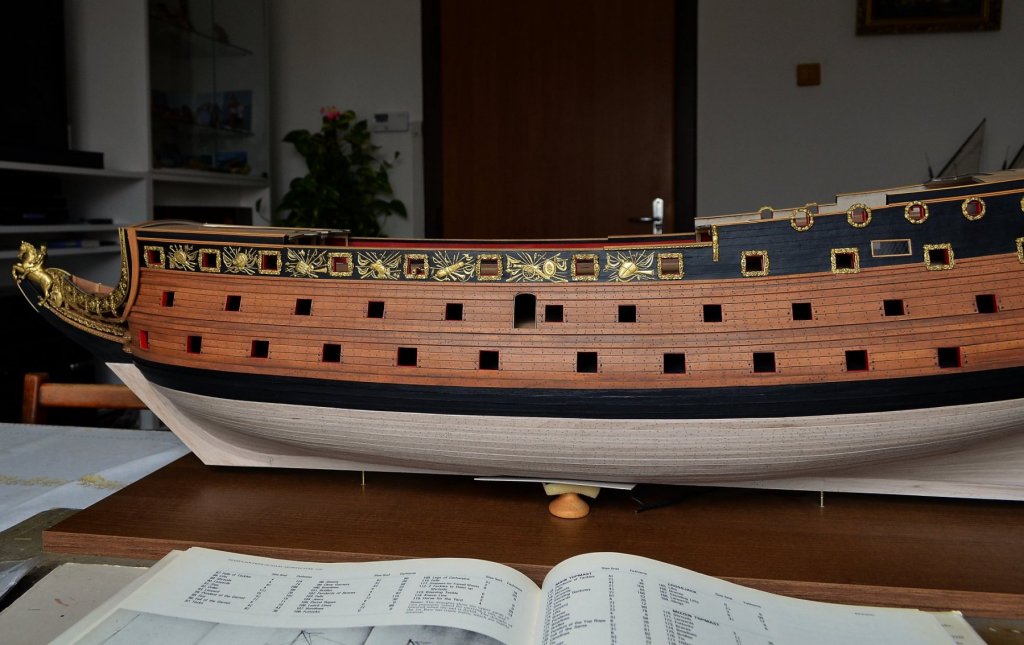
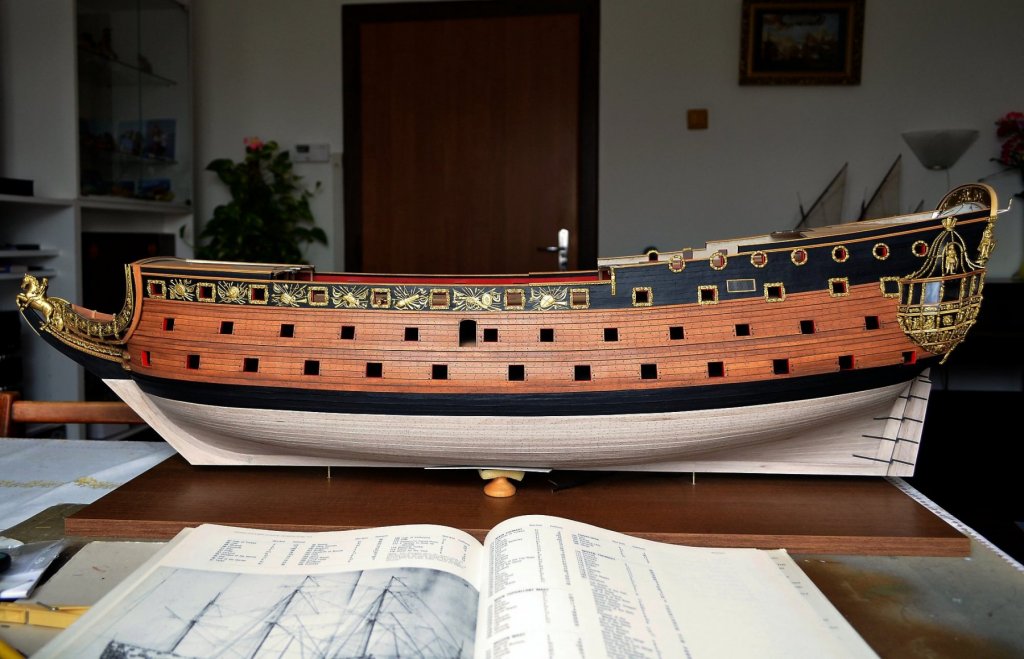
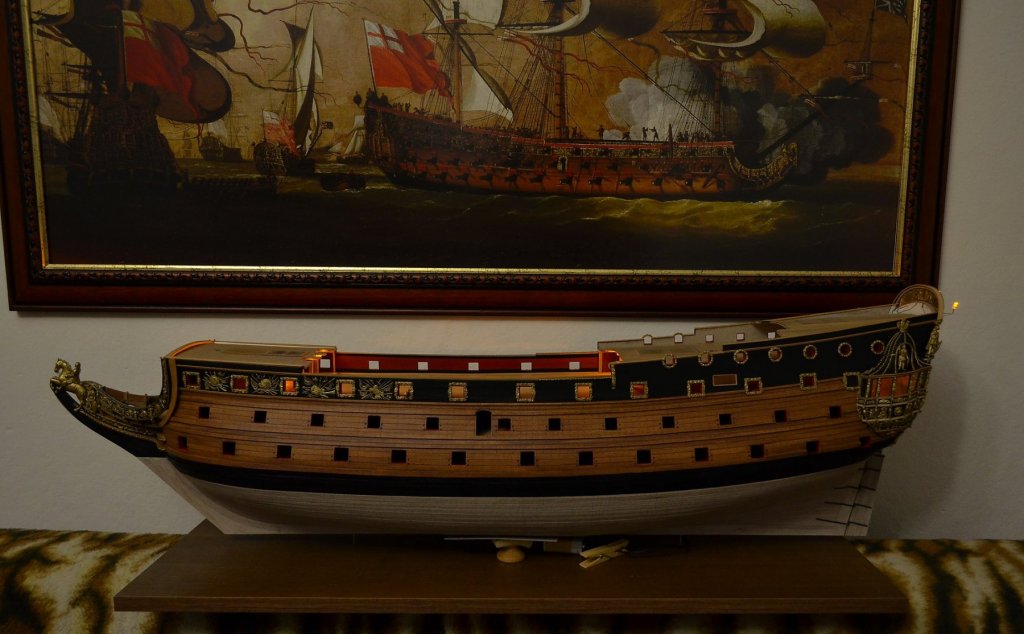
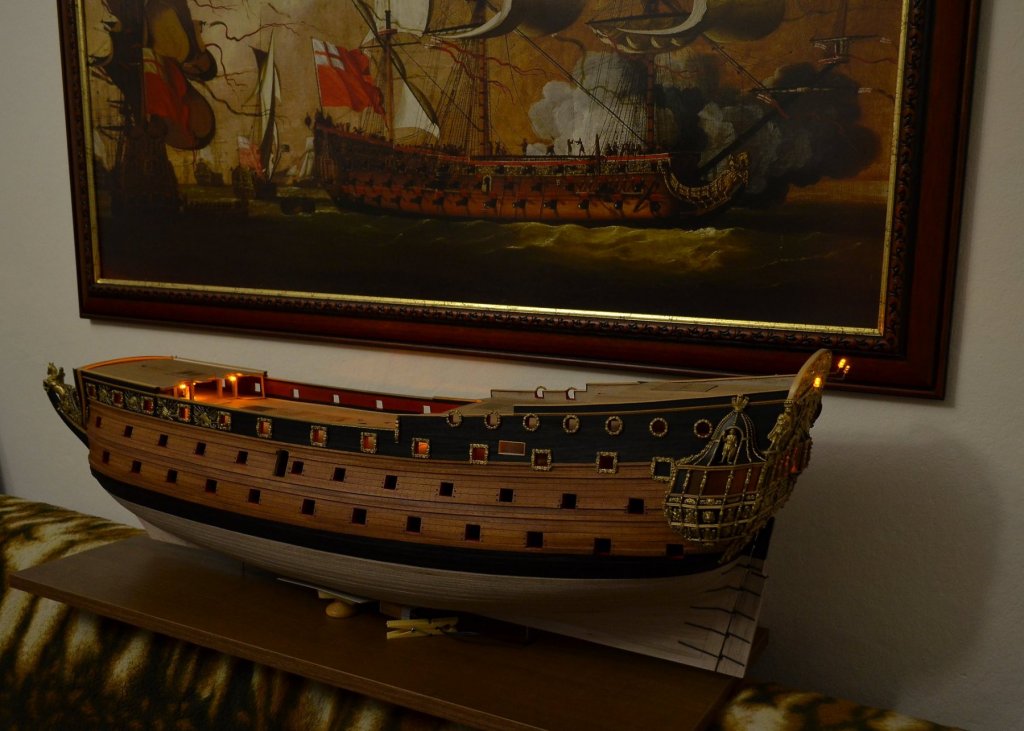
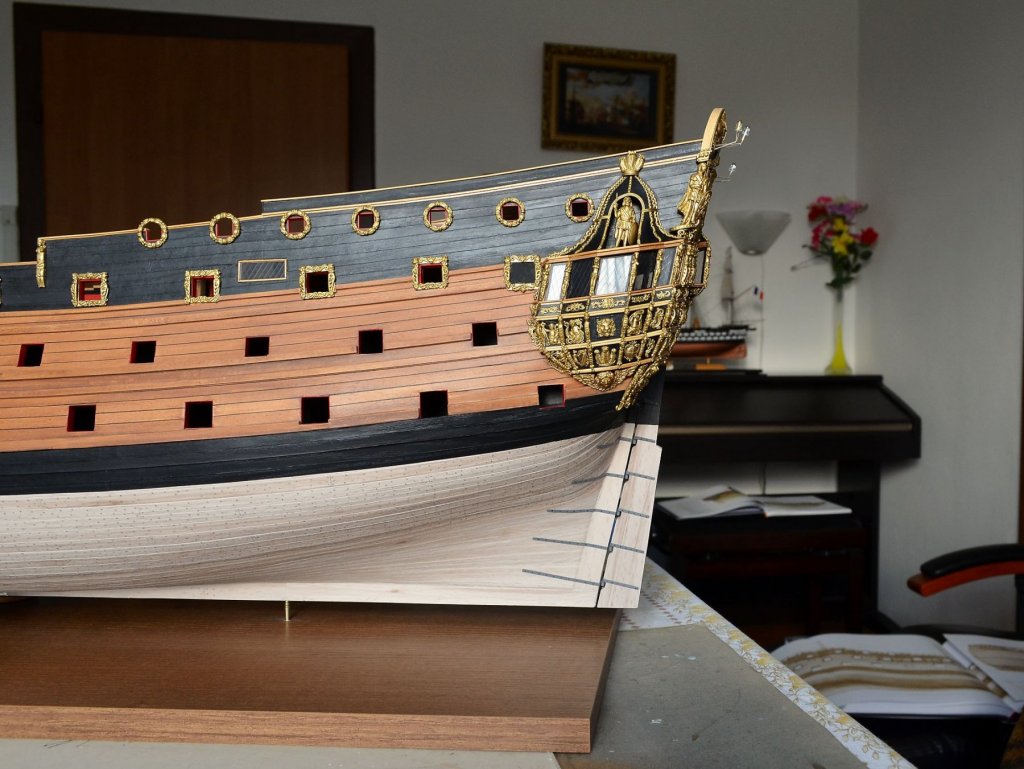
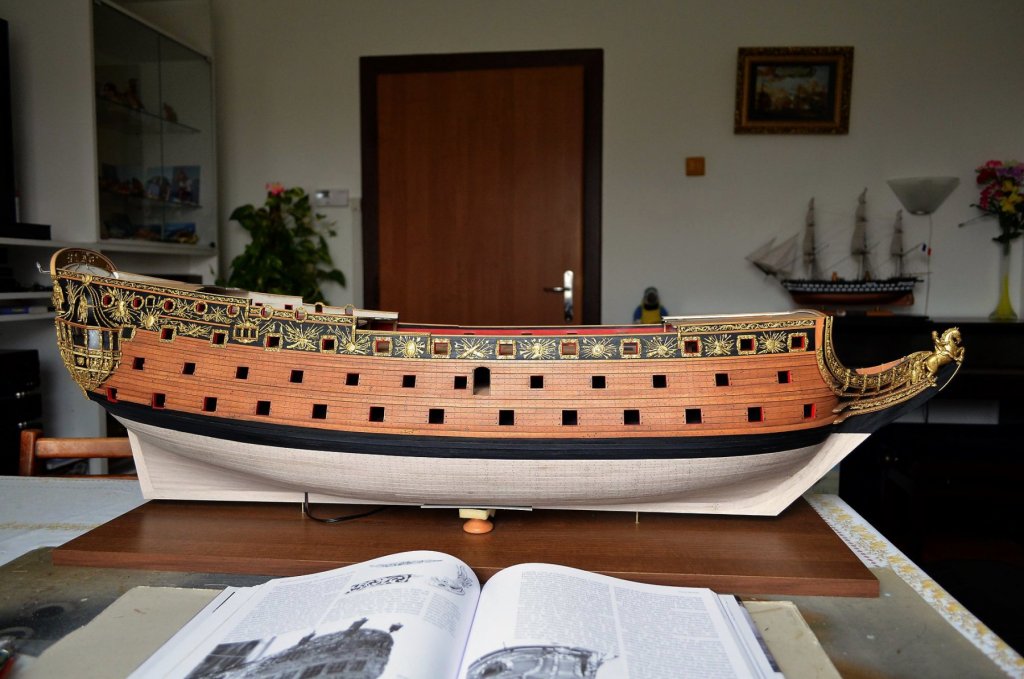
Current pics from progress. Please enjoy them and have a great time.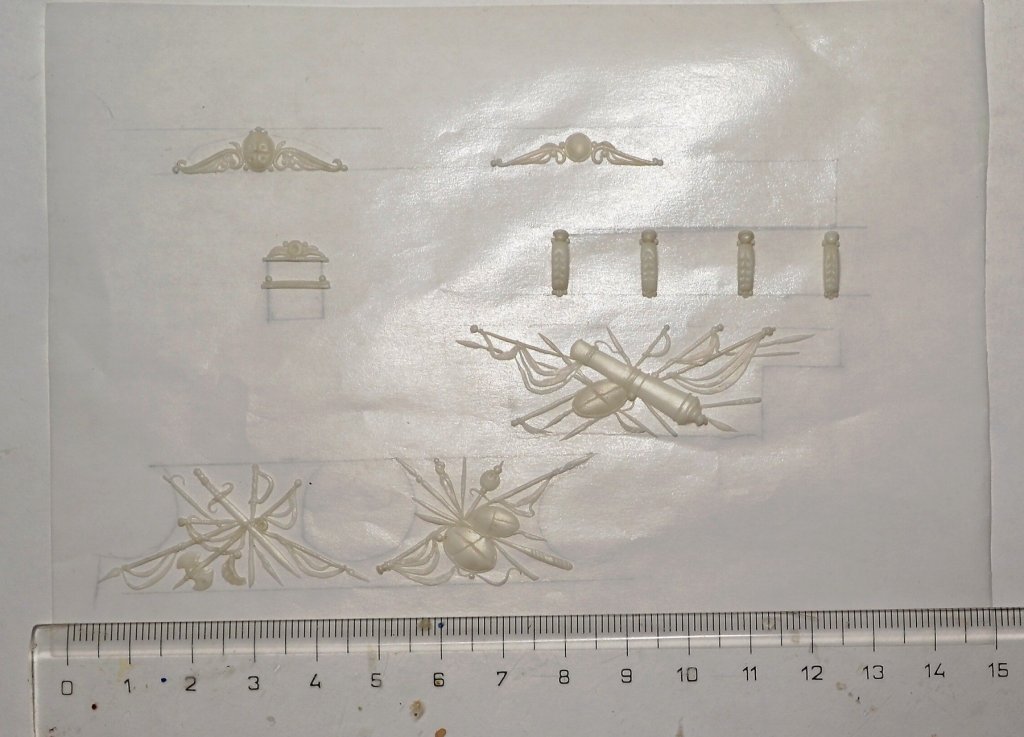


- 1,035 replies
-
- 28
-
-
-
- royal katherine
- ship of the line
- (and 1 more)
-
HMS ROYAL KATHERINE 1664 by Doris - 1/55 - CARD
DORIS replied to DORIS's topic in - Build logs for subjects built 1501 - 1750
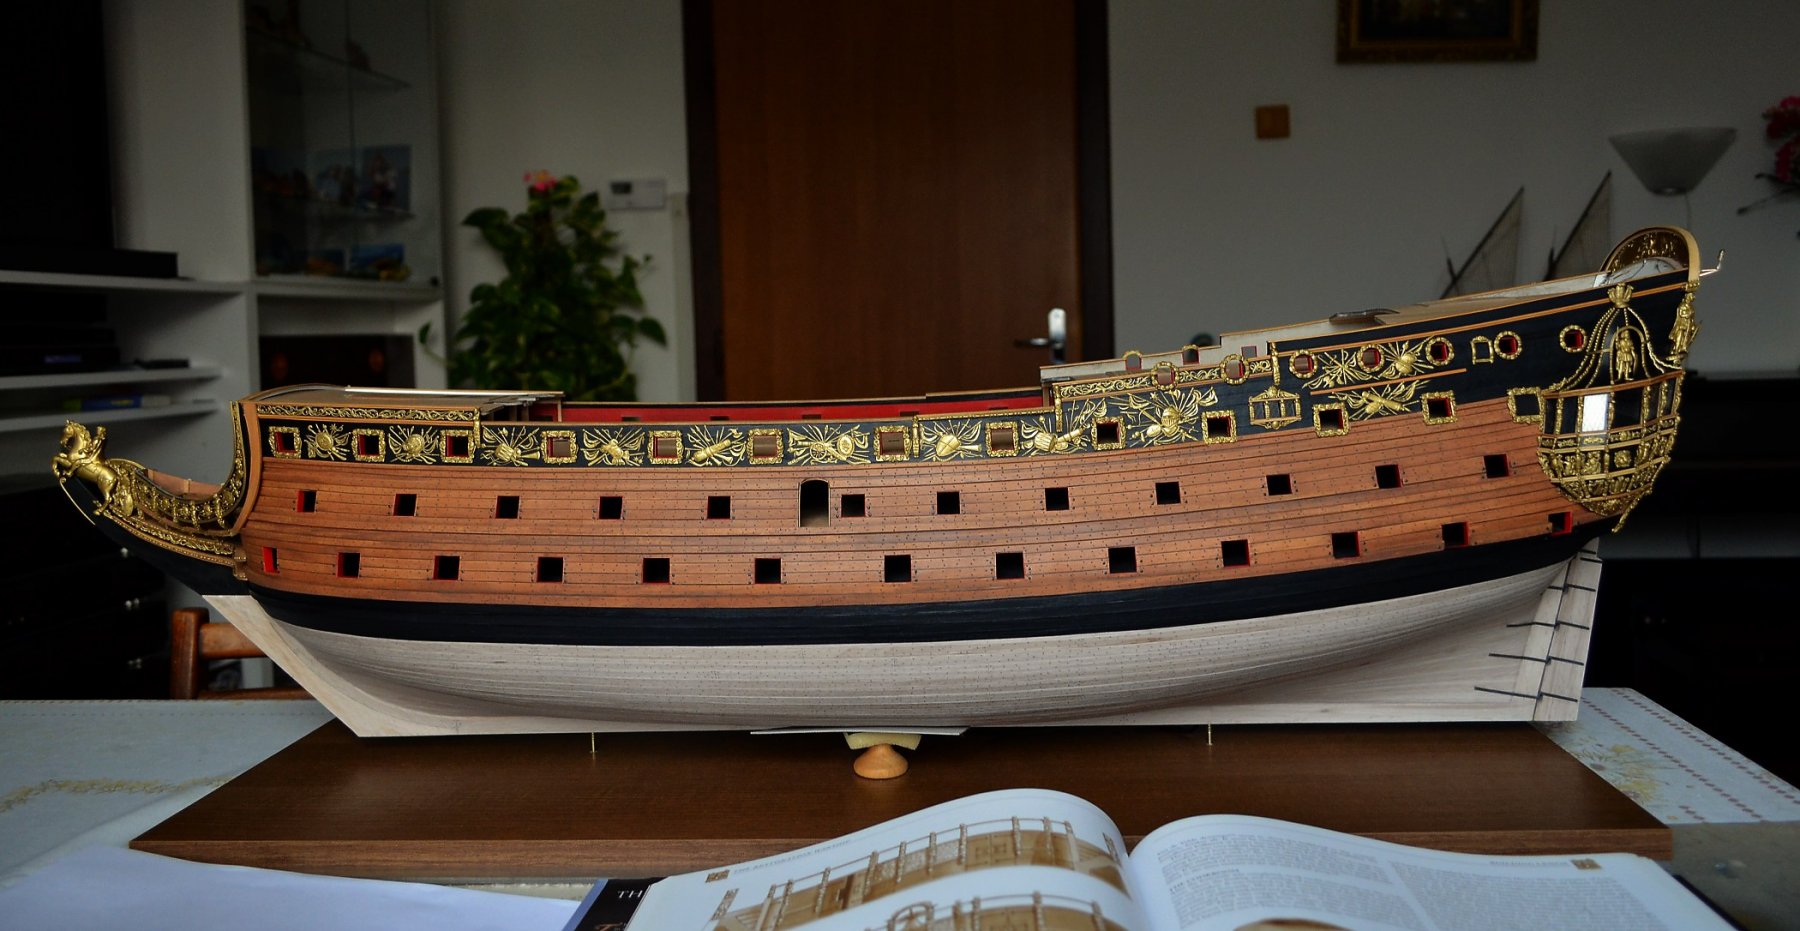
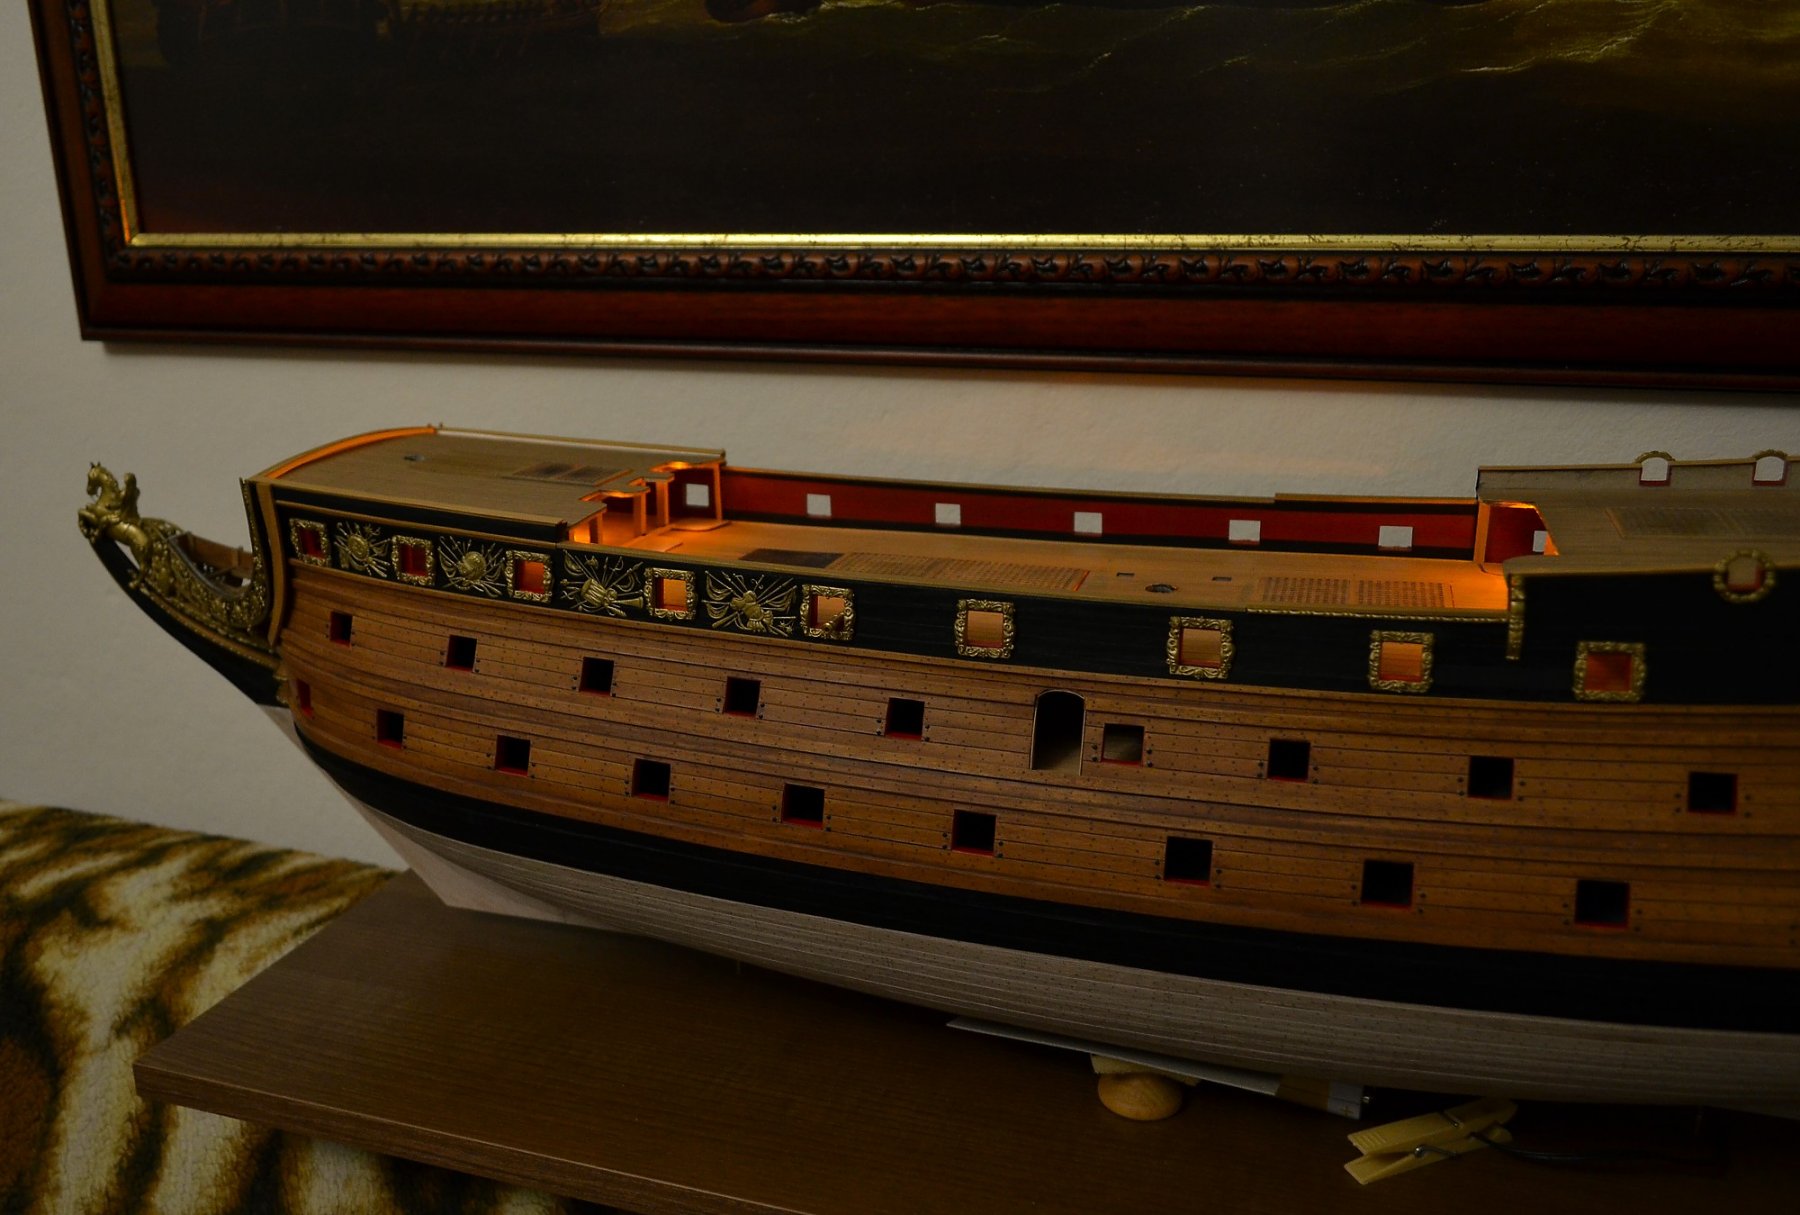
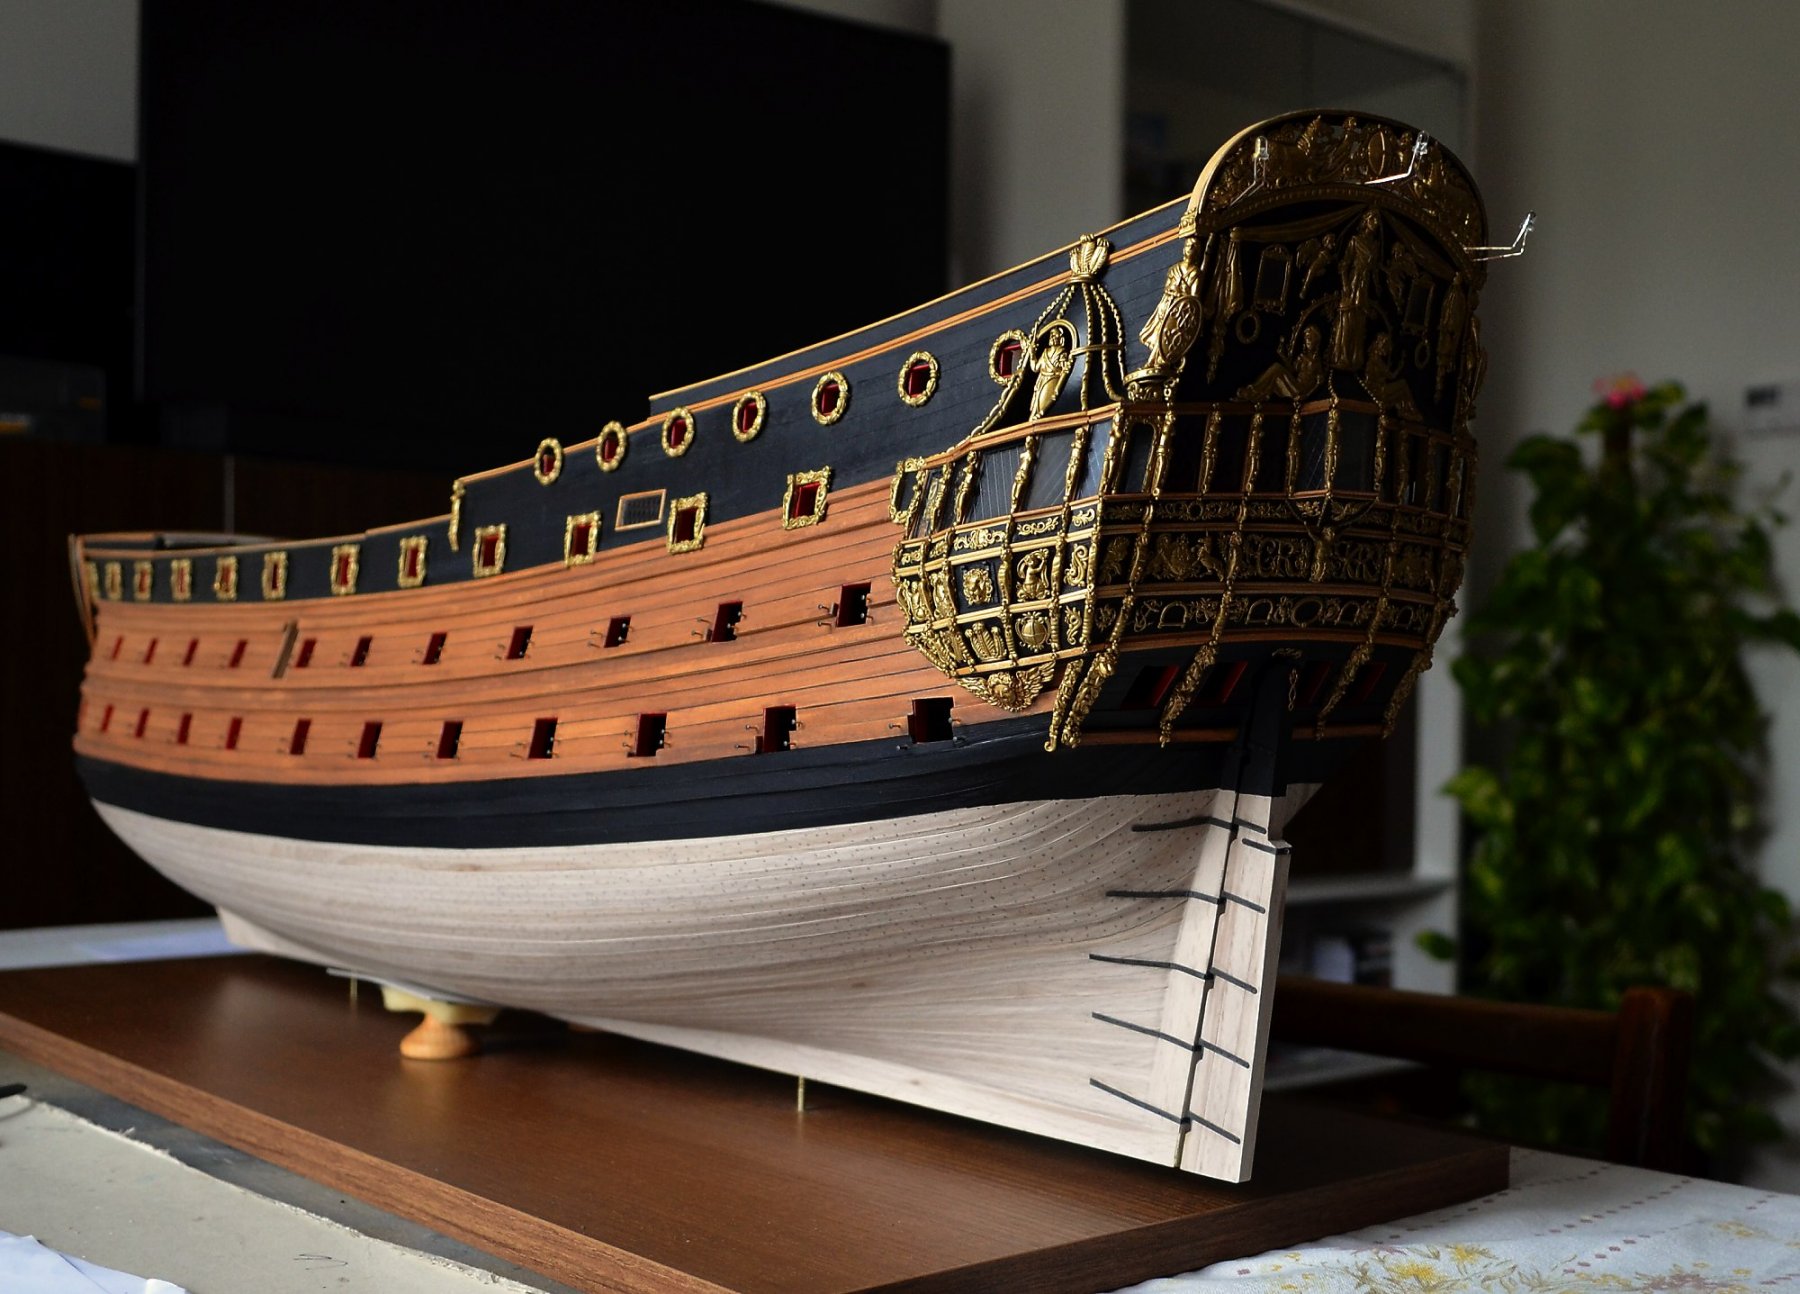
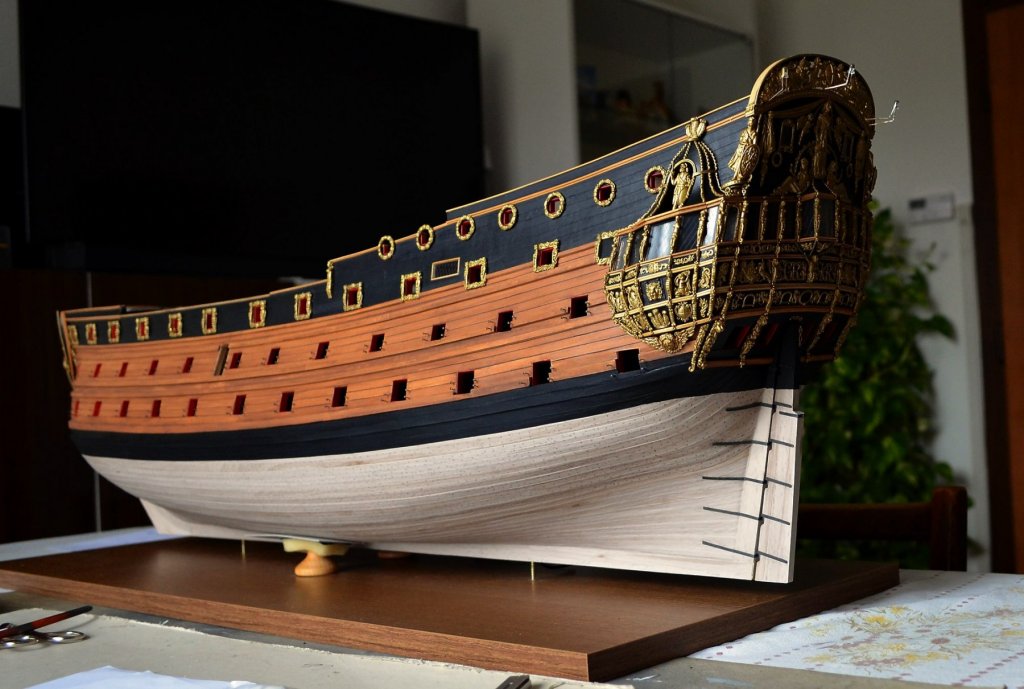
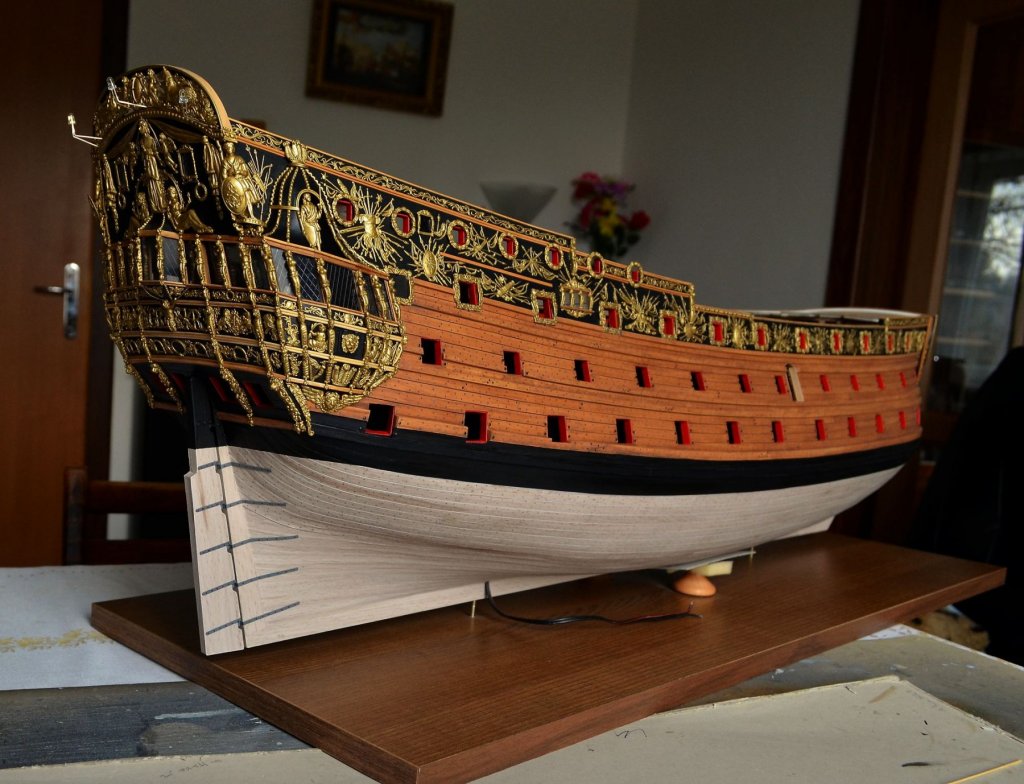
And others....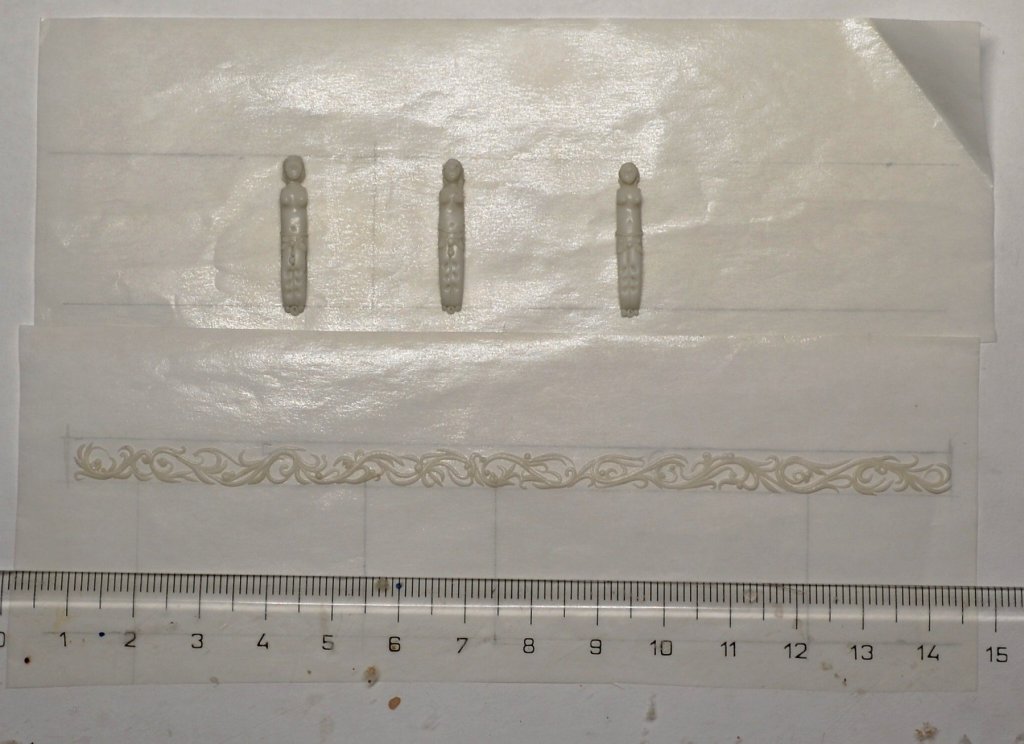


- 1,035 replies
-
- 24
-
-
-
- royal katherine
- ship of the line
- (and 1 more)
-
HMS ROYAL KATHERINE 1664 by Doris - 1/55 - CARD
DORIS replied to DORIS's topic in - Build logs for subjects built 1501 - 1750
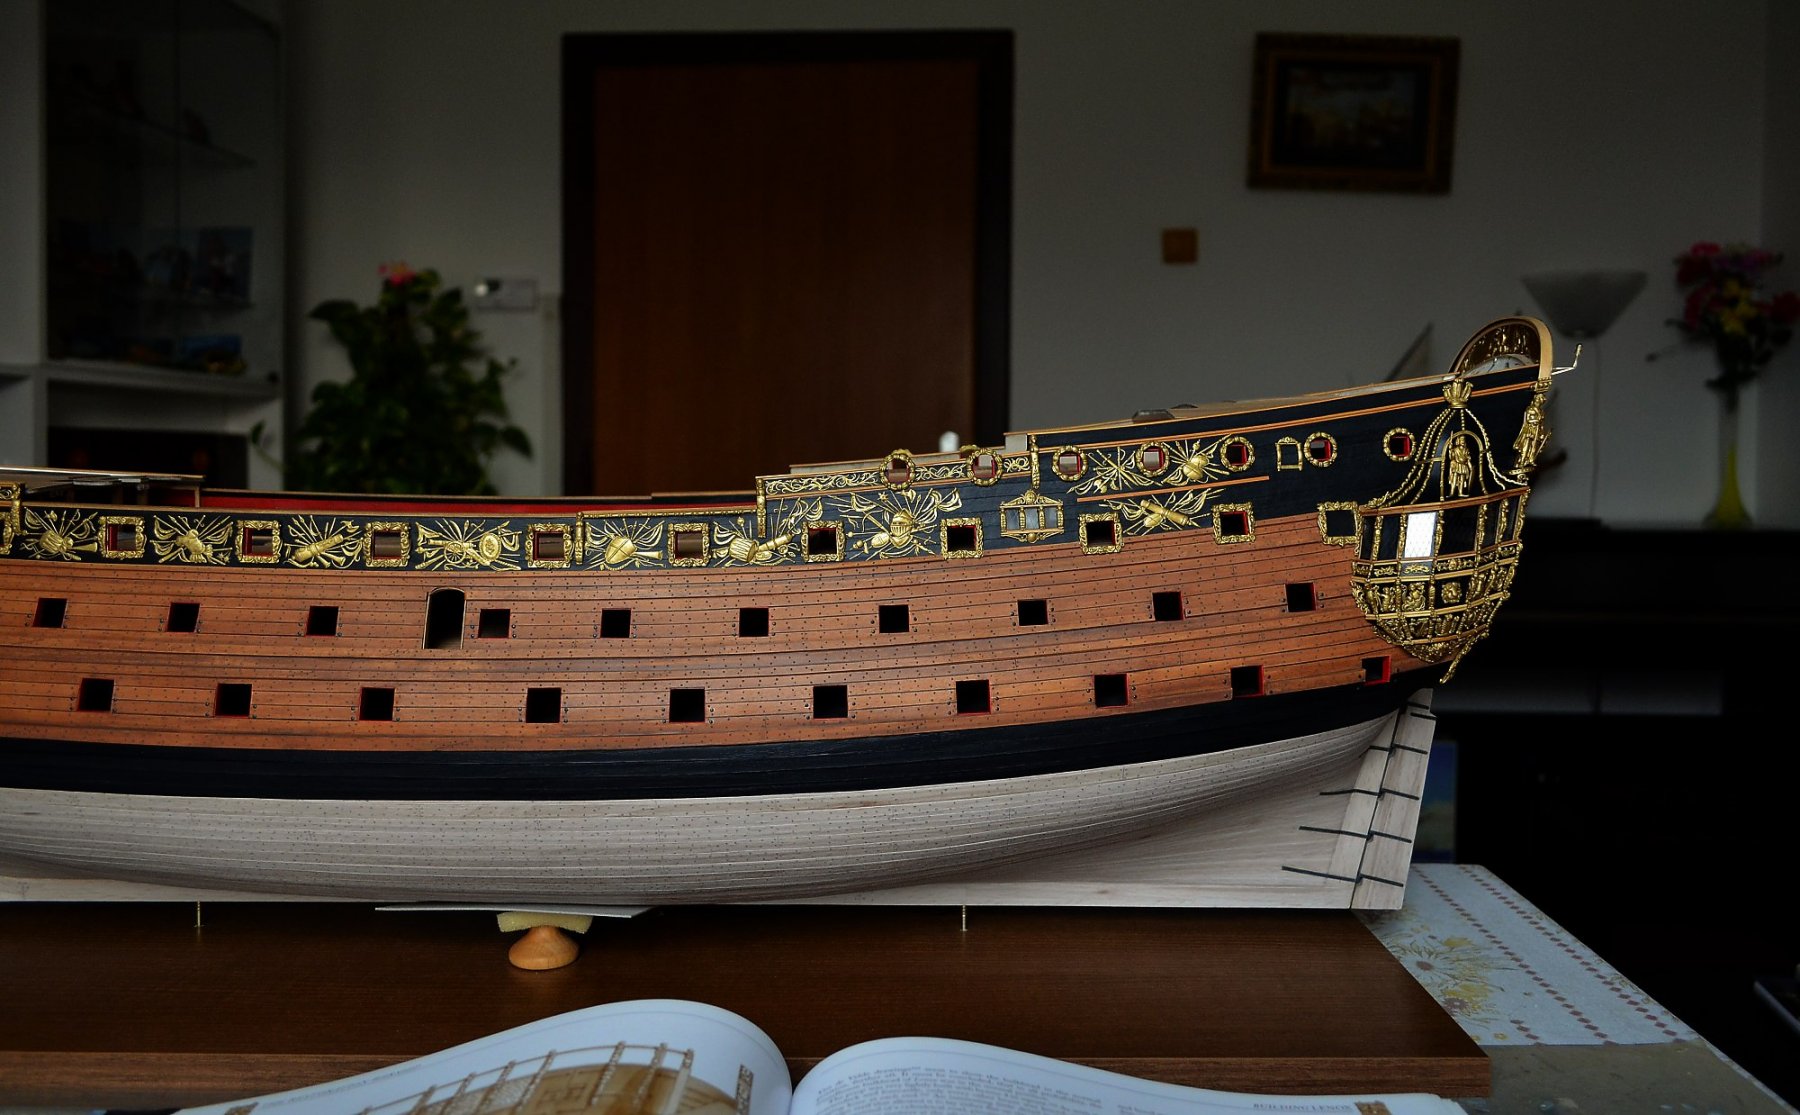
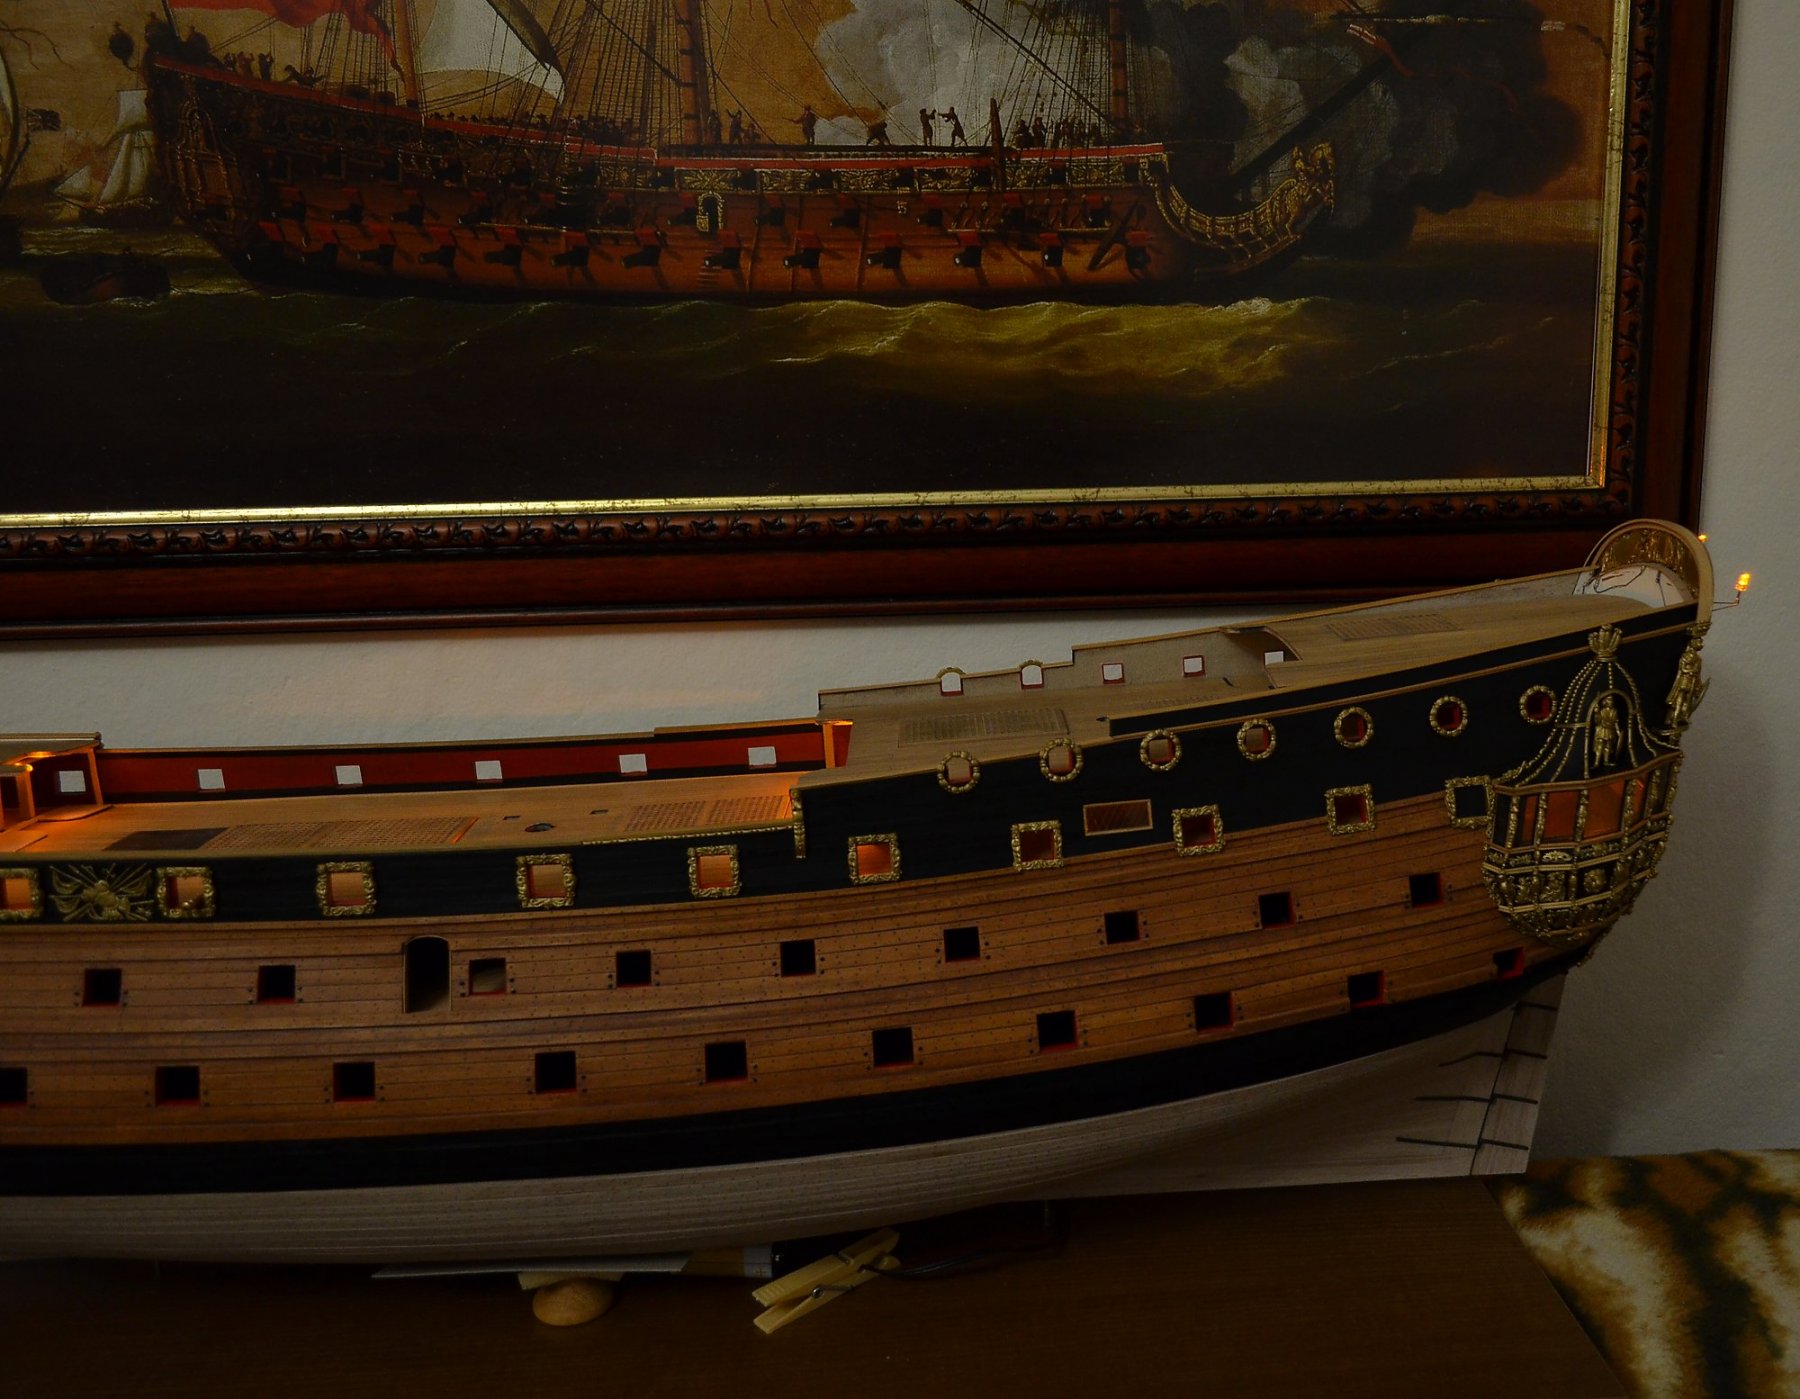
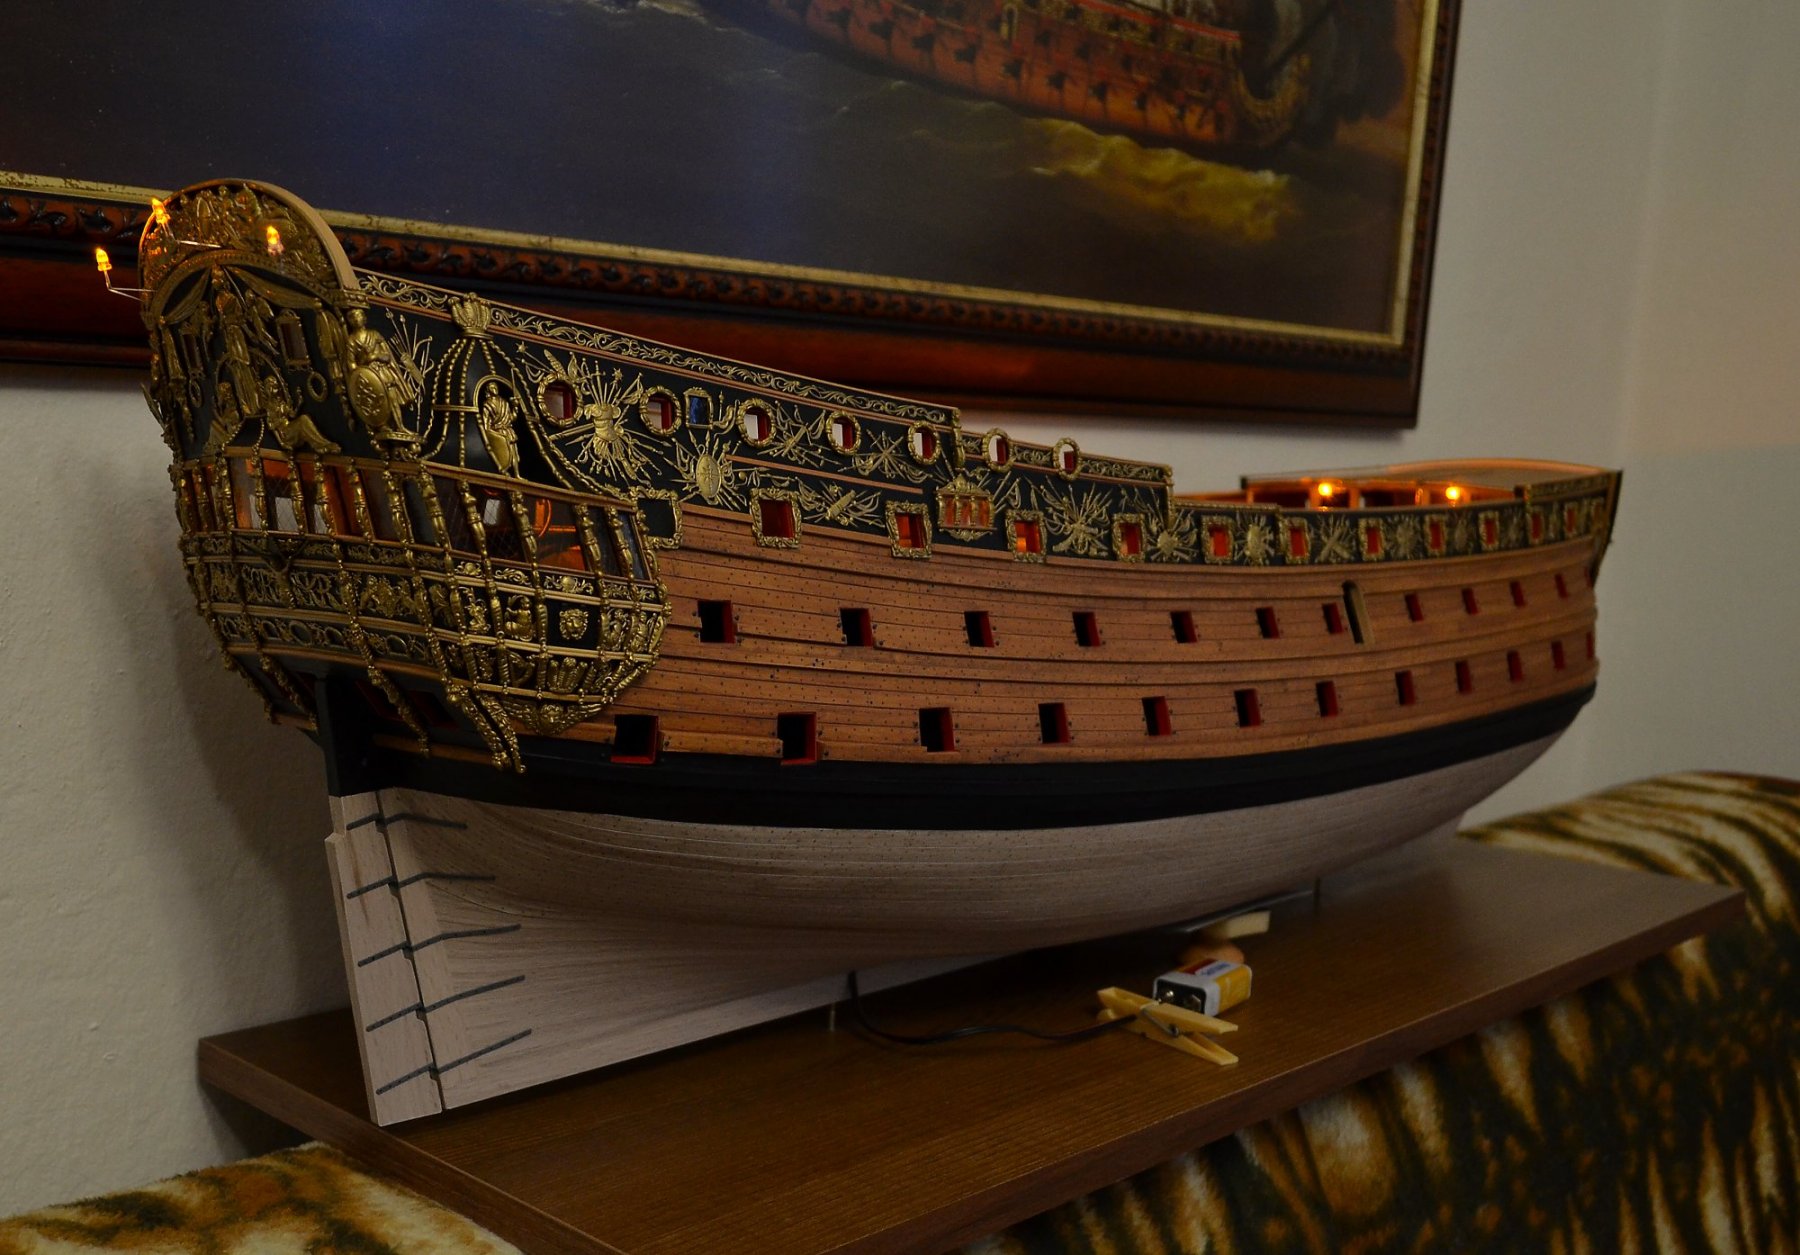
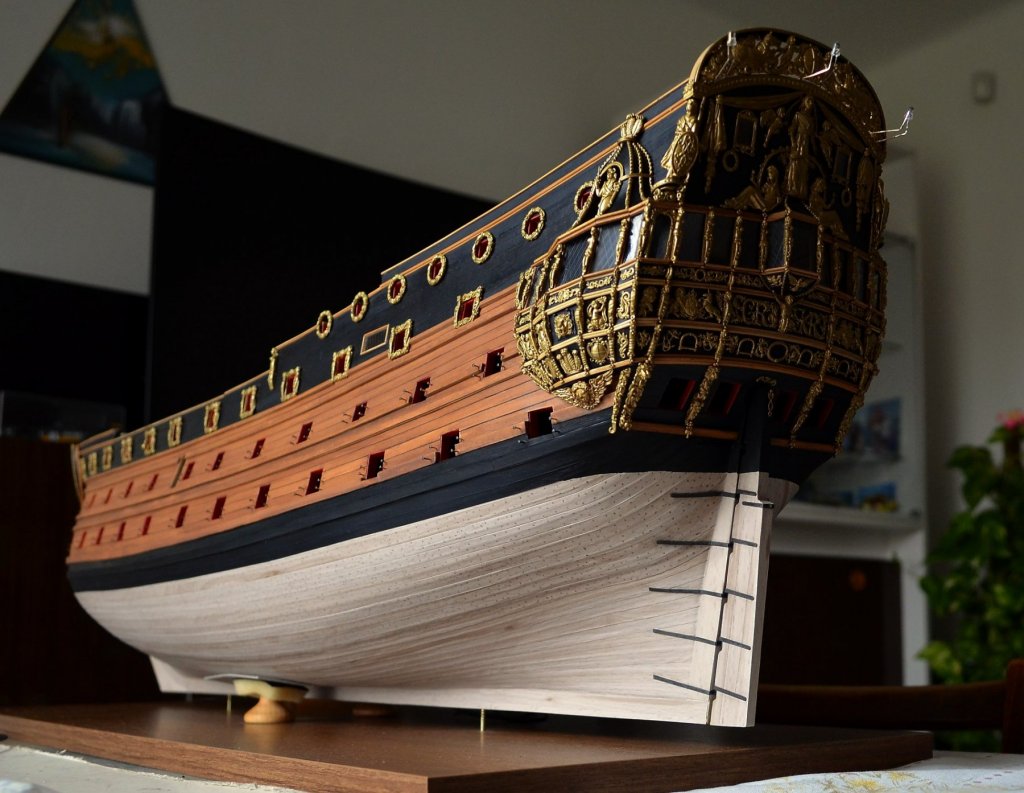
I can´t help myself but I love this work indeed....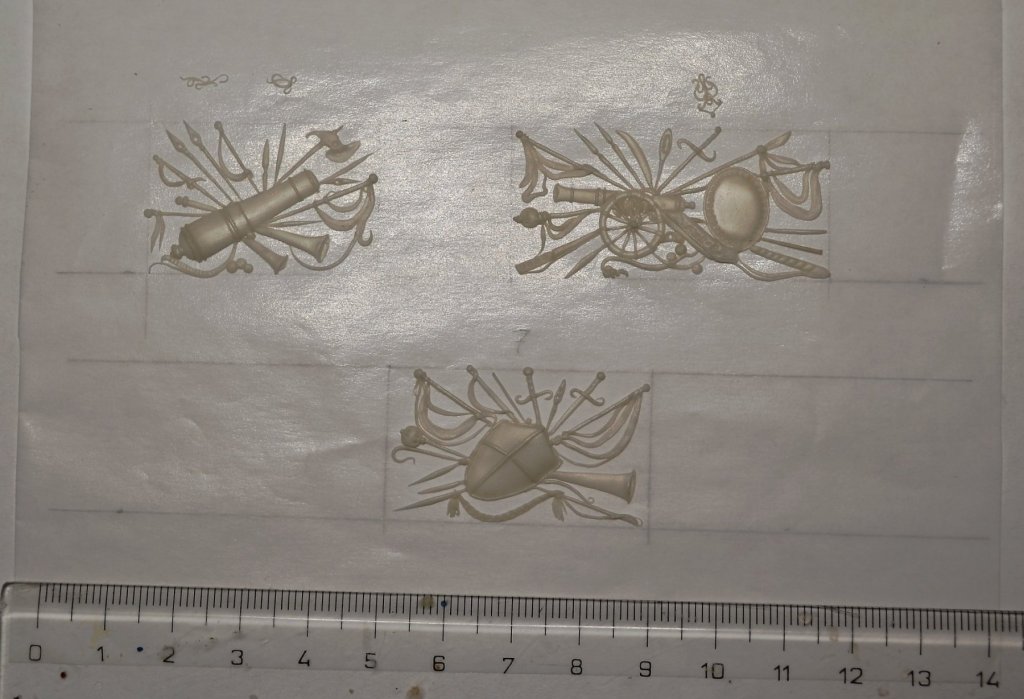


- 1,035 replies
-
- 23
-
-
-
- royal katherine
- ship of the line
- (and 1 more)
-
HMS ROYAL KATHERINE 1664 by Doris - 1/55 - CARD
DORIS replied to DORIS's topic in - Build logs for subjects built 1501 - 1750
Hello Michael, no problem, I will bring detailed report and tutorial from the work with these fine pieces of decoration as soon as possible. I believe, it could be interesting. And thank you for your kind words. Best regards, Doris- 1,035 replies
-
- 8
-
-
- royal katherine
- ship of the line
- (and 1 more)
-
HMS ROYAL KATHERINE 1664 by Doris - 1/55 - CARD
DORIS replied to DORIS's topic in - Build logs for subjects built 1501 - 1750
And my favourite work again - the decoration of course....😍


- 1,035 replies
-
- 24
-
-
-
- royal katherine
- ship of the line
- (and 1 more)
-
HMS ROYAL KATHERINE 1664 by Doris - 1/55 - CARD
DORIS replied to DORIS's topic in - Build logs for subjects built 1501 - 1750
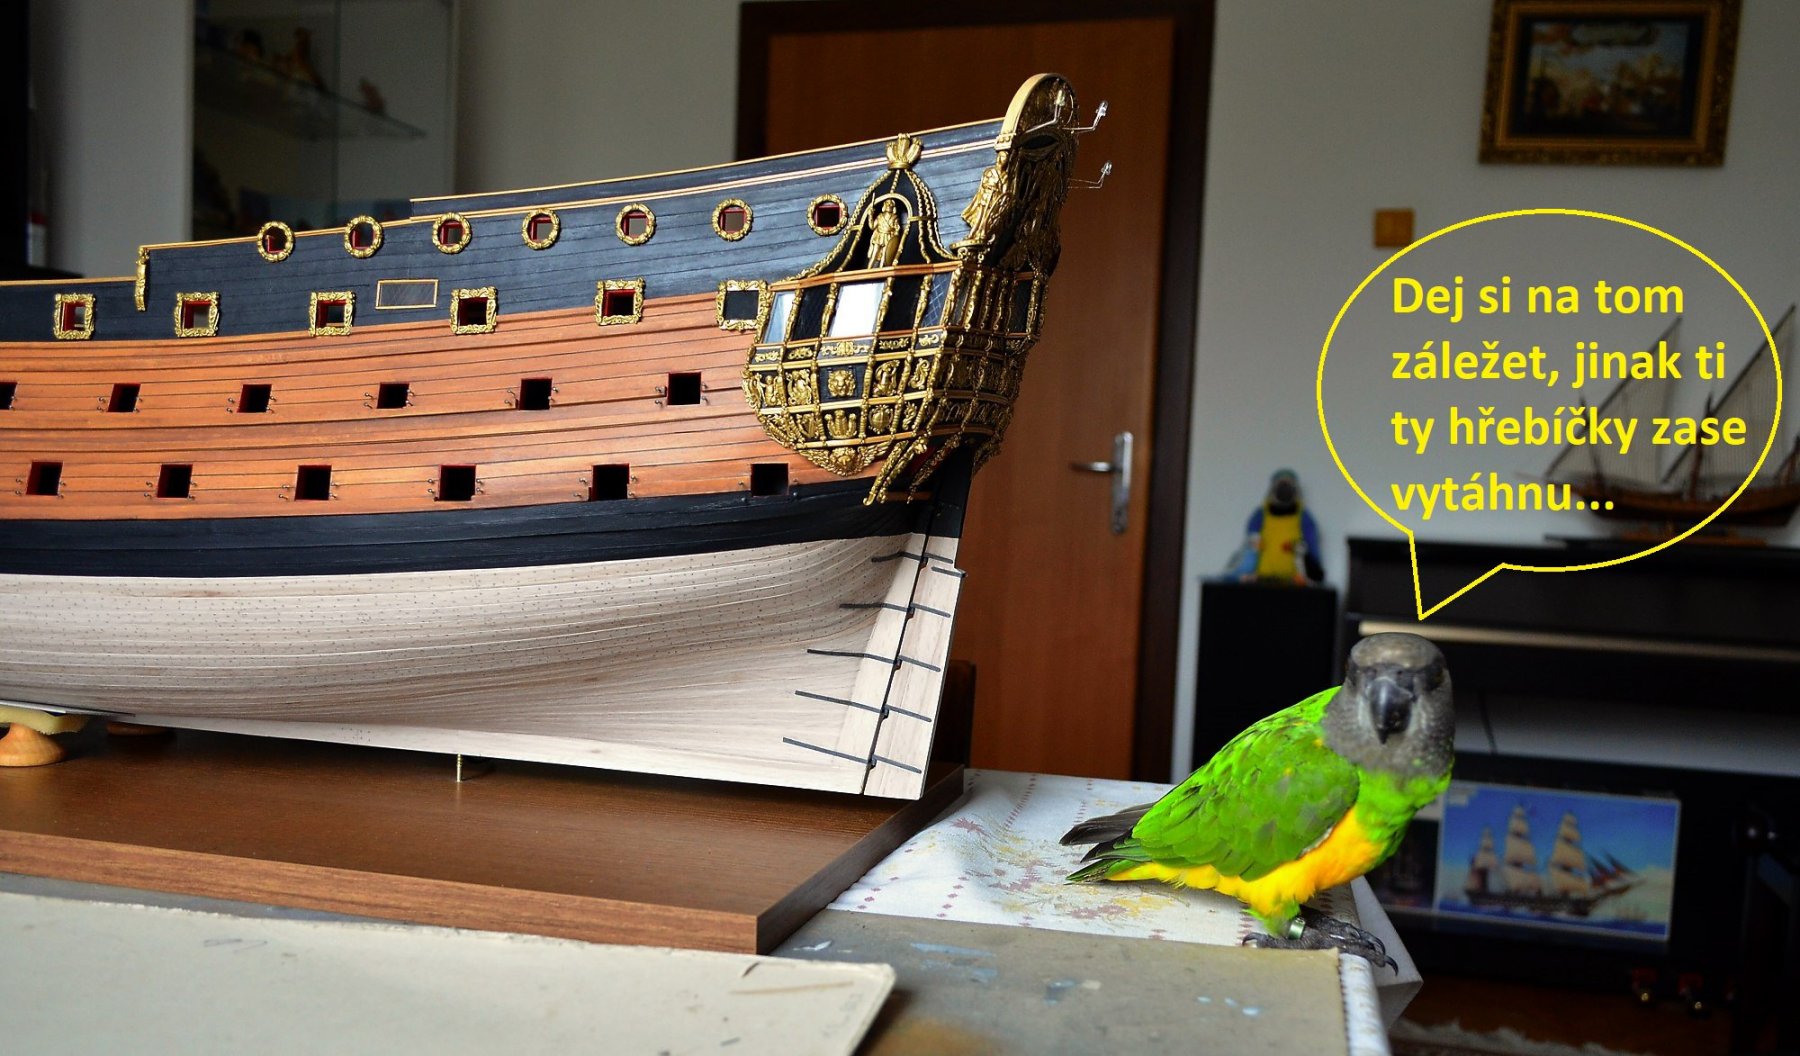
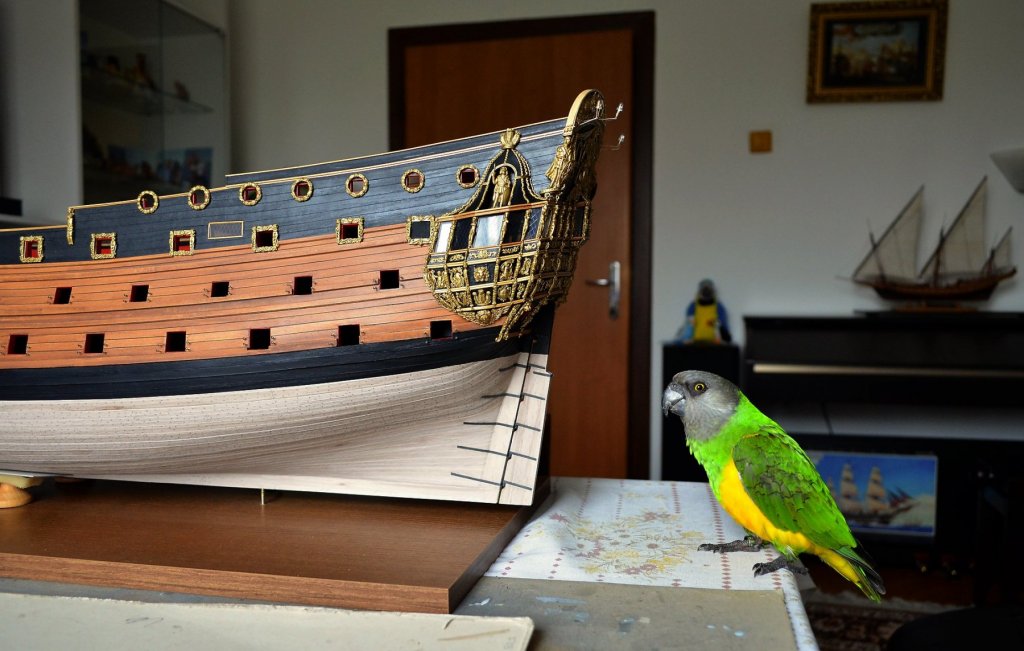
And here I continue with bolts and treenails on the port. I have a nice feathered friend, although he sometimes likes pulling out the metal bolts.....😊

- 1,035 replies
-
- 23
-
-
-
- royal katherine
- ship of the line
- (and 1 more)
-
HMS ROYAL KATHERINE 1664 by Doris - 1/55 - CARD
DORIS replied to DORIS's topic in - Build logs for subjects built 1501 - 1750
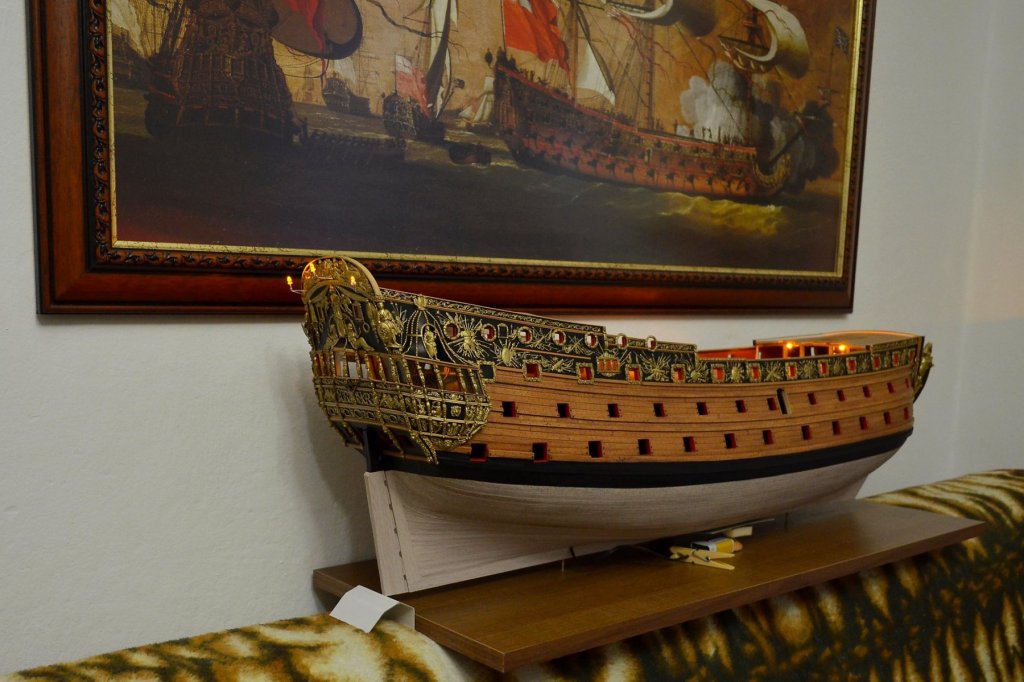
Almost finished rudder...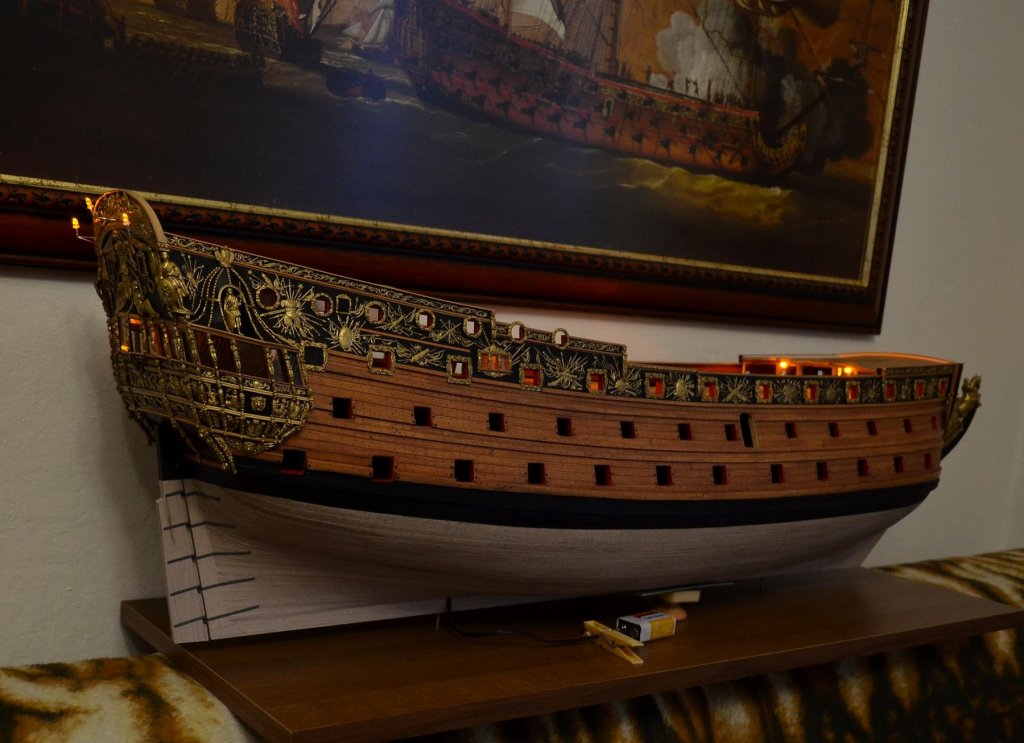


- 1,035 replies
-
- 24
-
-
-
- royal katherine
- ship of the line
- (and 1 more)
-
HMS ROYAL KATHERINE 1664 by Doris - 1/55 - CARD
DORIS replied to DORIS's topic in - Build logs for subjects built 1501 - 1750
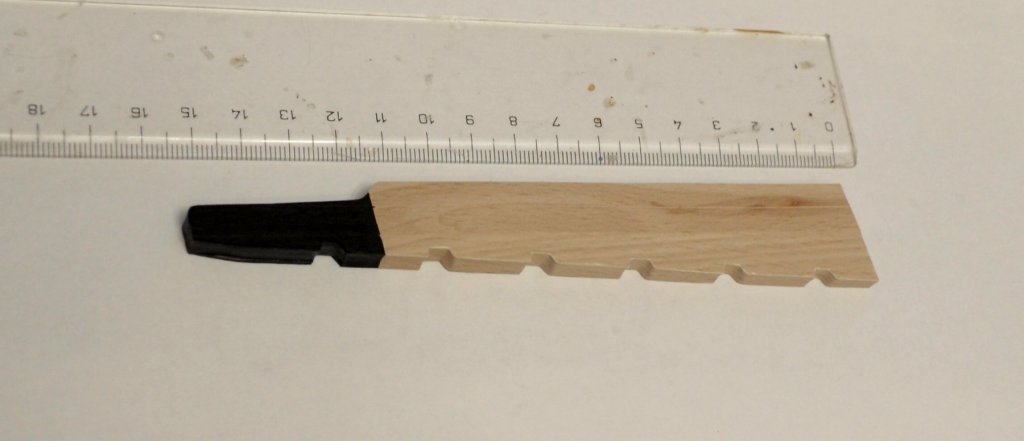
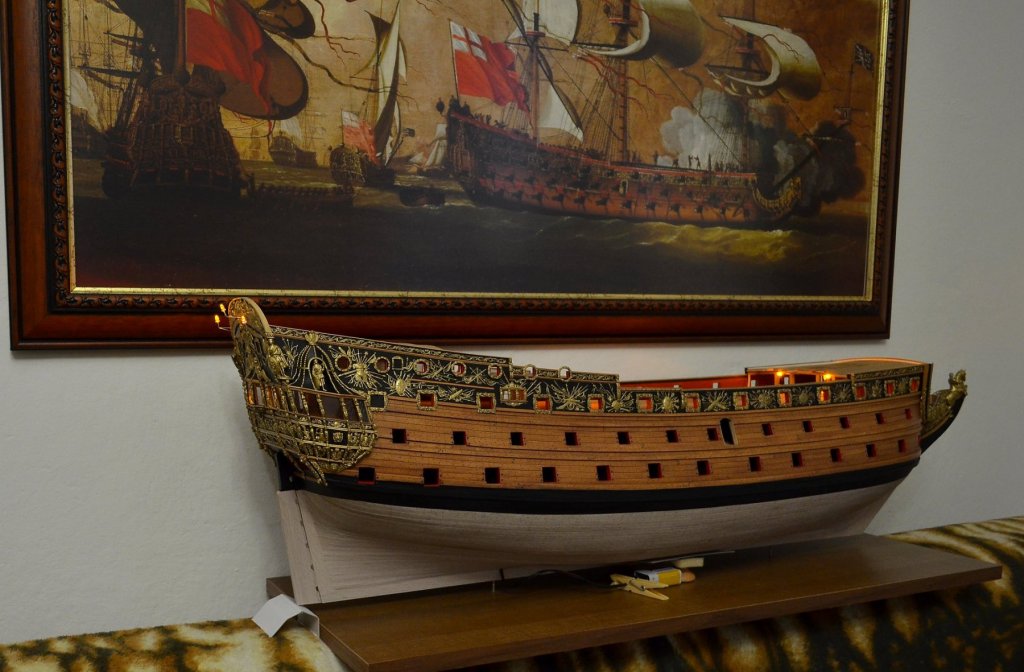
And here I made a rudder according to similar ships from that period - it is completely made of card.


- 1,035 replies
-
- 25
-
-
-
- royal katherine
- ship of the line
- (and 1 more)
-
HMS ROYAL KATHERINE 1664 by Doris - 1/55 - CARD
DORIS replied to DORIS's topic in - Build logs for subjects built 1501 - 1750
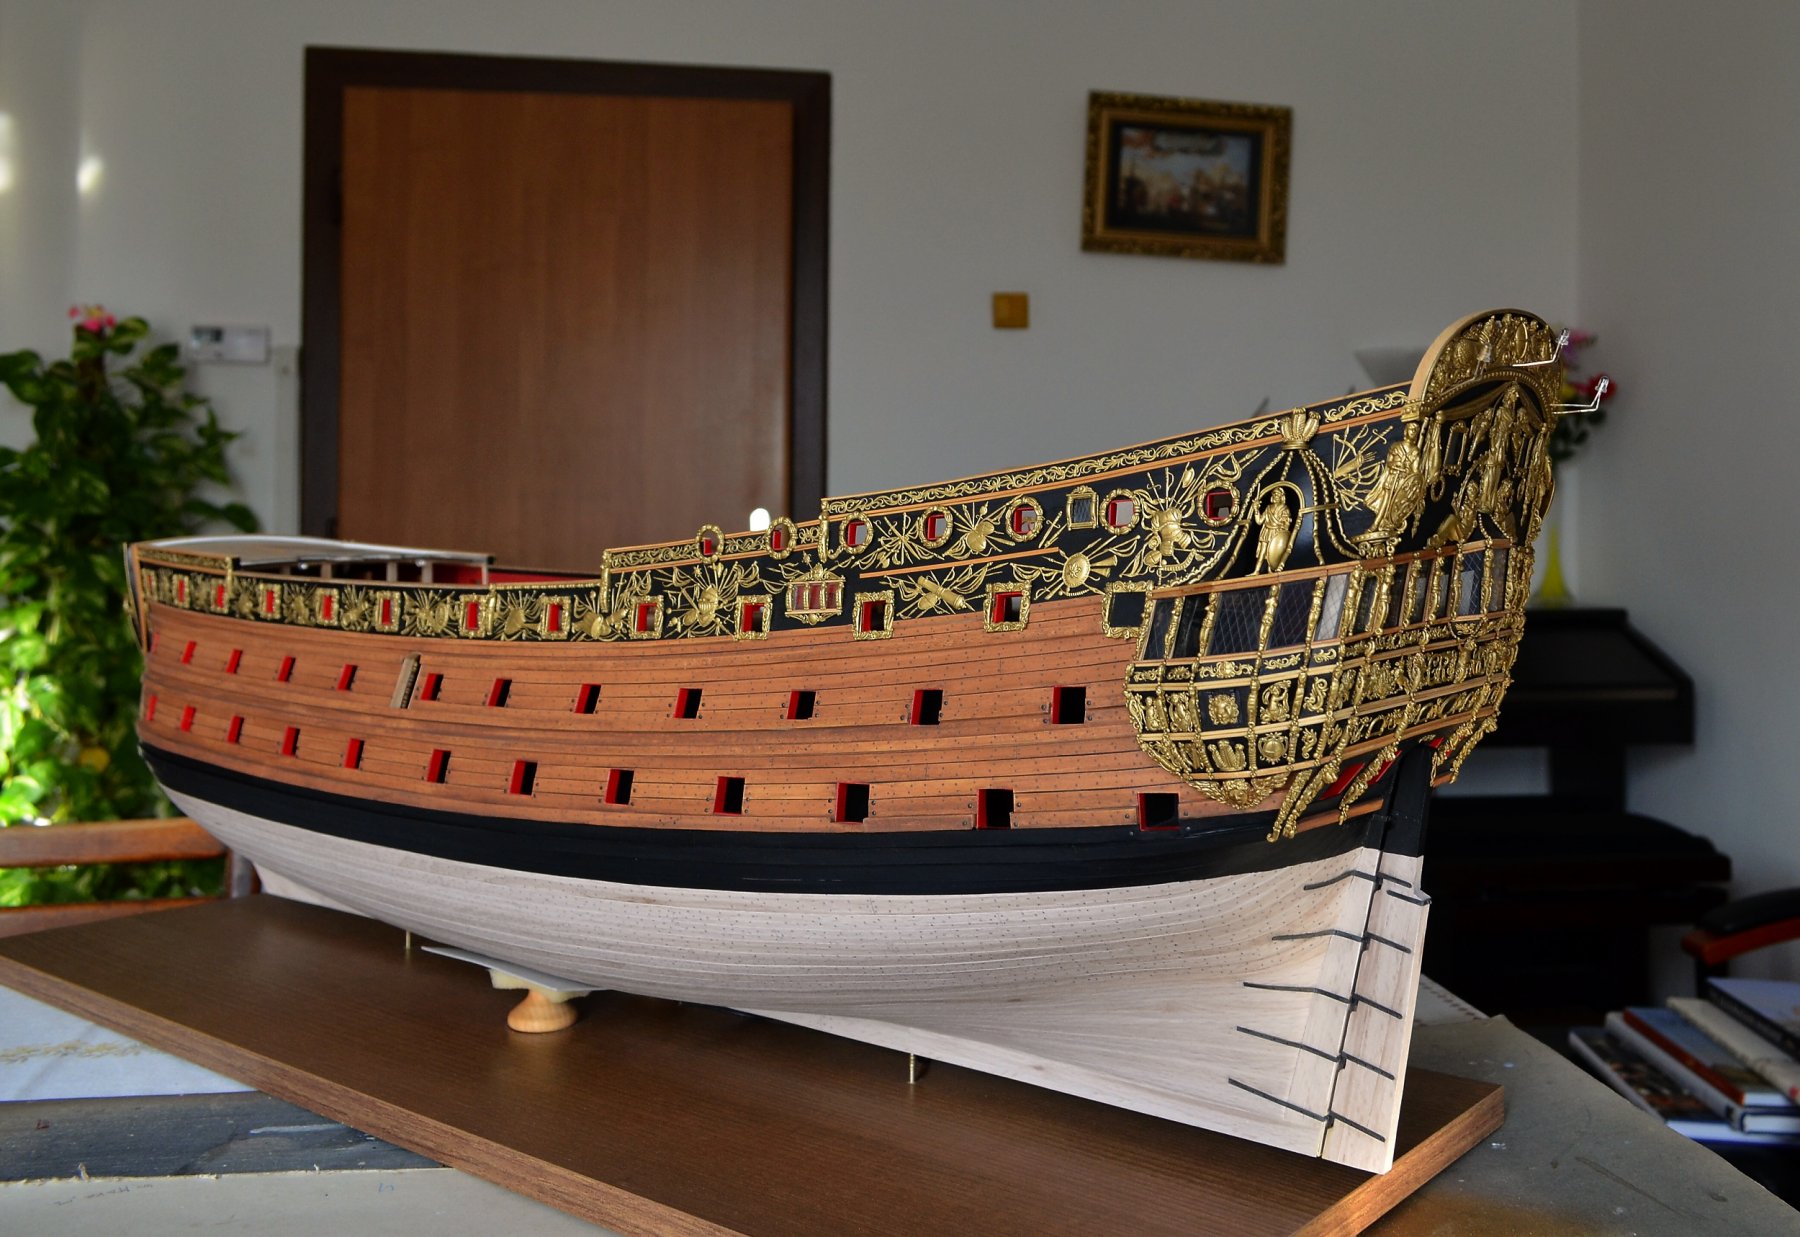
And finally the rest of the ornaments for the starboard...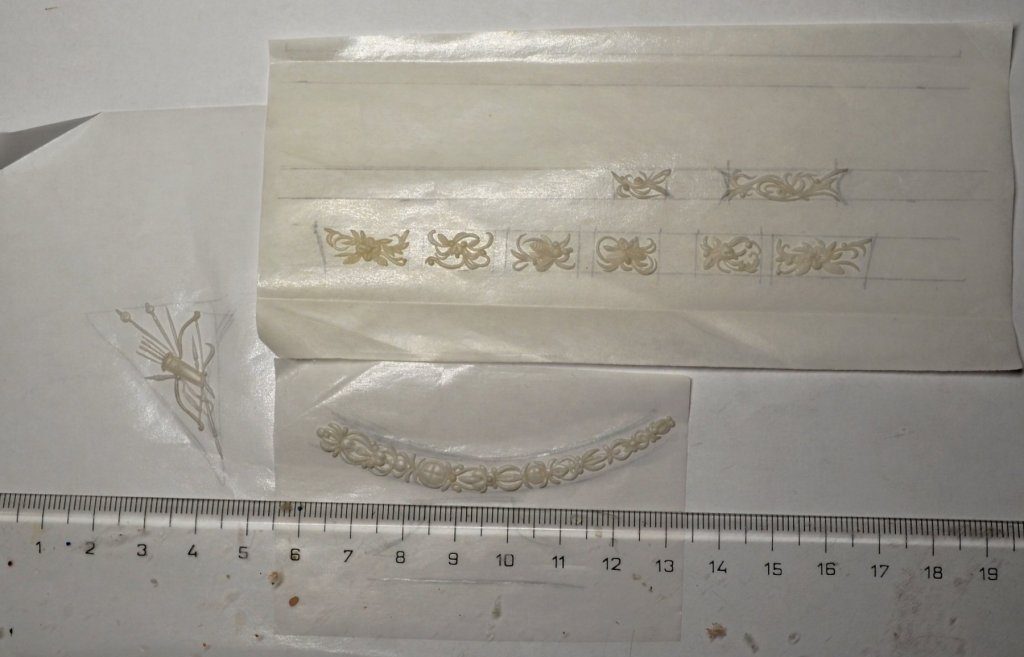


- 1,035 replies
-
- 31
-
-
-
- royal katherine
- ship of the line
- (and 1 more)