Siggi52
-
Posts
1,086 -
Joined
-
Last visited
Content Type
Profiles
Forums
Gallery
Events
Everything posted by Siggi52
-
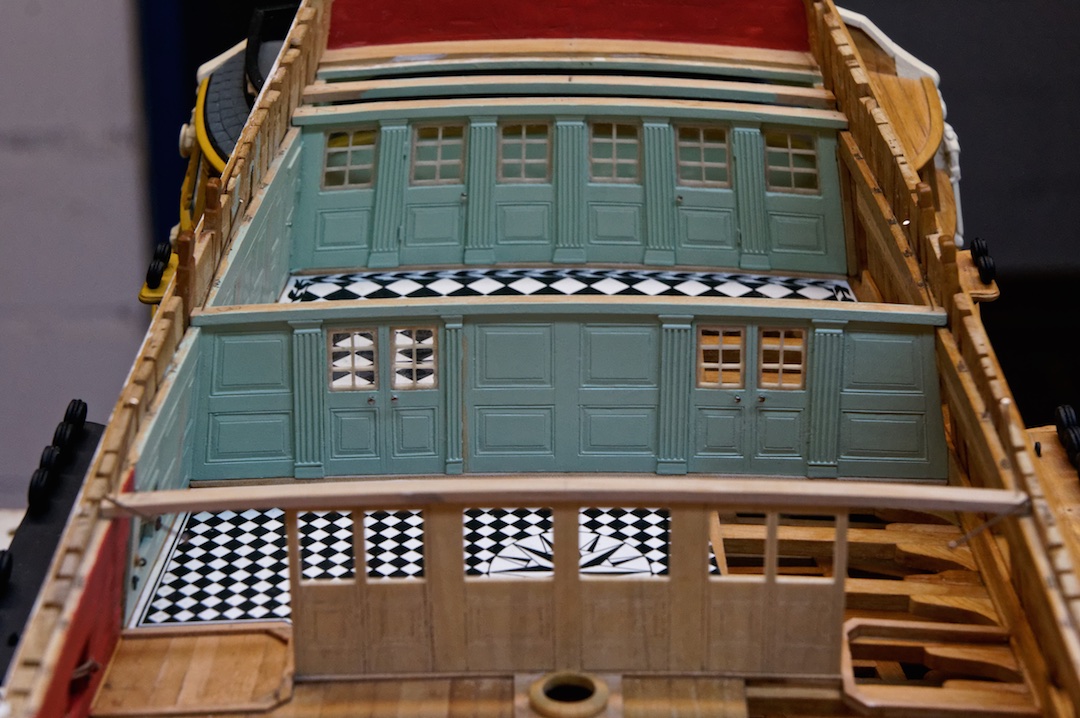
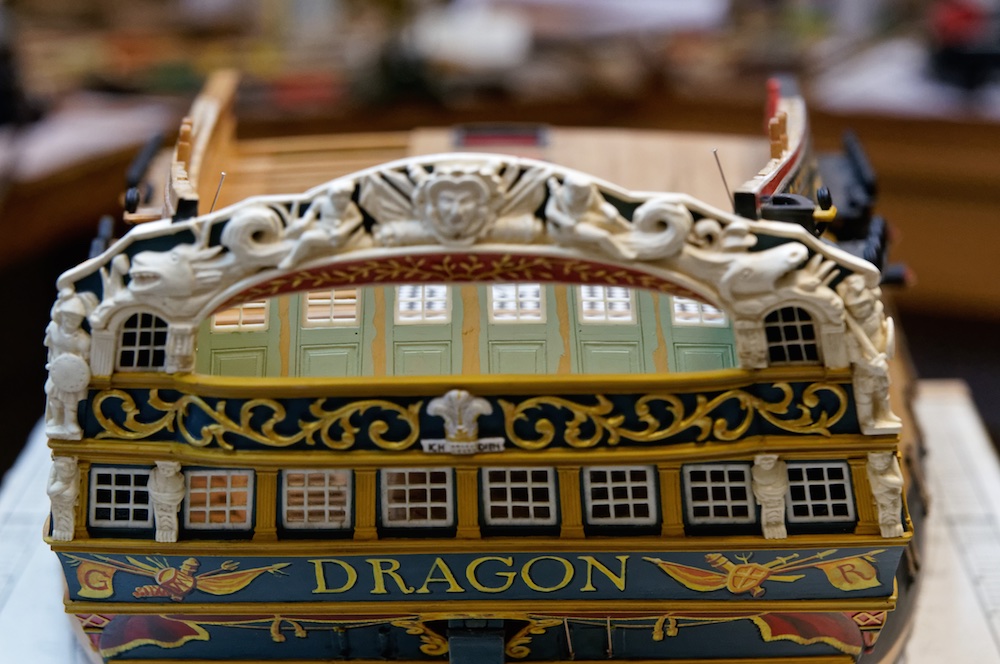
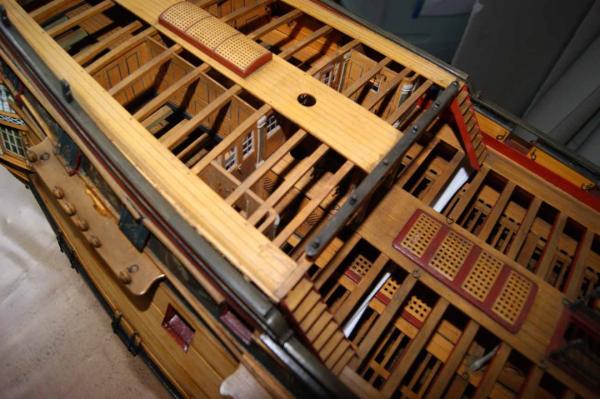
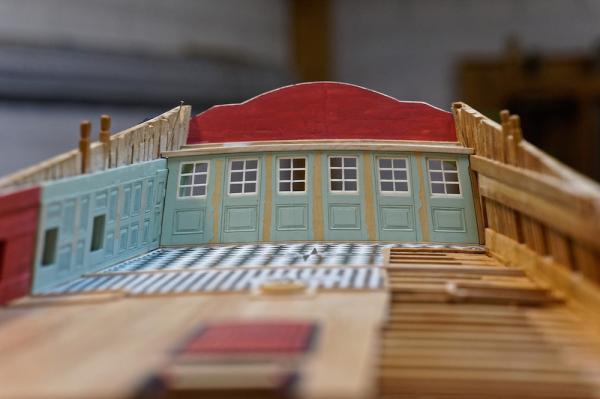
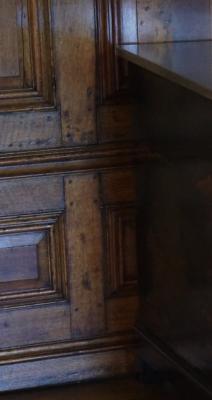
 Robin, may be that is right for cup boards, but luckily not for bulwarks But I felt some cold sweat at my forhead when I read your post and looked immediately through all my pictures. I know that they had pillars on both sides of the bulwark (not always), but I hadn't looked if also the paneling is on both sides if the bulwark. But it is. Here some pictures that Mark posted, on all my pictures the bulwarks are only from one side to see Regards, Siggi The Ajax and the Warrior
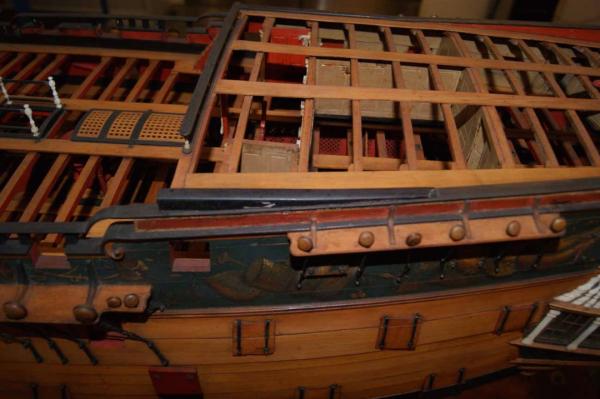

-
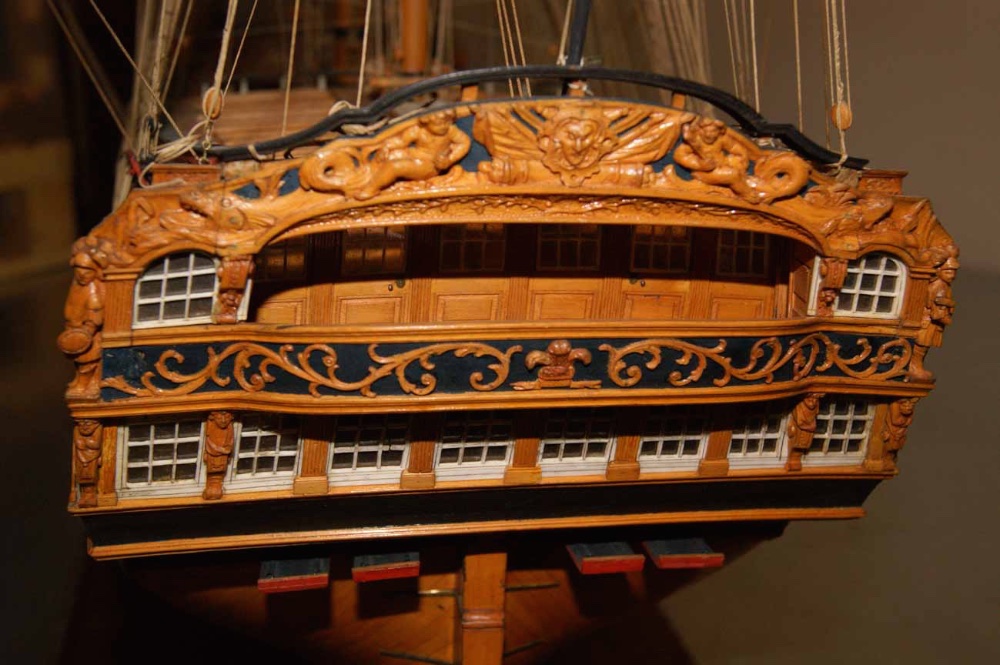
Good morning Christian, did you mean the painting in general? That was not so easy, but you find a lot of information in the historic models. Even when there the carvings often not painted. You lost a lot of the small details then. In the “Shipwright 2011“ is an article from Jonathon Kinghorn also with other historic sources and than here and there something. Mondfeld for example. I think it is the right way to show these ships. They are looking so wonderful in full color. Even when a „only wood“ model has it's own flair. So I'm looking forward with your Fly. I started also with a half model from plywood. Only to get a feeling, because I had never before done something like that. Regards, Siggi
-
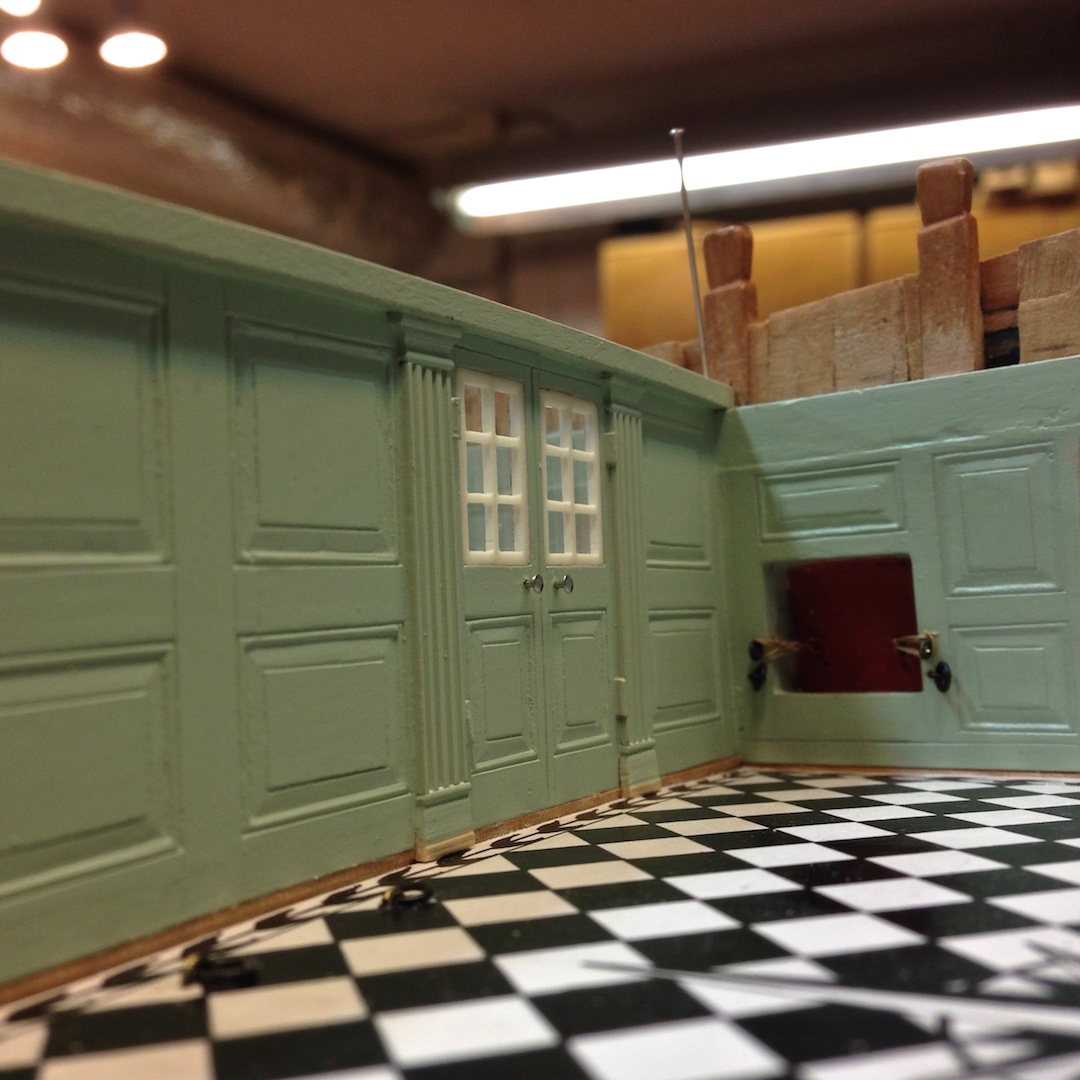
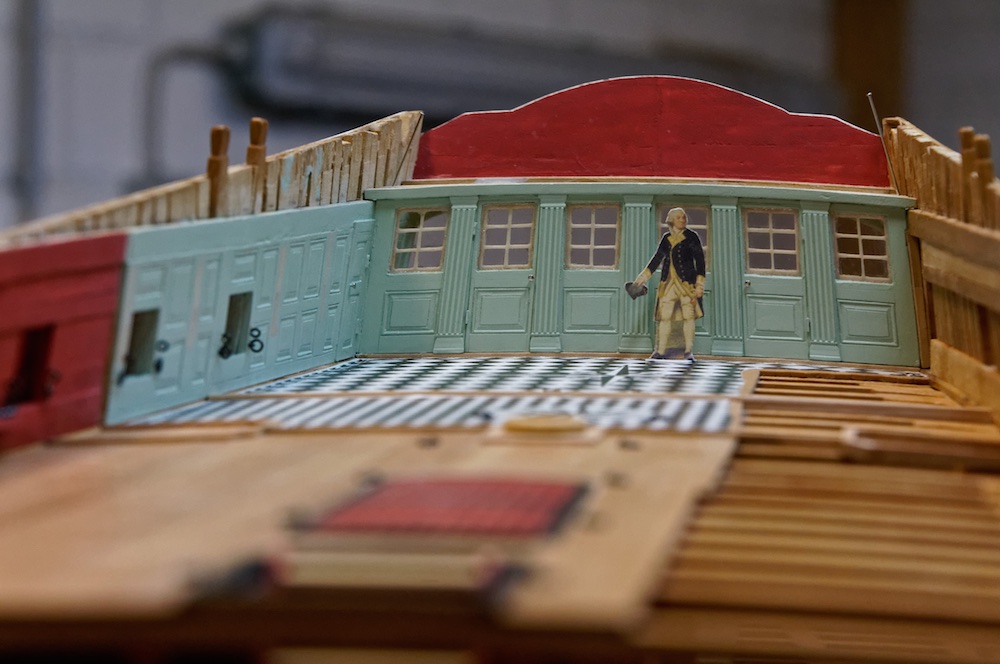
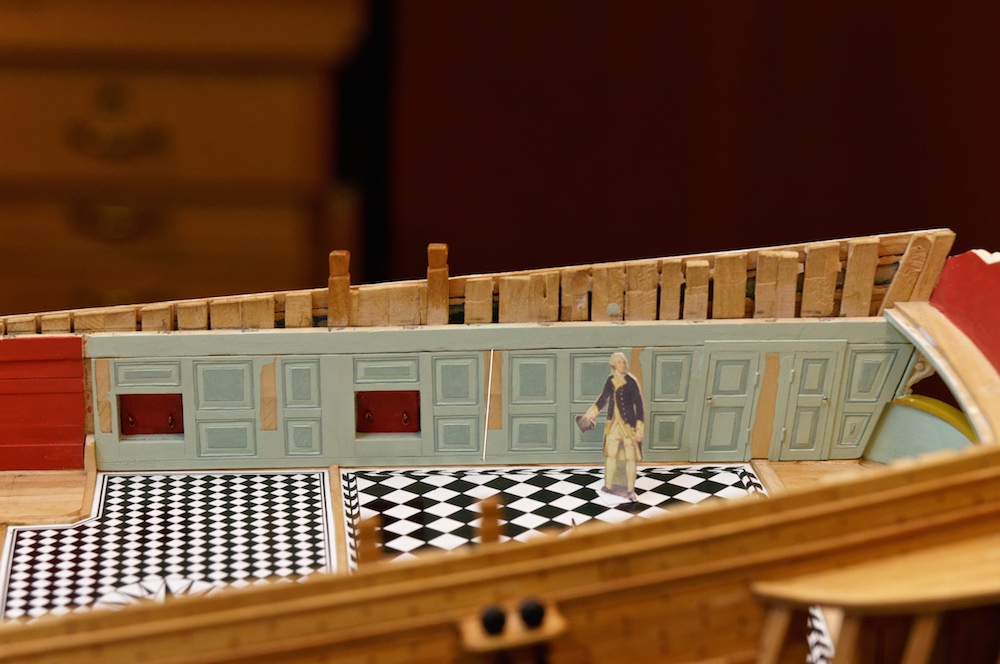
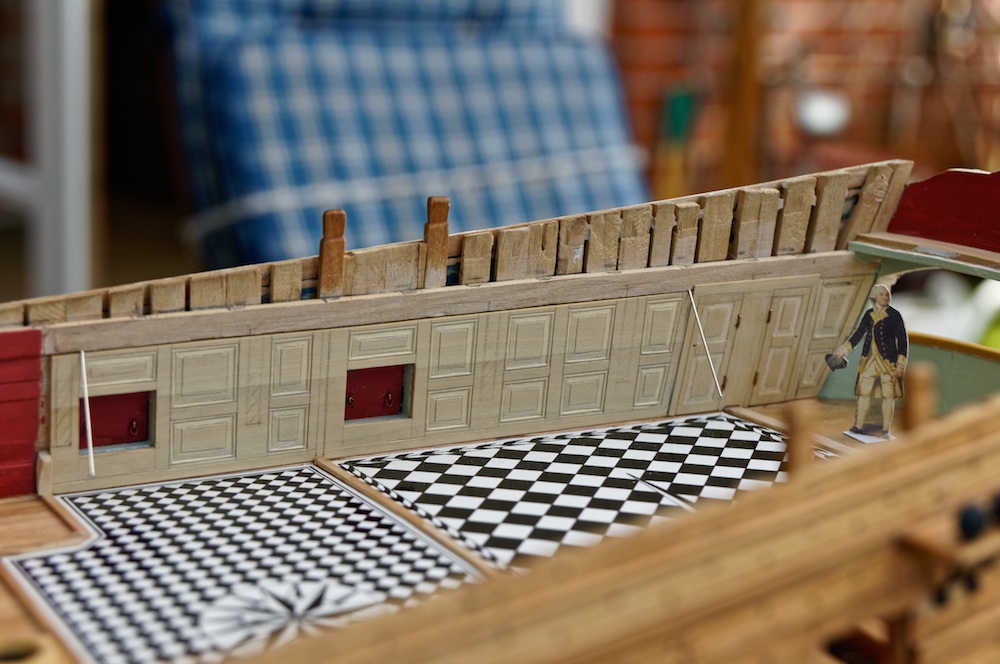
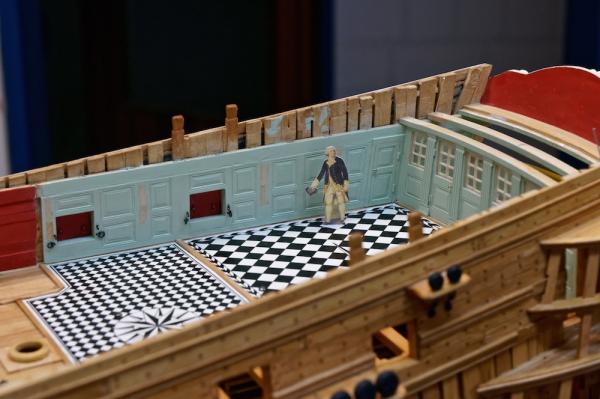
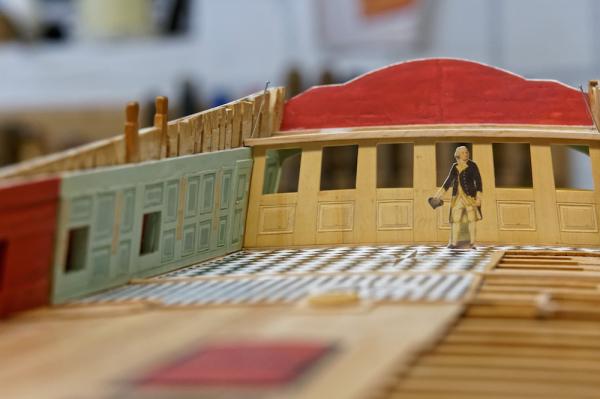
Hello, the aft screen is ready and the captain is very pleased. (I hope he will spend some drinks this evening ) He looks where to place the decks chairs Have a nice weekend, Siggi


- 453 replies
-
- 19
-

-
Hello, many thanks for your help. I changed the color already yesterday evening and it looks much better. Some things you could see only when you tried both versions. But the two color version was too wild and sucks up the carving and as Carl wrote, I have the two tones due to the shade of the carving. Regards, Siggi
-
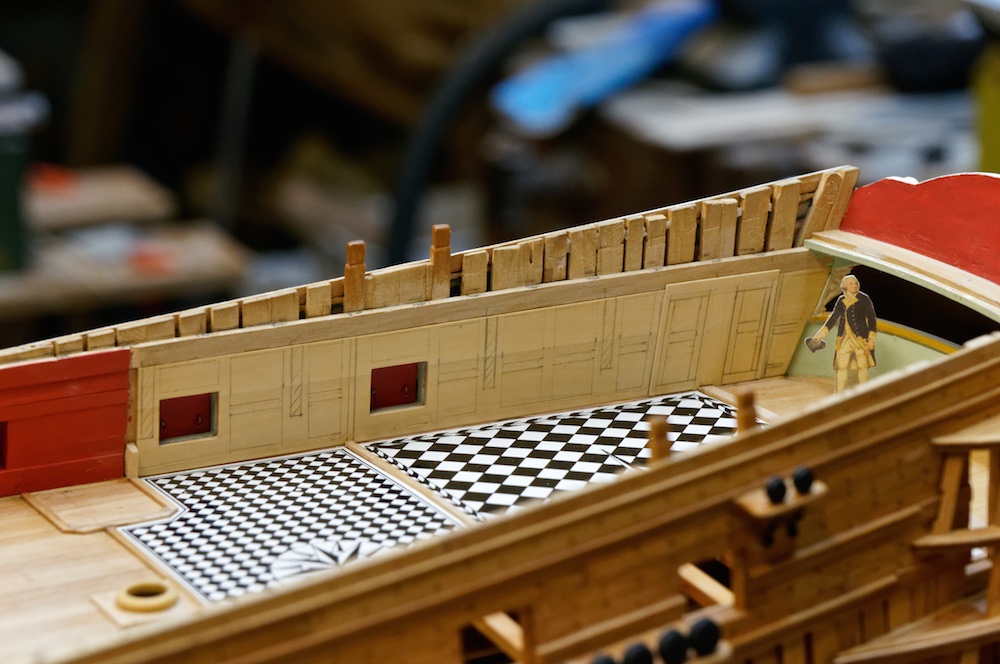
Hello, today I painted the aft screen and when I was ready I thought, wow. That is looking better then that what I did on the wall in two colors. What would you say, should I paint it all in only one color? It's not because of the paint job, that is really horrible and I bought today new brushes, but I think it is looking better and you could see the paneling better. Regards, Siggi

- 453 replies
-
- 15
-
-

-
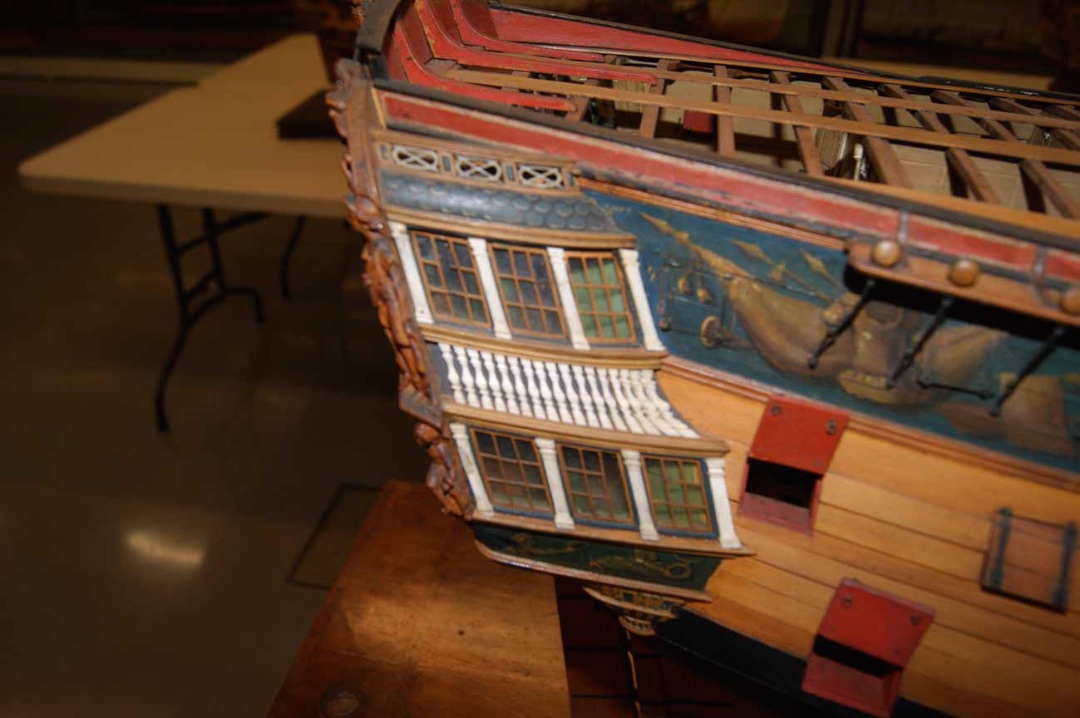
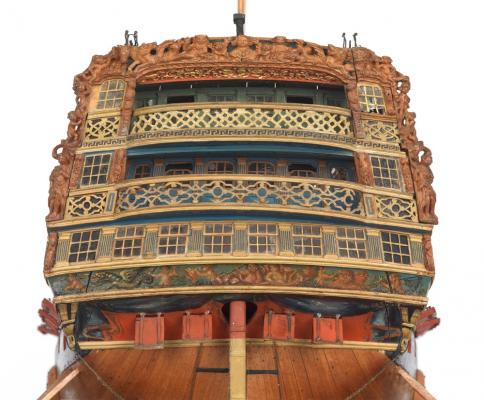
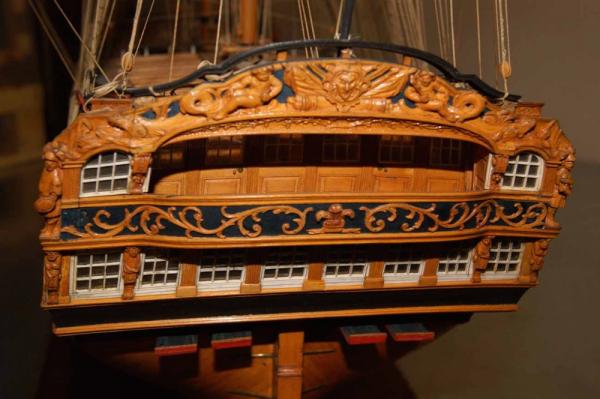
Mark, if you look careful you could see this color in some models, here as an example the Victory as she looked in 1765. The panels of the bulwarks where I think fitted into rabbets into the frames. As in doors. But if that really so was, I don't know. Would you construct the bulwarks plank by plank? Because we have here the may be hottest day of the year, 96°F, I went into the basement and build the aft screen. Even my tomcat stayed inside the house! Regards, Siggi
- 453 replies
-
- 11
-
-
-
Hello, now I have the paneling ready. But when I think about the future work with the rest bulwarks... Have a nice weekend, Siggi

- 453 replies
-
- 11
-
-
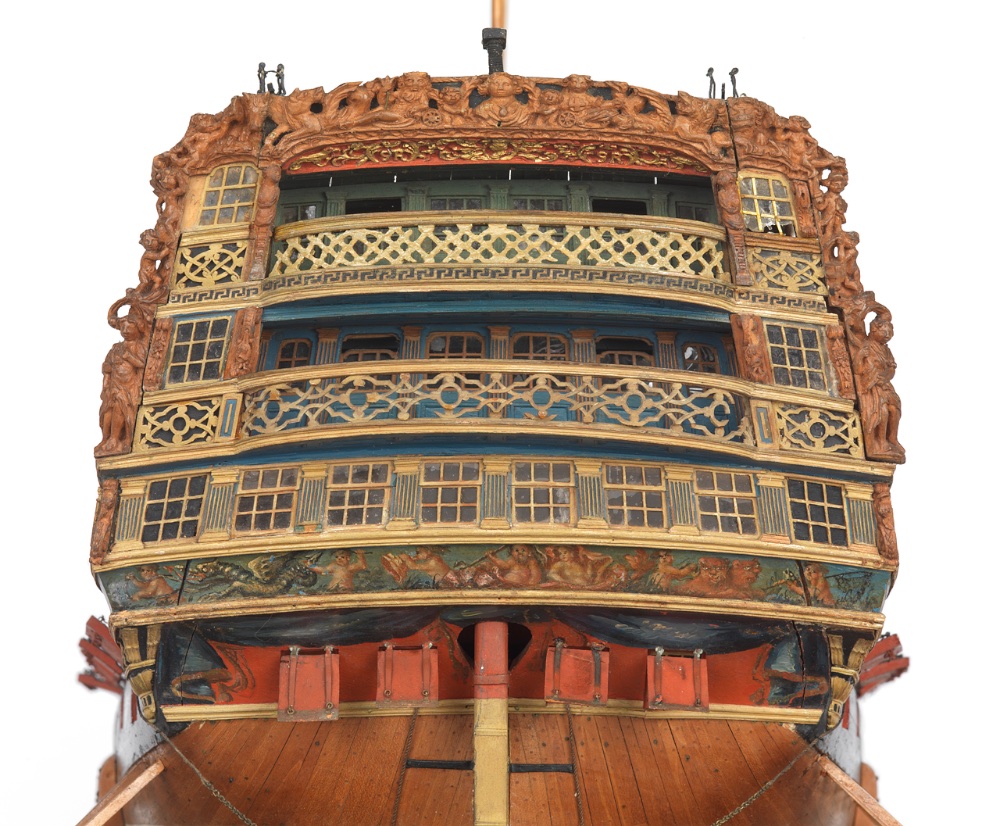
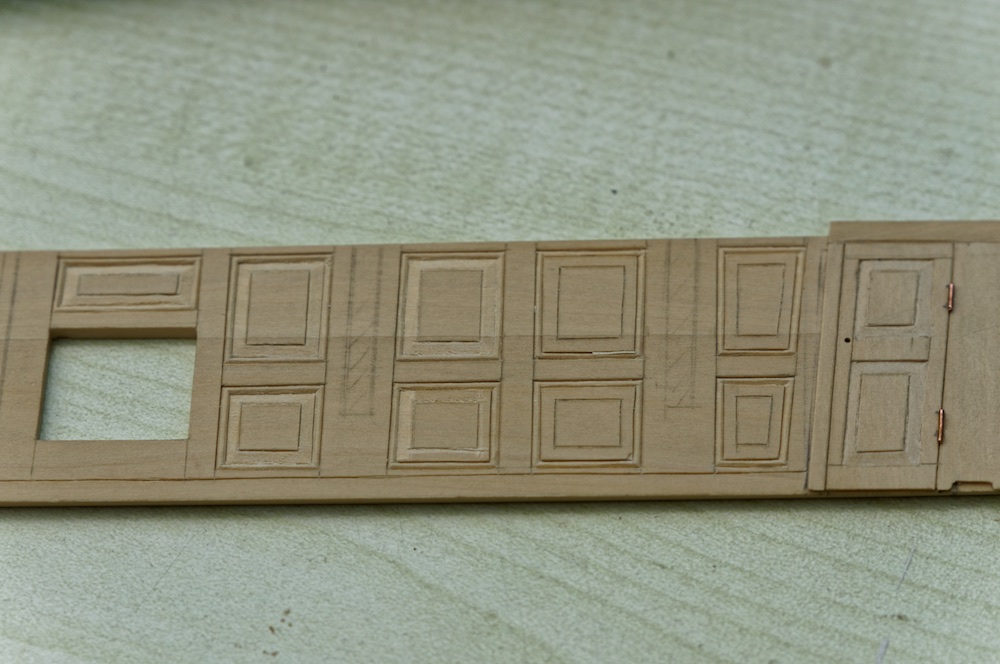
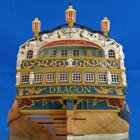
Robin, I do not know how the door is looking you mentioned, but here is the example that inspired me. The paneling at the Thunderer, or as I think the Dragon. And here is an example from the Kensington Pallas. It looks as if they used wooden pegs for nailing. And that is how I think they nailed the paneling to the wall. Others as in houses they did't need a wooden frame under the paneling, they could nail it directly to the wall. Also in this picture my painted paneling. When under color, you see every mistake you made. The captain must hang up a lot of pictures! But there is a lot of paintwork left. Steve, thank you for the kind words. Regards, Siggi
- 453 replies
-
- 10
-
-
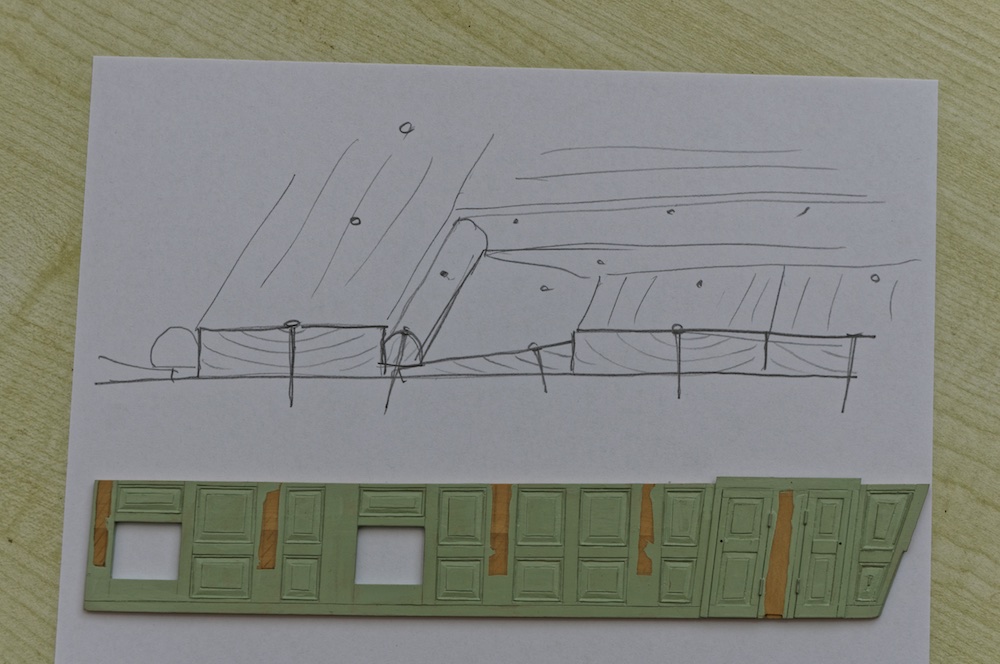
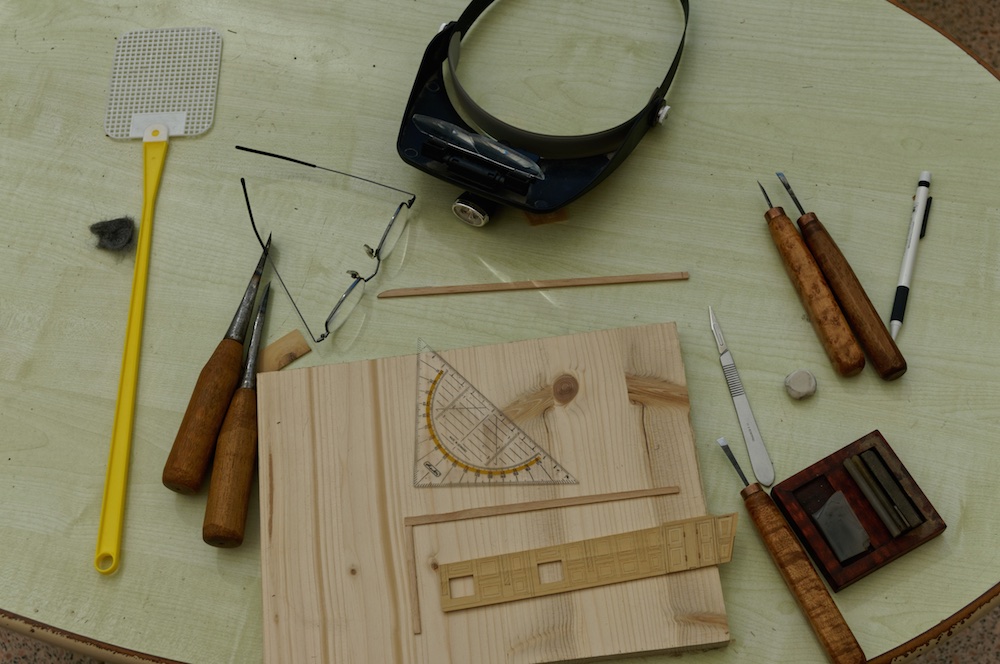
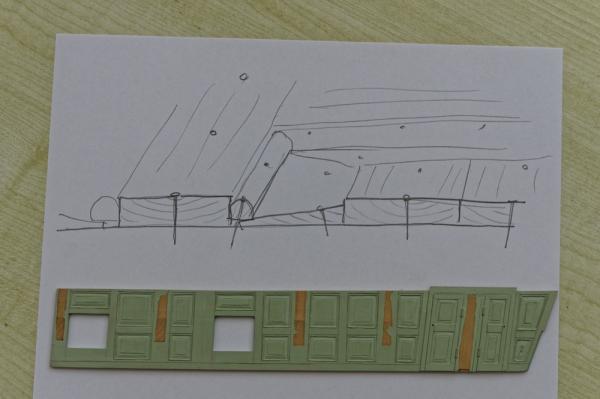
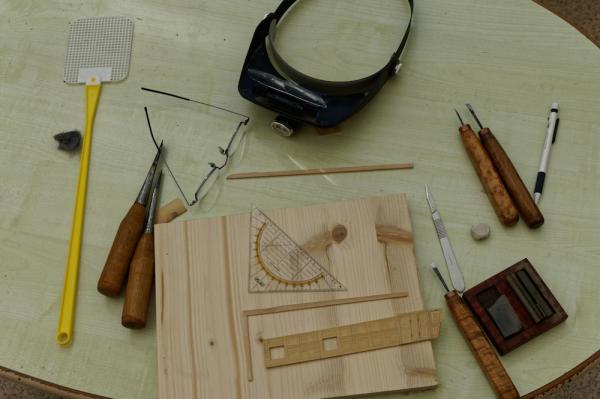
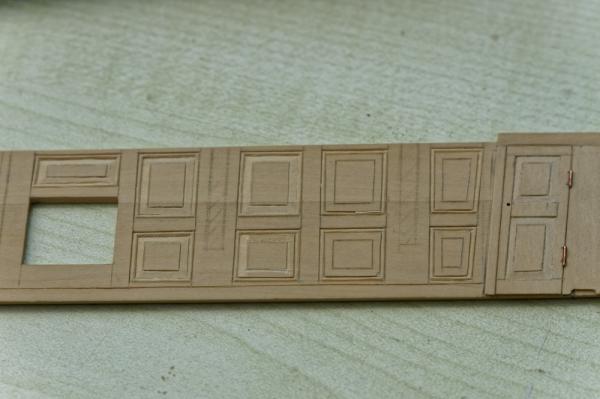
Hello, the paneling for the walls are ready! I did't think that it was so easy The most complicated part was the cutting of the lines. Here you must have an good eye or good glasses. Because we have here this week summer, I went outside to do the cutting. Here the equipment I used for it. And here the work is in progress At the moment all is under color and it did't look so bad. Regards, Siggi

- 453 replies
-
- 14
-
-
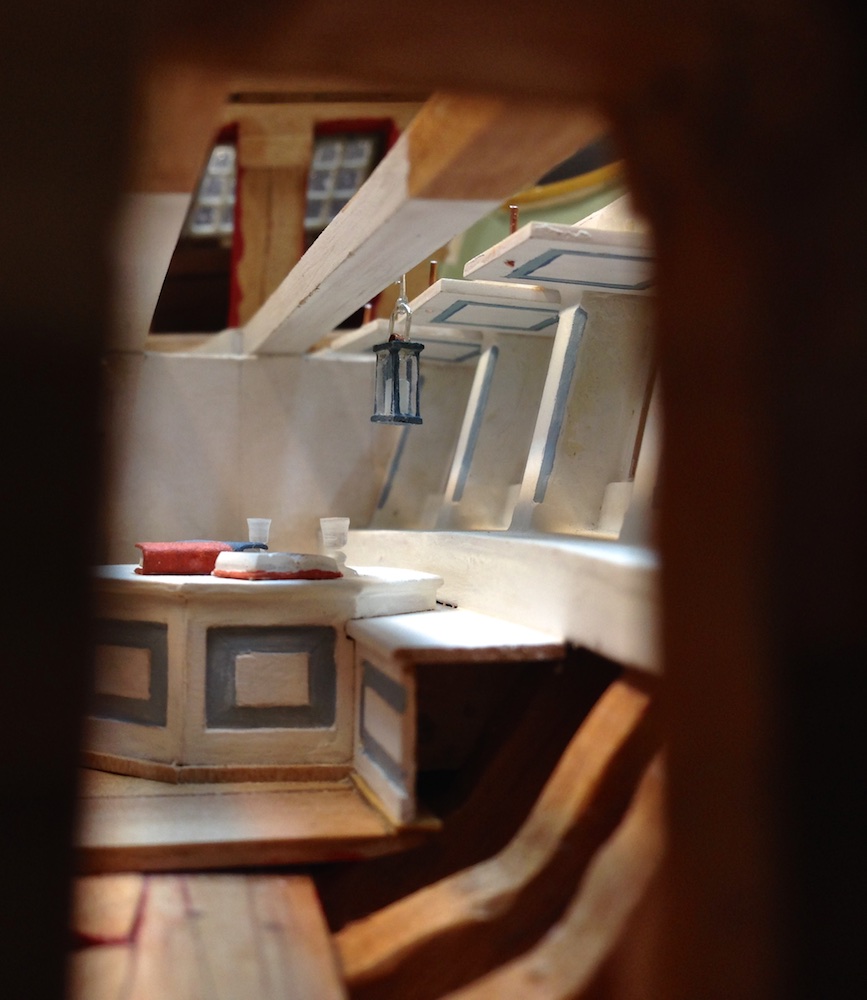
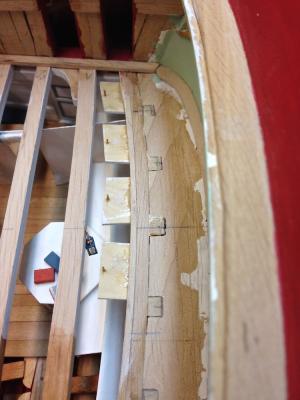
Robin, you could have questions! First to say, I really don't know anything. But from the standpoint of a carpenter I would say the paneling is build on the normal planking in a lighter wood, may be pine or spruce. The bulwarks would be build like doors in a frame. For the paneling you need only half of that and that was nailed on the planking. The planking may differ here from normal, that only the lower spirketting and the upper deck clamp have there normal with. The planking between would be 2 cm thinner for the paneling. I think that in this case the paneling is build and not painted, because at the models they look the same as in the bulwarks. As an example here a picture of the Egmont. To the left you have the aft screen and in the right background you see the same design on the wall. I hope I could help you with this. Regards, Siggi
-
Hello Mark, the poop had no cannons and they build in here only straight knees. So there are no knees „around“ the cannon ports (only left or right) of the quarter deck. I think I build it so as I described it above. Siggi
-
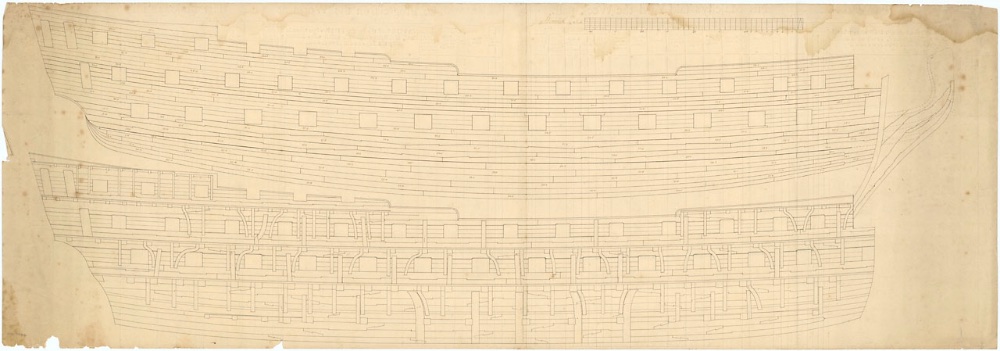
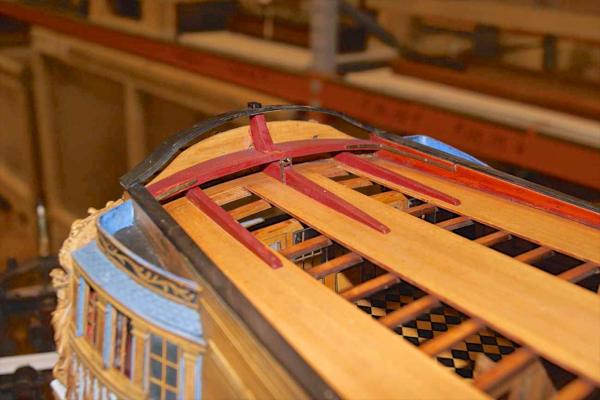
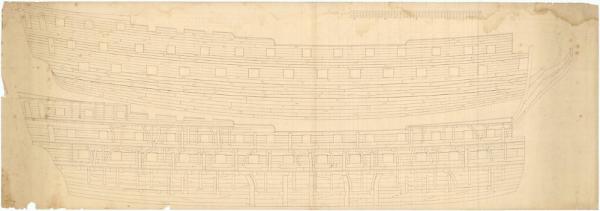
Hello again, and first, many thanks for your kind words about my work. Today I started with the paneling of the side wall. And here I have a question for the experts or all who know something about this. The hanging knees from the poop deck. Goodwin says: „Unlike other decks, only every other beam was supported with a knee on this deck, and these were placed where they would be most beneficial.“ Whatever that means? From the NMM I got this picture of the Berwick from 1775 And here my ship. For these beams I would build the hanging knees. Counting from behind, under the second beam would be the aft screen, then the 4th, and 6th. At the 8th is the bulwark, but I could build here also one and then at the 9th and 11th beam. Otherwise on later ships, here are no cannons at the poop deck, so the knees support only the deck. Many thanks in advance, Siggi
- 453 replies
-
- 12
-
-
-
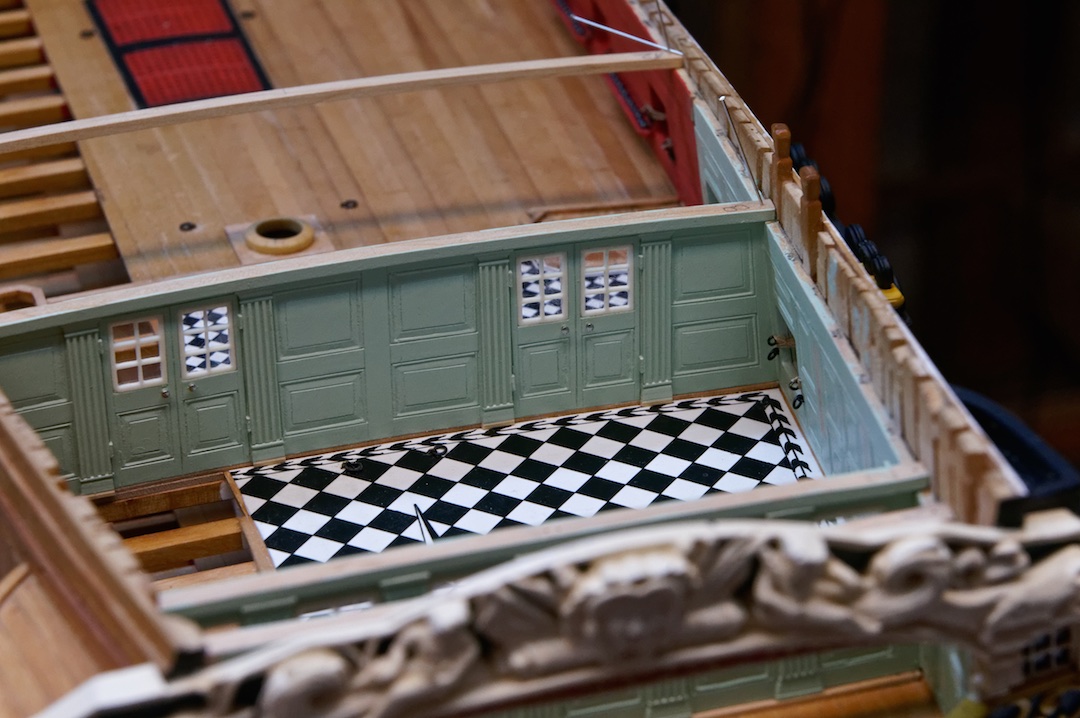
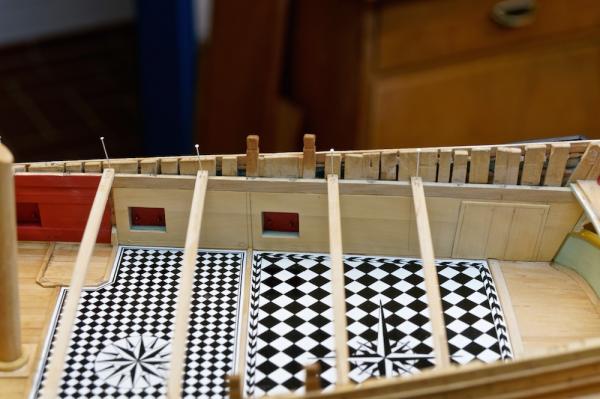
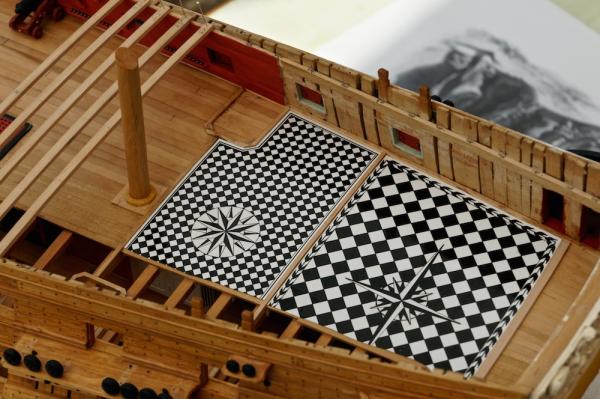
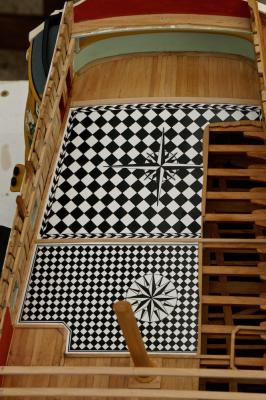
David, may be it's my english, but I mean a somehow sealed surface on a paper. In my case it was a plain white printed part of a print. Mark, yes it's the floorcloth of the Superb. The compasses are from other floorcloth out of houses. Siggi

-
Thank you for your nice comments. That is all manually drawn. The problem I had was, that for the first time when I put on the varnish, the paper in the white parts sucks it all up and it looks only bad. For the second try I used sealed paper and now I have a smooth surface where also the white parts shine. Siggi
-
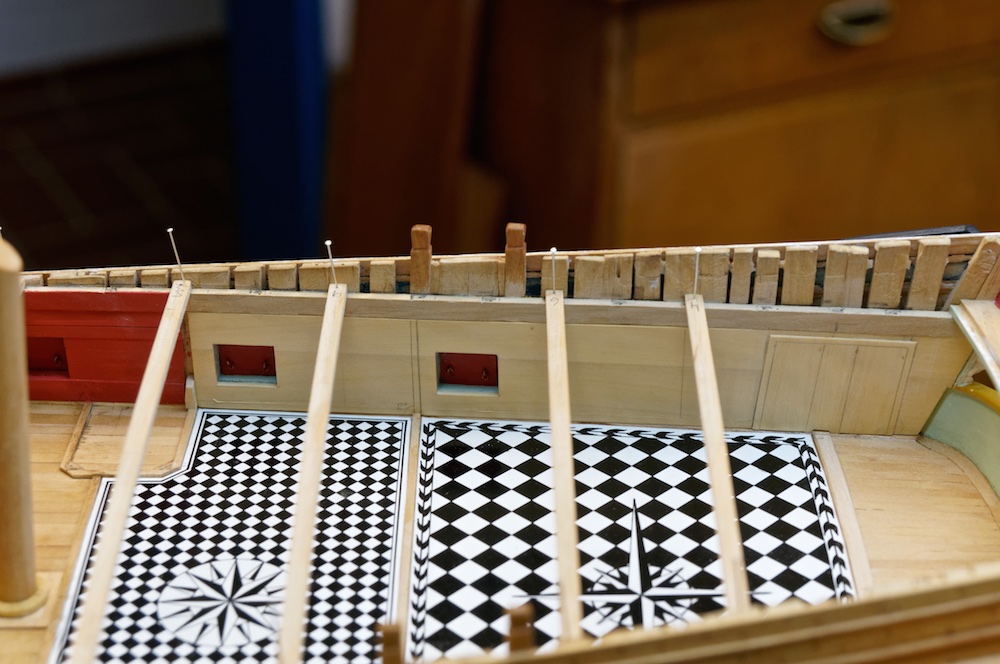
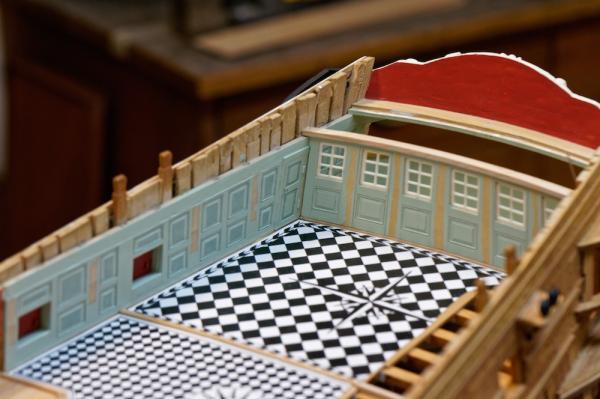
Hello, it is done, the floorcloth is in! That was a whole weekend of concentrating drawing, redrawing and making new. The for part of the quarter deck is also mainly ready. Regards, Siggi
- 453 replies
-
- 17
-
-
-
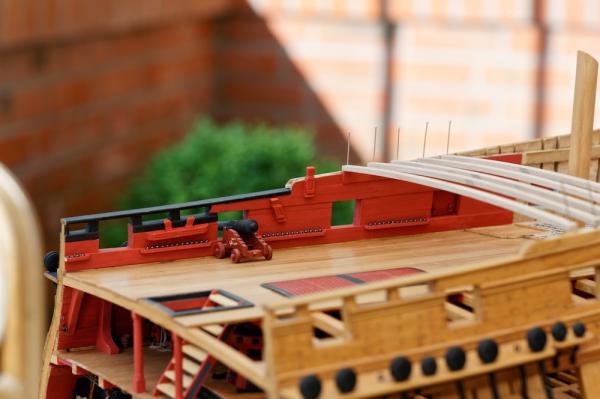
Hello, the workers have been very busy the last days. It's cold and rainy here, so they stay at the shipyard. All the beams for the poop deck are cut and installed. Also the walls, except for the great cabin, are ready. But the next problem occurs and again with the cannons. But about that later. Today I hope the captain will spend some drinks, because of the topping-out ceremony! Regards, Siggi

- 453 replies
-
- 14
-
-
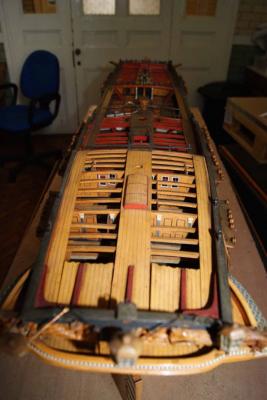
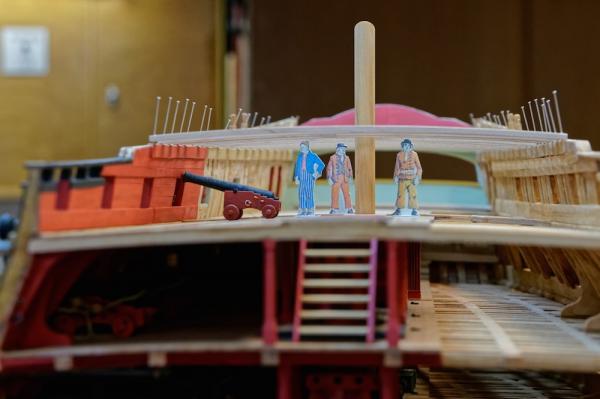
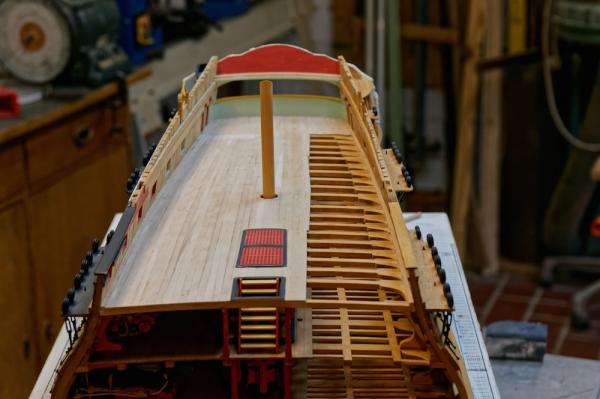
Hello, the planks for the the quarter deck are laid. Now is also the upper gun deck dark and only in the ward room is some light. Here I'm sunning the fresh oiled deck and showed the ship the great ocean. The layout for the first bulwark is also ready and installed. For the next days I have to cut the beams for the poop deck. Regards, Siggi


- 453 replies
-
- 14
-
-
Hello Mark and Robin, in any Western you could see that every small board is bullet proof, so I think that they also should be a protection from small gun fire. What I in a case of a storm not understand is, the windows are outside of the "deadlights" (now I got it). Robin, the captain wanted Windsor Chairs! Grrrr regards, Siggi
-
I'm sorry Robin, but my Mac wanted it so. But I changed it. My english is't soo good Siggi
-
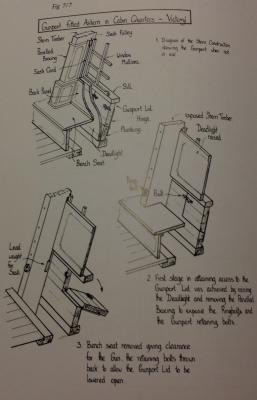
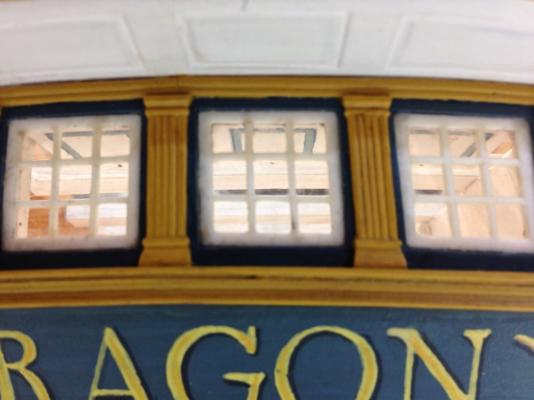
Hello, it is done, the deadlights are installed. It was really tricky to glue them in. Mostly is that the moment when something bad happens. But all went well this time. I painted the paneling only, because I thought that a build paneling would lessen the strange of the wood. Regards, Siggi

- 453 replies
-
- 15
-
-
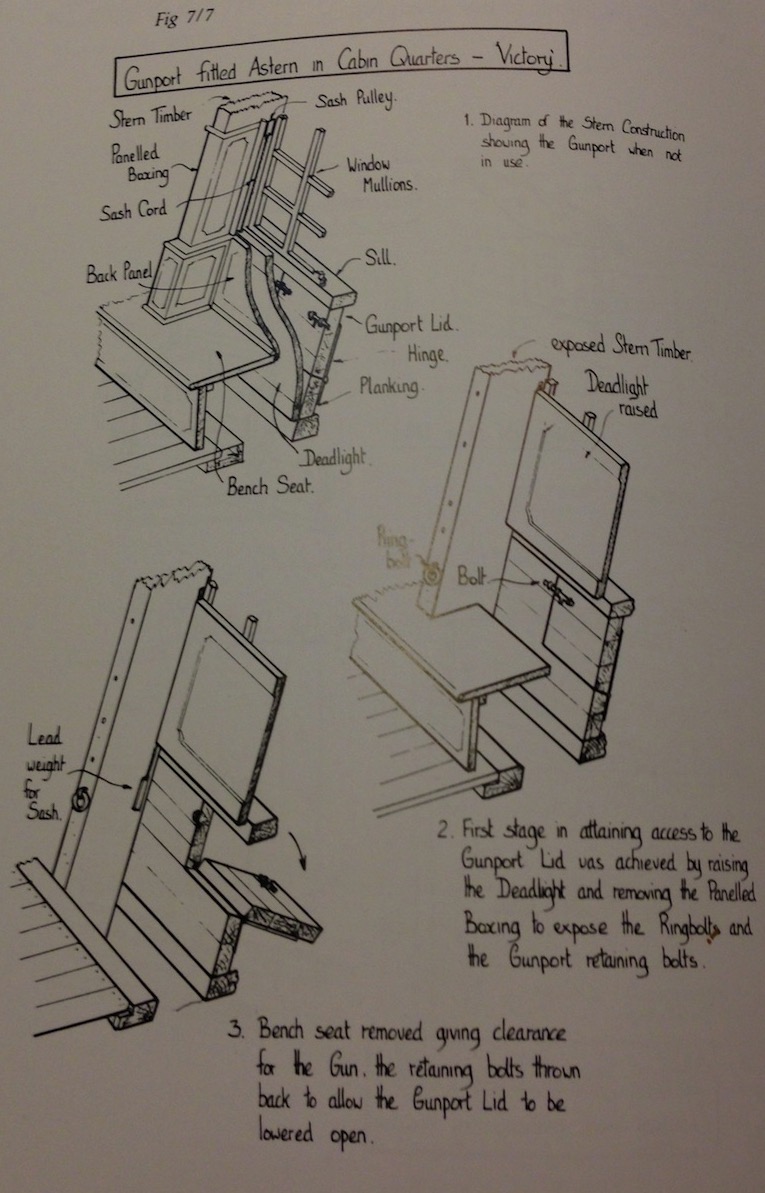
Thank you Robin for this, I will try first the fold up version. If my fingers are too thick for installing the deadlights, I will follow your version and do nothing. Have a nice day, Siggi
-
Thank you Druxey, that is what I also thought. So tomorrow I will see what I could do. Regards, Siggi
-
Hello, when I today looked some films from the L' Hermione, I saw that in the captains cabin where deadlights installed. Before I now lay out the planks for the quarter deck, should I build some or not? I do not know if they had such things at those times and when which version? For the first version, from Goodwin's book, I have nothing extra to do. I could say they are just hidden But if the more simple version from the Hermione and from this picture is the right one, I must get active. Is there anyone who could help me with this question? I don't know if they had cannon ports here in the 1760's, or if that is from the 19th century. Then I think the second version would be the right one. But I'm not sure. Many thanks in advance, Siggi