Siggi52
-
Posts
1,080 -
Joined
-
Last visited
Content Type
Profiles
Forums
Gallery
Events
Everything posted by Siggi52
-
 Hello, thanks for your kind words, that supports my much. Today I finished the binnacle. Through my research in the NMM, I found this picture of a frigate from the Amazon class, ca. 1780. So I had something I could follow. Against this one, the binnacles from the Victory and Tricomarlee looking really modern. And that is now my version Regards, Siggi
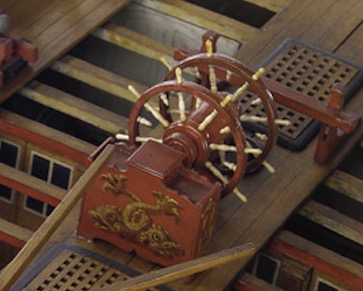

- 453 replies
-
- 15
-

-
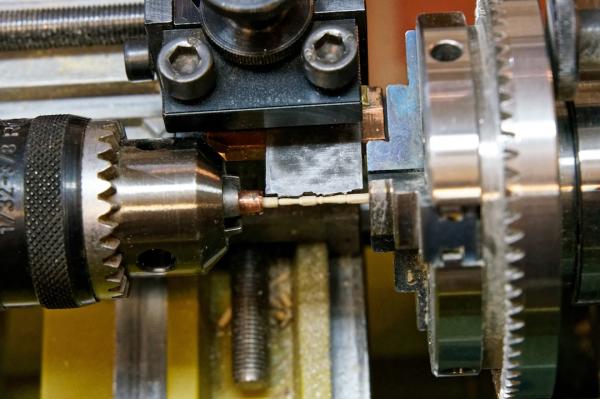
Hello Druxey, no I use a normal speed, rather fast for these small diameters. But I hold a pice of wood, with a notch in it, from the opposite side against it and support it. An other important thing is, at which high you set on your very sharp cutting tool. There are micrometers a difference. The first day I had a lot of breakages. But when the system was set, there was non. At the end, they broke often at the tip of the handle, so it was ok. Regards, Siggi
-
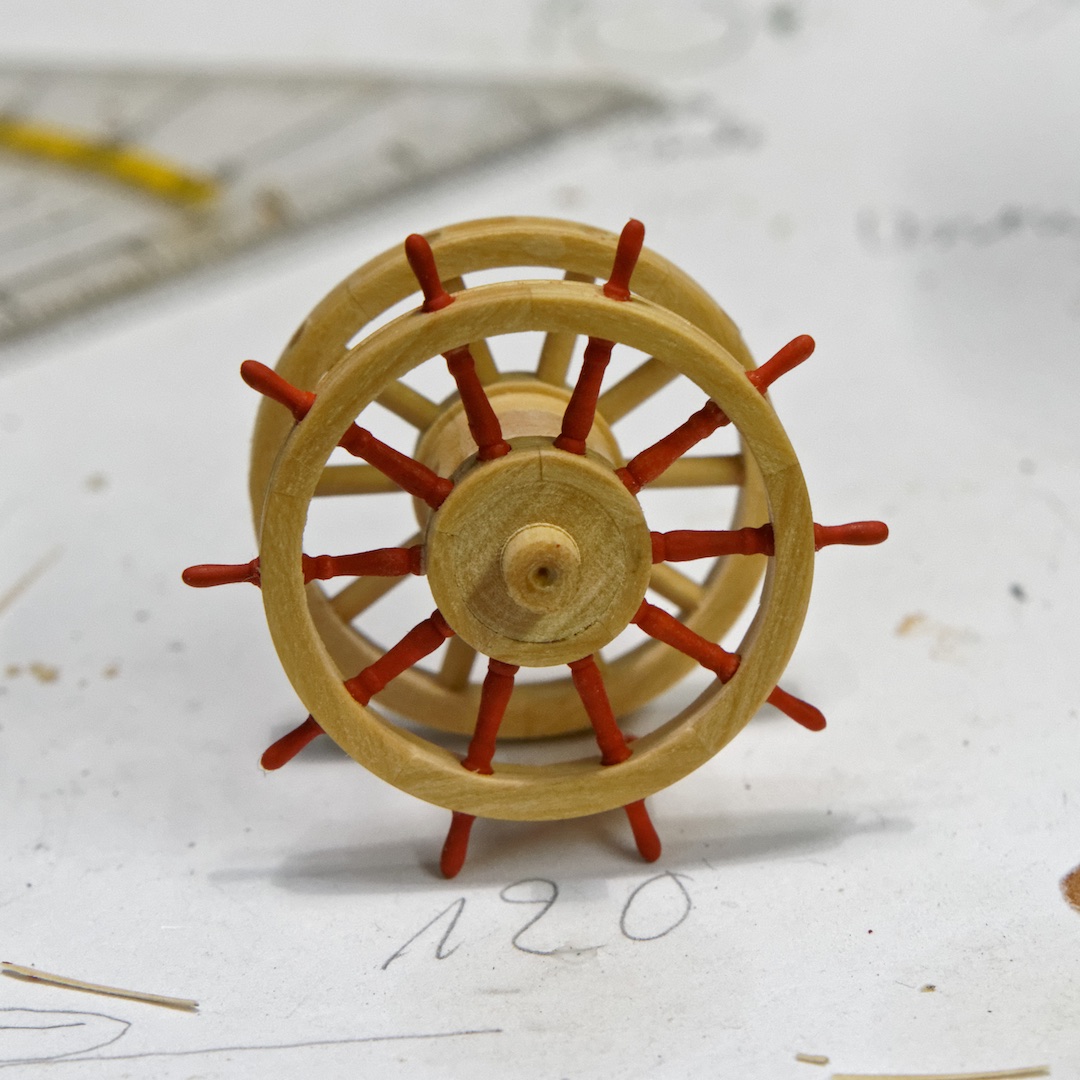
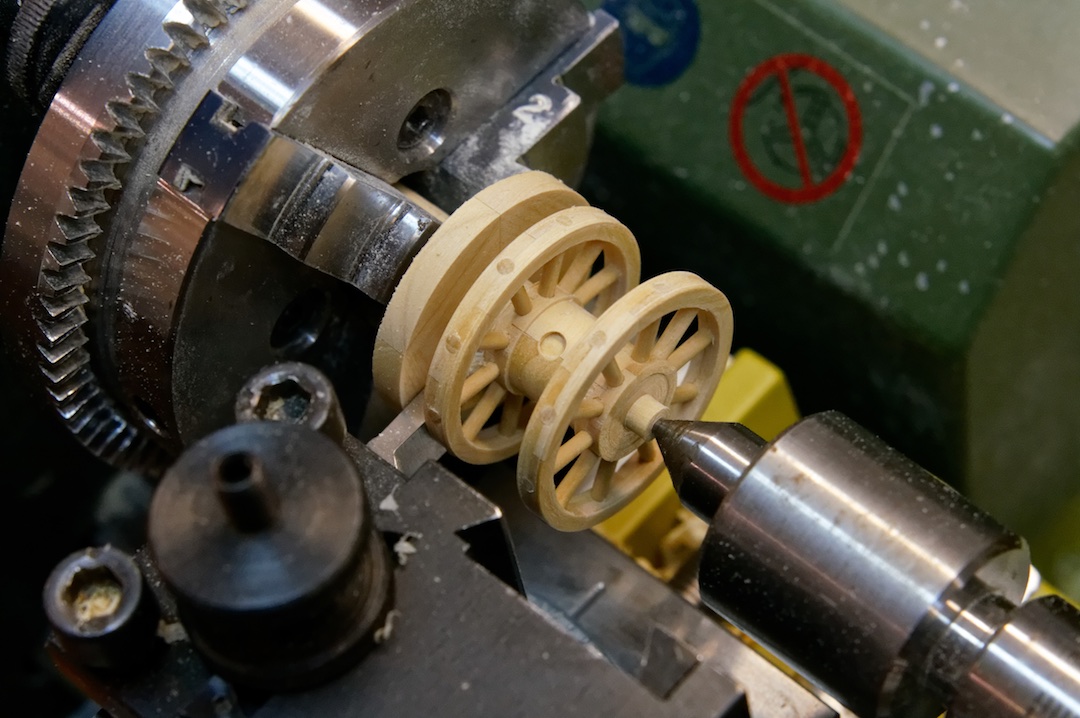
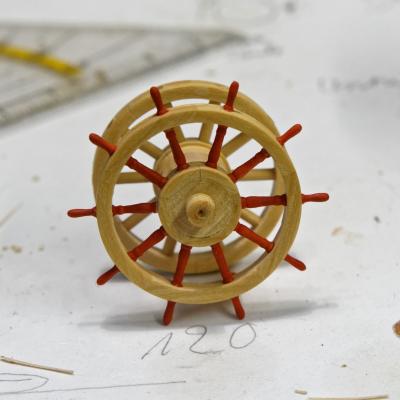
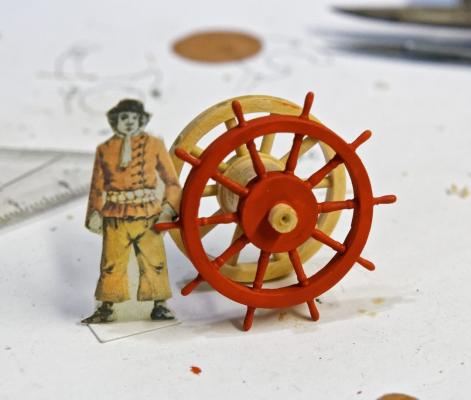
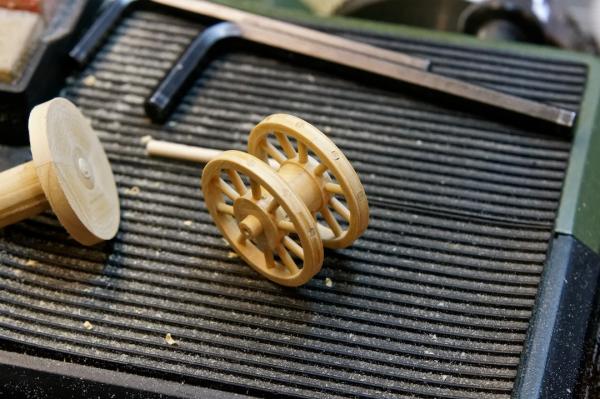
Hello, the captain proudly presents: the brand new wheels Here an impression from turning the spokes. This time all went well, no trash. But this day was't my day. I had more repairs than things I actually build new. Regards, Siggi


- 453 replies
-
- 19
-
-
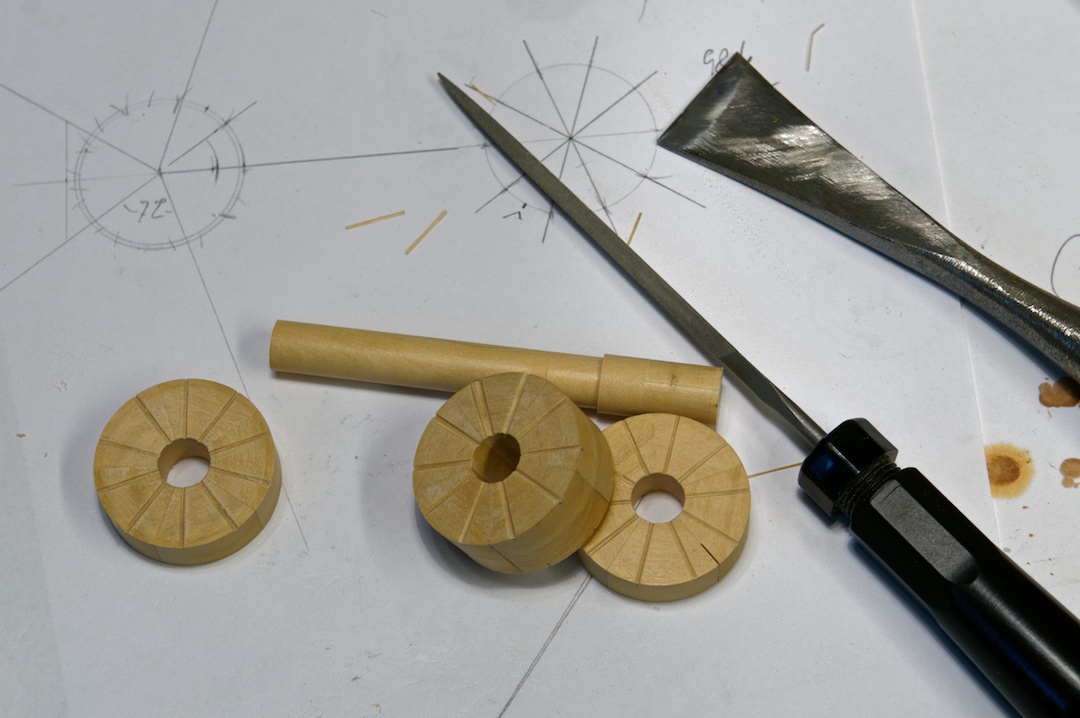
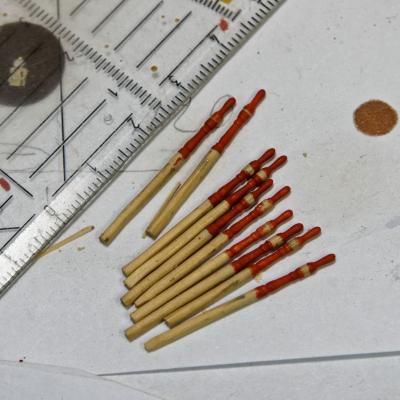
Hello, yesterday I worked hard to finish the first 10 spokes. (Not mentioned those who did't make it) But the result is I think good. I'm not satisfied with all spokes, but it is the best result I could archive. Tomorrow I will see to finish the rest. Regards, Siggi
- 453 replies
-
- 19
-
-
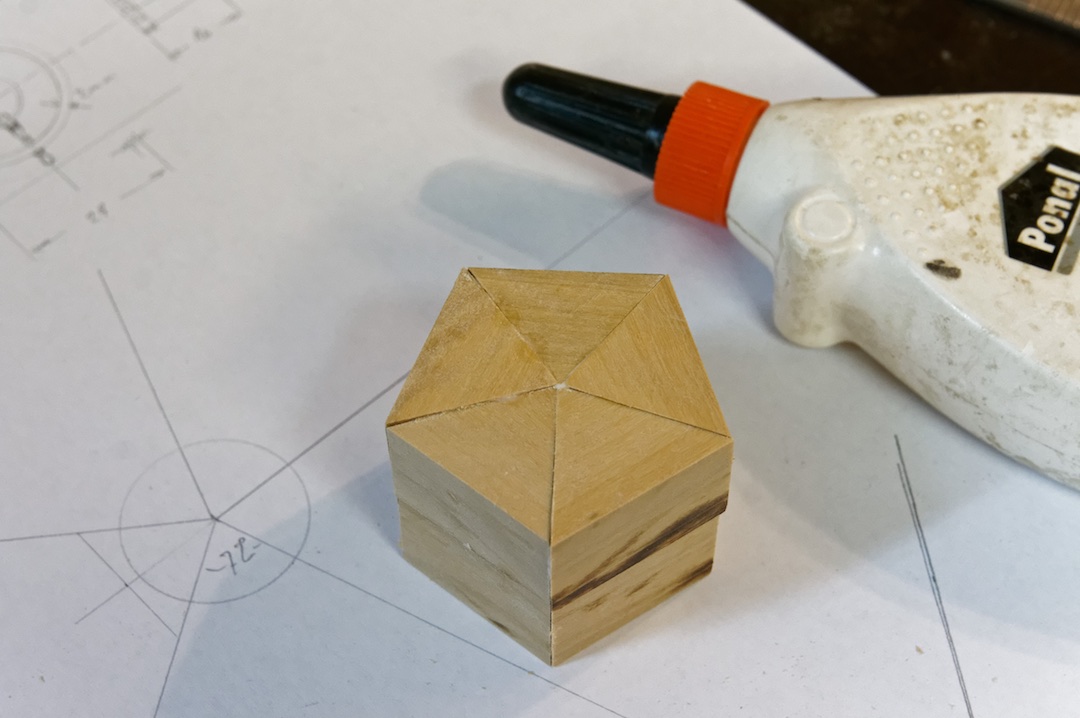
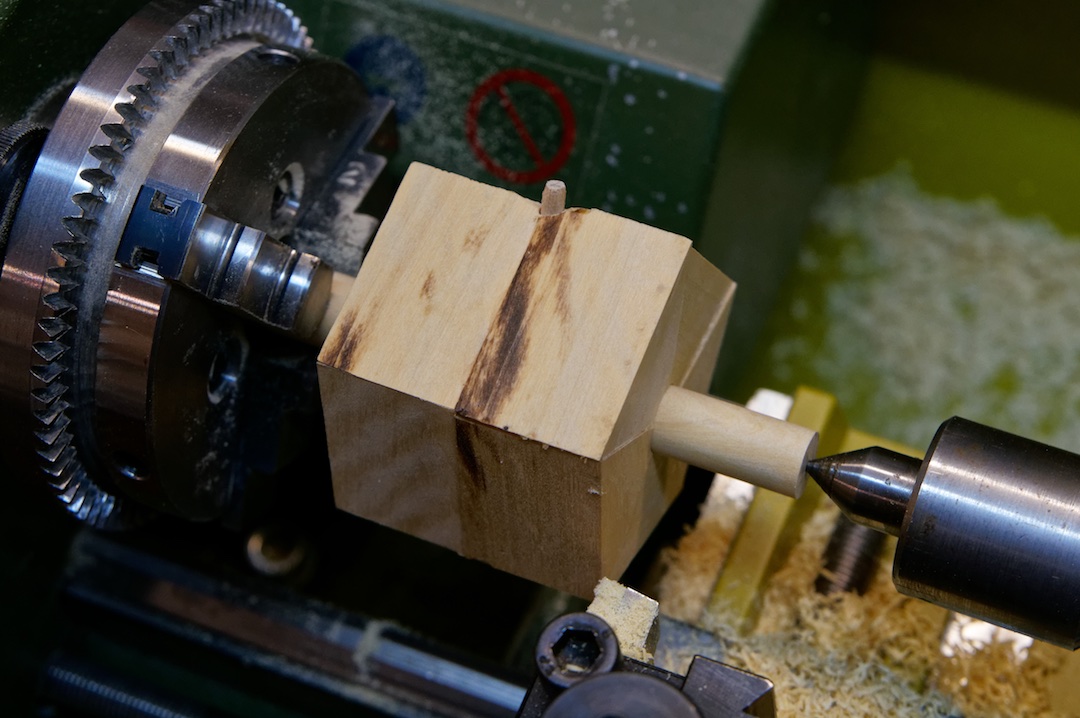
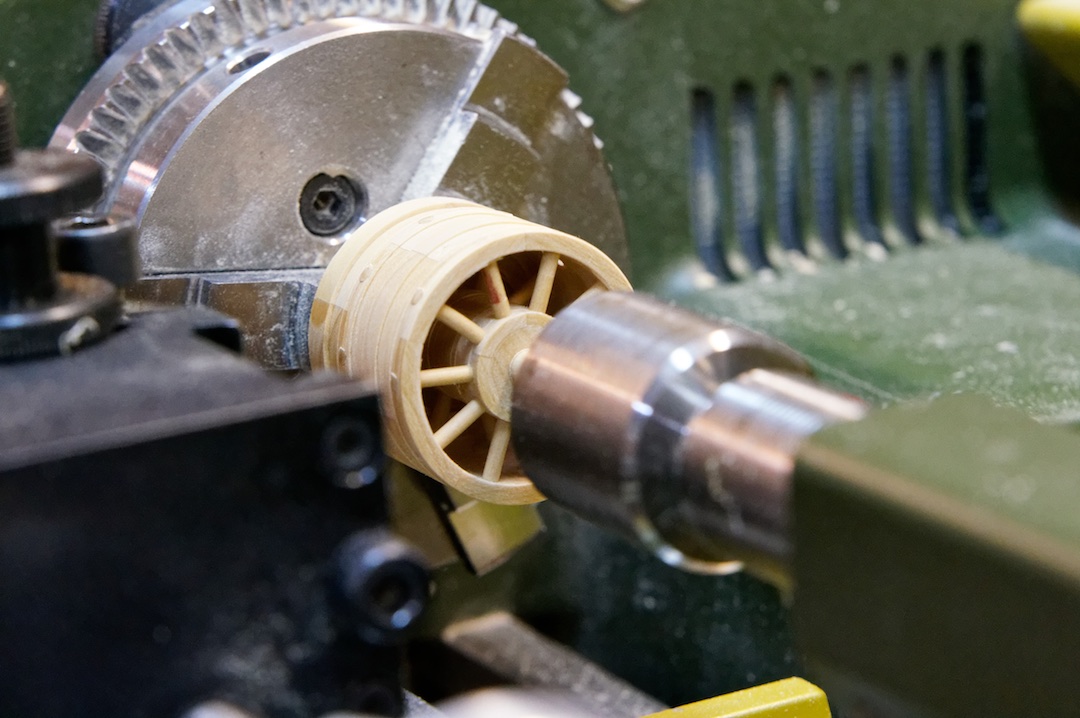
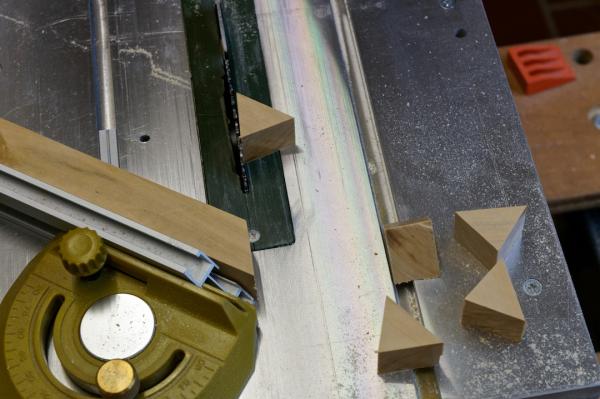
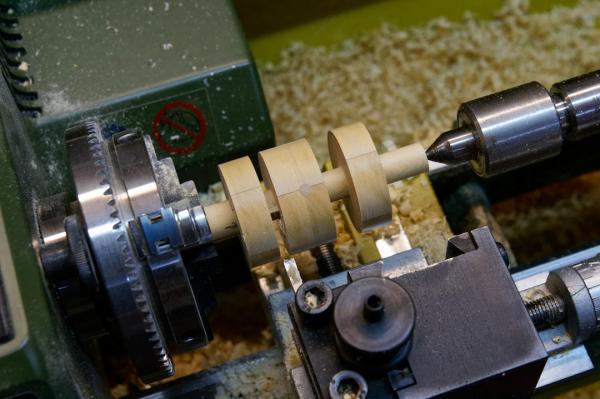
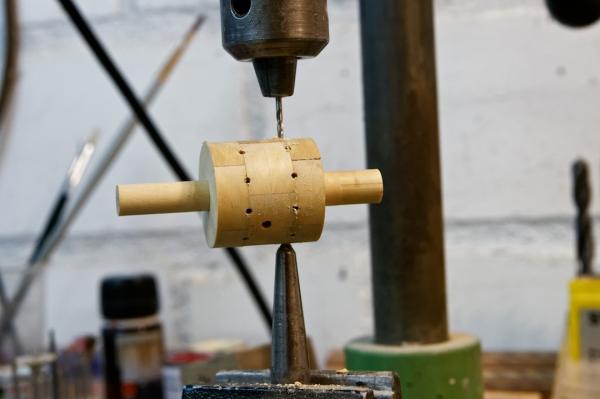
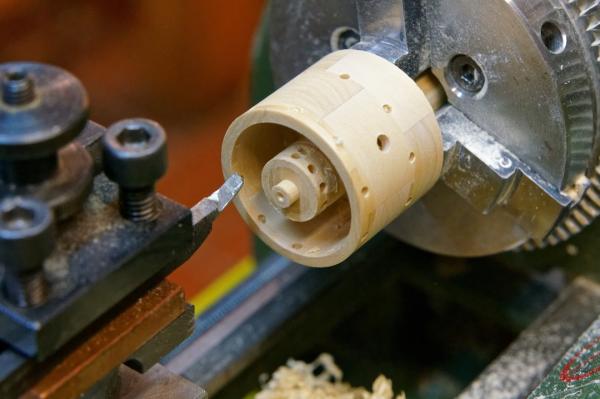
Hello, just to show you, that I'm not lazy here, the first pictures from the wheels. I worked after the method EdT used with his HMS Naiad, but modified some parts. Thank you EdT for this tutorial. At first I cut the triangles and glued then together. The next step was the axel. The pentagon is loose on the axle, hold only with a peg. Here is all turned round and the parted. I cut the channels for the spokes, so that the drill bit would have a direction. Here all is glued together and I drill the holes for the spokes. I drilled the holes, because I did't have such a nice machine like EdT Here I turn the interior free. That is now the second drum I turned. The first one did't make this step Here the temporary spokes are installed and I could turn out the rest. This time all went very well. The spokes here have a diameter of 1,8 mm. The next days I will turn the spokes and they shod go done to 1mm diameter. I hope I will not get crazy about this work. Regards, Siggi


- 453 replies
-
- 20
-
-
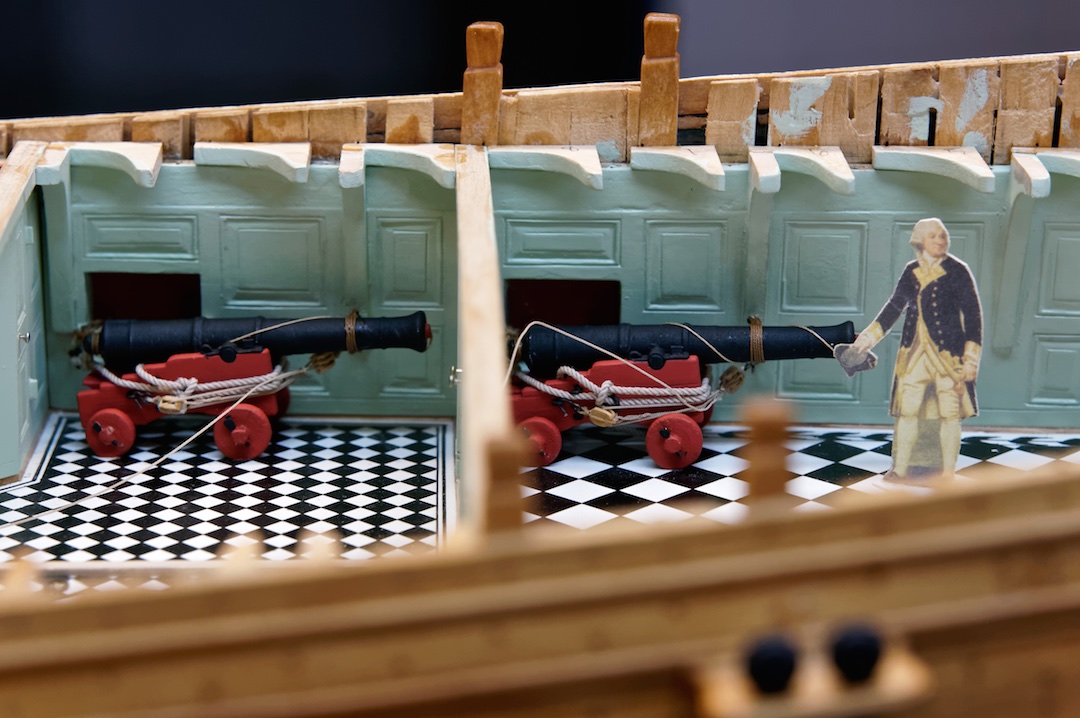
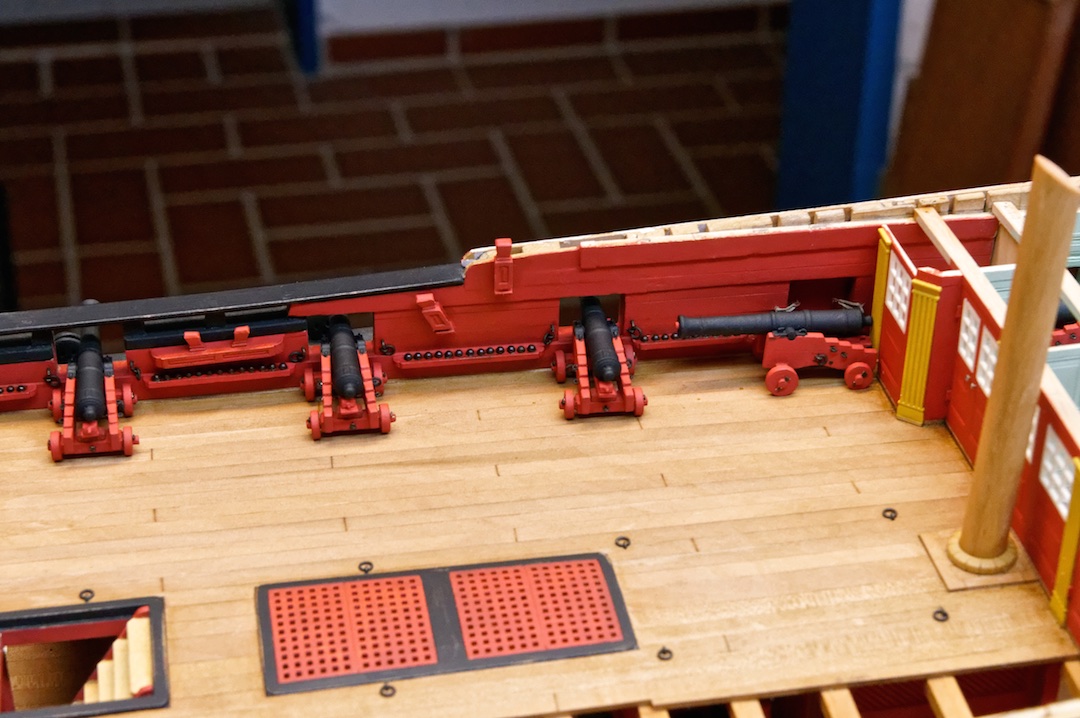
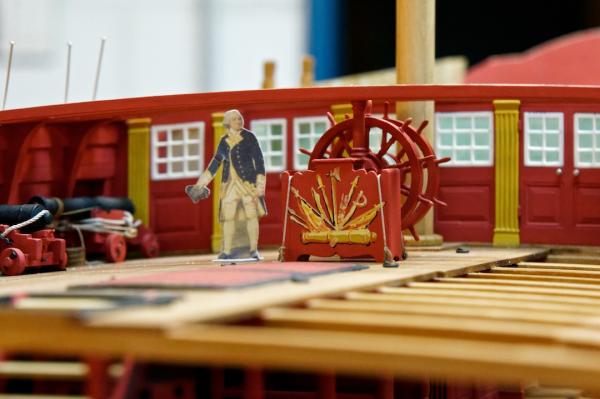
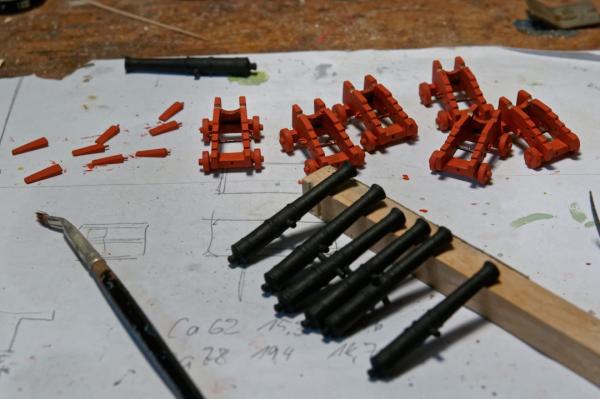
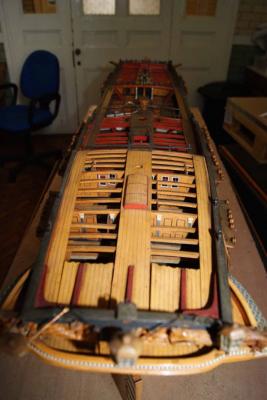
Hello, now the cannons are fixed to the wall. That was hard work with all these small blocks and hooks. But the captain was very pleased and spend a brandy after work. Tomorrow we have only left to tuck the ropes under the cannons and then, next week, comes my biggest problem, the wheels. Regards, Siggi


- 453 replies
-
- 15
-
-
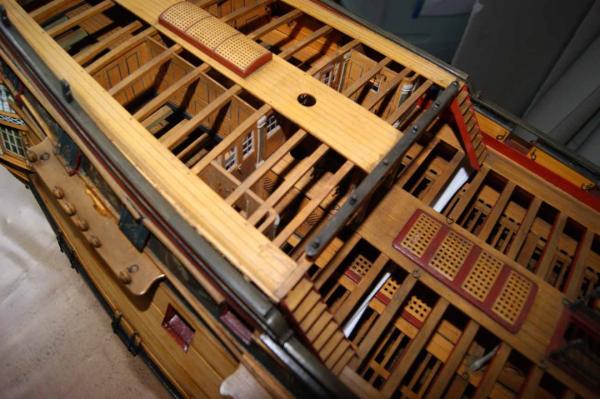
Hello, without much words, the knees are ready. It wasn't so bad as I first thought. Because I had not to dive so deep into the hull. From that point of view were the knees at the gun and upper gun deck the most worse things I had to do. The next thing to do is to install the cannons with all there tackle. Regards, Siggi

- 453 replies
-
- 20
-
-
Thank you for your kind words and encouragement. Now it would go much easier and faster. Siggi
-
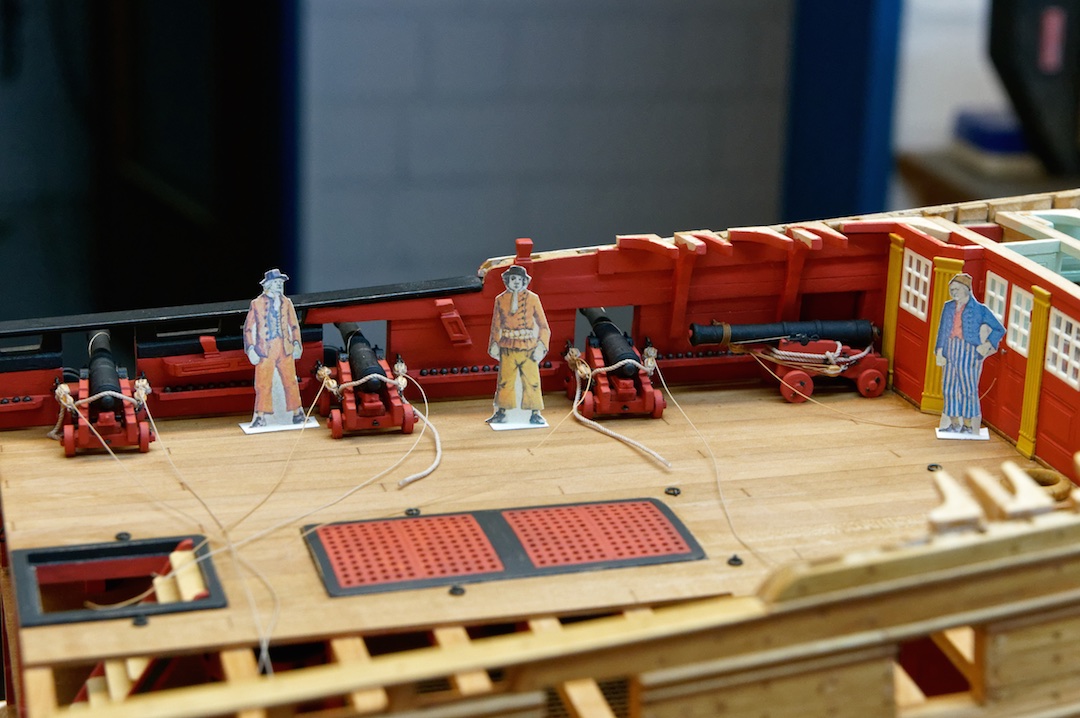
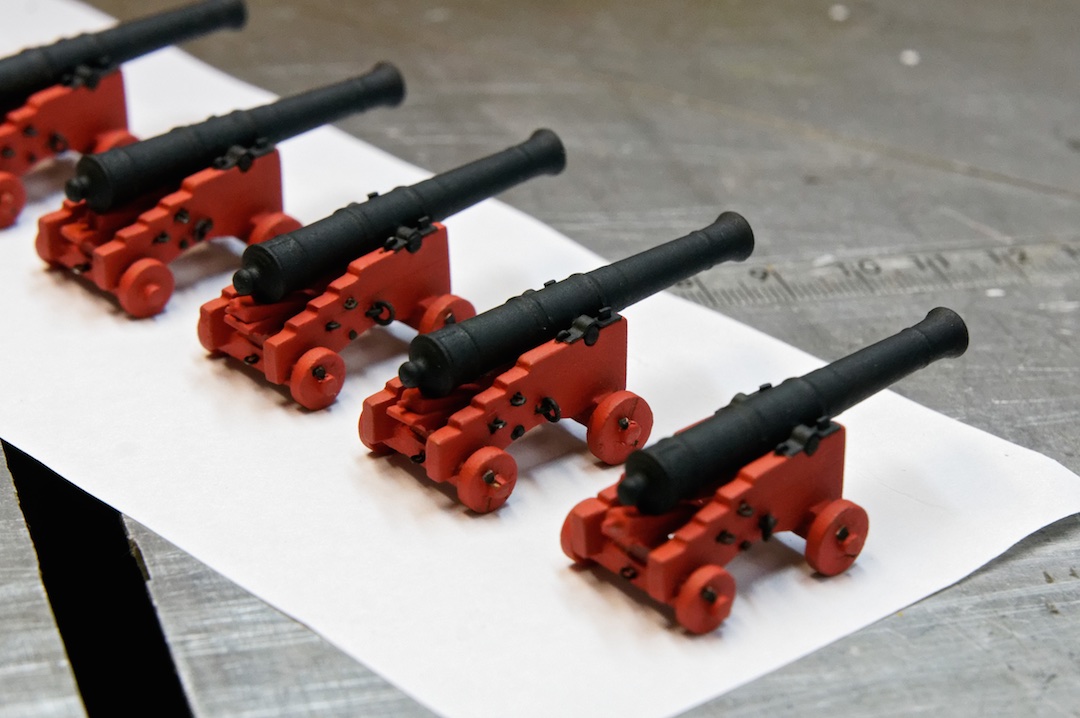
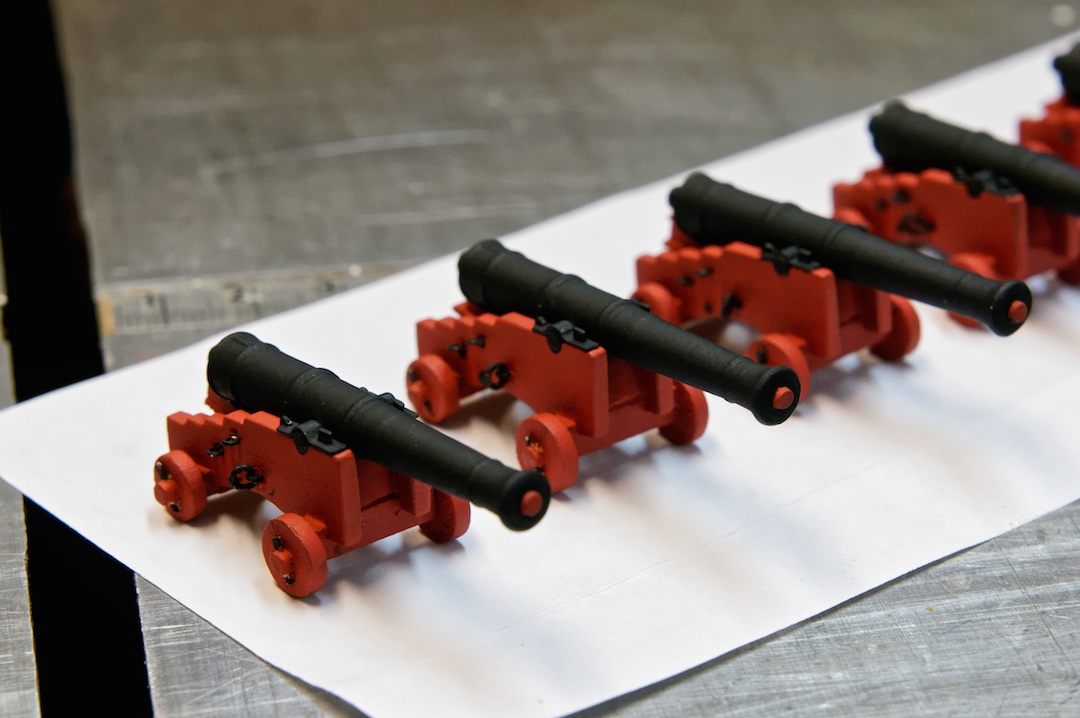
Hello, it is done, the last cannons are ready. Six at all. But before I could install them, I have to build all the knees for the deck beams and they are so tiny here Regards, Siggi


- 453 replies
-
- 15
-
-
Carl, I did know since Druxey once used this word what ist means. (a cornerstone said my Mac then!) And I thought that you are playing with that, because I could't see anything special in these wedges. So my answer was more ironically. Siggi
-
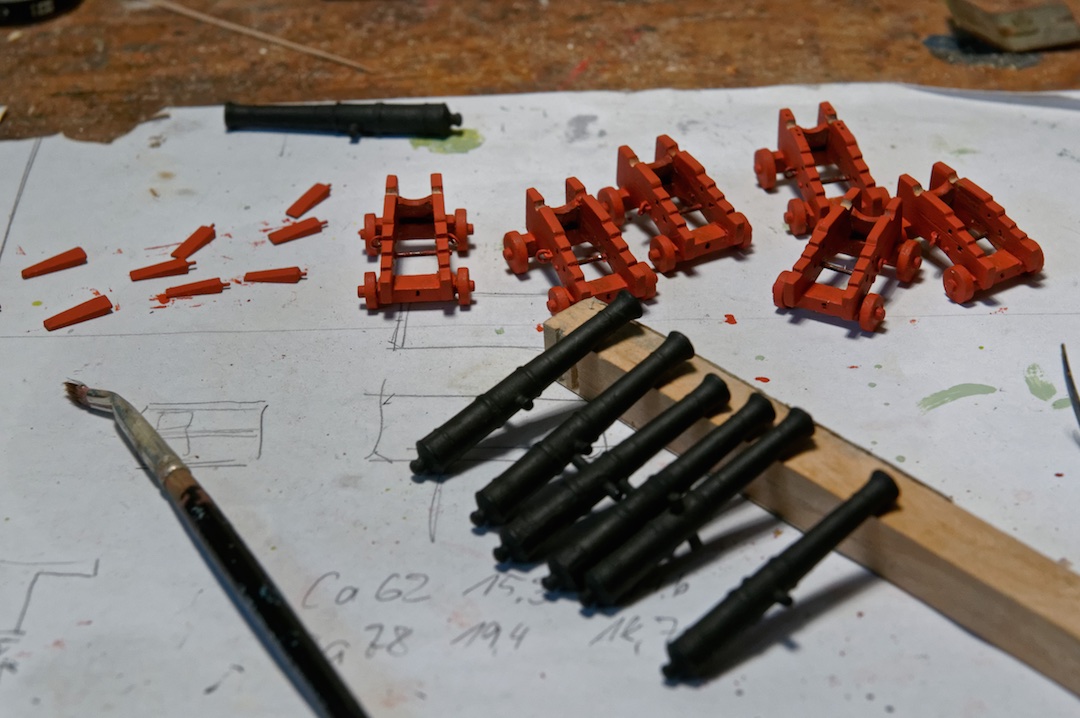
Hello, today the wether is rainy and the hedgerow is already cut (yesterday), so I went into the cellar and started working very carefully with the cannons. Just to get the feeling Mark (Bellona), what is with your cannons? We did't hear nothing from you the last time. Regards, Siggi
-
Robin, be patient. The sun is shining and there is so much to do outside the cellar, that I have no need to go under the surface. But I have sorted the cannons already and looked what I have to redo there. Today I have to fill up my last week brewed beer into bottles. Very important! Regards, Siggi
-
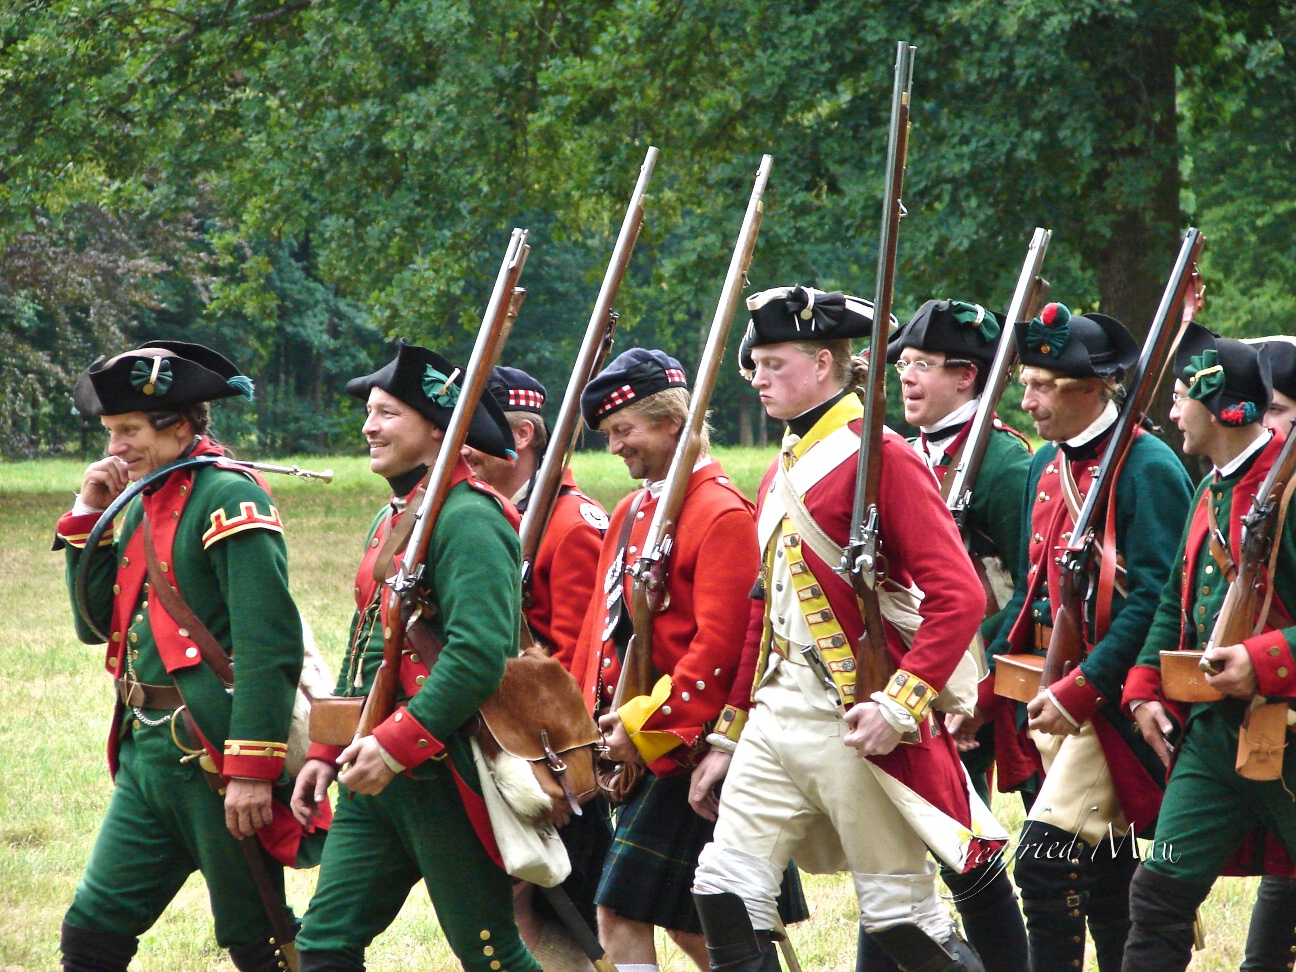
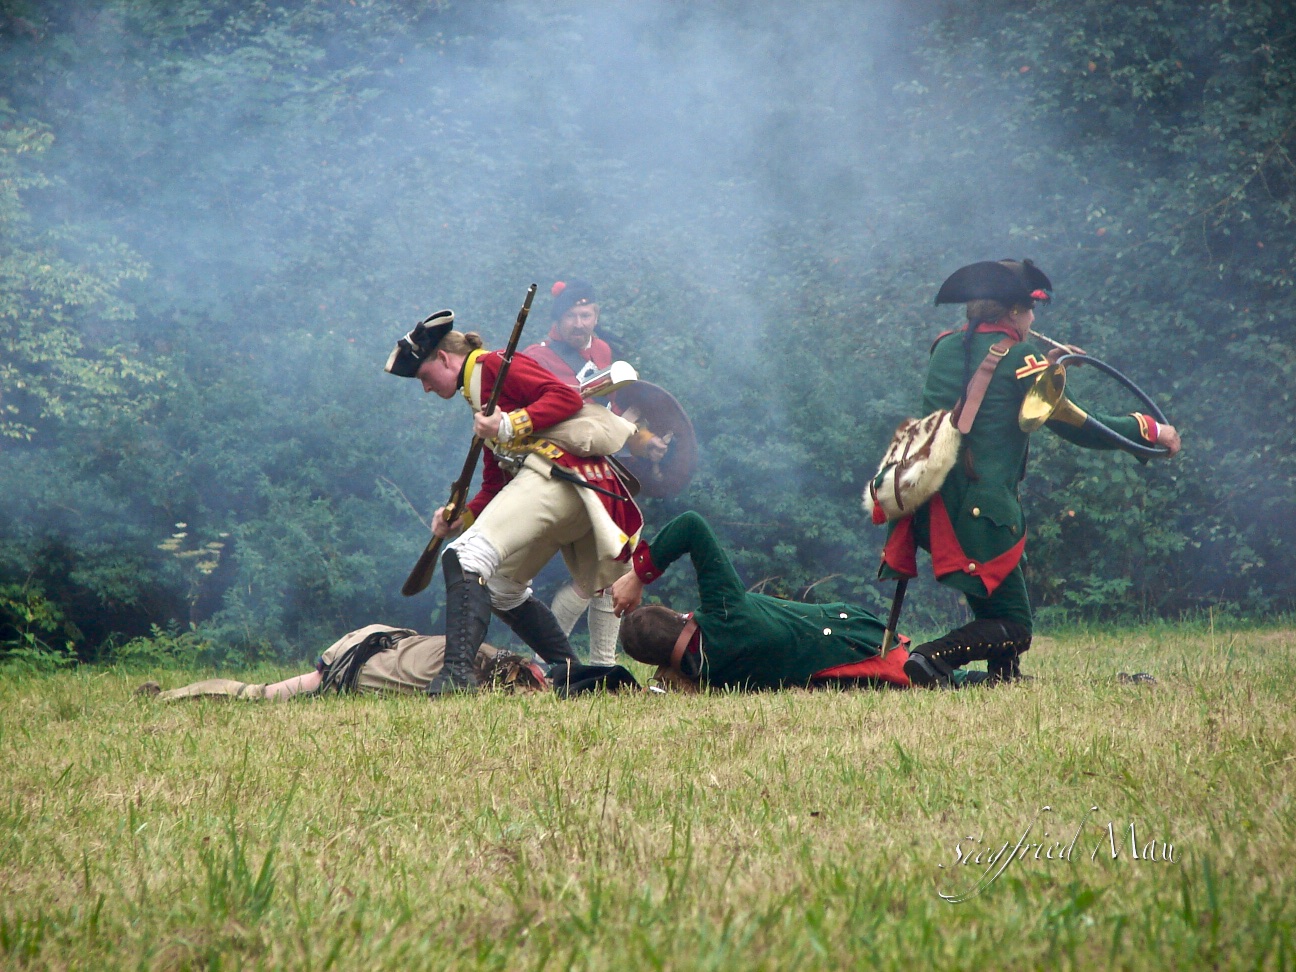
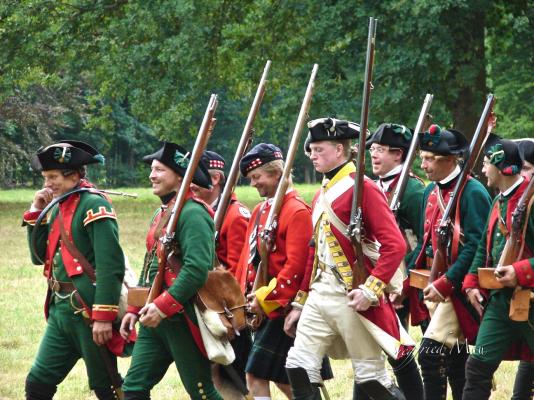
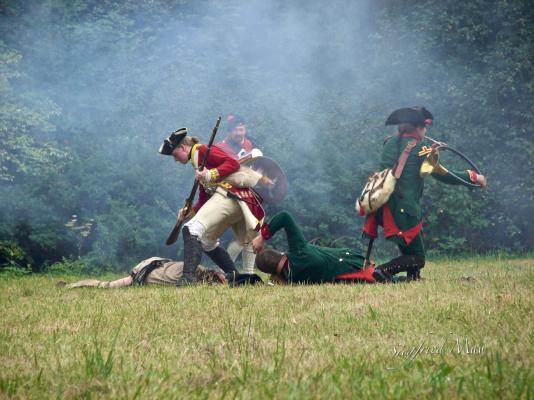
Hello, don't worry, I'm well. But the King called to the arms, so I gave the men at the shipyard vacation until next month. Here two pictures I took some years ago, Hessian Jaeger and some British troops on the march and at combat. More about this event you may find here: http://hessen-militär.de Regards, Siggi
-
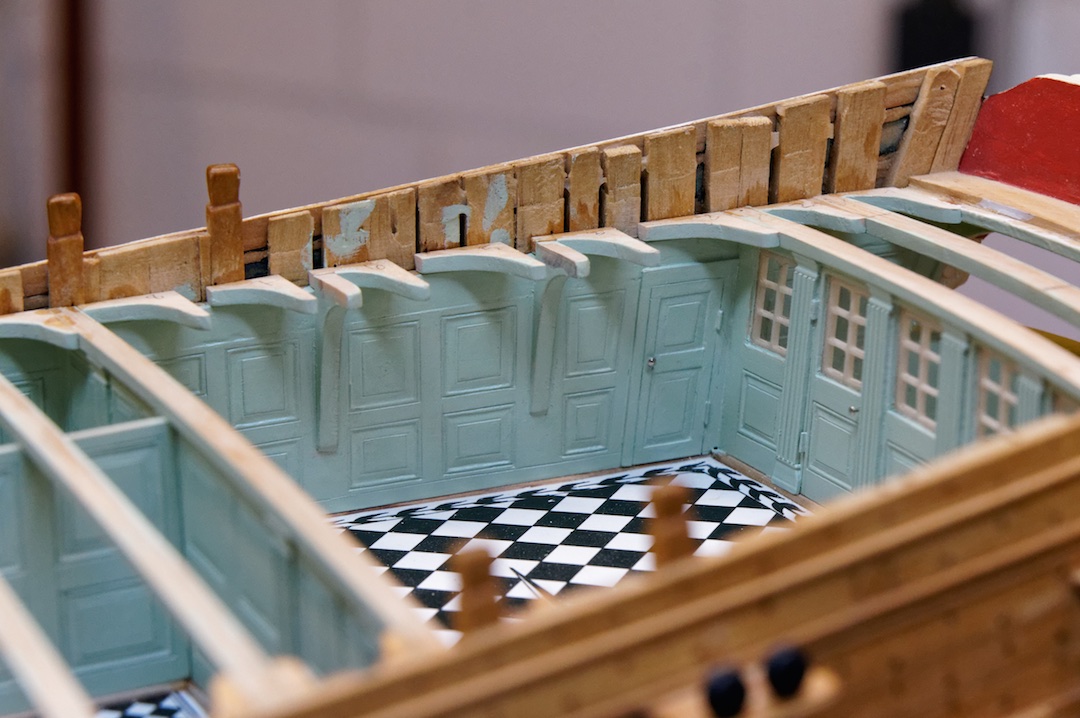
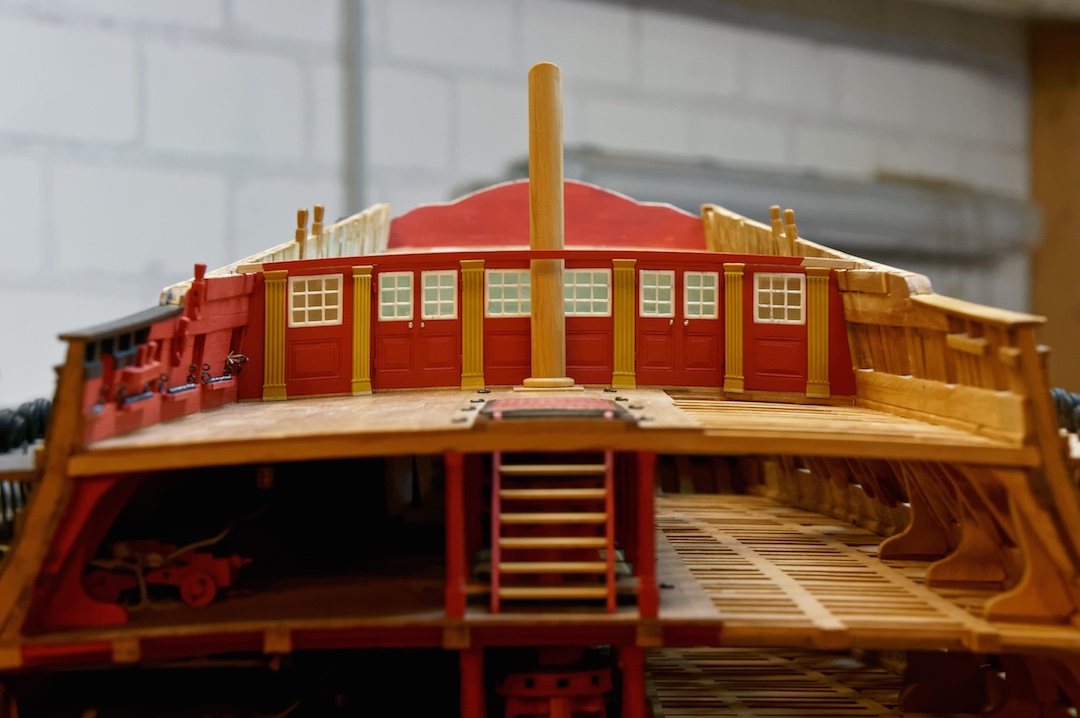
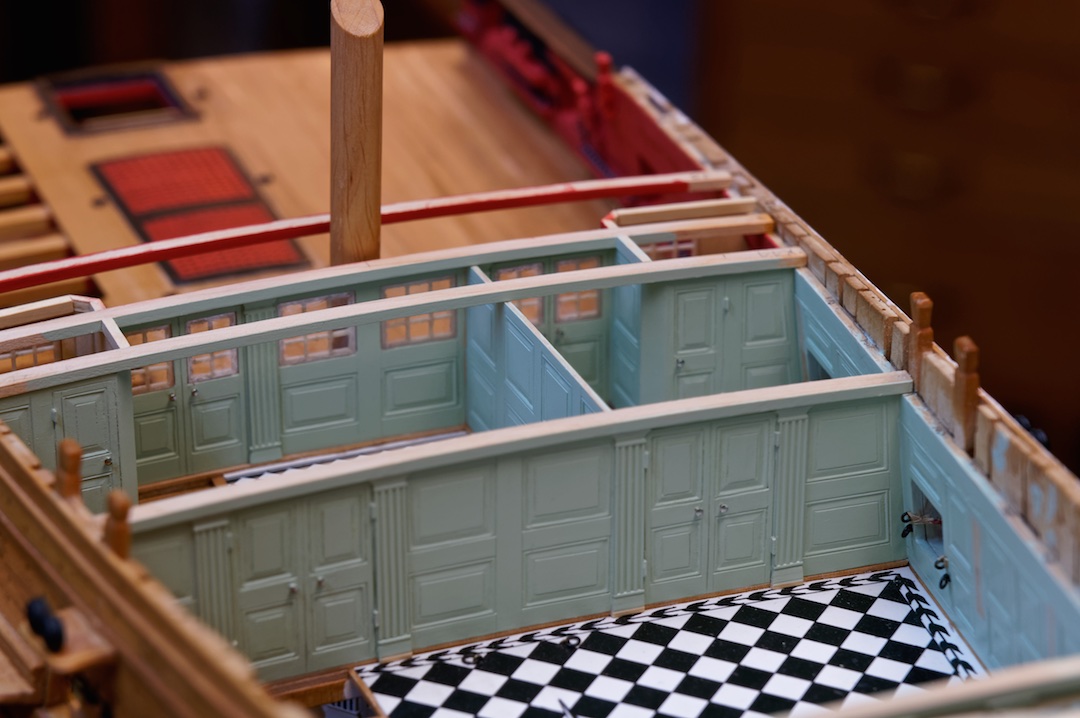
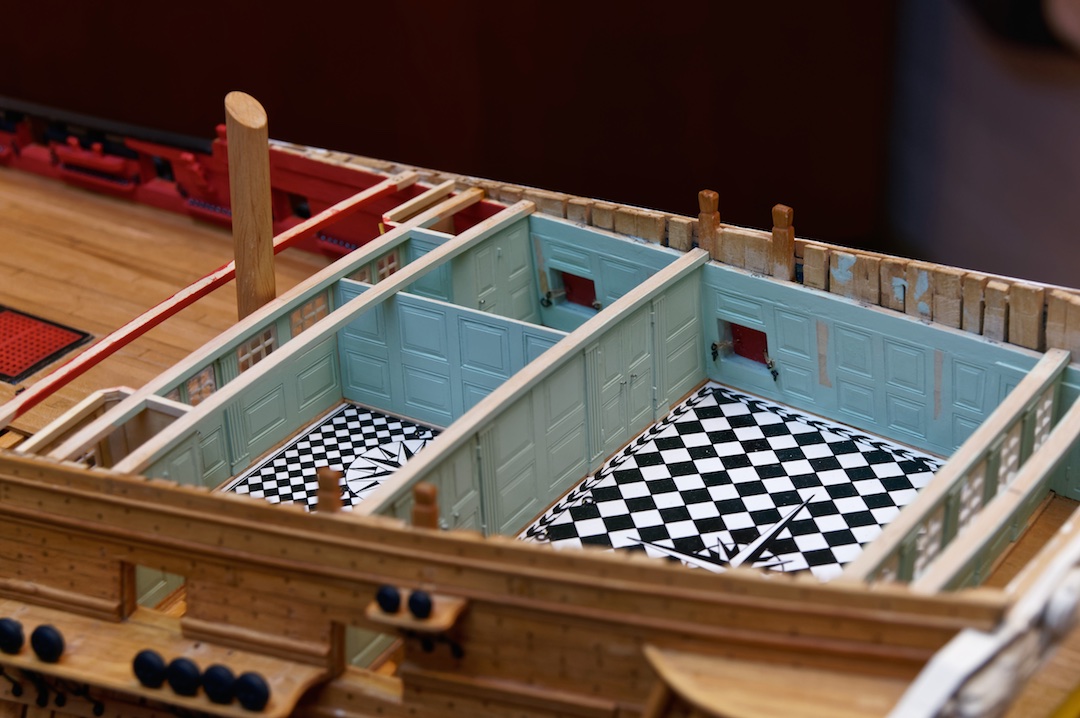
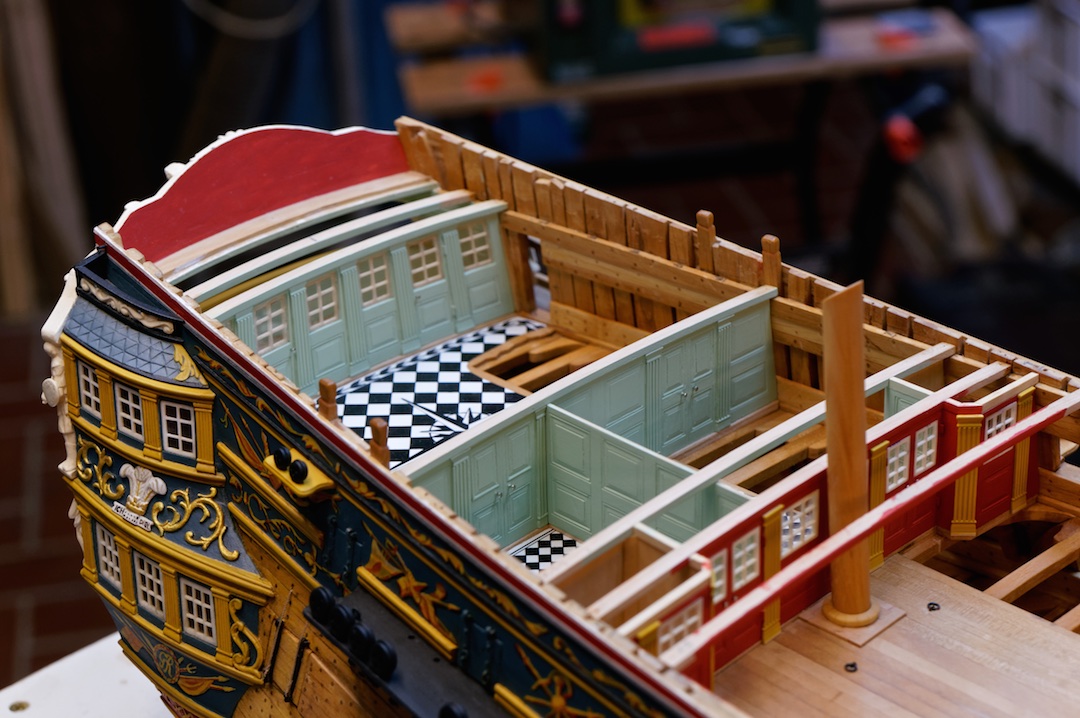
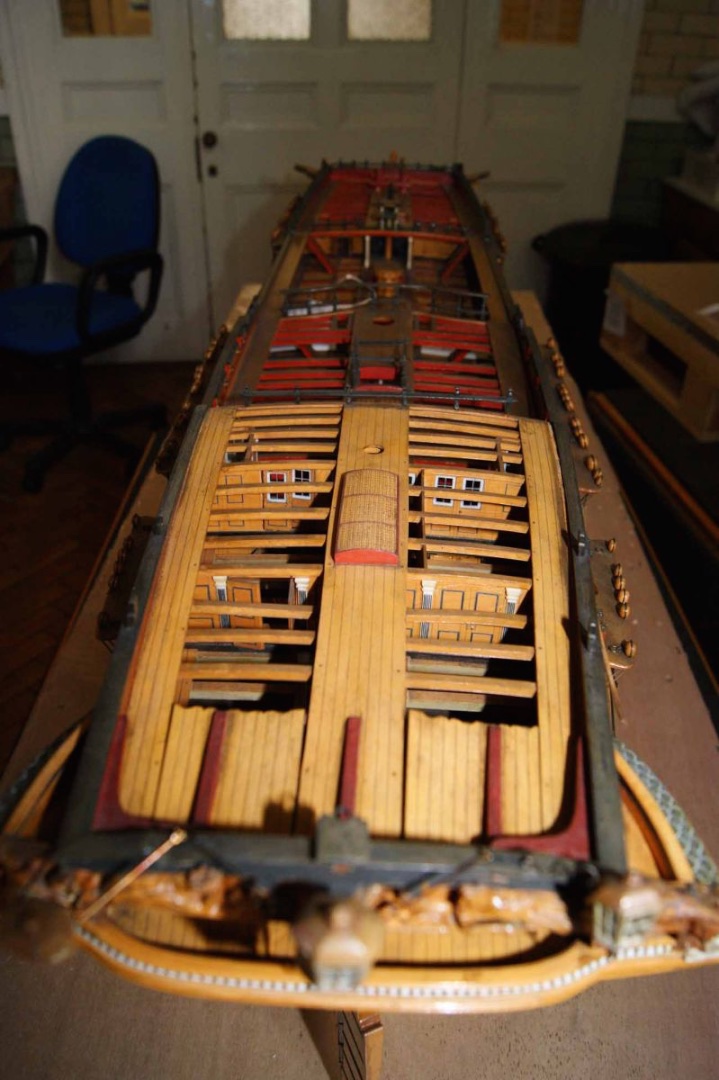
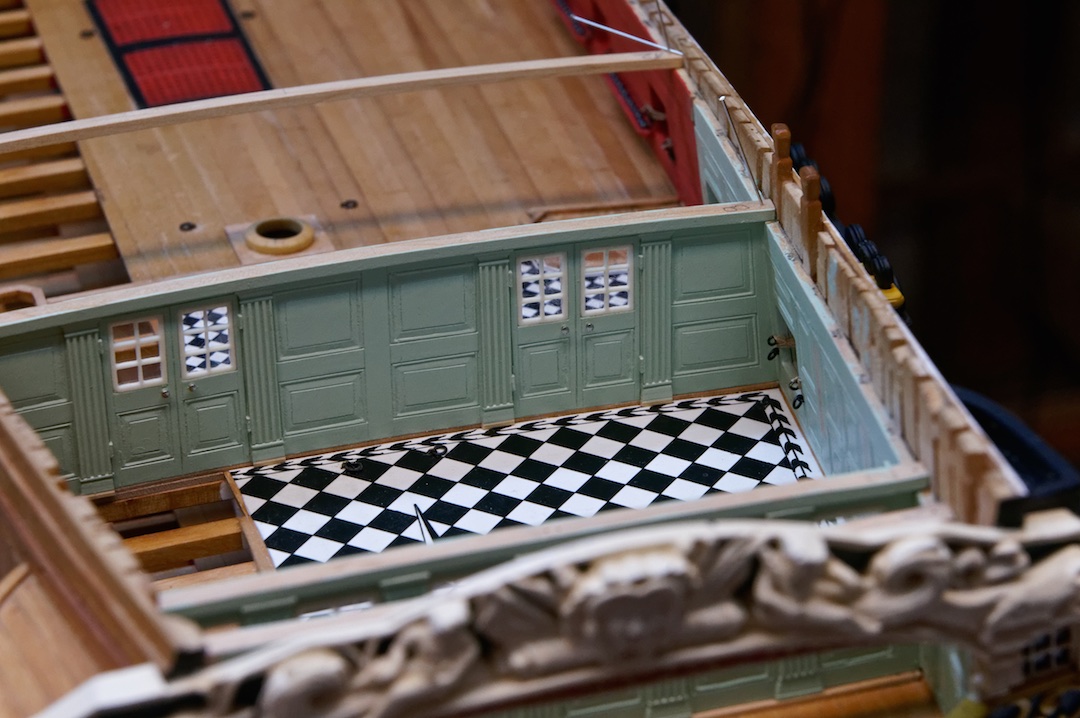
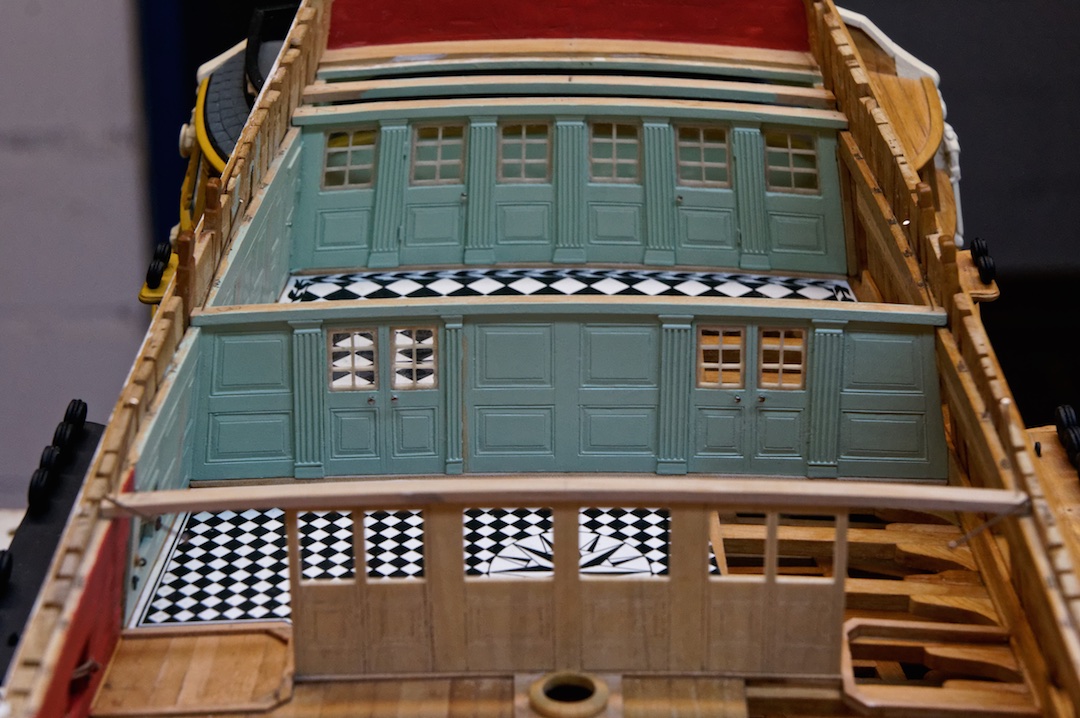
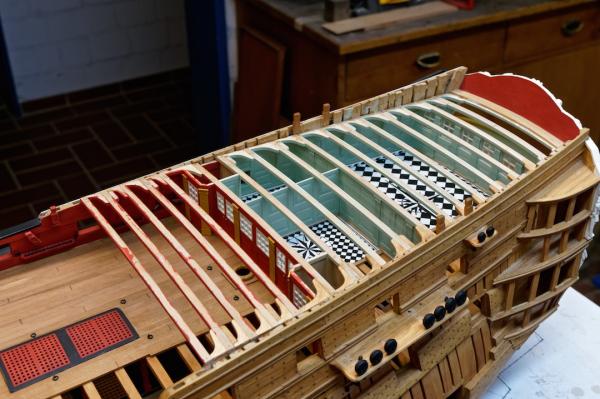
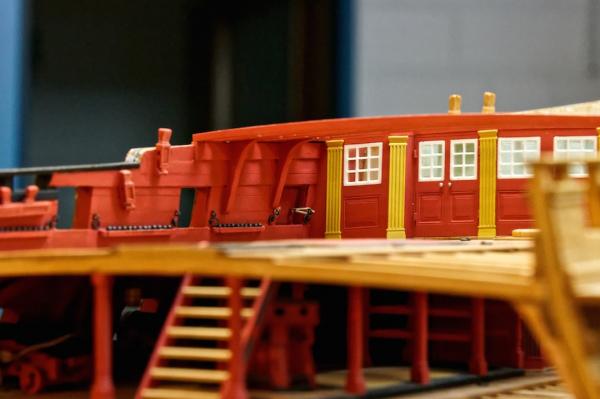
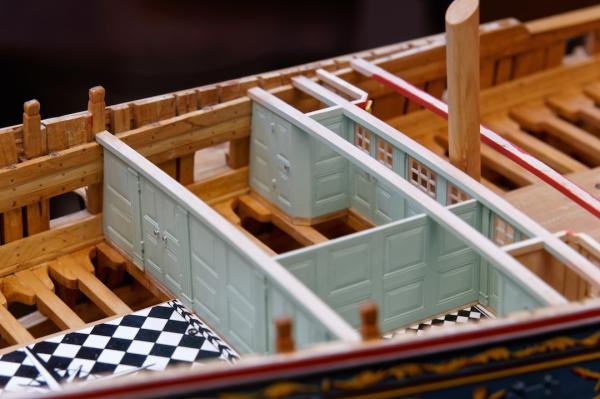
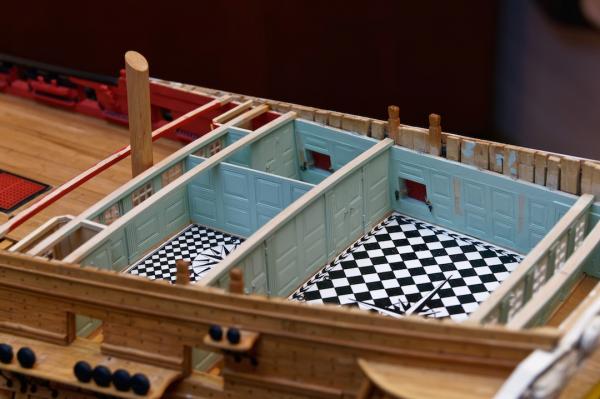
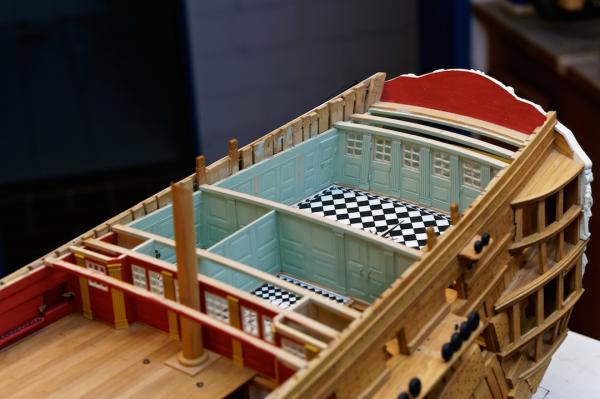
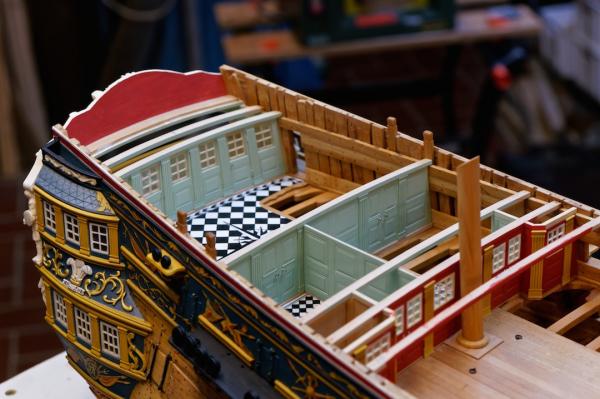
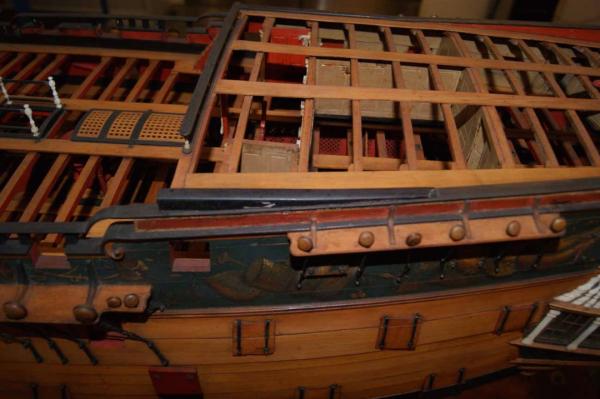
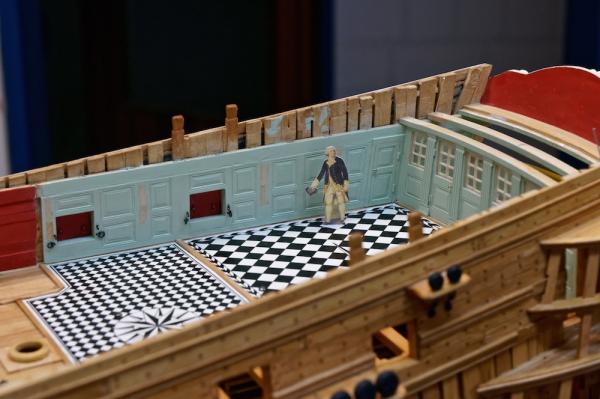
Hello, the great cabin is ready! That was a lot of interesting work. The next thing to install are the knees, but first without the beams. And if anyone knows more about the storing of the gunnery equipment, your knowledge is welcome. For more details please see my last posting. Regards, Siggi


- 453 replies
-
- 21
-
-
Many thanks for your mental support. It is not the first piece I made twice or more often, but these windows are soo difficult to make They are from bone, what I never again would use. At the moment I build the front bulwark new. At the pictures I saw that it was a little out of the vertical axis. To find the exact vertical axis is a great problem with this art of model. Because the two sides are not equal planked, the sides are working different. How to manage that in it's final case, is a great problem I have to solve in the future. Robin, is it important how they did it? If you look at picture from the Victory, they have the same design for the bulwarks and doors. Ok, they are I think from the 19th century and machined, but in the 18th century they could work with a plain and got the same results. Michael, did you also remember where they stored all the side arms and gunnery equipment from the quarter deck and especially the great cabin? That would be the next problem with the cannons here. The rammers, sponges and wad hooks are too long to be stored between the gun ports, there where is no poop deck above. And I think that the captain would't have them in his cabin between the beams. Regards, Siggi
-
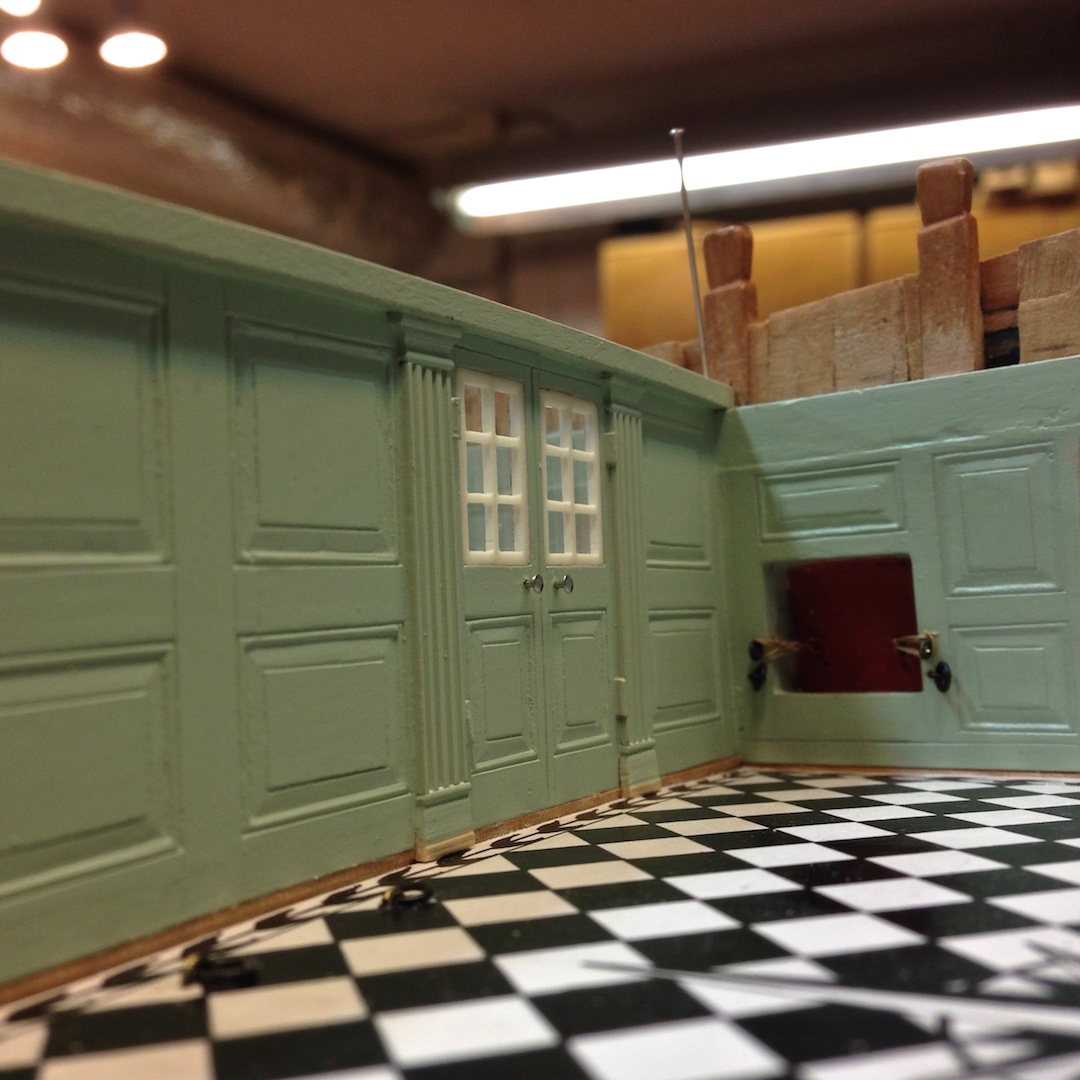
Hello, now the bulwark revised edition 2.0 and I hope the last one. The only bad thing about this is, that I could't use the windows again. Some are broken and the rest did't fit. That was a lot of work for nothing. But **** happens! The next windows would be a lot better, because of experience. Regards, Siggi
- 453 replies
-
- 20
-
-
Don't worry Robin. Without your question I may be never would found out, or to late, that I made a mistake. And that is the reason I'm here, that others could control my work. Thank you for that. I broke the windows out without any harm to the bulwark. So I must tomorrow build only new panelings for the doors. Regards, Siggi
-
What I found out when I looked at these pictures is, they had no windows in the doors at this bulwark I did't noticed that earlier. That means a lot of work tomorrow Siggi
-
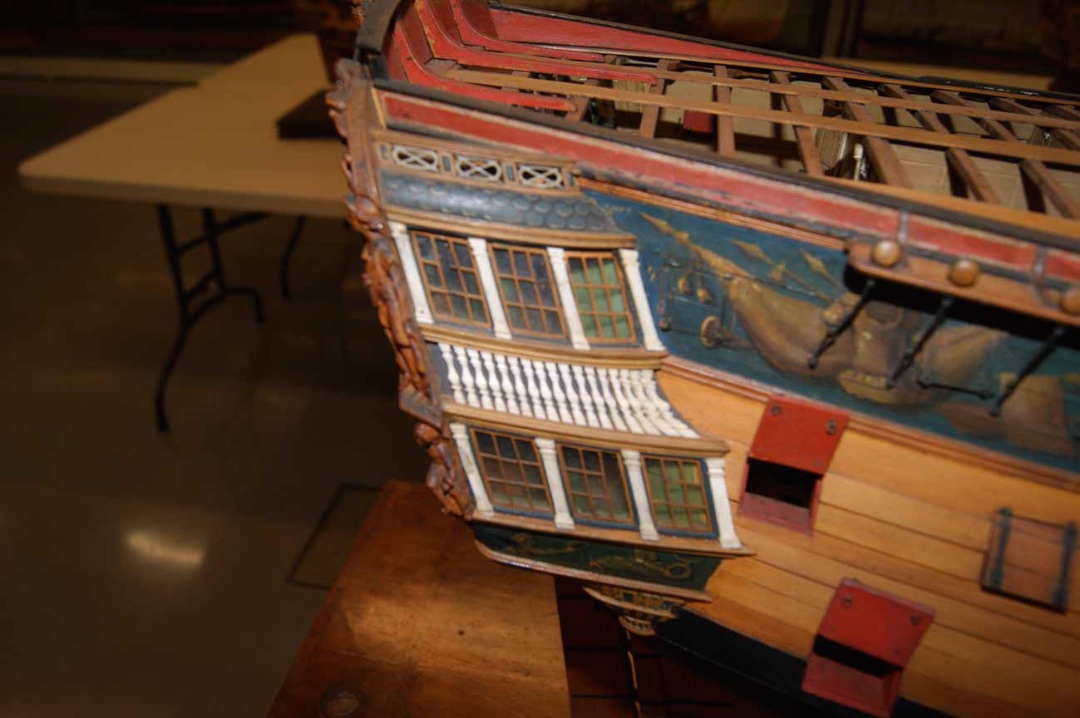
Robin, may be that is right for cup boards, but luckily not for bulwarks But I felt some cold sweat at my forhead when I read your post and looked immediately through all my pictures. I know that they had pillars on both sides of the bulwark (not always), but I hadn't looked if also the paneling is on both sides if the bulwark. But it is. Here some pictures that Mark posted, on all my pictures the bulwarks are only from one side to see Regards, Siggi The Ajax and the Warrior

-
Good morning Christian, did you mean the painting in general? That was not so easy, but you find a lot of information in the historic models. Even when there the carvings often not painted. You lost a lot of the small details then. In the “Shipwright 2011“ is an article from Jonathon Kinghorn also with other historic sources and than here and there something. Mondfeld for example. I think it is the right way to show these ships. They are looking so wonderful in full color. Even when a „only wood“ model has it's own flair. So I'm looking forward with your Fly. I started also with a half model from plywood. Only to get a feeling, because I had never before done something like that. Regards, Siggi
-
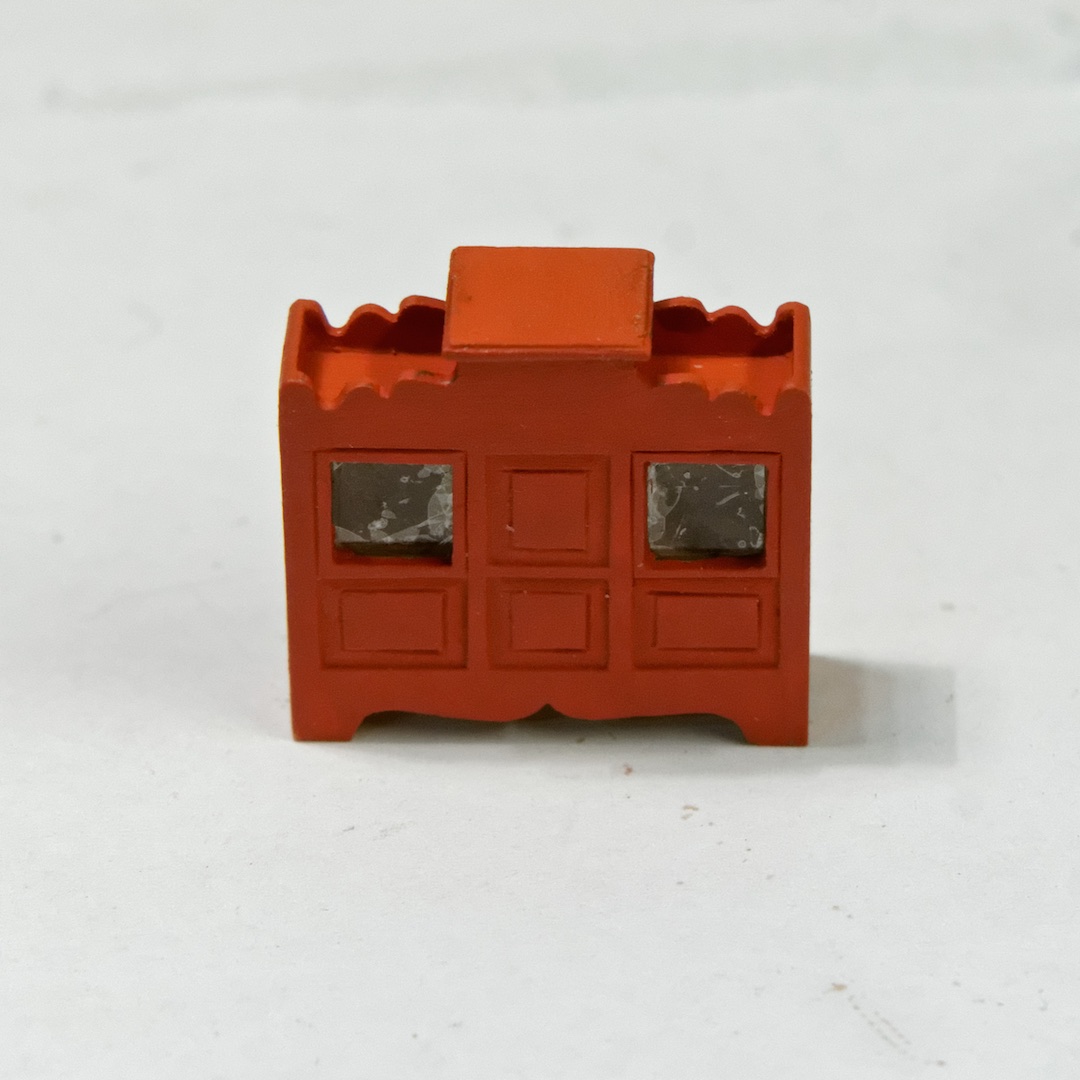
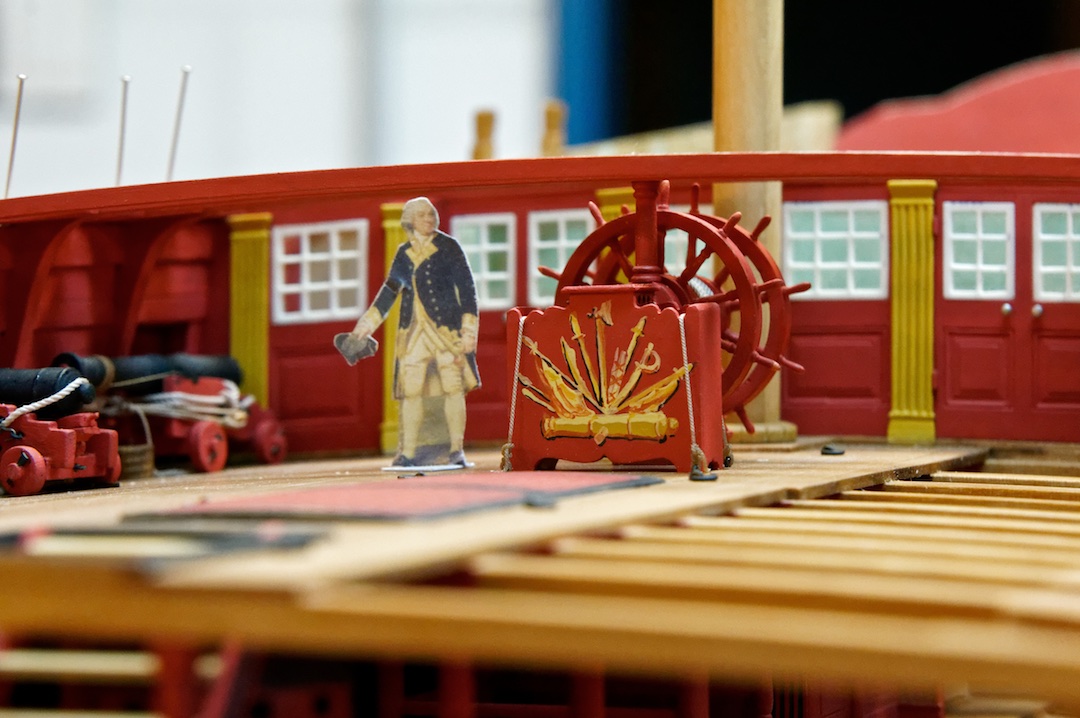
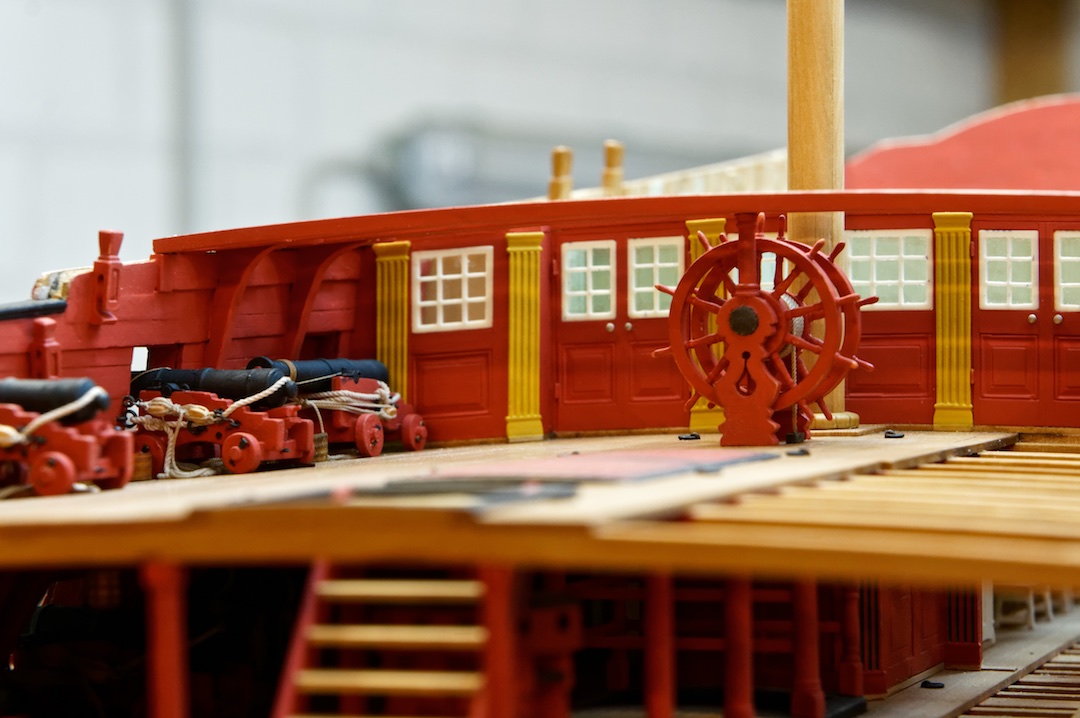
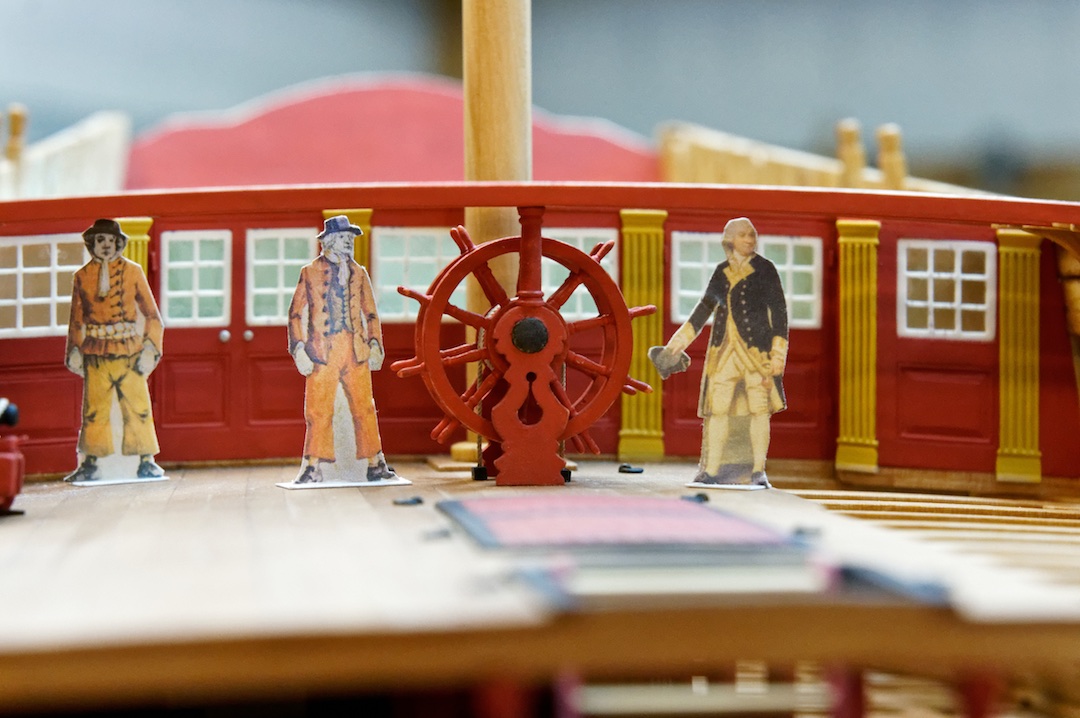
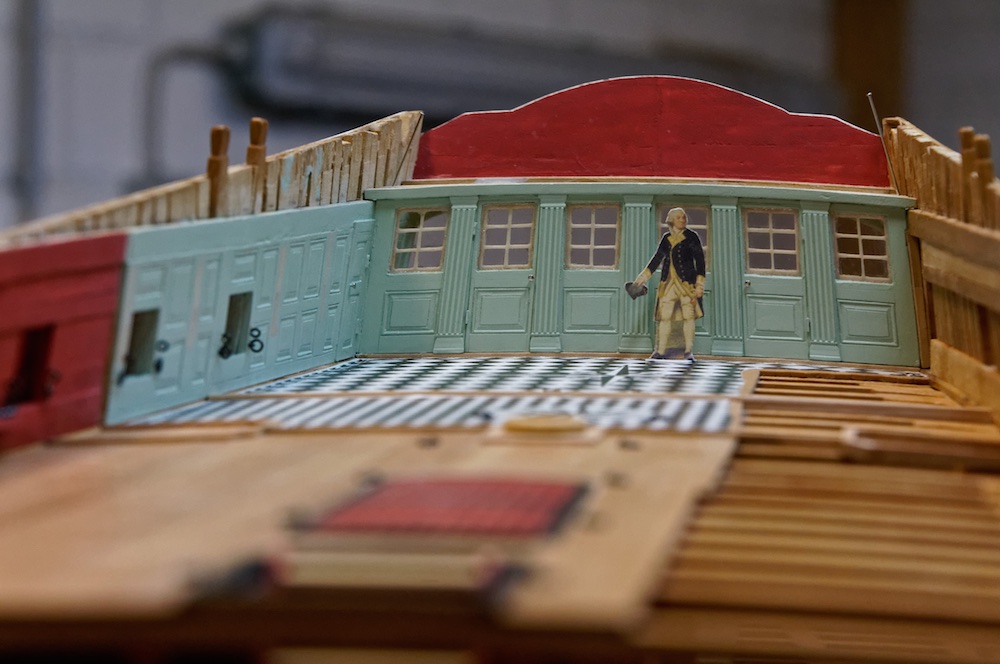
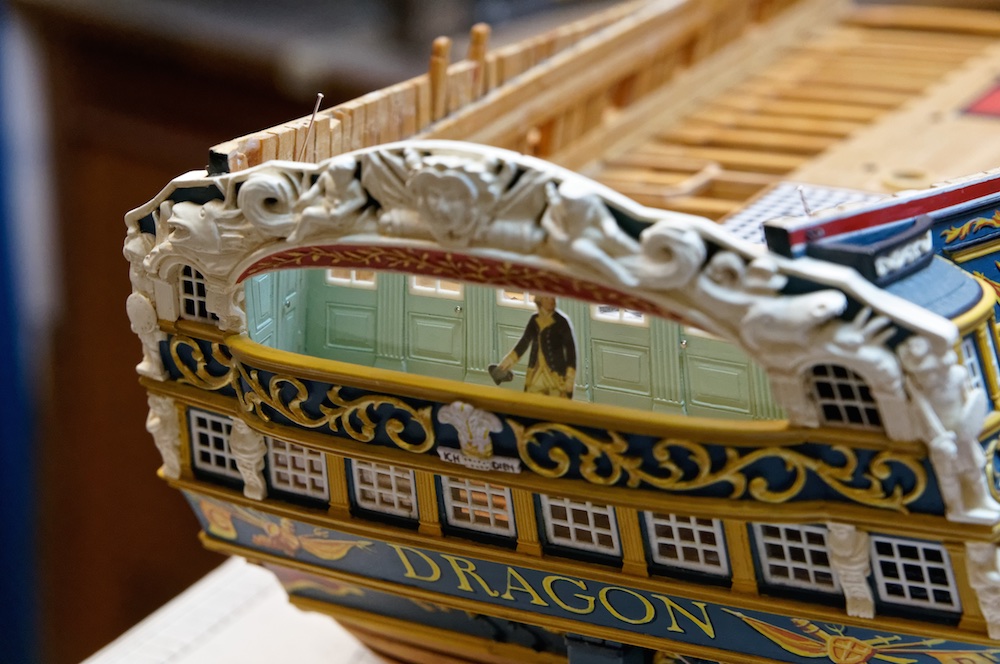
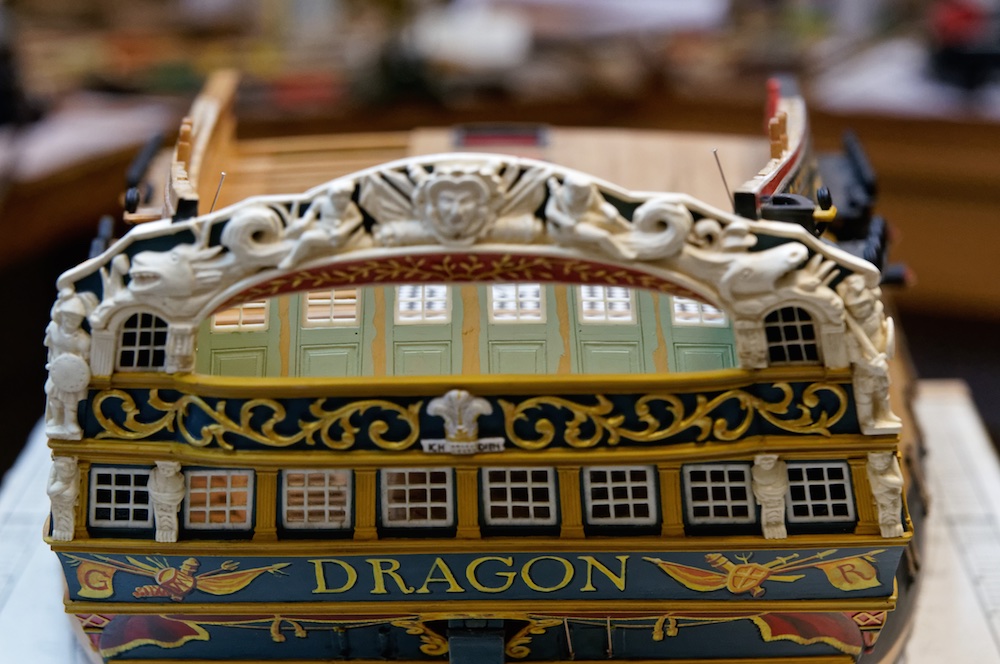
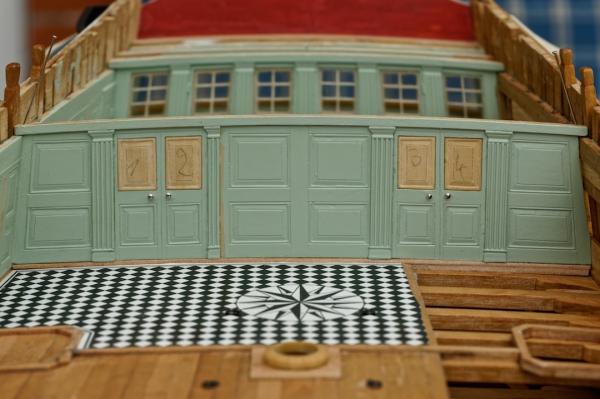
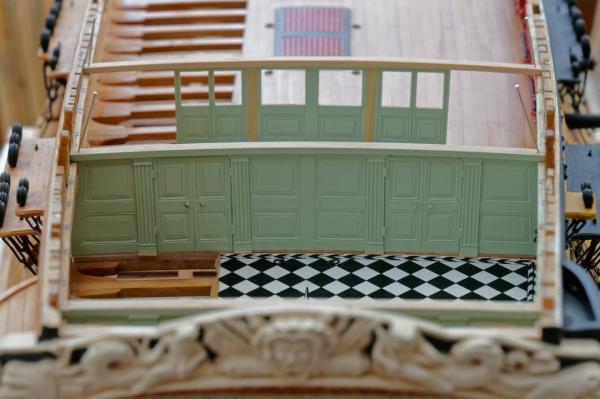
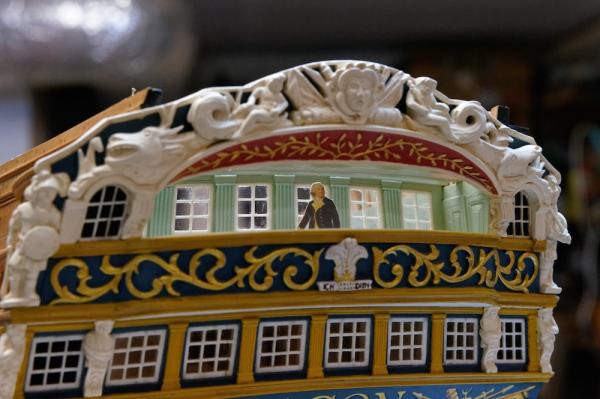
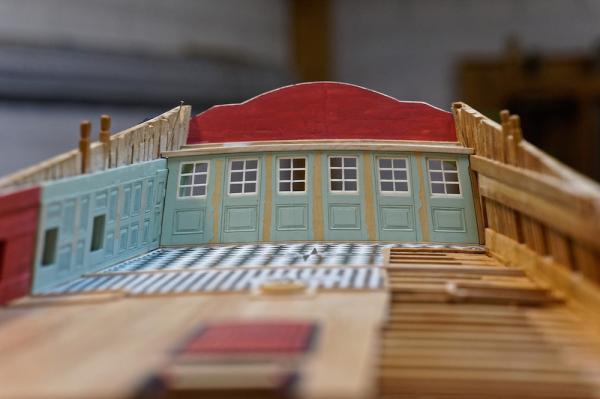
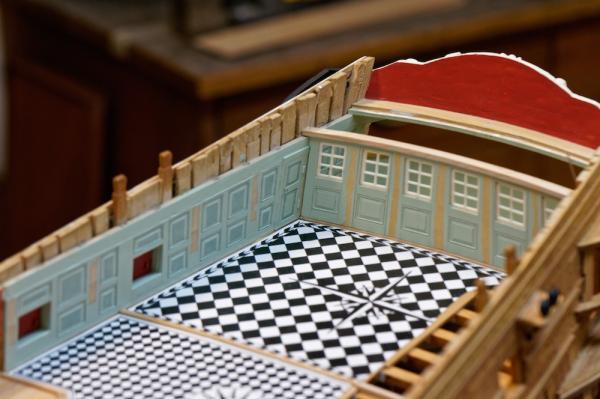
Hello, the aft screen is ready and the captain is very pleased. (I hope he will spend some drinks this evening ) He looks where to place the decks chairs Have a nice weekend, Siggi


- 453 replies
-
- 19
-
-
Hello, many thanks for your help. I changed the color already yesterday evening and it looks much better. Some things you could see only when you tried both versions. But the two color version was too wild and sucks up the carving and as Carl wrote, I have the two tones due to the shade of the carving. Regards, Siggi
-
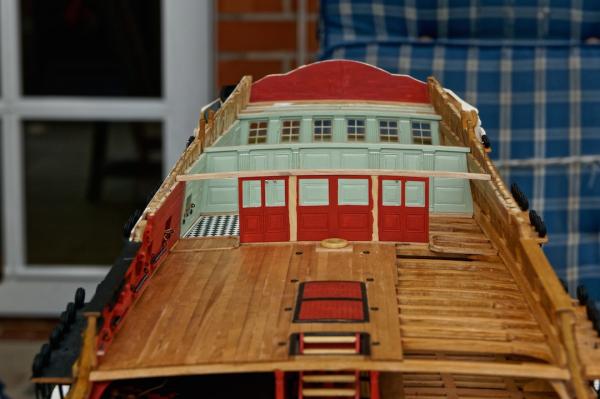
Hello, today I painted the aft screen and when I was ready I thought, wow. That is looking better then that what I did on the wall in two colors. What would you say, should I paint it all in only one color? It's not because of the paint job, that is really horrible and I bought today new brushes, but I think it is looking better and you could see the paneling better. Regards, Siggi

- 453 replies
-
- 15
-
-