-
Posts
632 -
Joined
-
Last visited
Content Type
Profiles
Forums
Gallery
Events
Everything posted by Hank
-
Jay, This has been a most informative thread. I think all of us have had problems with the usual variety of modeler's blackening agents - all with similar results. The blackening either isn't permanent and comes off on your fingers or doesn't affect the metal at all. I will have to dig out my toolbox with stained glass supplies and see if there is any of that patina there. I don't recall having used it in the past. The most common problem that I've seen with this process is getting a permanent oxidation of the metal, so this interests me quite a bit. Thanks for the experiments and so forth - that's the kind of "time well spent" research that helps all of us.
-
Yesterday (19 March 13) the U.S. Supreme Court, in hearing arguements regarding the resale of copyrighted materials ruled those sales legal. From the current article on CNN News: "The Supreme Court has ruled that copyright owners cannot legally forbid people who buy their works to sell them in the US, even if the items in question were made outside the US. The decision upheld a geographically unlimited first sale doctrine — a provision which holds that once someone buys a book, DVD, or other work copyrighted in America, they're free to sell or rent it without the copyright holder's permission". I'm certainly no lawyer, but this would seem to me to answer any question regarding the sale of CDs and DVDs (such as Bob Hunt's Practicums)to a 2nd party. I know this question has come up various times on MSW in regards to members who wished to sell one of his practicums. This applies to original media, as far as I can tell. Members may want to read the entire article currently (03/20/13) running on CNN news. Other media outlets probably are carrying the story, as well.
-
Actually, there are a couple books that do discuss the construction of steamers: The Old Steam Navy: The Ironclads - 1842-1885 (Volume Two), by Donald L. Canney.I don't know how detailed you are talking about but this book goes into the design, construciton, and history of the various classes of U.S. Navy ironclad steamers from the monitors to paddlewheelers. Volume One deals with the Steam Sloops, Frigates, and Gunboats of that period.
-
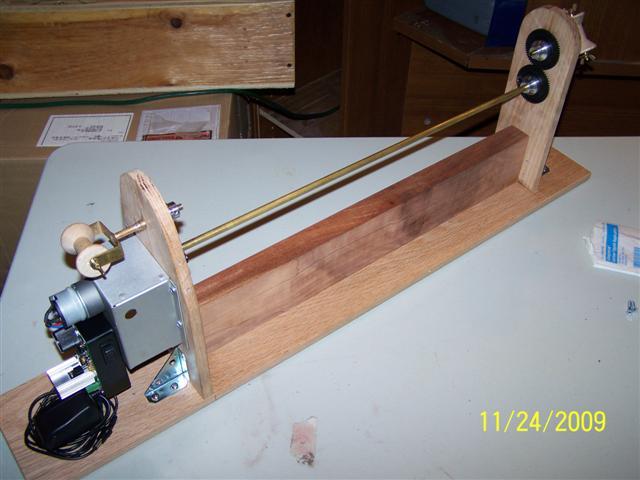
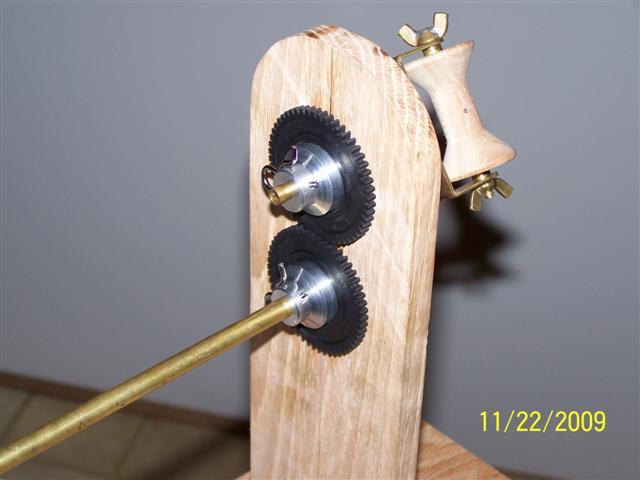
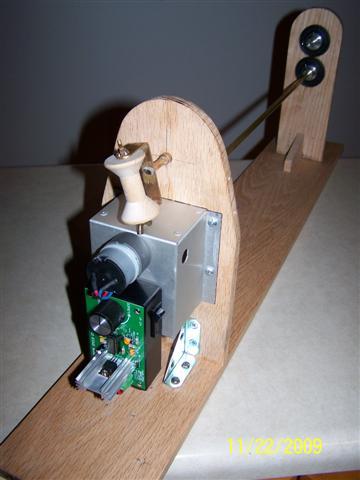
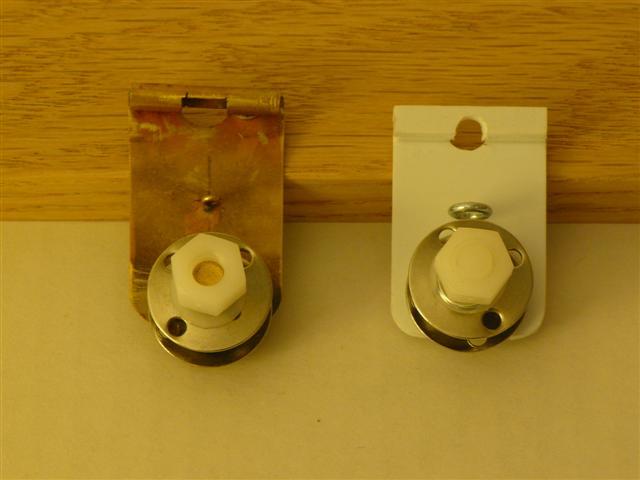
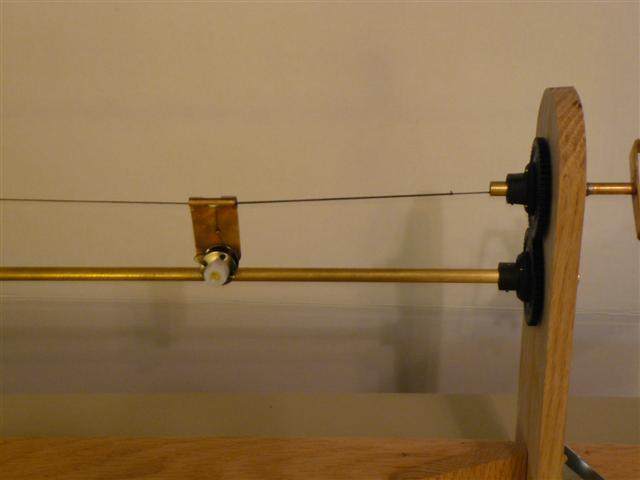
Oh NO-O-O!!! - you don't want to do that - I spent an evening taking apart a rather large HP printer that had been deep 6'd and ended up covered in primary colored powder that was all over everything. Lucky for me I had it out on the deck and not inside. The gears I retrieved were really not worth the effort - seldom in matching sets that provided the ratios I needed for my Electro-Serving Jig. I still have a large plastic bag of parts and small motors from that printer (all kind of useless at this point). I won't try to re-create my past posts on this (Electro-Serving Jig - 2009) here, but it works and does a great job in a short time period. I have attached a few photos. I originally used a sewing machine motor for power, but it tended to overheat due to the low speed of the jig. I replaced it with 2 DC elec. motors (each of different rpm) settling on the higher rpm mtr. (the last one I bought). The traveling serving thread bobbin device works pretty well, you just need to keep an eye on it. The gears I used were 2 pair of RC car gears I bought at a hobby shop and a friend of mine (shipmodeler & machinist) machined aluminum hubs for these gears. Much better than the all plastic originals I started with. The jig is approx. 22" long and running a complete length of line with serving takes less than 5 minutes. You then stop, put a tiny drop of cryo on the line to hold it, unlock the spools and advance the line, lock the spools and turn on the jig. As long as the bobbin has serving line, you're good to go! While it does need some tweaking, it works - you just need to keep an eye on things.
-

USN Anchor Hoy 1816 by Hank - 1:48 Scale - POB
Hank replied to Hank's topic in - Build logs for subjects built 1801 - 1850
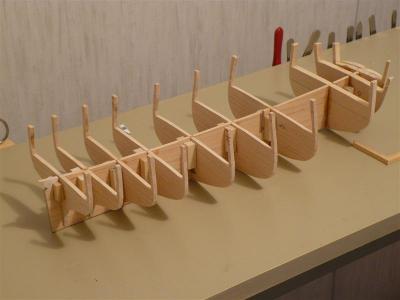
John - Yes, that's a good thing to keep in mind The attending photo is the work as of last night - I have all the bulkheads (except for the transom) now in place on the centerboard. As with the construction of PEACOCK, I cut 1/4" square stock for the blocks that hold each of the bulkheads in place. This (more or less) assures that the bulkheads are all at right angles to the centerboard. Since the article in Grimwood doesn't specifically give scantling sizes (his model is a lift construction hull), I'm going to use the sizes described on Chapelle's redrawn plan of the Boston (Doughty) Anchor Hoy which should work out well for this model. That wil give me the deck & hull planking widths and thicknesses that I'll use. Next week I'll begin fairing the bulkheads and also get the transom board ready for placement. -

USN Anchor Hoy 1816 by Hank - 1:48 Scale - POB
Hank replied to Hank's topic in - Build logs for subjects built 1801 - 1850
Wayne, Elia: Thanks for the support! As I mentioned - it isn't hard to screw up right off the bat. I managed to sink my Stanley 1/4" chisel into my right index finger Sunday night while trying to remove one of the bulkheads that was out of alignment. It's OK - a day's worth of bandaid and I'm back to shipmodeling. When I cut out the slots in the centerboard & bulkheads they were not precise - my cheapo scroll saw is mainly to blame - I reserve the rest of the blame for myself for buying the piece of #$%^&*! That is one item (QUALITY scroll saw) on my To Purchase list. I hope tonight to get the camera into action to record the current status of the project. -

Only ship in US Navy to bury its own namesake
Hank replied to jml1083's topic in Nautical/Naval History
Jim, Thanks for sharing this bit of U.S. Naval History. I served aboard USS STODDARD (DD-566) and USS NEW JERSEY (BB-62), both of which saw Vietnam Service during that period. I was on WesPac cruises Sep. '66 - Apr. '67 in STODDARD and Sep. '68 - Apr. '69 in NEW JERSEY. When our cruise ended in 1969, NEW JERSEY was in company with CORAL SEA when we were turned around mid-Pacific to address the shooting down of one of our USAF EC planes off the coast of N. Korea. Thanks for your valuable service, shipmate! -

USN Anchor Hoy 1816 by Hank - 1:48 Scale - POB
Hank replied to Hank's topic in - Build logs for subjects built 1801 - 1850
Thanks for the early replys! I'm glad there is some interest. I've also purchased the Anchor Hoy plan from S.I. by Doughty which was a Boston harbor craft (1818) used for similar purposes. It is a redrawn Chapelle plan and I'm thinking of following the Grice Hoy with this one only building this hoy Plank on Frame. That will be a first for me. Also, same scale 1:48. Since it is a double ended design, there will be less chance to screw up the frames on this 1st attempt. -
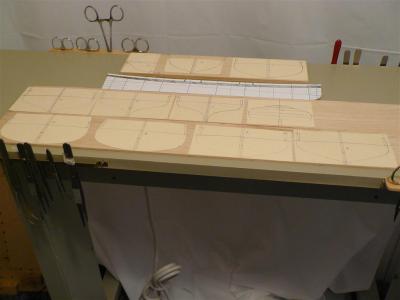
Rather than tackle another large warship which I had originally planned (USN Frigate BOSTON - 1799), I am currently working on a harbor craft from the 1816 period usually seen in the Gosport, VA area servicing USN warships with supplies, water, anchors, etc. This particular craft was designed by Wm. Grice and the plans are in the book American Shipmodels and How to Build Them by V. R. Grimwood. This will be a 1:48 scale Plank on Bulkhead scratchbuilt model. The model illustrated in the book is drawn at 5/32" = 1'-0" and I have scaled up the plans to 1/4" = 1'-0". It is a sloop rigged vessel with one mast. Currently I have the bulkheads drawn out and adhered to basswood blanks and have now cut them out. In addition, the keel, stem and sternposts have been cut and shaped (boxwood). I have constructed some of the deck furniture (also boxwood & walnut) and will post photos soon. As of last Thurs.I am in the early stages of faring the forward bulkheads into their final shape (no photos yet). I don't believe I will join the Stem and Sternposts or keel to the center piece and bulkhead ***'y until all the bulkheads are mounted and shaped to fit.
About us
Modelshipworld - Advancing Ship Modeling through Research
SSL Secured
Your security is important for us so this Website is SSL-Secured
NRG Mailing Address
Nautical Research Guild
237 South Lincoln Street
Westmont IL, 60559-1917
Model Ship World ® and the MSW logo are Registered Trademarks, and belong to the Nautical Research Guild (United States Patent and Trademark Office: No. 6,929,264 & No. 6,929,274, registered Dec. 20, 2022)
Helpful Links
About the NRG
If you enjoy building ship models that are historically accurate as well as beautiful, then The Nautical Research Guild (NRG) is just right for you.
The Guild is a non-profit educational organization whose mission is to “Advance Ship Modeling Through Research”. We provide support to our members in their efforts to raise the quality of their model ships.
The Nautical Research Guild has published our world-renowned quarterly magazine, The Nautical Research Journal, since 1955. The pages of the Journal are full of articles by accomplished ship modelers who show you how they create those exquisite details on their models, and by maritime historians who show you the correct details to build. The Journal is available in both print and digital editions. Go to the NRG web site (www.thenrg.org) to download a complimentary digital copy of the Journal. The NRG also publishes plan sets, books and compilations of back issues of the Journal and the former Ships in Scale and Model Ship Builder magazines.


