-
Posts
232 -
Joined
-
Last visited
Content Type
Profiles
Forums
Gallery
Events
Everything posted by chborgm
-
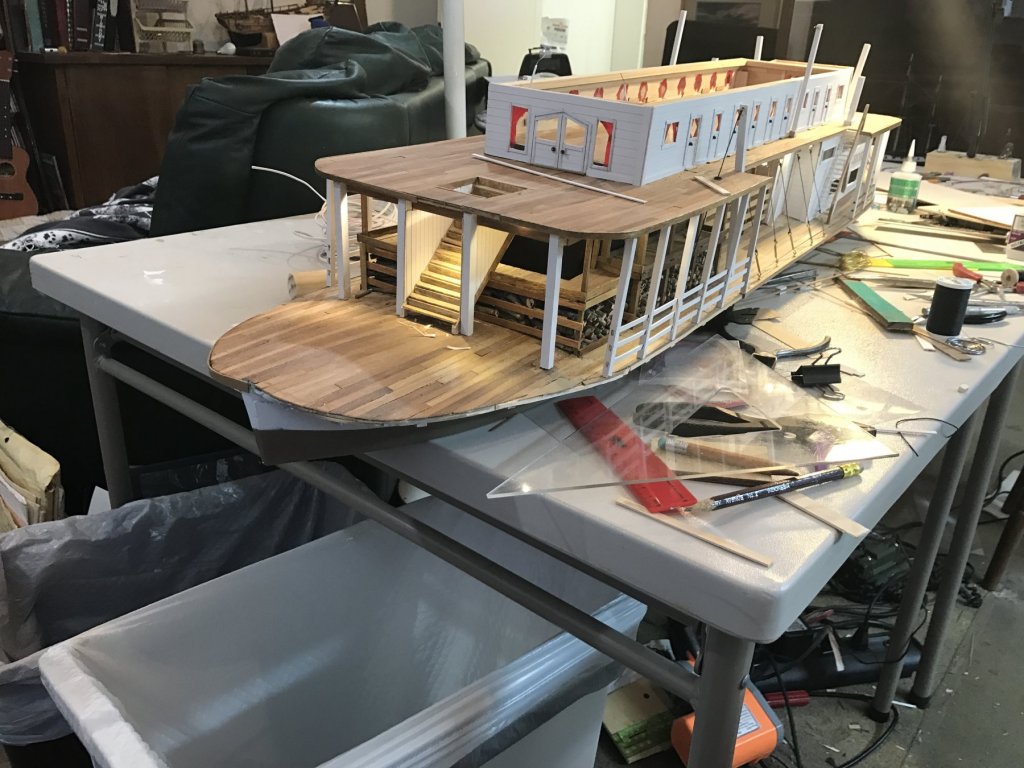
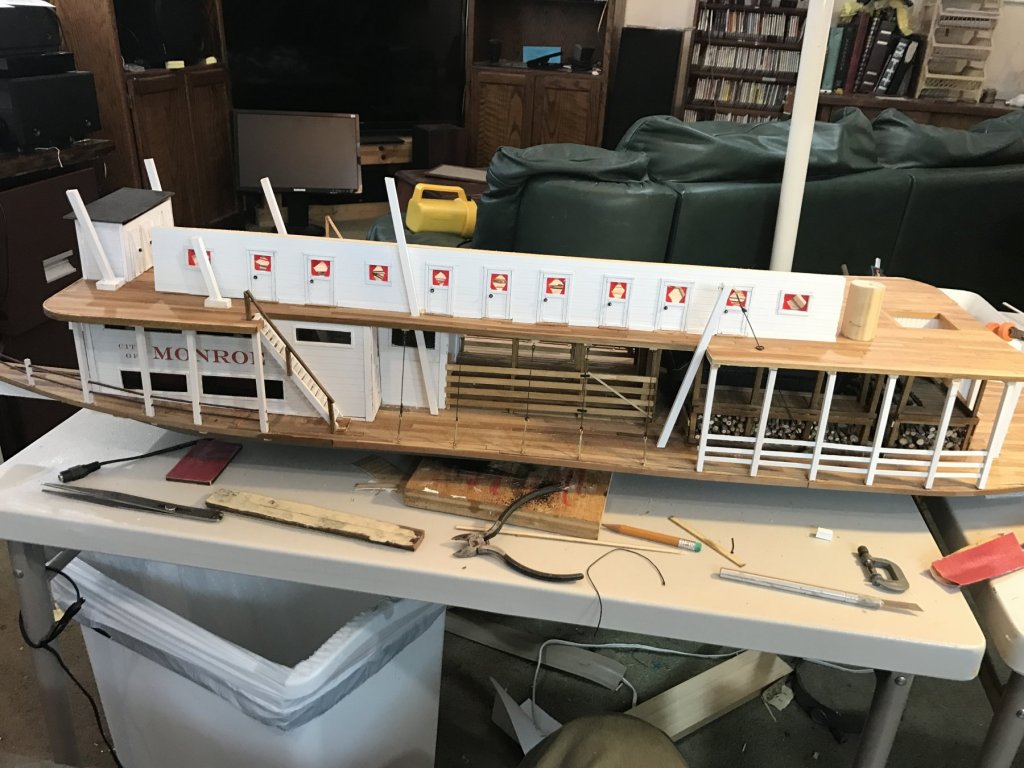
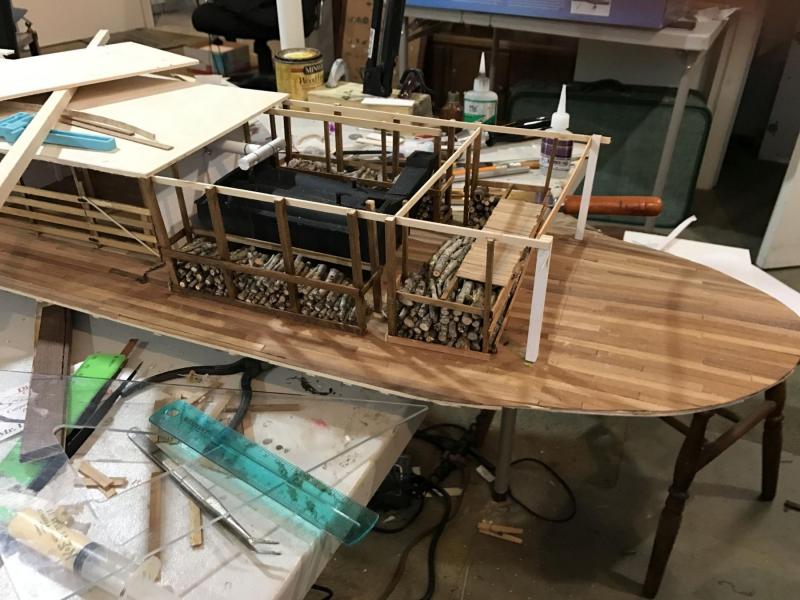
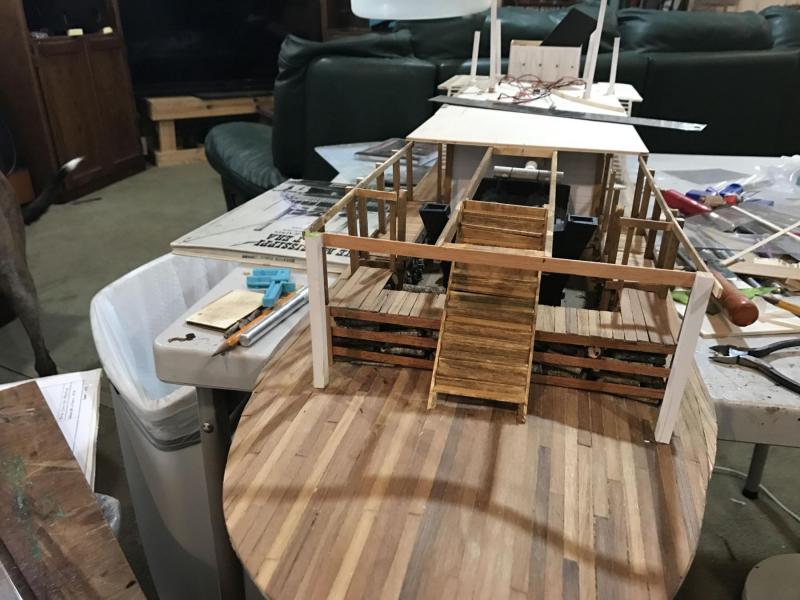
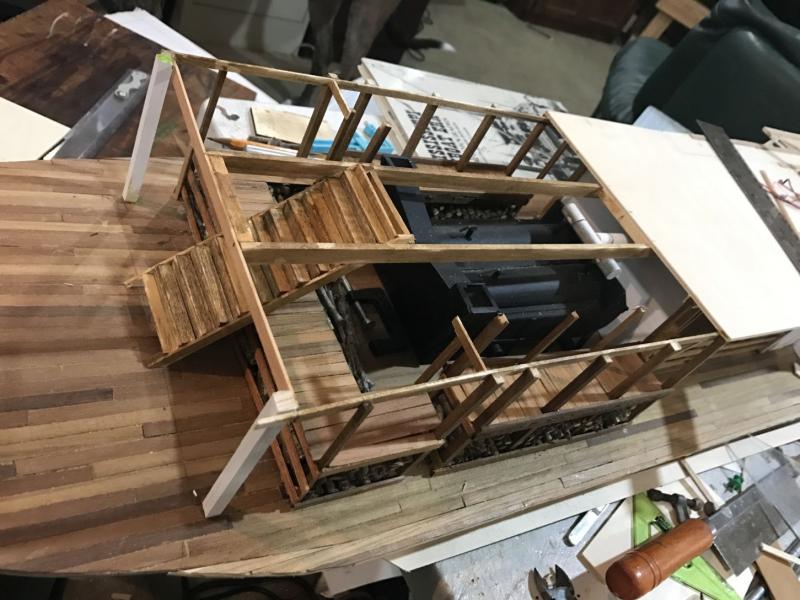
Made a little more progress. I found out one of the nicest things of supplied from a kit is all the parts that your require fifty of the same thing, the kit just turns on the laser cutter, and there you have them. In this case I am referring to the railings on the boiler deck. Making the first one was fun, but it became boring after ten or fifteen.Made a little more progress. I found out one of the nicest things of supplied from a kit is all the parts that your require fifty of the same thing, the kit just turns on the laser cutter, and there you have them. In this case I am referring to the railings on the boiler deck. Making the first was fun but then it became a chore. Another item that can help is that if you saved the scrap from previous kits laser cuts you can use these on a scratch build. In this case for the filigree at the top of the posts between decks I used what was left from the railing cut out from the “Mississippi Riverboat “ Kit. Hope the pictures below explain this better.
- 69 replies
-
- city of monroe
- steamboat
-
(and 1 more)
Tagged with:
-
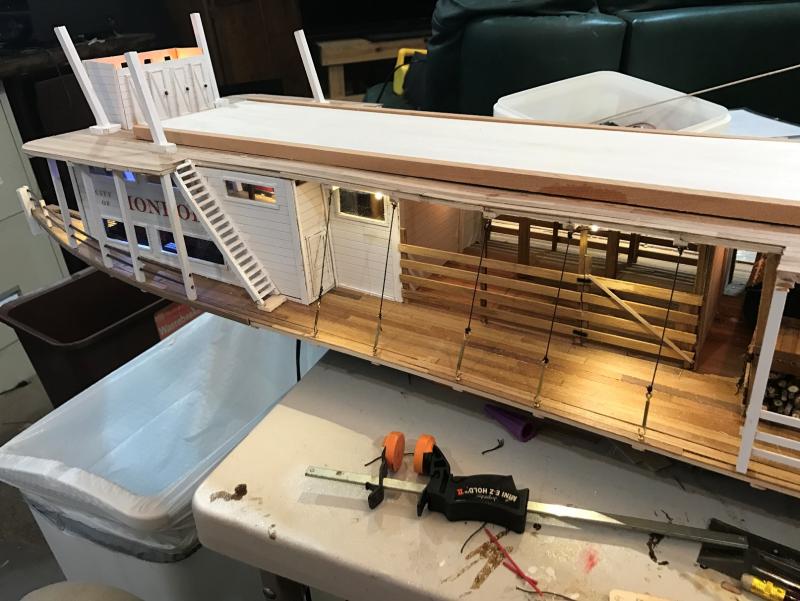
I did not take it that way, and appreciate ever one of them so keep them coming. That is what makes this site great. Not running them through makes construction easier. I forgot to point out that that thingee in the front is a working searchlight.
- 69 replies
-
- city of monroe
- steamboat
-
(and 1 more)
Tagged with:
-
You have a great eye. This is what happens to a first time "scratch builder" who deviates from the plan. I built the big double doors and side windows in the front of the cabin and then went to put the stacks through and found that they would only be a foot away from the cabin structure. So I figured that since I wasn't going to light the boiler up I could move the stack where I I had clearance. However I didn't make the mistake I made on my "Mississippi Riverboat" which you picked up The rear stairs have the same pitch. In all seriousness Thanks for the comment that is what makes this fun.
- 69 replies
-
- city of monroe
- steamboat
-
(and 1 more)
Tagged with:
-
- 69 replies
-
- city of monroe
- steamboat
-
(and 1 more)
Tagged with:
-

Steamboats and other rivercraft - general discussion
chborgm replied to Cathead's topic in Nautical/Naval History
Cathead and Bob Thanks for the response, and the effort you put in to get the info. As a result I am going to leave them off my "Monroe". I put them on my previous two builds and they kind of detract from the whole boat. Your eye first goes to the red or green light rather then viewing the whole item.- 281 replies
-
- Steamboats
- riverboats
-
(and 3 more)
Tagged with:
-

Steamboats and other rivercraft - general discussion
chborgm replied to Cathead's topic in Nautical/Naval History
I am building a scrath build of a mid 1800's river boat. Got a question> When did riverboats start using navigation lights. There was a law passed in 1838 that steamships have some kind of lights, but when did western riverboats start using them.- 281 replies
-
- Steamboats
- riverboats
-
(and 3 more)
Tagged with:
-
Very nice. I have never used yellow to get the effect you have.I'll have to try a sample on my current build.
- 296 replies
-
- chaperon
- model shipways
-
(and 1 more)
Tagged with:
-
Thnaks Bob Up close it has it's faults. Blighty I picked the Monroe plans because It looked like a typical riverboat . I have changed a fair amount of it. I enlarged the engine room to include what i think would be a kitchen, I converted it to wood because I like the piles of logs, and moved some things around to cover my mistakes. The one thing I learned in this first scratch build is once you start to improvise you creaet a lot of downstream problems that the kit builders solved. It adds to the enjoyment though, and it uses up a lot of the inventory of wood I had accumulated over the years. I built the Chaperon and that started by love for steam power, and also I am getting to old to tie a lot of lines
- 69 replies
-
- city of monroe
- steamboat
-
(and 1 more)
Tagged with:
-
Got a start on the boiler deck. As you can see I decided to have the curtains on the doors and widows red. I considered blue,purple and pearl. but decided to stick with the red I had used previously. I now have to finish with the walls and then have figure how much lightinh will be required.
- 69 replies
-
- city of monroe
- steamboat
-
(and 1 more)
Tagged with:
-
I small story about the wood pile. Somehow when I collected the little twigs that I cut up there were some black ants I didn't see. So every day one or two ants show up. Since they didn't have a ticket I killed them. I think I have them all by now. I agree that 1/4" is the best way to go, but it sure take a lot of wood. Clarence
- 69 replies
-
- city of monroe
- steamboat
-
(and 1 more)
Tagged with:
-
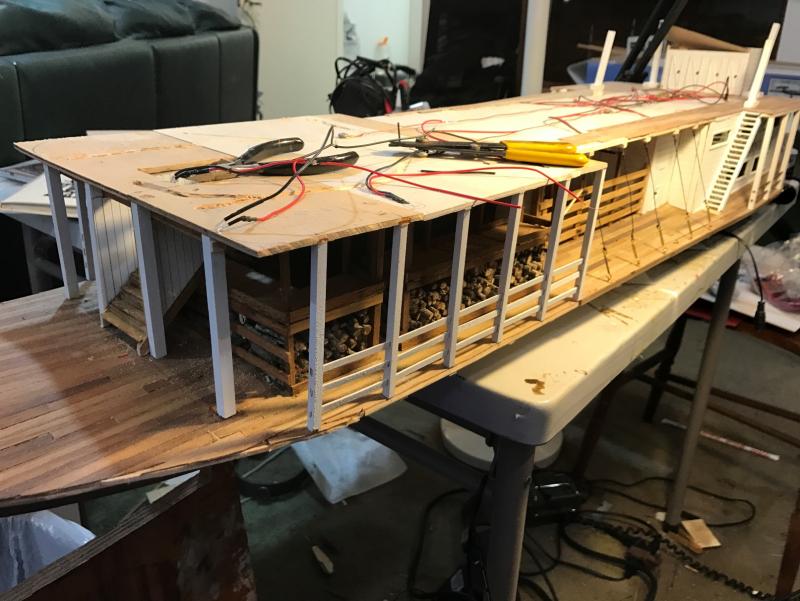
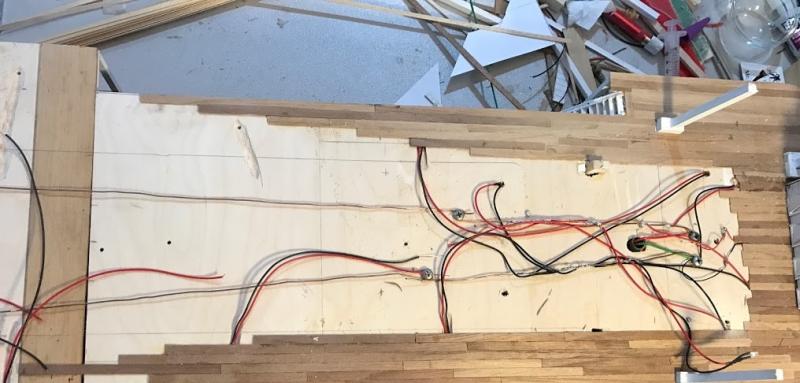
I have continued to make slow progress. I can't believe how big this is. I should have kept to the 1/8" scale instead of the 1/4". I am glad I had a lot of lumber left from previous work. Anyway here are a couple pics. The first shows the boiler deck planking complete and the false deck for the cabin area with the lights on.The second shows the rough wiring
- 69 replies
-
- city of monroe
- steamboat
-
(and 1 more)
Tagged with:
-
I like the effect. I see that you are powering with battery. Have figured out how long they will last? I use my lit models for night lights in the house so I used house current. I think your choice makes a cleaner installation. Clarence
- 296 replies
-
- chaperon
- model shipways
-
(and 1 more)
Tagged with:
-
To get an idea of brightness check my last post http://modelshipworld.com/index.php/topic/14508-city-of-monroe-by-cborgm-%E2%80%93-scale-%C2%BC%E2%80%9D-to-foot-western-river-steamboat-plans-by-j-f-hale-1974/ Those are 3mm 12v leds Kens suggestion of the led strips is a good idea.
- 296 replies
-
- chaperon
- model shipways
-
(and 1 more)
Tagged with:
-
I got carried away on that. I first built a two hole house, and that looked to small so I built this one. From I size standpoint it is ok, but for a packet steamer it is to much. I am going to turn down the lights.
- 69 replies
-
- city of monroe
- steamboat
-
(and 1 more)
Tagged with:
-
- 69 replies
-
- city of monroe
- steamboat
-
(and 1 more)
Tagged with:
-
There also incandescent tiny bulbs available that look like kerosene and will run at low 6-12 volts. The train stores have them also in the MicroMark catalog.
- 296 replies
-
- chaperon
- model shipways
-
(and 1 more)
Tagged with:
-
I have put lights into my last three models, and it really makes a difference, but I think you have to plan from the very beginning. If you are going to use battery you probably still to it, but if you are going to use house power then you have to get a line out the bottom of the hull or some place not to noticeable. The two site below are my two build logs. I used 3mm and 5mm 12v leds Very cheap if ordereed on ebay from china . Anything I can do to help let me know. http://modelshipworld.com/index.php/topic/12537-mississippi-riverboat-by-chborgm-mantua-scale-150/http://modelshipworld.com/index.php/topic/12537-mississippi-riverboat-by-chborgm-mantua-scale-150/ http://modelshipworld.com/index.php/topic/10758-portland-by-chborgm-bluejacket/ Clarence
- 296 replies
-
- chaperon
- model shipways
-
(and 1 more)
Tagged with:
-

Steamboats and other rivercraft - general discussion
chborgm replied to Cathead's topic in Nautical/Naval History
if you have an iphone there is a FREE app called "Photoscan". It does the job of scanning pictures into you phone. clarence- 281 replies
-
- Steamboats
- riverboats
-
(and 3 more)
Tagged with:
-

Steamboats and other rivercraft - general discussion
chborgm replied to Cathead's topic in Nautical/Naval History
In all the pictures I have seen, and I may have missed one, but I have never seen an anchor on deck. I would have expected one on the stern to hold the boat from swinging when headed into the bank. I was going to put one on my current Monroe build but don't know what kind would have been used. Clarence- 281 replies
-
- Steamboats
- riverboats
-
(and 3 more)
Tagged with:
-
Blighty I checked your log, and I will never get mine aged like yours. I wish I had found you log before I started. I think what I was aiming for was a model that did not look artificially bright and glossy.
- 69 replies
-
- city of monroe
- steamboat
-
(and 1 more)
Tagged with:
-
I made a little progress I am trying to make it look used, and show a little wear. This lets me cover up a lot of my errors. I am going to finish the boiler deck base and then do the wiring to the lights on the main desk. Also you can see I decided to make it a wood burner.
- 69 replies
-
- city of monroe
- steamboat
-
(and 1 more)
Tagged with:
-
The lettering was done with Mirtosoft Publisher and printed on decal paper. I then sprayed it with clear so the water would not wash off.
- 69 replies
-
- city of monroe
- steamboat
-
(and 1 more)
Tagged with:
-

Steamboats and other rivercraft - general discussion
chborgm replied to Cathead's topic in Nautical/Naval History
I would think ought to be at least 18inch, 3/8"for the model. I would like 1/2 inch Merry xmass- 281 replies
-
- Steamboats
- riverboats
-
(and 3 more)
Tagged with:
-

Steamboats and other rivercraft - general discussion
chborgm replied to Cathead's topic in Nautical/Naval History
I am trying to find a Bell for my scratch build of city of Monroe that fits the 1/4 inch scale. Merry Christmas Clarence- 281 replies
-
- Steamboats
- riverboats
-
(and 3 more)
Tagged with:
About us
Modelshipworld - Advancing Ship Modeling through Research
SSL Secured
Your security is important for us so this Website is SSL-Secured
NRG Mailing Address
Nautical Research Guild
237 South Lincoln Street
Westmont IL, 60559-1917
Model Ship World ® and the MSW logo are Registered Trademarks, and belong to the Nautical Research Guild (United States Patent and Trademark Office: No. 6,929,264 & No. 6,929,274, registered Dec. 20, 2022)
Helpful Links
About the NRG
If you enjoy building ship models that are historically accurate as well as beautiful, then The Nautical Research Guild (NRG) is just right for you.
The Guild is a non-profit educational organization whose mission is to “Advance Ship Modeling Through Research”. We provide support to our members in their efforts to raise the quality of their model ships.
The Nautical Research Guild has published our world-renowned quarterly magazine, The Nautical Research Journal, since 1955. The pages of the Journal are full of articles by accomplished ship modelers who show you how they create those exquisite details on their models, and by maritime historians who show you the correct details to build. The Journal is available in both print and digital editions. Go to the NRG web site (www.thenrg.org) to download a complimentary digital copy of the Journal. The NRG also publishes plan sets, books and compilations of back issues of the Journal and the former Ships in Scale and Model Ship Builder magazines.


