HOLIDAY DONATION DRIVE - SUPPORT MSW - DO YOUR PART TO KEEP THIS GREAT FORUM GOING! (Only 36 donations so far out of 49,000 members - C'mon guys!)
×


chborgm
-
Posts
232 -
Joined
-
Last visited
Content Type
Profiles
Forums
Gallery
Events
Everything posted by chborgm
-
 Sounds like a great practical engineering problem. To bad we don't have all the numbers. Was the wheel stopped, slowing down, building up. At what point would it break. But if this could not be done until both were at the same sspeed and direction why have it. I ordered the book and will read up. What a great thread.
 -
Steamboats and other rivercraft - general discussion
chborgm replied to Cathead's topic in Nautical/Naval History
What were the early European canal boats like?- 281 replies
-
- 1
-

-
- Steamboats
- riverboats
- (and 3 more)
-
It is really simple. All you need is a 120v to 12v adaptor like you use for a clock etc. Also you can buy all the 3 mm and 5mm leds prewired with resistor you want on ebay. They are about 20 cents each. They come from China so it takes a couple weeks to get. On my Mississippi Riverboat model I have about thirty running off one adapter. No trick to wiring just take the + output from the adapter to the red wire to the light and thats it.
- 60 replies
-
- 2
-
-
- king of the mississippi
- artesania latina
- (and 1 more)
-
I just got aware of this forum, and I know you will be happy with it. It may not be to late to put lights in it. You can see what I did with lights in Bluejackets kit of the portland, and the Mantura kit of the Mississippi River boat. there is a forum on both. Mississippi Riverboat by chborgm - Mantua - Scale 1:50 Portland by chborgm - BluejacketLet me know how I can help.
- 60 replies
-
- 3
-
-
- king of the mississippi
- artesania latina
- (and 1 more)
-
I think I made a lot of typo in my last post. Hope you figured it out.
-
i THINK THE LIGHTS HIDE a lot of the bad parts. It's what I would call: " A five footer". if you are closer than that all the defects show up. There is so much carpentry work that a to show youlot of bad joints to protect happen. I am not going to put any closeup pictures in, jparsley... are you building this kit?
-
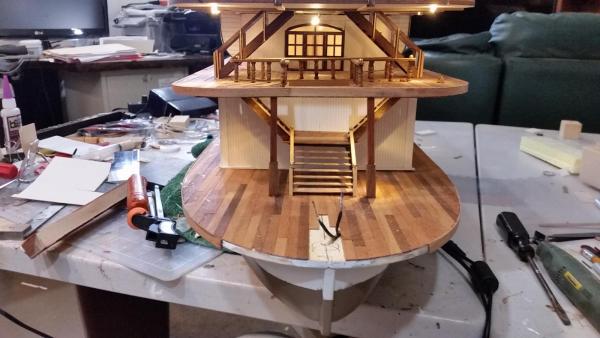
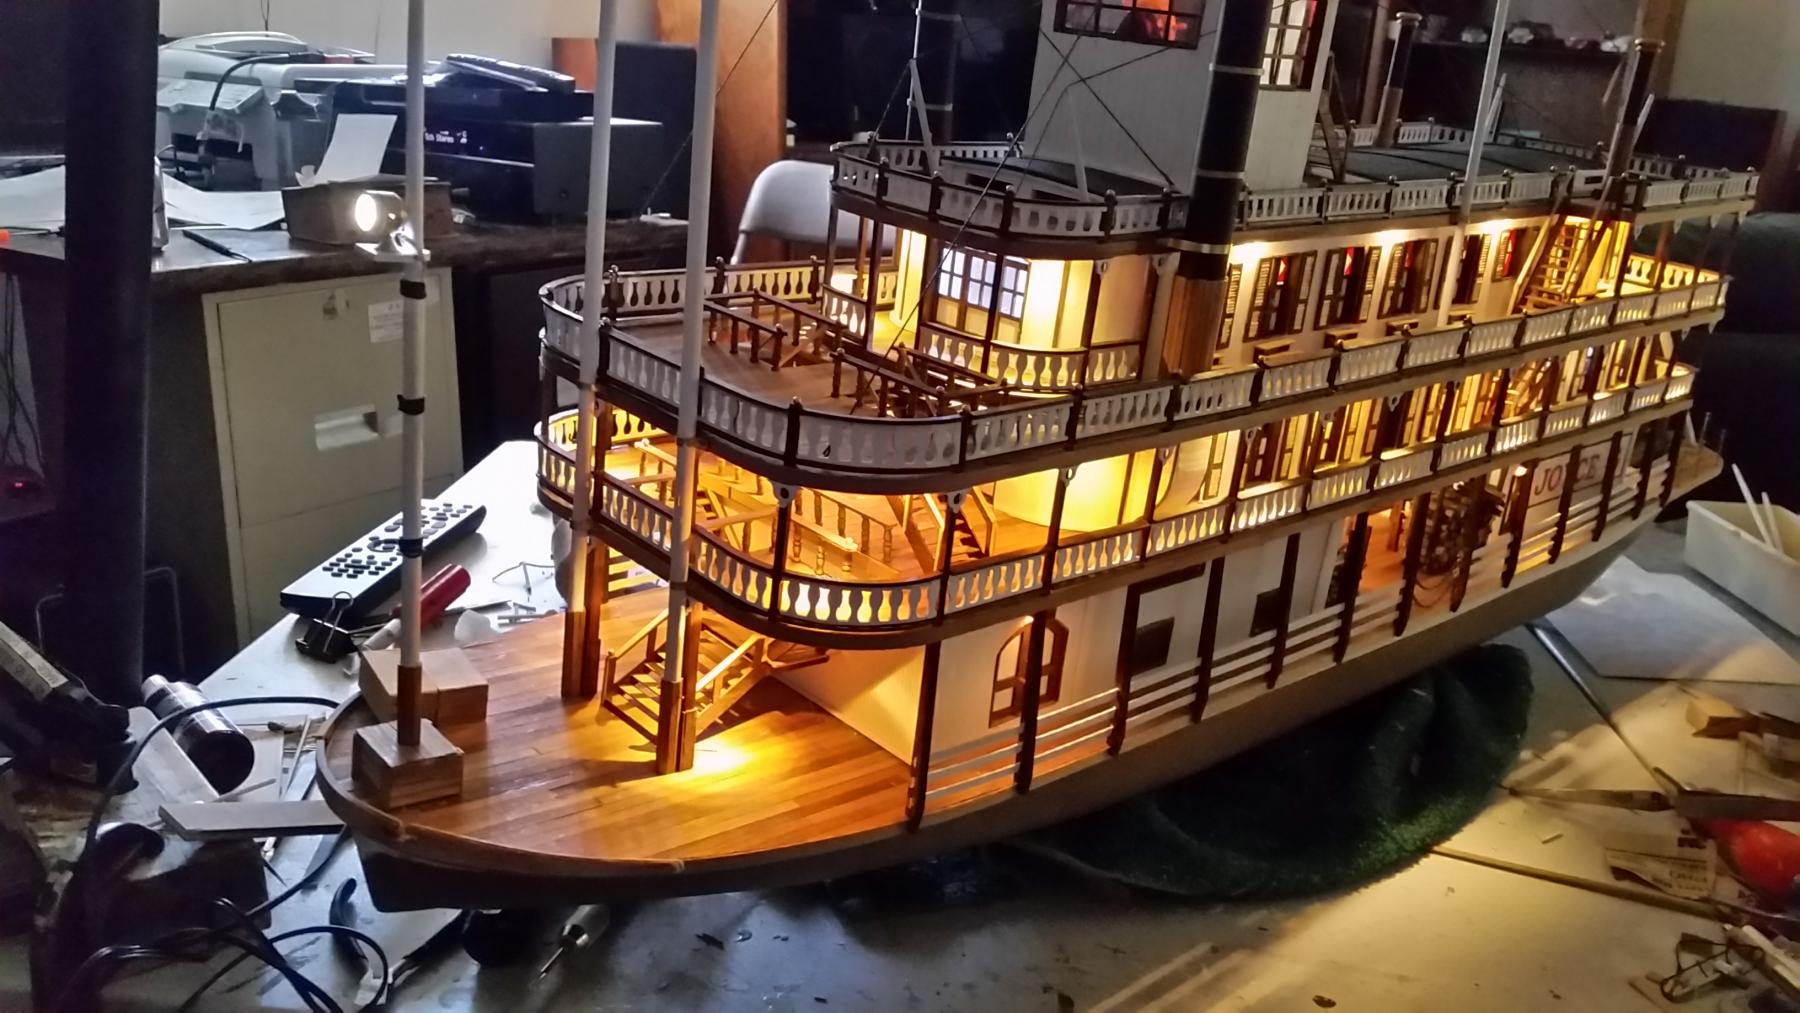
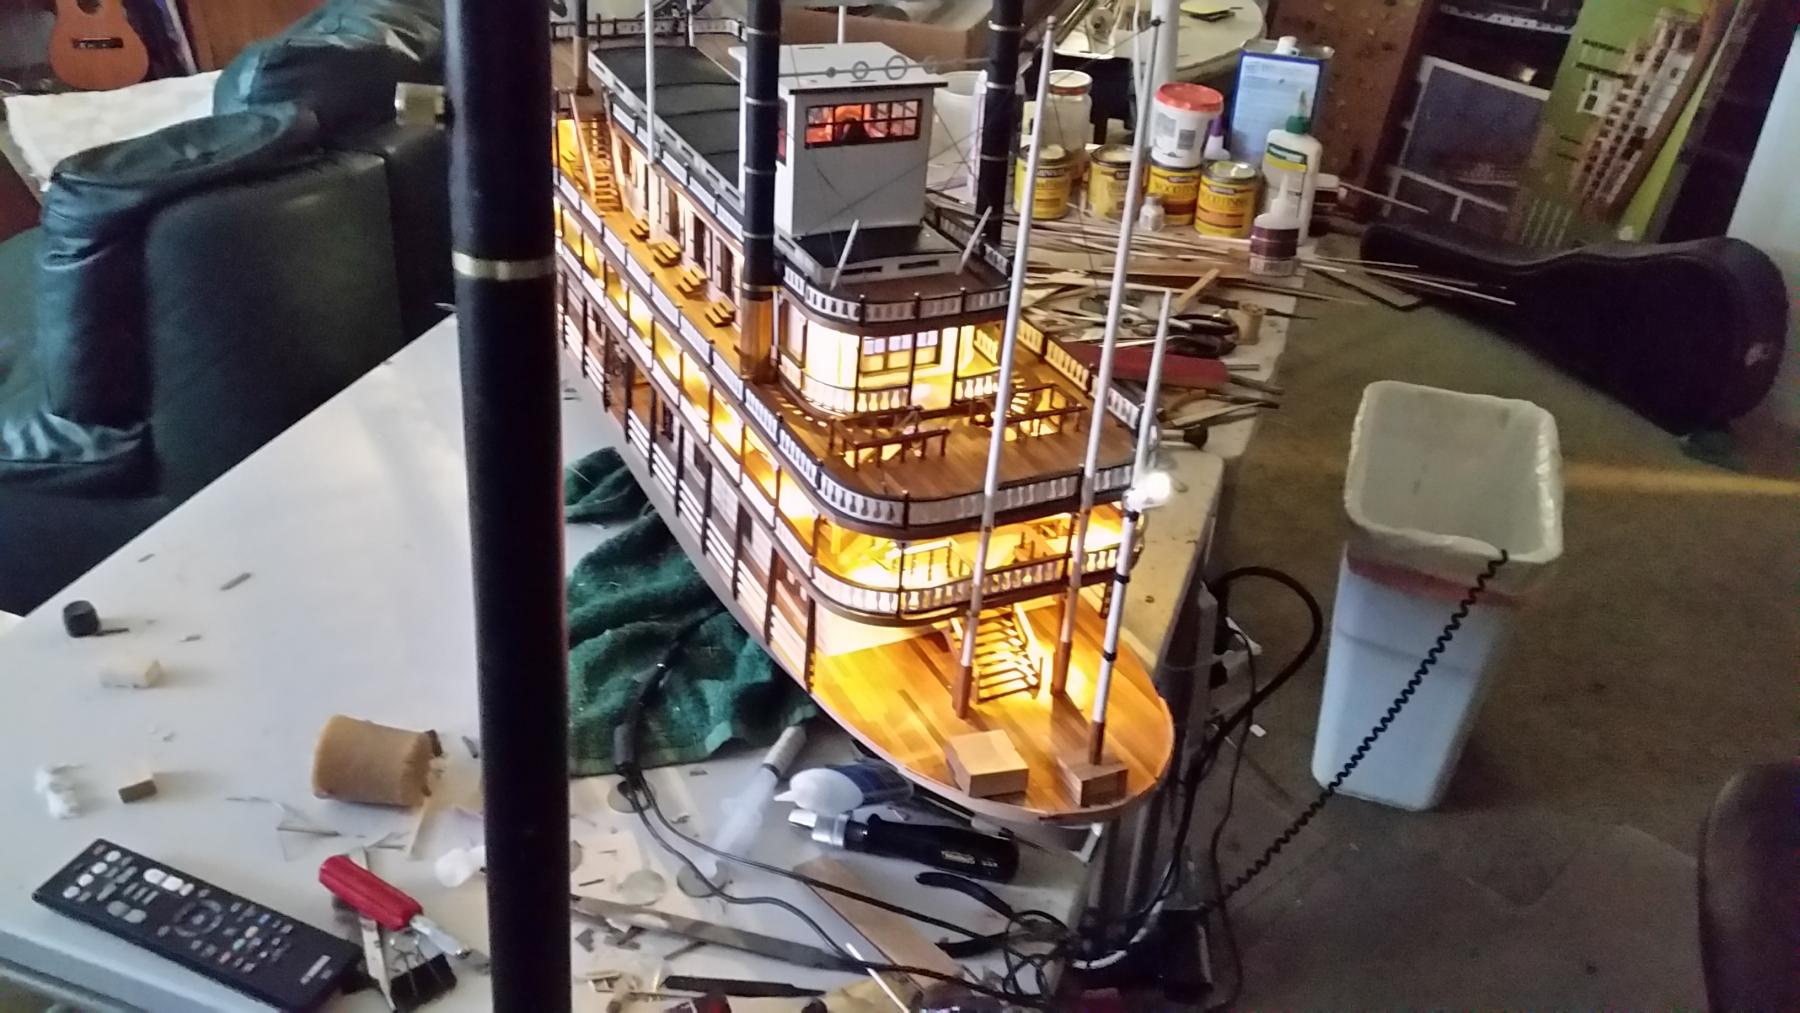
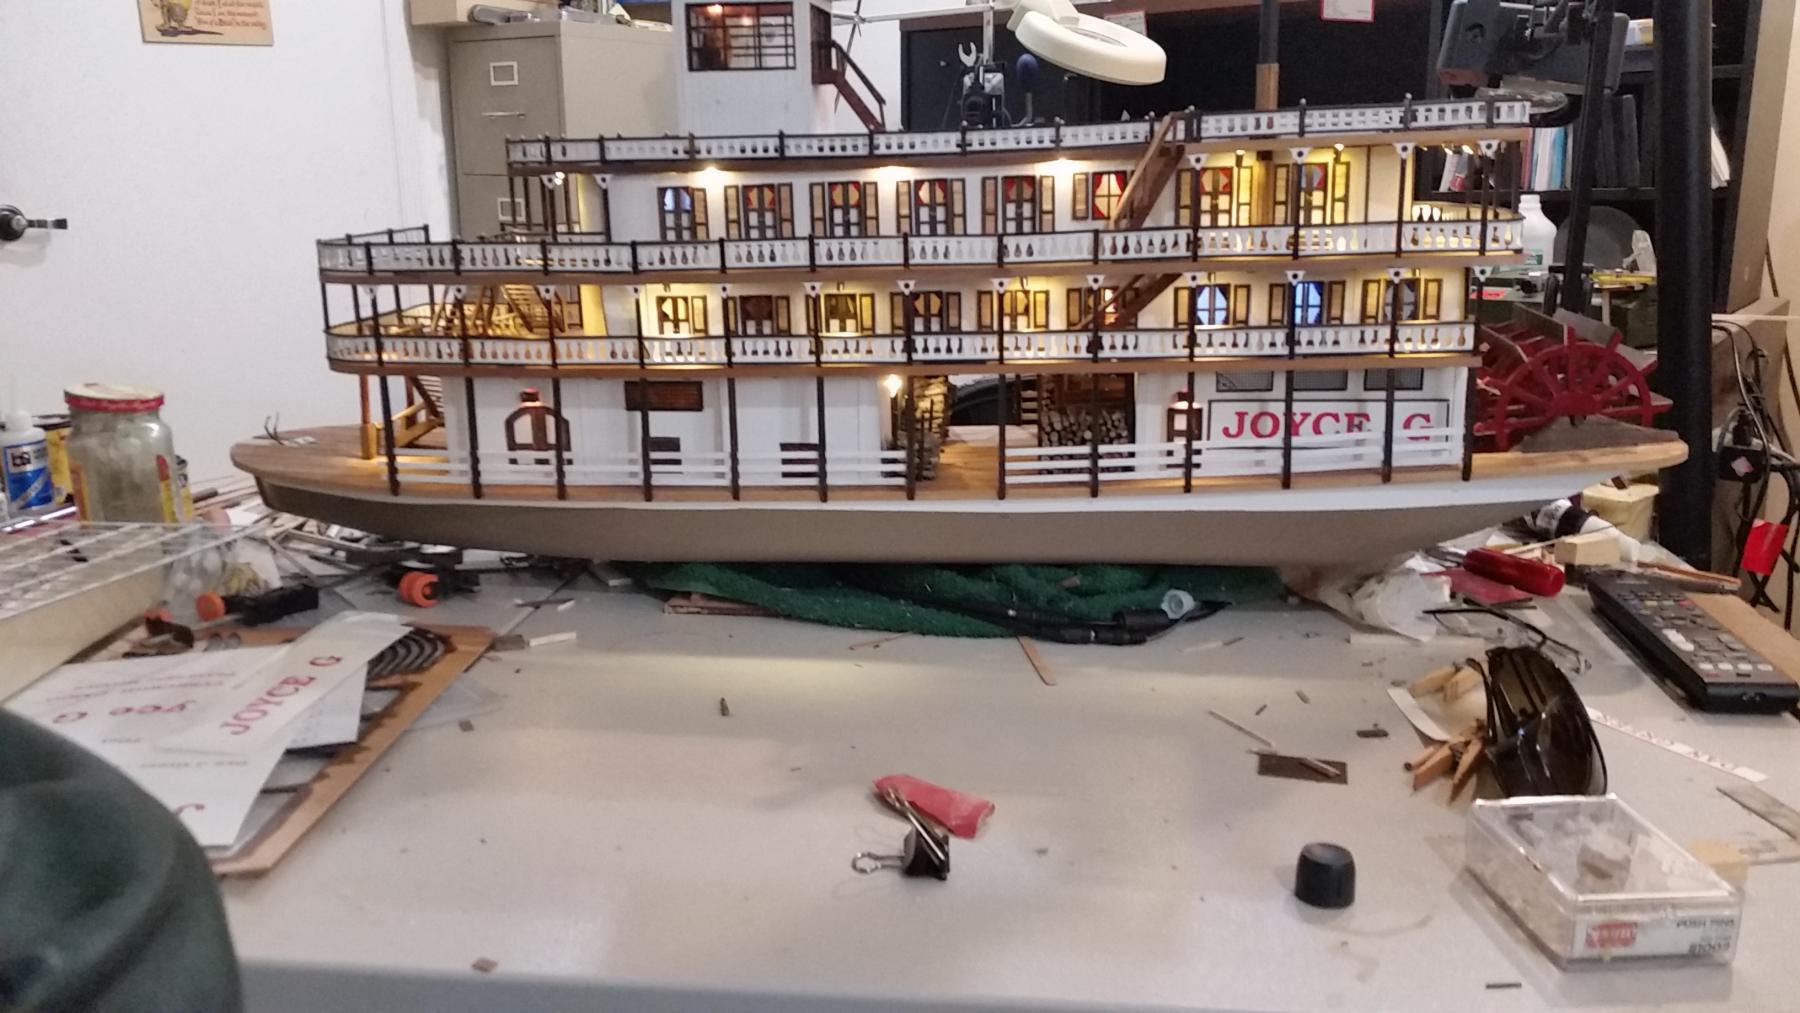
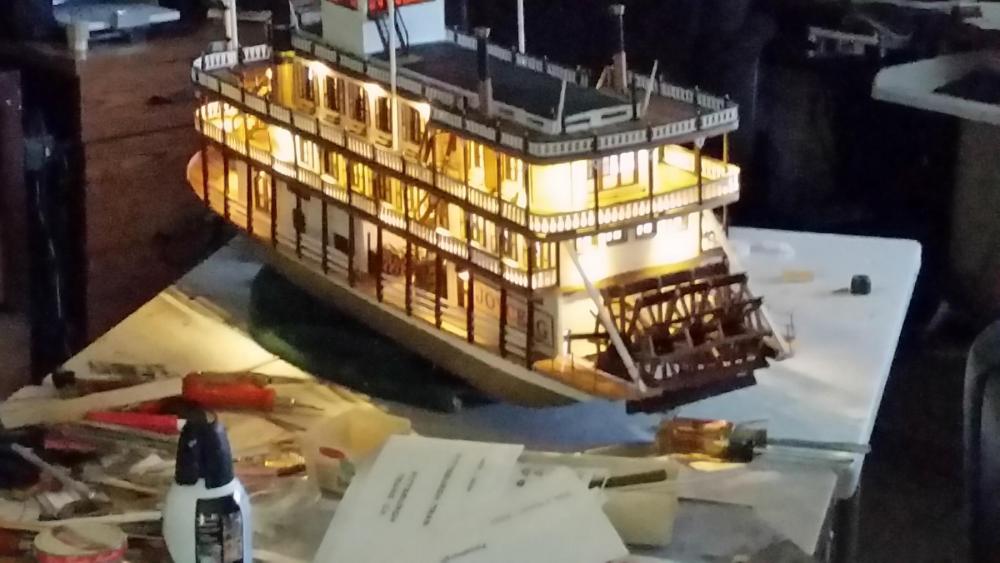
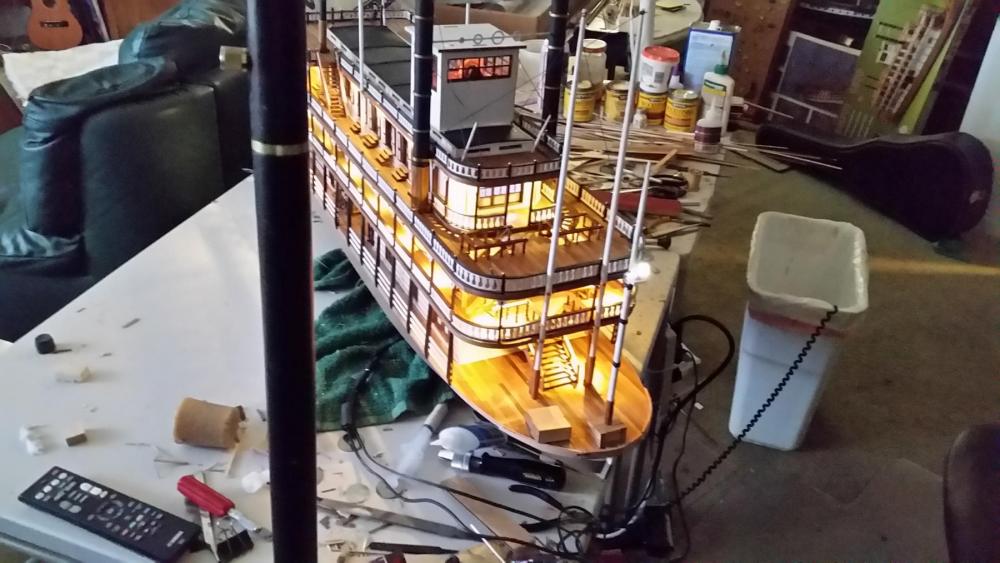
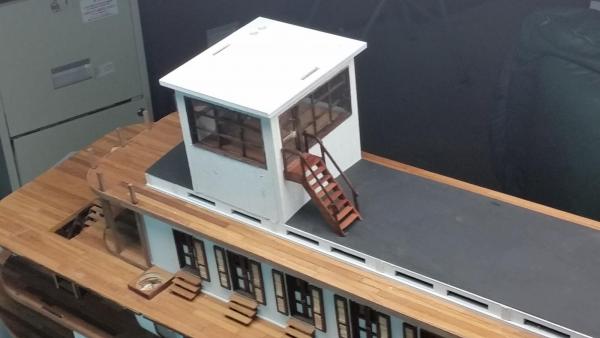
Thought I would take a few pictures and show status. I have all the standing rigging done, and built a new paddle wheel. I now have the the search light mounted and operational. I still have a lot of details, and complete the top of the pilot house. Also I have two ten foot skiffs to build and mount. .

-
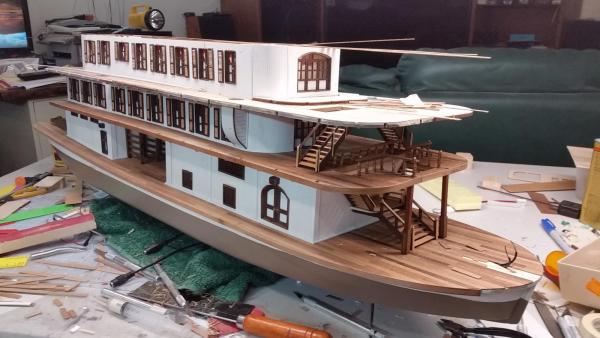
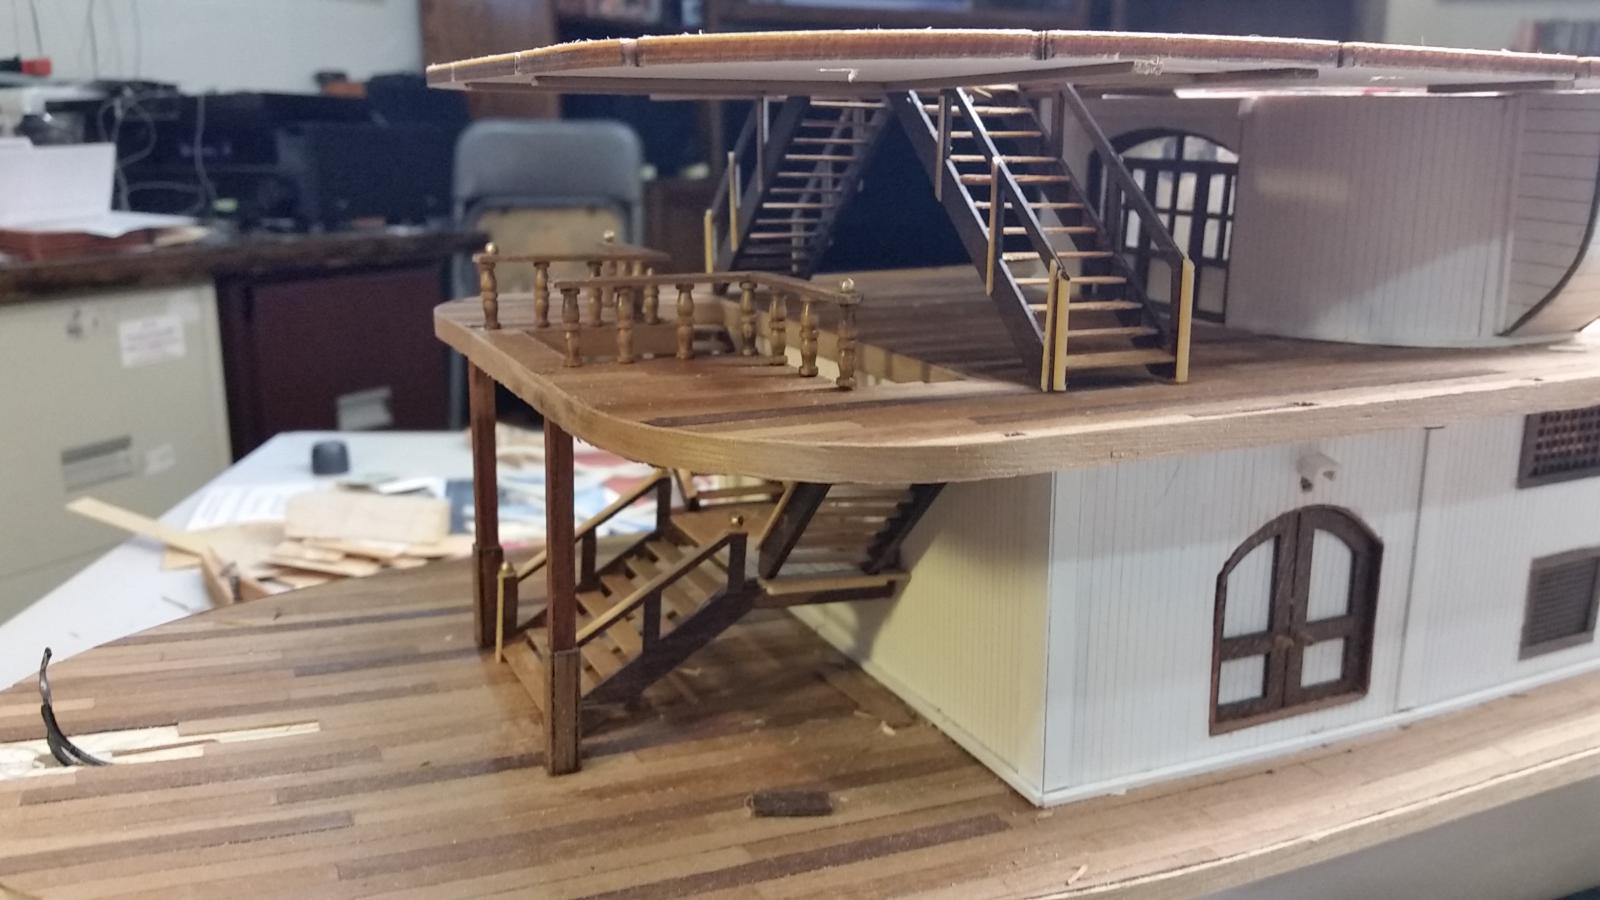
The stairs are at different angles because I screwed up. I took some wrong measurements and,I didn't realize it until I did the upper stairs correctly. In reality you couldn't climb the lower stairs without hitting your head. I couldn't correct it without tearing up a lot of work.
-
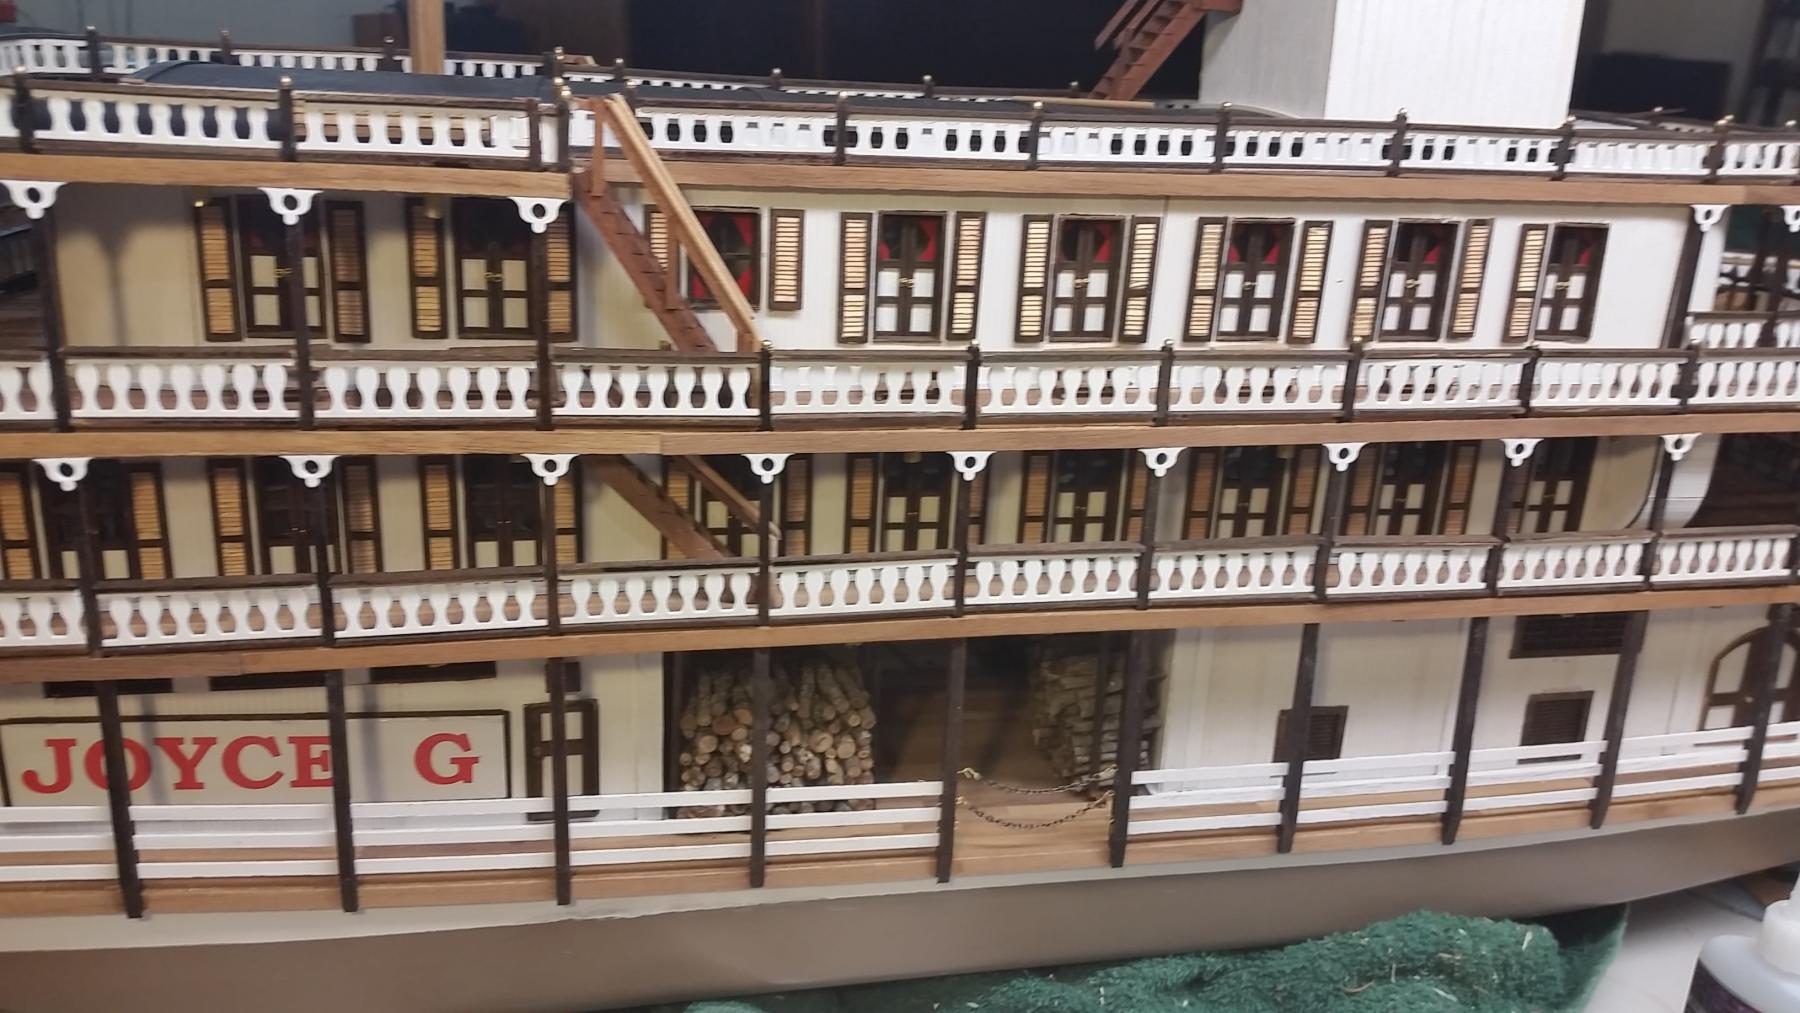
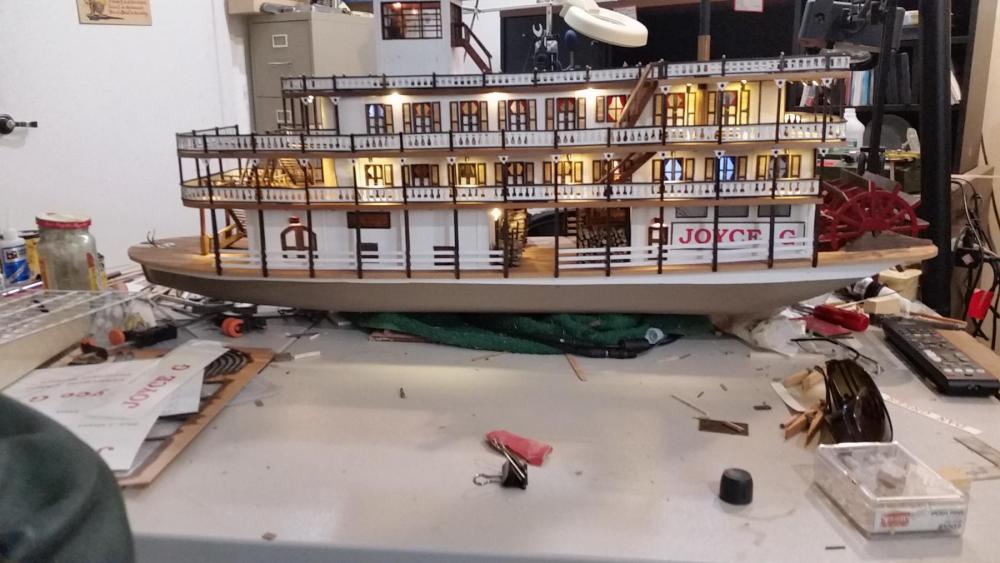
I have made a little more progress, I have finished the railing all around. I also decided to name it after my wife Joyce. I also have taken a step backward. When I put the paddle wheel on it looked to big and bulky. The kit was designed so that it could be an RC boat so the paddle wheel was big and heavy. As I mentioned before I cut it down to be a more realistic diameter, but didn't scale the structure down. Also I didn't like the red I had painted it. Anyway I decided to build one more correctly scaled and either use a diferent shade of red or use a more natural wood color.

-
Steamboats and other rivercraft - general discussion
chborgm replied to Cathead's topic in Nautical/Naval History
Cathead thanks for the input. The overall efficiency of the power cycle must have really been low. I consider just dry red Oak. Cottonwood green is 19. Million, and Pine is 17. compared to the 30 million for the red oak. On the efficiency, I checked my Mark Mechanical Engineers Handbook, and for engines of that era the engine alone efficiency was list around 10%. so when you consider the inefficiency of the fire and boiler heat lost through all the piping the overall eff must be in the low single numbers. That easily give the number you gave.- 281 replies
-
- 2
-
-
- Steamboats
- riverboats
- (and 3 more)
-
Steamboats and other rivercraft - general discussion
chborgm replied to Cathead's topic in Nautical/Naval History
I did a little homework to get a rough idea of the amount of wood a riverboat used. I started with a cord of oak with 12 percent moisture According to my MARKS Handbook a cord of wood is about worth 30,000,000 BTU Also 1 Horsepower is equal to 2542. BTU per Hour So a 500 hp engine would need 1,271,000 BTU per hour at 100% eff or 8,473,333 per hour at a 15% overall eff. (that’s from grate to output shaft) I have no idea if 500 hp is close, but with all the inefficient burning and heat loss through the pipes I don’t think the efficiency would be much more. So if you need 8,473,333 btus/hr to get 500 developed HP then one cord of wood would last about 3.5 HRS (30,000,000 / 8,473,333)hour- 281 replies
-
- 4
-
-
- Steamboats
- riverboats
- (and 3 more)
-
Steamboats and other rivercraft - general discussion
chborgm replied to Cathead's topic in Nautical/Naval History
Having grown up in Pittsburgh aboutten years after this all I can say is Thank you- 281 replies
-
- 3
-
-
- Steamboats
- riverboats
- (and 3 more)
-
Steamboats and other rivercraft - general discussion
chborgm replied to Cathead's topic in Nautical/Naval History
Got a general question. How much wood does a paddle wheeler like the Herion use.- 281 replies
-
- 2
-
-
- Steamboats
- riverboats
- (and 3 more)
-
I understand now, and in hindsight I should have.. The plan called for the wheel to be in the slot, but I wanted to have the rope and drum, and better support which was not possible as designed. After I assembled it, and glued it place I realized I should have moved the opening. Sometime you don't see the forest for the trees.
-
i am not sure I understand. I have not changed the centerline, but I reduced the diameter. I have not had the wheeel on fo a time, but I think it has three paddles below the waterline. I'll set it back on and take some pictures tomorrow.
-
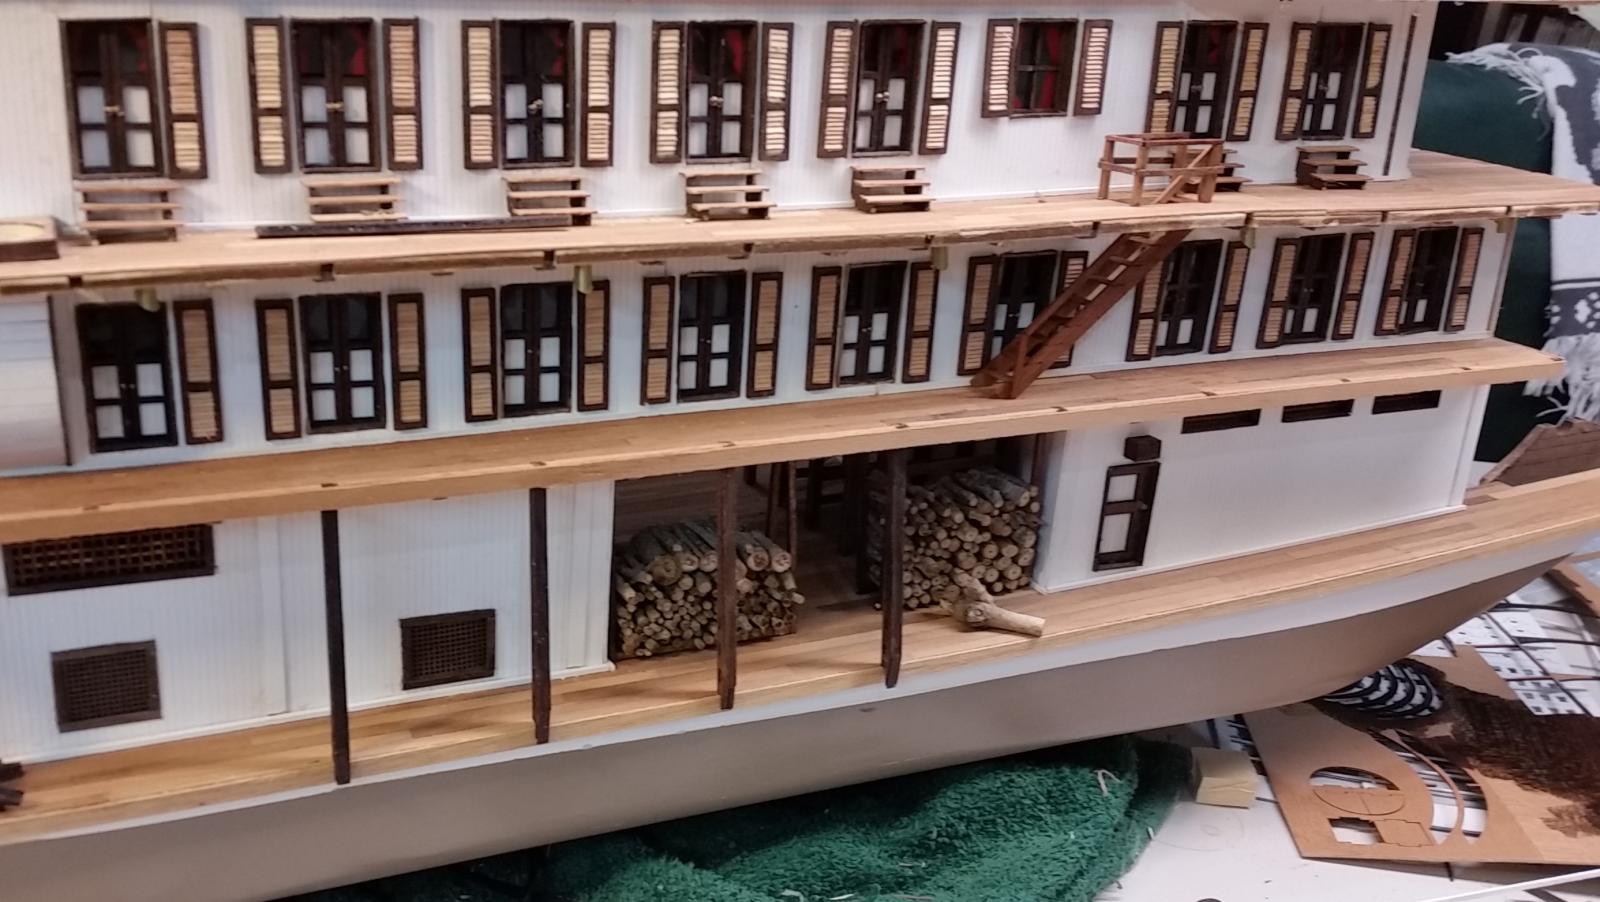
I thought I'd take a few picture to show some progress The wood piles are not in the plans, but I could not resist adding them. I am going to add a few more rack. The wood is little twigs of oak. I still have to add the peaked roof on the pilot house, a lot of railing, and other stuff. Try to keep up to date. Clarence


-
I am worrking on another steamer. "Mississippi Riverboat" check it our http://modelshipworld.com/index.php/topic/12537-mississippi-riverboat-by-chborgm-mantua-scale-150/
-
My keel is about an 1/8th x 1/4. I can only eyeball it since it is on a stand and can't measure' From scale stand point that would be 1' x 2' sounds about right. Good luck with your model. Let me know when you start a build forum. clarence
-
My grandfather was a stationary Engineer at the Duquesne Brewery it Pittsburgh,and he used to take me with him on Sundays when he had to check things. The details of this bring me back to those trips. Wow again. Heat up a kettle and connect the steam.
-
I agree with Kurt. It seems at times the most "minor" questions get the most interest and in sight. When I built the chaparon it bothered me that there was no planking from the fore steps on the top deck to the cabins. On my "non riverboat research" I found this STORY AND DEVELOPMENT History demonstrates that failure to account for mistakes of the past can produce devastating results. In the late 1800s, BUR materials were used to replace lead sheets on commercial wooden buildings.3 BURs were constructed in situ, using alternating layers of jute and tar or lake asphalt. These constructions, though crude, used largely unrefined bitumen that was rich in natural constituents and provided an improvement over conventional roof constructions of the time. Documented use of asphalt for roofing, Anyway I think I am going the plank the top deck since it does have a railing, and was sort for viewing. I will "tar" the roof of the glass house. I reserve the right to change my mind. Thanks again for all the feedback. Clarence
-
Cathead After all the research you have done how do you feel about the finish on the top? I intend to make either Black as if it was tared, our planked with heavy chalking between planks. I am leaning toward the tar. Clarence
-
I mislabled the decks I refereed to. I meant the Salon Deck not the Hurricane. (I still think they ought to be called the 1st, 2nd, 3rd etc)
-
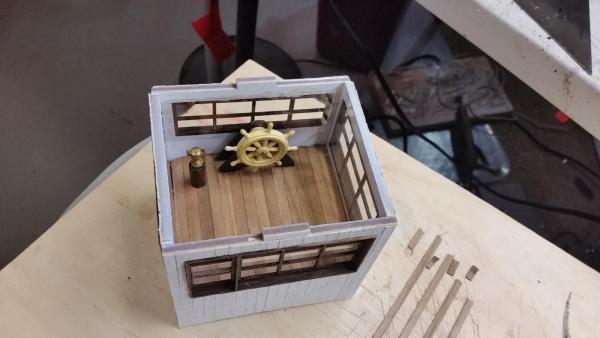
Carl the main change is on the boiler deck. Initially they blended into the cabin area at the top. I lowered this blend to the bottom of the deck. On the Hurricane deck I moved the stacks about 1/4" out ( thast a foot in scale). In engine room exhausts I haven't placed them. should be in passage way.They are now in the cabin. The Hurricane deck is planked I will get some pictures of it.
-
I am progressing slowly. I thought that I would add a few status pictures I am making afew modifacations to the plans. Mainly am moving the Stacks outboard. The plans have them going through the cabin area. I will do the same with the steam engine exhaust stacks