mugje
-
Posts
931 -
Joined
-
Last visited
Content Type
Profiles
Forums
Gallery
Events
Everything posted by mugje
-
 Ah tnx for the explanation. It sounds like an easier progress to do the main planking first and then mount the deck on the ship. Well, with the next ship i will keep that in mind. I had to first find out what the waterway was haha, but now i get it. Caldercraft does not have a waterway in there plans, so i don't know if i'm gonna do that for now. It's offcourse more authentic to install one, but i'll think about it. The pattern of planking is explained in the plans, so i can begin planking from the midline and don't see any troubles with that?
 -
Wow amazing work you do! So much detail! I really like your work👍
- 421 replies
-
- 1
-

-
- caldercraft
- granado
- (and 1 more)
-
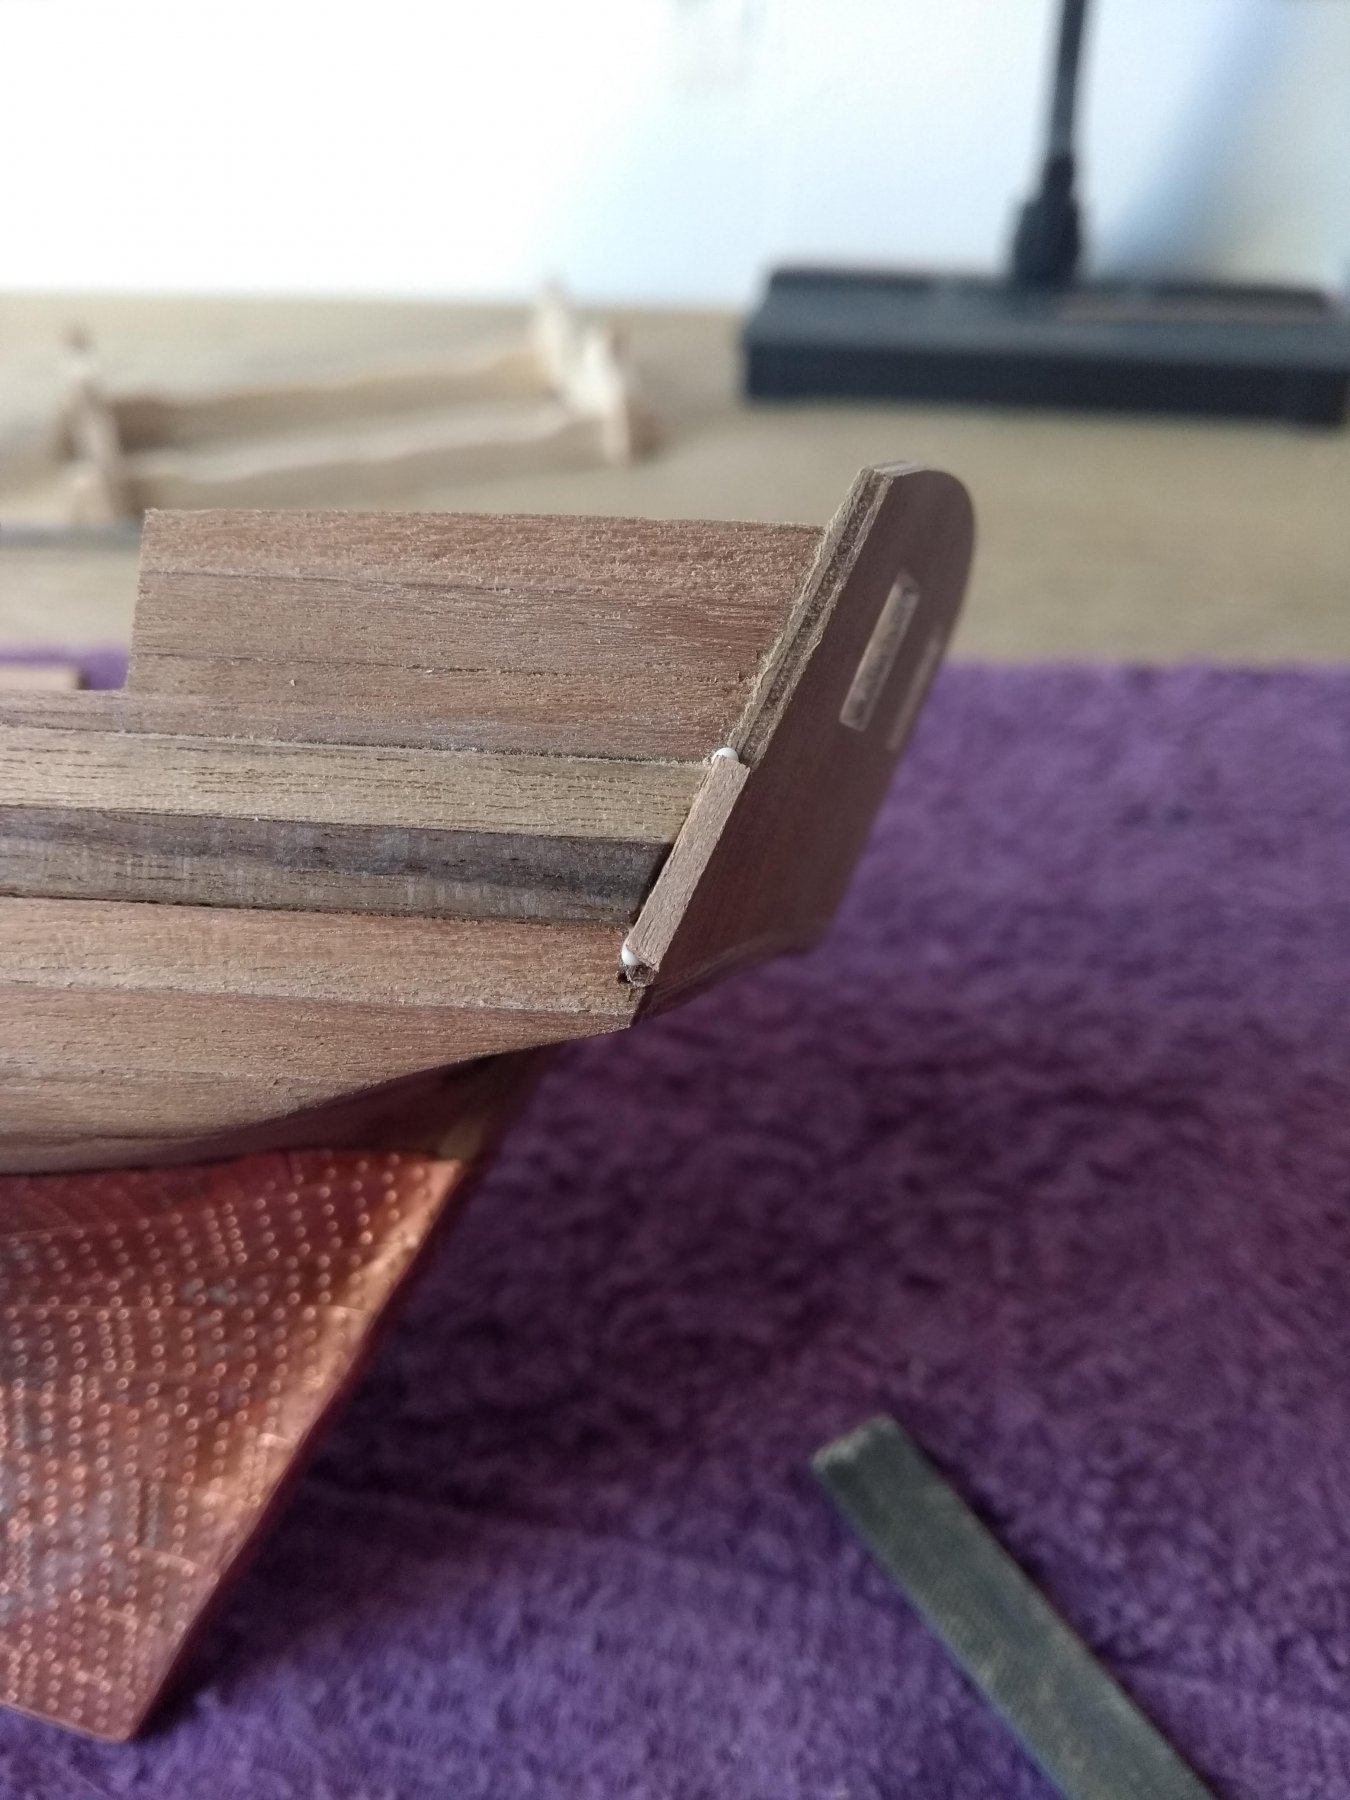
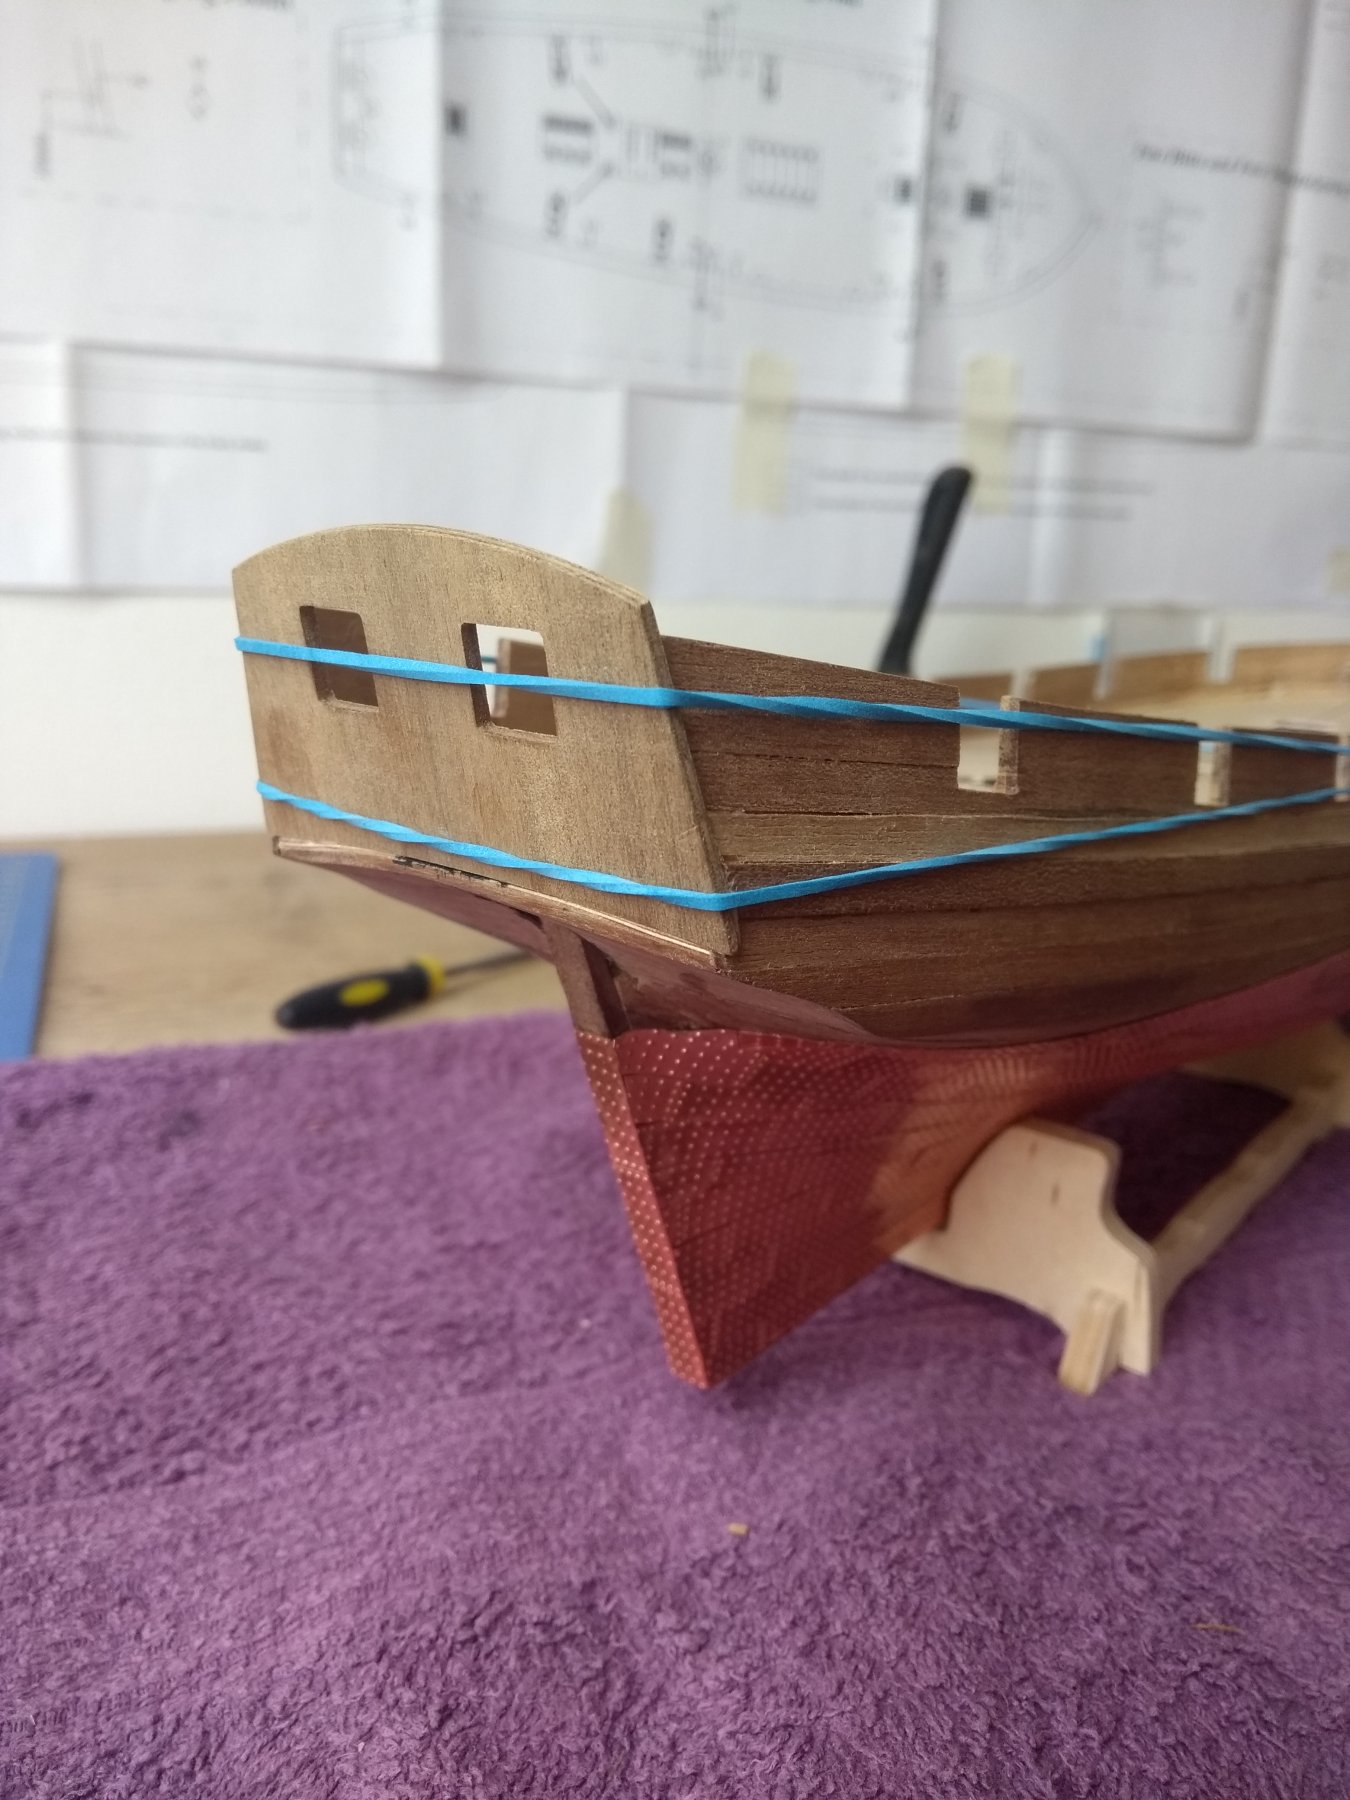
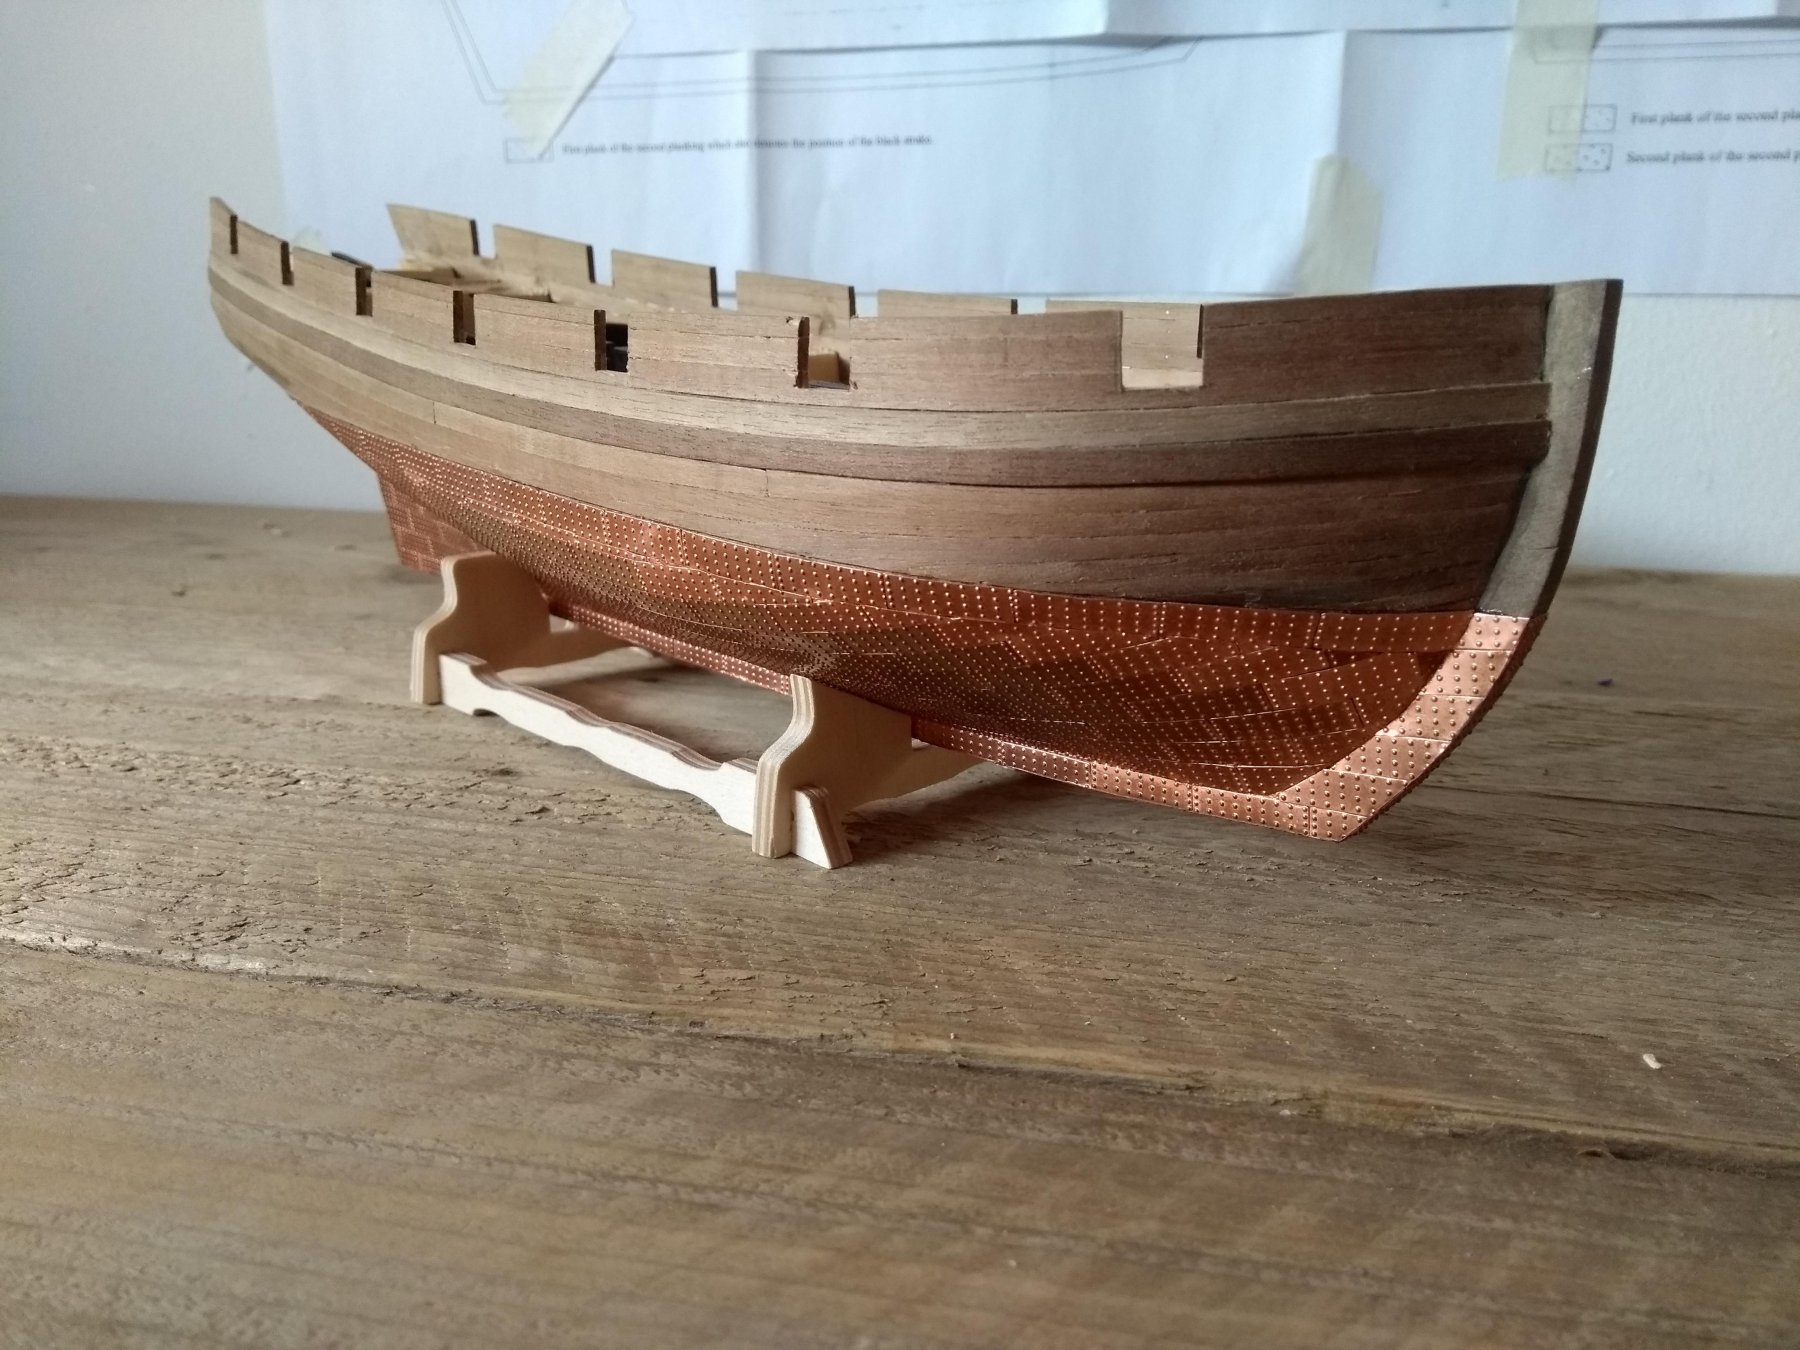
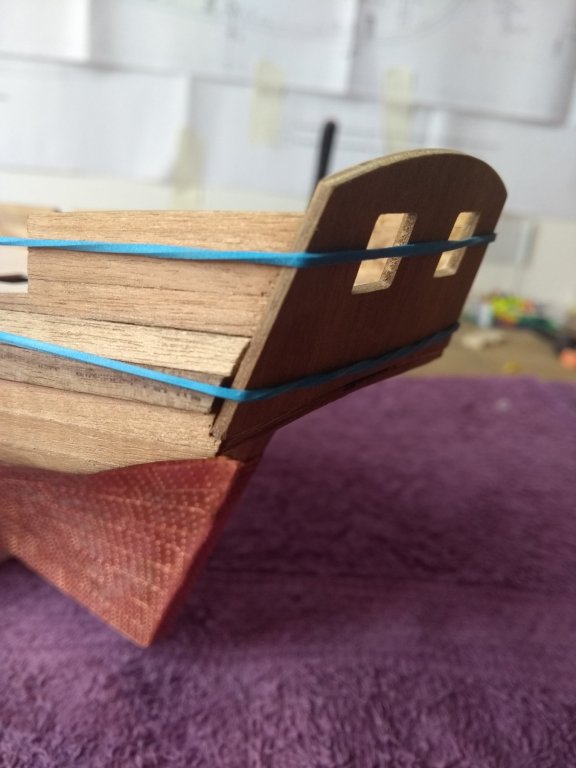
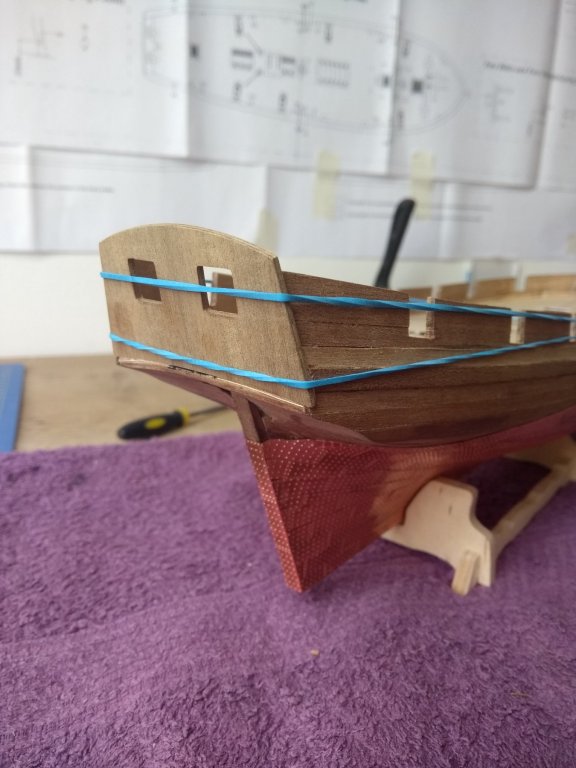
The stern fascia is now okay in my opinion. I extended the wale, and used some woodglue/wood dust to fill up the cracks and holes. Everything gets painted black, so the different colors do not gonna be visible.


- 271 replies
-
- 10
-
-
I wiped the copper plates clean with a mixture of vinegar and salt. Is isopropanol then still needed? And what do you mean with a clear layer of color? To varnish the copper plates? And yes, in the manual they put the deck first on the ship and then planking it. Would it be better not to? (with the next ship :D)
-
You have build a lovely Pickle Peter! Very clean work, something to aspire to. I will stick to the original stern fascia, i don't really want to do modifications on this ship. With my limited knowledge of ship building and history, it's easyer to keep the building progress going. But thanks for your input
-
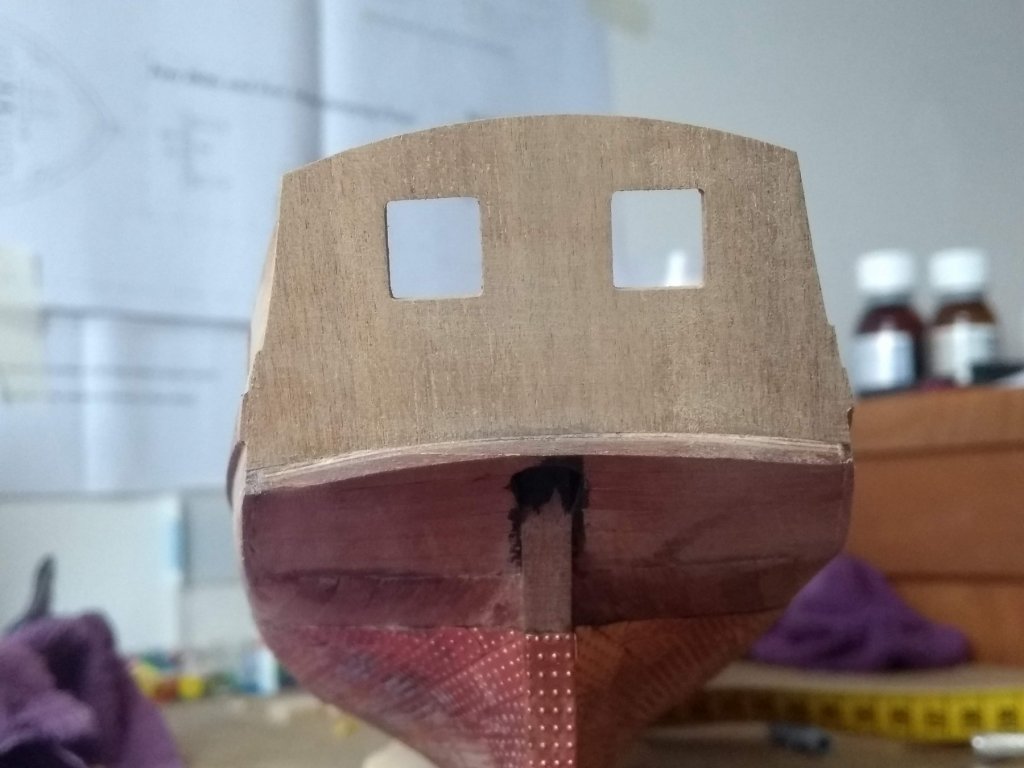
And also it seems that i have to make the wale longer, over the stern fascia, as i can see in the manual. Otherwise it looks a bit strange

-
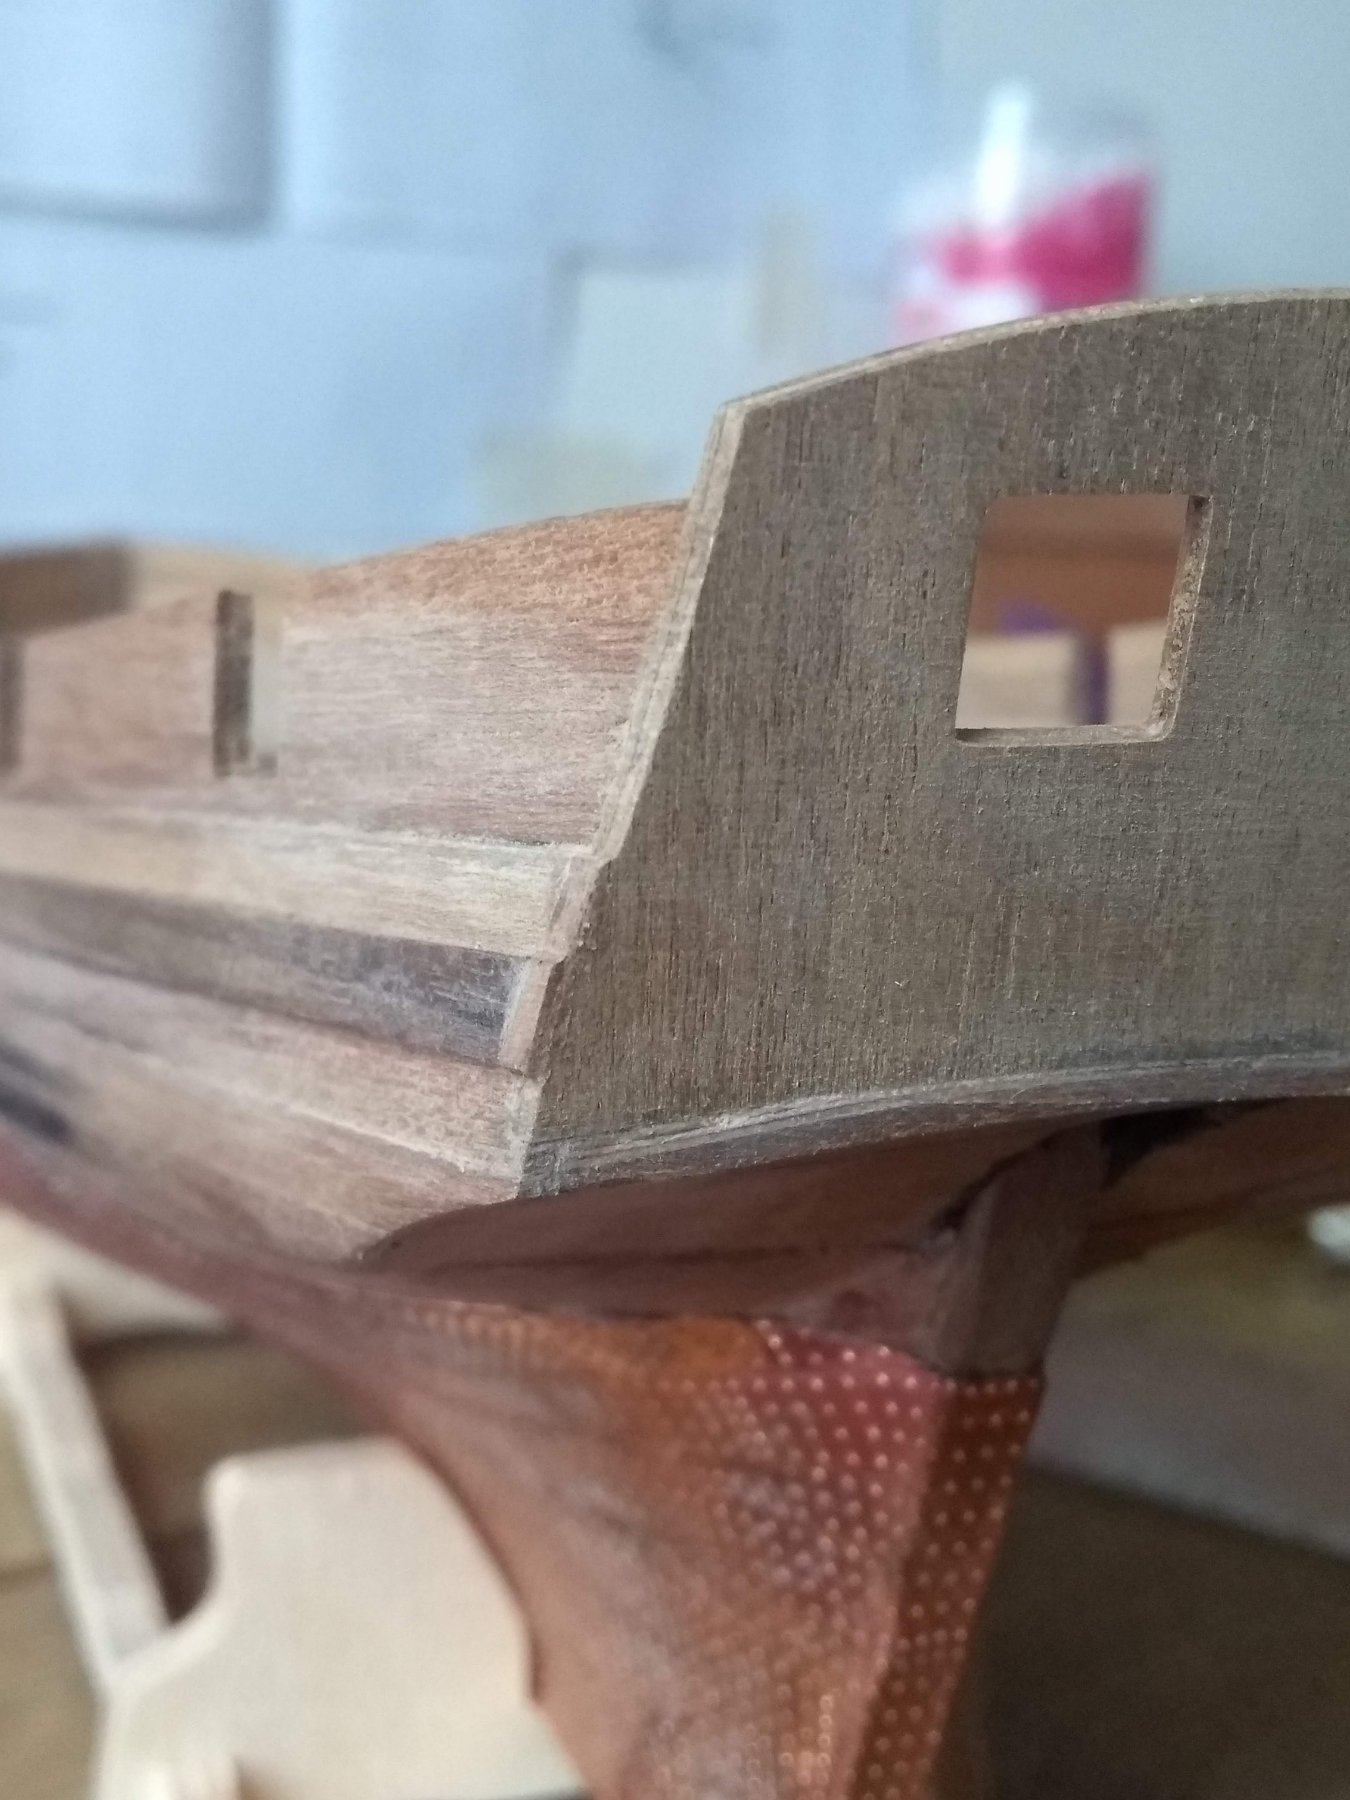
Just placed the stern fascia. In the manual it says that you place it after you planked the deck and the inner bulwarks. This doesn't seemt logical for me so i did it now. Definitely needs work after it to clean it up.
-
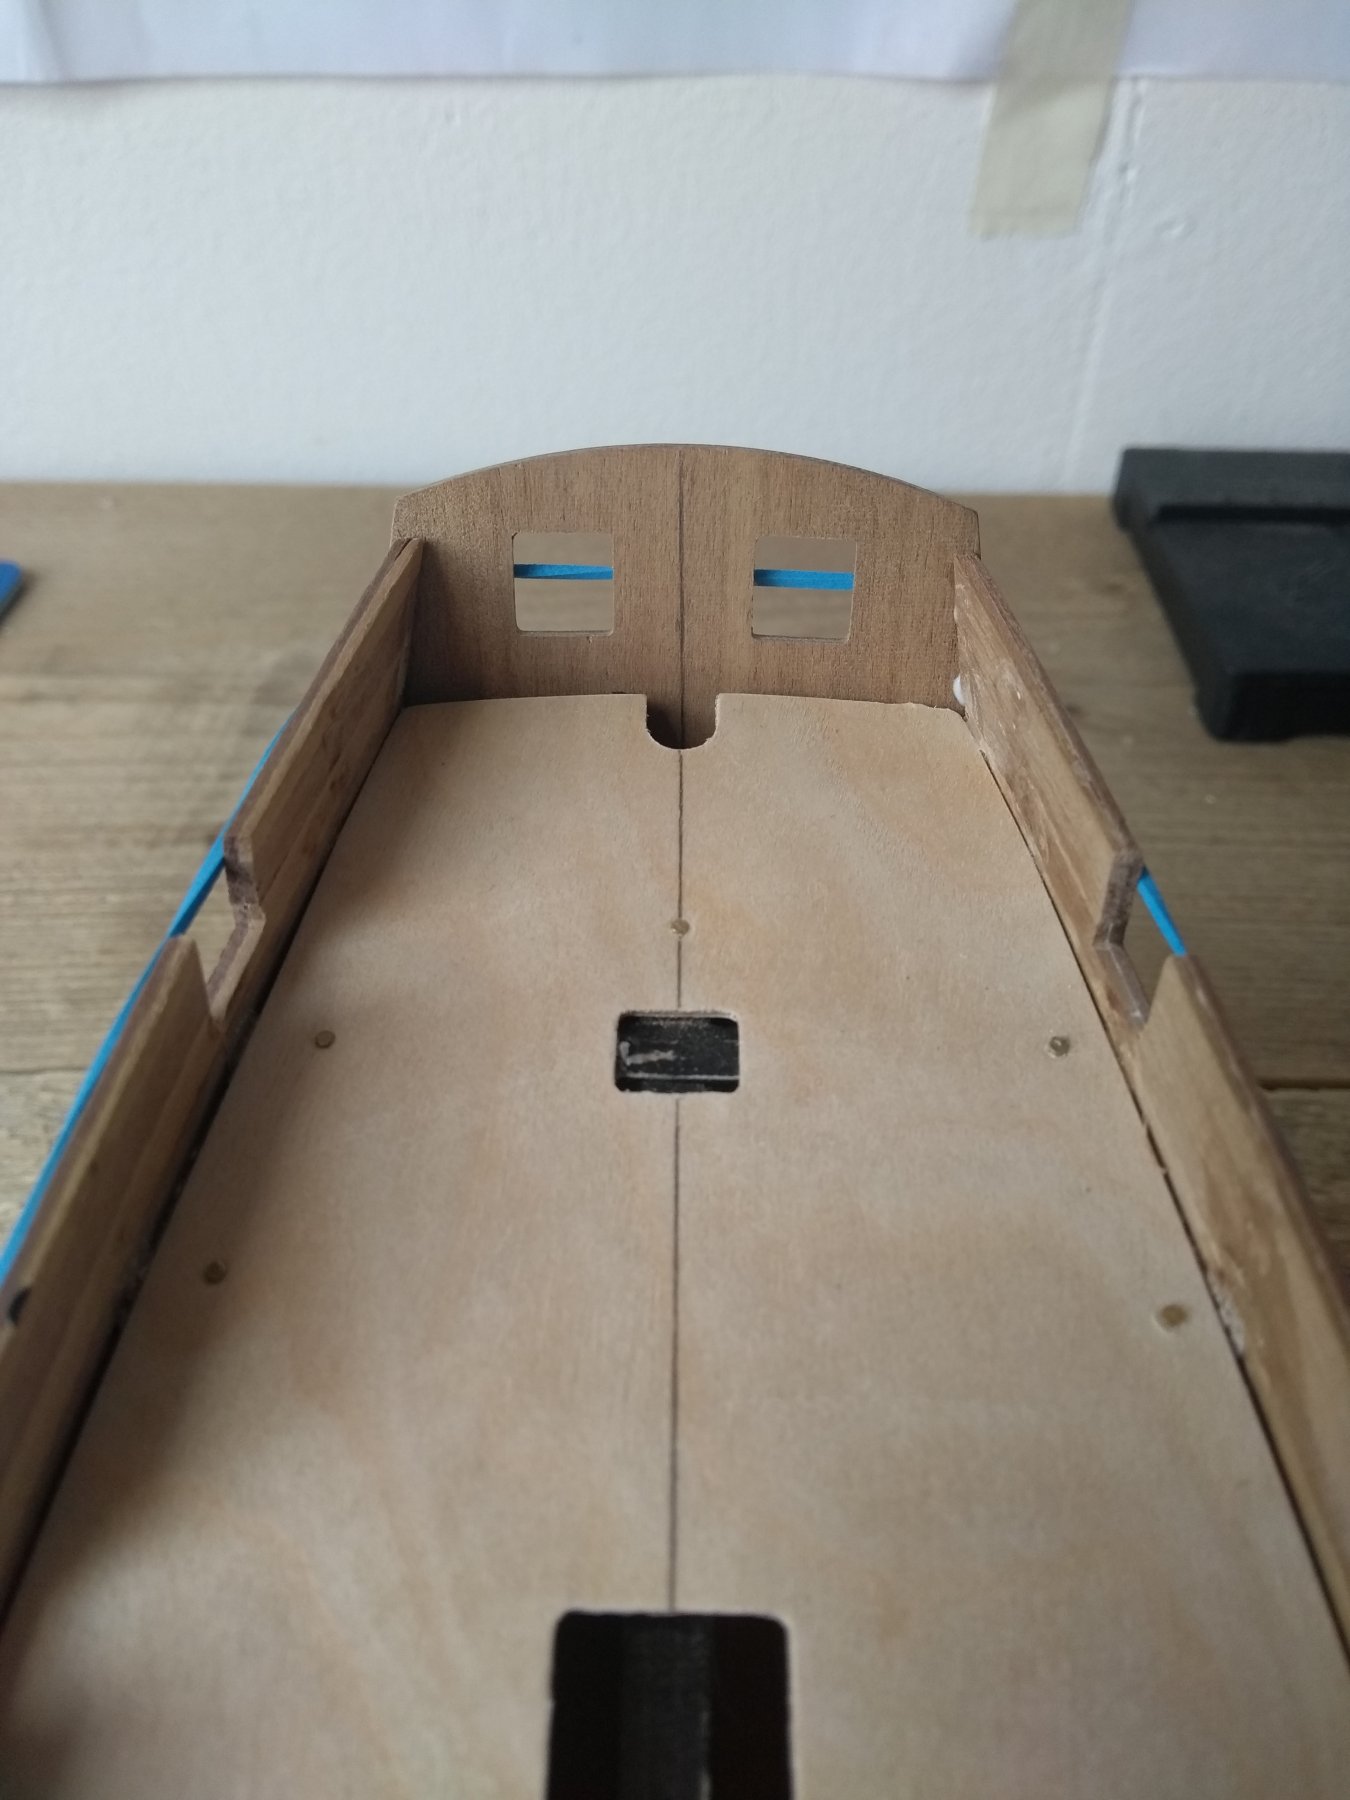
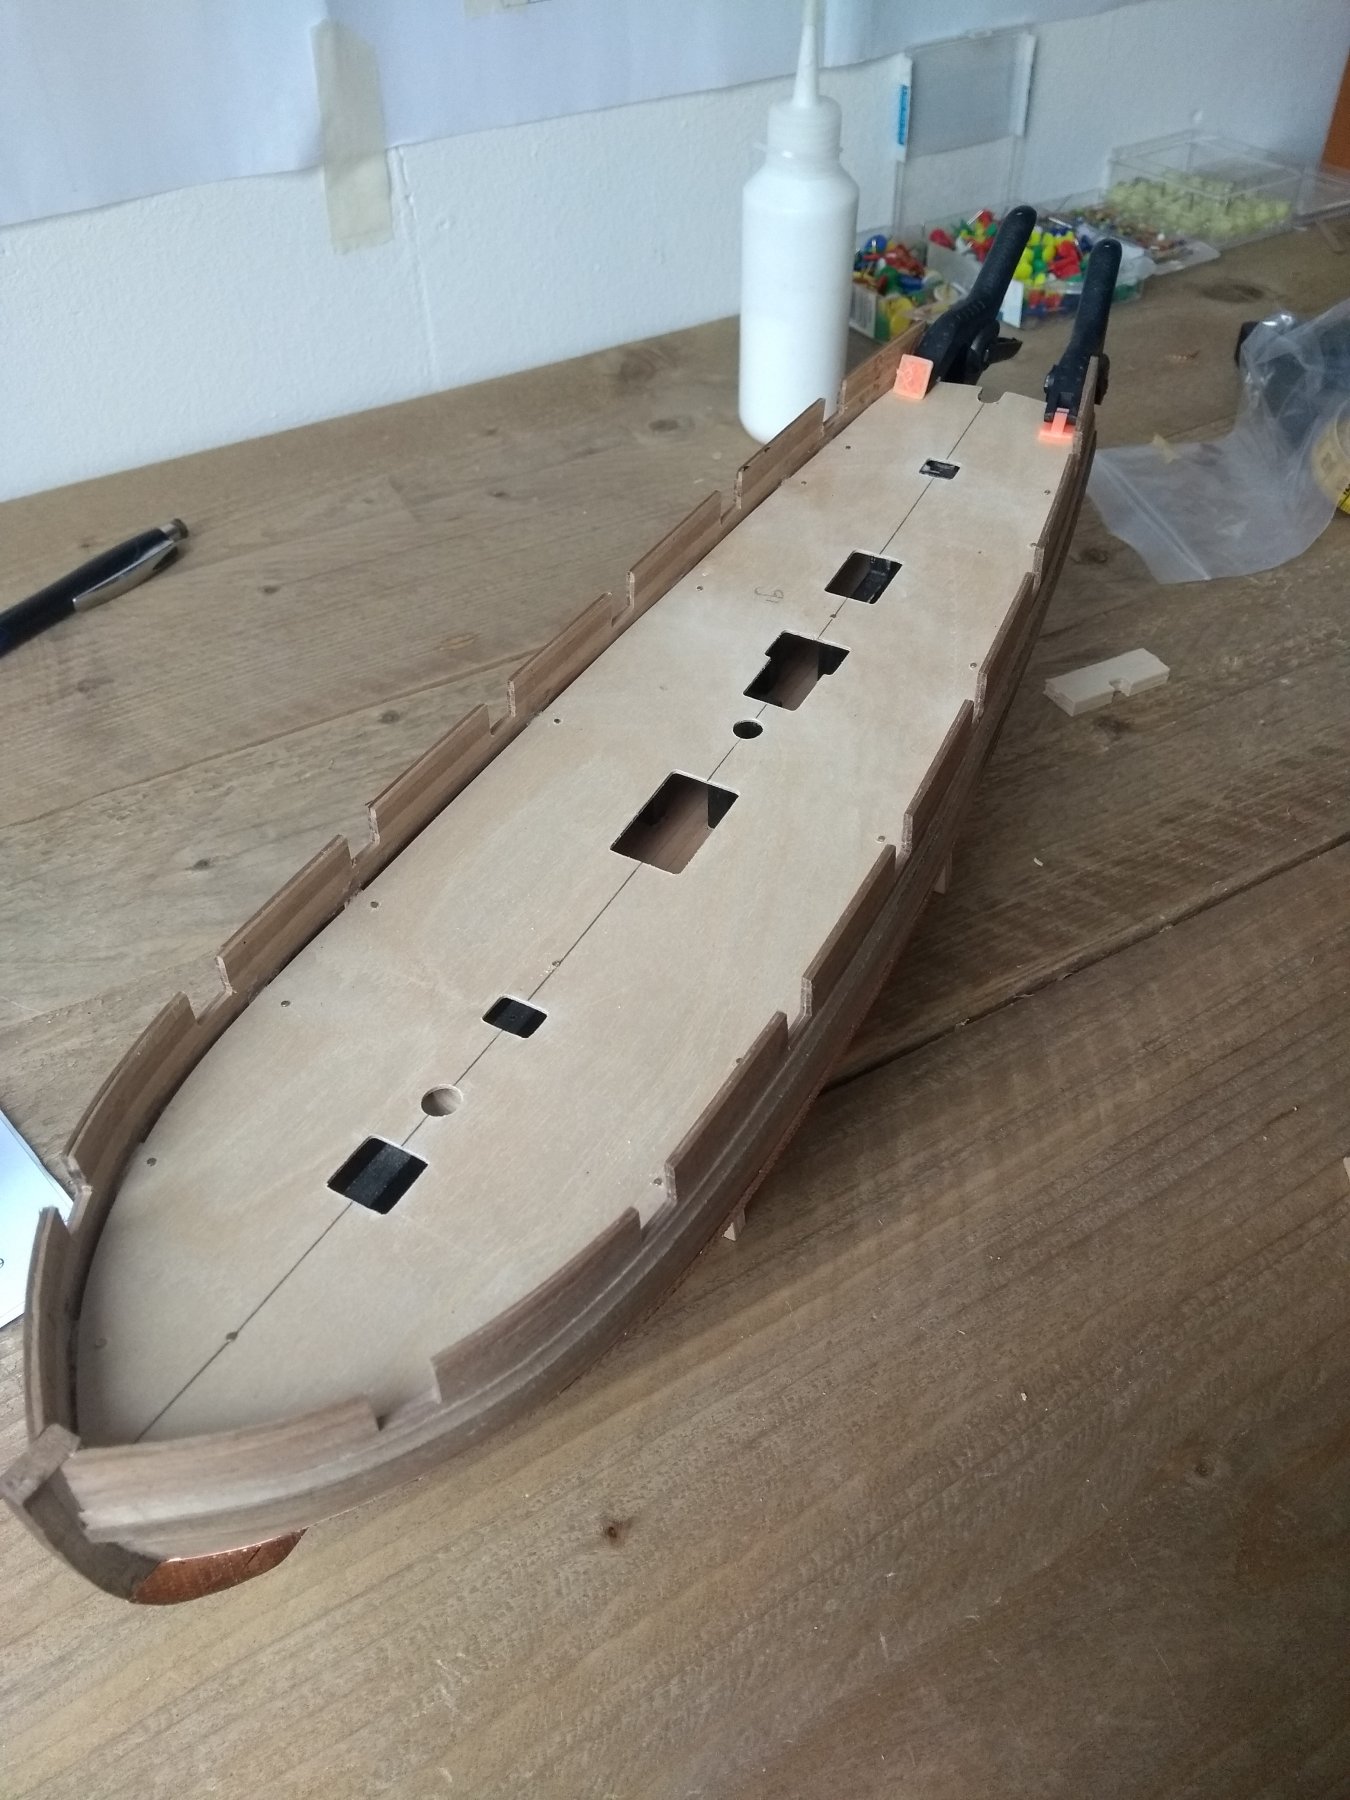
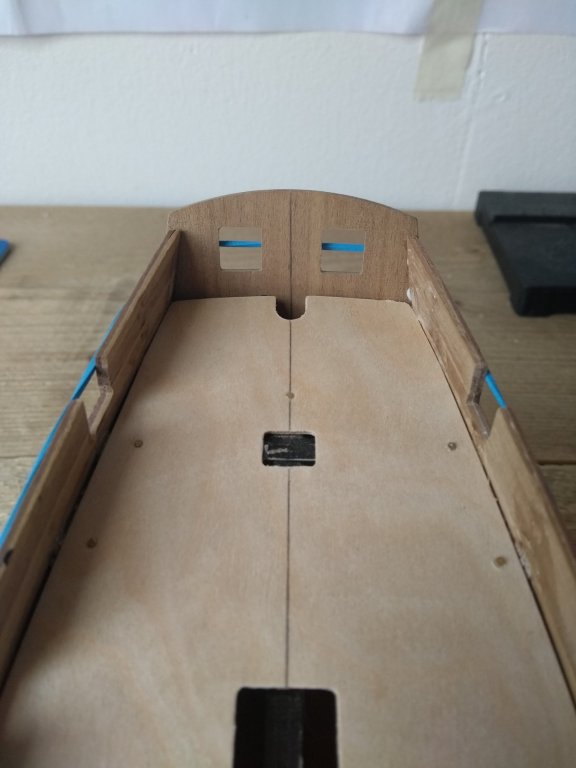
Glued and nailed the upper deck from front to back it's 1mm of center...well...it happens 😁. I can live with that. Dry fitted the mast also, so that fits when the time is ready

-
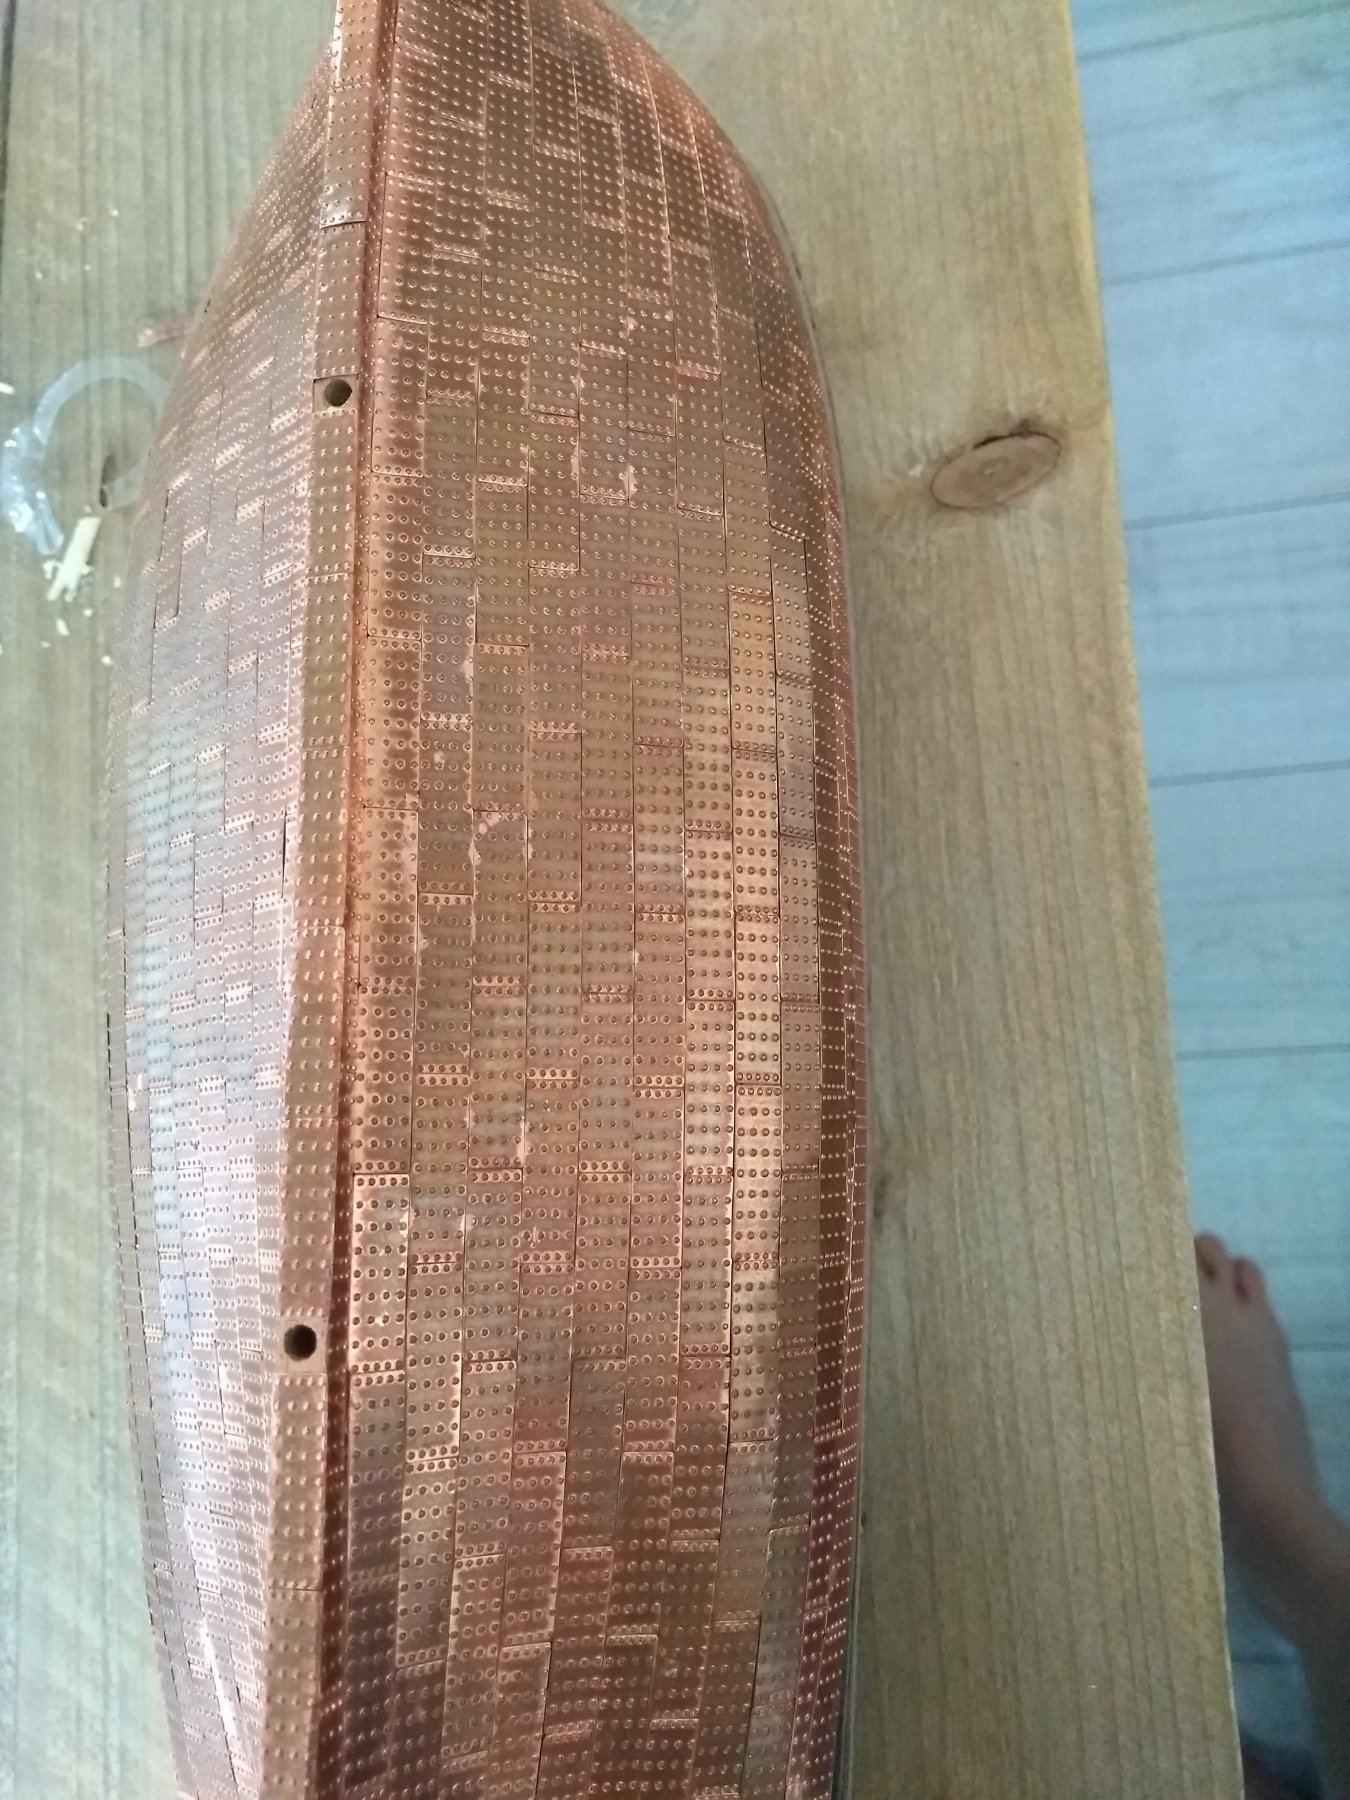
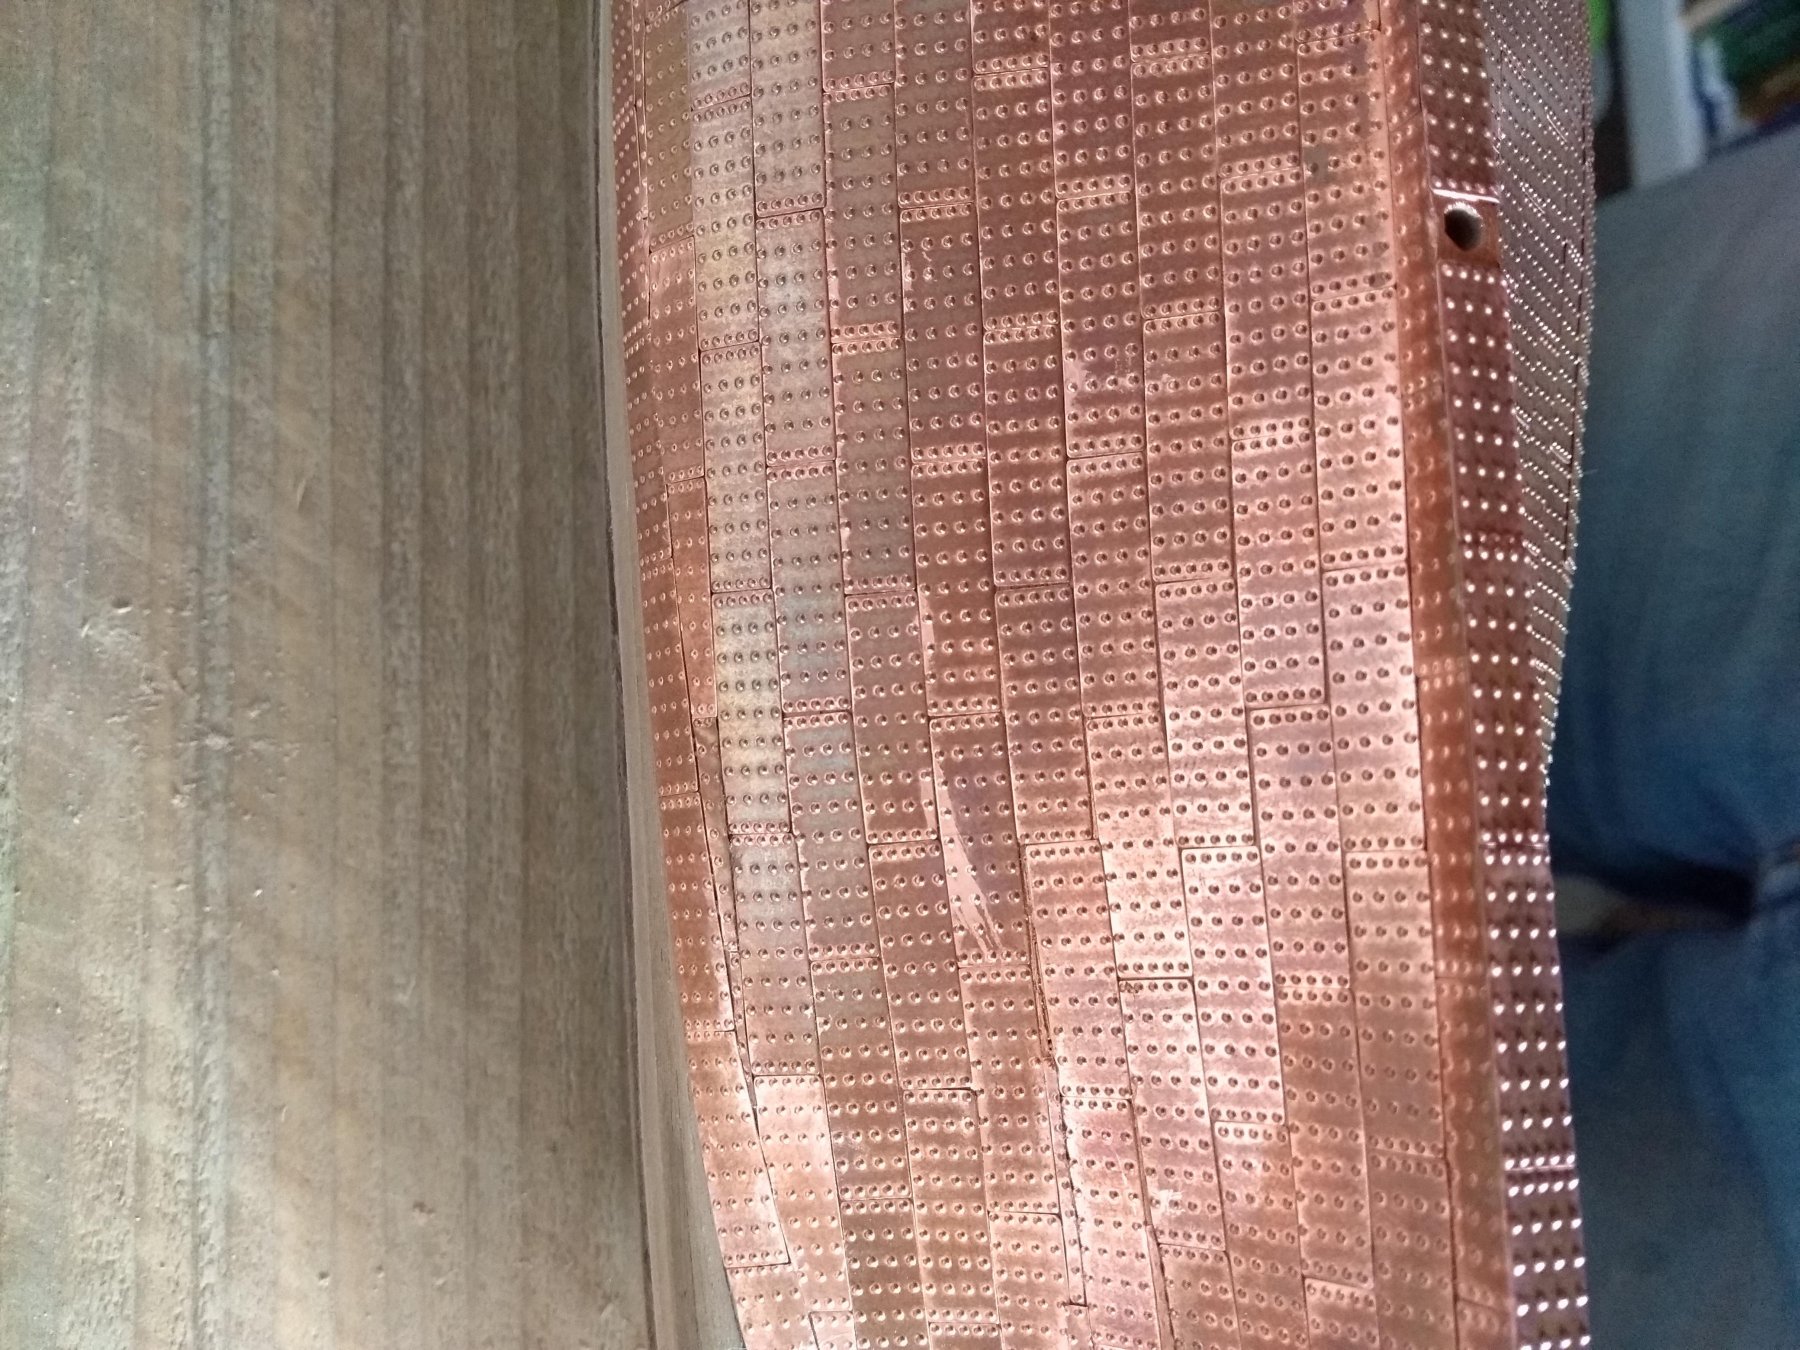
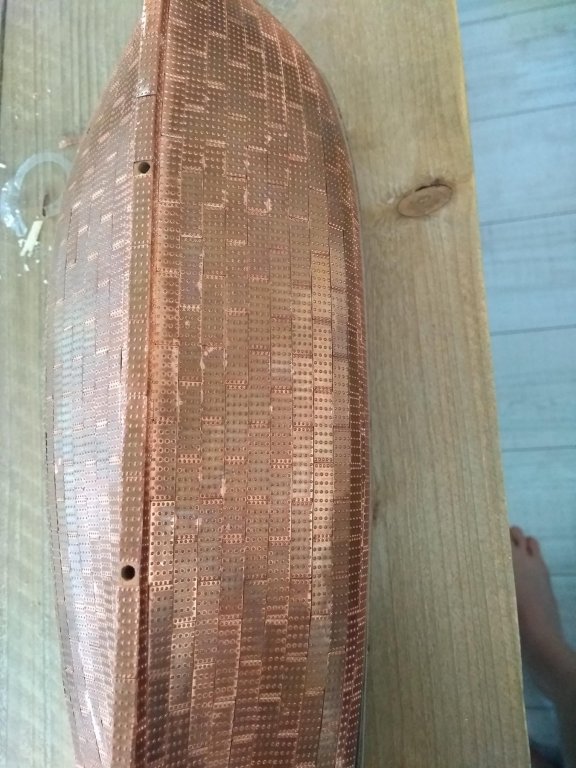
Thank you so much! I'm happy with it for a first time, it was a nice learning proces. It was not exactly how i wanted it but i'm a perfectionist so maybe it's never okay haha. I didn't get the measurements right, but that was okay because the copper tiles could mask it. For a next build there's more to learn about that!
-
First question right away. I'm happy how the copper plating turned out. And it's aging by day, i like that a lot! But there is some glue residue visible from the CA glue i used for the tiles. Now i read that you can wipe it off with some aceton? Does it also count for the dried glue like you see in on the pictures? and what is the best technique then? Any tips are appreciated!

-
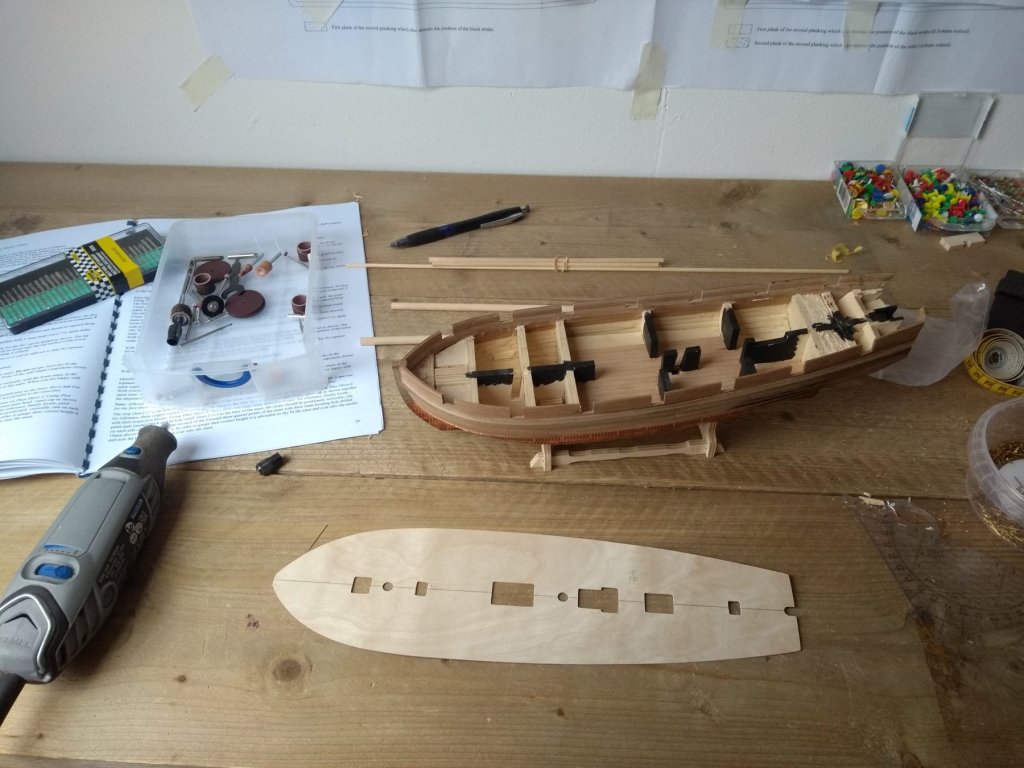
Hello! I already introduced myself a few weeks ago and thought that maybe a building log is a good thing, because it's my first build. So al the help is welcome! I'm from the Netherlands, so my spelling won't always be on point ;). I began this ship in 2015 but paused at the first planking stage. Life came in between and i didn't knew if i would continue this wonderful hobby. But recently i picked it right up where i left and addicted ever since. I'm now finished the second planking and plating the hull with copper plates. Yesterdag i spent the whole afternoon with cutting out the gunports. I didn't make use of the gunport pattern that was included because of the issues i had with installing them. So i just planked it with walnut strips and cut the ports yesterday out. My goal with this ship is to just make it right out of the box with practically no modifications, because i want first run through the whole practice of building a ship.
-
Well...it's not as crisp like i wanted, and it was my first time. So i'm try not to be to hard on myself and mask some bits
-
Dankjewel!
-
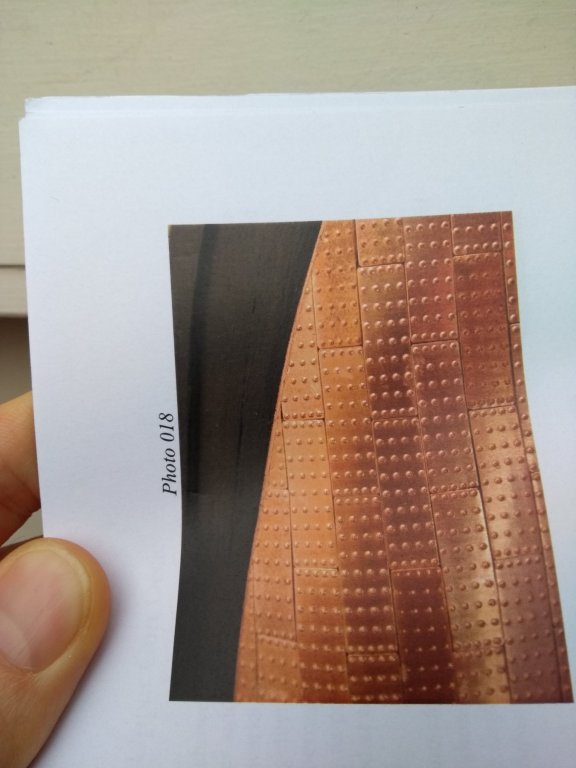
That's true I think, that's why i'm wheatering it also. Not to heavy but enough to give it some consistency overall. The line of paint is gonna be really thin and small, so i hope it doesn't stand out that much. If you look at the picture the result in the manual looks great with that fine line
-
Okay thanks! I'm considering wheatering the plates also, so maybe I can blend the color difference if there's is one with that. I will look for the humbrol
-
Thank you all for your kind welcome!
-
Hello, I have a question about a paint that matches the same color as the copper plates from Caldercraft. I'm currently building the Pickle from Caldercraft and I'm busy with the coppering of the hull. In the building manual, Caldercraft advices the use masking tape at the waterline and paint a nice straight line between the waterline and the copperplates if you don't get a nice straight line with the plates itself ;). It looks great on the pictures in the manual so I think it's a great idea. But now I'm looking for the right color of the paint that matches the tile color. Maybe has someone here on the forum already did this with a good matching result? I'm curious what kind of brand and maybe paint number you used. Thank you in advance
-
Hello I'm Ronald, 35 years and live in the Netherlands. I am a member for a while and I don't know if I already introduced myself, so here we go. The first time I checked in I began with the HM Pickle from Caldercraft, but life happened like with a lot of people and I lost sight of the wonderful hobby. But here we are again in 2019 and picked up where I left with the Pickle. Just finished the hull and now busy with installing the copper plates. So a short introduction, I don't post a lot of things but mainly read. But a introduction is always okay
-
Model Shipways Mayflower or Armed Virginia sloop
mugje replied to mugje's topic in Wood ship model kits
Tnx. I already looked at his log and the ship looks great! Well I think i'm going for the AMS then. -
Model Shipways Mayflower or Armed Virginia sloop
mugje replied to mugje's topic in Wood ship model kits
Thank you, that's really helpful. I'm not a big fan of small scales either, so that's a thing to consider -
I want to begin with a new kit. I don't have a lot experience. A while ago, I have build the hull and deck of the HM Supply from Caldercraft. But not finished this ship because some personal issues. I like both ships, but it's hard to choose. Can someone give me some advise about the two? Are they equal in difficulty? Would the rigging and hull shape of the Mayflower be to complex for a novice? The AMS is a bit bigger in scale, so that's a plus. But the Mayflowers manual is written by Chuck Passaro, that's a plus to haha. And does someone know what scale 5/32" = 1 ft is? I tried to figure it out, and does it come close to 1:75? I would love to hear your opinion
-
Yes perhaps the perfect kits don't exist .