jbwok
-
Posts
23 -
Joined
-
Last visited
Content Type
Profiles
Forums
Gallery
Events
Everything posted by jbwok
-
 Thanks once again: I'm off to the garage to try this. Foolishly I started this job on the starboard side, which is the one I'm planning to display, and I fear even substantial amounts of paint aren't going to cover the mess I've made. It's a shame the Warrior never fought a battle, as I could have done a post-engagement version!
 -
It's a pleasure to see your super work as usual - the bridge looks fantastic! I regret, though, that I have another plea for help. Although I haven't been updating my page I have a reasonable hull now, but as I struggle with the chain plates I'm slowly messing it back up again. I notice you say you'd pinned them - can I ask how you did that, given how narrow they are, and what did you use for pins? I've tried glueing them, but it looks terrible and then springs off...
-
Thanks, Popeye, although I'm not sure what you mean about the stern fascia? On my kit there were just big rectangular holes in all five window parts, including the stern, for which I have had to make pane dividers for as in my photo above.
-
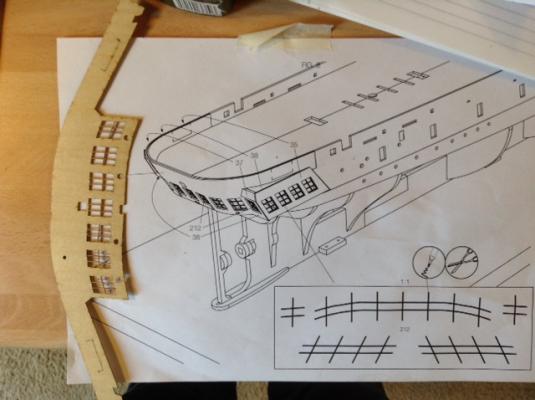
I am going to be boring about windows. First, the pane layout shown in the instructions is wrong; there is only one horizontal piece and two vertical ones in each window. See the page from the wonderful book by Davies and Dennison attached. Second, using pen to draw the lines on the windows is not going to look very good, particularly as some of the windows are actually fake and should have a blank background. So I've rooted in my spare wood drawer for some thin strip and started doing the frames properly. So basically the whole of Figure 8 is tosh. At least it's a break from sanding the hull, which is now about a micron thick and entirely composed of filler.
-
Hi Stuart - according to the photos of the Warrior in the book by Davies and Dennison the races sit on top of the deck.
-
Hi Nils - as you were kind enough to visit my log, I couldn't resist having a look at your builds, and I'm really impressed. Such wonderful work!
-
Hi Nils - thanks for the encouragement! The way I feel about the planking at the moment is that I'm never going to get it right! Perhaps another couple of hundred hours or so... I just can't wait to have the hull finished so I can start on all the fun bits. Stuart - I think tomorrow may be given over to preparing a cunning smoothing tool for inside curves which may end up looking VERY LIKE sandpaper wrapped round a pencil!
-
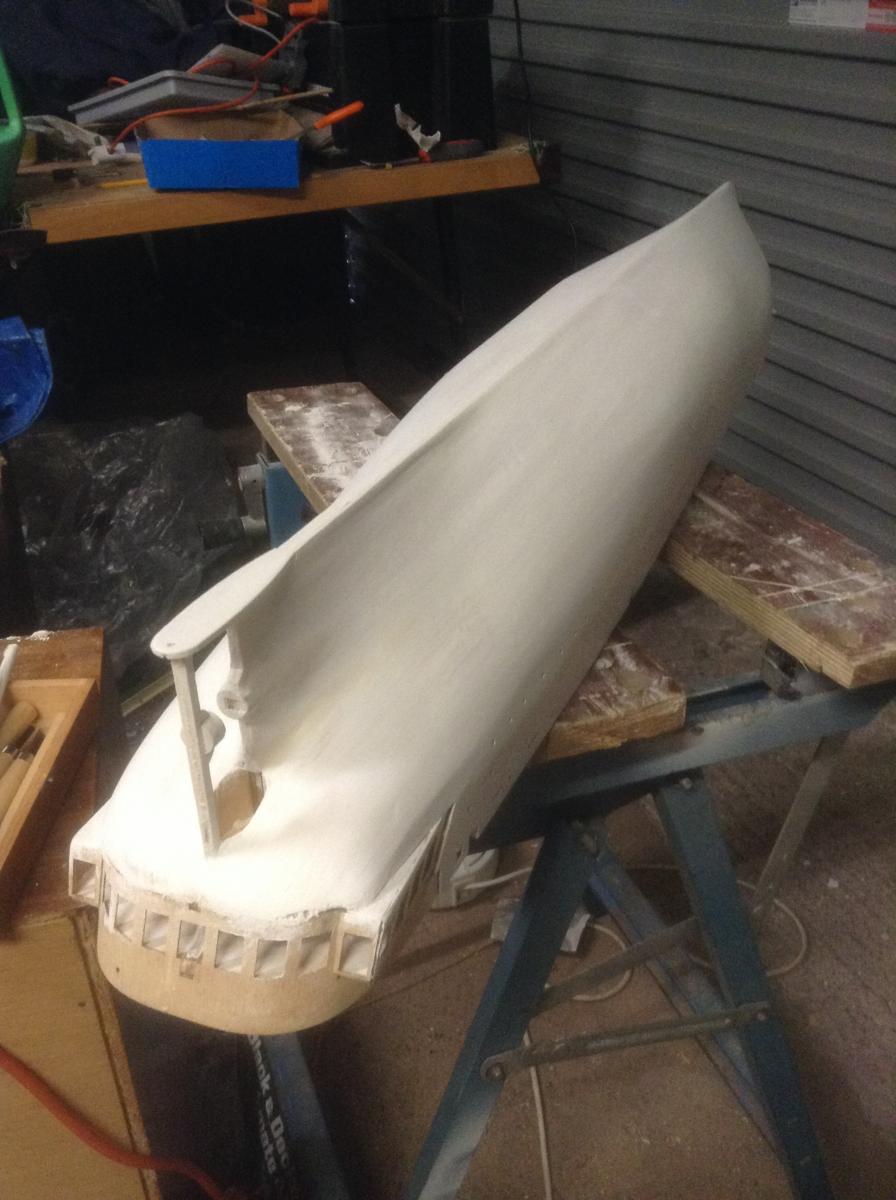
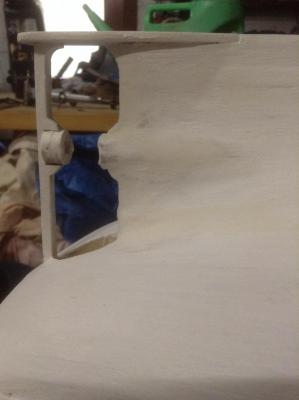
Nearly five weeks into the sanding/filling, and going mad... I have painted it with primer to give me an idea of how I was coming along (it was difficult to get an idea from looking at the small patches of wood between the massive swathes of filler) and find I've done a reasonable job on the flat and convex sections, but I'm really struggling at the stern. Every time I try to shape the shaft fairing I create a worse and worse mess! Anyone got any useful advice?
-
Hi - the sanding block has worked for all the flat and convex bits, but I'm struggling with the concave curves at the stern. I'll take your advice, though, and put up some photos on my pages and see what other people suggest. I've never come across Billings paints (and my son works in a model shop!) - I'll probably just use a Tamiya gloss black.
-
Good to hear from you again! I'm really struggling to get a smooth hull despite four weeks of continuous sanding, filling, sanding, filling...! I've bought the red paint to encourage myself that I'm getting near the point I can use it, but it ain't happening until I can sort the area around the stern. Incidentally, which black did you use?
-
Hi Gary, good to hear from you: I wish I'd used balsa blocks from the start as it would have made shaping the planks much easier. As it is I'm getting better at the planking as it as I go along (about 12 to go), so I may end up with a finished product which can only be viewed from the starboard side! I like the idea of having the citadel open, and thanks for the hint on the barrel lengths - does the same apply to the 40pdr guns which had the same nominal length of 120 inches as the 100 pdr?
-
Hi popeye Thanks for getting in touch - the plans aren't that great, if I'm honest! If you're interested, you should have a look at StuartC's log - he's a lot further ahead than me, and doing a terrific job.
-
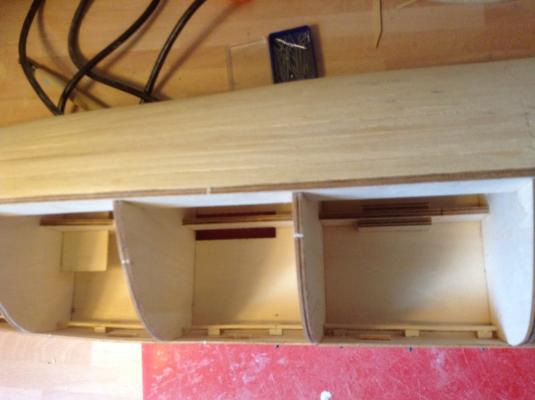
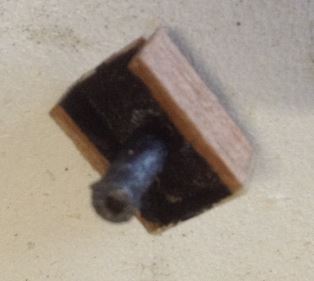
Here's a picture of the little supports which I'm using to bridge the gaps. I've now reached a point where they're useful between almost every bulkhead.
-
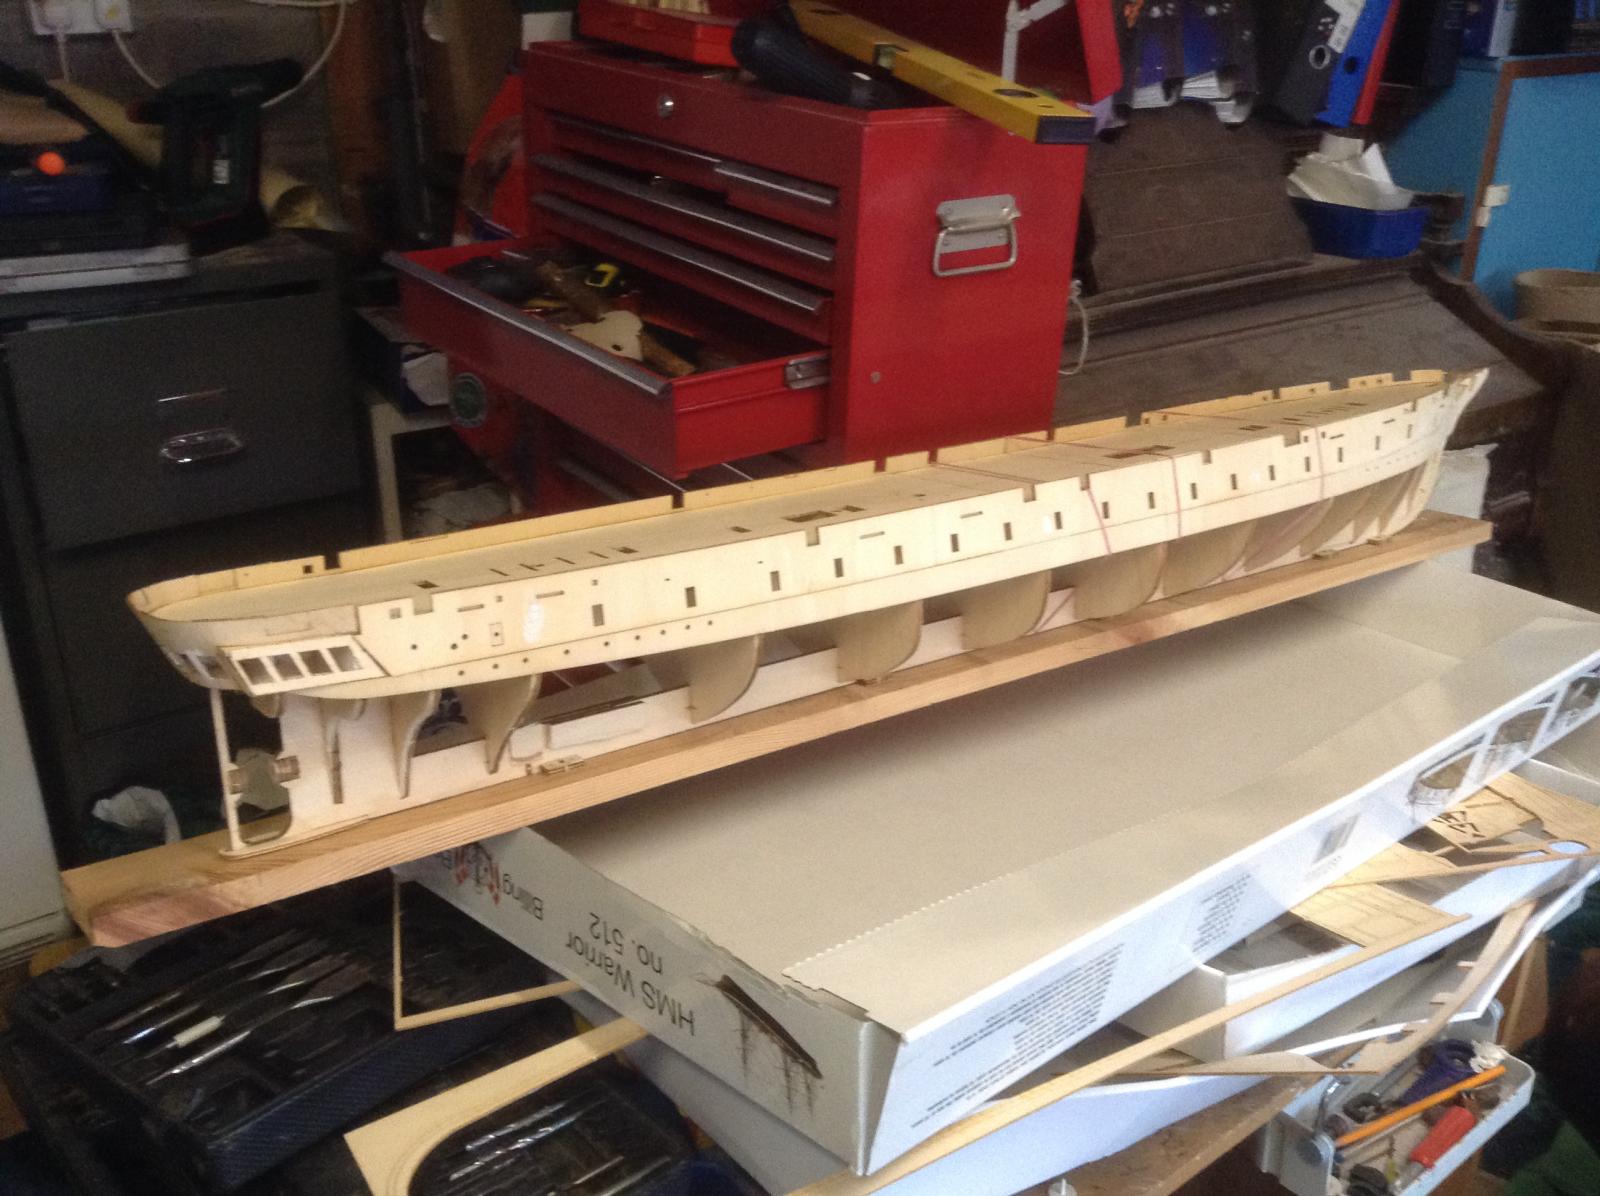
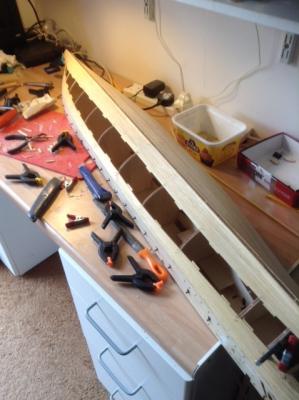
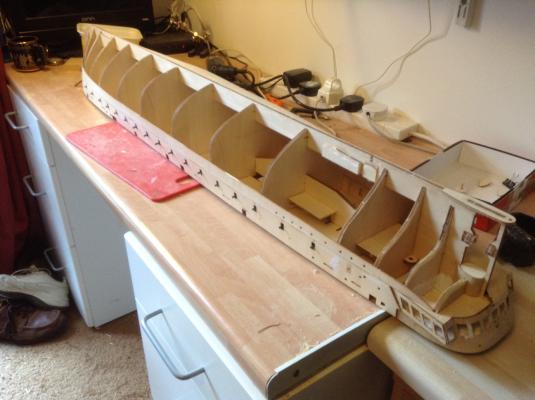
Hi Stockholm tar Thanks for getting in touch. The spacing is indeed a problem; the worst section is the one between the 4th and 5th frames from the stern, which are nearly 140mm apart, just at the point where the shape is starting to get very complex. To get round this I'm gluing small strips of thin wood inside the midpoints of the more curved planks to keep the edges aligned, and this tends to mean I have to wait for each one to dry before I do the next one. It's a very slow way of doing things, but I wish I'd done more of it on the side I've already done as there's a bit of sagging between frames which I've going to have to sort out. You'll see that I've also placed a couple of wooden blocks to strengthen the keel between these frames as the join was otherwise very weak. Another frame at this point would have been a big help - new builders please note that if I was building the model again I would have put one in.
-
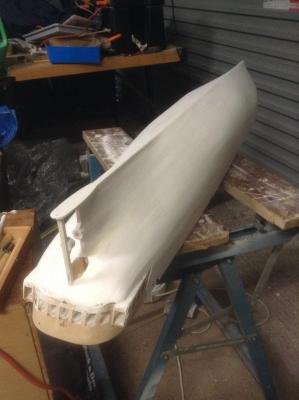
Port side planked, awaiting sanding and filling; cannon in place (as ship completed rather than later arrangement); scrap wood support added to stop them falling inside the hull later...
-
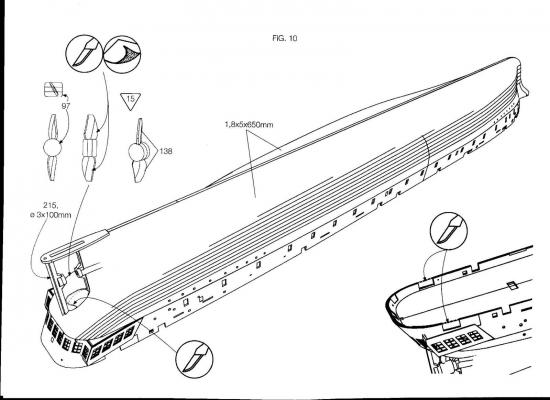
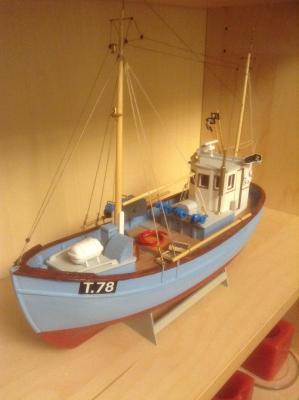
I'm back, and the planking has begun, albeit indoors. I find with all Billings boats that the instructions are aimed at a higher intelligence level than mine - this even applies to the 'Norden' I have built over the last seven weeks as a form of therapy. The Warrior's planking has to be done without a clue from either the massive drawing, which is a blank white space below the waterline, or figure 10 (see below) The bits you want to know - how does it fit to the bow and stern, what happens when you get to the prop well, is there a keel and if so, how thick, are left to your imagination or library. While I'm moaning, it would have been nice in a kit of this magnitude (and cost) if the hull had been double skinned: I'm looking at the half of the port side of the hull I have done so far and realising that getting it smooth is going to be a long and tricky job. I'll see how it goes before I dare put some pictures up. Memo to self: don't forget to put the cannon in the starboard side before you plank it! Also, run a spare strip of strong but flexible wood behind the boxes the cannon are mounted in so that if they get bashed they don't fall inside the hull.
-
Apologies to anyone excitedly awaiting the next instalment; I regret that ill-health and cold weather have driven me out of the garage, which is the only place big enough to build the Warrior! As soon as there's improvement (in health or weather) I'll get on with the planking as I seem to have dropped a long way behind StuartC.
-
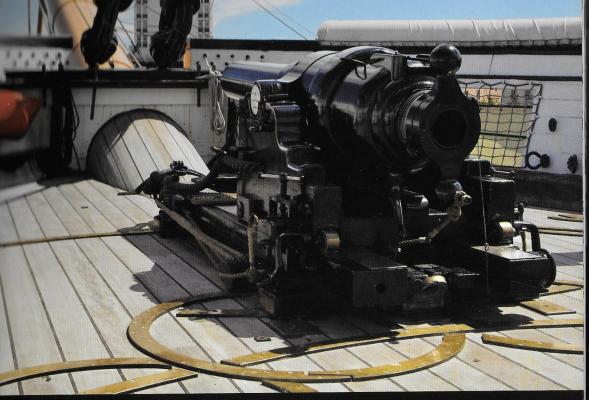
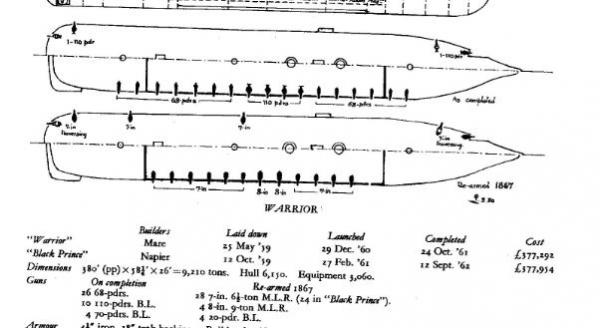
I've realised I don't know how to add a post to my own build log!!! Anyway, the guns. The kit has 19 ports a side, representing the designed main deck armament of 38 68 pounder muzzle loaders. However, before it was launched this was changed to include some 110 pdr breech loaders as per this illustration I have copied from Oscar Parkes 'British Battleships' - I hope I'm not in breach of any copyright here? The additional weight of these guns meant the number of 68 pdrs was reduced, so the correct launch arrangement, reading from the bow, is therefore 1 closed port; 6 68 pdrs; 4 110 pdrs; 7 68 pdrs; 1 closed port. Depending on how accurate you want to be, the barrels of the two types of gun are different shapes, the 68 pdr having a reinforced muzzle while the 110 pdr tapers to the end. That's the format I've gone for, but she was rearmed in 1867 (the 110 pdr was a bit of a disappointment) as per the lower drawing. Note this would start with four closed ports and end with three. PS (this is why I've never done a build log) - I now find from Lambert's book that the 68 pdrs were actually removed from the first two ports on each side as the ship was found to trim by the head, and the 110 pdrs were carried in the 3rd, 4th, 16th and 17th ports on both sides not counting the first two. As his source is a Midshipman who joined Warrior when she was commissioned it's probably more reliable than Parkes' information; it may of course be the guns had been moved from their designed location after completion.
-
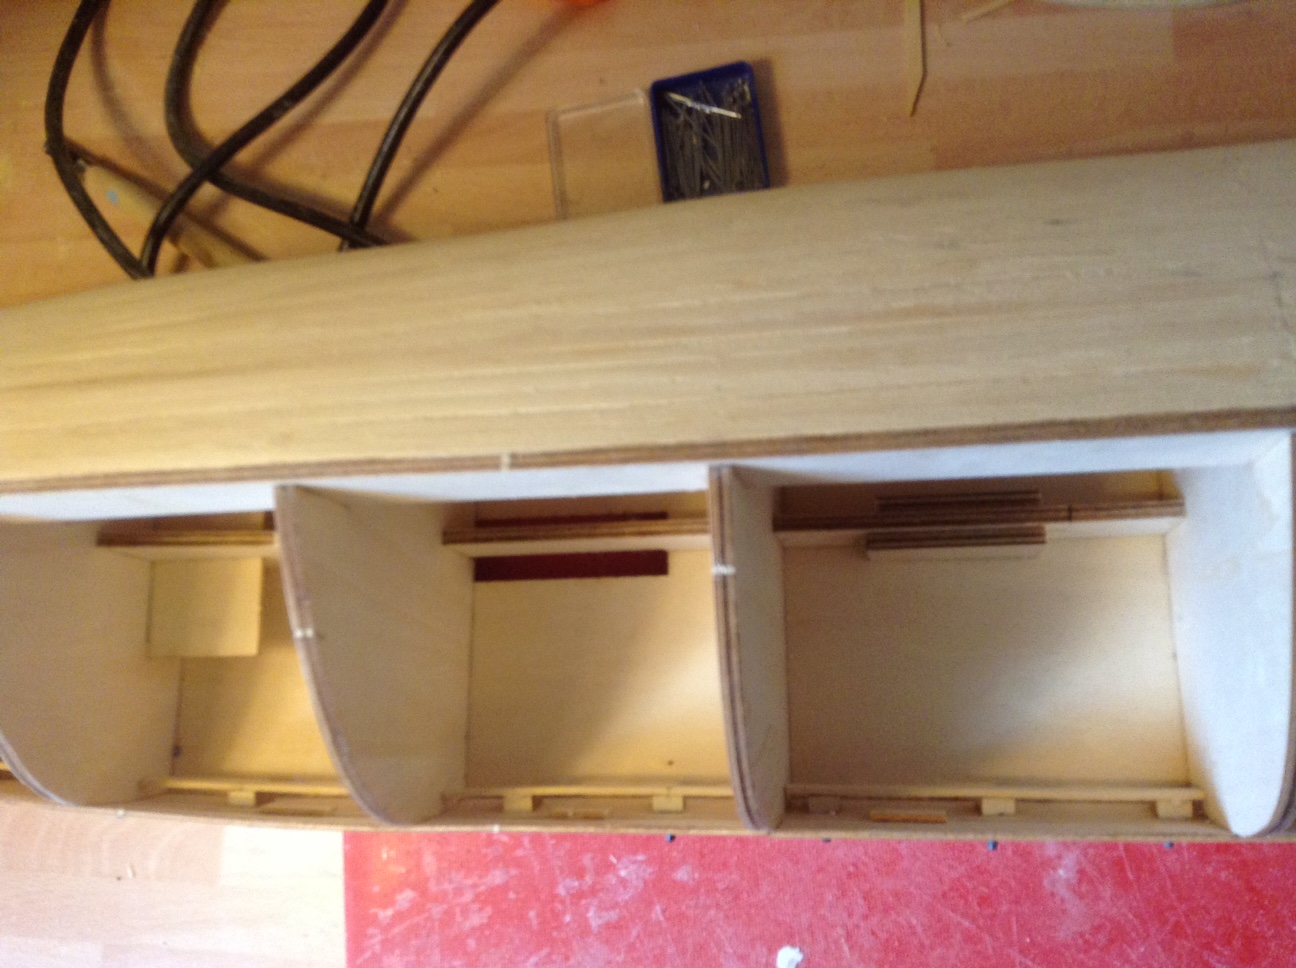
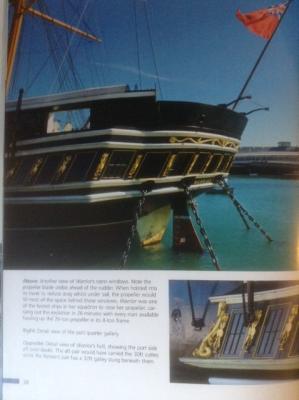
I've never tried a build log before, so please forgive any protocol violations: I'll learn as I go along! I'm not a particularly good modeller, but I get a lot of enjoyment from it. I've built a dozen or so wooden boats - highlights are a Thames barge,King of the Mississippi, Louise, the Renown boat, Bremen and a matchstick paddle steamer - so I just couldn't resist the Warrior. I've got to the point where I'm about to start planking, learning a lot from StuartC's excellent log elsewhere on this site, but I've found a few more things that might help new buyers. I'll add some pictures where it helps. 1. Fig 1. Reinforce keel joins, taking care not to intrude on hull. I know you're not as clumsy as me, but... 2. Fig 3 and 4 - I assume you have lots of old planking strips in a box or drawer somewhere: try planking and staining parts 88, 89 and 90 as the deck will be visible down the ladders. 3. Fig 6 - I found that sticking small wooden joining tabs along the bottom of parts 25 and 26 were a huge help in lining up and attaching parts 27 and 28. Make sure you don't make them more than a few mm deep. 4. Fig 7. I very strongly recommend buying 'HMS Warrior - Ironclad' by Wynford Davies in the Seaforth Historic Ships series. The photos are very useful given the lack of detail provided by Billings, and there are interesting thing to learn in the text, such as the windows at the stern aren't, as you might expect, the captain's or admiral's cabin but actually dummies hiding the raising propeller and the officers' toilets! While you're buying books 'Warrior - Restoring the World's First Ironclad' by Andrew Lambert is also very useful 5. Fig 9. Although you don't get to the gunports for some time (Fig 22), it is vital that you make a decision at this point what you're going to do about them. If you're going to have them closed, this is a good time to stick in parts 176 as you can get your fingers round behind them to level them up. If you're going to have them open, you'll want to have something to see behind them, so you have to sort that now before you do the planking. See my next post for details of the guns which were actually used in the ship, though! I used the scrap wood popped out from the gunport holes in the sides to make the back of 3mm deep boxes (I didn't bother with the top as you won't be able to see it); made up some short gun barrels from 3mm dowel which I shaped slightly, and drilled the boxes on a jig to receive these barrels. They may not look much in the attached picture (I said I wasn't particularly good) but they look much better sticking out of the sides than leaving a row of holes, and having them set in a box gives a nice impression of depth. Now you need to stick these in place before the planking begins.

-
Hi Stuart - carving the prop, have spoken to the foundry. That said, if you still have the spare one of the two they did for you I'd be happy to buy it to use or to make the mould as I'm the worst carver of propellers in Central Scotland! Incidentally, I have bought the Seaforth and Conway books about the ship off Ebay, and would recommend them to any of your followers looking for information and extra detail.
-
Hi again - terrific pictures, many thanks. Very inspired and off to the garage, although if it's OK with you I'll be back for advice when I try to sort the planking around the stern, which looks very, very tricky... All the best
-
Hi Stuart - thanks for getting back to me; I'd be really pleased to get a couple of photos of the model and exterior shots of the gunports. As I'm new to all this I'm not sure how you can get them to me? As for a build log, although I'm fairly pleased with the models I've built I'd hate anyone to see how much filler was needed to get that finish or to find out why a ship was on display that way round (it tends to be to hide the disaster on the other side!). Perhaps when I've got a bit further along, or at least hidden the botch where I couldn't get the keel to fit properly! I very much see your point about the detail, but I do think they could have provided a solution to the empty gunports (I've made 3mm deep boxes so the gun barrels start from well inside) and provided slightly more detailed instructions. I also thought the hull would be double skinned, which has in the past been my saviour when it comes to the final appearance of a model. Oh well: I have a very long mantelpiece waiting for the arrival of the Warrior, so I should be getting on with it. I just hope it ends up half as good as yours!
-
Hi - just started on my own Warrior, and this is my first post - I've built a Thames barge, Louise, King of the Mississippi, Bremen, Renown gunboat and various smaller models without help, but this time I think I need rather more expertise than I possess so I'm very grateful for all the tips. I have to say I'm a bit disappointed with the model - it just seems to be a big version of a small kit, lacking a lot of detail - but we'll see how it ends up. So far I've built the frame, planked the visible bits of the main deck using leftovers from the plank drawer and started on the sides, but now I've got stuck. I note you've armed your model: I've made up one side of gunport inners and a bunch of identical muzzles (as you say, slightly incorrect but nicer to look at) but can't work out from drawings or photos how much of the muzzle would protrude beyond the hull side when the guns were run out. Can you help with this detail? The way I'm doing the interior I can't start the the rest of the hull until I've done the gunports. Many thanks for your help