


Johnny Mike
-
Posts
62 -
Joined
-
Last visited
Recent Profile Visitors


-
 WWR4 reacted to a post in a topic:
Work area pictures only
WWR4 reacted to a post in a topic:
Work area pictures only
-
aaronc reacted to a post in a topic:
Work area pictures only
-
Canute reacted to a post in a topic:
Surprisingly good and cheap mini tools
-
Help to assemble AMATI chain plate 4090/05
Johnny Mike replied to Johnny Mike's topic in Masting, rigging and sails
Thanks I think I will just use something else. I thought there was some trick but the trick was on me. -
Help to assemble AMATI chain plate 4090/05
Johnny Mike replied to Johnny Mike's topic in Masting, rigging and sails
I did try anneling. But now it is still so tight a fit it not realistic to assemble without building a fixture for assembly. I just went with another design. Building myself and soldering the assembly -
Cant find this simple chainplate
Johnny Mike replied to Johnny Mike's topic in Masting, rigging and sails
Thanks guys I cant believe I missed this I have ordered from Model Expo before. -
Help to assemble AMATI chain plate 4090/05
Johnny Mike replied to Johnny Mike's topic in Masting, rigging and sails
Thanks guys. I can tell you I tried everything, everwich way and it cant be done. At this point I am convinced it was to be sold as an assembly and something happened. The only way was to spread both ears of the mount and force them back together but with this already formed from half hard brass they just break. I give up and went to making chainplates them myself. -
Some time in the past I aquired the simple chain plate shown here. It is what I need. Cant find them anywhere. Can anyone help.

-
Help to assemble AMATI chain plate 4090/05
Johnny Mike replied to Johnny Mike's topic in Masting, rigging and sails
This is my problem. How do you put this together? Some where in the past I got the assembled unit. I cant rember where. Now when I order the part I get the pieces. Even the picture on the web site I ordered from shows the assembled piece.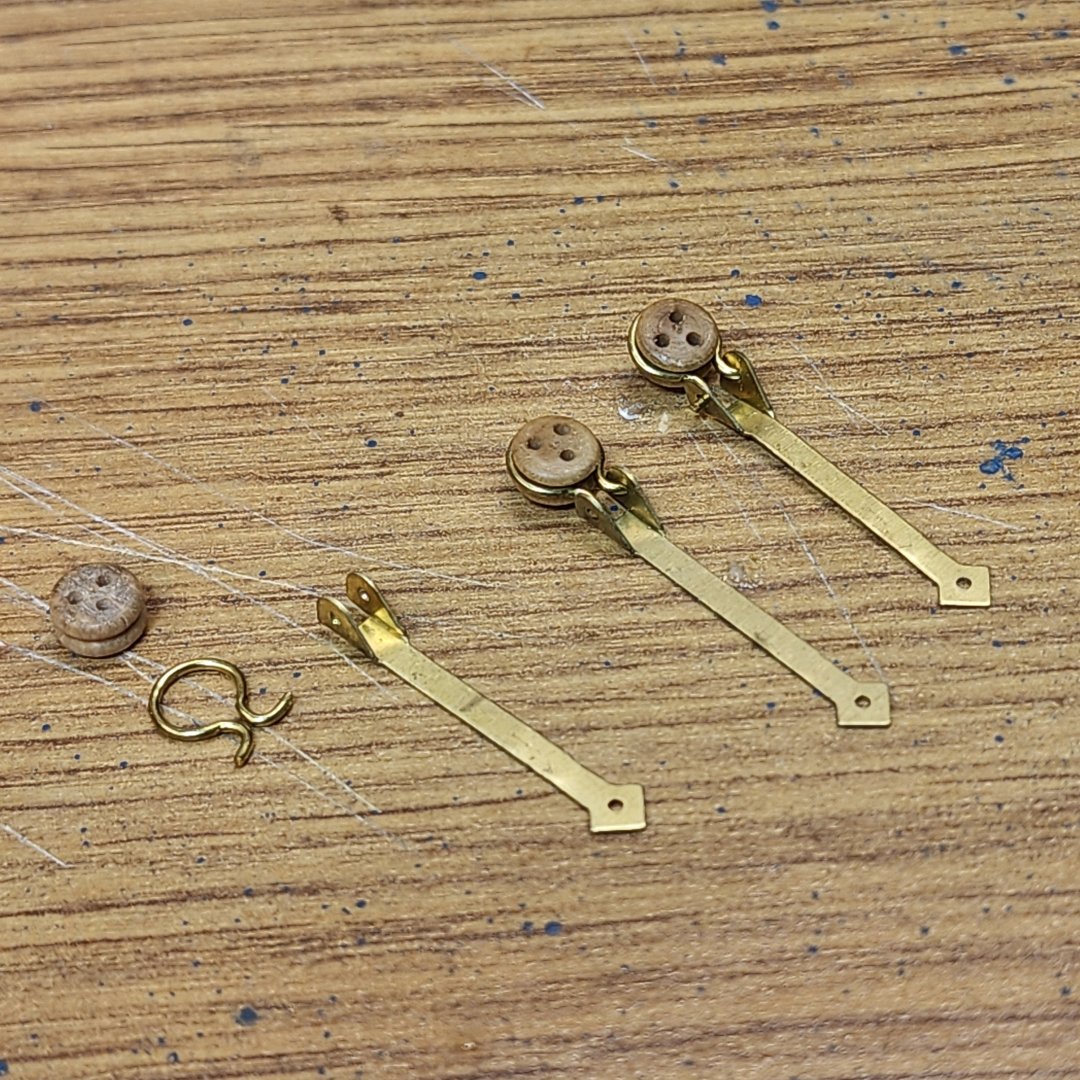
-
I am trying to figure out how to assemble the Amati chainplate assembly #4090/05. I am stumped can any one help? I can not figure out how to get the dead eye into the loop and then into the mount.
-
Johnny Mike reacted to a post in a topic:
Looking for ideas for work area
-
Sundt reacted to a post in a topic:
Looking for ideas for work area
-
Dave_E reacted to a post in a topic:
Work area pictures only
-
Tumblehome reacted to a post in a topic:
Surprisingly good and cheap mini tools
-
Ryland Craze reacted to a post in a topic:
Surprisingly good and cheap mini tools
-
Ryland Craze reacted to a post in a topic:
Surprisingly good and cheap mini tools
-
Surprisingly good and cheap mini tools
Johnny Mike replied to Johnny Mike's topic in Modeling tools and Workshop Equipment
Kurt I want to make sure everyone knows I do not promote or represent these tools and just stumbled across them on the internet and was impressed with their simplicity and quality. The small horizontal disc sander was purchased on line. MXBAOHENG I was surfing around on Amazon and just typed in mini power tools and started looking. I am sure these are Chinese manufactured units so I didn't expect much for $70 but was really quite impressed. They are listed by multiple vendors but search MXBAOHENG as that seems to be the manufacturer or importer. All of mine are this brand. I see you are from the far west Chicago suburbs. I am too.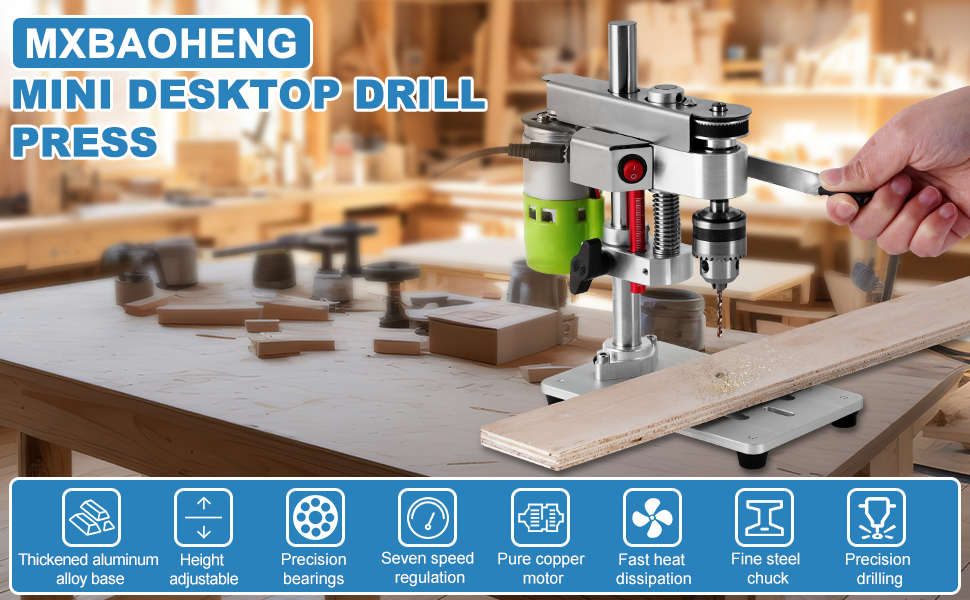
-
robert952 reacted to a post in a topic:
Work area pictures only
-
paul ron reacted to a post in a topic:
Surprisingly good and cheap mini tools
-
Surprisingly good and cheap mini tools
Johnny Mike replied to Johnny Mike's topic in Modeling tools and Workshop Equipment
Ronald-V You did not miss it. I can build almost anything but I am no good at electronic communication. -
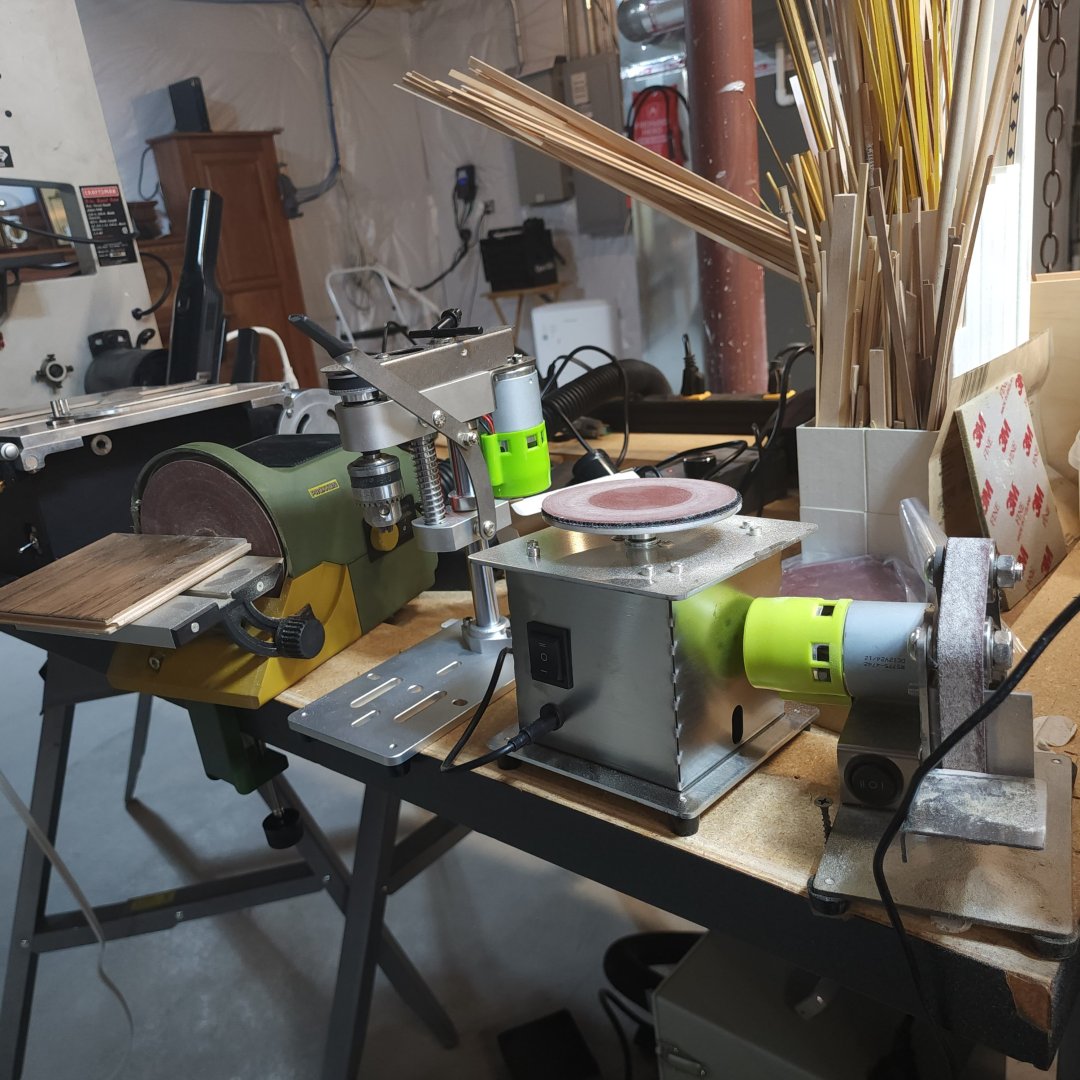
In searching around I can across a mini power sanders that was so cheap it caught my attention. I thought they were probably low quality, poorly made and pretty much worthless to use. As I have a few of these type's of tools. But the belt sander was so cheap, I think about $35, it sucked me in and I bought one. I was surprised at the high quality and fit and finish of the little sander. There are no plastic parts and most parts are high quality aluminum fitted together very well. Good bearings that track the belt and it has a forward and reverse DC motor that is smooth and quiet. I now use it all the time and put my larger sander away. I was so impressed I found and ordered the same type of disc sander and drill press that have the same motor with variable speeds. These are not toys but real work tools. Along side my Byrnes saw they are my go to tools. Hoping Byrnes will be able to start producing their disc sander again is all I need now. In the picture you will also notice a gray box under the bench that is a Dental vacuum that works quite well. It is powerful, quiet and has a variable speed motor. For small dust loads it is perfect and my old shop vack's are in the same place my old belt sander is.
-
Work area pictures only
Johnny Mike replied to Johnny Mike's topic in Modeling tools and Workshop Equipment
Thanks to all who have shared their work space pictures. I check-in occasionally and see new additions. This is exactly what I was hoping for. So many different work areas and tools are really interesting to see. I can see many similarities to mine but also new ideas for me. A picture is worth more than a thousand words. -
Gregory I found it on Amazon. I was just looking for mini sanders or hobby sanders and came across it. Mini reciprocating sander DSPIAE. Found it by accident.
-
Ronald I have the Proxxon sanders also and only use occasionally on a hull if needed. This is much smaller and is used where you would use sanding sticks and very easy to control.
-
I have so many different type of sanders my wife makes fun of me. But I just found one that is different and is great for specific jobs I have other sanders but none are straight in and out motion. I just started seeing them on the internet, and while I was skeptical about them because they were so inexpensive, I bought on. I was happily surprised. It is very light duty but exactly what I was looking for. Rechargeable on my computer with many sanding blocks for getting into very fine detailing. The sanding motion is exactly the plunge motion I wanted. Squaring up and finishing gun ports is just one ideal use for this sander. It also came with sanding paper that is pre cut to fit the different tips. .

-
Tapering Masts and Arms the easy way
Johnny Mike replied to Johnny Mike's topic in Masting, rigging and sails
Jan Thank you so much for taking the time to show me the details on this. I am surprised buy the complexity of the mast design to require this complexity. I can guess the reason is that strength is required in a certain direction. To design and make this ellipse shape on the long taper is truly masterful.


