HOLIDAY DONATION DRIVE - SUPPORT MSW - DO YOUR PART TO KEEP THIS GREAT FORUM GOING! (Only 53 donations so far out of 49,000 members - C'mon guys!)
×


robert22564
-
Posts
158 -
Joined
-
Last visited
Content Type
Profiles
Forums
Gallery
Events
Everything posted by robert22564
-
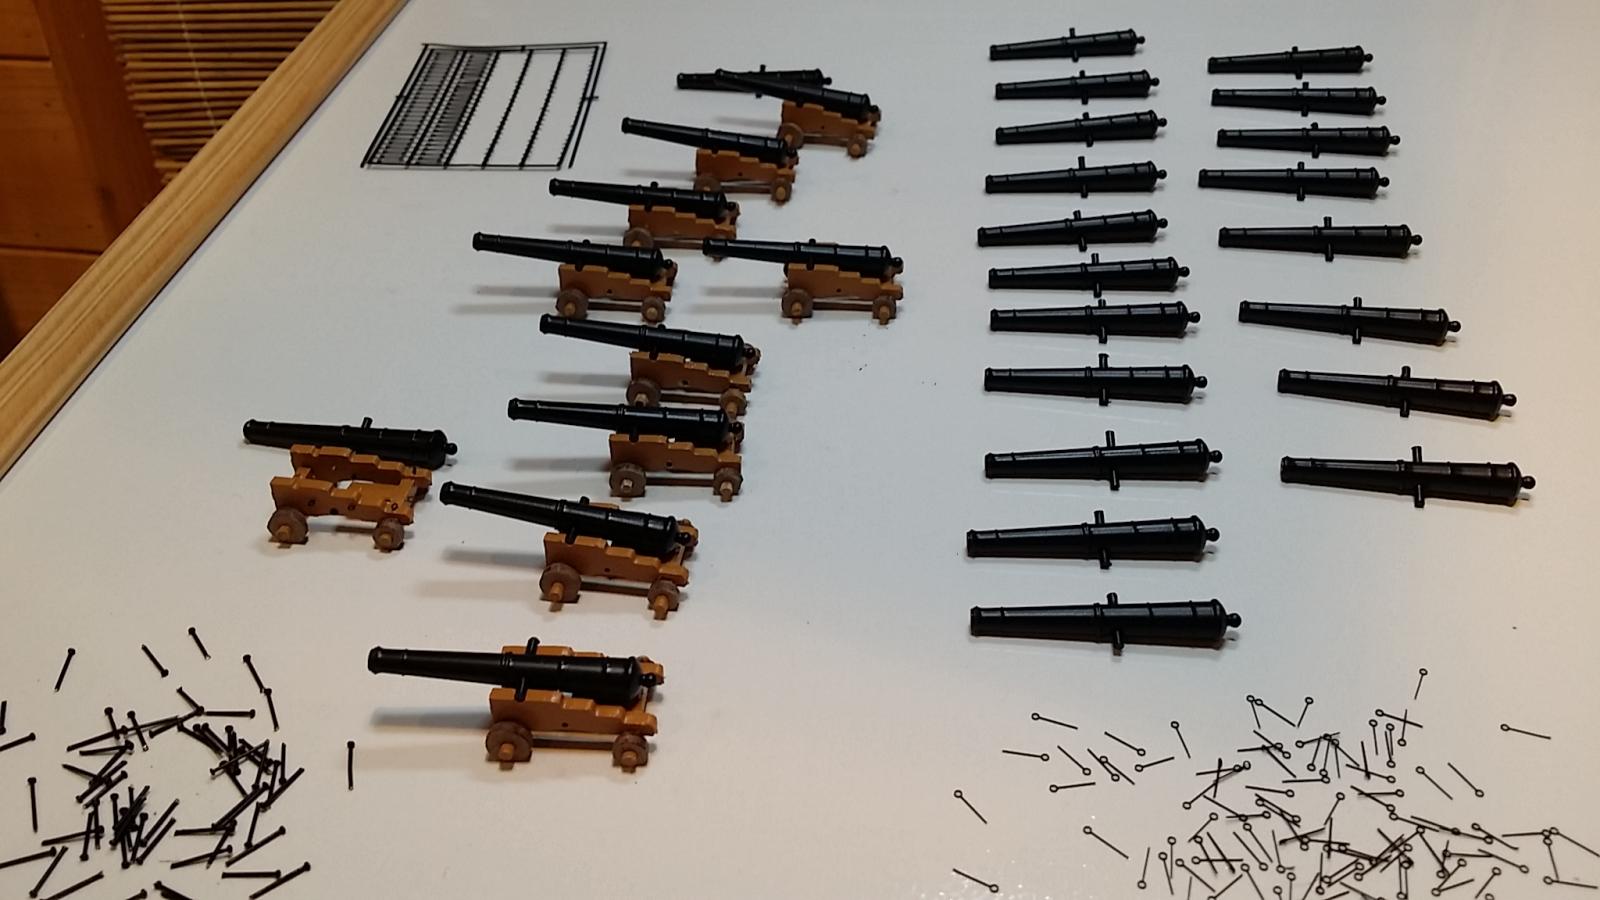
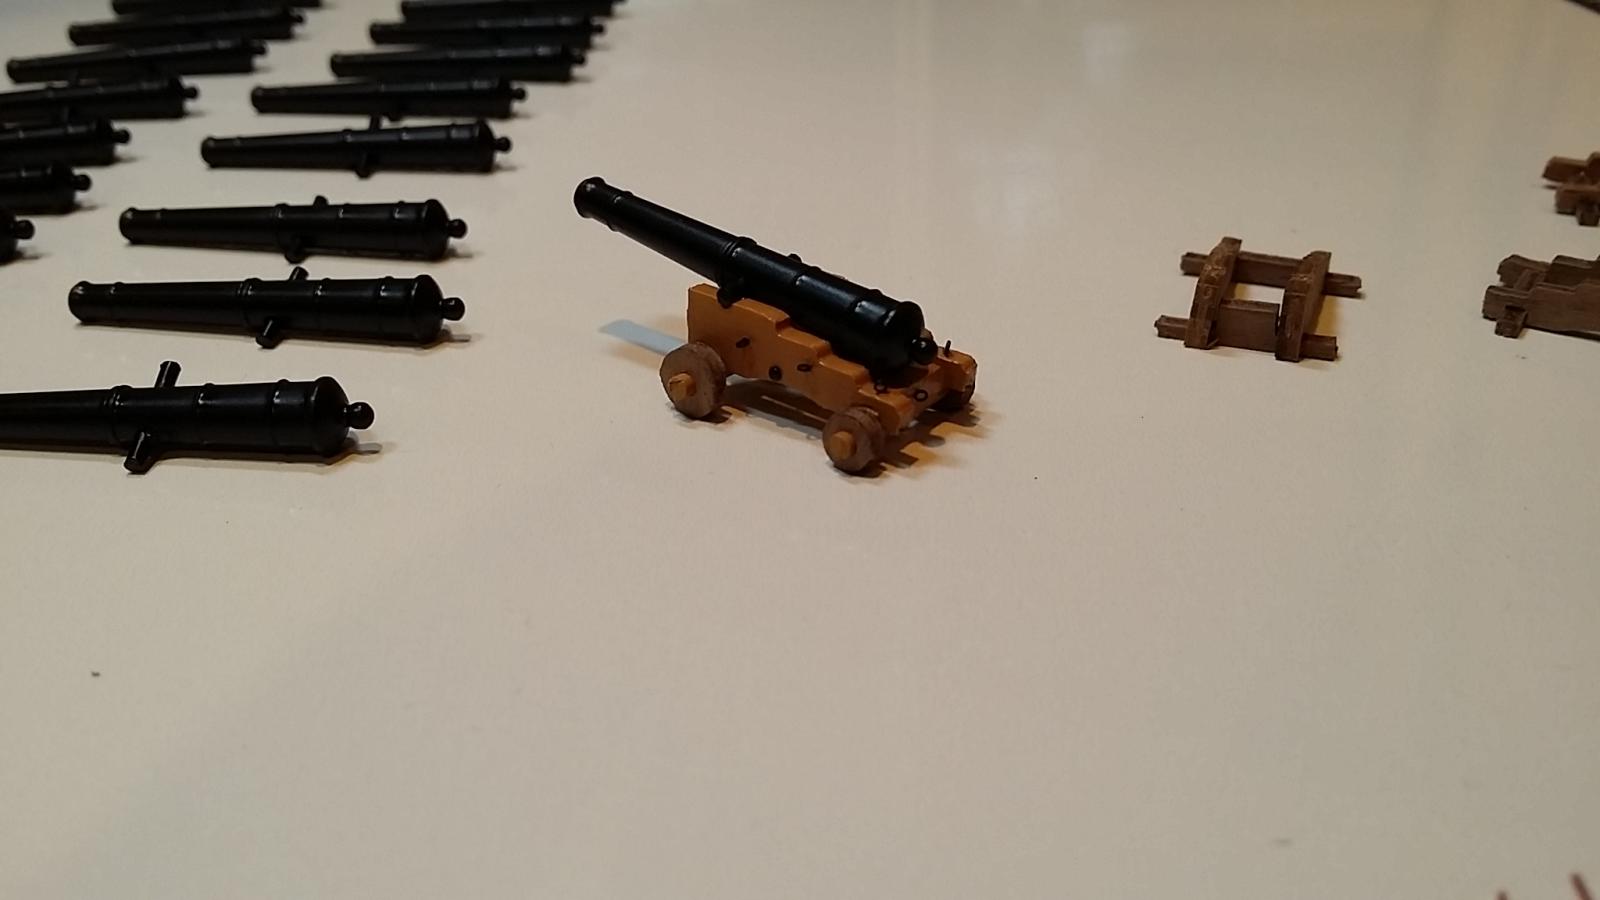
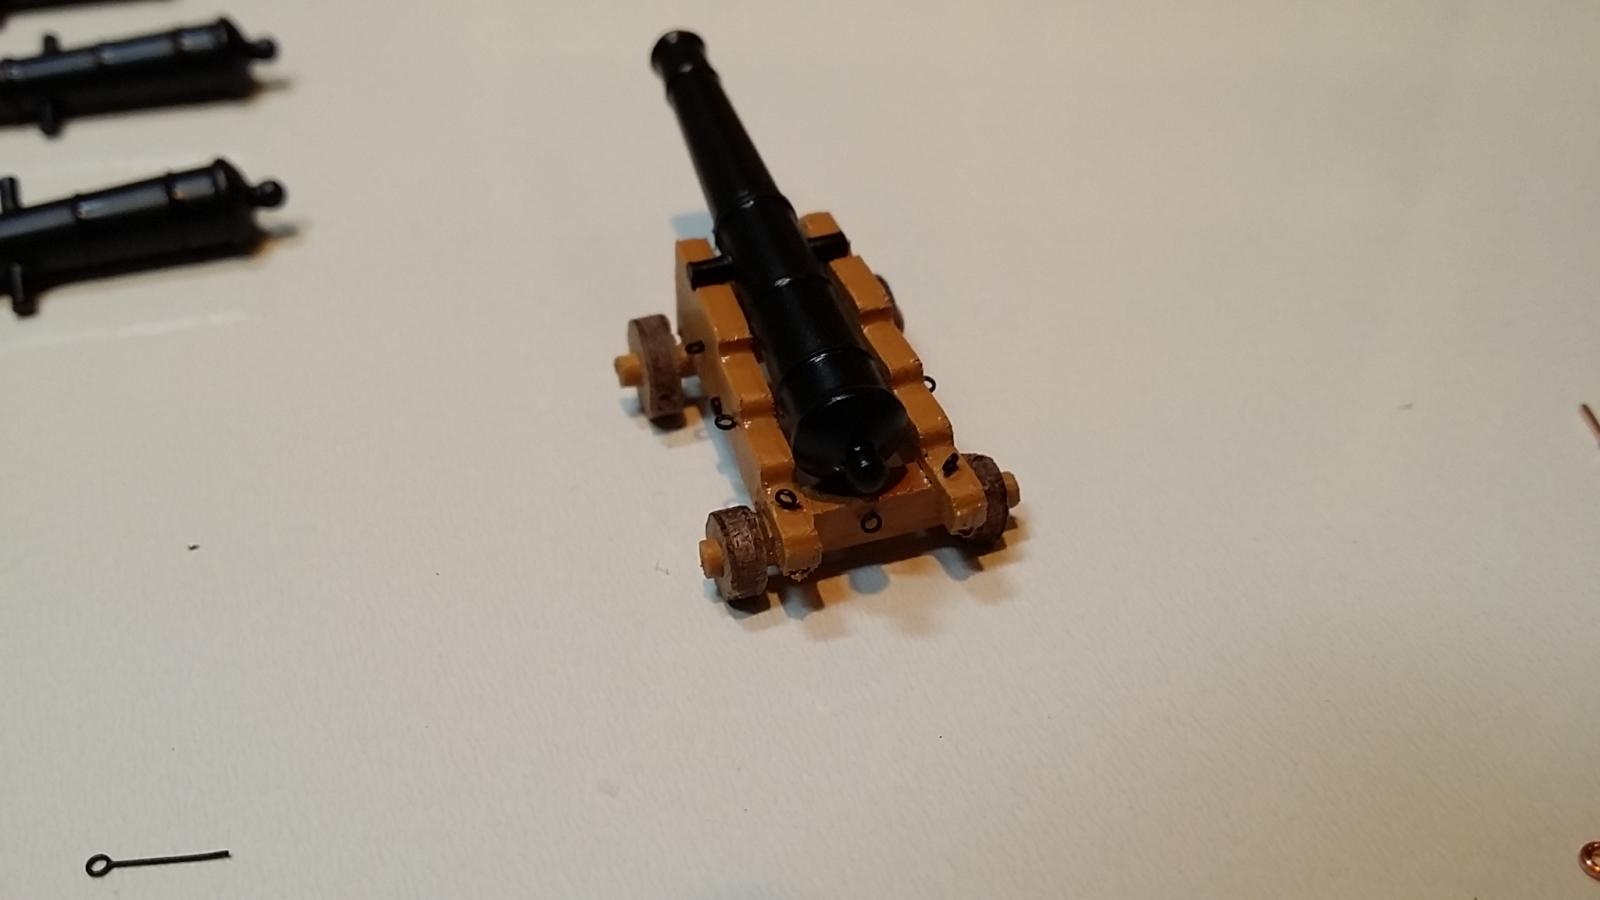
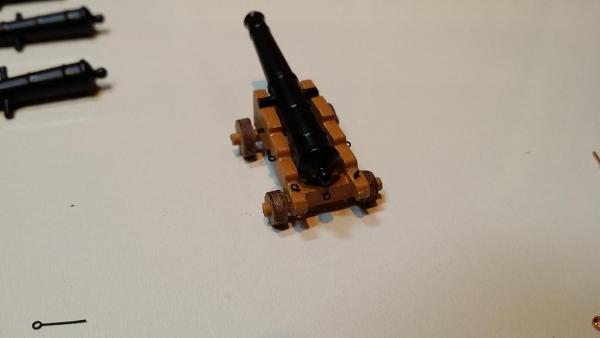
 Lol.........Sjors, the cannons are painted, Caldercrafts yellow ochre.
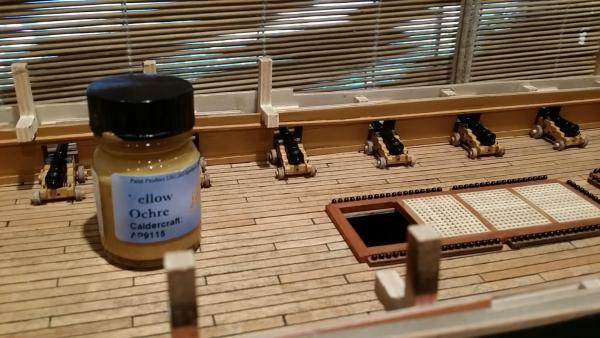
-
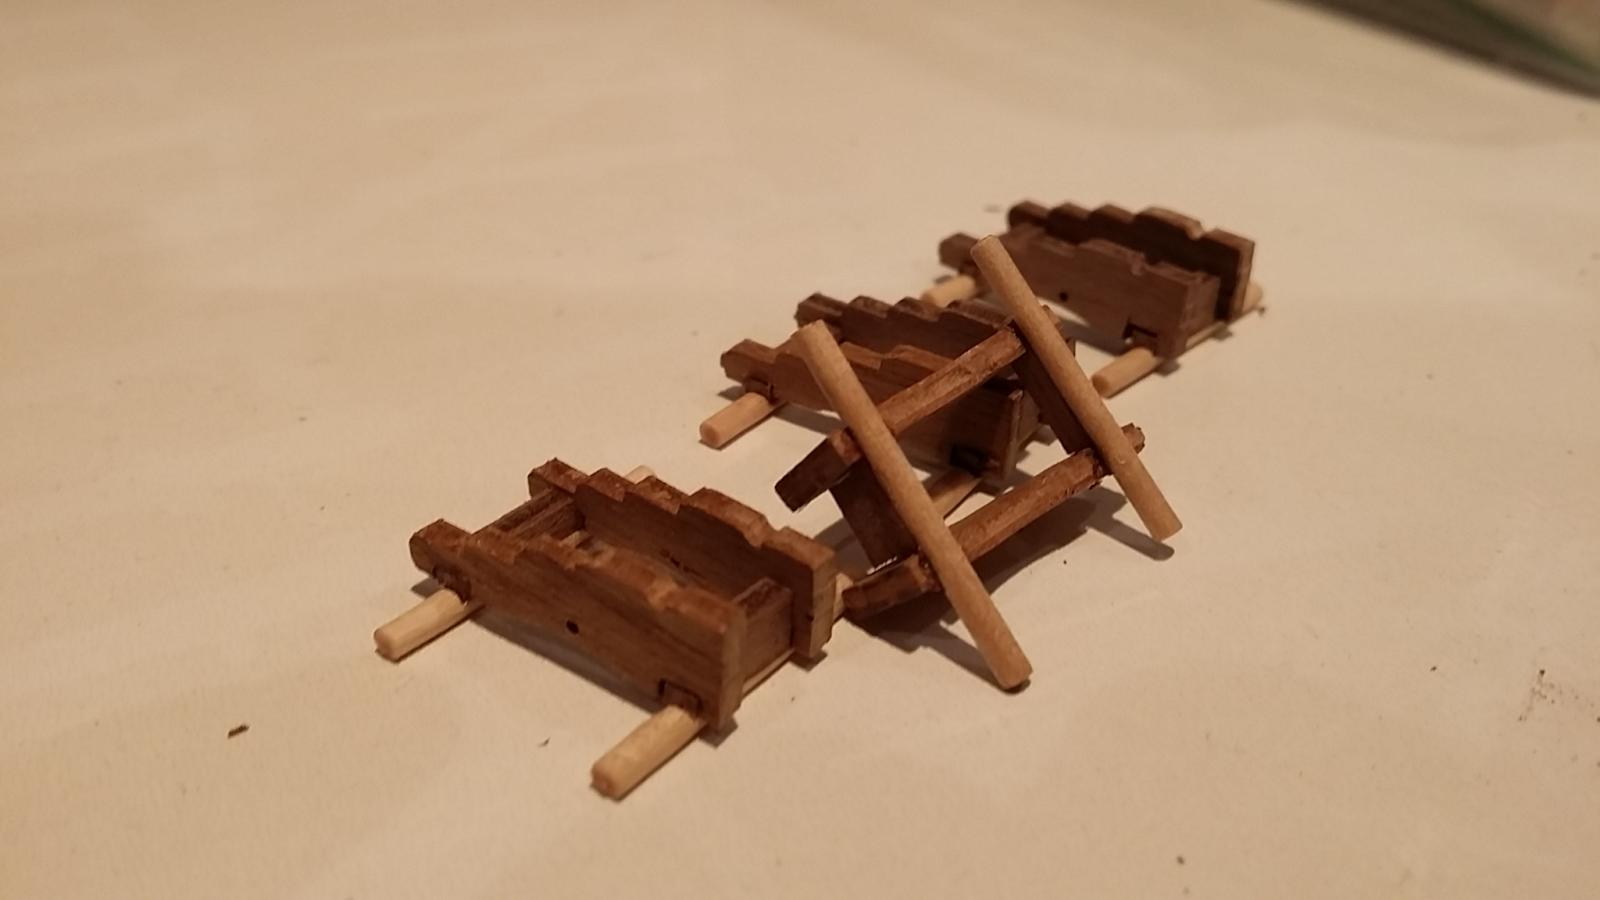
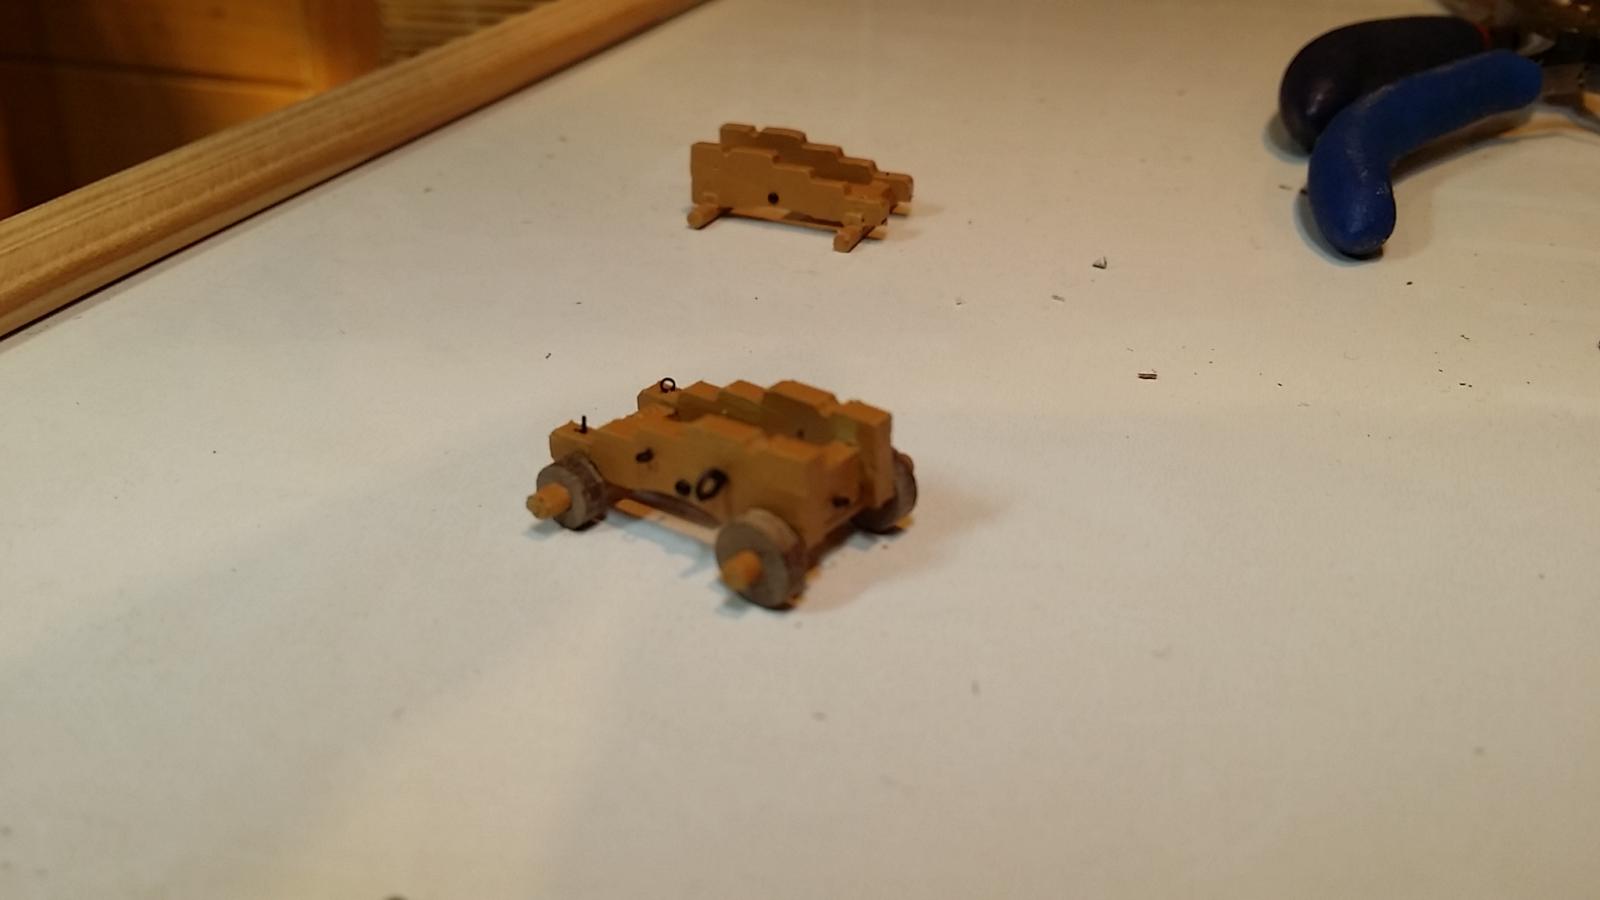
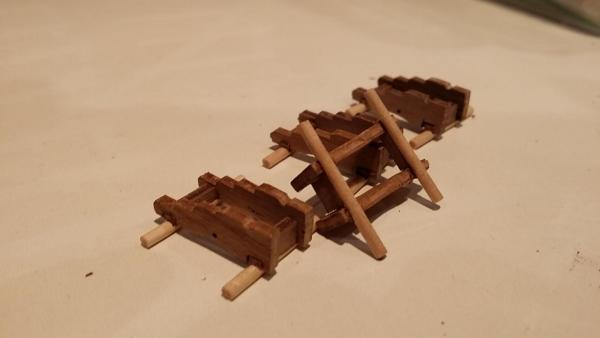
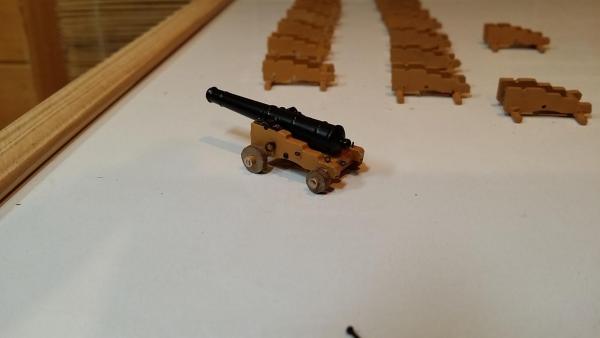
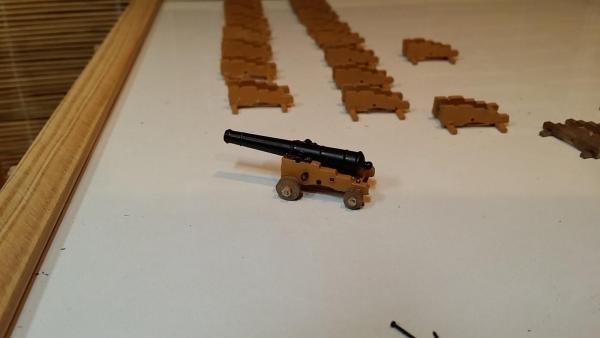
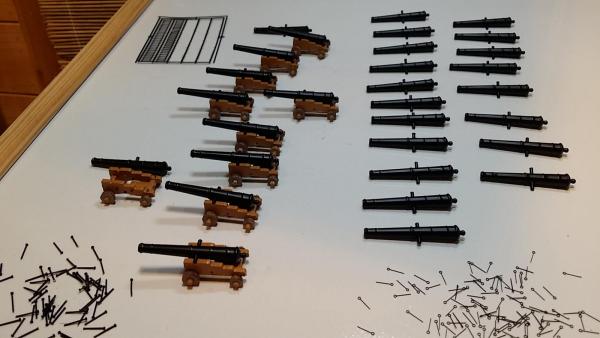
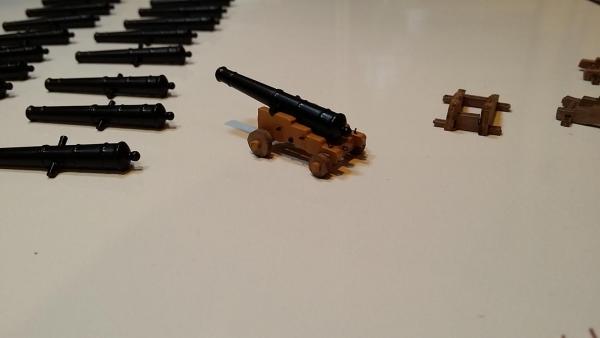
I've decided on a way forward with my Cannons, this is the template: I'm using the rings from part no.42844 as the breach ring. I'm also using the part no.36750 as the bridge. I've used cocktail sticks to make false axles just to raise the cannons a couple of millimeters. In my opinion it brings them into a better prospective and I was looking for the extra height.


-
Looks good to me Tim. I had the same issues doing my wales too, what I'm learning is that after a certain task I sit back and think that's crap, but after a little sanding and just generally making good I then think "yeah that's better", so what I think I could have done better ends up better anyway.
-
A trial pack from CMB, I still have a couple to trial
-
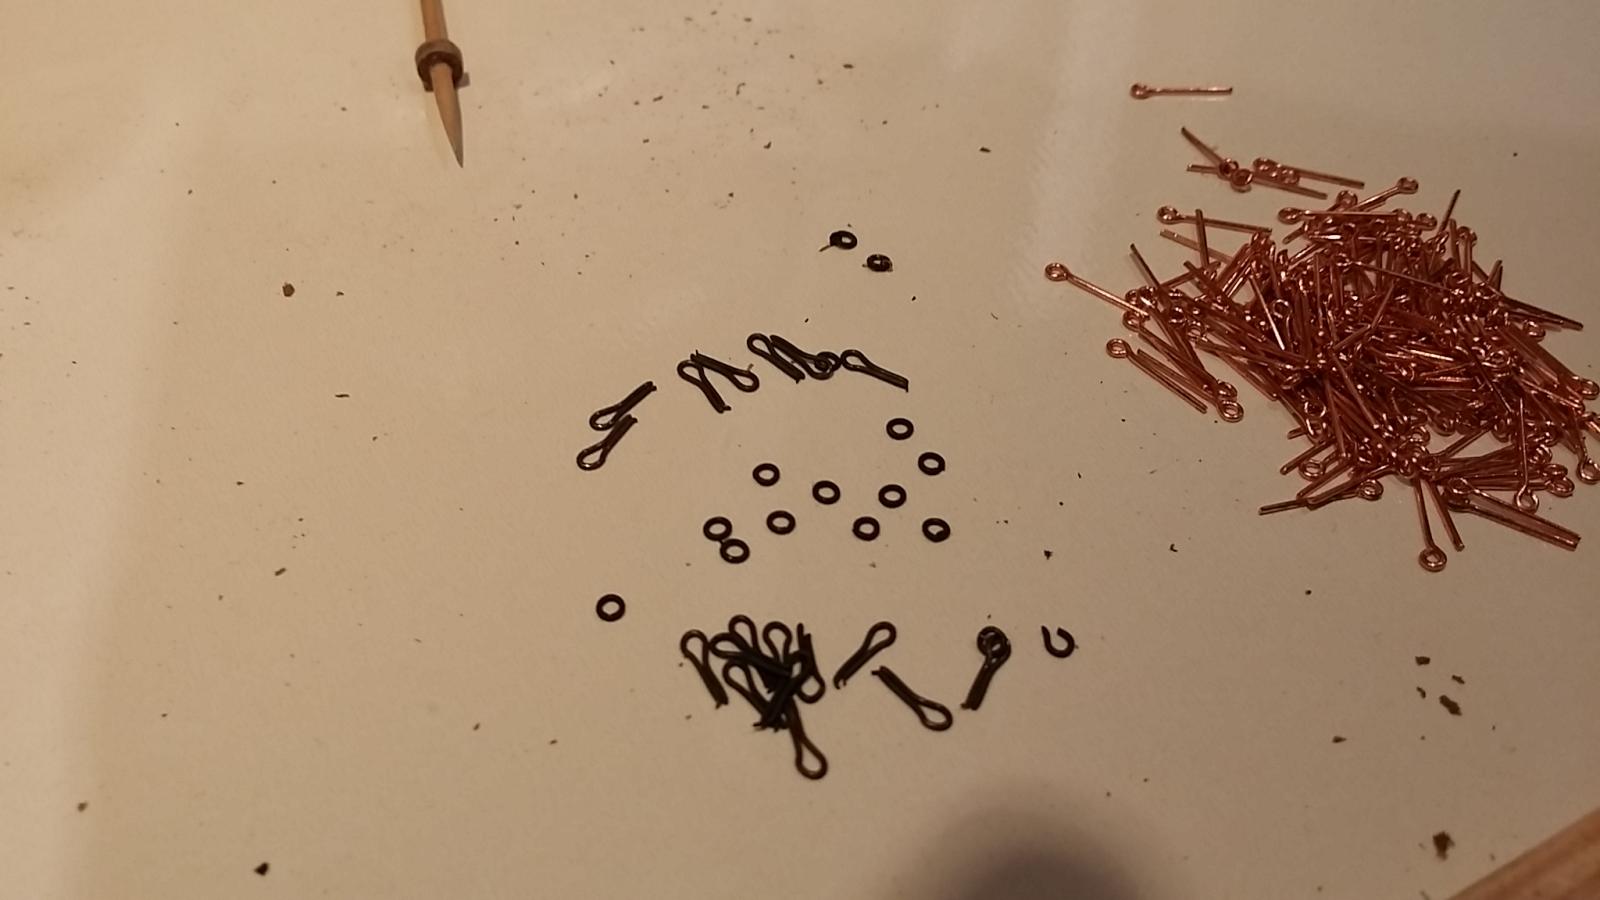
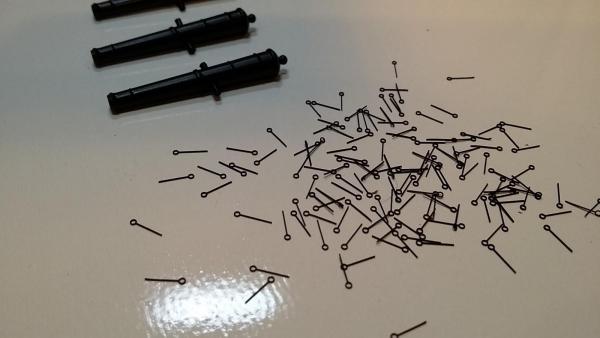
Lesson for oneself.......when laying out a bunch of little rings, don't cough, goodbye little rings
-
Your a diamond David, Thank you
-
Thanks Glenn, I'm looking at alternatives now
-
Yes you did send me a PM David, I'm just getting a little confused with these "C" Numbers which I now believe is an aftermarket part from Cornwall Model Boats......Correct? And it seems the way you've done them makes sense too, I'll do mine the same way thanks David.
-
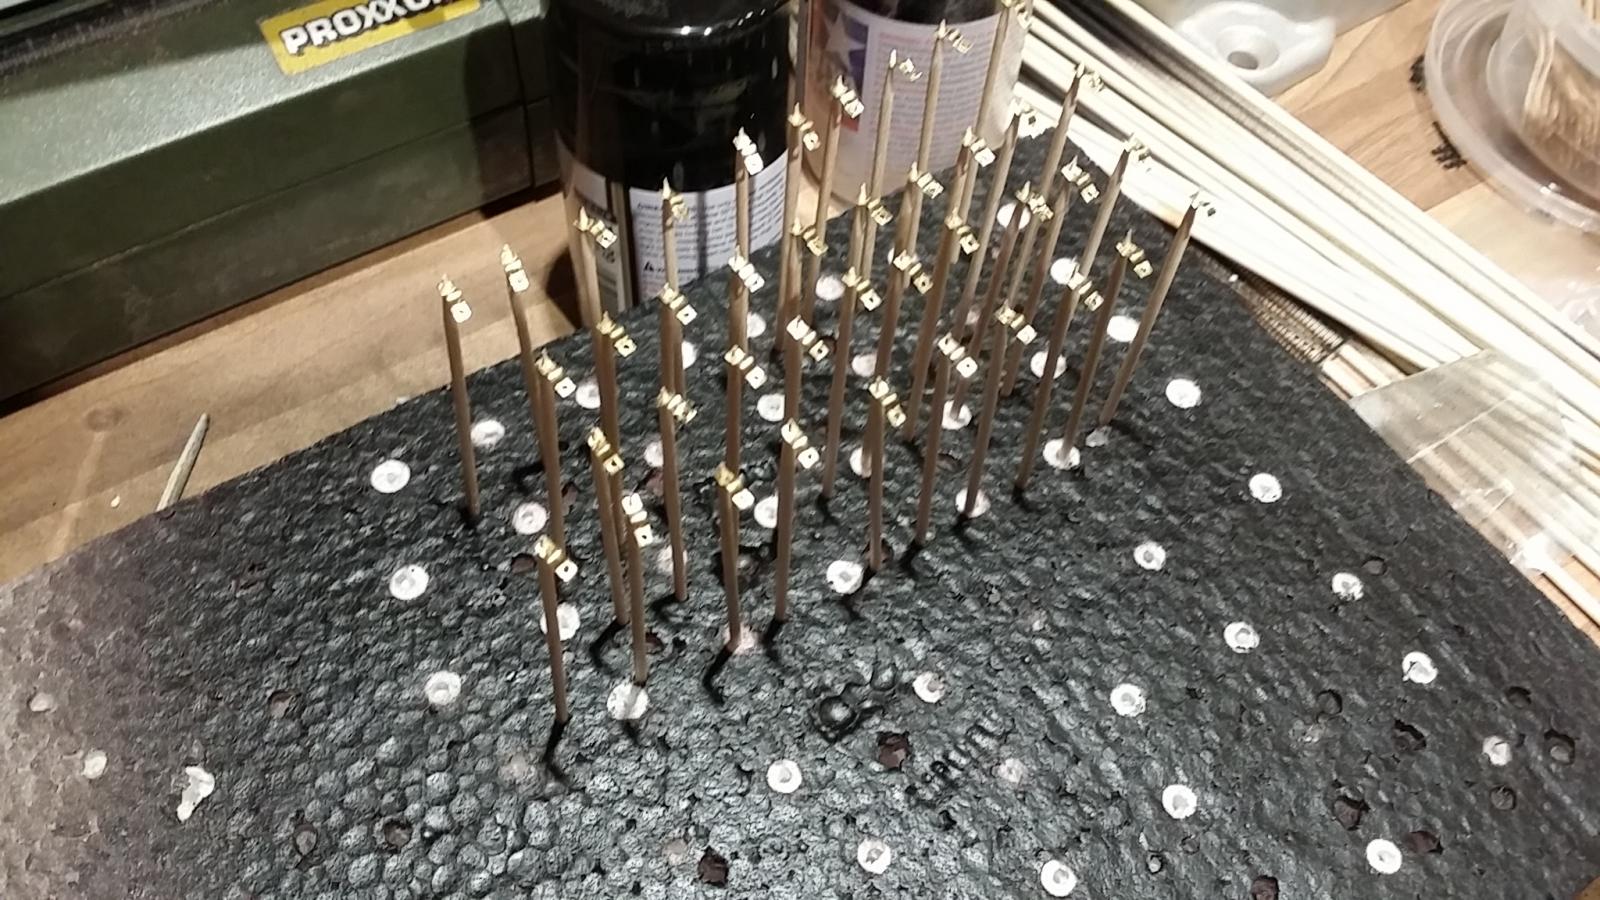
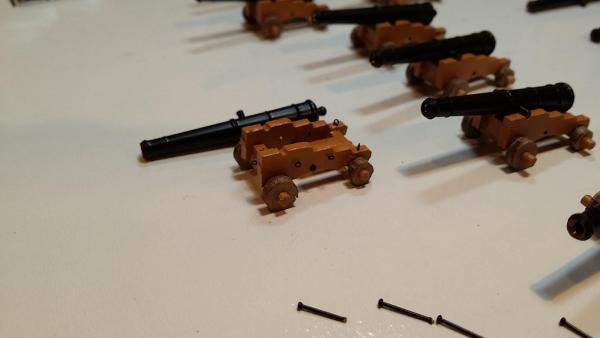
Need a little advice please. As you all know I've been playing with these cannons, the manual says use part (480) but these seem tiny, what's been your experience with rigging them? I noticed in Gils log he's used the eyelets supplied in the packet which are bigger. I do not like part (501) so I'll be ordering the Mantua ones from CMB.

-
Took your advice David and gave them 2 coats of matt varnish they're not going anywhere
-
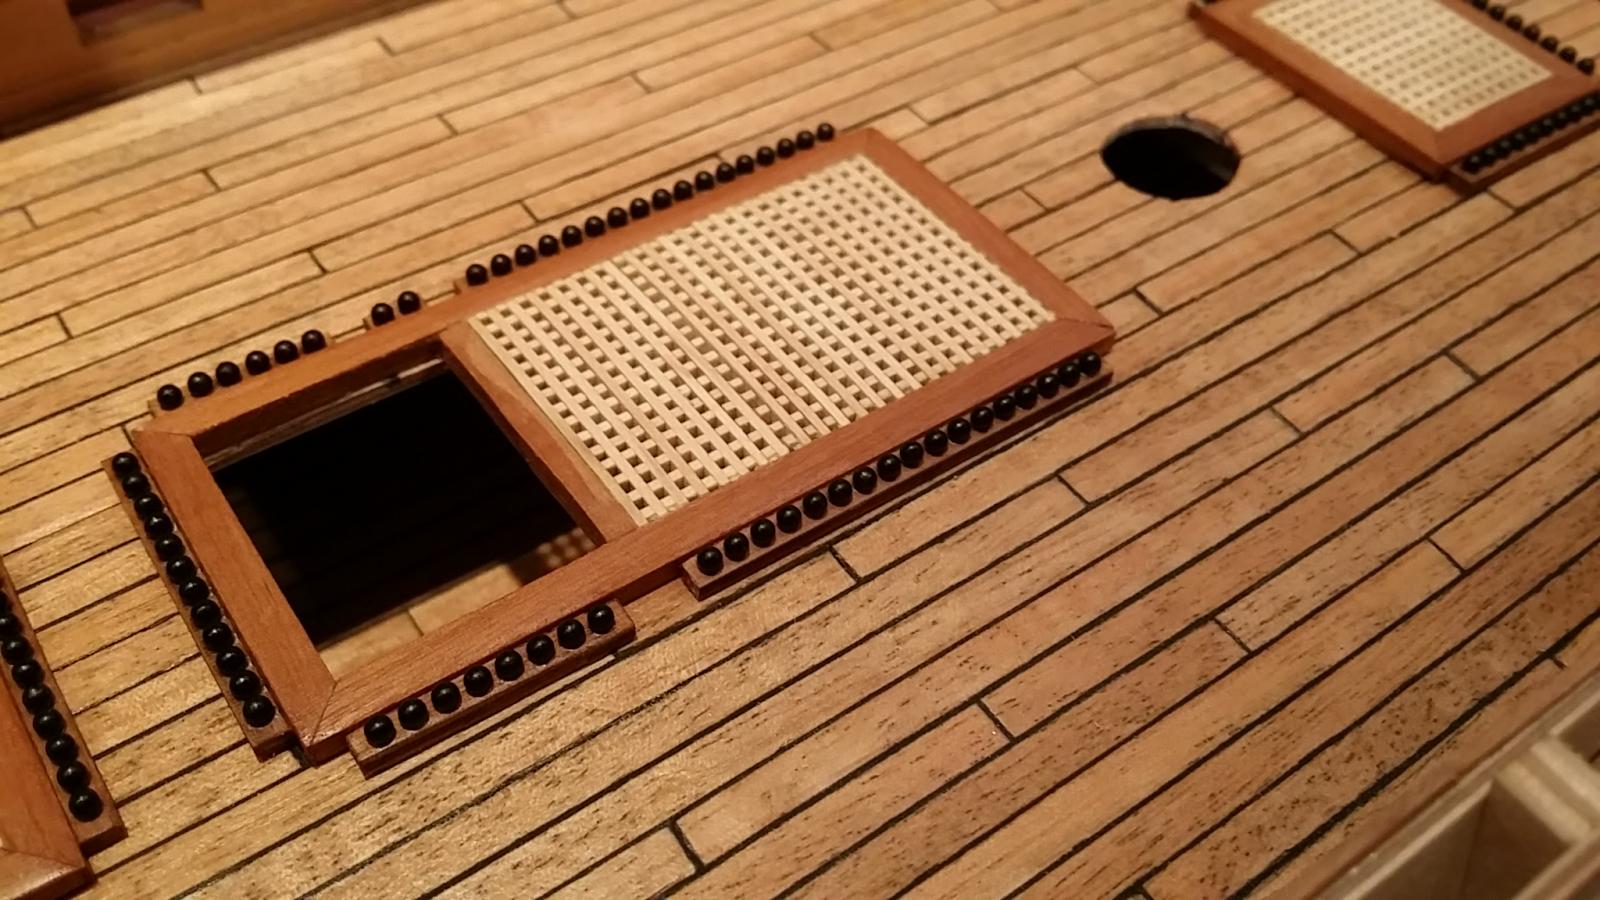
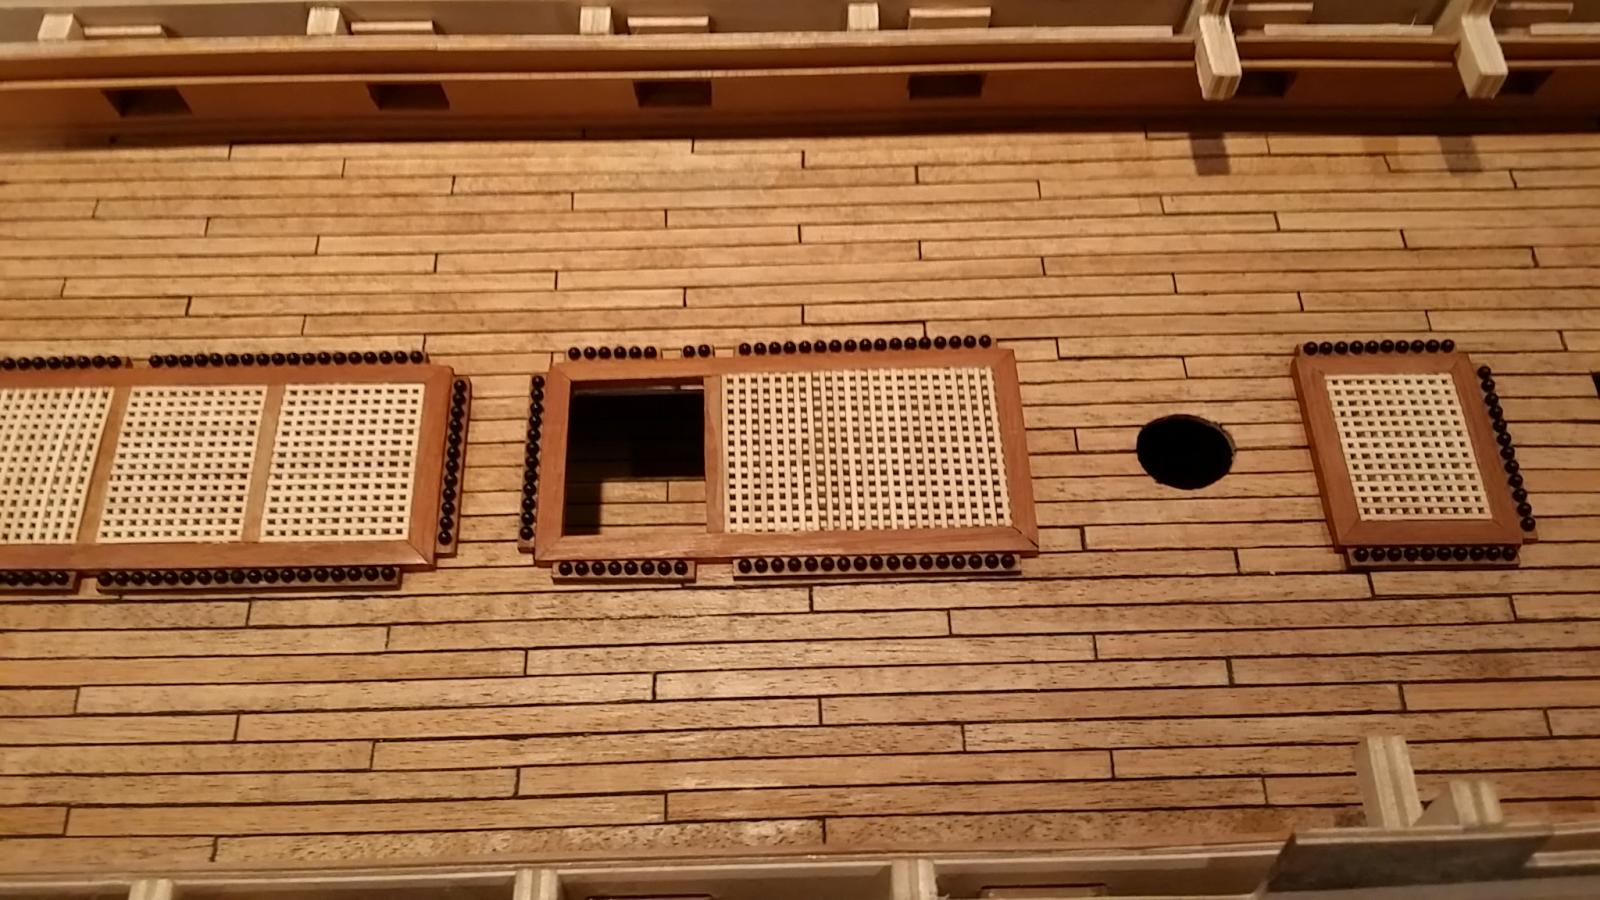
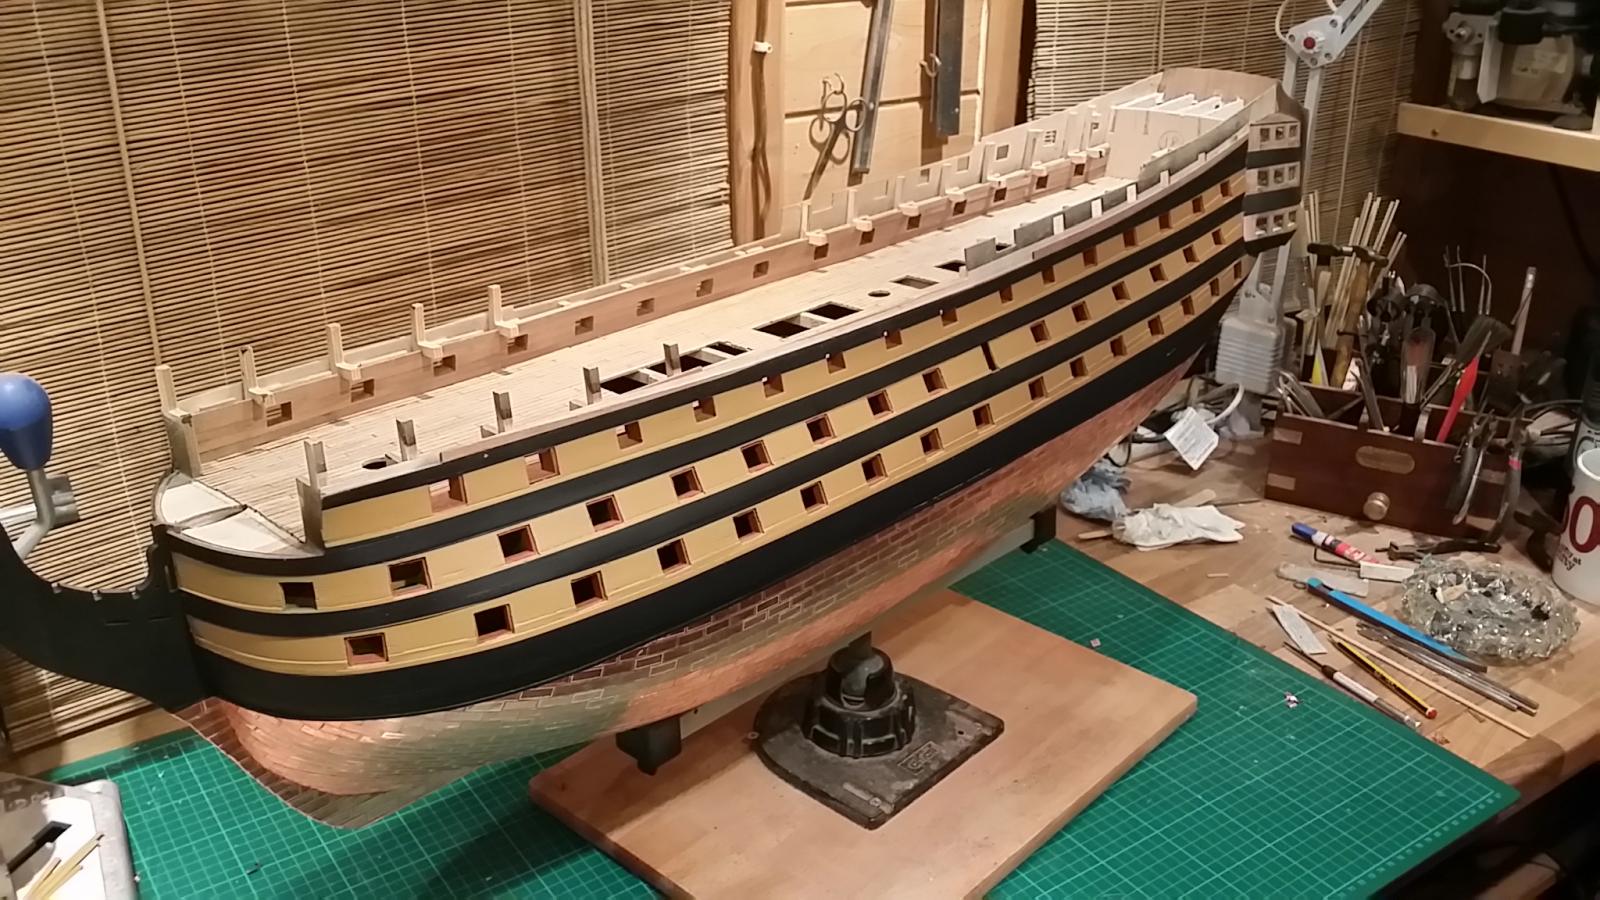
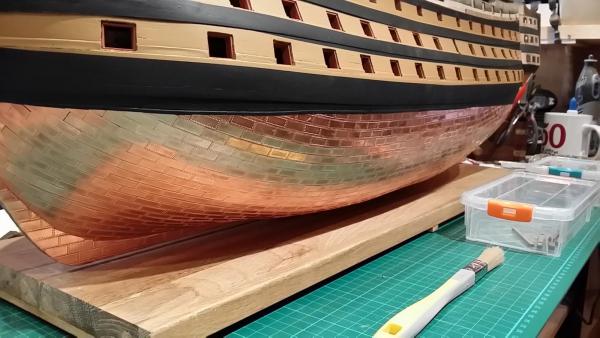
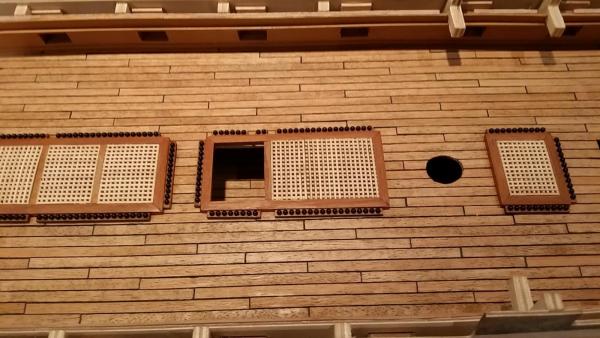
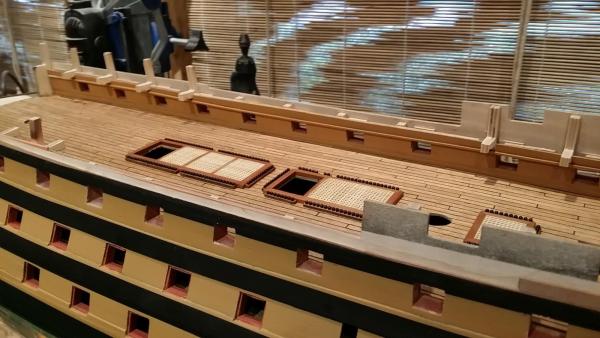
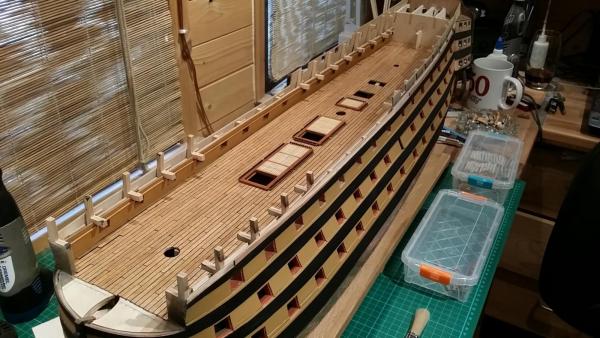
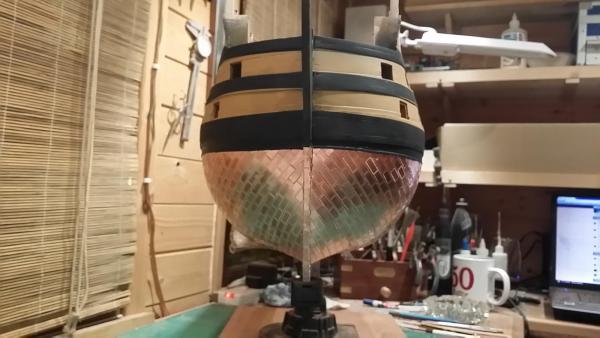
A quick update: I've made a temporary base to sit the ship on, I need to protect the copper plates from being caught while they naturally tarnish. The first coat of yellow ochre has been applied to the inner bulwarks and the deck has now been varnished with a matt coat. Now will be a couple of weeks of cleaning her up repainting areas that got disturbed a repainting some of the gunport linings, after that it'll be all hands on deck working on the cannons. The grating assemblies are only dry fitted at this stage.

-
Marvelous job, well done Glenn
-
Wow.............and wow what a masterpiece. A very very well done bit of kit.
- 32 replies
-
- 1
-

-
- kancabas
- cargo ship
- (and 1 more)
-
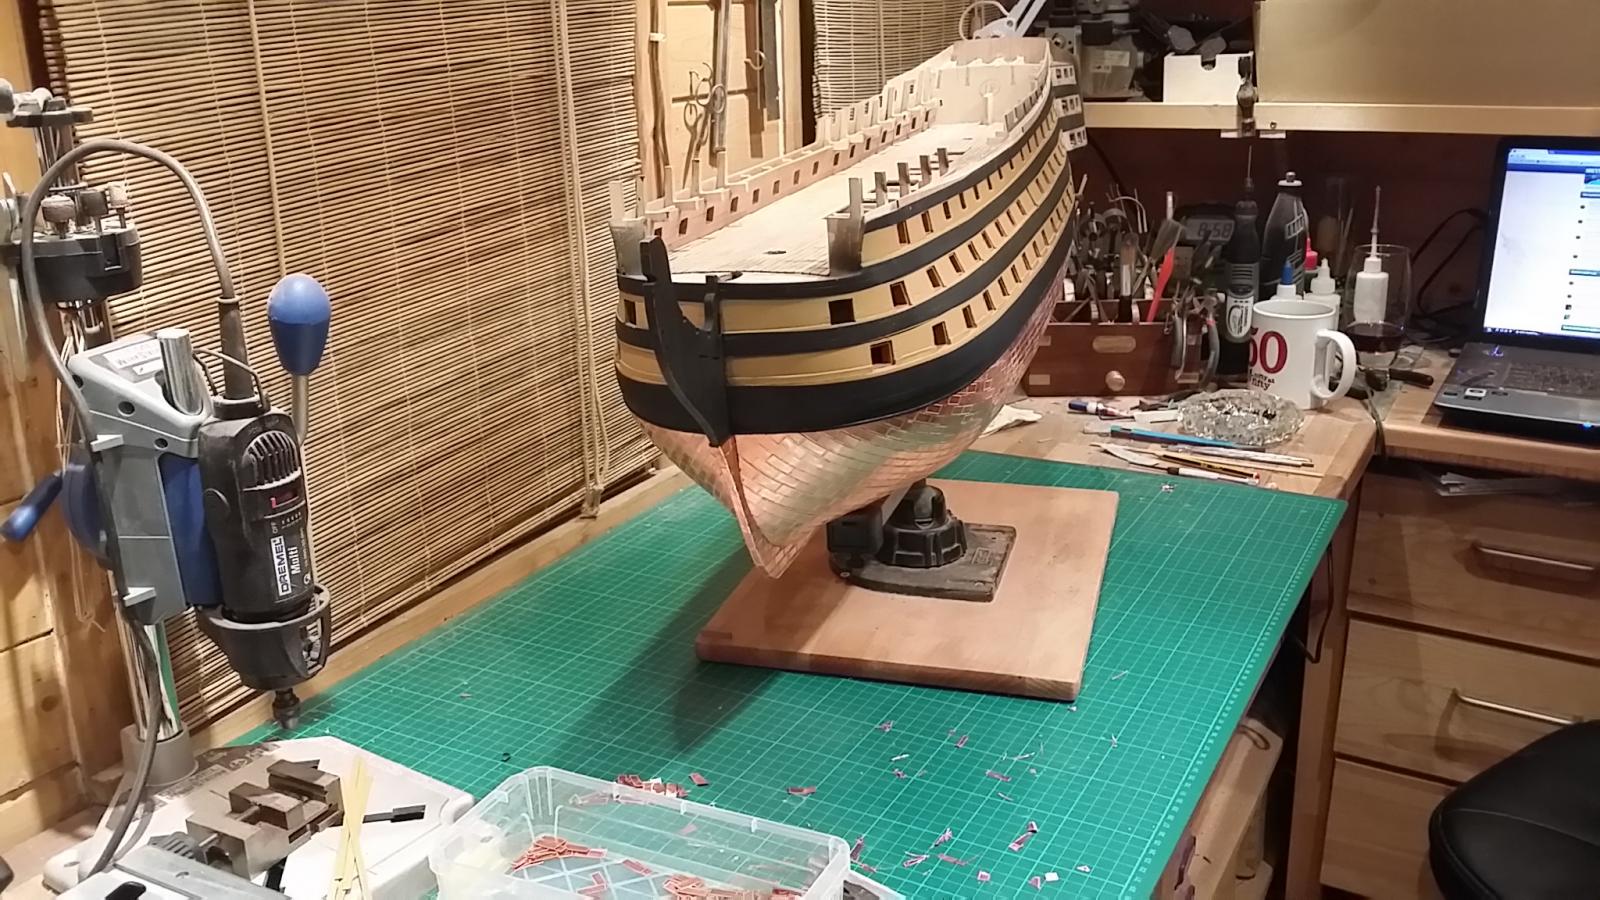
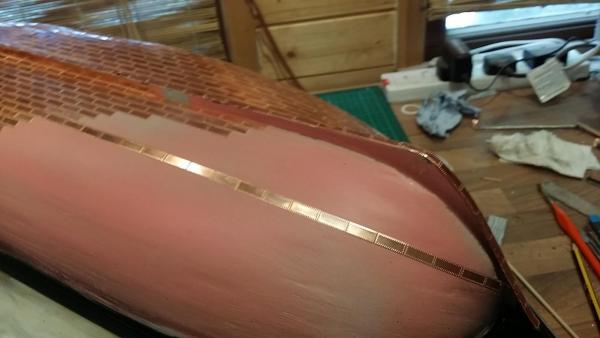
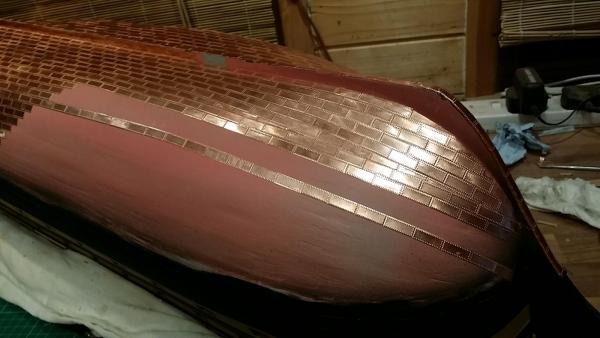
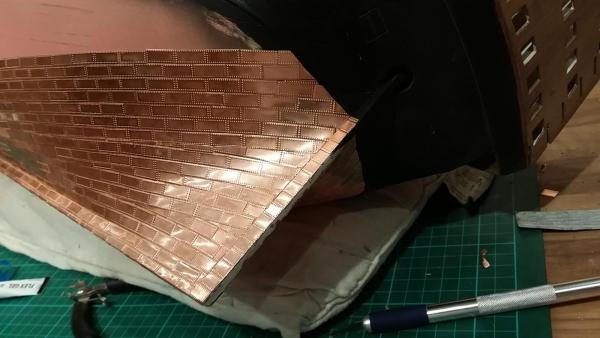
Thanks Sjors, I'm starting to ponder now whether to copper leaf or not, something in side of me is saying leave it alone and let it tarnish naturally. You can see in one of the pictures the original pyramid from where I started has already tarnished beautifully.
-
Good point Glenn, I'll do just that.
-
Thanks Glenn & George, I'm glad that particular part of this kit is over
-
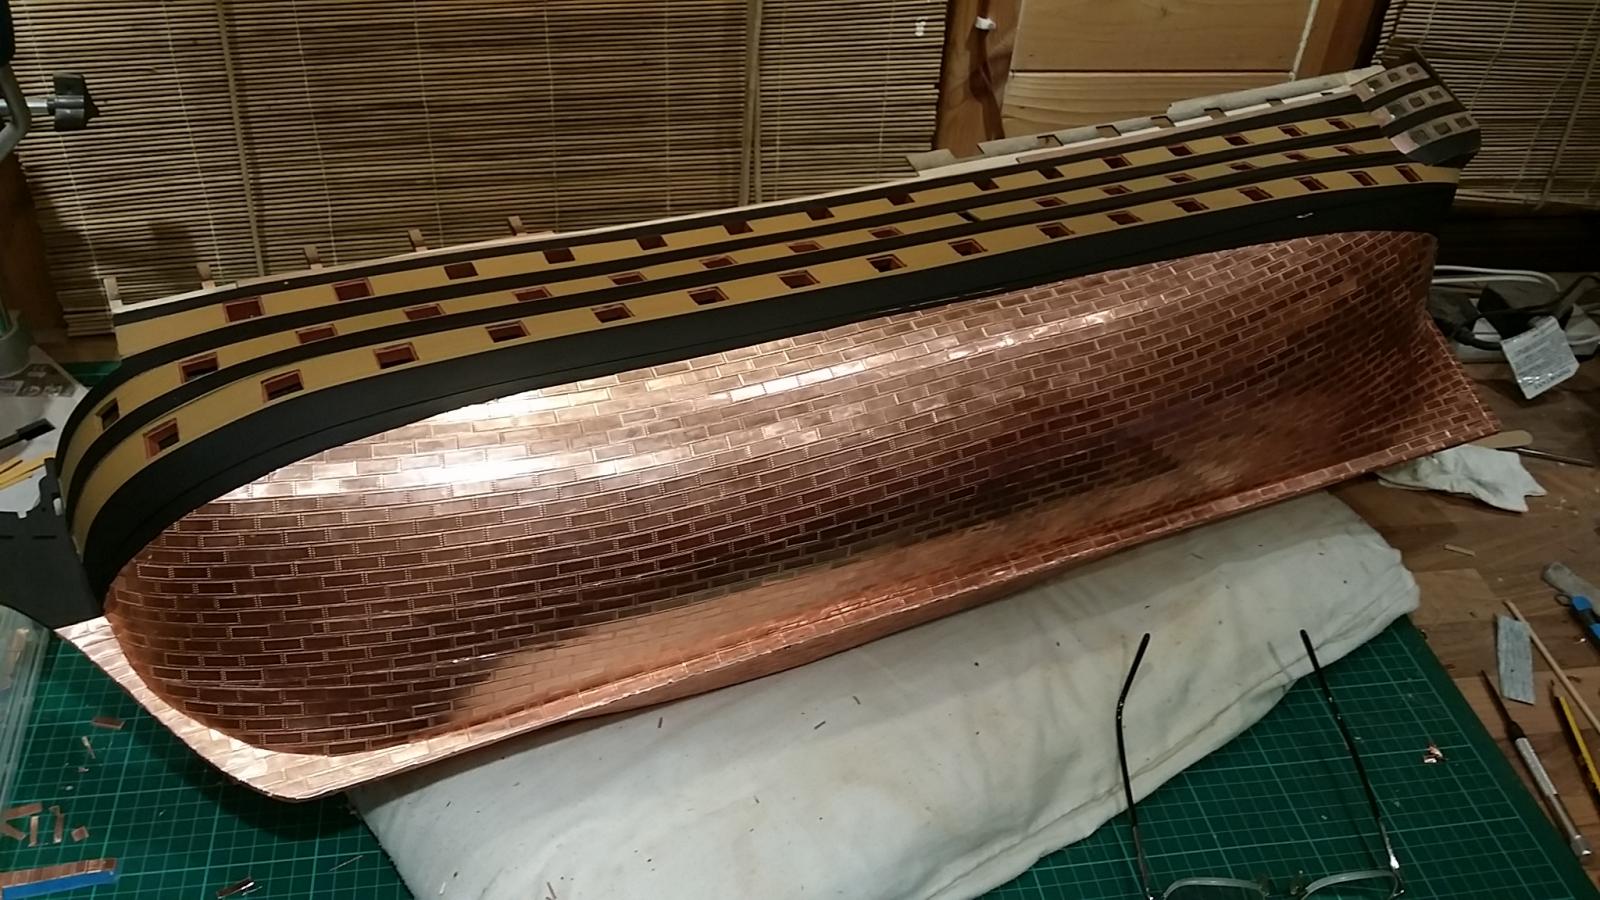
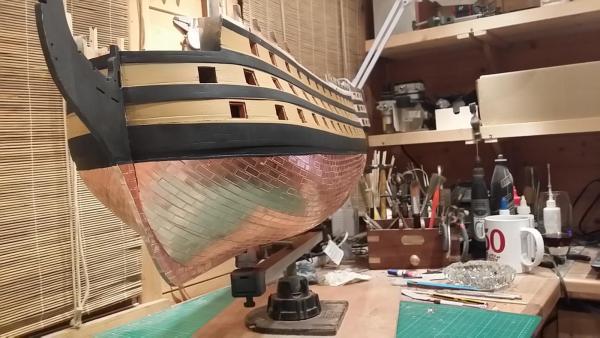
My next stage will be to trim the inner bulwark planking around the gunports. I've also decided to repaint the hull as the timing was wrong, I should have waited until all this work was done first, besides I wasn't very happy with the lines. A little rubbing and filling here and there wouldn't hurt neither. Then we'll move onto copper leafing the hull, It looks like I have a few tiles to play with so I'll do a test run on the leafing first.
-
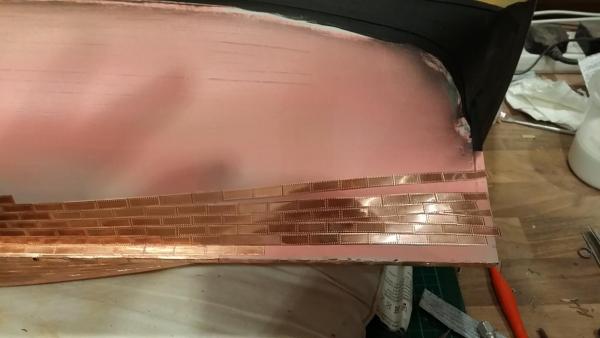
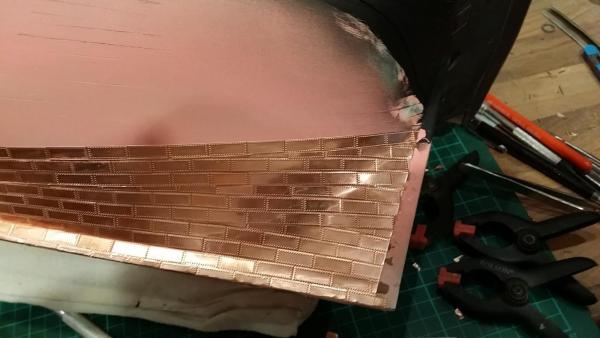
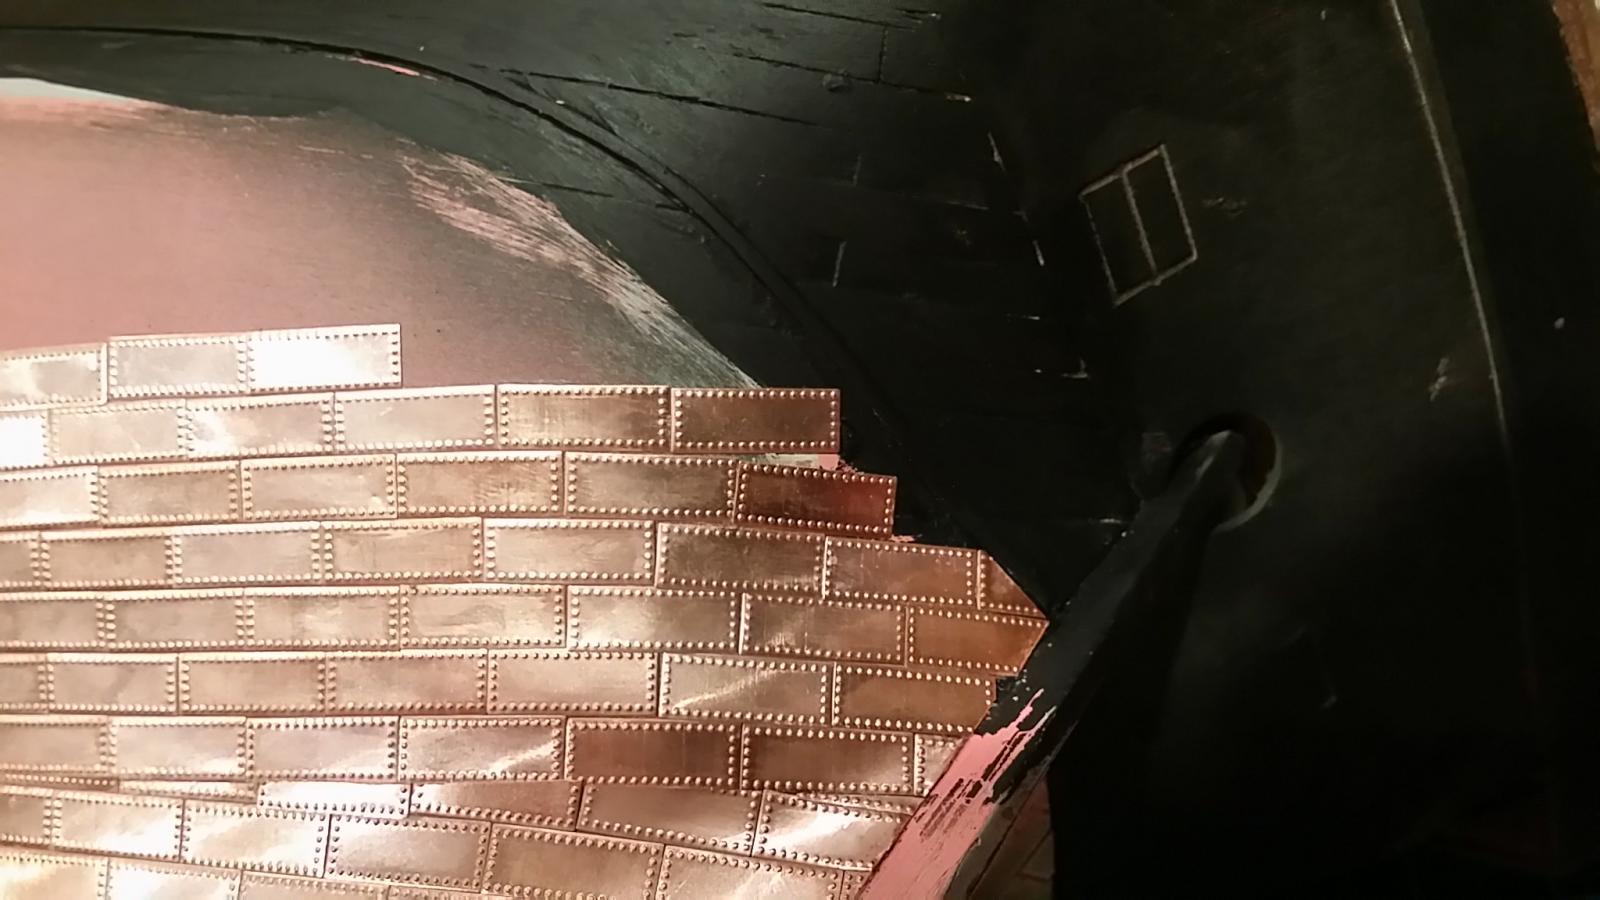
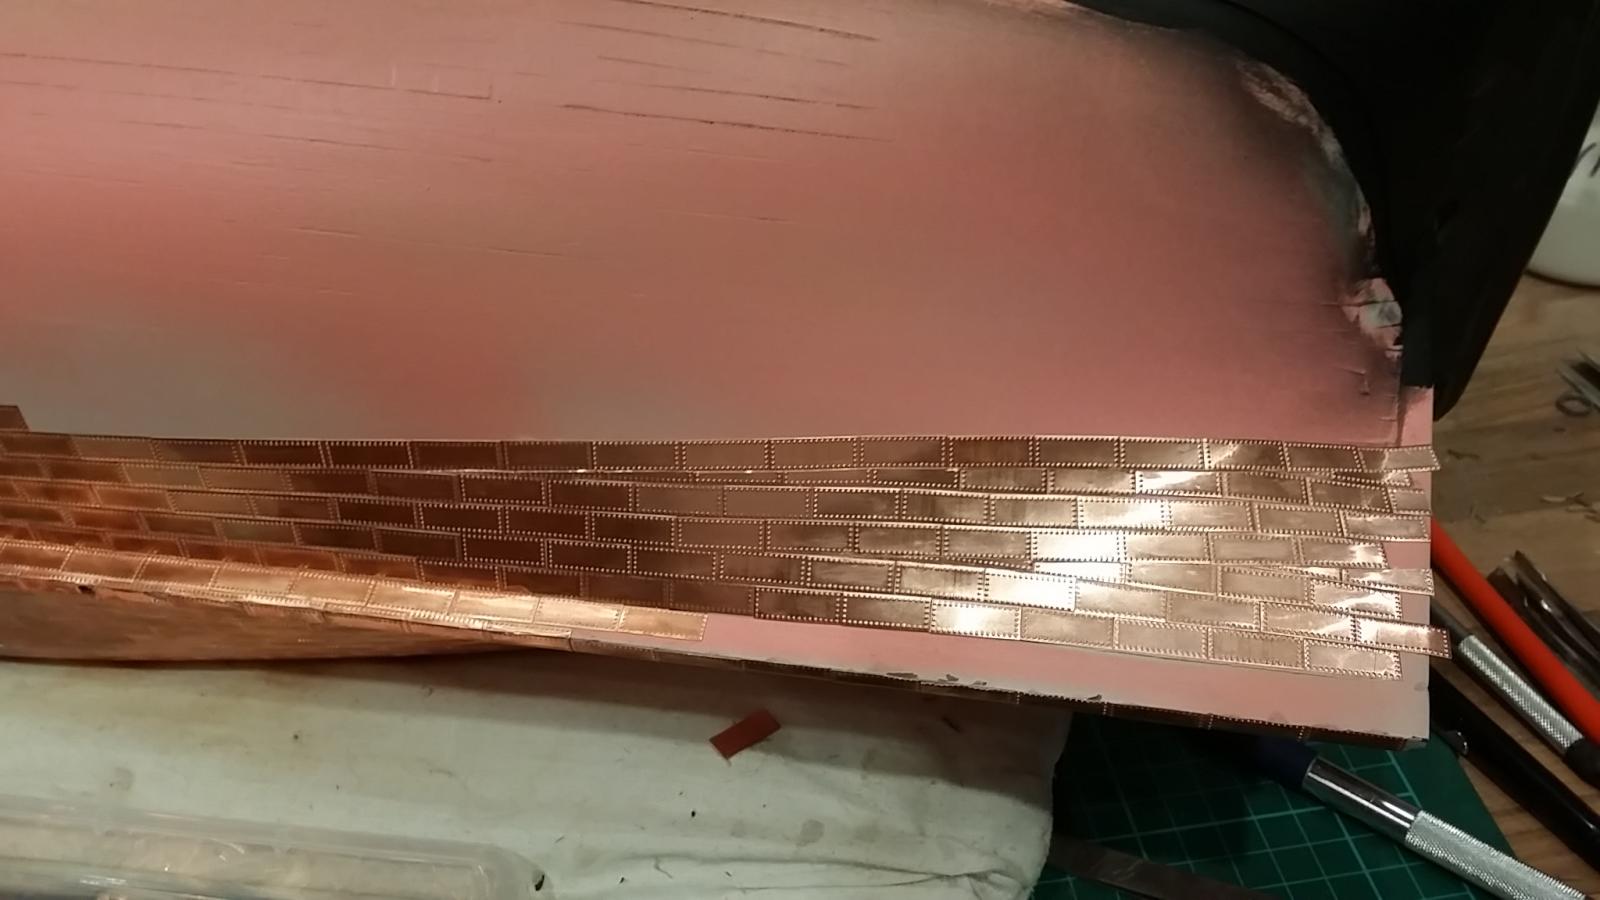
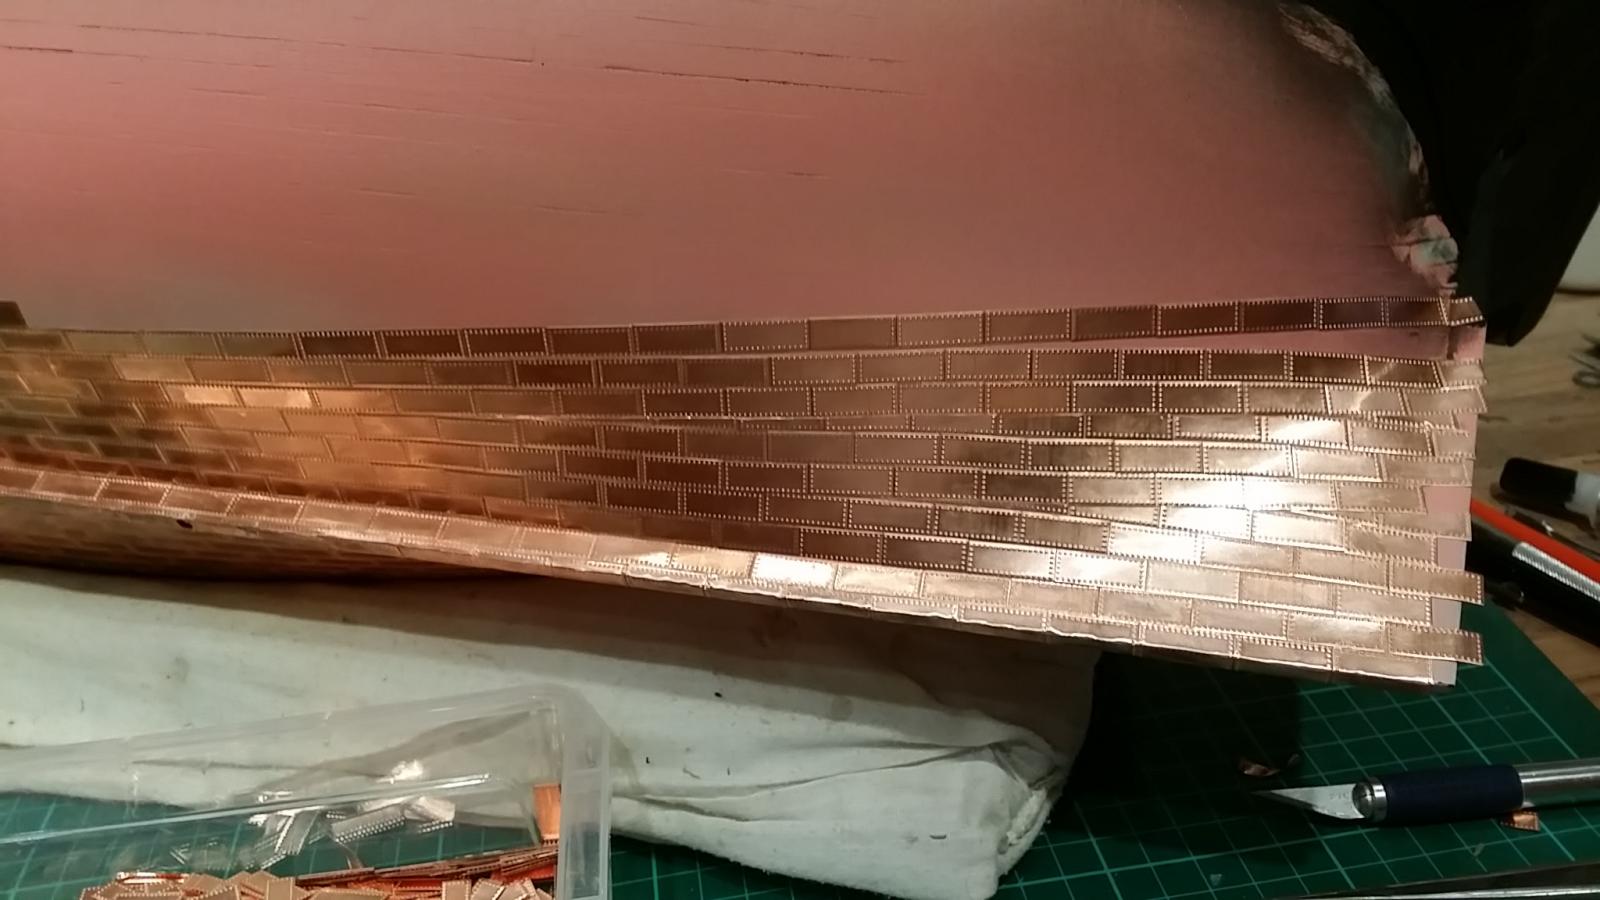
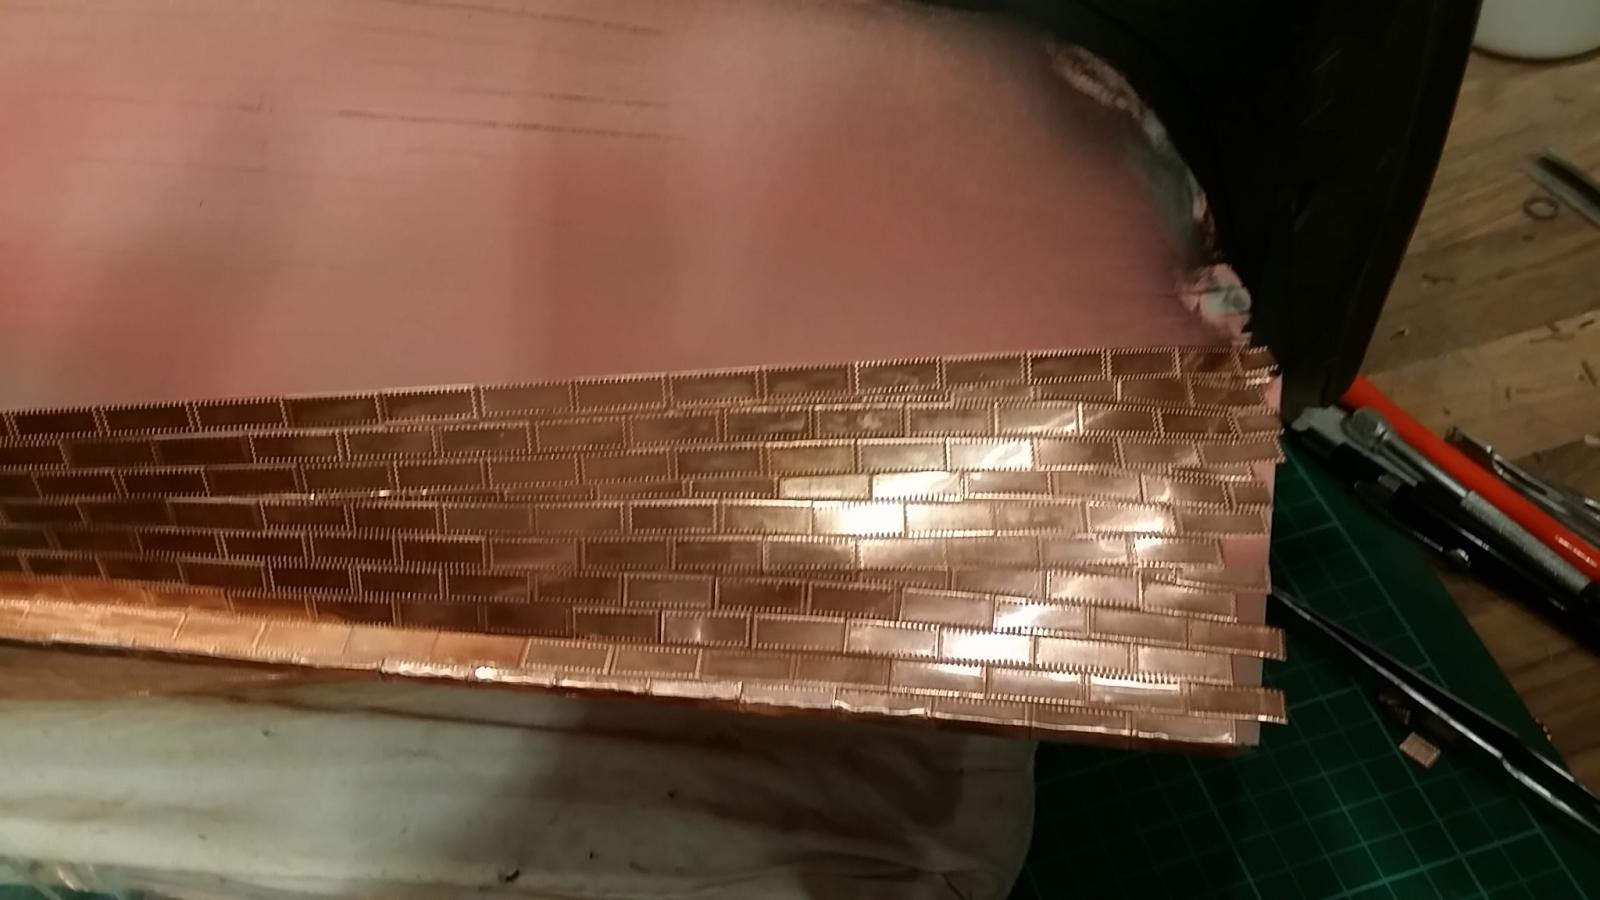
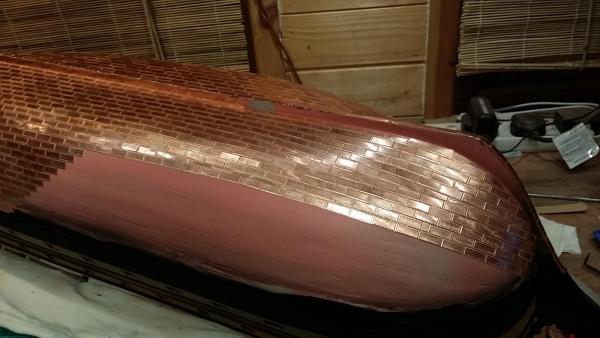
So, my findings.......the port side was not a mirror image of the starboard side unfortunately. But this is how it went. I butted up on the vertical 8 rows down. I filled it all in and added a row on the horizontal butt. then a further 4 rows down it was once again on the vertical. It was then a straight fill job butting the tiles together as best as possible.


-
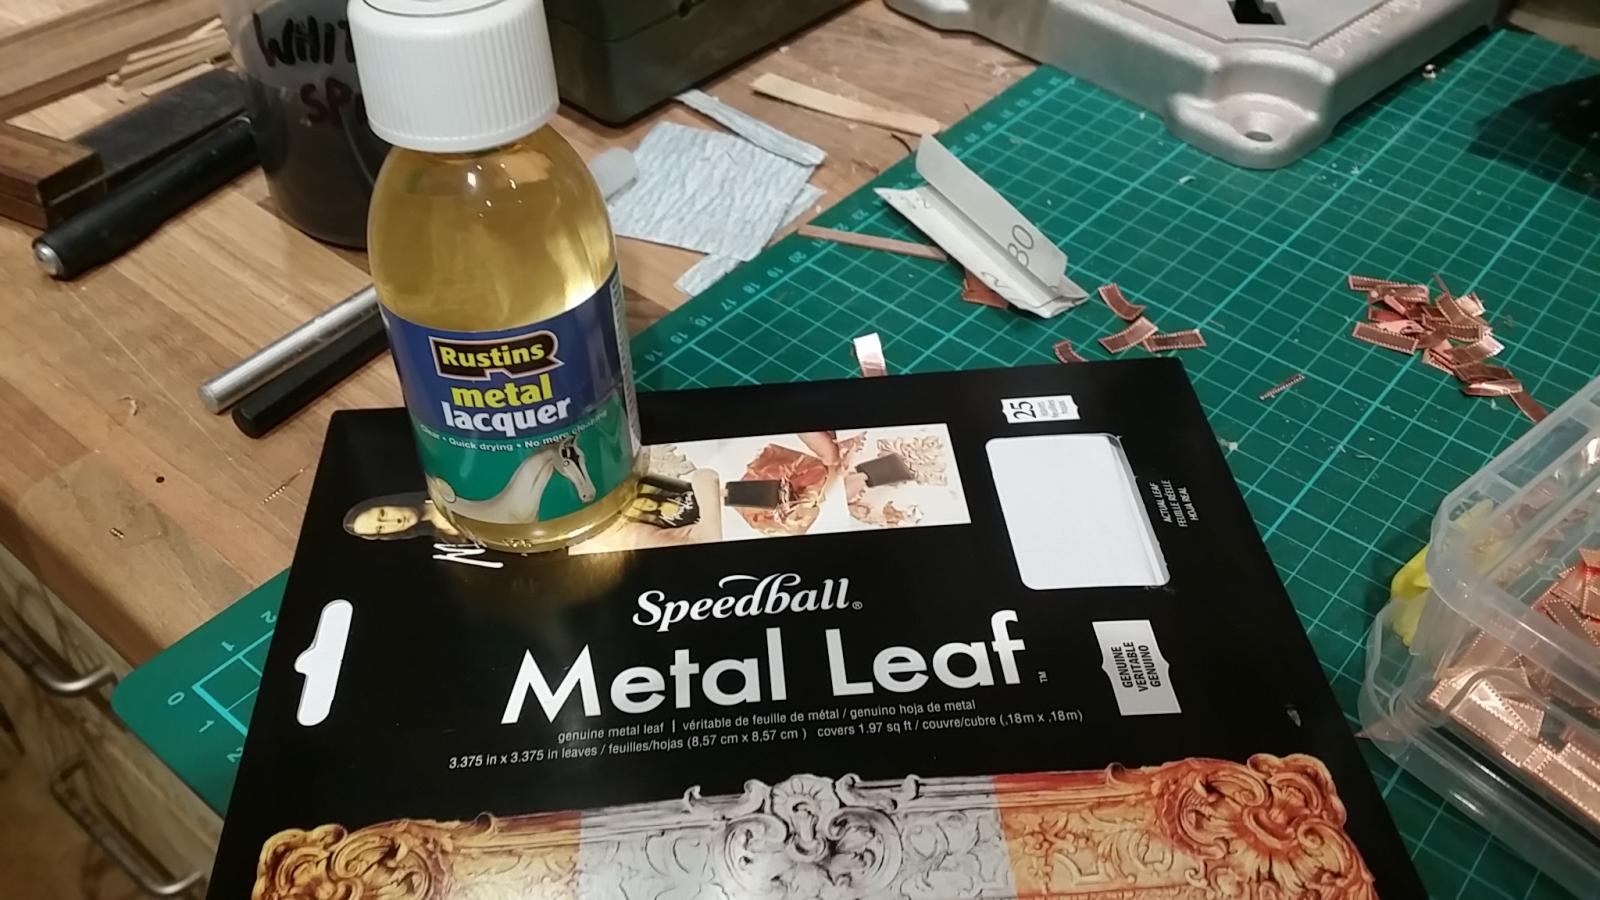
Hi Tim, My plan is to copper leaf the entire hull after the tiling is complete, then lacquer.....this will also be a first for me, so fingers crossed So yes it will be bright. I've also got a new toy to play with too

-
Wow, that's impressive work, looks great Tim.
-
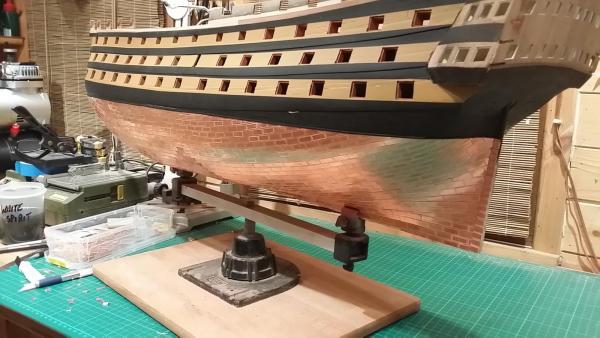
So far so good, now we start working towards the Bow.
-
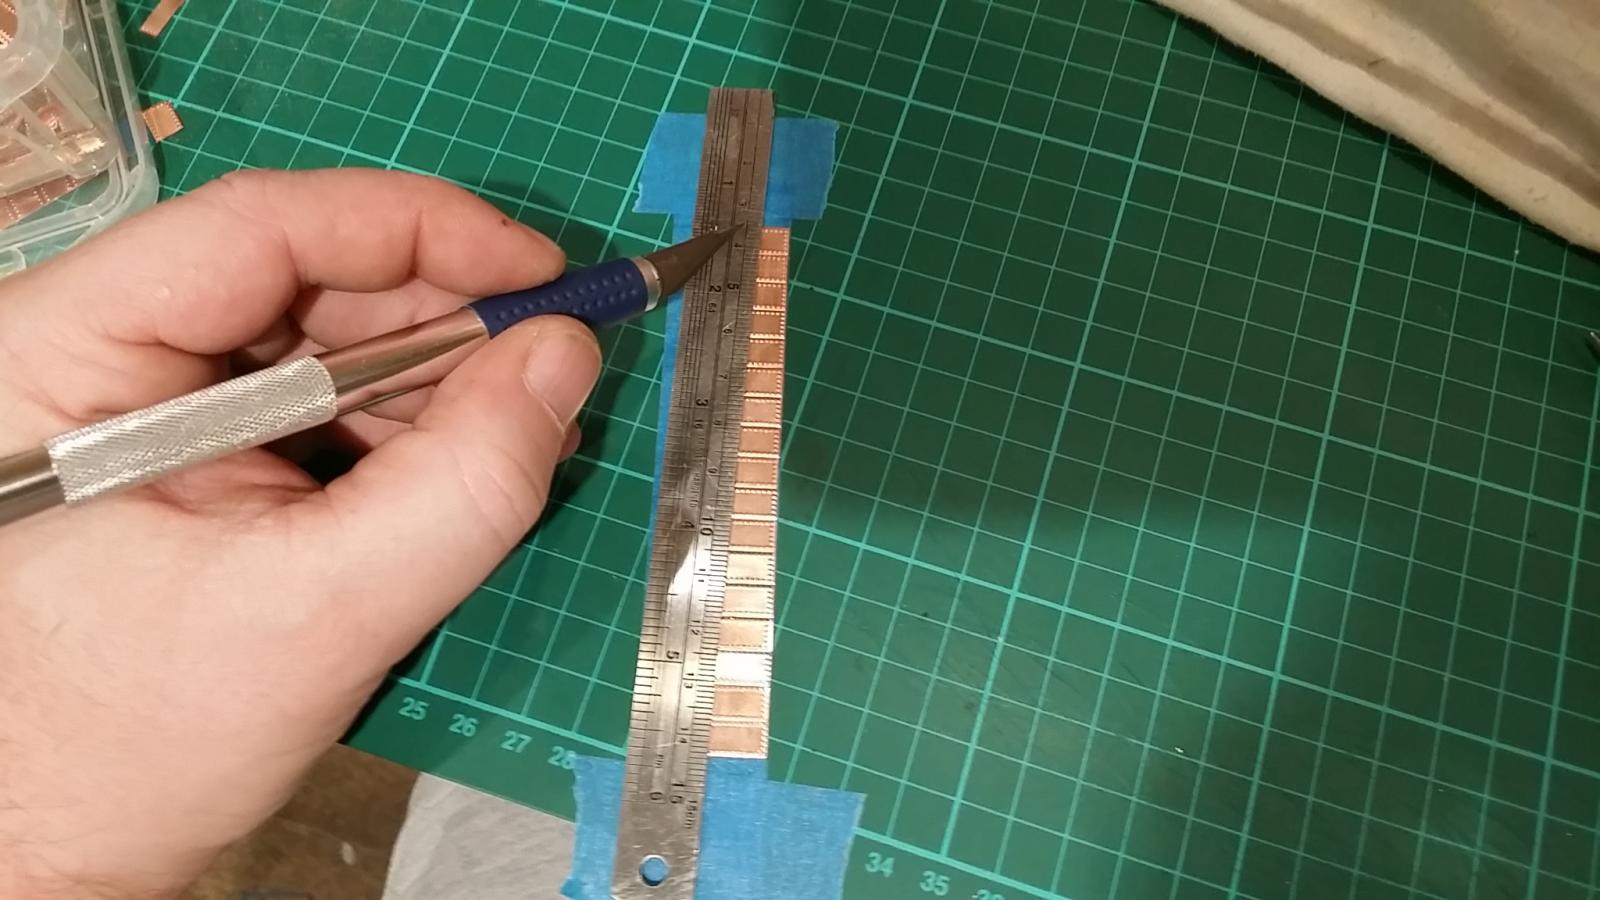
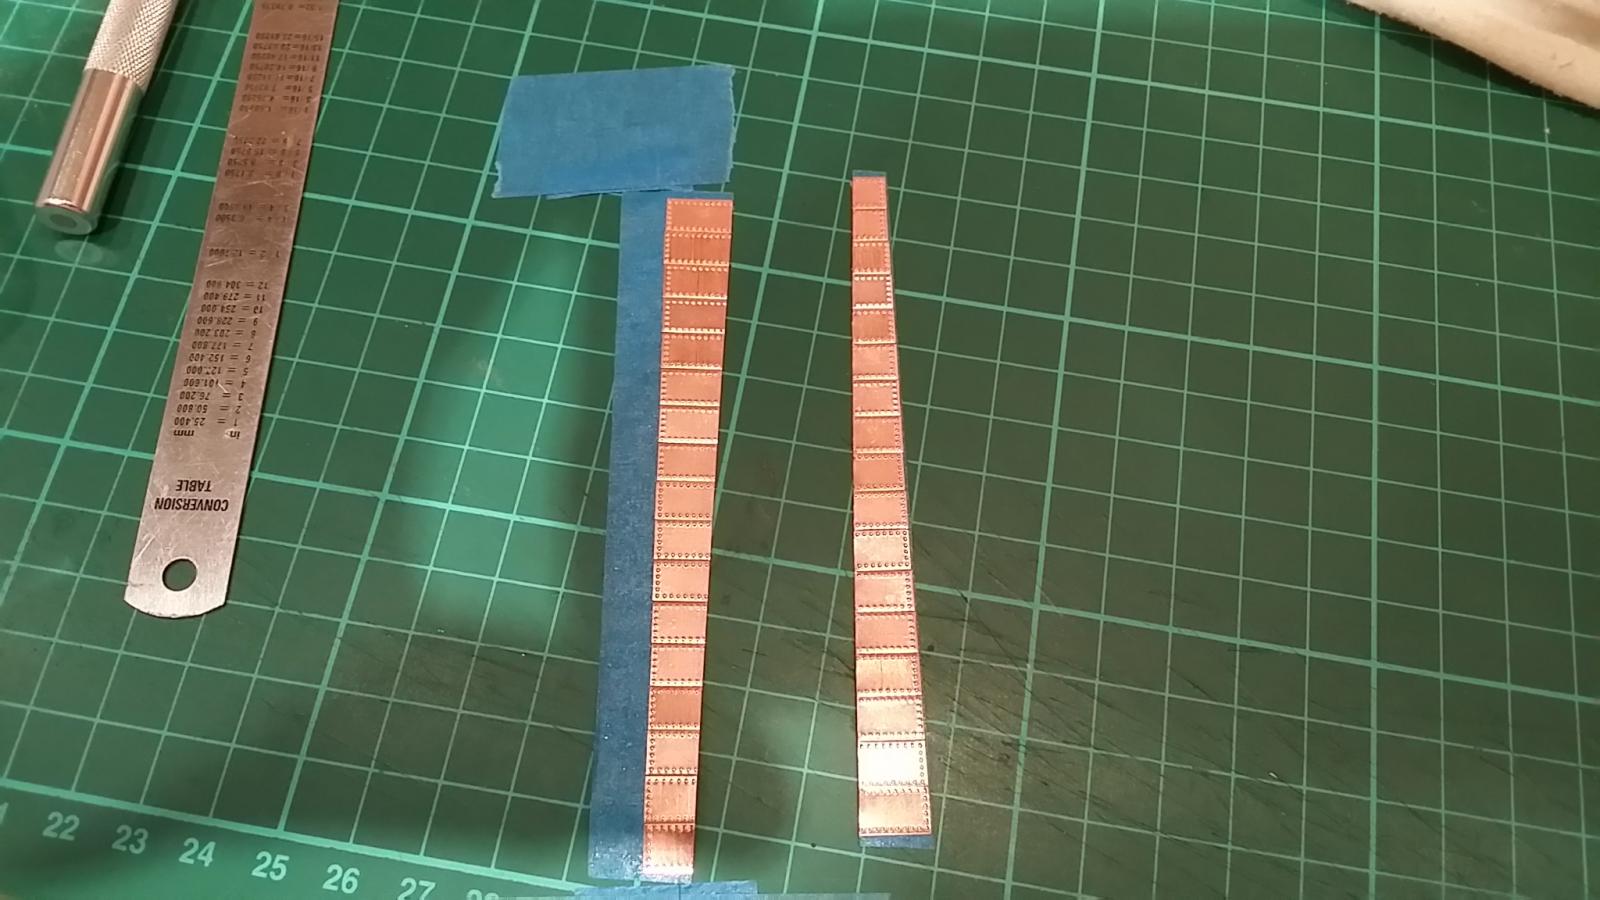
I then continued to but the tiles on both sides for 4 rows up, then the last few tiles of that row I kept tight on the vertical because the last stealer needs inserting. Fill in the gaps, I then laid out a row of tiles on inverted masking tape. then I measured the stern post top and bottom. Using a sharp knife I cut the tiles. Starting from the bottom I carefully removed them 1 at a time and fixed them to the stern post.


-
Thanks for the visit Jerry, I'll have to put my hands up as i'm also guilty of the above, their is without doubt some master ship builders on this site showing their tips and tricks for novices like myself to learn from. And yes I'm enjoying every minute of this build.
-
Thanks Phil, I thought it might be useful to get some sort of series to how i did it on here
-
Once again it was the horizontal and then the vertical will follow the curvature of the hull And then I filled in the gaps. So on and so on. Then I used a steel rule and a sharp knife to cut a clean line down the stern post.