-
Posts
60 -
Joined
-
Last visited
Content Type
Profiles
Forums
Gallery
Events
Everything posted by BNoah
-

James Caird by BNoah - FINISHED
BNoah replied to BNoah's topic in - Build logs for subjects built 1901 - Present Day
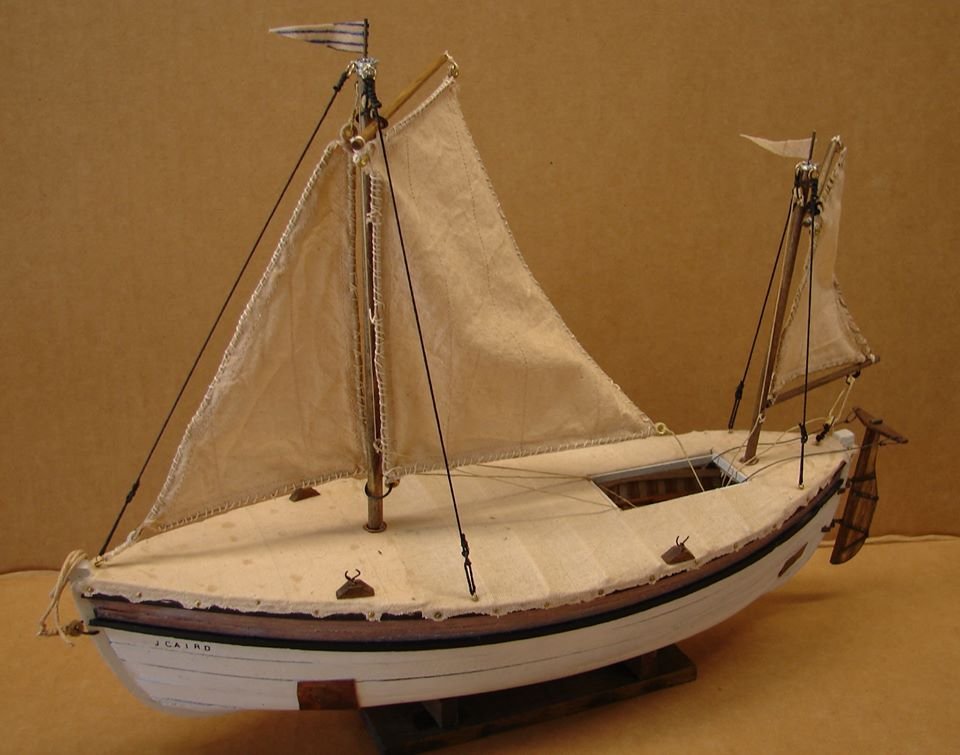
JAMES CAIRD: Build Completed -- September 3, 2019 This is it, I'm finished, the James Caird, she is done. I shall bore you no more. I've raised the masts, slung the standing as well as the running rigging, and raised the sails. I've had to take a few liberties at this stage. We know that shrouds were attached to four nails to hold the masts, but we don't know how the shrouds were secured other that there were no deadeyes available to supply tension. I've used a "midshipman's knot" which would have allowed the crew to supply or decrease tension as necessary. Only one of the original oarlocks exists. It was easy to place a mate on the opposite side of the boat but it is unknown where the other two described in diaries were located. I placed them so that they were accessible to an oarsman in the cockpit. Finally, we can see in period photos that a wind telltale or dogvane was on the top of both masts but we don't know if they were flags or just scraps of cloth. Shackleton's sledging pennant was a simple white field with parallel blue stripes, so that is what has been placed on the main mast.- 12 replies
-
- james caird
- boat
-
(and 1 more)
Tagged with:
-

James Caird by BNoah - FINISHED
BNoah replied to BNoah's topic in - Build logs for subjects built 1901 - Present Day
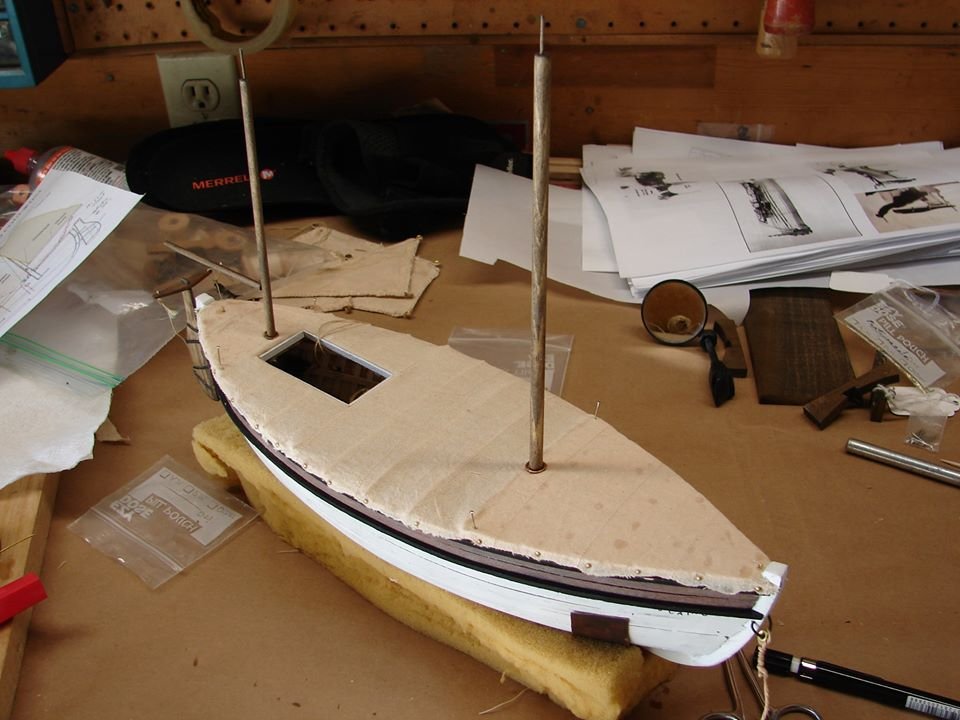
JAMES CAIRD: Build Continued -- August 22, 2019 The stretching of the canvas deck has been completed with the edges trimmed and pegged as in the original. The cockpit has been boxed. The masts have been set dry, so rigging of sails, standing and running rigging can begin.- 12 replies
-
- james caird
- boat
-
(and 1 more)
Tagged with:
-

James Caird by BNoah - FINISHED
BNoah replied to BNoah's topic in - Build logs for subjects built 1901 - Present Day
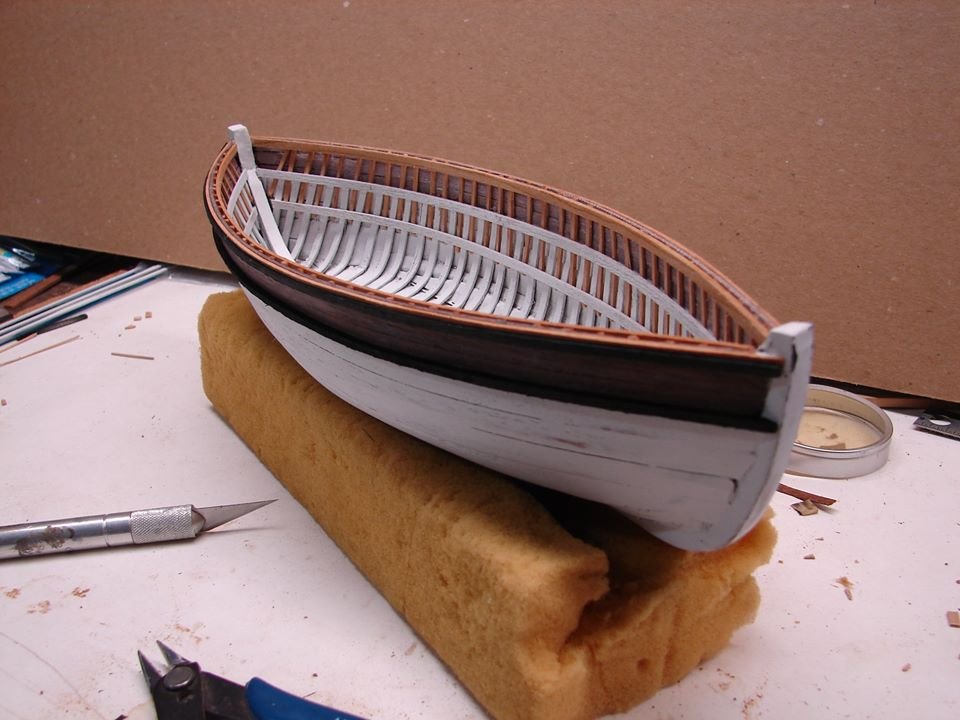
JAMES CAIRD: Build Continued -- January 18, 2019 We've (The "Caird" and I) made some progress since my last posting. The mounting blocks were finally cut away leaving just the bow and stern posts. The ribbing, interior wales and the exterior bumpers have been added. It begins to look like something. In the original when the sides were raised, Shackleton's carpenter cannibalized wooden packing cases as extensions between the boat's original ribs for support. That is why these are unpainted wood whereas the original boat was painted white. There is still a long way to go . . . but perhaps it is time for me to talk to my sail maker about getting that part of the project started.- 12 replies
-
- james caird
- boat
-
(and 1 more)
Tagged with:
-

James Caird by BNoah - FINISHED
BNoah replied to BNoah's topic in - Build logs for subjects built 1901 - Present Day
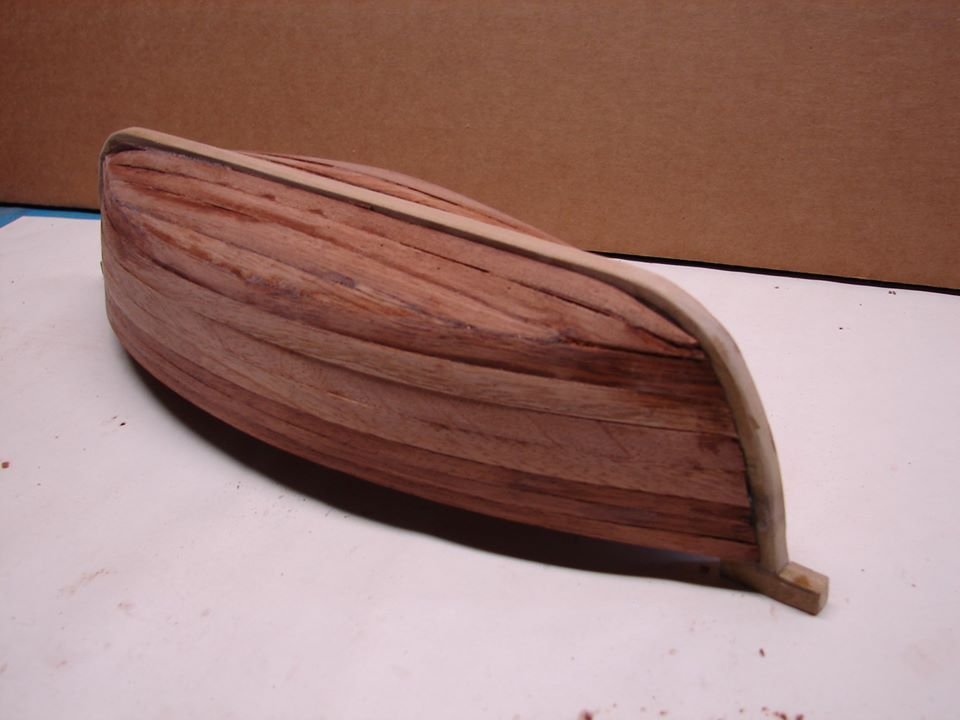
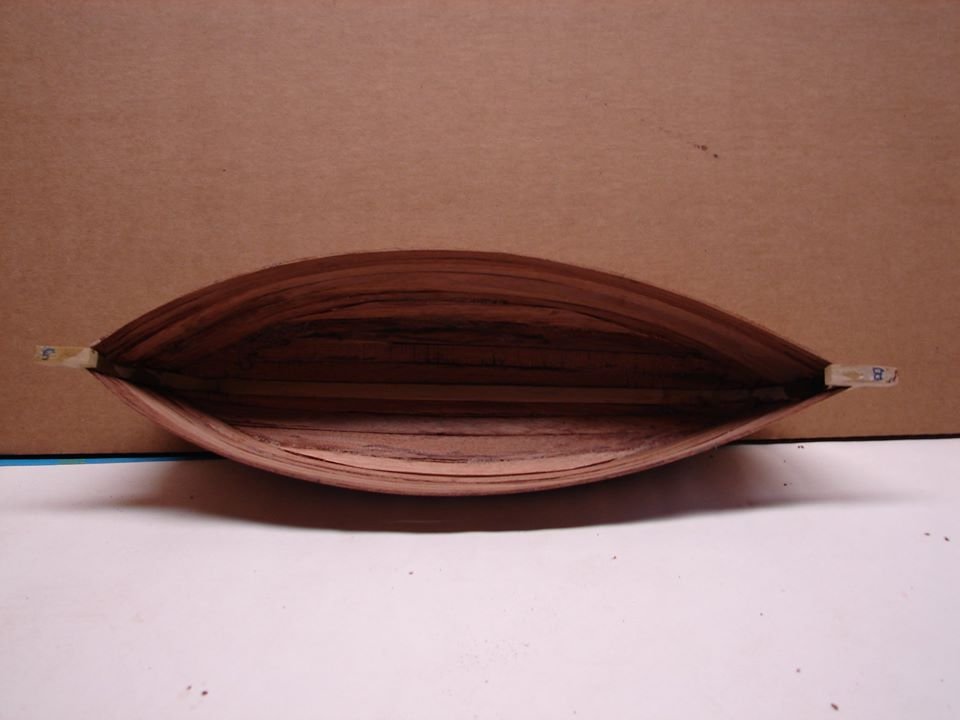
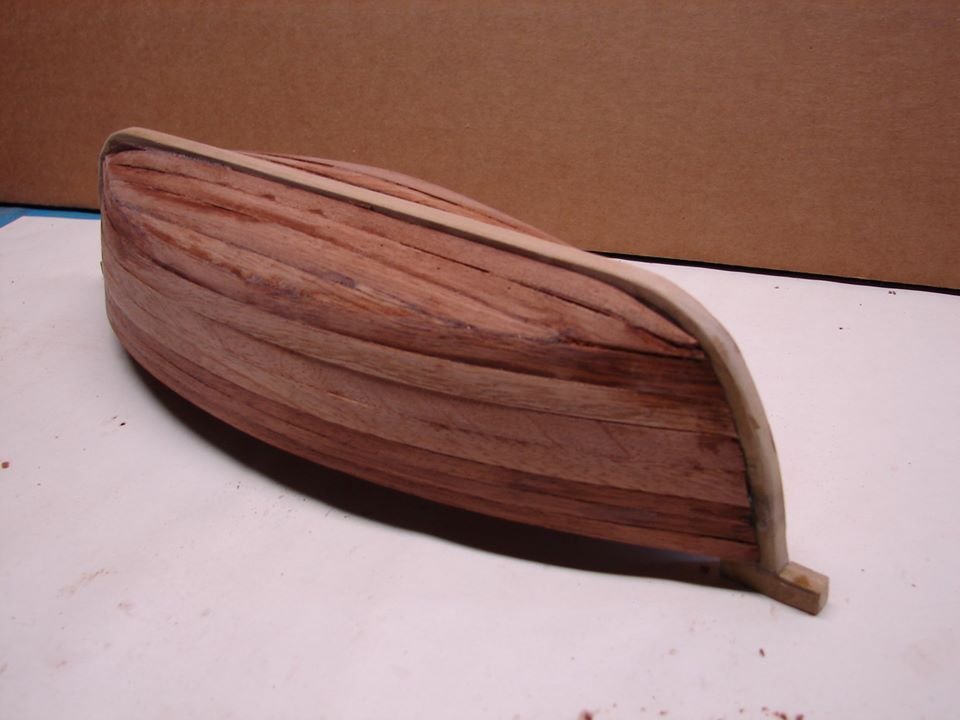
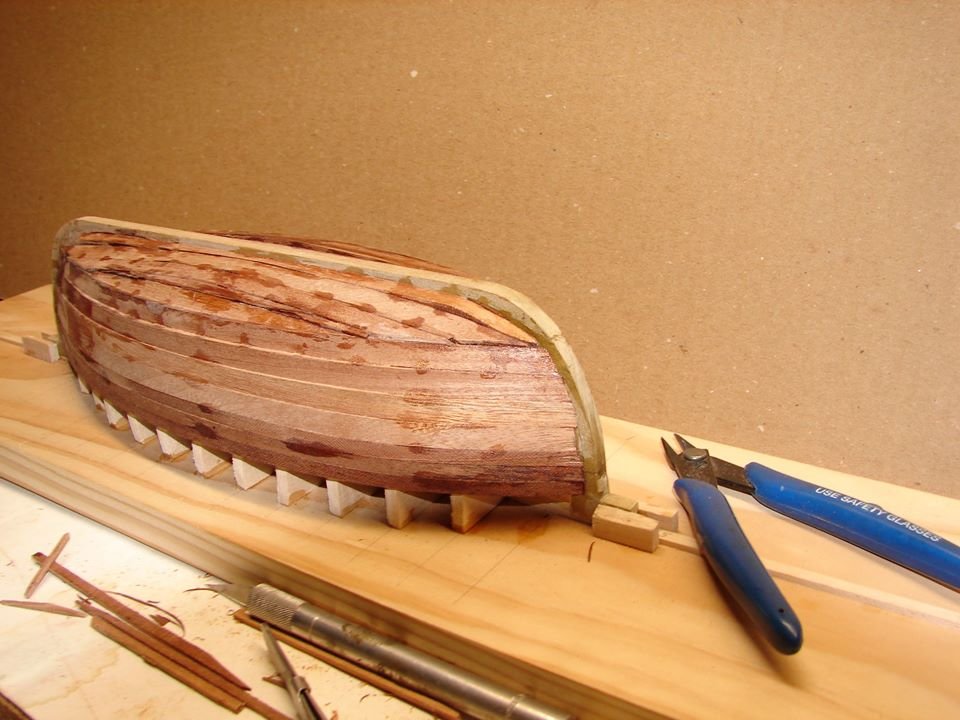
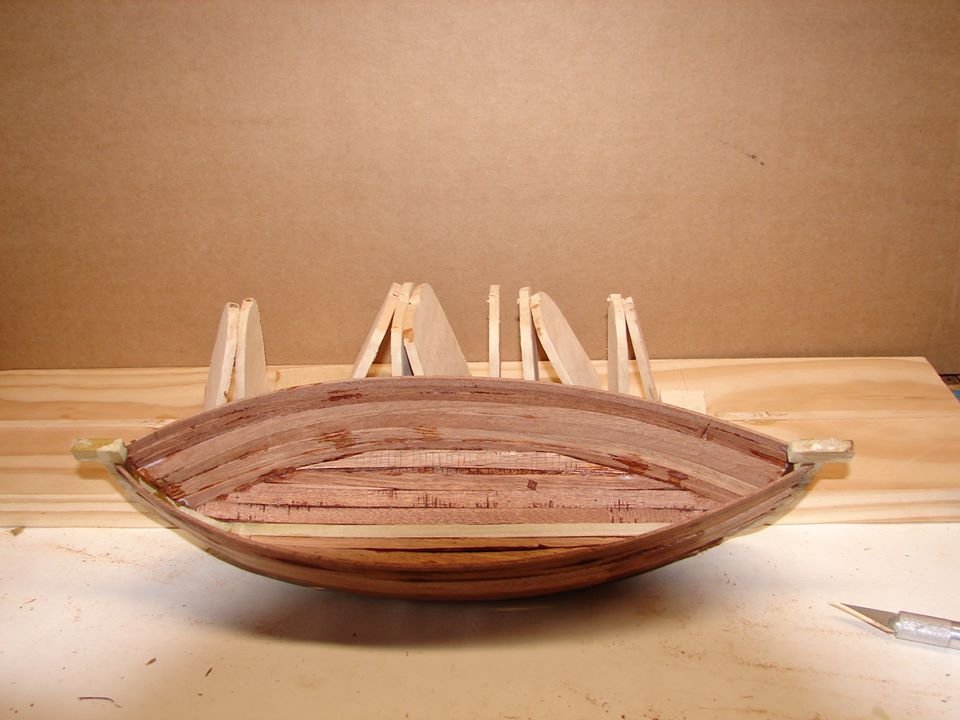
JAMES CAIRD: Build Continued -- January 3, 2019 This stage has been a real grind. The boat has been hand-sanded and shaped and it still looks battered, which is good. The Caird was damaged as it made its way over and through pack ice. Its sides were raised by salvaging another lifeboat (notice the top three strakes are narrower than the remainder). The seams were calked using hemp rope and the oil paints of the expedition's artist. Later I will add a "tingle" patch to the bow where it was stove. The model has gone from being just eggshell fragile to feeling like origami. I'll hold off removing the mounting blocks on the bow and stern but proceed with placing the 40 ribs. It really needs the reinforcement.- 12 replies
-
- james caird
- boat
-
(and 1 more)
Tagged with:
-

James Caird by BNoah - FINISHED
BNoah replied to BNoah's topic in - Build logs for subjects built 1901 - Present Day
JAMES CAIRD: Build Continued -- December 20, 2018 The planking is completed and it looks pretty rough. It will have to be heavily sanded inside and out to achieve the proper lines. Sculpted really. But first it has to be released from the false frame by cutting through the support at the bow and stern. The boat can then be lifted off. It is just a fragile eggshell at this point.- 12 replies
-
- james caird
- boat
-
(and 1 more)
Tagged with:
-

James Caird by BNoah - FINISHED
BNoah replied to BNoah's topic in - Build logs for subjects built 1901 - Present Day
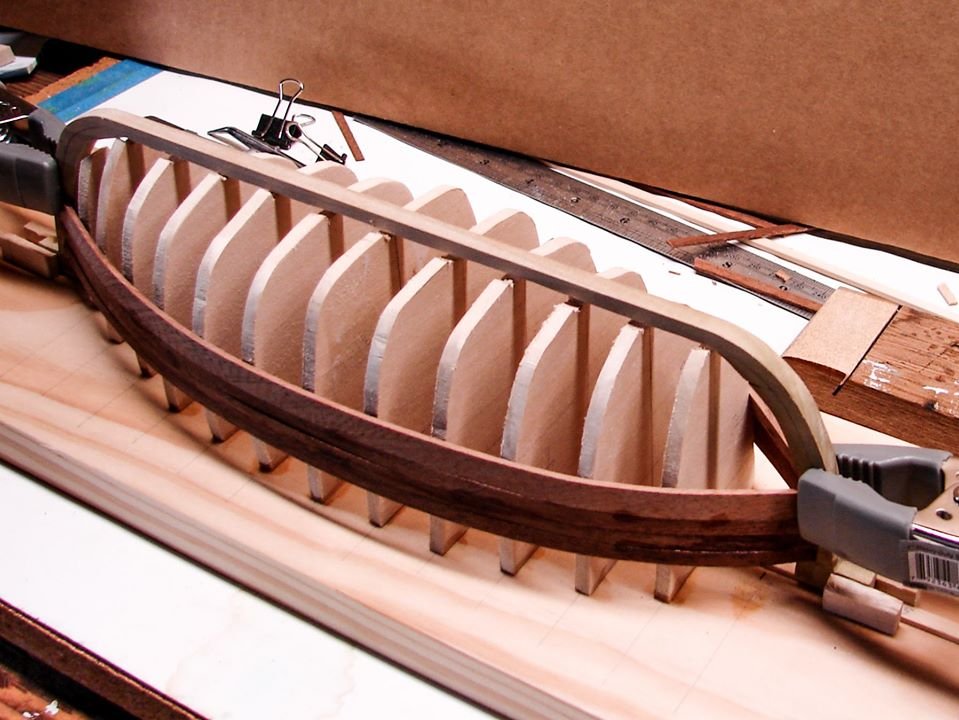
JAMES CAIRD: Build Continued -- December 17, 2018 I have placed the top staves, molding them to the false frame and attaching them to the keel and each other. Due to the curves involved I have used a heavier plank than on previous builds and am encountering physical difficulties that may make this the hardiest build yet, in-spite of its seeming simplicity. Staves were scavenged from one of the four life boats to provide the Caird more freeboard "on the ice" as the boat was man-hauled to the open sea to provide additional protection. Interior support used wood from provision boxes.- 12 replies
-
- james caird
- boat
-
(and 1 more)
Tagged with:
-

James Caird by BNoah - FINISHED
BNoah replied to BNoah's topic in - Build logs for subjects built 1901 - Present Day
JAMES CAIRD: Build Continued. December 13, 2018 The false frames have been cut and mounted. The hard part, placing and bending the staves now begins. Unlike my other builds, this has no internal support so once the false frame is planked the hull has to be removed like an egg shell. The only part from this step of the build which will remain in the final construction will be the keel.- 12 replies
-
- james caird
- boat
-
(and 1 more)
Tagged with:
-
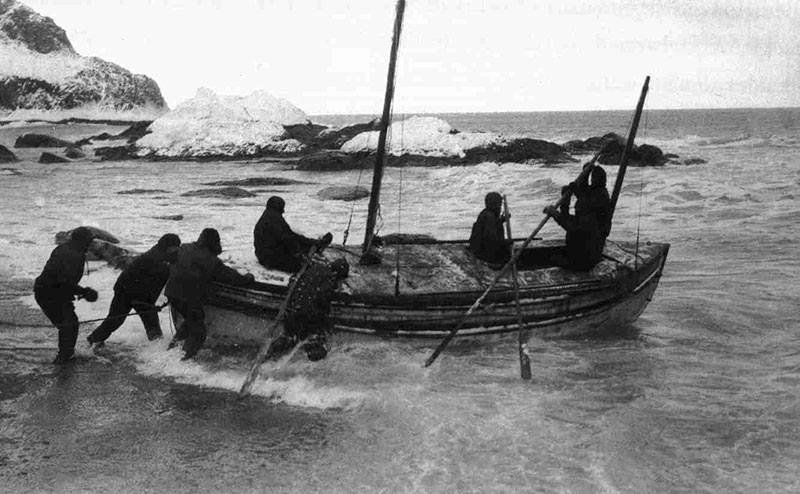
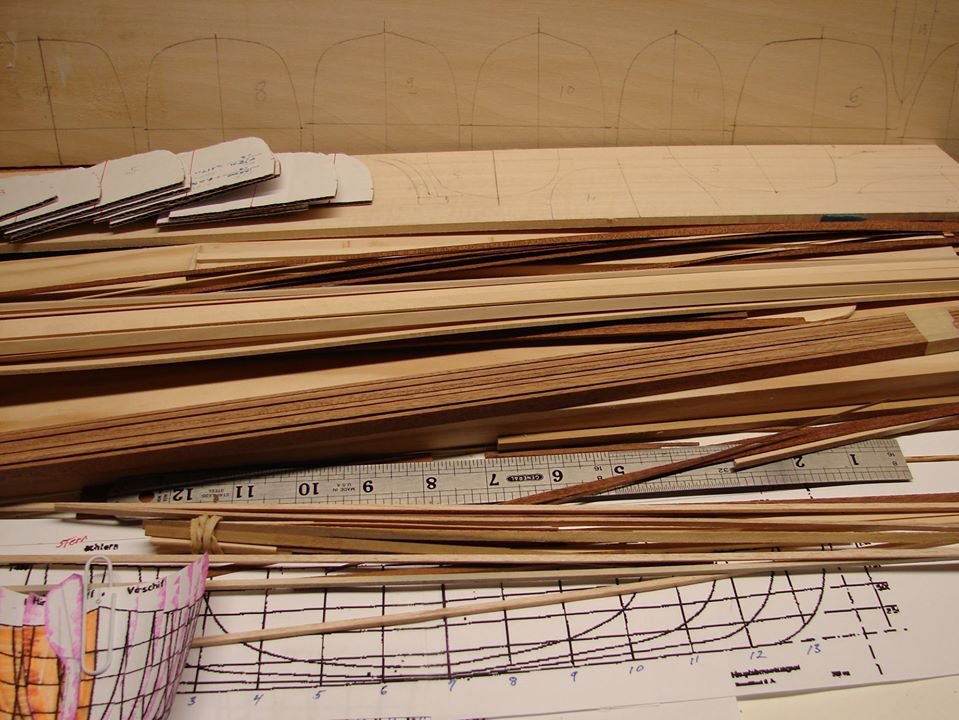
LAUNCHING the JAMES CAIRD: December 10, 2018 I've decided to do one last scratch ship model. For those of you not familiar with the "Caird" here is a summary of the voyage: After nearly a year being locked in Weddell Sea pack ice, the "Endurance," carrying Earnest Shackleton's "Trans Antarctic Expedition" sank in October 1915. Expedition members survived on the floating sea ice until April 1916 when they took to the sea in three of the ship's lifeboats and made their way to icebound Elephant Island in the South Polar Sea. Here, Shackleton had the largest of the boats, which he named the "James Caird" for one of the expedition's sponsors, prepared for a journey of nearly 700 miles to a Norwegian whaling station on the southeast coast of South Georgia Island. He was successful and his men were rescued and returned to England without loss of life. The black and white photo is of the launching of the Caird from Elephant Island. These and other expedition photographs supply some details for the build. I contacted Dulwich College where a restored Caird is displayed. They graciously provided a sketch of the boat’s lines and two “below deck” photographs of the boat’s interior. These were invaluable. The book, “Shackleton’s Boat: The Story of the James Caird,” by Harding McGregor Dunnett provided valuable details on conflicting descriptions of the boat’s details, restoration, depredations, and repairs. I hope I get this all right. The color photograph: I've reckoned the boats Lines, prepared templates, sketched the false frames and gathered materials to start the build. Should be successful in a couple of years. If it is a bust, I can always consign it to a fiery Viking funeral. For Posting.docx
- 12 replies
-
- james caird
- boat
-
(and 1 more)
Tagged with:
-
MTaylor, The "James Caird" build is very (VERY) much in its infancy for me. Nonetheless, I appreciate the link and the tip. I will follow up when I'm ready to make a commitment. Best regards, BNoah
- 59 replies
-
- fram
- polar exploration
-
(and 1 more)
Tagged with:
-
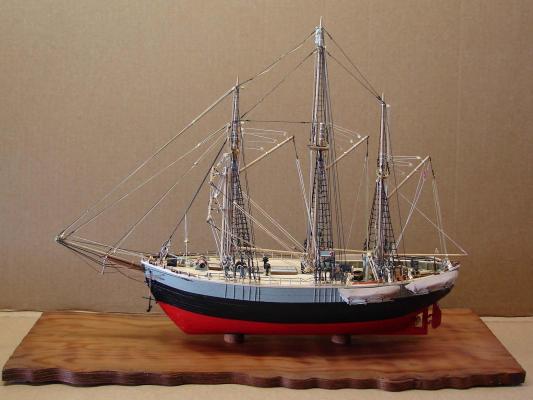
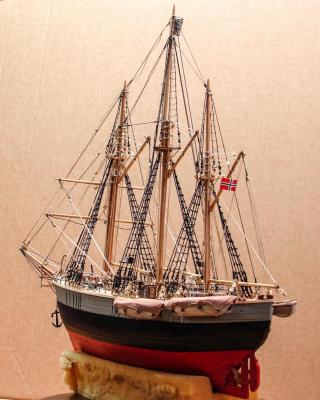
COMPLETE & DONE February 15, 2016 I'm finished and she is mounted on her display board. Done, done, done. I want to thank all of you who have offered encouragement and suggestions throughout this build. You buoyed my spirits at some low periods (definitely a plus of belonging to this forum has been the support) and offered key ideas at others. Nic Damuck of BlueJacket has my particular thanks for going above and beyond in answering parts questions for me. I know I said that this was my last effort at scratch model ship building, but , , , if I could find a good plan set or even photographs of the interior of Shackleton's James Caird, I just might try again.
- 59 replies
-
- fram
- polar exploration
-
(and 1 more)
Tagged with:
-
Mark, Ohhhhhhhhhhhhhhhhhh, too late. I used tung oil last evening and put the second coat on this morning already. BNoah
- 59 replies
-
- fram
- polar exploration
-
(and 1 more)
Tagged with:
-
David, Thank you for your interest and help. BNoah
- 59 replies
-
- fram
- polar exploration
-
(and 1 more)
Tagged with:
-
dgbot, Thank you for your comment, but I want to understand your suggestion. I chose a curly redwood because I thought the wood, if treated correctly would result in a sense of a rolling sea. The plank you see is the back side of the piece I intend on using as the base for the model support. The "curliness" of the grain seems not to be coming through strongly although the other grain does. Do you think this much grain overpowers the model? I'm open to suggestions. Thanks, bnoah
- 59 replies
-
- fram
- polar exploration
-
(and 1 more)
Tagged with:
-
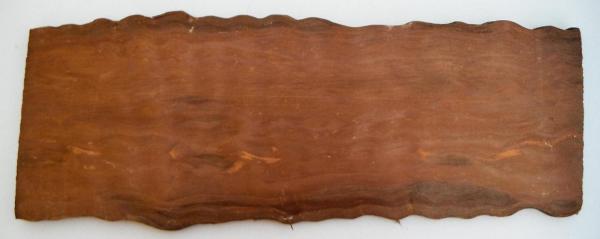
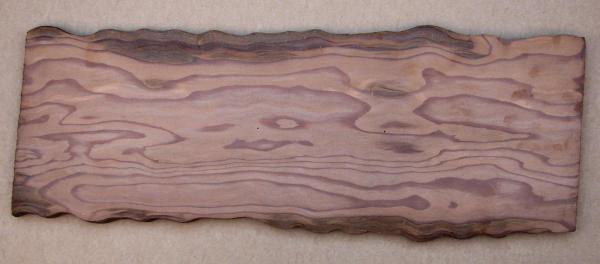
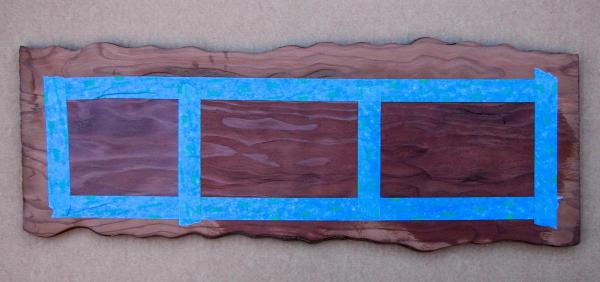
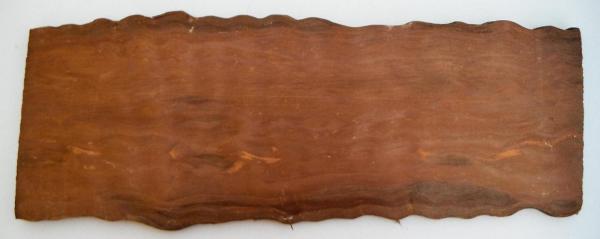
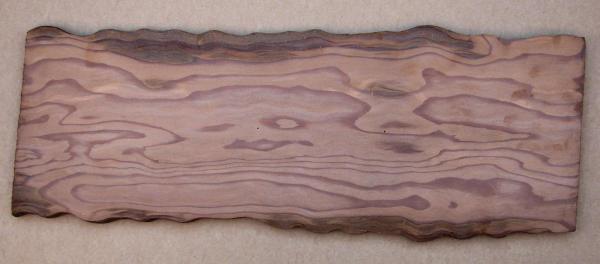
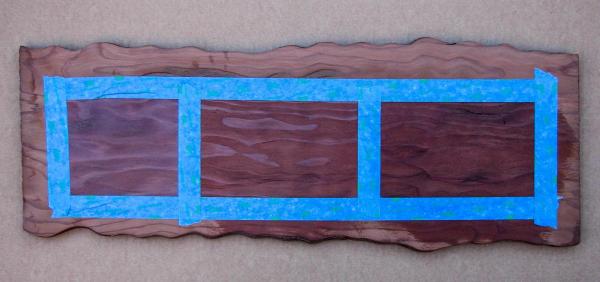
TESTING WOOD TREATMENTS February 11, 2016 I've taken the redwood blank (see my August 11, 2015 posting and the first photo image below), sanded it (second image) and on the back tested three wood treatments. From left to right they are: a satin urethane finish recommended by a wood working specialty shop in Sacramento, Tung oil, and Danish oil. None of them bring out the "curly" nature of the wood grain as I had hoped. Unfortunately, the photo images do not give a "real" color. I will set this aside for a few days and think about how I am to proceed.
- 59 replies
-
- fram
- polar exploration
-
(and 1 more)
Tagged with:
-
TREATMENT TESTING February 16, 2015 I've taken the planned wood blank (First Photo below) and sanded it (Second Photo below). I have been unable to find locally some of the treatments suggested by Forum responders. I have used the back of the blank to test from left to right: A satin urethane finish recommended by a woodworking specialty shop in Sacramento, Tung Oil and Danish Oil (Third Photo below). Unfortunately, even trying to adjust the images, I have not been able to achieve "real" color. None of the treatments have brought out the curly nature of the grain. They just seem to darken the overall nature of the wood.
-
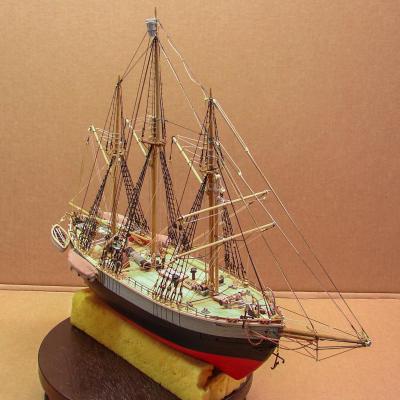
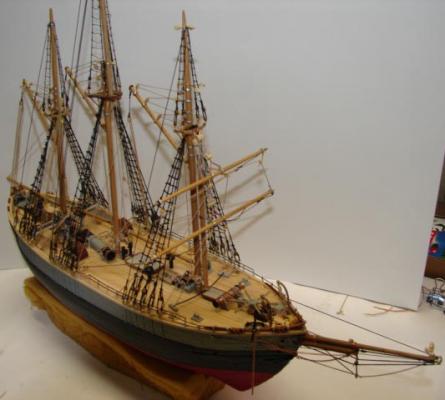
COMPLETE but not DONE February 9, 2016 I've completed the build! The standing and running rigging has been completed and the ship's boats have been slung. The Norwegian flag has been raised so it must be complete. But she isn't really done until I've prepared the display stand. I'll turn my attention to that next.
- 59 replies
-
- fram
- polar exploration
-
(and 1 more)
Tagged with:
-
John, Thank you for your responses. I'm having indifferent success producing and securing facsimile wire cable, and so, I think I shall take your advice to Grsjax to heart.
-
Anyone, I have another wire rope question. I'm building a model of the Norwegian topmast schooner Fram, launched 1892. A photo in my personal collections taken over 40 years ago of this ship in Oslo clearly shows wire cable (rope) supporting the foremast and bowsprit. I know that wire rope was invented in Germany in the 1830s. Would it have been in common use on sailing ships at the end of the 19th century, or is what I see in the picture part of a 20th century restoration and inappropriate for my model. Thank you in advance, BNoah
-
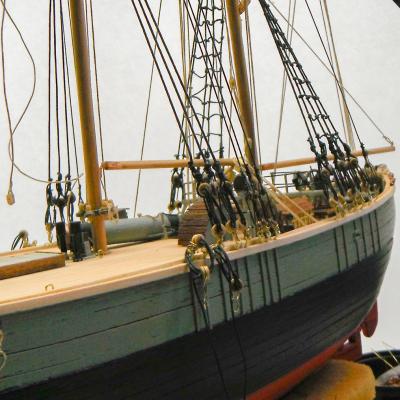
STEPPED FOREMAST January 21, 2016 It has been a long hiatus of four months since my last posting. Late last September I set the Fram aside in my garage workshop and placed a paper dust cover over her as I prepared for a trip to the San Juan Islands in Washington State. When I returned three weeks later I was dismayed to discover that some vermin had broken fittings on the un-stepped foremast and damaged completed rigging on the model. It really put me off because it meant I had to undo some hard work to be able to make the repairs. I just couldn't face it. It dates me, but I was just bummed out. I set her aside inside the house and have concentrated on the holidays and grandchildren. Last week I made the repairs, and have now completed stepping the fore and snow masts & rigging them as shown in the picture below. Next I'll complete the ship's rigging and mount the ship's four boats. Tomorrow I'll go see "In the Heart of the Sea." I've put that off too long too.
- 59 replies
-
- fram
- polar exploration
-
(and 1 more)
Tagged with:
-
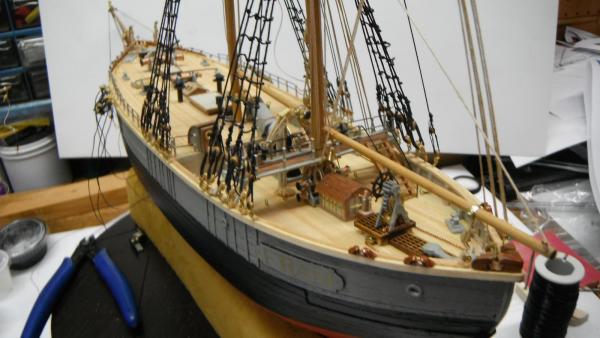
MORE DETAILS COMPLETED September 17, 2015 The fore deck railings and the Fram's name plate have been completed and installed. The bridge is also visible in this view. The side lights have also been constructed and are visible to the right of the snips next to the foam dry dock.
- 59 replies
-
- fram
- polar exploration
-
(and 1 more)
Tagged with:
-
Thank you for kind thoughts and suggestions. Been down most of those roads. Meloxicam helps. Pressure on tools causes tremor which makes it difficult to achieve the accuracy I envision. Enough of this, Nebraska lost yesterday, so time to get back to the ship.
- 59 replies
-
- fram
- polar exploration
-
(and 1 more)
Tagged with:
-
The family curse of osteoarthritis. I can no longer grip and hold small tools steady. Pin vise is an absolute killer.
- 59 replies
-
- fram
- polar exploration
-
(and 1 more)
Tagged with:
-
STEPPING THE MASTS September 5, 2015 I've stepped the main and mizzen masts. There will no problems, but as usual, the shrouds and ratline knots give me fits. I wonder if I'd started this 40 years ago if I would have been steadier and achieved a better look. It is hard to see, but I did place the bridge with the mizzen. Perhaps a subsequent posting will show it better. I will have to place the railings on the main deck before placing the foremast. Otherwise I may not be able to work behind the shrouds. All-in-all, while not a museum quality model, I'm feeling good about it. I'll be happy when it is done and feel a sense of accomplishment, but I'll be sad too I think, knowing it will be the last build I'll ever do. Guess it is time to start looking for a Chapter of the Sons of Norway who may want it. Progress will slow now through the end of the year. Nebraska football starts today. Go Huskers!
- 59 replies
-
- fram
- polar exploration
-
(and 1 more)
Tagged with:
About us
Modelshipworld - Advancing Ship Modeling through Research
SSL Secured
Your security is important for us so this Website is SSL-Secured
NRG Mailing Address
Nautical Research Guild
237 South Lincoln Street
Westmont IL, 60559-1917
Model Ship World ® and the MSW logo are Registered Trademarks, and belong to the Nautical Research Guild (United States Patent and Trademark Office: No. 6,929,264 & No. 6,929,274, registered Dec. 20, 2022)
Helpful Links
About the NRG
If you enjoy building ship models that are historically accurate as well as beautiful, then The Nautical Research Guild (NRG) is just right for you.
The Guild is a non-profit educational organization whose mission is to “Advance Ship Modeling Through Research”. We provide support to our members in their efforts to raise the quality of their model ships.
The Nautical Research Guild has published our world-renowned quarterly magazine, The Nautical Research Journal, since 1955. The pages of the Journal are full of articles by accomplished ship modelers who show you how they create those exquisite details on their models, and by maritime historians who show you the correct details to build. The Journal is available in both print and digital editions. Go to the NRG web site (www.thenrg.org) to download a complimentary digital copy of the Journal. The NRG also publishes plan sets, books and compilations of back issues of the Journal and the former Ships in Scale and Model Ship Builder magazines.


