BNoah
-
Posts
60 -
Joined
-
Last visited
Recent Profile Visitors
676 profile views


-
 GrandpaPhil reacted to a post in a topic:
James Caird by BNoah - FINISHED
GrandpaPhil reacted to a post in a topic:
James Caird by BNoah - FINISHED
-
GrandpaPhil reacted to a post in a topic:
James Caird by BNoah - FINISHED
-
GrandpaPhil reacted to a post in a topic:
James Caird by BNoah - FINISHED
-
GrandpaPhil reacted to a post in a topic:
James Caird by BNoah - FINISHED
-
GrandpaPhil reacted to a post in a topic:
James Caird by BNoah - FINISHED
-
GrandpaPhil reacted to a post in a topic:
James Caird by BNoah - FINISHED
-
GrandpaPhil reacted to a post in a topic:
James Caird by BNoah - FINISHED
-
GrandpaPhil reacted to a post in a topic:
James Caird by BNoah - FINISHED
-
BNoah reacted to a post in a topic:
James Caird by BNoah - FINISHED
-
Sea Hoss reacted to a post in a topic:
James Caird by BNoah - FINISHED
-
mtaylor reacted to a post in a topic:
James Caird by BNoah - FINISHED
-

James Caird by BNoah - FINISHED
BNoah replied to BNoah's topic in - Build logs for subjects built 1901 - Present Day
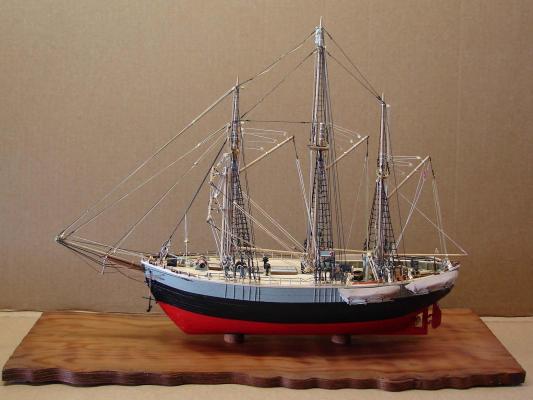
JAMES CAIRD: Build Completed -- September 3, 2019 This is it, I'm finished, the James Caird, she is done. I shall bore you no more. I've raised the masts, slung the standing as well as the running rigging, and raised the sails. I've had to take a few liberties at this stage. We know that shrouds were attached to four nails to hold the masts, but we don't know how the shrouds were secured other that there were no deadeyes available to supply tension. I've used a "midshipman's knot" which would have allowed the crew to supply or decrease tension as necessary. Only one of the original oarlocks exists. It was easy to place a mate on the opposite side of the boat but it is unknown where the other two described in diaries were located. I placed them so that they were accessible to an oarsman in the cockpit. Finally, we can see in period photos that a wind telltale or dogvane was on the top of both masts but we don't know if they were flags or just scraps of cloth. Shackleton's sledging pennant was a simple white field with parallel blue stripes, so that is what has been placed on the main mast.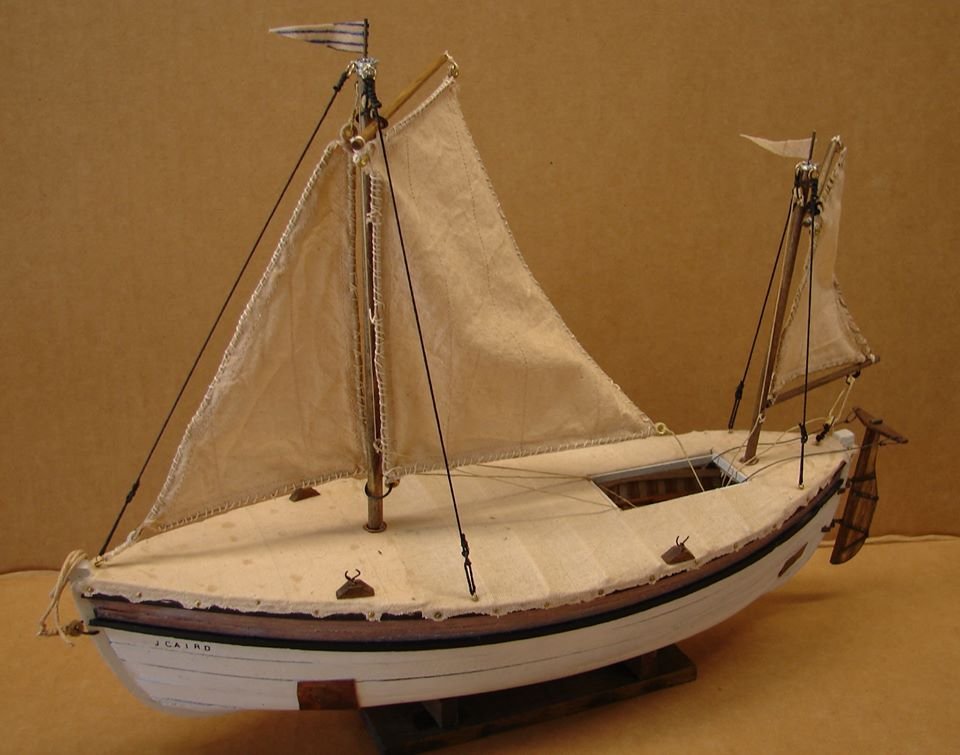
- 12 replies
-
- 5
-
-
- james caird
- boat
- (and 1 more)
-
James Caird by BNoah - FINISHED
BNoah replied to BNoah's topic in - Build logs for subjects built 1901 - Present Day
JAMES CAIRD: Build Continued -- August 22, 2019 The stretching of the canvas deck has been completed with the edges trimmed and pegged as in the original. The cockpit has been boxed. The masts have been set dry, so rigging of sails, standing and running rigging can begin.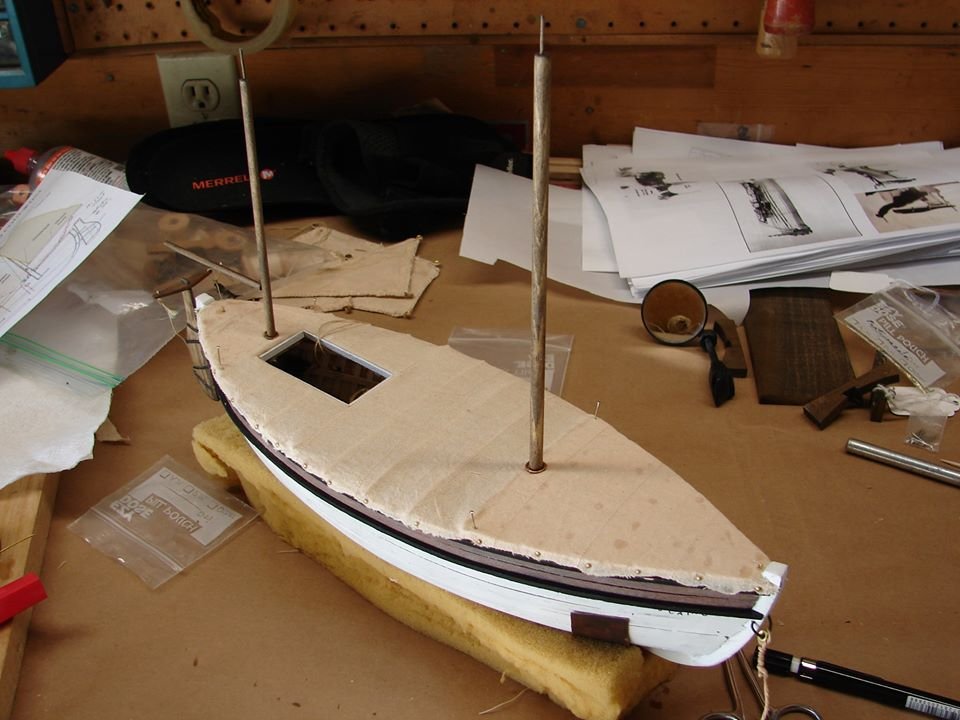
- 12 replies
-
- 3
-
-
- james caird
- boat
- (and 1 more)
-
James Caird by BNoah - FINISHED
BNoah replied to BNoah's topic in - Build logs for subjects built 1901 - Present Day
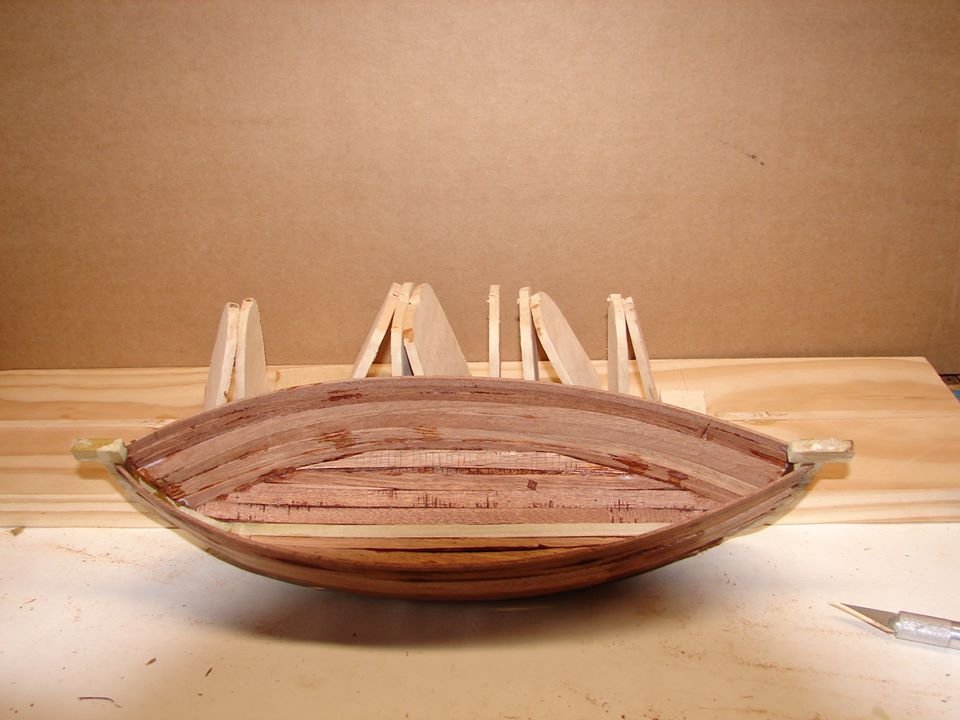
JAMES CAIRD: Build Continued -- January 18, 2019 We've (The "Caird" and I) made some progress since my last posting. The mounting blocks were finally cut away leaving just the bow and stern posts. The ribbing, interior wales and the exterior bumpers have been added. It begins to look like something. In the original when the sides were raised, Shackleton's carpenter cannibalized wooden packing cases as extensions between the boat's original ribs for support. That is why these are unpainted wood whereas the original boat was painted white. There is still a long way to go . . . but perhaps it is time for me to talk to my sail maker about getting that part of the project started.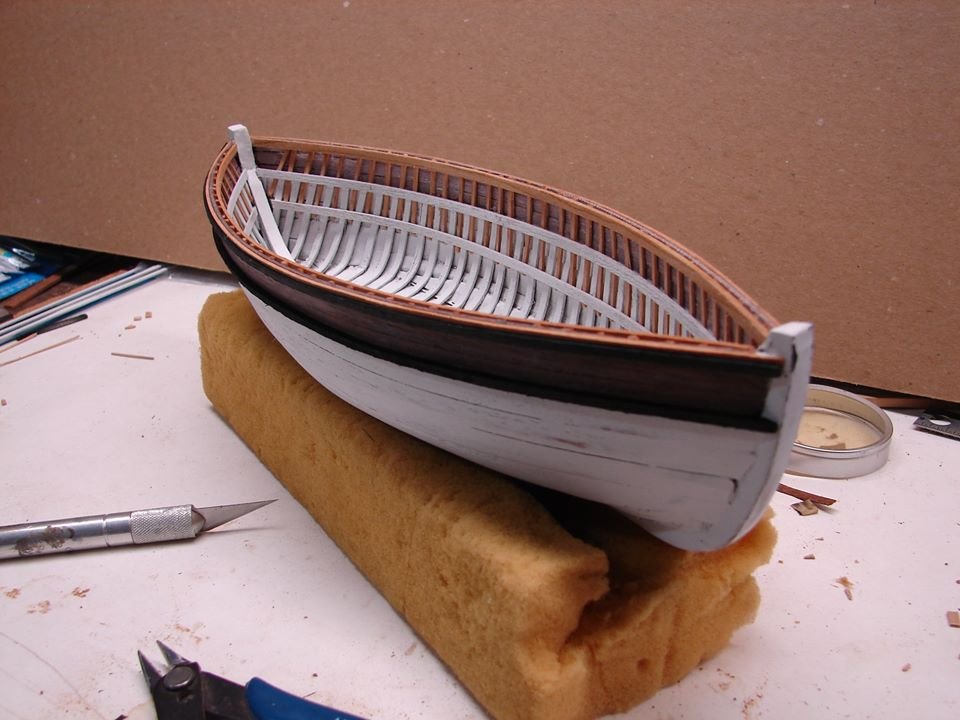
- 12 replies
-
- 2
-
-
- james caird
- boat
- (and 1 more)
-
James Caird by BNoah - FINISHED
BNoah replied to BNoah's topic in - Build logs for subjects built 1901 - Present Day
JAMES CAIRD: Build Continued -- January 3, 2019 This stage has been a real grind. The boat has been hand-sanded and shaped and it still looks battered, which is good. The Caird was damaged as it made its way over and through pack ice. Its sides were raised by salvaging another lifeboat (notice the top three strakes are narrower than the remainder). The seams were calked using hemp rope and the oil paints of the expedition's artist. Later I will add a "tingle" patch to the bow where it was stove. The model has gone from being just eggshell fragile to feeling like origami. I'll hold off removing the mounting blocks on the bow and stern but proceed with placing the 40 ribs. It really needs the reinforcement.
- 12 replies
-
- 2
-
-
- james caird
- boat
- (and 1 more)
-
James Caird by BNoah - FINISHED
BNoah replied to BNoah's topic in - Build logs for subjects built 1901 - Present Day
JAMES CAIRD: Build Continued -- December 20, 2018 The planking is completed and it looks pretty rough. It will have to be heavily sanded inside and out to achieve the proper lines. Sculpted really. But first it has to be released from the false frame by cutting through the support at the bow and stern. The boat can then be lifted off. It is just a fragile eggshell at this point.
- 12 replies
-
- 2
-
-
- james caird
- boat
- (and 1 more)
-
James Caird by BNoah - FINISHED
BNoah replied to BNoah's topic in - Build logs for subjects built 1901 - Present Day
JAMES CAIRD: Build Continued -- December 17, 2018 I have placed the top staves, molding them to the false frame and attaching them to the keel and each other. Due to the curves involved I have used a heavier plank than on previous builds and am encountering physical difficulties that may make this the hardiest build yet, in-spite of its seeming simplicity. Staves were scavenged from one of the four life boats to provide the Caird more freeboard "on the ice" as the boat was man-hauled to the open sea to provide additional protection. Interior support used wood from provision boxes.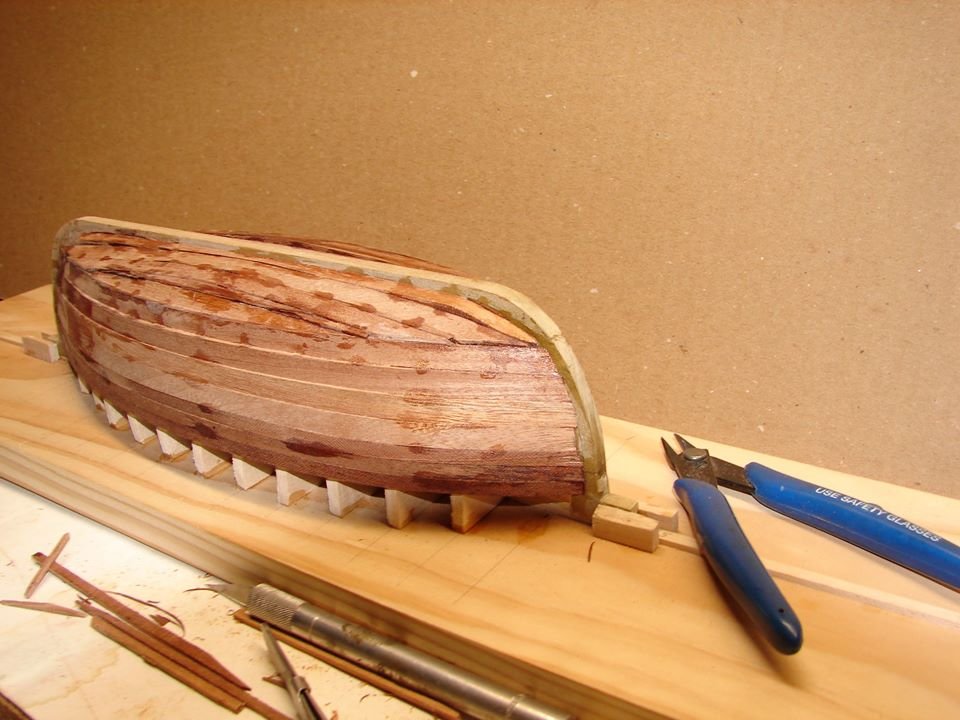
- 12 replies
-
- 2
-
-
- james caird
- boat
- (and 1 more)
-
James Caird by BNoah - FINISHED
BNoah replied to BNoah's topic in - Build logs for subjects built 1901 - Present Day
JAMES CAIRD: Build Continued. December 13, 2018 The false frames have been cut and mounted. The hard part, placing and bending the staves now begins. Unlike my other builds, this has no internal support so once the false frame is planked the hull has to be removed like an egg shell. The only part from this step of the build which will remain in the final construction will be the keel.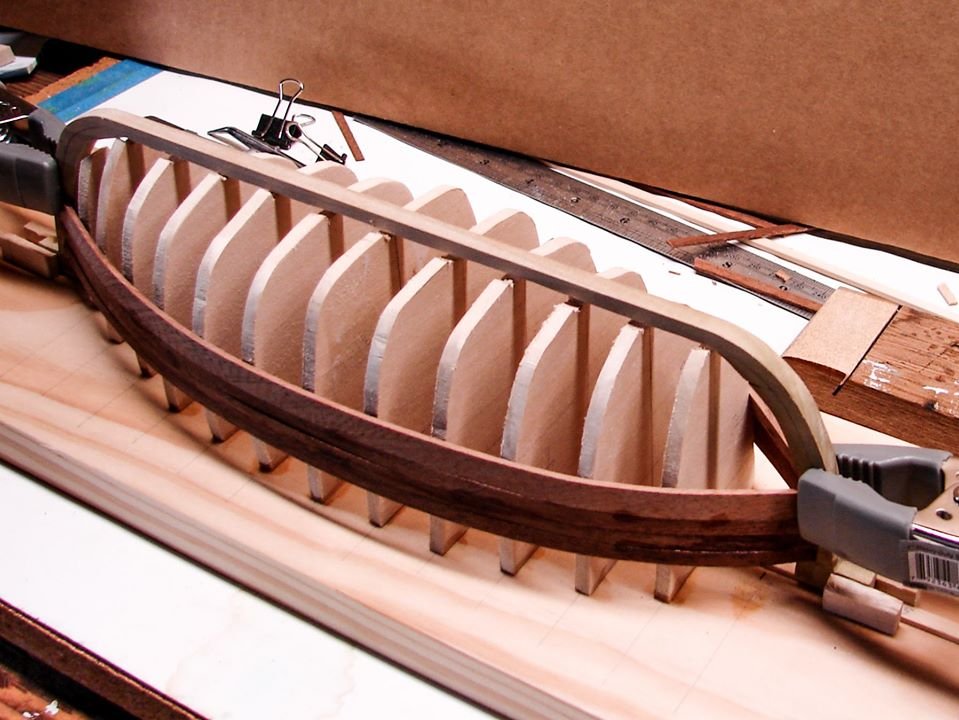
- 12 replies
-
- 1
-
-
- james caird
- boat
- (and 1 more)
-
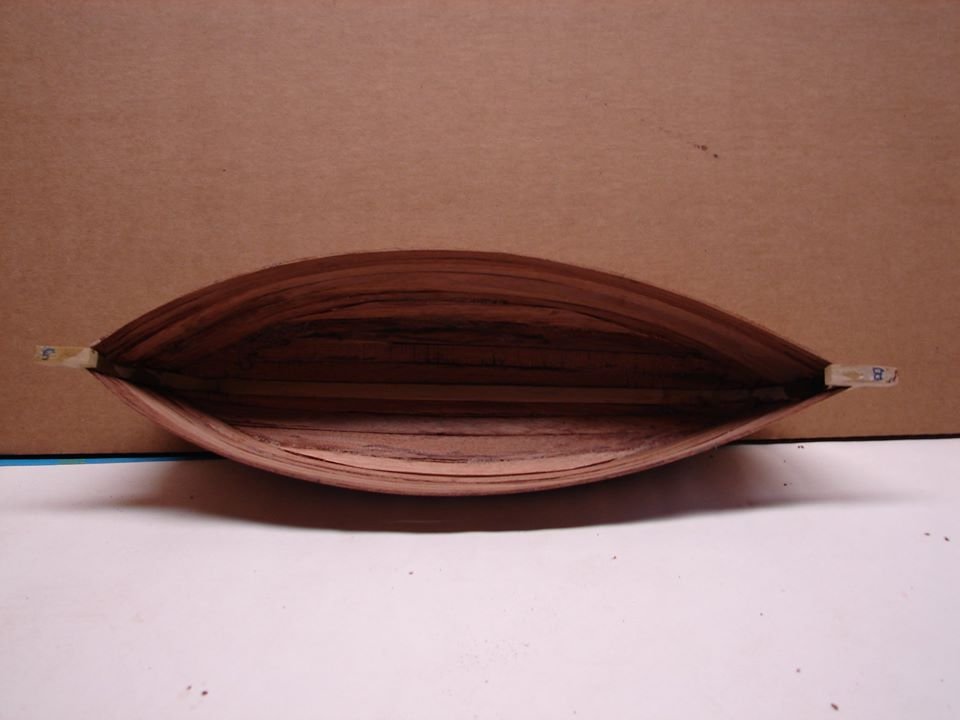
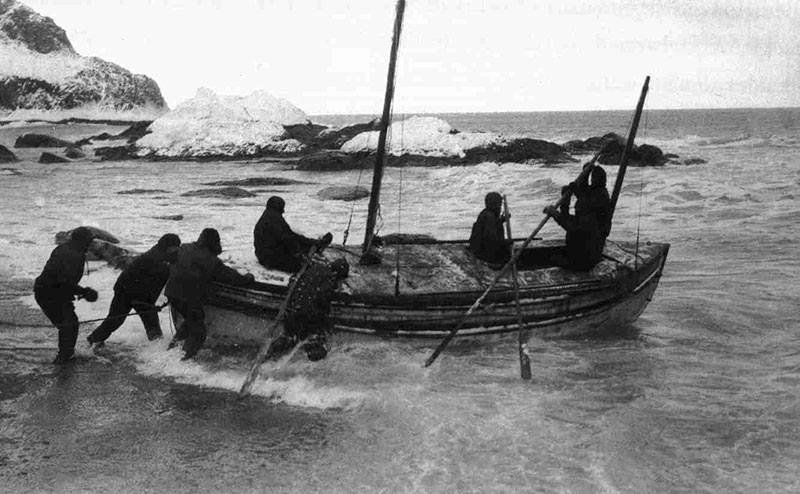
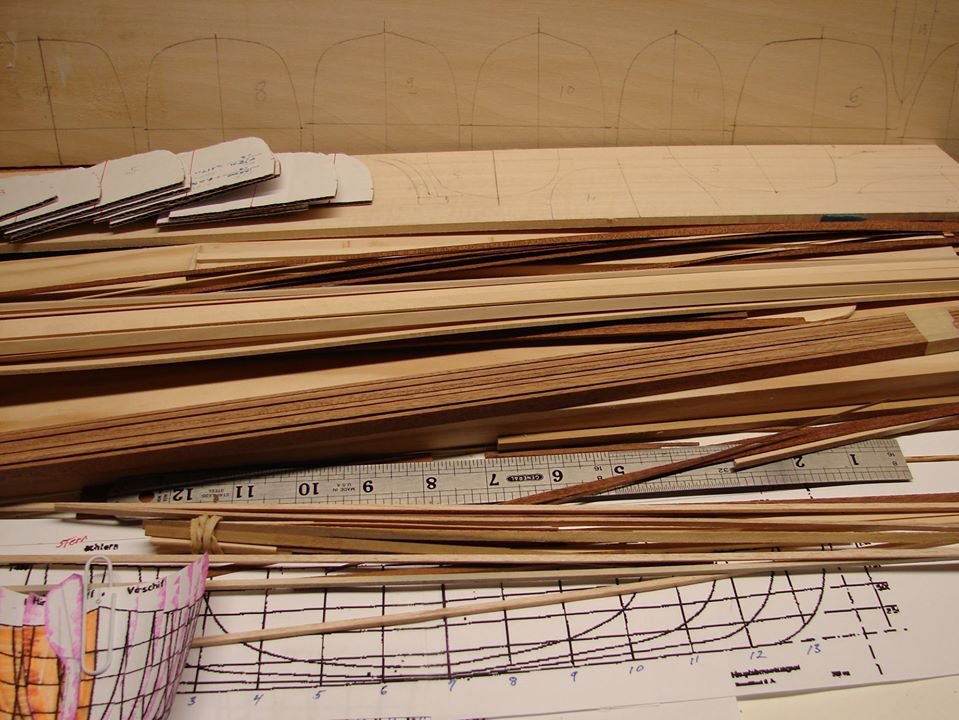
LAUNCHING the JAMES CAIRD: December 10, 2018 I've decided to do one last scratch ship model. For those of you not familiar with the "Caird" here is a summary of the voyage: After nearly a year being locked in Weddell Sea pack ice, the "Endurance," carrying Earnest Shackleton's "Trans Antarctic Expedition" sank in October 1915. Expedition members survived on the floating sea ice until April 1916 when they took to the sea in three of the ship's lifeboats and made their way to icebound Elephant Island in the South Polar Sea. Here, Shackleton had the largest of the boats, which he named the "James Caird" for one of the expedition's sponsors, prepared for a journey of nearly 700 miles to a Norwegian whaling station on the southeast coast of South Georgia Island. He was successful and his men were rescued and returned to England without loss of life. The black and white photo is of the launching of the Caird from Elephant Island. These and other expedition photographs supply some details for the build. I contacted Dulwich College where a restored Caird is displayed. They graciously provided a sketch of the boat’s lines and two “below deck” photographs of the boat’s interior. These were invaluable. The book, “Shackleton’s Boat: The Story of the James Caird,” by Harding McGregor Dunnett provided valuable details on conflicting descriptions of the boat’s details, restoration, depredations, and repairs. I hope I get this all right. The color photograph: I've reckoned the boats Lines, prepared templates, sketched the false frames and gathered materials to start the build. Should be successful in a couple of years. If it is a bust, I can always consign it to a fiery Viking funeral. For Posting.docx
- 12 replies
-
- 2
-
-
- james caird
- boat
- (and 1 more)
-
BNoah reacted to a post in a topic:
Fram by Tadeusz43 - scale 1:100 - polar exploration ship
-
I'm very excited to discover your build, and will watch your progress with great interest. Best regards and good luck. BNoah
-
MTaylor, The "James Caird" build is very (VERY) much in its infancy for me. Nonetheless, I appreciate the link and the tip. I will follow up when I'm ready to make a commitment. Best regards, BNoah
- 59 replies
-
- 1
-
-
- fram
- polar exploration
- (and 1 more)
-
BNoah reacted to a post in a topic:
Fram by BNoah - FINISHED - Scale 1:100 - as she appeared for Amundsen's 1910-1912 South Pole Expedition
-
COMPLETE & DONE February 15, 2016 I'm finished and she is mounted on her display board. Done, done, done. I want to thank all of you who have offered encouragement and suggestions throughout this build. You buoyed my spirits at some low periods (definitely a plus of belonging to this forum has been the support) and offered key ideas at others. Nic Damuck of BlueJacket has my particular thanks for going above and beyond in answering parts questions for me. I know I said that this was my last effort at scratch model ship building, but , , , if I could find a good plan set or even photographs of the interior of Shackleton's James Caird, I just might try again.
- 59 replies
-
- 9
-
-
- fram
- polar exploration
- (and 1 more)
-
Mark, Ohhhhhhhhhhhhhhhhhh, too late. I used tung oil last evening and put the second coat on this morning already. BNoah
- 59 replies
-
- 2
-
-
- fram
- polar exploration
- (and 1 more)
-
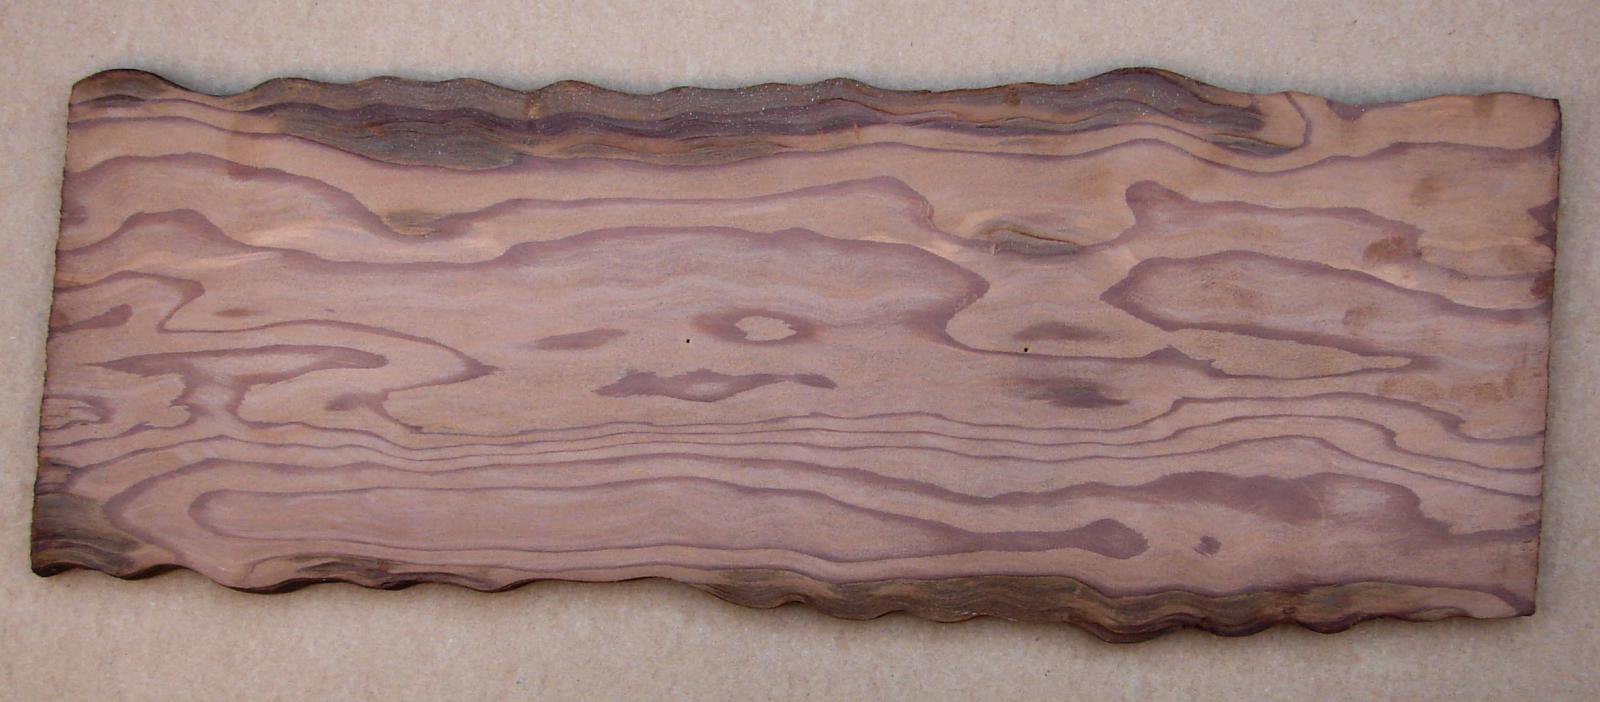
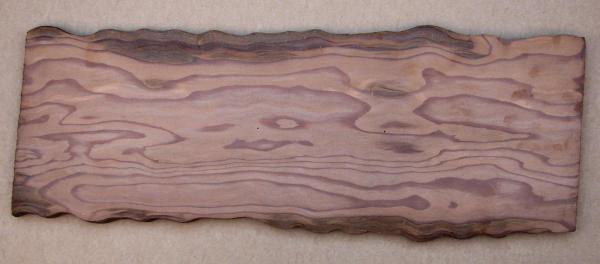
dgbot, Thank you for your comment, but I want to understand your suggestion. I chose a curly redwood because I thought the wood, if treated correctly would result in a sense of a rolling sea. The plank you see is the back side of the piece I intend on using as the base for the model support. The "curliness" of the grain seems not to be coming through strongly although the other grain does. Do you think this much grain overpowers the model? I'm open to suggestions. Thanks, bnoah
- 59 replies
-
- 3
-
-
- fram
- polar exploration
- (and 1 more)
-
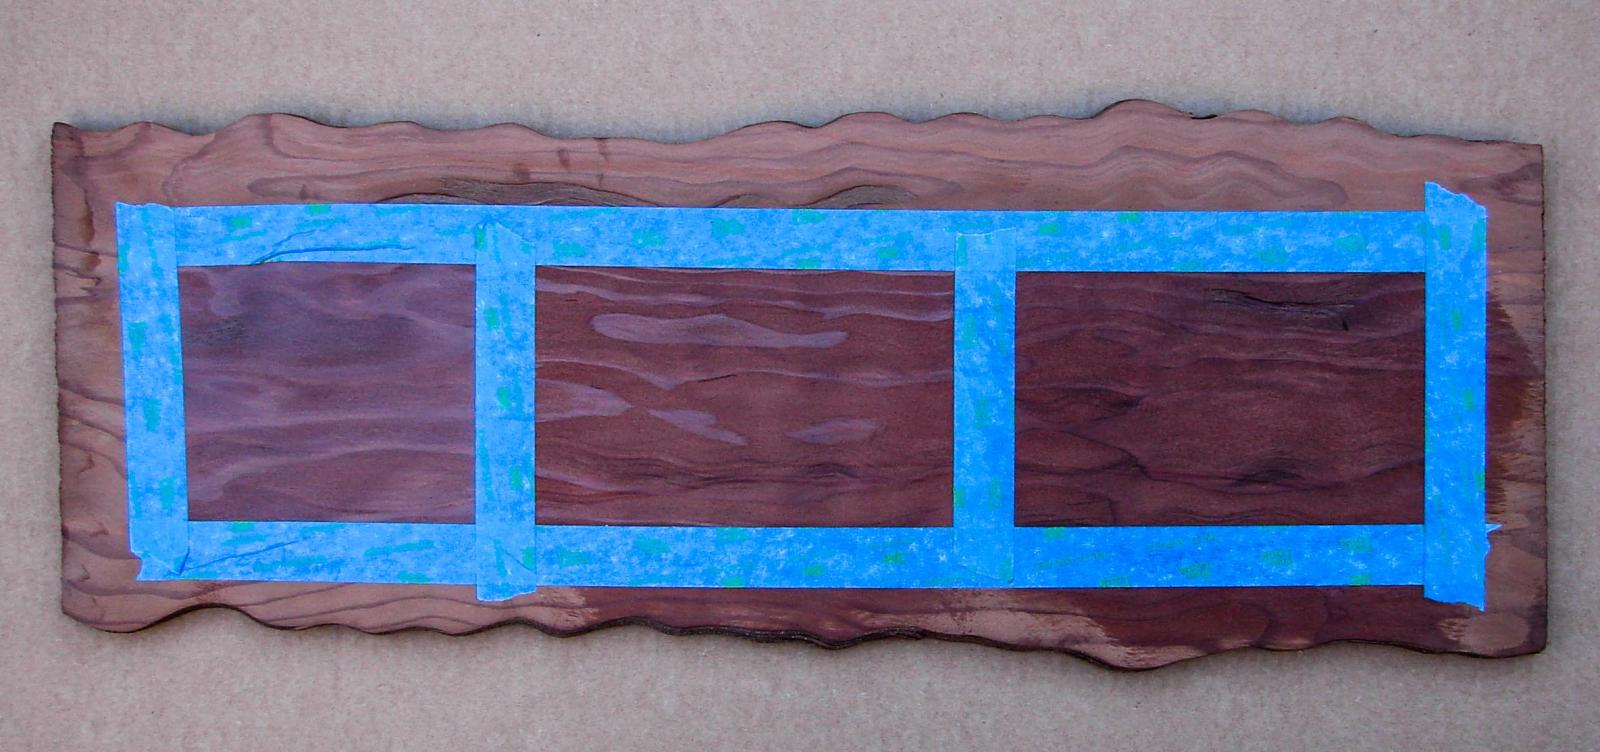
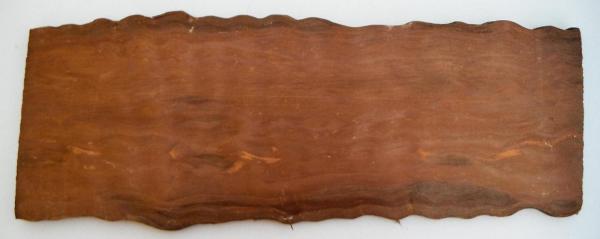
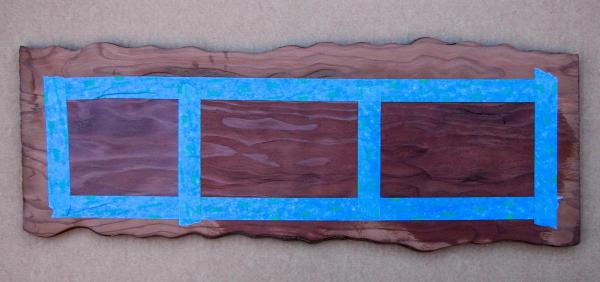
TESTING WOOD TREATMENTS February 11, 2016 I've taken the redwood blank (see my August 11, 2015 posting and the first photo image below), sanded it (second image) and on the back tested three wood treatments. From left to right they are: a satin urethane finish recommended by a wood working specialty shop in Sacramento, Tung oil, and Danish oil. None of them bring out the "curly" nature of the wood grain as I had hoped. Unfortunately, the photo images do not give a "real" color. I will set this aside for a few days and think about how I am to proceed.
- 59 replies
-
- 3
-
-
- fram
- polar exploration
- (and 1 more)