HOLIDAY DONATION DRIVE - SUPPORT MSW - DO YOUR PART TO KEEP THIS GREAT FORUM GOING! (Only 44 donations so far out of 49,000 members - C'mon guys!)
×


Drazen
-
Posts
389 -
Joined
-
Last visited
Content Type
Profiles
Forums
Gallery
Events
Everything posted by Drazen
-
 This would be possible to cut the curves, but wood has been bent also on the real ship. I think also about the direction of grain if the grain and the curvature are too strong. It is also more simple to put the piece of wood through the thicknesser (I use the Proxxon DH 40, excellent machine) and then bend. Many top modellers (our Russian friends Dobrenko, Dr. Mike and others) and my Croatian friend Mile Bijelić (won gold on World Championship twice) do use this method. I do not have concenn. Dražen
 -
I also like the Russian method with a needle a lot; Fast, very precise and realistic. Also: you use the wood for bolts - same as in the reality. Please, see my link where I explained it too: http://modelshipworld.com/index.php?/topic/911-de-zeven-provinciën-by-dražen-carić-scale-1-45-1665/?p=16266 Dražen
-
I use iron (or soldering iron) when doing thin pieces. This would not be easy/possible with this one (thickness: 8.5 mm). I have overbent the structure (having thick working gloves on) right after putting it out of the "steam engine". The fixation afterwards was even not holding a lot. Now, the wood is out and has perfectly the same shape. The steam engine has 100° C and the wood has been in it for approx. 1 hr. I (over)bent it right after getting it out. What I also observed... I did cut these wood pieces somewhere in October. Till February, they bent significantly in one direction due to drying in winter months - in summer they would bend in other direction. That is wood. Dražen
- 487 replies
-
- 1
-

-
- ship of the line
- 80 guns
- (and 1 more)
-
I like your transom a lot. It looks real. Which size is it? Which wood do you use? Dražen
-
I know this feeling - being boss of my own company (innovation management), making De Zeven Provincien, new high end Dynaudio loudspeaker boxes, bow for shooting, sports, and many other things ... at least, I feel no boring Dražen
-
Well, the lighting comes from above (opening for the ladders on the upper deck): In the reality, it should leave such impression. The gunports will be mostly closed on the lower deck, so no light from there. From gratings, there would be light coming in, but i neglected it since not directly above. The main issue for closing the lower gunports was for me that I don't like to much of the weapon showing out. I get a feeling of loosing the nice ship line. Also, I wanted to make a little different situation a usually. If you go to the, i think 2nd. or 3rd page if my log, you will find the HMS Prince, 1670 made by Mile Bijelić This model has also many nearly closed gunports. I will close most of mine on the lower deck - close them completely and leave just three slightly opened - more opened than Mile did on his model. With this, I believe to get a more realistic situation and an even better ship line expression. Still, I am going to represent all guns. Except the 36 pounder (lower deck), most of them will be still visible on the ship. I will show all guns once again near the model on the model stand - represented one after another in a row, including the 36 pounder - of each type one gun & bullet. Dražen
-
Thnk you Jan, ... so many things in life need to be disguised, isn't it Dražen
- 487 replies
-
- 1
-
-
- ship of the line
- 80 guns
- (and 1 more)
-
Jan, Normaly it should. I did bent it over slightly. The fixation is just for securing that no relaxation happens when getting completely dry. Dražen
-
Jan, do you mean if the curvature is right (it is) or... if they will stay in wished curvature after complete drying (more or less they should). ? Dražen
-
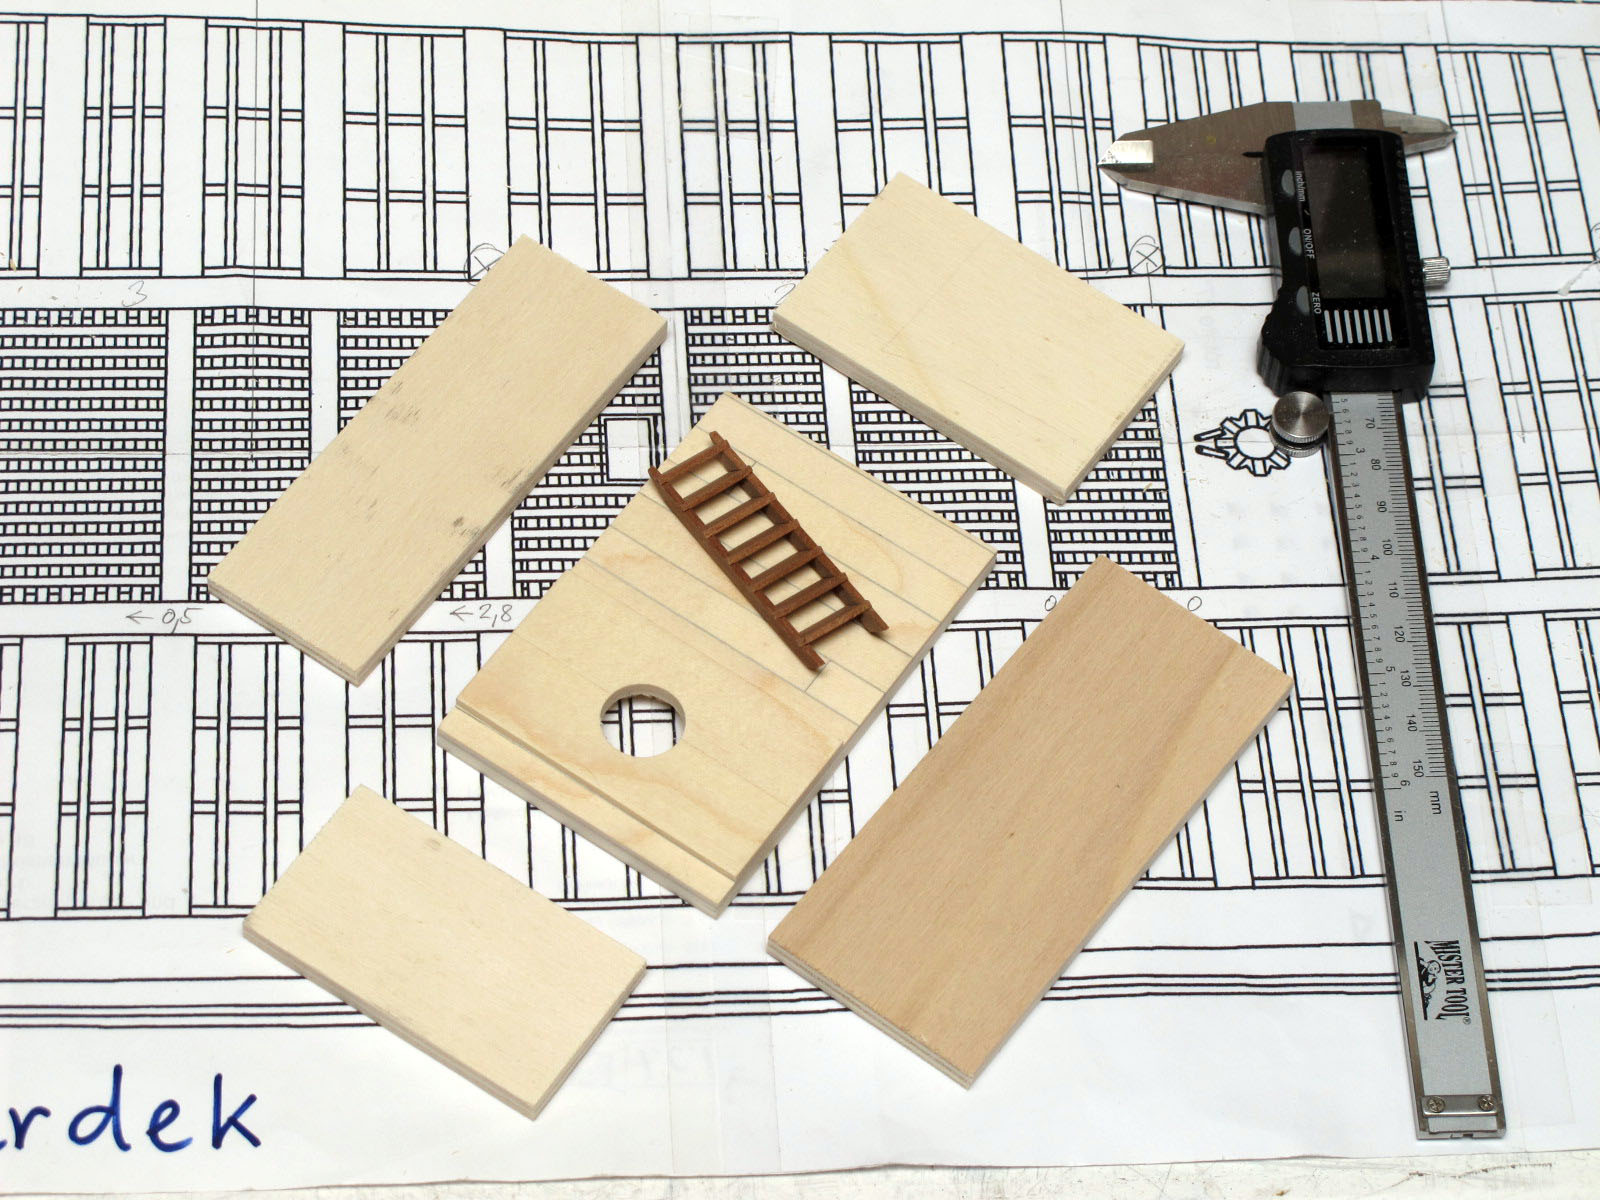
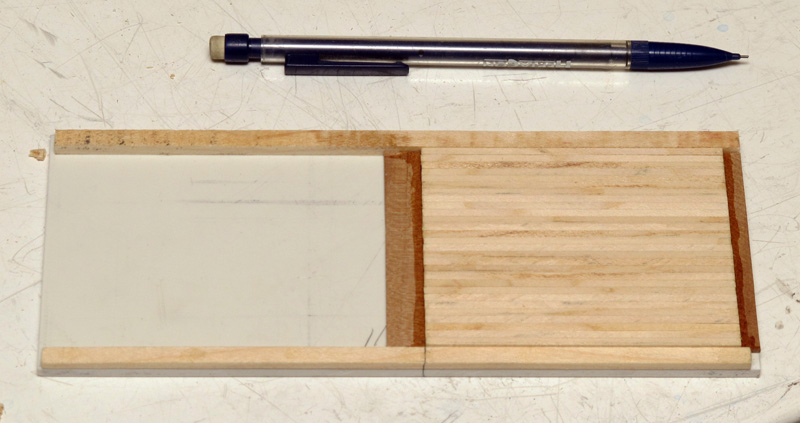
Today, I was airbrushing the ladder-box - the only part of the lower deck I will (slightly) show. The floor/deck part in the middle of the photo has already been pickled. Dražen

- 487 replies
-
- 4
-
-
- ship of the line
- 80 guns
- (and 1 more)
-
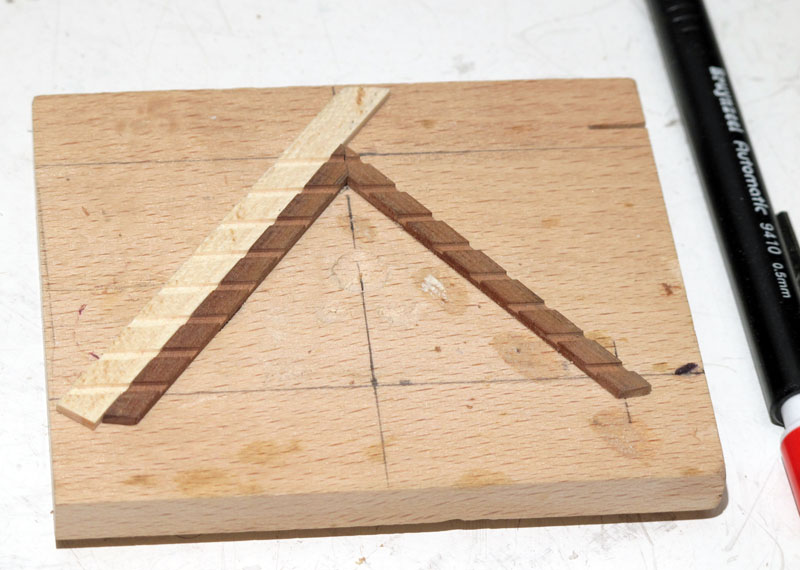
Later on I bent the beams and fixed them in the bench vice. There, I need to leave them a for week or more in order to dry properly. Important: On the outer side of the curve, I put a piece of a cheap wood - if something splits this will be the cheap wood and it will protect with its pressure the inner parts (parts I want to keep safe) from splitting. Dražen

- 487 replies
-
- 3
-
-
- ship of the line
- 80 guns
- (and 1 more)
-
The setup: I needed later on to hold (fix) the middle part of the pipe in high position - so the condensed water can run back or forth and not be jammed in the middle part. The steaming took approx. 30 minutes. Dražen

- 487 replies
-
- 4
-
-
- ship of the line
- 80 guns
- (and 1 more)
-
I put my wood in the box and close it with screws. Please, note the small opening on the lid (one cannot see it well, but it is pointing in your direction) where the condensed water runs out. This must be positioned down in order to allow all water run our. Othervise the wood gets soaked in the water. Dražen

- 487 replies
-
- 2
-
-
- ship of the line
- 80 guns
- (and 1 more)
-
I put my wood in the box and close it with screws. Please, note the small opening on the lid (one cannot see it well, but it is pointing in your direction) where the condensed water runs out. This must be positioned down in order to allow all water run our. Othervise the wood gets soaked in the water. Dražen
-
Yesterday, I was bending the deck beams and testing my new, as I call it, "steam engine". Dražen

- 487 replies
-
- 3
-
-
- ship of the line
- 80 guns
- (and 1 more)
-
... and here making the "black box" under the gratings to give impression of depth - in order to show nothing underneath. Dražen

- 487 replies
-
- 3
-
-
- ship of the line
- 80 guns
- (and 1 more)
-
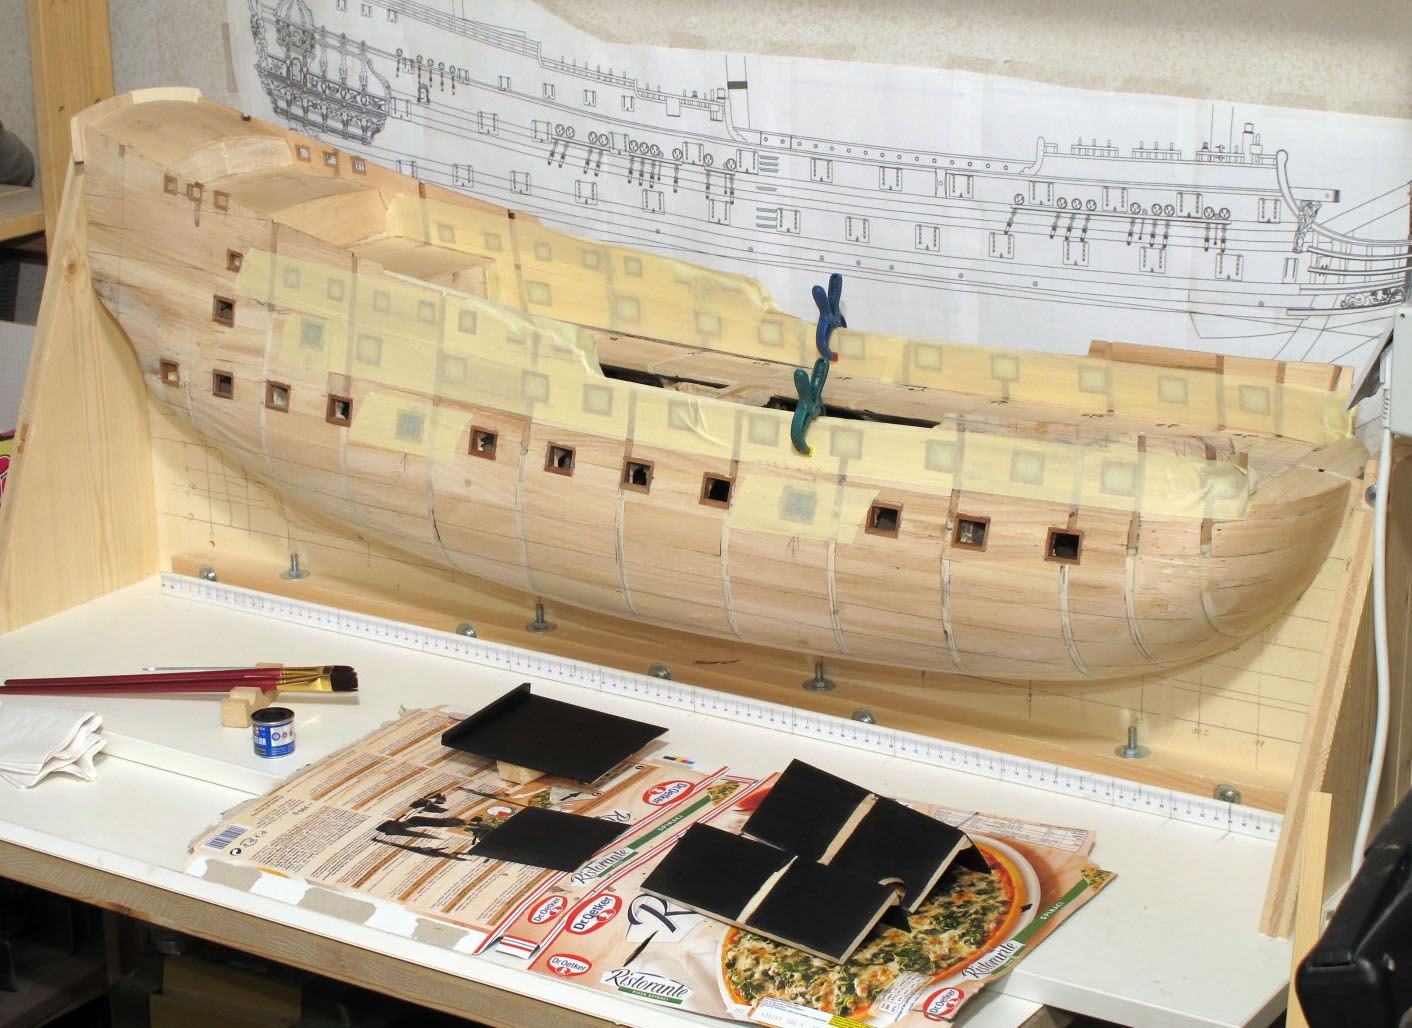
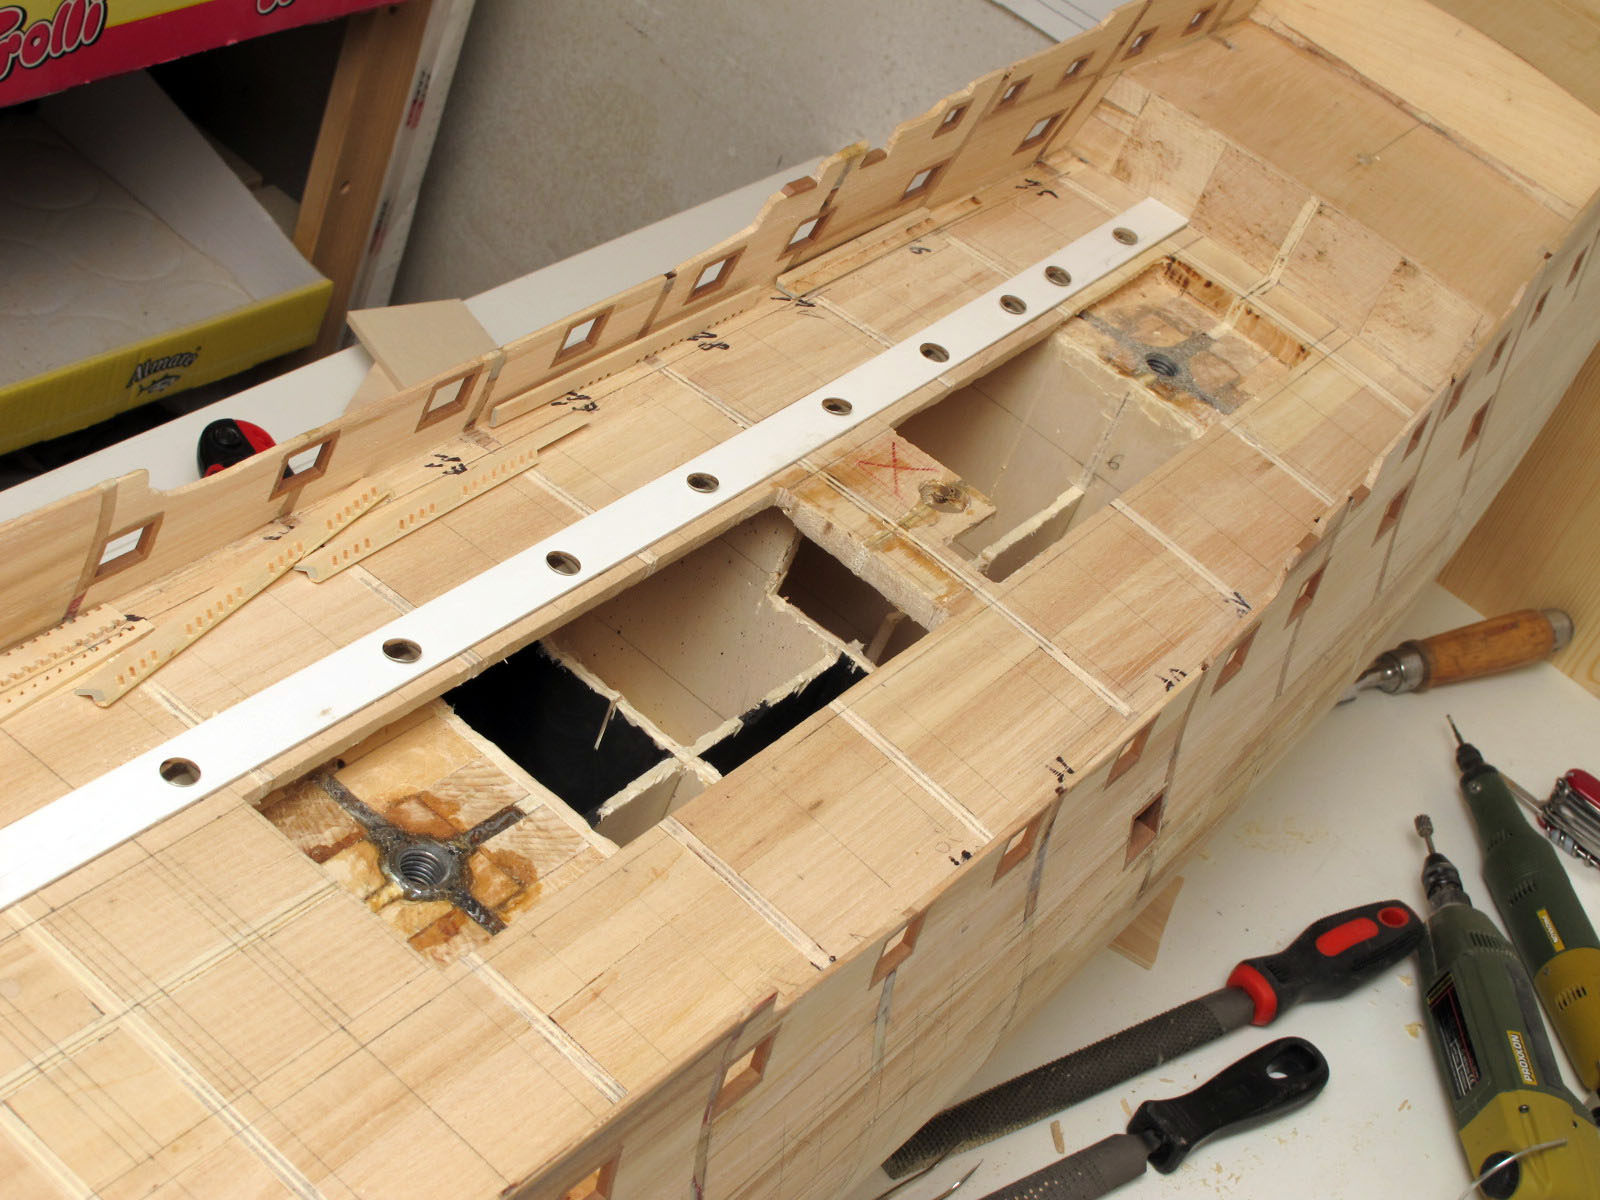
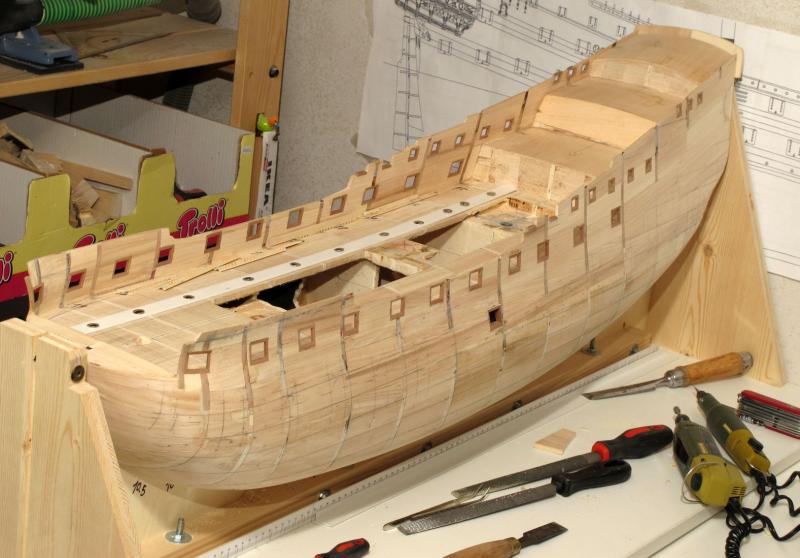
We came no to the present. I have been digging a hole in the hull before I install the gratings and lay the deck planking. On the photos, you can see nicely the strong fixation for the ship - two screws with strong metal "star-fixation", fixed around with wooden pieces. Dražen

- 487 replies
-
- 3
-
-
- ship of the line
- 80 guns
- (and 1 more)
-
... and the box is (nearly) ready. This module will be the only part of the lower deck (overloop) which will be slightly seen from above. Dražen

- 487 replies
-
- 2
-
-
- ship of the line
- 80 guns
- (and 1 more)
-
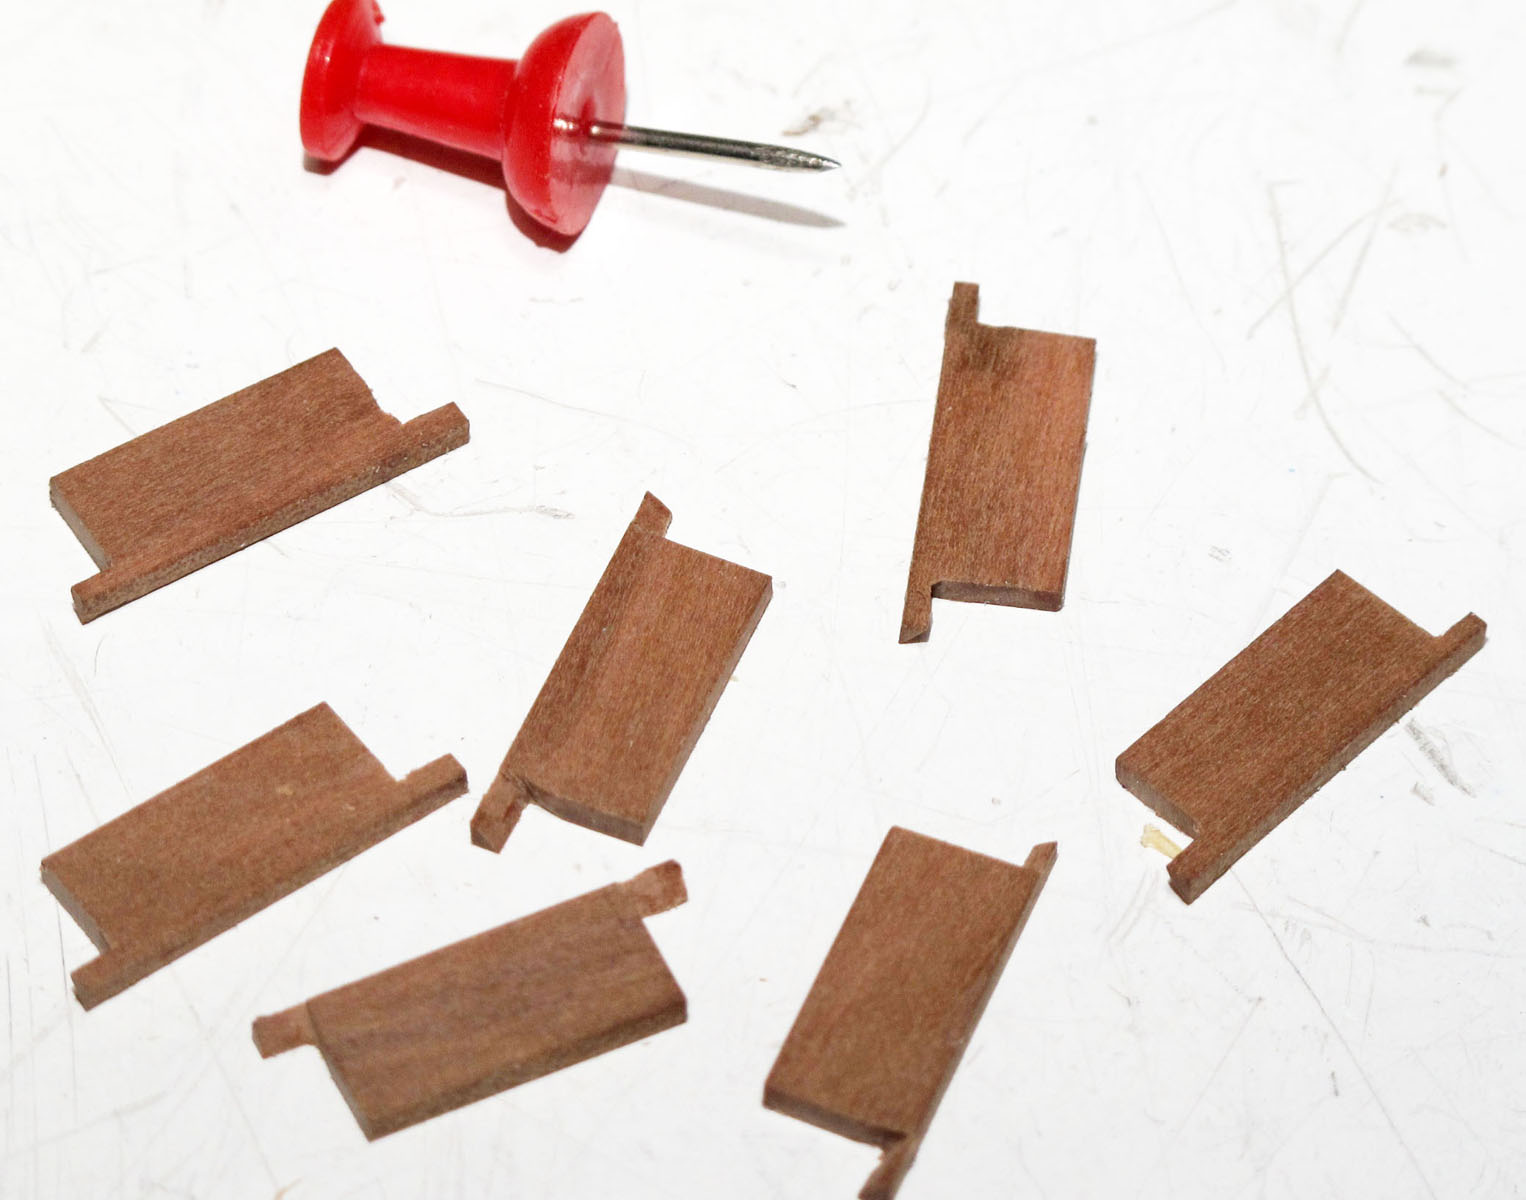
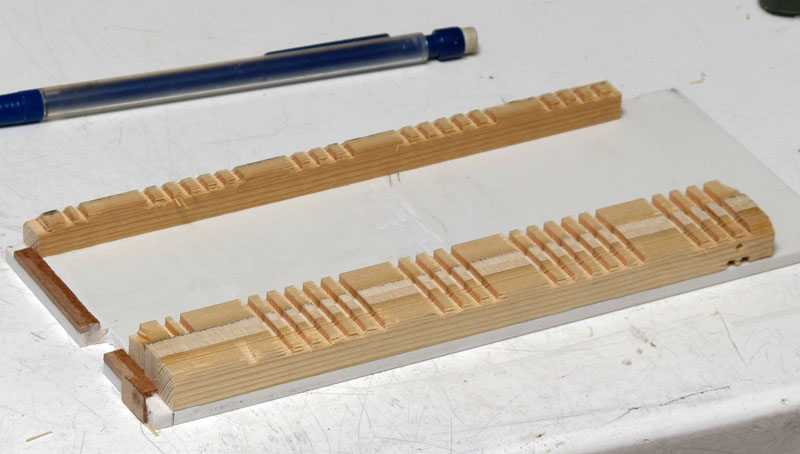
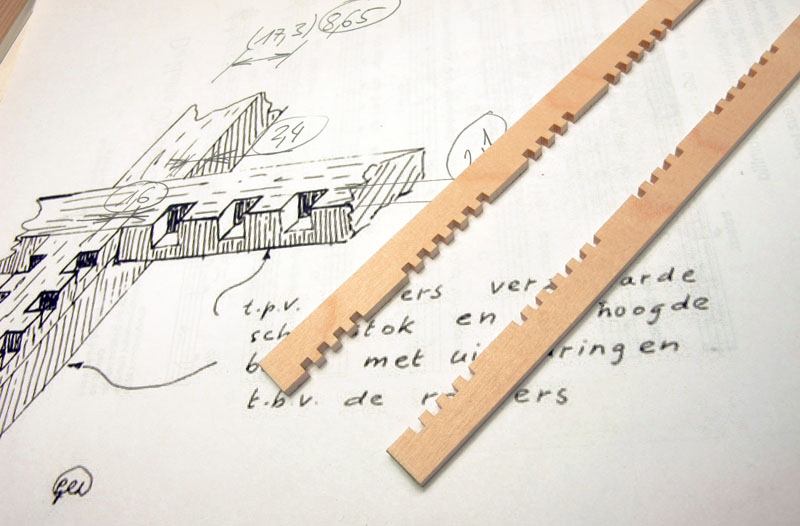
Same with the side frames (binding strake). Dražen

- 487 replies
-
- 5
-
-
- ship of the line
- 80 guns
- (and 1 more)
-
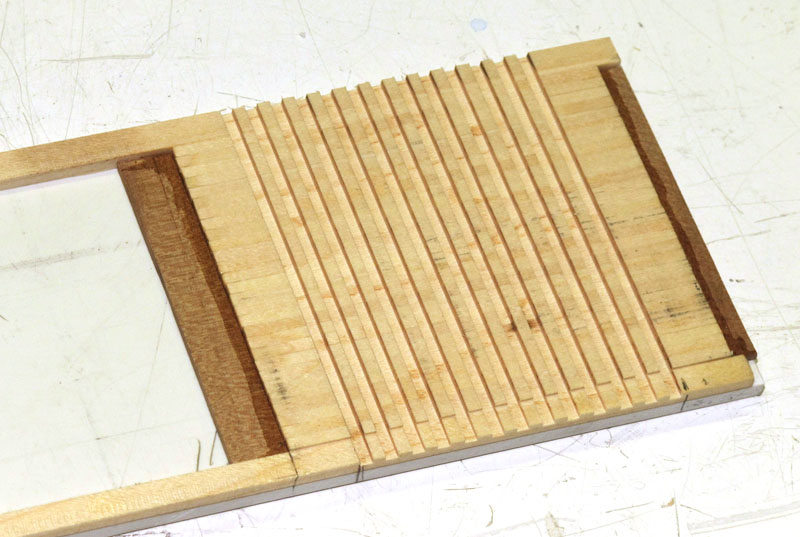
Gratings set in a holder + prepared for milling Dražen
- 487 replies
-
- 2
-
-
- ship of the line
- 80 guns
- (and 1 more)
-
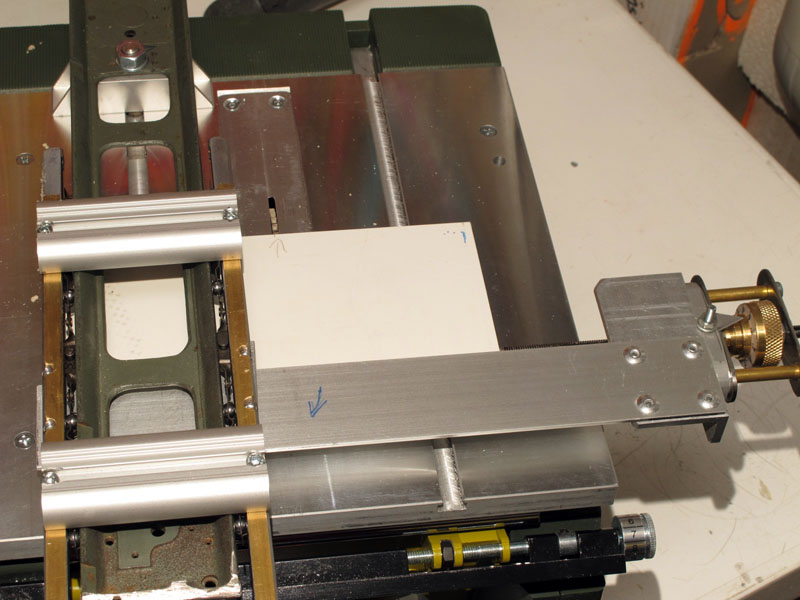
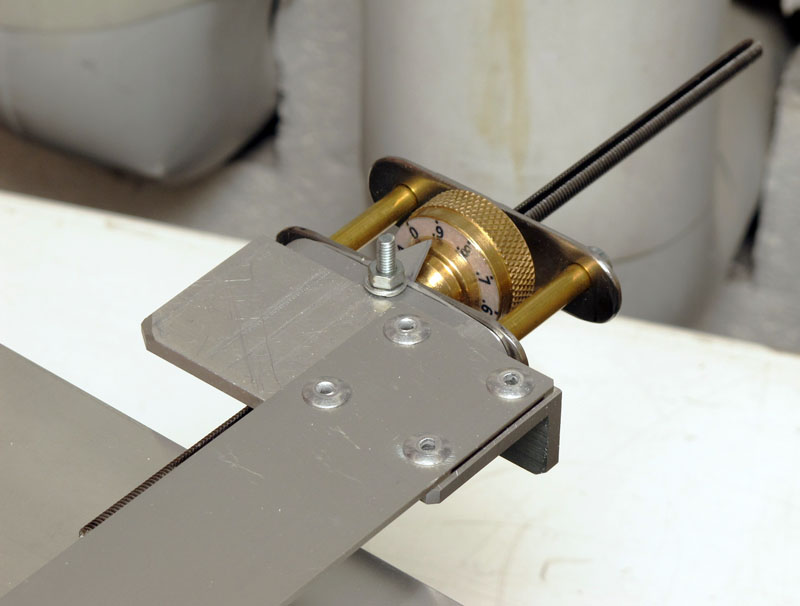
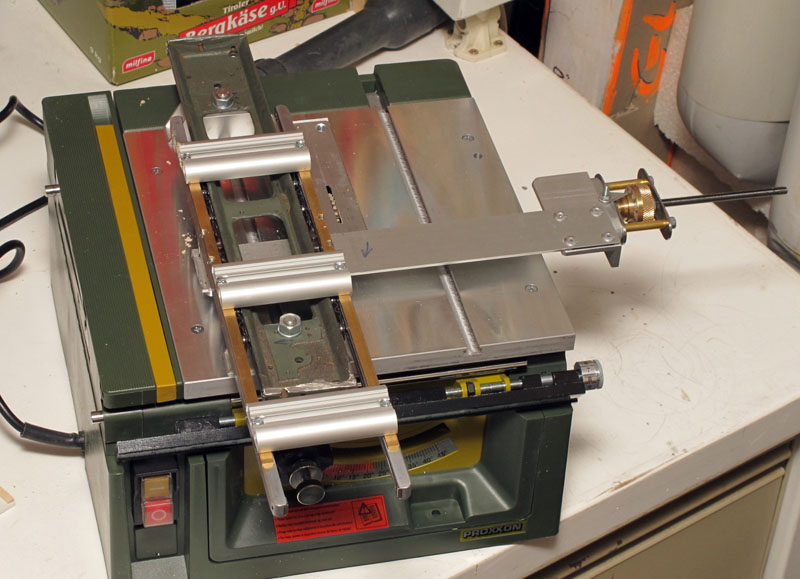
Let us go on with the history... My tool for making gratings: M6 thread gives a 1mm shift per turn. You get the point? The linear bearing is from an old typewriter so I get a very controlled movement when milling. The adjusting wheel is from a garden tube connector, the scale simply printed on the computer printer, glued/covered with epoxy. Dražen

- 487 replies
-
- 2
-
-
- ship of the line
- 80 guns
- (and 1 more)