HOLIDAY DONATION DRIVE - SUPPORT MSW - DO YOUR PART TO KEEP THIS GREAT FORUM GOING! (Only 36 donations so far out of 49,000 members - C'mon guys!)
×


Drazen
-
Posts
389 -
Joined
-
Last visited
Content Type
Profiles
Forums
Gallery
Events
Everything posted by Drazen
-
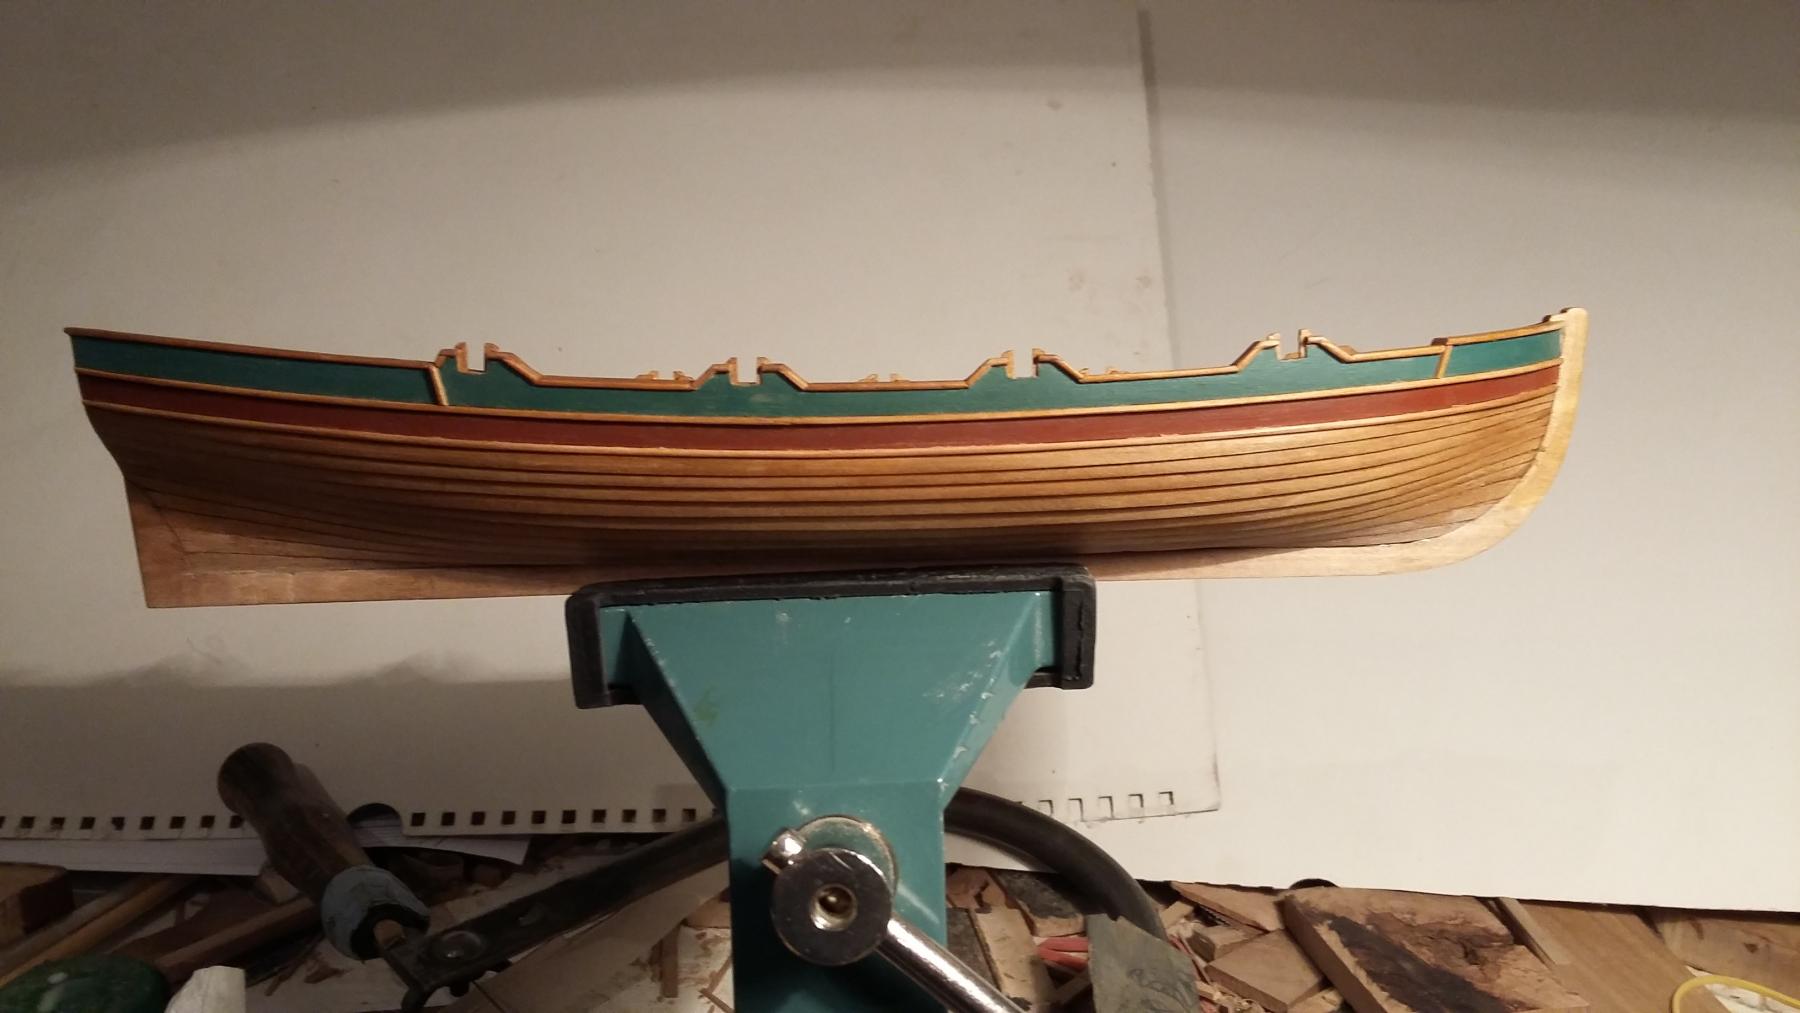
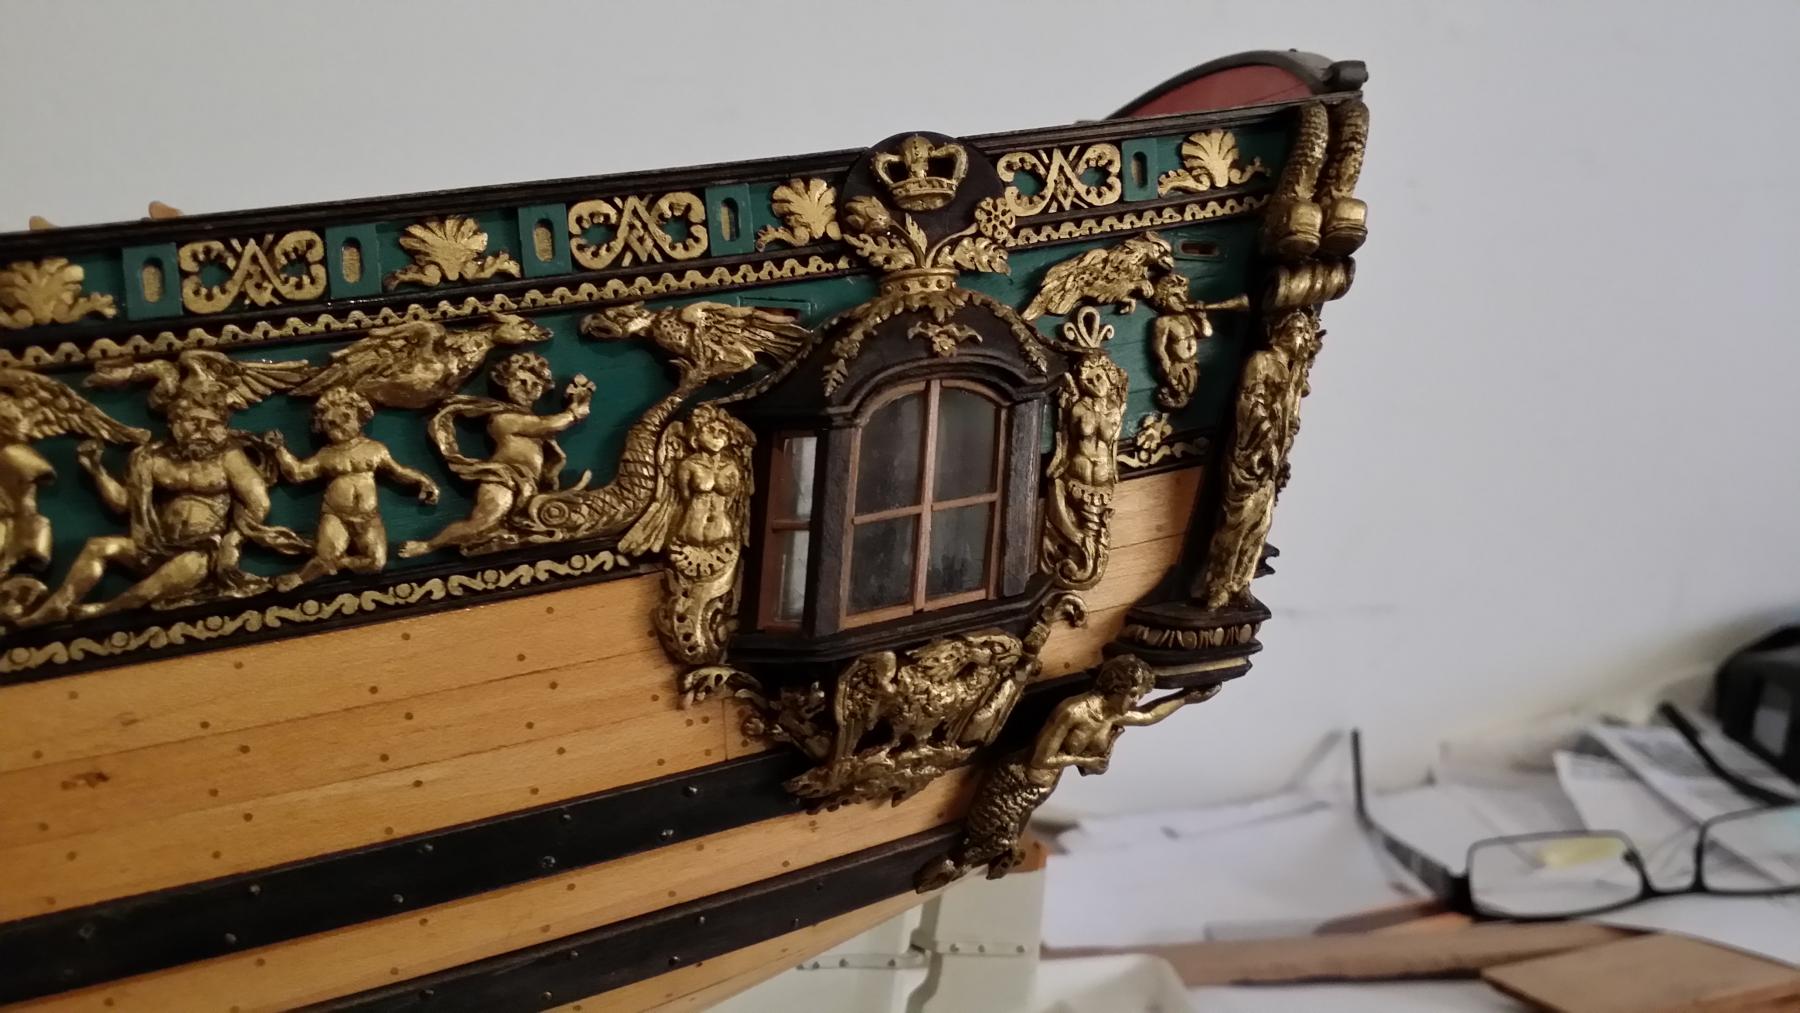
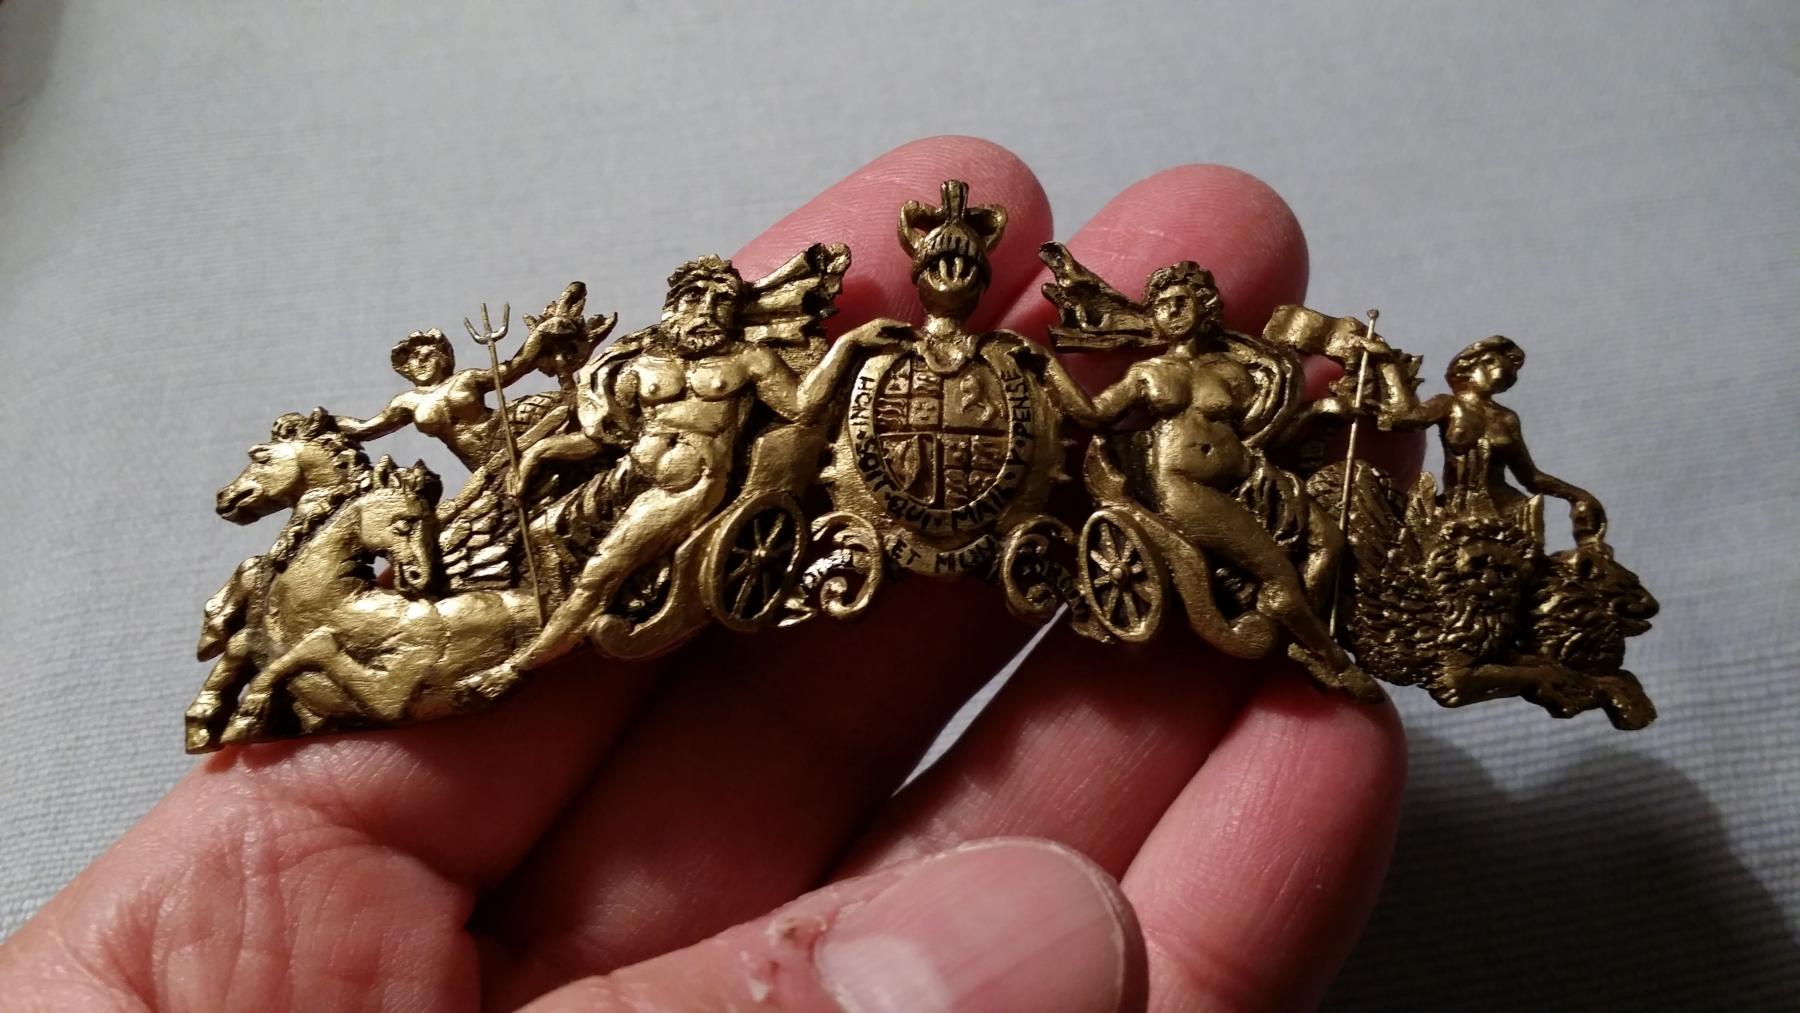
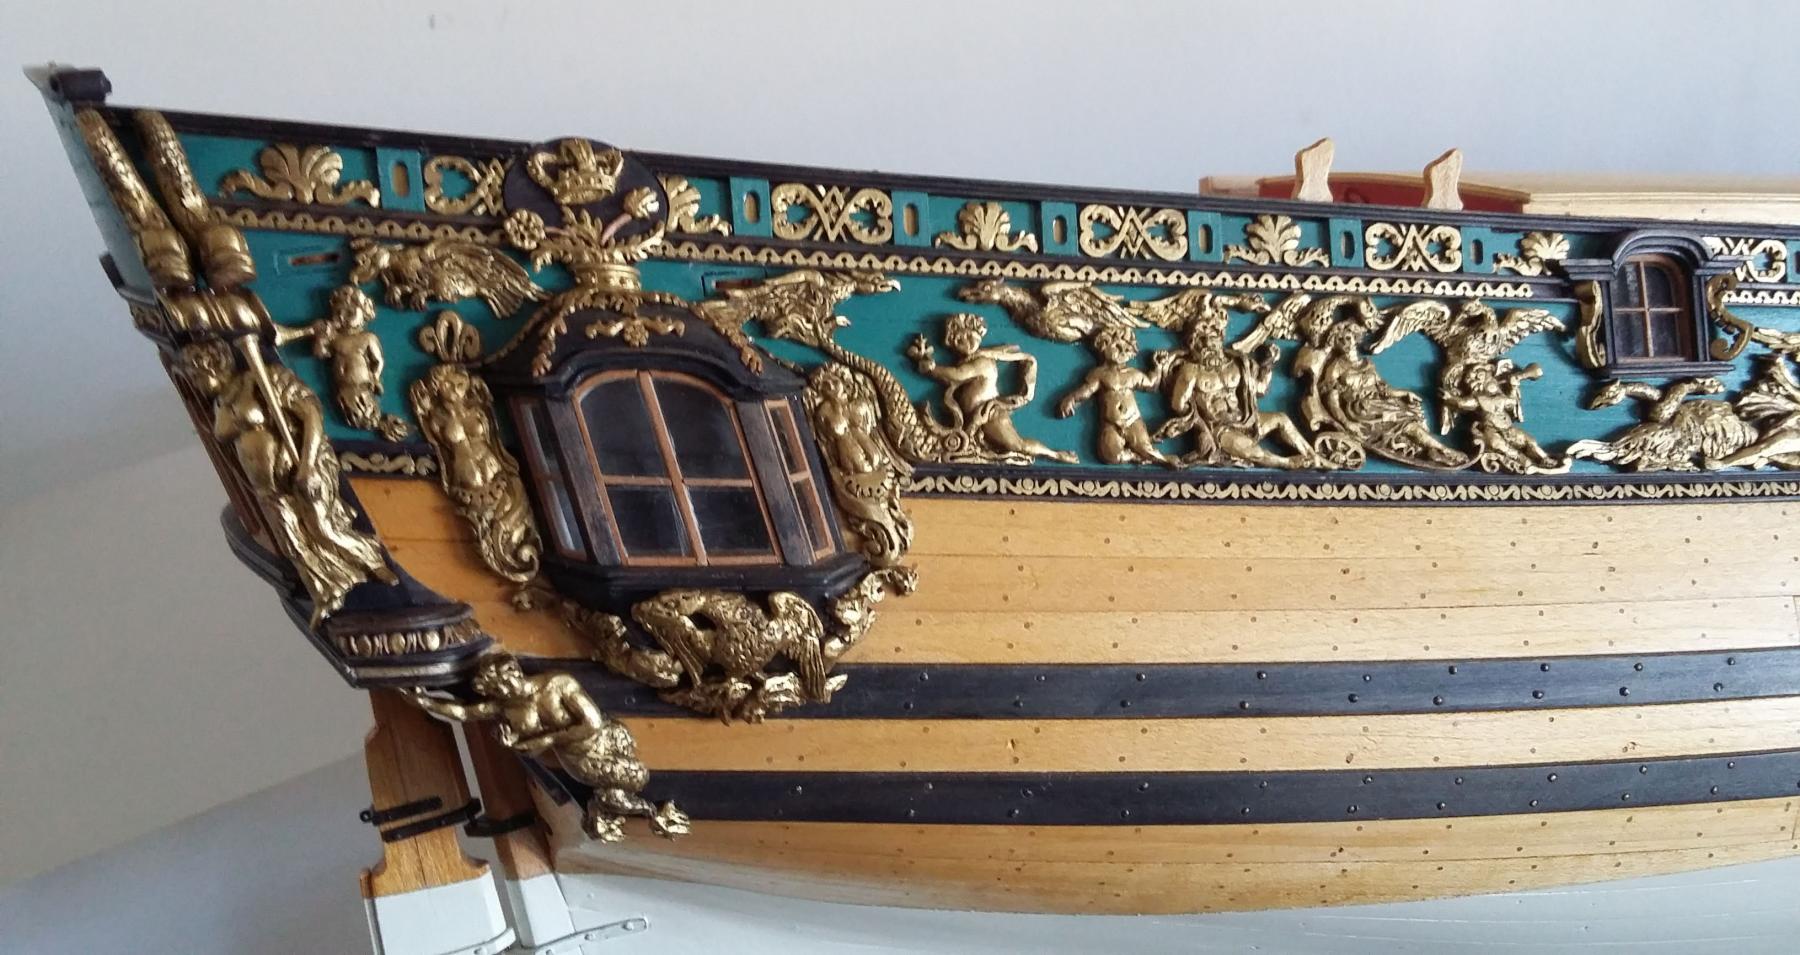
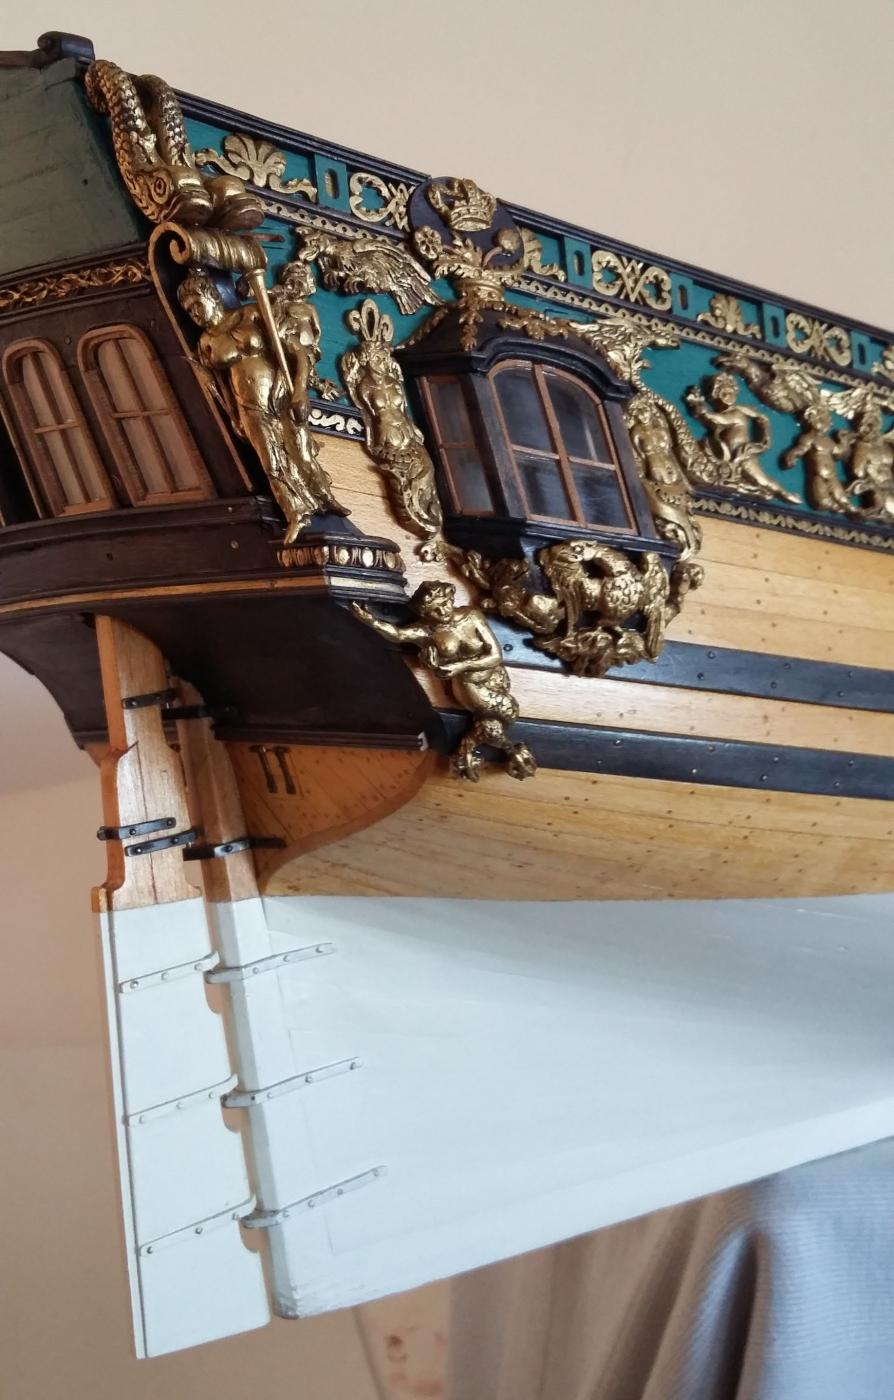
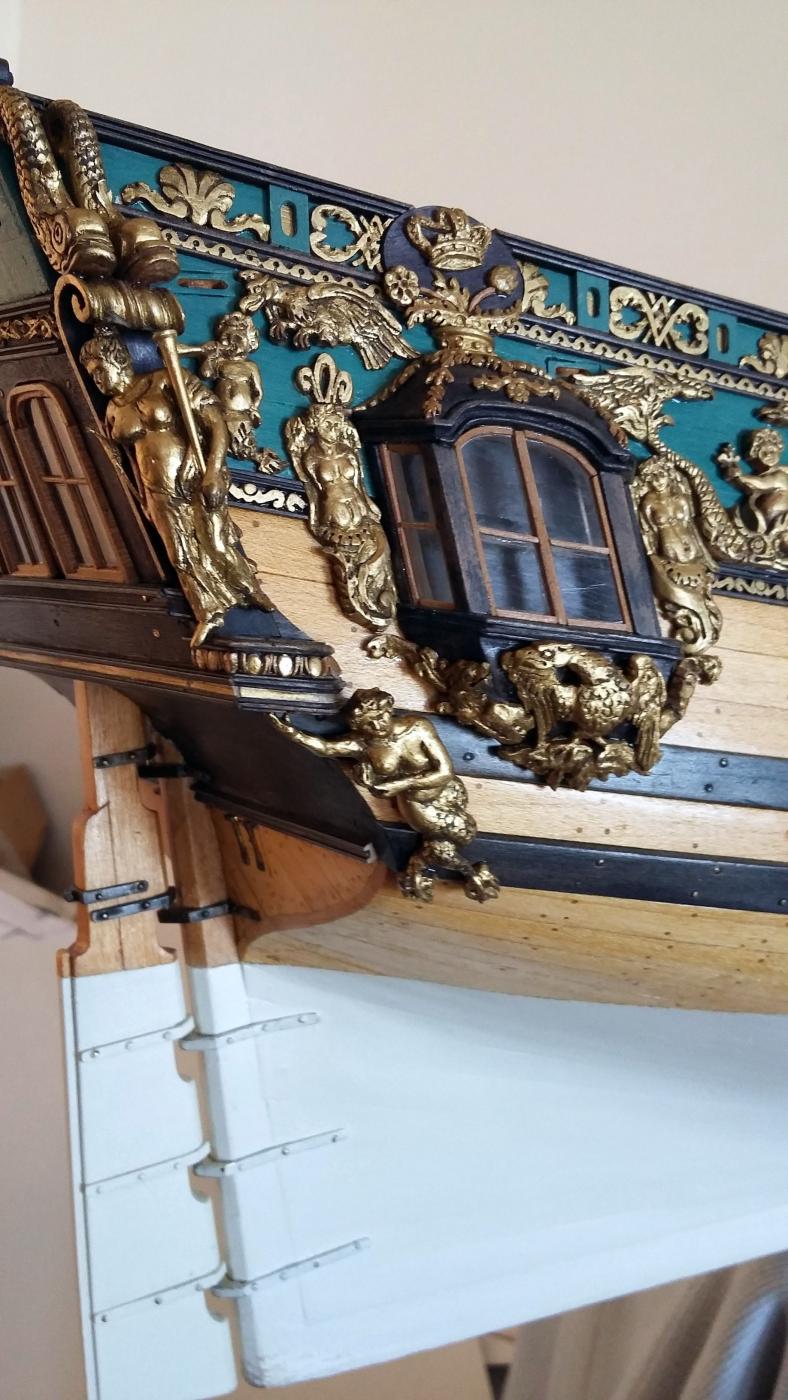
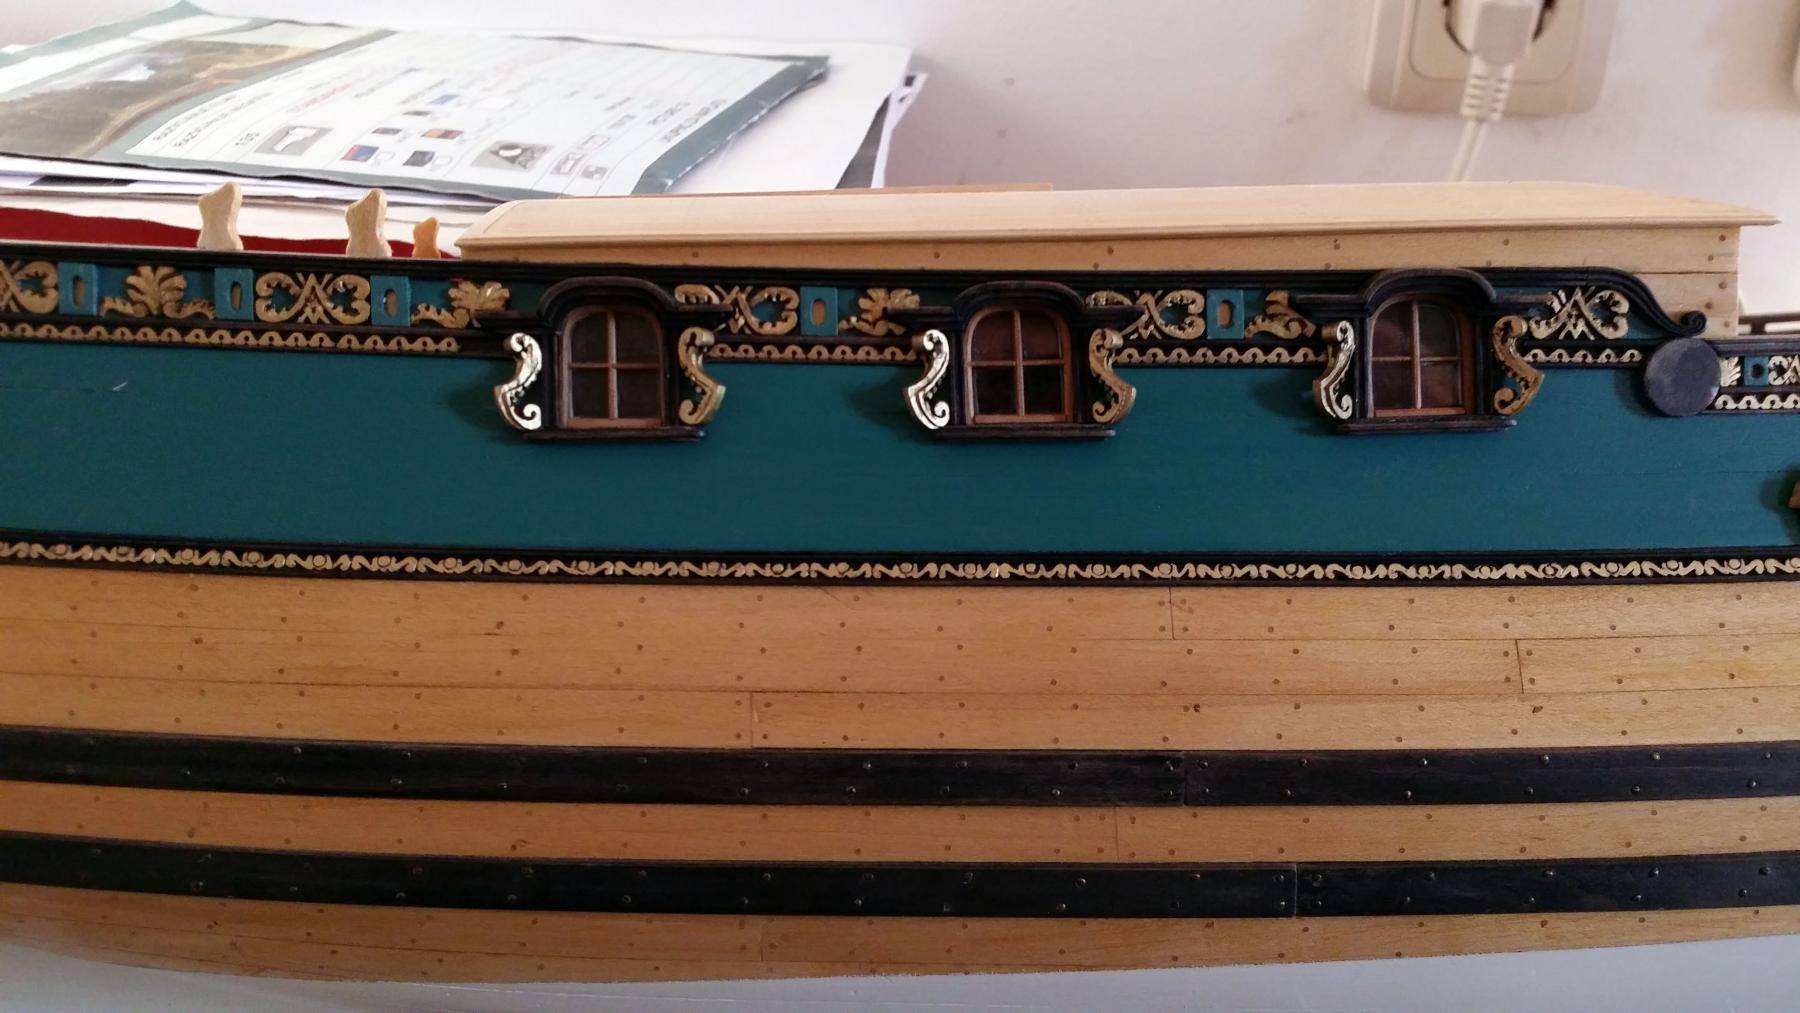
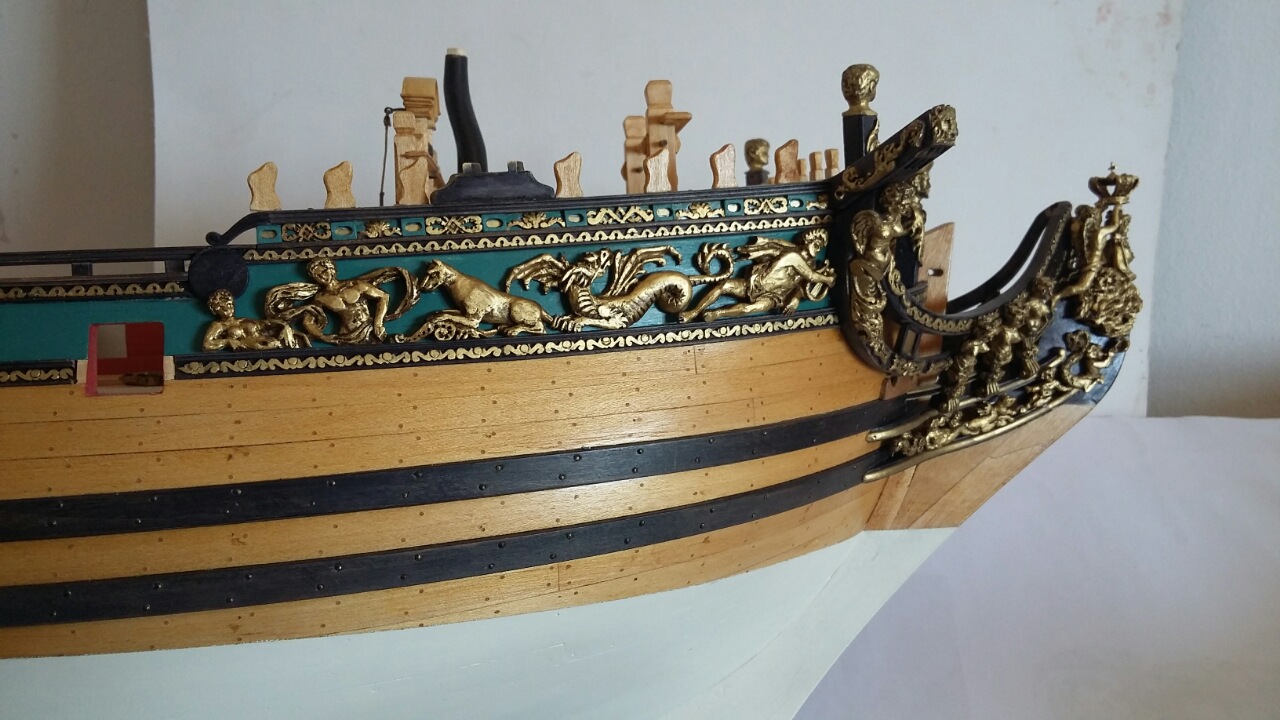
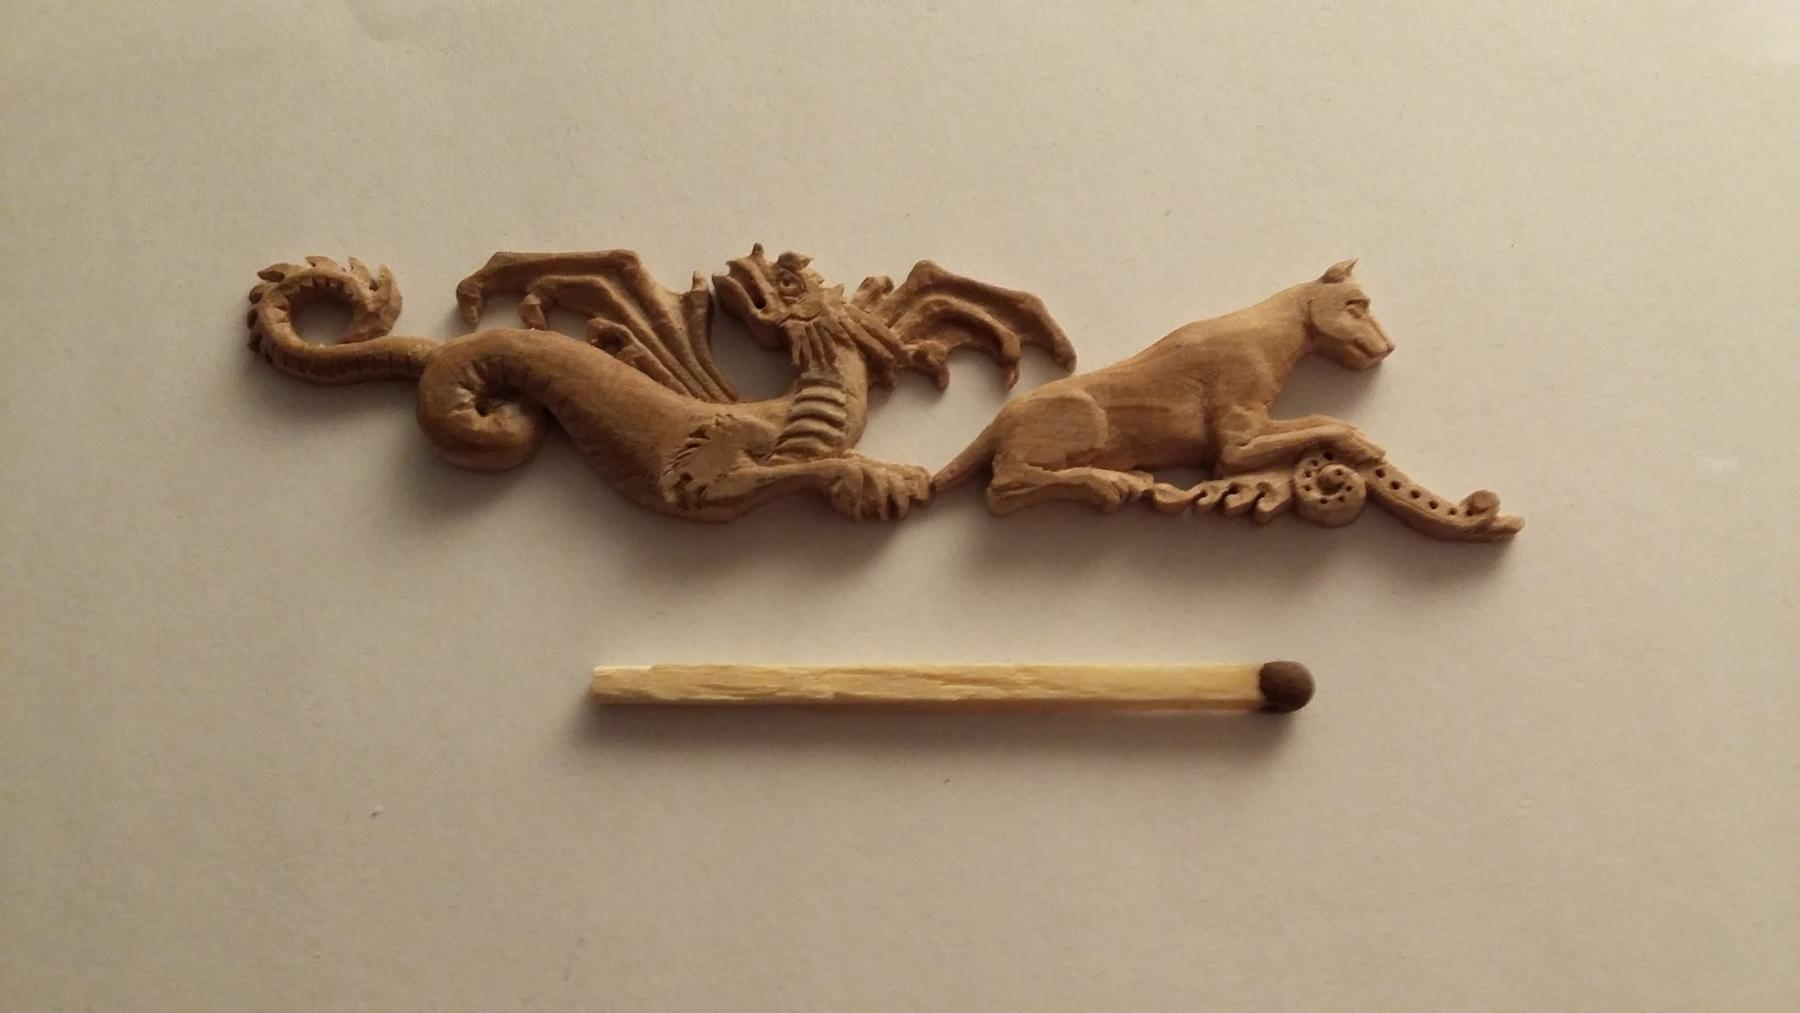
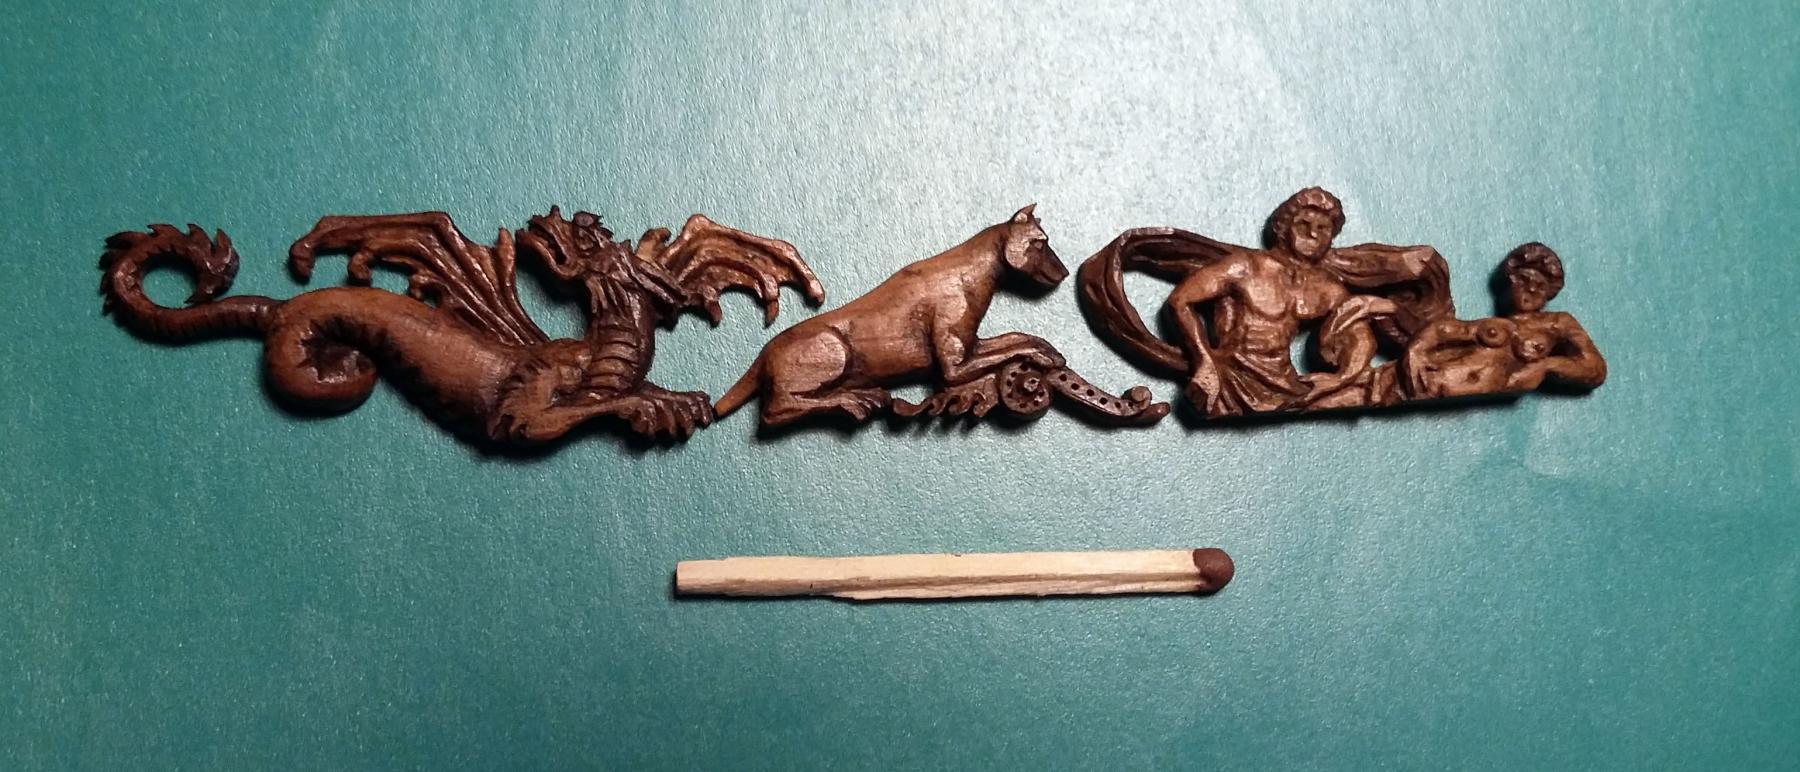
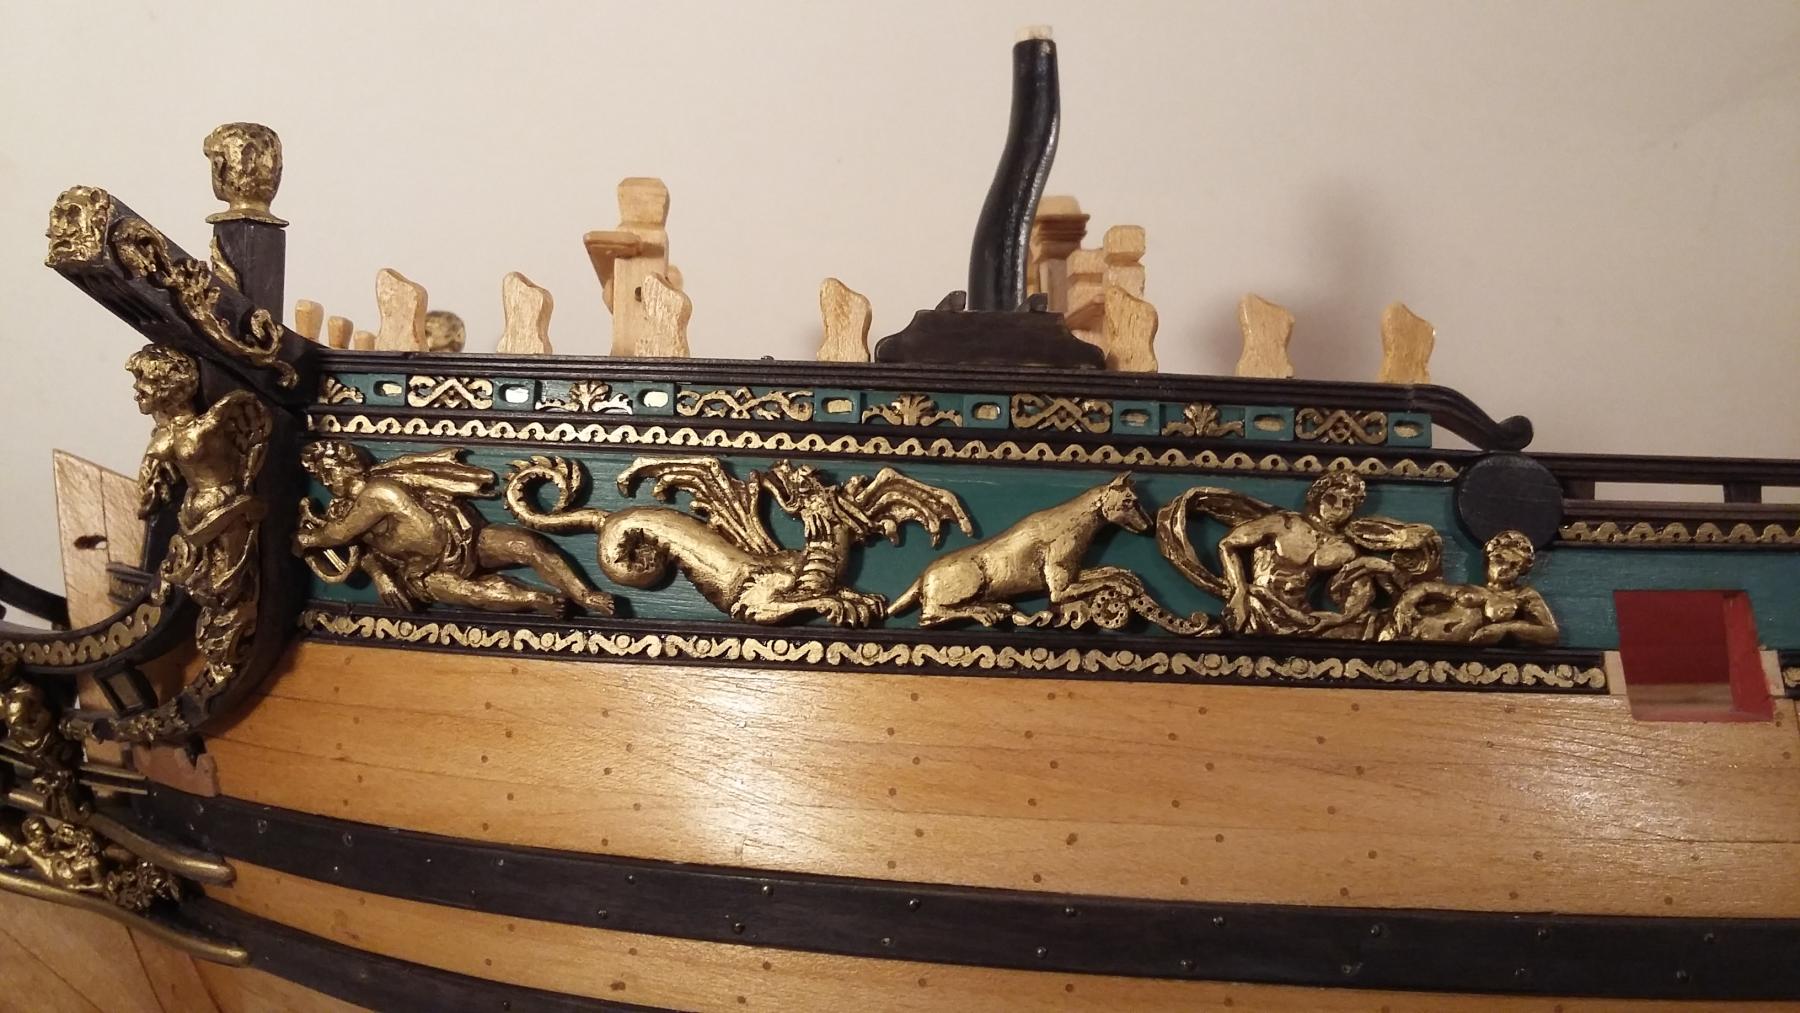
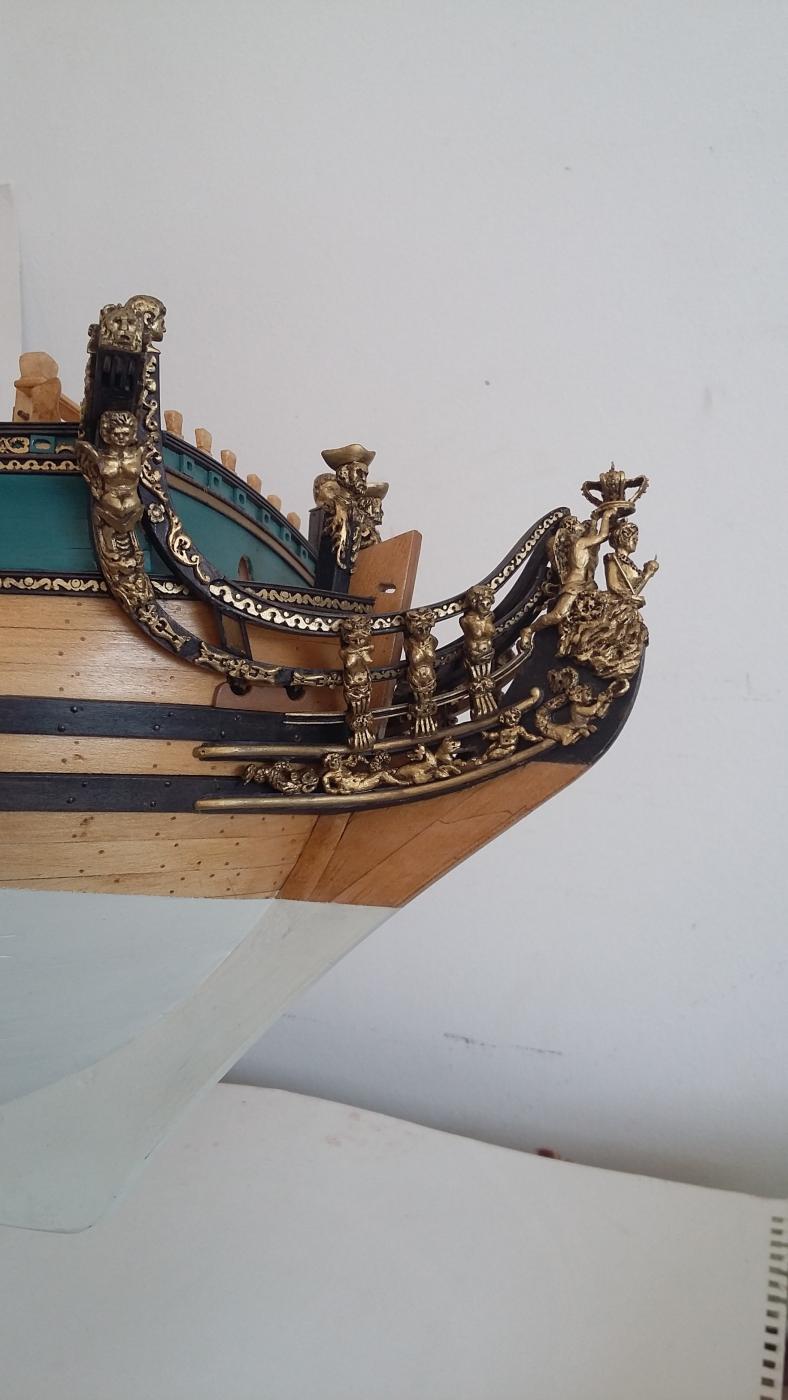
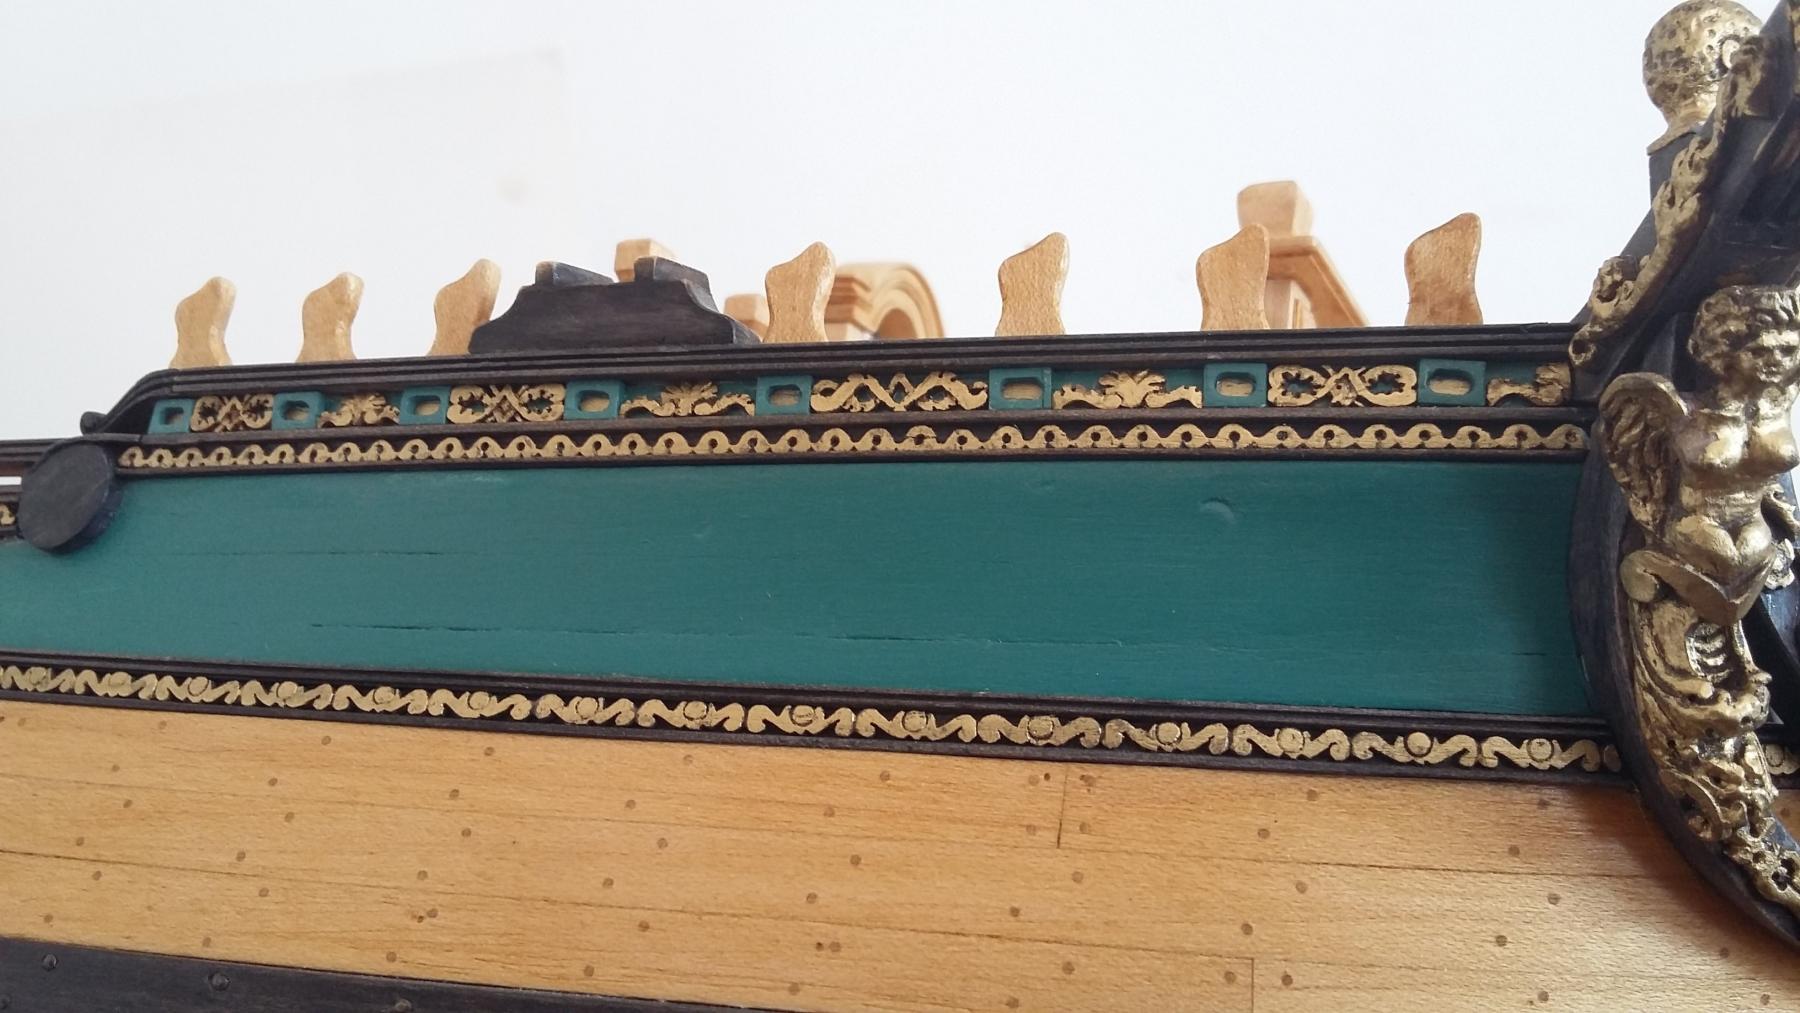
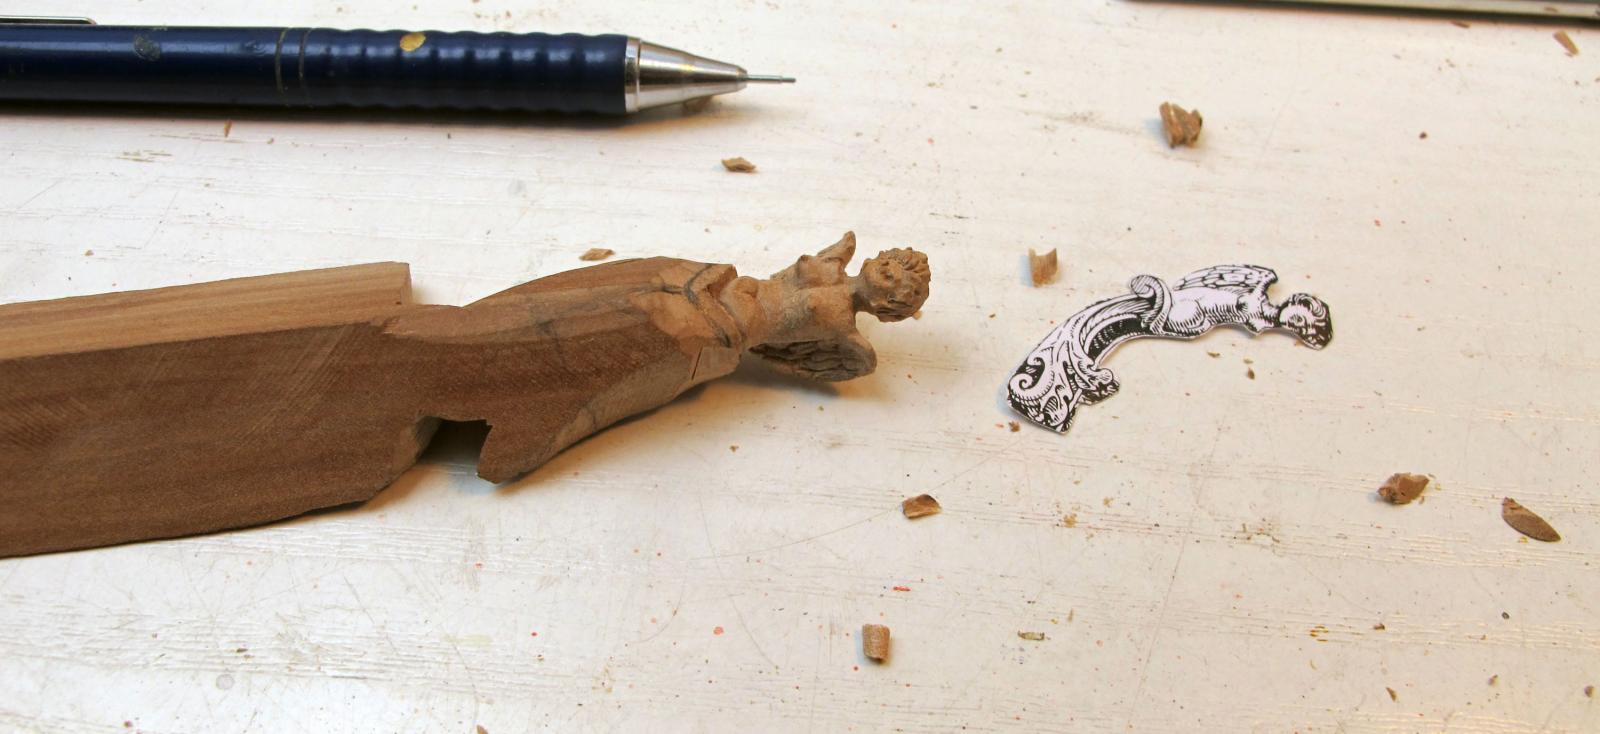
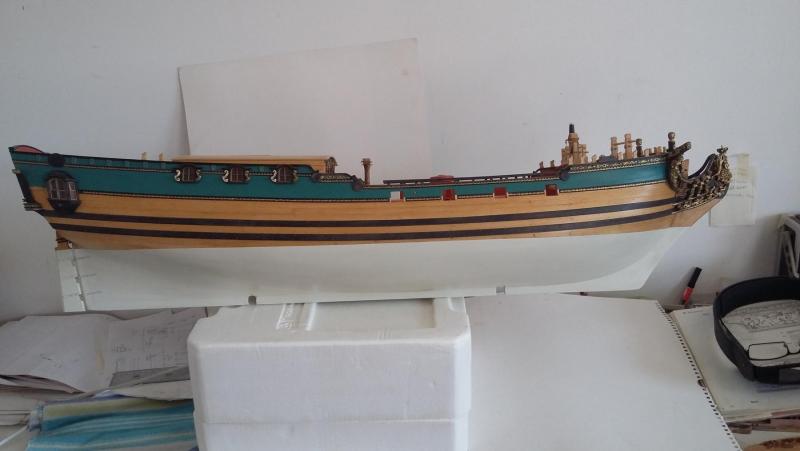
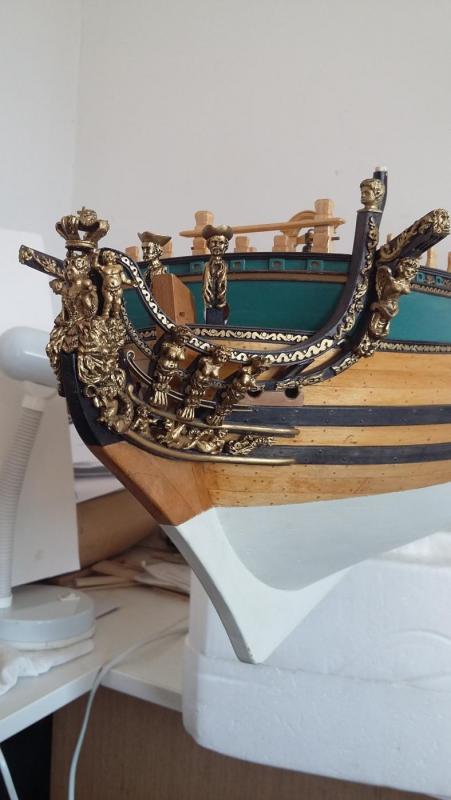
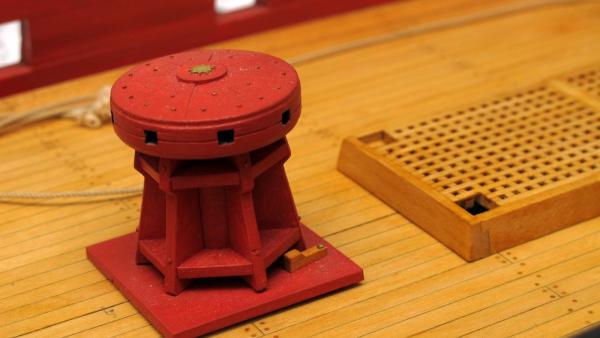
 … after a longer time,… sorry for the absence of the reports. Mile is continuously going on with his work and I send here the further photos. I hope, the photos speak for themselves. Dražen

- 86 replies
-
- 12
-

-
- royal caroline
- yacht
- (and 1 more)
-
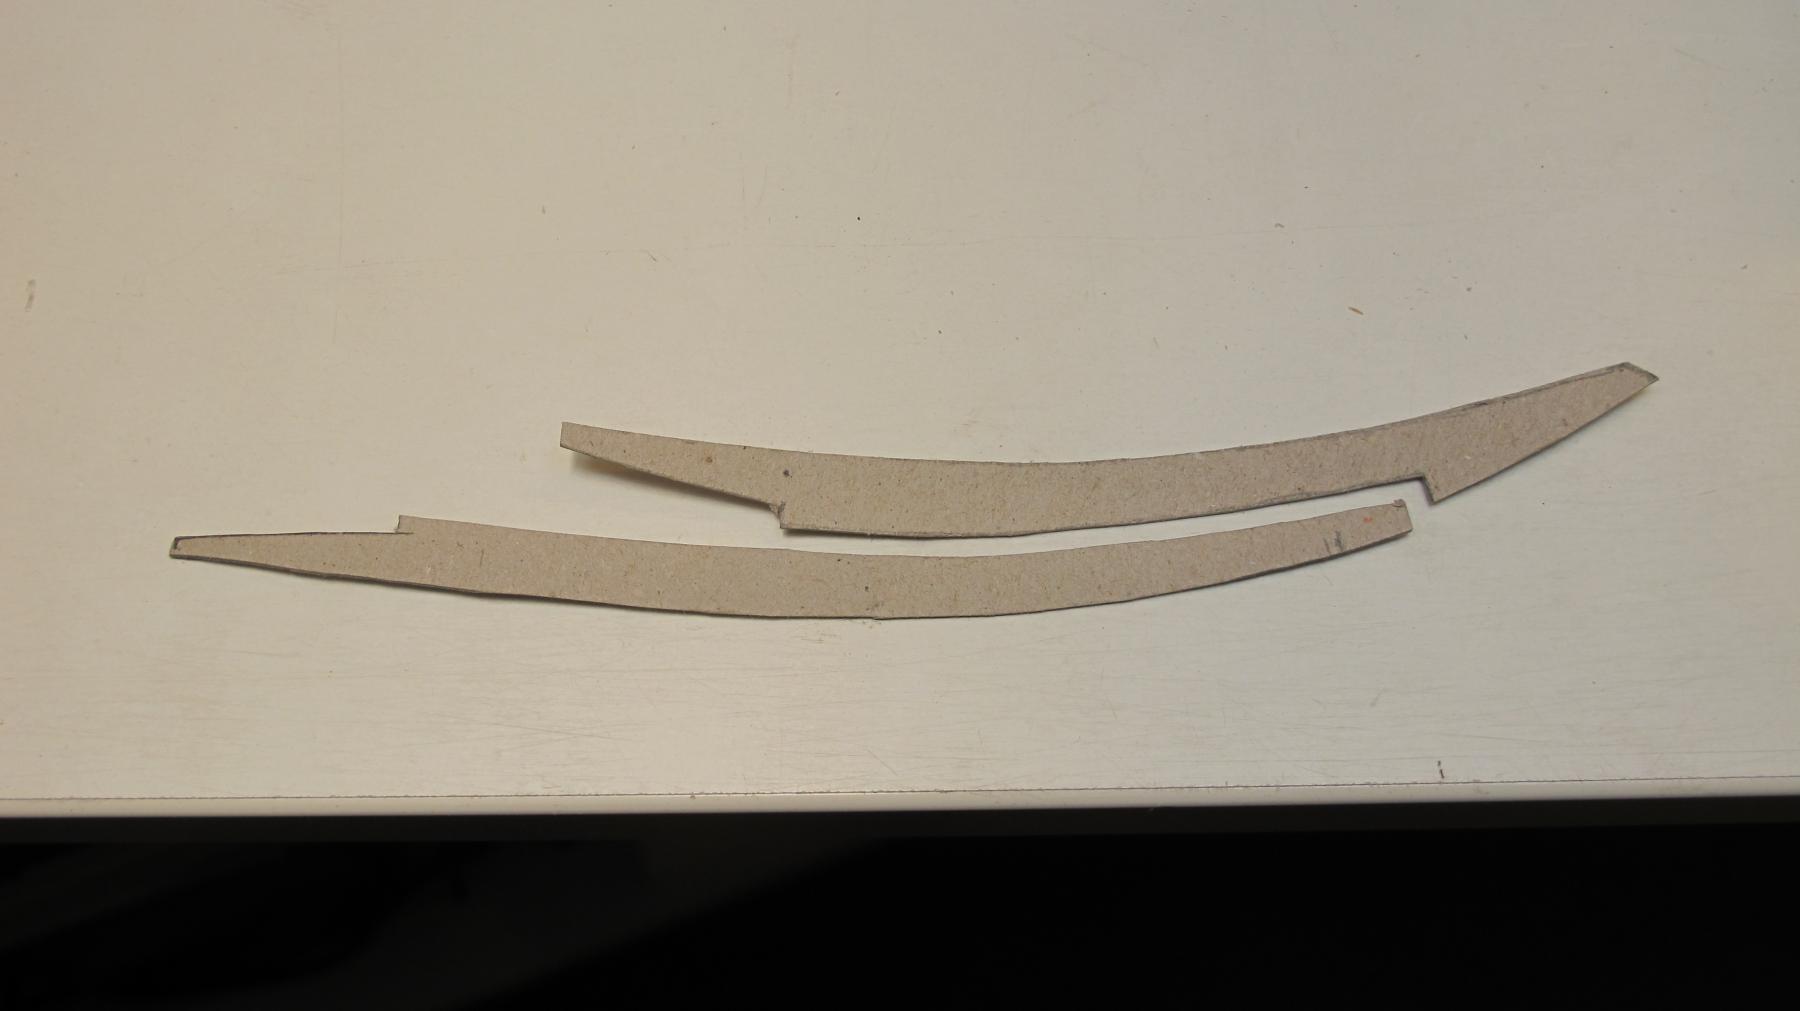
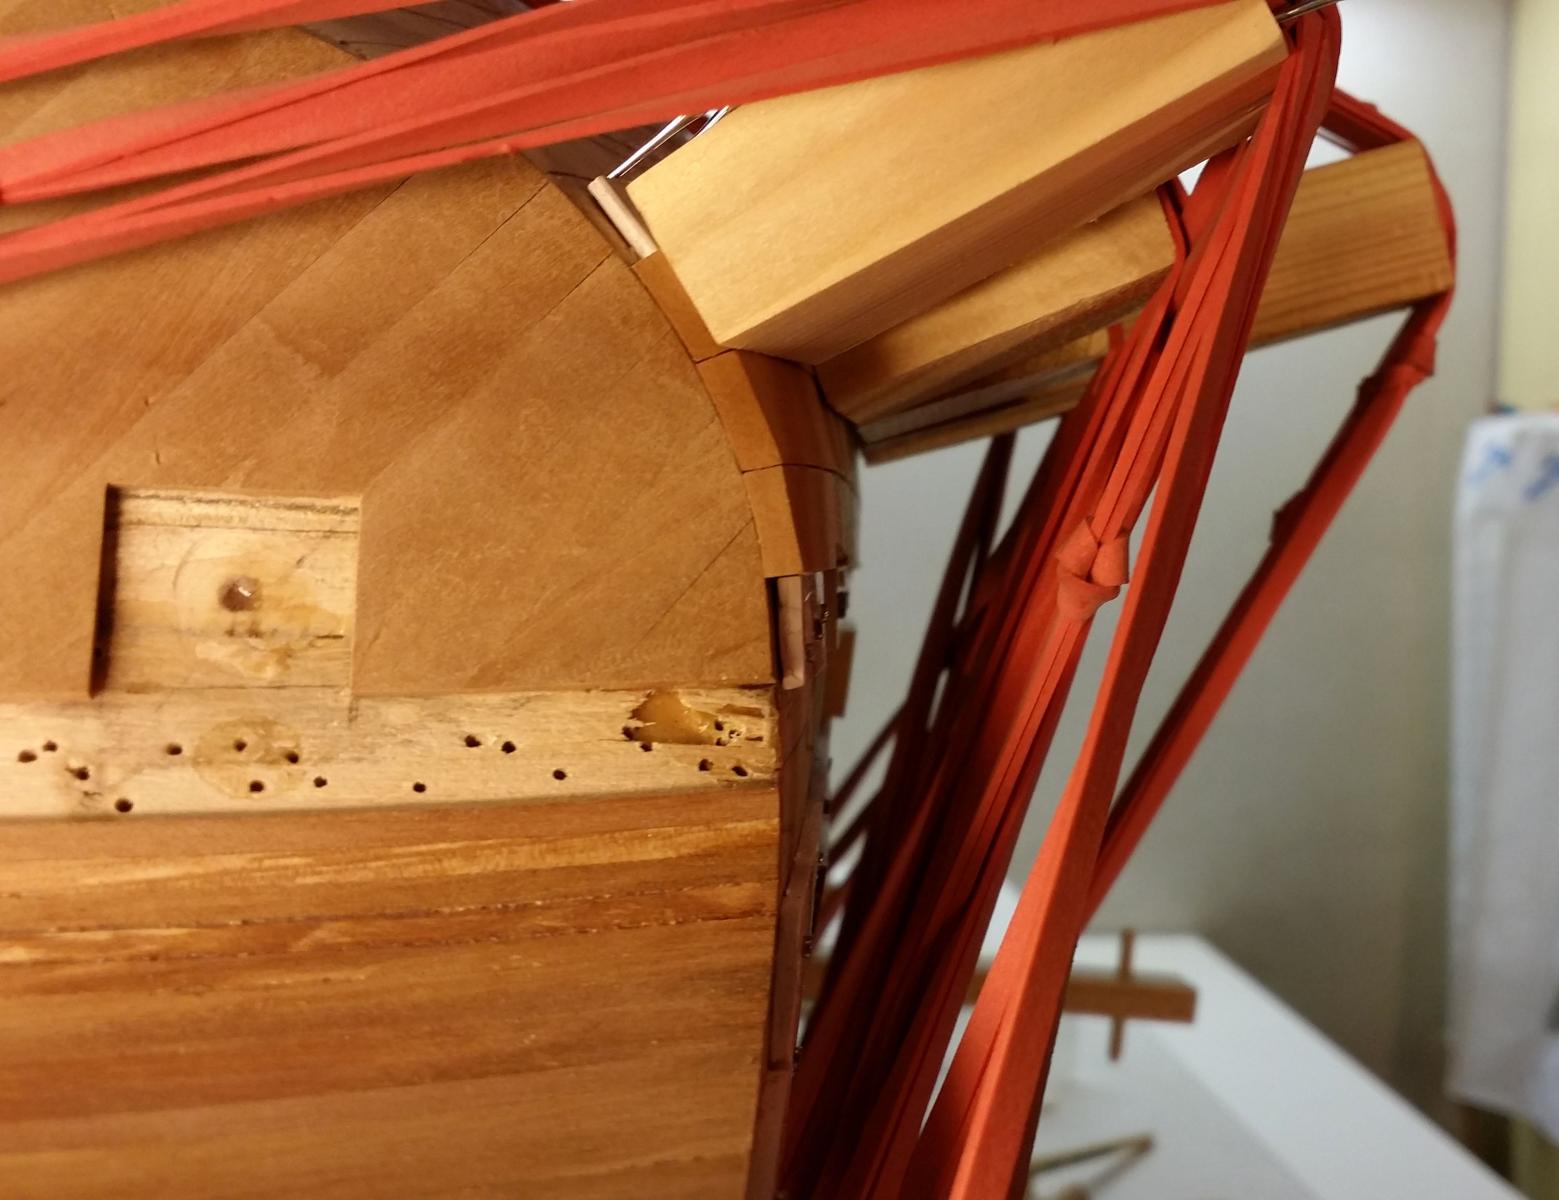
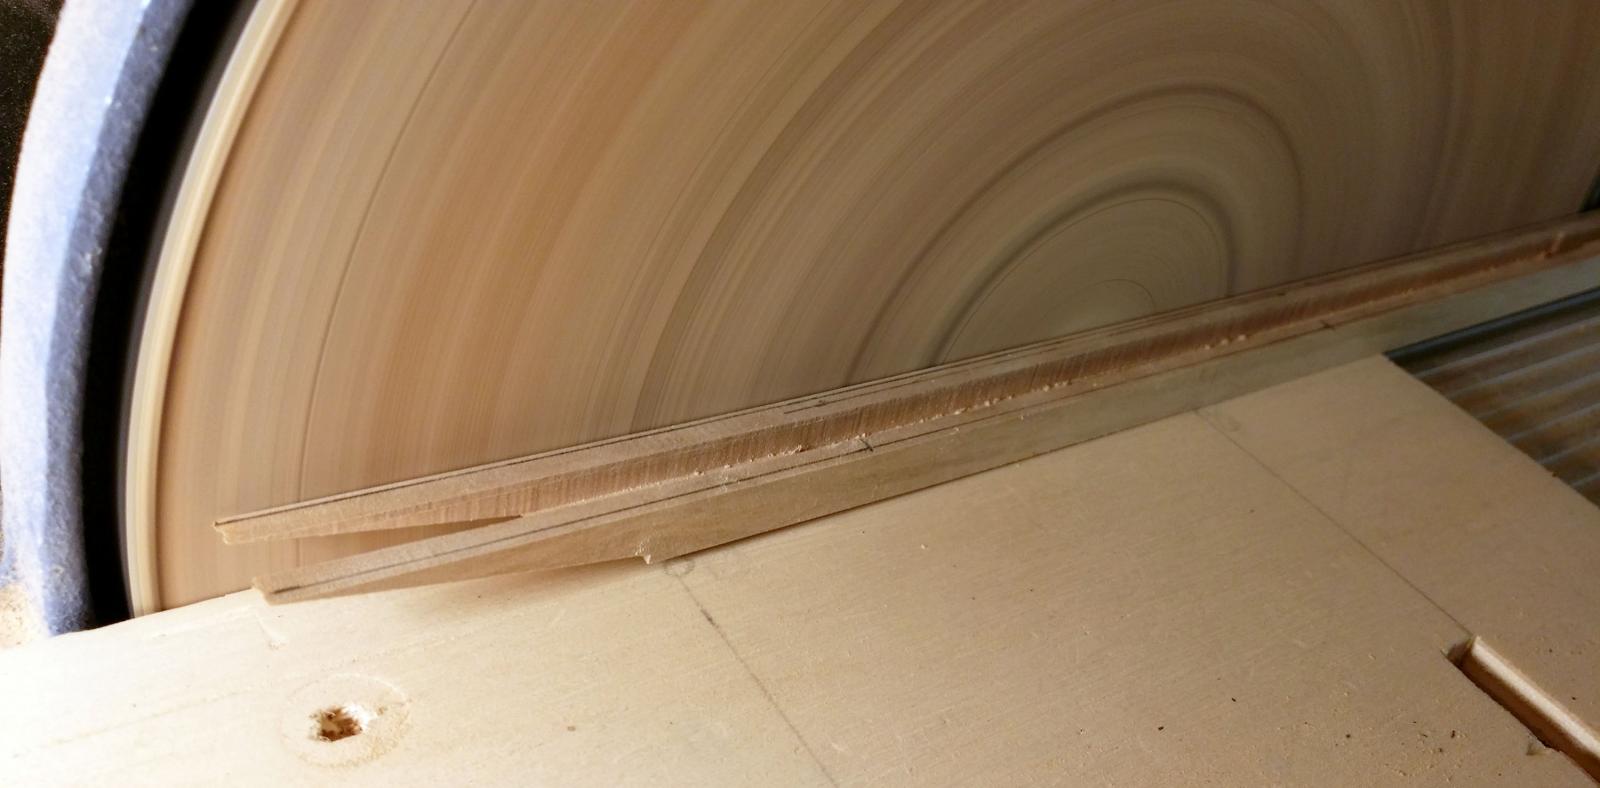
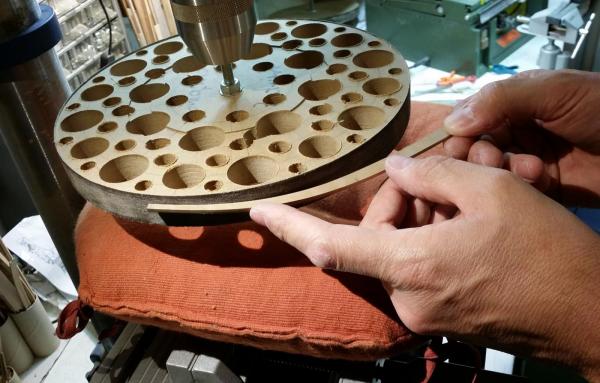
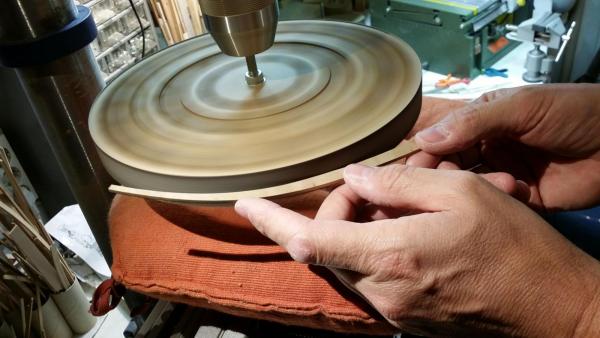
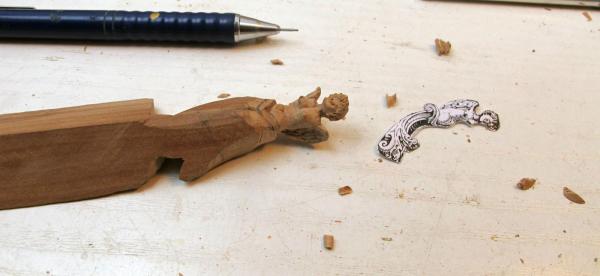
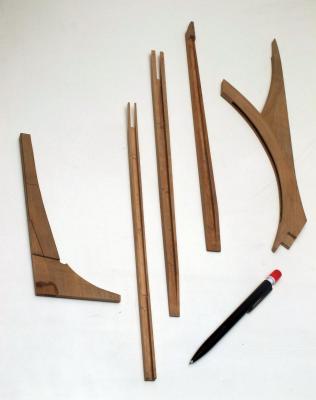
This is the tool I made for grinding inner (concave) lines. Drazen
- 487 replies
-
- 19
-
-

-
- ship of the line
- 80 guns
- (and 1 more)
-
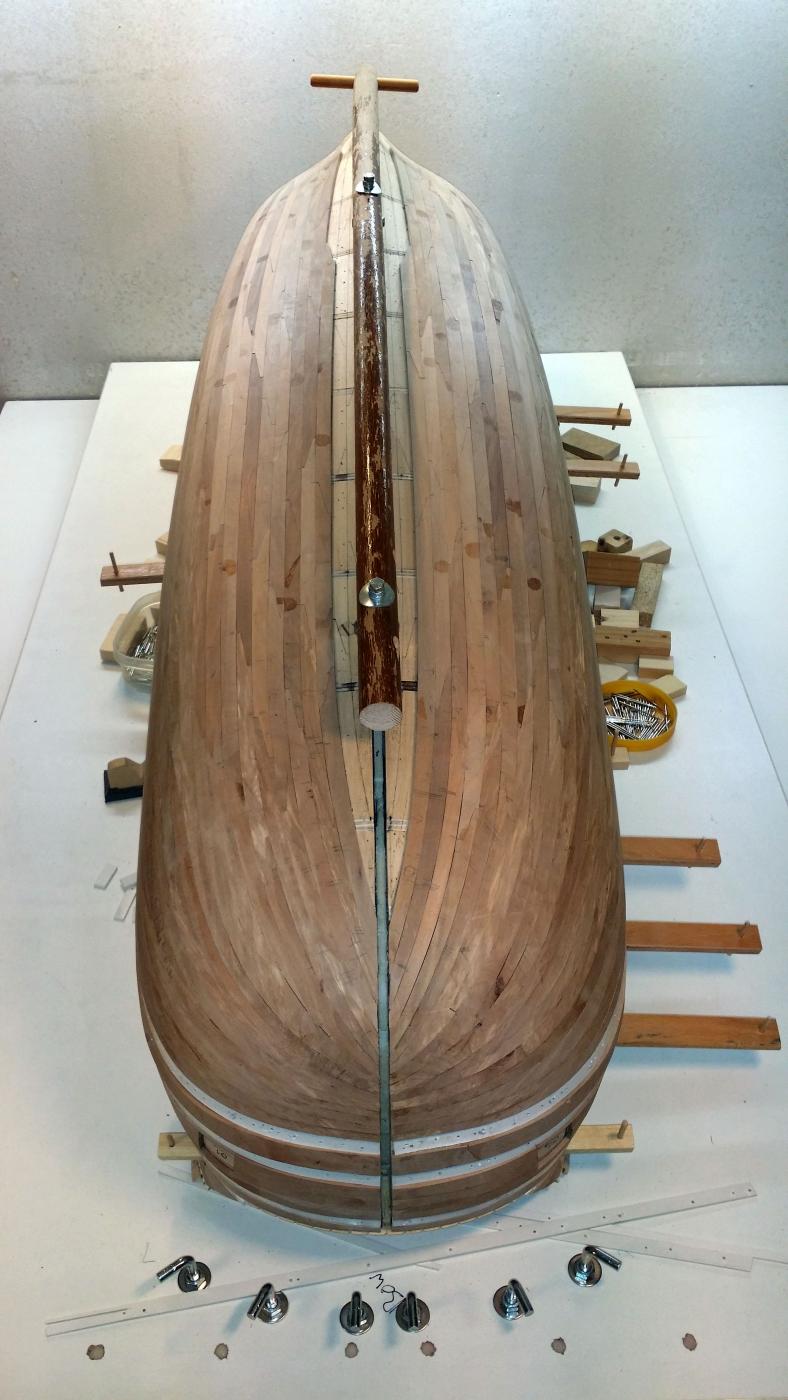
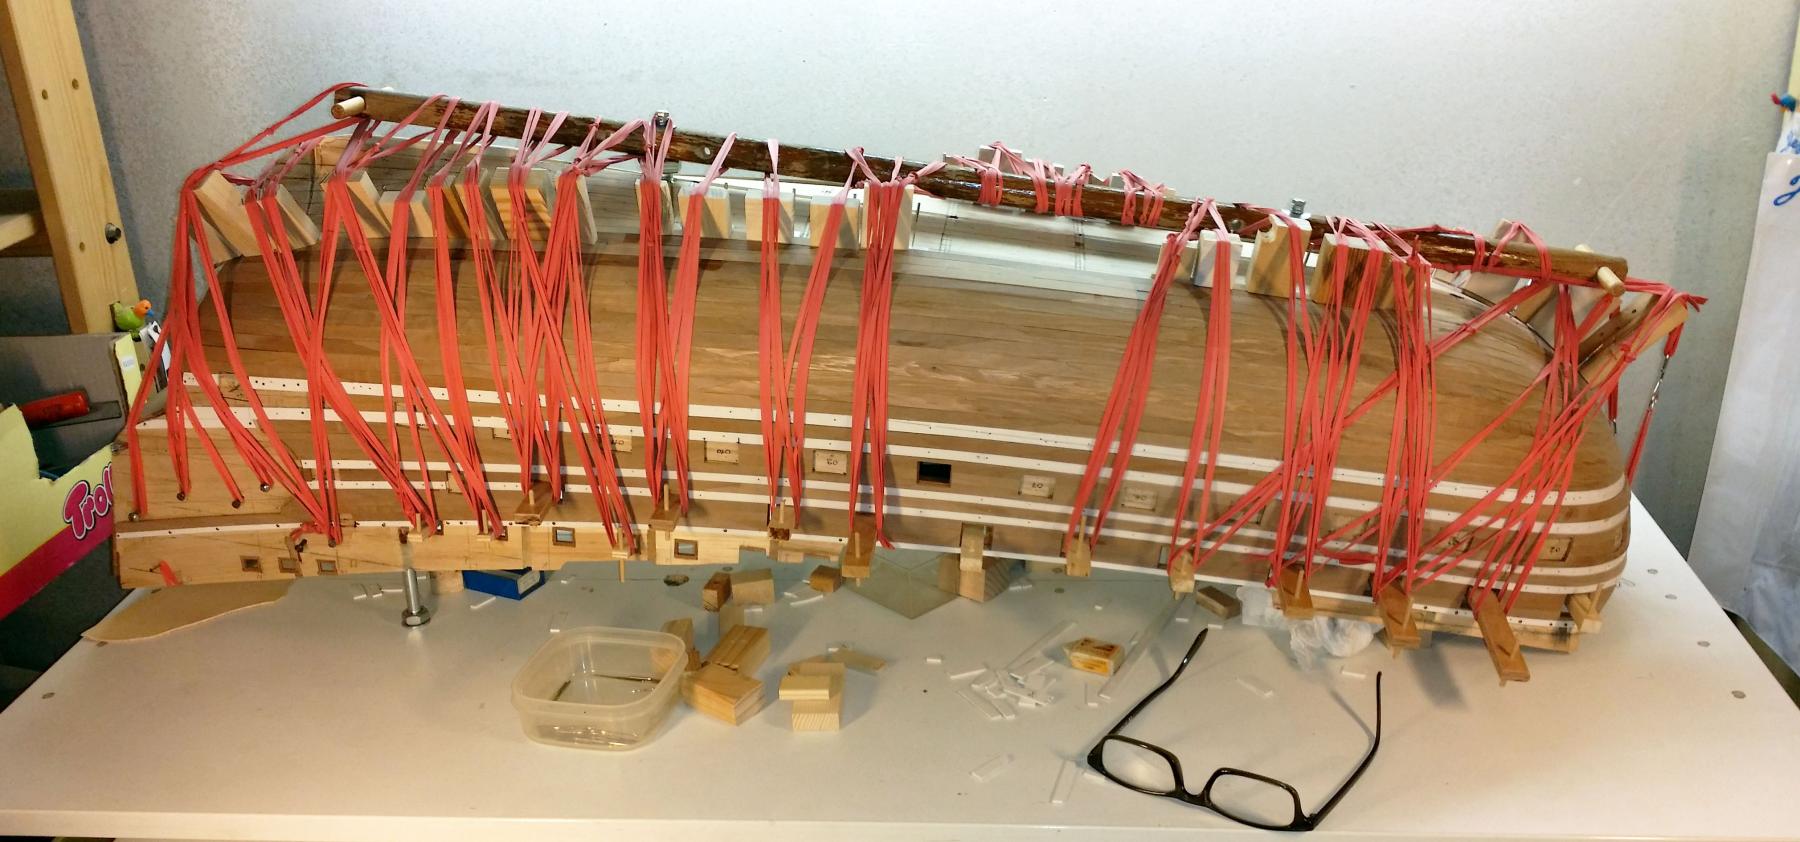
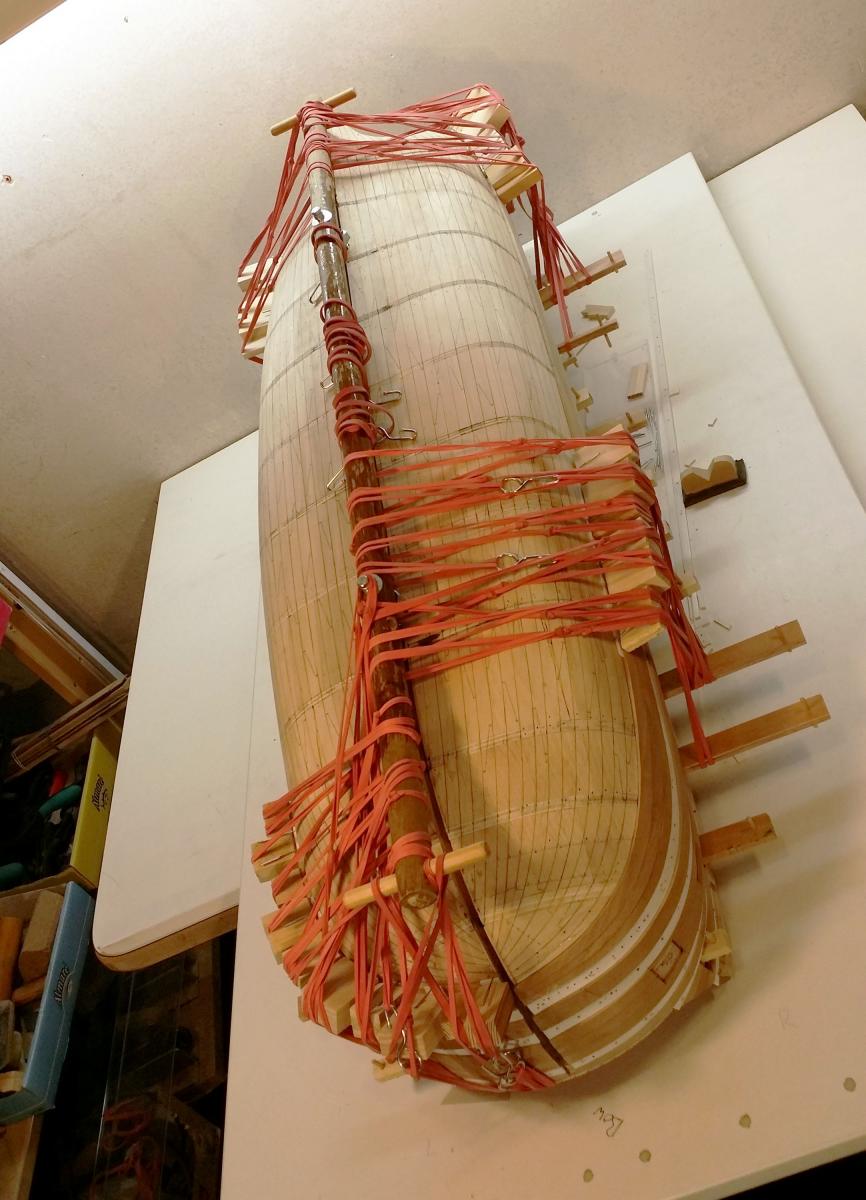
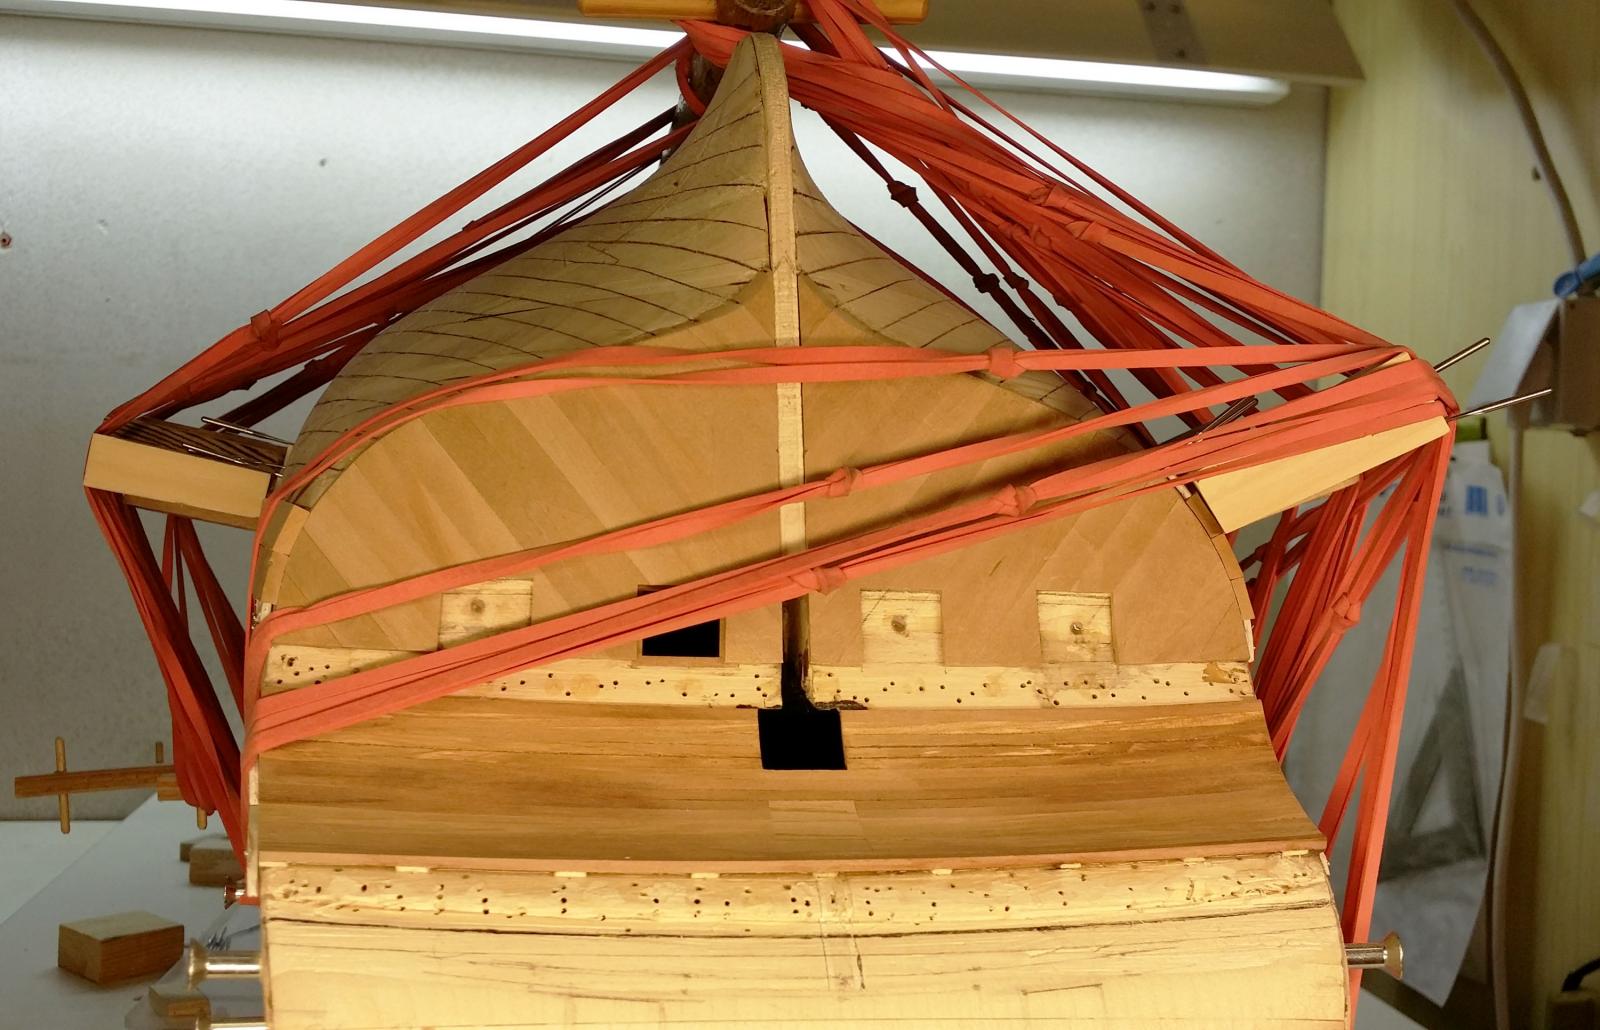
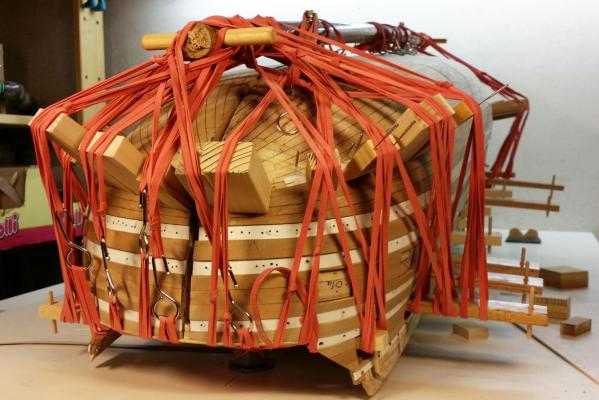
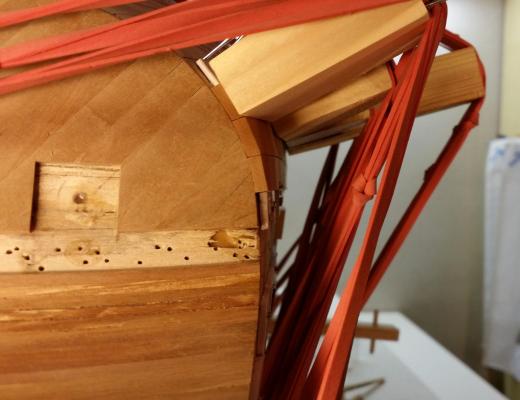
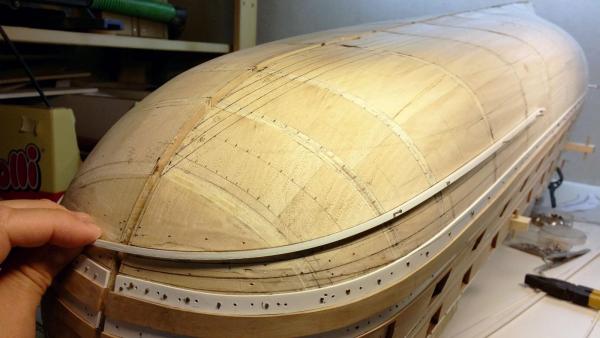
Some photos of the progress... Here, how I apply the preasure when gluing the planks. Drazen


- 487 replies
-
- 9
-
-
- ship of the line
- 80 guns
- (and 1 more)
-
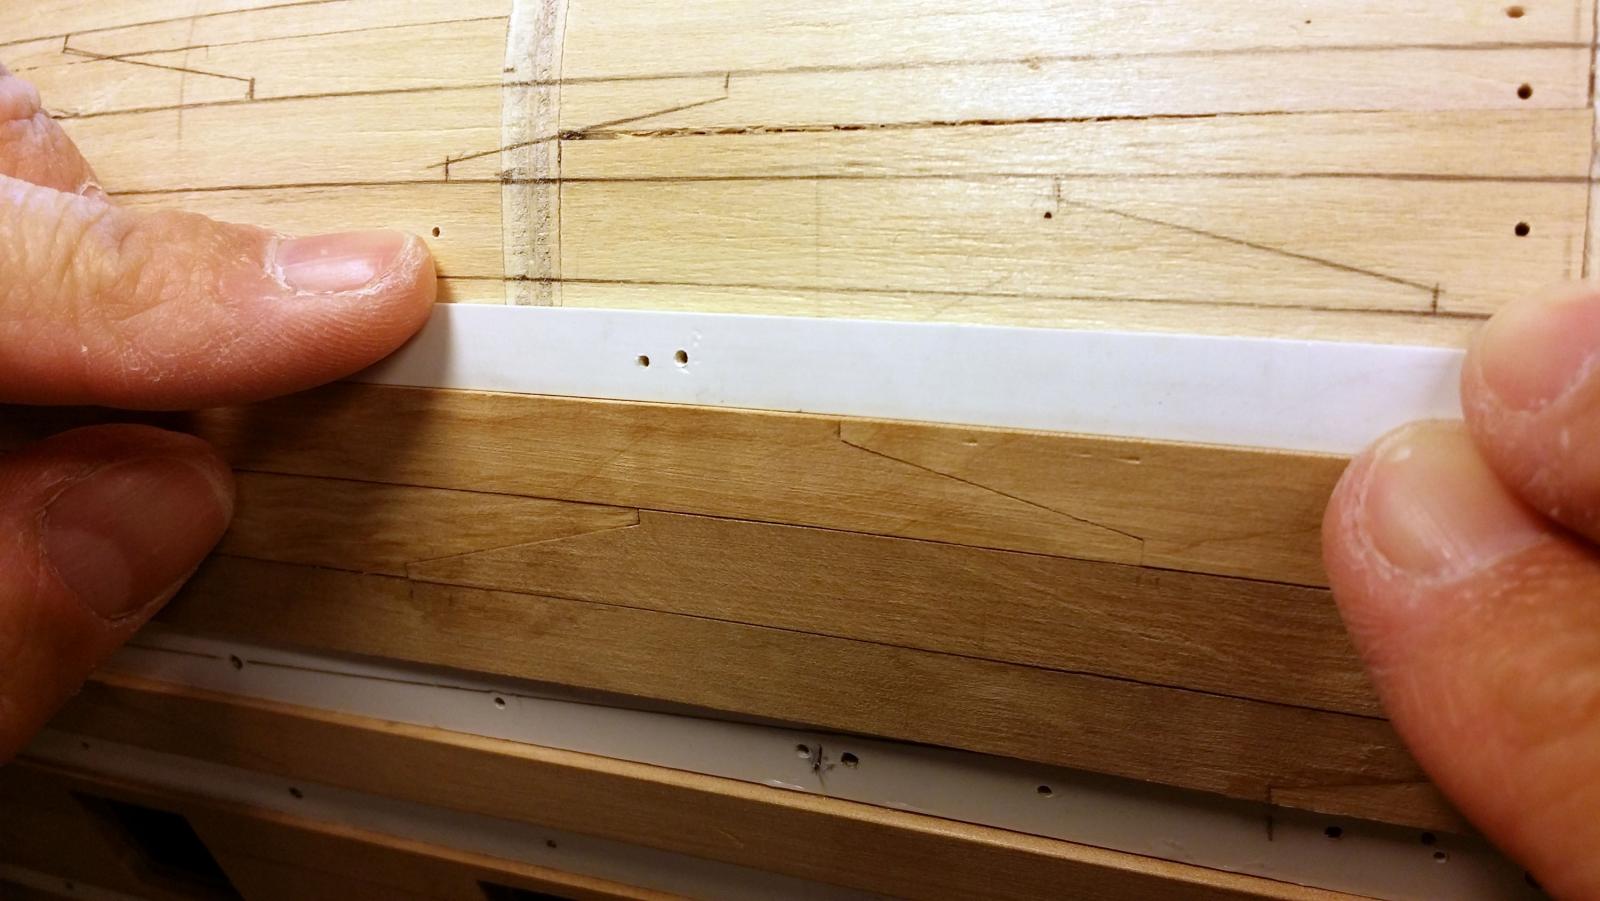
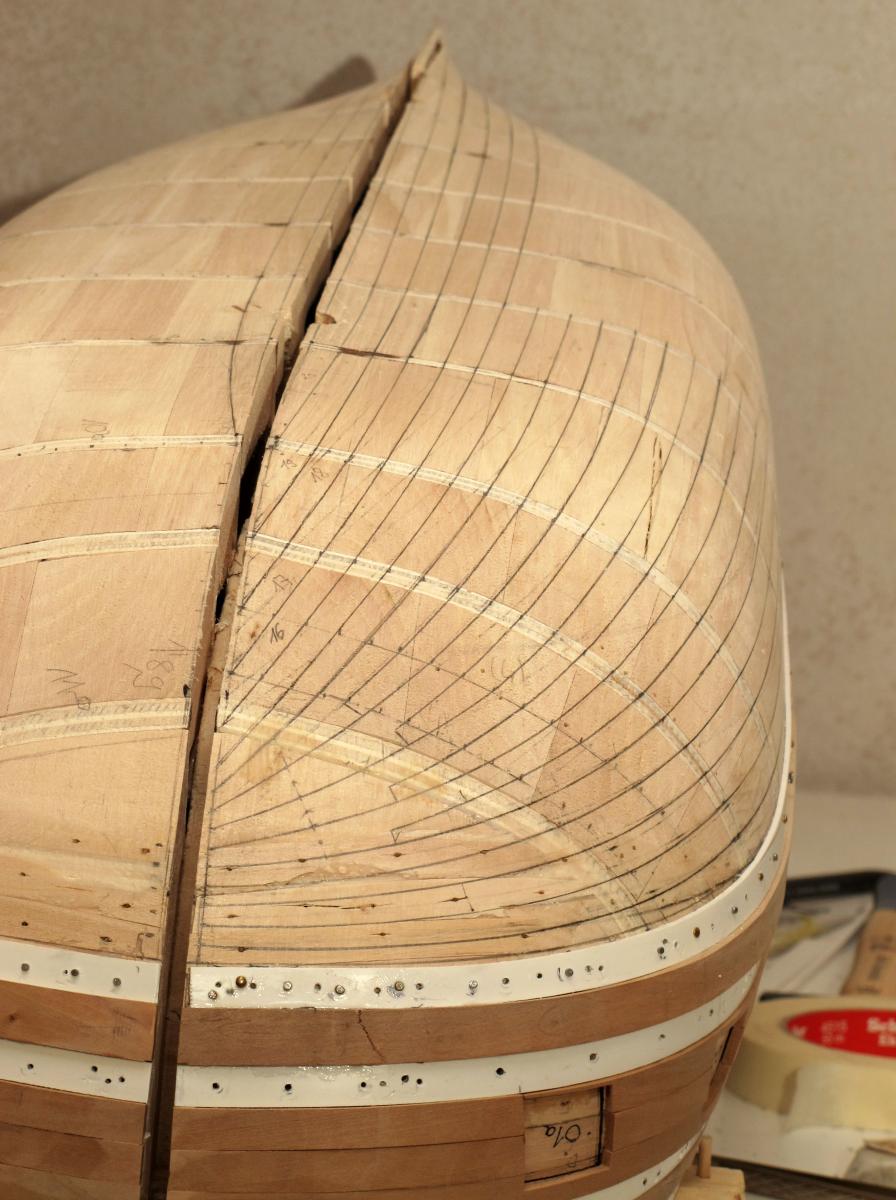
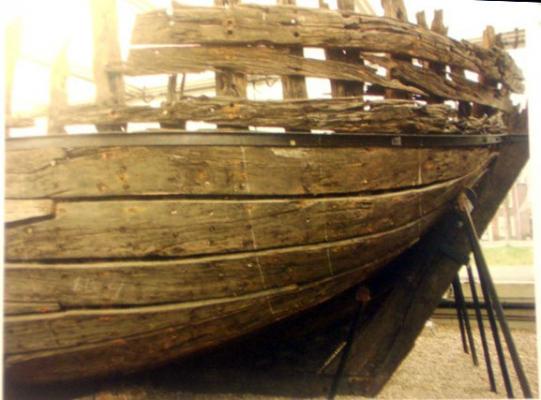
Jan, I was discussing this topic with Ab some time ago. From my understanding, the rules are anyhow for Dutch not that strict, but more – the practicality is important… and not to do “stupid” things. What I did, was to set the keel planks first. The most difficult is the garboard strake as it is twisted twice - also on the stem. I was trying to give them all a natural and less possible bent first. I did this all with a plastic plank since one can feel the tension and how far you can stress the material. Then, after 4 to 6 planks, I moved to the planks below the 1st lower whale ad did few planks there. Seems this is the way as described in several literatures if I am not wrong. Then, I did the steeling planks/drop planks as it fitted best. Funny, I did not need to add any plank on the stern – it just went well and not to wide. Exception: the garboard strake and the next one are wide at the end, but the replica has it too – part on the stern just over 70cm! If you look at the wreck, it is a beautiful example how we can do exact job, but in the past, things have been made as it would be easy. Even the one dropped plank on your photo is made in “english way” – stealing from both neighbored planks – at least Mondfeld shows it in his book as a rule. Attached: the low stern section of planking. Drazen

- 487 replies
-
- 7
-
-

-
- ship of the line
- 80 guns
- (and 1 more)
-
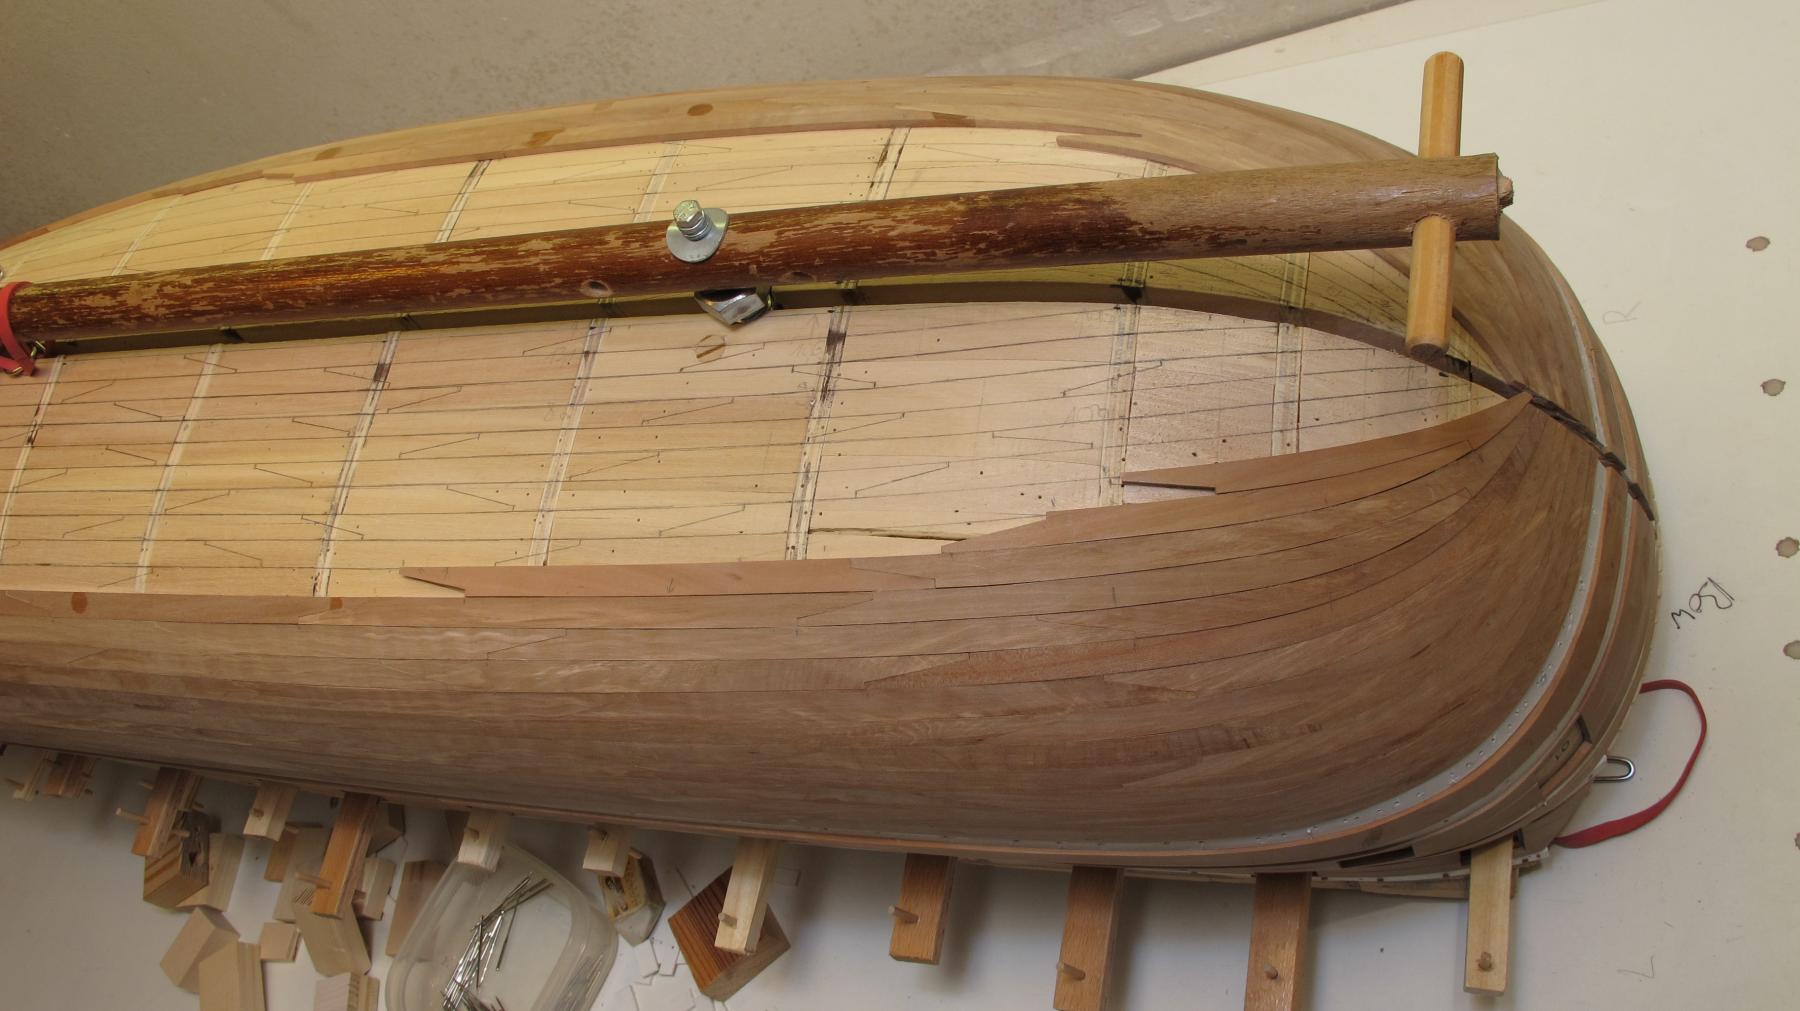
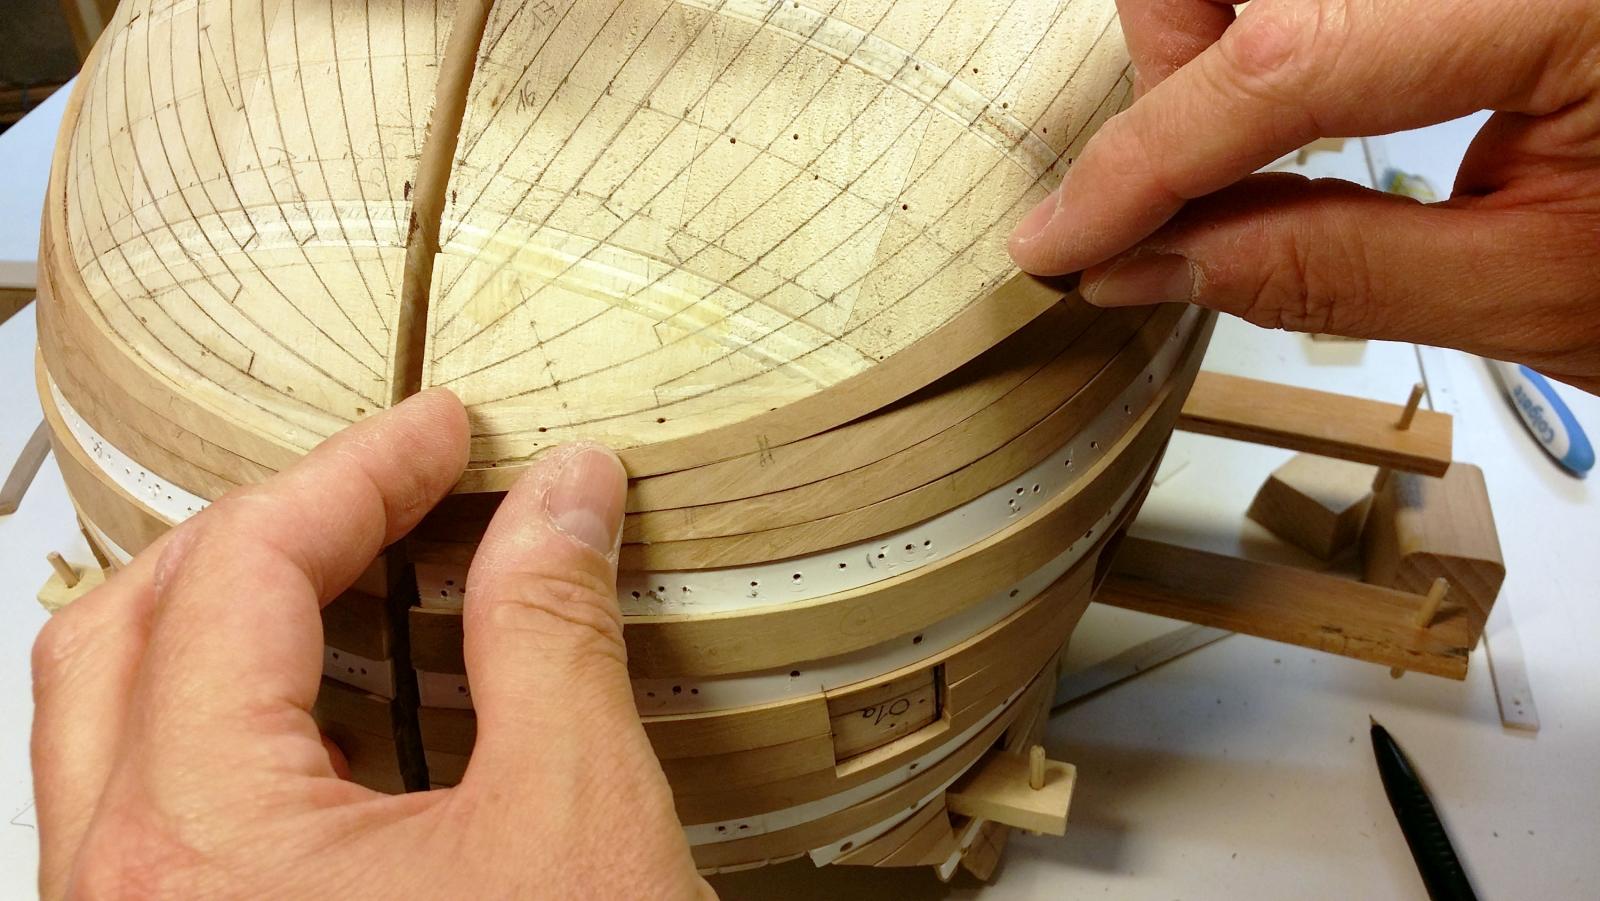
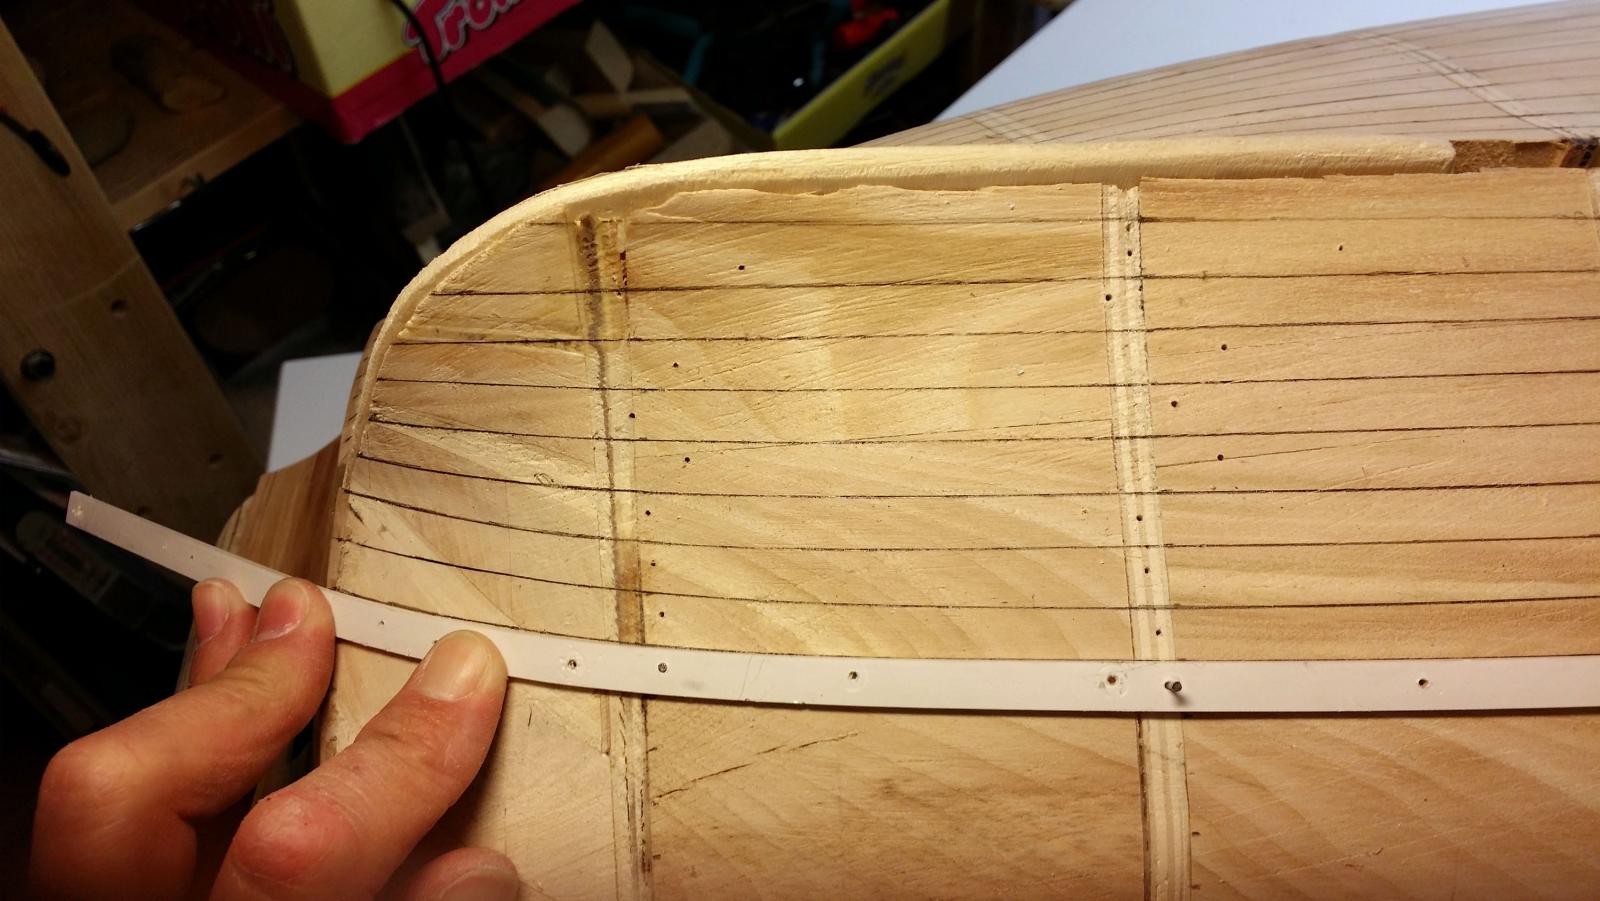
Jan, I am not sure if I understand what you mean. I was going through Vasa, Ab Hoving’s books, Herbert’s plastic model, Hohenzollern model (Winter), Monfeld’s book, but I did not check the William Rex since do not have any good info there. Do you have any example, that you can post? The only doubt I had was if to “drop” the neighbored planks as some literature shows, but I got nice lines by dropping every second plank. What do you mean under “giving room for the others to get to the stern”? Here a photo of a dropped neighboured planks. Drazen
- 487 replies
-
- 2
-
-
- ship of the line
- 80 guns
- (and 1 more)
-
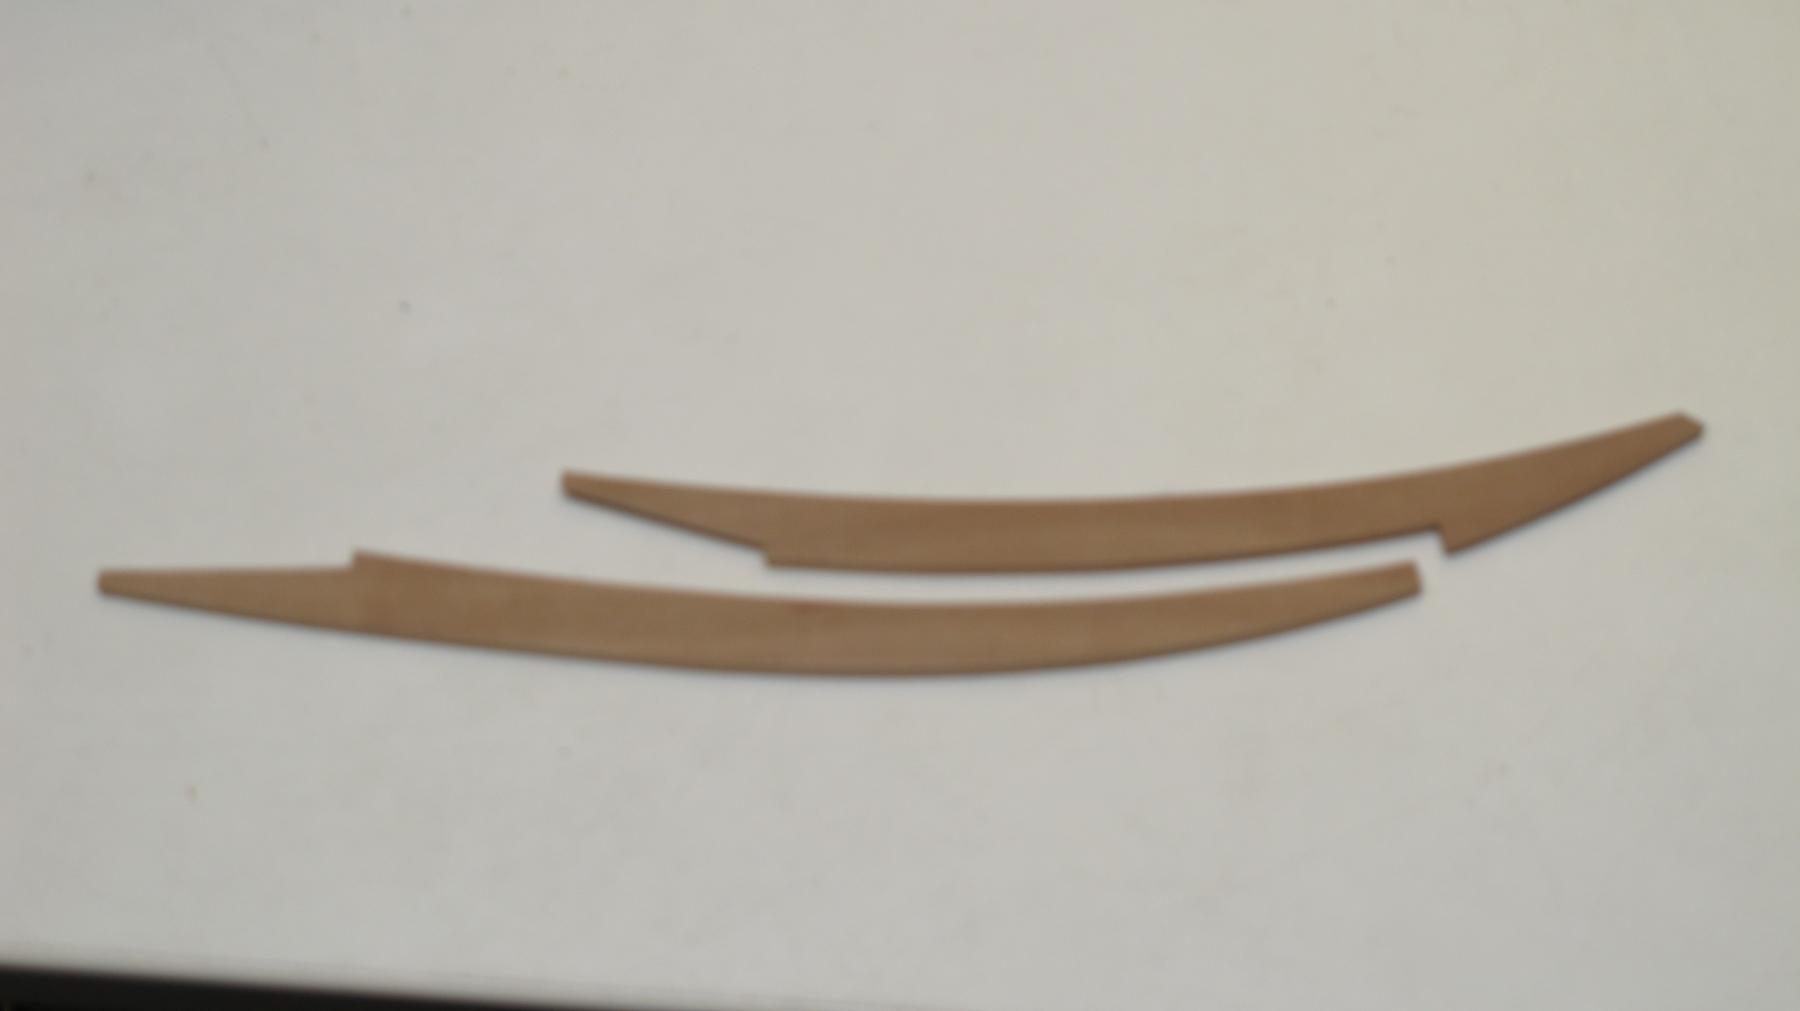
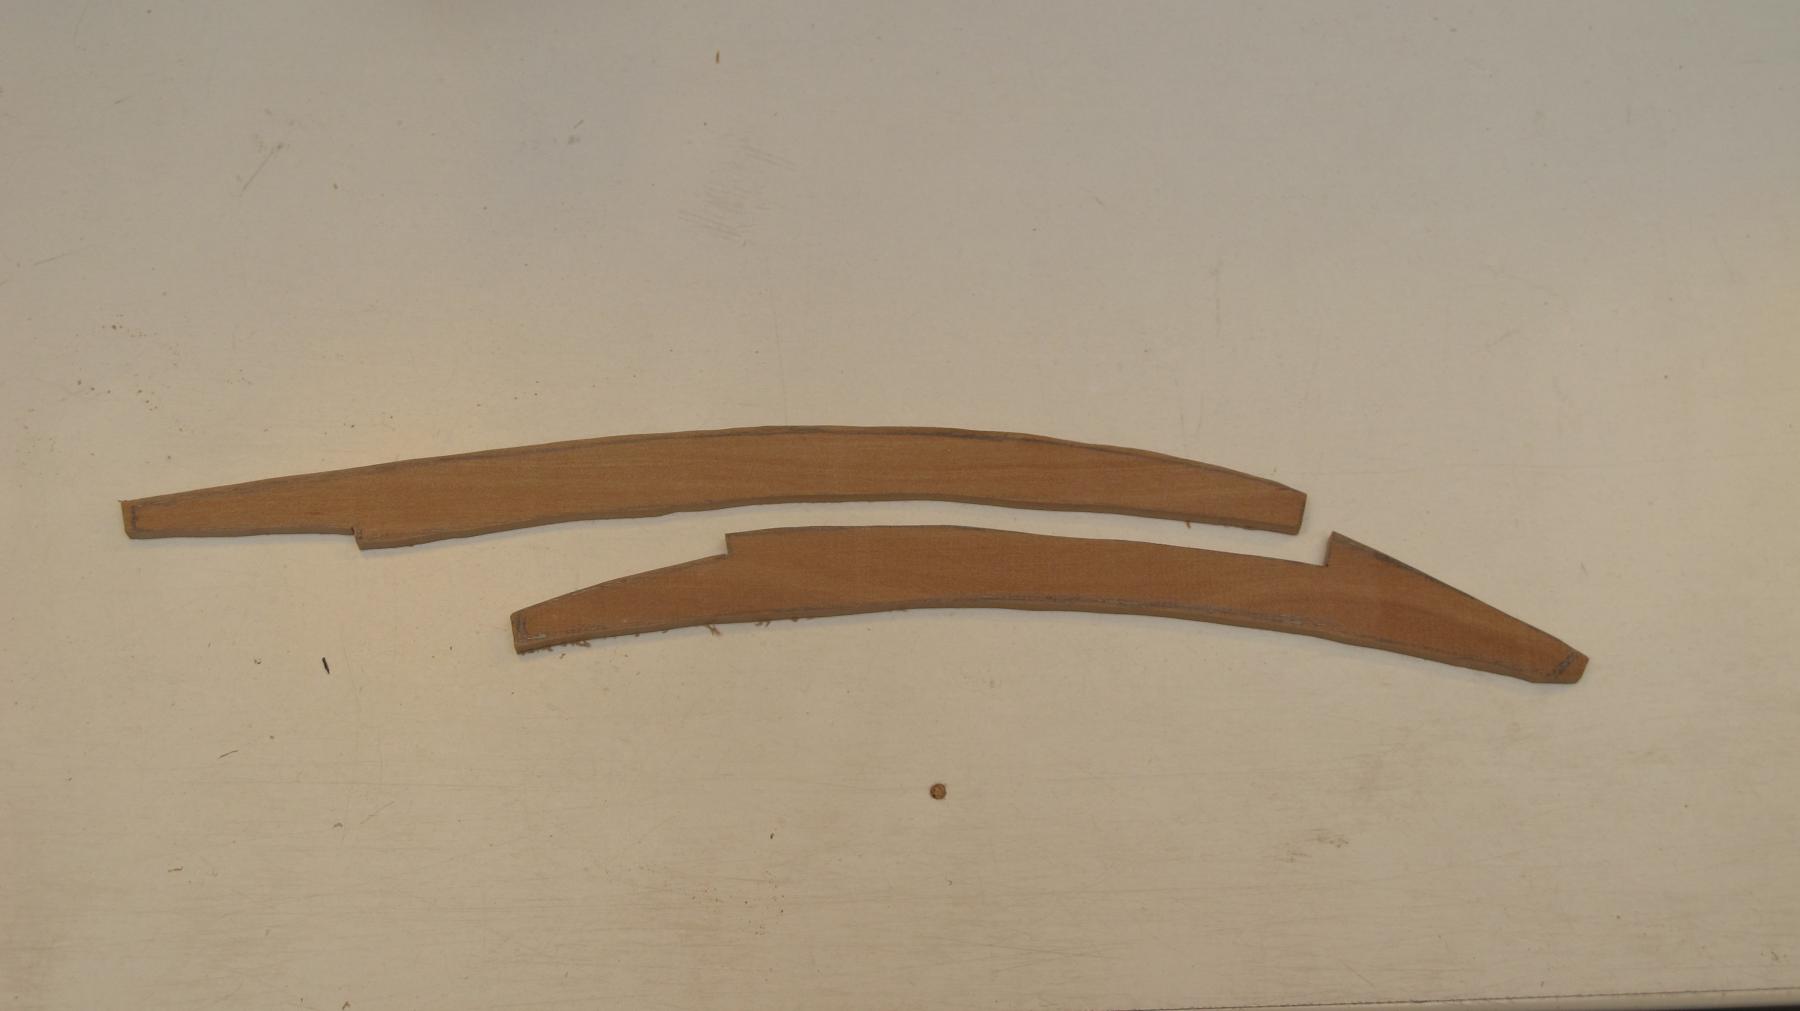
… and here: ready including the scarves. Drazen
- 487 replies
-
- 12
-
-
-
- ship of the line
- 80 guns
- (and 1 more)
-
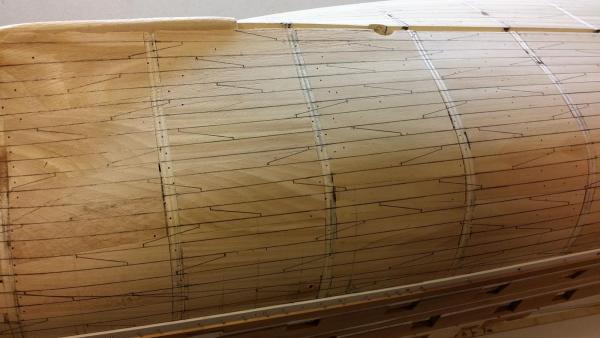
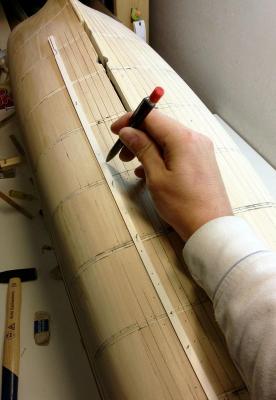
Here: drawing the plank lines using flexible plastic ruler. Drazen
- 487 replies
-
- 9
-
-
- ship of the line
- 80 guns
- (and 1 more)
-
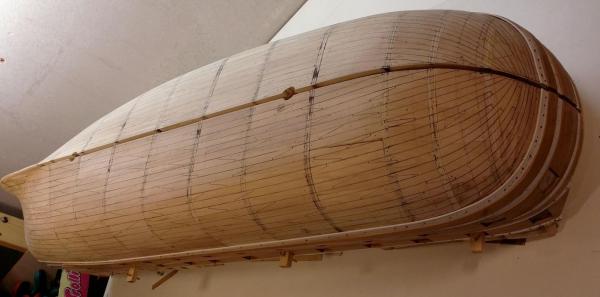
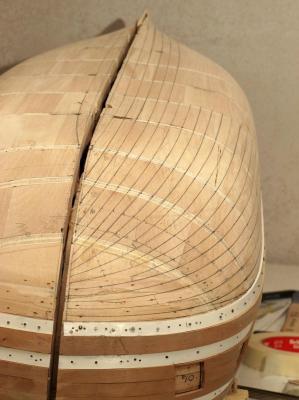
In the meantime the keel is more or less ready. I had to correct the final shape due to some errors in the plans. Drazen

- 487 replies
-
- 5
-
-
- ship of the line
- 80 guns
- (and 1 more)
-
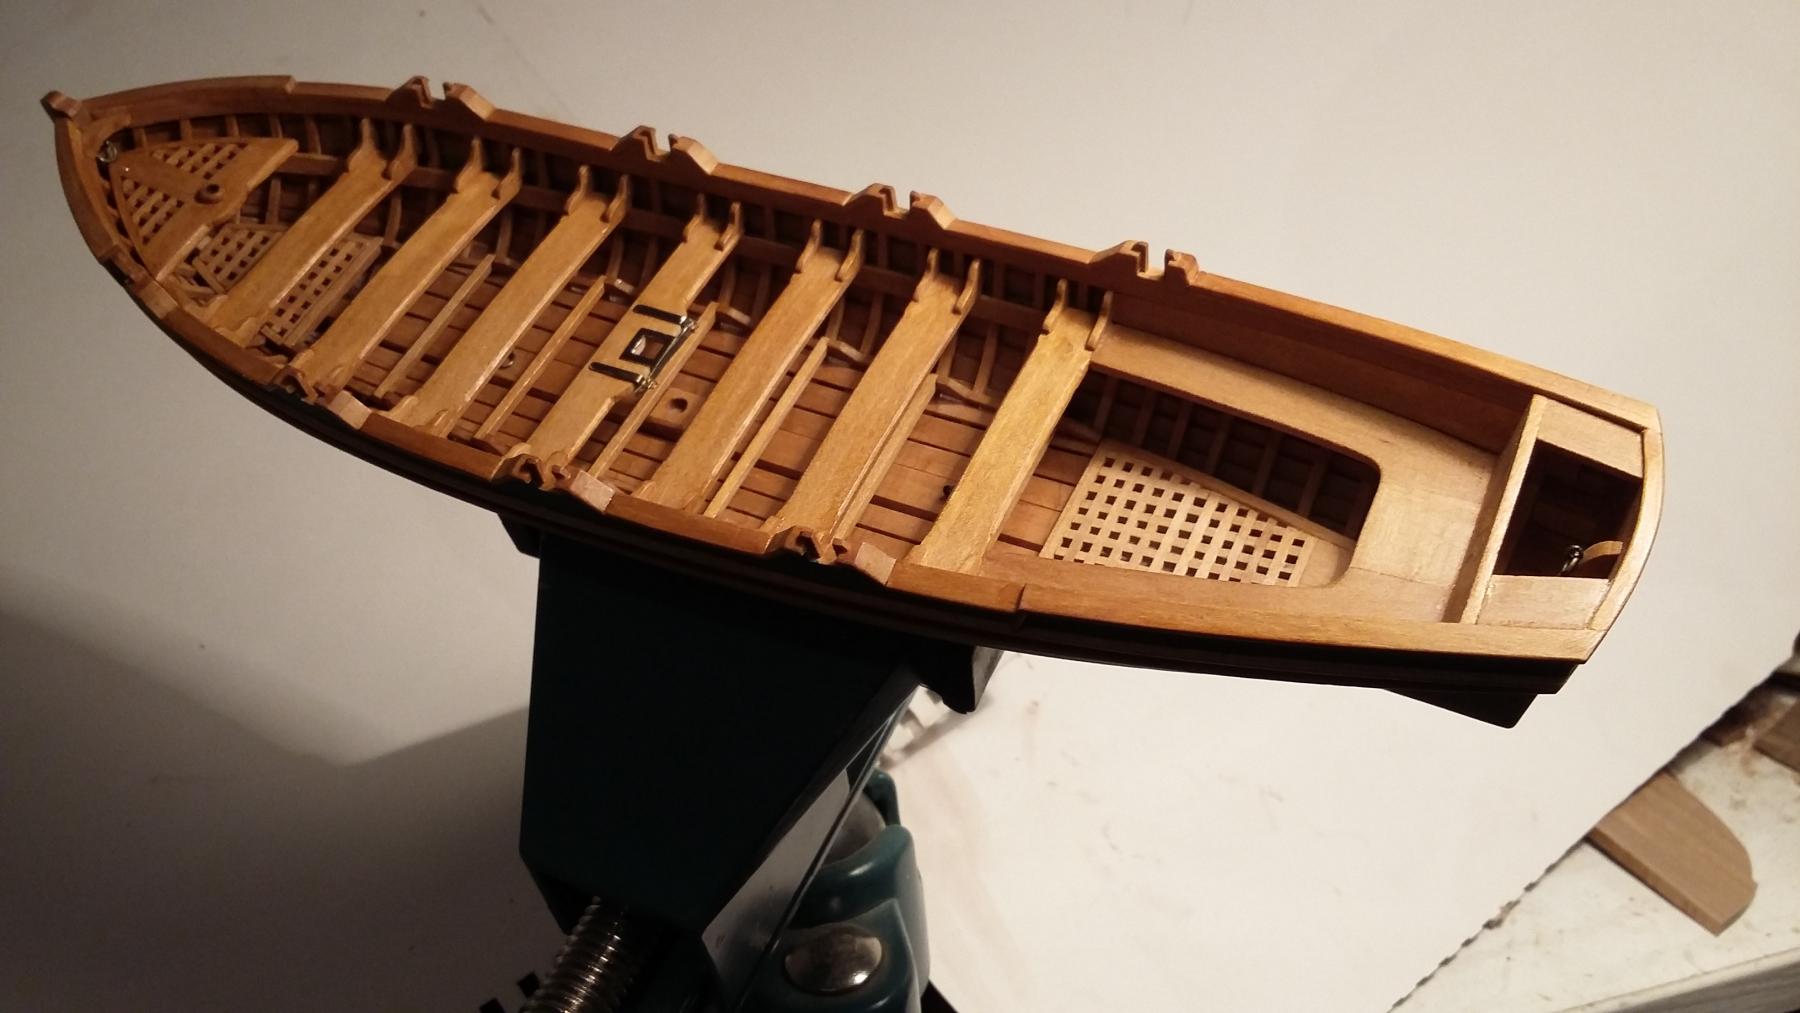
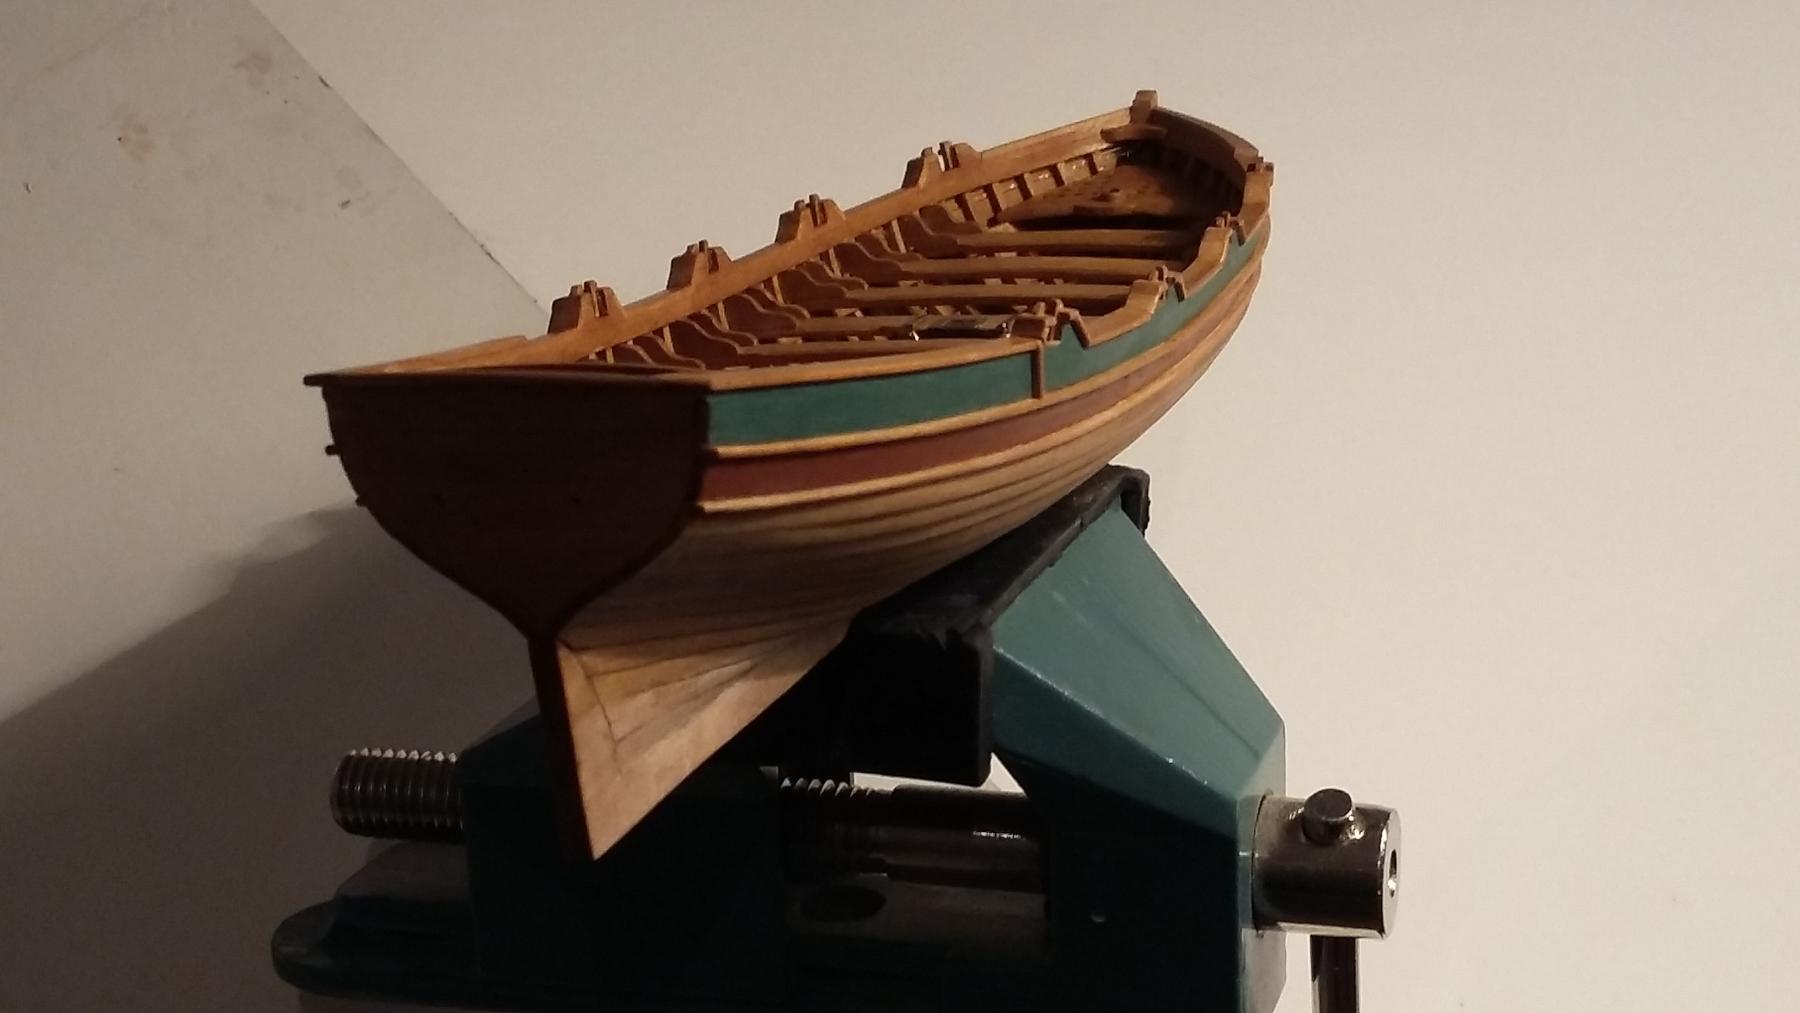
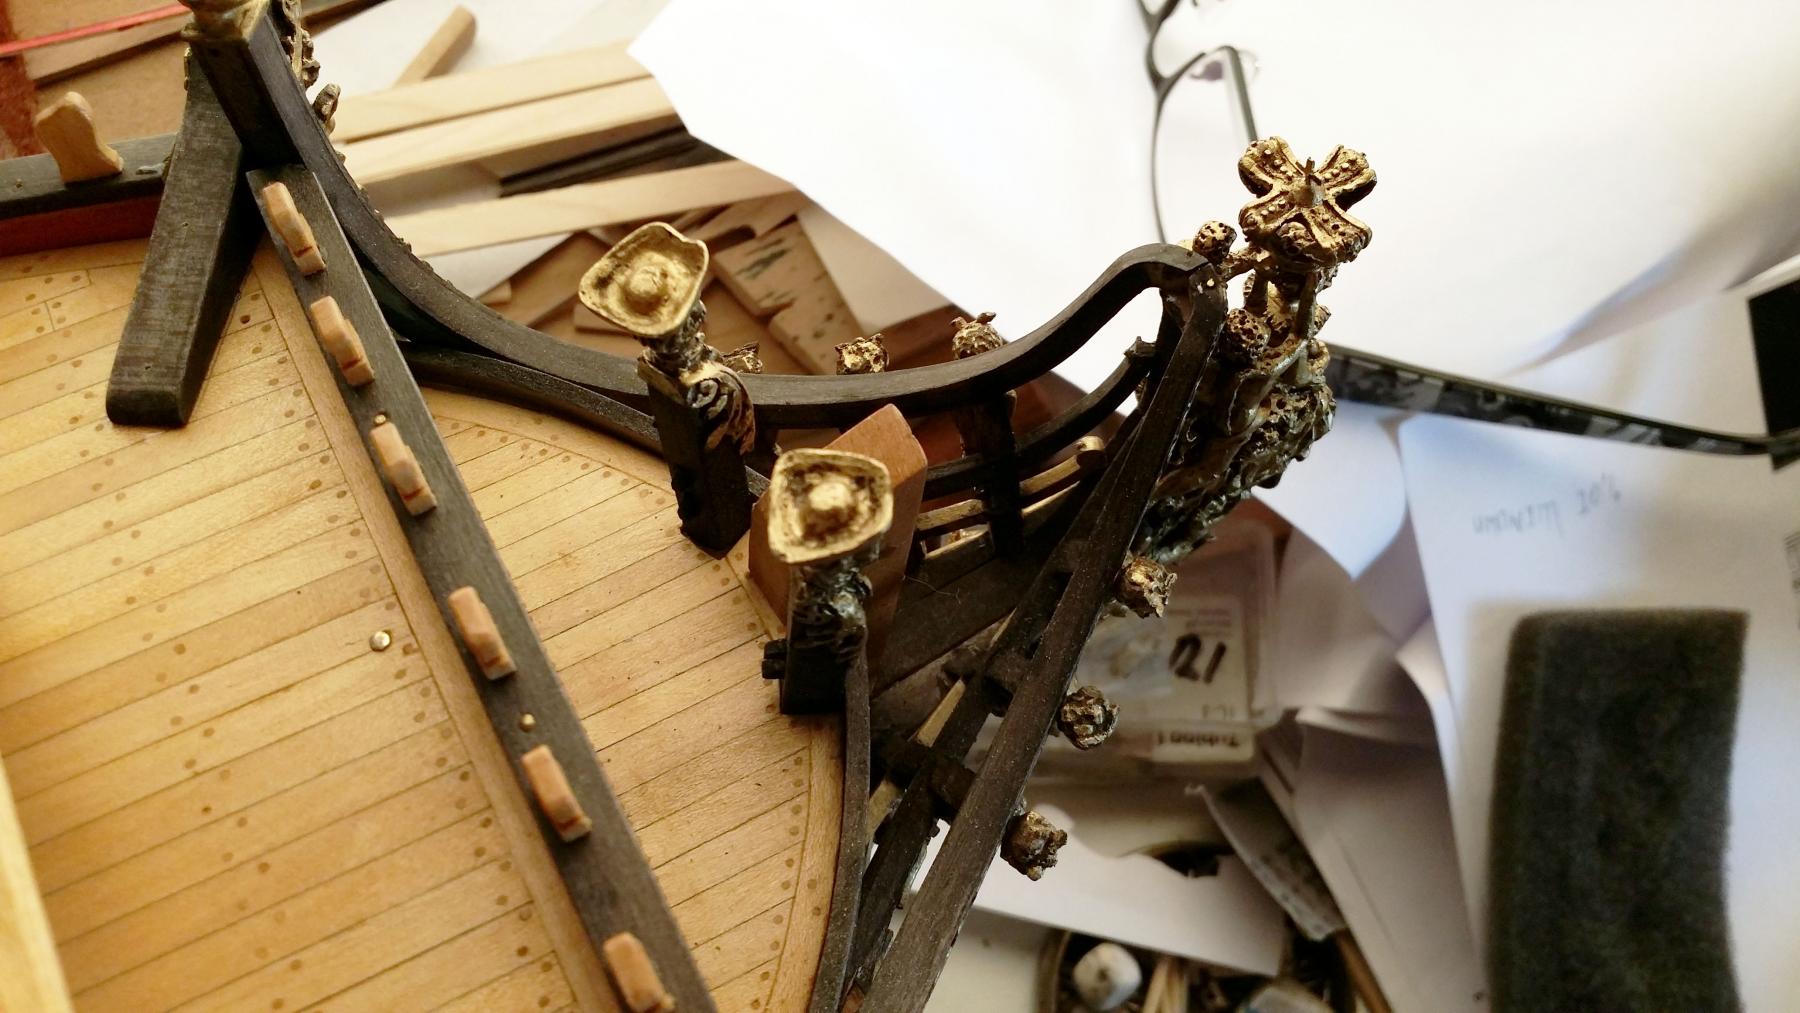
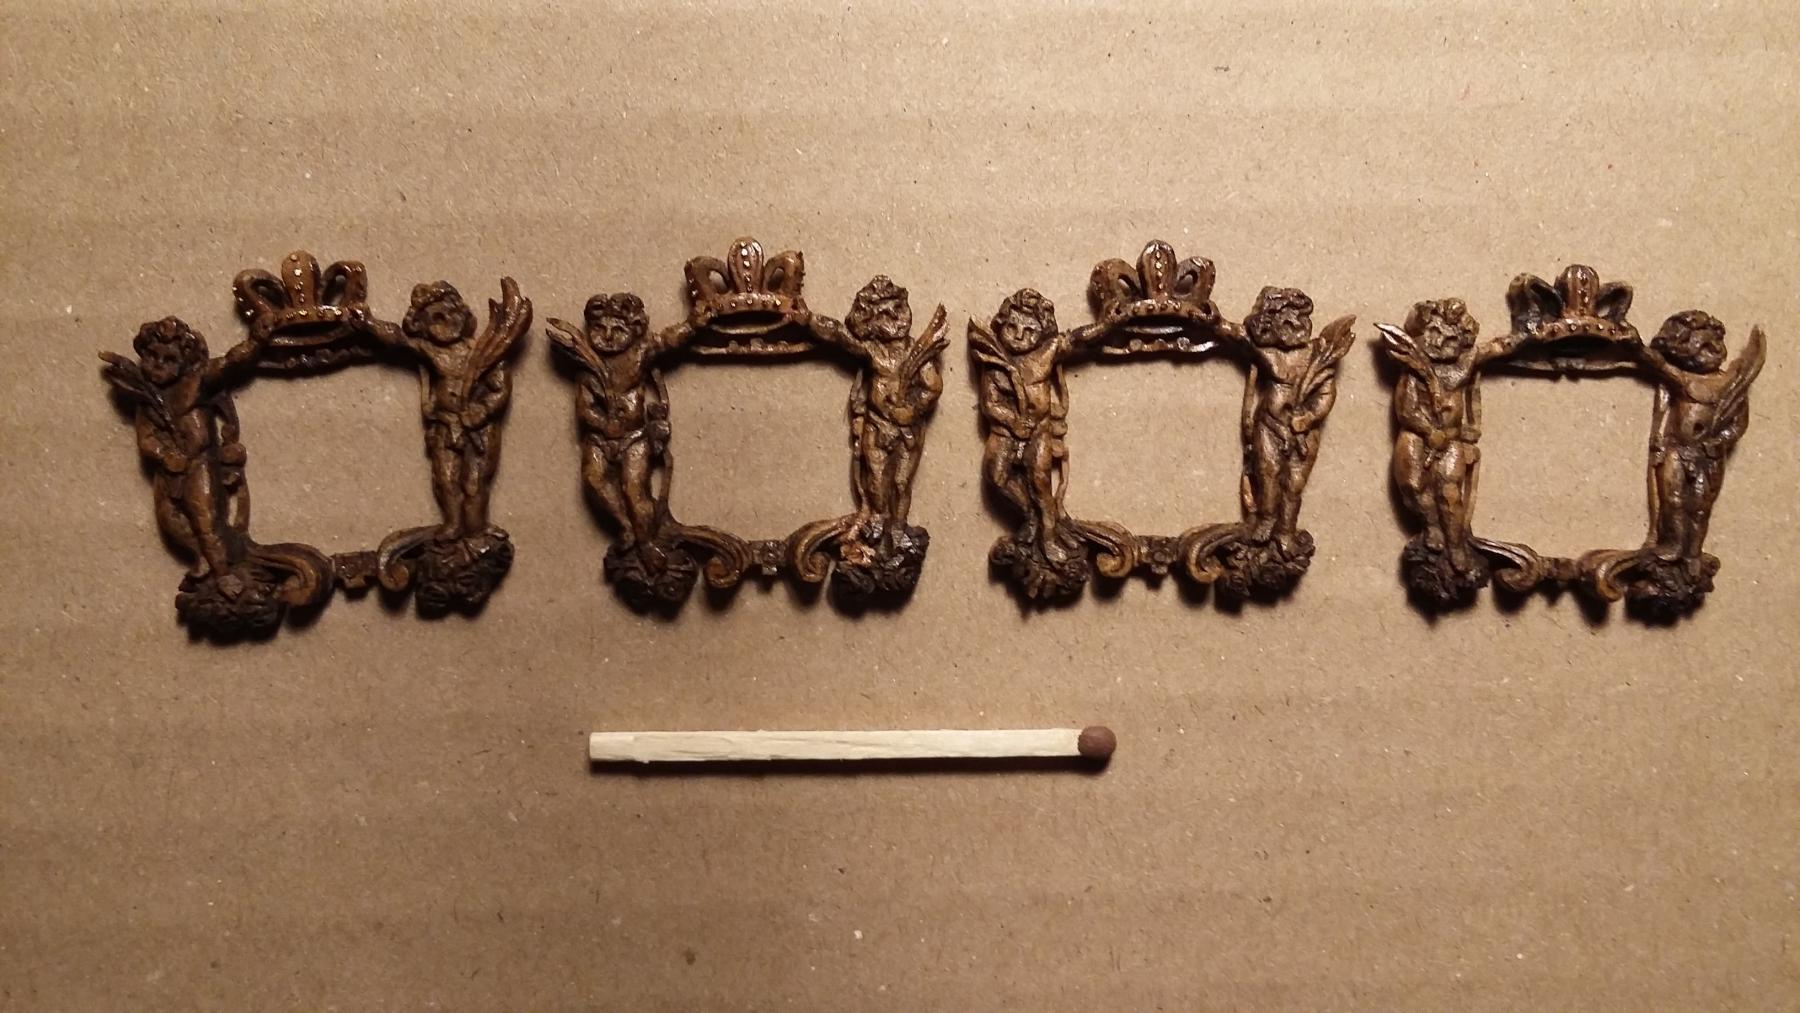
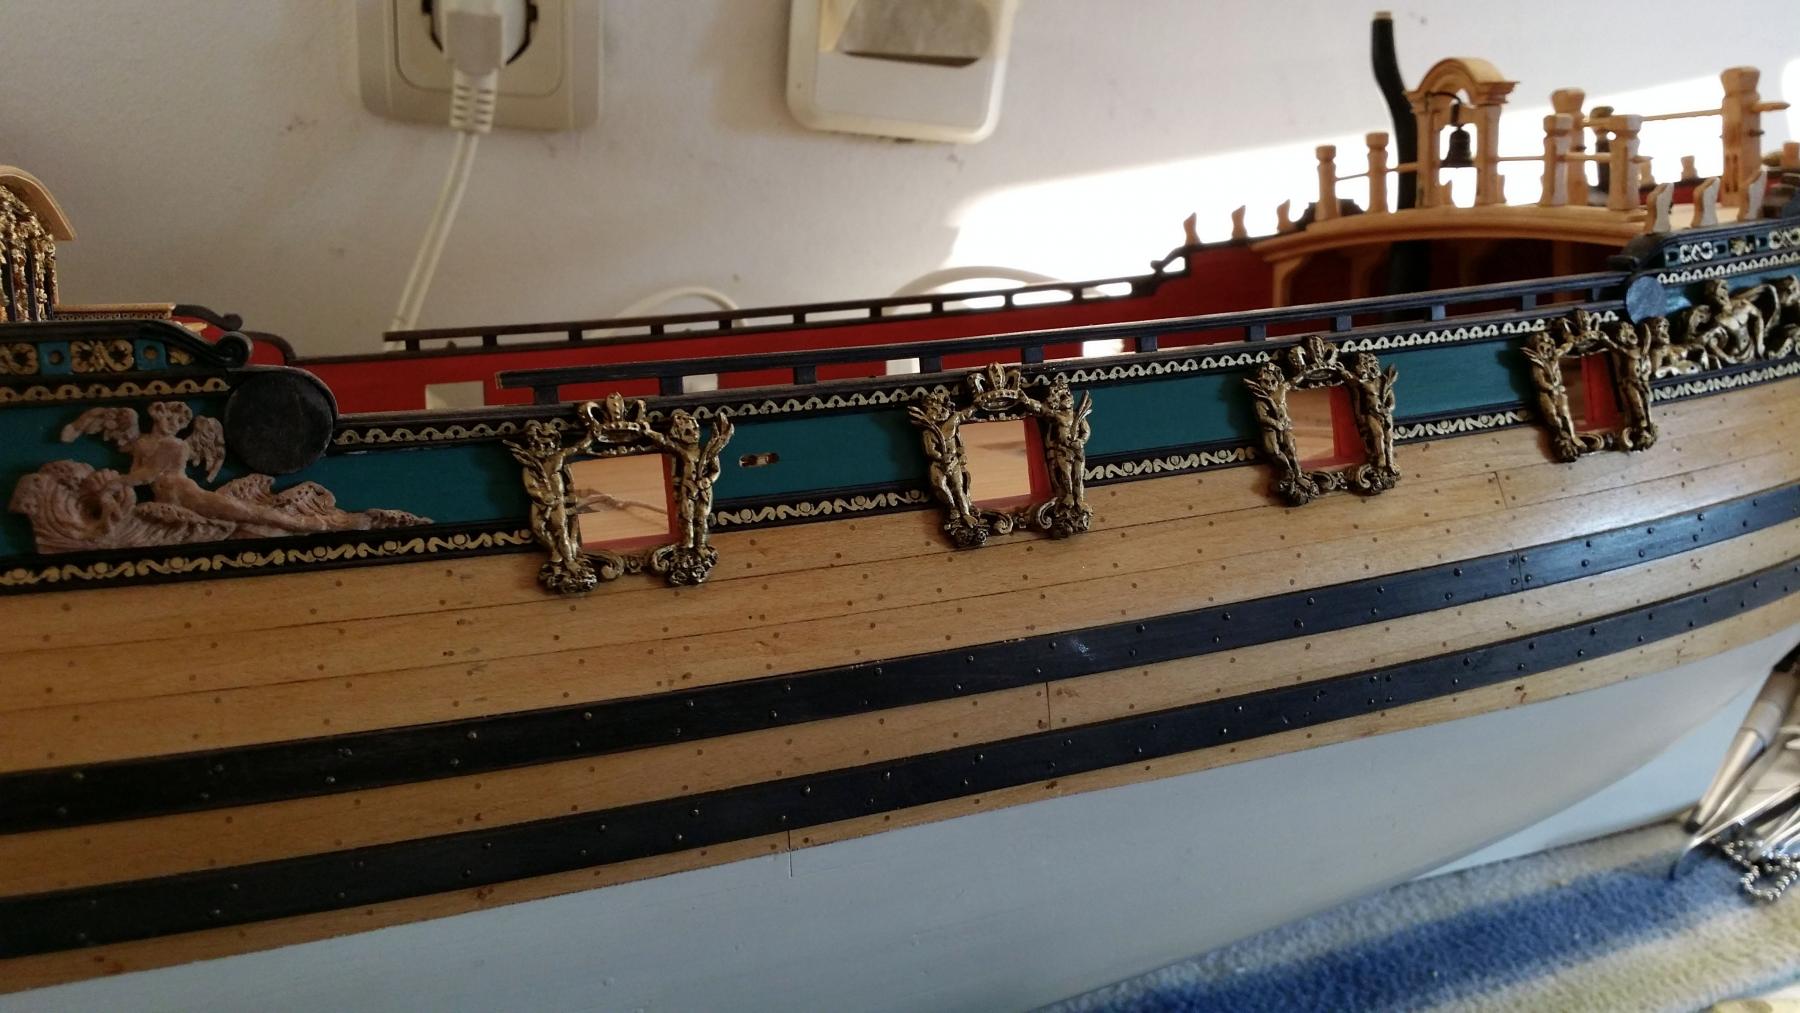
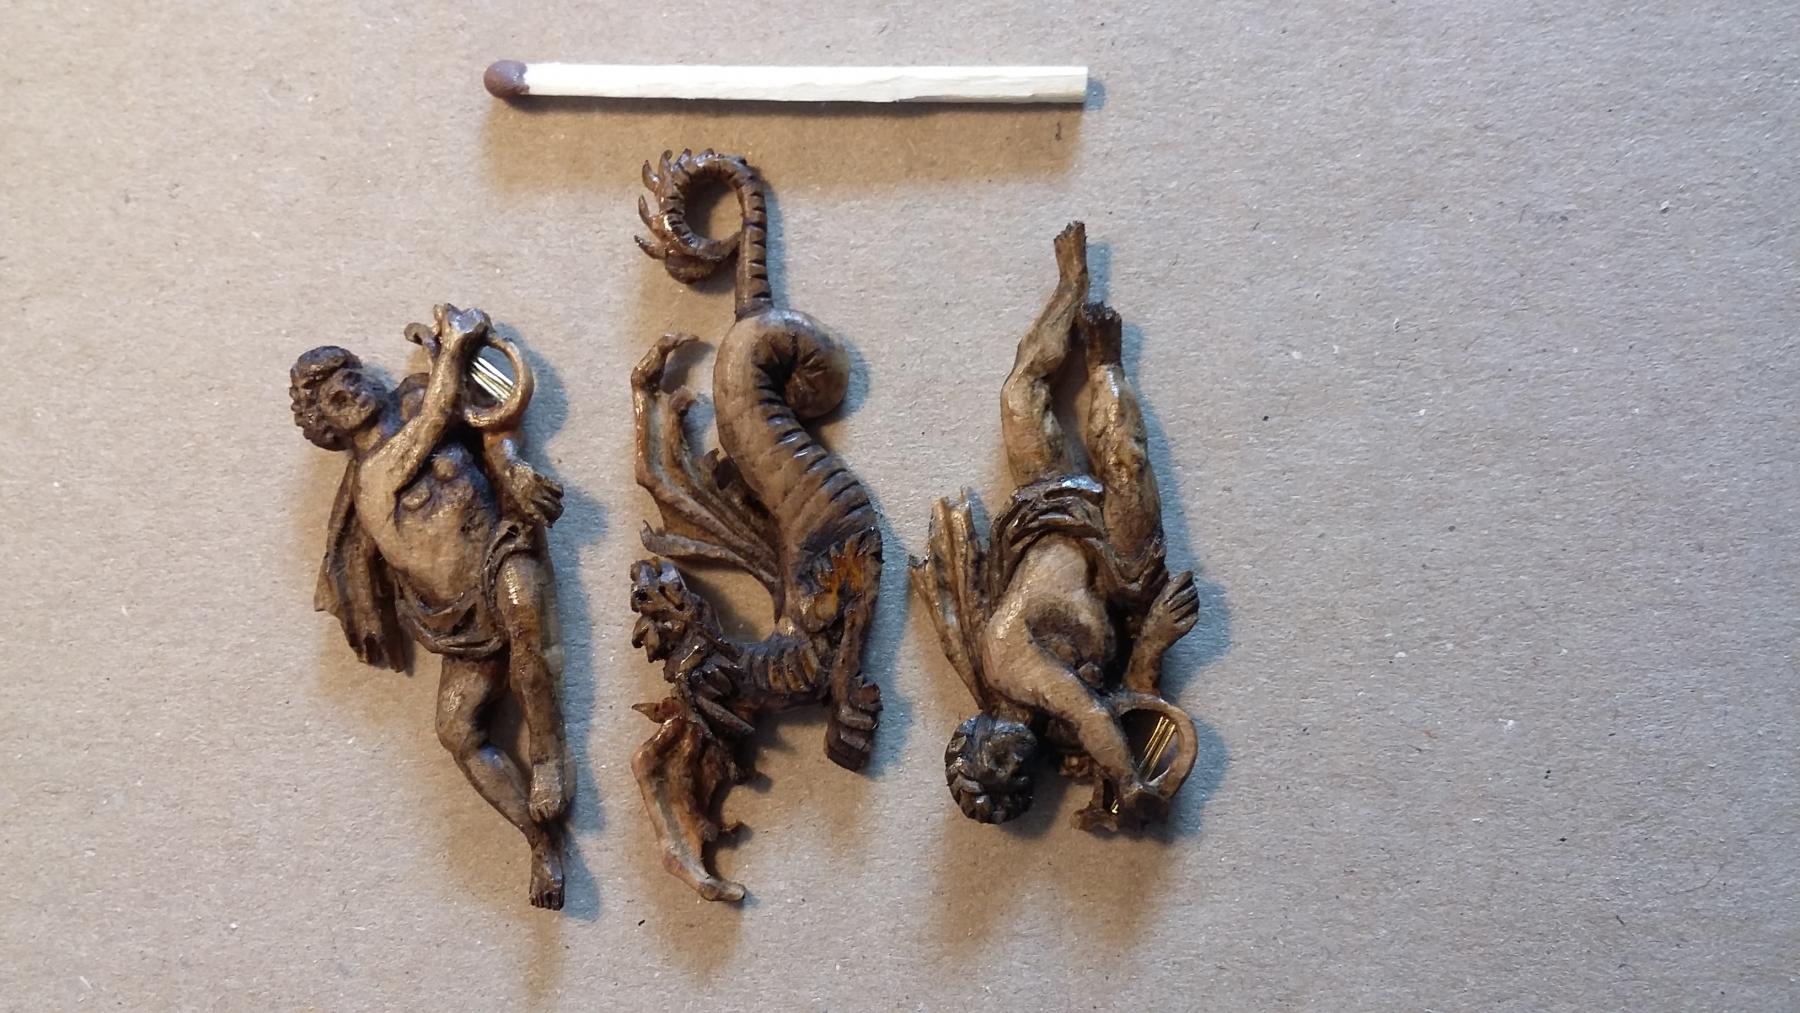
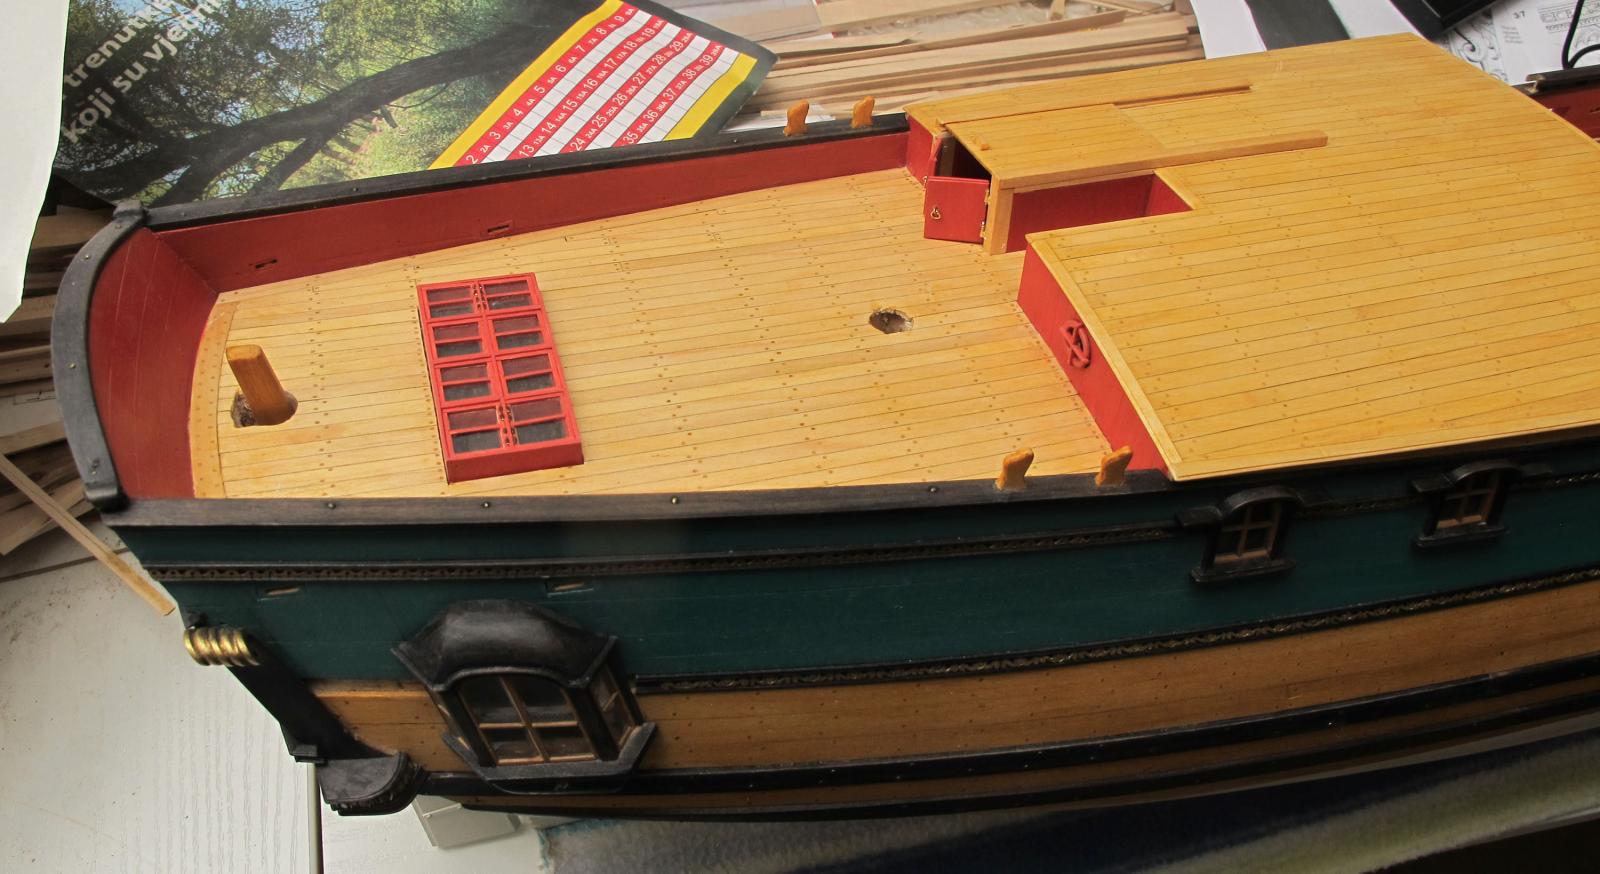
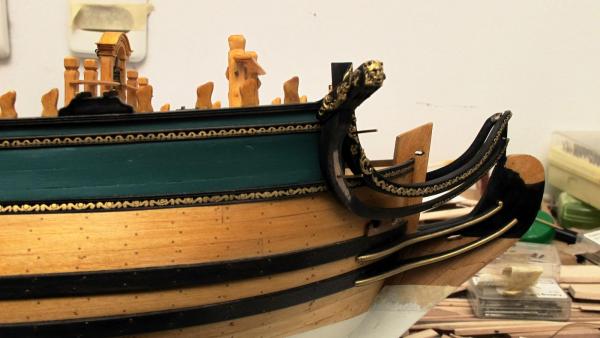
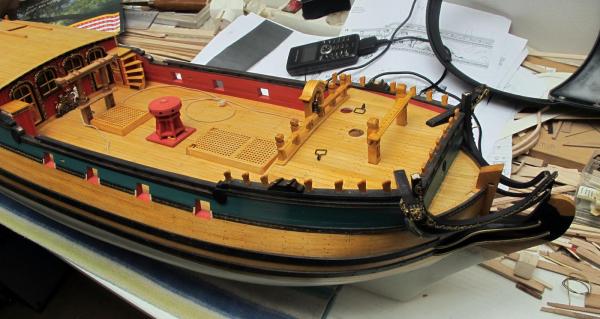
some new photos from the last weekend when I met Mile. Dražen


- 86 replies
-
- 18
-
-
- royal caroline
- yacht
- (and 1 more)
-
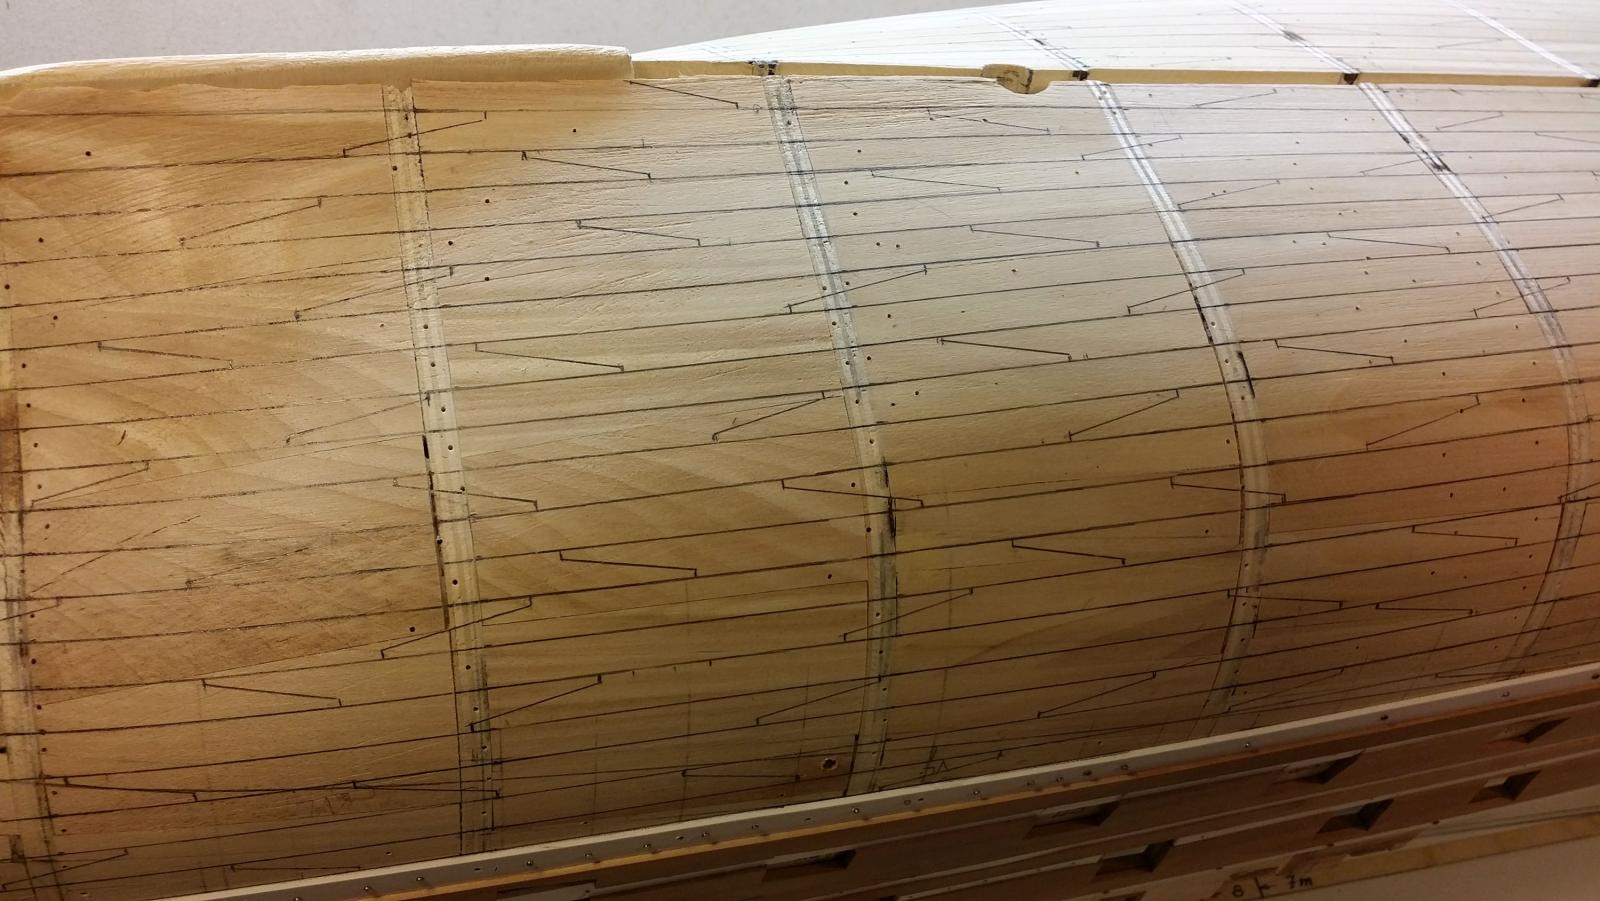
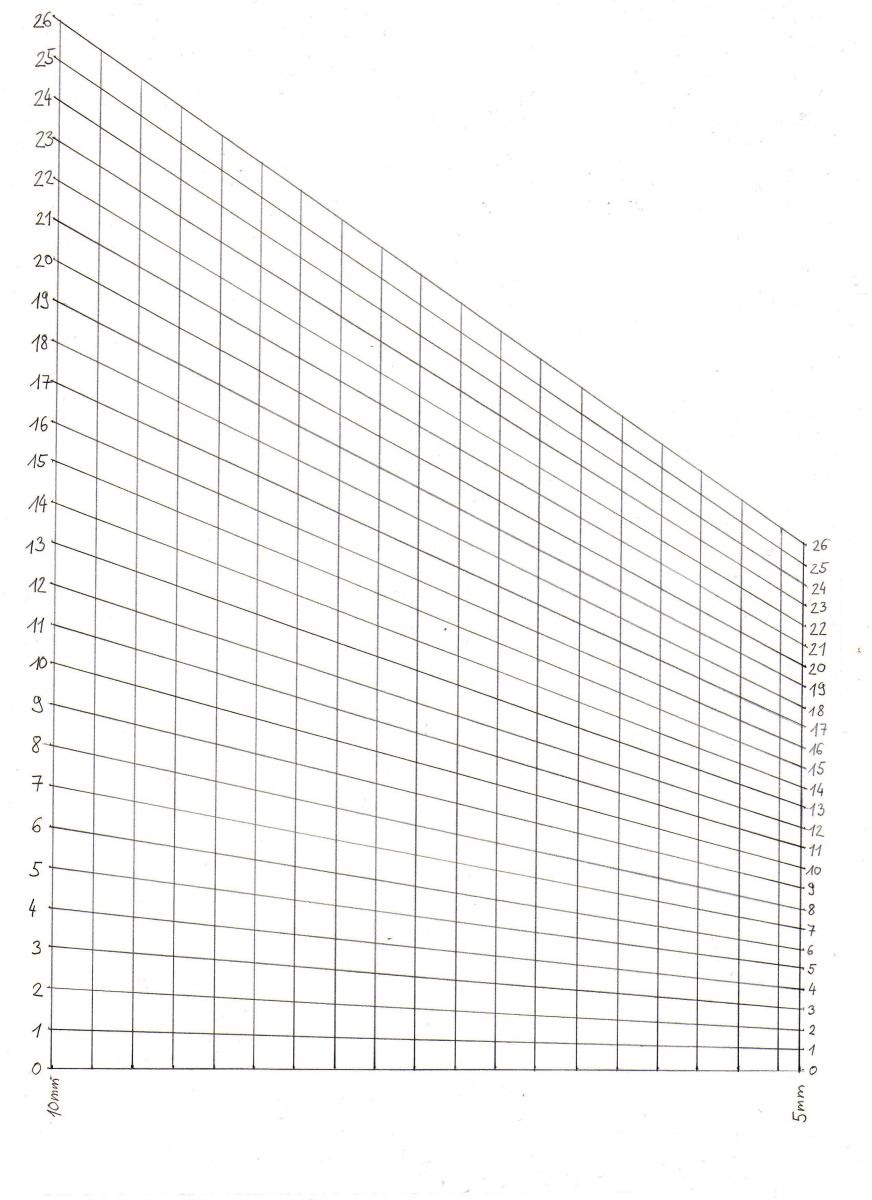
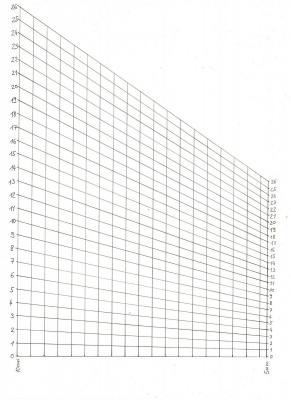
Well, this is pure mathematics - the “theory of similarity”: If you want to divide any length in identical (or not identical) parts, you can draw this wished division on a wished line, which is not in the same scale as you need. Then, you draw the connection lines to a smaller or bigger scale – so your scale is somewhere in between, or to a point on the paper (in my case, the point will give lower accuracy). From this paper (see photo), you can take (cut out) any length you need which represents the length of the outer line on the hull. What you do, is to measure the length on the hull with a piece of paper and transfer this length onto this diagram – so, that you search that the measured length fits to the number of the lines of planks you want to have. In my case, I have calculated that I need 20 plank widths. So, I see where the length fits to the length from 0 to 20. Then, I cut there with a knife and use it as a template to mark the 20 times the same high of the planks on the hull. This I repeat for every bulkhead or wished perpendicular line. In my case, I need same divisions for the planking - what historically may not be 100% correct, but looks better on the model and during the planking process, the width of the plank lines will be not exact anyhow. Another procedure to divide the outer line of the hull in eg. 20 is by measuring the length again with a piece of paper and dividing it on a calculator and add them one after another onto the hull. Then, you have a problem that you are adding the eventual mistake when 20 times measuring and marking. There are some further methods as well. Anyhow, this method seems to me the most simple to get exact division to any length you need. This template, one can print out on a printer several times. I was marking today and needed some 6 to 8 papers for all bulkheads. Many words… and I hope it is clear… I am also an airplane guy – really; focused on scale 1:48 from the beginning of aviation till end of WW2. Drazen
- 487 replies
-
- 4
-
-
- ship of the line
- 80 guns
- (and 1 more)
-
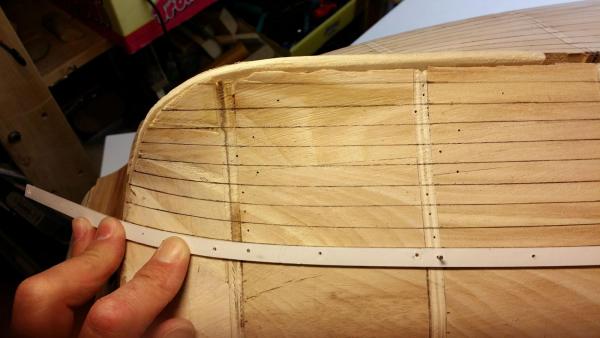
For drawing planks I use self made „plank divider“. With this I can easily get an equal width. One can print my photo and does not need to draw it. Drazen

- 487 replies
-
- 11
-
-
- ship of the line
- 80 guns
- (and 1 more)
-
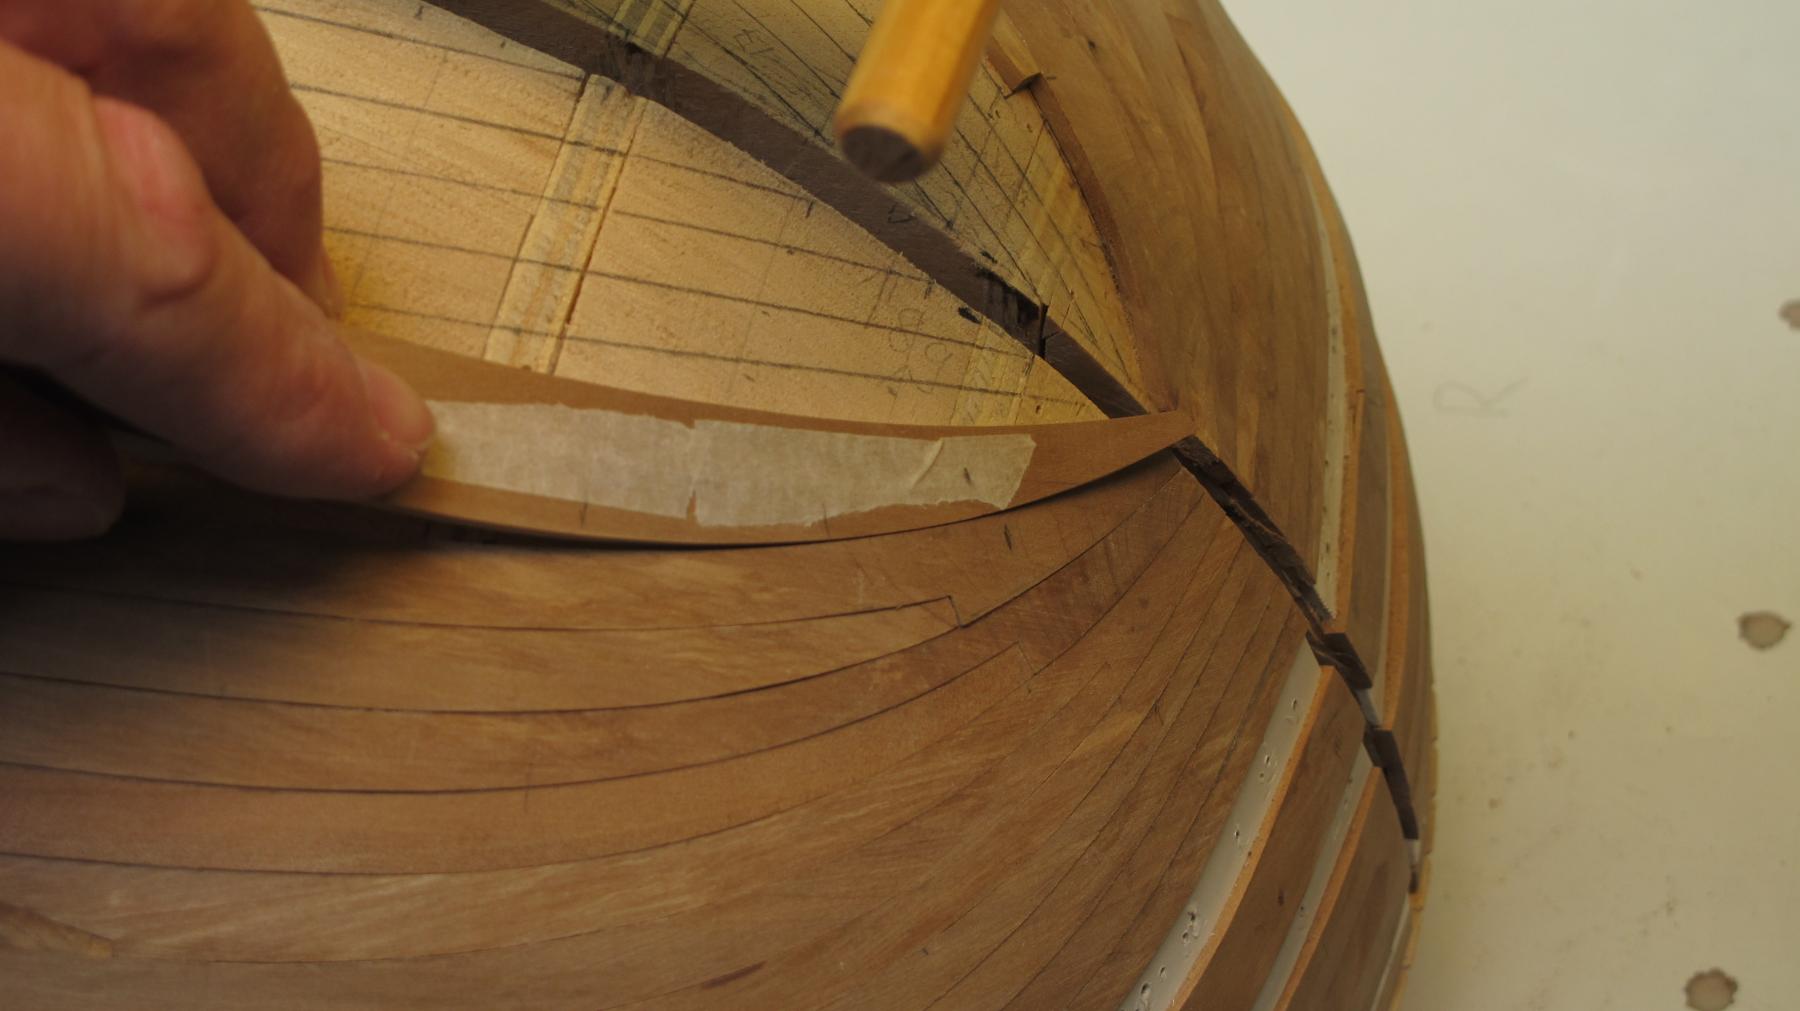
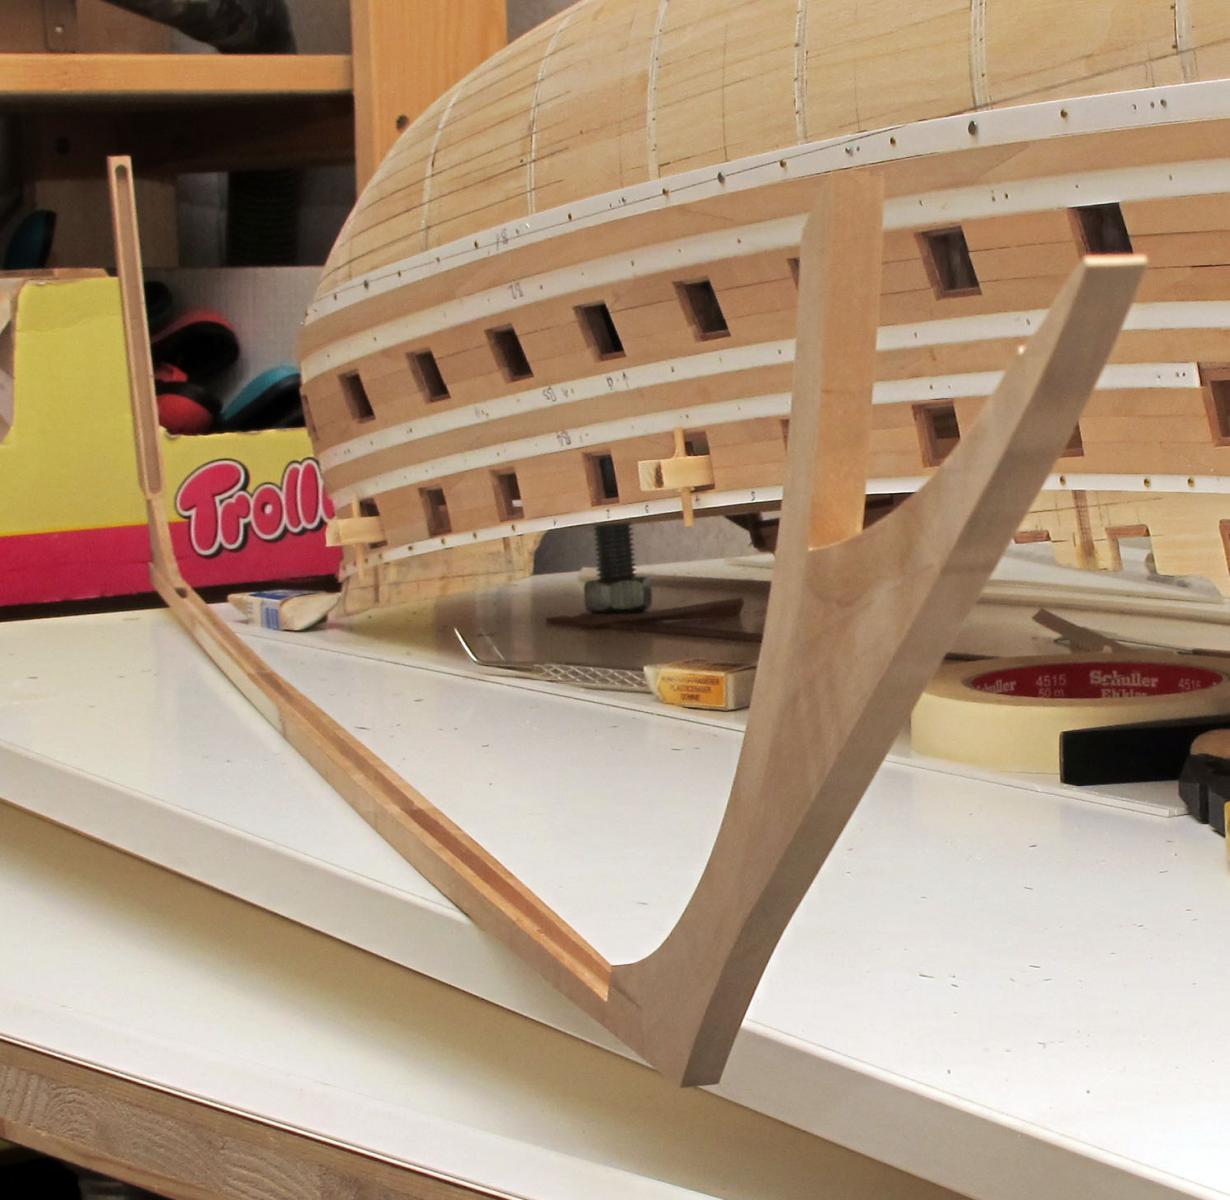
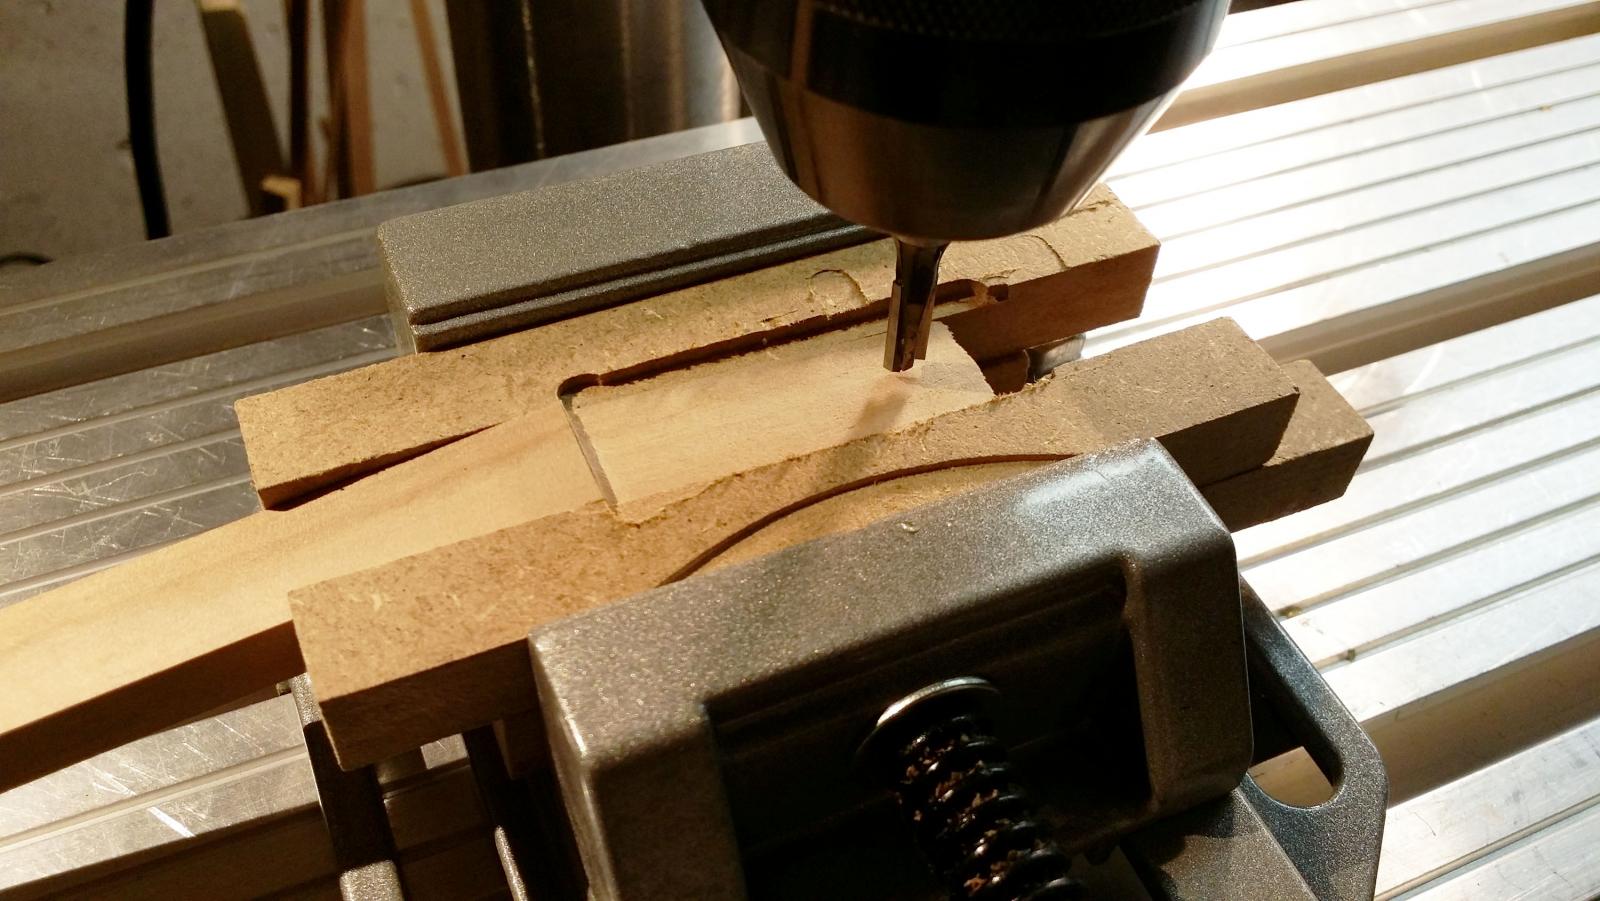
Next, I made a rough recess for the false keel. This recess will fix the keel additionally. Than, I did the rabbet for the garboard strake. Than, I have grinded the keel – brought it to the right width all over the length. Drazen


- 487 replies
-
- 8
-
-
- ship of the line
- 80 guns
- (and 1 more)
-
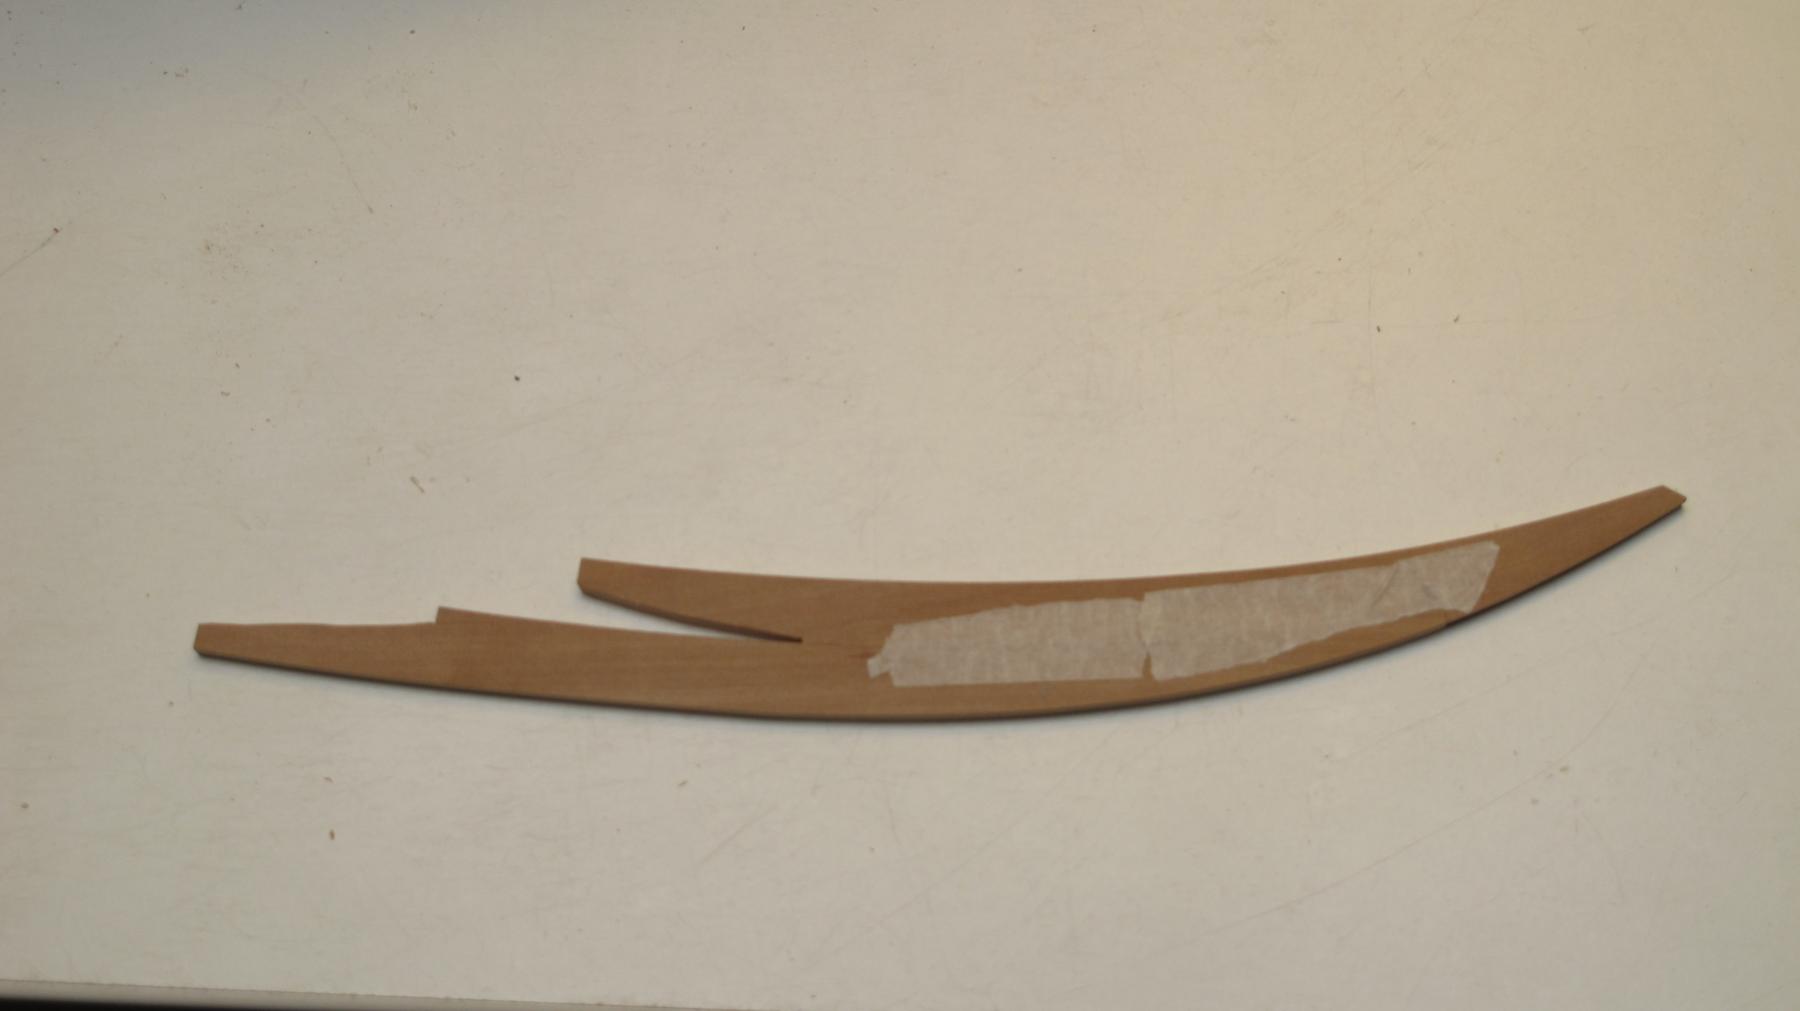
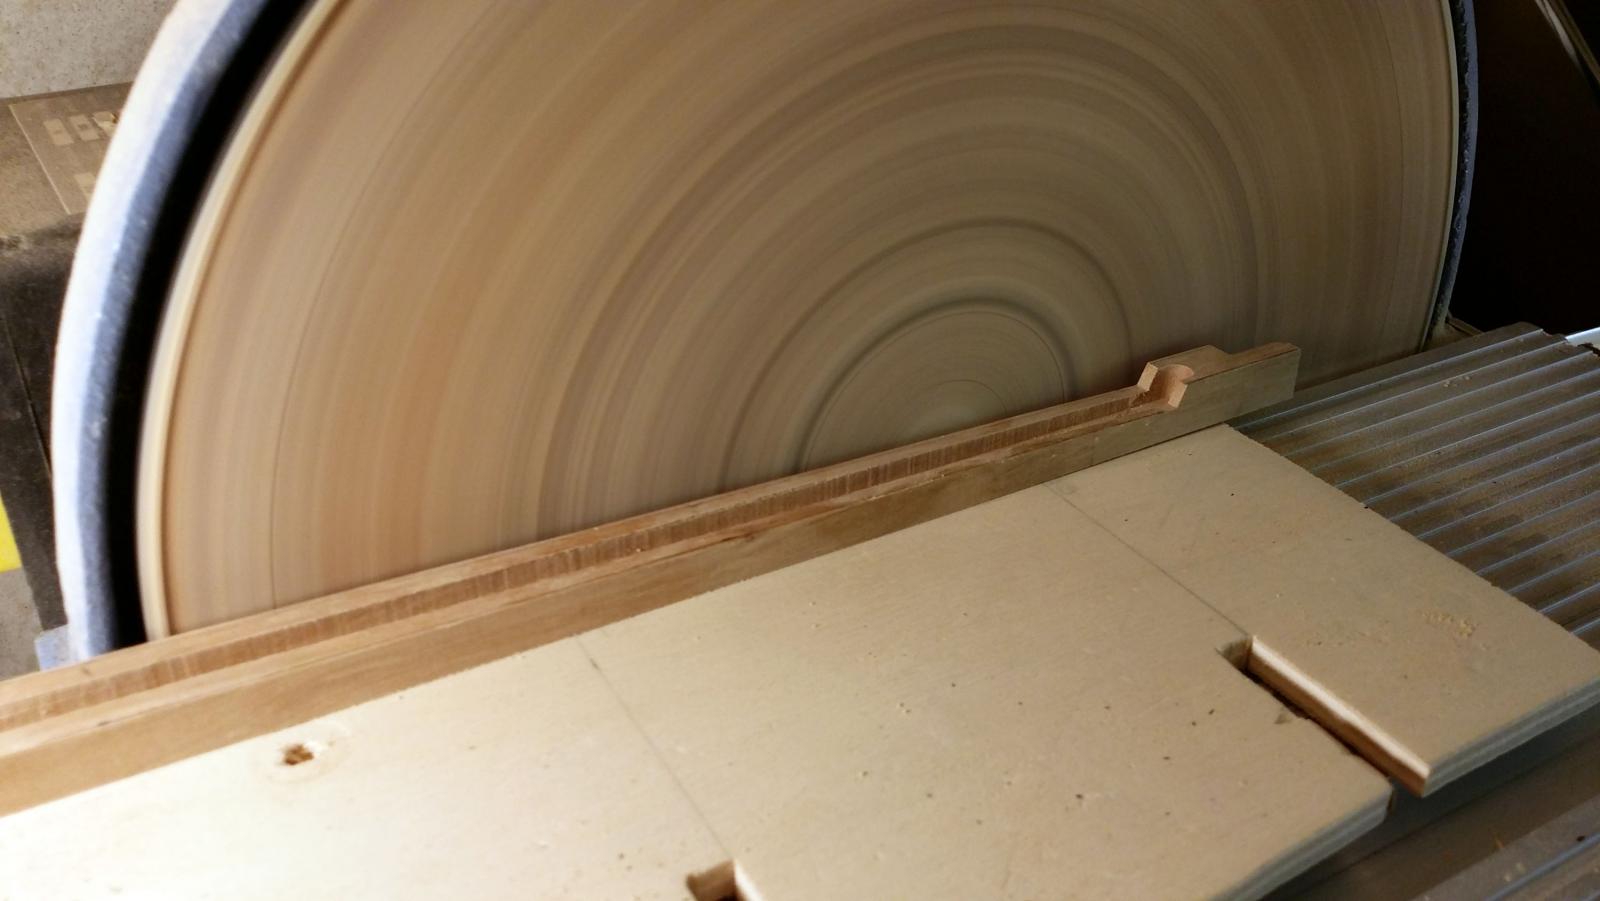
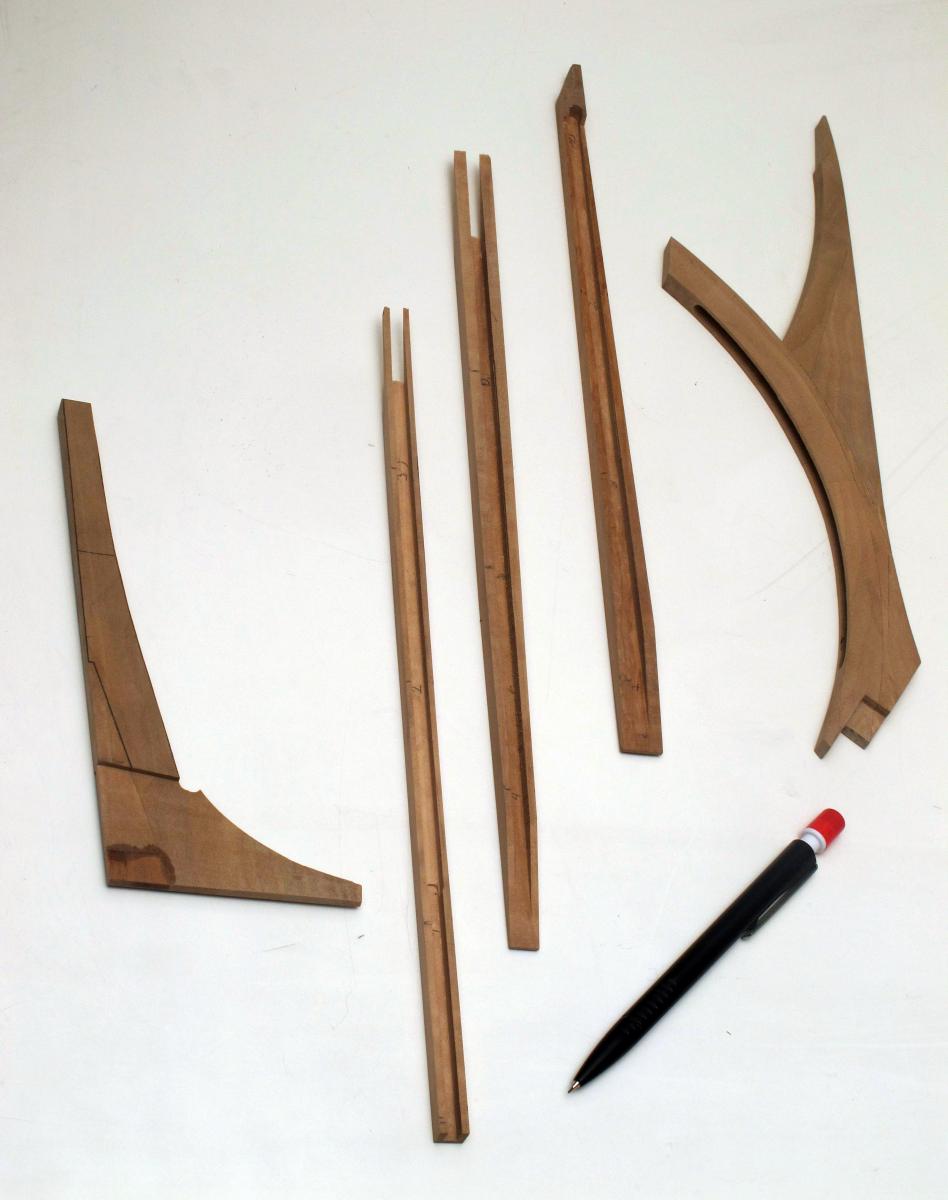
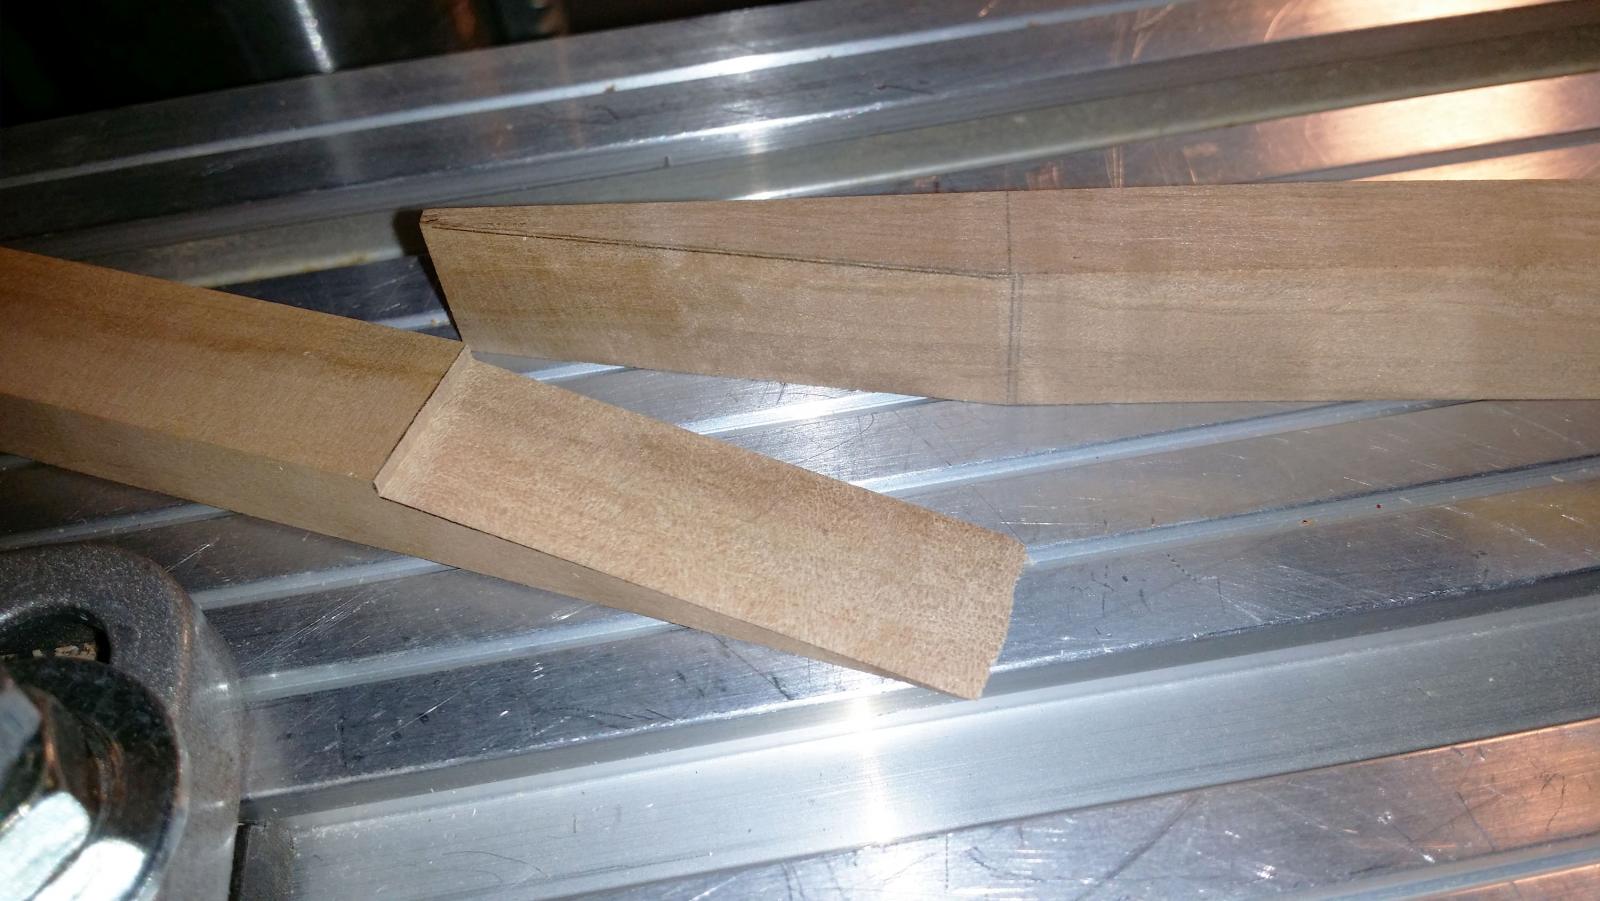
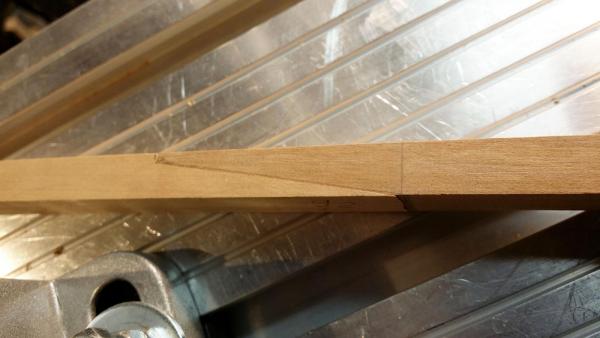
Some parts of the keel are not ready yet. Here is how I make scarfs on the keel. Drazen


- 487 replies
-
- 11
-
-
- ship of the line
- 80 guns
- (and 1 more)