
henrythestaffy
-
Posts
56 -
Joined
-
Last visited
Content Type
Profiles
Forums
Gallery
Events
Everything posted by henrythestaffy
-
Thanks Steven, i appreciate your comment.
-
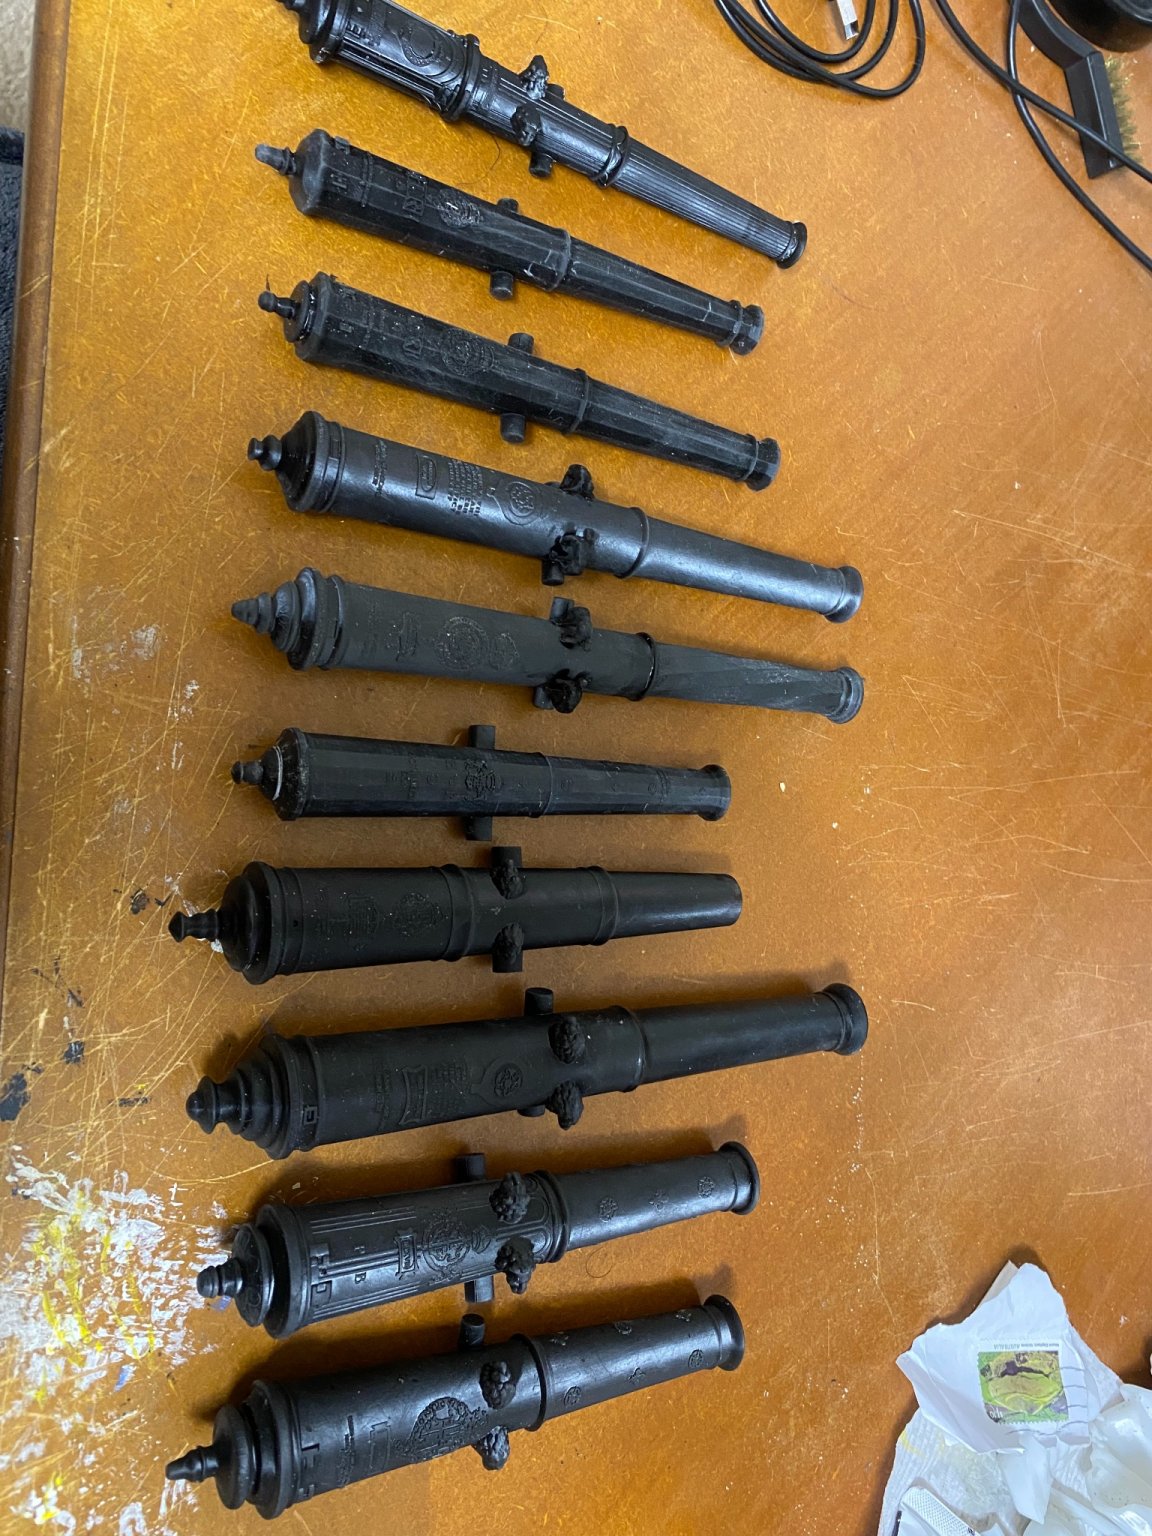
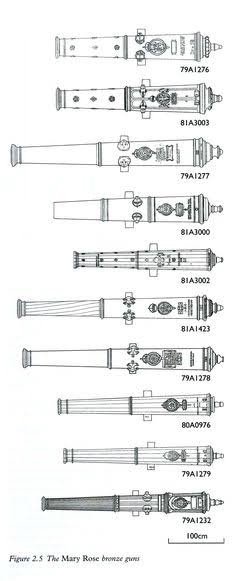
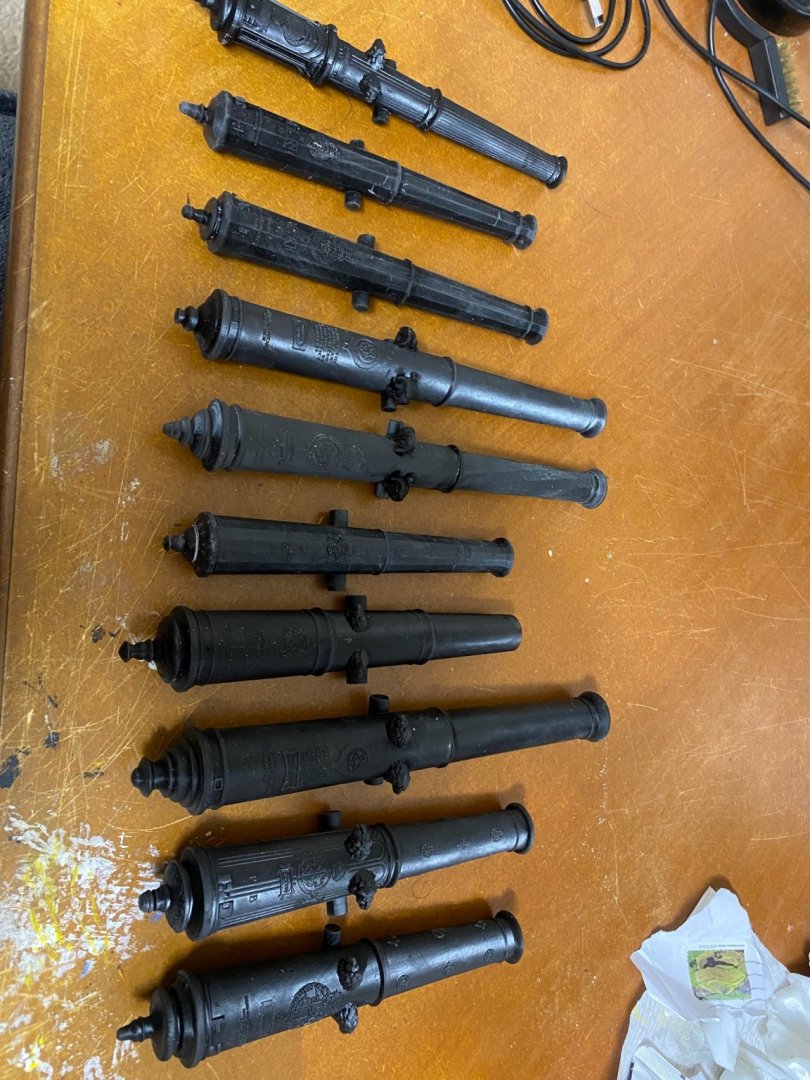
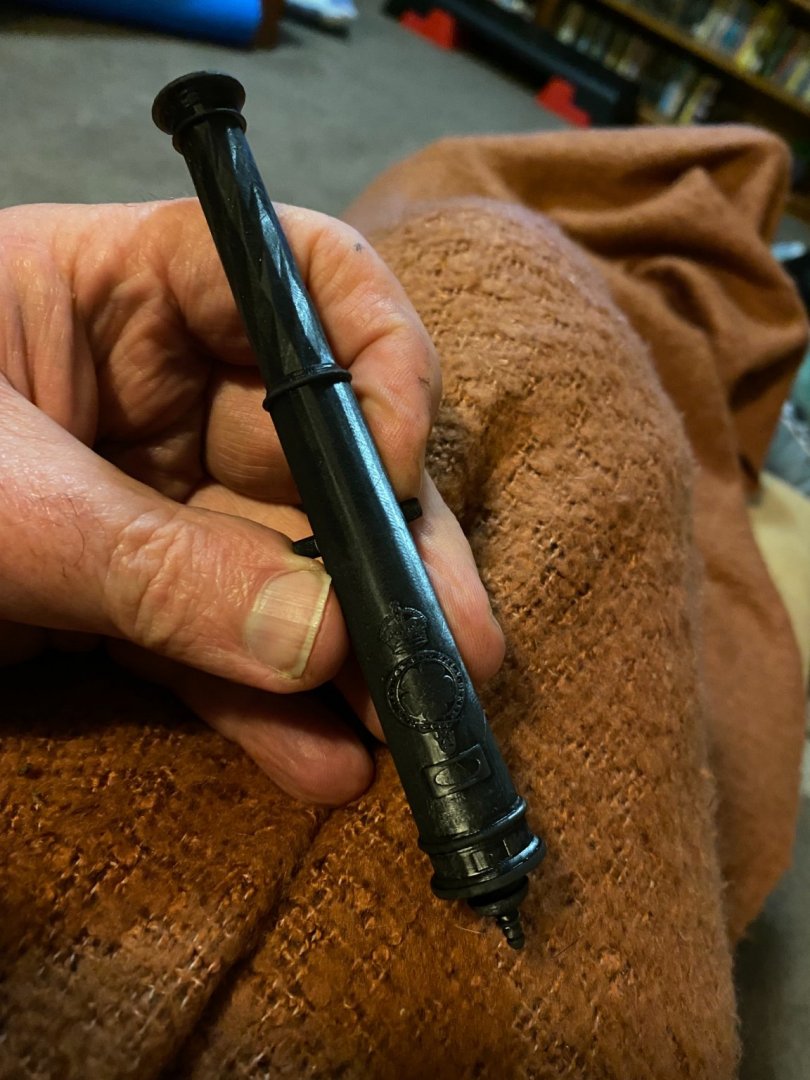
I have been converting a picture of the guns recovered from the Mary Rose to printable files using Fusion 360. The scale is about 1:20. The second picture is the result after several rebuilds and restarts. I am pretty happy with the final result. If any members would like to make use of any of these cannons for a model then let me know. Otherwise if anyone has a particular cannon they would like modelled i am open to suggestions. All i need is some drawings. The scale can be adjusted to any size. The only limitation is the 3d printer build plate size. Only stipulation is that they are not to be sold. My present project is the culverin at the Basel museum with a dragon head on the barrel.
- 8 replies
-
- 13
-

-

-
3d printing process
henrythestaffy replied to henrythestaffy's topic in 3D-Printing and Laser-Cutting.
Mark, what you say is correct if the barrel is attached directly to the build plate. This something you should avoid. Too much suction is bad for printing. That is why in Paul’s example the barrel is lifted from the build plate with supports. Angling the print also helps as it is better to start small and have the model fan out, if you can, as it prints. It pays to look at each model before printing and work out the most beneficial way to position it on the plate. If you wanted to print a pyramid for example placing it flat on the build plate or even 5mm off the plate would not be as preferable as putting one of the edges at the lowest point and printing up from there. I don’t hollow any of my prints anymore because it creates too many bad prints due to either suction or misplaced supports. The placement and size of supports is another whole different kettle of fish when it comes to success or failure in 3d printing. -
3d printing process
henrythestaffy replied to henrythestaffy's topic in 3D-Printing and Laser-Cutting.
Kevin, if you were going to print it as a solid model and then drill the barrel later then putting the muzzle on the build plate is ok. Otherwise putting the muzzle on the build plate will create a suction which is something i try and avoid. Models can work their way loose and the FEP can be damaged. An angle and 5mm off the plate is a good way to print. -
3d printing process
henrythestaffy replied to henrythestaffy's topic in 3D-Printing and Laser-Cutting.
EG, I had a look at the link for the model and it would seem that there are a number of problems as you say. Are you printing the remixed version or the original? The remixed version is claiming to have fixed the issues with the original version. -
3d printing process
henrythestaffy replied to henrythestaffy's topic in 3D-Printing and Laser-Cutting.
Egilman, no problem. I also forgot to mention that i have my first three layers set at 90 seconds each and then the rest at 6 secs. That may have been part of the default setting of the machine but i cant remember whether i had to input those settings or not. My printer is the photon s. If you have a link to the model you are having problems with i dont mind downloading it and having a play around. -
3d printing process
henrythestaffy replied to henrythestaffy's topic in 3D-Printing and Laser-Cutting.
I concur with the recommendation for fusion 360. I make all my models with this program and have found the biggest limitation is importing complex meshes. It slows down and sometimes just flatly refuses to process them. Reducing the amount of faces usually fixes that. Fusion can also repair mesh when it comes time to convert them into solids. Windows 10 has 3d builder which can also repair and reduce mesh models. The thumping sound when printing is the FEP releasing the model as the plate is going upwards. It can get quite loud if your model has a bell like shape that is creating a suction when the plate is moving upwards and your resin level is low. You need to keep the resin levels up. I usually add a hole on the model nearest where it joins the plate to remove any chance of a vacuum forming. If your model is not releasing from the FEP then the zero will need to be reset to fix that. That is when you set the distance from the plate to the lcd the thickness of a sheet of paper. You will be resetting the zero not the home. I have never used the lubricant for the FEP and I think you will find once you get the settings right that you won’t need it. The other thing worth mentioning is I run the plate over some flat sandpaper a couple of times before I start a print. It just roughens it a bit for better adhesion. In fact, it sometimes works too well. -
here are are some small deadeyes I printed for someone else. If you want I can design Some blocks and send you the file to get them printed. All I need is a picture or drawing. yes

-
3d printing process
henrythestaffy replied to henrythestaffy's topic in 3D-Printing and Laser-Cutting.
How are you positioning the rose on the build plate Egilman? By that I mean at what angle. The trick is to look at the rose and imagine it getting printed layer by layer and then pick the angle that gives it the most contact with the plate and eliminate areas that hang out in space. If you are not already using them try the lightest supports and add more manually. I use a pair of mini side cutters to remove the supports and the tendency is to rush when starting out. Take your time and cut them gently with the cutters. -
3d printing process
henrythestaffy replied to henrythestaffy's topic in 3D-Printing and Laser-Cutting.
Egilman, i would suggest downloading some files from thingiverse and practise putting supports on with chitubox. Chitubox will do it automatically but in most cases you will need to check them manually and add or subtract. The positioning of your model and angle on the build plate has a large bearing on success or failure. I dont use chitubox to slice my model, for that i use the photon workshop program that comes with the printer. If you need a hand just ask and i will do my best to help you avoid wasting resin and making unusable models. -
3d printing process
henrythestaffy replied to henrythestaffy's topic in 3D-Printing and Laser-Cutting.
I have been using the wash and cure for about a year now and wouldn’t go back to the previous method. It is so clean and easy that I would recommend it to anyone starting out. The printers themselves have two lcd screens that are consumable. The main printing screen, depending on how often you use it, will need replacing at some point. Mine usually last around 1 to 2 years. Setting up the print vat with the PET plastic bottom can be a little tricky the first couple of times. Once you get it right though it is a breeze. I use a program called Chitubox to set my supports and positioning of the model. It’s free and then you send the model to the software that comes with the printer to slice it and you are right to go. If you are considering designing your own models I would suggest fusion 360. It also free for hobbyists and is a very good CAD/CAM program. It can be a little daunting at first but there are some excellent tutorials on the net for it. -
3d printing process
henrythestaffy replied to henrythestaffy's topic in 3D-Printing and Laser-Cutting.
I have found that the positioning of the model and supports makes all the difference to the outcome. I used to try and hollow out my models but now i only make solid ones. All things that you learn from experience and can hopefully help new users with. -
Brass piano hinges
henrythestaffy replied to Chariots of Fire's topic in Metal Work, Soldering and Metal Fittings
I wasnt suggesting a substitute but an alternative if the brass hinge isnt available. I believe the hinge required is 5mm wide . when open, meaning each part would be about 2.75mm wide. Not sure where .8mm comes into it but the mentioned size is well within the capabilities of a resin printer and with a coat of brass leaf paint you have a hinge. Certainly worth considering. -
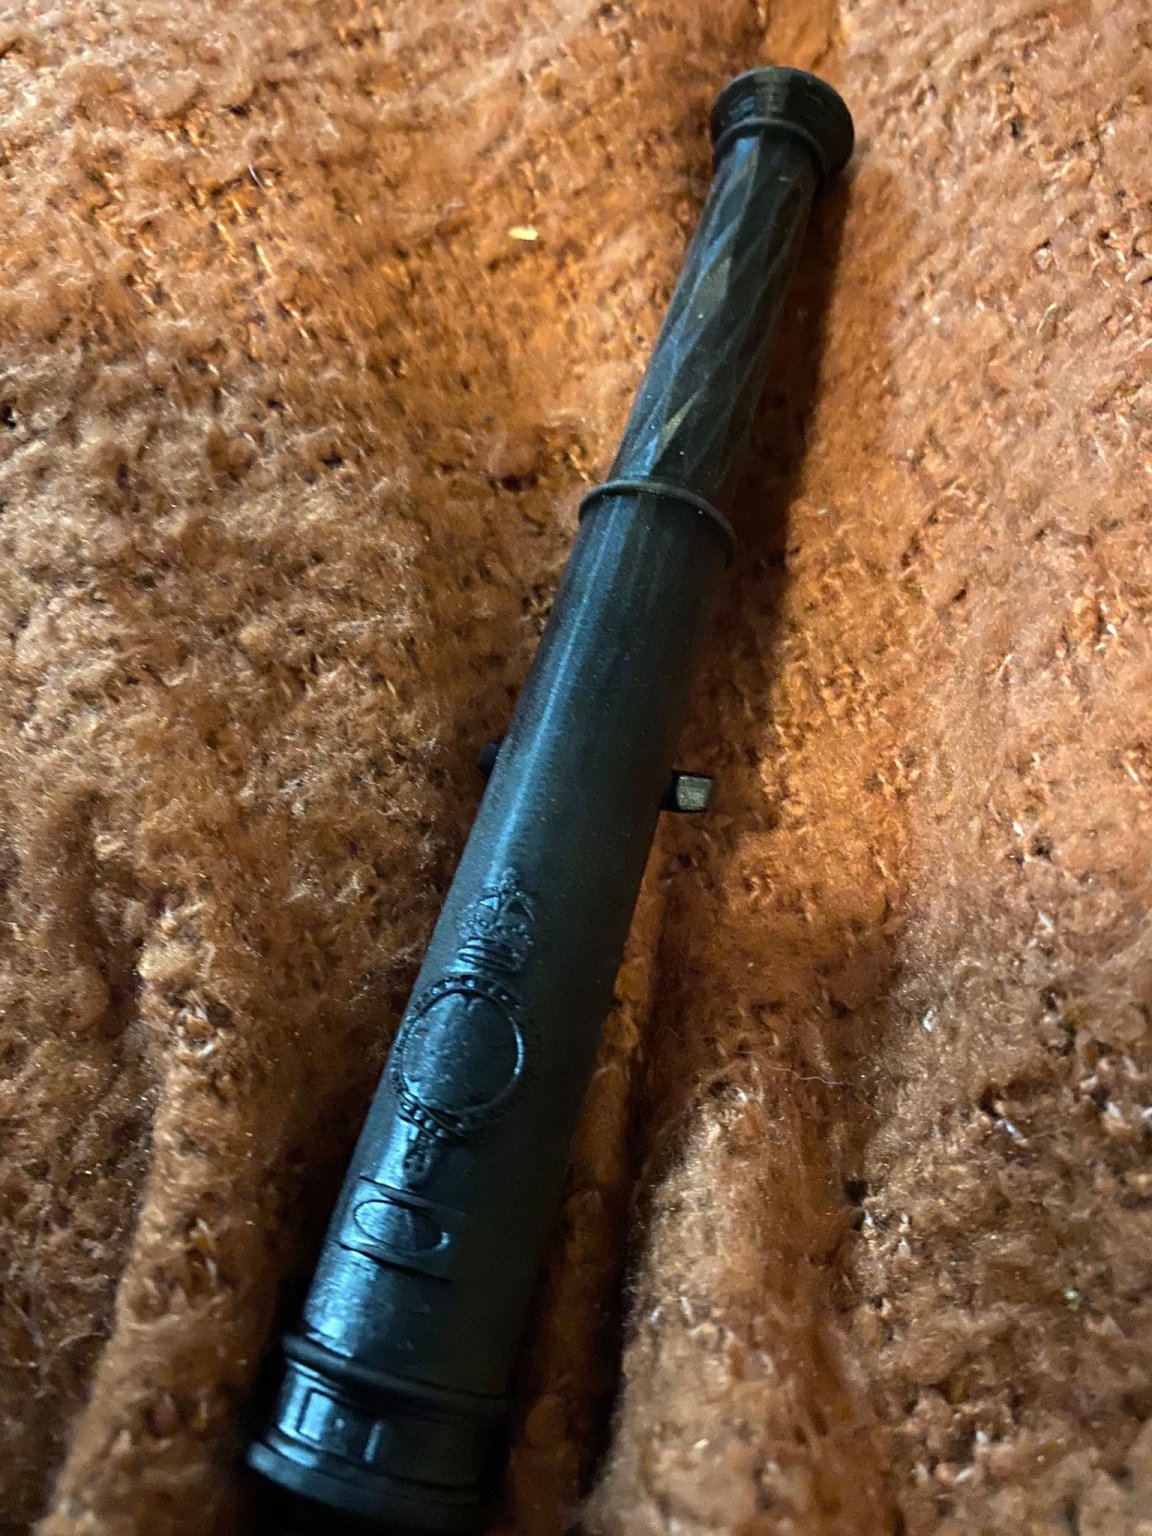
Here is my first print of a culverin Steven. I didnt put dolphins on it yet and i think some of the embossing on the tudor rose needs to be a little more defined. Otherwise i think it looks ok.

- 740 replies
-
- 10
-
-
-
- Tudor
- restoration
- (and 4 more)
-
Brass piano hinges
henrythestaffy replied to Chariots of Fire's topic in Metal Work, Soldering and Metal Fittings
Looks like I missed the boat, but have you considered 3d printing the hinges? -
Thanks Steve, glad to be able to help. A couple of thoughts come to mind about the 1mm deadeye holes. I could make them a little bigger or, as Roger said, there are some very fine wires on the market. Places like eBay have a large range and give you some idea of what is available. After making the deadeyes on Fusion 360 it has spurred me on to creating a culverin from the Mary Rose. I have almost finished apart from the loops shaped like mermen near the centre. I never realised how amazing the world of CAD is. It was one of those things that I planned to do but never got around to it. Your problem with the deadeyes was the catalyst for me to get moving, so I thank you for that. Let me know if there is anything else I can help with and I will look at enlarging the holes to see whether it is practical for your purposes. By the way if any other forum members reading this would like some help with 3D printed objects then drop me a line and if I can help then I certainly don’t mind. Paul
- 740 replies
-
- 7
-
-

-
- Tudor
- restoration
- (and 4 more)
-
3d printing process
henrythestaffy replied to henrythestaffy's topic in 3D-Printing and Laser-Cutting.
Druxey, here are the technical specifications for the printer. Unlike the plastic type printers that keep the build plate static the resin printers have a vat that the build plate lowers into. The lcd under the vat shoots the uv light where the model needs it for that layer and then the build plate raises and lowers again and the next layer is printed. The layer resolution shows that there can be between 10 to 40 raise and lowers of the build plate to make 1mm. Mine is set at around the 40 raises or 25 microns per layer. Technical Specifications ● Printing Technology: LCD-based SLA 3D Printer ● Light-source : UV integrated light(wavelength 405nm) ● XY DPI : 47um (2560*1440) ● Y axis resolution : 1.25um ● Layer resolution : 25 ~ 100um ● Printing speed : 20mm/h ● Rated Power : 50W ● Printer size: 230mm*200mm*400mm ● Printing volume : 115mm *65mm *165mm (4.52″*2.56″*6.1″) ● Printing material : 405nm photosensitive resin ● Connectivity :USB Port ● Package Weight: 9.5kg -
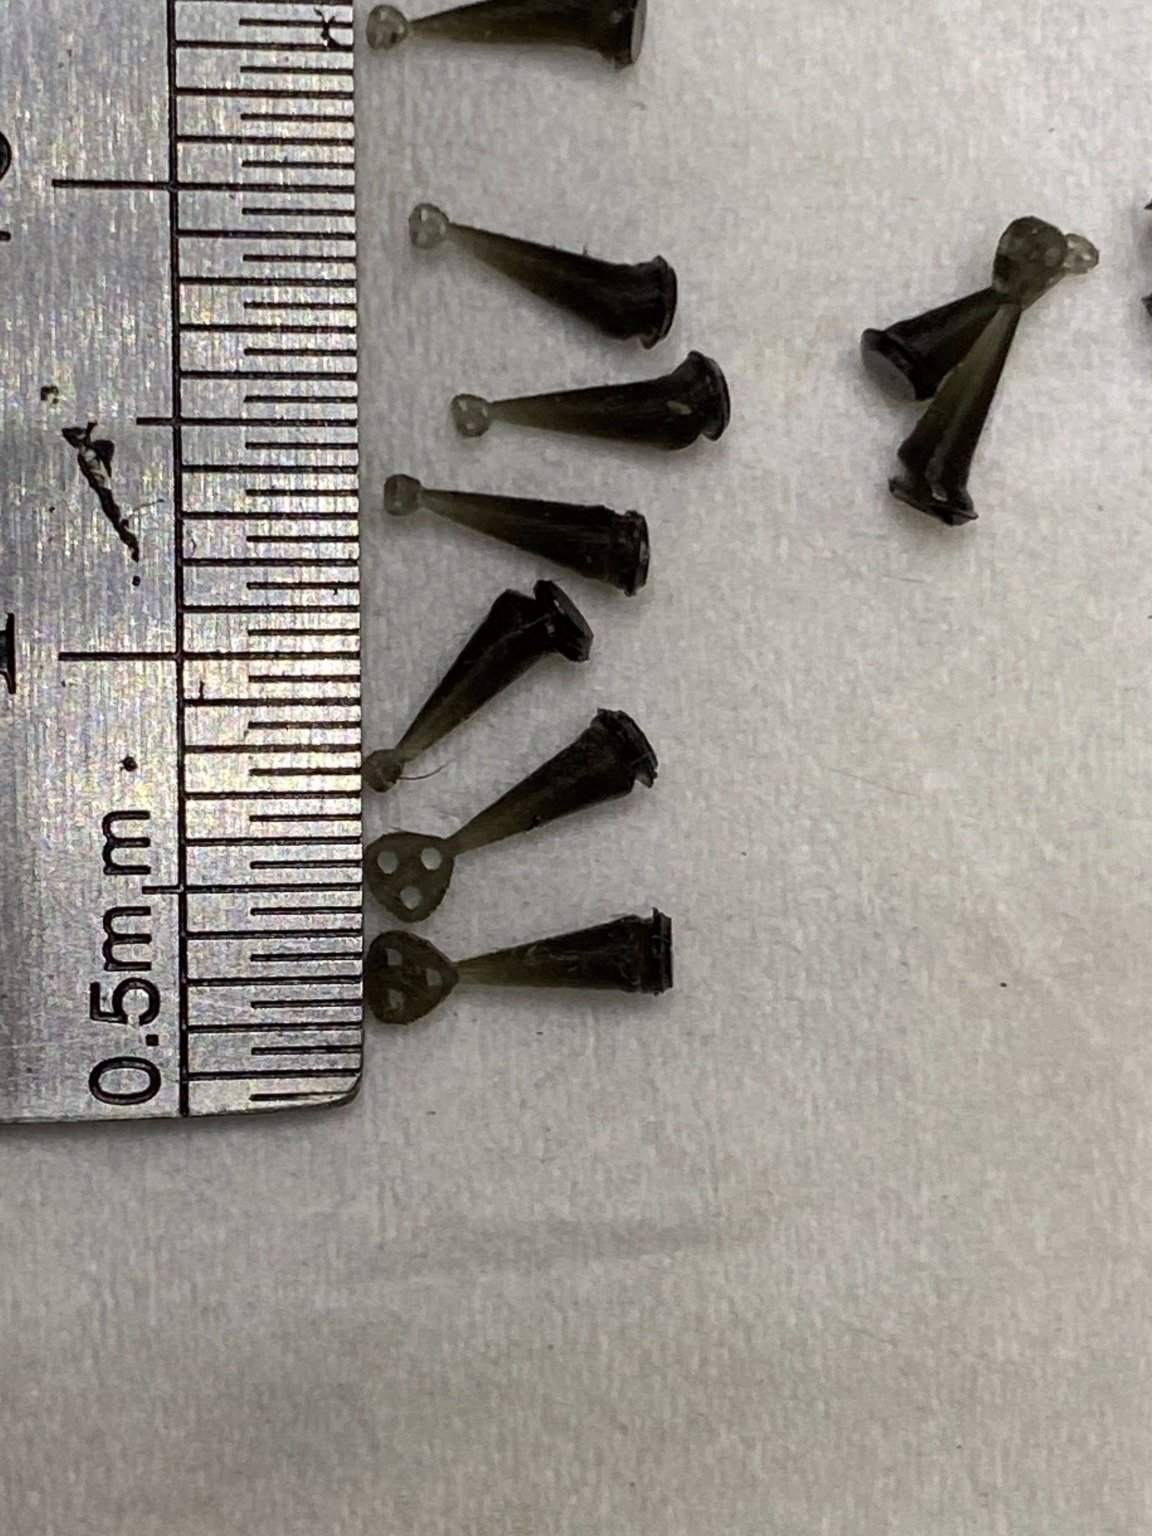
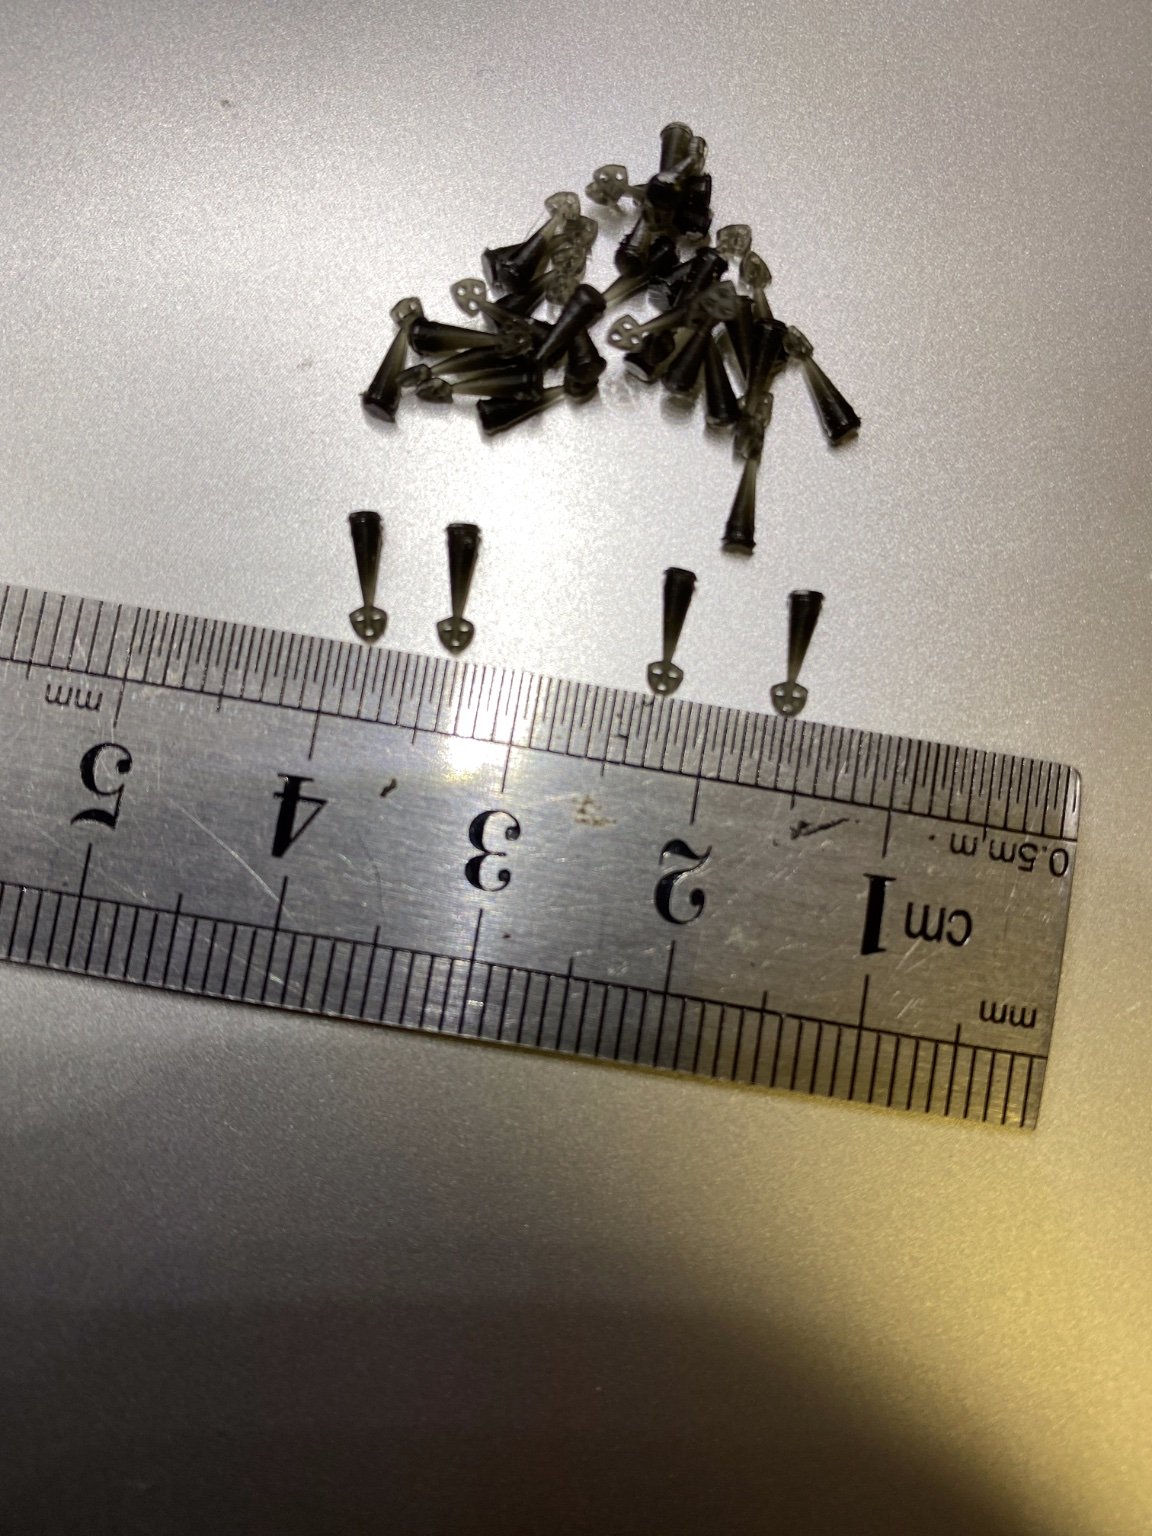
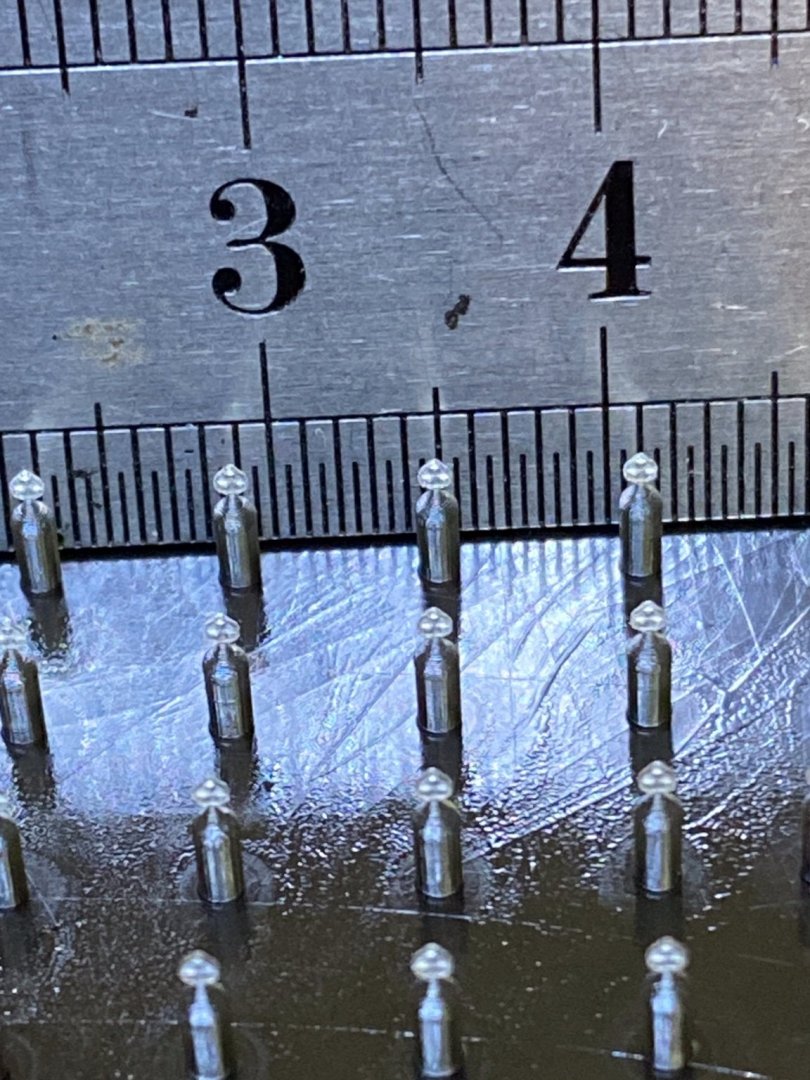
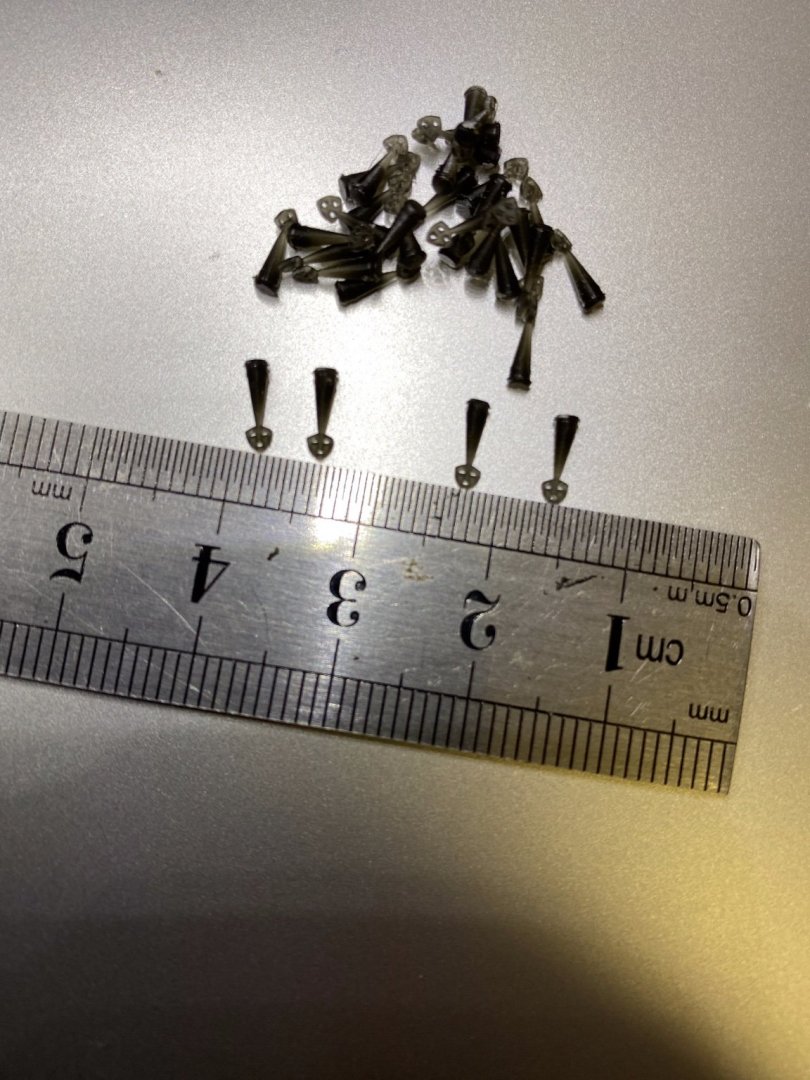
Steven here is the 1mm deadeye up close. It seems to have come out pretty good with the smaller support. I printed 128 of them. I dont envy you trying to thread them.
- 740 replies
-
- 8
-
-
-
- Tudor
- restoration
- (and 4 more)
-
Thanks Pat, I am having another go at the 1mm version as we speak. I will take Henry (the staffy) for his morning walk and when we get back they should be done. Paul
- 740 replies
-
- 4
-
-
- Tudor
- restoration
- (and 4 more)
-
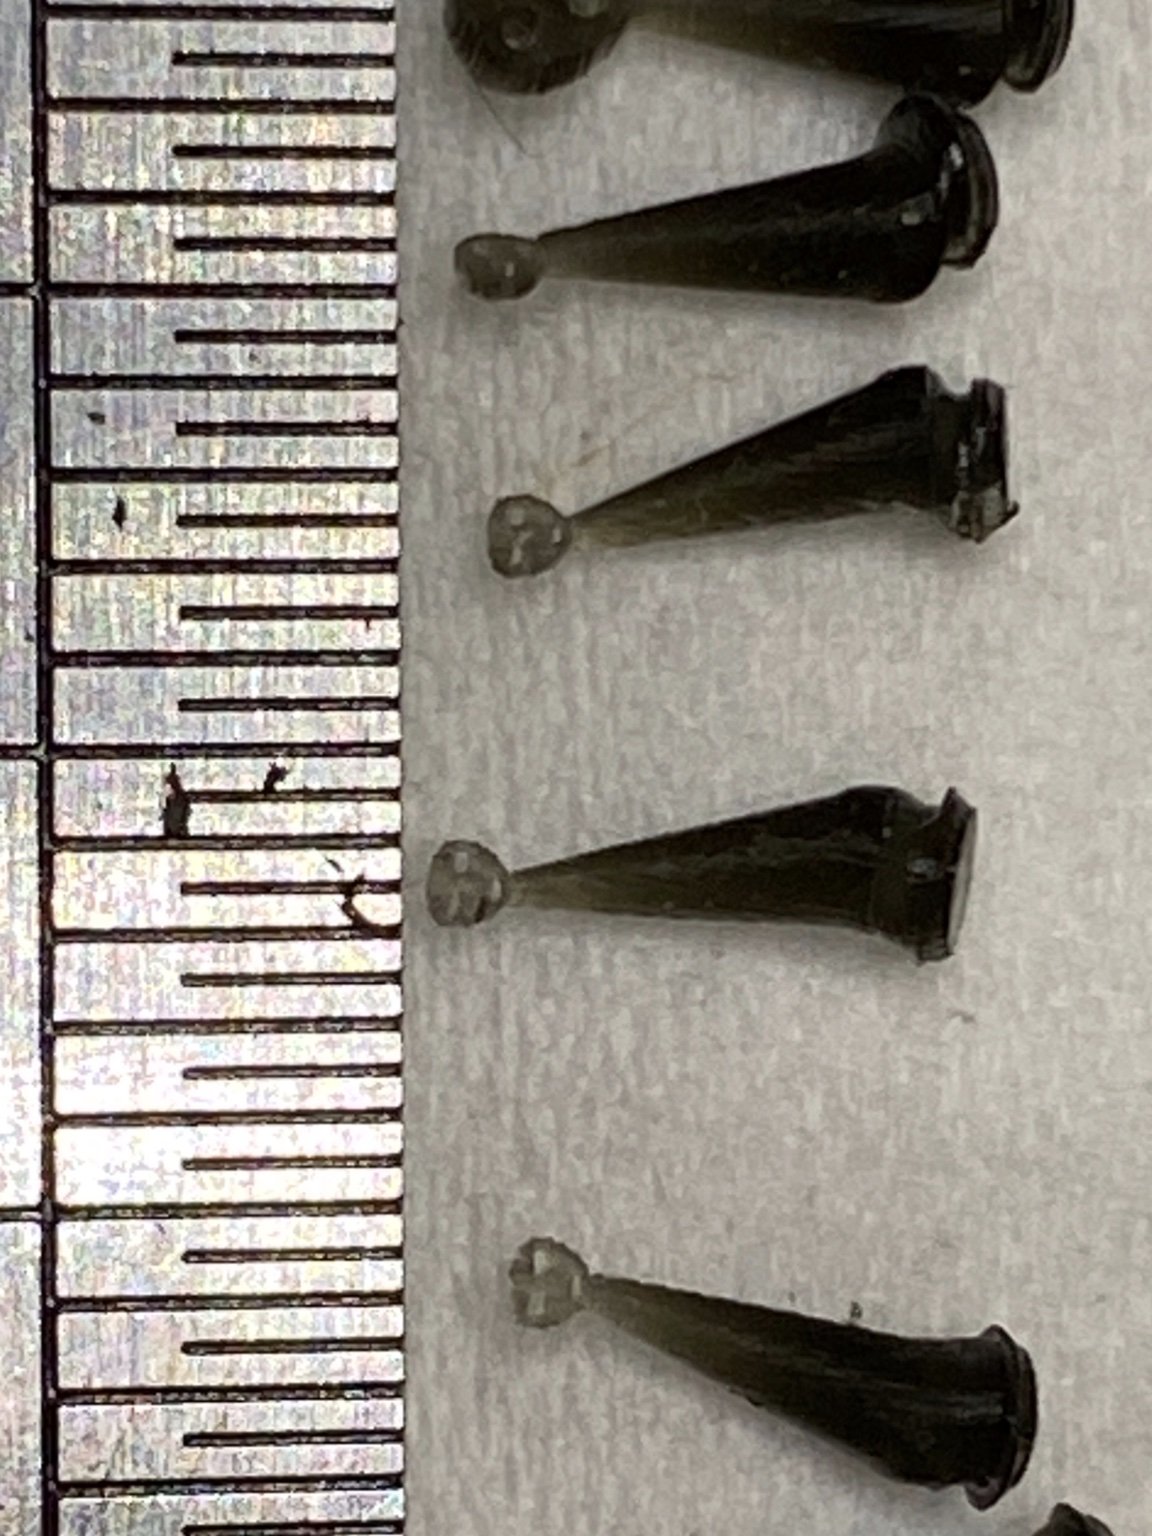
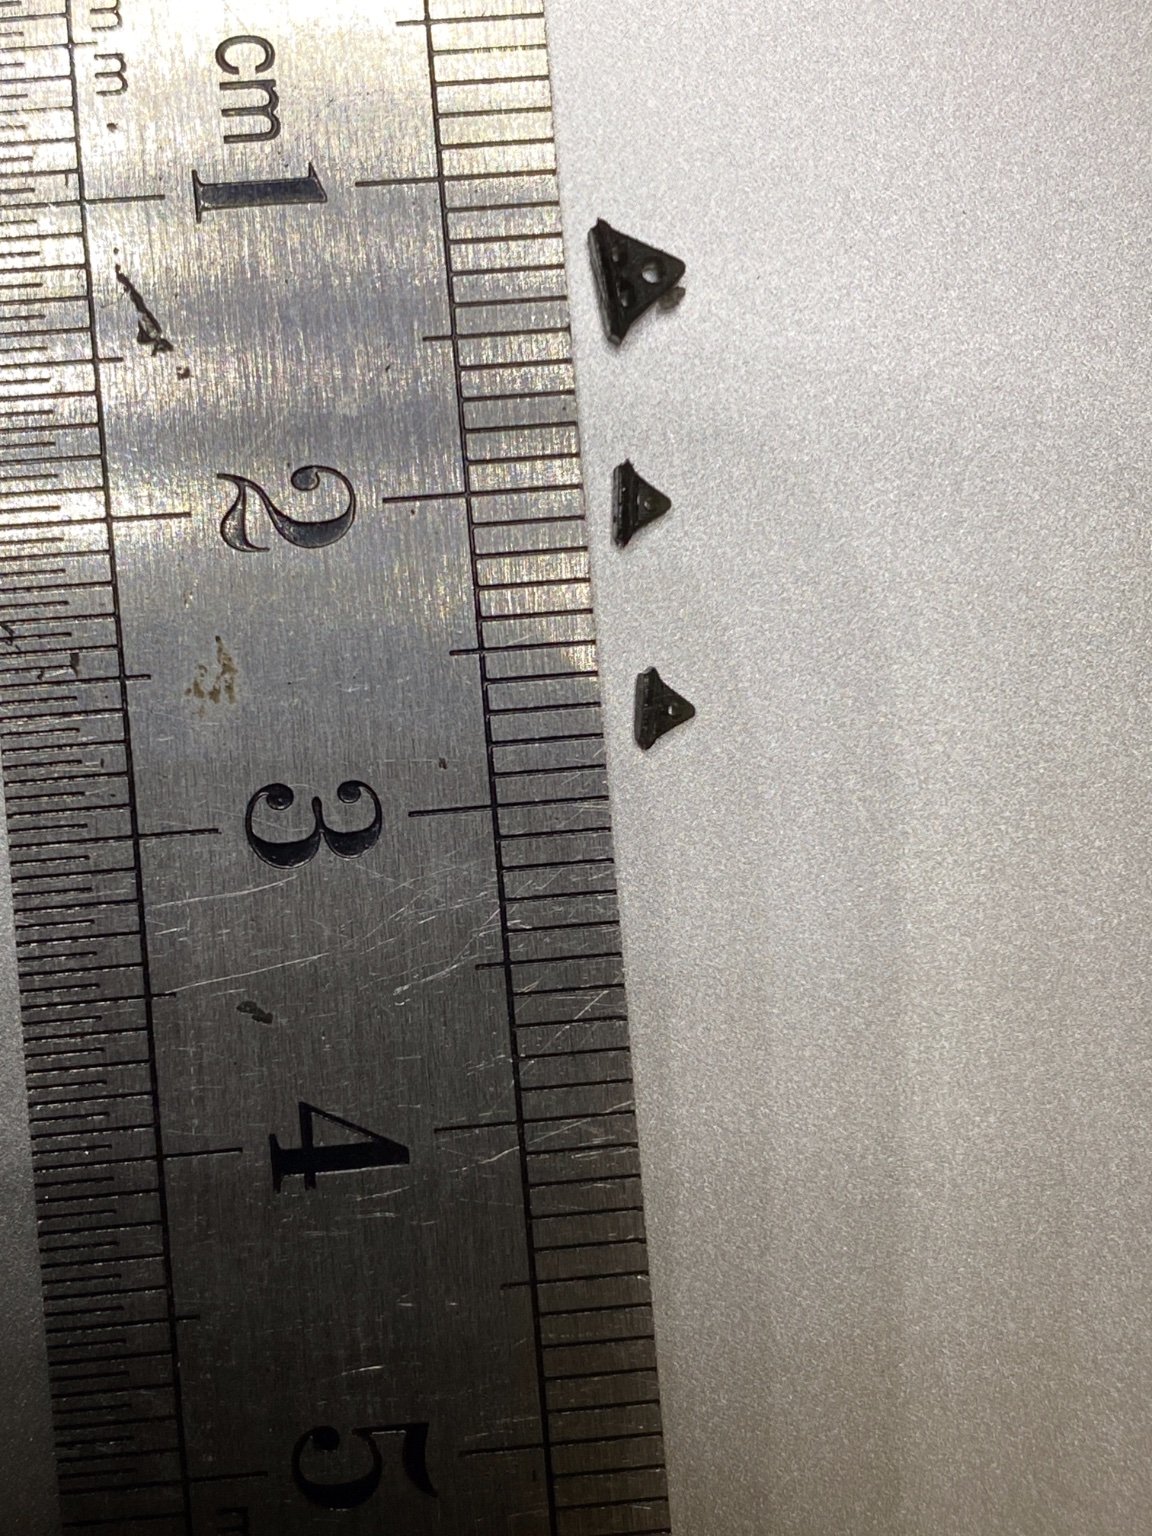
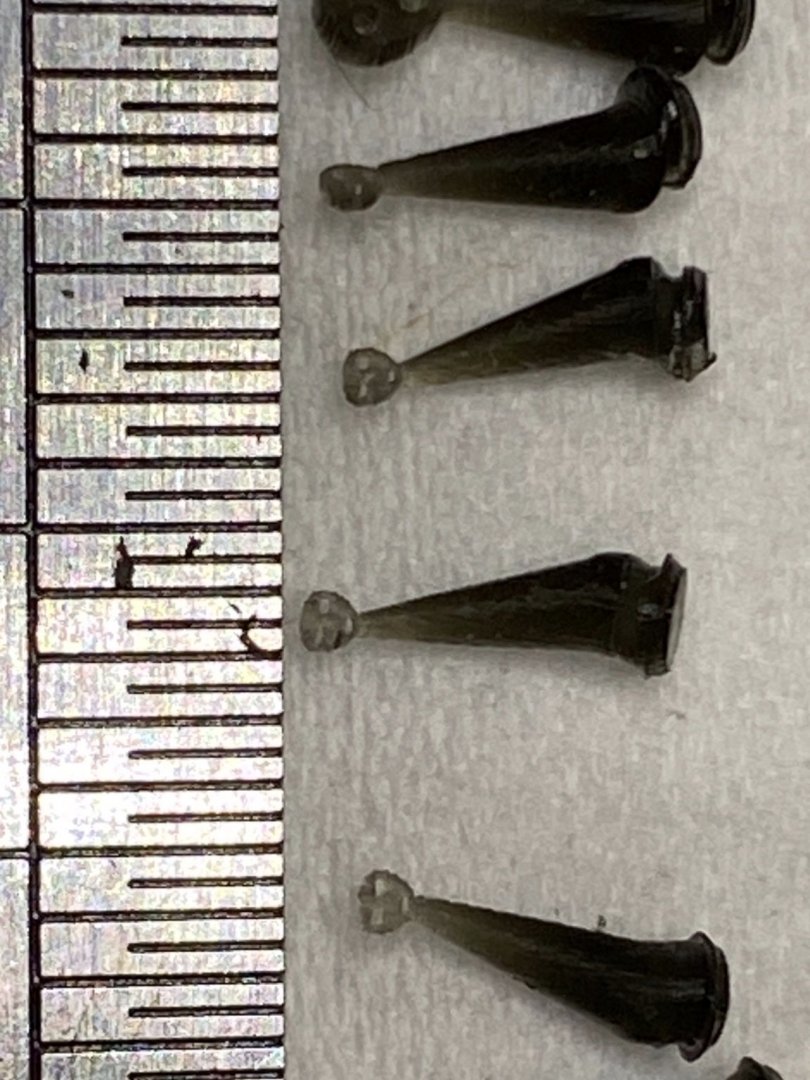
Steven, here are the 2mm deadeyes a little more rounded on the corners and some 1mm efforts that are fair but i think we can do better. The deformity on the vase if the supports is due to the build plate coming a little loose. I also think i can try a smaller support on the 1mm deadeye. What do you think about the shape? Are they closer to what you wanted?
- 740 replies
-
- 7
-
-
- Tudor
- restoration
- (and 4 more)
-
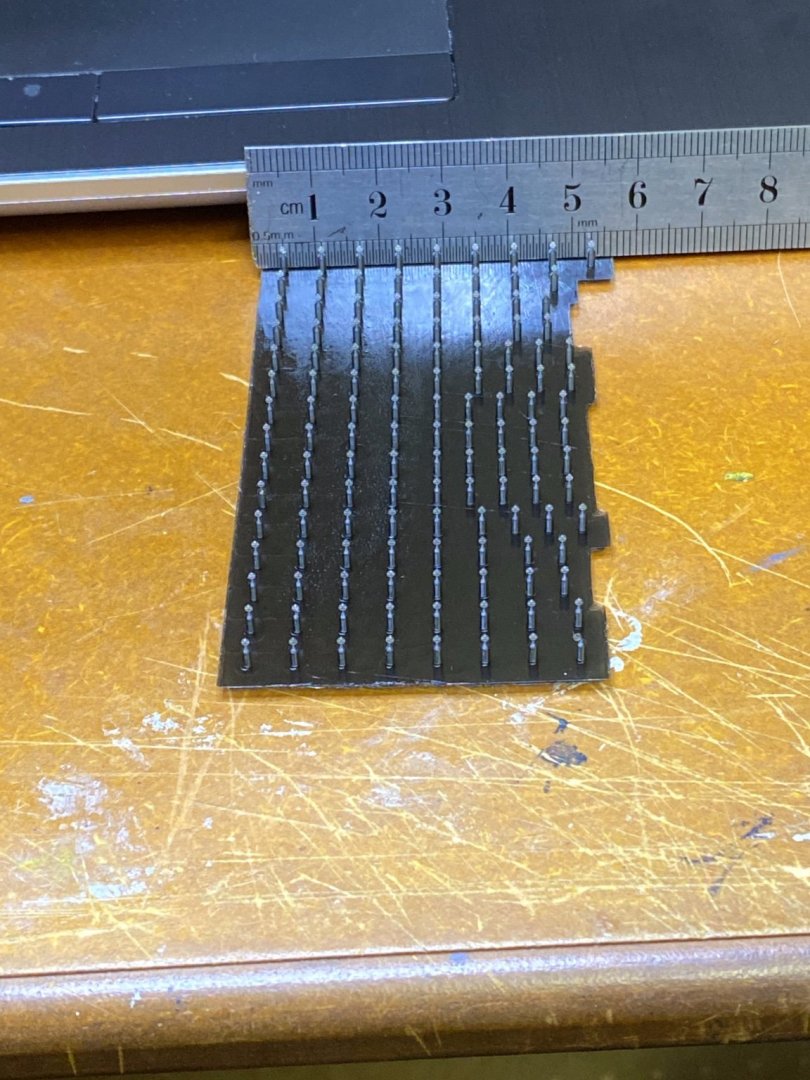
I was asked in another forum to explain the process i used to create deadeyes for the Great Harry in resin. I usually print models that i get from thingiverse.com which saves me having to create my own models. In this case though i did create the deadeyes in fusion 360 through trial and error mostly. I am not very proficient at using fusion 360 but i would recommend anyone who is thinking of using a 3d printer to look at some of the youtube video tutorials and learn from them. Once you have the STL or OBJ file that you want to print on your resin printer then there are a number of things that you need to do to print it correctly. Mainly around scaling and setting up the model correctly on the build plate. I use an anycubic photon s resin printer that can produce a high level of detail. If anyone has some specific questions regarding setting these printers up and printing models efficiently then fire away and i will do my best to explain what i know. If anyone wants to see what these printers are capable of i can attach some photos of models i printed and explain what i did. The attached photo is the deadeyes that i made earlier.

- 312 replies
-
- 14
-
-
-
Druxey I don’t want to hijack Steven’s log, it might be better for me to start a new page outlining what I did. These dead eyes were just a chance for me to have a go at designing something from scratch. I usually use other people’s models to print. If Steven is happy with the results then they are his to have. I can scale them up or down to suit or change the shape. If people are interested in how to set up their printer and where to place supports etc. I can help with that. If it’s more about designing your own models then I am probably not the right person to ask.
- 740 replies
-
- 7
-
-
-
- Tudor
- restoration
- (and 4 more)
-
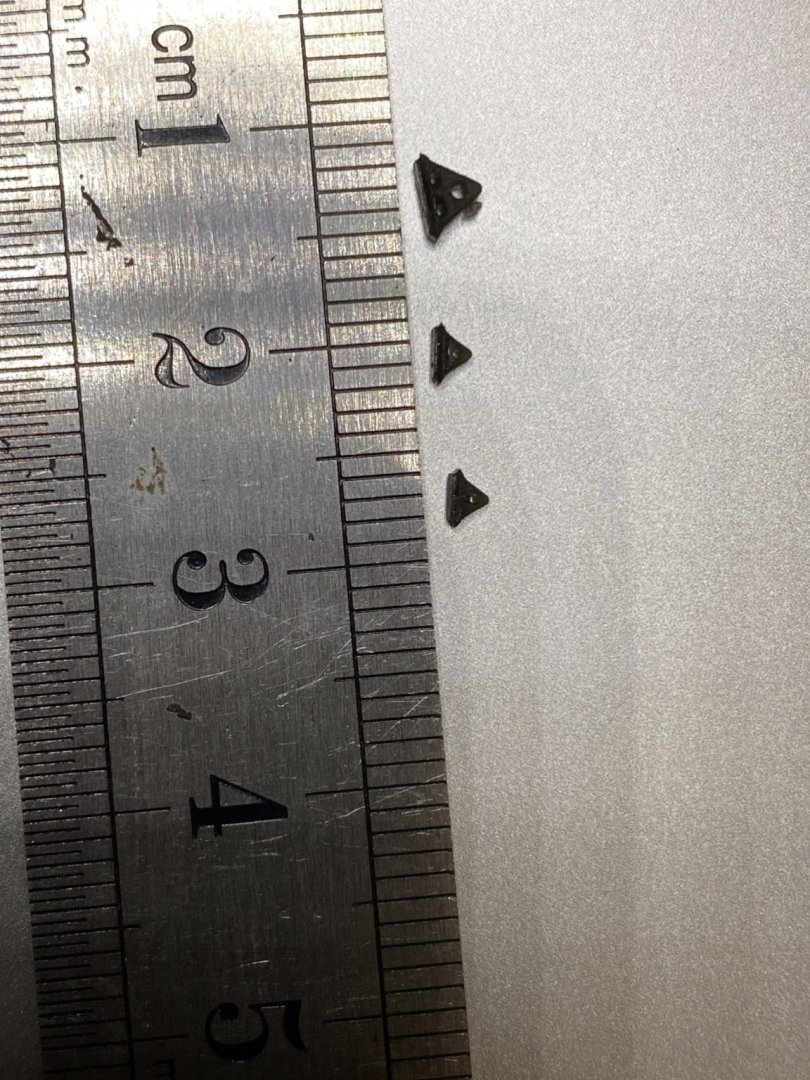
Here is an improved version Steven. I rounded the sides to give them more of the guitar pick shape.
- 740 replies
-
- 9
-
-
-
- Tudor
- restoration
- (and 4 more)
-
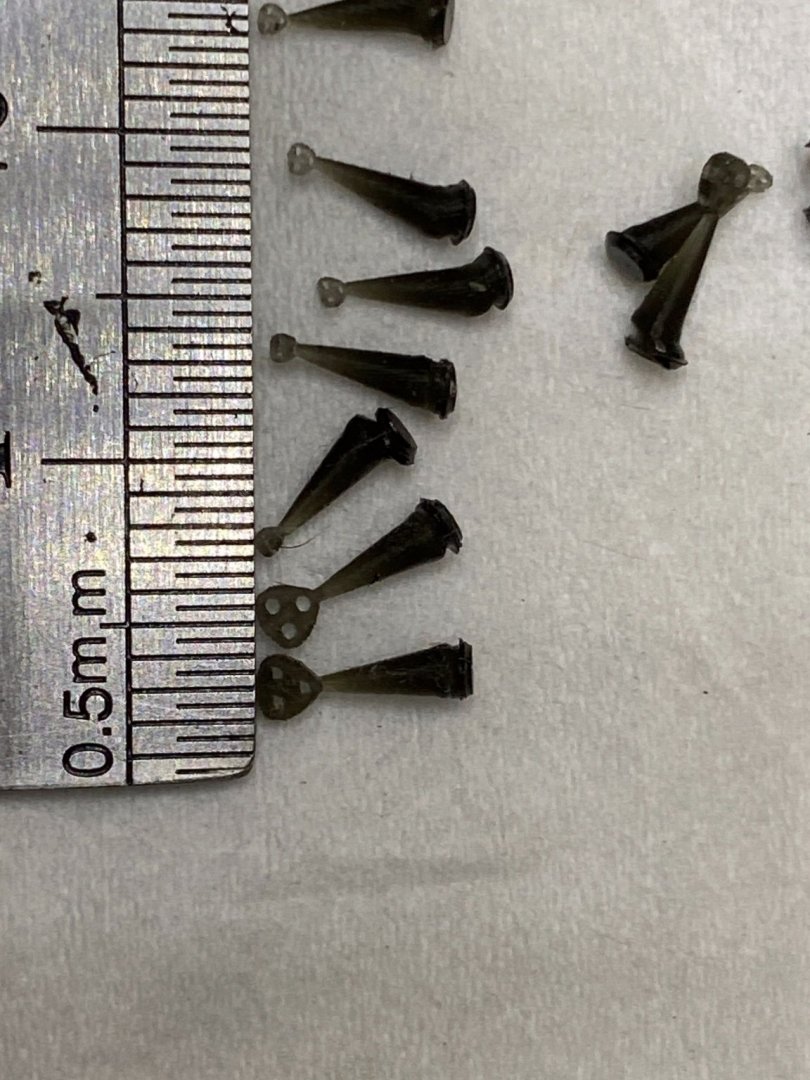
Steven, here is a photo of a 2mm and 3mm deadeye. You can see there is some distortion on the bottom of each one where it was attached to the build plate. I can fix that by elevating them off the plate with supports. The ends were rounded on the model but i will need to increase the radius on these small ones. If you like the look of them let me know what size and how many you need.
- 740 replies
-
- 7
-
-
-
- Tudor
- restoration
- (and 4 more)