NJQUACK
-
Posts
152 -
Joined
-
Last visited
Content Type
Profiles
Forums
Gallery
Events
Everything posted by NJQUACK
-
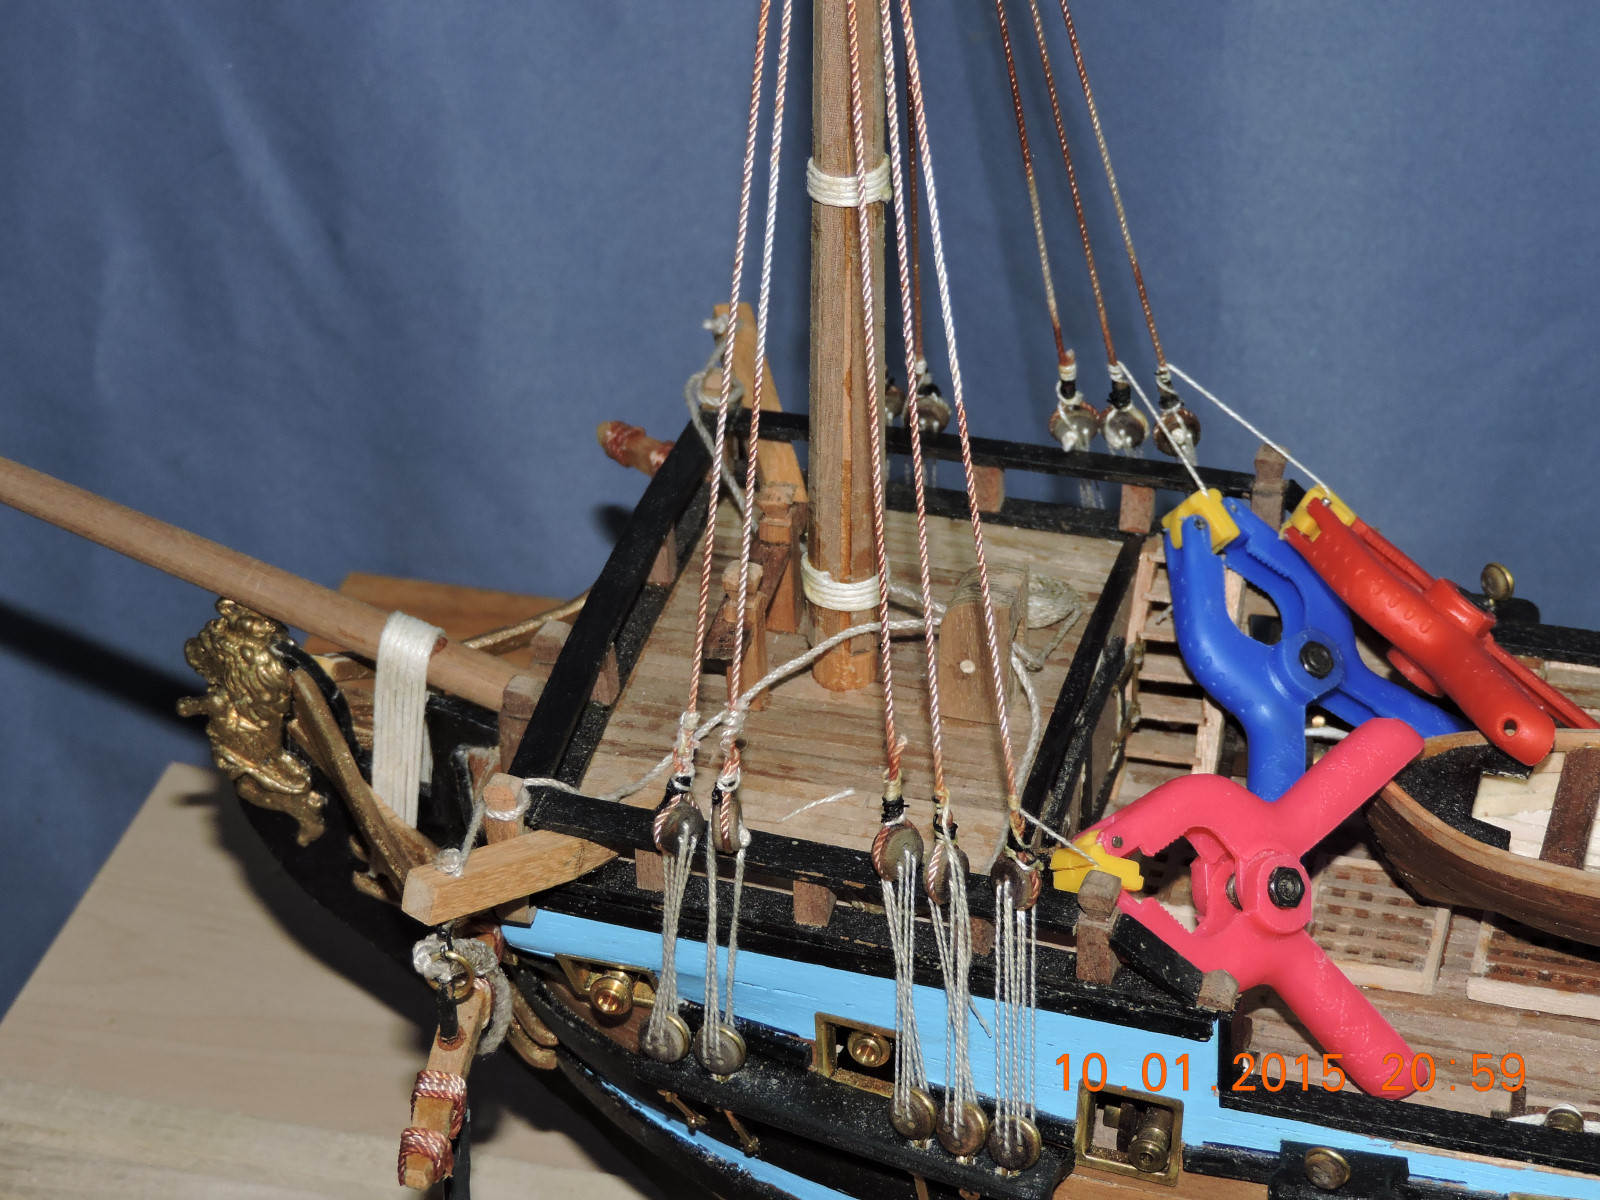
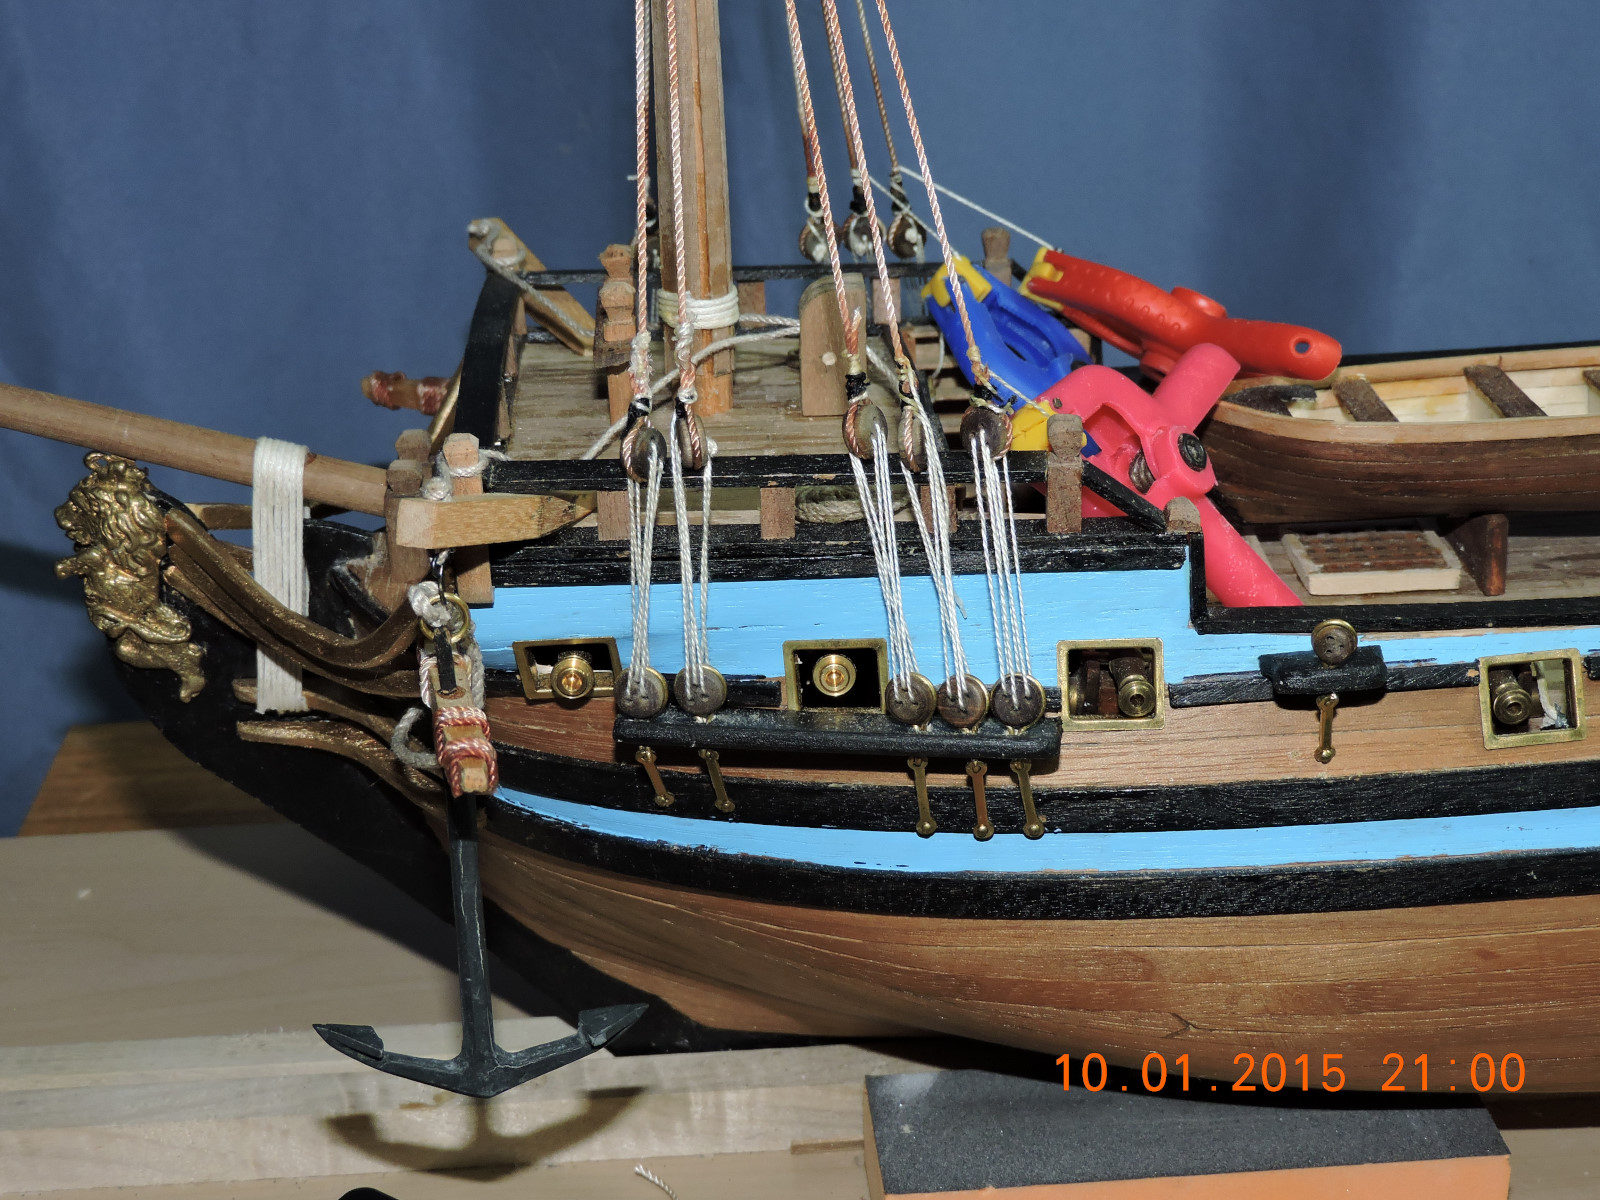
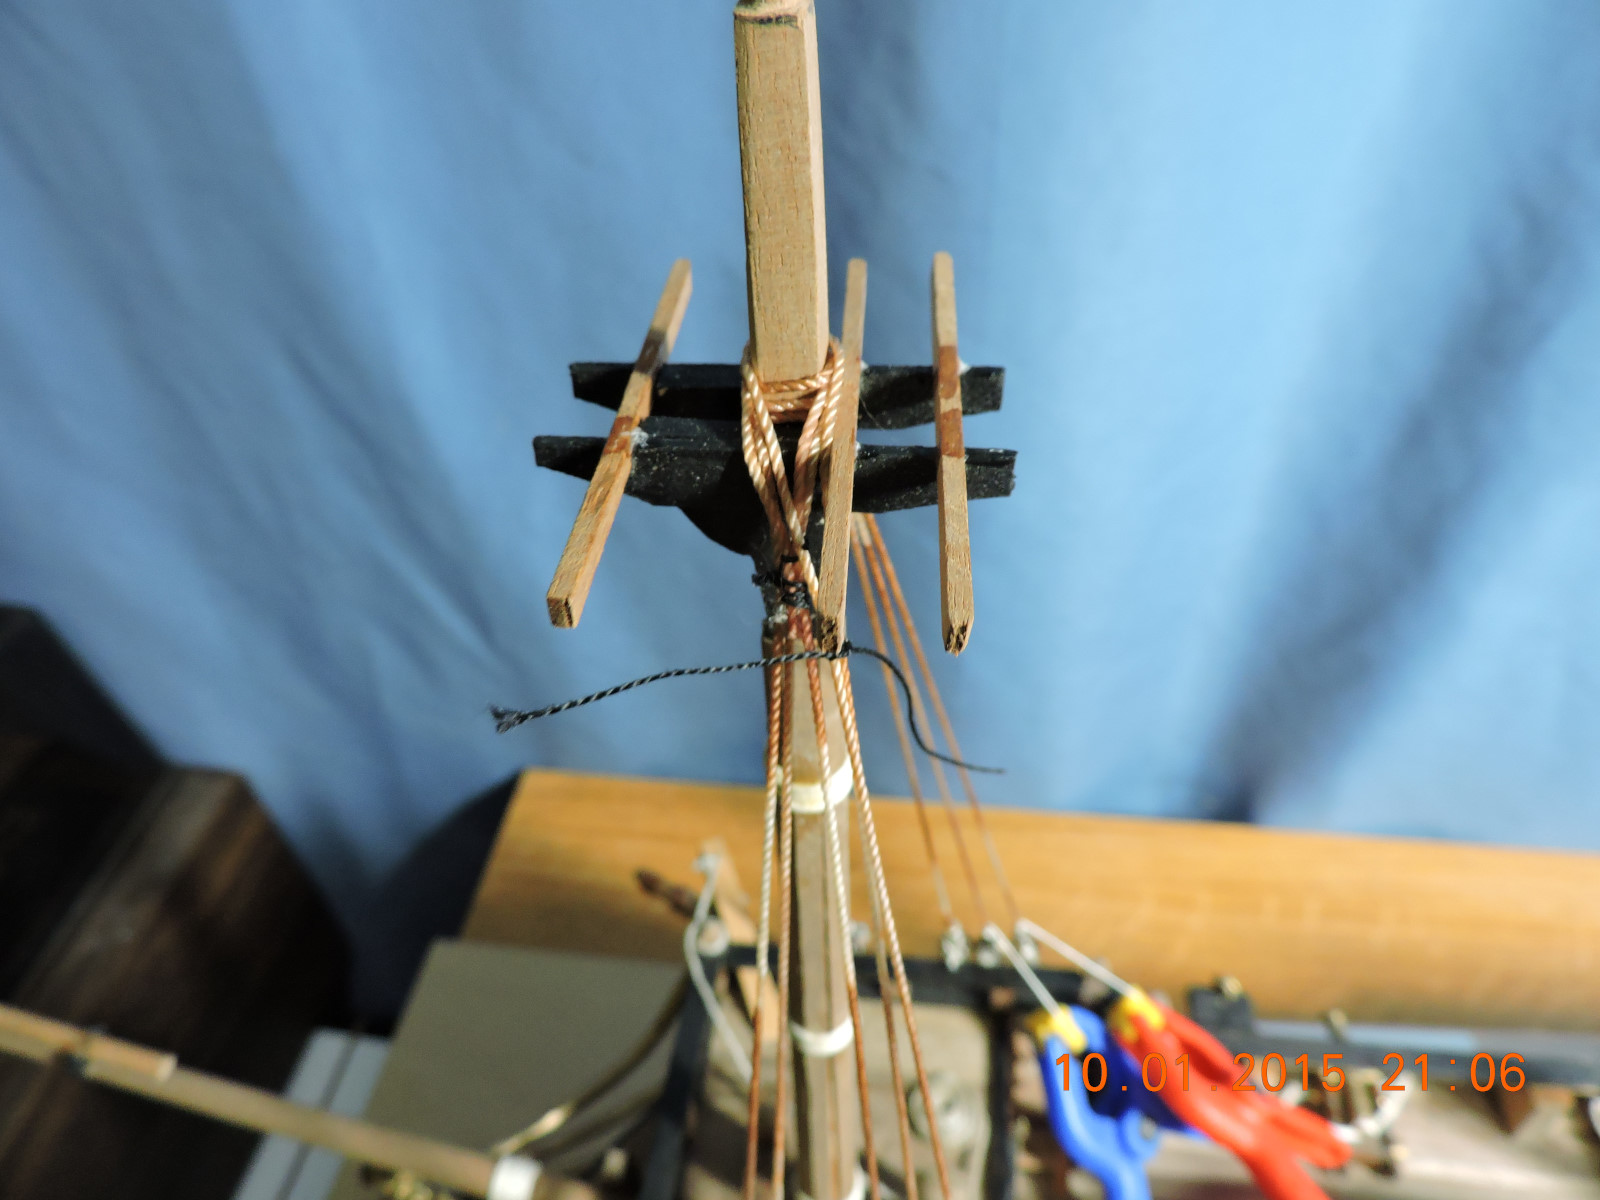
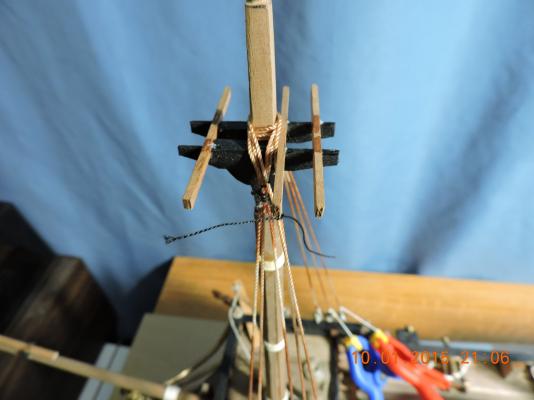
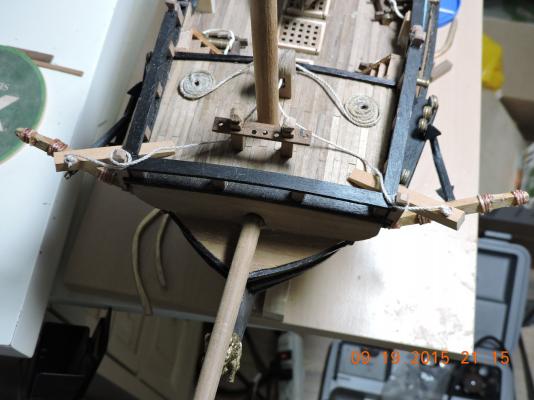
 Hi I’ve started working on the fore mast and shrouds this week. Walter
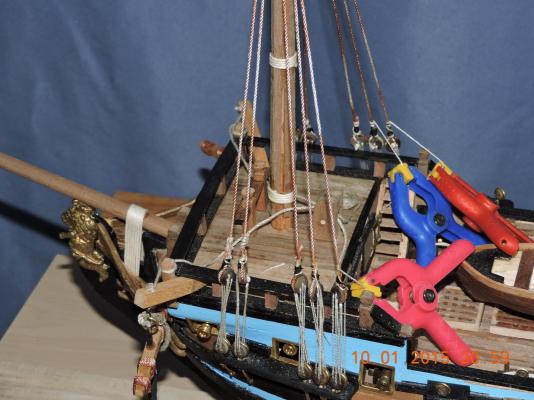

-
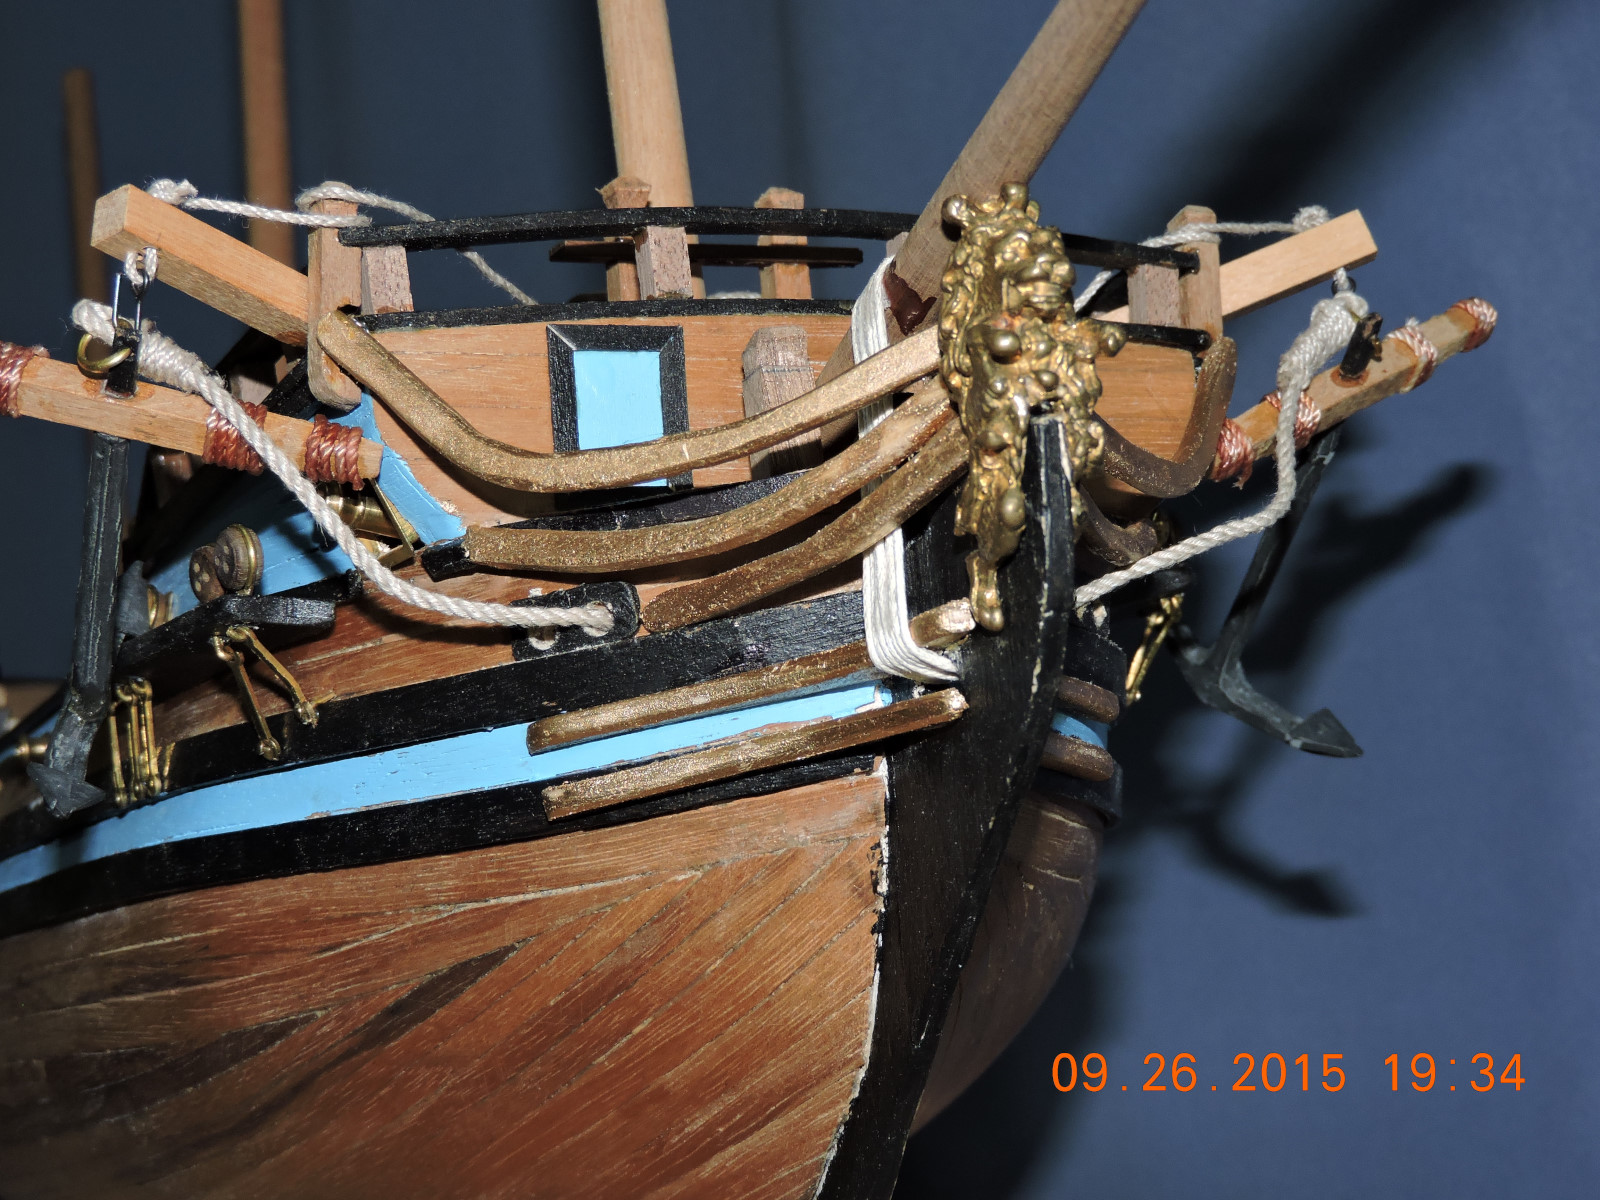
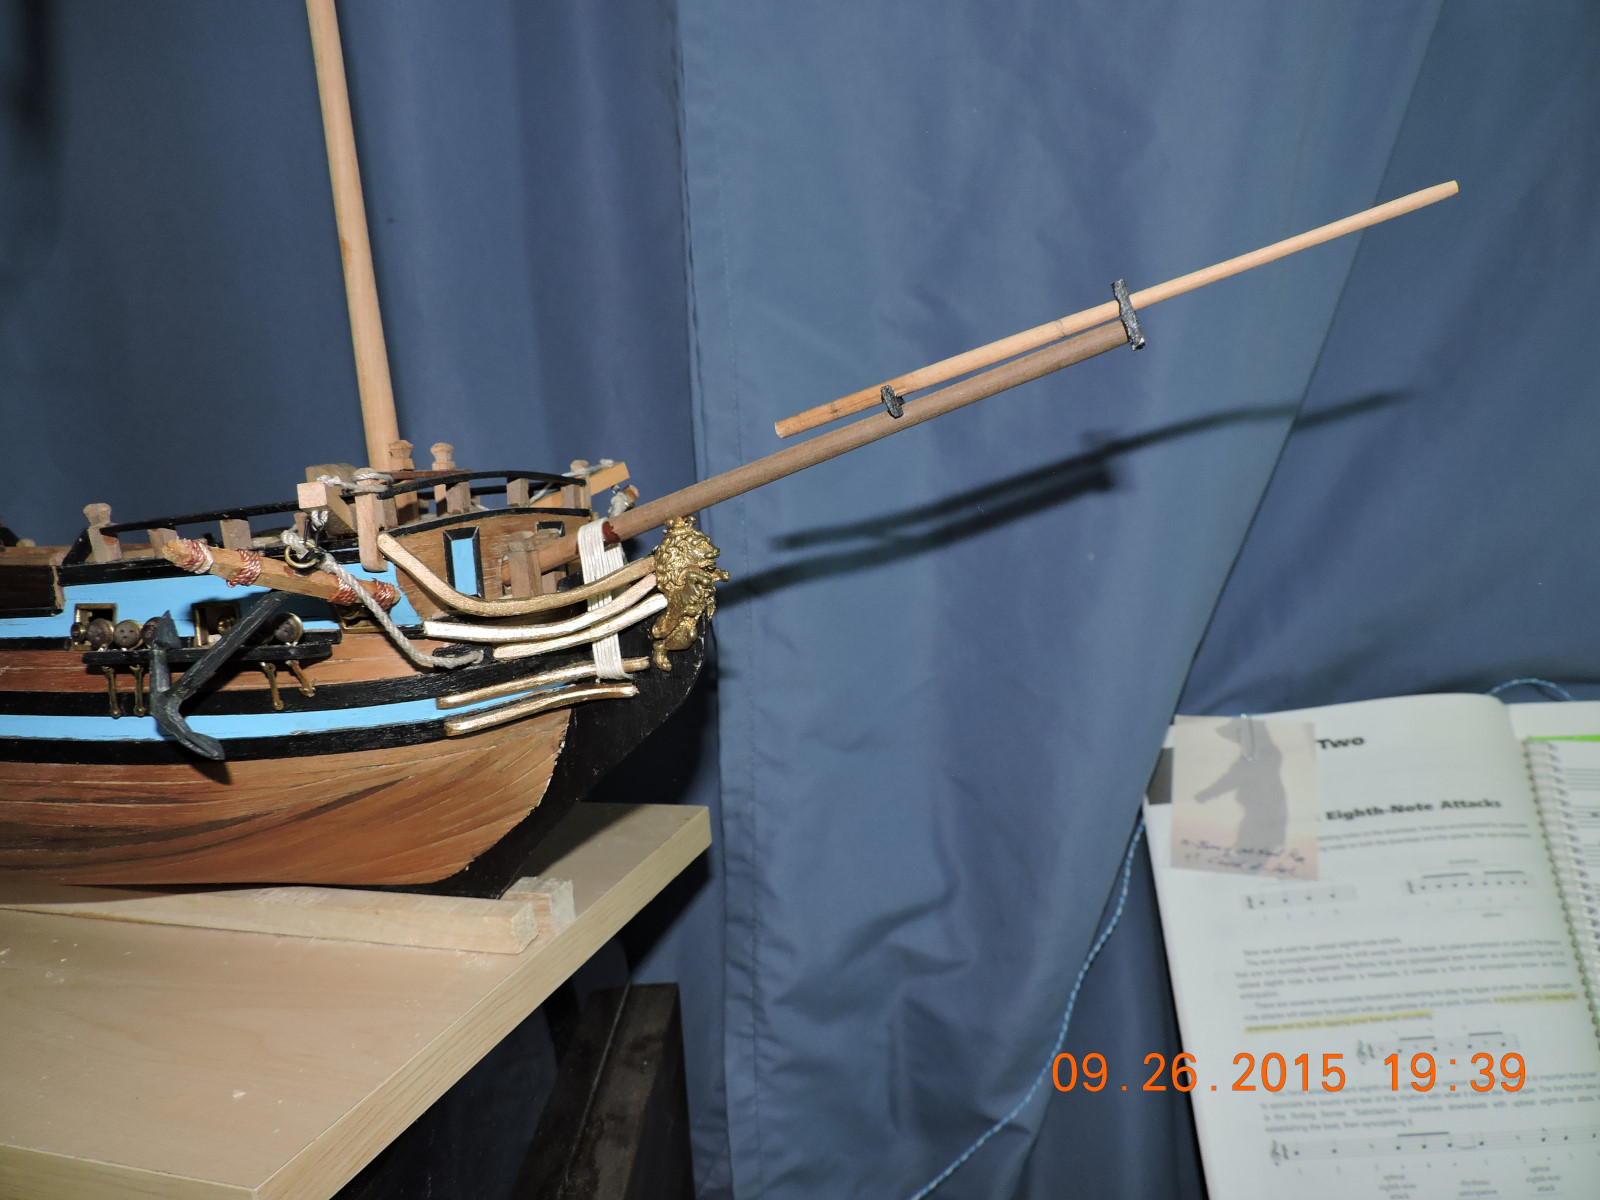
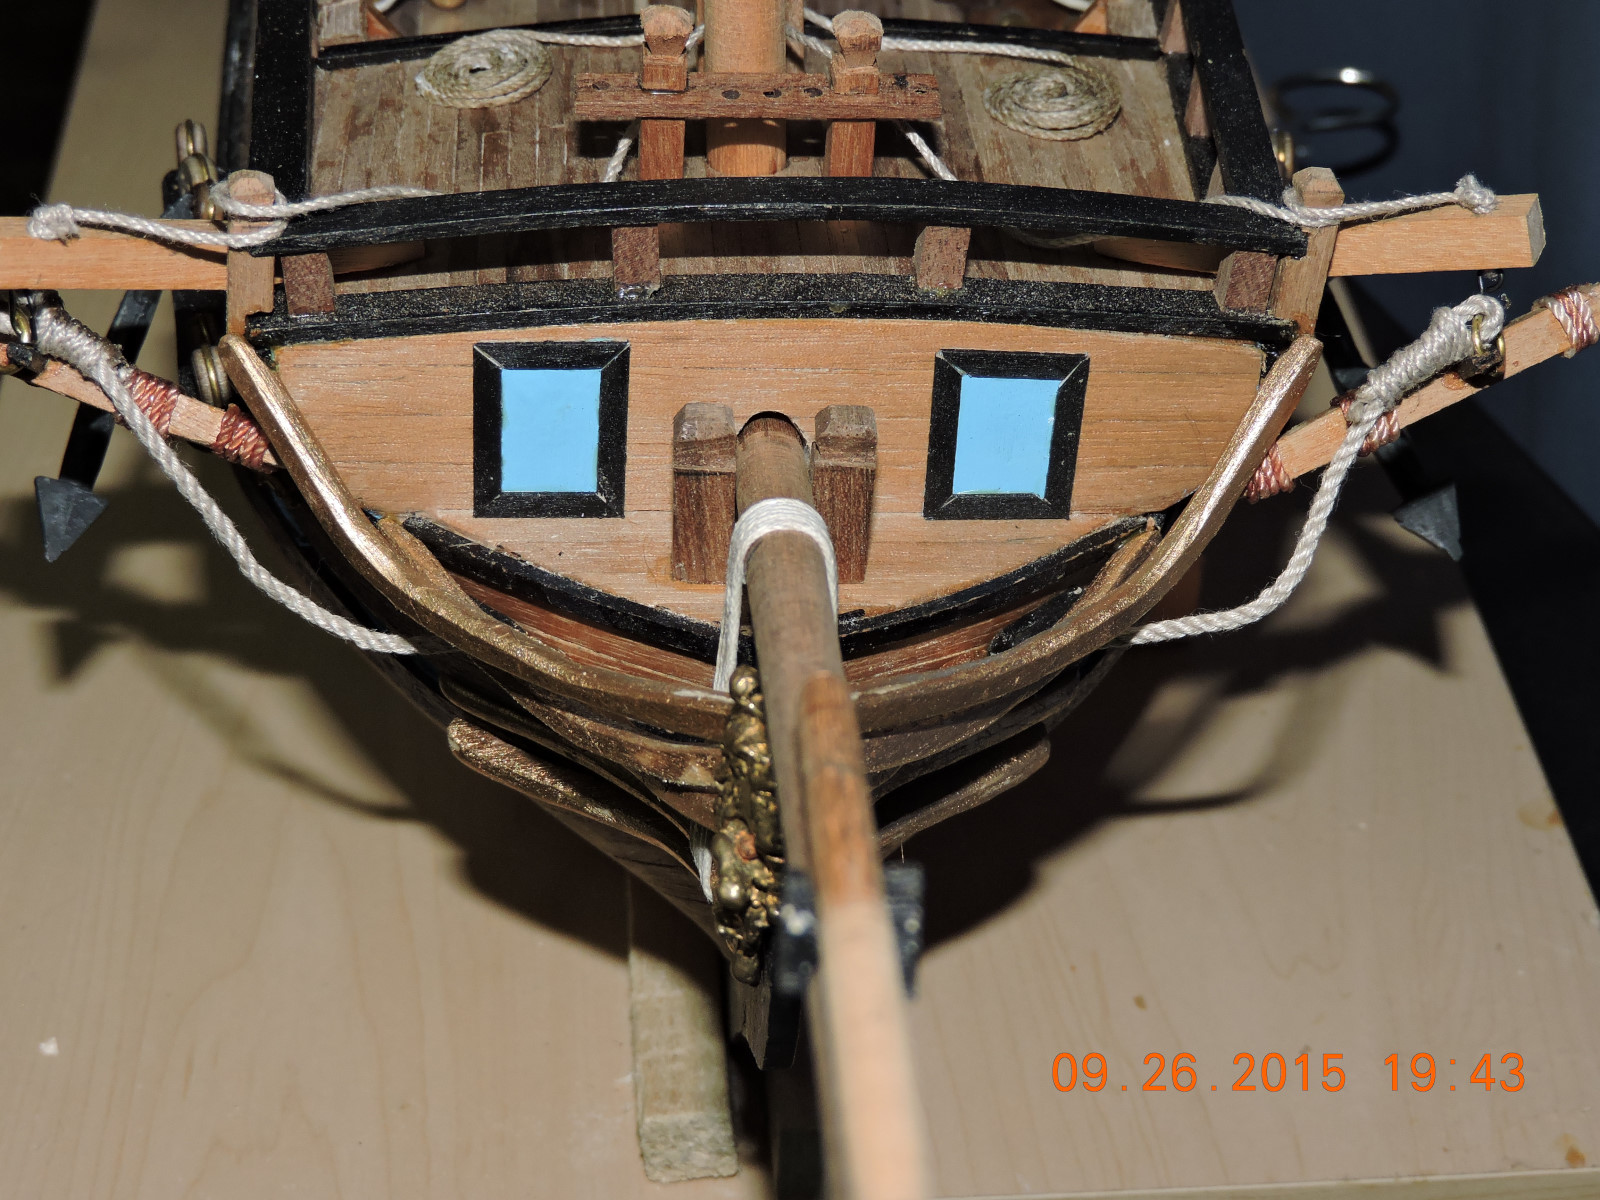
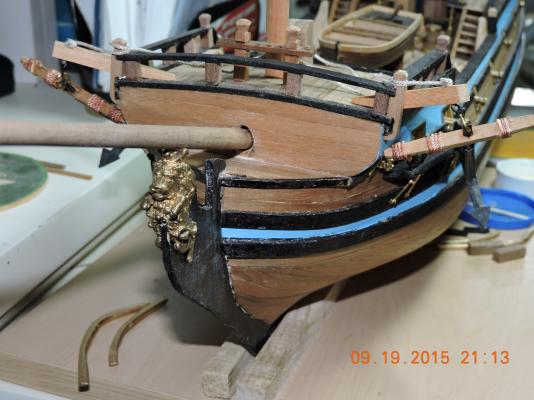
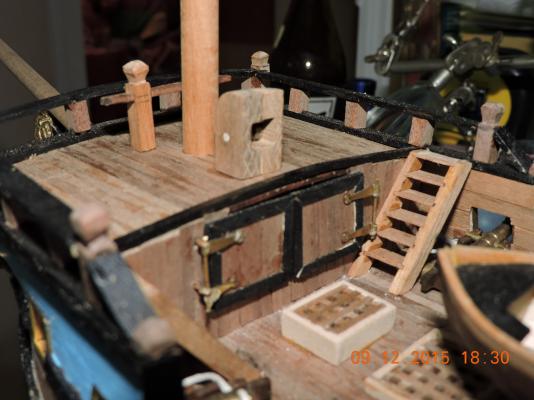
Hi I decided not to use the metal parts of the kit for the head rails and cheeks, but make my own. This week’s focus was on head rails, cheeks and jib boom. Walter


-
Hi, I'm currently building this kit. I do not have the instruction booklet, but I have the addendum to the instructions which outlines the building steps and has a few notes which may not be on the plans. It's about 9 pages. If you would like I could mail you a copy this weekend if you pm me your address. Happy building. Walter
-
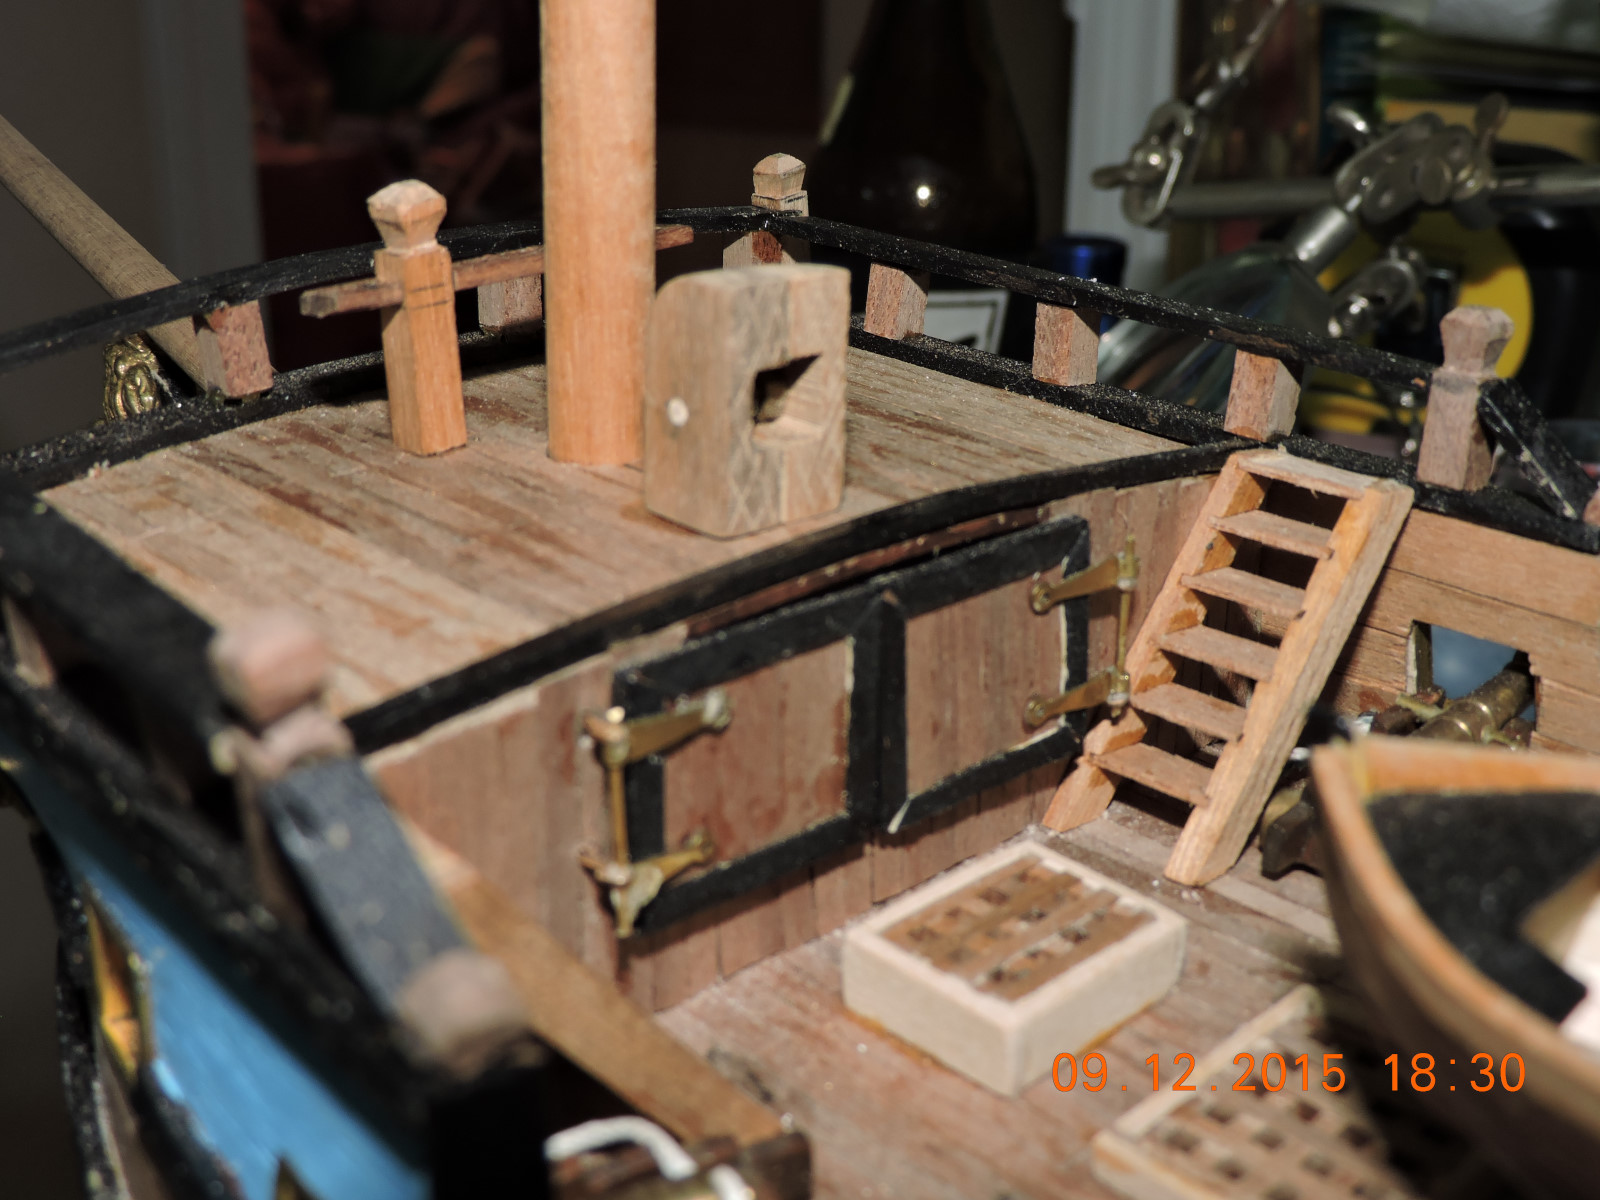
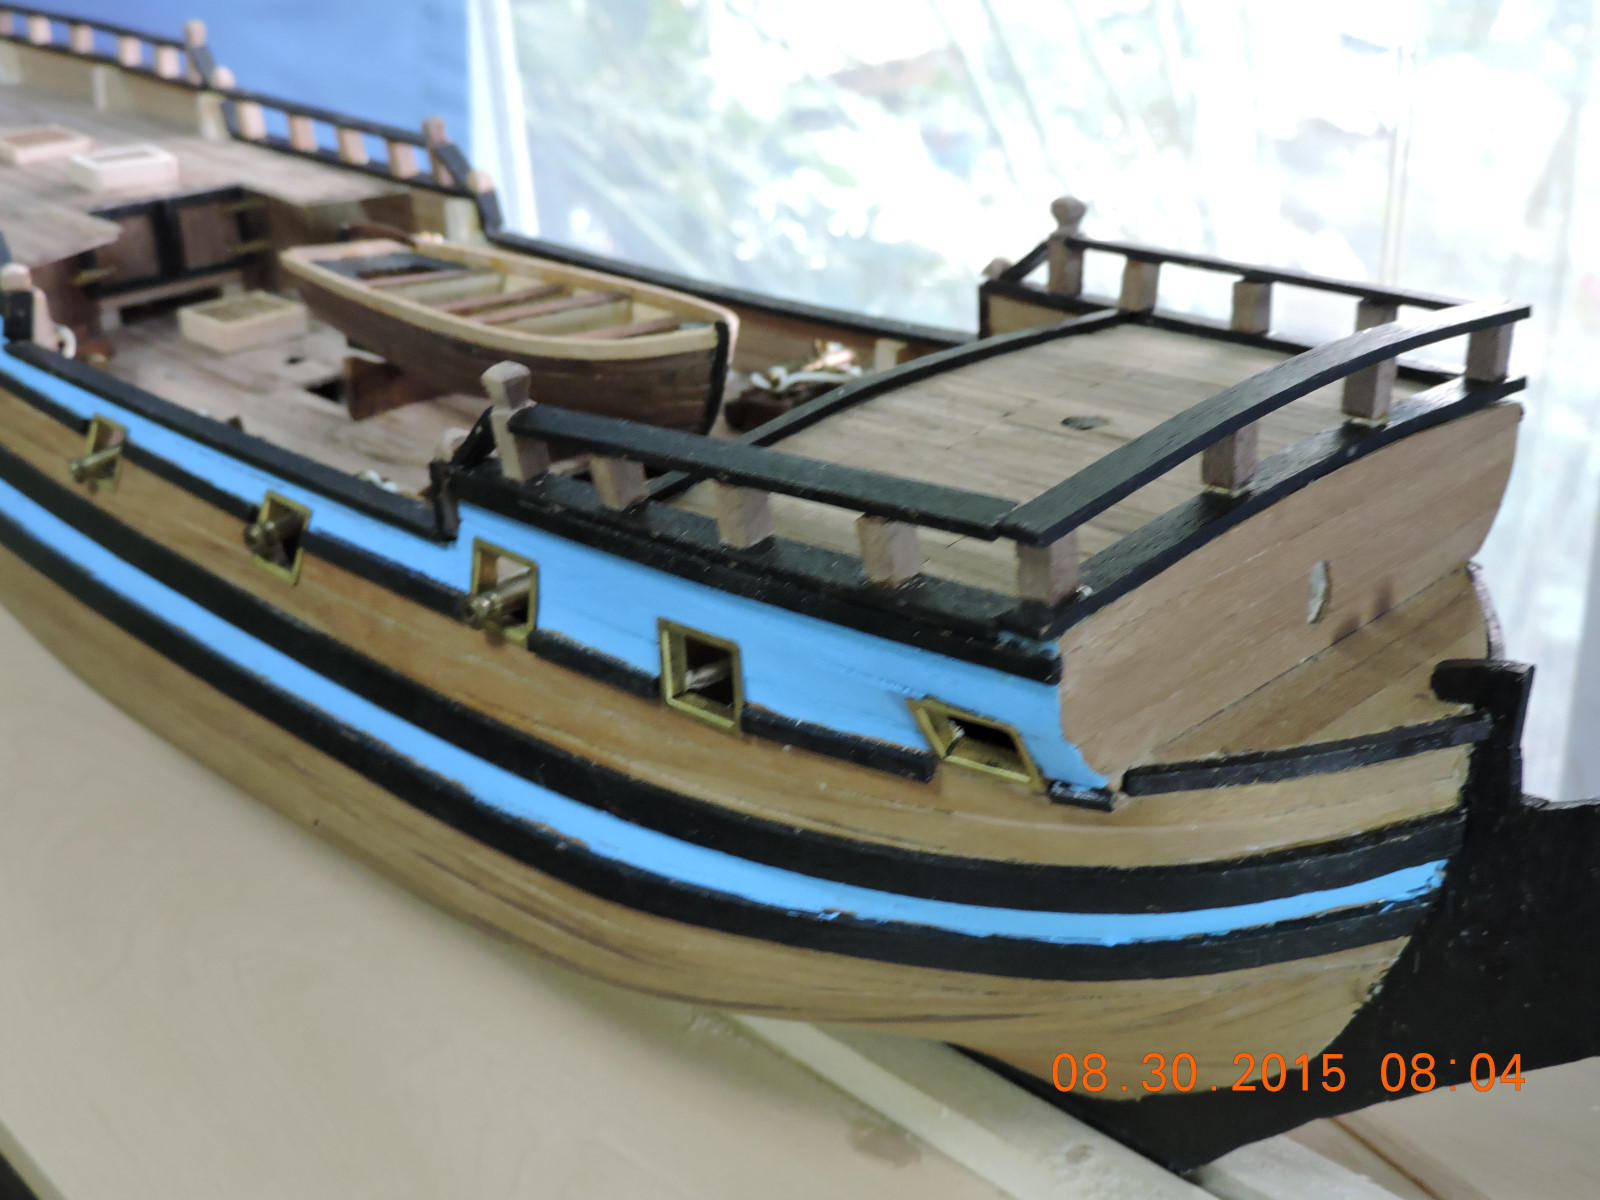
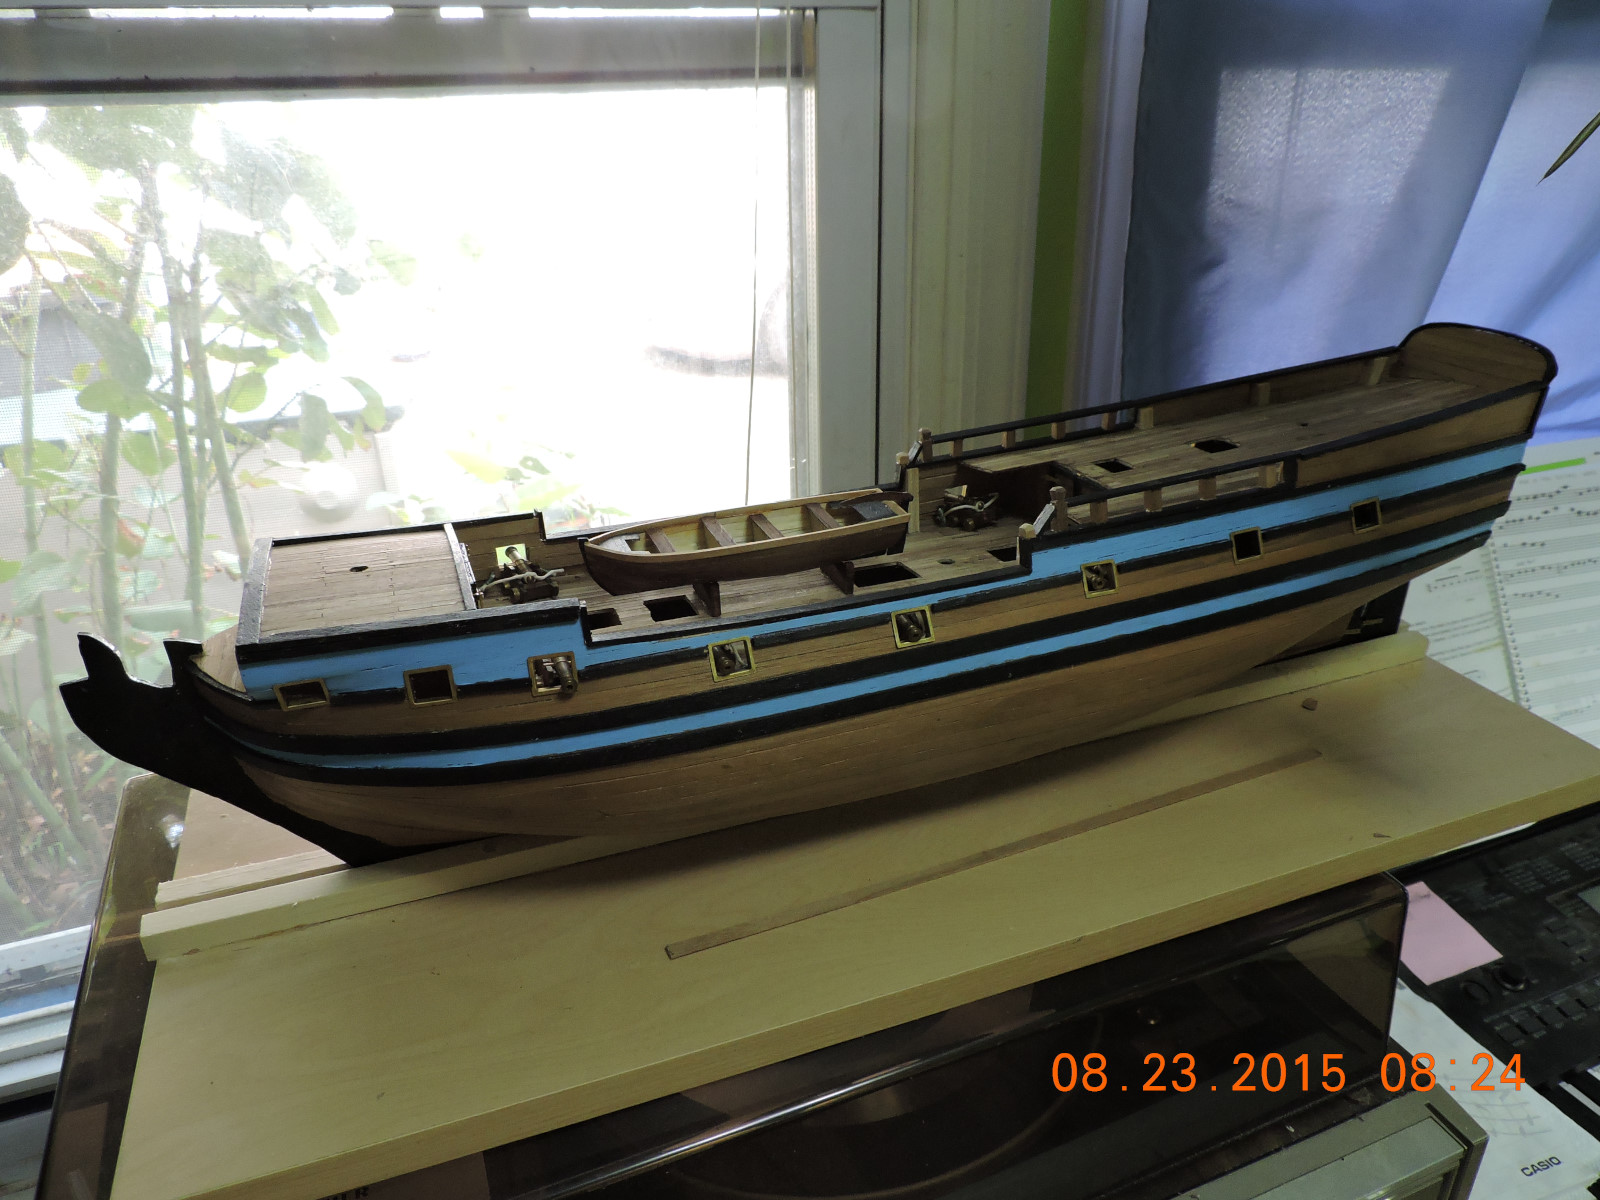
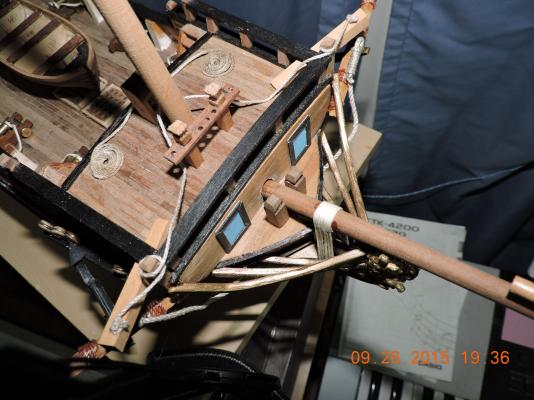
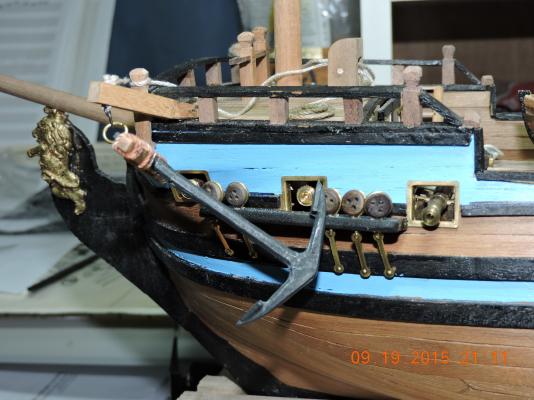
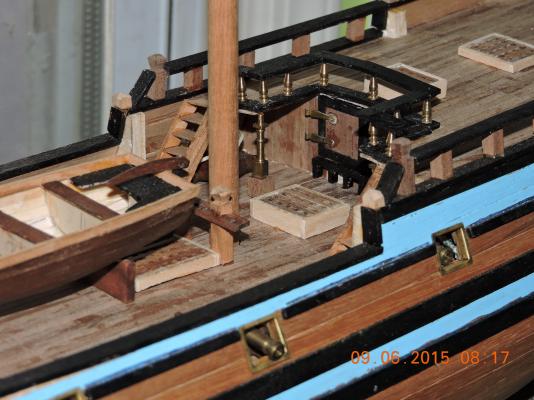
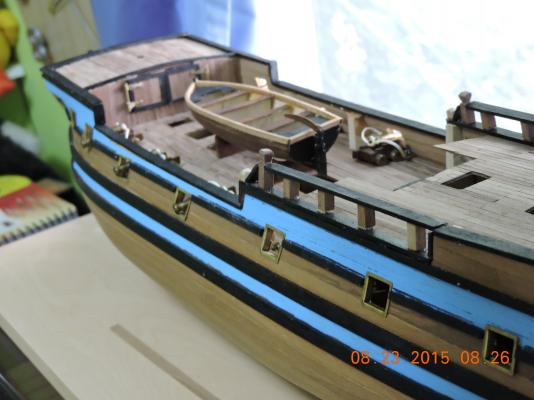
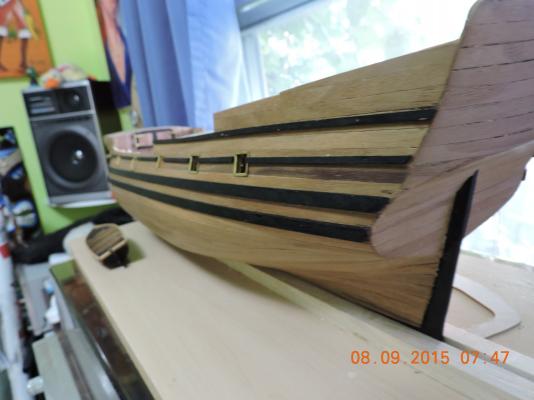
Hi, This week the catheads, anchors and some deadeyes were added. Walter

-
Thank you S.Coleman. A few days after i did the window reflections I had another idea for creating reflections. On a future project i may go down to the waterfront and photograph an actual sea or bay scene. I just have to make sure I don't capture any Jet Ski's. Walter
-
Thank you Bill. I'm having a lot of fun with this project and learning a lot thanks to this great site. Walter
-
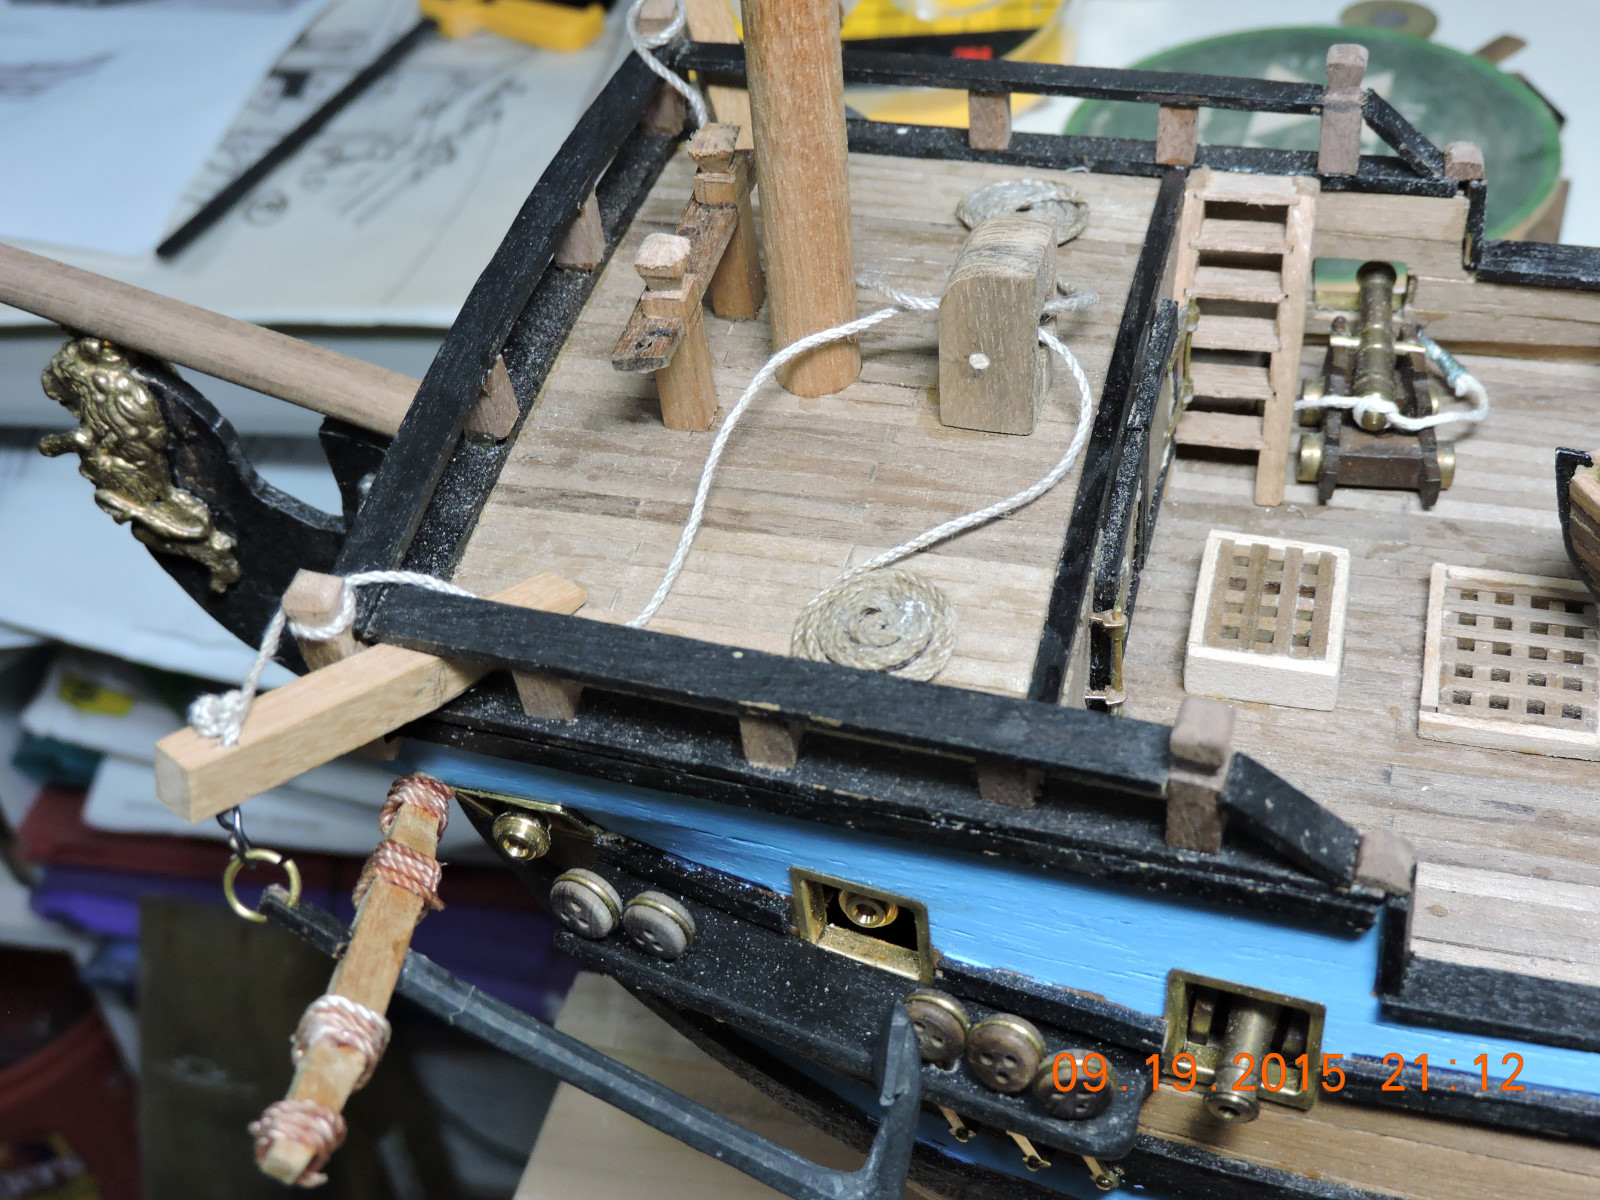
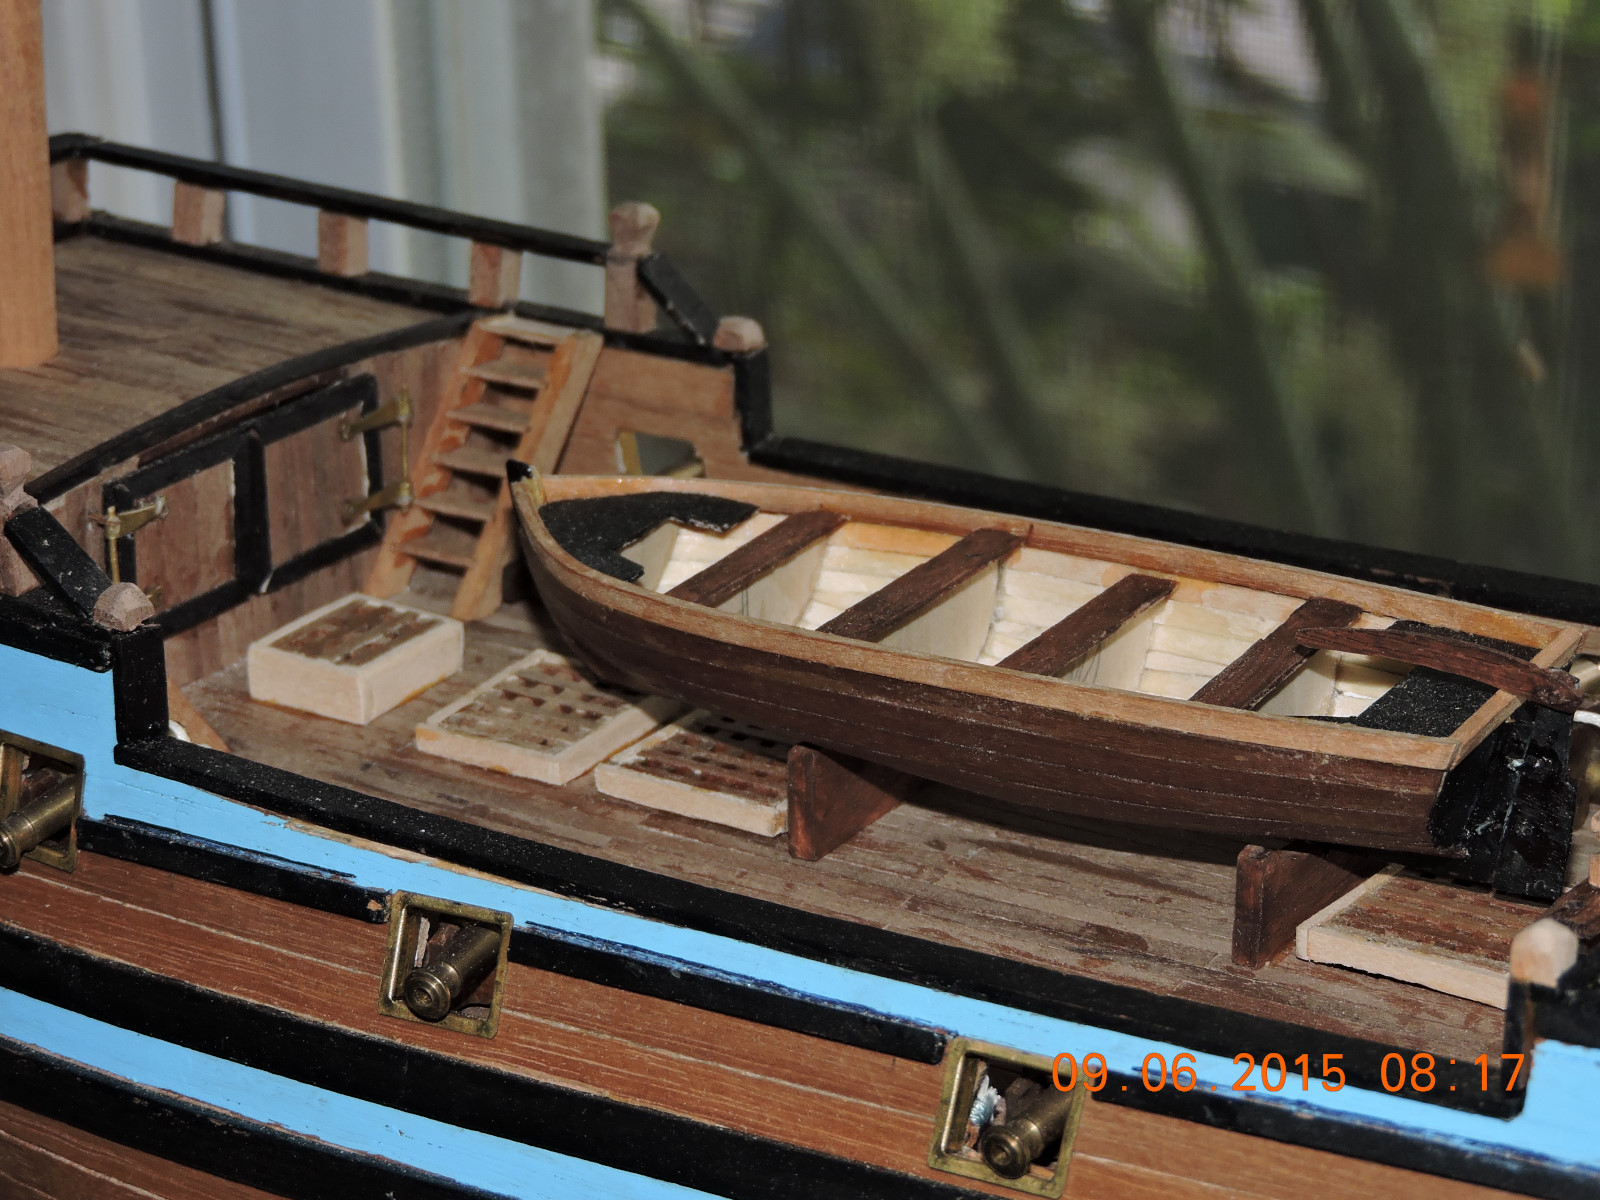
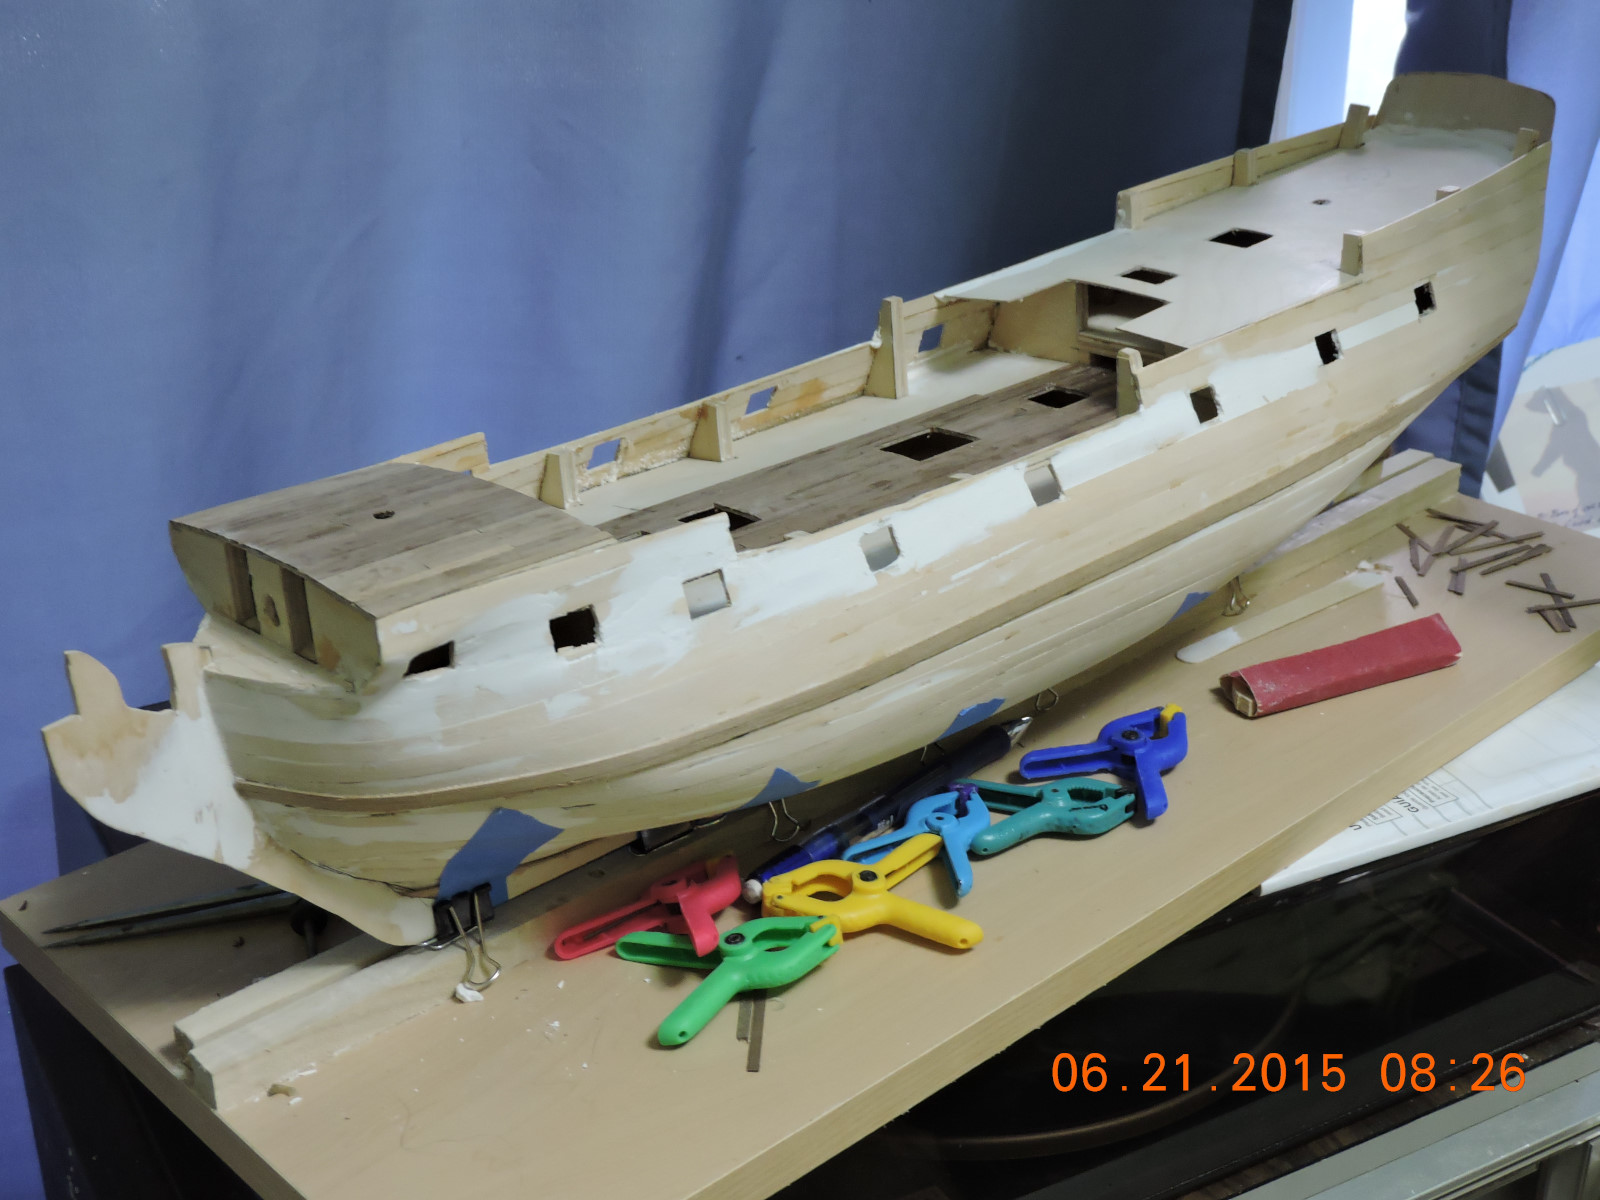
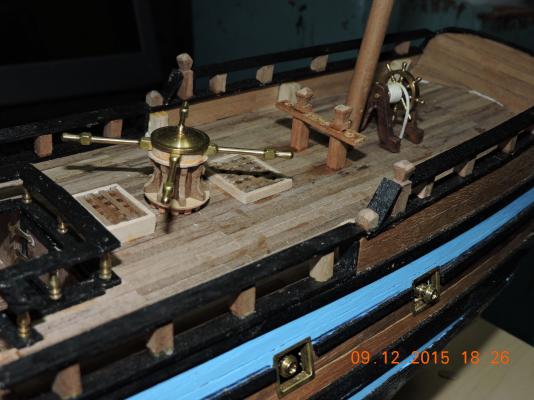
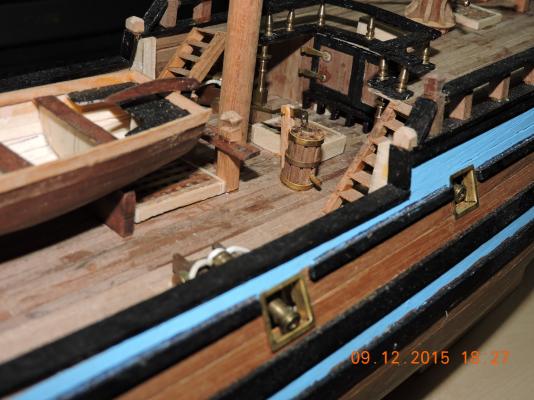
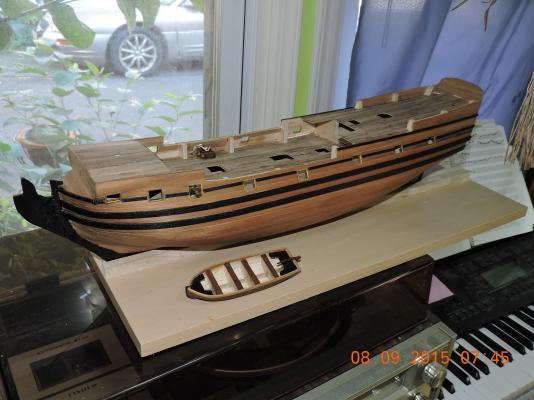
Hi, This week I made some progress with the deck furniture. The pump, wheel, capstan and anchor pulleys have been installed. Walter
-
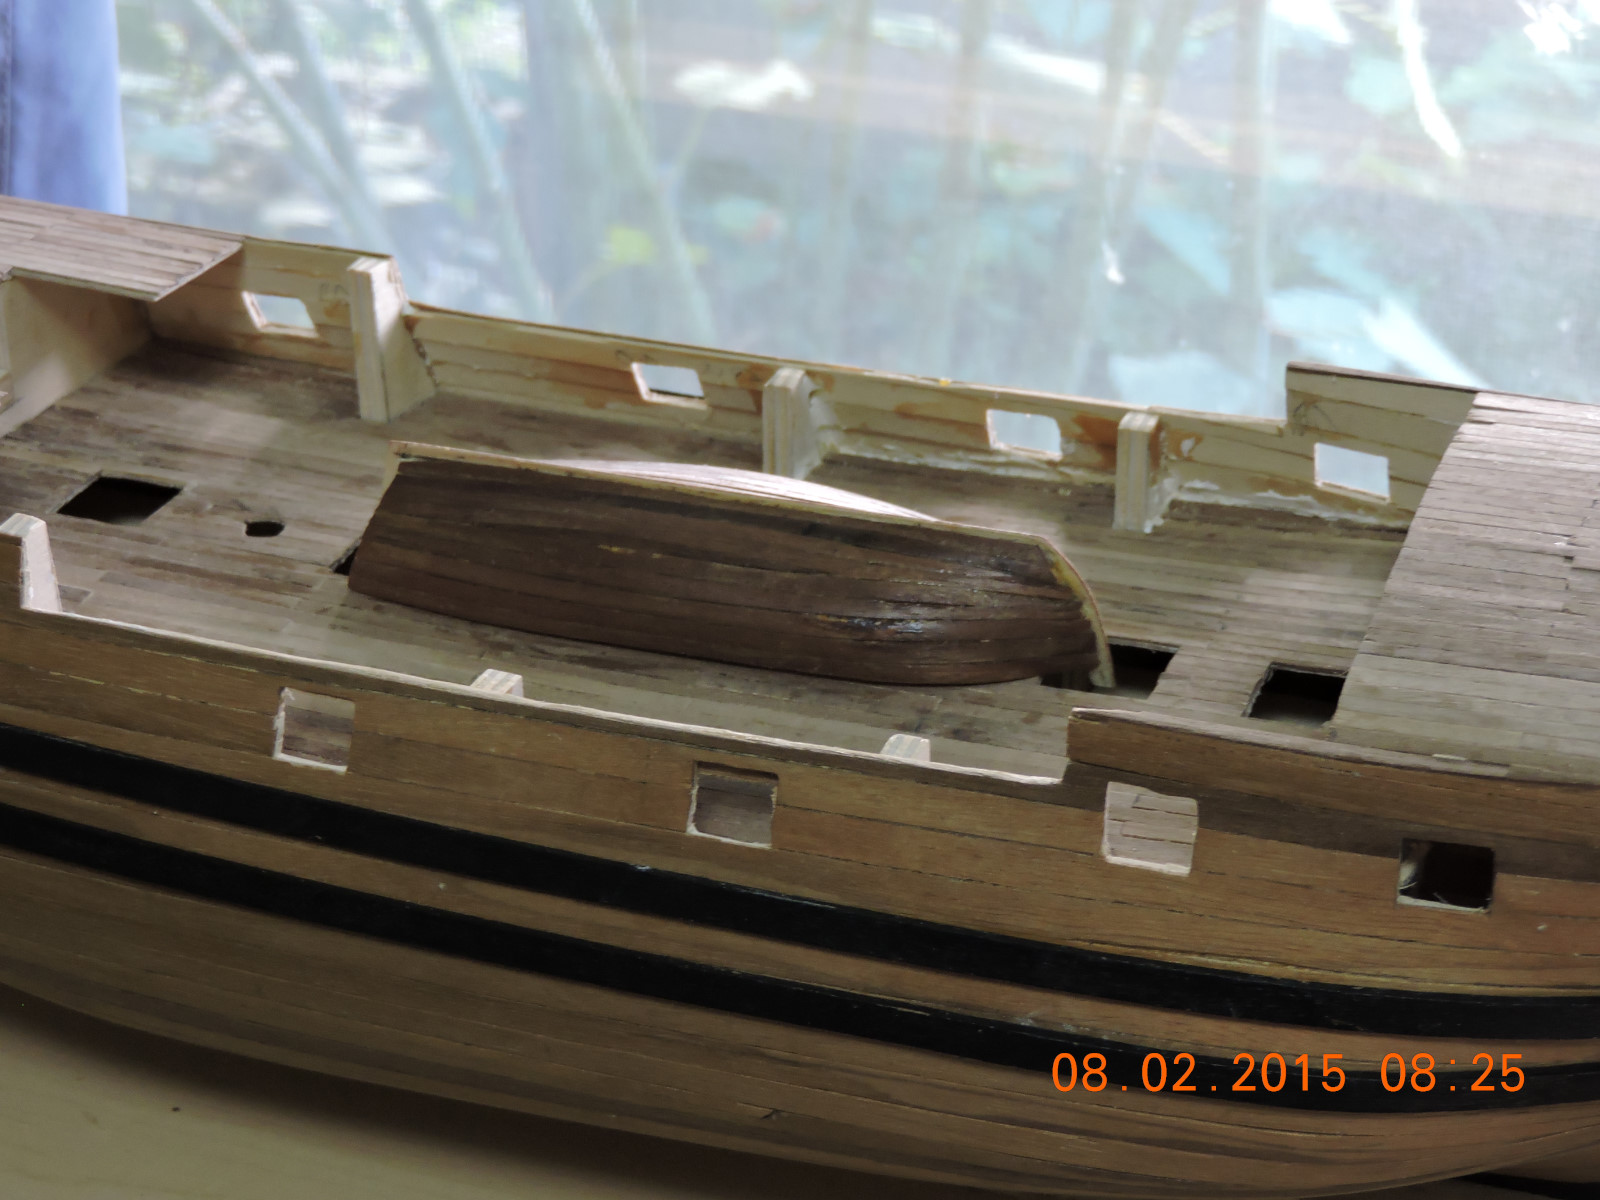
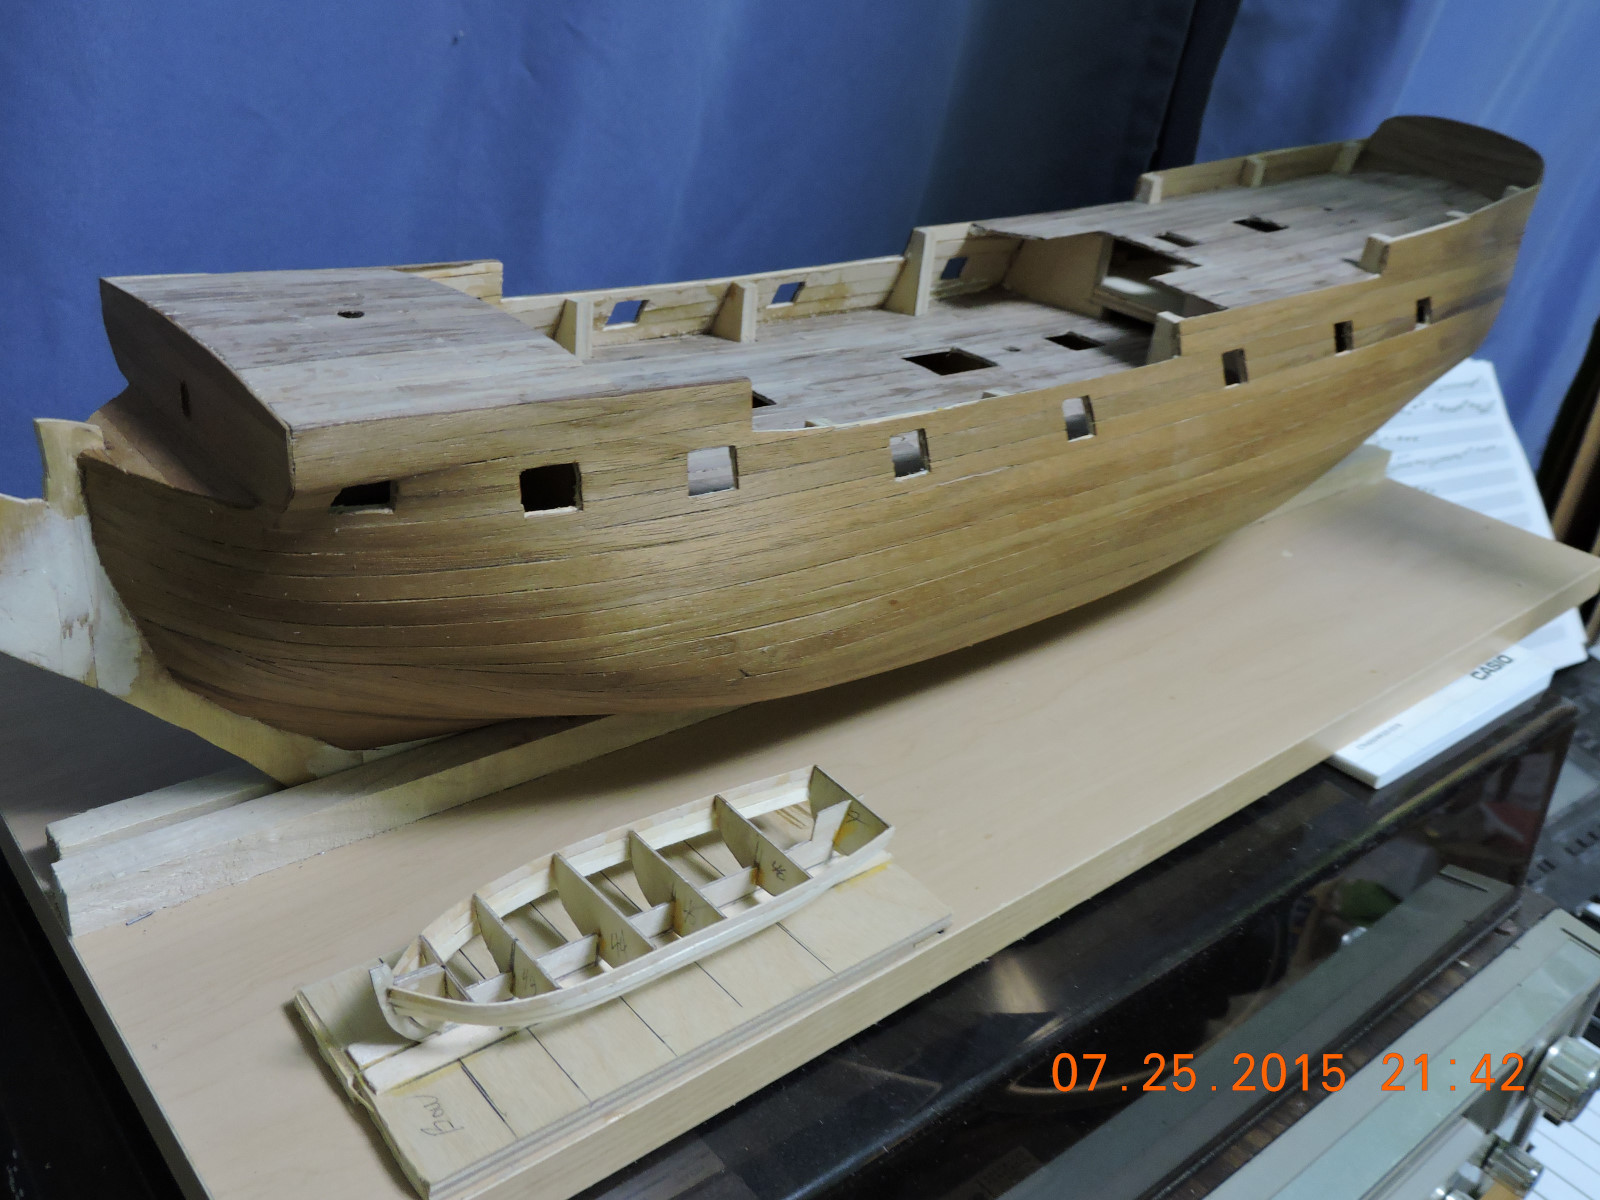
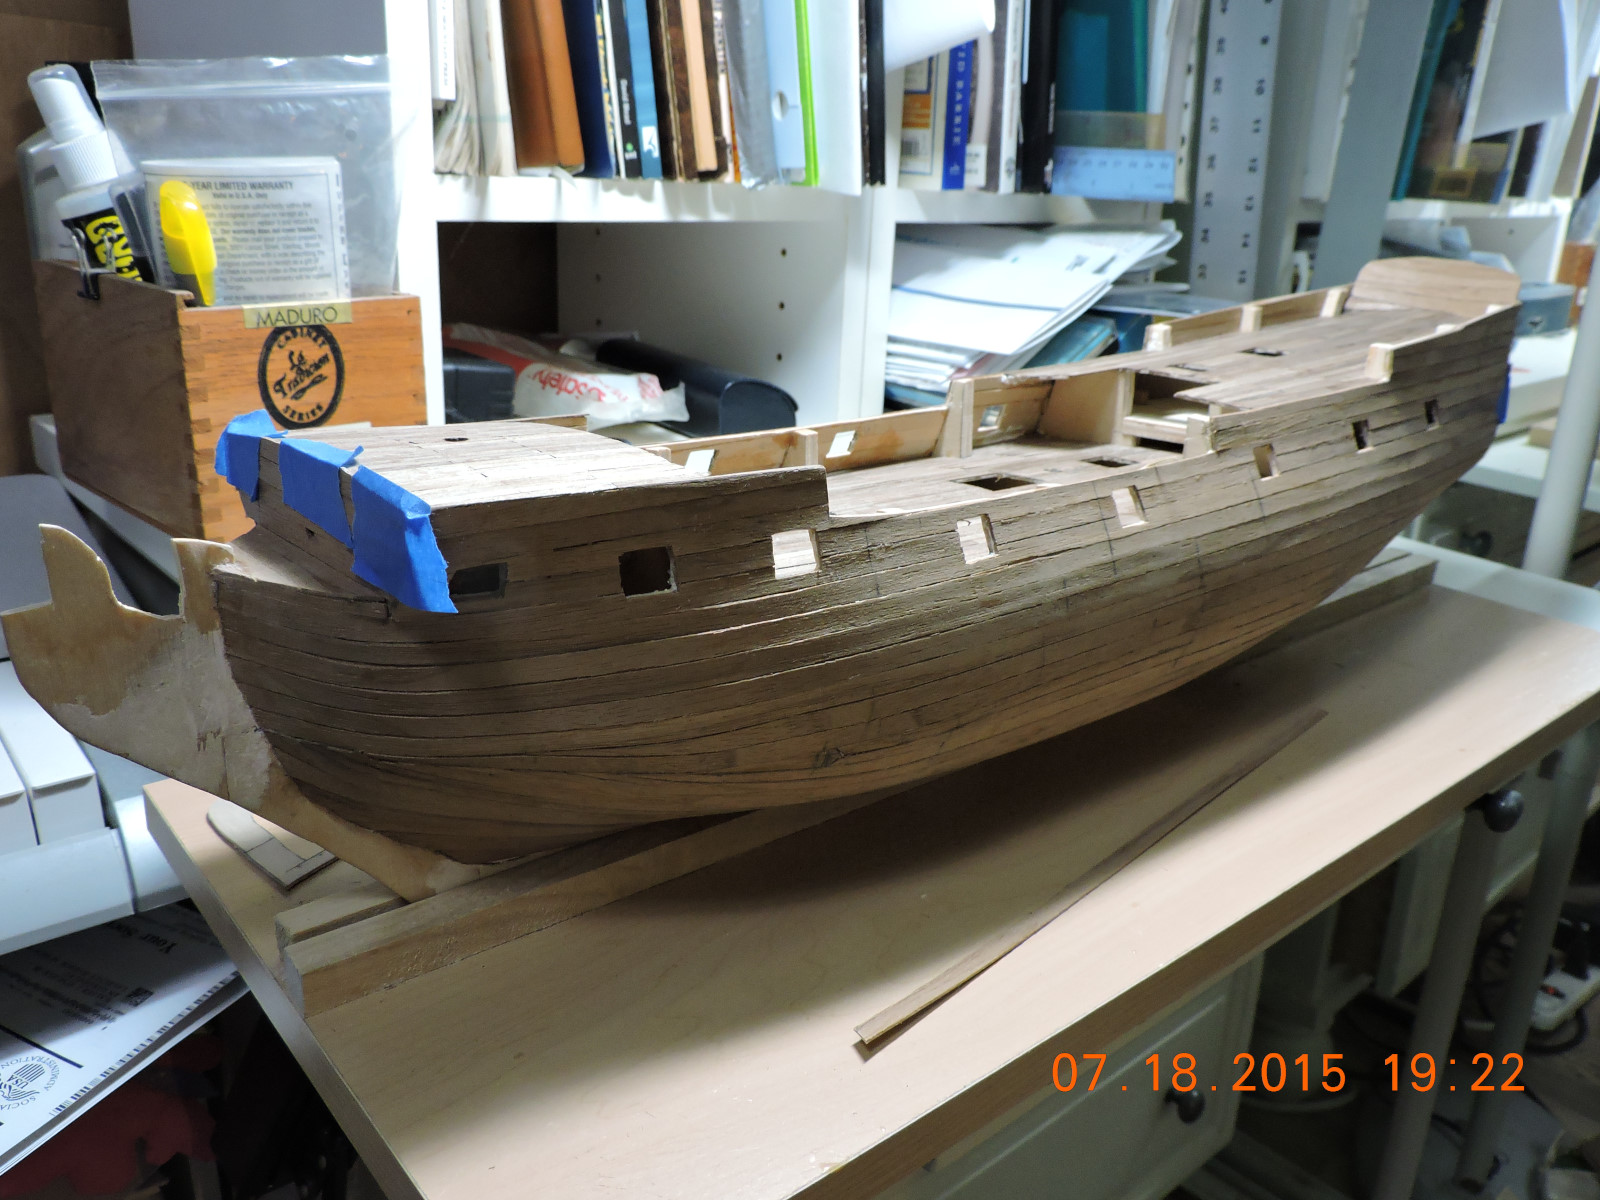
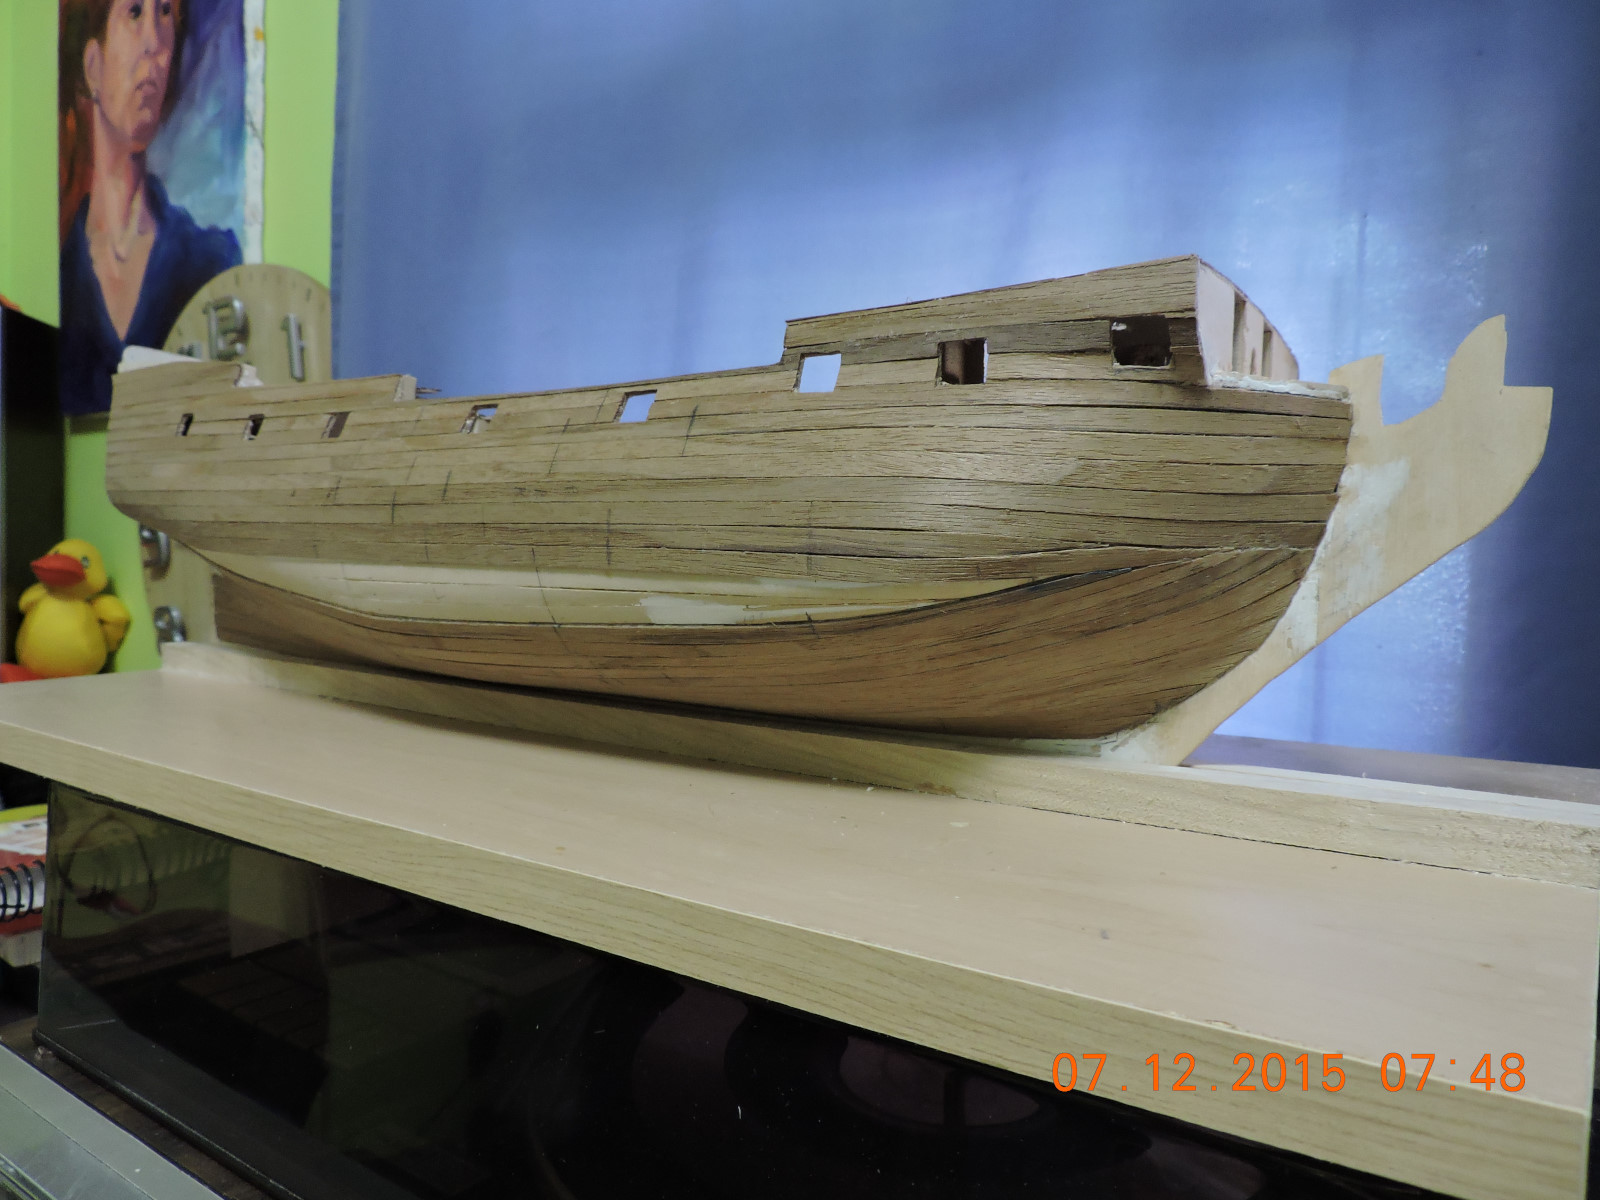
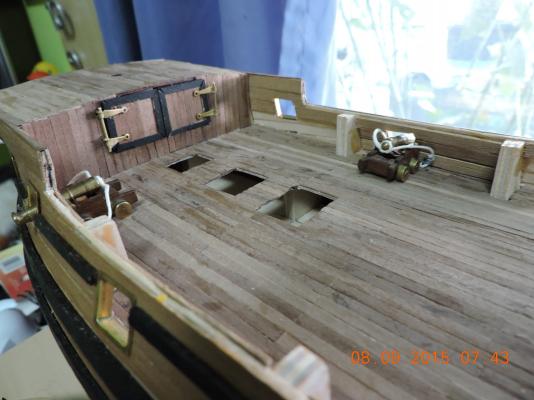
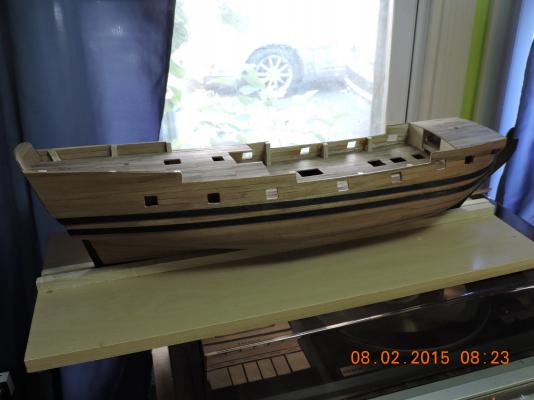
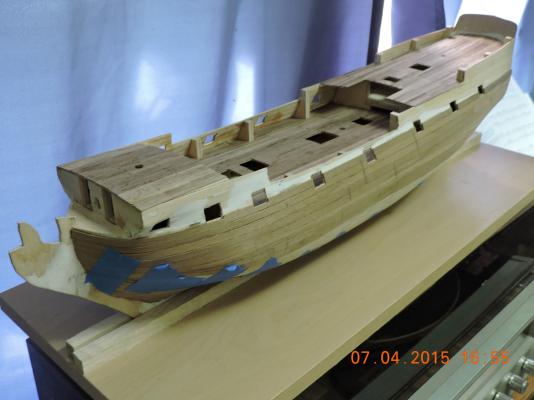
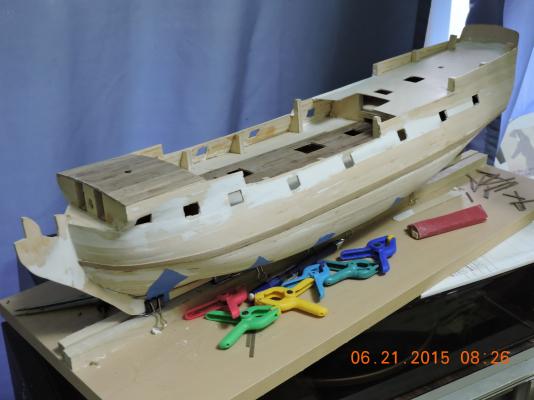
Hi, This week more rails were added, the hatches completed and the ladders completed. I test fit the masts to insure the holes lined up while there still isn’t a lot of stuff on the decks. Walter

-
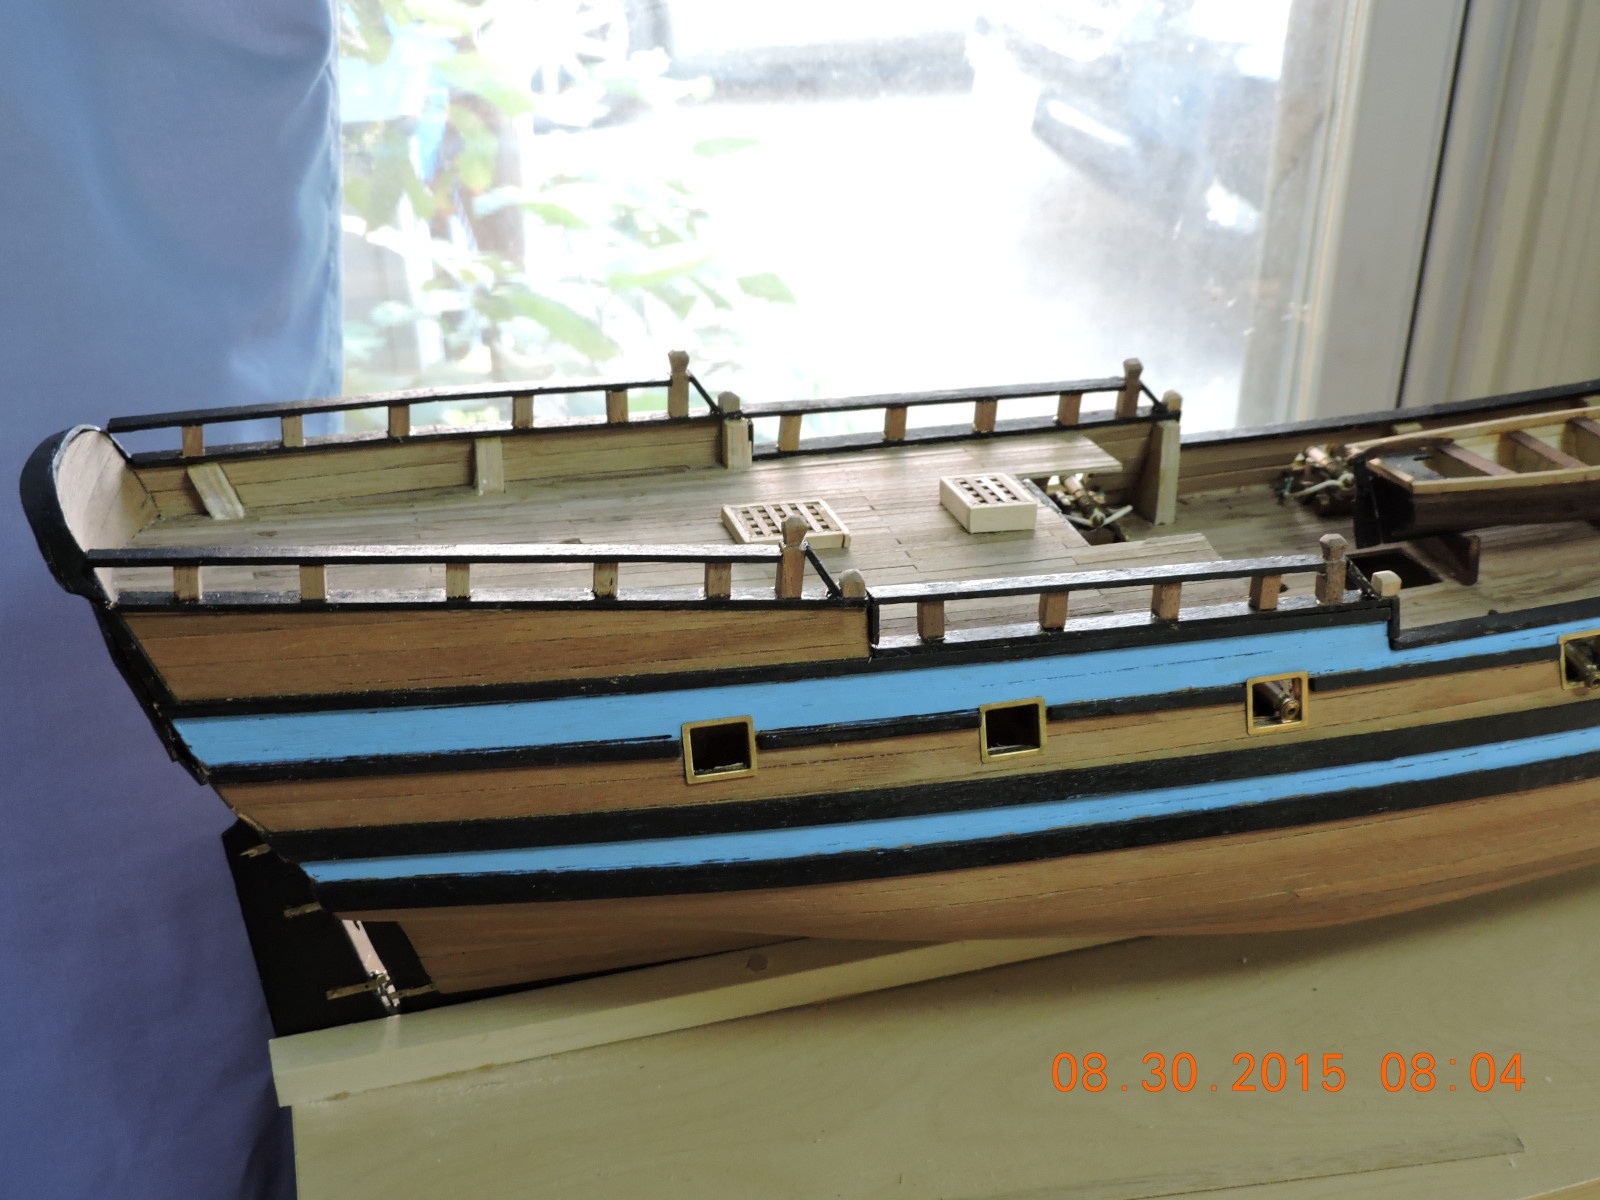
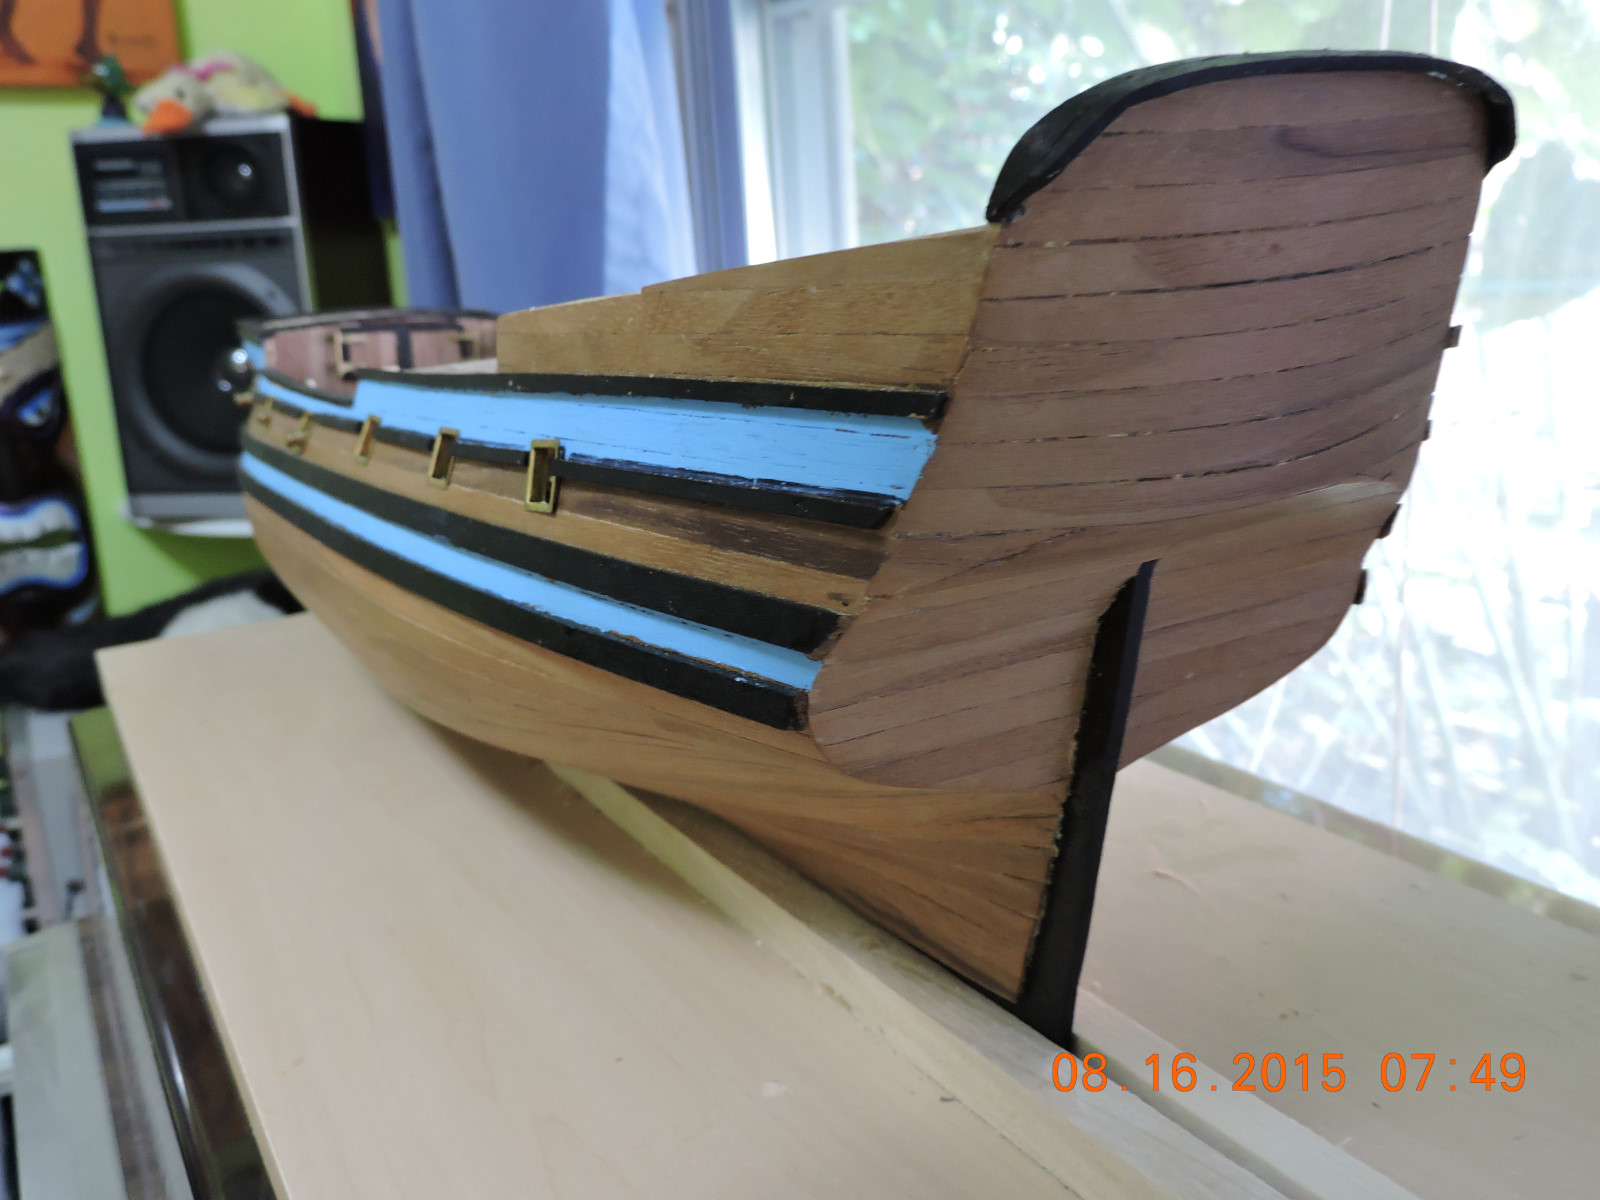
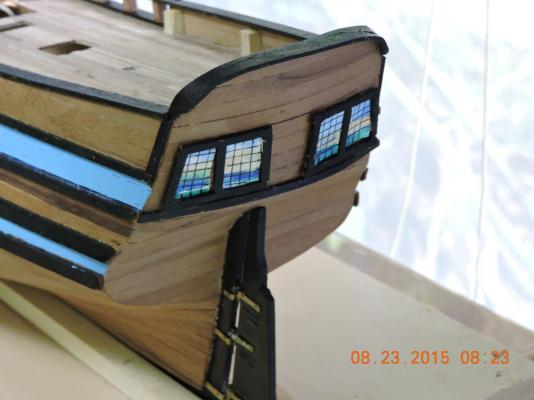
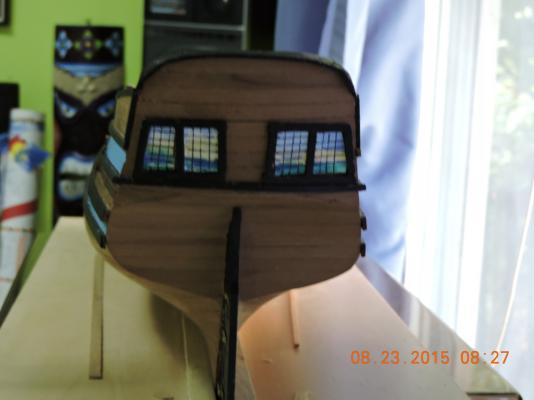
Hi, This week I did a bit of work on the stern and rails. From the start of this project the layout of the stern did not seem right to me, In particular the windows on the plans protruded above the deck line. After reviewing two period paintings (a Willem van de Velde, theYounger from 1706 and a Pete Monamy from 1714), I decided to create my own interpretation complete with a watercolor painting to represent reflections in the glass. Walter

-
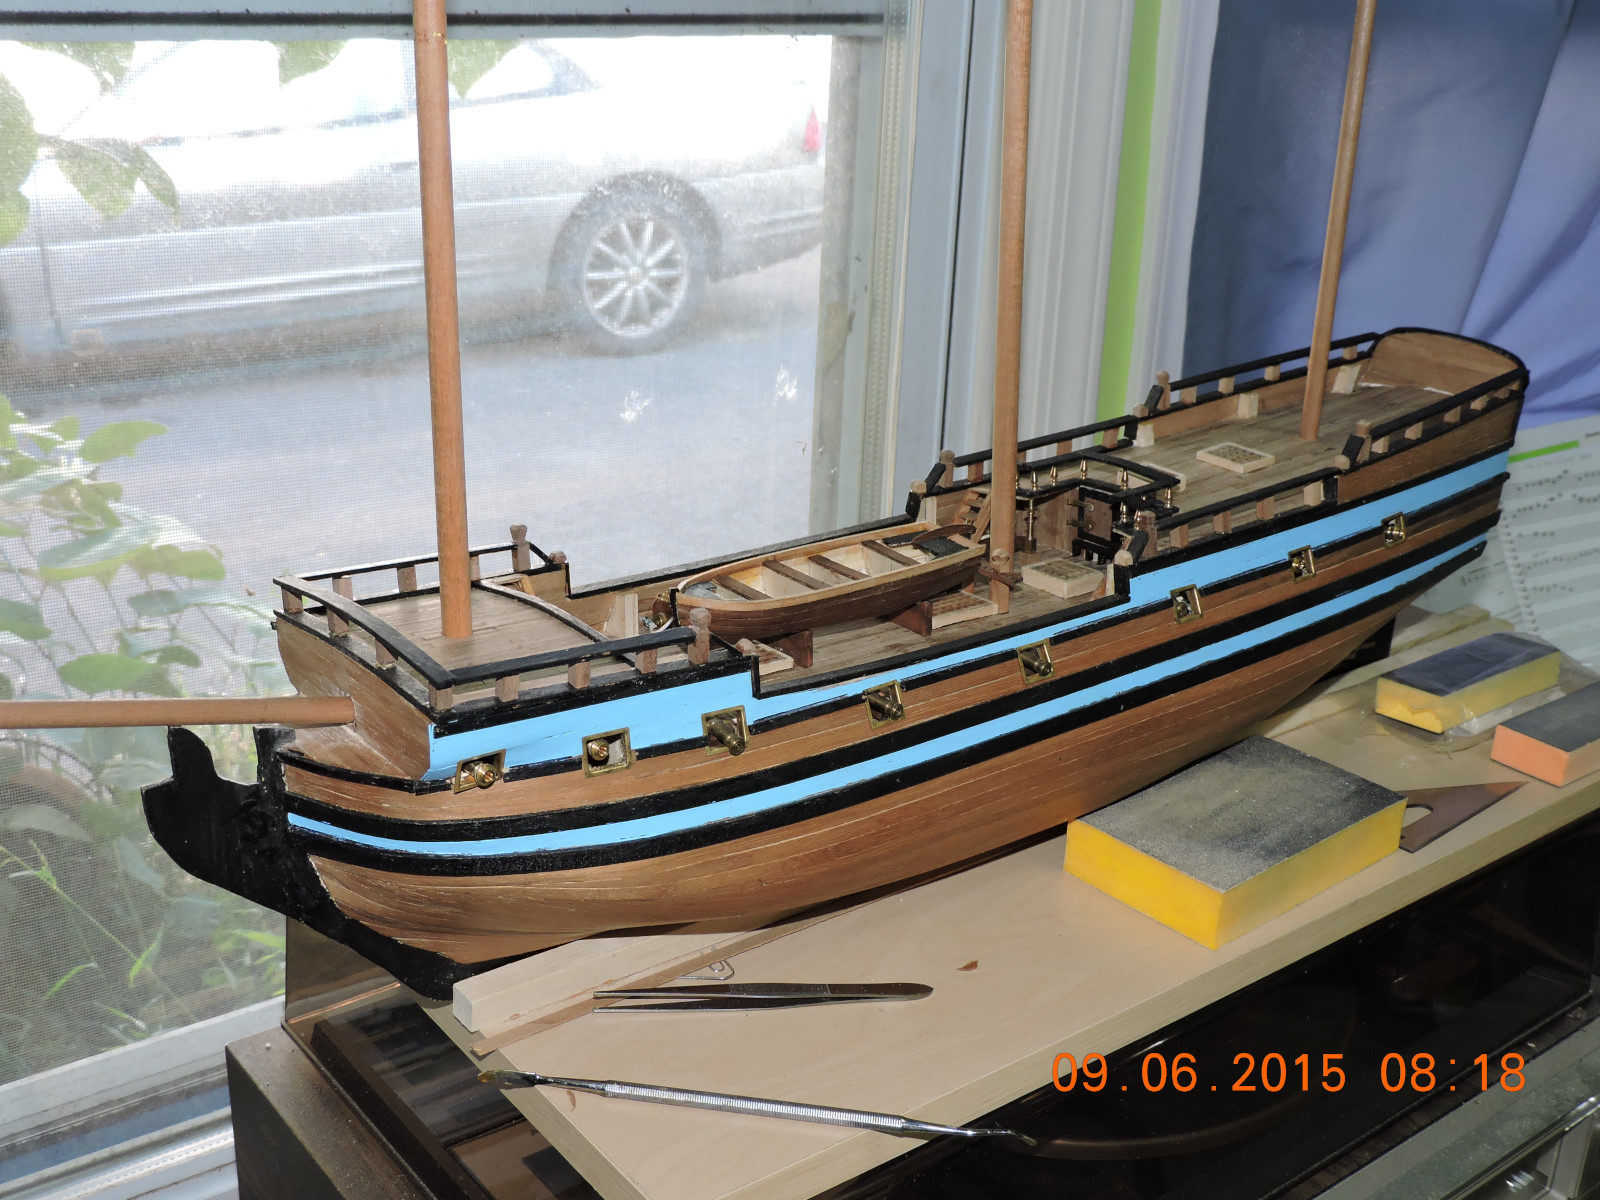
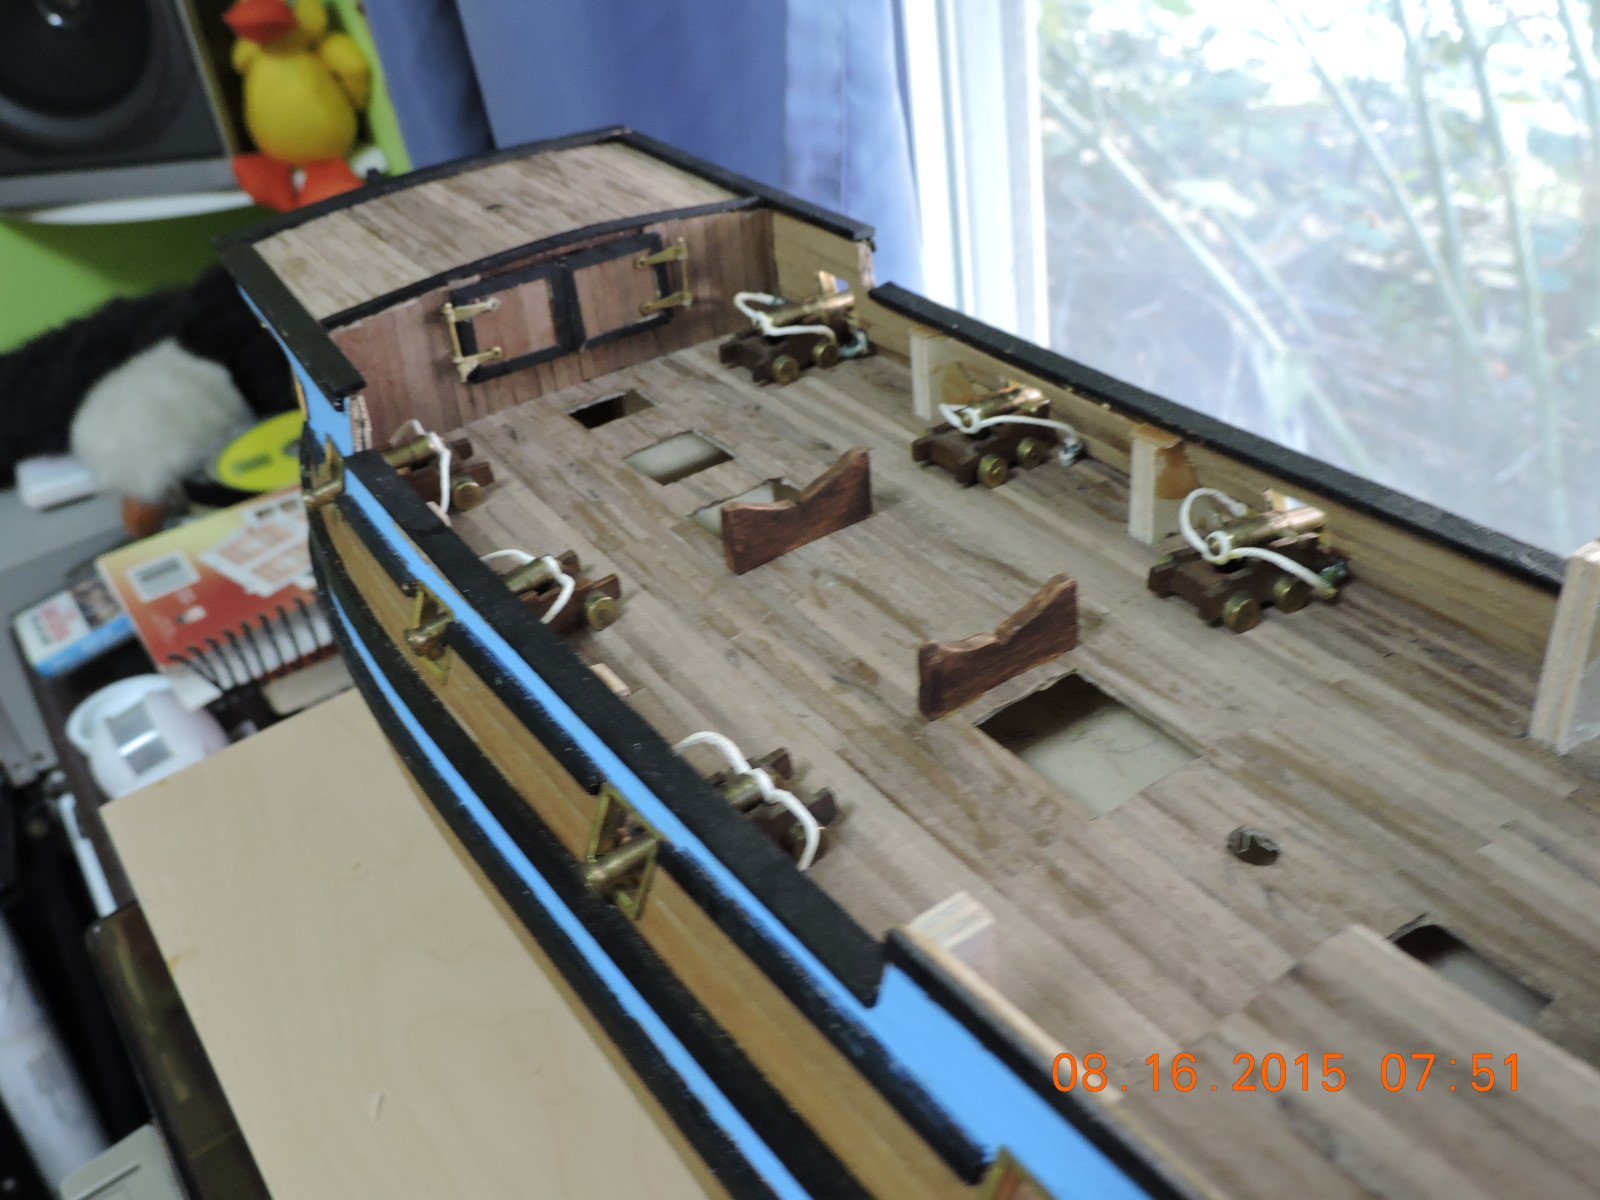
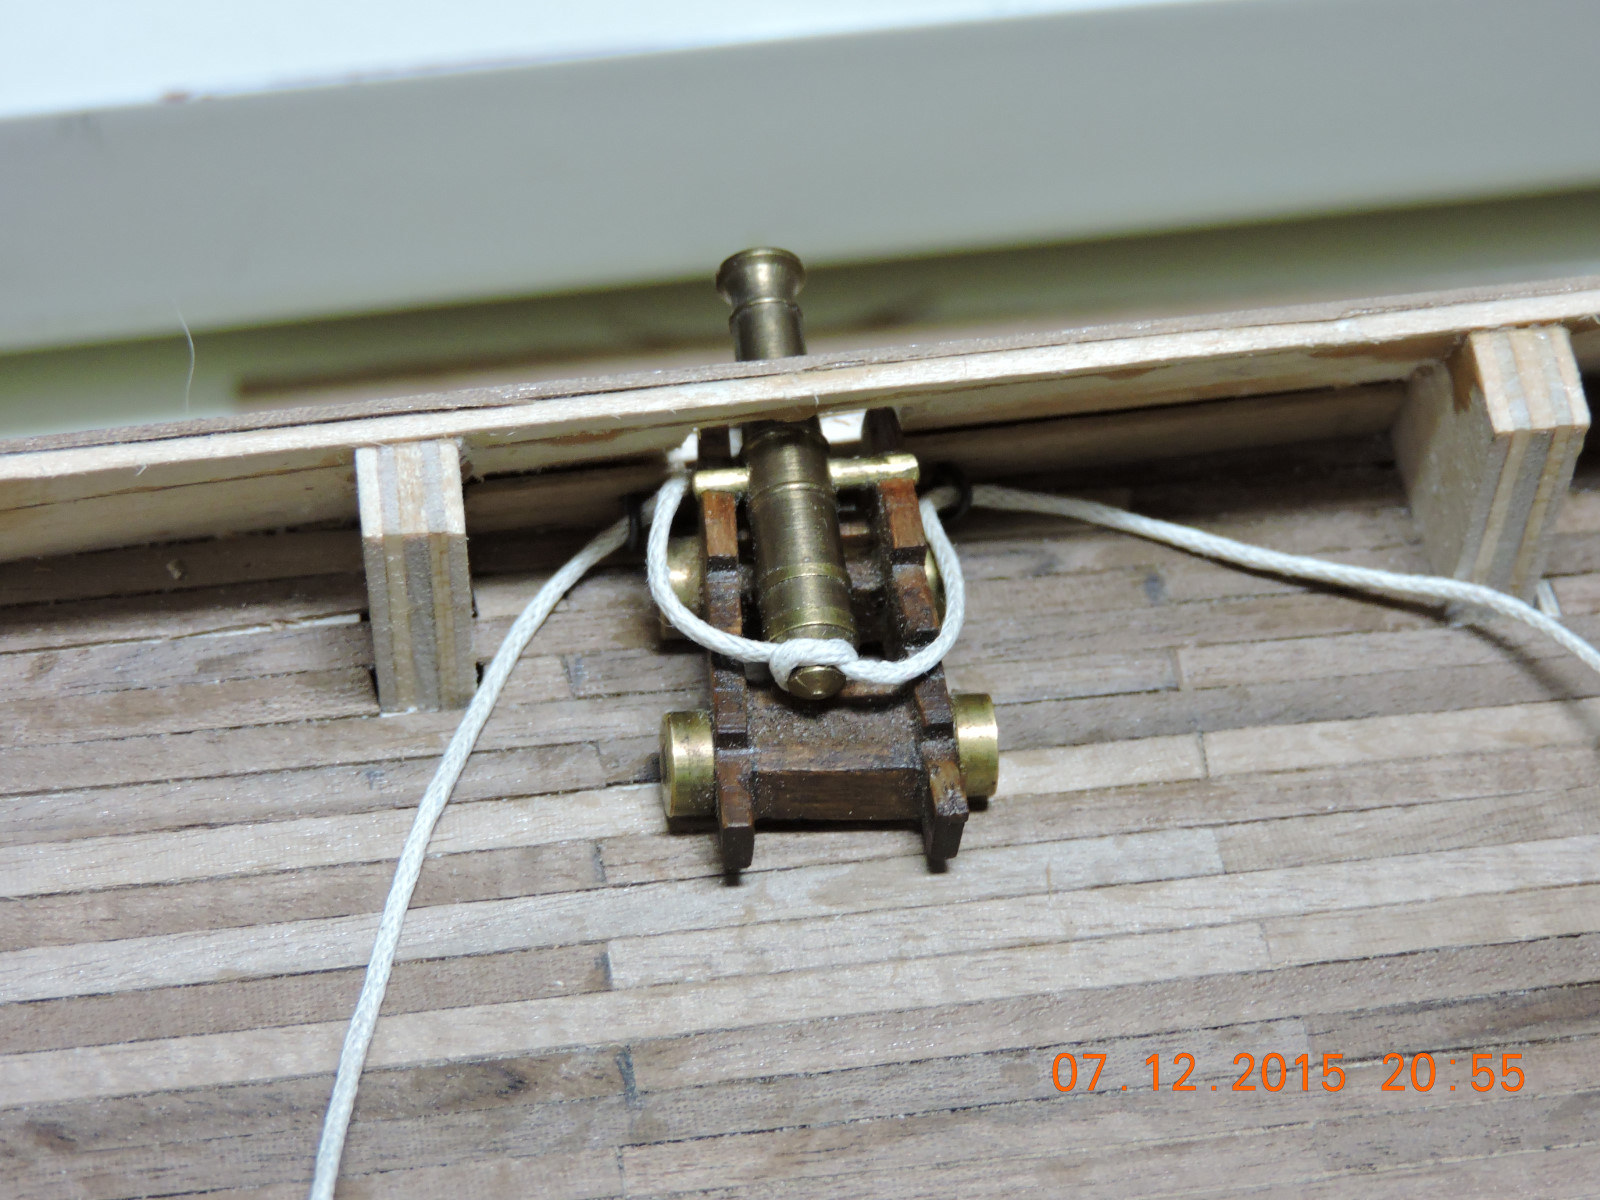
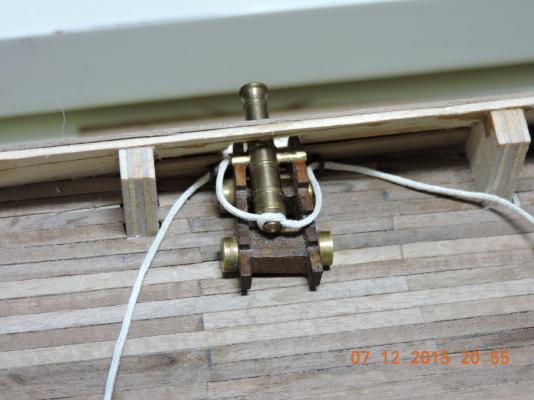
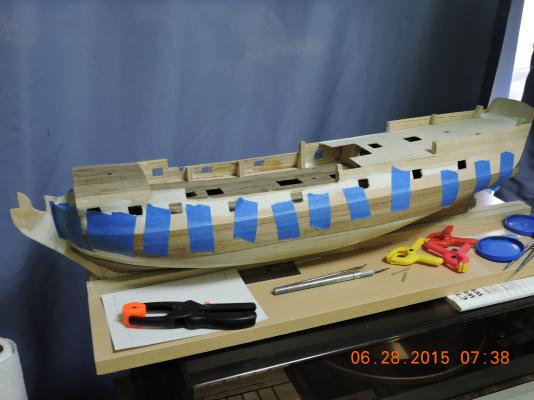
Hi, Moving along. Added more wales. Beginning to work on the deck furniture and rigging canons. Walter
-
Thank you Don. It took a while to get the hang of it and understand what was going on. Everything makes perfect sense when I read about it, but put wood and glue in my hands and something else happens. I'm looking forward to my next ship to take advantage of all I've learned. Walter
-
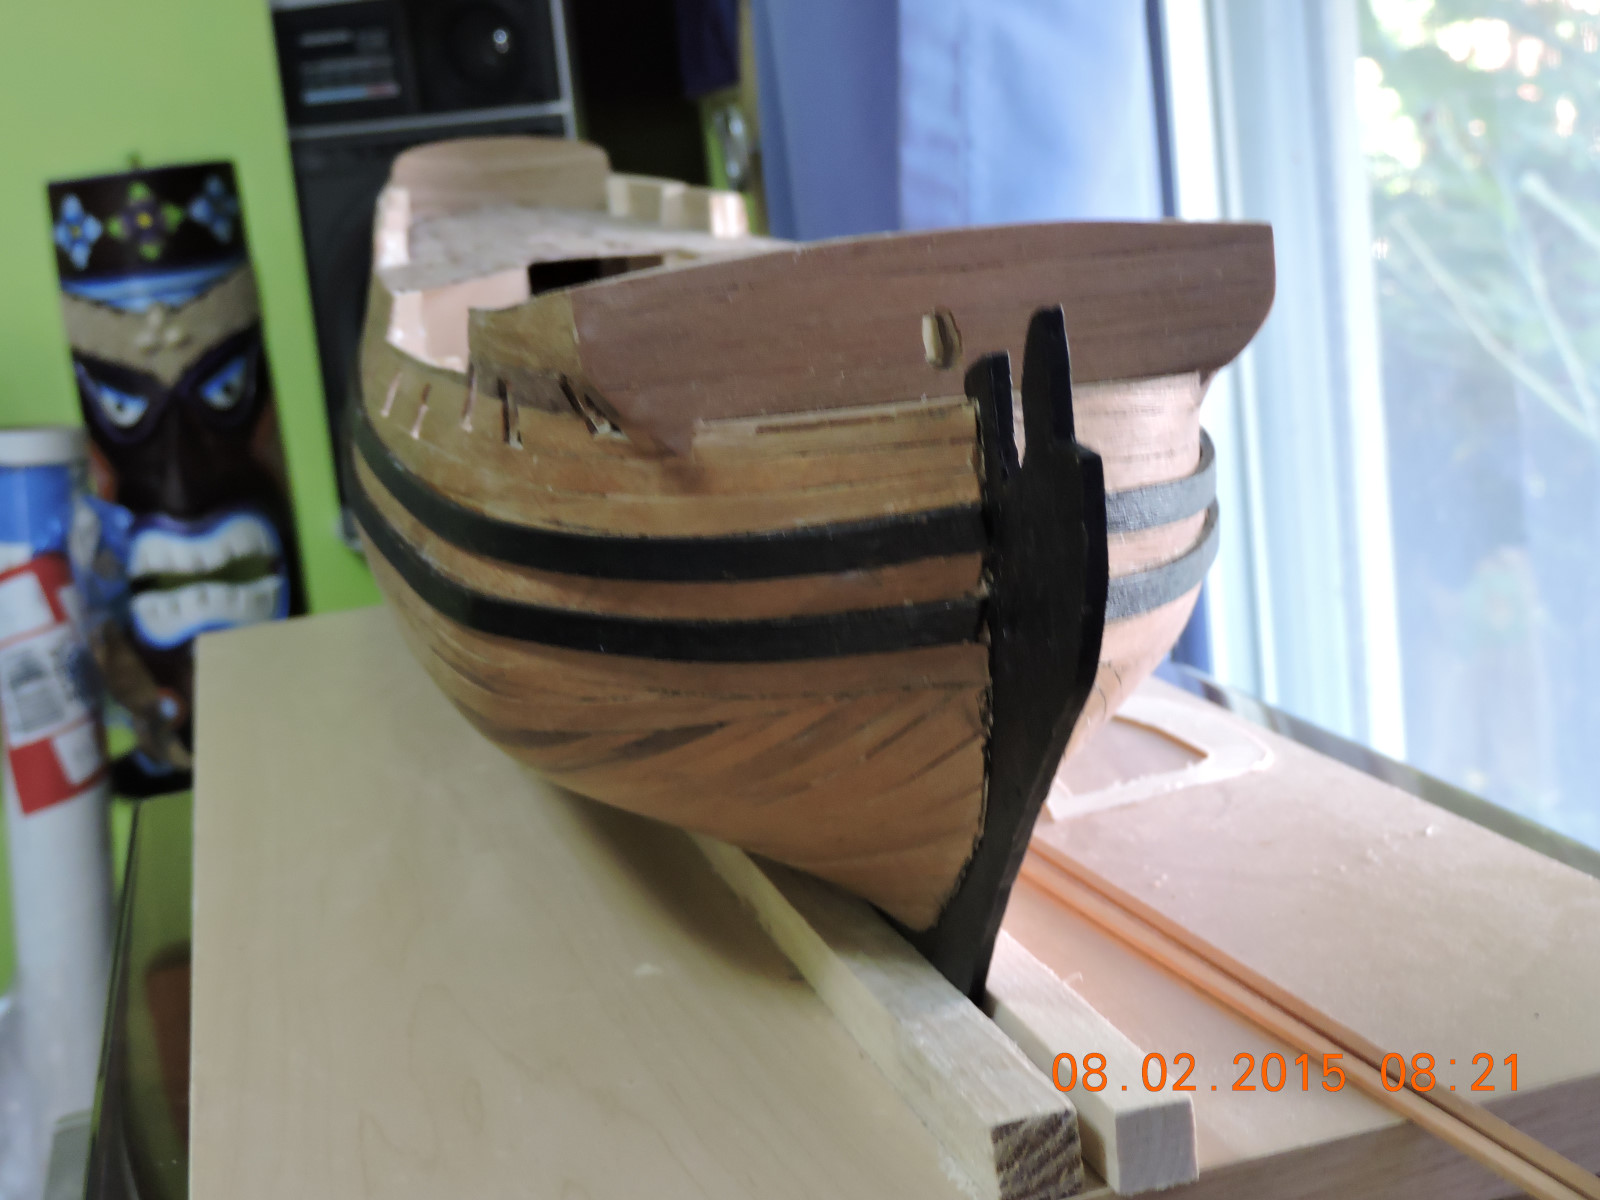
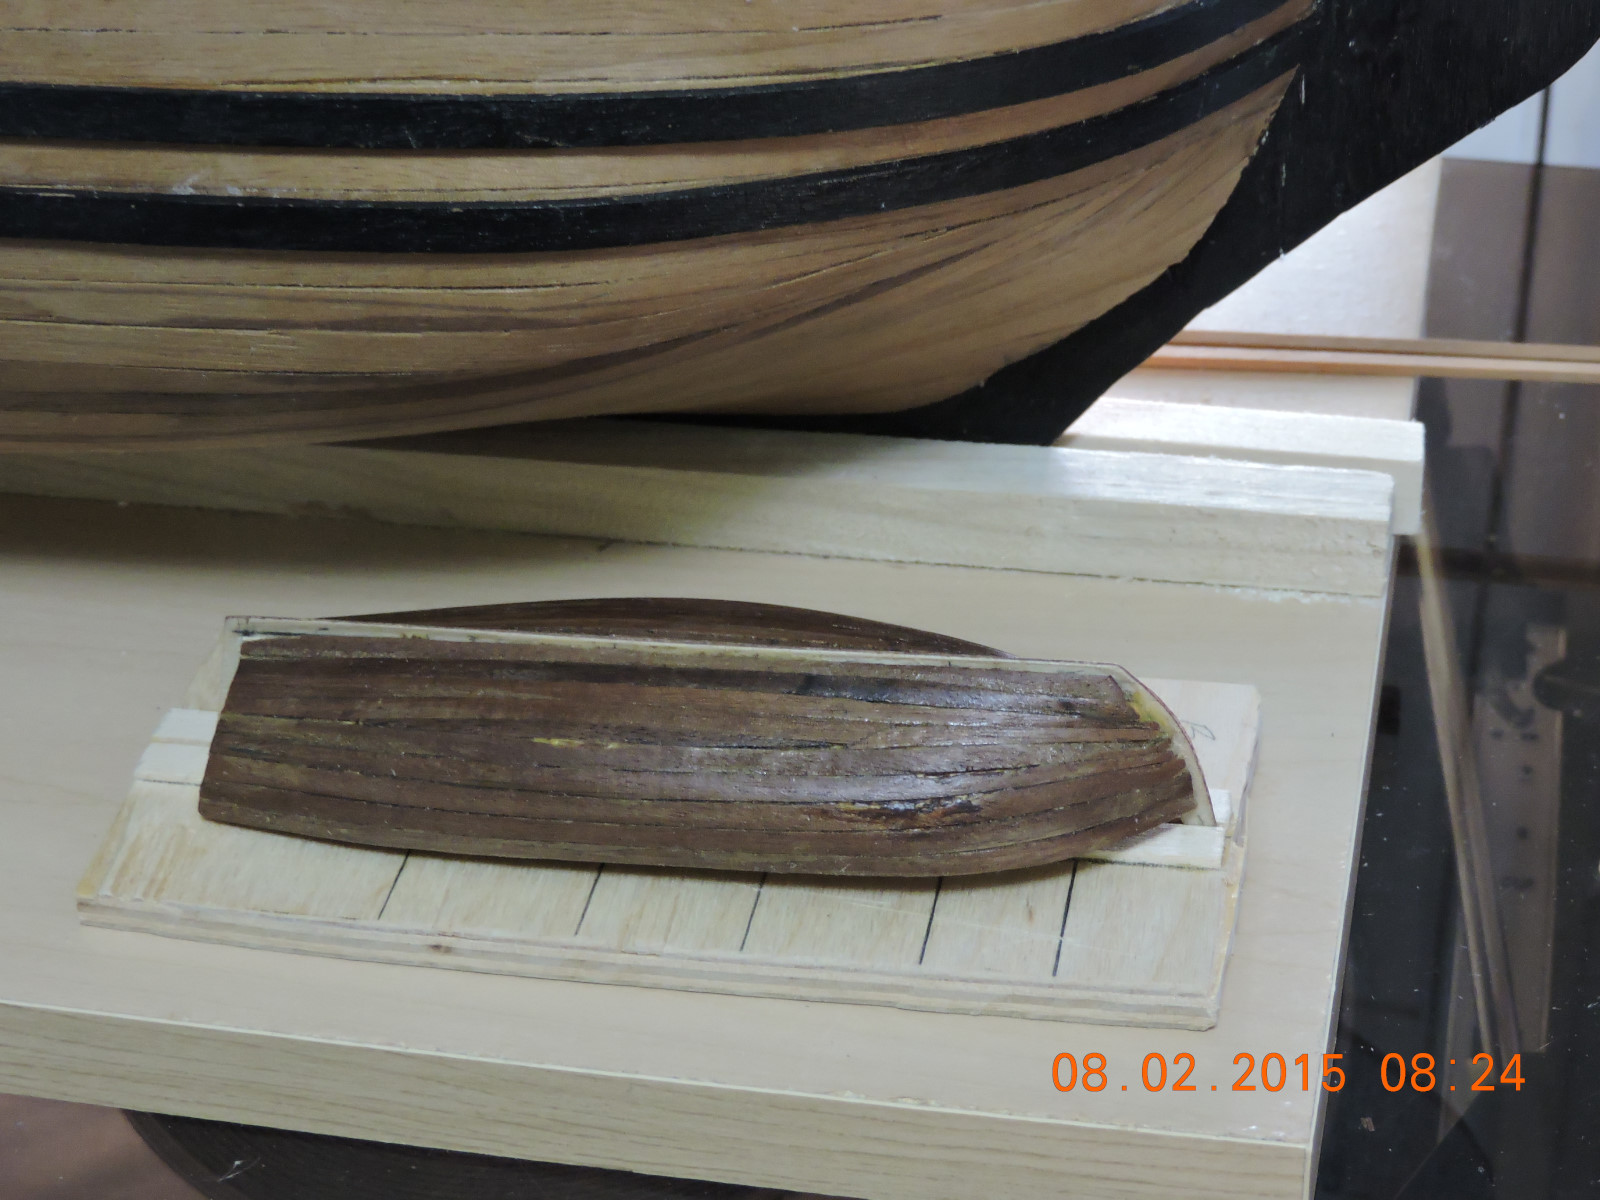
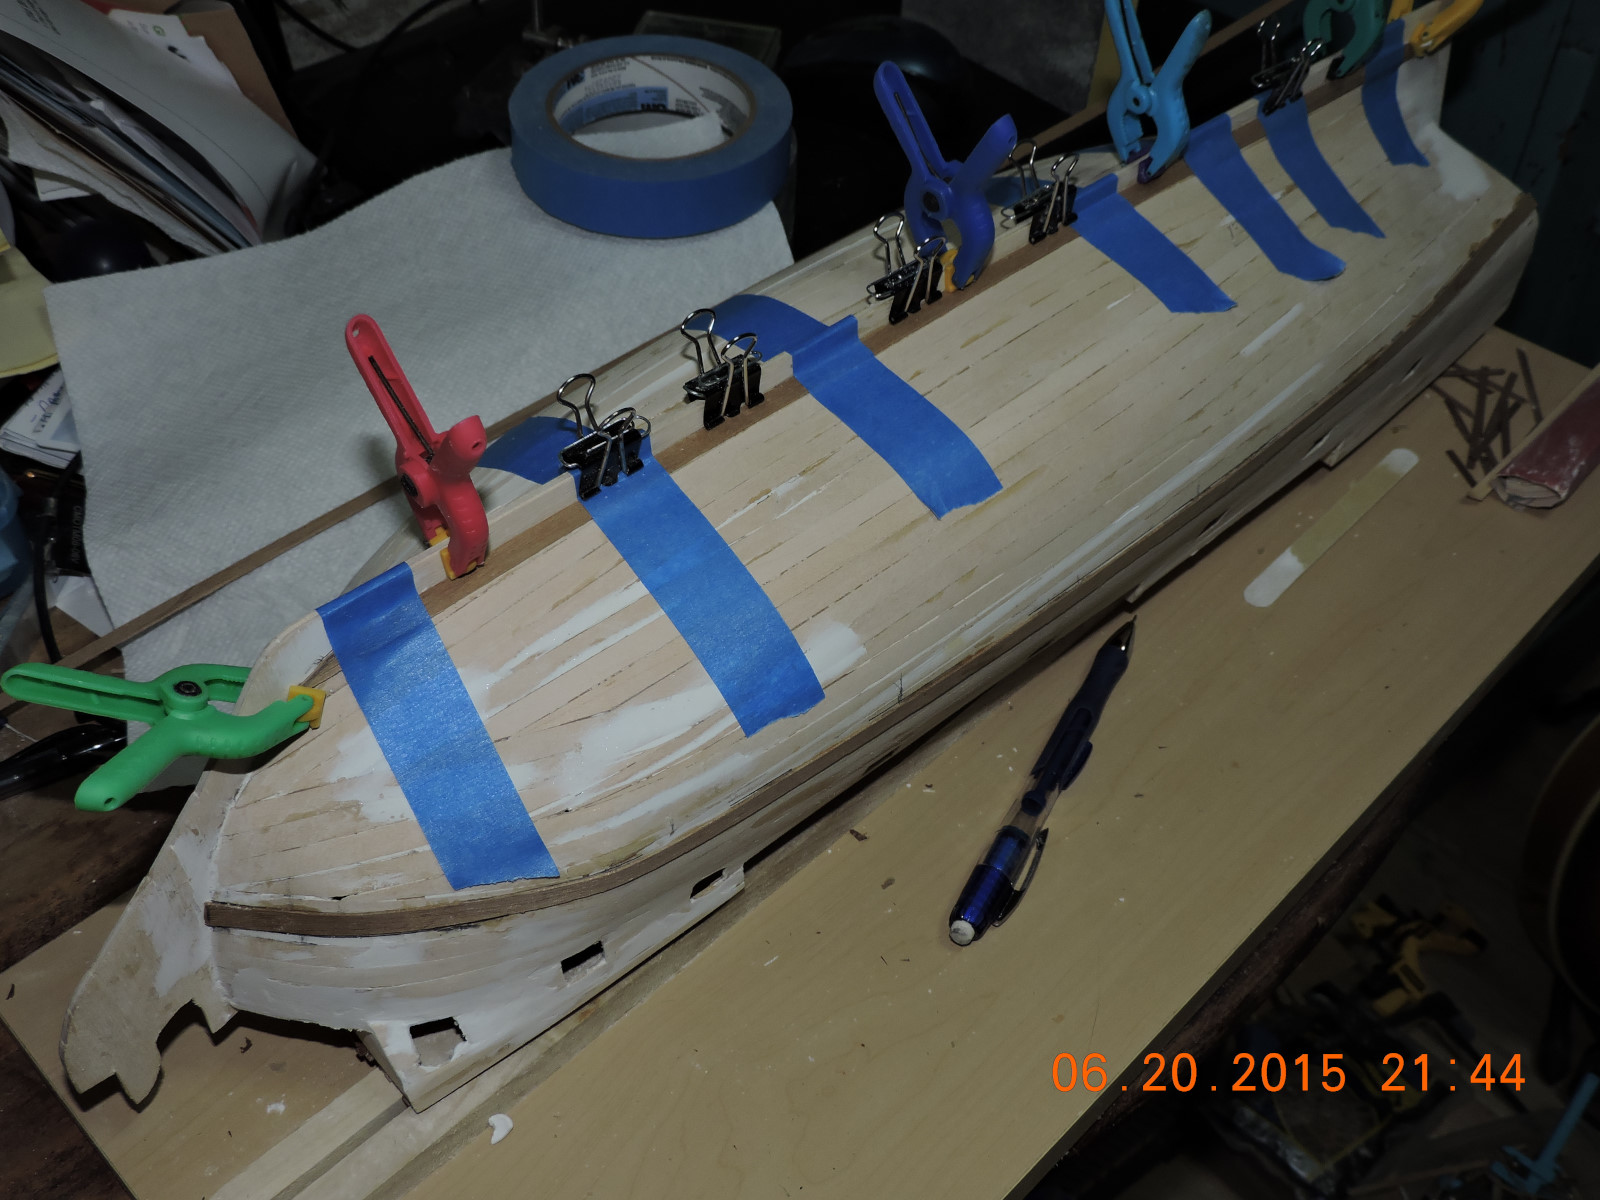
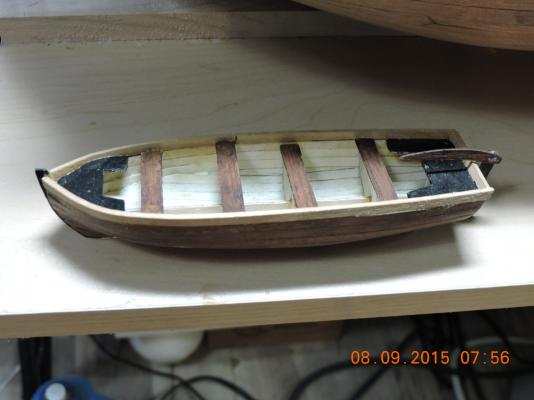
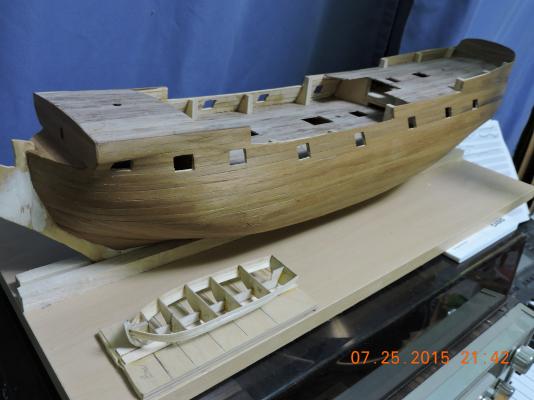
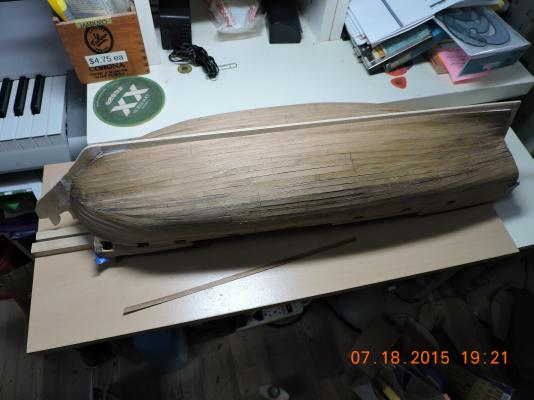
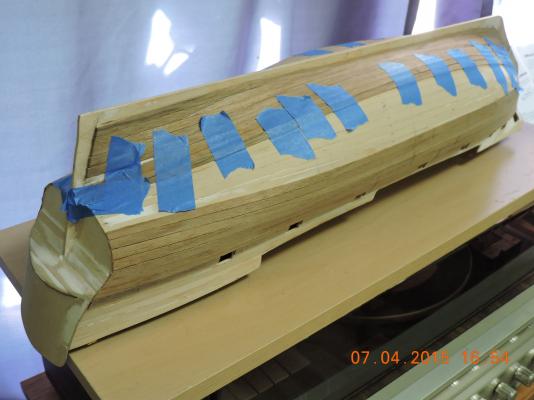
Hi, Busy week. Put a coat of poly on the hull. Pre-bending, painting and installing the wales. Painted keel. Finished second planking of ship’s boat and added a coat of poly to the hull. Walter


-
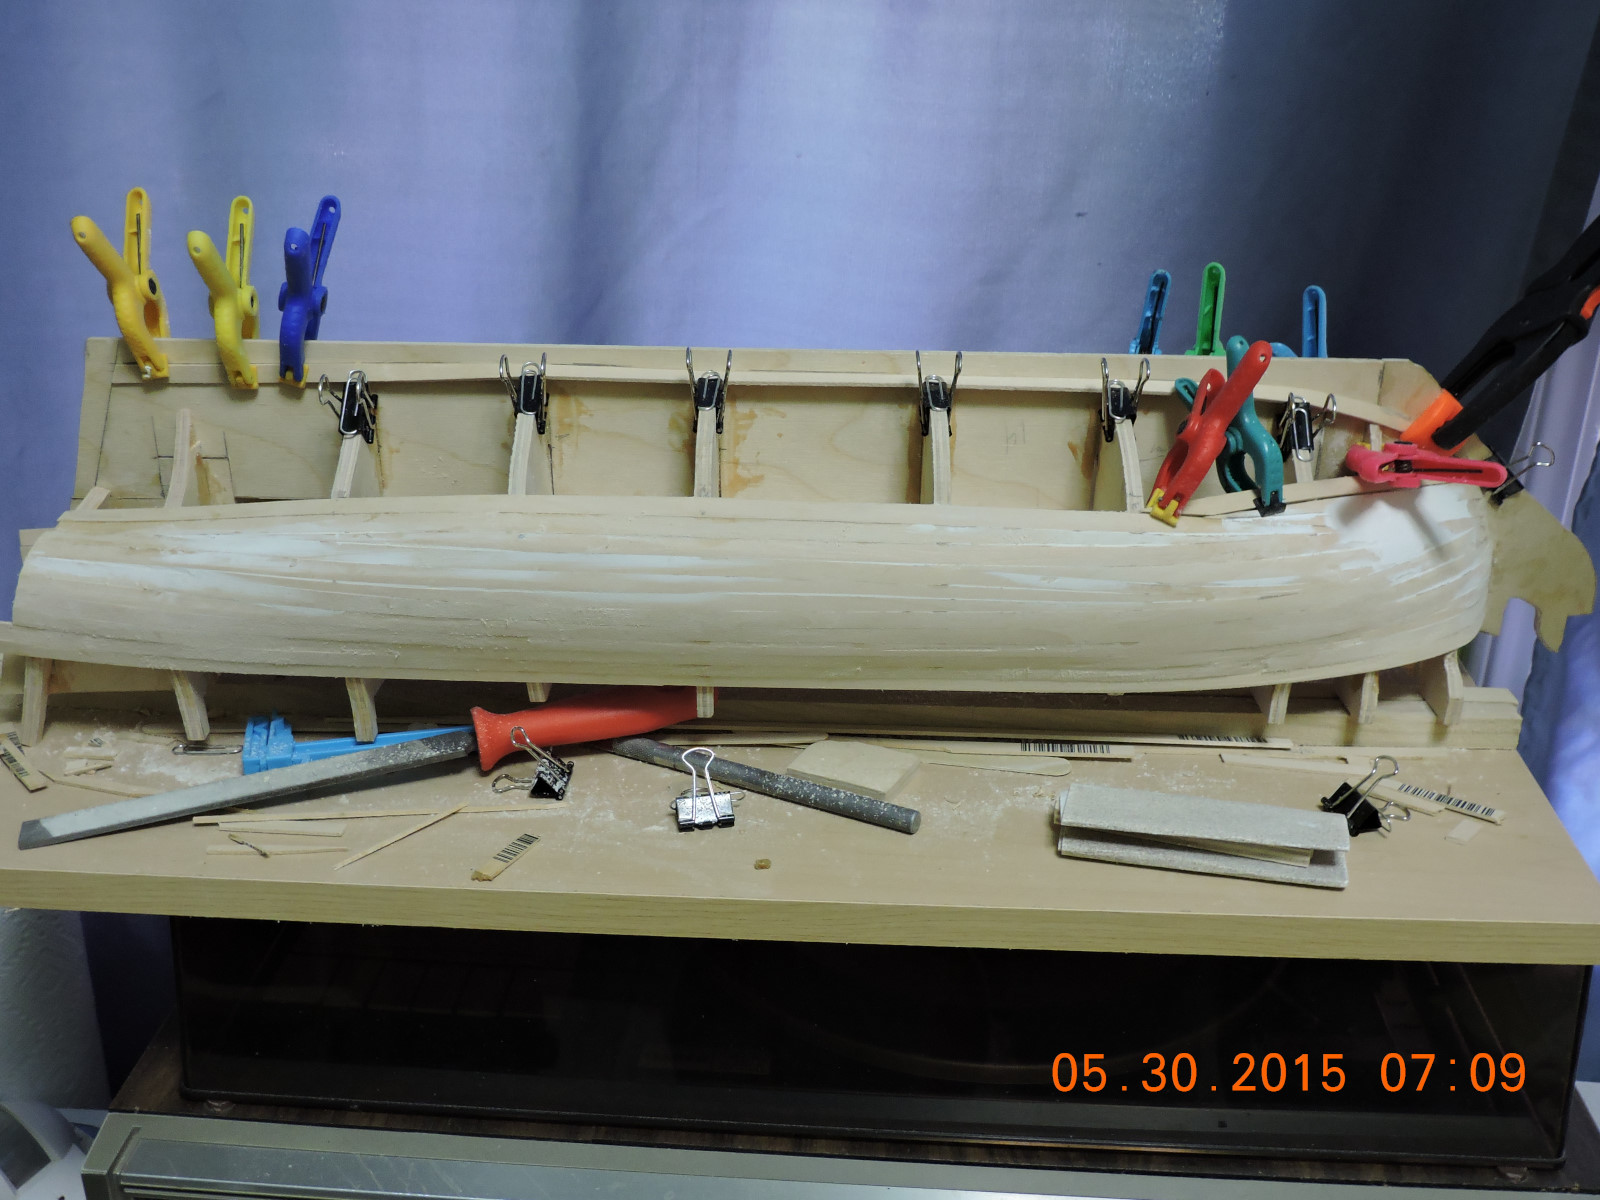
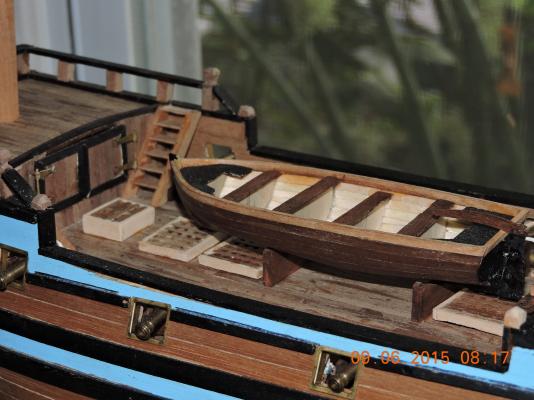
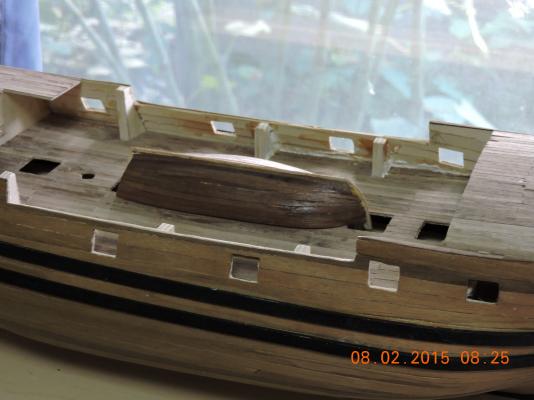
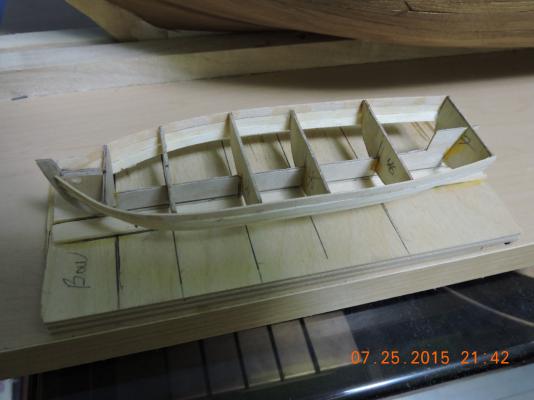
Moving along. Second planking sanded up very nicely. I’ve started the ship’s boat. Walter
-
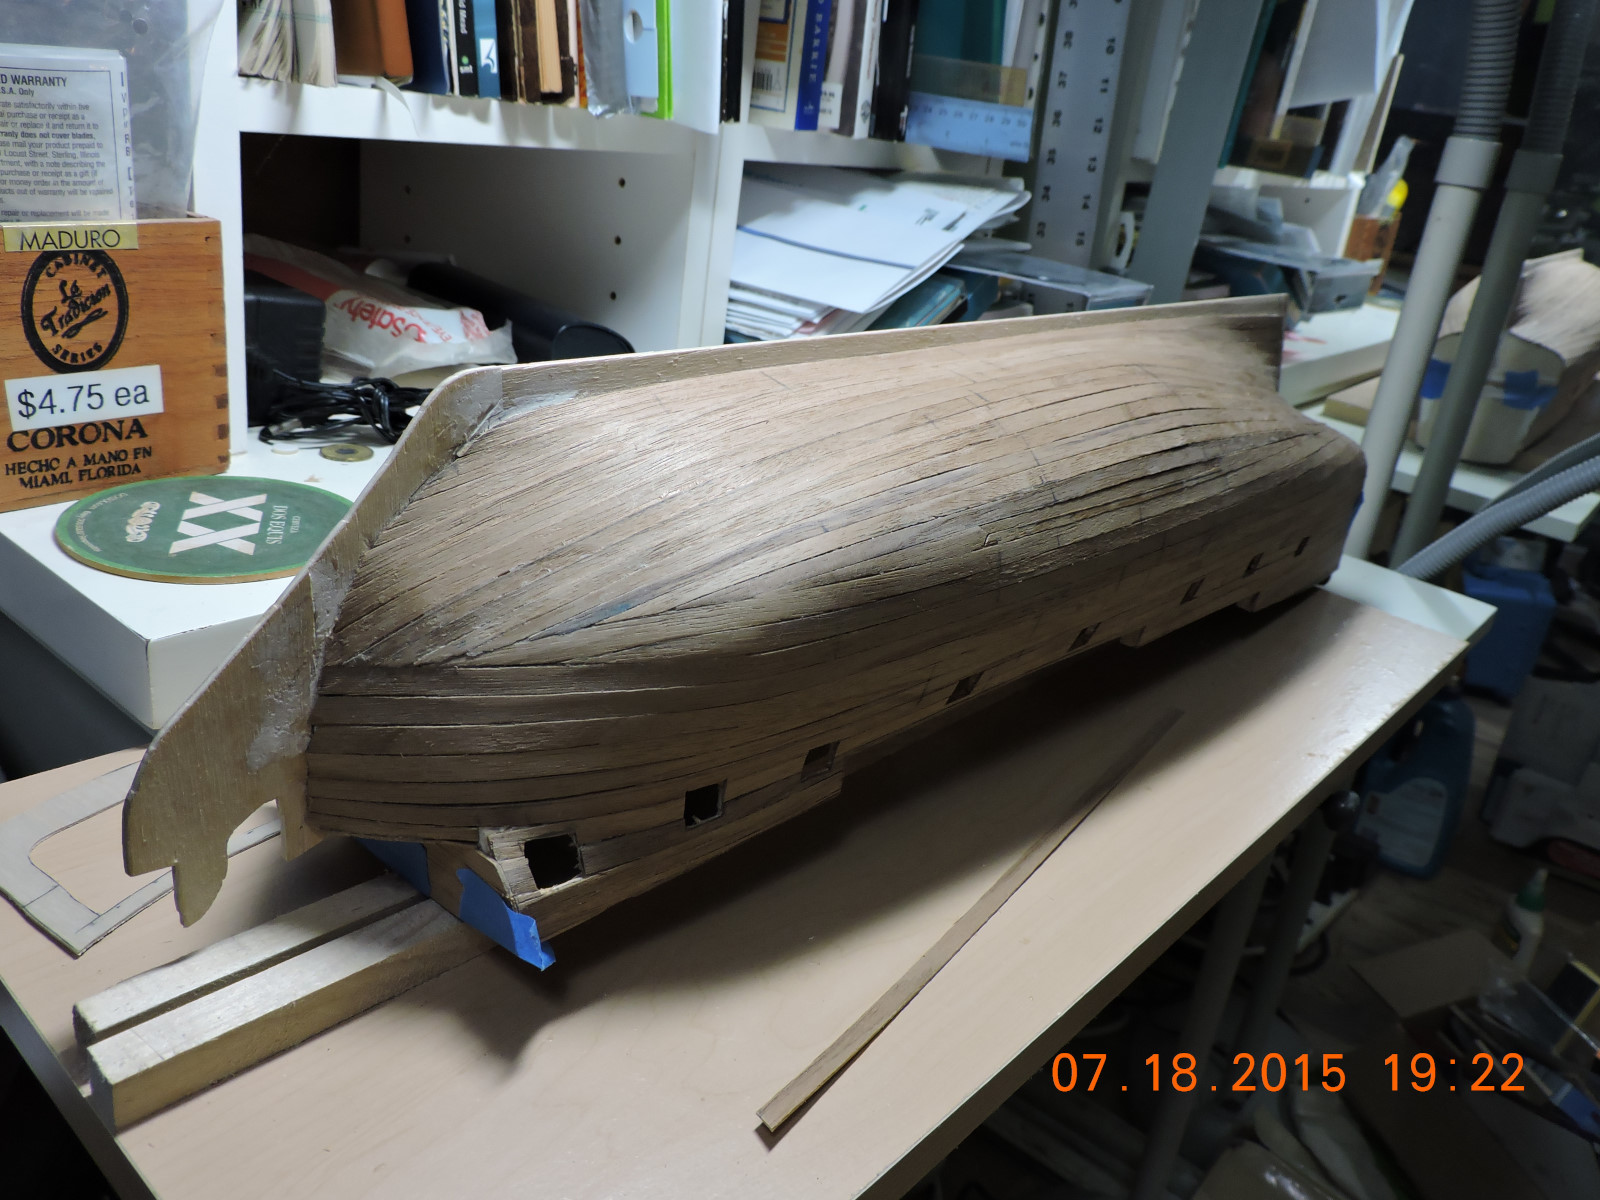
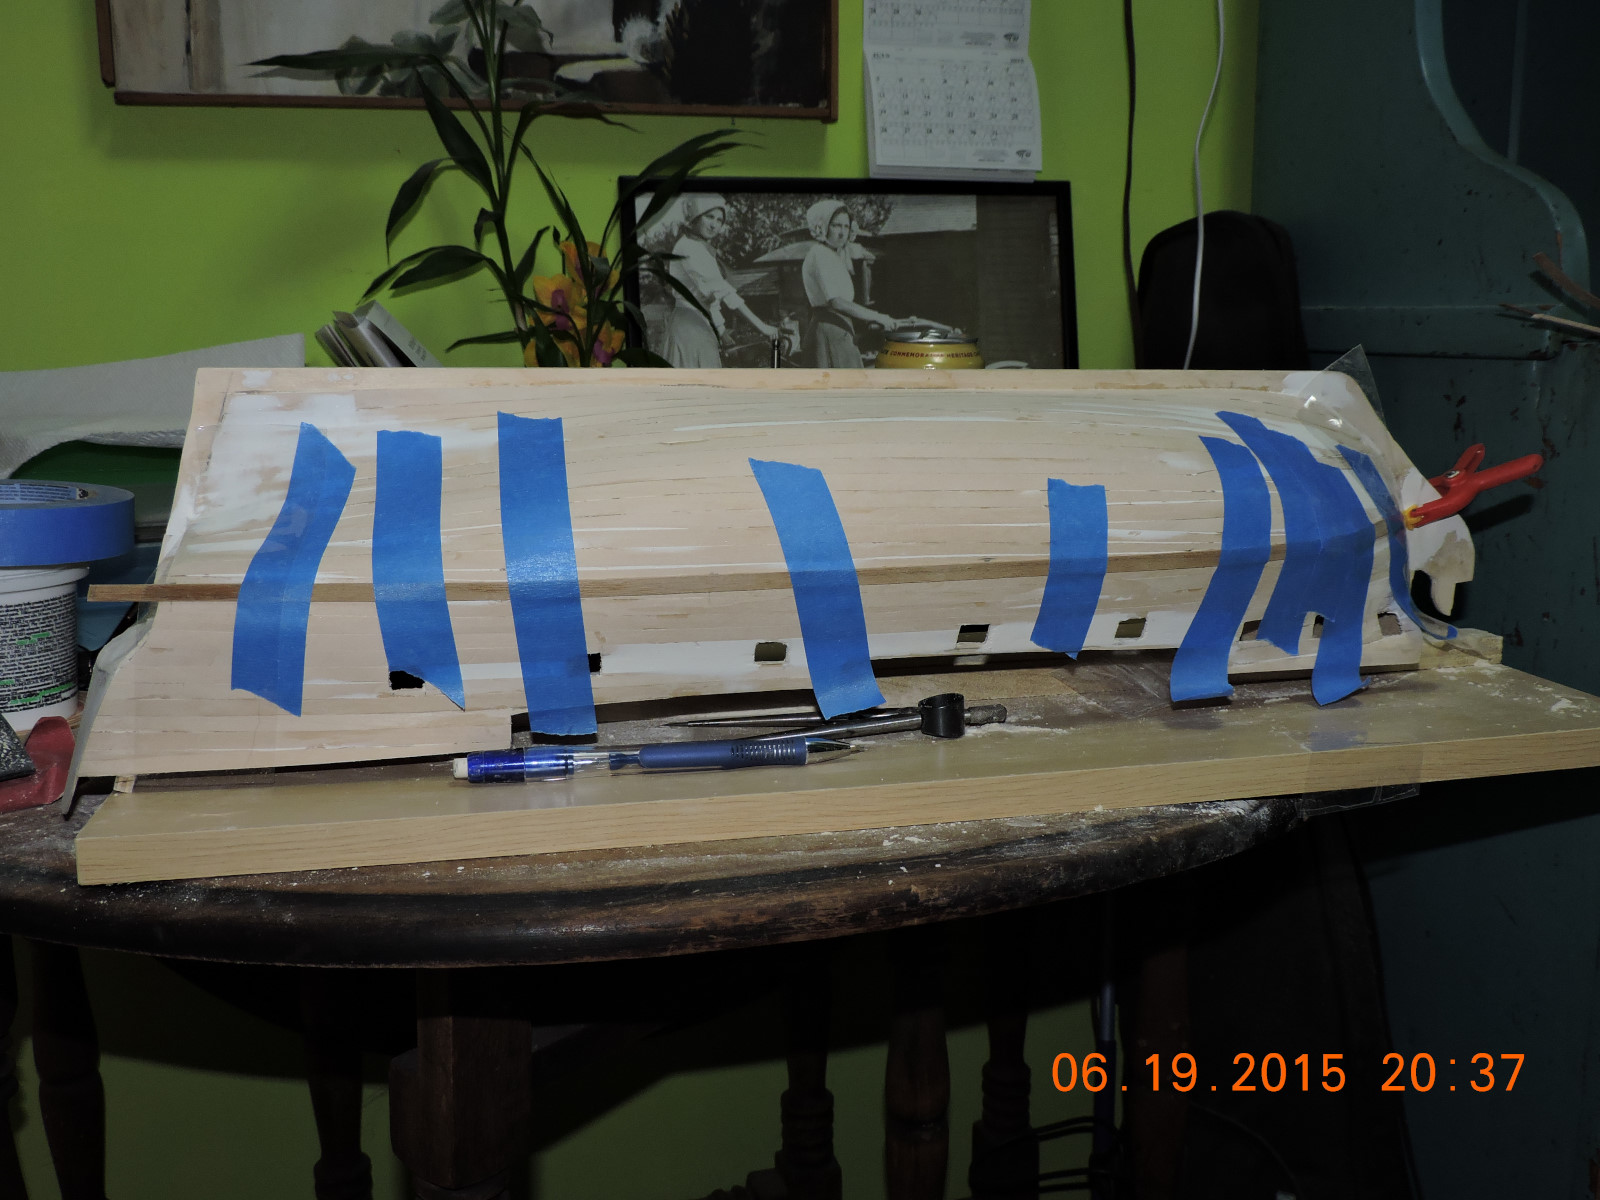
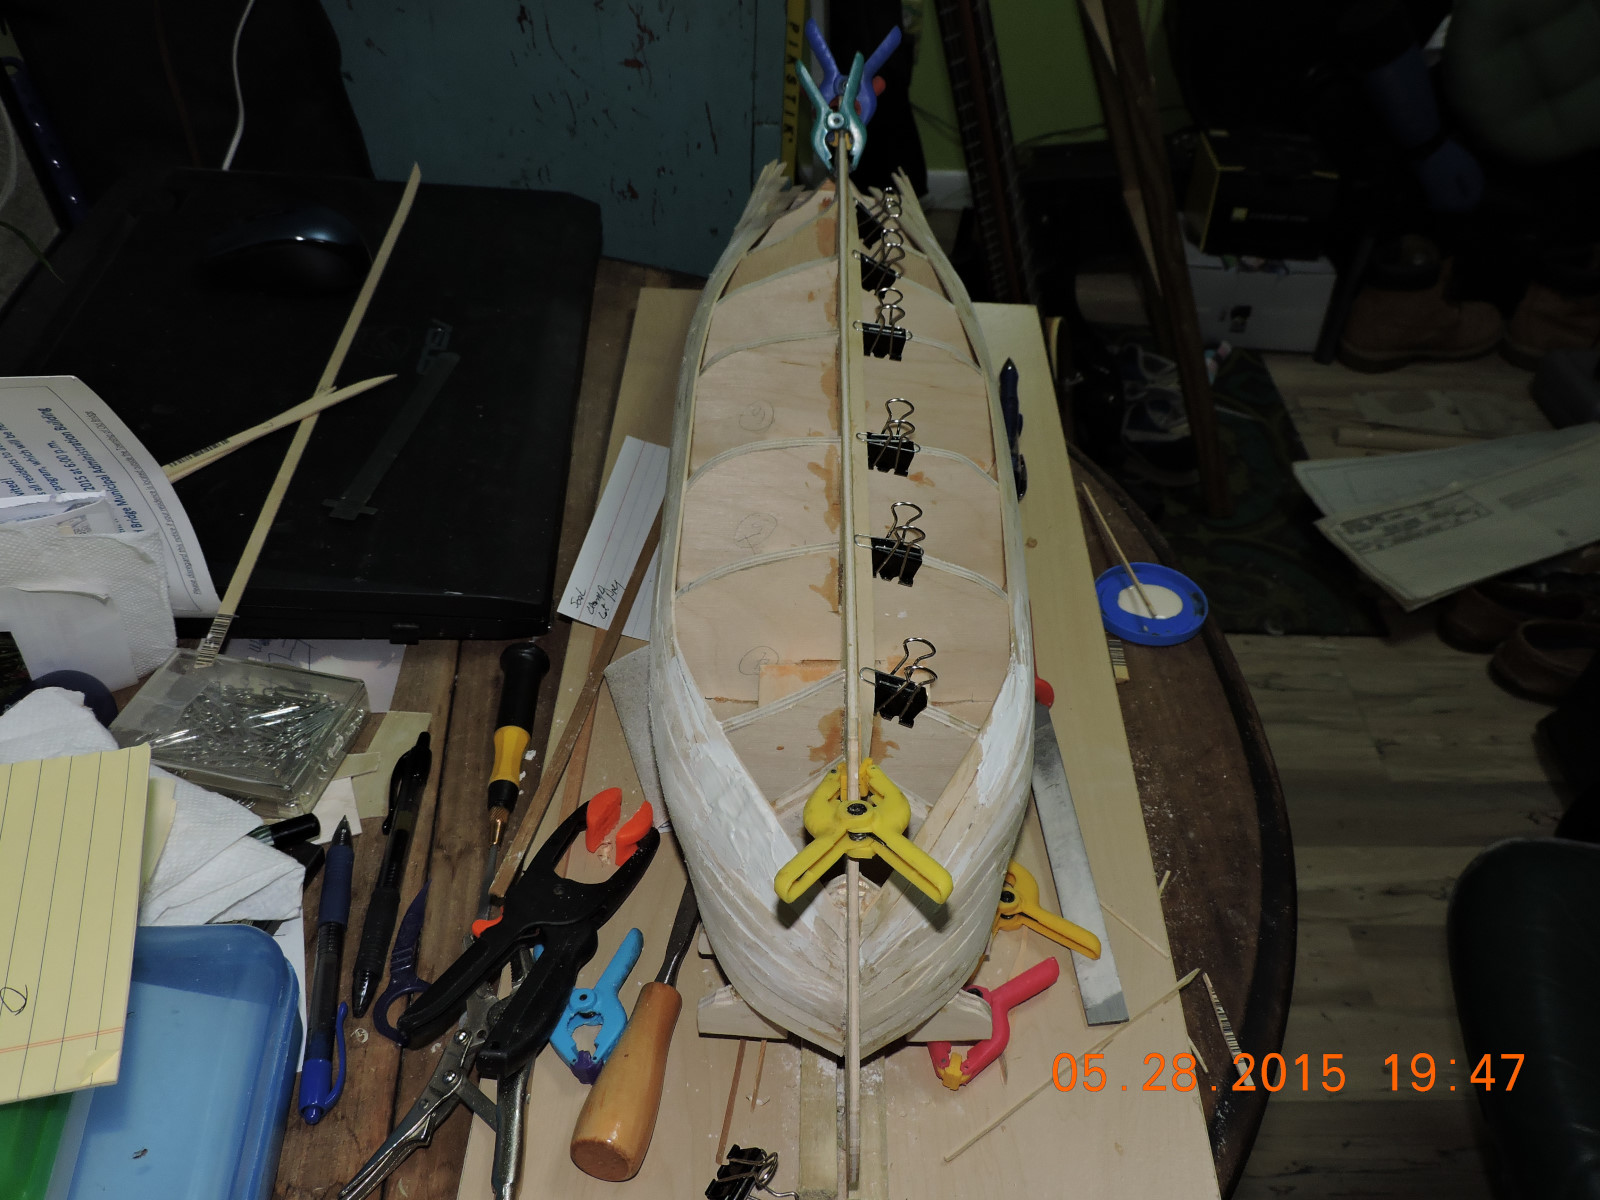
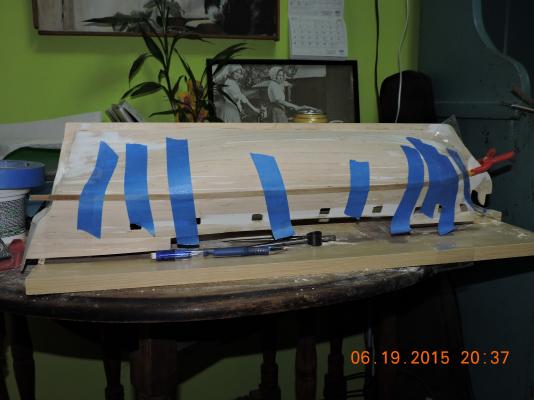
The second planking is on the home stretch. I need to complete the stern and inside the waist. Expect to be in sandpaper mode shortly. Walter

-
Hi, Just a quick update. Planking is continuing. Making a little bit of progress every day. Walter
-
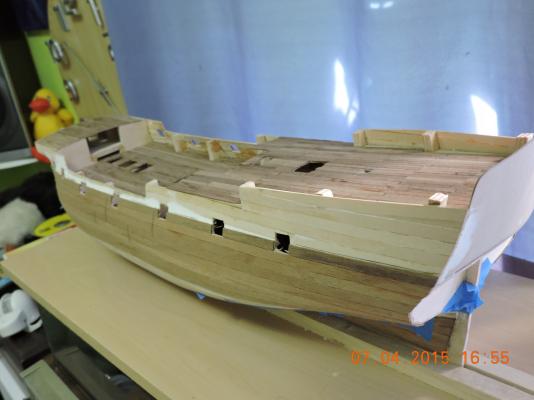
Hi, The second planking and deck planking are moving along. I’m just taking it nice and easy and enjoying the building process. Walter

-
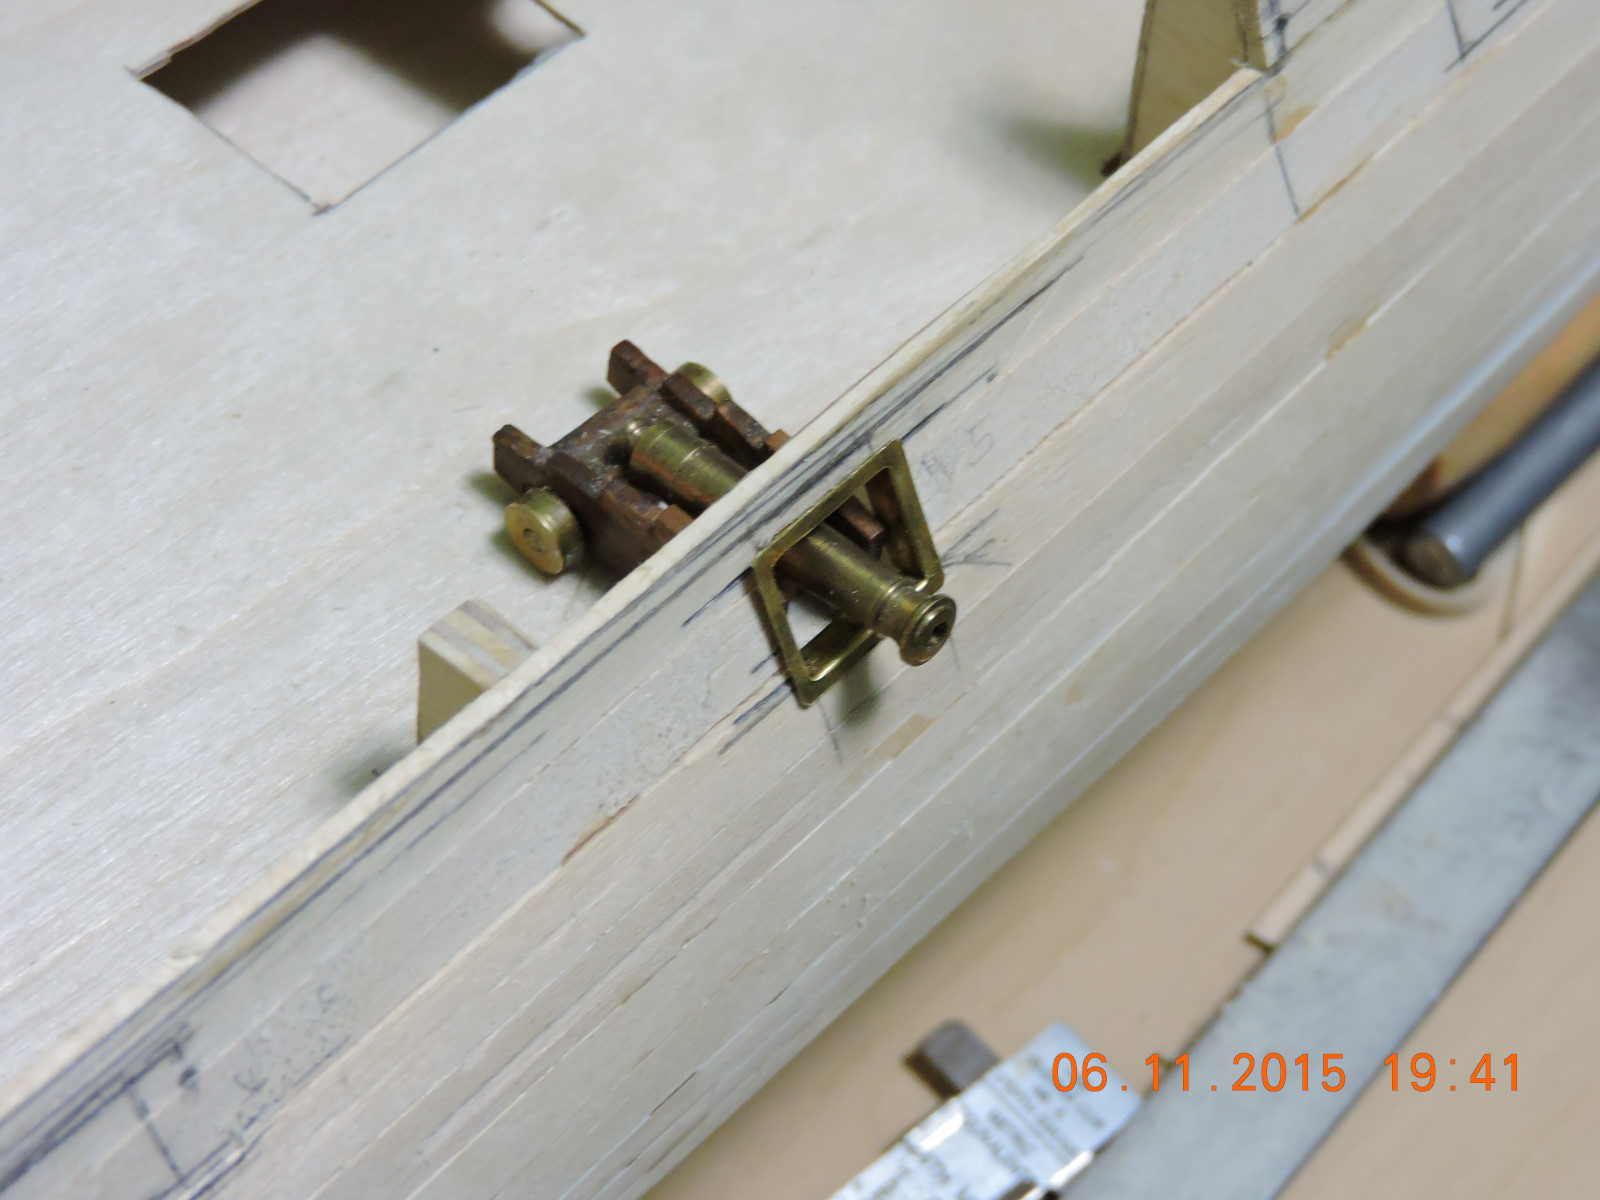
Thank you. Yes, there are sure some interesting curves around that gunport. Walter
-
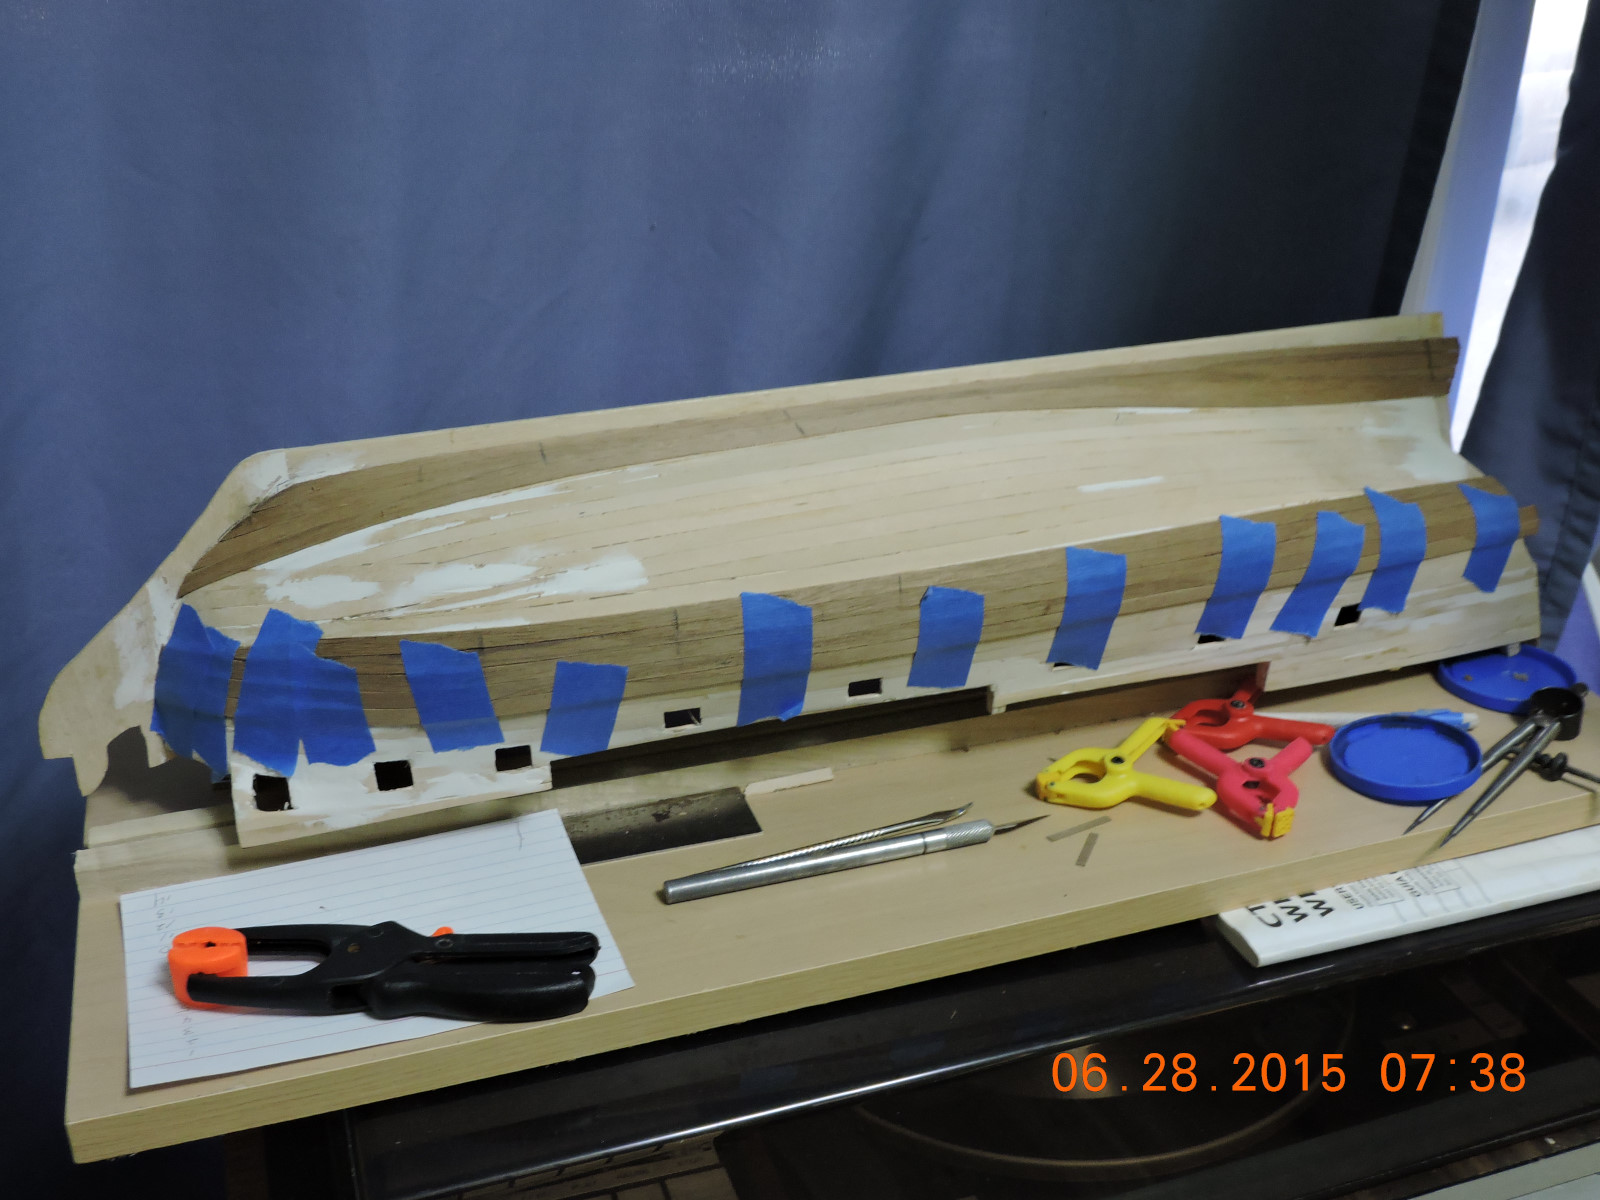
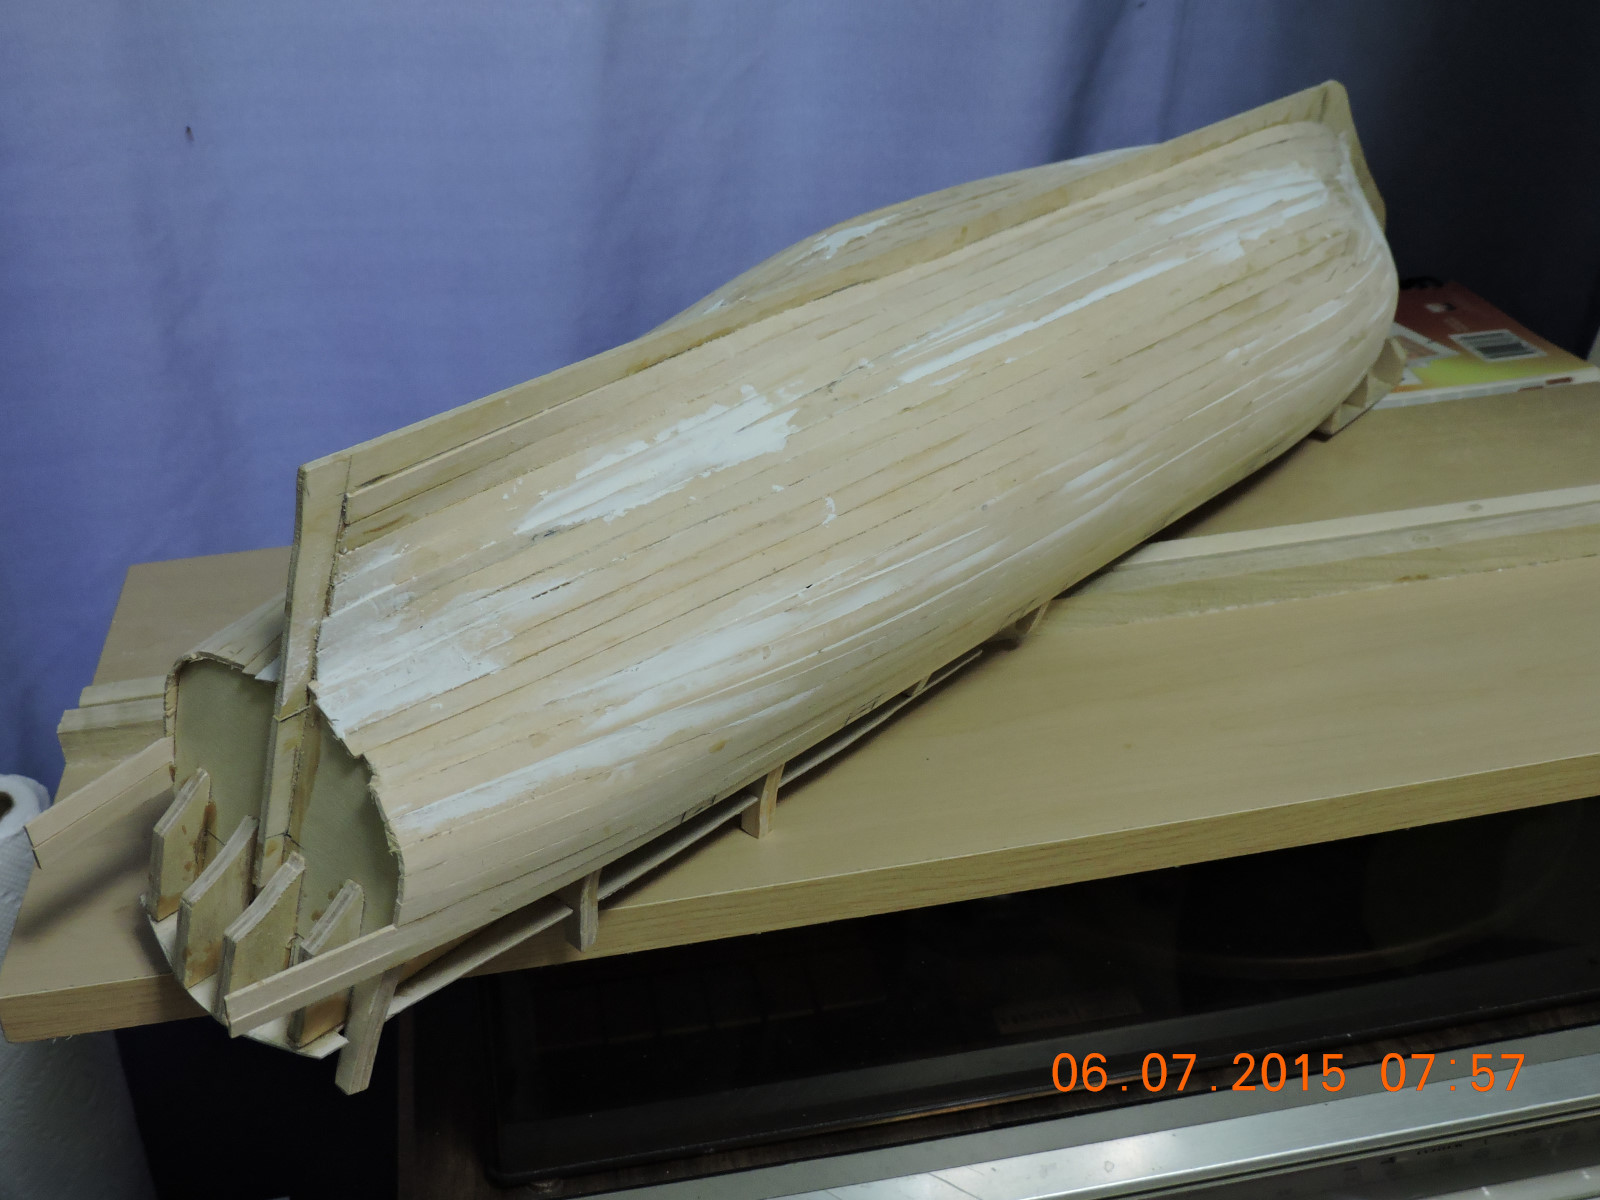
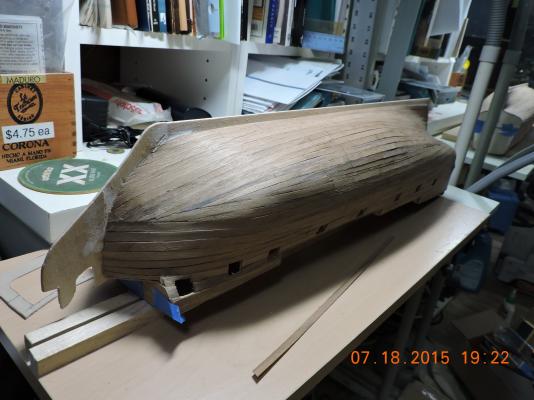
Hi, The first planking and sanding are now complete. I’ve started the second planking and deck planking. I’m looking forward to doing a much better job on the second planking now that I have a much better idea of what is going on, and the lines of the ship. Having a lot of fun with this project. Walter

-
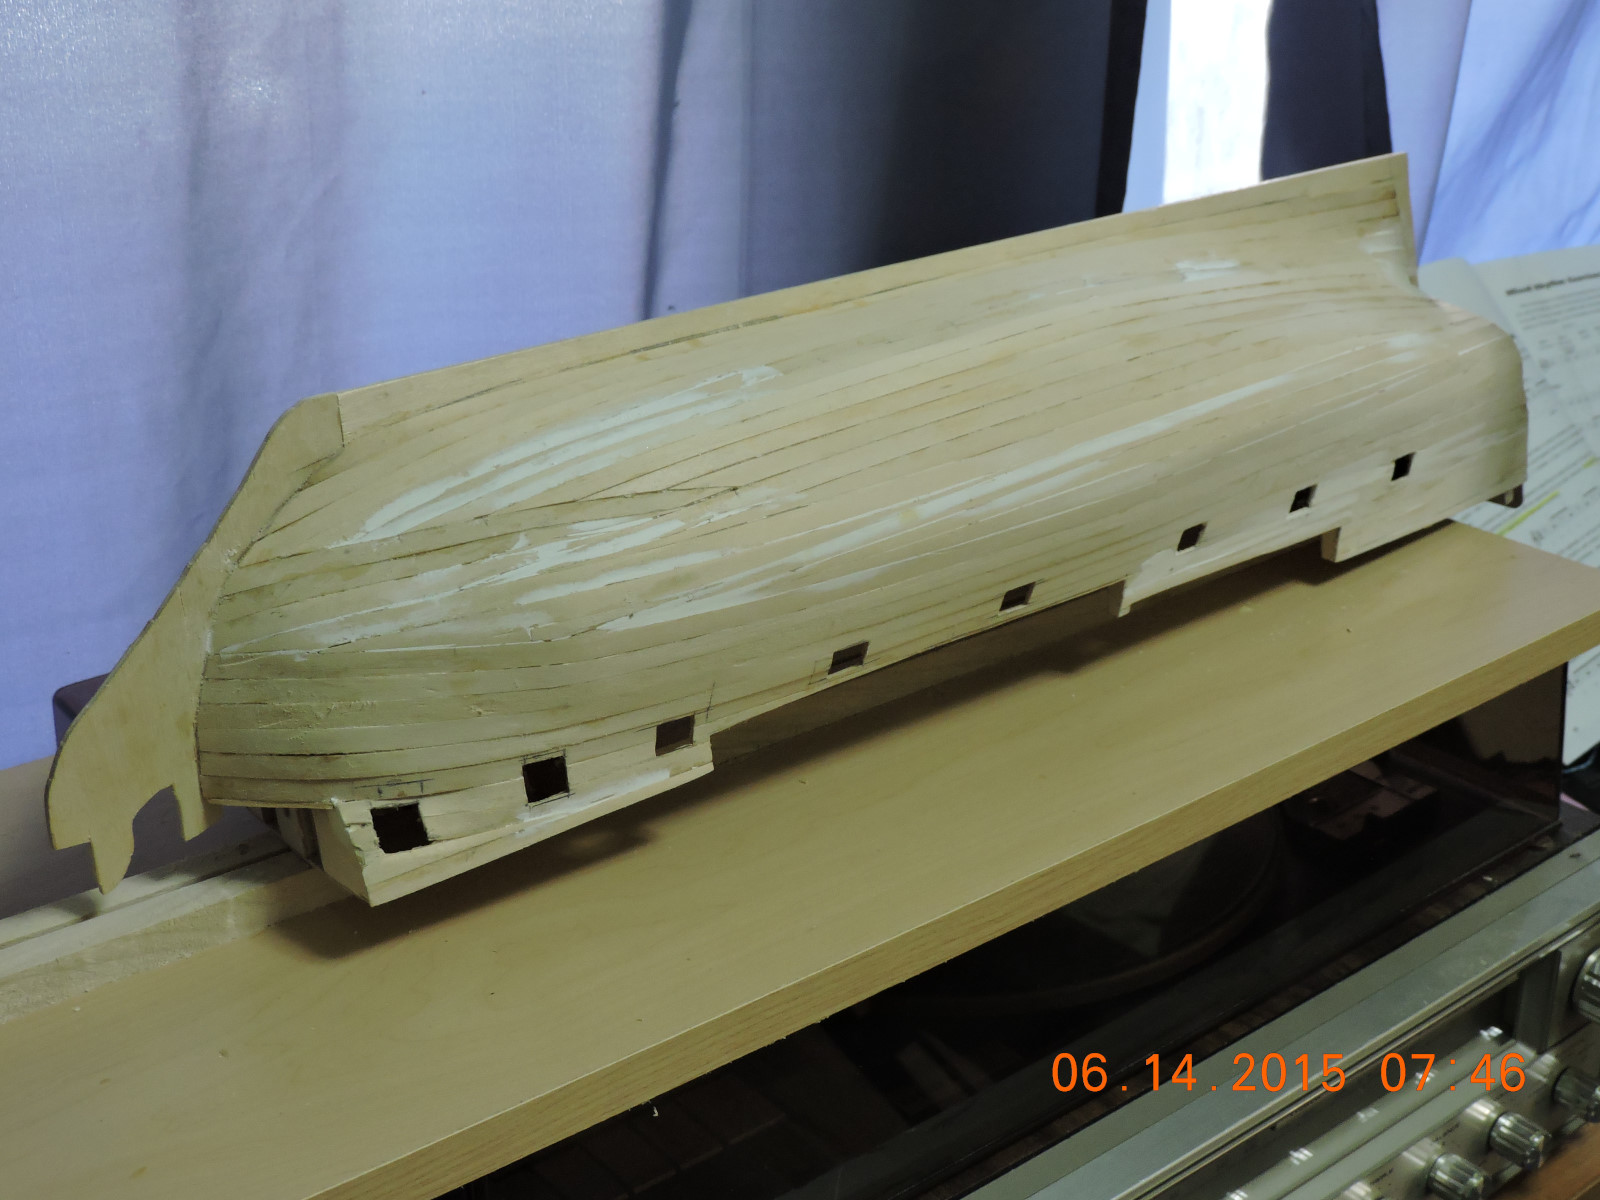
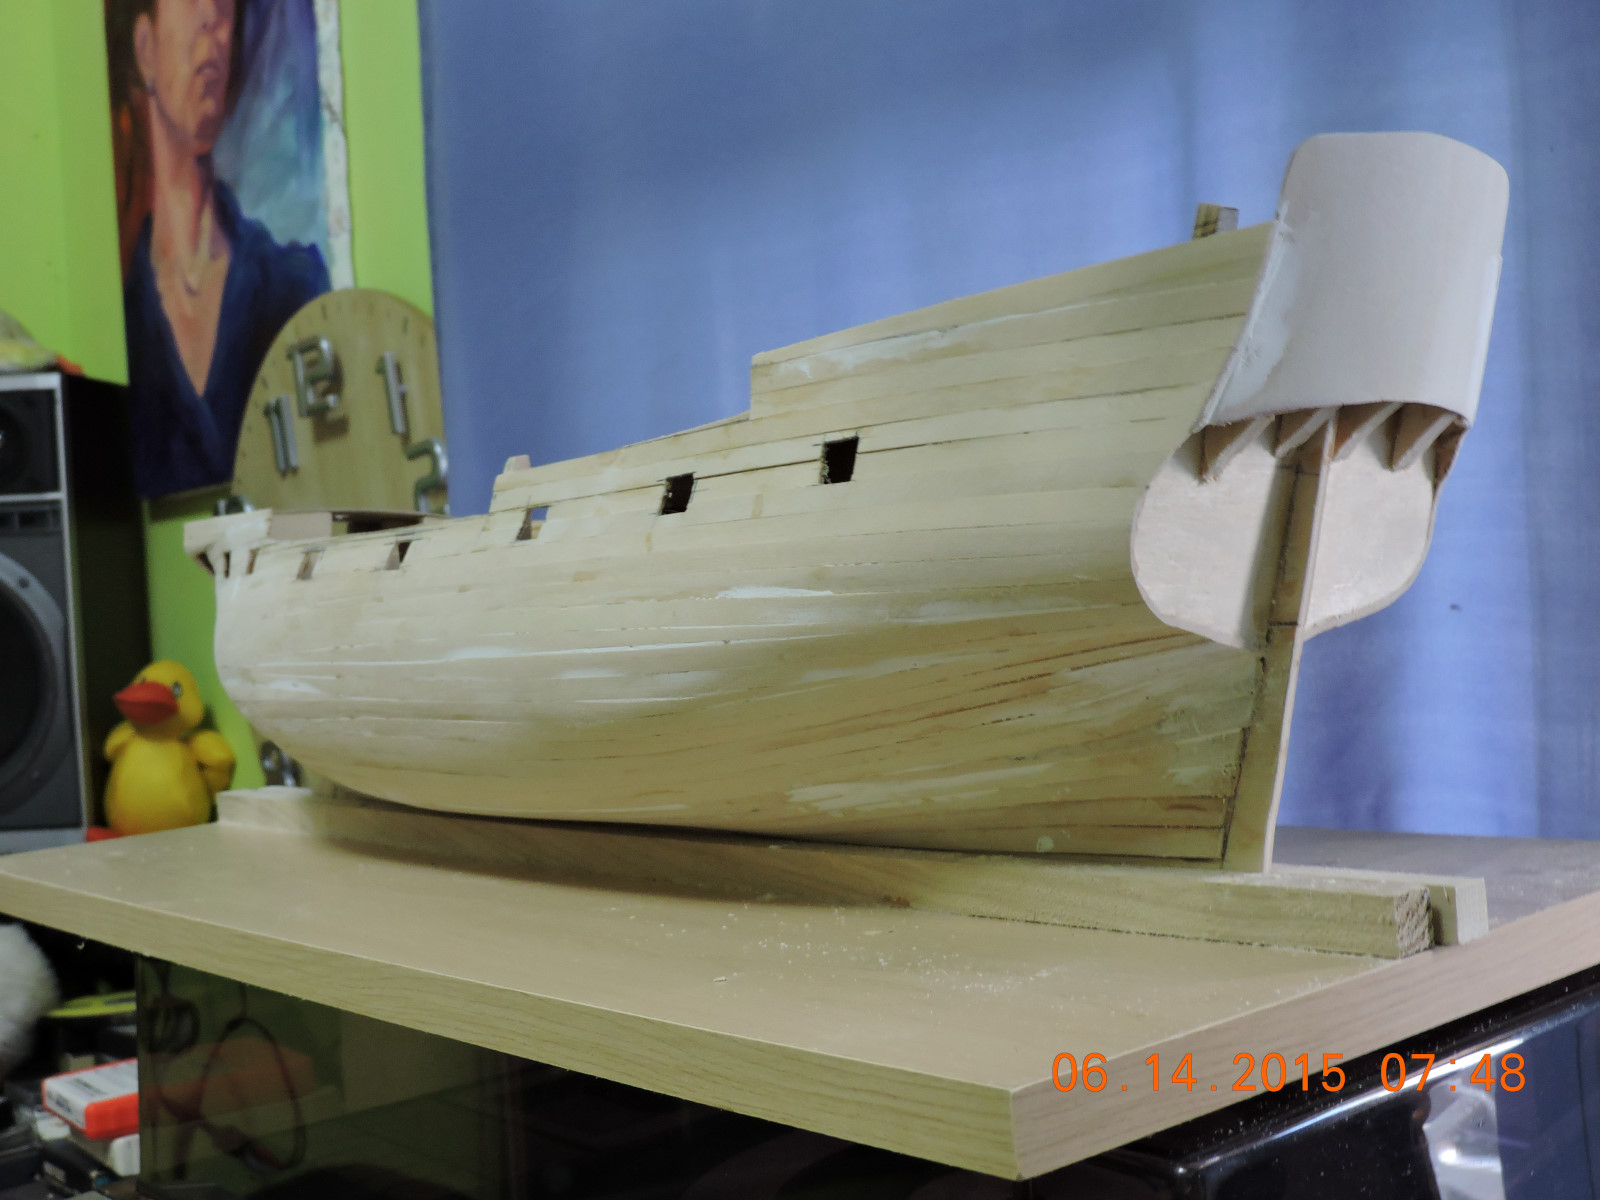
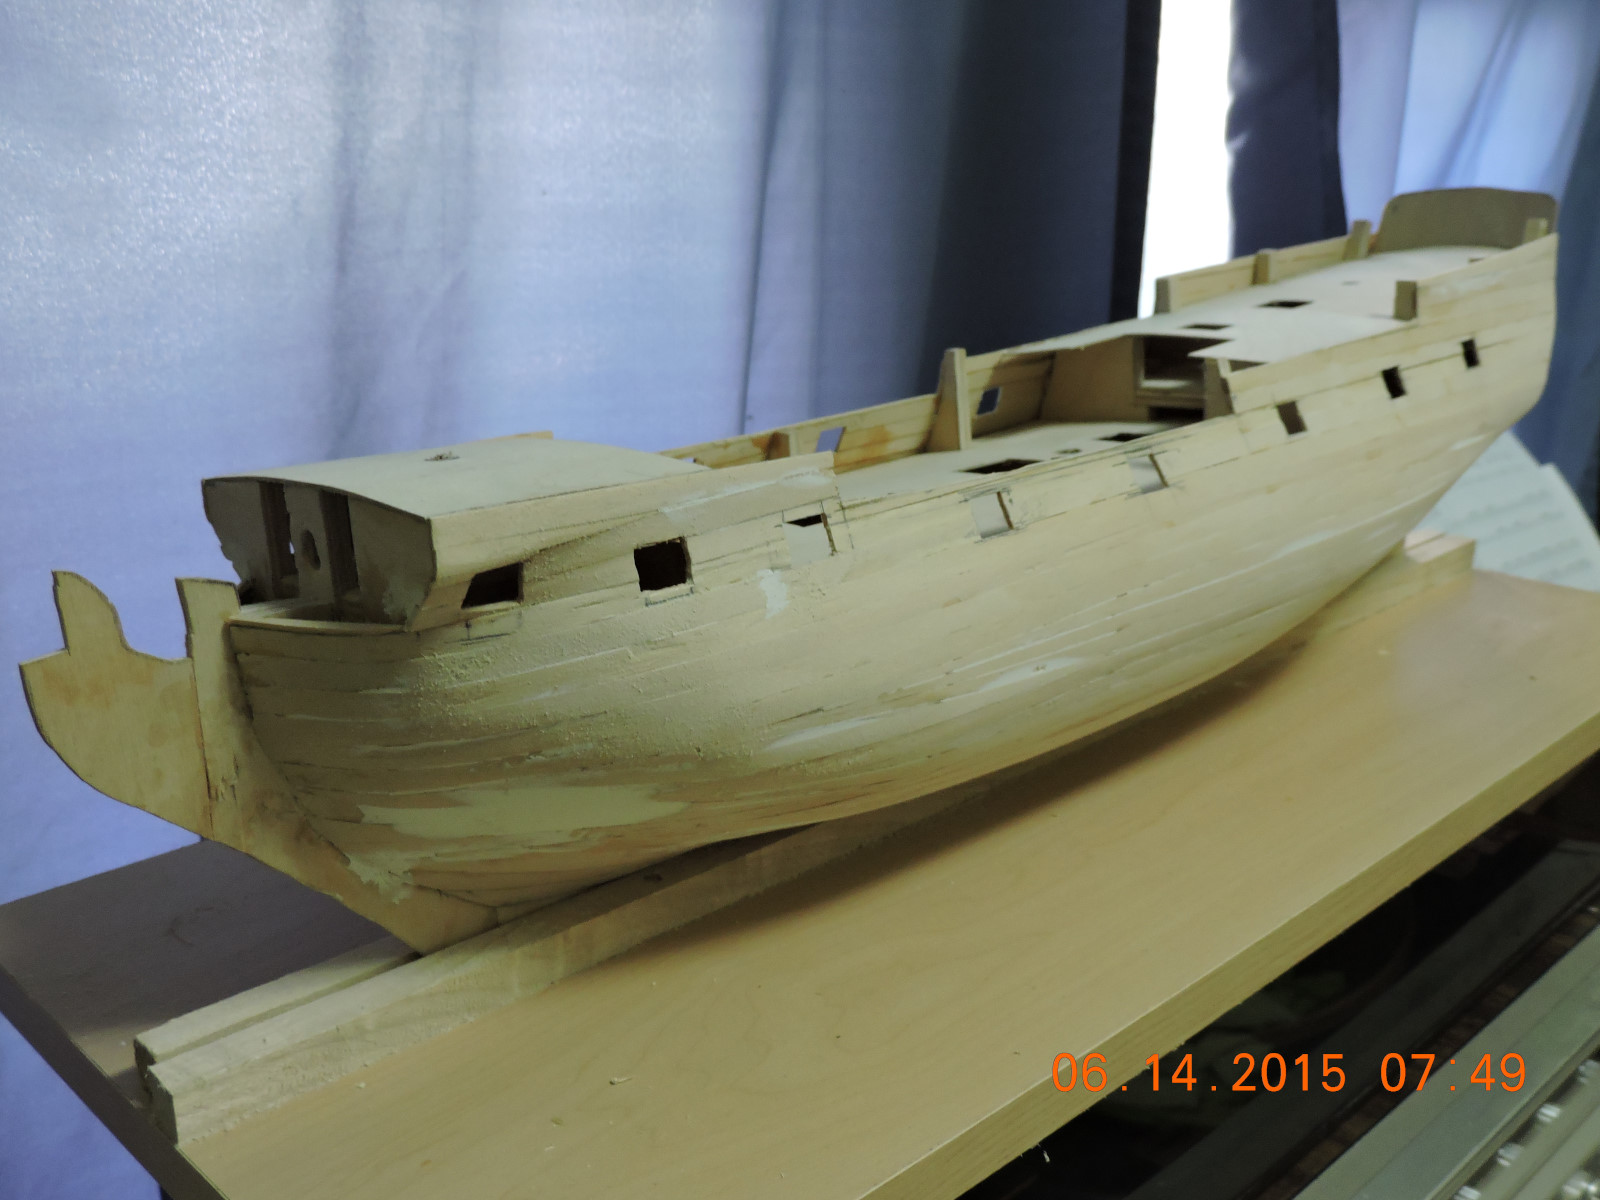
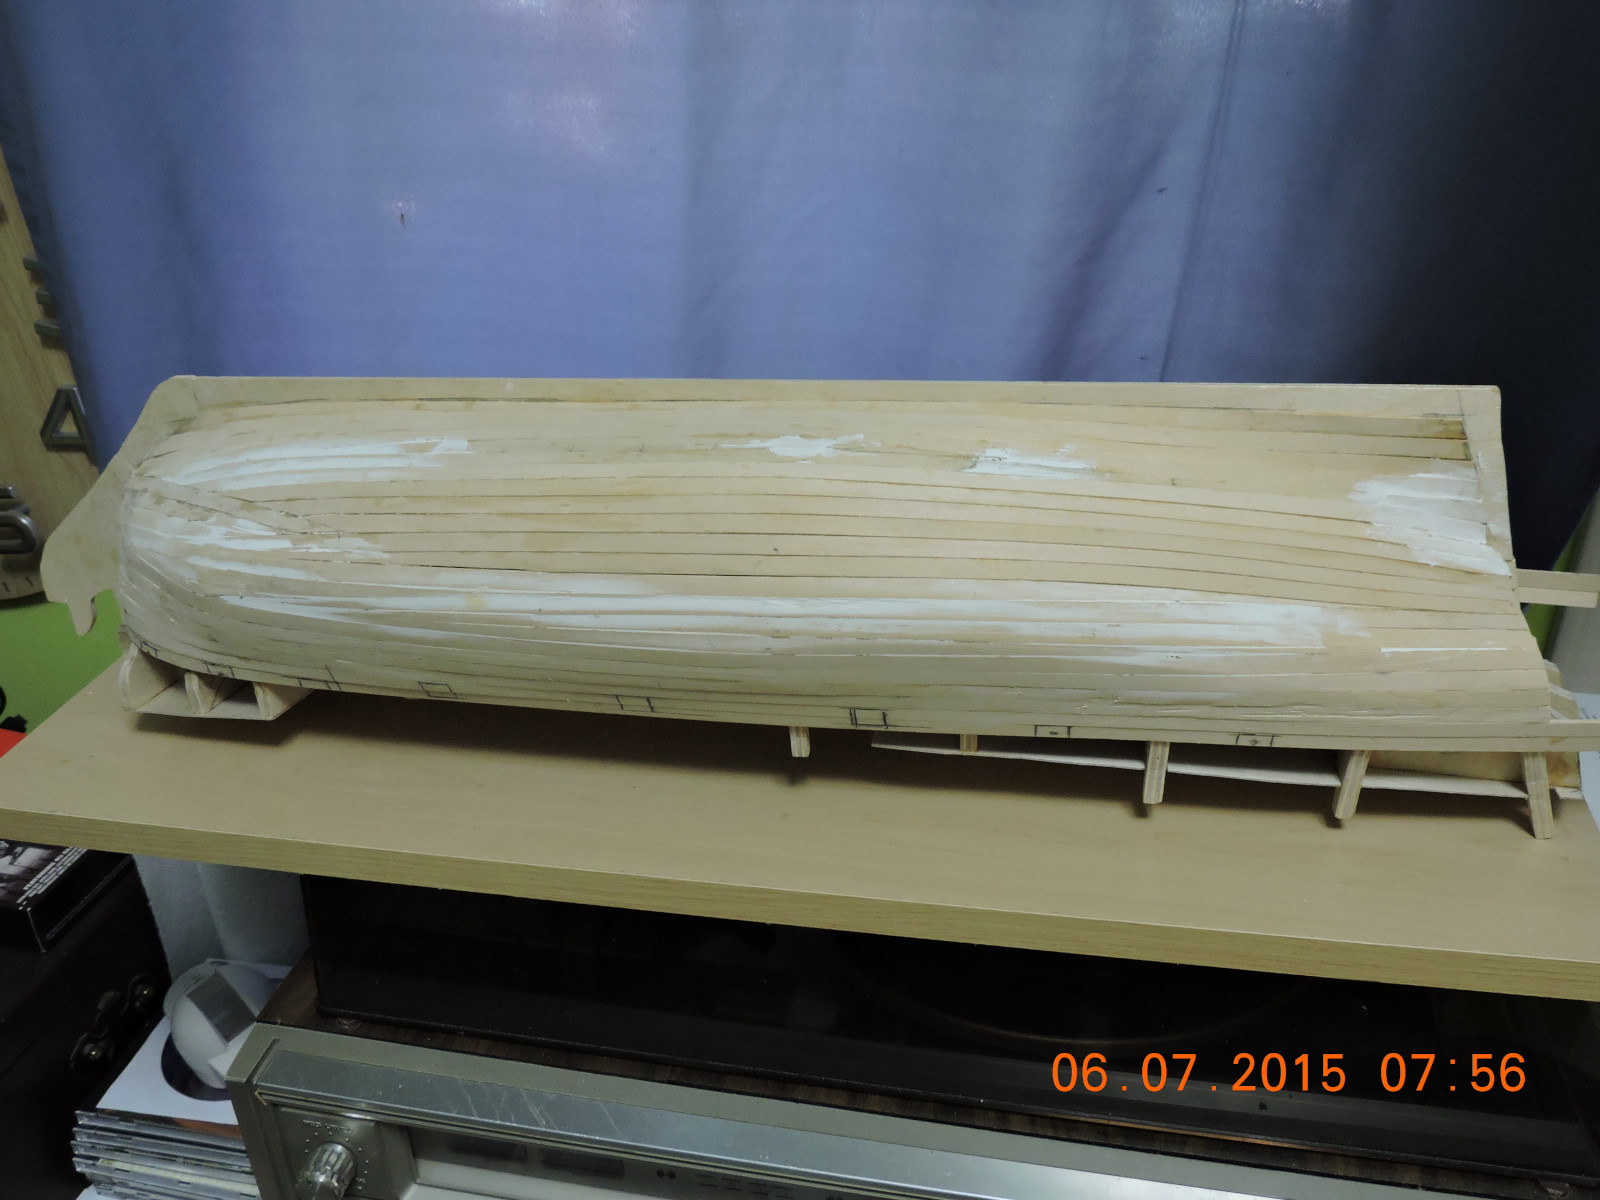
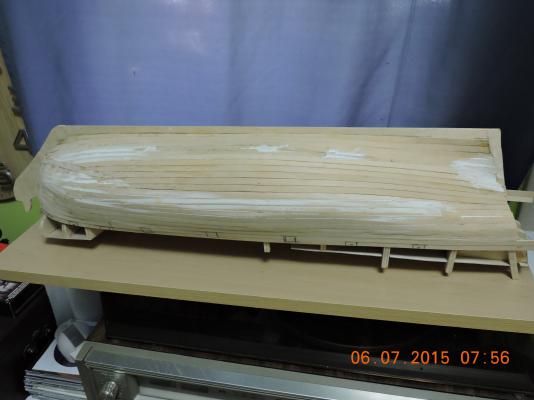
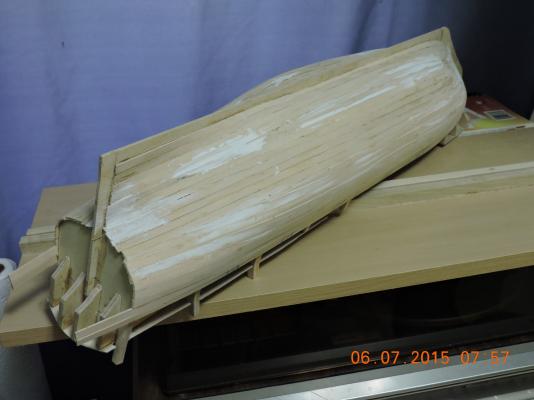
6/14/2015 Hi, The first planking is on the home stretch. Now I getting ready for some big time filling and sanding. Walter


-
Hi, Time for an update. The first planking continues. The bottom of the hull is complete and I am now working on the top. I’m looking forward to sanding and the second planking. Walter

-
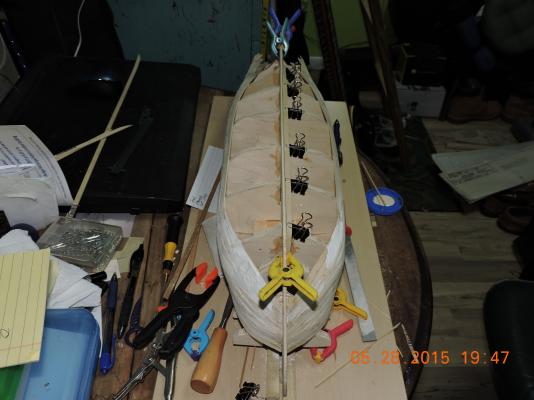
Hi. Time for a quick update. The planking is moving along slowly, but that’s to be expected. Wish I got more blocks in earlier particularly around the bow. A lesson learned. The only crazy event so far is when I poked a hole in the hull with a chisel. I was trying to clean up a few things and got over aggressive. With a little glue and filler, all patched up and back to planking. Walter