


BubbleHead
-
Posts
103 -
Joined
-
Last visited
Content Type
Profiles
Forums
Gallery
Events
Posts posted by BubbleHead
-
-
Hello:
Daniel
Not too many. Tried soaking for about half hour then hour and putting then in boiling water for about ten min. none worked. That was 3-4 pieces but they were long enough to try two bends. Finally they soaked over night. The first one bent but split at the sharp bent that's when I decided to make the cap (1mm larger to accommodate the stock) and clamp everything together. Got lucky it seemed to work.
TJ
-
Hello:
Don't know why but for some reason can't get started.
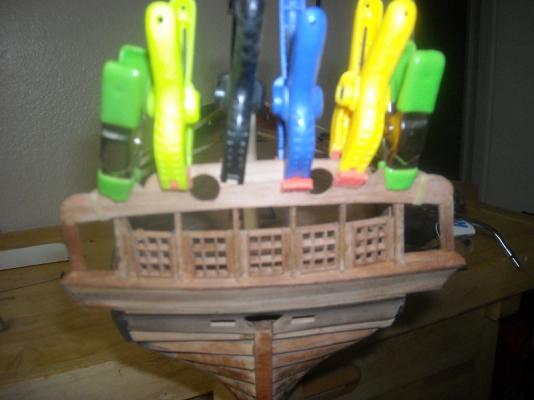
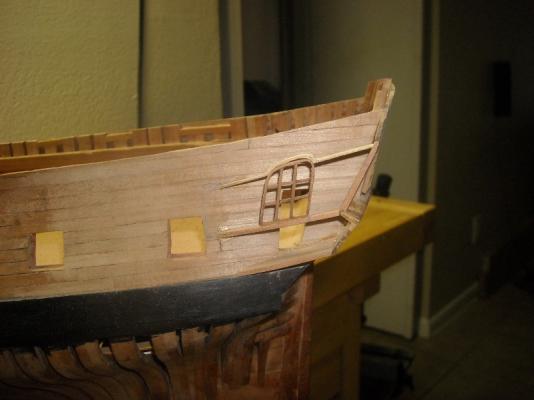
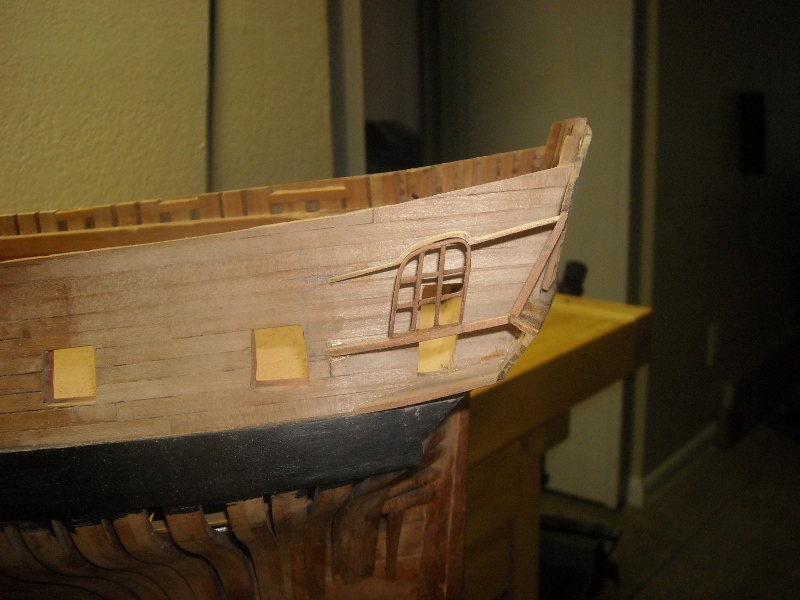
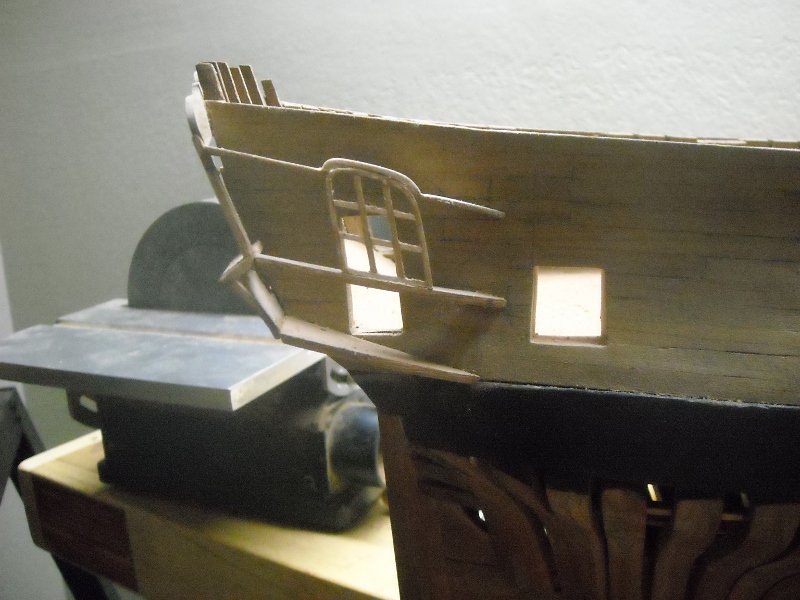
Hear are some pic on how I started the lights on the quarter galleys.
Soaked the frame for a long time it seemed that the sharp Conner just wouldn't bend without braking. The frame is 1X1mm, made a jig to press 1X1mm between the two pieces clamped it and the legs. Seemed to work well.
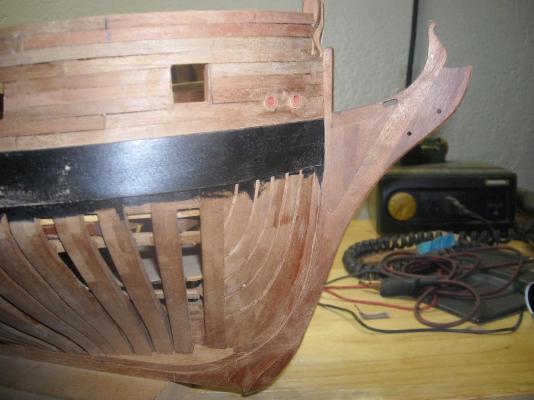
I'm not sure if this is the right way to build the quarter galleys, may be should of spot glued frame in and temp stations to set the frame shape, took it off and built it on a jig then reinstalled the finished product. May still do that as I put my thumb through the port light fitting the other light.

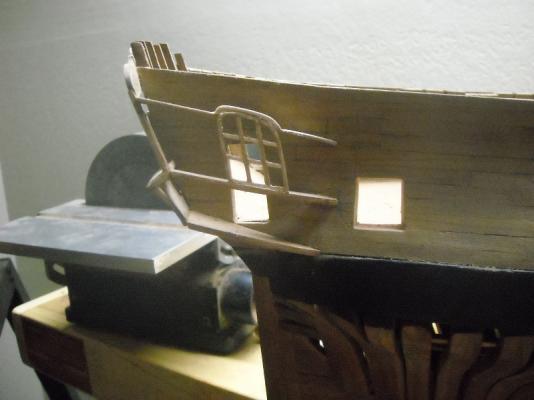
When installing the Taffarel made big mistake and didn't get the stern rounded enough consequently the angle of the Taffarel extension doesn't match the angle of the lights, hopefully it can be hidden some what or just won't be noticed where it's going. I finely got the stern lights to match and installer that was only the fourth time I think. The pic looks like there uneven but there really not.
Love this learning process
TJ
- mtaylor, sonicmcdude, Pete38 and 2 others
-
 5
5
-
Welcome aboard Randall.
Nice start. I to like your board, but like Daniel says I wouldn't go with ebony as it takes some practices. I bought a stick and it's still in it's waxy form. I went with Fiebineg's leather dye and it looks grate, but when applied to the stern lights I found out that it didn't penetrate the wood very well, it kind of laid on top of the wood. I think next time I'm going to try some kind of ebony stain. Just my opinion there has been a lot of debate on the subject.
TJ
-
Hello:
Been away having my telescopes refitted with new lens's, just waiting for new glasses using store bought ones. Doc want's me to wait, but can't sitting hear looking at the model and nothing done.
I finely got the rail done only took three try's. The taffarel is made of planking and I'm going to soak it for a little while and hope the glue won't come apart and clamp it to the stern timbers to get the curve.

-
Hello:
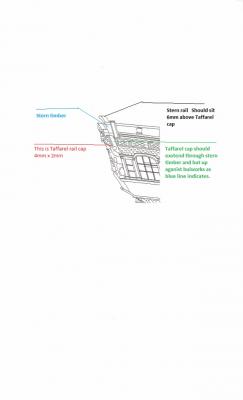
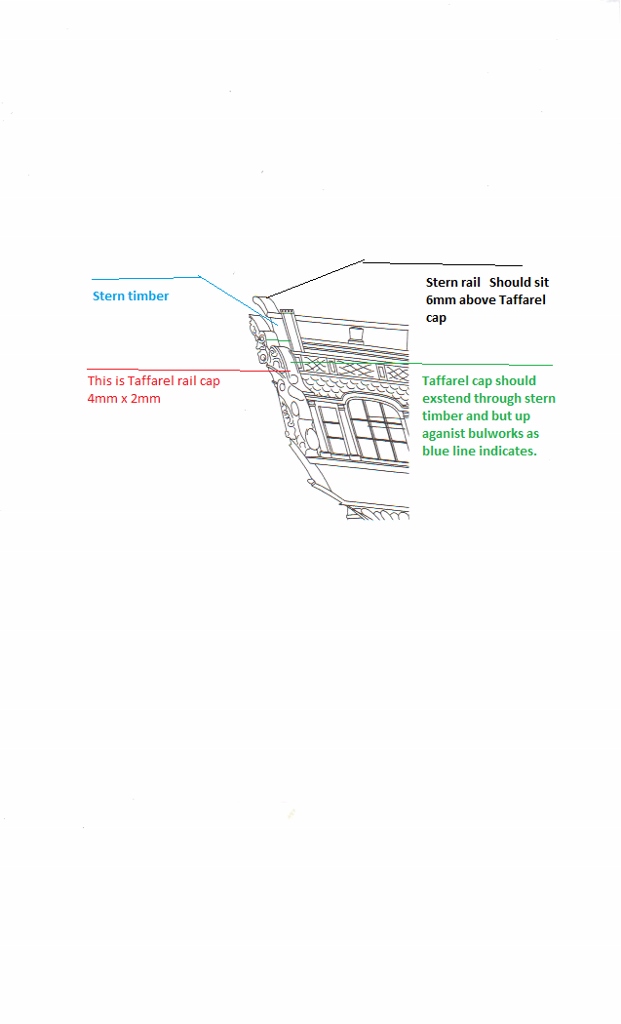
Aldo, yes I think so, and I think after thinking, if the cap go's flush with the inside of the stern timbers by the time it gets on the out side of the hull where the lights, roof and all that structure meets with taffarel, the rail may interfere with the roof, just looking at the print looks like it should be even or a little above the roof. We will see. But that's the fun part.
TJ
-
Hello:
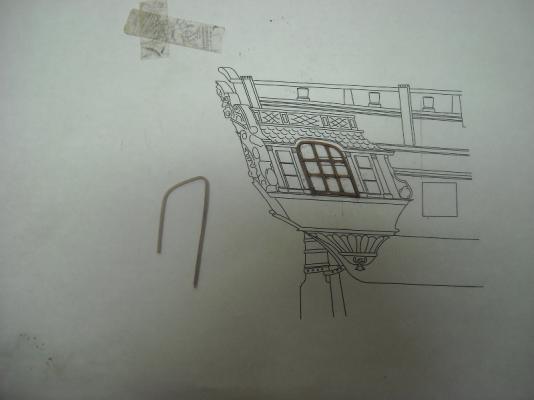
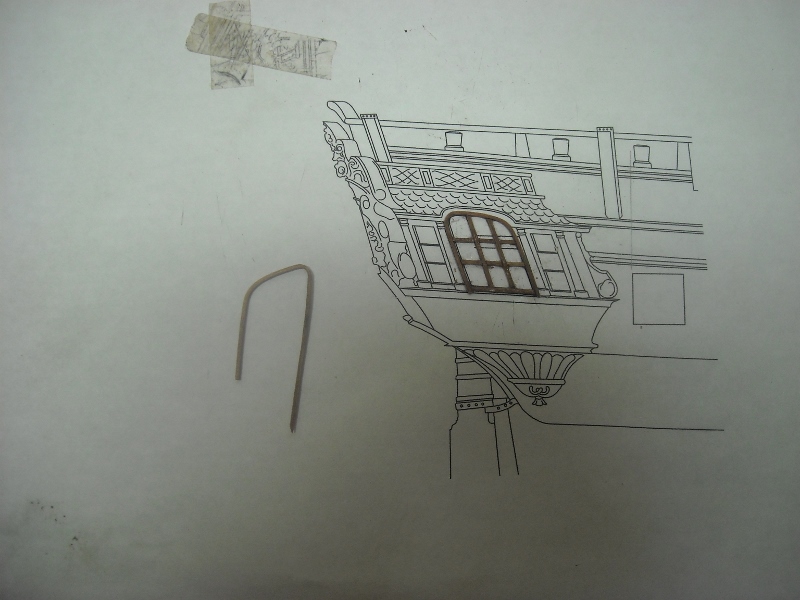
I was over reading the Taffarel question. Thank you all. I will be going with the blue line. In my pic here it is the green line
TJ

-
Hello
Thank you Druxey and Aldo.
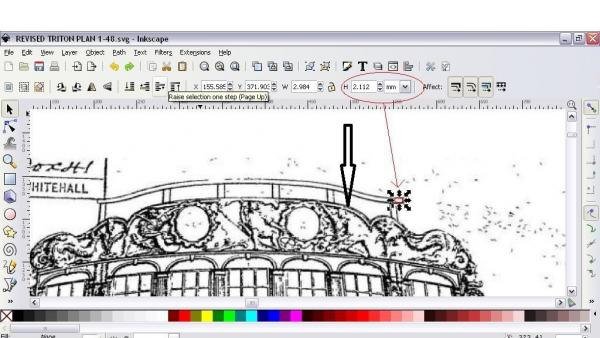
I'm going with the blue line also. Red would be easier. Don't think you can see this. Found out some thing new just click on the pic. Nice Admiral
TJ.
-
Hello:
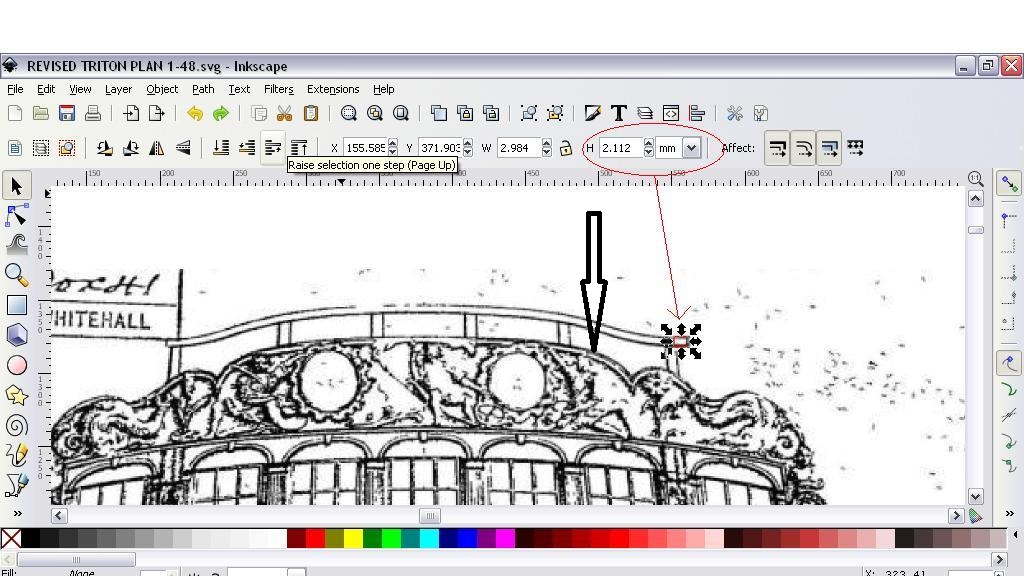
Thank you Aldo. So that mean all three are approximately the same width. I put an arrow on the one that I'm working on. (green) and that one should be 4mm too. I went to take a pic but some how the last time I downloaded pic the memory card says it pass protected
don't know what happened. I'll try to fix it or another trip to the hardware store.TJ
-
Hello:
Thank you Mark and Aldo
Aldo I have measured the rail from the inboard works and it measured 4mm to me that seems small don't know why but we will make it and put it on. Have it mostly done now. I have decided to remake the tafferal from a single board to planking. While making planking for this might as well make up the hull planking while the set up is there.
TJ
-
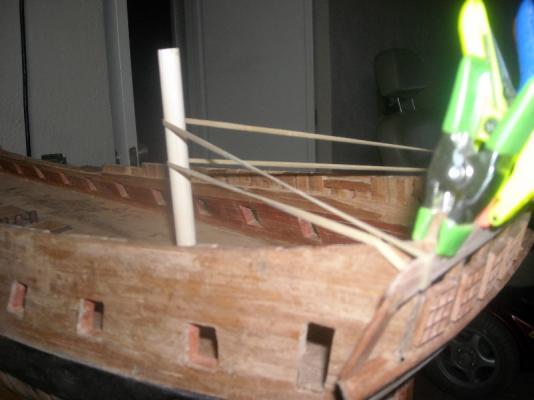
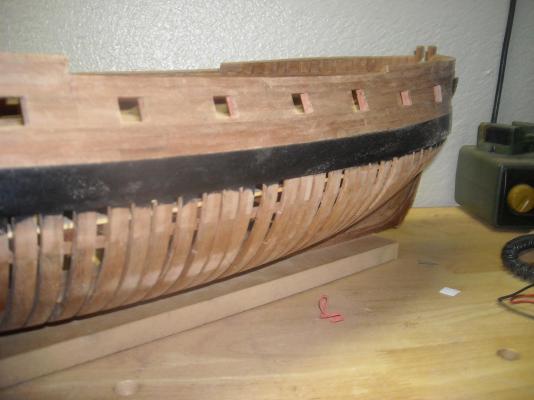
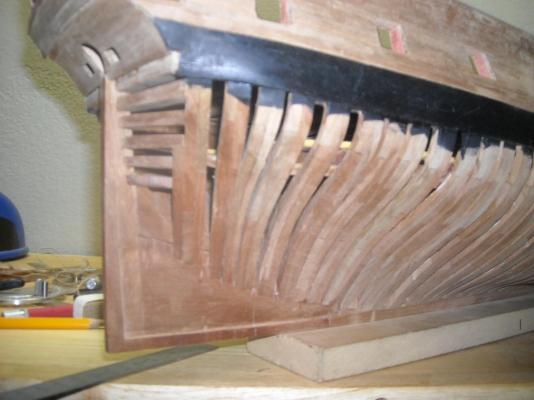
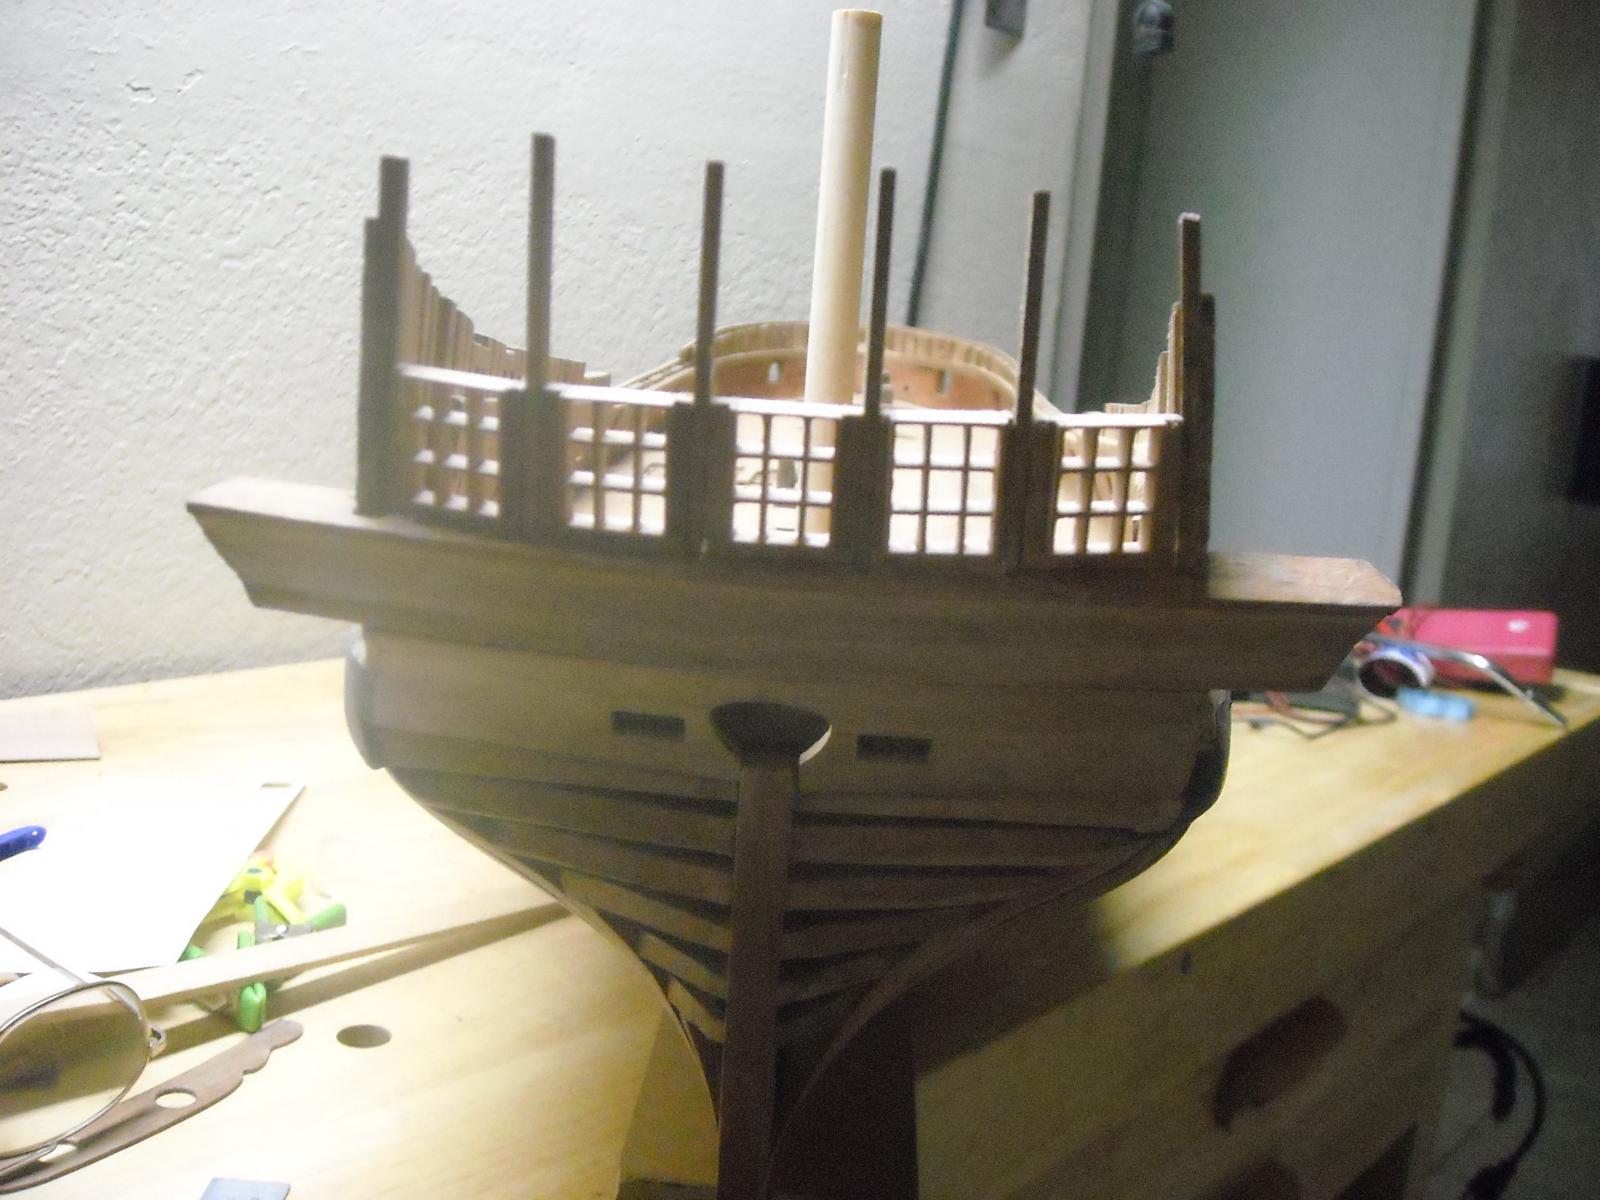
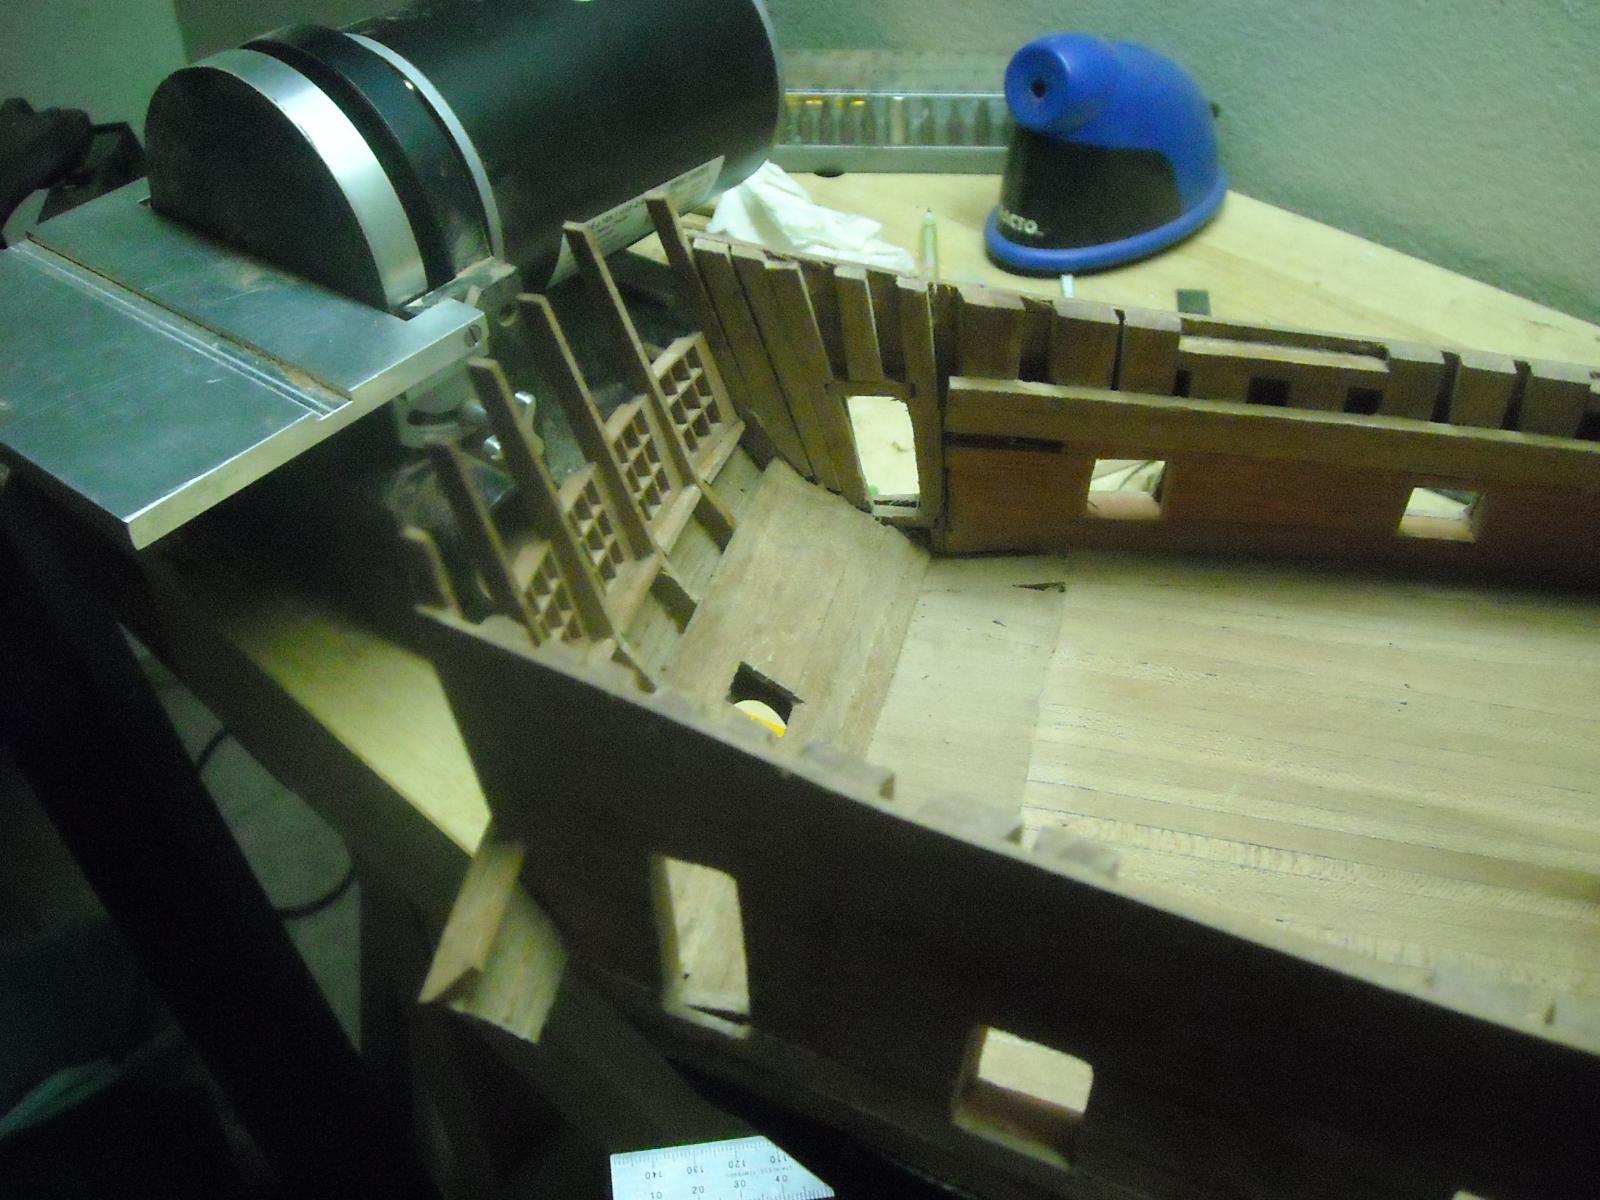
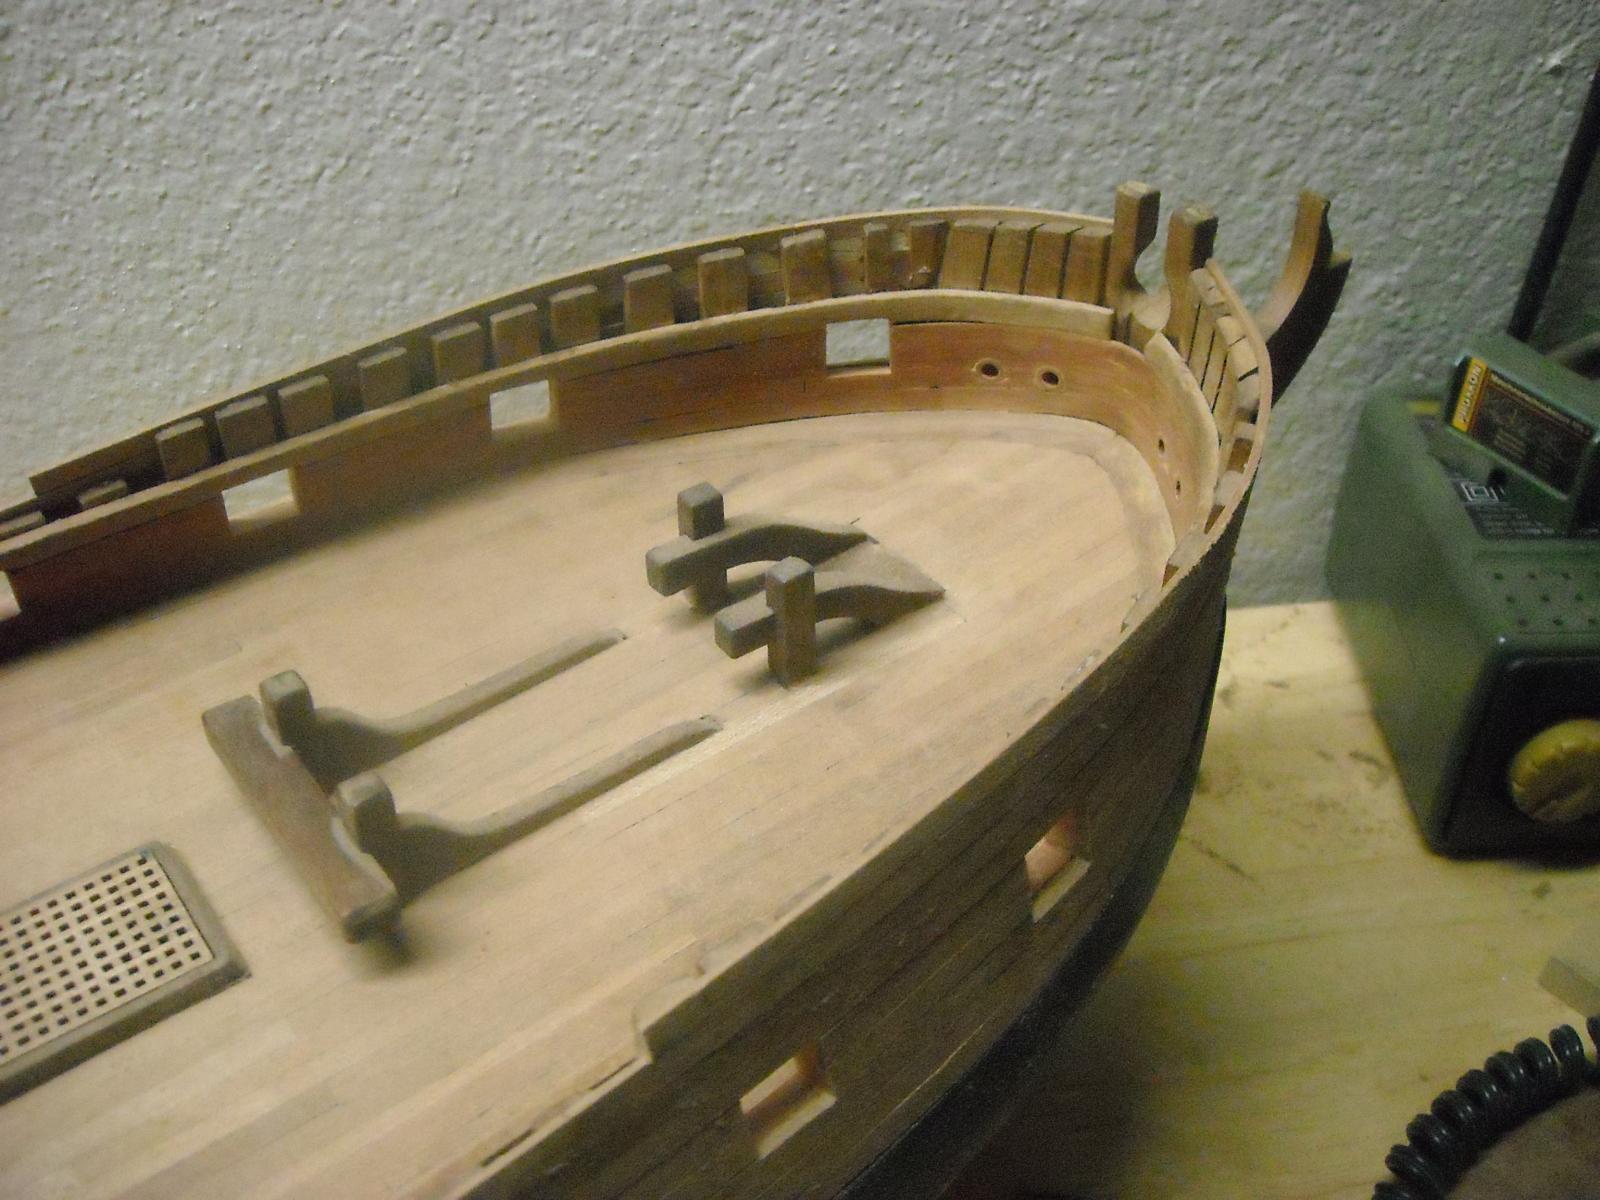
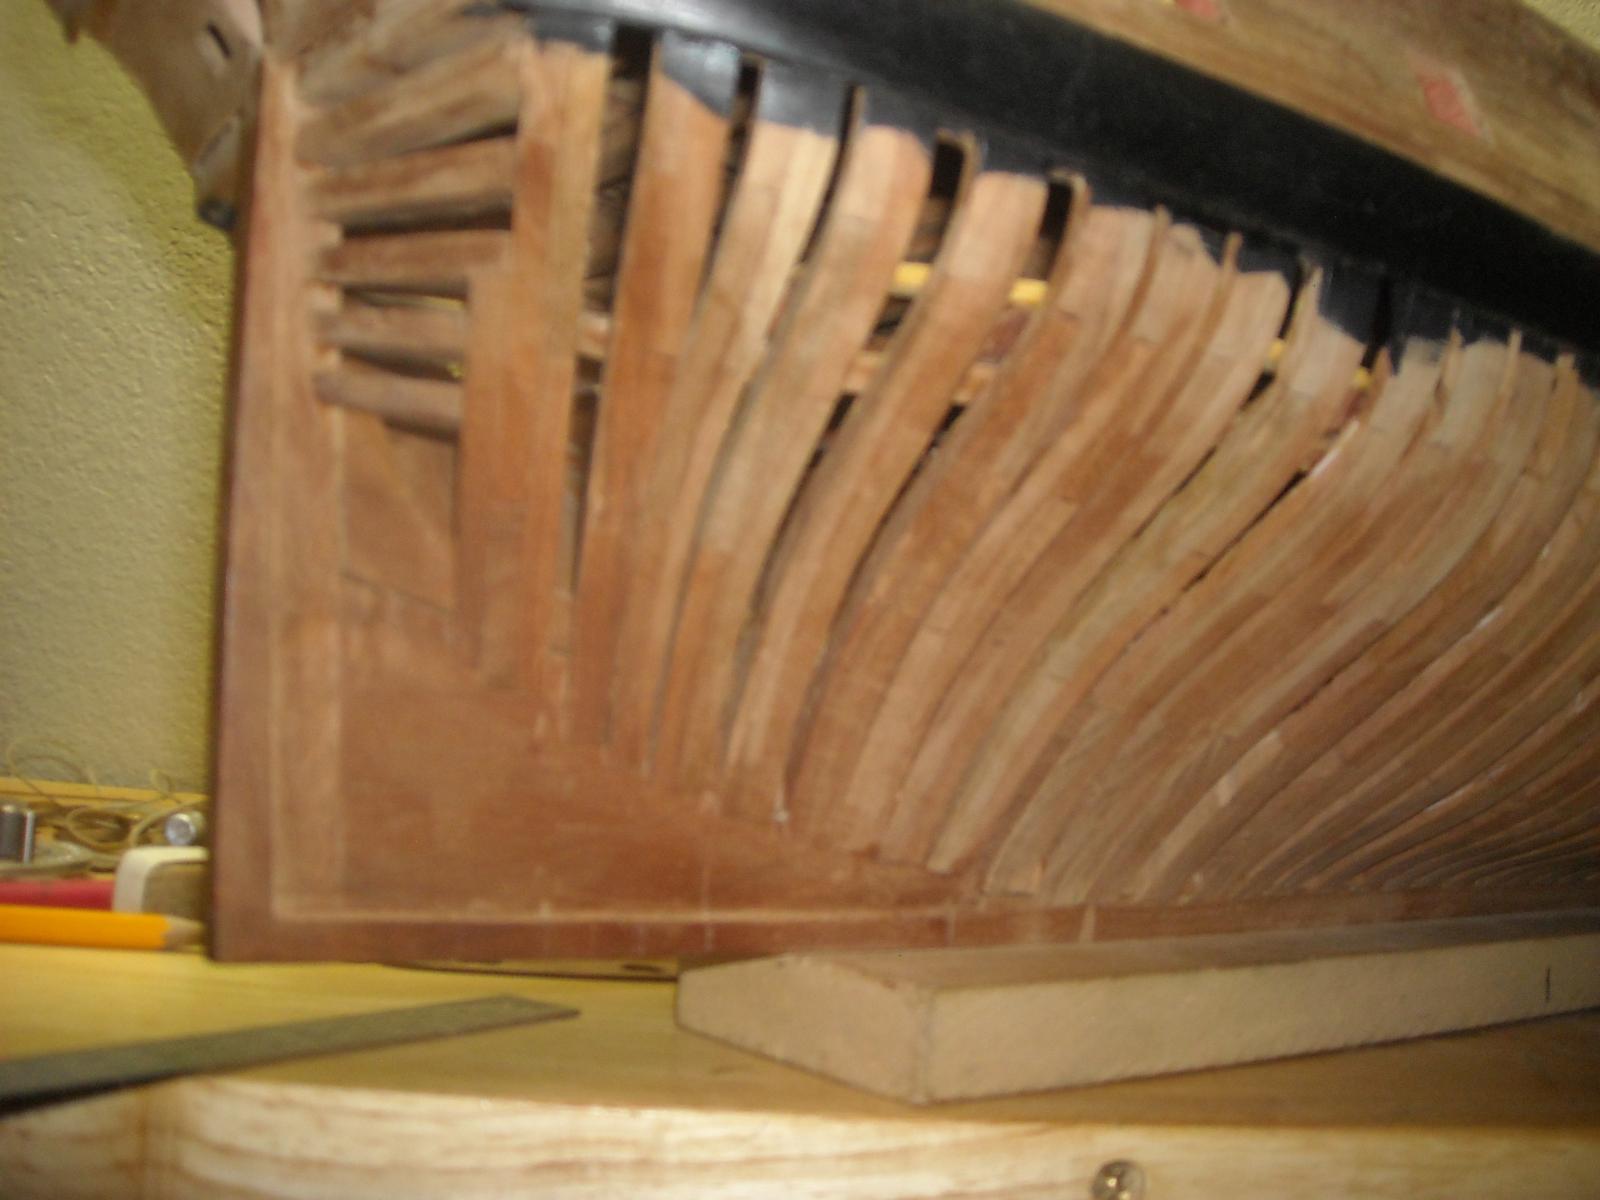
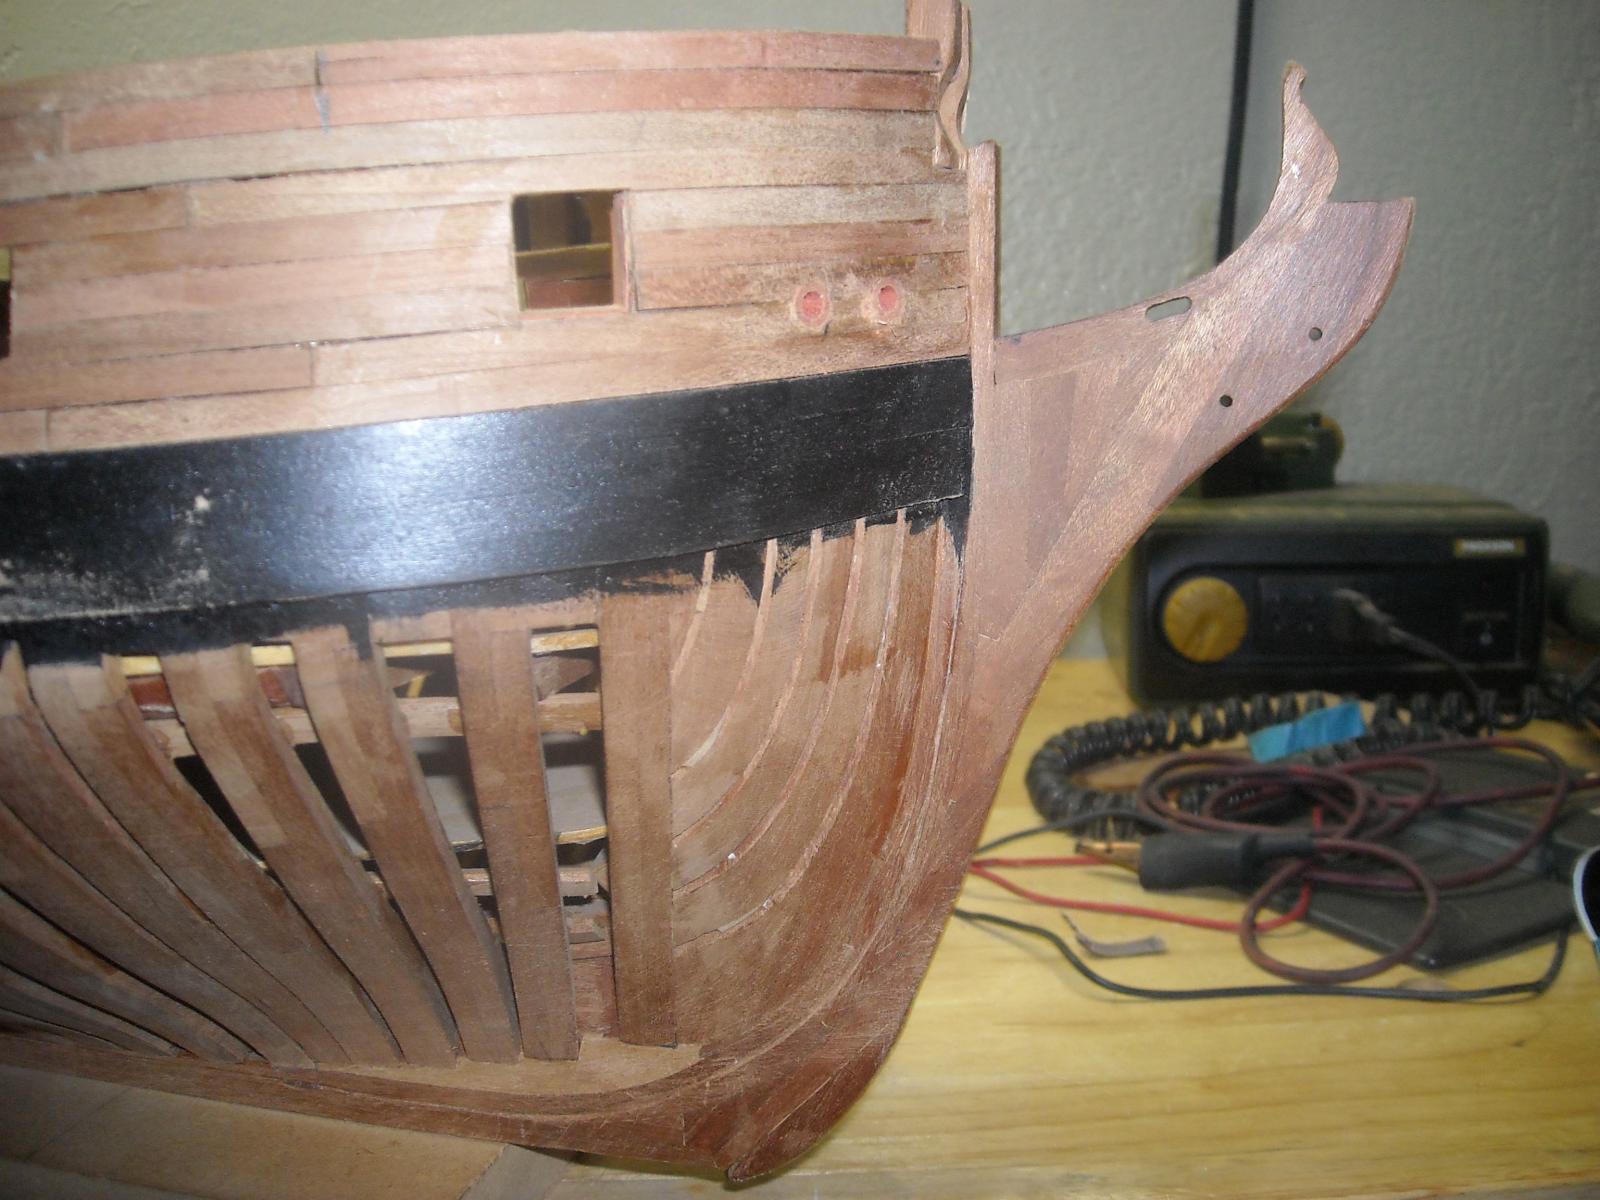
Hello:
Hear is some pic of the hull and what has been done so far. The quick work hasn't been sanded yet and I need to do a light sanding all over before applying some wipe on polly. It should lighten up the cheery in the places I would like a little liter. The gaps aren't as big as they look and should fill in well with a little sanding and glue. I'm trying to build the lights around the stern. Please what is that called that part of the grate cabin or is it just part of the grate cabin. I have made many mistakes in this build but that's OK. Learning I was always trying to jump ahead. As you can see at the stern deck a big goof but it will be covered. There are numerous others. The whales are died with fiebing's leather dye and it looks good but when applied to the lights I found that it didn't sink into the wood very well mostly stayed on top and when gluing parts to it they just glued to the dye and not to the wood so I think I will be going to ebony stain of some kind maybe min wax.


- harvey1847, sonicmcdude and HIPEXEC
-
3
-
Hello:
Thank you David and Daniel
I will do that Daniel as I just went through all the stuff for the last couple of hours and zip even my favorite pic is gone. Guess didn't lesson in 101 pic saving class, probably find them when not looking for them,
TJ
-
Hello:
Thank you Sinan I hope so to, but I had to reboot yesterday thought I saved the files but it doesn't look like it. I think there are some on a disk.
TJ
-
Hello
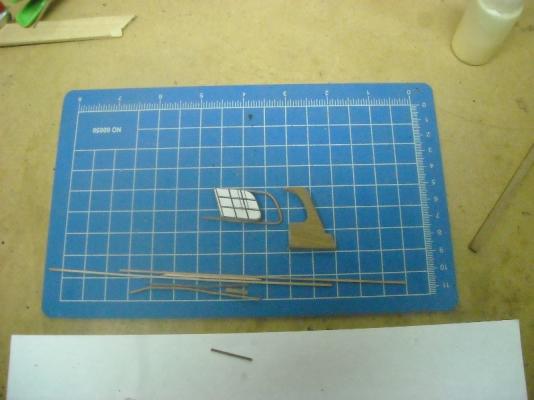
Well I have had tough time with the lights but finely got what I wanted. The first pic shows some of the ones I thought I was going to use. The first is too crooked second is too small and the third is just right.
I'll have to see if I can find some old pic of my build and post them. Don't think I saved any though.
I do have a question though. I am working on the Taffarel and would like to know what the measurements are if the rail that sit on top of it, are they. (2 1/2" X 4 1/2") ? this to me seems small. I have looked in TFFM, Construction of English War Ship and in the Triton prints couldn't find it in the or was I not looking in the right place.
Hear is some of my trial and errors of the lights.


- harvey1847 and sonicmcdude
-
2
-
Hello Danny
I have been fowling along and nice work.
I have been working on the Triton's stern for months. Finally got it ready for the lights and after many tries haven't gotten them all the same. When I did they were too small measured ones cut twice.
just can't wait to start the slanted ones. This has been such a nightmare for me my next build will have the same kind of stern. Practice, practice, practice.I will be interested in how you will make your lights, the same as you just did individual parts. I finely did mine like hatch comings then sanded them to the right thickness. This took days to get them little devil's right.
TJ
-


ID or Heght Measureing
in Modeling tools and Workshop Equipment
Posted
Hello:
I'm not part of this company and am not selling any thing. Just showing a poetical modeling tool for hull construction and other thing in ship modeling. What do you think.
When I saw this just had to have it. You know what I'm talking about, good for something even if it go's in the you know where drawer. I think with a little bit of modification it will come in handy and quick.
It's made like an auto antenna with ends that are screwed on and that's where the modification comes in, put any thing on you would like. All though the 3" is still too long for measuring from deck to deck or stanchion height as it is. I'm sure something can be done. May be points on the ends or some kind of piece to go down to the base with a pointer or something to measure the height of a stanchion. It pulls in and out snugly and stays in place. Just received them yesterday. Not tested yet.
Part of the add.
The large EZ Story Stick captures measurements from 7 inches (collapsed) to 45 inches (expanded). The mini Story Stick captures measurements from 3 inches to 8- 1/2 inches.
I bought both for $25 U.S. that included shipping
TJ