-
Posts
543 -
Joined
-
Last visited
Content Type
Profiles
Forums
Gallery
Events
Everything posted by 6ohiocav
-
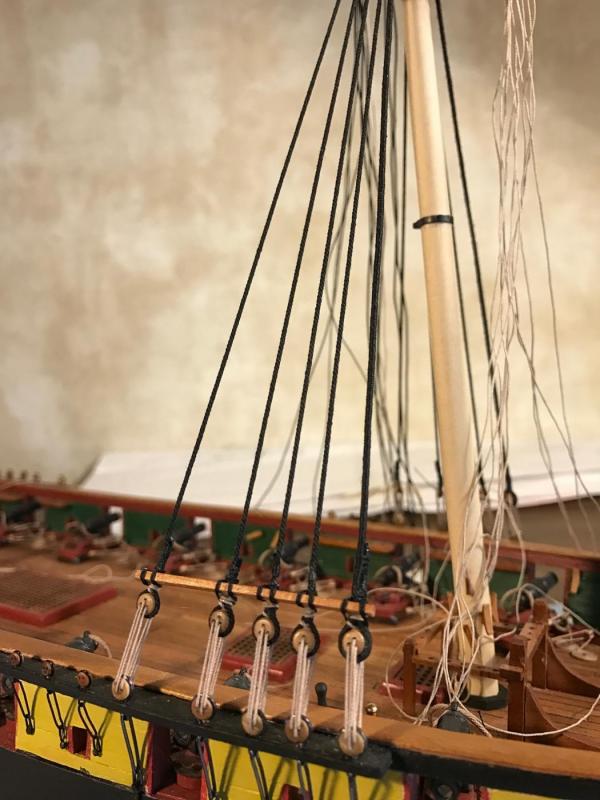
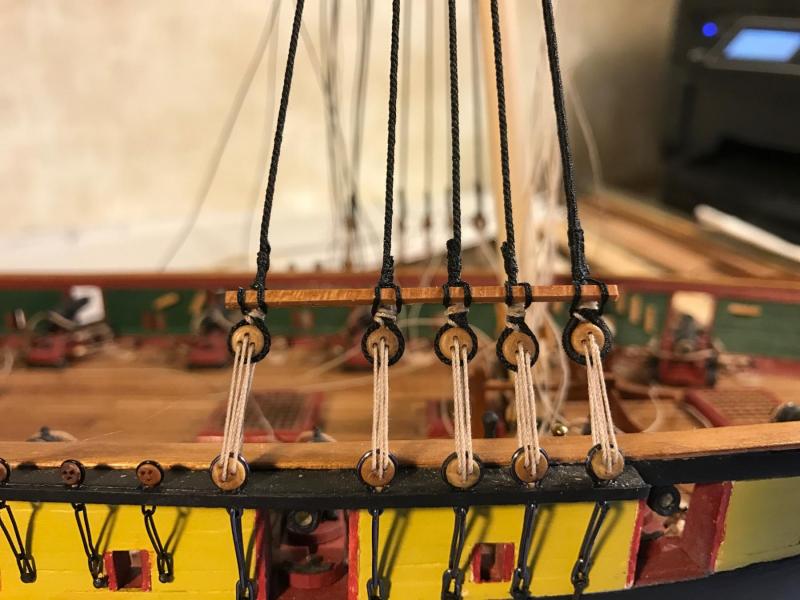
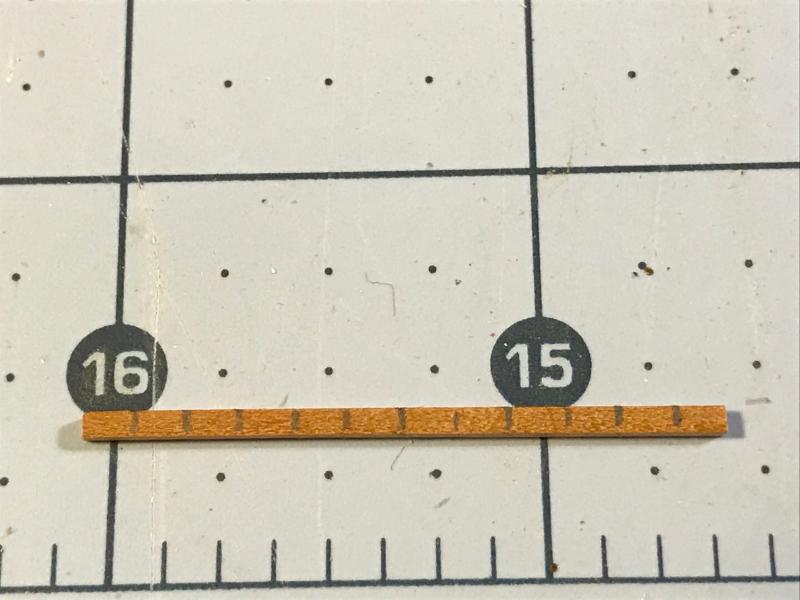
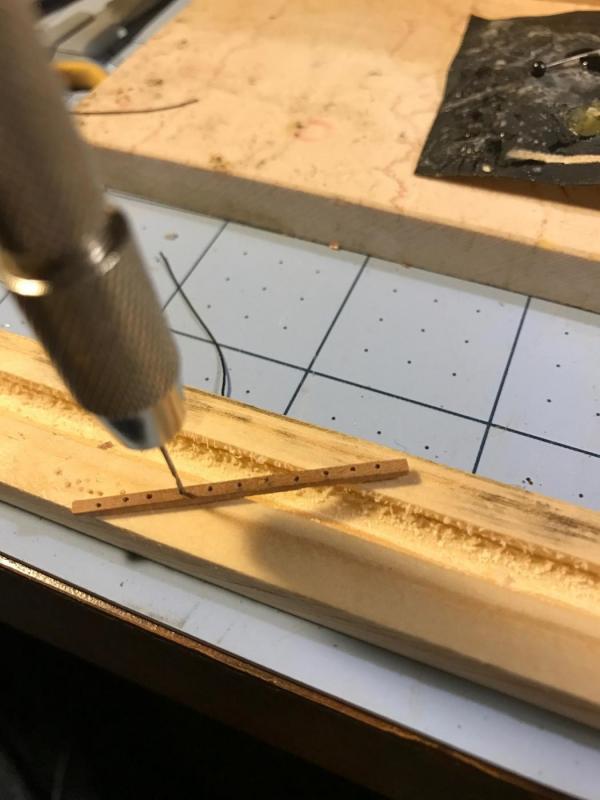
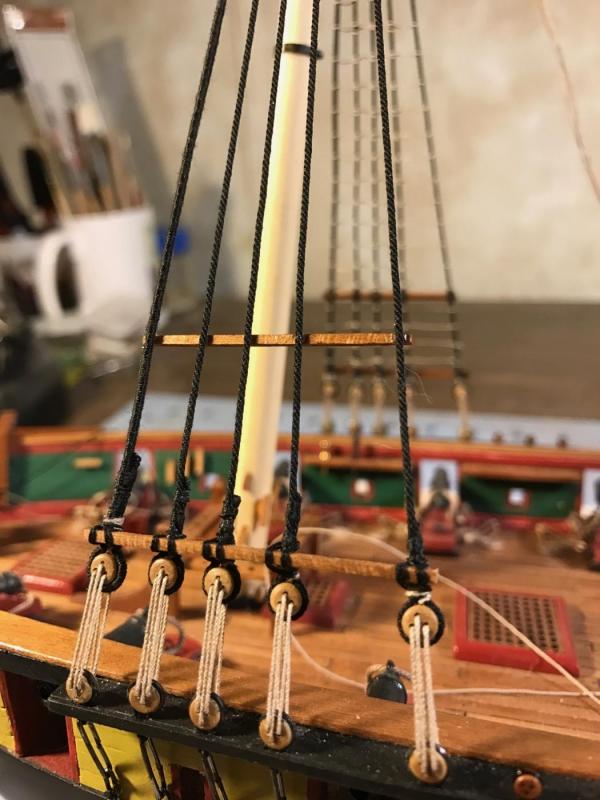
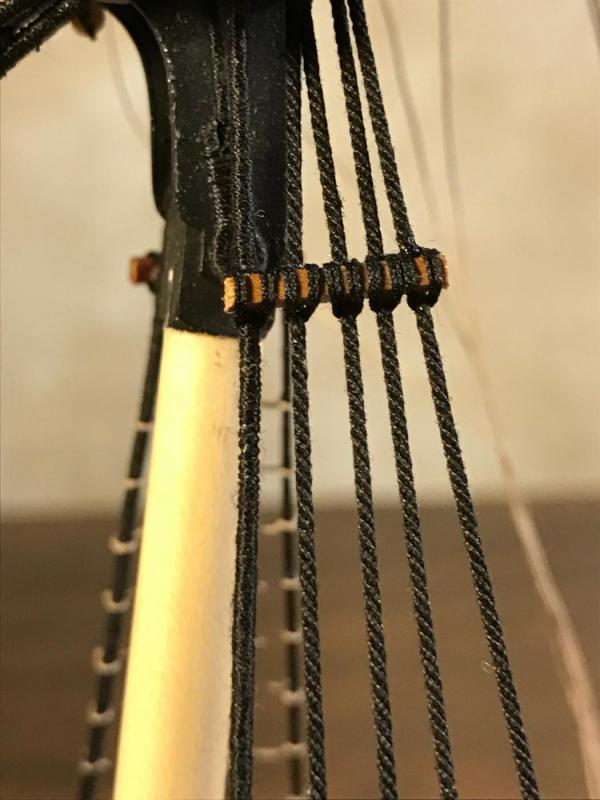
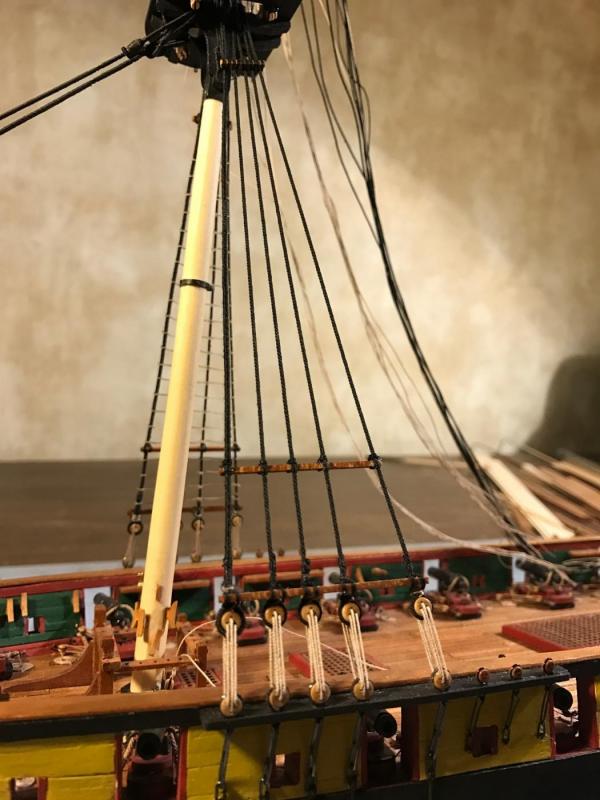
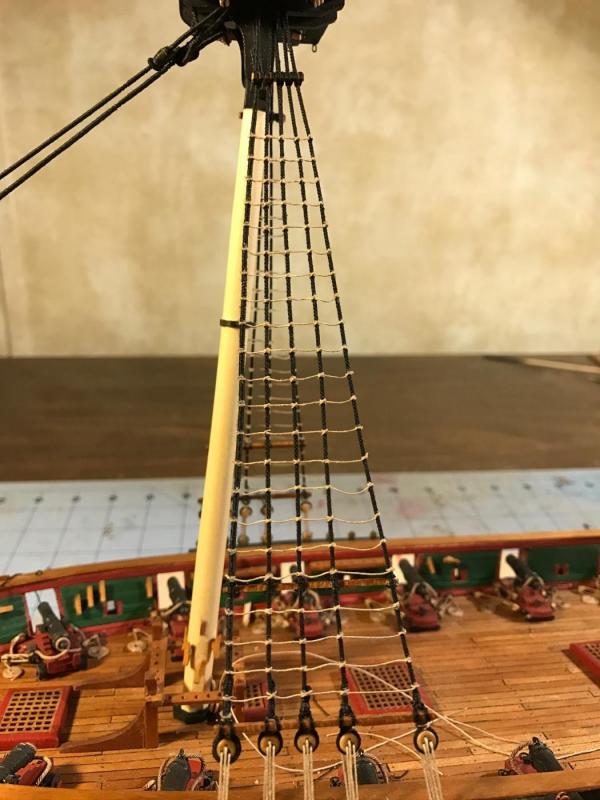
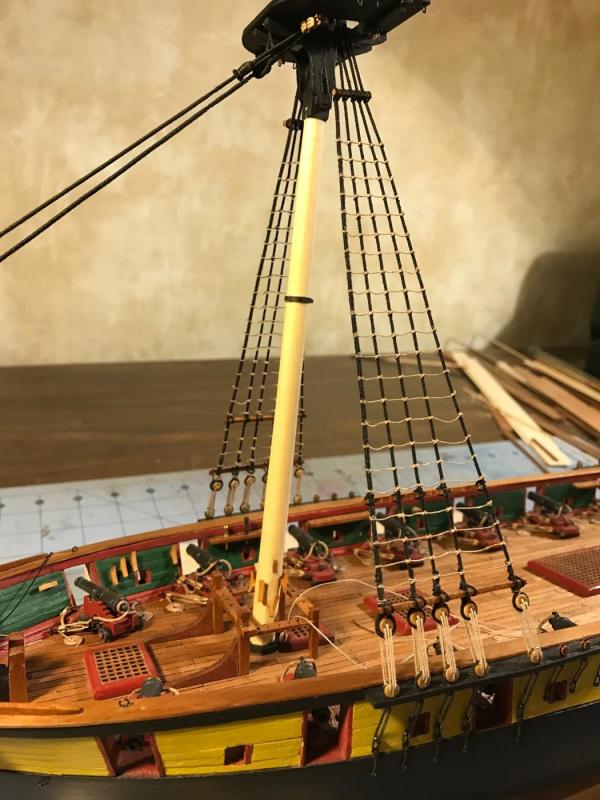
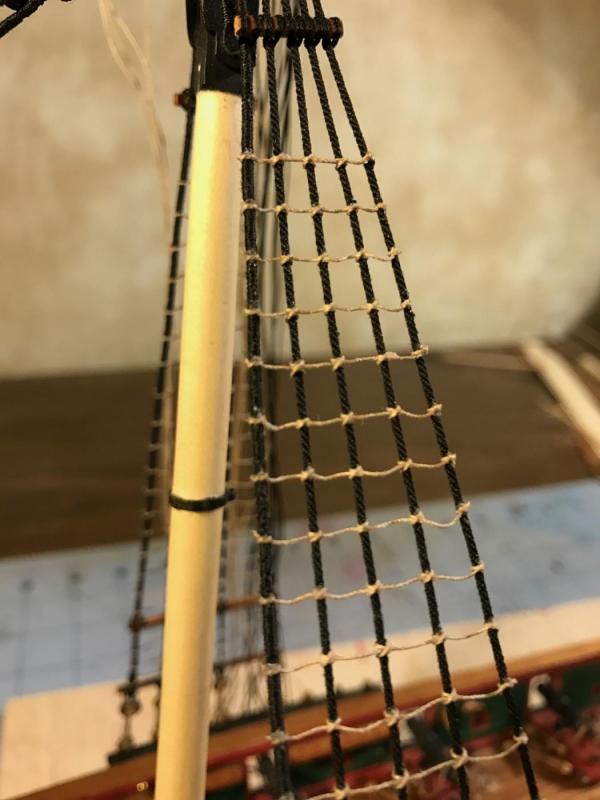
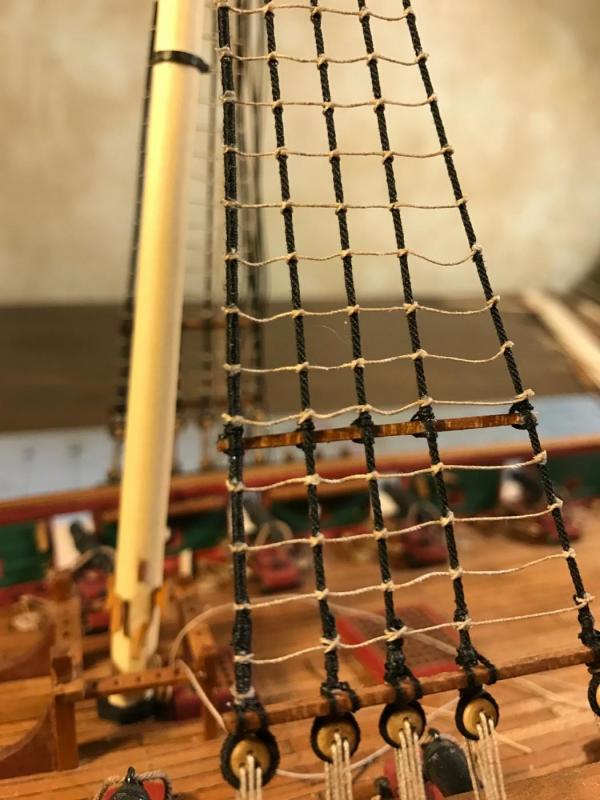
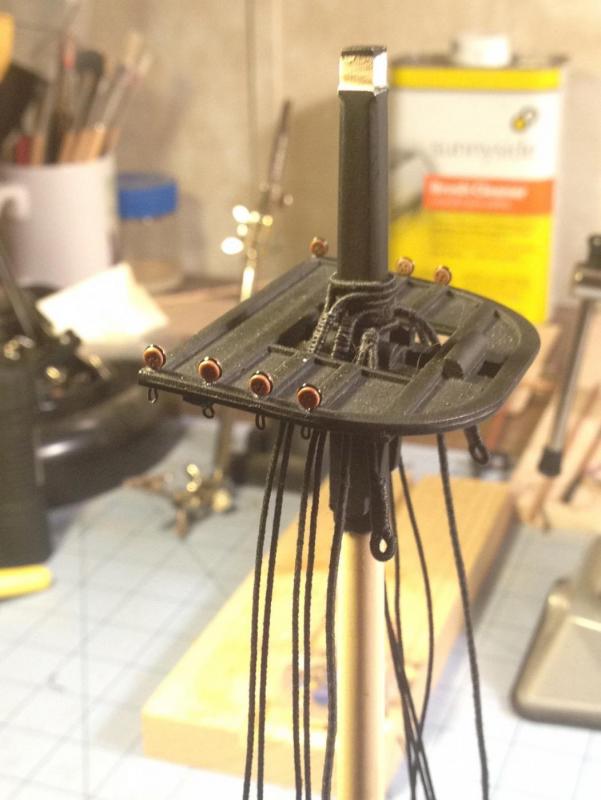
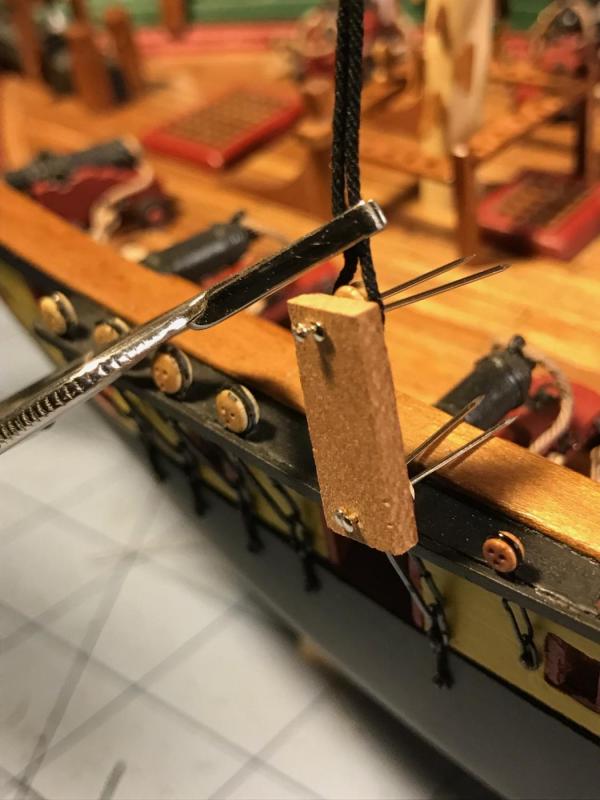
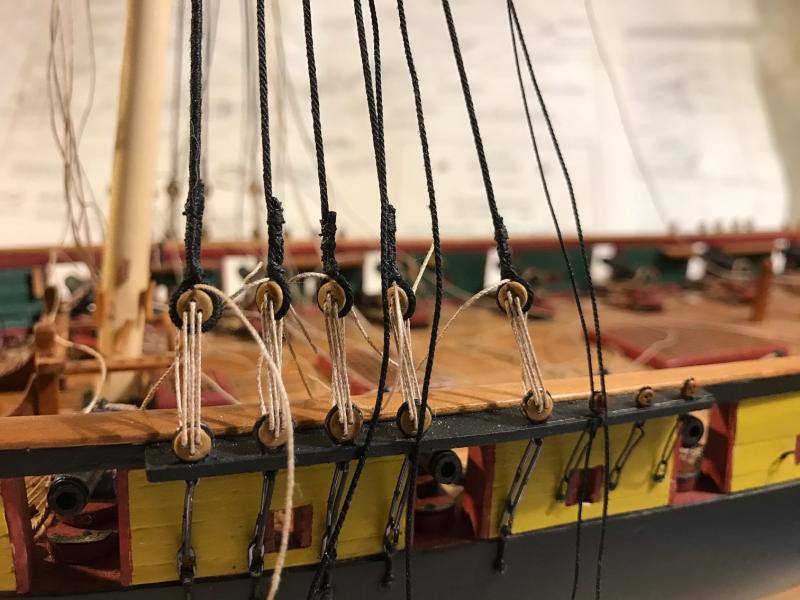
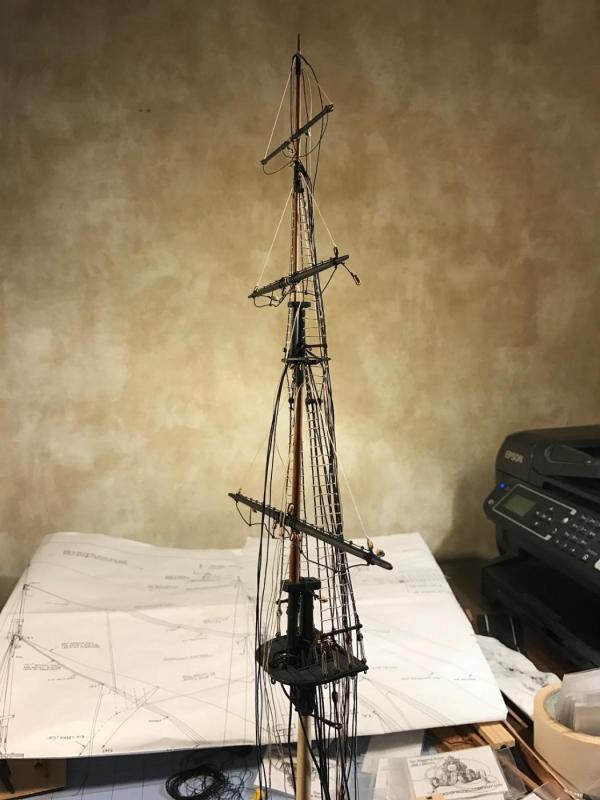
LOWER SHROUD SHEAR POLES, FAIRLEADS, AND RATLINES I had previously lashed the deadeyes on my lower shrouds and threaded the lanyards. It was time to tie of the lanyards, attach the lower and upper shear poles and fairleads and tie the dreaded ratlines. I milled my shear poles and fairleads out of some cherry stripwood and finished them off with my tung oil. I initially secure them to the lines with a drop of CA. On the lower shear pole, I used it to line up the deadeye and shroud lines to face forward since they tend to twist out of alignment without it. I lashed it with .008 black rope. You can get away with a half hitch knot since it disappears in this small size. I tie the knot in the back and add a small drop of CA with the tip of a pin to finish it off. The fairlead is a bit trickier. It is installed on the inside of the shrouds, and has 8 small holes to accept running lines that pass through on their way to the pin rail below. I measured out the holes, and drilled them with my pin vice. I lashed them with the .008 rope. The upper shear pole is small and tucked close in under the top. I tied it off like the lower. For the ratlines, I used my .008 tan rope. I tie a half hitch knot on the ends and use a classic clove hitch on the middle lines. For the half hitch, I learned through experience to tie it such that the end leading to the shroud lines comes under the knot so that it creates a natural crescent shape. I do the same with the end knot.
- 648 replies
-
- niagara
- model shipways
-
(and 1 more)
Tagged with:
-
FOREMAST MAIN STAY AND PREVENTER STAY I served .045 rope for the main and .035 rope for the preventer stays. I then measured them for length, and clamped in a closed heart. I purchased 7mm closed hearts from Chuck and Syren. Great product again. After some assembly, I gave them a coat of cherry stain and finished with tung oil. I was able to position my portable vice with a spring clamp close enough to insert the heart for lashing. The heavy served stay ropes were pretty stiff, so the whipping was a bit challenging. I weaved a section of .018 tan rope for the lanyard. Once done, I threaded the lanyard and tied it off on the upper lashing of the heart. It turned out pretty good.
- 648 replies
-
- niagara
- model shipways
-
(and 1 more)
Tagged with:
-
Bruce, I have been silently following along and had to finally make a post to your wonderful log. I am sharing your pain on the challenge of rigging my Niagara. I want to thank you for alerting me to the necessity of planning. I am trying to follow your lead as I lay out a road map to my own rigging maze. Your ship is simply beautiful.
- 245 replies
-
- model shipways
- Finished
-
(and 1 more)
Tagged with:
-
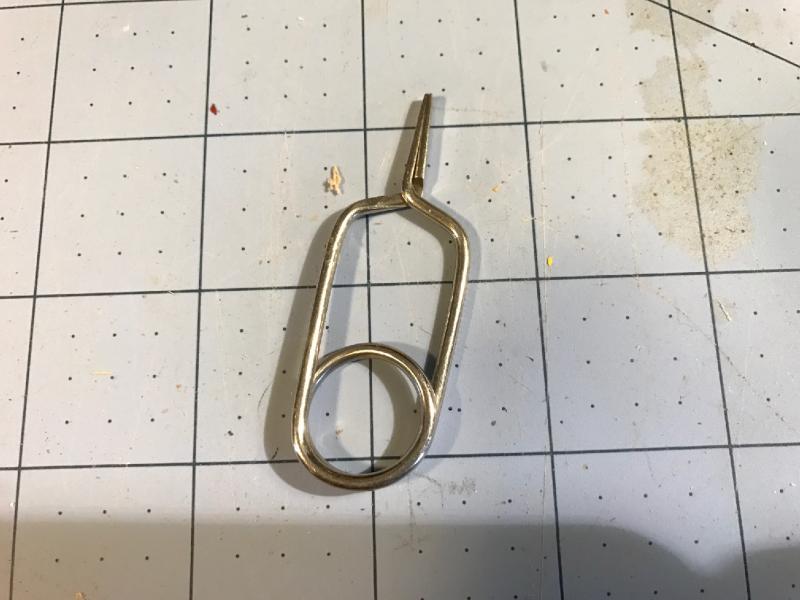
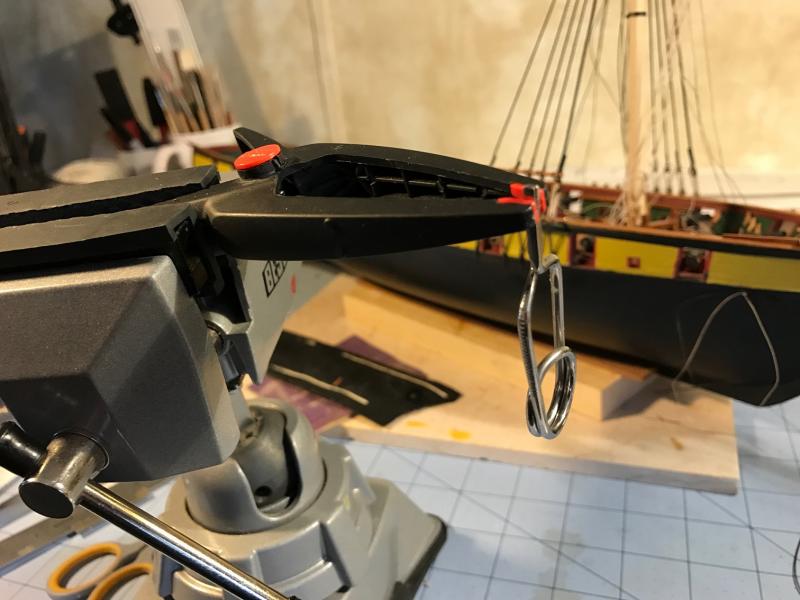
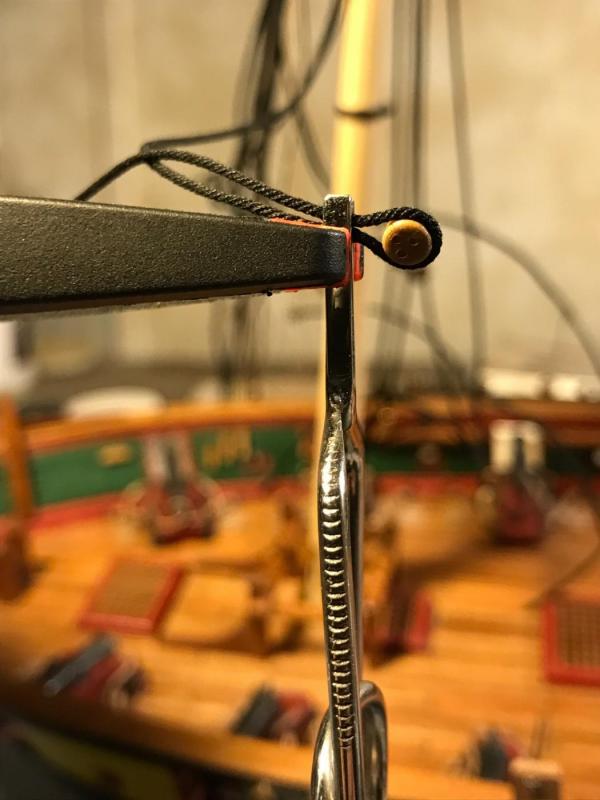
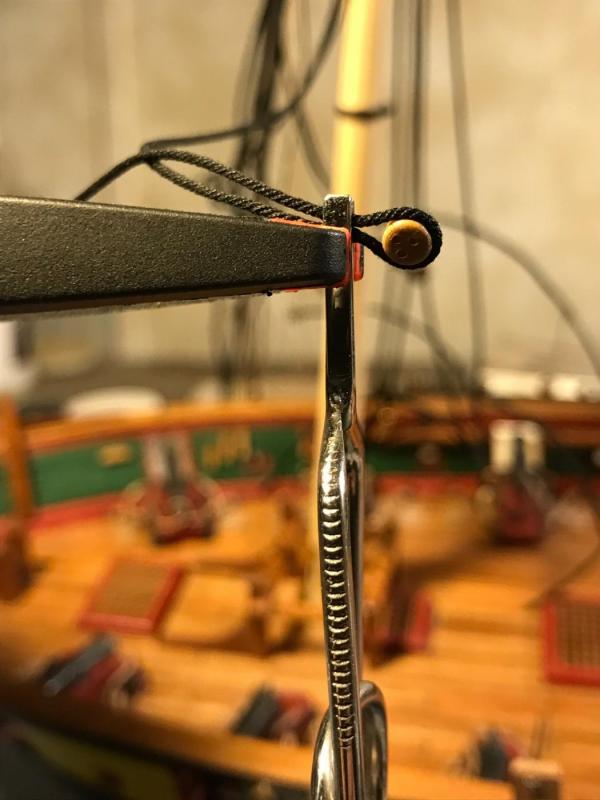
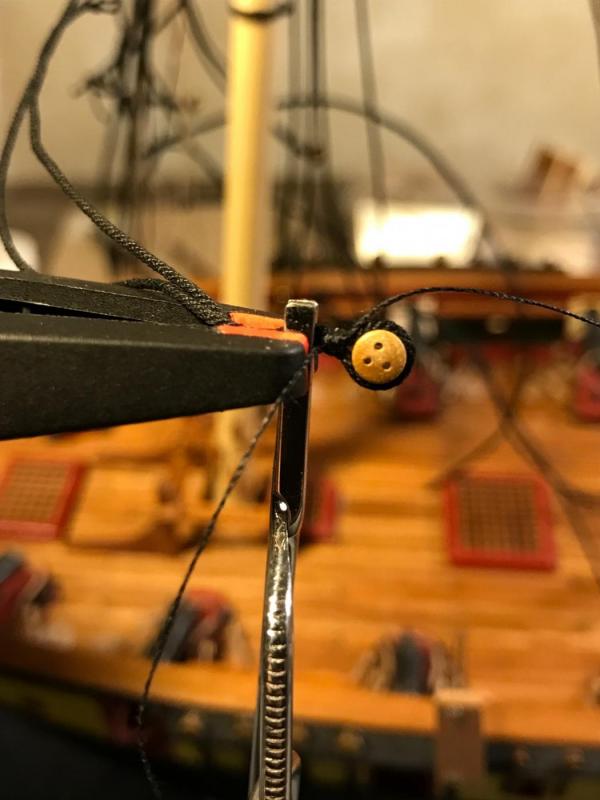
Mike, Here are some photos of the vice set up I used for the deadeyes. The official term for the steel clamp from my fly-tying days is a hackle plier. I use it to clamp the deadeye in place after measuring the line with the jig and then simply insert it all into the spring clamp as per the photo. Makes for a quick and secure base upon which to seize the deadeye in place. The extended spring clamp in the vice gives me the ability to get it in close to the ship to reach the shroud. Happy rigging!
- 843 replies
-
- niagara
- model shipways
-
(and 2 more)
Tagged with:
-
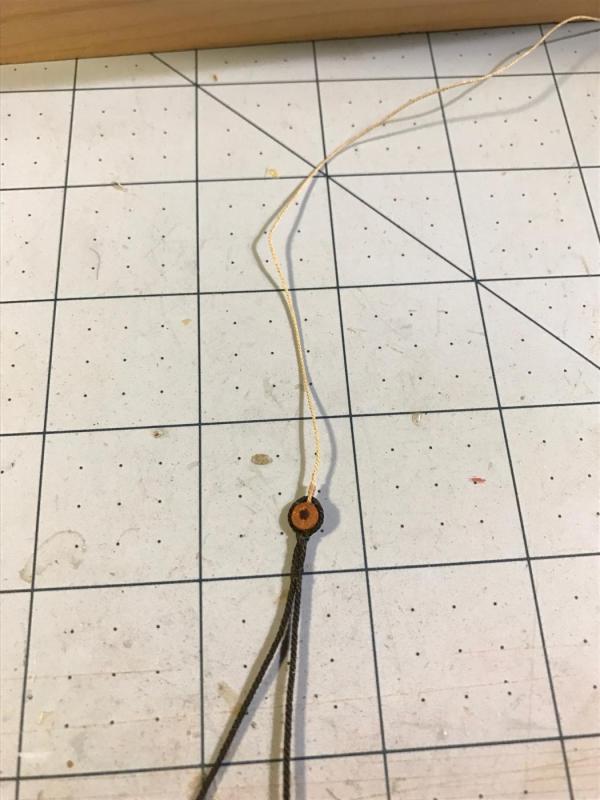
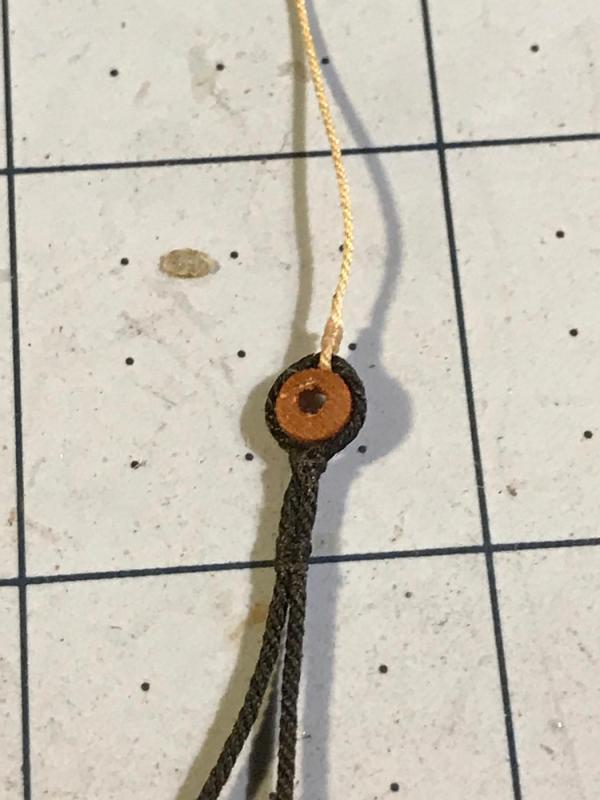
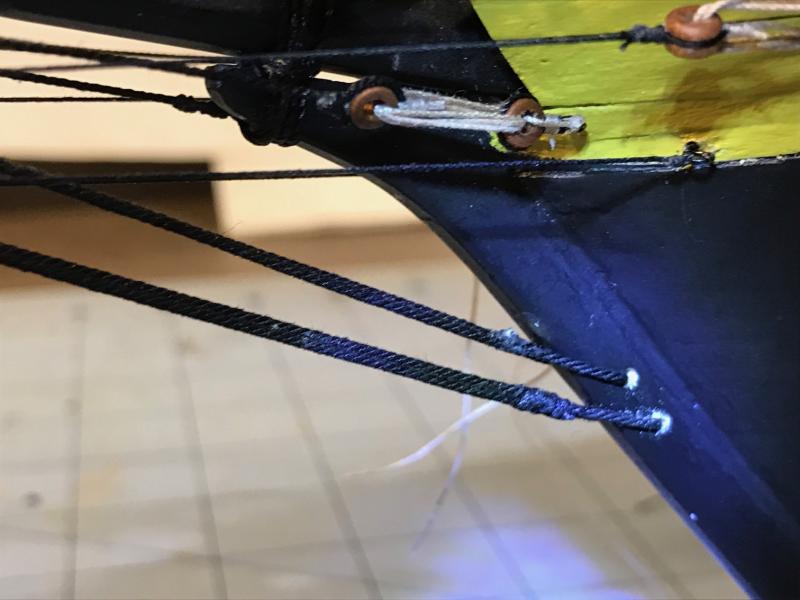
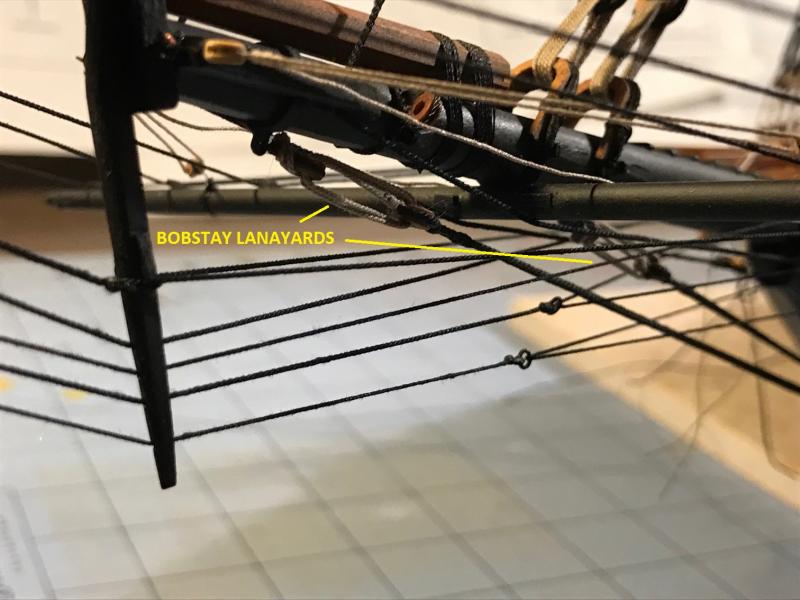
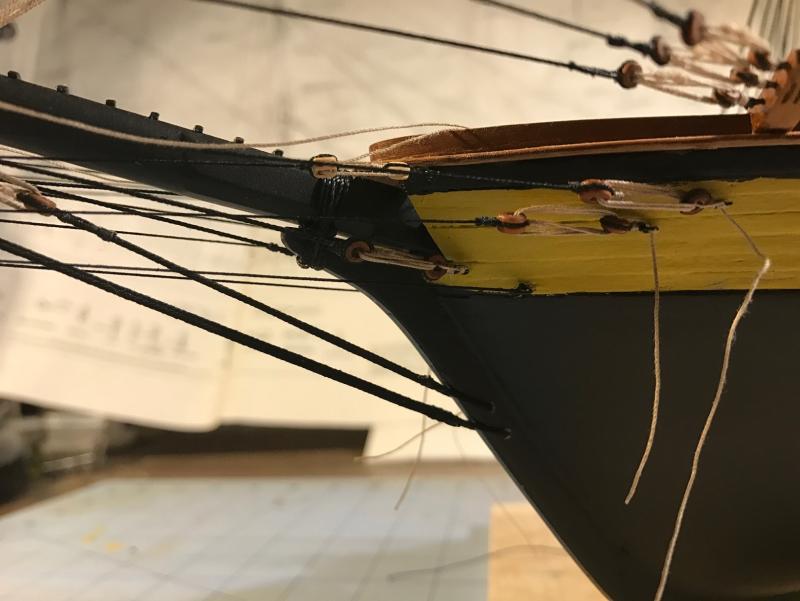
BOBSTAYS A somewhat tricky item. The plans call for a Double line that runs through a hole in the keel to a bullseye under the bowsprit. There are 2 separate bobstays. As I indicated, I should have done these first thing. It would have been much easier with nothing in the way. Since I did all of the stays first, EVERYTHING was in the way. I used .035 Syren black rope (great product). I seized the bullseye first on a long strand of rope. I did this in my vice. Since this would tie to a bullseye previously tied to the bowsprit, I attached a lanyard rope. I used .018 Syren Tan. This is a good time to discuss stropping lanyard ropes to bullseyes. I experimented by tying the lanyards to the fully stropped bullseye as against simply inserting the lanyard between the stropping rope and bullseye and then seizing the connection. Aesthetically, I preferred the later. I am not sure what is the right way. I then threaded the lanyard through the two bullseyes, settling on a proper spacing, and tying the end around the seizing rope on the bullseye on the bowsprit. Once that was done, I ran the other end of rope through the hole in the keel and pulled it away from the ship far enough to put both ends into my vice to seize the connection. This was a bit tricky since the plan called for a double rope. I therefore had to splice the ends together, and at the same time create a seized loop around the keel. I also decided that I would like to lash over the cut end to conceal it. I did my first whipping, kept it loose enough so that I could remove the rope from the vice and carefully pull it tight against the hull without undoing the whipping. Once done, I tightened the whipping, coated the knot with a drop of CA, then carefully cut off the ends of the seizing thread, and VERY carefully cut of the end of the bobstay rope. With the seizing up against the hull, I added a separate seizing/lash to cover the end of the bobstay. VERY difficult. No room and ropes everywhere. The first one took most of the evening. I then worked on the second one, going through the same procedure. Unfortunately, when I threaded the lanyard, tied the end to the bullseye seizing on the bowsprit, and then cut the excess, I must have nicked the seizing. When I attempted to pull the other end through the keel, the seized bullseye on the bowsprit broke free. ARGH. I had about a ½ inch of seizing rope still attached to the bullseye, not enough to wrap around the bowsprit, but enough to sieze to a eyebolt. Sooooo, I tied this off to an eyebolt, and then crawled under my ship – that is I extended the bowsprit out over the bench – and sat underneath it to drill a small hole under the bowsprit. I had to rig a headlight on my forehead in order to see, and carefully pull all of the rigging aside to get to the target. What a pain. I then added a drop of glue to the eyebolt and inserted it. I let it dry, hoping it would hold, and then completed the task. Two bobstays, ONE ENTIRE EVENING.
- 648 replies
-
- niagara
- model shipways
-
(and 1 more)
Tagged with:
-
Mike, I just wound the rope around a scrap of small dowel and did the lashing. That rope was served, so it was pretty stiff and held its round shape pretty well. I guess you would call that an eyesplice.
- 843 replies
-
- niagara
- model shipways
-
(and 2 more)
Tagged with:
-
Mike, If you are talking about how they are attached to the top of the mast - YES you alternate P to S. I thought you were referring to alternating for when you tie them down. This is how I did mine. I think this shows the alternating pattern.
- 843 replies
-
- niagara
- model shipways
-
(and 2 more)
Tagged with:
-
Mike, In answer to your question, YES. Once I did the first whipping, and secured the deadeye, I took the assembly out of the steel clamp and turn it around by putting the deadeye in the black clamp - more secure. I then do the next two whippings. I am left handed, so I pull on the rope with my right hand and hold the seizing loop between my right thumb and forefinger. I then wrap the seizing rope with my left hand, passing it to my right ring and pinky to hold tight, as I reach around with my left hand to complete the wrap. After 6 turns, I pull the end through the loop and pull tight. This can be done in a vice, much harder anywhere else.
- 648 replies
-
- niagara
- model shipways
-
(and 1 more)
Tagged with:
-
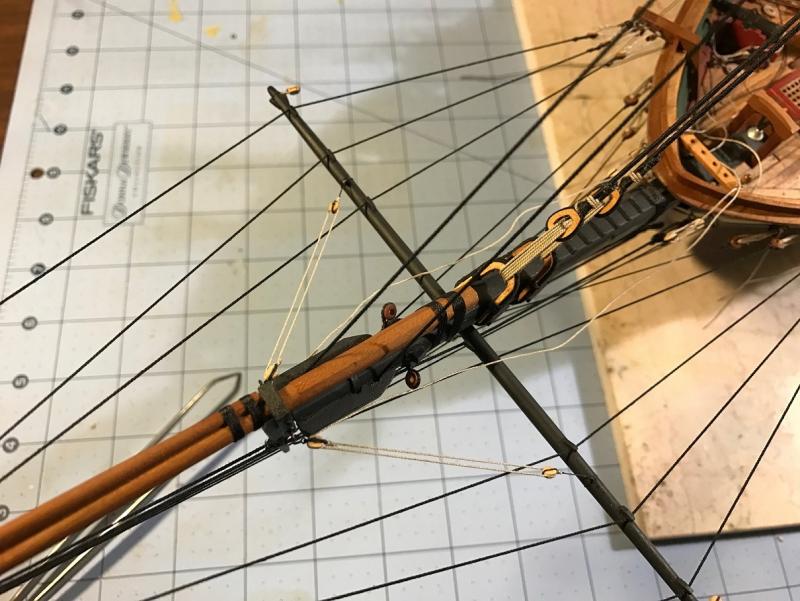
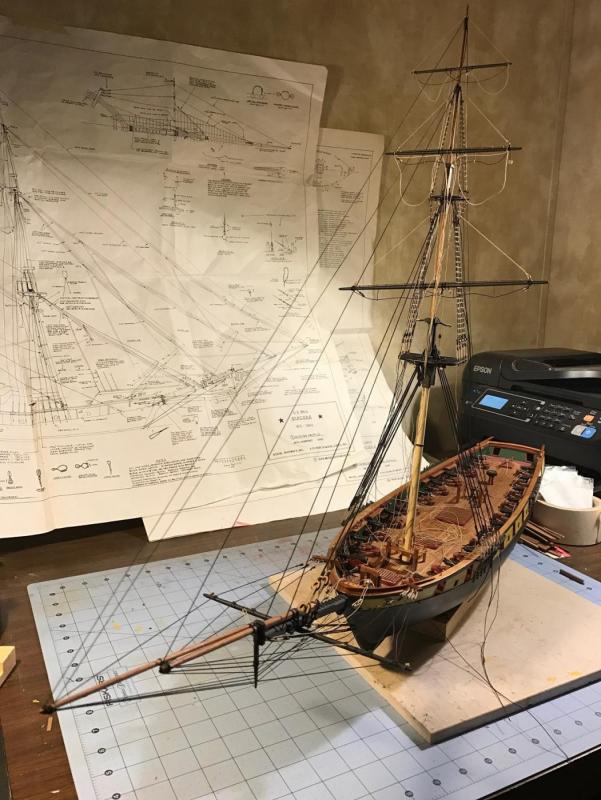
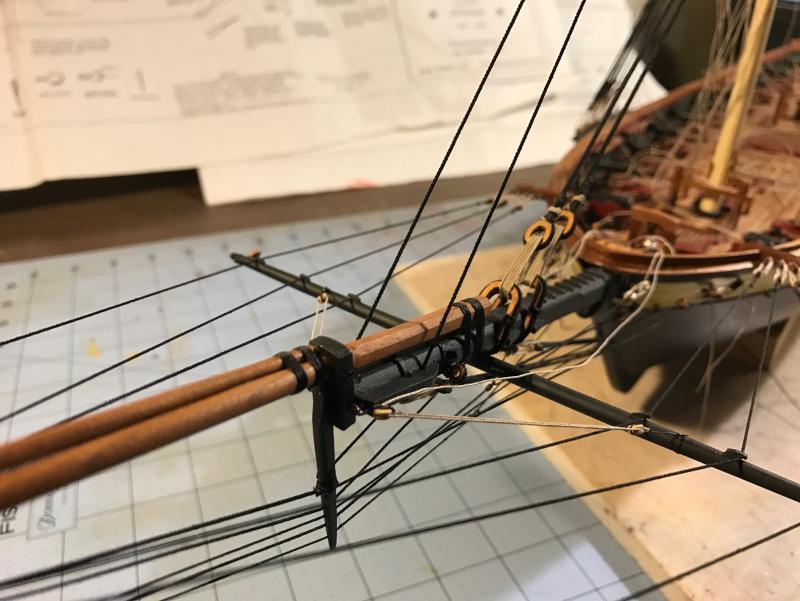
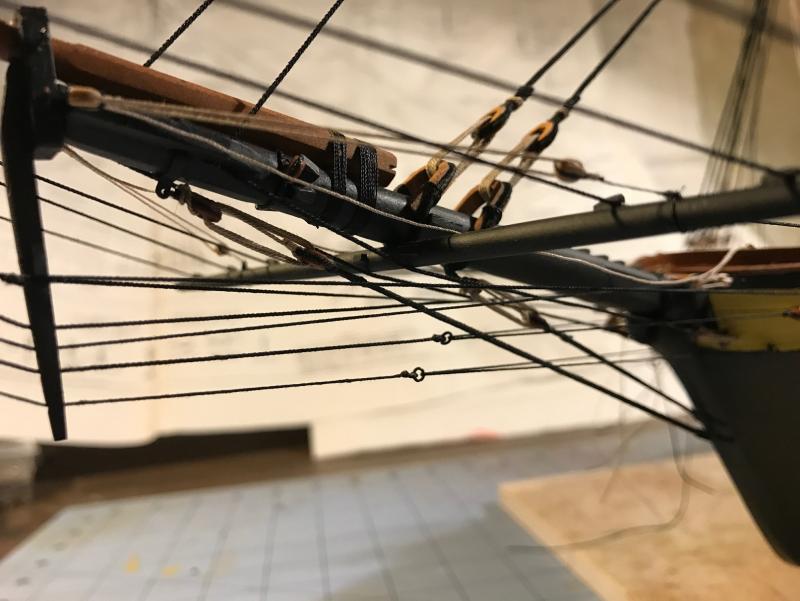
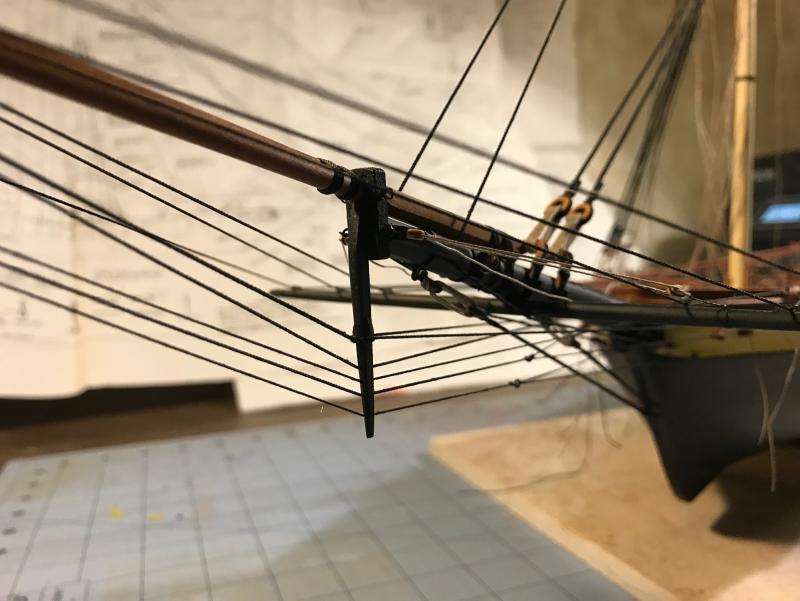
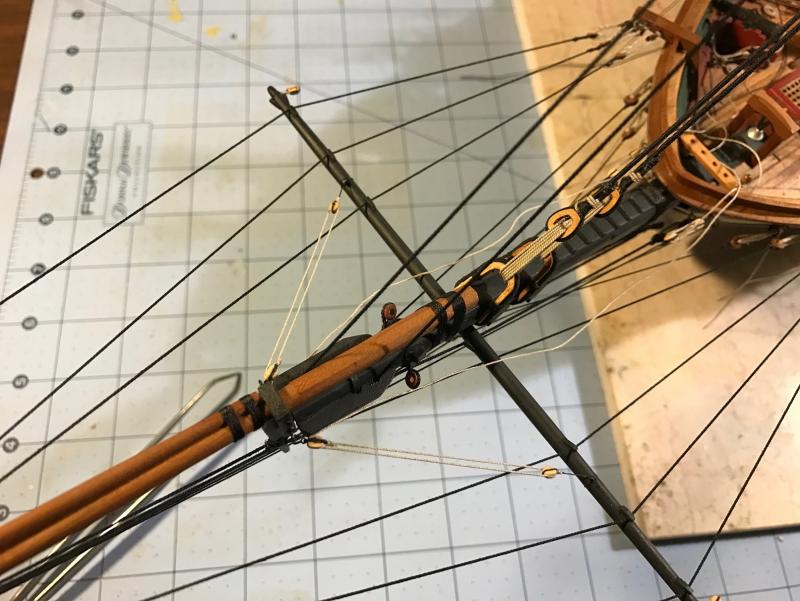
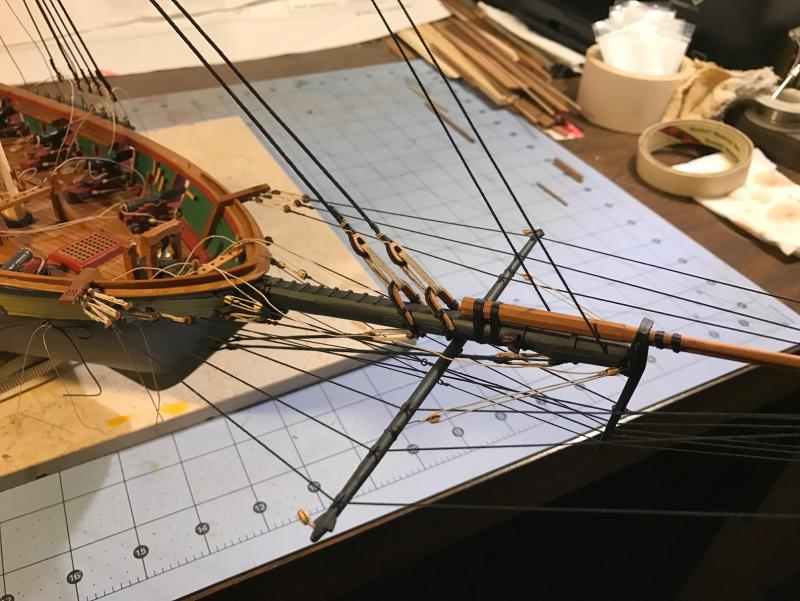
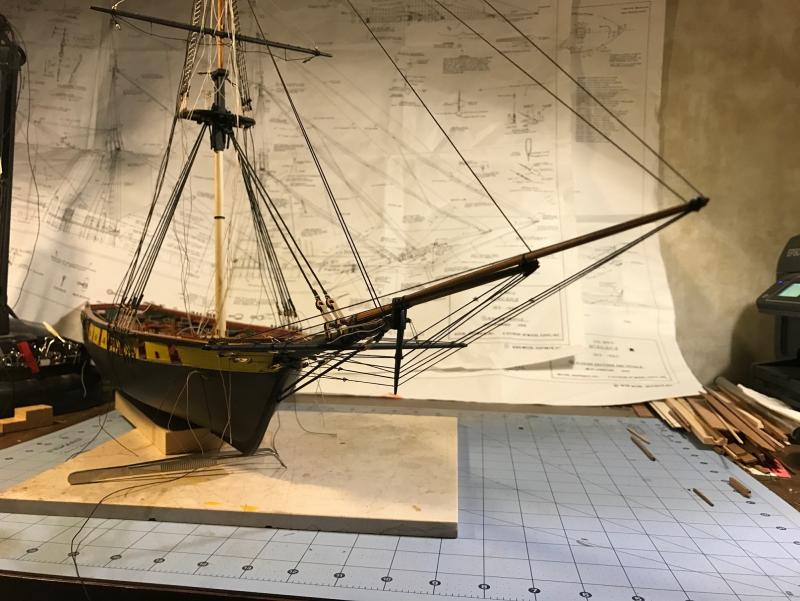
FORESTAYS AND BOWSPRIT RIGGING With my foremast finally in place, I was in a position to begin belaying all of the standing rigging onto the Bowsprit/jib. I worked on this over the holiday weekend and have knocked out about 90%. I am attaching a couple of photos of the finished product, but will break this work down into segments in order to map out how I tackled all of these individual lines . Just some general observations for my future Niagara builders. I gave my order of attack a lot of thought. I tried to figure out what to belay first. I ended up attaching the JIBBOOM GUYS FIRST. There was no method to this madness, other than I had seen that others had done this first. From there, I then attached all of the stays, starting with the FORESTAY and PREVENTER STAYS, and moving up the mast to the TOPMAST STAY, TOPGALLANT STAY, FLYING JIB STAY and ROYAL STAY. I then attached the JIBBOOM MARTINGALE and FLYING JIBBOOM MATINGALE. I then attached the BOBSTAYS. If I were to do this again, I would totally reverse this order of attack. I should have attached the BOBSTAYS FIRST. By the time that I got to them, which run from holes in the keel to the underside of the bowsprit, it was so crowded with stays and guys that it was nearly impossible to tie and manipulate the ropes. More on that challenge later. I would then attach the stays as I did them, bottom (Forestay) to top (royal). Then the martingales. Then LAST, the Guys. The guy lines were in the way during the entire process. I am lucky I did not knock one off. I hit them hard with just about every tool I used on this process. In short, think INSIDE OUT on the bowsprit, and BOTTOM TO TOP on the stays.
- 648 replies
-
- niagara
- model shipways
-
(and 1 more)
Tagged with:
-
Depending on how tight your mast fits in the hull, I would not worry too much about alternating from starboard to port. I thought about that, but did not have any problems. You should not be pulling the shroud lines to hard to line them up. Just snug. That should not pull the mast out of whack. You might want to consider alternating when you tie them down.
- 843 replies
-
- niagara
- model shipways
-
(and 2 more)
Tagged with:
-
Mike, I am not at my bench or I would send you a photo. The metal clamp is from my fly tying days. You can pick up one of these at a sporting goods store. The black clamp with the orange tip is a simple spring clamp that I have mounted to my bench vice. I think you have the same vice. It has a movable swivel head that allows me to sneak it in close to the ship so that I can seize these lines. I clamp the deadeye with the steel clamp, assuring the right distance, and then take the whole assembly over to the bench vice, clamp it in, and tie it up. Quick and pretty accurate since I don't have to handle the deadeye.
- 648 replies
-
- niagara
- model shipways
-
(and 1 more)
Tagged with:
-
Hey Mike, I just posted my method to sieze the deadeyes to the lower shrouds on my log. I am curios to see how your method works out. A word of caution. Don't tie these off. I strongly urge you to tie on all of the upper shrouds and standing rigging lines to your masts, attach the fully rigged yards, and tie on harnesses, lifts, (clews and sheets if you plan on using them) BEFORE you step the mast. I did all of that on my bench. I cannot imagine how hard and time consuming it would have been if I had to do this when the mast was installed on the ship.
- 843 replies
-
- niagara
- model shipways
-
(and 2 more)
Tagged with:
-
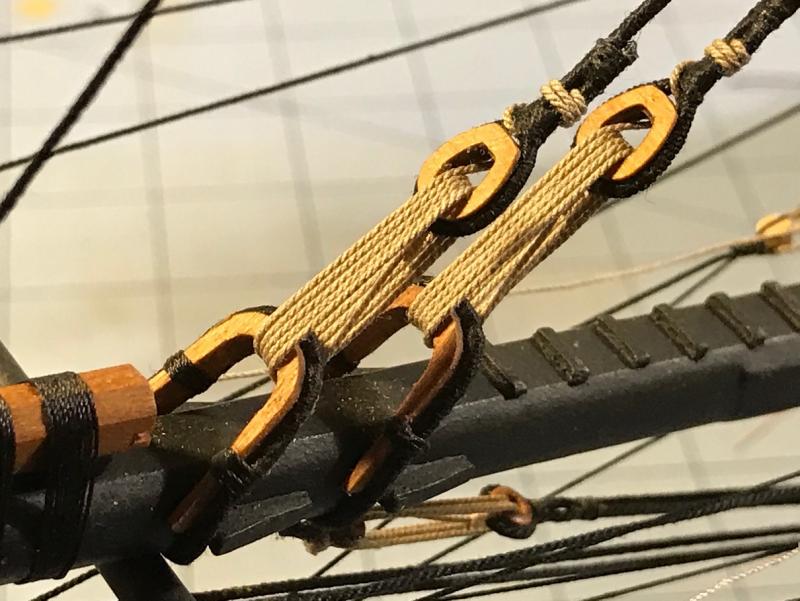
LOWER SHROUDS AND LANYARDS Well, I finally stepped my foremast. I tied as many ropes on as I could figure out (all of the standing rigging and much of the running rigging) and attached all but the course yard. Once in place, I started by connecting the lower shrouds. I created a jig similar to the one I used on the upper shrouds. I pulled the shroud tight, and clipped the deadeye with a clamp. I then took the clamp to my vice, placed next to the ship, and seized the deadeye. I used three whippings on each. My forward shroud line was served, thus the larger diameter. I used .012” rope for the lanyards. I haven't tied them off just yet. My jig worked well and the deadeyes lined up nicely. It was also pretty efficient allowing me to knock this out pretty smartly.
- 648 replies
-
- niagara
- model shipways
-
(and 1 more)
Tagged with:
-
Mike, Great work bench. I agree with Julie. I want to come and build my ship there. My work area is always a mess, and I only have a small tray to place unused items. It gets so bad sometimes that I cover my mess before I take any pictures. I assume all of the cabinets were purchased at Hobby Zone.
- 843 replies
-
- niagara
- model shipways
-
(and 2 more)
Tagged with:
-
To ALL As my son and daughter work their way home from college for the holiday weekend, my family and I would like extend our wishes to my fellow shipwrights and yours to have a wonderful and warm Thanksgiving Weekend. And since I am on the subject, thank you for your guidance and inspiration on this great forum. Cheers to you all, and I hope you find some time to work on your builds this weekend.
- 648 replies
-
- niagara
- model shipways
-
(and 1 more)
Tagged with:
-
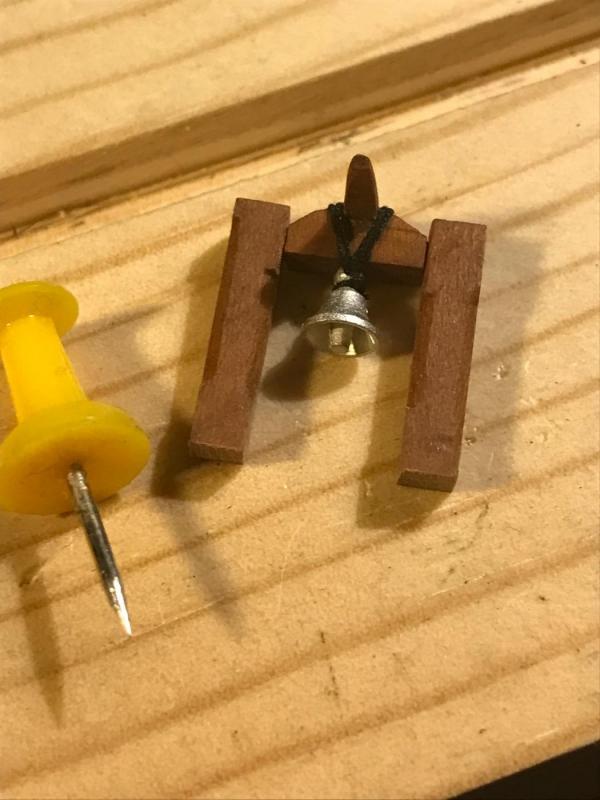
Mike, I don't have the plans with me, but If I recall, the cross member that the bell is strapped to with the handle to ring the bell is pinned between the bits. I used metal wire. The cap is a separate item that is glued to the top of the bits and the entire assembly straddles the Bowsprit. I think I did this according to the plans, but I would not be surprised if I did not, as I have strayed from them before.
- 648 replies
-
- niagara
- model shipways
-
(and 1 more)
Tagged with:
-
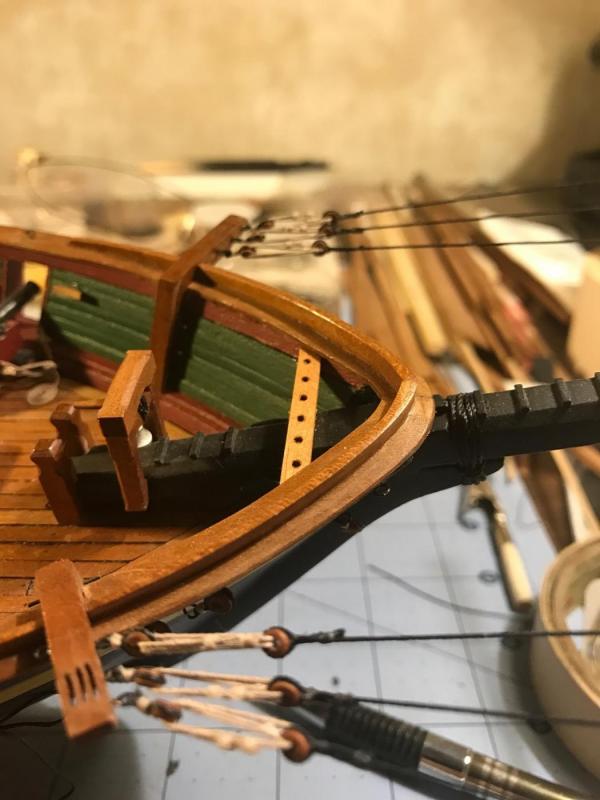
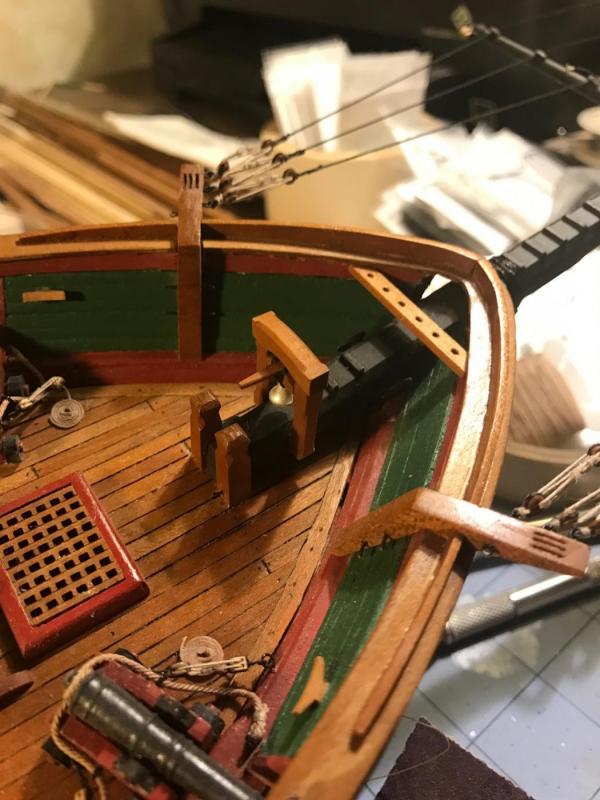
SHIP’S BELL AND FORWARD PINRAIL Before I encase the bow with rigging, I decided I had better finish some of the last tasks on the deck that I have been putting off. I had previously built the ship’s bell framing, but had not lashed the bell and attached it to the Bowsprit. I also had to install the forward pin rail. I built all of this from scratch from my supply of cherry.
- 648 replies
-
- niagara
- model shipways
-
(and 1 more)
Tagged with:
-
All of my kit supplies dowels 1/4 inch or smaller were warped. The "best" one I could find was used for the spanker mast, and I had to straighten it by soaking it a bit, and bending it by hand. Not great but acceptable. Of course, as soon as I stained it, it went back to its original warped shape and I had to "straighten" it again. Acceptable, but a little less so. Still a good kit, just some typical foibles.
- 648 replies
-
- niagara
- model shipways
-
(and 1 more)
Tagged with:
-
Ken, I assume that if you were not going to add sails, that the rings on the spanker mast simply sit there on the ship as you pictured them. I at the very same point on my build and wondered what to do with the rings, as I am not adding sails. I won't ask you what the first thing that goes, as I think I know.
-
I turned all of my masts and yards from square stock on the mini lathe. It took forever, and the scrap pile was large. But now, All of that work is paying off. I have come to realize that all of those octagon shapes that took forever to file by hand are there for a reason. A lot of running rigging is belayed to the "shelves" at the top of the octagons. If I had filed the octagons from the kit supplied dowels, which would have reduced the diameter, there would not be anything to the anchor the rope to. I decided to turn the masts simply for aesthetic reasons. The Cherry tops (oiled) and Holly lowers with the flat black yards creates a great contrast. Gaining a functional advantage was a bonus.. Spending the additional funds for quality blocks and ropes has also made a difference. Joel, You have not sent me to the darkside, but you sure have saved me from it many times. Thanks friend. Bring on your build. I would love to see it.
- 648 replies
-
- niagara
- model shipways
-
(and 1 more)
Tagged with:
-
Mike, Those boats are really neat. You really are a true multi-tasker.
- 843 replies
-
- niagara
- model shipways
-
(and 2 more)
Tagged with:
-
Mike, I understand your frustration, but Joel is right (he generally always is). You have to rig your ship. It is a challenge for sure, but with that comes a great sense of accomplishment. Also, the limited rigging I have completed really brings this ship to life. It is a wonderful look. You have spent too much time and your ship is too beautiful to leave "undressed"
- 648 replies
-
- niagara
- model shipways
-
(and 1 more)
Tagged with:
-
Joel, I am definately banking on the experience gained on the foremast to guide me through the work on the main mast. It is however pretty daunting as I look at the "very bare" main mast knowing that it has taken me nearly an entire month to just to get the foremast to this point. I am trying my best to hit the authenticity marks. Thanks for noticing. As for speed, it must be in the eye of the beholder. This work takes forever. I spend hours just looking over the plans before I even pick up a tool or a piece of rope. I feel like I am going at an excruciating slow pace, like I have strapped on full sails, with stunsails and royals, and am only making 7 knots when I feel like I should be cruising at 25 knots. Scott, The decision to use tan ratlines was based on a few points. I understand that standing rigging was tarred in order to preserve the rope fibers, ergo the black look. My amateur research indicated that ratlines were not always tarred. I perused a number of build logs and found that many shipwrights used tan ratlines. Aesthetically, I very much like the look and contrast in colors. Spacing was based on using a 14inch range transferred over to the 1/64 scale.
- 648 replies
-
- niagara
- model shipways
-
(and 1 more)
Tagged with:
-
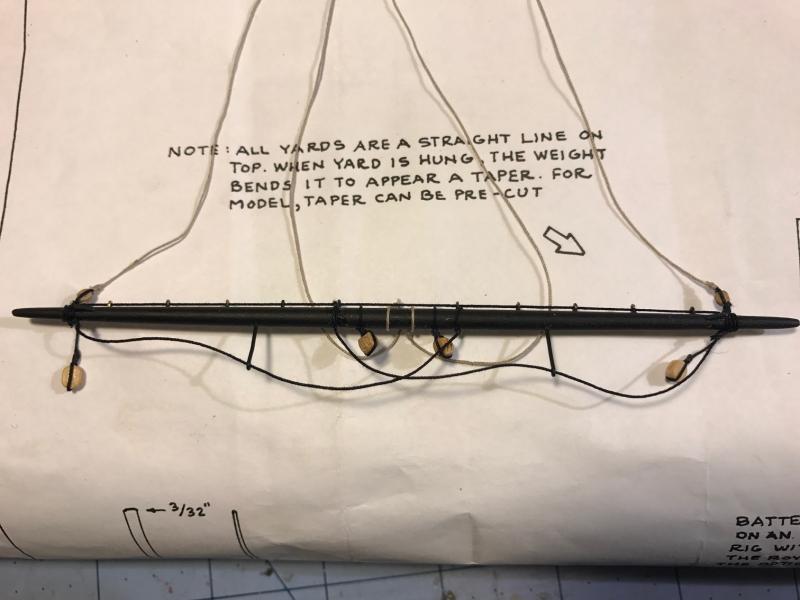
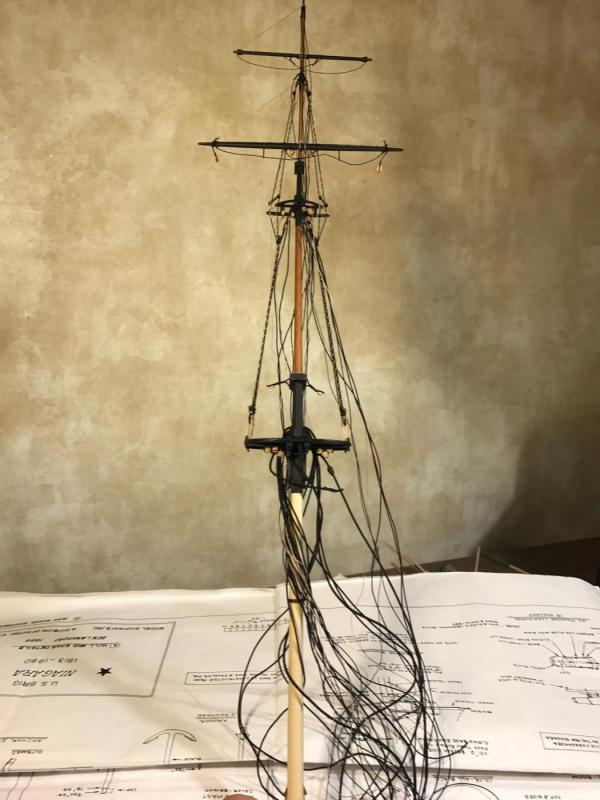
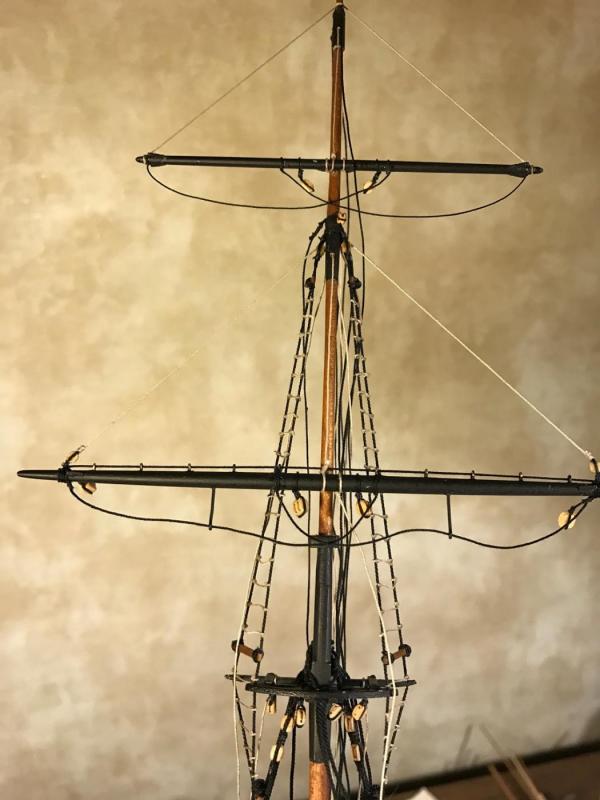
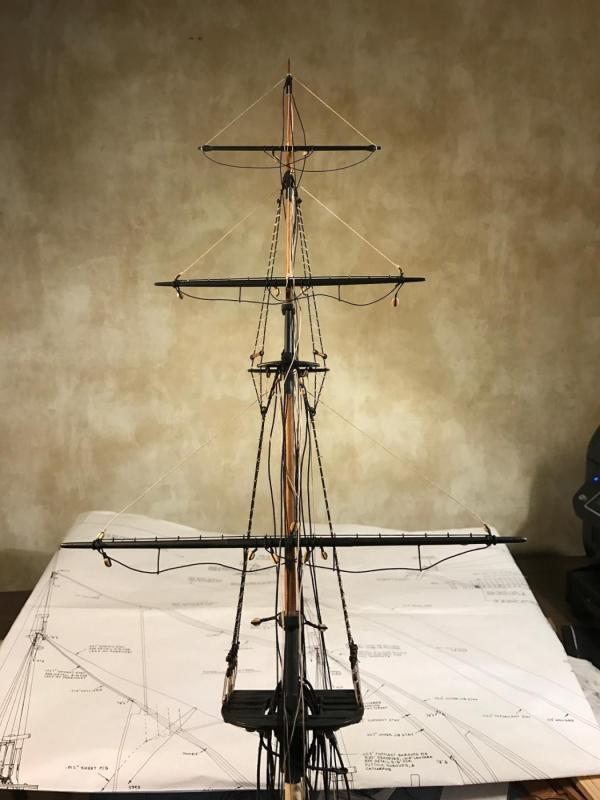
ROYAL, TOPGALLANT, AND TOPSAIL YARDS In another small milestone, I dressed up and hung the Royal, Topgallant, and Topsail yards on my foremast in a lowered position. I started with seizing all of the blocks to the yards by stropping them on a vice and slipping them over the yards. I seized blocks in my lift lines and tied bracing blocks. Once they were all attached, I then installed the footropes and jack stays. I pinned the yards to the mast with straight pins and a drop of CA. The lift lines were then belayed to best secure them. I seized all of the blocks for the clewlines, sheets, and buntlines, even though I am not going to attach any sails. My plan is to run rigging to these blocks and tie them off on the yards somewhere. I believe I have now reached a point where I will be stepping my foremast to the ship. That will then allow me to tie off the front stays and finish the bowsprit rigging and attach my lower shrouds and ratlines. If I attach the course yard in advance, I think it will be in the way when I work on the shrouds and ratlines. I will prepare the mast and yard with the pin in advance so that the installation will be as easy as possible. The size of the bird nest of loose rope is alarming. There is plan for all of this... I think!!!
- 648 replies
-
- niagara
- model shipways
-
(and 1 more)
Tagged with:
-
Mike, I "whip" as many knots that way as I can. My strategy on seizing stays and shroud lines to the masts by doing them in a vice and slipping them over the mast in a systematic planned method allows me to use these whippings. I can tie these knots pretty well in a vice, not so much so on a mast. All of my blocks are stropped with whippings. They look much better and hold better. I freeze all of my knots with CA. On some seizings directly to mast heads or the jib, I have actually glued the rope down without any knot, just a single wrapping. I try to avoid that, but have a few. I attached the royal yard last night and just about fully prepared the topgallant yard and will be attaching that later today. I should have some photos for you.
- 648 replies
-
- niagara
- model shipways
-
(and 1 more)
Tagged with:
About us
Modelshipworld - Advancing Ship Modeling through Research
SSL Secured
Your security is important for us so this Website is SSL-Secured
NRG Mailing Address
Nautical Research Guild
237 South Lincoln Street
Westmont IL, 60559-1917
Model Ship World ® and the MSW logo are Registered Trademarks, and belong to the Nautical Research Guild (United States Patent and Trademark Office: No. 6,929,264 & No. 6,929,274, registered Dec. 20, 2022)
Helpful Links
About the NRG
If you enjoy building ship models that are historically accurate as well as beautiful, then The Nautical Research Guild (NRG) is just right for you.
The Guild is a non-profit educational organization whose mission is to “Advance Ship Modeling Through Research”. We provide support to our members in their efforts to raise the quality of their model ships.
The Nautical Research Guild has published our world-renowned quarterly magazine, The Nautical Research Journal, since 1955. The pages of the Journal are full of articles by accomplished ship modelers who show you how they create those exquisite details on their models, and by maritime historians who show you the correct details to build. The Journal is available in both print and digital editions. Go to the NRG web site (www.thenrg.org) to download a complimentary digital copy of the Journal. The NRG also publishes plan sets, books and compilations of back issues of the Journal and the former Ships in Scale and Model Ship Builder magazines.


