-
Posts
543 -
Joined
-
Last visited
Content Type
Profiles
Forums
Gallery
Events
Everything posted by 6ohiocav
-
1.Rope .008, .012, .018, .025, .035, and .045 in black and brown 2.5mm and 7mm closed hearts (I have not used any of the 5mm hearts yet) 3.3/32, 1/8 and 5/32 single and double blocks. 4. Brass hooks 5. 7mm wooden cleats I can tell you that I have used a ton of .012 tan rigging. The plans call for nearly all running rigging and lanyards to be of .010 to .014 tan rope, so I have used .012 to do the trick. I strop all blocks with .012 black rope I have also used a lot of the 1/8 blocks, double and single.
- 648 replies
-
- niagara
- model shipways
-
(and 1 more)
Tagged with:
-
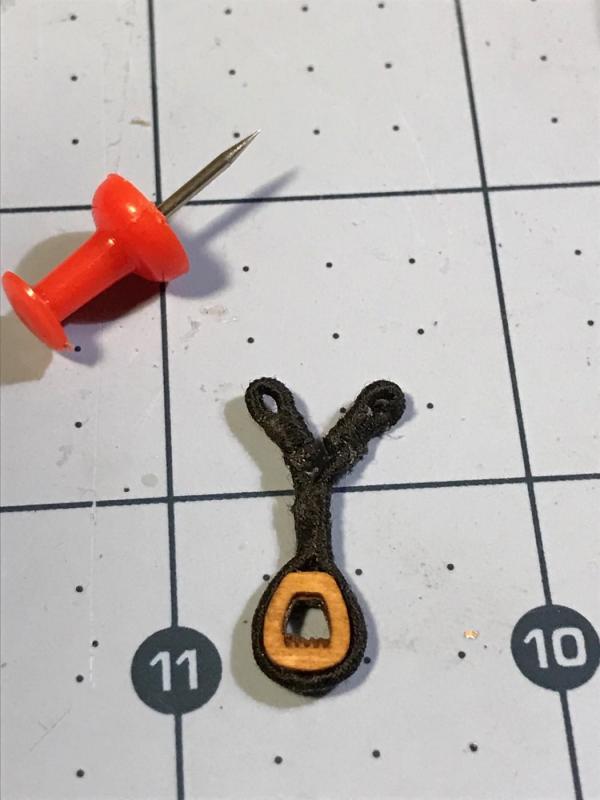
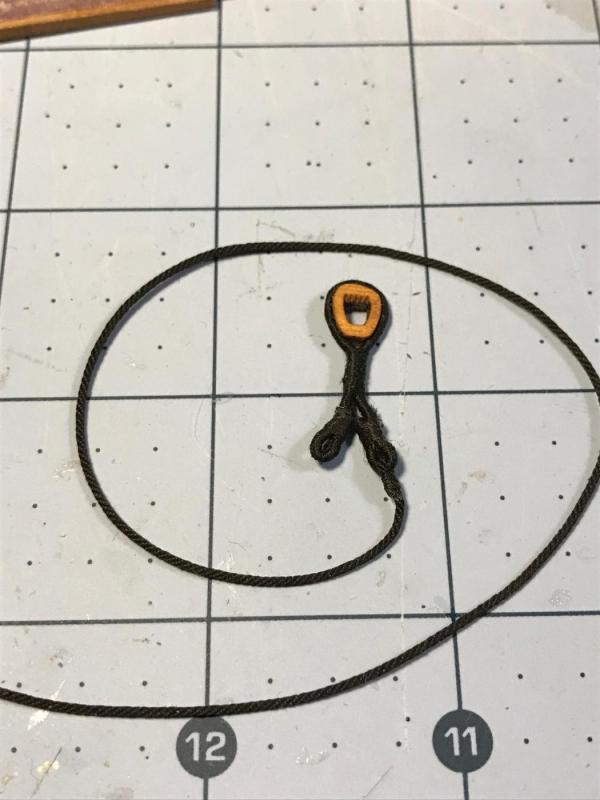
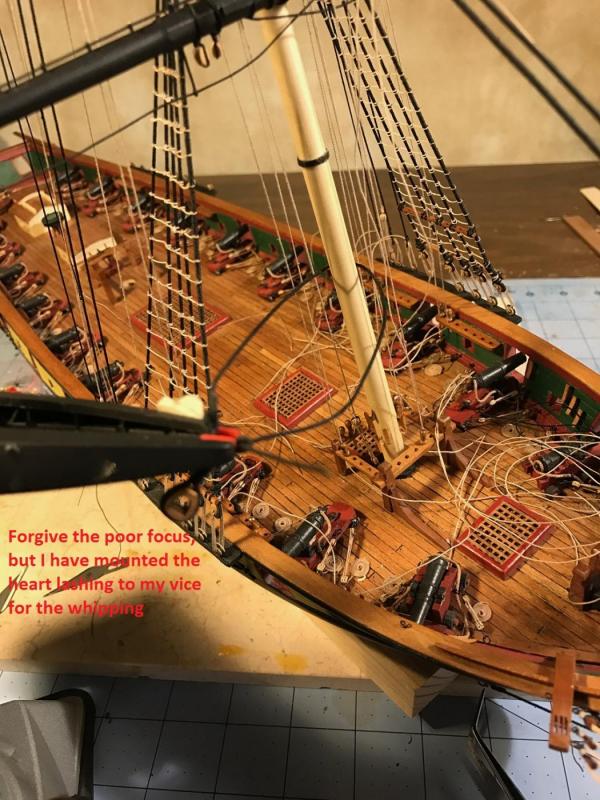
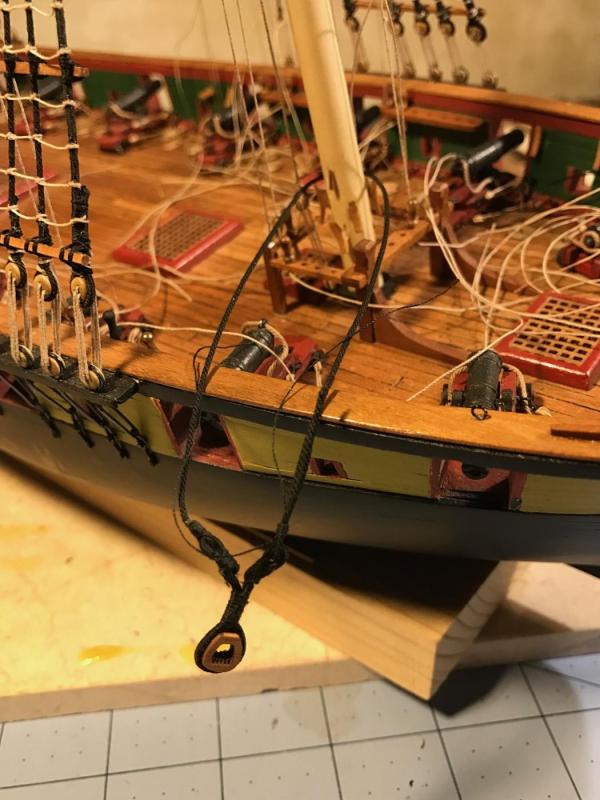
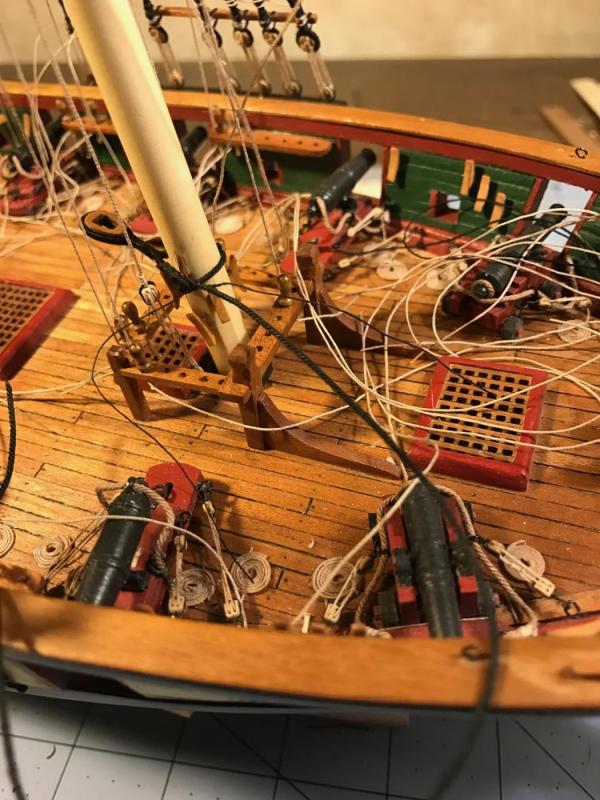
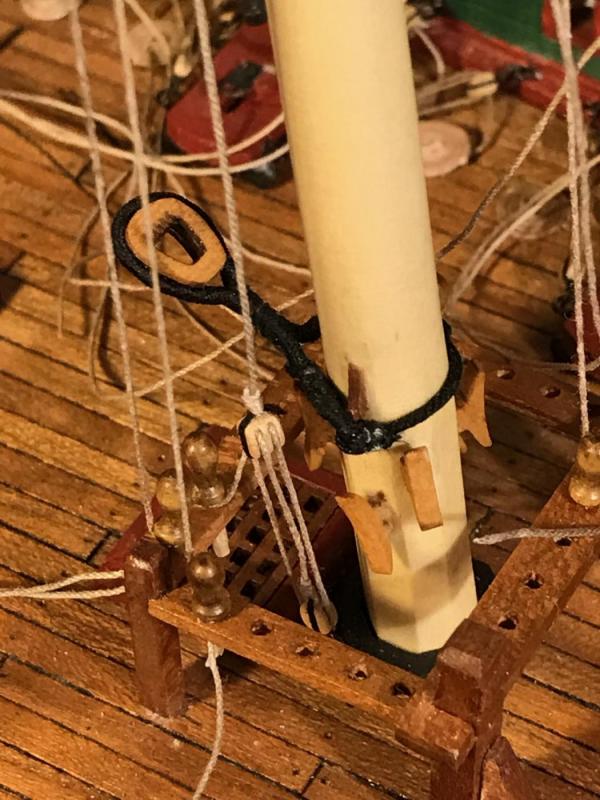
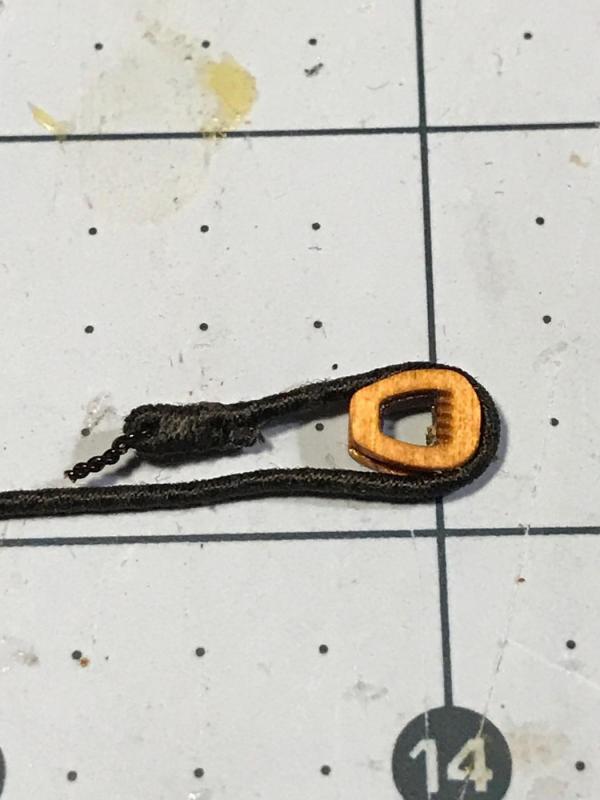
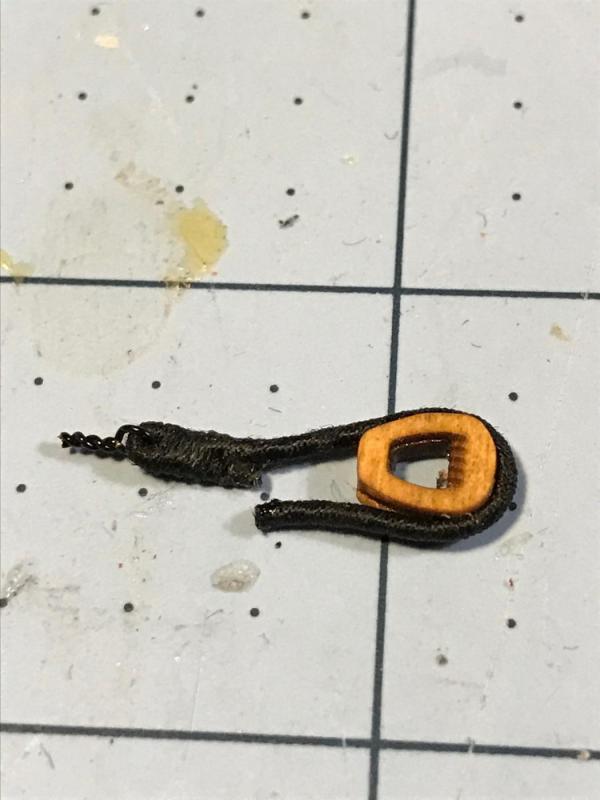
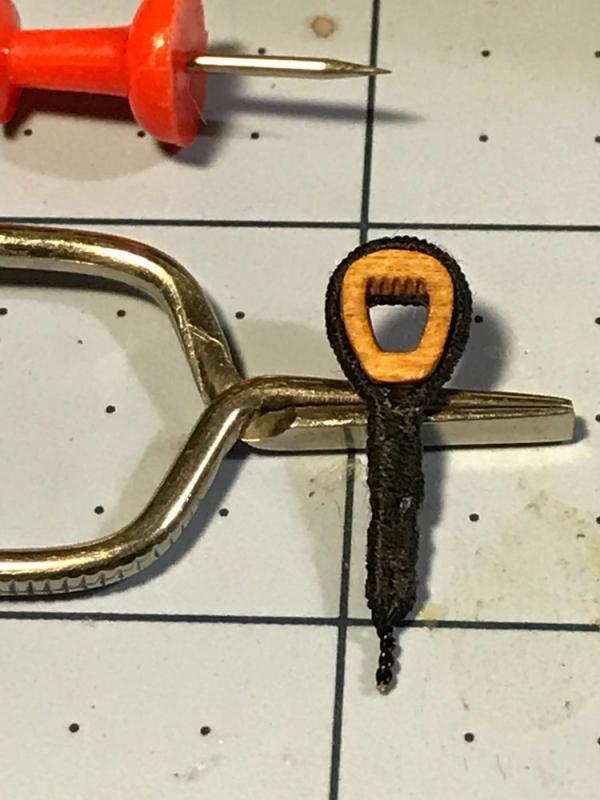
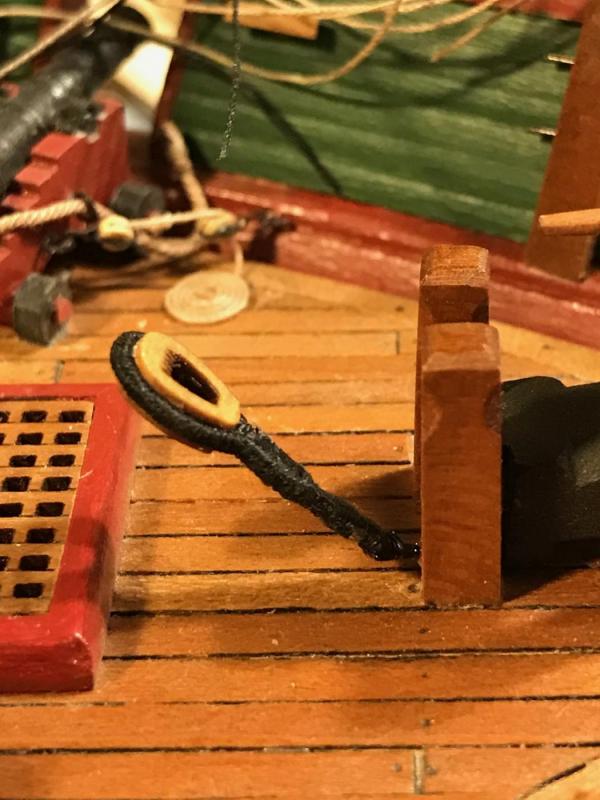
MAIN STAY AND MAIN PREVENTER STAY Shifting my attention to the main mast, I began work on the lower shrouds and main and preventer stays. Of course, reviewing the plans reminded me that the main stay is attached to a closed heart that is lashed to the fore mast – and I SHOULD HAVE DONE THAT BEFORE I STEPPED THE FOREMAST. The preventer stay is seized to an eye bolt on the forward bit. With the pin rails surrounding the foremast, and running rigging all over the place, lashing a closed heart to the foremast was a challenge. Here is how I accomplished this. AGAIN, this should have been done while working on the foremast. 1. I started with a .045 rope that I served. I stropped it around the closed heart and created two eye splices, per the plans. 2. I then took a long length of .035 unserved rope and seized the end to one of the eye splices with a standard whipping. 3. Here is the tough part. I then positioned the heart around the mast, and ran the .035 rope through the other eyes splice. I choose a long enough strand of rope to allow me to pull the end out away from the ship to reach my spring clamp mounted in my vice. 4. I then tied a standard whipping, keeping the knot loose. 5. I took the rope out of the vice, and carefully, by alternating gentle pulls on both sides of the rope, eventually snugged the lashing up to the mast. Once done, I attached a small drop of CA on the knot, and very carefully cut off the tail. The photos below show this process. The preventer stay was much easier, but again, should have been installed before I stepped the foremast. The plan provides that the preventer stay is wound to a closed heart that is attached to an eyebolt secured in the forward bit. I again started with a served .045 rope. I ran it through a hand twisted eyebolt, then wrapped it around the heart. Because the rope is very thick, I decided that I did not want to lash it to “itself” – making a overlarge and cumbersome knot. I elected to cut the end, and fuse it with a lashing. I drilled a hole in the bit, applied a drop of CA on the eyebolt and installed the completed assembly. The photos better describe this process.
- 648 replies
-
- niagara
- model shipways
-
(and 1 more)
Tagged with:
-
Don, Bravo. Your ships wheel is simply exquisite. Love the paint job and the detail on your deck furniture too.
- 653 replies
-
- trabakul
- marisstella
-
(and 1 more)
Tagged with:
-
Hi Steve, No wax. I have not seen a need to use it. Syren's rope is really fine. I read that you should use bees wax on ratlines so that you could impute sags, but i opted not to. The pattern I used for the ratline knots created natural looking sags. Should I use wax?
- 648 replies
-
- niagara
- model shipways
-
(and 1 more)
Tagged with:
-
A balmy 5 degrees here and going below 0 tonight. But I work inside in my den so warm and toasty.
- 648 replies
-
- niagara
- model shipways
-
(and 1 more)
Tagged with:
-
Mike and Pete, No special tools. I use a set of bent end tweezers, small bent needle nose pliers, (for when I need to clamp down on something like a loose end that needs tightening), my portable vice where I mount a small wooden block with two wire ends used to seat blocks for stropping on one end, and on the other end of the vice, a spring clamp ( I will shoot you a photo when I get back from the office. I call it my stropping and lashing station), and the Syren Serving Machine. I frequently use my hackle vice to keep lines tight when necessary, or when I need to lash deadeyes and bullseyes, as indicated in previous posts. As for rope, all of it is from Chuck Passaro's Syren Company. You can find a link on this website. All of the size references are to his products.. I also purchased all of the blocks, open and closed hearts, brass hooks and wooden cleats from him. I have been able to mill my own bullseyes. I have probably doubled the cost of the kit with all of the aftermarket parts, but the quality is outstanding, makes the end product look much cleaner and sharp, and therefore in my opinion, worth the cost. We are absolutely getting hammered with a winter storm this weekend in NE Ohio. It is a good time to work in the shipyard.
- 648 replies
-
- niagara
- model shipways
-
(and 1 more)
Tagged with:
-
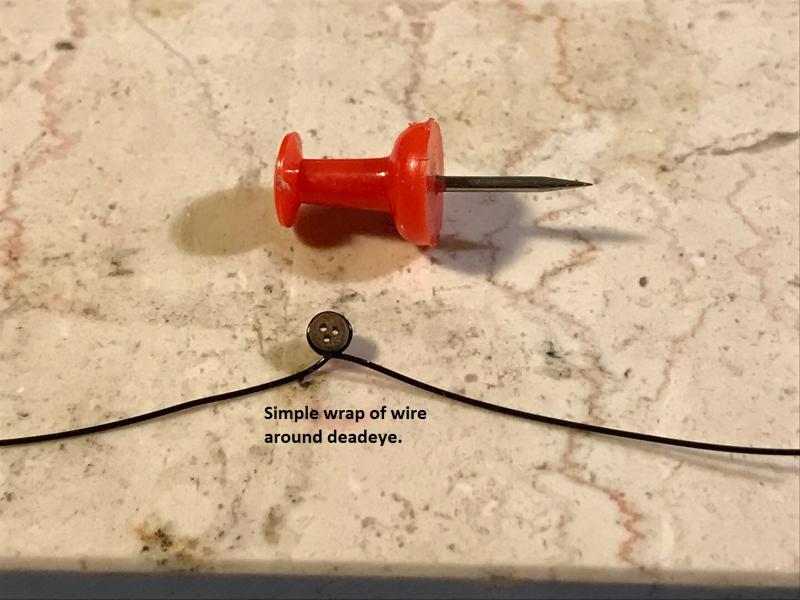
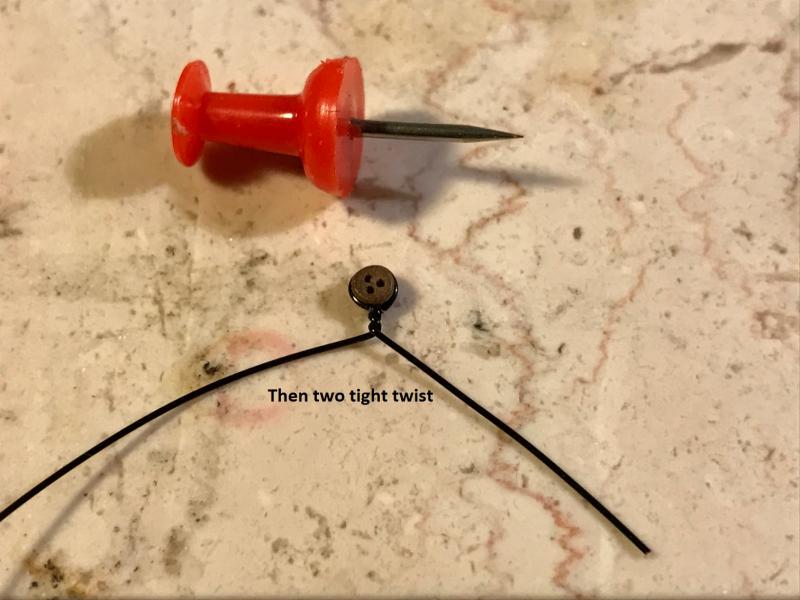
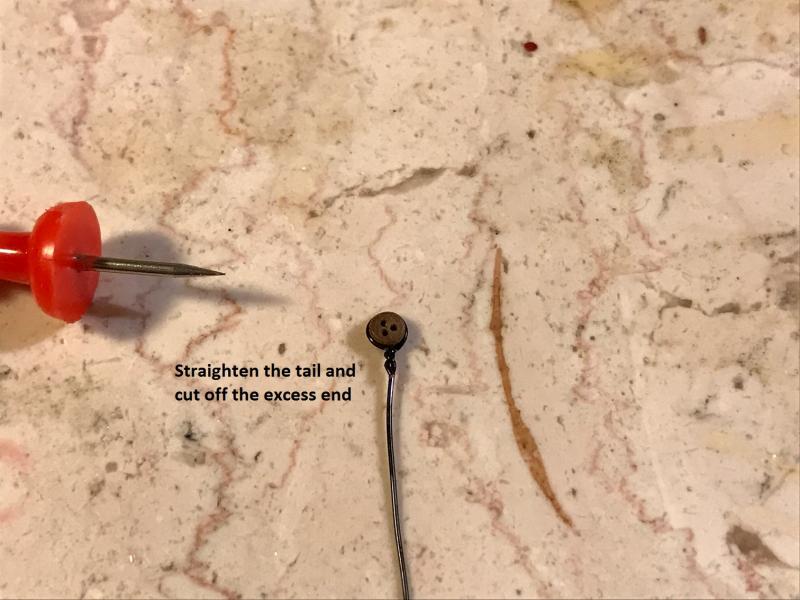
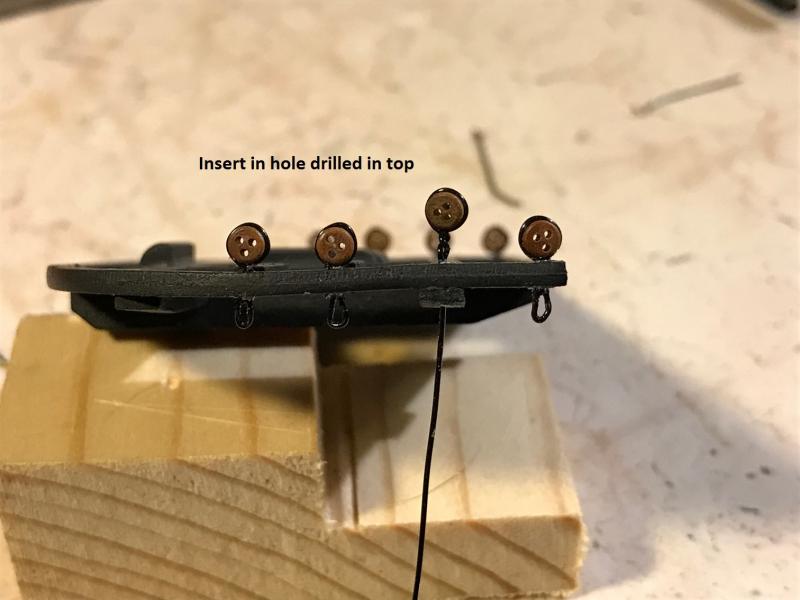
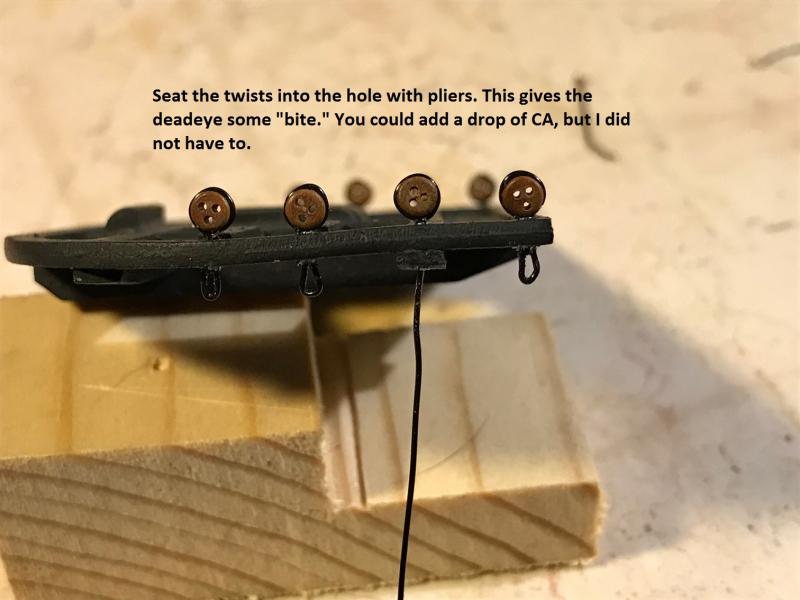
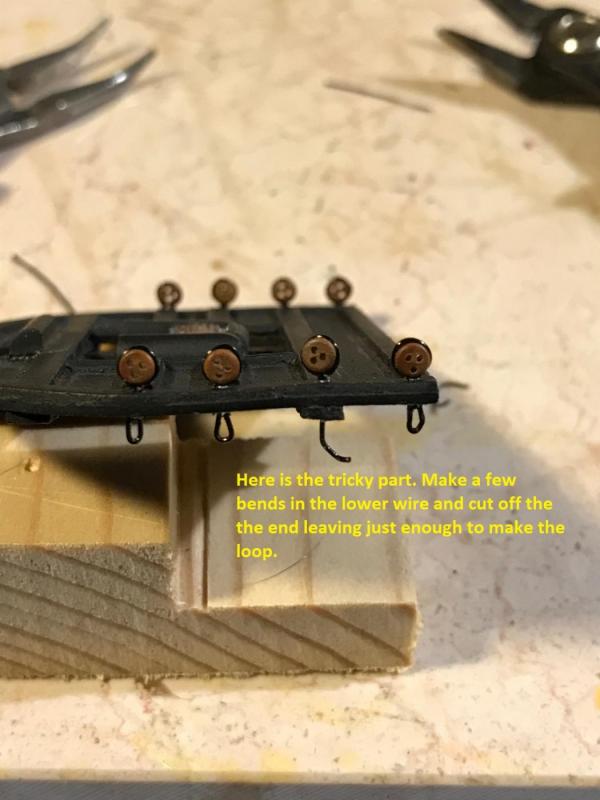
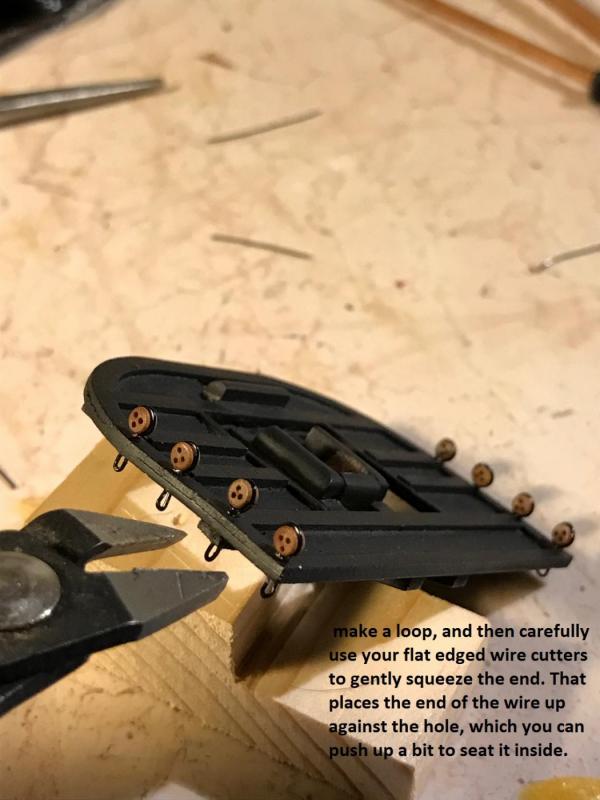
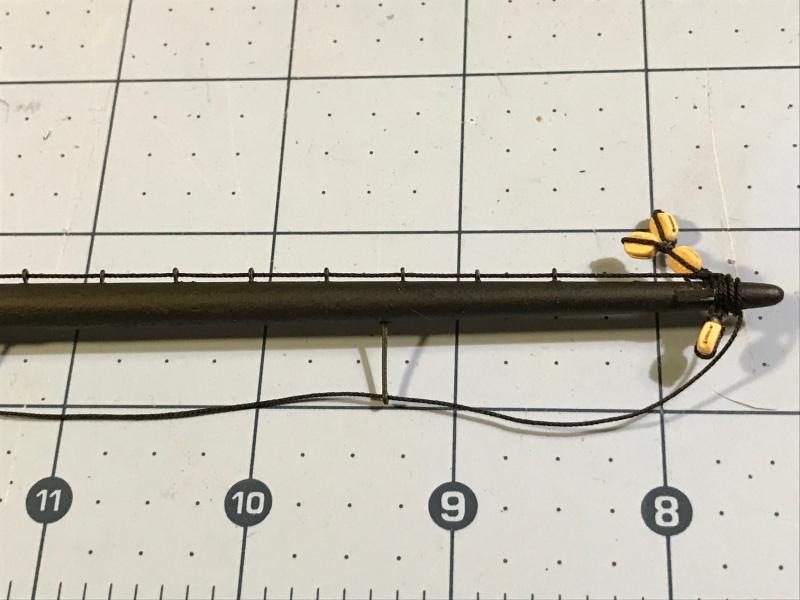
MAIN MAST UPPER DEADEYES Having now done this on the Foremast, I sort of fell into a technique that may be of some help to the family of Niagara builders out there. The Niagara calls for four, upper shroud 3/32” deadeyes, port and starboard, to be seated in the top with a loop underneath to accept the futtock lines and hooks that are tied off to the main shrouds. Here is how I did mine. I use a .26 gauge wire for the stropping process. It is the same wire I use for my eyebolts. I also use the same drill bit I use to do holes for the eyebolt. The pictures tell the story.
- 648 replies
-
- niagara
- model shipways
-
(and 1 more)
Tagged with:
-

American sailing warships with no plans or records
6ohiocav replied to CharlieZardoz's topic in Nautical/Naval History
I believe the Constitution build referred to is this one, starting at post 469. Exquisite work indeed. http://modelshipworld.com/index.php/topic/11935-uss-constitution-by-xken-model-shipways-scale-1768/page-24- 401 replies
-
- John Adams
- Alliance
-
(and 3 more)
Tagged with:
-
Hi Mike, I definitely would choose the same order of things, with the modifications I noted in the log. I have turned my attention to the main mast, and will be repeating the procedure steps, with refinement. I hear you on the photo. However, I am finding all kinds of hidden faults when I view my photos. I already know that I am going to have to do some touch painting, but have resigned myself to patiently wait until the very end. Scott, I have to honestly say that I was intimidated by this part of the build, and have now come full circle. I very much enjoy rigging this great ship. My knowledge of how a 19th Century sailing ship worked has greatly increased. I have also improved my knot tying skills (which is not hard since I had none when I started). The real challenge has been navigating through the plans and instruction book. I hope that my experience and the many mistakes I made will help fellow Niagara builders overcome any misgivings with this part of the build. Once you get started, the beauty of each line that you install will carry you forward.
- 648 replies
-
- niagara
- model shipways
-
(and 1 more)
Tagged with:
-
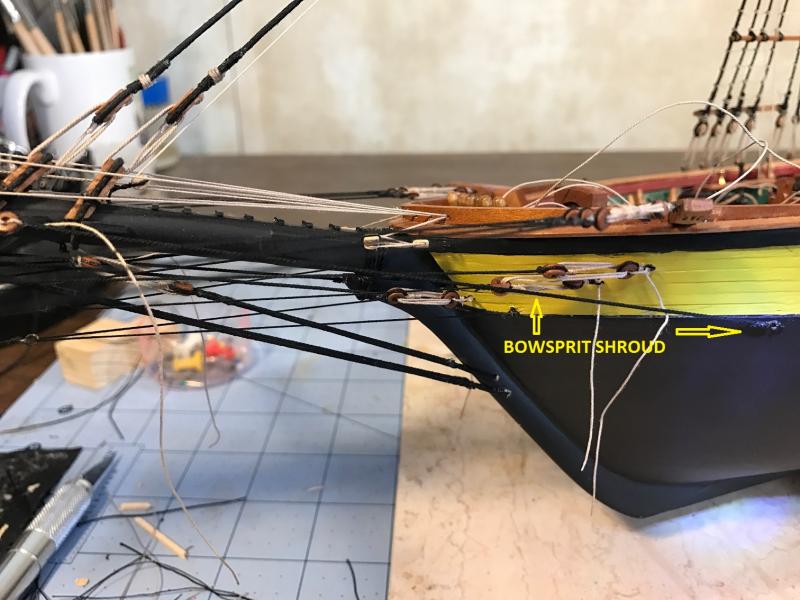
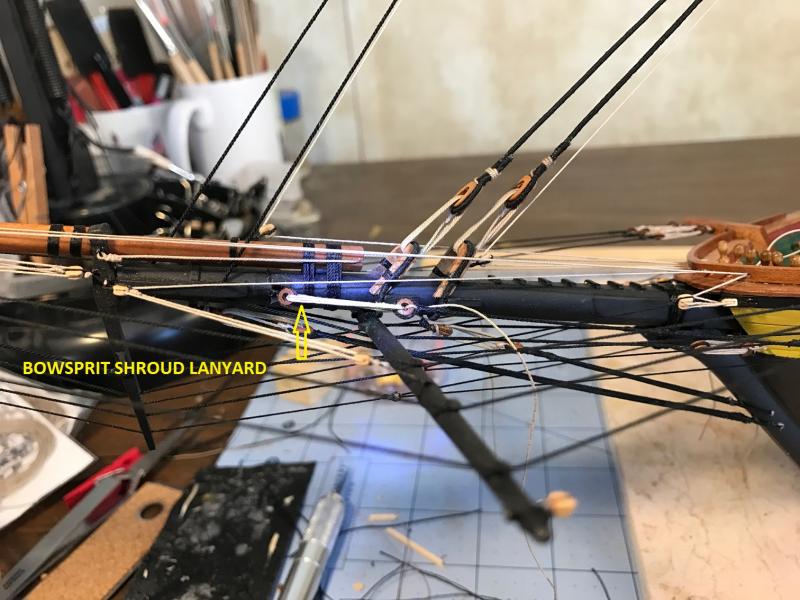
BOWSPRIT SHROUDS Just a quick update as I go through the plans and pick up some things that I misses at the bow. I installed the bowsprit shrouds. I used a .025 black rope with a blackened black hook seized to one end and hooked to an eyebolt on the side of the hull. The other end was lashed to a bullseye. I had to make up another batch of cherry bullseyes on my mini lathe (see previous post). I seized a .012 tan lanyard to the bullseye and wound it to the bullseyes lashed to the bowsprit. Another tedious endeavor. The Bowsprit/jib is a very complicated place with ropes and lines going in every direction. The good news is that I believe I have completed all of the rigging up front and as far as I can tell, no line is rubbing up against its neighbor.
- 648 replies
-
- niagara
- model shipways
-
(and 1 more)
Tagged with:
-
Mike, This is really coming along nicely. Great bucket! How does it feel to work in a macro world?
- 143 replies
-
Joel, Well said my friend. I have made a number of such changes in routing. Currently, my royal sheets and clews pass through the fairlead on the lower shrouds, through the ratlines, and belay to the pin rail. None of the lines are permanently secured. I pass them through the holes in the pin rail, and secure them by wedging a pin in the hole. It allows me to undo them, which I have had to do a number of times to eliminate chafing. So far, so good The mighty essence of this ship is beginning to take the stage, and I must say, it is great to behold. I am just about ready to break out the main mast. It is still in pieces and looks totally naked compared to its sister. The thought of doing this herculean task all over again is pretty overwhelming.
- 648 replies
-
- niagara
- model shipways
-
(and 1 more)
Tagged with:
-
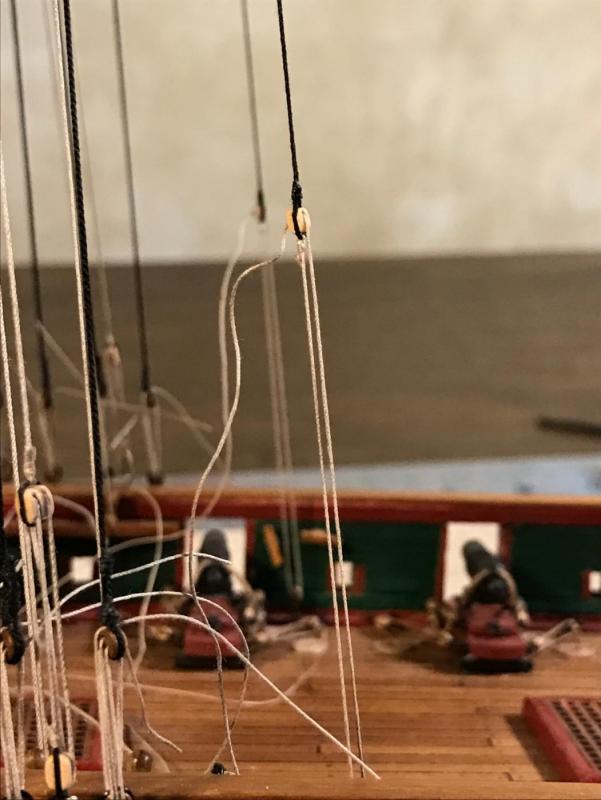
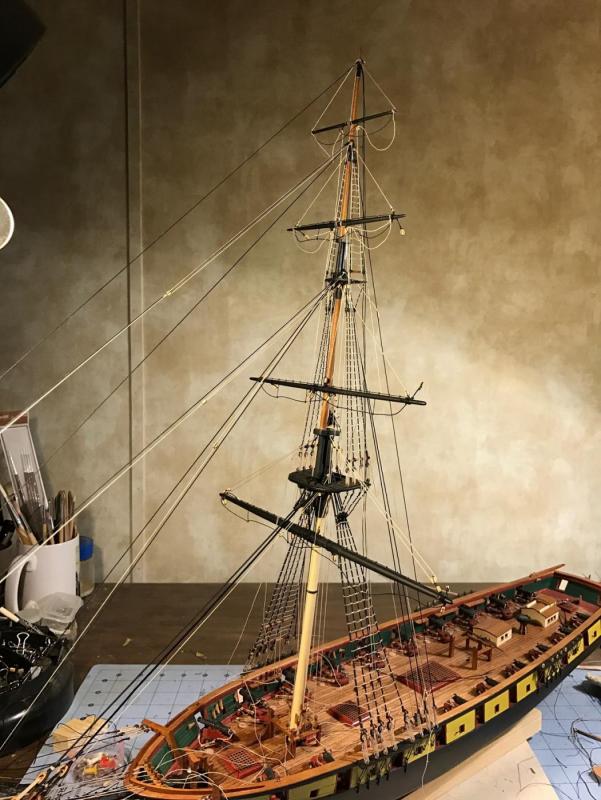
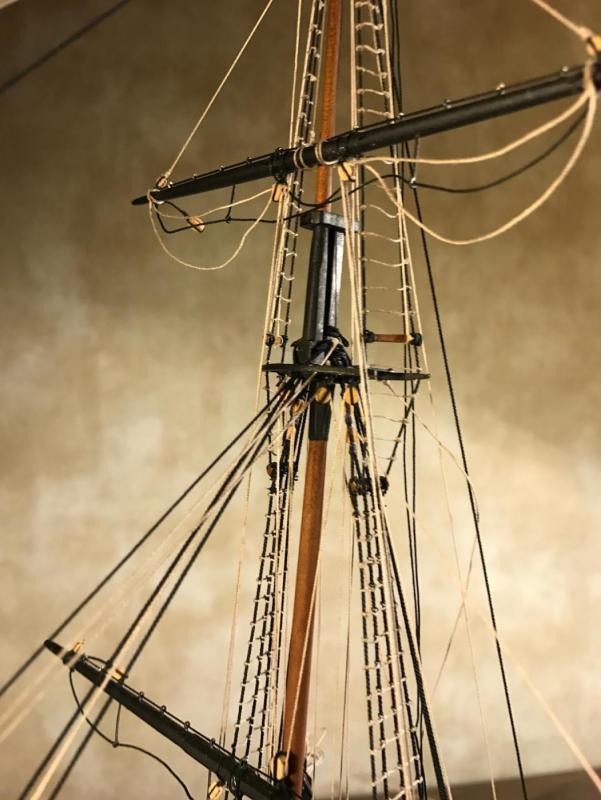
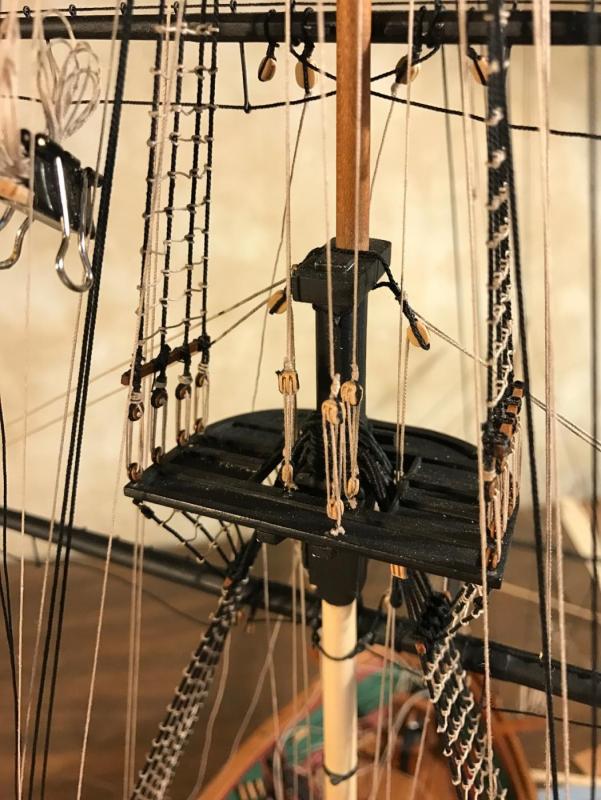
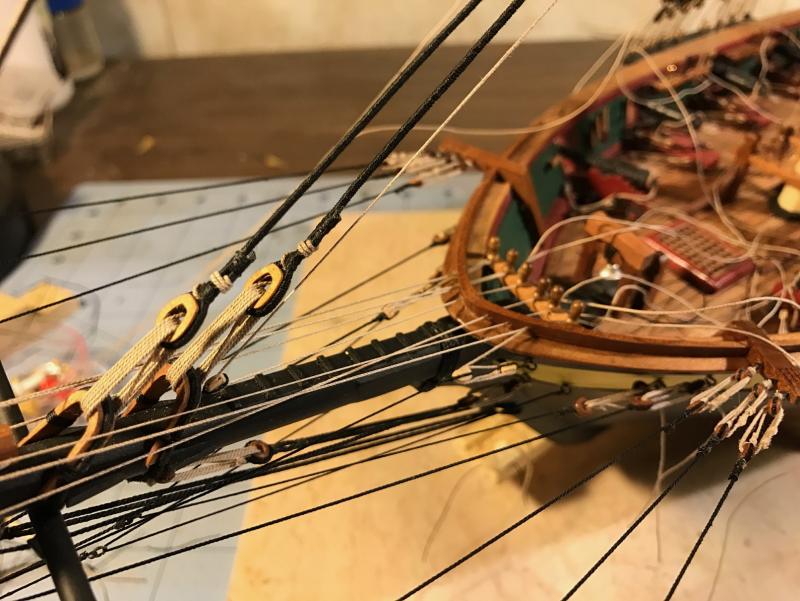
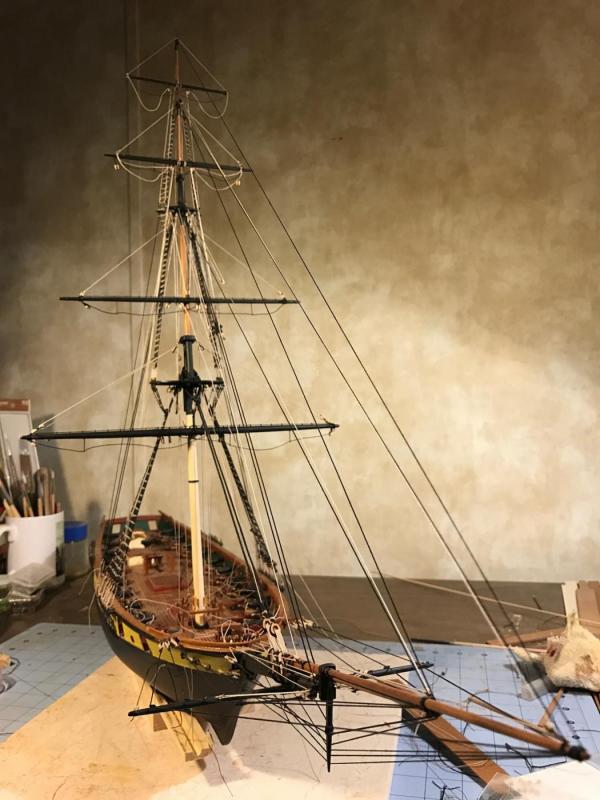
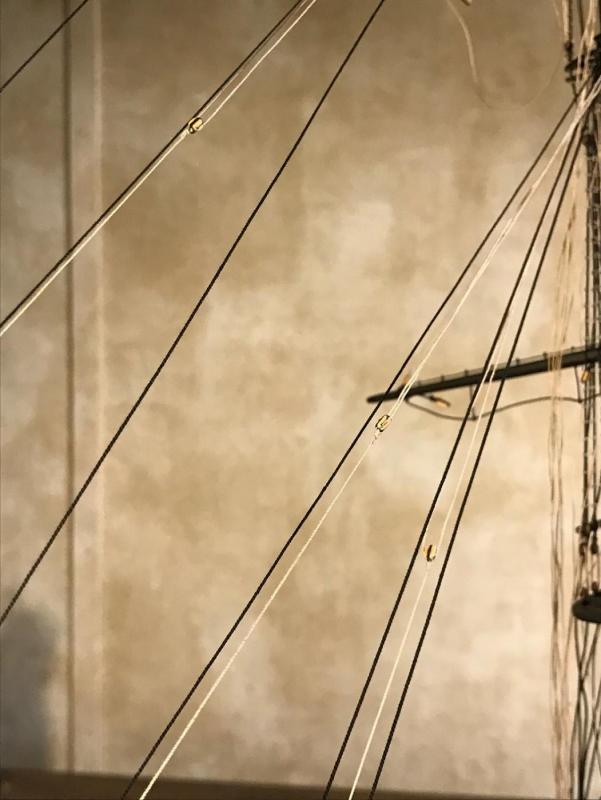
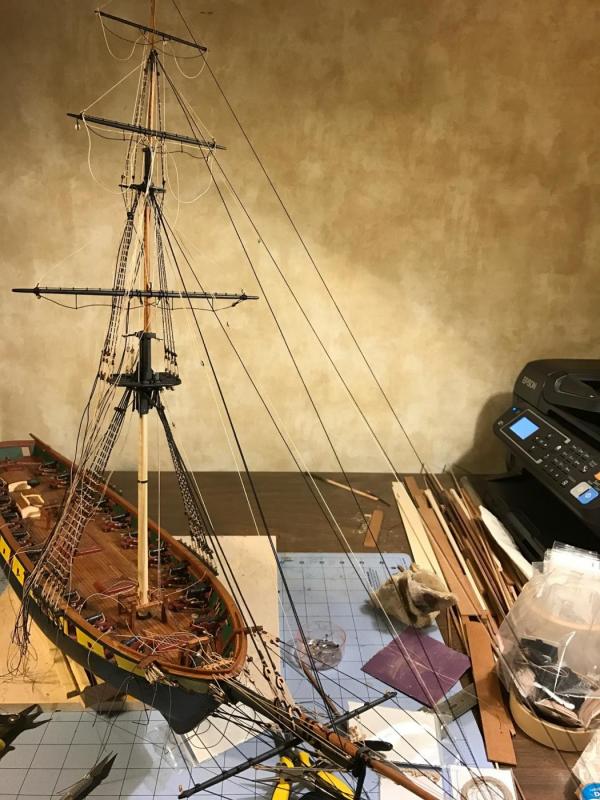
BELAYING FOREMAST STAYS AND RUNNING RIGGING With the course yard in place, it was time to finally time to “tie up some loose ends” – actually, a lot of loose ends. On the Foremast Back Stays, from top to bottom: 1. Royal Back Stay – Seized to top of the mast and belayed to a tackle hooked to waterway eyebolt. 2. Top Gallant Backstay – Seized to mast and belayed to deadeye on channel 3. Topmast Backstays (2) – Seized to mast and belayed to deadeye on channel On the Foremast Running Rigging, from top to bottom: 4. Royal Halliard – belayed to the lower stave 5. Royal Clew Line – tied off at end of the royal yard, left slack, and belayed to the lower stave 6. Royal fixed lift – tied off at top of mast and end of royal yard. 7. Royal Sheets – tied off on end of t’gallant yard, routed through block in shrouds, and belayed to pin rail on deck. 8. Top Gallant Tye – wound around t’gallant yard and seized to a tackle attached to lower top. 9. Top Gallant Lift – Tied to end of t’gallant yard and routed through block in shroud and belayed to lower stave. 10. Top Gallant Clew – Tied to end of t’gallant yard, left slack, routed through block on yard (held with a knot) and belayed to pin rail on deck. 11. Top Sail Lift – Tied to end of top sail yard and routed through block in shroud and belayed to tackle on lower top. 12. Top Sail Clew Lines – I seized the blocks with the clew lines to the top sail yard, but have not figured out what to do with them. Per the plans, they run to blocks lashed to the course yard and back up to the seized block on the top sail yard. On the Bowsprit, all routed through holes in the chock rail and belayed to pins in the forward pin rail 13. Jib Stay Halliard 14. Outer Jib Stay Halliard 15. Inner Jib Stay Halliard 16. Fore Stay Halliard 17. Spritsail Yard Lift 18. Top Gallant Stay Leads Still to do (or figure out) 1. Top Sail Sheets, 2. Course Sheets. 3. Course Clew lines. I am not sure this is correct. It is the best I could do in my interpretation of the plans. I have not completely decided to do with the buntlines, reefs, and leechlines – except to eliminate them. By adding the clew lines and sheets, I have at least added some of the running rigging for sails that will not be added to the ship . Here is a series of photos that show you where I am at presently. The steps in this post took a solid 5 days to complete.
- 648 replies
-
- niagara
- model shipways
-
(and 1 more)
Tagged with:
-
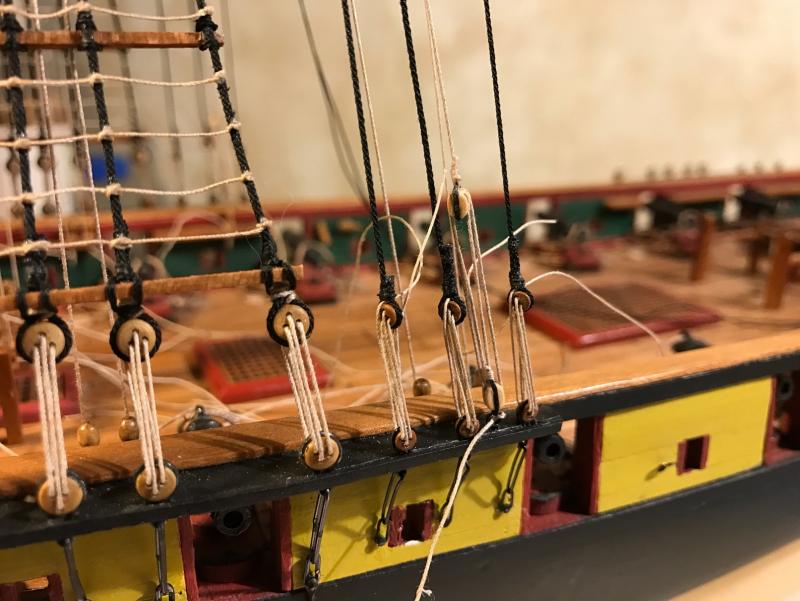
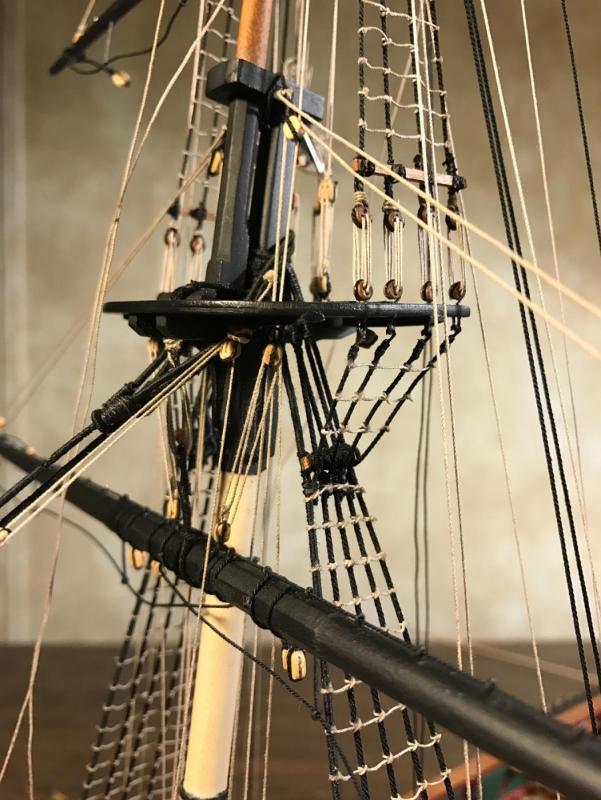
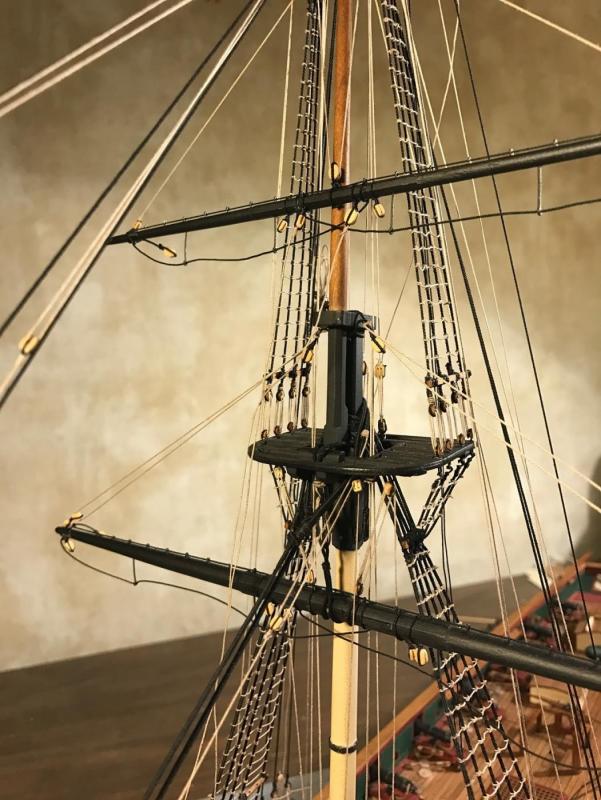
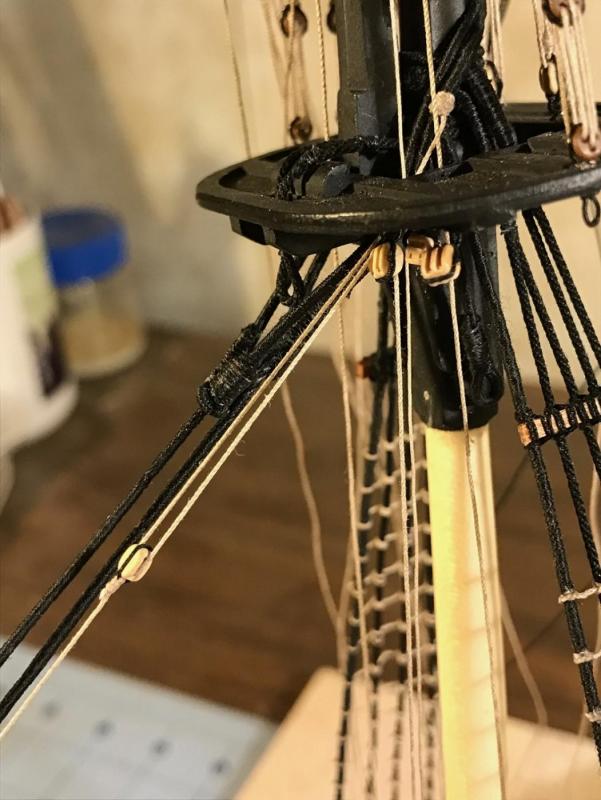
FUTTOCK SHROUDS For all of the planning, I forgot to install the futtock shrouds before raising the course yard. It was therefore a bit more taxing with the yard always in the way. I used .025 black rope. I seized a blackened brass hook on the end, attached that to the bottom of the deadeye and wound the other end around the stave and lashed it to the shroud. This is not easy. I placed a small drop of CA on the shroud, and held the futtock line in place until it set. That allowed me to then apply two lashings. Once done, I dressed them up with ratlines. Once I install the catharpin, another daunting task, it should pull all of the shrouds together and tighten up the lines. It is quite amazing how everything "ties together." Rigging this model has proven the engineering prowess of the 19th century shipwright
- 648 replies
-
- niagara
- model shipways
-
(and 1 more)
Tagged with:
-
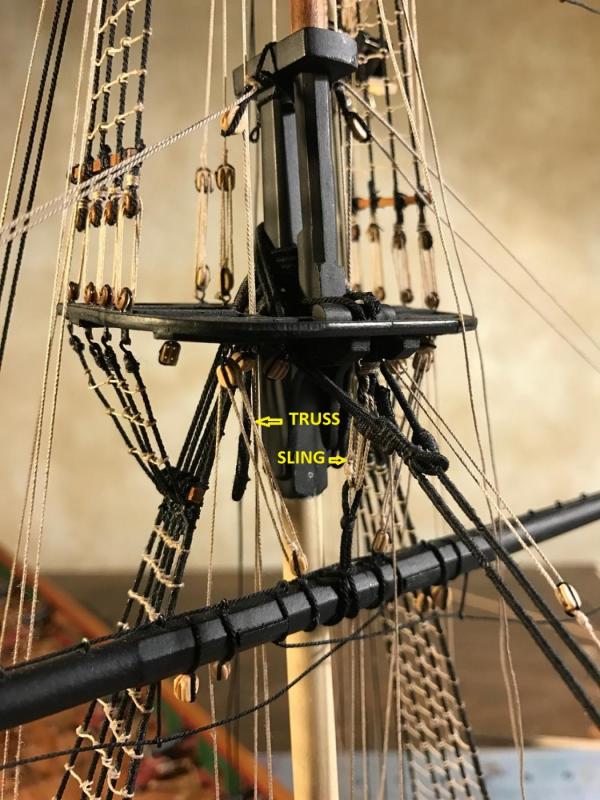
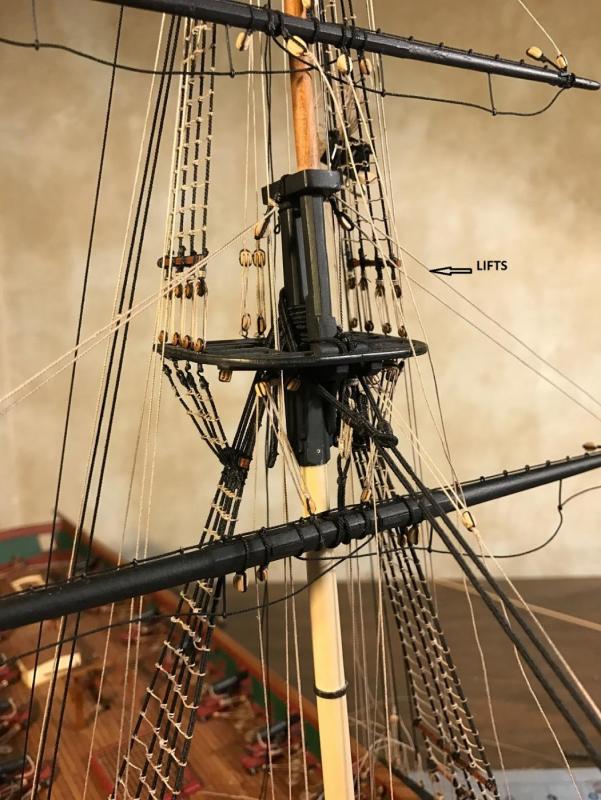
SETTING THE COURSE YARD IN PLACE With the course yard fully dressed, I pinned it in place, and weaved the lanyards for the truss blocks and sling ropes. I used a heavy .018 tan lanyard for the sling. The truss assembly has a complex combination of a double lashing around the yard, with two 1/8 single blocks, and a single lashing around the mast. l also rigged the course lifts with .018 tan rope.
- 648 replies
-
- niagara
- model shipways
-
(and 1 more)
Tagged with:
-
Greetings Mike, Welcome to the world of rope maizes and protruding spars. Your ship looks awesome, and as you hang your rigging, it is going to look better and better. As for serving, I opted to serve the entire main and preventer stays (the largest diametered rigging in all ships). I served the entire forward lower shroud line - that being the one that the course yard might rub against. I served all of the throat collars (2 inches) of the remaining lower shroud lines (where it winds around the mast). That was it. Just a suggestion. That decision was based on some research but mostly from suggestions lifted from other build logs. I may have spent as much time trying to decide what to serve as I did serving the lines. Since I am only a bit ahead on this same journey, together I think we can conquer all of the hurdles that rigging a 19th century sailing vessel will create.
-
I agree with Mark. On my brig, I found it very useful to hang all of the yards, attach all of the upper shrouds, seize every block I could think of, run every running rigging line reasonable (lifts, clews etc) BEFORE I stepped the masts. I left the course yard off figuring it would be in the way when I rigged the lower shrouds that had to be done after the mast was stepped. Rule of thumb. Better to work sitting down with the mast on your bench than standing hunched over a fragile ship and reaching into a maize of rope and spars.
-
I turn all of my yards from square stock on a mini lathe. I use a spindle steady rest for those very thin and fragile yards to keep them from wobbling/breaking. Anything that can't be put in the lathe is done as Jan suggests, by hand with a file, mini block plane, or sanding stick.
-
Jerry, Very good advice. I have not glued anything yet, and if I do any gluing, I will use a diluted white glue that can easily be undone. Your suggestion of not gluing anything may be better yet. I read somewhere on this forum (please forgive me since I can't remember where) that you should pass the lines through the pin rail holes and then insert the pins to wedge the lines in place, then wrap around. That is a GREAT idea. I wish I could take credit for that. It has made the process of tieing those lines tight very manageable. Gary Owen
- 648 replies
-
- niagara
- model shipways
-
(and 1 more)
Tagged with:
-
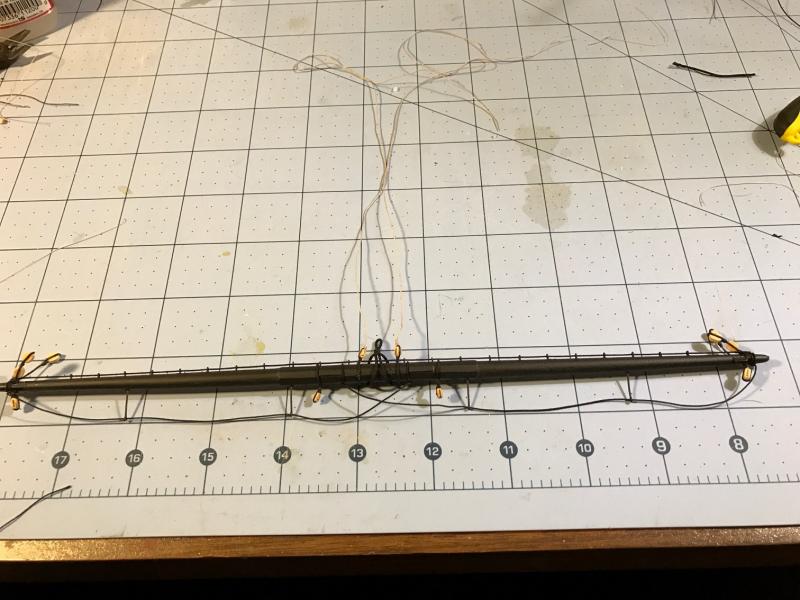
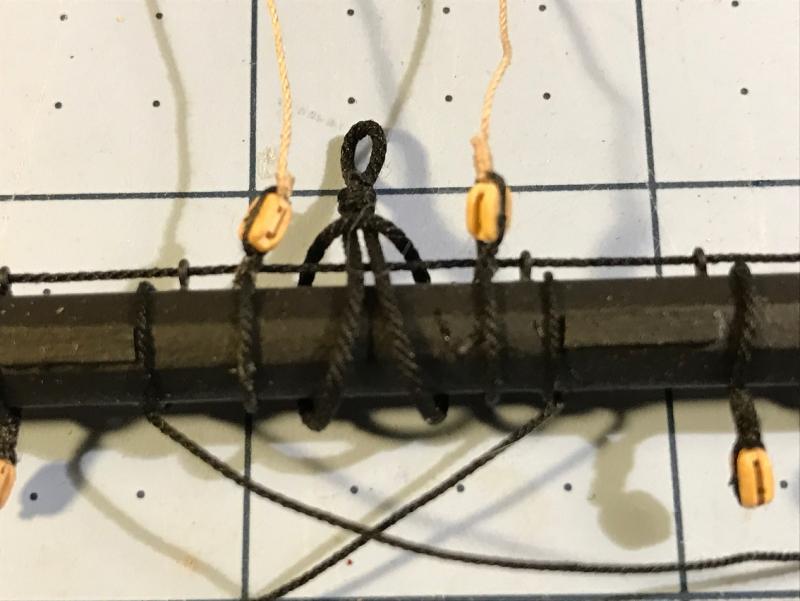
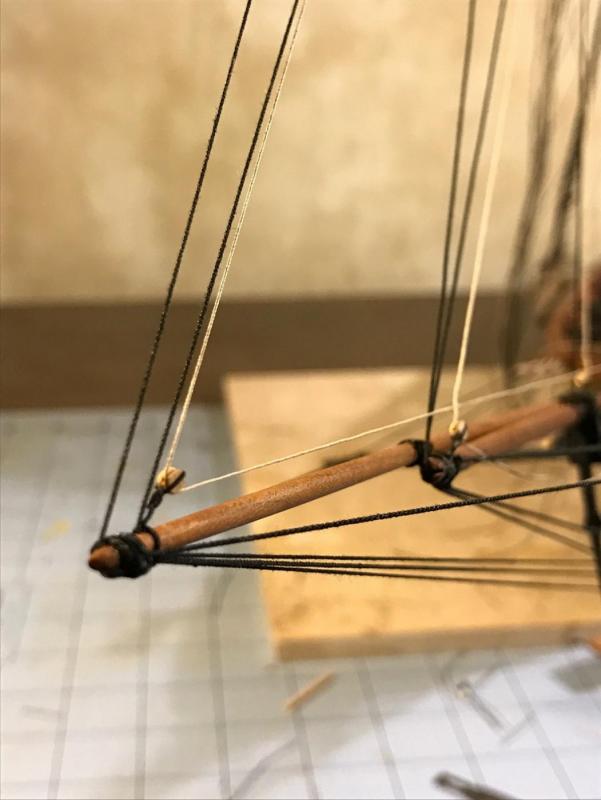
COURSE YARDS Now that I have completed the foremast shrouds with sheaves, fairleads and ratlines, and did about as much running rigging as I could, it was time to mount the course yard. Before I did that, I had to dress up the bare spar. On all of the yards that have jackstays and foot ropes, it is advisable to seize all of the blocks, slings, braces etc BEFORE you do the jackstays and foot ropes. That way, all of the blocks can be stropped in a vice with oversized loops that can be simply slipped over the yard and tightened. If you add the jactstays or foot ropes, you will have to slip the seizing rope between the lines and the yard and tie and stropping loop on the yard instead of the vice. The yard is now ready to mount. I now face a daunting decision. How much running rigging do I want to add to a ship WITHOUT any sails. I have attached all of the blocks as per the plans, and possibly could run buntlines, sheets, clew lines, etc, but have no sails to attach the lines to. I understand that I could just tie off the ends to the yards and such, but wonder just how much detail I need to add to the ship. For now, I have decided to rig clew lines and some of the sheets (course and topsail), tying the ends to the yards (instead of to sails that are not present). No buntlines. Does this make any sense? Any suggestions?
- 648 replies
-
- niagara
- model shipways
-
(and 1 more)
Tagged with:
-
I understand your concerns. However your ship looks great, and she is going to look even better when you begin to add her life lines. When you feel comfortable, there are many of us out there willing to lend a hand. Good luck with the Rattlesnake. I will be riding along.
- 287 replies
-
- niagara
- Model Shipways
-
(and 1 more)
Tagged with:
-
Mike, Tightening up the lanyards is a tricky process, and yes, until finally set, they can twist and usually do. I have been reluctant to finally set any of my lanyards on the bow, that is tied and set with a drop of glue. Some are just knotted, some are still loose. I am giving myself the ability to undo something if necessary or tighten them up if I create slack when adding another line (a constant frustration.) Once I get all of the rigging done, I will go back and finalize all of the tie offs with glue, and will be able to undo any twists. I wrap my bullseyes with three lashes. The rope does not easily slip through when lashed three times, so yes, you have to tug on the first, and pick up the slack on the later. And you have to be careful that you don't pull too hard. By the way, on the slack issue, I have decided to hold off until the very end to tie off the back stays. I have figured out that those lines will tighten up the entire front portion of the rigging. The 19th Century shipwright knew what he was doing in the design of a rigged sailing ship.
- 648 replies
-
- niagara
- model shipways
-
(and 1 more)
Tagged with:
-
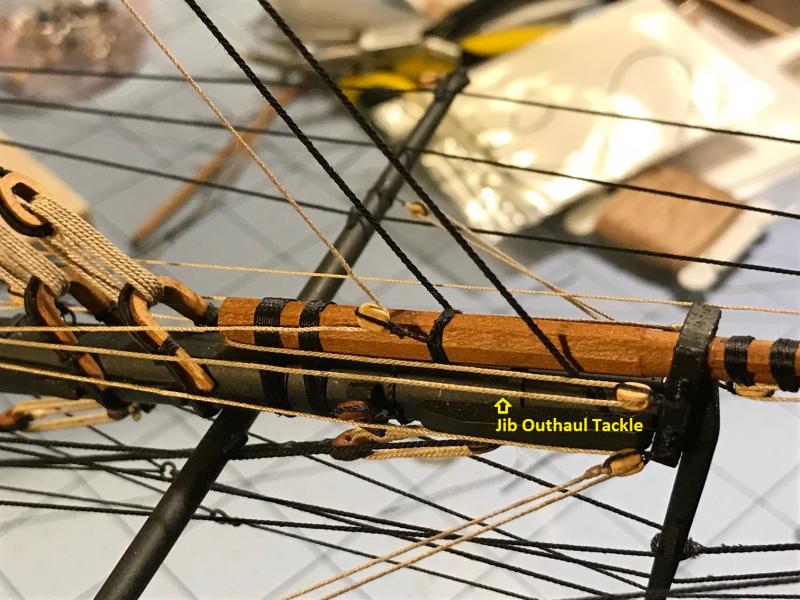
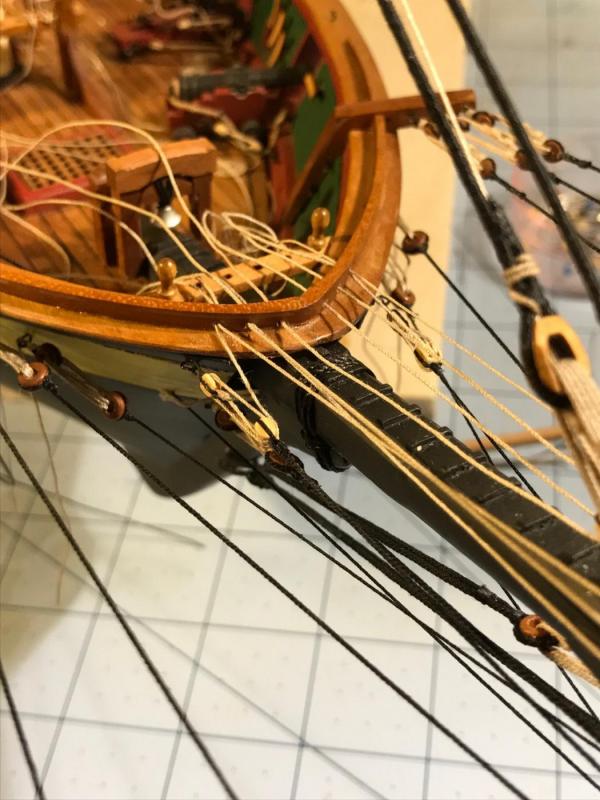
FOREMAST HALLIARDS AND JIB OUTHAUL TACKLE I continued working on the running rigging on the foremast. I added the 4 halliards used to haul the stay sails. That included attaching blocks on the foremast, which I had done earlier, and also adding blocks to the bowsprit and jib for the downhaul lines. For some reason, I missed those. Probably because when I built the bowsprit and jib many months ago, I did not know what a halliard even was. In any case, I had to tie on 4 blocks to a very crowded bowsprit and jib. The main halliard downhaul block had to be positioned under the main stay open heart. There was no way I was going to be able to lash that to the spar, so I opted to strop the block to an eyebolt. I was able to position my pin vice in between the jaws of the heart and drill a receiving hole, and carefully insert the eyebolt with a drop of CA. The rest of the downhaul blocks were lashed. All of the downhaul lines then traverse the length of the bowsprit and pass through fairlead holes in the chock rail and are tied off on the forward pin rail. The only problem is that I failed to drill the holes in the chock rail. Again, I had to do that in between the lines of spaghetti ropes and of course the spritsail yard was in the way of where I had to turn the drill. Niagara builders – DRILL THE HOLES BEFORE YOU INSTALL THE BOWSPRIT. The loose end of the uphaul line had to be belayed, according to the plans, to the “stay throats.” That was not overly specific, so I used a best guess, based on what a 1/64 figurine standing on the tops would do with the loose end – tie it waist high in an easy access place that was out of the way. I also added the jib outhaul tackle. I used a .018 tan rope with 1/8 blocks. The plans however did not specify where the loose end of the rope went to. I looked in the plans and the instruction book. Nothing. I therefore assumed it passed along the bowsprit, through the fairlead holes and was tied to the forward pin rail.
- 648 replies
-
- niagara
- model shipways
-
(and 1 more)
Tagged with:
-
Thanks Mike and Steve, Any time you have to do something 250 times in a row, you get into a rythem. My knot tying in general has improved exponentially. I cannot believe how many things need to be tied up and I am not even close to being half done. I also have to give a ton of credit to my fellow Niagara builders, past and present. If not for your build logs and fantastic models, I could never have overcome the 'umpteen" different challenges that would have swamped this effort and put this build on the shelf.
- 648 replies
-
- niagara
- model shipways
-
(and 1 more)
Tagged with:
-
Joel, I am not a surgeon, or a weaver,--- But I did stay at a Holiday Inn Express ...... BAD JOKE. Actually, the credit all goes to Chuck's wonderful Syren products. Using great rope and his laser cut hearts makes all the difference. Also, a dogged persistence to do and redo everything until it looks right. And for that, you have to thank all of the incredible shipwrights on this forum. Every tip I use is borrowed from someone. Thanks Mike and Mike. Welcome in Steve. And Elijah, no greater compliment can be given to an amateur modeler than the kind words you sent along.
- 648 replies
-
- niagara
- model shipways
-
(and 1 more)
Tagged with:
About us
Modelshipworld - Advancing Ship Modeling through Research
SSL Secured
Your security is important for us so this Website is SSL-Secured
NRG Mailing Address
Nautical Research Guild
237 South Lincoln Street
Westmont IL, 60559-1917
Model Ship World ® and the MSW logo are Registered Trademarks, and belong to the Nautical Research Guild (United States Patent and Trademark Office: No. 6,929,264 & No. 6,929,274, registered Dec. 20, 2022)
Helpful Links
About the NRG
If you enjoy building ship models that are historically accurate as well as beautiful, then The Nautical Research Guild (NRG) is just right for you.
The Guild is a non-profit educational organization whose mission is to “Advance Ship Modeling Through Research”. We provide support to our members in their efforts to raise the quality of their model ships.
The Nautical Research Guild has published our world-renowned quarterly magazine, The Nautical Research Journal, since 1955. The pages of the Journal are full of articles by accomplished ship modelers who show you how they create those exquisite details on their models, and by maritime historians who show you the correct details to build. The Journal is available in both print and digital editions. Go to the NRG web site (www.thenrg.org) to download a complimentary digital copy of the Journal. The NRG also publishes plan sets, books and compilations of back issues of the Journal and the former Ships in Scale and Model Ship Builder magazines.


