HOLIDAY DONATION DRIVE - SUPPORT MSW - DO YOUR PART TO KEEP THIS GREAT FORUM GOING! (Only 24 donations so far out of 49,000 members - C'mon guys!)
×


6ohiocav
-
Posts
543 -
Joined
-
Last visited
Content Type
Profiles
Forums
Gallery
Events
Everything posted by 6ohiocav
-
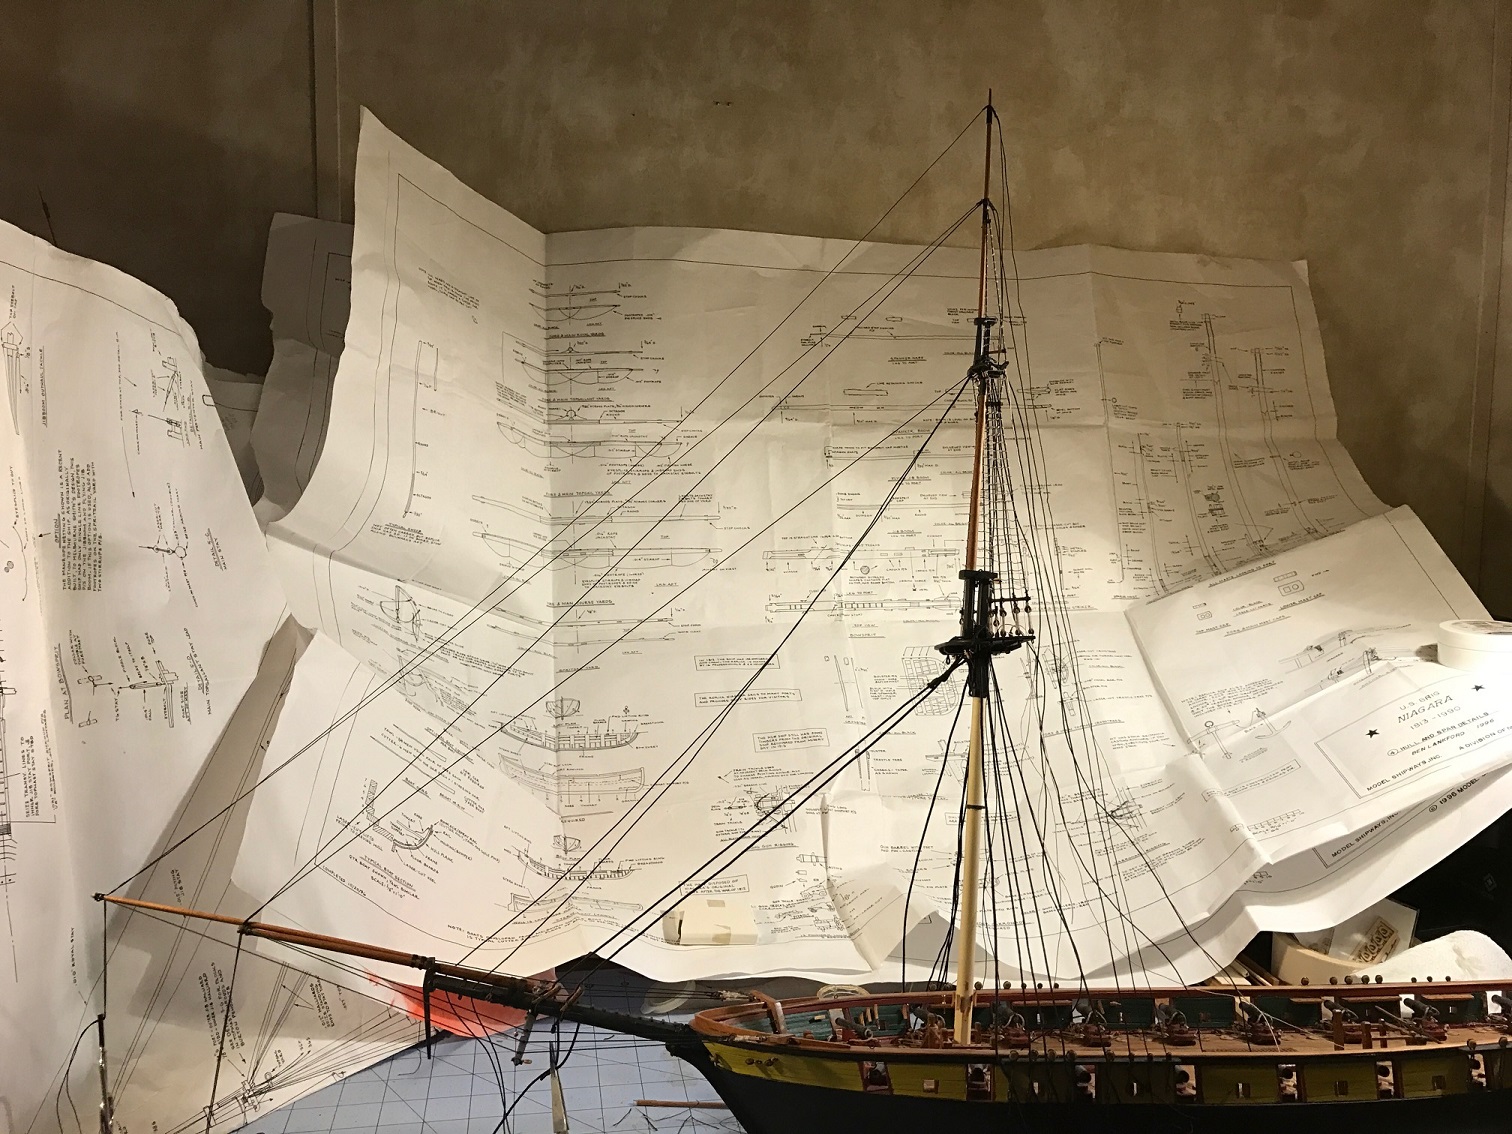
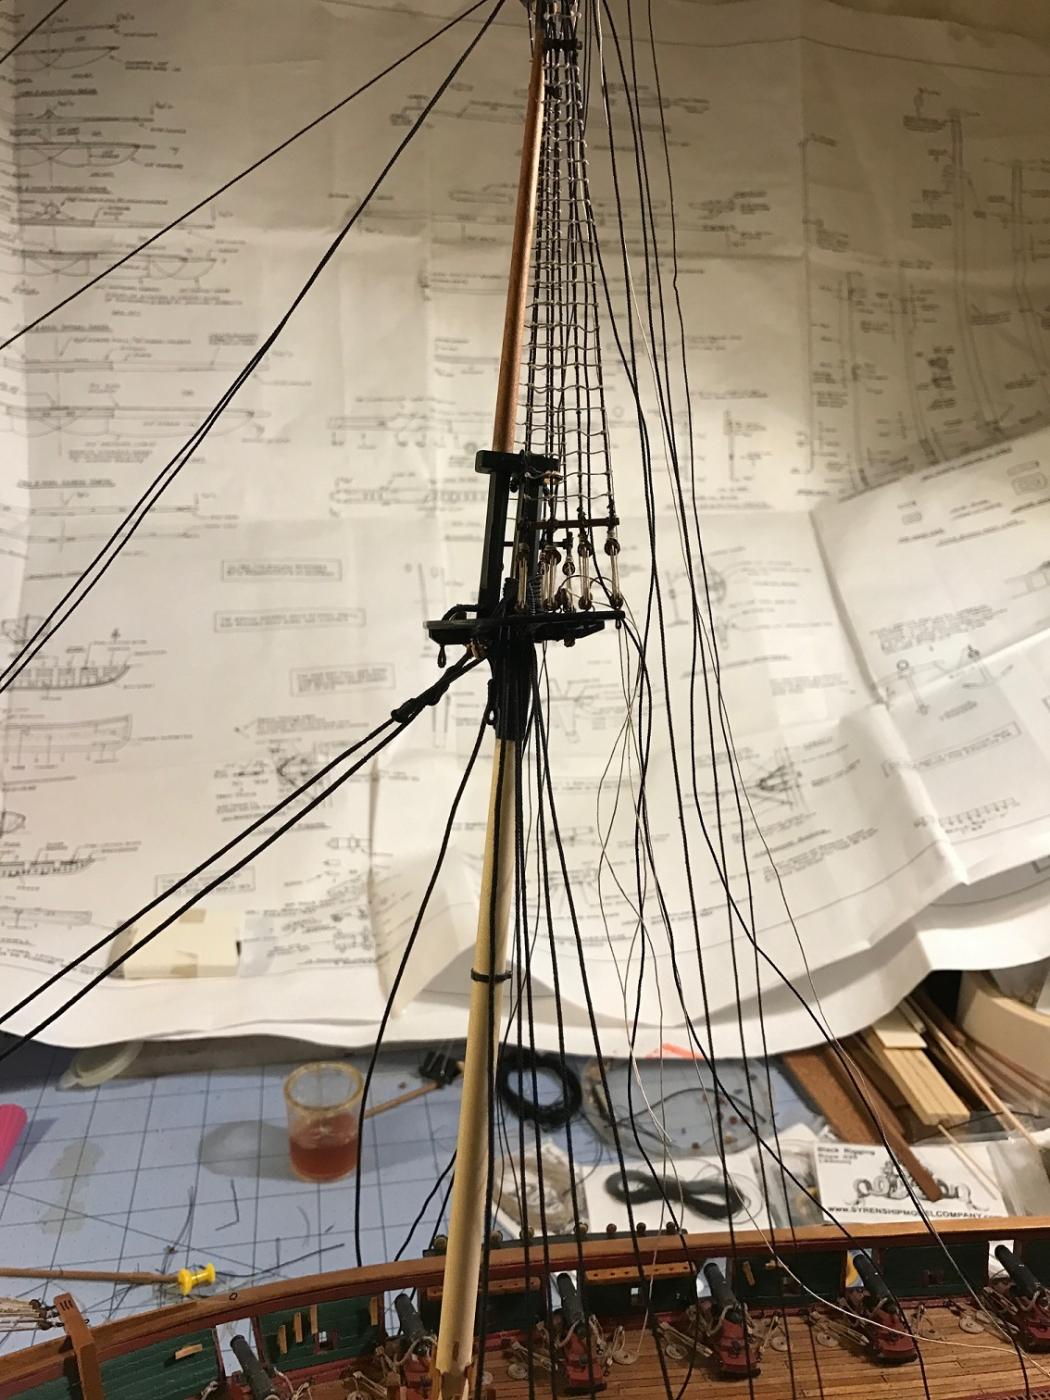
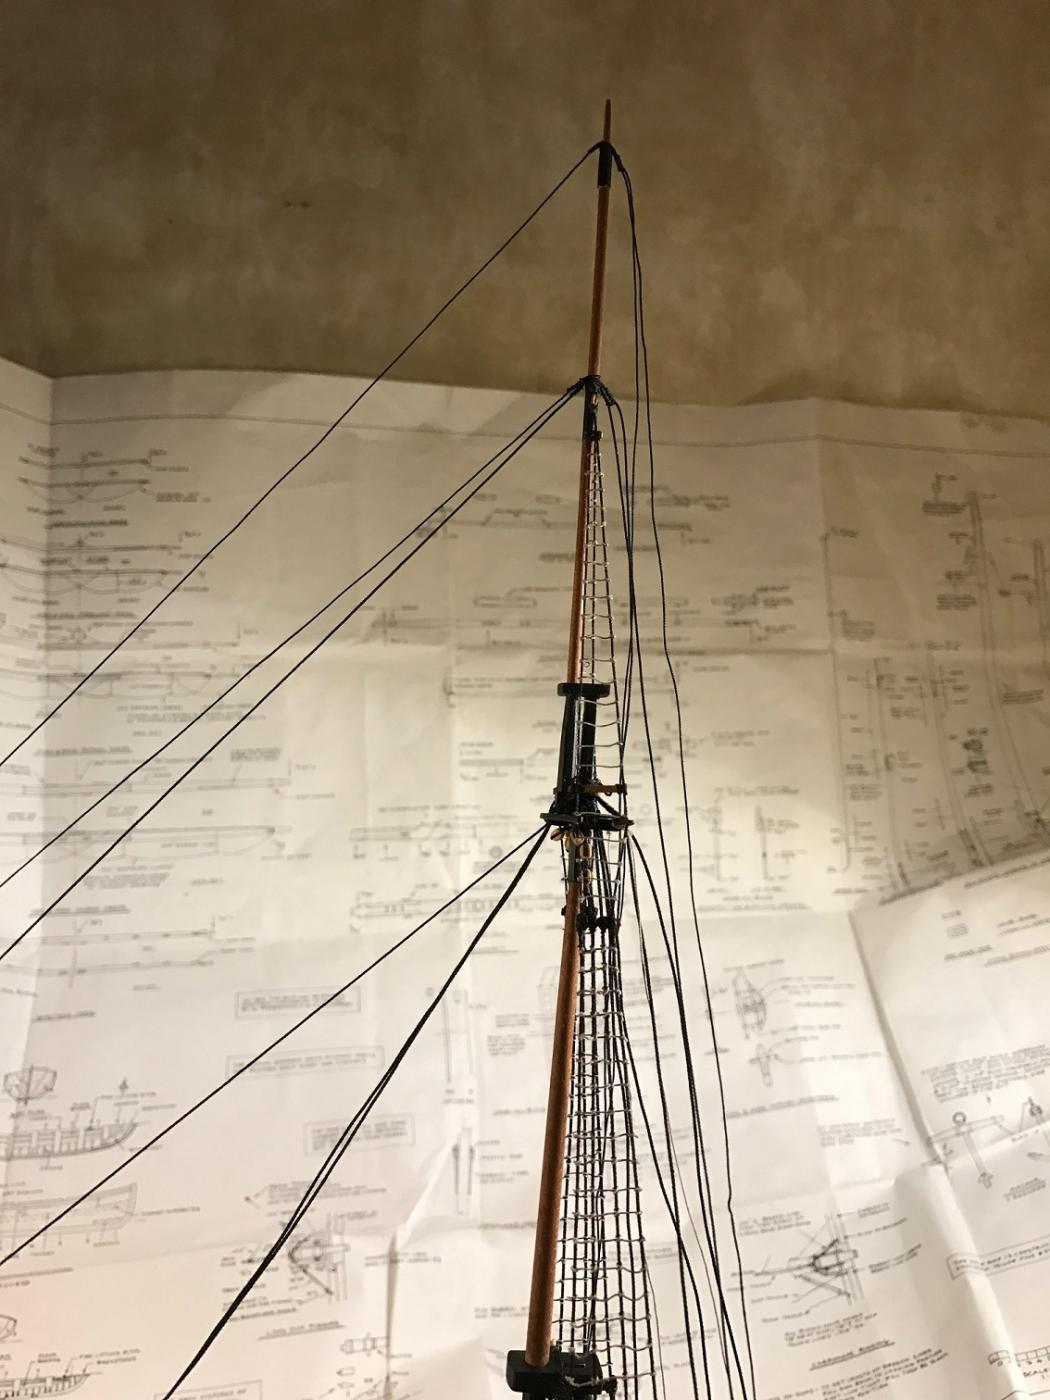
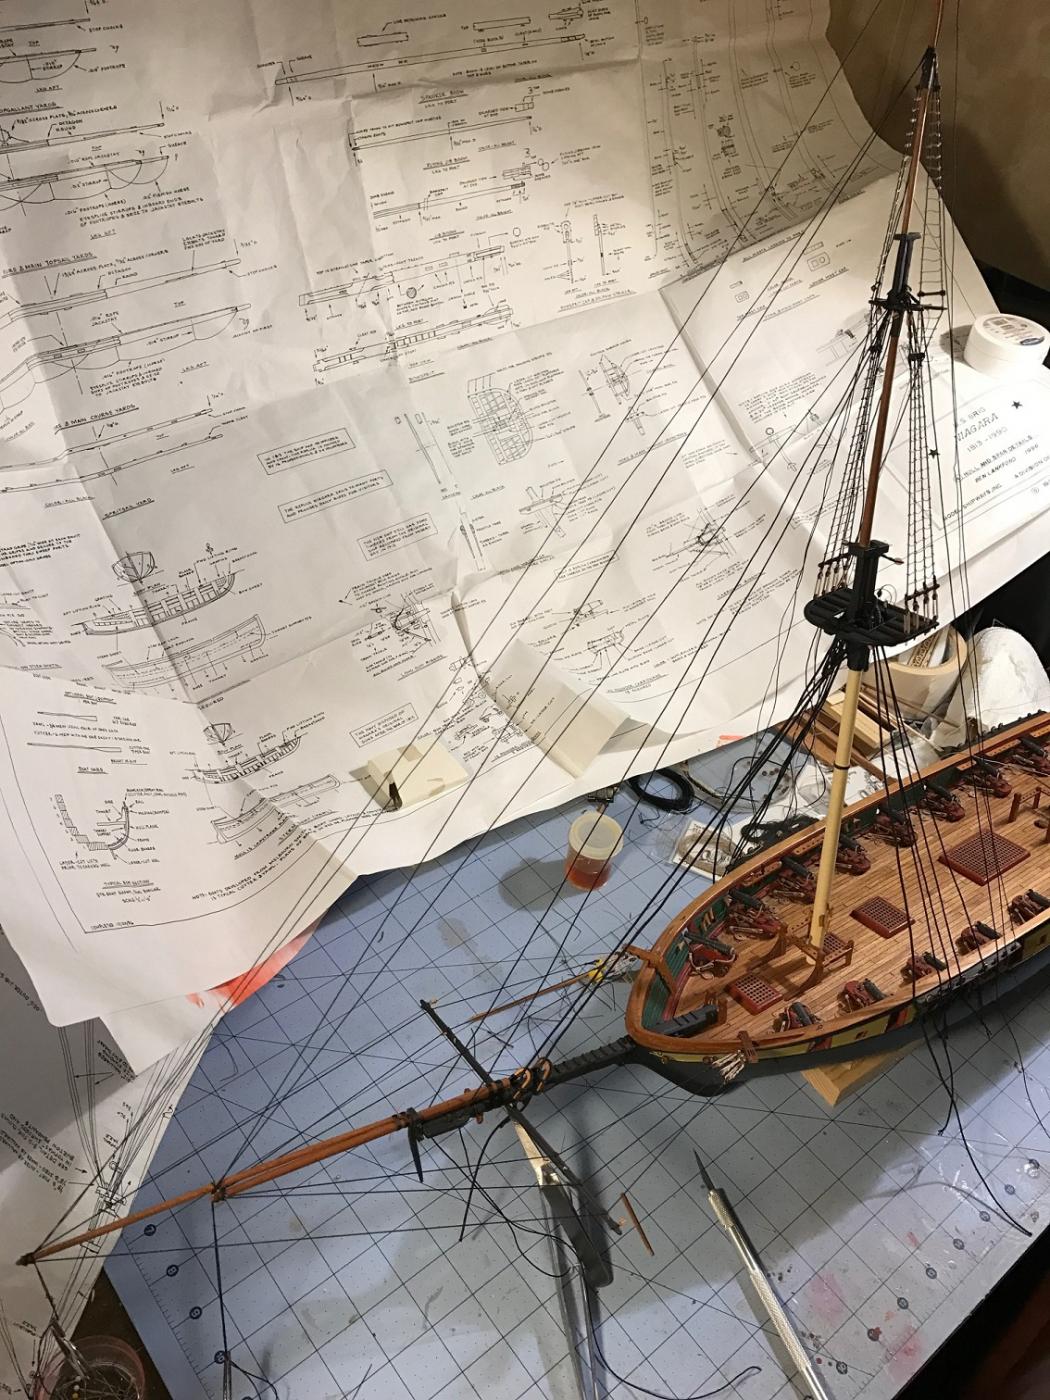
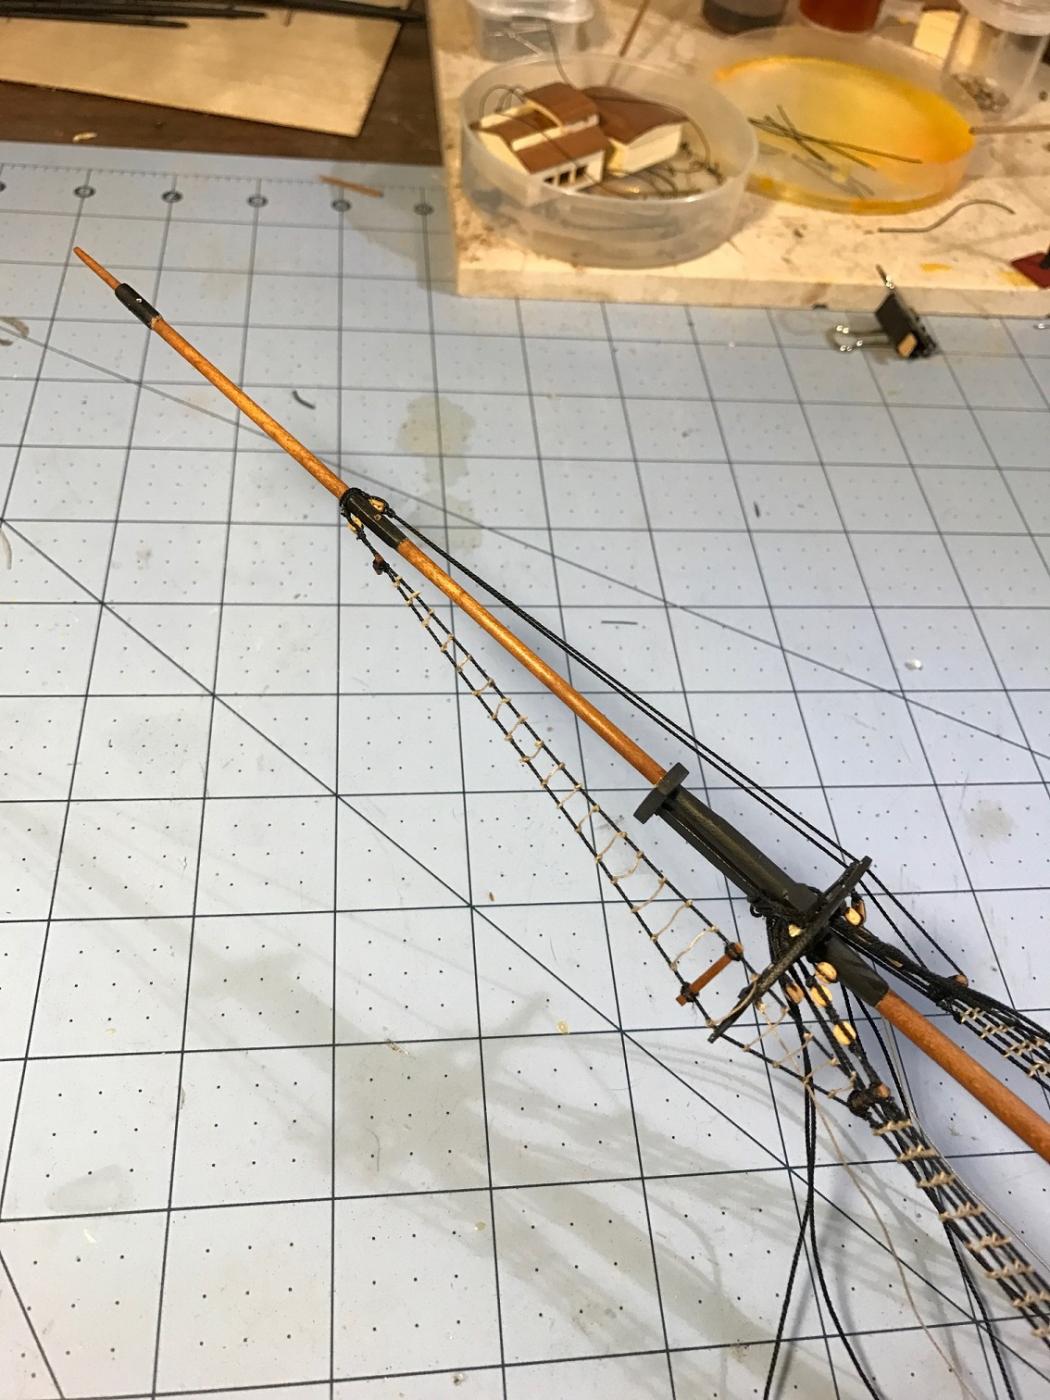
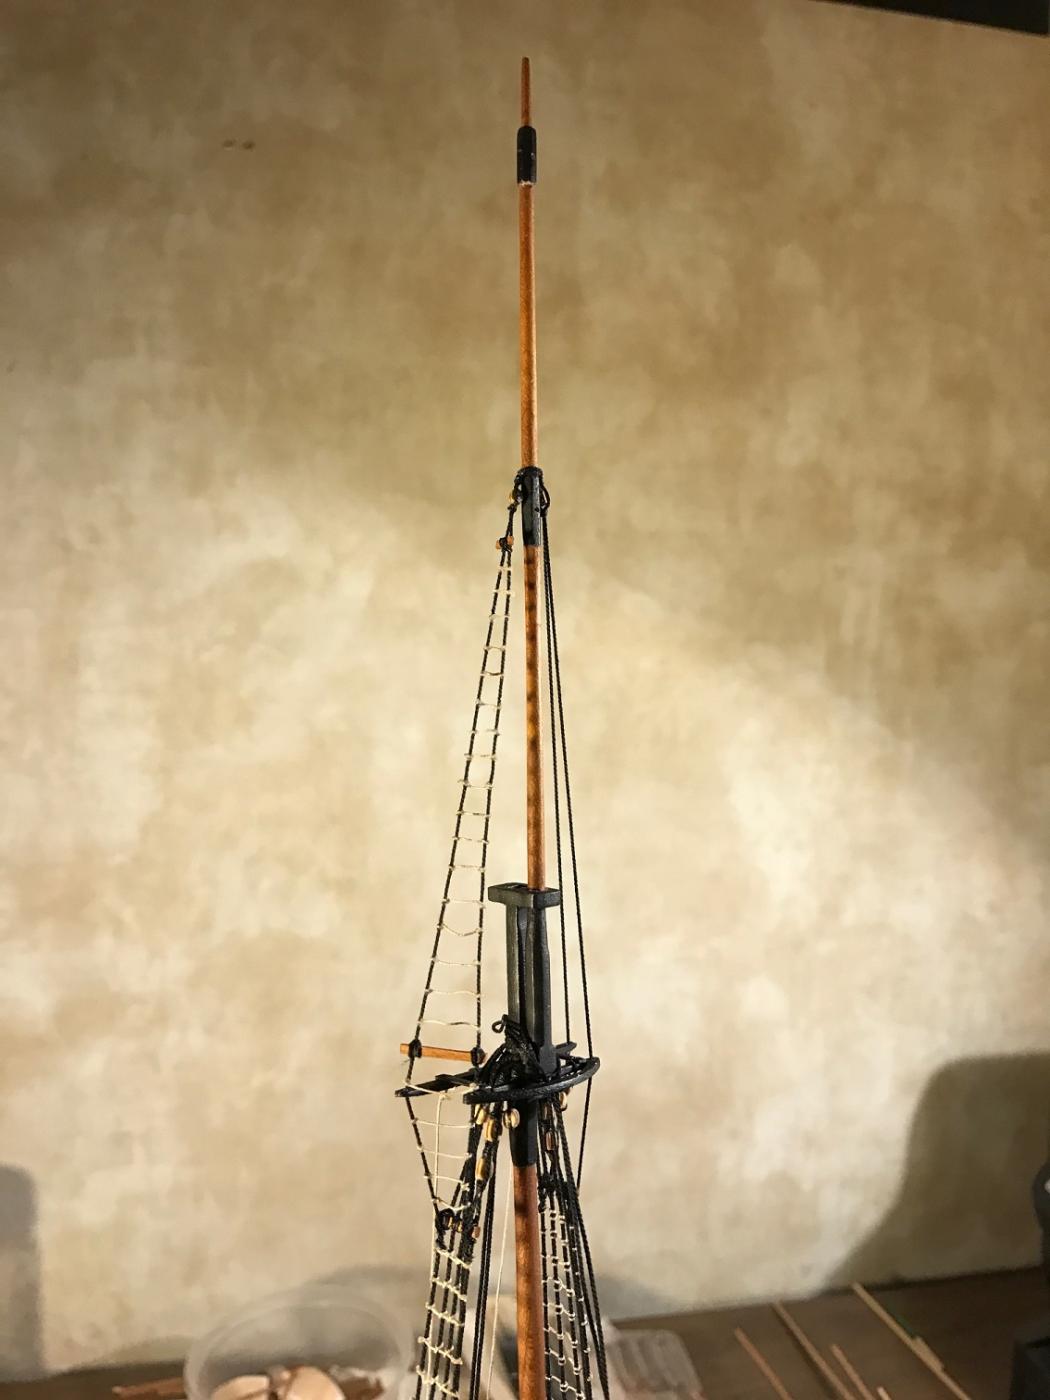
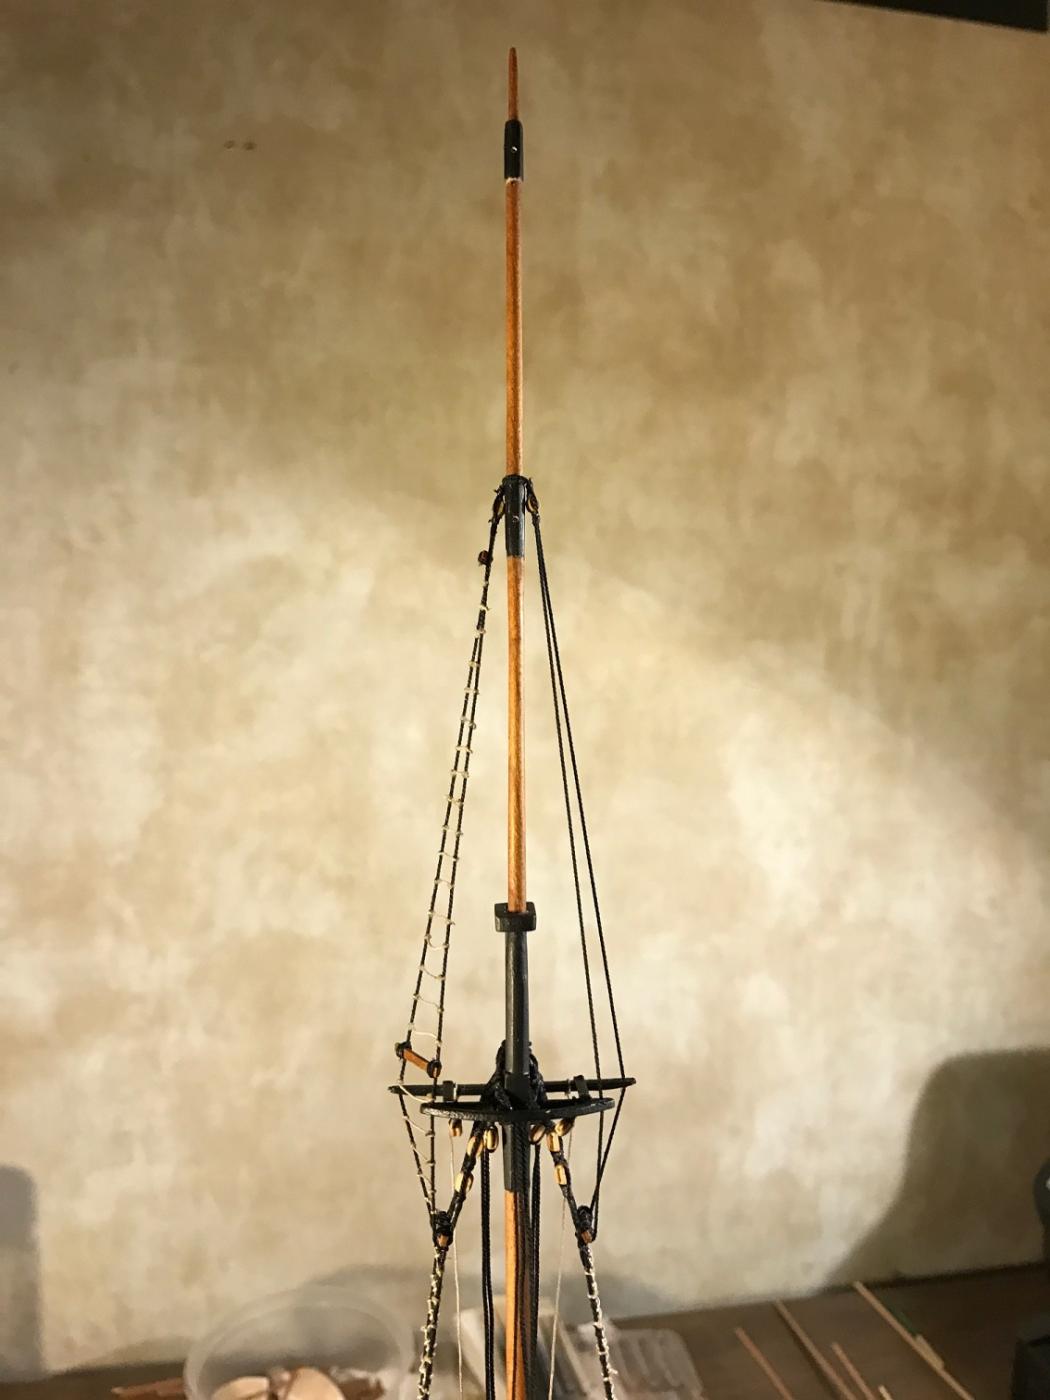
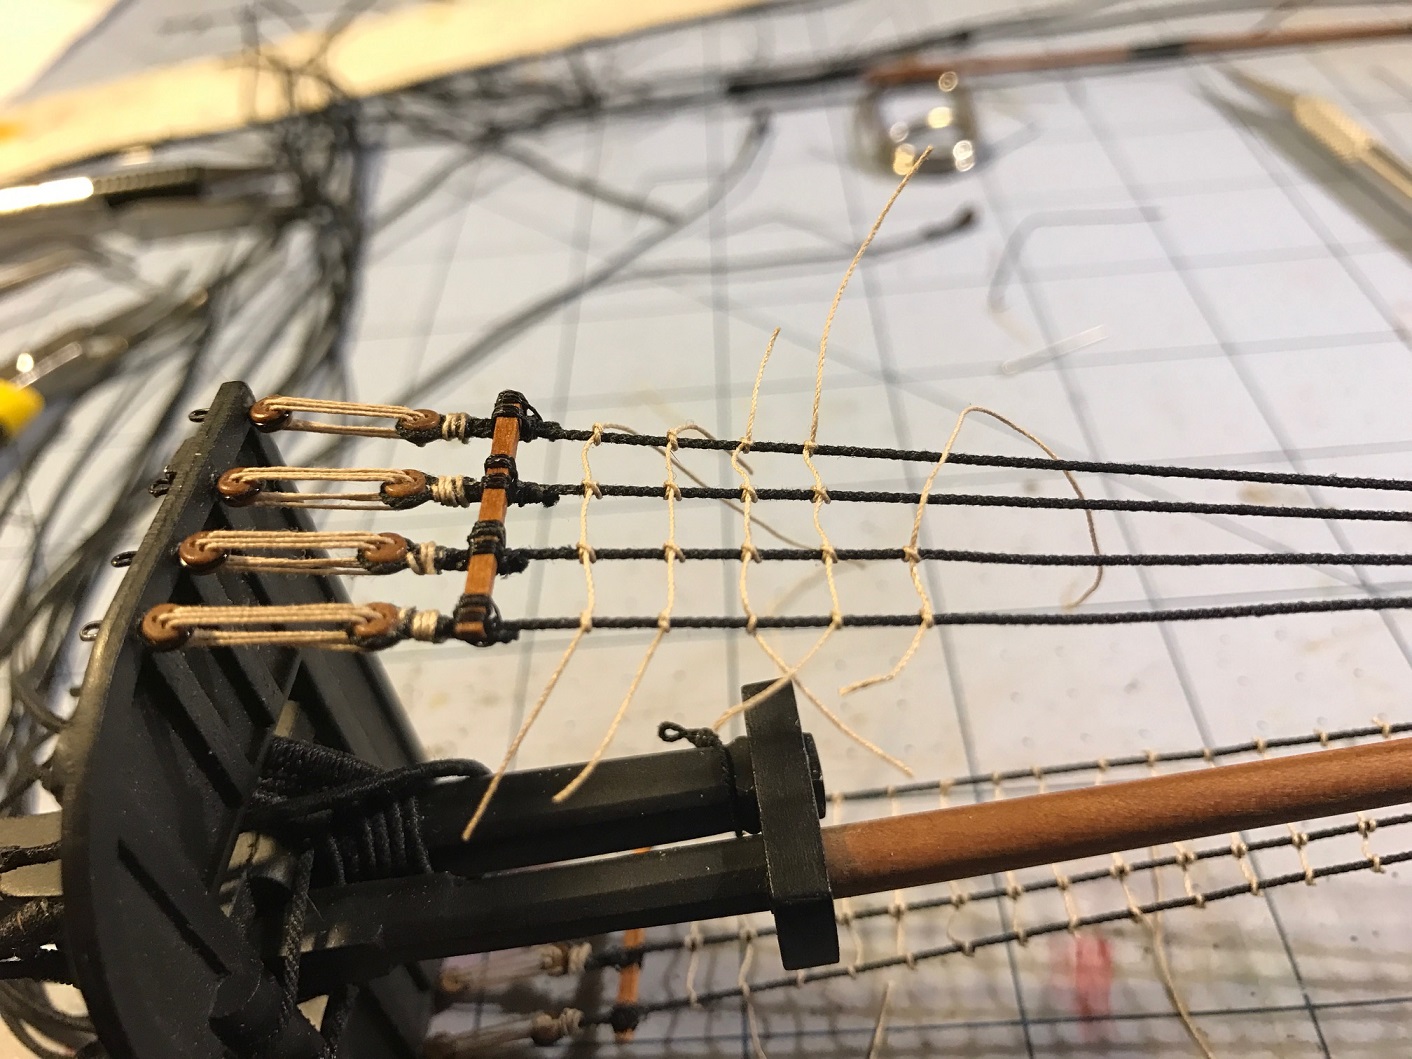
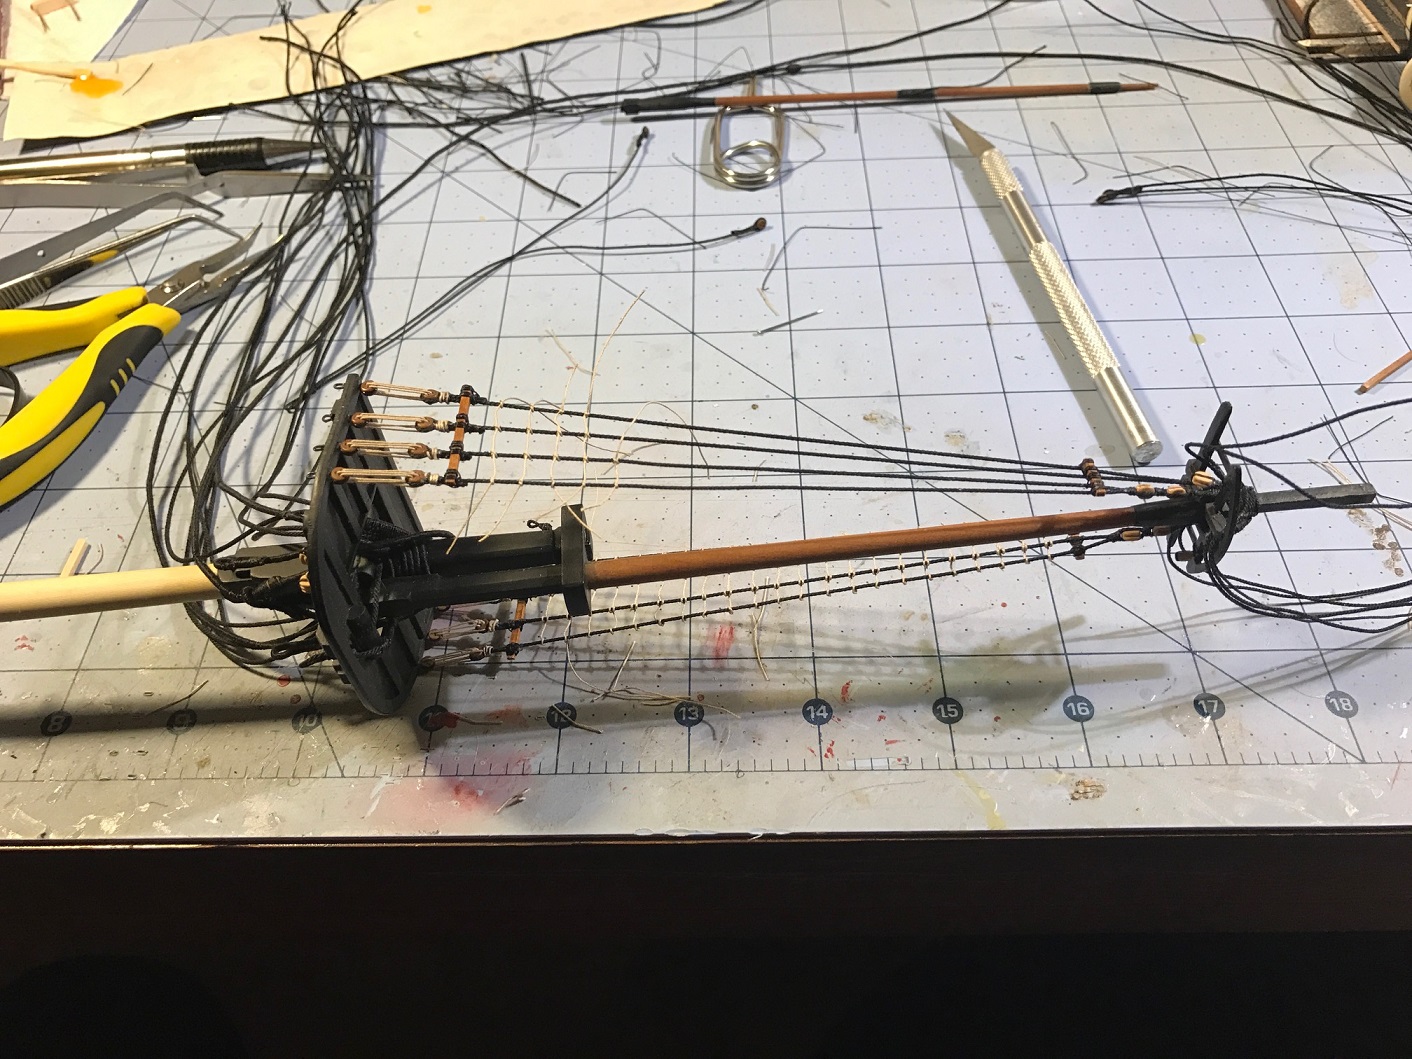
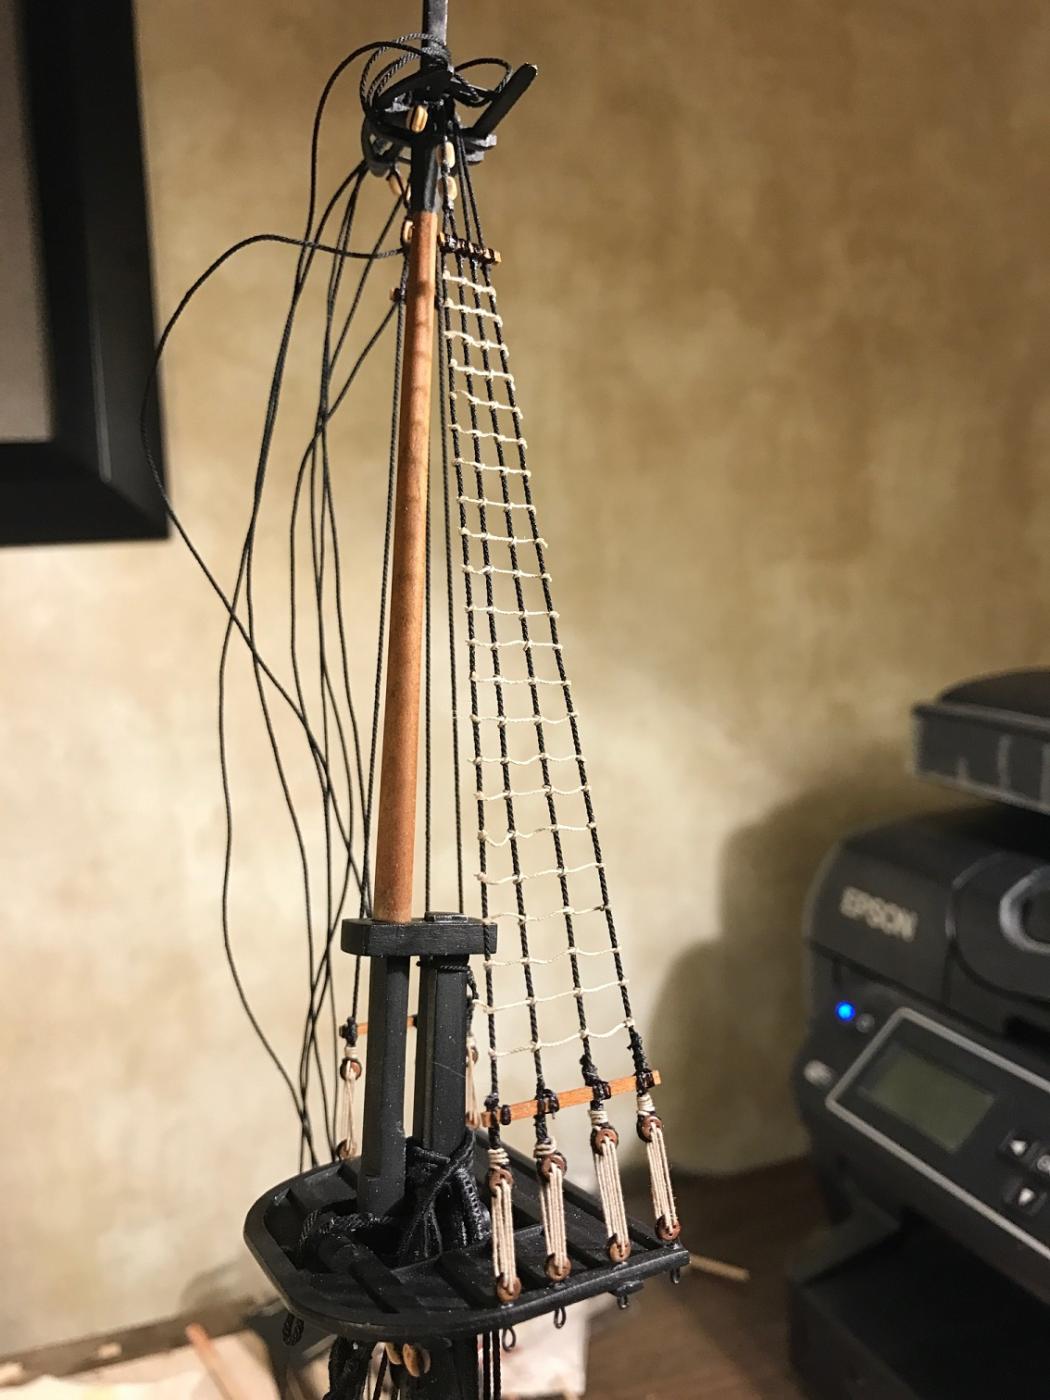
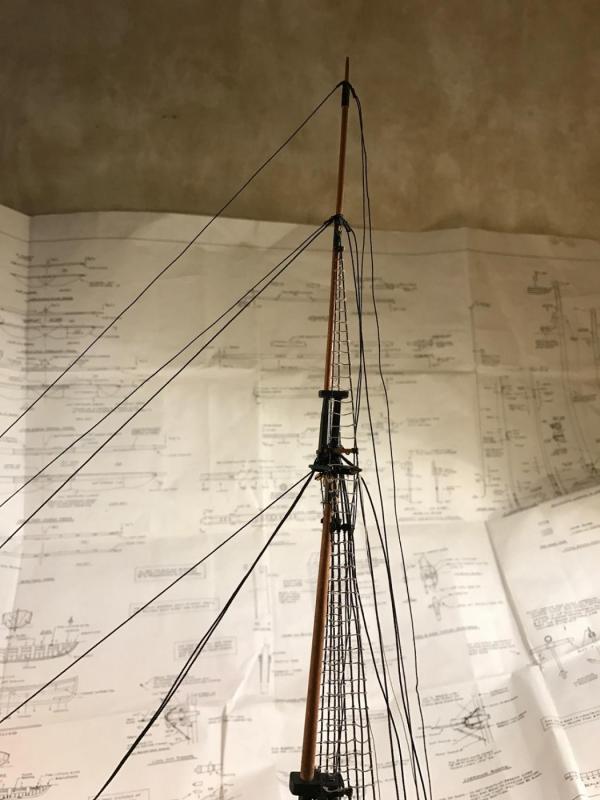
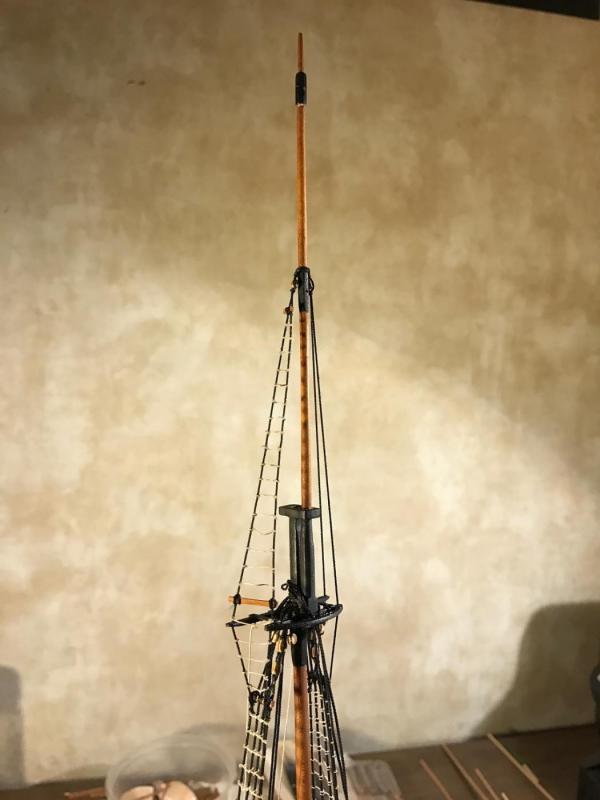
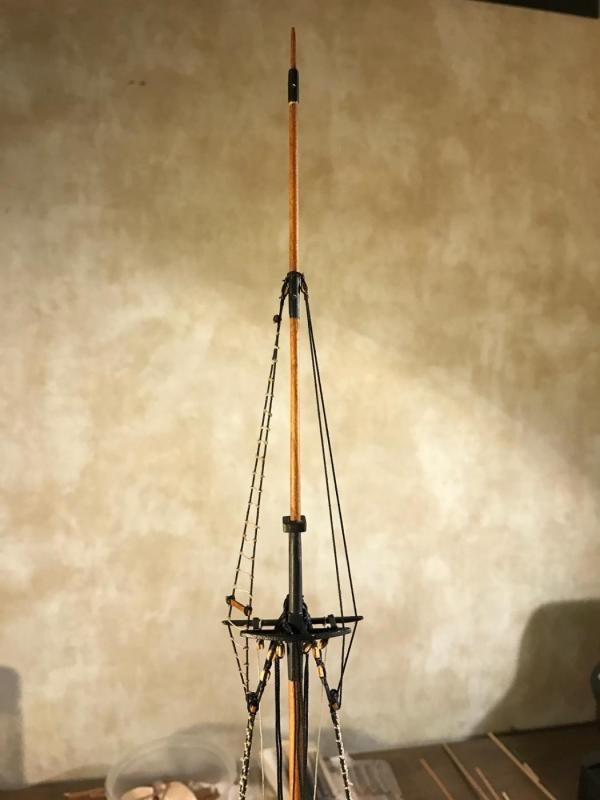
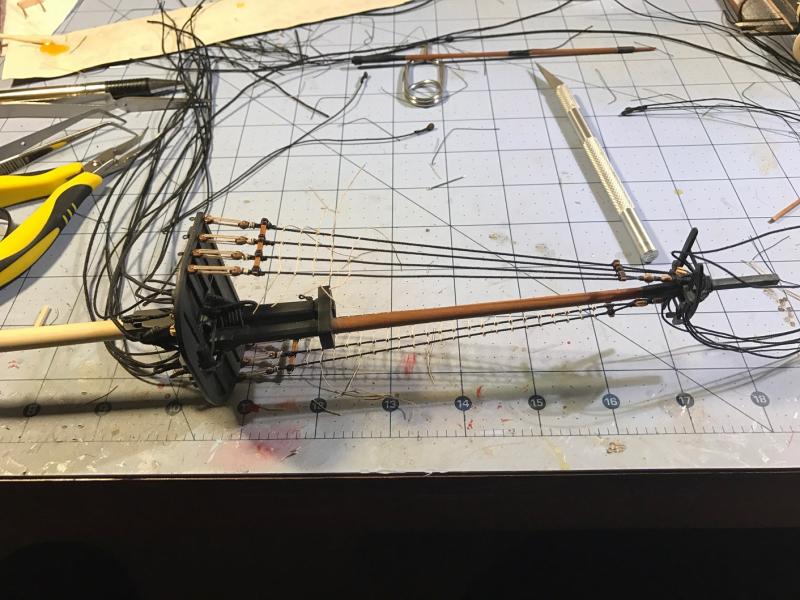
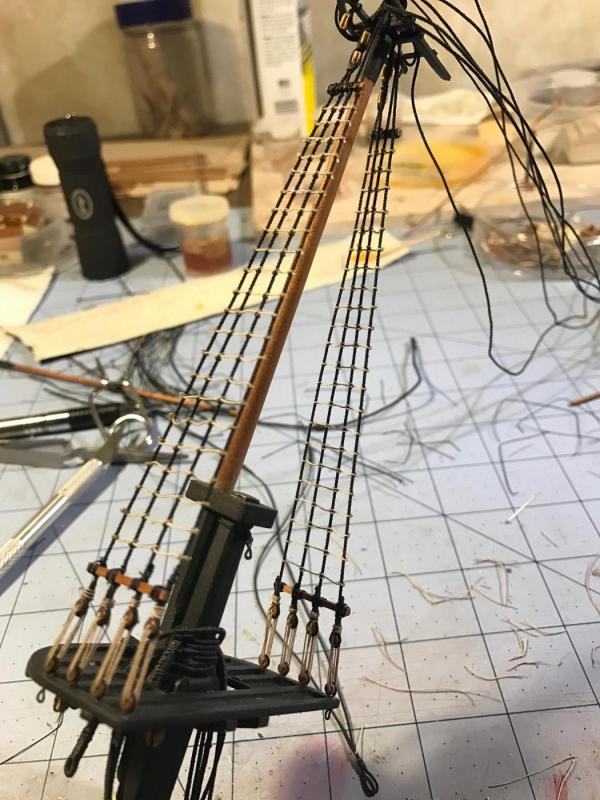
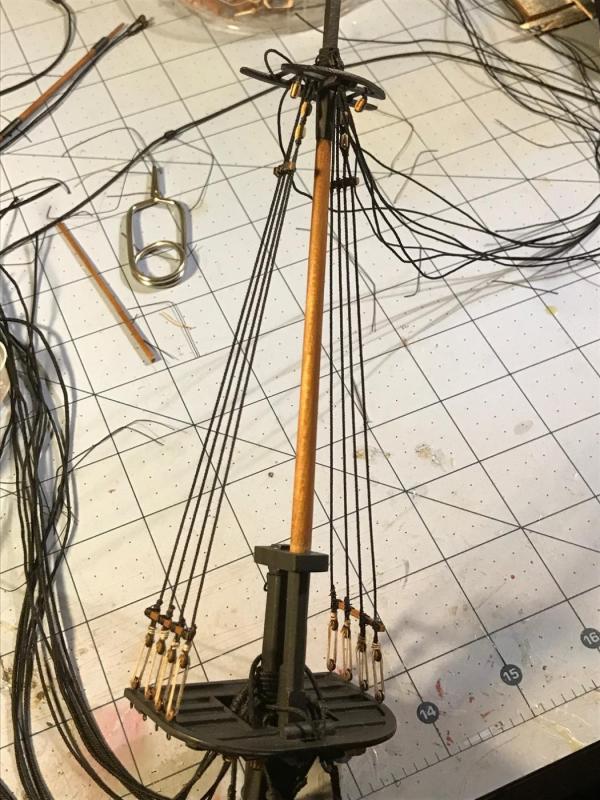
 MORE TOPGALLANT RATLINES AND STAYS I finished the port side ratlines on the topgallant shrouds. I also seized more backstays, topgallant, royal etc. stays and slipped them over the mast adding more vines to the assembly. It gave me cause to insert the mast and do some inventory to make sure I had all of the lines set correctly. So far so good.... I think. I took a few photos. This process is slow and a real mental challenge. I will be working on the foremast yards next to prepare them for attachment. The plan is to attach the royal and topgallant yards before stepping the mast. I will not attach the course yard until I have tied the lower shrouds. I haven't decided what to do with the topsail yard, but will probably attach it before stepping the mast. And when and if I ever finish the foremast, I have the mainmast waiting in the wings.


- 648 replies
-
- 5
-

-
- niagara
- model shipways
- (and 1 more)
-
There going to love floating that fine ship in the bathtub
-
Jerry Thanks for stopping in. You have certainly piqued my interest. I'll have to give that idea some thought. Thanks for offering.
- 648 replies
-
- 2
-
-
- niagara
- model shipways
- (and 1 more)
-
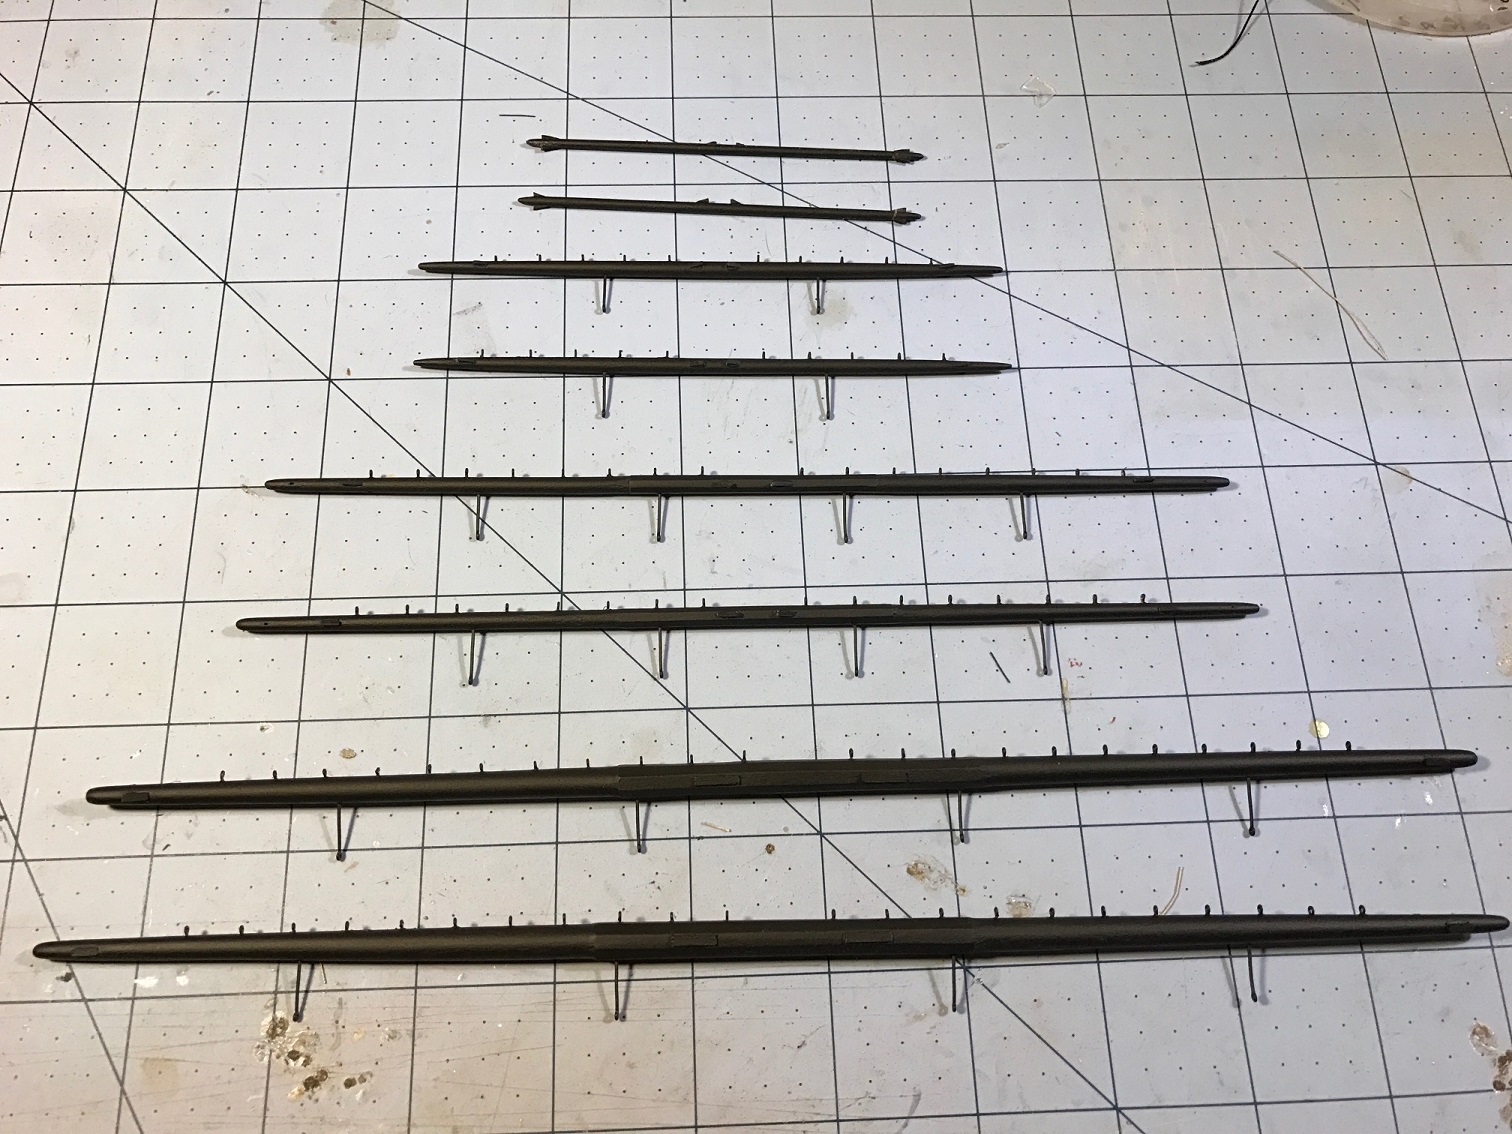
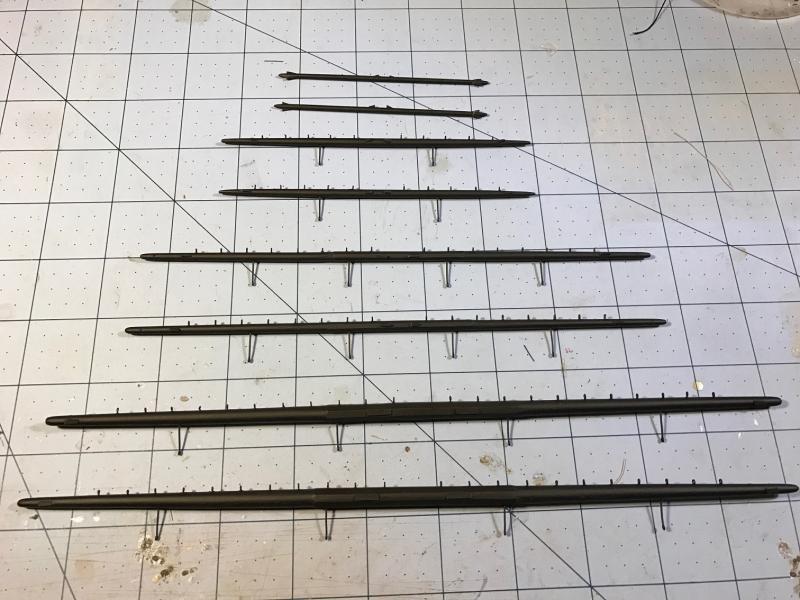
TOPGALLANT MAST AND SHROUDS, YARDS I installed the topgallant mast and worked on the upper shrouds. I used .018 black Syren rope for the shrouds, and .008 brown for the ratlines. I lashed the cherry staves as I did on the lower shrouds. I finished the starboard side and will finish the port side tonight. The plans call for a pendant in the shrouds near the hounds to run the topgallant yard lift through. I decided to use a 3/32 single block instead. I also spent the day getting the yards ready. I installed the stirrups, using fish hooks (great tip from this forum). I then primed and painted them with flat black paint. I will be seizing blocks, jackstays and the foot ropes next. My thoughts are that I will pin the yards to the Foremast before finally attaching it to the deck. I have finally decided to leave the yards in their lowered position hanging on their slings and lifts. I should be able to do all of this running rigging before attaching the mast. Right now, I have a spaghetti factory hanging from my foremast. I have seized every line I can think of, including some of the brace lines. I hope I can keep them straight when I start attaching them to the right locations.
- 648 replies
-
- 6
-
-
- niagara
- model shipways
- (and 1 more)
-
Not a lot of open seas in Ohio Amish Country, but we do have a lot of wood. I am trying to convince our friends at Keim to get some castello boxwood. That is the only specie they do not offer. I am really spoiled too. Going in person and inspecting the stock is a real luxury. Good luck on the deadlines. Got to save me one of those "signed" 2nd editions.
-
Using laminated stock is a great hedge against warping. Using stable wood such as cherry and walnut is also a good idea. I also turned masts from American Holly that I milled myself from a stock board I picked up at Keim's. It turns wonderfully and the white grain-less finish eliminates the need to paint them. Probably too late for your Connie, but a good choice for white colored masts.
-
Mike and Scott, I started with a flat poly, but even that has too much of sheen for my taste. I have now switched to a tung oil. Nearly all of my wood however is cherry.
-
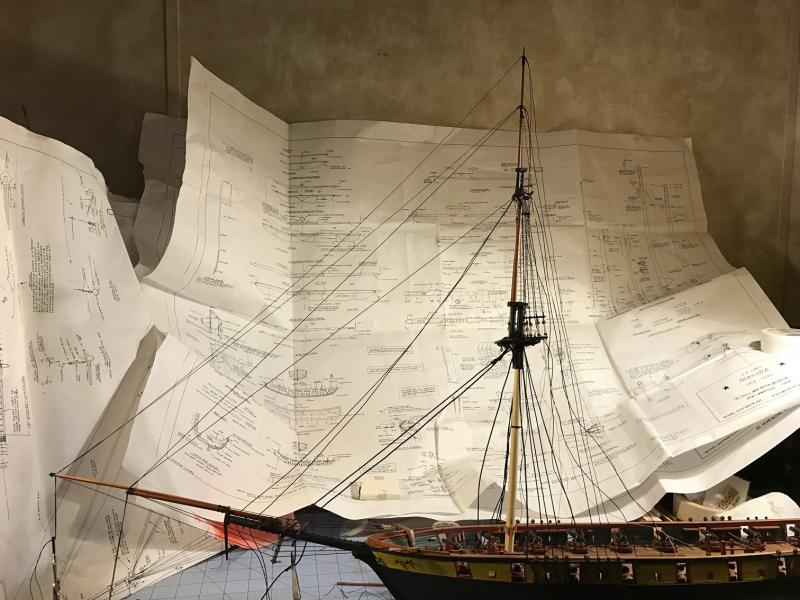
Mike, Glad you brought that up. You have to peruse sheet 5 and 6 of the plans, the instruction manual, and diagrams of both masts just figure out where the blocks need to be located. And being a 2 dimensional drawing, good luck deciding where exactly on the top they need to be. The hard part however is deciding what to do with all of these blocks. Half of the blocks on my upper foremast top are for sail rigging which I probably wont even do. I know I have said this many times over, but the rigging plans are extremely difficult to follow. Just a FEW simple diagrams of each top would be SOOOOOO helpful.
- 648 replies
-
- 1
-
-
- niagara
- model shipways
- (and 1 more)
-
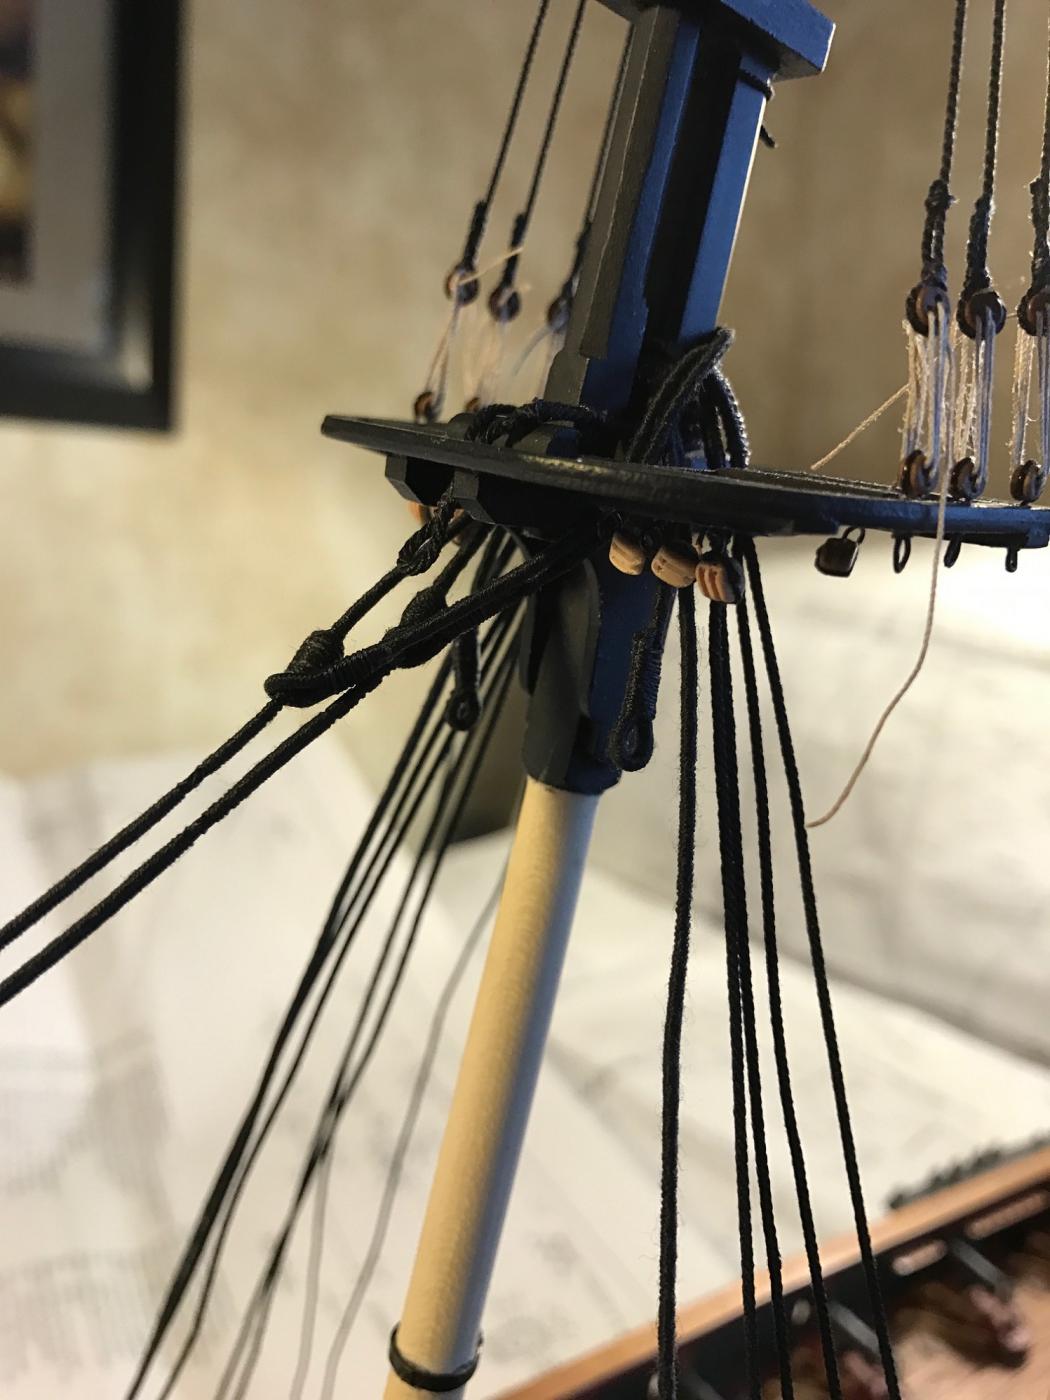
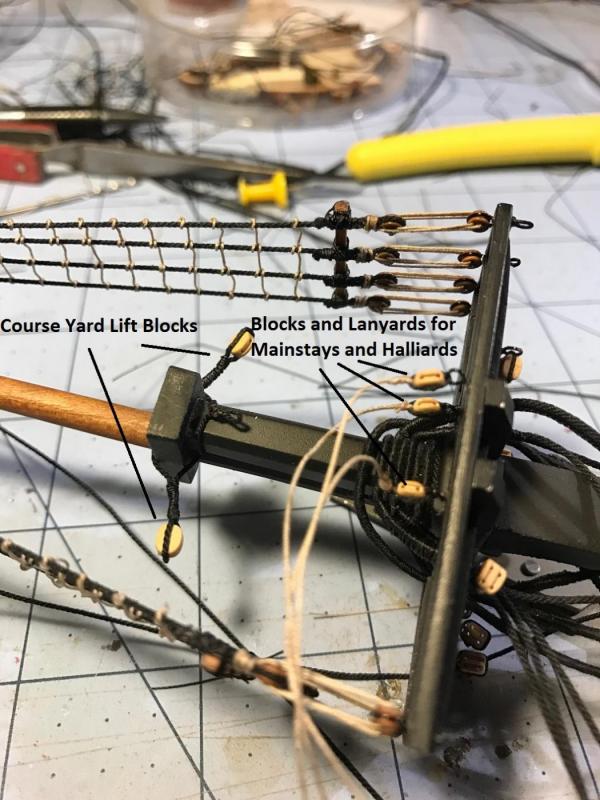
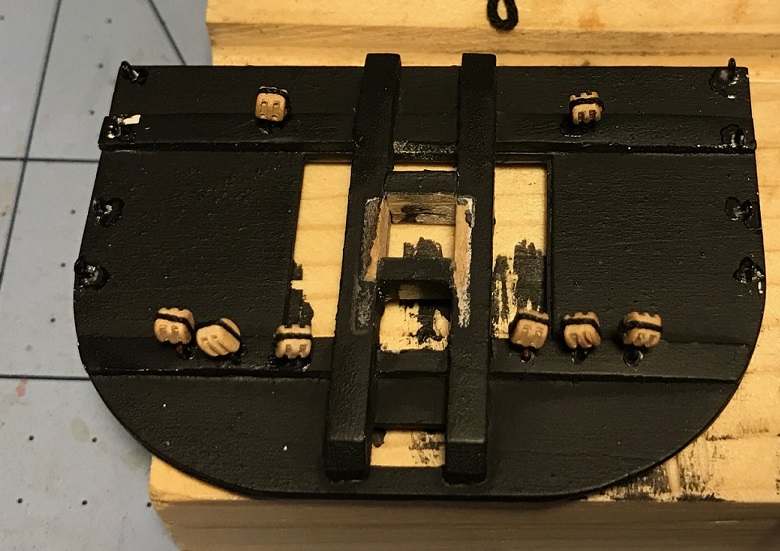
Foremast Course Yard Lift Blocks, Main Stay Blocks, and Upper Top Blocks Spent an entire evening just attaching various blocks to my foremast lower and upper tops. I also attached the Course Yard Lift Swing Blocks. I should have added all of these before I assembled the bottom and top mast, and especially BEFORE I attached the cap and rigged the upper shrouds. I had to sieze the two block assembly on the mast, instead of on the bench. If I had given this more thought, I could have easily put this together in advance and slipped it over the cap before attaching it to the mast head. Live and learn.
- 648 replies
-
- 5
-
-
- niagara
- model shipways
- (and 1 more)
-
Scott, Your ribbing strakes look real clean. Great work. I did not have the courage to tackle that challenge and simply lined the planks up to the edging. I like your choice of stain as well. Good call.
-
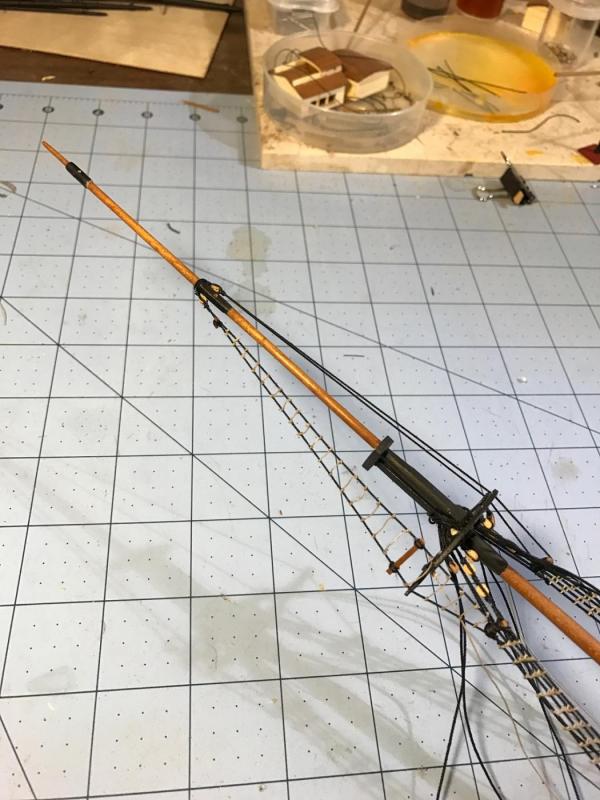
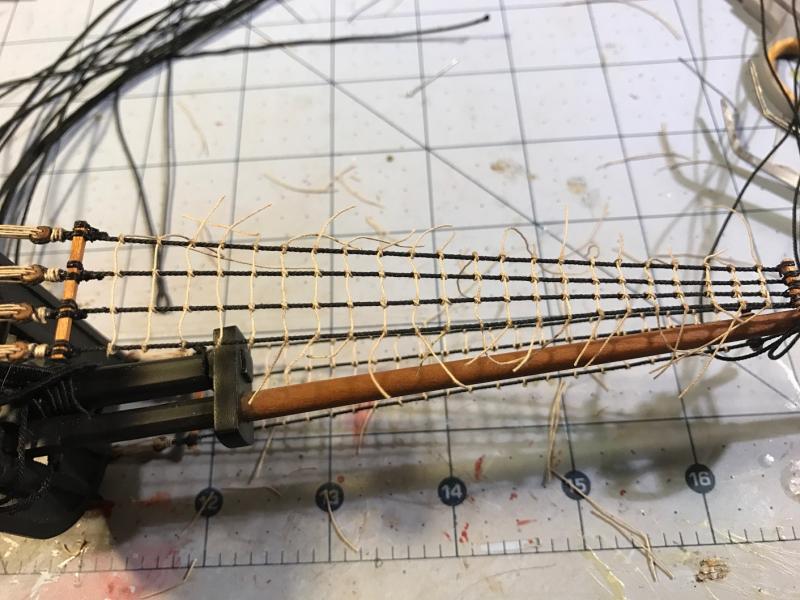
It is laying on the bench. I have a soft clamp on the end holding it down. Tying the ratlines while the mast lays horizontal is about as good as I can get it. I will be attaching the top gallant mast section next and then working on those shrouds. I think I am also going to attach the yards, at least the top gallant and royal, before stepping the mast in the deck hole. I am trying to do as much as I can before I attach the mast. Once I do that, I will then work on the lower shrouds and back stays - at least that is the plan.
- 648 replies
-
- 3
-
-
- niagara
- model shipways
- (and 1 more)
-
MORE KNOTS I worked on the starboard side upper shrouds. I now know why so many folks lament over the ratlines. Of course, mindless repetitive tasks suite me….and Joel, I am not a surgeon, but if anyone needs stitched up with .008 Syren brown rope, I am your mate.

- 648 replies
-
- 4
-
-
- niagara
- model shipways
- (and 1 more)
-
Ken, I like your idea of sectioning your masts allowing you to file the octagon sections from a square stock. Making such cuts on a round dowel is always undersized and does not look good. I started all of my masts from square stock, marked off the octagon section and turned the rest on the lathe. The octagon section was filed by hand. I am lucky to have an indexing pin on my lathe that allows me to make fractional turns of the stock and holds it in place. I then simply file the very top, then turn it 45 degrees, set it and file the top again. It made good looking octagons. I posted some photos in my log. Your tops look marvelous. Gluing the caps on may impede your ability to get the throat collars from the shrouds over the mast head requiring you to tie them on the mast. I just went through that mental exercise. By the way, how big is this ship going to be?
-
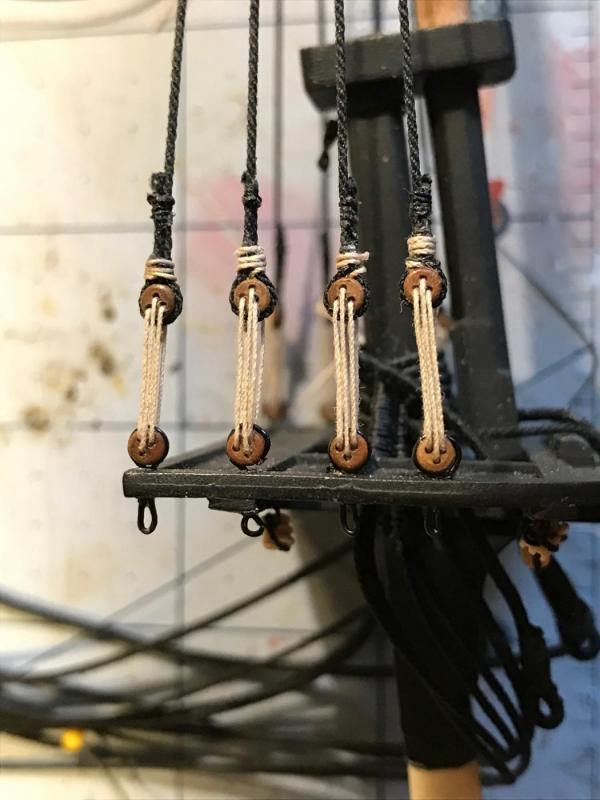
I did not do any temporary fastening. When rigging the lanyards, I did not seize them until all were installed. That allows some give and take to make sure the lines are all tight. The rope does not easily travel through the three holed deadeyes when pulled. If you want to tighten them, you have to pull on the rope coming from the middle hole first to create some slack, and then pull the end. I was kind of surprised that all of the tugging and contorting of the shrouds when I attached the staves and ratlines did not loosen anything up. Up and onward!
- 648 replies
-
- 3
-
-
- niagara
- model shipways
- (and 1 more)
-
Joel and Mike, After some experimenting, and going to with the "best look" for display purposes, I think I will have the yards in their upper positions. I will be pinning the yards initially. I am still trying to figure out what to do with clews, buntlines, sheets etc. I will seizing all of the blocks, whether I actually rig them will depend on whether I ever figure out how to tie things off. Thanks for the help.
- 648 replies
-
- 3
-
-
- niagara
- model shipways
- (and 1 more)
-
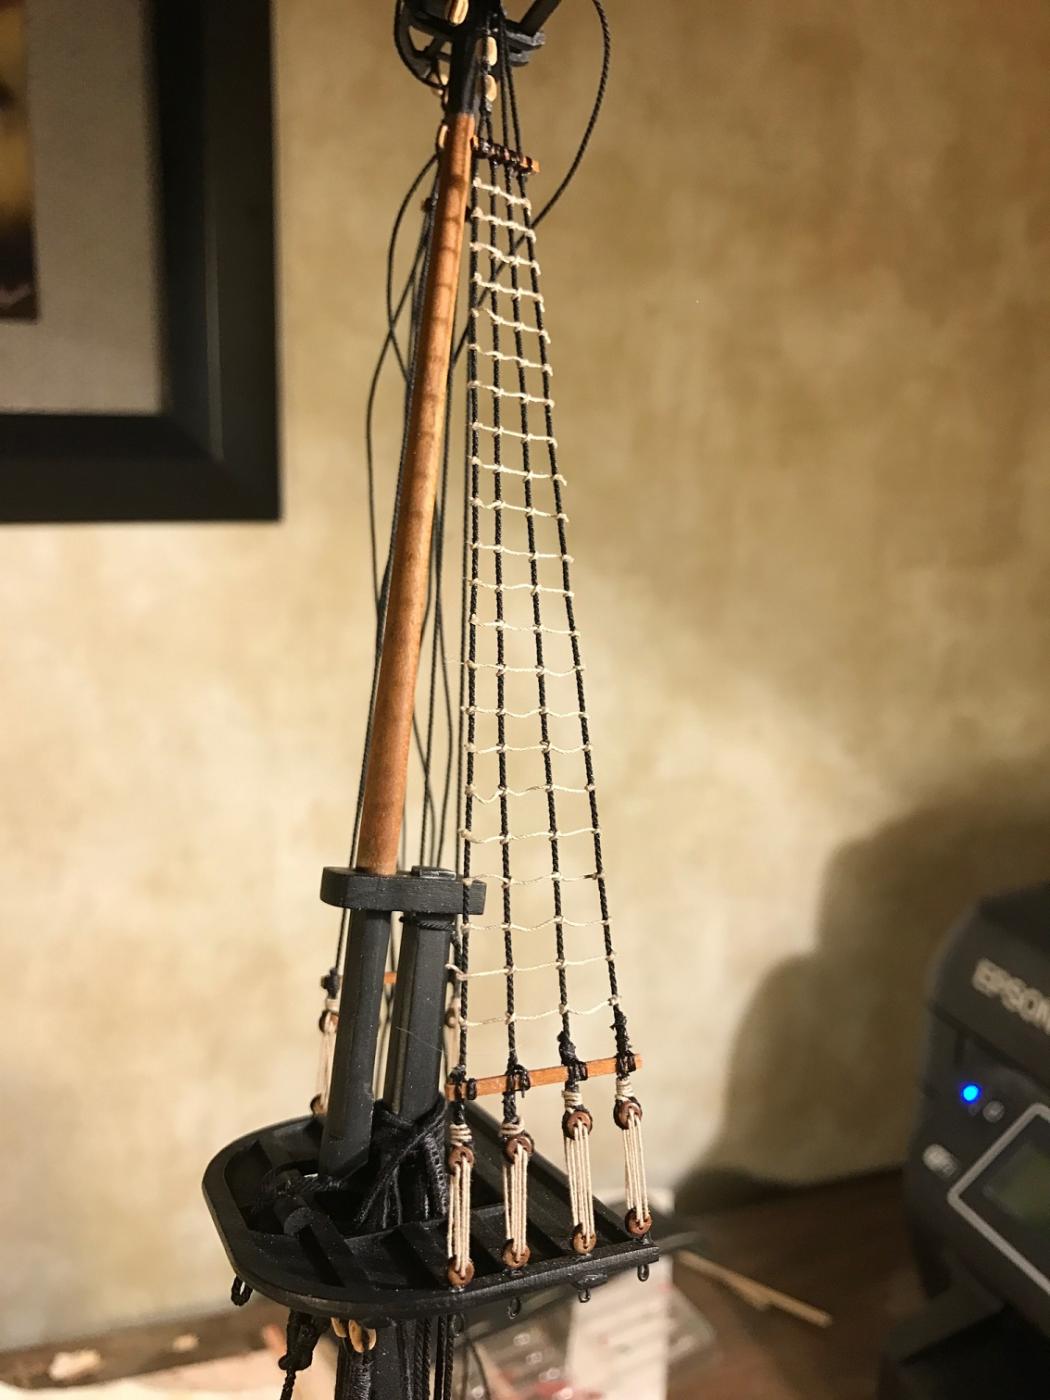
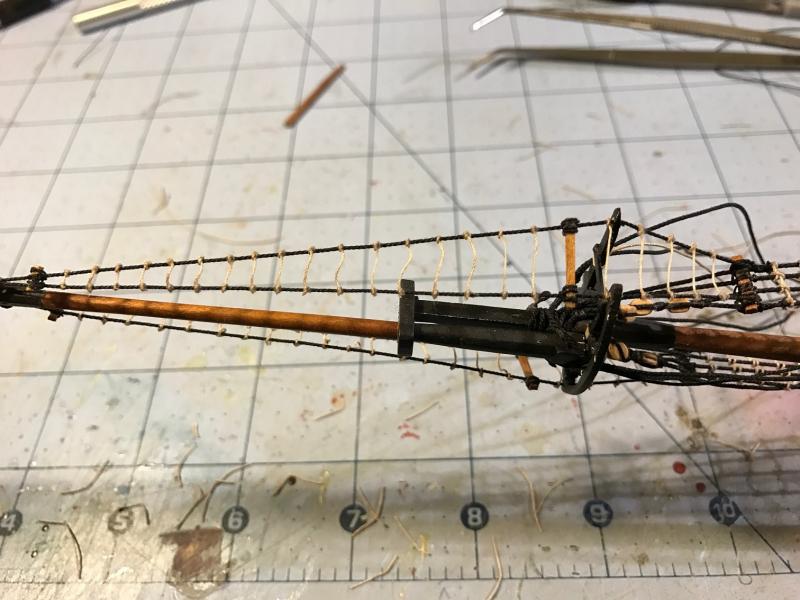
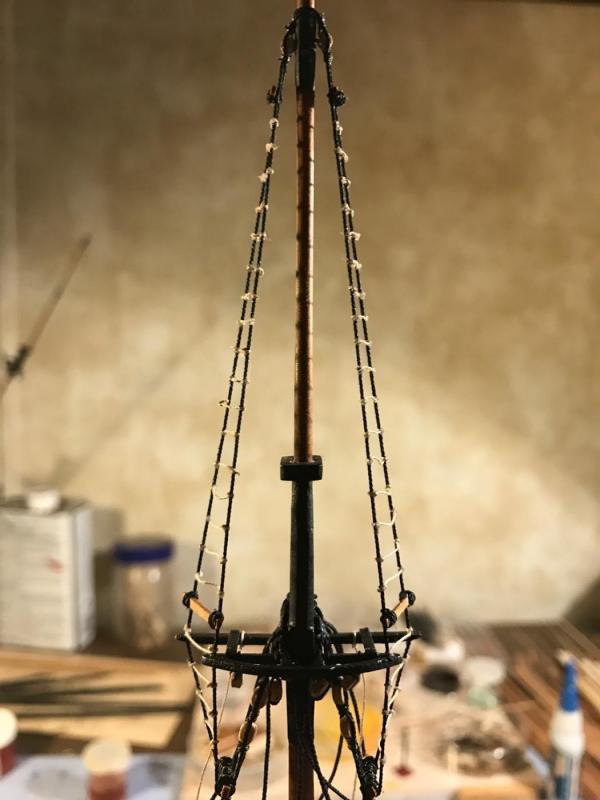
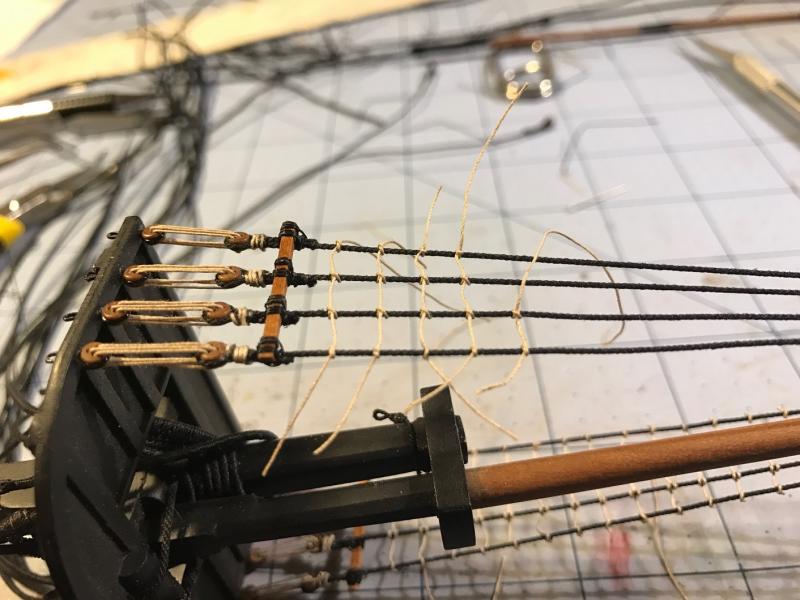
FOREMAST UPPER SHROUDS AND RATLINES I worked on the upper shrouds of my foremast. I created a jig to set the correct length of the shrouds before I seized the deadeyes. Doing this on the bench had great advantages. After setting the length, I was able to mount the rope end into my vice to seize the deadeye. I used .025 Syren rope for the shrouds, and the 3/32” deadeyes. I experimented with .012” and .008” rope for the lanyards, and found that the .008” looked much better in the small deadeyes. The .012 rope was too bulky, and bunched up. I made my staves out of cherry strip wood. I initially glued them in place with a drop of CA to hold them in place while I lashed them. I used .008” for the ratlines. I used half hitch knots on the ends and clove knots in the middle. I dabbed a spot of CA on the half hitches. After tying a few, I started to get into a rhythm. Tedious for sure, but much easier while lying flat on the bench. I was going to paint them black, but like the oiled natural look of the cherry. Tonight I will finish up the topmast shrouds, install the topgallant mast and work on those shrouds. Then a few more stays, and perhaps, just perhaps, I will ready to step the mast. A monumental accomplishment. Then I can finish rigging the jib, and then work on the lower foremast shrouds, a ton of ratlines, and THEN, start all over on the main mast.


- 648 replies
-
- 7
-
-
- niagara
- model shipways
- (and 1 more)
-
*QUESTION* I will be working on the fore topgallant mast riggings next, and may decide to attach the royal and topgallant yards before stepping the mast assembly. That begs an important question that I will now have to face. I am rigging without sails. The plans have the royals and topgallants in the raised position, since it is a plan for full sails. If the sails have been taken off, shouldn't these yards be in a lowered position. And if that is correct, How low should they be. My plans don't give me that. I have a lot of questions of what to do with the bunt, leach, and sheet lines, for the course and top yards but that can wait for another day, and perhaps another portion of the forum. I have already installed the blocks for them.
- 648 replies
-
- 3
-
-
- niagara
- model shipways
- (and 1 more)
-
Joel, Not sure I am hitting the mark on the books, but it looks pretty good to my amateur eye. Thanks for all of the advise over the months.
- 648 replies
-
- 3
-
-
- niagara
- model shipways
- (and 1 more)
-
Mike, Good to hear from your friend. I will take your questions in order. The plan that I came up with is working pretty good. I will be sure to list every surprise or mishap going forward. I should be able to clear the minefield for you. I have not glued anything, and may not. My foremast sits so snuggly in its deck hole that I won't need to. It is also plumb port to starboard. (The main mast is going to be another story since it is listing to port a bit, so I will doing some surgery to the hole ) I have removed the caps and topmast so many times (I rigged the topmast shrouds 3 time already), I am afraid to glue anything. Fortunately, the pieces fit snug enough that I don't think I will have to. No stretching at all, but it is early. The deadeyes in the tops also held up to a lot of pulling, three times over. I only have two sizes of deadeyes - 3/32" (100) and 1/8" (60). My plans call for 9/64" deadeyes for the lower shrouds (which I don't have but are real close to 1/8") and 3/32" for the uppers and backstays. I used the 1/8" for the lower mains and should have plenty left over. I put the 3/32" in the uppers and for backstays, and should have plenty of those as well. Of course, I am not using any of them for bullseyes, as I am making my own. As for juice, thanks back at you. Your wonderful work inspires me to keep slugging it out. Go Tribe.
- 648 replies
-
- 4
-
-
- niagara
- model shipways
- (and 1 more)
-
Jerry, Simply awesome. My hat goes off to you trooper. The video is really neat. What an amazing ship. It actually beats to windward!. I have an idea. My father was a model train nut, and he had some liquid that when a dropped into the stack created smoke. Not sure how it works, but it would be really cool to rig up all the cannons and let loose with a full broadside. Congratulations again!
- 553 replies
-
- 2
-
-
- sloop of war
- constellation
- (and 3 more)
-
Bob, Greetings from Zoar Ohio in Tuscarawas County. Welcome aboard. What part of Ohio are you in? I have to second Lee's invitation to join the Shipwrights of Central Ohio. I just did. I have not been able to attend any of the monthly meetings, but the newsletter is first rate. You found the right forum. I am currently up to my eyeballs on the running rigging on the Niagara, and could not have figured it out without the gracious help from the experts on this forum.
-
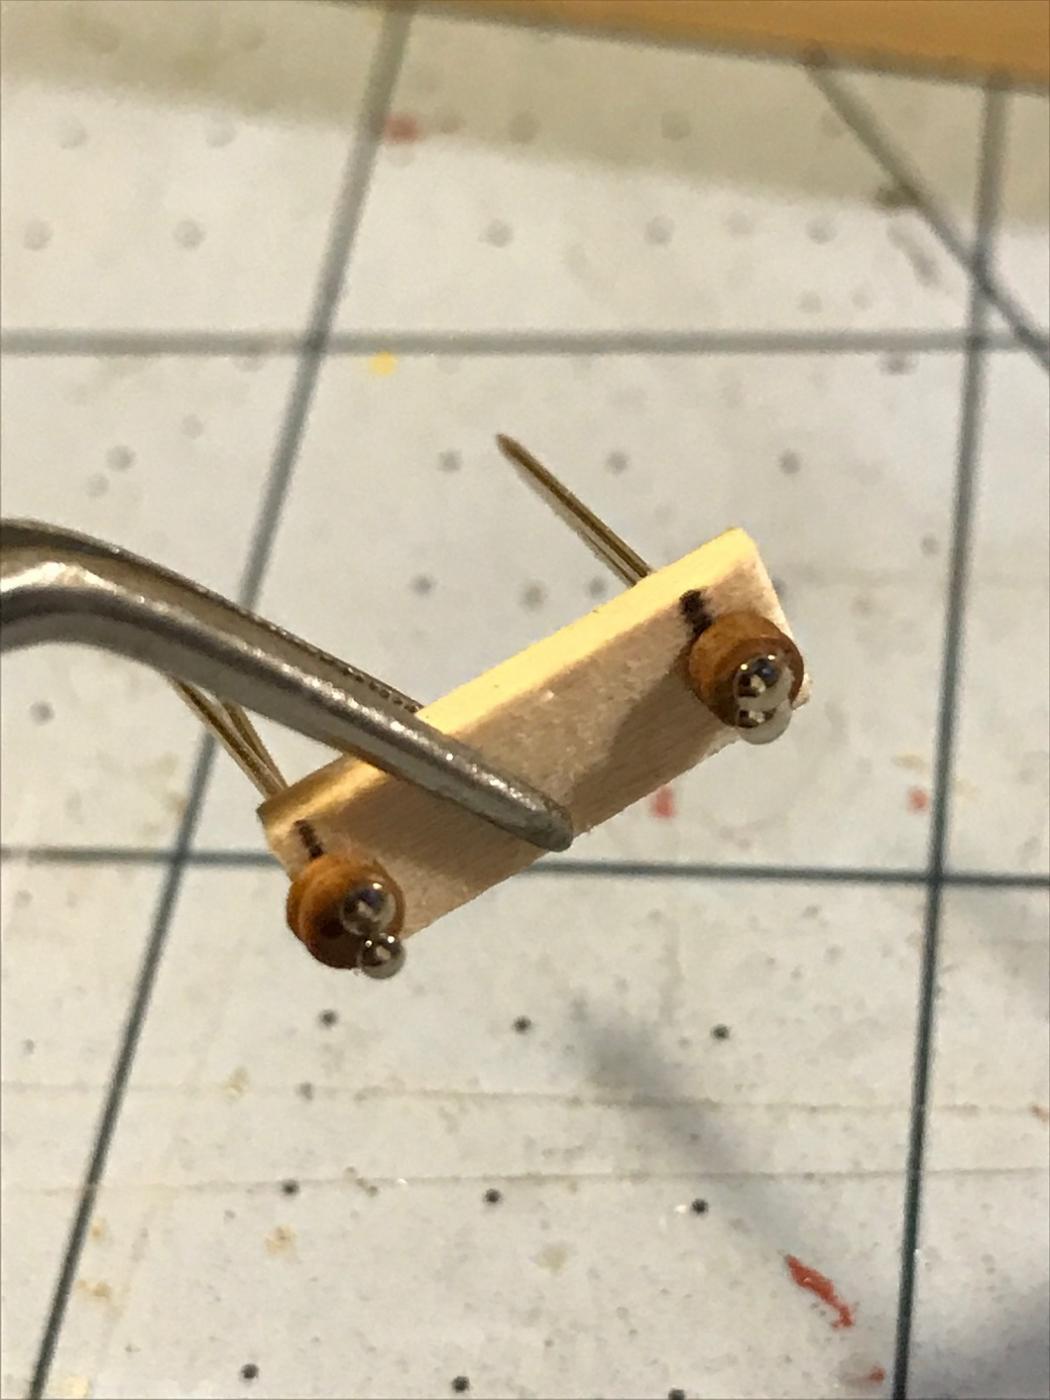
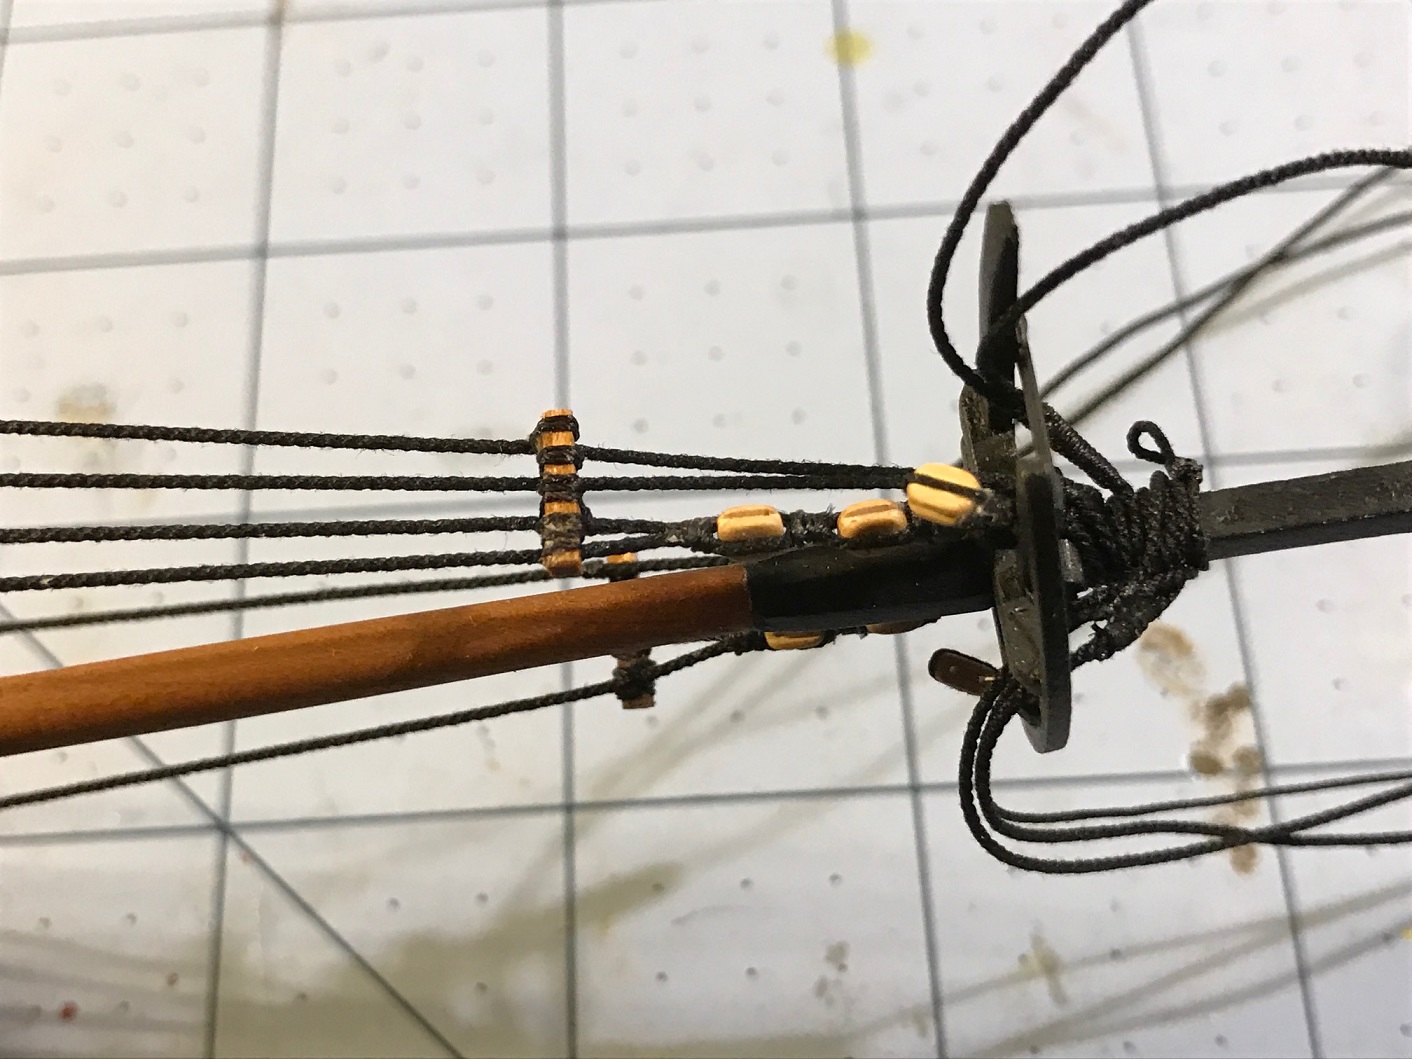
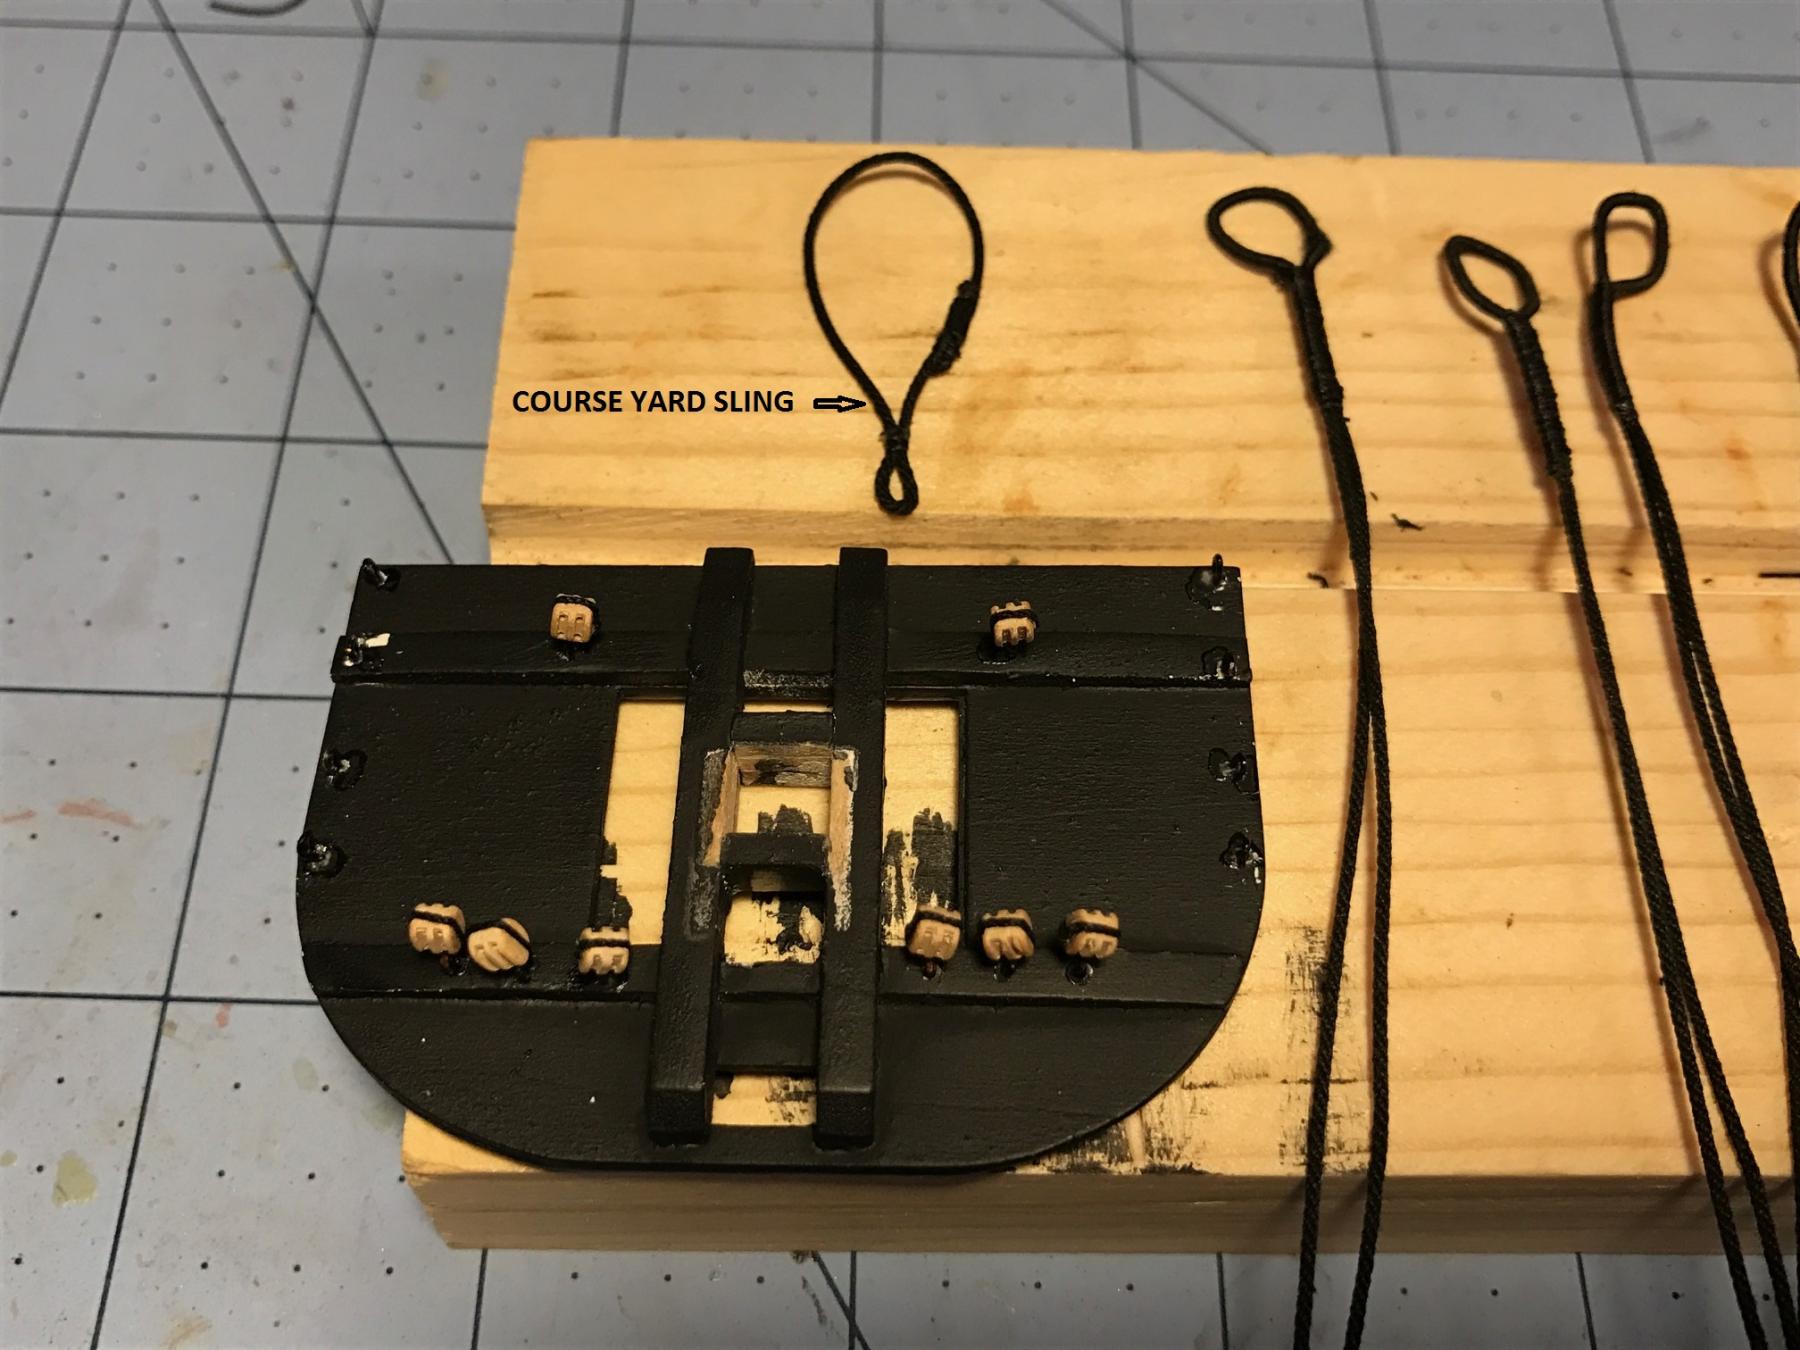
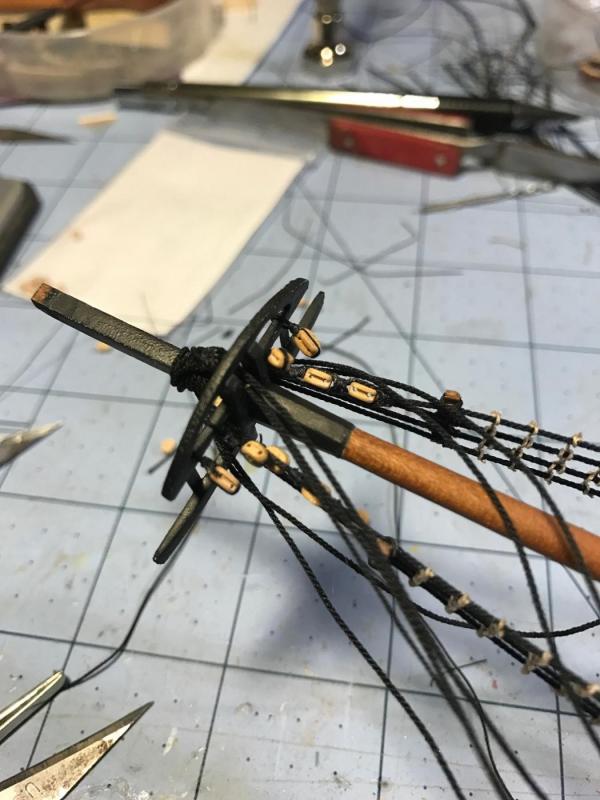
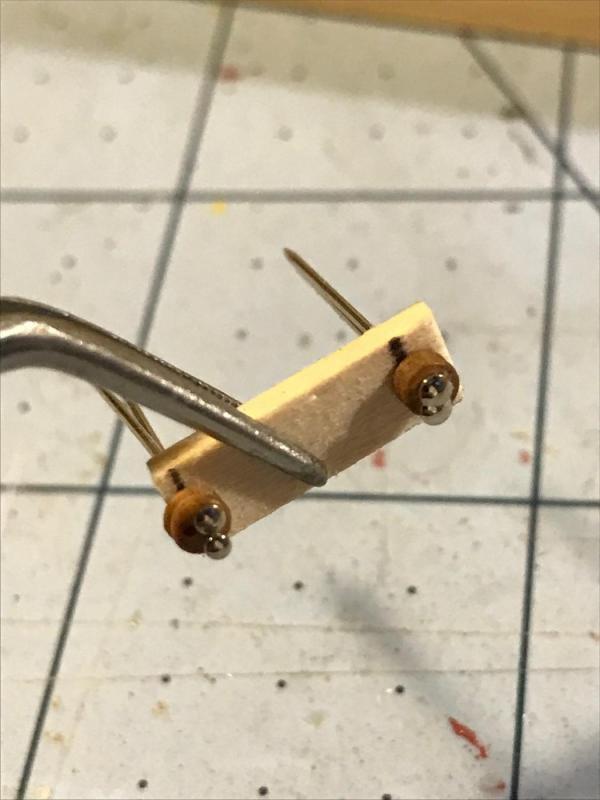
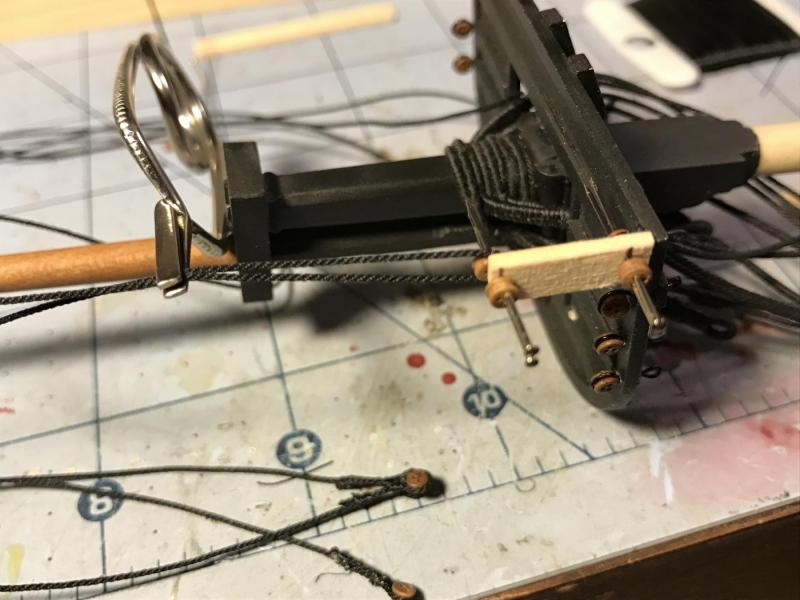
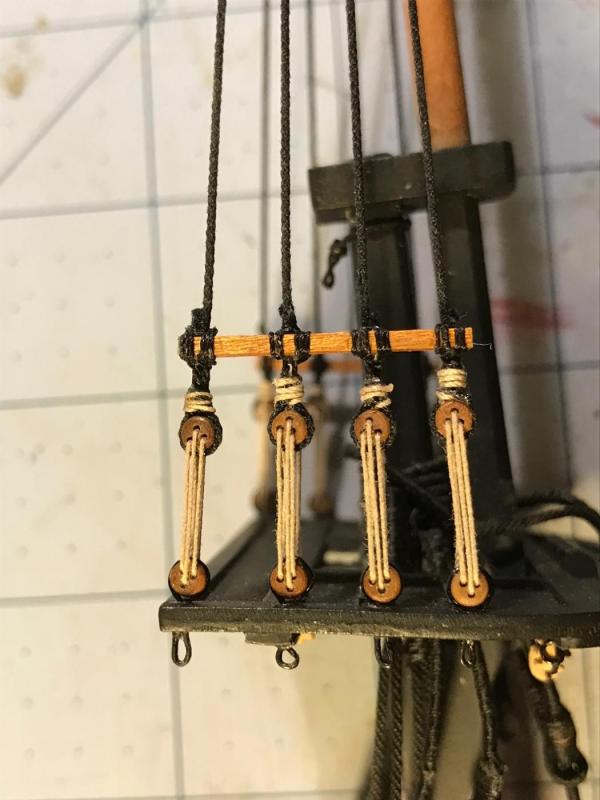
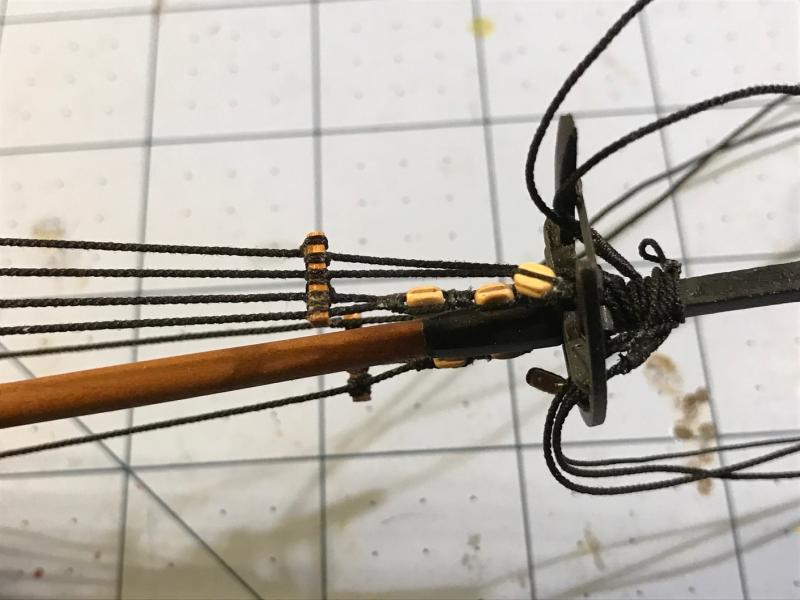
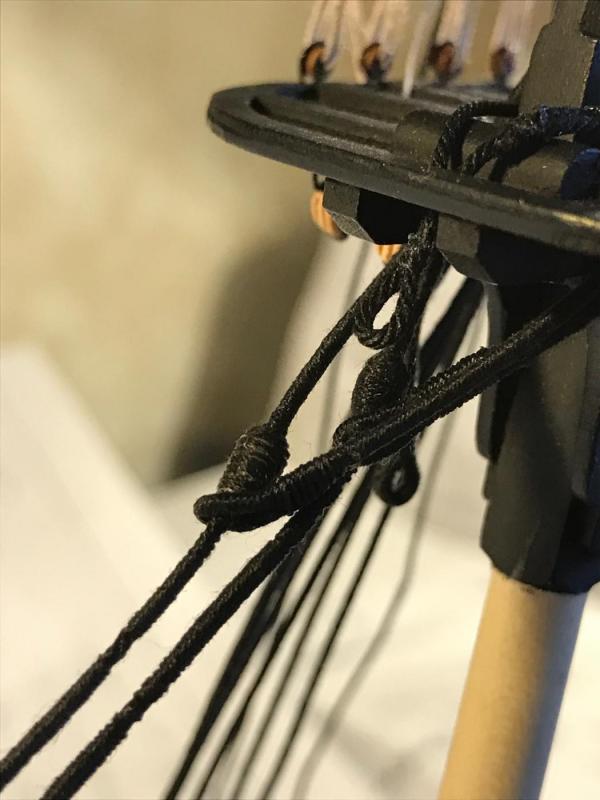
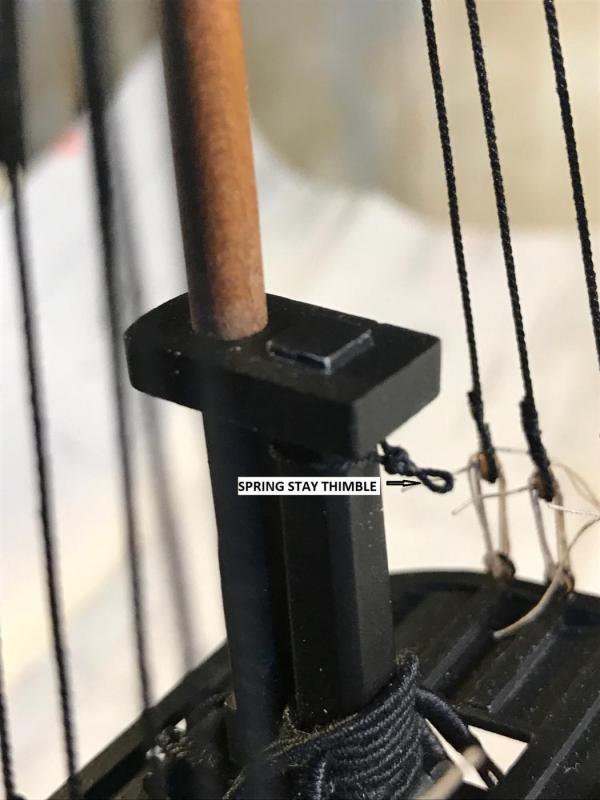
FORE TOP TREE Once I had created all of the various rigging devices that slipped over the fore lower mast head, I worked on the tree. I seized all of the double blocks to eye bolts, drilled holes and glued them under the tree. Using a .28 gauge wire, I stropped the kit supplied 3/32” deadeyes, creating the elongated loop at the bottom. I created a cradle with the wire around the deadeye first, and then slipped the wire through the hole in the tree. I then pulled it up to make the loop, and inserted the end through the hole. I cut both ends of the wire flush with the tree and added a small drop of CA. This method was relatively easy, and the joint is hidden in the hole and more importantly, the joint has held up to all of the pulling from the lanyards. I then glued the tree to the cheeks and the fore mast, and then slipped the riggings over the top. FROM WHAT I CAN TELL, since there is no reference in the plans that I found, and the drawings are too small and vague, the order of installation was as follows. 1. Course Sling. I figured that since this carried the weight of the course yard that it would have naturally been placed firmly against the mast head and tree. The plans do say that stays are always placed on top of shrouds, but there was no reference to where the sling went. I just put it on first. 2. Burton Pendant Shrouds - Starting on the starboard side 3. Double Shrouds – alternating from starboard to port 4. Fore Stay. 5. Preventer Stay. 6. AND DON’T FORGET – The Spring Stay Thimble – I did.

- 648 replies
-
- 7
-
-
- niagara
- model shipways
- (and 1 more)
-
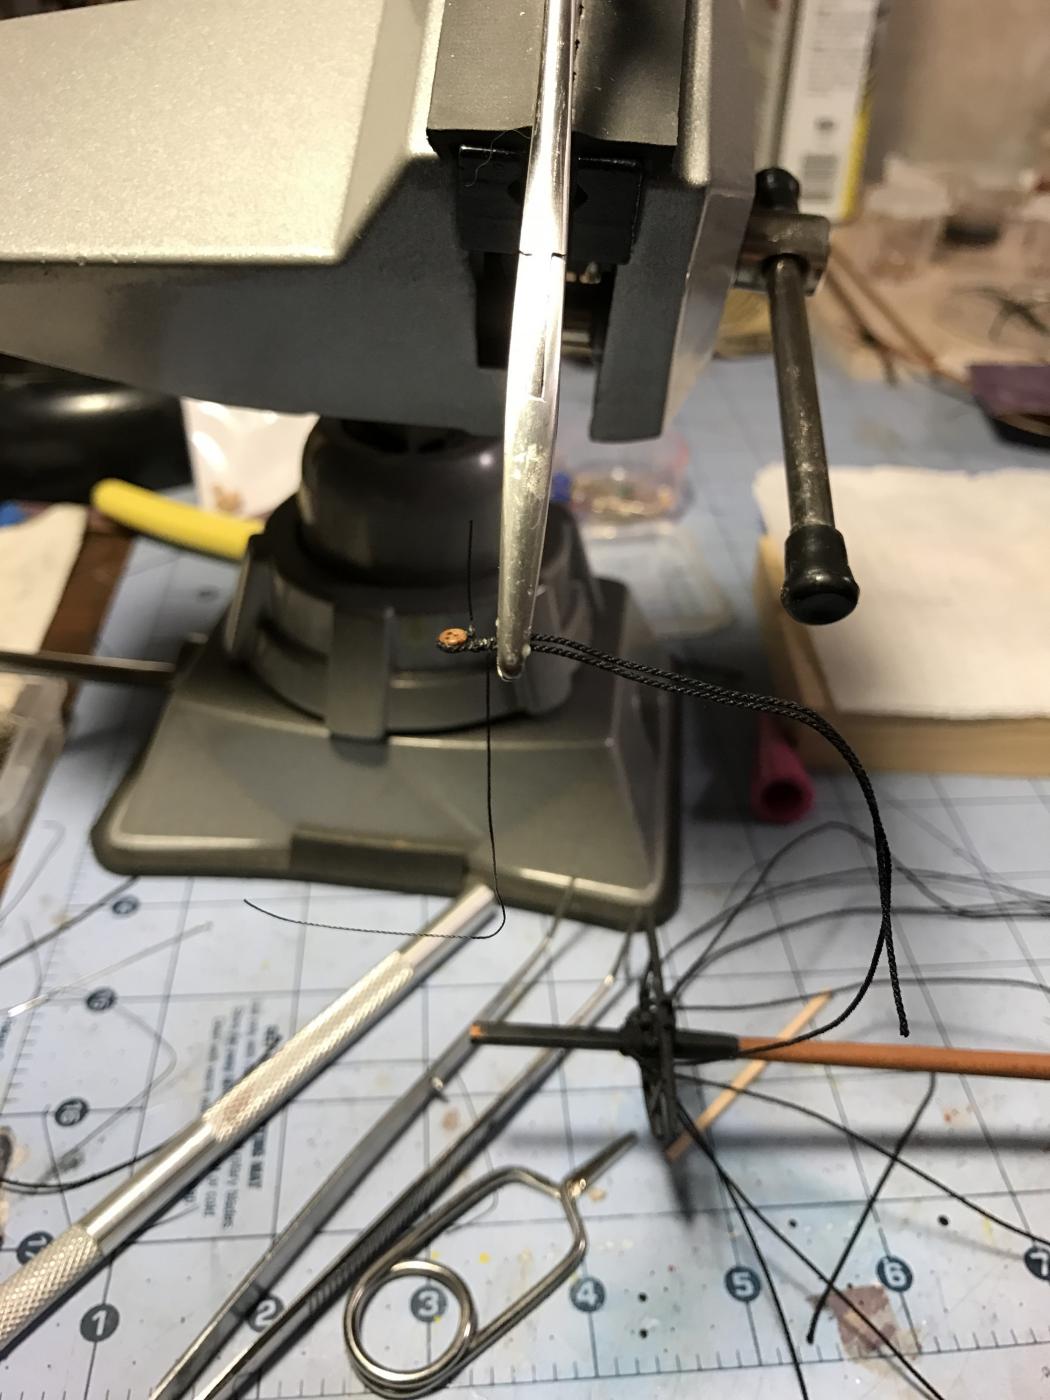
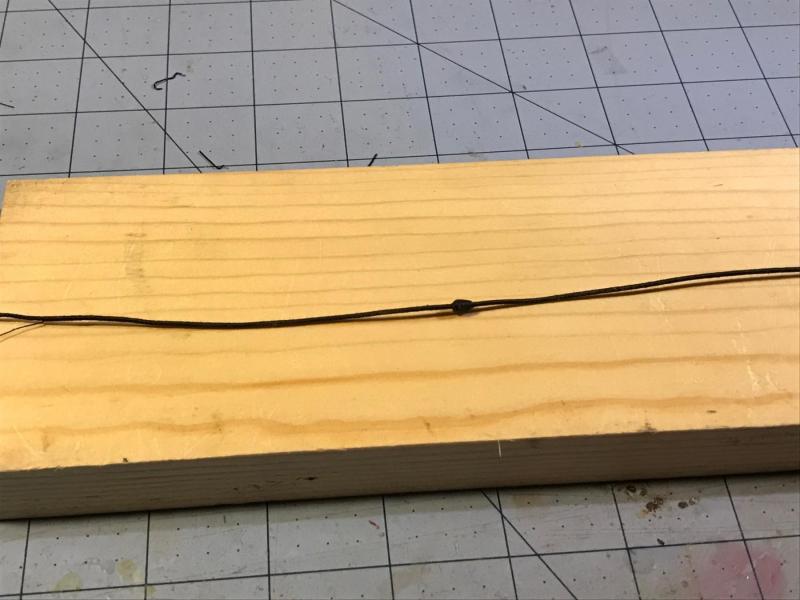
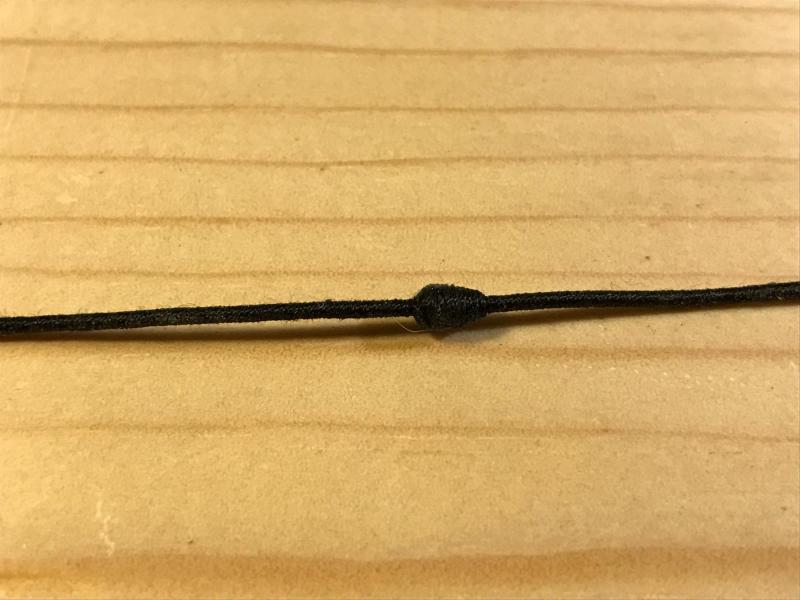
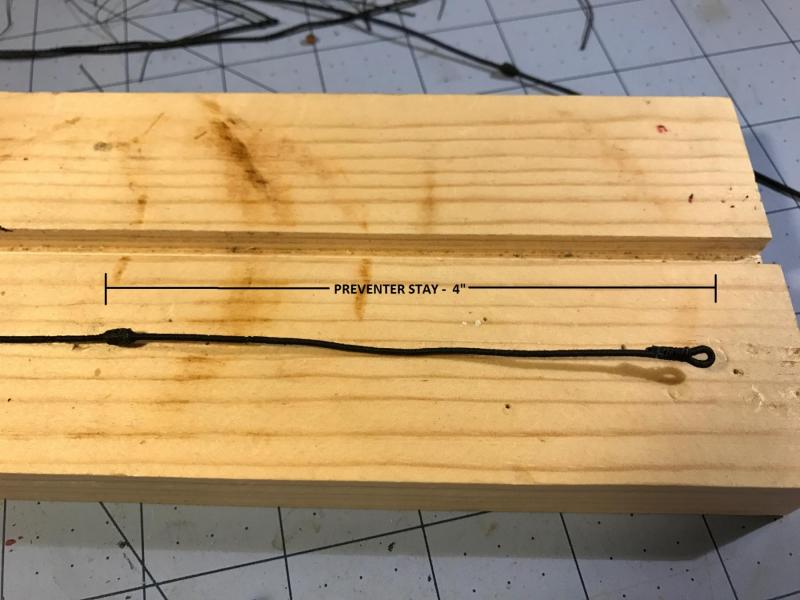
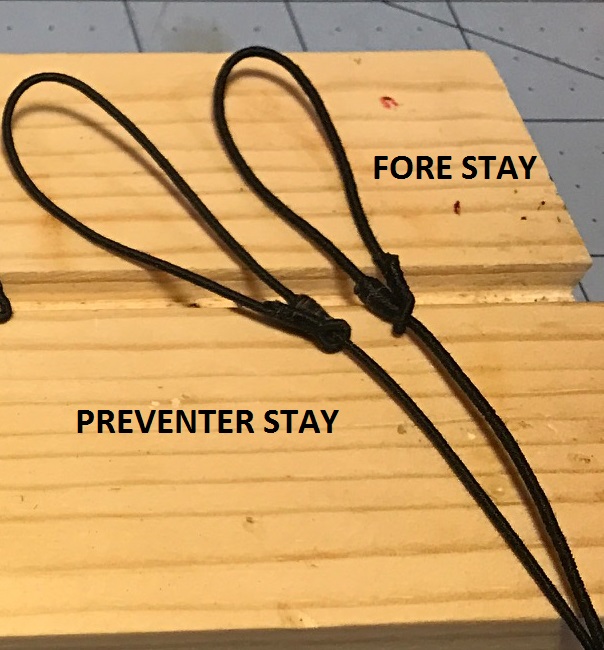
FORE STAY AND PREVENTER STAY I decided to serve the entire run of these stays. I started with Syren .045 rope for the Fore Stay and the .035 for the Preventer Stay. I created the mouse by turning them on the lathe much like I did when I created my bullseyes. I slid them onto the rope and served right over them. I added a spot of yellow glue on the mouse to keep the serving thread from sliding off. It worked pretty well. I then created the thimble/eyesplice on the end with a traditional lashing. I left 3.5” from the eyesplice to the mouse on the Fore Stay and 4” on the Preventer Stay.
- 648 replies
-
- 4
-
-
- niagara
- model shipways
- (and 1 more)
-
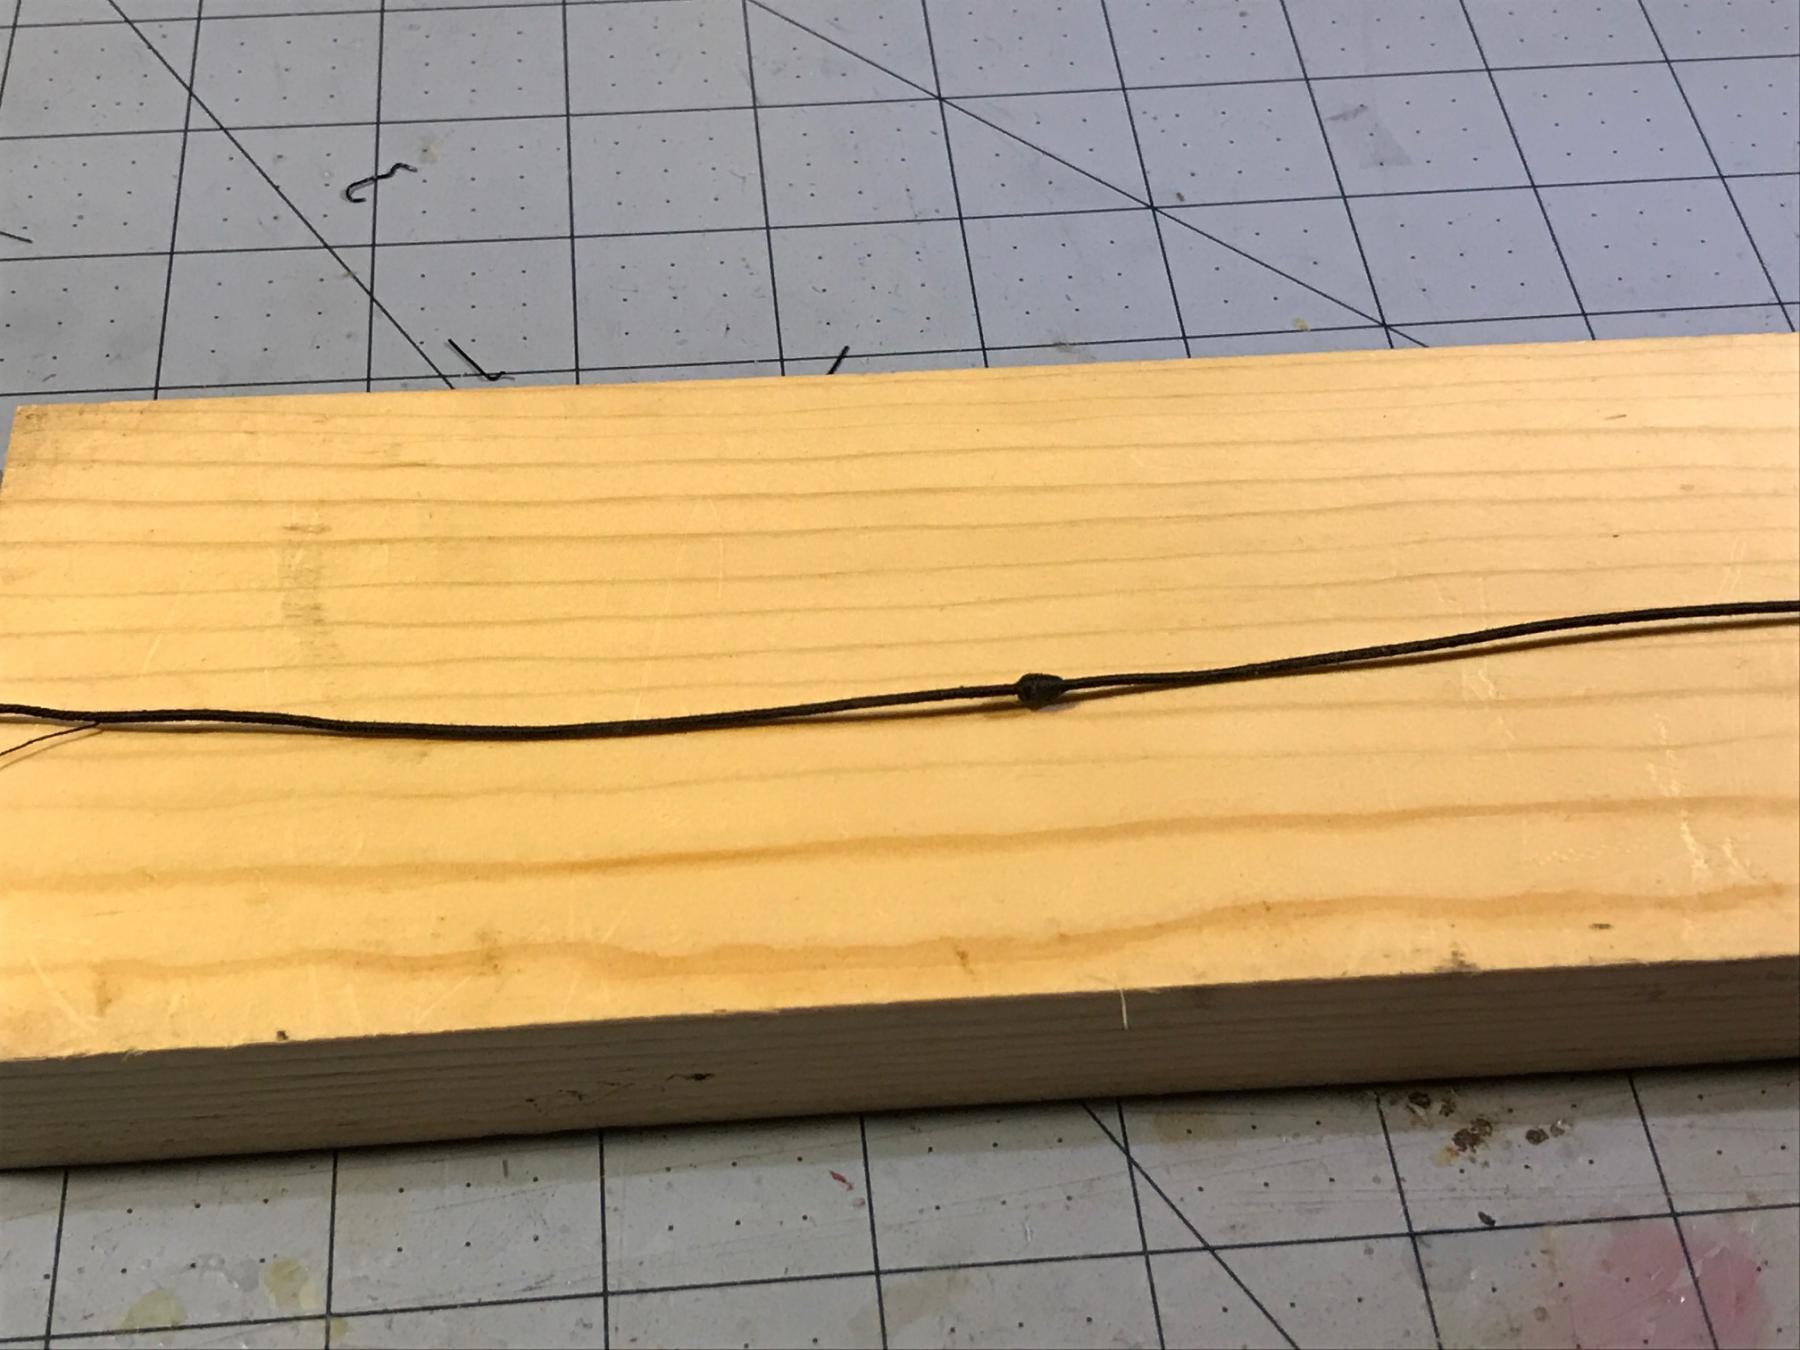
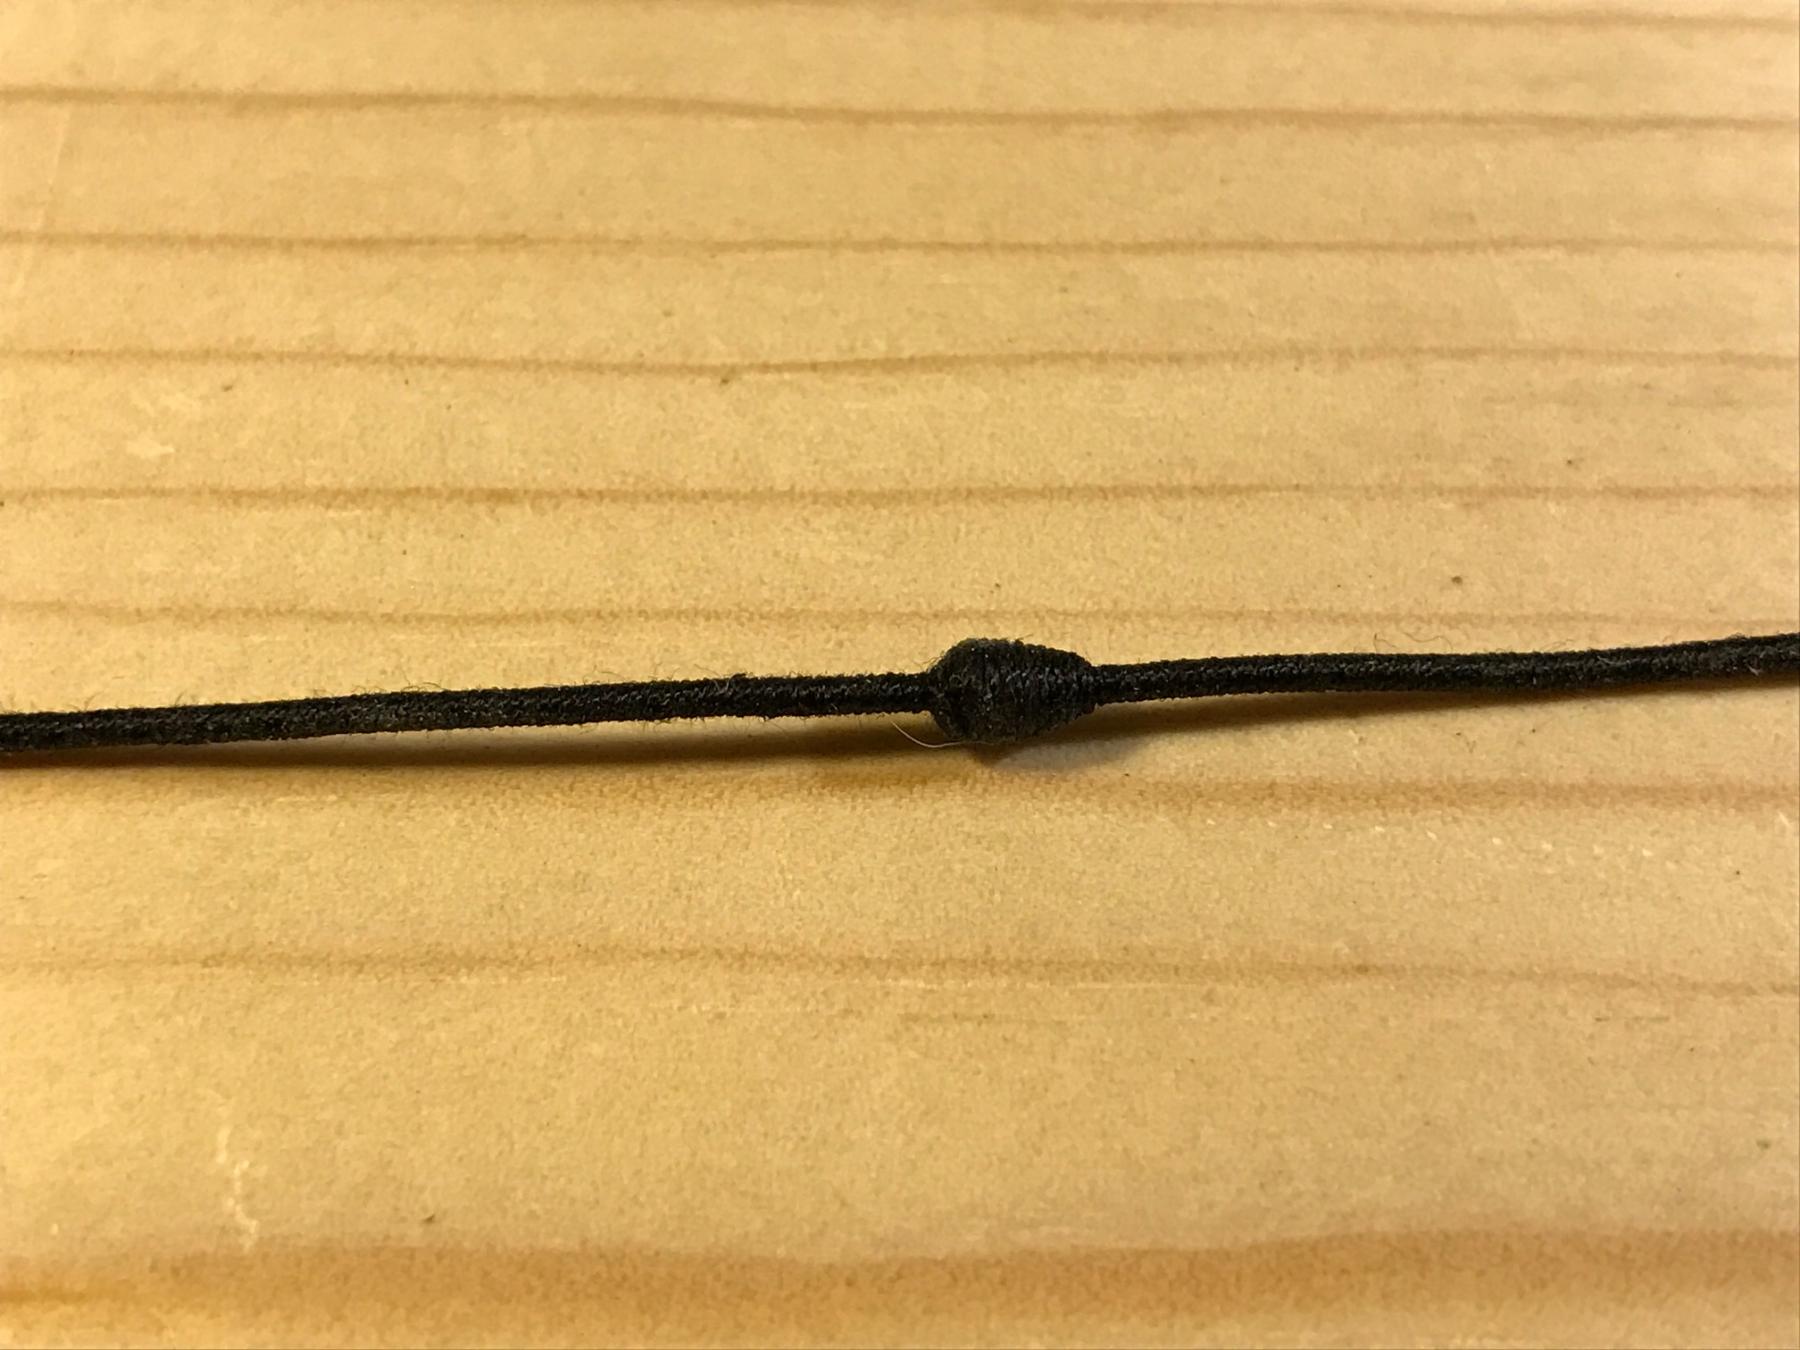
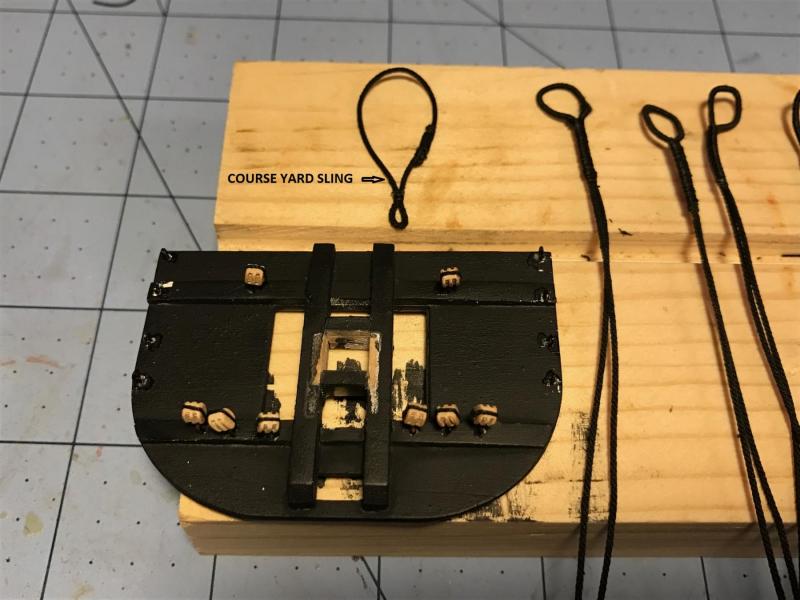
COURSE YARD SLING I seized a thimble with a traditional whipping and tied the ends together with a double whipping as per the plans. I used .035” rope.
- 648 replies
-
- 4
-
-
- niagara
- model shipways
- (and 1 more)
-
Bian thanks for confirming that. I was thinking the same thing. It will also be a lot easier to "undo" something if I screw something up. Steve, The problem with the rigging plan is that it includes all of the sails. I am rigging the ship without sails. It is hard to seperate out all of the clew, sheet, and buntlines from the plans, and there is not enough detail to show how some things are belayed or tied off. Some of the rigging lines on the plans don't connect with themselves in places, and when there are multiple lines running the same way, it is very difficult to follow. It requires a lot of outside research and knowledge of sailing ships. And to be honest, it would not take much to alter the plans to provide the details we need. Are you out there Model Shipways??? It is a phenominal kit. We just need a little more direction for the rigging.
- 648 replies
-
- 4
-
-
- niagara
- model shipways
- (and 1 more)