-
Posts
543 -
Joined
-
Last visited
Content Type
Profiles
Forums
Gallery
Events
Everything posted by 6ohiocav
-

whats an easier build for a first kit
6ohiocav replied to rdestefano01's topic in Wood ship model kits
I can tell you exactly what happened before this forum. I was a big modeler in my younger days, but had never built a wooden planked ship. In the late 80"s, I purchased Artesania's La Toulonnaise. I never got passed the initial stern and transom construction. I got lost in the poorly translated instructions and with no help in sight, abandoned the project. This site renewed my interest in ship building, and has given me the courage to re-enter the water. Good luck with whatever you decide. -
Great question and one that I have given some thought to. I use a desk lamp on a movable arm (with a magnifying lense that I rarely use) with an incandescent bulb on my left. On the right, I have another desk lamp with a shade and normal bulb. My den has an overhead light that I can use as well. Combined, I can almost eliminate the shadows created by my fat fingers, which to me is the biggest problem. I work during the day and do most of my model work at night, so lighting is always a concern. Since starting this project, I have had to upgrade my reading glasses from a 1X to a 2X. I consider that a battle casualty. An interesting side story. Earlier this month, we had a power outage. I think I was rolling rope coils, and decided to finish up using candle light. Thought I would experience what it was like in the 19th century.
- 648 replies
-
- niagara
- model shipways
-
(and 1 more)
Tagged with:
-

whats an easier build for a first kit
6ohiocav replied to rdestefano01's topic in Wood ship model kits
Rob, Welcome aboard. I am a newbie as well working to finish my first ship. Your question caught my eye since I too want to sometime build the 1/48 Surprise or USS Constitution. Both would be on my list. However, years ago when faced with the same question you asked, I opted to start small and chose the Niagara. I am partial to war ships, and being from north eastern Ohio, it was easy for me to get excited to build a Lake Erie classic. It is a beautiful ship and I am learning a lot. It is also about half the price of the other kits, and has yet to overwhelm me. I feel confident that the skills I have picked up will serve me well for the next project. Having said that, there are builders on this site that have tackled the Constitution as their first build and seem to be doing fine. There are also a lot of build logs on the Conny, not so much for the Surprise, so you won't be going it alone. Just my humble opinion. Good Luck and welcome. -
Oh, I forgot. Make sure you strop a cold one once in a while to heal the eyes and brain.
- 648 replies
-
- niagara
- model shipways
-
(and 1 more)
Tagged with:
-
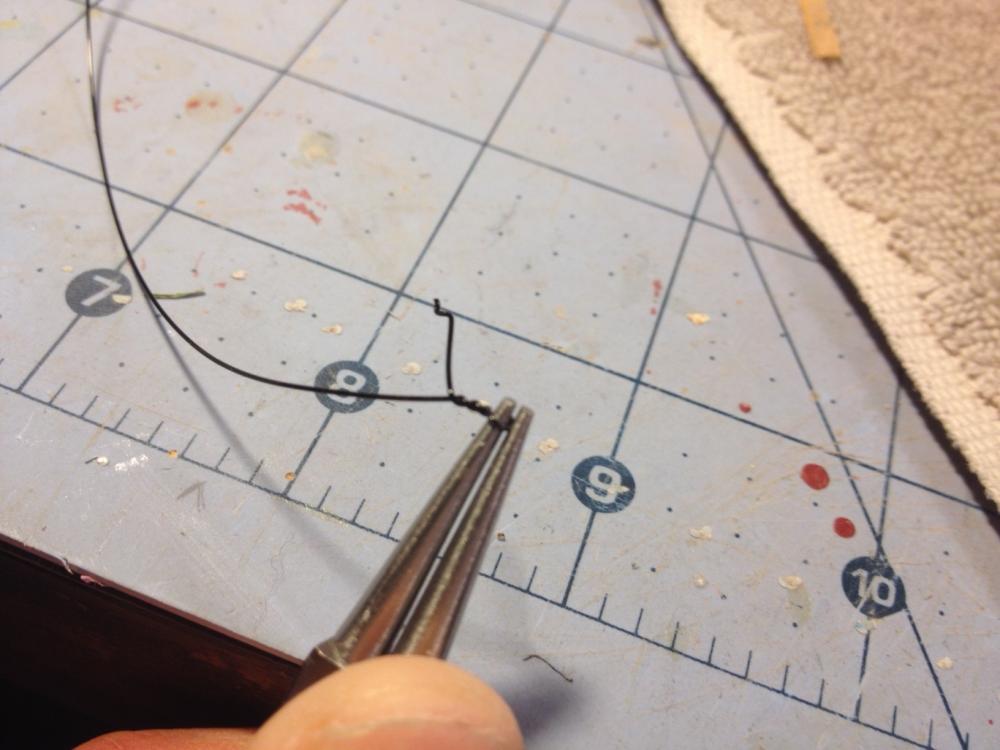
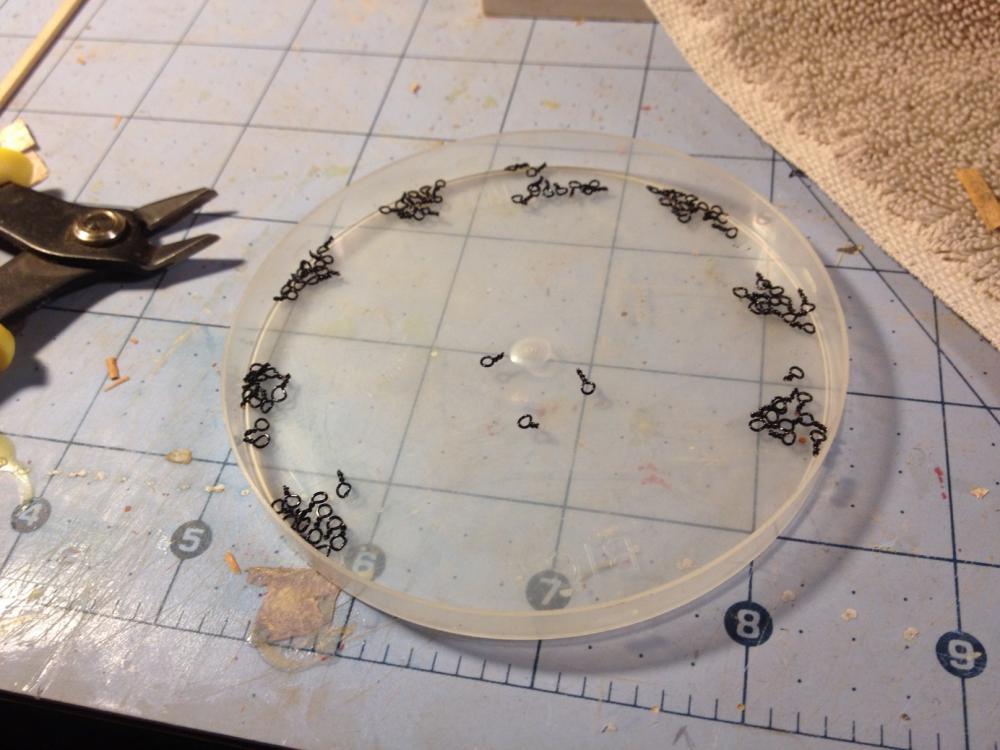
Mike, I don't know if this will help, or if indeed you are doing it this way, but I did the task systematically. That is, 1. I made all of my eyebolts at one time (170). 2. I then seized all of my tackle loops at one time (80). 3. Then stropped all of the single blocks with loops and hooks at one time(80), 4. Then the double blocks with hooks (80). 5. I then seized all the eyebolts to the breech lines and passed them through the sled and carronade rings and seized the other end to an eyebolt. 6. I installed all of the eyebolts into the bulwarks and waterways. Doing these tasks separately gets you into a rhythm, and you get efficient doing it. Only after assembling all of the component parts did I start going down the line to install the guns on the deck carriages. Regardless, seeing all of that intricate handy work blossom on to the deck is worth the effort. I still have those "did I actually do that" moments.
- 648 replies
-
- niagara
- model shipways
-
(and 1 more)
Tagged with:
-
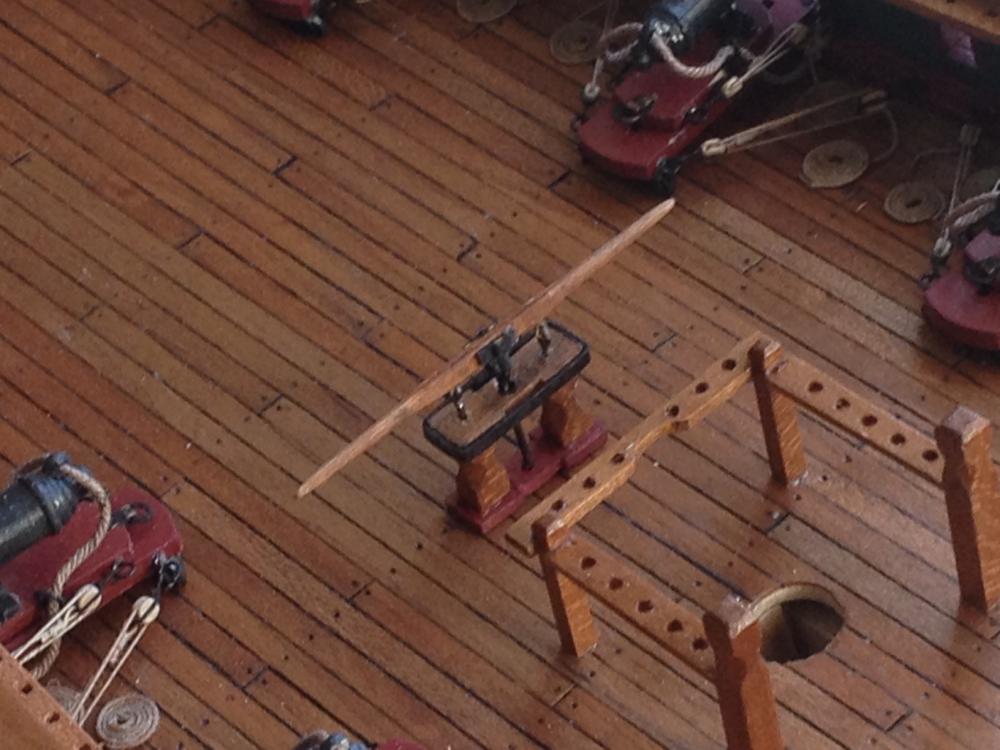
I drilled two small holes. My crew is glad that it can remove the water from the leaky hull! I have not glued the pump down on the deck yet. I may wait a while. This thing is very delicate. One bump, and I think the handle will completely fall apart. How is the "stropping'?
- 648 replies
-
- niagara
- model shipways
-
(and 1 more)
Tagged with:
-
Joel, Your Lexington Rudder is a work of art. That does not look like a laser cut part. What type of wood is it made from.
- 648 replies
-
- niagara
- model shipways
-
(and 1 more)
Tagged with:
-
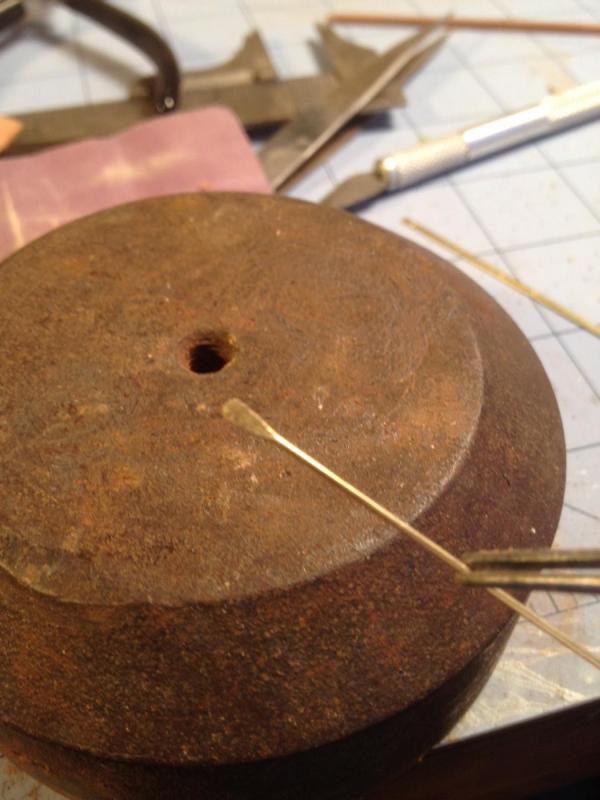
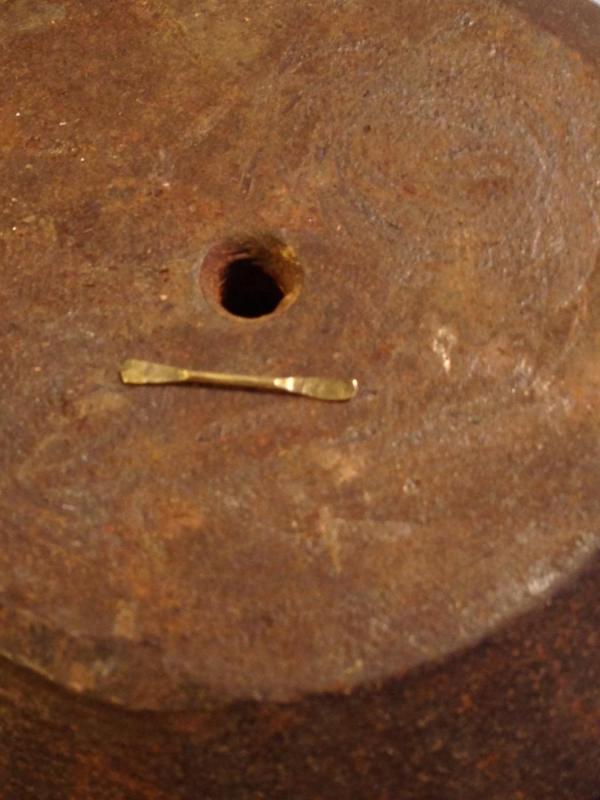
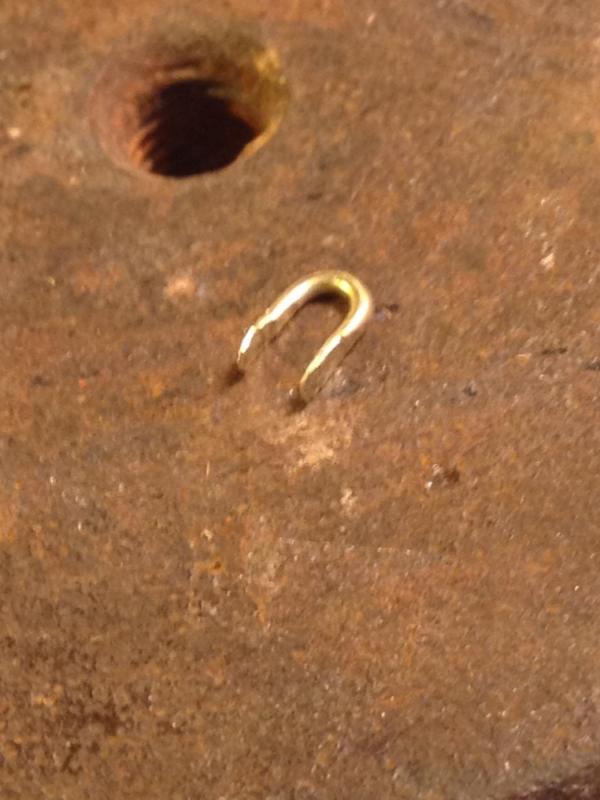
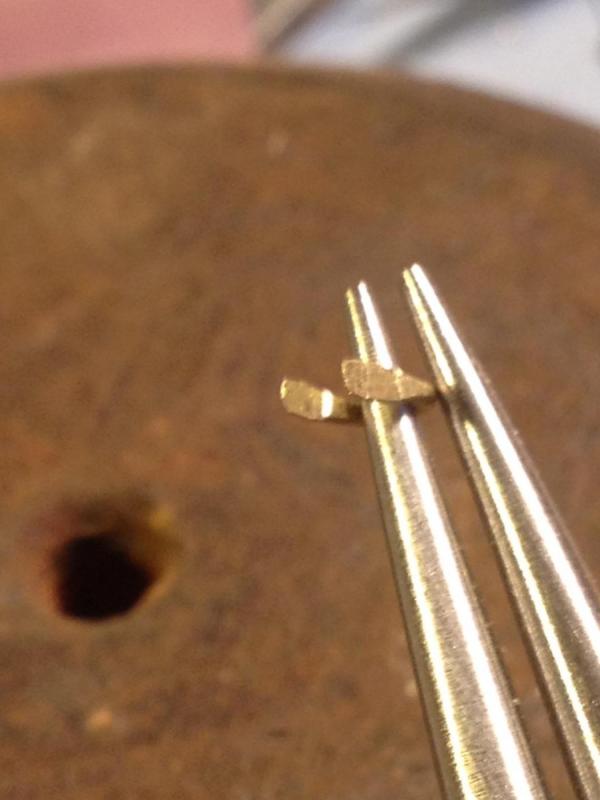
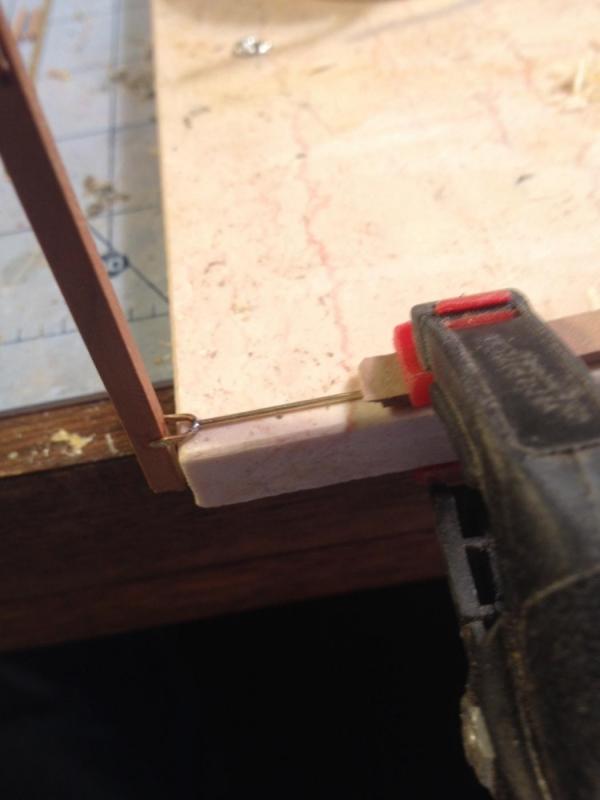
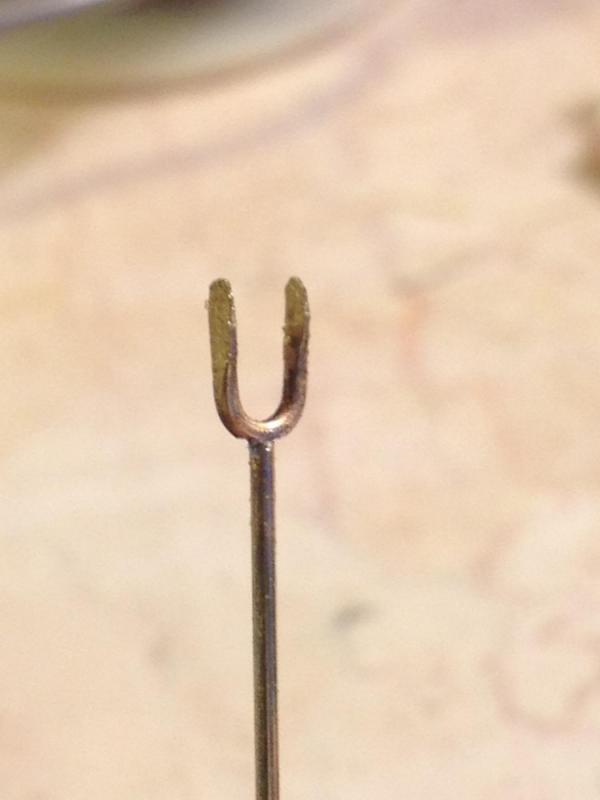
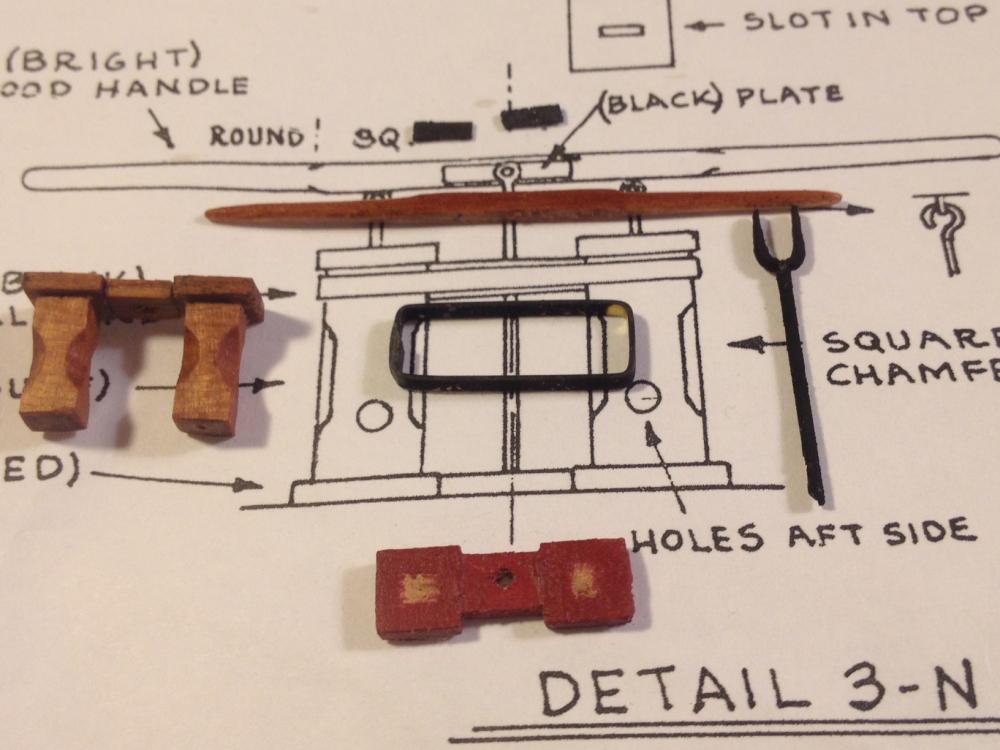
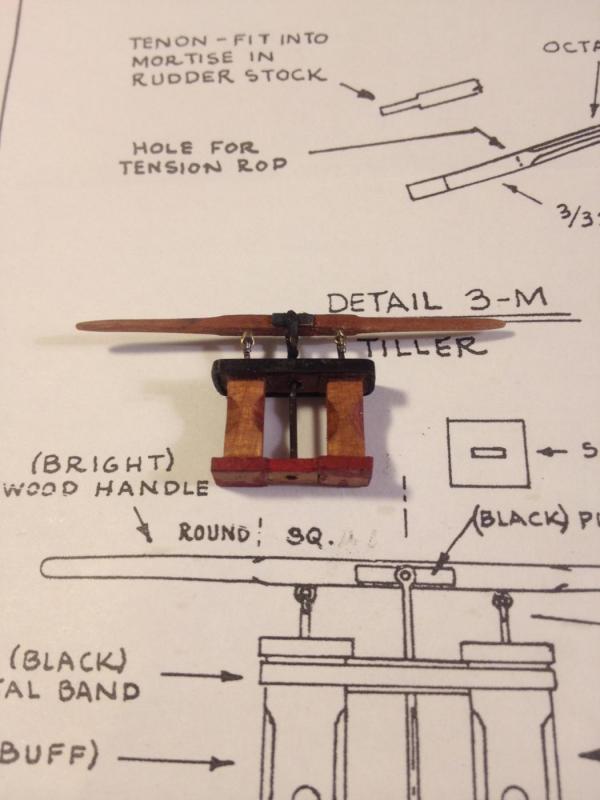
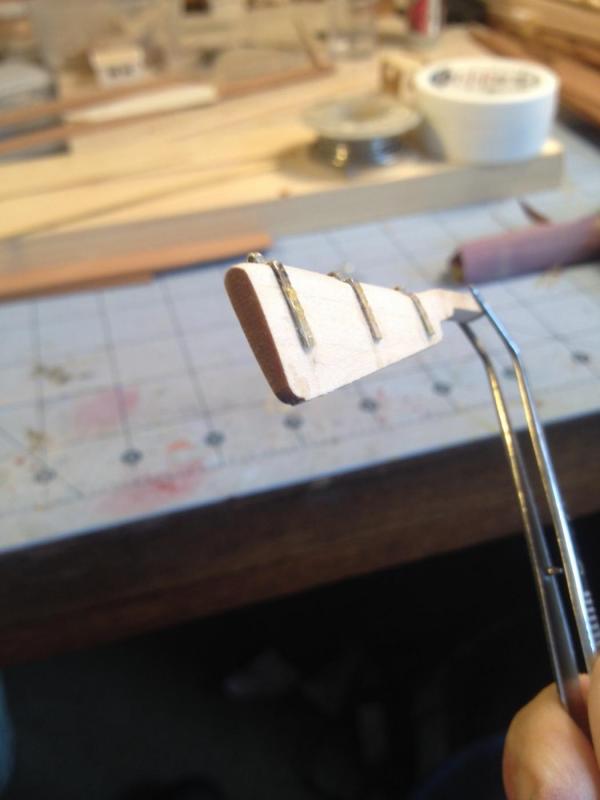
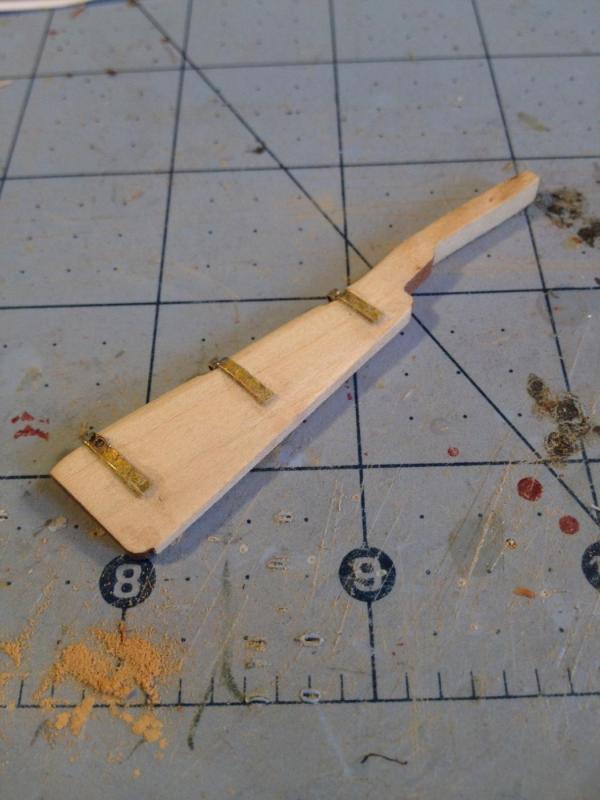
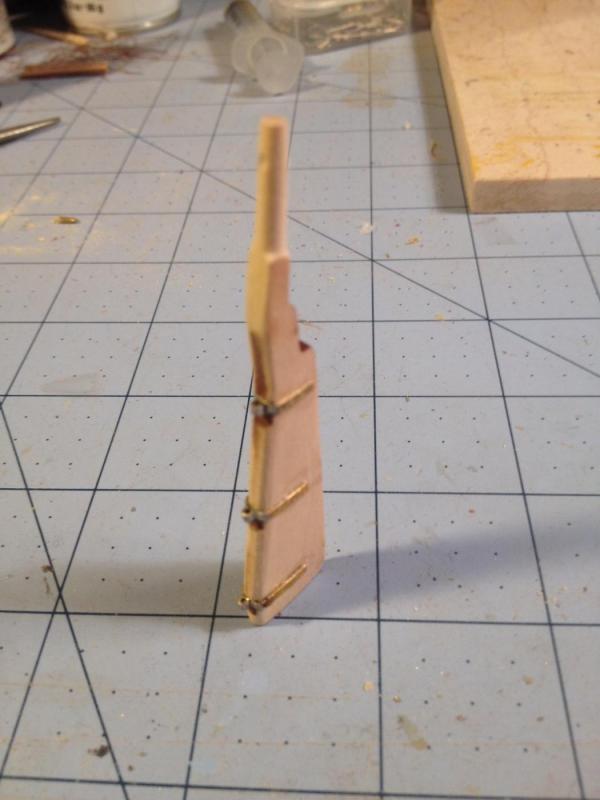
Bilge Pump This little project taxed all of my amateur skills. Carving, painting, metal work, and soldering. It took two evenings. I started by milling some 1/8 inch square cherry bar stock to make the bits. I filed the chamfers with a micro half round file. Created the base, painted it gun stock red, and glued up the top. Using the bar stock, I formed the rectangular metal band using the 1mm brass straps from the kit. I carefully soldered the ends together, filed and then blackened it. I then worked on the center rod, and the “U” shaped bracket. I used .05mm brass rods. For the bracket, I flattened both ends of a 3/8 inch length, I carefully bent it with my round nose pliers. Soldering the base of the bracket to the end of a .05mm rod was a real challenge. I clamped down the rod on top of a granite tile, and attached the U bracket to a pieces of scrap wood that I could hold in my left hand against the end of the rod. That freed my right hand to do the soldering. Getting it to line up square was the real challenge. Believe it or not, I actually did it right the FIRST time. Once done, I cut the small black plates for the wooden handle. I then blackened the plates and the center rod and bracket. I carved the bilge handle out of cherry. I inserted two of the small brass eye bolts from the kit on the bottom of the handle and attached two sections of 24 gauge black wire for the drivers. I drilled holes on top of the bits to accept the driving wire. Once all of the components were done, I assembled them all together with medium CA. Here are some photos of the process.
- 648 replies
-
- niagara
- model shipways
-
(and 1 more)
Tagged with:
-
I was able to reuse the gudgeons. I just used Medium CA. I know it is not the preferred method of attaching brass to wood, but it holds well enough for this non moving part. Besides, it came in handy when I had to remove them for the rework. I have not decided how to attach the pinions to the painted ship hull. Any thoughts on how to remove the small sliver of paint needed for the brass strap without marring the adjoining surface. I only have to scrape a thin strip of paint. I thought about cutting a razor blade to width and using it like a chisel. I came across the same challenge when I glue the pin rails to the painted bulwarks. I hacked the heck out of the surface and spent time repainting around the rails
- 648 replies
-
- niagara
- model shipways
-
(and 1 more)
Tagged with:
-
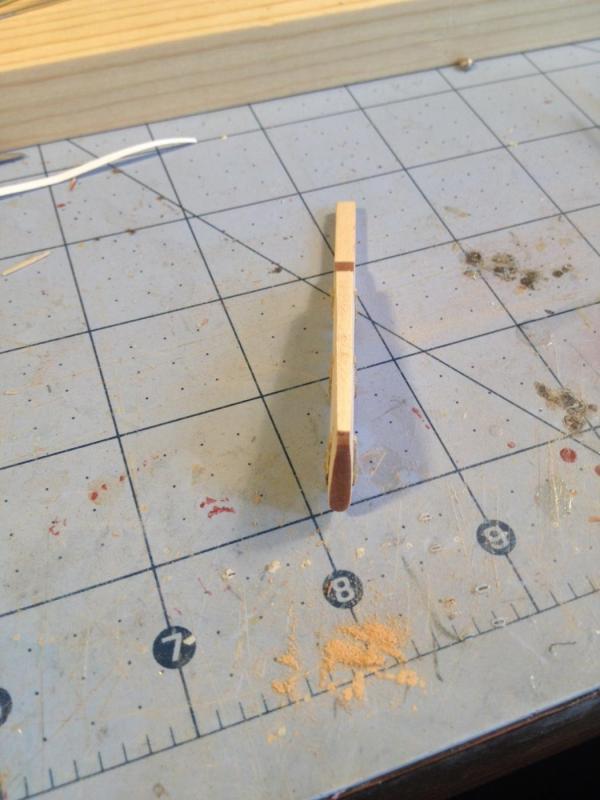
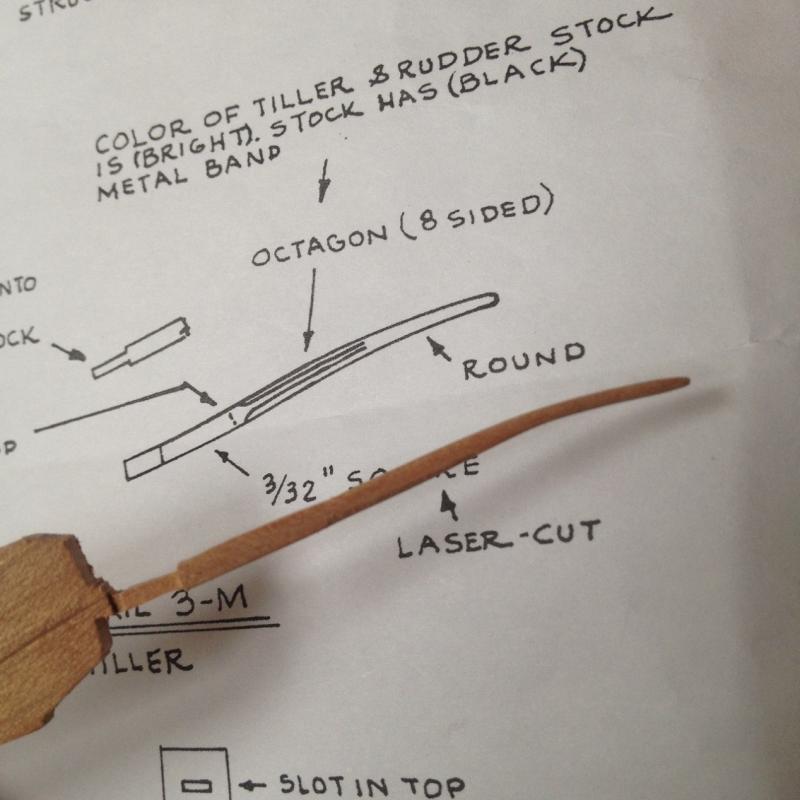
Rudder and Tiller Thanks to Joel's keen eye, I have reworked the rudder by carving the taper. I also rounded the top and carved the tiller out of cherry. As I am replacing all non painted kit laser cut parts with my own creations, more time is added to the build. However, in the case of the tiller, the fact that I left the unfinished part attached to the cherry stock actually made the fine carving easier. carving the octagon and then creating the rounded end would have been rather tedious on such a small delicate part. Using the stock cherry stick as a handle helped. As soon as I get the rudder painted, I will be installing the entire system. Here are some shots.
- 648 replies
-
- niagara
- model shipways
-
(and 1 more)
Tagged with:
-
Mike, I forgot about the rings. Thanks for the heads up. ... all of this begs another question I have been pondering. Since I am rigging my ship without sails, do the spanker mast rings simply sit around the spanker mast on top of one another? By the way, my kit supplied spanker mast is shaped like a banana. It is such a small diameter dowel, I have yet to find a replacement. I am going to soak it and try and straighten is some. I then planned on staining it with a cherry finish, which of course if I ever do get it to straighten out, will probably cause the dowel to warp again. Always something.
- 648 replies
-
- niagara
- model shipways
-
(and 1 more)
Tagged with:
-
That looks good to me. Was the eyebolt attached to the hull when you seized it, or did you do it off the ship and insert the eyebolt after? I have not attached any of the eyebolts to the hull yet. Our collaboration has been tremendously helpful. I sometimes think I should convert my ship to the USS Lawrence so that if and when we both finish them, we can create the Lake Erie Fleet. As an aside, I ordered a set of 7mm wooden cleats from Syren to replace the Brittania ones from the kit. I did not like the way my brown paint looked. I was waiting until they arrived before I tackled the installation of eyebolts and cleats. After reading these posts, I am now glad I did not attach the eyebolts. One other thought. We are both getting close to pure rigging. I feel as if we could both accomplish this task if the plans were clearer. Having said that, I actually think the overall plans have been pretty good. The rigging plans however do necessitate a general knowledge of sails and rigging that I as a true landsman, simply do not possess. You mention Lee's Book. Worth getting?
-
Mike, Thanks again for blazing a trail on an important issue that I too was pondering. It is scary that we are facing the same questions on our builds at about the same time. I literally just ordered a set of 3mm hooks thinking that all of the blocks that are shown on the eyebolts needed to be attached with hooks. The diagrams you posted were the exact ones I was questioning. If I may, I think that Henry is suggesting that we weave a strand of seizing rope inside the stropping line and tie if off on the bolt. I am envisioning something similar to what I did with our single blocks for the gun tackles. Also, I do not have access to the plans, but if I recall, there may be a diagram of how to seize a block to an eyebolt on one of the rigging sheets. Thanks all. I will be taking in all of this in.
-
Mike Roger that on the masts. I know that only small portions of the masts around the tops are painted black. I started masking them off last night. The bottom of both masts are made out of holly, and the rest is in cherry. I will be applying an oil finish to the wood for the natural look. I don't have the plans in front of me, but I believe all of the yards and booms are black. I used the 2mm brass straps from the kit. It is the widest brass strips provided. It is the same brass strips I used on the carronades for eyebolts. I did not anneal the brass per se. It is pretty flexible and I bent it cold with my mini pliers. I heated it up to solder the tubing and pins of course. Thanks for all the heads up. You have already saved me many times over.
- 648 replies
-
- niagara
- model shipways
-
(and 1 more)
Tagged with:
-
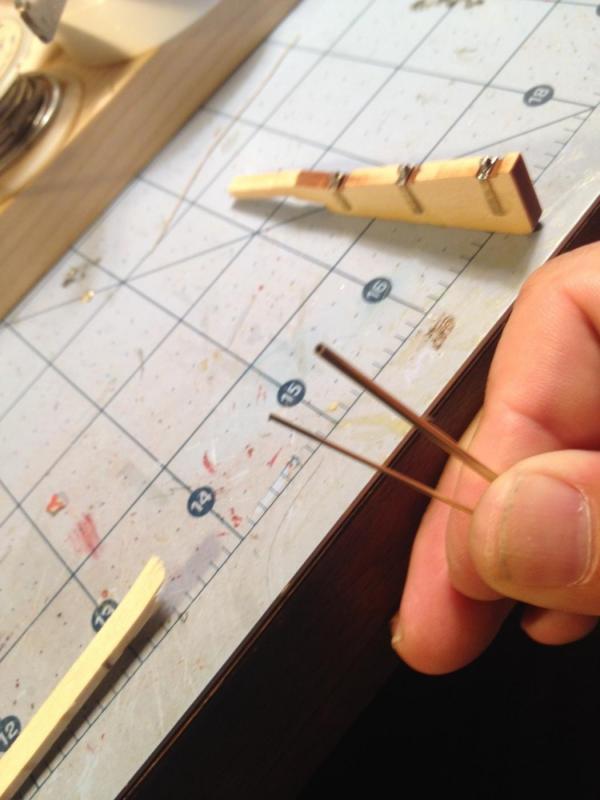
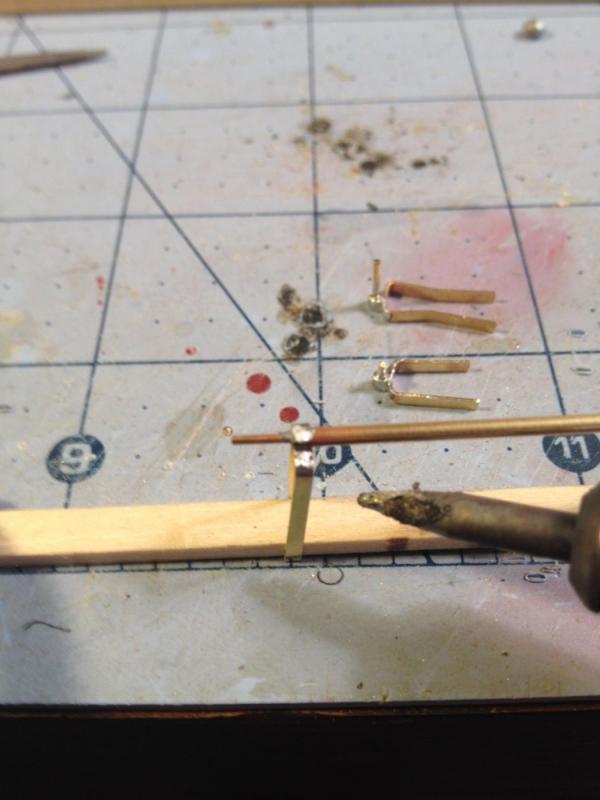
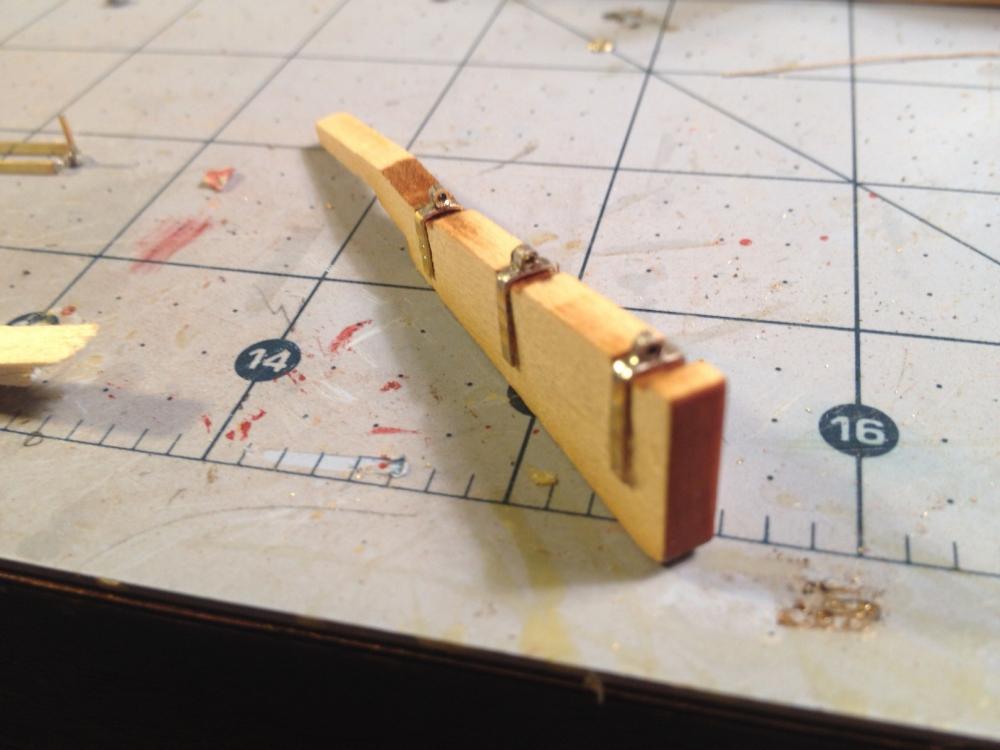
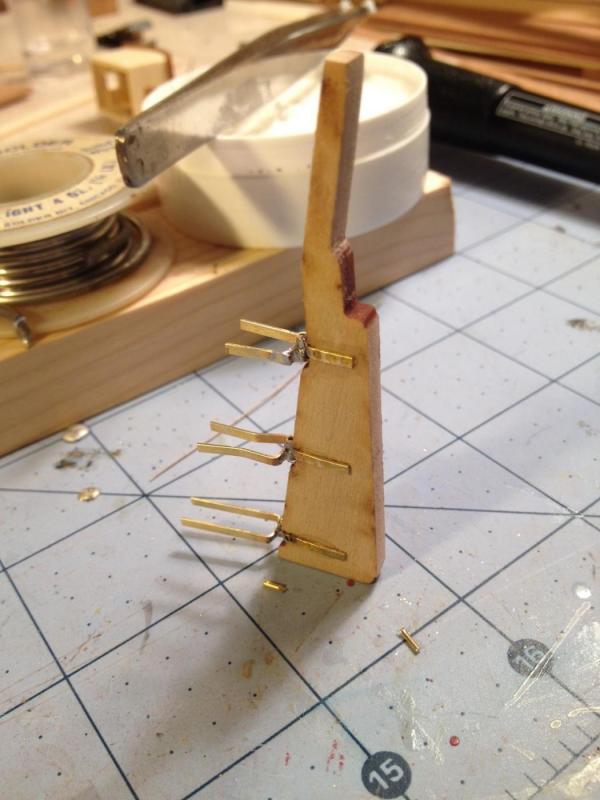
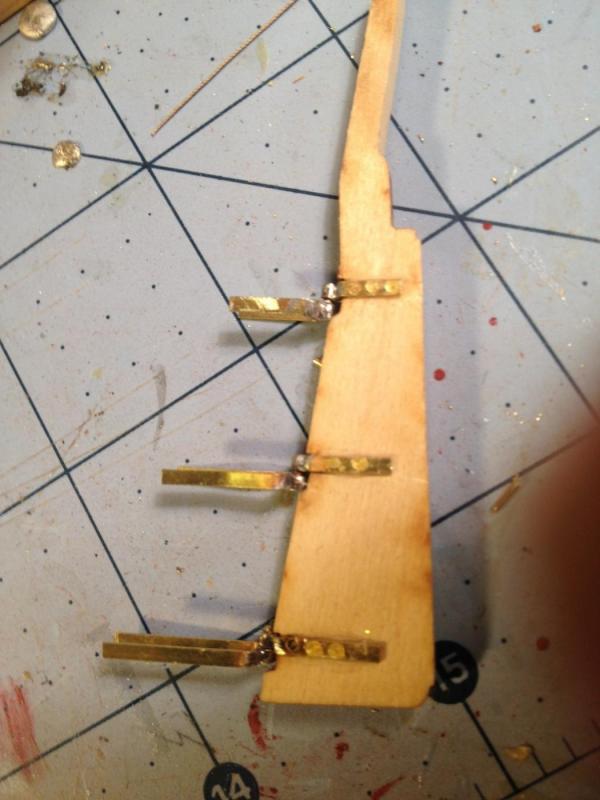
Rudder Assembly I worked on the rudder assembly. To do that, I had to create the gudgeons and pins. I used the brass straps from the kit. I also bought some brass tubing and some brass pins that fit snuggly in the tubing. For the female rudder brackets, I molded the strap metal with my pliers. I then attached the finished U shaped strap to a strip wood clamp, and soldered the end of my tubing flush with one end of the strap. I then cut off the other end and filed the excess. For the male keel brackets, I did the same thing, then soldered a length of brass pin inside the tube and cut to size. I used yellow glue drops to simulate bolt heads, and glued the straps to the rudder. The entire assembly was set aside for black paint, and once painted, I will attach it to the ship. Here are some photos. I also found time to work on the stern. I finally lined the stern gun ports with red painted strip wood. That was a tedious project, seeing that I could not sand the edges after installing without completely ruining the finish on the bulwark. I therefore had to make sure they fit perfectly before installing. I do like the look however. Since I had to get out the red and green paint for the stern, I used it as an opportunity to do some much needed touch up work around the ship. I also drilled the hole to accept the top of the rudder. I located the hole where I thought it needed to be, only to get it wrong. It needed to be as far back against the bulwark as I could place it. I now have a larger hole than I would like, but feel that I can create a frame piece to cover it up that should look ok. I will add some photos later tonight for those of you that plan on cutting this hole in the future. I am just about ready to open up the paint booth. I have worked on all of the parts that need to be painted black, and since I believe I now have them done (including rough channels), I should be ready to break out the air brush. On the list for black paint – Masts, trees, yards, gaffs, bowsprit, rudder and hinges, channels and some trim pieces. All of that hard work now threatened to be tarnished by a mediocre paint job. Wish me luck.
- 648 replies
-
- niagara
- model shipways
-
(and 1 more)
Tagged with:
-
Great looking work Ken. It would be easy for me to confirm that rope coils are called for, since I did the same on the Niagara, but I only did that because I followed the suggestions of others on this site, and since I saw a photo somewhere, sometime (and I can't remember either) of a rope coil on the Niagara. The tail has to go somewhere, but I am far from being an authority on this. I will be curious to see what comes up.
-
Mike, This looks great.... Really. I would not change a thing. I like the styrene collars. That was a great idea. I would have never thought of frapping the tackles, but I will definitely give this a try the next time around. I spent the whole weekend cleaning up my stern - gun port framing, and rudder. My journyman metal/soldering skills needed for the gudgeons were seriously taxed.
- 843 replies
-
- niagara
- model shipways
-
(and 2 more)
Tagged with:
-
Thanks Mike for the note on the rope coils. just another technique that I picked up on this forum.
- 648 replies
-
- niagara
- model shipways
-
(and 1 more)
Tagged with:
-
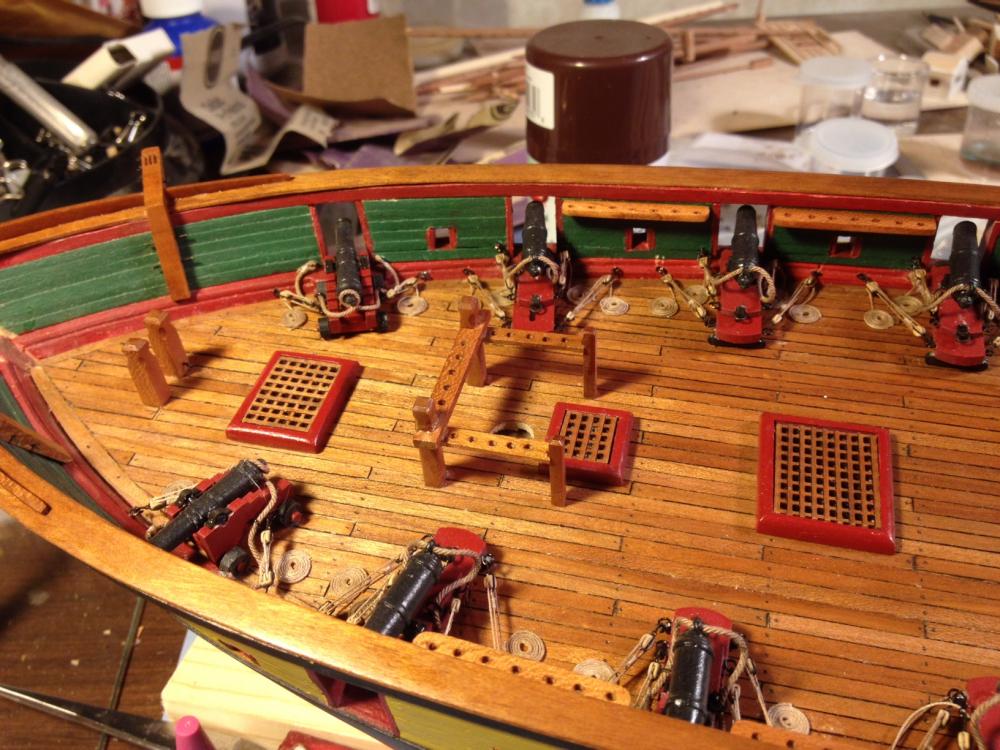
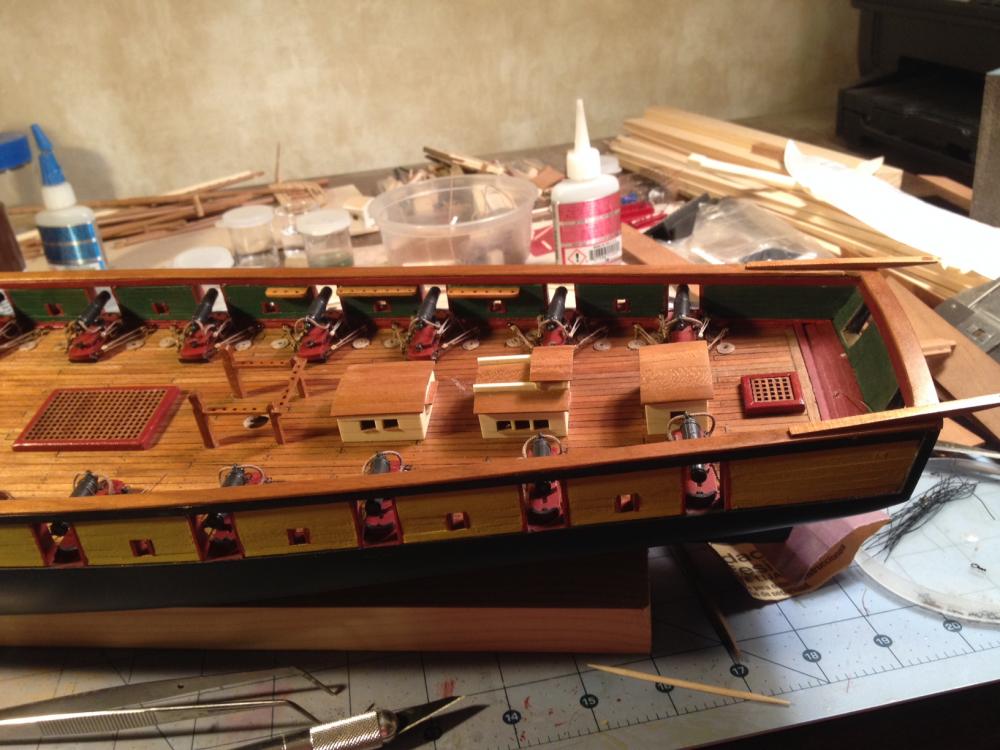
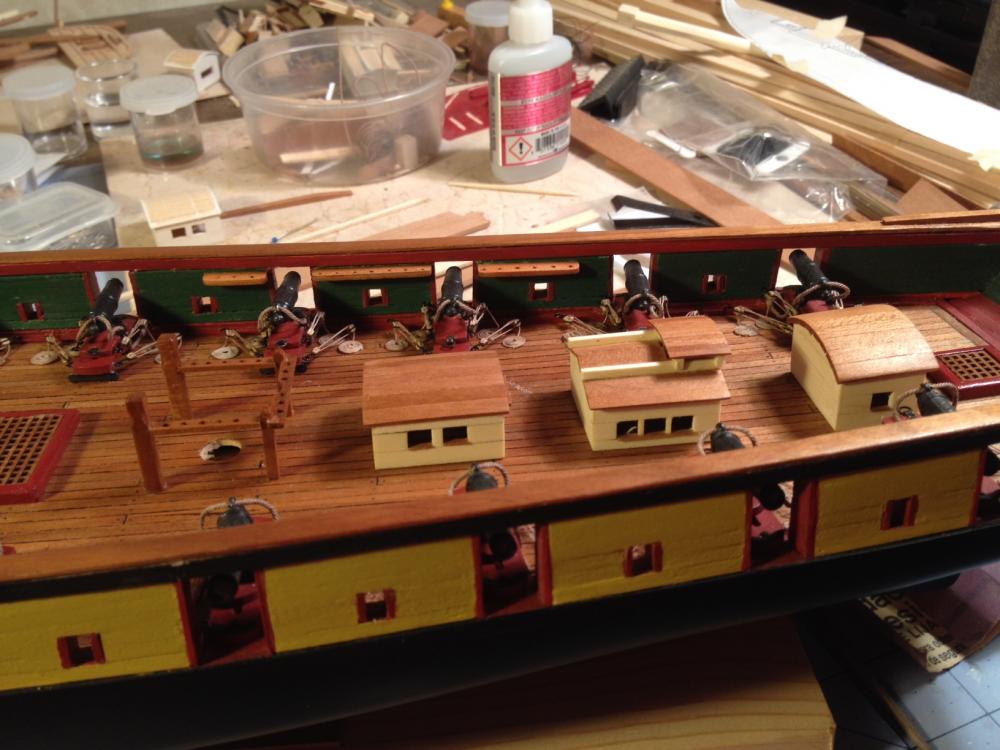
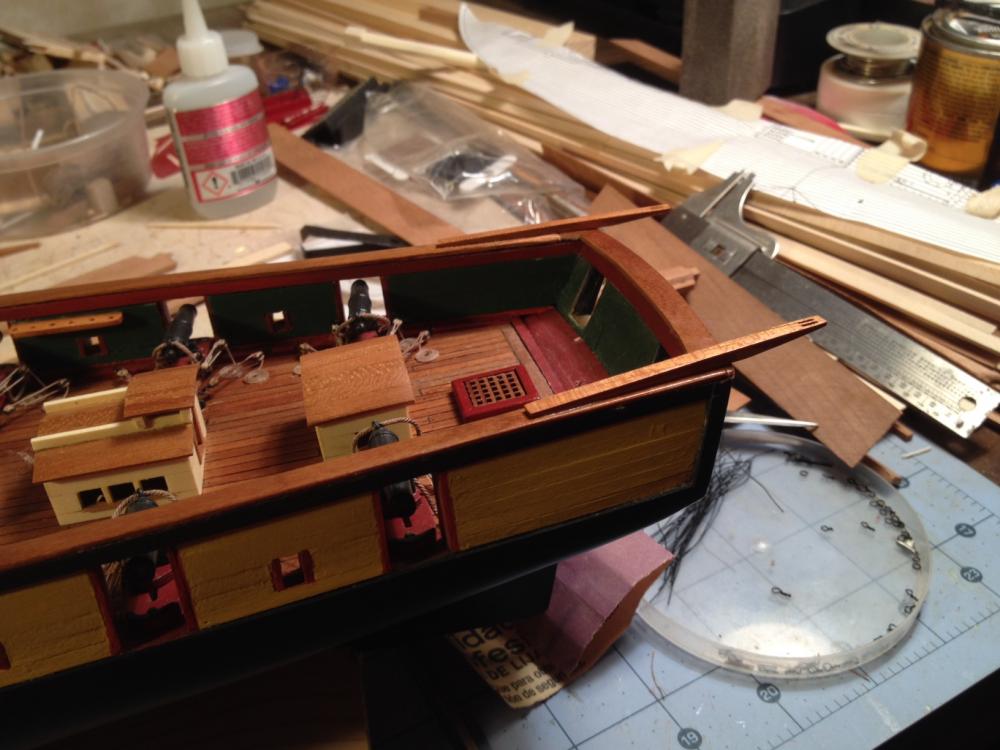
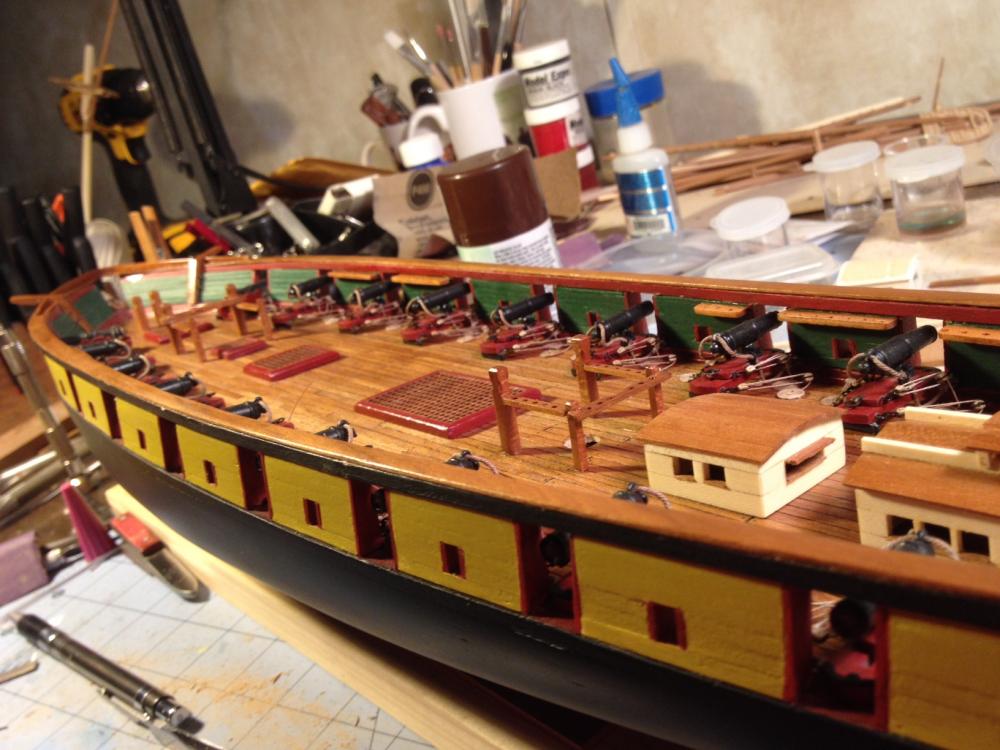
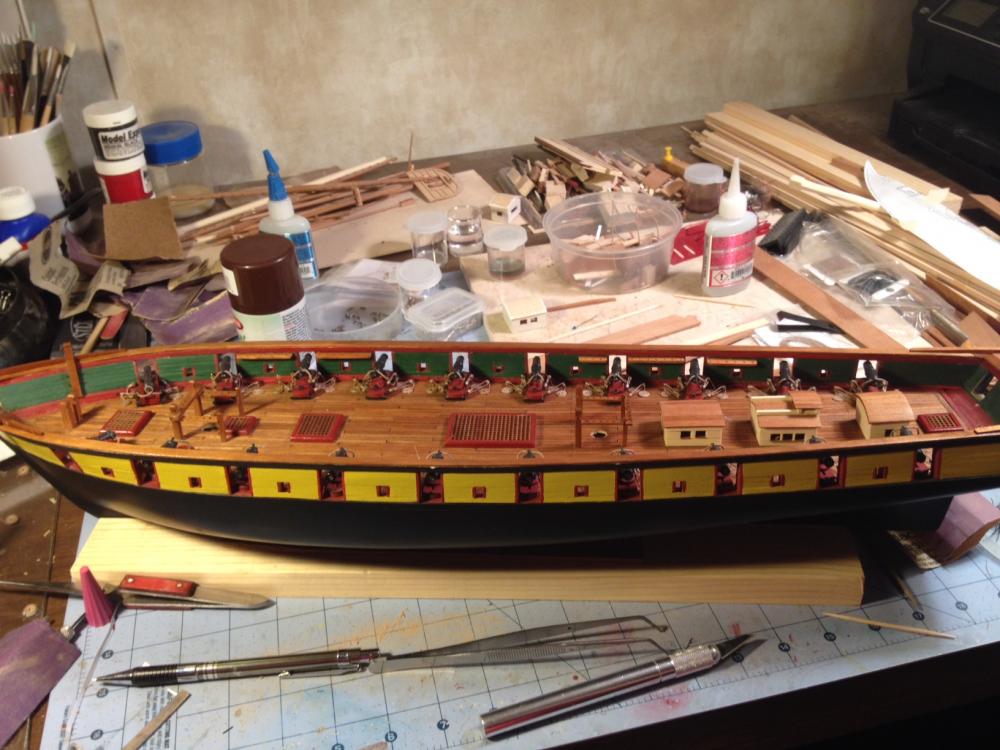
Installation of Fife Rails, Pin Rails, Catheads, Boat Davits and Forward Bits I finally got around to installing some of the deck furniture that I created over the months and have been storing at the shipyard. I built the Fife Rails out of cherry months ago, and somehow during storage, I lost one of the cross sections for the foremast fife rail. I will have to rebuild it. I pinned and glued the posts with medium CA. It was quite a chore to position them to keep them plumb and square. All by line of sight. I scrapped my initial pin rails that I built out of basswood and painted red. I did not like the paint finish. So I rebuilt them out of cherry and finished them with poly. It took a while to scrape the paint from the bulwark. I glued them on with medium CA. I still have to add the wire support brackets. I glued the catheads in place with medium CA. I have to add the wire support and knees.I also installed the stern Boat Davits. All were made out of cherry I temporarily put the bowsprit in place, and glued the forward bits that hold the bowsprit in place. I pinned and used medium CA. Getting them to line up plumb and to fit the notch at the end of the bowsprit was a challenge. I realized that I will have to work on that notch some to make it fit right. I finished all of the cherry parts in a flat poly. I also finally put a coat of finish on the main rail. I cut them out of cherry as well and I am very happy with the look. Then I ran into a bit of an issue. I placed the three stern skylights in place and realized just how cramped the rear portion of the deck is. It reminded me of a tip that Josh sent to me a while back about the interference these structures will have with the capstan. Now that I have positioned them in place, I can fully appreciate this point. How on earth will my 1:64 scale crewmen operate the darn thing with all of the braces in place. There is absolutely no room to turn it. Also, the rear skylight is only about 1/4 inch from the rear of my stern carronades, which gives me no room at all to install inhaul tackles. I don't know if I am going to simply lay them down as is, or perhaps only use two, and if so, which ones, or eliminate them altogether. I set them on the deck in the following photos. I will say this. It is starting to look like a real ship, at least without masts and yards.
- 648 replies
-
- niagara
- model shipways
-
(and 1 more)
Tagged with:
-
Mike, My kit did not supply enough anyway. Using the mini bead pliers quickened the process significantly. You also don't have to paint/blacken them. I am using these throughout the project. I used all of the kit supplied small eyebolts on the yards.
- 648 replies
-
- niagara
- model shipways
-
(and 1 more)
Tagged with:
-
About the same size as the large ones. I used the same homemades for the bulwarks. Did about 160 of them. Here are some photos that I posted earlier on my log
- 648 replies
-
- niagara
- model shipways
-
(and 1 more)
Tagged with:
About us
Modelshipworld - Advancing Ship Modeling through Research
SSL Secured
Your security is important for us so this Website is SSL-Secured
NRG Mailing Address
Nautical Research Guild
237 South Lincoln Street
Westmont IL, 60559-1917
Model Ship World ® and the MSW logo are Registered Trademarks, and belong to the Nautical Research Guild (United States Patent and Trademark Office: No. 6,929,264 & No. 6,929,274, registered Dec. 20, 2022)
Helpful Links
About the NRG
If you enjoy building ship models that are historically accurate as well as beautiful, then The Nautical Research Guild (NRG) is just right for you.
The Guild is a non-profit educational organization whose mission is to “Advance Ship Modeling Through Research”. We provide support to our members in their efforts to raise the quality of their model ships.
The Nautical Research Guild has published our world-renowned quarterly magazine, The Nautical Research Journal, since 1955. The pages of the Journal are full of articles by accomplished ship modelers who show you how they create those exquisite details on their models, and by maritime historians who show you the correct details to build. The Journal is available in both print and digital editions. Go to the NRG web site (www.thenrg.org) to download a complimentary digital copy of the Journal. The NRG also publishes plan sets, books and compilations of back issues of the Journal and the former Ships in Scale and Model Ship Builder magazines.


