HOLIDAY DONATION DRIVE - SUPPORT MSW - DO YOUR PART TO KEEP THIS GREAT FORUM GOING! (Only 20 donations so far - C'mon guys!)
×


mbp521
-
Posts
1,002 -
Joined
-
Last visited
Content Type
Profiles
Forums
Gallery
Events
Everything posted by mbp521
-
 Cathead, I learned from my past builds that any little piece that can be snagged and easily torn off will. Just on my Endeavor build alone I bet I replaced the jack-staff three times while rigging her before I finally waited until I was almost done to install it a fourth time. I guess I'm a slow learner.
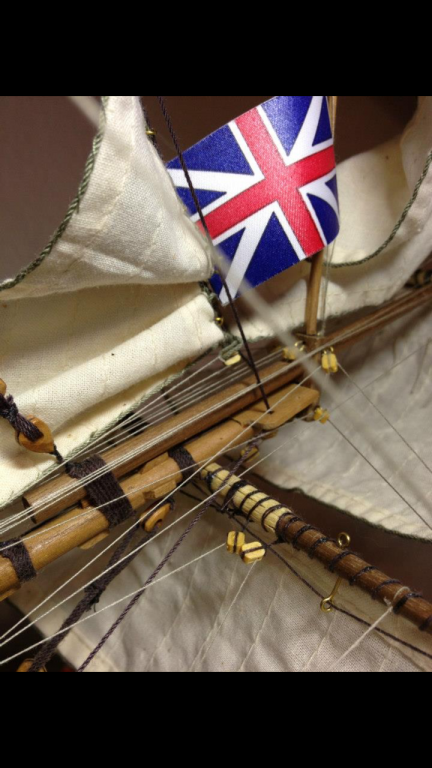
- 133 replies
-
- 3
-

-
- chaperon
- model shipways
- (and 2 more)
-
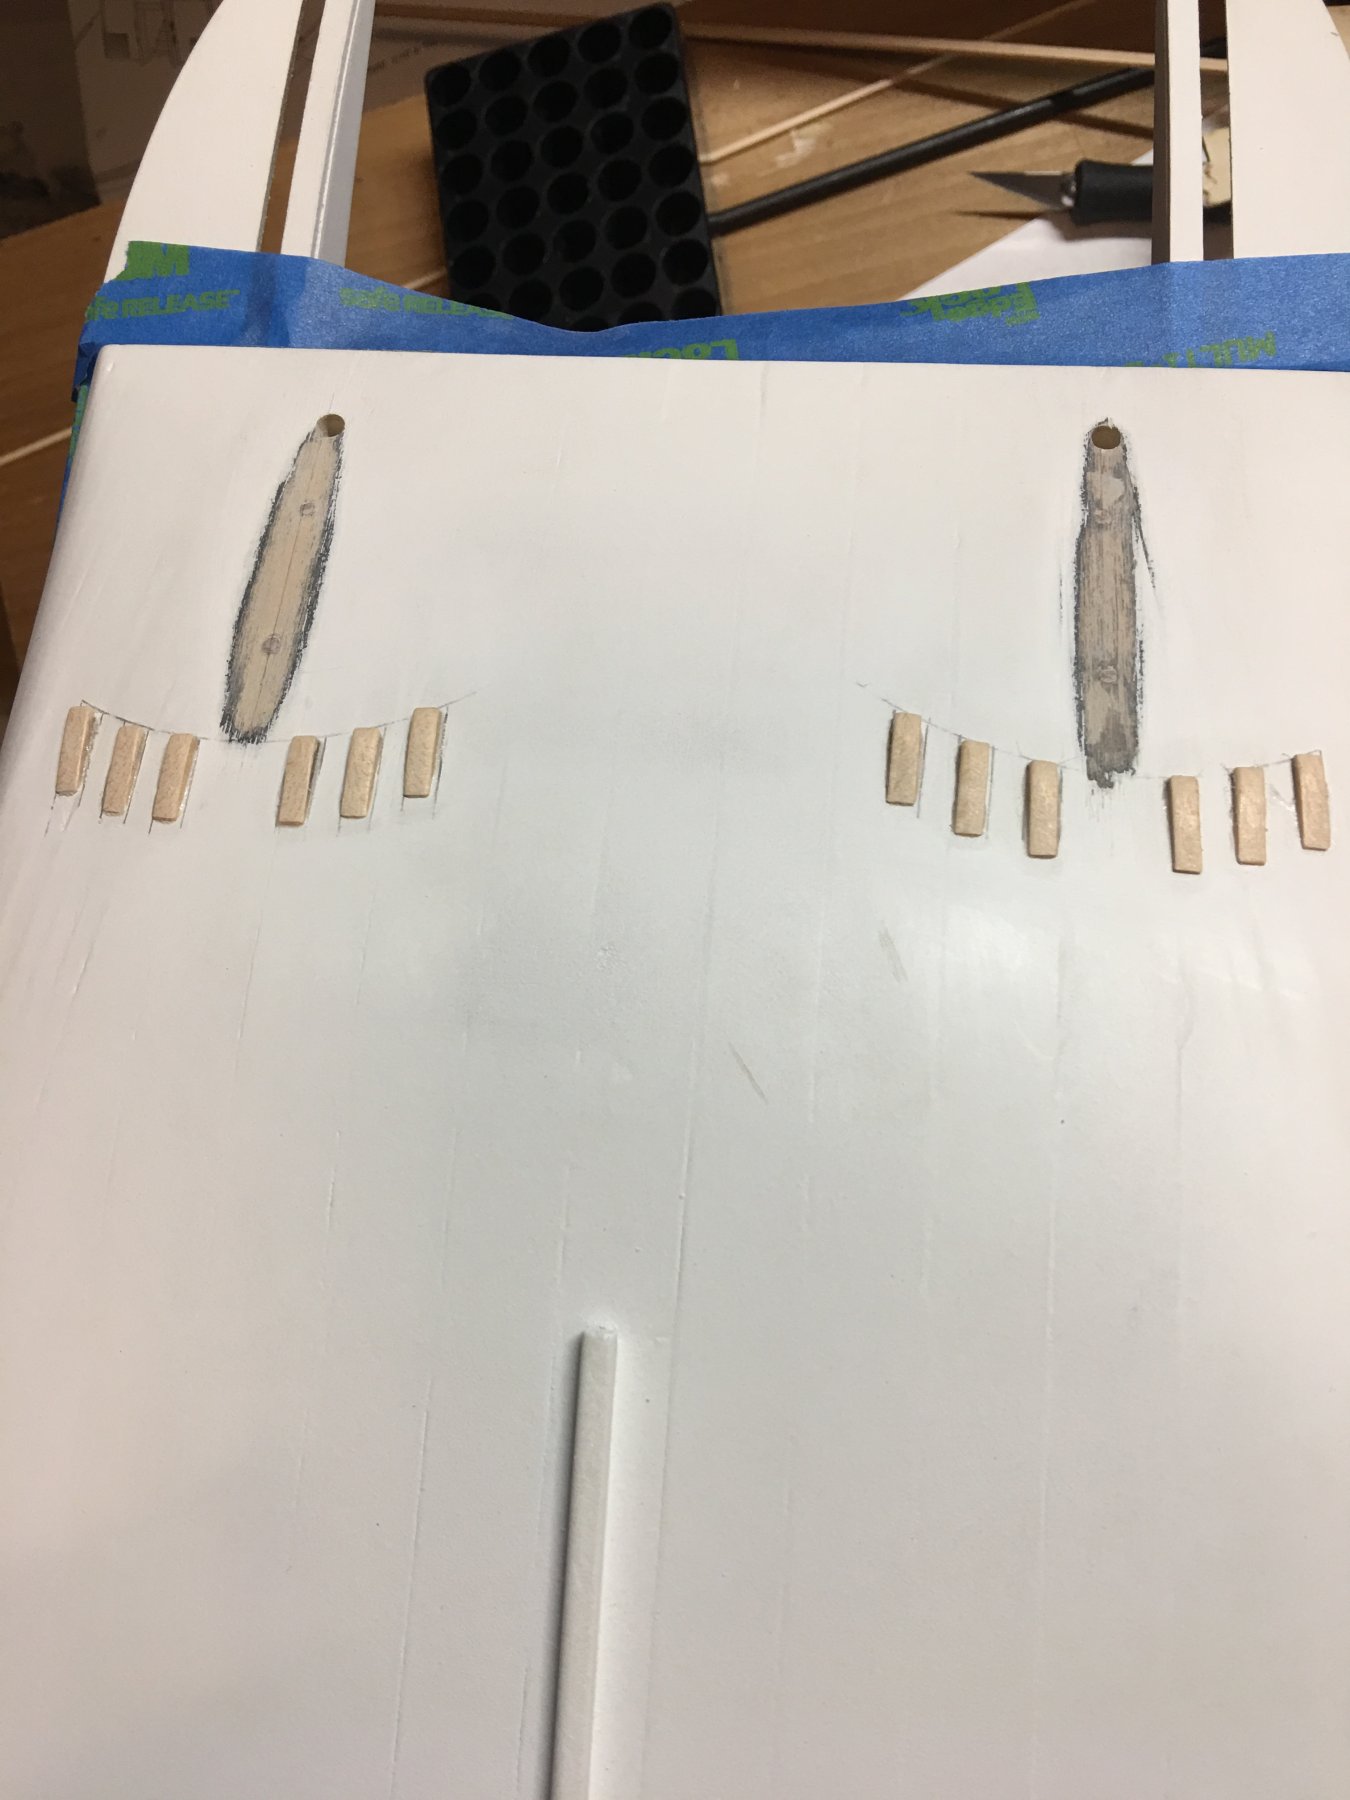
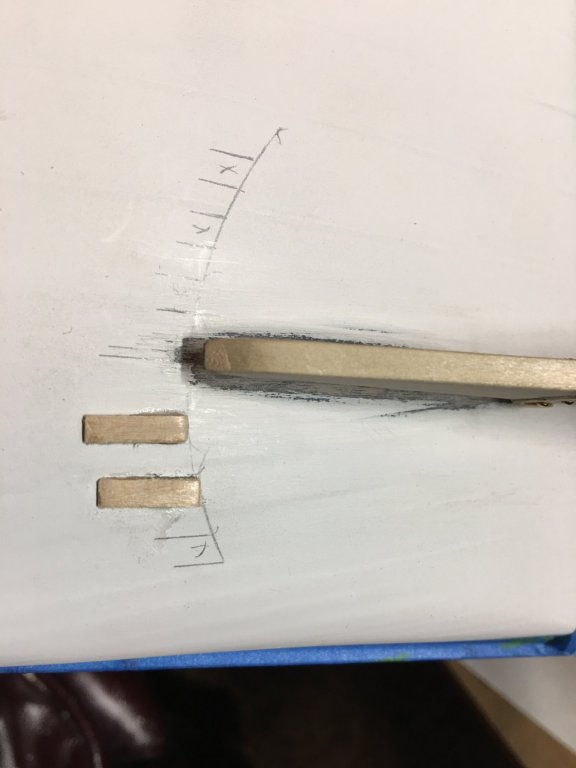
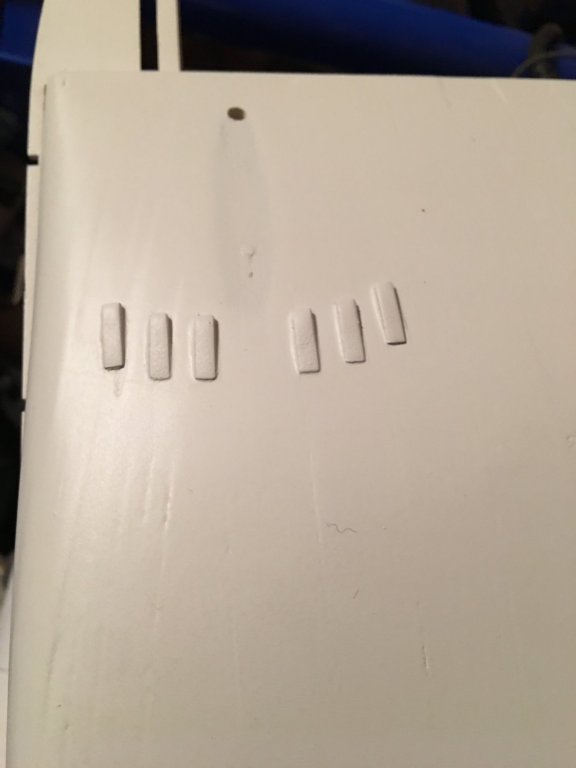
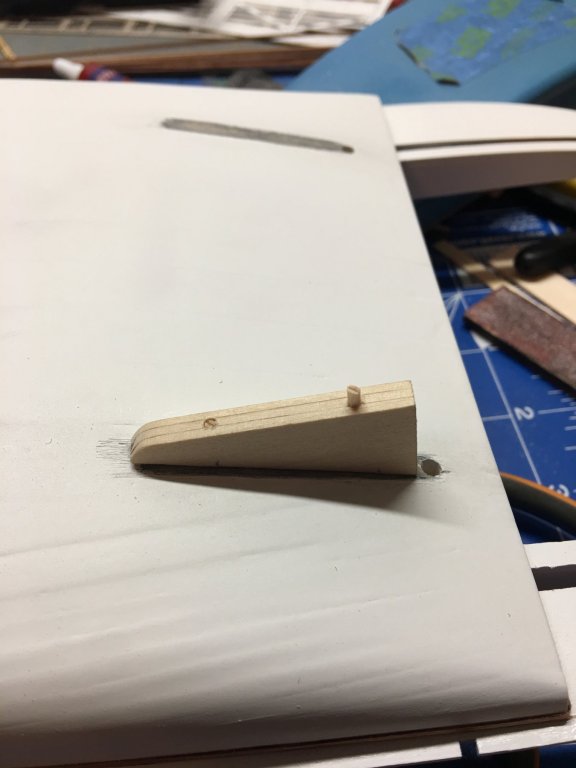
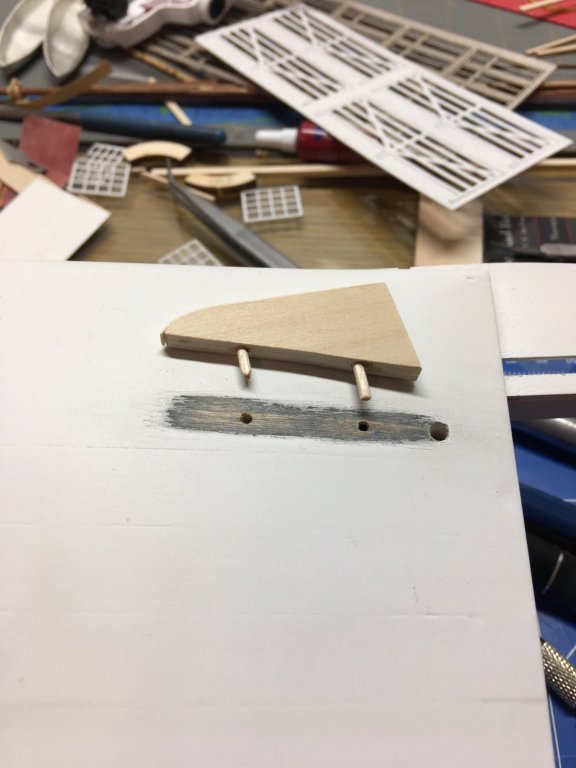
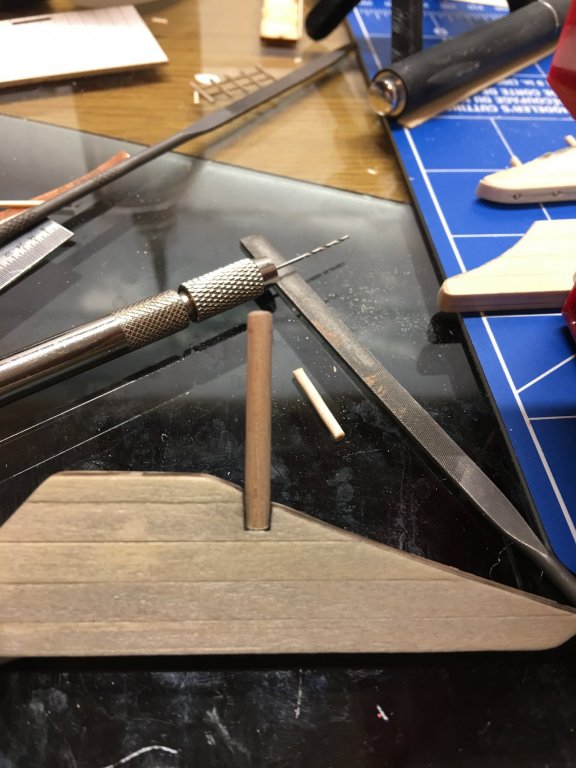
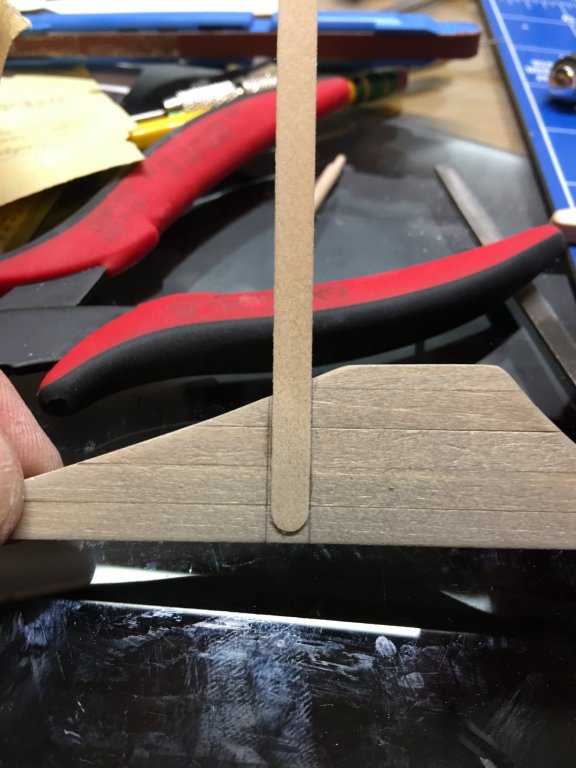
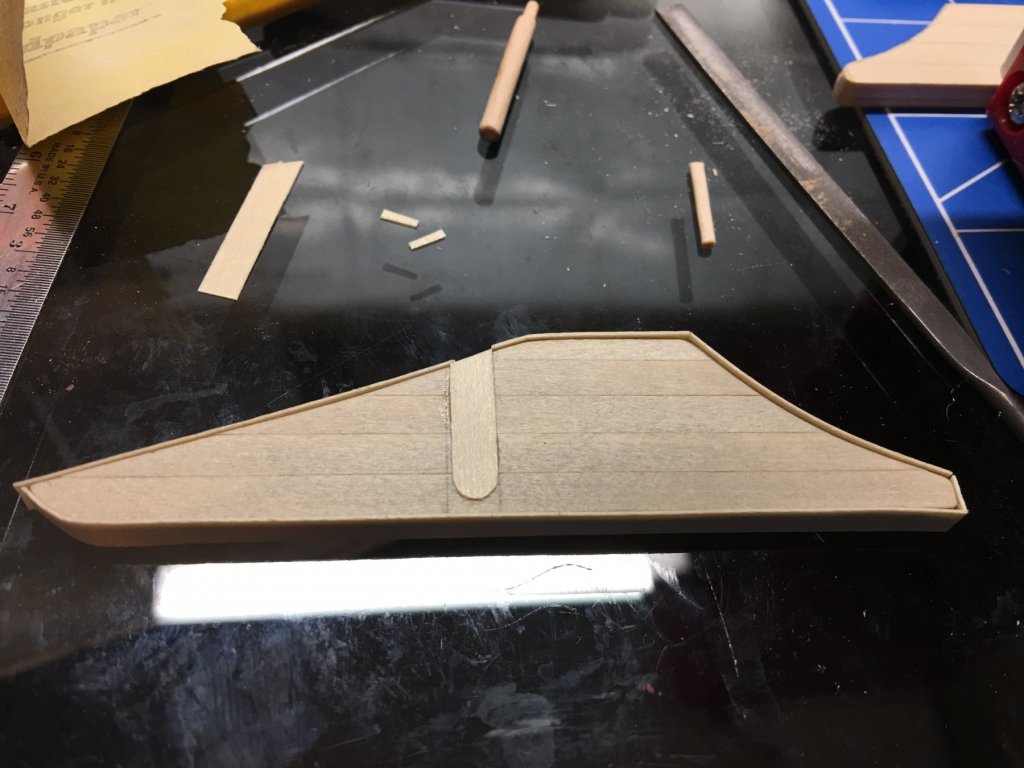
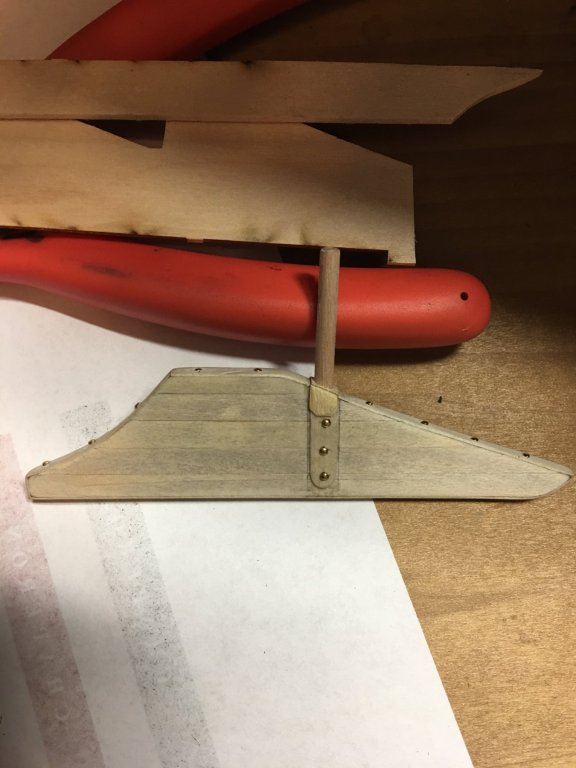
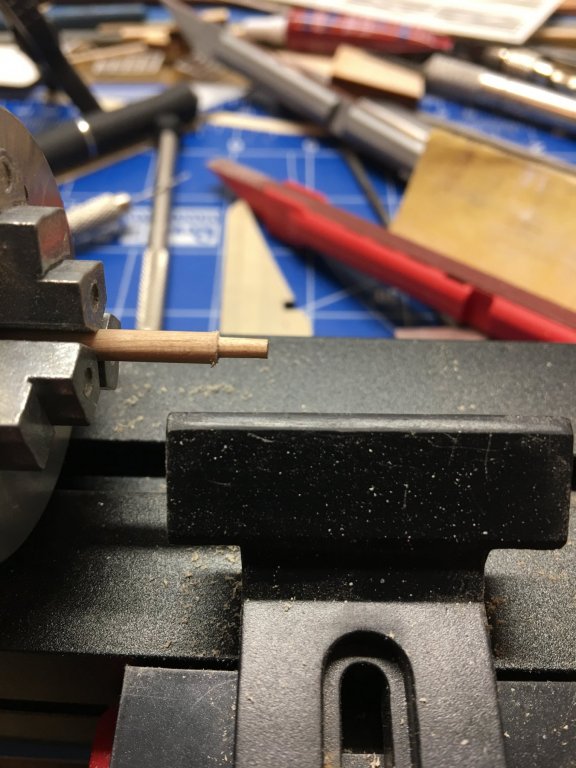
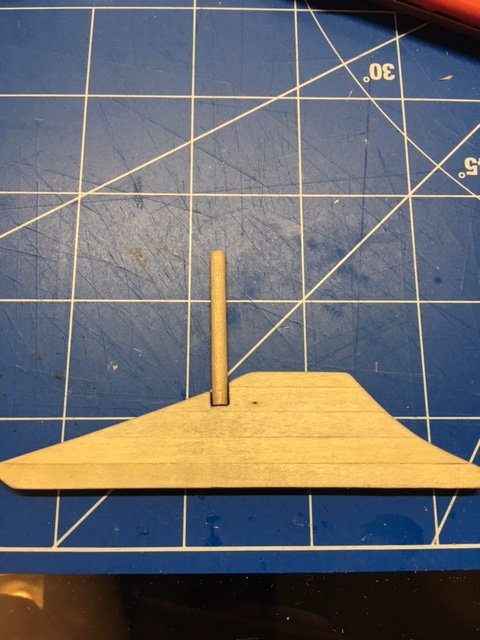
Hello all, Got to spend a little time working on the Chaperon this weekend and finally finished up on the rudders. I also decided to go with the protective wedges that sit on the hull just forward of the rudders. I thought it added a nice little bit of detail. Please forgive the sanded areas just above where the rudders sit. This was where I was toying with the idea of installing a split rudder, much like the Bertrand. This idea was scrapped once Kurt & Cathead set me down the correct path with the balanced rudder. A little sanding and paint and it's almost as if it was never there. Placement of the first two wedges on the starboard rudder. All 12 wedges in place. First coat of paint. I noticed that I didn't get the mount post of the split rudder sanded down good enough. Amazing what a coat of white paint will reveal. Final coat of paint and the rudders temp installed. I think I'll wait until I'm almost done to install them permanently, just in case i get clumsy and knock one off. I really don't want to have to rebuild them. ...and just for learning purposes, some pics of my attempt at making the split rudder. That's all for now. While I still wait for Amazon to get my order straight on my deck planks, I'll start work on the pilot house. Looks like a nice little project to bide my time. Thanks for looking, -Brian


- 133 replies
-
- 6
-
-
- chaperon
- model shipways
- (and 2 more)
-
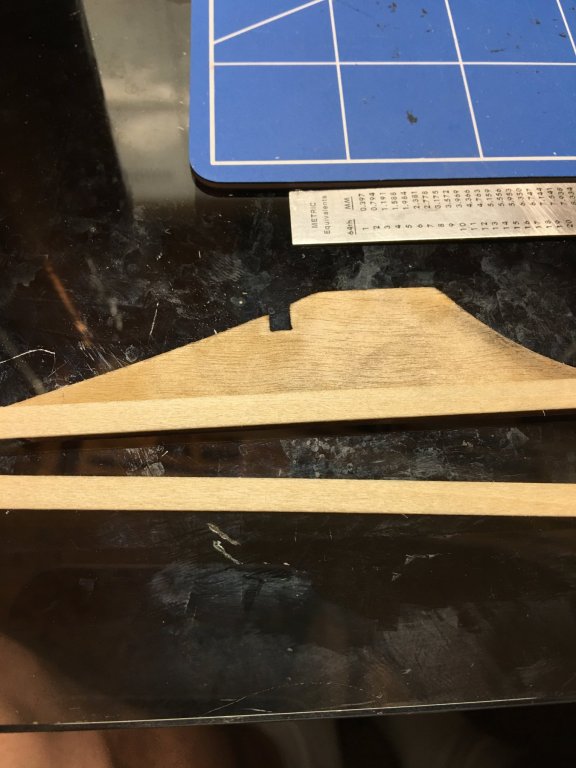
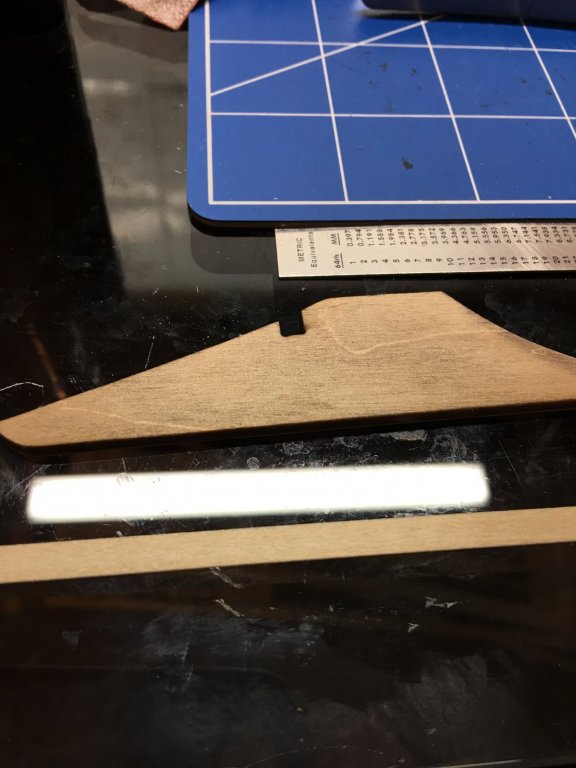
Good evening everyone. Not a whole lot going on this week in the shipyard. Did a little travelling over the Easter weekend so I wasn't able to get much accomplished. However, thanks to Kurt and his library of useful steamboat information I was finally able to solve my rudder dilemma. For my build, I incorporated some of the older build techniques with some of the more modern ones to complete my rudders for the Chaperon. I went with the balanced rudder that used stacked timbers, held in place with through bolts from top to bottom. I also simulated the wood sheathing that wrapped the entire rudder for added strength and protection. I wasn't able to find any other information on how the tiller was attached to the rudder itself so I did the best I could with what information I was able to find. My thoughts were that the rudder was drilled out where the tiller was attached. The joint was a mortise and tenon with an iron yoke attached at the top and running down the sides of the rudder. Holes were then drilled though the yoke and tiller and then bolted together. All of this I simulated with some scrap pieces of wood I had laying around. I figure with a few coats of paint everything should look right. It may not be entirely accurate, but it adds a little extra detail to an otherwise plain looking rudder. Now to make the second one, paint them up, then get them mounted. While I am doing that I will contemplate whether or not to add the protective wedges to the hull. Thanks again for looking. -Brian
- 133 replies
-
- 5
-
-
- chaperon
- model shipways
- (and 2 more)
-
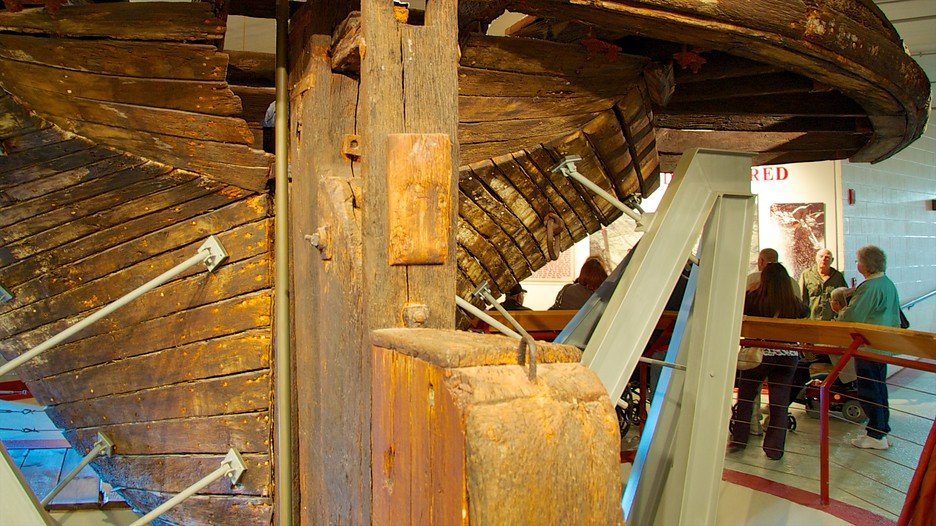
Kurt, Thank you so much for the references, this definitely clears up my rudder dilemma. I am by no means a physics expert, but the simplicity of tucking the rudder up above the bottom of the hull line make perfect sense. The Western Rivers Steamboat Cylcopedium, is this a publication that is available for purchase? If so, this is surely something that I would like to get my hands on. Cathead, No apology needed. it happens some times. No harm was done. If I had a dollar for every time I got ahead of myself I could hire someone to build the models for me. Fortunately I don't have that kind of money and get to enjoy doing the building myself. Still your input is greatly appreciated and I learned something today, not to mention I got a little more practice at my scratch building. So as I was working on mocking up a rudder similar to the Bertrand I started pondering how to attach the tiller and the gudgeons and still have a functioning rudder when I stumped myself. My scratch built hinged rudder. So I came back to the build log to take another look at Cathead's Bertrand example when I saw that Kurt and Cathead had given me more helpful information. So now that I know that the Chaperon had a balanced rudder, this posed another question. How was the tiller attached to the to the rudder itself. I keep going back to my example in post #15 where the tiller is connected to what looks like a U-bracket and bolted through the rudder timbers. This looks to be a feasible design, however I'm not sure the Chaperon had an iron tiller. My second thought was maybe the rudder timbers were drilled out from the top and a wooden tiller was inserted down the hole then cross drilled and bolted through the timbers and the tiller. I know this is probably more detail that will be seen, I would just like to get it right. Like many people have said in their builds on this forum, "Its not about the accuracy, it about how much you enjoy the build. It's your model, build it like you want". Typical balanced rudder. Another question that Kurt's information poses, did the Chaperon have the wedges installed in front of the rudder? I think they would add a nice touch to the detail. I may think a little on this one. Maybe even mock some up and see what they look like. Again, Kurt & Cathead your information in greatly appreciated. Thanks for looking -Brian

- 133 replies
-
- 4
-
-
- chaperon
- model shipways
- (and 2 more)
-
Cathead, More pictures are always a plus, they would definitely help with my rudder dilemma so please feel free to post away. I also could not agree with you more that the style of rudder that the Chaperon kit comes with would be very susceptible to damage. In one of my earlier posts I had found a similar style of rudder on an more modern era sternwheeler (I say that, given that the picture shows a steel transom not wooden) and with my limited knowledge of riverboats never thought that the design could possibly just be a cheat. I'm inclined to say that the Chaperon lies somewhere in the middle of the Bertrand and the example below. I also based some of my research on the rudder design off of my KotM model which has a similar rudder style as Chaperon, even though this particular model is not designed from a real steamboat. That being said, I have been to the Bertrand museum in Missouri Valley and have several pictures of the model they have on display there. The display setup they have there is just amazing as are all of the artifacts recovered from the wreck site. I do like the design of the rudder and believe that it is a much more sturdy setup. One of the only things that stands in my way of incorporating this into my Chaperon is that the sheer of the Bertrand looks to be a lot steeper than the Chaperon. But, this poses a unique challenge, and I do like a good challenge. So I may try to work the Bertrand design into my build. Thank you for all of the input and information. -Brian
- 133 replies
-
- 3
-
-
- chaperon
- model shipways
- (and 2 more)
-
Cathead, Thank you for the compliments and the excellent advice on the rudder construction. I have been mulling over several methods and my first thought was to simulate bolts running from top to bottom sandwiching the timbers together. Then I ran across your build of the Arabia (which I might add is a beautiful piece of work, one which I follow religiously) and after researching information on it got me to thinking and surfing the web on different types of rudder constructions. The more I looked the more ideas I came up with and the more I realized that I was going to need some help. I still keep looking for more info on rudder construction for that time period but nothing really comes up. Since the Arabia and the Chaperon construction are pretty close to same time, I may go with a sort of hybrid design where I have bolts holding the timbers together, wrap it in wood with an iron u-bracket to attach the rudder to the tiller. I'll start experimenting and post pictures of what I come up with. As for dirt and grime, you are correct, a little adds to the realism. I don't want her to look as though she was just launched yesterday, but my painting talents are somewhat limited so there is no way that I could make her look well used as Blighty did in his build. So I'll do my best to give her that just out of dry dock with a fresh coat of paint look.
- 133 replies
-
- 2
-
-
- chaperon
- model shipways
- (and 2 more)
-
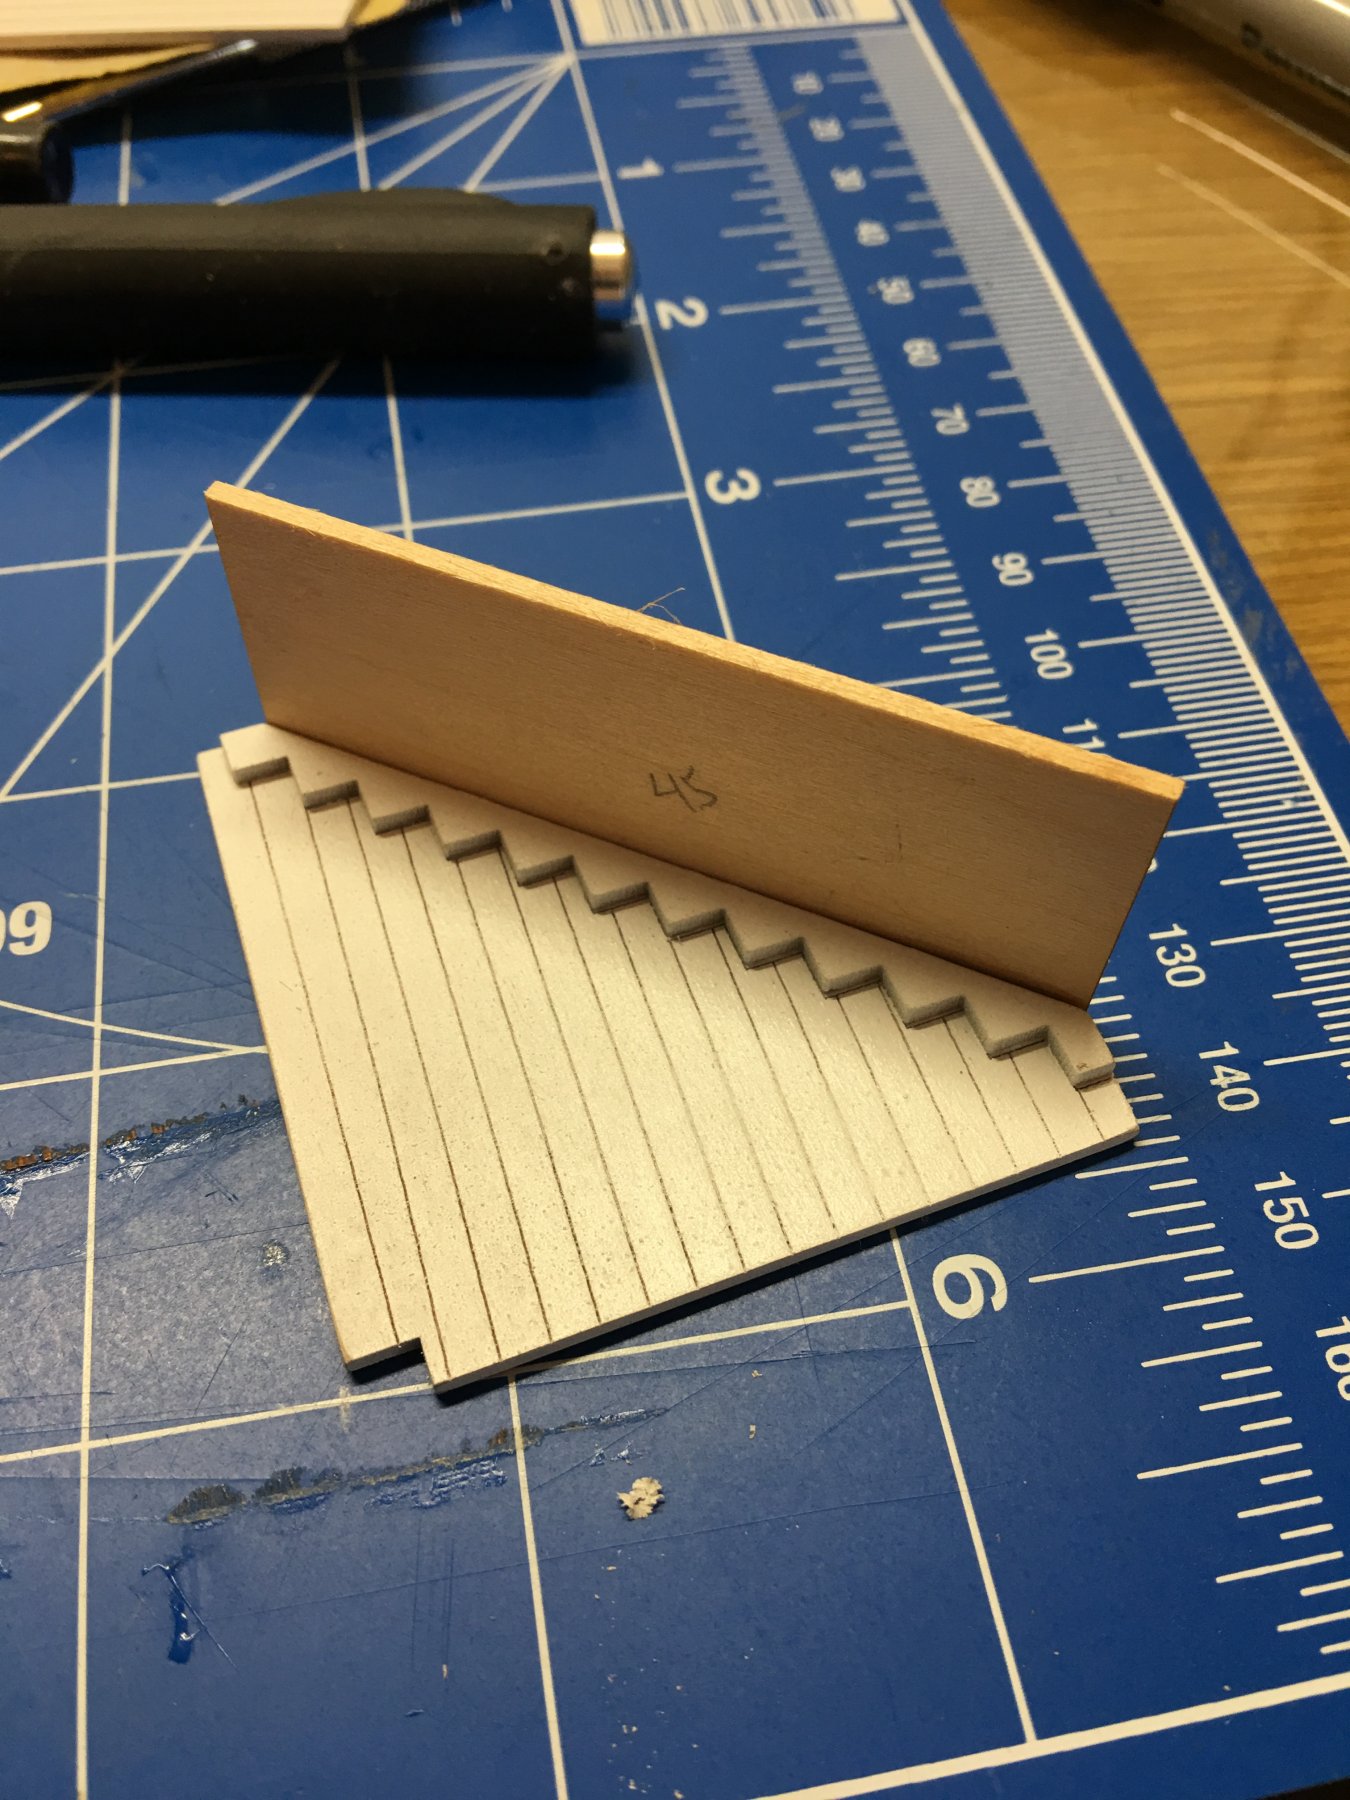
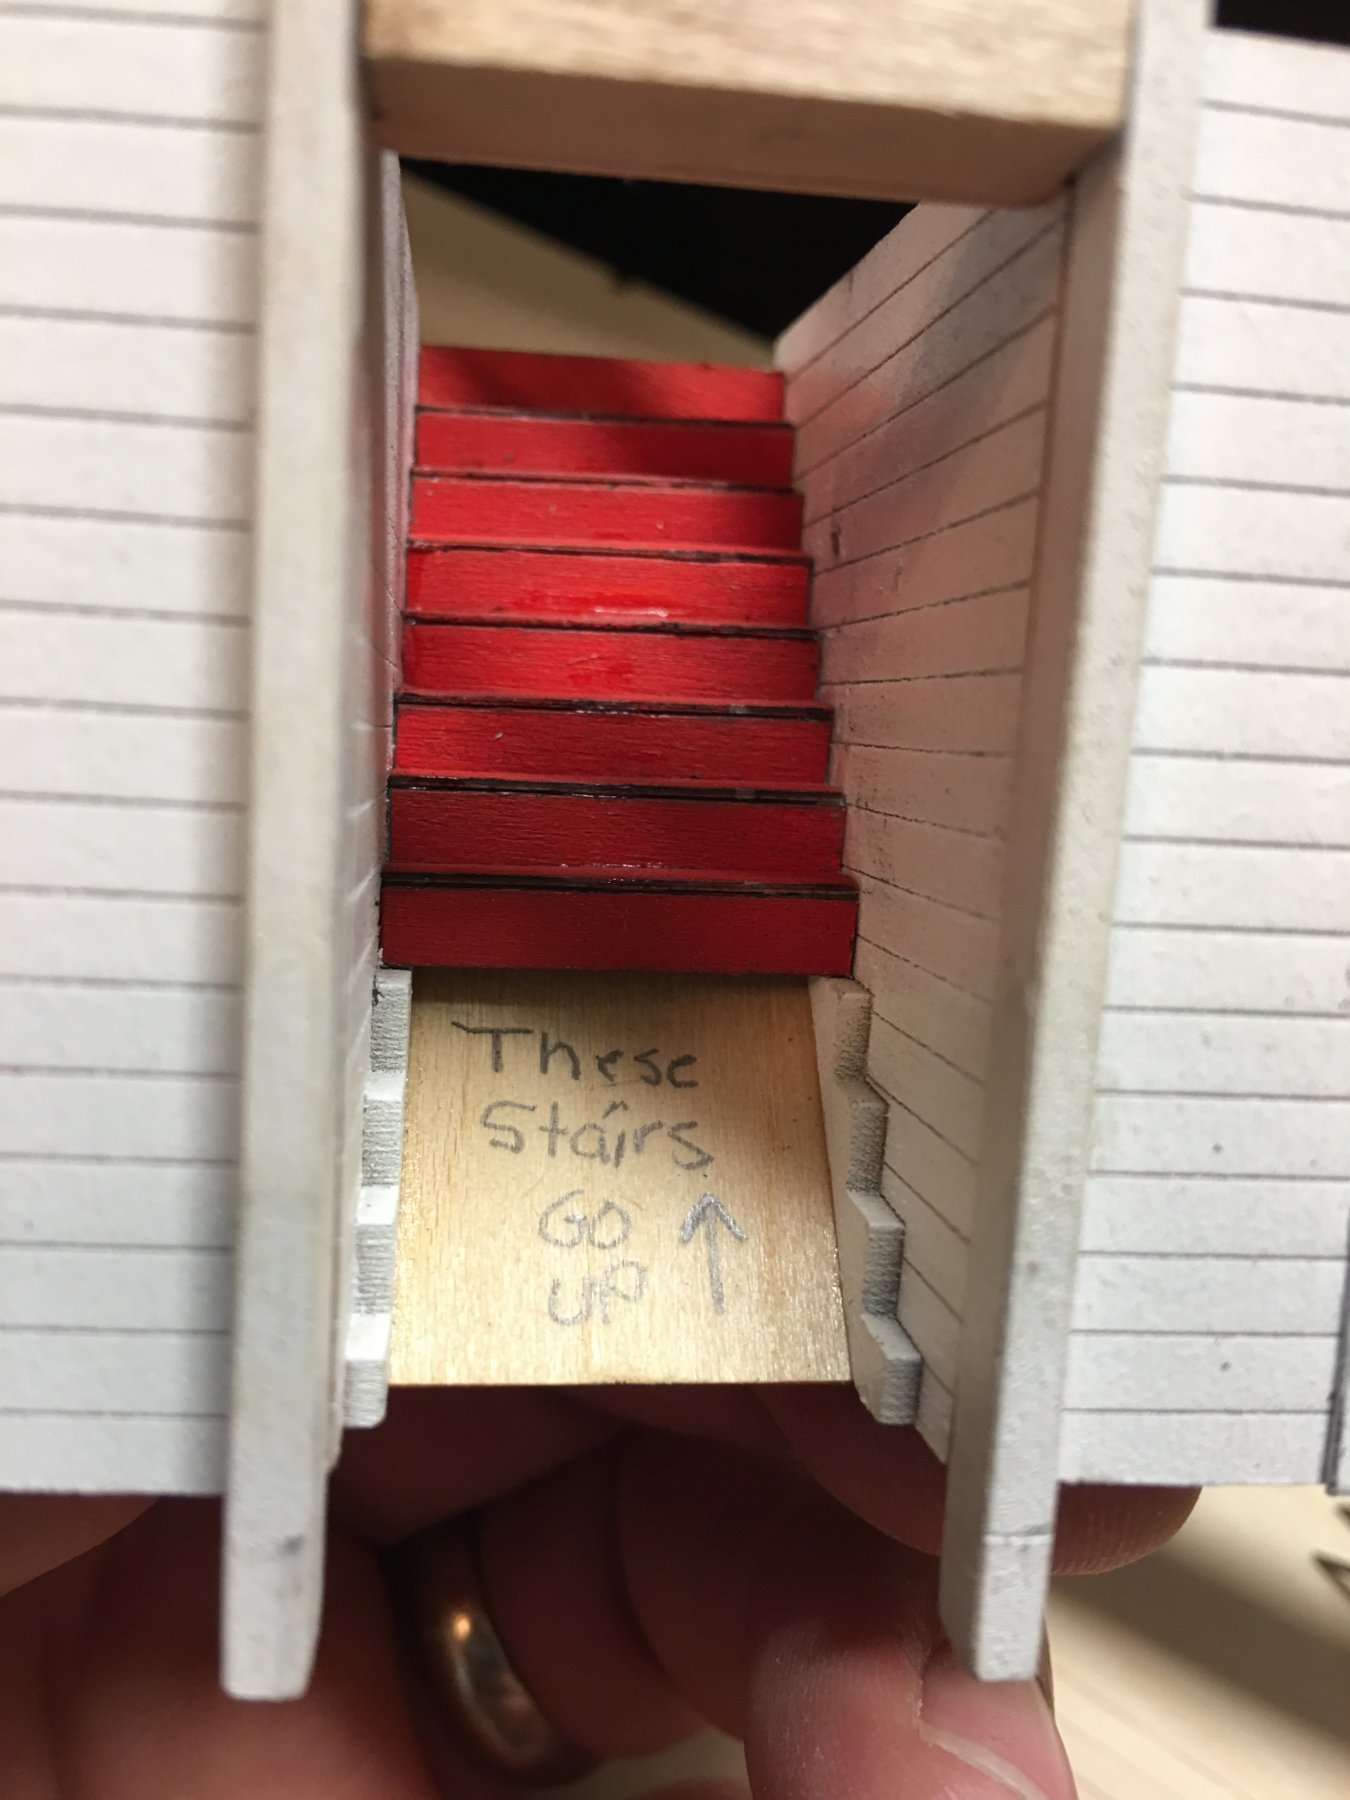
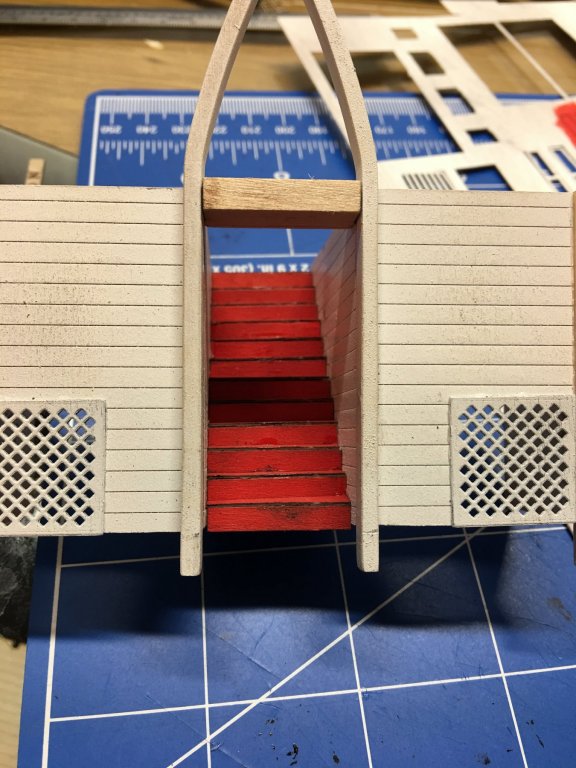
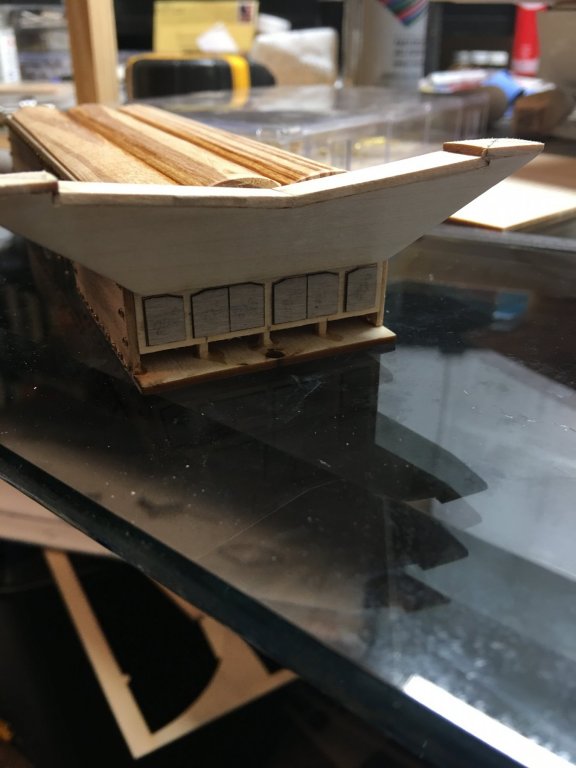
Greetings everyone, Slow going in the shipyard this week, not much accomplished due to work. While I still wait for my planking to arrive (delayed for some reason that Amazon can sort out), I figured that I would do a little work on some of the main deck structure. For now, I focused on the forward staircase and coal locker. Fairly simple build, the most tedious part was placing all of the stair risers and runners. One thing that I noticed was the instructions call for the corner posts of the coal locker walls to be set flush with the front of the walls. Dry fitting these pieces would not allow for the walls to be in a straight line with the top beam, keeping the precut holes in the decking lined up. I had to cheat the corner posts forward a little to get everything to line up right. Not a huge deal, since personally I think the wall set back about a millimeter looks better than being flush. One little thing that I like to do on my models is leave little notes in places that will never be seen, but I know they are there. Usually I put the build start date in the hull, unfortunately I forgot to snap a picture on this one, but here is just one of the others that are on this build. One thing that I am going to have to get in the habit of doing is washing my hands a little better when dealing with flat white paint. It seems to pick up even the most minuscule pieces of dirt and transfers it to the bright white surface. Oh well, nothing a little touch-up paint can’t take care of. A little shameless borrowing of ideas, I loved the look of adding posters to the front walls of the coal lockers. The idea came from Bruce Evans' build, a beautiful addition to dress up the walls. I know that the Mark Twain poster is not late 19th century and Dinsneyland wasn’t around then, but I liked the picture and thought added a nice touch. Besides, they are small enough that unless you are really looking, you can’t tell. That's all for now. Until next time, thanks for looking. -Brian


- 133 replies
-
- 10
-
-
- chaperon
- model shipways
- (and 2 more)
-
Hugh, Just found your build log. Very nice work on the KotM. I built this kit a year or so ago and enjoyed it start to finish. Looks like you are at one of the most tedious parts of the build. I can honestly say that all the effort is very much worth it in the end. -Brian
-
Chris, Very nice start. I had the same thing happen to me, on or about the same area. Funny thing is I thought I made every effort to assure all bulkheads were square. Good thing is at least it will be hidden and doesn’t affect the integrity of the hull planks. Hopefully you will be able to get back to your build soon. -Brian
-
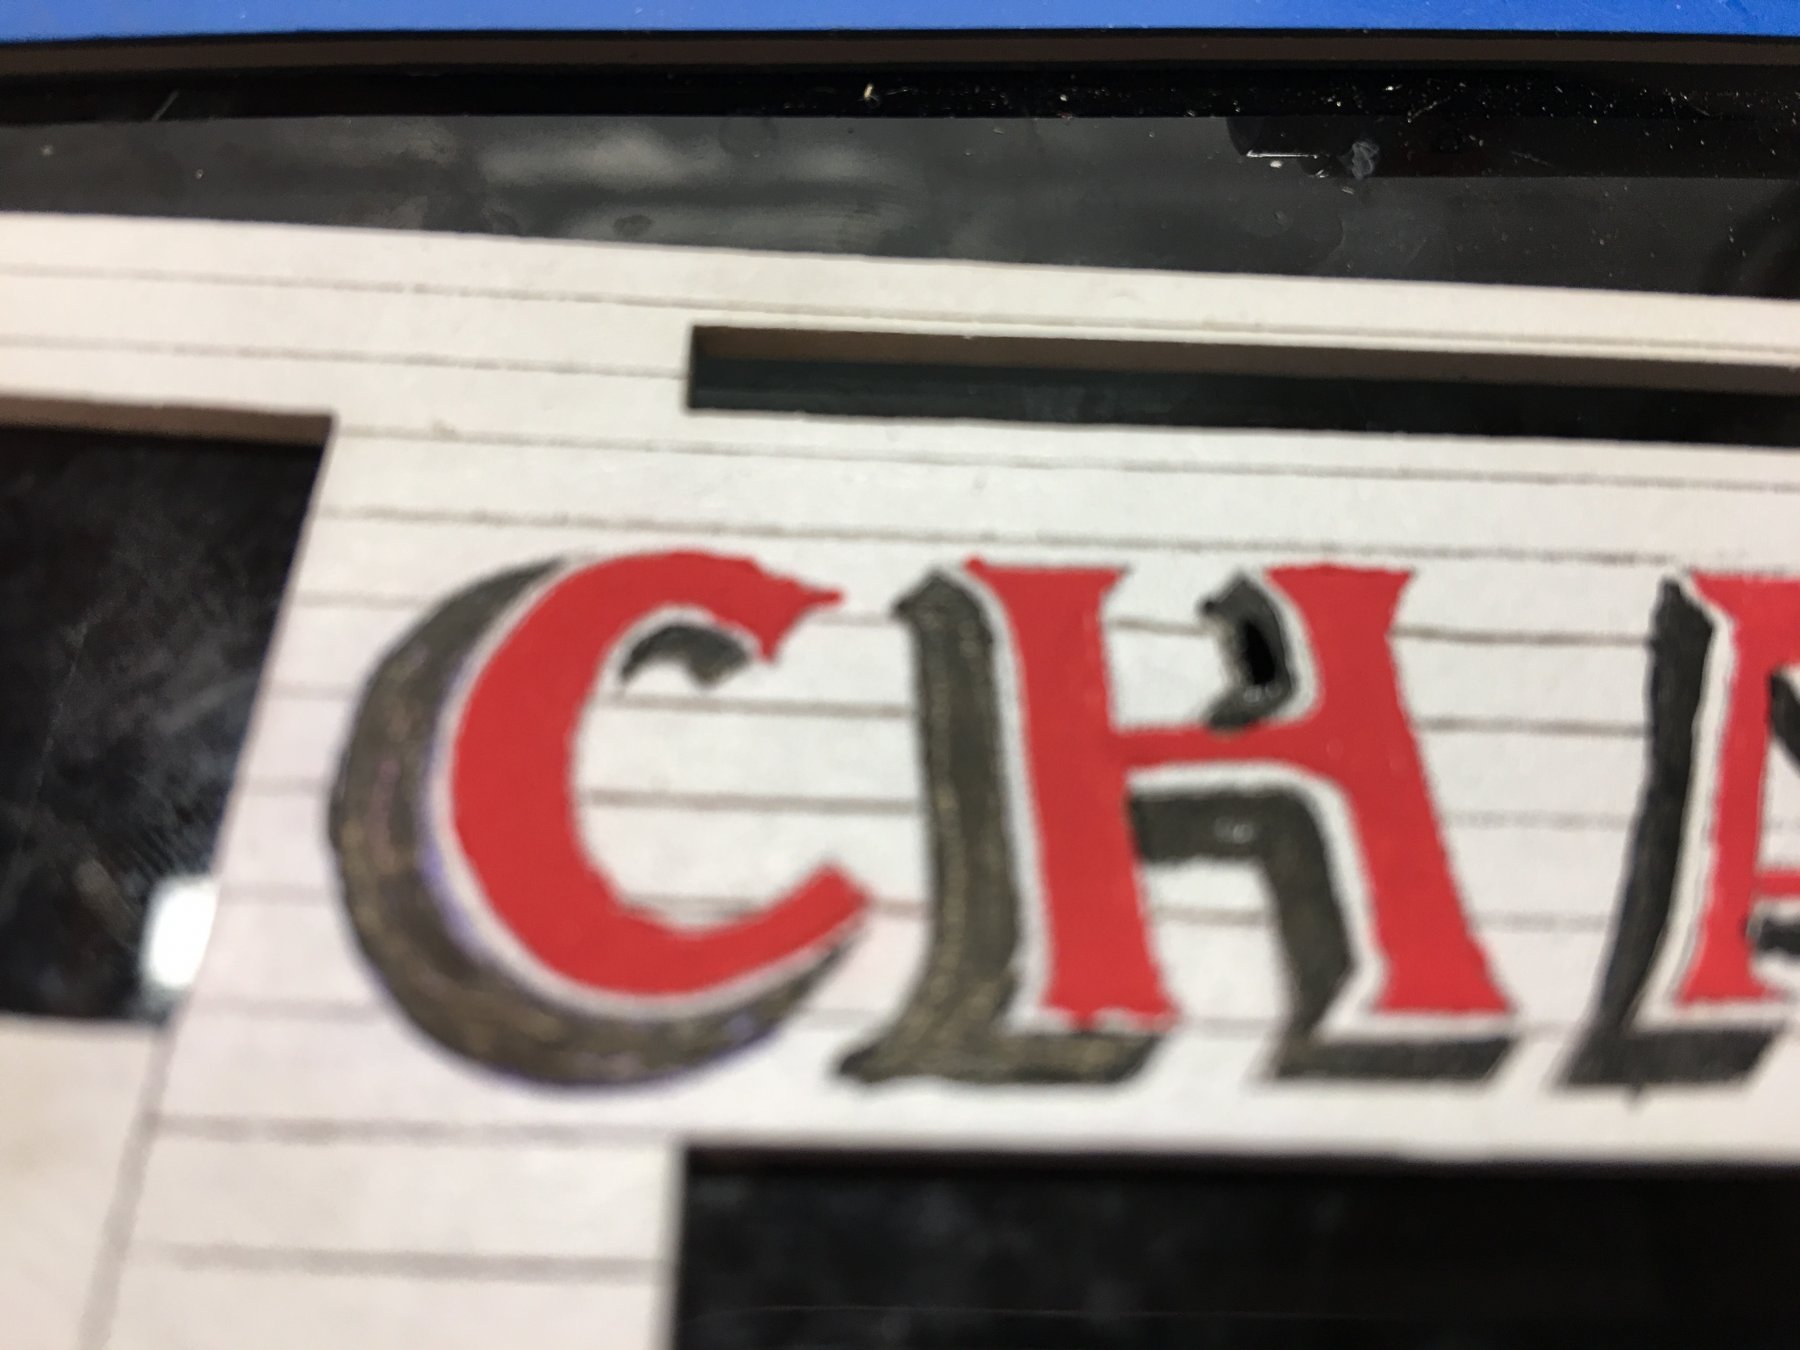
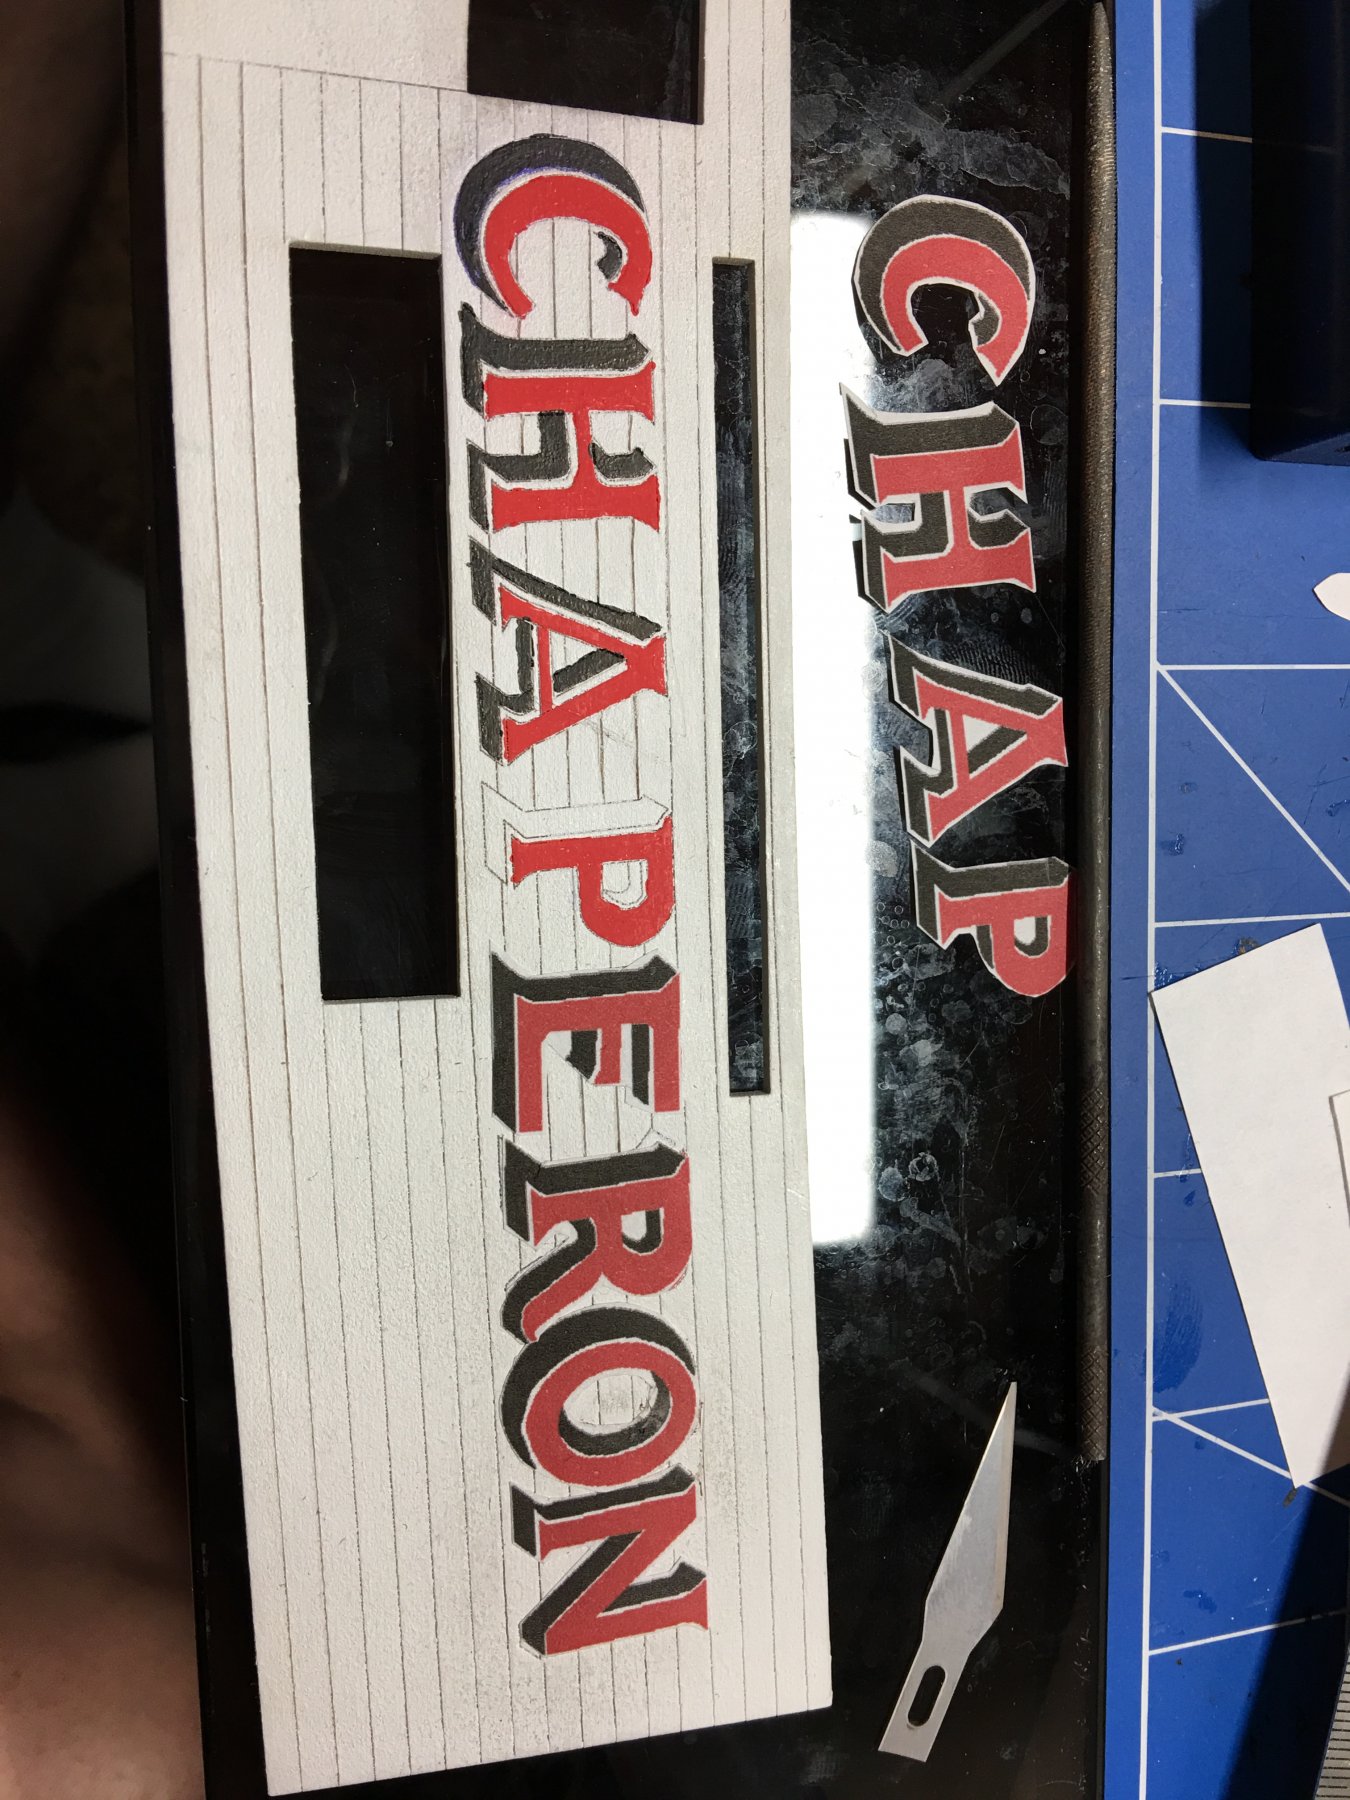
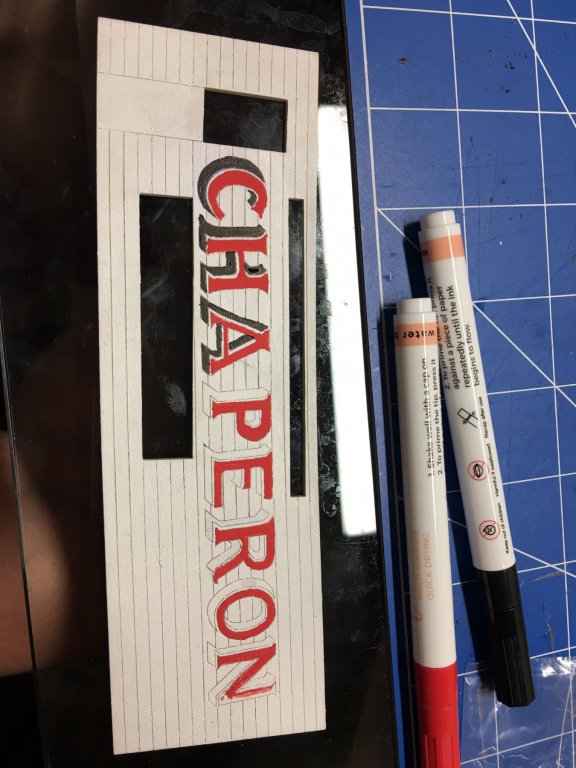
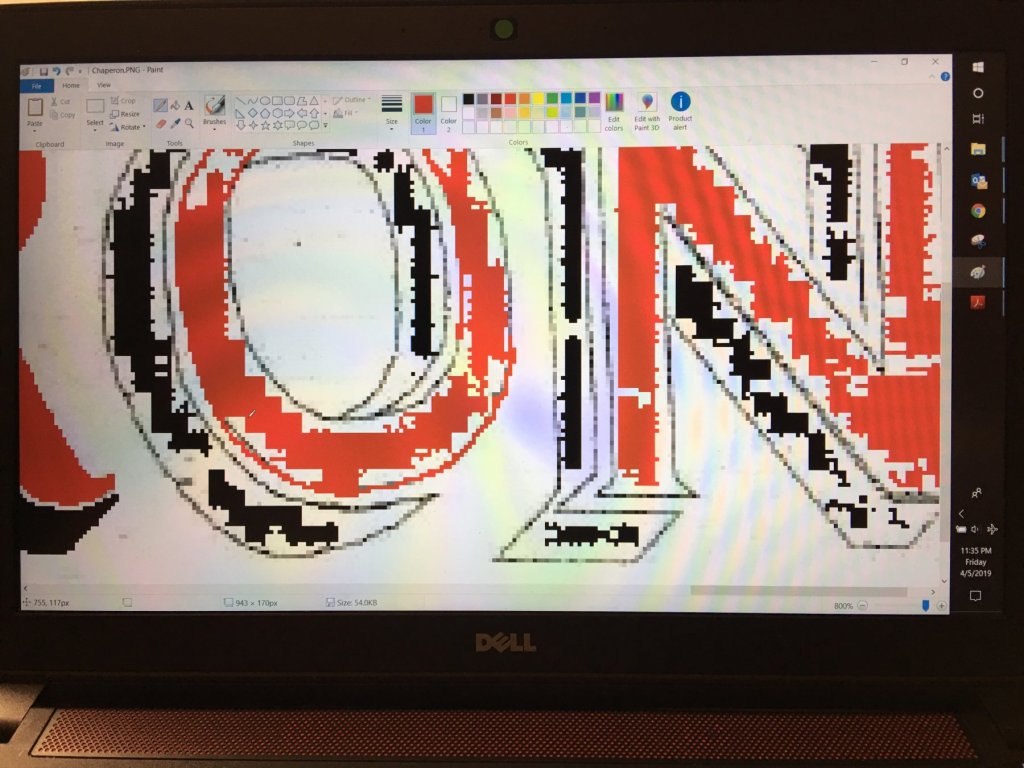
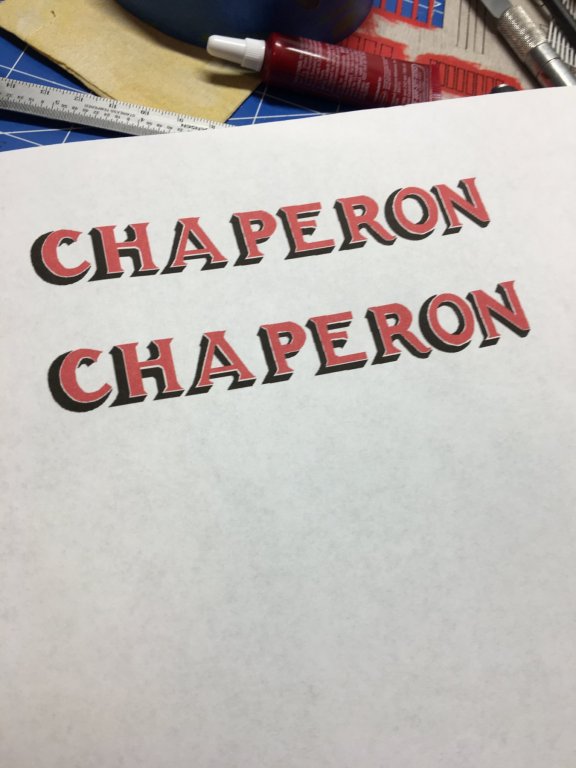
Good evening All, Making use of my waiting time on my planking. While attempting to hone my painting skills, I decided to work on the Chaperon lettering of the mechanical room sides. Needless to say my hands just aren't as steady as they used to be and I spent more time cleaning up paint on the outside of the lines than I did actually painting the letters. Even with fine tip paint pens, I still failed. Here I am trying to teach my grand-kids how to color inside the lines, and I cant even do it. After several failed attempts at making clean lines, I finally threw in the towel. I had noticed in one of the other build logs of the Chaperon that it was pointed out that not all of the shading (the black portion of the lettering) was complete on the "A", "P" & "R" and the "O" was really out of round so I decided to let technology take a turn at the lettering. I took one of the side pieces and placed it in the scanner and made myself a copy of the lettering. Then with the simple paint program that Microsoft is generous enough to include with Windows, I set out on making my own lettering. After several hours of staring at tiny pixels I had the lettering that was worthy of putting on my model. I added the missing shading and cleaned up the "O", making it more rounder as it should be. After a little resizing to get the letter to the proper scale and printing them out, it was all up to my so-so steady hands to cut out each letter and glue it to the sides. Letter by letter it finally took shape until all the pieces were in place. Now that they are all placed, a little trimming, some touch ups and shot of satin clear coat and I'll have what I'm was looking for. Nice crisp lettering. With this little side project completed, hopefully my planking will arrive tomorrow (according to the tracking it should), I can move on to getting the deck completed and start working my way vertical. Thanks for looking. -Brian


- 133 replies
-
- 7
-
-
- chaperon
- model shipways
- (and 2 more)
-
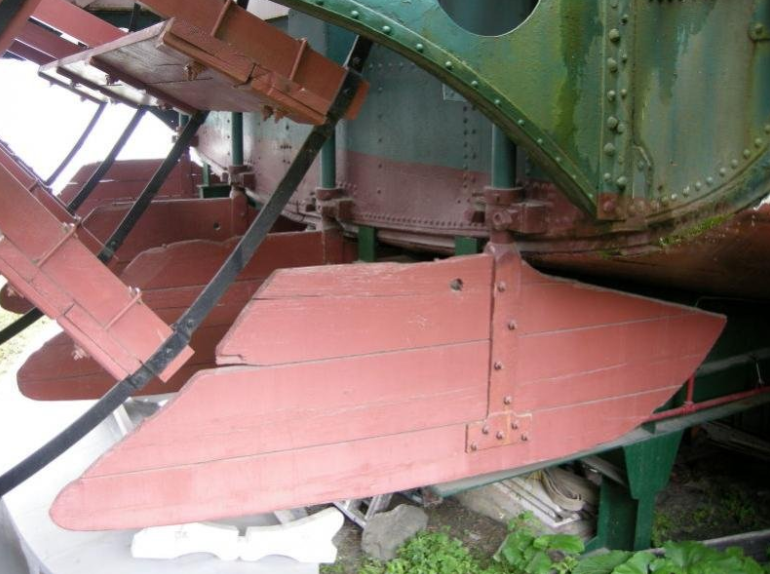
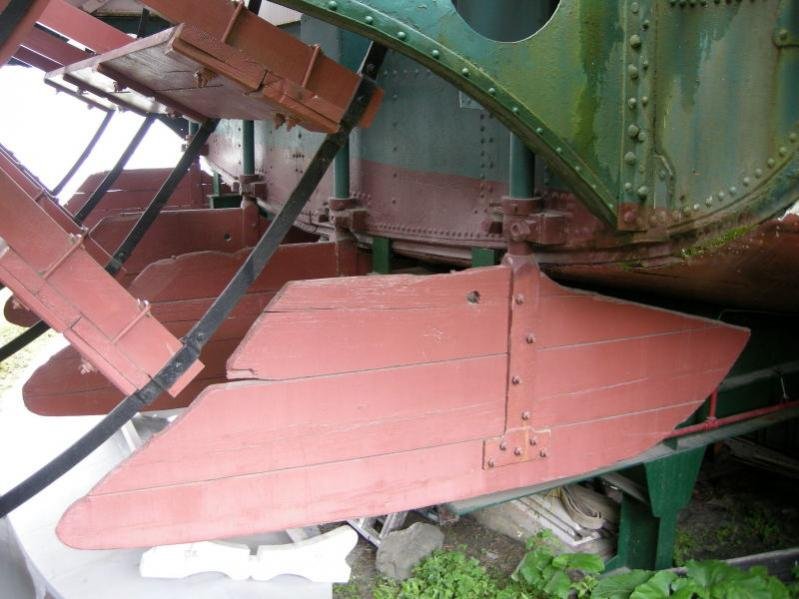
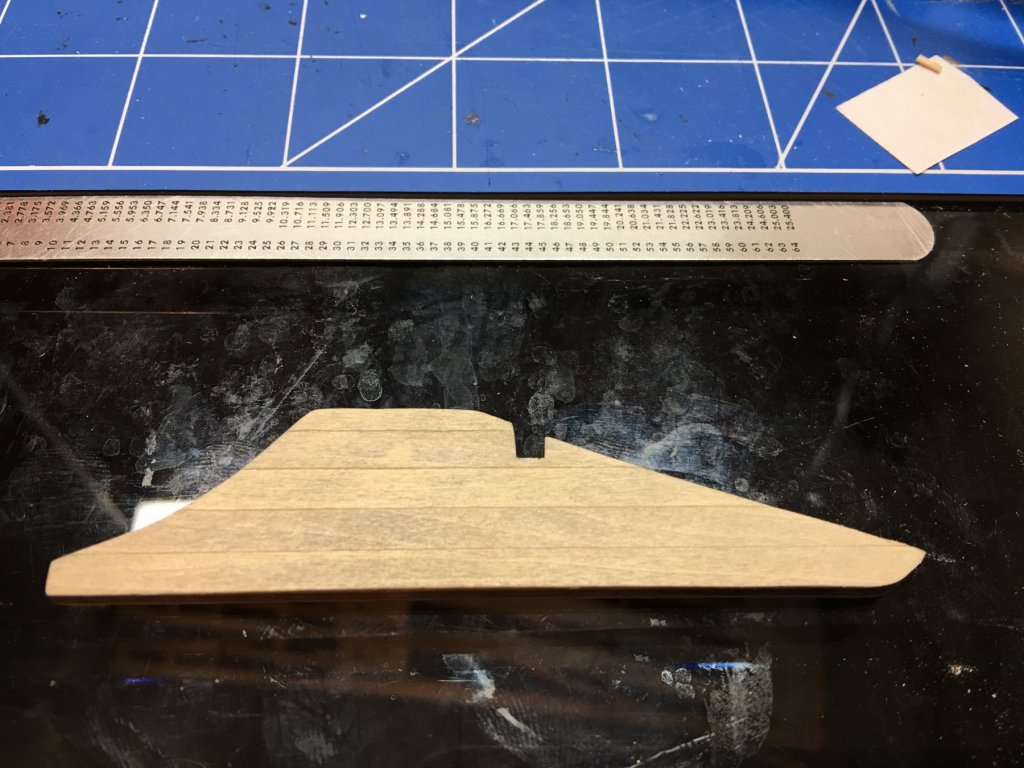
Hello everyone, So as I continue to wait on the planking to arrive, I started working on other features. While was going through assembling the rudders, I thought I would add a little more detail to them like the strapping and rivets. To show some of the timber detail, used some leftover planking from a previous build and just overlayed the plywood pieces. During the planking process a thought occurred to me that I had no idea as to how steamboat rudders were assembled. Were they stacked timbers that were banded with flat iron around the outside perimeter and held together with rivets, or were they assemble more like sailing ships where they were strapped across sides of the timbers? So off to the internet I went. During my search I found very little information or pictures of them steamboat rudders. I did find a few pictures of the Arabia rudder and several more modern rudder types, but nothing from around the late 1880's. The Arabia being a side-wheeler only had one rudder and it looked to be banded around the perimeter, but it looks more like wood than iron. More modern era stern-wheeler rudder. This one looks a little thin compared to the Chaperon rudders. Does anyone know where I would need to look for better info on how the Chaperon's rudders, or other steamboats of her time were assembled? Any and all information is greatly appreciated, Thanks again for looking. -Brian

- 133 replies
-
- 9
-
-
- chaperon
- model shipways
- (and 2 more)
-
Thank you for the compliments. Though some of the detail may not be seen. I know it’s there, it always makes a good discussion topic. -Brian
- 133 replies
-
- 5
-
-
- chaperon
- model shipways
- (and 2 more)
-
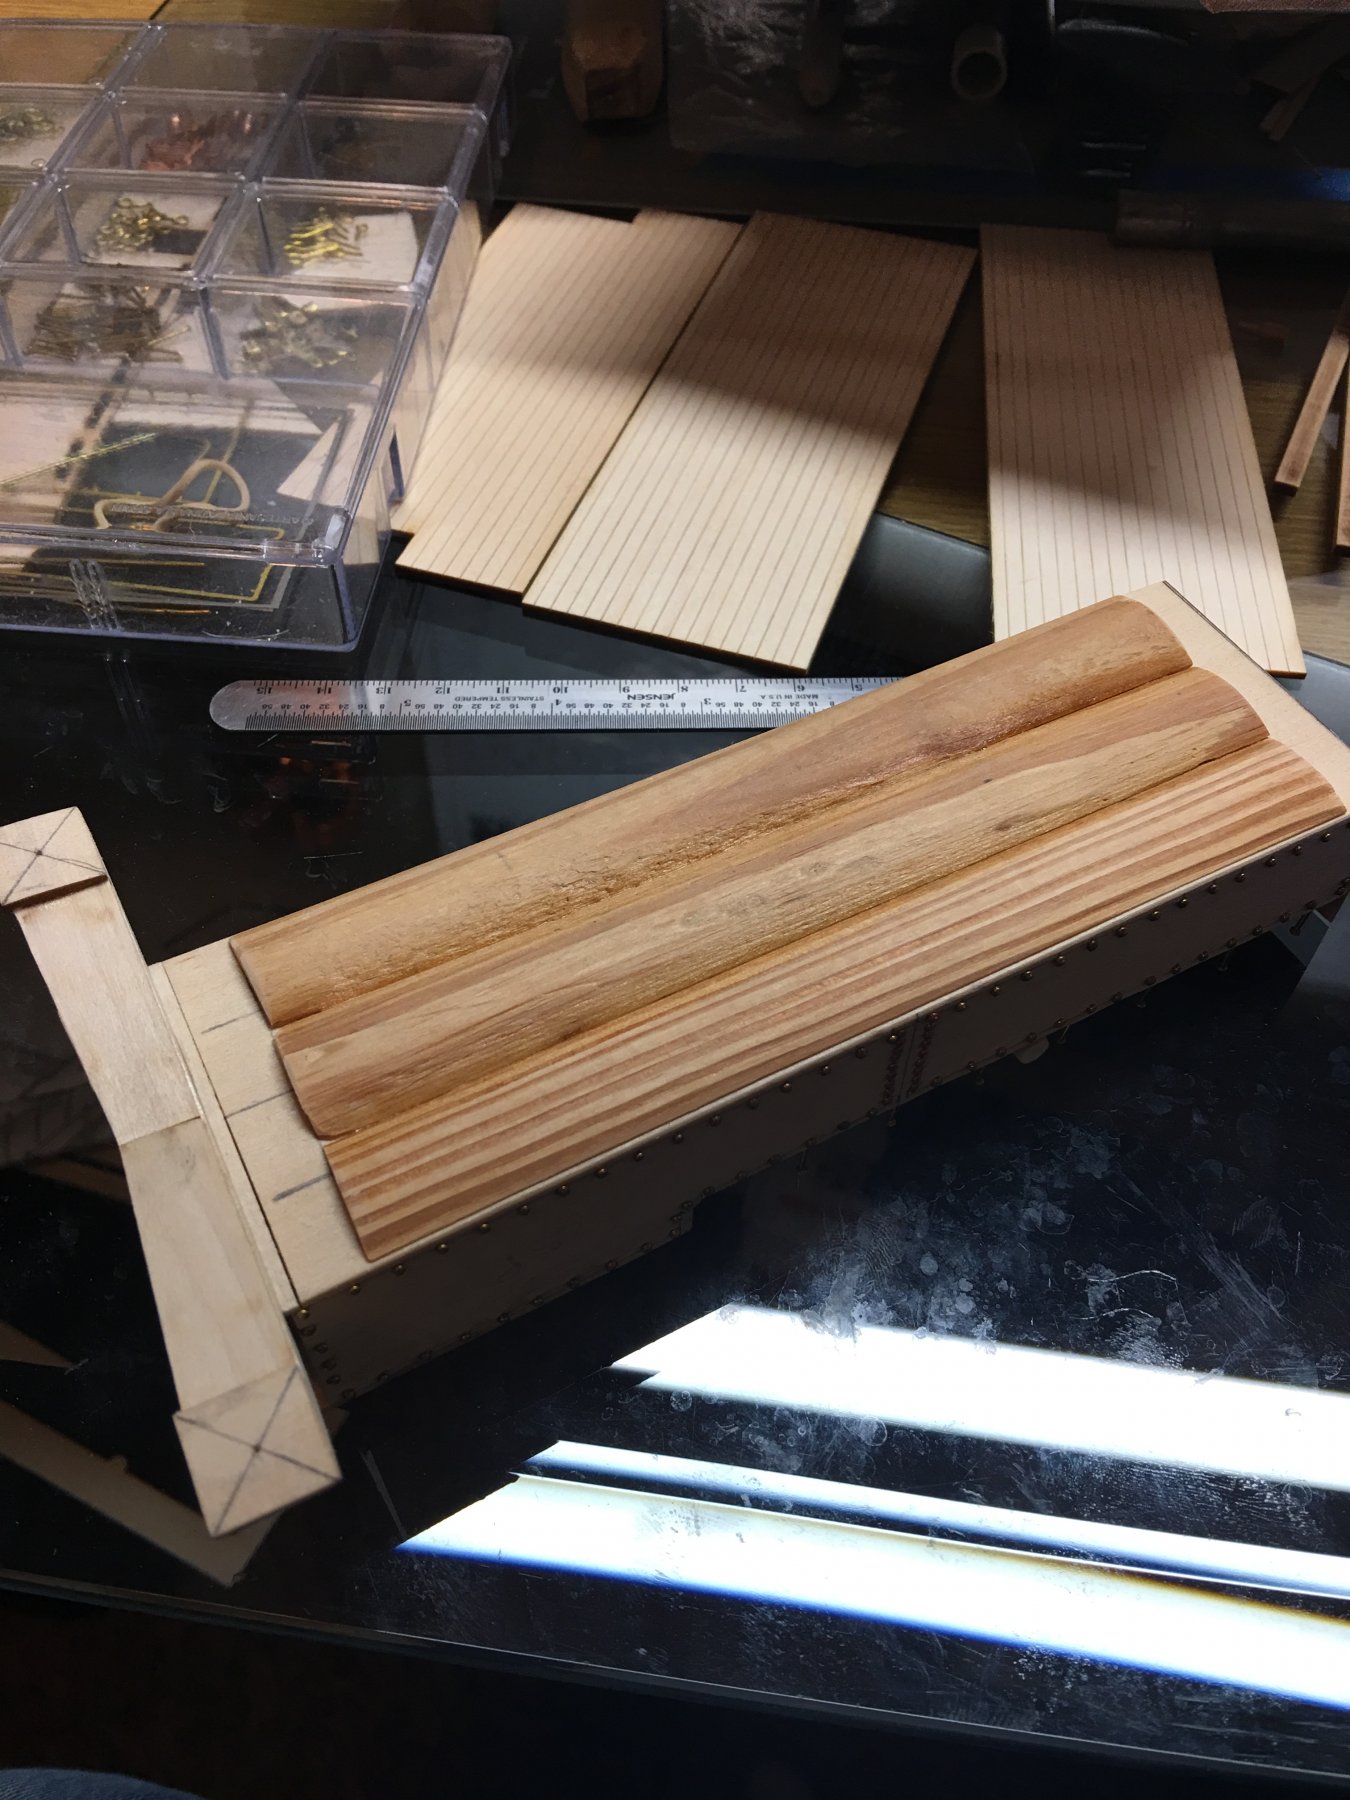
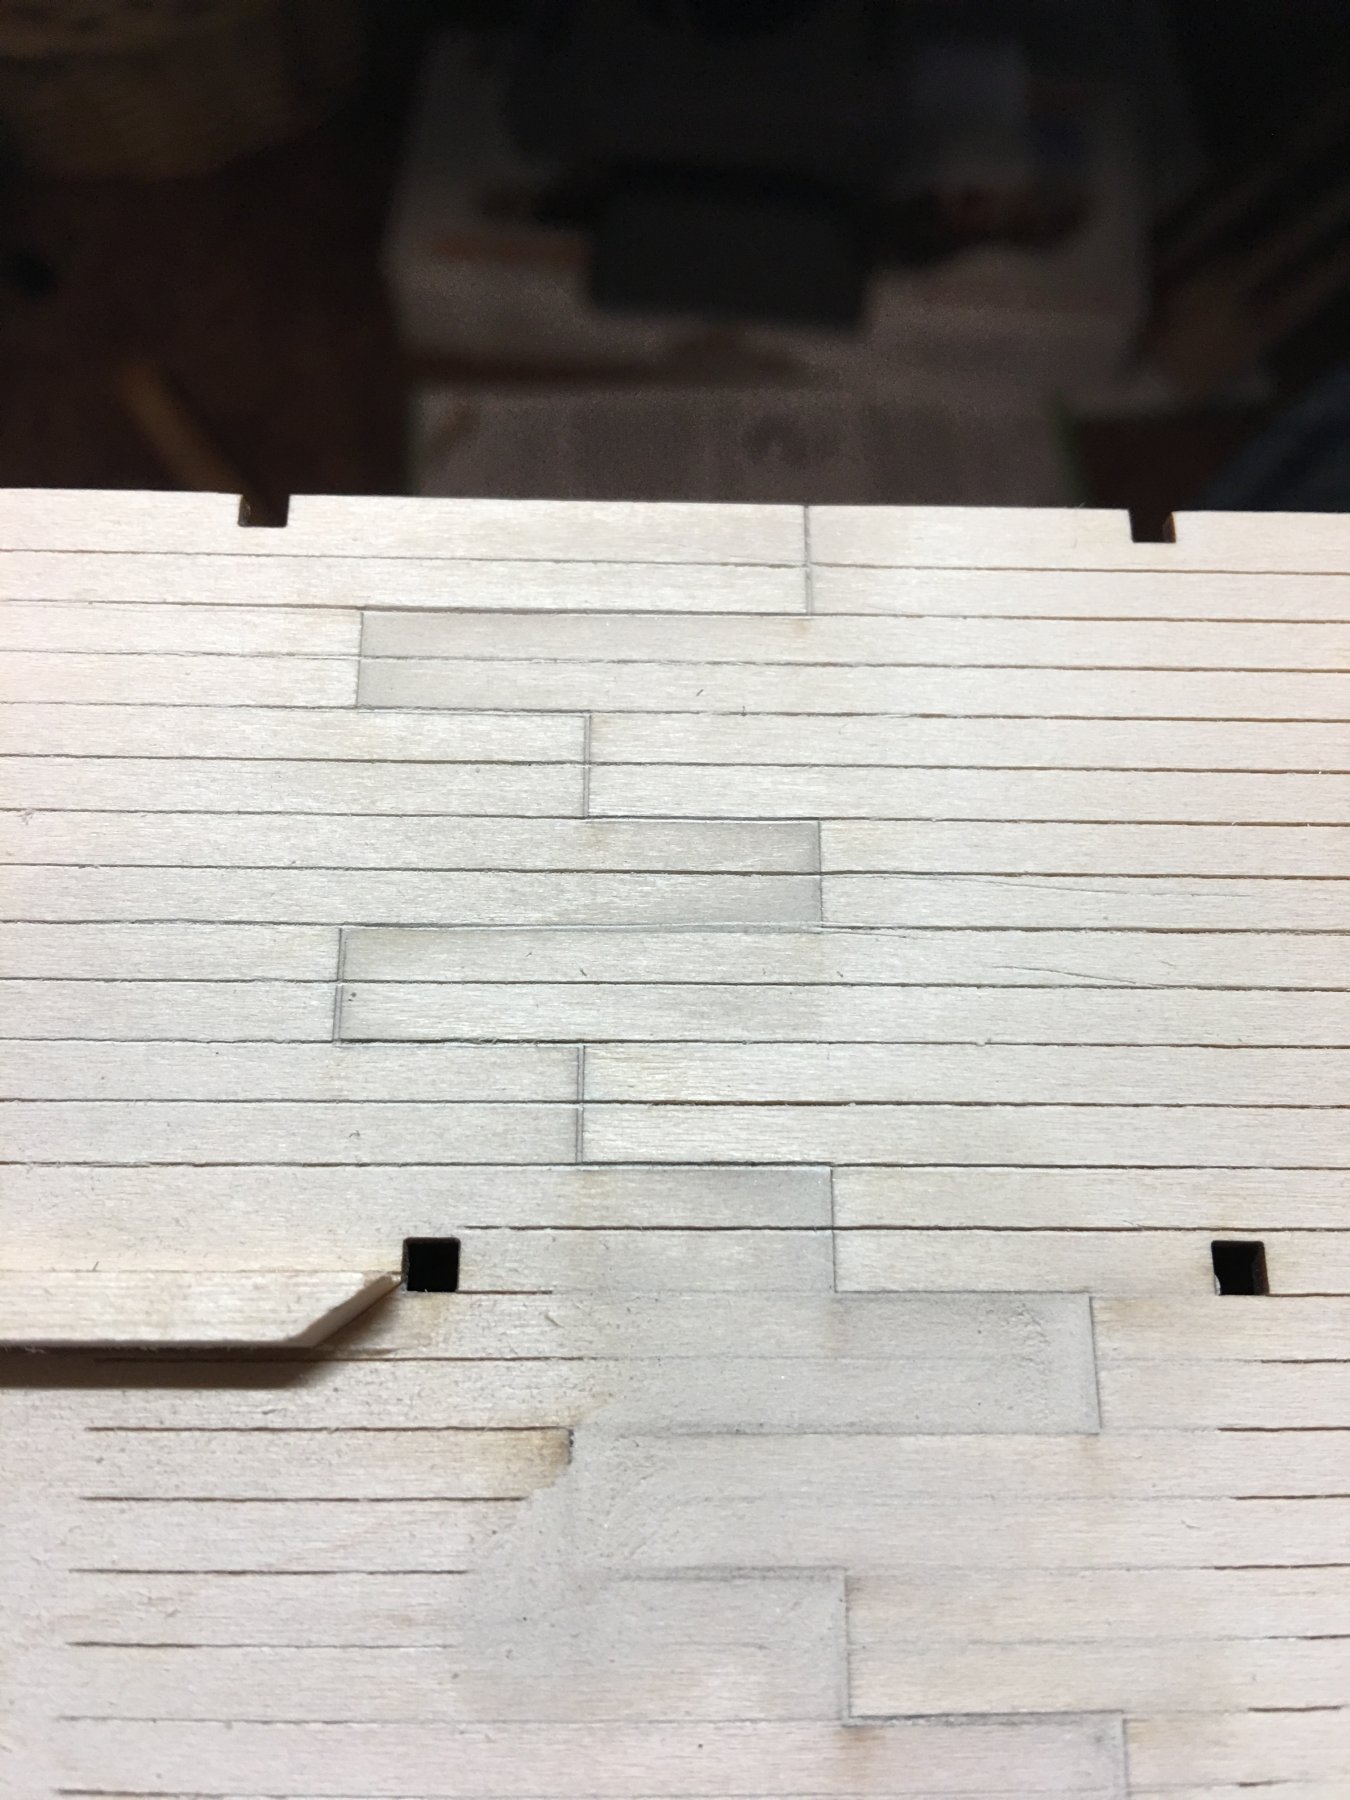
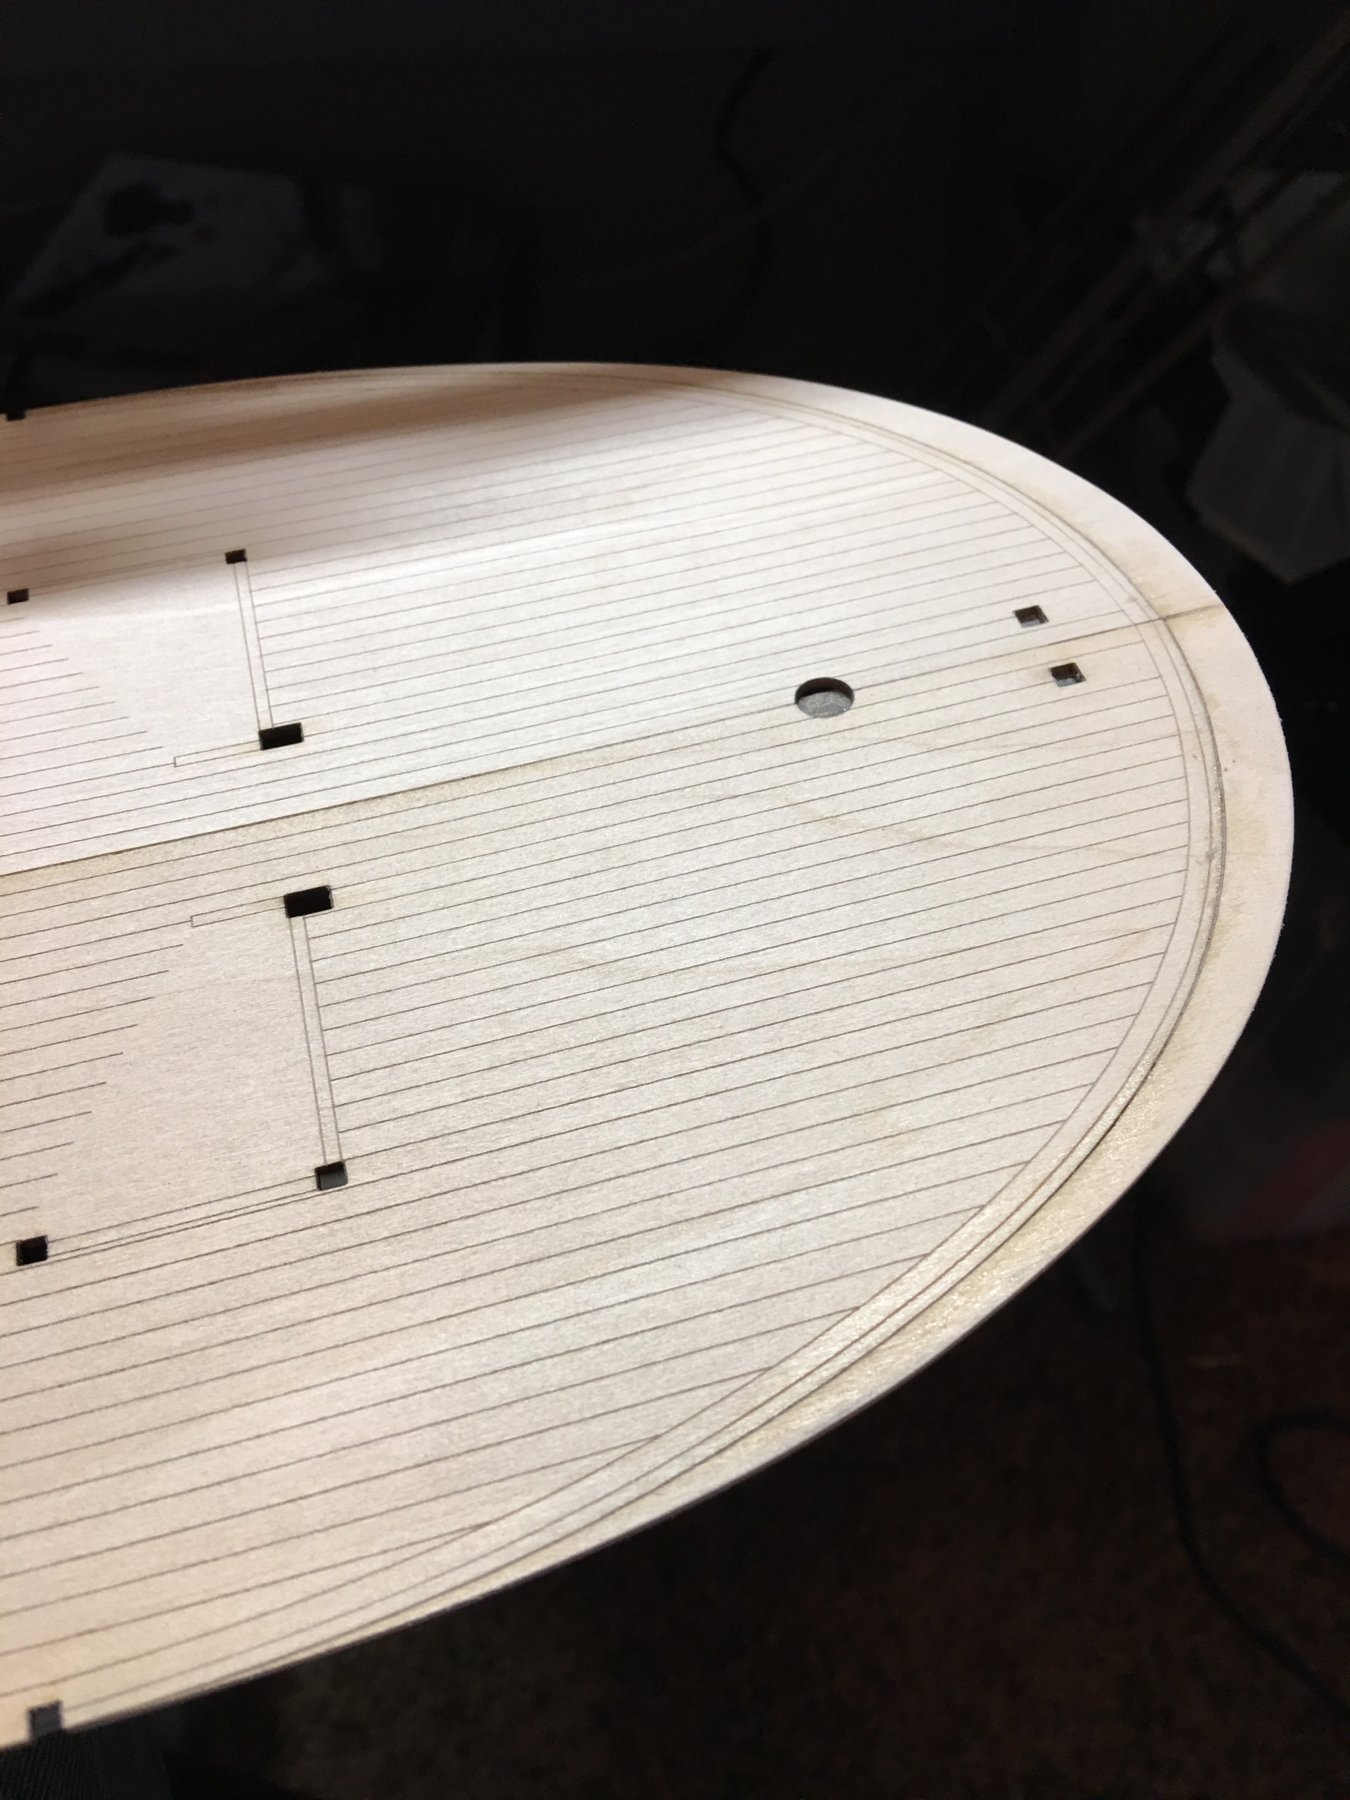
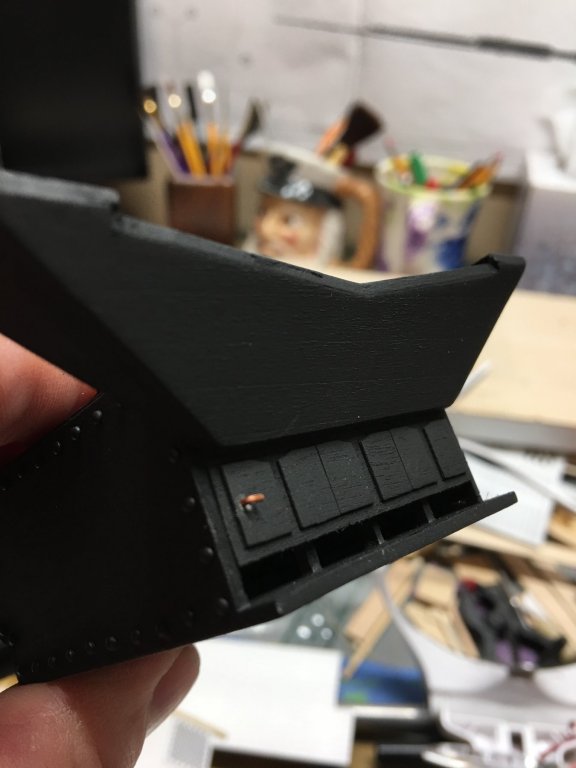
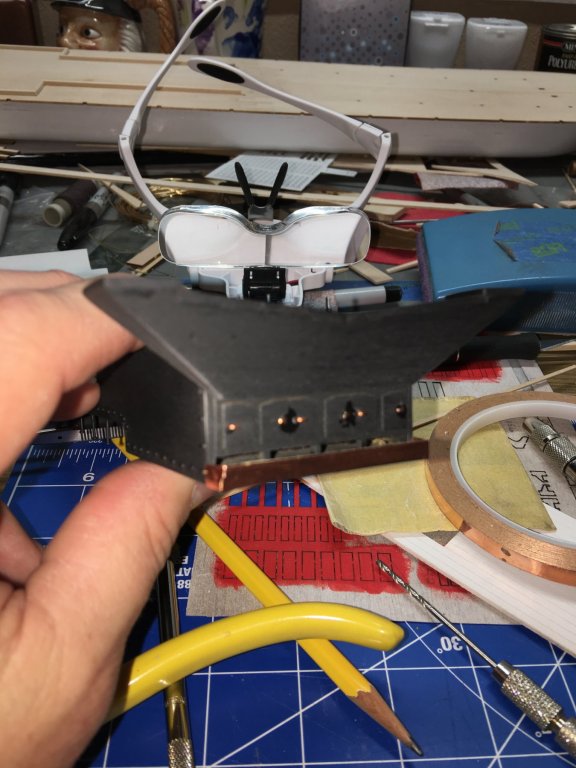
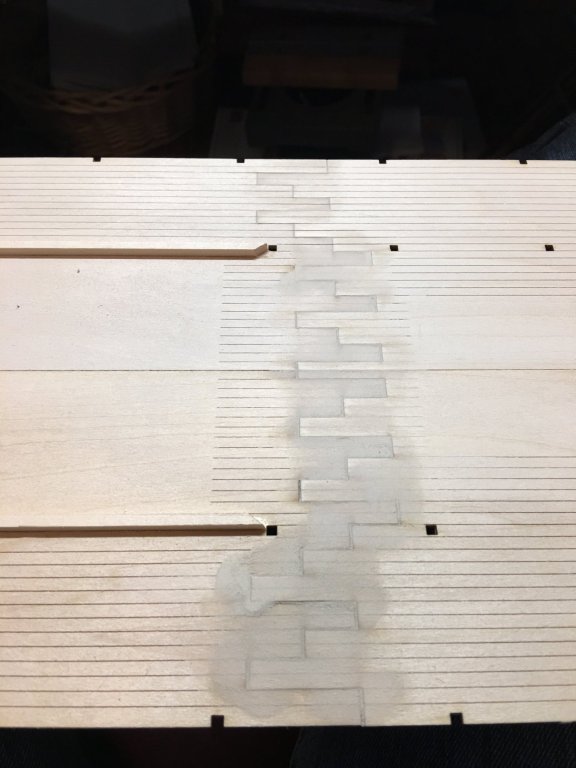
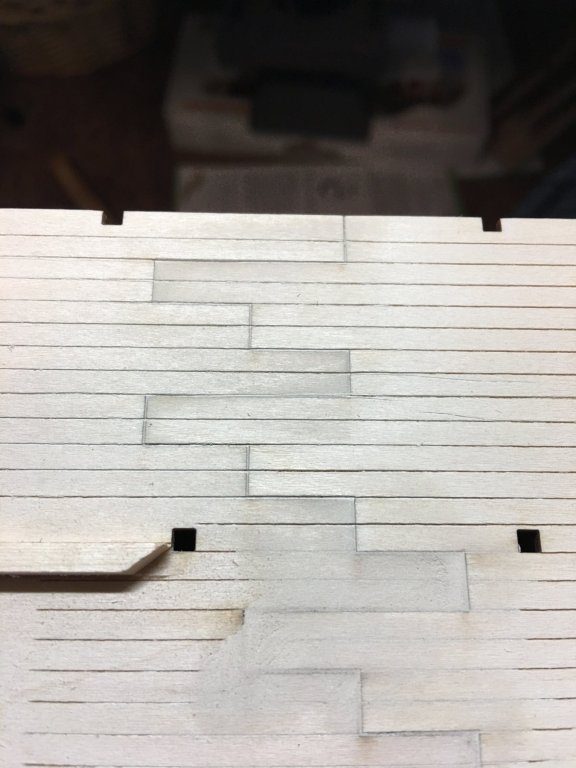
Hello everyone, A little more work in the shipyard over the past few days. I finally made the decision that since I wanted to do a stained deck on my Chaperon and I just couldn't get over the roughness of the "finger joint" between the main deck pieces, that I am going to go with adding a layer of planking. This will serve two purposes, to cover up the joint as well as help hide the deck extension I added. This will also allow me to show individual planks instead of one long one running from bow to stern. While I sat and pondered what I wanted to do about the "finger joint" issue on the main deck and waiting on my order of extra basswood planks, I did a little work on the boiler. Instead of just the plain 'ol square box, I decided to add a few extra details. Not that they will really be seen that much, but I thought it added a nice touch. First I added the individual boiler tops and rivets along the seams of the boiler cover. Next, the boiler doors may be a little hard to open without handles. So I added them along with sides for the ash pan. Now for a little touch up on the boiler paint and install the pop-off valves, gauges, steam lines and drum, then this will be ready to install once i get the planking down. Until next time. Thanks again for looking. -Brian

- 133 replies
-
- 14
-
-
- chaperon
- model shipways
- (and 2 more)
-
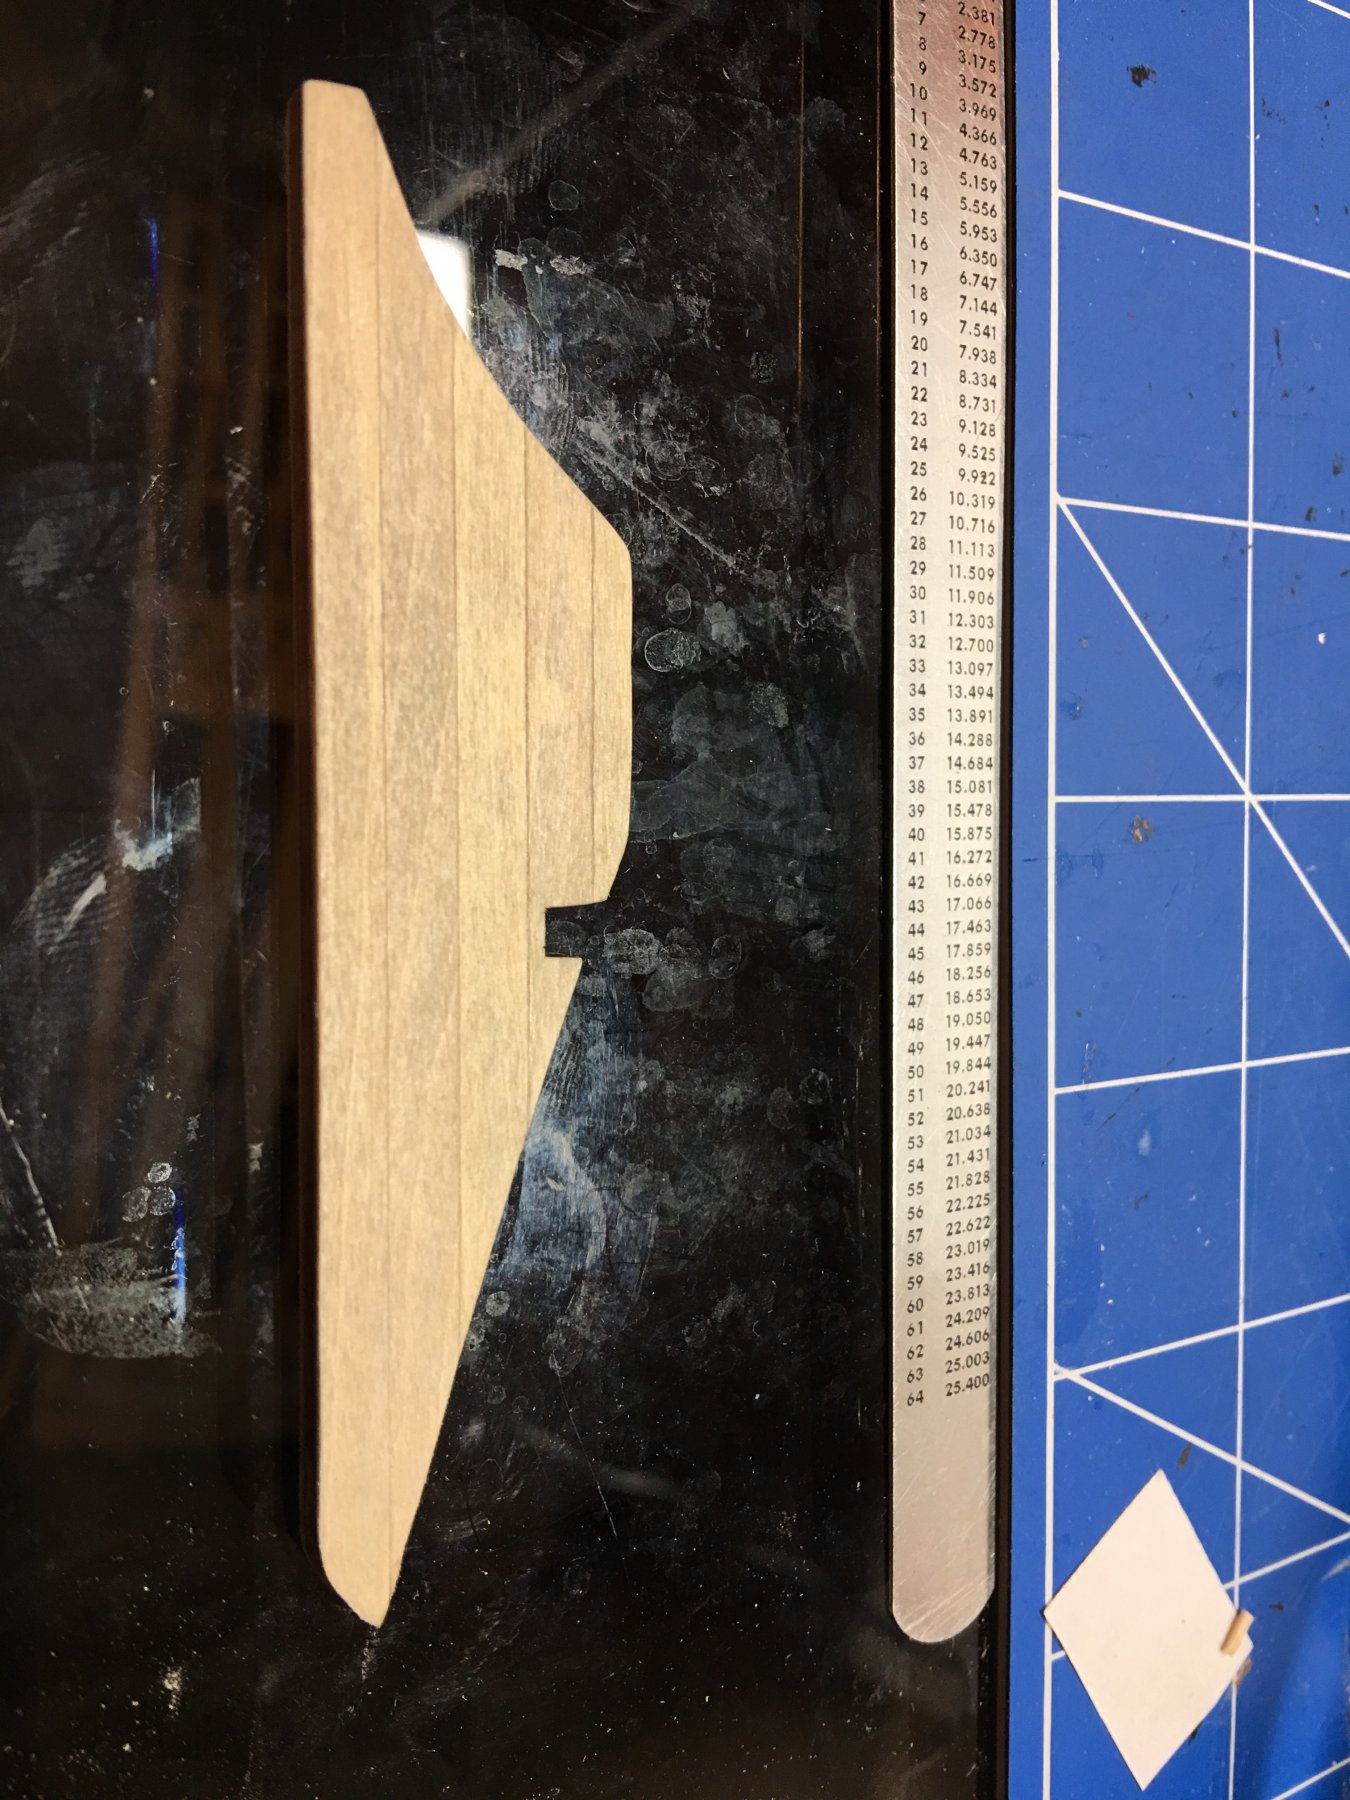
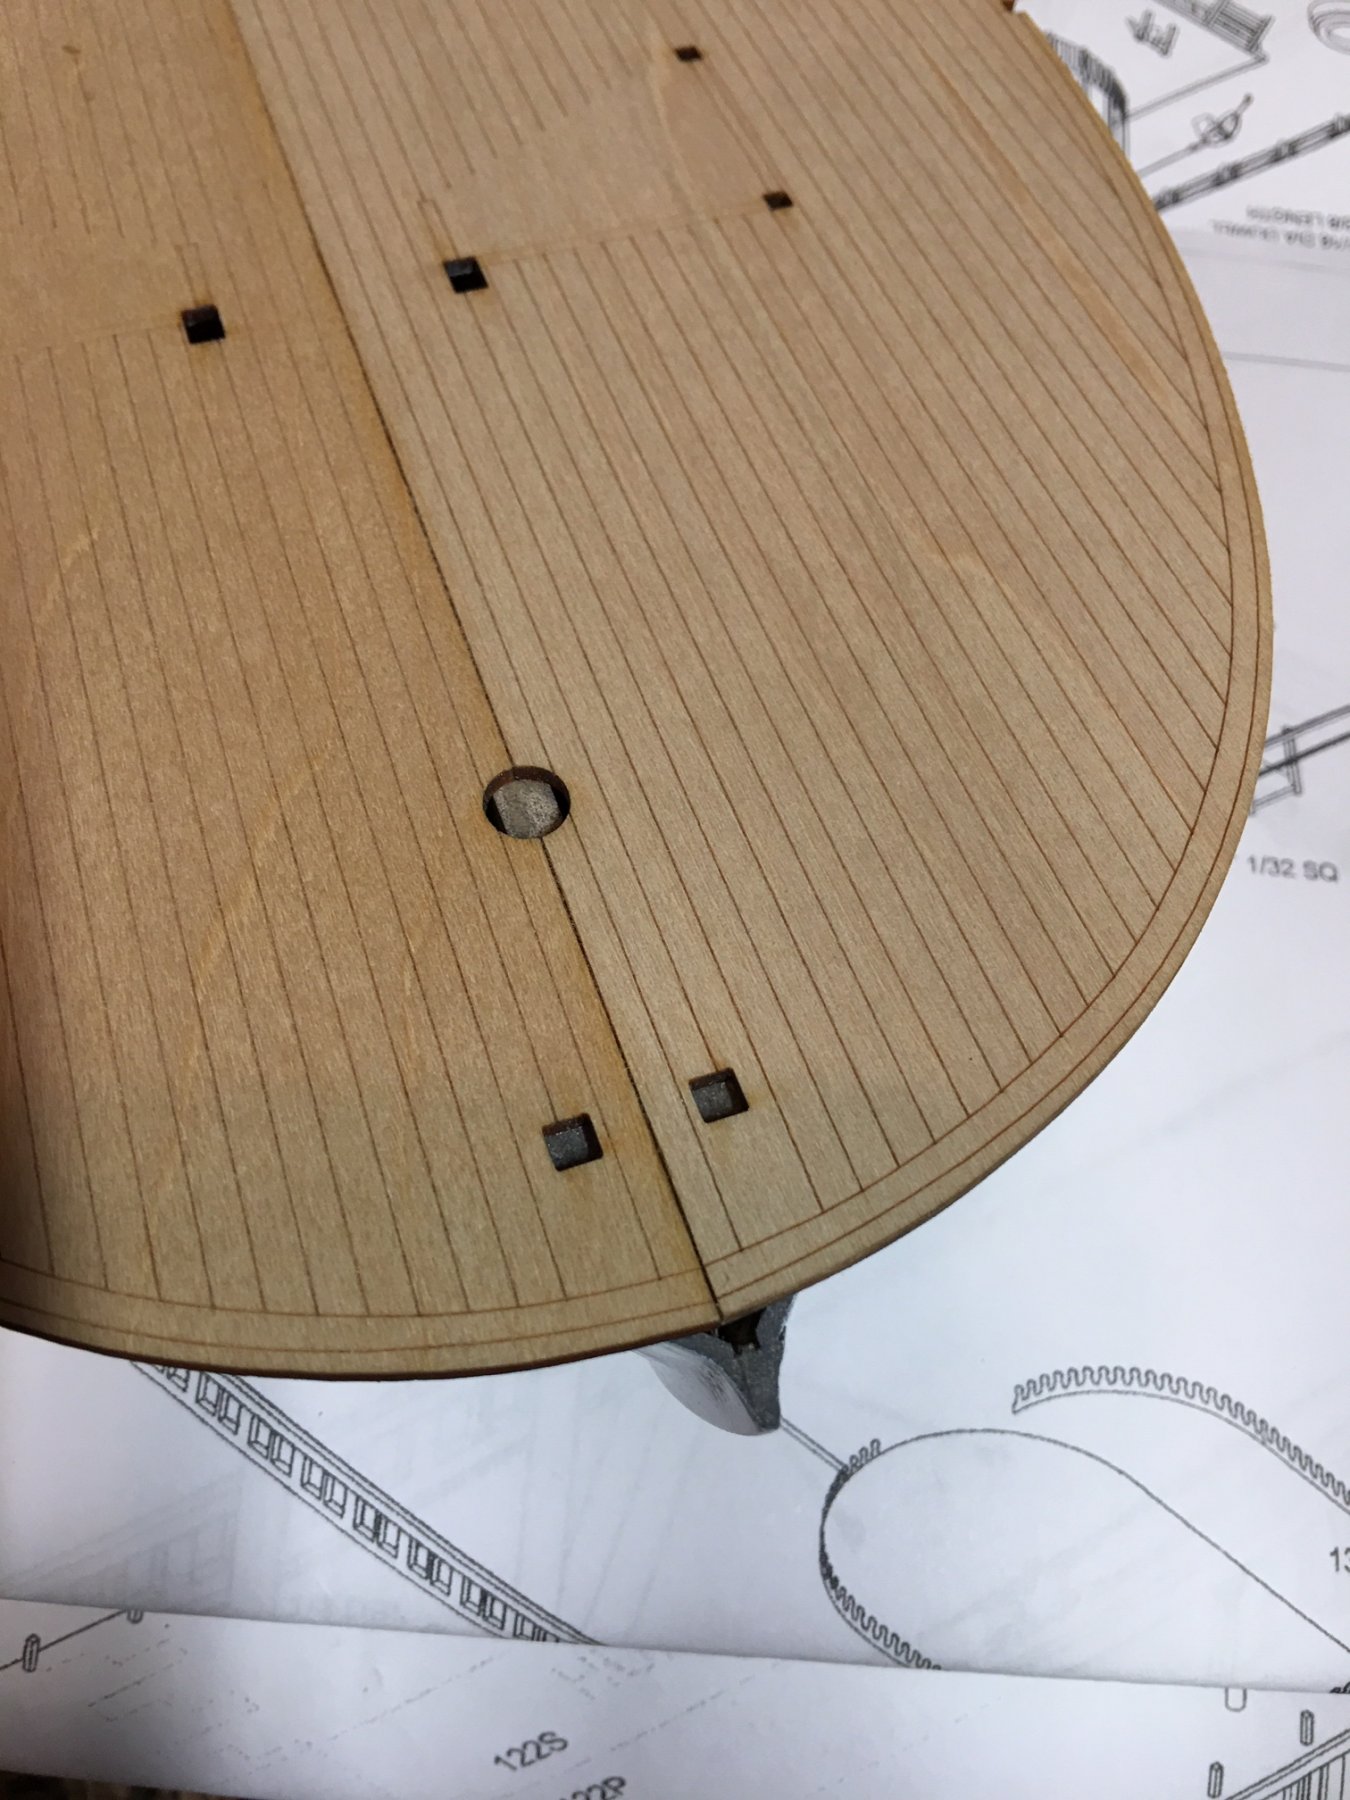
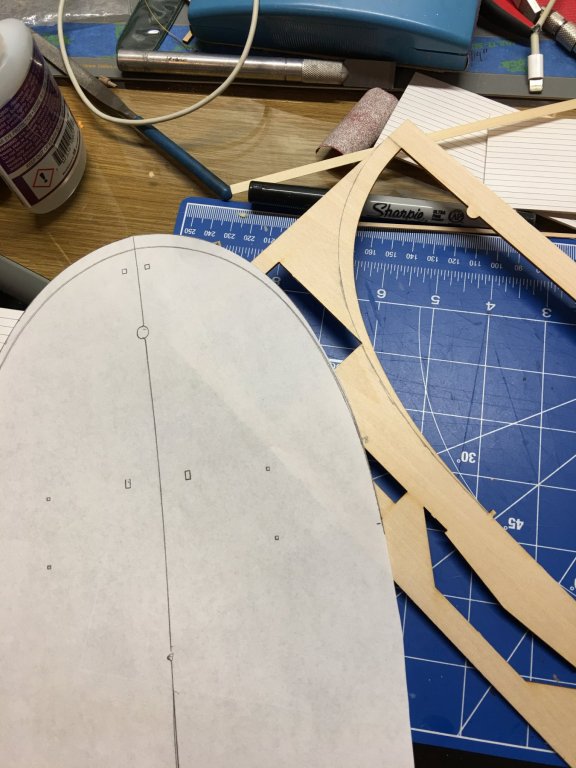
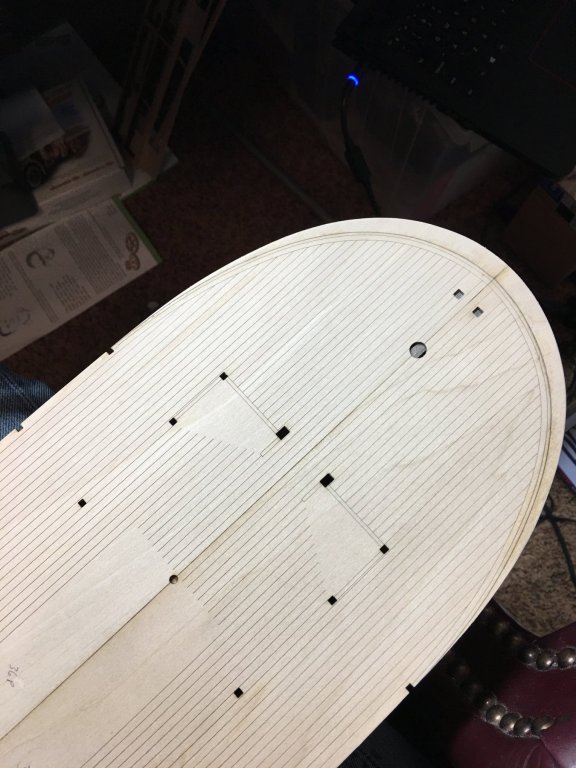
After a little bit of thought and I came up with a solution. Instead of tearing down the hull, re-planking and installing a new keel, I decided to just extend the deck a little to compensate for the extra length. I used the main deck pieces and made a paper template, then traced the edges on a piece of scrap. I used the pieces the decks came from, that way I only had to make one cut and the inside of the "addition was a perfect match for the deck. Then I cut out the extensions with a little CA placed them on the bow, using the station notches as a guide to get them perfectly in place. A little sanding to shape, and Viola, problem solved. I know this little extension throws the authenticity out of whack by making this fine boat a little longer than it should be, and you hard core Steamboat aficionados please don't think less of me, but to scale it only adds about a foot to the length. And who knows, maybe during the lifetime of the actual Chaperon and over zealous captain ran her into a dock at one time and the ship workers had to make some modifications. Anyway, I am happy with the results and will press on. Thank you for looking, -Brian


- 133 replies
-
- 13
-
-
- chaperon
- model shipways
- (and 2 more)
-
Thank you Chris for the helpful info. Matte/Low Sheen paint it is from here on out. I should have known from the first coat that it was not going to come out like I wanted. It was just wishful thinking that it would. Lesson learned. -Brian
- 133 replies
-
- 3
-
-
- chaperon
- model shipways
- (and 2 more)
-
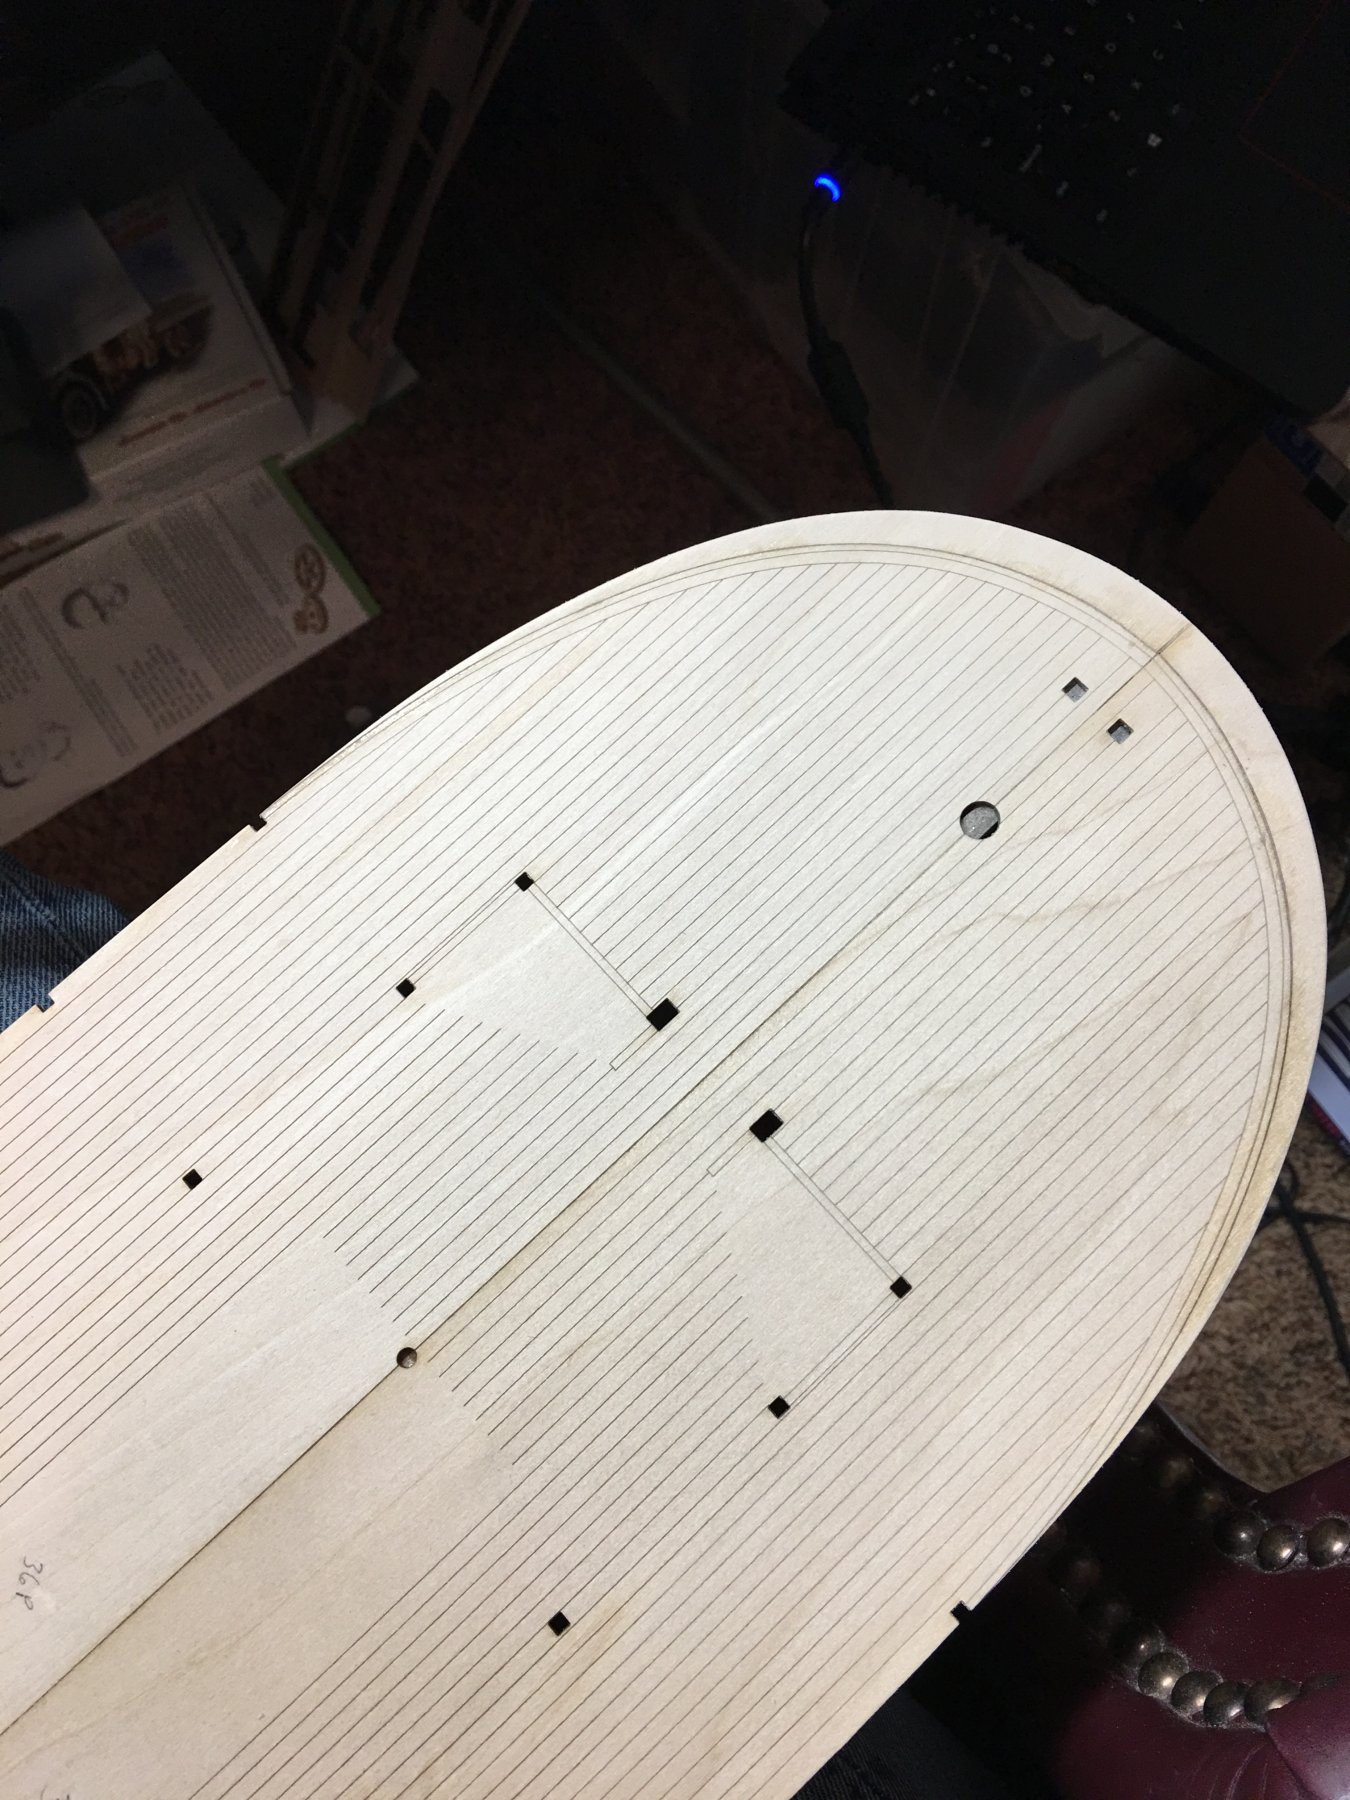
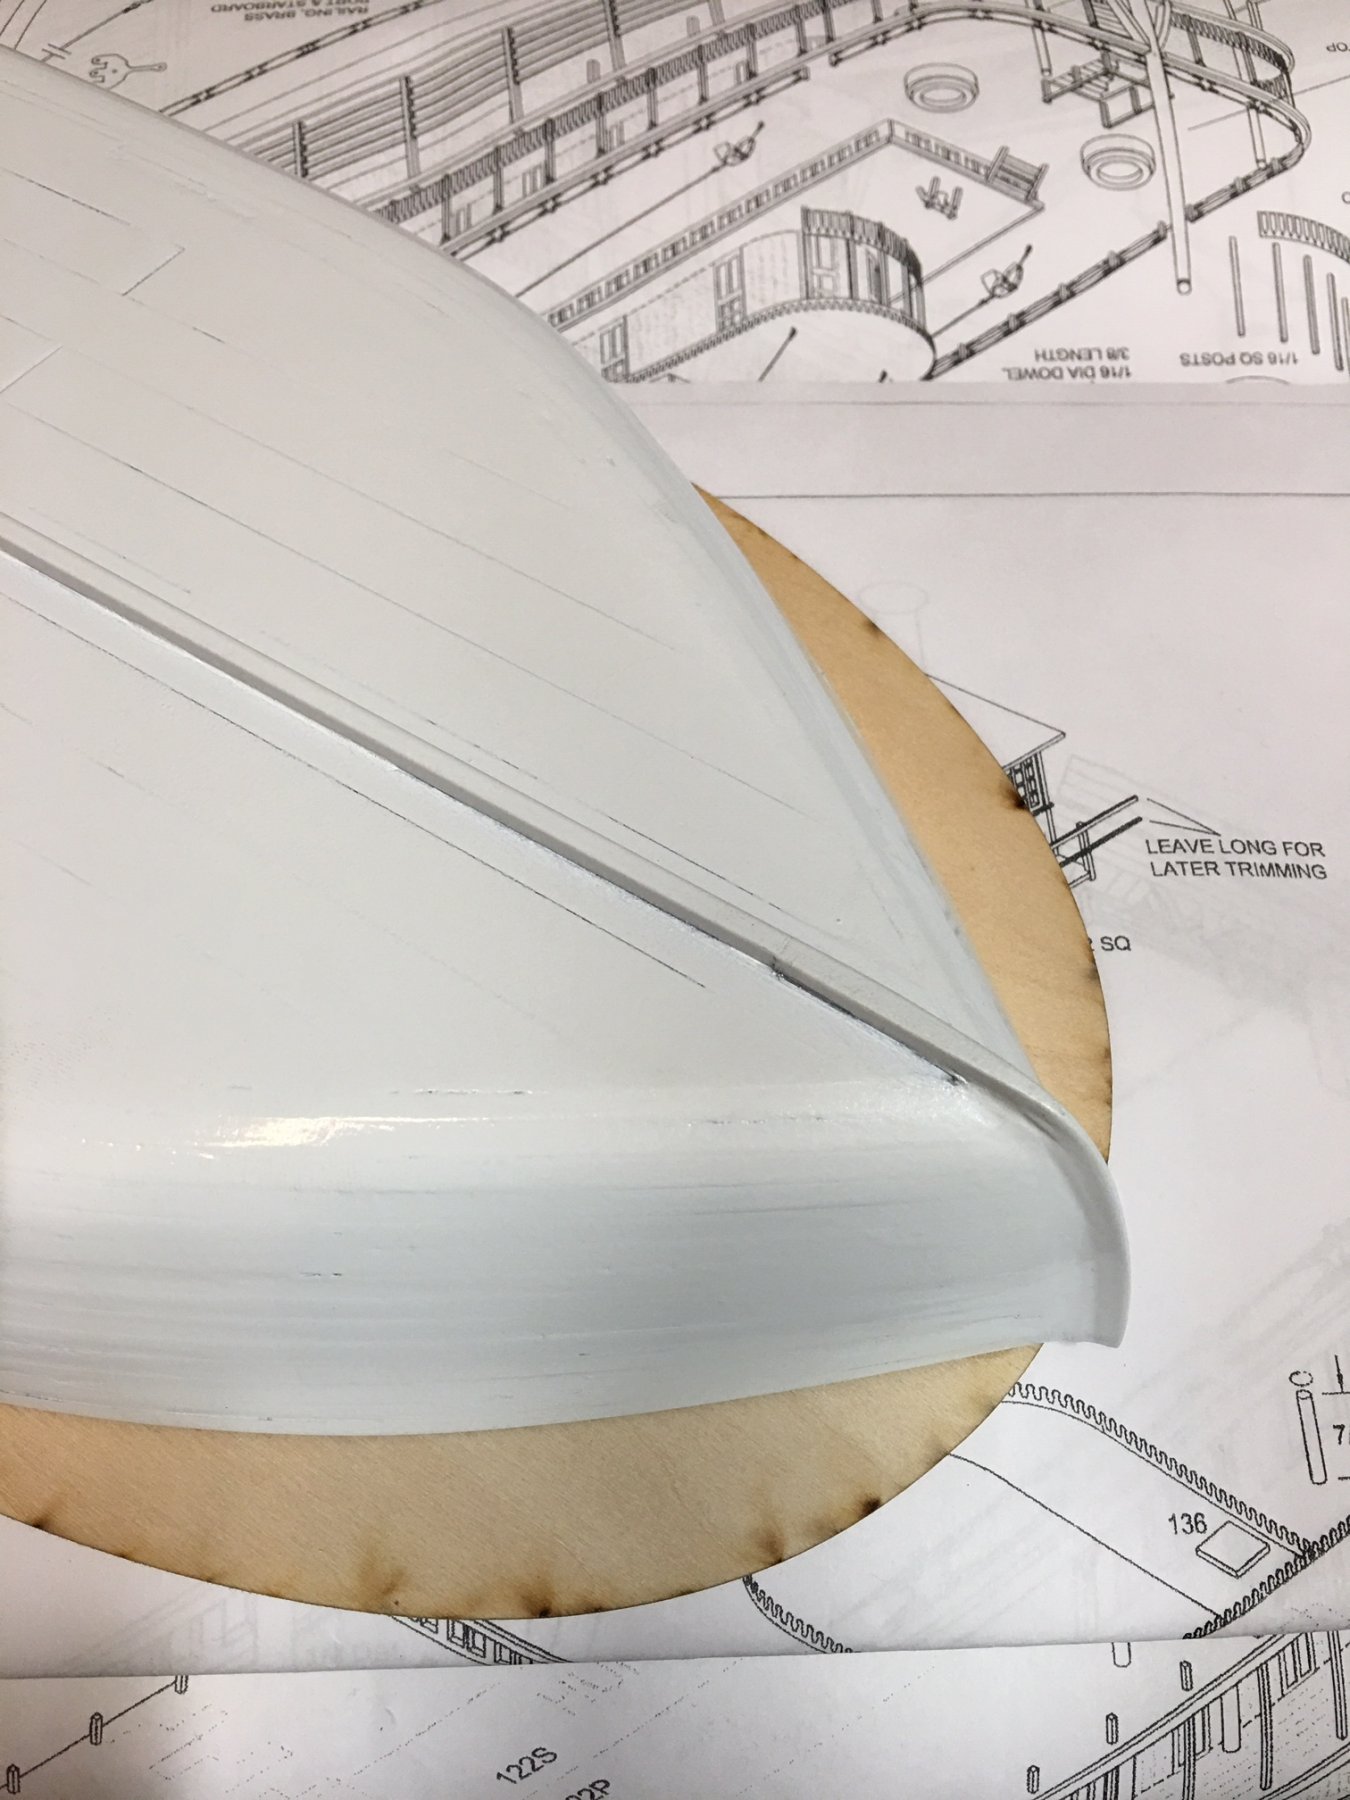
Good day everyone, A little work has been done on the build. Unfortunately not a whole lot since this thing called a job tends to get in the way of my fun time. Anyway, I have planking complete on the hull as well as filled, sanded and painted. I made the mistake of using gloss paint in the hopes that it would fill in some of the voids i may have missed during filling and sanding. Nothing that cannot be remedied with a little sandpaper and some flat white. This is my first painted build so I dealing with a learning curve when it comes to painting. On the good side, this will give me the opportunity to apply a little more filler and clean the hull up a bit. One thing I did notice is that when I installed the keel on the bow, I some how managed to make it a little long. Now the deck pieces are about 1/4 too short cover the bow. Not sure how I managed to do that. Must have given the bow a little too much rake when planking. I may be able to extend the bow a little to cover this up since I am still not real happy with finger joint on the deck pieces and will probably lay down my own planking. I'll give this some more thought and hopefully come up with some sort of solution.

- 133 replies
-
- 8
-
-
- chaperon
- model shipways
- (and 2 more)
-
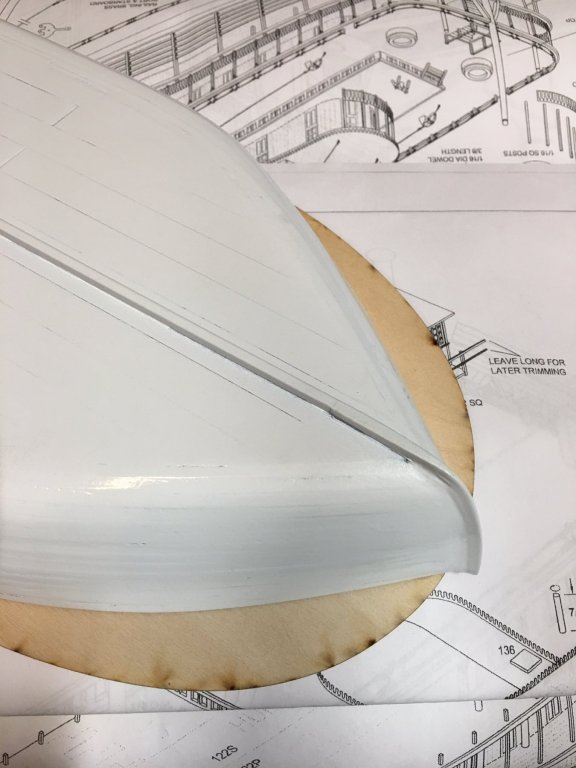
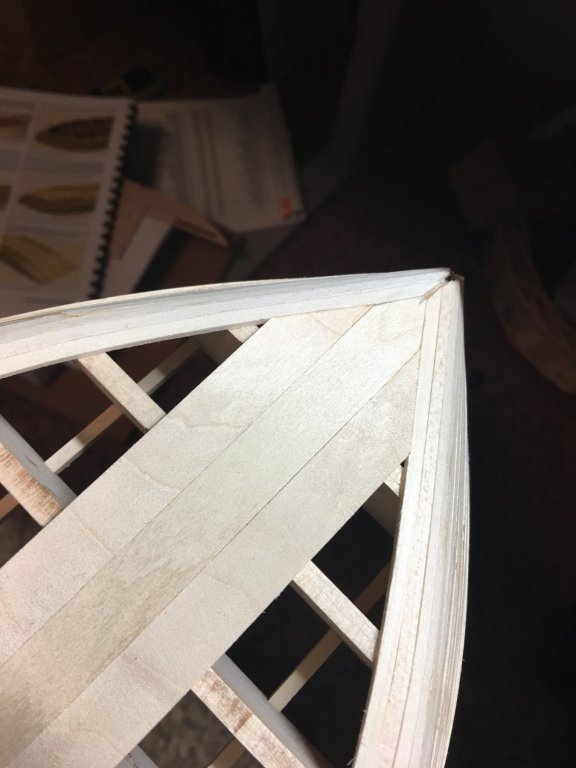
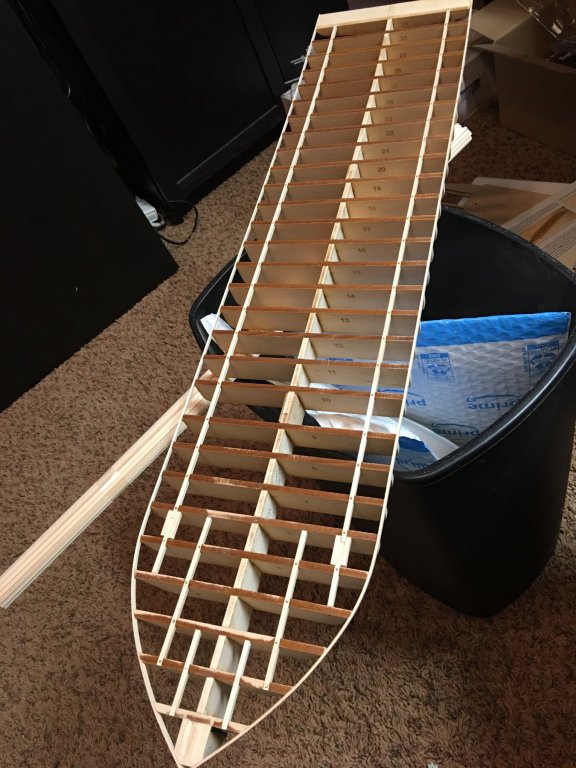
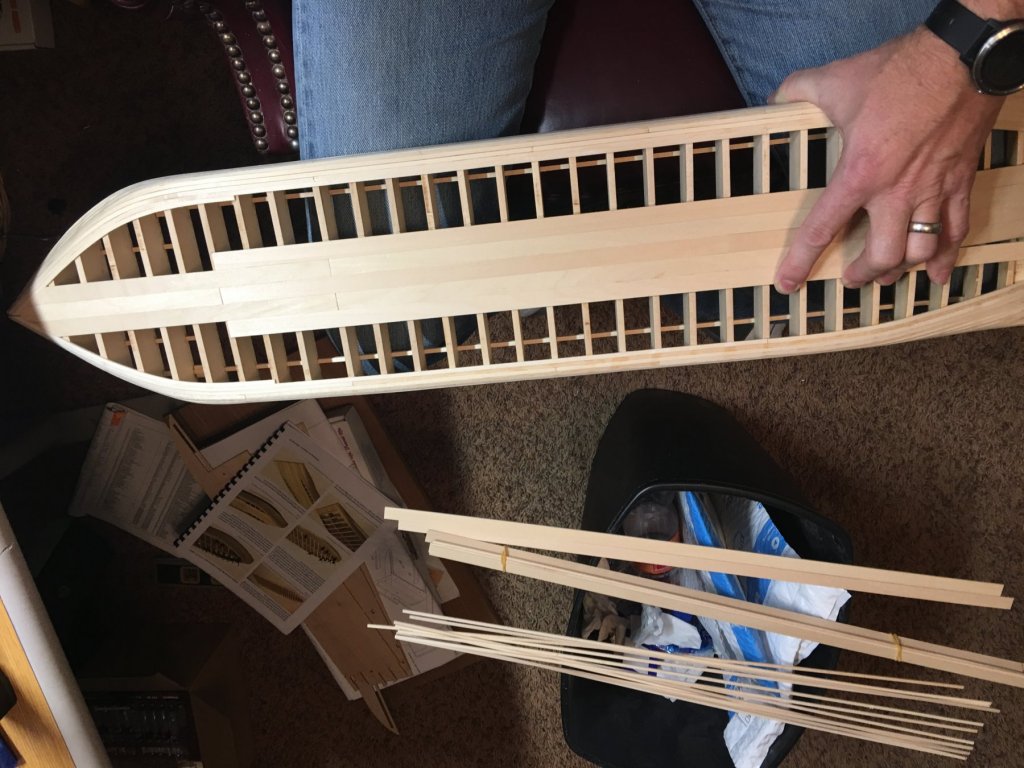
Hello everyone. While I am not new to the ship modelling world this will be my first attempt at a build log, so please excuse any errors while i work my way through this. While I love the older period sailing ships, I recently tried my hand at steamers. I picked the Artesania Latina King of the Mississippi and enjoyed the build so much that I wanted to attempt another steamboat build. After reading several build logs on MSW and the reviews of the kits I decided on the Model Shipways Chaperon. I really like the quality and detail of their kits, and after completing the AL KotM, this is a real step up. I actually started the build a couple of weeks ago and while researching some of the builds came across Kurt Van Dahm's post for his article on his build of the Chaperon. Since I want to do this model justice I purchased his article to help me along the way. Since Kurt was so gracious to make this information available, I figure why not return the favor and start a build log. Anyway, like most, I won't bore you with the details of the kit contents since this has been done already, and jump right in with the build. Since i just now decided to start a build log, I have very few pictures of the beginning, however going forward I'll try to take more as I go along. Any and all comments and suggestions are always welcome. Thank you for looking. -Brian Here is what I have so far. Starting the hull. Bulkheads and stringers in place and first row of planking. Small planking completed and starting on the big planking.
- 133 replies
-
- 12
-
-
- chaperon
- model shipways
- (and 2 more)