HOLIDAY DONATION DRIVE - SUPPORT MSW - DO YOUR PART TO KEEP THIS GREAT FORUM GOING! (Only 20 donations so far - C'mon guys!)
×


mbp521
-
Posts
1,002 -
Joined
-
Last visited
Content Type
Profiles
Forums
Gallery
Events
Everything posted by mbp521
-
 Thank you Bob for the kind comments. I am always up up for a good challenge, this build looks to be like it’s going to be just that. I think it’ll be fun though. -Brian
 -
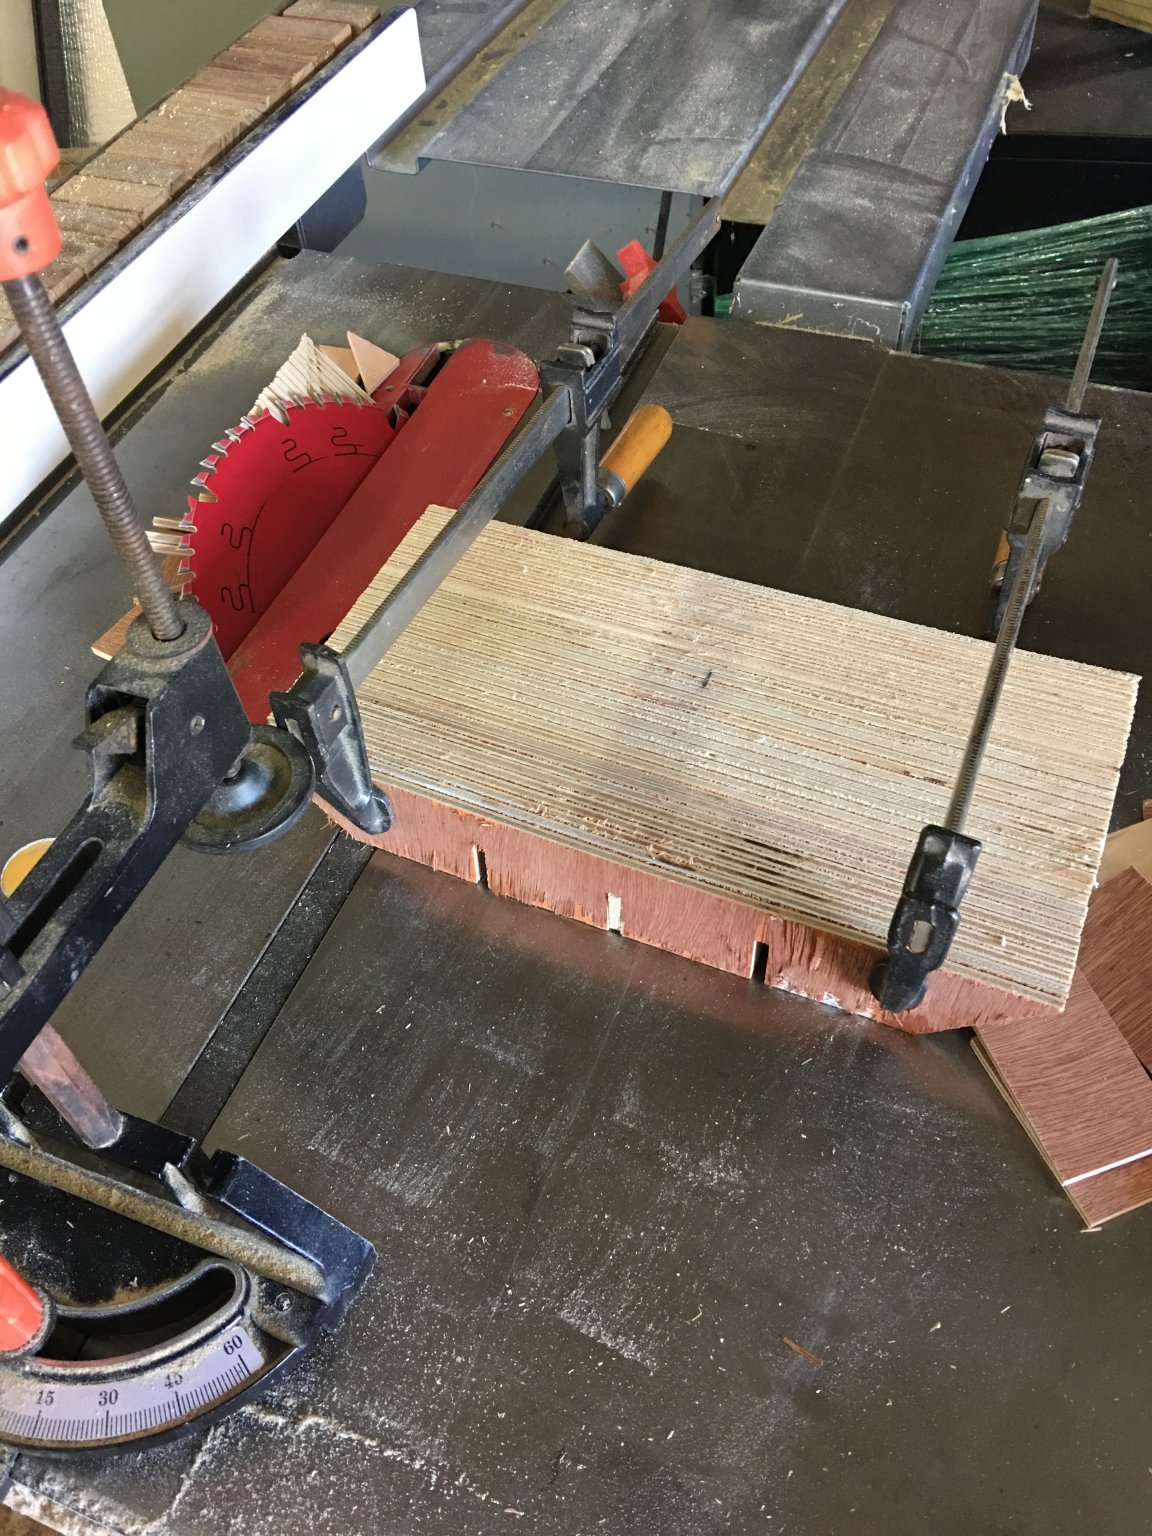
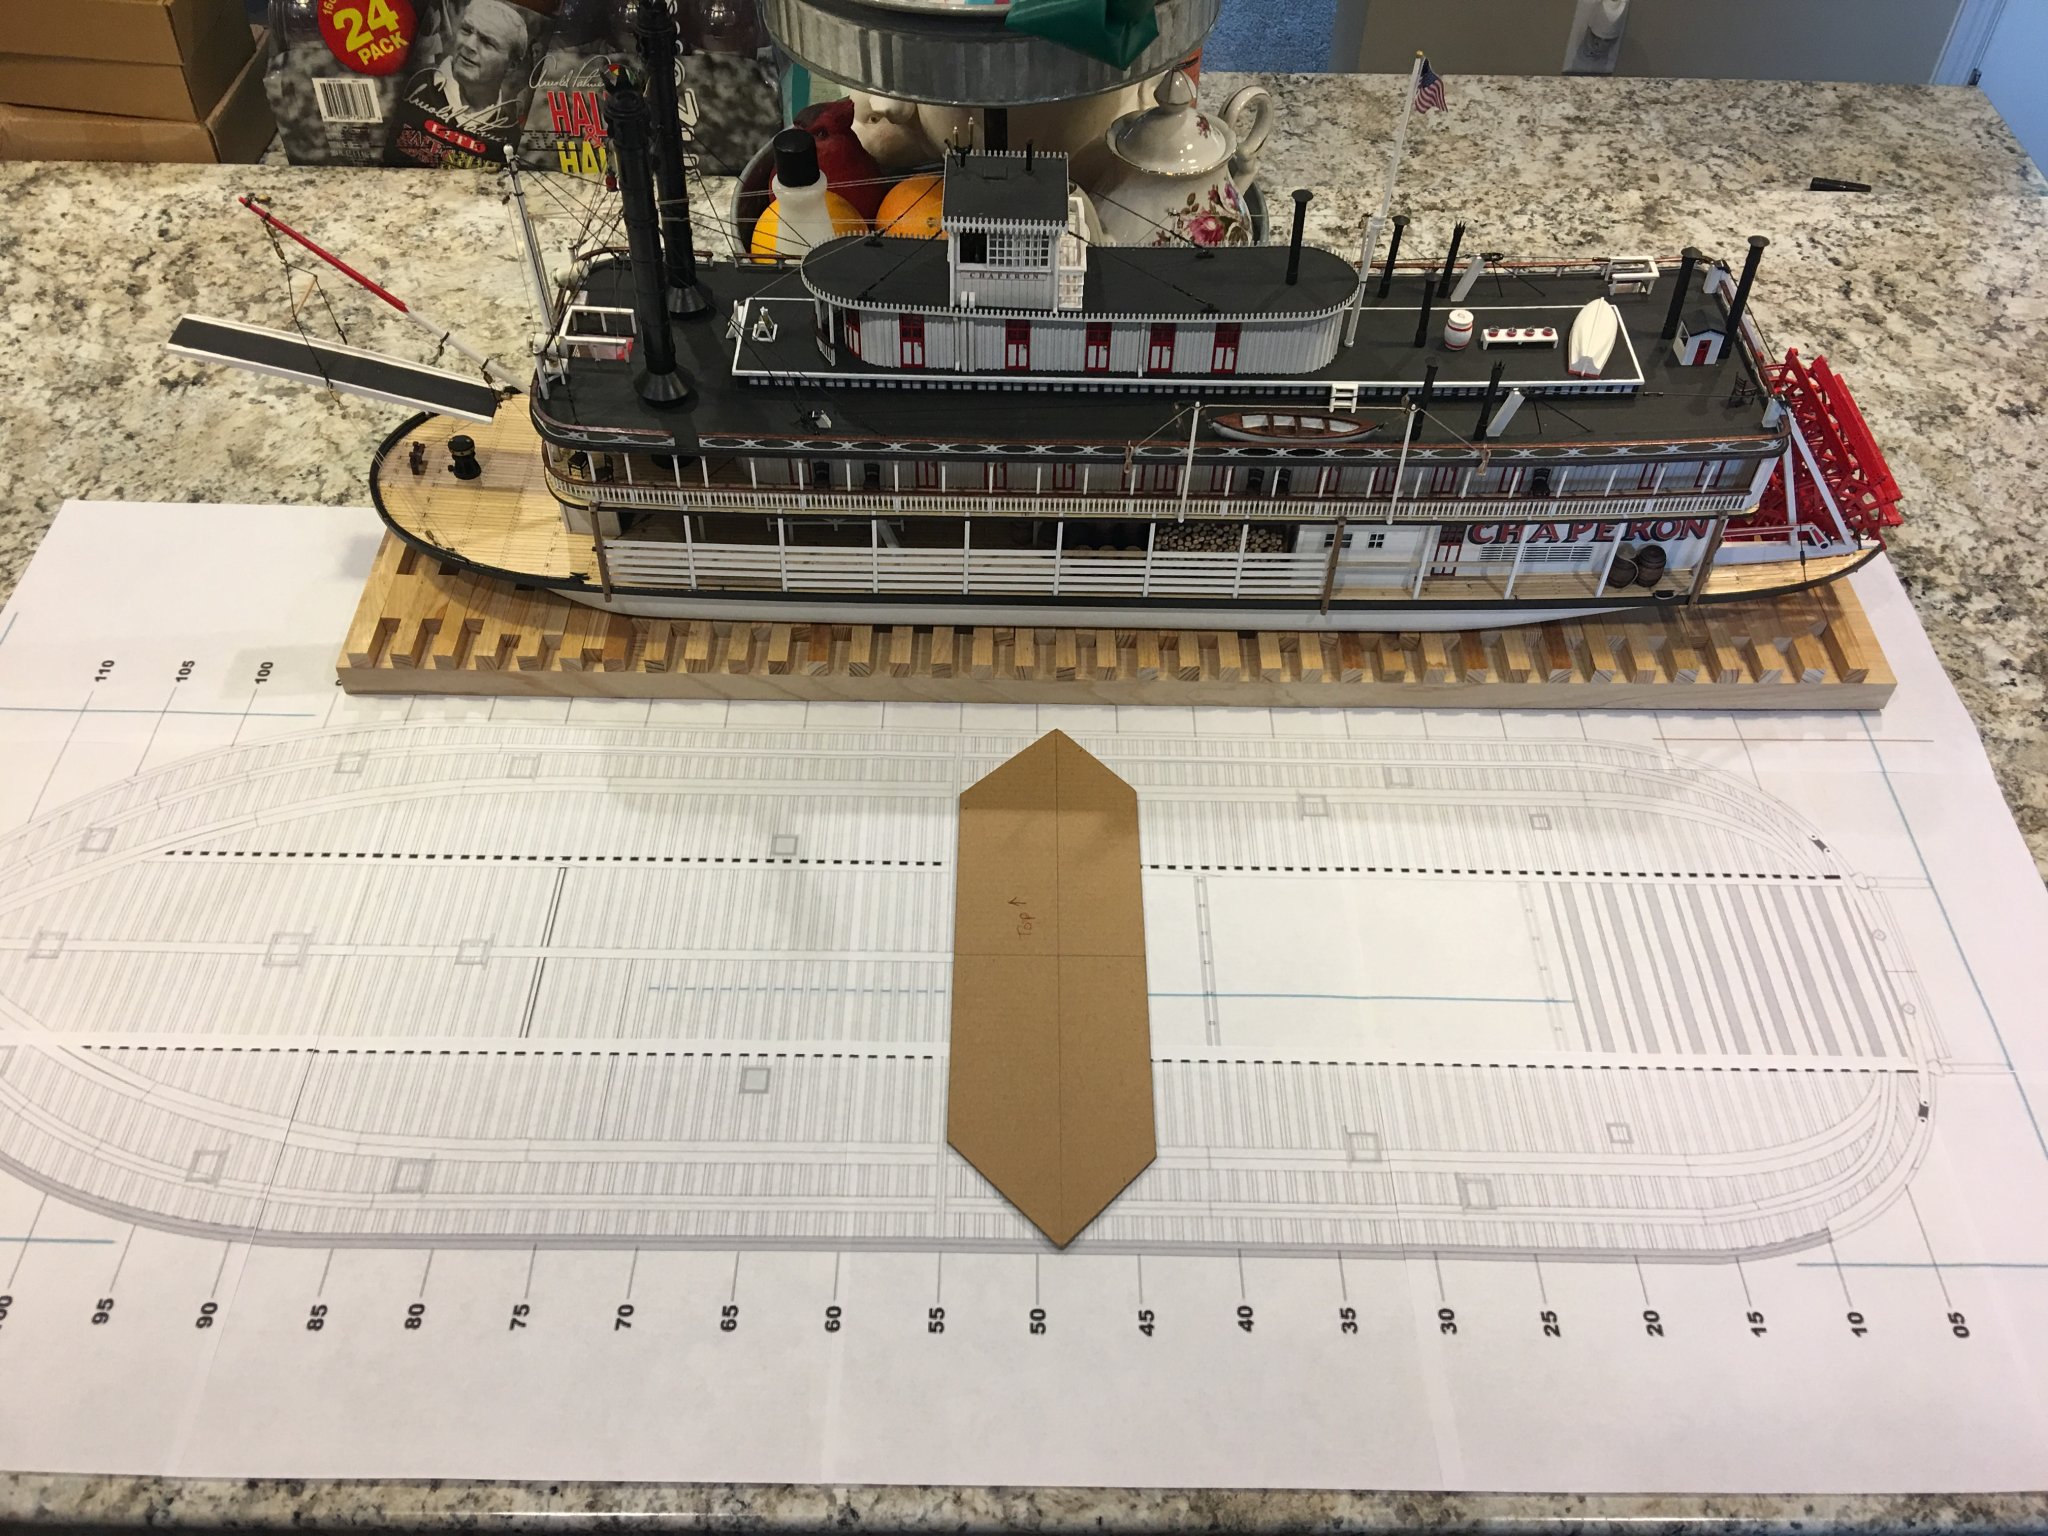
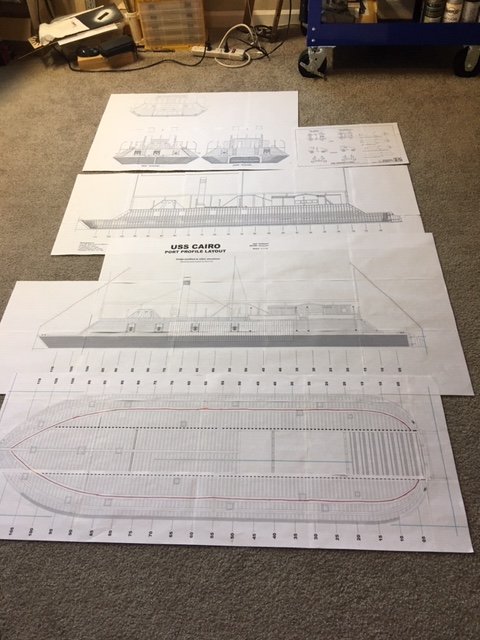
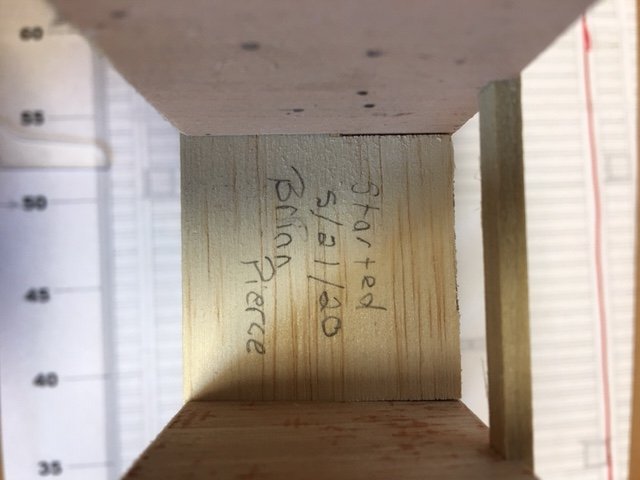
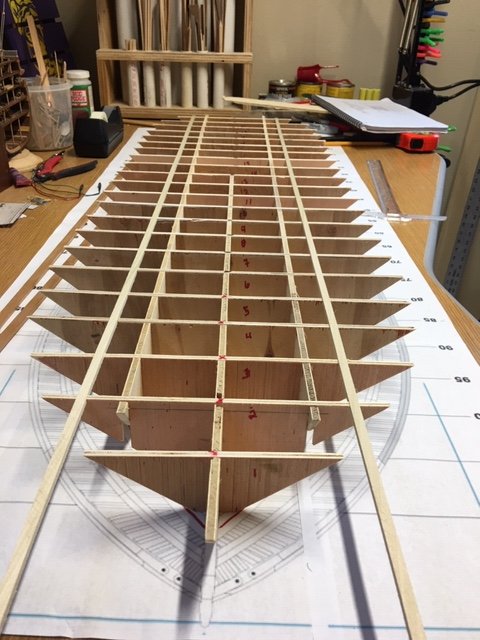
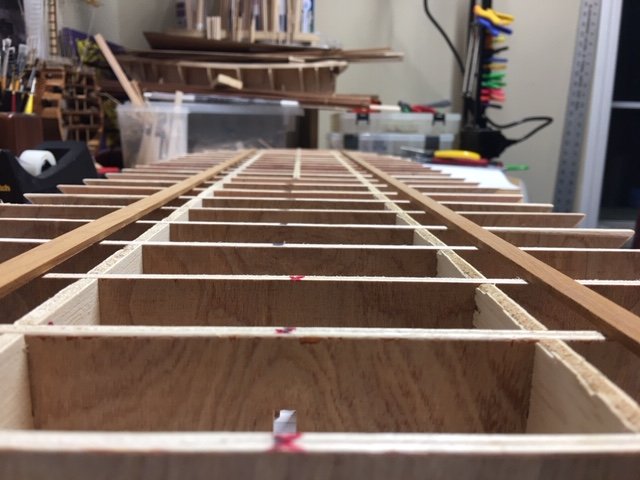
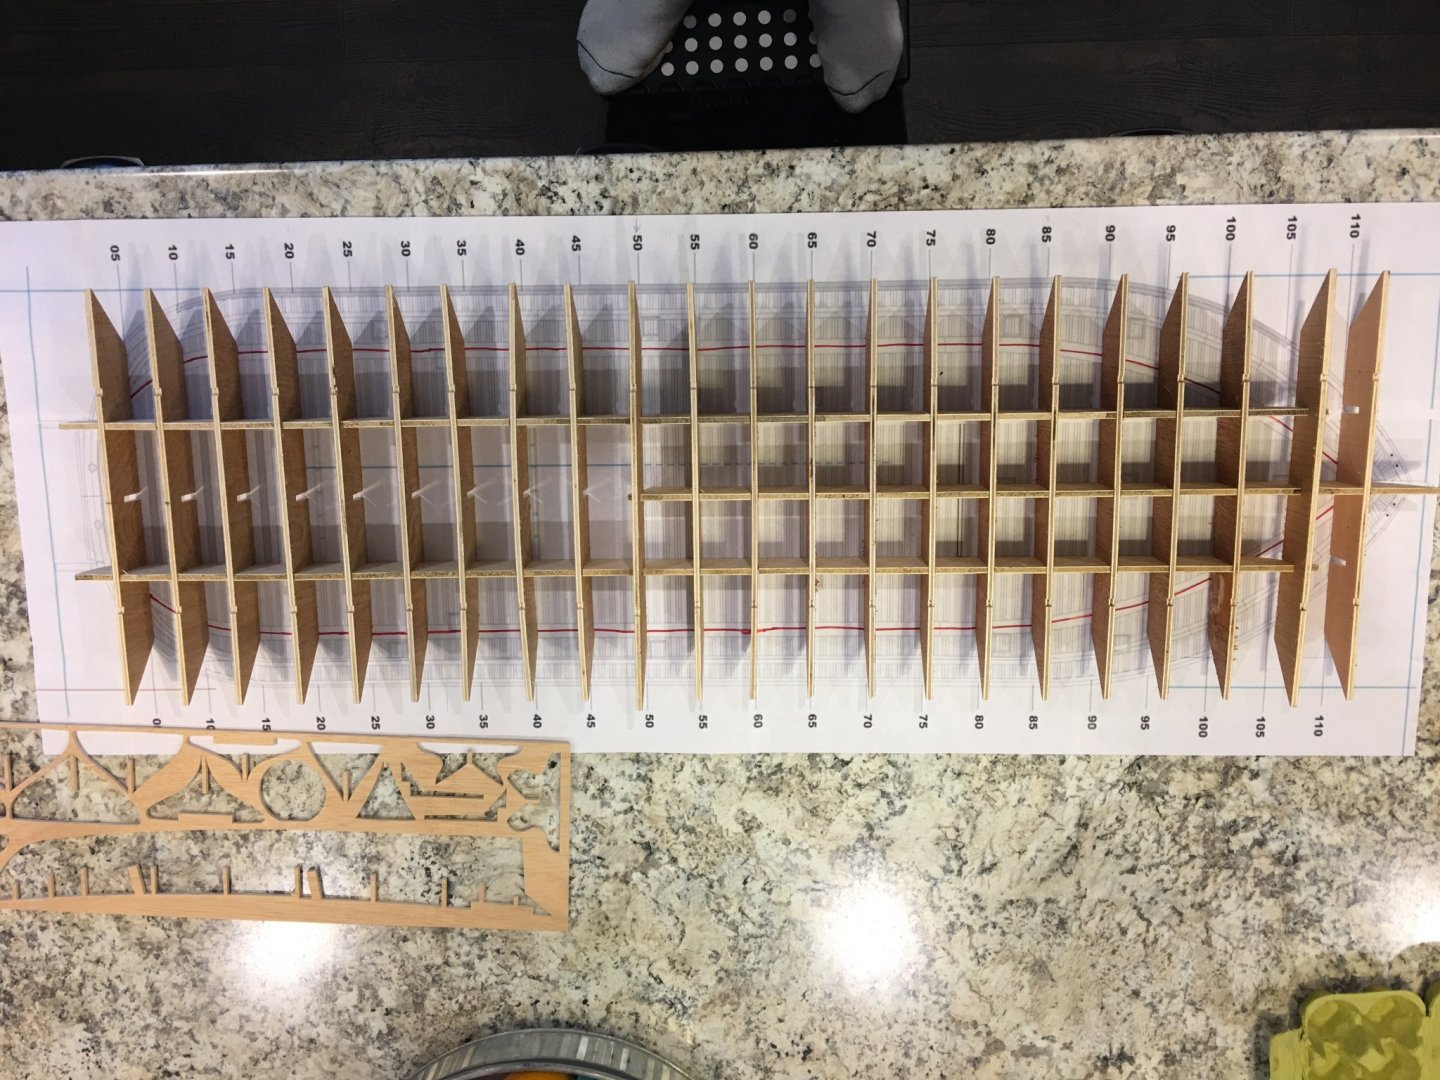
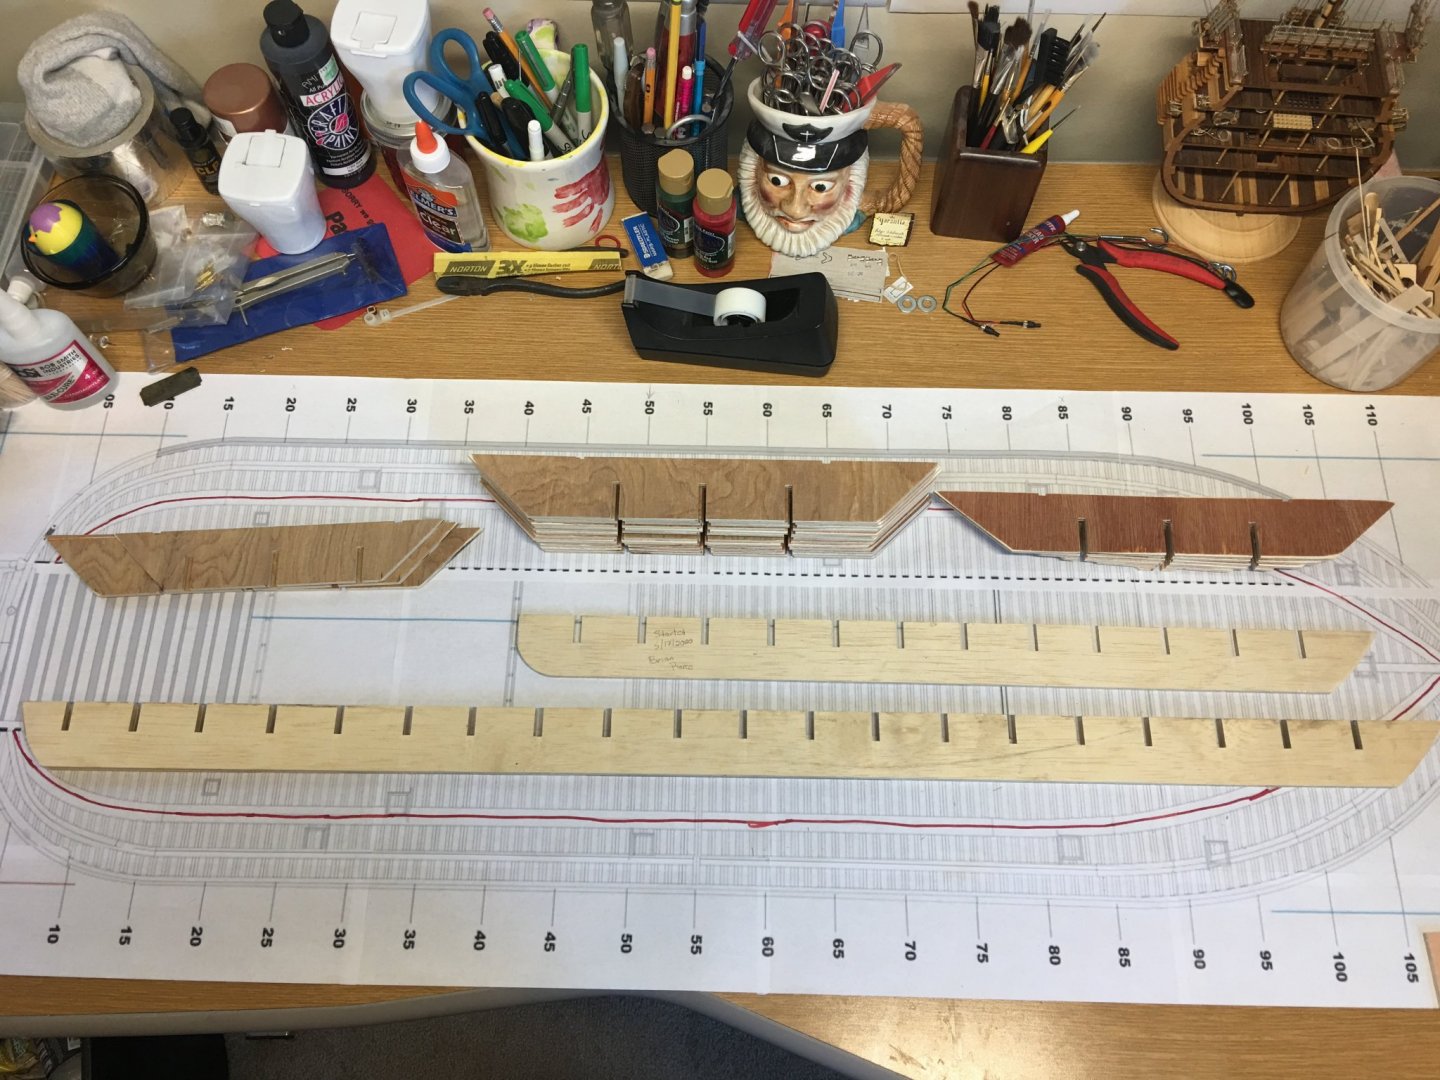
Hello everyone, …and so, it begins. I am finally kicking things off on this build. First thing I did was scale up the Bob Hill plans to fit the 1:48 ratio and print them out. This put the overall length of the model at 43.75” with a beam of 13”. I managed to print out most of the plans to scale that I will be using. I wanted to take them to the local print shop and have them printed out, but unfortunately for me, the print shop wasn’t able to handle them on that large of a scale (drawbacks of living in a rural community). However, I did get them printed on my home printer. I think I came out cheaper, just a box of paper and a black ink cartridge. That, and a lot of tape to stick the pages together. Oh well, I now have scaled plans to work off of. Here are the hull framing plans next to my Chaperon (same 1:48 scale) which is about 36” long. Man this thing is going to be a big build. I am now beginning to wonder what I was thinking going with this scale. Eh, why not, it’ll all be worth it in the end. As stated earlier, I am not going to bother with too many details on the interior of hull and hold of this model, since it is going to be a static display and fully enclosed. For the hull construction I am using the plank on bulkhead design, single planked in basswood. I used ¼” plywood for the bulkheads, cut to shape on my table saw. I notched each one out in three places for the three false keels to interlock with. These bulkheads were spaced about 1.75” apart, or approximately every fifth frame outlined on the plans. Right now, all are the same width, but I will cut them down to follow the taper of the bow and stern, but it was easier to cut them all the same size at first to get all the notches lined up. Of the 22 bulkheads, 14 are the same width. I cut down the three stern and five bow bulkheads to follow the contour and taper of the hull. Here are all of the bulkheads and false keels dry fit. I will go ahead and leave the bulkheads that extend across the paddle-wheel area between the aft pontoons until the hull planking is done. This way I won’t have to worry about keeping the aft end in line and even. Once the hull planking is on it should hold everything in place and I’ll remove the center of the bulkheads and install the cross-braces. Everything seems to be pretty straight. Doesn’t look like I have any warping to contend with on the false keels. There are a few bulkheads that will need some adjusting, but all in all things look good so far. So this is where I am at for now. I did place my order for the basswood planking and hopefully it should be here within the next few days. Right now, I am going to work on squaring up the bulkheads to the false keels and get them glued into place, then set the stringers to hold everything in line. Oh, one last thing. As I do on all my builds, my signature. For no other reason other than I did it on my first build so I keep on doing it. Thank you for looking. -Brian


- 739 replies
-
- 21
-

-
Welcome aboard everyone. What a great audience. Hopefully I all goes well with the build and I don't disappoint. I am currently working on scaling the rest of the plans and printing them out. Hopefully I will have something picture worthy accomplished here shortly. -Brian
-
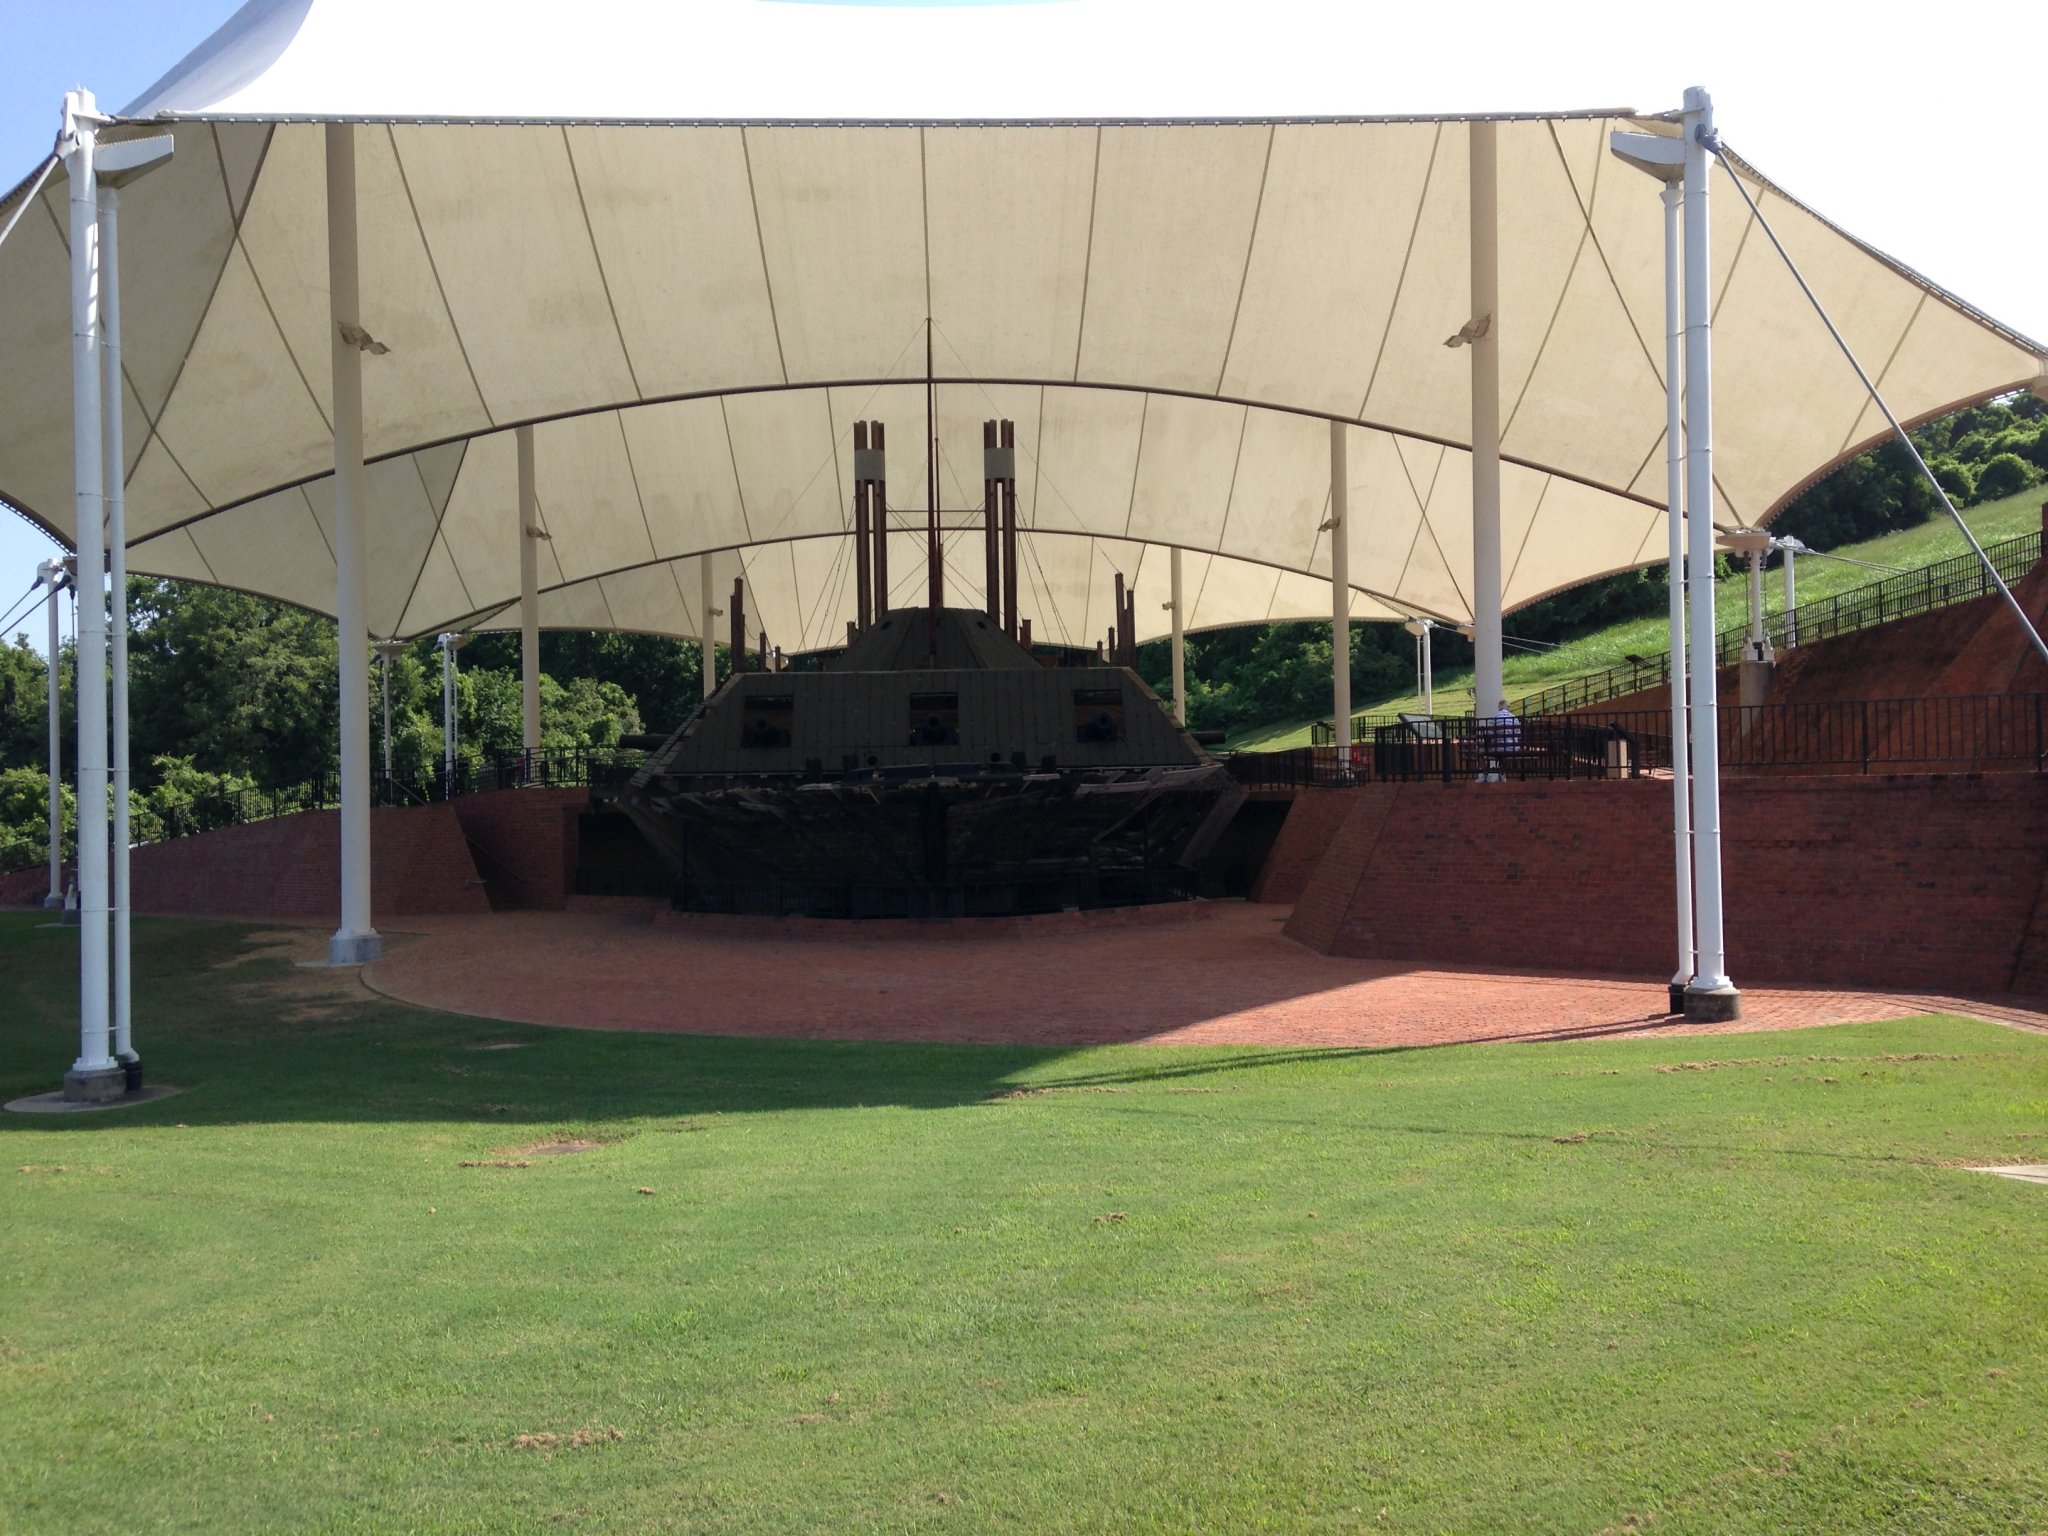
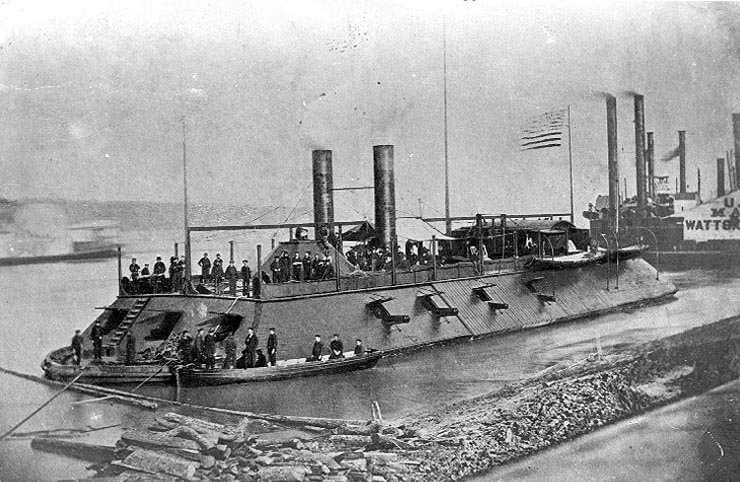
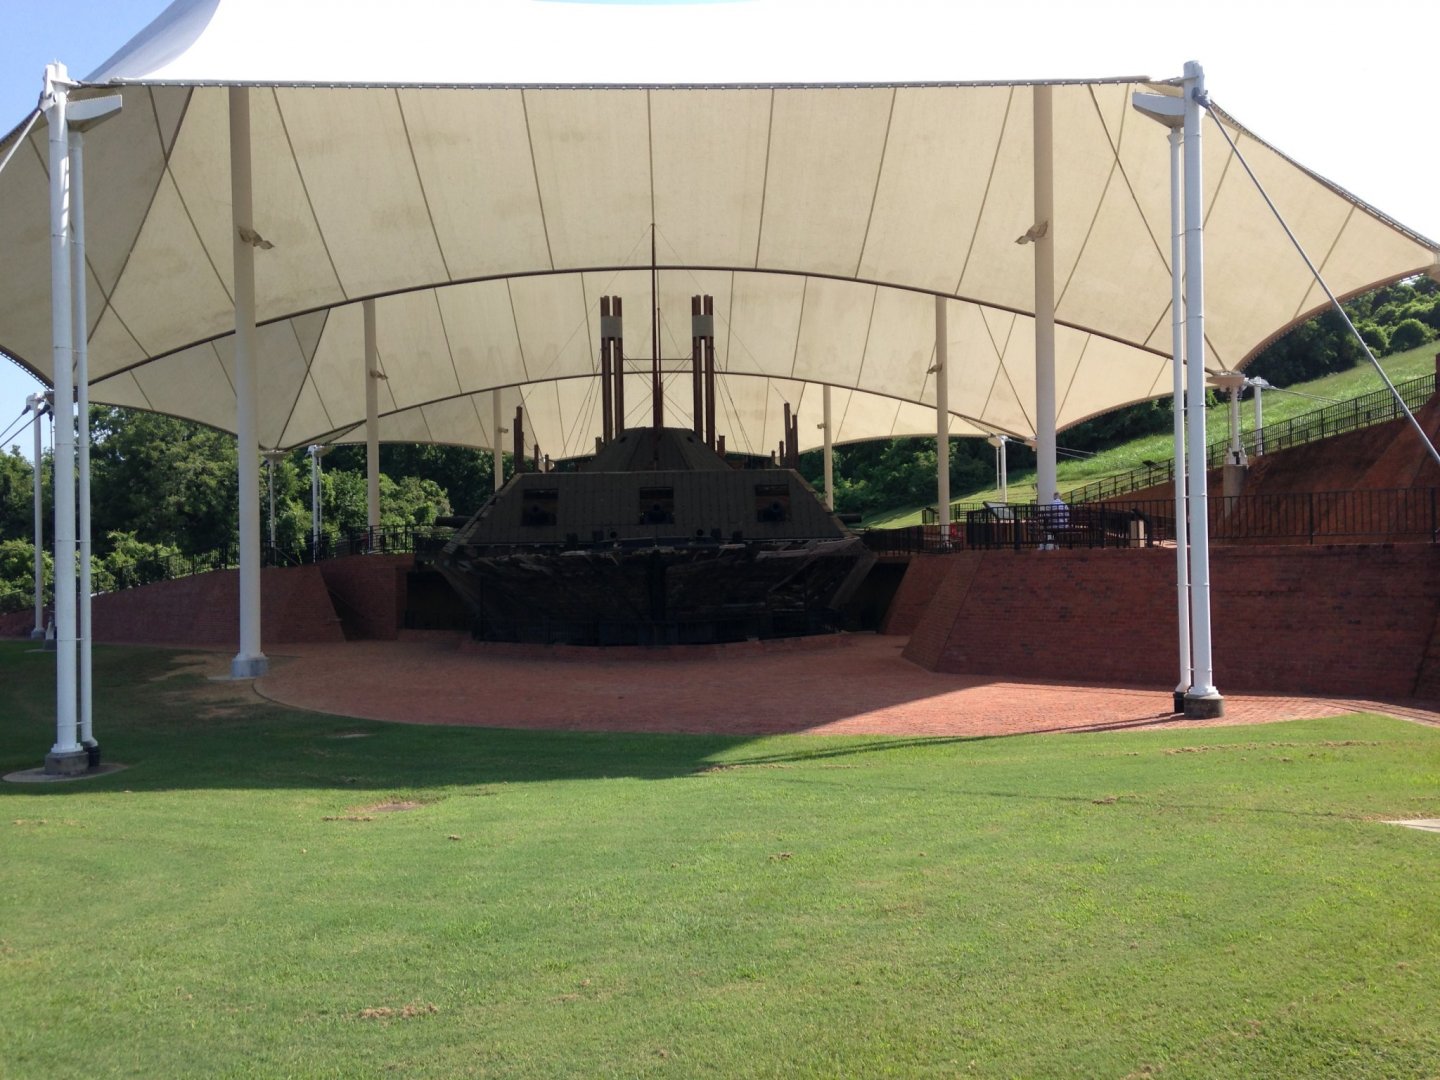
Hello Everyone, Welcome to the beginning of my build log for my first scratch build model. I recently completed work on the 1884 Packet Steamer Chaperon, which was my first attempt at a build log, and I enjoyed it so much that I wanted have another go at it. The comments and suggestions and overall conversation on the build was way more than I had expected. There are so many people out there with so many great ideas that helped along the way. Not to mention the knowledge I gained from the research. For this build I will be taking on the City Class USS Cairo American Civil War Ironclad as she was shortly before her sinking in 1862. I have been in love with this particular ship since my first visit to Vicksburg NMP back in 1984. Something about the mystique of the recovery of a sunken ship and the history of those who lived aboard is just fascinating. And, since there are no large-scale wooden model kits out there for this particular ship, I figured this was the perfect opportunity to scratch build one. My plan is to build this model in 1:48 scale using the Bob Hill plans, the USS Cairo HSR documentation from the Vicksburg NMP, and several other builds, especially the build log for the Civil War Ironclad USS ST. LOUIS by the Gateway Model Shipcrafter's Guild. This is an exceptional build and their extensive research has found many discrepancies with the USS Cairo HSR and I hope to “borrow” some of their research findings to accurately build my representation of the USS Cairo. I won’t be building out a whole lot of interior details, with the exception of what can be see through the gun ports, skylights and deck vents. I will probably build out the tops of the boilers, flue, capstan, and possibly simulate the engines. I haven’t quite determined what material I will use for the iron plate cladding, but for the railroad irons on the forward and aft casements, I plan on using HO scale model railroad track to try and make it look as authentic as possible. Without boring you with too much of a detailed history of this ship, here is a little background info on it: The USS Cairo, along with her six sister ships (Carondelet, Cincinnati, Louisville, Mound City, Pittsburg, and St. Louis) were commissioned by the U.S. Army (later transferred to the U.S. Navy), designed by Samuel M. Pook and built by James B. Eads at the Carondelet and Mound City Shipyards in 1861. USS Cairo was 175’ in length with a 52’ 2” beam and drew only 6’ of water. Not very deep for a 512-ton heavily armored ship. Ironically, she was sunk by a Confederate “torpedo” on December 12, 1862 in the Yazoo river while on a mine clearing mission. The USS Cairo wreckage was located in 1956 and finally raised from the mud in 1964. She sat in neglect at the Ingalls Shipyard in Pascagoula, MS for several years, until 1977 where she was transported, restored and placed on permanent display at the Vicksburg National Military Park in Vicksburg, MS. This will definitely be a learning experience for me, so if you would like to follow along, please pull up a chair and feel free to offer up any suggestions. I am always open to new ideas and constructive criticism. If you see something that I am doing wrong or see a better way to do something, by all means, please let me know. I welcome the input. As she sits today (well, six years ago when I took this picture): -Brian
- 739 replies
-
- 15
-
-
Yes sir. About time I get my feet wet in the scratch build world. City Class - USS Cairo. Coming soon. Just need to study up a little more on the plans and I'll start the build (and the build log). -Brian
- 133 replies
-
- 6
-
-
- chaperon
- model shipways
- (and 2 more)
-
Eric, Thank you for steering me in the right direction. I don't know where my mind was when I said western red cedar. I guess I was thinking Western Rivers and got turned in the wrong direction. My compass may need a calibration. You are also correct about the the Cedar/Juniper trees out here. I would say that about one third of my property is covered with them (I'd say at least a couple thousand of them). One of these days I would like to get a small sawmill and start harvesting some for projects around the the house. Too may other projects right now though. As for the davits, the sockets seemed like a viable design. I figured that when lifting the boats, the deck hands would pull the ropes at an angle away from the bow and stern of the boats. The weight of the boats would be used to counter the angle of the ropes thus keeping the davits pretty well balanced in their sockets. Sounds good on paper anyway. But like you said, "modelers license" was applied in this case.. -Brian
- 599 replies
-
- 3
-
-
- sidewheeler
- arabia
- (and 4 more)
-
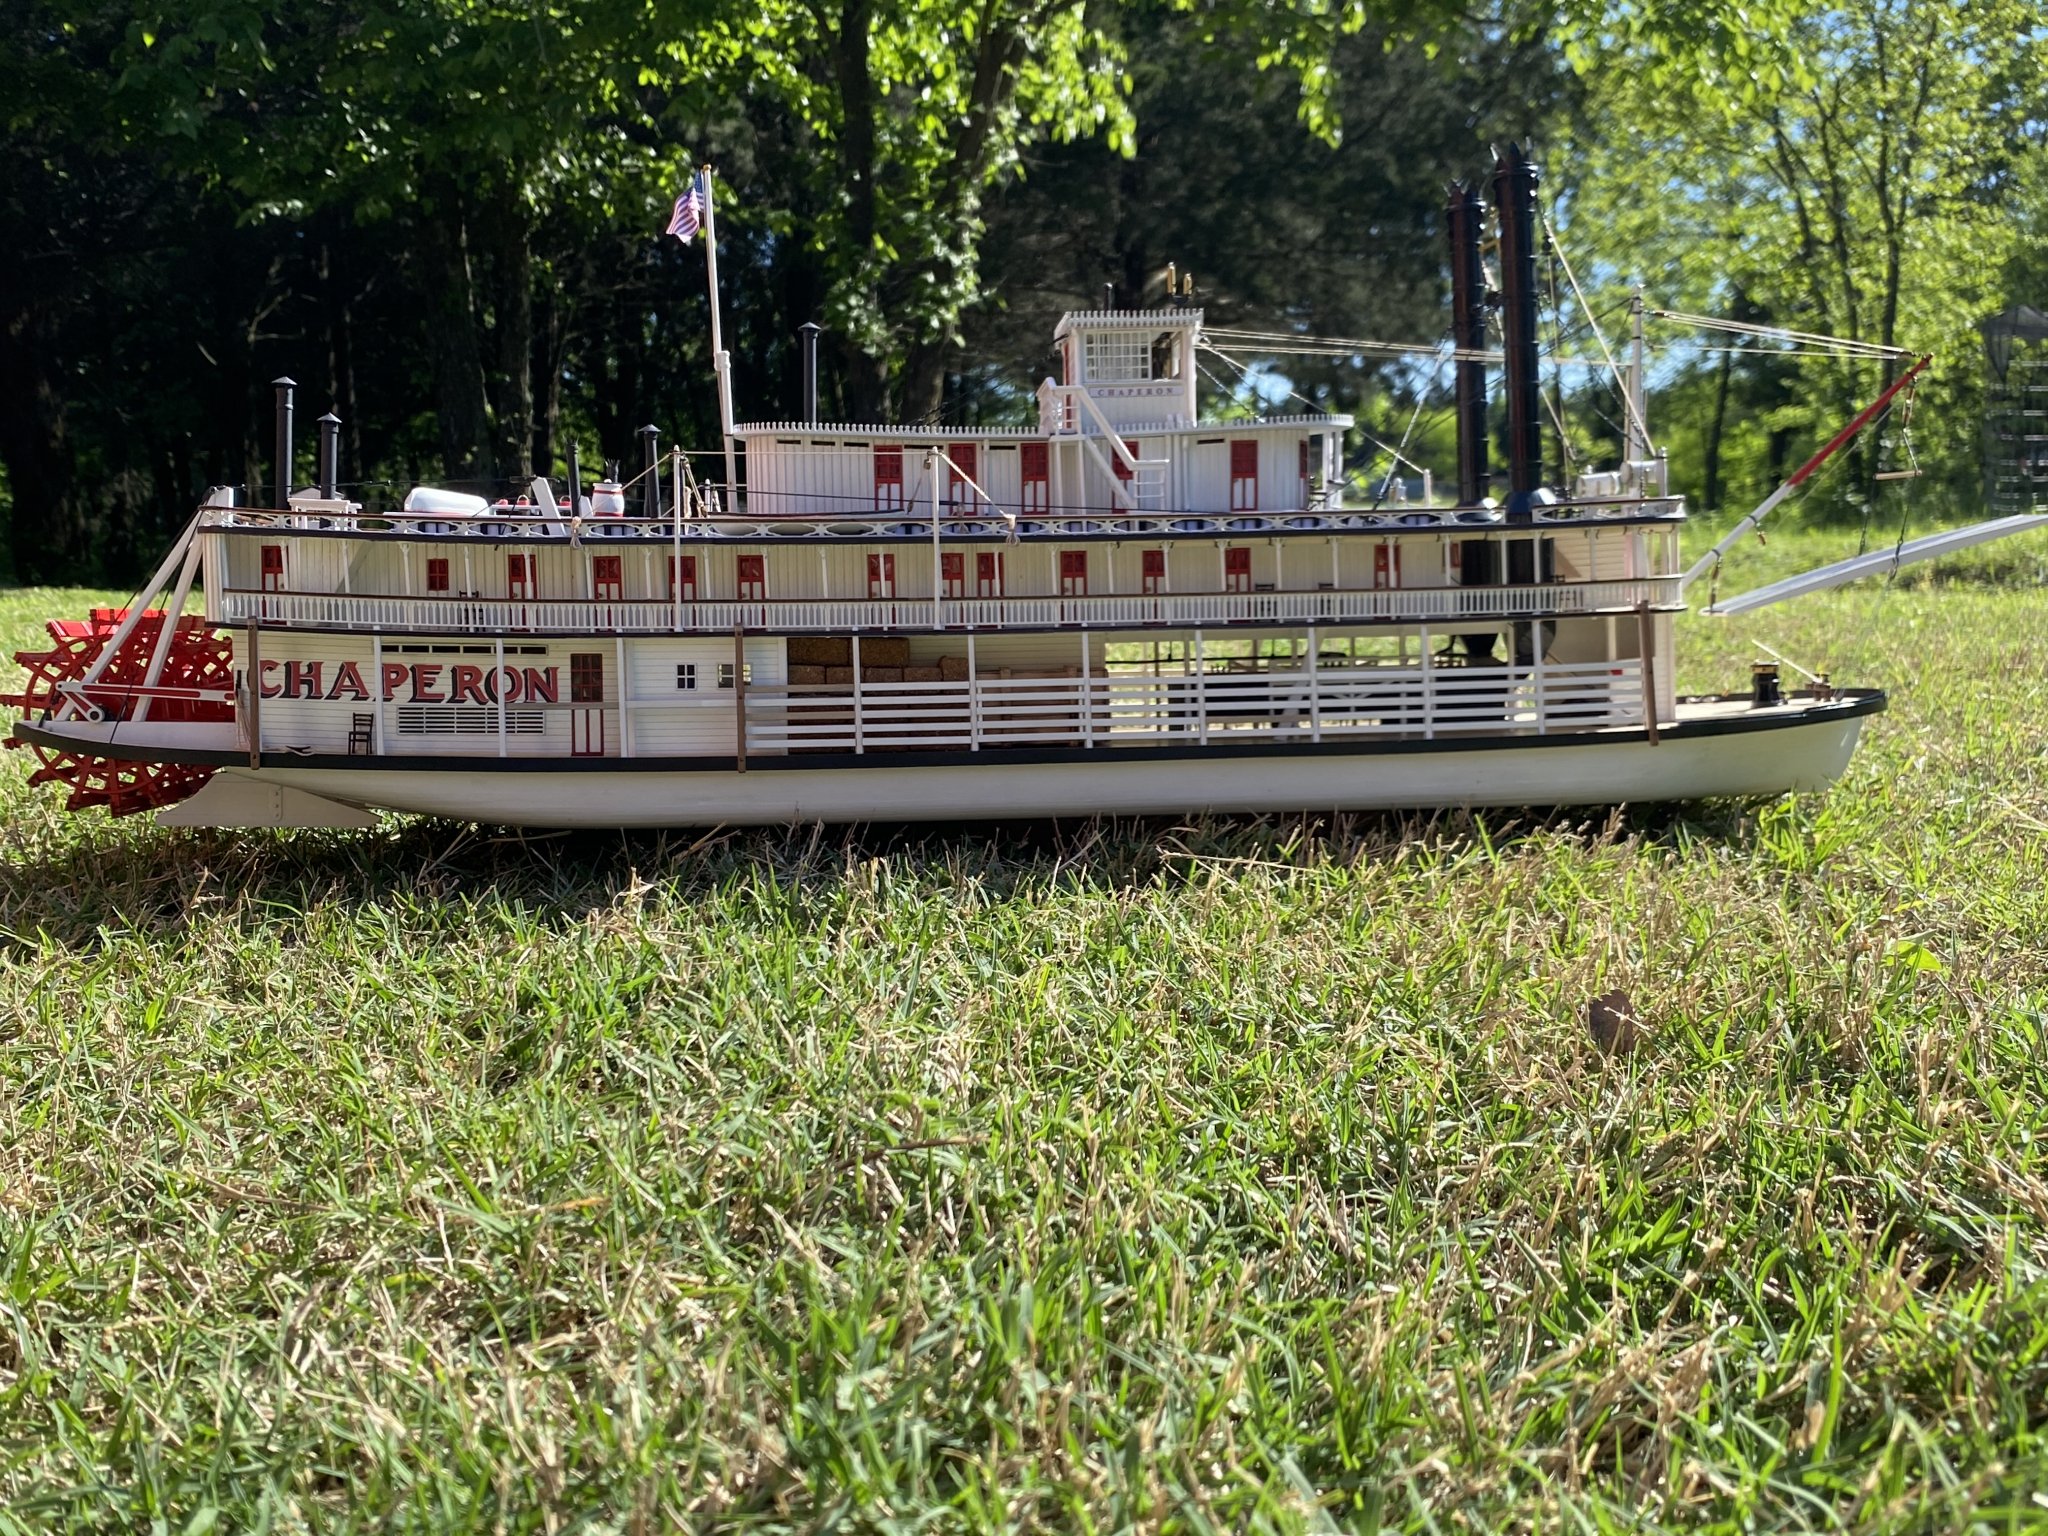
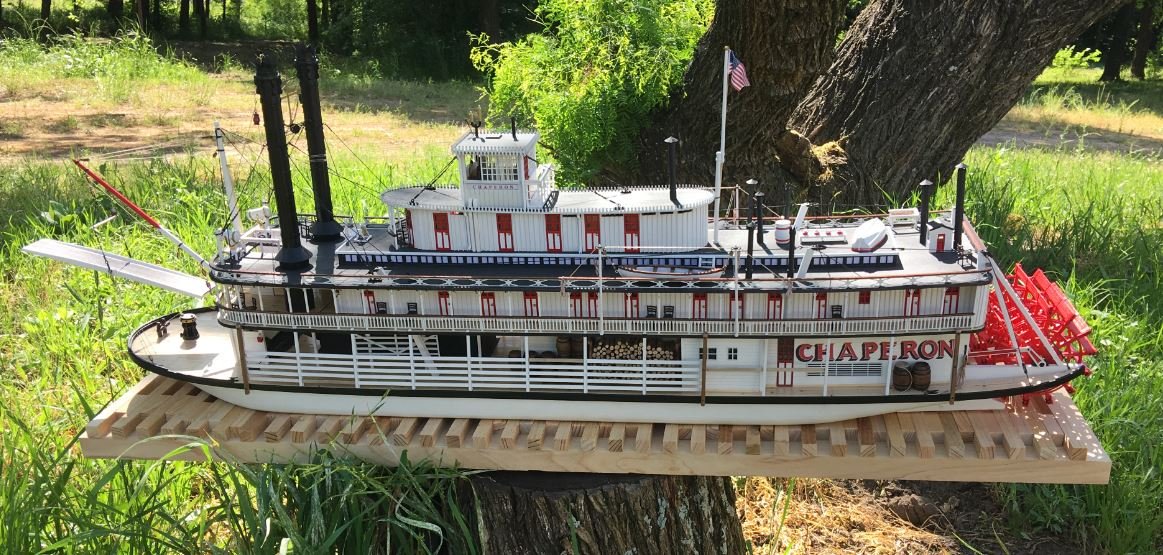
Thank you all for the kind complements. This was definitely one of the more fun builds that I have done. I know that the build is complete, but I wanted to put out a small update on the progress of my display. I haven't gotten around to making the case for it yet, but I have made some headway on the base. I wanted to go with an epoxy resin water base, but I just don't think that my talents are quite there yet. So I went with a base that would somewhat represent her in dry-dock on the ways. Right now the base is in the construction phase, but I'm getting there. Slow progress on it because I've been anxious to get started on my next build. And here she is by the plans for my next build for size comparison (build log coming soon). -Brian

- 133 replies
-
- 9
-
-
- chaperon
- model shipways
- (and 2 more)
-
Eric, Beautiful job on the work boats, the rigging is progressing at breakneck speed. Quick question. I ran into the dilemma on my Chaperon build with how the davits were attached at the bottom. I studies numerous photographs of how they were set up, but none were close enough to get a good idea on them. Finally I ended up just rounding the end of the davit and making a block with a concave socket for the rounded davit end to pivot in. In looking at your photograph above, is this what you did? I tried zooming in a bit but still couldn't make out how it was done. By the way, love the base. The western red cedar looks great with the colors of the boat and the darker border adds a nice contrast to it all. -Brian
- 599 replies
-
- 9
-
-
- sidewheeler
- arabia
- (and 4 more)
-
Great work on the navigation lighting Yves! Good to see you are going to tone them down a bit. Otherwise it makes an easy target for the sub hunters. -Brian
-
Eric, Very nice job! If mine had come out looking that good I would have put it upside right. Looking forward to the next “lessons learned” version. -Brian
- 29 replies
-
- 2
-
-
- ships lifeboat
- model shipways
- (and 1 more)
-
Eric, I feel your pain on these. Several years ago I built these particular “lifeboats” for my Flying Fish. More than once I was ready to launch them into the never while trying to get the ribs formed around the formers. What I ended up doing was taking three strips of thin stock, soaking them in warm water for an hour or so and applying three layers around the former to “laminate” them. This worked perfectly to get the right shape. After making four of these for this build, I swore I wouldn’t make another one. For my Chaperon I built the MS kits that have the stackable layers that you sand to shape. These worked better and with less frustration. The only drawback to these is the seats are thin and susceptible to breaking. That’s why I mounted mine keel up. The overall look is good, the layers give the look of planking. -Brian
- 29 replies
-
- 3
-
-
- ships lifeboat
- model shipways
- (and 1 more)
-
Eric, Why not set her up on some barrels. Those would be a nice transition from the ones you have on her cargo. -Brian
- 599 replies
-
- 2
-
-
- sidewheeler
- arabia
- (and 4 more)
-
Yves, I agree with everyone on this. Truly an amazing piece of artwork, craftsmanship, and model building. You are a treasure to the hobby and an inspiration to us all. -Brian
-
Eric, Very interesting information. I’m looking at the photos of your last post, they almost confirm my initial thoughts that the grasshopper rigs served a dual purpose. I look at the riggings on the Far West and see that there are one set of blocks and tackle attached to the sparring poles for hopping sandbars and possibly assisting with pushing away from shore. Just down from that there is a second block and tackle rig that looks like it could be used to manipulate cargo as well as set the landing stage stretched across her bow. The Mary McDonald has a similar rig set up on her as well. Again, this is just my limited knowledge speaking. I love to delve into things that fascinate me but I know little about. What would really be interesting is to actually see these rigs in action. I’d love to take a short trip back in time to take a ride up/down river on one of these boats and see how they actually operated (hopping sandbars and all). I’ve ridden on several modern day steamboats (Natchez, Samuel Clemens and Delta Queen), but they are not much different than taking a River cruise in a regular boat with the exception of the thumping of the paddle wheel. Just the smell of the burning coal (or wood depending on the time and location) and the ruggedness of the expanding western frontier. Ahh to be born a hundred years earlier. -Brian
- 599 replies
-
- 4
-
-
- sidewheeler
- arabia
- (and 4 more)
-
Yves, So true. The build logs have been a wealth of knowledge to help along, as well as all of the input from others. This may have been my first build log but definitely wont be my last. -Brian
- 133 replies
-
- 3
-
-
- chaperon
- model shipways
- (and 2 more)
-
Yves, Thank you for the kind words. This was my first attempt at a build log. I was a little hesitant to start one at first. I've been a member of MSW for a while now and I wasn't sure if I would maintain the log or not. I see so many that start one but never finish and I was afraid I would do the same. Persistence pays off though. Kurt, Thank you! Your build article was a huge help. -Brian
- 133 replies
-
- 3
-
-
- chaperon
- model shipways
- (and 2 more)
-
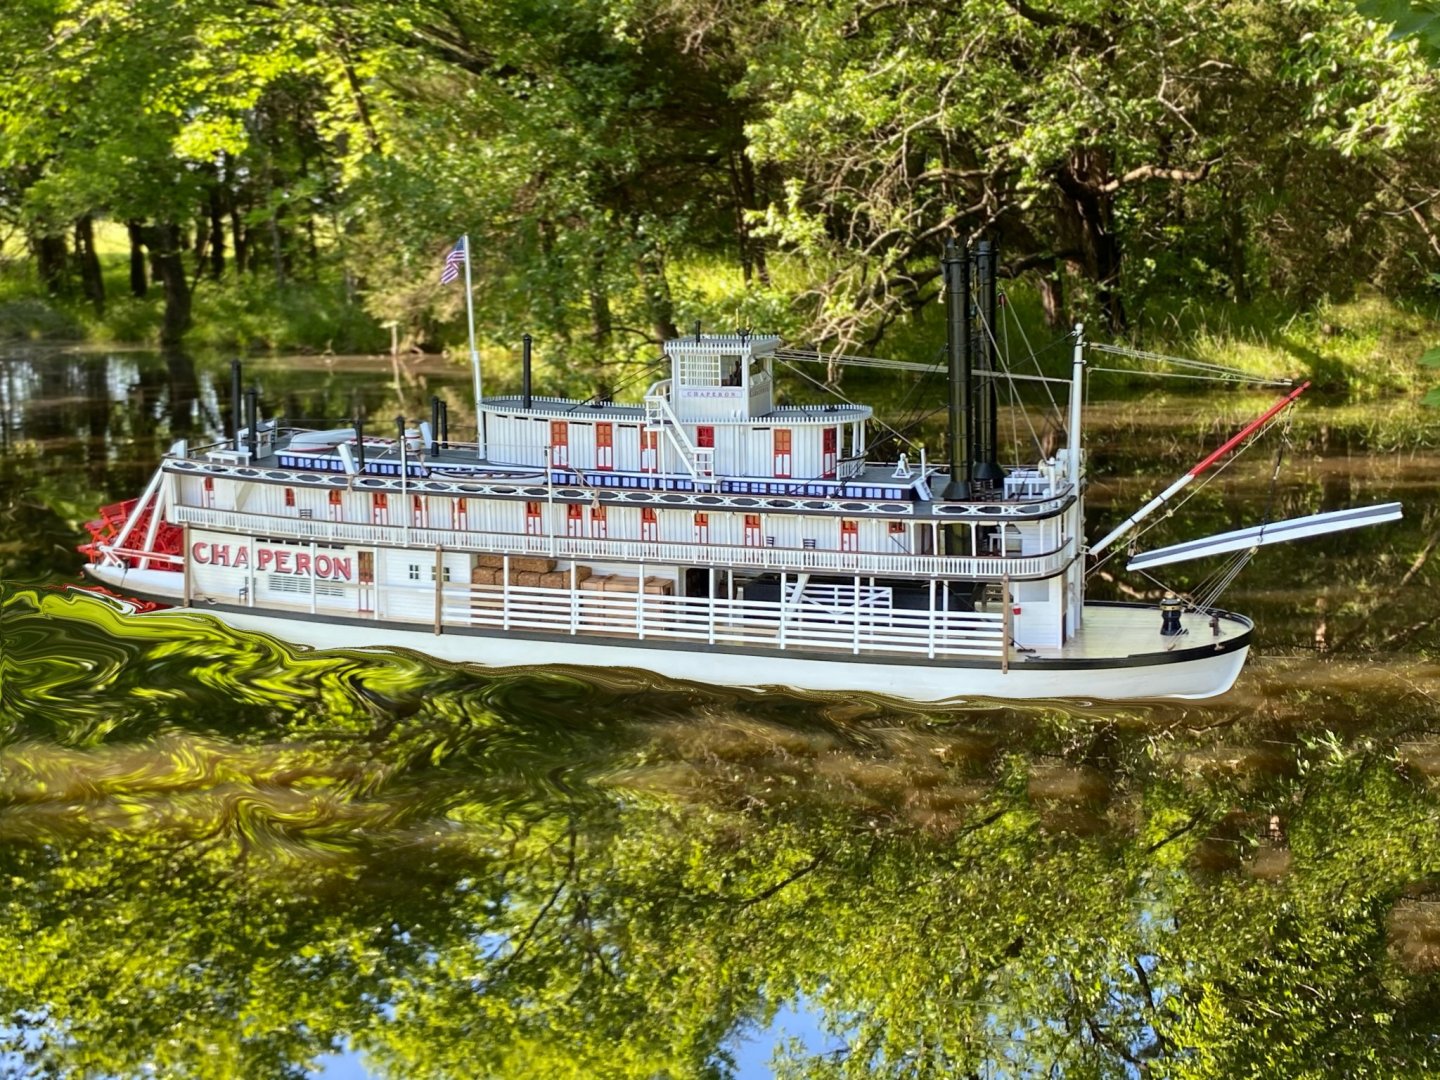
Eric, it’s the drought season. I really wanted to get some sort of picture of her with water in the background, but we couldn’t find a way to set her up other than holding it in front of the pond like we did. I still had the mount bolted to the bottom when we took the pictures and I wanted to set it up on a post actually in the water but my fear was my clumsiness would kick in and I would have to start this build all over again because I dropped it and it sank. I’m still toying with idea of making a epoxy resin water base for it in the case but I’m not sure my artistic skills are up to that task yet. I may play around with is and see how it comes out. Thank you so much for your kind words and encouragement throughout this build, I will definitely miss this build log to. I’ll still drop in on your build and offer similar words of encouragement as well, although I might not be much help in knowledge base of Western River Steamers, but I’ll do my best. -Brian
- 133 replies
-
- 2
-
-
- chaperon
- model shipways
- (and 2 more)
-
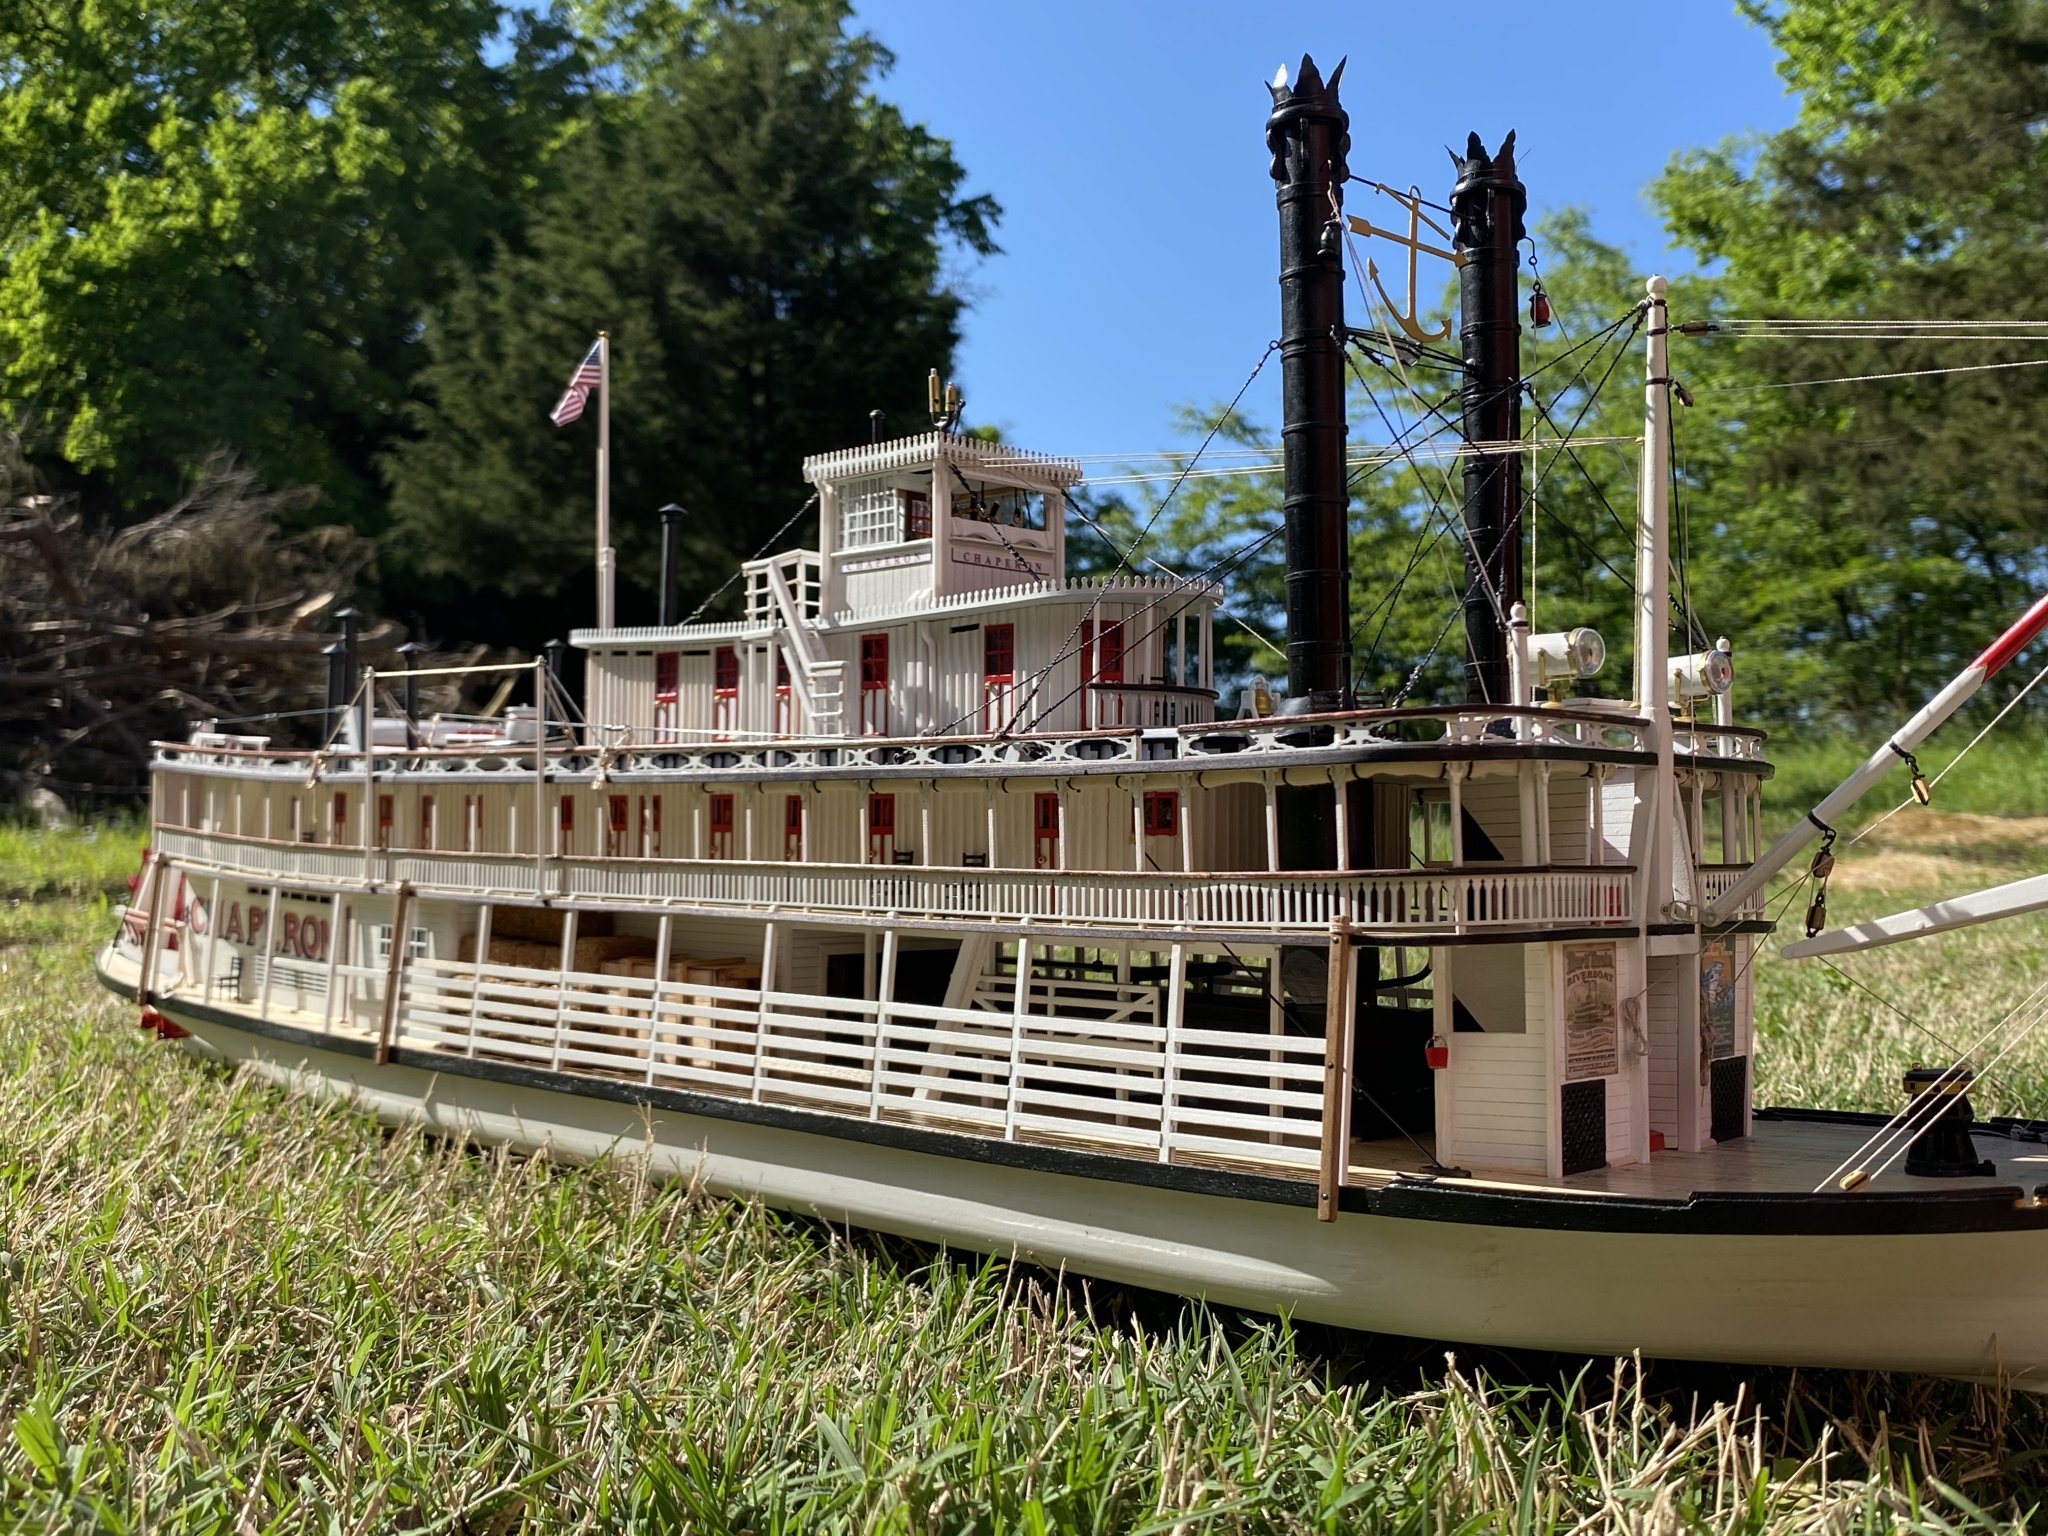
Hello All, Well it's almost time to close the books on this build. I've just about done all that I can do to my Chaperon (aside from building her a case and installing those elusive stag horns on her bell). It's hard to believe that it has been 13 months and 24 days since I started this project. My how time has flown. Before I do close this build log out, I wanted to throw out a real quick kit review. Please keep in mind that I am by no means a professional model builder, nor do I claim to be an expert on model kits or writing reviews. These are just my observations, opinions and views so please take all of this with a grain of salt. All in all, Model Shipways has done a fantastic job with this kit. As with all model kits there are some areas of imperfection and room for improvement, but for the most part this one is a fantastic kit. I urge anyone that is into the steamboat era (or even those that are not) to check it out. It is a fun and rewarding build. Pros: First: Their packaging is minimal, no fancy boxes with graphics all over them, just a simple blue box with a picture of the completed model pasted to the top and one on the side for shelf identification. This helps keep the costs down and if you are like me, your're just going to toss the box once the model is complete anyway. All of the parts are packaged neatly for easy inventory and identification and the wood strips are individually wrapped according to their size (with the exception of the dowels, but those are easy to sort out). As for the materials and parts themselves, the kit was complete with no missing parts. Even if there were parts missing, Model Expo's customer service is spot on. A quick email to Ed and he'll have the parts on their way to you in no time. Second: Right out of the box you can tell this is going to be a nice model. MS uses good quality wood for all of their kits. I built several kits that the supplied wood is just complete junk. It splinters easily or has to be sanded down to nothing to get a decent finish on it. MS uses good Basswod that requires minimal sanding to get a good finish on. Their laser cutting is precise and easy to remove the parts from their sheets and most of the char is minimal. A little light sanding cleans the parts up nicely and provides a good bonding surface. Third: The instructions and plans were clear and easy to understand. These coupled with Kurt's build article (which I have to say is well worth the price) will help make this an almost effortless build, especially if you are going to build it straight out of the box. If you decide to go the route I took and "dress" it up a bit, well then that takes a little more effort. I only wish that the overall plan sheet was to scale. This would make it easier to get the correct placement of some of the features. This is only a minor thing and nothing that warrants putting in the Cons section. Fourth: It's easy to tell that a lot of research went into the plans for this kit. During my build I studied numerous pictures of the actual Chaperon and many of the "out of the box" details are spot on (kudos to you Bob Crane). As with all my models, I put my own little spin on them to "personalize" them. And like Eric said in a previous post, I made this model my own. Fifth: As for the amount of material supplied with the kit, there is more than enough to complete everything with plenty left over to use on other builds. I don't believe that I ran short on anything. Many of the extra details that I added were built from leftover materials from previous builds. With the exception being the deck planking, but that was my choice, so thats on me. Cons (I hope you don't find these too petty, I just want to present my opinion on these) : First: I know I've said it many times throughout this build, I am not a fan of the brittania pieces. I know that it is a safer (lead free) alternative to pewter and it is probably used to keep the costs down for production and the consumer, but surely there is a better alternative out there (or at least update the molding process). The capstan was totally out of round, and no amount of adjustment could be made to make it look right without reducing the scale. The lifeboats will do for what they are. With a little effort you can doctor these up and make them look fairly nice. And the steam whistle, pretty much useless. Not realistic looking at all. However, nothing a little scratchbuilding on my part couldn't remedy. Secondly: The finger joints on the Main and Boiler deck sections are one of the biggest distractions. I know this was done due to packaging limitations, but with the prescibed deck board lines this a drawback. One simple soultion could be to prescibe the individual deck board lengths so that the finger joints are not quite as obvious. Since I went ahead and planked mine, this wasn't a huge issue and if you paint the deck as was on the original boat then these are a little easier to hide. Fortunately MS did put the joints in somewhat inconspicuous places so they are not that easily seen. Third: The PE turnbuckles were flat and not very realistic. No too much to say about these, other than these unused parts will sit in my parts box and maybe get used for some other project. Good thing was that I got to hone my metal working skills scratch building more realistic looking ones. Fourth: The missing Hog Chain posts on the Main deck up by the boilers. This is a minor detail, but one that could be remedied easily by adding the parts to the kit. There is more than enough room on the parts sheets to add these without having to add additional plywood sets. This is just a small detail, and to be honest, if it were not for Kurt mentioning it in his build article, I might have completed the model without ever knowing they were missing. For my build I decided to create several fetures to add to the detail and realism of the model. While my build is not museum quality, I am extremely happy with the end result. I can understand that no (affordable) kit can have every detail on it, and given the amount of chanages this boat went through over her career, it would be next to impossible to have a kit that fit every detail into it. So it is left up to the builder to add as much, or as little to it as they want, but that is what makes this hobby so enjoyable. I also want to thank everyone for their guidance, input and commnets. Eric, Kurt and Roger, I can only hope to one day be half as knowledgeable as you guys on steamboats. All of your contributions to my build are greatly appreciated. Thanks to everyone that followed and visited my build and gave me a "Thumbs-up" on my progress. (Geez, I'm starting to sound like I'm accepting an Oscar or something). Anyway, here are some final pictures of my build (again, minus the stag horns and case). I hope you enjoyed my build log as much as I enjoyed writing it. Oh yeah, and one for fun. I didn't want to actually see if she would float, so I had my daughter take a picture of it in front of my pond and Photoshop my arm out of it. I'll Post some of these in the completed gallery and once I get the case built I may add a few more pictures. -Brian


- 133 replies
-
- 13
-
-
- chaperon
- model shipways
- (and 2 more)
-
Beatiful work as always Eric. Nice solution for the post tops. if you wouldn't have said anything I would have thought they actually do extend through the deck. So here is a questions that I though about while reading through your update. I'm really going to show my limited knowledge of steamboats here. Arabia has a jckstaff that her pilots used for navigation, and she has grasshopper arms for negotiating sand bars, I am going to go under the assumption that on boats like Chaperon that didn't have a jackstaff that the pilots used the landing stage boom as a navigation tool instead. Also, since Chaperon didn't have grasshopper arms I guessing that on the rivers she travelled, sandbars were not as much of a concern so they were not needed. Now here is where I am going with this: In looking at your painting of Arabia that you have at the first of this build, I noticed that with the jackstaff and the grasshopper arms, there is no landing stage or boom. So were the grasshopper arms used as a dual function, to hop sand bars as well as load freight and set the landing stage? or did they use some other method? My first thought was work boats (tinders) or landing barges, but it seems to me that these methods would not be very effecient. Forgive me for the long winded question, I'm just trying to expand on my learning. By the way, I know your heart lies in the steam era and Western Rivers, but you ought to take a trip back in time one day and build a fully rigged ship. They are lots of fun and challenging. Very time consuming (not that your Arabia hasnt been) but very fun. -Brian
- 599 replies
-
- 5
-
-
- sidewheeler
- arabia
- (and 4 more)
-
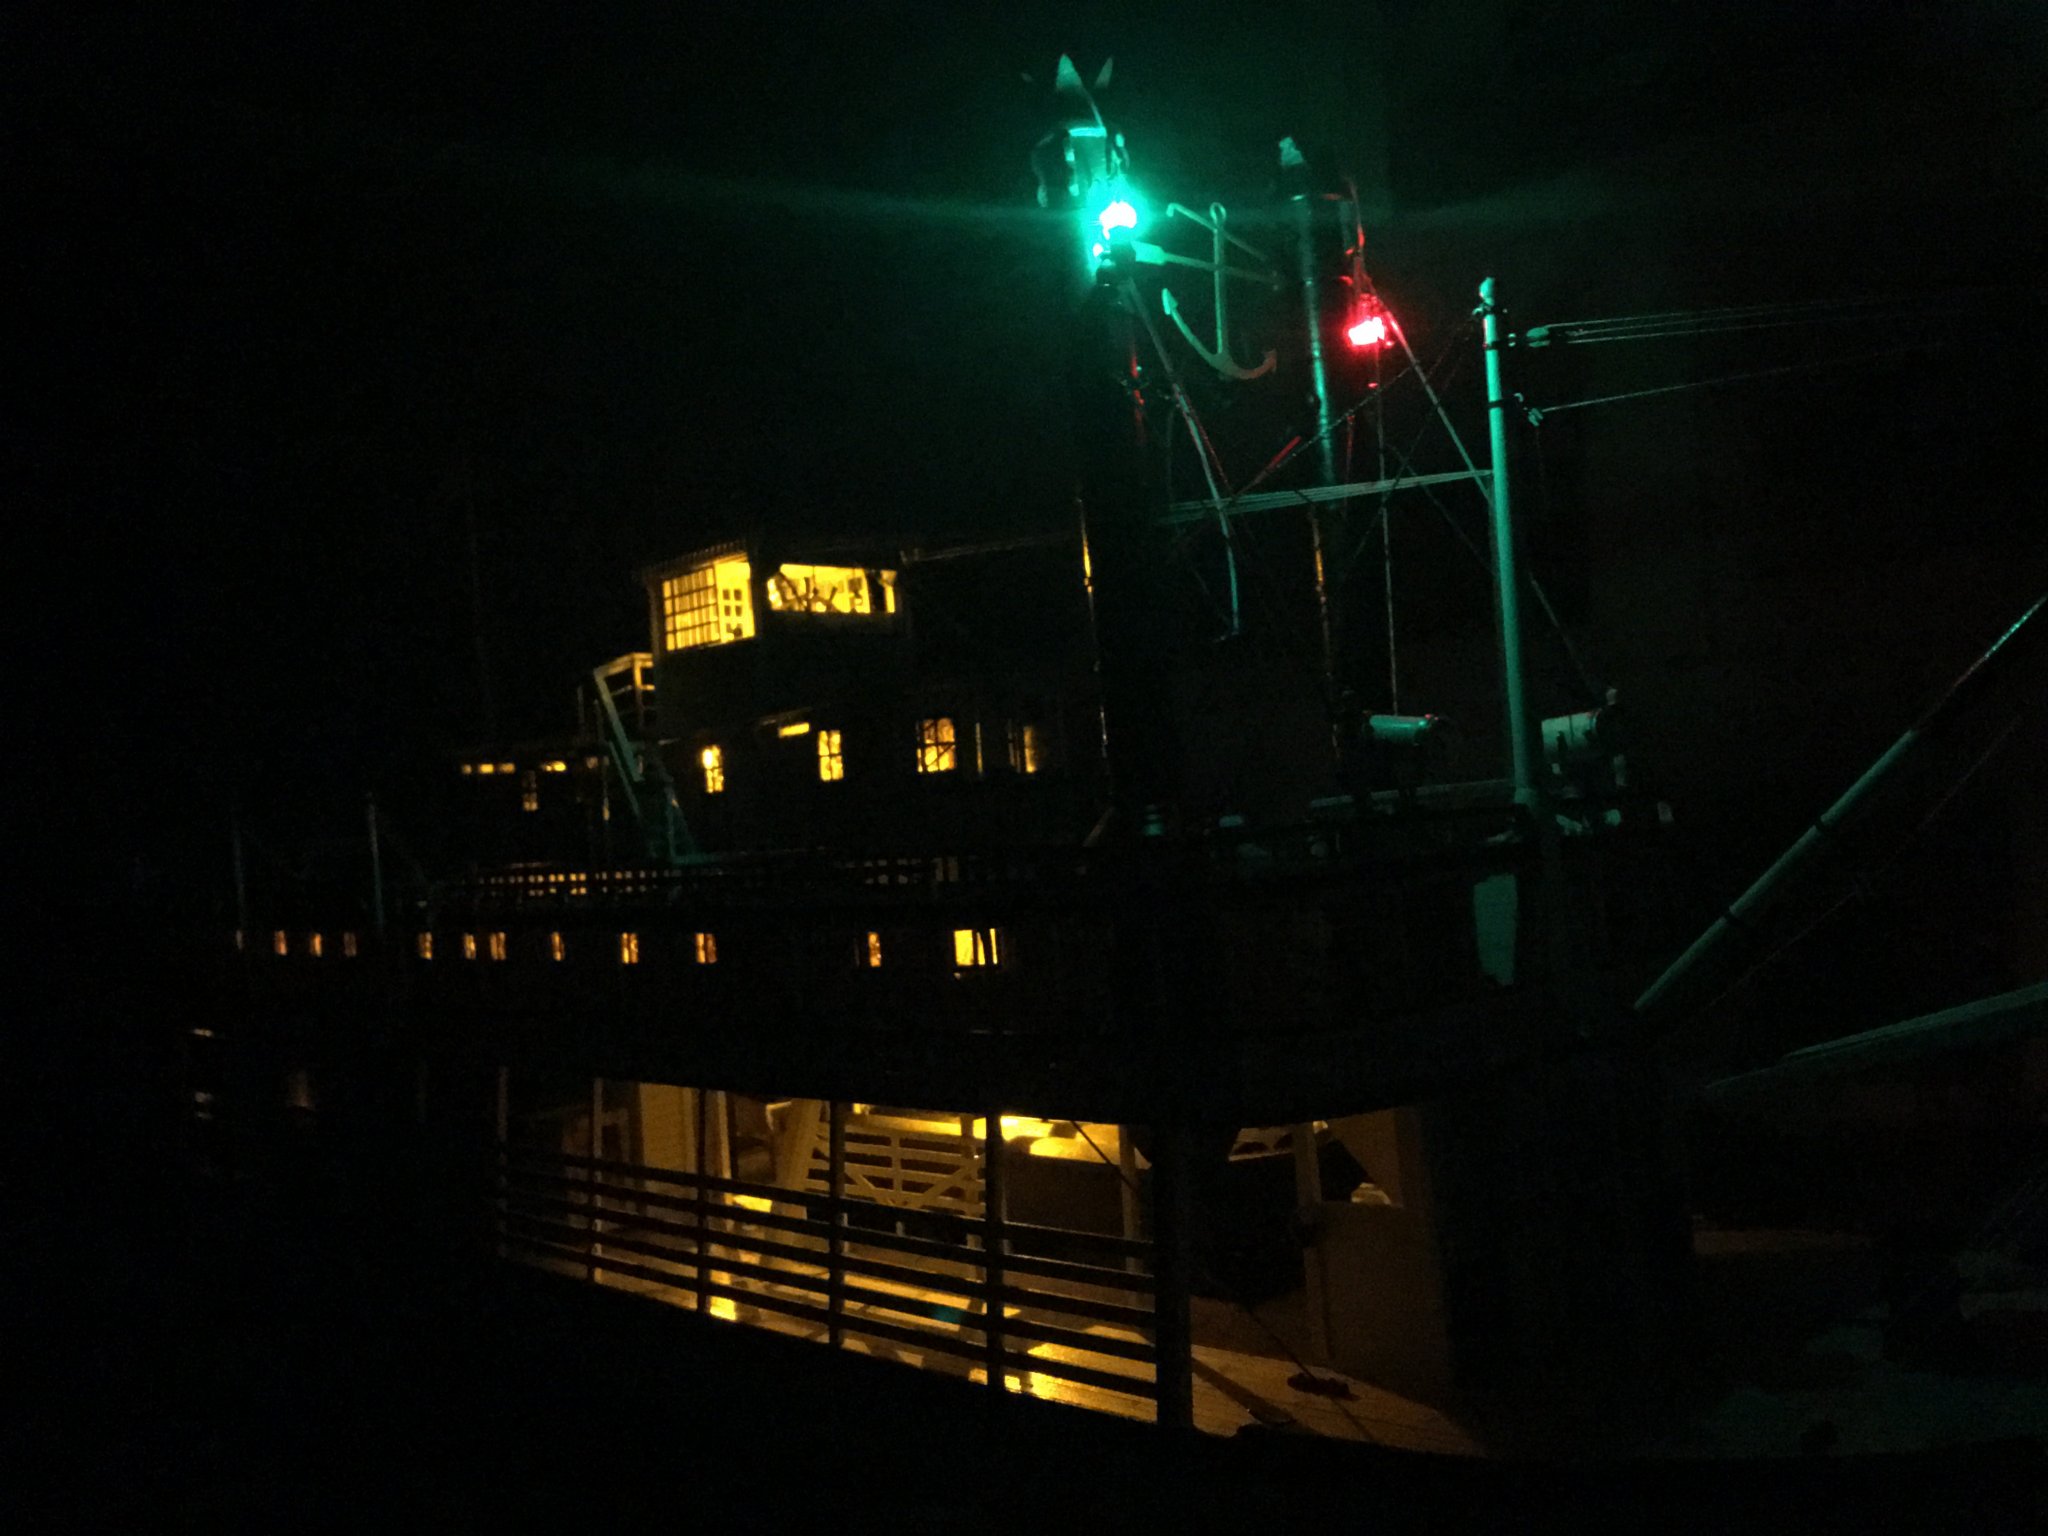
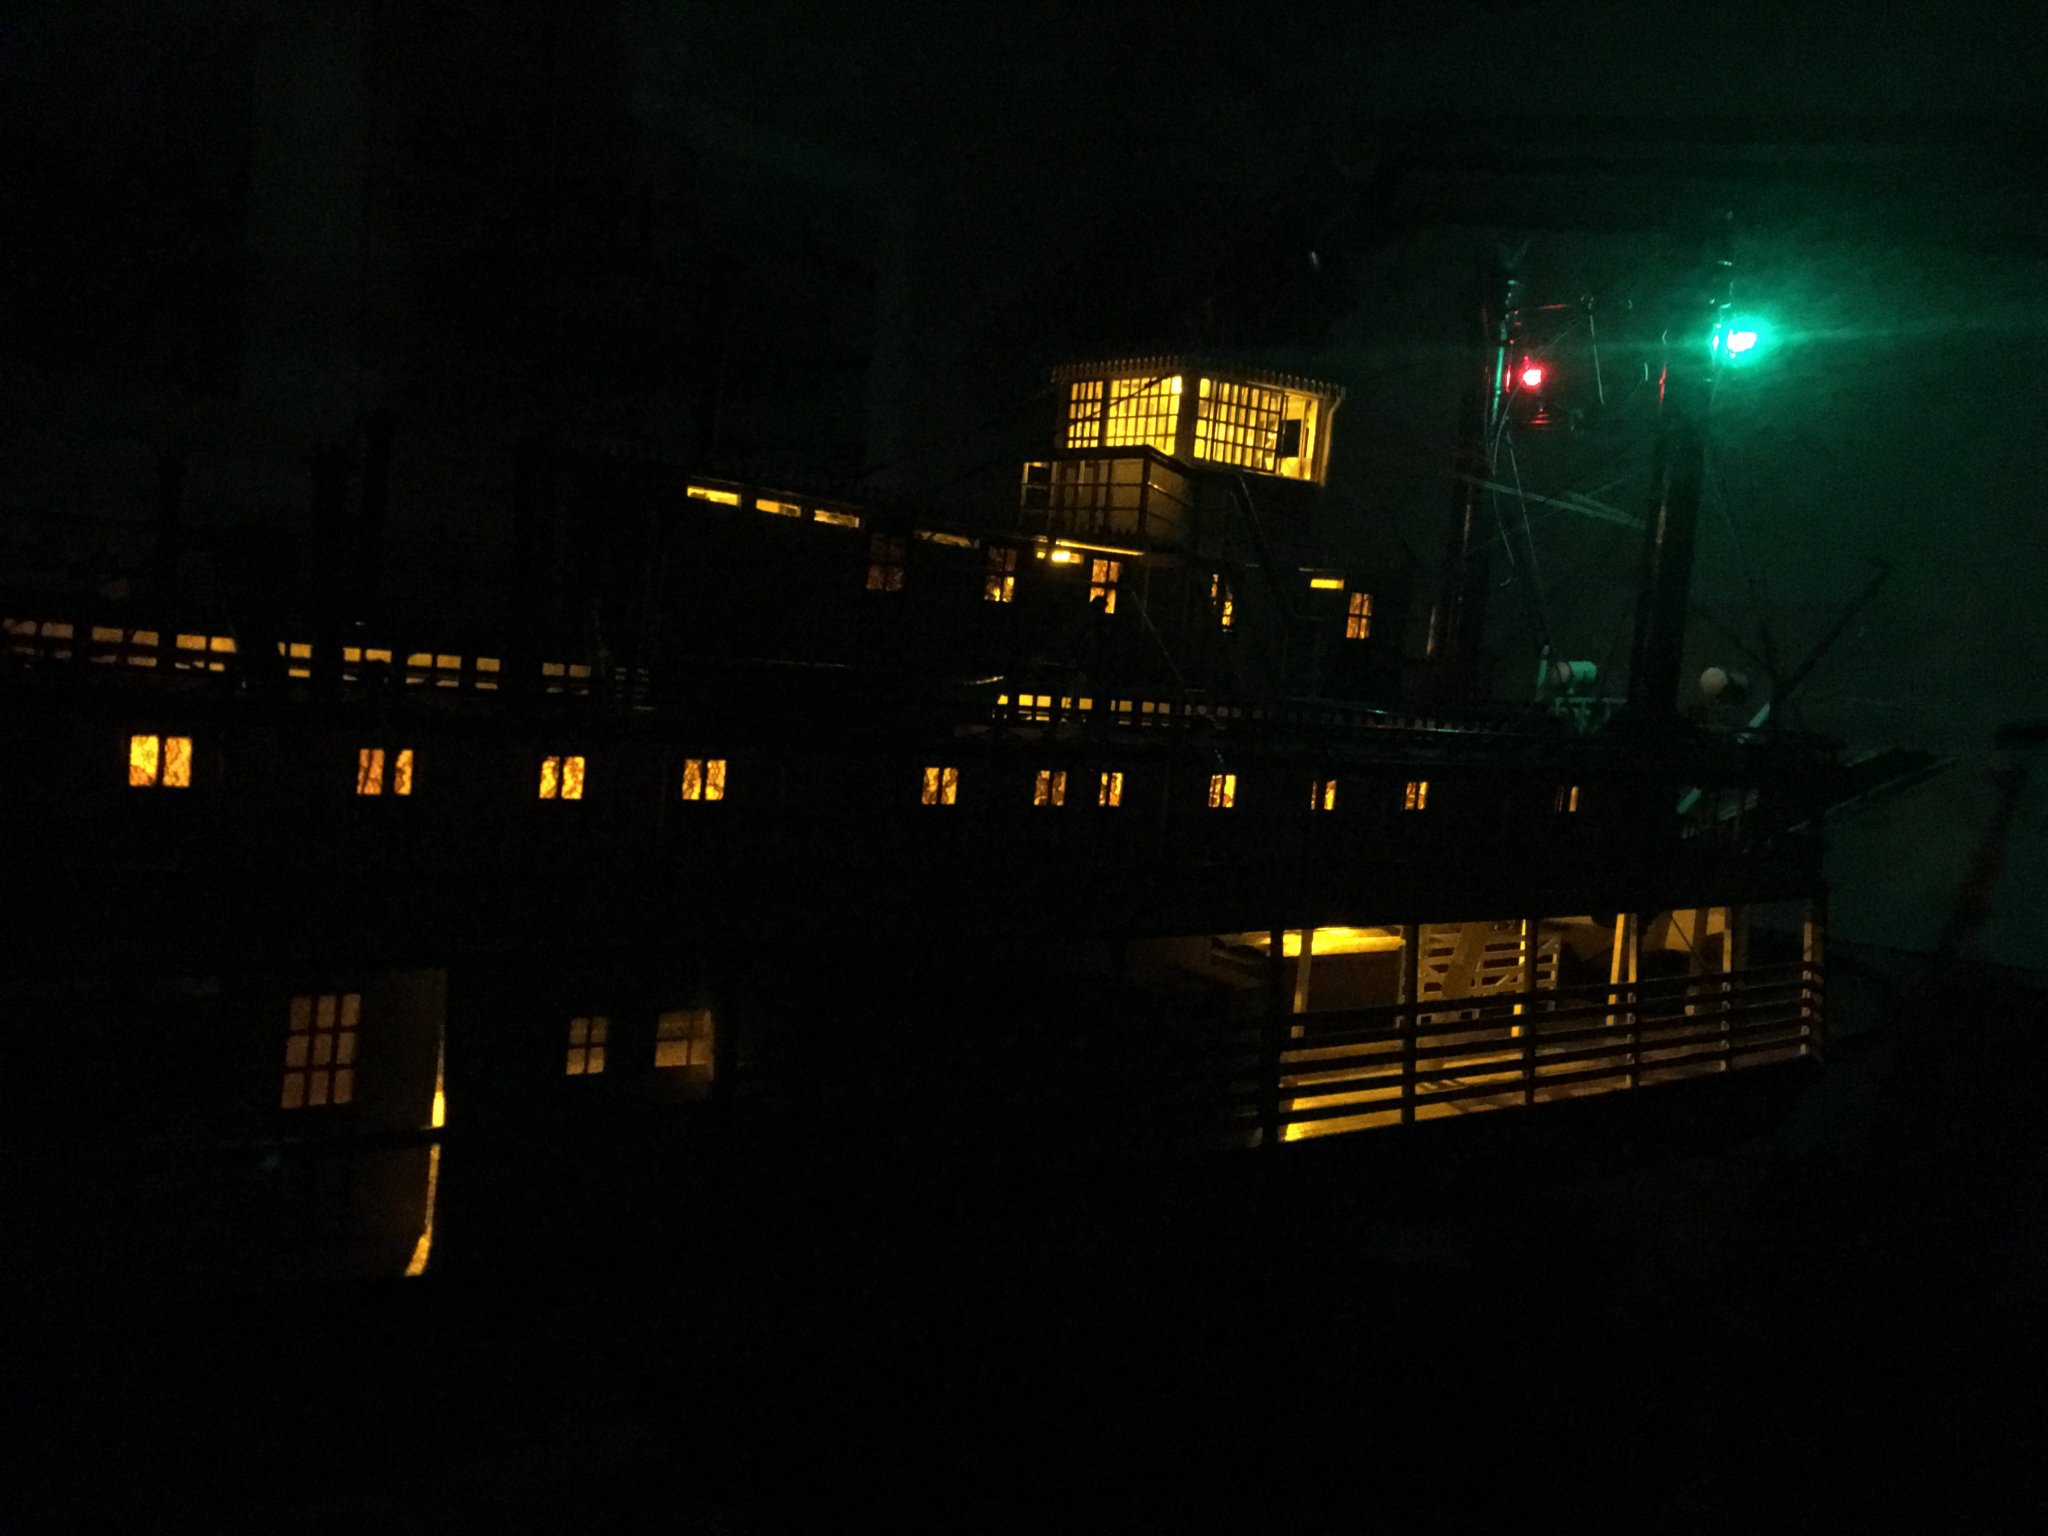
Yves, Thank you for the compliments. You do have a point, that pilothouse light is a bit bright. I wonder if that’s the reason many of the boats met their demise on the river because the cabin lights were too bright for the pilot to see the dangerous snags at night. I’m sure the searchlights helped with that though. I may tone it down a bit to help with the night vision. As for the red navigation lights, all of the old photos of the Chaperon have them in place. I’m sure they were just oil lanterns with colored lenses that were lowered, lit then hoisted into place for night running. Since all of the old photos are black and white I just went under the assumption they were the standard red and green used today. Even the instructions call for the kit supplied lanterns to be painted red and green (and we all know how well we can trust the instructions). I guess I need to look a little deeper into this subject to see if they were actually using these colors. Off to the interweb. -Brian
- 133 replies
-
- 3
-
-
- chaperon
- model shipways
- (and 2 more)
-
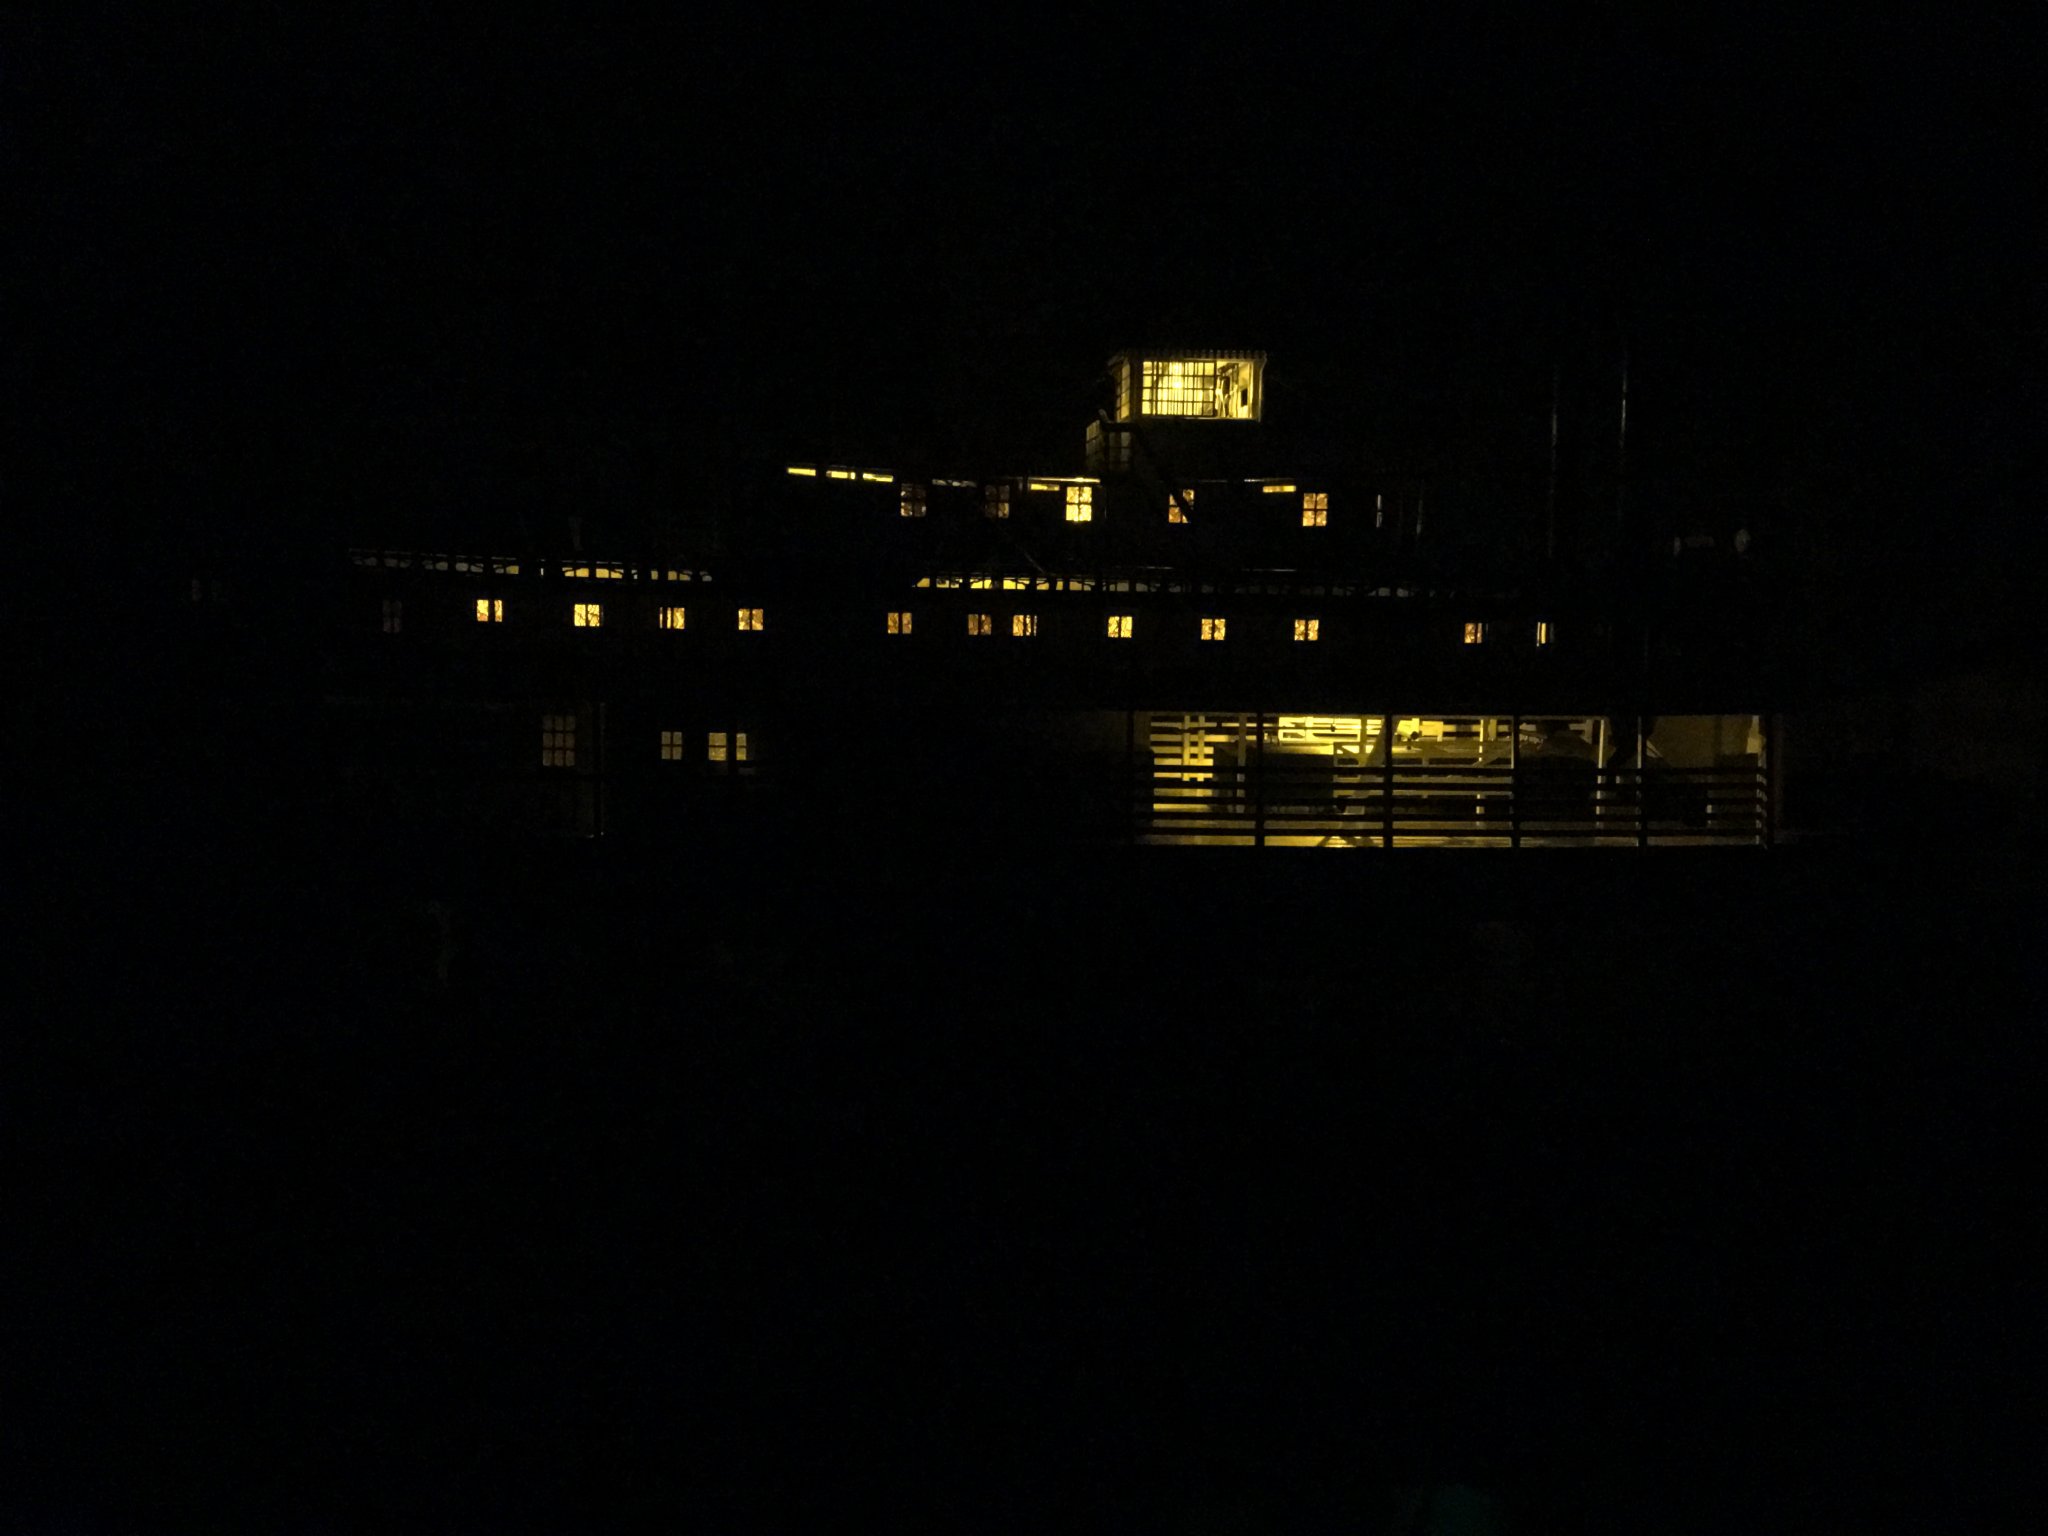
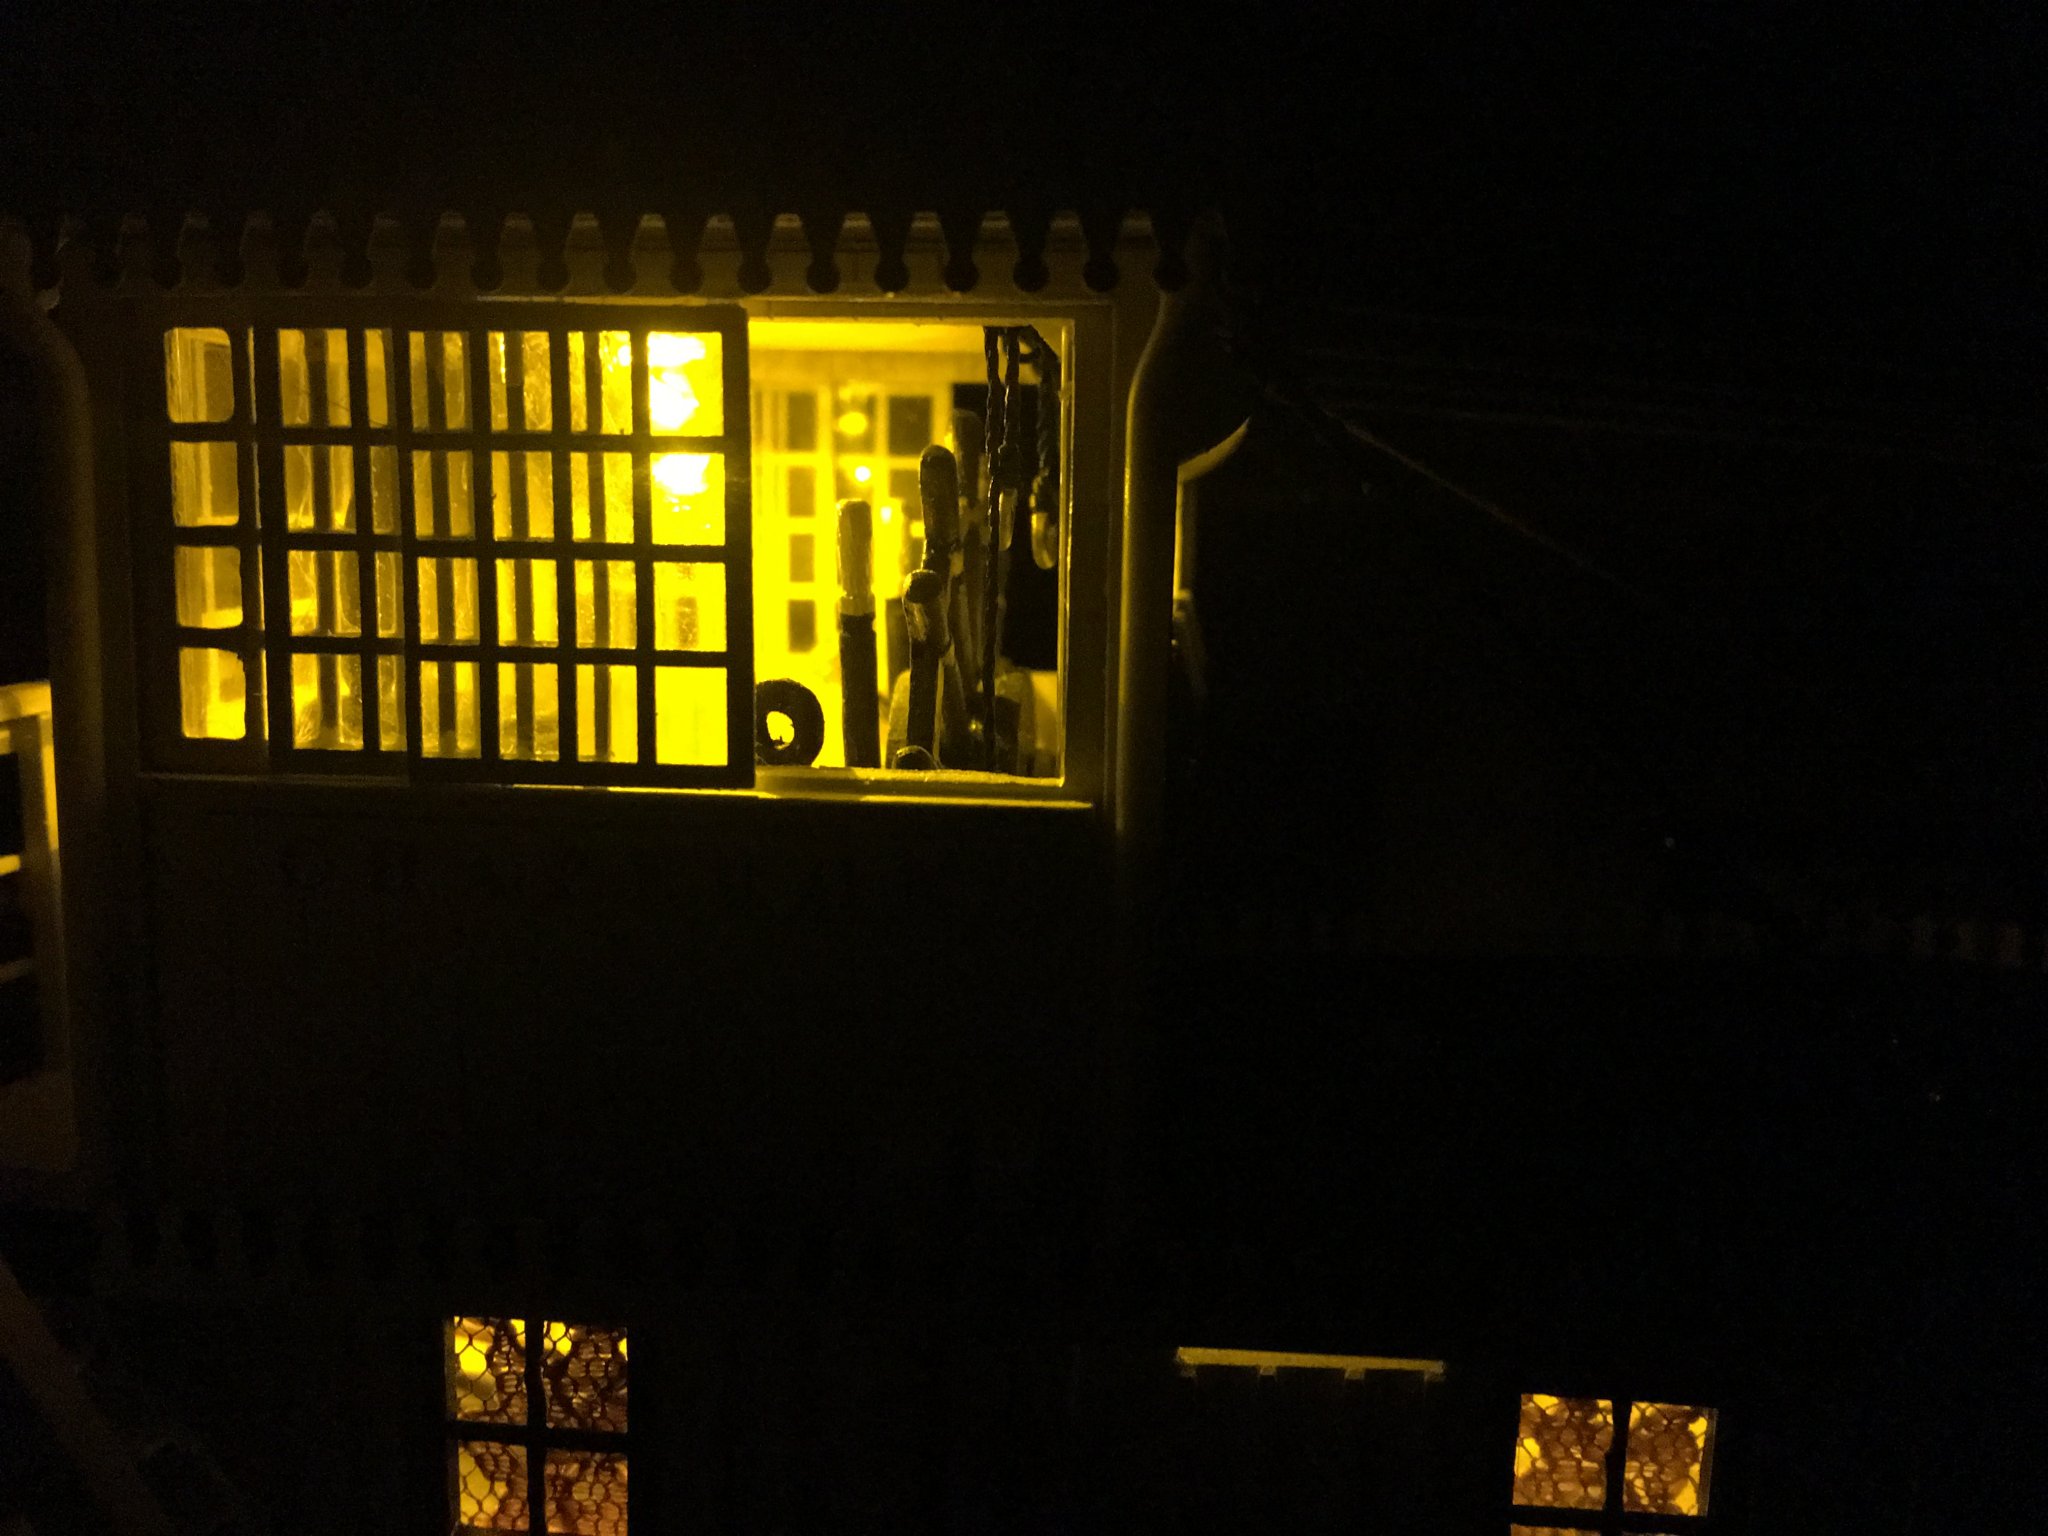
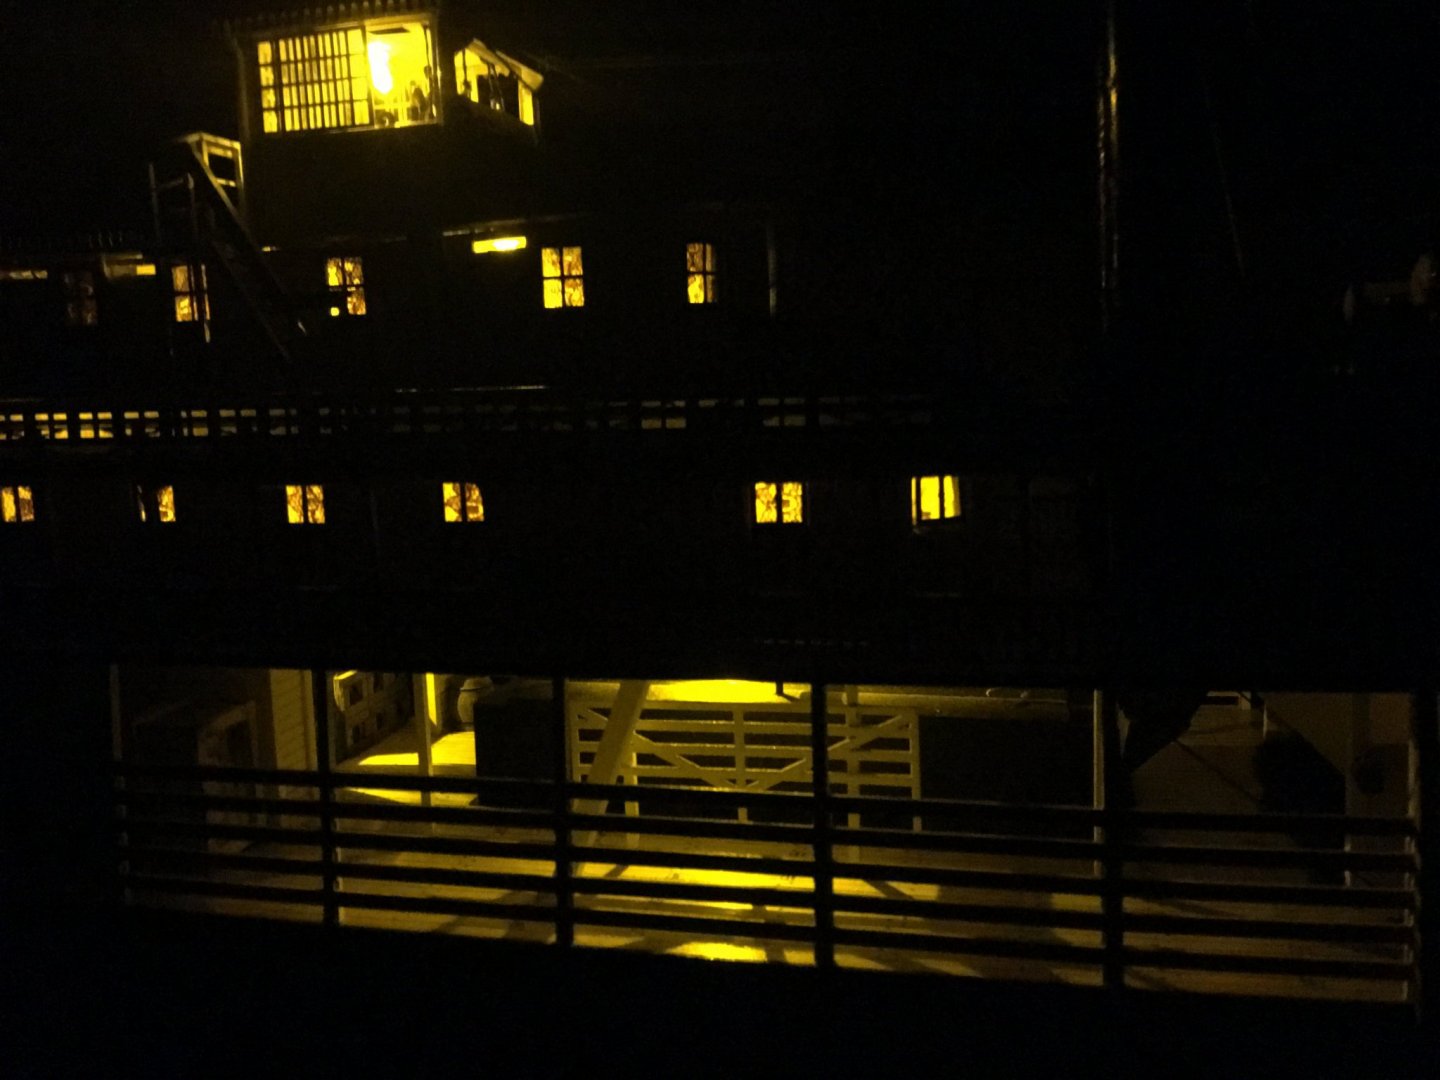
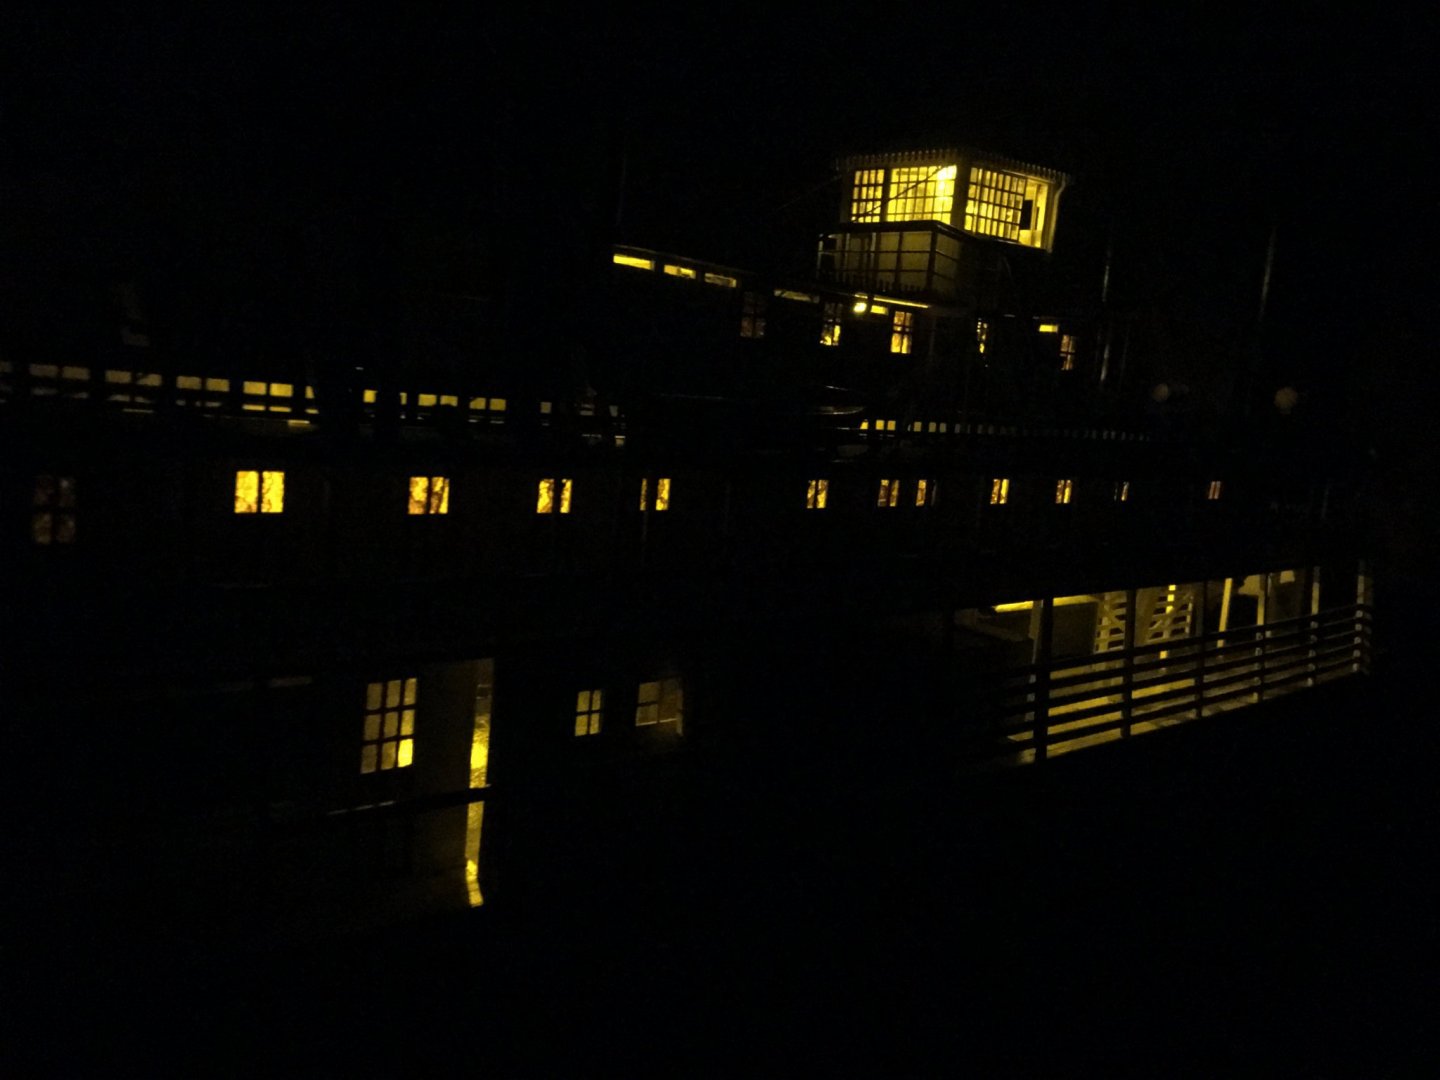
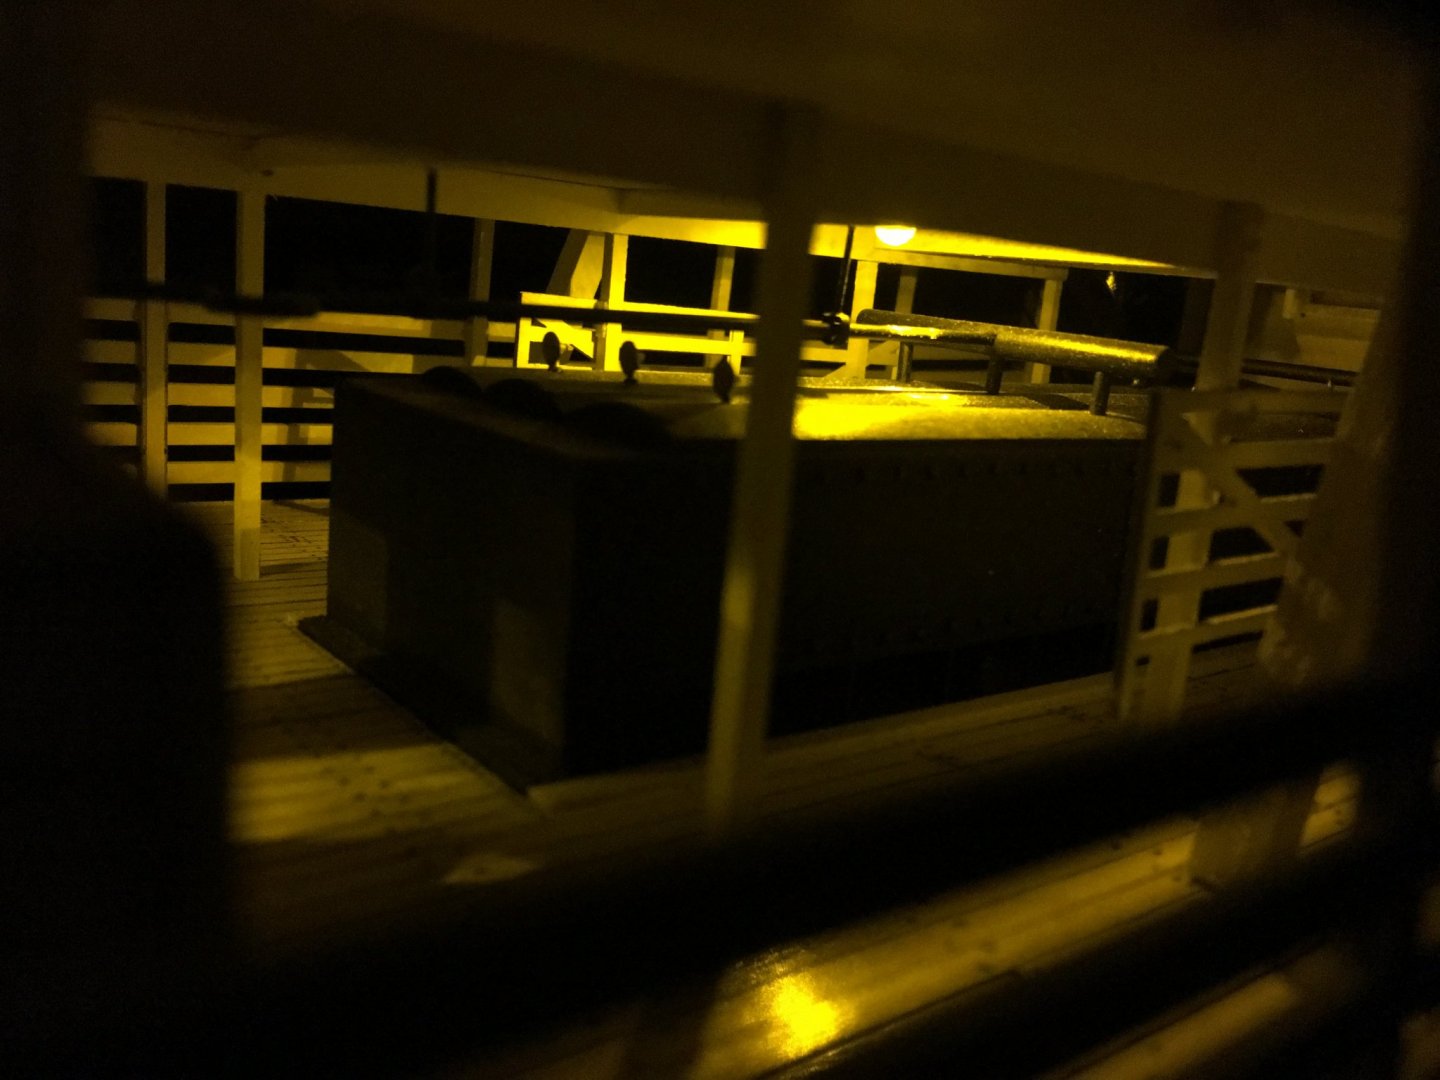
Hello All, After my post last night I got to checking to make sure that my lighting was functioning properly and then I realized that I hadn't posed any pictures of Chaperon lit up. So here are a few from my tests last night. The Admiral suggested that I take more night pictures, but next time get the fog machine out and take them with that running. Awesome idea. Some with just the deck lighting on. Some with the navigation lights on. They are a little bright, but I still think they look pretty cool. After seeing these, now I really wish that I would have found a way to light up the search lights. Oh well, maybe on another build. Thanks for looking. -Brian


- 133 replies
-
- 9
-
-
- chaperon
- model shipways
- (and 2 more)
-
Thank you Eric. I thought it would be a neat touch. Just something different to add a little bit of realism. Completing these builds is bittersweet. The end result is worth all the time and effort put into it as you admire sitting on the shelf. However, on the flip-side ending the build means the end of the discussions and interesting topics that come up while build progresses. Fortunately, there will be other builds and the process starts all over again. No telling what topics are to come in future builds. -Brian
- 133 replies
-
- 1
-
-
- chaperon
- model shipways
- (and 2 more)
-
Eric, You are getting to the part of your build that I like most. I am one of those who love rigging. Something about it to me feels that it really starts to bring the model together. This is one of the only drawbacks of the steamboat era is that there is just not that much rigging. Beautiful job on the smokestacks. I really like the use of the parrel beads for the attachments. I wish I had thought of that on mine. I think they look much more realistic than eye-bolts. I'm real anxious to see how the grasshopper arms come out (no pressure). By the way, don't fret the work boats too much. You still have plenty of time to come up with a solution. Look at what you have accomplished so far. Absolutely magnificent build! -Brian
- 599 replies
-
- 3
-
-
- sidewheeler
- arabia
- (and 4 more)
-
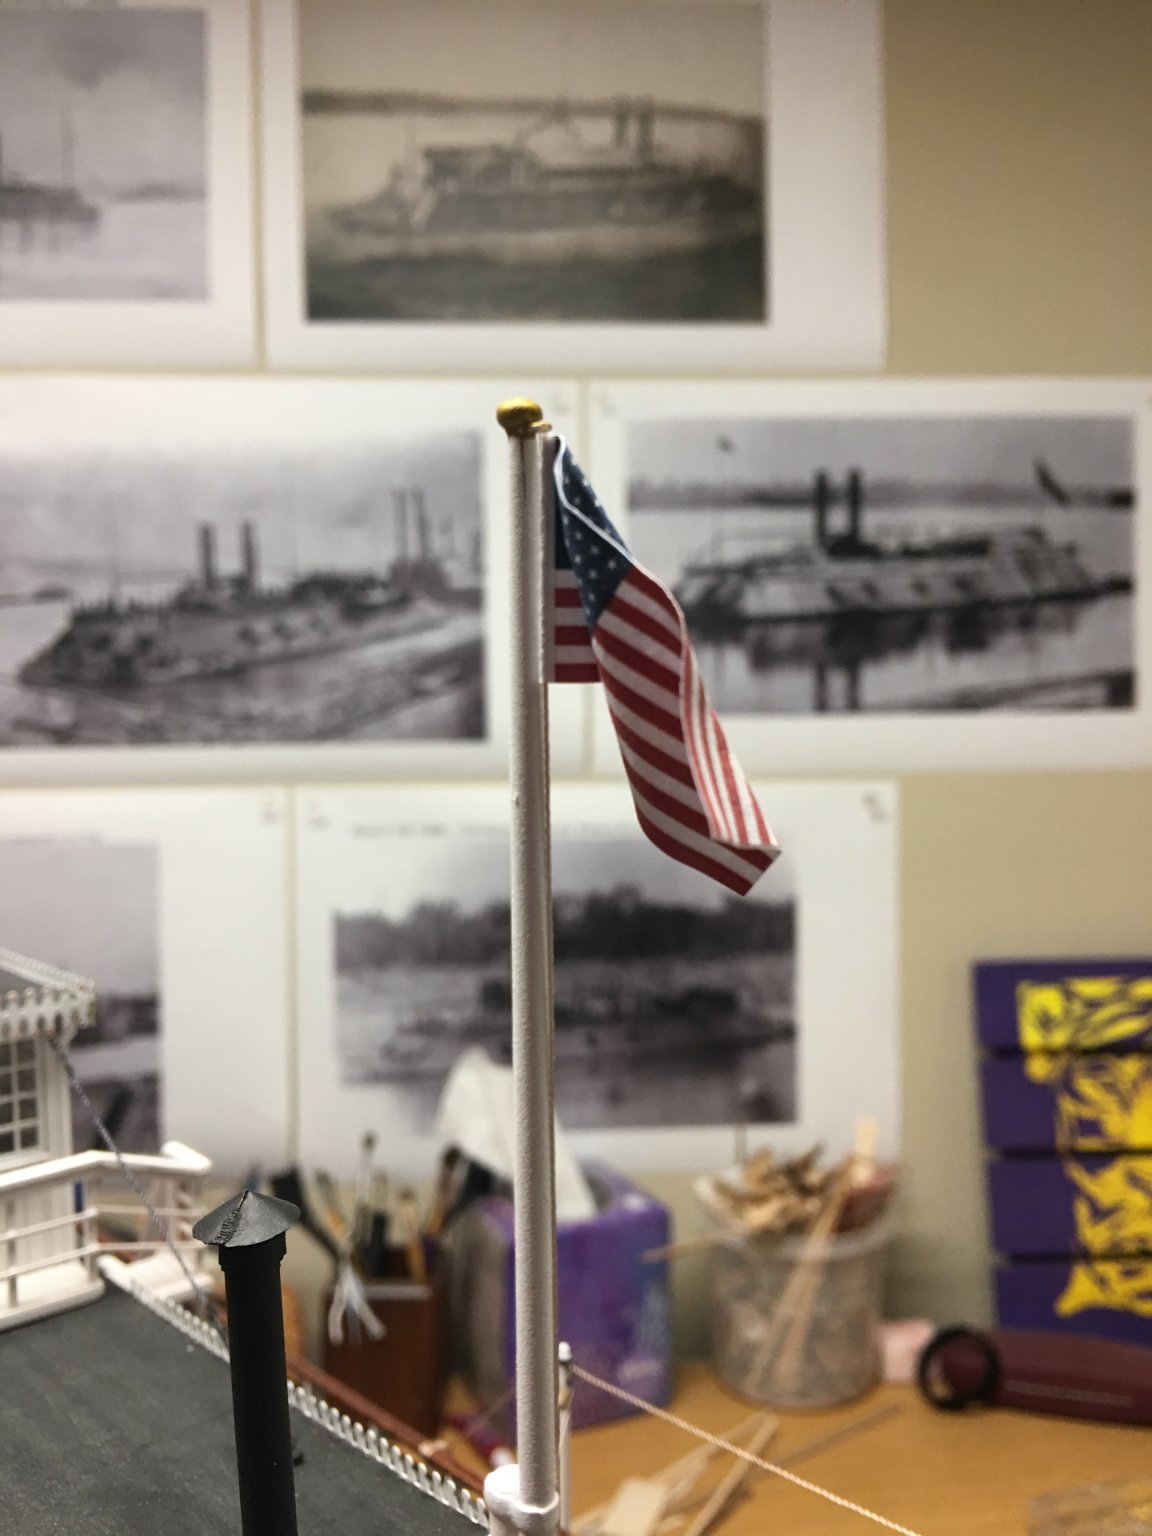
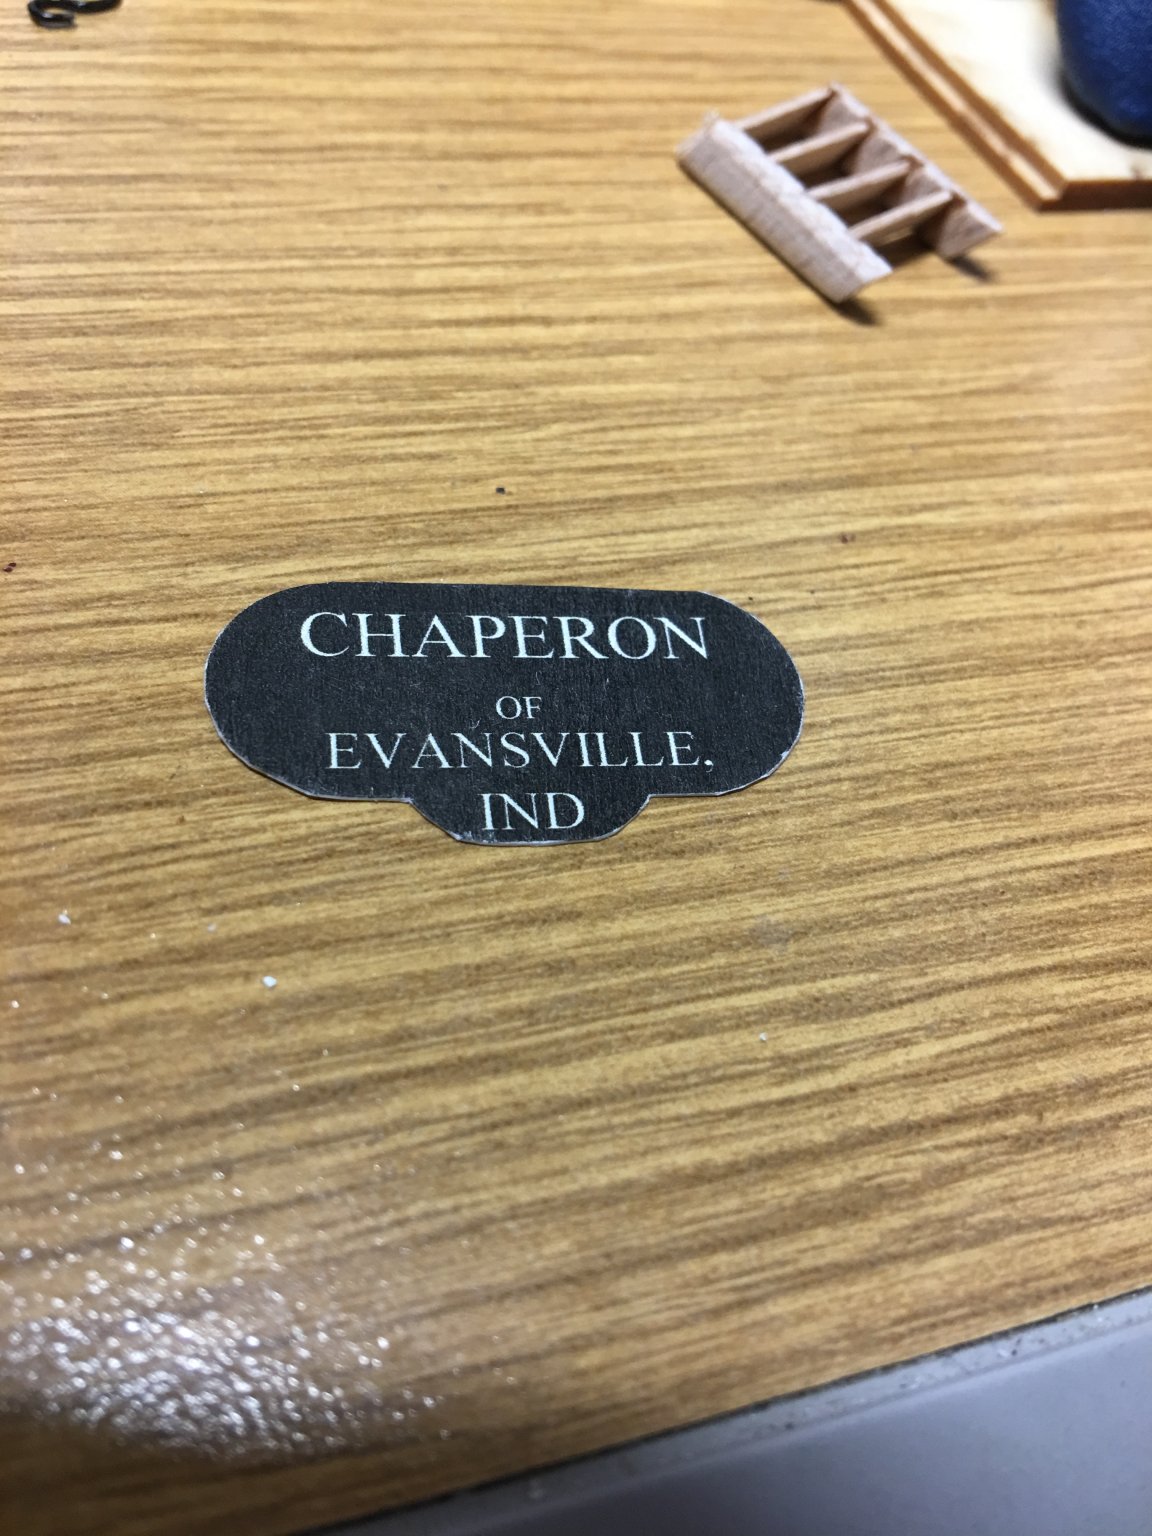
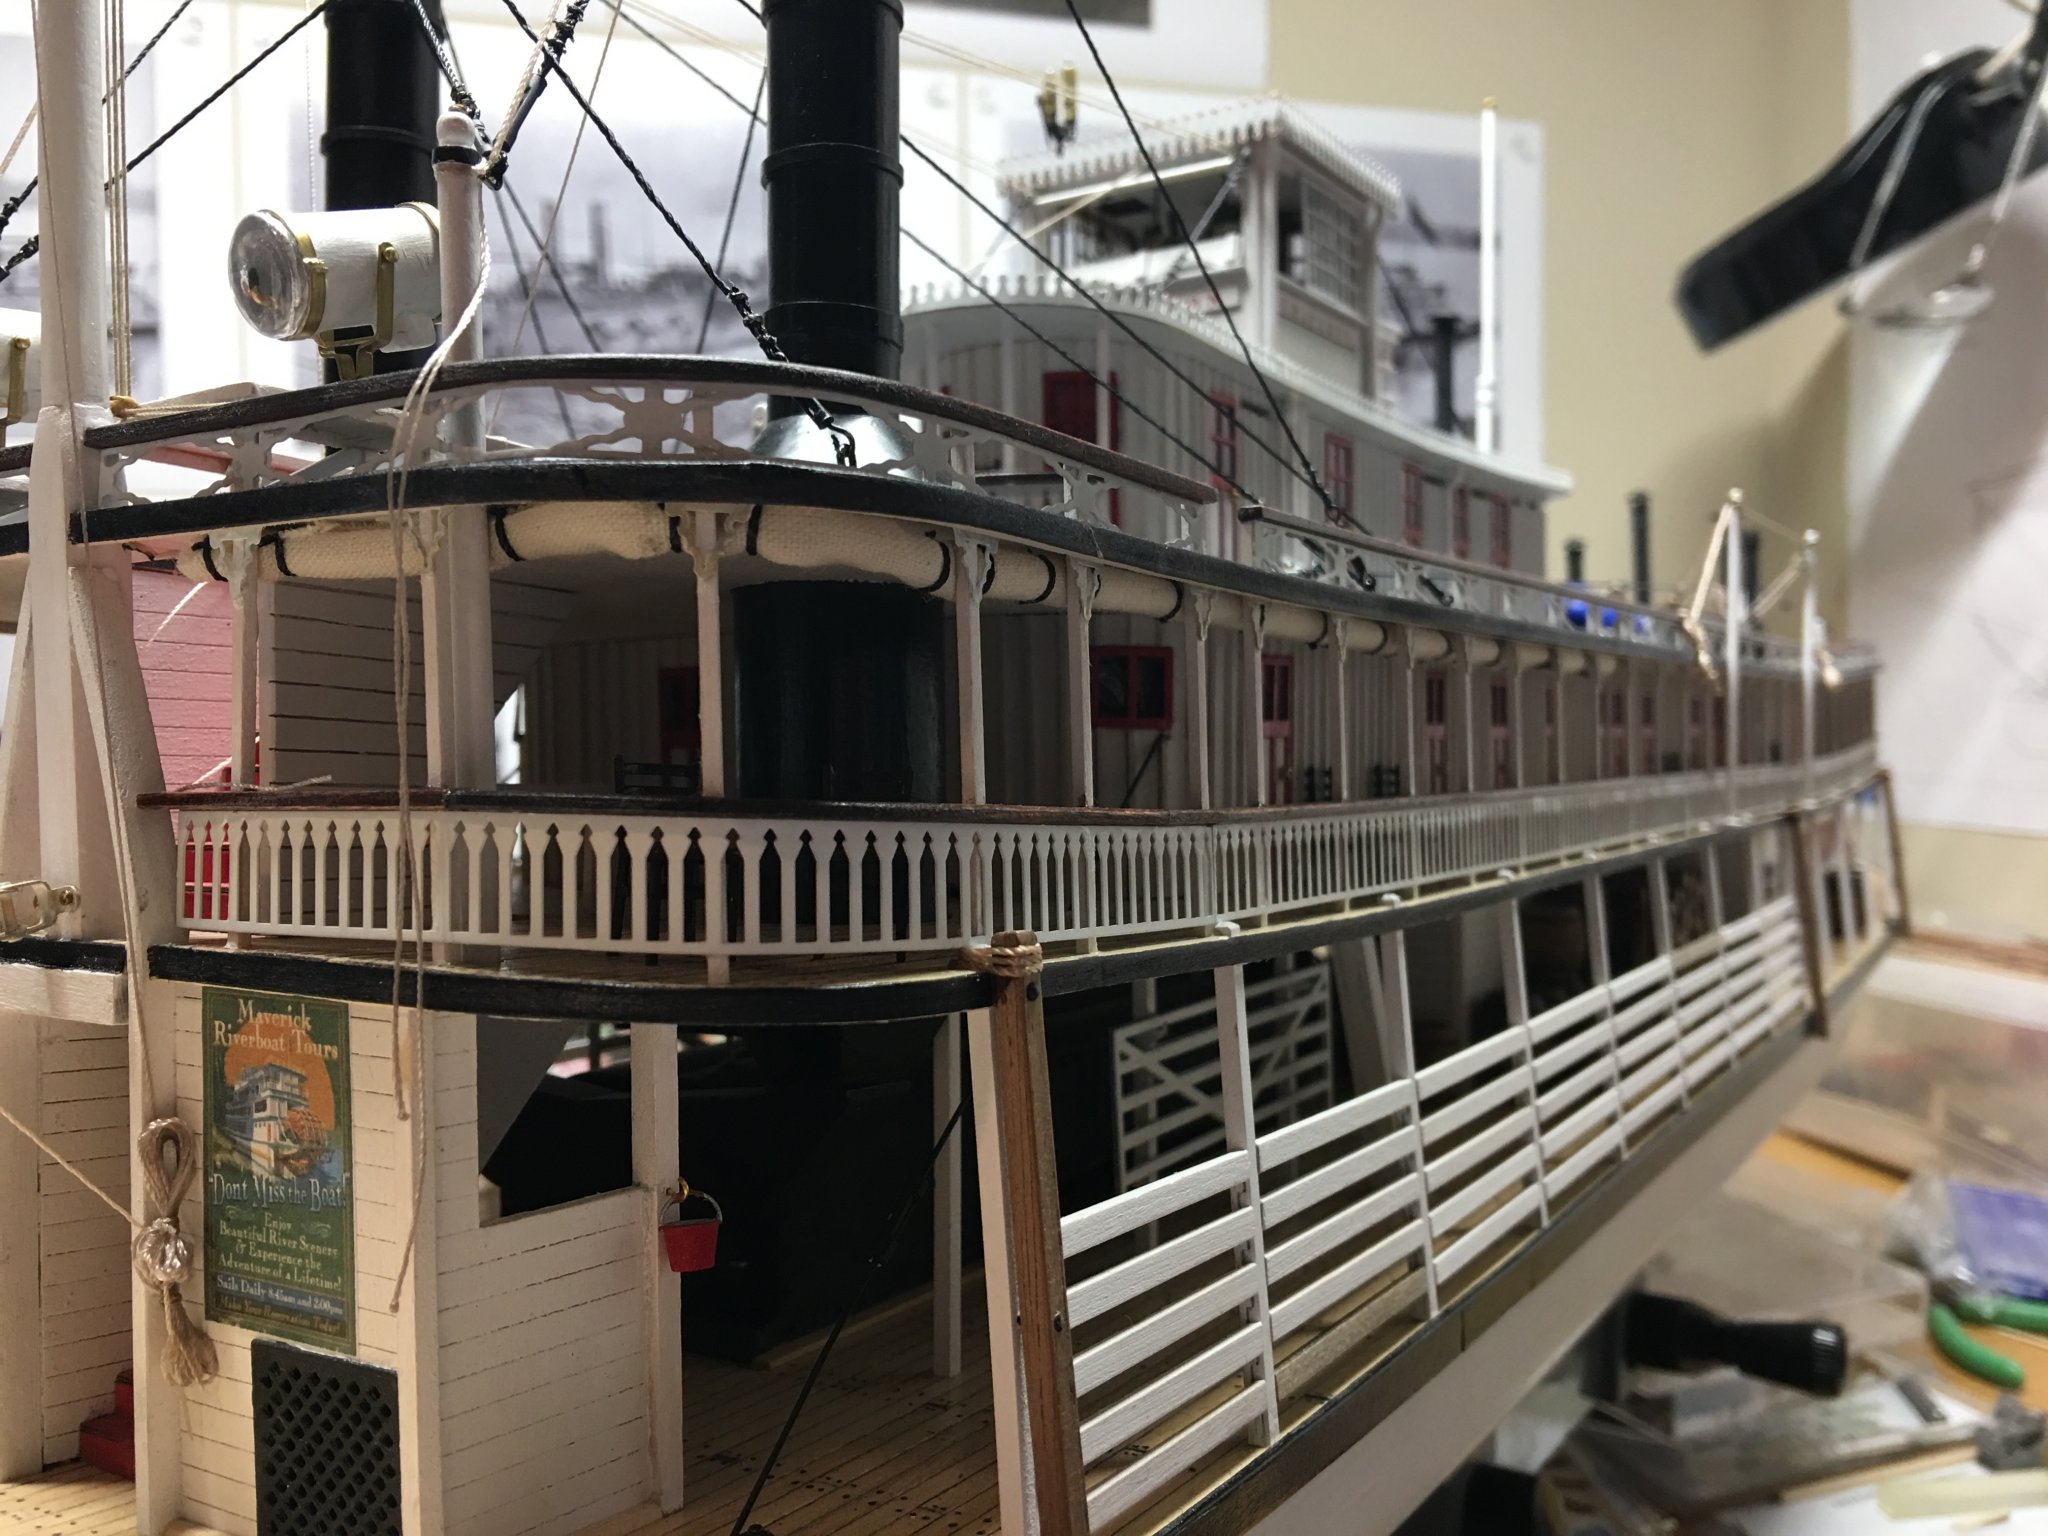
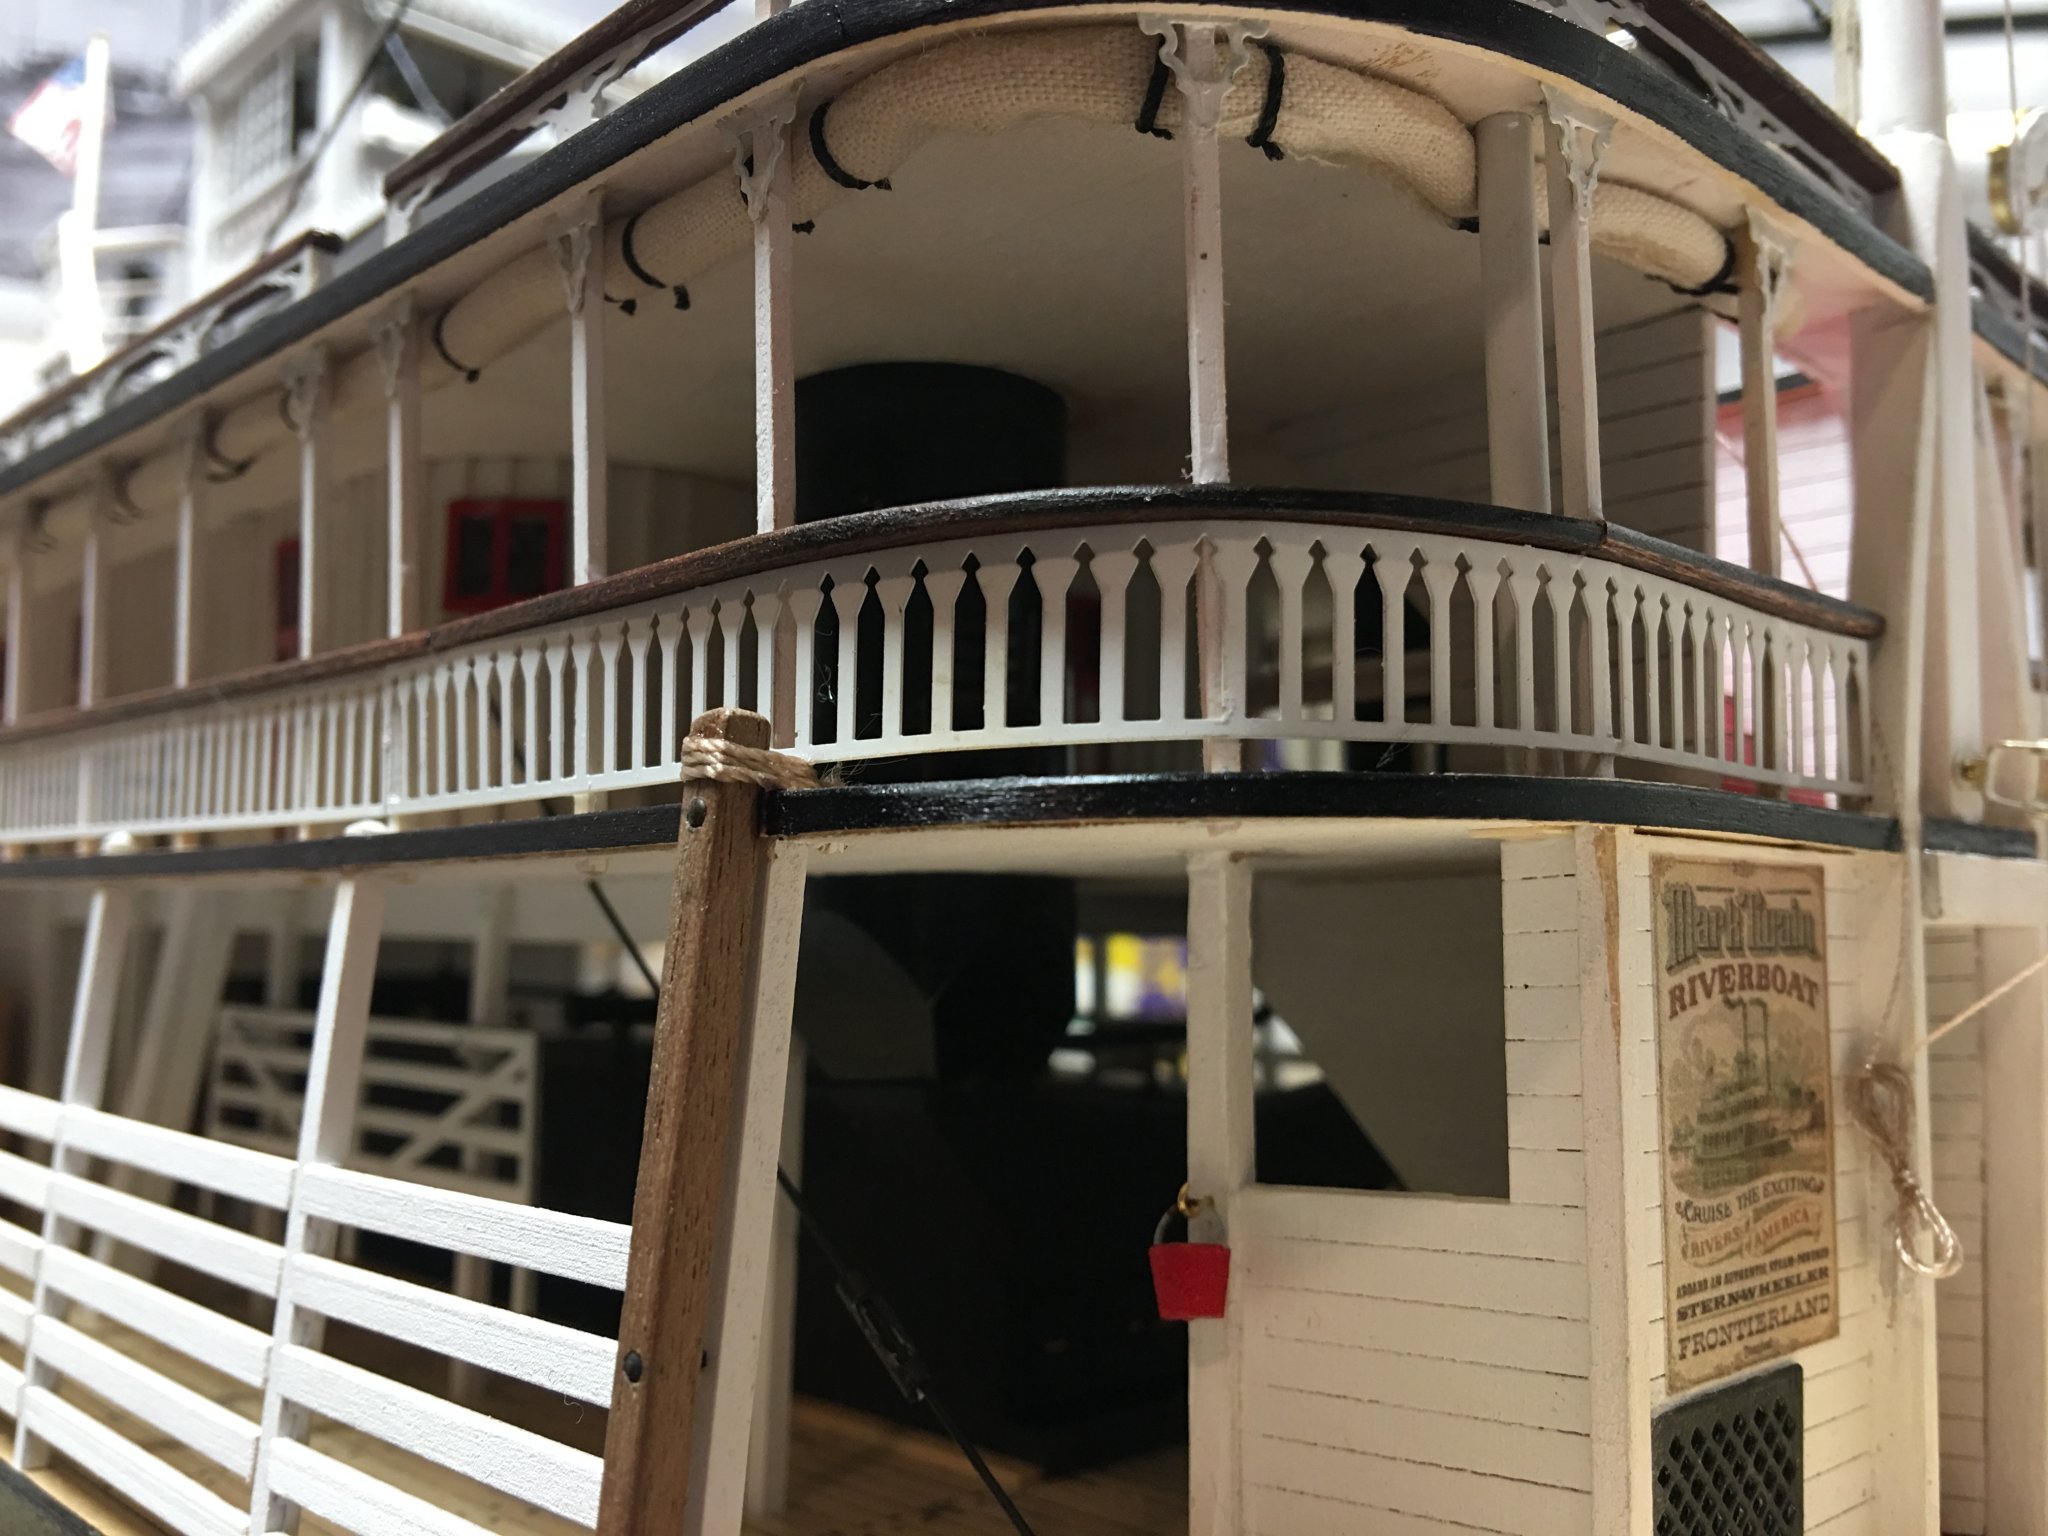
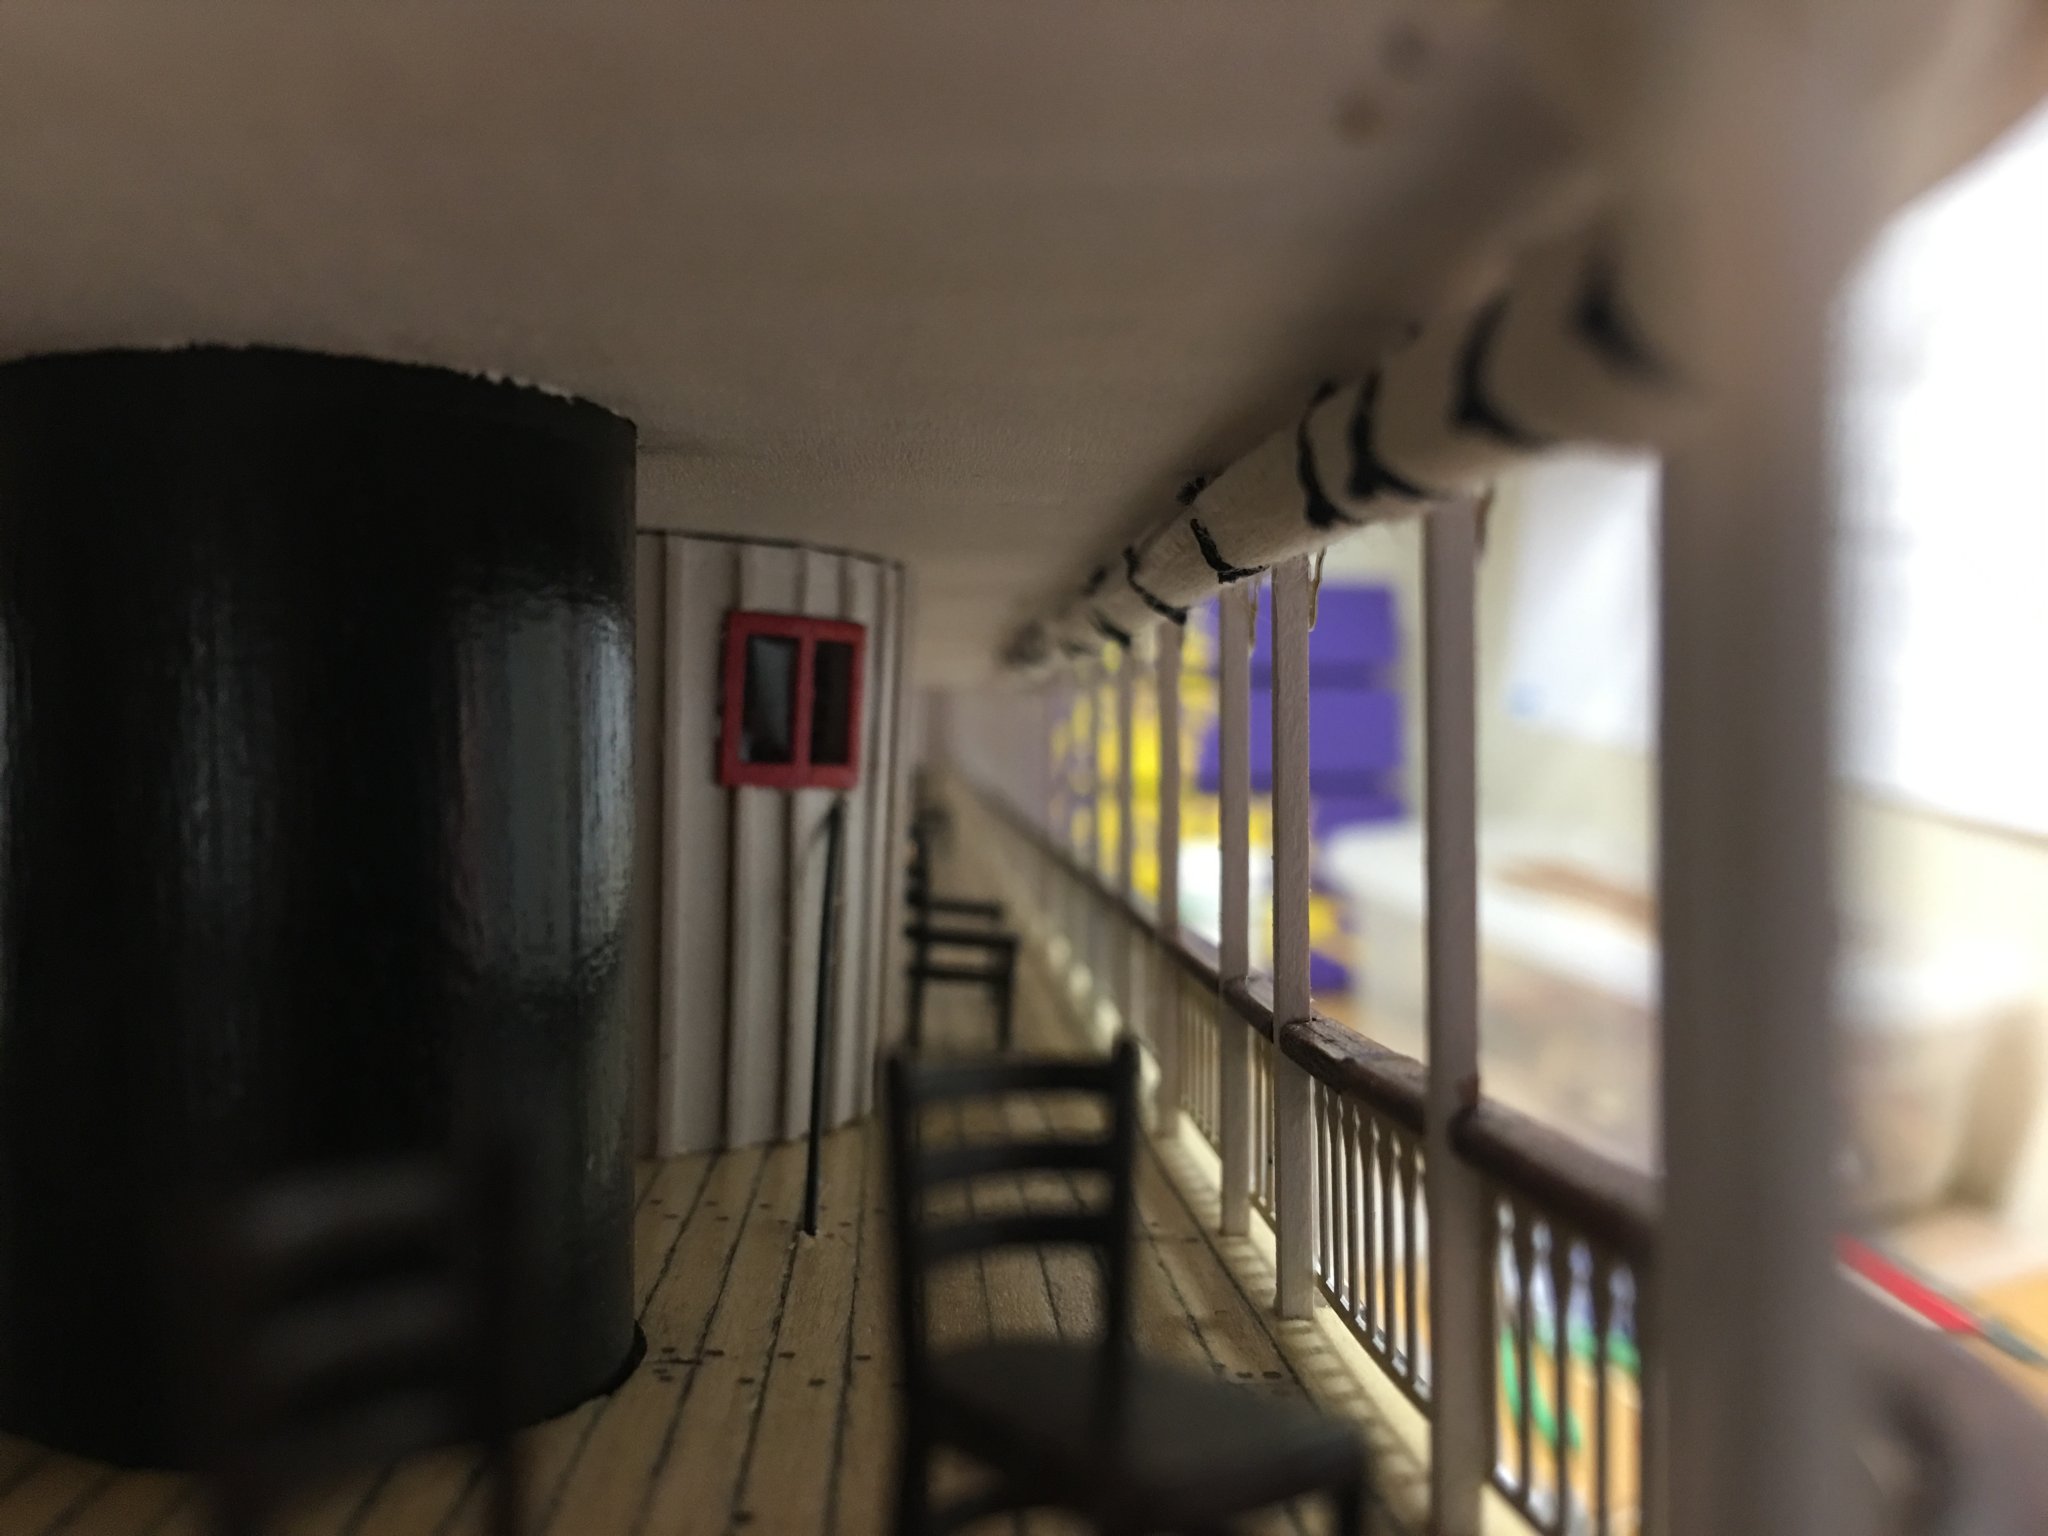
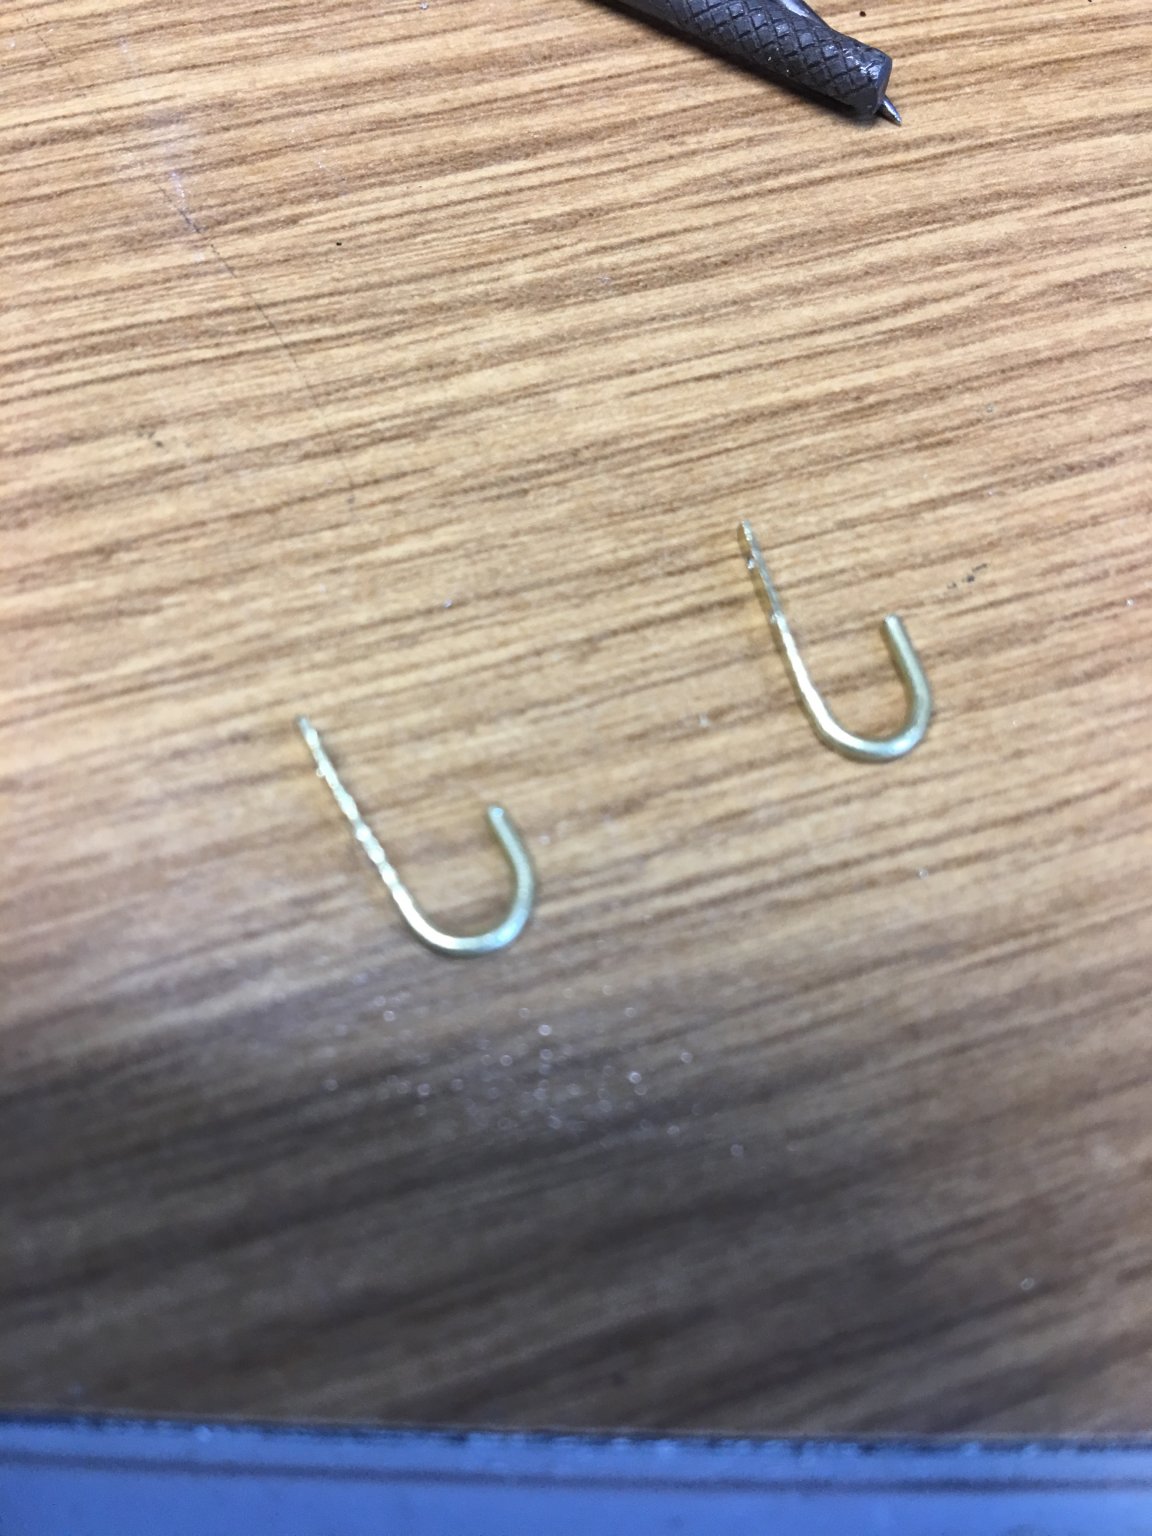
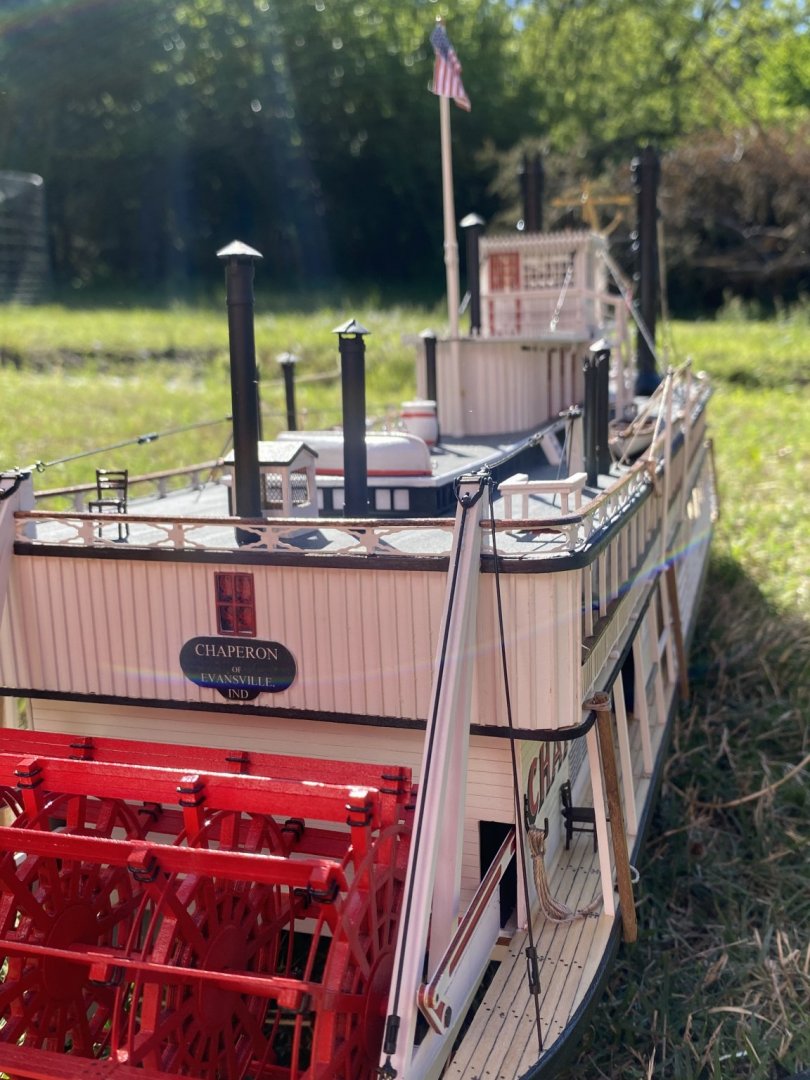
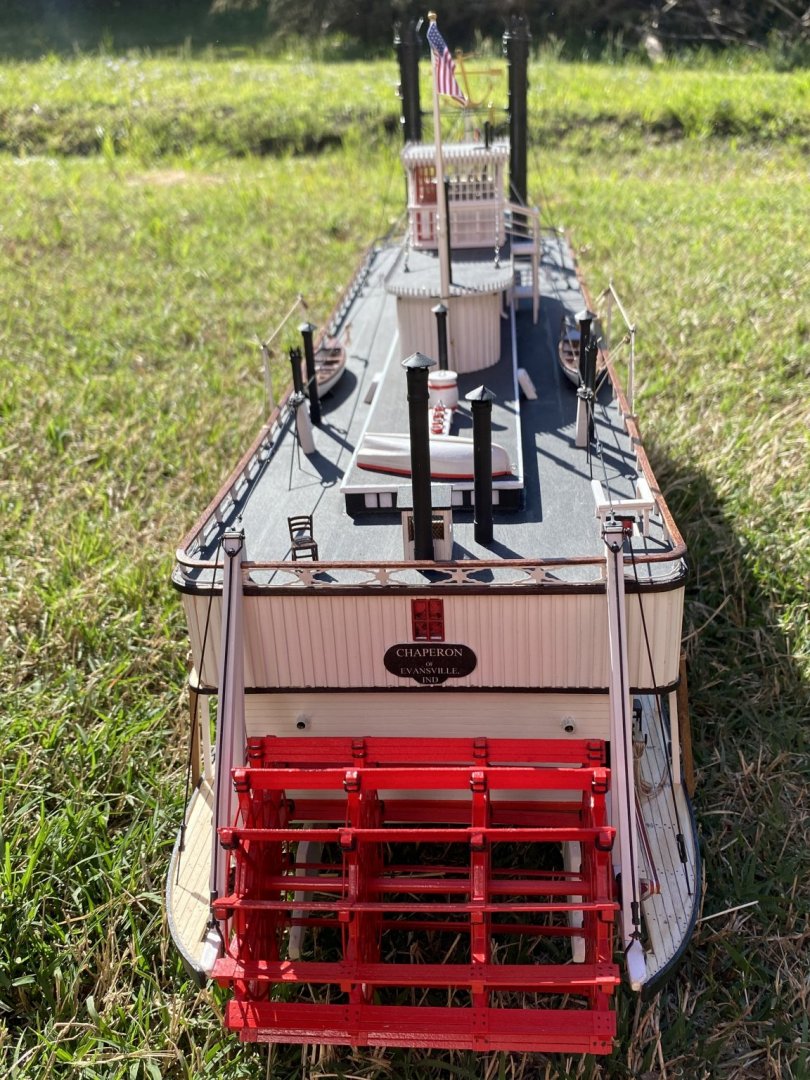
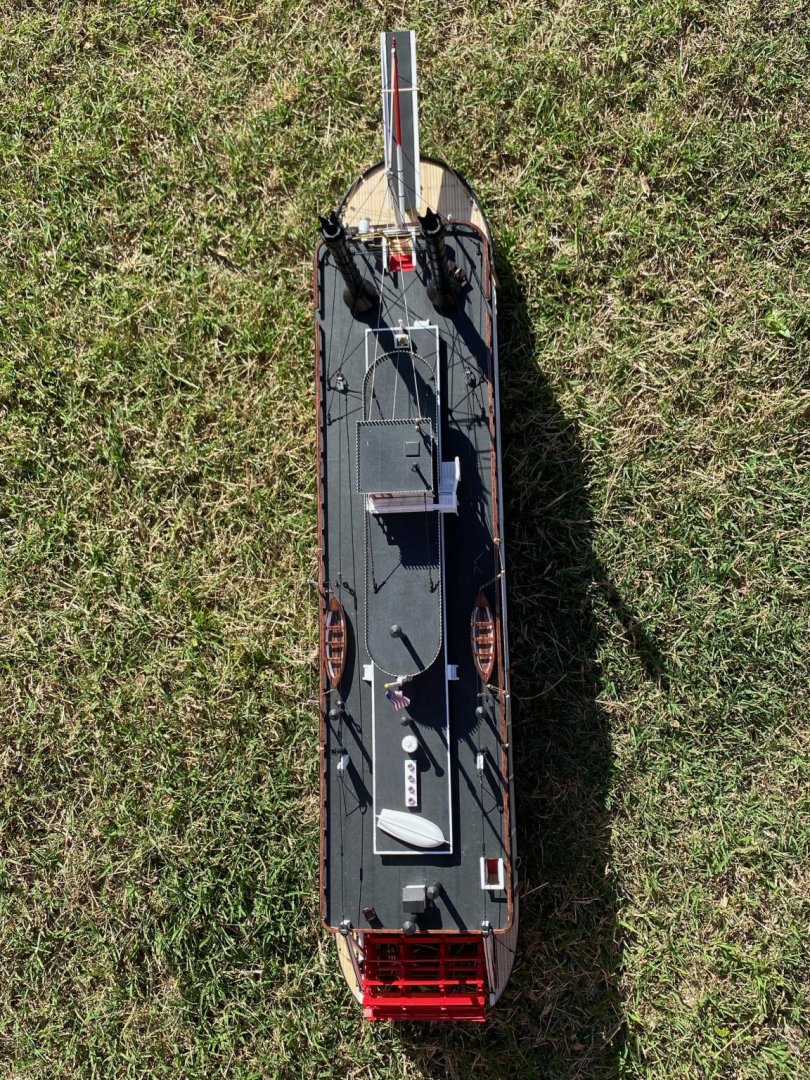
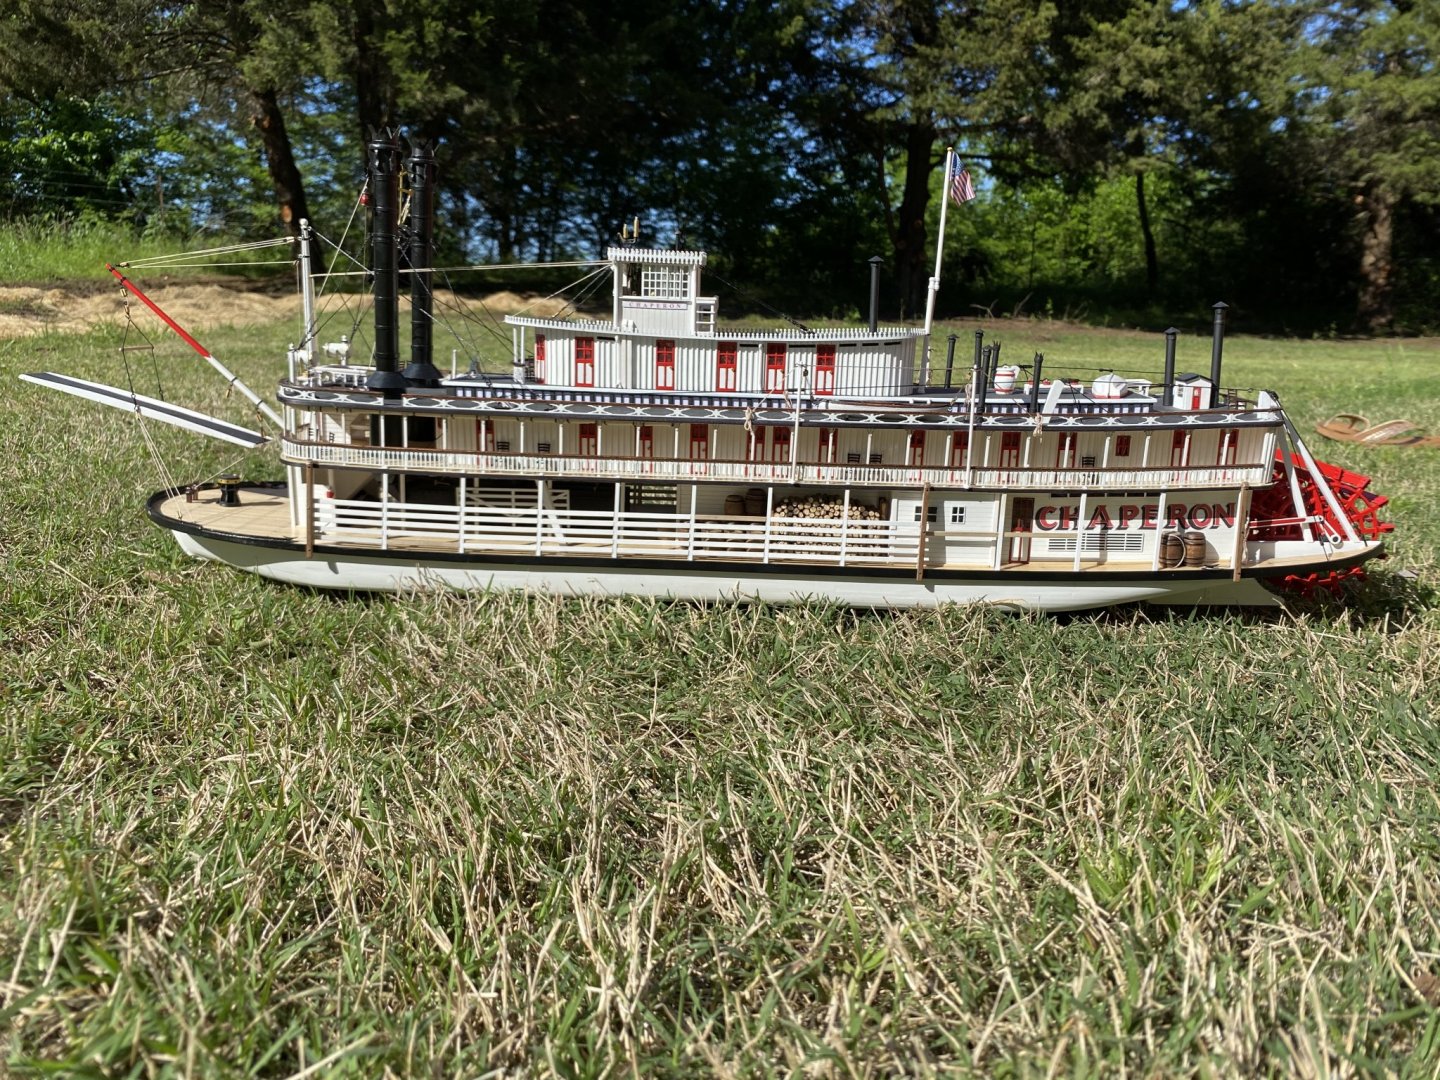
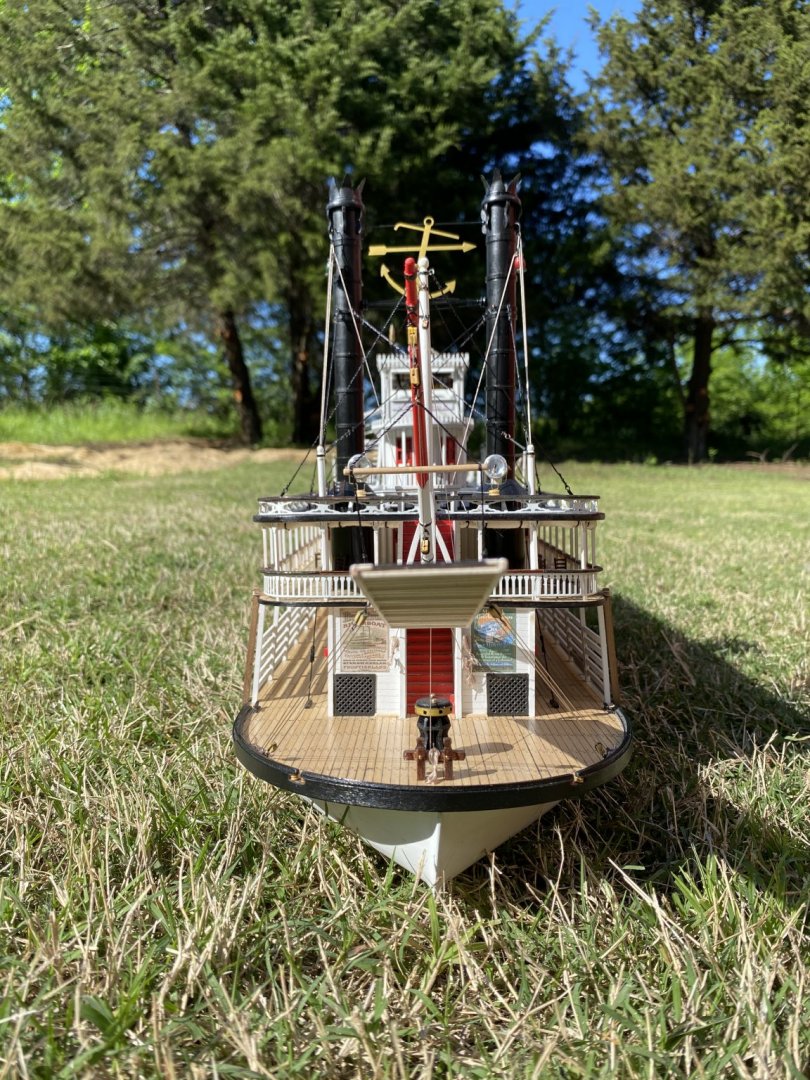
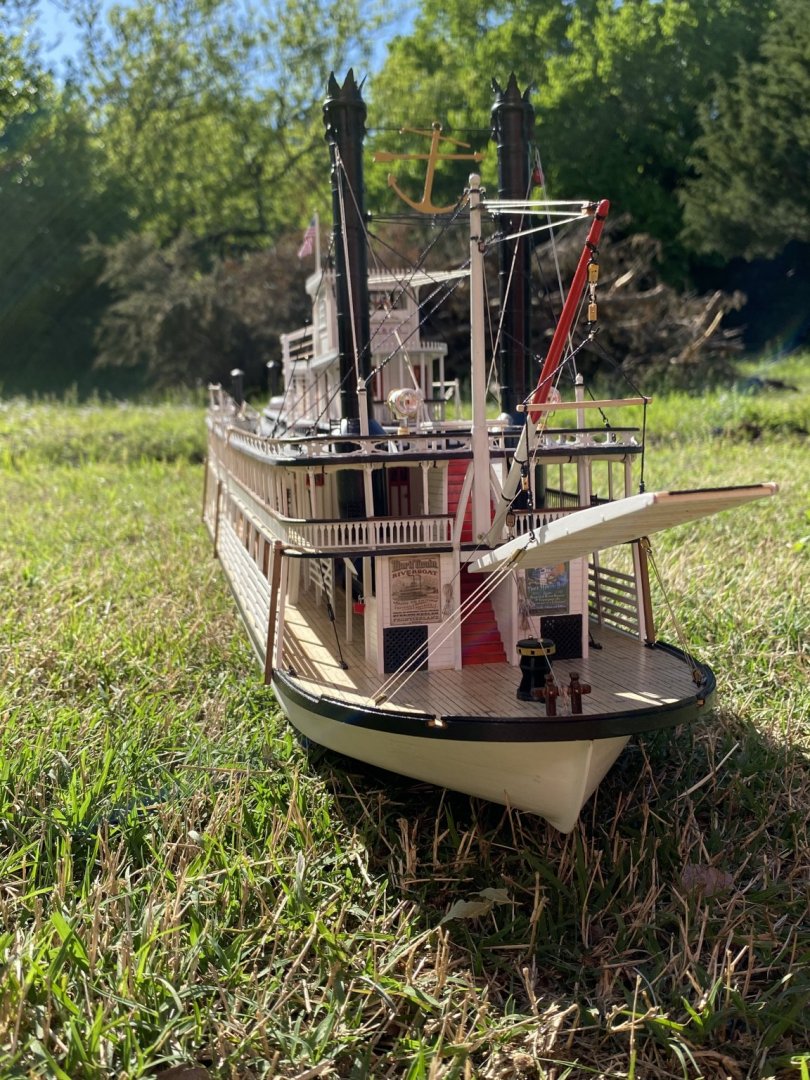
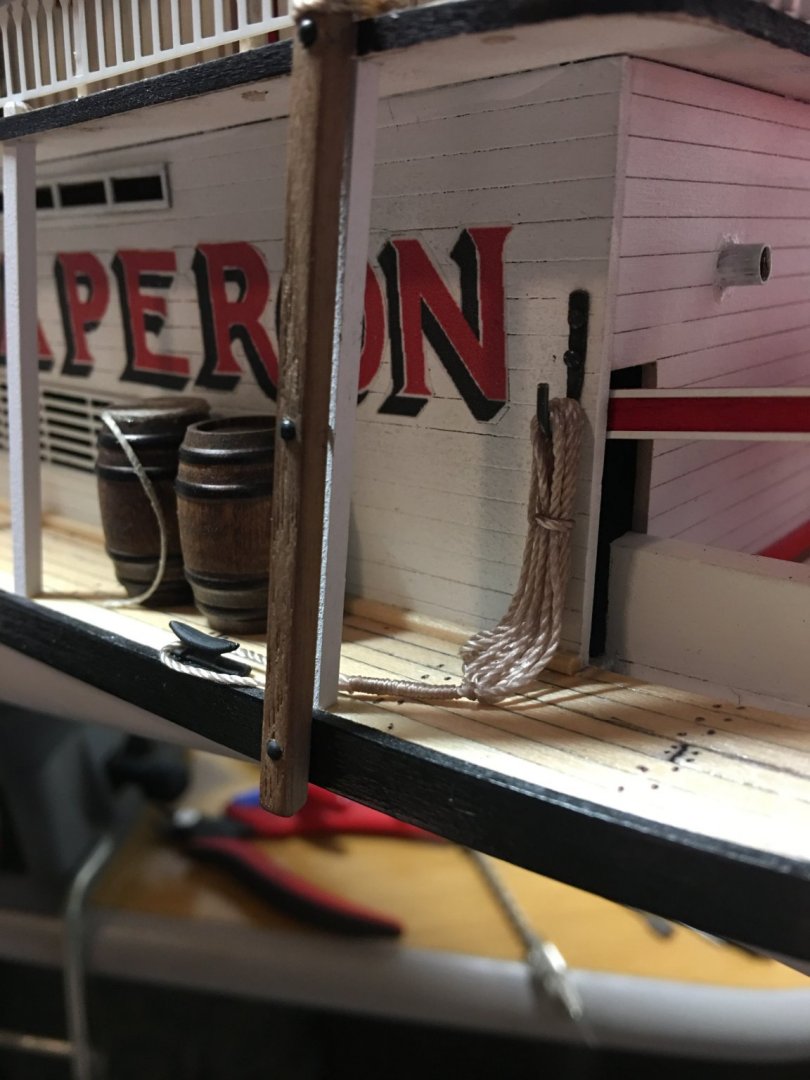
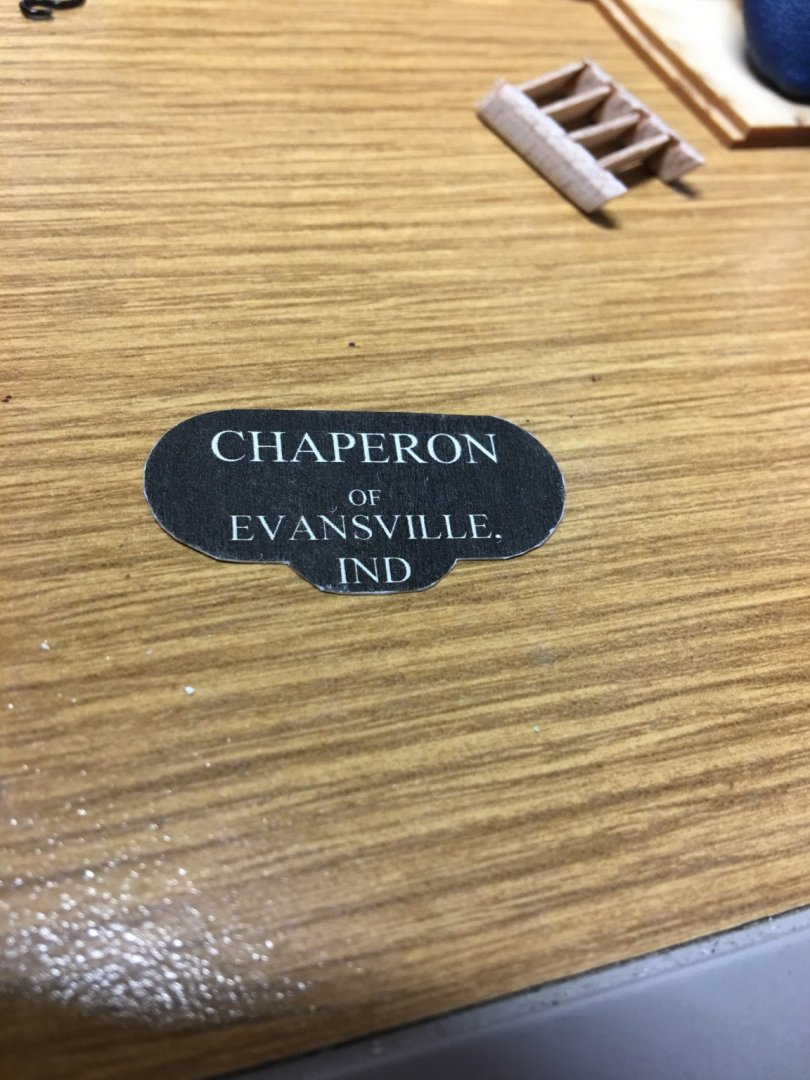
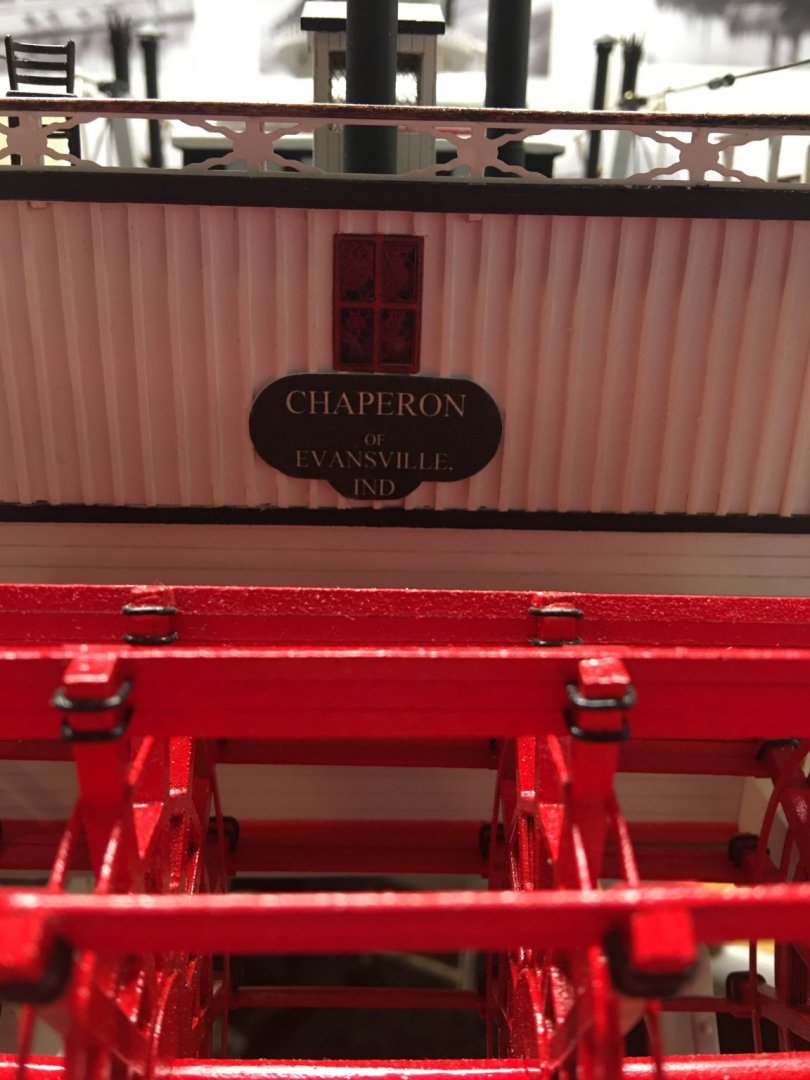
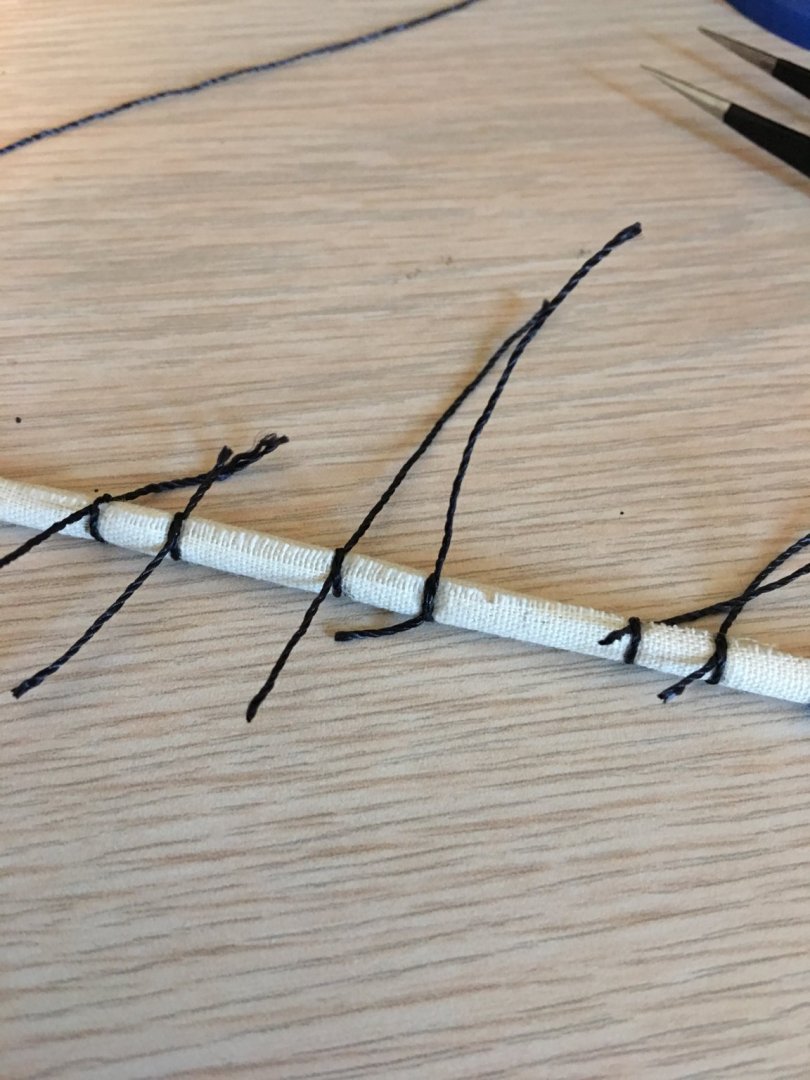
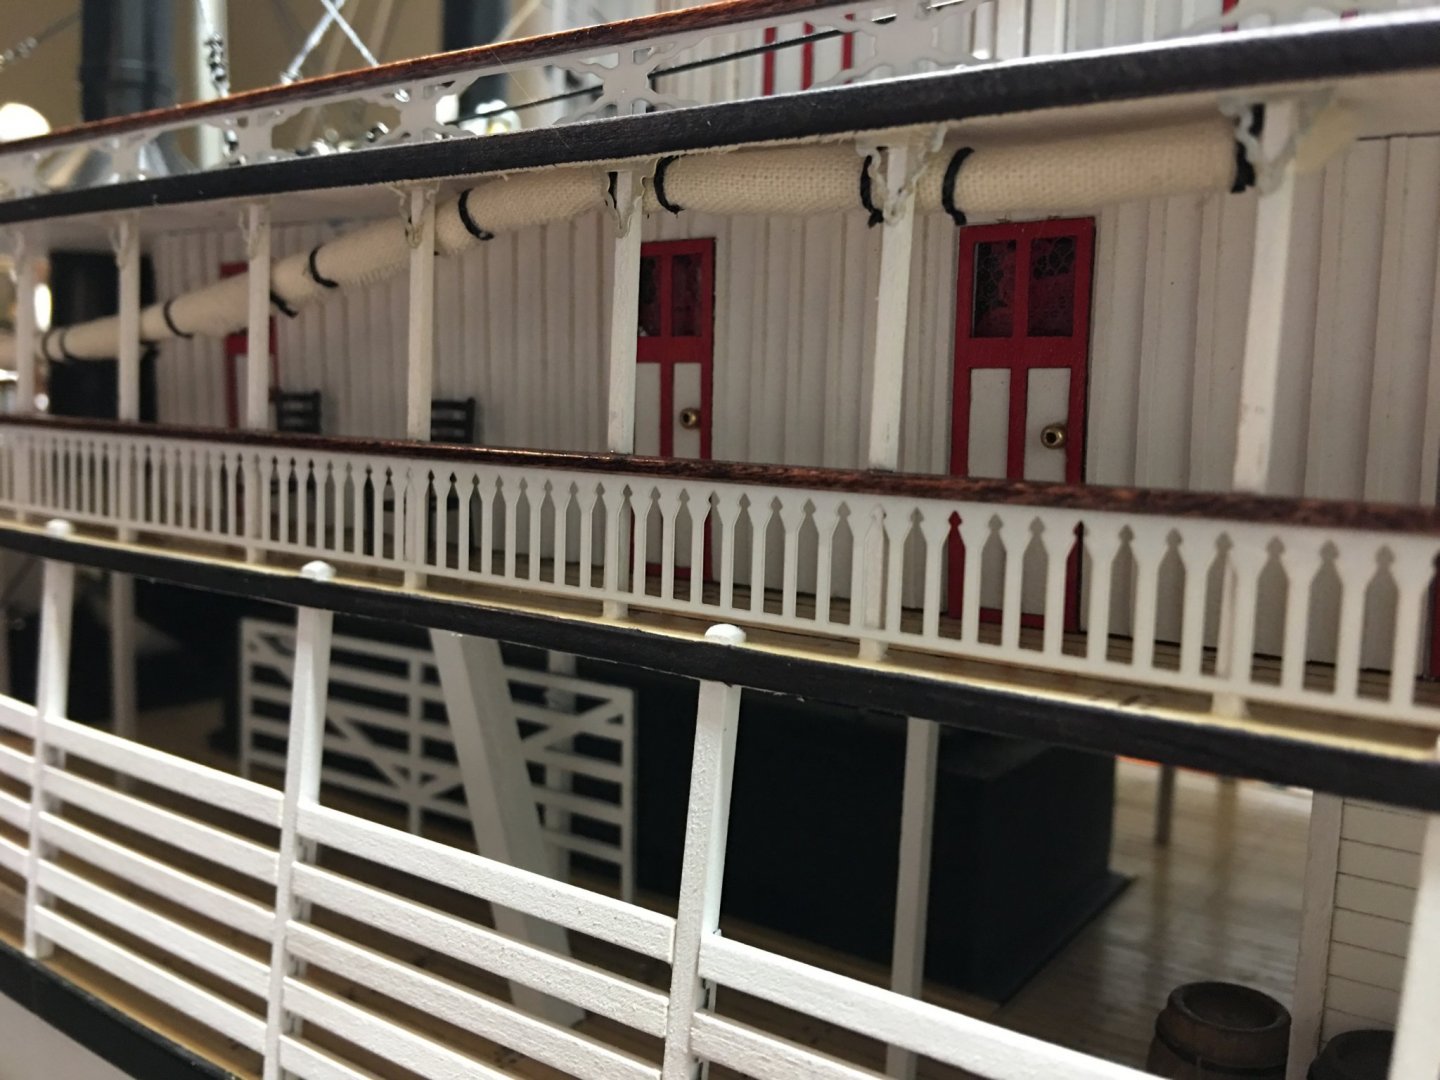
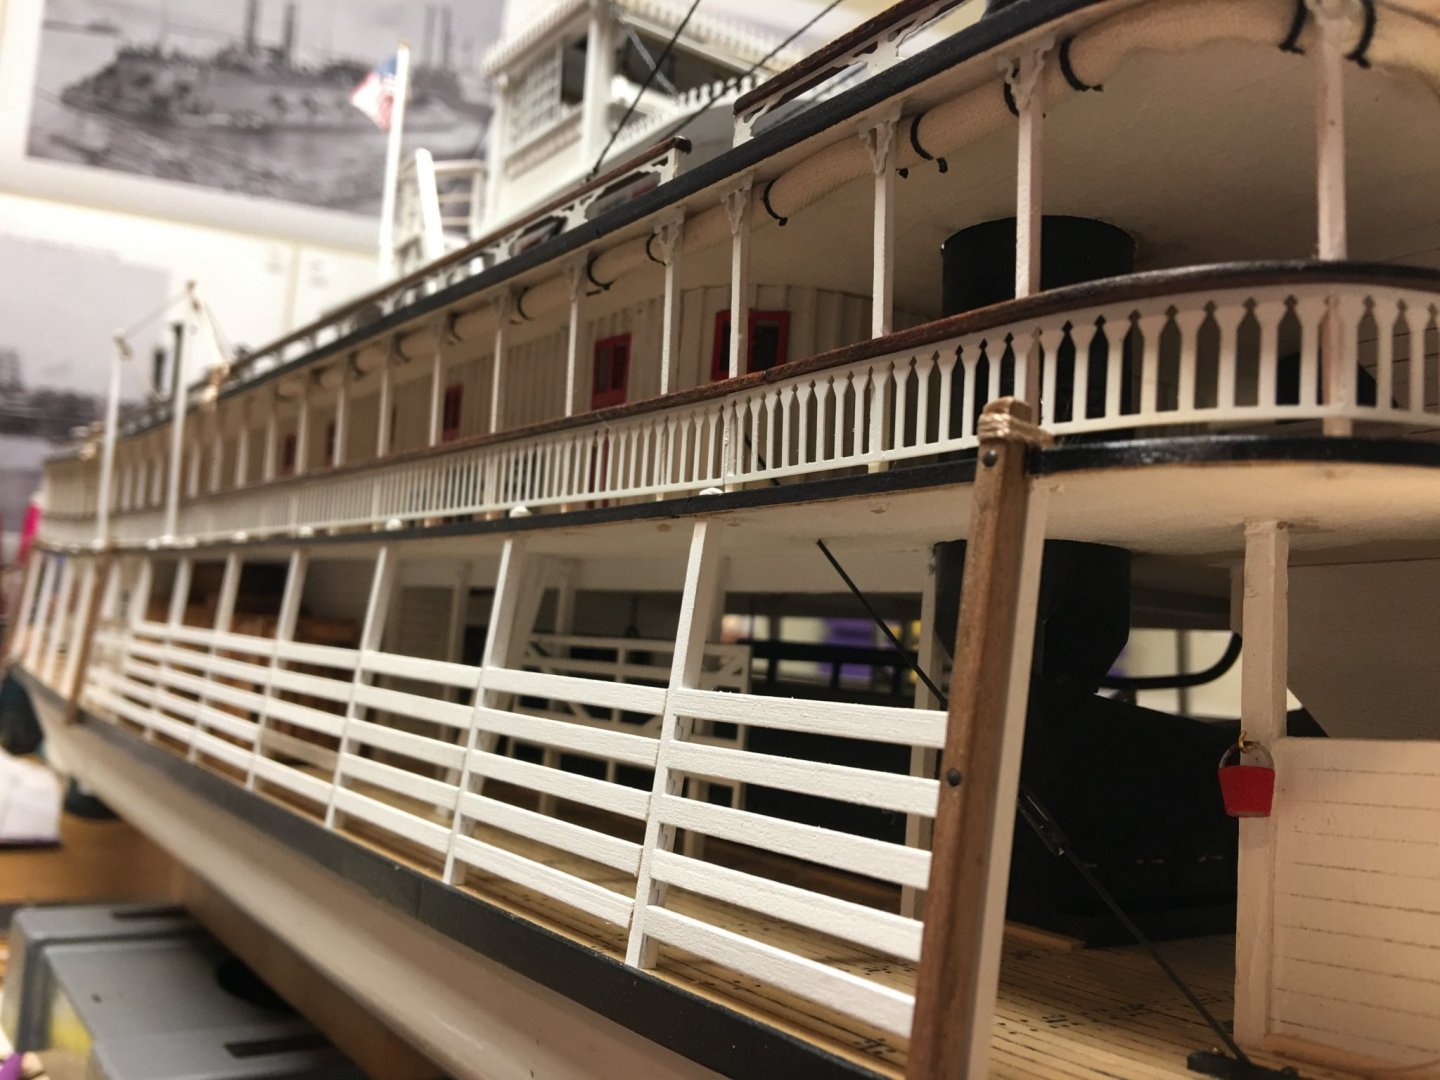
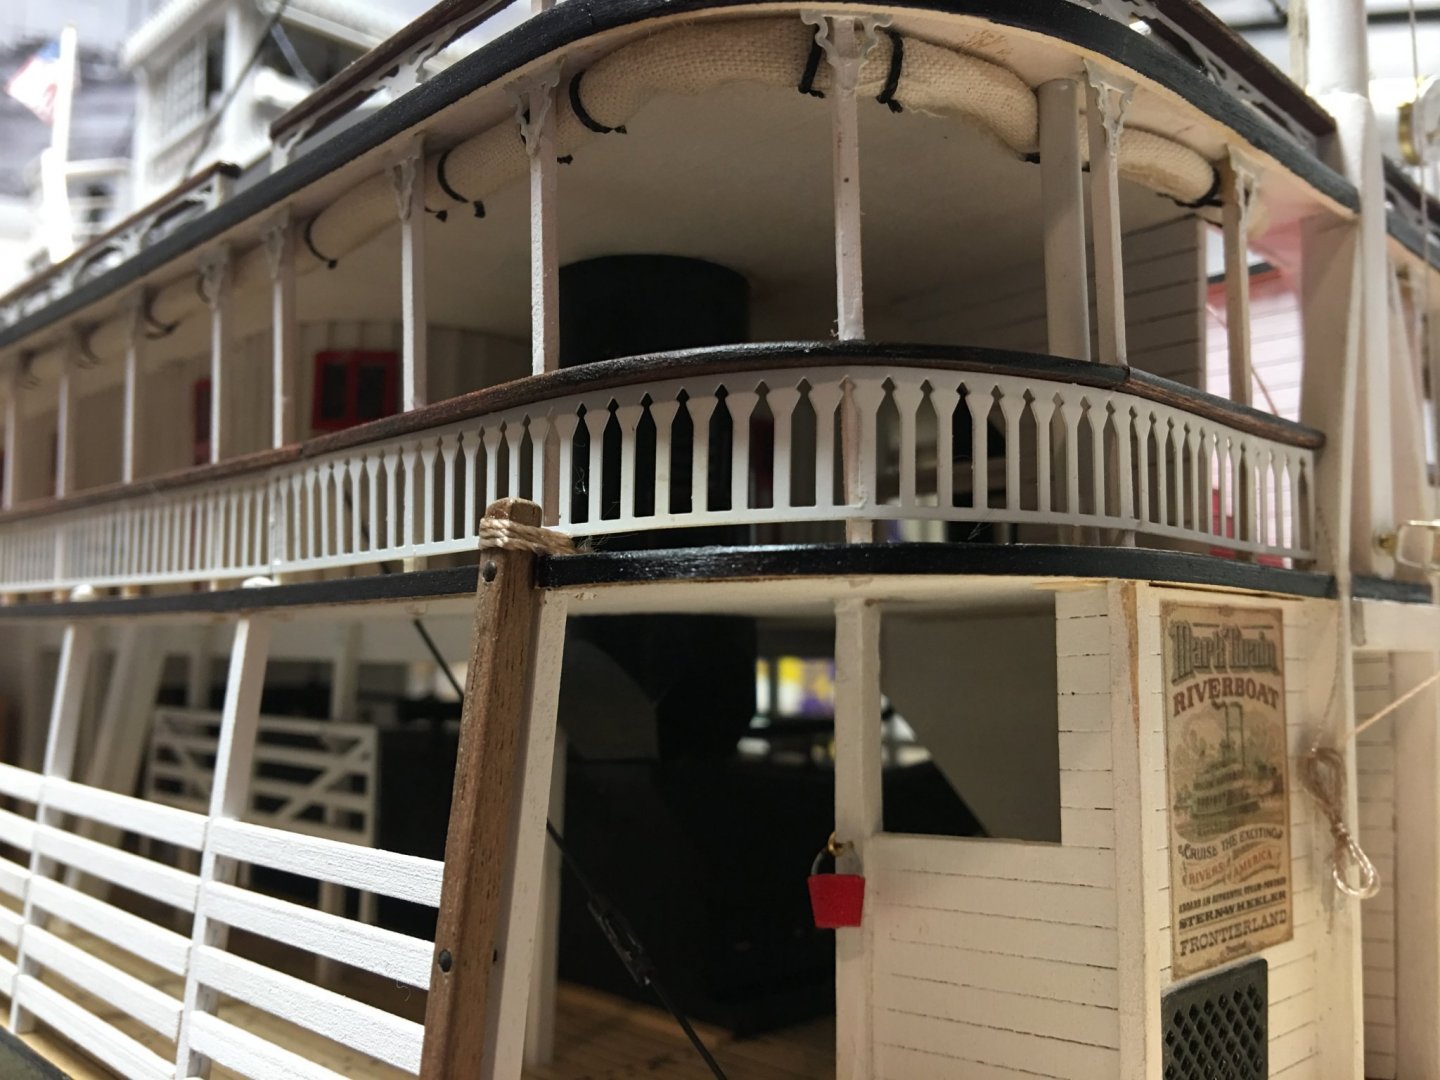
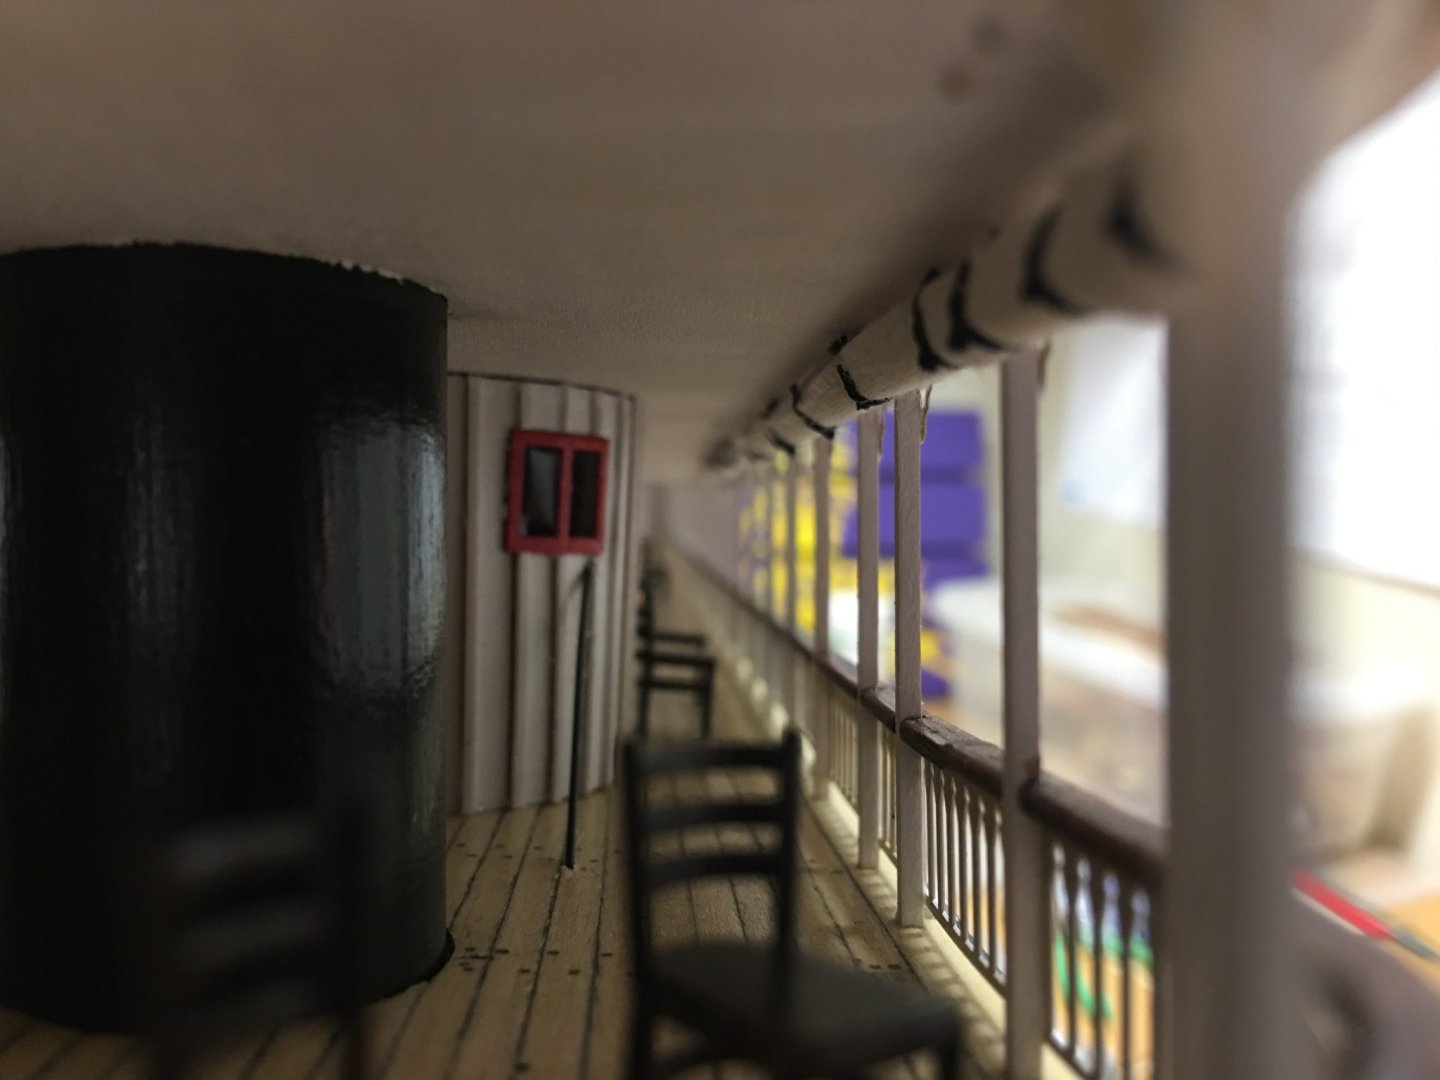
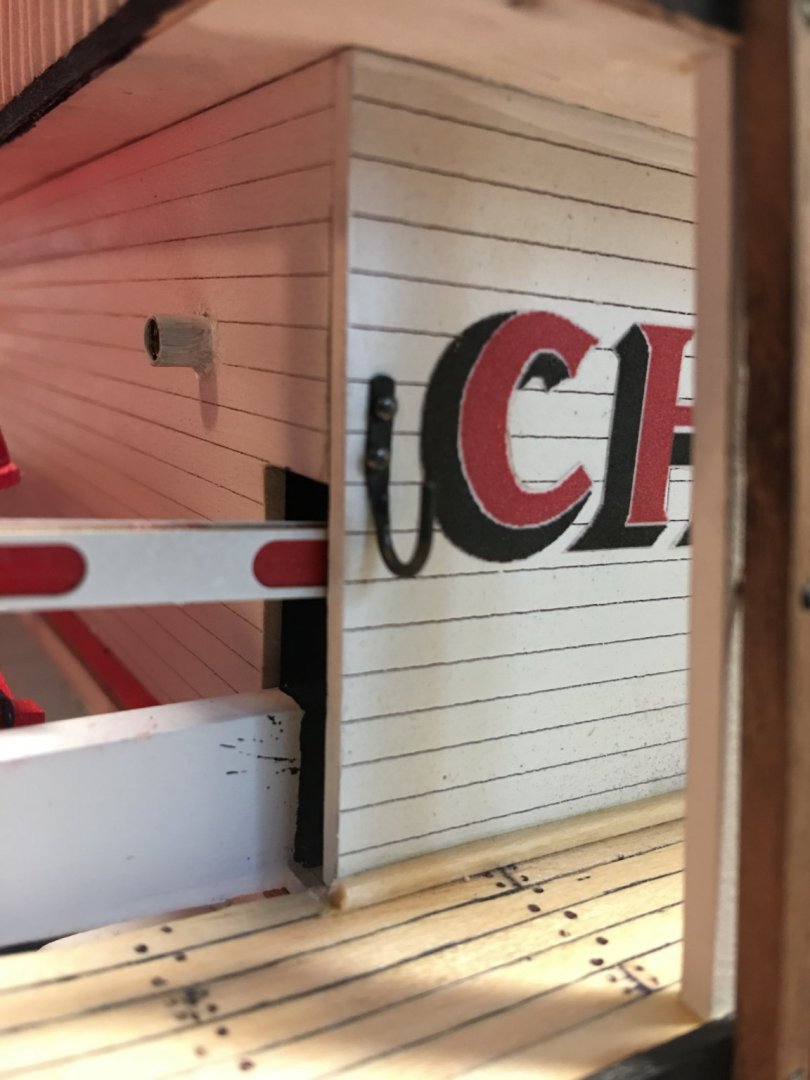
Good Afternoon Everyone, Time for one of my final updates, I've just about go this baby finished. This weeks work consisted of getting the ensign printed and installed. I couldn't come up with an alternative method to make the flag so what I ended up doing was printing it out on standard printer paper. I then cut it out and distressed it on the edge of my workbench rolling over and over on both sides to soften the paper and give it an almost cloth-like feel. I then took some clear Elmer's glue and glued the halves together, then formed it into a semi-waving form. I installed a little brass cleat on the bottom of the flagpole and tied off the lanyard to it. All in all, I think the results looks pretty good. Next I added a couple of rope hooks to both sides of the aft end to store the mooring ropes. For the hooks I used some 20 ga. brass wire, hammered one end flat then formed the hook. I drilled a couple of holes in it for the mounting bolts, dipped in some brass black then mounted it to the engine room wall. I made up a couple of rope coils from some heavy string and washed it down with some diluted clear Elmer's to hold it in a natural hanging position. I also seized a tie loop on one end and looped it around the aft cleat. Another detail that I added was the name placard that is mounted on the aft end just above the paddle wheel. Judging by some of the old photos, this was a detail that looks to added some time later on, as not all of the photos have this detail. Since my build is somewhat of a cross between an earlier version and later version of Chaperon, I figured I'd go ahead and add it. The sign I printed on standard printer paper, then with a little spray adhesive, I glued it to a piece of thin polystyrene sheet then cut it out. I coated the sign with some Mod-podge for protection and a little CA was used to mount it in place. Lastly, for the surprise detail that I added was sun screen/shade that was mounted on the Boiler Deck to keep passengers shaded during the hot summer days. I know it's nit much, but thought it was a nifty little detail that add some character to my build. I had the sail material from my USS Constellation build since I am building it without sails, that I used for the screen. I cut a 1.5" strip and wrapped it around a small wooden dowel. I then marked of the stationaries and installed the ties on either side of them. Once these were completed, I slid the dowel out and mounted the screen in place. From all of the pictures that I found, none of them had the sun screen going any farther down than about a third of the way. My guess was that this was specifically designed to shade the common area in the font of the deck. So just a few more cleanup items and some touch up paint here and there and I will be done. My daughter is an amateur photographer and is dying to do a photo shoot of my completed build. So as soon as I can complete the above listed items and get the pictures taken, I'll get some final pictures posted and close the door on this build. As always, thanks for the kind words, likes and for looking. -Brian


- 133 replies
-
- 7
-
-
- chaperon
- model shipways
- (and 2 more)
-
Eric, I don't think the Model Expo boats come in scales, just lengths. They leave it to the builder to get the correct size in relation to the scale of their build. One option you could go with if the scaling of features isn't right is to cover the boat with a tarp. I've seen this on several builds and it looks great. The boat I used on my build I wasn't real happy with the way the insides looked so I just turned it upside down and mounted it keel up. Just a couple of suggestions. I'm sure with your expertise and inventiveness you'll come up with something that will definitely look great. -Brian
- 599 replies
-
- 5
-
-
- sidewheeler
- arabia
- (and 4 more)