HOLIDAY DONATION DRIVE - SUPPORT MSW - DO YOUR PART TO KEEP THIS GREAT FORUM GOING!
×


rodgerdodger
-
Posts
95 -
Joined
-
Last visited
Content Type
Profiles
Forums
Gallery
Events
Everything posted by rodgerdodger
-
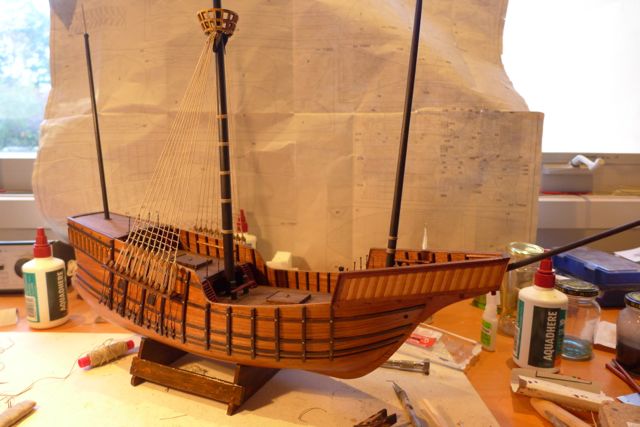
 Since my first posting on this log on April 1st I have pressed on with the model and have completed the standing rigging and completed most of the deck fittings including the rails on the rear deck which add a but of interest. The rigging thread supplied with the model was of good quality although synthetic, but the rope size was too small in my opinion. It might have been to scale but I reckon it is preferable to oversize the rigging, particularly the mast shrouds, as it is a major feature of most period models. I replaced it with hemp rigging thread. When it arrived it wasn’t quite what I expected as is often the case when you buy on the web. But it is very nice to work with and does not have the fuzziness that I have experienced with other natural fibre ropes. The deadeyes and blocks supplied with the kit were of good quality and in a colour that suited the model. However the deadeyes were all one size as were the blocks. Smaller deadeyes would have been preferable on the forward and rear masts, and I had some spare blocks of smaller sizes to use where suitable.
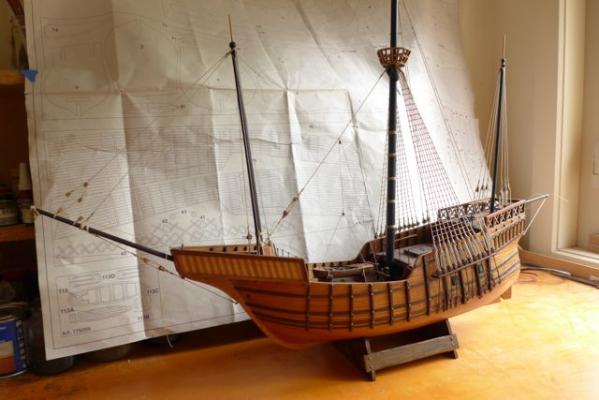

- 39 replies
-
- 2
-

-
- santa maria
- mantua
- (and 1 more)
-
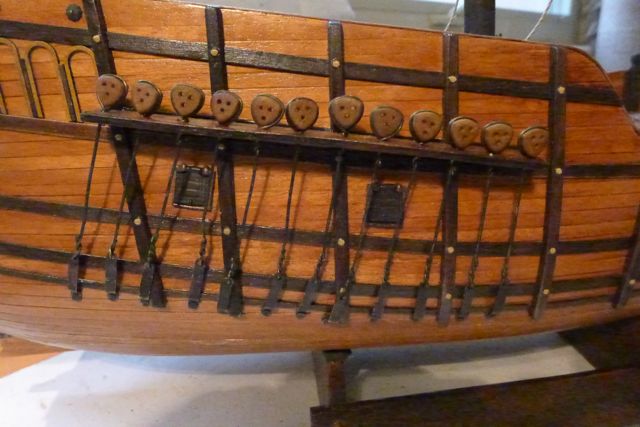
Good to hear from you CaptainSteve. I suggest the Santa Maria will be a cakewalk after the Constitution! The installation of the deadeyes and chainplates was not an easy task and the result was very disappointing. Measuring the correct length of wire and twisting in place was tortuous. There has to be another way and after some thought I reckon there is but that will have to wait for the next model. I will work on straightening the wire ties when the model is finished. Fortunately when you stand back from the model this feature is not the one that catches your eye, and my son will forgive me I am sure. Note that I have substituted AL metal gun ports for the printed timber ports provided by Mantua.

-
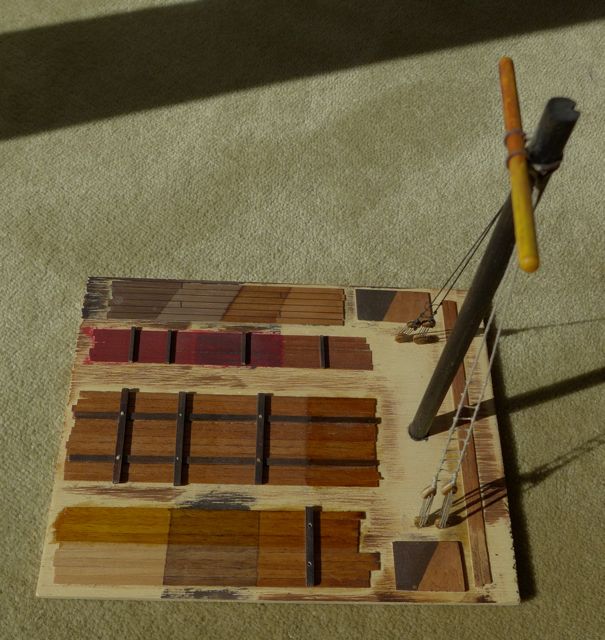
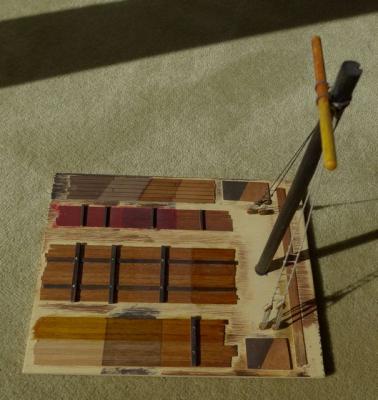
I prepared a ‘sample board’ at the start of the project to test colouring and finishing the timbers for the deck and hull planking. Seemed a good idea but the finished product was very dependent on the porosity of the timber (effectiveness of sealer) and a consistent method of applying the colouring or stain. Also mocked up a piece of rigging to check on the suitability of the cord provided with the kit. Decided that the size of the cord was inappropriate for the job and decided on a substitute mentioned later.
- 39 replies
-
- 2
-
-
- santa maria
- mantua
- (and 1 more)
-
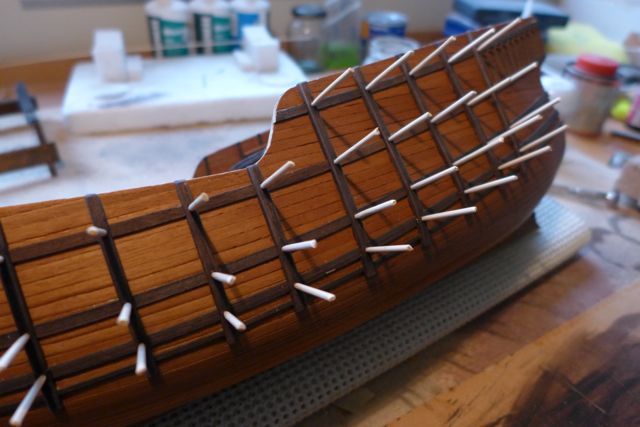
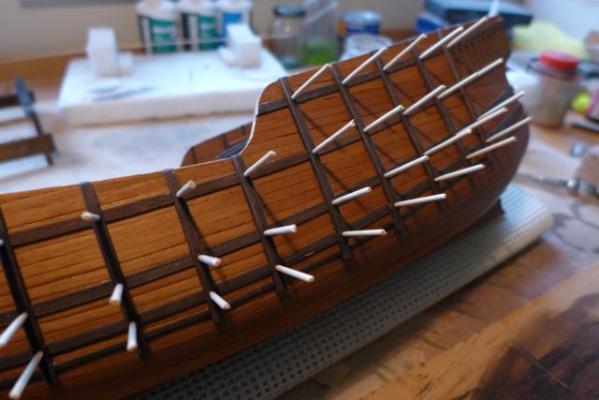
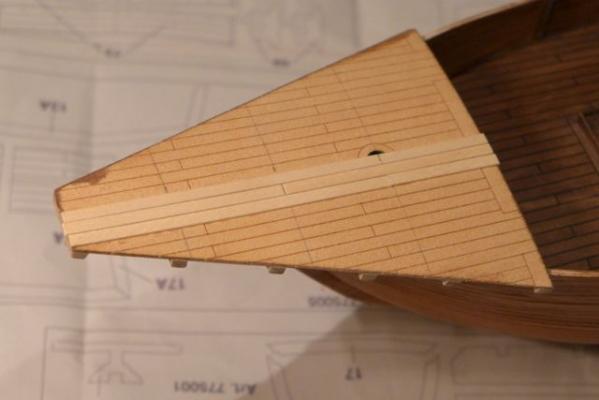
I decided to add trenails to the fenders where crossing the walers. I took the quick and easy route of drilling a 1.5mm hole at each location and inserting the tapered end of a toothpick until seated neatly. I then nipped the excess off and sanded the trenail down to as close as I could to the surface of the fender. I then touched up the small defects on the hull that had arisen during the building process (mainly colour corrections) and finished the hull with two coats of satin polyurethane. I tossed up between matt and satin but to my way of thinking the sheen of the satin finish gives the boat an added antique look. The polyurethane brought out the colours beautifully and encouraged me to keep going. I need to work on my photographs to give a better idea of the look of the finished product.
- 39 replies
-
- 2
-
-
- santa maria
- mantua
- (and 1 more)
-
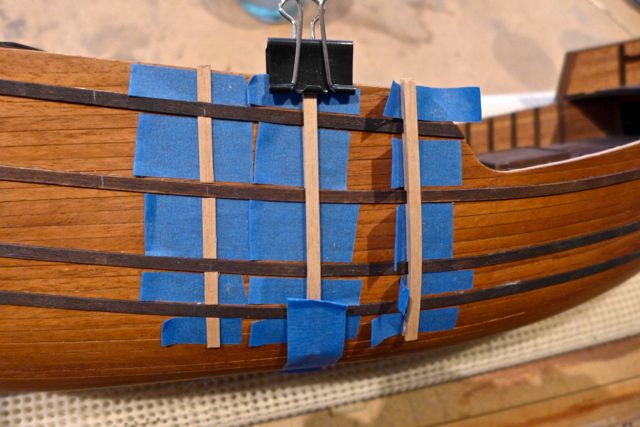
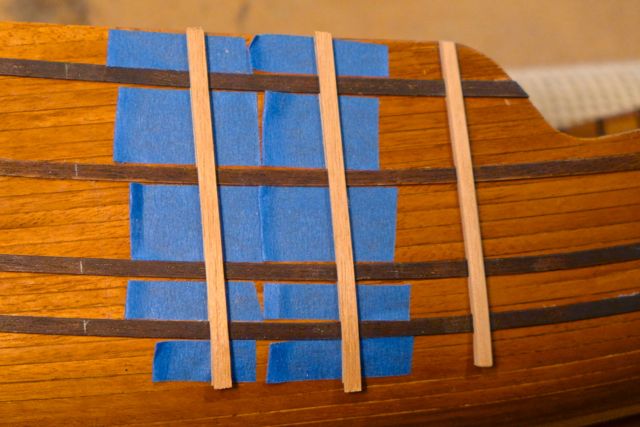
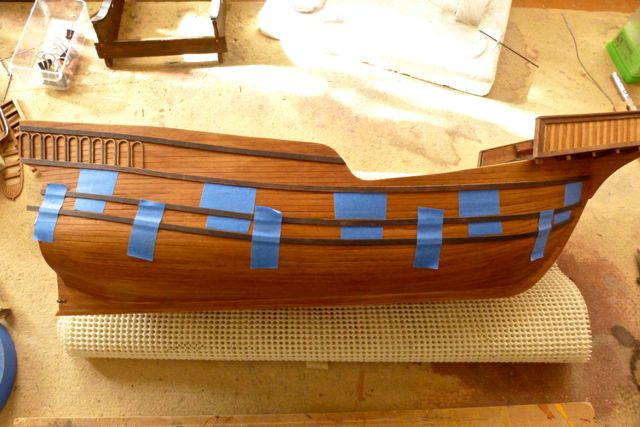
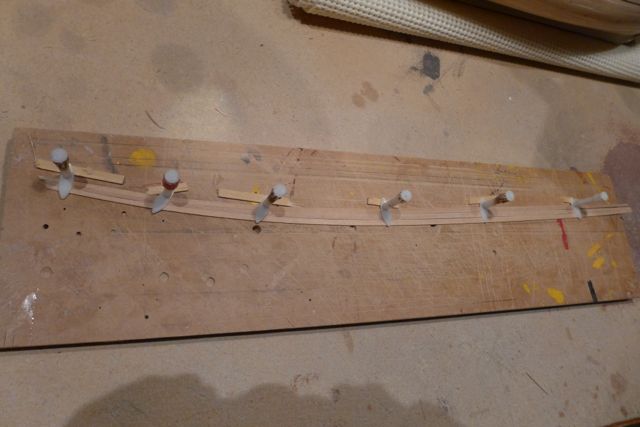
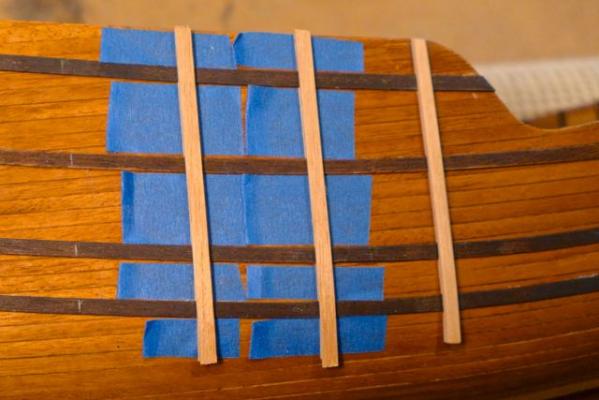
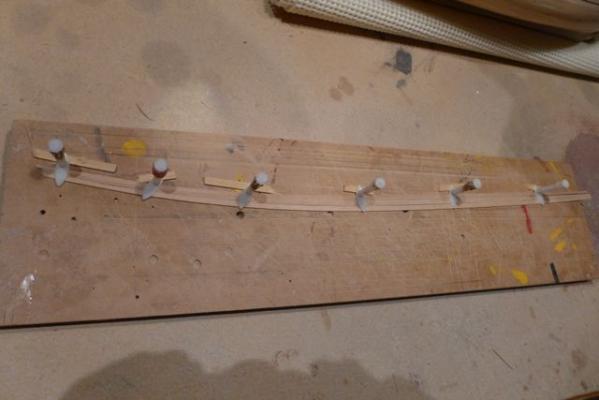
Next step was building the vertical fenders (if that is the correct term – I can’t see them serving any other purpose). The fenders are laminated in three layers from the same material as the second planking. Laminating is necessary to form the fenders to the curved hull. The instructions with the kit expect you to build the fenders in place, but I wanted to be able to finish them neatly by sanding the edges and sides plus colour them in a different colour to the hull. The attached picture shows the stages in completing each fender. The left fender is at the stage when the first lamination is tacked glued to pieces of masking tape stuck to the hull. The center fender has the next two laminations in place and clamped while setting. The right fender, after allowing sufficient time for the glue to set, can now be lifted off the hull by peeling of the masking tape (gently!). The second picture shows the RH fender in position (but not fixed) after sanding etc. The centre and LH fenders are ready to be lifted from the hull.

-
Thankyou Marktime - delighted to hear you find it of interest and I am not talking to just myself after all. After staining the hull I continued with completing the forecastle deck with no hiccups. I used two different timbers to give the stripe effect that I have seen on another version of the Santa Maria. Adds a bit more interest. The walers (if that is the correct term – I haven’t had time to check) are from the same material as the 2nd planking. Again wetted, set to the required curve and dried on a board before gluing in place. Slow but worth the effort. The walers were stained with coulour wedge. It is a pain trying to draw lines on a curved hull when setting out the walers so I used pieces of masking tape to define the position of the waler before fixing into place. The decorative arches at the stern supplied with the kit are a bit whimpy but I didn’t want to spend the time looking for alternatives. I am keen to get the model finished asap. Needless to say when first installed they didn’t cover the distance required – could have done with one more arch each side. Corrected the situation by adding a 1mm sq bead between each arch.

- 39 replies
-
- 1
-
-
- santa maria
- mantua
- (and 1 more)
-
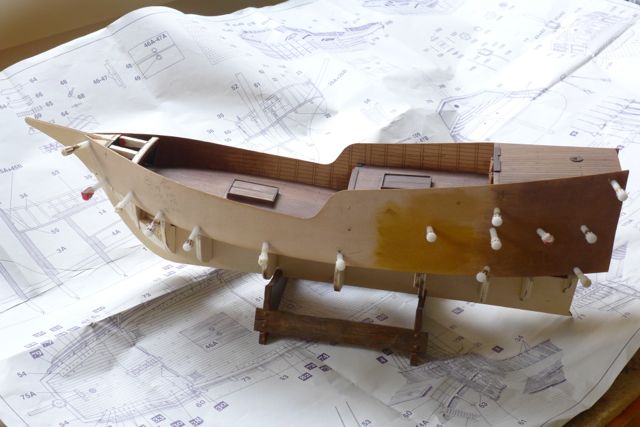
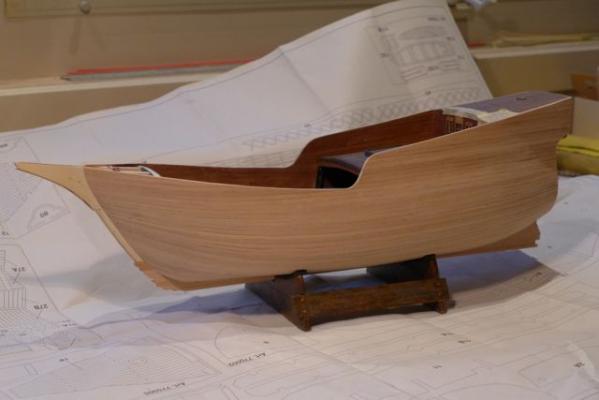
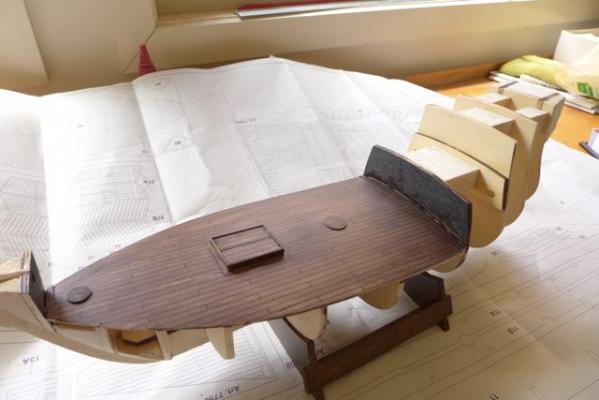
View of hull after completing 2nd planking, sanding, sealing and colouring with walnut stain. Installation of forecastle deck underway and new planking over the printed deck panel.

-
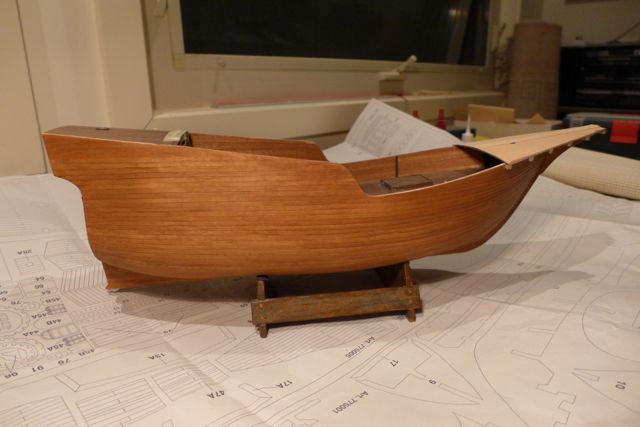
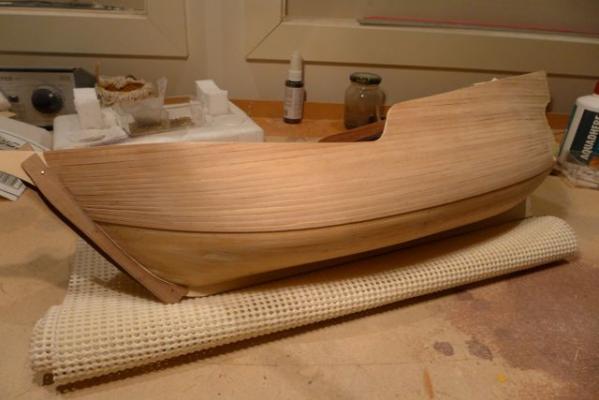
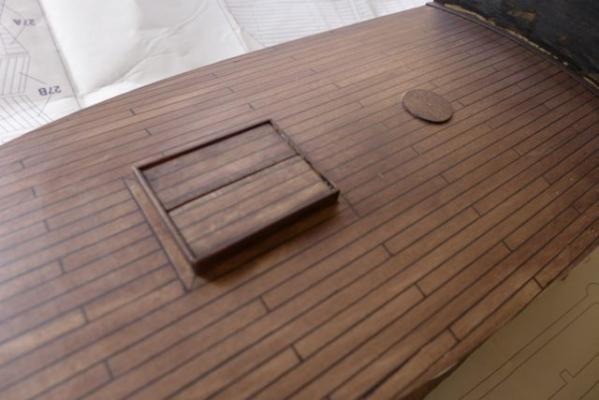
A view of the completed 2nd planking. I chose not to sand the planking too much to keep a more natural look in the finished product. The finished planking to the inside face of the bulwarks can be seen in this view.
-
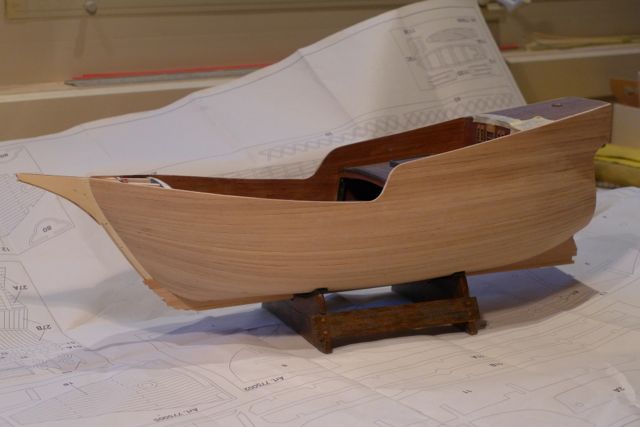
After the fixing of the bulwark panels the next task was to fix the first layer of planking below the panels down to the keel. The material supplied with the kit was 2mm thick balsa strips, far too soft and brittle for the task, so I again ordered some replacement limewood strips. The 1st planking was completed in the conventional manner without too much difficulty. The 2nd planking provided with the kit was supposedly walnut strips but the colour seemed too light for walnut. However it served my purposes as I intended to colour the planking anyway. Instead of commencing the planking with a horizontal plank at the deck level, as is usual for most models I believe, I chose to curve the planking at the bow to keep as closely as possible in line with the top of the bulwarks. If I had used a horizontal plank I could see myself running out of room in the bow area for a full or half plank as the planking reached below the water line. I managed to complete the planking with planks no less than 50% full width, but only just. To curve the planking in this manner I had to pre-set the plank by wetting the plank (after tapering), and setting on a board to dry using the threaded drawing pins again. It made less work when it came to gluing the plank to the hull keeping it in place while the glue set. To pin the plank in place at the bow I use a piece of timber fixed to the keel profiled to the shape of the curved hull. The plank fits tightly into the gap between the timber piece and the hull avoiding the use of pins or whatever. I have used standard PVA for planking in the past but I recently discovered that there is a faster setting version of PVA ideal for this operation.
- 39 replies
-
- 1
-
-
- santa maria
- mantua
- (and 1 more)
-
The kit came with preshaped bulwark panels in a laminated material similar to the deck panels. The material was very suitable for the job being flexible enough to fit the curves with out having to apply too much pressure. Fitting the panels still required a lot of trial assemblies, sanding etc to ensure a correct fit between the panels and the deck. In preference to using clamps, which is made difficult by the shape of the hull and non-parallel surfaces, I used what are in effect threaded drawing pins. I carefully located the bulwarks, marked the position and predrilled the bulwark and hull frame for each pin. Having glued the frame, the bulwark was located in the correct position with a single pin and it was plain sailing from there on. The deck side face of the bulwark panels was preprinted with the planking. I chose to plank the inside face of the bulwarks with some spare 0.5mm walnut strips. The colouring on the outer face of the bulwarks was a trial of using stains. The material acted like blotting paper which is another reason I decided to plank over the printed layout.

-
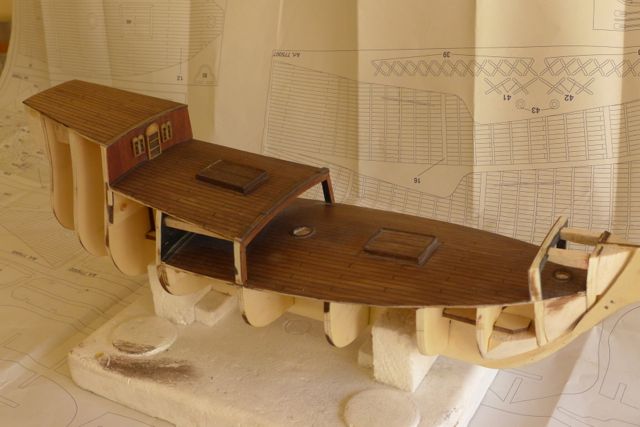
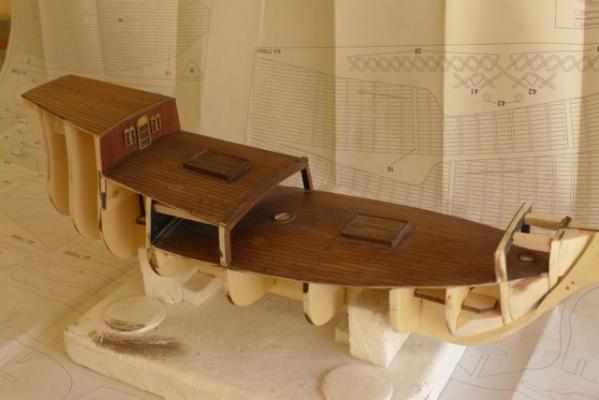
Mid and upper rear deck levels now completed and preparing for the installation of the bulwarks. At the locations where there is a portal frame to support the mid-level stern deck and the forecastle deck the hull frames were extended to provide fixing for the bulwarks. I removed these extensions to be able to properly plank and finish the lower deck. I then cut out two new portal frames and fixed them in place supported by some scrap timber back to the adjacent hull frame. This proved worthwhile as the assembly is subject to a lot of manhandling when it comes to fitting the bulwarks.
-
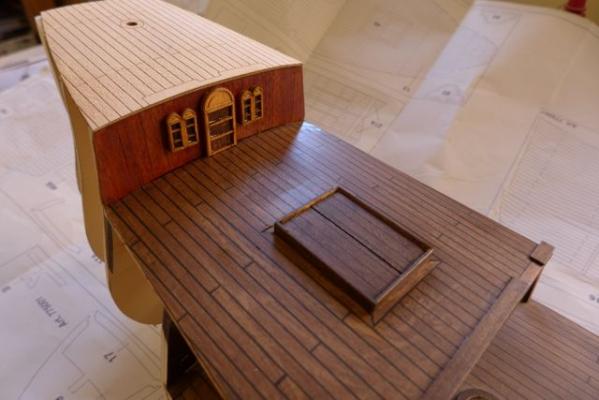
Now working up the stern deck levels, finishing each level before working on the next, and adding details along the way (door and windows to capt’s quarters) for ease of access. Note upper stern deck not yet replanked. The problem as always is protecting finished surfaces as you progress and I have no easy answer for this.
-
Opening a new kit is always an exciting moment - some of us just don’t grow up. And as always there are surprises and disappointments. There are some good things about the Mantua kit and some bad and these will be mentioned along the way. The assembly of the false keel and hull frames was relatively straightforward, the laser cut components being well done in good quality ply. However the components were fully interlocking and it was necessary to completely assemble all the components before applying any glue, making the alignment and squaring of the frames tricky. Nothing that can’t be sorted with a bit more sanding etc. The first photo shows progress after the lower deck is in place. Note the filler blocks in the bow and stern – not mentioned in the instruction manual (pictures only) so difficult for the first time builder. Secondly note I have used filler blocks between the frames. These give the hull torsional strength that is valuable when planking. Once had to recommence planking after realizing the hull was twisting out of alignment as the planking progressed. The decking was pre-printed on a thin ply type material which had a fuzzy surface and the jointing disappeared when sanded. Anyway a printed deck is not for the serious builder so the first step was to order replacement decking that was another unwanted delay. I wanted to build an ‘old looking’ model of an old boat so I planned to colour the deck (and planking etc.) with stains instead of relying on the natural colour of the wood. But this meant I had to complete each deck level as I proceeded as access for sanding colouring etc was not possible after work proceeded on the next deck level or when the hull sides were in place. So in this shot the lower deck has been completed. Planked in limewood (straight , clean edges, easy to work with), joints formed using a plastic sheet to maintain constant joint thickness, joints filled with an ebony wood filler, sanded to highlight the joints, sealed (to prevent excess penetration of the stain), stained ‘wedge’, finished with matt polyurethane. The problem was to get colour consistency between the decks. Didn’t succeed 100% but my son won’t notice.
-
Late 2012, after a 6 year or so break from making ship models, I offered to make a model for my son for a table display in his new house. He was quick to accept, but first I had to tell him that a model of HMS Victory was not a good idea as I wanted to complete it in my lifetime. After searching the web as one does these days I discovered MSW, and also how easy it is to buy models etc. on the internet. How things change. I (we) settled on the Santa Maria. Not too big, not too small, stacks of character, unique design, great sail setting and of historical significance, plus a chance of finishing it in a reasonable amount of time. From the kits available I settled on Mantua because of its design although I had not built a Mantua model before. The kit was ordered and arrived Jan 2013. I started work on it with the intent of logging progress on MSW when lo and behold MSW had disappeared. Having worked on several models over the years in the isolation of my workroom I was looking forward to sharing the experience with others for the first time. Not to be but I now see that MSW is back on line and I am now about to graduate from a Lurker to an Officer cadet! I have been working on the model for about 9 weeks now and this is where I am at. I intend to log my progress from the start but I can’t do it all at the one time, and anyway I would rather work on the model than spend time posting too many logs logs. Like reading a good book, once you start it is hard to put it away.