Sunsanvil
-
Posts
83 -
Joined
-
Last visited
Content Type
Profiles
Forums
Gallery
Events
Everything posted by Sunsanvil
-
 Meticulous work. Fine finish. A truly inspirational build. I have what might be a silly question (please forgive if this was addressed somewhere in the middle and I missed it): Why no drain holes at the sides of the lower deck? (I think they are called scuppers). B
 -
Can someone give me a run down of Santa Maria kits?
Sunsanvil posted a topic in Wood ship model kits
We got to visit the Nao Santa Maria in Saint Andrews yesterday. What a thrill. Of course now I'm all jazzed up to build one. Can someone give me the cliff notes on the various kits? Is there one which sticks out as being "the one to get" or anything like that? Thx B -
I'm thinking Golden Oak overall, Dark Walnut accent (Gunwhale etc), and maybe do the thwarts Natural. Can one apply acrylic paint over an oil stain? If so I might do white at/under the waterline.
-
Yes, its true, I abandoned this to a shelf for, what...two years?! Embarrassing. But the cover is off, the box is open, the plans rolled out again. Now, where was I? Oh yes, staining the inside. Need some help/direction here. What (I think) I want to do is get some stain between the ribs before fitting floor boards etc. But how? Do they make stain brushes that small or should I just use a bit of scrunched up cheeze cloth? I cant really "rub in the direction of the grain" in between those ribs. Will that matter in this instance? Would gel stain be a better choice here? Is it worth applying pre-stain?

- 66 replies
-
- 3
-

-
- bounty launch
- model shipways
- (and 1 more)
-
Regretfully I'm still at something of an impasse on finishes. I want to do the interior in a stain and paint the outside. The paint is no problem as I have decades of experience and a treasure chest of supplies (including multiple airbrushes). I've experimented a bit with water based stains on scrap basswood and find grain raising to be a real issue, even with sealers, and its not the look I'm after (just looks like extra thin paint). I should probably try a small jar of MinWax and experiment applying it with gauss cloth (though those spontaneous combustion warnings make me nervous). Does anyone know if acrylic paint can be applied over it? I'm thinking ahead to what might happen if some bleeds through a crack to the outside.
-
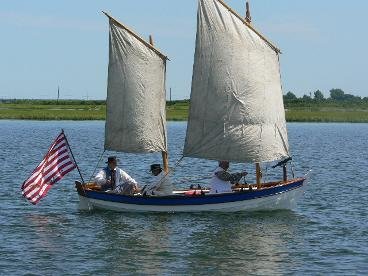
After a long hiatus I'm dusting this off, determined to finish it (I'm forbidden to buy any more kits until I do ). Ordering some cherry stain for the inside today with a plan to paint the outside. On the subject of mast/sail position, I stumbled across this: Granted it is smaller than our subject...on the other hand it is a credible "real" reference. I think I might just kick convention aside and position the larger mast and sail fore, the smaller set aft. Thoughts?
- 66 replies
-
- 2
-
-
- bounty launch
- model shipways
- (and 1 more)
-
Might be a long shot, but has anyone uses General Finishes Dye on basswood, something like their Vintage Cherry? I'm trying to visualize what that would look like. In general, how are their waterbased dyes in terms of grain lifting (they say they include some resin to minimize it, but that implies there will still be some lifting). B
-
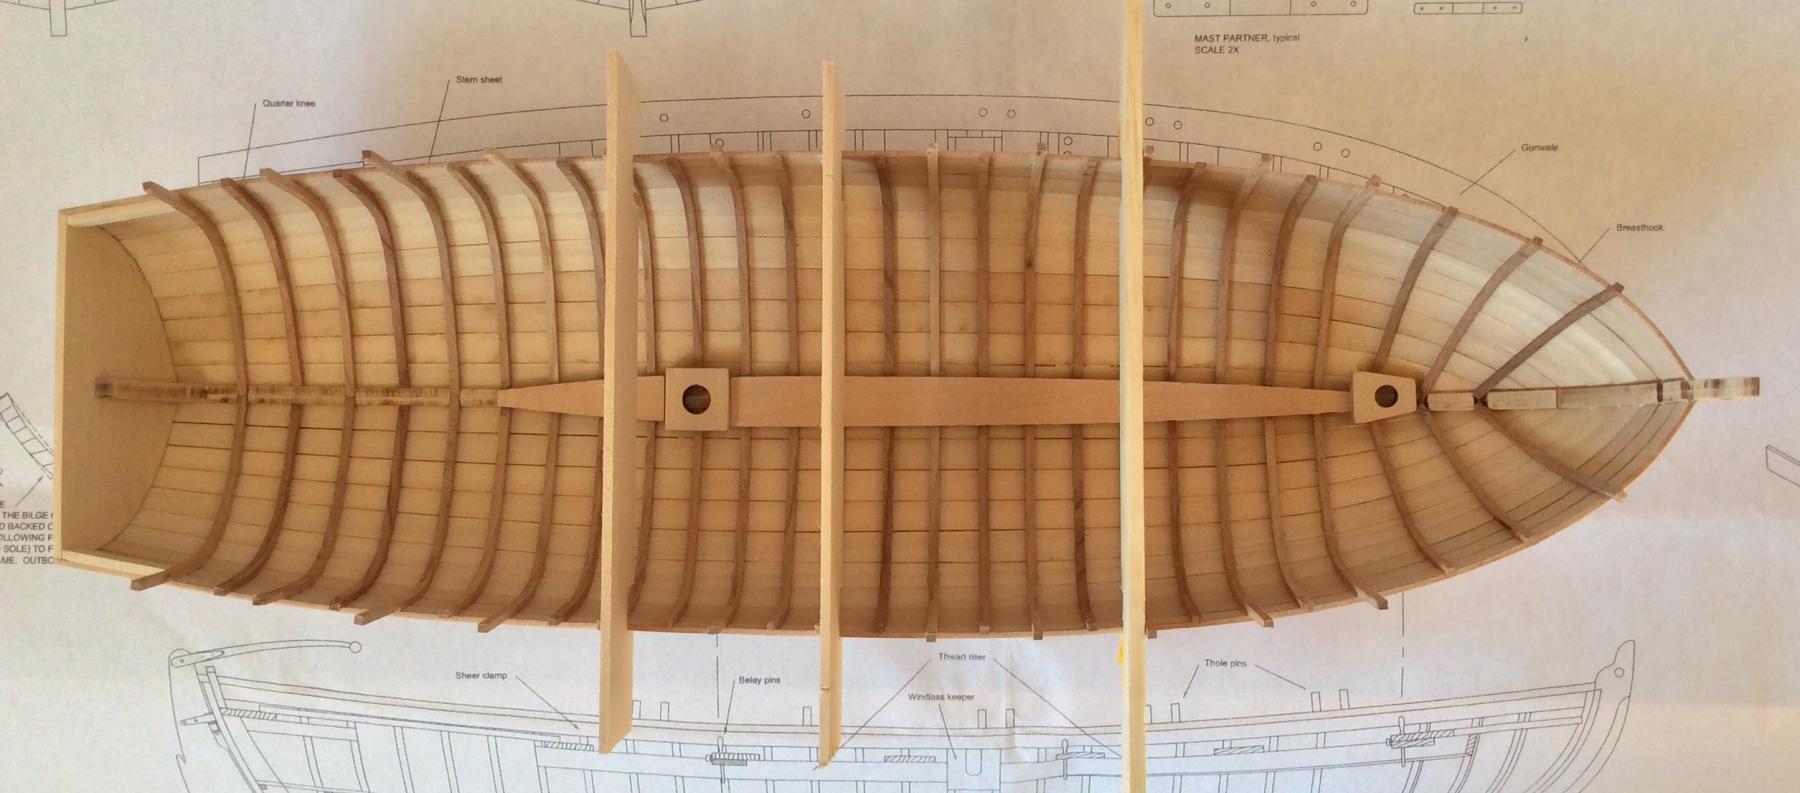
Haven't made any progress over the past couple weeks. I've sort of hit a crisis of indecision. Dont know what I want to do as far as stain/finish. I wanted to use LeeValley's linseed oil (Tried & True brand Danish Oil) because I'm familiar with it and have a bunch here but its just too light a finish. I've read you can tint it but that sounds like opening a can of worms. Tried & True makes stained versions of the oil but I cant find any in Canada. Dont know what I want to do with the masts. Swapping them seems like an interesting approach but where no one else has explored this I'm nervous to go out on a limb like that. I started fiddling with the parts for the quarter deck...for some reason it doesnt look right to me for the beams to rest against on the hull planks like the plans show. I'd have thought they should rest on top of the ribs. If anyone can send some sage words to inspire me back on task it'd be much appreciated. B
- 66 replies
-
- 1
-
-
- bounty launch
- model shipways
- (and 1 more)
-
Stumbled across this while googling about wood stains: http://www.apieceofrainbow.com/make-wood-stain/ No idea if its bogus or what, but its an interesting notion...
-
I just took a peak at the launch used in the 1984 movie, and had a bit of a revelation when it comes to the masts question. First, in their version, the positions of the masts seems to correspond with the kit plans, however... The larger sail is seen on the forward mast, the smaller one aft. I make no assertion as to what is more correct and such, but this does open up a new possibility at least. B
- 66 replies
-
- 1
-
-
- bounty launch
- model shipways
- (and 1 more)
-
Minor update. Sheer clamp is in. I really need to figure out what I'm going to use for stain. I don't feel like spending $50 on prestain, stain, polycrylic, and solvent cleaner. I tried some danish oil on a test piece but it doesn't have any real colour or depth. I thought I'd try some of the craft stain (Folk Art or Americana). I have their sealer from my wife's tole painting supplies I could use. Have to find some first (Michael's had everything but). I am also really torn on the position on the main mast. As others have shown it looks so much more correct one thwart forward, but I'm afraid that's going to put the two sails too close together (I plan on displaying it with sails unfurled).
- 66 replies
-
- 6
-
-
- bounty launch
- model shipways
- (and 1 more)
-
Has anyone ever tried this stuff? https://www.realmilkpaint.com/shop/oils/dark-tung/ Since regular tung/danish doesnt really give any color to basswood, I'm wondering it this might be an alternative as a "single product" finish.
- 1 reply
-
- 2
-
-
Thanks for that tip. What is the science behind it? The bit of moisture causes the wood to swell and evens out the divot?
- 66 replies
-
- 2
-
-
- bounty launch
- model shipways
- (and 1 more)
-
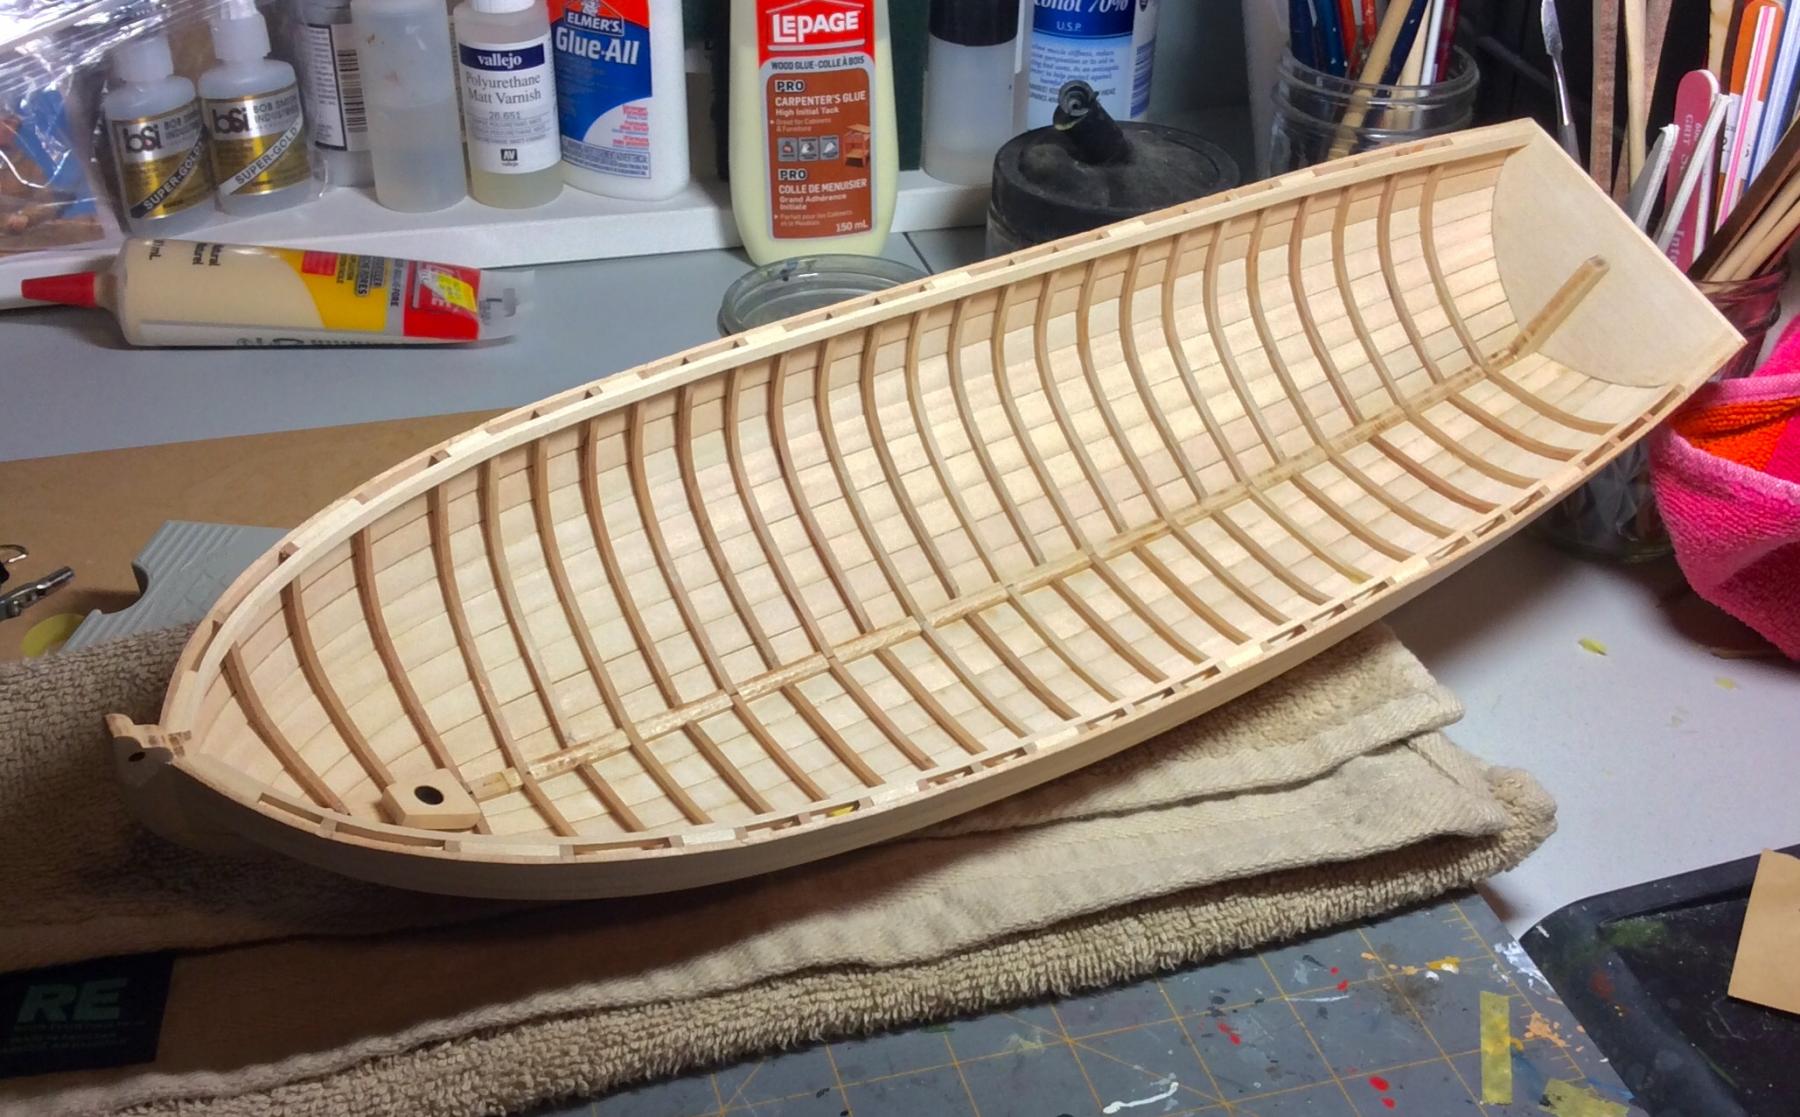
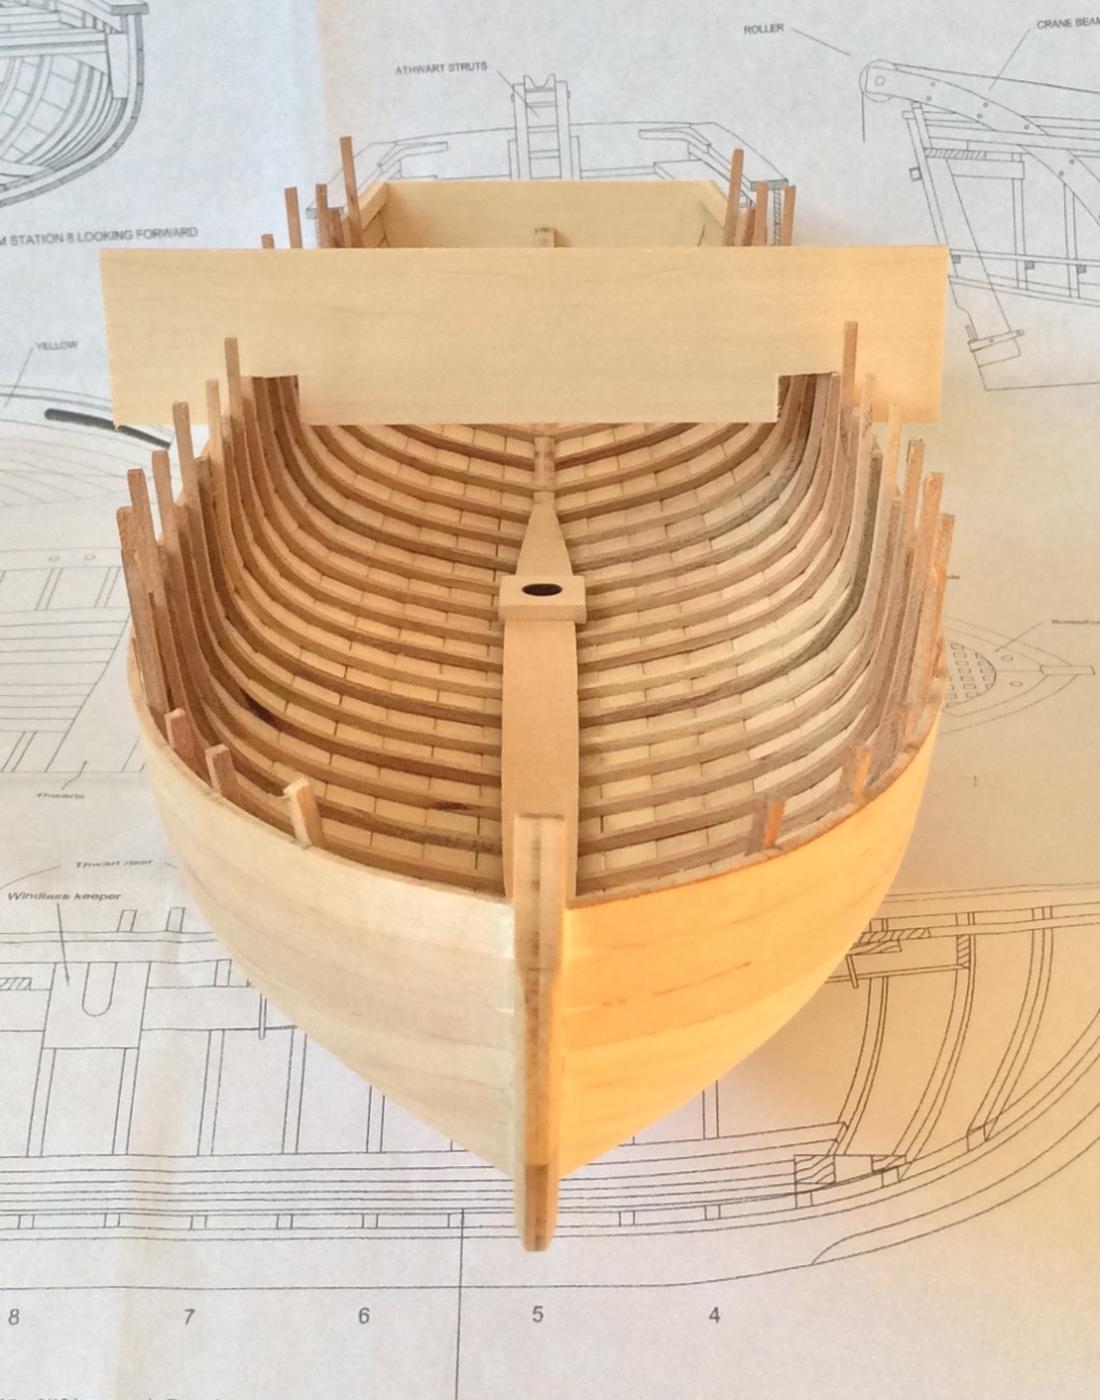
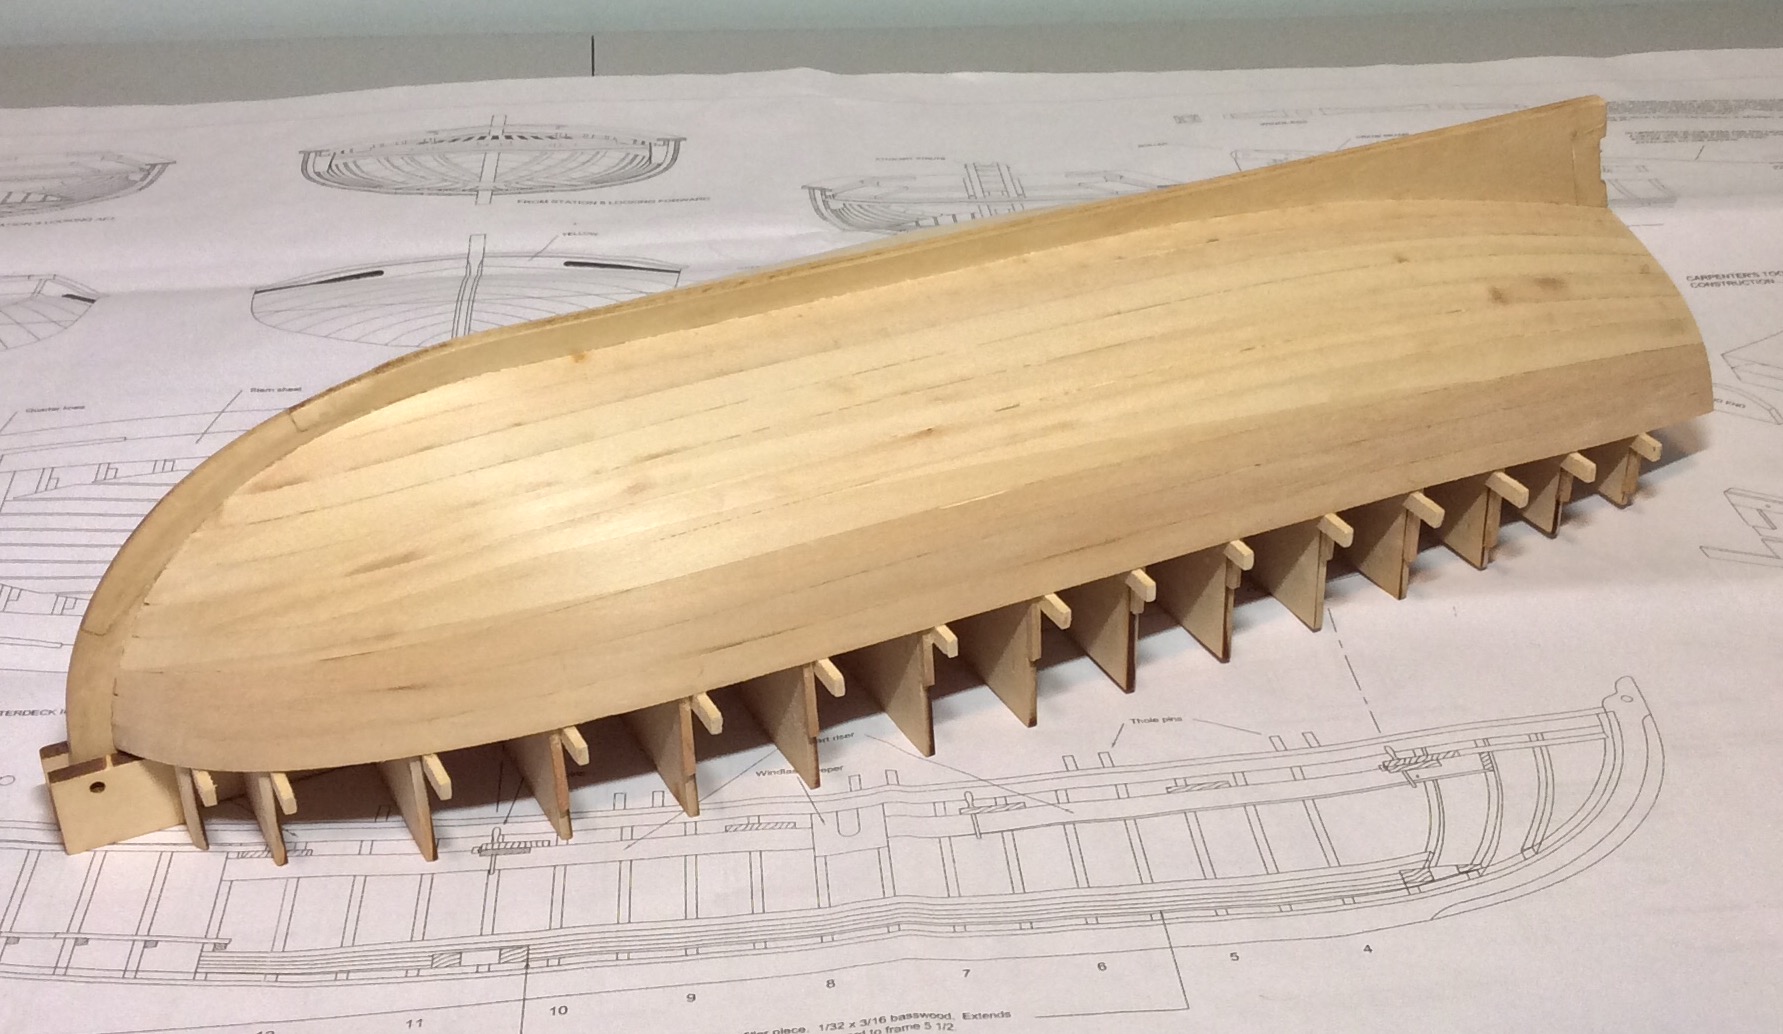
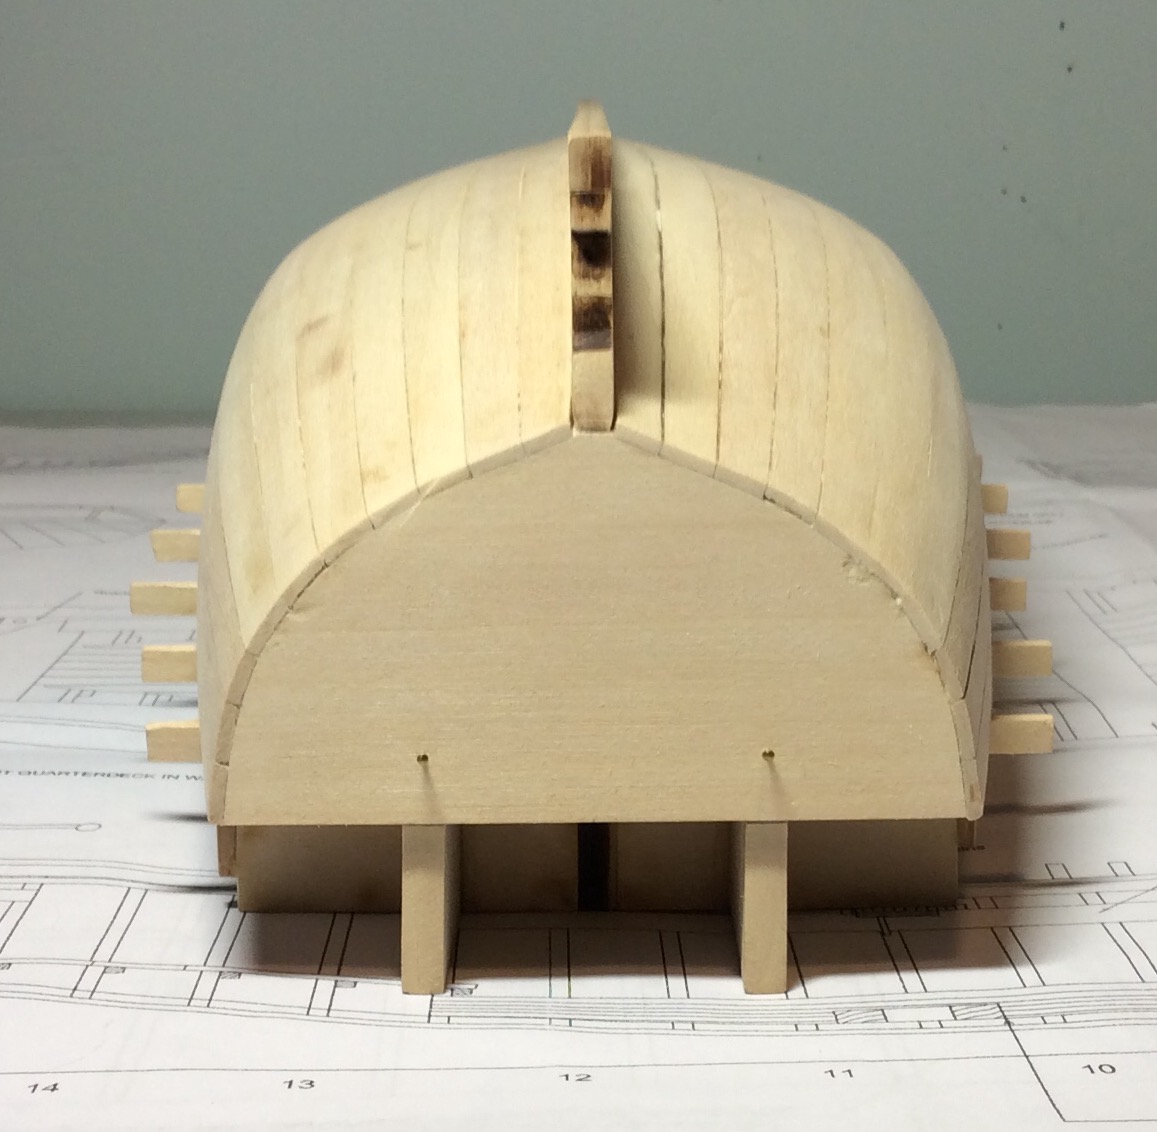
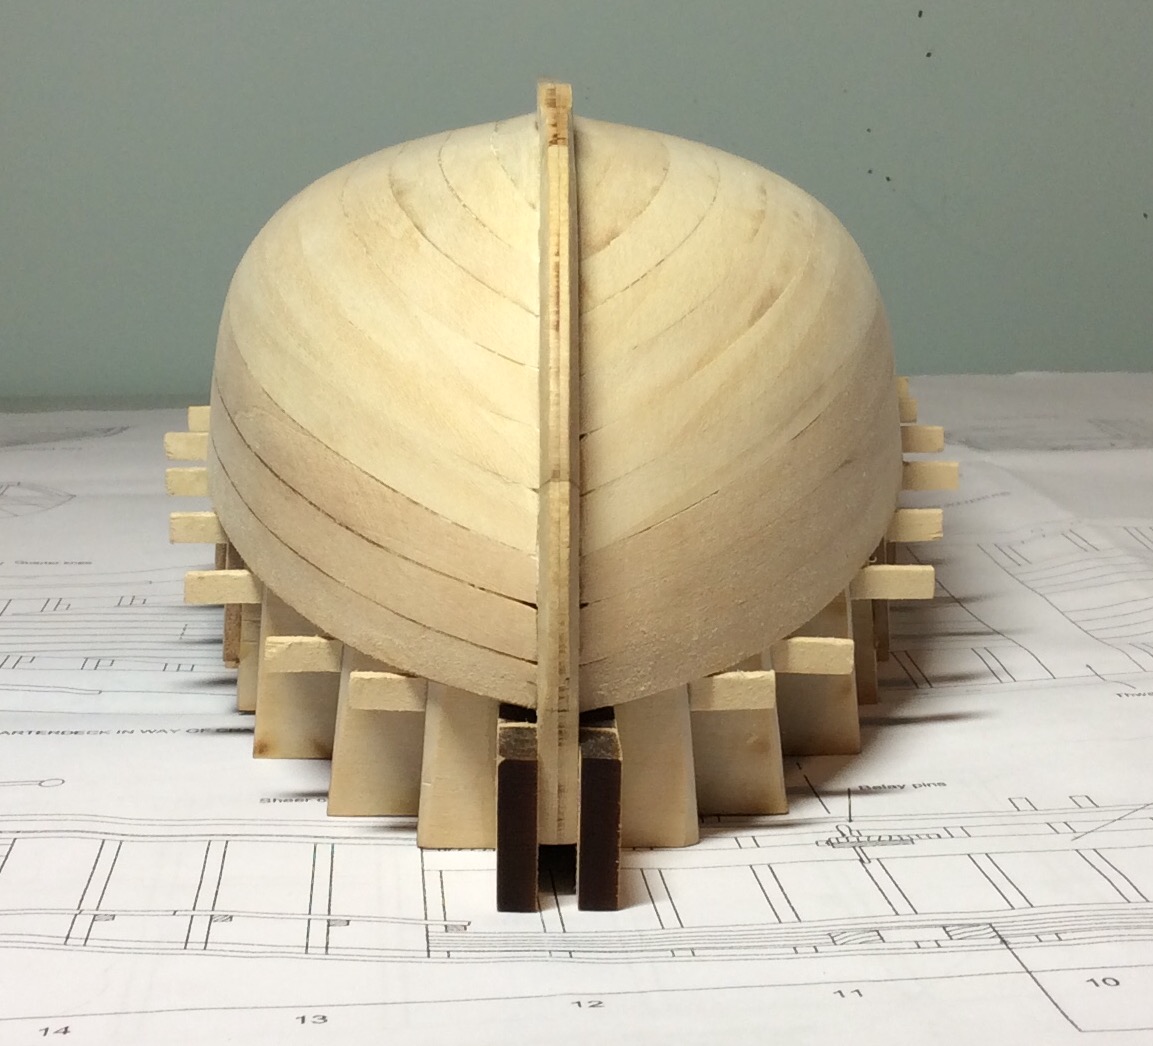
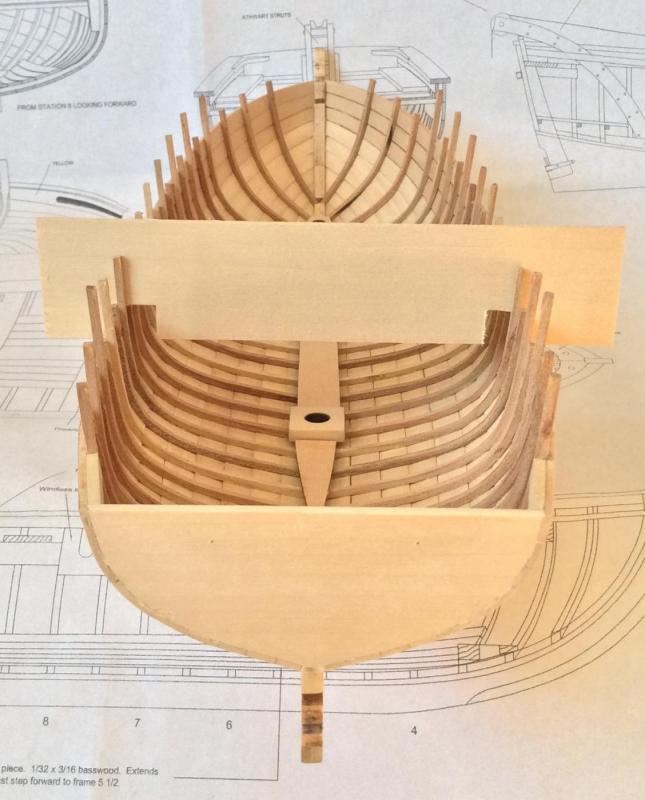
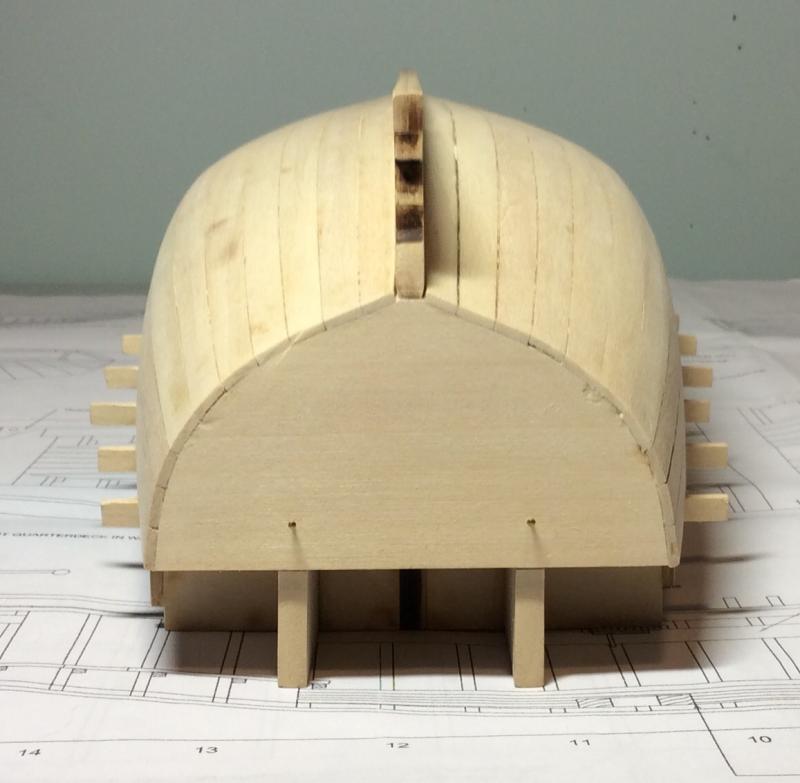
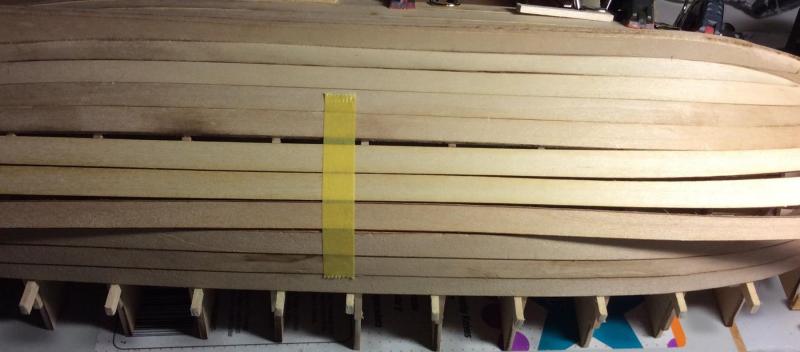
Well I reached my New Years goal of getting the tween and kant frames in. I used the boil method on these and had dramatically fewer breaks compared to the curling iron method. I used mini binder clip which left a divot in each one since they were soft from the boiling but for the most part that should be hidden by the sheer clamp. At some frames though the clips left a slight dent on the outside of the sheer plank which I hope I can sand out. I am using 3 braces as you can see since I had nightmares of the hull bowing out. Surprisingly there was very little but just to be safe I left them in place during the tween frame installation and will probably leave then on until the sheer clamp is in place at which time I figure it will be firm enough to hold its shape on its own. I agree that 3 kant frames probably isn't enough but instead of adding more I simply spaced the 3 more evenly which looks more correct to me (the instructions would have you group the three close together leaving a large gap between them and the last main frame as well between them and the bow. I also agree the mainmast feels too far back as instructed. Not surprising given some of the other..umm.. dubious aspects of the model. I will have to think long and hard about how I want to tackle that. The blocks and centre floor are not actually installed, rather they are just set in place to get a sense of the spacing.


- 66 replies
-
- 6
-
-
- bounty launch
- model shipways
- (and 1 more)
-
Keith, yours and Cptn Rat's logs are my references here. I may take a page from yours and do a half stain half paint on the outside. To tree nail or not to tree nail...that's a question. Does anyone sell pre-drawn walnut (or a 1/16 dowel)? There has been some consternation over my username. Most friends just call me B.
- 66 replies
-
- 4
-
-
- bounty launch
- model shipways
- (and 1 more)
-
When you say natural stain, is that basically a clear stain? I guess I hadn't considered that because the instructions say that basswood is "not attractive" on its own. That and the fact that MSW used a markedly different color basswood for half the sheets. If you look at the latest pics you can see how the sheer and the next two are an almost redish color. I figured a tinted stain would homogenize things a bit. I mentioned Golden Oak because I was super inspired by Capn Rat Fink's Launch. I especially liked the contrast of the dark walnut gunwale against the lighter hull. What I'm really torn on is whether to go with classic MinWax or their waterbased one. I like the idea of soap and water cleanup but I know that there are certain things which just plain work better with good ol' solvent based formulas. Its not a trivial decision either as a couple shades, a pre-stain, and a finish clear are going to cost a cool C$40 either way.
- 66 replies
-
- 3
-
-
- bounty launch
- model shipways
- (and 1 more)
-
Right now I'm thinking stain. As it is there are many gaps/cracks with are "pre-filled" by proxy with the carpenters glue (allegedly stainable). I've just finished filling any remaining with filler (also allegedly stainable). Next step will be to pickup a small can of Golden oak and experiment on some spare bass wood, including some simulated gaps filled with the carpenters glue and filler and see how it looks.
- 66 replies
-
- 3
-
-
- bounty launch
- model shipways
- (and 1 more)
-
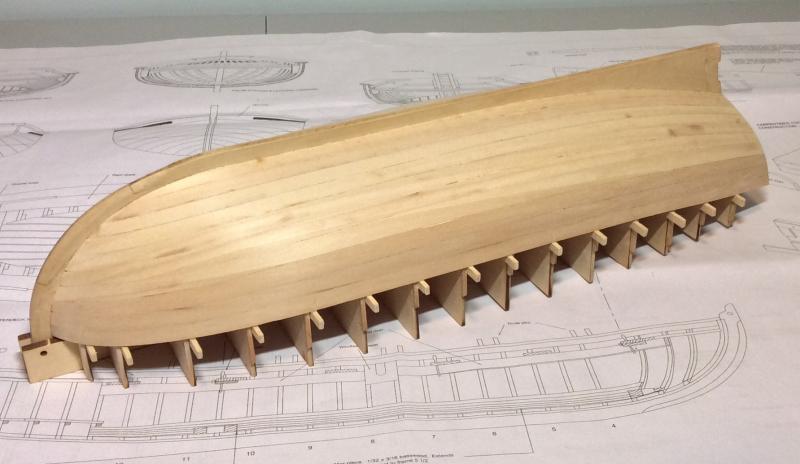
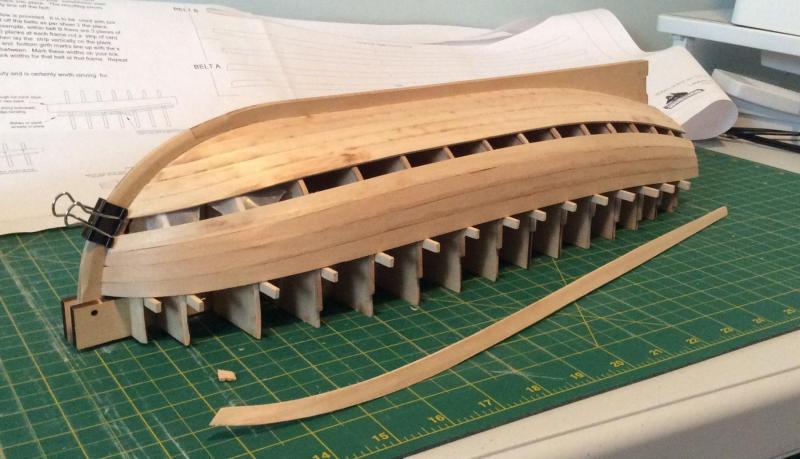
Well, we officially have a planked hull. In the end I just held the shutter with my hands for 25 minutes each. I edge glued every one so after the first sanding there isn't actually a ton of filling to do. It's remarkable how solid it feels at this point. I will do a bit of crack filling, another cursory sand, and then comes the moment of truth: popping it off the building frame...

- 66 replies
-
- 6
-
-
- bounty launch
- model shipways
- (and 1 more)
-
It's actually funny because although a lot more work of course, the planks I've made from scratch are the best ones. We almost have a hull folks... Serious question: How on earth do I hold the shutter plank now that I have nothing to clamp to???
- 66 replies
-
- 3
-
-
- bounty launch
- model shipways
- (and 1 more)
-
Its just frustrating because I really dont put this under the category of "learning", or "skill". How much of what type of glue, bending and shaping, broken cheery ribs, those sorts of things I take responsibility for. But when the sum of the widths of pre-cut planks is more than 3mm lacking, that is clearly a kit design and/or manufacturing issue. Anecdotally speaking, I think its their cutting: if you measure and compare the planks on the printed plans they are all slightly larger than the laser cuttings.
- 66 replies
-
- 3
-
-
- bounty launch
- model shipways
- (and 1 more)
-
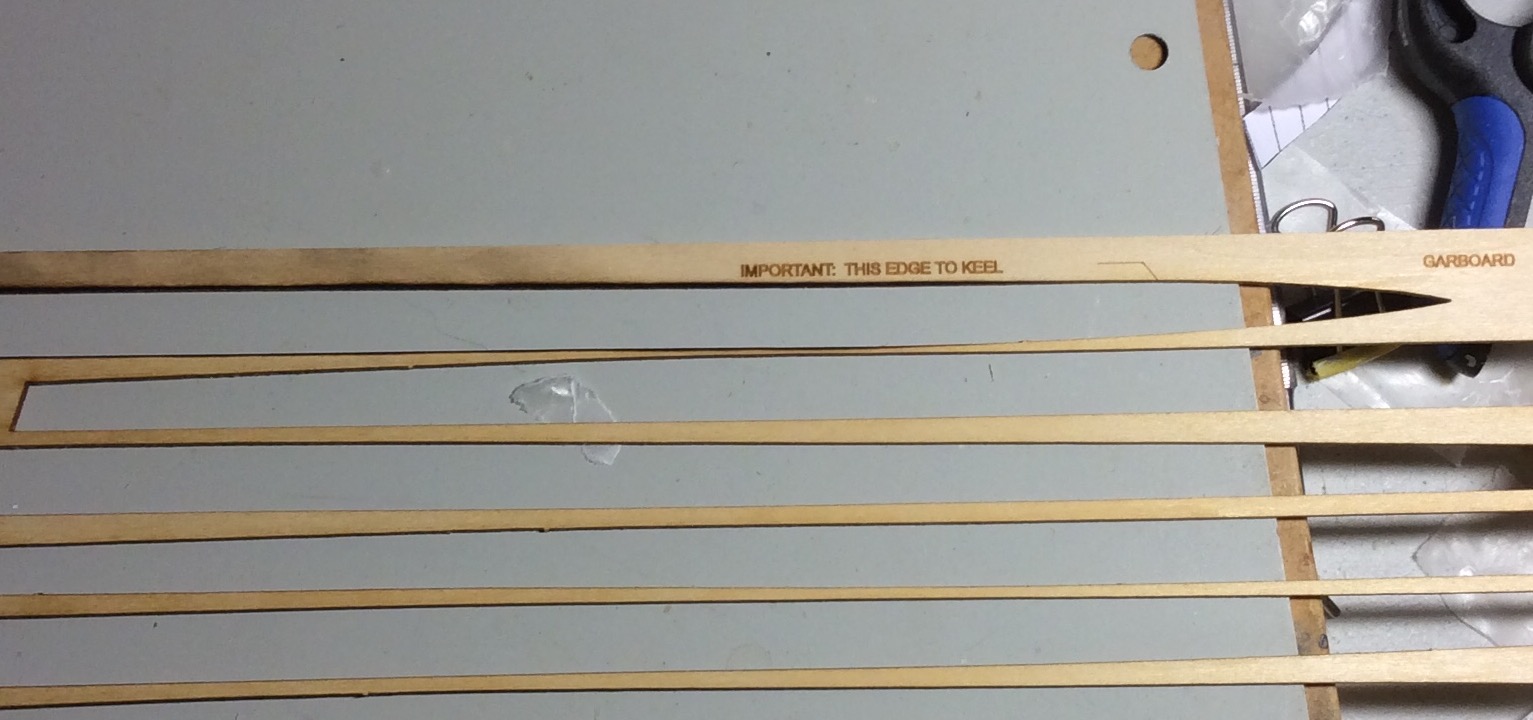
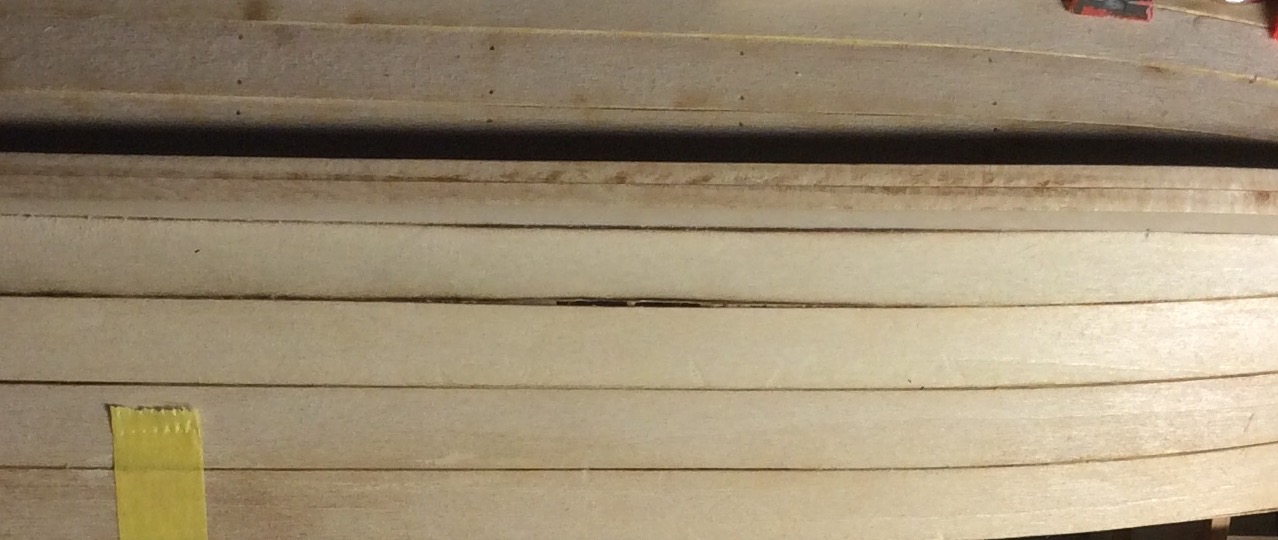
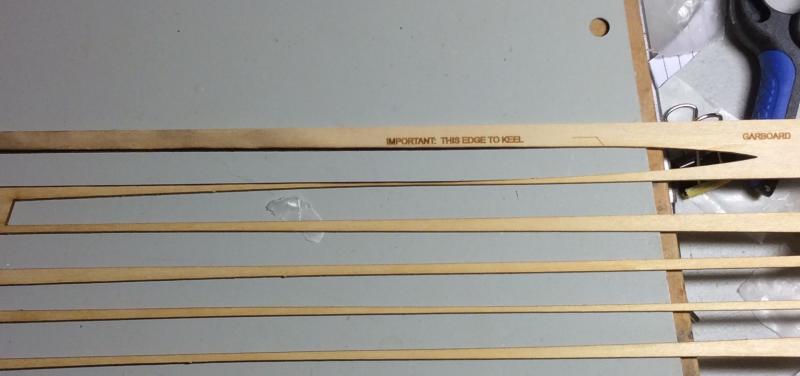
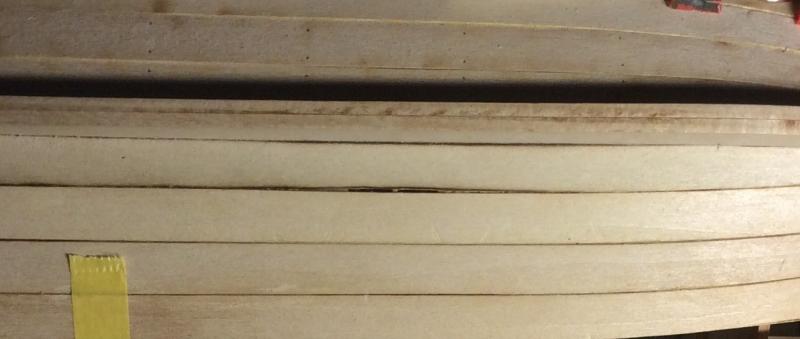
Planking continues and I must say, at this juncture, I'm not impressed with Model Shipways quality. A good deal of the laser cuttings have what I call "burn out" where clearly the beam was out of focus, moved too slow, or something. Case in point is this garbord... Which translates on the model to a substantial gap which cannot be corrected. And if you are thinking I could have sanded that out, think again. For all MSW's talk of the planks being a little oversized, note that I've done NO reducing of the planks whatsoever (save for right at the hood ends) and this is what I get a midship: This is a travesty. I was thinking I would make the shutter plank from scratch but now I'm thinking I better make all three so that I don't end up with one notably wider than all the others! So much for MSW's "invovation".
- 66 replies
-
- 5
-
-
- bounty launch
- model shipways
- (and 1 more)
-
I LUST after their mini chisels and plane. C $100 if I bought both though so this is one of those "I will have to save up" things.
- 100 replies
-
- 10
-
-
Poor results with carpenters glue
Sunsanvil replied to Sunsanvil's topic in Modeling tools and Workshop Equipment
Like I said, I did get a hold of another bottle, and found it interesting that it was no different than the first. Makes me wonder if the temp or RH in my craft room is a factor. Next step will be a completely different brand but I'm still interested in the science behind this stuff and why not one but two bottles of LePage (sourced over a year apart mind you so they are definitely not from the same batch) behave differently for me compared to yourself. -
Poor results with carpenters glue
Sunsanvil replied to Sunsanvil's topic in Modeling tools and Workshop Equipment
Thanks for that! I wonder, was yours fully cured though? I got my hands on a completely different bottle from a friend. Did several blob tests. Both bottle yielded the same results: Left overnight: still pliable. After a full 24 hours +: Fractured into hard pieces. Bad ju ju at my house?