Sunsanvil
-
Posts
83 -
Joined
-
Last visited
Content Type
Profiles
Forums
Gallery
Events
Everything posted by Sunsanvil
-
 Building frame is just about ready. Keel is ready, rabbet carved. What to do about this abomination... Is the consensus to put it on the inside and hide it with stowage? I don't have the right material to make my own. I'm a little confused about carving the taper at the stem. Concave, convex, othe...?
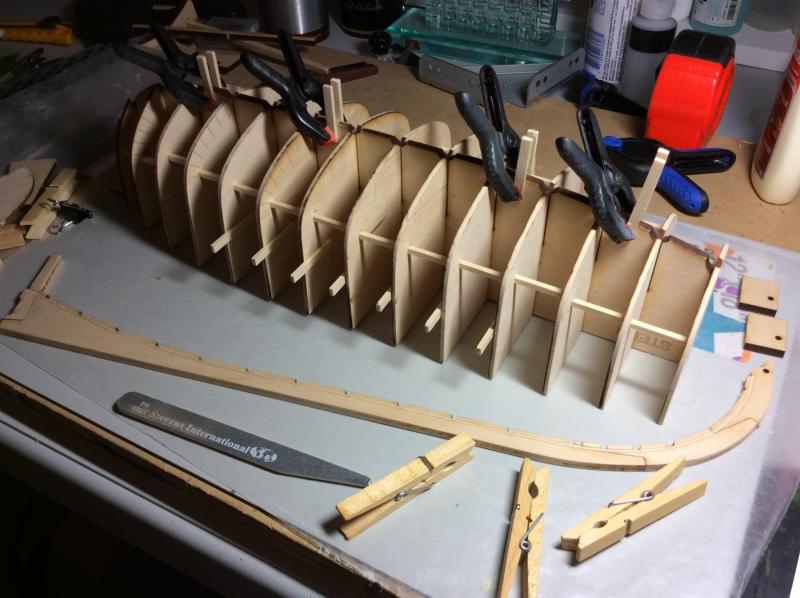

- 66 replies
-
- 2
-

-
- bounty launch
- model shipways
- (and 1 more)
-
Could someone recommend a good all around wood filler for the wood ship hobby? Ideally something which doesn't stand out too much when stained, and comes in a reasonably small quantity. Thanks
-
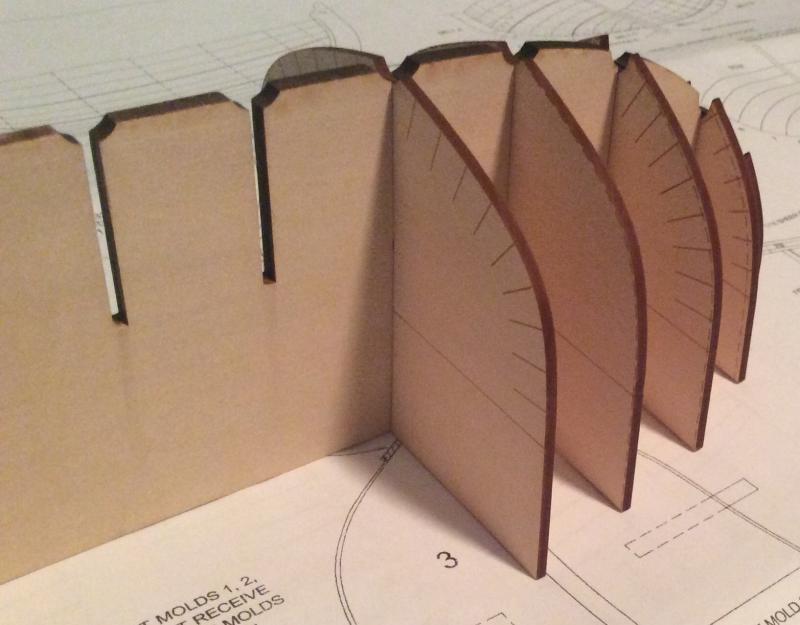
Except the fairing guides on the few which have then end up on the wrong side. Not a big deal but seems like an oversight in the design/instructions...
- 66 replies
-
- 1
-
-
- bounty launch
- model shipways
- (and 1 more)
-
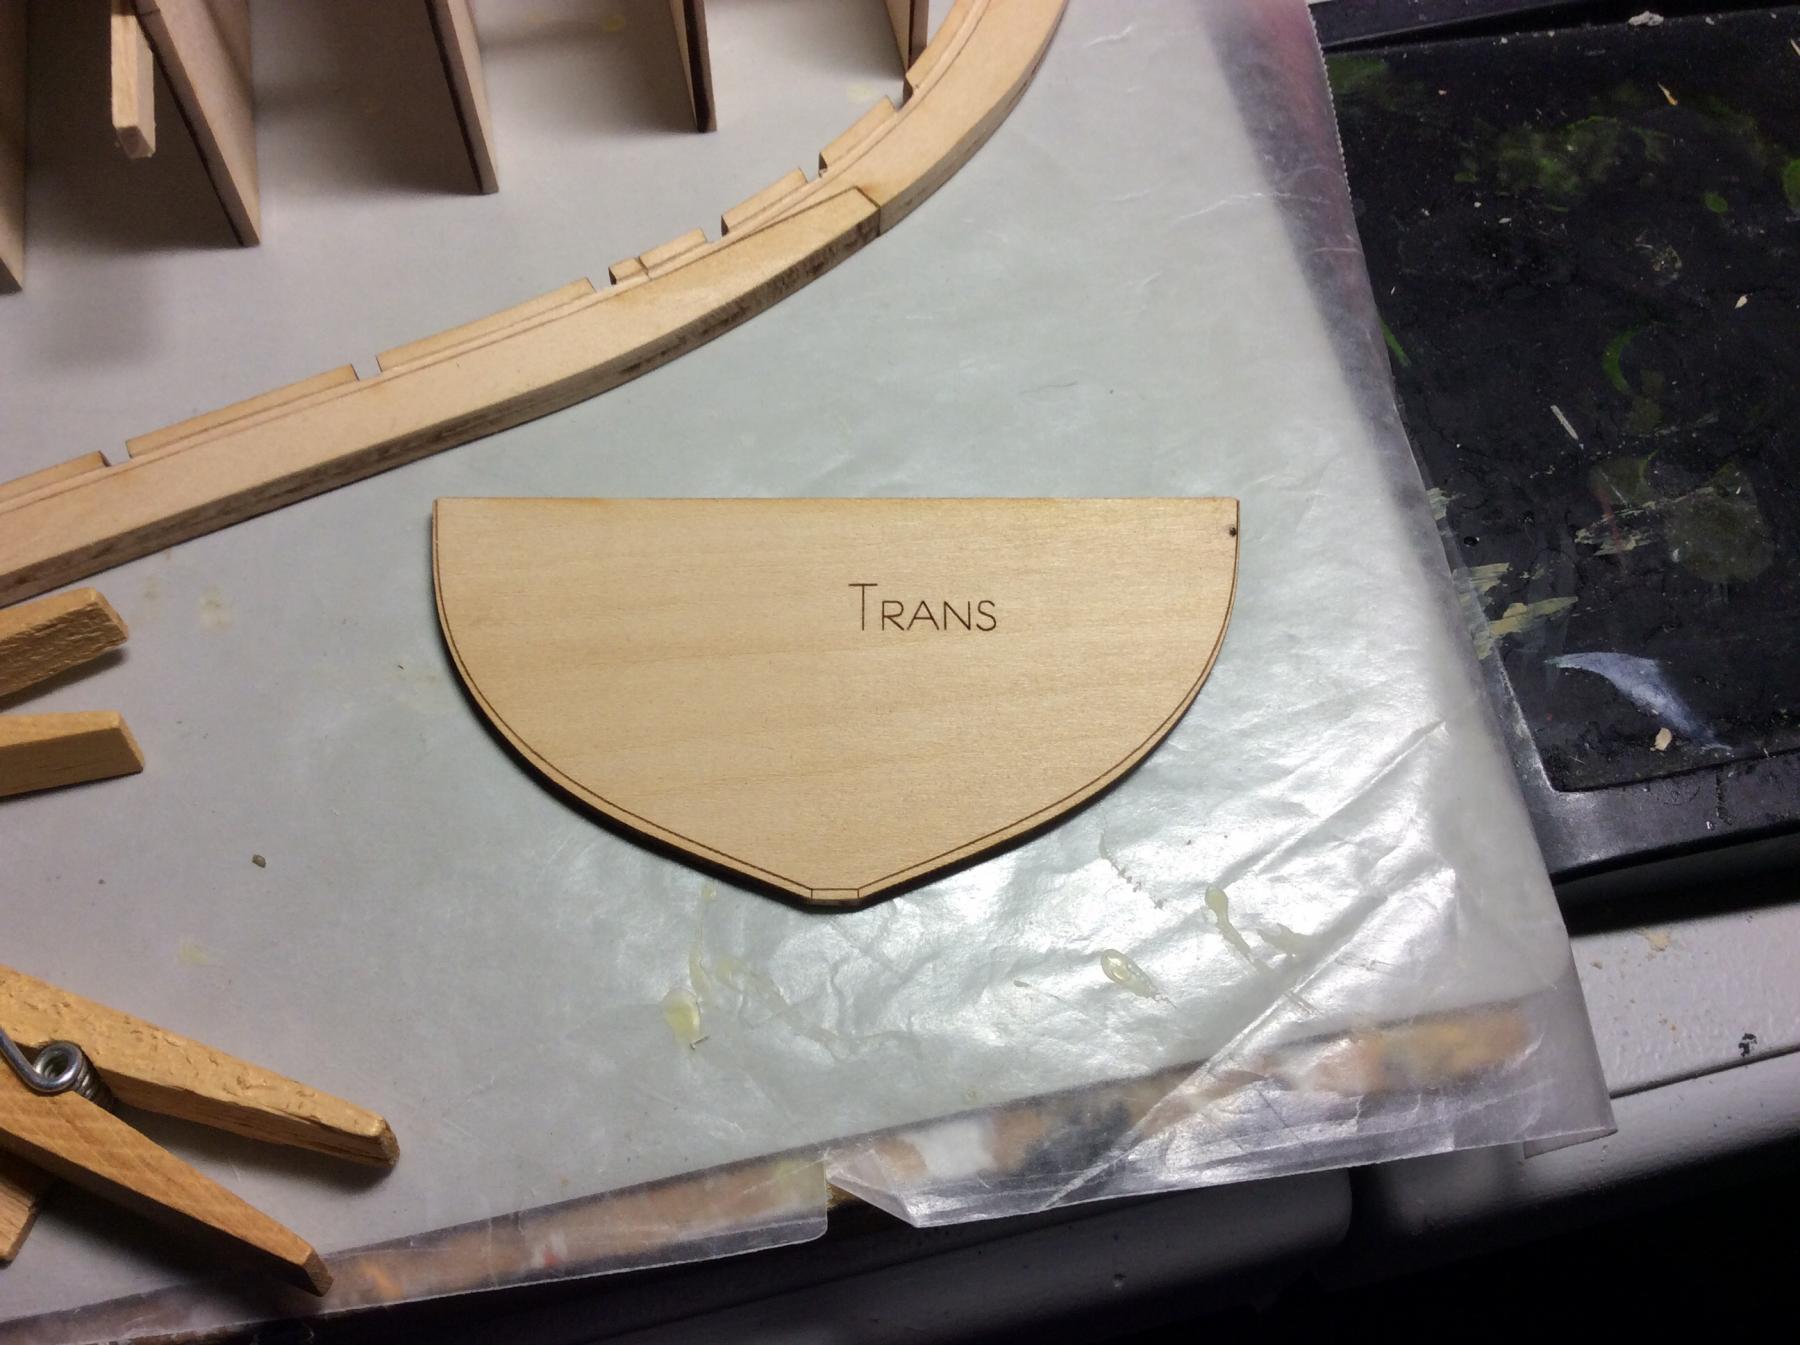
Finally getting back to this and have my building frame ready to assemble. The instructions are very clear, in several places, that the shear tabs should face forward on molds 9-15 and rearward on 1-8. But doing so means that the dotted fairing guide lines on 1-3 and 15 are on the wrong side. Just short sighted design? I've laminated the real keel and stem parts and scarf joined them. Lines up perfect with the plans at the bow but I notice that the whole thing is shorter than what is on the plans by about 1/8". The frame notches do not all line up with what is on the plans but do line up with molds on the false keel though so I'm thinking its the printout which is wrong....
- 66 replies
-
- 2
-
-
- bounty launch
- model shipways
- (and 1 more)
-
If you are daring, and have access to an airbrush, I would actually try painting the parts the base blue, then using the airbrush paint a lightened mixture, at least 20% white, only in the middle area of each panel or facet which is what we do a lot in scale models to create a subjectively more realistic appearance). If you look at the side of my Tiger tank, or any of the Mobile Suits, you can see what I mean. https://thesunsanvil.wordpress.com/
- 414 replies
-
- 5
-
-
- riva aquarama
- amati
- (and 2 more)
-
Yes that's a fairly well documented, but not widely considered phenomenon in scale modeling. Its kind of funny because you have the military modelers especially who are obsessed with getting THE EXACT shade of whatever for the bt109, Corsair, Tiger Tank, Russian uniform, whatever.....but then lament that it appears to the naked eye subjectively too dark. Someone actually had a cheat sheet of how much white to add to a color at various scales to compensate.
- 414 replies
-
- 5
-
-
- riva aquarama
- amati
- (and 2 more)
-
Steam Bending
Sunsanvil replied to Julie Mo's topic in Building, Framing, Planking and plating a ships hull and deck
These look cool! What is your steam source? A tube connected to a kettle of water or something more sophisticated? -
Thanks everyone!
-
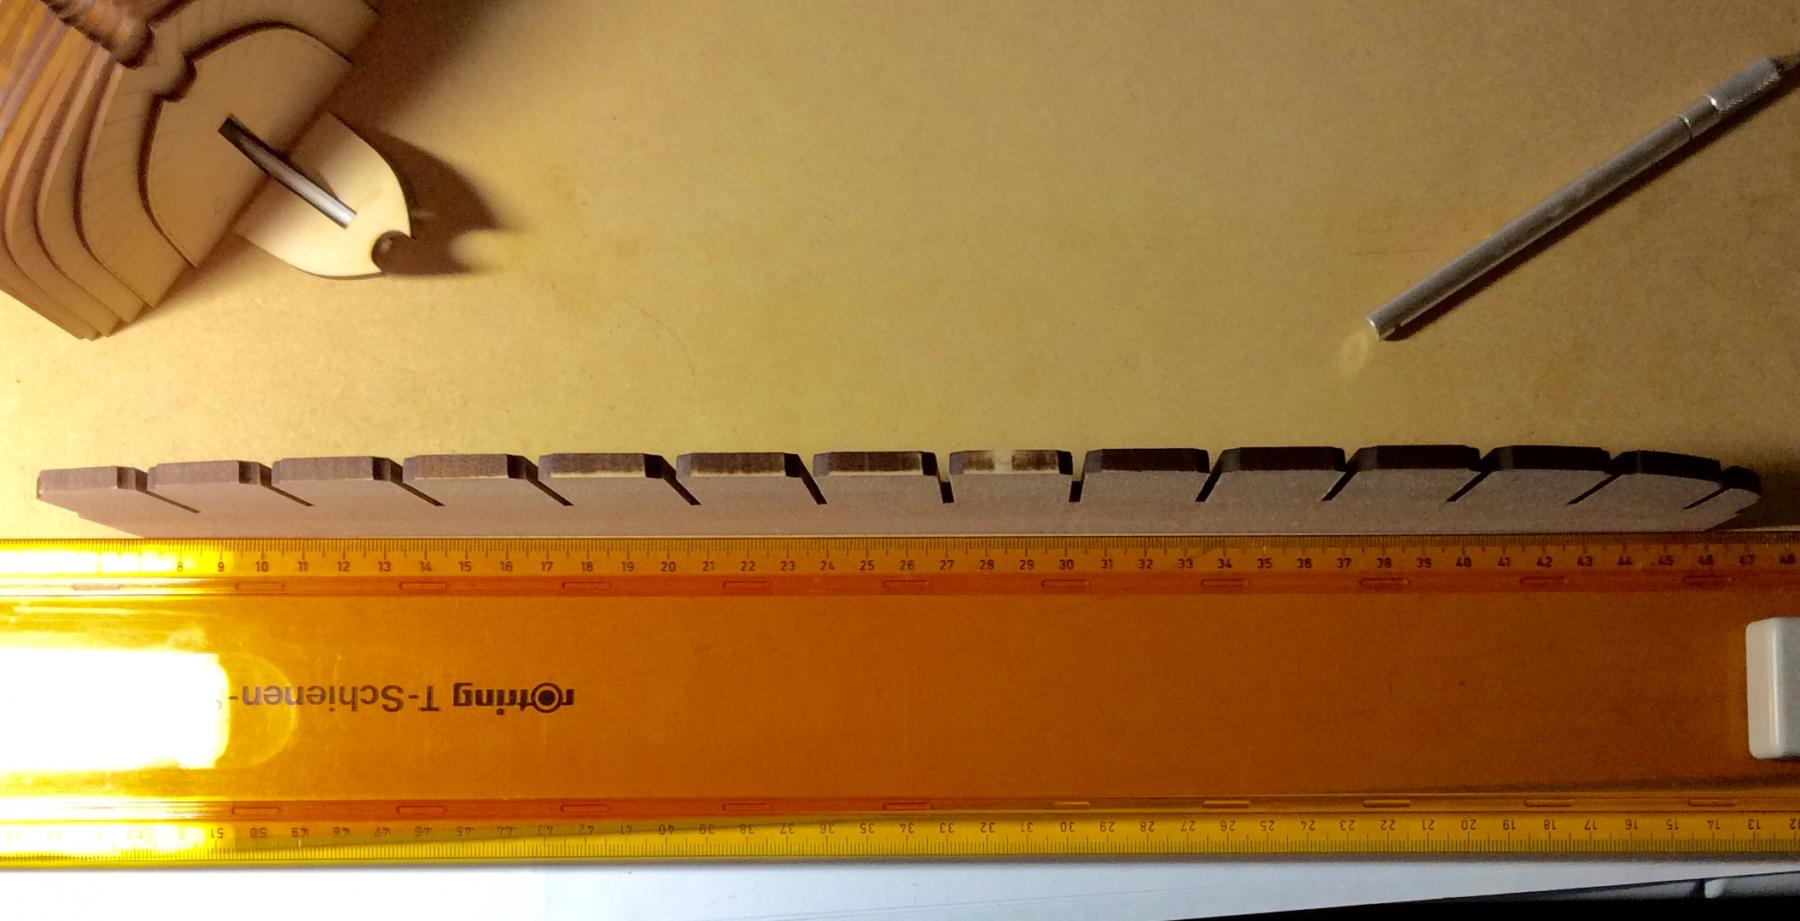
I asked this in my build log but thought the question might better served here. Basically I'm wondering how perfect to expect wood to be. Here is the very start of my first wood build... The false keel is ever so slightly out of true at its top edge, no more than 1mm of deflection relative to the strait edge. Is this within normal tolerance for a 18" launch or is this going to translate into bigger issues down the road? The bottom length of it seems perfect by the way. I've read about soaking and clamping parts like this but I really wonder if that mightent not do more harm than good. Thought? Thanks.

-
I have a set of Tamiya modeling files which are lovely for plastic but much too fine for wood. Can someone recommend a set which is small yet coarse enough to shape wood? Thanks.
-
Not necessarily. LiPo has taken off in the RC hobby mainly because of the power-to-weight ratio which is critical for flight applications. It would be impossible to do all the micro helicopters, planes, and drones without it. That said, I avoid them whenever possible as they can be much more temperamental. For terrestrial, where weight is not as great an issue, I still like good old NiMh battery tech.
- 414 replies
-
- 2
-
-
- riva aquarama
- amati
- (and 2 more)
-
Thanks Cap'n. I was inclined to just use the false keel as is but thought it best to ask. It occurred to me though that it does mean the top of the center frame will be ever so slightly off kilter, probably by only 0.5mm, relative to the stem and stern, but on an 18" model made of wood which is going to change and shift over the course of the build anyway, perhaps a non issue? As for CA, I actually like using it for certain things but a big long keel like that, to me, is asking for trouble: apply the thin CA without the two halves being perfectly perfectly flat and one might just end up locking in a warp. Thinking ahead to the frames, it strikes me that, where they are all nicely marked for the sheer tabs/guides, would I not be wise to leave the sheer tabs off until after fairing of the frames? They have to be faired past the tabs anyway and that would be a lot easier if the tabs weren't there at the time....
- 66 replies
-
- 2
-
-
- bounty launch
- model shipways
- (and 1 more)
-
Well, I've finally had time to reset the modelling table and start this project. I feel very confident with the overall process but already have some wood related questions. Here is my false keel: Sorry for the poor light. What l'm trying to show is that at the top edge (the one resting against the strait edge), is out of true by, litterally, 1mm (gap between it and the strait edge at the mid point). I have no idea if that's crazy unaceptable or within normal wood tolerances at this size and scale. The bottom edge is perfect. I've read about soaking and clamping parts such as this to strait edges etc but I really wonder if I mightn't make it worse rather than better. The other starting question is on laminating the two keel halves. The instructions caution against using wood glue, suggesting instead CA/super glue but I'd rather not the later if possible. If one is judicious with the amount of wood glue, and weight it down against a perfectly flat surface, is there that much danger of warpage? Also wondering if someone can suggest a good set of files? The ones I have now are too fine. Great for plastic, but no good for shaping wood. Thanks all....


- 66 replies
-
- 3
-
-
- bounty launch
- model shipways
- (and 1 more)
-
Great build log. I've read through it like 3 times now and am subscribed. Very inspirational. I've put this kit on my bucket list now (since I will likely never ever see a real one, let alone ride in one...never mind owning one ).
- 414 replies
-
- 4
-
-
- riva aquarama
- amati
- (and 2 more)
-
Just taking this one out of the box myself. Gone over the instructions 20 times. Can you see any reason why a person couldn't add the shear guide tabs after fairing the bulkheads? I'm thinking that would make fairing easier since you have to go beyond the tabs anyway.
-
Does pre-staining wood with something like Minwax prior to assembly have any effect on the efficacy of normal wood (carpenter's) glue?
-
Coverage question?
Sunsanvil replied to vossy's topic in Painting, finishing and weathering products and techniques
More than you'd think, as long as you're not wasteful. Airbrushing, despite the overspray, is actually a very efficient application of paint. That said, a 1:200 Bis has a lot of area to paint. A 22ml bottle of unthinned paint might just do you for the hull red but in terms of primer and other greys I'm guessing you are going to need more. Only reference I can give is that of a 18ml bottle of pr-thinned Valejo ModelAir lasting me three 1:35 tanks or 1:32 aircraft. -
Does the position of the oarlocks on this one seem a bit odd to any one? Seems they are positioned for rowers to face forward and push-row.....
-
Maybe try some CA "paste" for something similar in consistency to epoxy but in a ready to use tube format?
-
Prepare PE for painting
Sunsanvil replied to cog's topic in Metal Work, Soldering and Metal Fittings
Honest truth, the Tiger tank I did a couple years ago with (what felt like ) a ton of PE on it....I didn't do anything at all to prep it per sé...and primer adhered just fine, even on the larger flat pieces like the fenders (you can see it by clicking on my signature...board wouldn't let me use the img tag). Unless a part is overtly contaminated, today's model paints do a pretty good job holding on, though if something will be subject to a lot of handling after being painted then more care could be wise. -
Generally speaking I've always regarded epoxy as what you reach for when you need not a couple drops, but a couple tablespoons of adhesive. Good quality CA, used correctly, should be just as strong....but would get expensive if needed in quantity (as a loose generalization CA is 4x the price of Epoxy on a per volume basis). Worth noting though that CA does give off fumes which some are sensitive to...or get sensitive to over time. I used to be able to use it without ill effect but now if I glue one part with regular CA I will be stuffed up for days. Now I have to buy the odorless CA which works just as well...but costs even more.
-
As a total newcomer to wood I at first thought I had nothing to add here, but on reflection I do. Even though the topic is "new kit development", I think its worth saying that with regards to existing kits I would like to see more/better information on all the manufacturer's websites. A ship name, scale, and a handful of low resolution photos of the expertly finished product, frankly, doesn't cut it. Show me what I am getting for my $100-$600 (don't rely on 3rd party reviews). You don't have to give away the plans but a PDF of the assembly process is what gave me the confidence to finally click "buy" on my first kit. As far as future development, I think there is a great opportunity to up the scale realism by embracing a more multi-media approach. Wood is nice, I like wood, and wood is the whole point here but there are many many parts-pieces which could stand to be resin, or even injection molded plastic. There are just some details for which the over-scale grain of real wood shatters the illusion (ships wheel for example). Also the plastic model world is doing amazing things with PhotoEtch and I see lots of opportunities for its incorporation in wooden ship building (beyond what its currently being used for).
-
Thanks guys. Any idea what the "active ingredient" is in these products?
-
I've come across about 2 dozen references to chemically blackening brass parts, including this instruction book in front of me, but none of them say exactly what the chemical is. So...whats the secret sauce? B