
Mindi
-
Posts
96 -
Joined
-
Last visited
Content Type
Profiles
Forums
Gallery
Events
Everything posted by Mindi
-
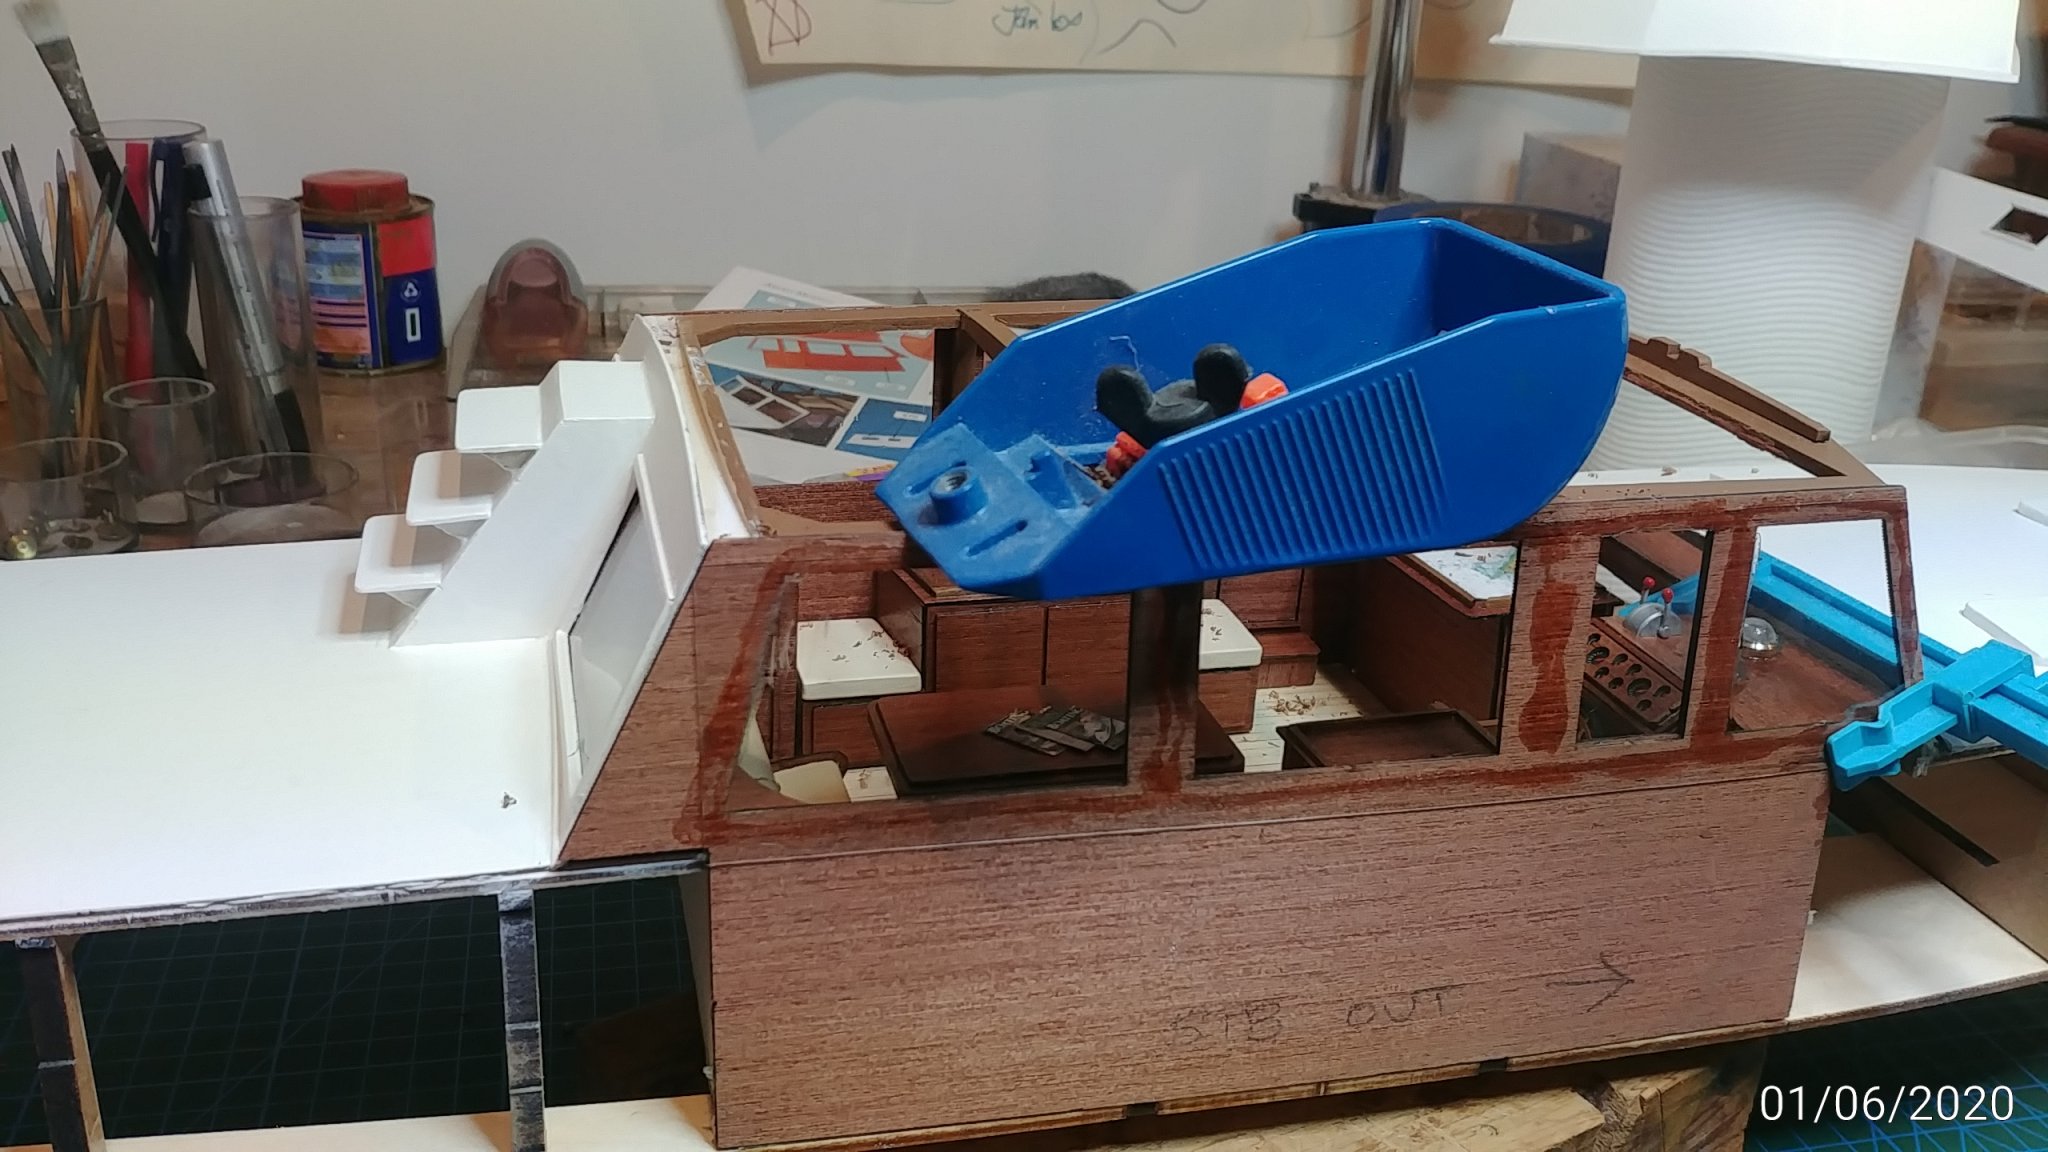
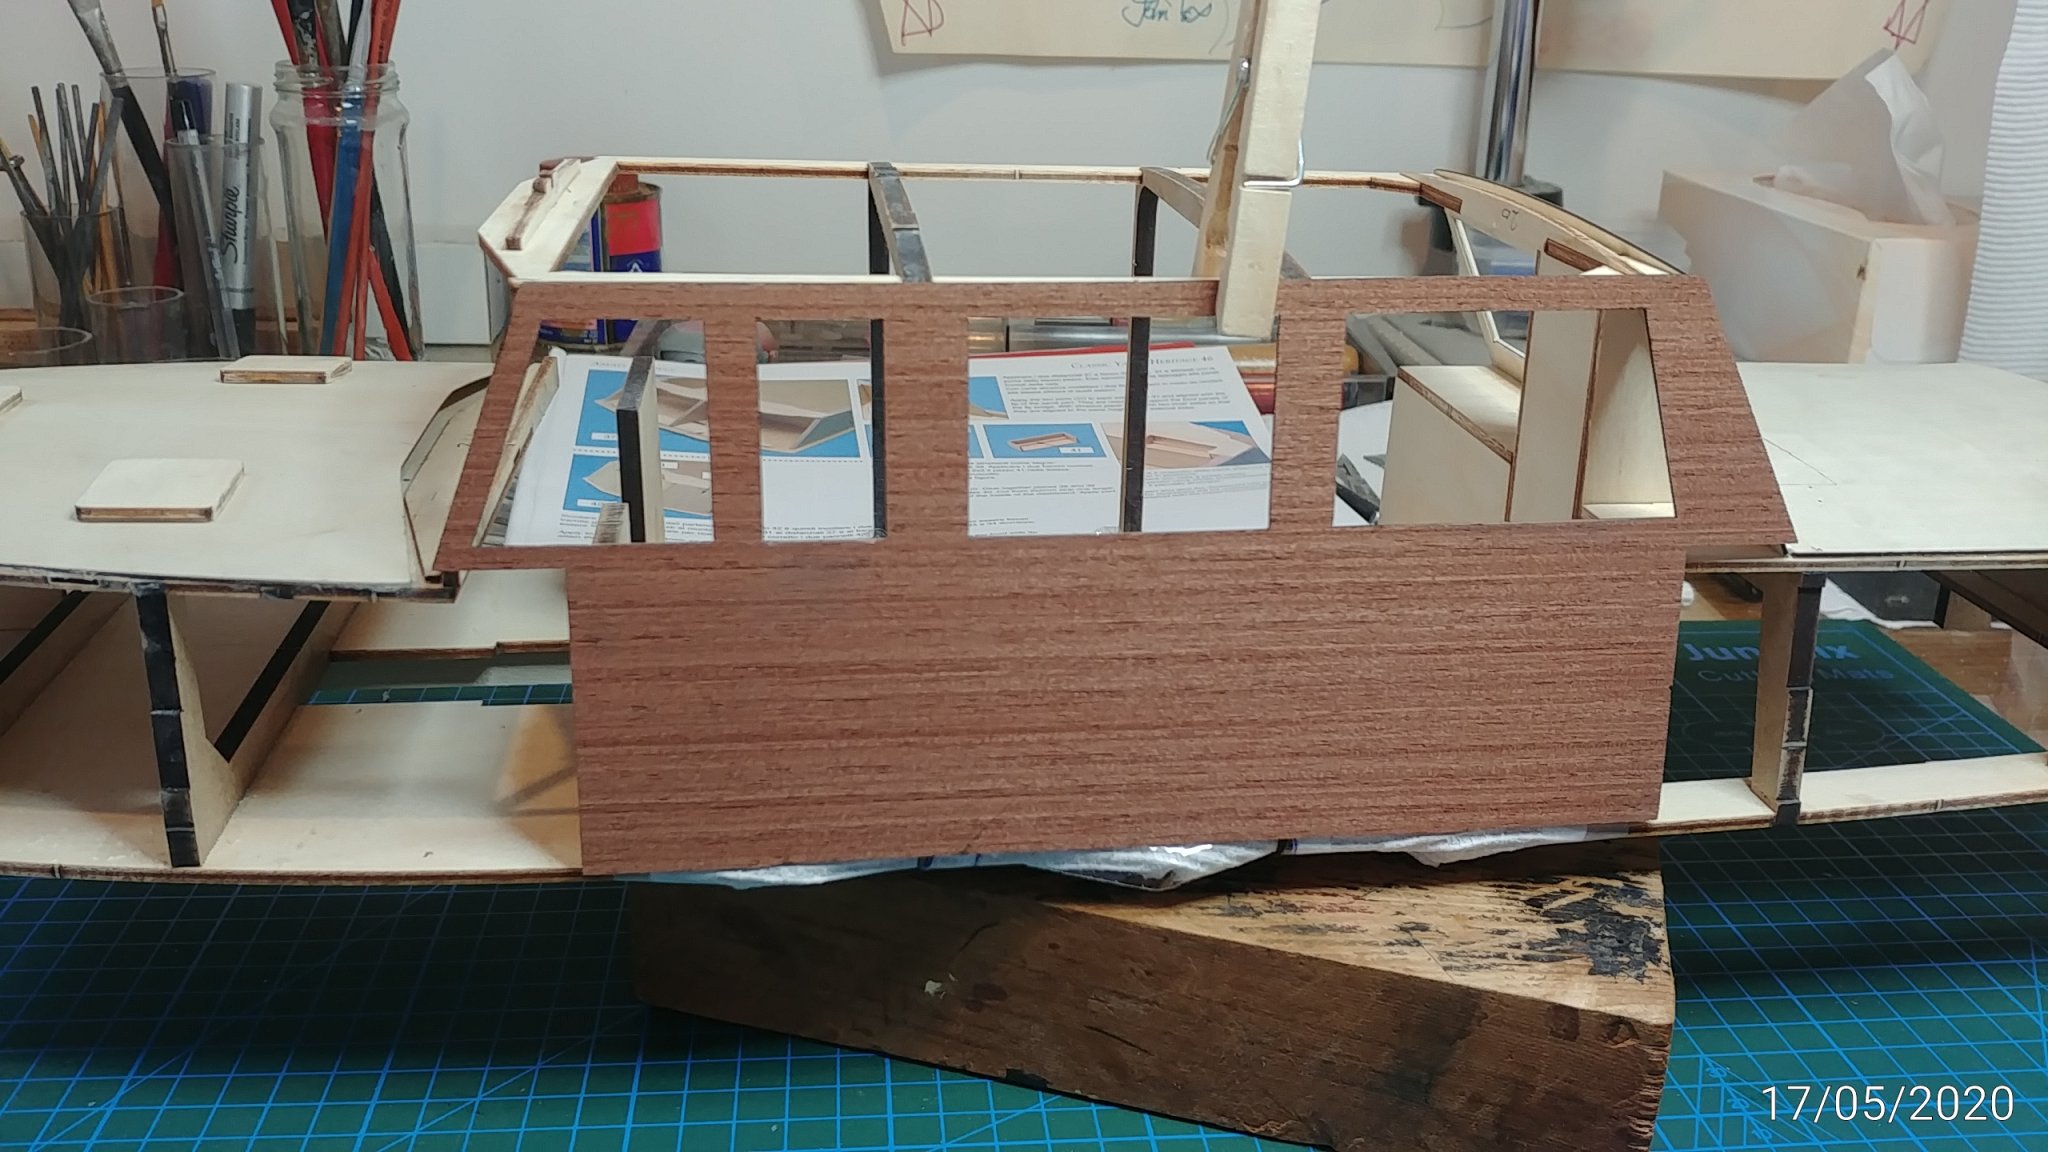
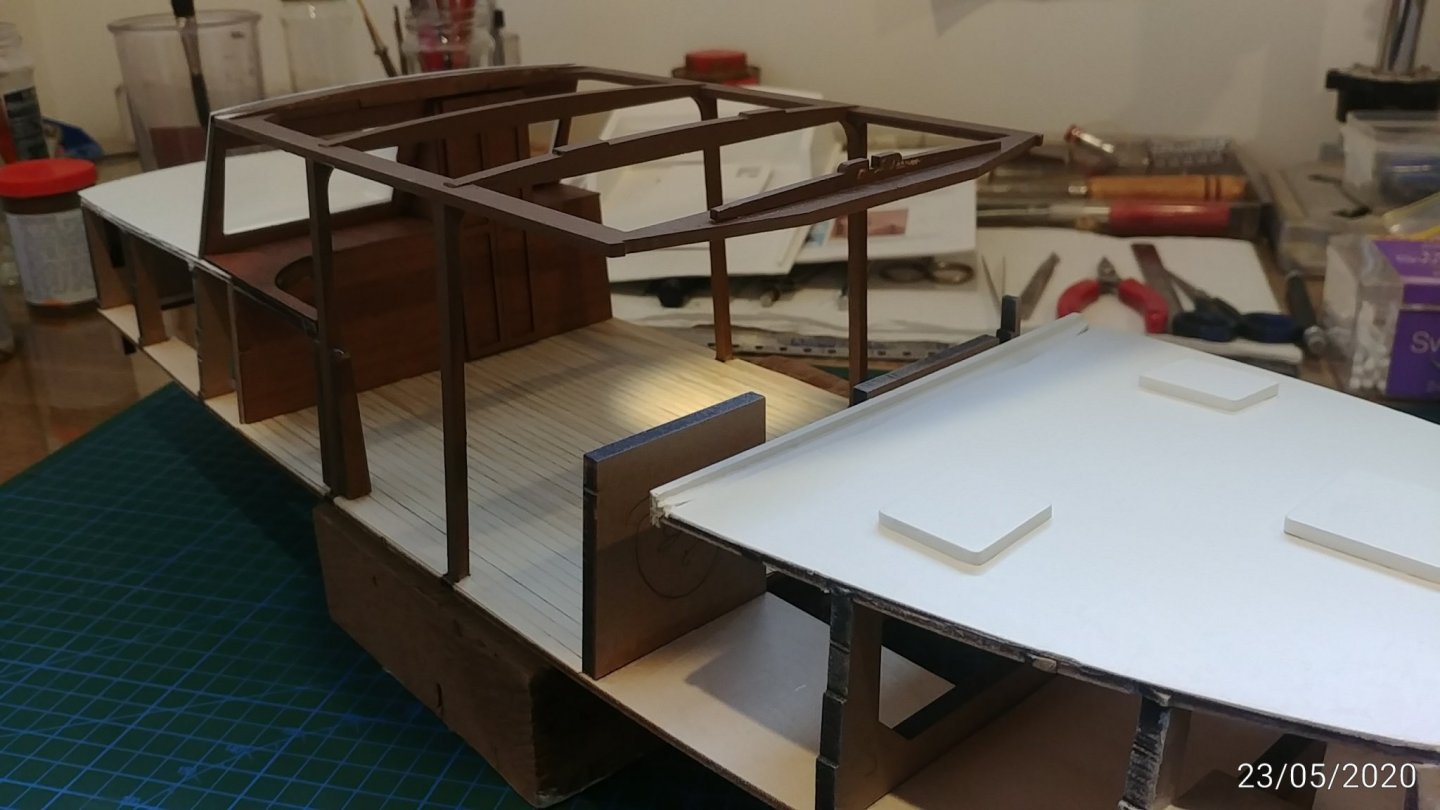
Notes on fitting inside cabin walls These walls (127,128) need to finish flush with roof side frames (17). To achieve this you can either plane off about 3mm for the full length from either ther bottom or top, in my case it had to come off the top because I did not trial fit the flybridge roof until later and it was too late to take it off the bottom. The lower edge of these side walls sits on top of the boat floor not outside it. See next post but you can see here that I have removed the overhead instrument panel 169 to enable roof fit

- 91 replies
-
- 3
-

-
- amati
- grand banks 46
- (and 1 more)
-
Thanks Mike...it's a welcome change from rigging challenges...lol
- 91 replies
-
- 1
-
-
- amati
- grand banks 46
- (and 1 more)
-
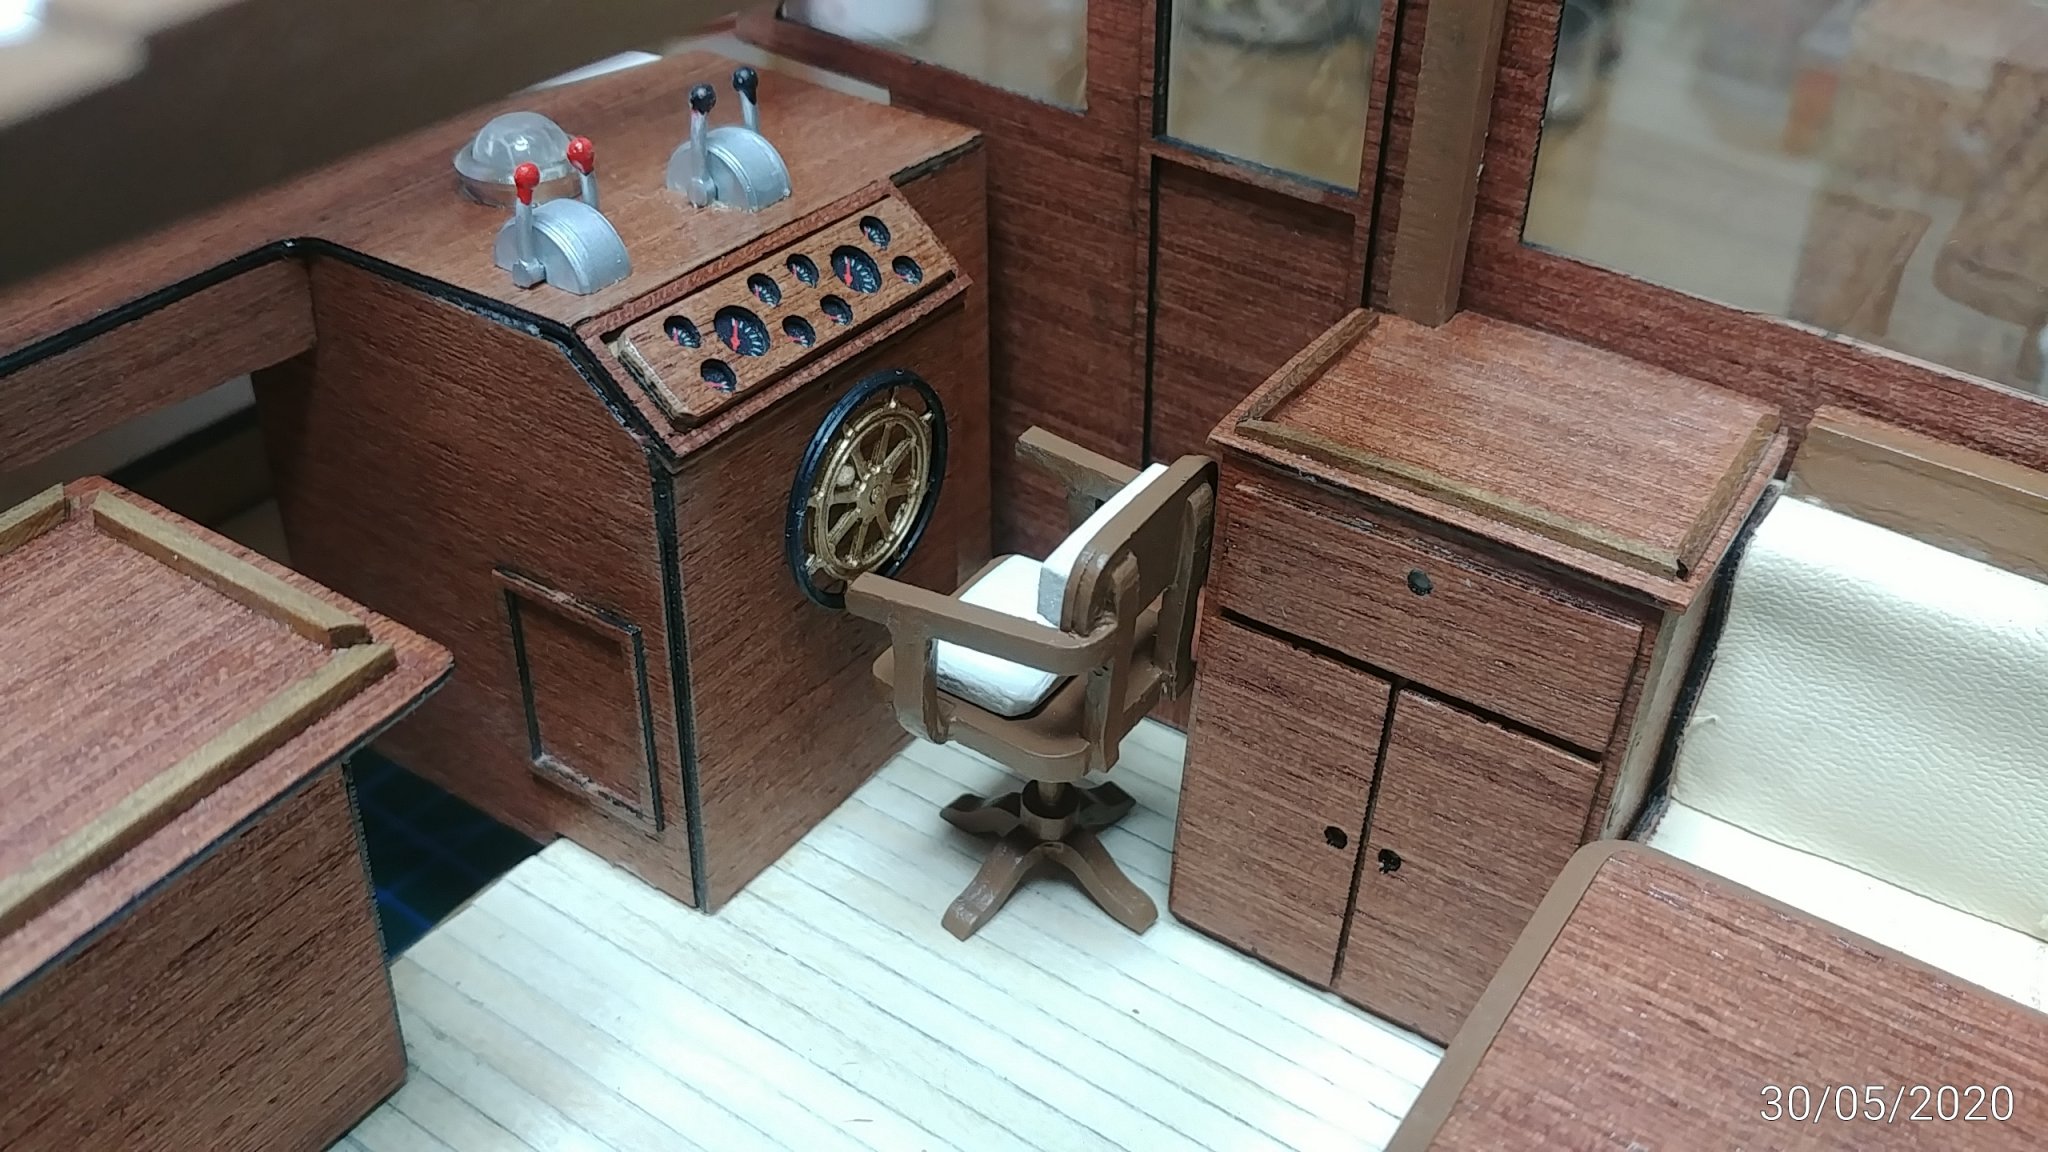
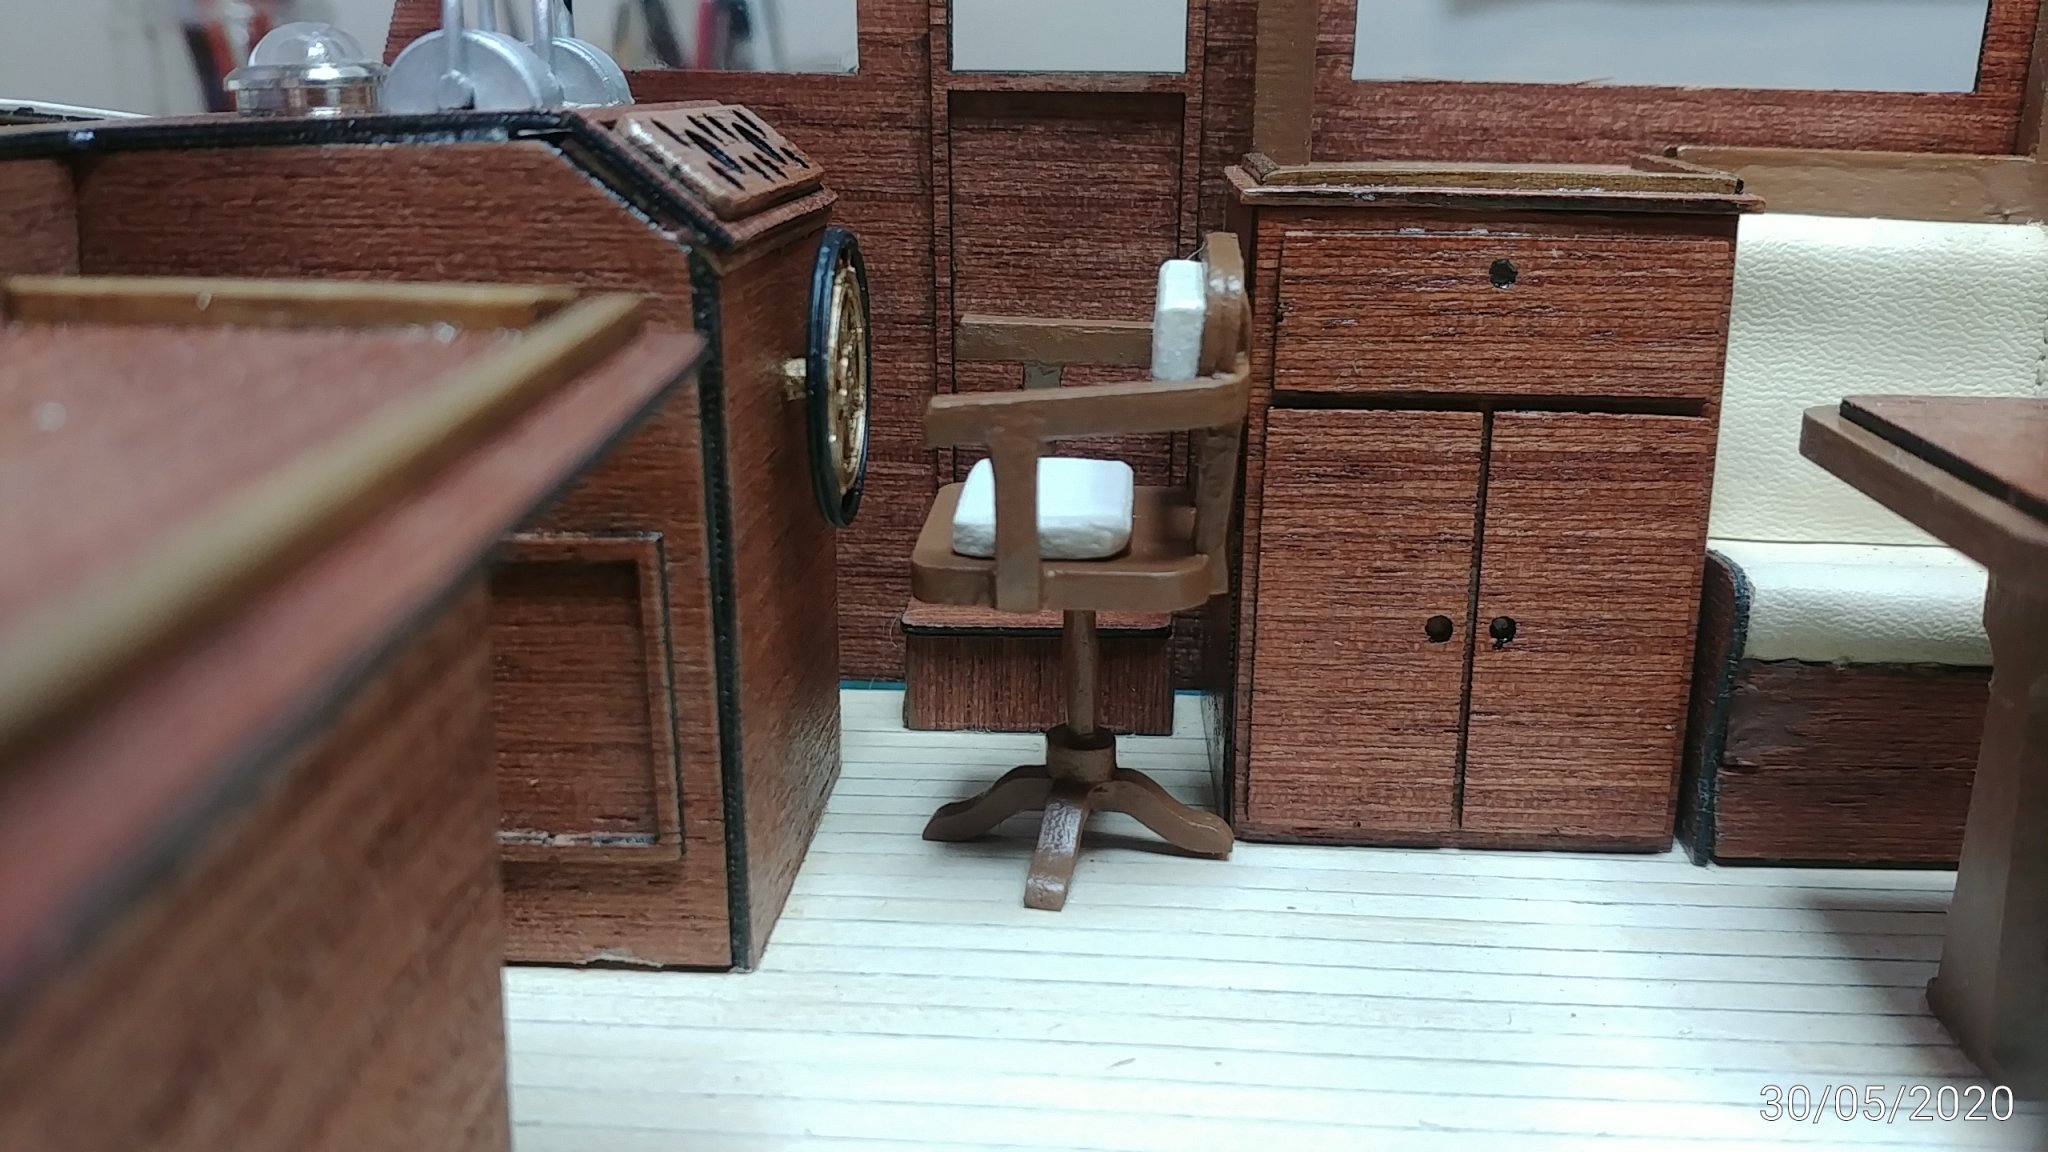
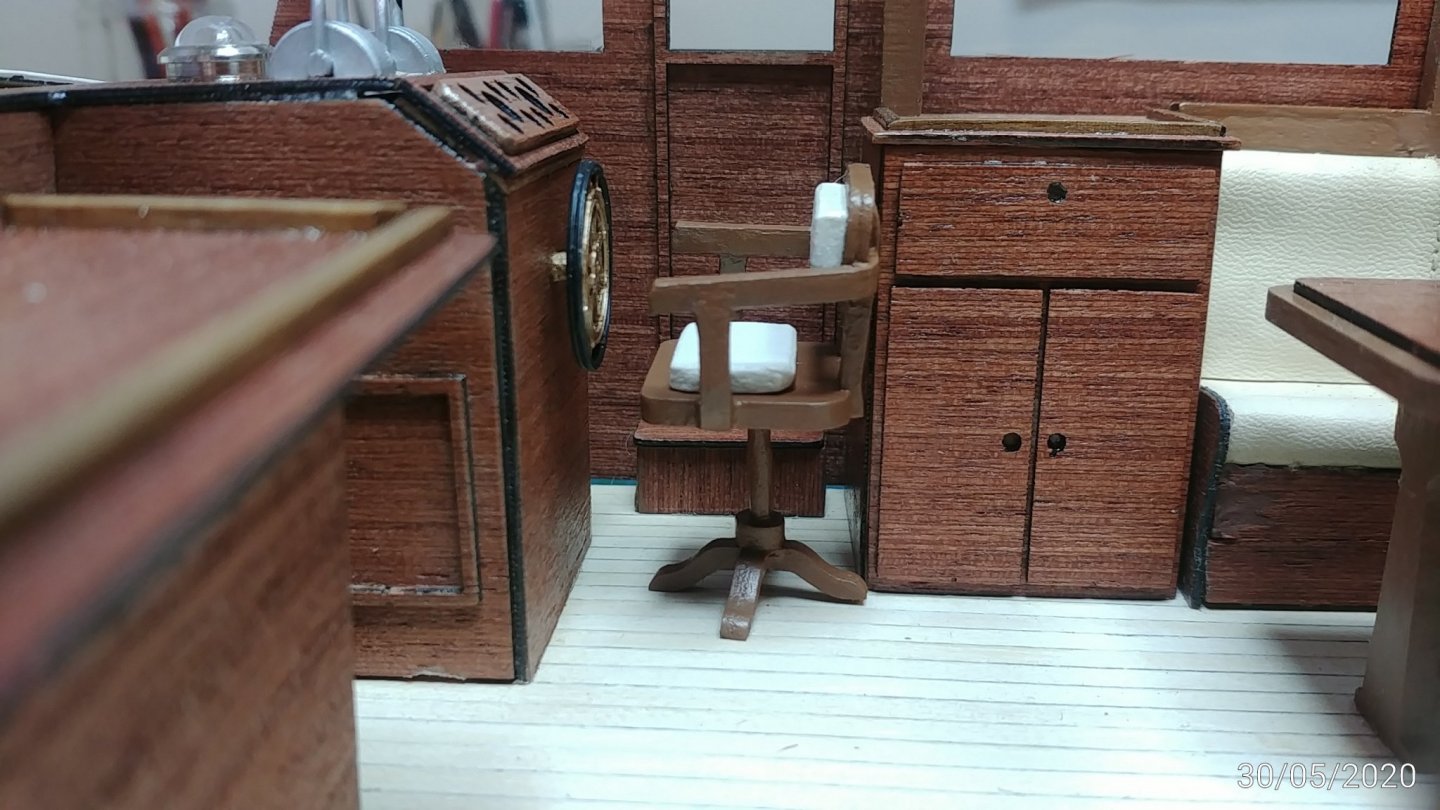
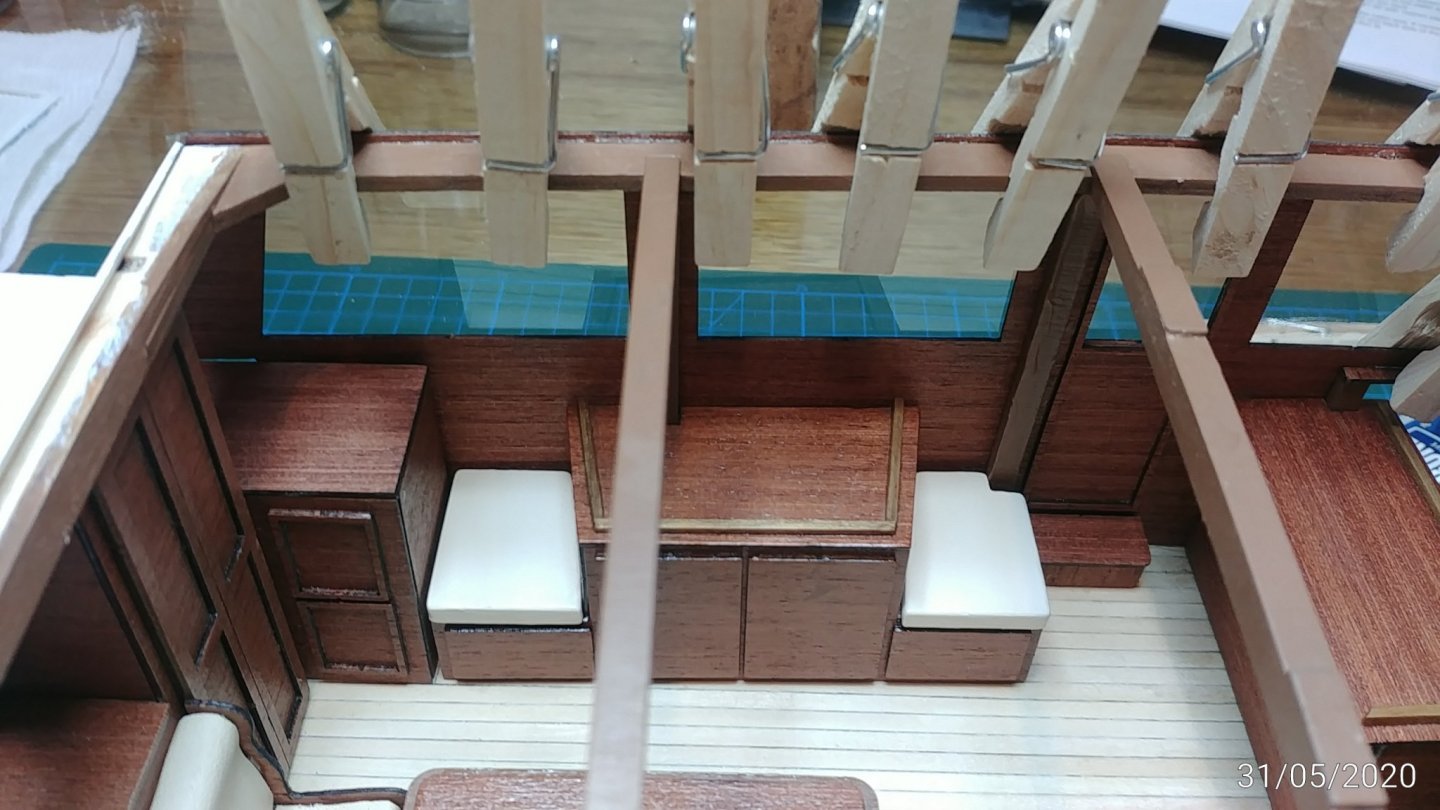
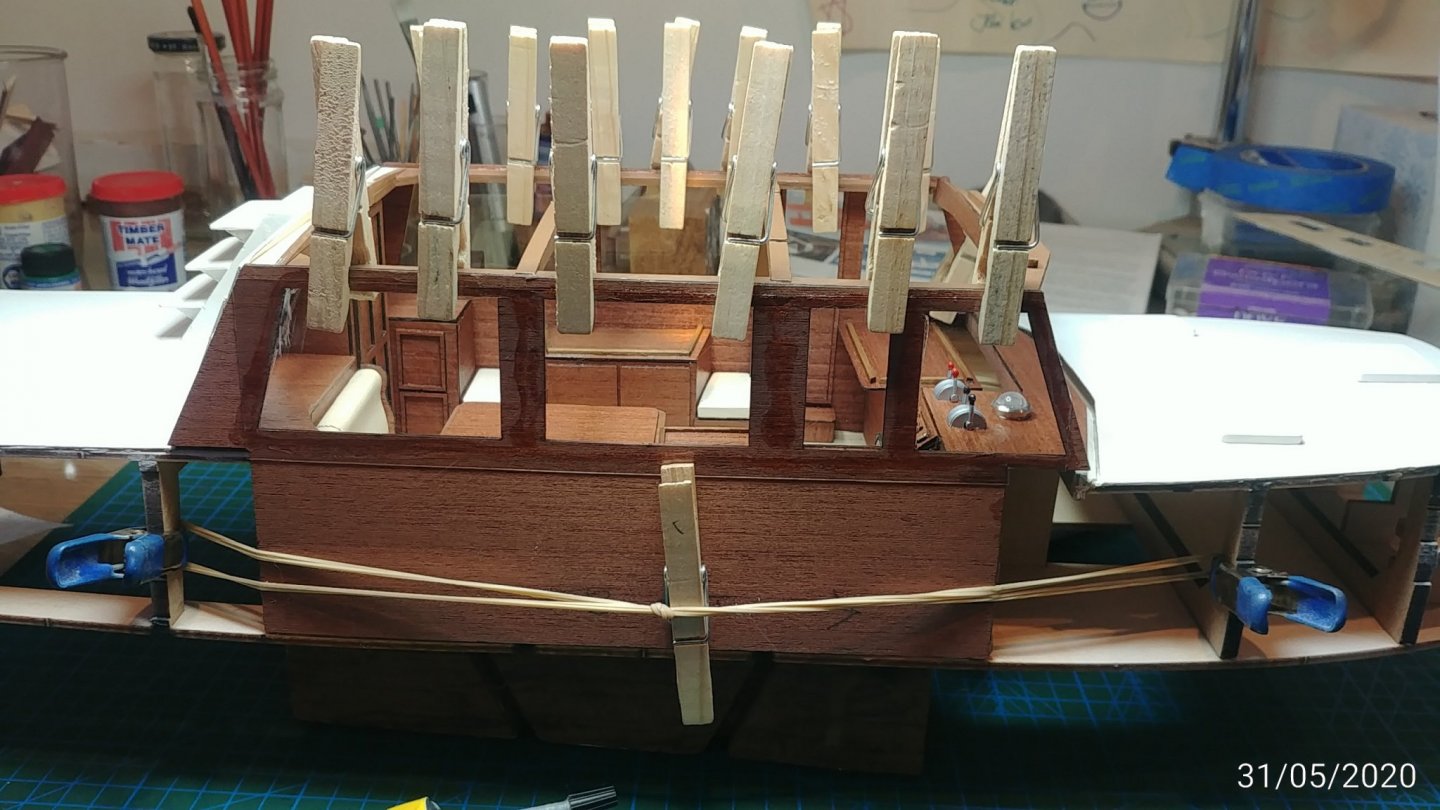
Finished the cabin. I think ther helm chair is big out of scale but in the end put it in. Sometimes it takes a while to work out how to hold things while the glue sets. The cabin lining went on reasonably well...windscreens next.


- 91 replies
-
- 9
-
-
- amati
- grand banks 46
- (and 1 more)
-
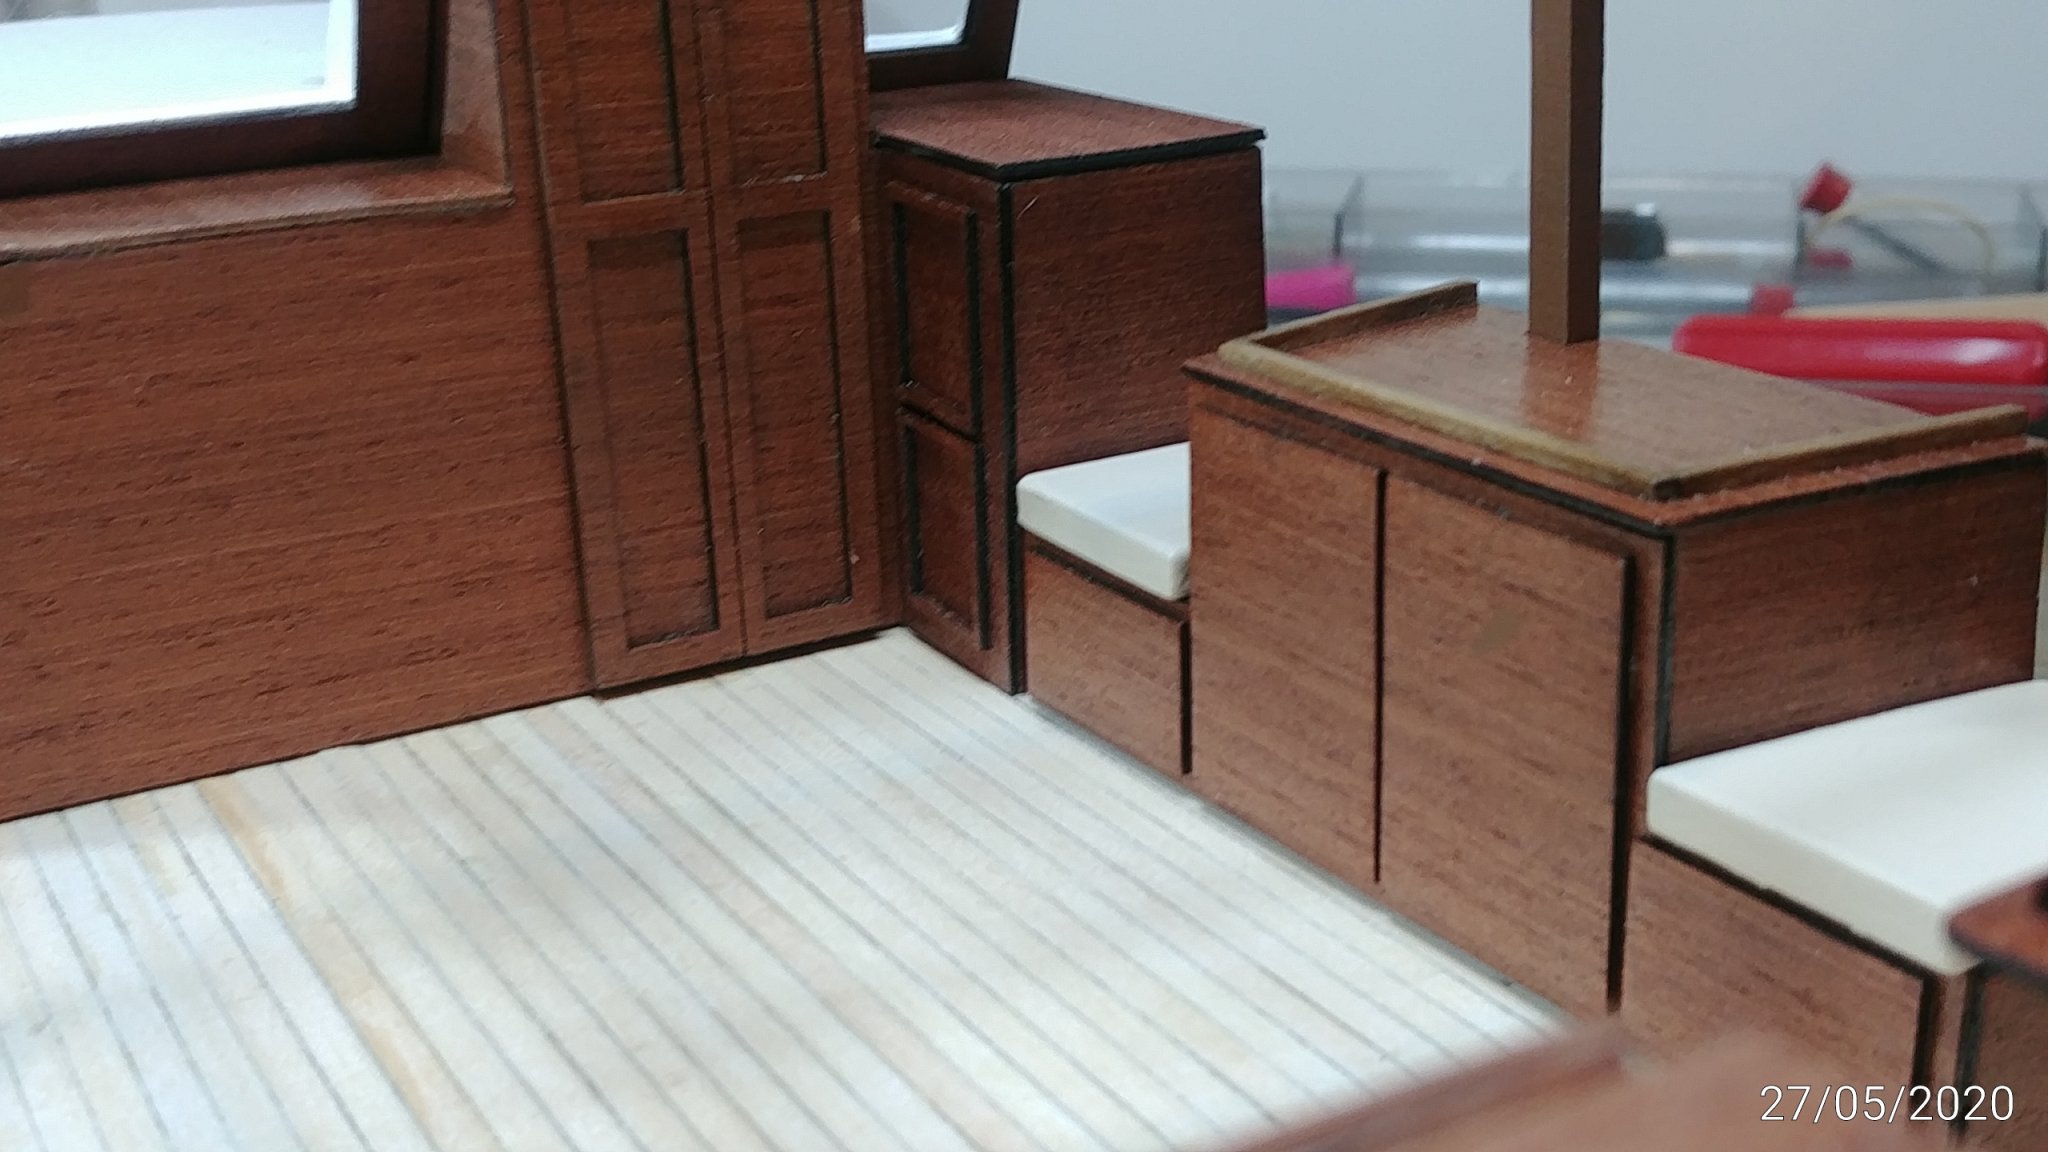
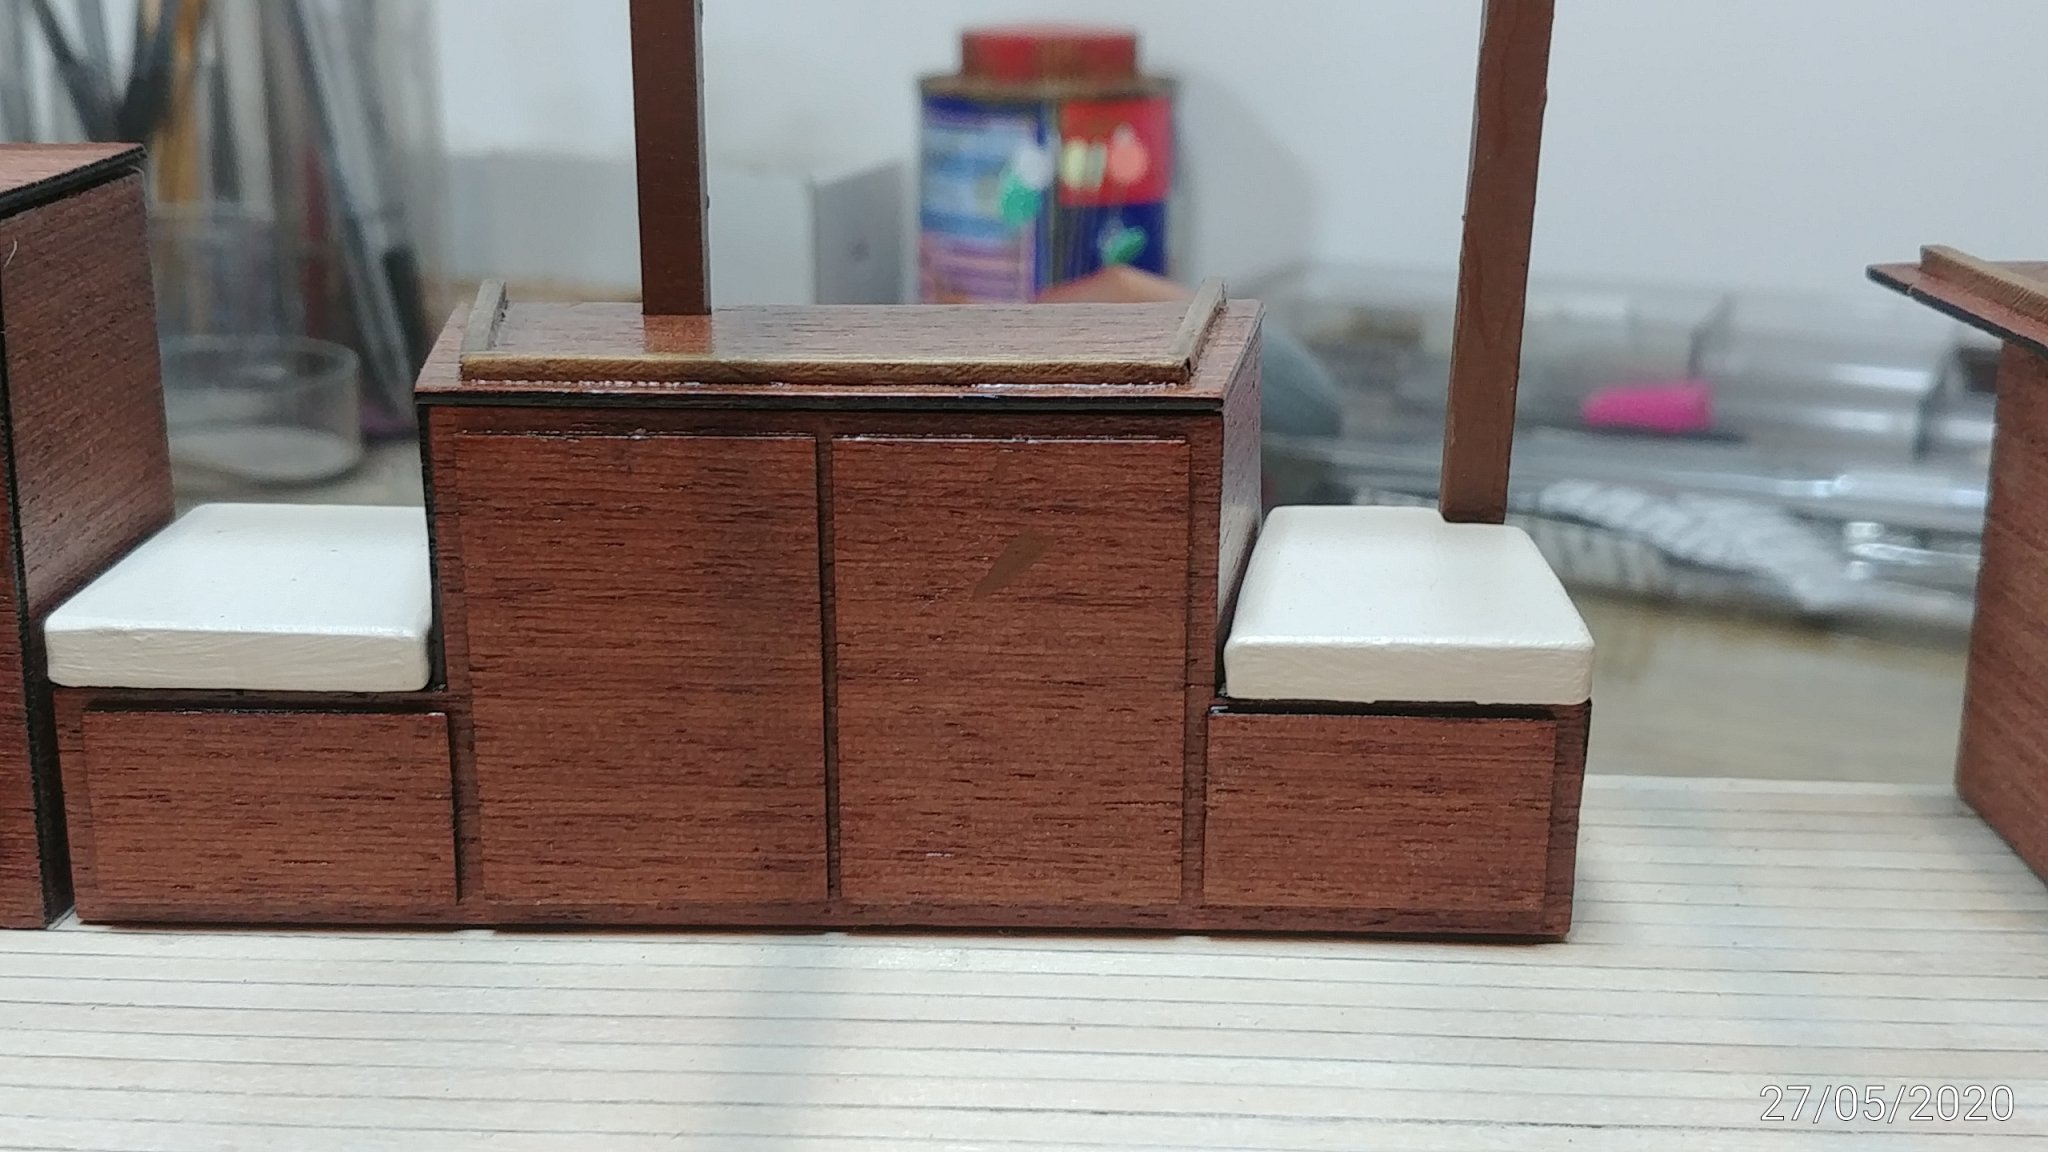
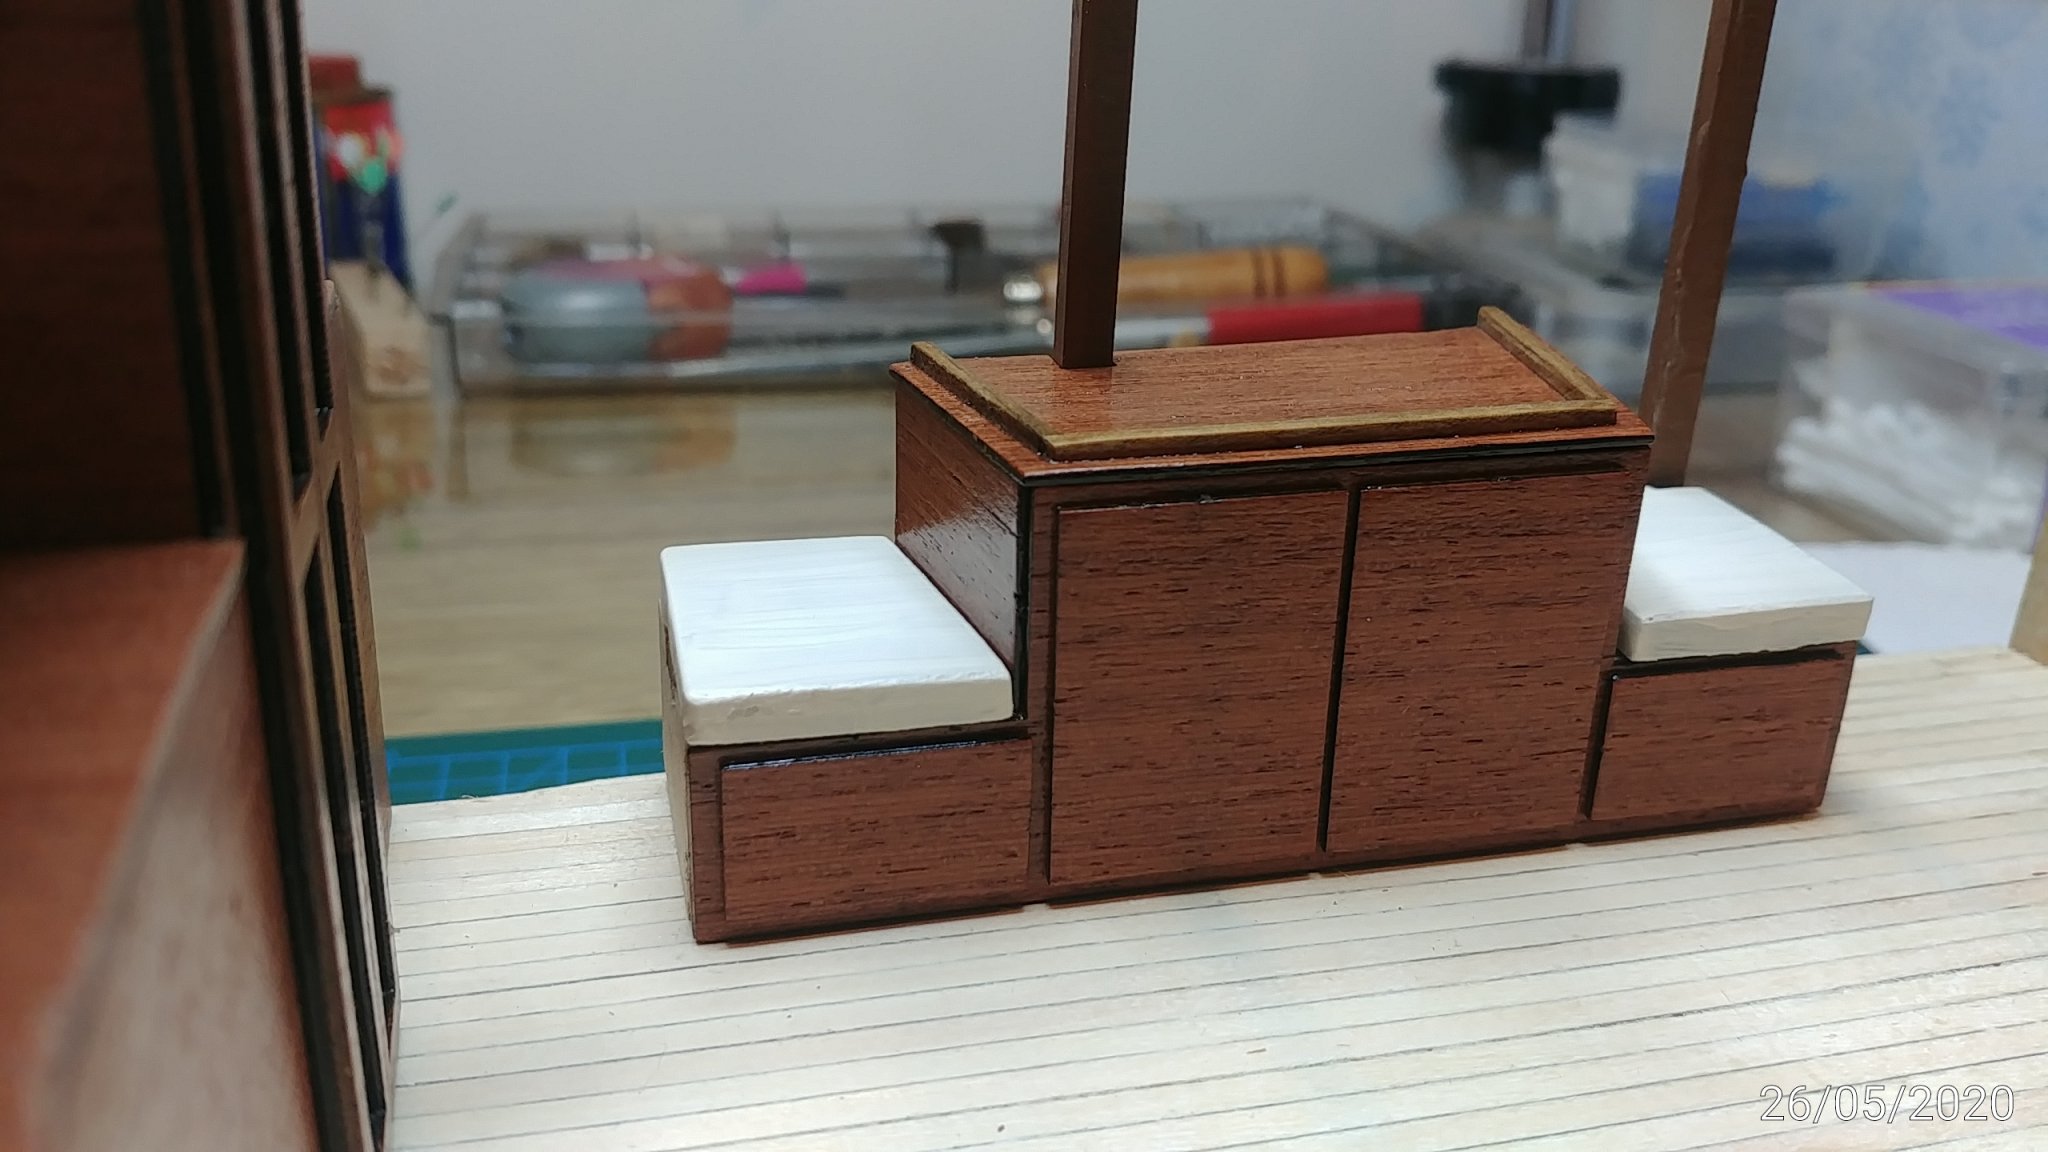
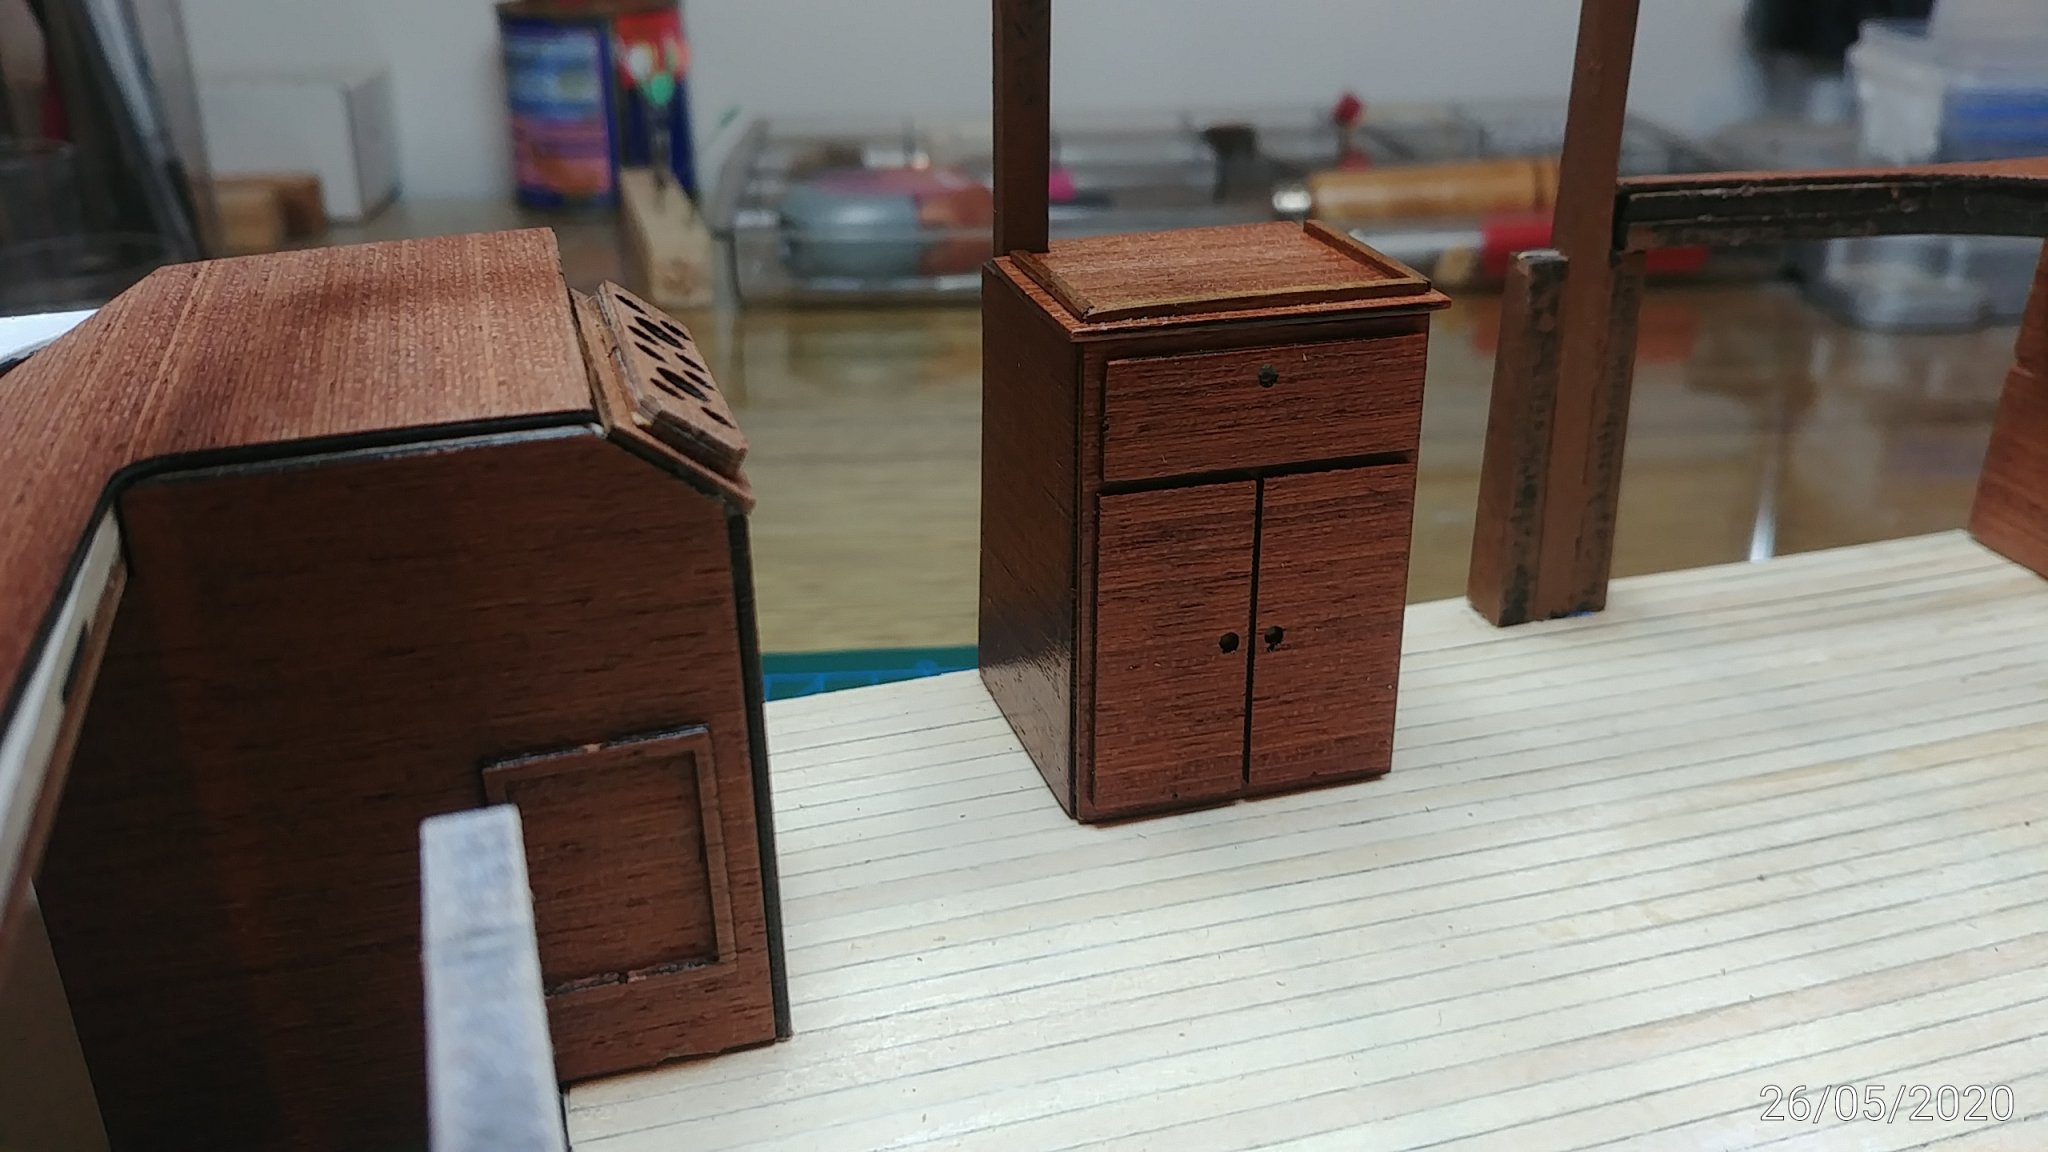
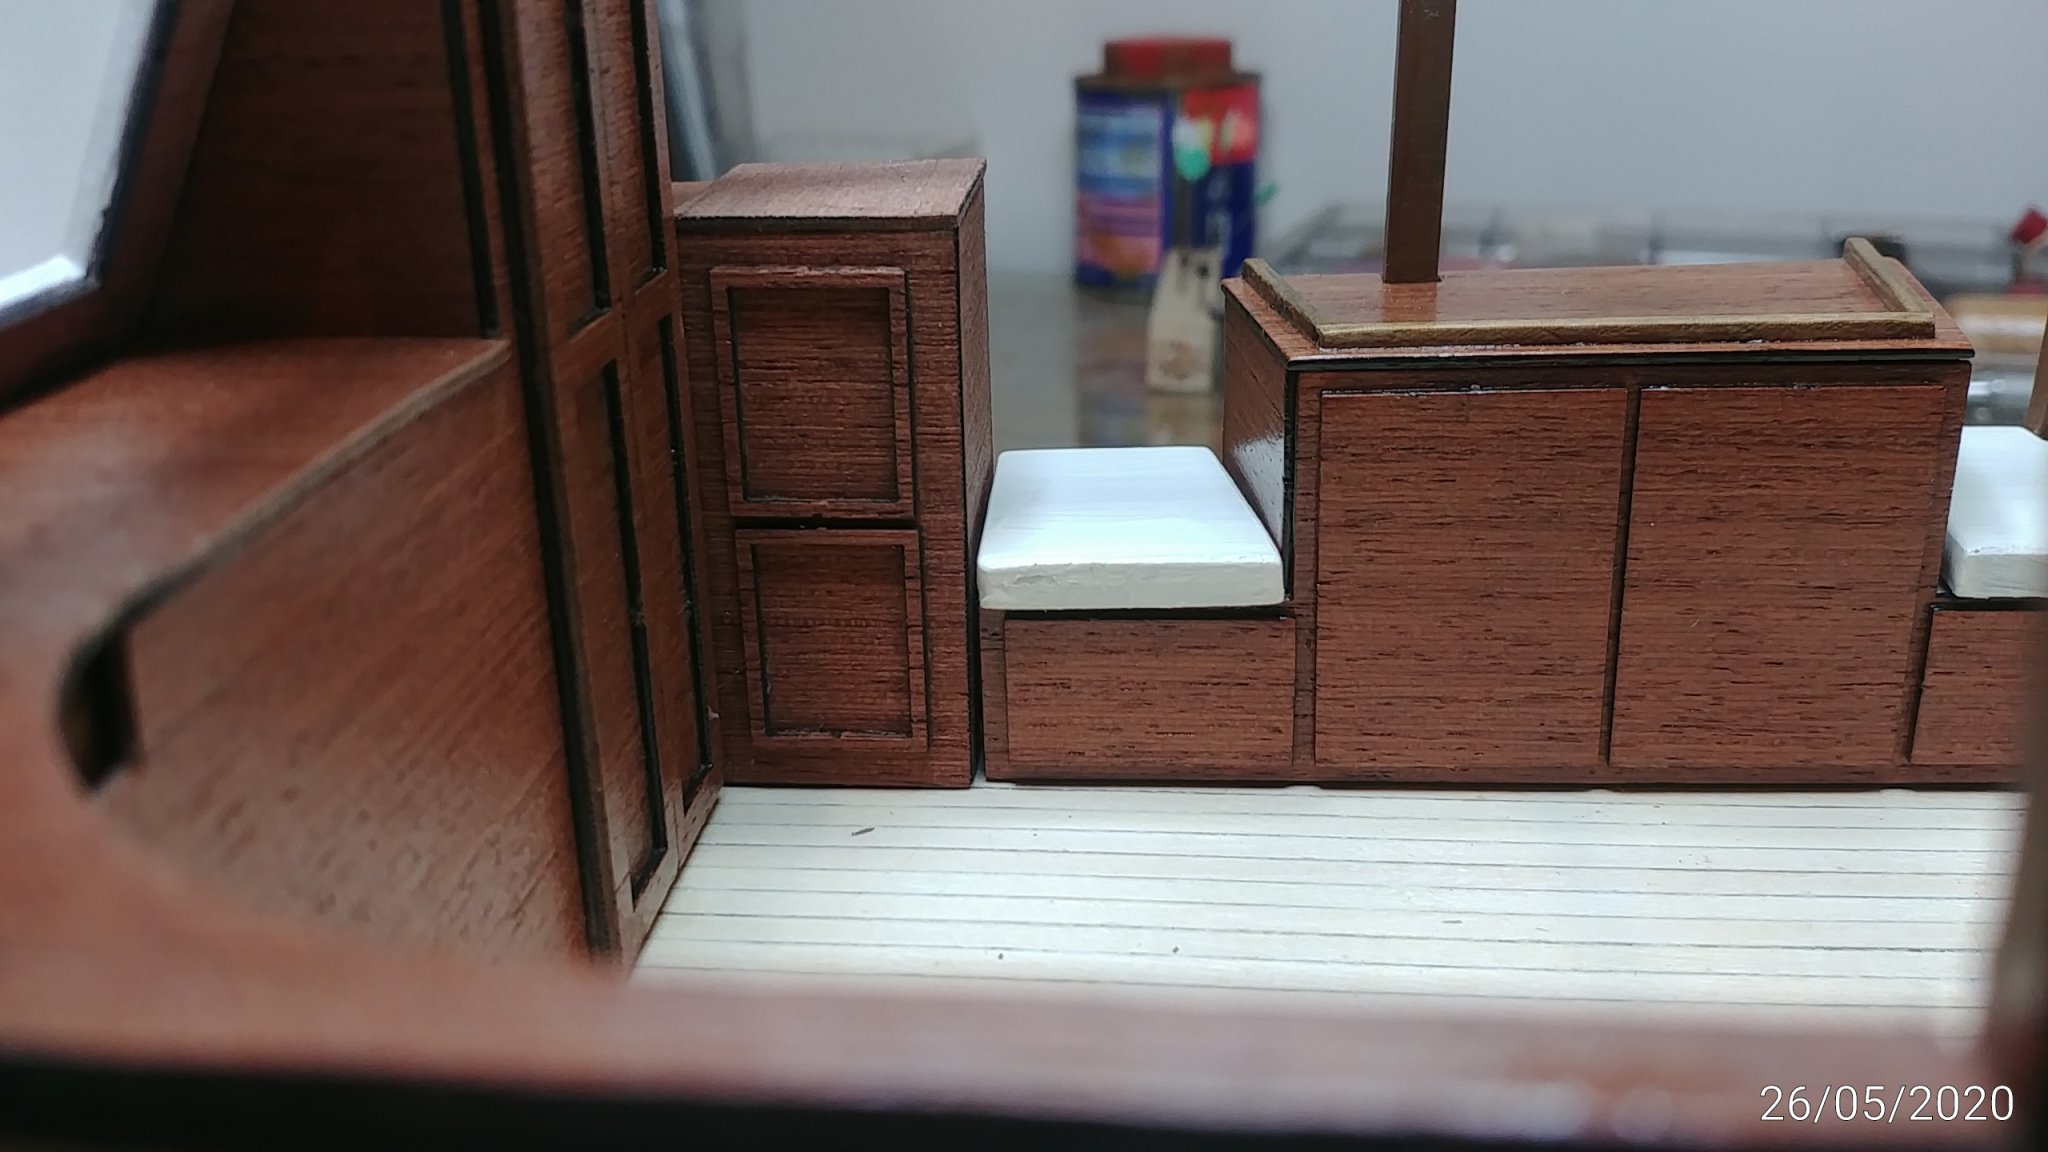
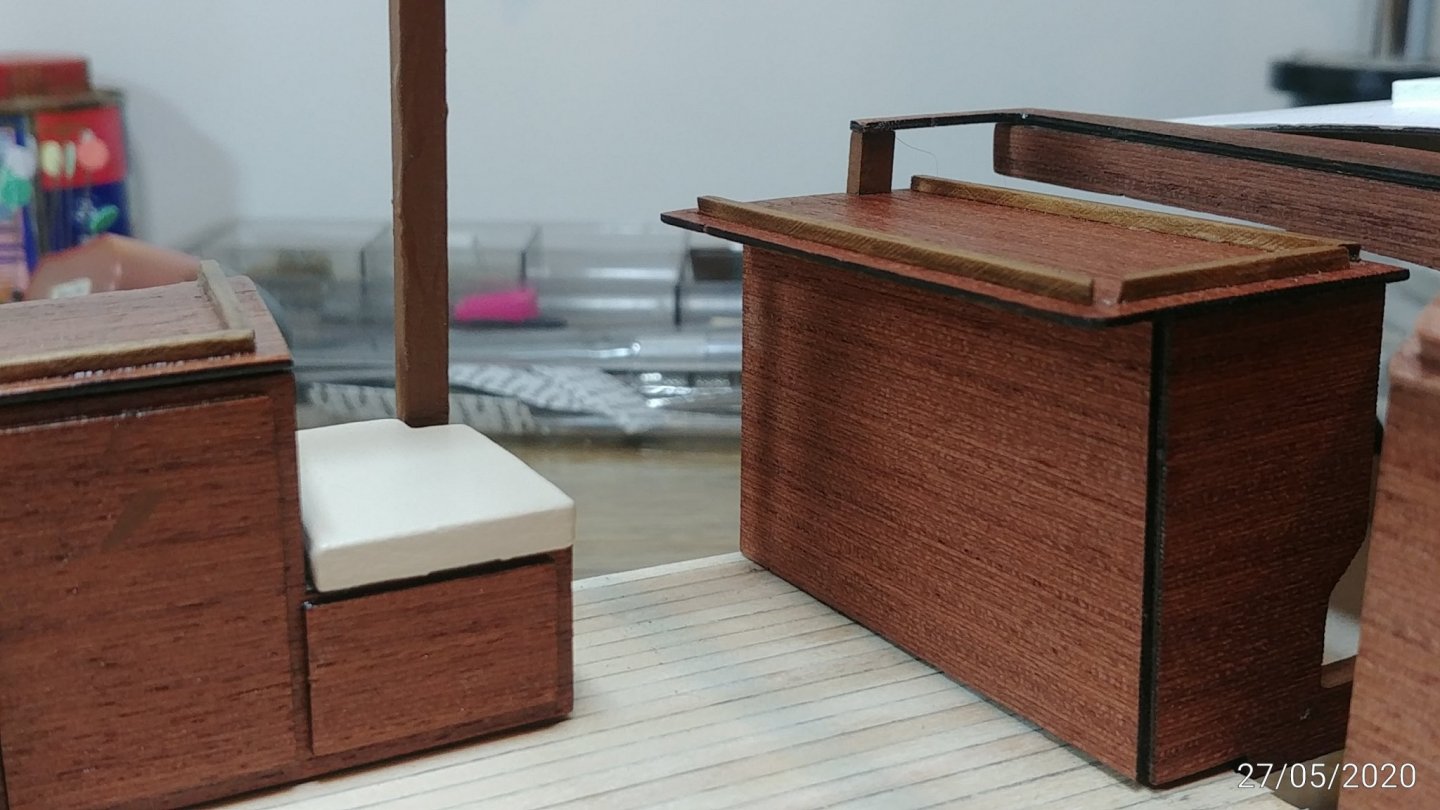
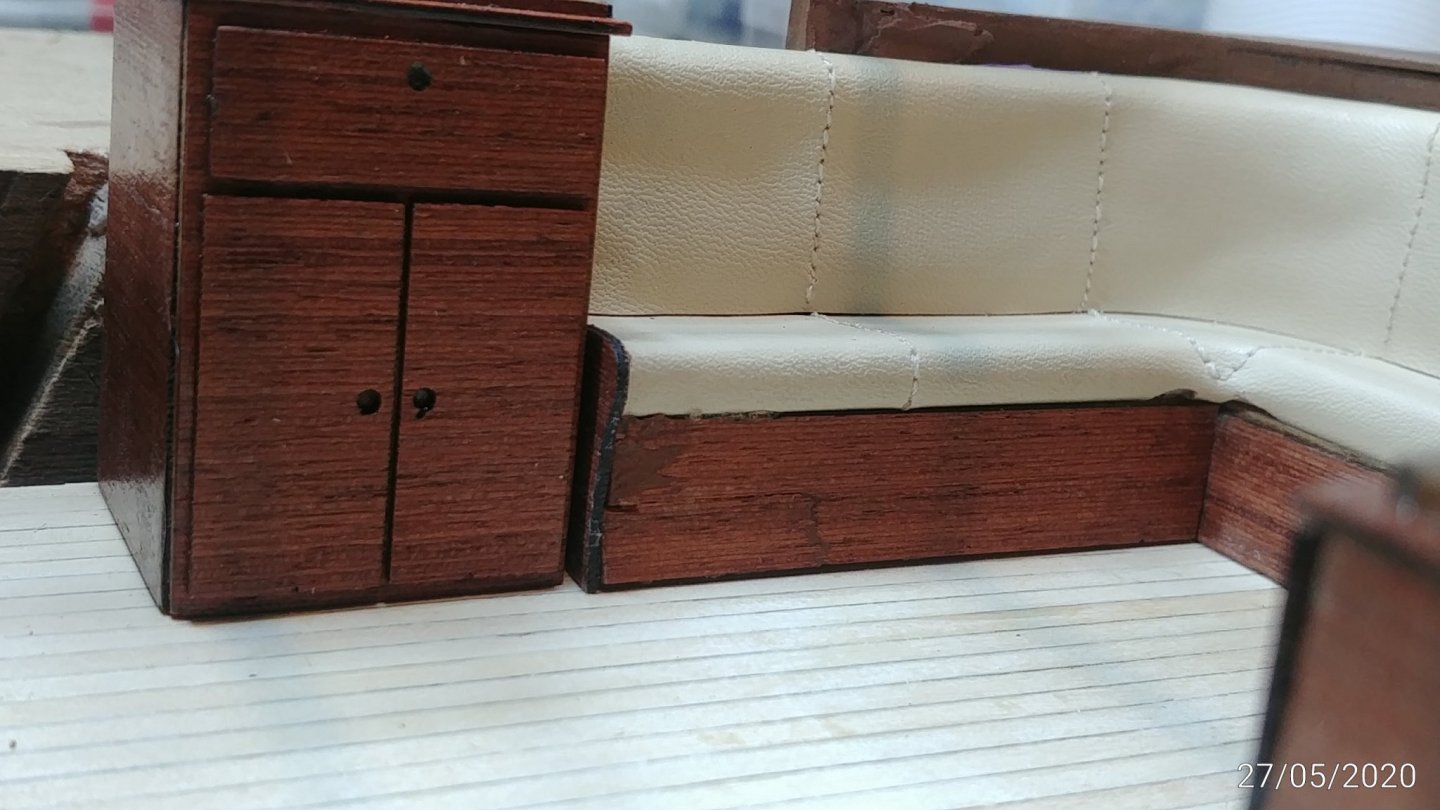
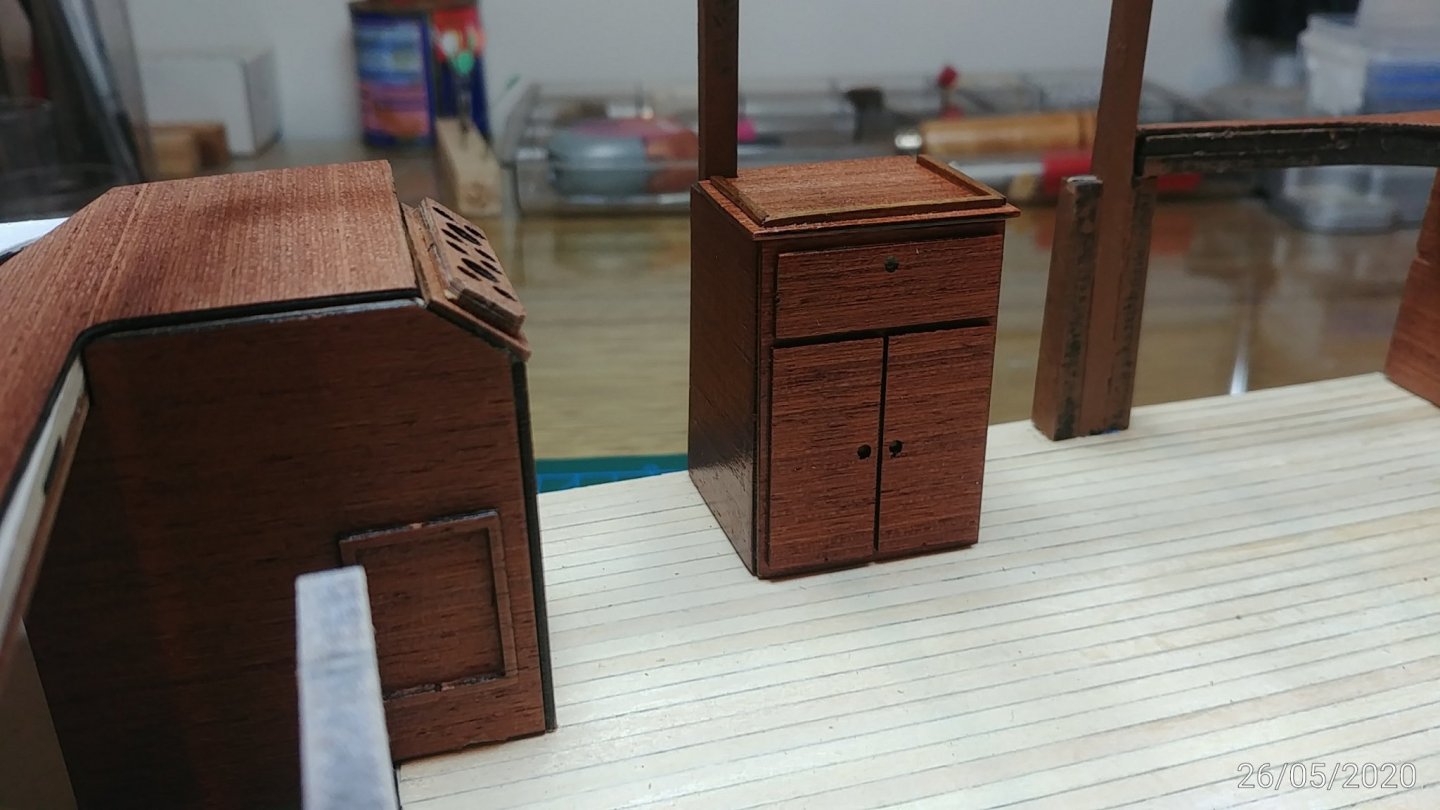
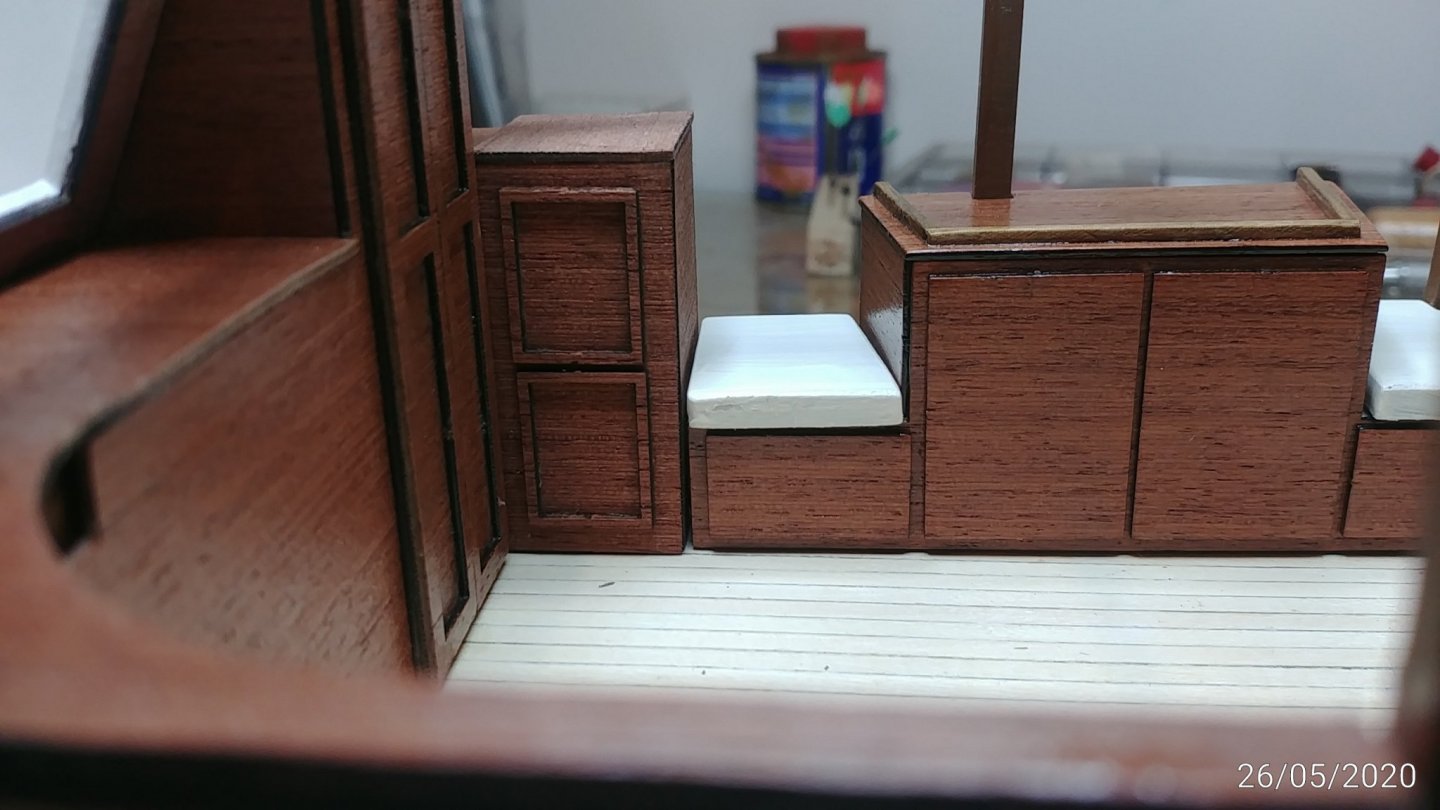
Some serious kit bashing last few days. I had no end of trouble getting the curved sofa to fit without being in front of the door to lower deck at one end, and/or pushing the small cabinet in front of the door at the helm station at the other end. I cut away the curved backboard to let the sofa in and under a bit, but that was not enough and in the end I had to take the saw to the whole sofa structure and remove about 6mm from the long end. Restuck the leather and the end panel OK.... I am sure that I must have done something incorrectly, probably around the curved back board..?? perhaps it should have been higher allowing the sofa to go under properly. Dont know....but all the parts have fitted so well that I am assuming I have introduced the error. Also found the top of the small cabinet next to the dinette was at the same height as the adjacent counter under the rear portside window. I took the top off the cabinet and ran a new piece of mahogany from the bottom of window through over the small cupboard. Looks better as one piece....well I think so anyway.Very close to finished the cabin interior. I think the lime floor planking was a good modification...that faux parquetry paper really wasnt for me. Actually the woodwork doesnt look this shiny, it is reflecting the flash in the photos, it is more semi gloss than they look.


- 91 replies
-
- 10
-
-
- amati
- grand banks 46
- (and 1 more)
-
Experimenting with a new finish for the mahogany cabin furniture and walls ...I have always used Lifecolour LC77..Satin Clear. It is closer to Matt than Satin I think. I am using Tamiya Semi-Gloss on this furniture and interior. It is never quite right...I think this is definitely on the "gloss" side of semi gloss but it does give more life to the enclosed cabin so I am happy with it really. You can see in the next lot of photos that it is not matt.


- 91 replies
-
- 6
-
-
- amati
- grand banks 46
- (and 1 more)
-
There are actually a few errors in the instructions related to wrong part numbers or positioning. I think I will post them here as I go as an aid to someone following after me. Some are just unimportant spelling/translation errors which I will no longer bother with but just pics of corrected graphics.


- 91 replies
-
- 4
-
-
- amati
- grand banks 46
- (and 1 more)
-
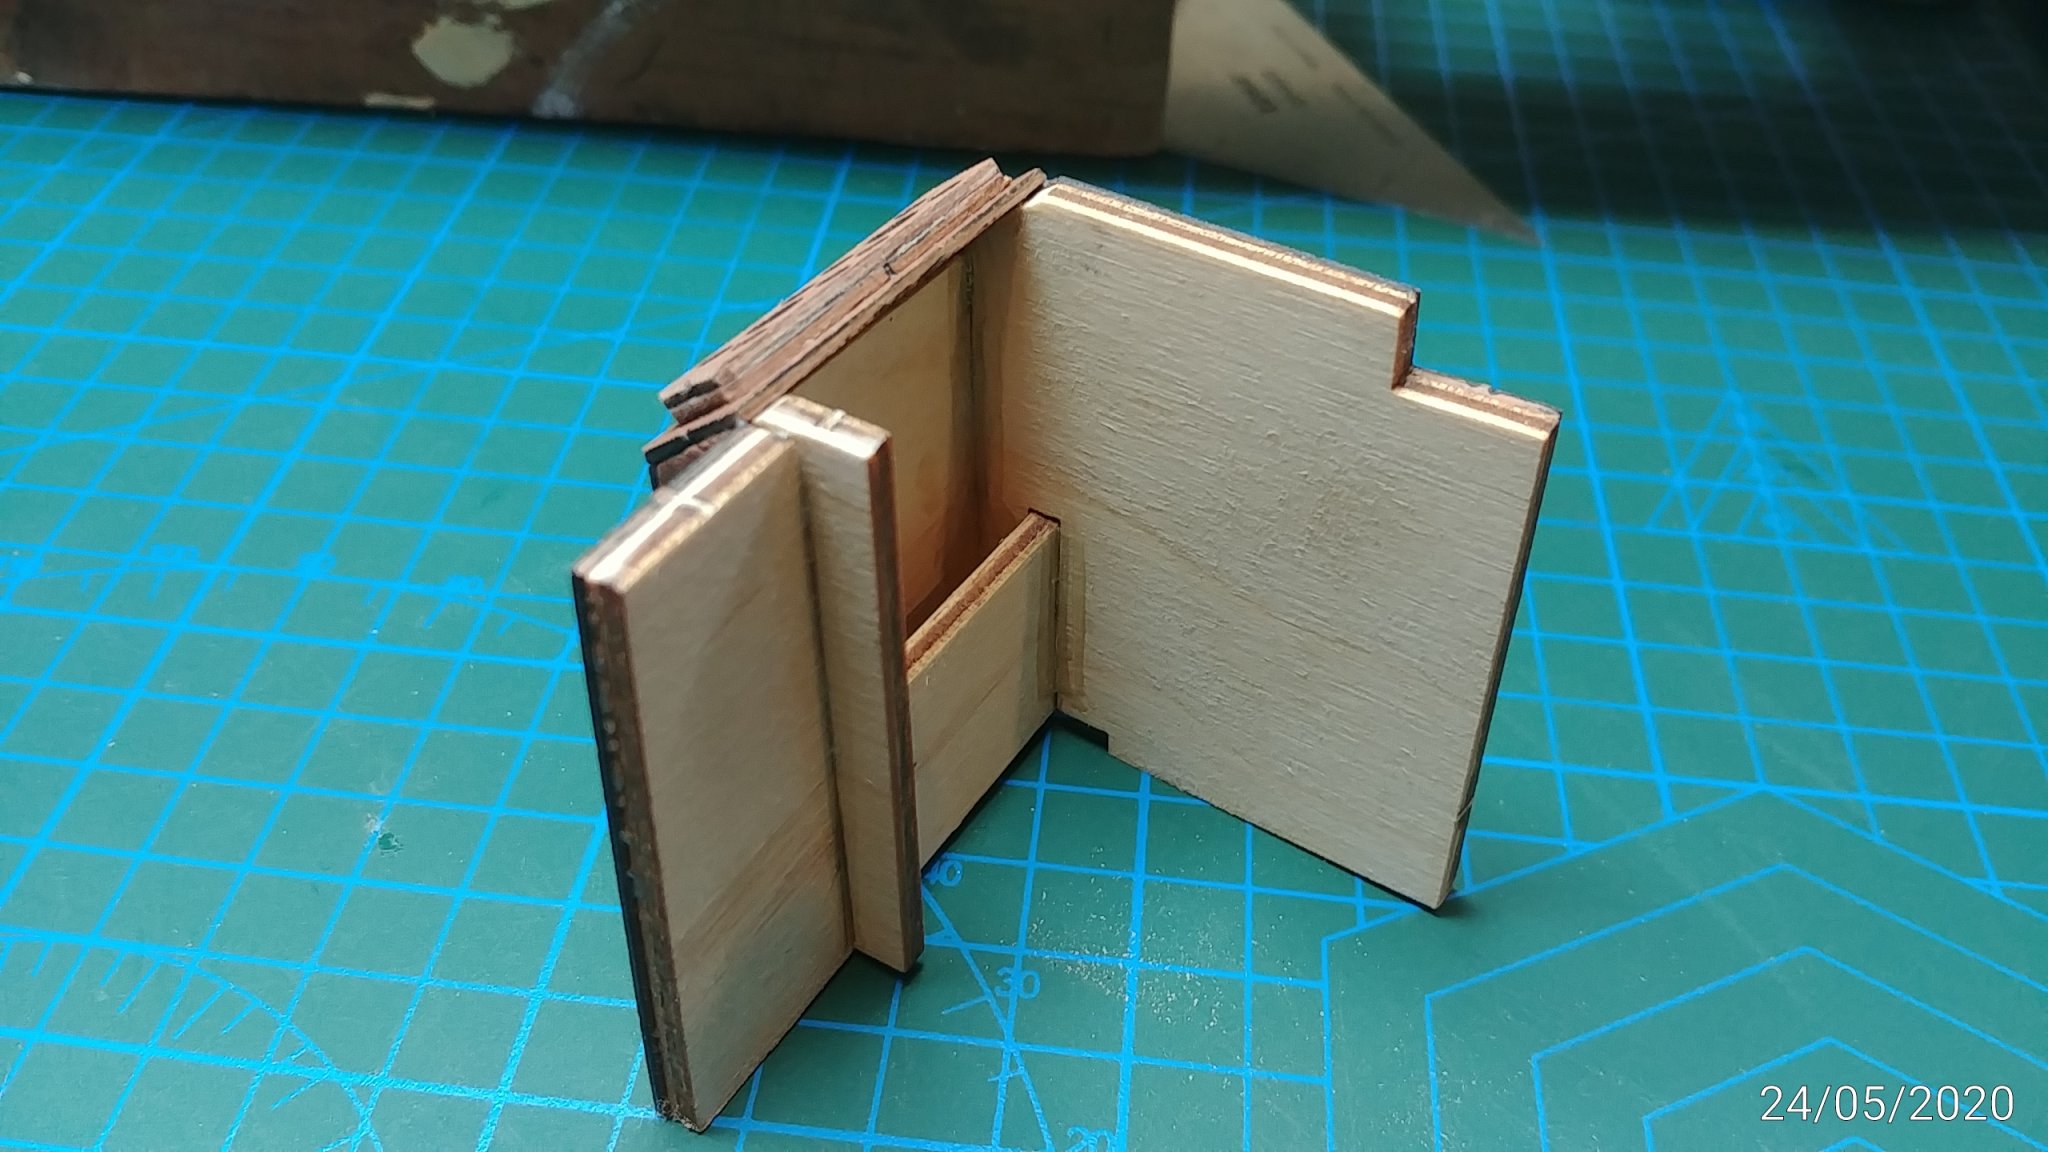
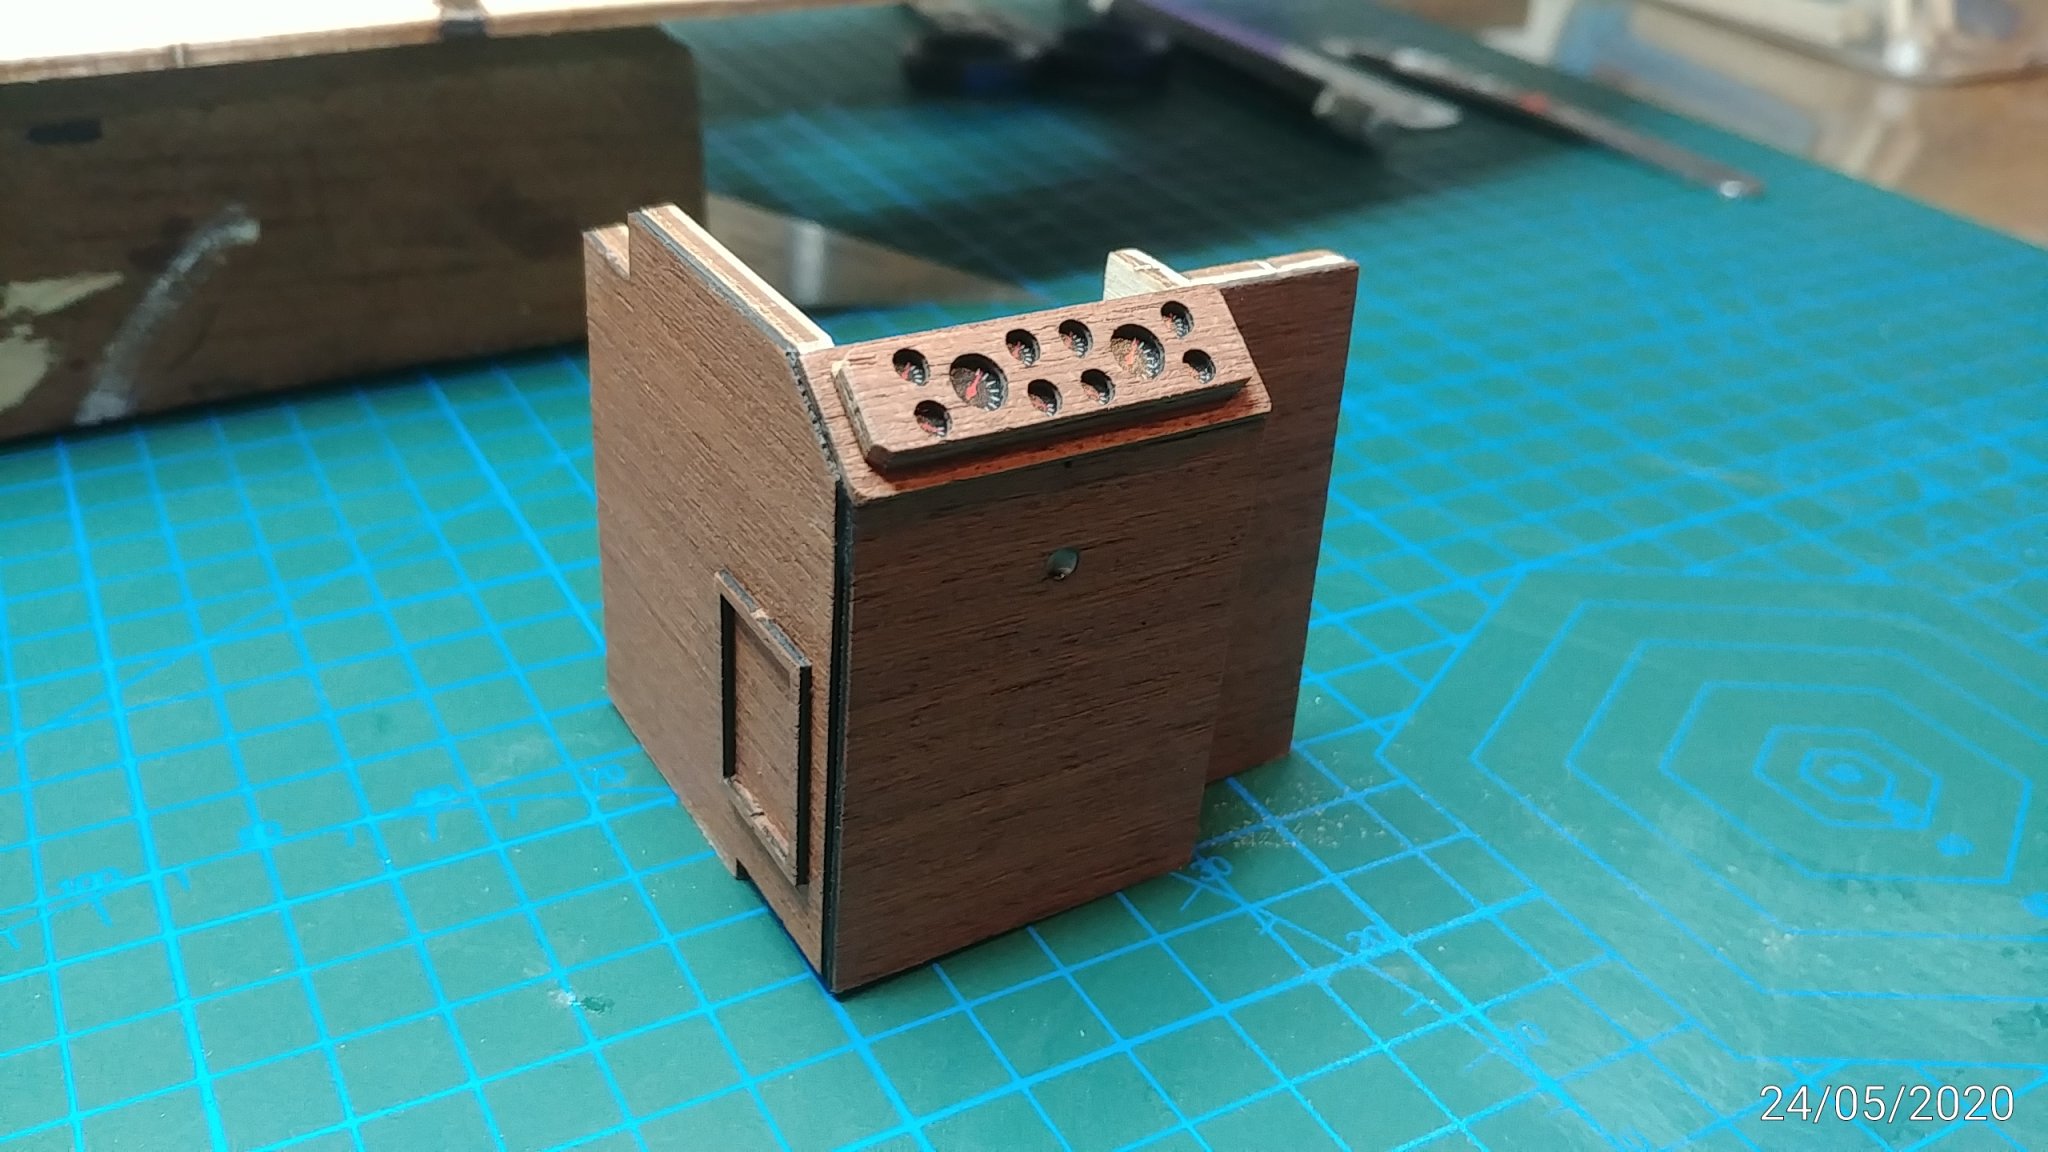
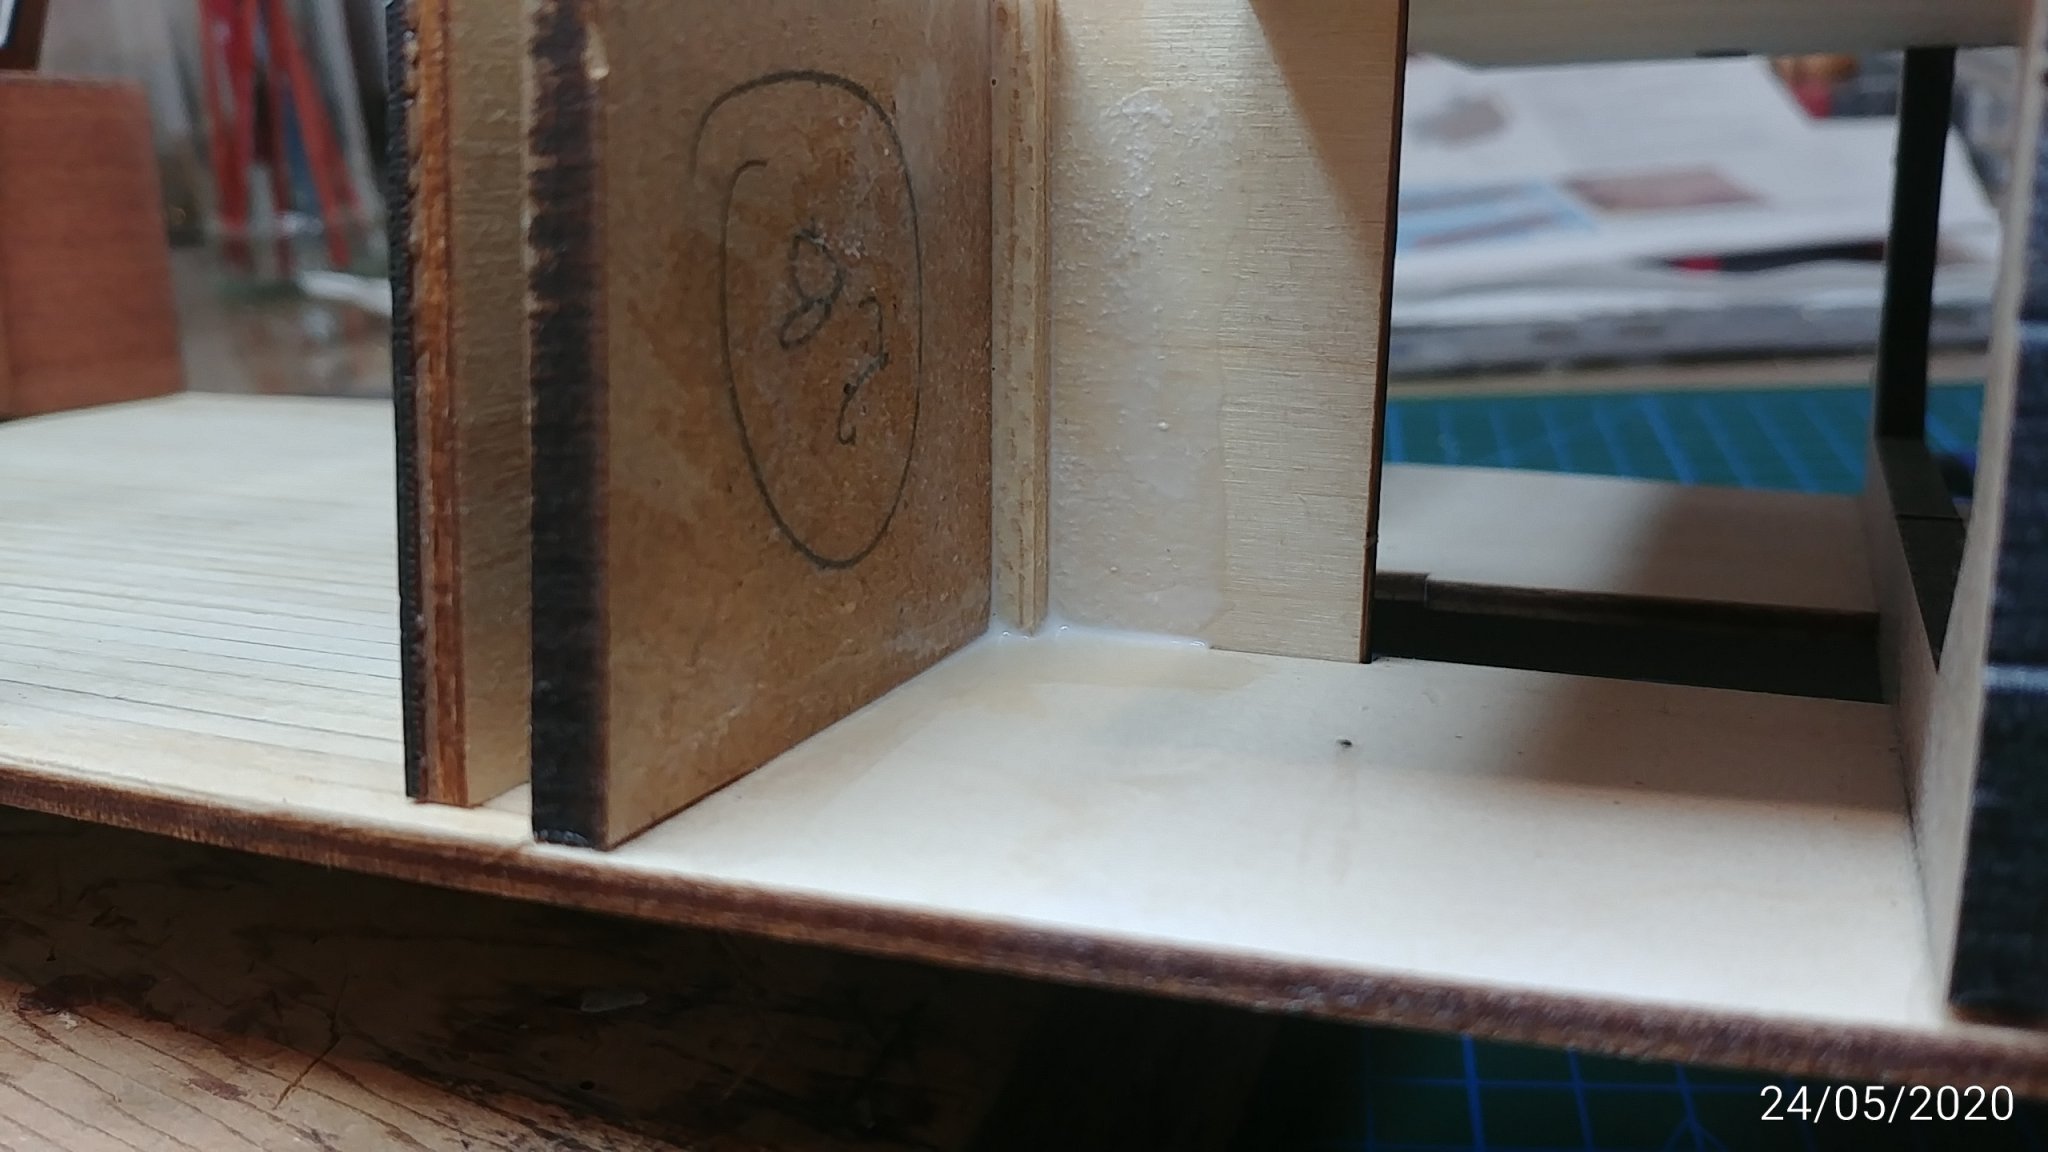
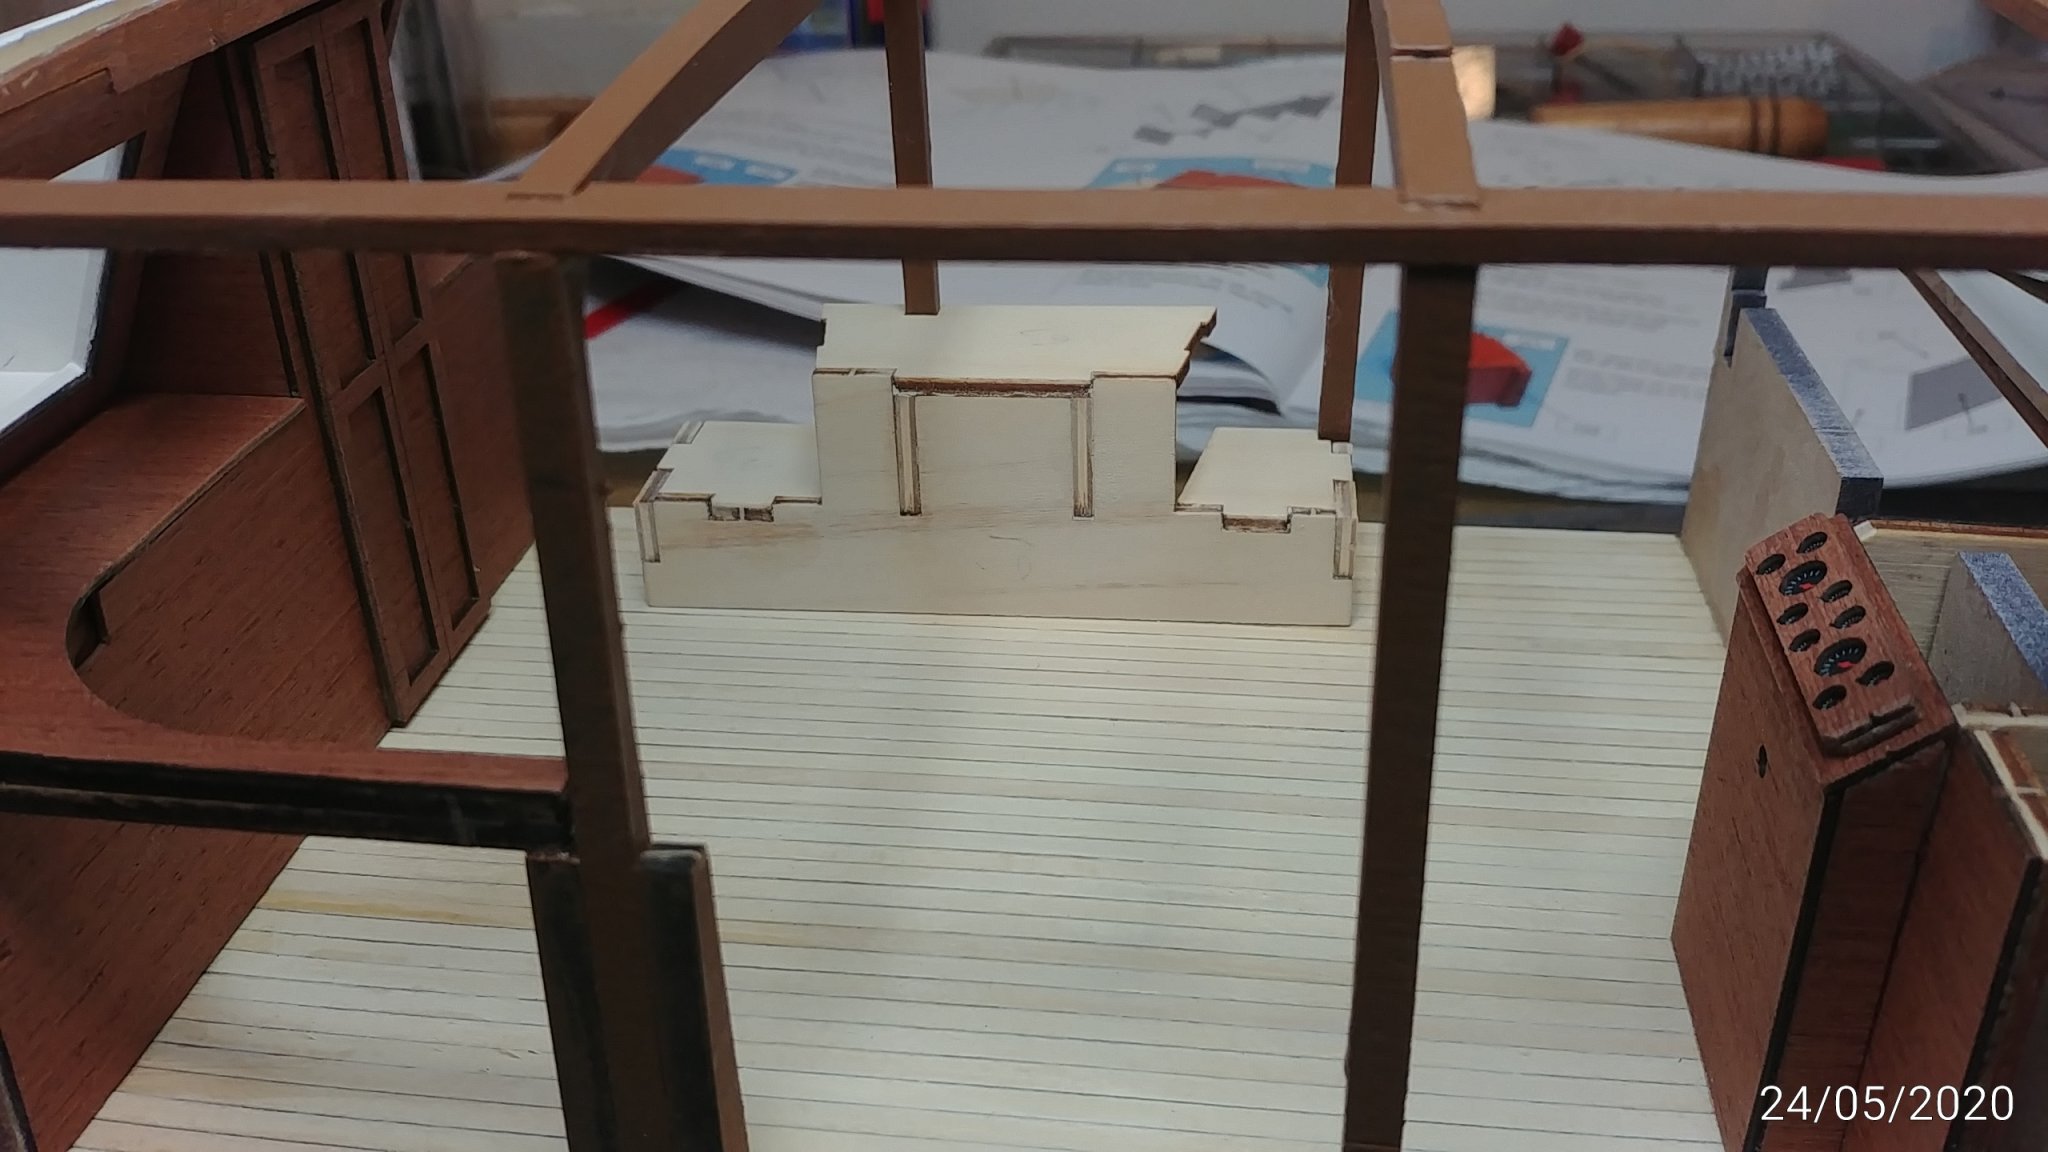
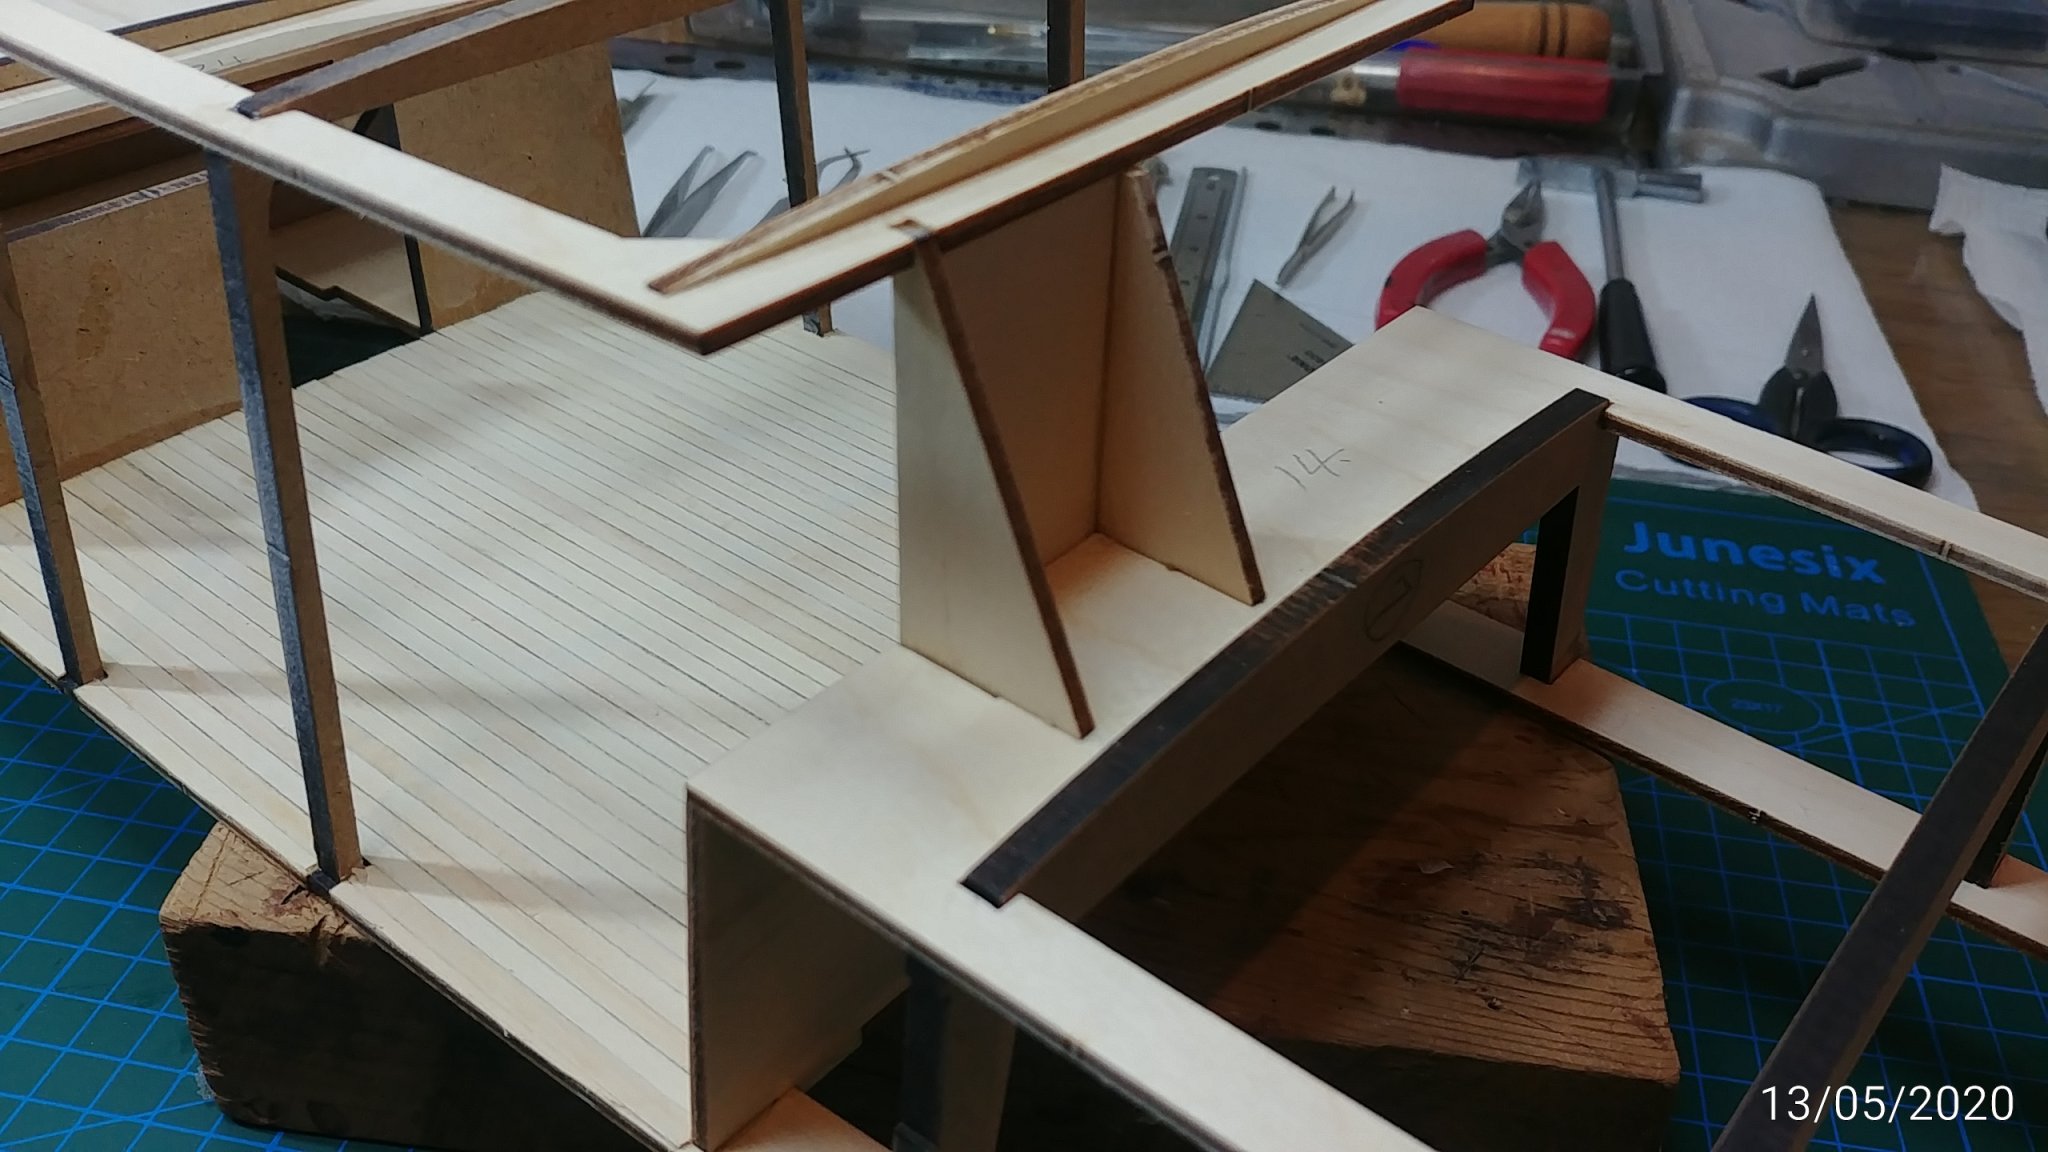
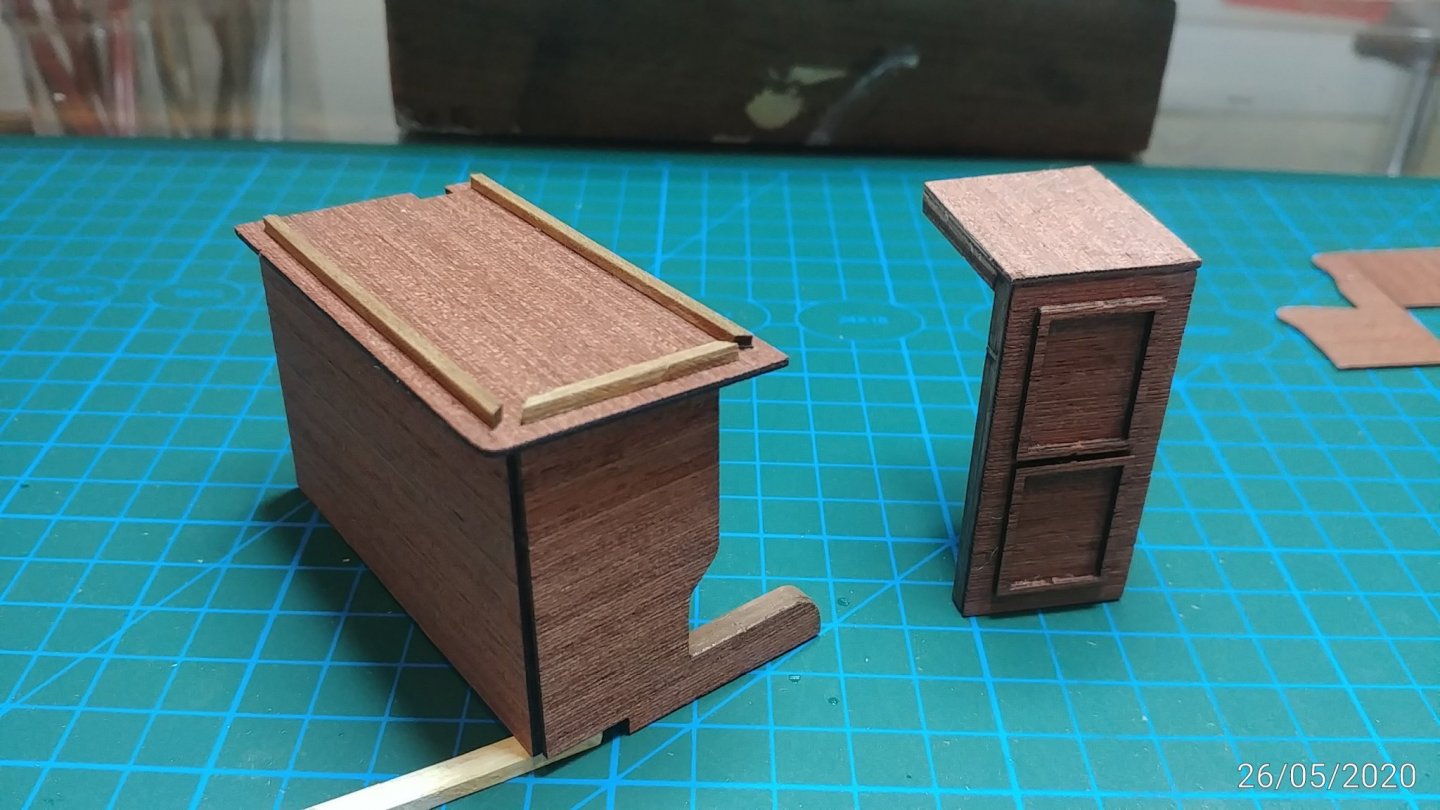
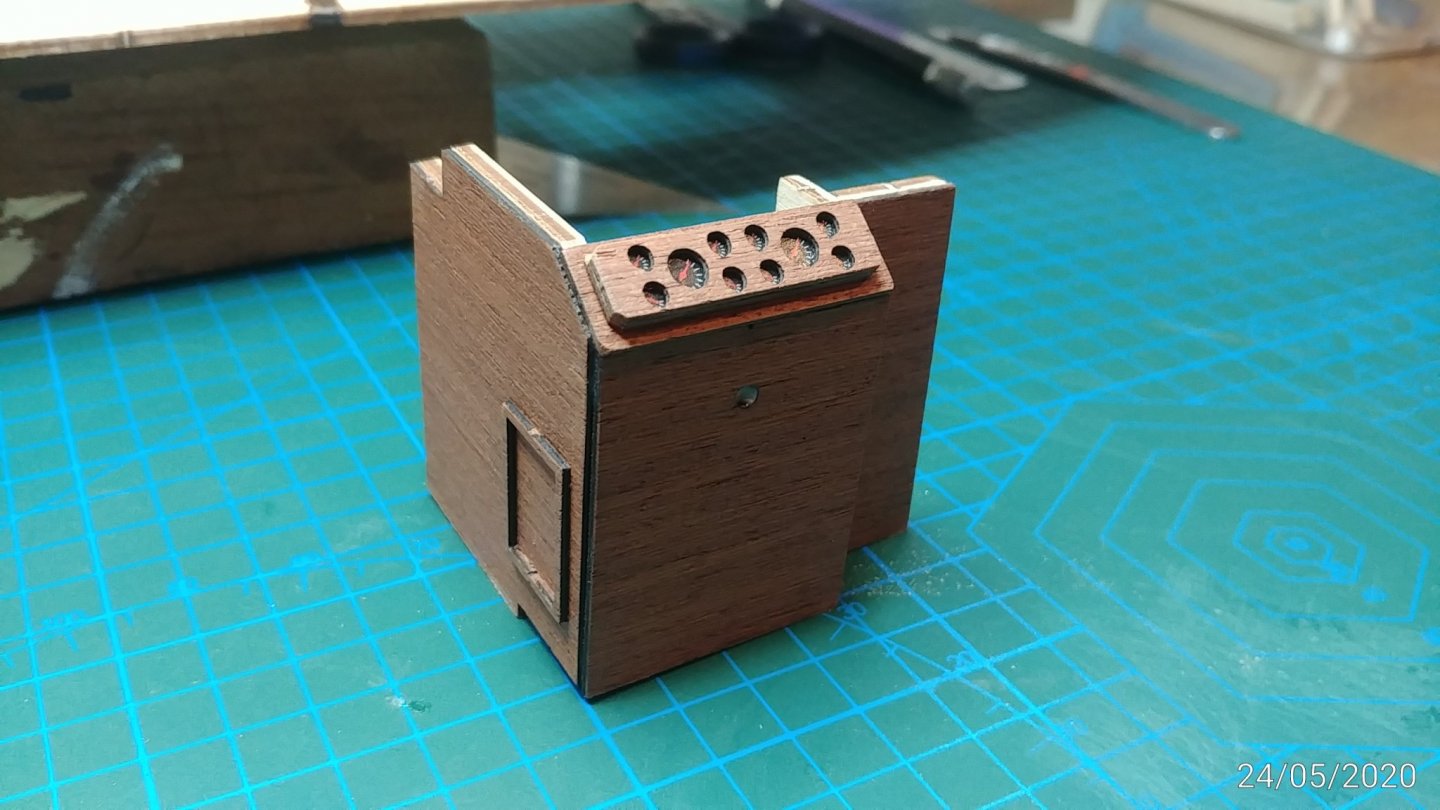
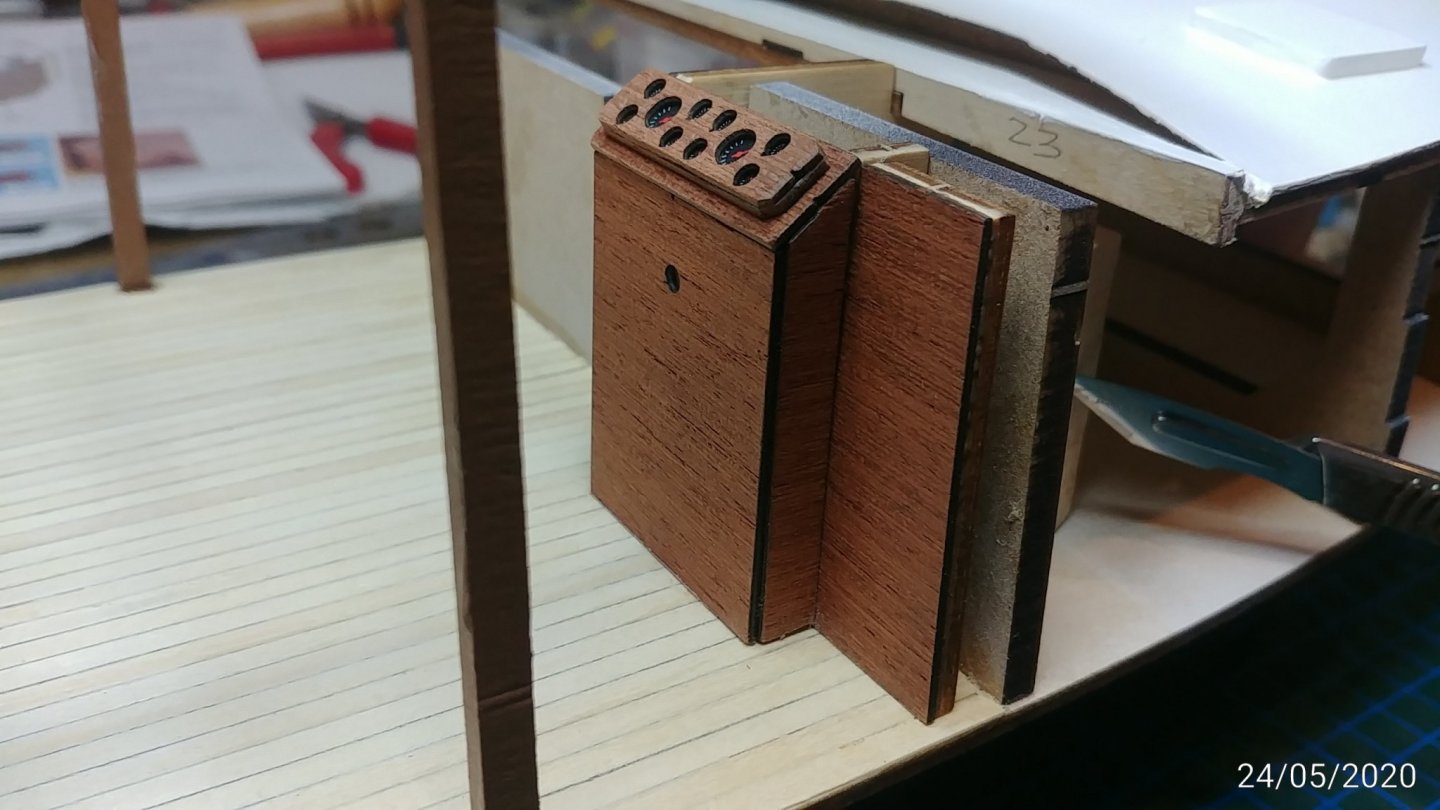
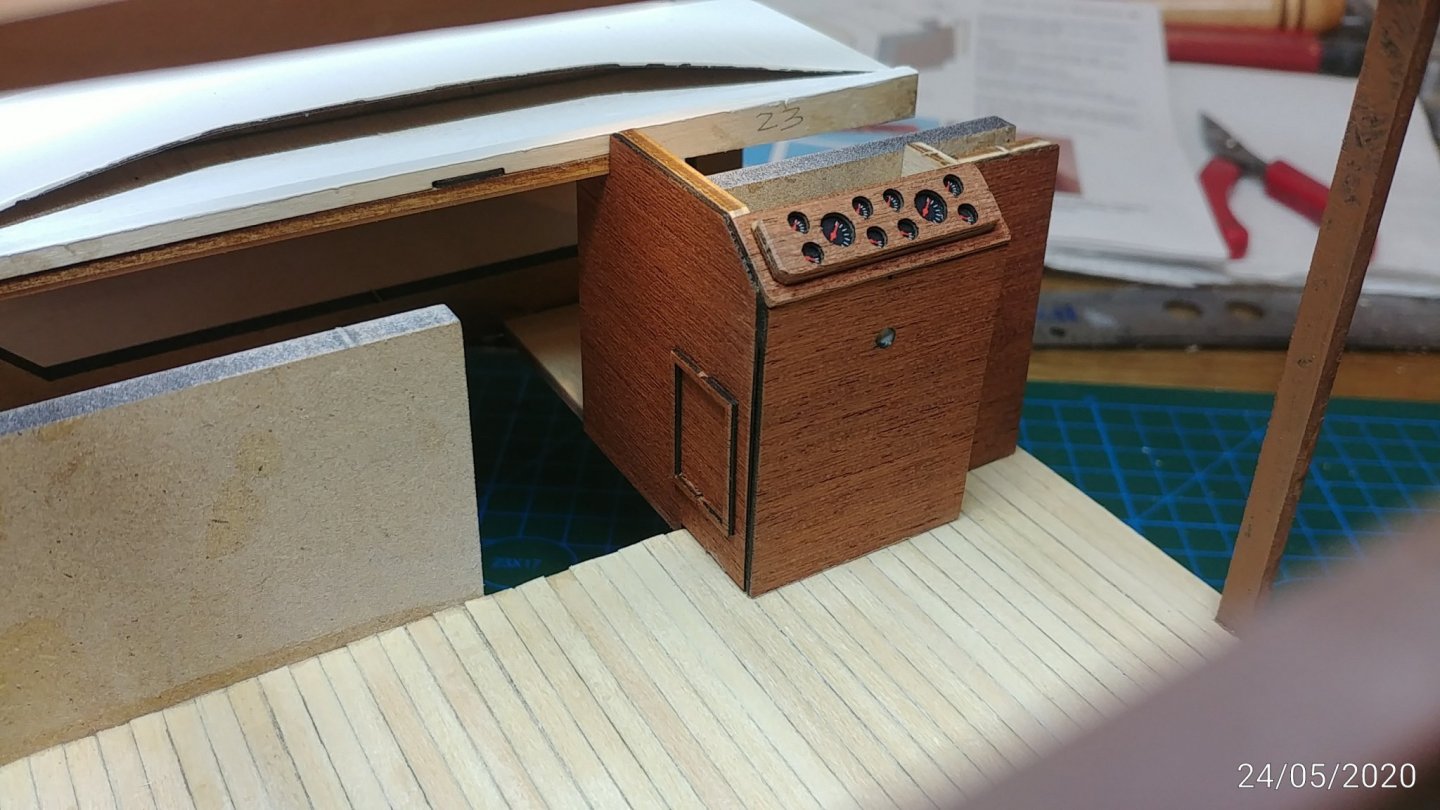
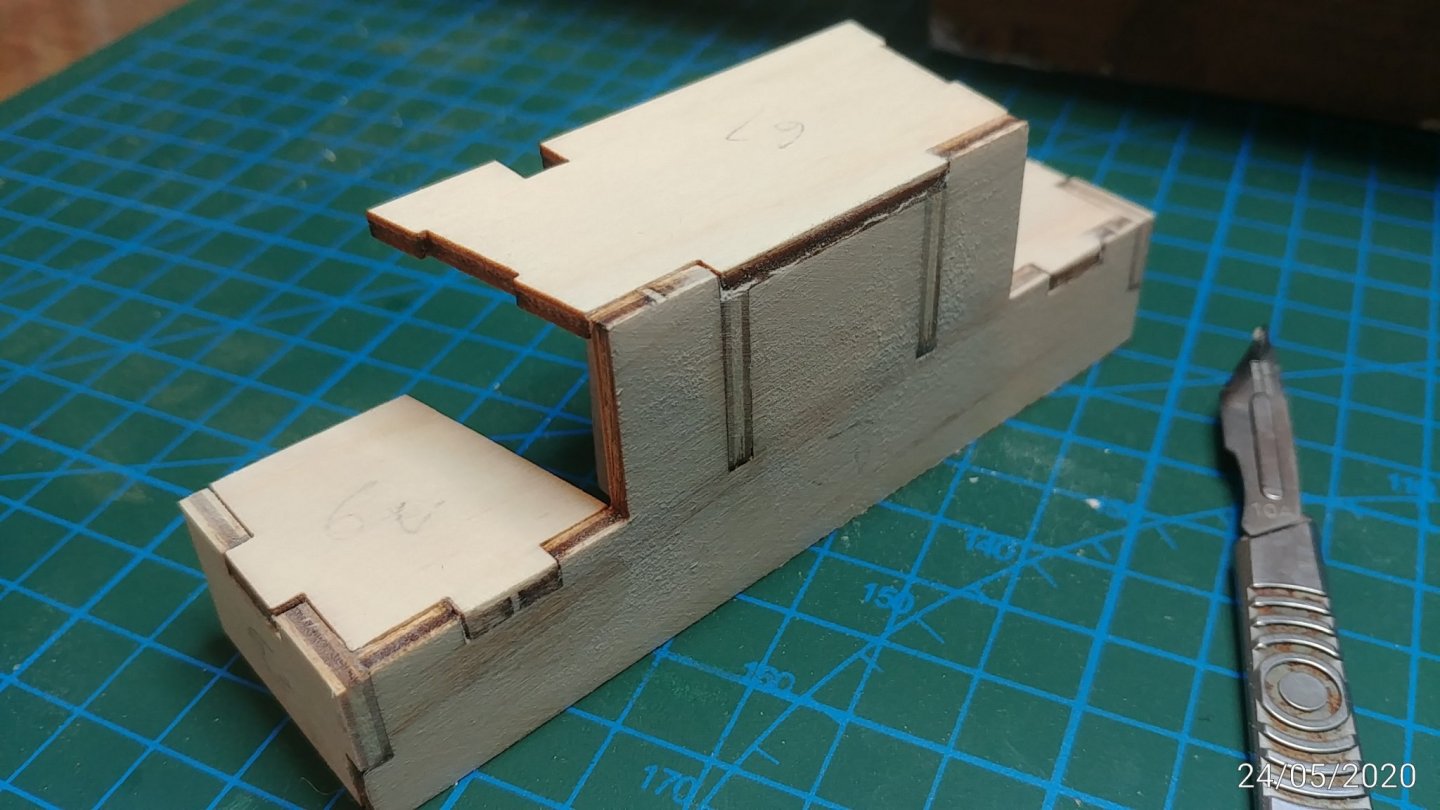
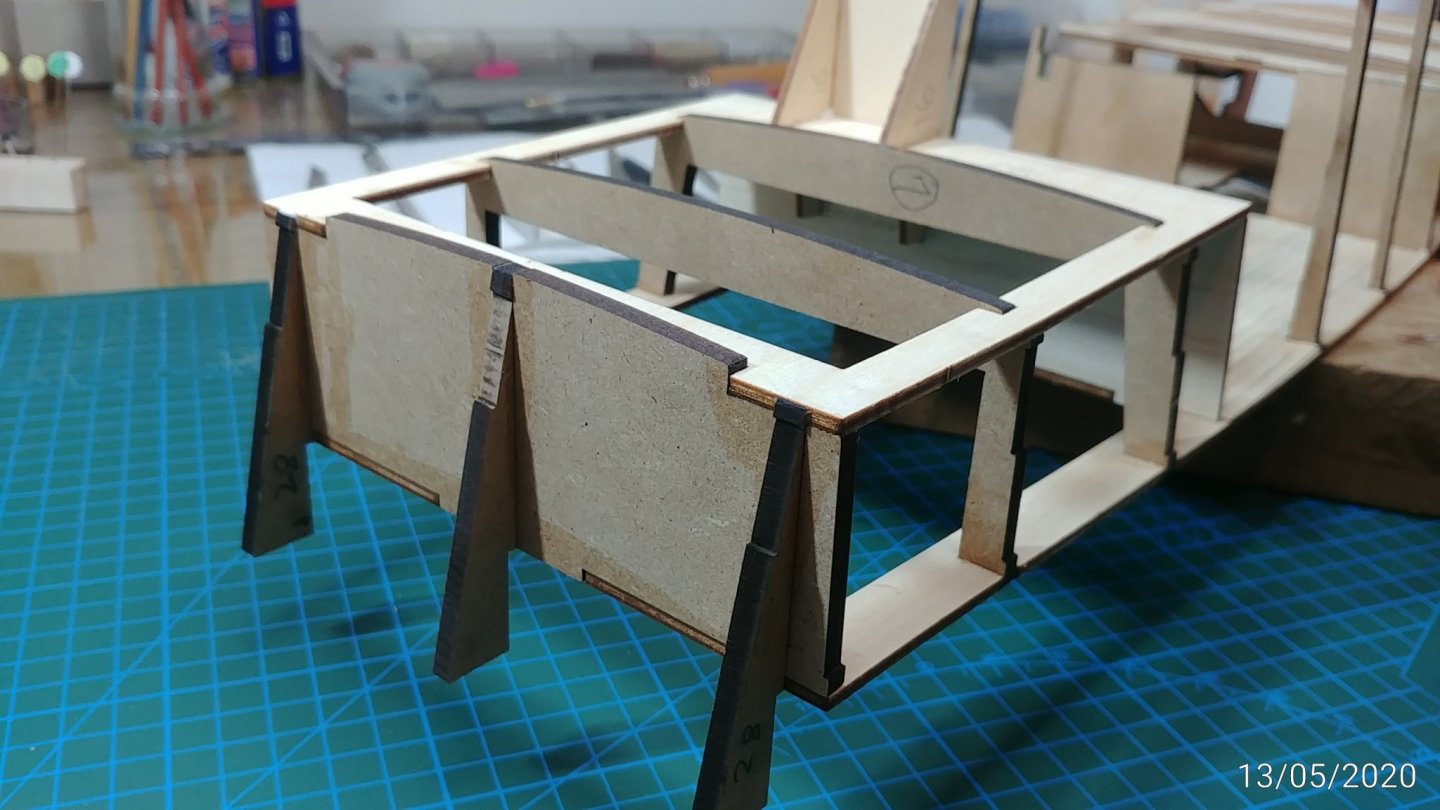
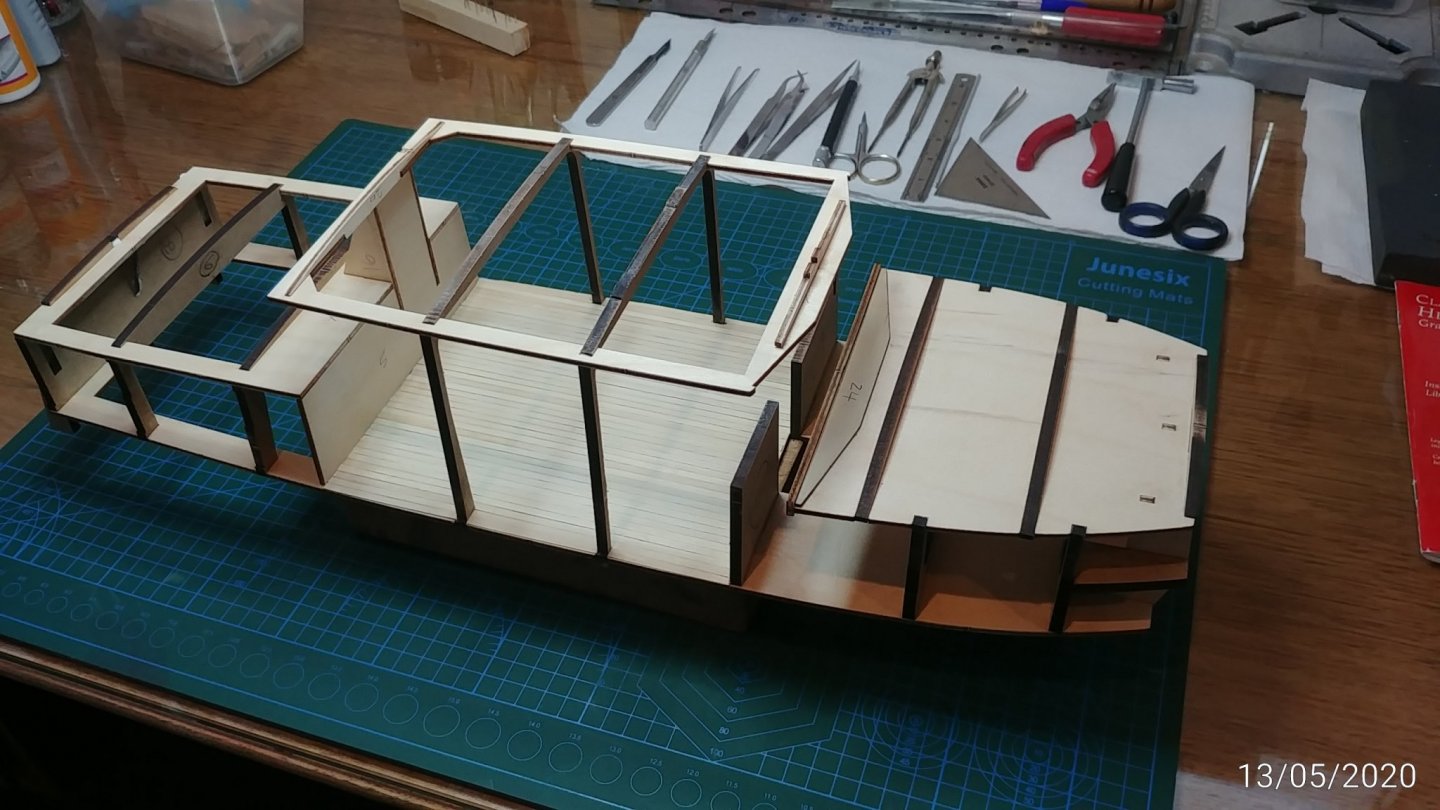
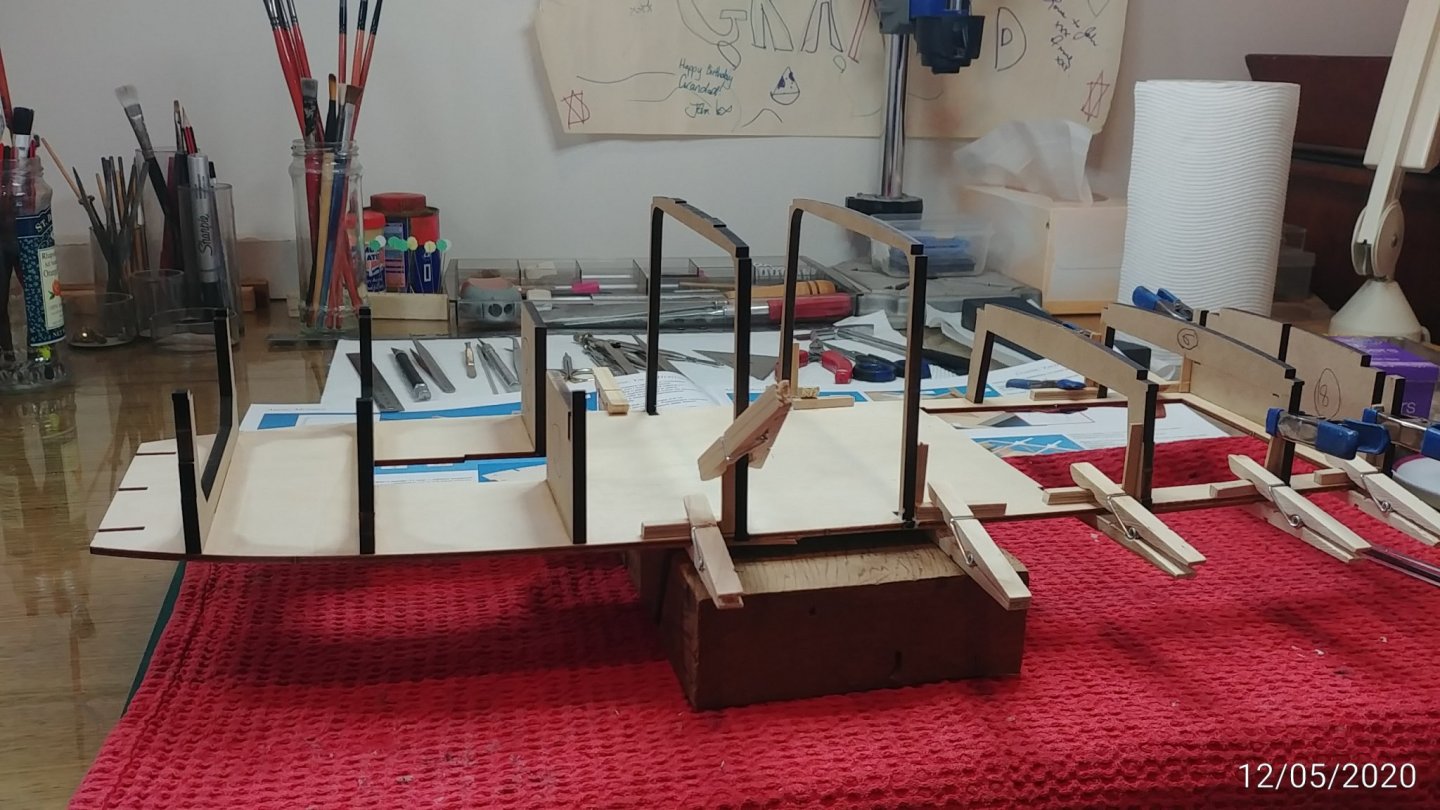
Main cabin control station today.All parts fitted nicely with very little fine tuning. Good quality kit. Fastened it in place by gluing a corner post inside the guest cabin rather than risk glue on the cabin floor if glued under the structure itself. Also frameup for dinette and trial position.


- 91 replies
-
- 5
-
-
- amati
- grand banks 46
- (and 1 more)
-
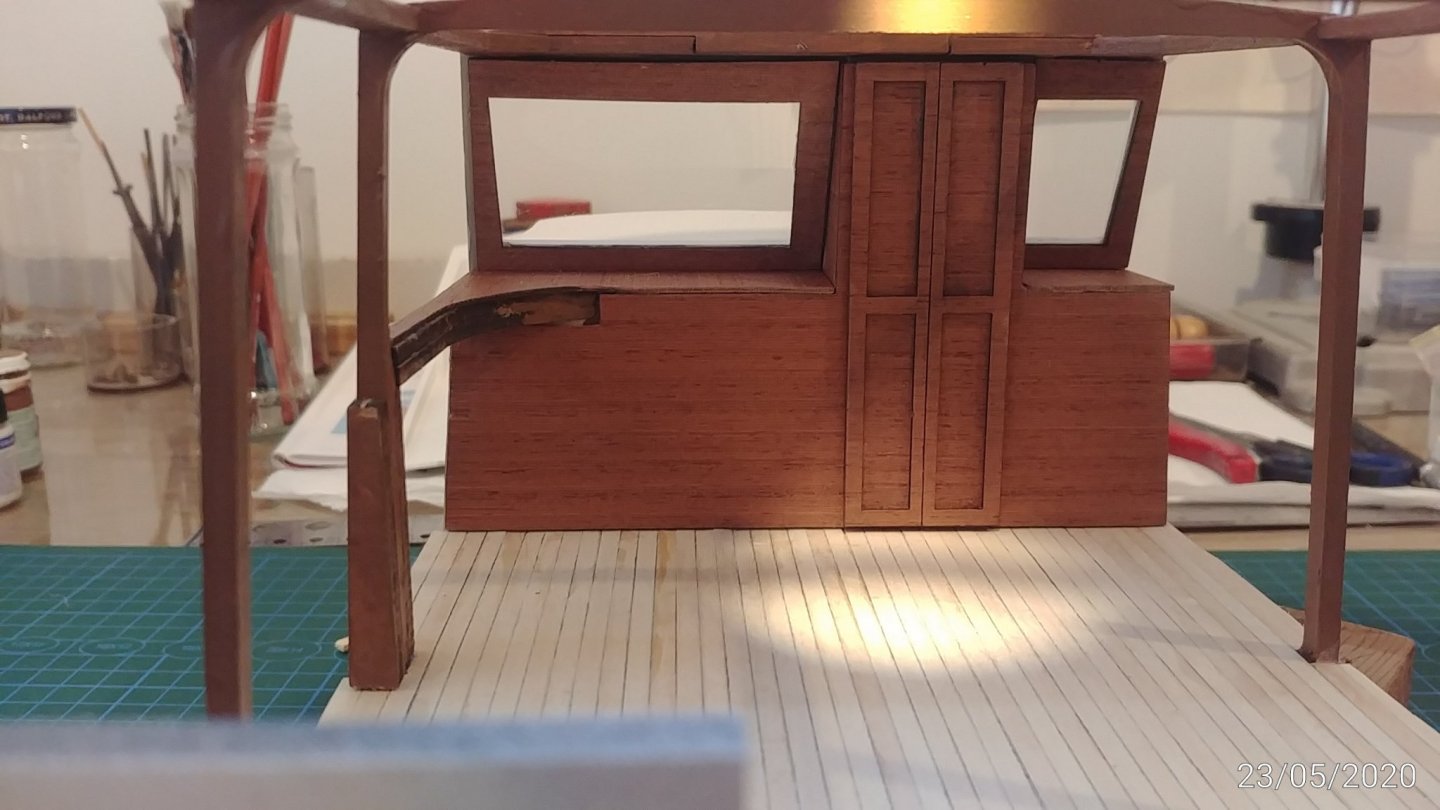
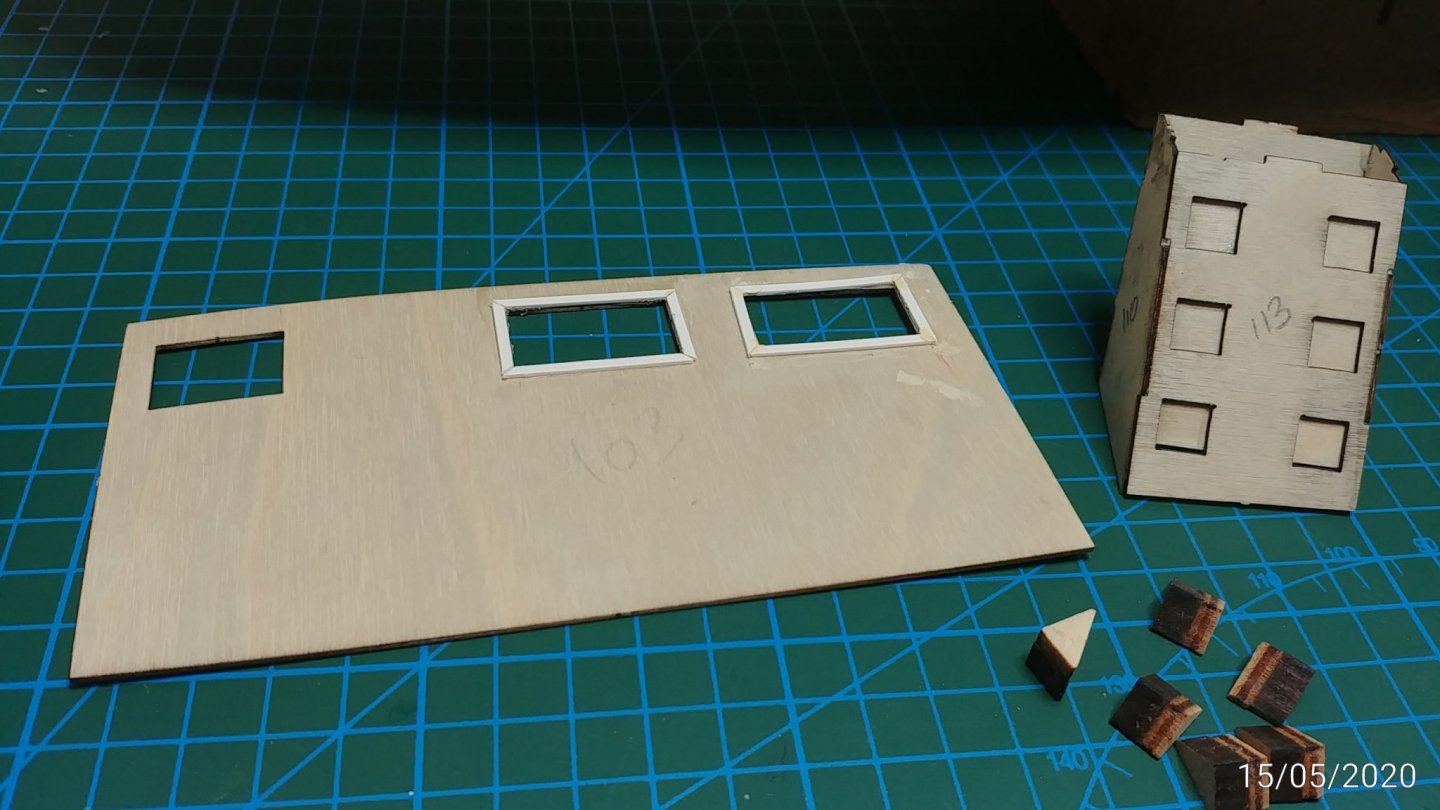
Rear cabin wall and rear cabin windows completed. Mahogany looks OK with the Lime floor.
- 91 replies
-
- 6
-
-
- amati
- grand banks 46
- (and 1 more)
-
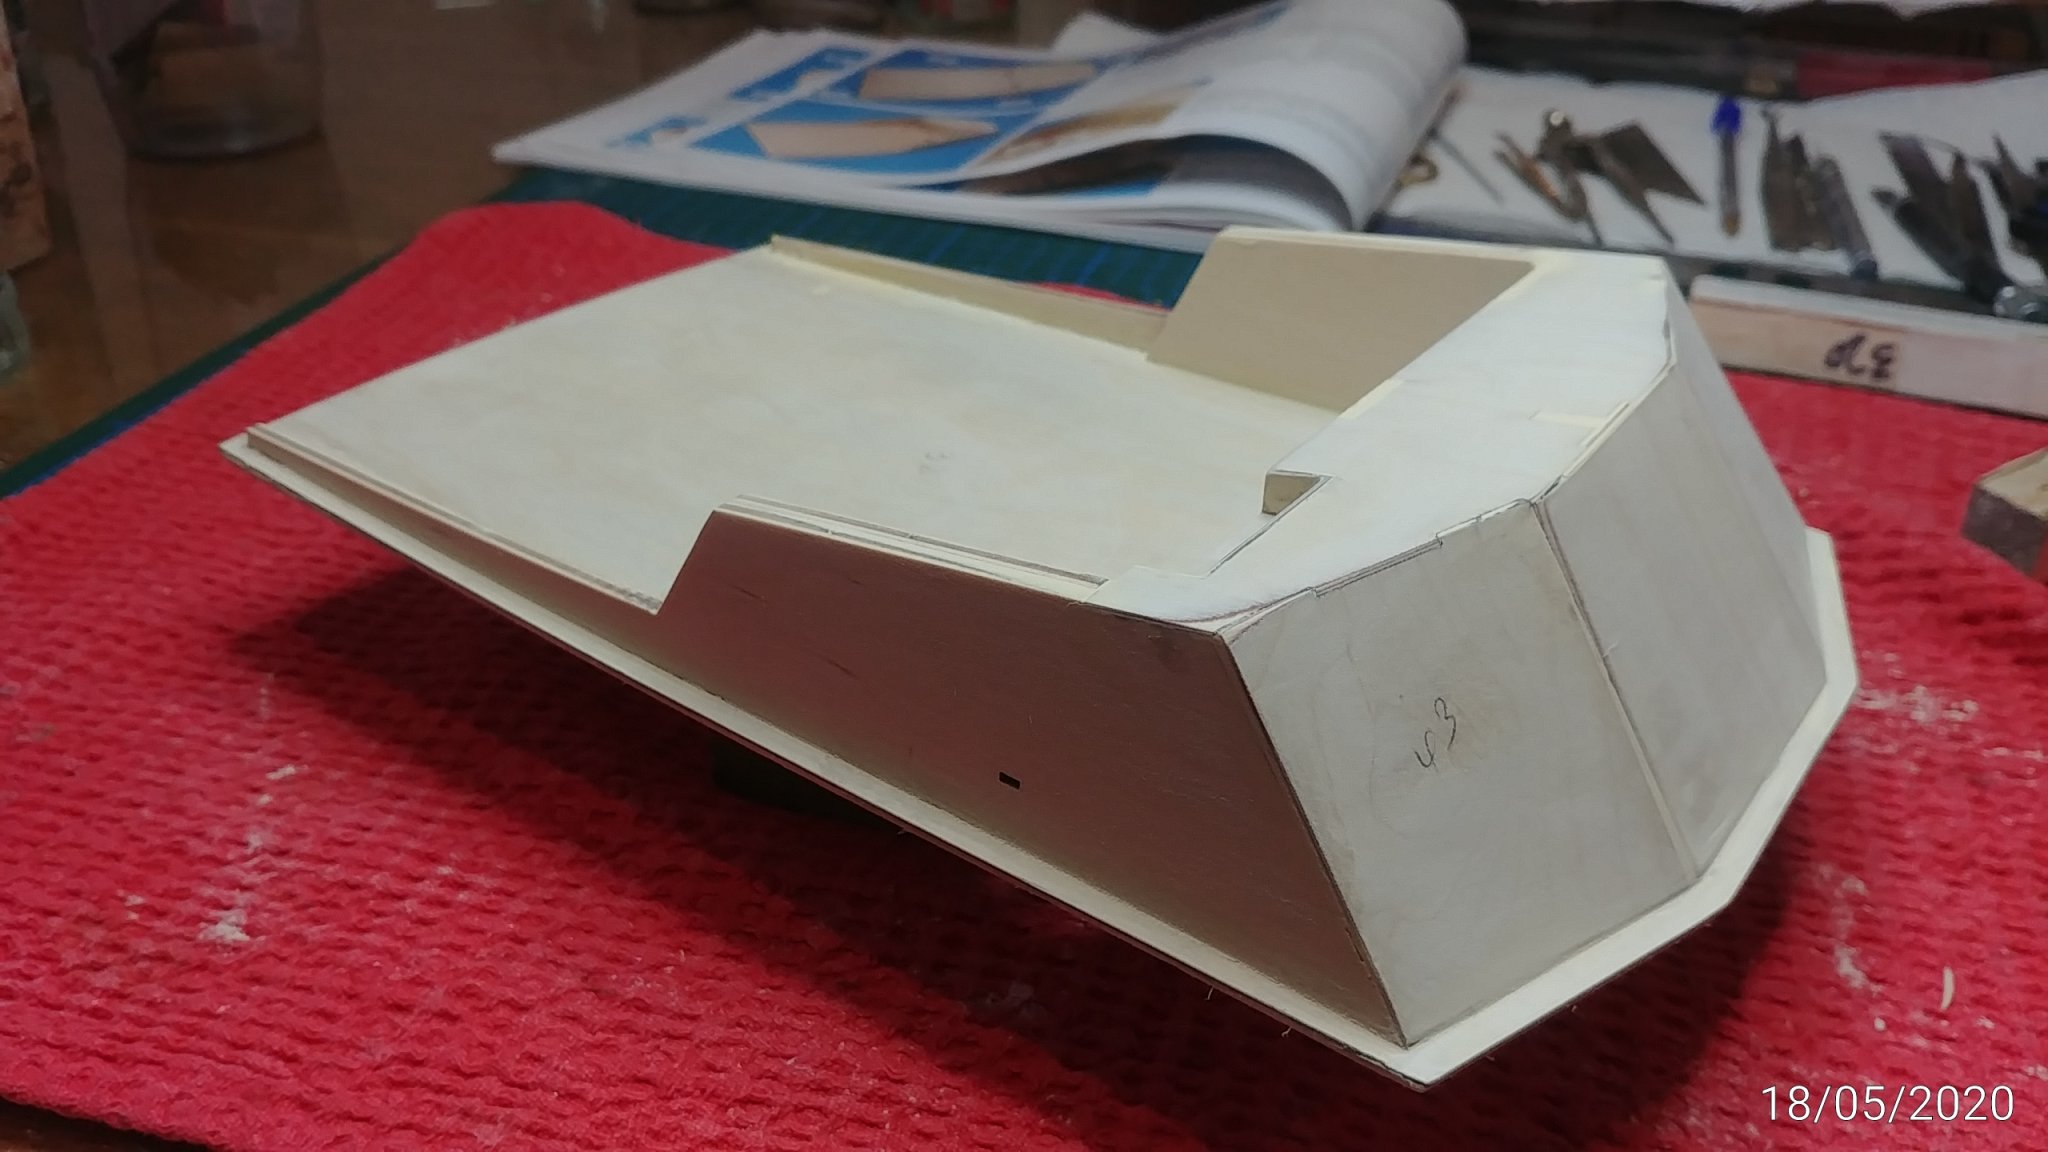
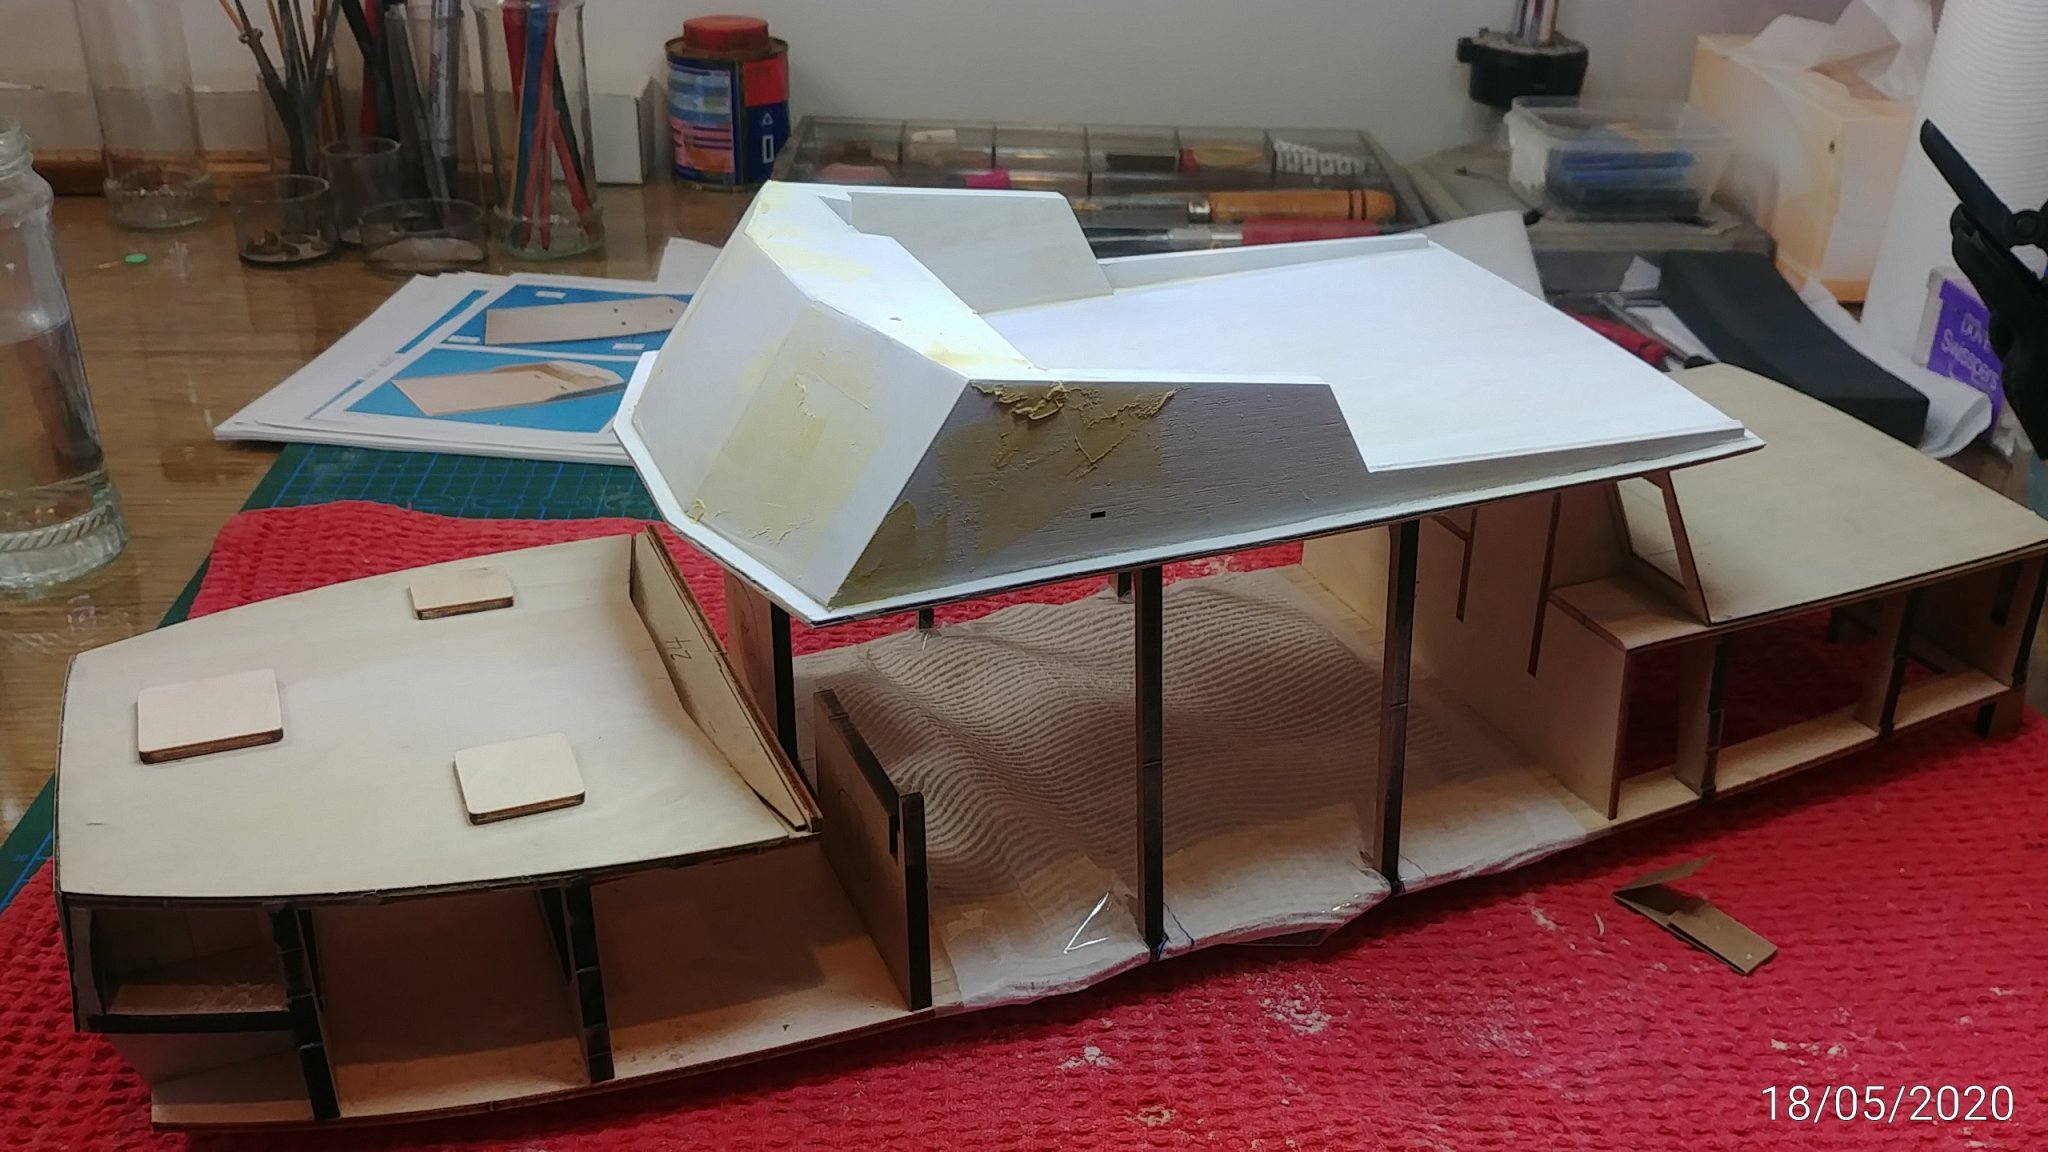
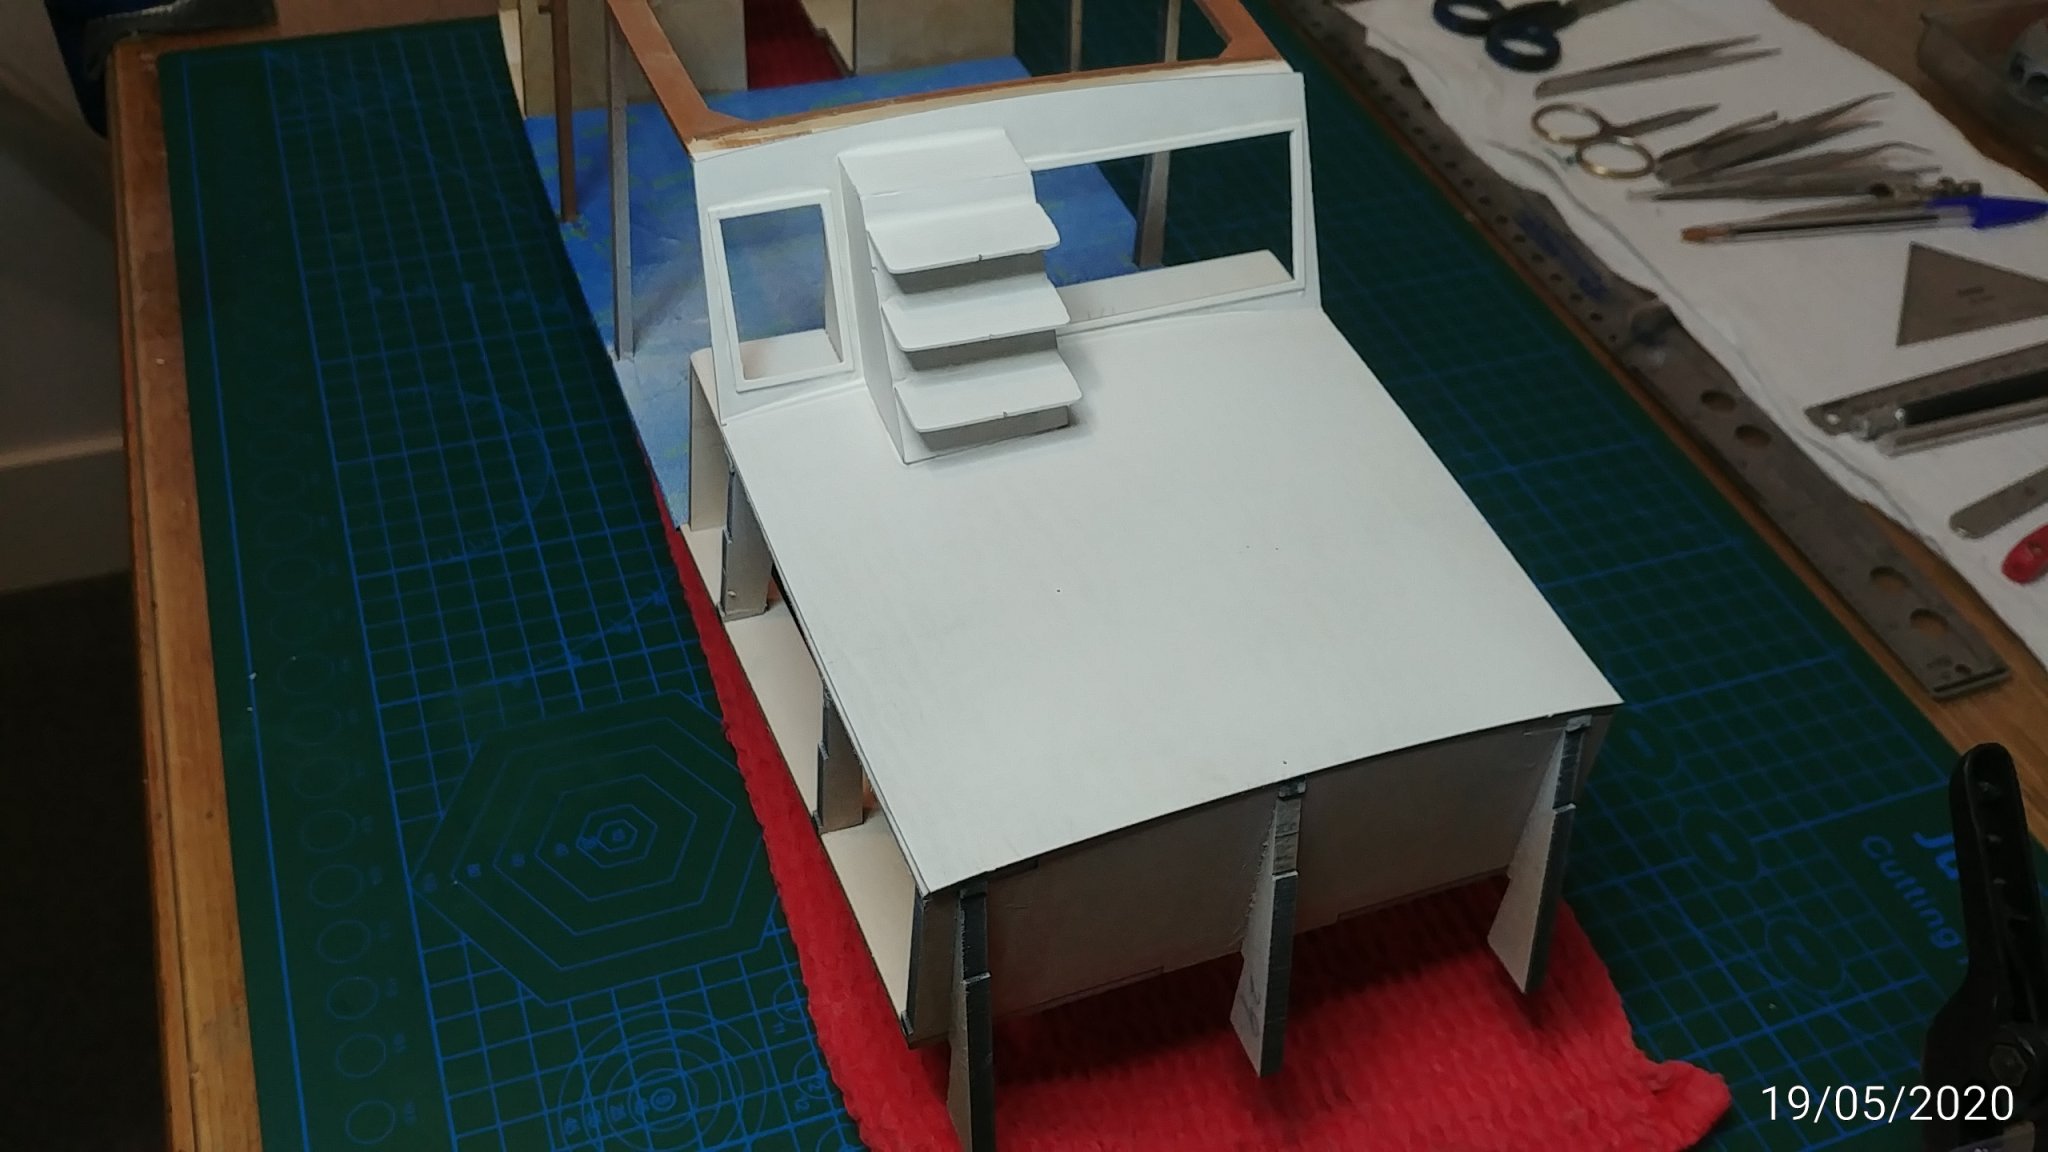
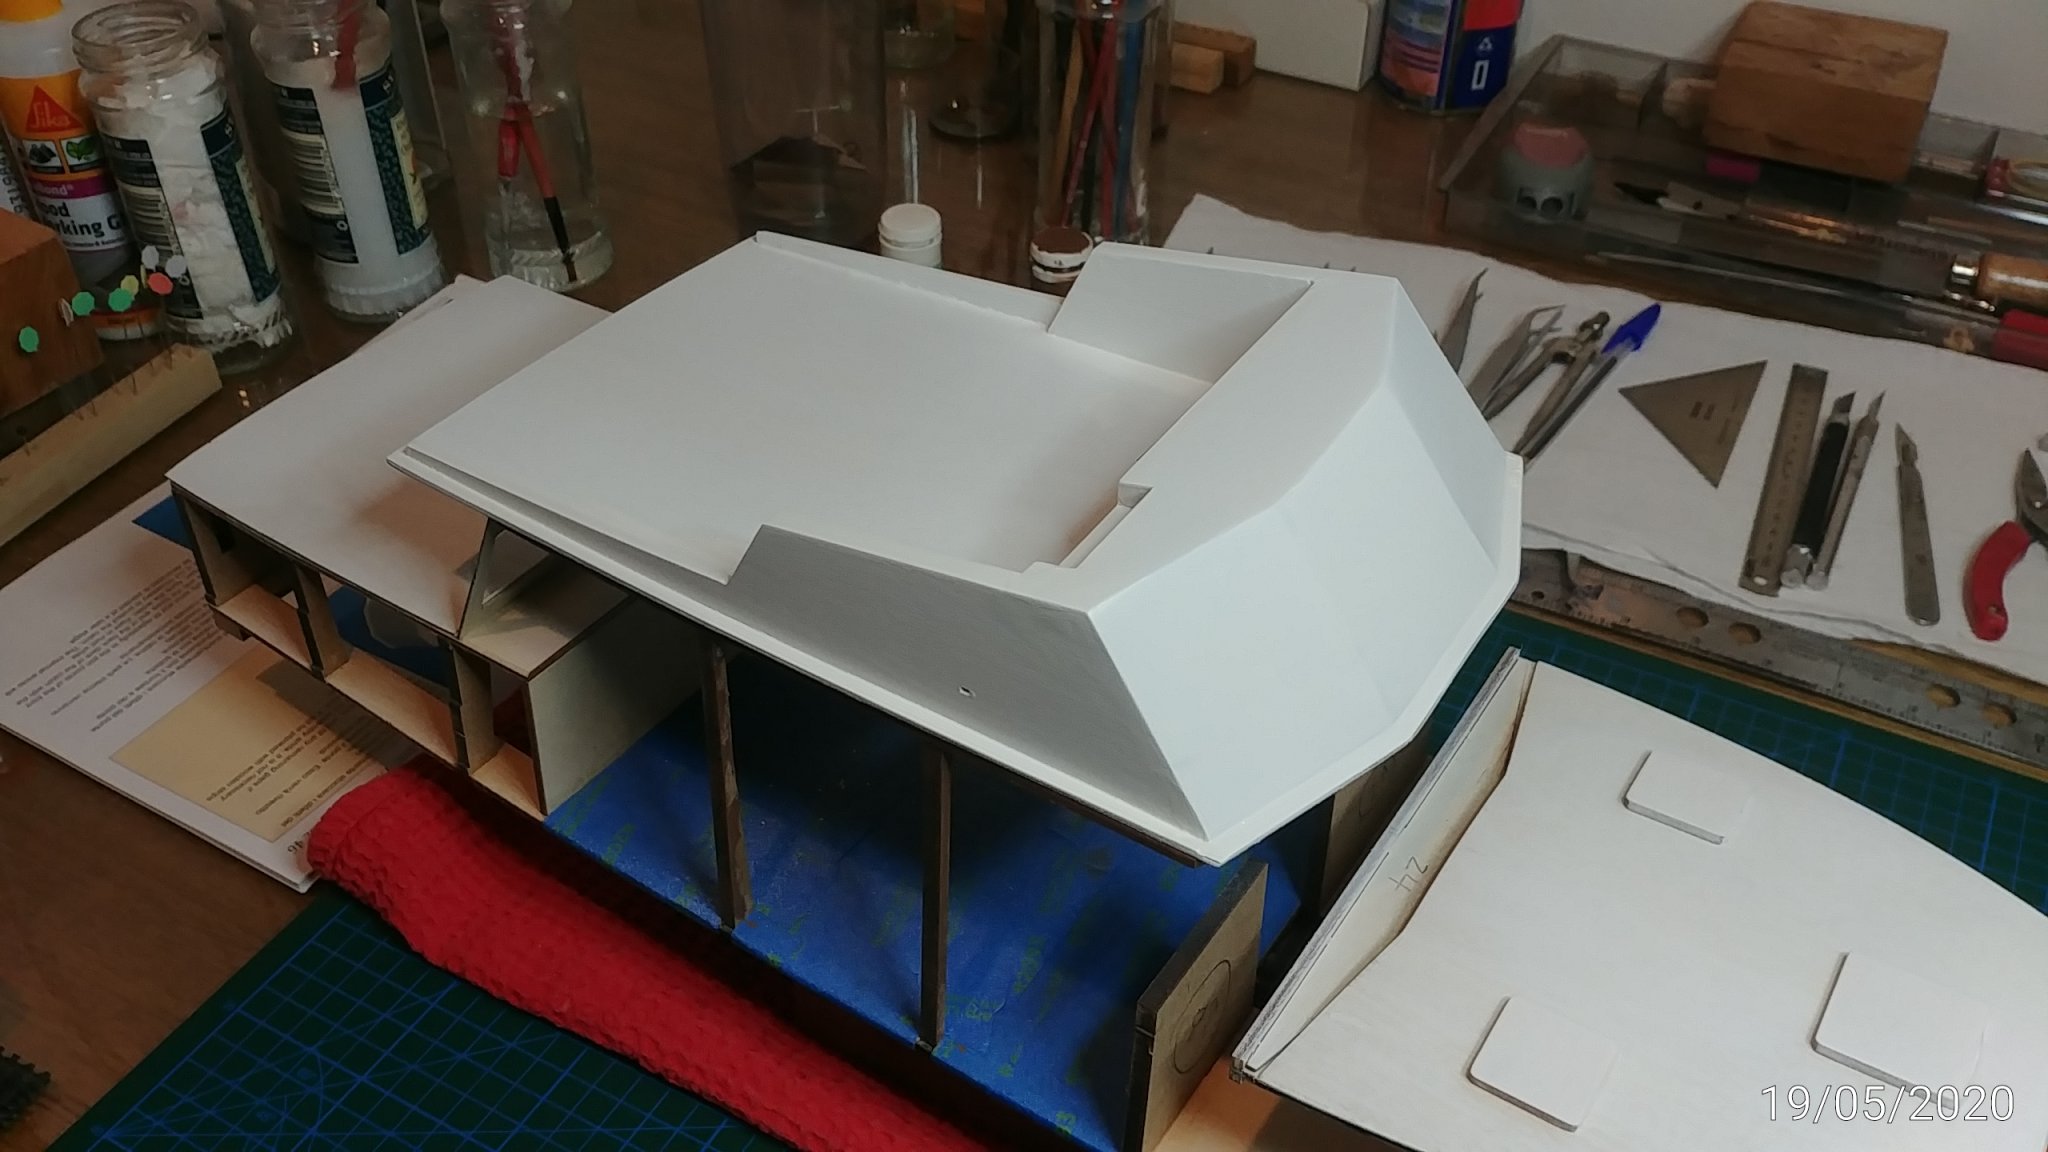
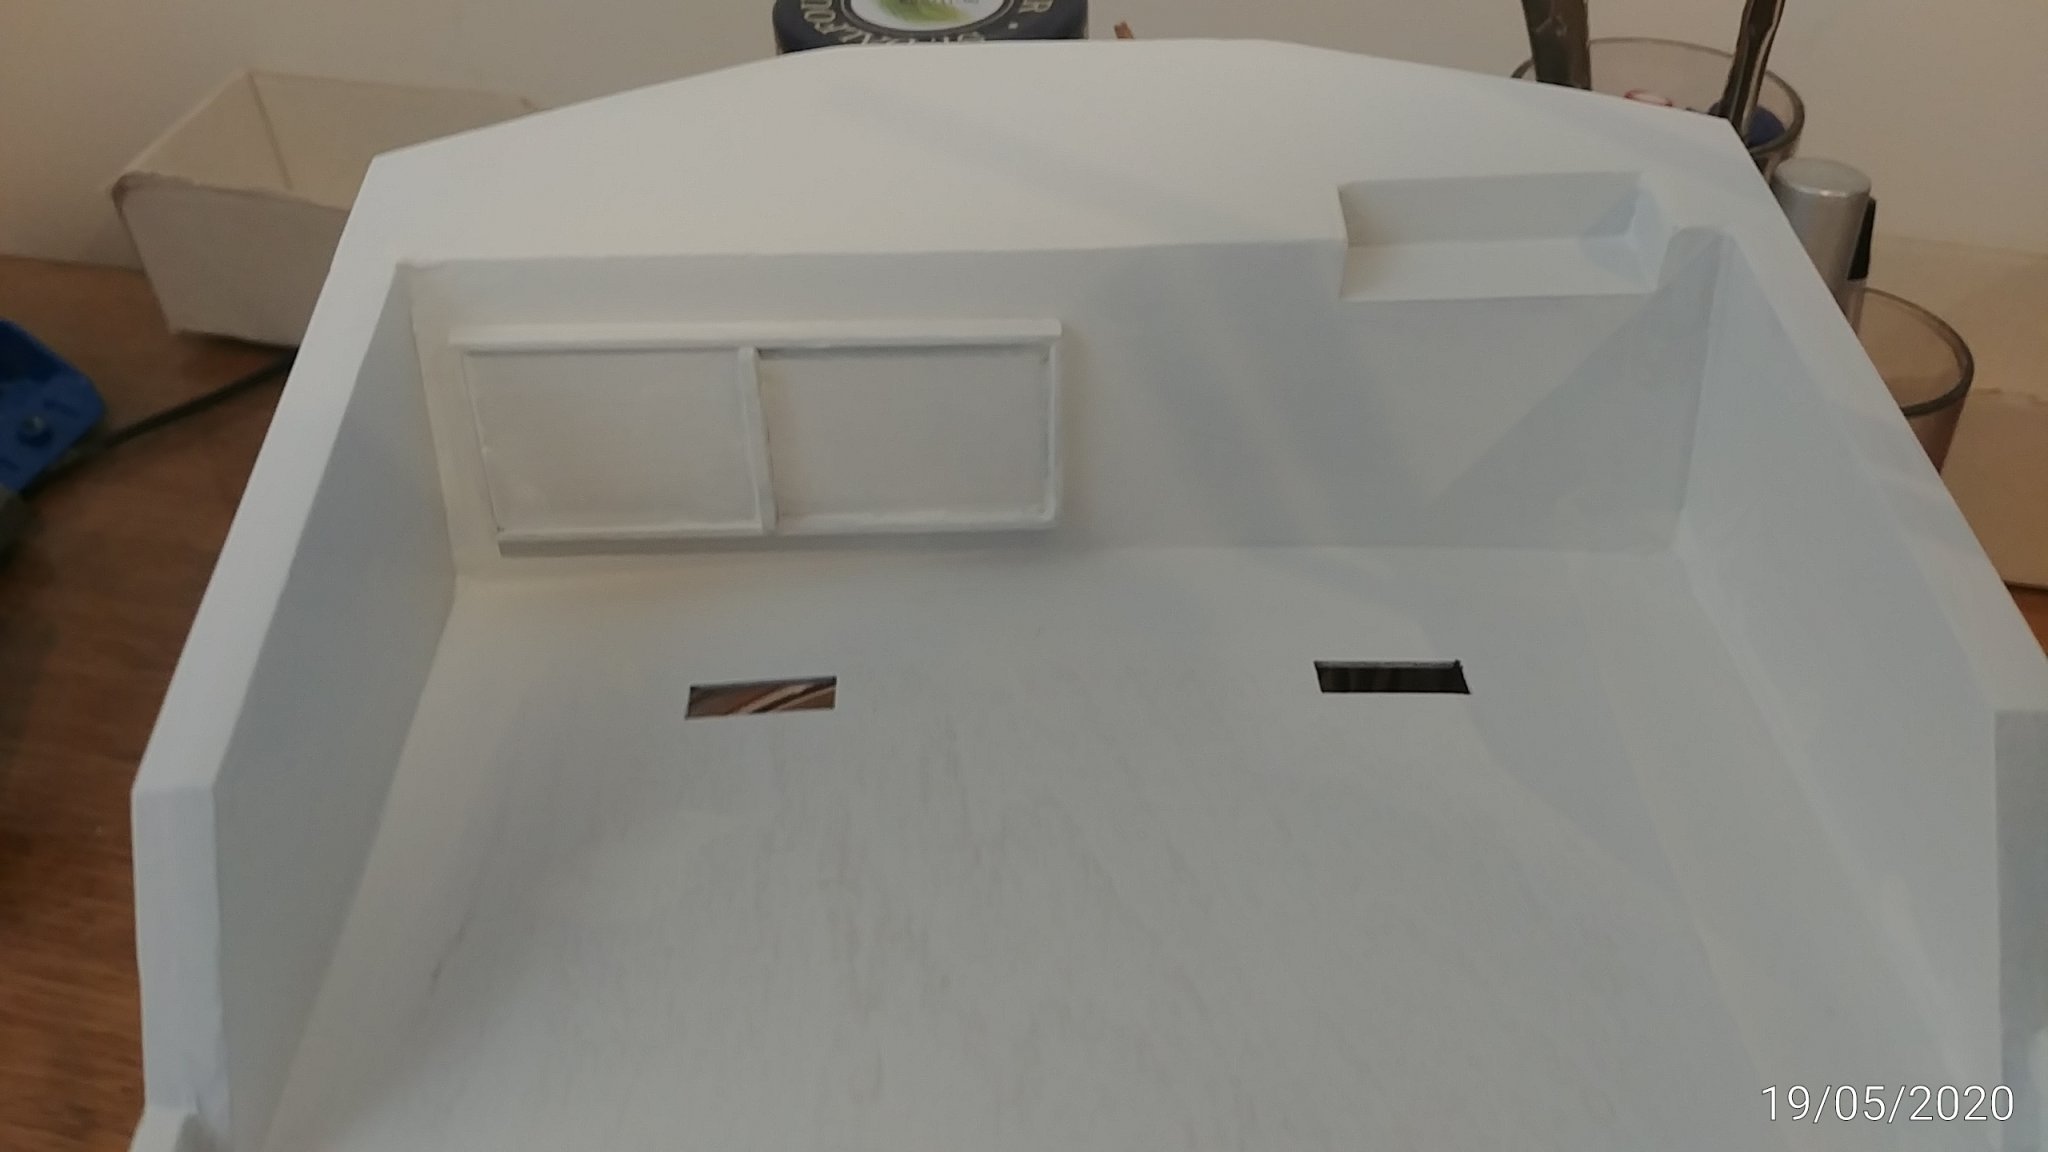
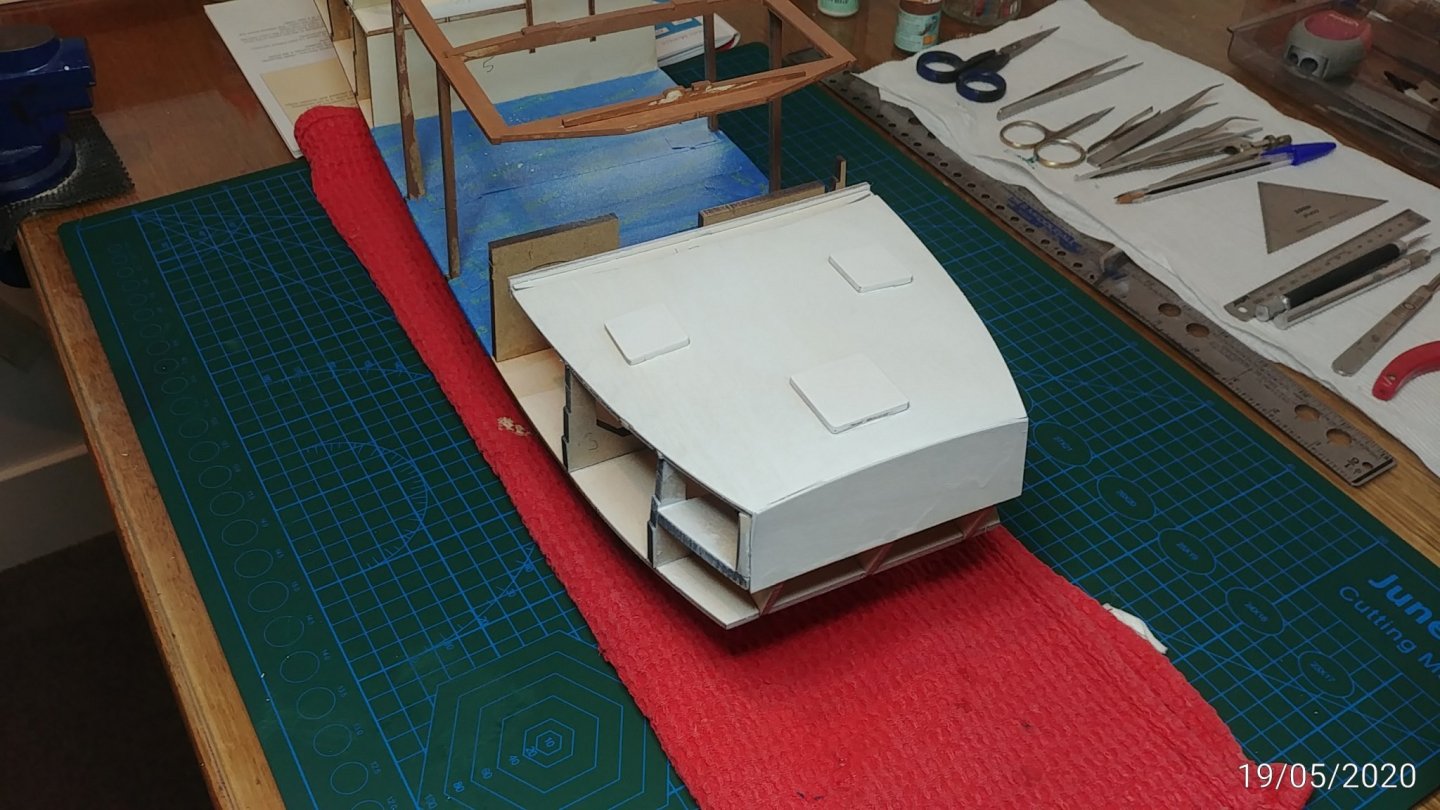
Started to fill and spray undercoat the flybridge and cabin exteriors. This is where it comes in the process, and I have to topcoat them as well. Makes it better to brush the topcoats rather than spray and ongoing work will need touchups and hard if sprayed. Using Admiralty Matt White much better opacity than Tamiya and I like the colour. These shots show 1 coat of sprayed undercoat on the cabins and the final one of flybridge has 3 undercoats and 1 topcoat.


- 91 replies
-
- 4
-
-
- amati
- grand banks 46
- (and 1 more)
-
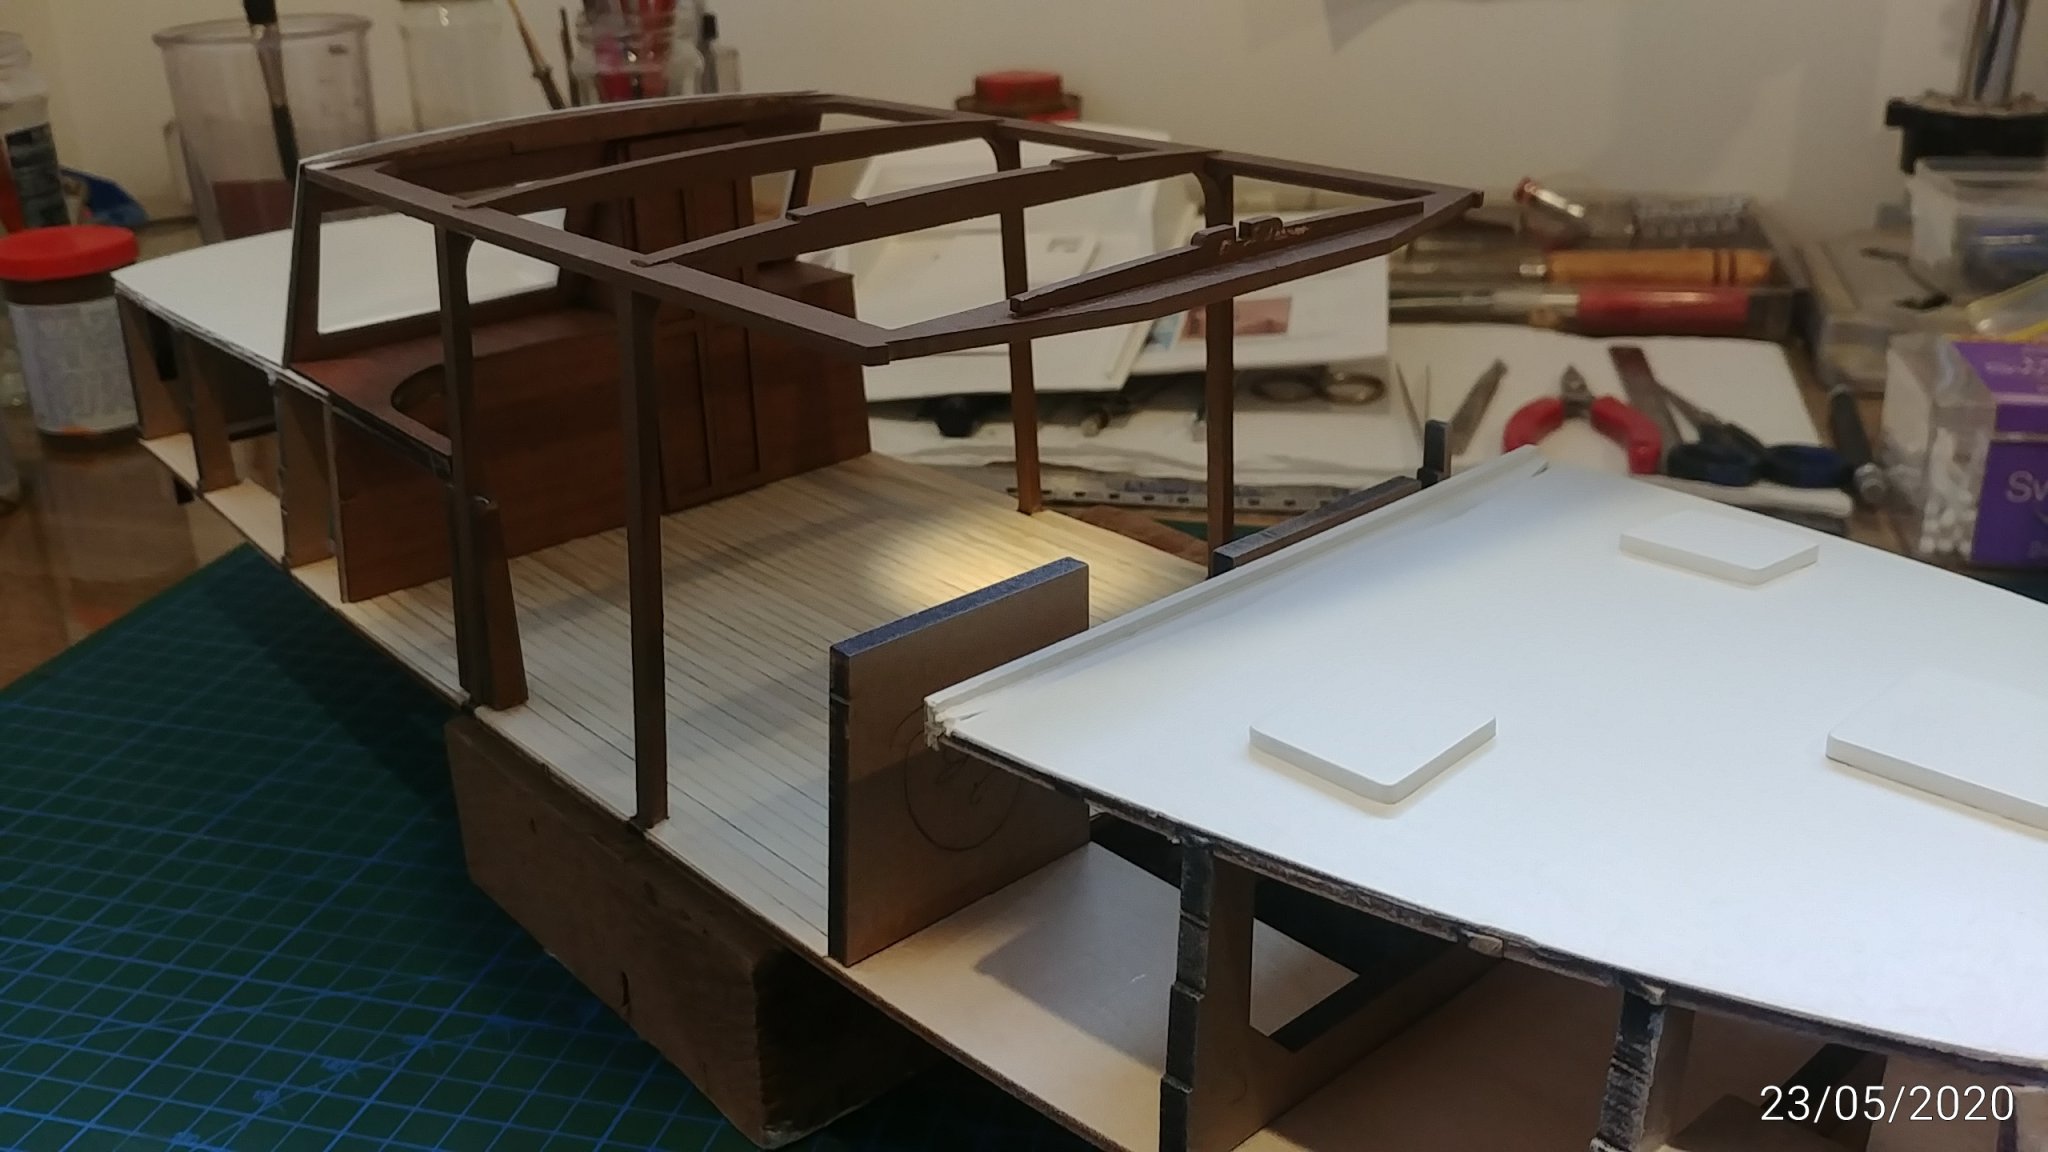
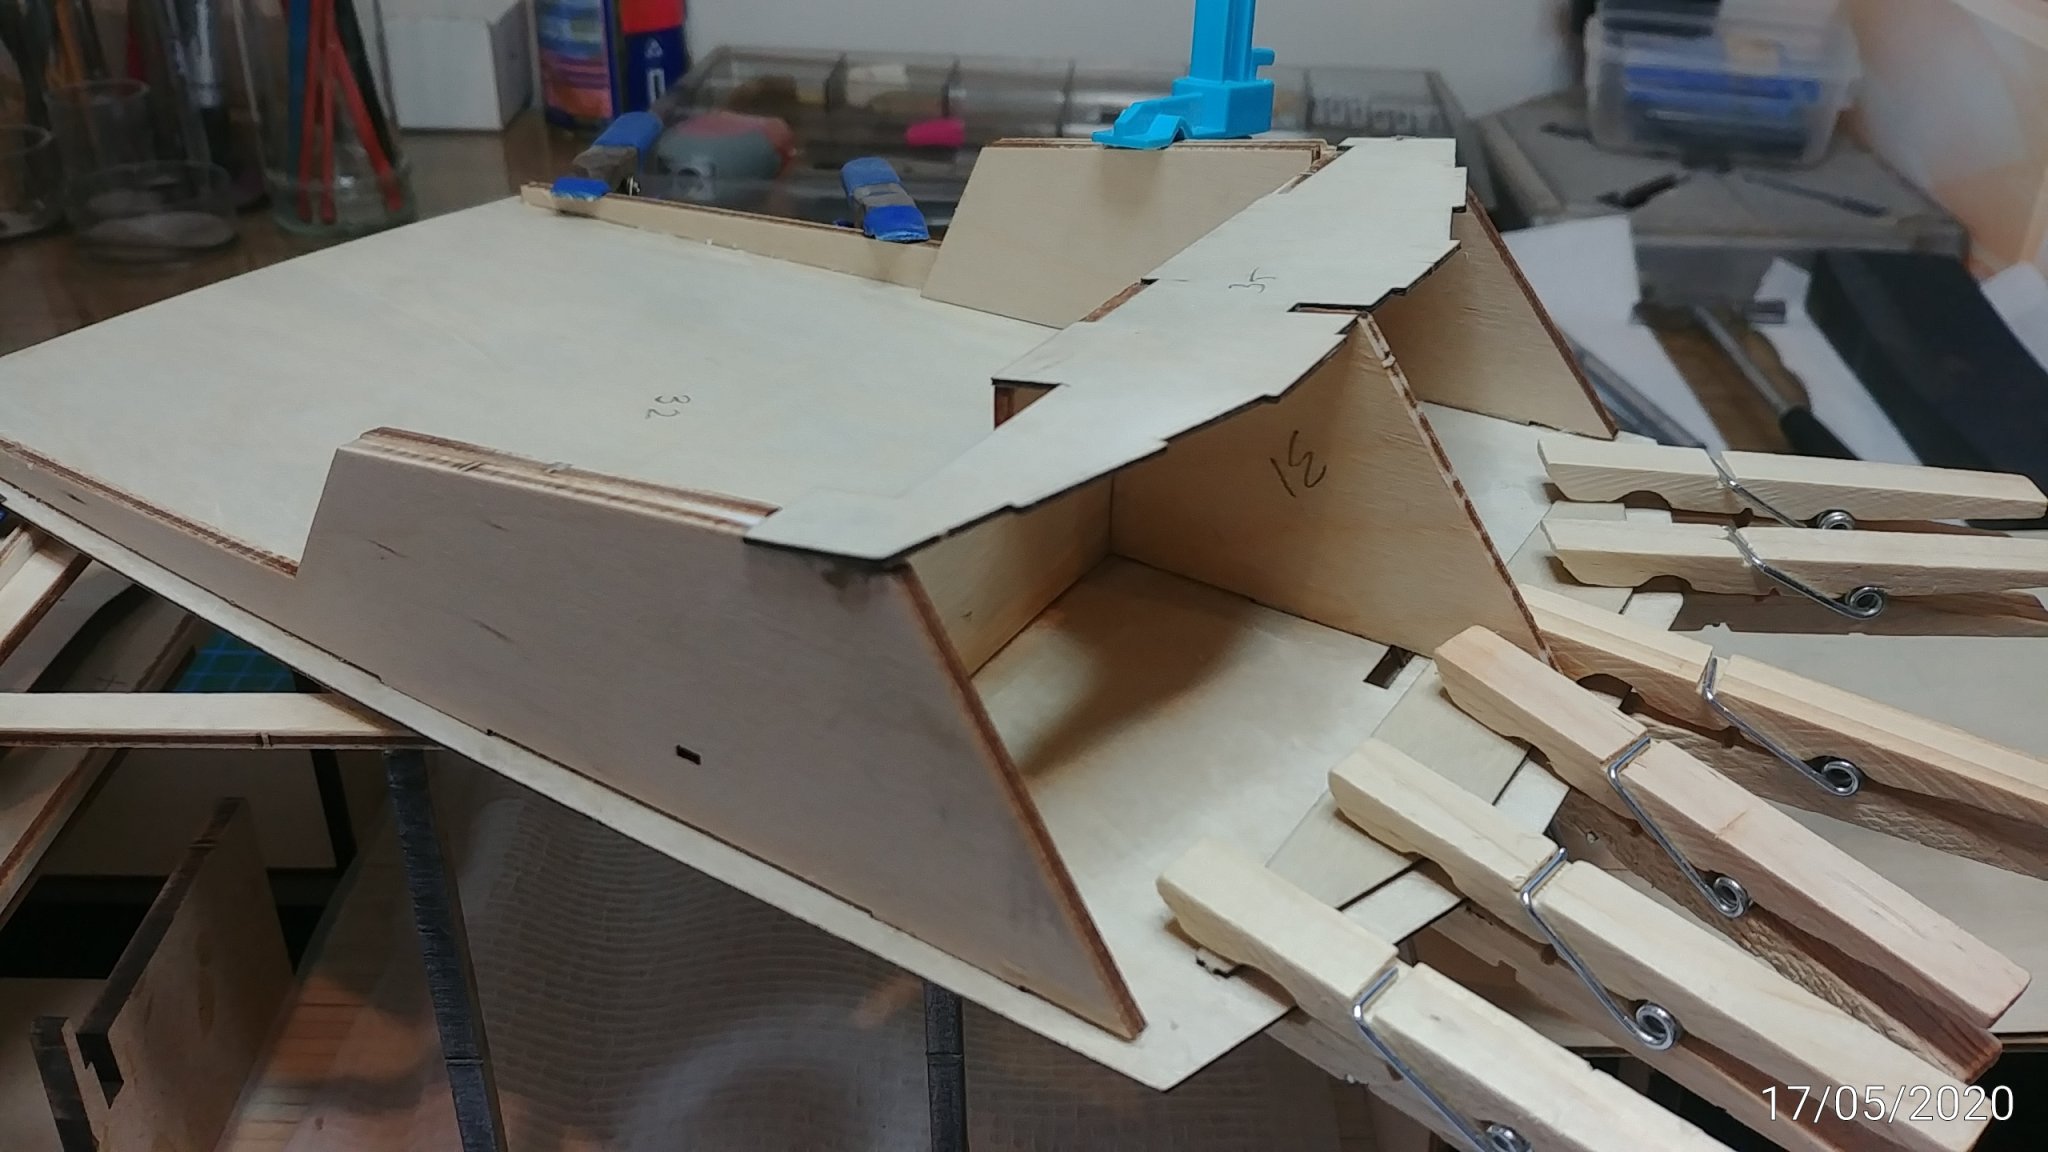
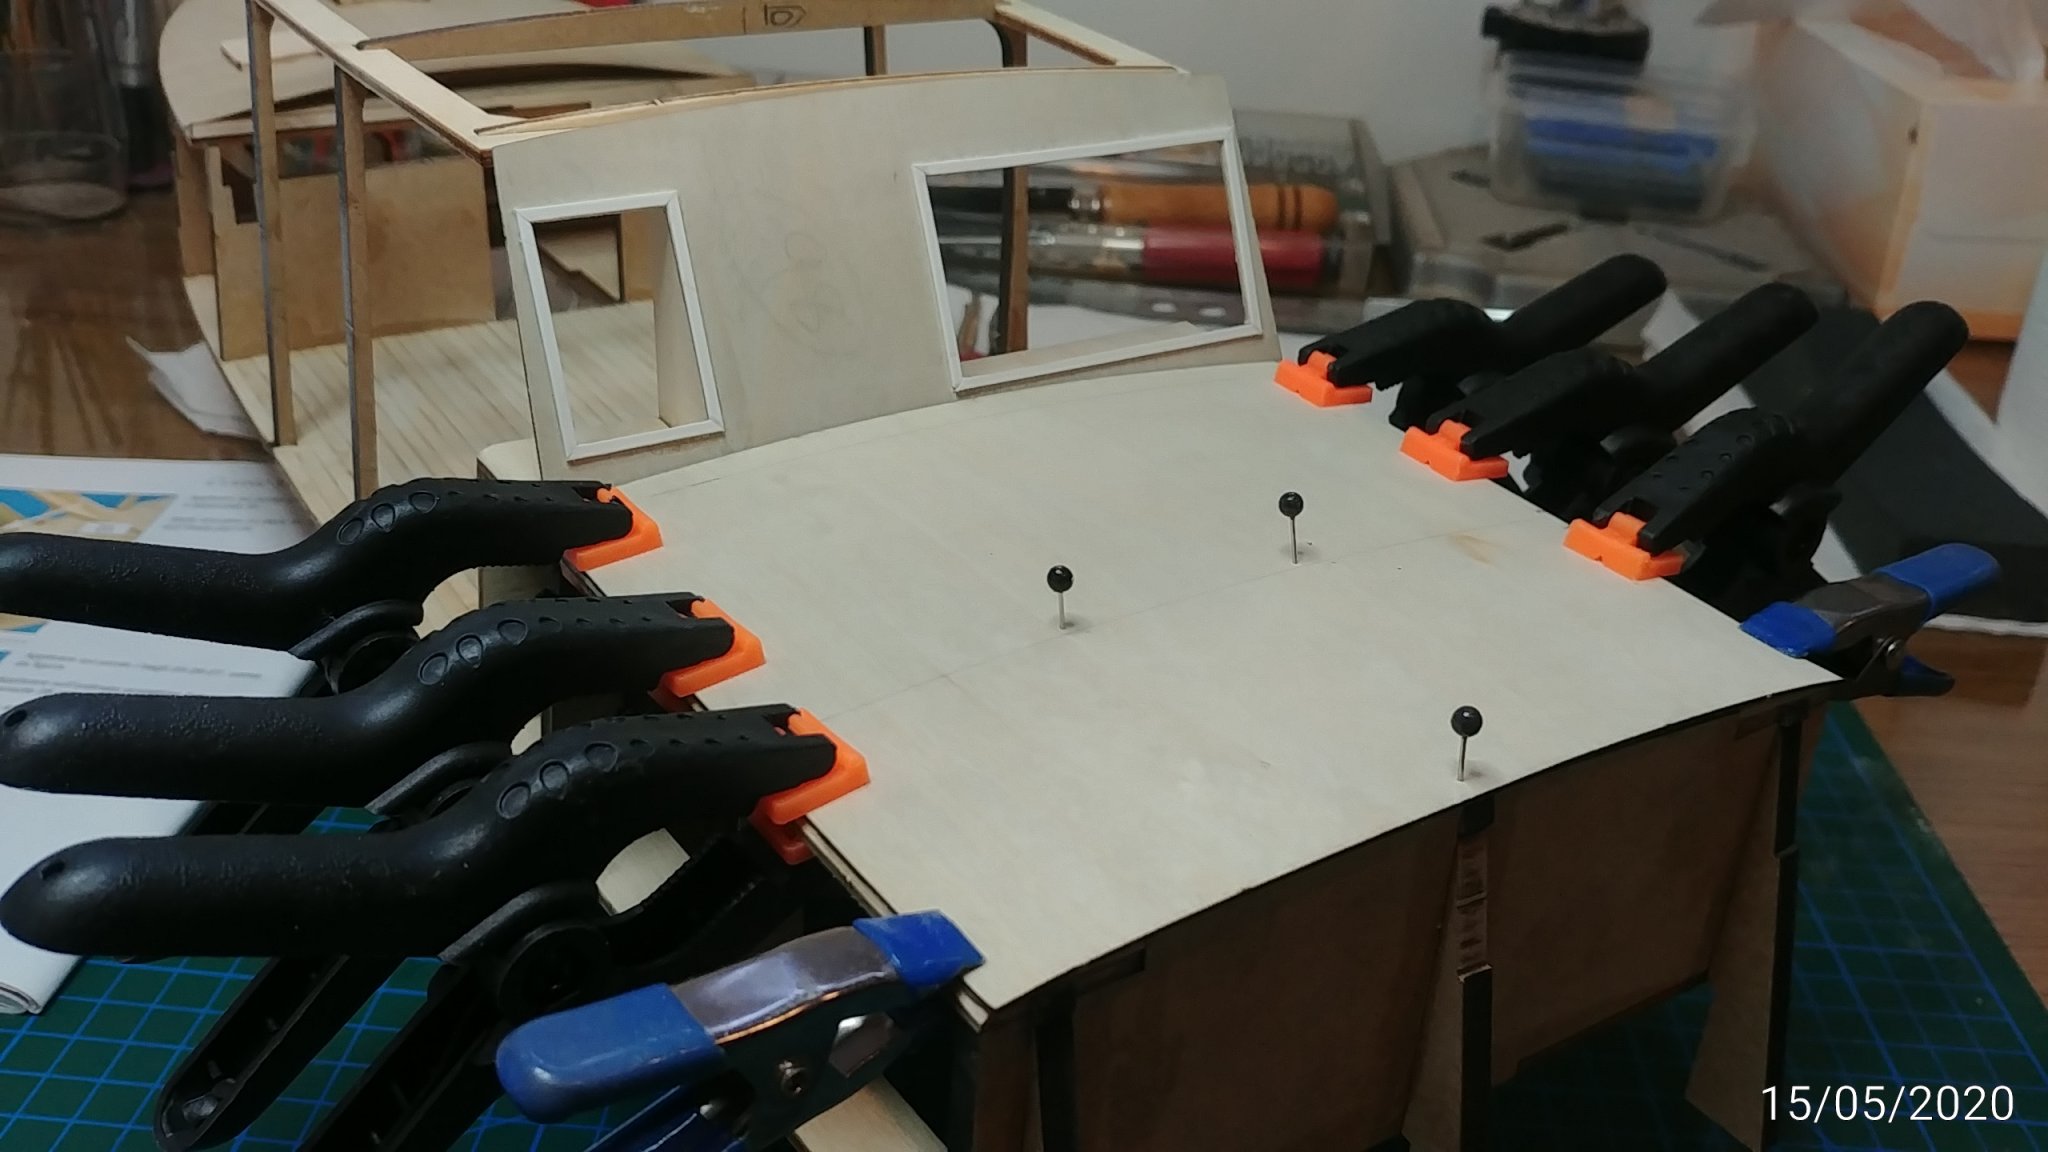
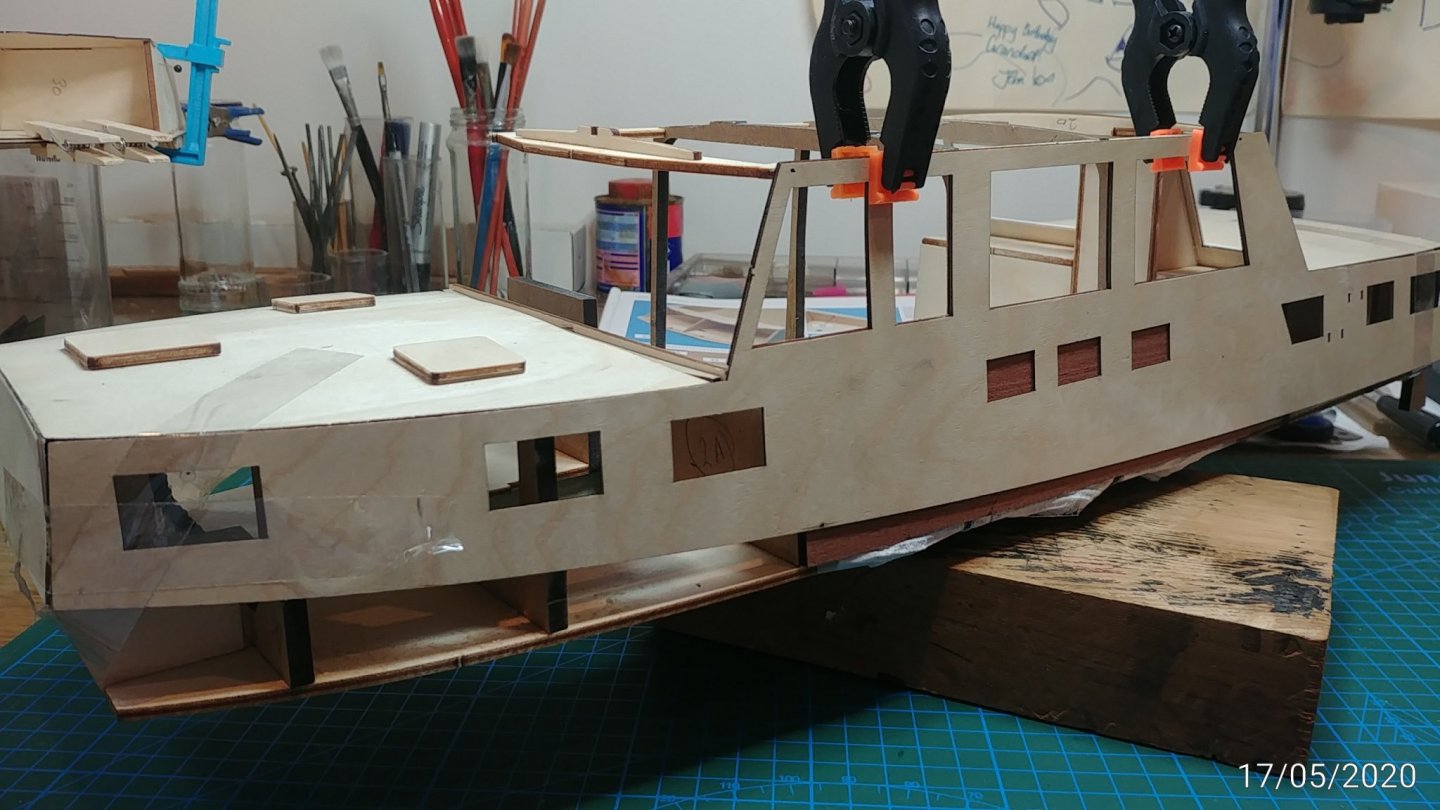
Framed up the flybridge, convex floor complicates it just a little and it took a couple of tries to get it right. Then trial dry fit of mahogany inner cabin wall and full length outer cabin wall. All fitted pretty well. Masked the planked floor as will soon need to spray primer.


- 91 replies
-
- 5
-
-
- amati
- grand banks 46
- (and 1 more)
-
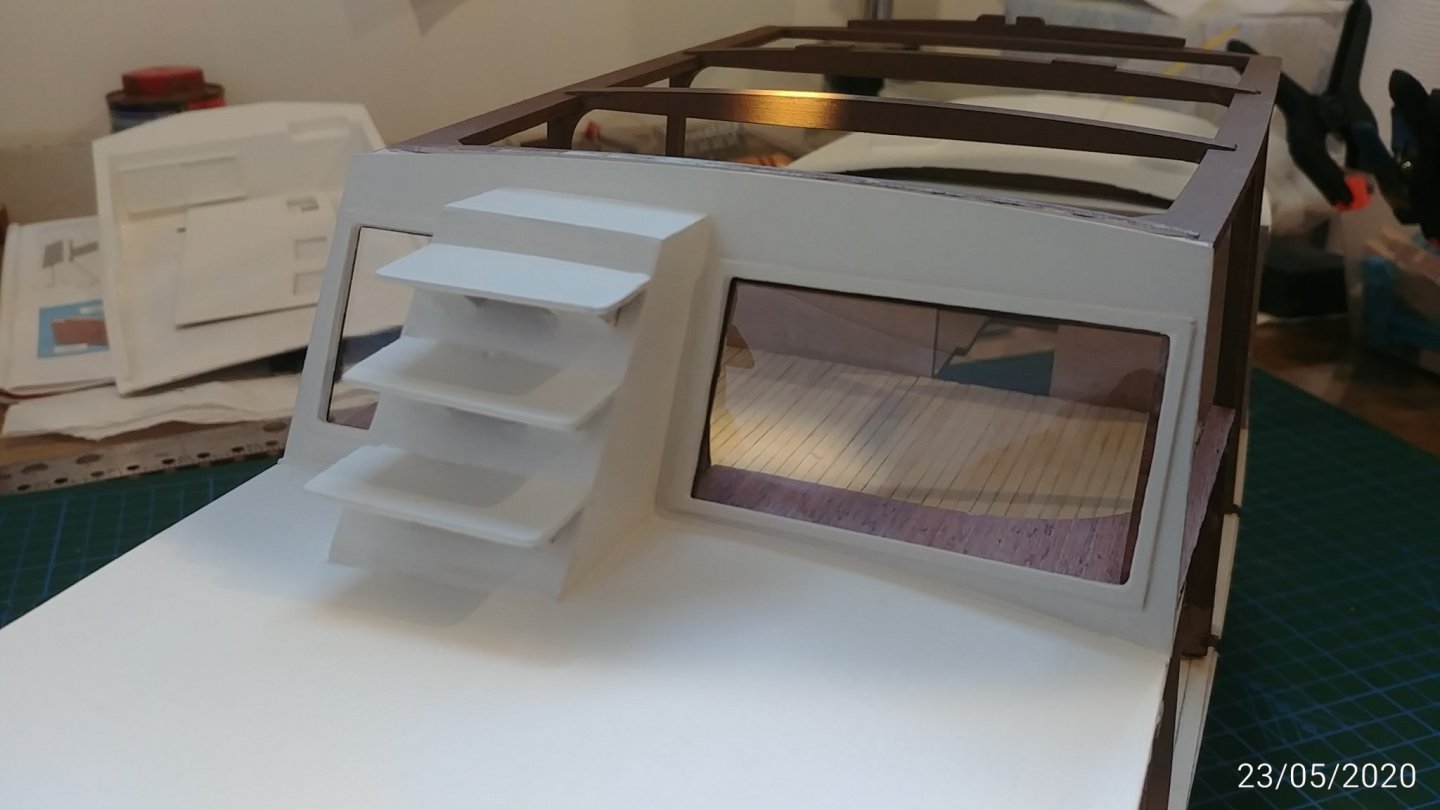
Cabin structure nearing completion, started window trims and stairs to flybridge. Wish I had bought a mini mitre cutter.


- 91 replies
-
- 4
-
-
- amati
- grand banks 46
- (and 1 more)
-
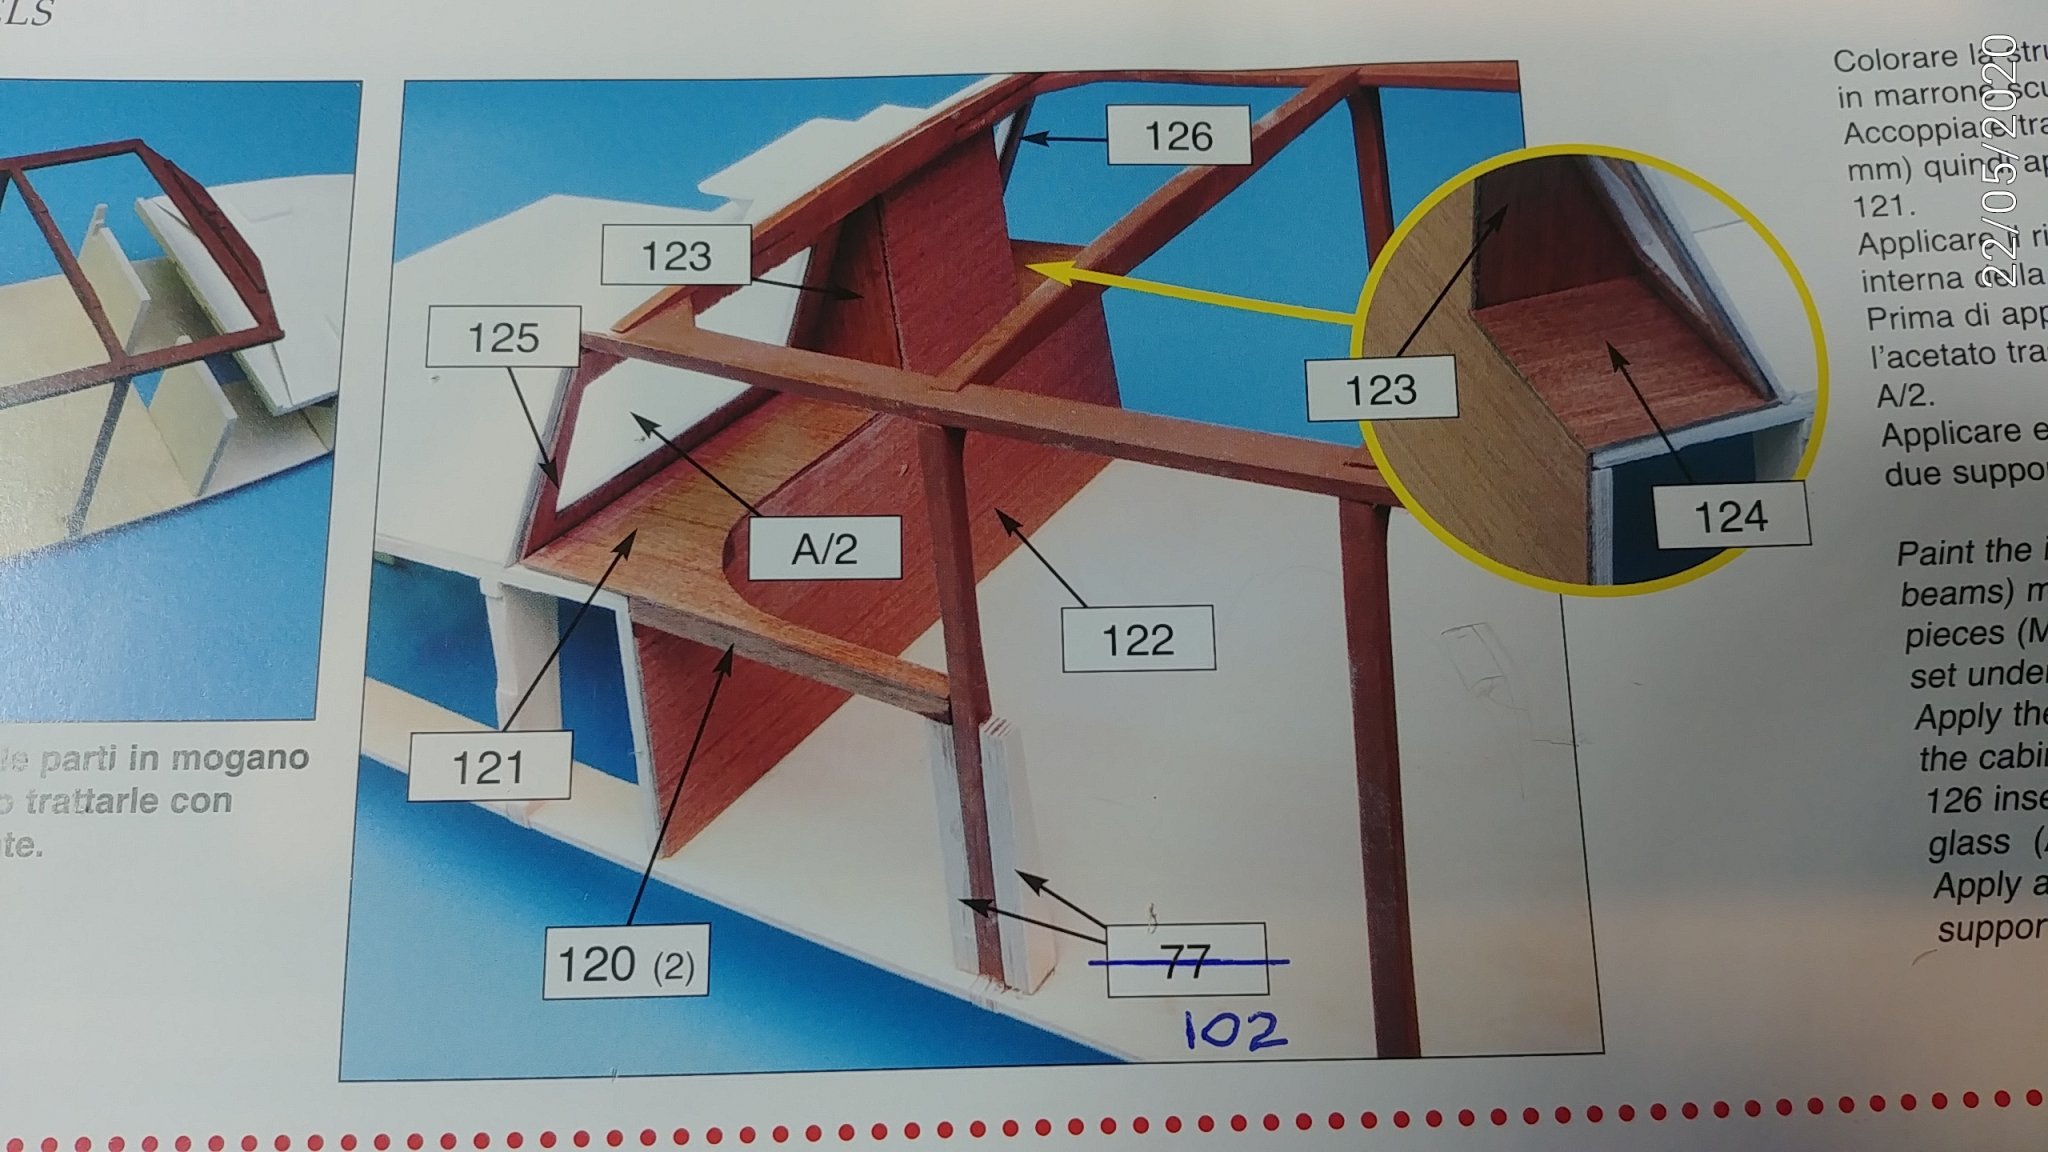
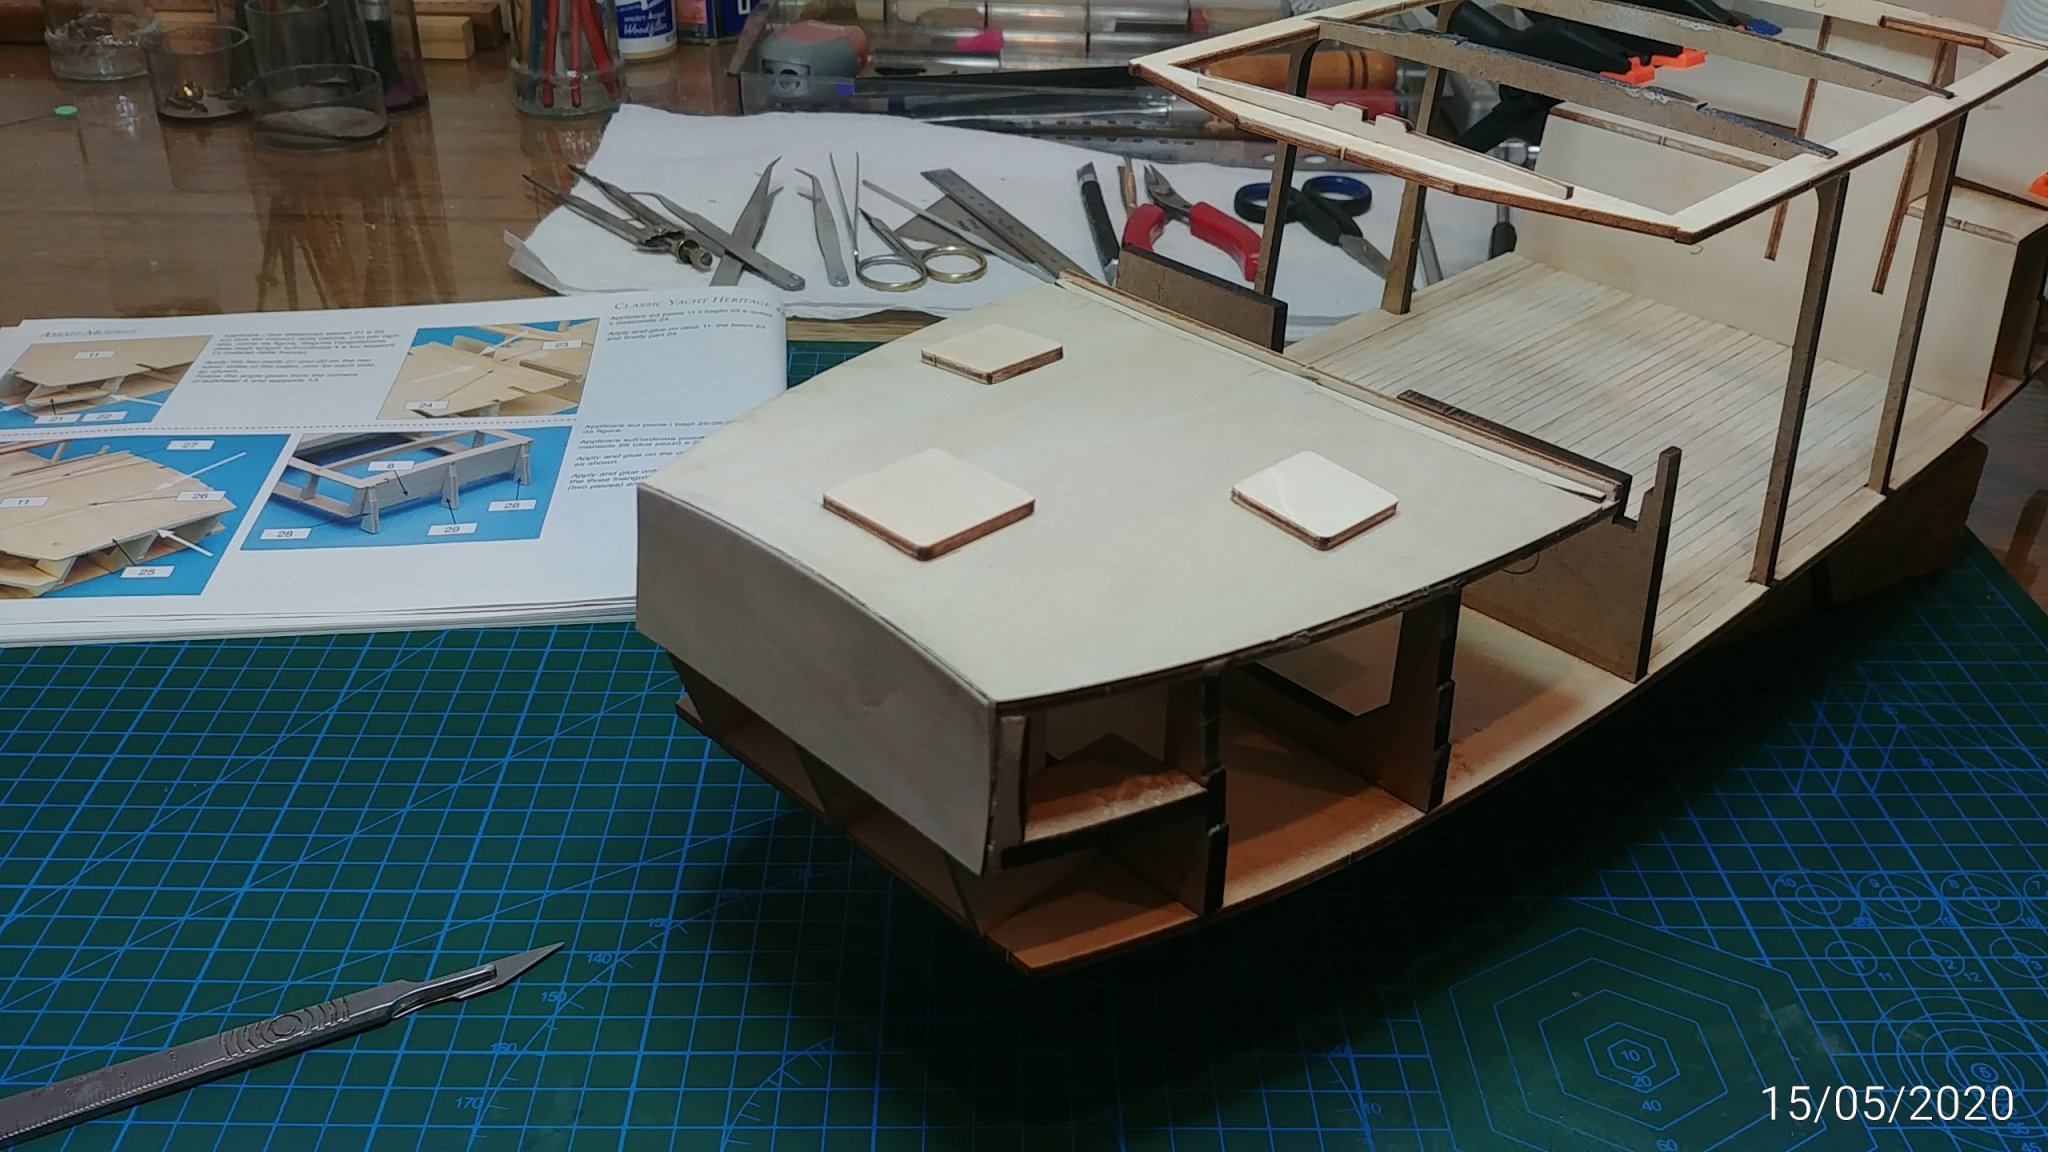
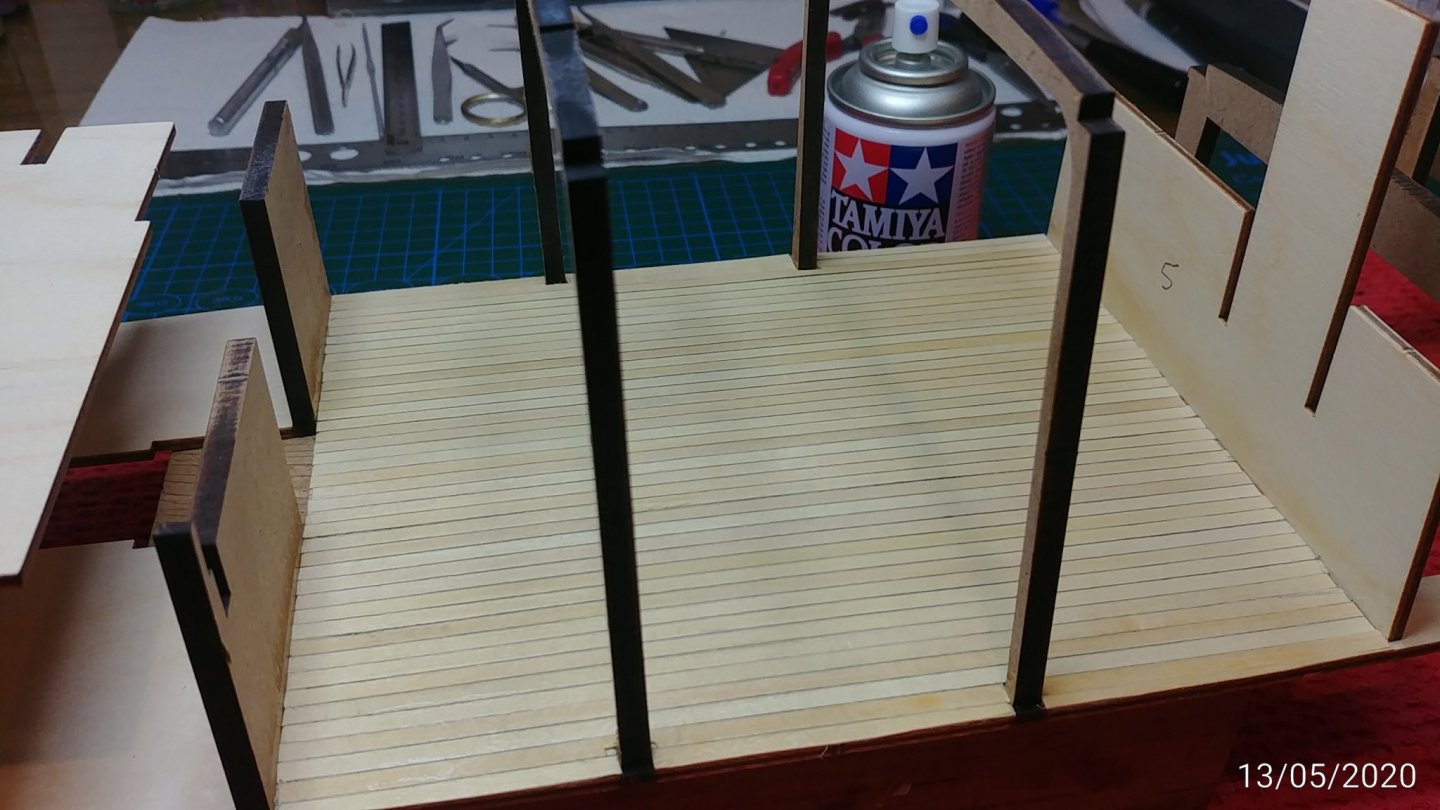
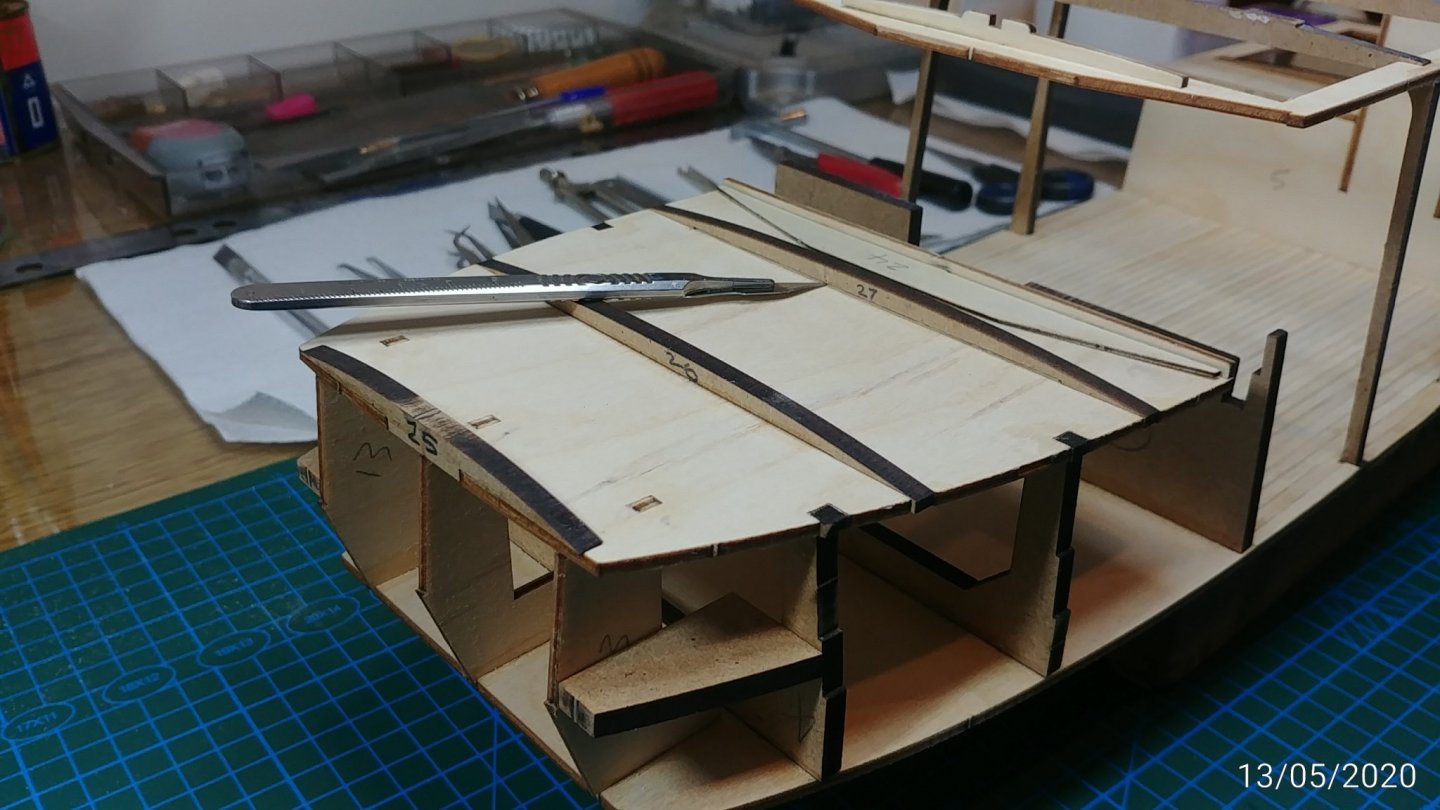
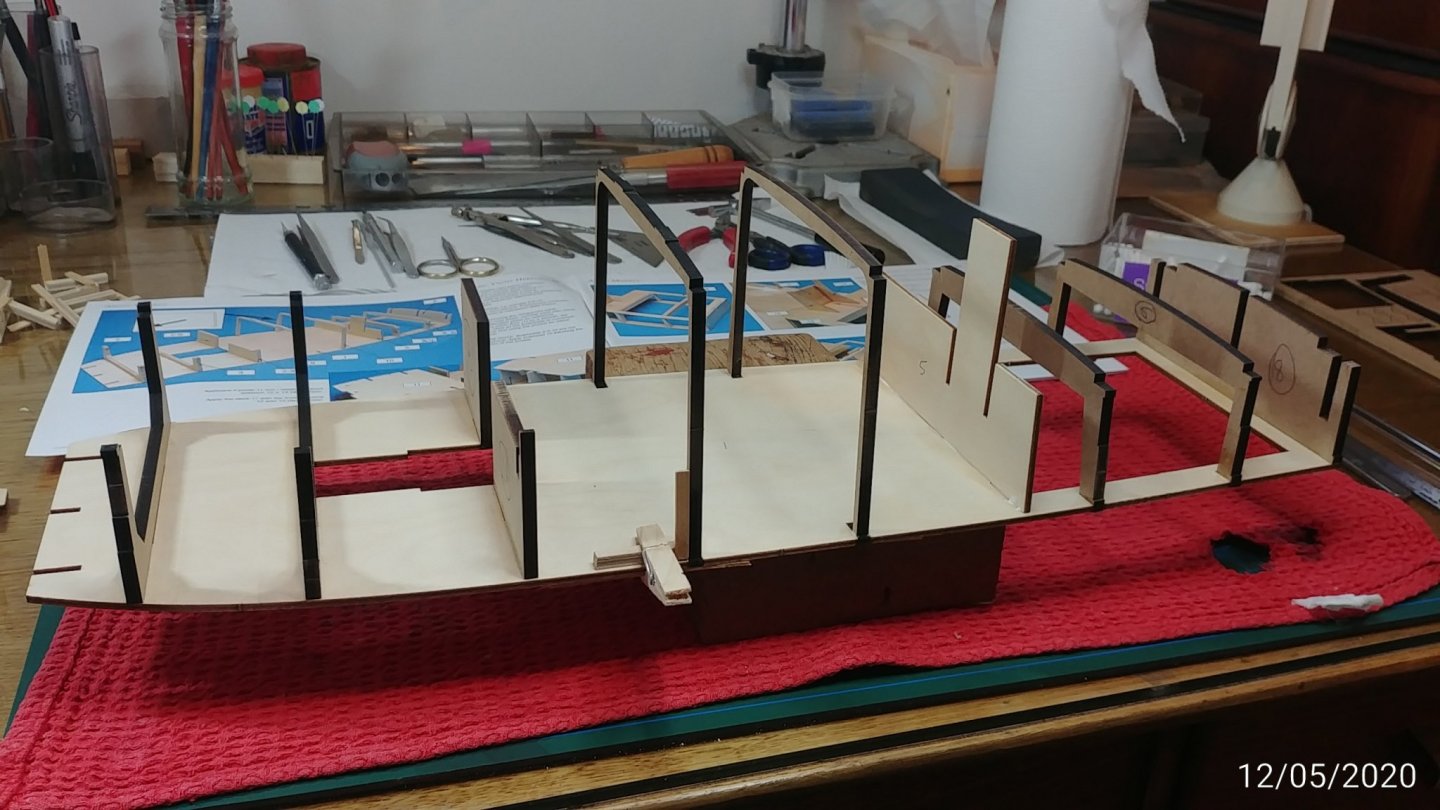
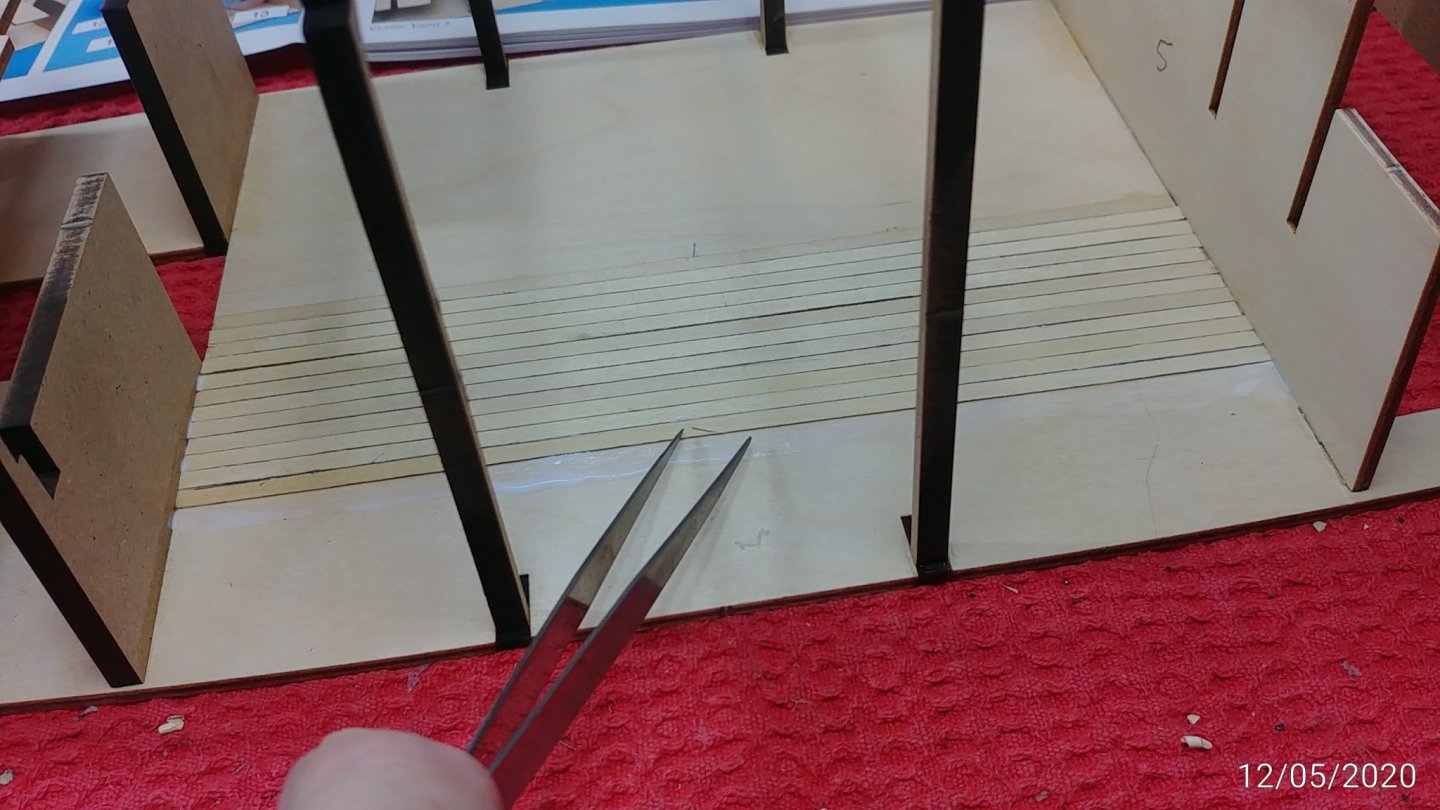
Only day 2 and I have completed the frameup of the cabin....have to slow down. The Amati parts go together so accurately that assembly is just so easy. Some very minor notes for future builders, I used a 0.5mm thick deck plank under part 27 ..pointed to by knife....(rear cabin arch) to just raise it very slightly to fair it into the sides perfectly. It was OK but this was easy and did make a slightly better fit. The limewood floor finished up OK. I could not work out exactly how to fit parts 21B and 22B...they are little supports for 21 and 22 the horizontals mid way up in the front corners. (see gb006) As far as I could see 21B and 22B were not really required and are not visible in the instructions. I kept them in case they turn out to be important.

- 91 replies
-
- 5
-
-
- amati
- grand banks 46
- (and 1 more)
-
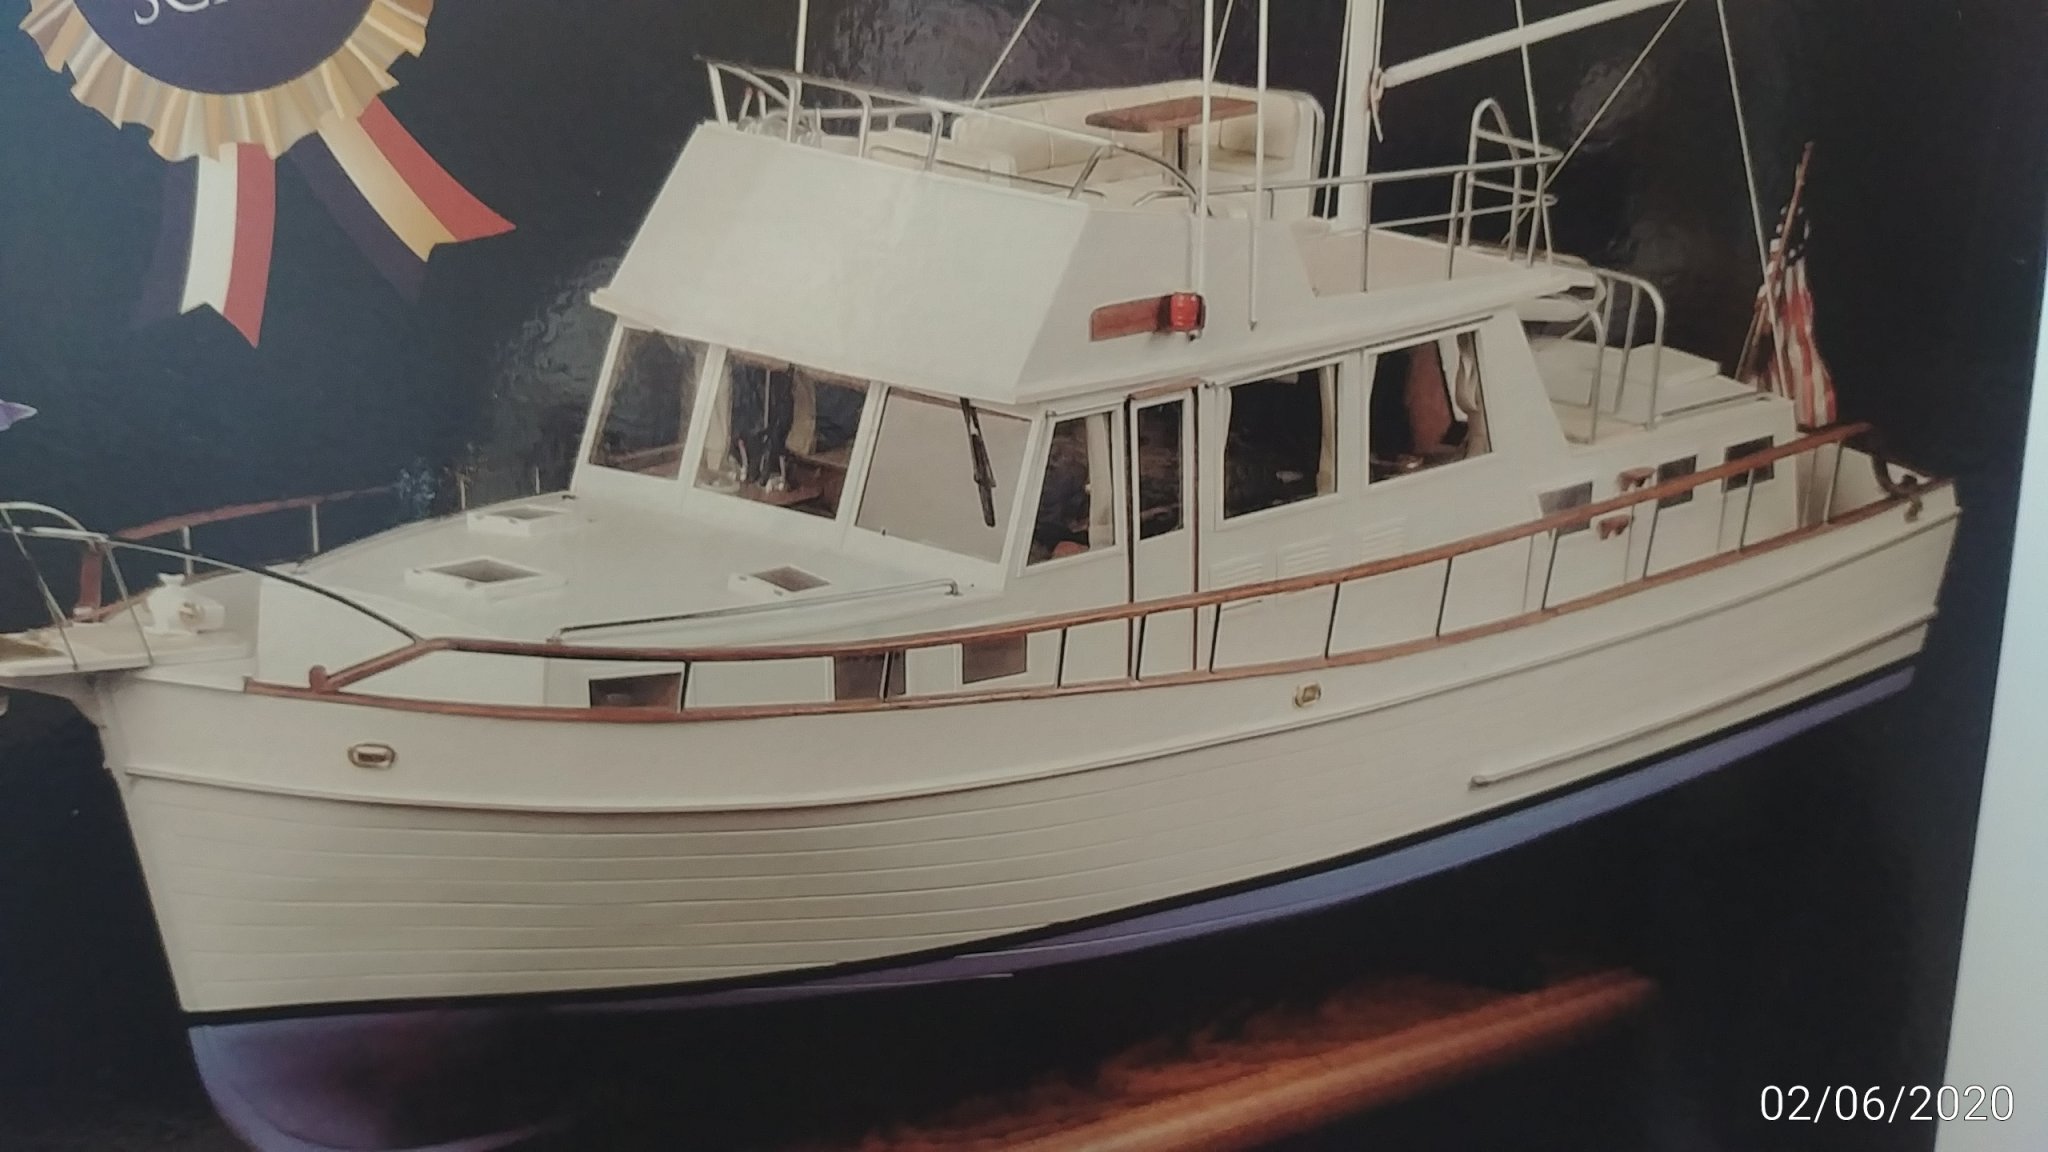
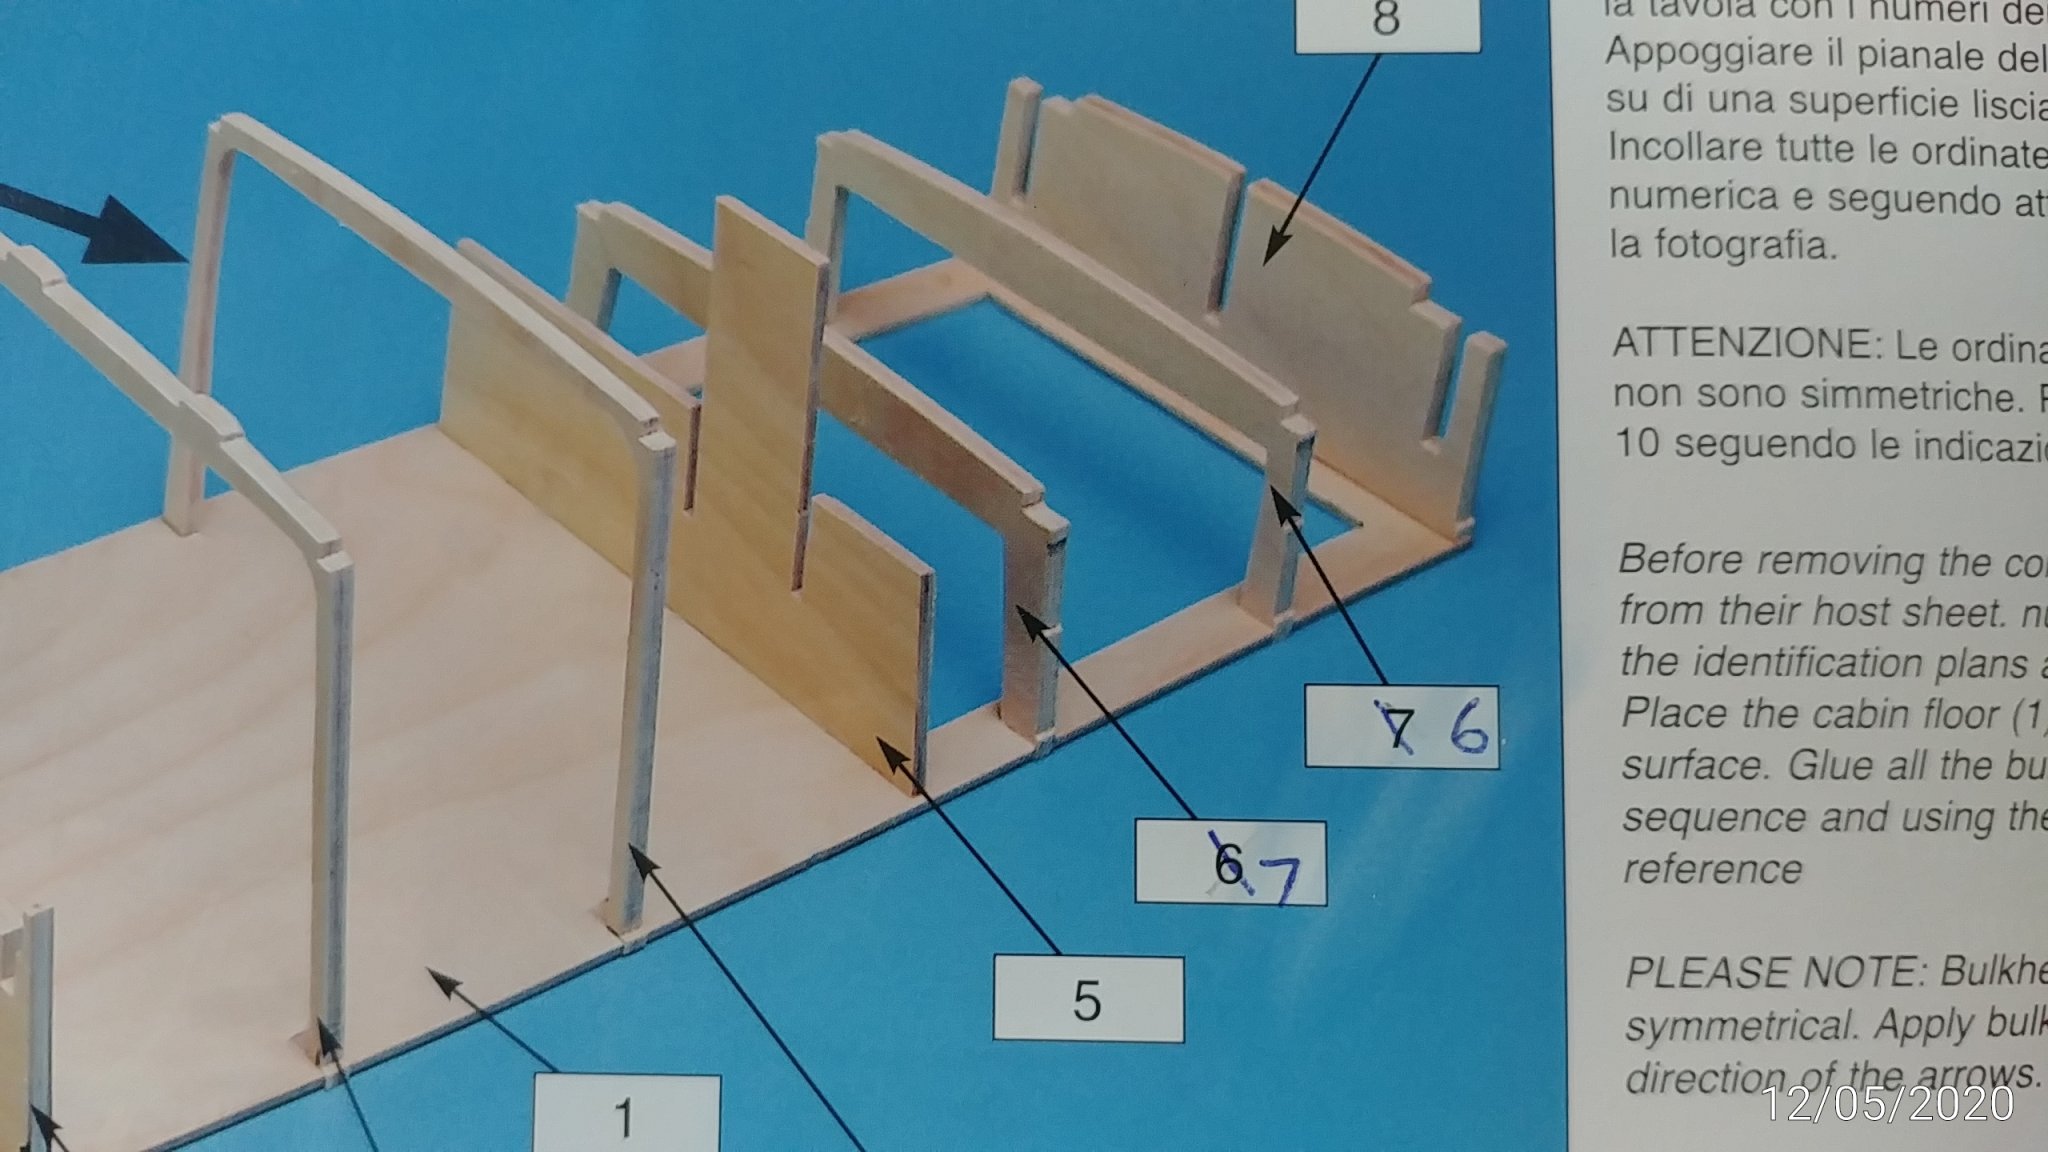
This is the start of my build log. The first thing was to compare the Amati kit with my previous build which was the Caldercraft Endeavour. I thiunk this is much better, with sharper CNC parts, and much better documentation. Having said that there is an annotation error on Page 1 as pictured below in GB004. The parts wont go in the places described for 6 and 7 but it is obvious where they should be...the other way around. The kit has a very awful paper print cabin floor covering which simulates the parquetry of the real boat. While I am sacrificing some authenticity I am planking the cabin floor with leftover Endeavour decking which I will possibly stain to look like teak, or may leave it matt and blond to show up better inside the cabin when largely built in.


- 91 replies
-
- 6
-
-
- amati
- grand banks 46
- (and 1 more)
-
Dave Unless I am mistaken only one of the four boats had a white lead coating as an experiment against worm. It was the longboat (I think) and the others were assumed brown/tar as for the main ship's hull. The experiment was such a success it led directly to the expensive implementation of white lead on ship's hulls when Cook reported back to the Admiralty on the immunity the white lead had conferred on the longboat, it was untouched when examined at the end of trip Compliments on the brilliant work.
-
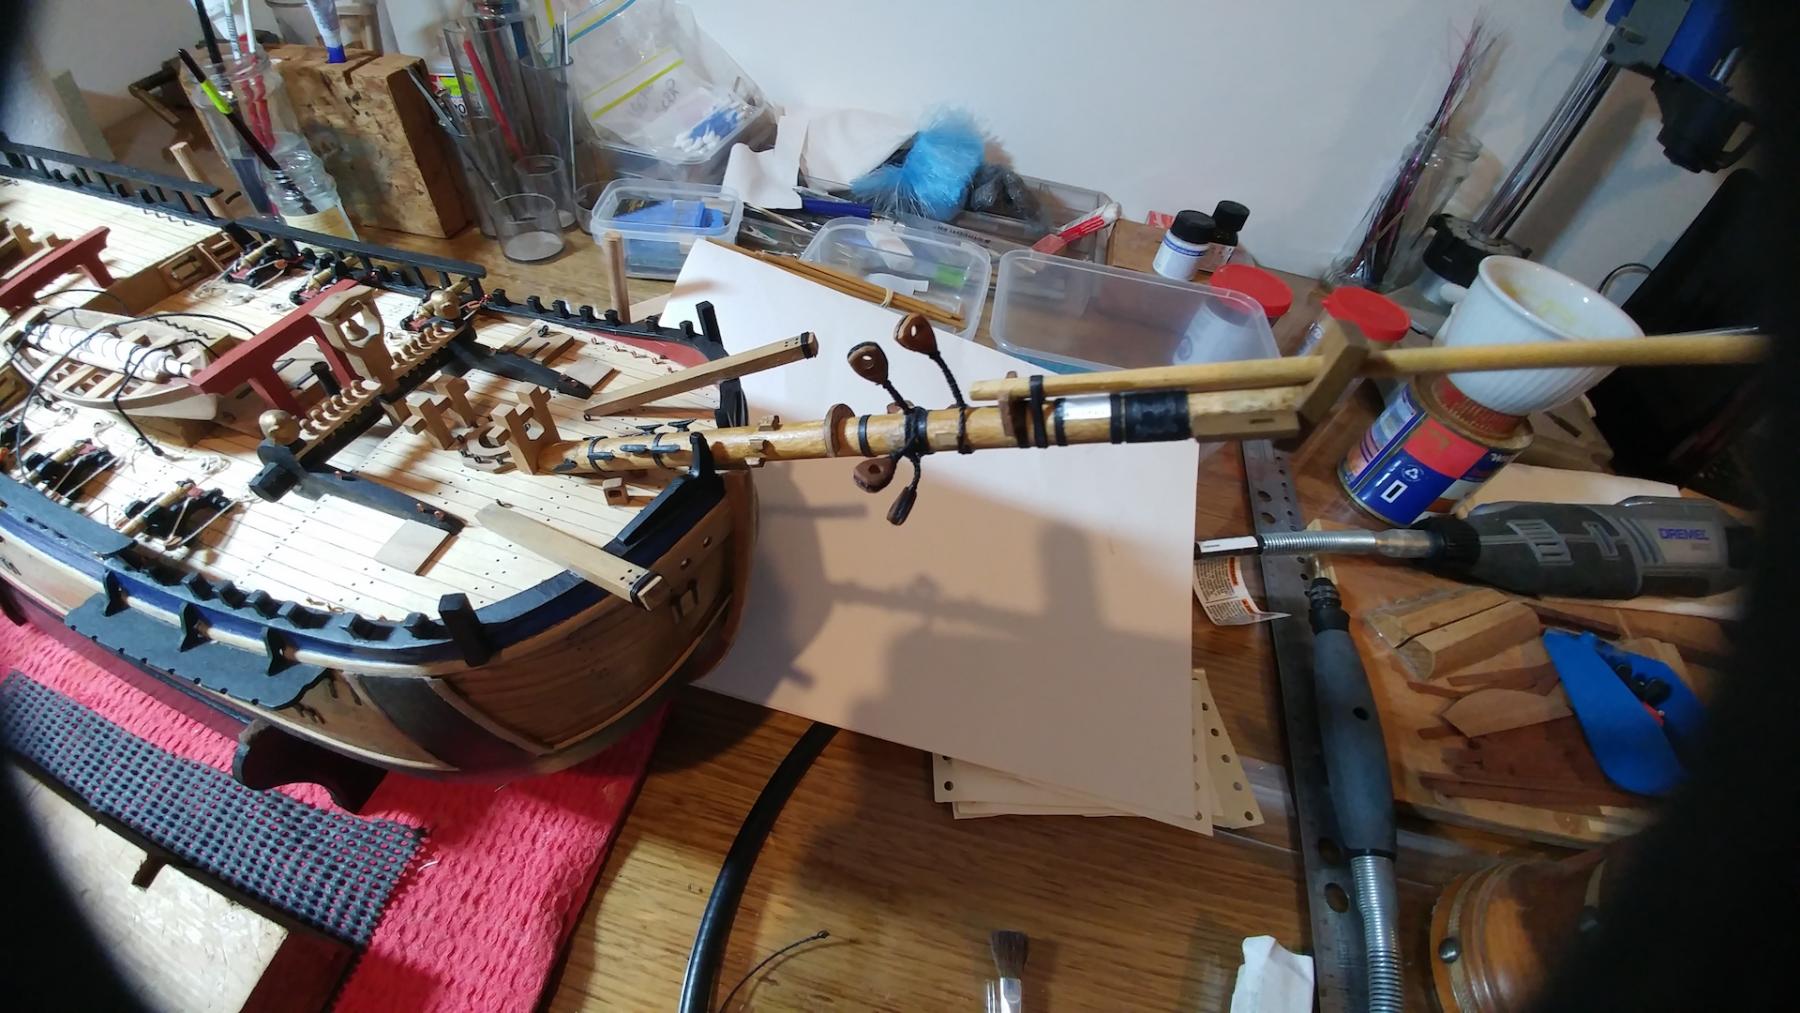
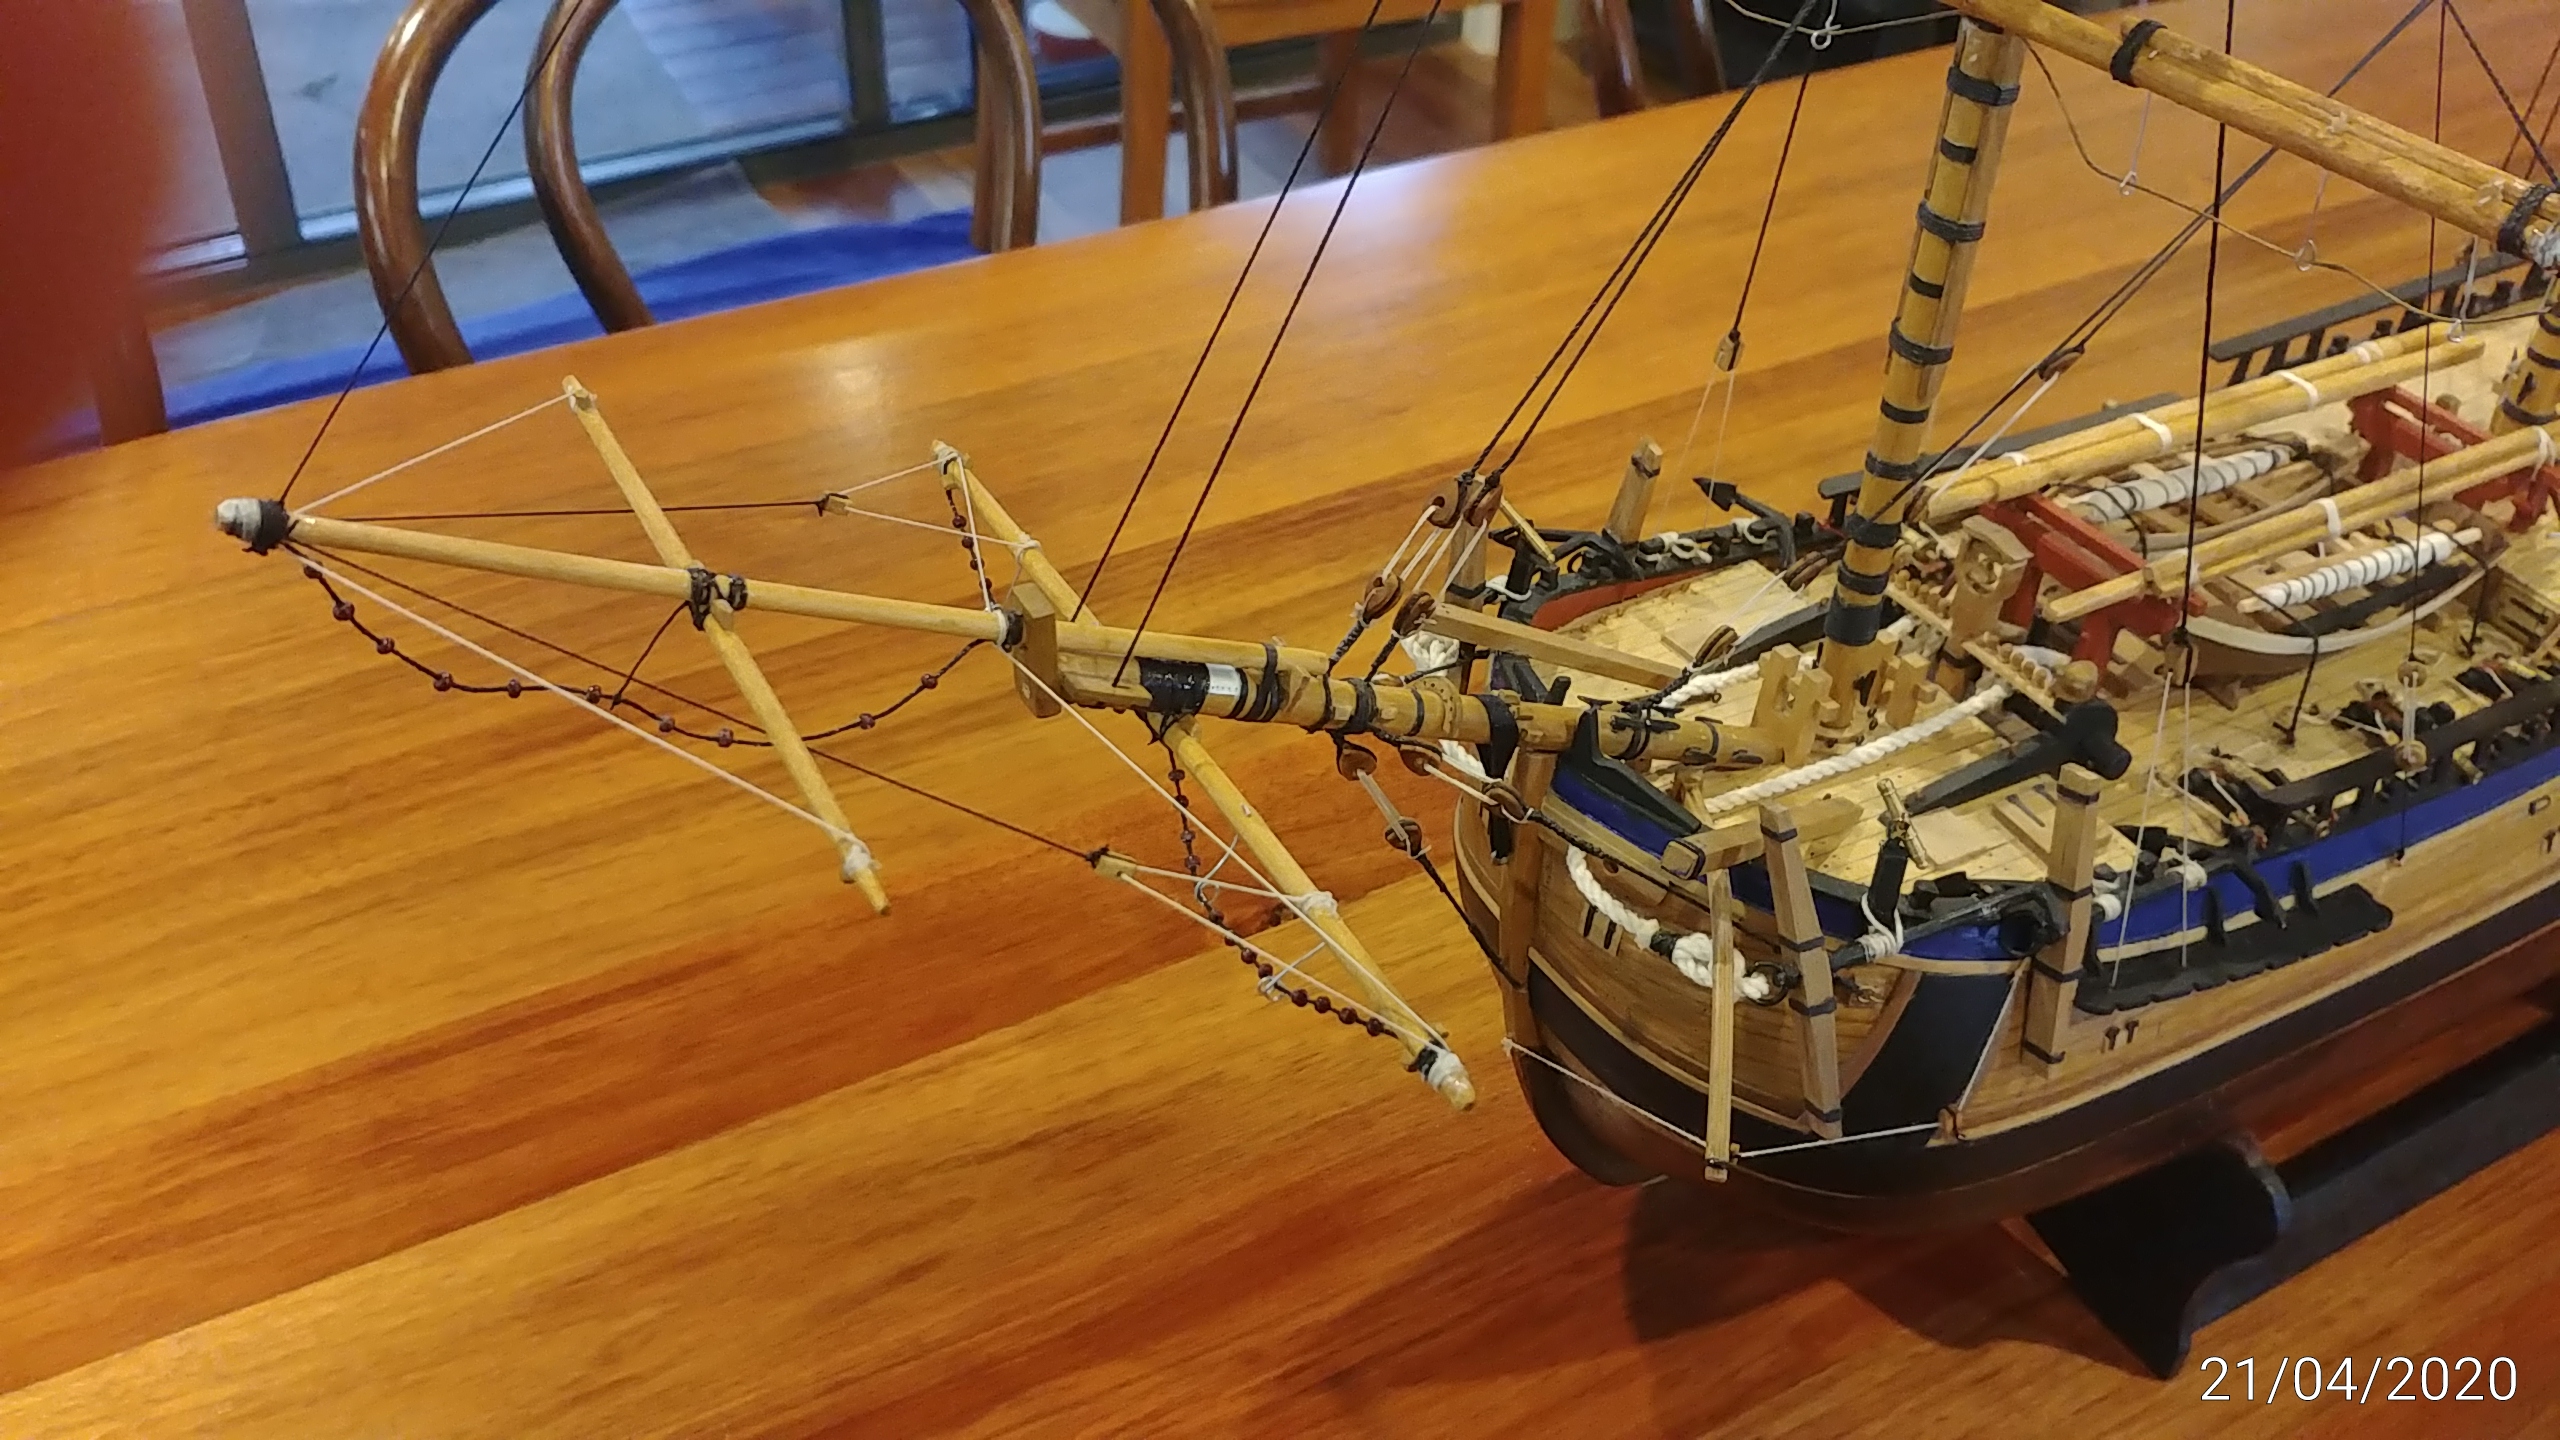
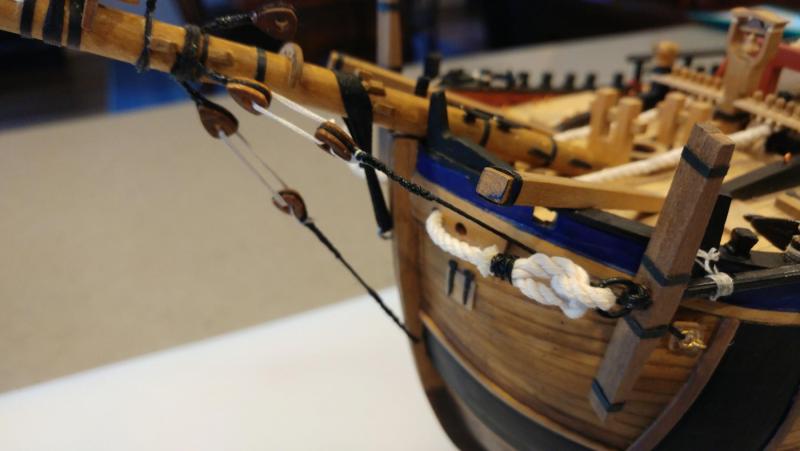
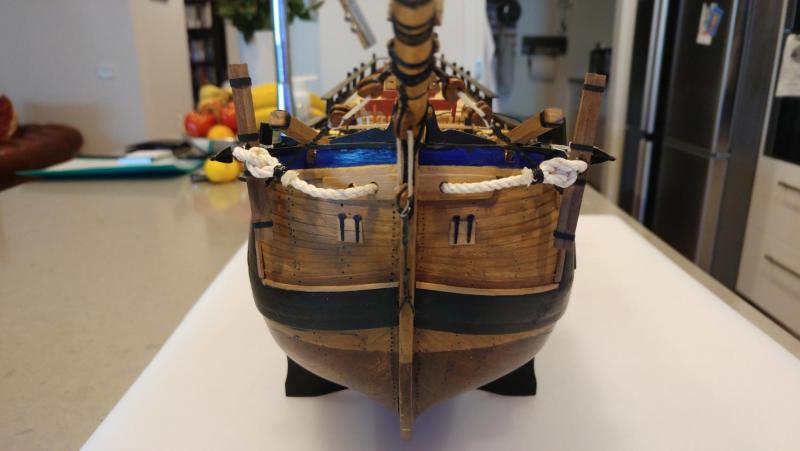
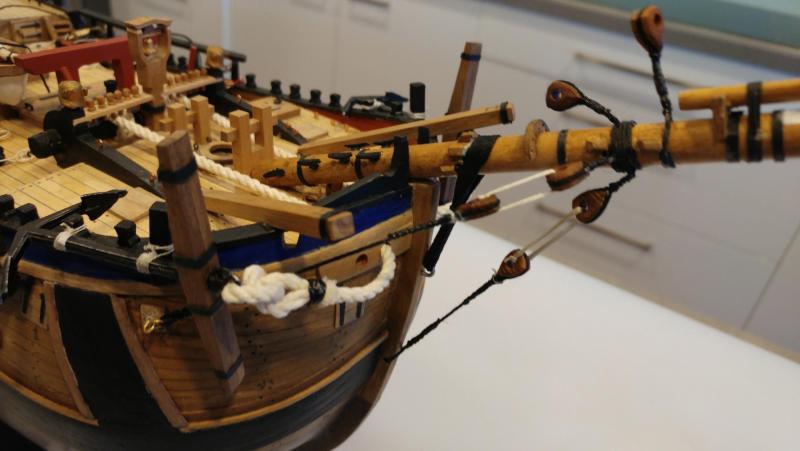
Have been working on the front end..oops..bow..! Just about done bowsprit and supports. Finally managed to bump and snap a bumpkin...called that because if you bump it you kin start making another one. (sorry) Serious bumpkin question...recognise that AOTS argues strongly for bumpkins and other authors & modellers reject them as over interpreting Banks' sketches and they did not exist on the ship...whatever..! Once you have them in place and the anchor lashed to the gunwhale, I cannot see how you can install bumpkin stays to the locations shown on AOTS and still lower the anchor past them. I would have thought the anchor in practice would have been lowered under control and in an emergency able to be cut free and freefall ...this would wipe out the bumpkin stays in one fell swoop. Anyone thought about this..?
-
Working on the bowsprit to have a break from boats. Am staining all masts and spars as AOTS "pine resin varnish"....aka...wattyl baltic pine. It is a revolting yellowish pale brown but when aged a bit by rubbing with a kleenex and some black it looks pretty realistic.

-
Thanks to all three of you. Go that..that explains why I thpought the scale was all screwed up...onlt the foremast is "right"... who would have guessed..?
-
Has anyone resolved the questions around the Mizzen height..? The Caldercraft kit plan has the mizzen drawn at 208mm but annotated as 178mm... ? and I do recall some uncertainty about the real height..? Any direction anyone..?
-
Has anyone resolved the questions around the Mizzen height..? The Caldercraft kit plan has the mizzen drawn at 208mm but annotated as 178mm... ? and I do recall some uncertainty about the real height..? Any direction anyone..?
-
Thanks Michael
-
Slog I just saw this from you...thank you very much. I have given up on getting a response from Jotika so you have got me out of jail. Cheers.
-
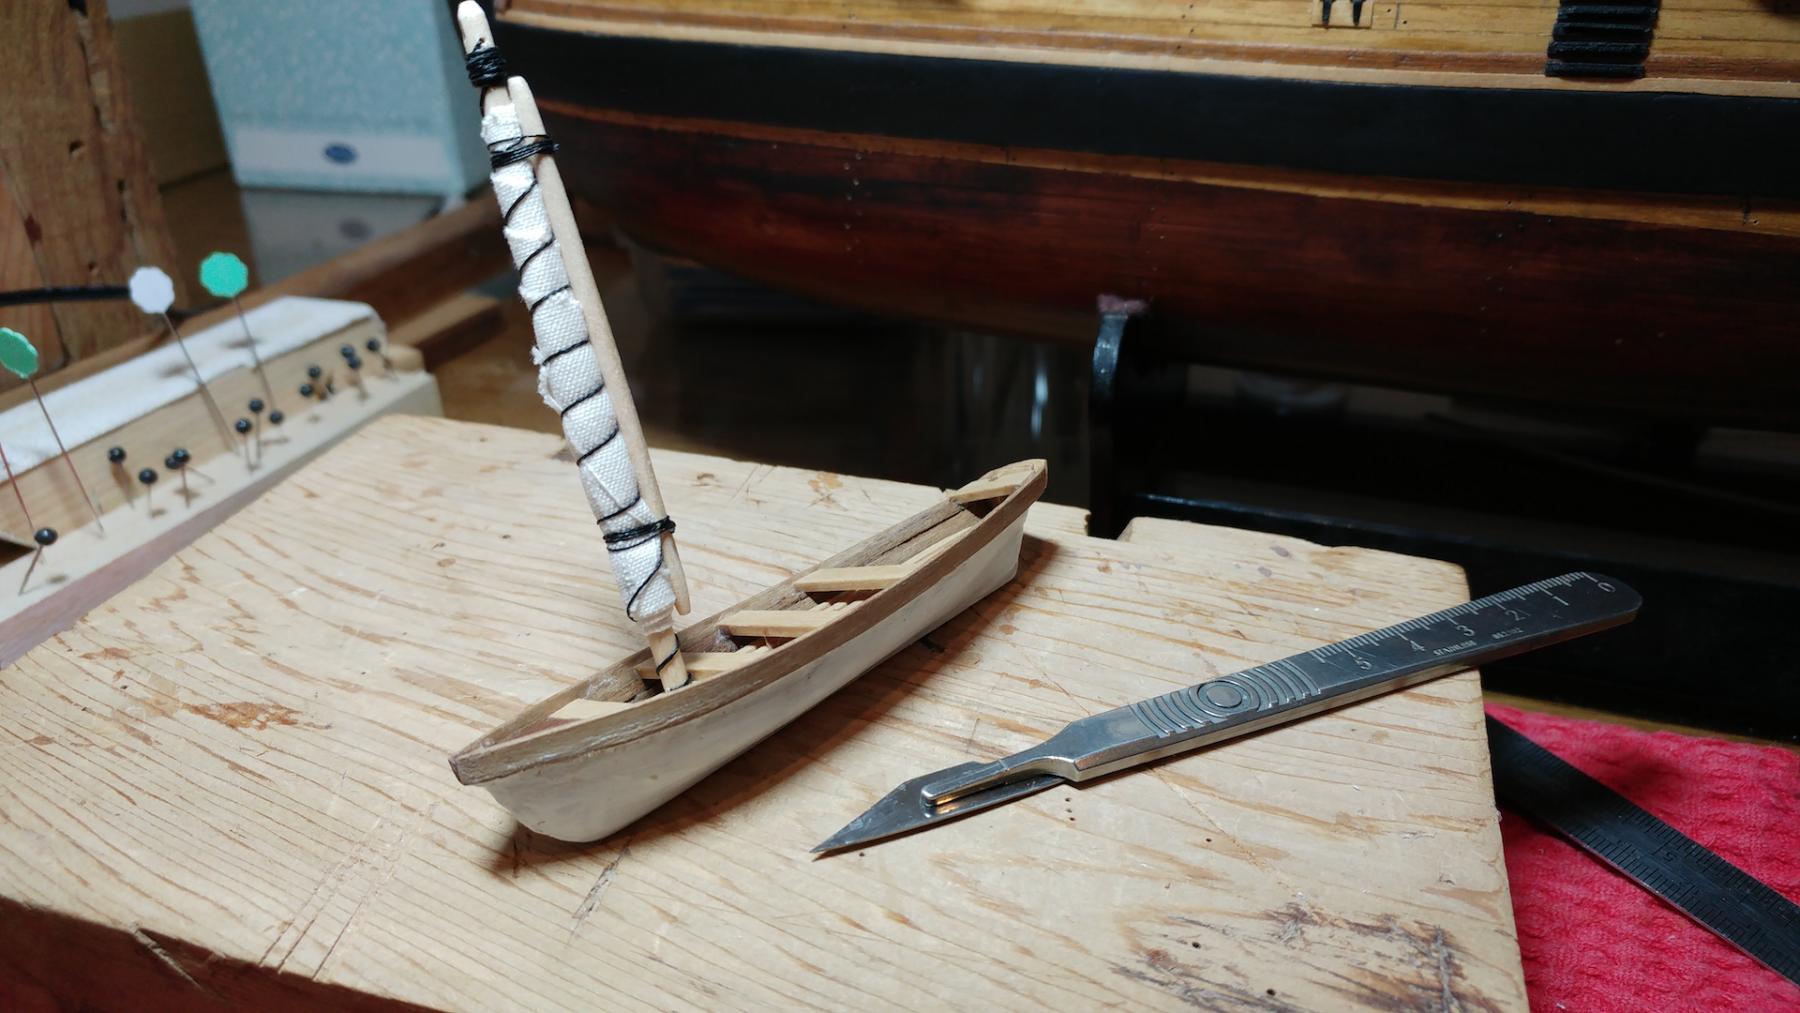
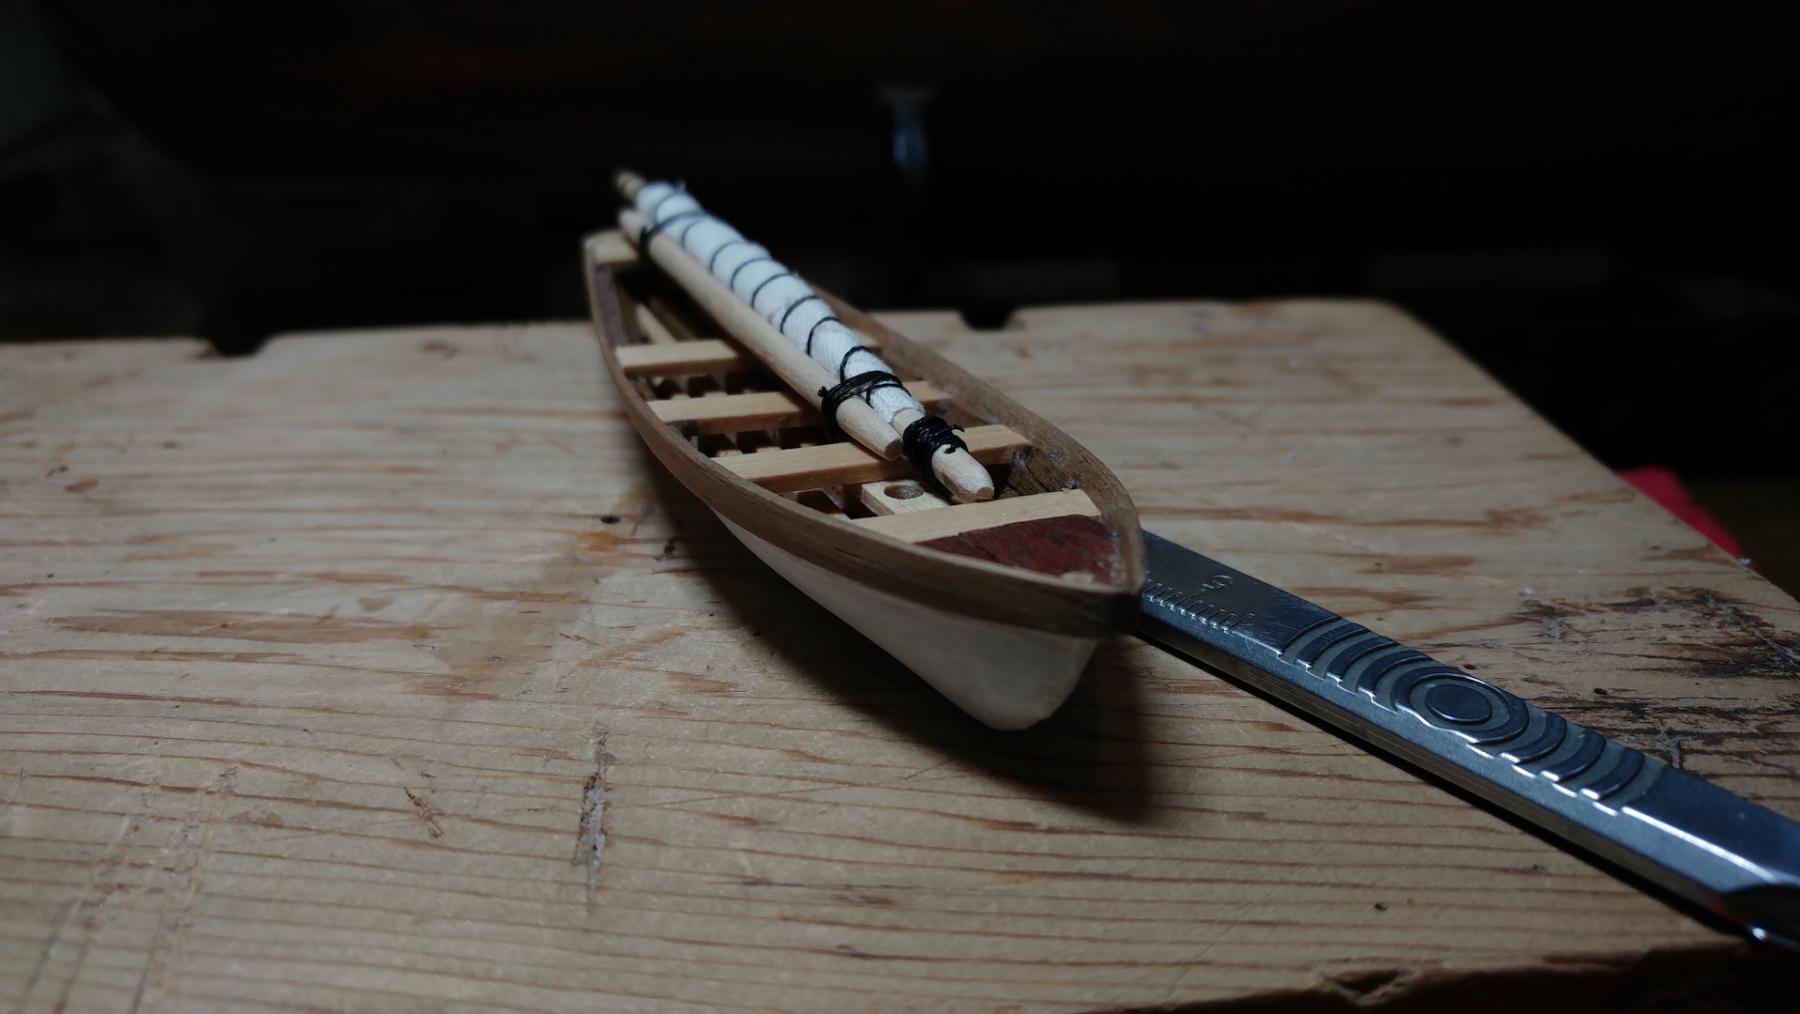
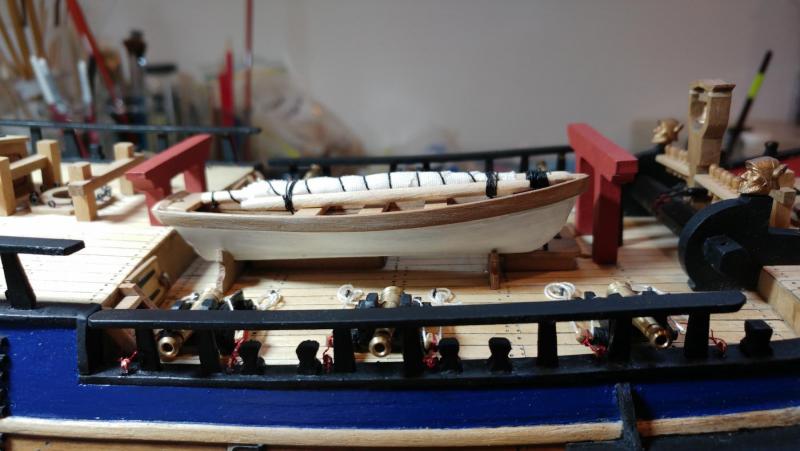
Made the Pinnace first as it is white and better to practice on something which is painted. Have to do oars, but made up a simple gaff rig and mast step for one of it's sailing configurations just for the fun of it. Hate doing the boats..it was getting to this stage 5 years ago that made me stop although I am reasonably happy with this first one. I dont think this is a strong point of the kit to be honest.


-
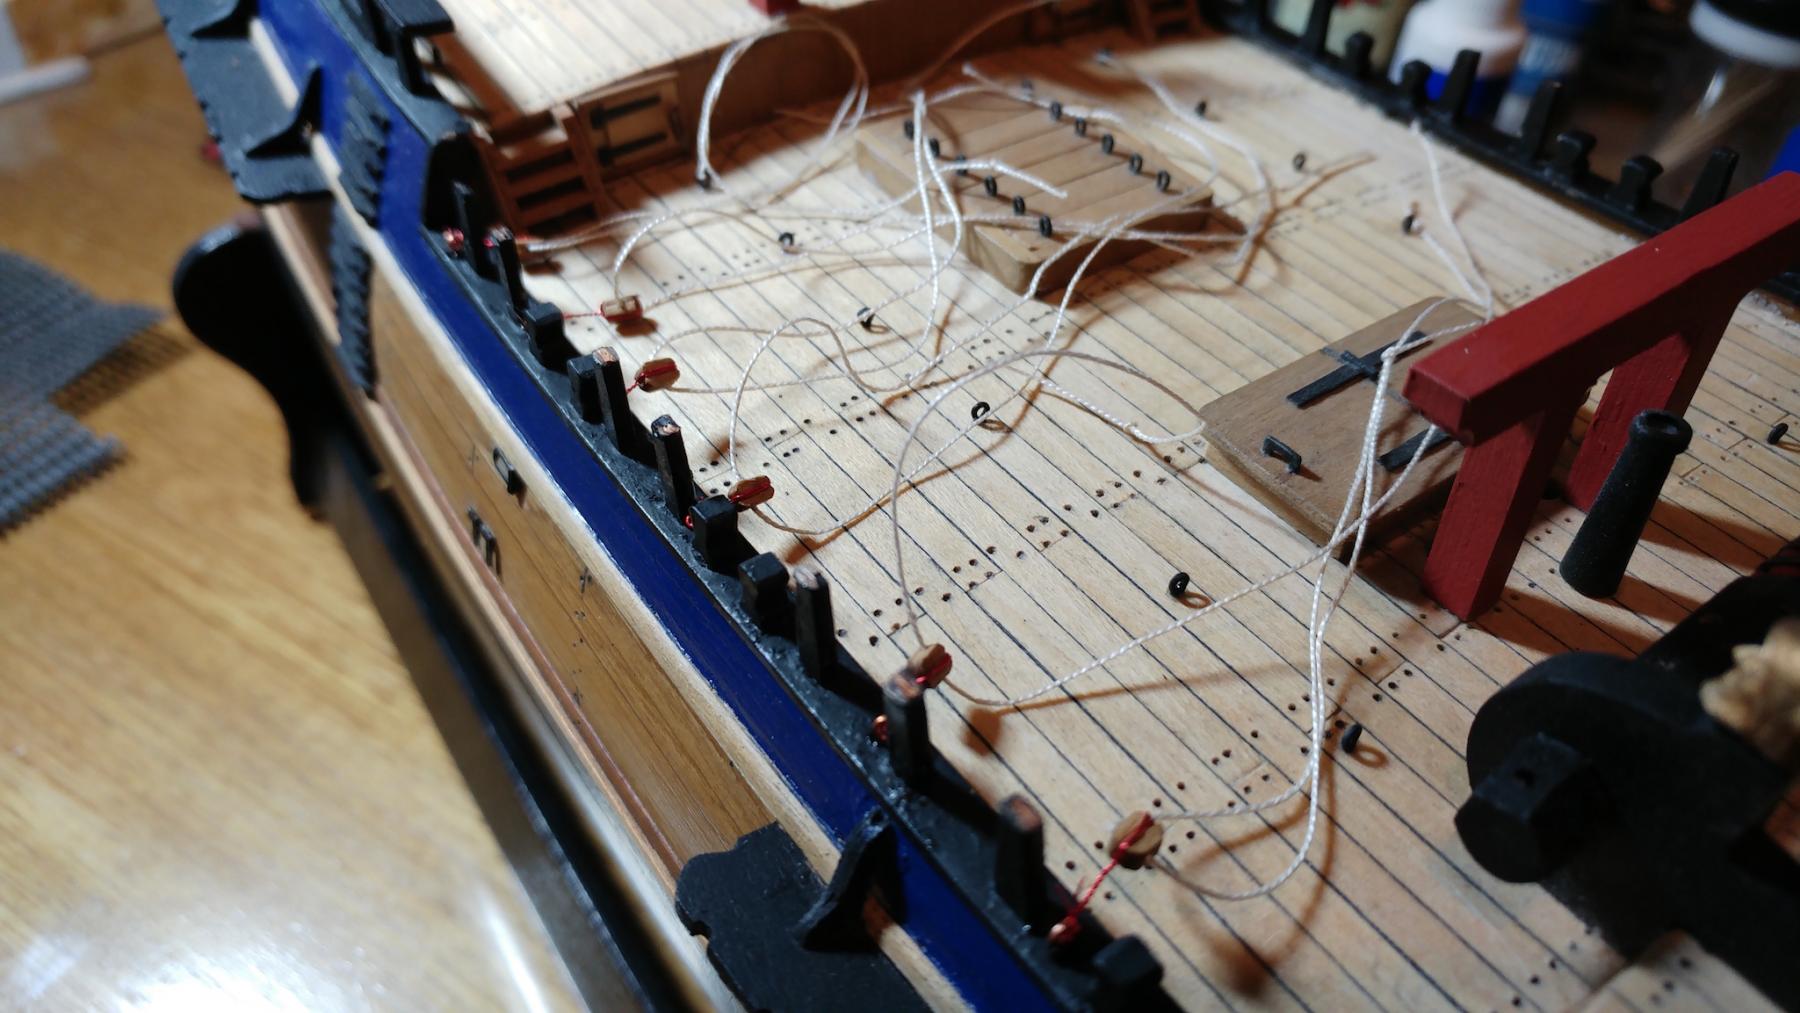
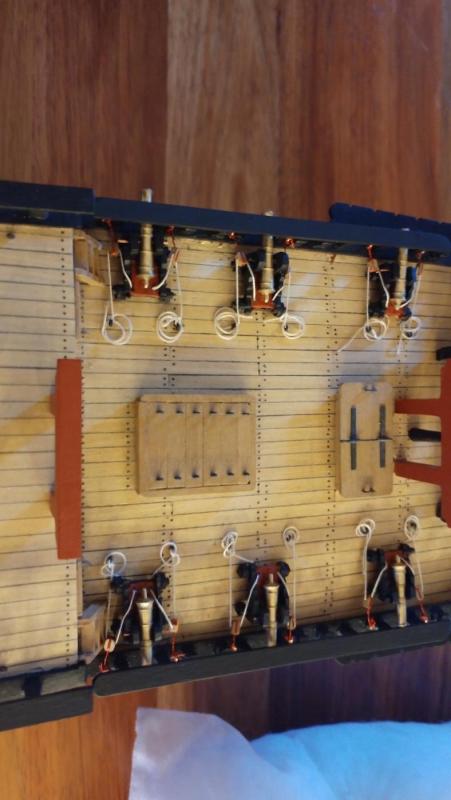
Gun Deck done except for boats and spar storage. Made single block gun tackles but no breeching lines as was getting over my fiddly tolerance point. Happier than before but would still like to do it again. Move on.
-
Gosh there are some Endeavours being built here which are a standard I cant approach. Better I dont look....! Some beautiful rigging work happening. I was so unhappy with my cannon that i took them off, removed the capping rains for the gundeck, and started to bulid gun tackles albeit with only one block. Make them a little more detailed if it works out OK.

-
beautiful rigging