HOLIDAY DONATION DRIVE - SUPPORT MSW - DO YOUR PART TO KEEP THIS GREAT FORUM GOING! (Only 36 donations so far out of 49,000 members - C'mon guys!)
×


Rossi46
-
Posts
170 -
Joined
-
Last visited
Content Type
Profiles
Forums
Gallery
Events
Everything posted by Rossi46
-
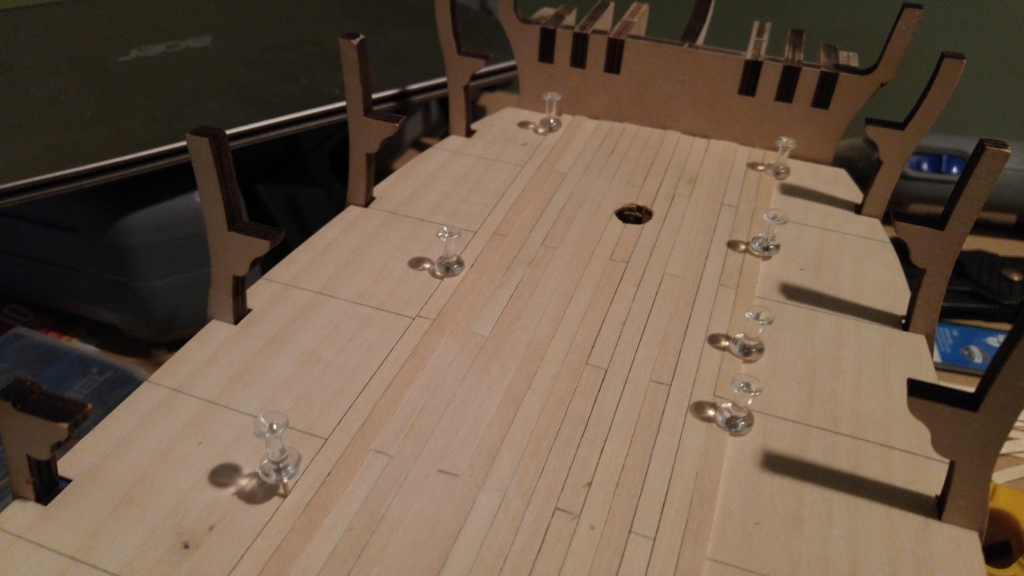
I decided to go off script for the Captain's cabin. I wanted to take advantage of the inside space and make it more of a showpiece, so I decided to add some fun little features, including lighting. The first thing I did was come up with a plan and how to incorporate lighting. I decided on a table and chairs, with a burning candle. The tricky part was hiding the wiring and having the effect look like a candle and not a flashlight. This is what i came up with.
- 144 replies
-
- 2
-

-
- surprise
- artesania latina
- (and 2 more)
-
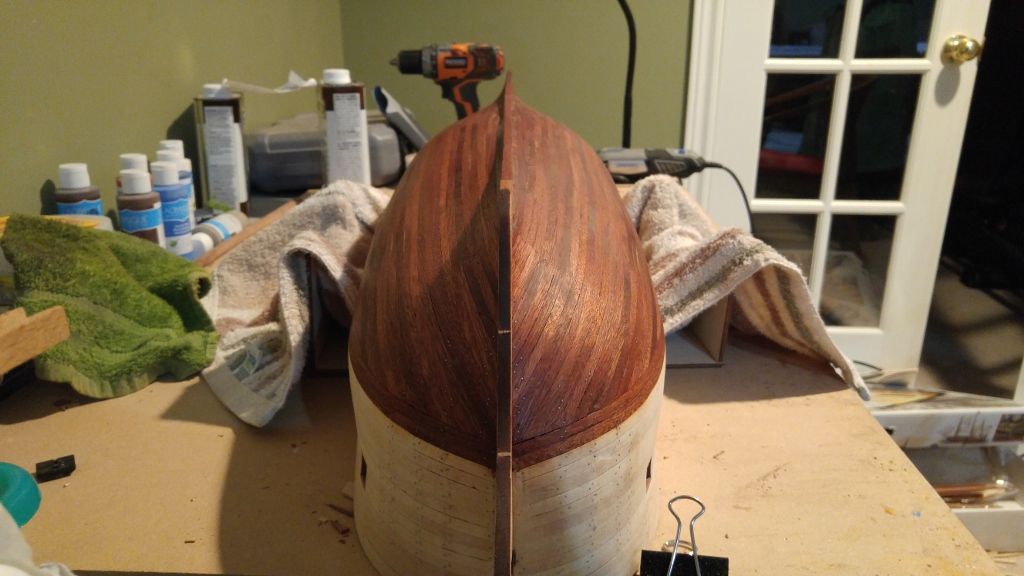
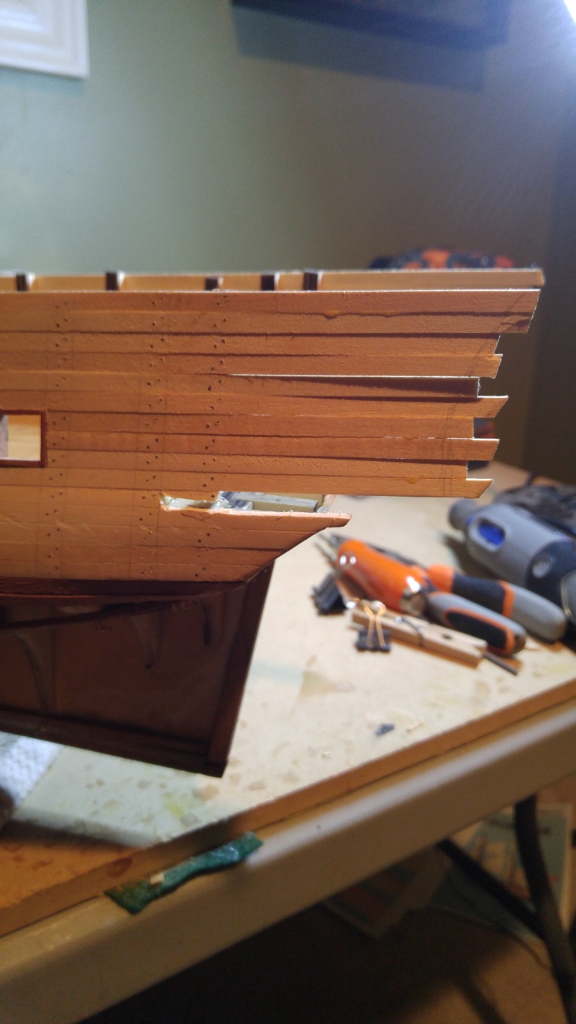
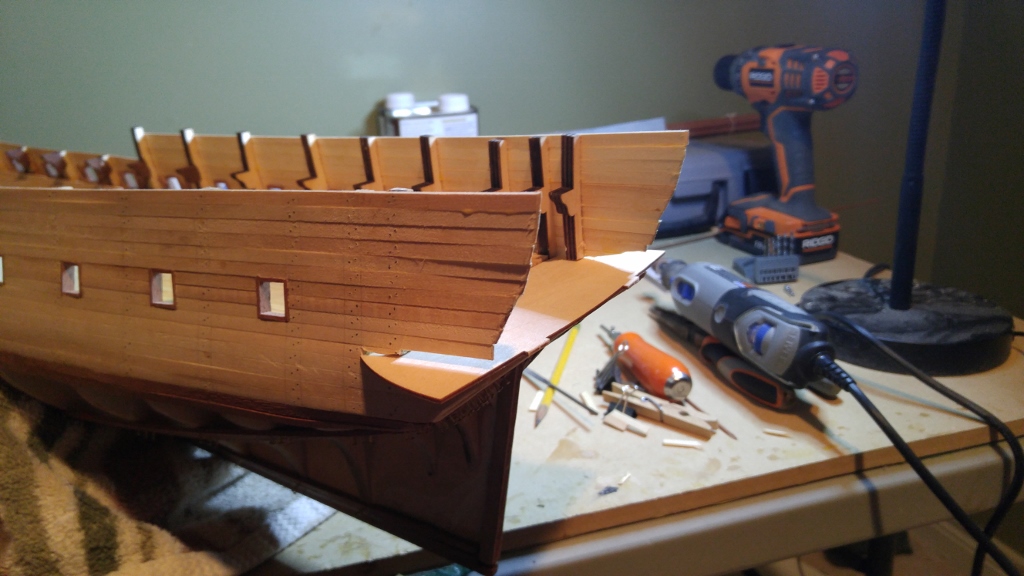
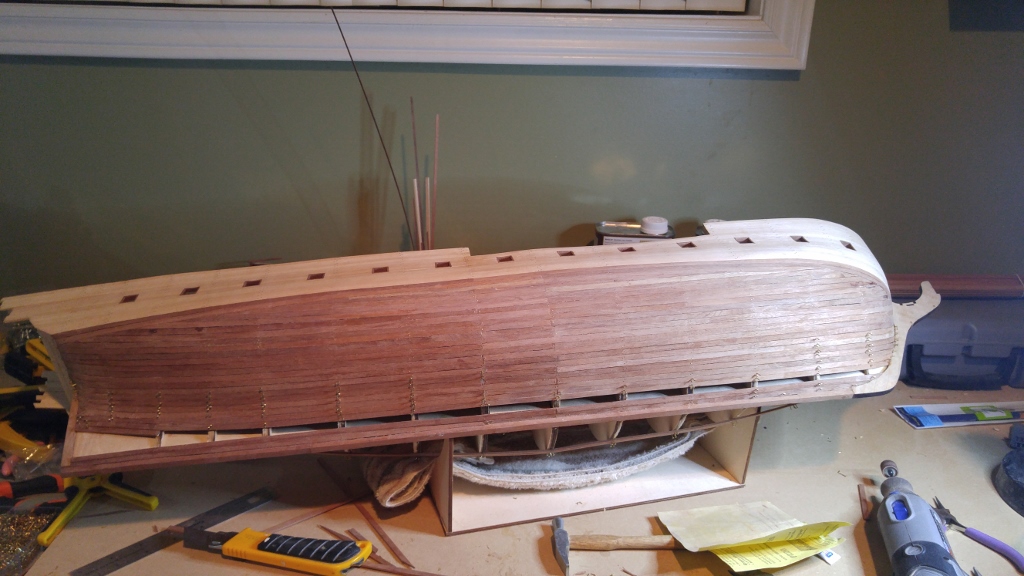
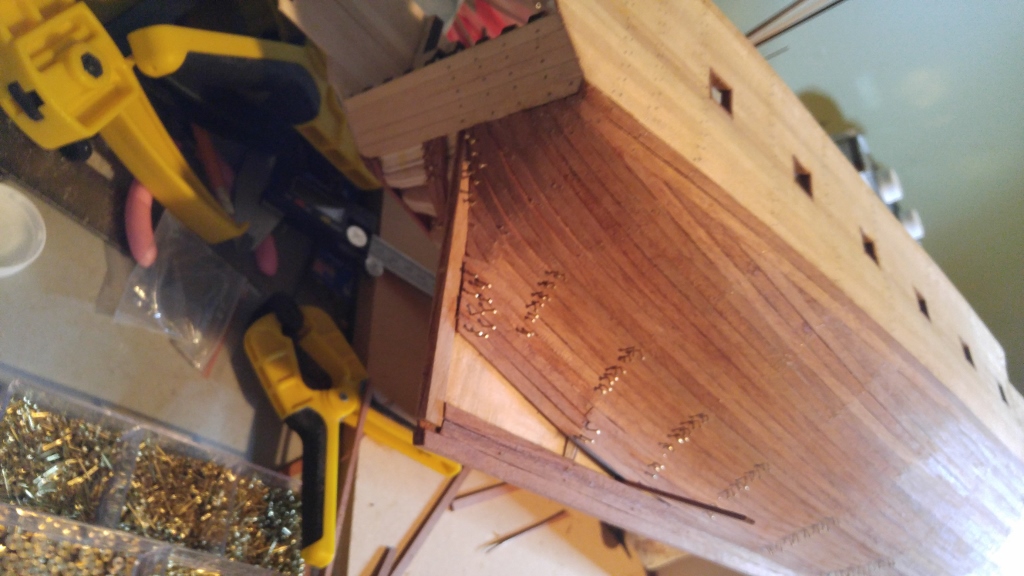
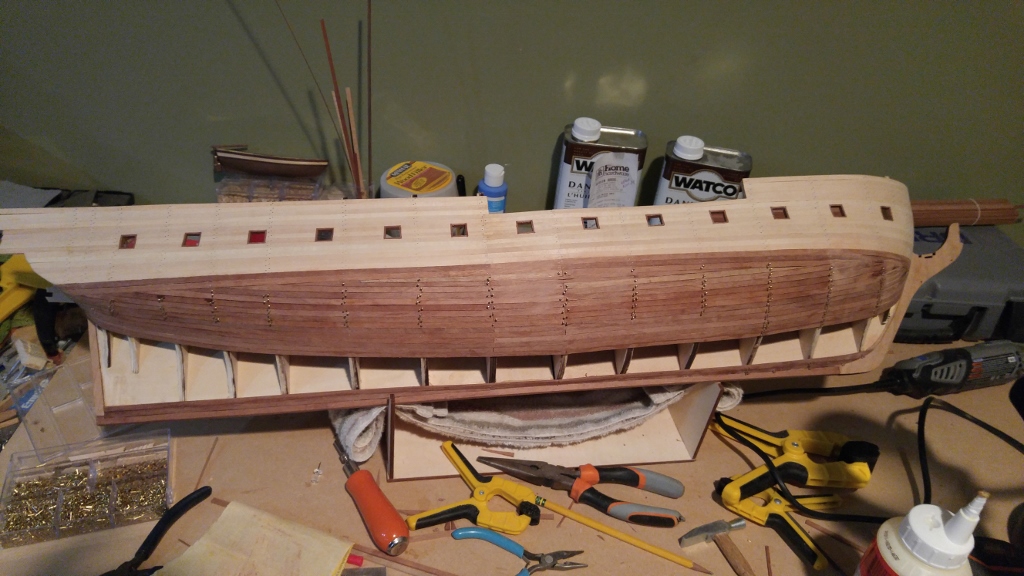
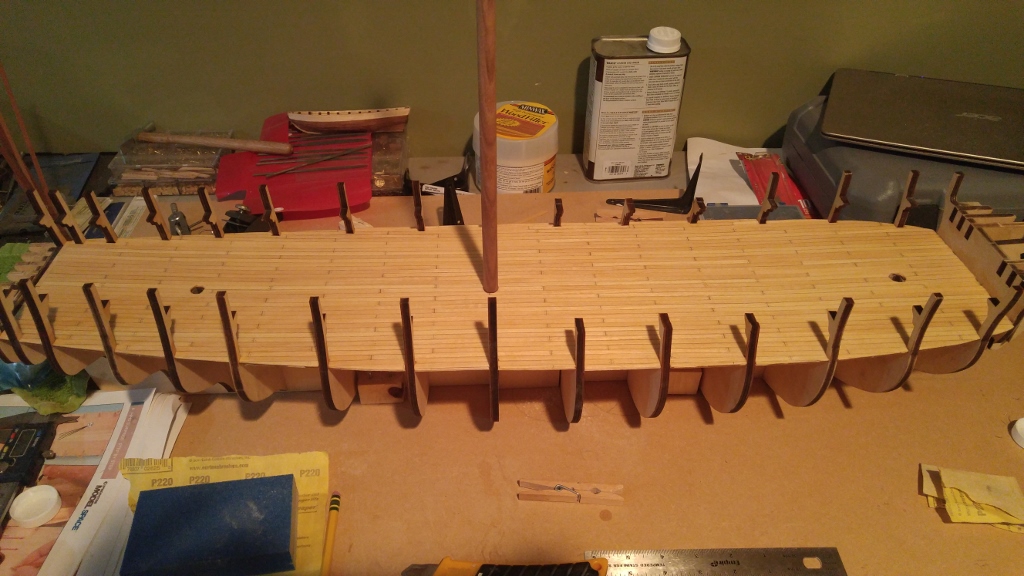
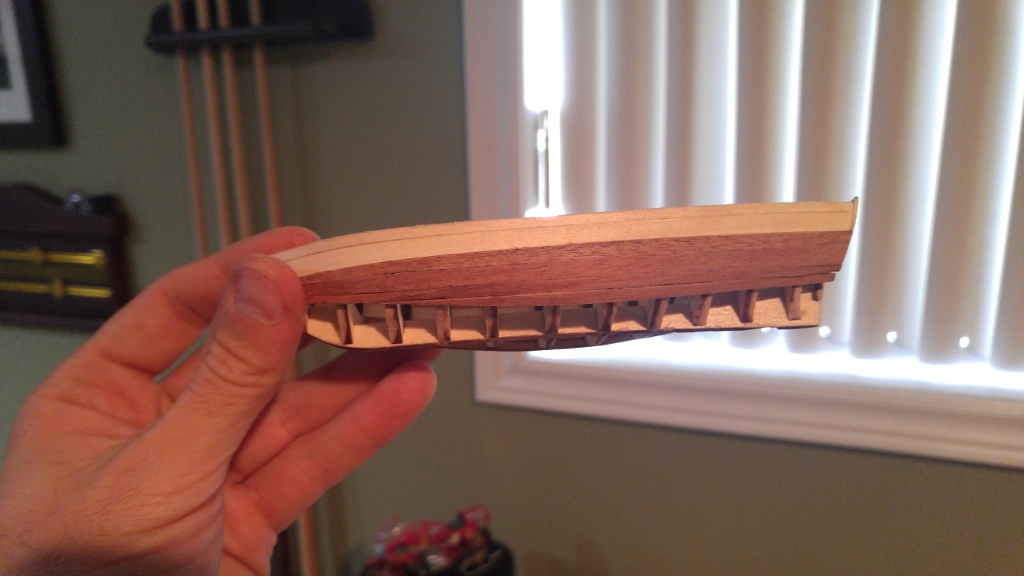
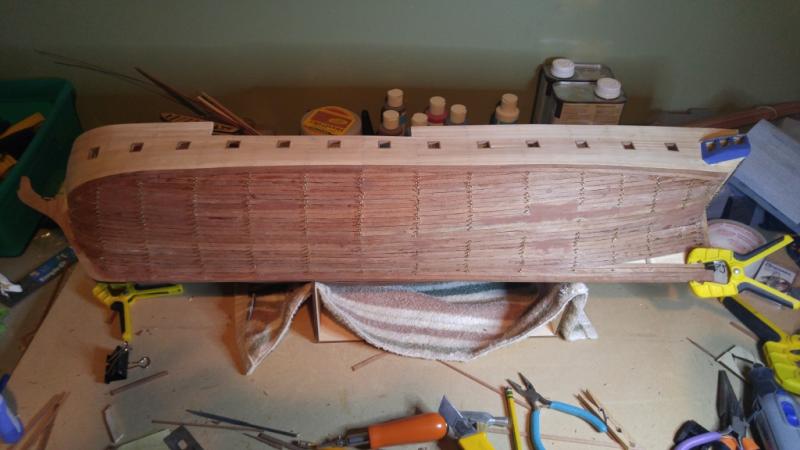
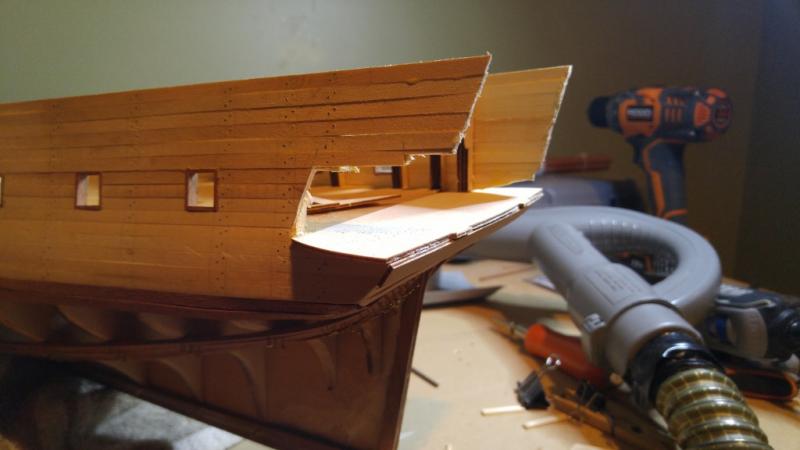
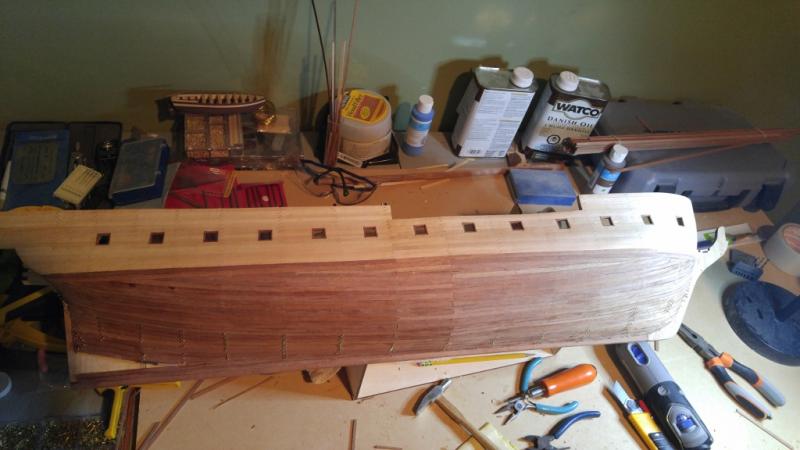
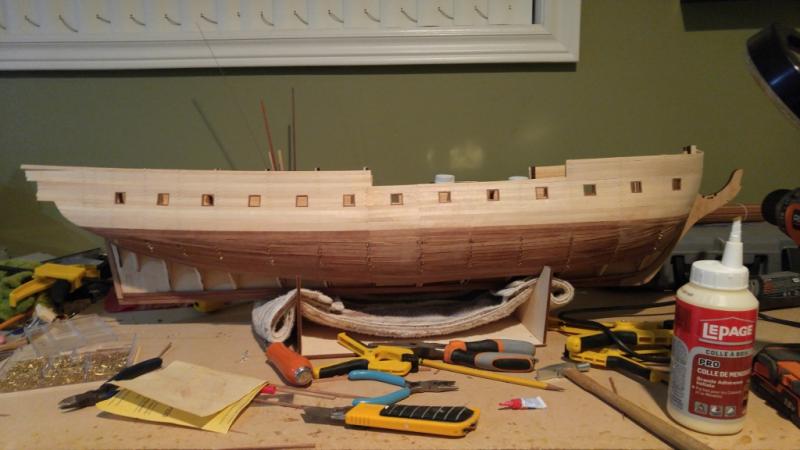
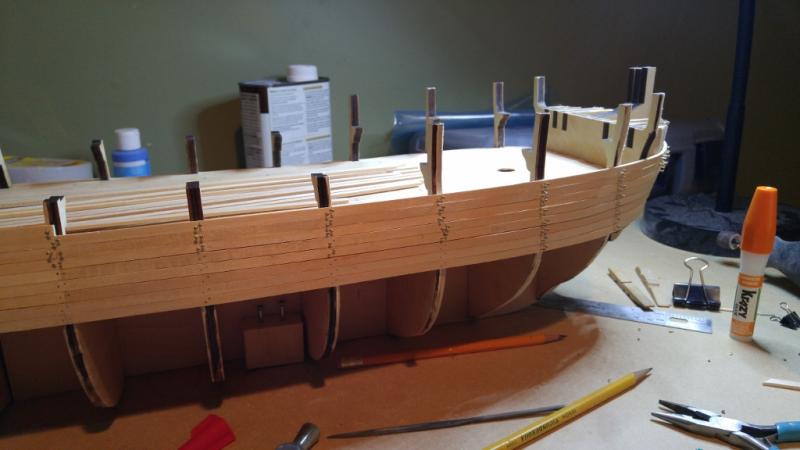
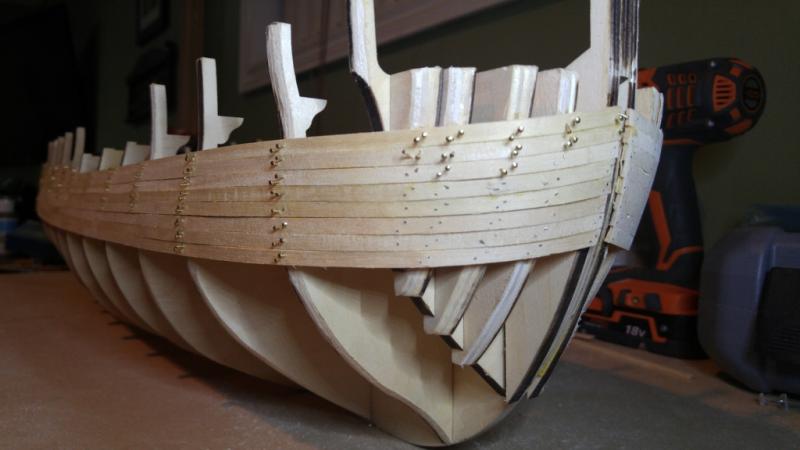
Rough planking done, now to sand it smooth. I actually chose not to sand it perfectly smooth, just wanted it to look tight and clean, but still show the handbuilt quality. I was happy with the results, especially the symmetry, which was another mail goal. I would say though, there is a very fast learning curve with these things, my dad and I both talked about how much better and easier the work was the second and third time etc...

- 144 replies
-
- 10
-
-
- surprise
- artesania latina
- (and 2 more)
-
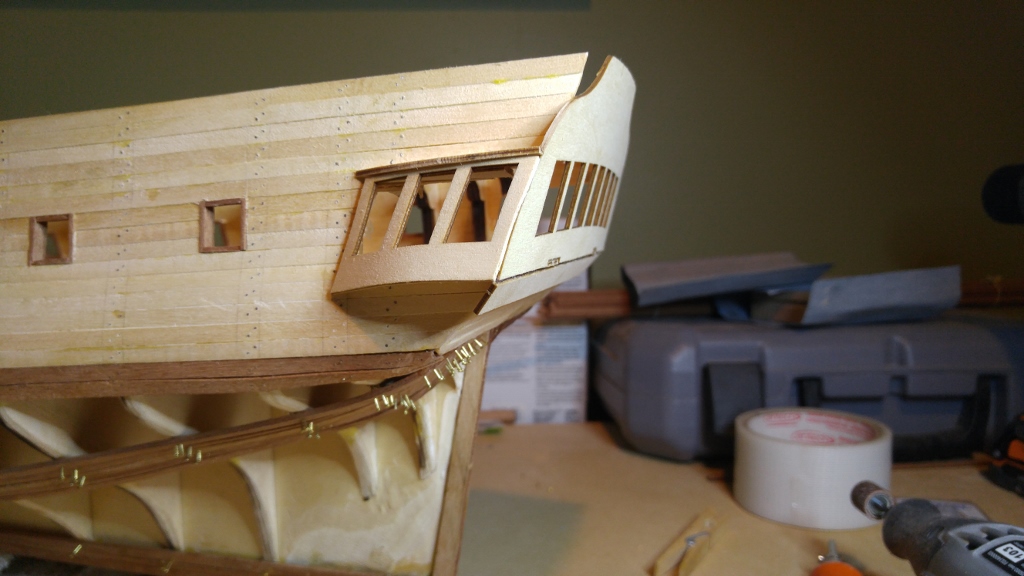
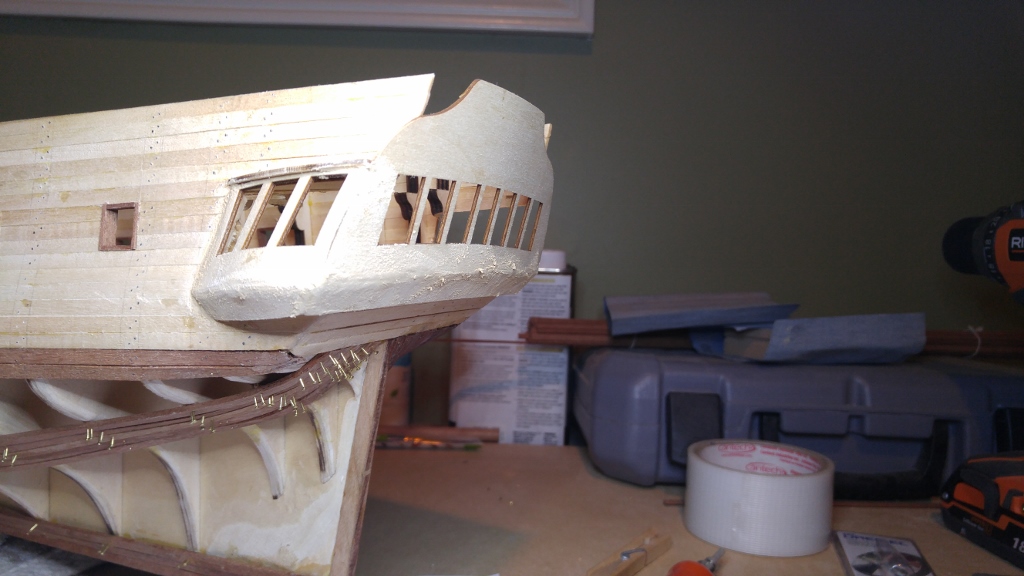
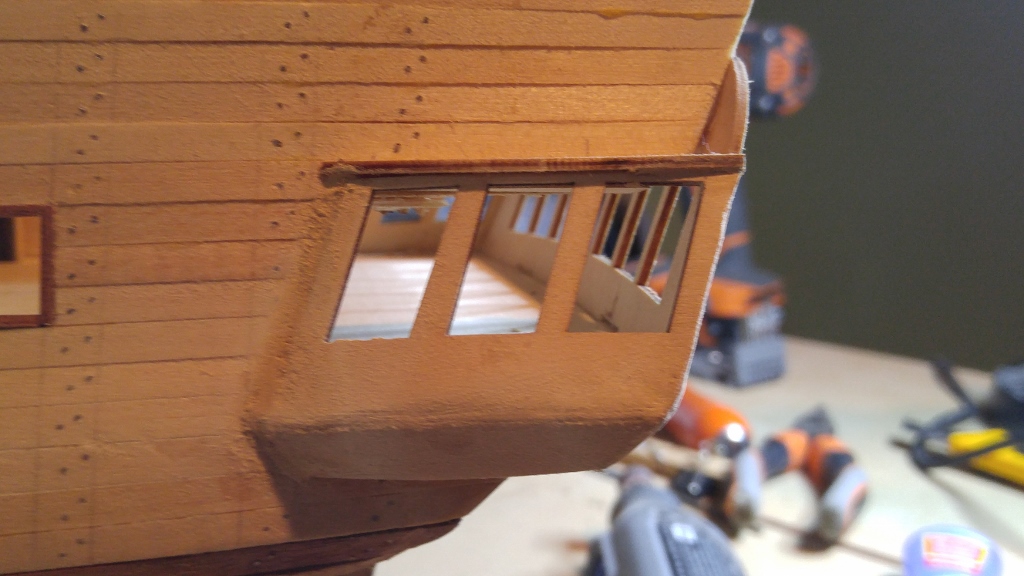
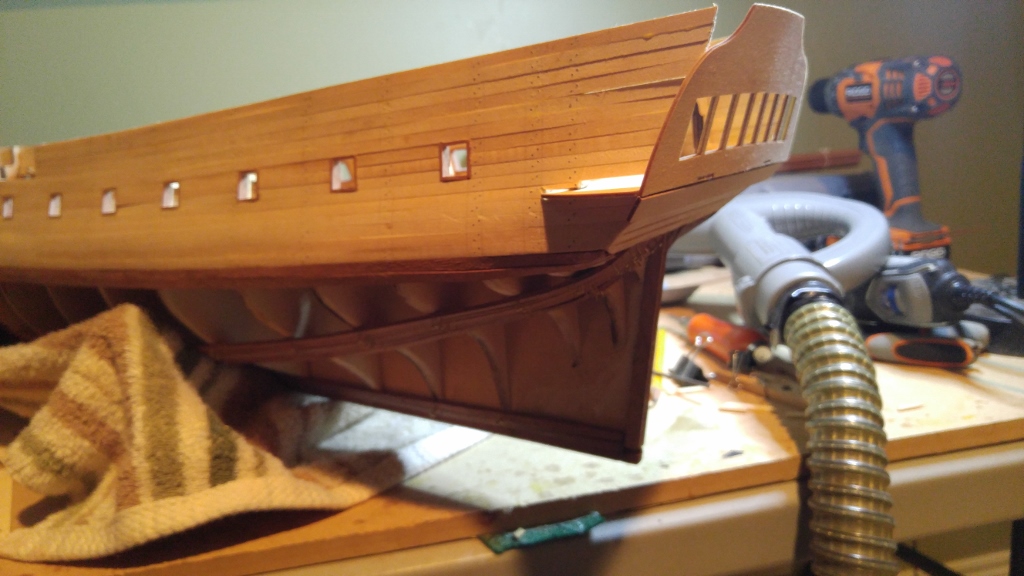
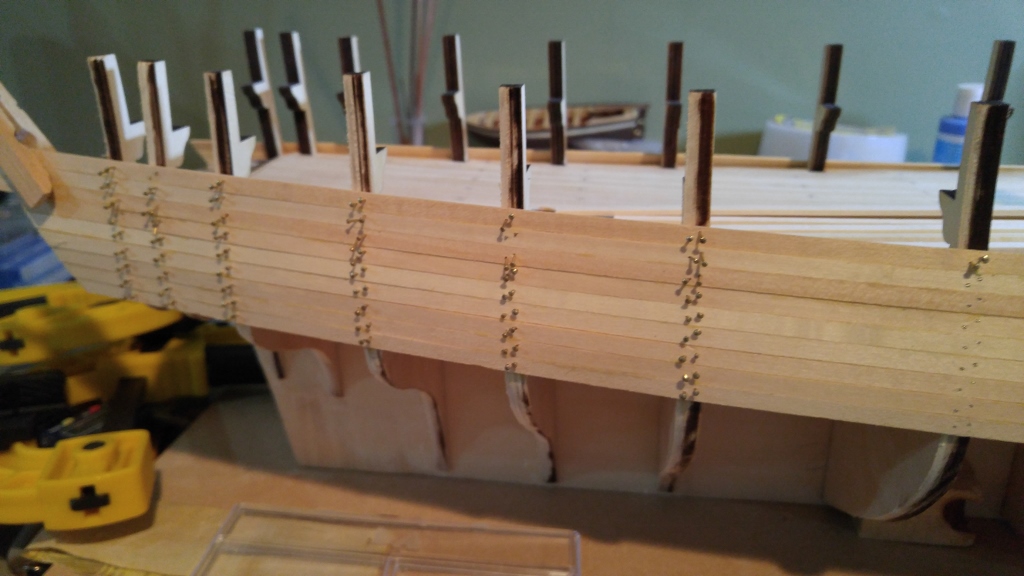
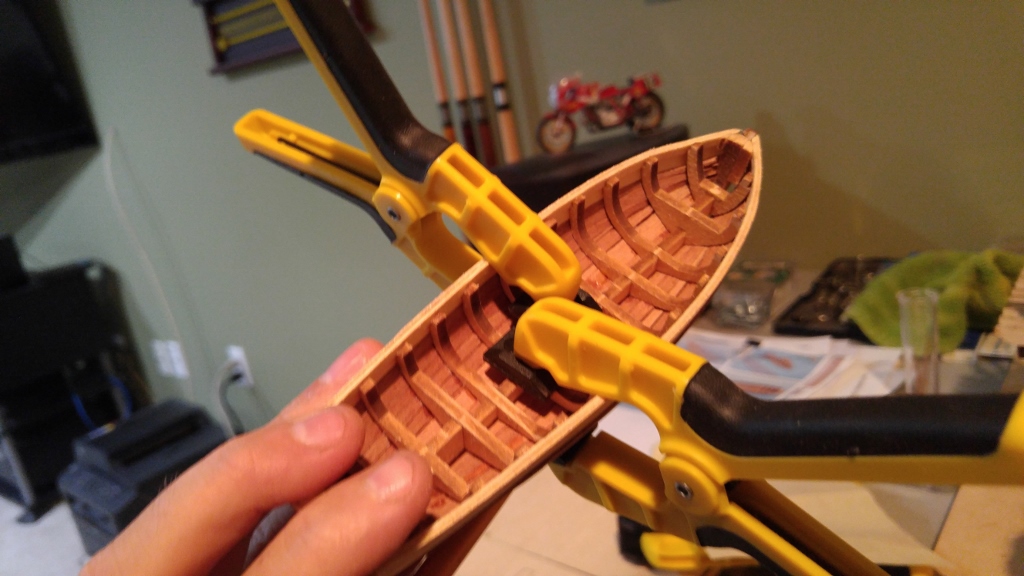
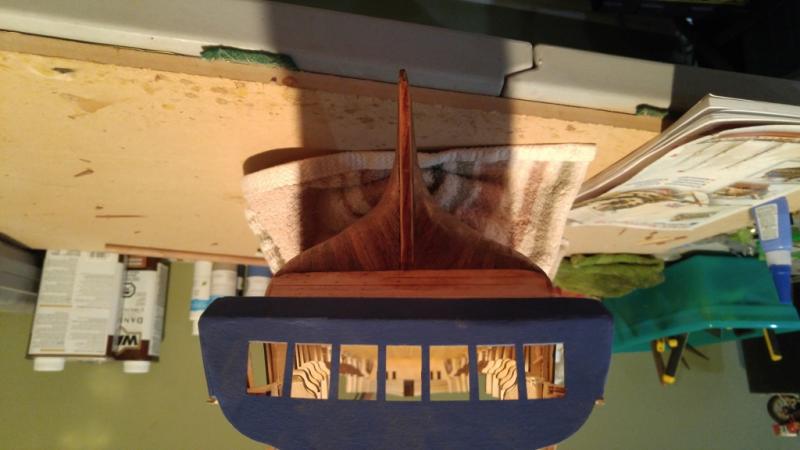
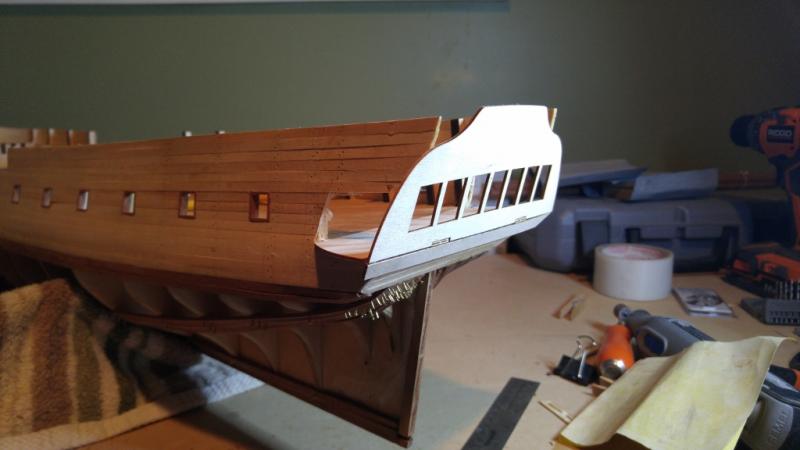
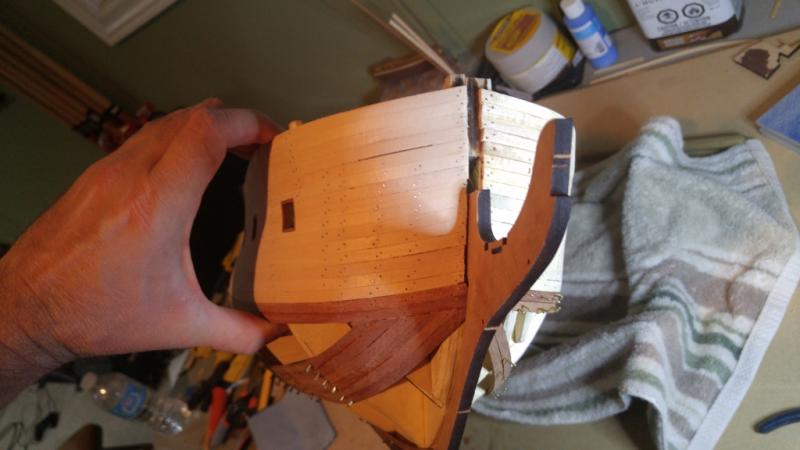
Next up was the captains quarters. This was a little intimidating, as the instructions basically have you roughly carve into the side of your newly finished planking(which I was quite protective of lol). But I figure, its only wood, and I could always redo something if I needed to. My main focus was making sure that the lines on the side of the captain's cabin were perfectly parallel with the rest of the boat. Also, being painted, I knew I had the option to use filler:)


- 144 replies
-
- 8
-
-
- surprise
- artesania latina
- (and 2 more)
-
I will take a look through your build, hopefully take some good tips! cheers.
- 144 replies
-
- 1
-
-
- surprise
- artesania latina
- (and 2 more)
-
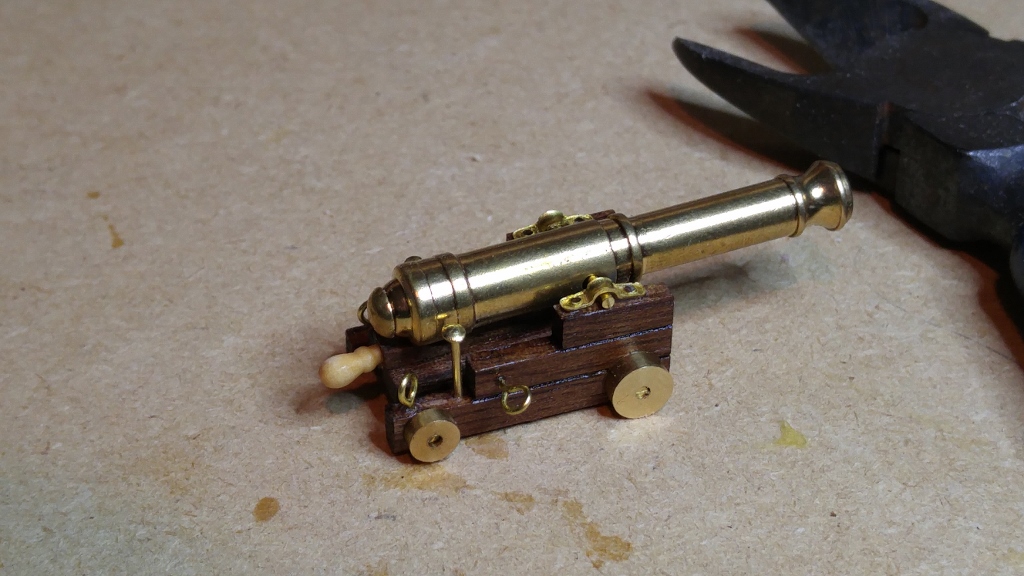
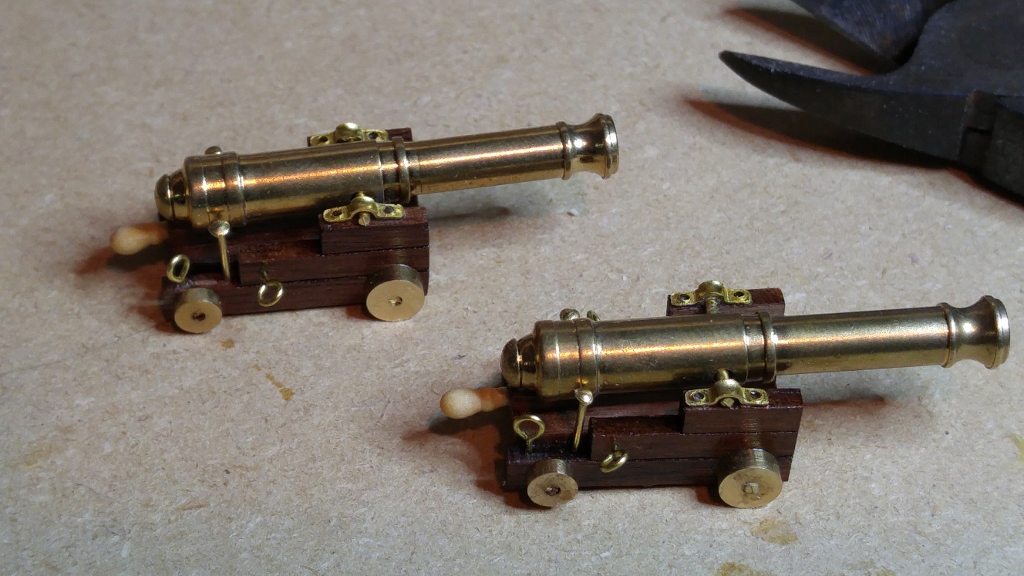
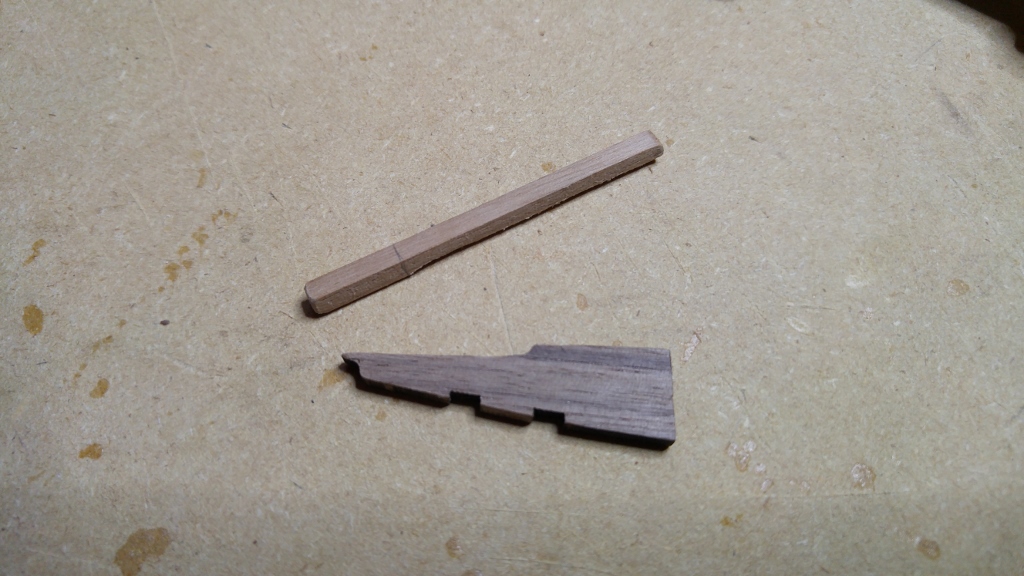
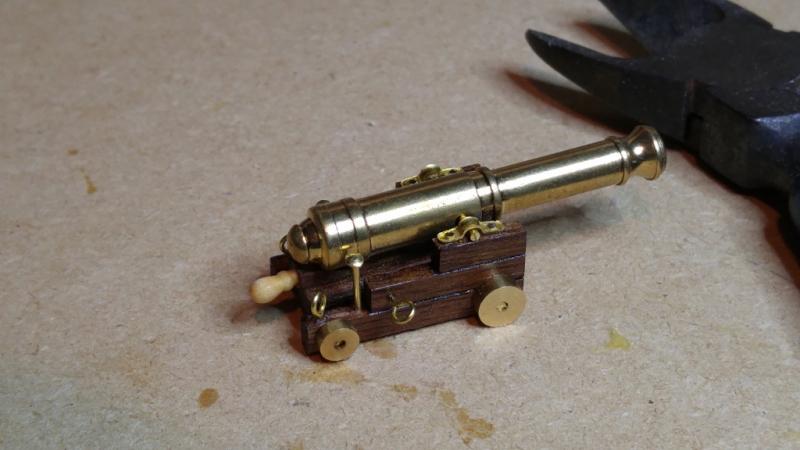
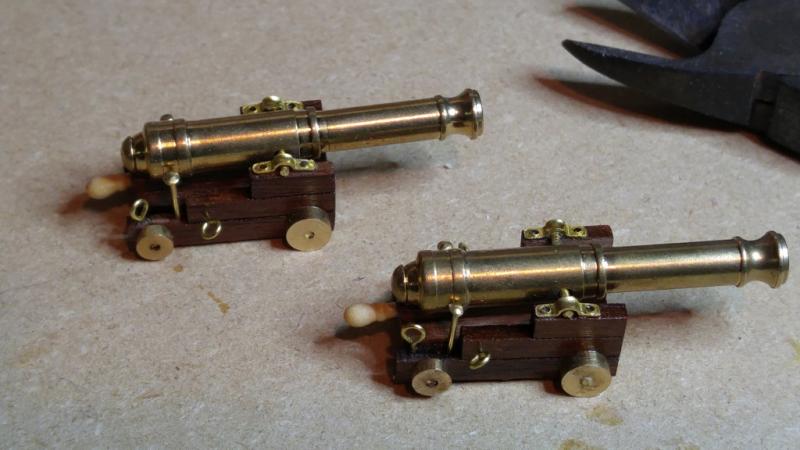
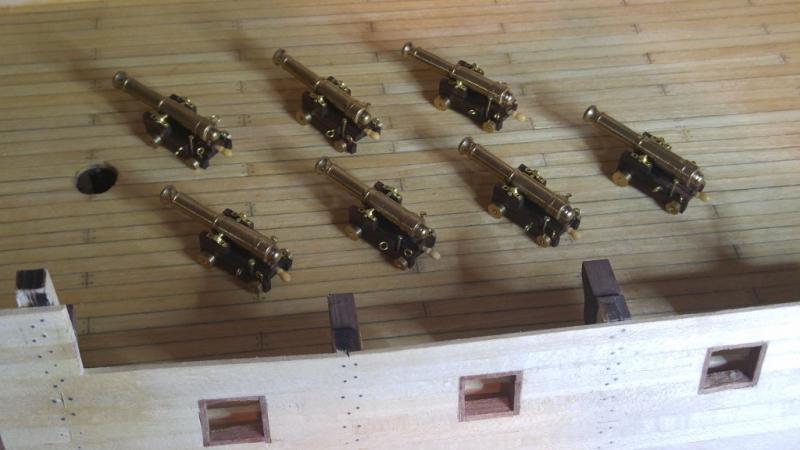
While working through the planking, I also started building cannons for the next stage, this provided a nice break from the repetitiveness and also made sure I was ready to move on at the next stage. I've continued this approach throughout the build.


- 144 replies
-
- 9
-
-
- surprise
- artesania latina
- (and 2 more)
-
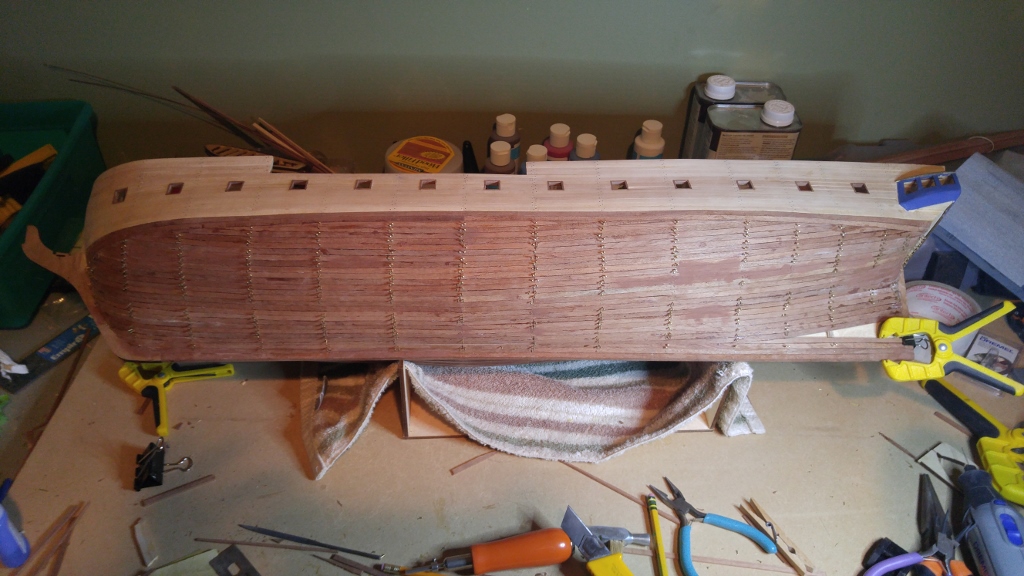
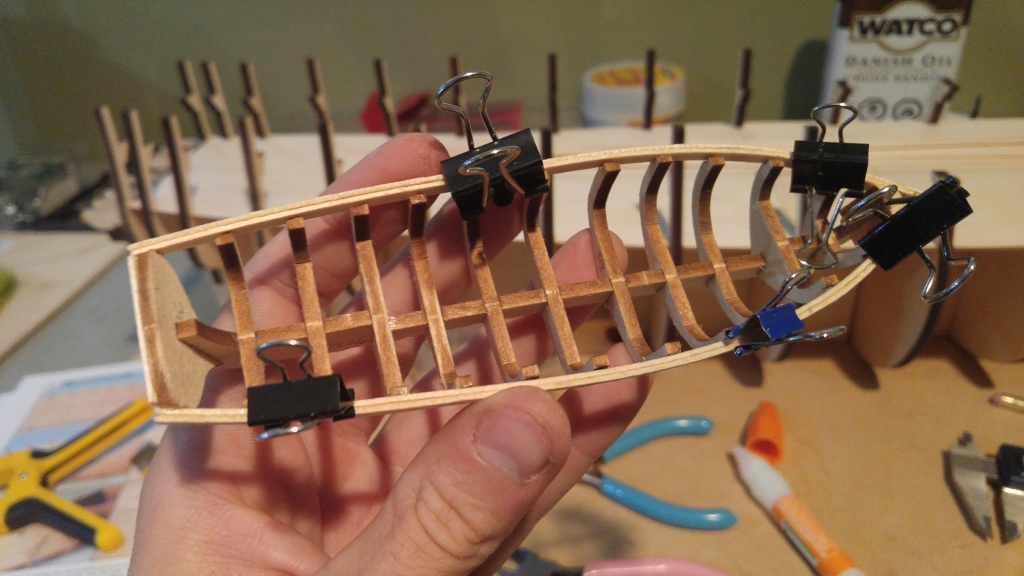
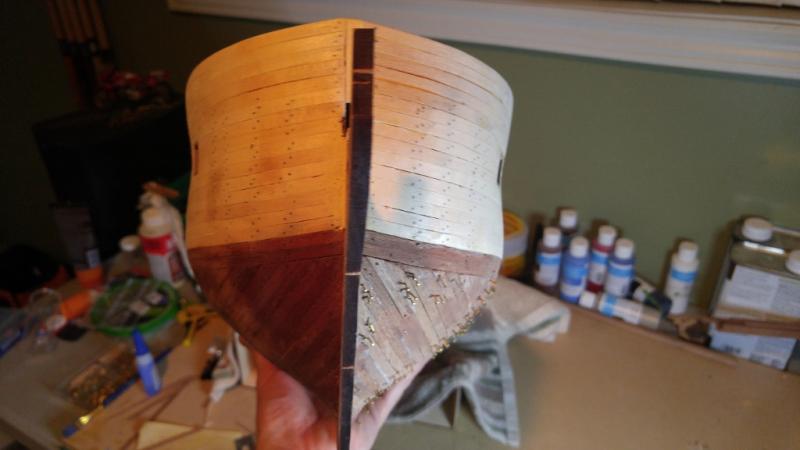
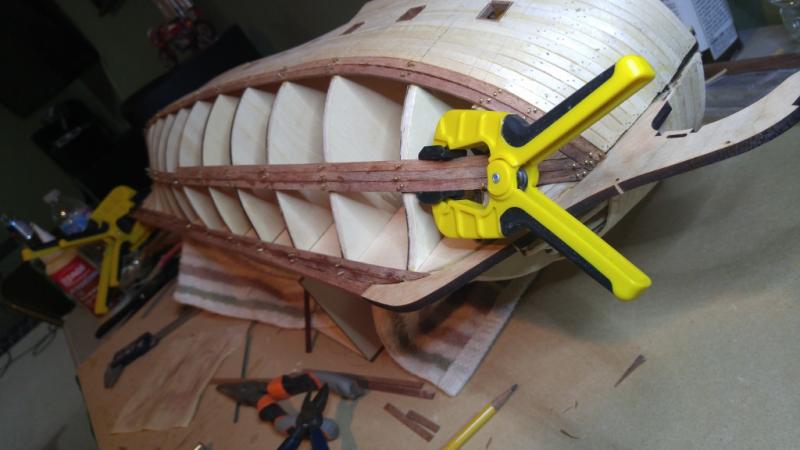
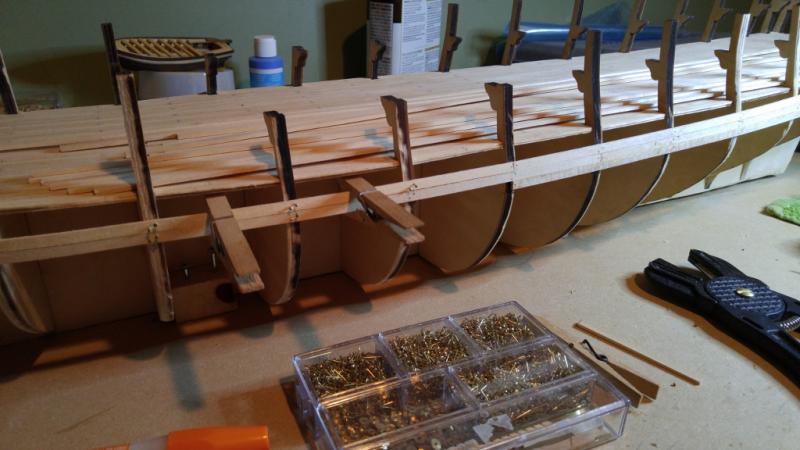
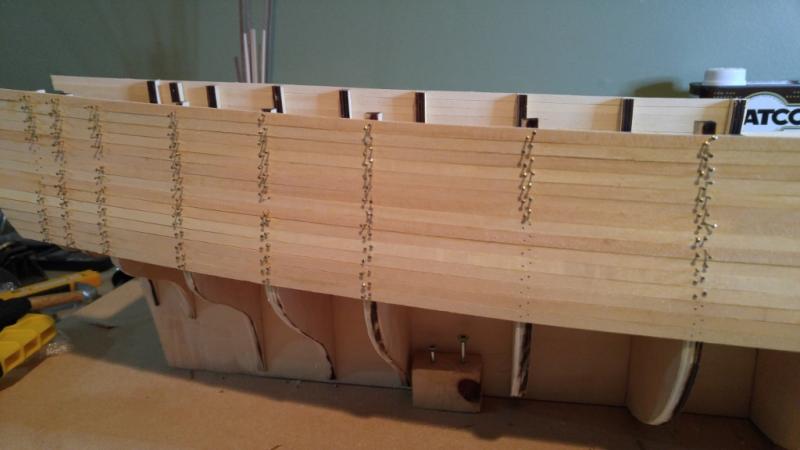
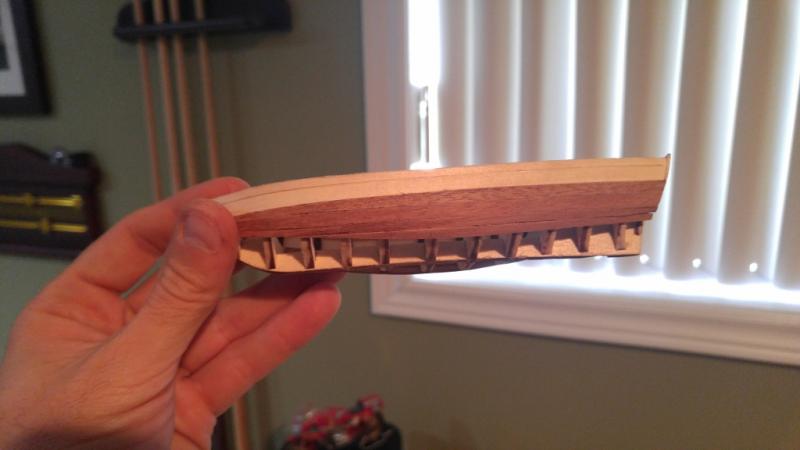
When it came to the underside planking, which with the more aggressive curves and more difficult to work with sepele, I decided to copy the technique used by Youtube user Bill Bergmark(thanks!). Rather than tapering each end piece like it seems is more accurate and preferred by experienced modelers, I chose to run straight pieces right down the middle and the fill in the sides from there. I thought this would give me the best balance of aesthetics and likelihood of success lol.

- 144 replies
-
- 10
-
-
- surprise
- artesania latina
- (and 2 more)
-
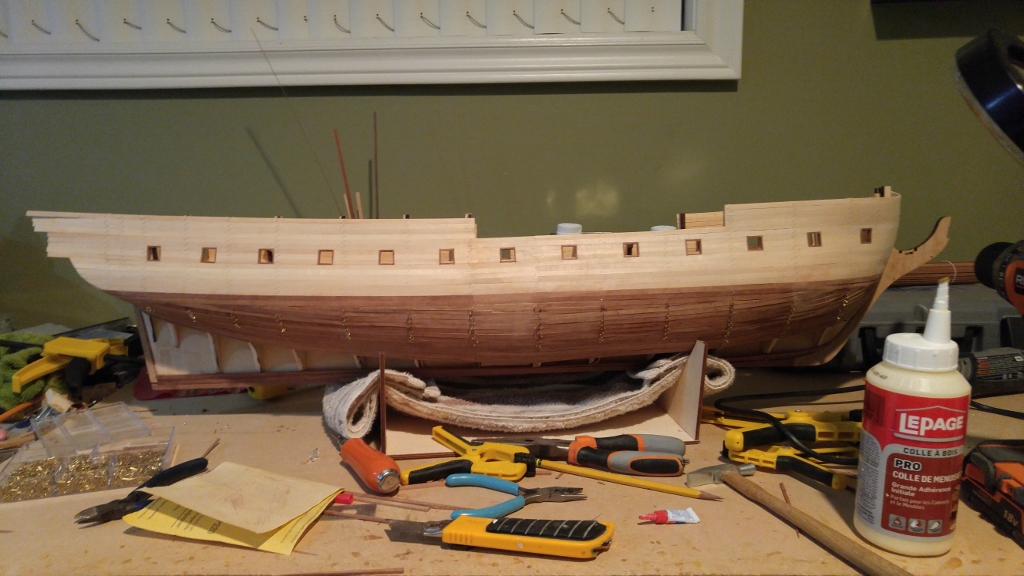
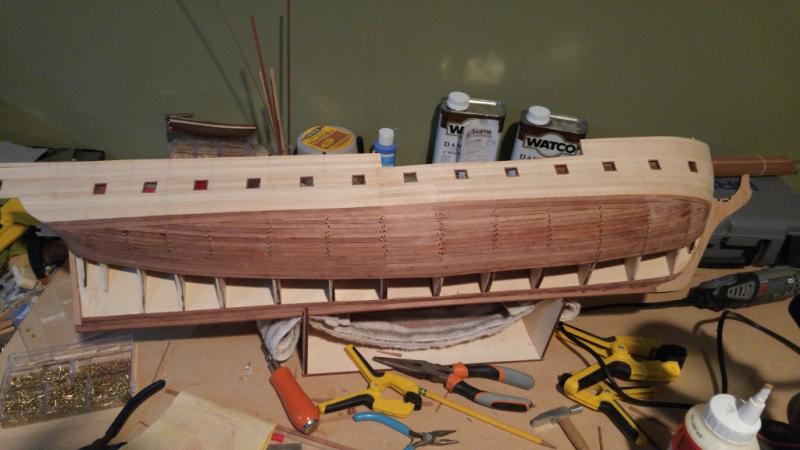
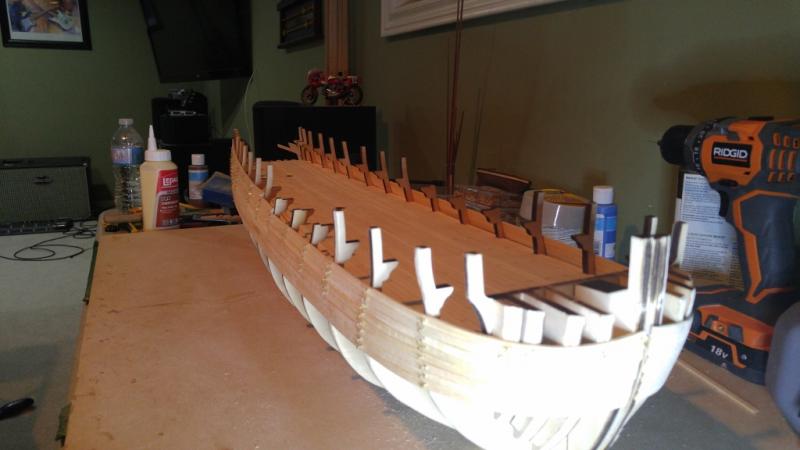
Planking. This was a little intimidating, but I learned some things from the launch, did lots of research and took my time. Lots of dry fitting before applying glue. I also made the early decision that I would nail everything as I really liked the added detail it provided to other peoples builds. Initially I bent the planks using a bladed bender, but switched to heat and soaking. I have a kettle with uninsulated metal sides that worked perfect for bending and significantly shortened to the process, which came in really handy for the sepele planking!

- 144 replies
-
- 10
-
-
- surprise
- artesania latina
- (and 2 more)
-
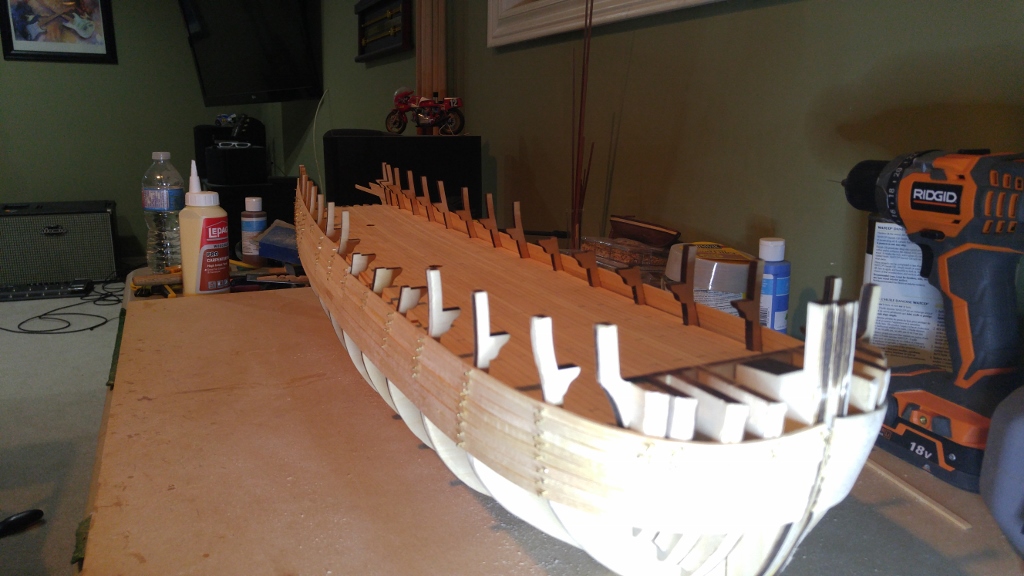
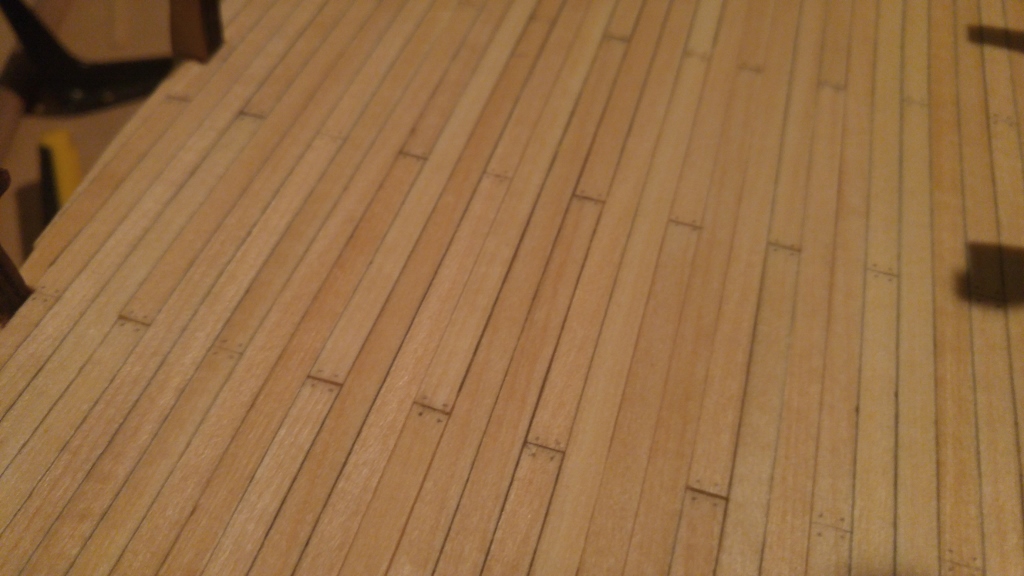
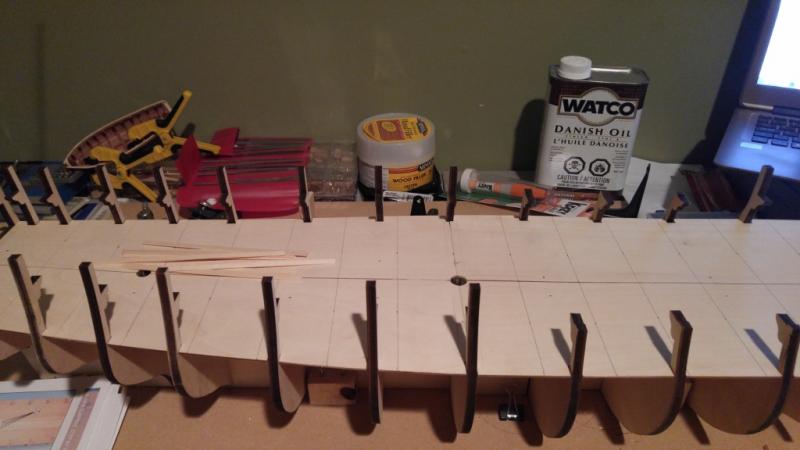
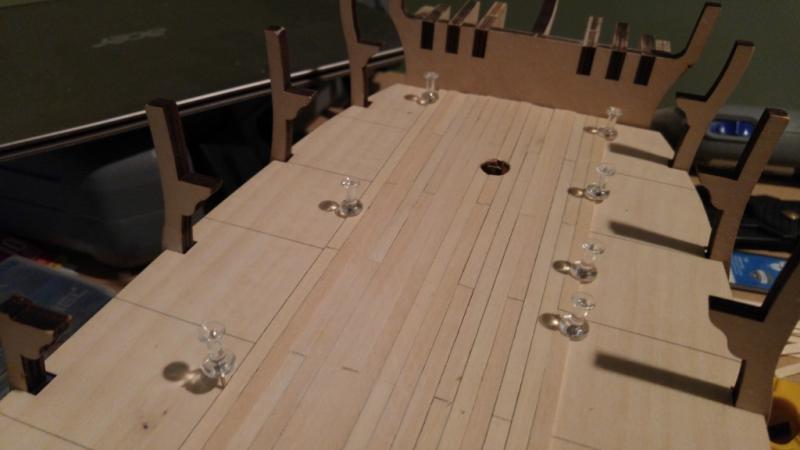
Now on to the decking. this went pretty smoothly and I used a couple of techniques from other build logs. I pencilled the edges to the planks and staggered the decking every 4 rows. The length was based on a guys calculation for an accurate scale/best use of wood.


- 144 replies
-
- 9
-
-
- surprise
- artesania latina
- (and 2 more)
-
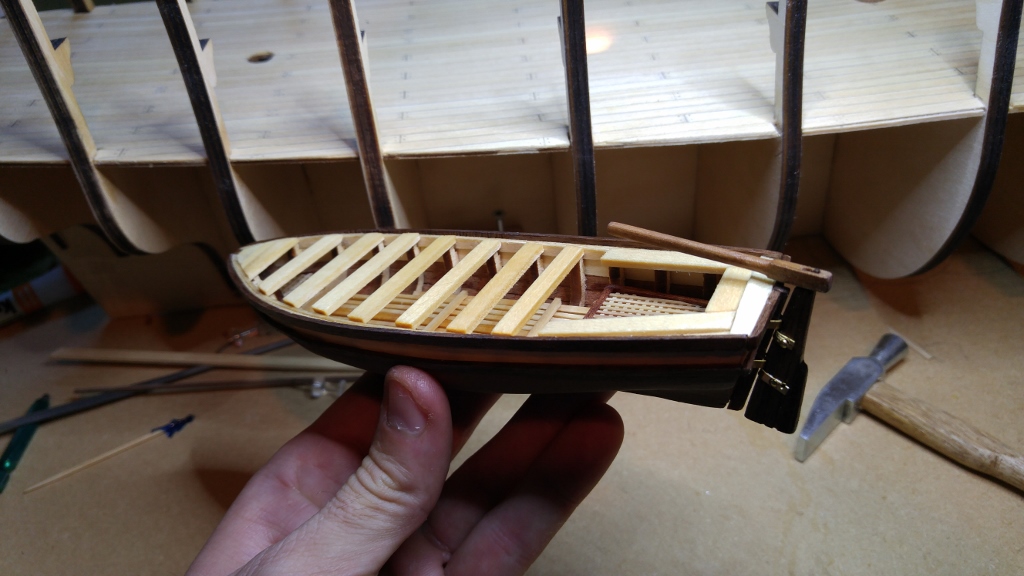
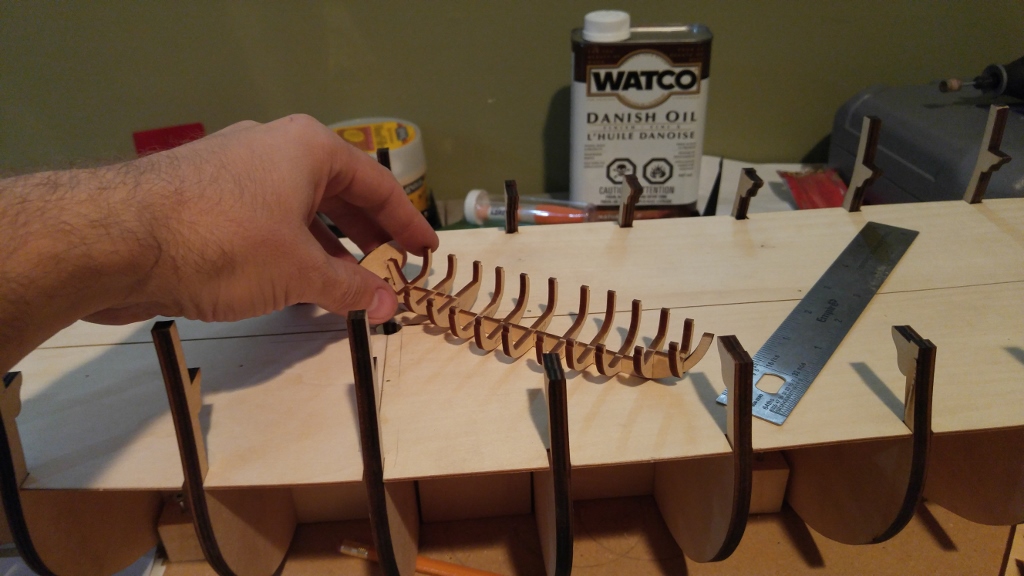
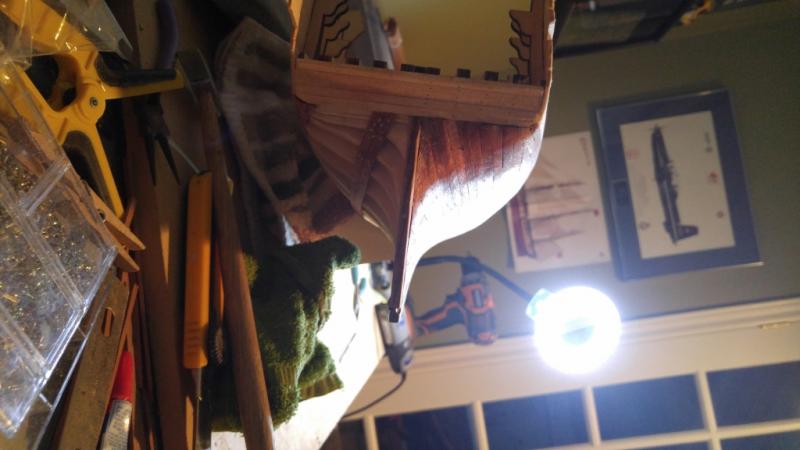
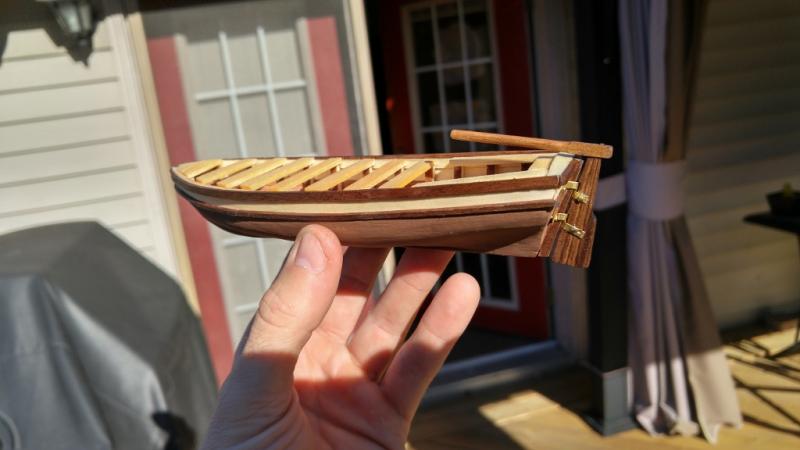
The main lesson I learned was from a mistake I made. I attached the planking right to a point at the bow of the little boat, which made it difficult to cut back and sit flat and flush against the keel.


- 144 replies
-
- 11
-
-
- surprise
- artesania latina
- (and 2 more)
-
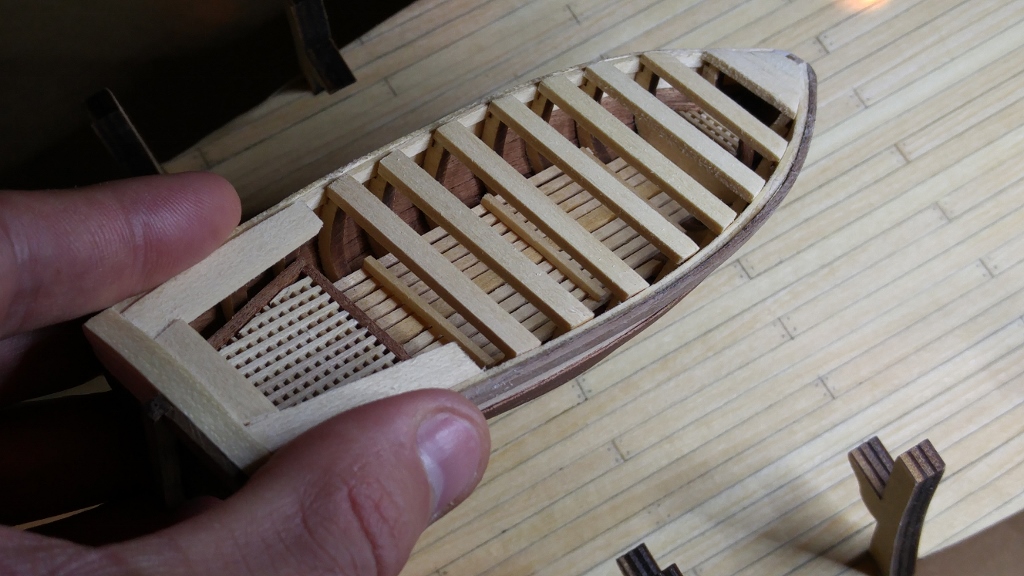
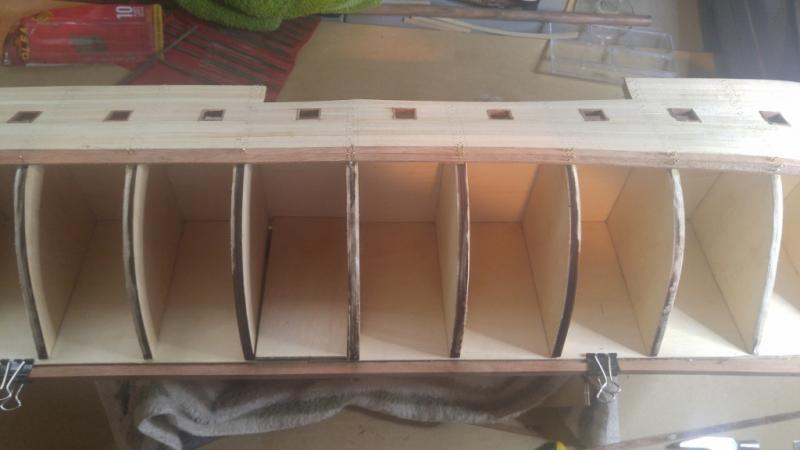
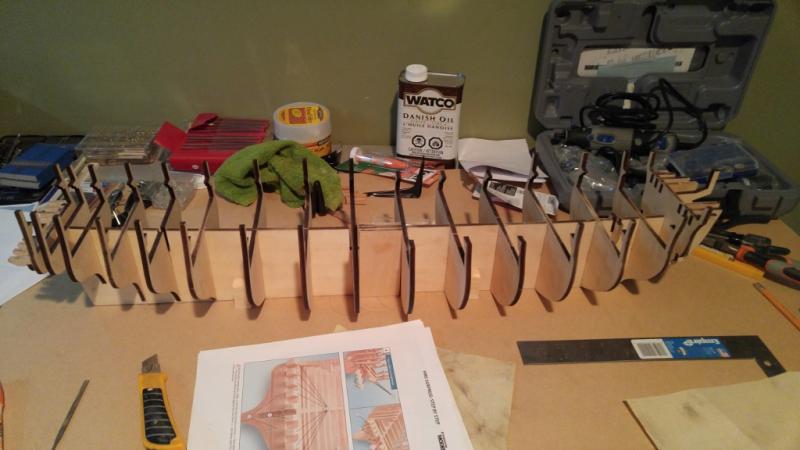
Having no experience with these models, I decided to build the launch boat before proceeding with any decking/planking on the main boat, as a "safe" introduction to many of the techniques I would be using throughout the build. This ended up being a positive experience and gave me some really good fundamental tips that paid dividends on the big boat.


- 144 replies
-
- 11
-
-
- surprise
- artesania latina
- (and 2 more)
-
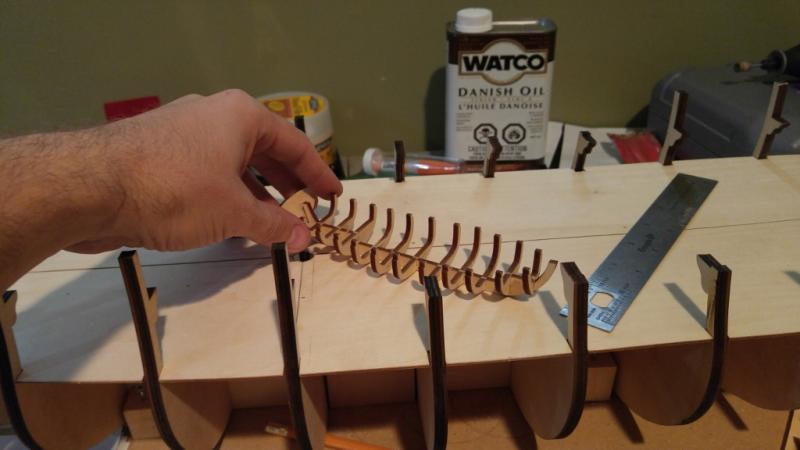
First thing I did, with this being a very big model, was get a place I could do the build and have it be safe and out of the way for the many months it will be in progress.
- 144 replies
-
- 8
-
-
- surprise
- artesania latina
- (and 2 more)
-
thanks. the forum won't let me log in from my phone where all the pics are so I'll have to transfer them first. P.S. Blighty, fellow ontario resident here.
- 144 replies
-
- 1
-
-
- surprise
- artesania latina
- (and 2 more)
-
Howdy, This is my first build and thought I would share the experience on here as I am sure there will be lots to share with others new builders and lots learn from you folks. I know the forums suggest going easy with the first build, but I inevitably regret not getting what my heart is set on with these types of projects, and will all of the online support and my own commitment to doing a good job and researching plenty, I just jumped right in with the HMS Surprise kit. These were the main reasons(for those new builders grappling with the same situation) -I wanted something in as large a scale as possible and 1:48 was appealing -I wanted something imposing, artful and sentimental to display in the home -I thought the Surprise was very visually appealing and had enough detail and accessories to be interesting, but wasn't as daunting as 100+ HMS Victory cannons for instance. -The kit had very good reviews, online support, build logs and INSTRUCTIONS:) -I wanted the kit to have a full complement of rigging and sails. So that's it. On to the build. Note: I started the build 2 months ago and took tons of pics along the way in case I decided to do a build log. I'm currently finished with the upper decking and inside planking, and starting the many upper decks accessories. I'll post pics and comments in chronological order until caught up, then it'll slow down significantly to real time progress lol. I appreciate any comments and tips...thanks.
- 144 replies
-
- 12
-
-
- surprise
- artesania latina
- (and 2 more)