HOLIDAY DONATION DRIVE - SUPPORT MSW - DO YOUR PART TO KEEP THIS GREAT FORUM GOING! (Only 36 donations so far out of 49,000 members - C'mon guys!)
×


Rossi46
-
Posts
170 -
Joined
-
Last visited
Content Type
Profiles
Forums
Gallery
Events
Everything posted by Rossi46
-
I've heard from a few people about this kit, noone seems clear when it is getting released, but its on the to do list. I think I'll be able to finish the surprise and then do one more before tackling that beast. I'm leaning towards the billings boats Oseberg Boat. Not as detailed and appointed, but I am really interested in its story and have always loved the lines of the old viking boats. Plus a smaller project will put me in the right frame of mind for the monster Victory:)
-
You're painting the decking though aren't you, so its the painted surface that needs aging, not the wood.
- 296 replies
-
- 4
-

-
- chaperon
- model shipways
- (and 1 more)
-
Love it. I wouldnt back off on the aging at all, it works very well with your plan
- 296 replies
-
- 5
-
-
- chaperon
- model shipways
- (and 1 more)
-
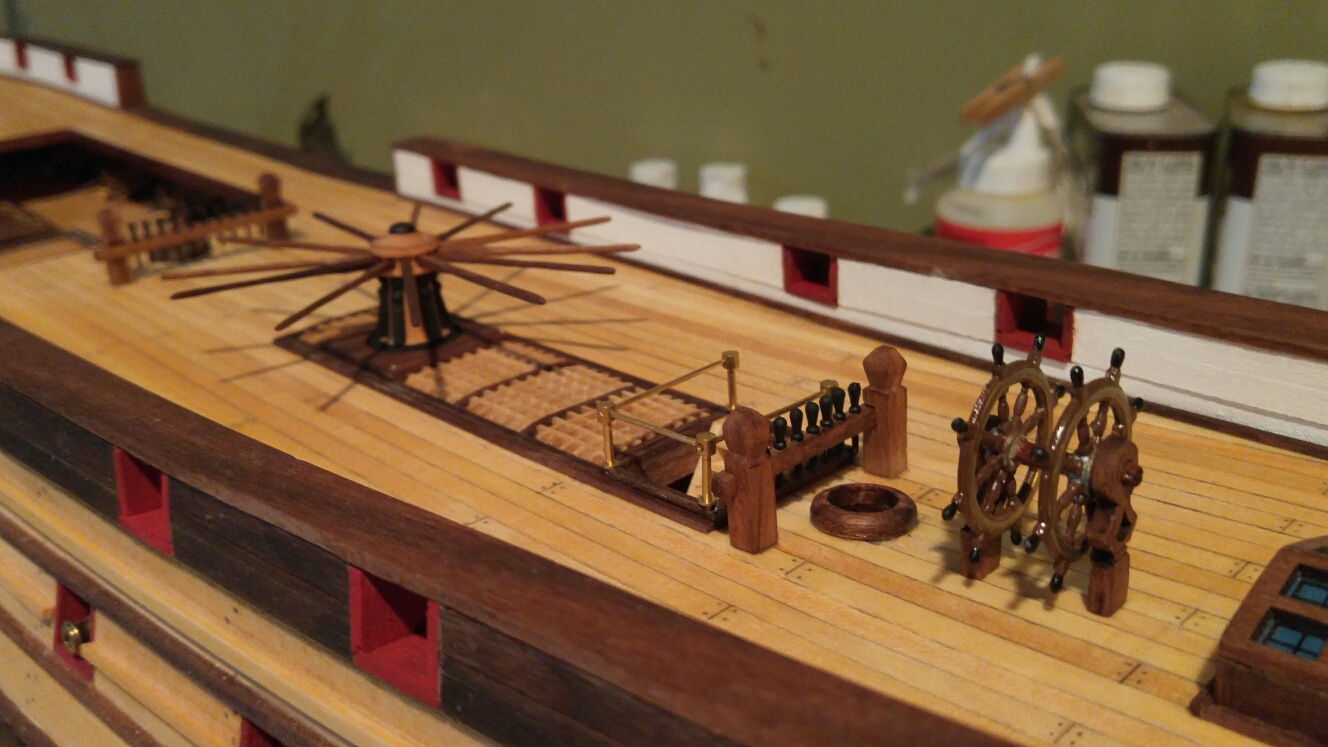
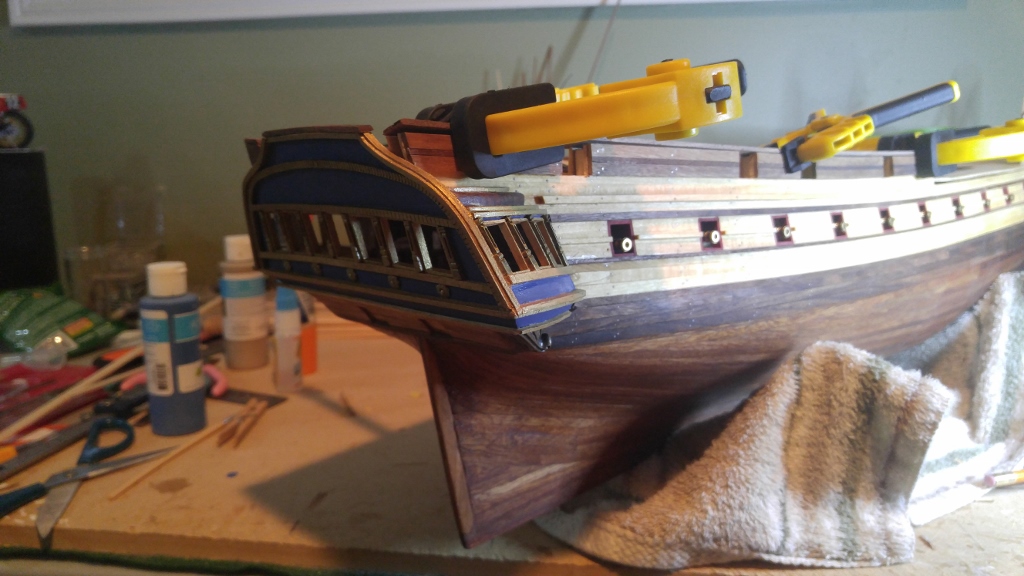
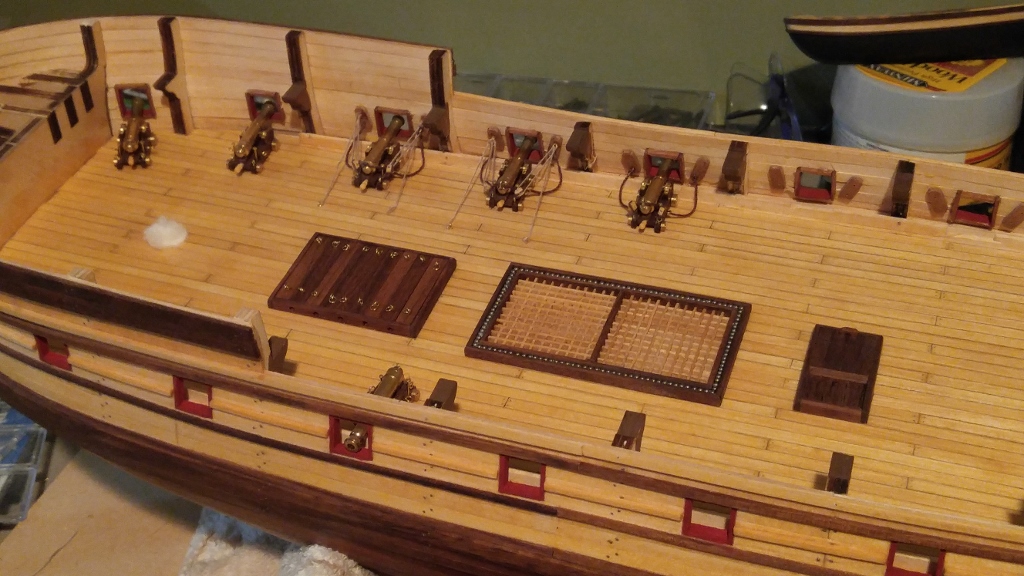
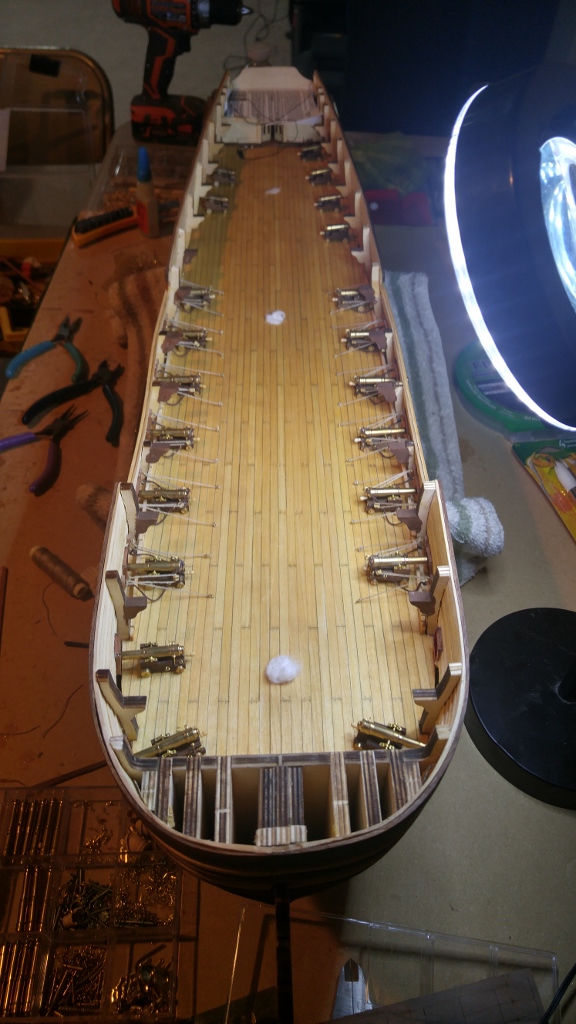
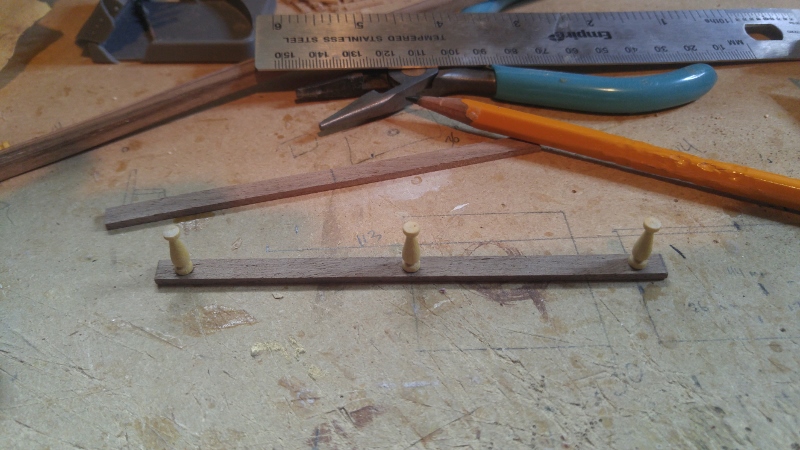
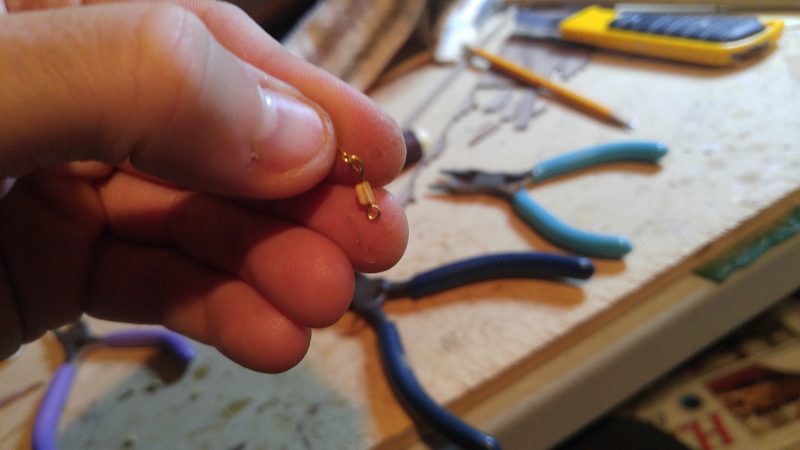
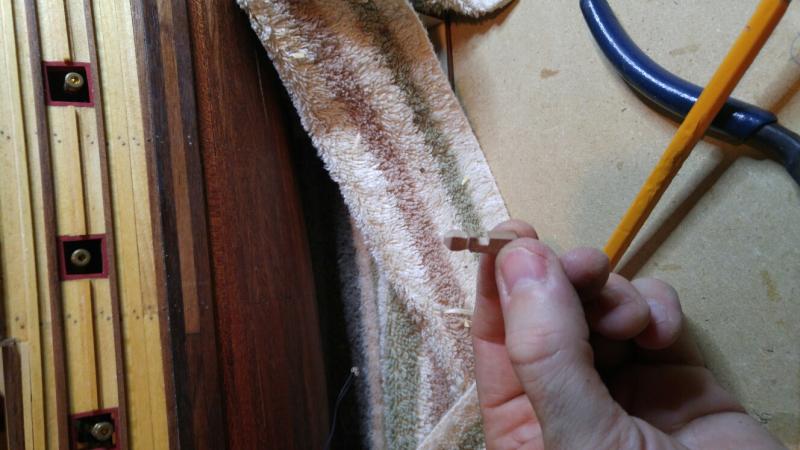
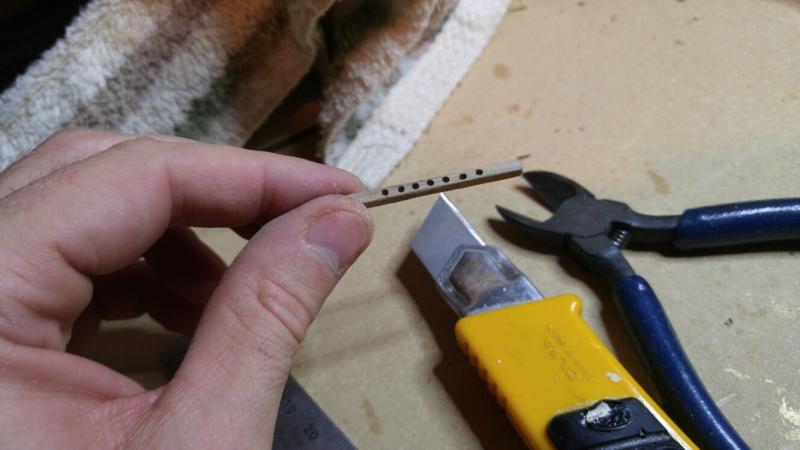
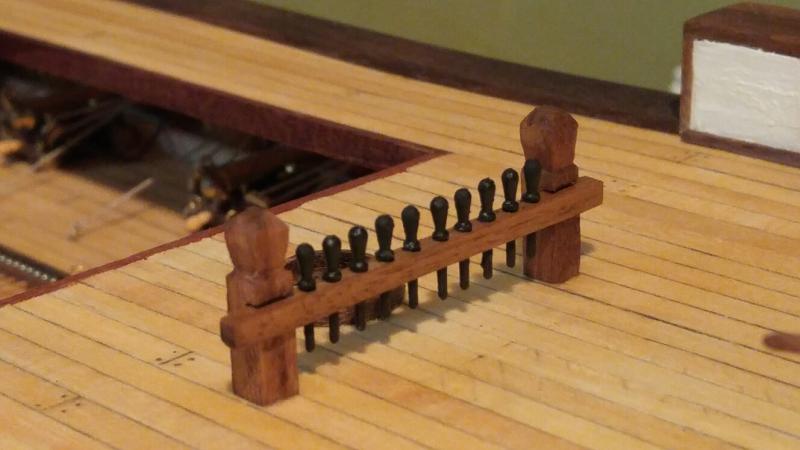
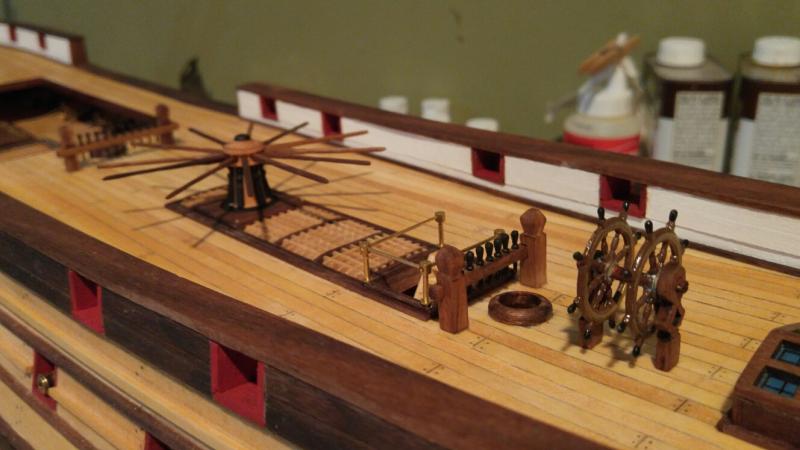
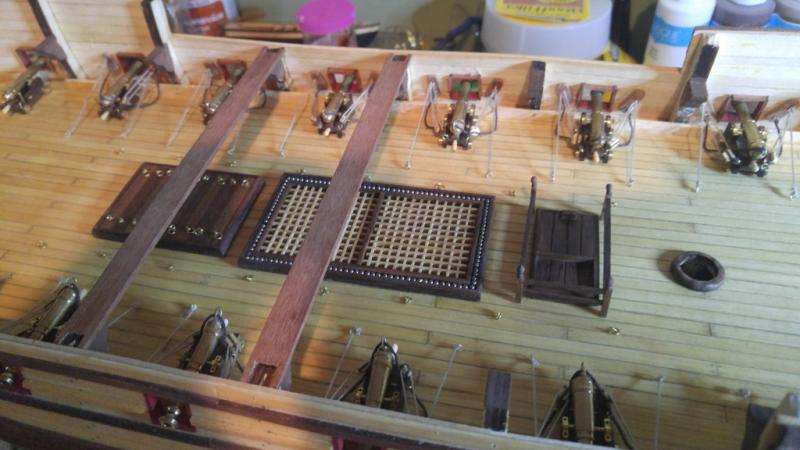
trying to balance time between a home improvement project and the boat, but managed to get some more of the detailing done and starting on the top deck cannons. I chose to use a loop and hook to connect the blocks to the inside of the boat, looks nice and I was having a heck of a time twisting the little metal loops around the block. Also, I came upon my first situation with missing parts. The brass posts for the railing were missing 4, so i repositioned what I did have and evenly spaced them. No problem.
- 144 replies
-
- 9
-
-
- surprise
- artesania latina
- (and 2 more)
-
I live in windsor ontario. I'm leaning towards kit bashing, but could easily see myself ending up scratch building and really getting into carving. I had no idea what the possibilities were until I started digging into the posts on this site. But I don't want to get ahead of myself with the scratch build stuff, which is why I'm looking at kits that get you on your way. I'm looking more and more at smaller boats done in larger scales ie. greater than 1:40, to get that authentic look. so much to sift through its overwhelming. My dad just got the Chaperon, and that looks like a blast to build.
-
did you have mom run down to the post office lol. It still wasn't in by almost 5pm. (Blighty is my dad btw)
- 296 replies
-
- 5
-
-
- chaperon
- model shipways
- (and 1 more)
-
Im so new to this im not sure how to source wood for a scratch build. Do you buy sheets and cut your own planks, buy prefabricated planks in the size you need. I ask because i have a dremel, file and a knife and thats about it lol
-
Im an avid audiobook listener and plan on getting the aubrey books. I havent read them before
- 144 replies
-
- 3
-
-
- surprise
- artesania latina
- (and 2 more)
-
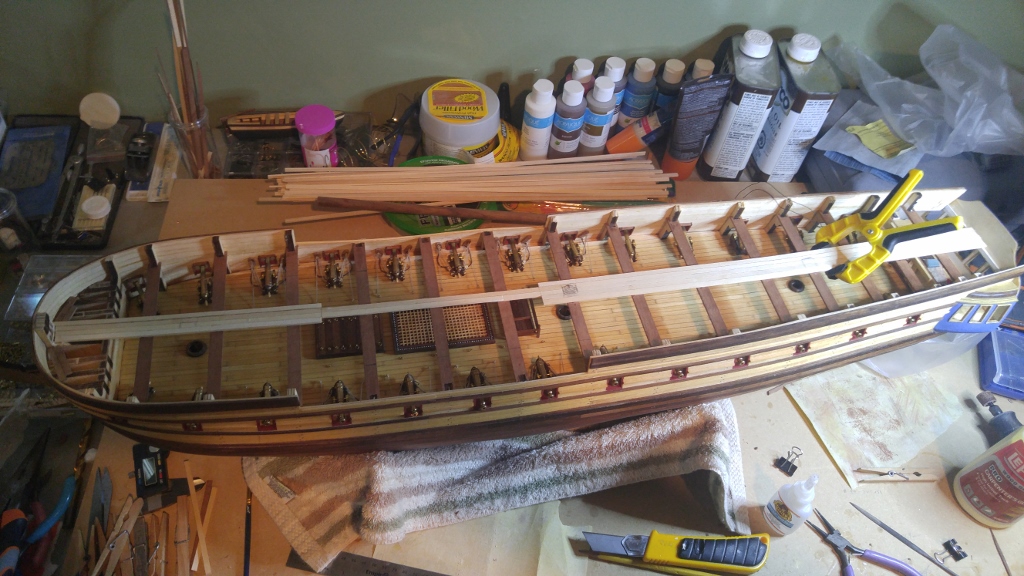
Thanks. I expected it to take much longer to get to this point to be honest, but doing an hour or two here and there and its really going quite quickly considering.
-
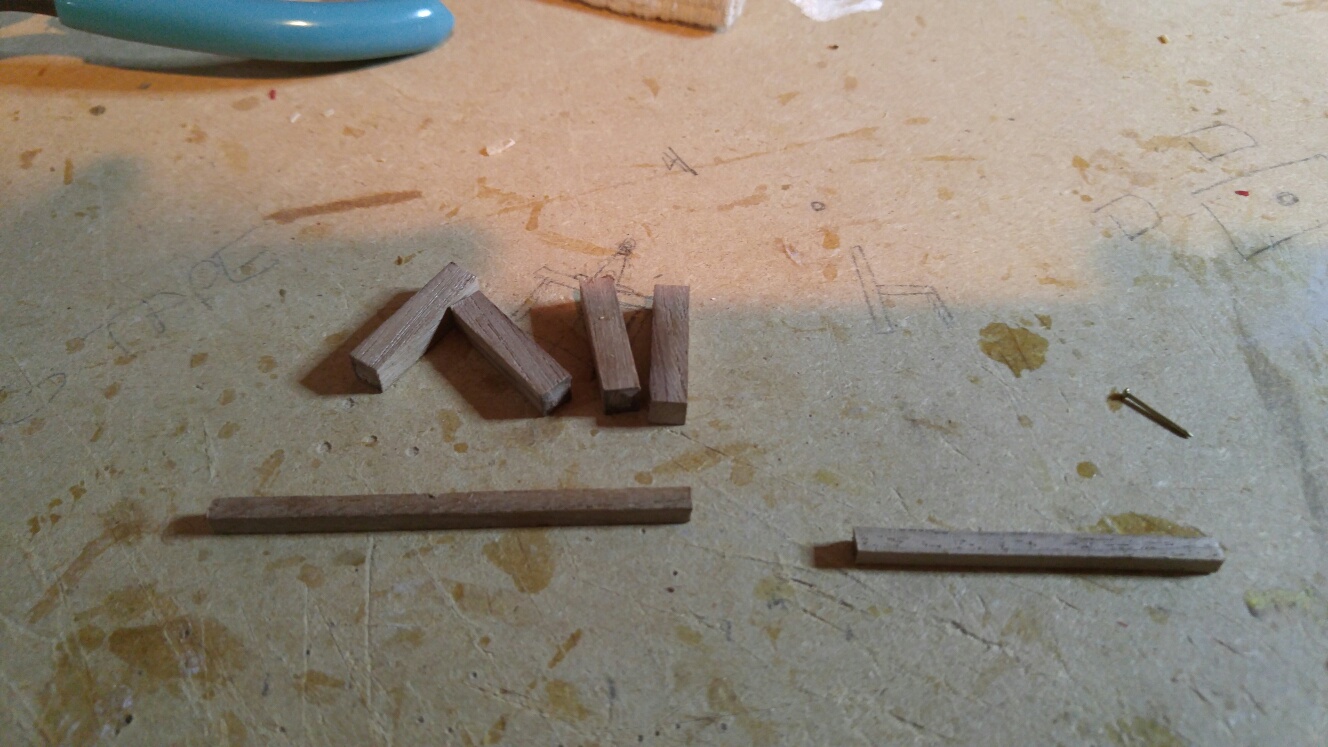
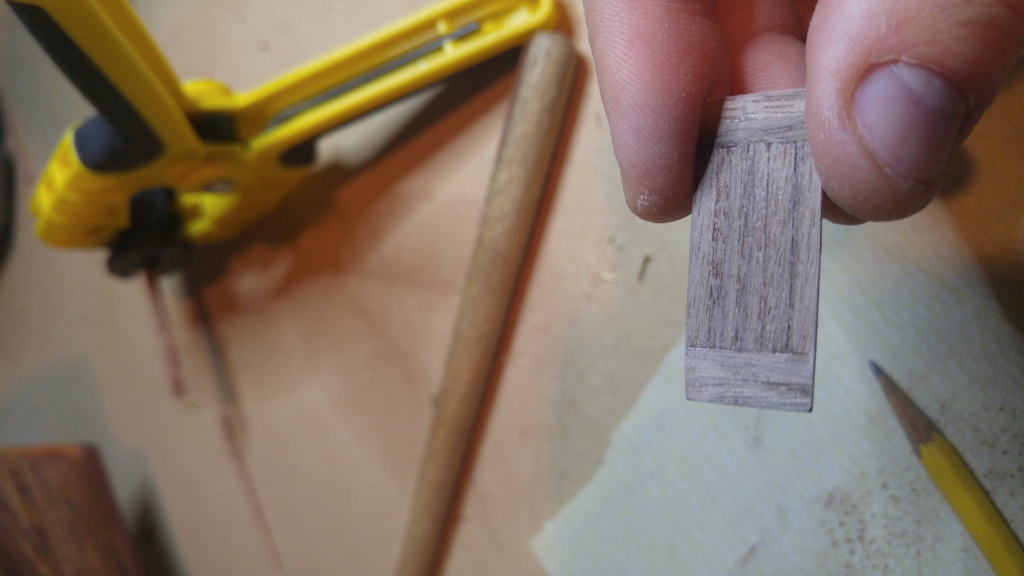
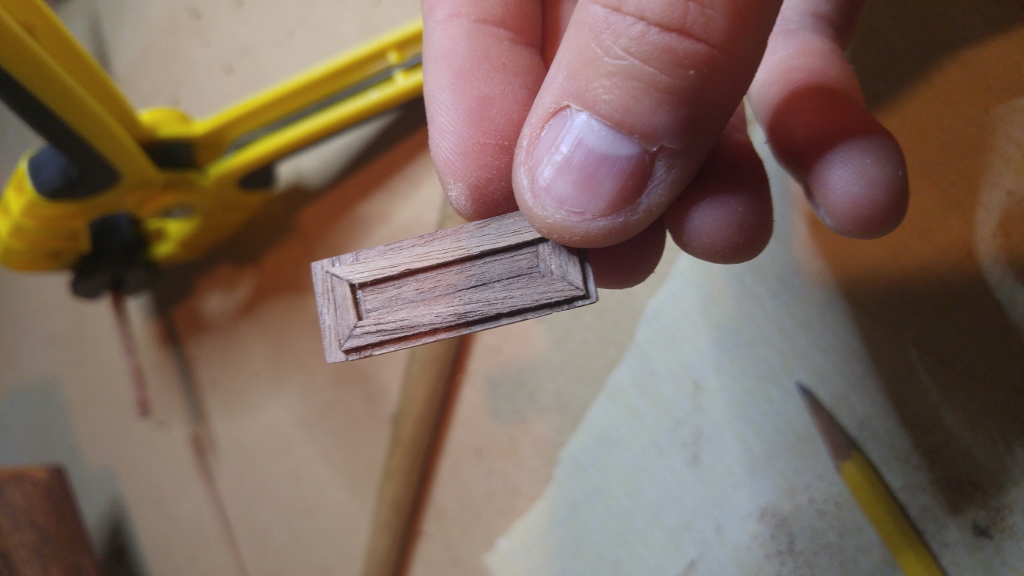
A bit more detail work. Most of the rough shaping is done with a dremel and then finished with files and sandpaper.

- 144 replies
-
- 10
-
-
- surprise
- artesania latina
- (and 2 more)
-
Hi mike. Thanks for the kind words but im sure some of my approaches make real pros cringe. All of the online resources like msw and youtube etc... Sure do make life easier.
- 144 replies
-
- 2
-
-
- surprise
- artesania latina
- (and 2 more)
-
Hey folks, Im currently mid way through building the HMS Surprise and would like to start researching for a future build. I was hoping to hear your opinions on what is the ultimate kit out there in terms of detail, quality of wood and parts, instructions and sheer presence. What are some of the very highly regarded kits out there... Royal william, SOS, Victory etc... Or any large scale models of smaller boats. Im looking for something very stunning or with a really cool story behind it. Or a high quality large scale viking boat. Any guidance would be appreciated.
-
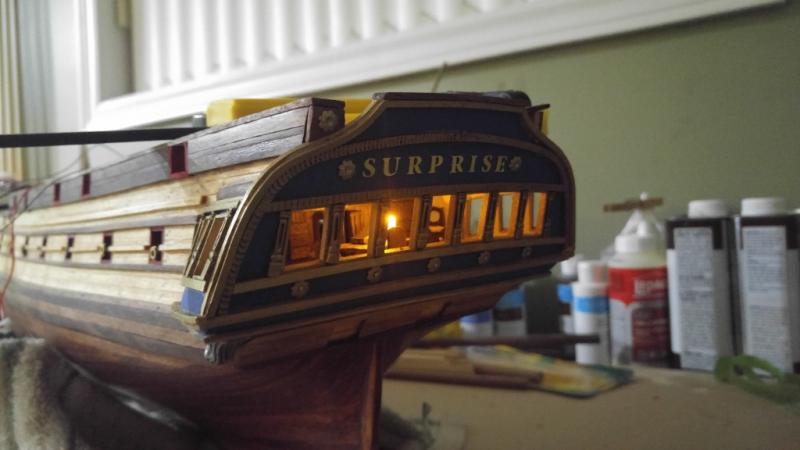
Hey neptune. Much appreciated, i will be refencing your build log extensively, especially for masts, rigging and sails. Very informative and quite intimidating lol. The flickering effect is great in person, and multiple lights in series all flicker independently. Quick question, is there a build log on the royal william, it dwarfs the
- 144 replies
-
- 1
-
-
- surprise
- artesania latina
- (and 2 more)
-
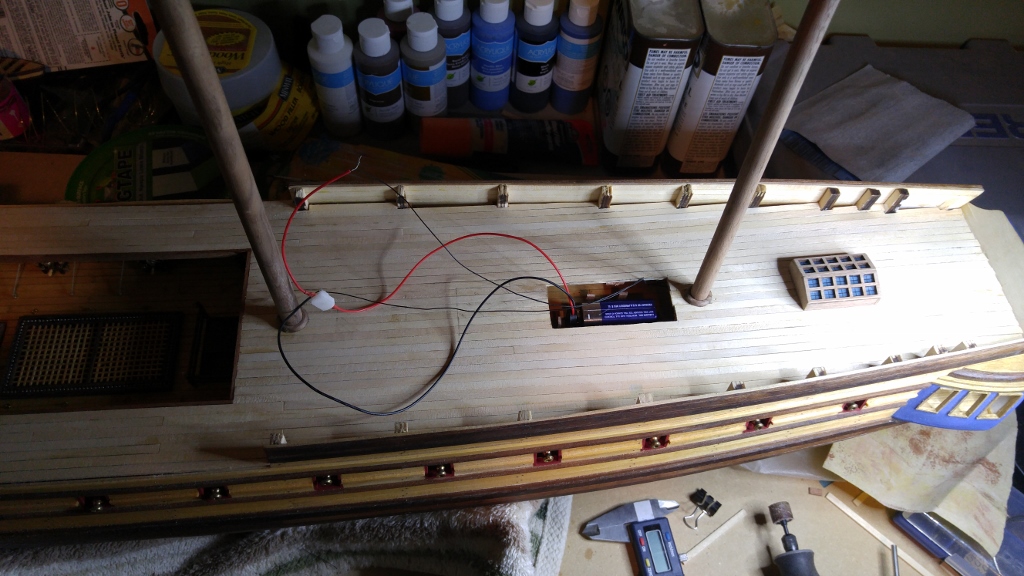
I also decided to run the wiring/switch/battery outside the boat, to later be hidden in the display stand.
- 144 replies
-
- 2
-
-
- surprise
- artesania latina
- (and 2 more)
-
Great point rexy. The led's do have a resistor built in to the line. The guy sells them as kits with required resistance depending on power source, but a very good point to note. I got the 9v setup.
- 144 replies
-
- 2
-
-
- surprise
- artesania latina
- (and 2 more)
-
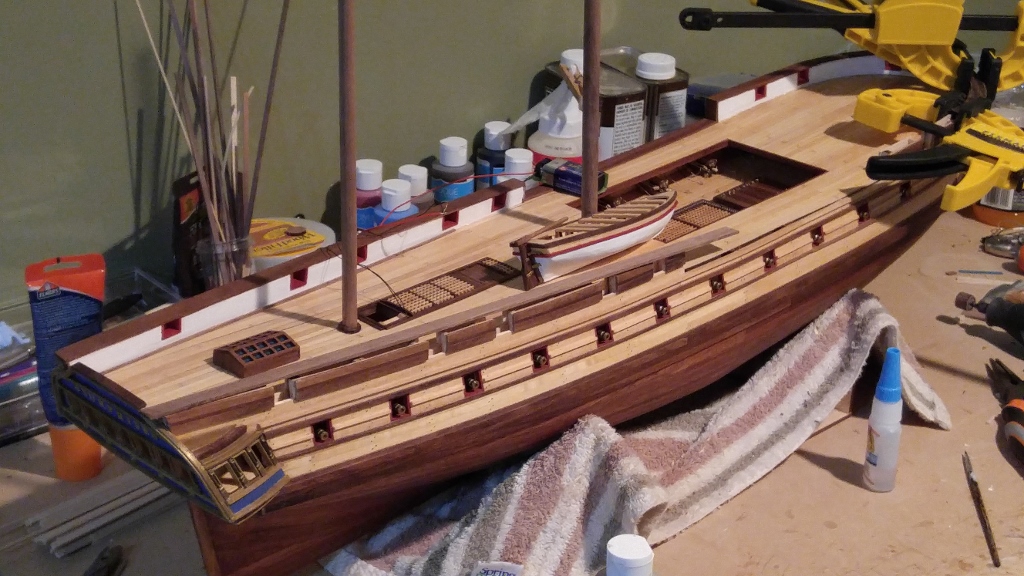
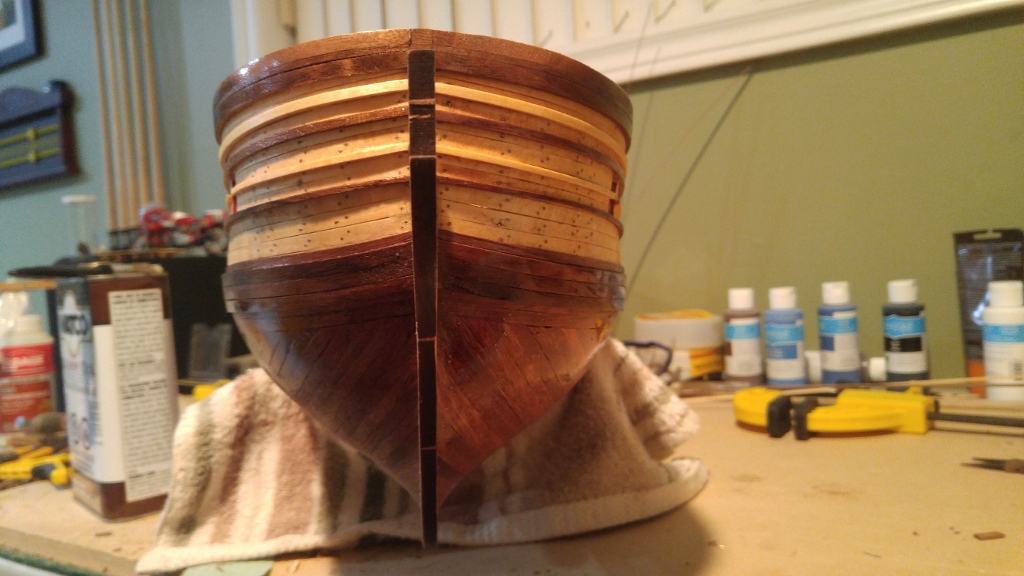
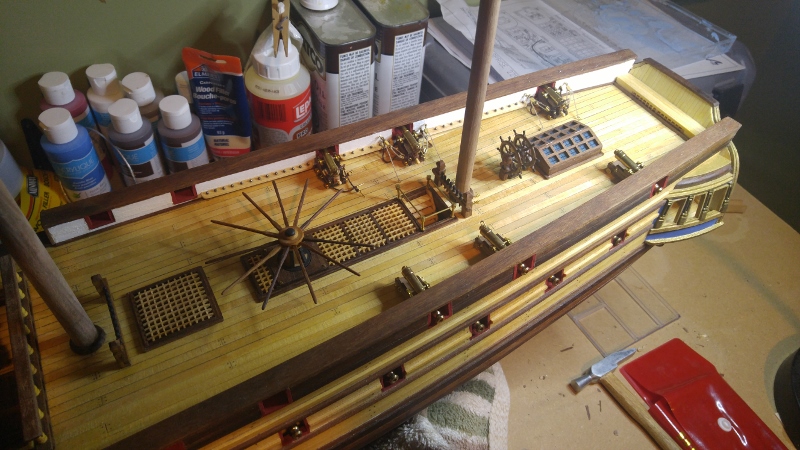
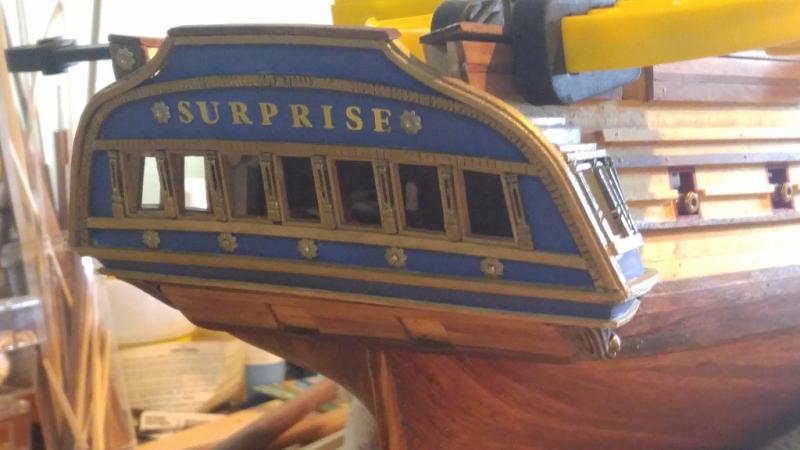
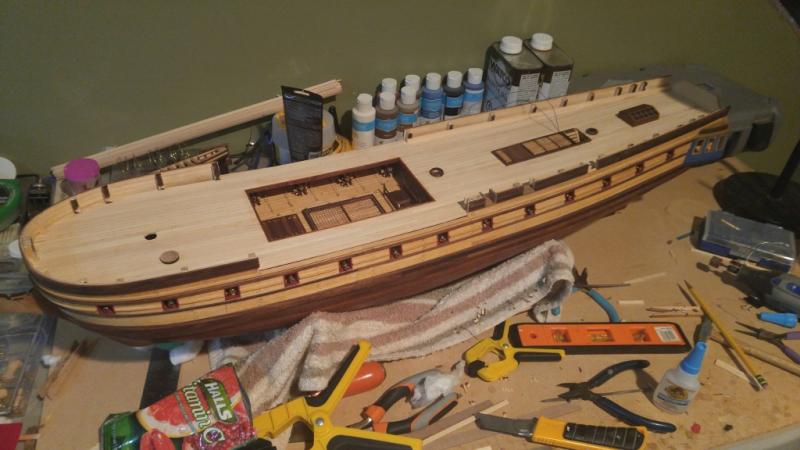
I also settle on a colour scheme for the launch and inside planking, cannon ports. Happy with that. This pretty well catches up the build to where I'm at now, so updated will come much slower, but I will do my best to keep the info and pics coming. I wish I could add a video of the light effect, it just so hard for the phone still pic to capture it well.
- 144 replies
-
- 2
-
-
- surprise
- artesania latina
- (and 2 more)
-
While working on the inside planking and gunwale covers(lots of difficulty with the bow end) I decided to have more fun by doing the decorative parts to the backend. Not in the right order, but I'm the boss lol And I also made sure it wouldn't cause issues with any preceding steps.


- 144 replies
-
- 14
-
-
- surprise
- artesania latina
- (and 2 more)
-
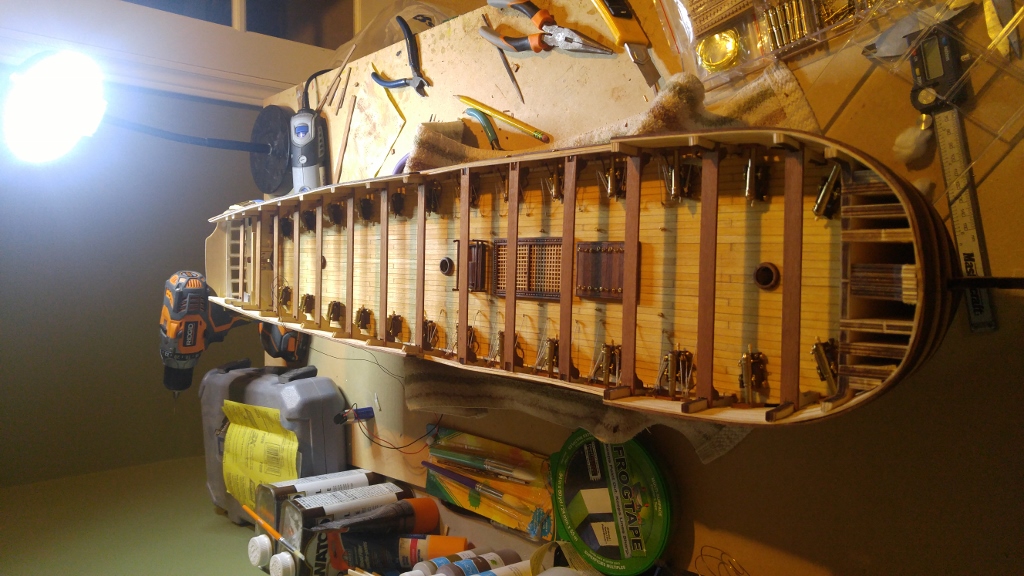
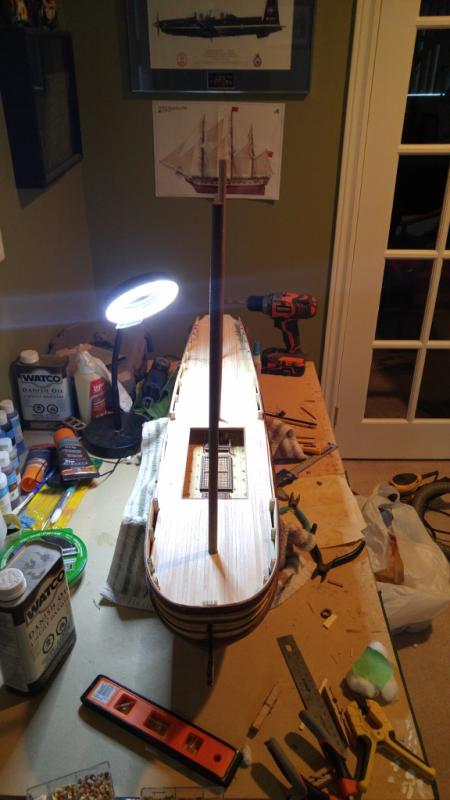
Happy with mast alignment. Had a little trouble with drilling mast holes when using a bigger drill it. Had some tearout that required surgery, but that is the great thing about wood! Besides, I try to be thorough and calculating, but I'm not too worried about making a mistake, its part of the learning process. The way the ended up working for me was to drill a rough outline(smaller that required) of the mast hole with a tiny micro bit and dremel, then cut the rest out and file to size.
- 144 replies
-
- 5
-
-
- surprise
- artesania latina
- (and 2 more)
-
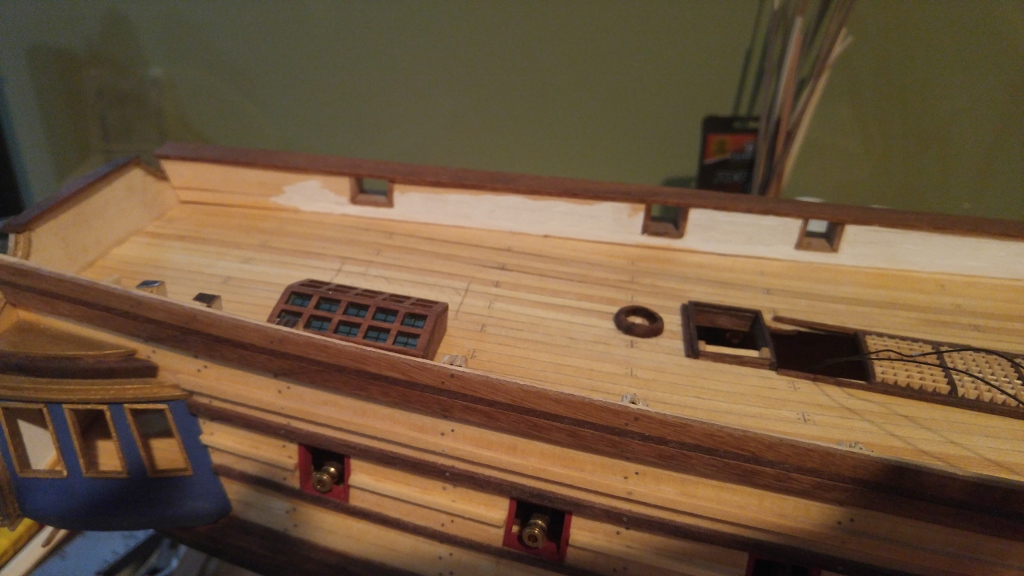
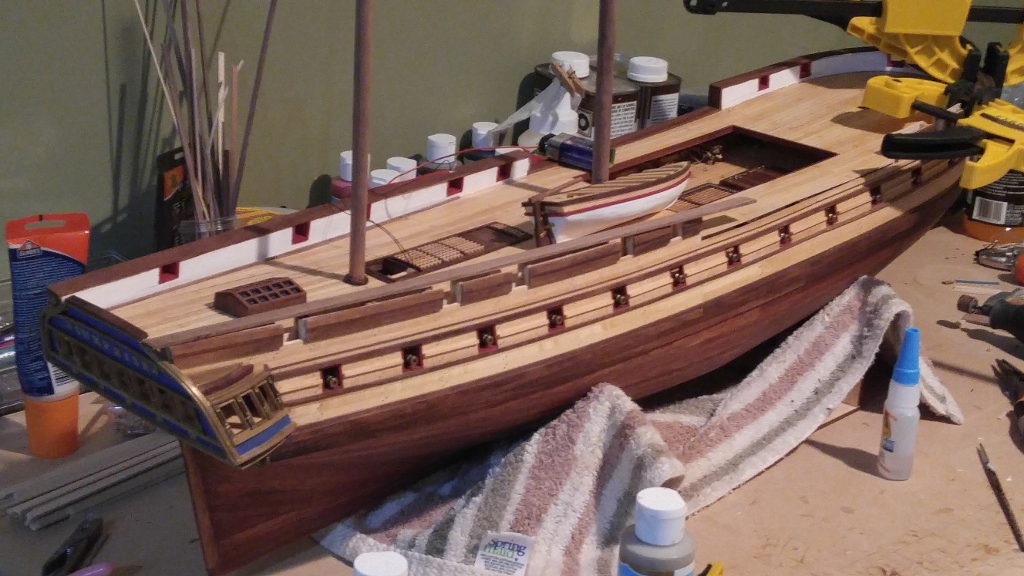
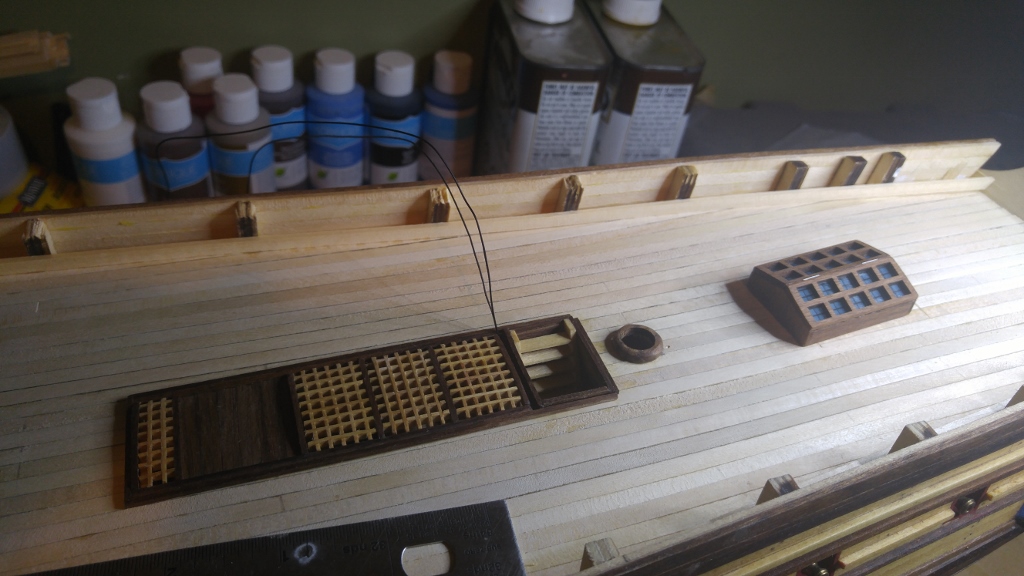
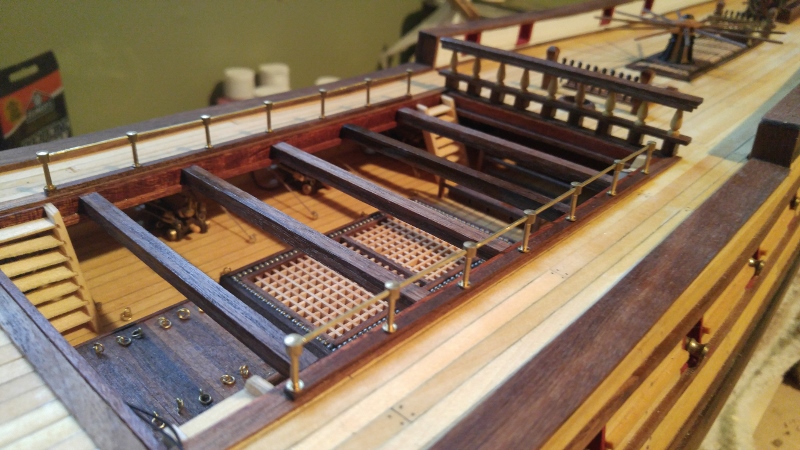
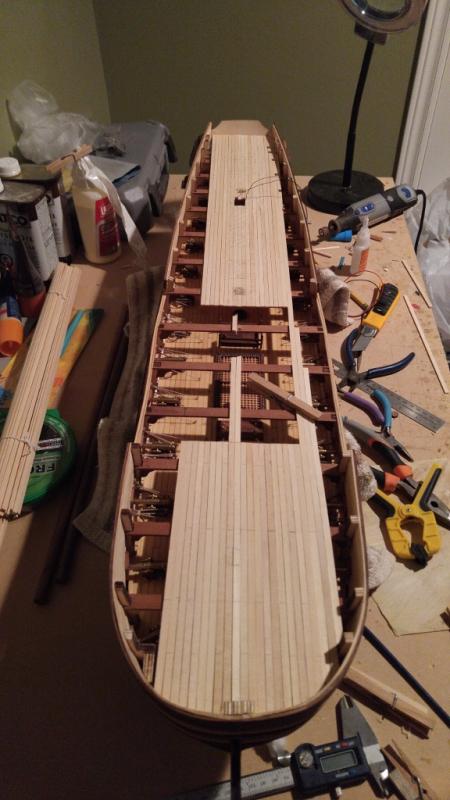
With the first deck done, its on to the upper decking. I chose to pre-calculate the large cutout and deck around that space, instead of cutting it out after the fact. this worked well and would probably be the way I do it next time too.


- 144 replies
-
- 11
-
-
- surprise
- artesania latina
- (and 2 more)
-
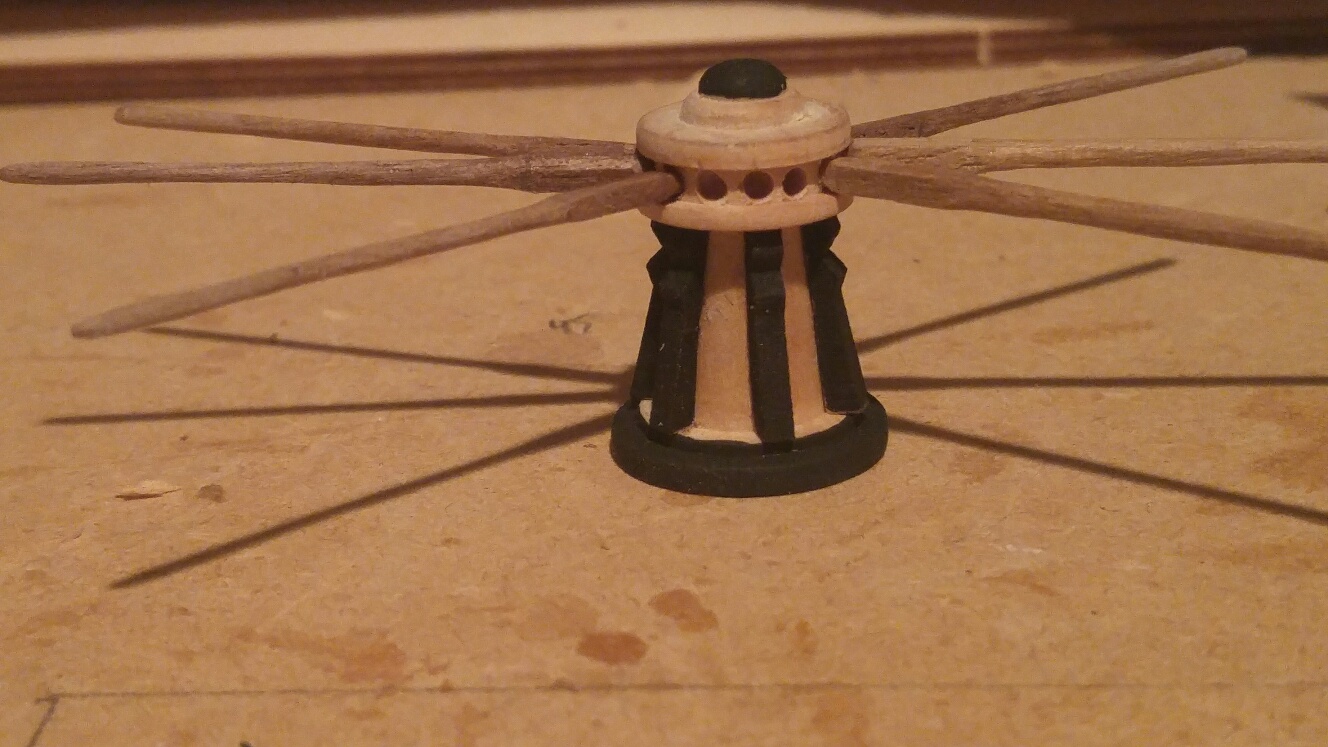
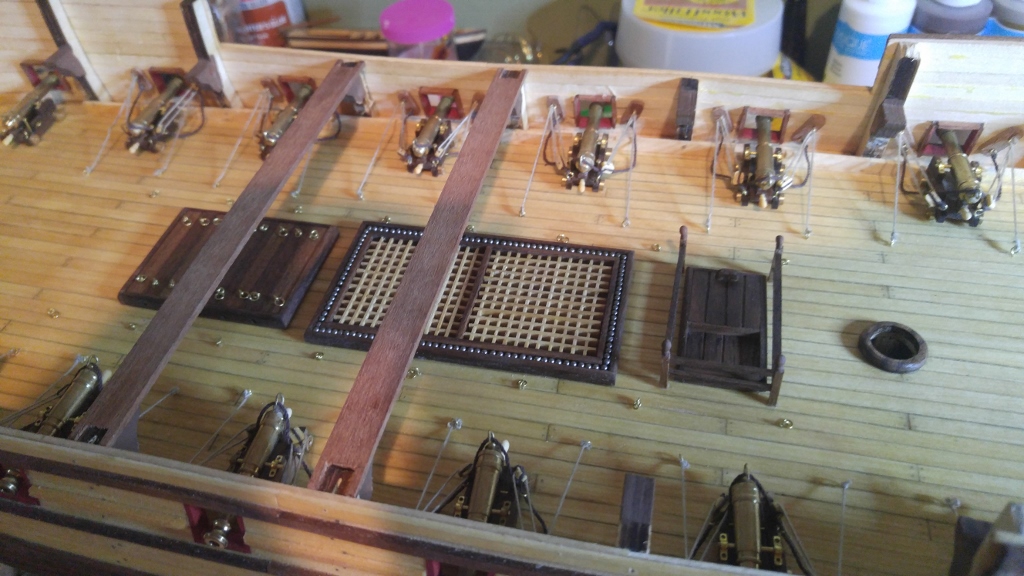
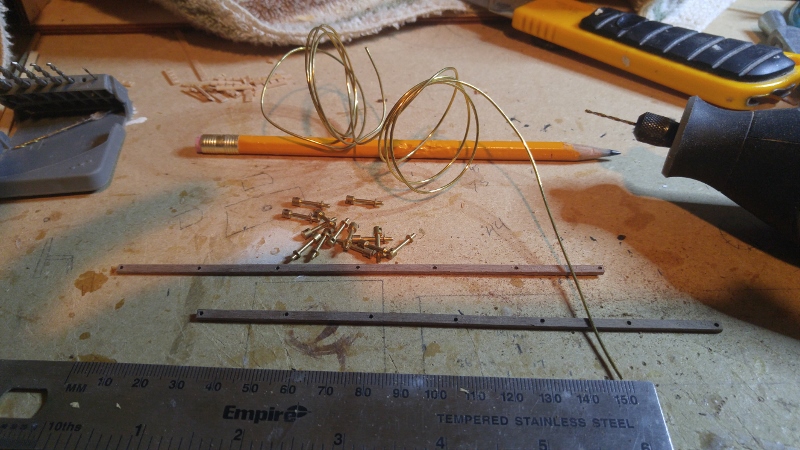
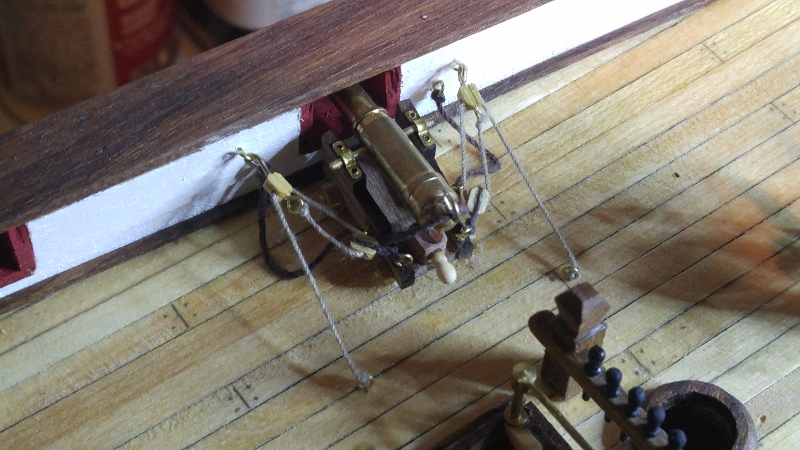
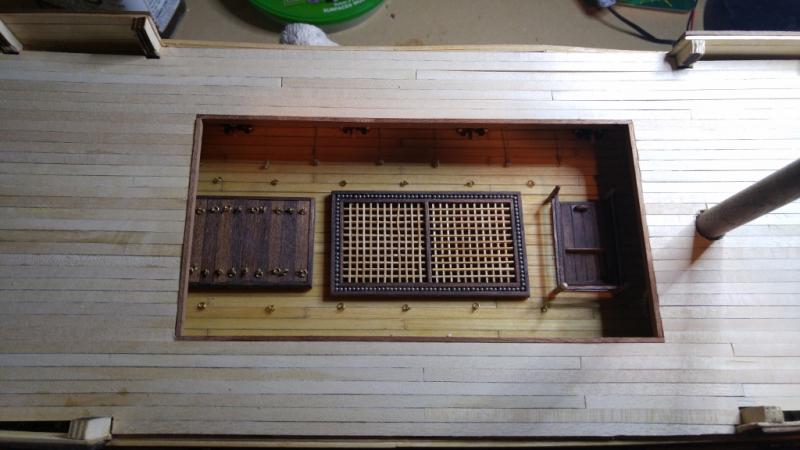
Now on to the some deck accessories and cannon rigging. I went with something different for the rigging, as I was having a very hard time twisting wire to make loops for the little blocks. So I used the loop attached to the side of the boat as a makeshift block because it can't really be seen. On the upper deck I will use a different approach that will use a little hook attached to the block.


- 144 replies
-
- 7
-
-
- surprise
- artesania latina
- (and 2 more)
-
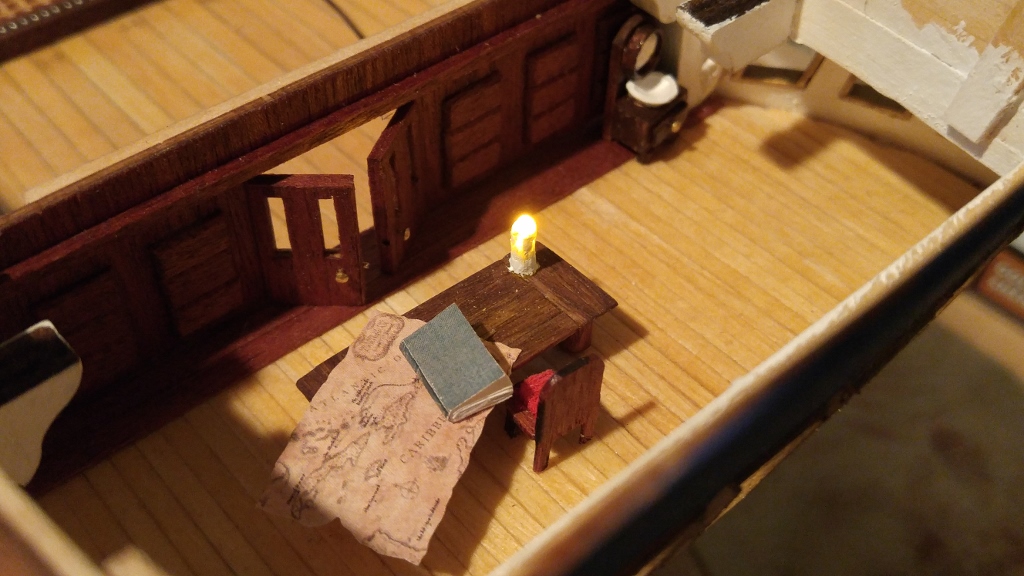
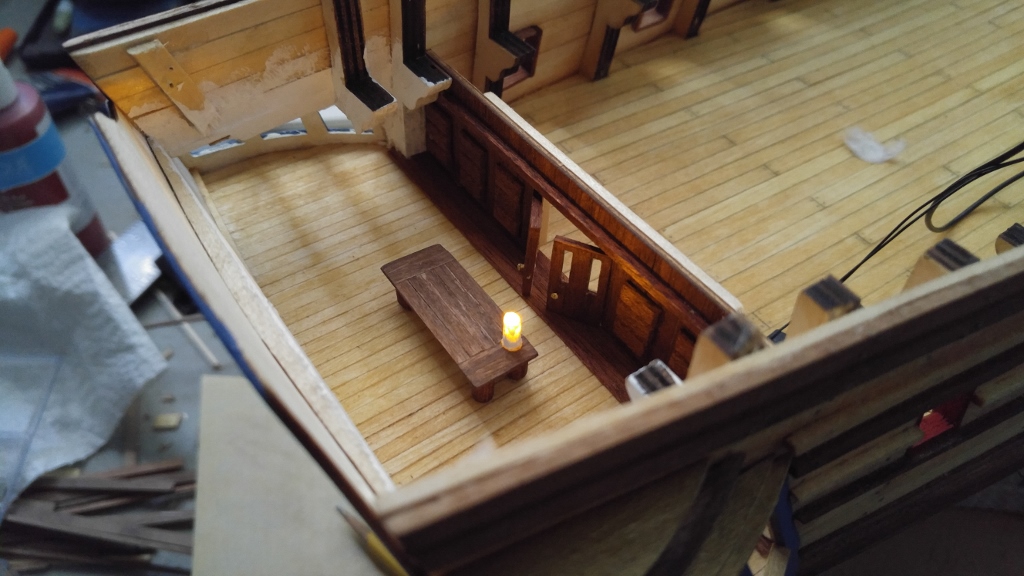
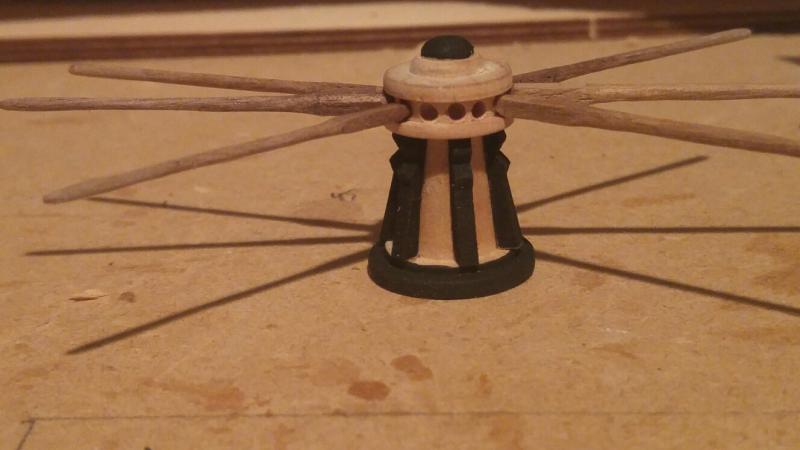
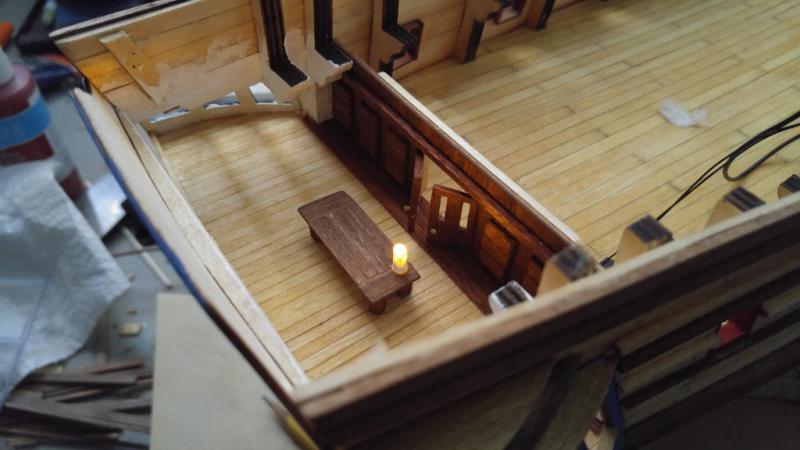
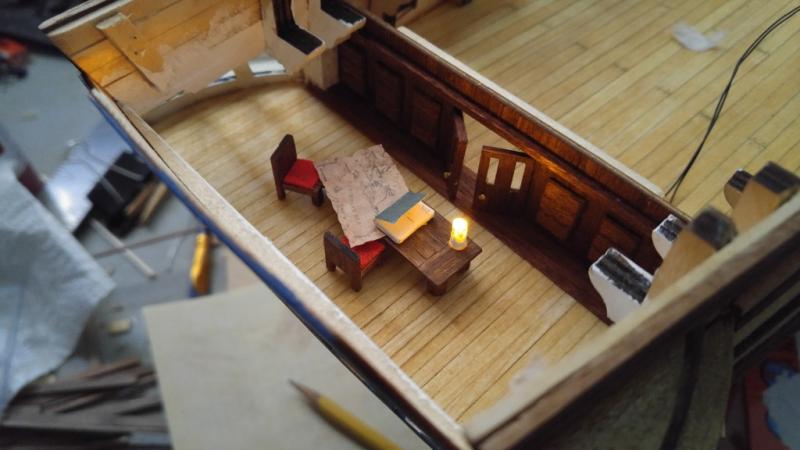
Here is the rough layout, with a phishing wire run through the table leg, for pulling through the LED when it came in. For the LED, I chose a 1.8mm flickering yellow LED from Evan Designs Shipworks. He has tons of stuff and different colours for different applications. The flickering effect is awesome and completely random. To create the candle, I ran the LED through the leg and shaved down what I could to get as small a profile as possible. This is also why the table legs were so thick, to accommodate the wire and hole I had to drill. Then I wrapped dental was around the LED assembly right up to the very tip. I painted the whole thing white, with varying thickness of paint, to give the glowing effect of a candle with the wick burning down into it. Worked great, and pictures really don't do it justice. Very pleased.
- 144 replies
-
- 12
-
-
- surprise
- artesania latina
- (and 2 more)
-
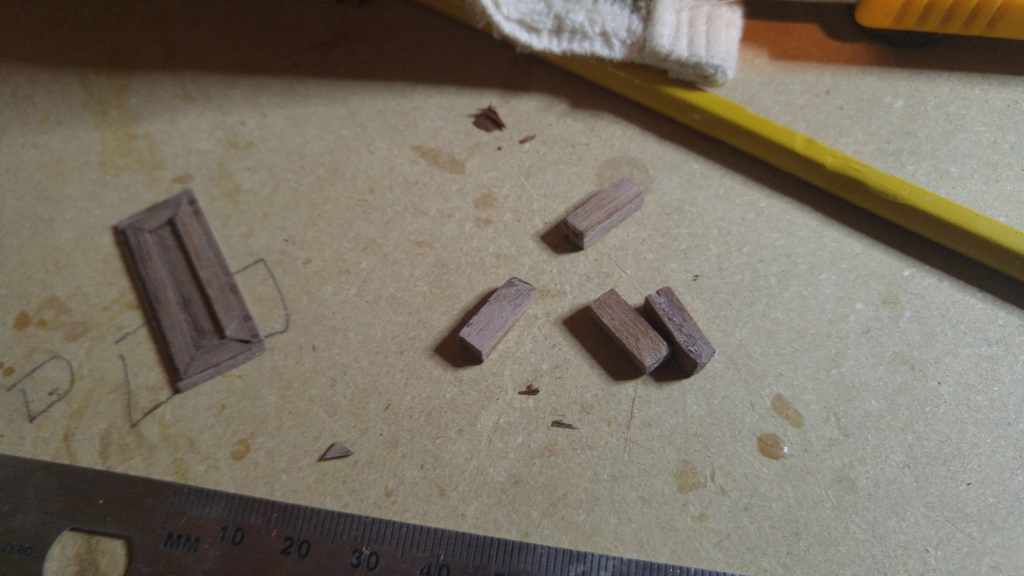
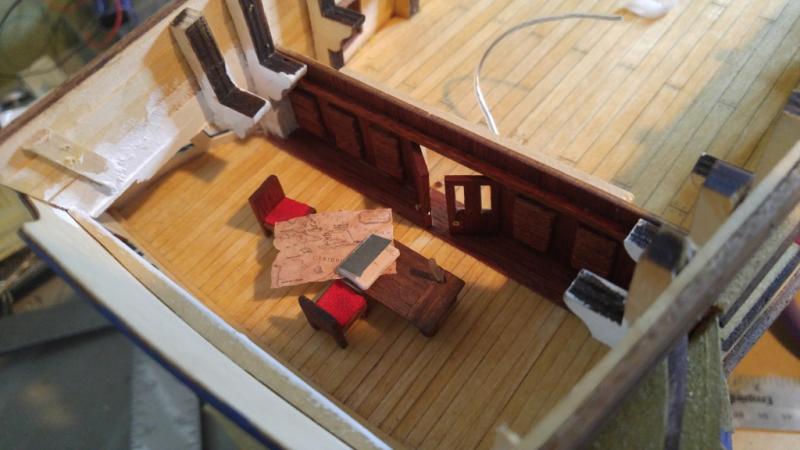
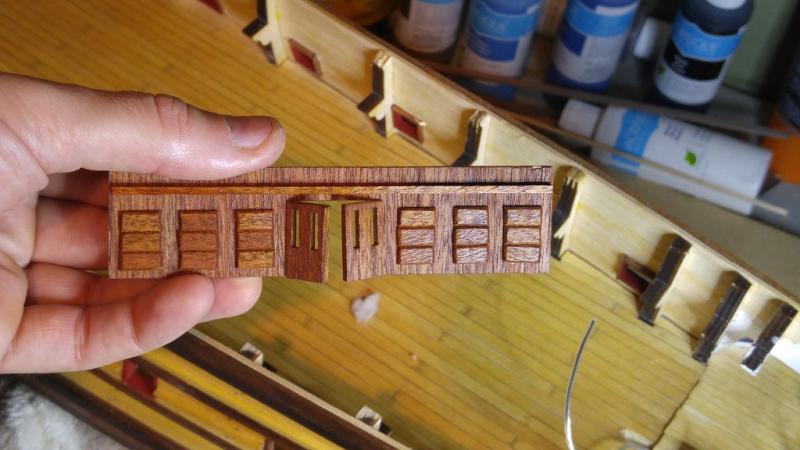
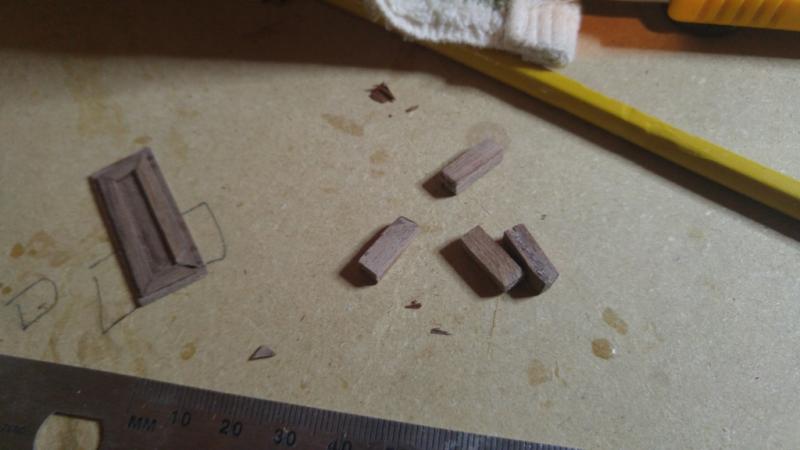
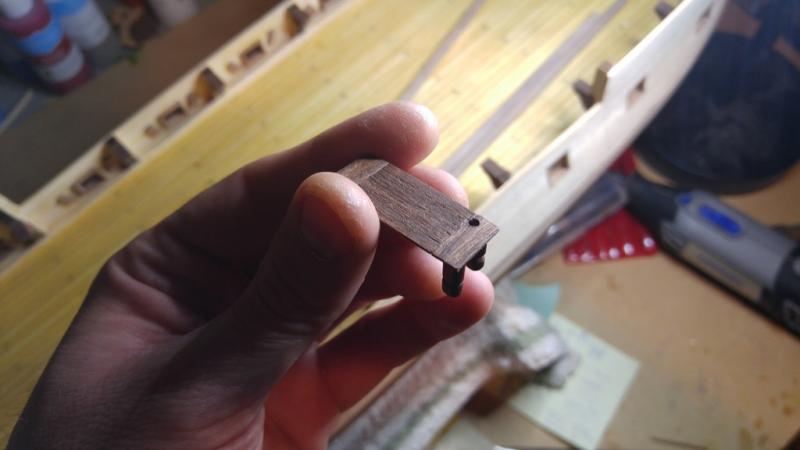
I had to grab the book so I could call of the parts by the right name lol. Next I planked the captains quarters and built the wall. I screwed up the planking by coming up short, which was partially due to an illusion in the manual pics. But I should've caught that. I fixed it by adding a couple of strips of sapele laminate as an "entry transition". This provided the space I needed for the furniture plans. I also laminated the edges of the door so you couldn't see the layers of plywood and added knobs/mortise. Again, it was fun so I did it
- 144 replies
-
- 5
-
-
- surprise
- artesania latina
- (and 2 more)
-
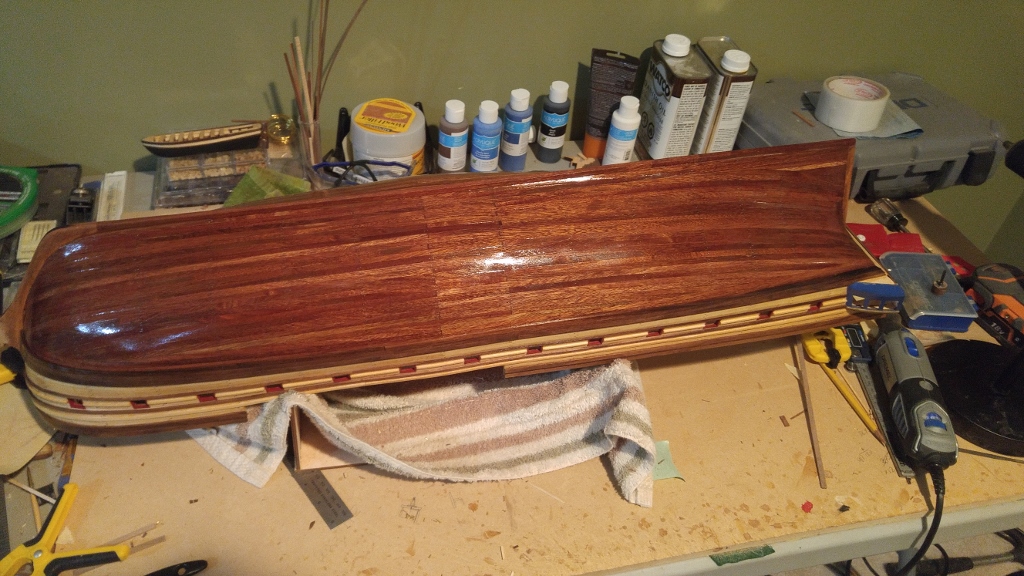
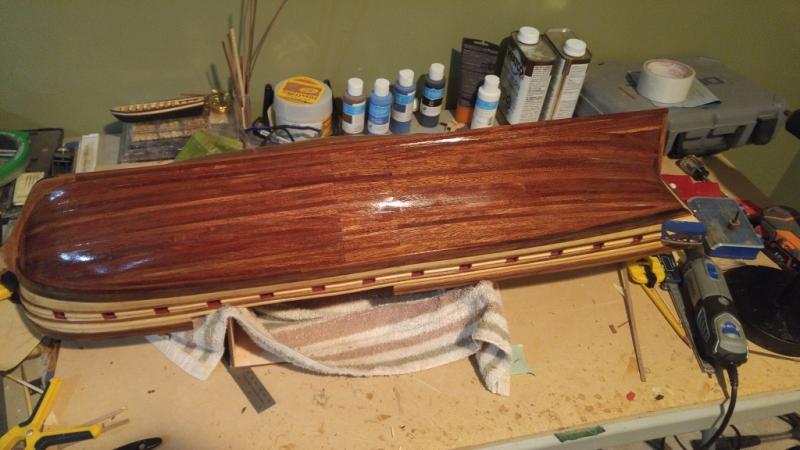
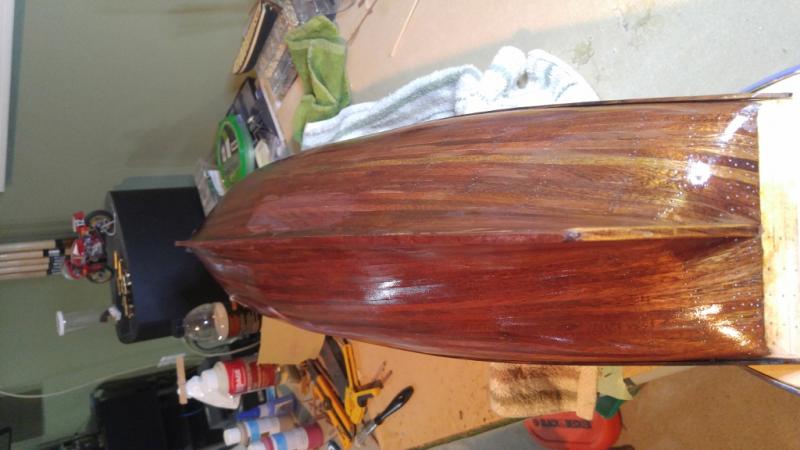
Adding the strips down the side, and giving everything a coat of Danish Oil. Again, not too experienced with this stuff, so I soaked the wood in the oil but didn't wipe off the excess, so it got gummy and nasty. I used fine steel wool to rub it down, reapplied and wiped off excess. No problems now.

- 144 replies
-
- 6
-
-
- surprise
- artesania latina
- (and 2 more)
-
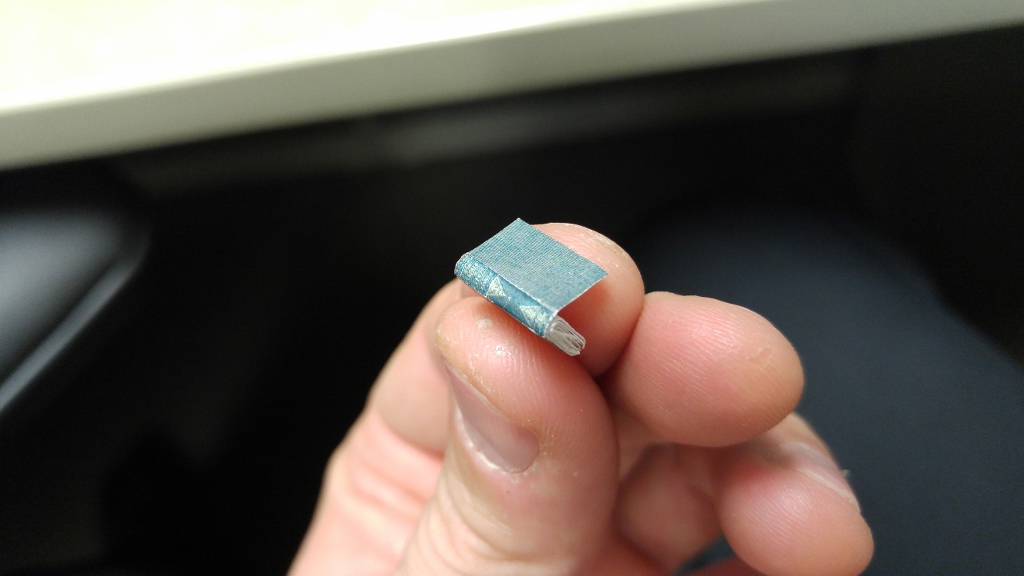
The book is a replica of Darwins famous book, not period correct but I don't care about that stuff as much. Its fun, and that is what this build is all about. Scale wise, I just tried to make stuff close, as long as it passed the eye test it was good for me. As you may notice, I used a mini dremel bit to drill through the leg of the table, which is where i plan to run the LED wiring for the candle.


- 144 replies
-
- 11
-
-
- surprise
- artesania latina
- (and 2 more)