HOLIDAY DONATION DRIVE - SUPPORT MSW - DO YOUR PART TO KEEP THIS GREAT FORUM GOING!
×

wtimlen
-
Posts
117 -
Joined
-
Last visited
Content Type
Profiles
Forums
Gallery
Events
Everything posted by wtimlen
-
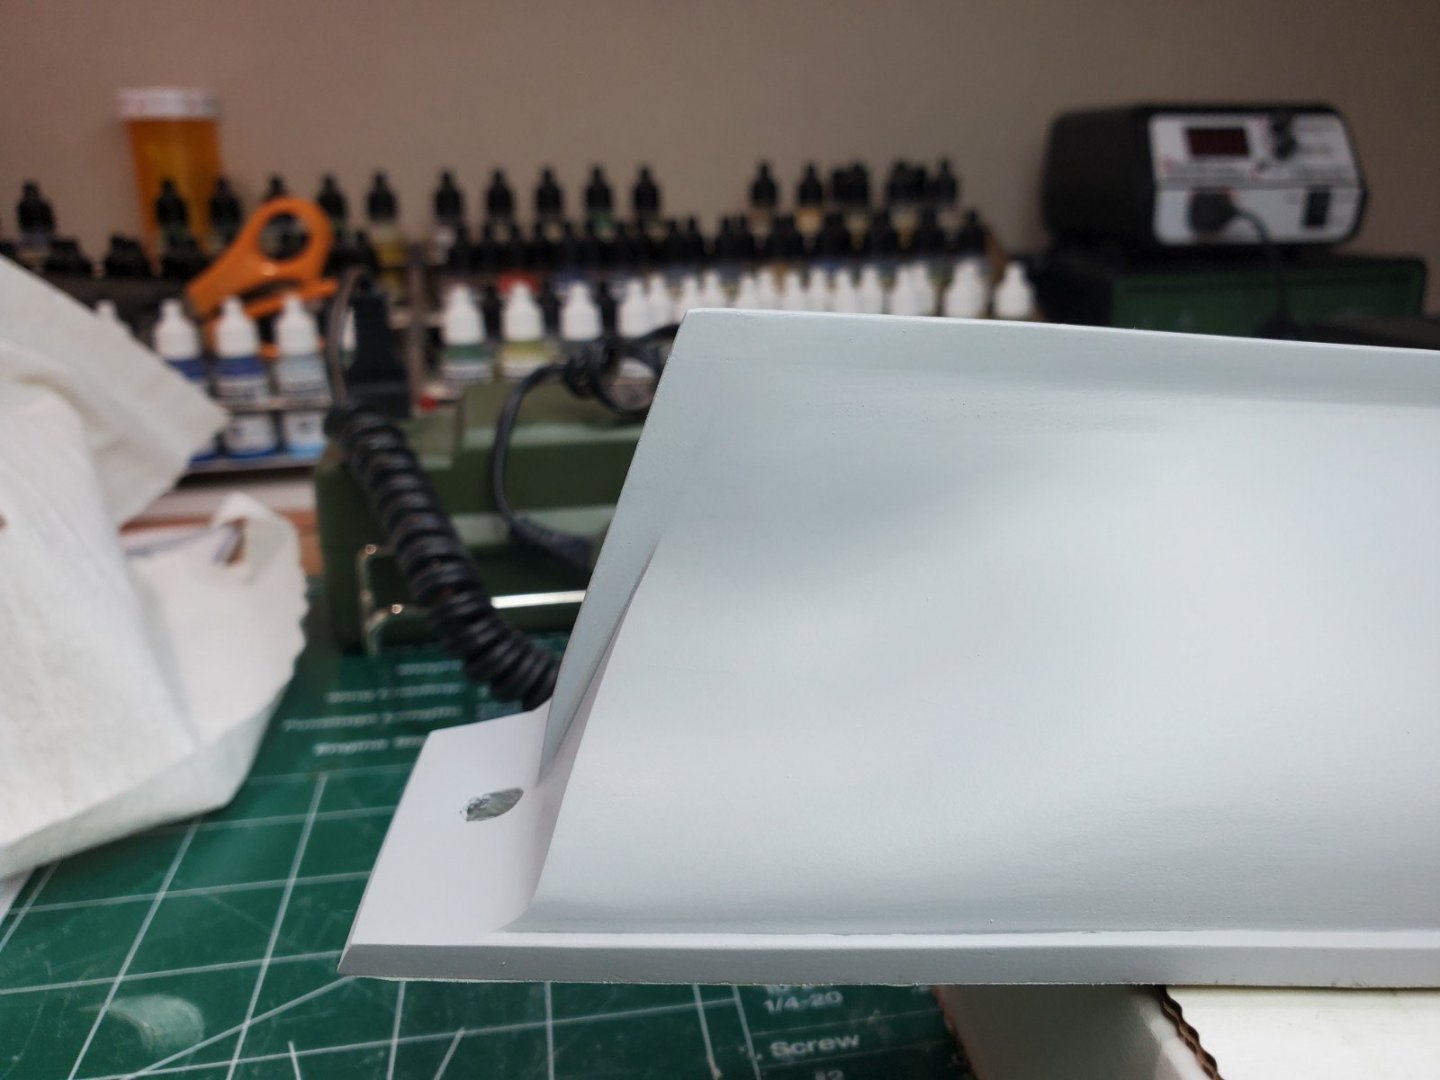
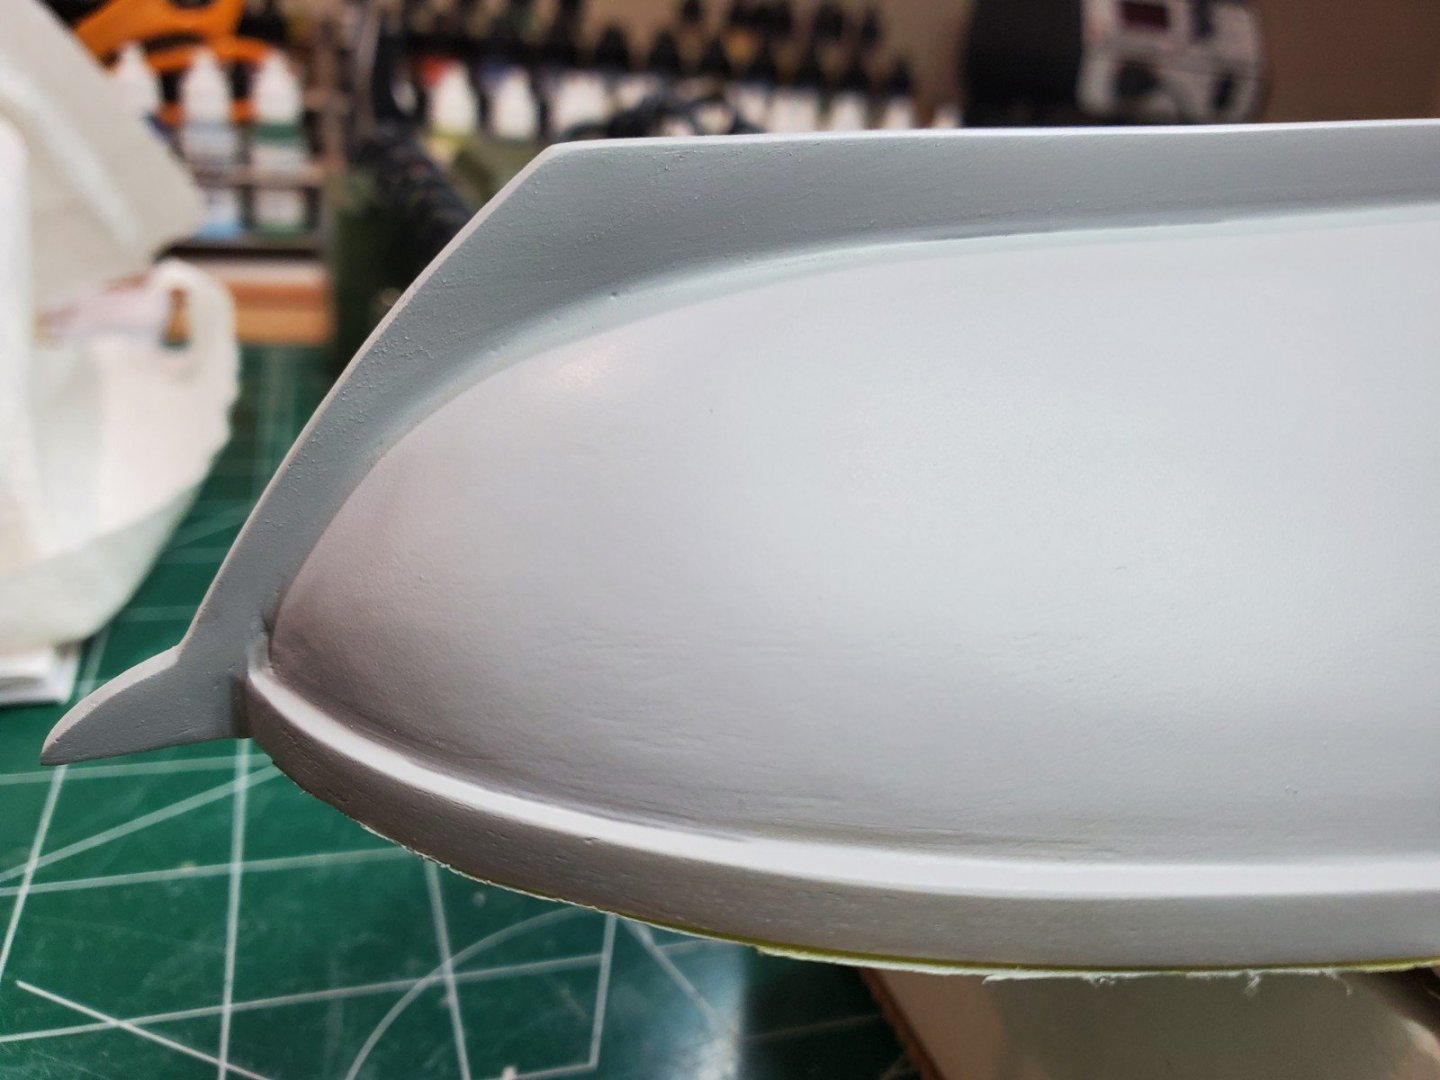
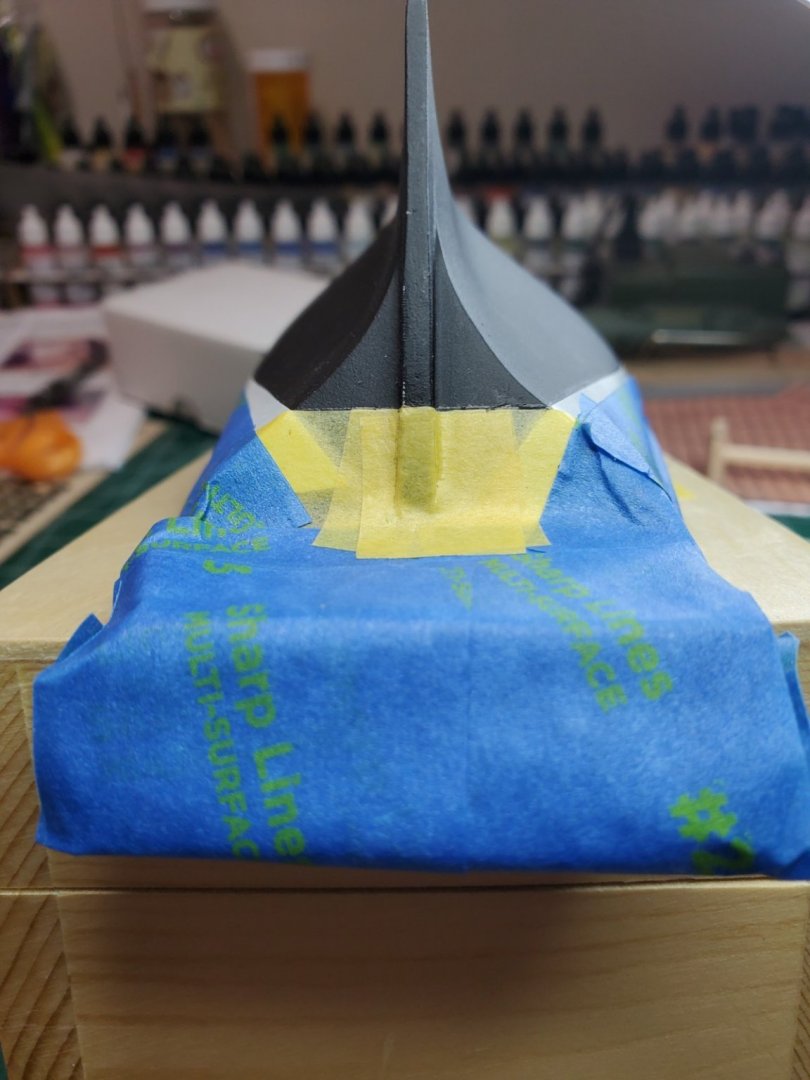
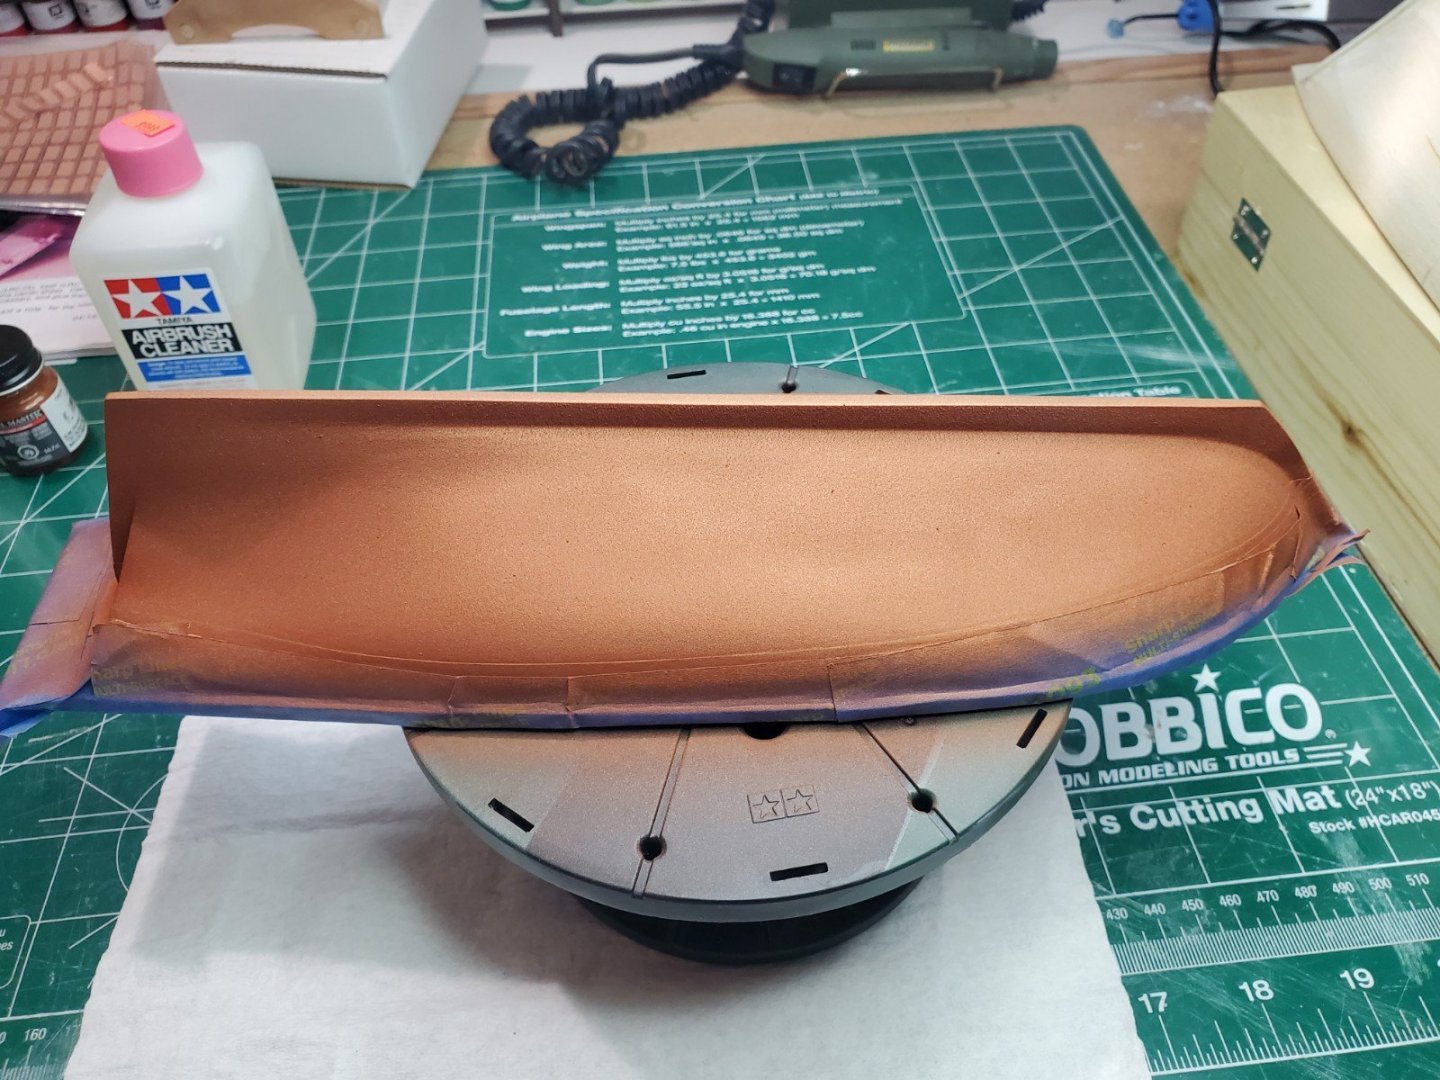
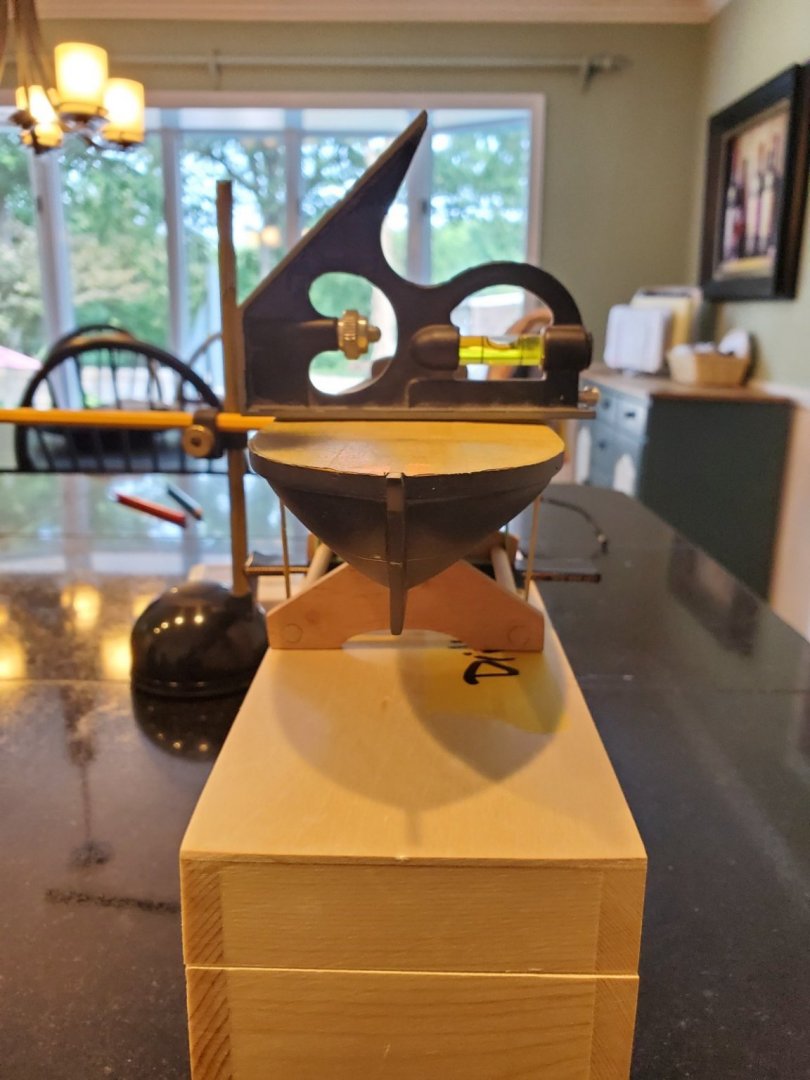
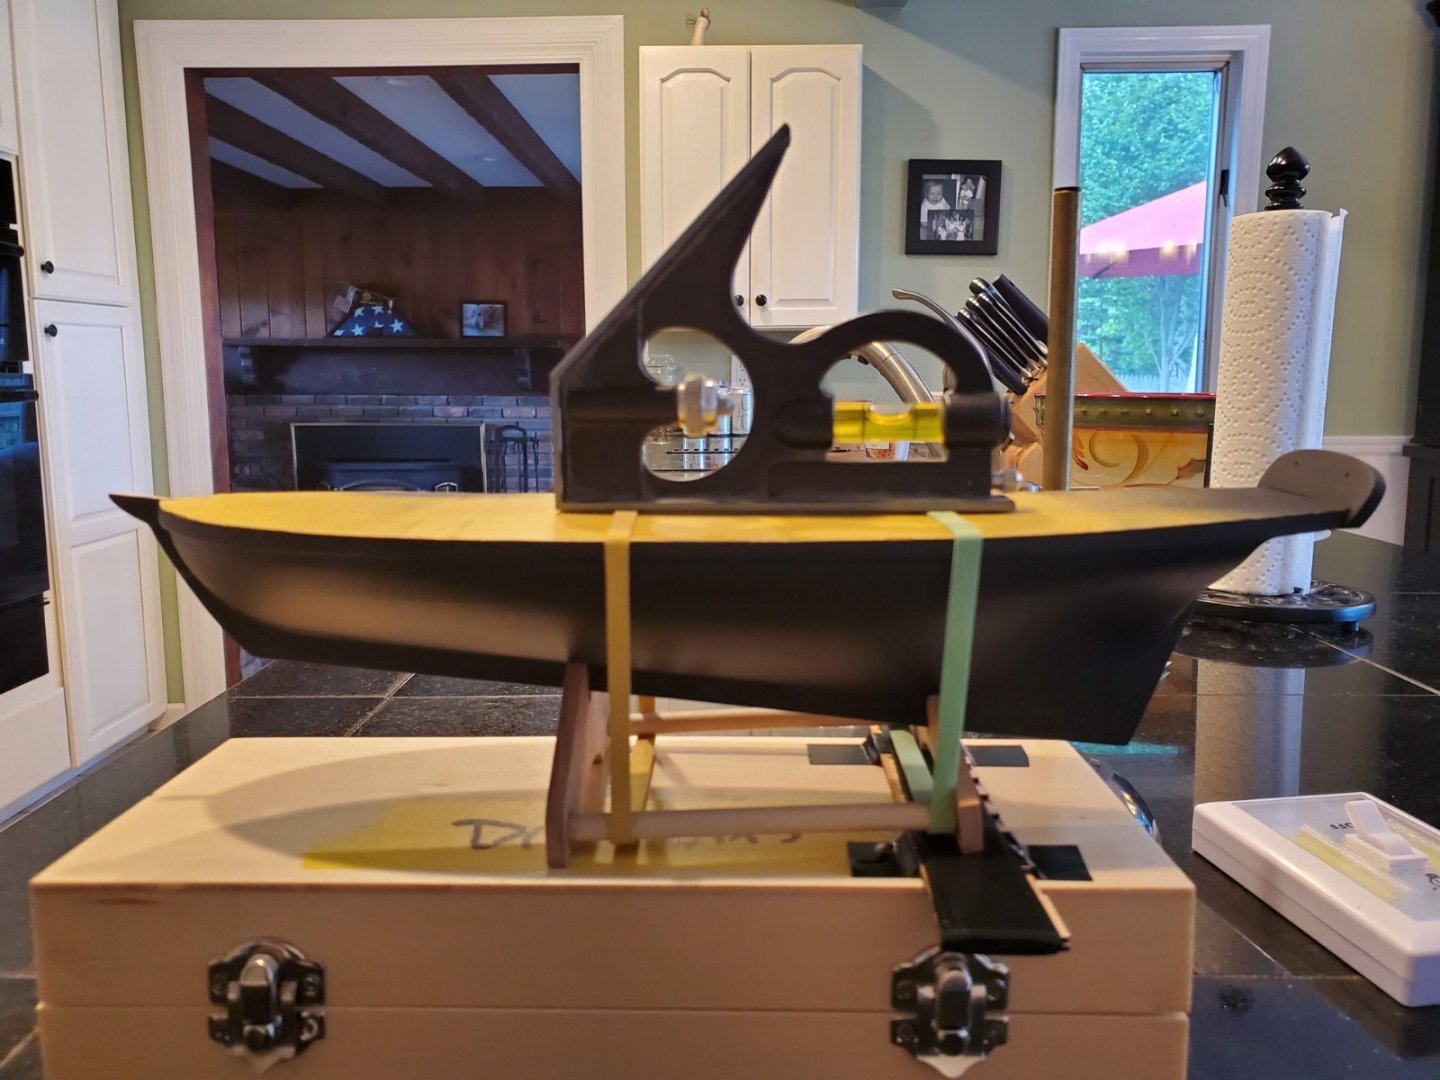
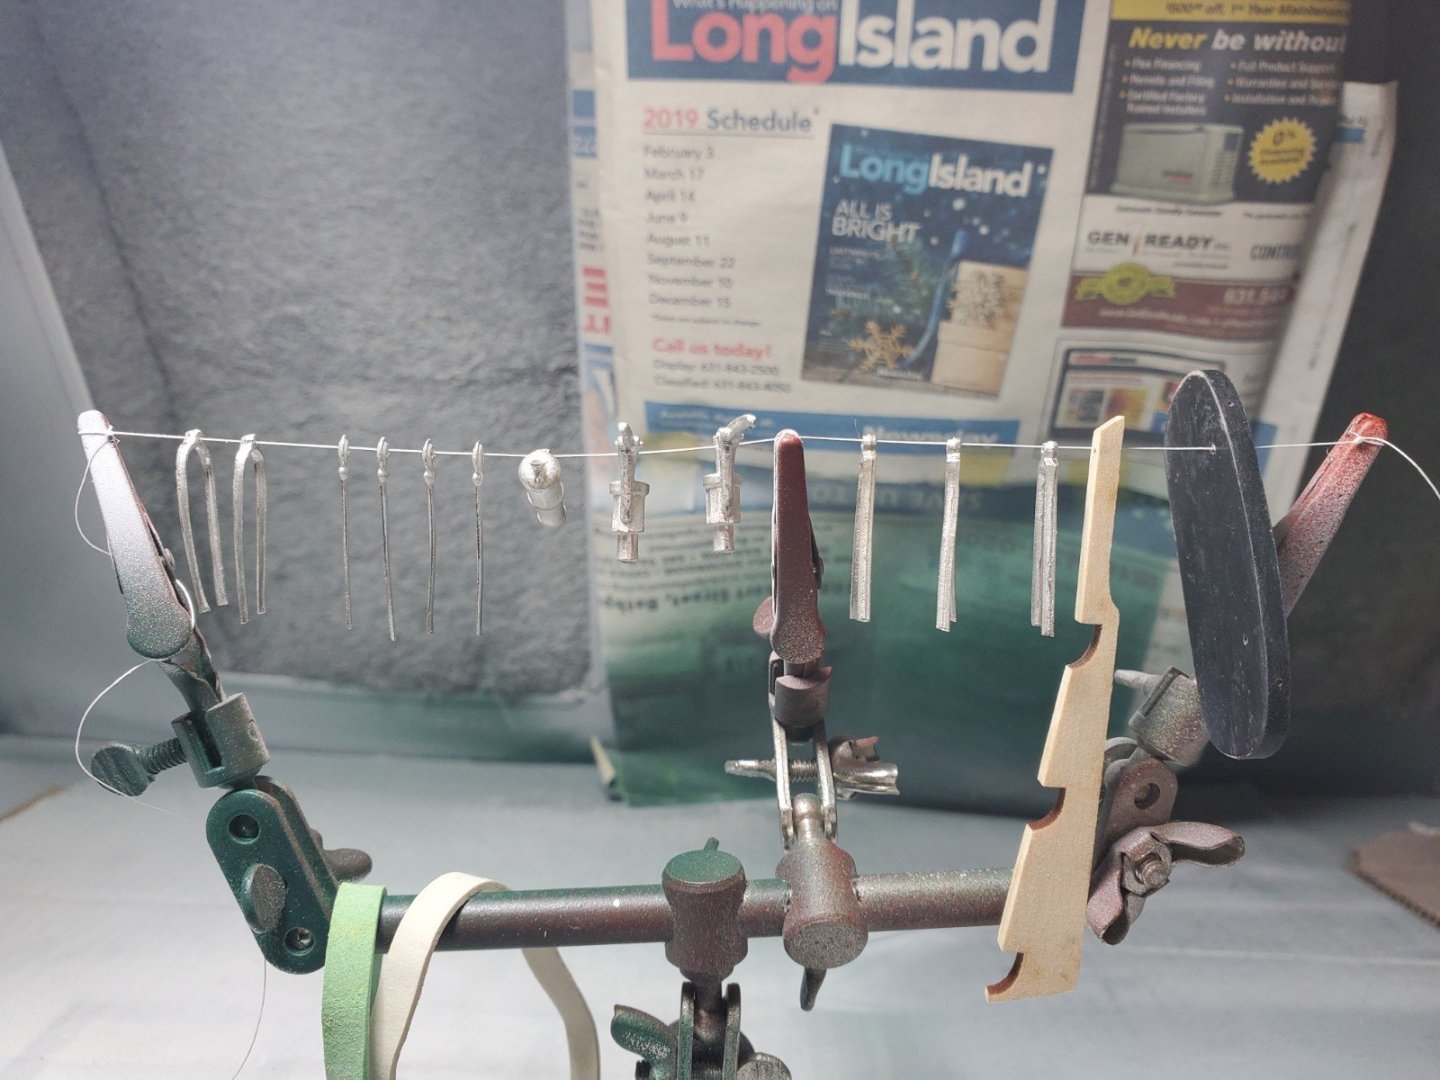
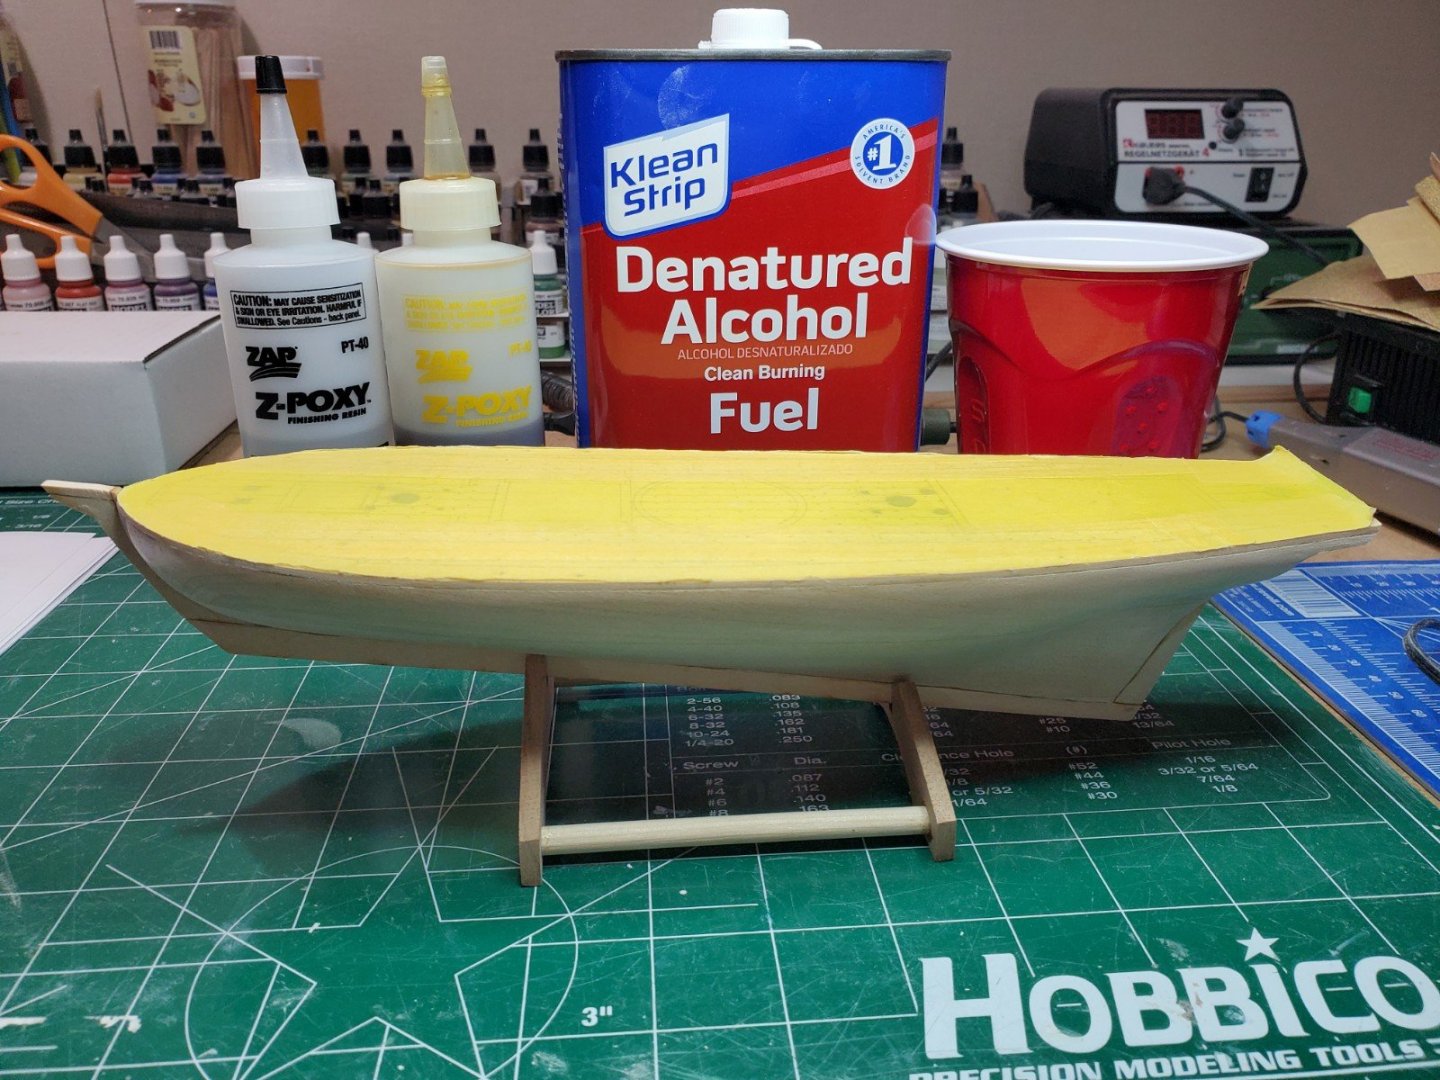
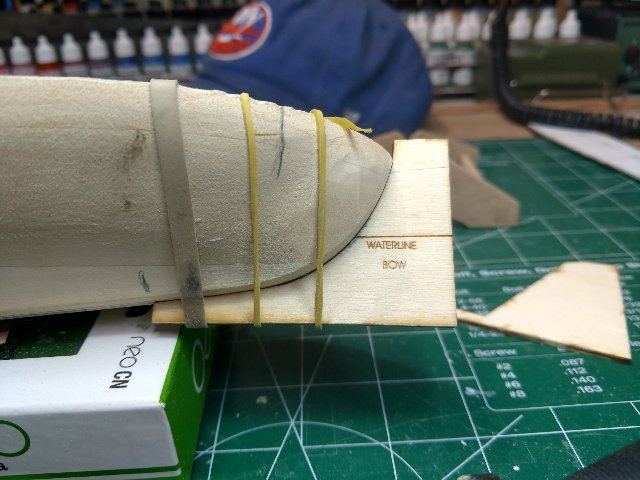
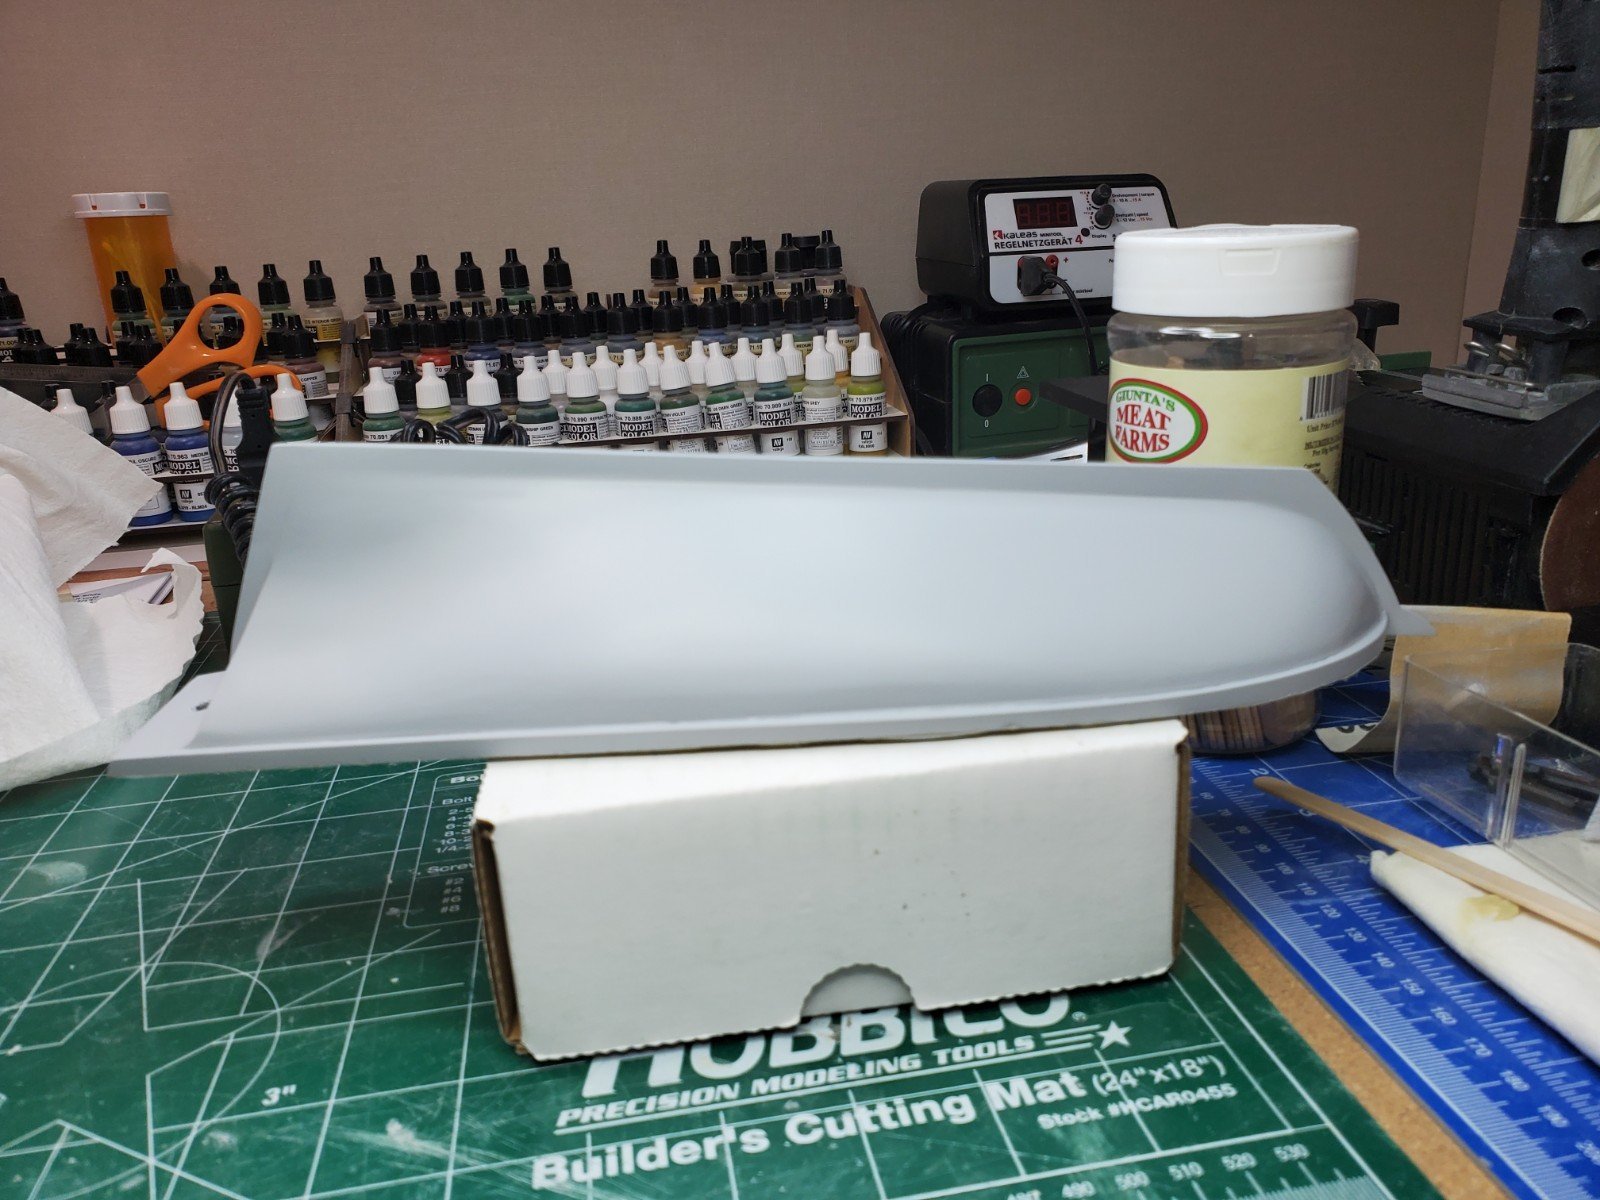
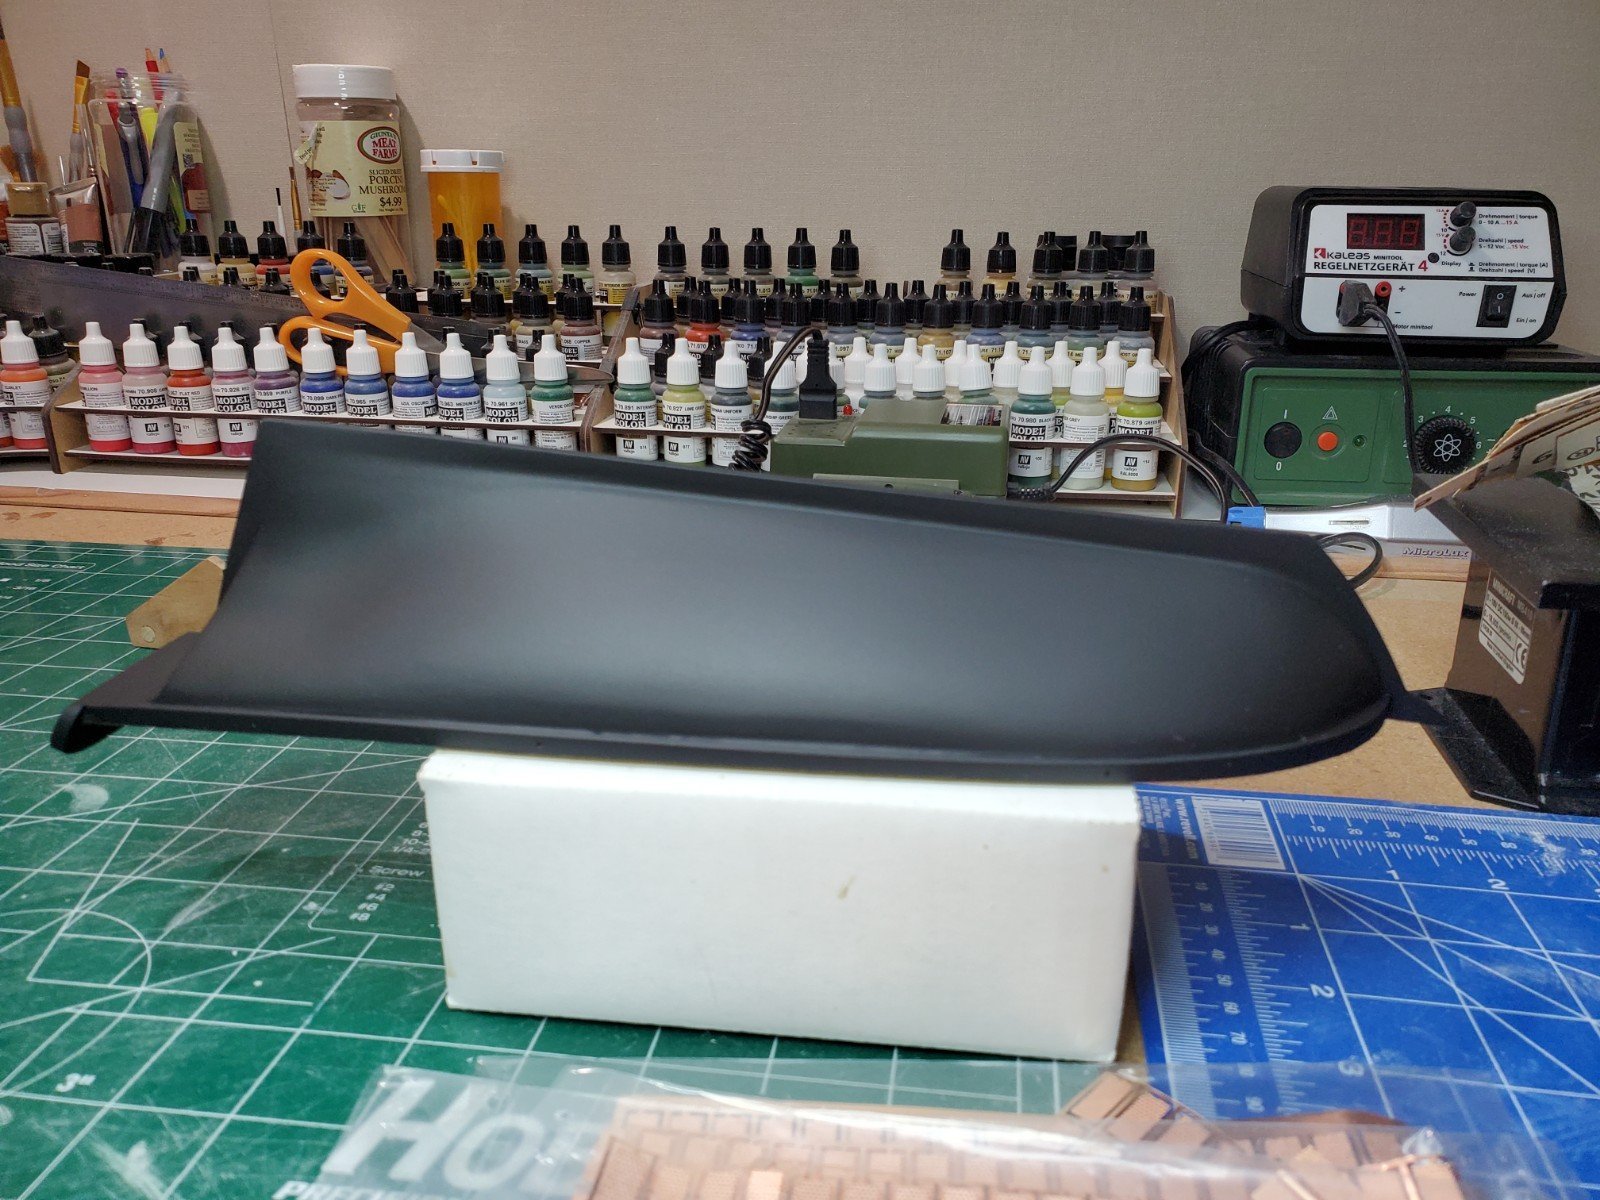
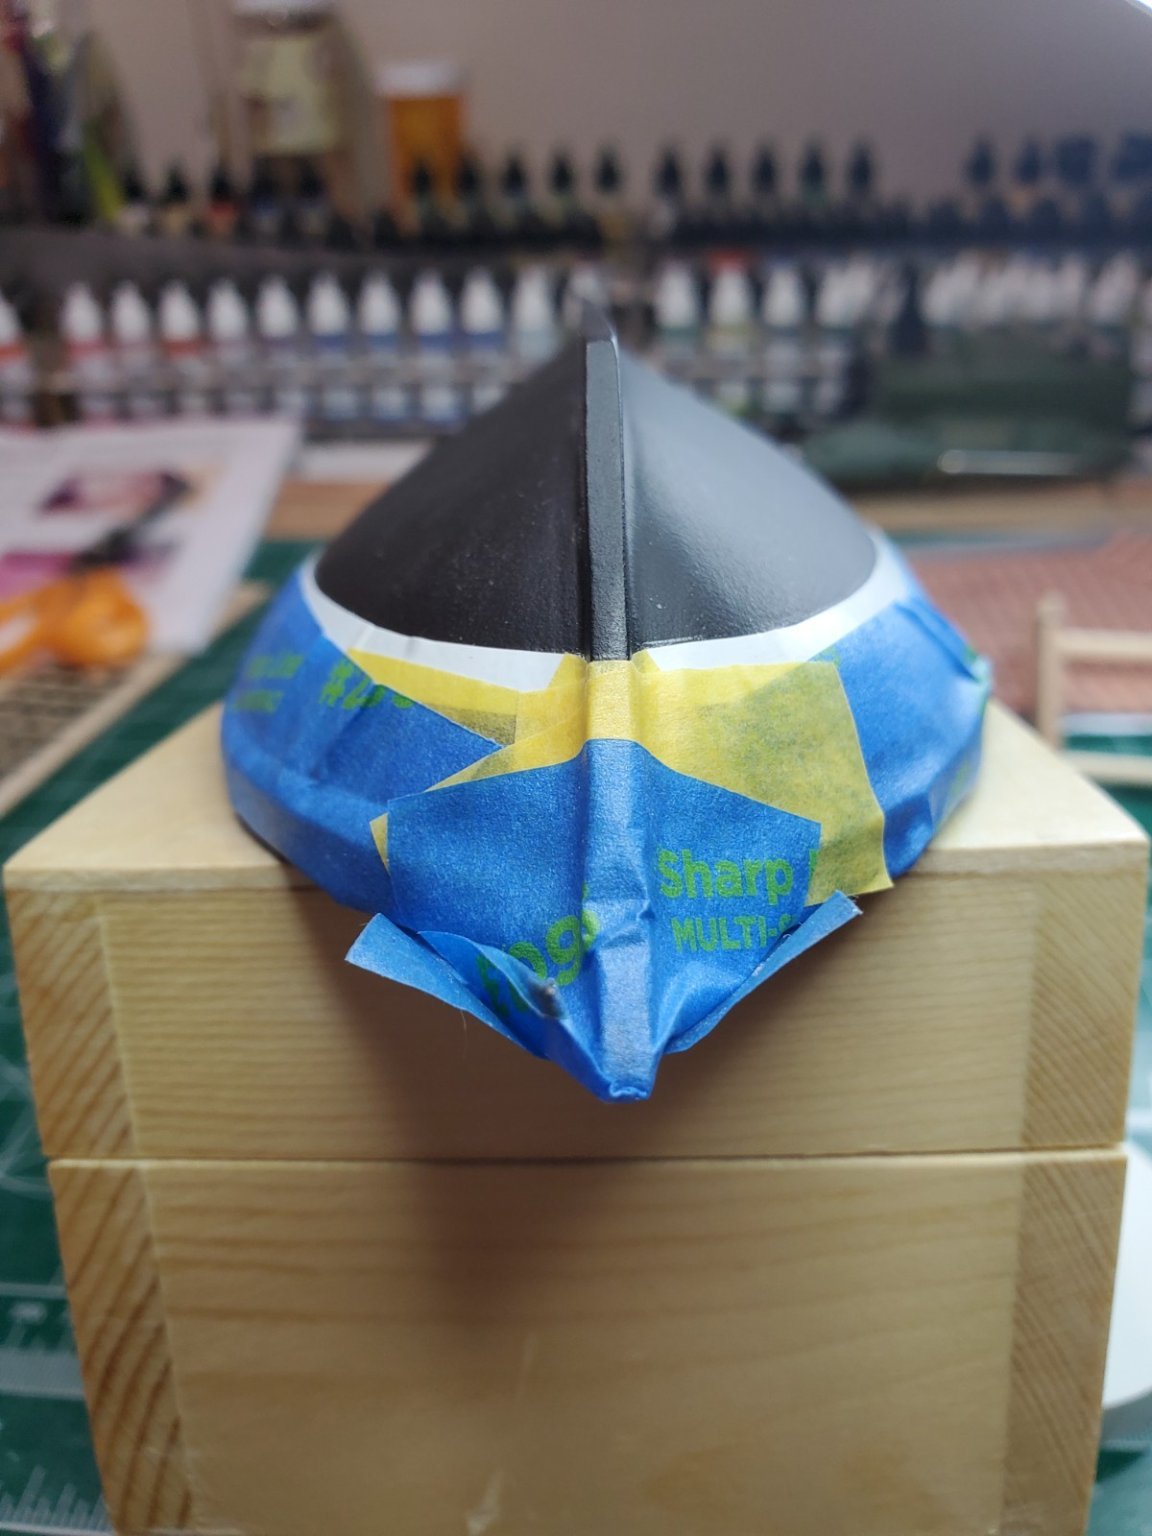
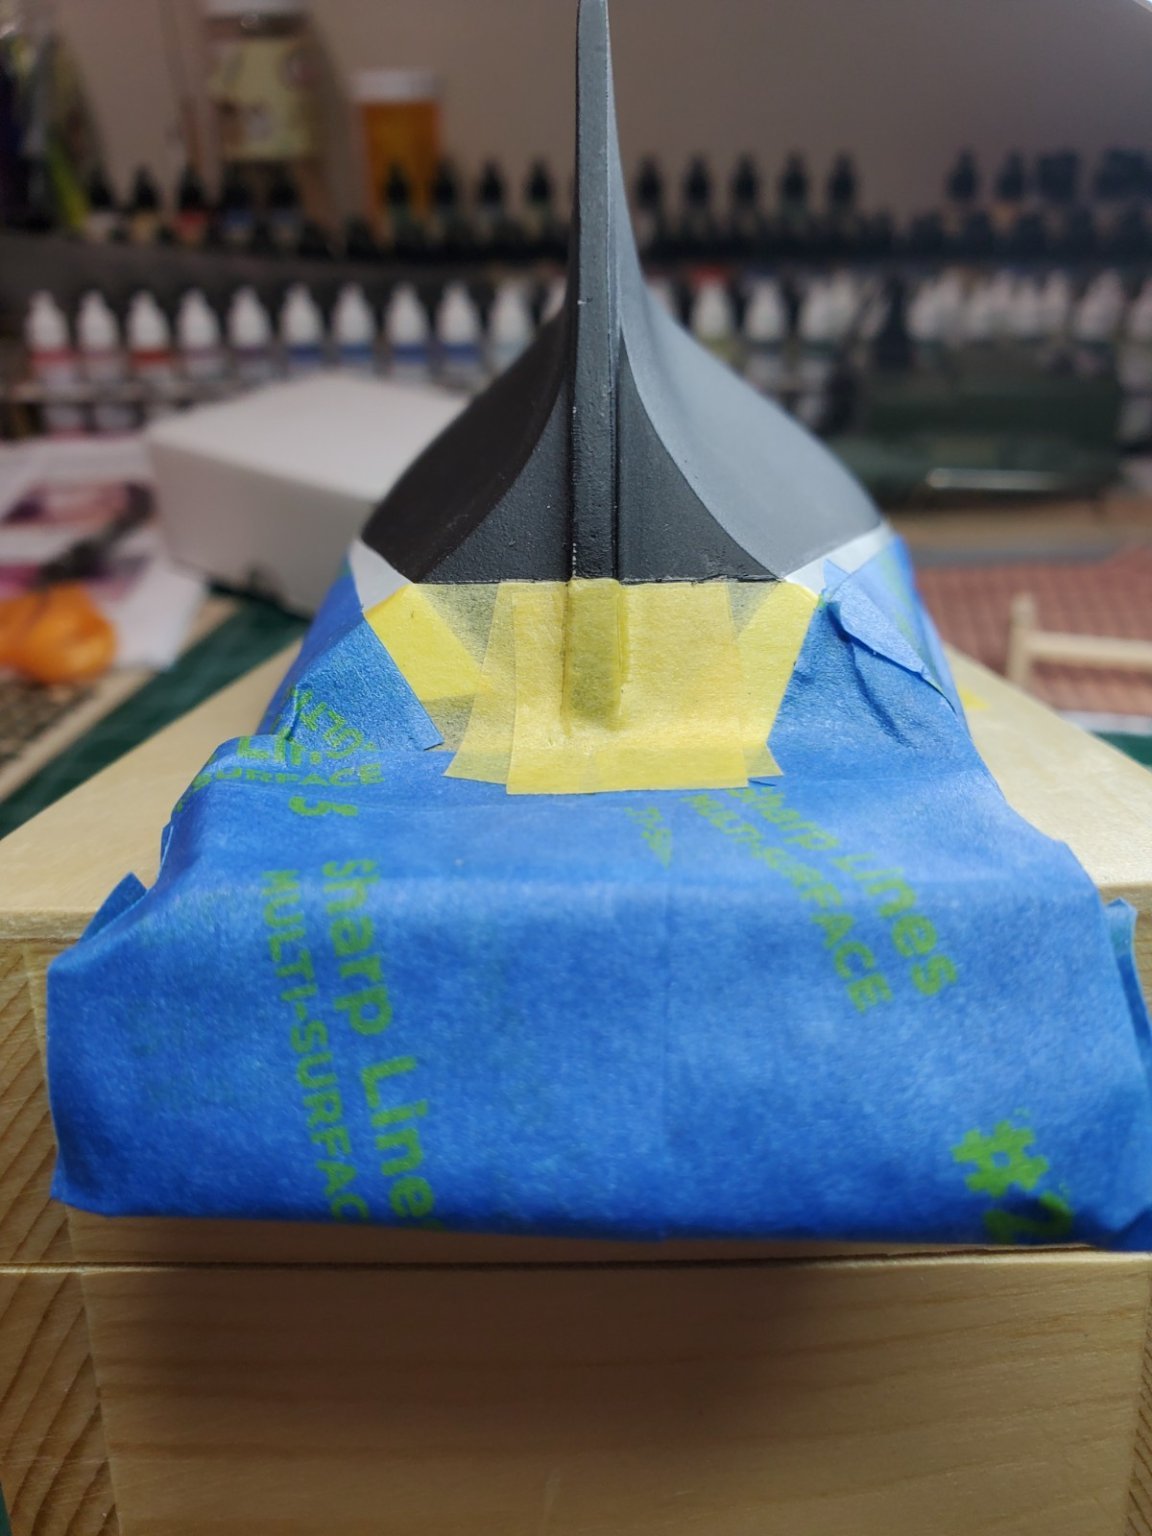
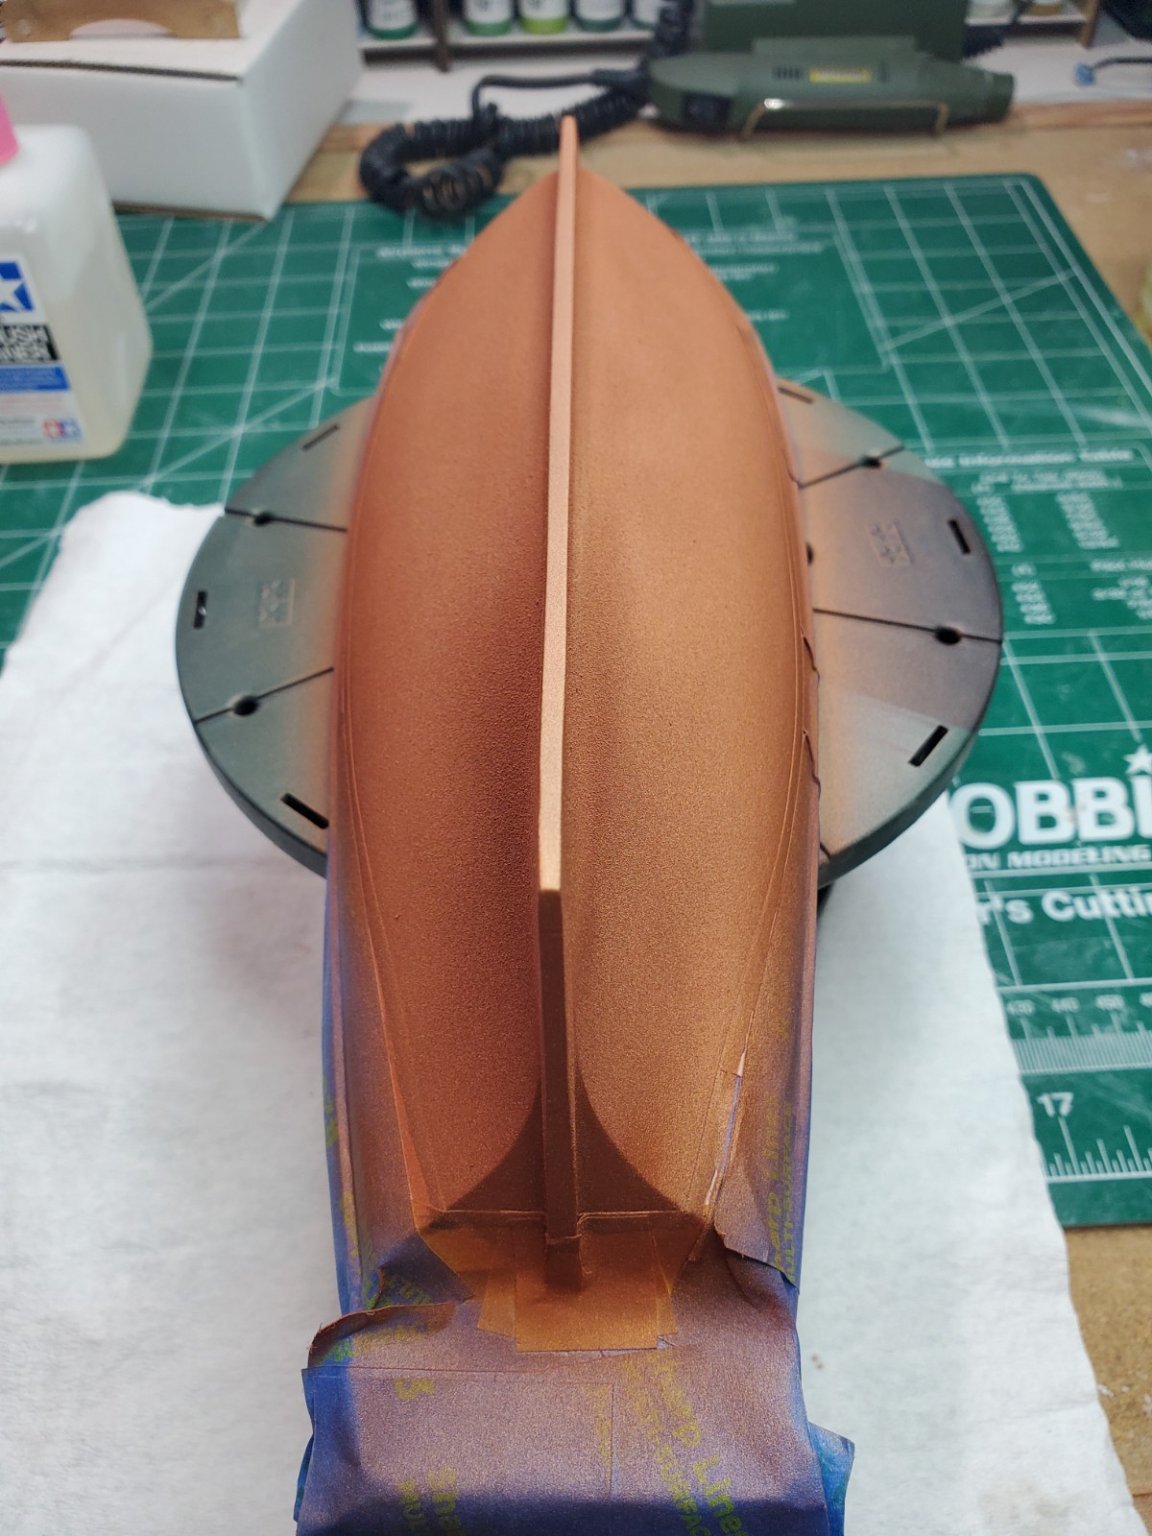
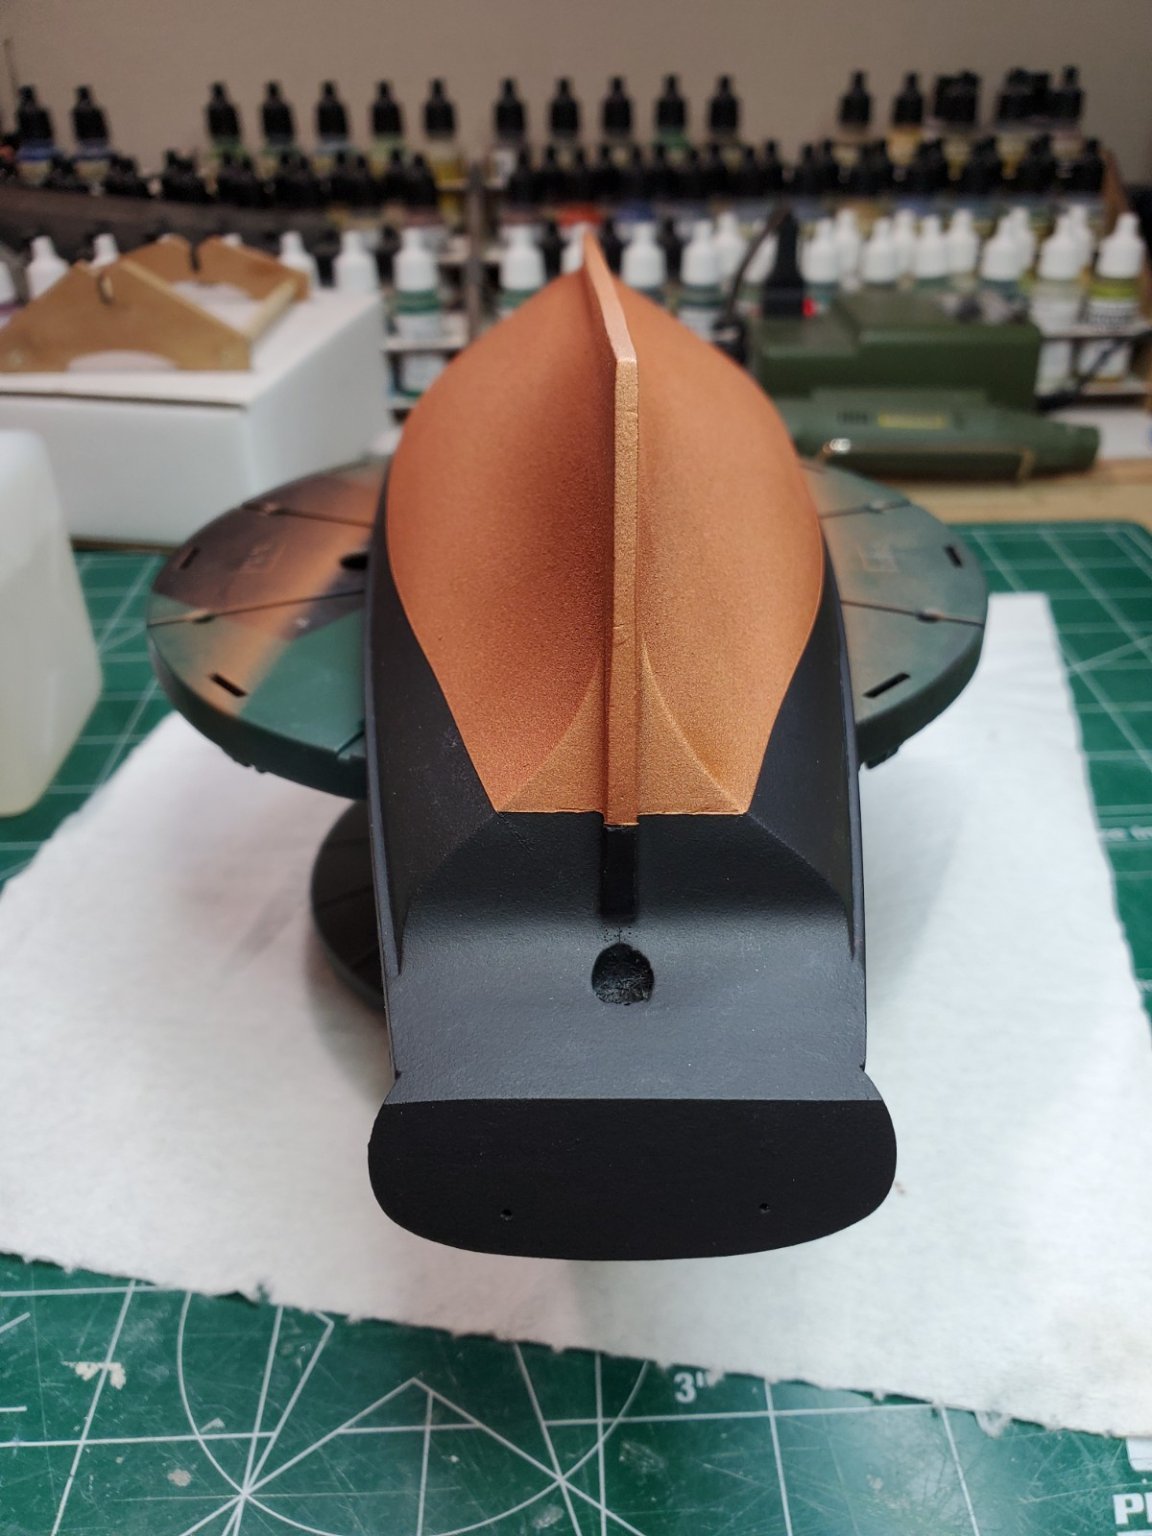
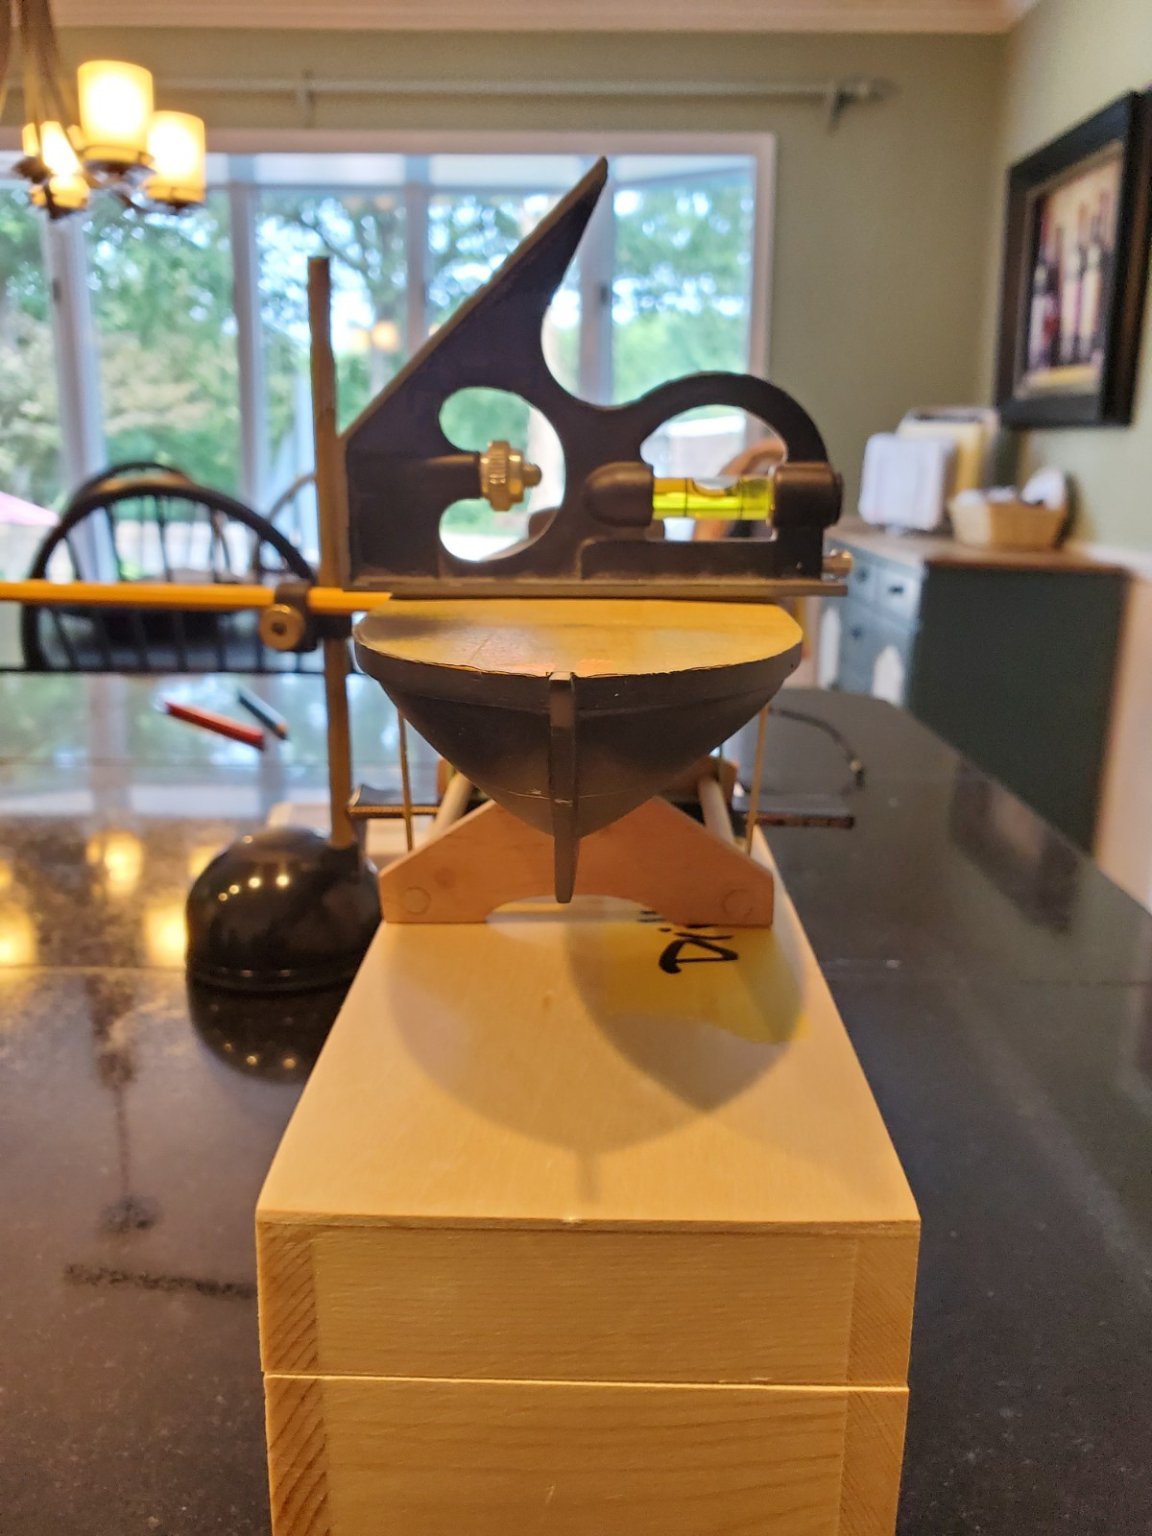
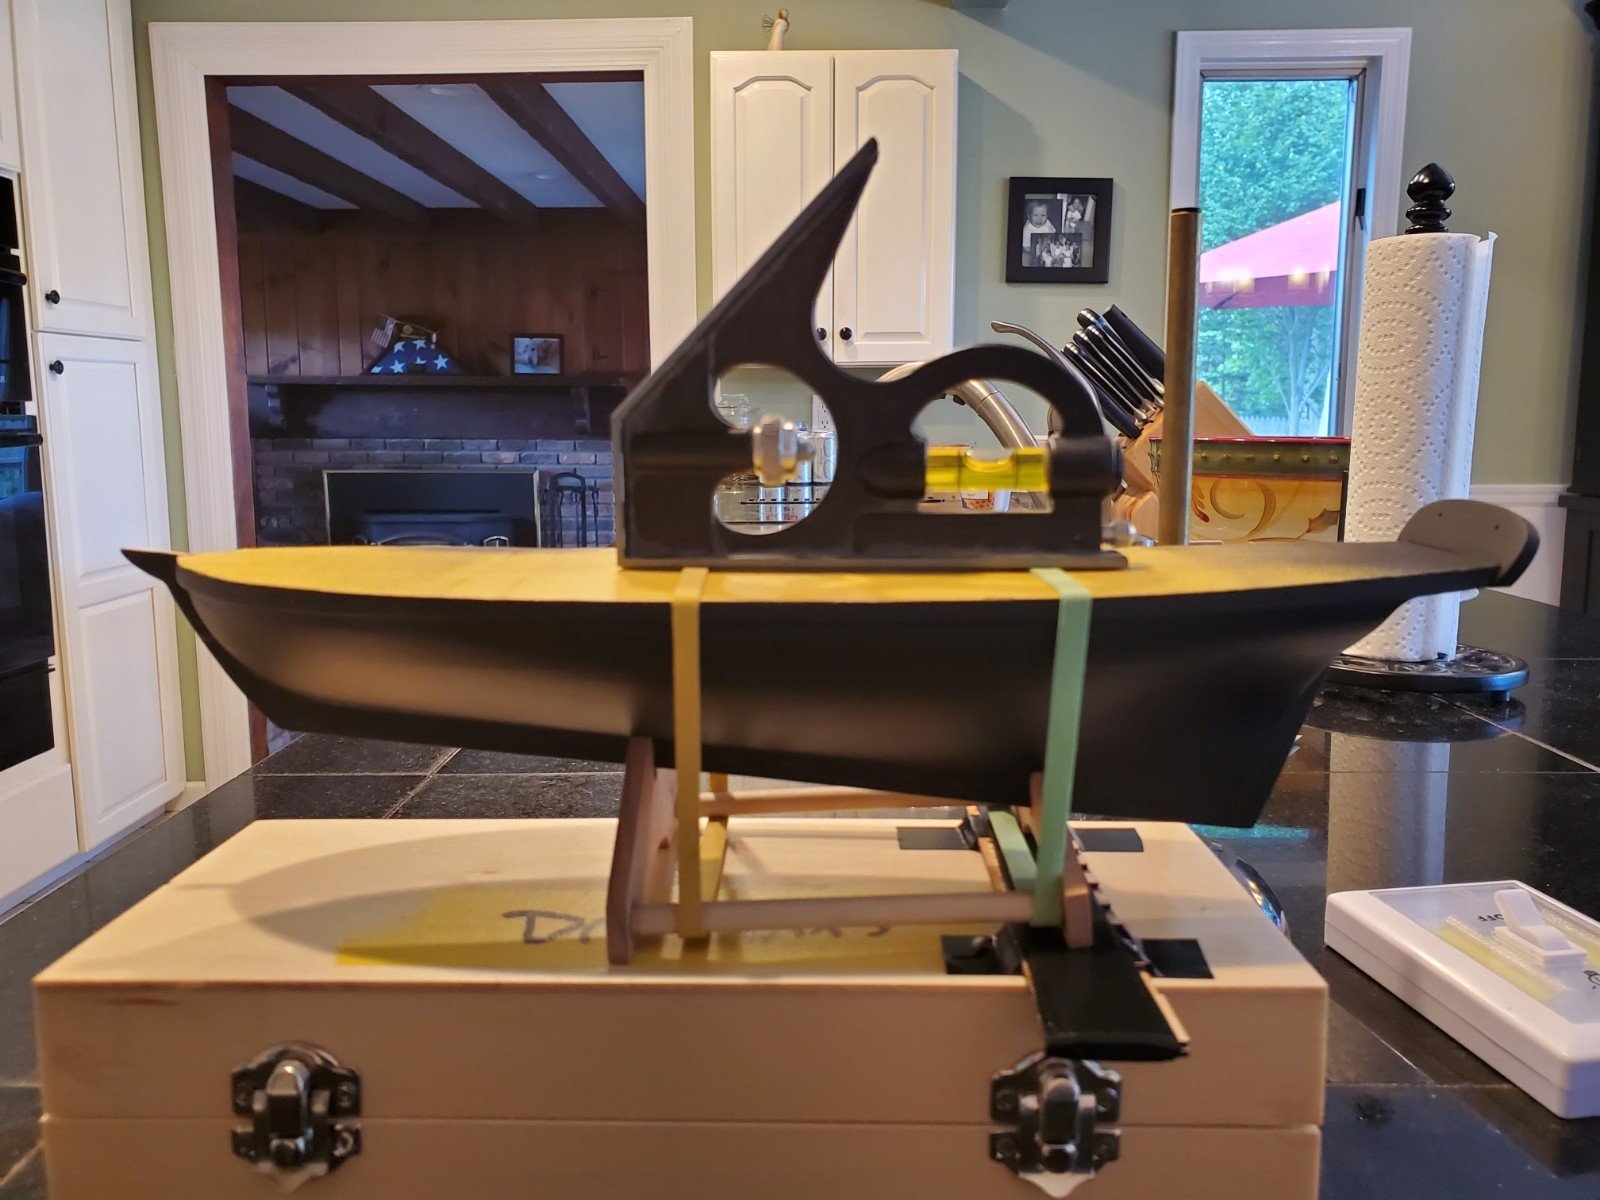
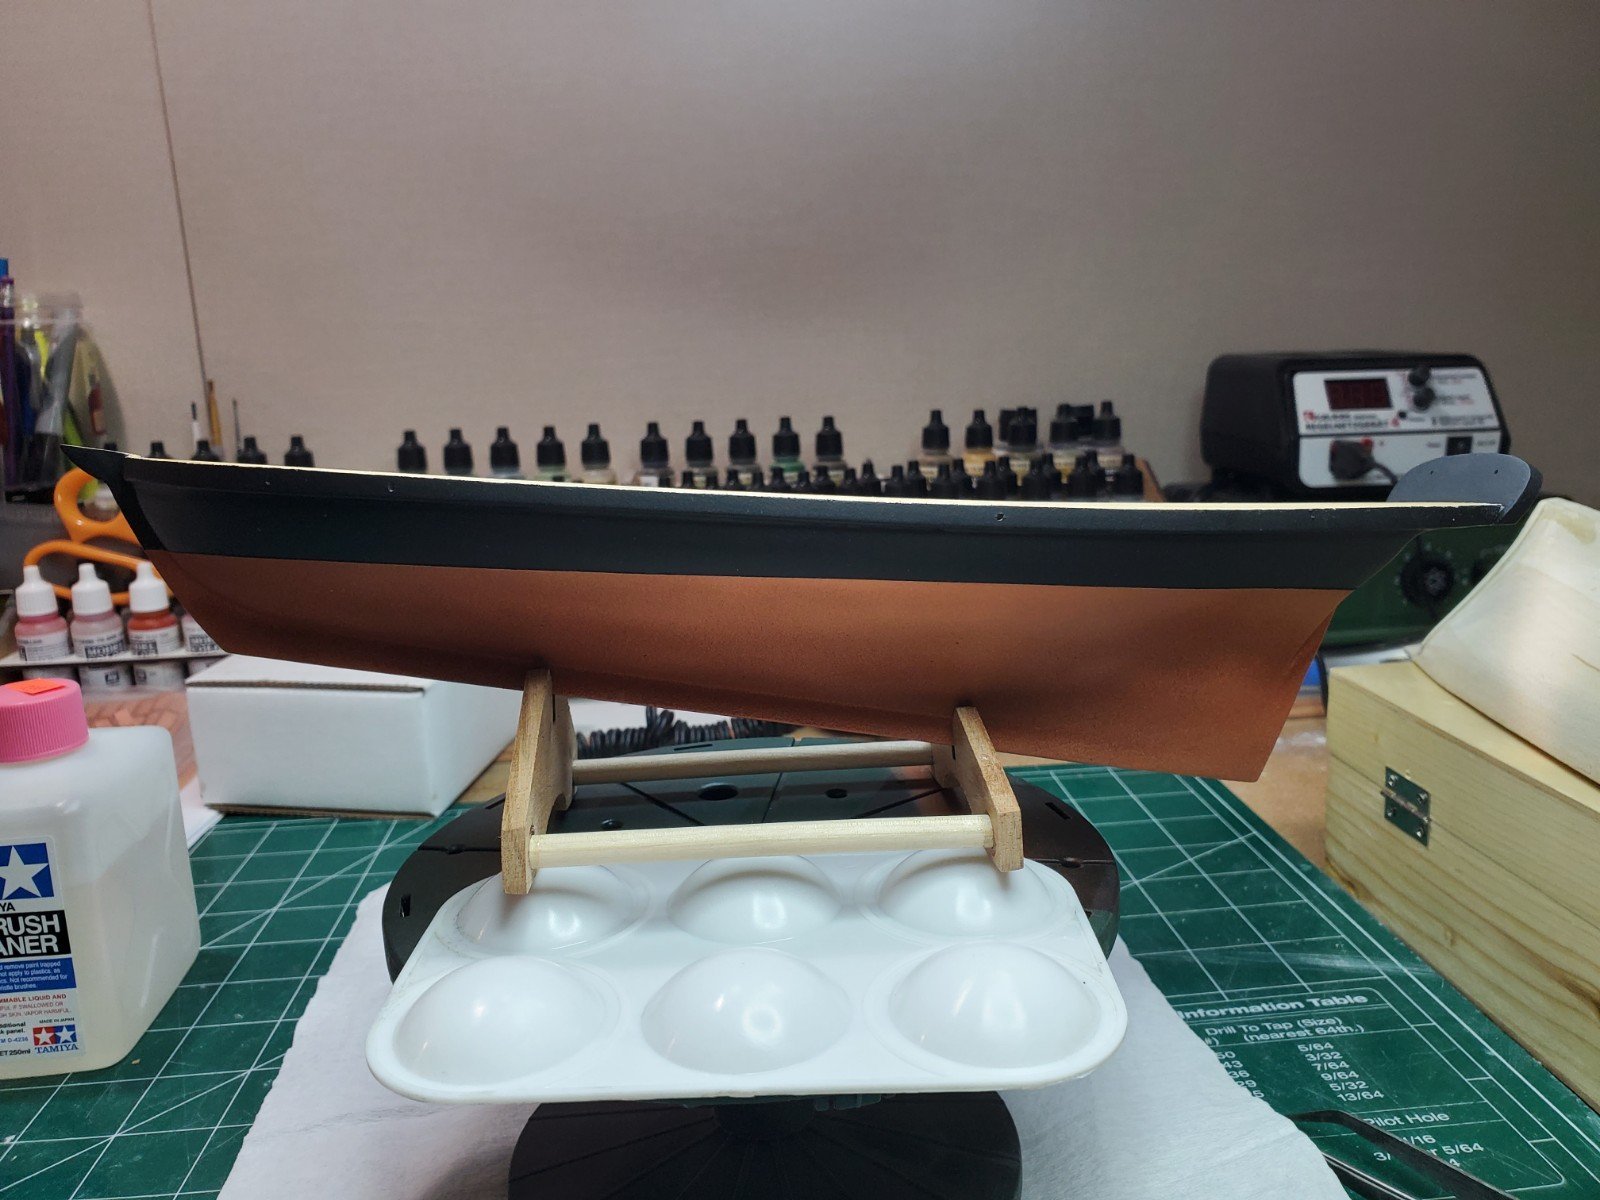
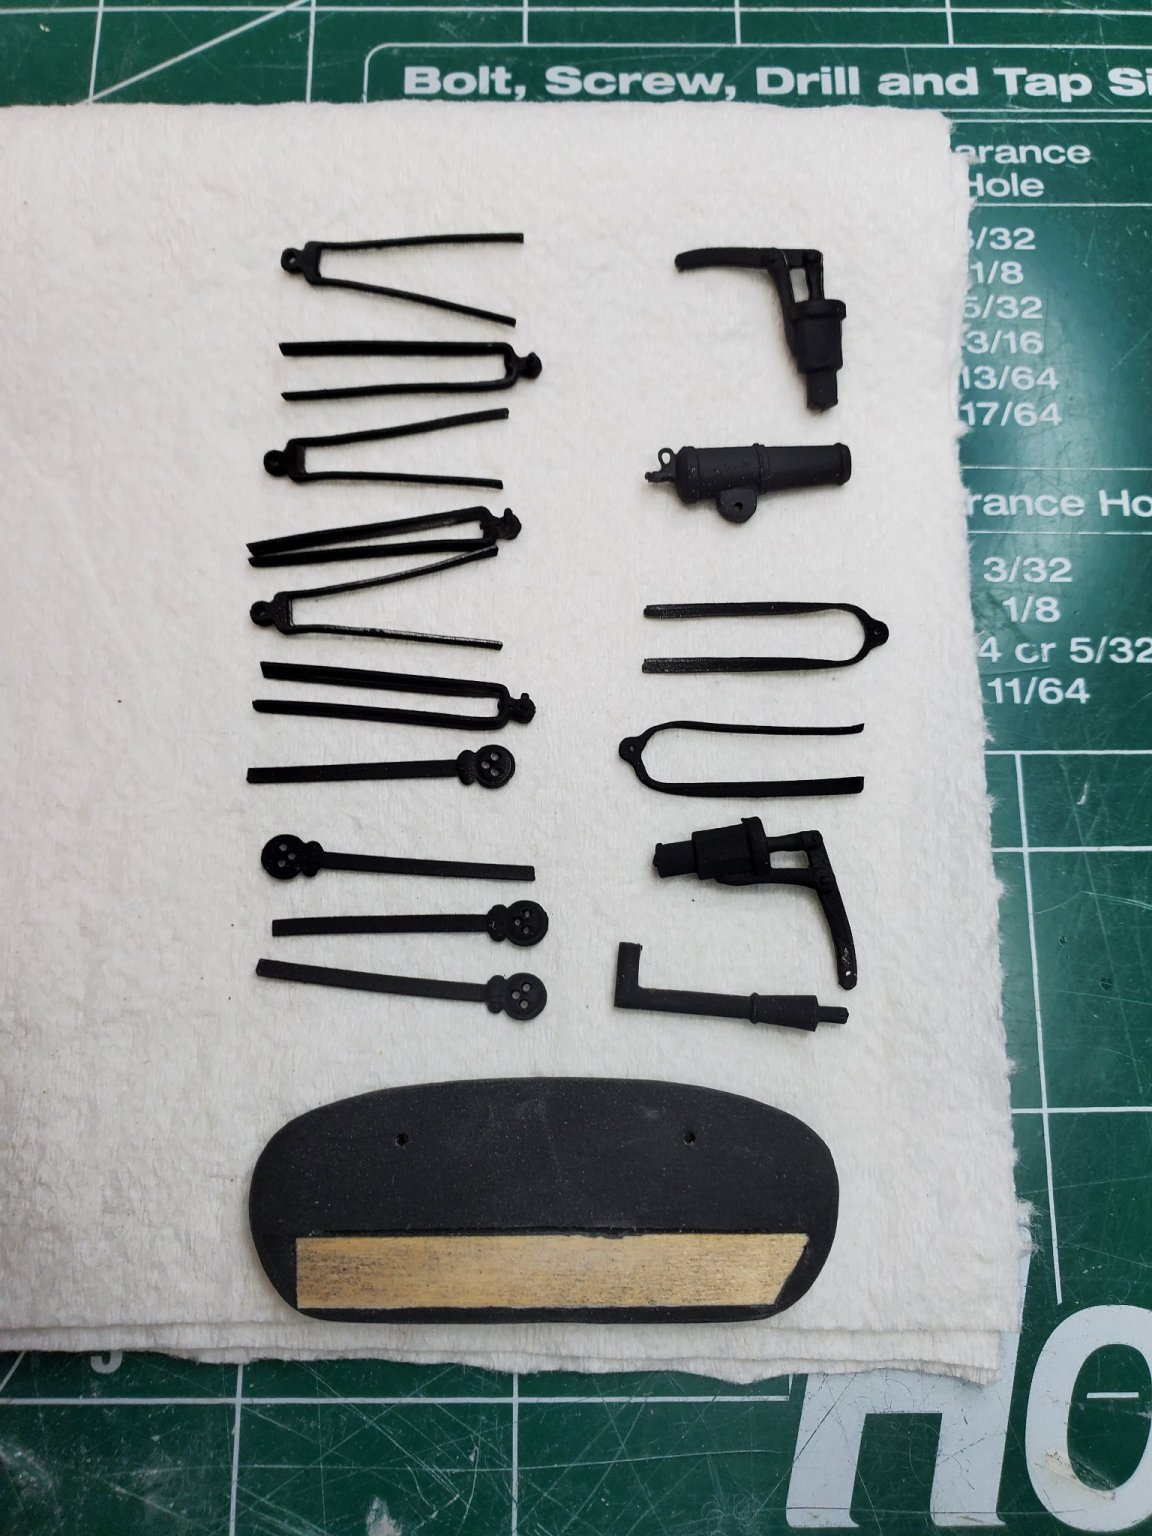
 Hello Folks, After several weeks I made progress on the hull of Revenue Cutter: I applied the final primer coat (Grey Tamiya Spray) I applied Testors Enamel Flat Black spray paint, I really like this paint. I am usually a Tamiya & Vallejo person. I also applied several coats of Tamiya Flat Clear to protect the finish, I learned this on my Yankee Hero Build. I then penciled out the waterline, I was concerned over using a pencil on the black hull, however it was a piece of cake. I could clearly see the waterline. The plans do a nice job at helping to determine where to locate the waterline on the hull. I needed to do the waterline on the only real level place in the house with a lot of natural light. Used my level to ensure the waterline was fair on both sides. Then it was on to the masking, I used something new; Tamiya flexible masking tape. It worked great, I was almost able to mask the entire side of the hull with one piece of tape. I used regular masking tape to mask above the waterline. I then applied a coat of Model Master Flat Black on the edge of the tape to create a seal to prevent the copper paint from going under the tape. I found the adhesion of the Tamiya tape to be on the light side, so I took the additional step that I learned from Blue Jacket. It hasn't failed me yet. I then sprayed the bottom of the hull with Model Master Enamel Copper with my Iwata Neo Airbrush. I am learning to get better with the airbrush, cleaning it is a drag however the results are well worth it I believe. I then unmasked it carefully. I am looking forward to copper plating the hull, I think the copper undercoat will hide whatever gaps I encounter on that journey. I am somewhat intimidated of plating the hull, especially because I do not have the steadiest of hands. I will give it a shot, I followed sjanicki's build to help along, as well as the links he posted in his awesome Revenue Cutter build. That's it folks for this post, onto reading about plating and checking some other builds with plating. I hope everyone out there in MSW world is doing well.


- 89 replies
-
- 9
-

-
- bluejacket shipcrafters
- revenue cutter
- (and 1 more)
-
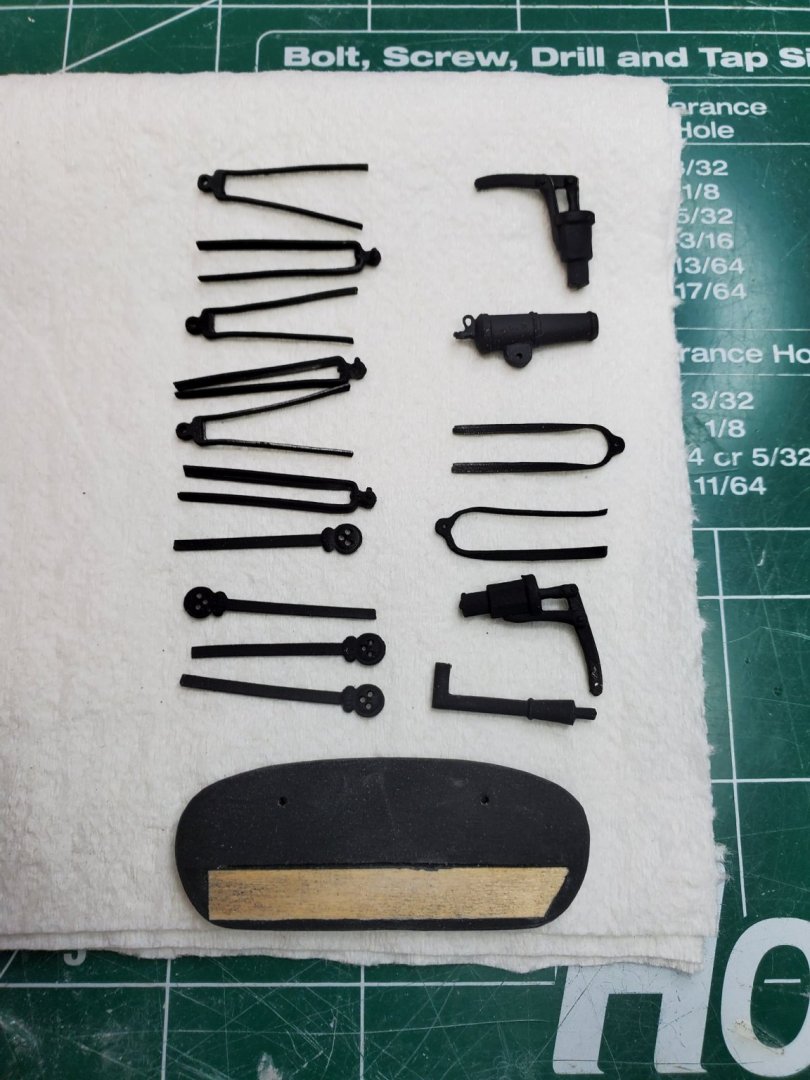
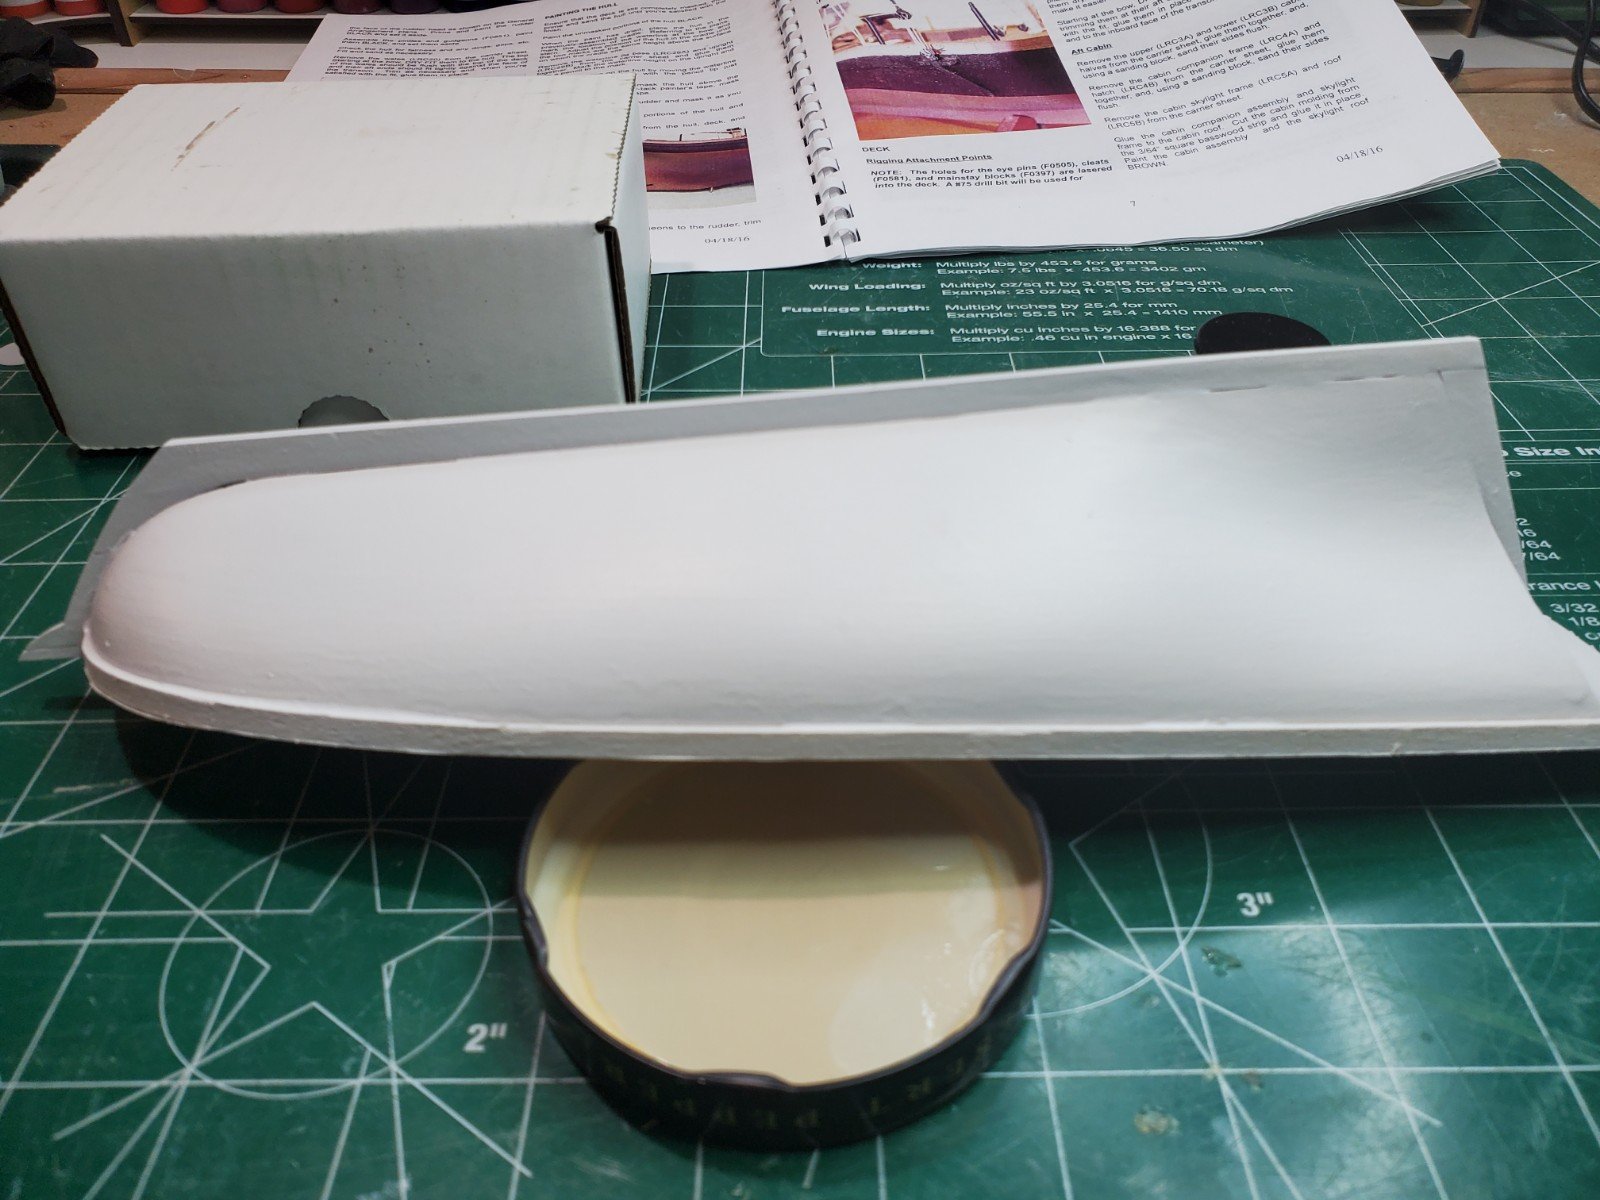
Hello Folks, It's been a while from my last post, I primed, puttied and sanded the hull 3 times. The first priming was pretty painful, the second better and the third a charm. Pretty monotonous work for three times however corrected a lot wrongs along the way sandpaper grit used #400, #800, #1500, #2000, #3000. Also I have completed painting several parts, prepared the transom and painted the rudder. Next Steps: Re-mask the deck again, the tape edges lost their edge during all the priming, sanding. Final Priming Affix the transom to the hull. Drill the holes for the for the channels and glue them in place. Paint the hull flat black with Model Master Flat Black Establish the waterline I will post again once I get though the above, enjoy the holiday weekend everyone! Bill T.


- 89 replies
-
- 4
-
-
- bluejacket shipcrafters
- revenue cutter
- (and 1 more)
-
No, it is always clean. Regarding the toe rail, same thing happened to me. I applied the toe rail fore to aft, and I just made a small piece of triangle basswood at the stern. I noted it in my build. It was a simple fix, barely noticeable. Good Luck, Bill T.
-
Hello Mike, A trick I learned from BlueJacket that work great for me is to apply a few coats of Flat Clear over tape edge of line you are painting. This will create a seal between the tape and the hull. It works flawlessly for me, I rarely have paint leak under the tape. It is an extra step however for me well worth it. Good Luck. Bill T.
- 81 replies
-
- 1
-
-
- Bluejacket Shipcrafters
- Yankee Hero
- (and 1 more)
-
Looks good to me, this is representation of some fine work. Can't wait to see the final pictures.
-
Hello Nic, I appreciate the time you took to respond. I will hopefully see you shortly (you know what I mean!) Thank you, Bill T.
-
Thank you, The comment is appreciated! All the best! Bill T.
-
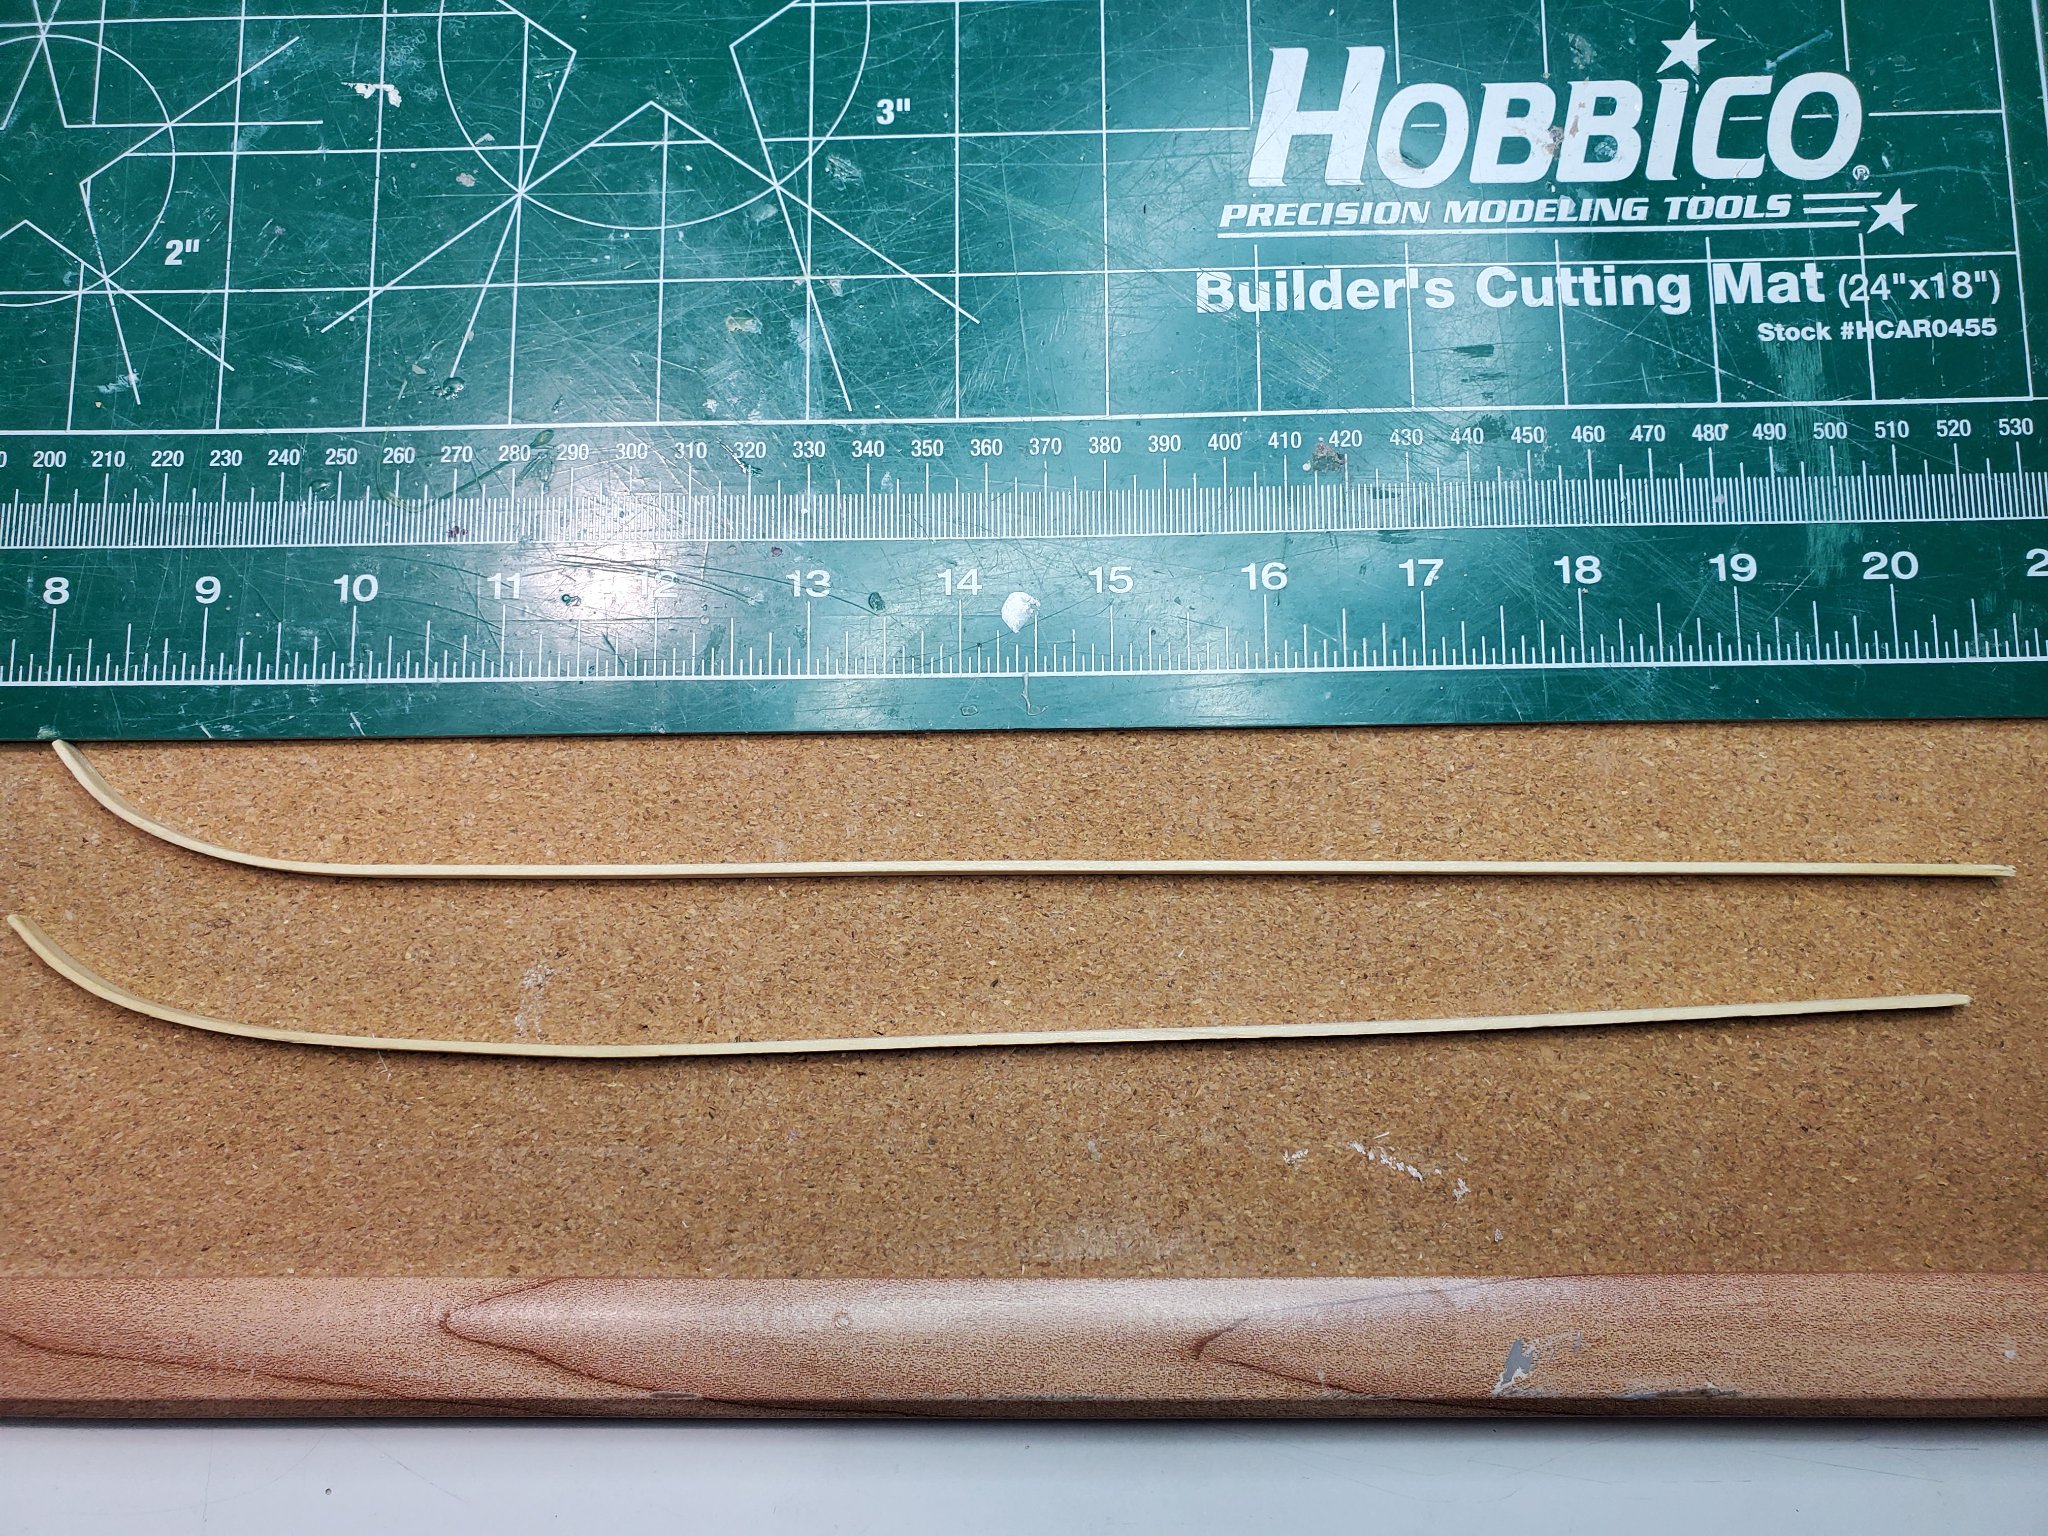
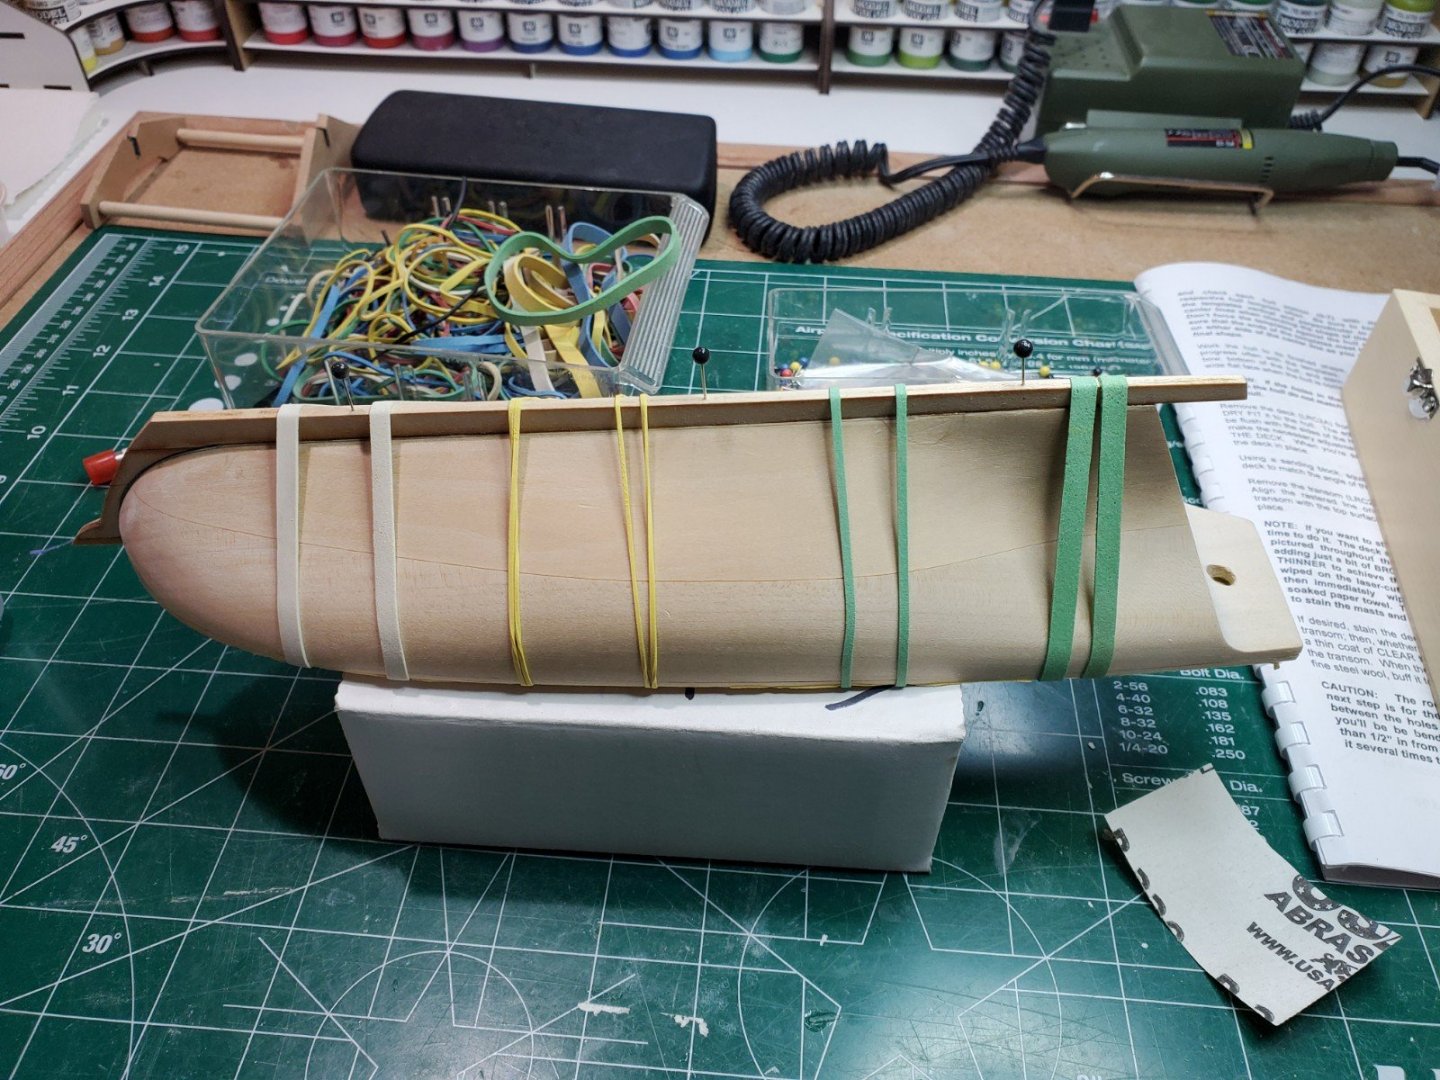
Hello Folks, I have a short post for the Revenue Cutter: As usual I strayed away from the kit manual, as stated in the past I will never win any awards for accuracy. I trashed my Blue Jacket wales by splitting them, so I hit my basswood wood shed (Model Shipways Niagara Kit abandoned 10 years ago). Pulled out two strips of 1/16 by 3/16 strips for the wales. In addition, I busted out my never used before Micro Mark plank benders (steam based benders) for the wales to bend for the bow portion. I was very happy with the results (see below), also it added I believe a more prominent set of wales for detail purposes. The small gap between the hull and the wales at the bow portion will be addressed when affixing the toe rails to the hull, no worries there. I then stained the top portion of the wales once affixed to the hull to match the deck color. After that I did my usual, added thinned down Finishing Resin to the wales to prevent denting and splitting. Next steps: The punishing first coat of priming to find the dents. Filling dents with putty, sanding for two/three runs until I get it right. Finally painting with Model Master Enamel Paints supplied with the kit. I need to look up the paint to thinner ratio for airbrushing for Model Master Enamels as I am usually a Acrylic Paint fan. I am thinking probably a 2/1 or 3/1 ratio, I am a rookie at Enamels with airbrushing. Any help would be appreciated. Thank you all, Bill T.
.thumb.jpg.07fa977004a74f8f88c9f37372a99043.jpg)
.thumb.jpg.ea89581475fd09f7cfe118a3516c57df.jpg)
.thumb.jpg.93e65b9123e20c2a33f71d7d949ab64d.jpg)

- 89 replies
-
- 5
-
-
- bluejacket shipcrafters
- revenue cutter
- (and 1 more)
-
I wish I had a nickels for how many times I did that to my builds, I busted my door too (LOL) on the Yankee Hero. With all the fine work you have done to date it will be lost in the finished build I believe. The stand looks great, I added felt from Michaels too lessen scratches on the hull once painted. Also, I forgot I applied 2 coats of Tamiya flat clear spray onto the hull to prevent chips later on the build. Also I used Acrylics (Tamiya) versus enamels, enamels I read have better adhesive characteristics. I am trying enamels on my current build Revenue Cutter (Model Master) shortly, I will learn as we all do moving forward. Bill T.
- 81 replies
-
- 1
-
-
- Bluejacket Shipcrafters
- Yankee Hero
- (and 1 more)
-
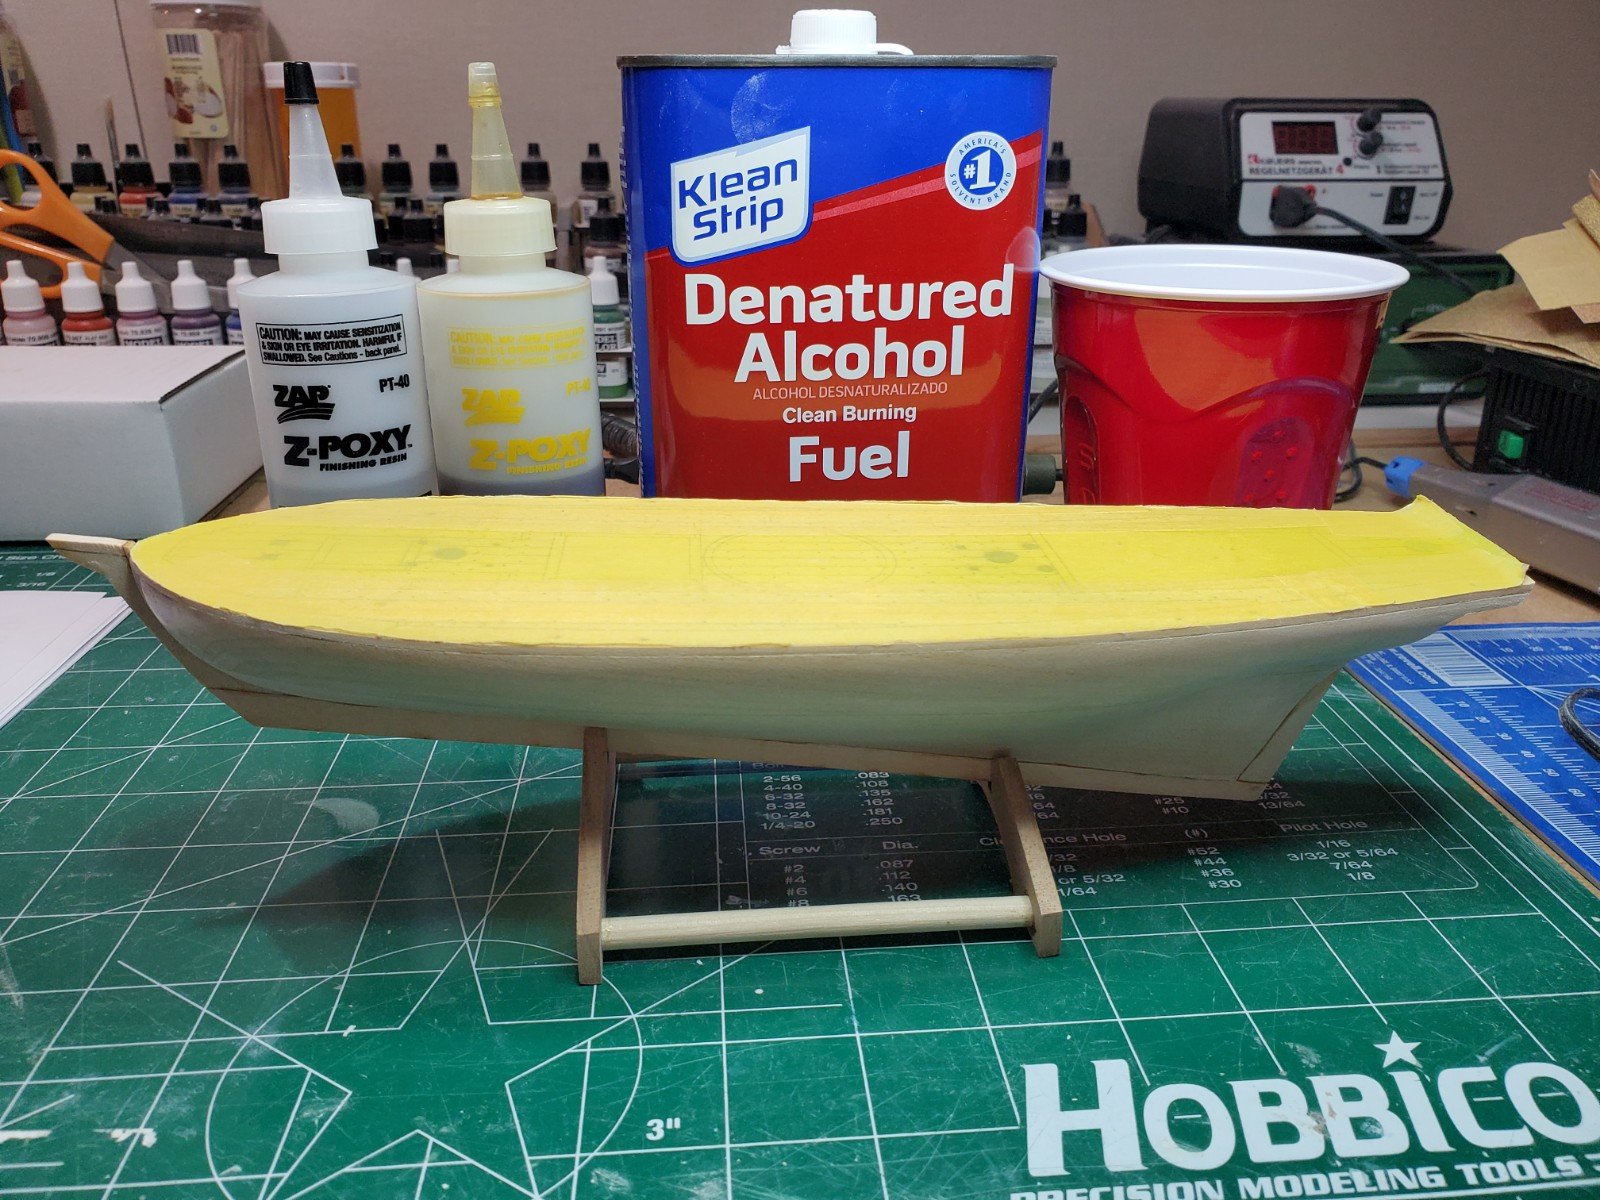
I use ZAP for my finishing resin because it is readily available, however there are others available that work just as well. Make sure you thin it with denatured alcohol. Mix the 50% Hardener and 50% Resin, once you have that mixed then mix it 50% Resin mixture and 50% Denatured Alcohol (Use a "Solo" cup, it doesn't melt). Also when mixing the denatured alcohol the mixture should fog up, don't worry about that it will subside as you continue to mix. Remember, one coat the penetrate the wood (let dry completely) and another to fill in small imperfections. Than I prime and sand down, look at my build post (Yankee Hero) for specifics. I hope this helps! Onto my Revenue Cutter! Bill T.
- 89 replies
-
- 3
-

-
-
- bluejacket shipcrafters
- revenue cutter
- (and 1 more)
-
Also on the stand I added felt to where the hull meets the stand to prevent scratching the hull after painting.
- 81 replies
-
- 1
-
-
- Bluejacket Shipcrafters
- Yankee Hero
- (and 1 more)
-
Hey Michael, Don't sweat the rigging, make sure you use the correct diameter thread (unlike I did) for each step. To facilitate my rigging I take a lot of time to make sure my blocks are set to my spars and mast prior to affixing them to the boat. Also make sure the holes in the blocks are 100 clear (nothing worse than clearing block holes when already affixed to the boat), I run the ends of my lines through some thin CA to produce a needle affect, I also cut the end on angle so it is a little sharp. The other step a take is I do not secure knots on my Running Rigging with CA until all rigging is complete to make sure all appropriate line are proper tightness. Also as noted above, I always set my standing rigging first witch is only 2 lines. Check out Blue Jacket, they offer a rigging class that I have attended twice, worth every penny and pretty fun as well! Hopefully they will have another class once it is safe to do so.
- 81 replies
-
- 1
-
-
- Bluejacket Shipcrafters
- Yankee Hero
- (and 1 more)
-
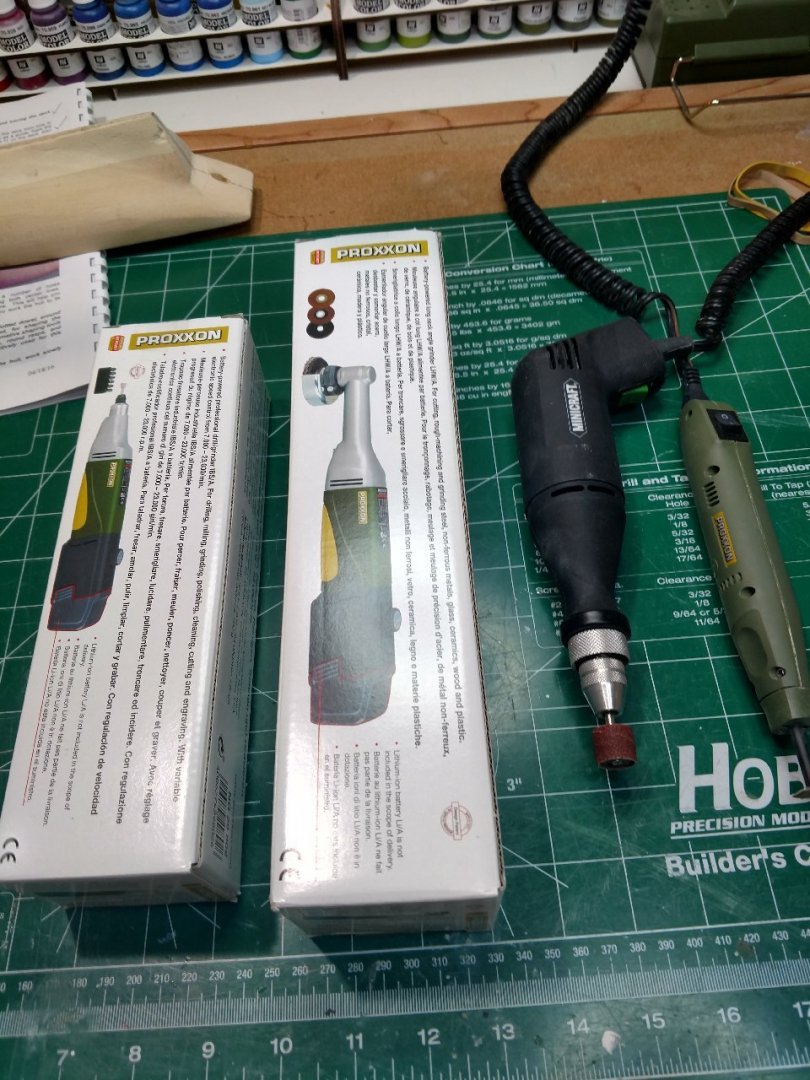
Hello MichaelW, A little pricy, however top notch quality. I find I get what a pay for, the belt sanders already has saved me hours of sanding. Especially since I take an extra step to harden the wood with thinned finish resin to prevent dents from occurring once painted. The Proxxon tool I use the most is the Pensander (PS 13), it is fantastic. If you decide to get the Pensander I recommend you order additional sanding pads. Good luck, your build is coming along well. Bill T.
-
Looking good my friend, you got this. The rudder looks good as well.
-
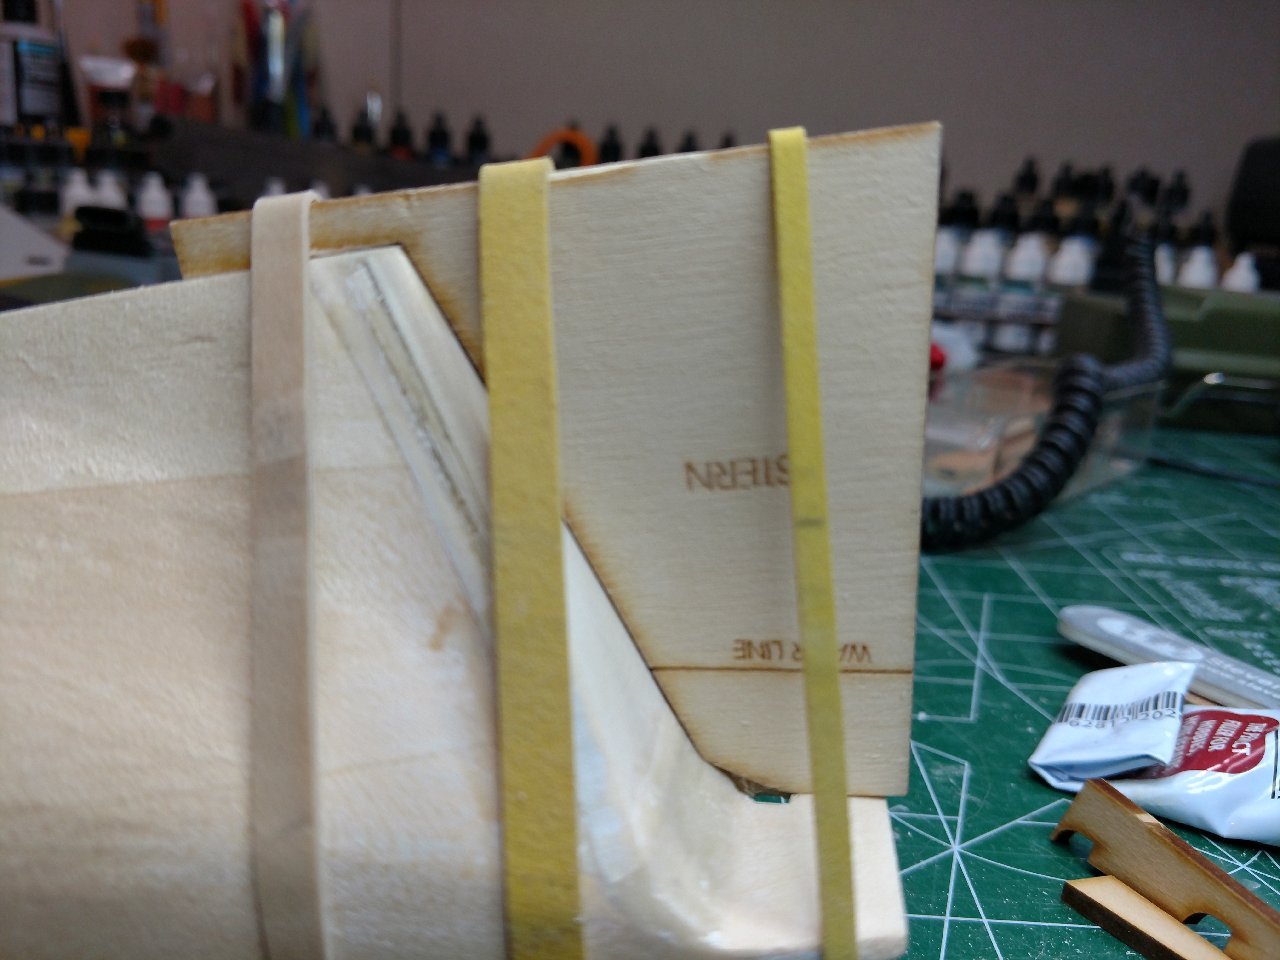
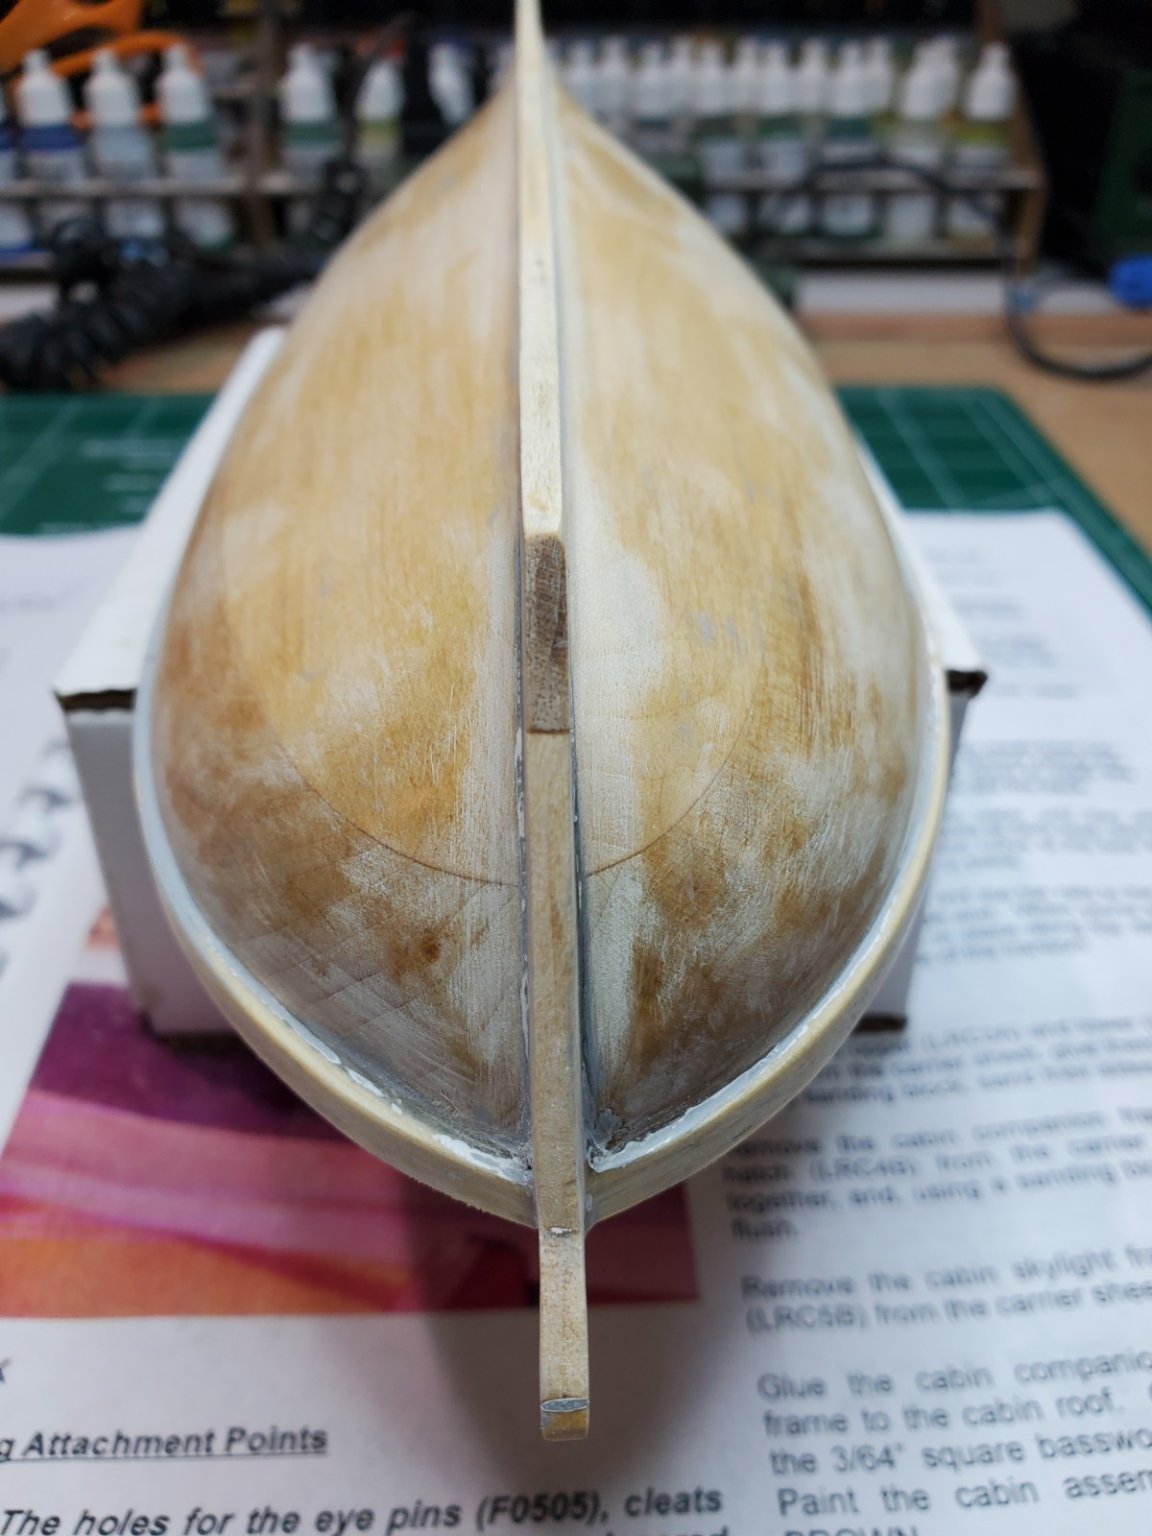
Hello Folks, Finally I was able to accomplish some important steps to prior to copper plating the hull: Added all of the keel portions to the hull. Added a small piece wood the stem the ensure the bowsprit will sit directly on the stem. Added 2 coats of Finishing Resin diluted with Denatured Alcohol to harden the wood and fill in minor dents. I needed tape off the hull close to where the deck meets the hull to unsure no resin penetrated the deck. This would prevent stain from penetrating the deck which would have been problematic. All good there. Next Steps: Sand down the hull again. Add putty to appropriate areas of the deck. Sand hull again, prime the hull, finish the hull, stain the deck with Miniwax Cherry stain. Some Pics below: Stay safe folks, Bill T.


- 89 replies
-
- 6
-
-
- bluejacket shipcrafters
- revenue cutter
- (and 1 more)
-
Hello Mike, I finished this Yankee Hero earlier this year, it is a great kit. I did a log for it as well on MSW if you wish to learn from some of my mistakes. I was very pleased with the finish product. Also, do not hesitate to contact me with any questions. I will be following as well if you have any questions. Good Luck and enjoy! Happy New Years! Bill T.
- 81 replies
-
- 1
-
-
- Bluejacket Shipcrafters
- Yankee Hero
- (and 1 more)
-
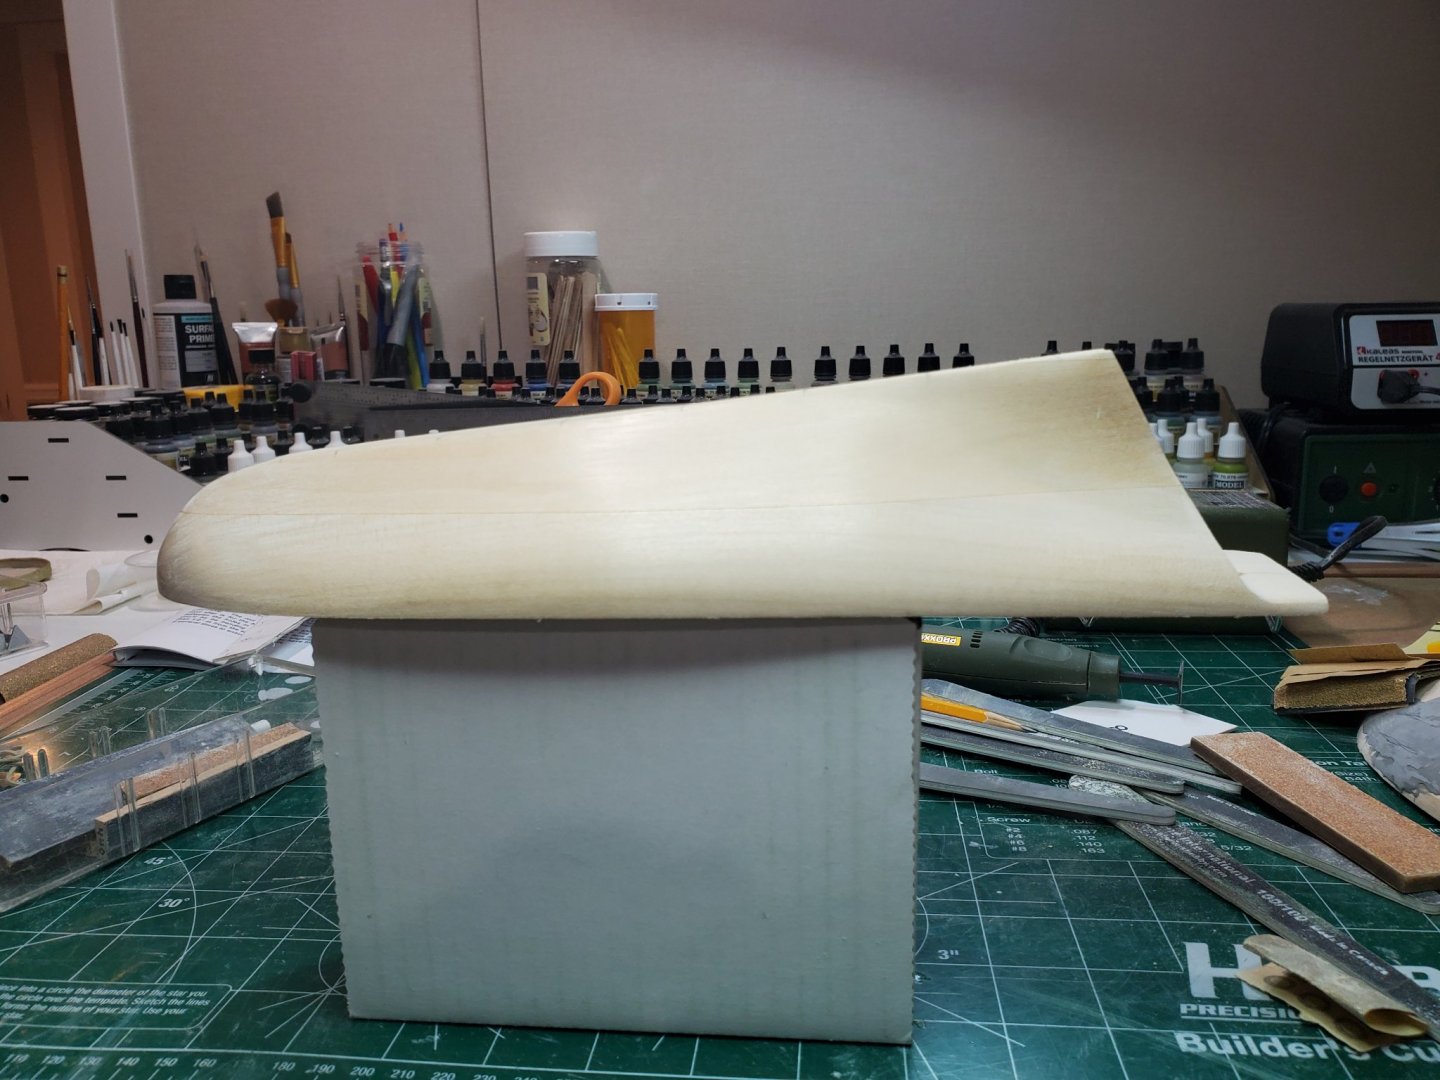
Hello All, I hope this post finds everyone well. So I finally caught up to where I left off when I received a new hull from Blue Jacket after trashing my original hull. I am very pleased with the result. Some observations: Believe in the stern and bow wooden templates to the shape of the hull. Getting the "bulkhead" templates to an average 90% accuracy worked well for me. Next steps: Apply the keel which fits well, already dry fitted it. Apply 2 coats of finishing resin to harden the wood and prevent dents moving forward. This is an extra step that I like to do, not only does it prevent dents and scratches while working on the hull, the capillary action of the resin fills in several minor scratches and dents. It worked great on my Yankee Hero, a little more work though. Below please find some pictures, Thanks everyone, Bill T.


- 89 replies
-
- 5
-
-
- bluejacket shipcrafters
- revenue cutter
- (and 1 more)
-
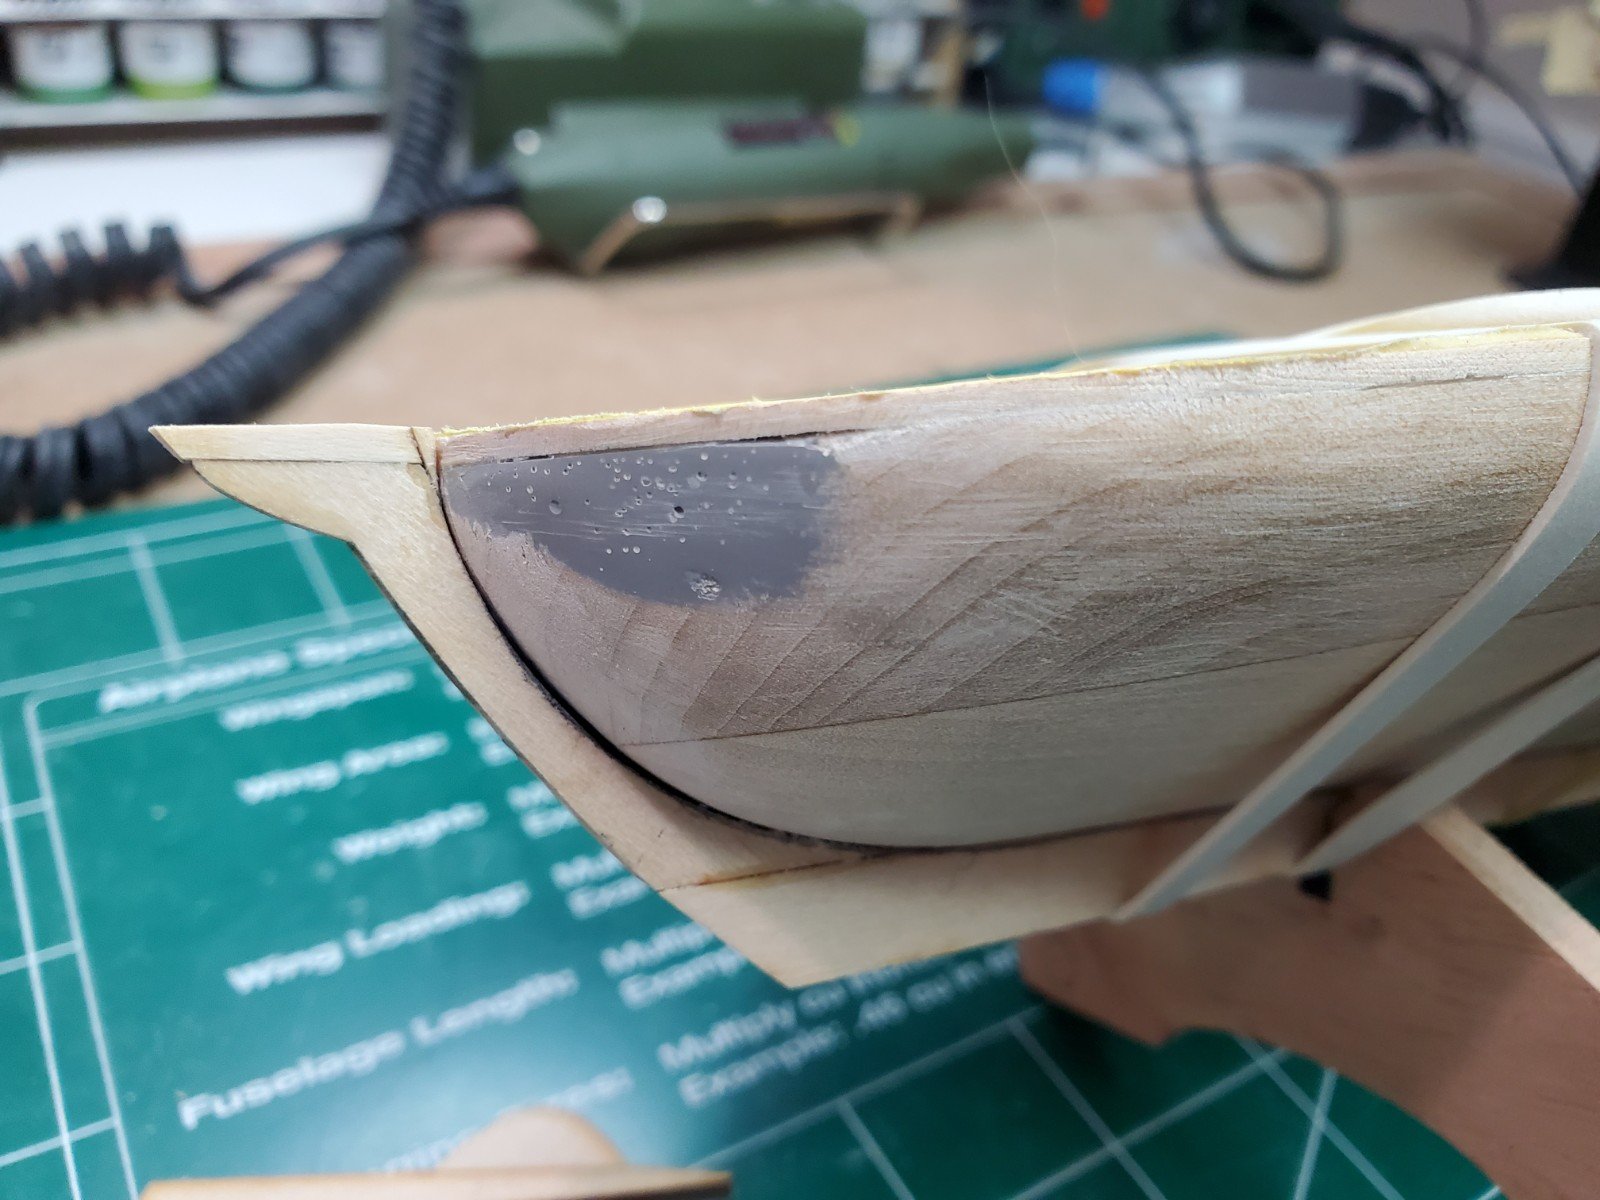
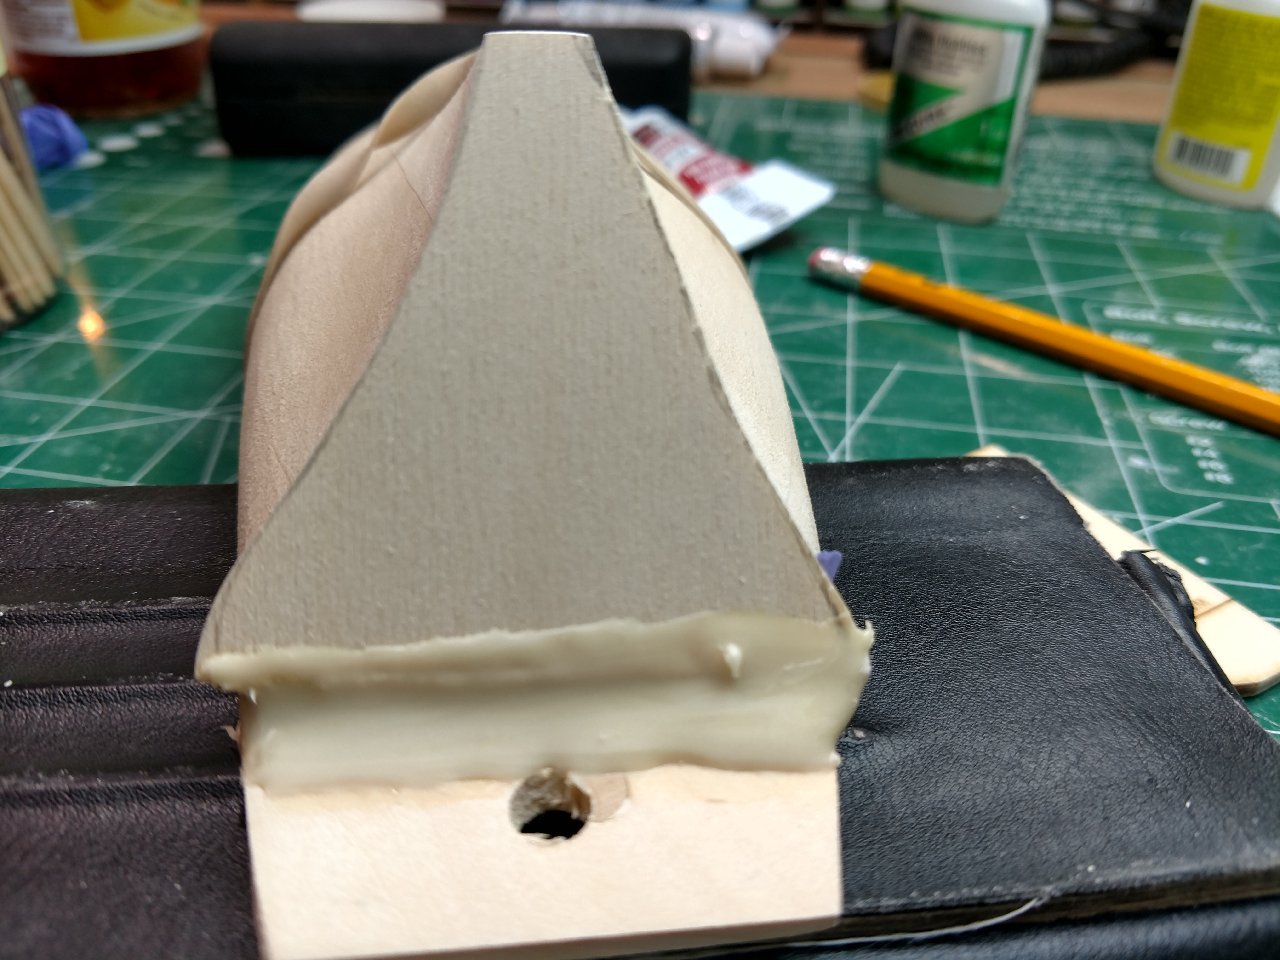
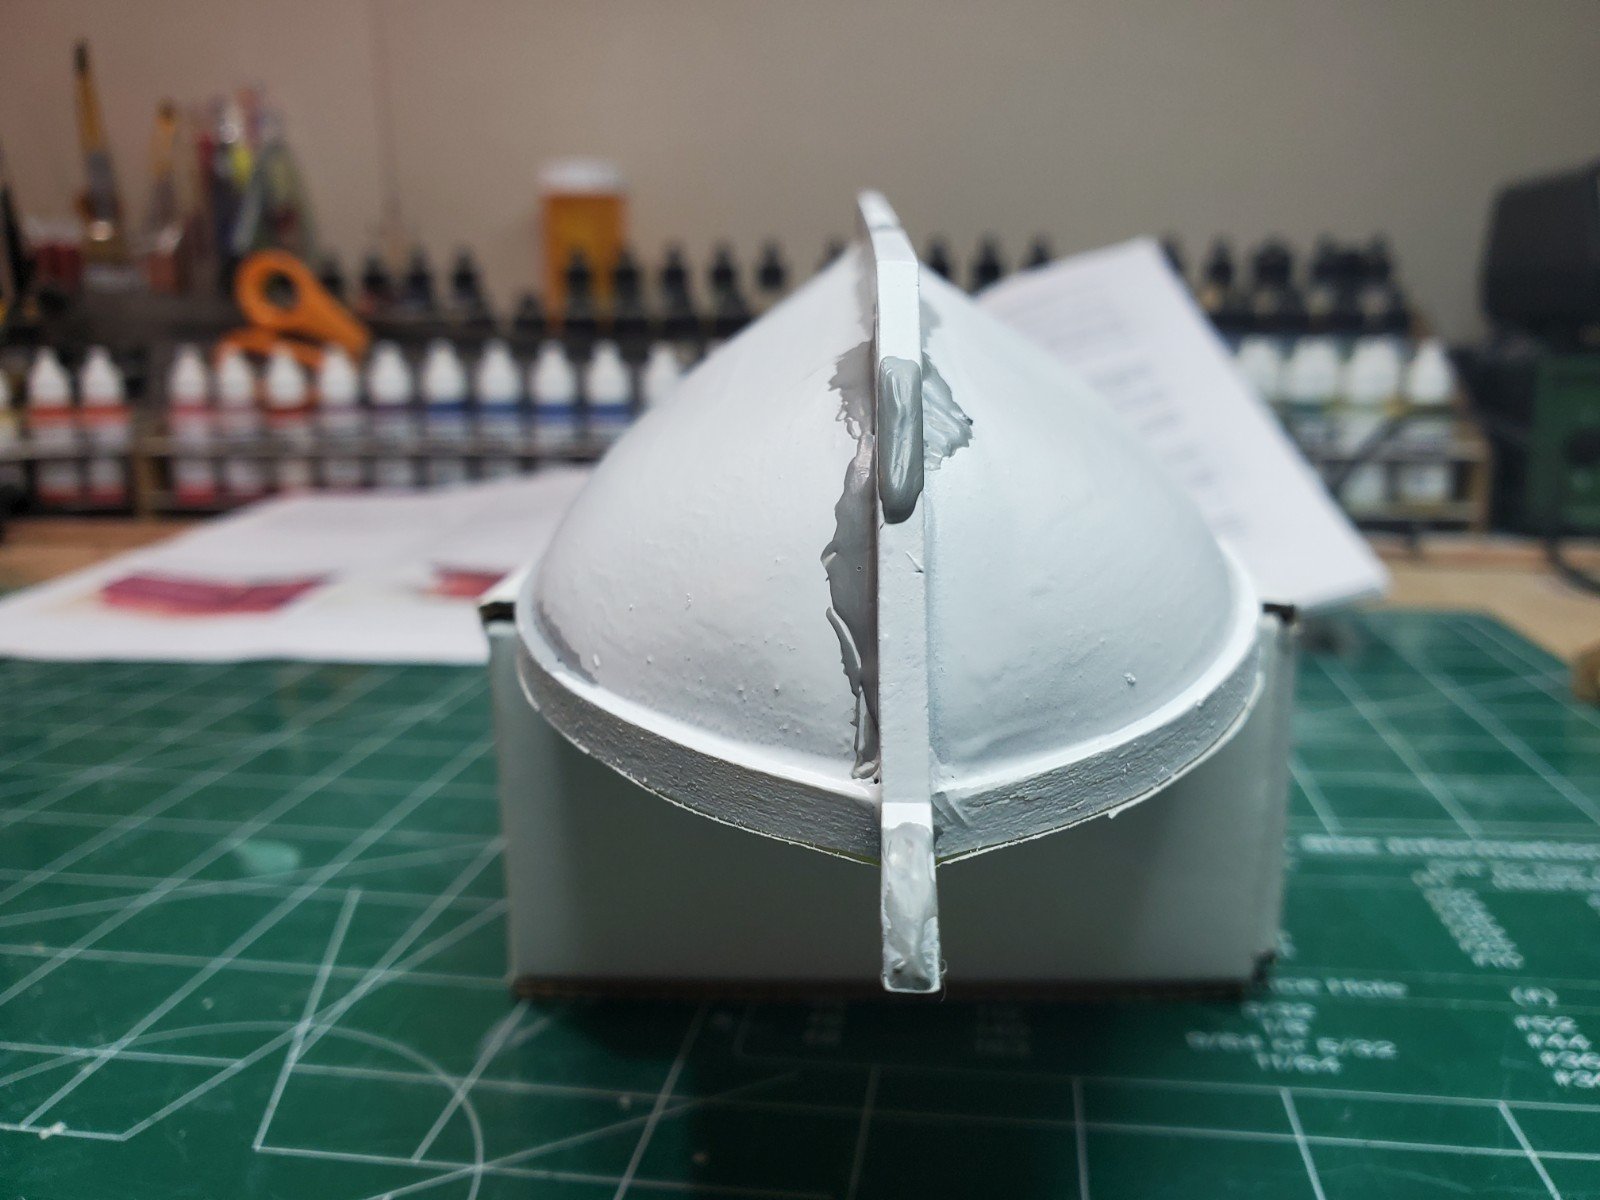
Hello Folks, I know it has been a while, however that doesn't mean I haven't been busy. I left off on the stern which presented me with challenges that I overcame (above). A lot of issues resulted in trying new tools and using templates for the first time. The stern survived as seen in my previous post, however the rookie could not survive the mistakes on the bow. Even though I followed the templates for the bow, I butchered the bow by taking a catastrophic amount of wood off the bow. I am still a little perplexed over what happened (See Pictures). My bulkhead templates are true, however when I assembled the false keel I was stunned at what I saw! So I spoke with Blue Jacket, I was advised to use the shaping for the bow and stern templates for the shaping of the boat as gospel. Use the bulkhead templates from the keel upward towards the deck (However not all the way up to the deck). So the new hull arrived, and starting again, no quitting here. Looking forward to beginning my posts once I catch up to where I left off. Be well everyone and be safe, Bill T.
- 89 replies
-
- 3
-
-
- bluejacket shipcrafters
- revenue cutter
- (and 1 more)
-
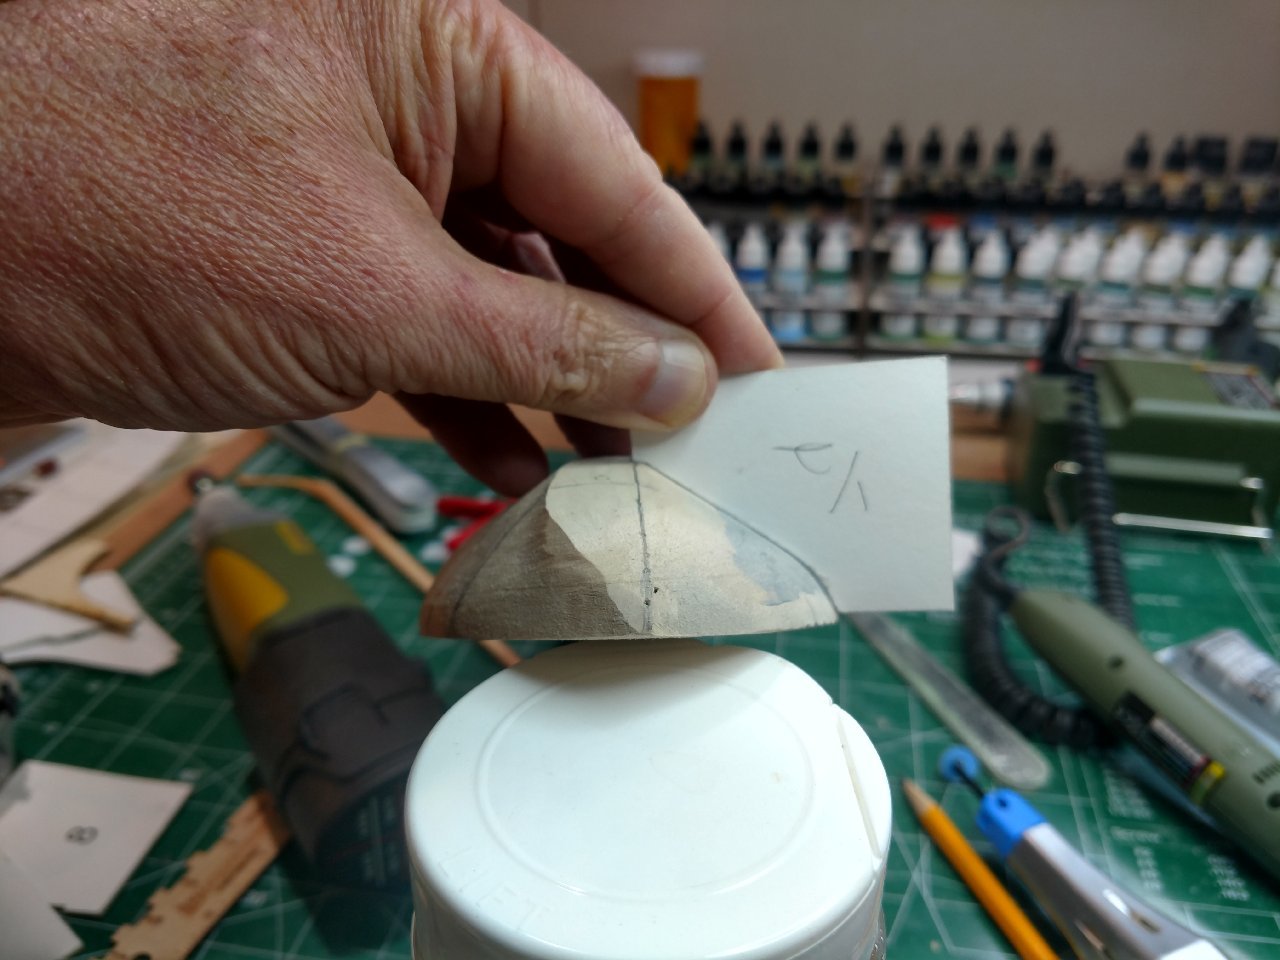
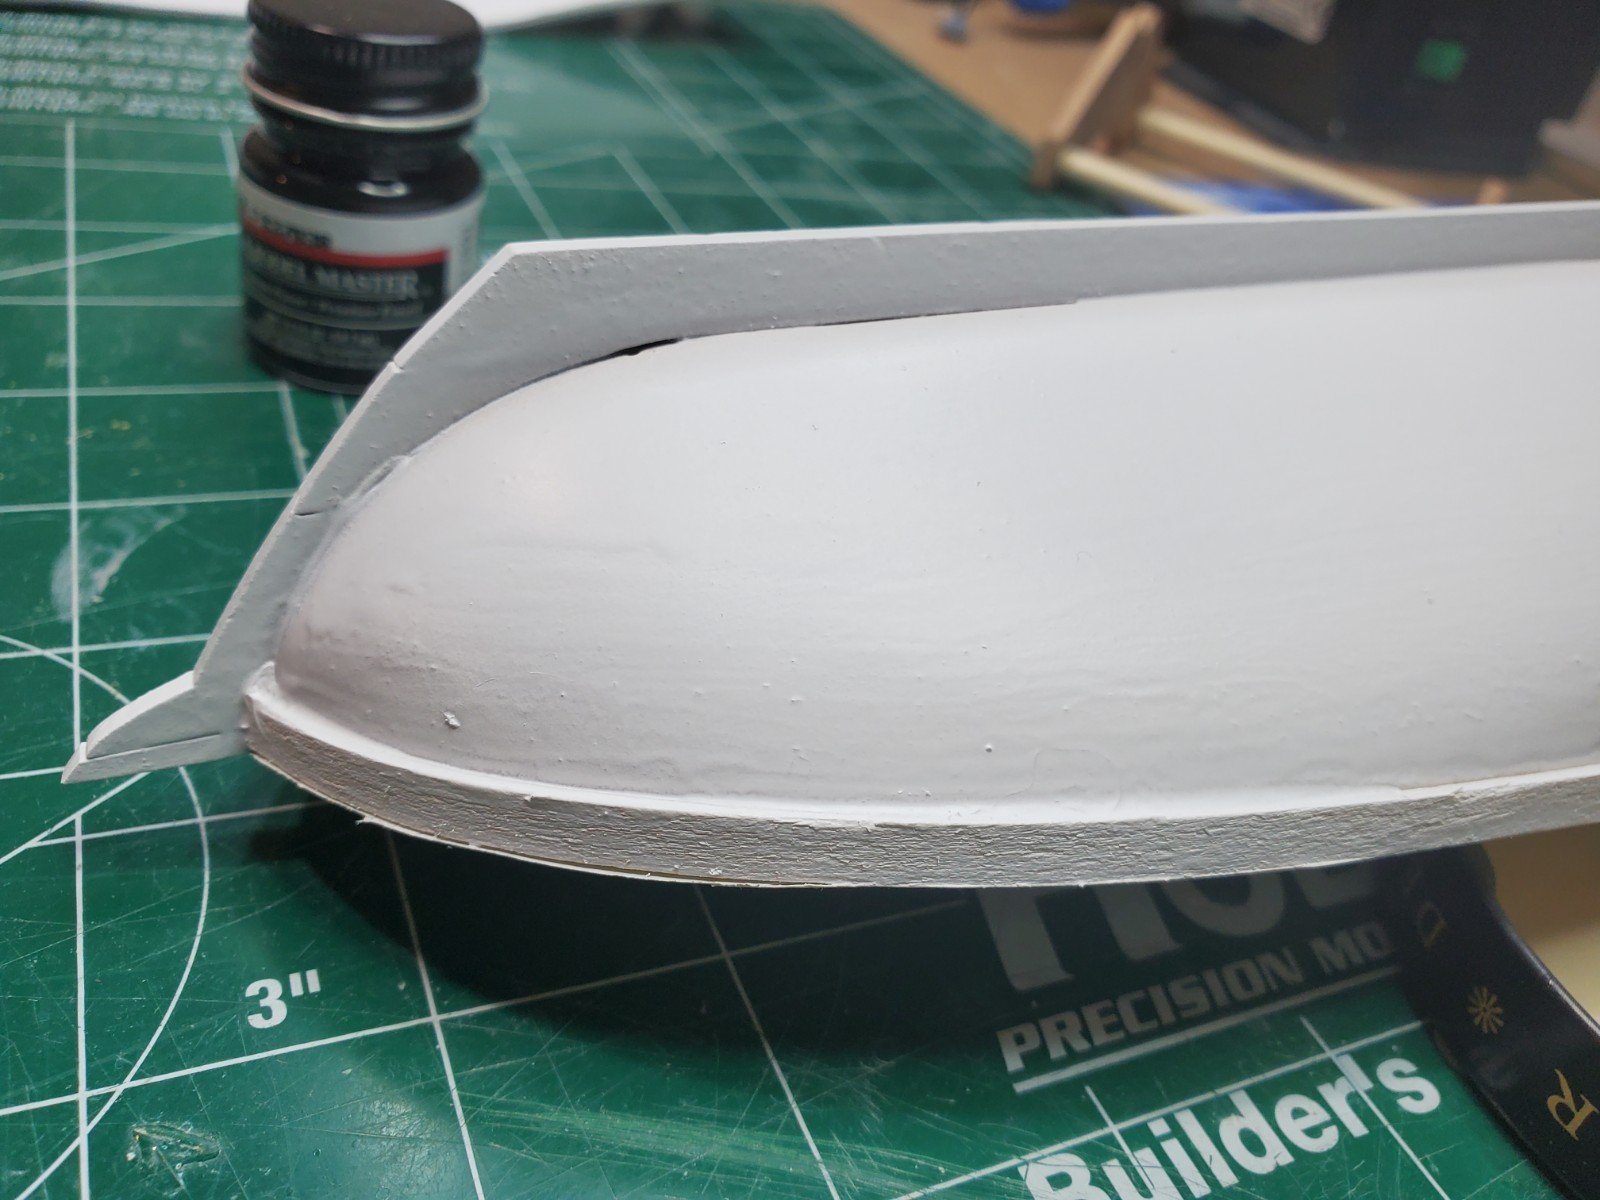
Hello Folks, After pondering whether or not to add another piece of basswood to the stern to the RC (Revenue Cutter) I decided to move forward extend the stern to have the rudder whole closer to the stern to be safe. It added about 3 hours of work to the build however thinking about it for 4 nights before sleeping and on my way to work for 4 days (we all do that I believe) it was well worth it. I am now very pleased versus my prior post with the results (even though my stern looks like counting years on a open tree trunk) three years to be exact if one looks closely at the "after pictures" (LOL). It's part of problem resolution that I imagine we all experience on builds! Before (& Sleepless): After: (Now I can sleep) Much better, now on to the bow and move towards the stern. Learned a lot here including never compromise and follow my gut. 😉

- 89 replies
-
- 4
-
-
- bluejacket shipcrafters
- revenue cutter
- (and 1 more)
-
Greetings from Chicago and winter is coming
wtimlen replied to ThirdCoast's topic in New member Introductions
Welcome to the MSW group, Being a beginner I have found this format to not only enlightening and fun, however extremely supporting. This is a great group to be associated with, best of luck with your future endeavors on ship building. -
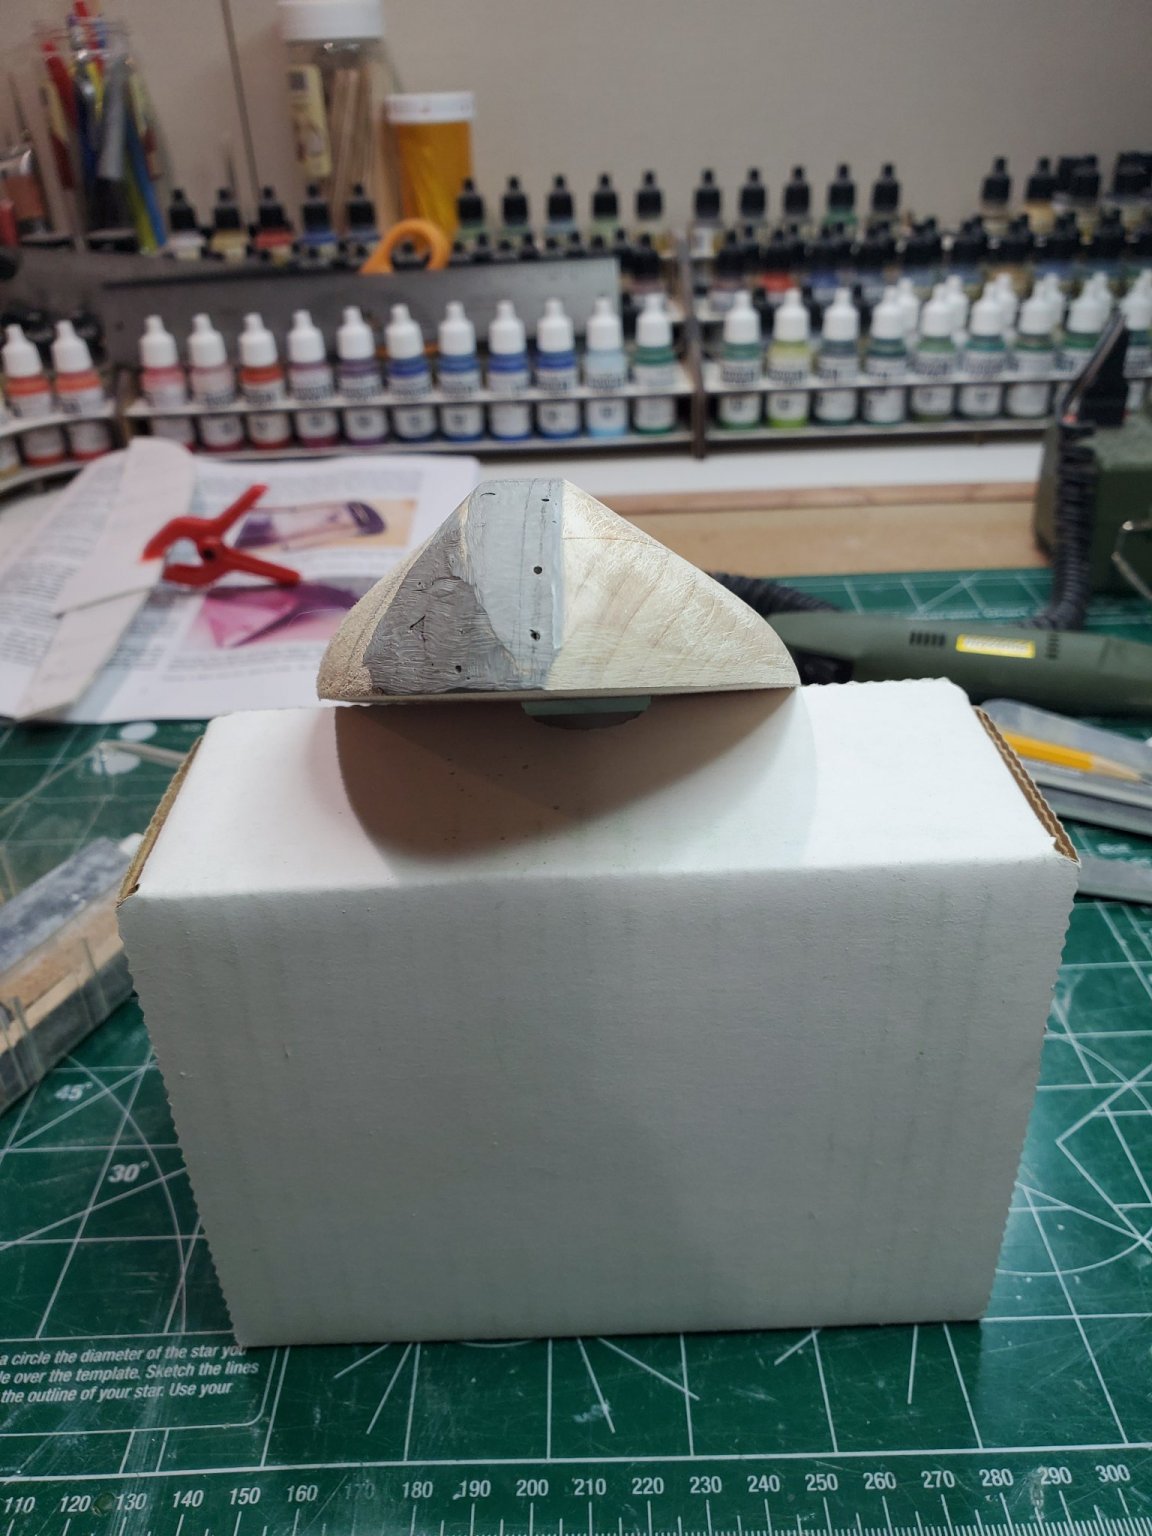
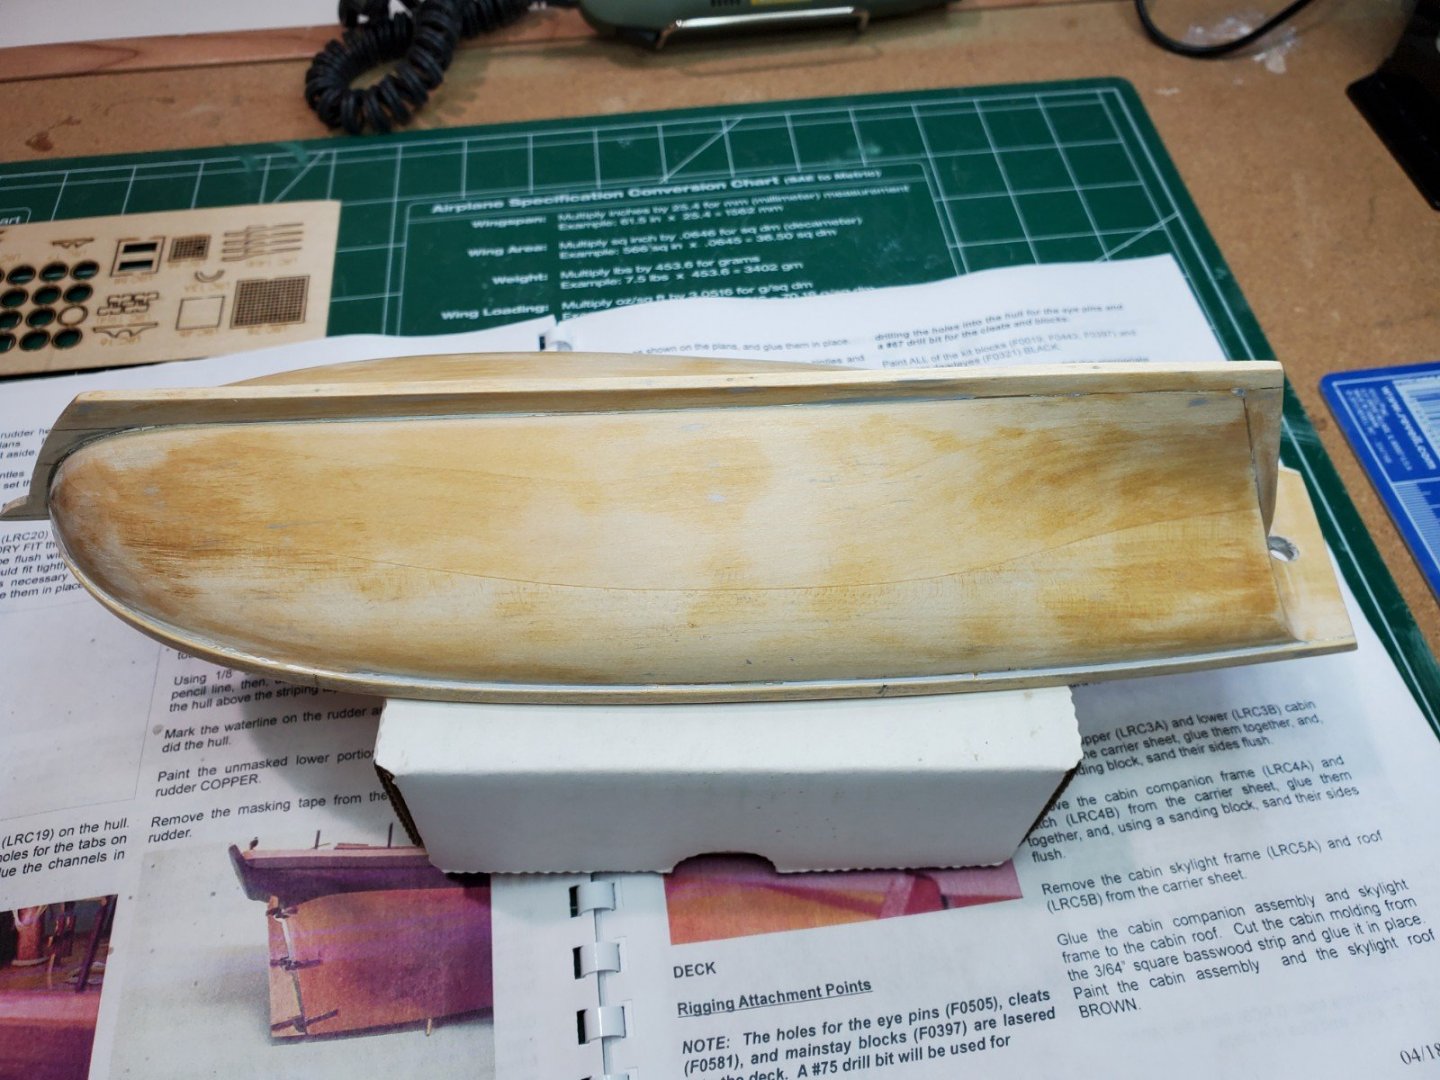
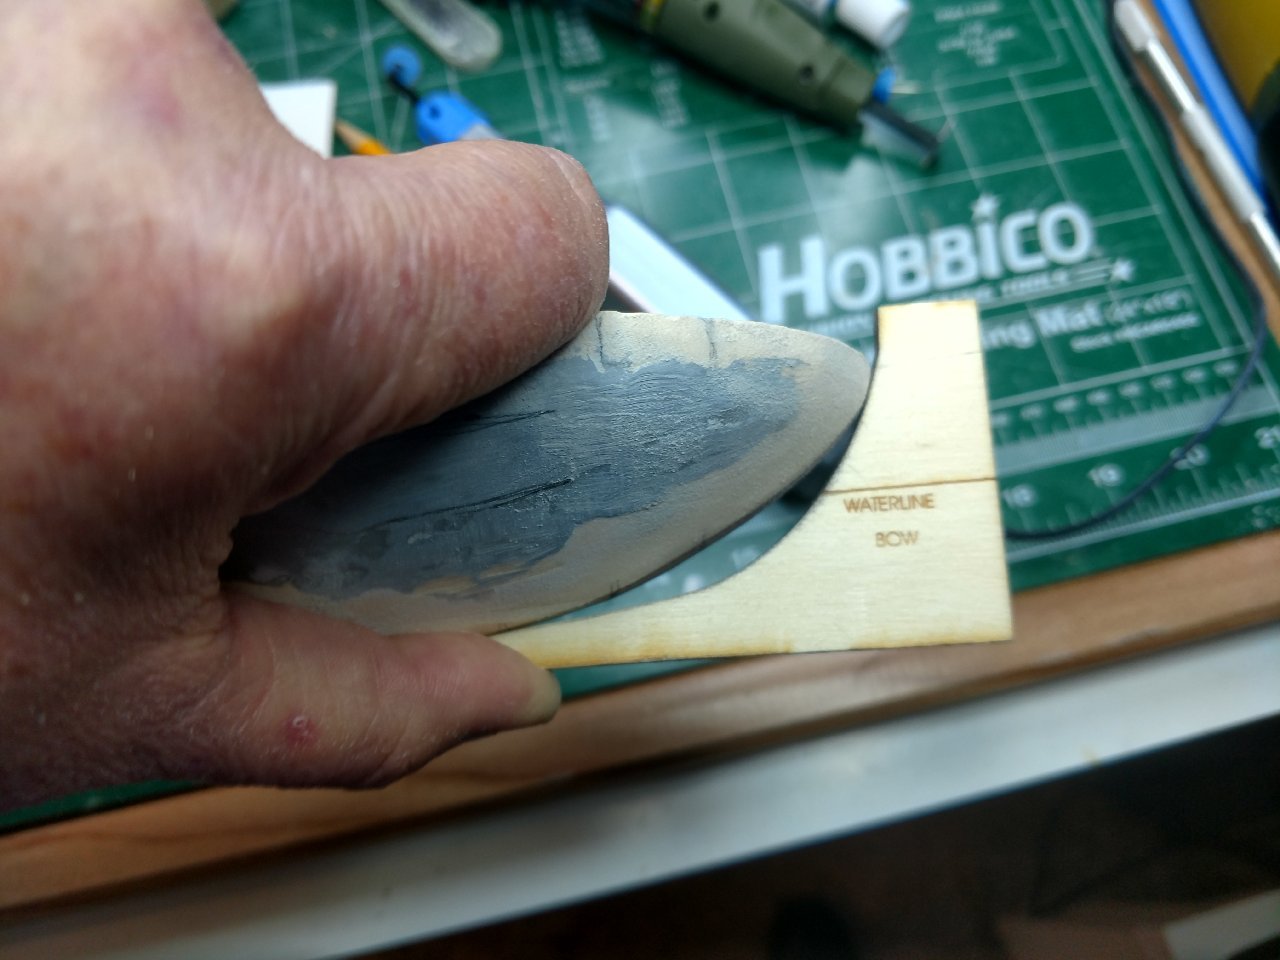
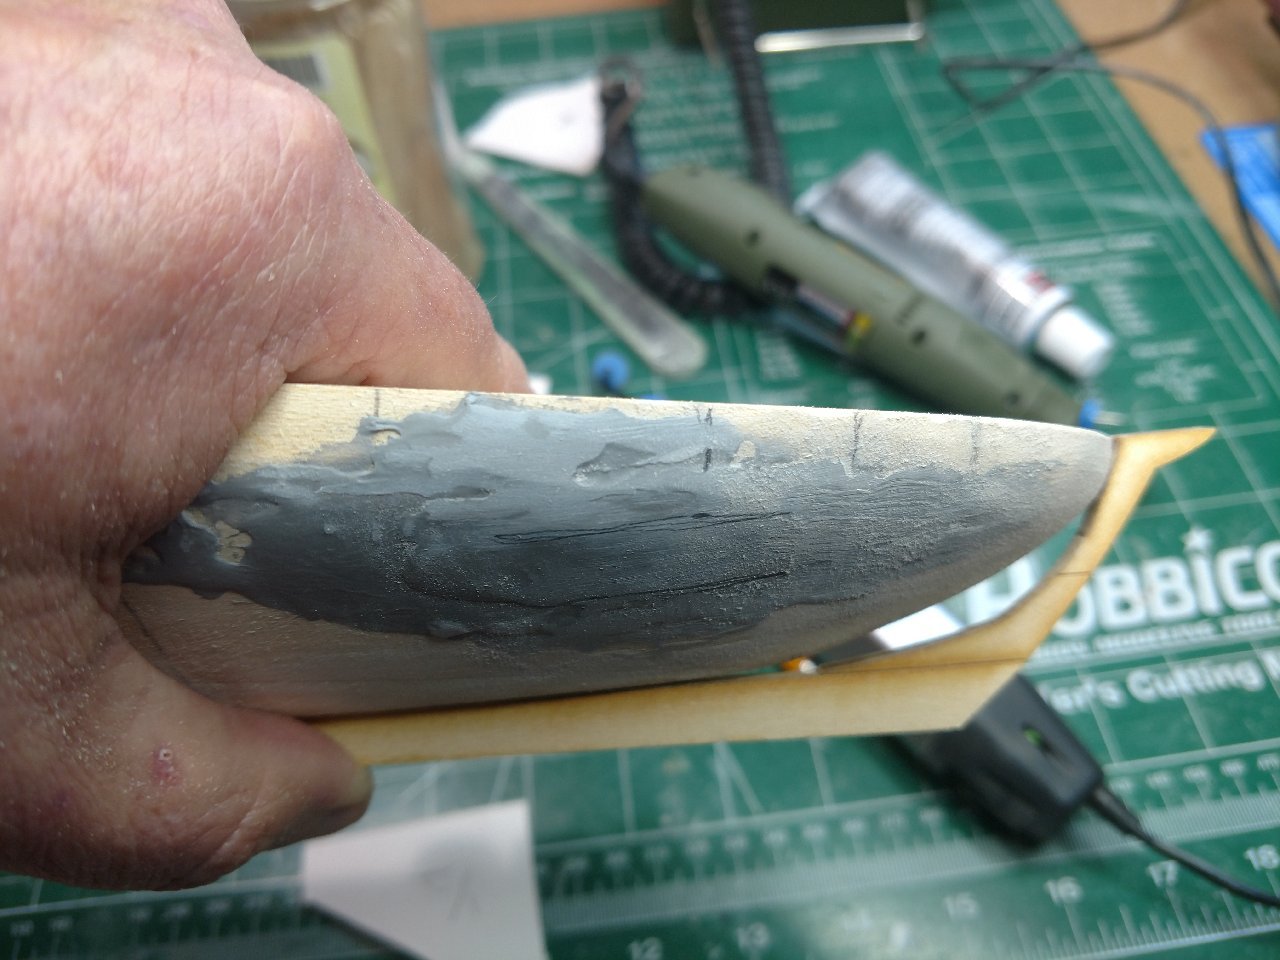
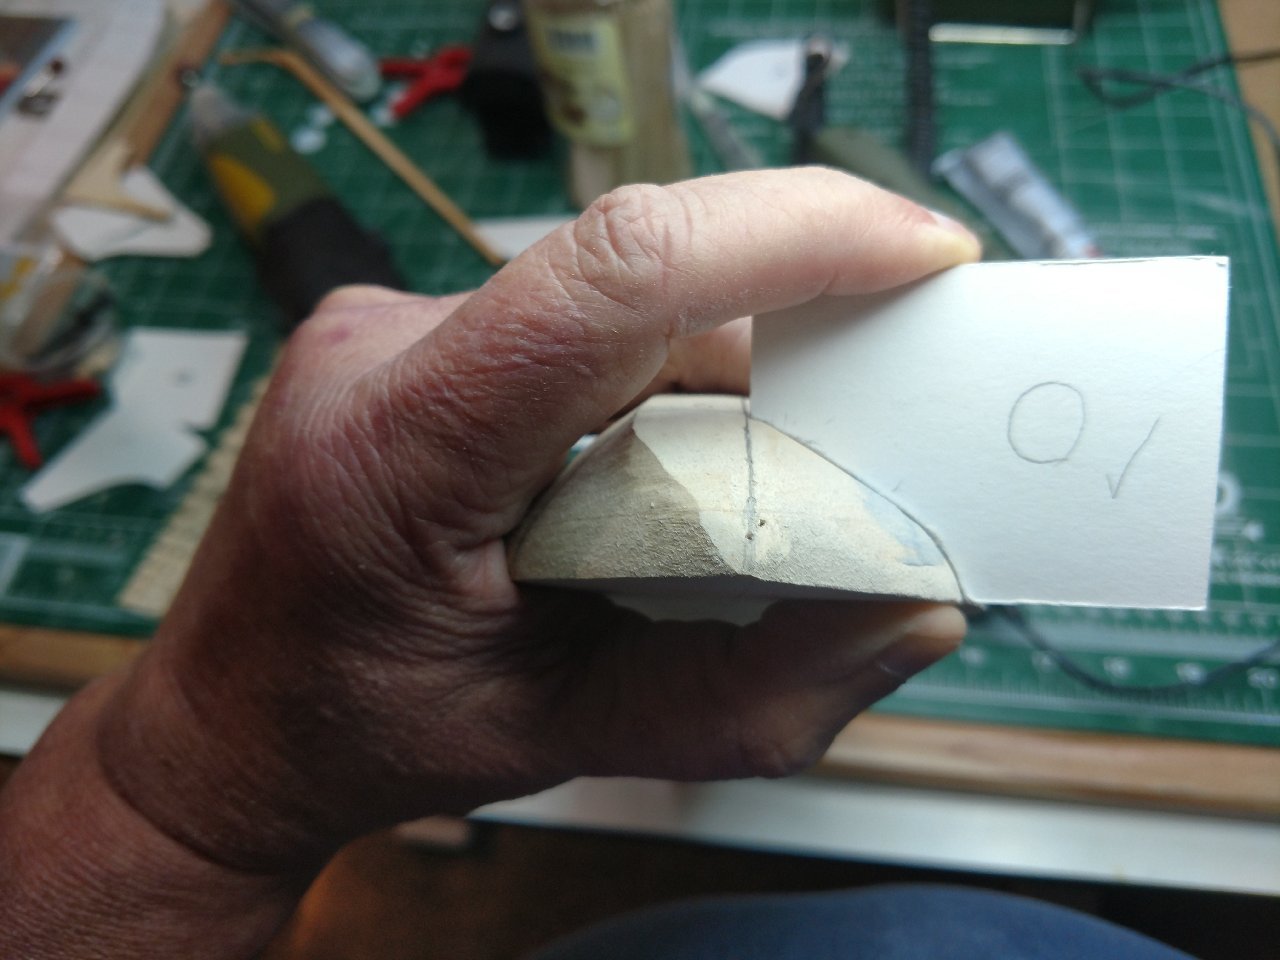
Hello Folks, It has been a long time since my last post however It is nice to be back on the BJ Revenue Cutter. Still in the beginning steps: Shaped the bow using the template supplied by BJ, pretty straight forward. I notice that as I use the templates to shape the forward portion a lot of wood will be coming off. I will trust the templates though. The stern was a different story, using new tools has it's ups and downs. As the picture below outlines I took way too much wood off the stern, I just could not get template correct. So I added basswood to the stern and worked slowly using the template, not perfect, however good enough for me. I am concerned about the position of stern-post vs the rudder hole, it seems like there is too much distance. Normally this would not concern me, I could always add basswood to the stern to bring the rudder to the correct position. However I plan on copper plating the hull which means I need to be accurate now prior to the process of plating the hull. I will figure something out, probably dry fit the stern post and rudder. I will show my solution if any on my next post. Take care all! Bill T.
- 89 replies
-
- 4
-
-
- bluejacket shipcrafters
- revenue cutter
- (and 1 more)
-
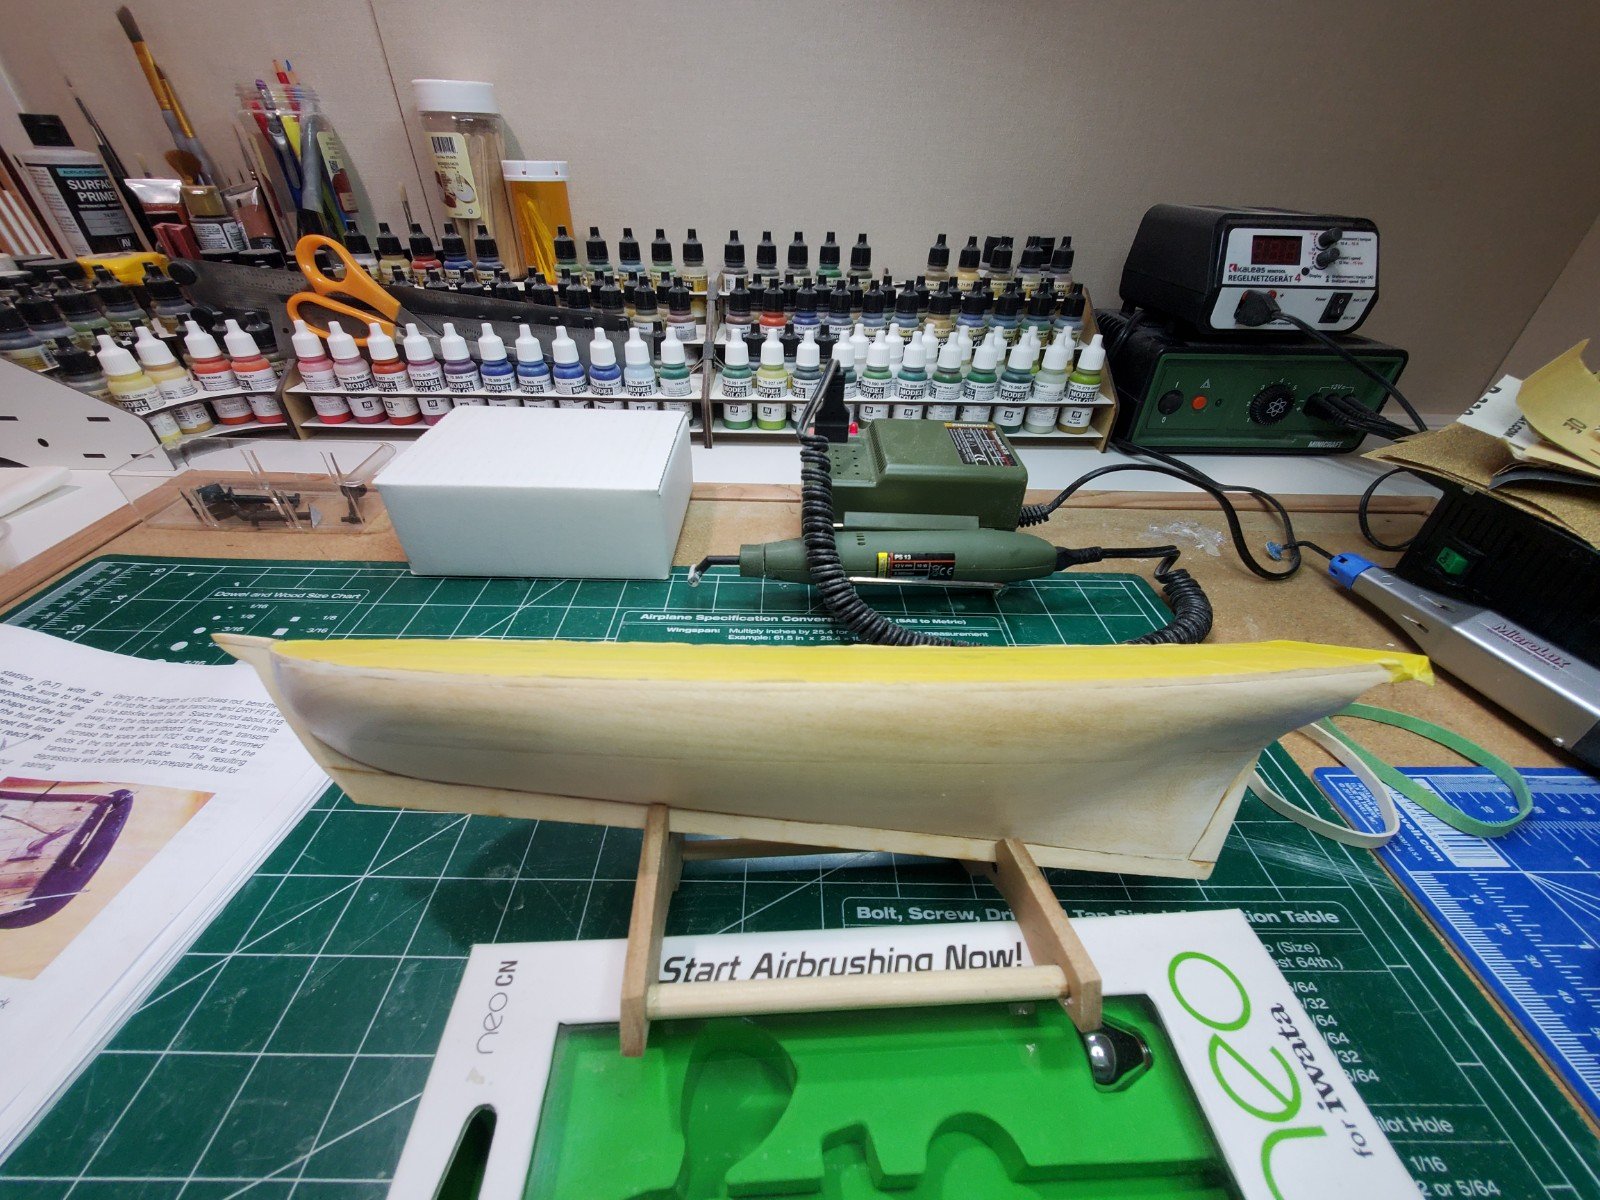
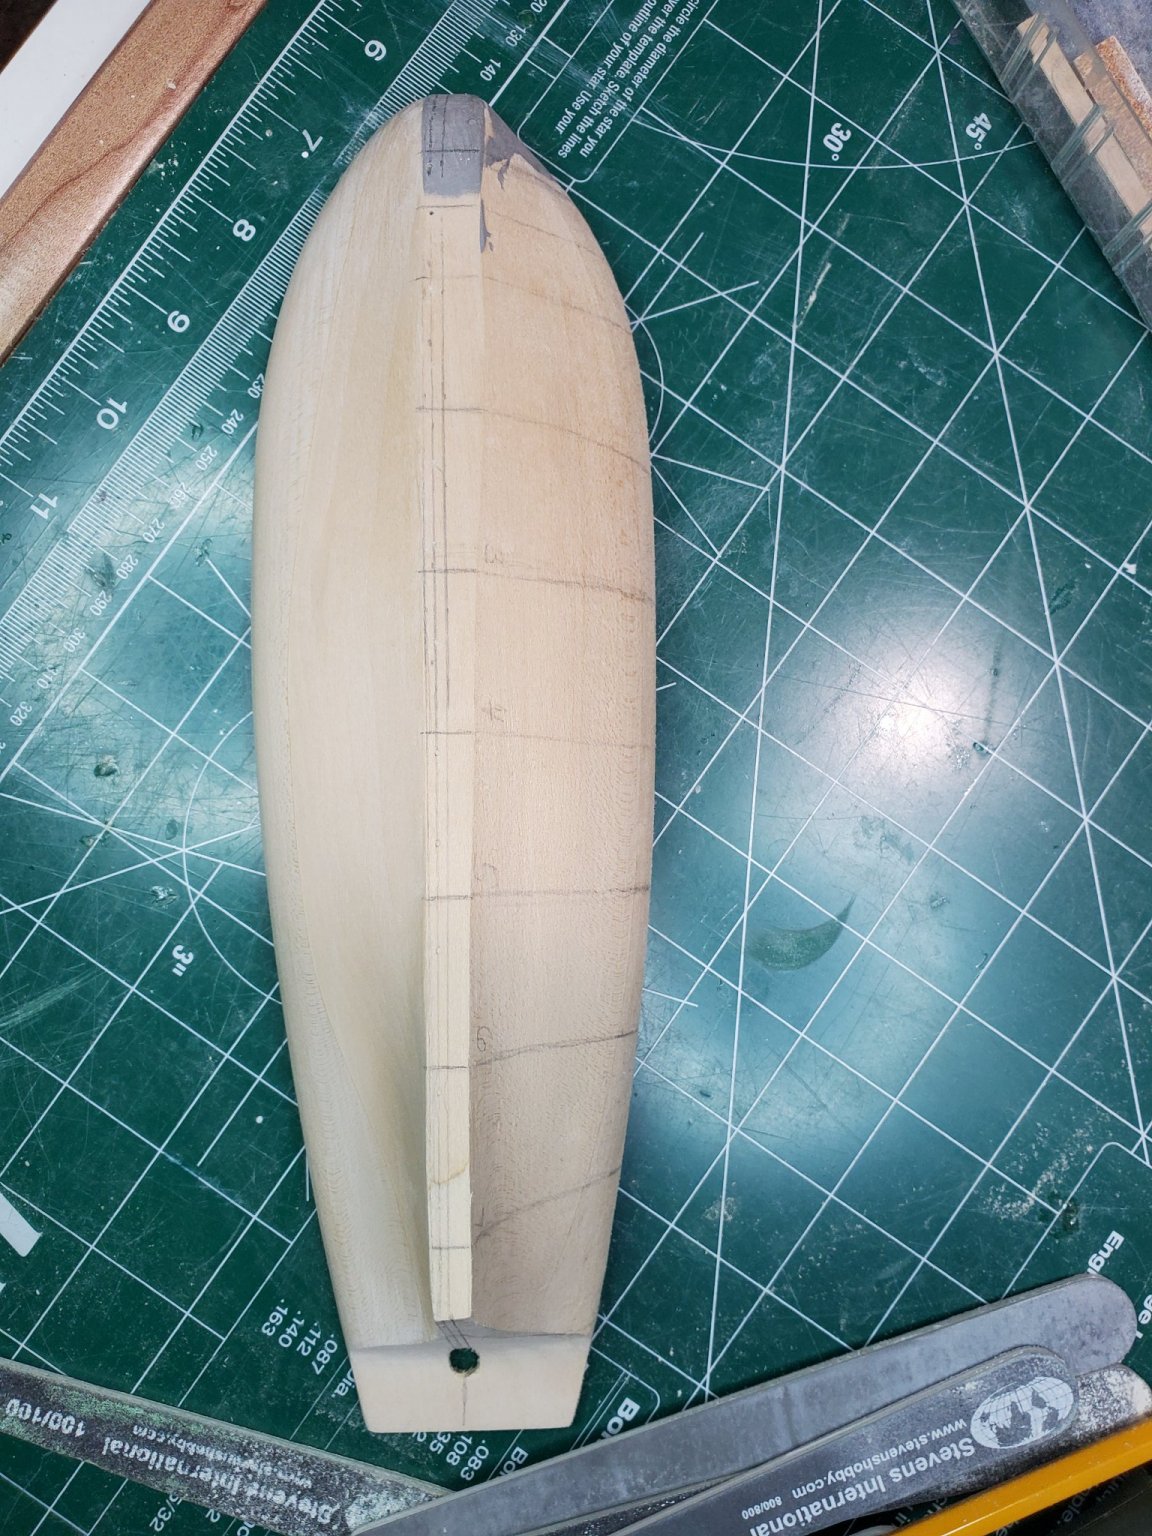
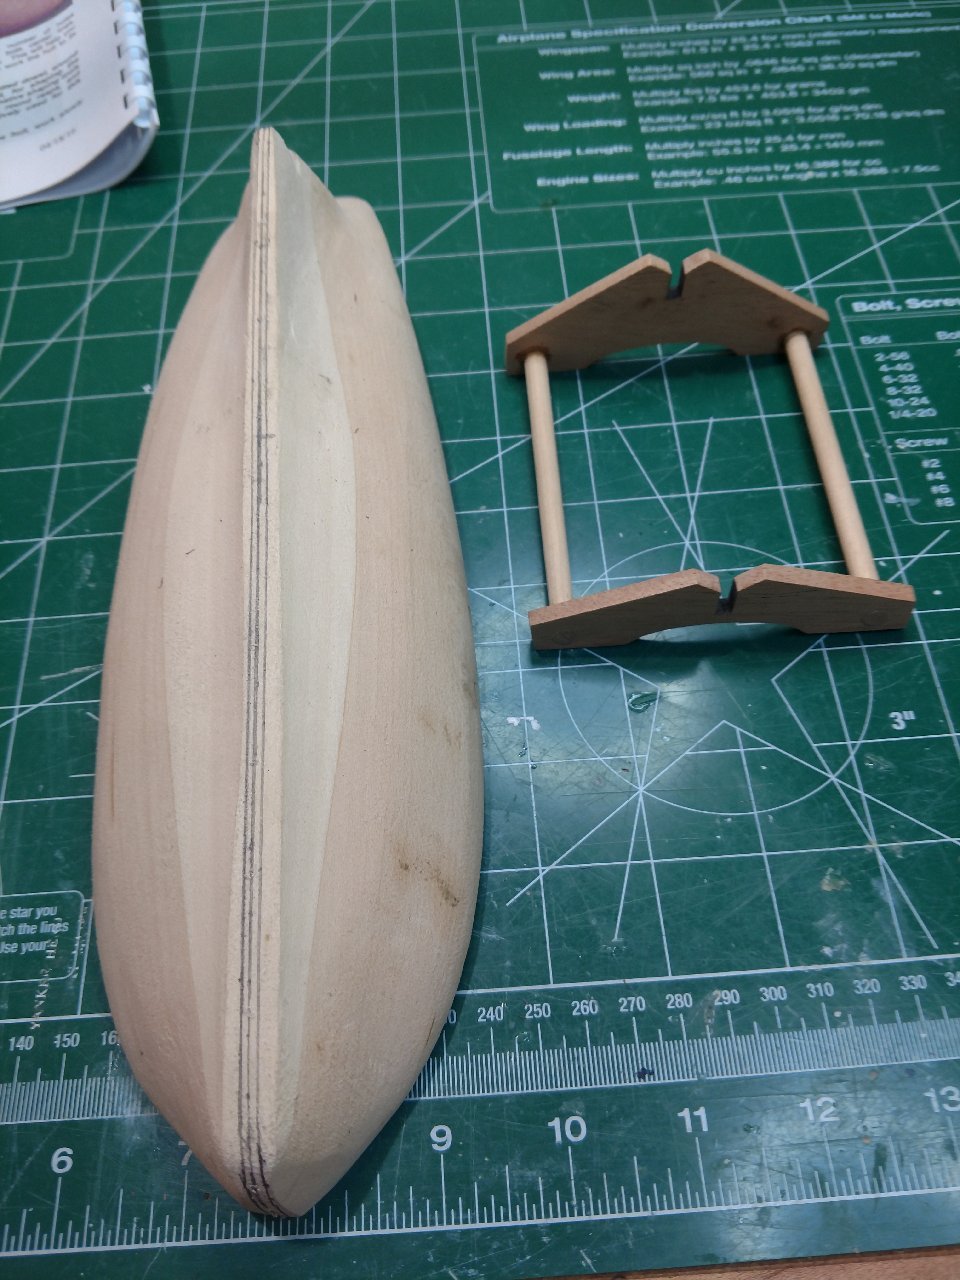
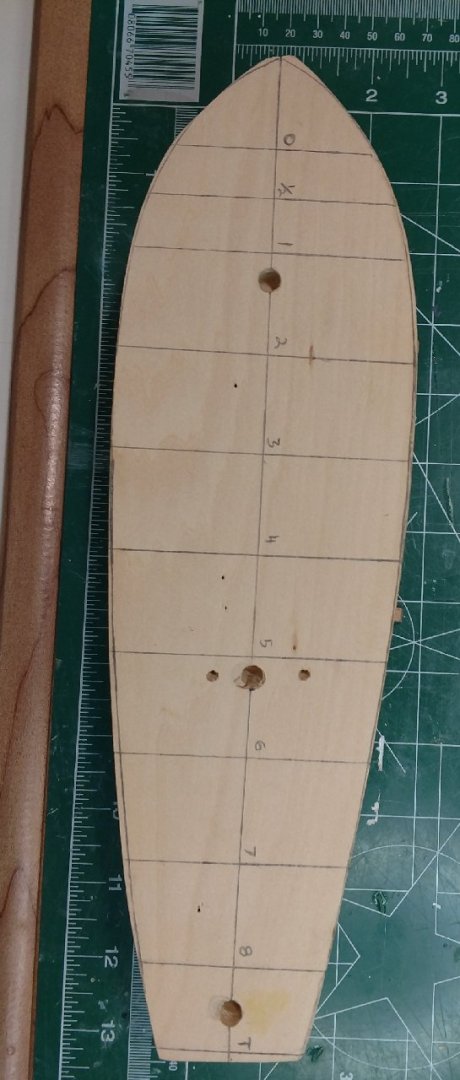
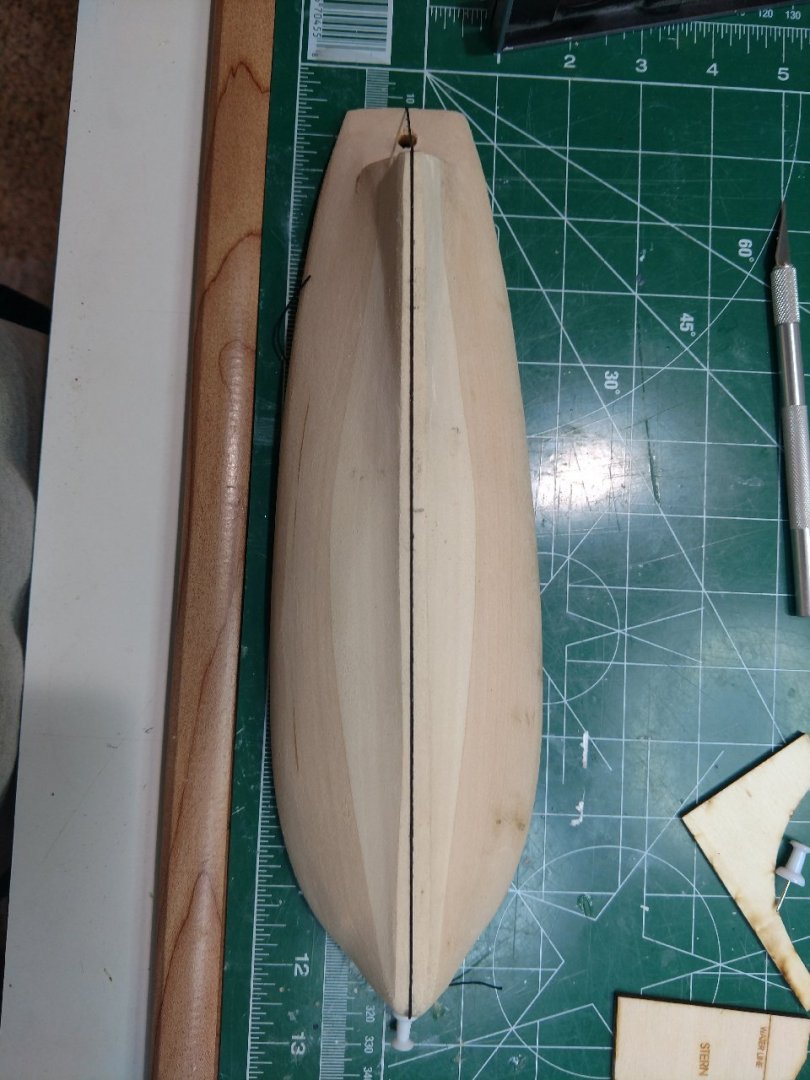
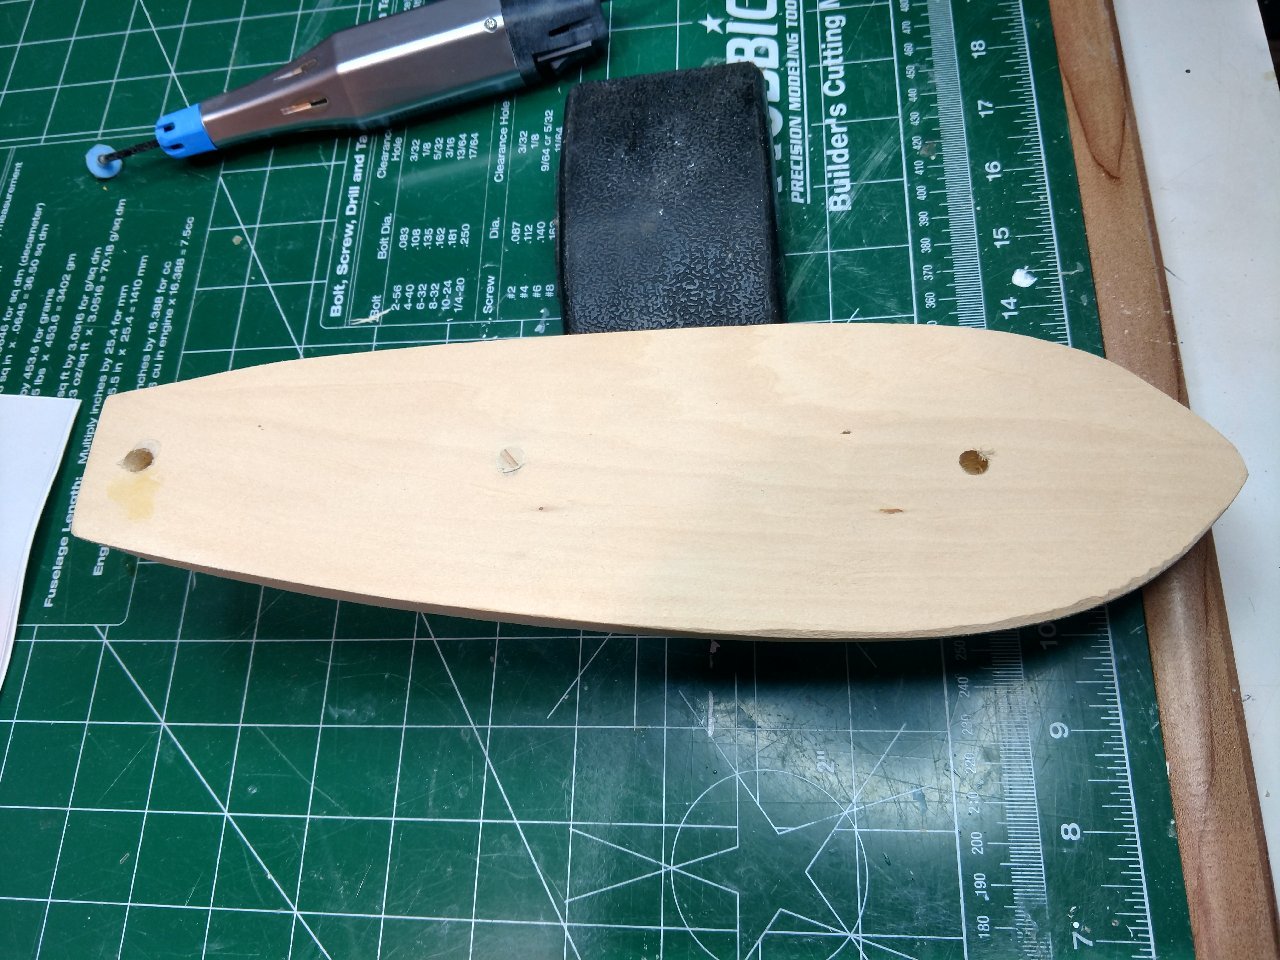
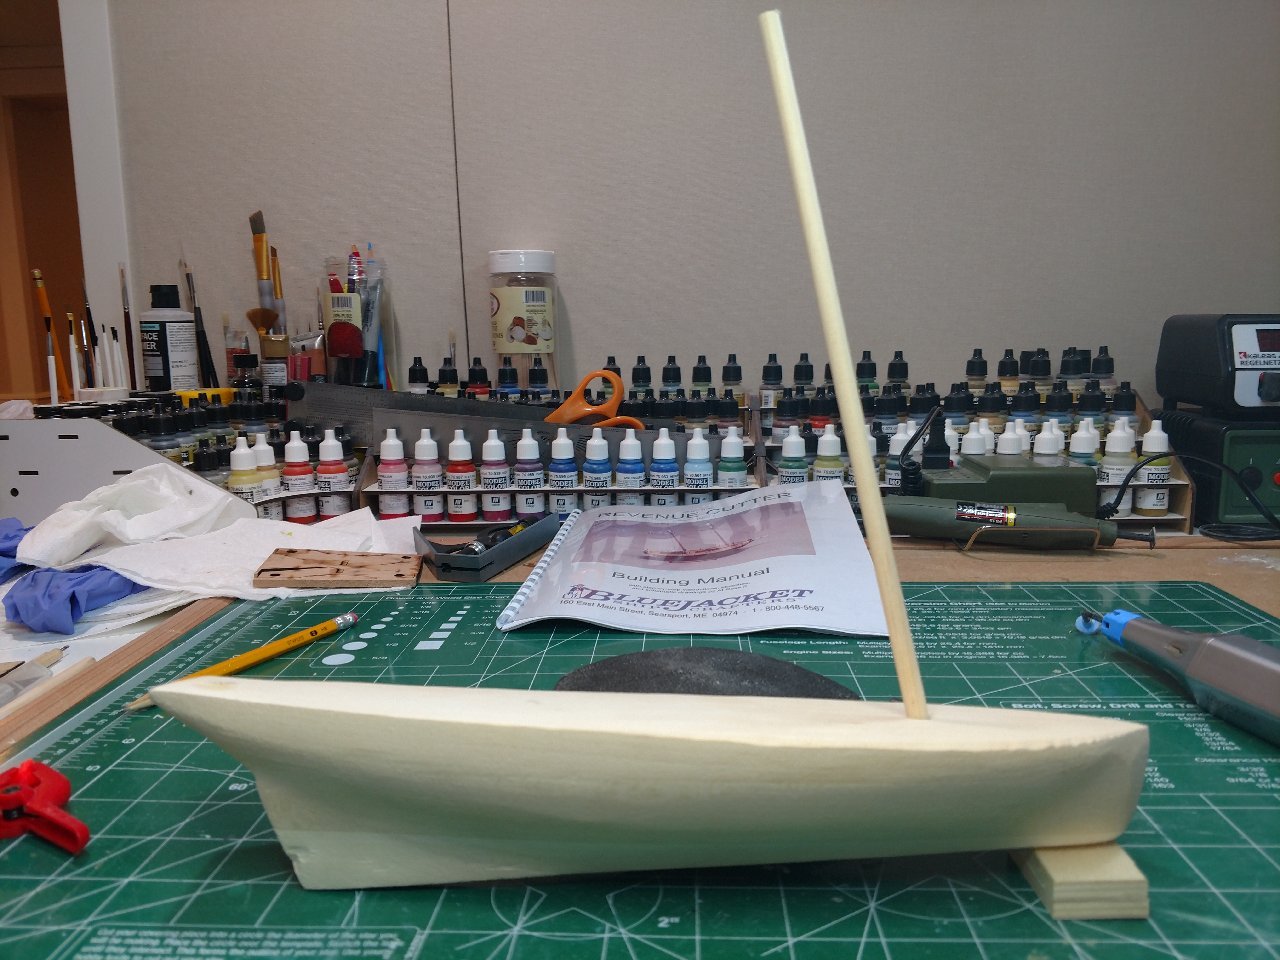
Hello Folks, Short post for today: Finished marking the template lines and the hull outline as per the manual. I noticed I do not have too much room for error on the hull sides. That's why they make putty I guess, that is if I take too much wood off the hull. I also completed the stand, not pretty however it is going to need more work because the hull is going to be copper plated. It will make a good working cradle for now. Once the center-line was located and drawn I used a push pin with string attached and ran it along the keel to locate a fairly accurate line that coincides with the center line on the deck. Drilled the holes as per the manual, could not believe I broke one of my #75 drills. Those break easy! I just received a mini-grinder from Proxxon, and I have some rotary tools as well to work on the stern. On to working the hull and making a mess! Take care all, stay cool and safe, Bill T.

- 89 replies
-
- 5
-
-
- bluejacket shipcrafters
- revenue cutter
- (and 1 more)
-
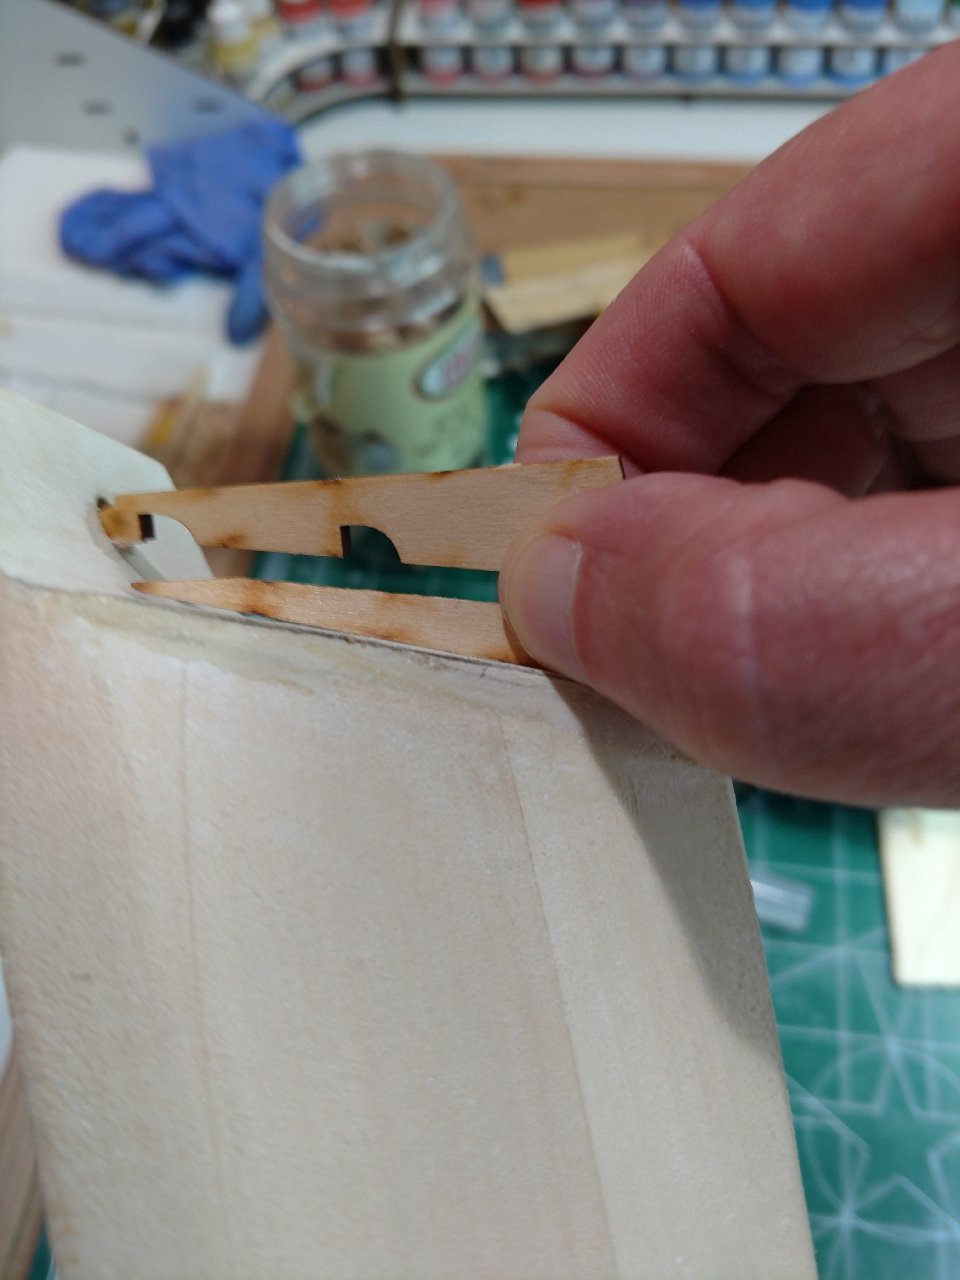
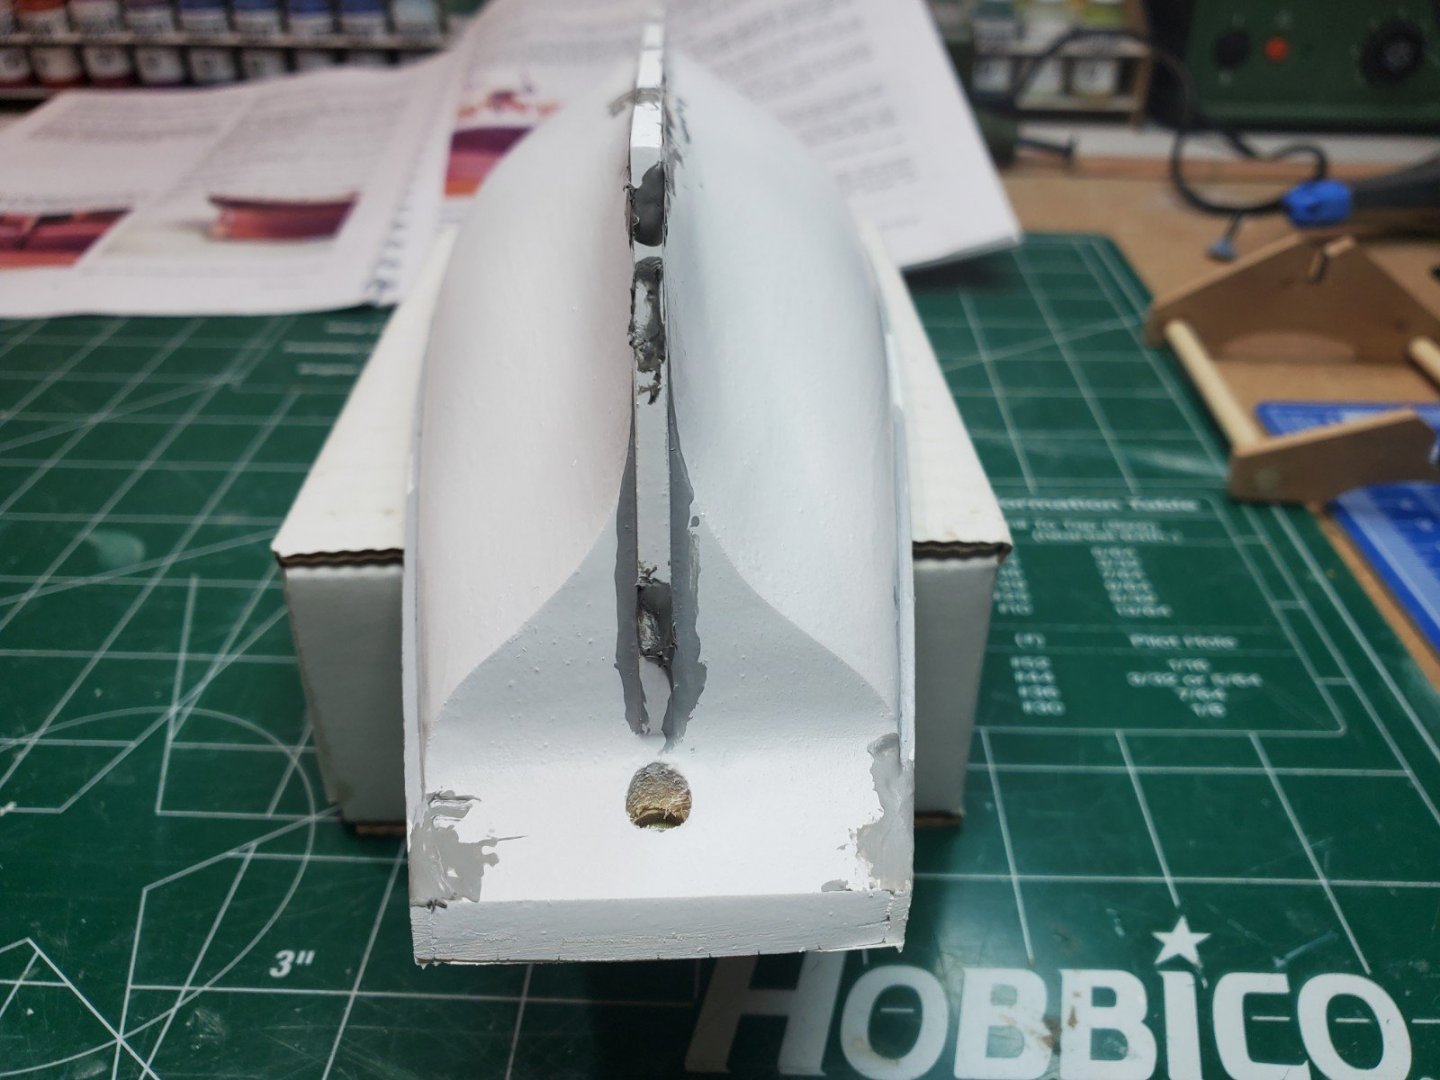
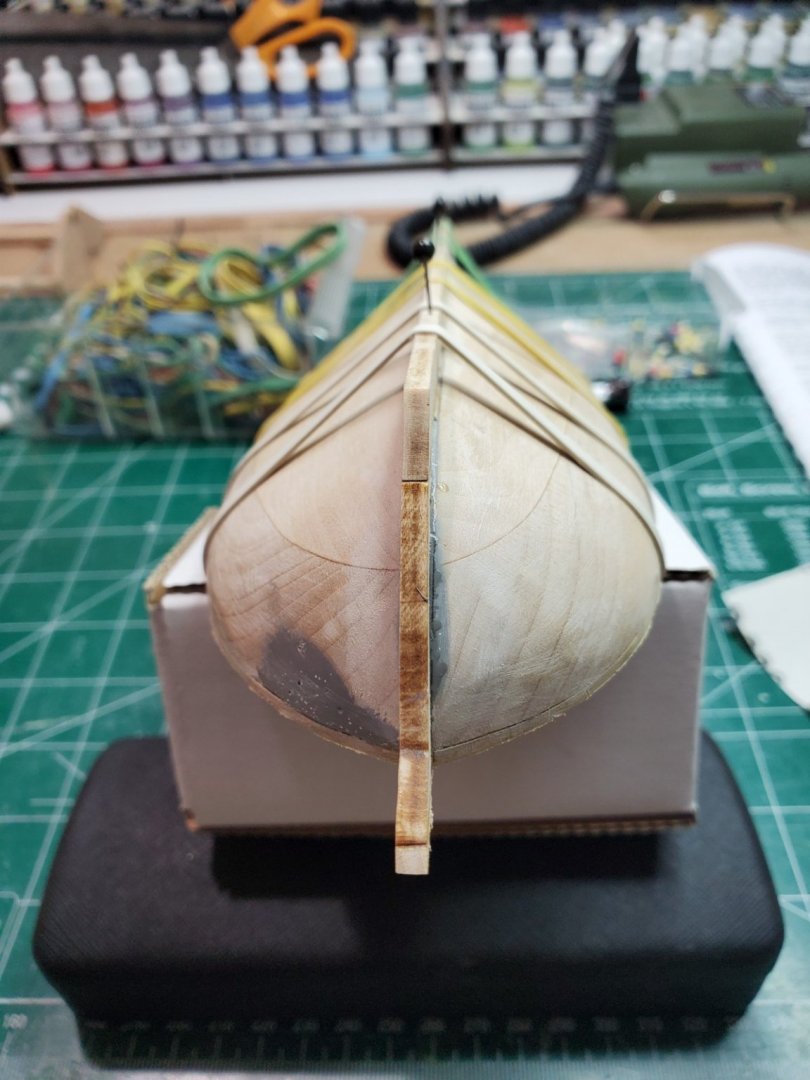
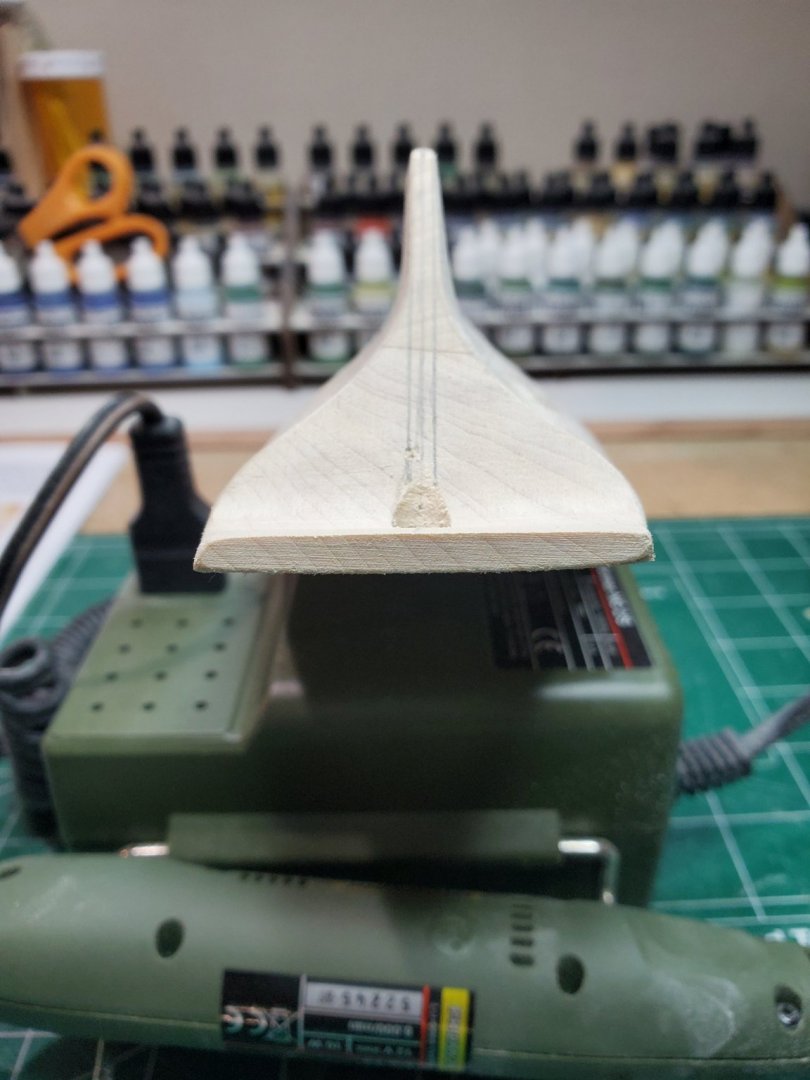
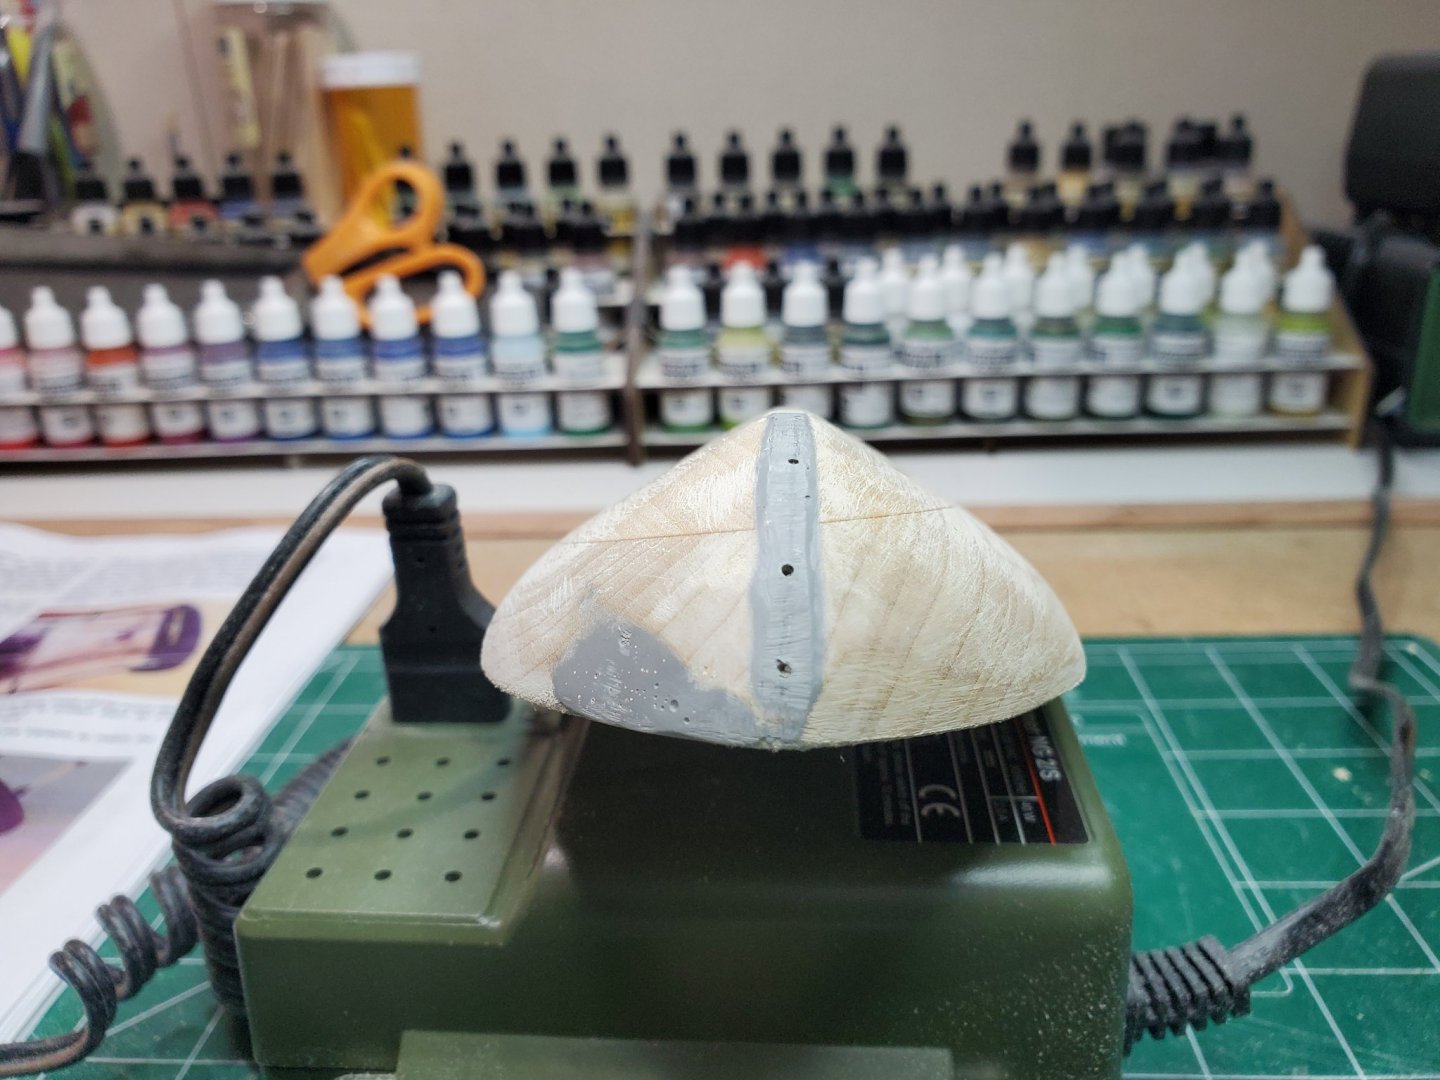
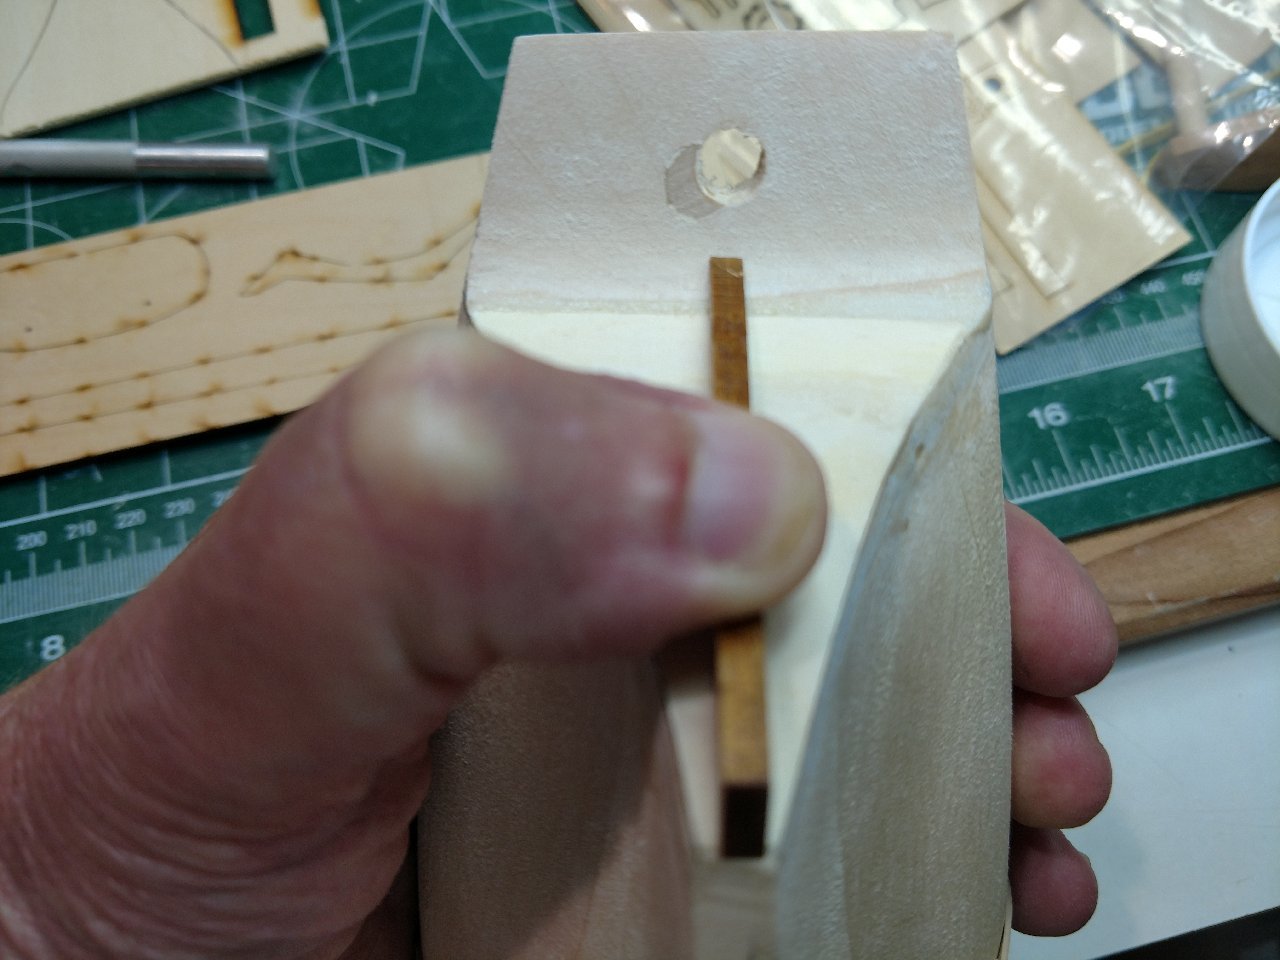
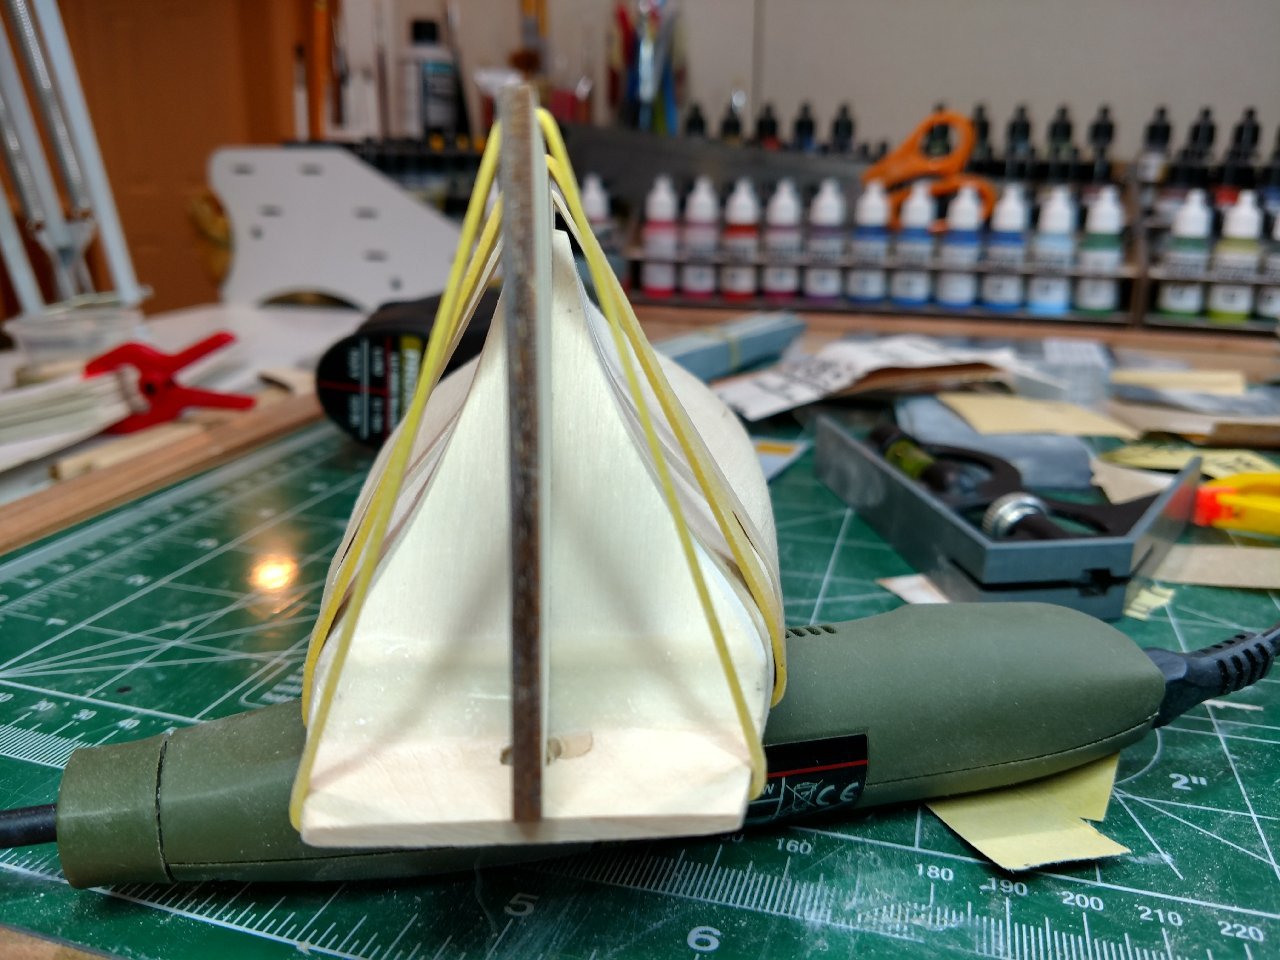
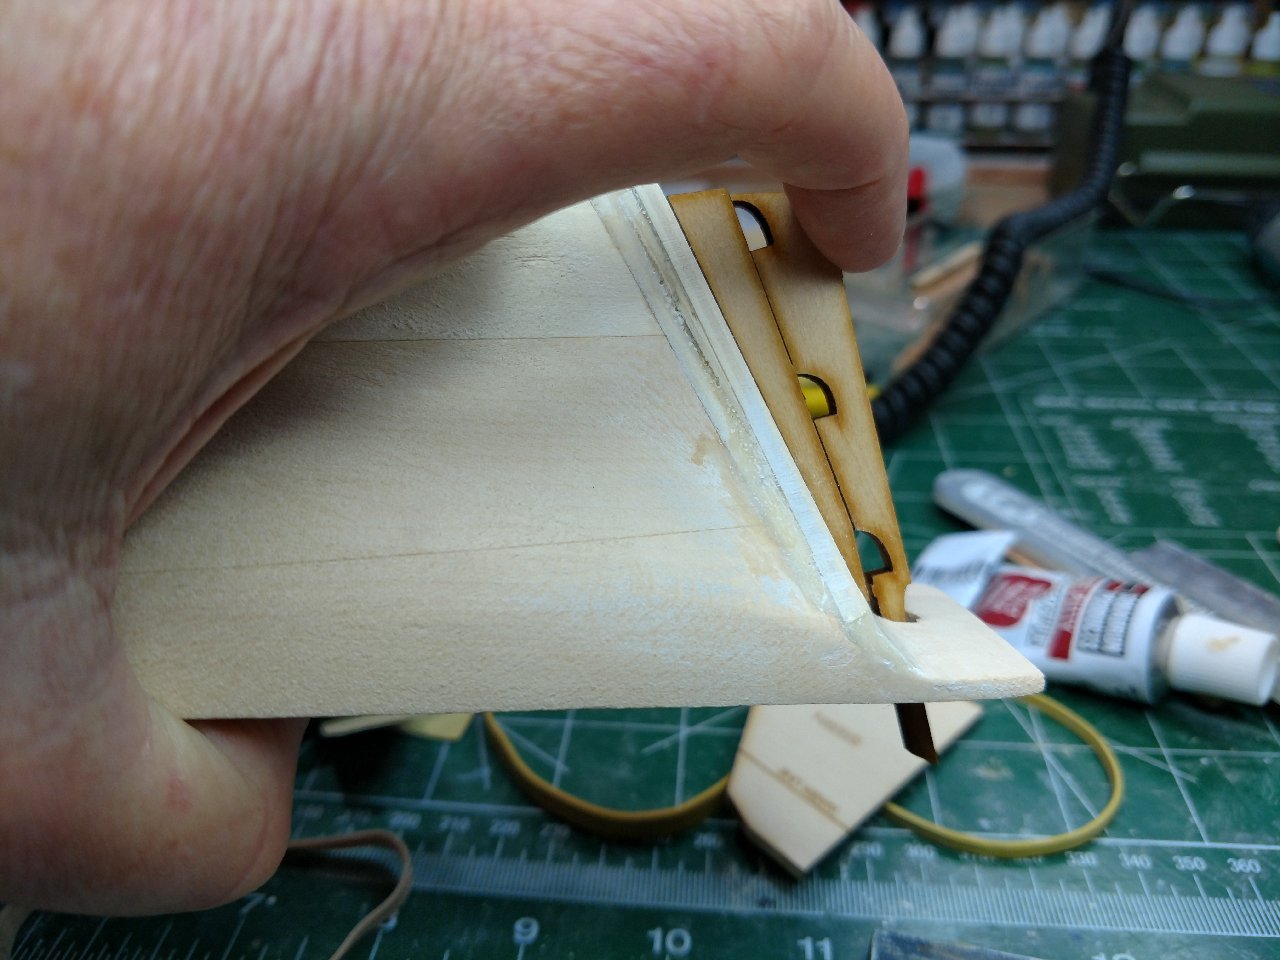
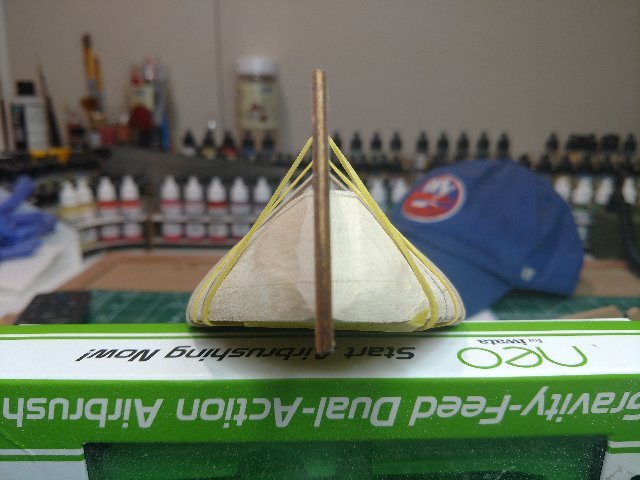
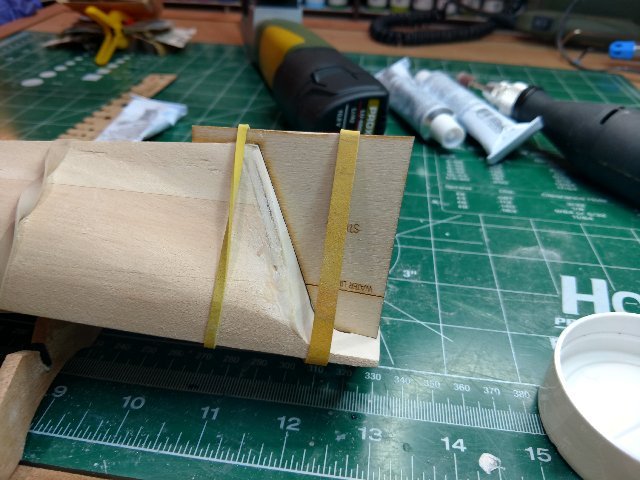
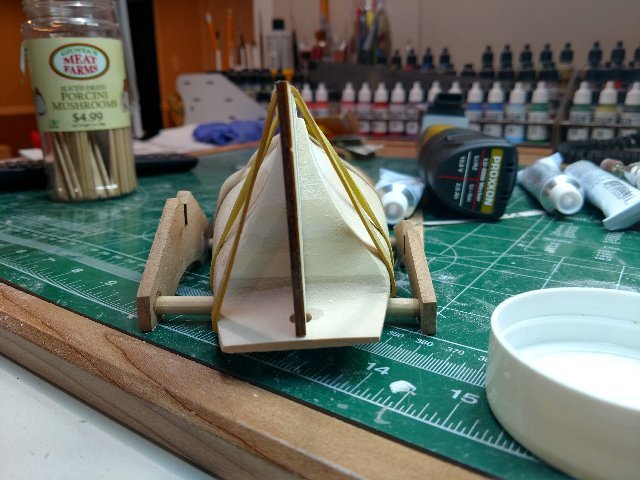
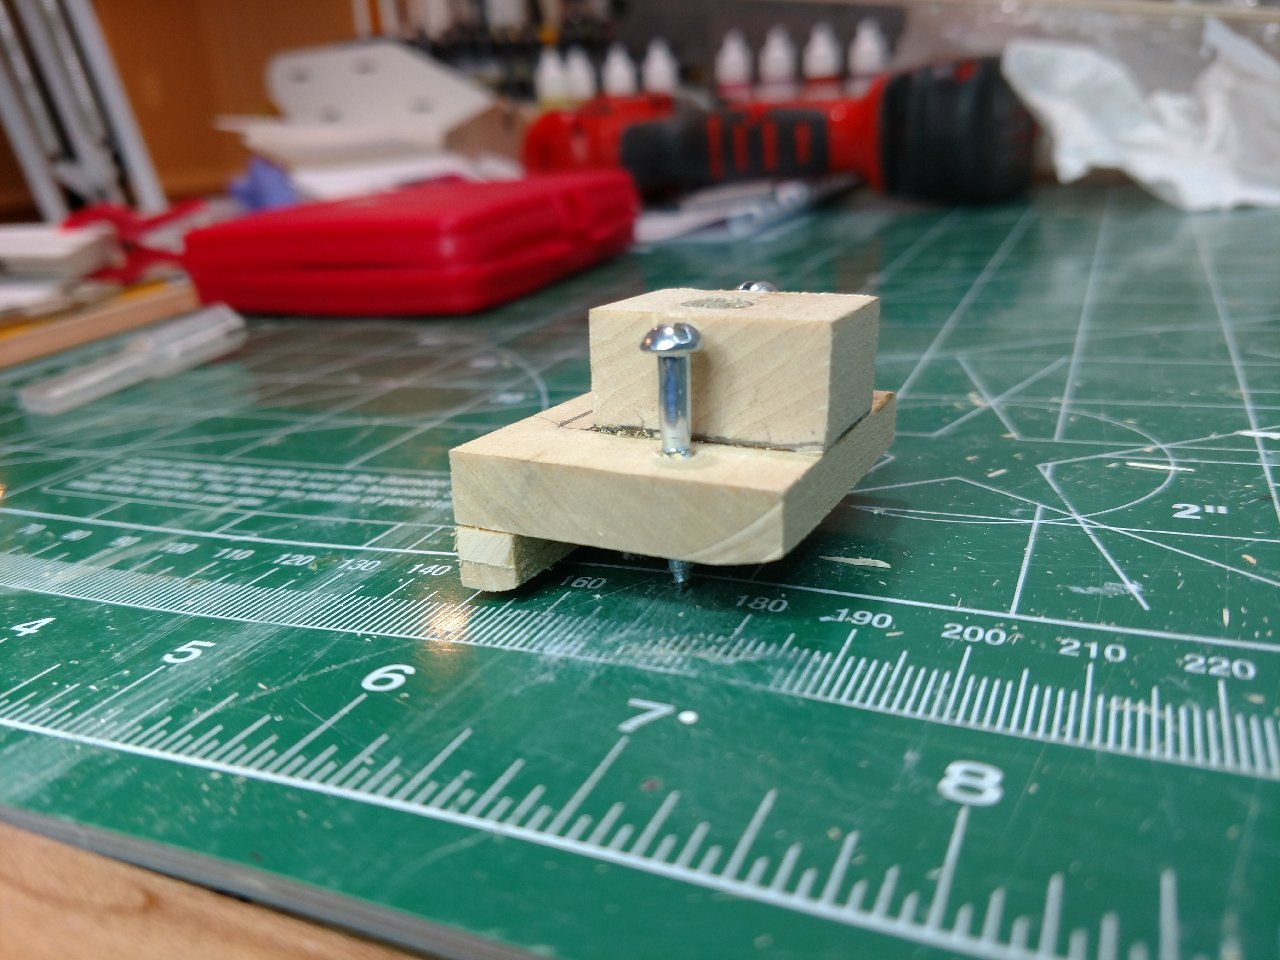
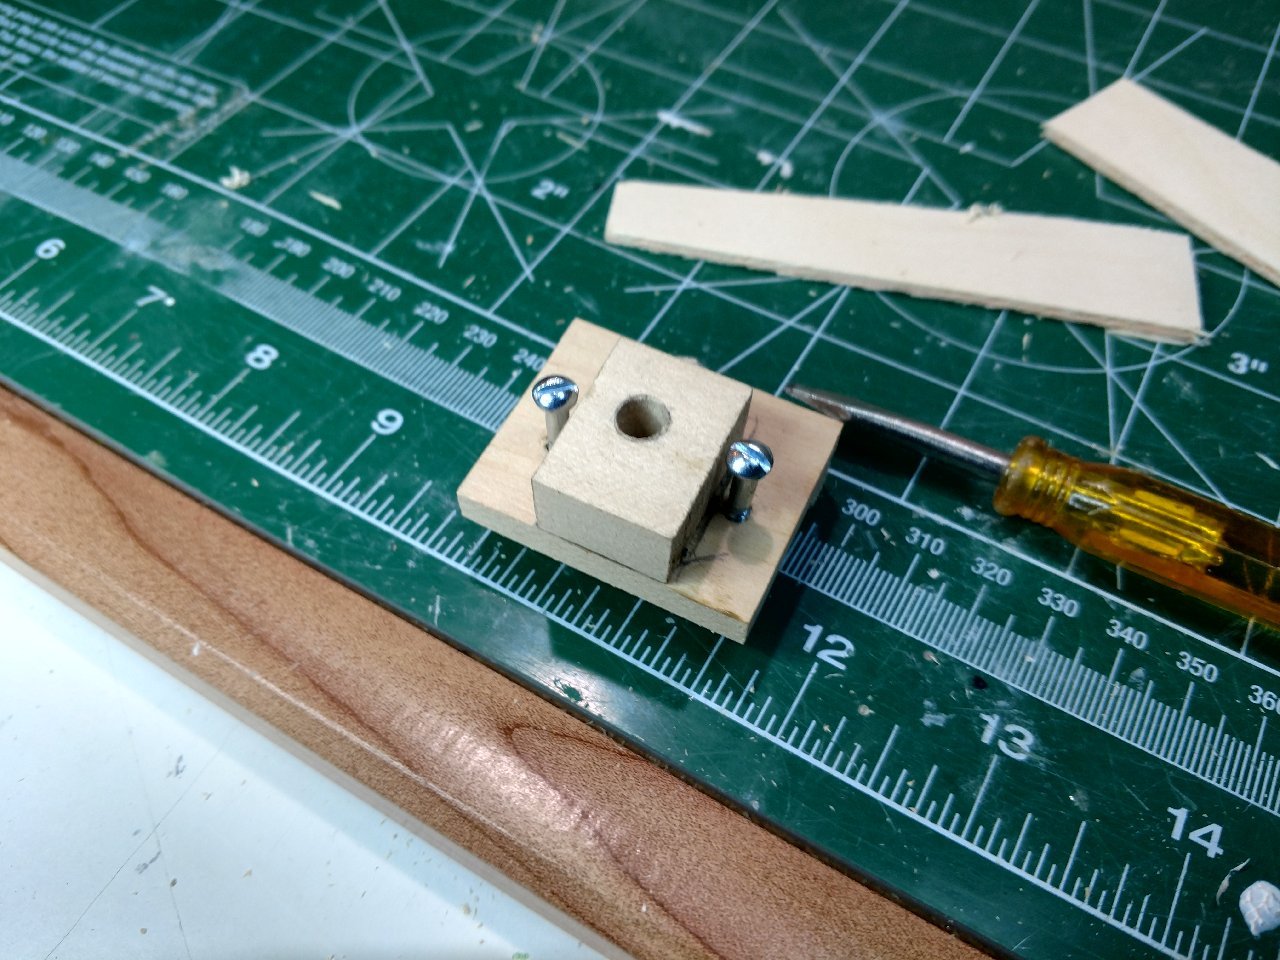
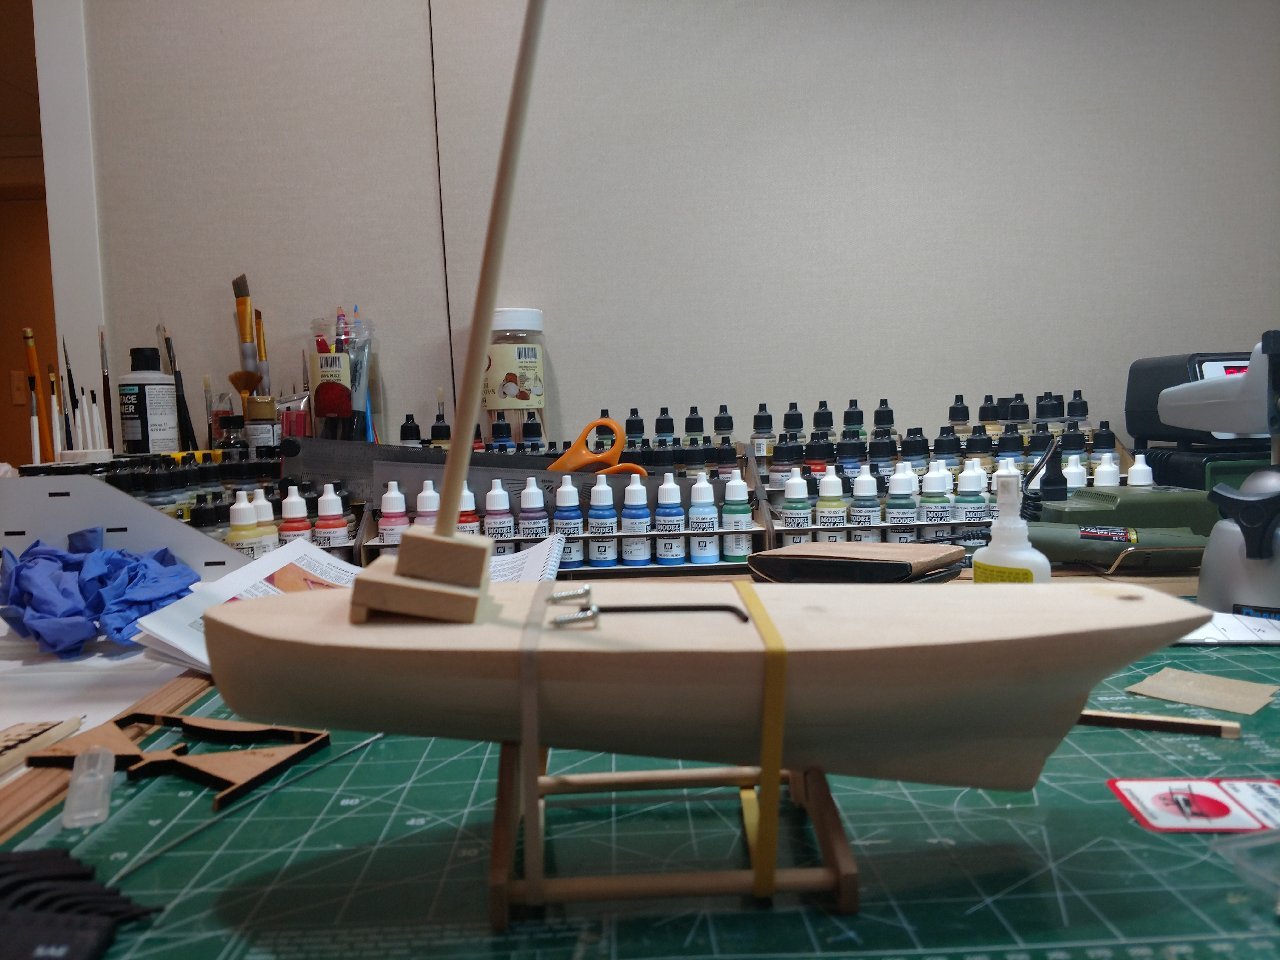
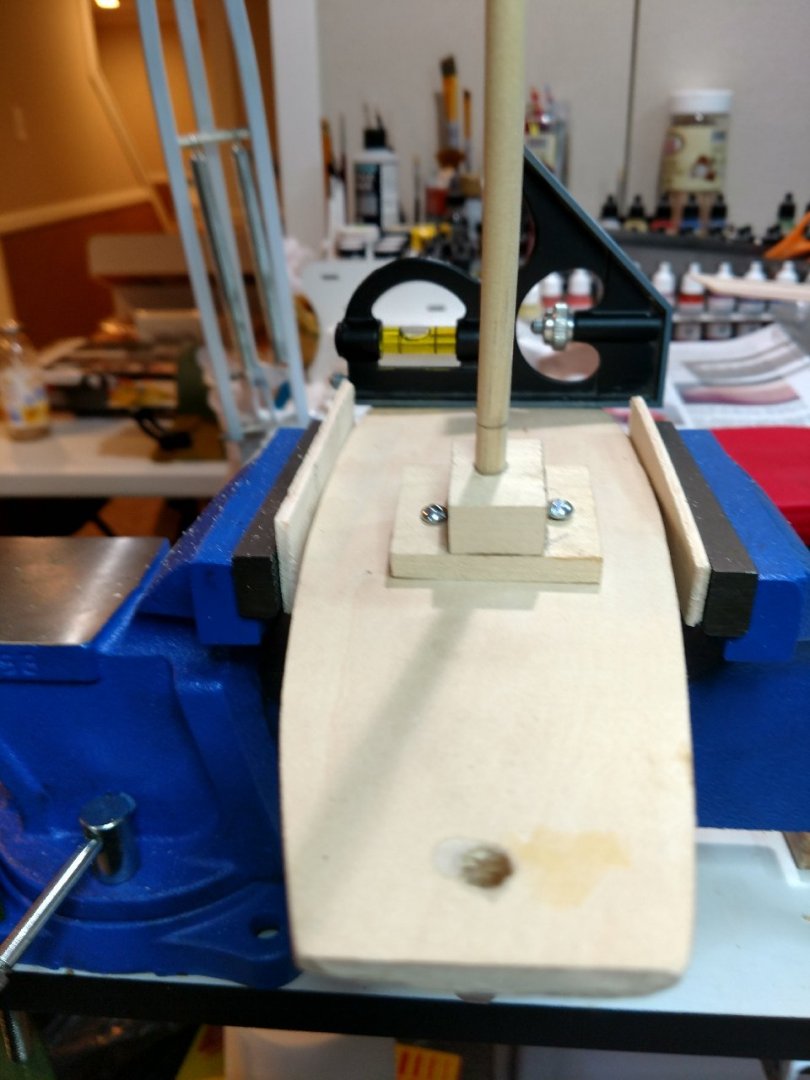
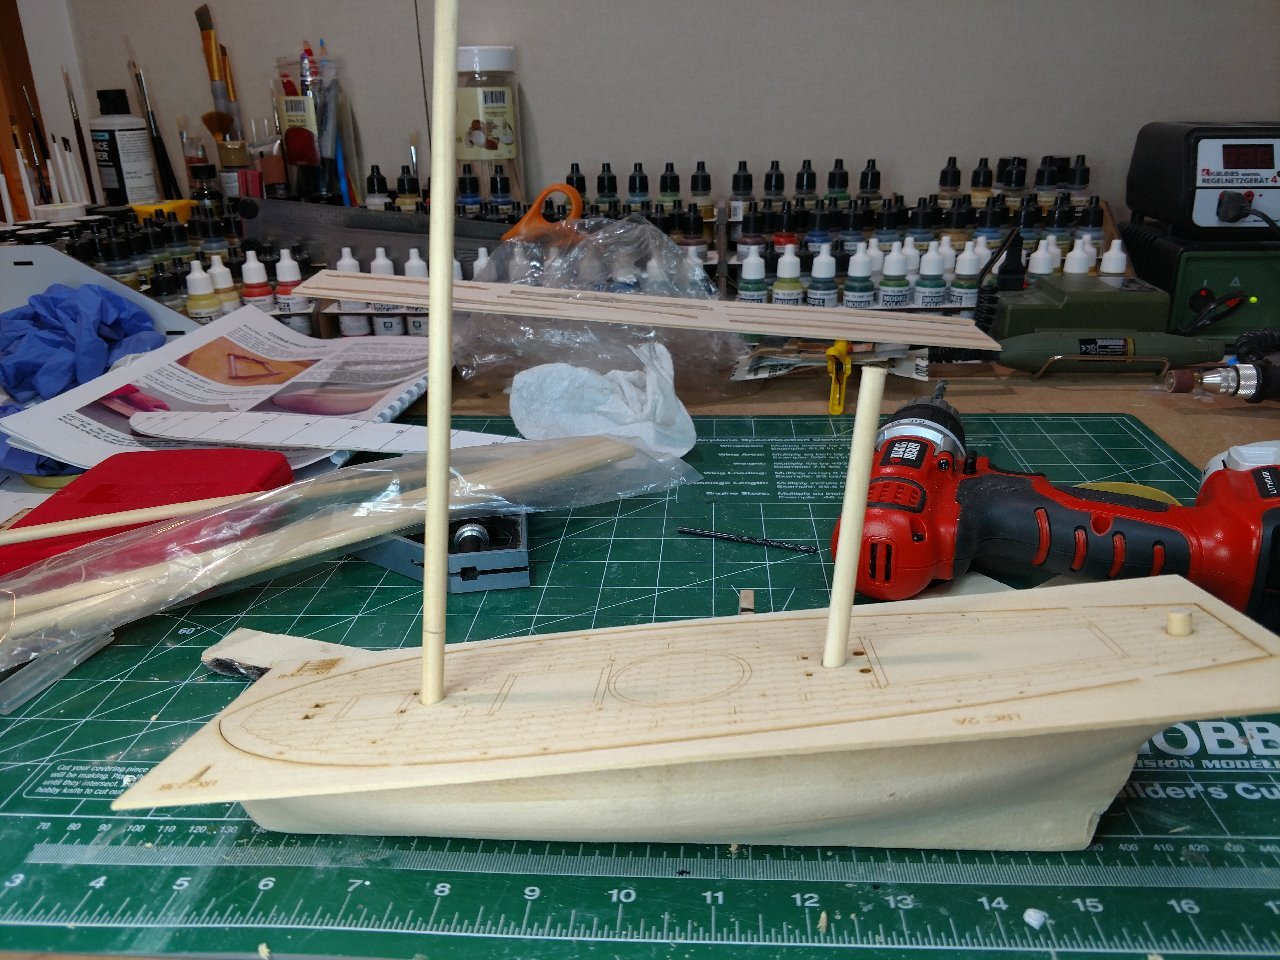
Good Afternoon Folks, Back in business, feels good!. Left off with having to re-drill misaligned holes in the hull of the kit, covered the original hole with 1/4 in dowel. Needed time to think of how to do this and assimilate the same rake on the foremast with the re-drilled mainmast hole. I am pleased with the result so far, I may be a little off since I do not possess a drill press yet. All this was done free hand (Just ordered a Proxxon Drill Press to save time in the future). Step 1: Make a jig (took 3 times to get it right, kept on splitting the jig when drilling the whole for the side screws) to replicate the rake of the foremast to use when drilling the mainmast. Step 2: Find the correct location of the mainmast Step 3: Affix the jig onto the hull in the proper location. Step 4: Drill the whole and pray the rake and location match the deck piece. Step 5: Get back to the business of moving forward on this build! Have a great weekend folks! Bill T.

- 89 replies
-
- 8
-
-
- bluejacket shipcrafters
- revenue cutter
- (and 1 more)
-
Hello My Friend, Thank you for following, I hope to build my jig this weekend. I will post it Be safe and once again, thank you for posting your build as a guide, Bill T.
- 104 replies
-
- 1
-
-
- revenue cutter
- BlueJacket Shipcrafters
- (and 1 more)
-
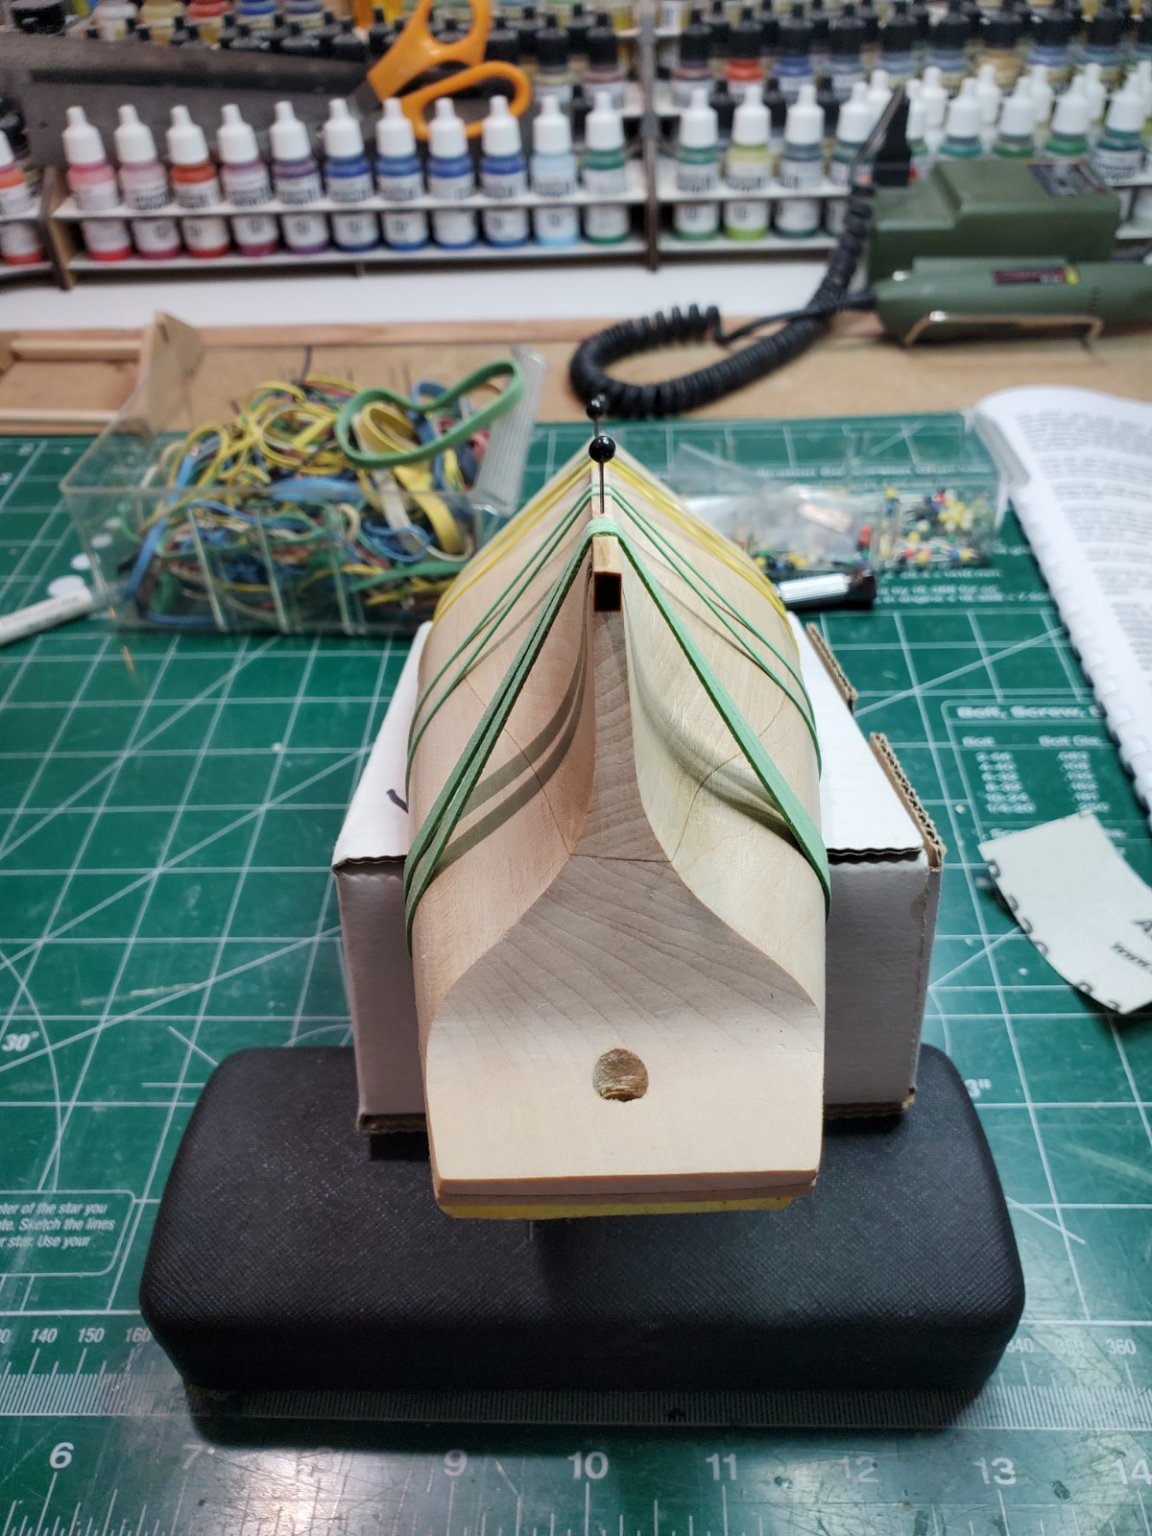
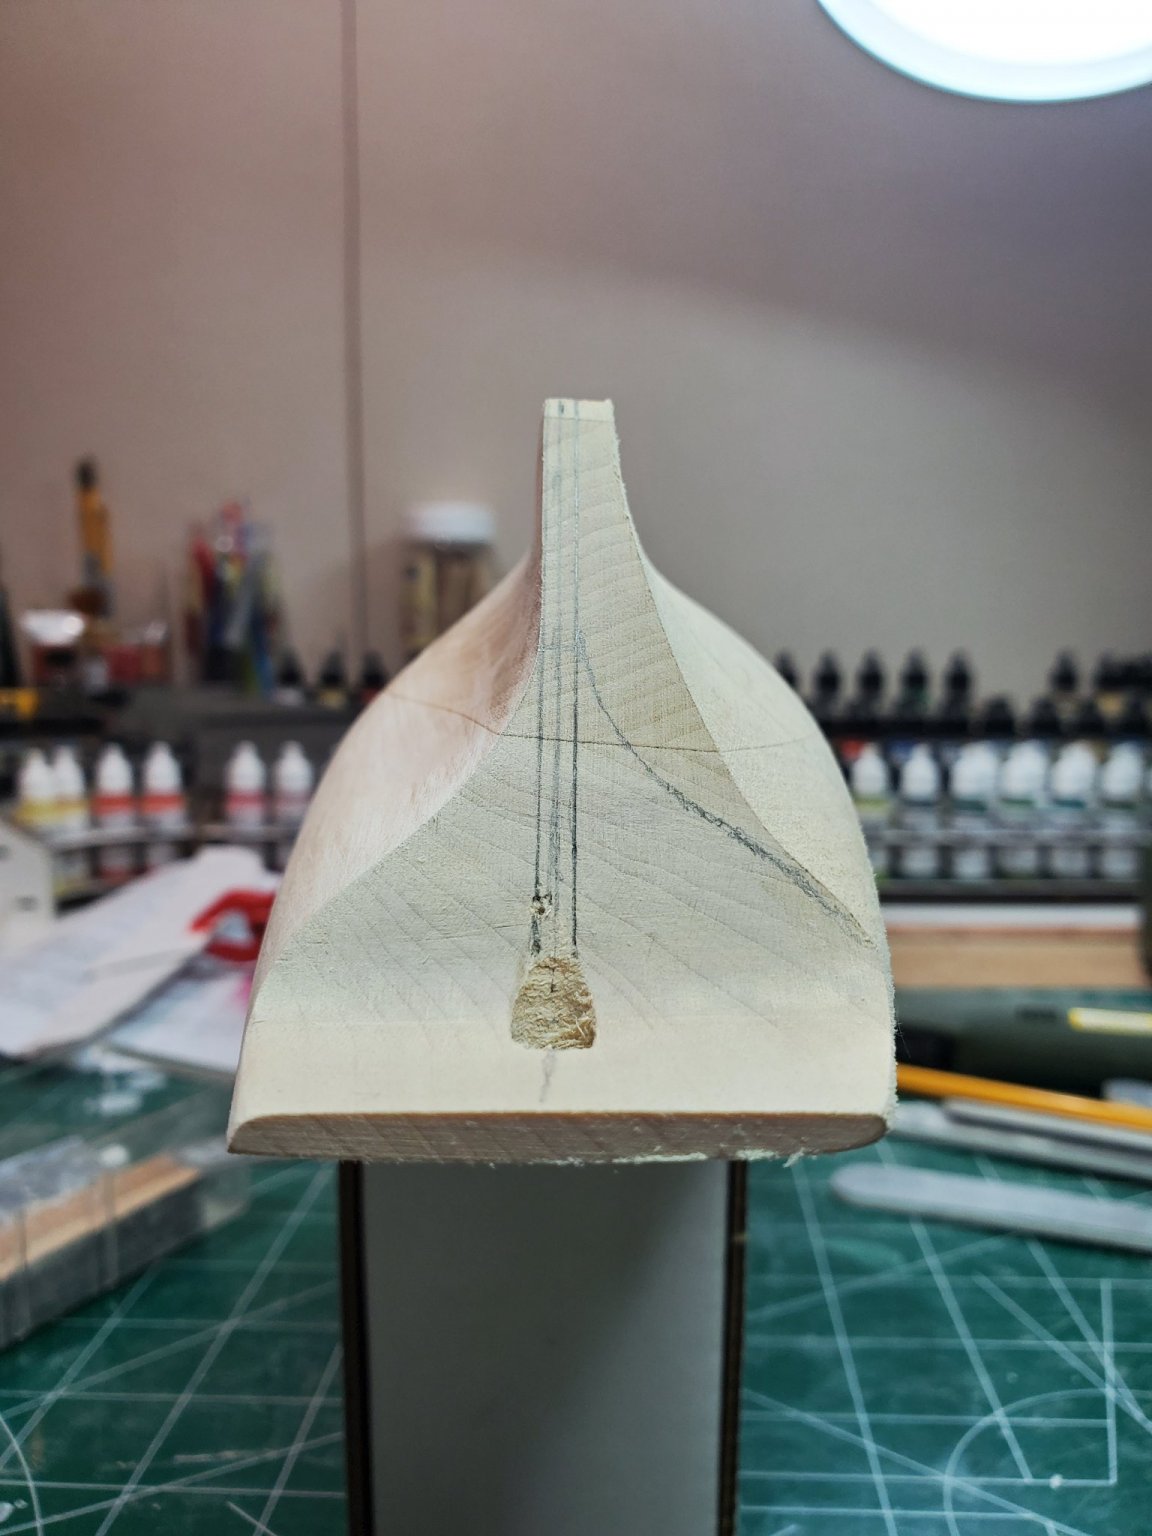
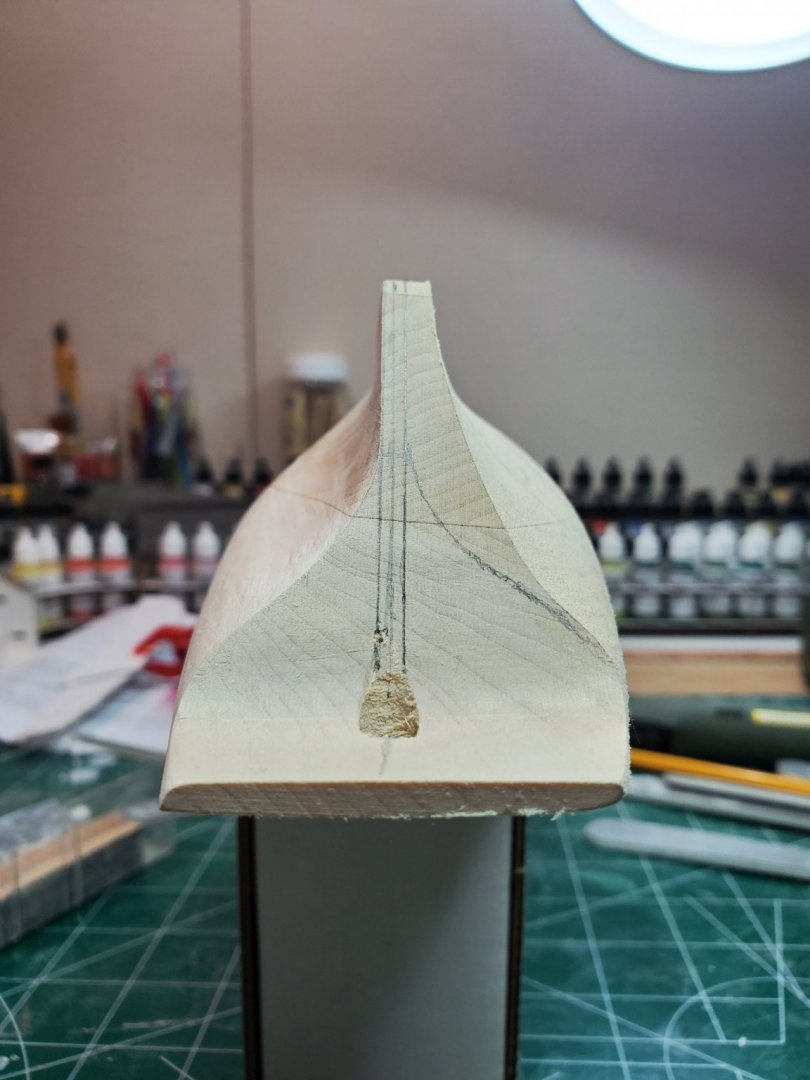
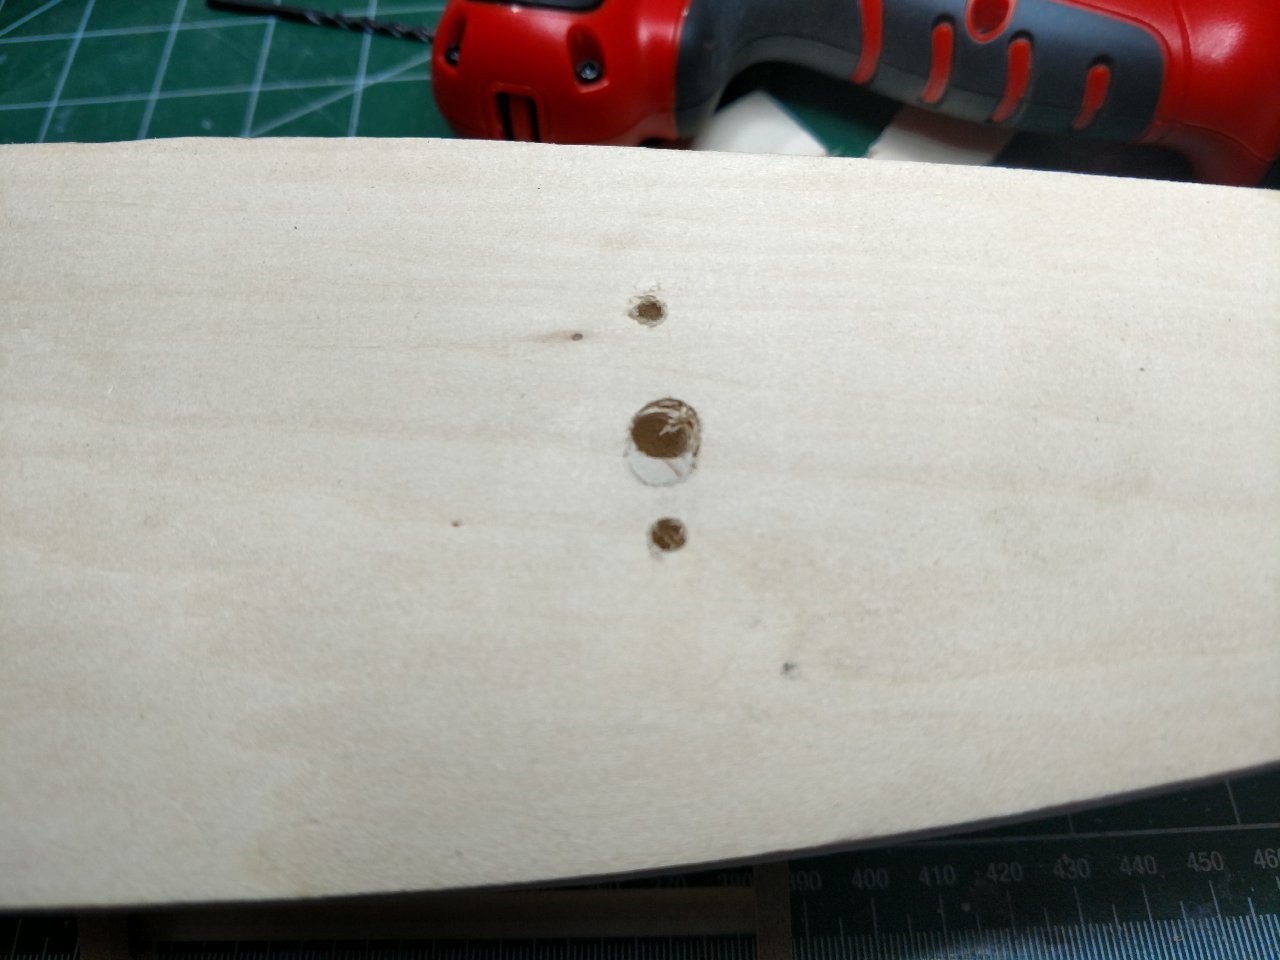
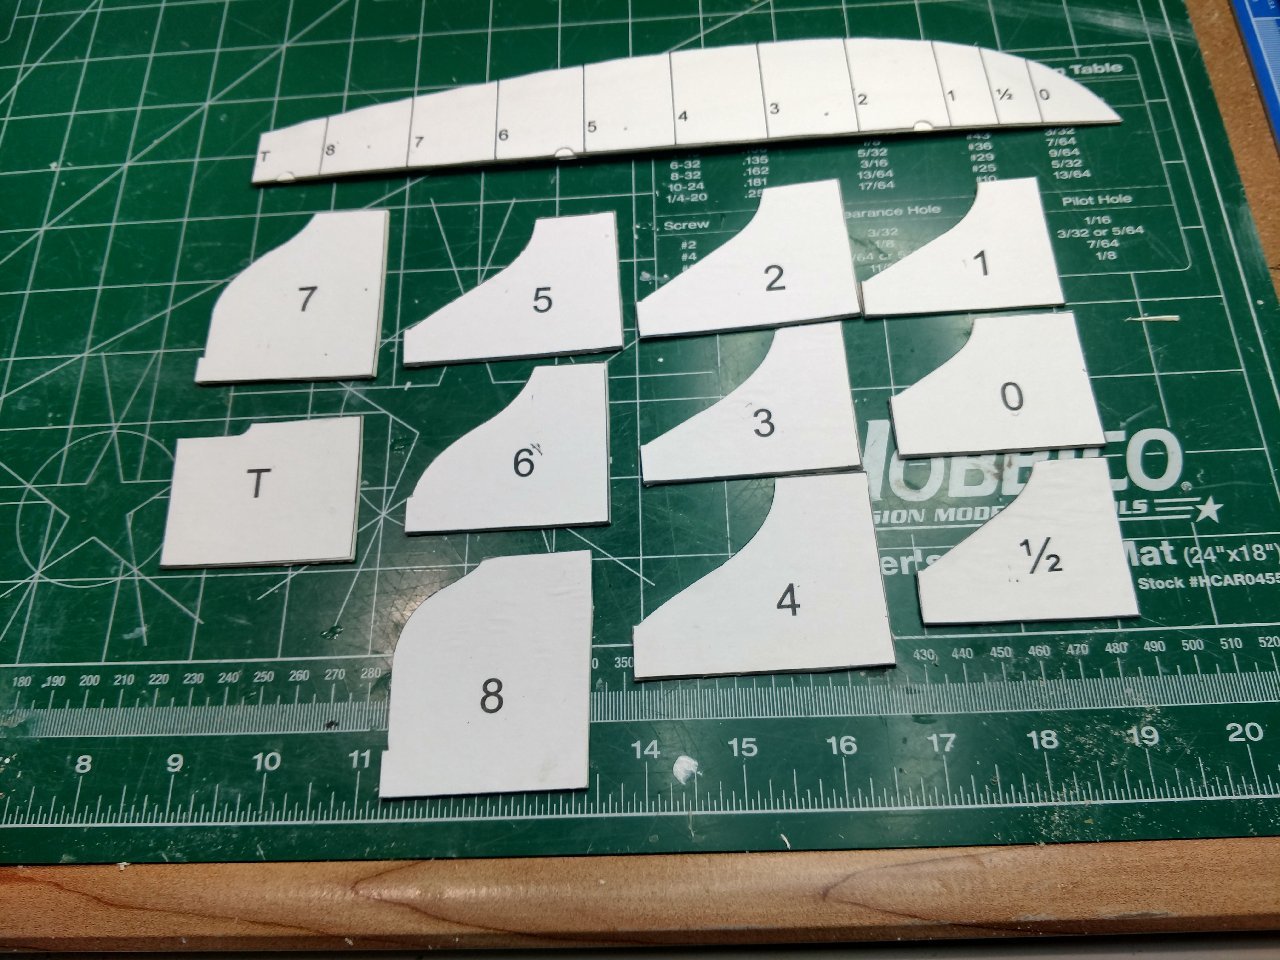
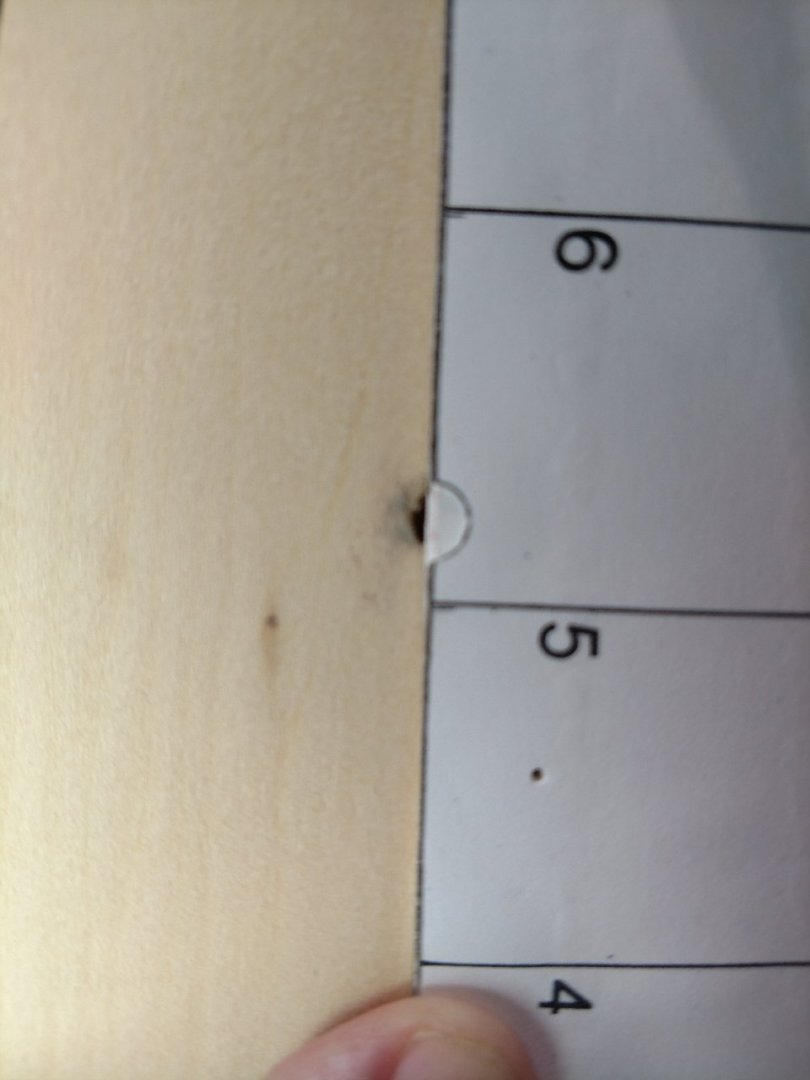
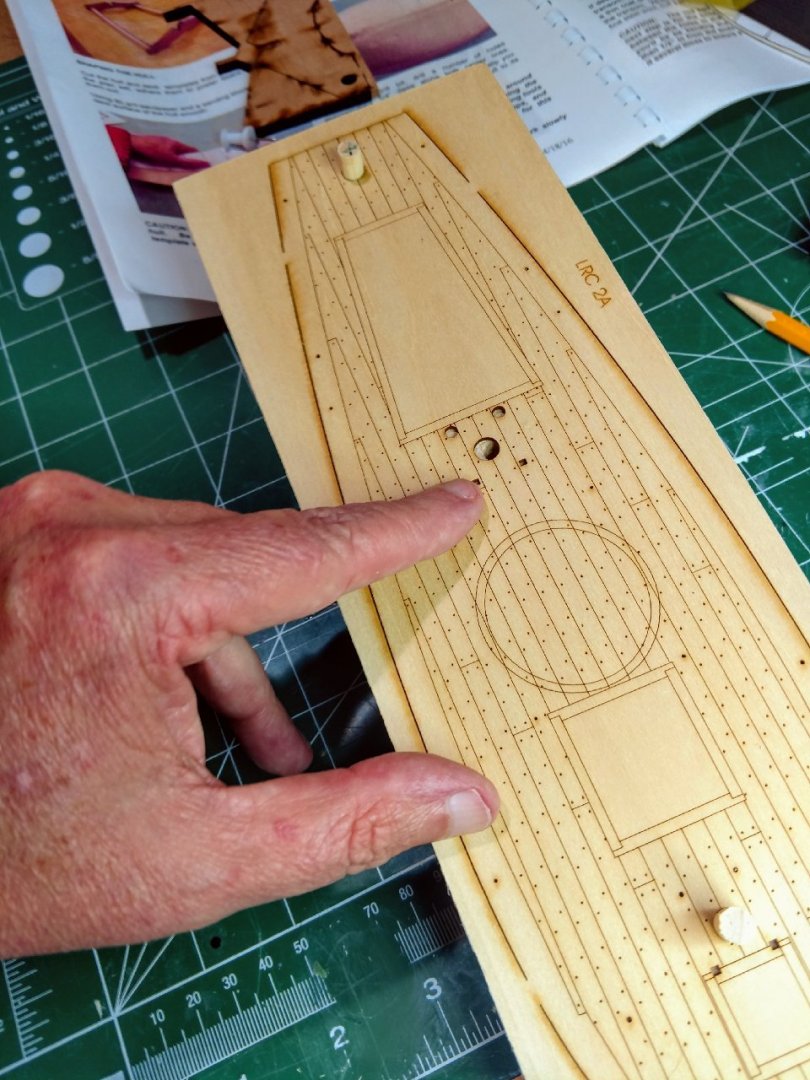
Hello Folks, I got caught up in life over the past few weeks, this is progress of the kit to date: Templates are complete, used frame matting material versus poster board as per Ryland Craze's recommendation above. Worked great and would recommend matting material over poster board every time. I little tougher to cut through, results well worth it. After messing around with the templates I notice that the holes did not line up for the masts and rudder. I double checked the templates I came up with the same result. Finally I broke out the deck part, made some small dowels to secure it, and confirmed there was a problem. I got in touch with Blue Jacket (BJ) quickly because I am planning to copper plate the boat vs. copper paint it. I was worried about spending all the time copper plating the hull and then deal with what I thought could be a big problem. They responded quickly as usual recommending to filling the hole and drilling another or drilling a larger whole (the rigging later would prevent a wobbly mast (BTW this problem has already been addressed and corrected by BJ, however my kit is a pre-correction kit). I decided to fill in the offline mast hole, make some sort of a jig to support drilling a new mast hole that matches the deck part and the angle of the mast. I will use the foremast whole as a guide to have the angle of the new mast hole correct. I believe this will be largest challenge so far. Looking forward to giving it a shot, overcoming obstacles can be rewarding. I will hopefully have this corrected and move on. (the beginning of my jig is in the bottom right hand corner of the above picture). Stay safe all! Bill T.

- 89 replies
-
- 6
-
-
- bluejacket shipcrafters
- revenue cutter
- (and 1 more)


.jpg.2acebd9275fe6070facda6186e8ab3ad.jpg)
.jpg.4ca21cab6e3cc92b046f18f74ece0036.jpg)
.jpg.26869fa11566fa8b97bab75a25e95226.jpg)