
MichaelW
-
Posts
69 -
Joined
-
Last visited
Recent Profile Visitors
532 profile views

.jpg.d84ec4dad1d7791e855dca06210ab6f3.thumb.jpg.f45209242e851d4409eca1a09293165b.jpg)


-
 zifnab reacted to a post in a topic:
Yankee Hero by MichaelW - FINISHED - BlueJacket Shipcrafters - 3/8"=1' - 1889 Quoddy Boat
zifnab reacted to a post in a topic:
Yankee Hero by MichaelW - FINISHED - BlueJacket Shipcrafters - 3/8"=1' - 1889 Quoddy Boat
-
dvm27 reacted to a post in a topic:
Yankee Hero by MichaelW - FINISHED - BlueJacket Shipcrafters - 3/8"=1' - 1889 Quoddy Boat
-
hollowneck reacted to a post in a topic:
Yankee Hero by MichaelW - FINISHED - BlueJacket Shipcrafters - 3/8"=1' - 1889 Quoddy Boat
-
Duanelaker reacted to a post in a topic:
Yankee Hero by MichaelW - FINISHED - BlueJacket Shipcrafters - 3/8"=1' - 1889 Quoddy Boat
-
Duanelaker reacted to a post in a topic:
Yankee Hero by MichaelW - FINISHED - BlueJacket Shipcrafters - 3/8"=1' - 1889 Quoddy Boat
-
Duanelaker reacted to a post in a topic:
Yankee Hero by MichaelW - FINISHED - BlueJacket Shipcrafters - 3/8"=1' - 1889 Quoddy Boat
-
Duanelaker reacted to a post in a topic:
Yankee Hero by MichaelW - FINISHED - BlueJacket Shipcrafters - 3/8"=1' - 1889 Quoddy Boat
-
Duanelaker reacted to a post in a topic:
Yankee Hero by MichaelW - FINISHED - BlueJacket Shipcrafters - 3/8"=1' - 1889 Quoddy Boat
-
My next project is the Bluejacket Shipcrafters Diesel Tugboat. I purchased the kit this summer when I visited the shop in Maine. Nic gave me a great tour of the production areas. Thanks again Nic!
- 81 replies
-
- 5
-
-
- Bluejacket Shipcrafters
- Yankee Hero
- (and 1 more)
-
Thanks everyone. I learned a lot in this build, which I plan to use on my next build. This site is a great tool and a place to find encouragement.
- 81 replies
-
- 1
-
-
- Bluejacket Shipcrafters
- Yankee Hero
- (and 1 more)
-
Thank you sir!
-
Thanks! On to the next model.
-
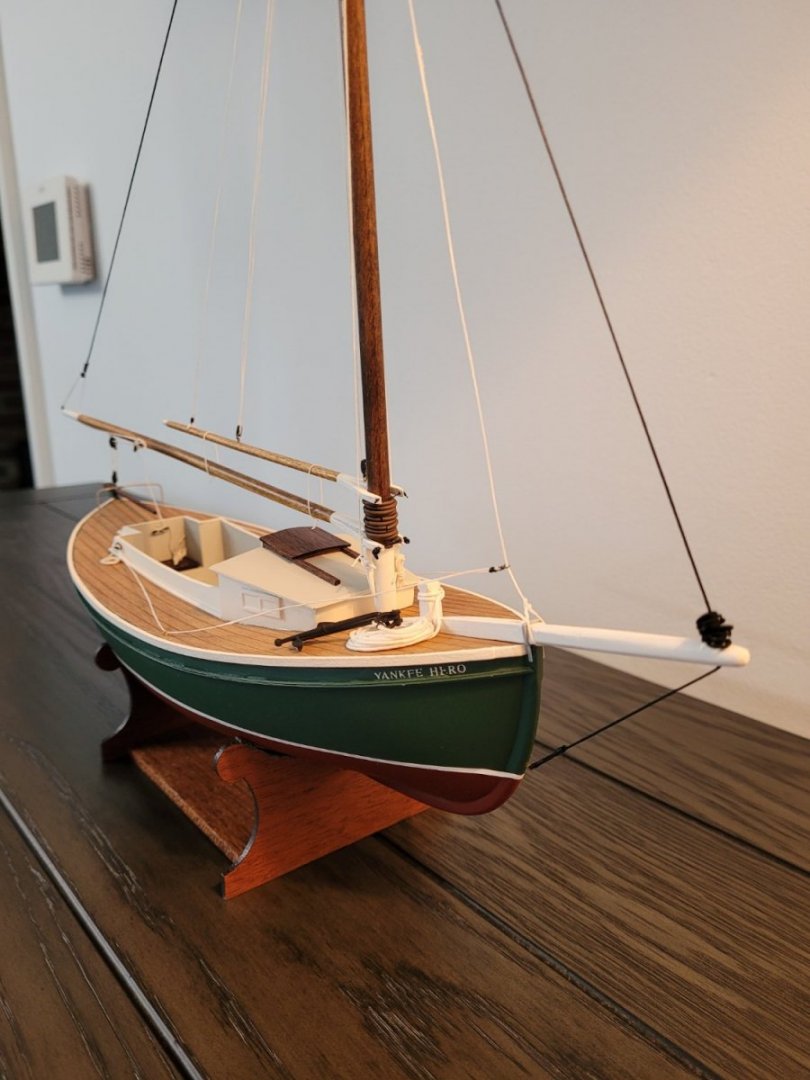
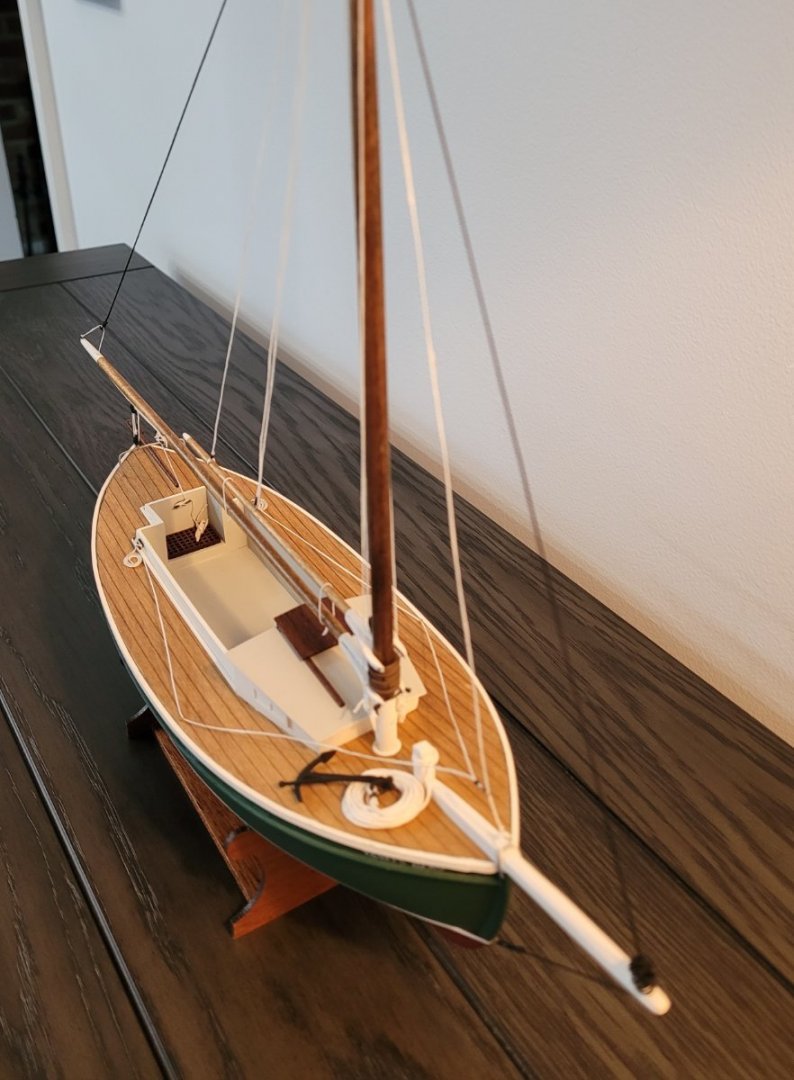
And now the Yankee Hero is finished. Some details I'd do differently, but it's done.

- 81 replies
-
- 10
-
-

-
- Bluejacket Shipcrafters
- Yankee Hero
- (and 1 more)
-
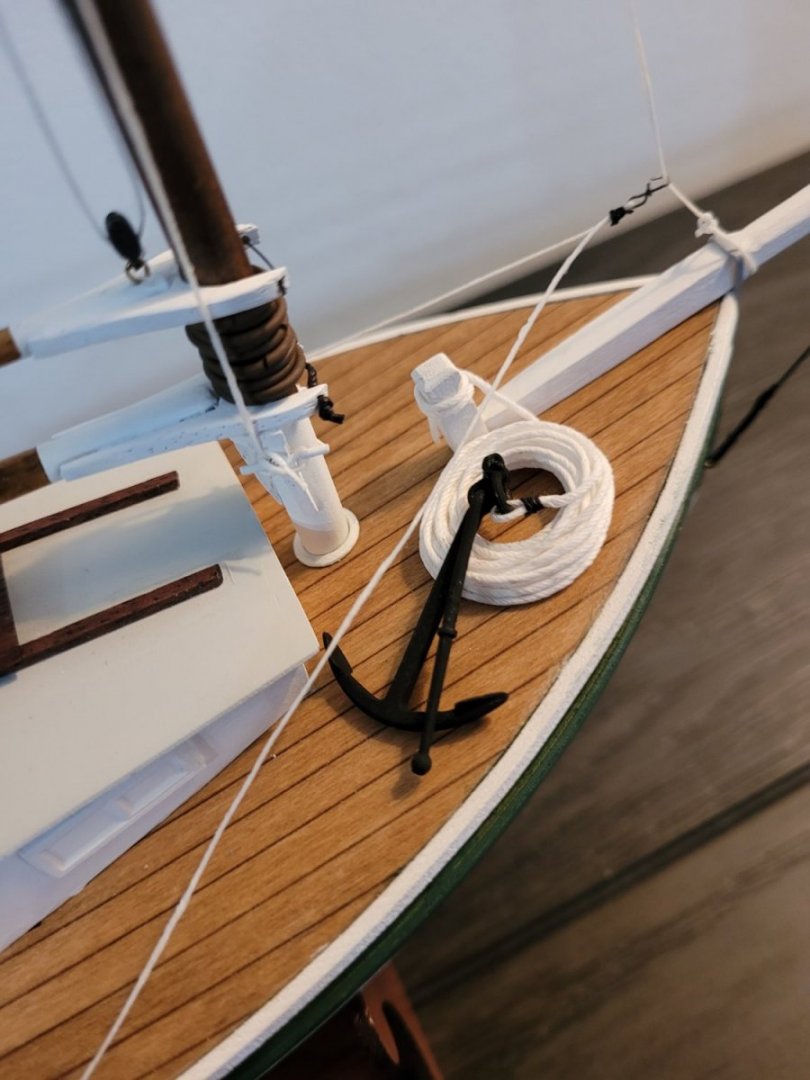
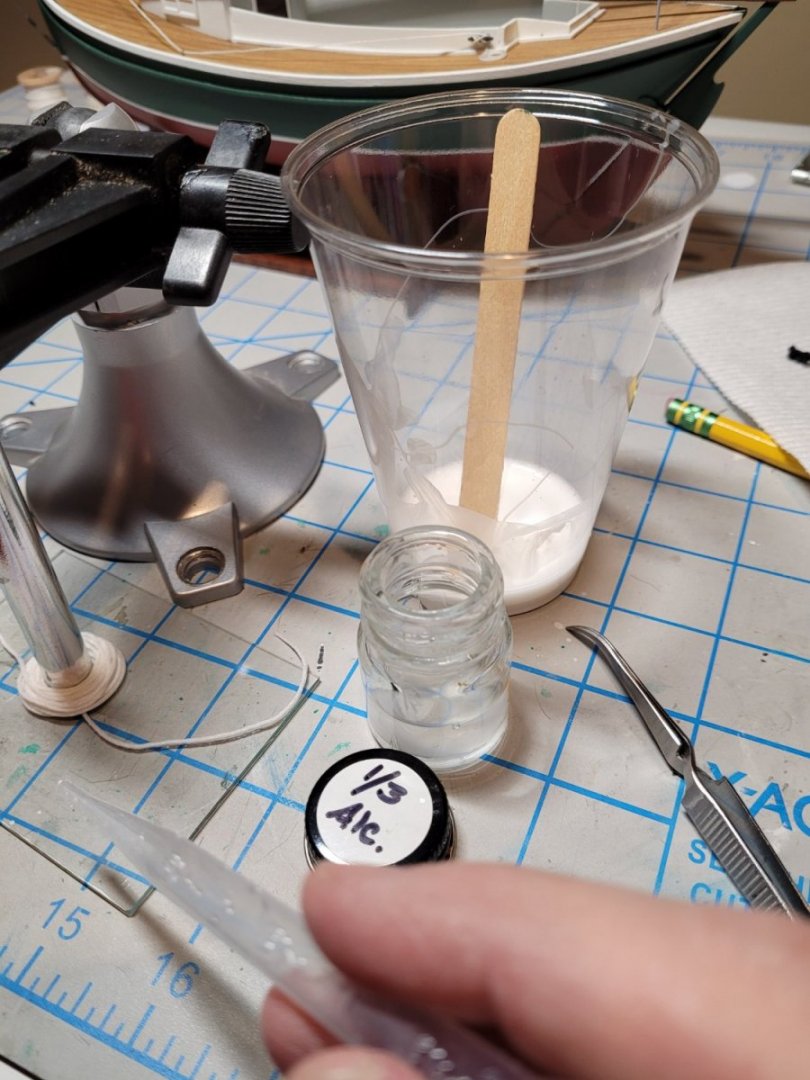
Using some skills from placing model railroad ballast, I soaked the anchor rode in a 1/3 rubbing alcohol - 2/3 water solution. That made the line very pliable. I then used the handle of an Xacto knife to prepare the coil - it was the right size. I carefully looped the line into a normal looking rope pile. I then used very dilute white glue with a dropper to soak the line with white glue. Let dry overnight. I then seized a loop for the anchor shackle. To make it easier to tie off the rode on the Samson post, I used a dropper and re-wetted the line with the alcohol/water solution. Done.
- 81 replies
-
- 3
-
-
- Bluejacket Shipcrafters
- Yankee Hero
- (and 1 more)
-
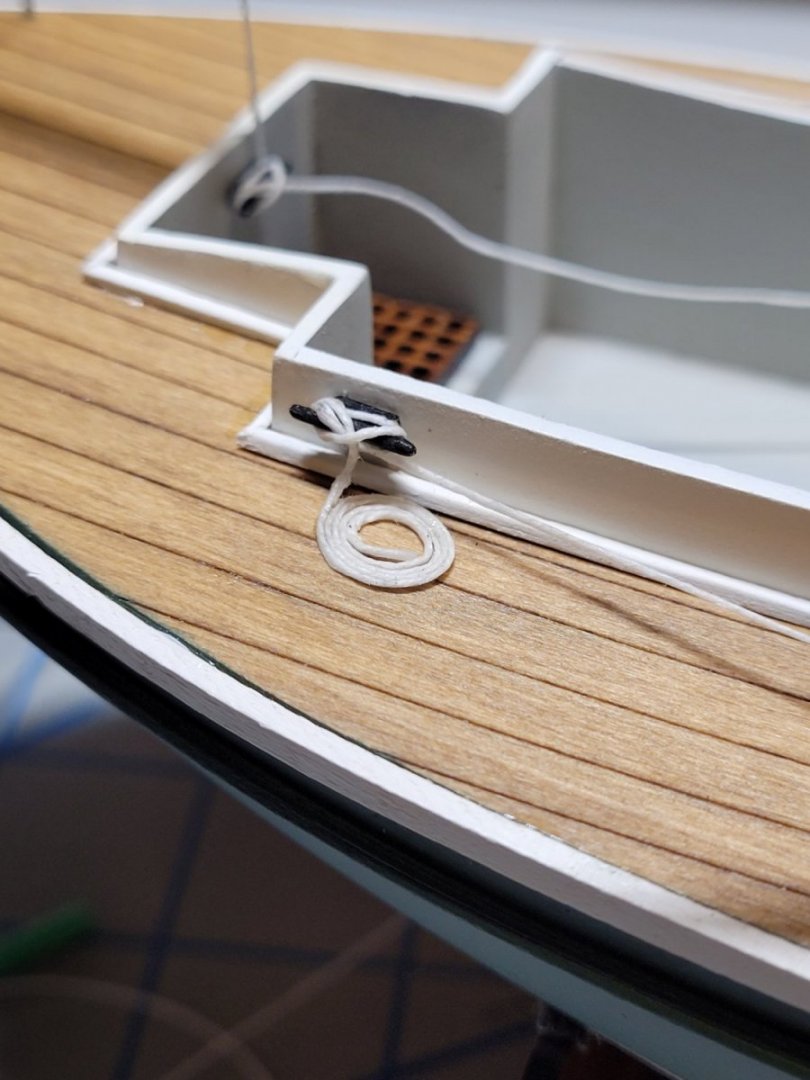
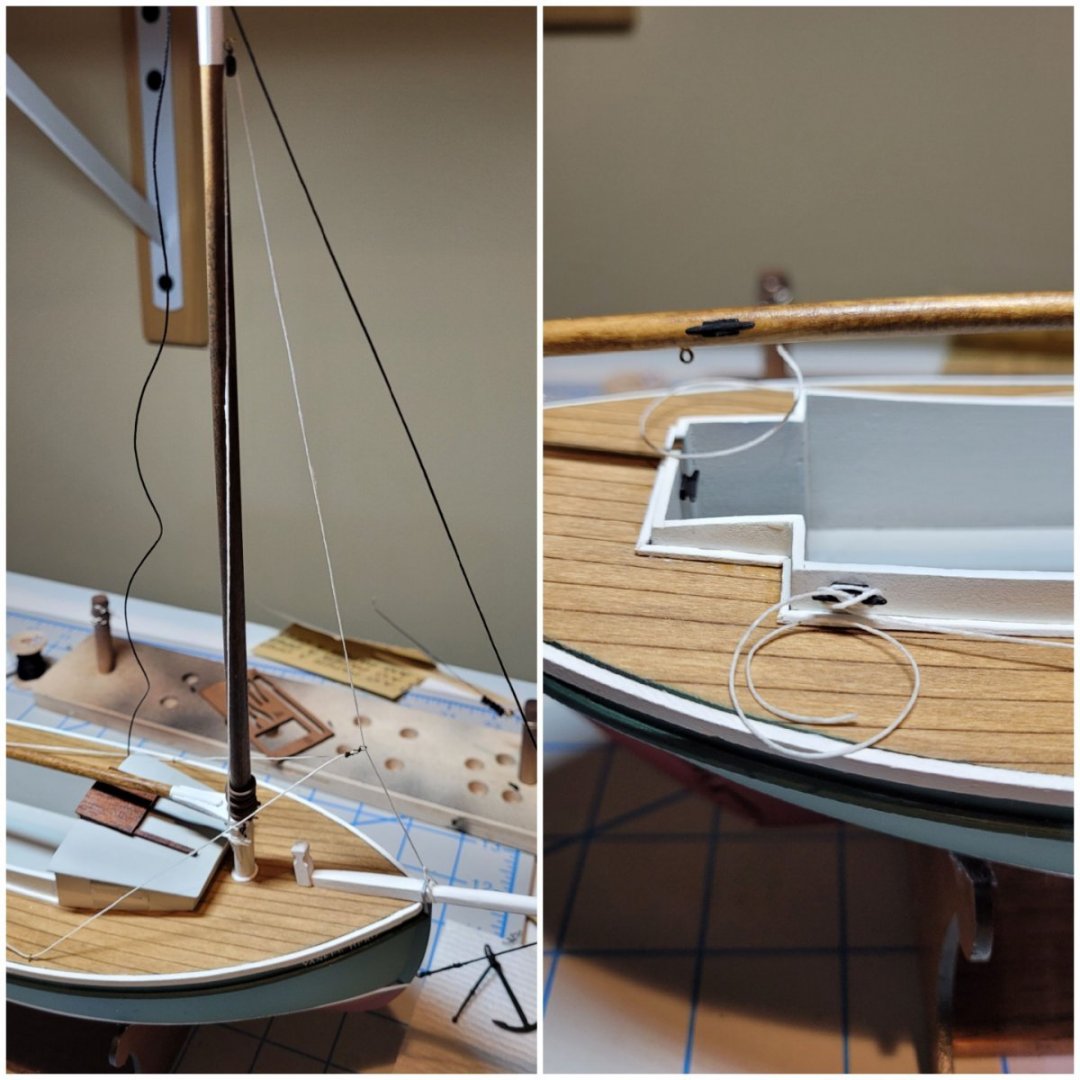
The next task was to square away the lines. After cleating off the jib sheets, I wanted to coil the remaining line in a Flemish coil. I knew I'd have to glue the coil into a round, but didn't want to try that right on the deck. I clamped a small piece of glass from a small picture frame into a hobby vice and positioned that next to the cockpit. I then carefully coiled the line using tweezers to coil the line and my finger to hold the coiled line down. Once I got the coil to the size I wanted, I used a drop of CA to hold the coil together. I used some accelerant to speed up the CA cure, then slid the coil onto the deck. I had to glue the coil down for to lay flat. After repeating the process on the other side, I cleated off the main halyard and coiled the remaining line and hung it on the pin at the mast. I coiled the mainsheet and left it on the cockpit grate. All that's left to do, I think, is place the anchor on the fore deck and coil the anchor rode.


- 81 replies
-
- 2
-
-
- Bluejacket Shipcrafters
- Yankee Hero
- (and 1 more)
-
The next task as to square away the lines. After cleating off the jib sheets, I wanted to coil the remaining line in a Flemish coil. I knew I'd have to glue the coil into a round, but didn't want to try that right on the deck. I clamped a small piece of glass from a small picture frame into a hobby vice and positioned that next to the cockpit. I then carefully coiled the line using tweezers to coil the line and my finger to hold the coiled line down. Once I got the coil to the size I wanted, I used a drop of CA to hold the coil together. I used some accelerant to speed up the CA cure, then slid the coil onto the deck. I had to glue the coil down to it laid flat. After repeating the process on the other side I cleated off the main halyard and coiled the remaining line and hung it on the pin at the mast. I coiled the mainsheet and left it on the cockpit grate. All that's left to do is place the anchor on the fore deck and coil the anchor rode.
- 81 replies
-
- 2
-
-
- Bluejacket Shipcrafters
- Yankee Hero
- (and 1 more)
-
Thank you sir! I've finished the rigging and am finishing the last few tasks. I'll have photos shortly. MSW has been a huge source of tips and encouragement.
-
MichaelW reacted to a post in a topic:
Yankee Hero by MichaelW - FINISHED - BlueJacket Shipcrafters - 3/8"=1' - 1889 Quoddy Boat
-
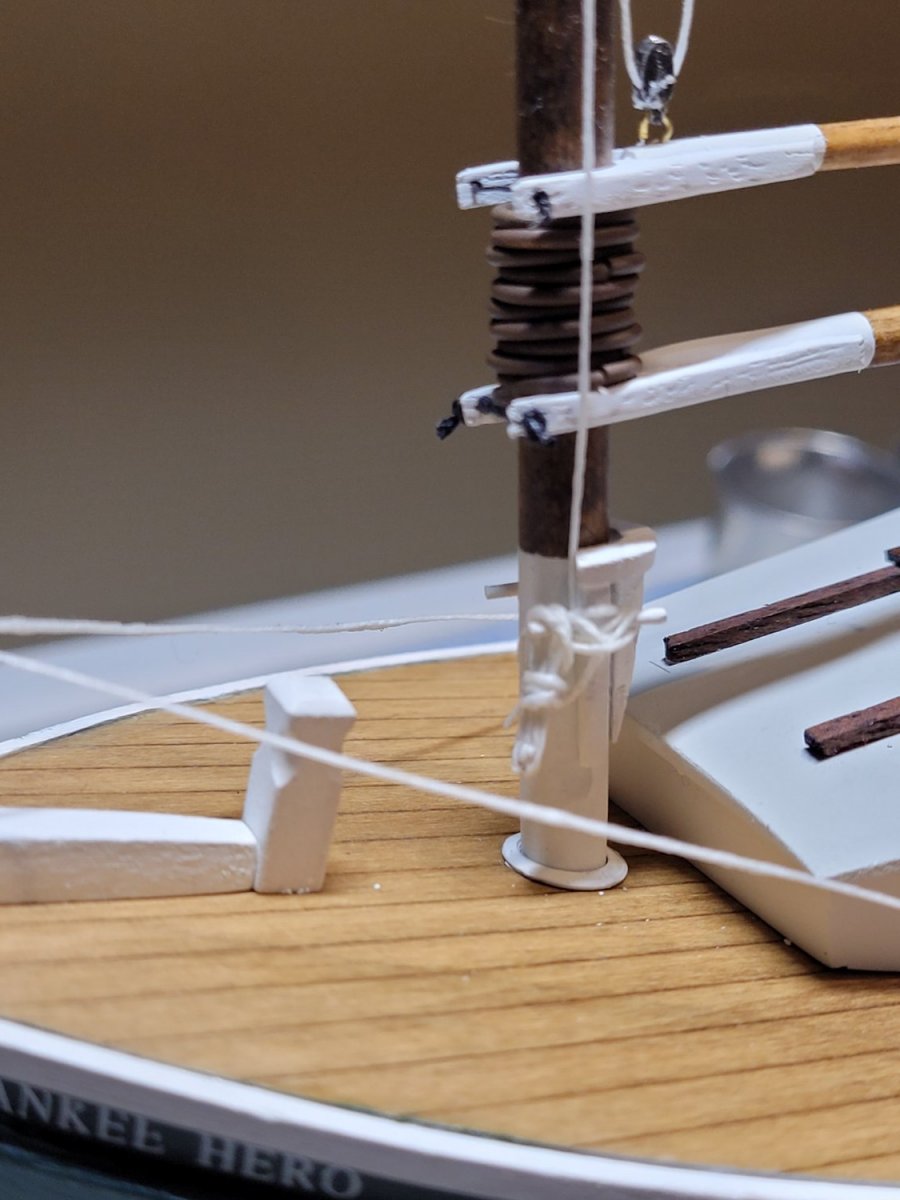
I painted the blocks, cleats, and anchor flat black. I then waded into rigging the boat. The first step was to find YouTube videos on seizing loops at the end of lines. I picked the technique that worked best for me. It take some practice to get the turns of the seizing to line up. I read through and carefully followed the rigging directions in the BlueJacket instructions. As shown in the following photos I ran the forestay, topping lift, jib halyard, and jib sheets. I also attached the boom and threaded and tied off the parrels, which keep the boom attached to the mast. Still more rigging to go. Apparently there are many ways to coil the ends of lines (i.e. search "Flemish coil"). I'll need to figure out what works best for me.

- 81 replies
-
- 1
-
-
- Bluejacket Shipcrafters
- Yankee Hero
- (and 1 more)
-
Great! I'll go with that. Thanks!
-
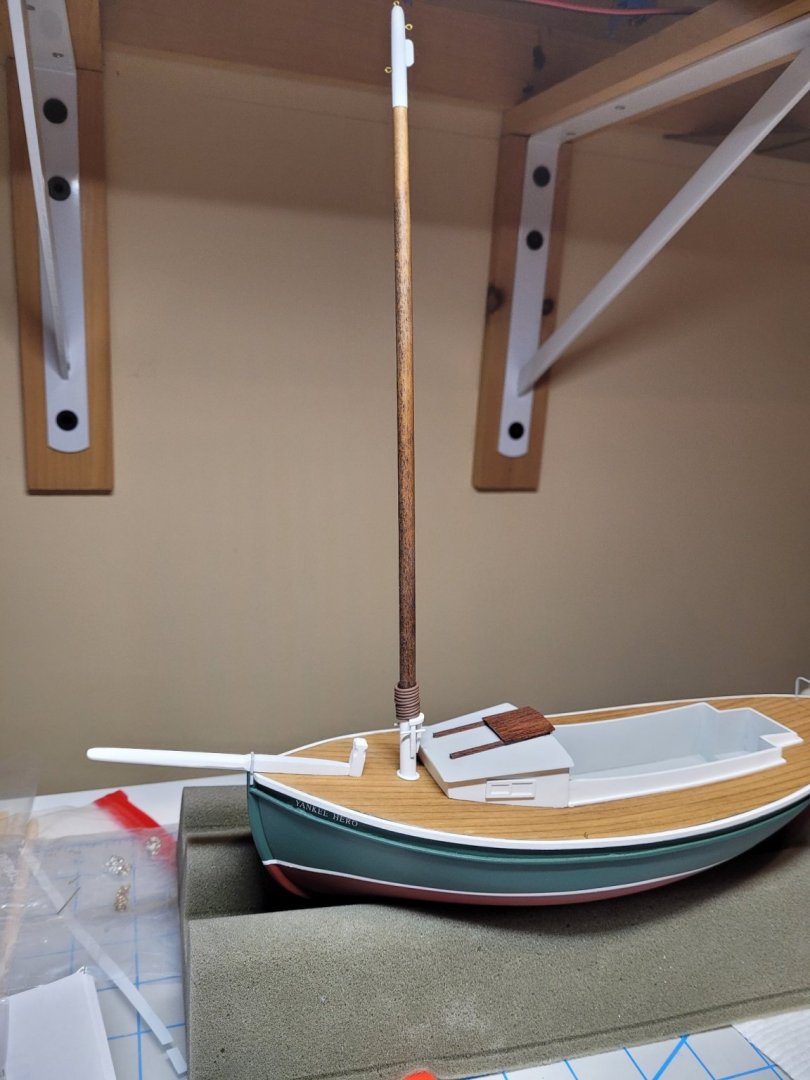
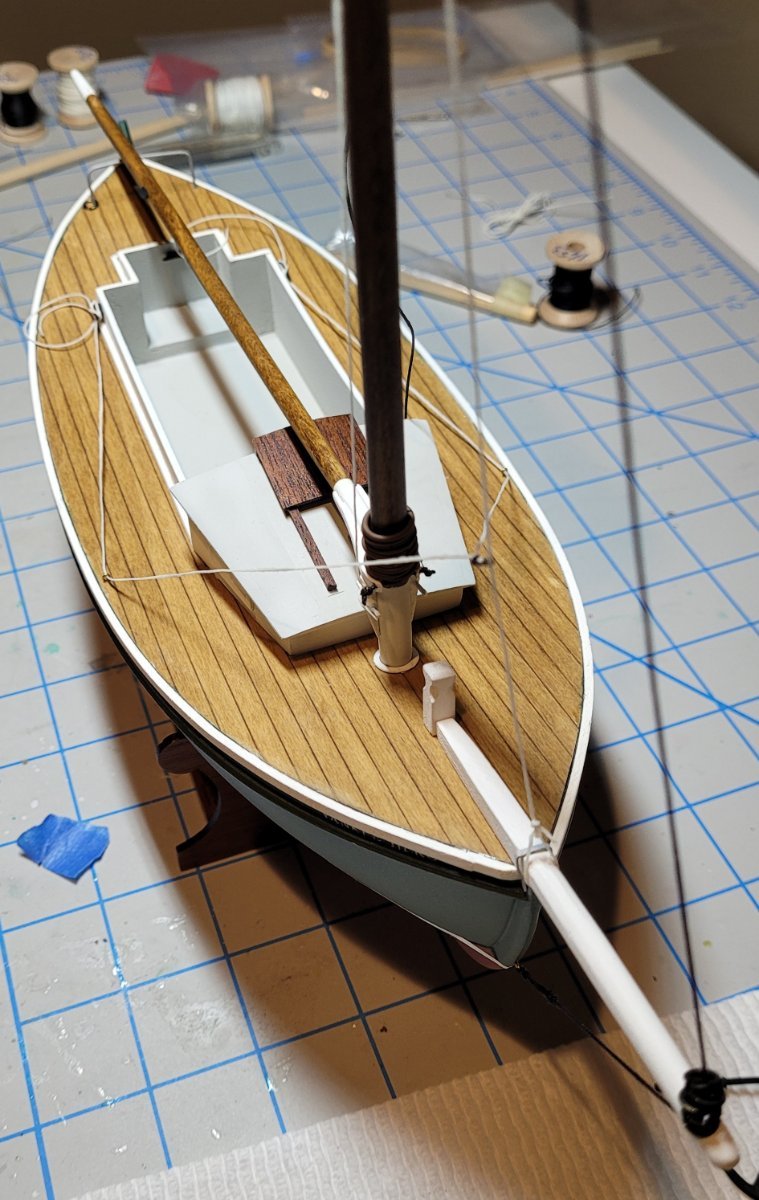
At a snail's pace now.... After a false start on the mast step (glued it on before placing the hoops on the mast), I have made some progress. The mast is up, mast step attached (after loading the hoops to the mast the second go-around), boot stripe on, and spars ready to be attached. The next step - rigging! I still need to shape and attach the tiller. I am wondering if I should paint the blocks or leave them gray...... Any suggestions?
.thumb.jpg.08be9f93184af647579a503faa892381.jpg)
- 81 replies
-
- 1
-
-
- Bluejacket Shipcrafters
- Yankee Hero
- (and 1 more)
-
MichaelW reacted to a post in a topic:
Atlantic by Chris H - BlueJacket Shipcrafters - 1:96 Scale
-
Thanks Tom! Just the shot in the arm I needed to get this boat finished!
-
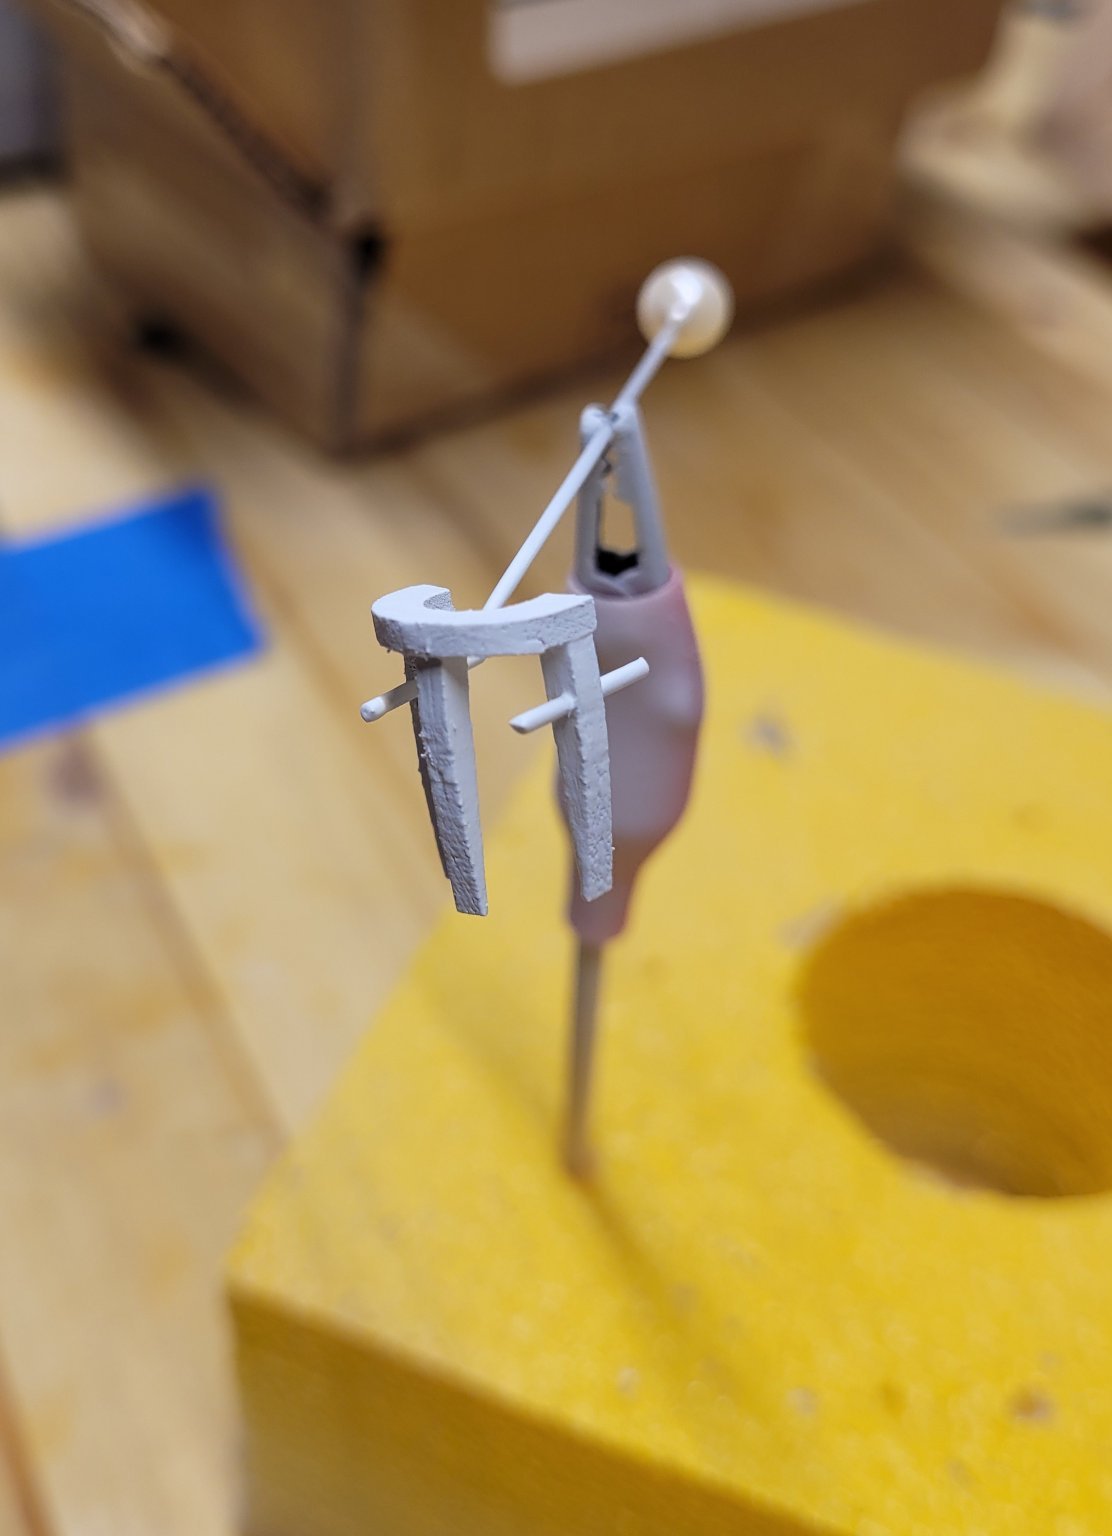
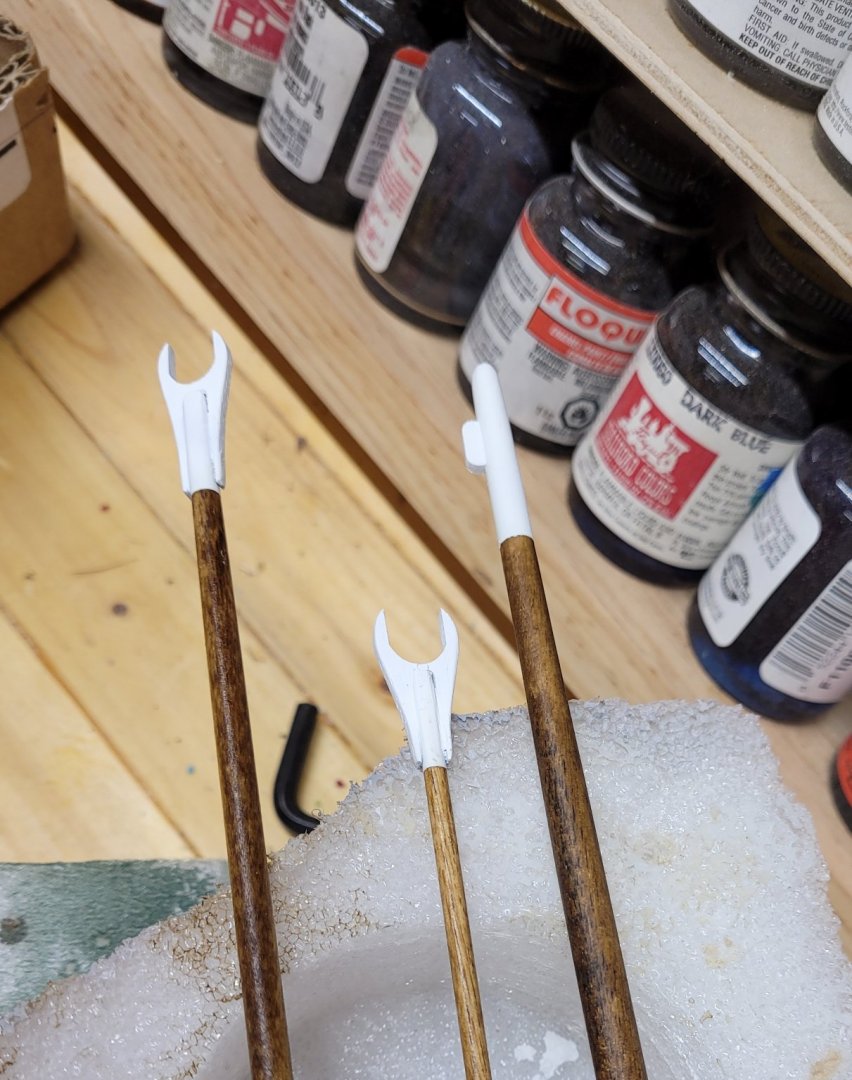
Ok, the spars and mast are finished. I also assembled and painted the boom step. Because I figure the boat owner would have varnished the spars, I sprayed them with some lacquer to give them a little shine. On very close inspection it looks like I should have sanded the boom step parts a bit more. The parts seemed quite delicate so I didn't want to mess with them much. I may clean it up a little more before installing.

- 81 replies
-
- 1
-
-
- Bluejacket Shipcrafters
- Yankee Hero
- (and 1 more)
-
MichaelW reacted to a post in a topic:
Marie Felling by rvchima - FINISHED - Caldercraft - 1:32 - Harbour Tug
-
Thank you! I am probably writing too much and adding too many photos. My hope is that this will help the next modeler.


.jpg.3bc974a4193e95323c604a5fbb5862ad.jpg)