wtimlen
-
Posts
103 -
Joined
-
Last visited
1 Follower
.thumb.jpeg.fc5d633a7b34428fcf19419a73d56d55.jpeg)
About wtimlen

- Birthday 02/22/1965
Recent Profile Visitors
1,415 profile views


-
 EricWilliamMarshall reacted to a post in a topic:
USS Perry by EricWilliamMarshall - BlueJacket Shipcrafters - Scale 1/96
EricWilliamMarshall reacted to a post in a topic:
USS Perry by EricWilliamMarshall - BlueJacket Shipcrafters - Scale 1/96
-
 KurtH reacted to a post in a topic:
Revenue Cutter by wtimlen - BlueJacket Shipcrafters - 1:48
KurtH reacted to a post in a topic:
Revenue Cutter by wtimlen - BlueJacket Shipcrafters - 1:48
-
Thukydides reacted to a post in a topic:
Revenue Cutter by wtimlen - BlueJacket Shipcrafters - 1:48
-
Thukydides reacted to a post in a topic:
Revenue Cutter by wtimlen - BlueJacket Shipcrafters - 1:48
-
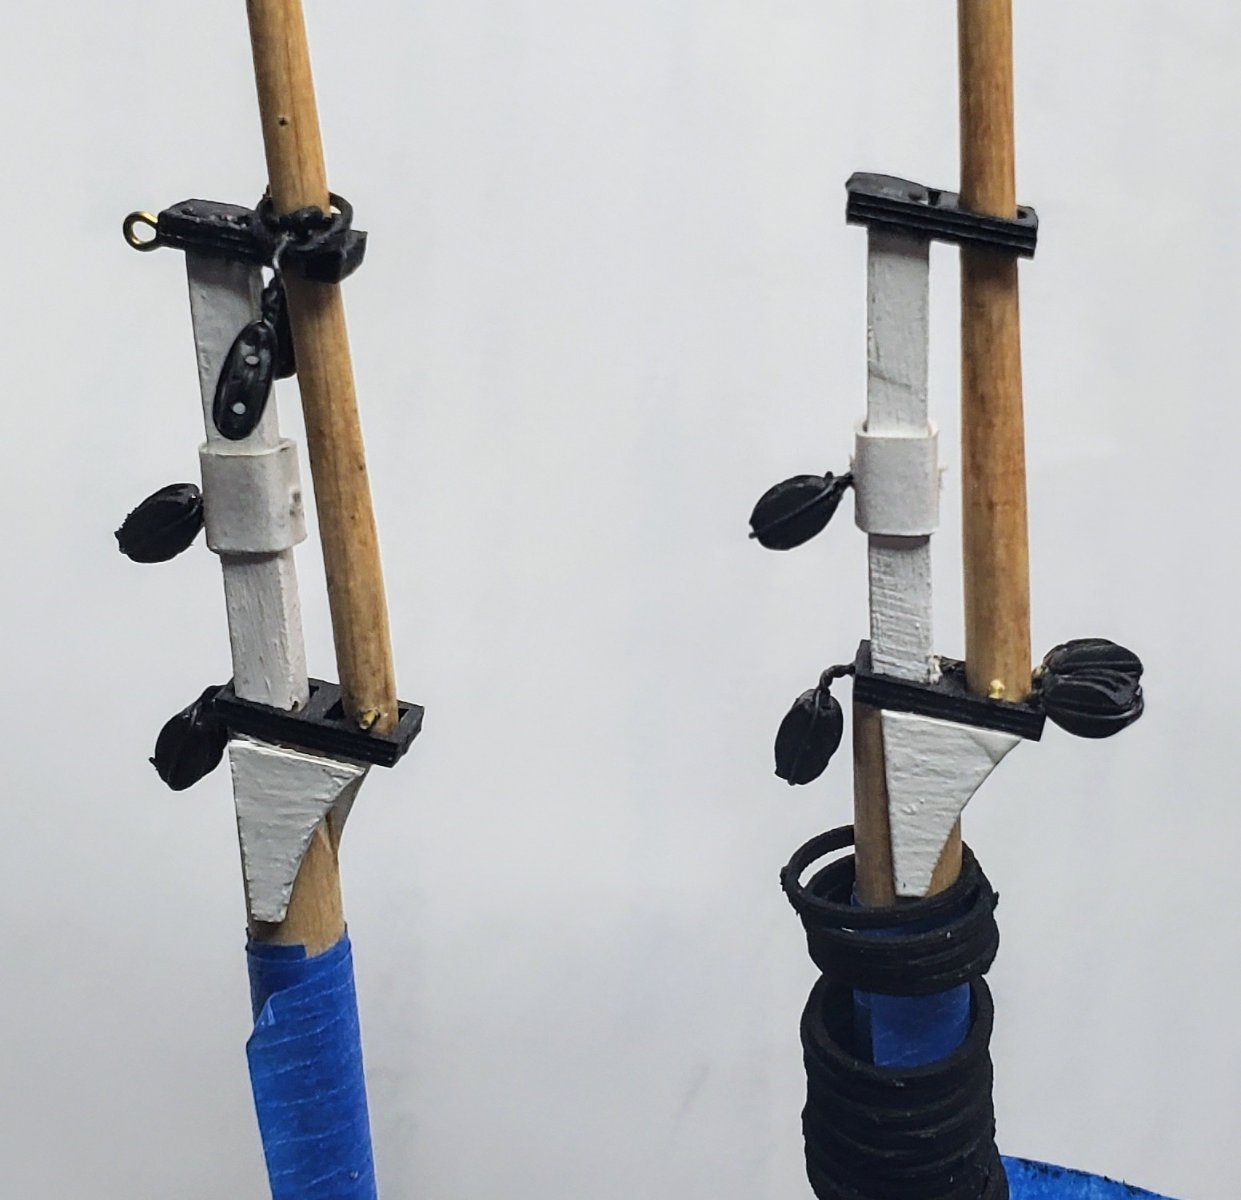
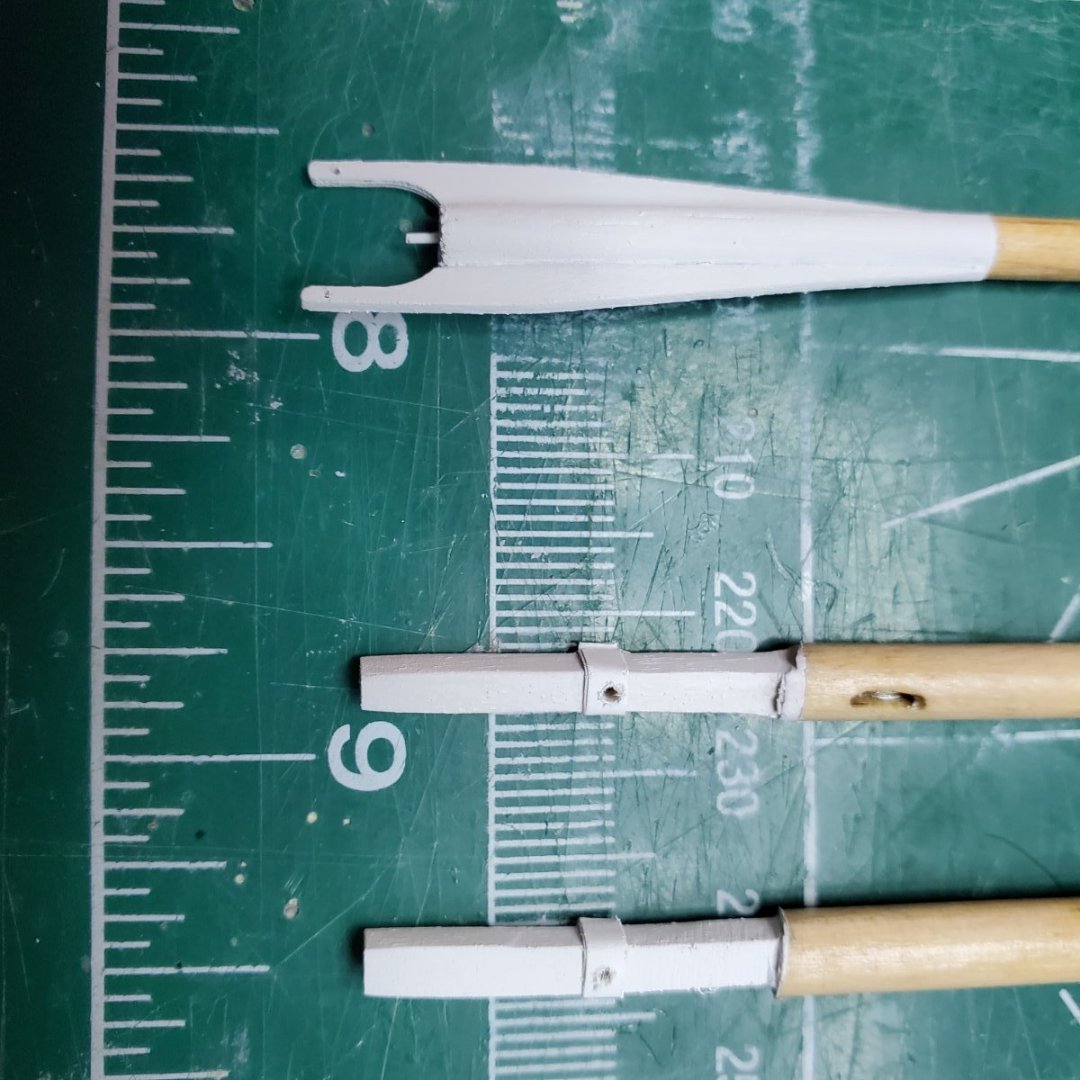
Hello Folks, Been a little busy at work, however I have kept up with the pictures when I could sneak in some time with the Revenue Cutter. All pieces are assembled and it is time to begin the process of rigging the model (finally). Some Notes on Spars, Masts and Bowsprit: Spars / Mast Caps: Be super careful drilling holes in these pieces for the blocks. I severed both a spar and a mast cap trying to drill holes for the blocks, next time I will use new drills and or probably just tie blocks using thread. Blocks and Spars: Dry fit the spars to the masts prior to gluing the blocks onto them to get the correct angle for them for rigging purposes, the blocks on the spars should be set at an angle so they meet nicely with the blocks on the mast (and vice versa mast blocks to spar blocks). Mast Caps: As usual did not follow the paint scheme, I painted the mast caps flat black (Tamiya XF-1). Bowsprit: Assembled as per instructions and gammoning completed as well. I painted the cap flat black (Tamiya XF-1). I will not glue this part onto the hull until I rig the cannon on the deck and I am completely ready to rig. I guarantee I will break the bowsprit (as I usually do). Next Post: Cannon rigging, and standing rigging (I hope). Be well all, Bill T.

.thumb.jpg.cd902afd4073a14305c9cf522431a073.jpg)


-
KurtH reacted to a post in a topic:
Revenue Cutter by wtimlen - BlueJacket Shipcrafters - 1:48
-
BrianK reacted to a post in a topic:
Revenue Cutter by wtimlen - BlueJacket Shipcrafters - 1:48
-
ccoyle reacted to a post in a topic:
Revenue Cutter by wtimlen - BlueJacket Shipcrafters - 1:48
-
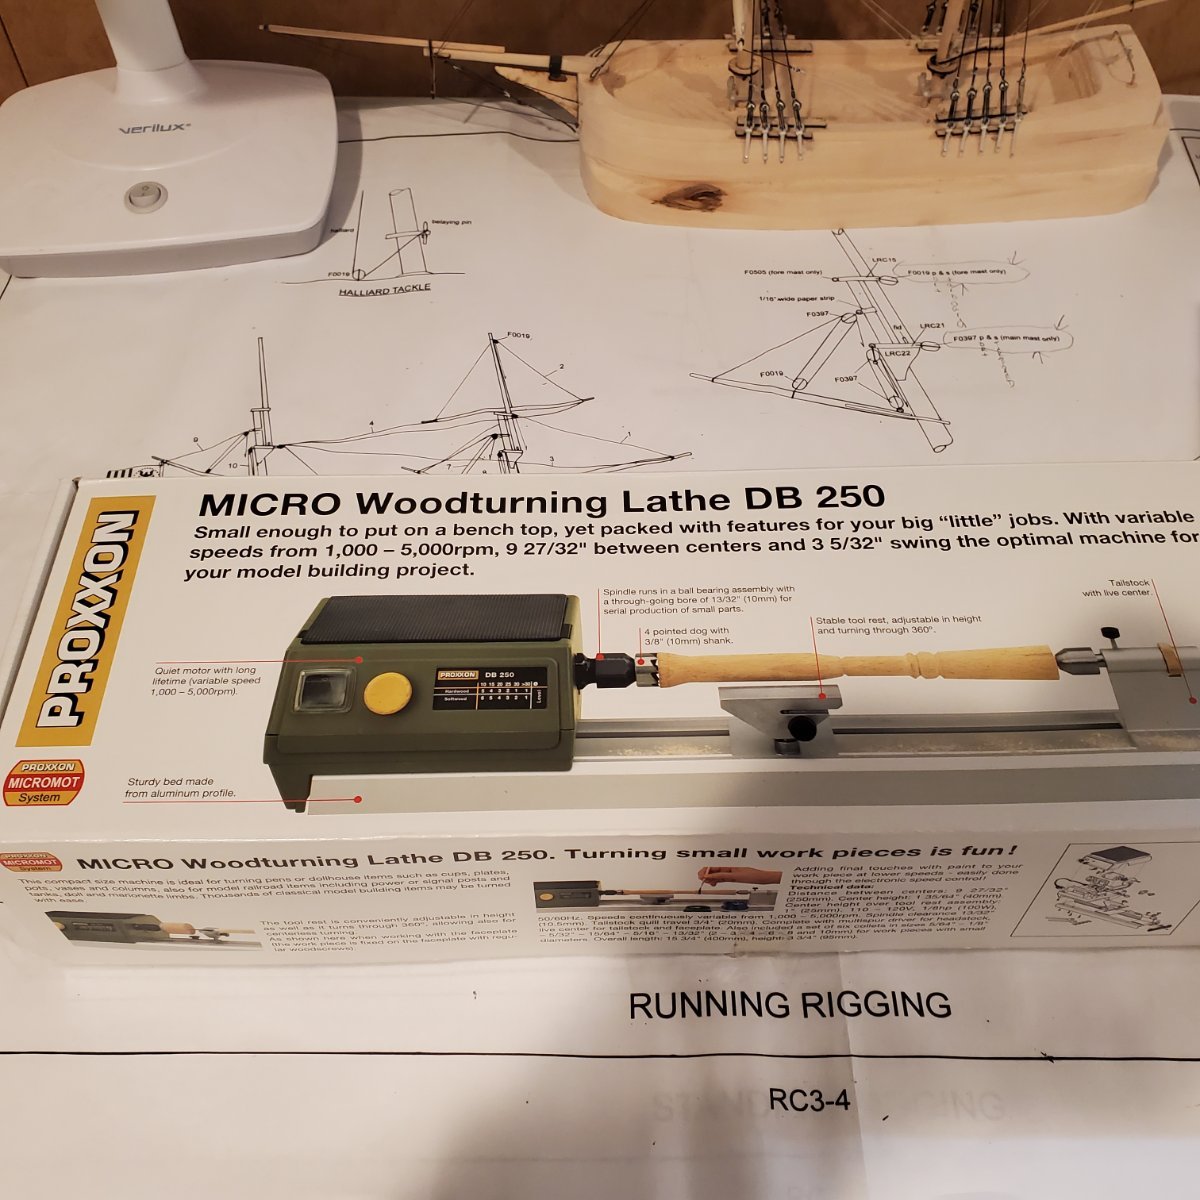
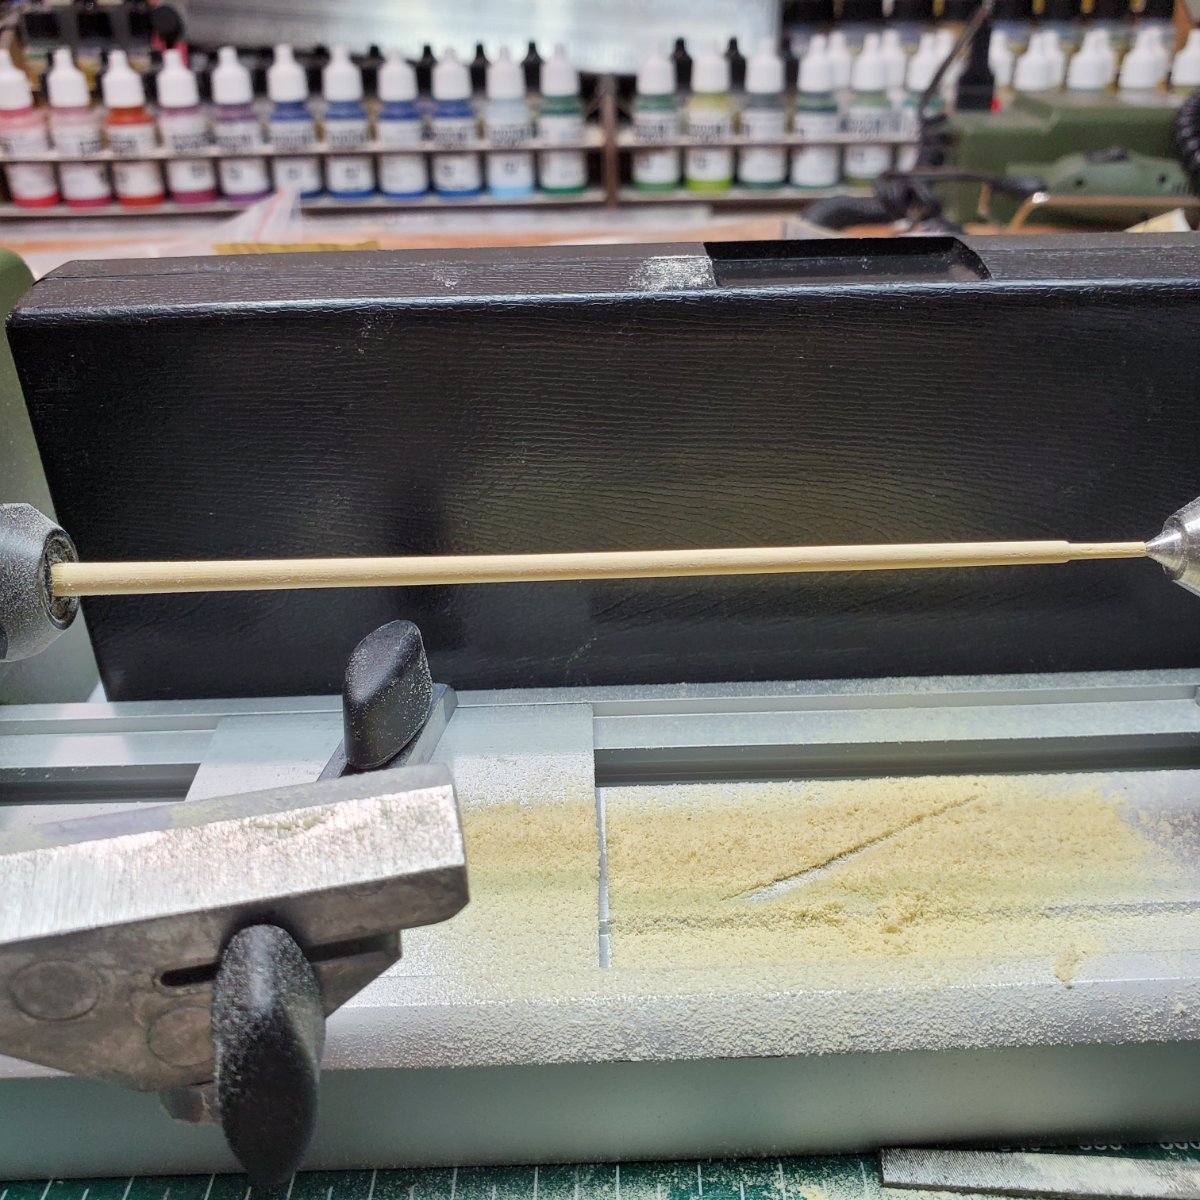
Good Tidings Brian, I used a Proxxon Micro Woodturning Lathe DB 250 I hope this helps!

-
Keith Black reacted to a post in a topic:
USS Perry by EricWilliamMarshall - BlueJacket Shipcrafters - Scale 1/96
-
BrianK reacted to a post in a topic:
Revenue Cutter by wtimlen - BlueJacket Shipcrafters - 1:48
-
Some nice work there Eric! Cheers, Bill T.
-
wtimlen reacted to a post in a topic:
USS Perry by EricWilliamMarshall - BlueJacket Shipcrafters - Scale 1/96
-
wtimlen reacted to a post in a topic:
USS Perry by EricWilliamMarshall - BlueJacket Shipcrafters - Scale 1/96
-
wtimlen reacted to a post in a topic:
USS Perry by EricWilliamMarshall - BlueJacket Shipcrafters - Scale 1/96
-
wtimlen reacted to a post in a topic:
USS Perry by EricWilliamMarshall - BlueJacket Shipcrafters - Scale 1/96
-
wtimlen reacted to a post in a topic:
Revenue Cutter by Duck-Rabbit - BlueJacket Shipcrafters - 1:48 - Ensign Kit - First Build
-
wtimlen reacted to a post in a topic:
US Revenue Cutter 1815 by Jsk - Seahorse - 1/72 - CARD
-
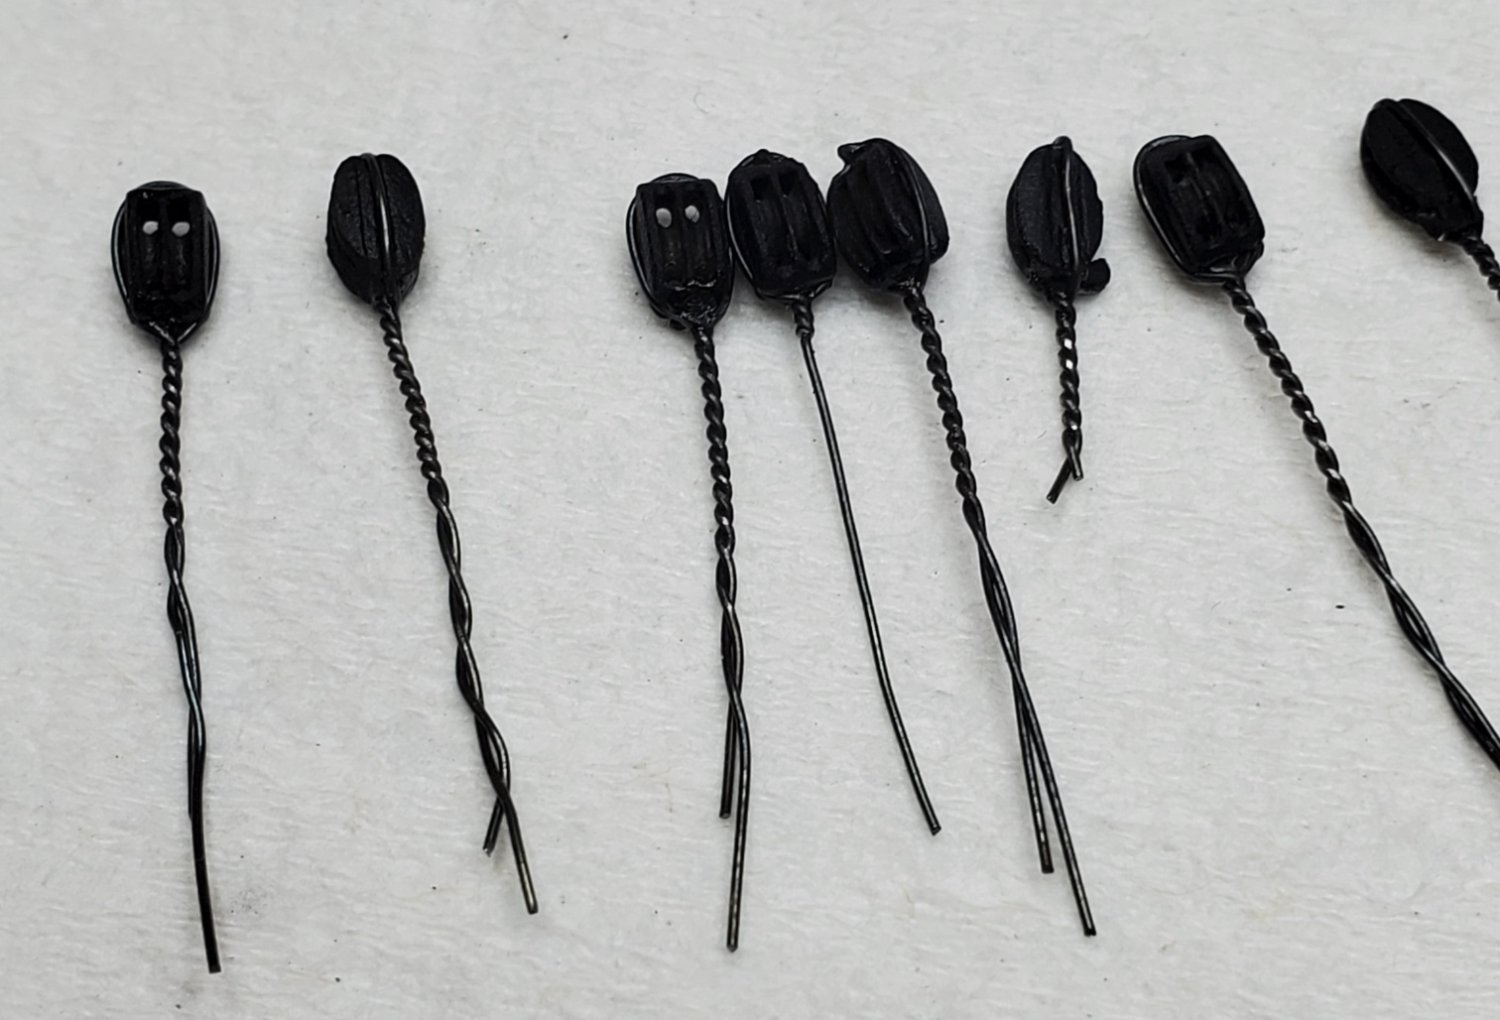
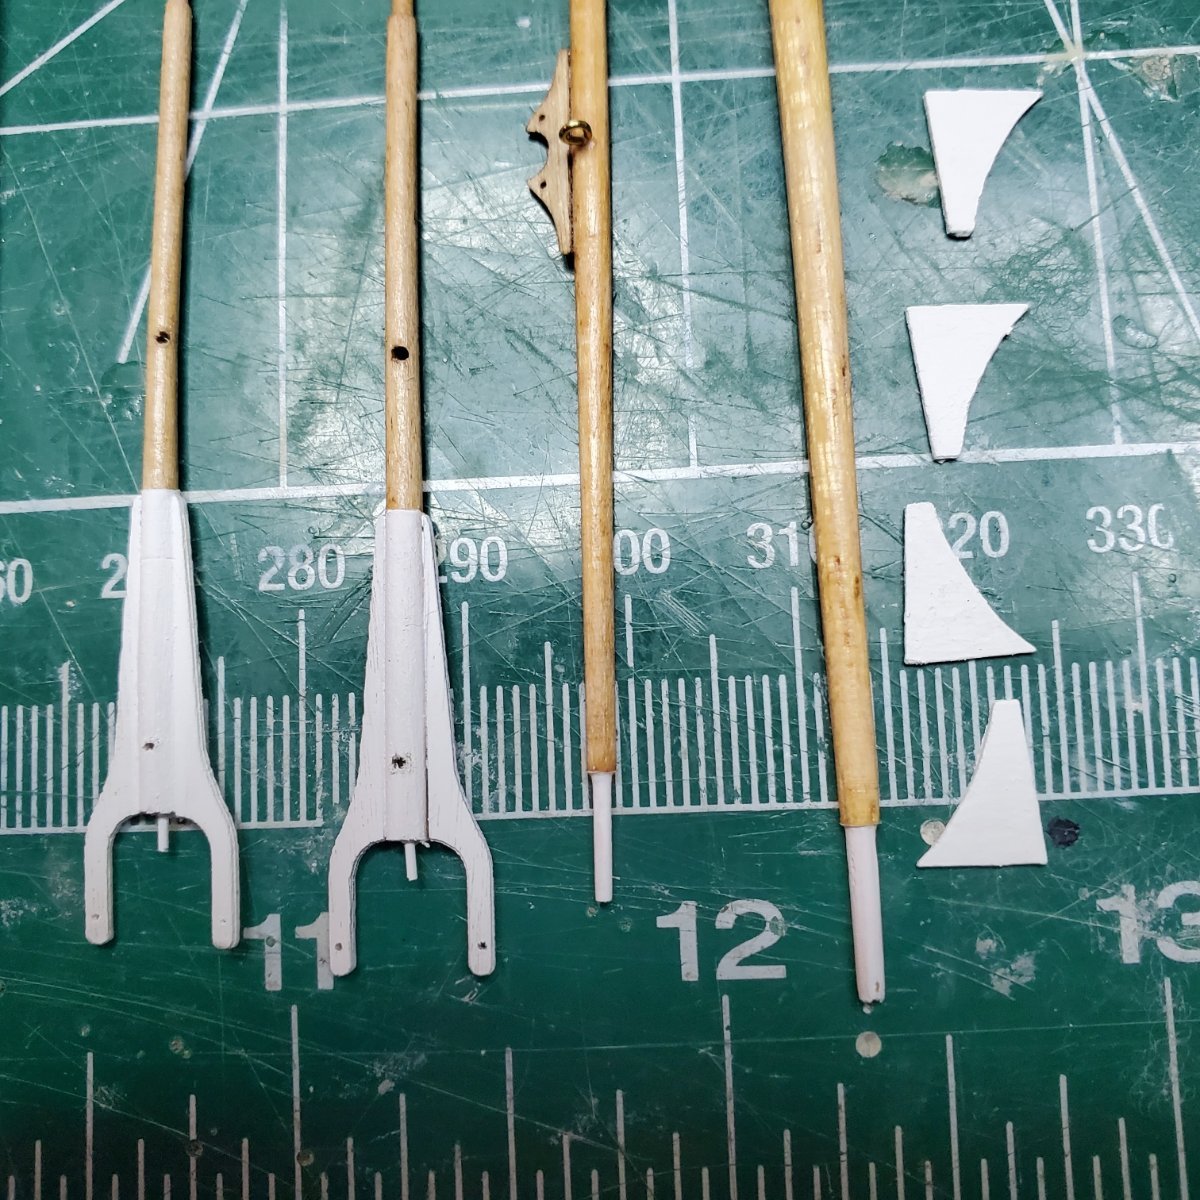
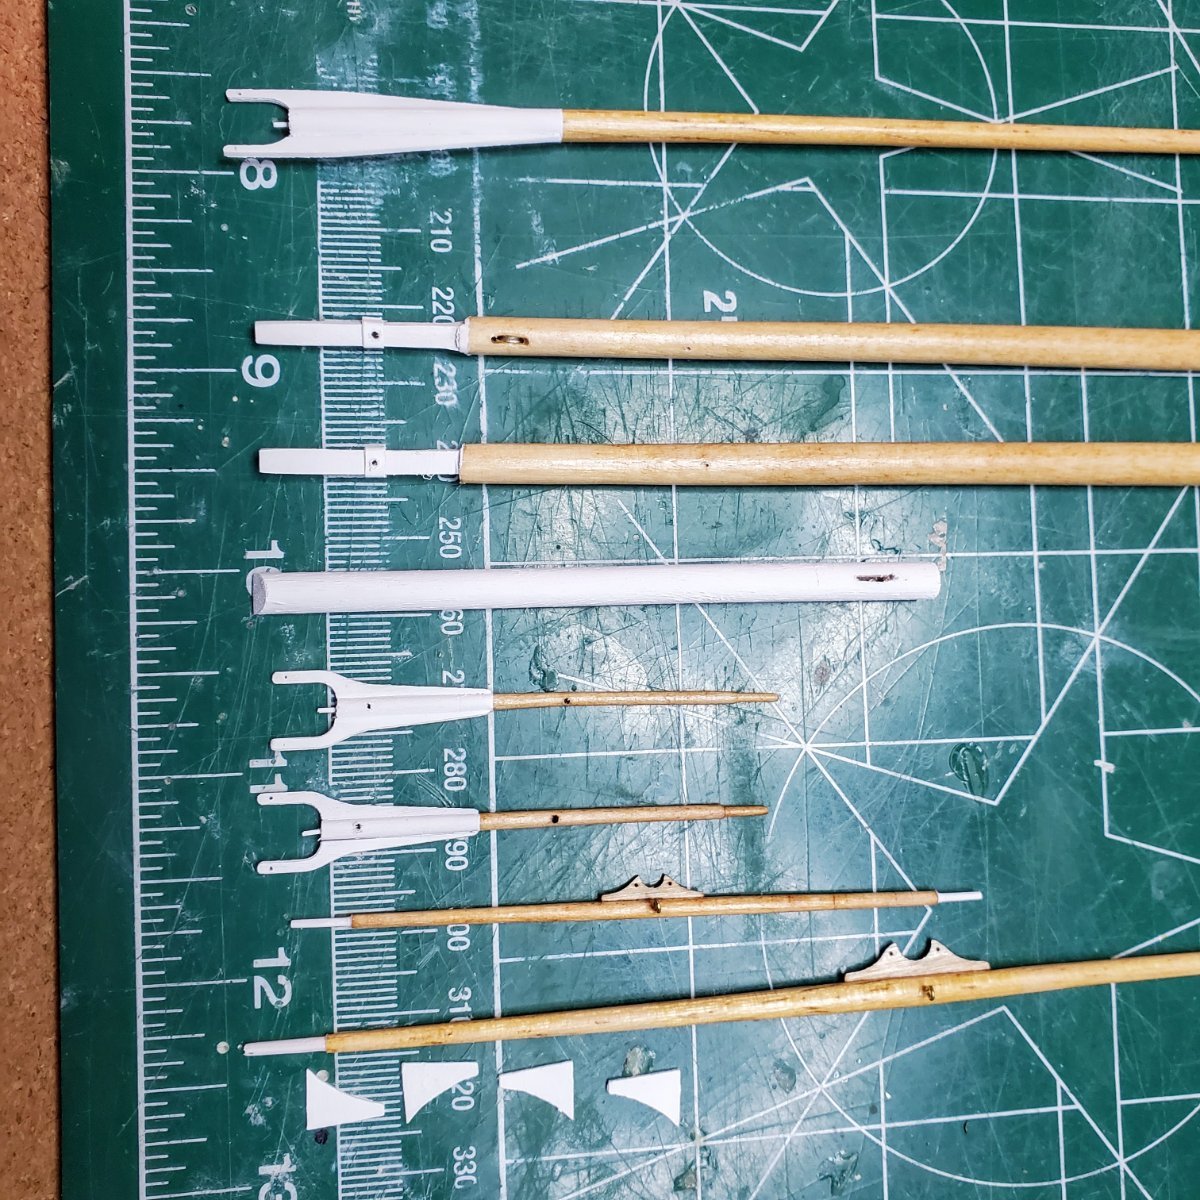
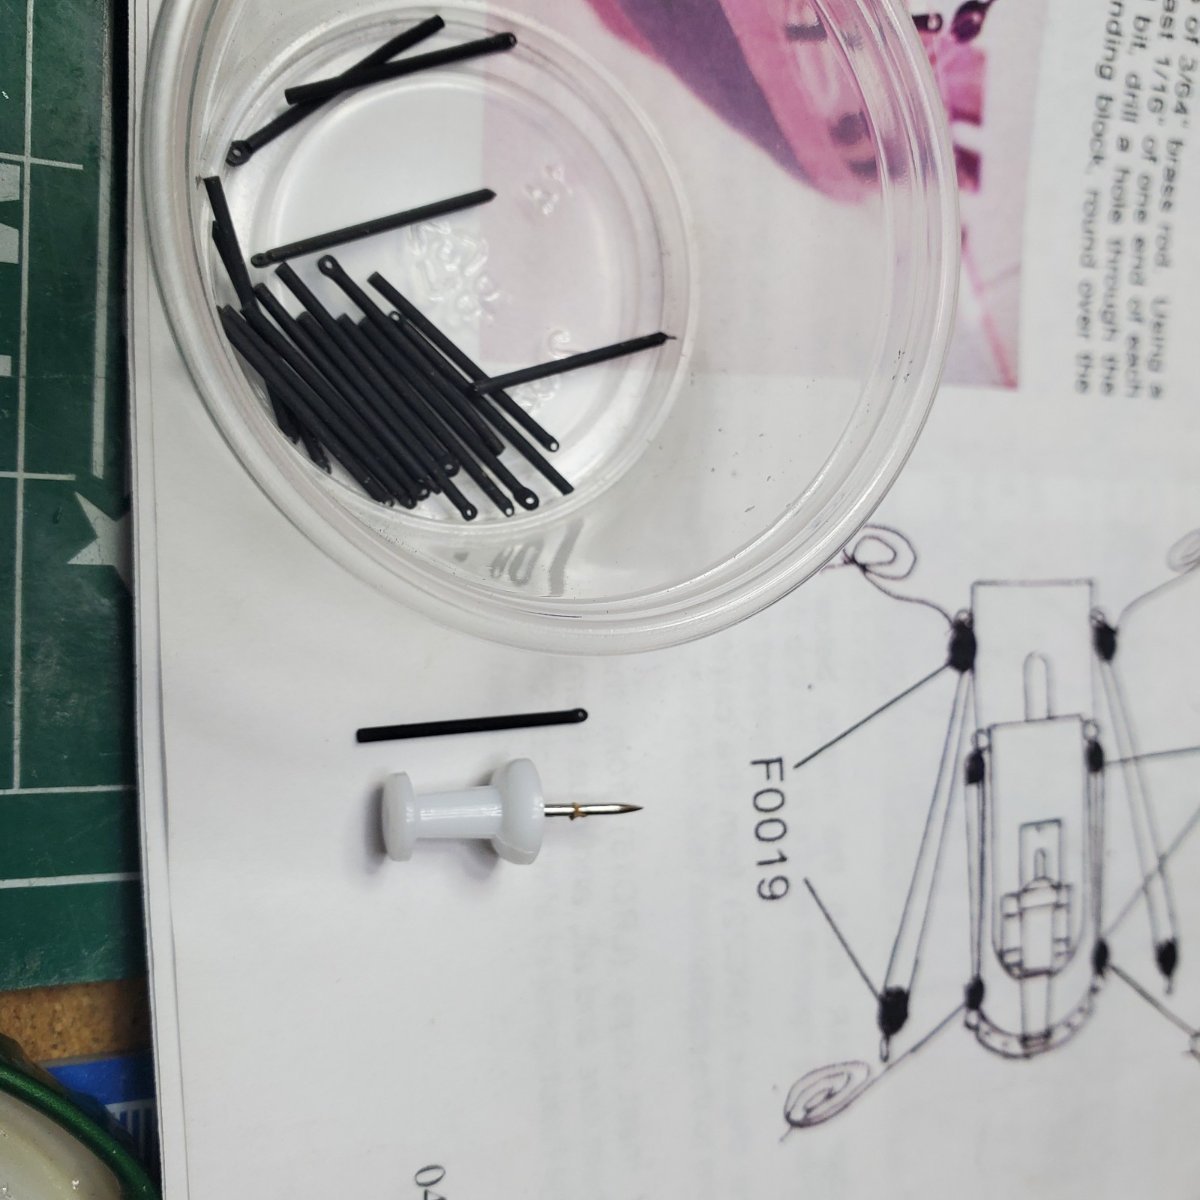
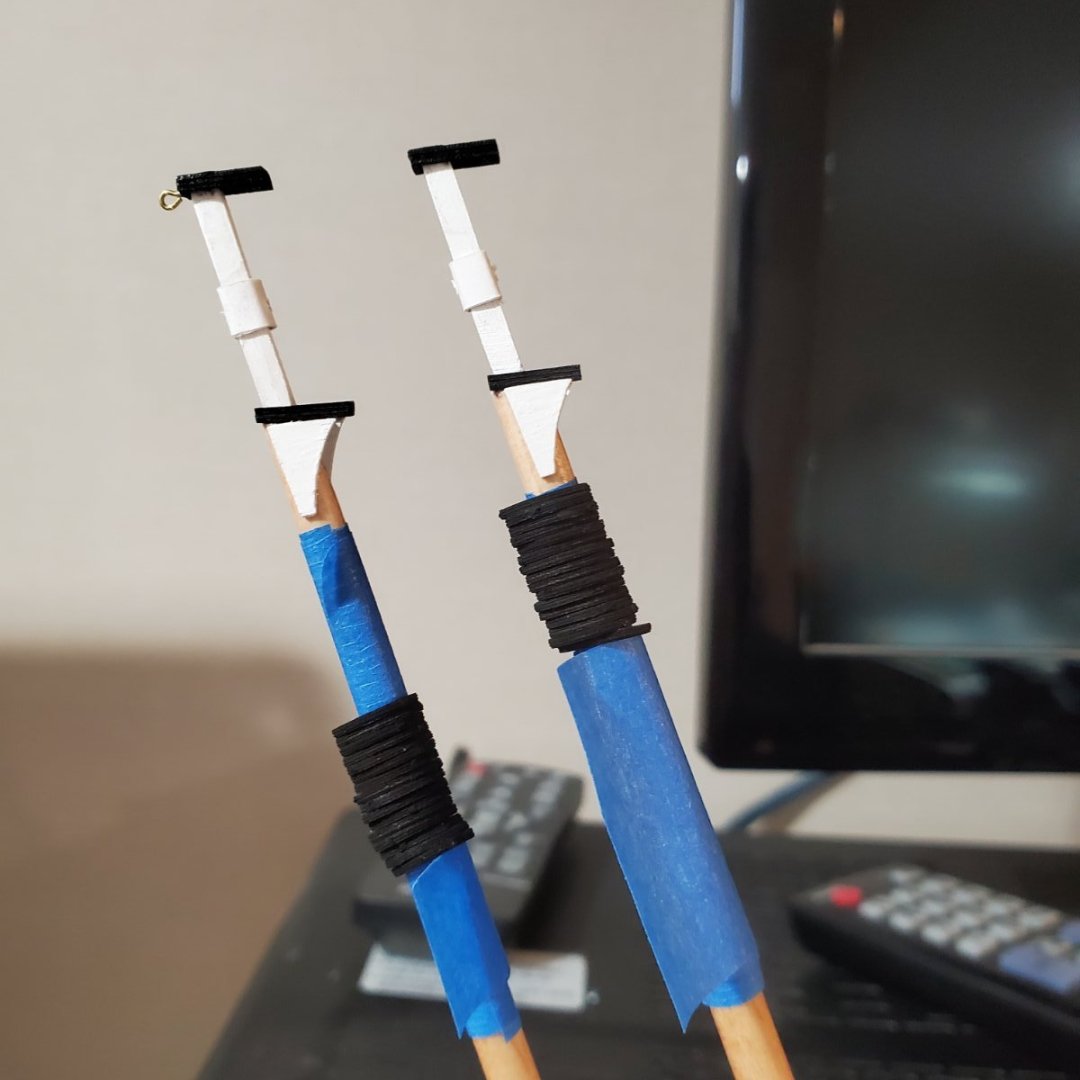
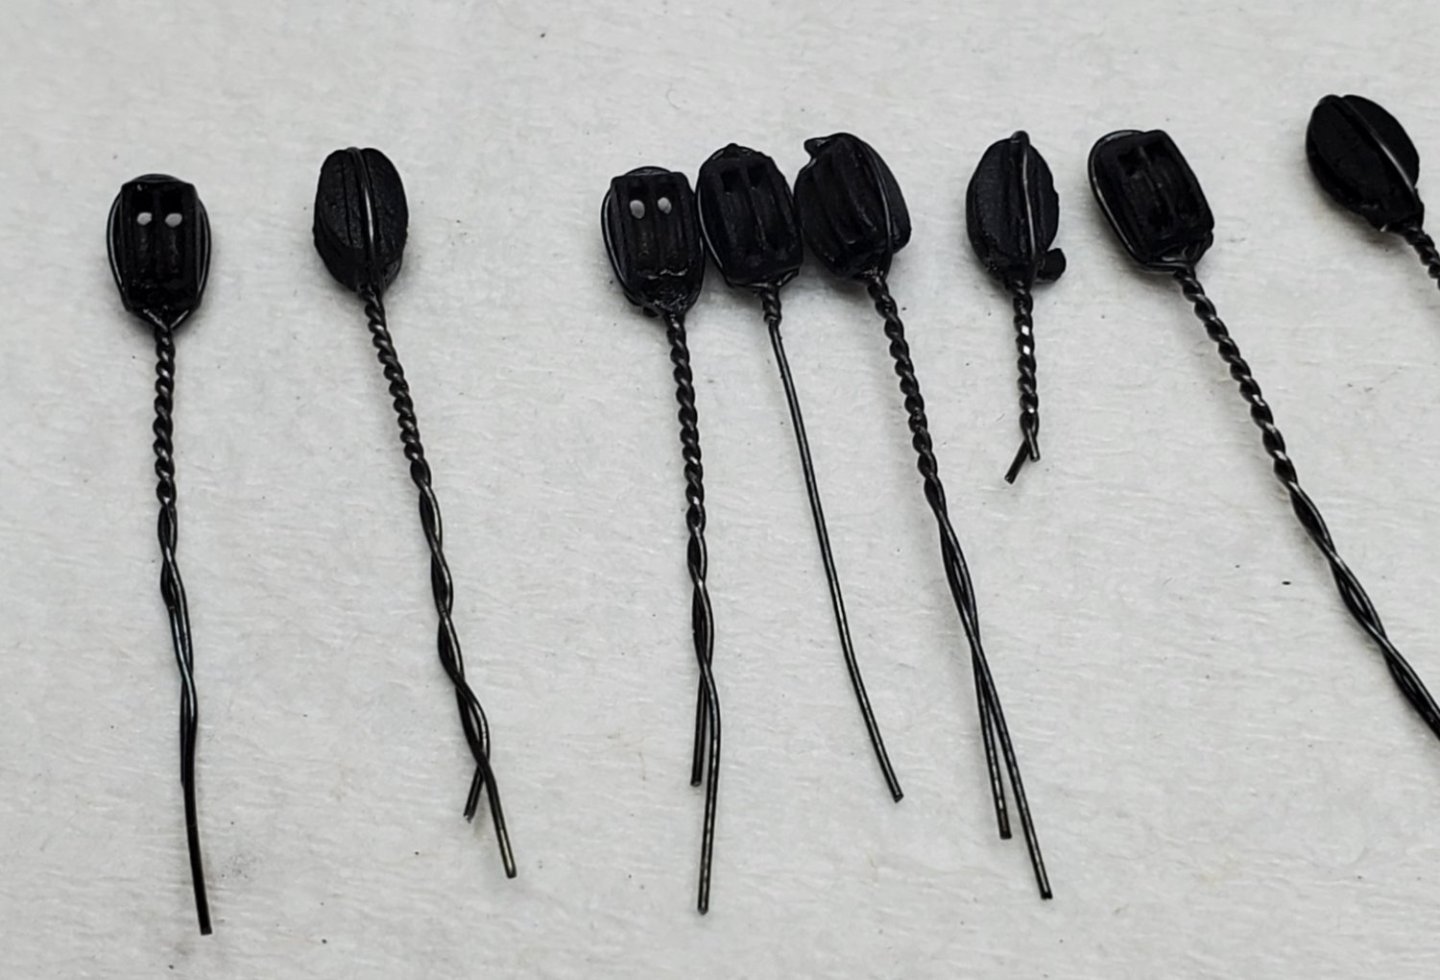
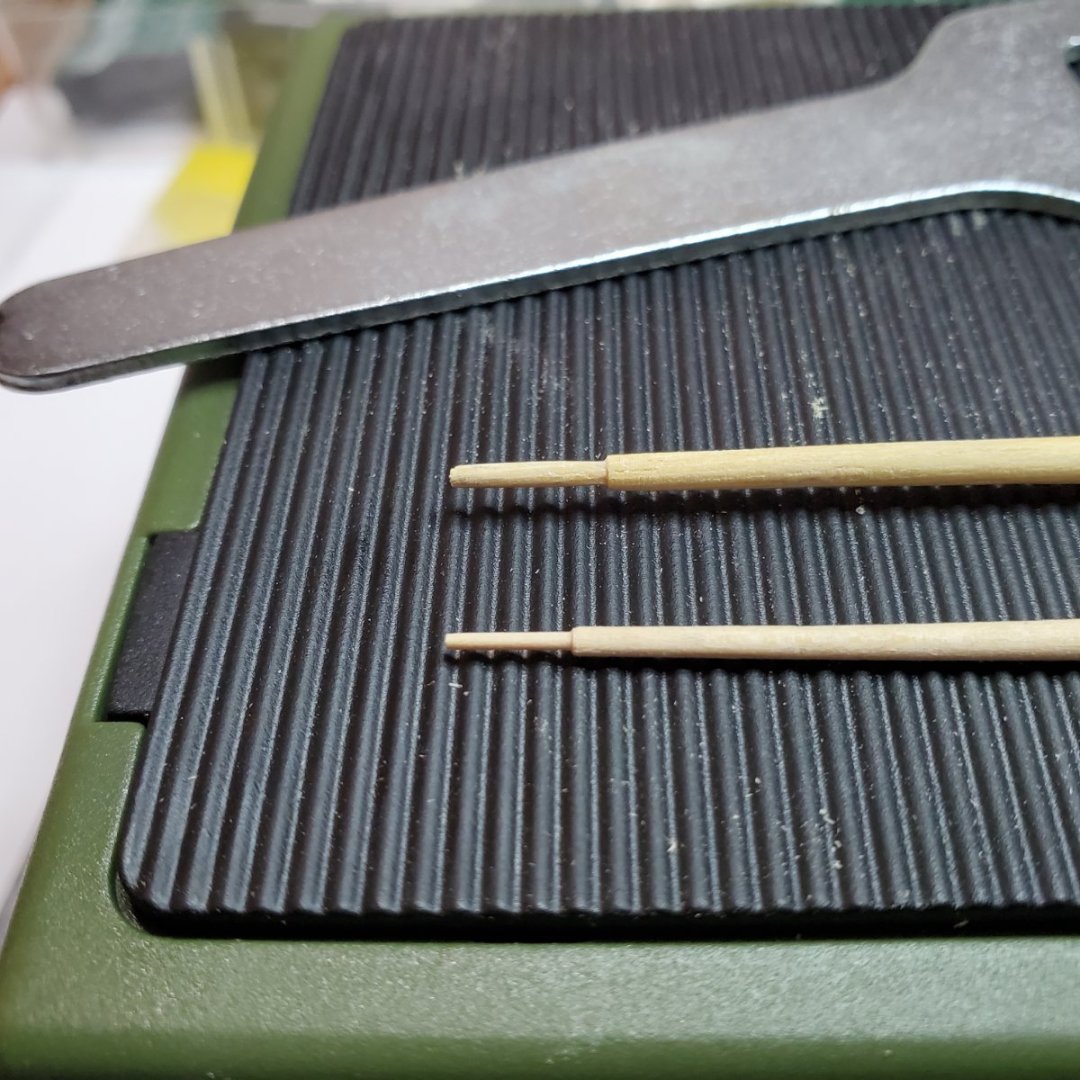
Hello Folks, Long time, no post. Work prevented me from doing work on the Revenue Cutter, however I kept up with my limited pictures. Work is beginning again on a regular basis and having fun again! All spars, masts are tapered, shaped, stained and sealed according to the Blue Jacket plans. Used a Proxxon Lathe to accomplish this portion, a real time saver. All holes are drilled. All remaining mast parts are painted (of course I strayed away from the original paint scheme) ready for assembly later today (I hope). I still need to do some final clean-up on the painted parts, sometimes it seems clean-up is a never ending process! In my next post will show the blocks with the pigtails completed. Tomorrow I hope to post the assembled masts. Nice to be back!


-
catopower reacted to a post in a topic:
Revenue Cutter by wtimlen - BlueJacket Shipcrafters - 1:48
-
wtimlen reacted to a post in a topic:
USS Perry by EricWilliamMarshall - BlueJacket Shipcrafters - Scale 1/96
-
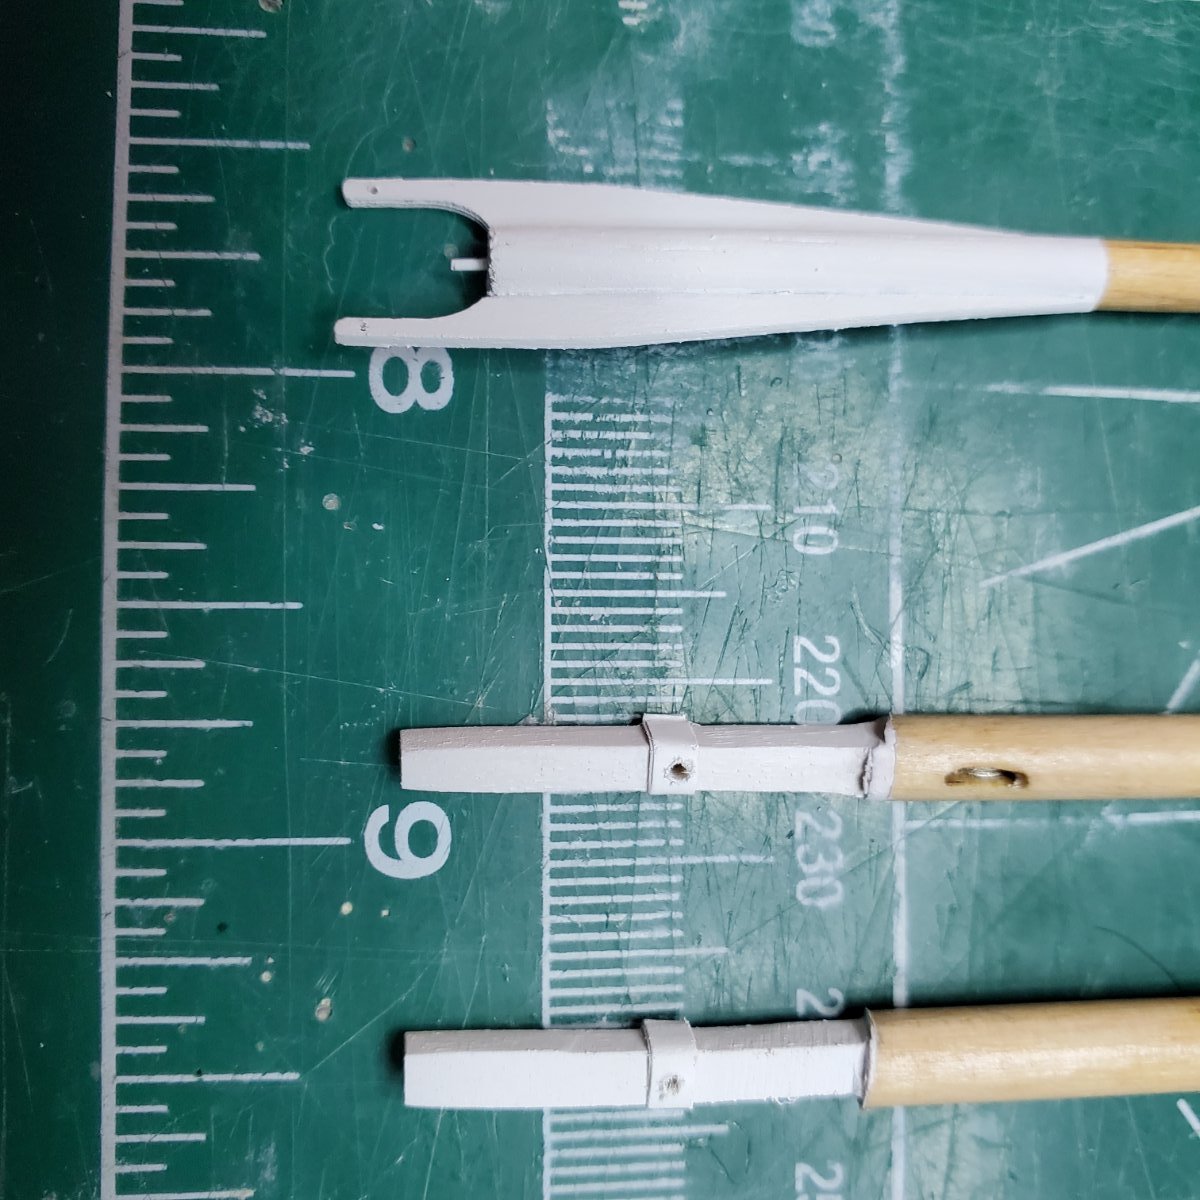
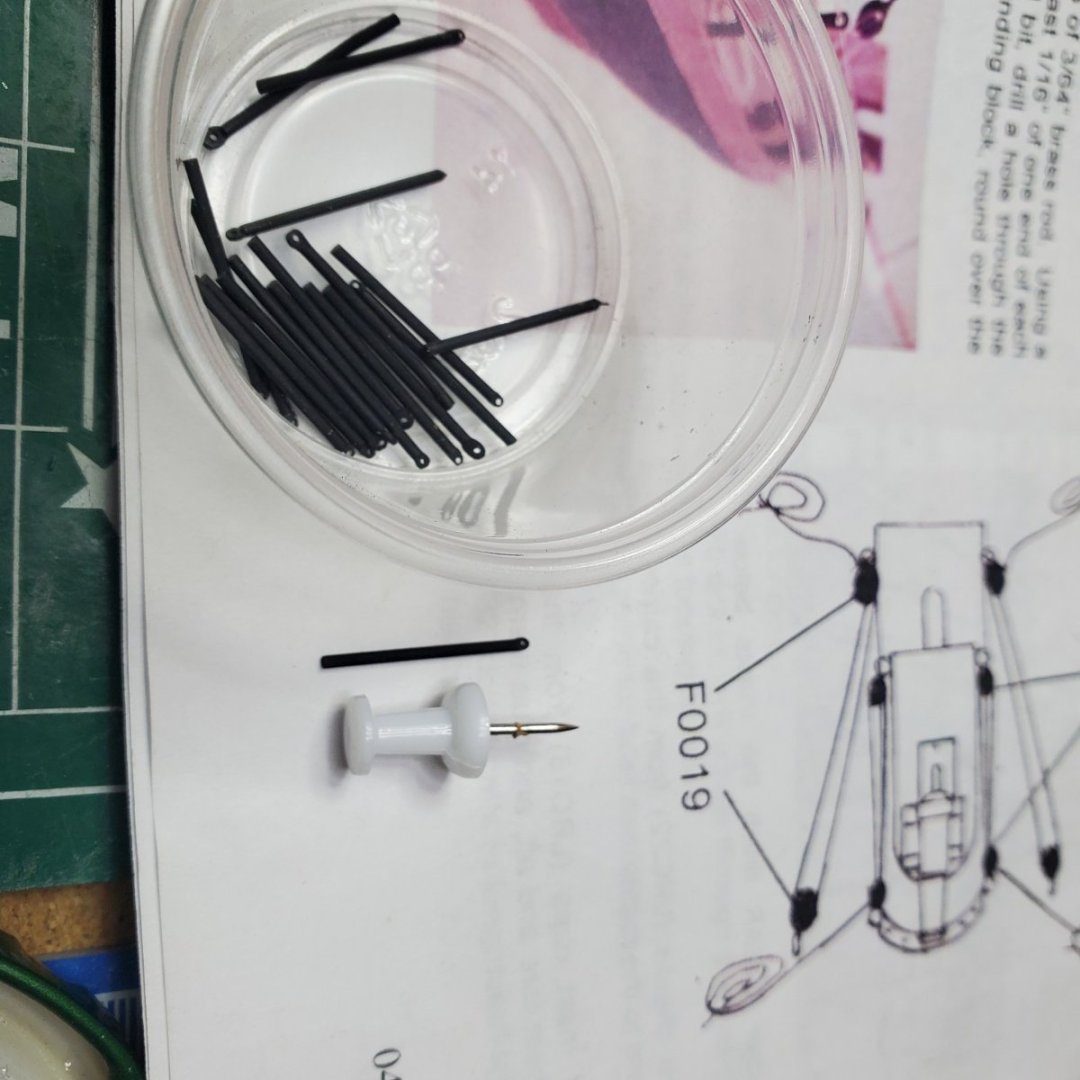
Hello CF, When referring to using a wire to attach the spar to the mast I am referring to a "Fid", I am about to use this method on my Blue Jacket Revenue Cutter. At the end of the Boom or Gaff which will butt up against the mast, drill a hole with a #75 drill bit. Then cut a piece of 0.020' brass rod (accessable from BlueJacket or local hobby store) that protrudes out 1/8" from the holes drilled into the Boom or Gaff. Glue the brass into the holes. Conversely, drill a hole into the mast where the Boom or Gaff are to be located on the Mast. Then just fit and glue the Boom or Gaff with the brass wire protruding into the mast hole drilled on to the mast. When rigging in general I always with inboard rigging and proceed to the outboard lines. I use this sequence to execute the rigging in general: Rig Boom and Gaffs Attach and Rig Yards Rig fore and main stays rig back stays rig braces I hope this helps, if not the people at BlueJacket are great at helping you through any difficulties you maybe having. I you wish, send me a picture of where you are at and will detail how I proceeded from where you are stuck. Good luck! Bill T.
-
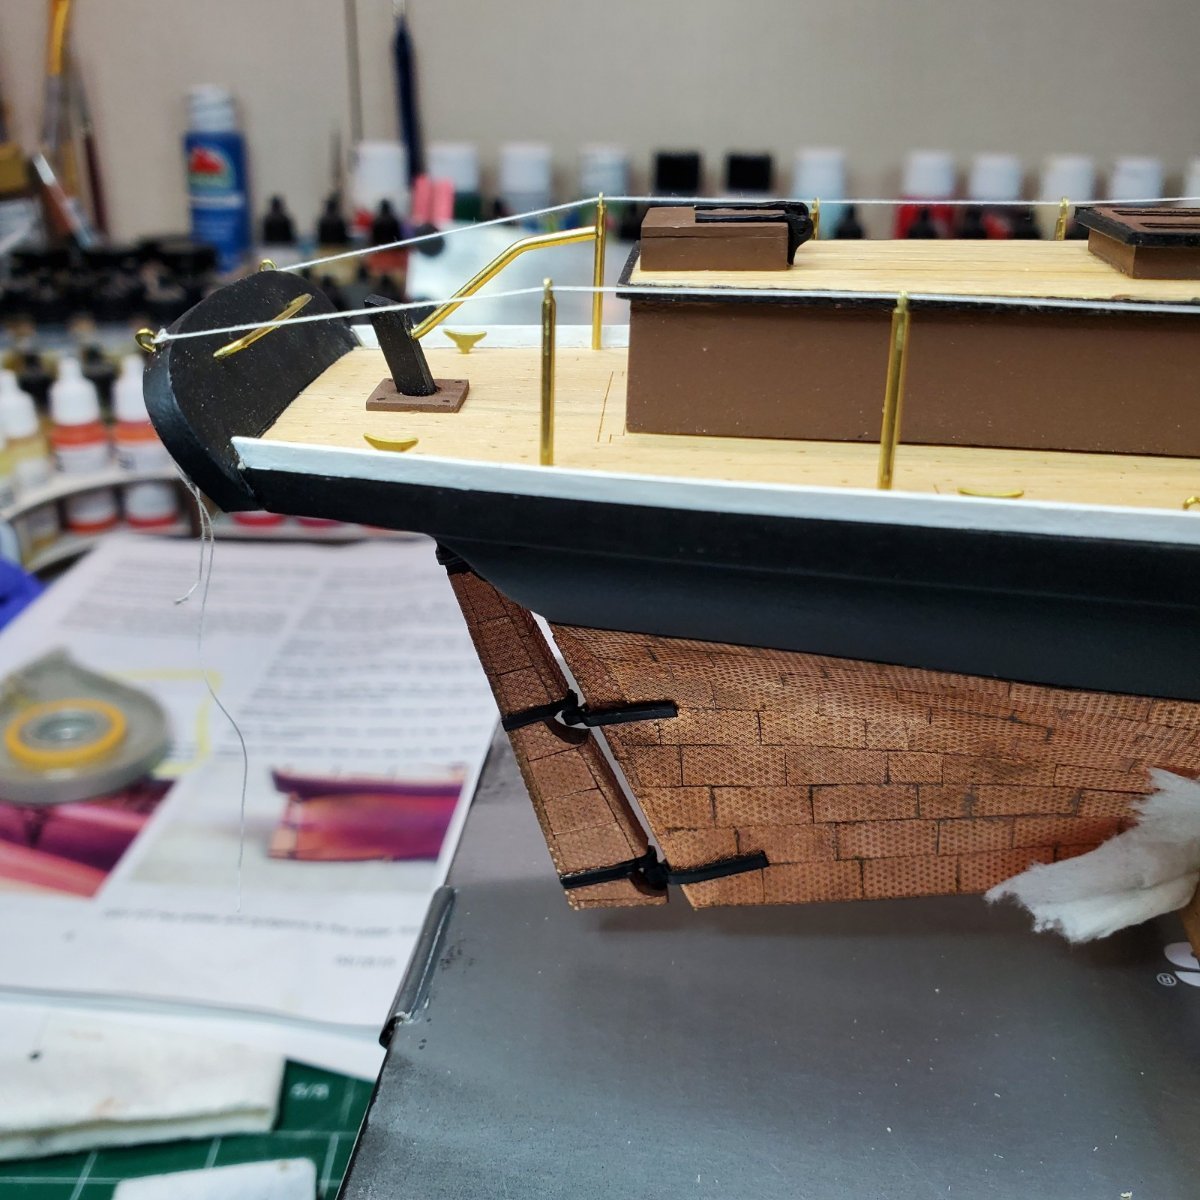
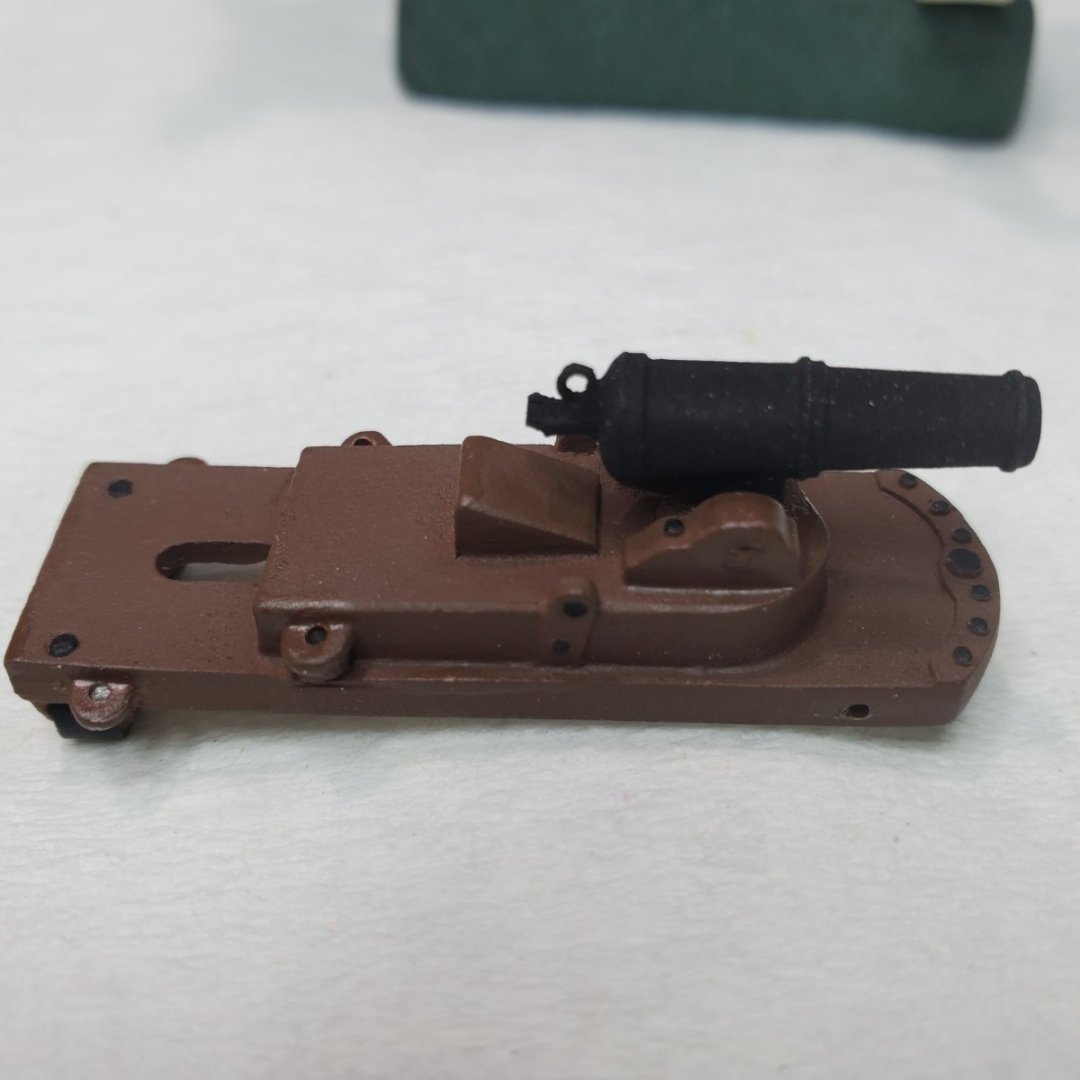
Hello Folks, Although posts have been few and far between doesn't mean the Revenue Cutter has been ignored (I kept up with my pictures though). I believe I am finally finishing up with the hull/fixtures and ready to move on masts and spars. Then my favorite part rigging. This post is as follows: I decided to color the stanchions black, I colored them using the Blue Jacket Brass Black #52. Then I sprayed them with Tamiya Flat Black (XF-1) and Flat Clear (XF-86). Pleased with the final result. Drilling the holes on the deck for the stanchions was slow process. I needed to bend a few stanchions to make the 90 degree angle. (I wish I knew a way to make a jig to ensure the holes were all the same 90" angle). All is well though. I test drove the stanchions prior to coloring them to ensure no roadblocks occur at the point I need assemble them onto the deck. I also rigged them at that time as well, just as a test. This portion was completed prior the coloring of the stanchions (FYI). Then it was onto the carronade, this was more challenging than anticipated. (This part was a "mini-kit in itself). Attaching the pigtails to the frame of the frame was challenging for me (especially for the 3/16" blocks!). I decided to use leftover eyelets from my previous rigging classes (which I highly recommend for anyone with rigging challenges) to assist me in affixing the blocks onto the carronade frame. It is now complete and placed aside for placement onto the deck. A lot of touch up work done for such a small piece on the deck. Thank god for my magnifying glasses! 🔍 Time to clean up a little bit and onto the mast and spars (I hope). Excited to try my Proxxon Lathe for the first time! Be well folks.


-
wtimlen reacted to a post in a topic:
Yankee Hero 1899 by wtimlen - FINISHED - BlueJacket Shipcrafters - Scale 3/8
-
Nice work, looking forward to next post.
-
Hello Ogontz, I hope all is well, I did have a little bit of an issue with this. One can not notice what I did under the white paint. My jaws broke, I glued them each separately onto each side of the spar. In other words, when it split each jaw I had 2 assemblies (for each spar) and it worked out well. I ended up having a gap the end of the jaws though, I closed the gap with some putty though and all was good. A little extra work, however I was pleased with the result. I hope this helps your dilemma. Good luck with your build, if you have a log I will look it up! Bill T.
- 57 replies
-
- 1
-
-
- finished
- yankee hero
- (and 1 more)
-
Hello Bob, Thank you so much for the kind words, the Yankee Hero by Blue Jacket is a great kit.
-
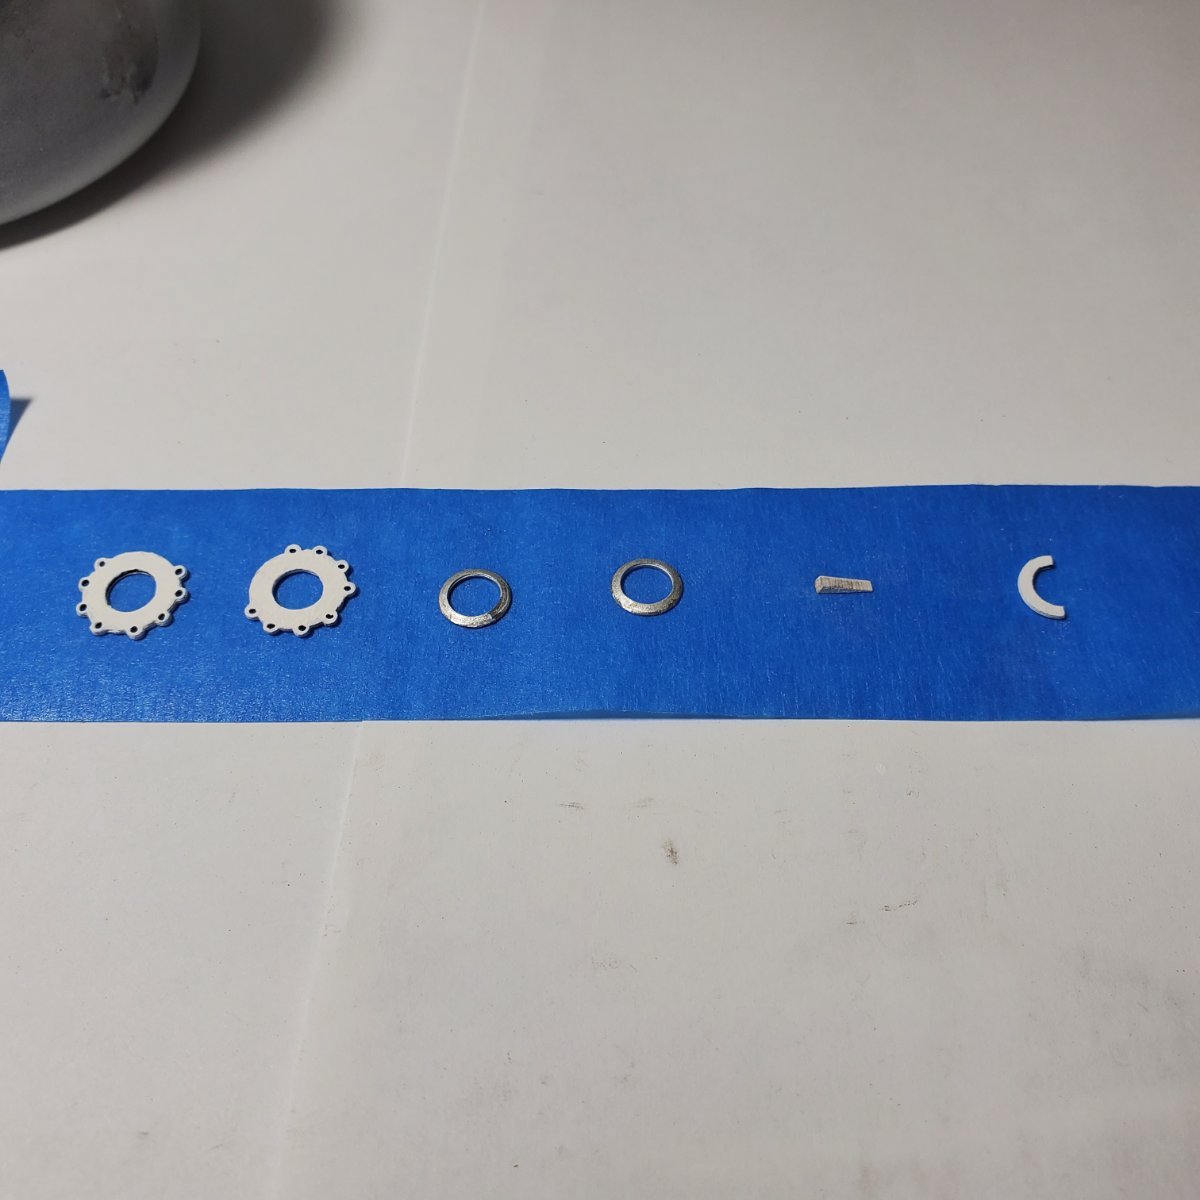
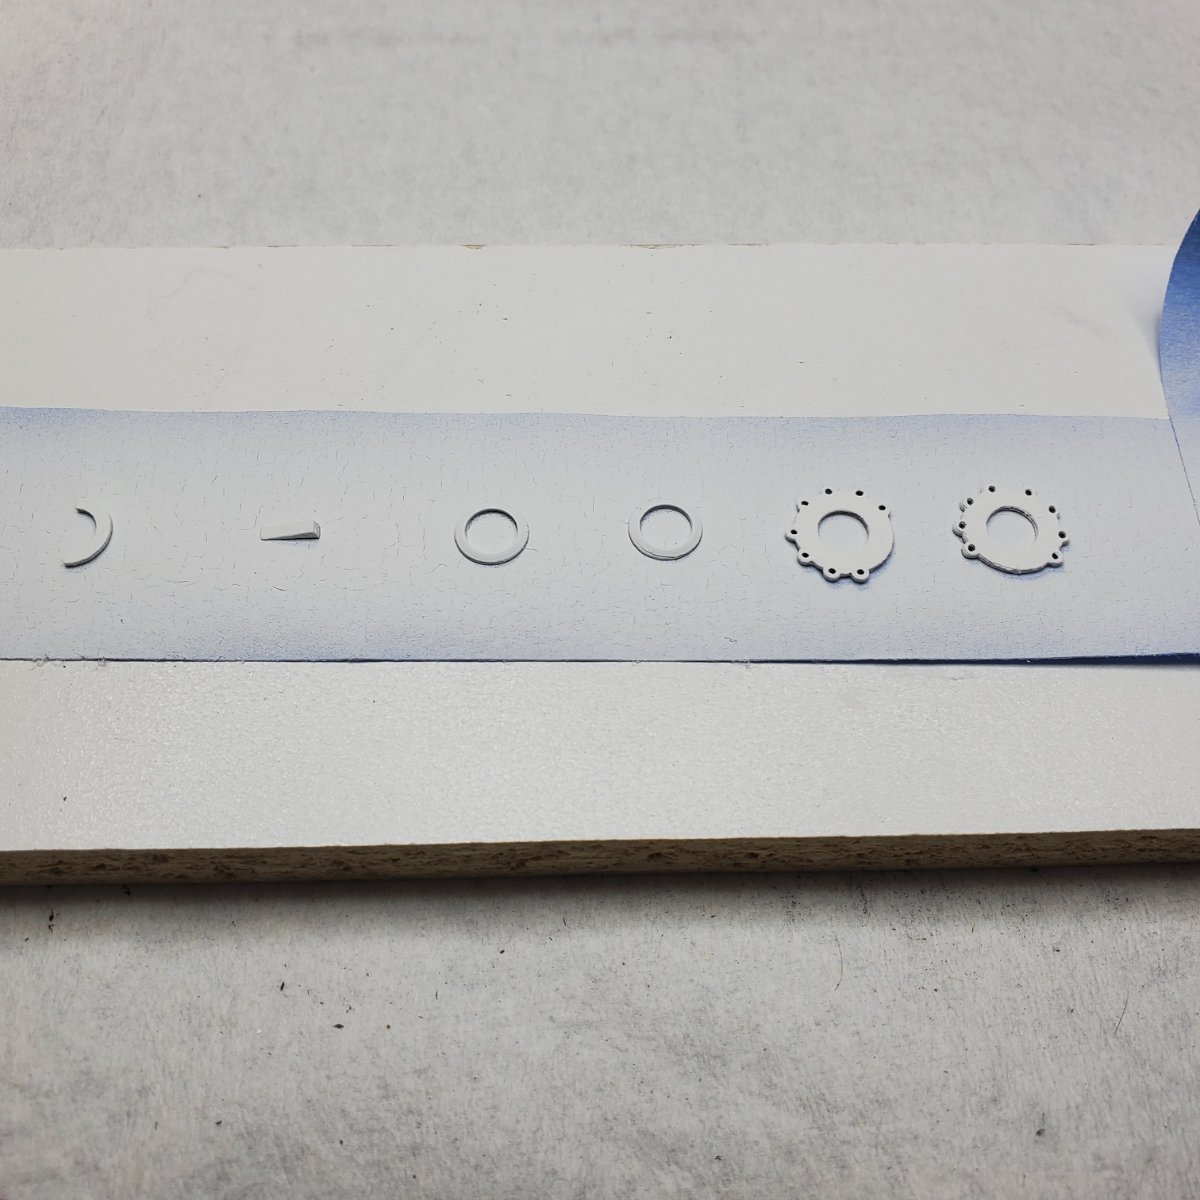
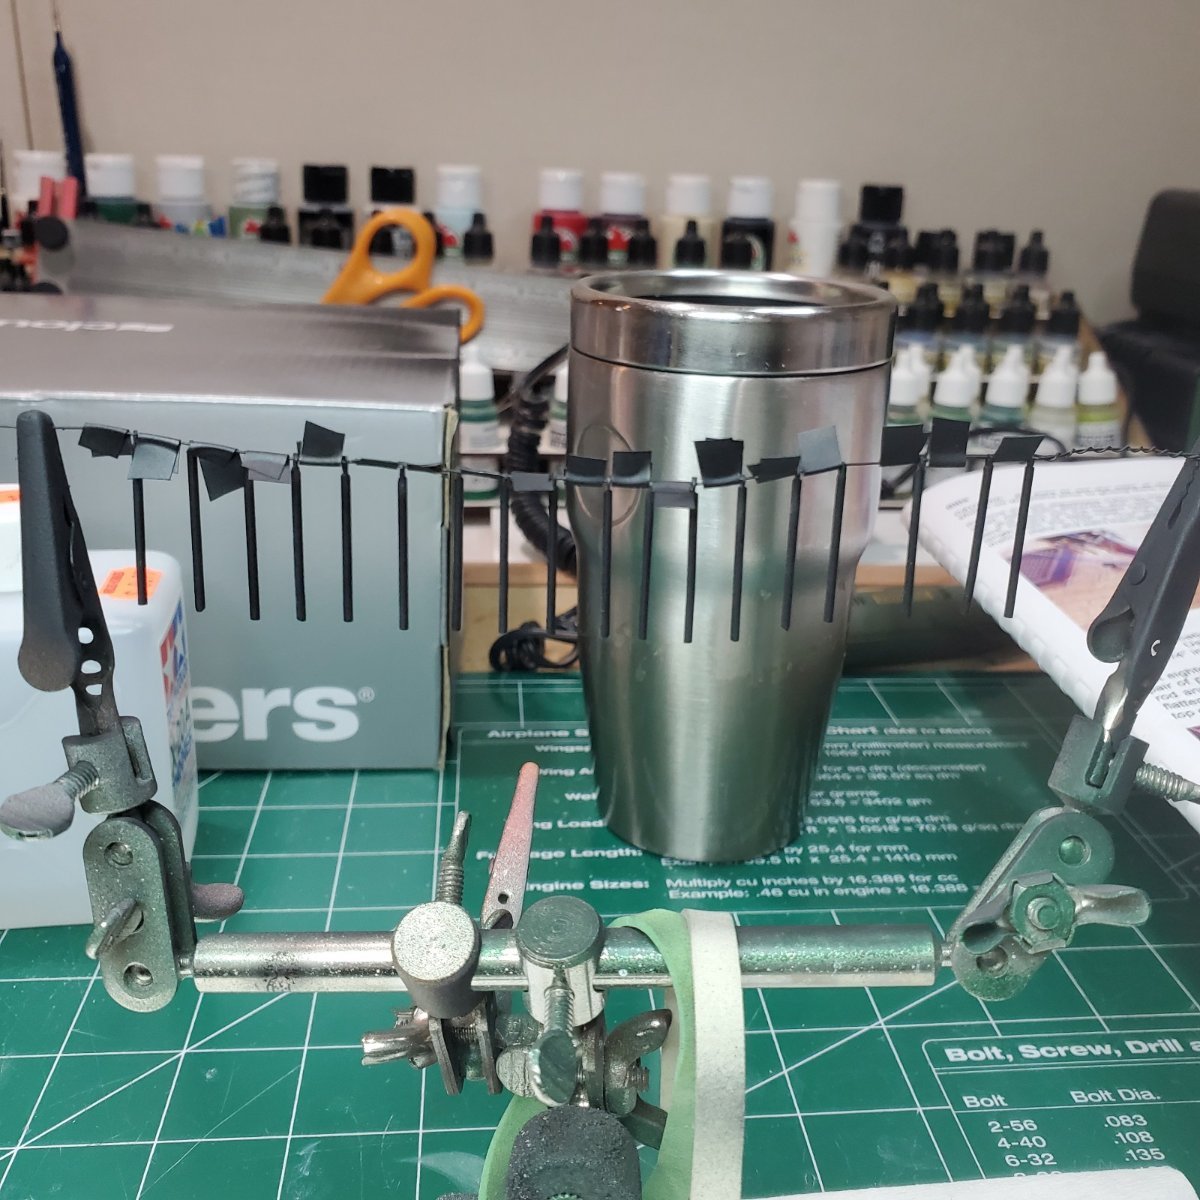
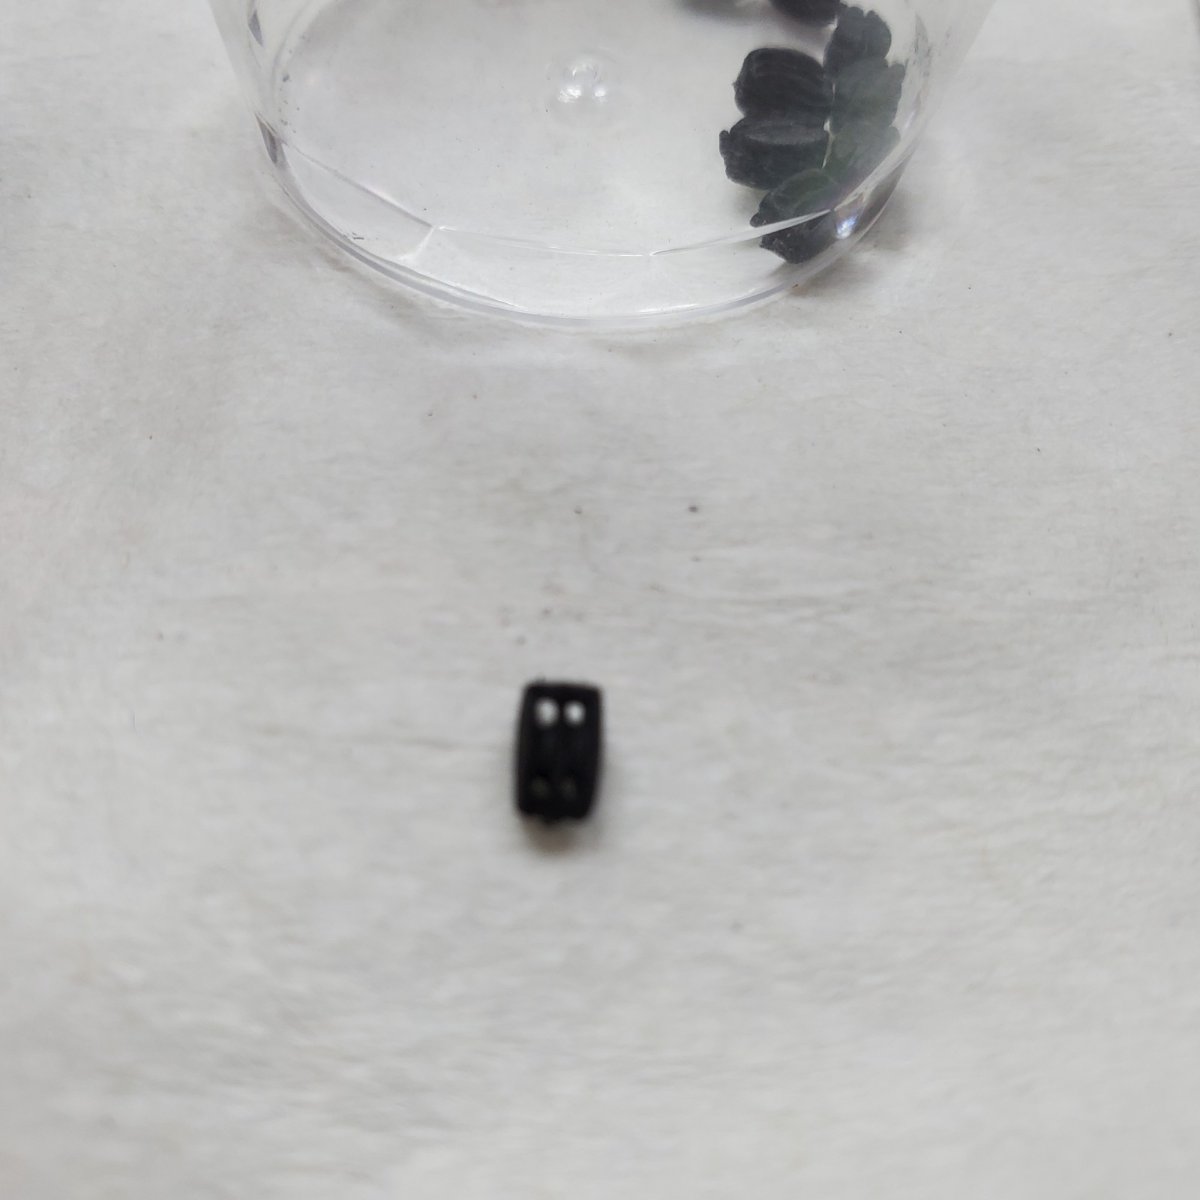
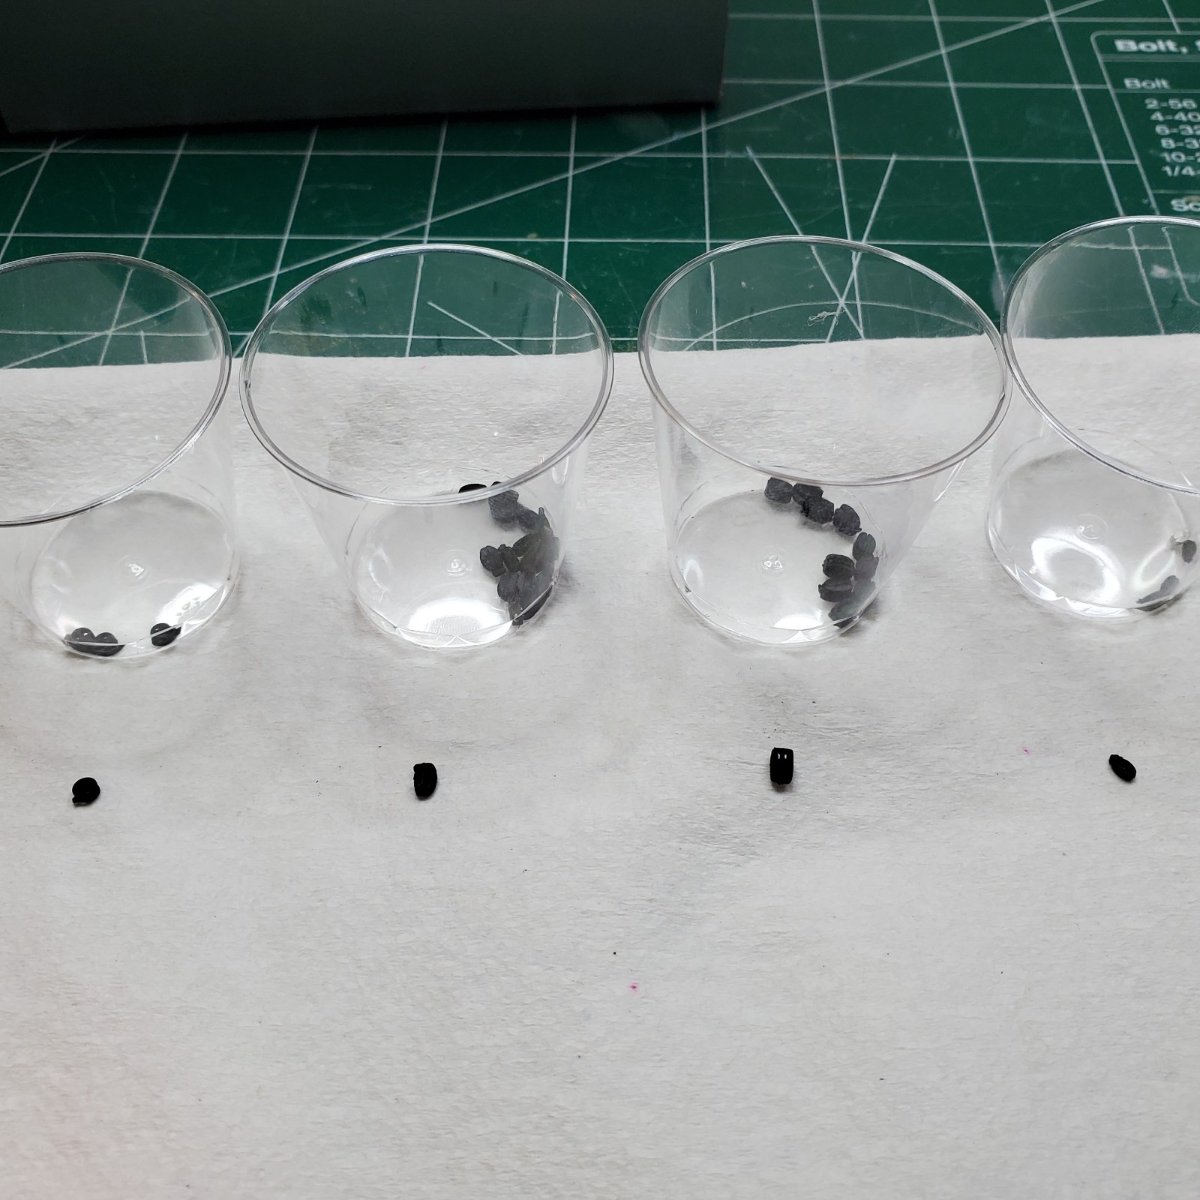
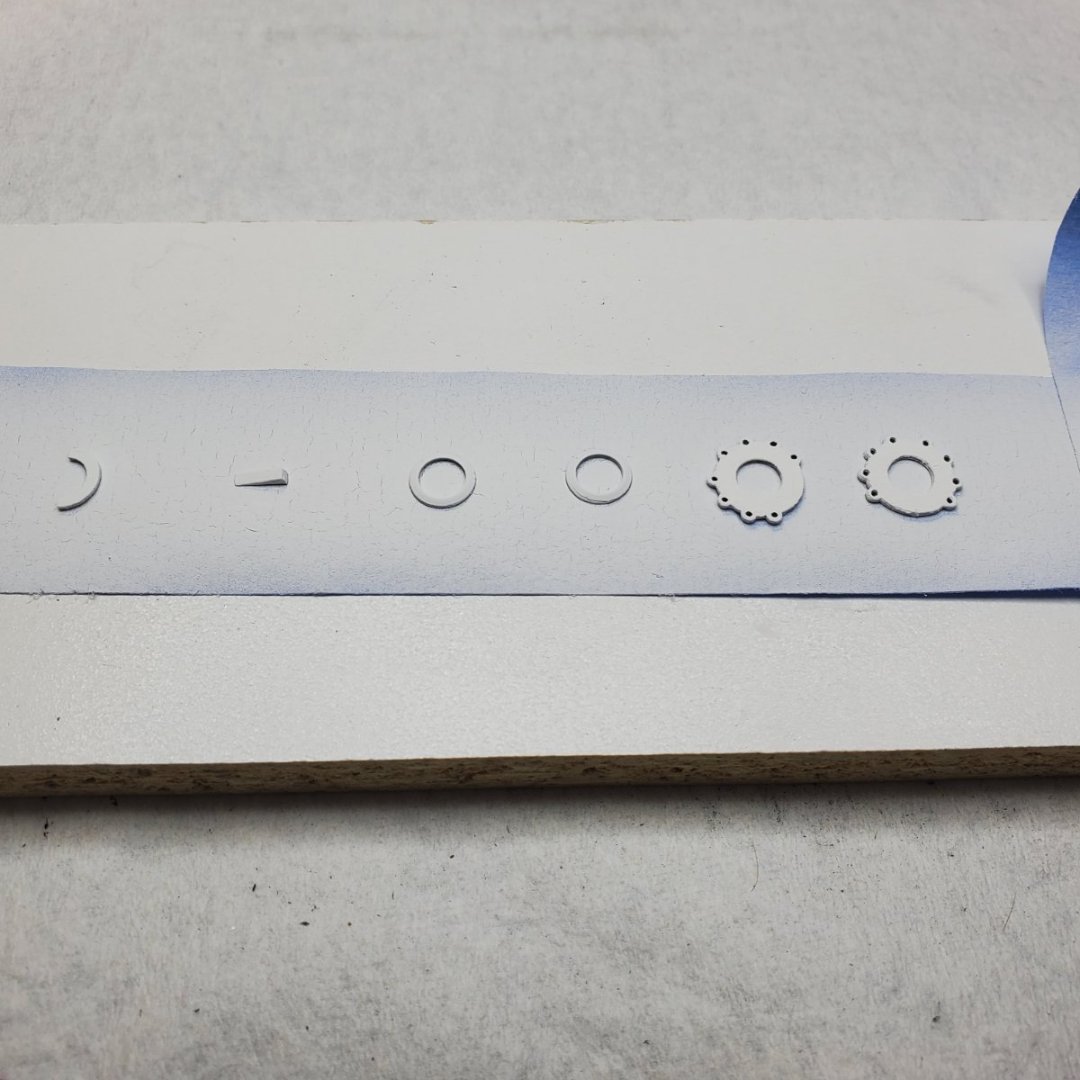
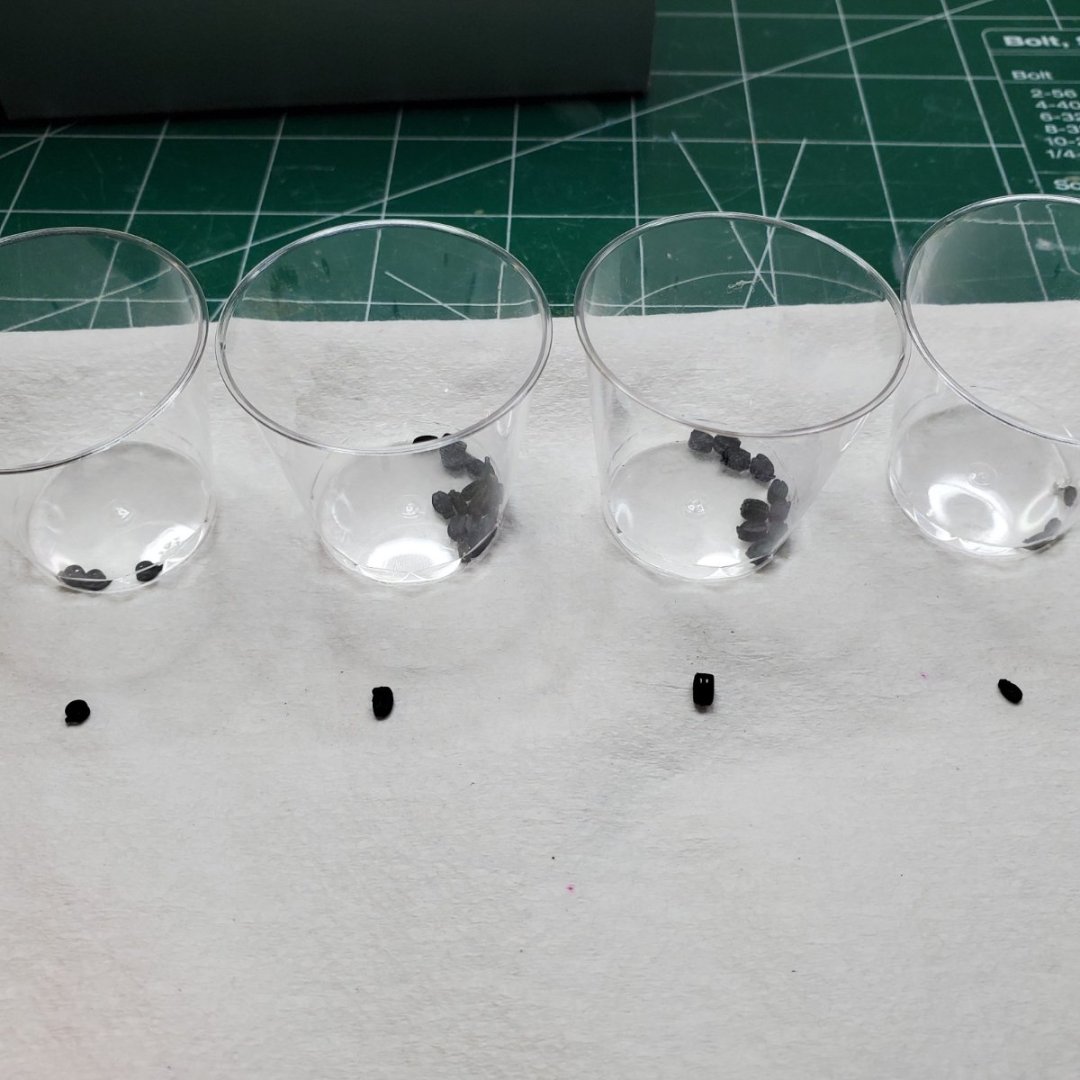
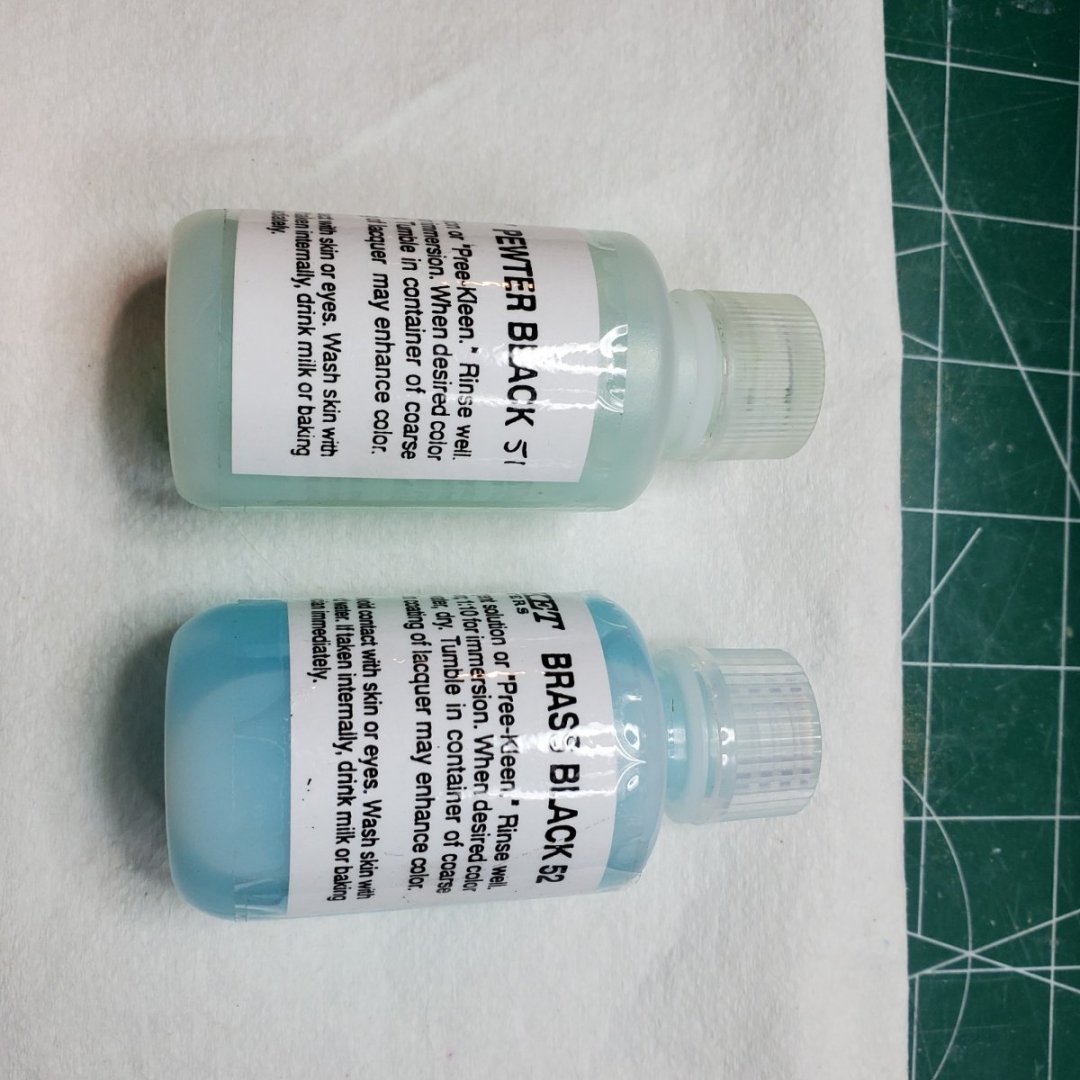
Hello Folks, Happy New Year's. A quick post tonight, probably another larger one this weekend. Status on the Bluejacket Revenue Cutter is listed below: Blocks: Drilled all blocks with #75 drill bits to clear out the holes. Cleaned them all with Acetate and let dry overnight prior to the Blue Jacket Pewter Black #51 bath the following day. Did NOT want to paint every block... Even after the pewter bath I still airbrushed them with a coat of Model Master Flat Black and a seperate coat of Tamiya Clear Flat (LOL). Worked out nicely so far... Stanchions (18) required however made (20): This was a project in of itself, however survived... Used a heavy vice grip pliers to flatten the 1/16 inch to drill the hole for the safety rope. Filed each stanchion (rounded the tops) as outlined in the building manual. Used an blade #11 to create a small canyon for a #75 drill bit. Drilled a #75 drill bit hole into the stanchion, trashed about 5 drills doing this part. Did this manually with a pin vise. The brass was not to kind to me. Drilled another hole with a #72 drill bit to widen the hole (with an electric drill) a little to ensure there would be no issues with rigging the safety line. The reason for this was that this assembly would be completed at the finishing line of the build with all the rigging in place. These will be black stanchions on the finished model using BlueJacket Brass Black #52 Solution to color the pieces. Will probably airbrush these pieces as well (similar to the blocks). Most importantly found the need to purchase a light weight flex shaft rotary machine and 3 sets of (#61-#80) Drill Bits from MicroMark to avoid the pin vise drilling (and breaks) for repetitive jobs like this. Brass and Pewter Darkening Solutions: Used BlueJacket Solvents to darken the blocks and stanchions BlueJacket #51 & #52 solutions. Next Post (I hope this weekend): Finished Stanchions (colored) Finished Hull with dry fitted stanchions. Completed Carronade And then on to mast and spars.


-
Hello CF, I had the same situation, the model instructions include a section which outlines to use rigging threat tied across the open portion of the "shoe" to keep the spar on the mast, the rigging will take care of the rest (See slide #34 above). However, you can also install a small piece of brass wire into the spar so it sticks out and then drill a hole into the mast at the position you wish to affix the spar to the mast (With some CA Adhesive). I believe they call this a Fid. I did not end up using this method however it would have worked fine. I hope this helps, I will look up your build on MSW. Any other questions please feel free to ask. Good Luck & Happy New Years! Bill T.
-
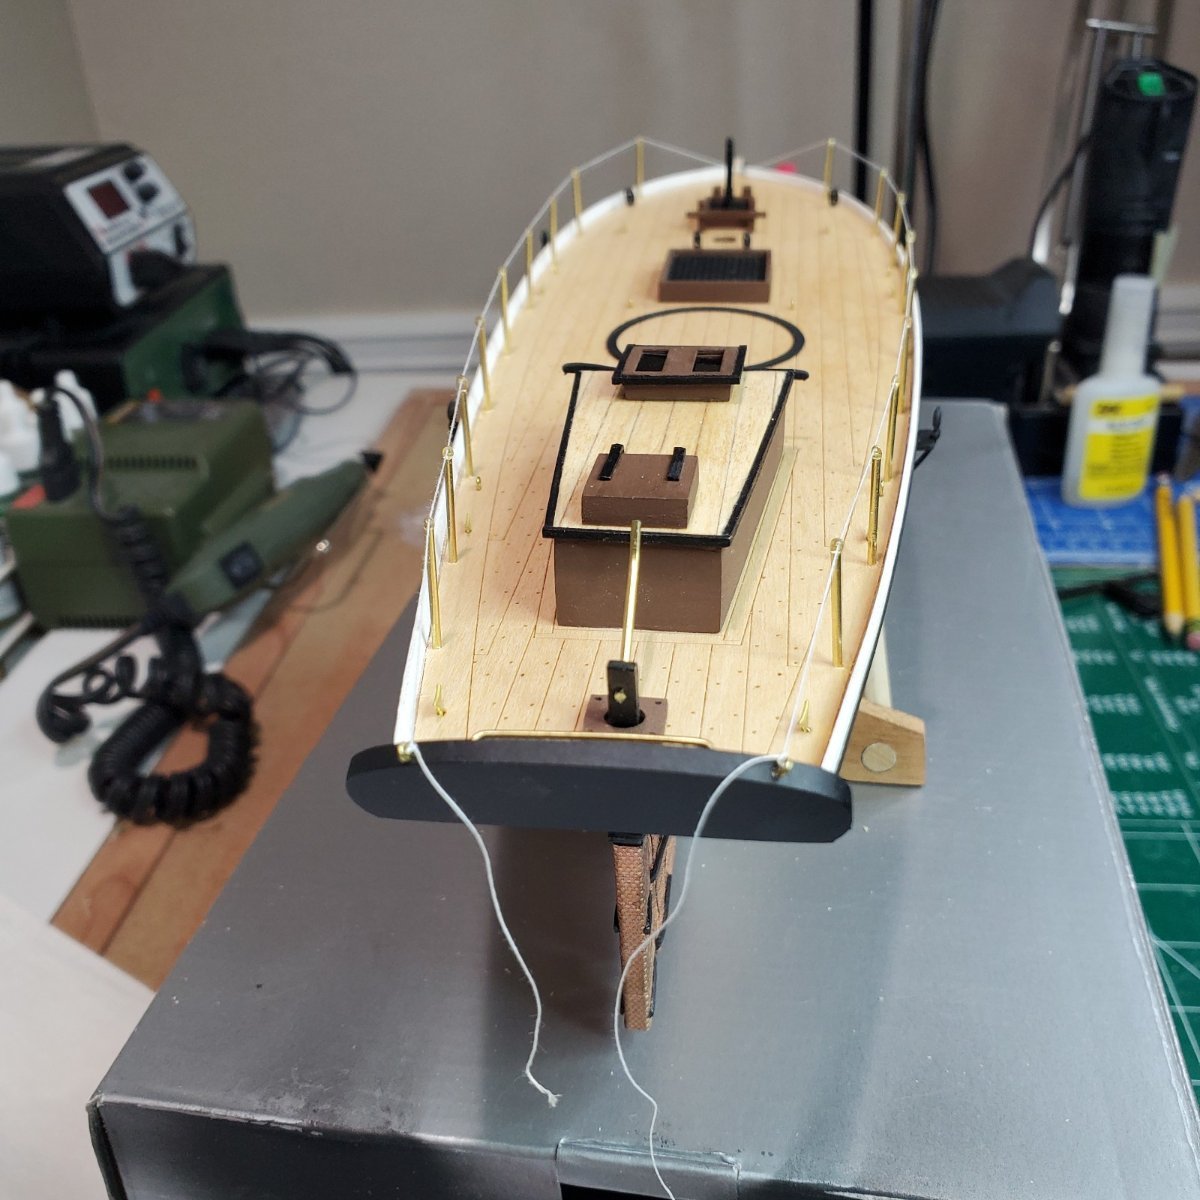
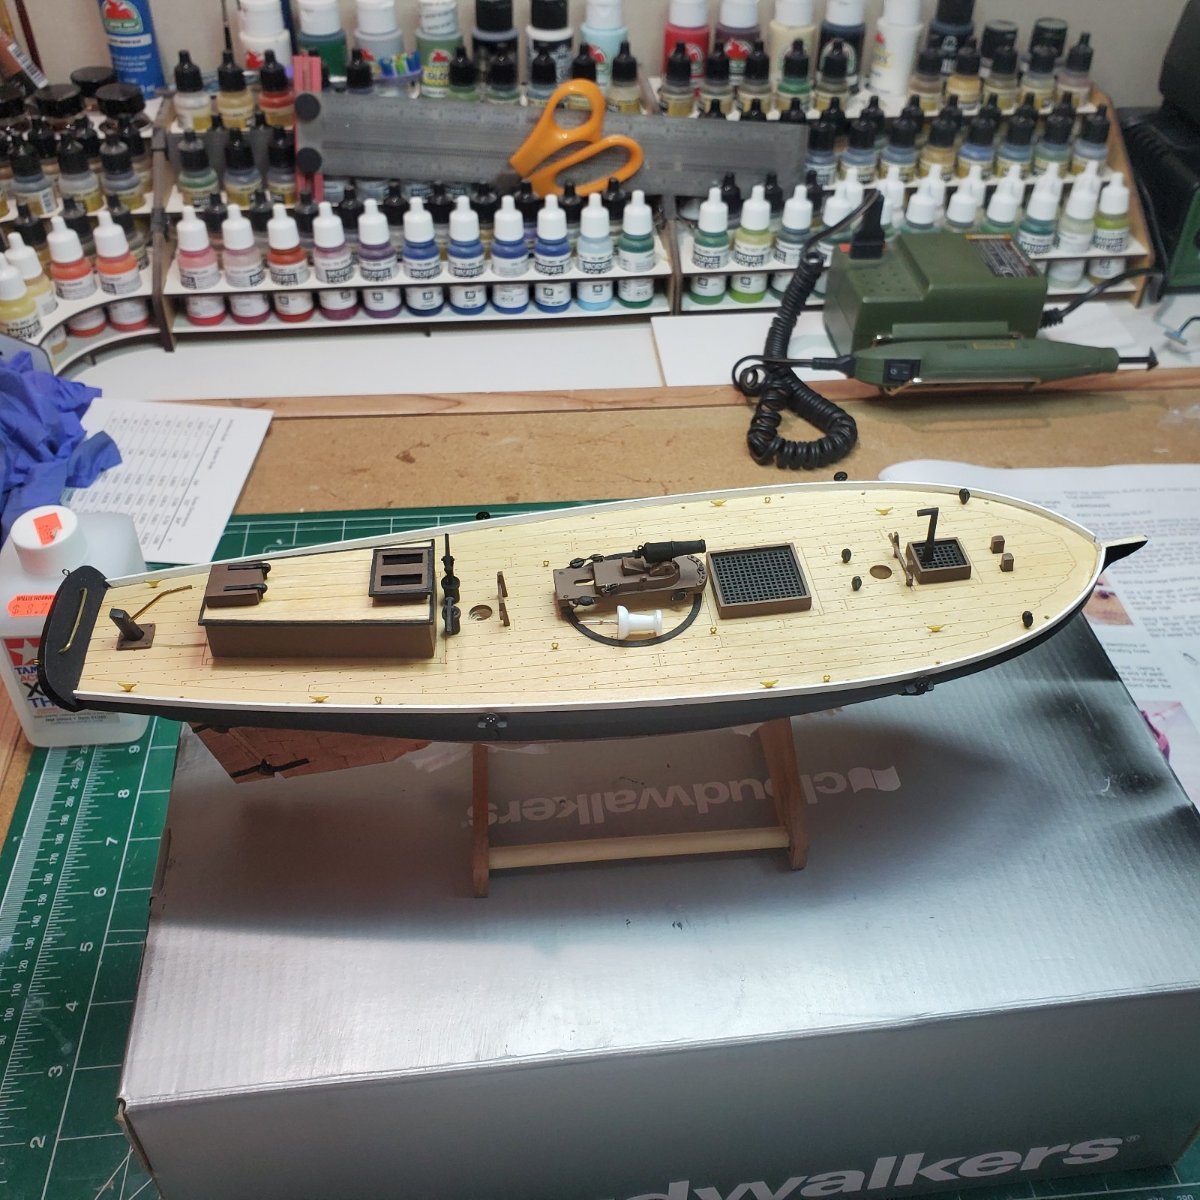
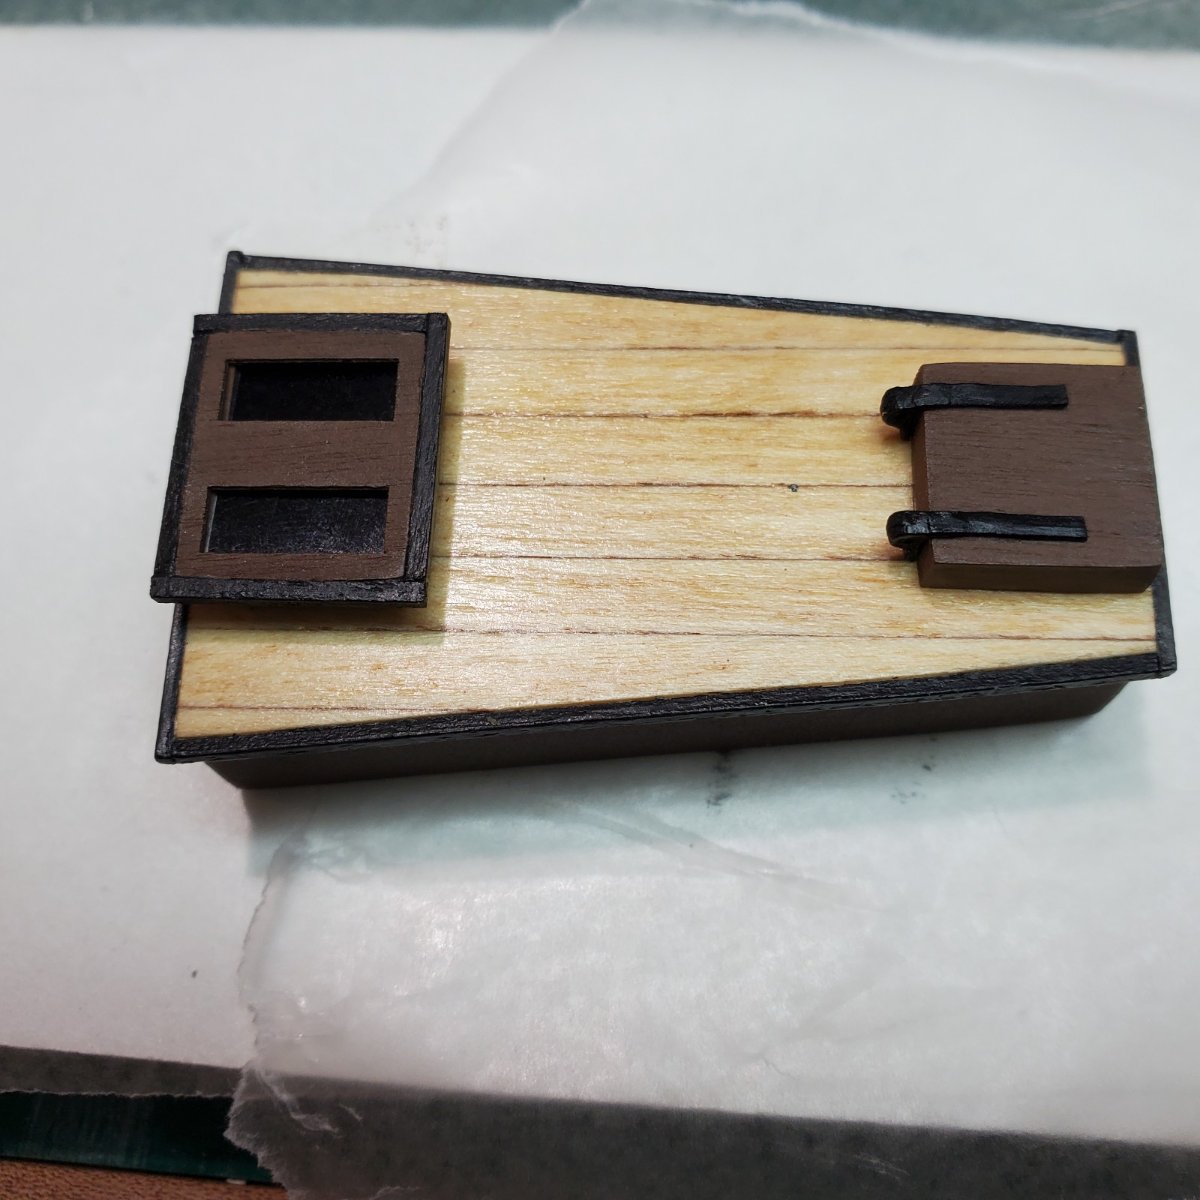
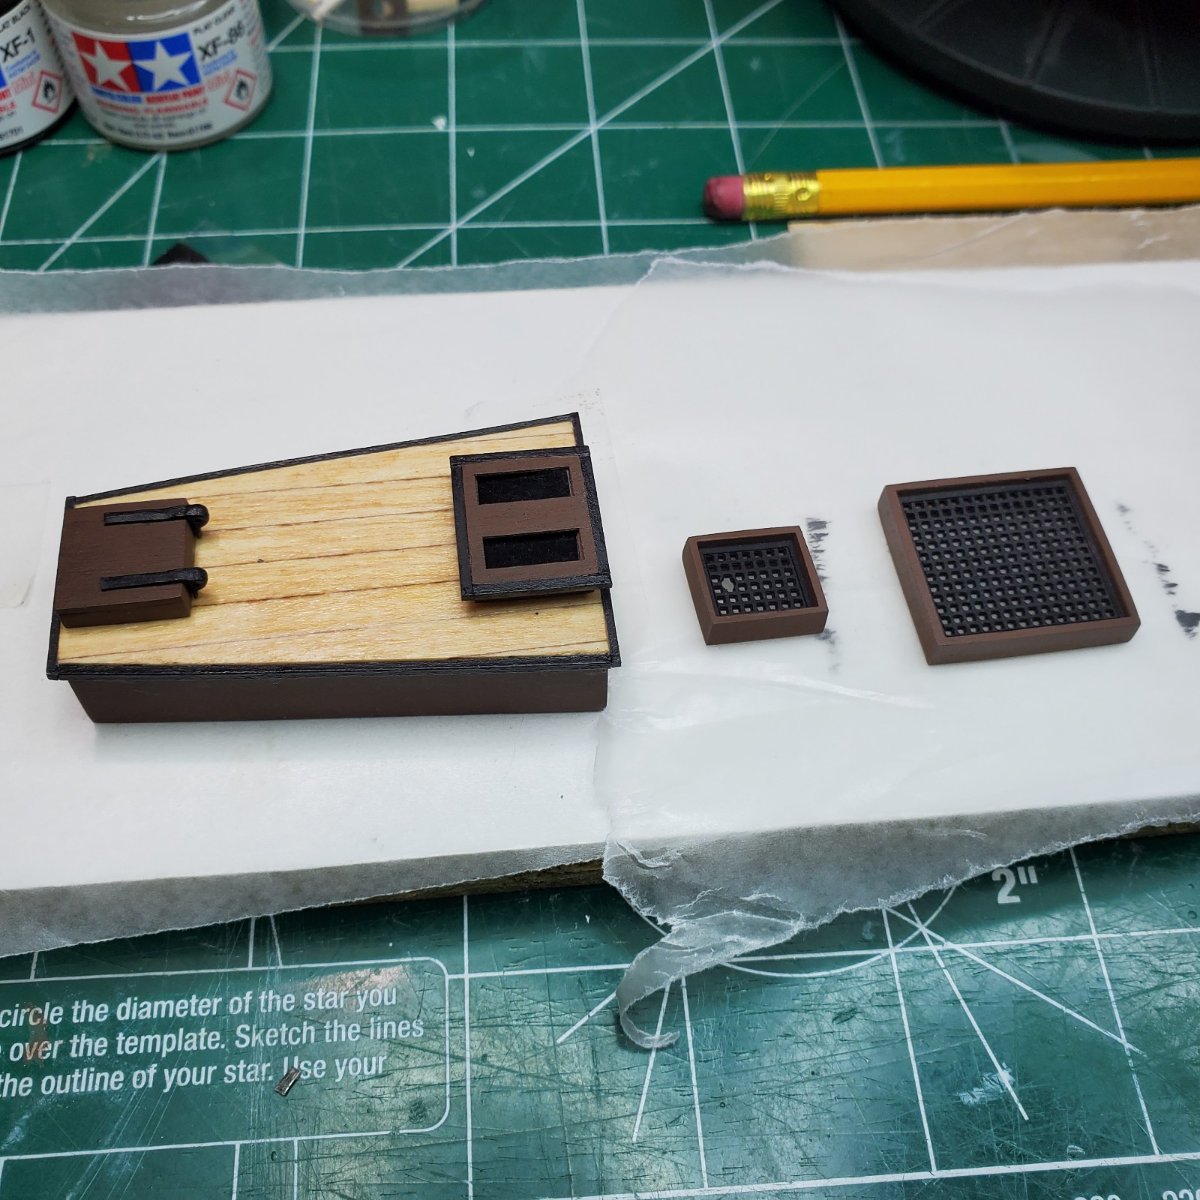
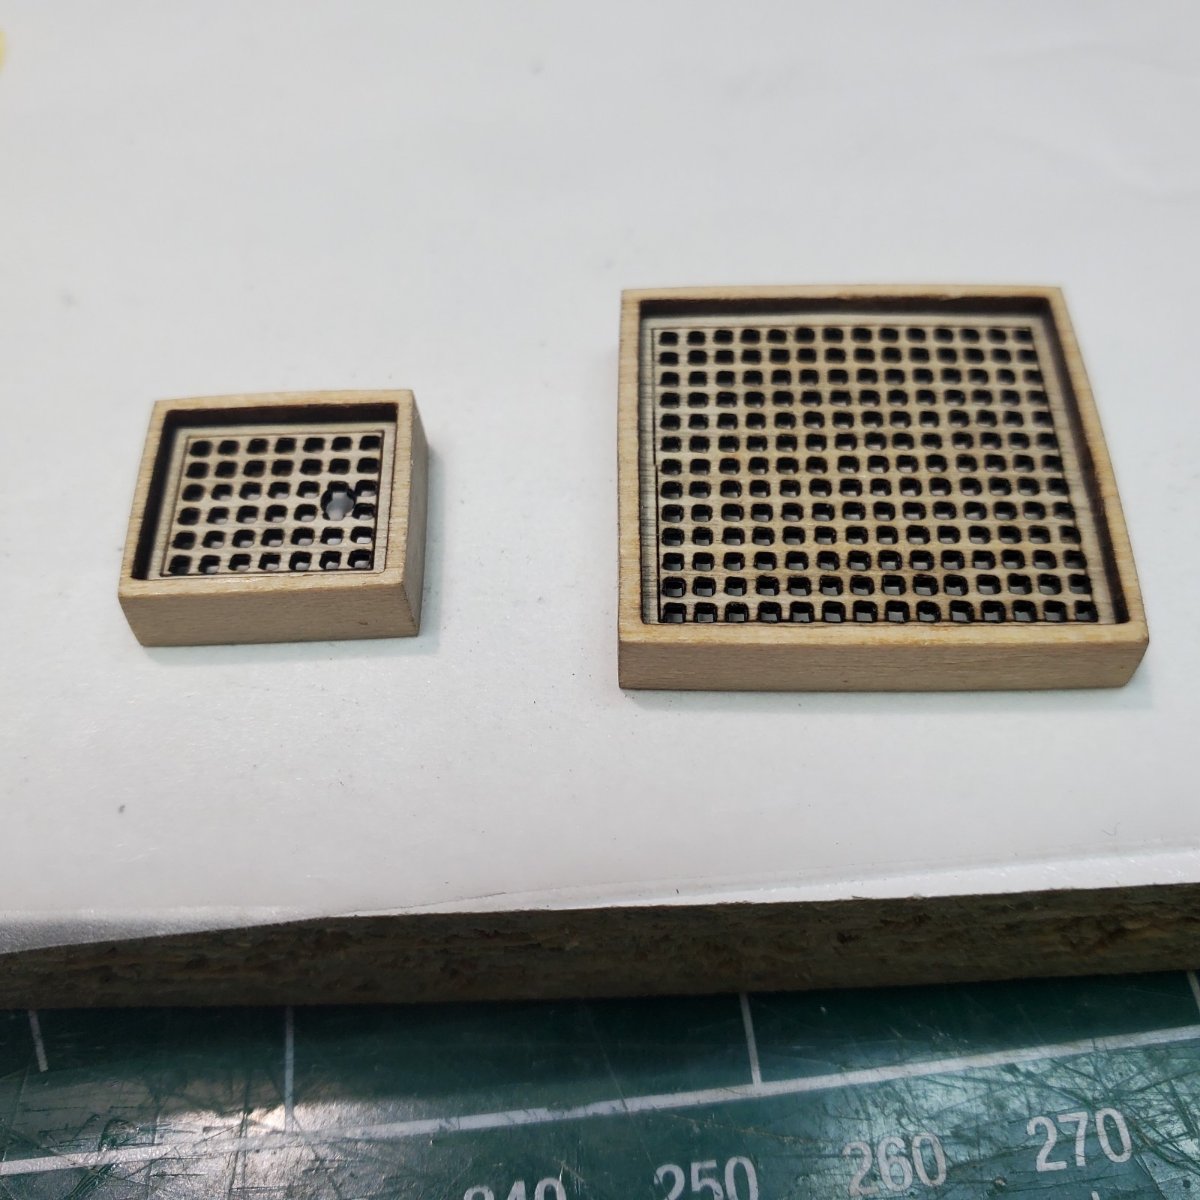
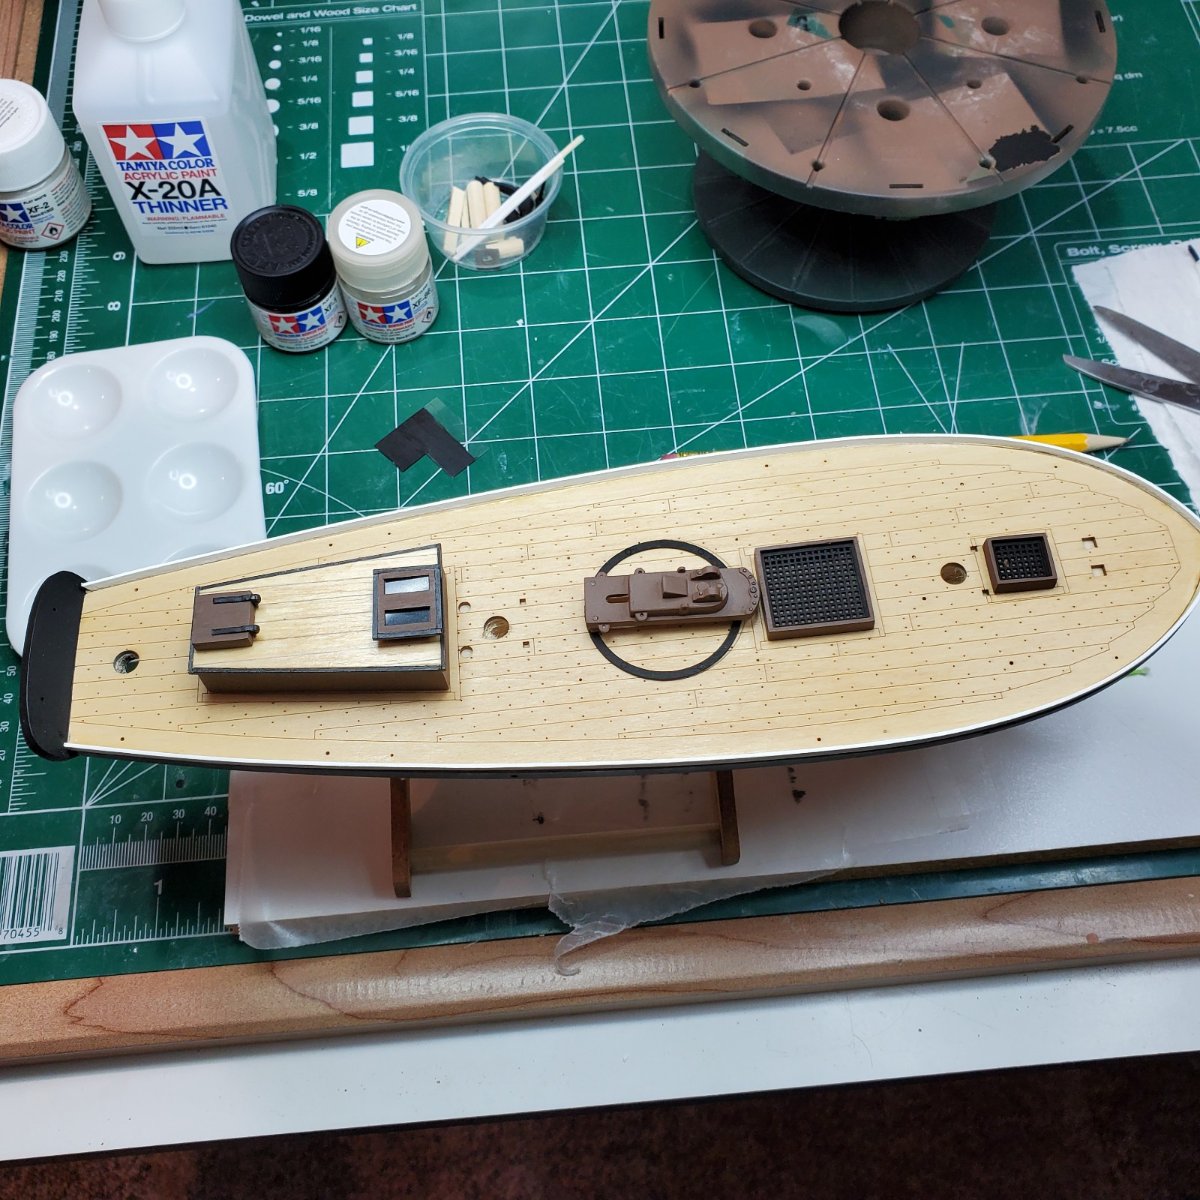
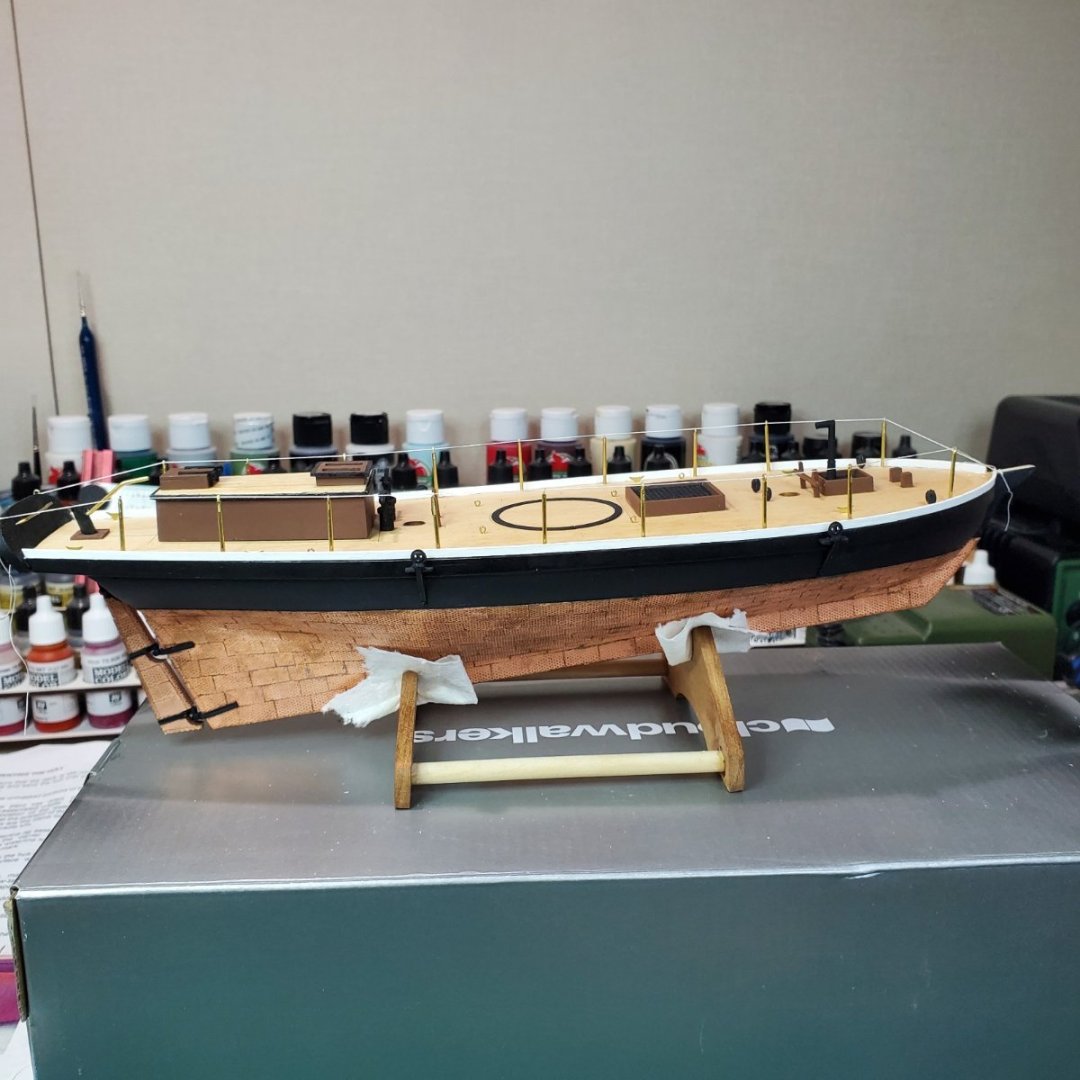
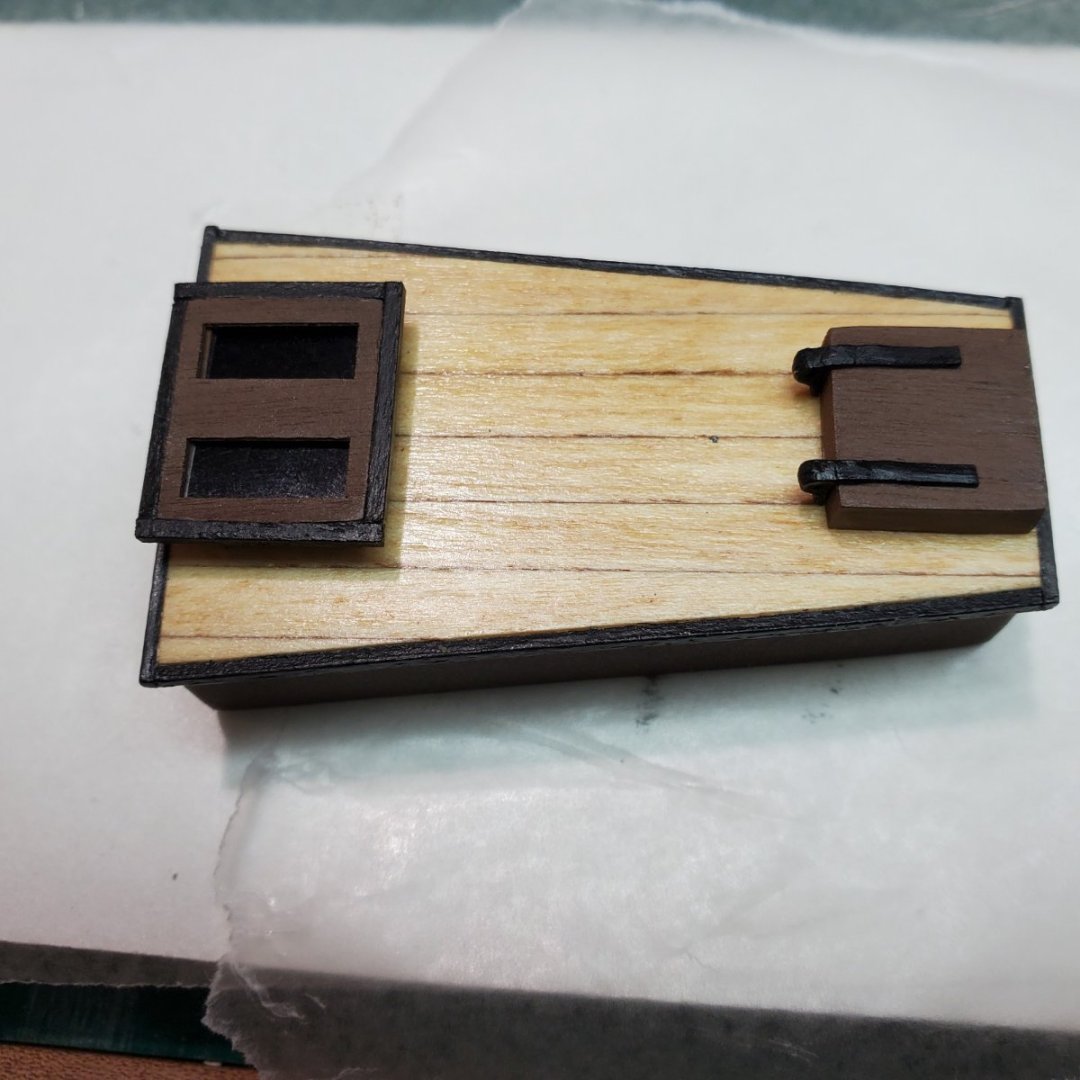
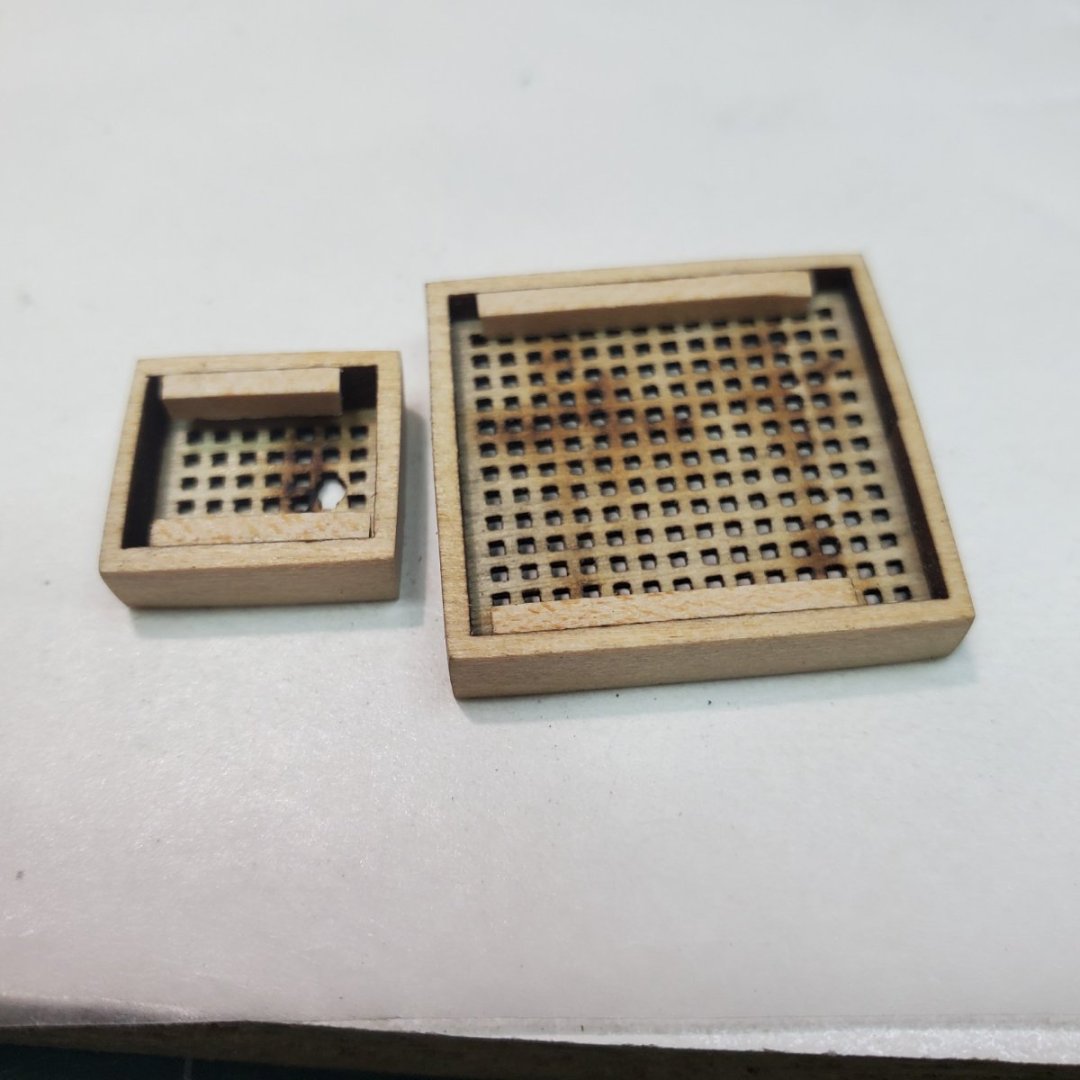
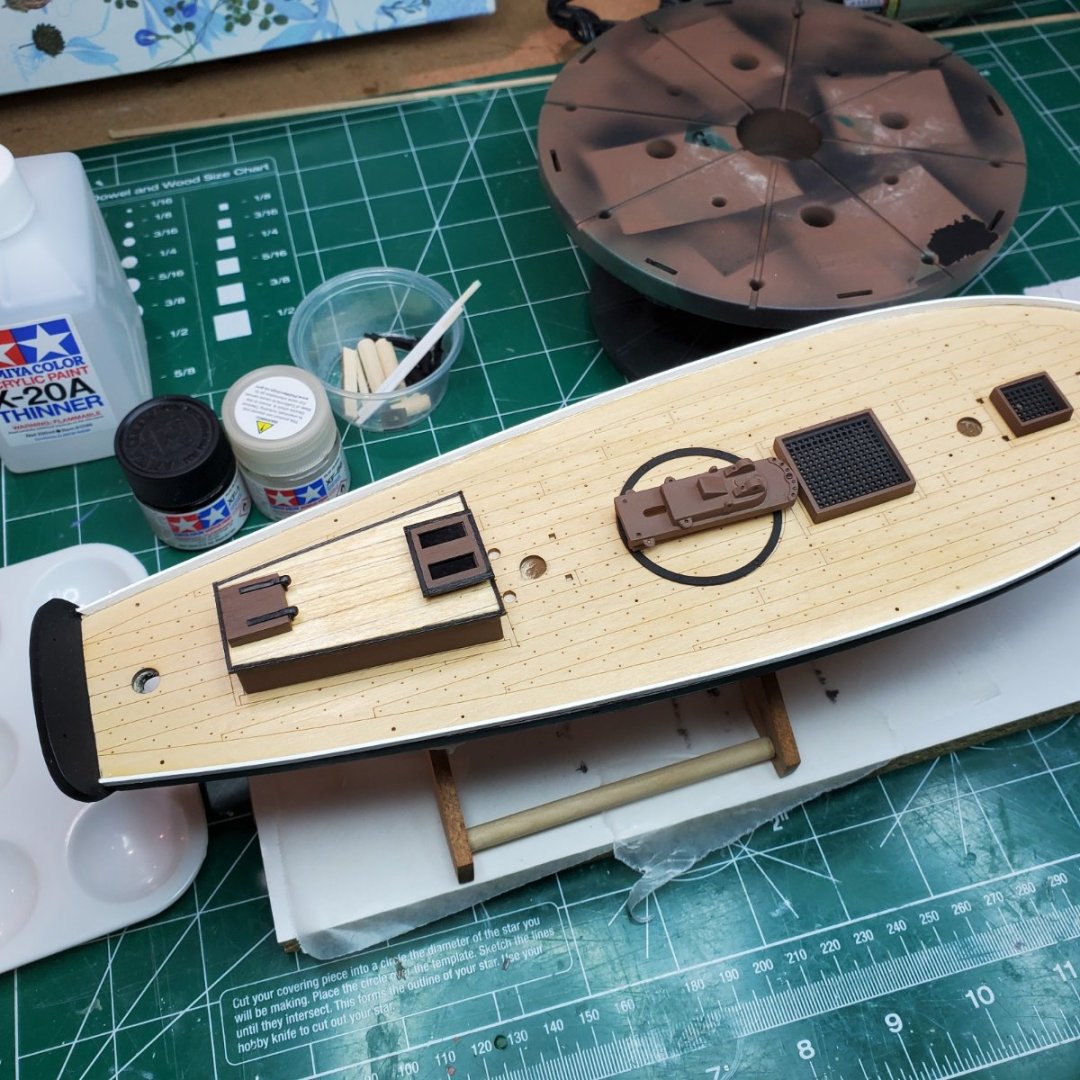
Hello Folks, Zoom Meeting over! So getting back to my post relating to my deck fittings on the BJ RCutter: Outside of detailing the deck house differently I also completed some other fixtures differently and dry fitted them to the deck. In addition to the deck house molding being in black trim I followed the same with the sky light. Both hatches I painted the molding Brown however I made the grates recede into the molding to add depth to the pieces. In addition I also painted the grates flat black to ad detail. Finally some dry fitting. Next up making the Blocks and Stanchions black with using pewter solutions purchased from Blue Jacket. Thanks for following, Bill T.


-
wtimlen reacted to a post in a topic:
Dallas by SteveA - Artesania Latina - 1:50
-
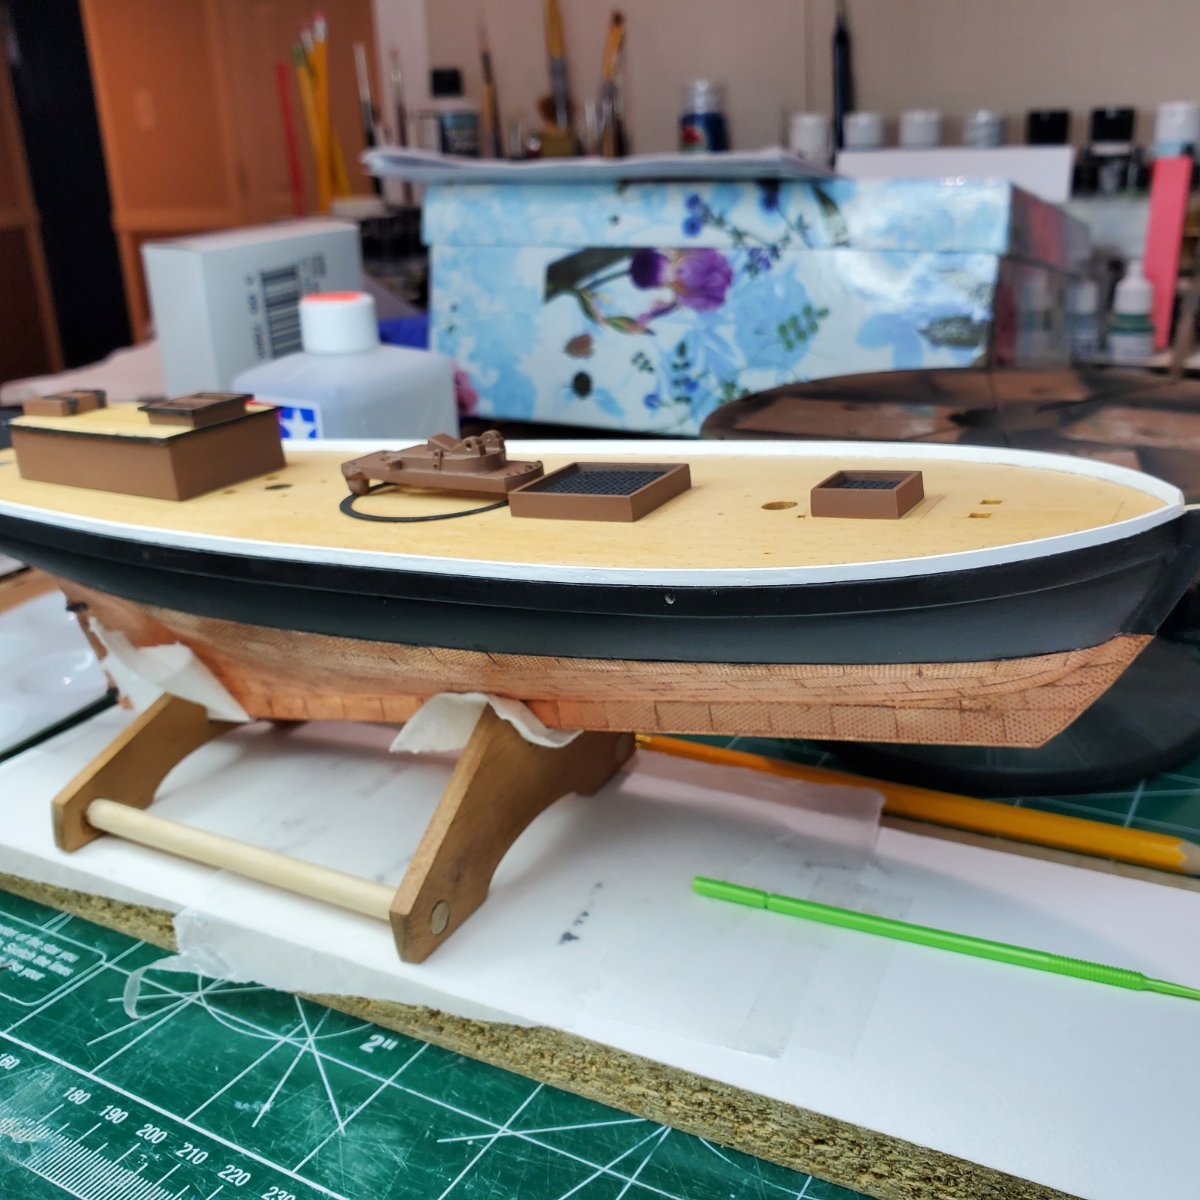
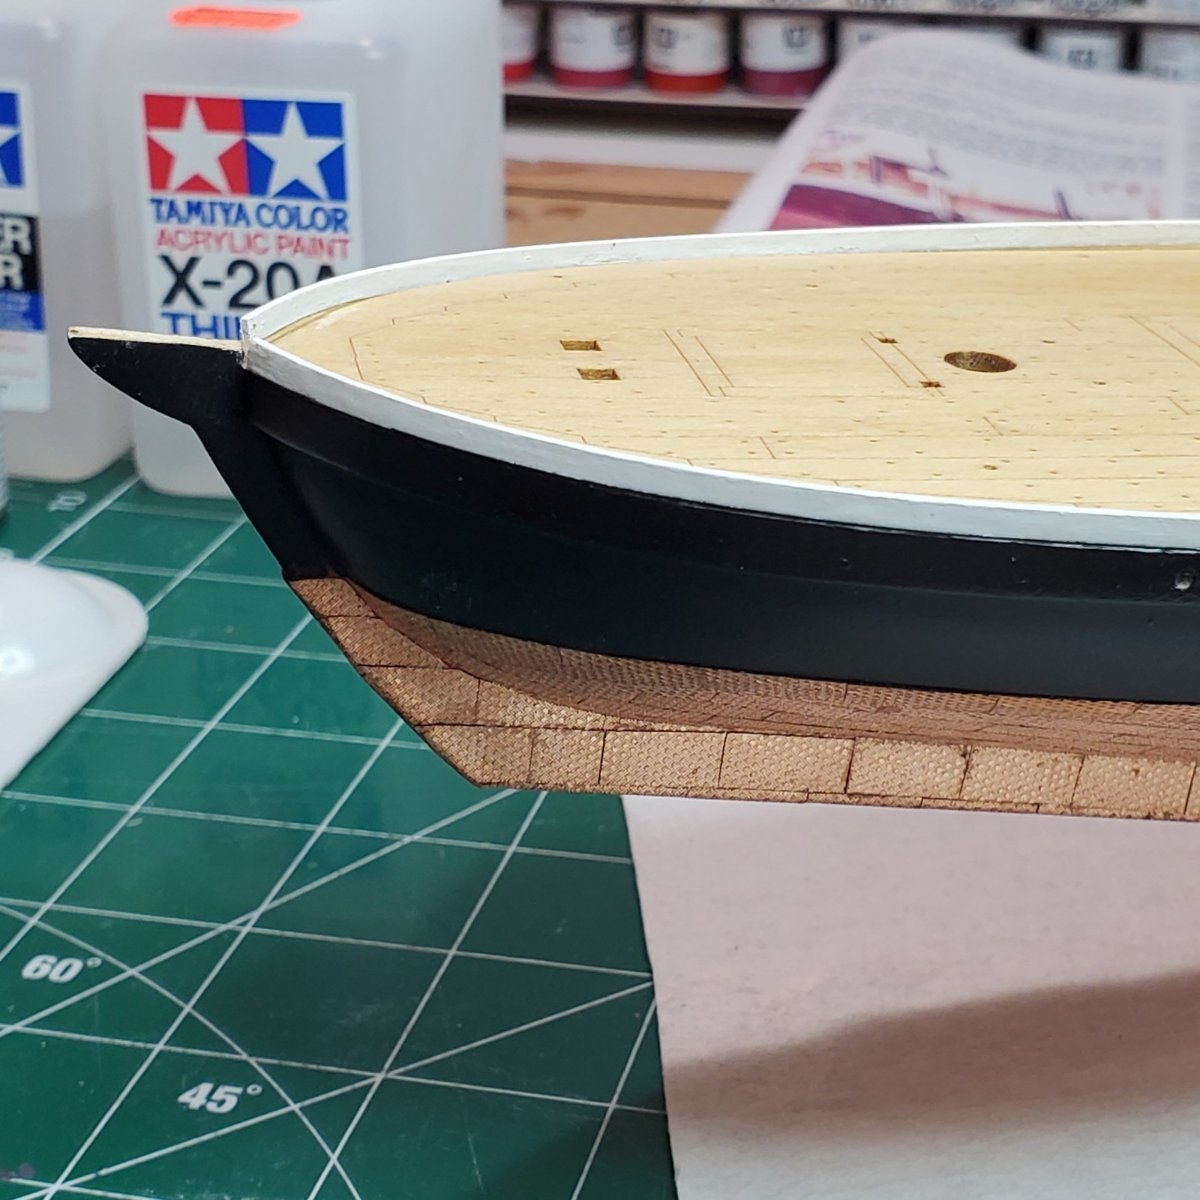
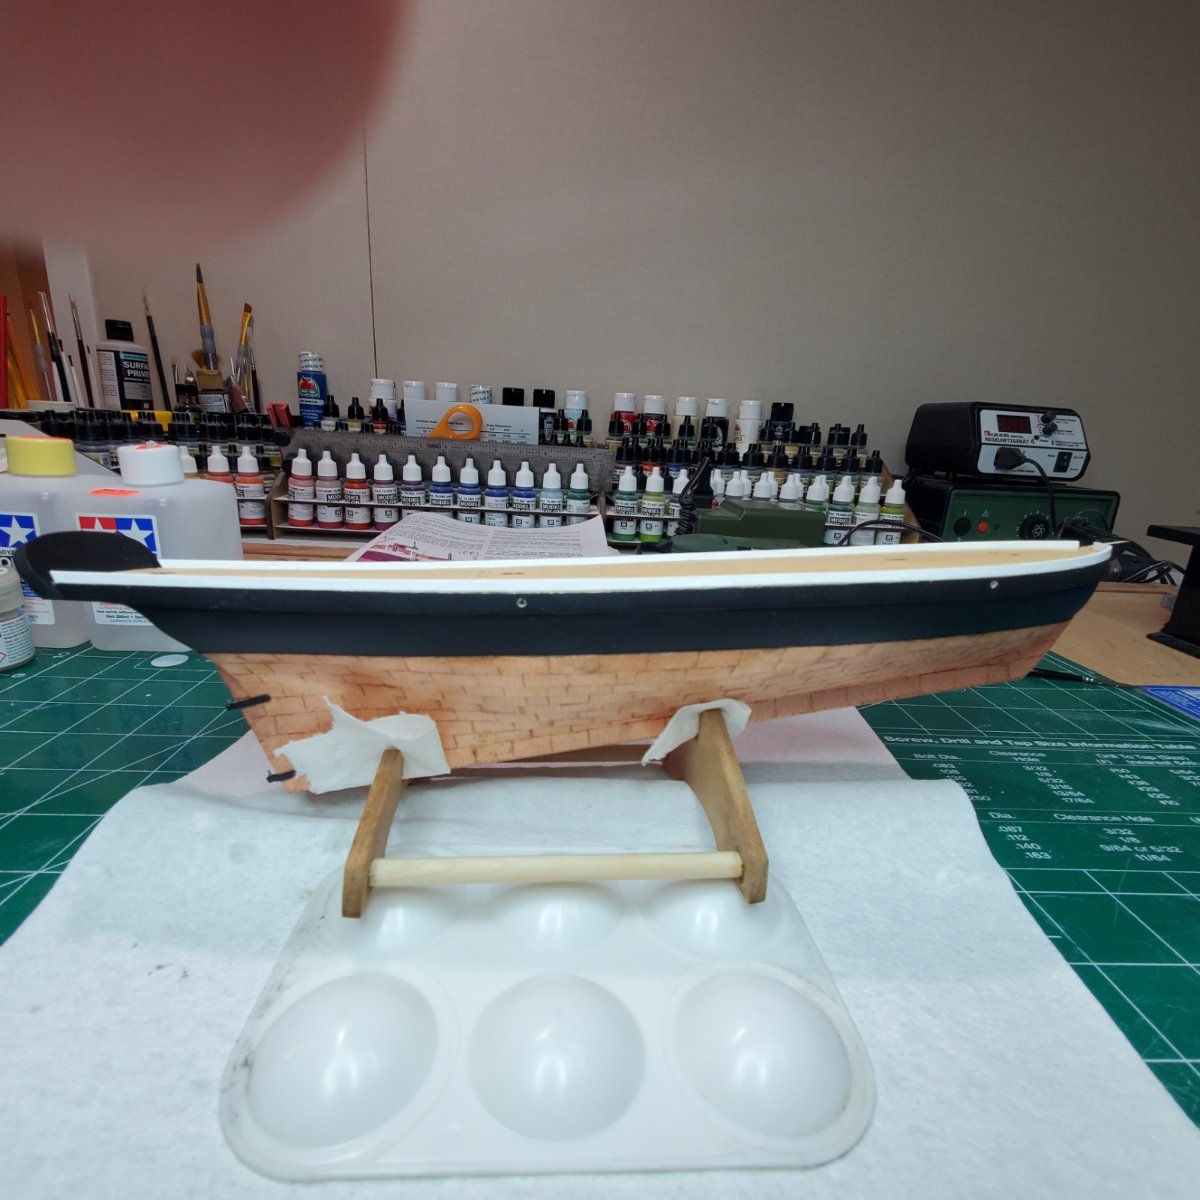
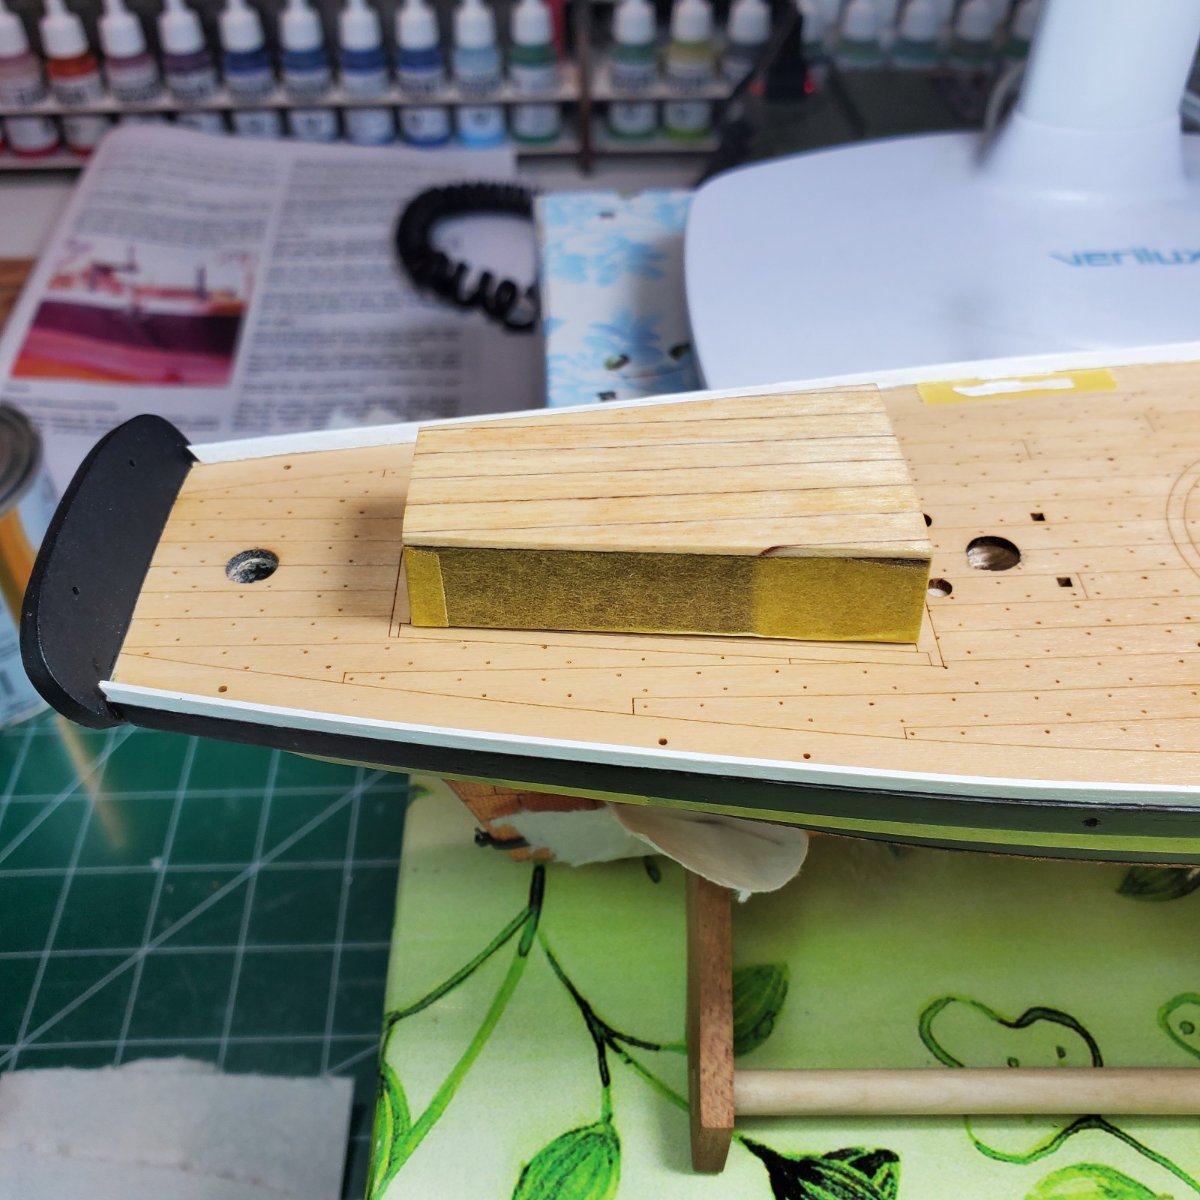
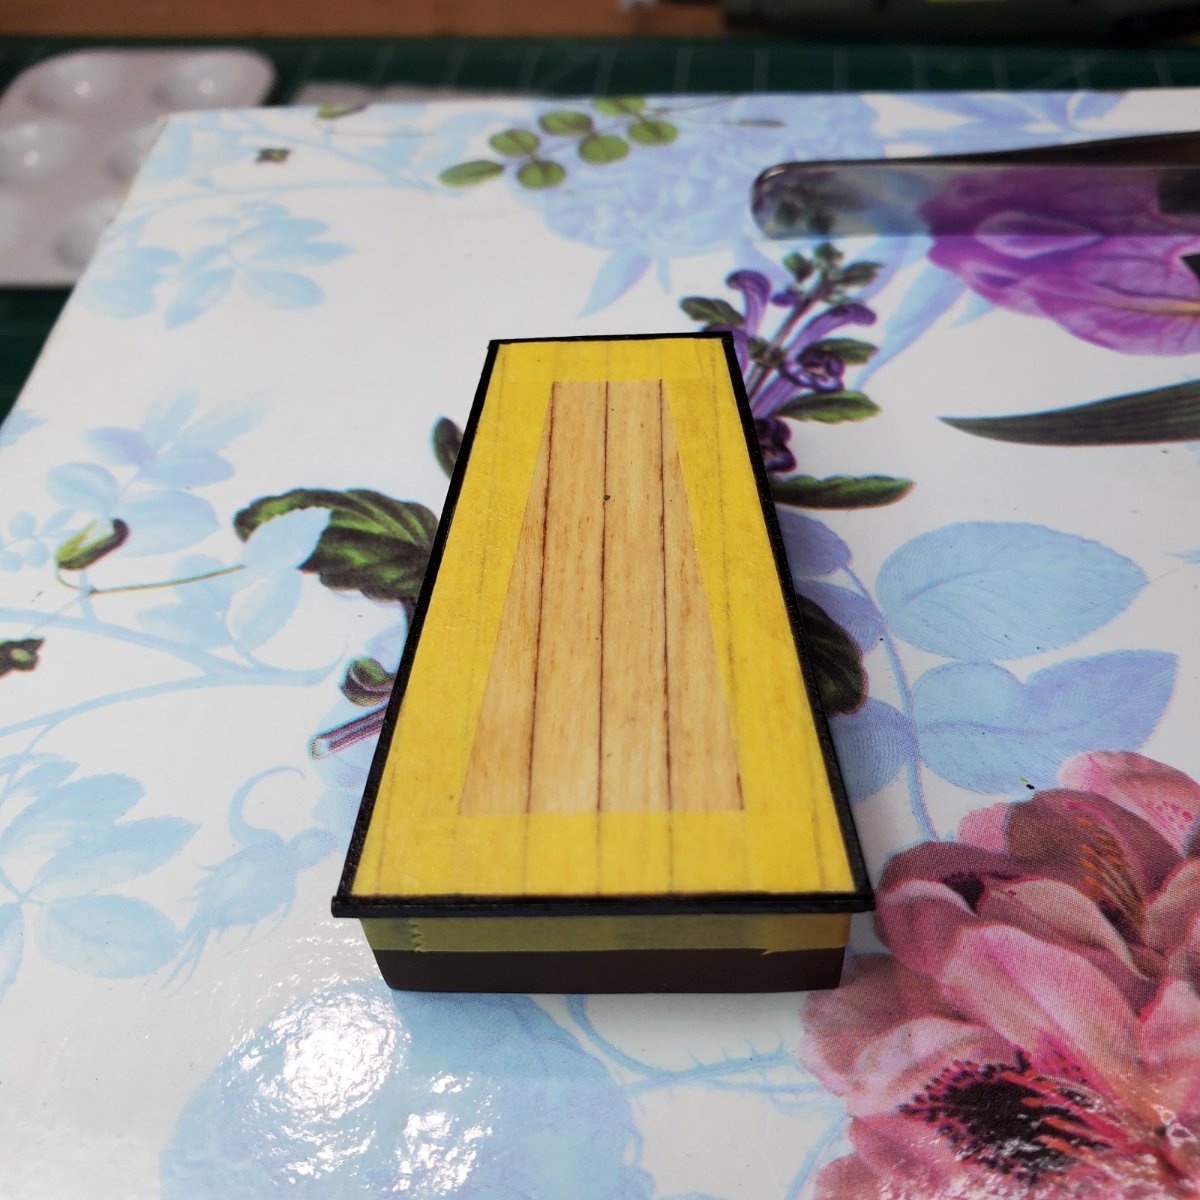
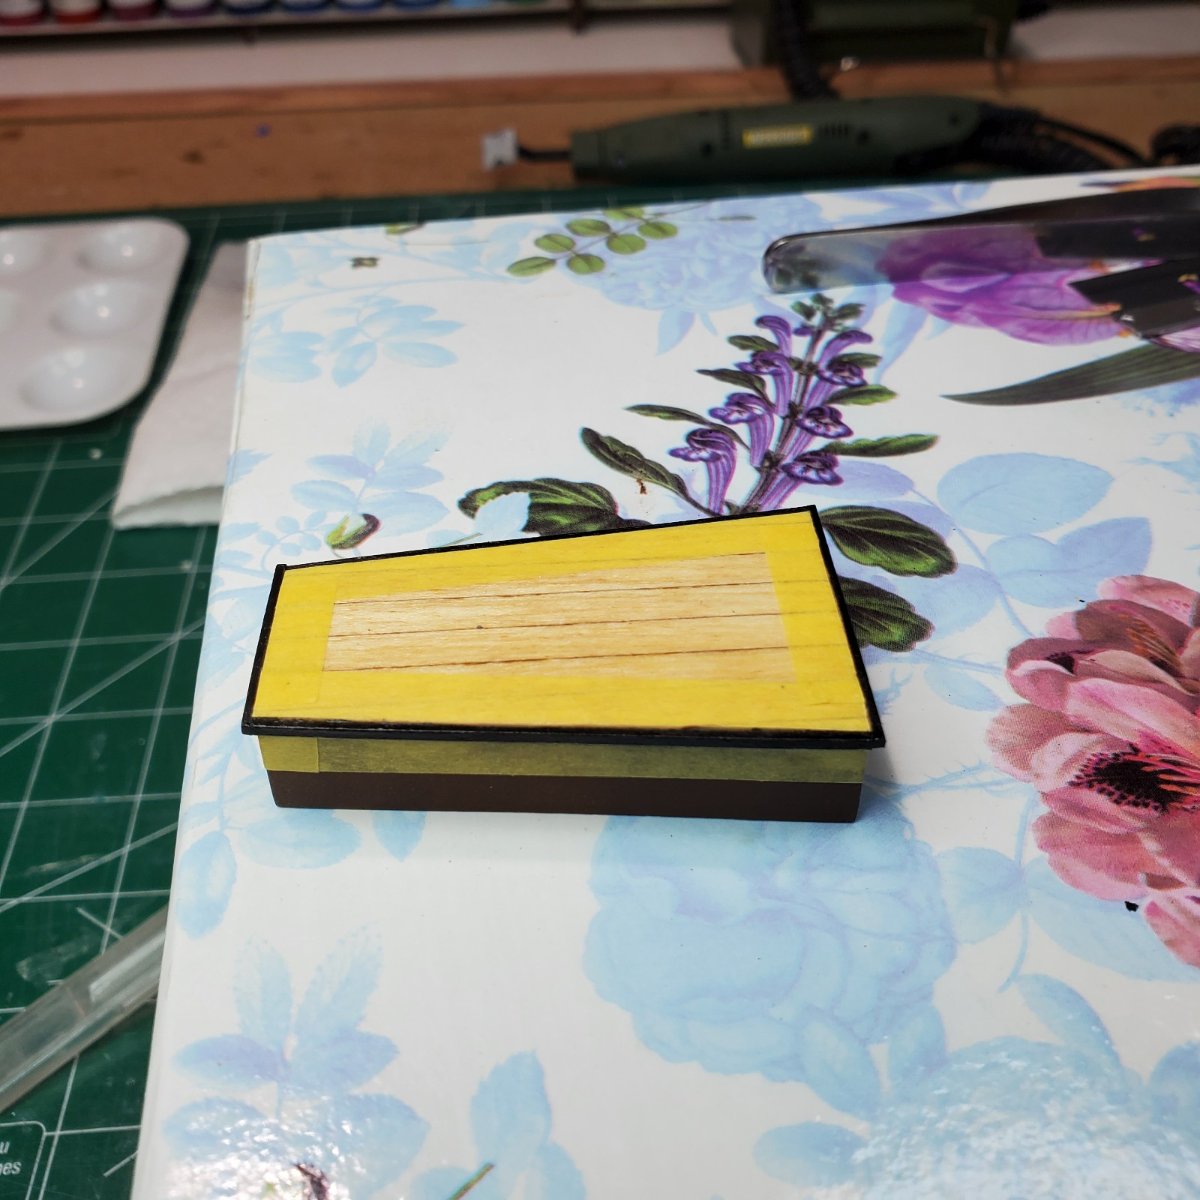
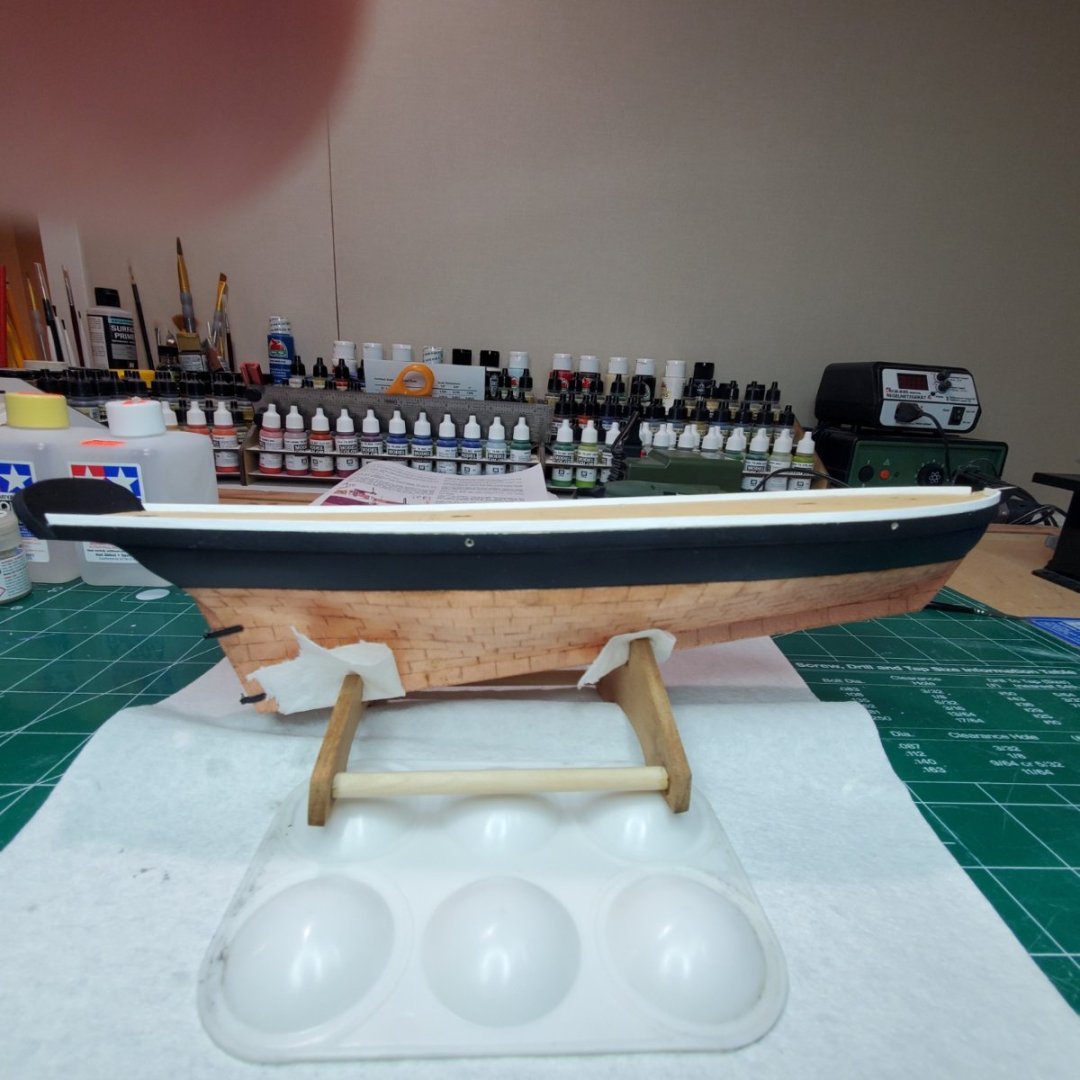
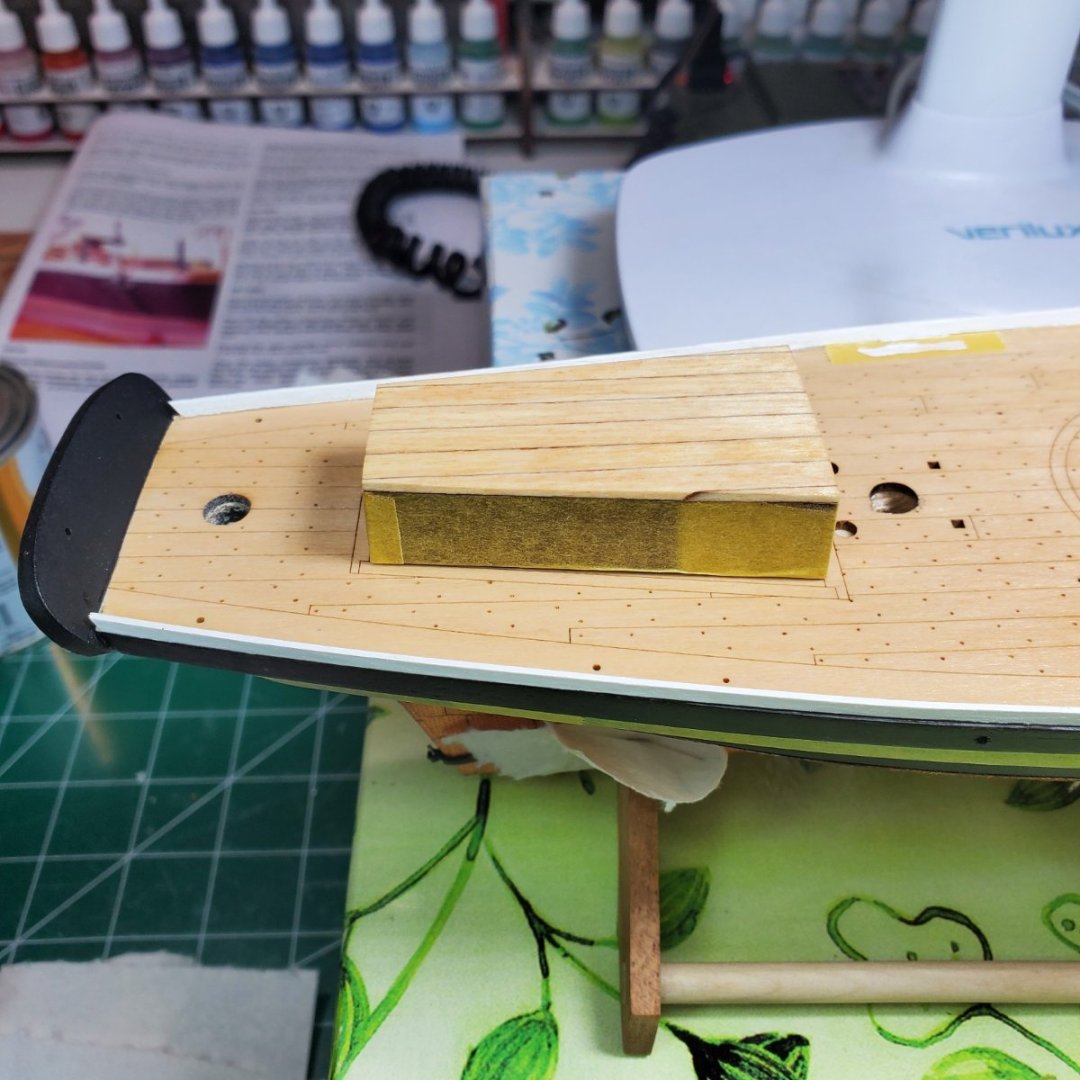
Hello Folks, First post in quite some time, however been busy on the build. I will probably split this into 2 seperate posts. One being completion of the Hull and the second on the deck detail. I really liked the Toe Rails on the Blue Jacket Yankee Hero so I decided to paint them Flat White like the Yankee Hero (Model Master) as opposed the staining them. I was pleased with the outcome. I generally follow the suggested paint scheme, however never exactly as I have mentioned in prior posts. The Toe Rails were somewhat challenging due to the paint mixing with the CA. I repainted the portion where the Toe Rails meet the hull to rid the boat of the reflection of the CA. This took some time and extra steps, however well worth it. Again deviating from the normal I decided to cover the rear cabin with decking on the top with the thought this would be a working area for the deck hands to a certain extent. I broke out some scrap wood from my "wood shed" to accomplish this. I painted only one side of each plank with Vallejo "Mud Brown" to match the laser detail color on the deck. After gluing them together, sanded them and stained with Miniwax "Golden Pecan", same as I used for the deck. Finally I used Flat Black paint (Model Master) to trim the rear cabin moldings versus the brown as suggested in the manual. I will have better pictures in my next post of the cabin. I will post again shortly, in an hour. Have a zoom meeting! Thanks, Bill T.


-
Hello Mike, Thank you for the kind words! That is the same order I went, the Yankee Hero by BJ is a great kit. Loved making it, I have a build thread for my Yankee Hero on MSW if you wish to check it out. Going from the Yankee Hero to the Revenue Cutter from a progression perspective is working out well. All the best, Bill T.

.jpg.26e625588a0ec00d04f5603ad8dcd831.jpg)