HOLIDAY DONATION DRIVE - SUPPORT MSW - DO YOUR PART TO KEEP THIS GREAT FORUM GOING!
×

wtimlen
-
Posts
117 -
Joined
-
Last visited
Content Type
Profiles
Forums
Gallery
Events
Everything posted by wtimlen
-
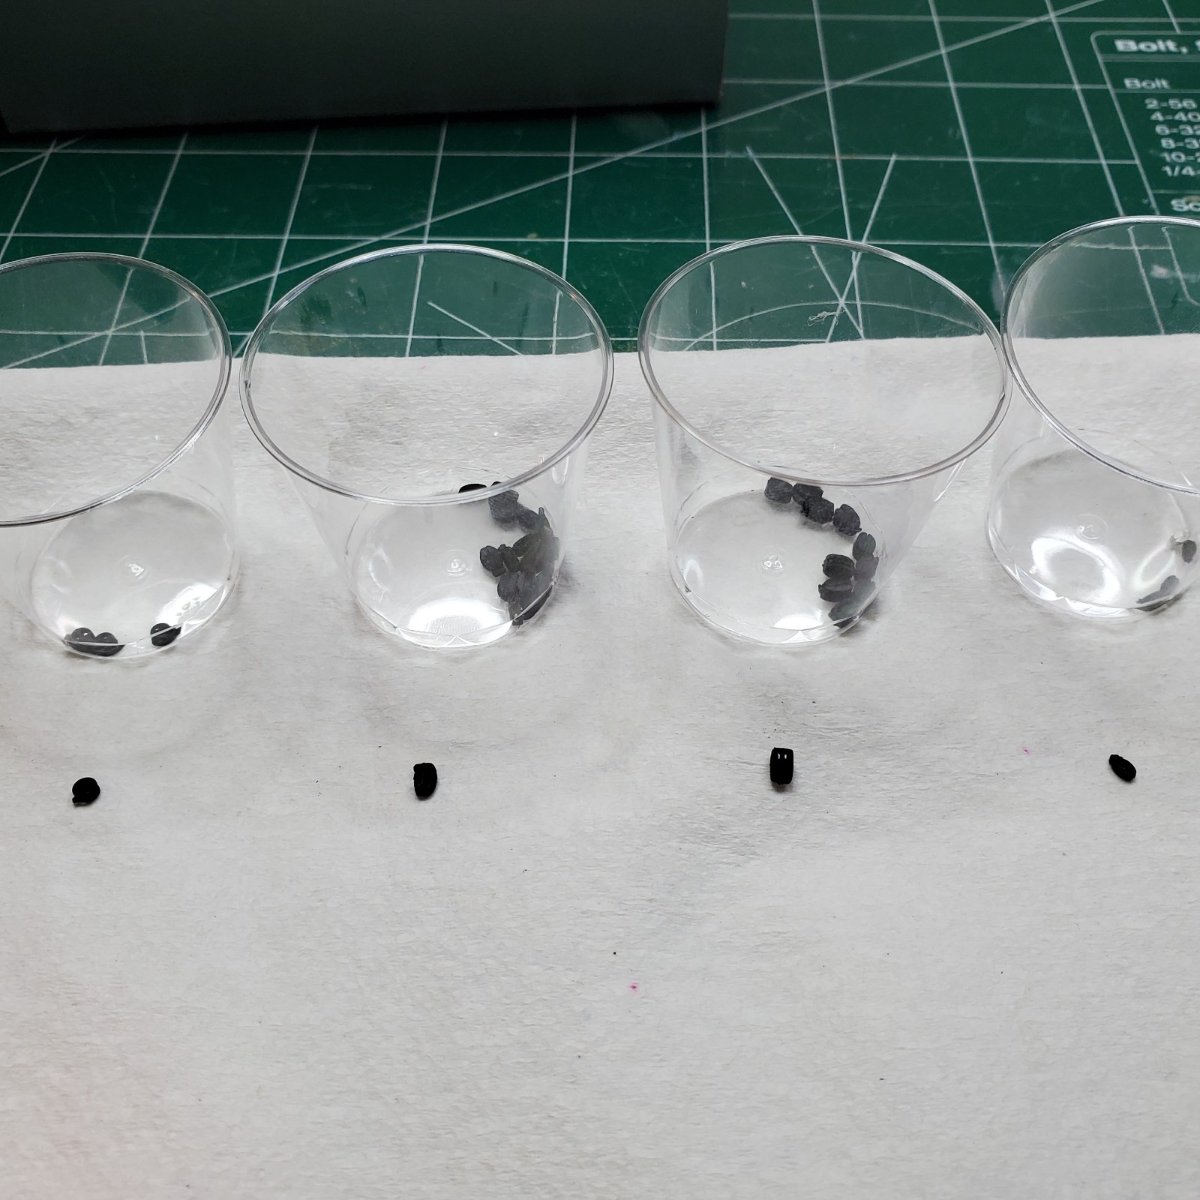
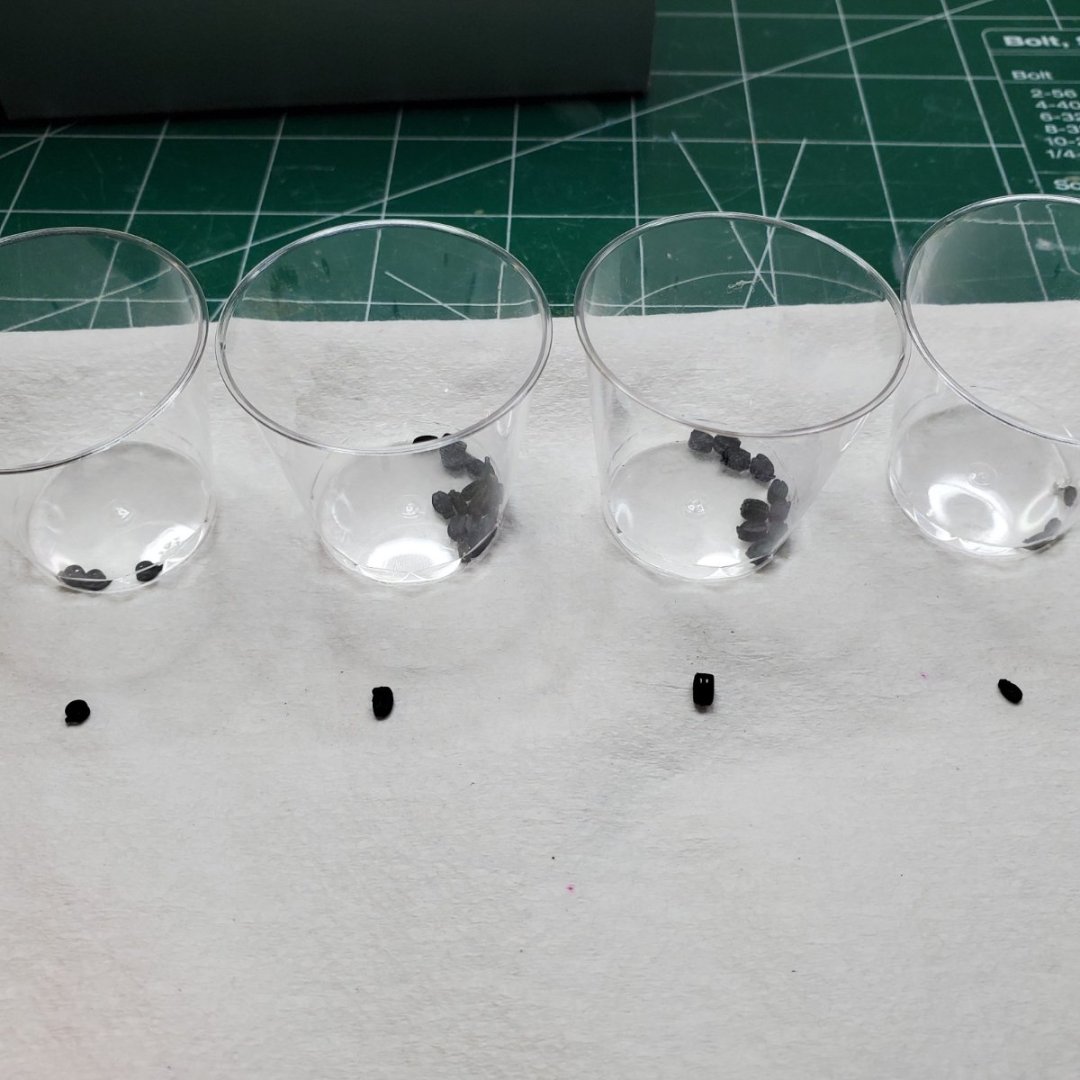
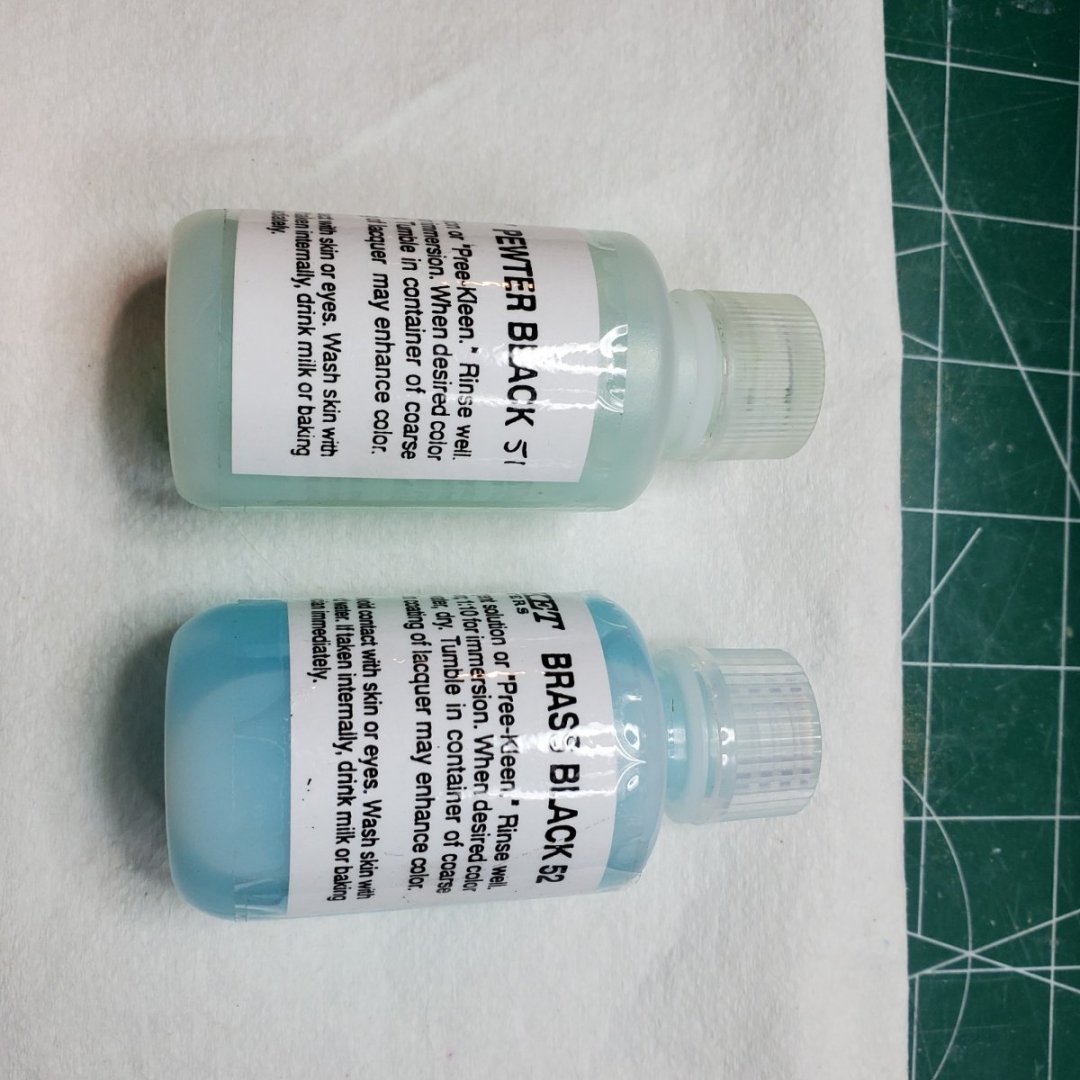
 Hello Folks, Happy New Year's. A quick post tonight, probably another larger one this weekend. Status on the Bluejacket Revenue Cutter is listed below: Blocks: Drilled all blocks with #75 drill bits to clear out the holes. Cleaned them all with Acetate and let dry overnight prior to the Blue Jacket Pewter Black #51 bath the following day. Did NOT want to paint every block... Even after the pewter bath I still airbrushed them with a coat of Model Master Flat Black and a seperate coat of Tamiya Clear Flat (LOL). Worked out nicely so far... Stanchions (18) required however made (20): This was a project in of itself, however survived... Used a heavy vice grip pliers to flatten the 1/16 inch to drill the hole for the safety rope. Filed each stanchion (rounded the tops) as outlined in the building manual. Used an blade #11 to create a small canyon for a #75 drill bit. Drilled a #75 drill bit hole into the stanchion, trashed about 5 drills doing this part. Did this manually with a pin vise. The brass was not to kind to me. Drilled another hole with a #72 drill bit to widen the hole (with an electric drill) a little to ensure there would be no issues with rigging the safety line. The reason for this was that this assembly would be completed at the finishing line of the build with all the rigging in place. These will be black stanchions on the finished model using BlueJacket Brass Black #52 Solution to color the pieces. Will probably airbrush these pieces as well (similar to the blocks). Most importantly found the need to purchase a light weight flex shaft rotary machine and 3 sets of (#61-#80) Drill Bits from MicroMark to avoid the pin vise drilling (and breaks) for repetitive jobs like this. Brass and Pewter Darkening Solutions: Used BlueJacket Solvents to darken the blocks and stanchions BlueJacket #51 & #52 solutions. Next Post (I hope this weekend): Finished Stanchions (colored) Finished Hull with dry fitted stanchions. Completed Carronade And then on to mast and spars.

-
Hello CF, I had the same situation, the model instructions include a section which outlines to use rigging threat tied across the open portion of the "shoe" to keep the spar on the mast, the rigging will take care of the rest (See slide #34 above). However, you can also install a small piece of brass wire into the spar so it sticks out and then drill a hole into the mast at the position you wish to affix the spar to the mast (With some CA Adhesive). I believe they call this a Fid. I did not end up using this method however it would have worked fine. I hope this helps, I will look up your build on MSW. Any other questions please feel free to ask. Good Luck & Happy New Years! Bill T.
-
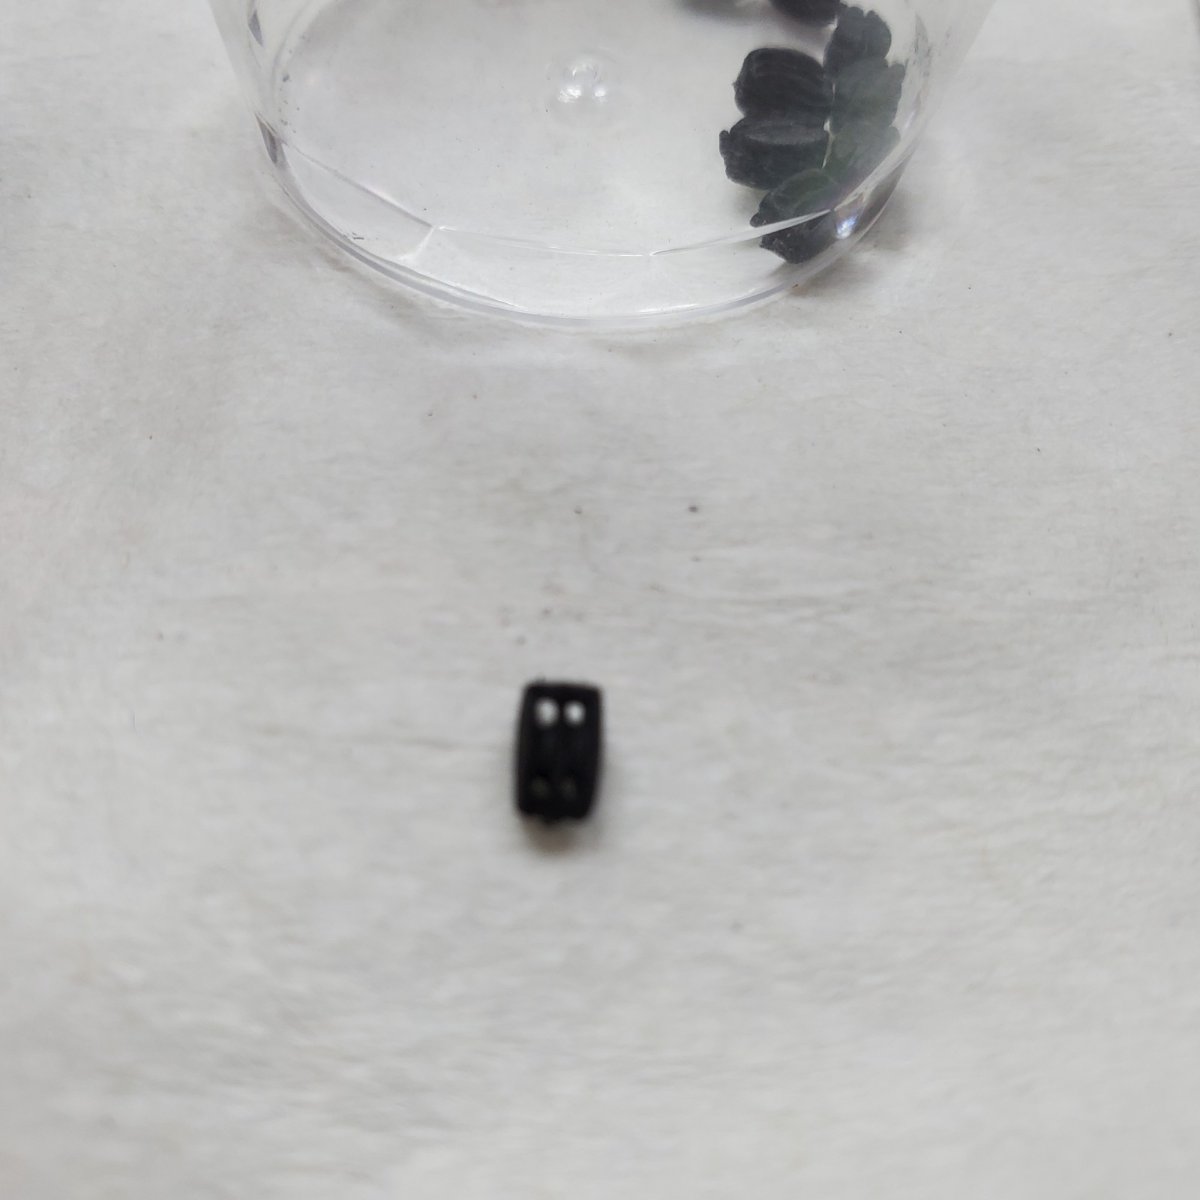
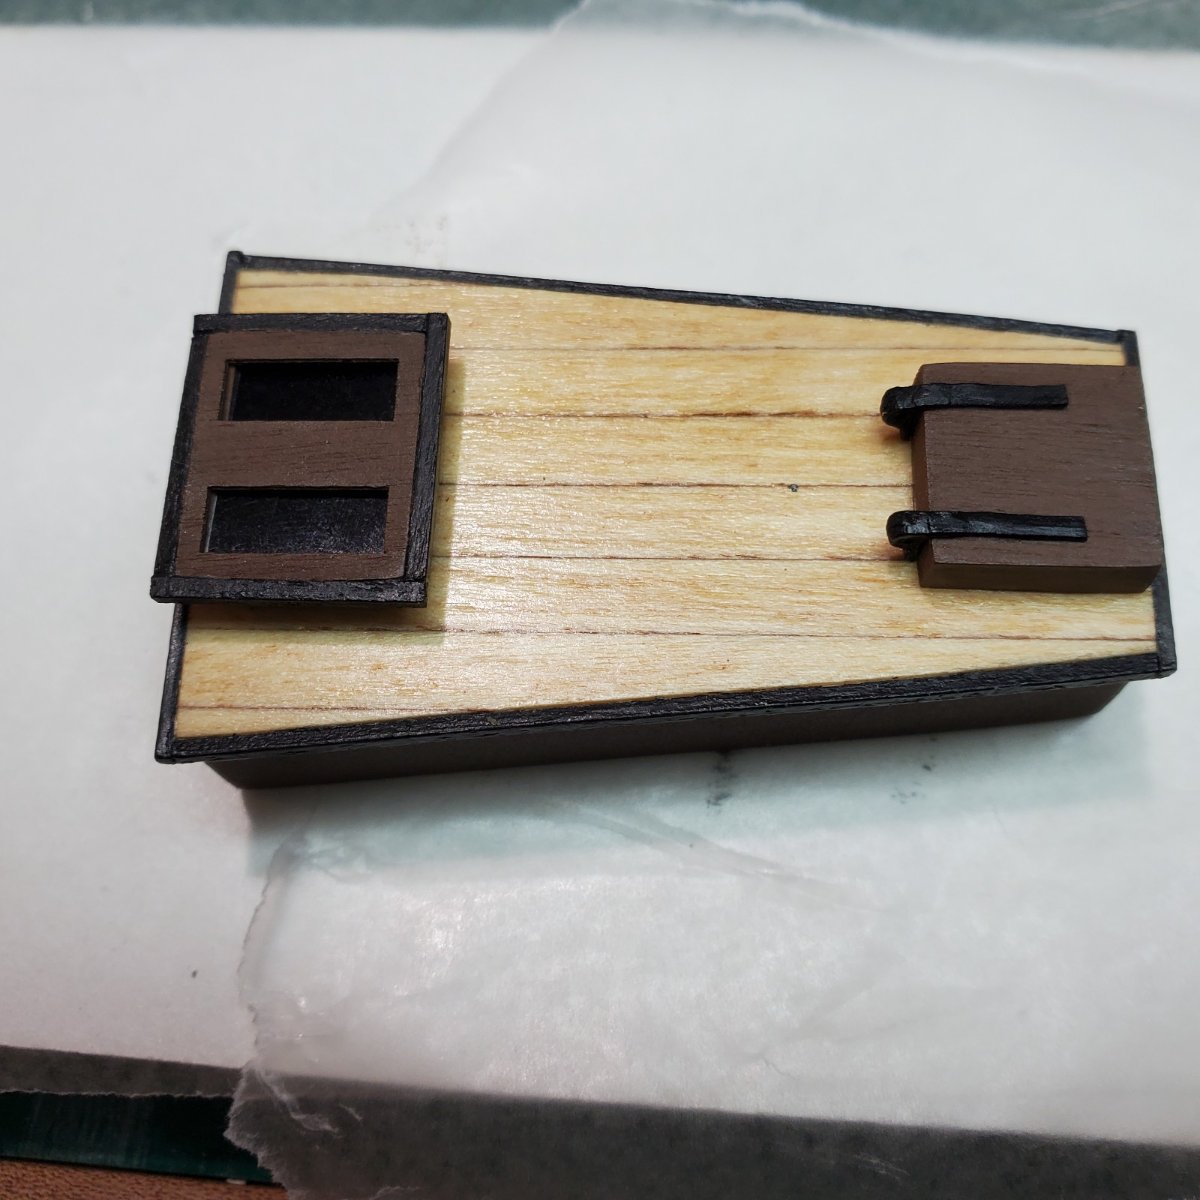
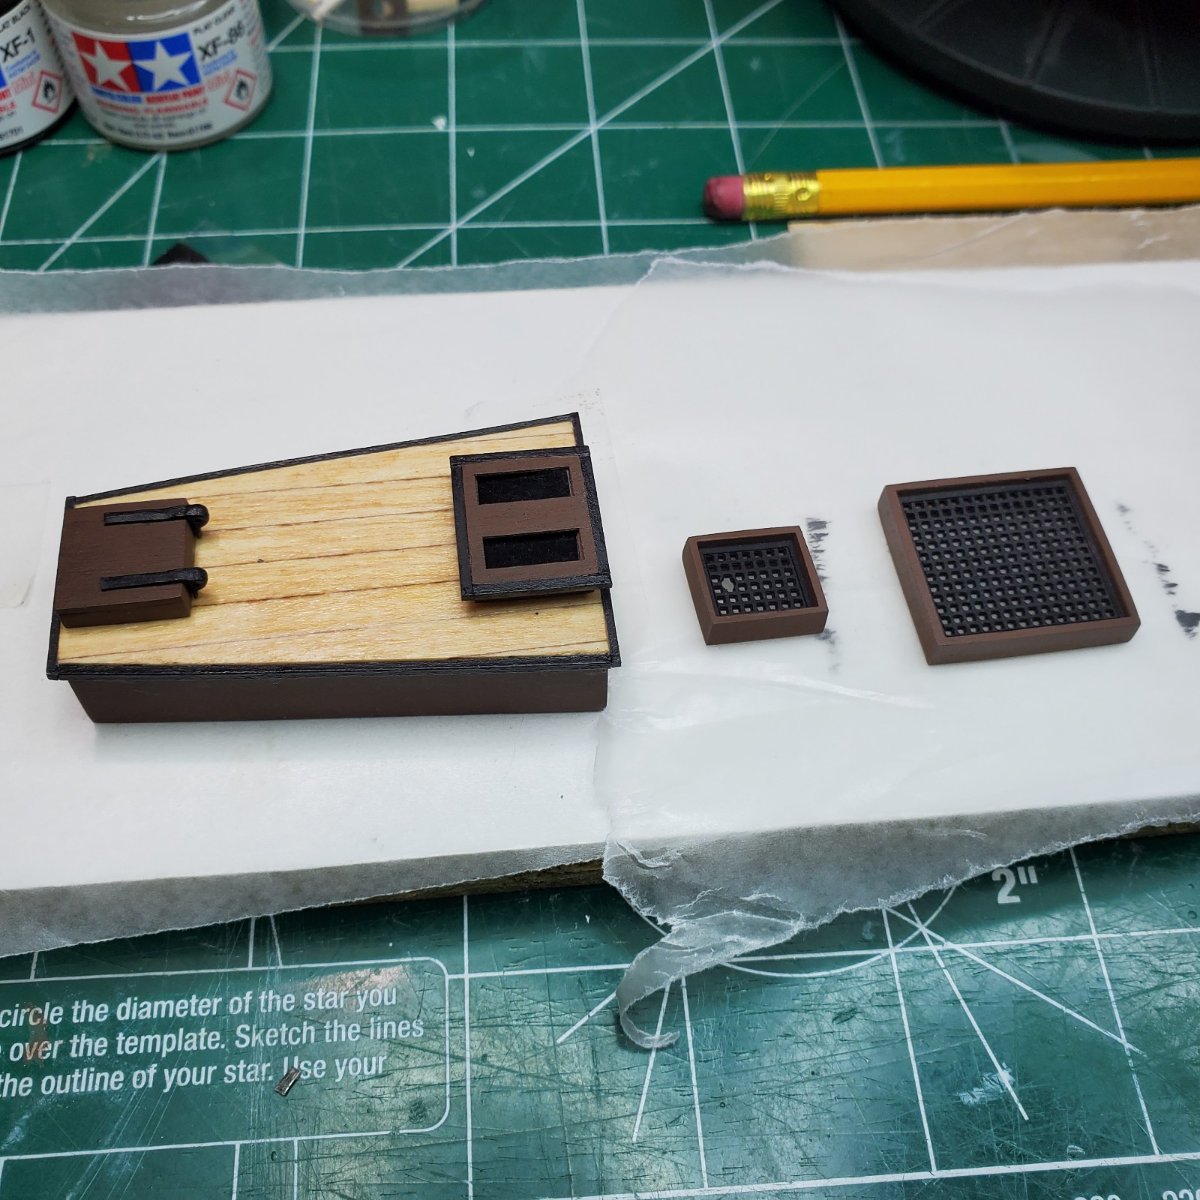
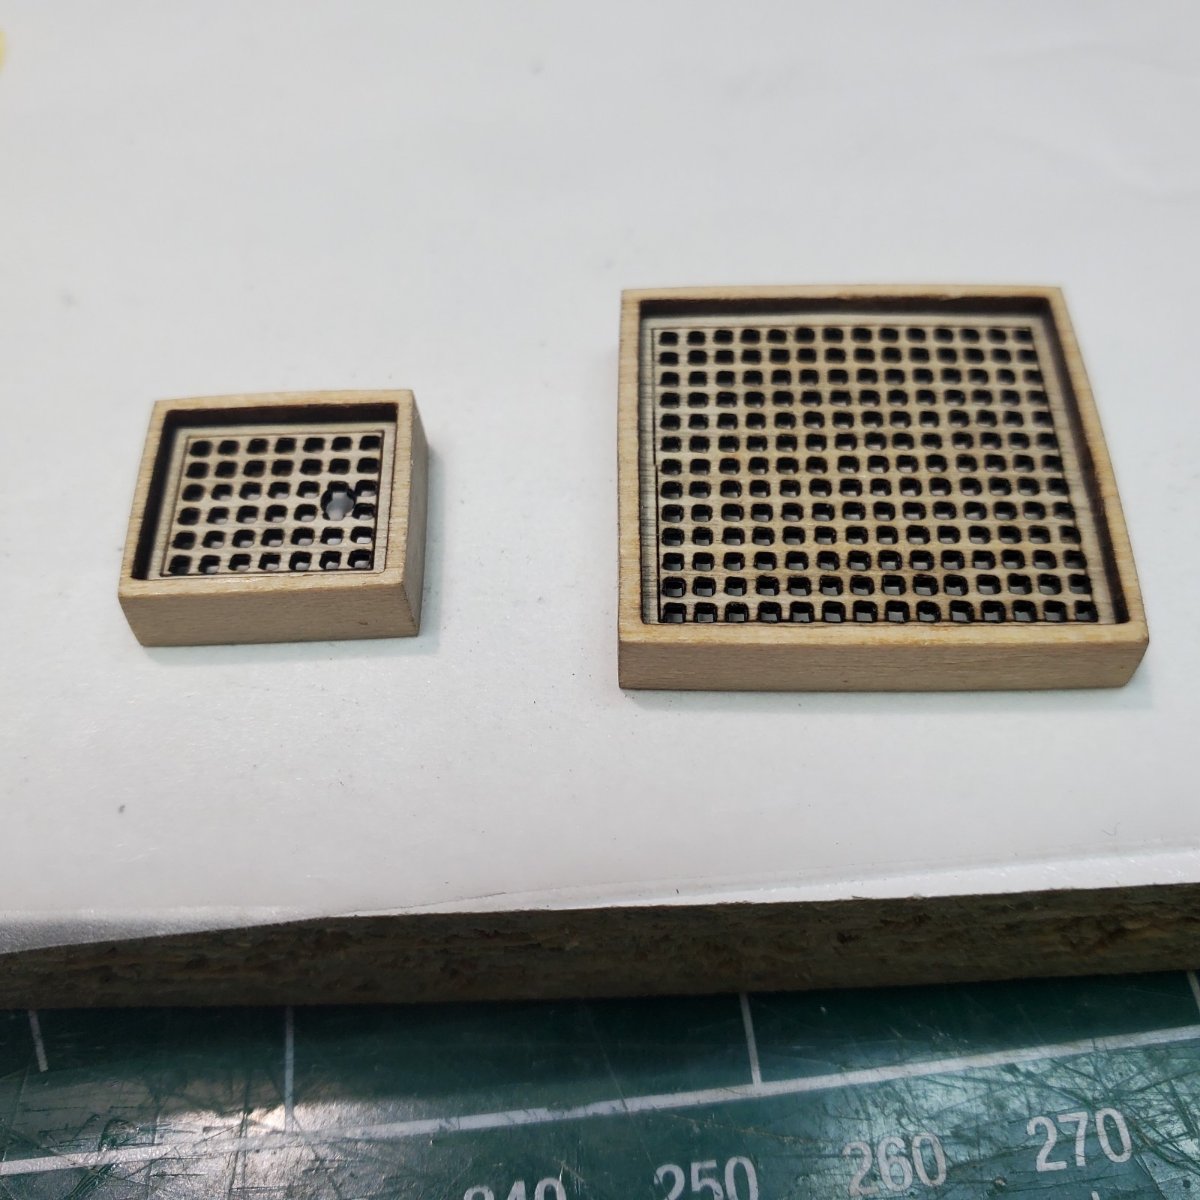
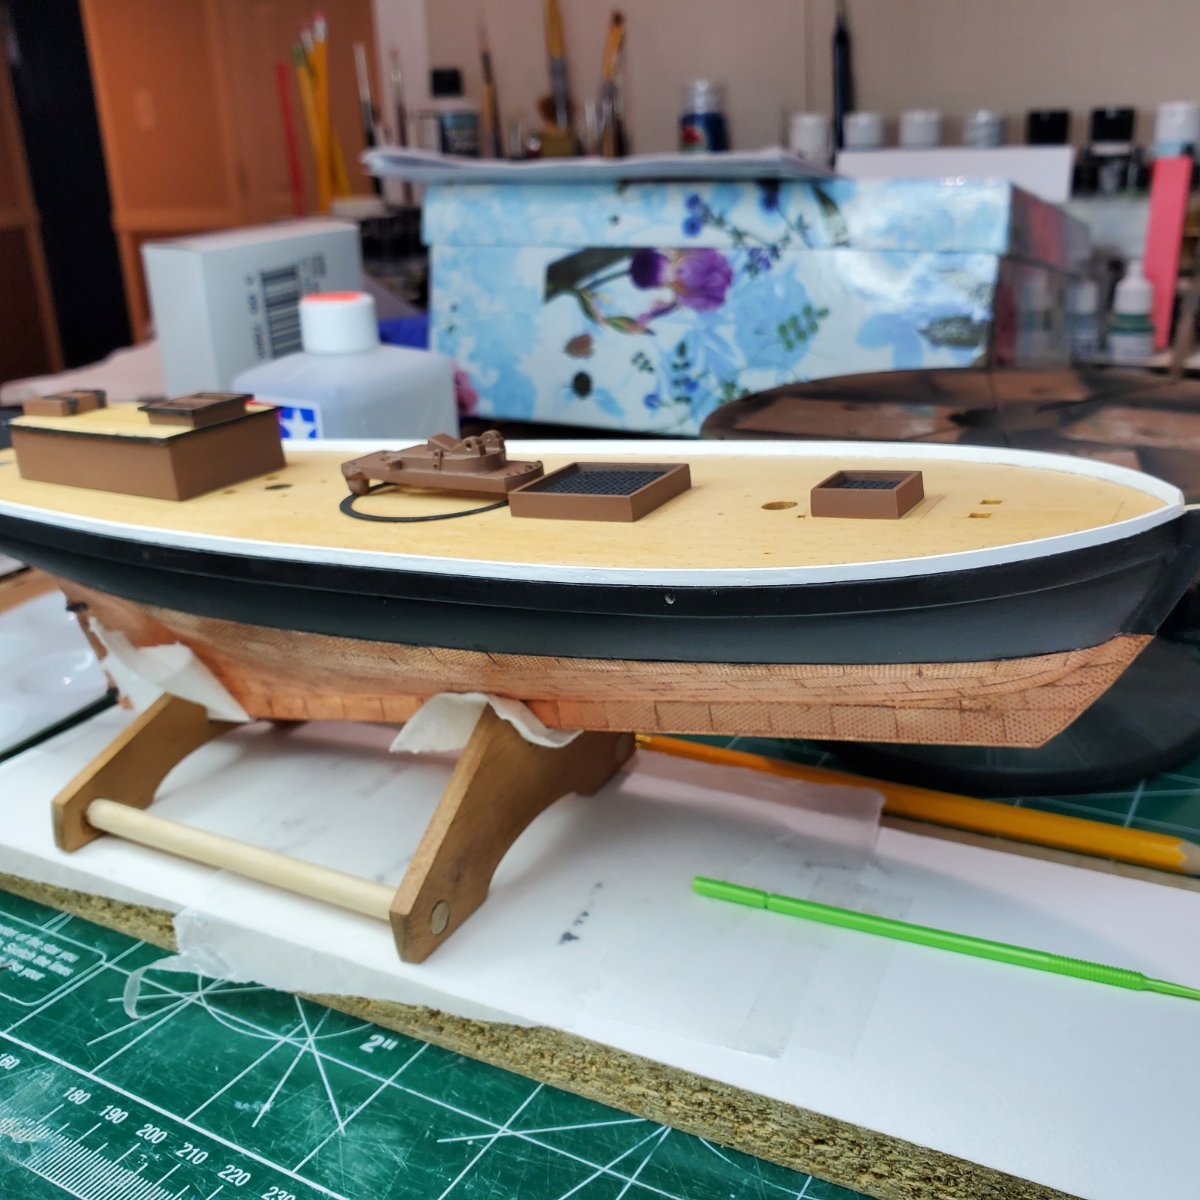
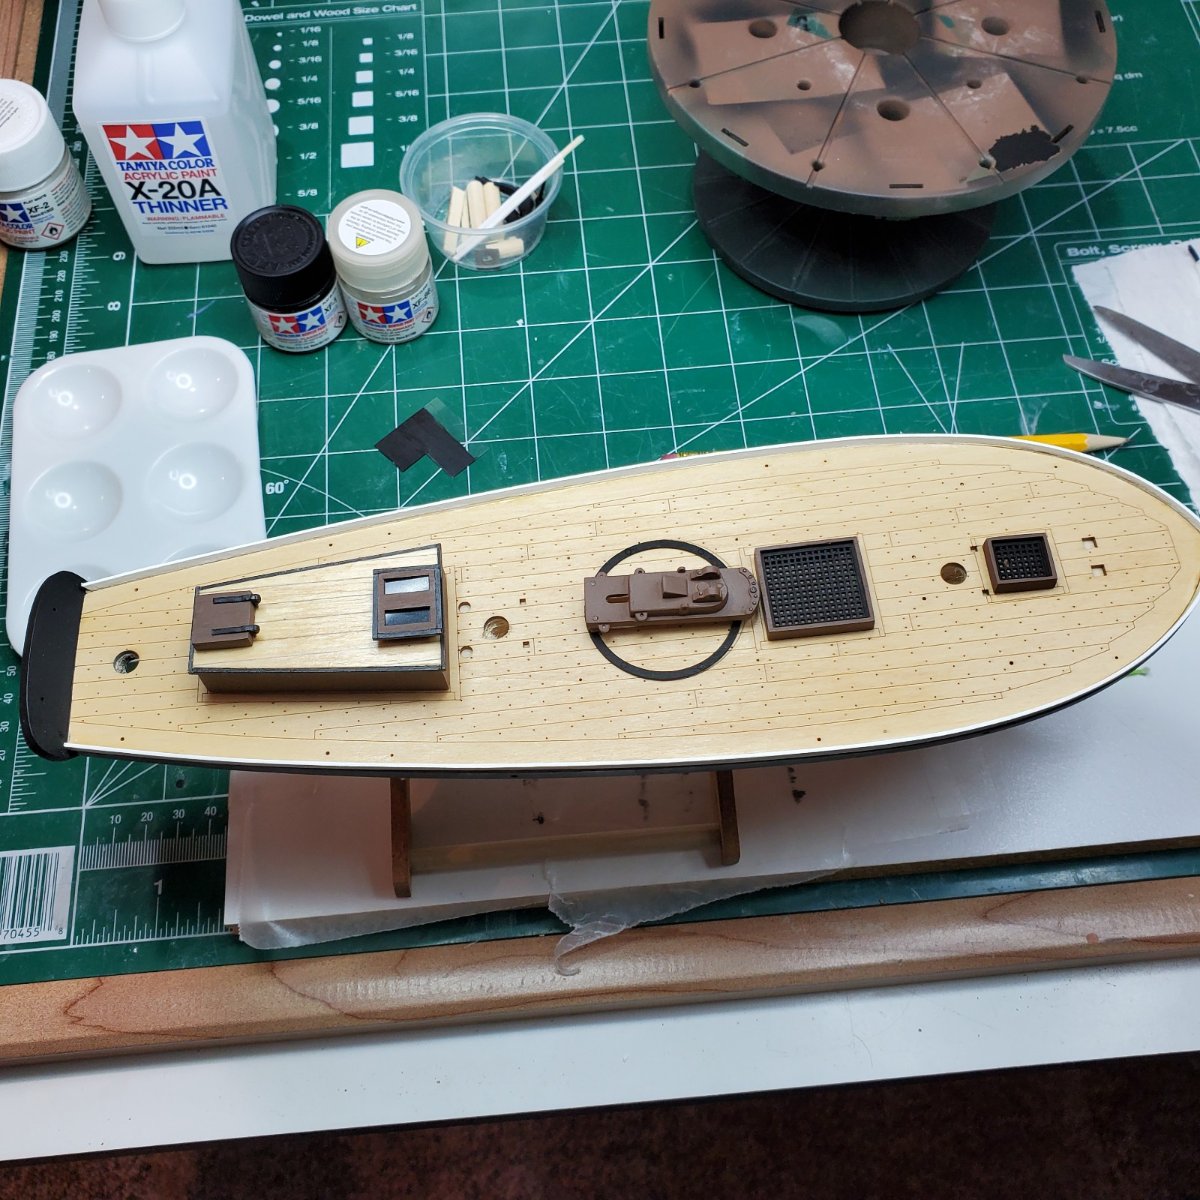
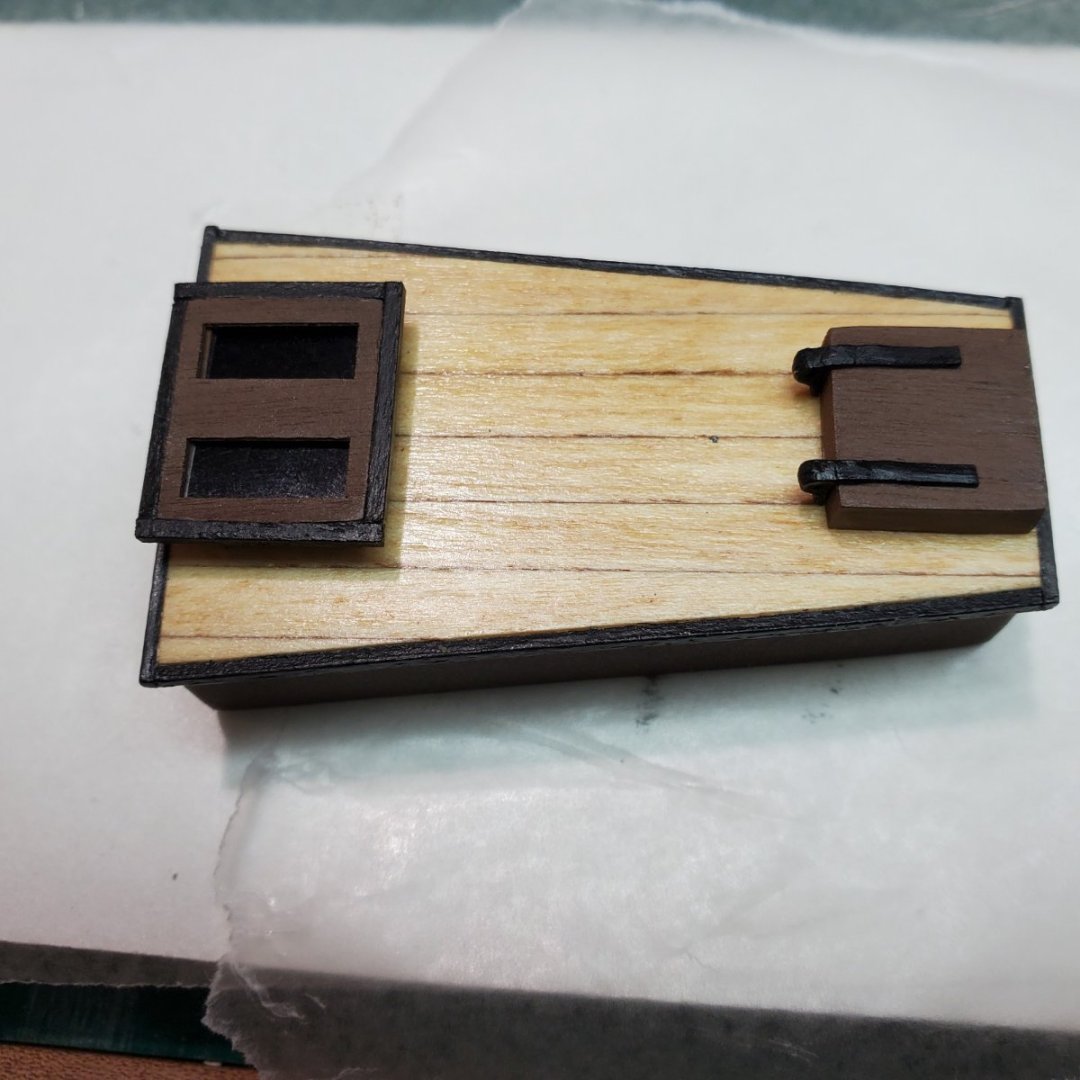
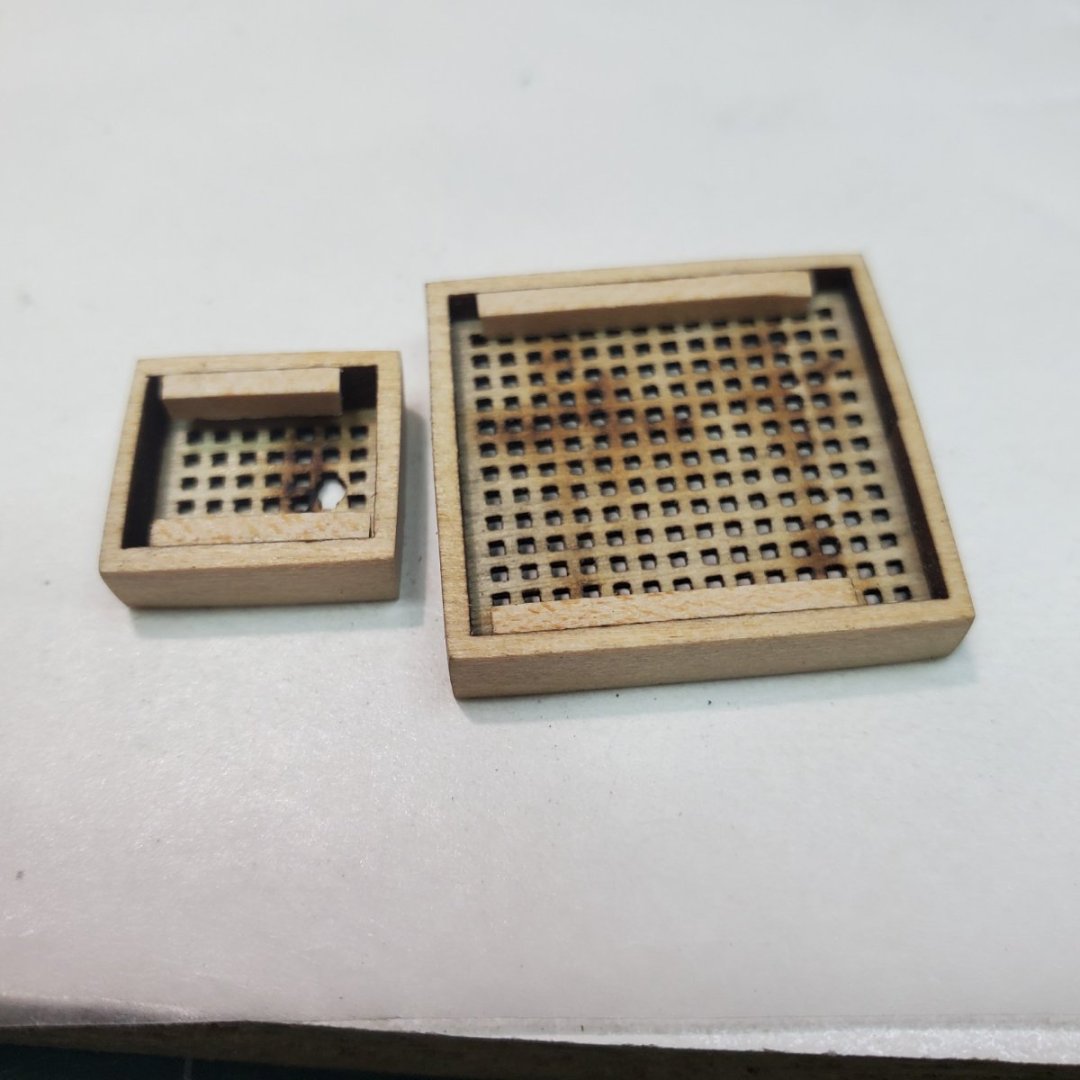
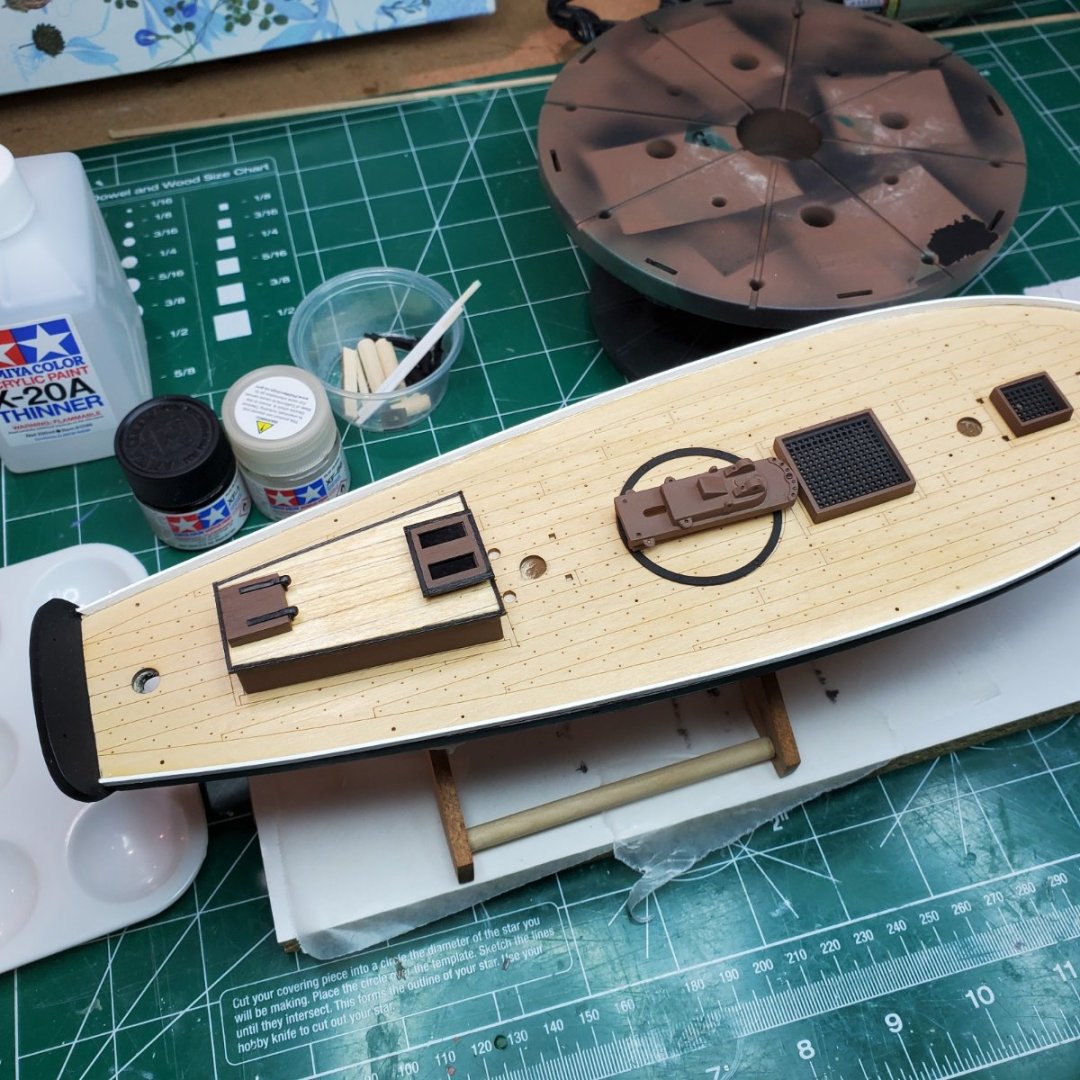
Hello Folks, Zoom Meeting over! So getting back to my post relating to my deck fittings on the BJ RCutter: Outside of detailing the deck house differently I also completed some other fixtures differently and dry fitted them to the deck. In addition to the deck house molding being in black trim I followed the same with the sky light. Both hatches I painted the molding Brown however I made the grates recede into the molding to add depth to the pieces. In addition I also painted the grates flat black to ad detail. Finally some dry fitting. Next up making the Blocks and Stanchions black with using pewter solutions purchased from Blue Jacket. Thanks for following, Bill T.


- 89 replies
-
- 4
-

-
- bluejacket shipcrafters
- revenue cutter
- (and 1 more)
-
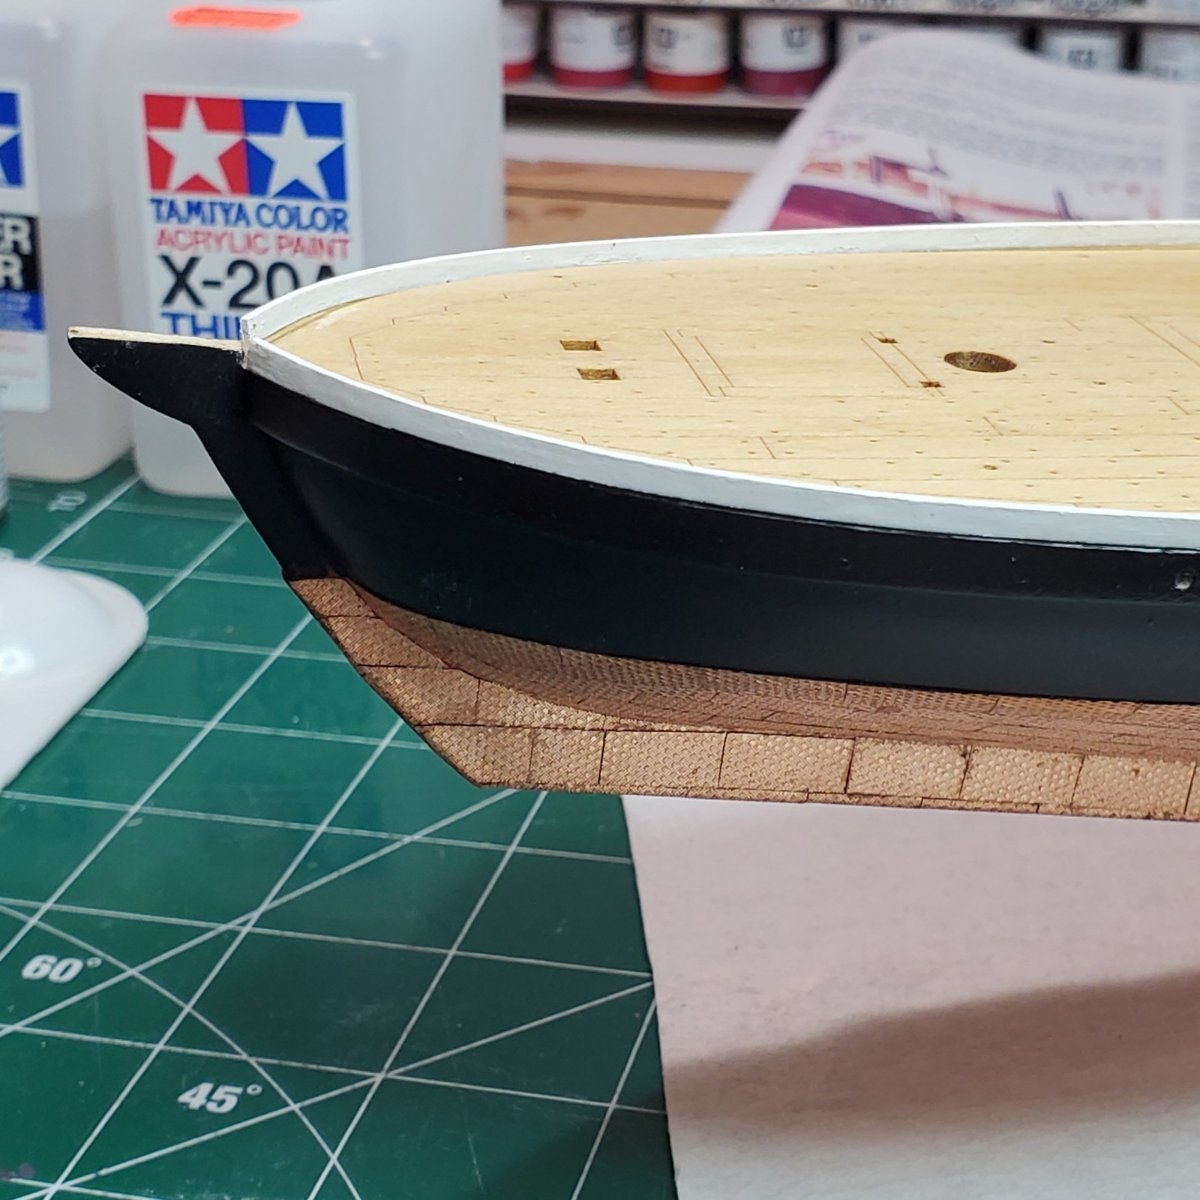
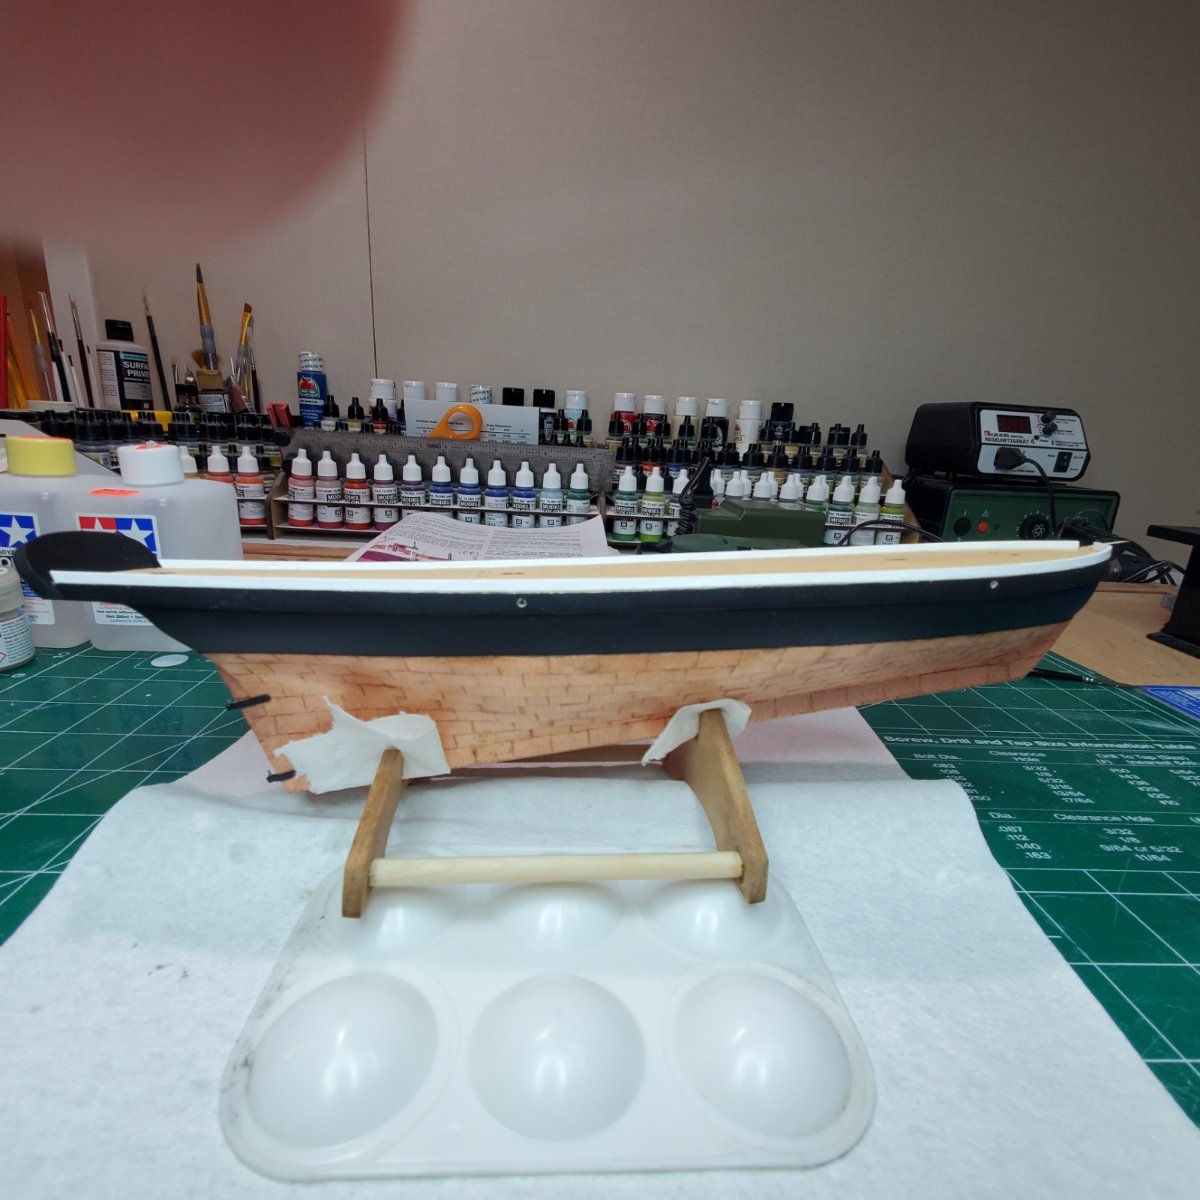
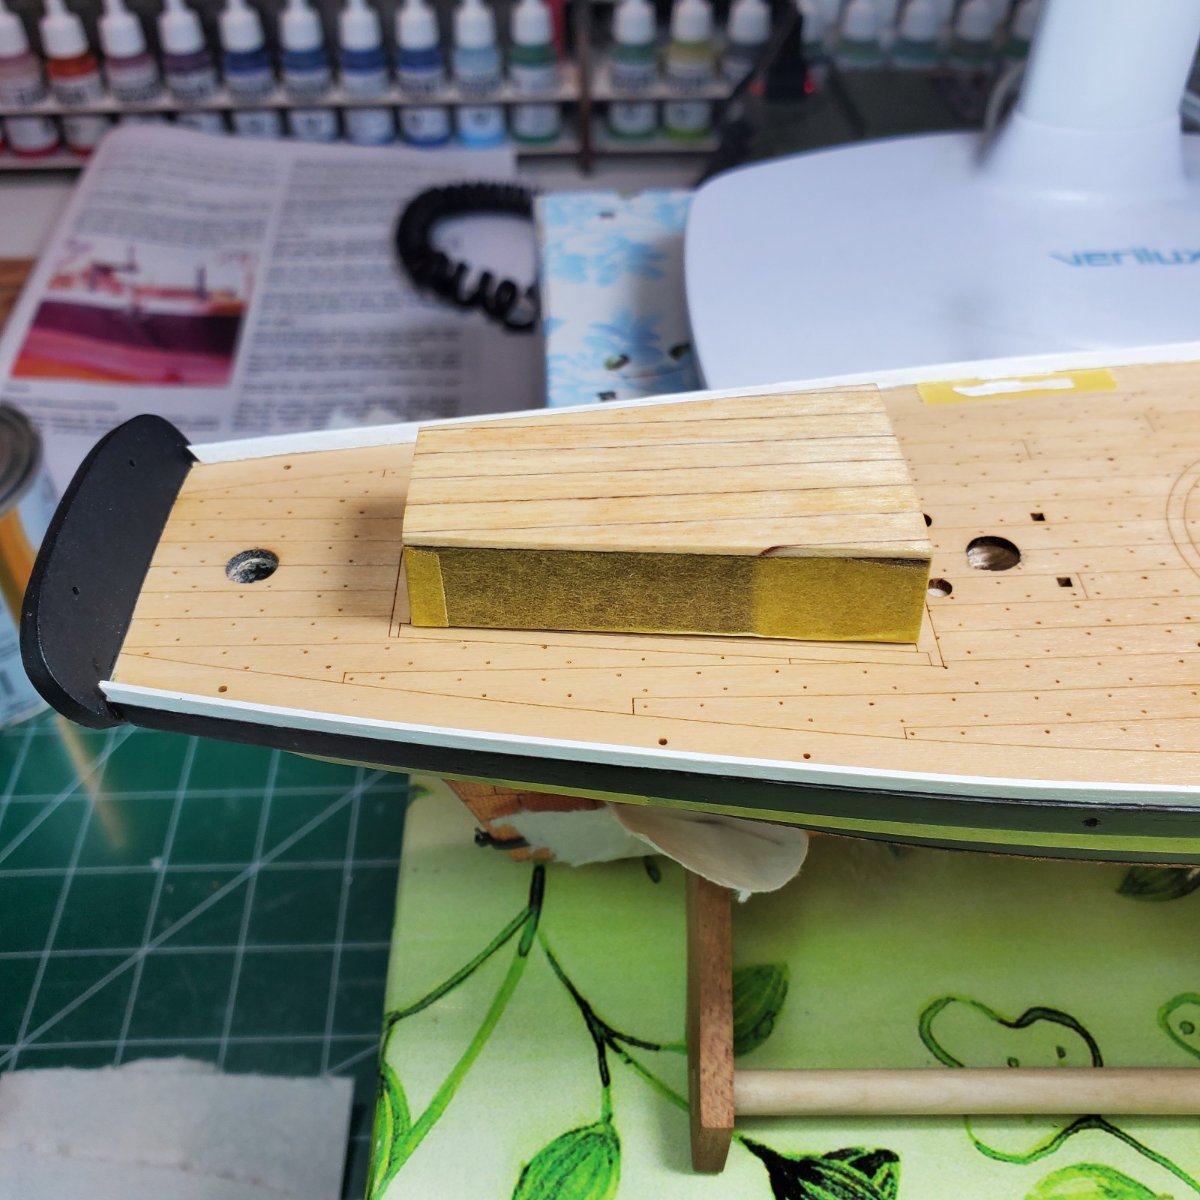
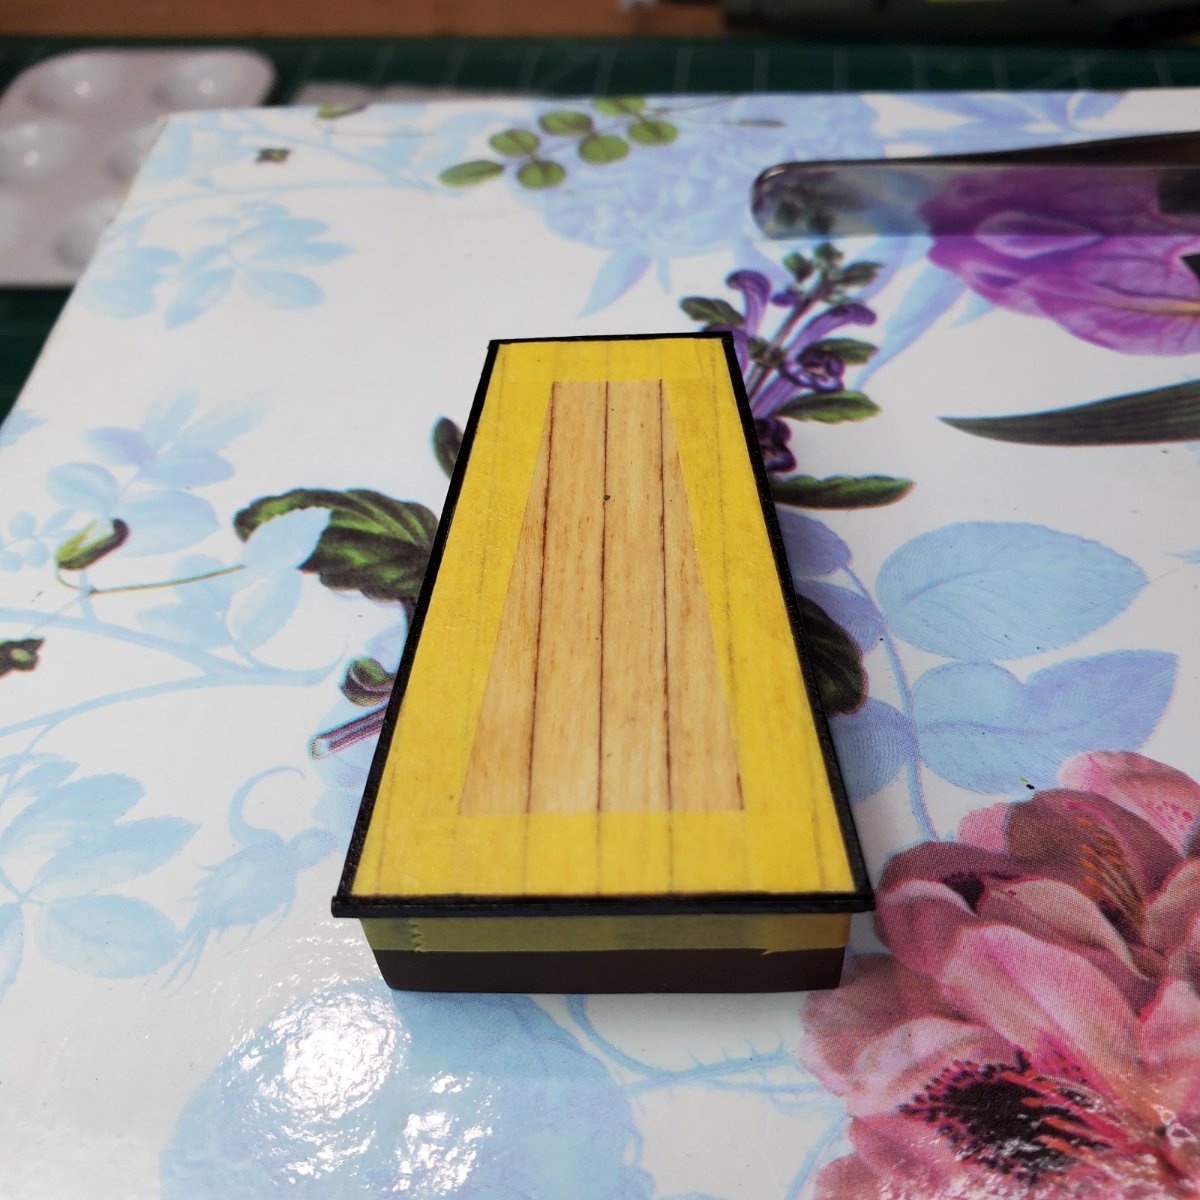
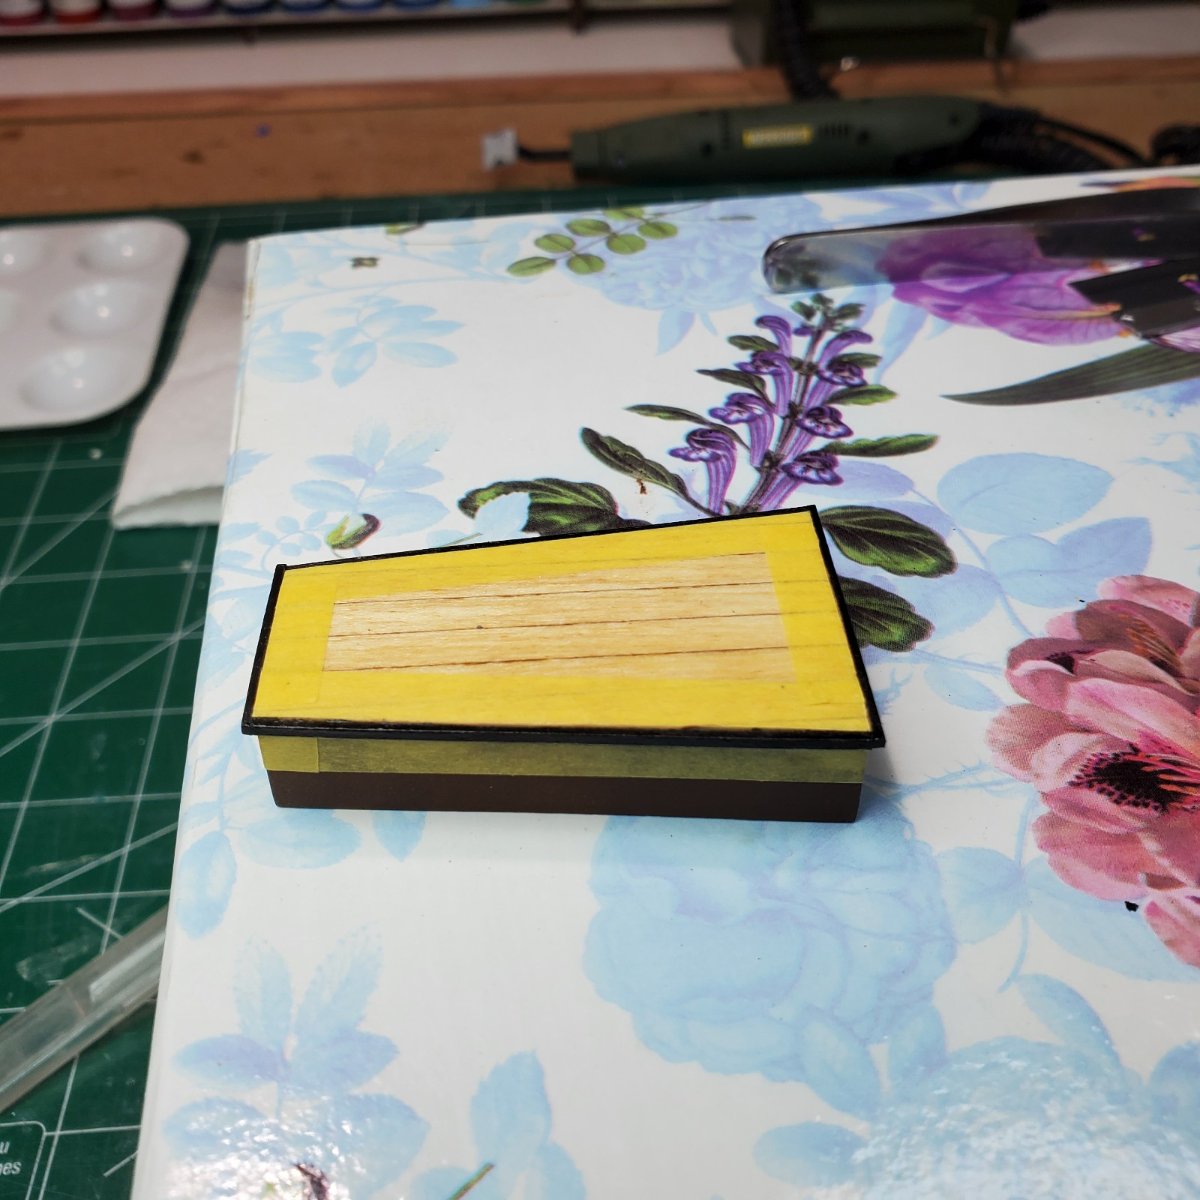
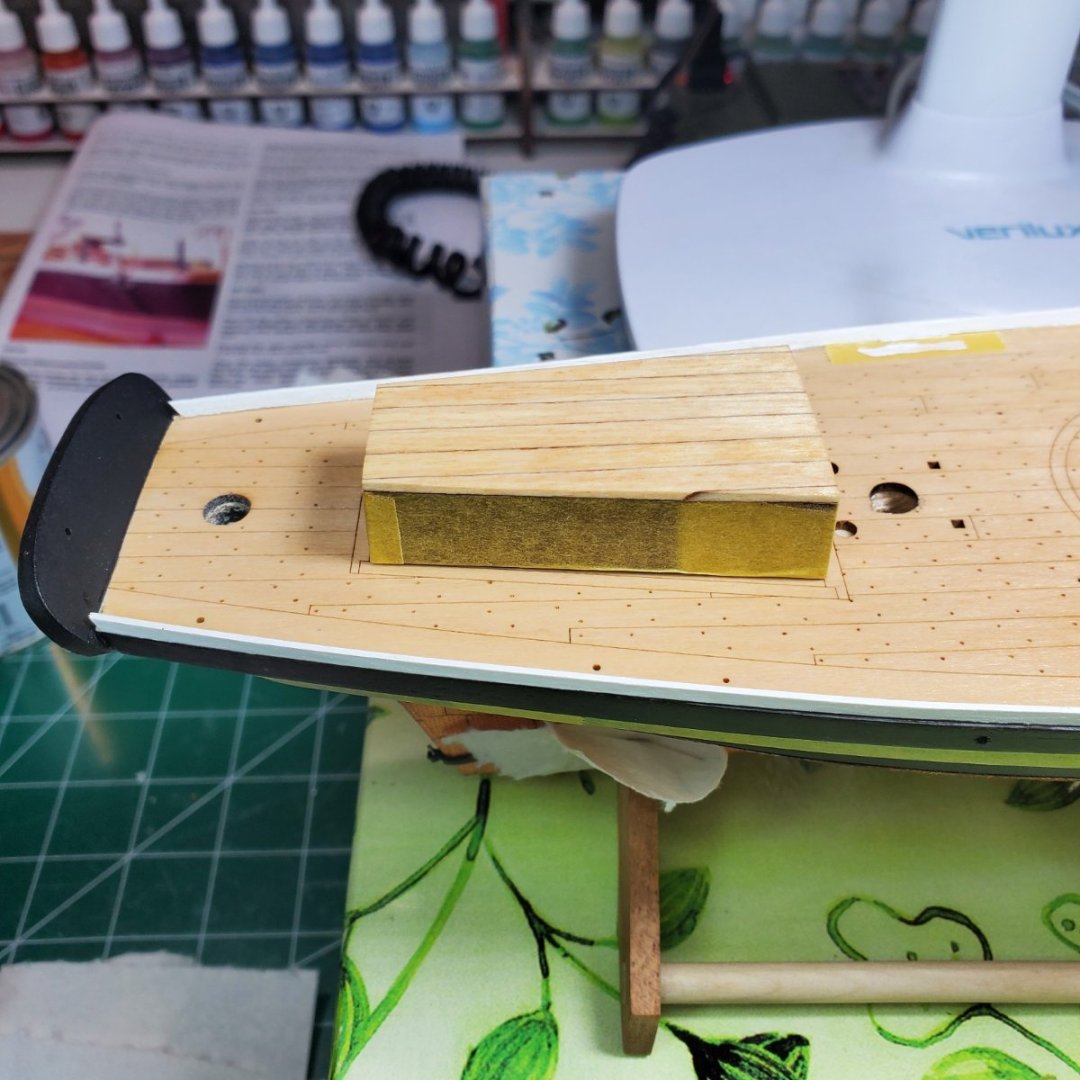
Hello Folks, First post in quite some time, however been busy on the build. I will probably split this into 2 seperate posts. One being completion of the Hull and the second on the deck detail. I really liked the Toe Rails on the Blue Jacket Yankee Hero so I decided to paint them Flat White like the Yankee Hero (Model Master) as opposed the staining them. I was pleased with the outcome. I generally follow the suggested paint scheme, however never exactly as I have mentioned in prior posts. The Toe Rails were somewhat challenging due to the paint mixing with the CA. I repainted the portion where the Toe Rails meet the hull to rid the boat of the reflection of the CA. This took some time and extra steps, however well worth it. Again deviating from the normal I decided to cover the rear cabin with decking on the top with the thought this would be a working area for the deck hands to a certain extent. I broke out some scrap wood from my "wood shed" to accomplish this. I painted only one side of each plank with Vallejo "Mud Brown" to match the laser detail color on the deck. After gluing them together, sanded them and stained with Miniwax "Golden Pecan", same as I used for the deck. Finally I used Flat Black paint (Model Master) to trim the rear cabin moldings versus the brown as suggested in the manual. I will have better pictures in my next post of the cabin. I will post again shortly, in an hour. Have a zoom meeting! Thanks, Bill T.


- 89 replies
-
- 5
-
-
- bluejacket shipcrafters
- revenue cutter
- (and 1 more)
-
Hello Mike, Thank you for the kind words! That is the same order I went, the Yankee Hero by BJ is a great kit. Loved making it, I have a build thread for my Yankee Hero on MSW if you wish to check it out. Going from the Yankee Hero to the Revenue Cutter from a progression perspective is working out well. All the best, Bill T.
-
That is simply inspiring to me as a beginner. Thank you. Bill T.
- 112 replies
-
- 1
-
-
- Bluejacket Shipcrafters
- Constitution
- (and 2 more)
-
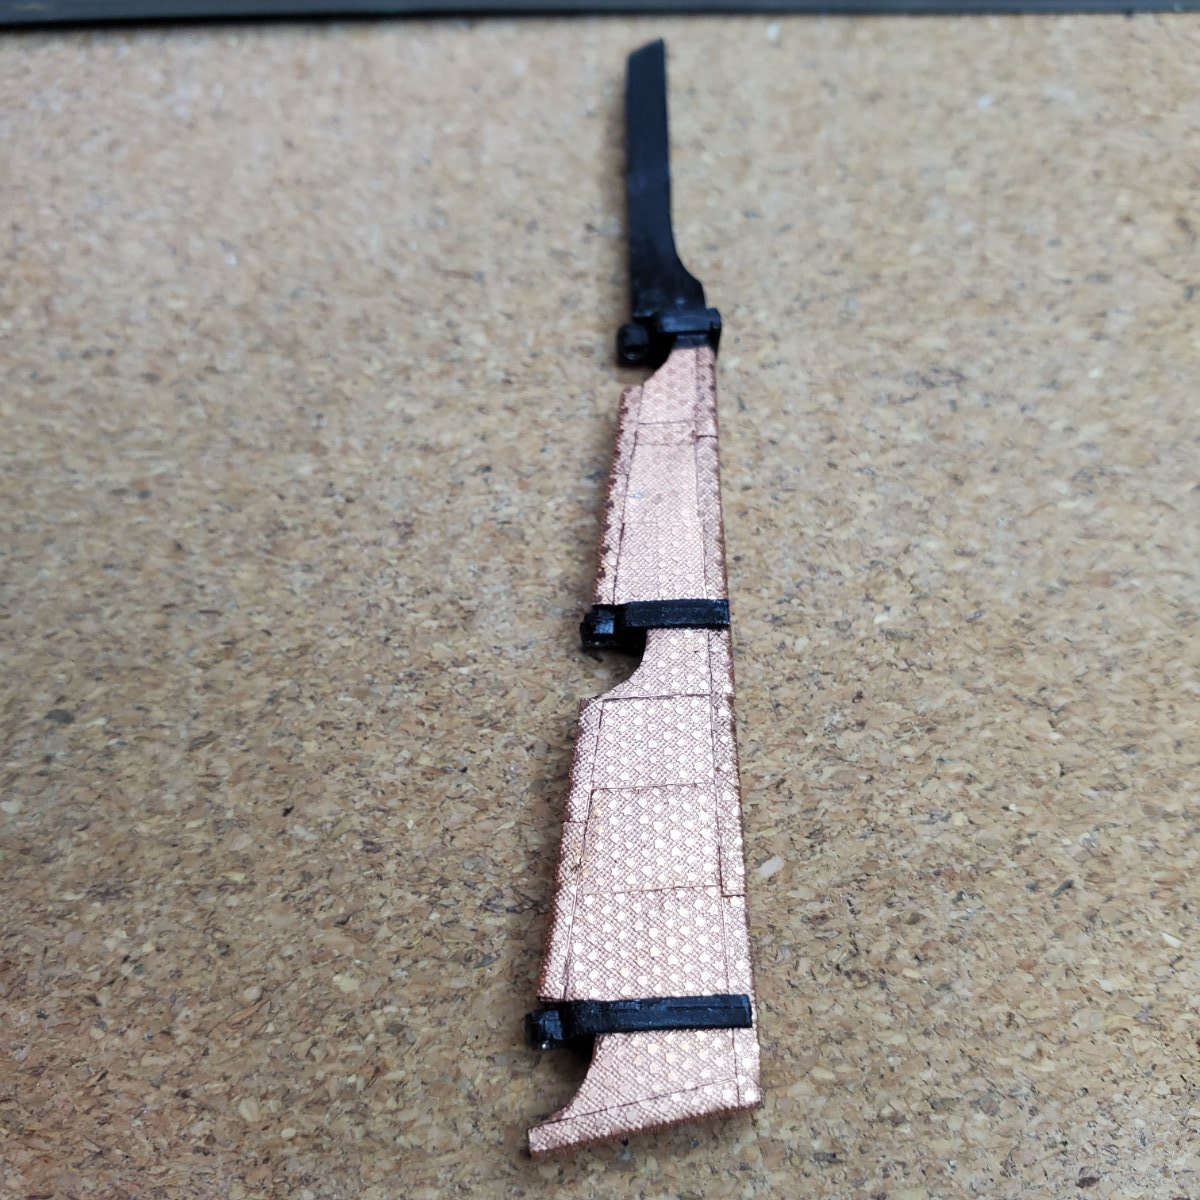
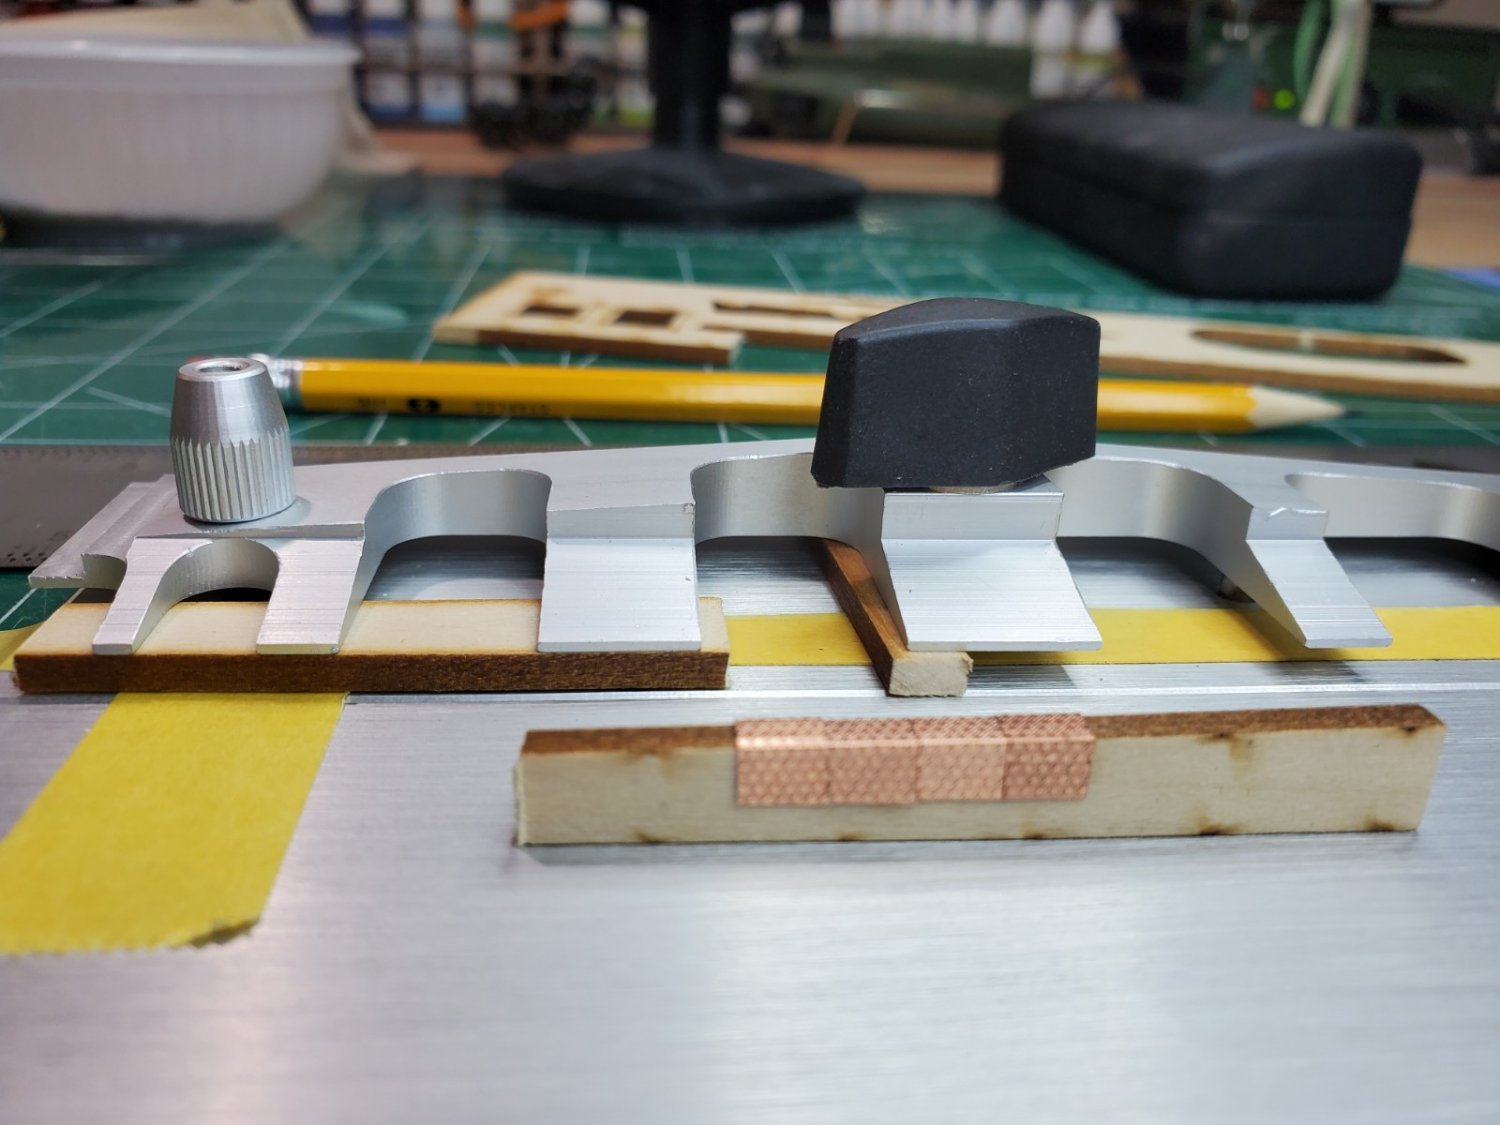
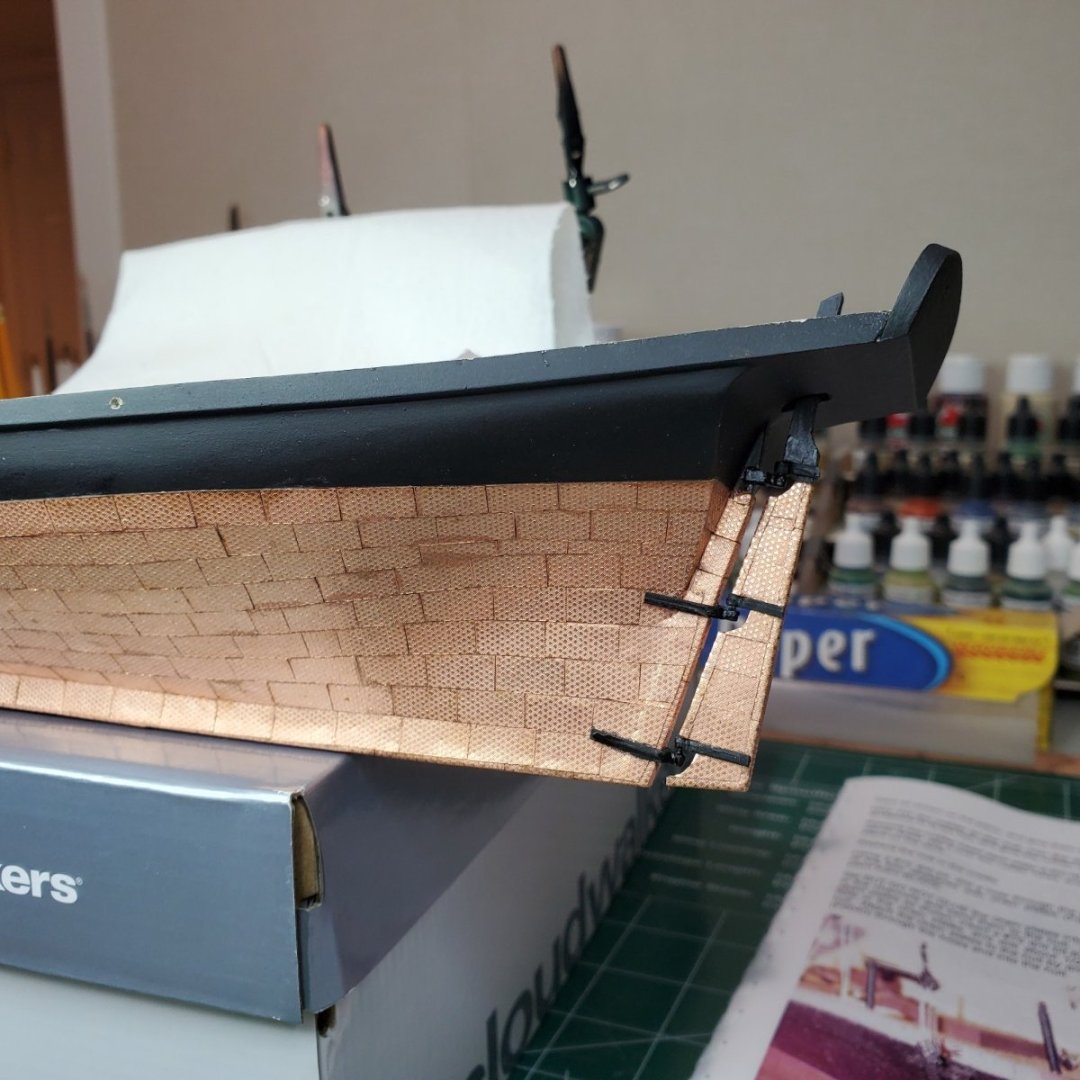
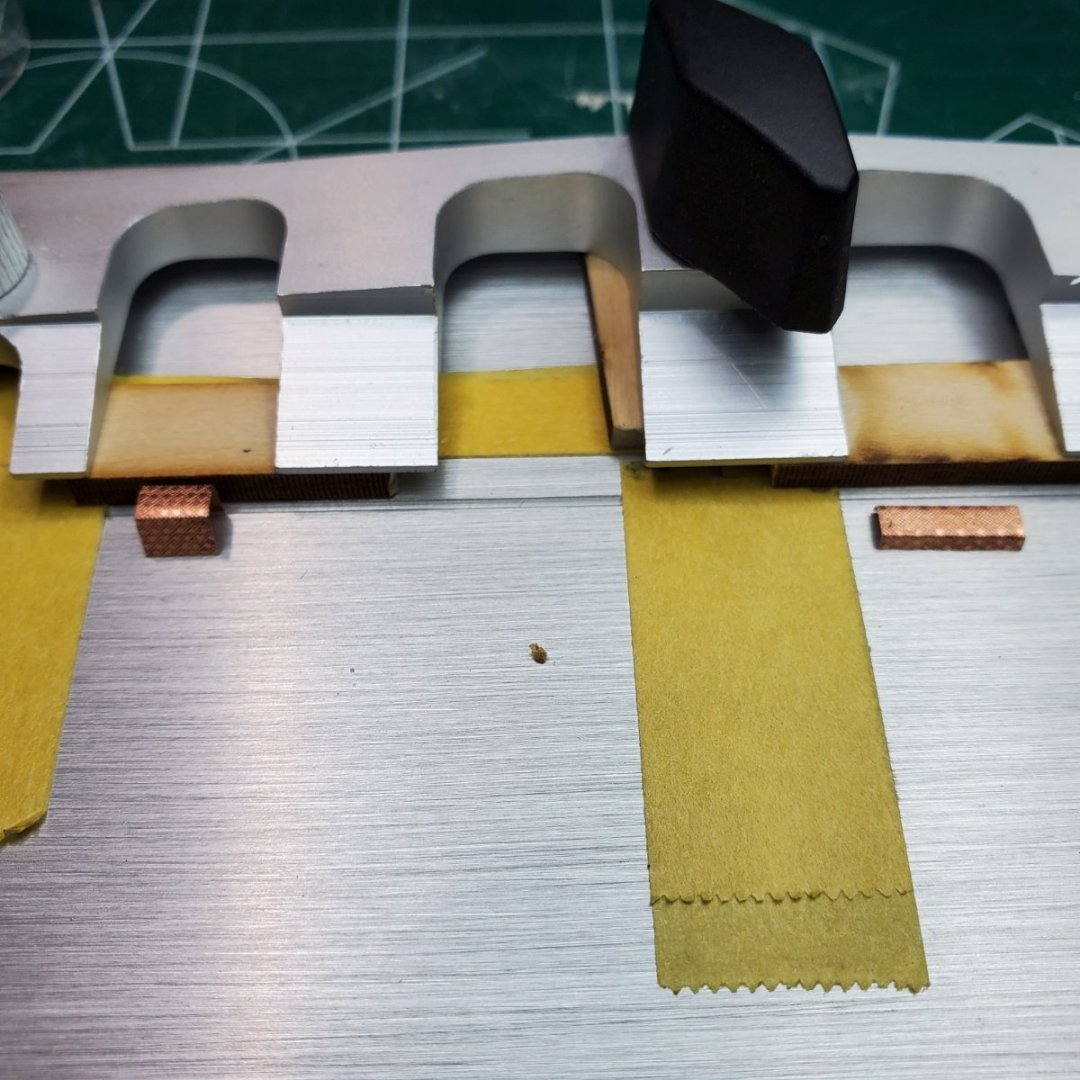
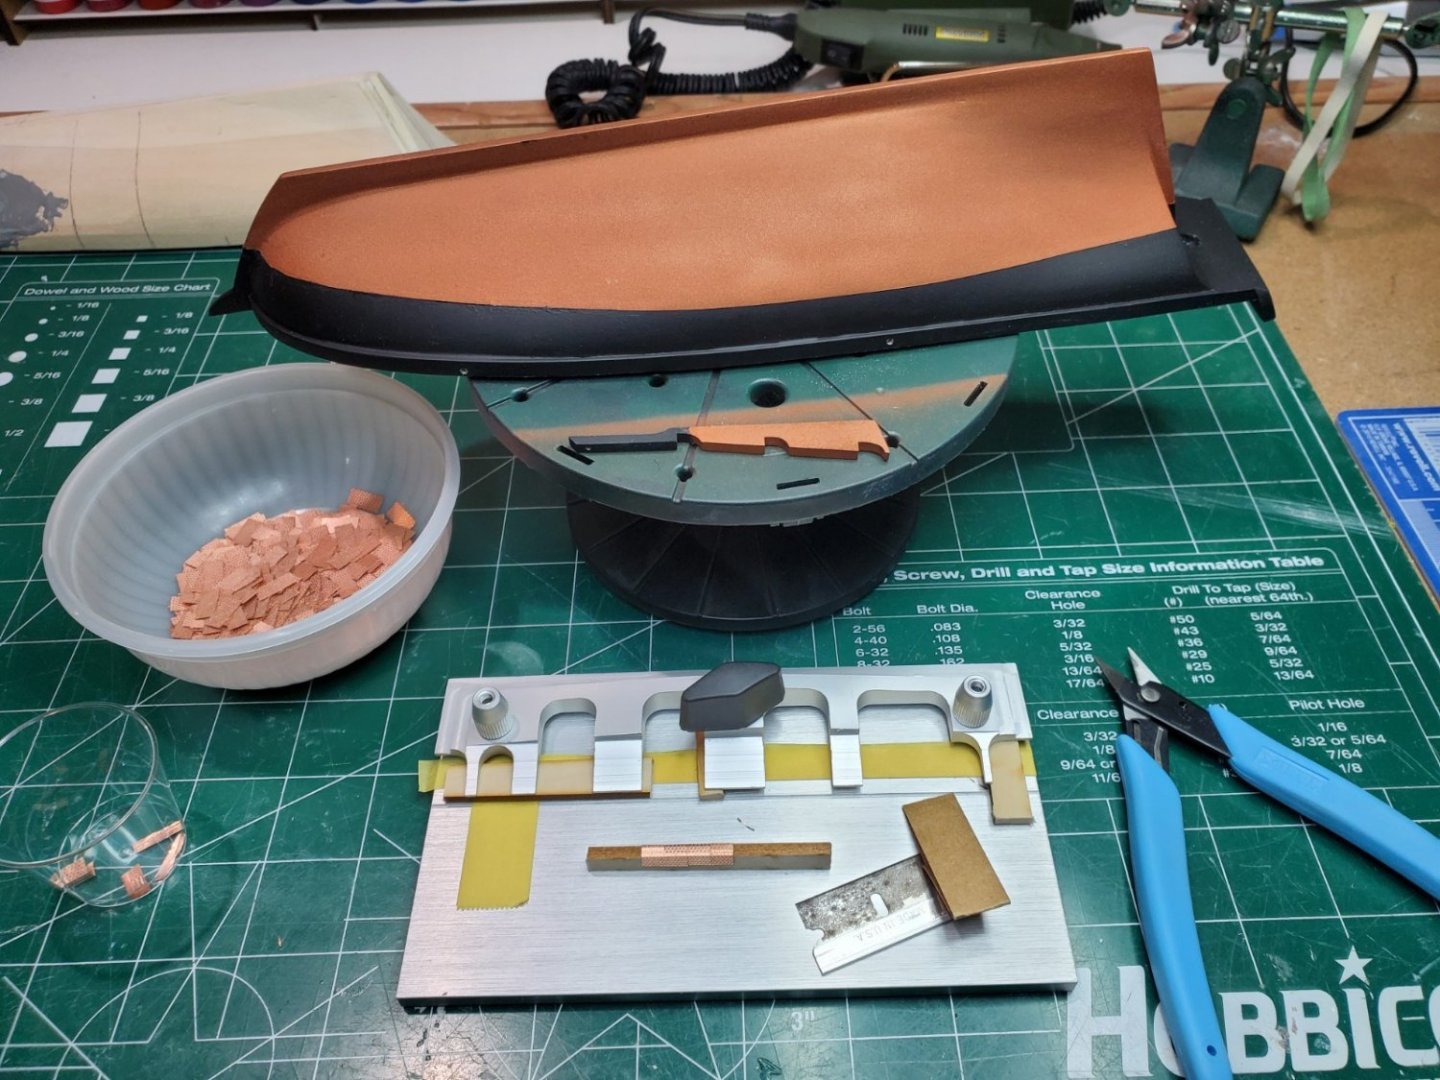
Hello Folks, Finally completed copper plating the Blue Jacket Revenue Cutter, sort of proud of it as I was intimidated by the task for a first time beginner. I learned more about modeling by plating the RC than any one single task on a model. I little rough in places however overall happy with the results. Here are some take aways from the task in addition to my previous posts: Bottom to top, back to front progression. When it comes to adhesives 2 things to mind, I used slow CA and less glue is more. To apply glue I used a dowel with a pin on the end to apply the glue. Every plate was fabricated one way or another (filed and or sanded), that why it took me 7 months I guess (01.31.2022 - 08.06.2022) Using 10X magnifying very important to ensure tight fitting plates. Needed to make a Jig for the pintles and gudgeons because I needed make them wider due to the thickness of the copper plates (picture below). This was an unexpectedly hard part of the process. I also ended up using a pair needle nose pliers and squeezed at the locations of the pintles and gudgeons to thin locations of the hull they were located on the hull and rudder, this worked great at my wits end! I plan on affixing the rudder last as I am sure I will break it during remaining build, hoping things go quicker now. Onto the toe rails! Thanks, stay cool as it is hot in NY, Bill T.


- 89 replies
-
- 7
-
-
- bluejacket shipcrafters
- revenue cutter
- (and 1 more)
-
Thank you Stan, still following your lead. Bill T.
-
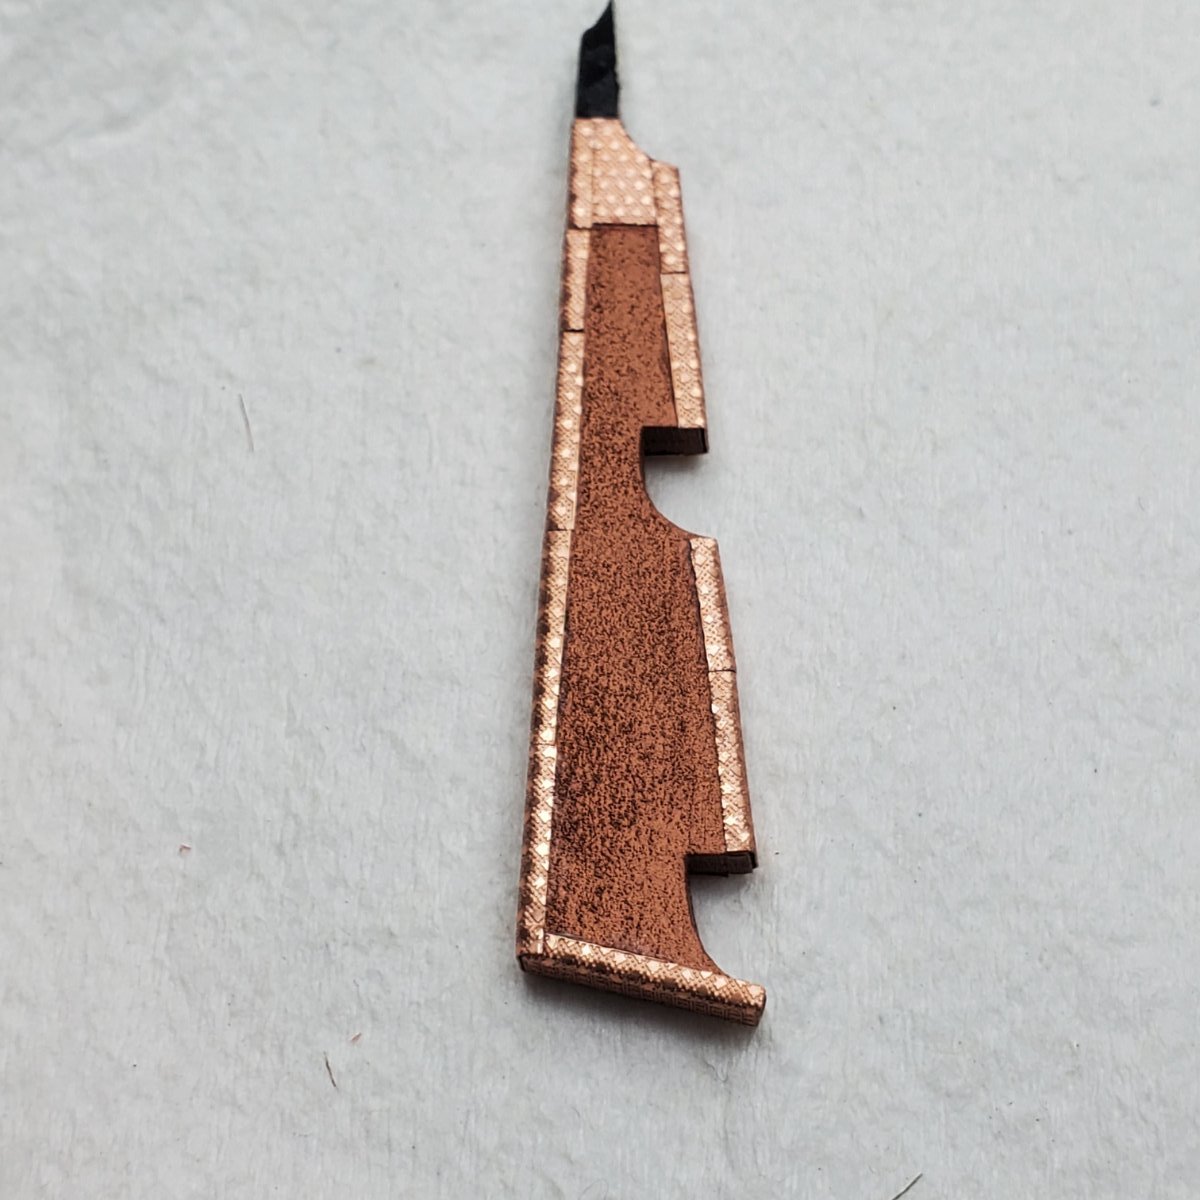
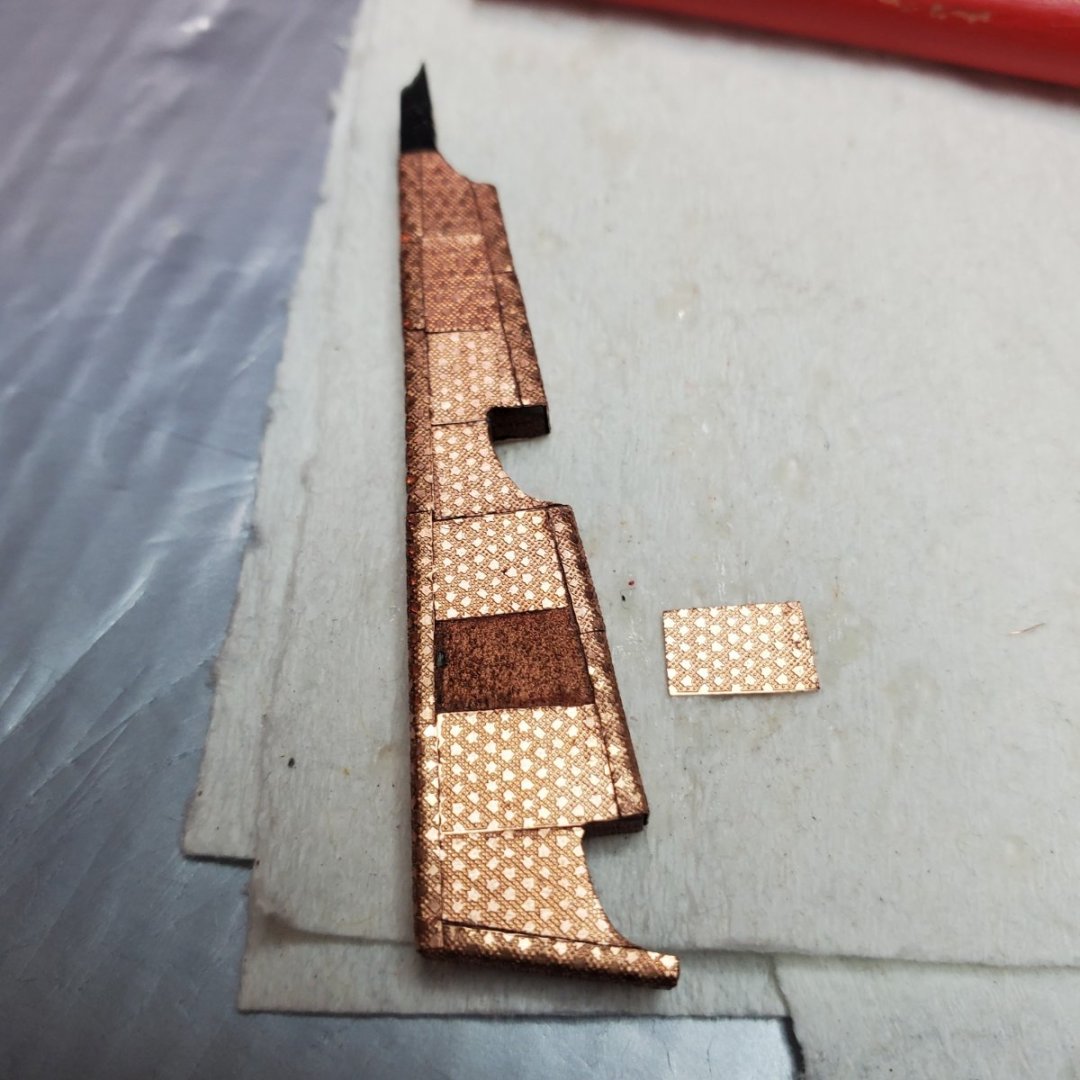
Hello Folks, A short post today for a change, I am working on coppering the rudder of the BJ Revenue Cutter. I am a little over halfway completed with the rudder, a lot more challenging that I anticipated which I will note below (lot of small delicate pieces (10 hours so far I logged, however I take into consideration my beginner status). My next post will be with the rudder complete with the pintles and gudgeons affixed to the rudder. Some notes: I coppered the fore and aft of the rudders with the same method used on the false keel. Then I used the line from the aft part of the rudder to align the plates from bottom to top, except for the top plate which I did with a full plate because I knew I was going to be filing it for shaping purposes. Used full plates on the rudder at the locations where pintles would be placed on the rudder because of the filing needed at those locations. Did not want to mess with filing half plates, not skilled enough to tackle that! Attempted to replicate the exact shape of the rudder with the copper plates, a little rough however satisfied for a newbie. I also broke the rudder early, however unlike Life it broke at a place that made the rudder easier to handle. I guess there is always a first. Happy 4th to all! Bill T.

- 89 replies
-
- 7
-
-
- bluejacket shipcrafters
- revenue cutter
- (and 1 more)
-
Thank you Stan. Thank you Nick, rudder next.
-
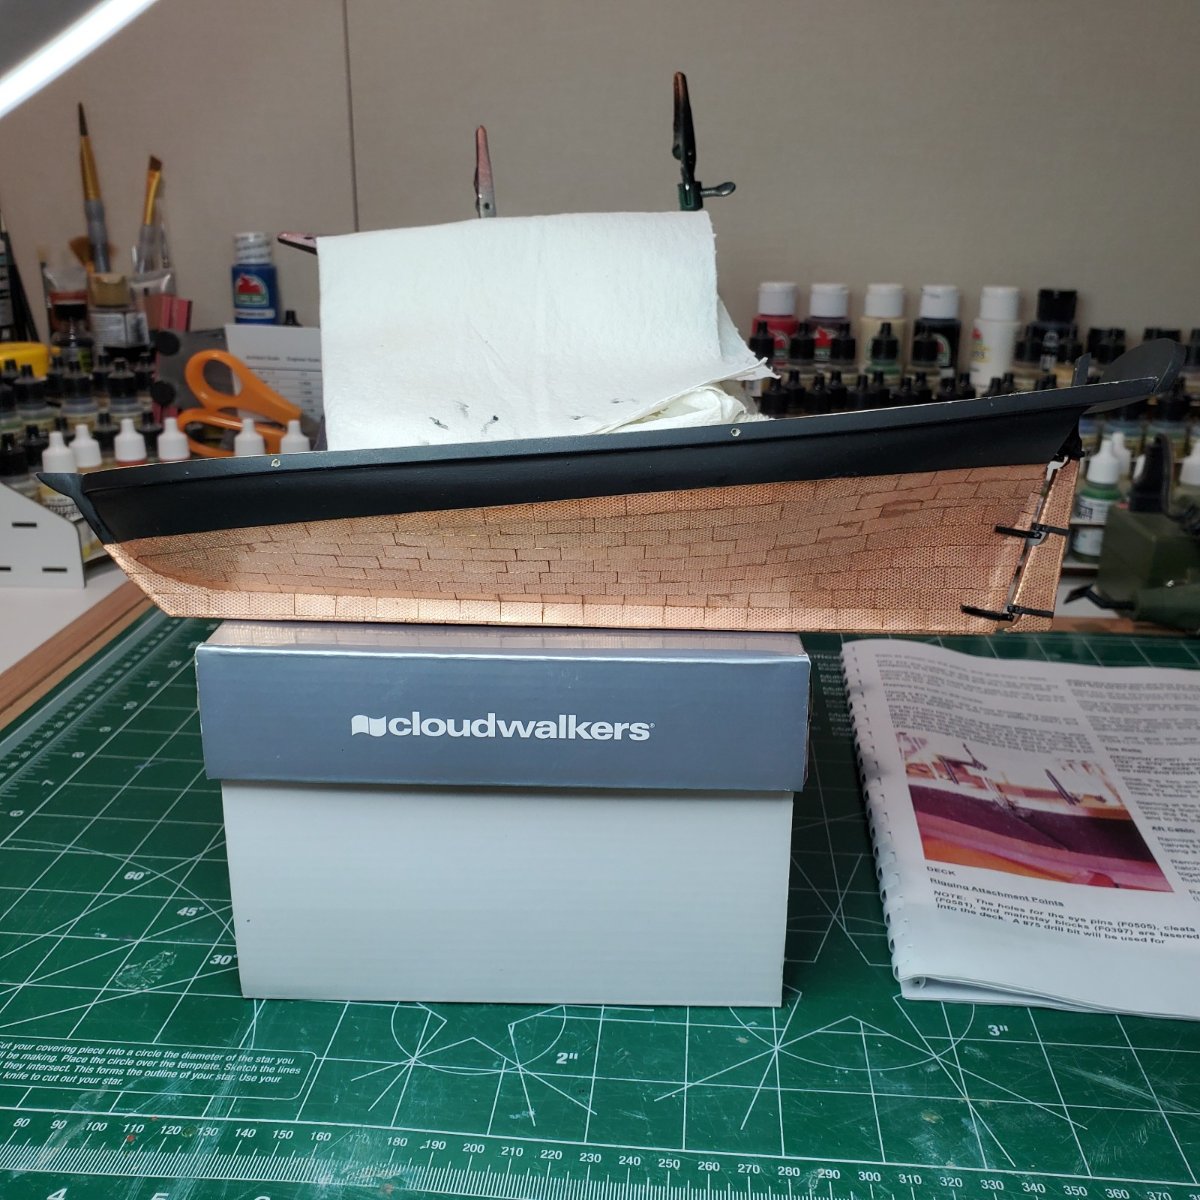
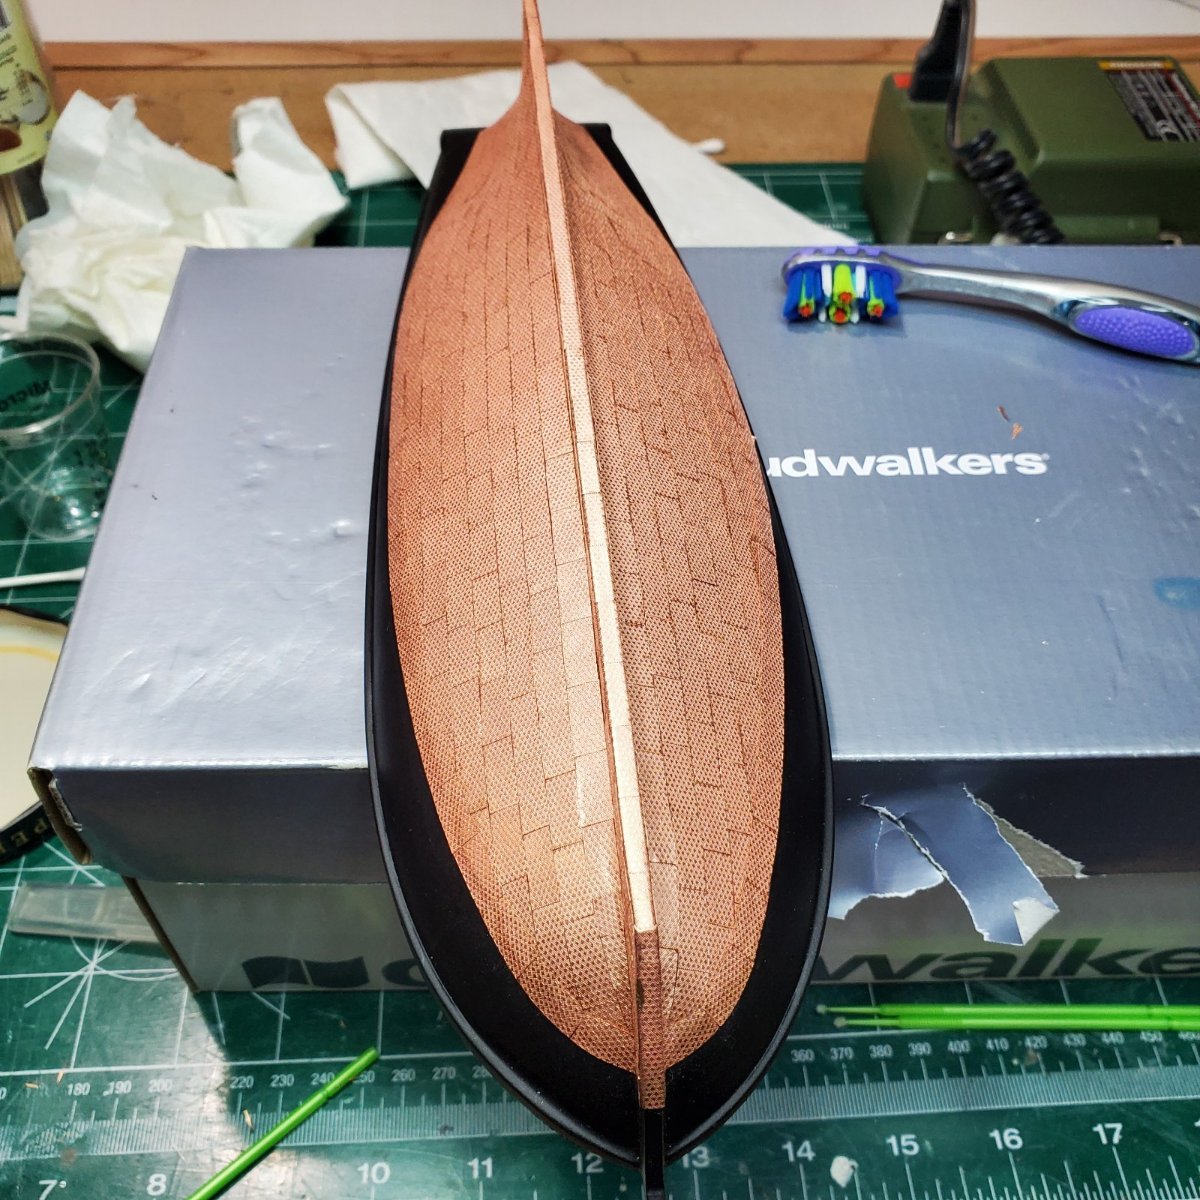
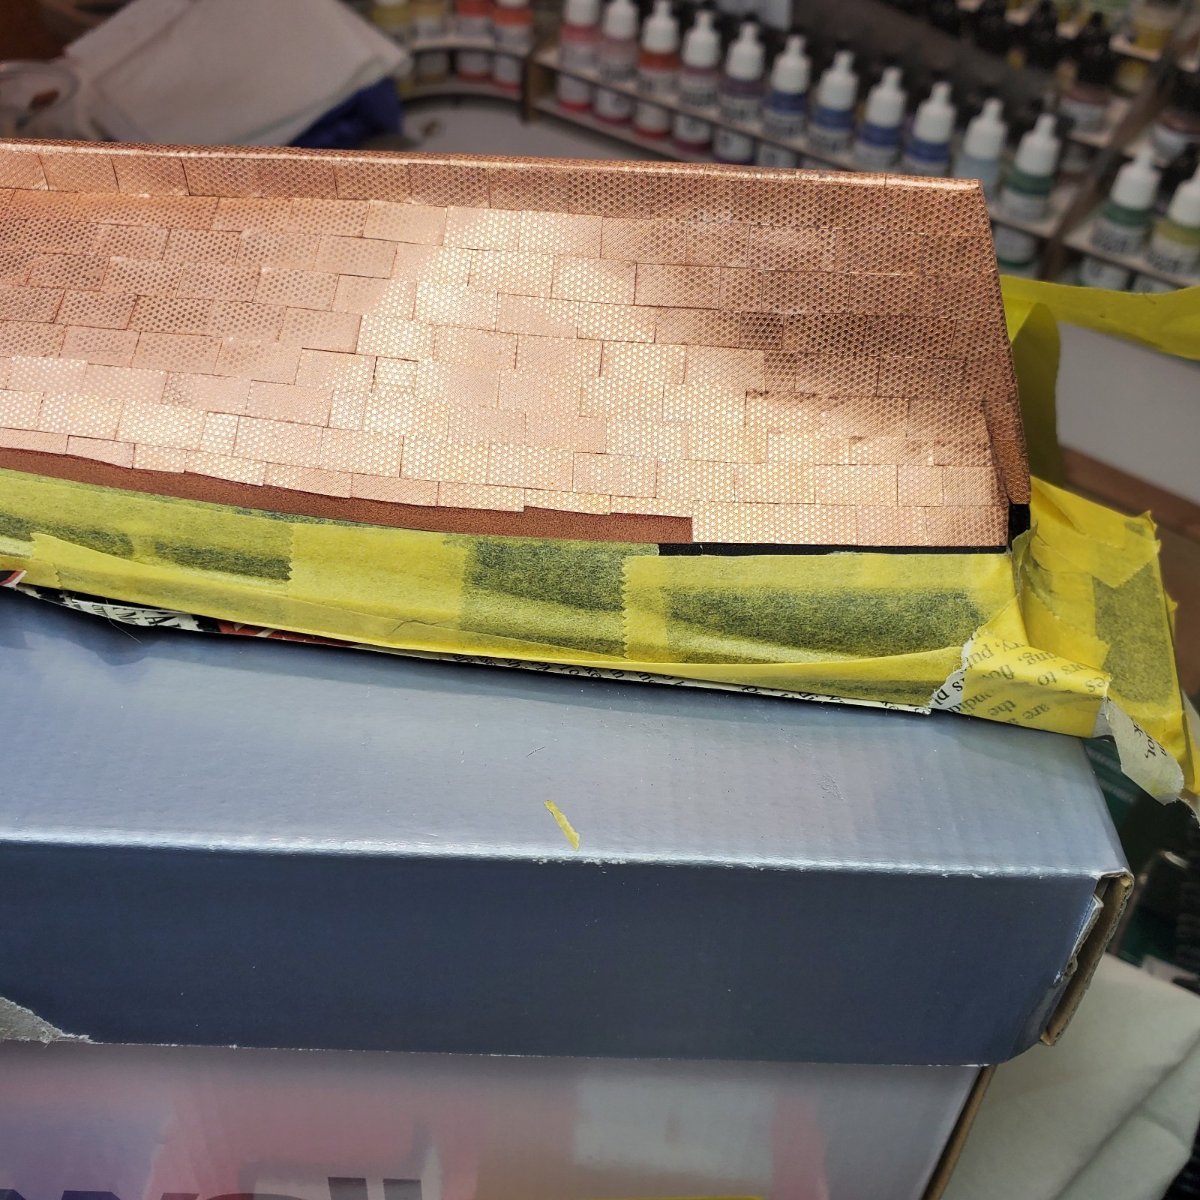
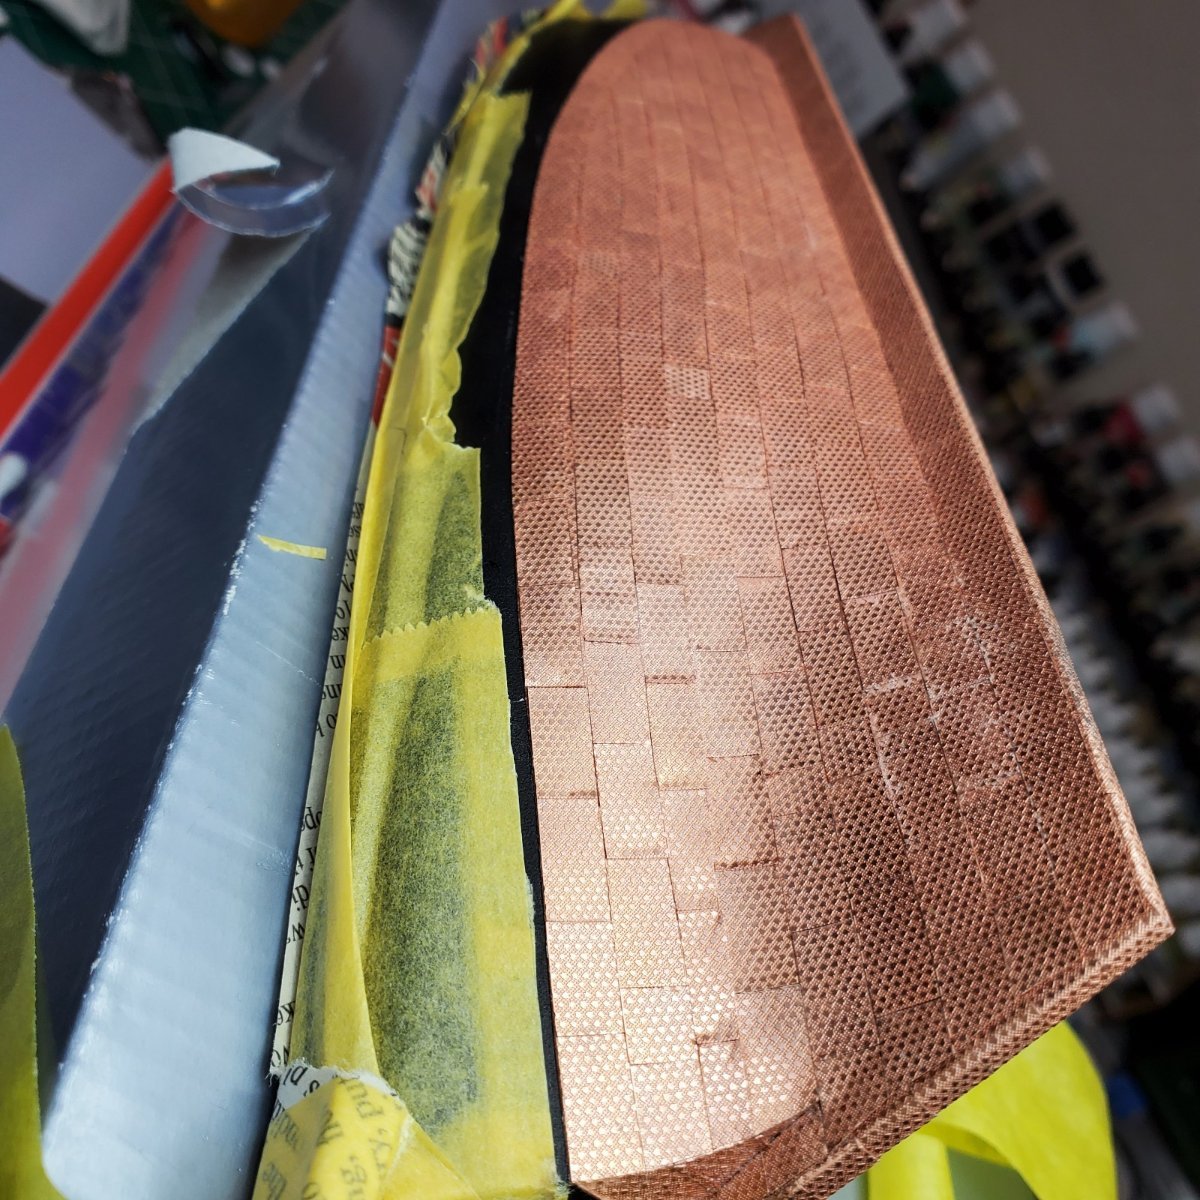
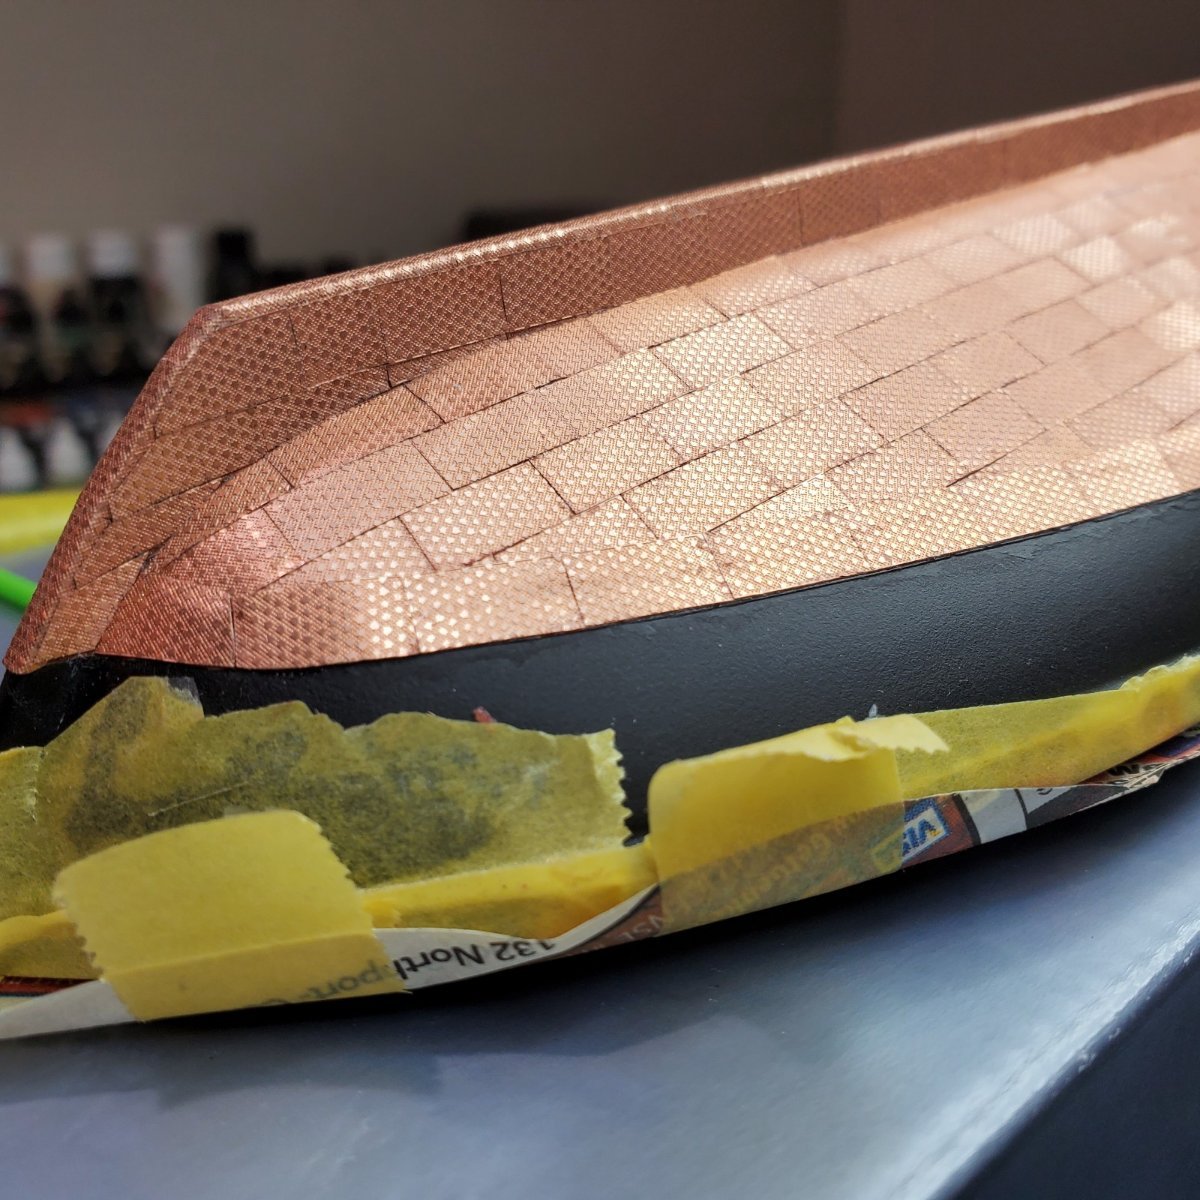
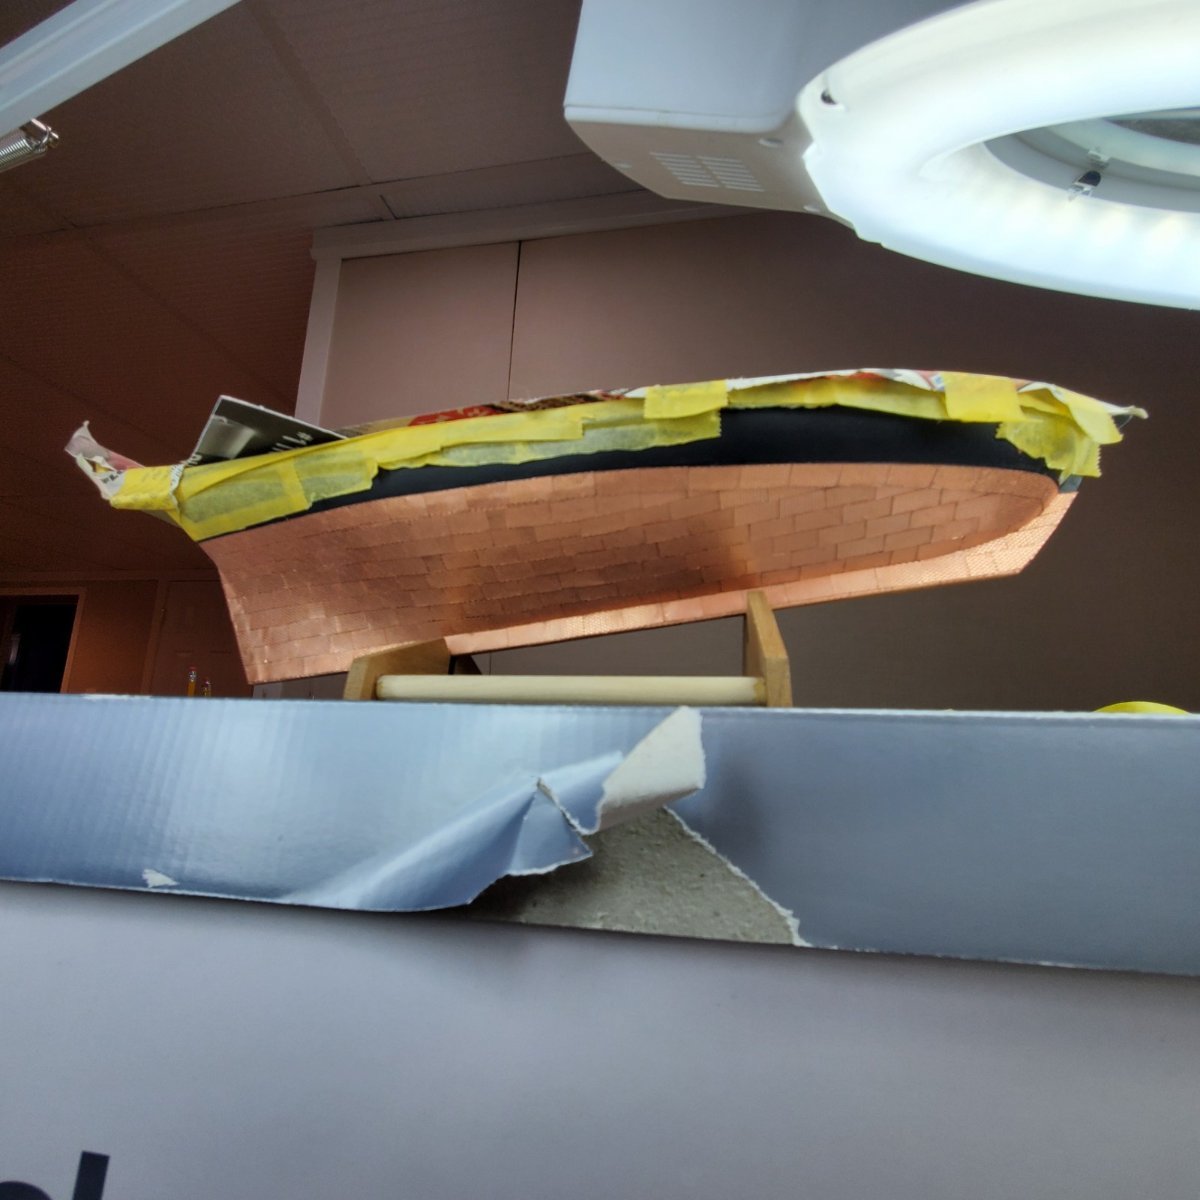
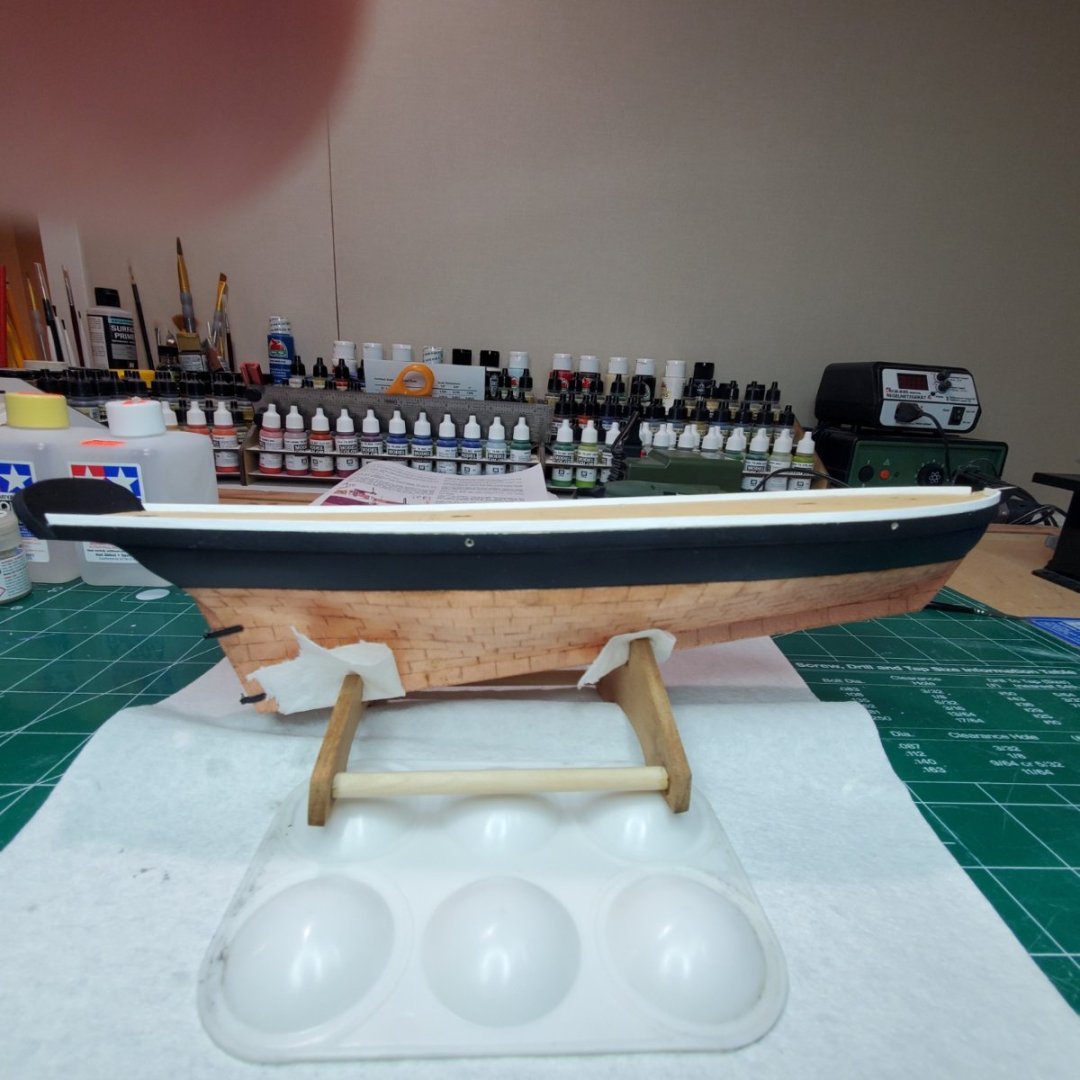
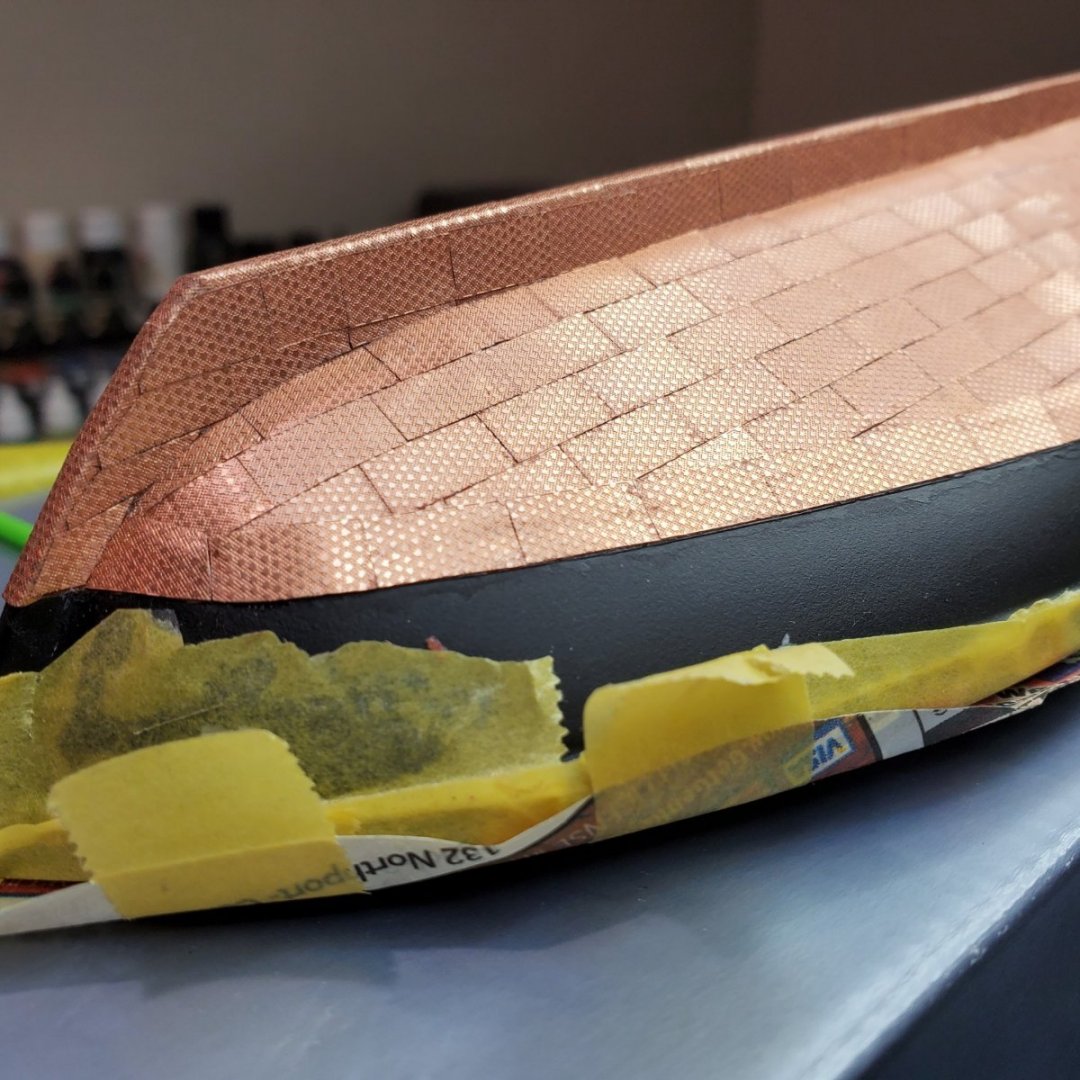
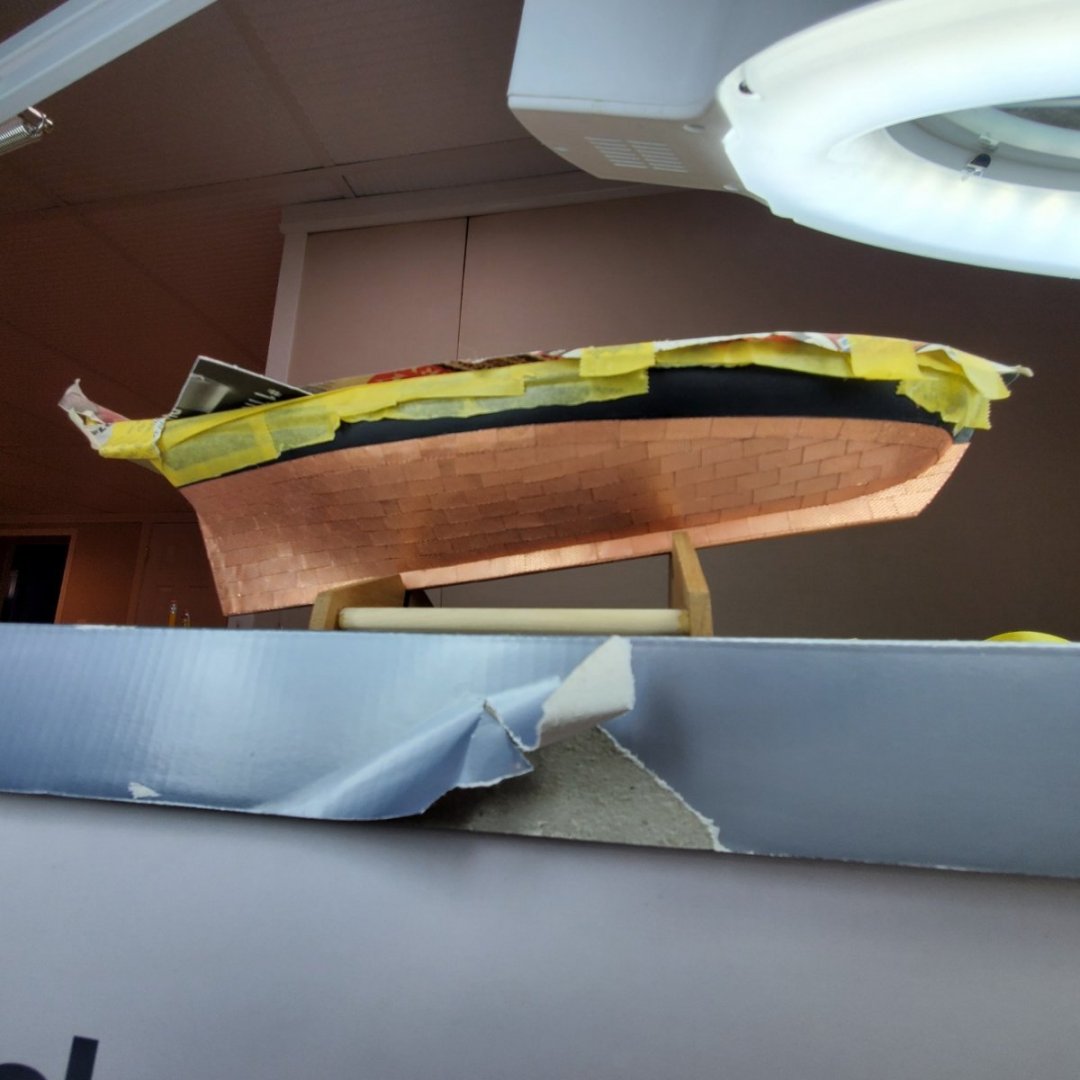
Hello Folks, I have been distant however busy on the BJ Revenue Cutter coppering the hull. After many moons of plating I have finished the entire hull. Pretty cool to be a part of the copper plating club, never thought I could do it. It is rough in some parts however learned a ton about modeling in general. Plating is repetitive so I will list some things that I learned from the process in hopes of helping someone in the future: Started 01.31.2022, completed 06.12.2022. Use a photo-etch jig to bend the parts if possible, (Keel). I used 10X goggles to ensure plates fit well and ensure plates were square where needed. I rolled every plate with end of my Exacto knife to ensure all 4 corners of all plates were down on the hull (A slight "U" curve). Less glue is more and saves a ton of clean-up time. Polyurethaned over the copper paint to ensure good adhesion to the hull. Plus the hull was sealed so humidity would not affect the and pop the plates off the hull. Used Slow CA to give me time to situate every plate, unsteady hands and a beginner I guess. After all complete, used Tarn-X to clean the plates so they now will age simultaneously. Blue Jacket Copper Plates great to work with. Beginners like myself, follow other builds with copper plating (thank you Sjanicki, Mr. Bluejacket and EricMichaelsWilliams (Spelling?) build threads). Last but not least, it was worth it and I am excited and happy to go from the "necessary evil of the hull" to embark on the boat fixtures and my favorite the rigging. Pictures are listed below:


- 89 replies
-
- 9
-
-

-
- bluejacket shipcrafters
- revenue cutter
- (and 1 more)
-
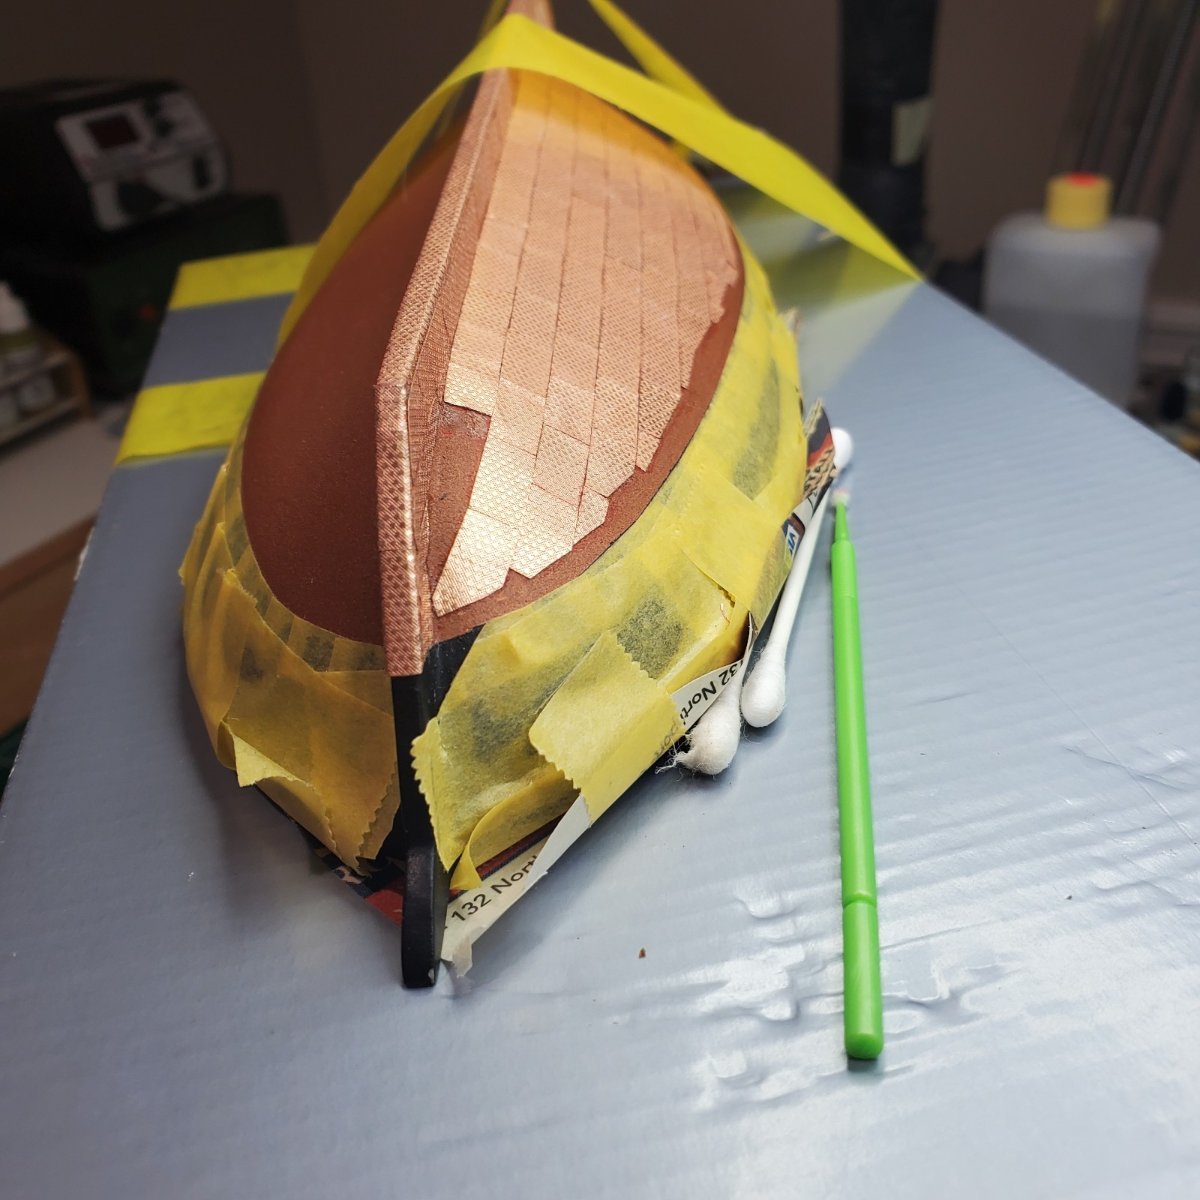
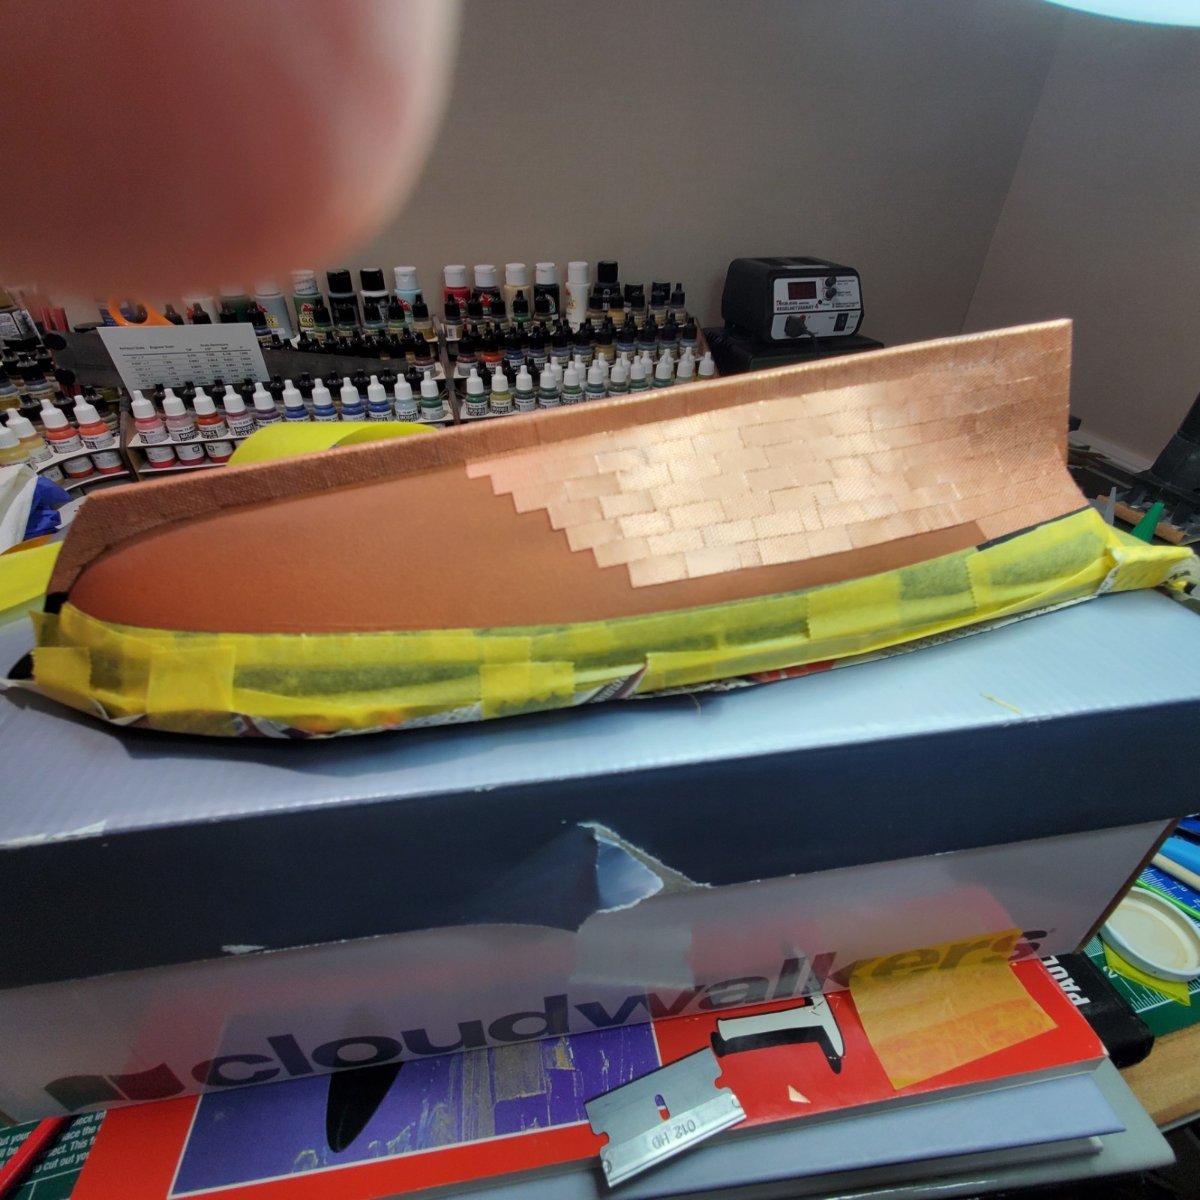
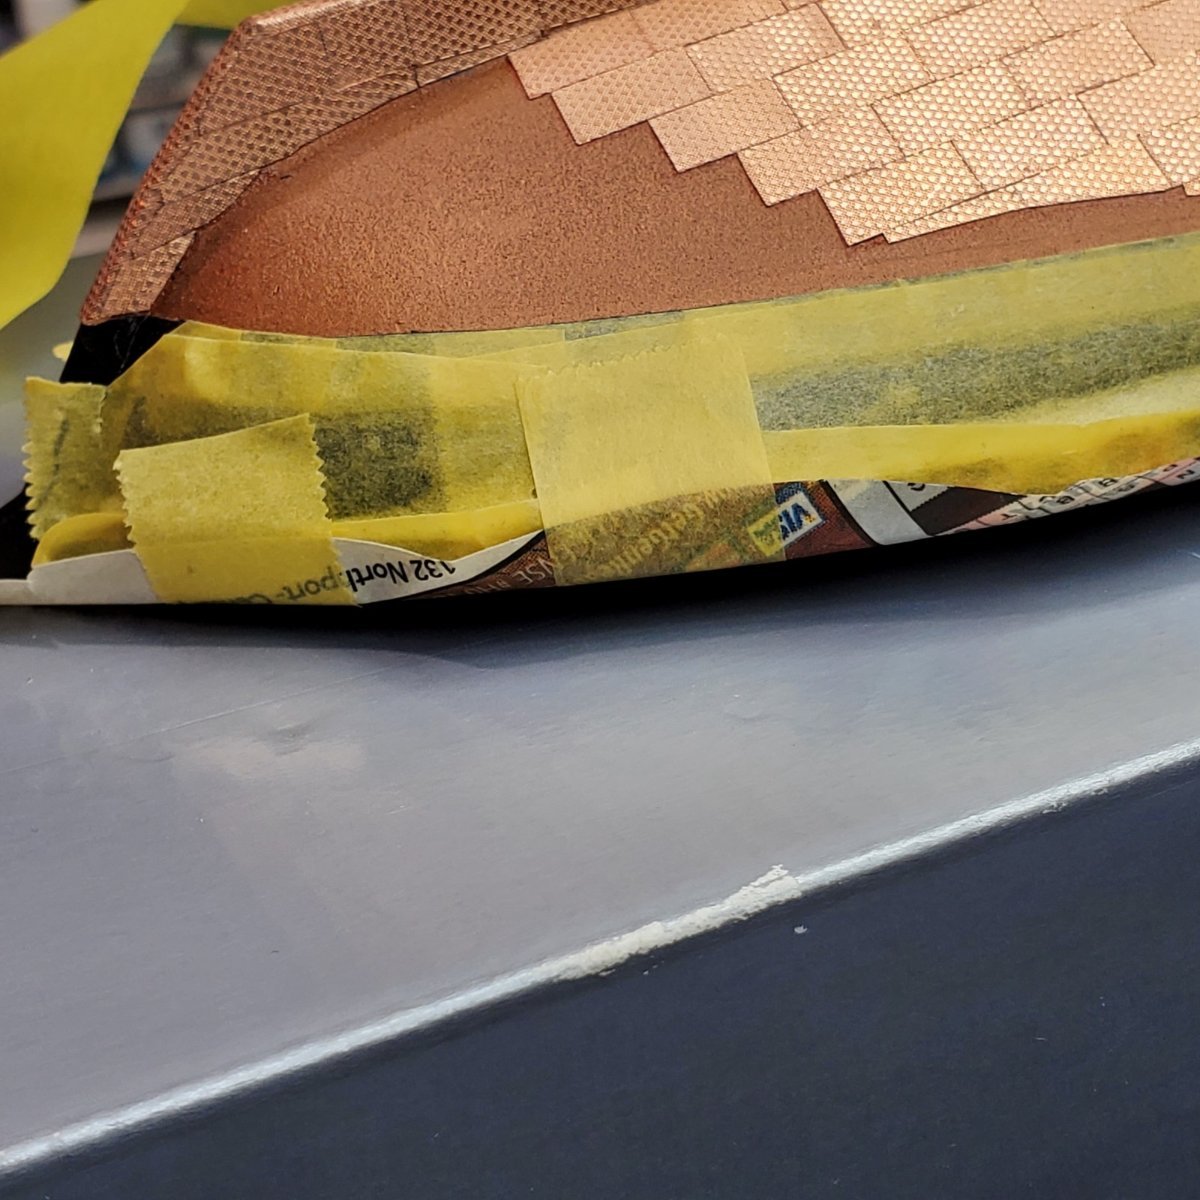
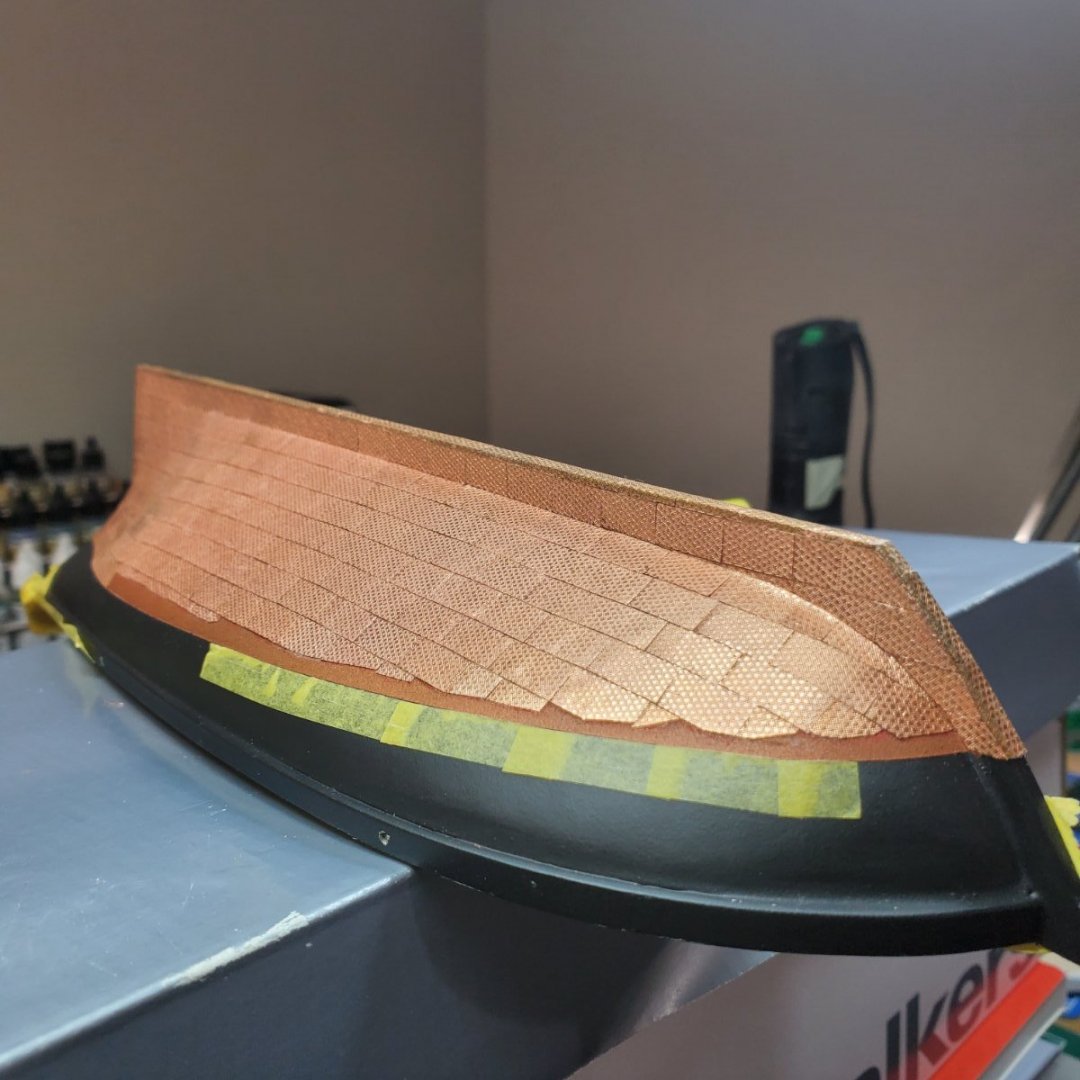
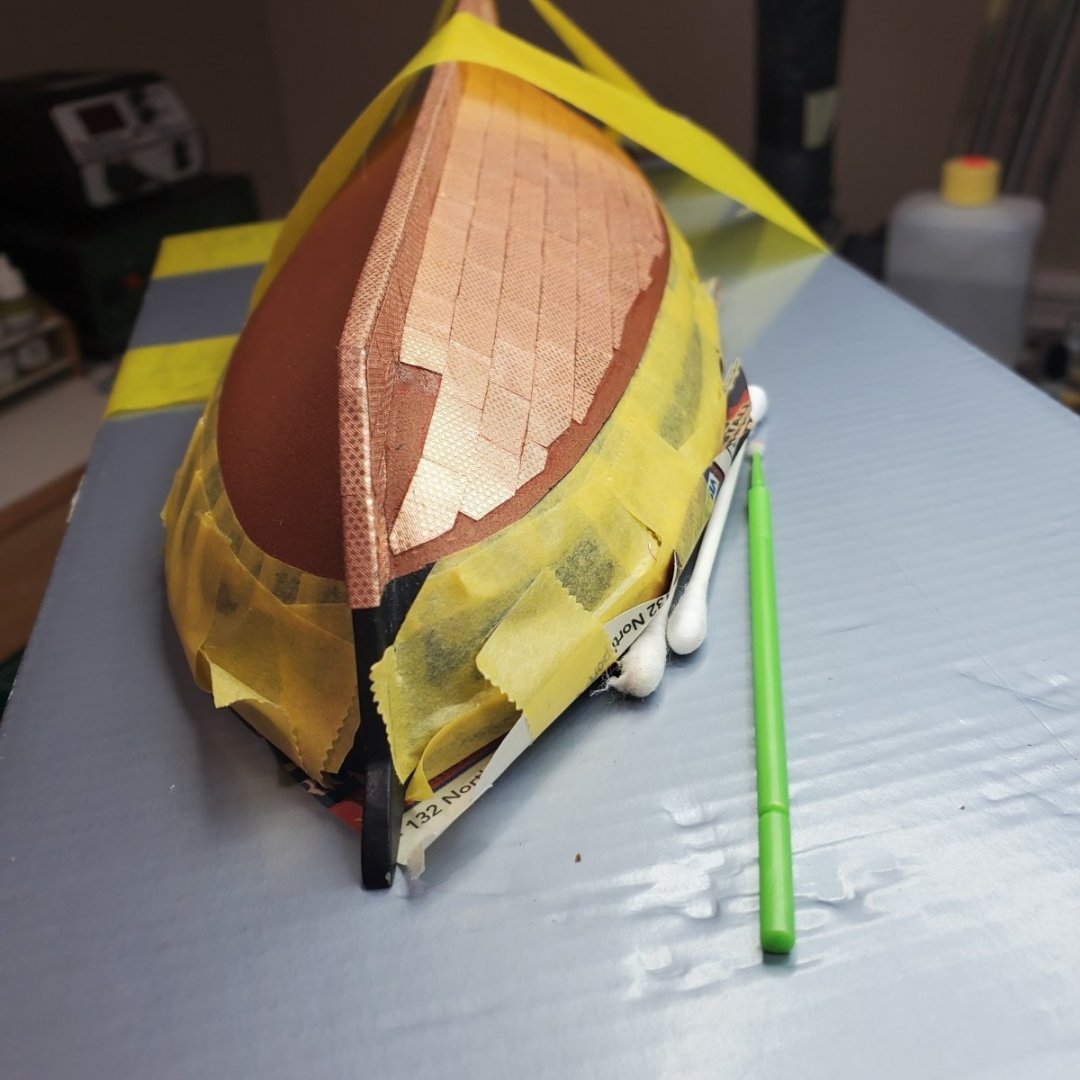
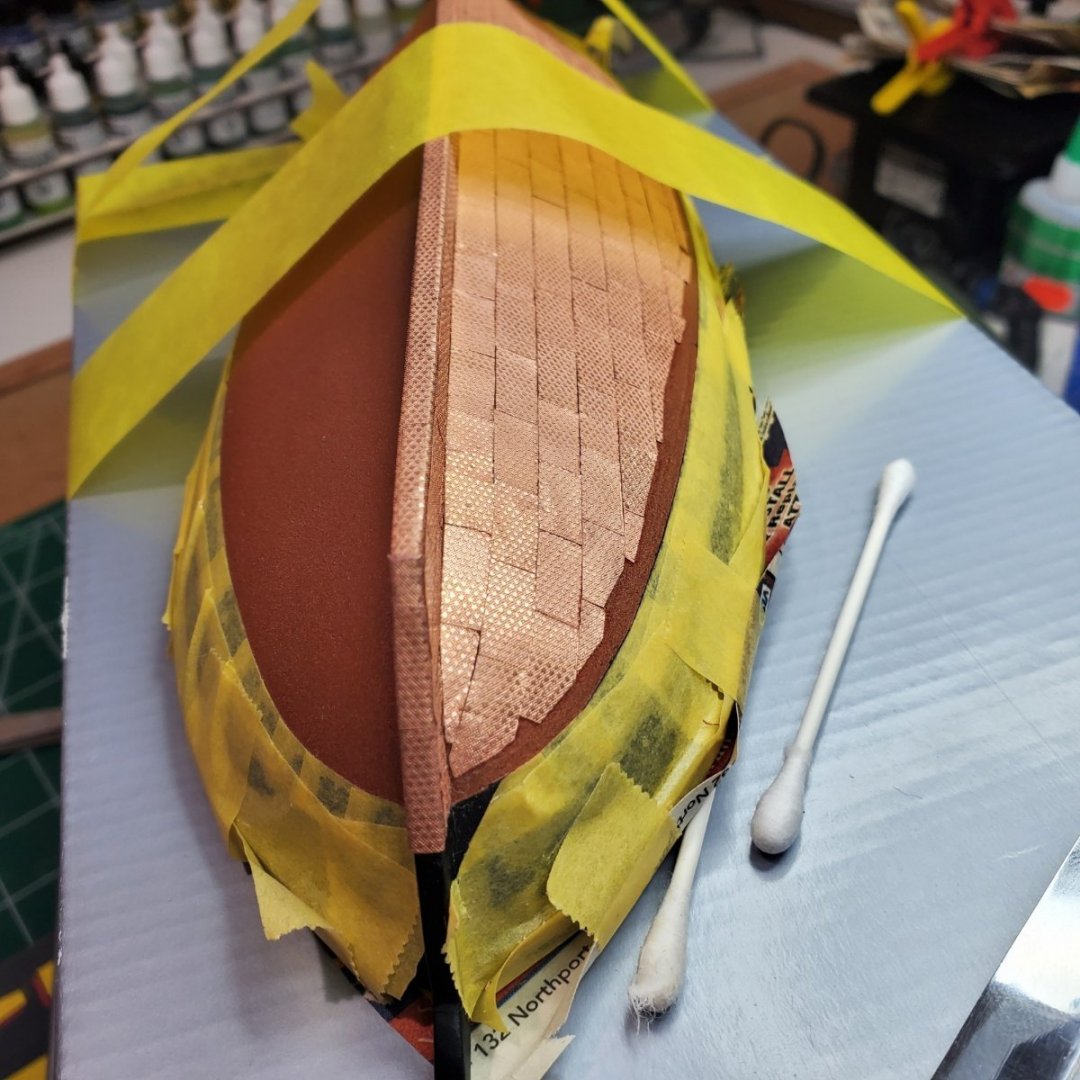
Hello Folks, I have been distant however busy on the BJ Revenue Cutter coppering the hull. After many moons of plating I have finished 1/2 of the hull. When started I have to admit I wasn't too sure how it would turn out or be able to complete it. Pretty happy with the results, although not perfect. Proceeded with a hybrid model of MrBlueJacket (Mary Taylor) and SJanicki methods. A few notes: Every plate was altered in some shape or form. Used slow CA because of my unsteady hands, gave me time to make adjustments. Used thin CA when I ran into stubborn plate end not adhering to the hull. Every plate ruined was refabricated and used on another portion of the hull (I guess one can call it a "Green" hull). I ran 2 strakes of plates along the keel and bottom because I had a feeling I would have issues at the bow if I ran just one straight through, glad I did. See photos. Started from the bottom and proceeded forward and upward. Covered the jagged edges by affixing water line plates. See photos please. I learned a ton by doing this, and glad I took on the challenge. A little choppy for me, however I will easily exchange it for the experience. Lastly, this was the hardest task I have ever encountered making a boat. Feels good though, I hope the second half turns out better. Take care Folks, (On to the rudder to break things up a little) Bill T.


- 89 replies
-
- 7
-
-
- bluejacket shipcrafters
- revenue cutter
- (and 1 more)
-
Hello Folks, Still working and learning on copper plating. These pictures represent some progression to date from my last post. Posting this for two reasons (1) not to be distant and (2) I have a question (I rarely post questions however with the time placed on plating I need to) any help would be appreciated! Question: Using slow CA which is working well. It is used sparingly and excess is wiped off immediately with a Q-Tip (lot's of Q-Tips!!!). Question: There are plates where the excess glue is wiped away, however leaves a dull white residue. Is there a solution that can be used to remove the residue that won't affect the adhesion of the copper plates to the hull? Any help would be greatly appreciated! (And thank you!) Some progression pics below: Again, thank you! Bill T.


- 89 replies
-
- 2
-
-
- bluejacket shipcrafters
- revenue cutter
- (and 1 more)
-
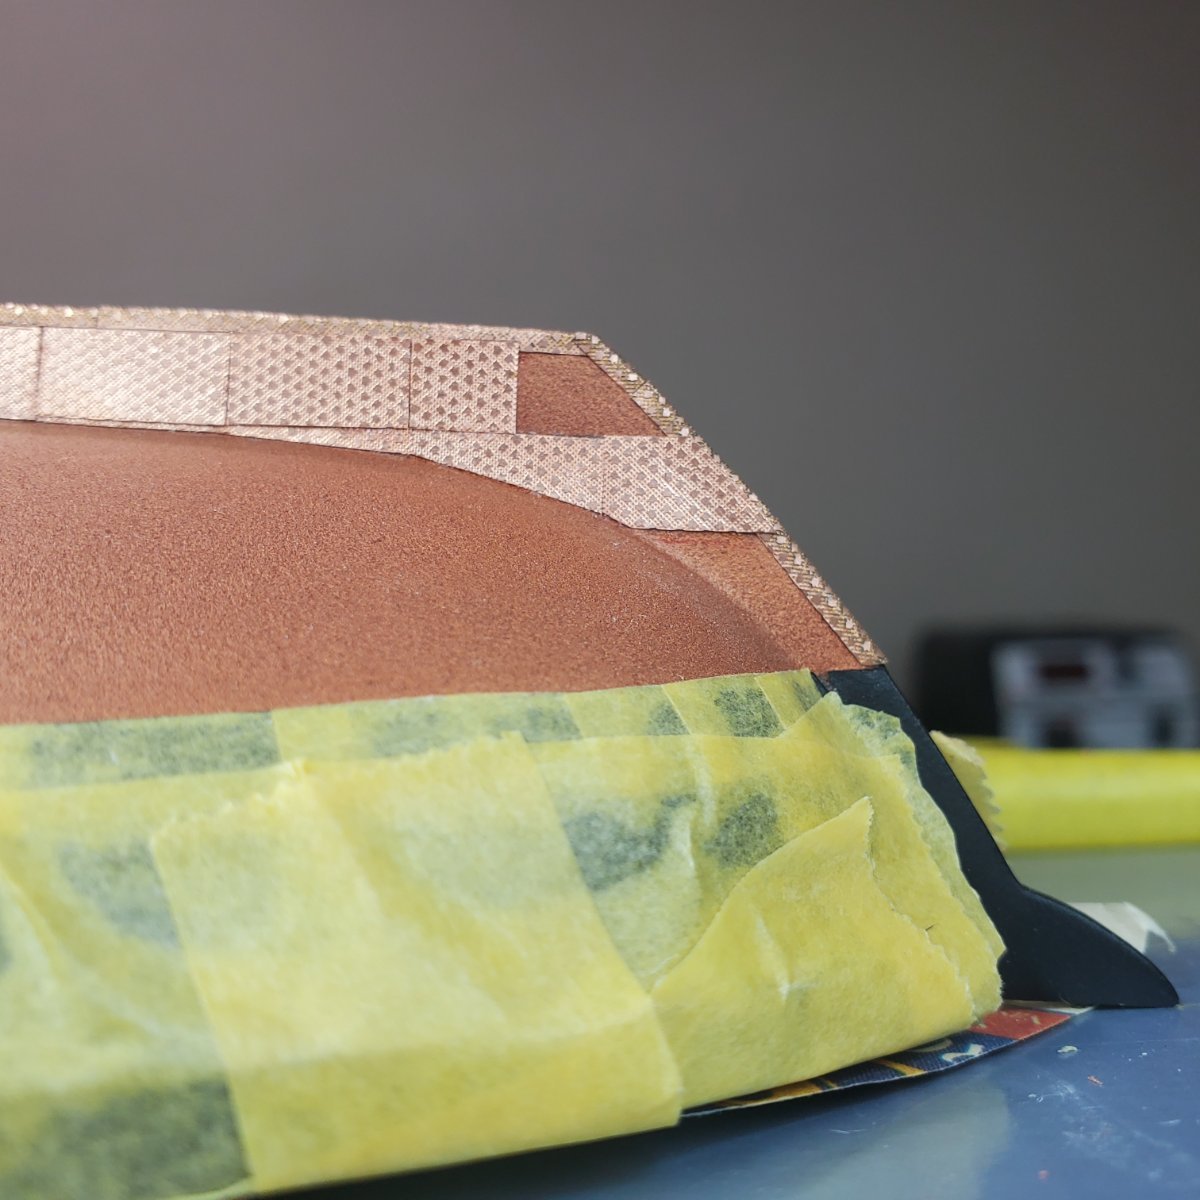
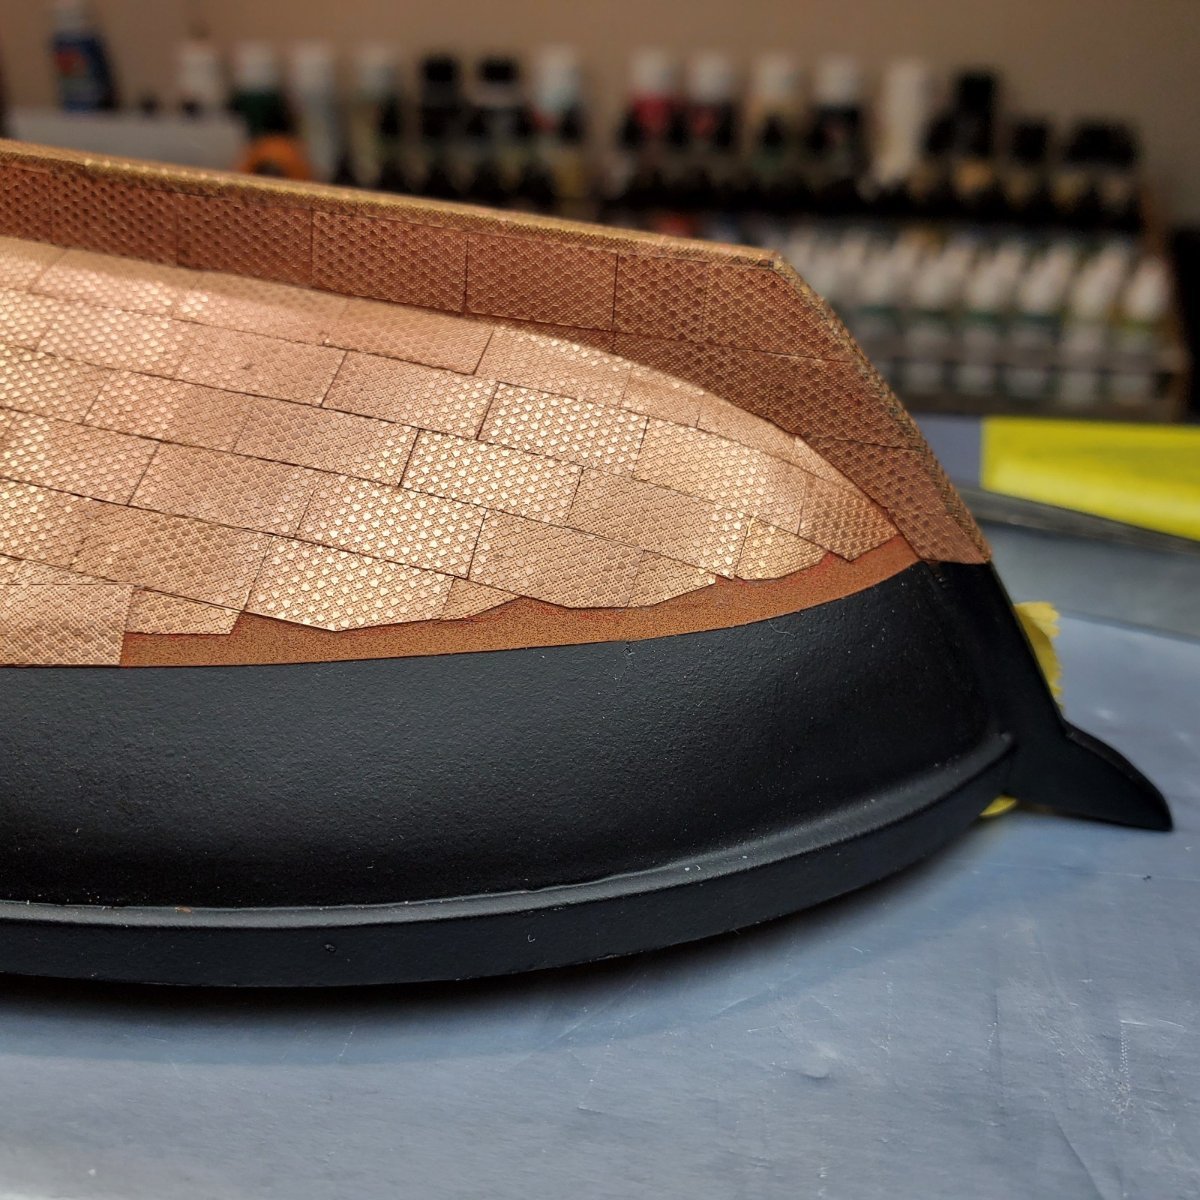
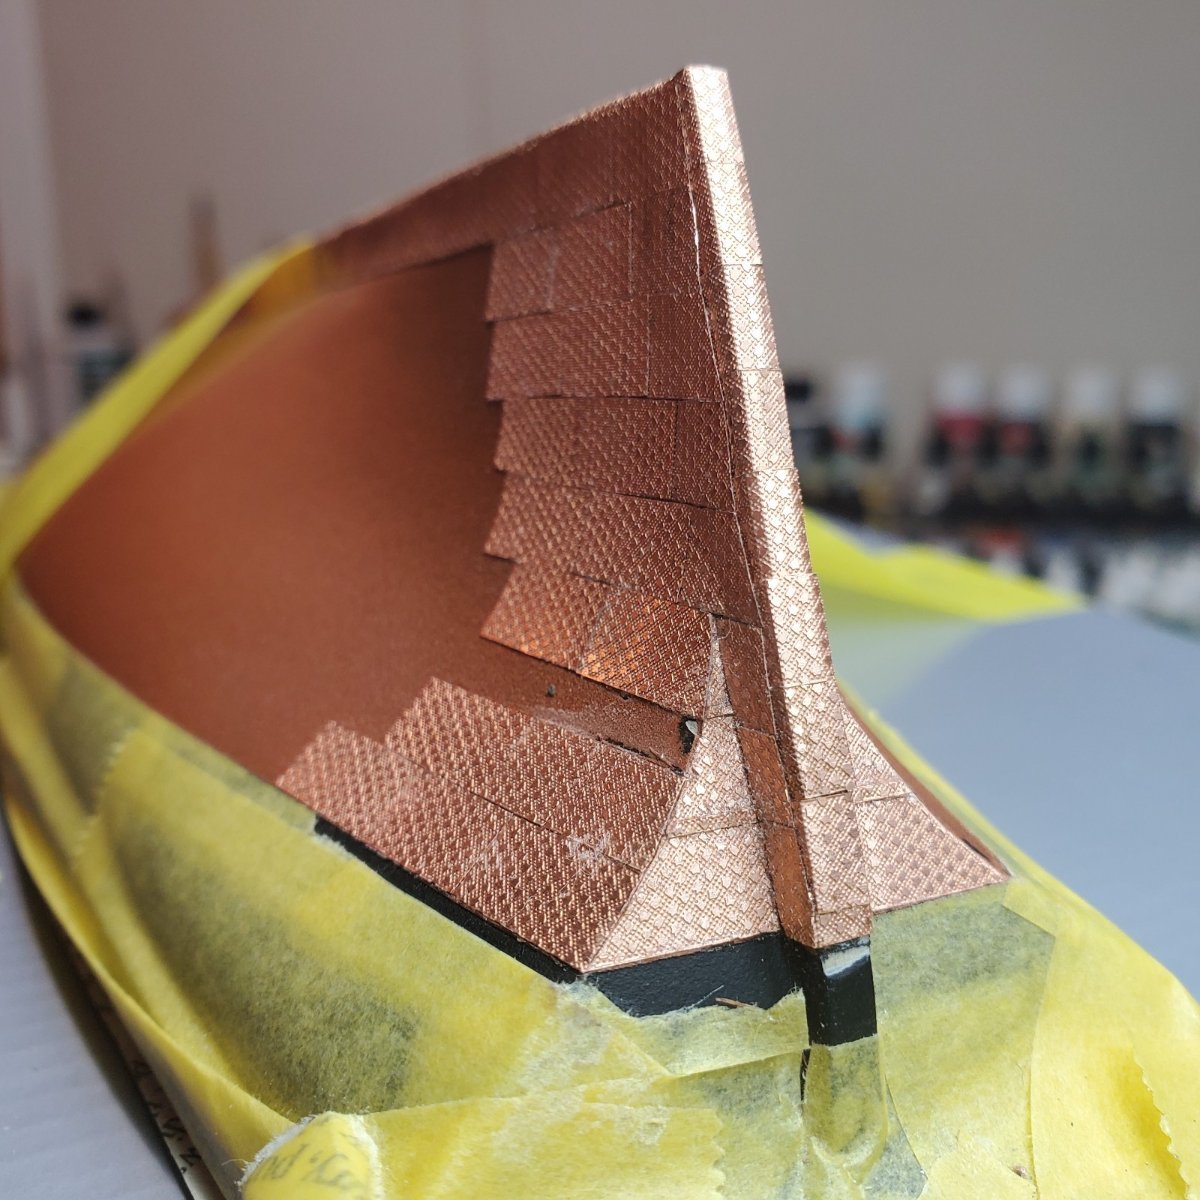
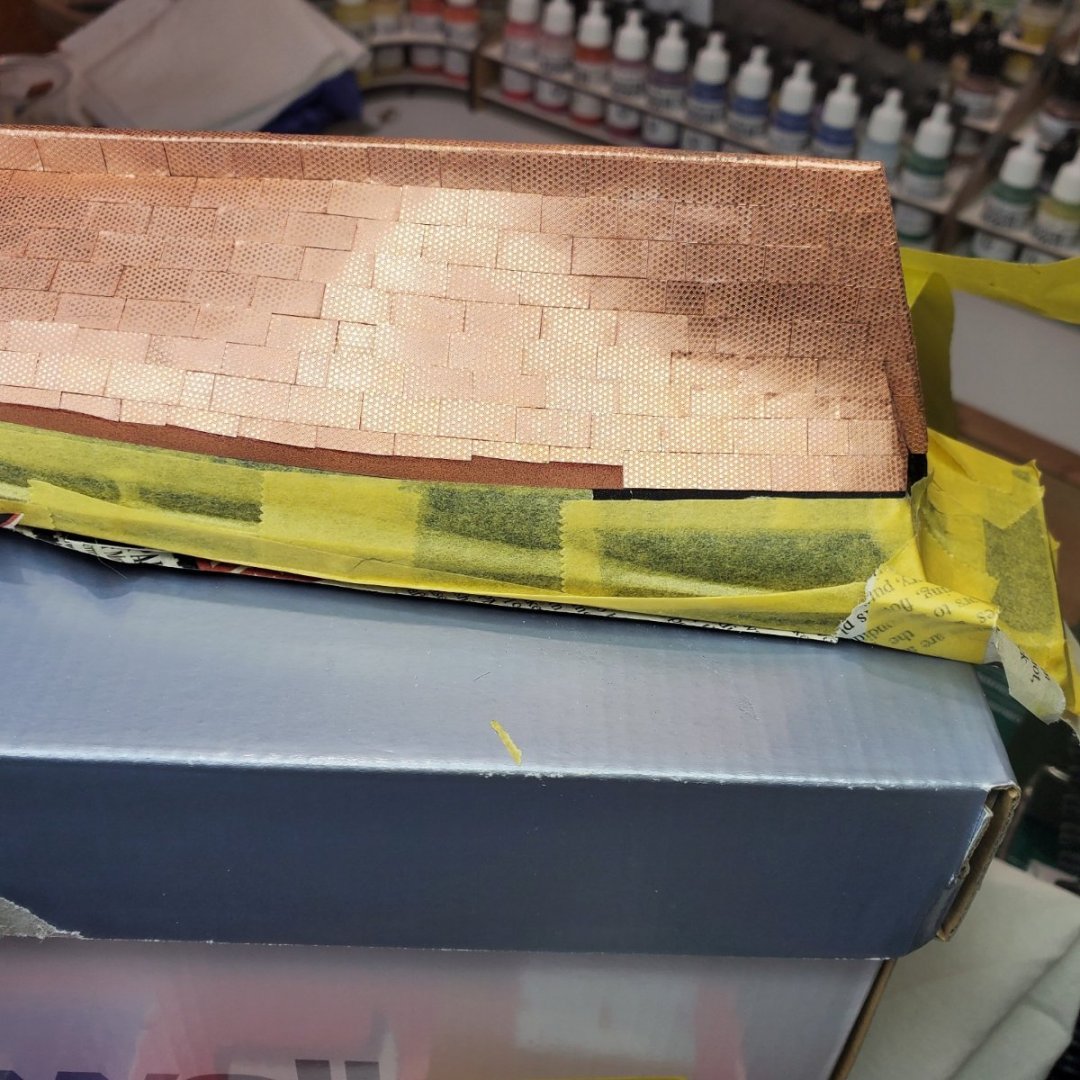
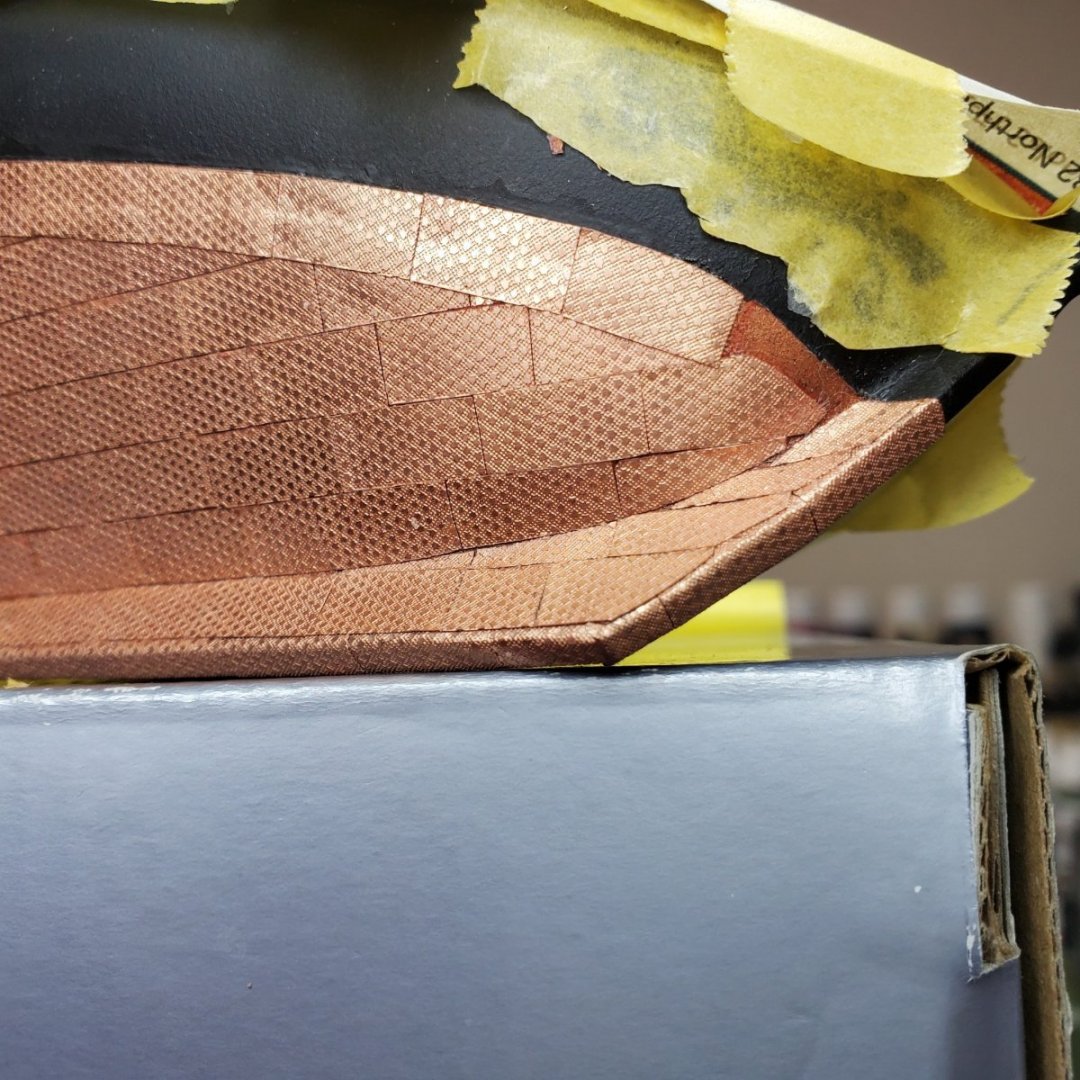
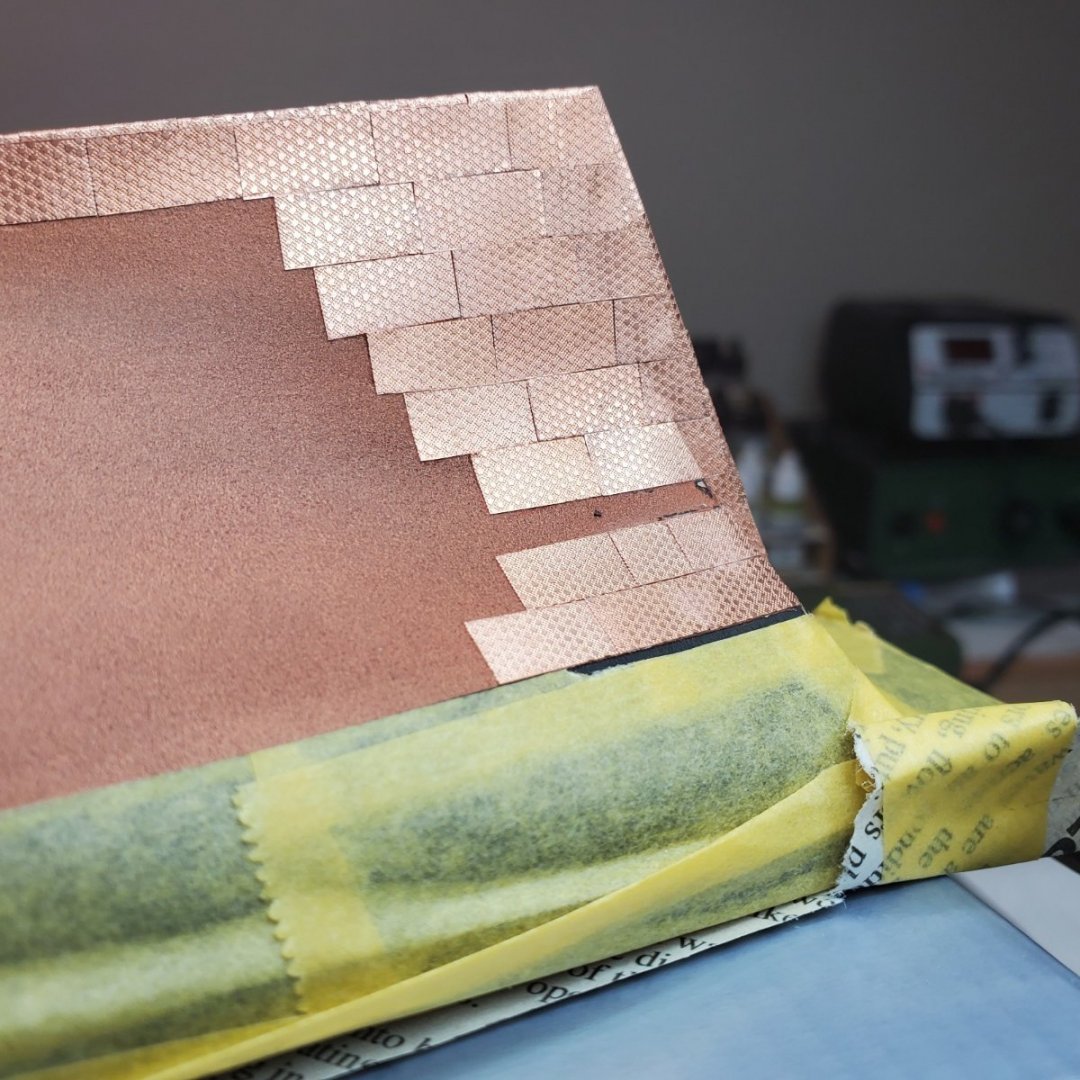
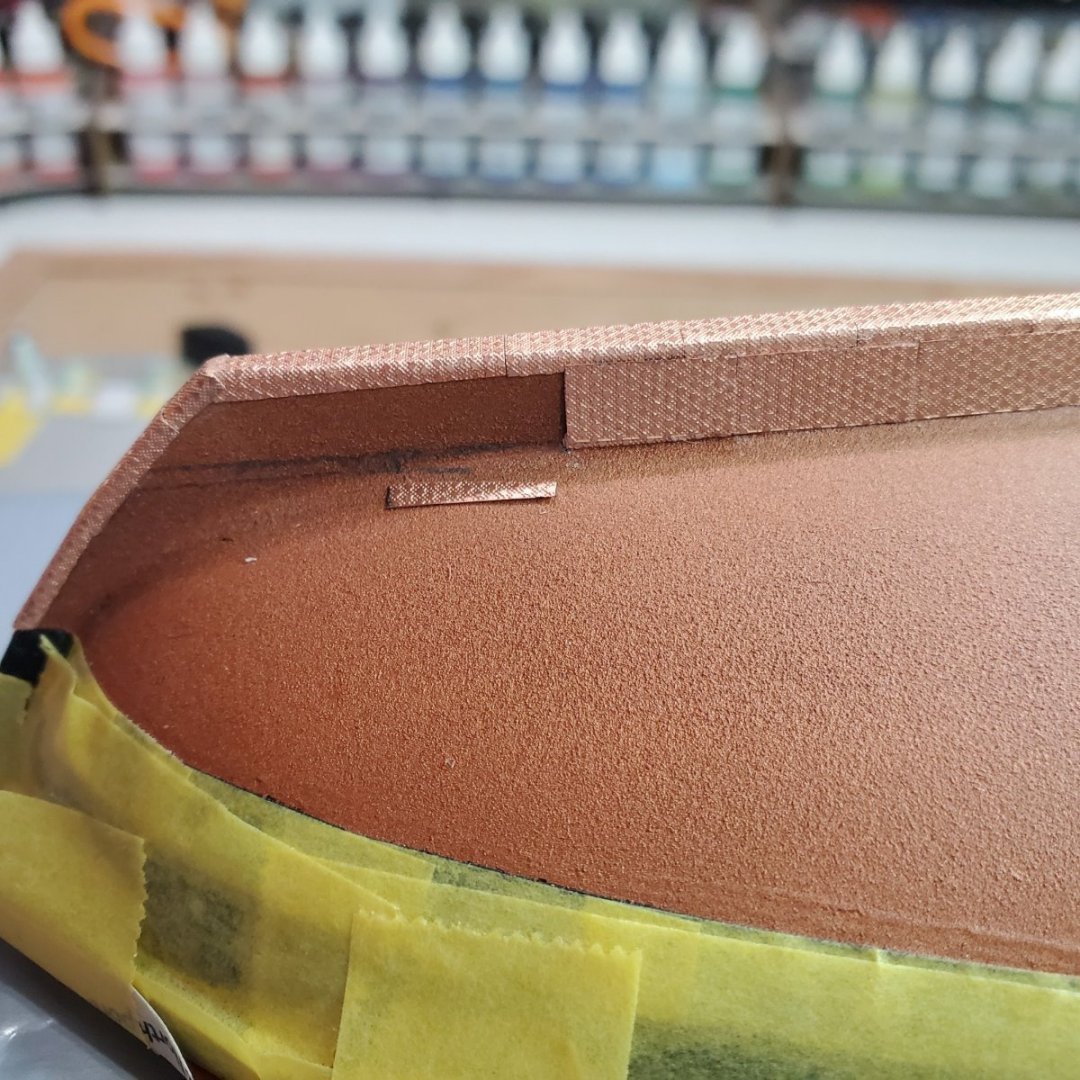
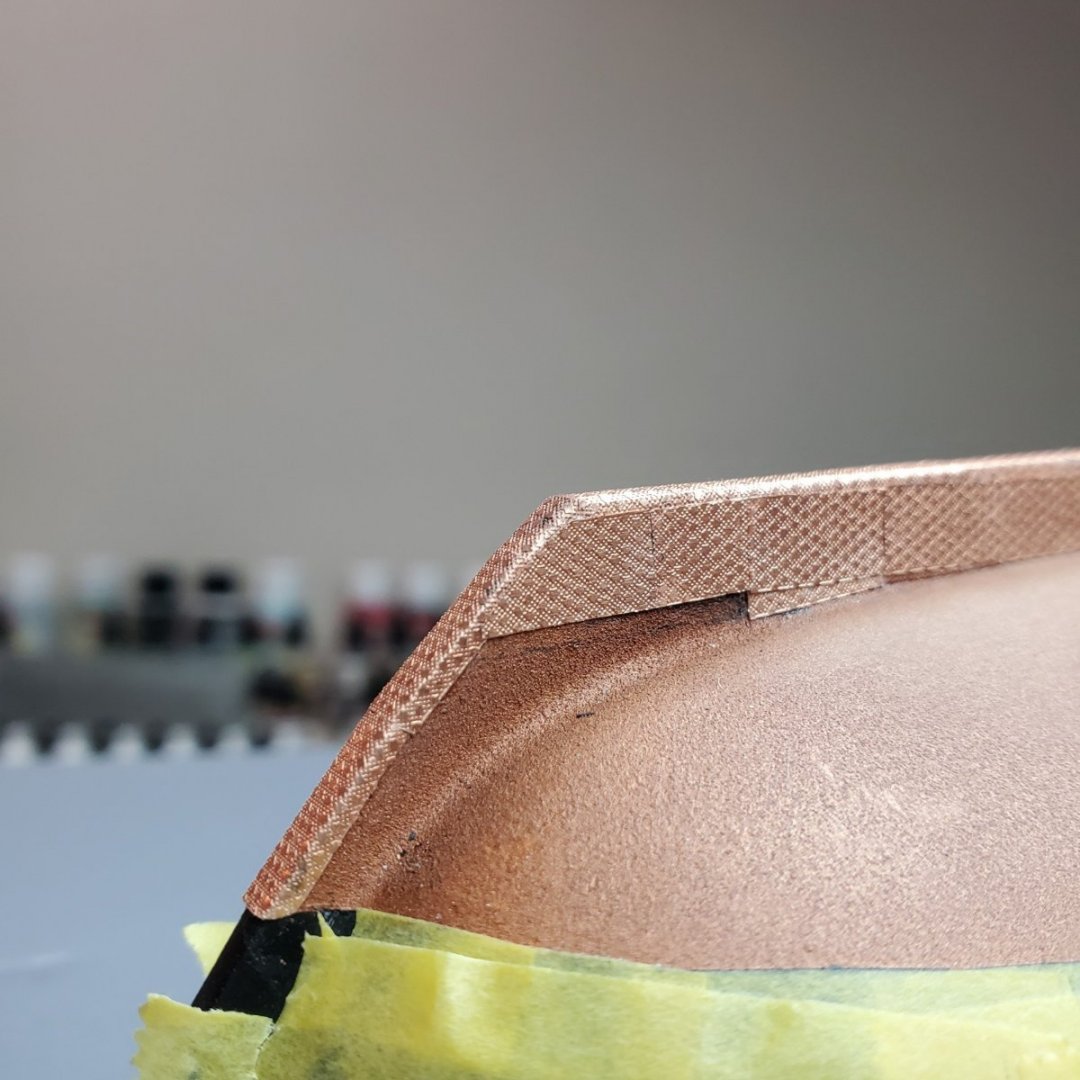
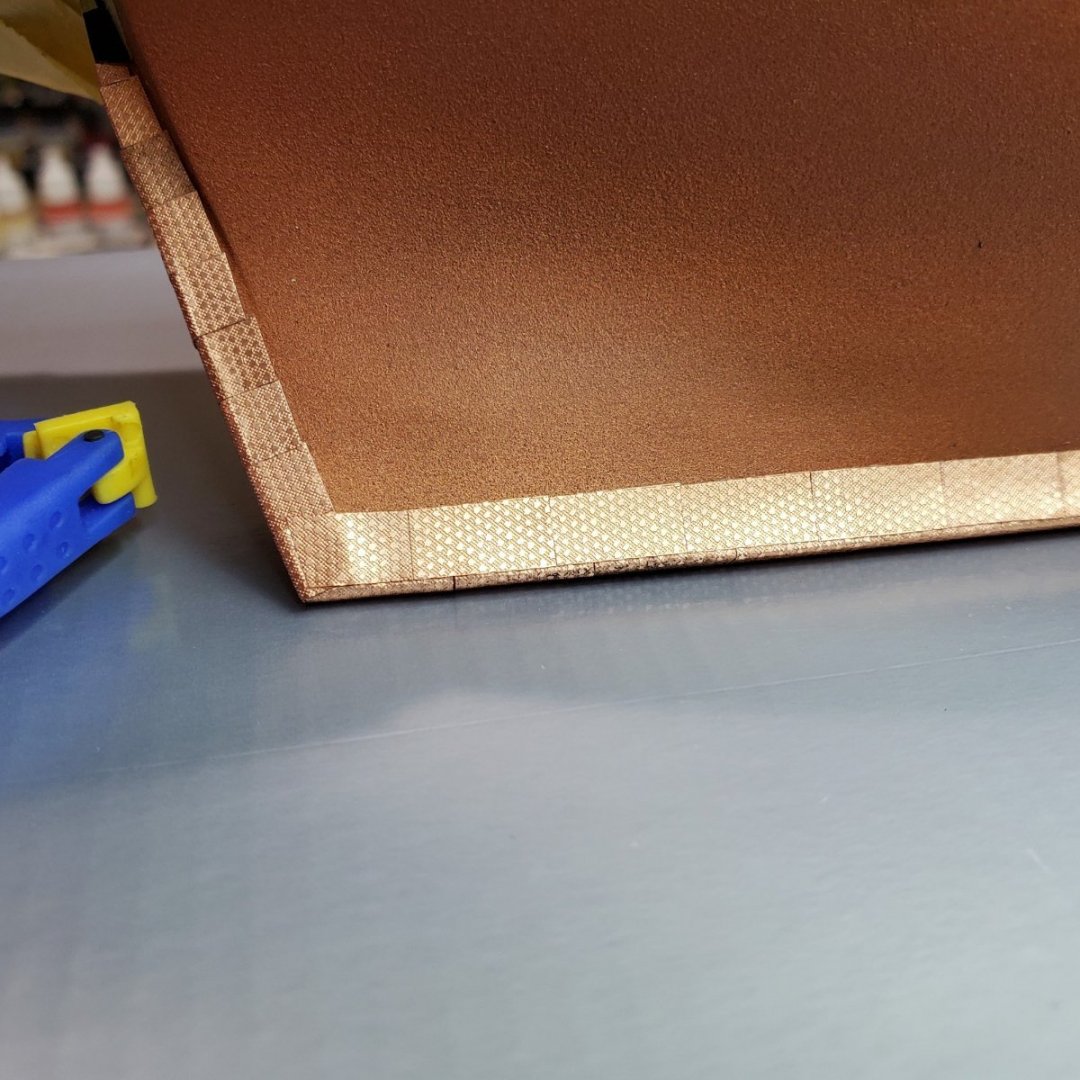
Hello Folks, Presidents Day presented me with some time work on what is going to be a long journey plating the BJ RC. I am enjoying the journey, so far it has been challenging and interesting. However I notice with practice some portions are getting more manageable. Thank god the plates are excellent quality. All plates are affixed individual, I am glad I sprayed the hull with polyurethane prior to coppering. No adhesion issues, Slow and Fast CA depending on the piece of copper being affixed. Going through a lot of plates, however I have a nice stock of pieces and parts for those weird parts of the hull in the future. No plate is wasted, flattened out and ready for re-application when needed. I finished the stern portion of the boat, I decided not to curve the plates around the stern and make them square hoping for a sharper corner. I like it, although a little choppy for my liking. All pieces needed to be filed, cut or adjusted on the stern (4 hours of work for the newbie). Then a began building up from the back, bottom to top as I have read in some posts. Finally for this post, I started working the waterline, I love working the waterline on all boats for some reason. Obviously some touch work will be needed, I like doing touch up work. Lucky, because there will to be a lot! Why do pictures show every little mistake OMG! Some pictures below, I won't keep posting because the process is repetitive. However if I find that anything that could help someone I will post! Be well folks! Bill T.


- 89 replies
-
- 6
-
-
- bluejacket shipcrafters
- revenue cutter
- (and 1 more)
-
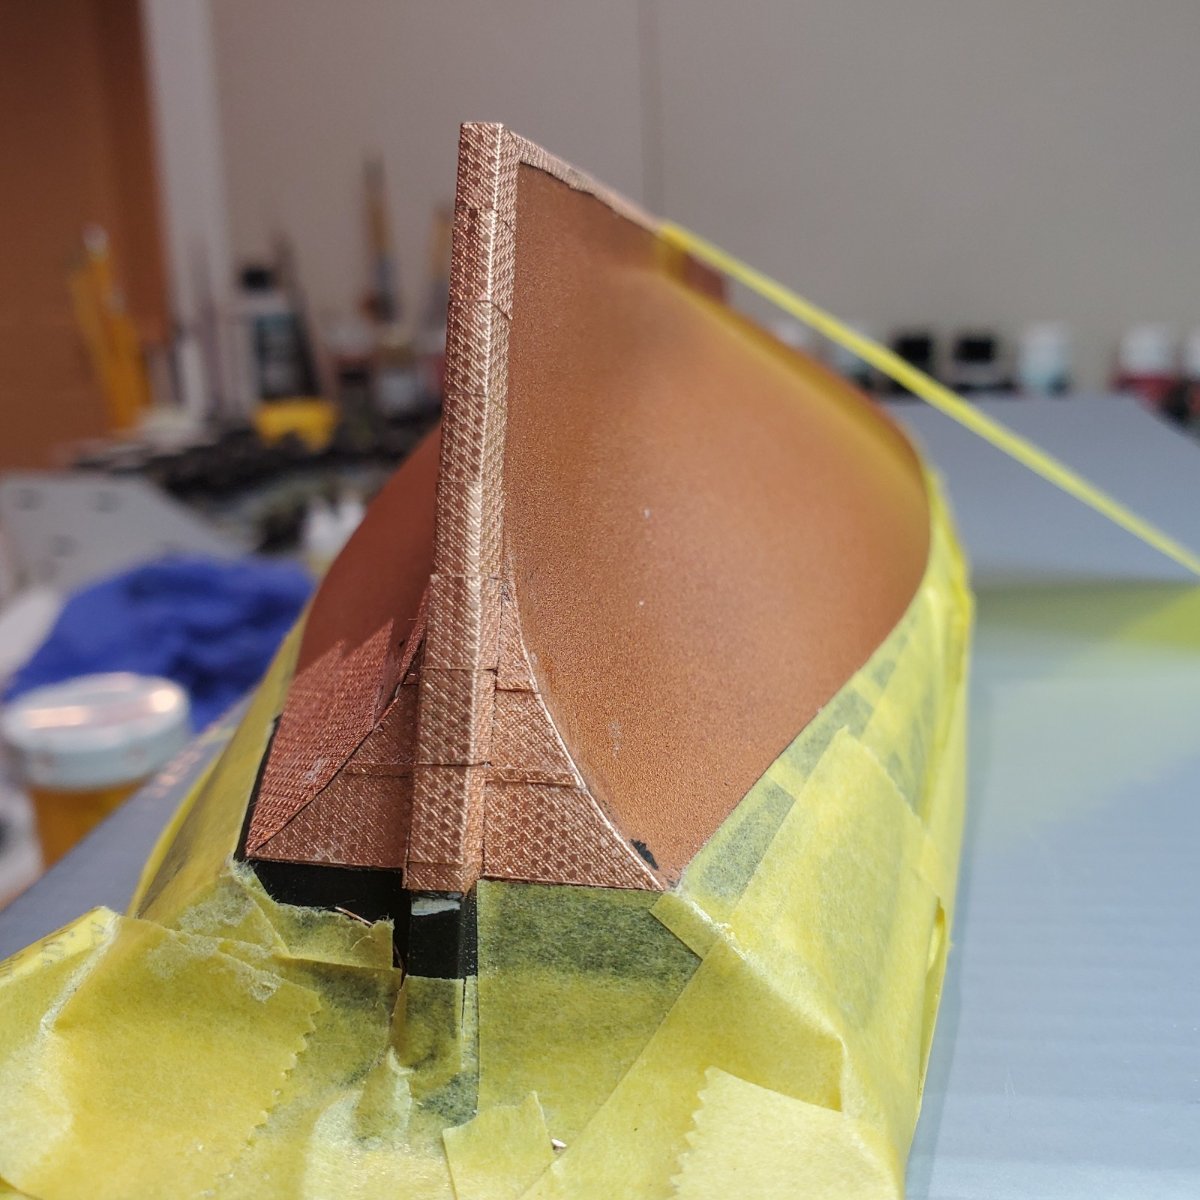
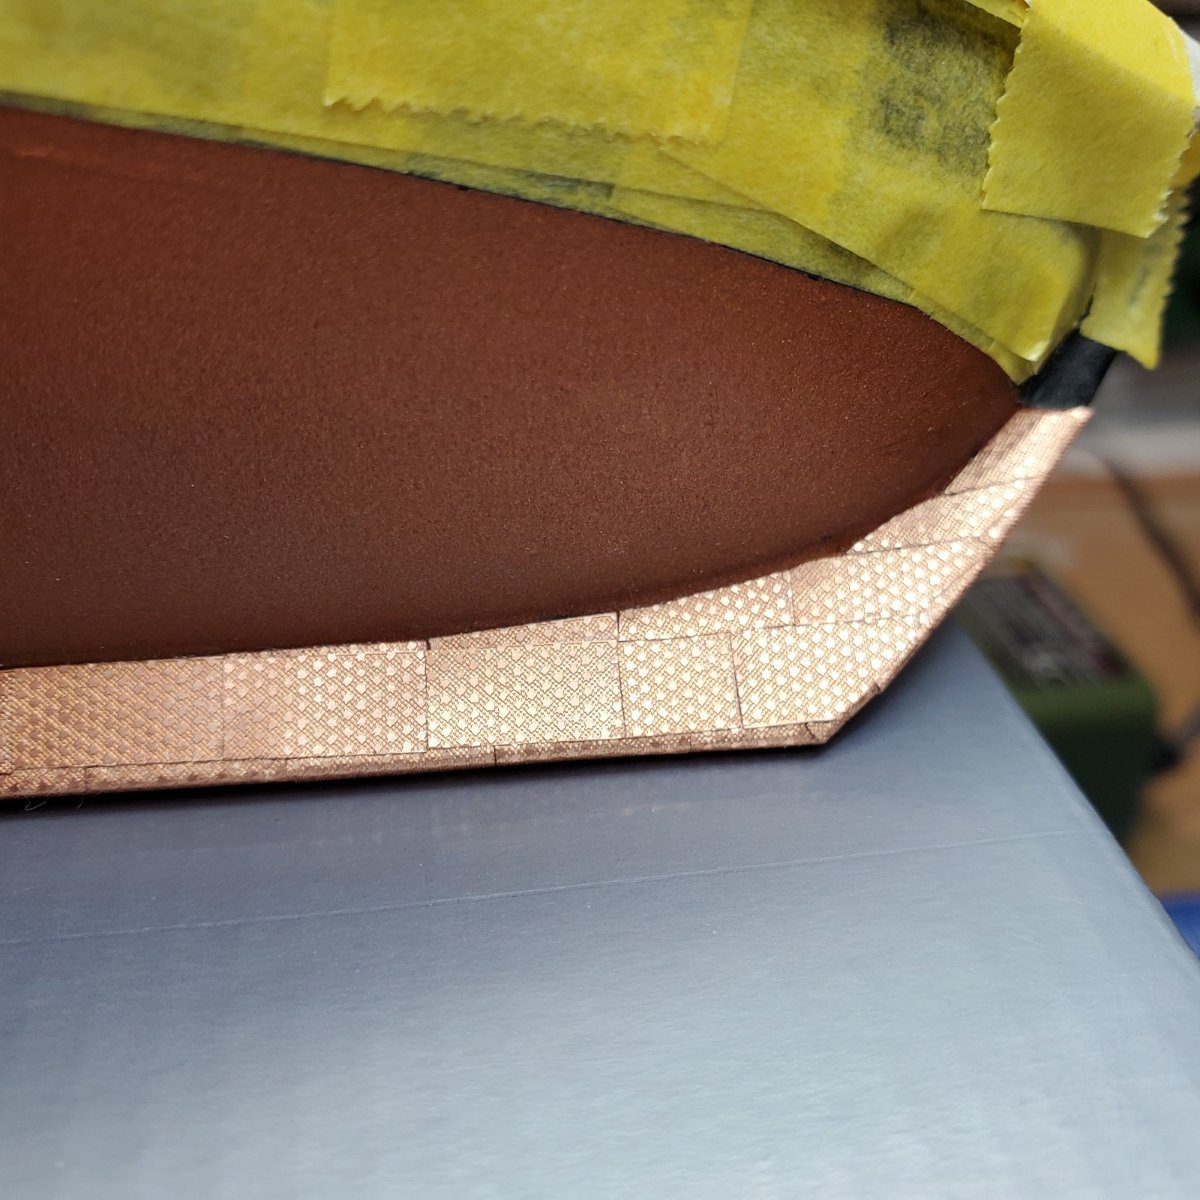
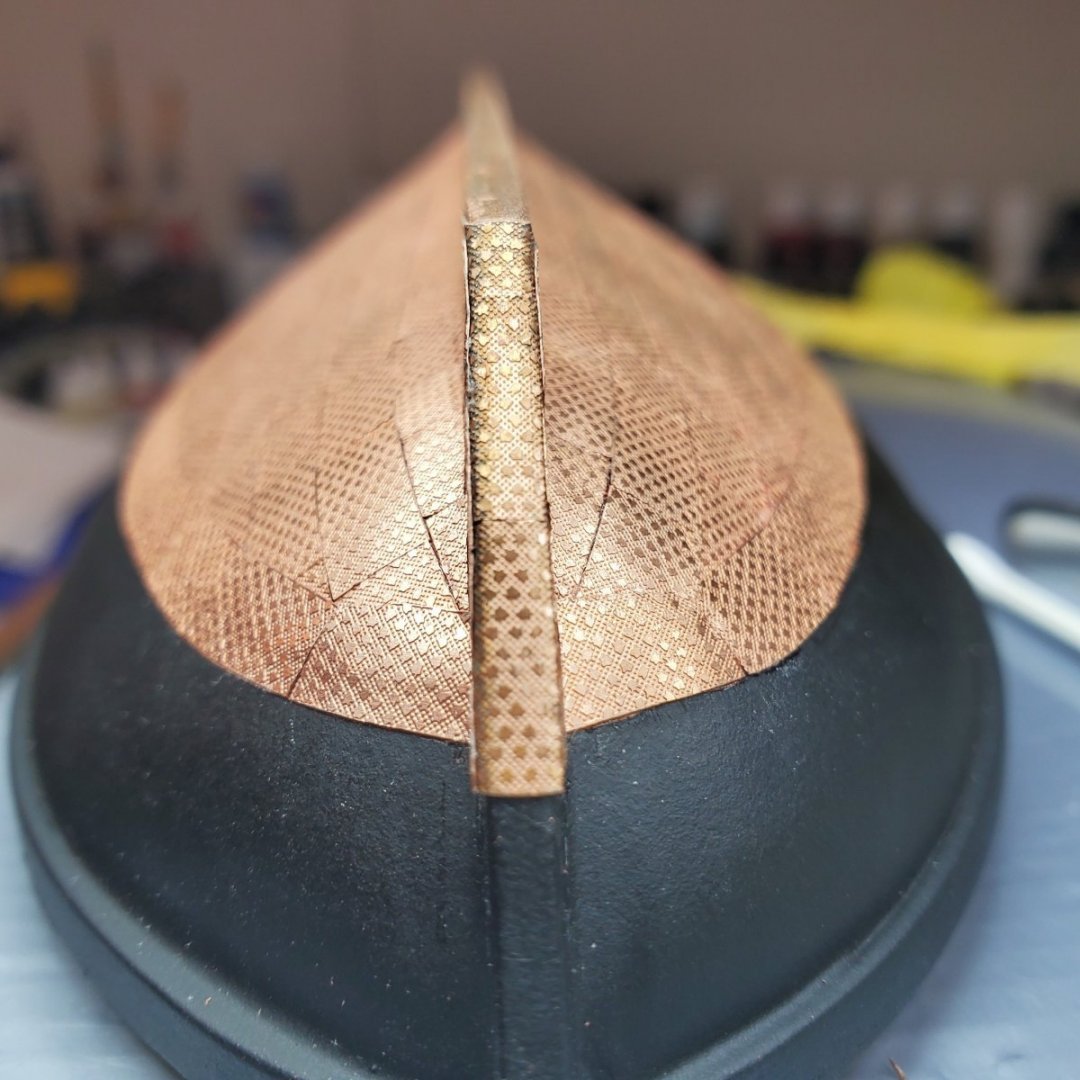
Hello Folks, Another short post to prevent being distant. Copper Plating is quite a challenge to me, even frustrating at times. However along with frustration comes a lot of education and rewards. The false keel, stem and sternpost are complete. A little choppy for my liking although. I am getting more comfortable on handling the "moody" plates. Plating of the stem was the hardest part of building any model I have experienced, I liked doing it though. When I do the other side I will do some things differently. I find Xuron photo etch cutters and the Proxxon Pensander to be my go to tools for shaping (worth every penny). Also found the dimples on the plates help as a guide to make sure the plates are the same size and square after being cut off the sprue. Magnifying goggles critical for me (5X Magnification). The gaps on the sternpost will be covered by the hull plating as I venture to that area. I can't wait to clean this portion up. Will start planking the bottom row this week (I hope), middle outward for my first time. Following Sjanicki's method on this side. Also, I have always shied away from planked a model kits (always been a solid hull person), plating has definitely given me a better understanding of hull lines and confidence in tackling planking now. My next build will definitely be a planking kit now! (Blue Jacket "Herreshoff" I think will be a descent progression) Some Pics below: Be well folks, Bill T.


- 89 replies
-
- 5
-
-
- bluejacket shipcrafters
- revenue cutter
- (and 1 more)
-
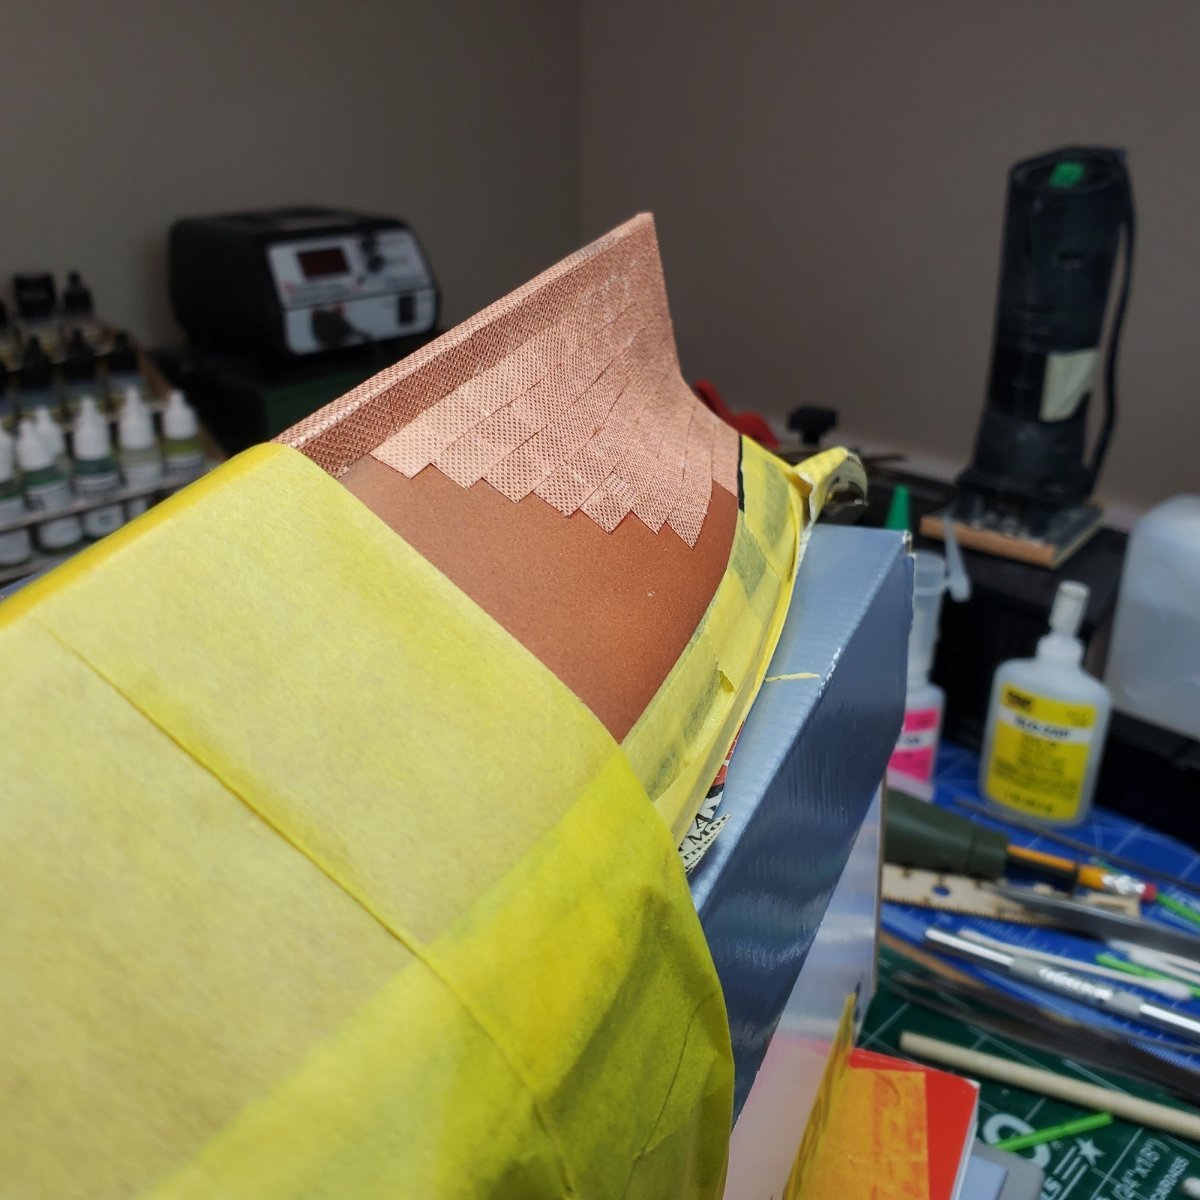
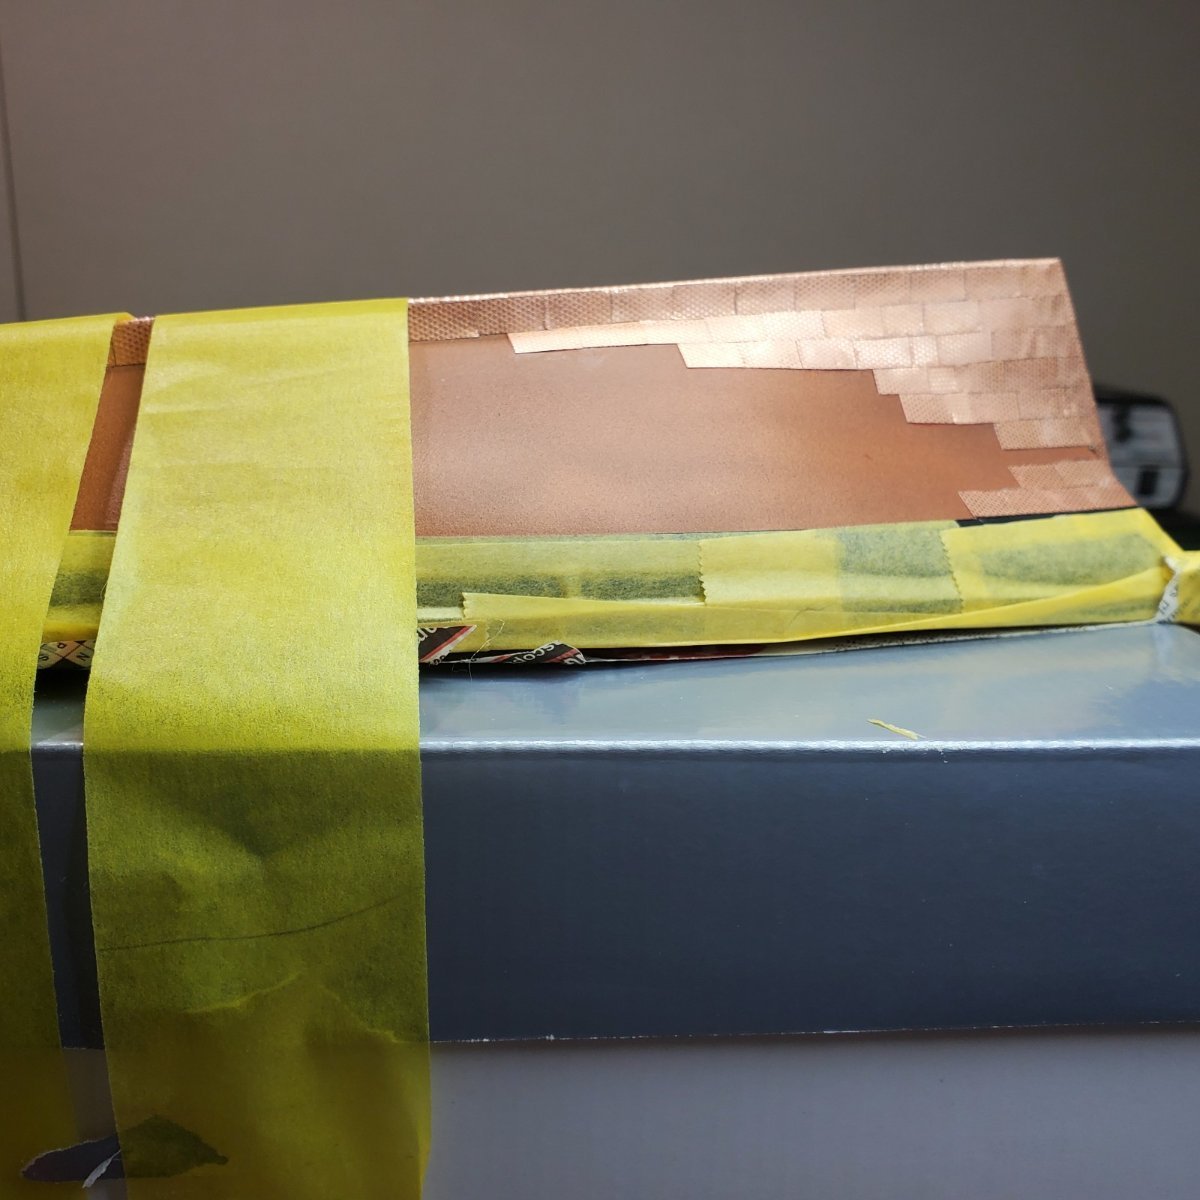
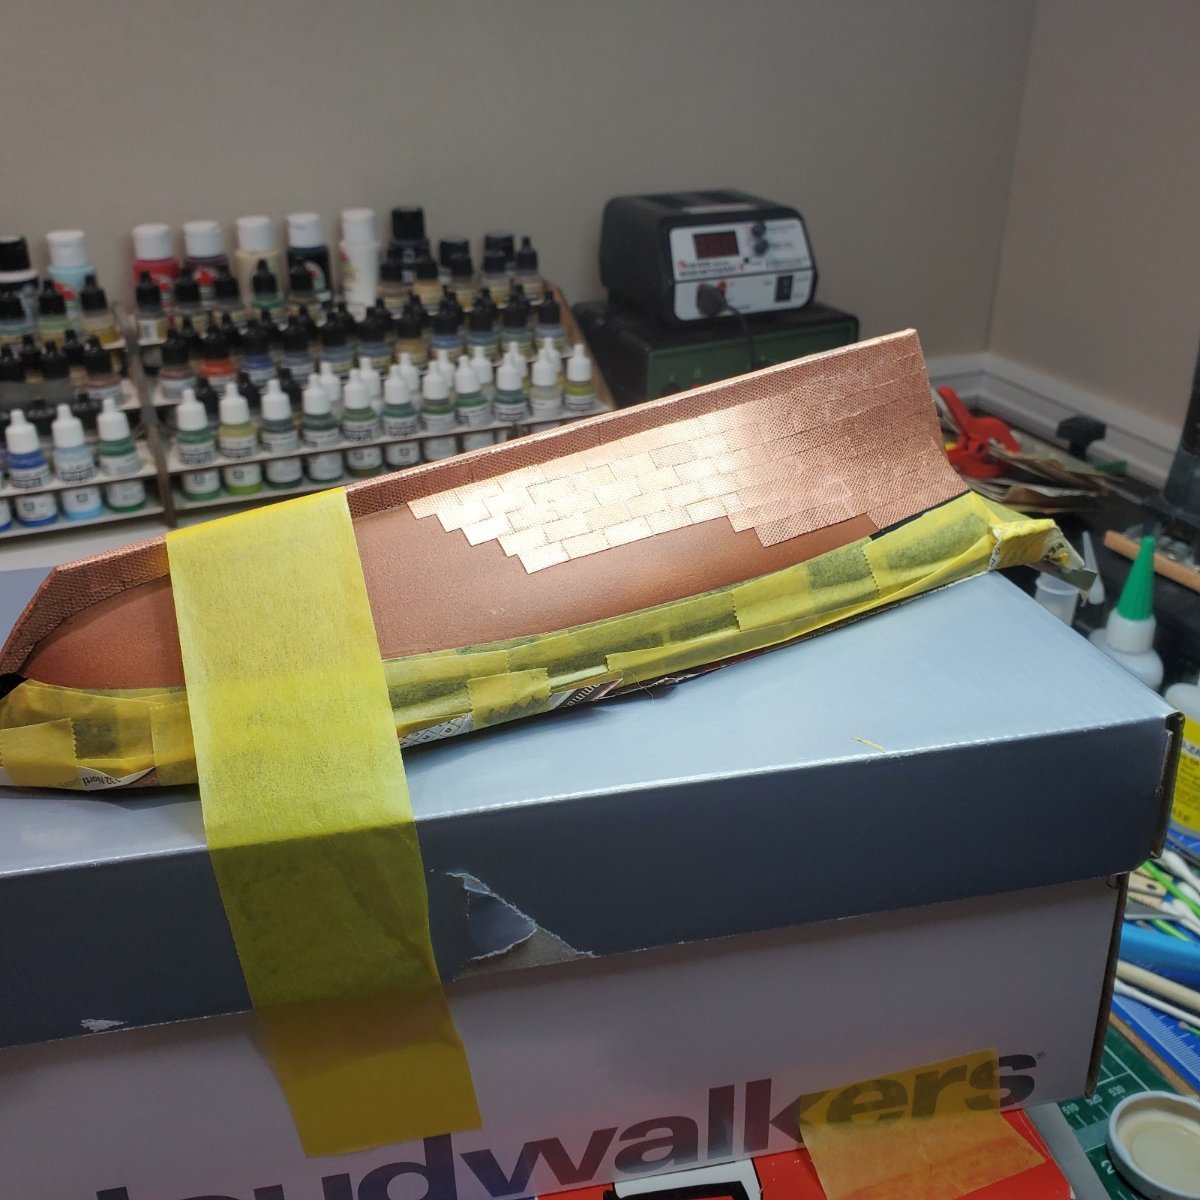
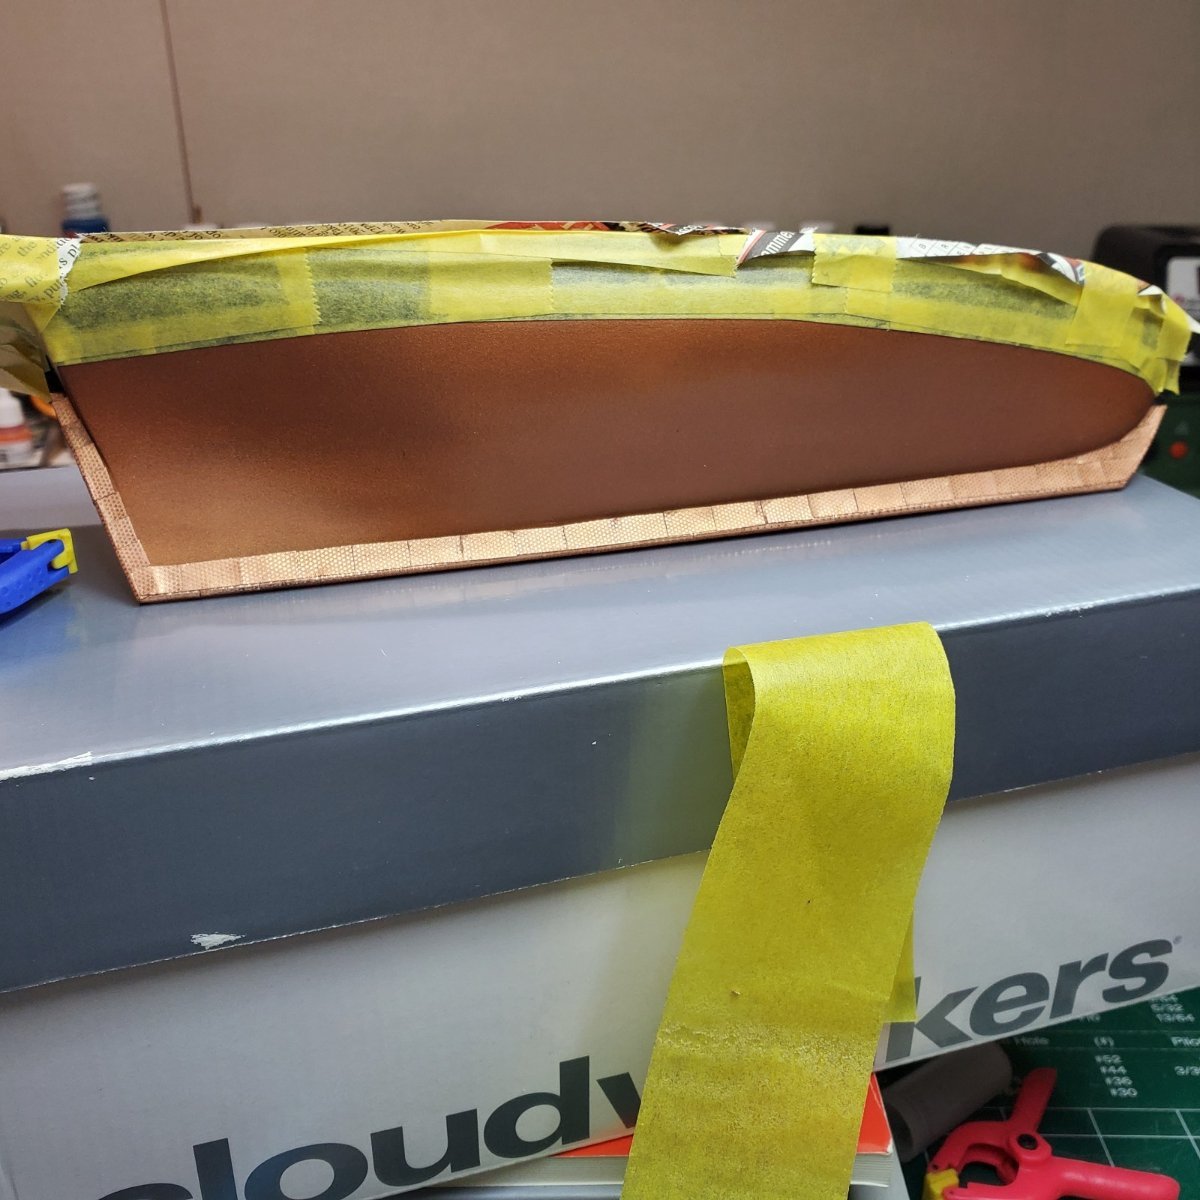
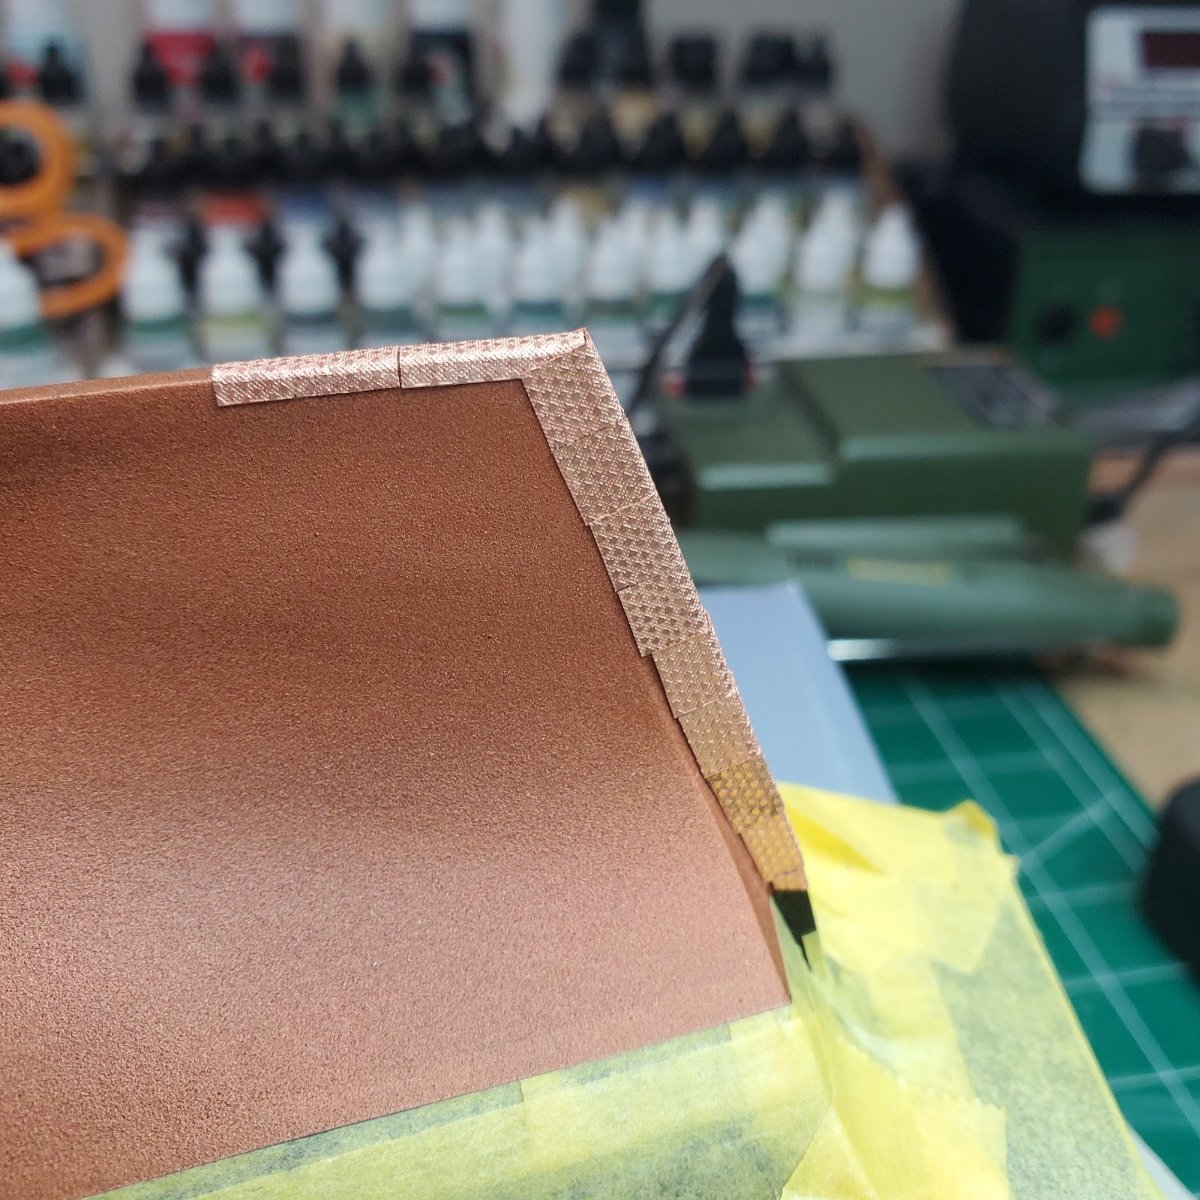
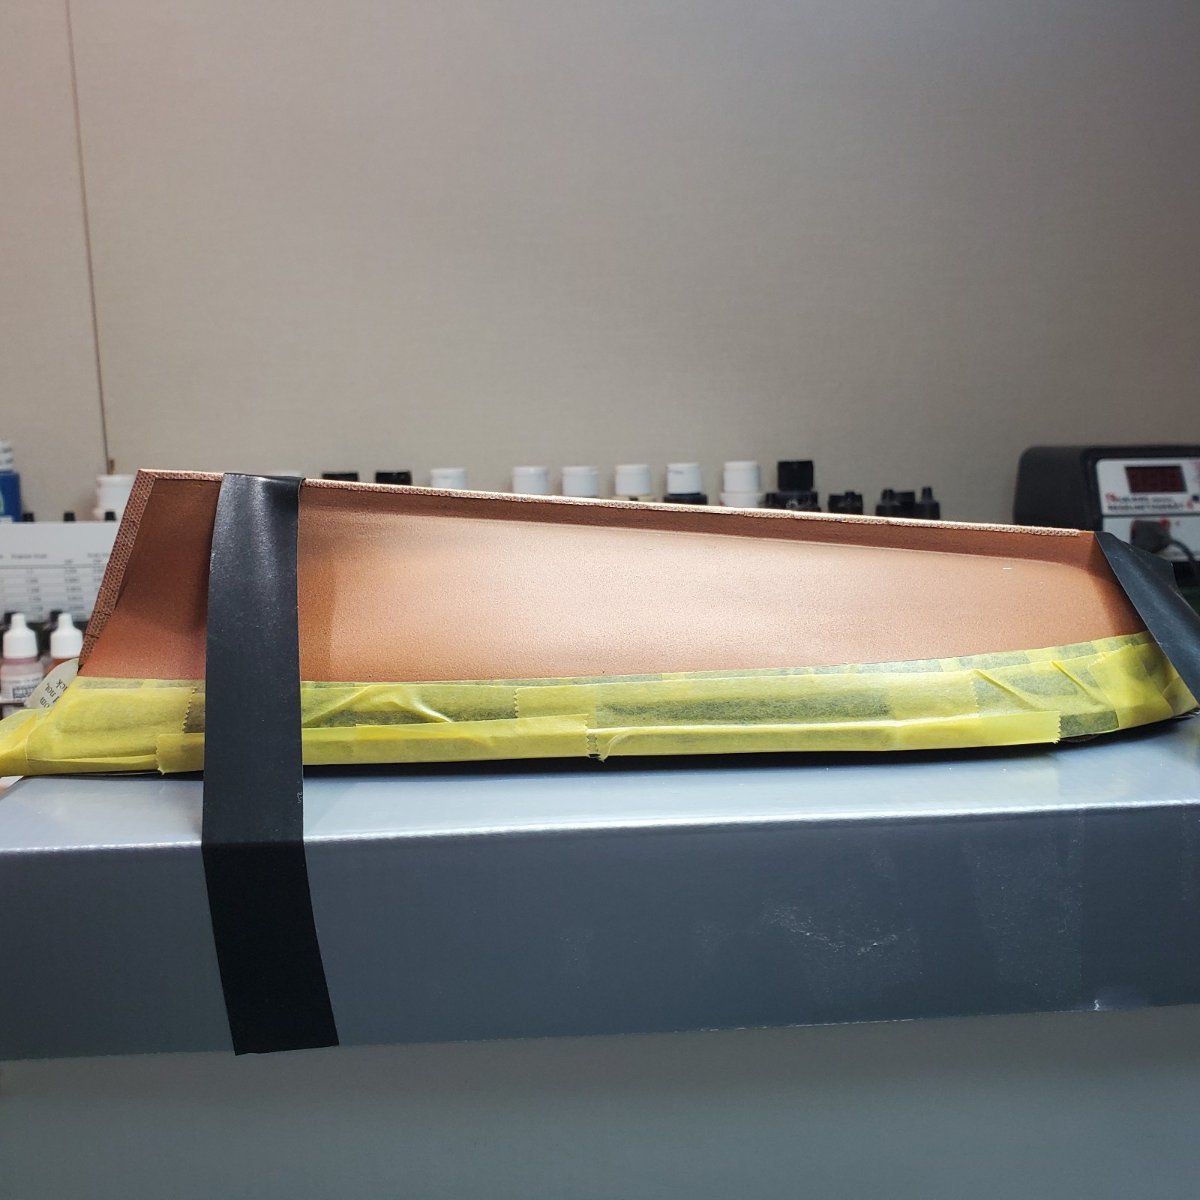
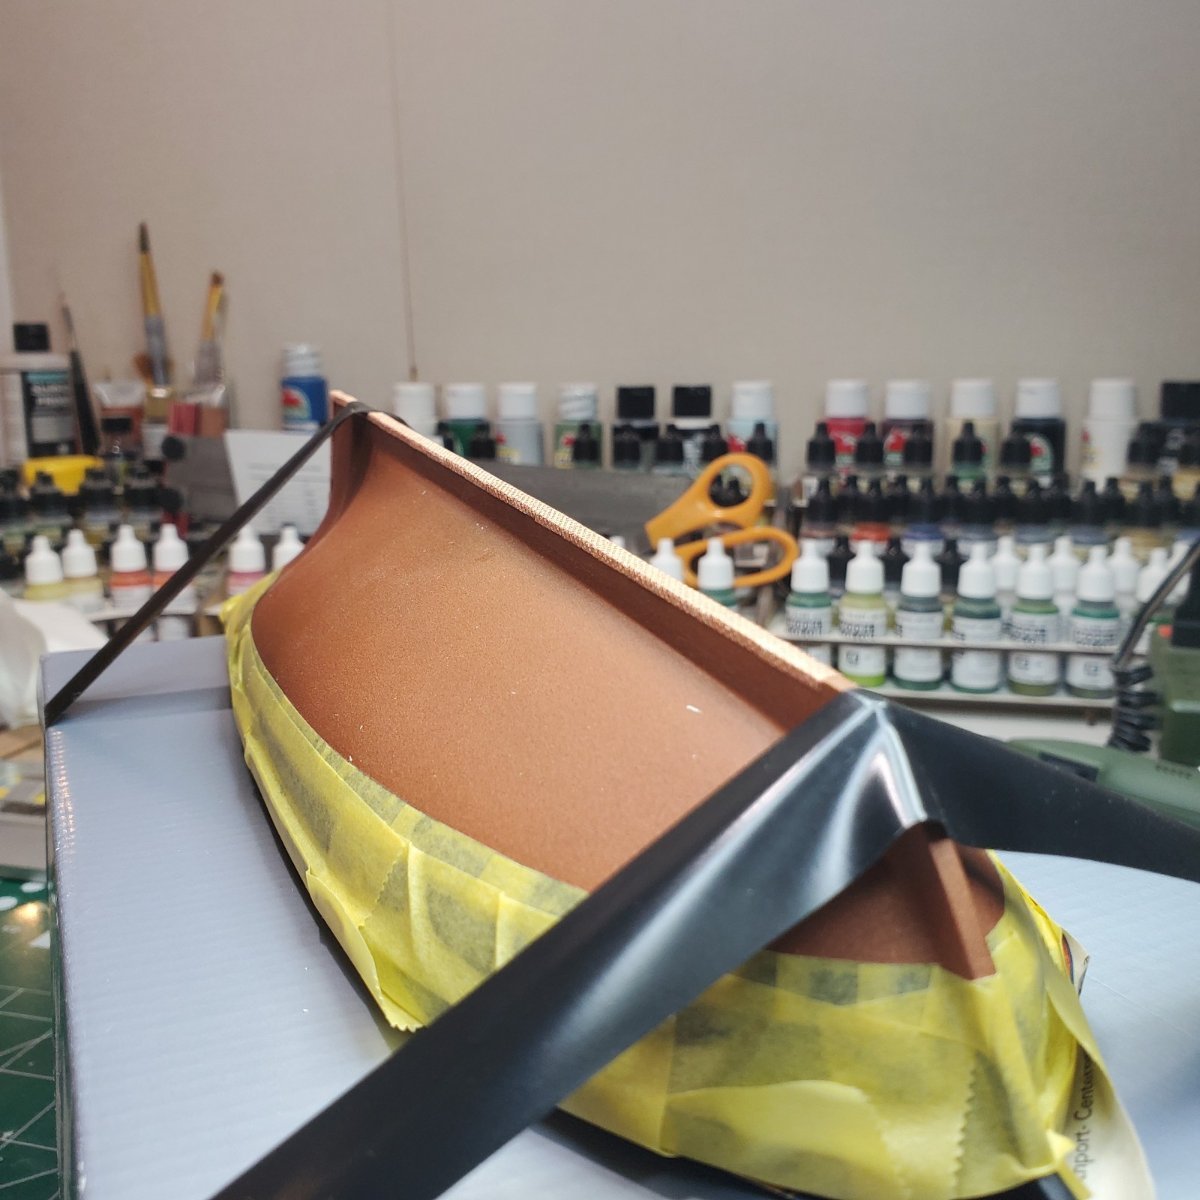
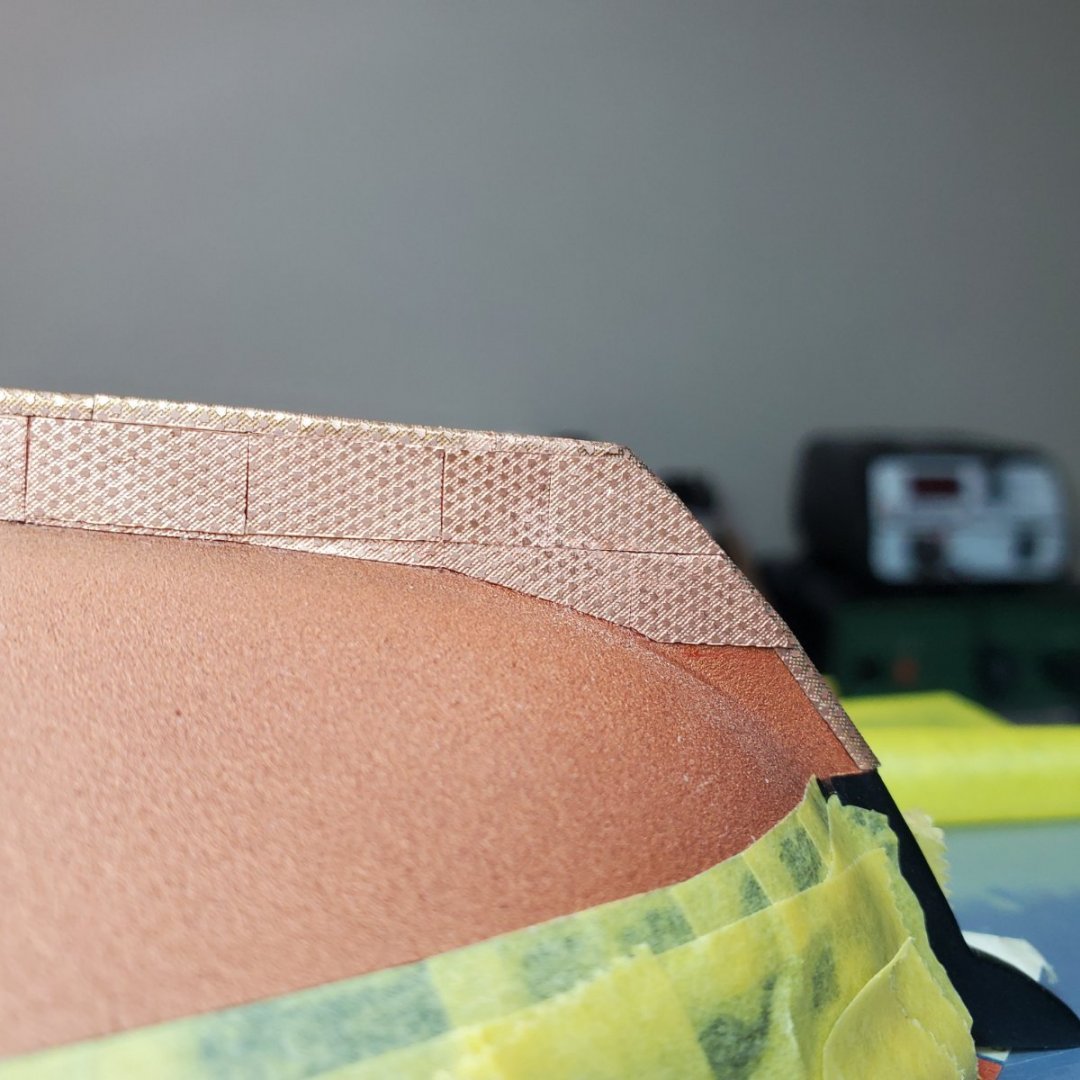
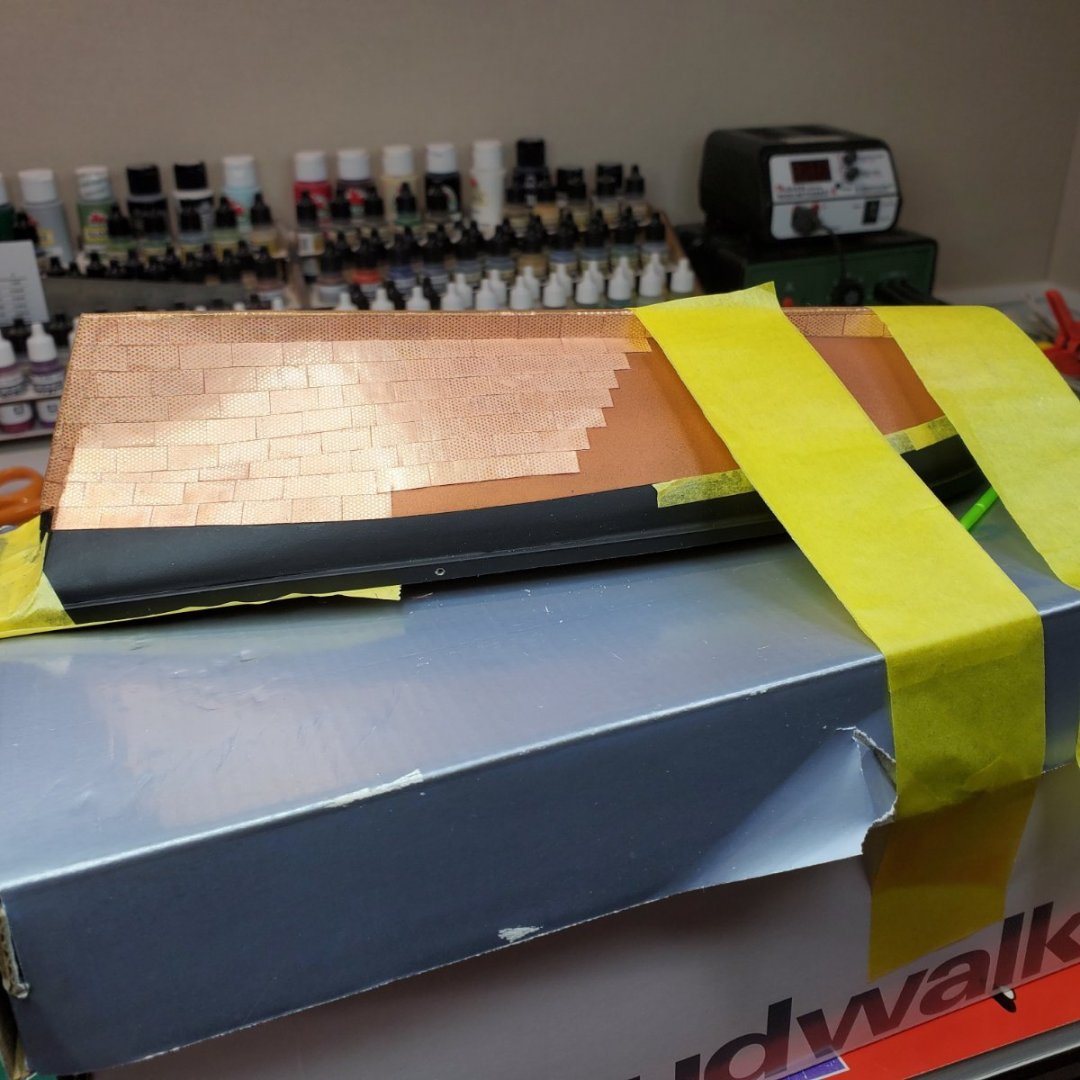
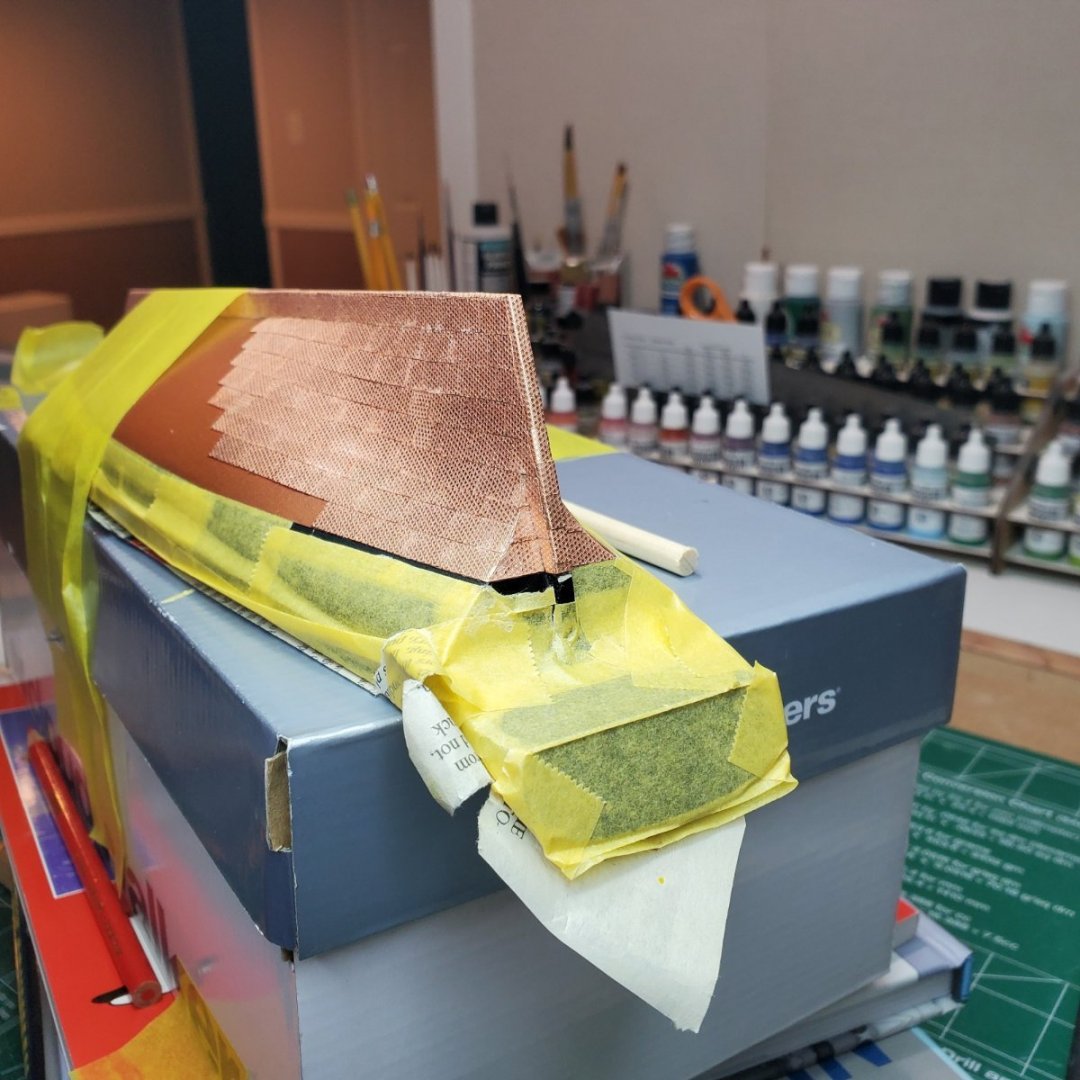
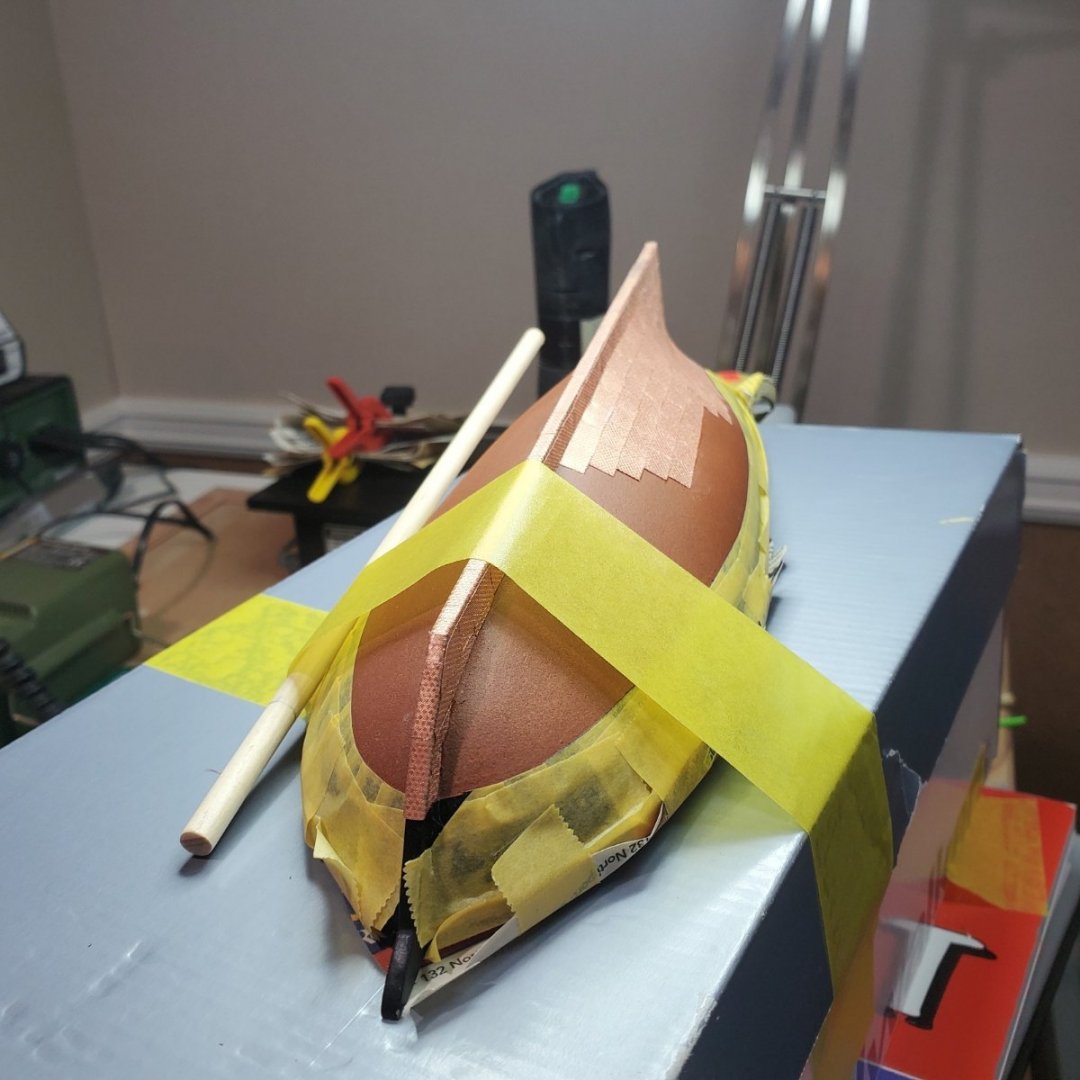
Hello Folks, A quick post for today, I finally got over my mental block and dove in on copper plating (feels good!). Copper plating the Blue Jacket RC will definitely be a challenge and I am hoping to learn a lot from the experience. My patient is now taped onto the gurney (shoe box) for the long process ahead. I have come to the realization that this will be a slow and rewarding process. Also my photo-etching skills have benefitted already from this experience as well. Just learning how to handle the plates can be an art form! (Especially with me not being the steadiest of hands (Thanks Dad!)). Using magnifying glasses I find to be important is key for me on this part (5X glasses). Started at the stern post, not as clean as I wished. However, I will in all likelihood go back and clean this up as develop better plating techniques. Using the photo etch Jig and channel guide has been a blessing to achieve sharp corners along the false keel. Fairly happy with the progress on the false keel (so far). Tomorrow my plan is to work on the stem. Using thick CA now and that seems to do the trick. Using Q-tips to wipe off excess CA when needed. I am normally light on the glue to start with anyway. Some beginner pictures below (Ha-ha): Be well all, Bill T.


- 89 replies
-
- 5
-
-
- bluejacket shipcrafters
- revenue cutter
- (and 1 more)
-
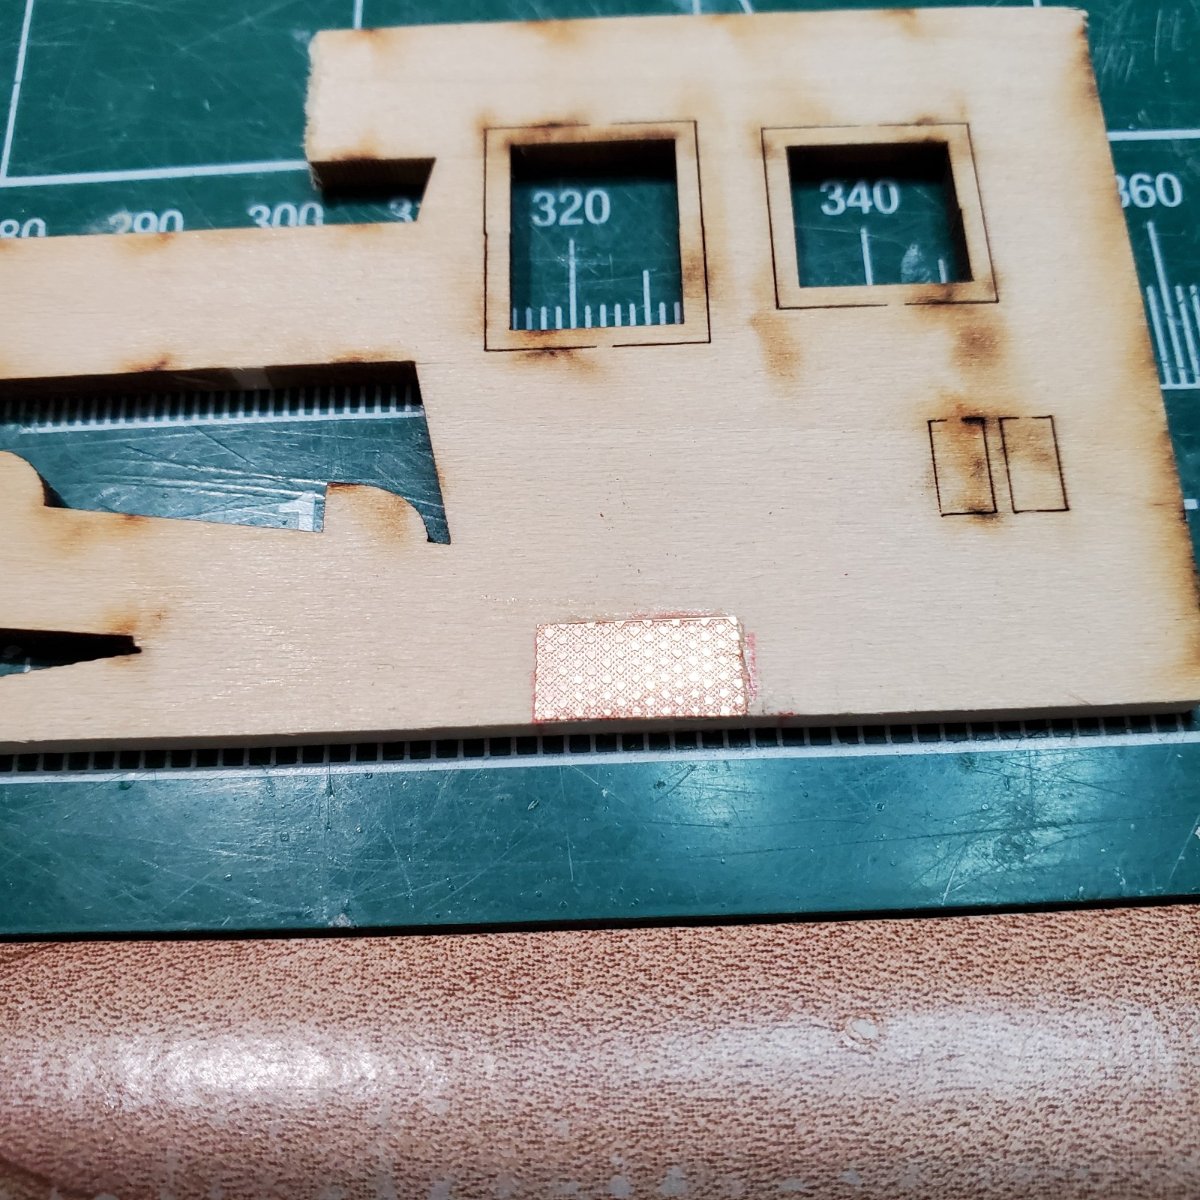
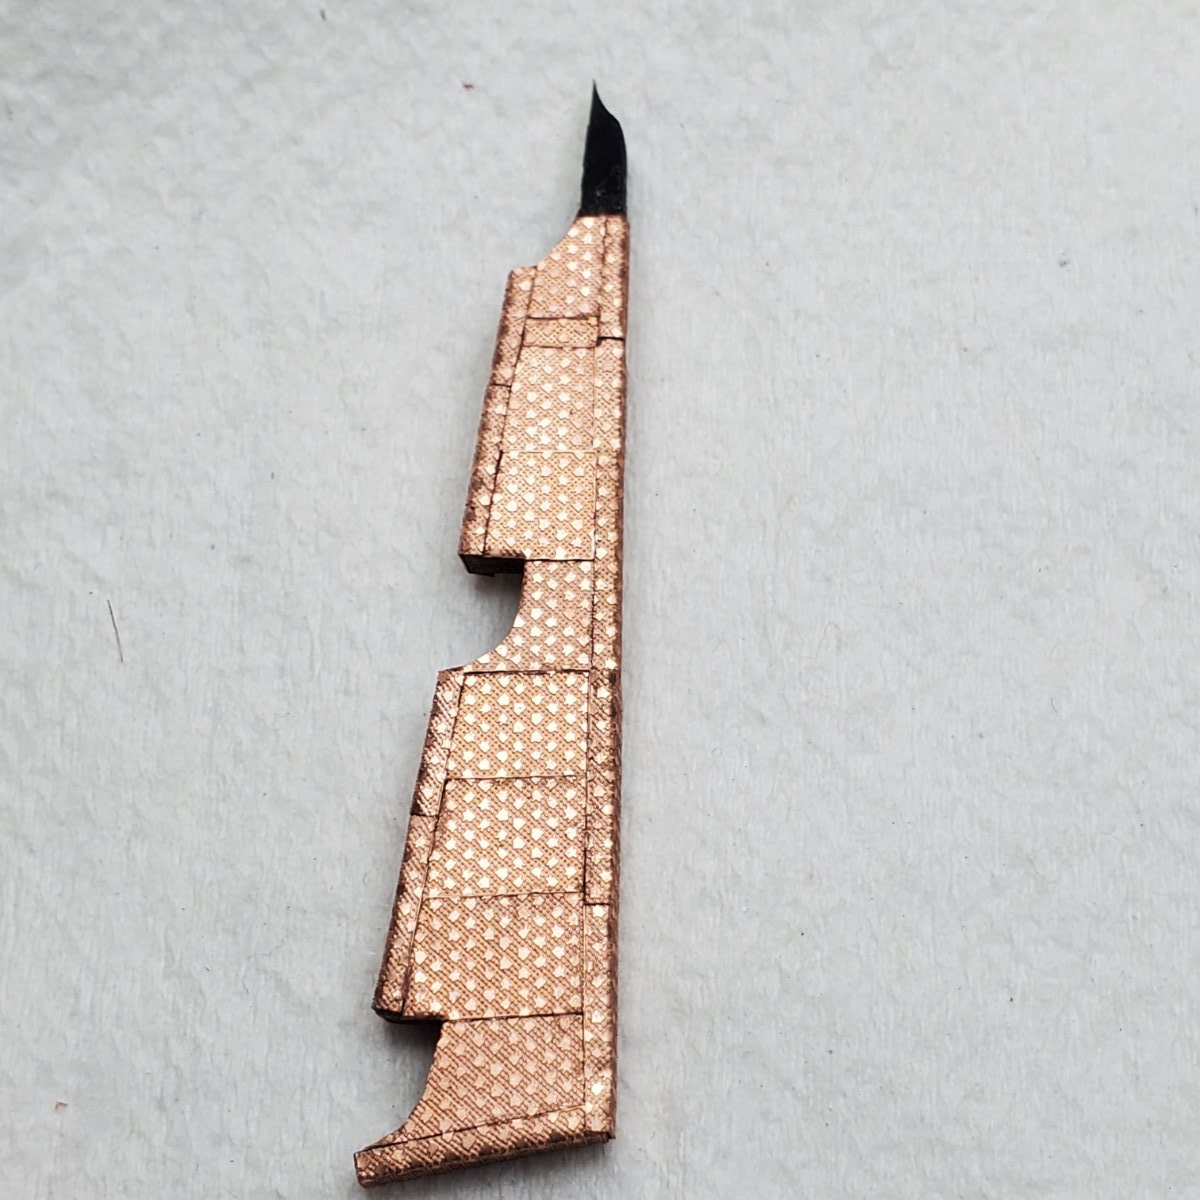
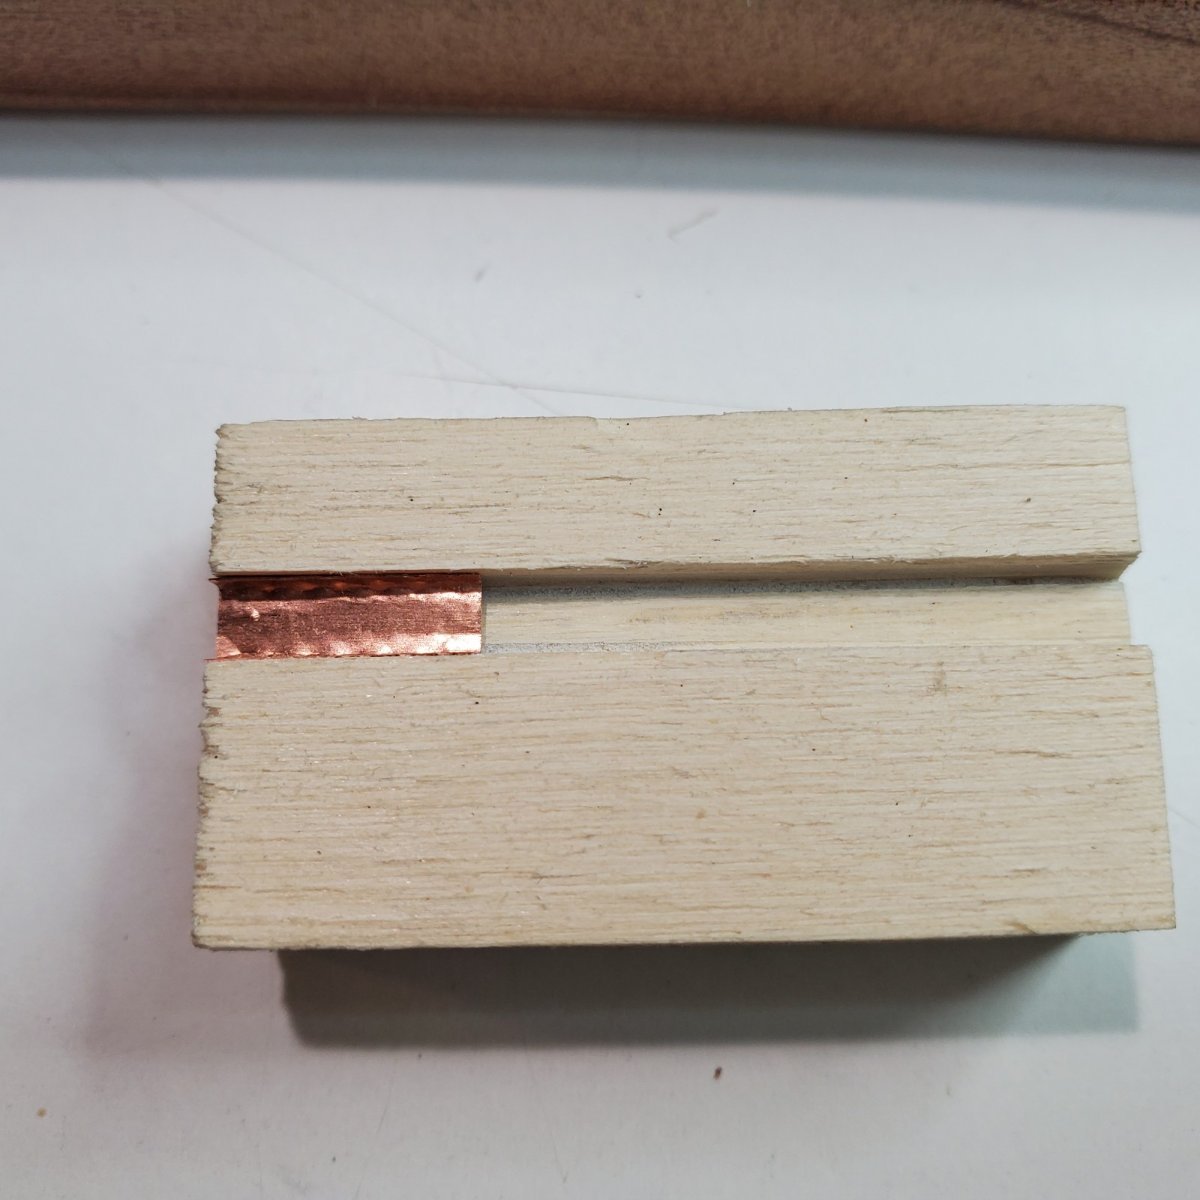
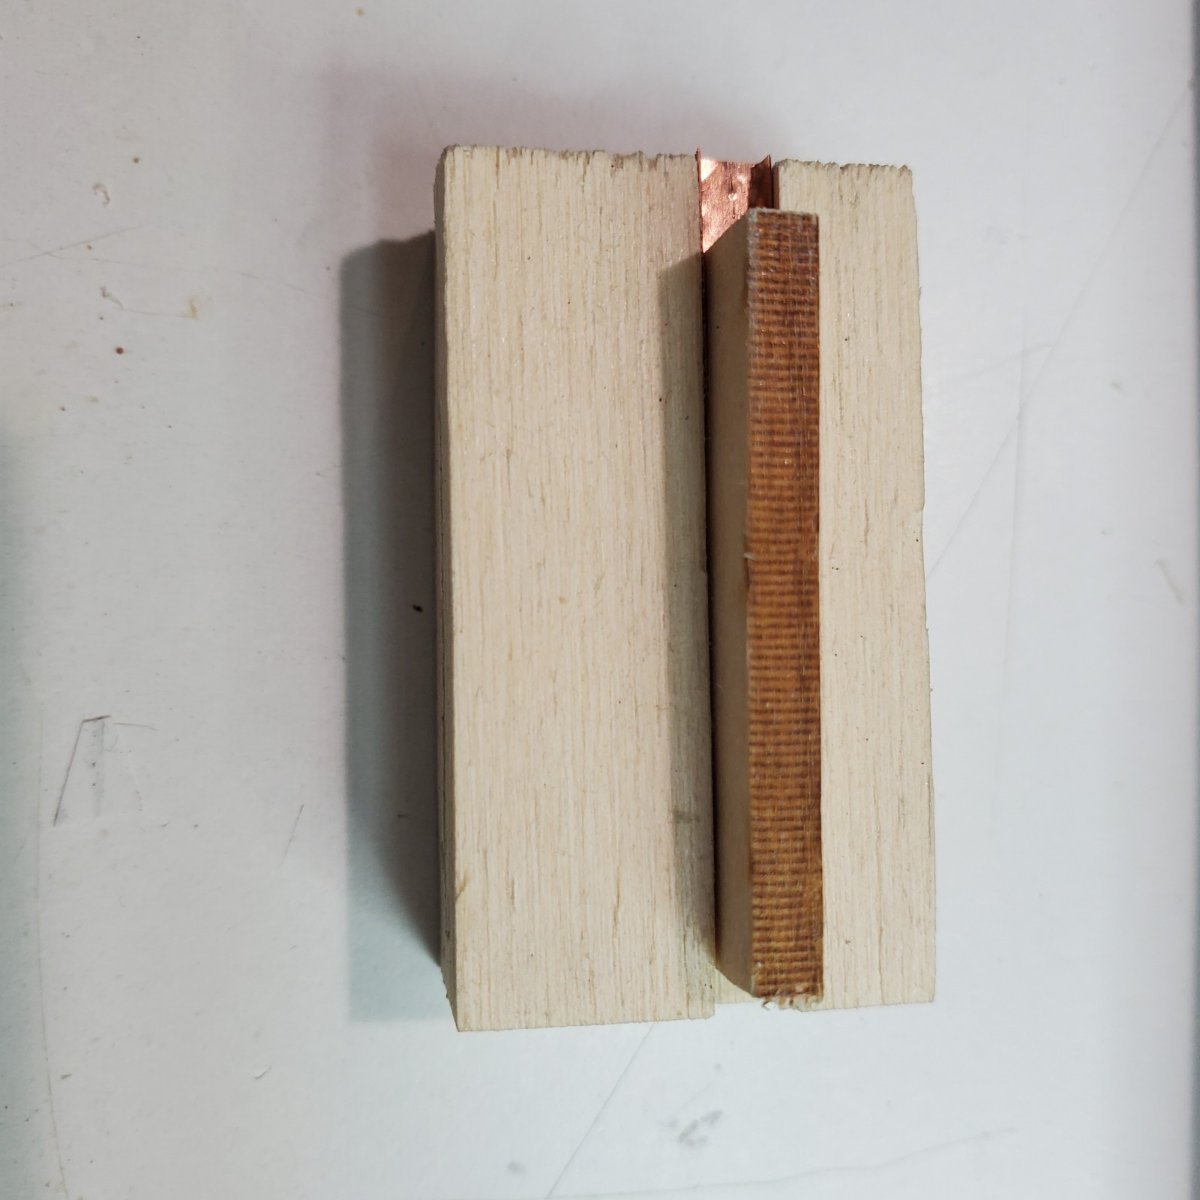
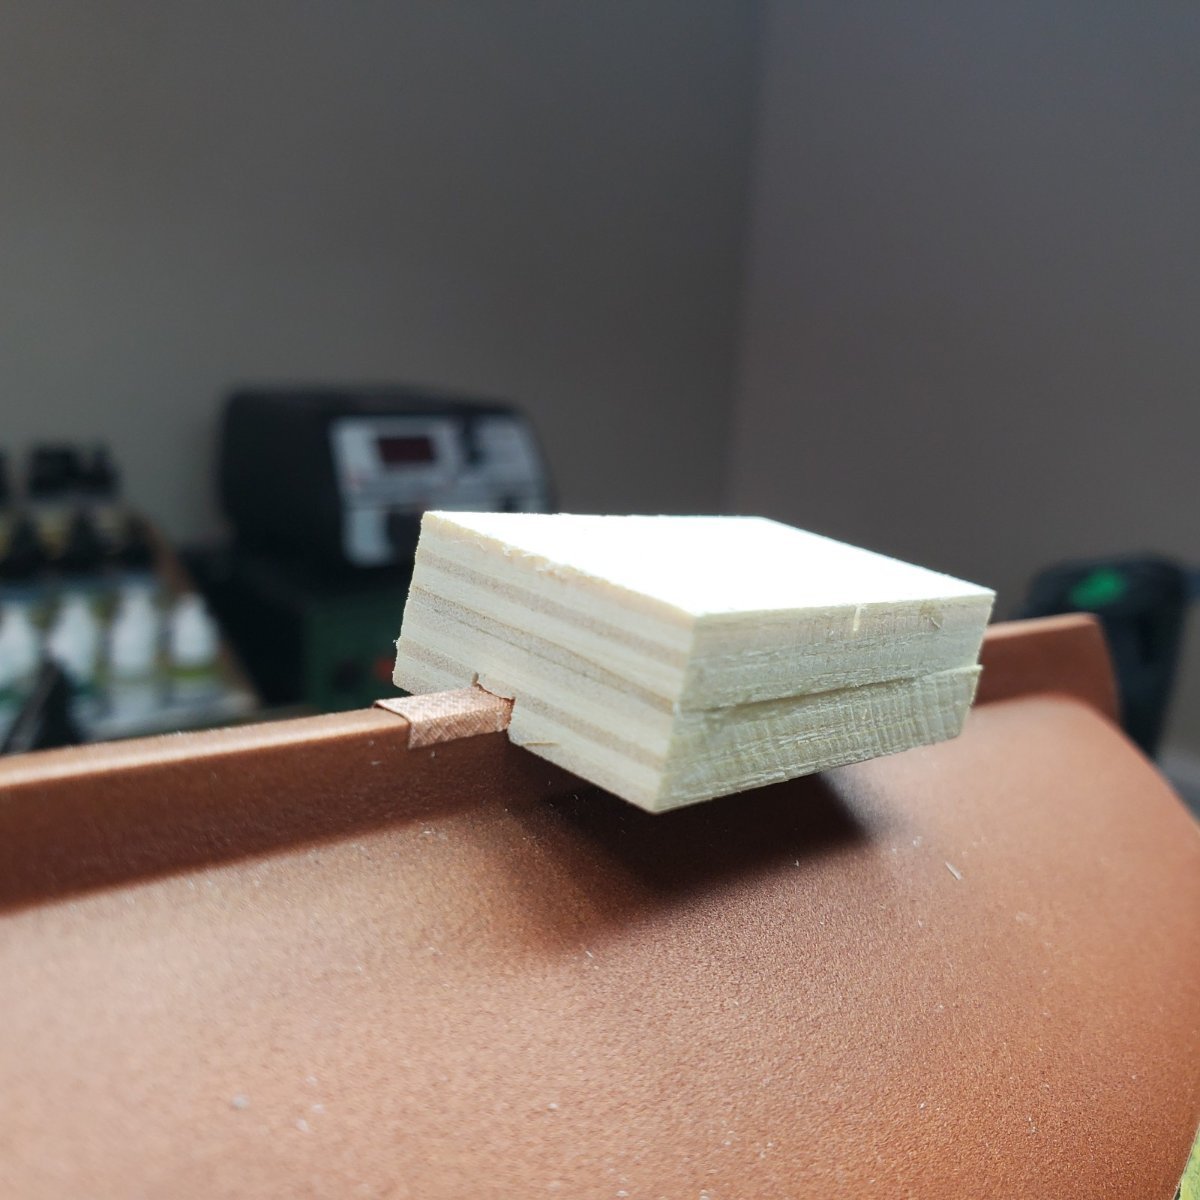
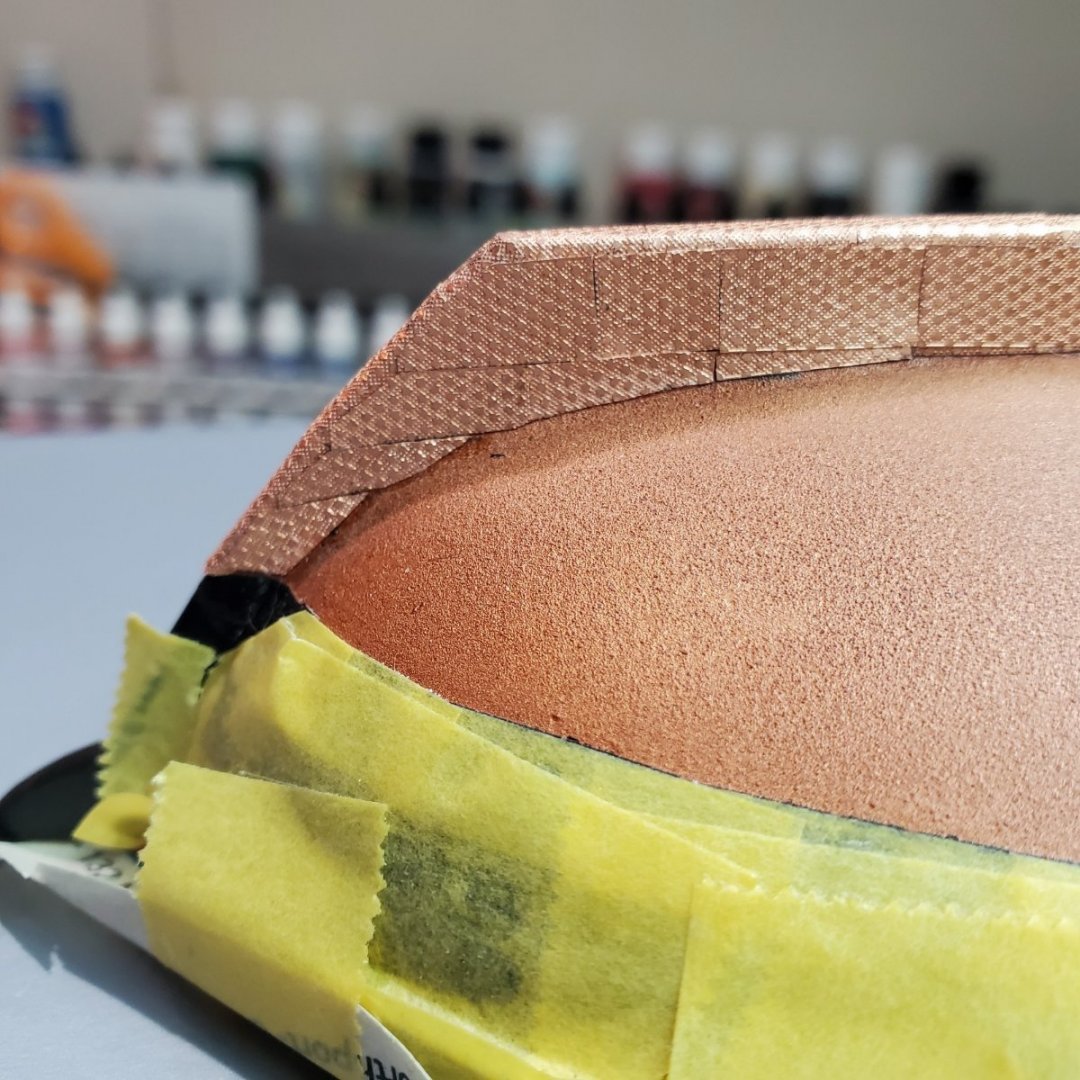
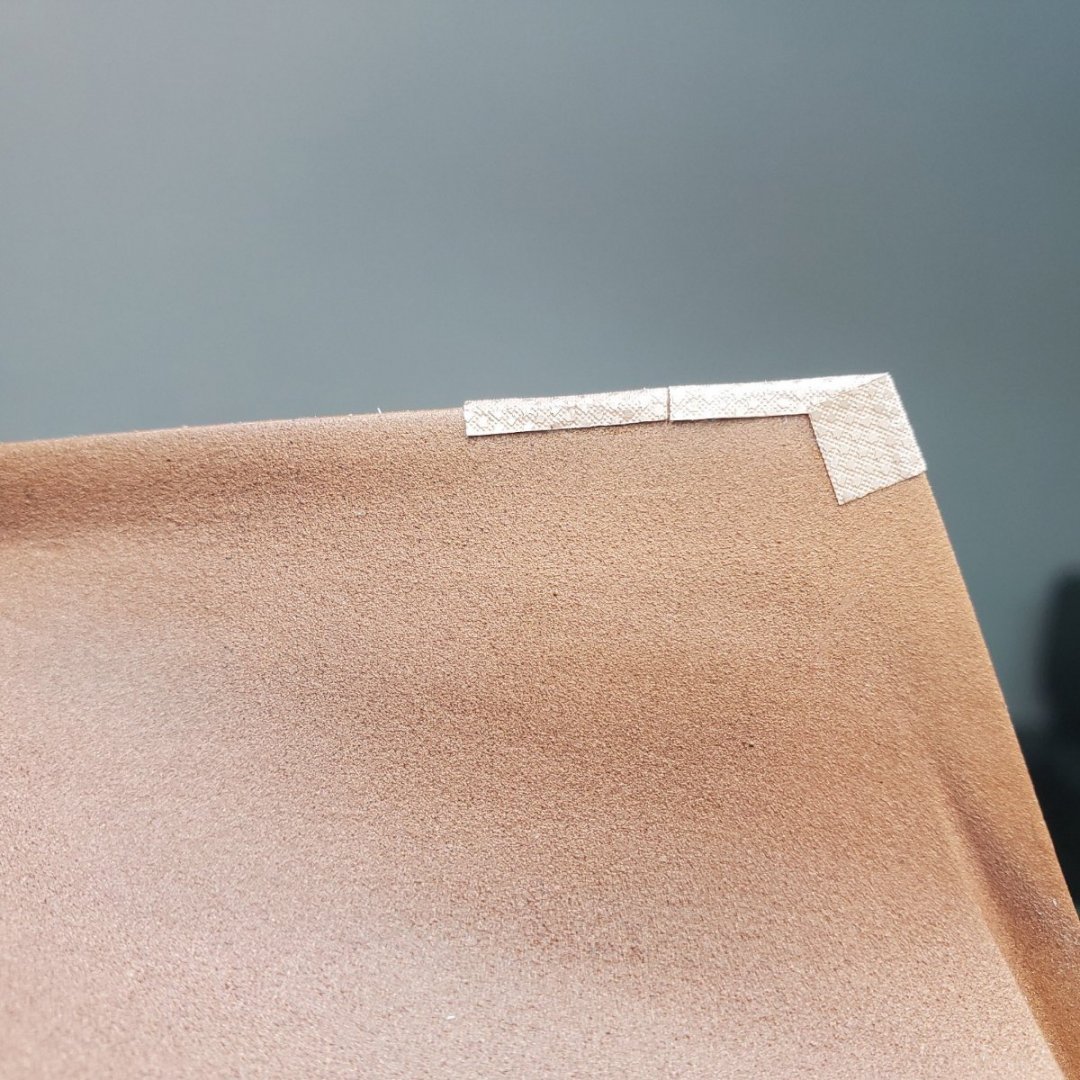
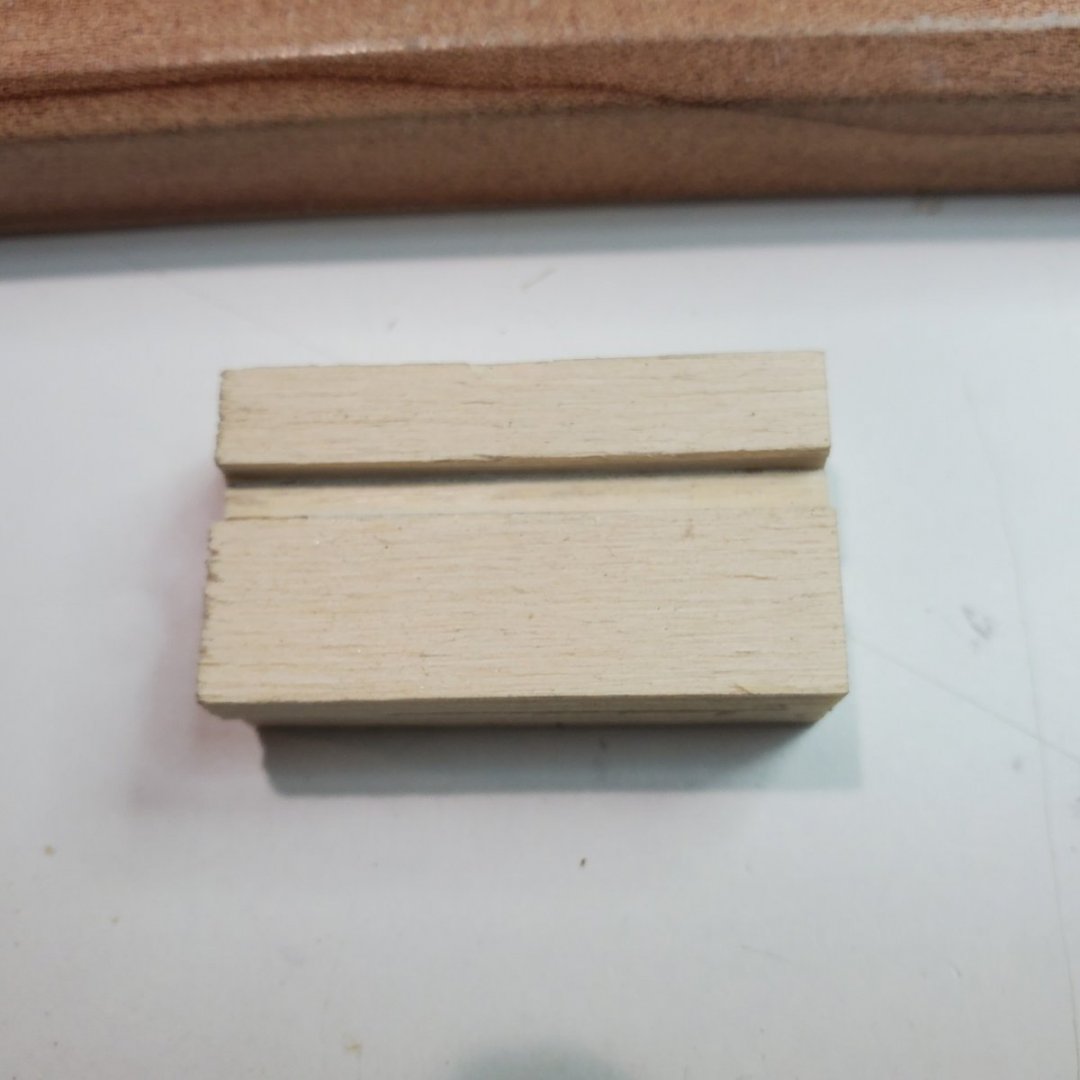
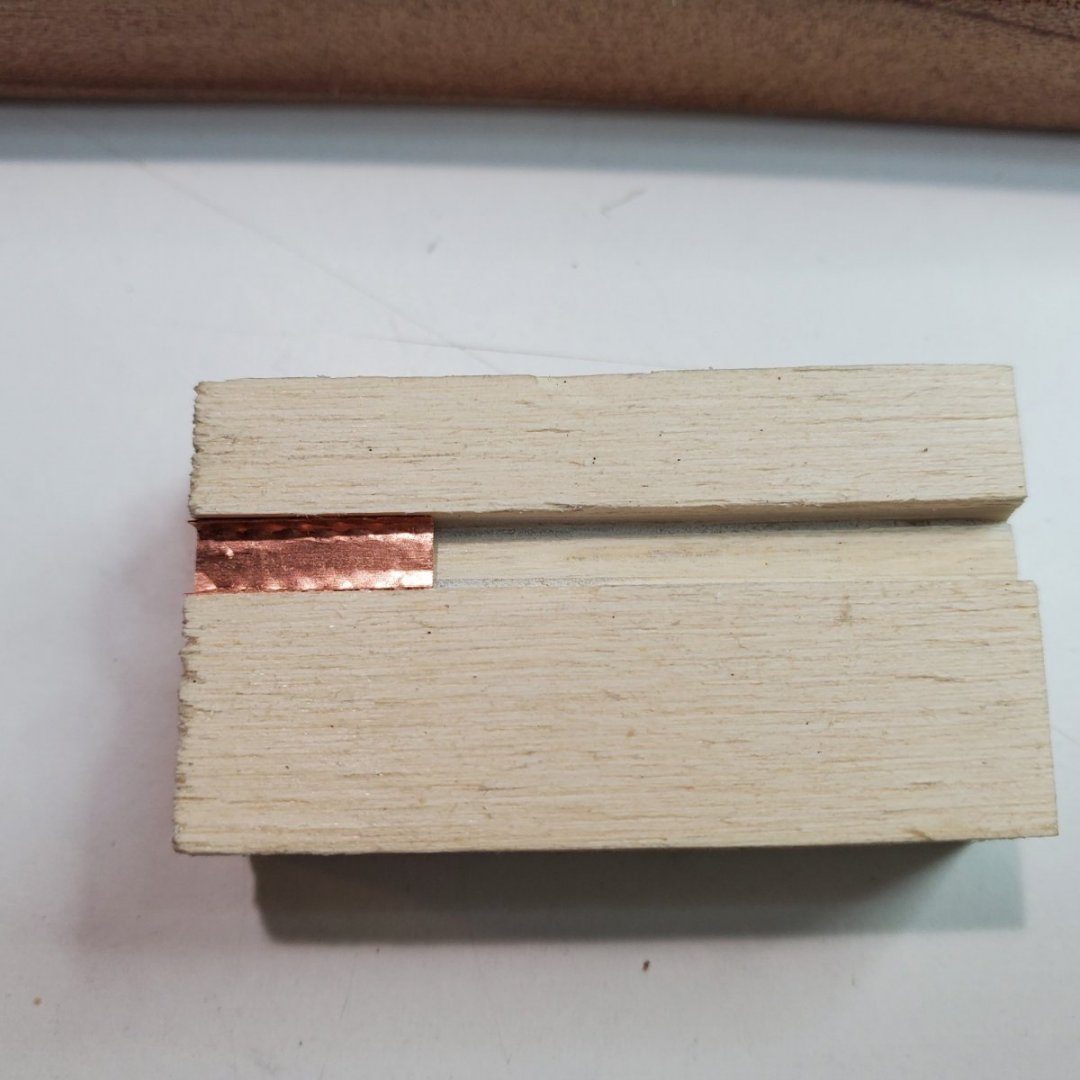
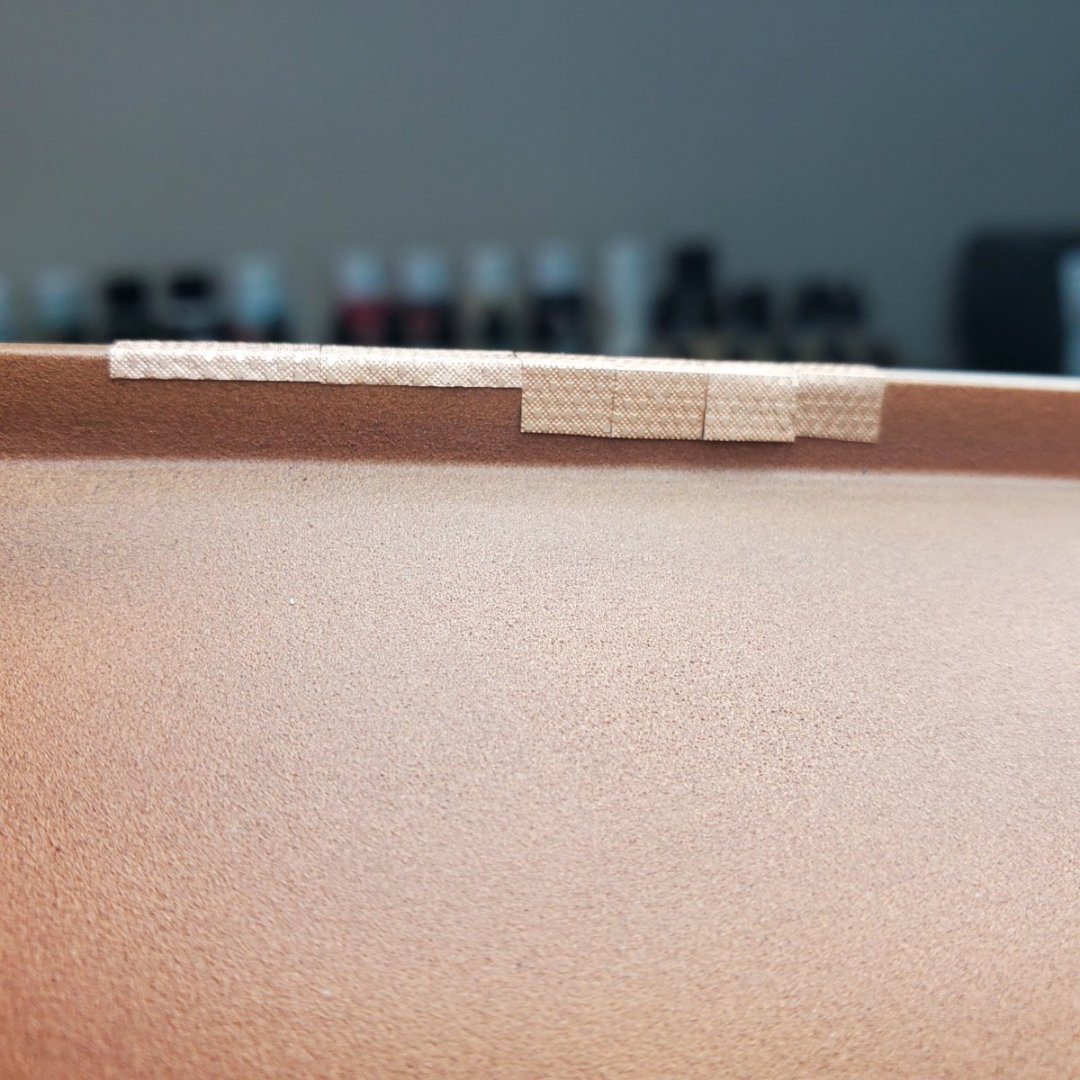
Hello Folks, One last post prior to plating, decided to fabricate a channel strip to ensure a uniform look along the keel. Planned steps to form plates on the stem, false keel and sternpost. Form the plate in the jig in my previous post to ensure consistent overhang on each plate. Place the plate in the fabricated channel guide and further form the plate by pressing it with scrap wood the same thickness of the false keel, stem and stern post in the channel guide. The glue the plates on with wax paper between the channel guide and the plates to prevent glue adhesion between the guide and the plate. Dry fitted it a few times with decent results. The channel guide was cut with an x-acto saw and the channel carved out with a file and razor, 1 hour of work.


- 89 replies
-
- 5
-
-
- bluejacket shipcrafters
- revenue cutter
- (and 1 more)
-
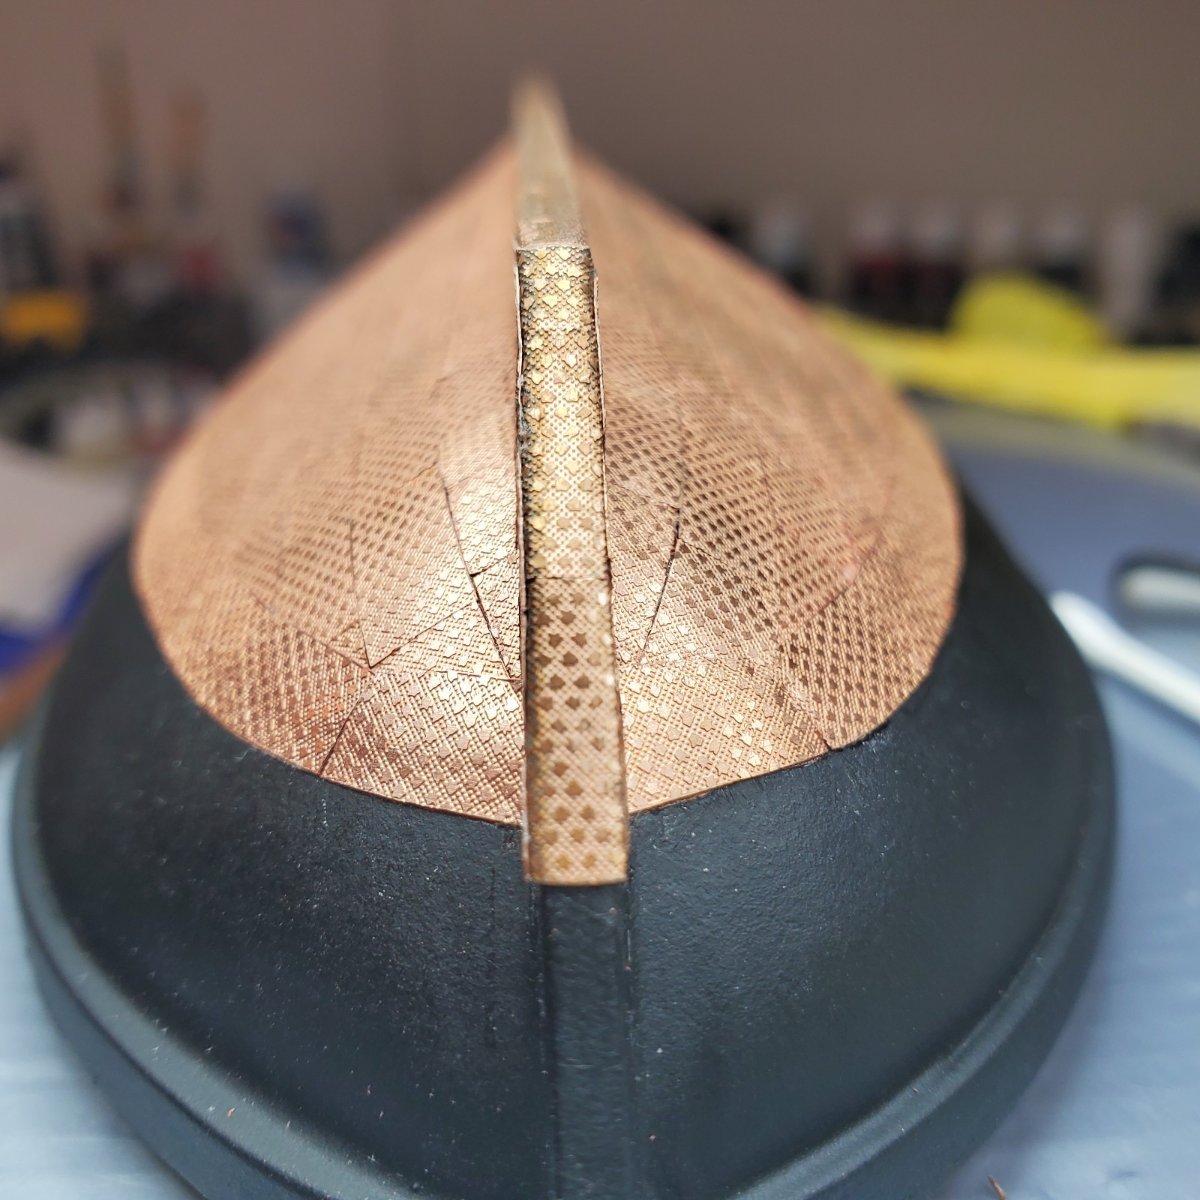
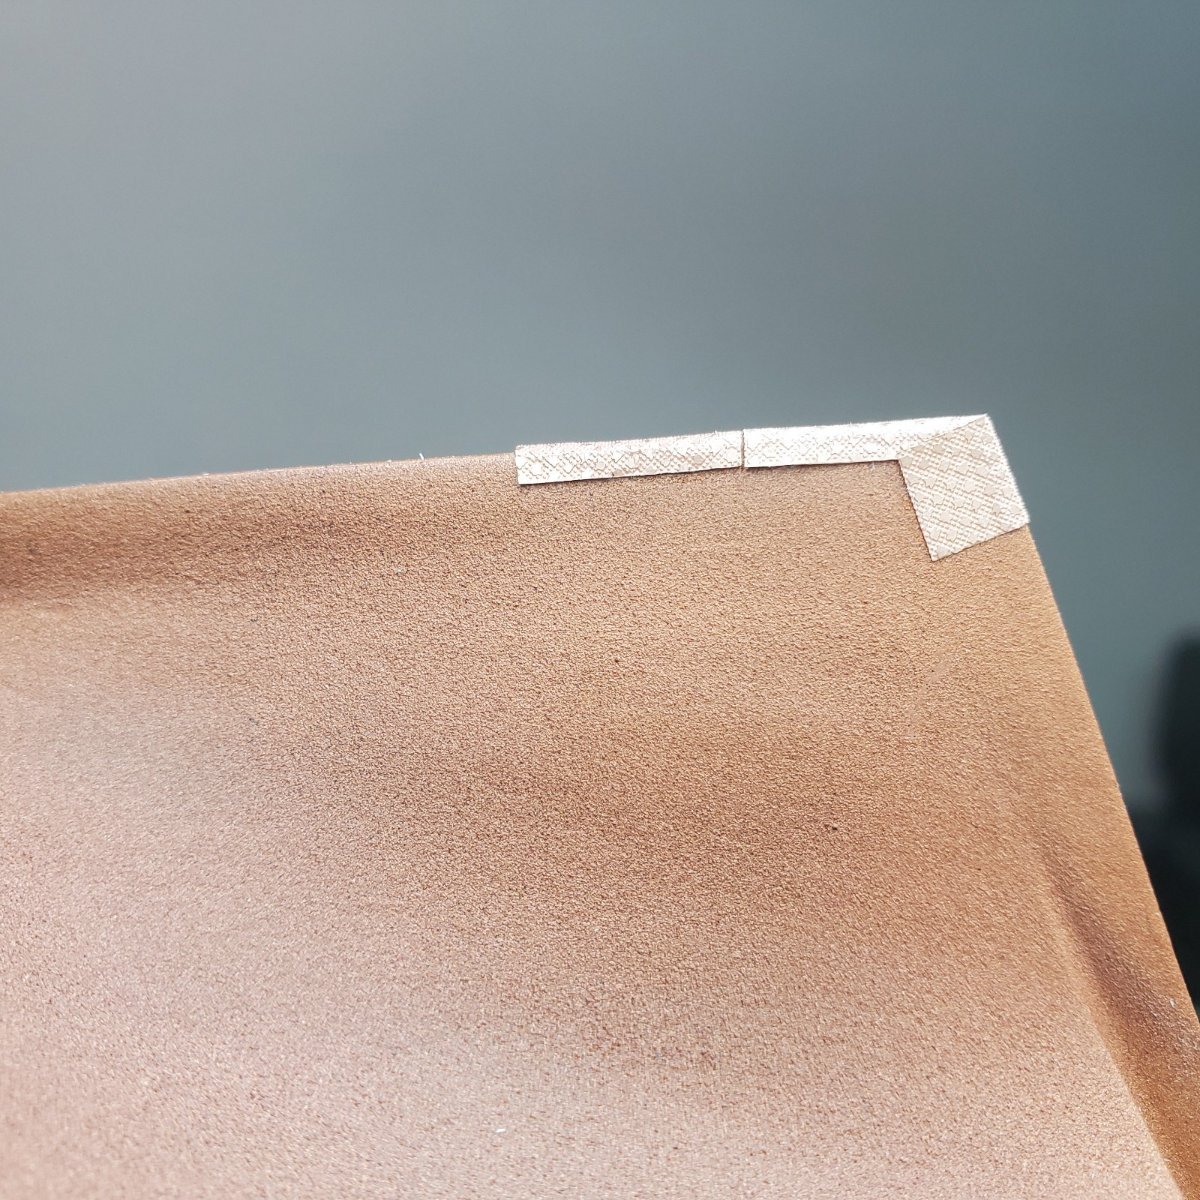
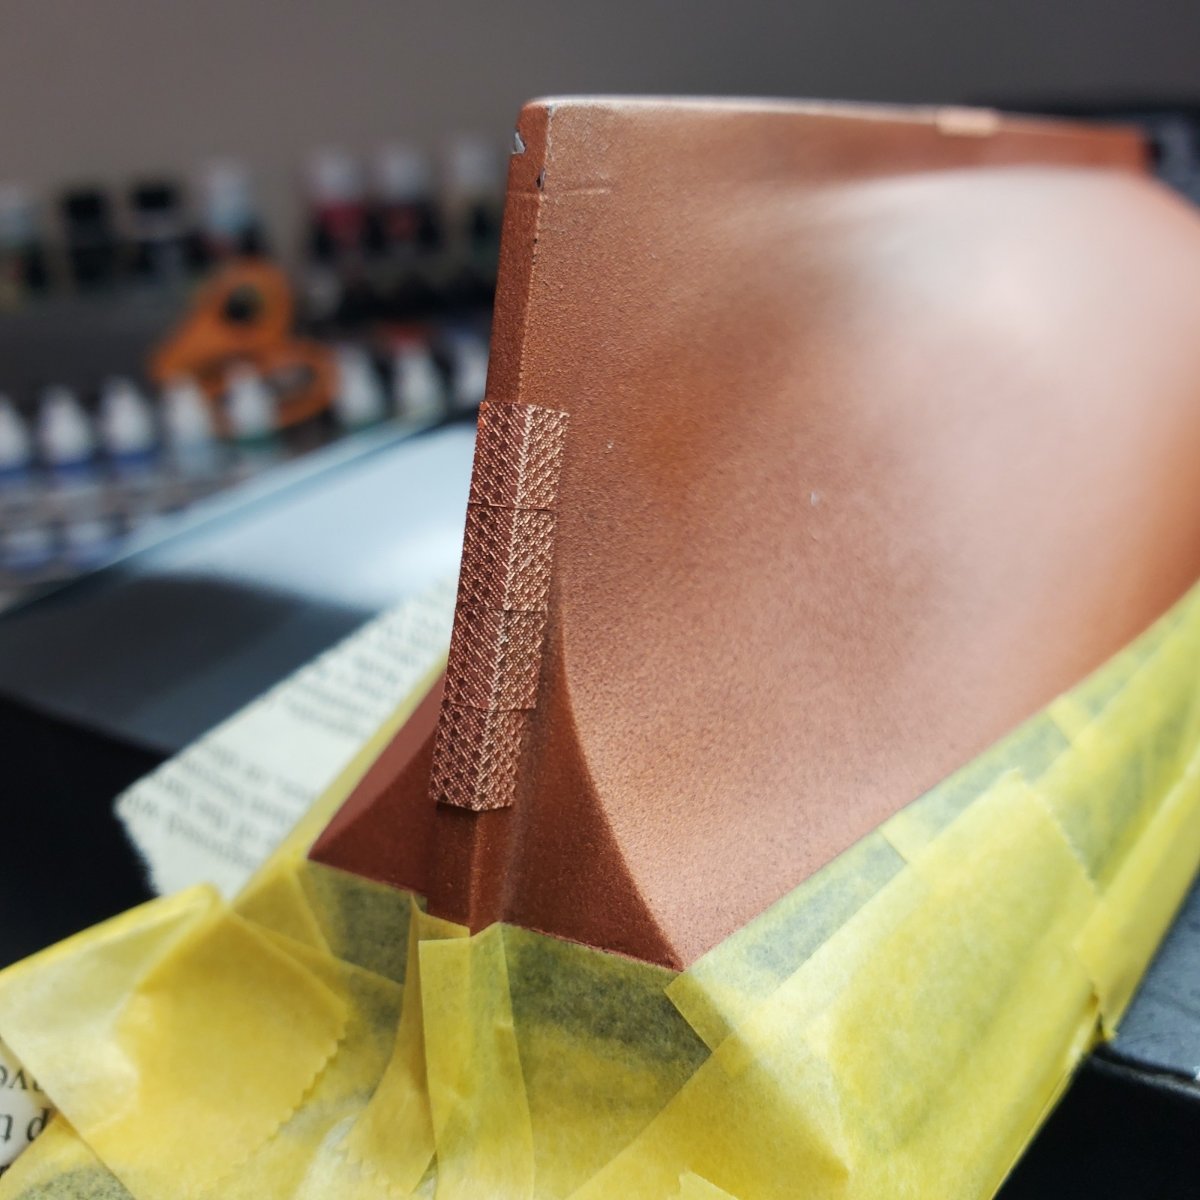
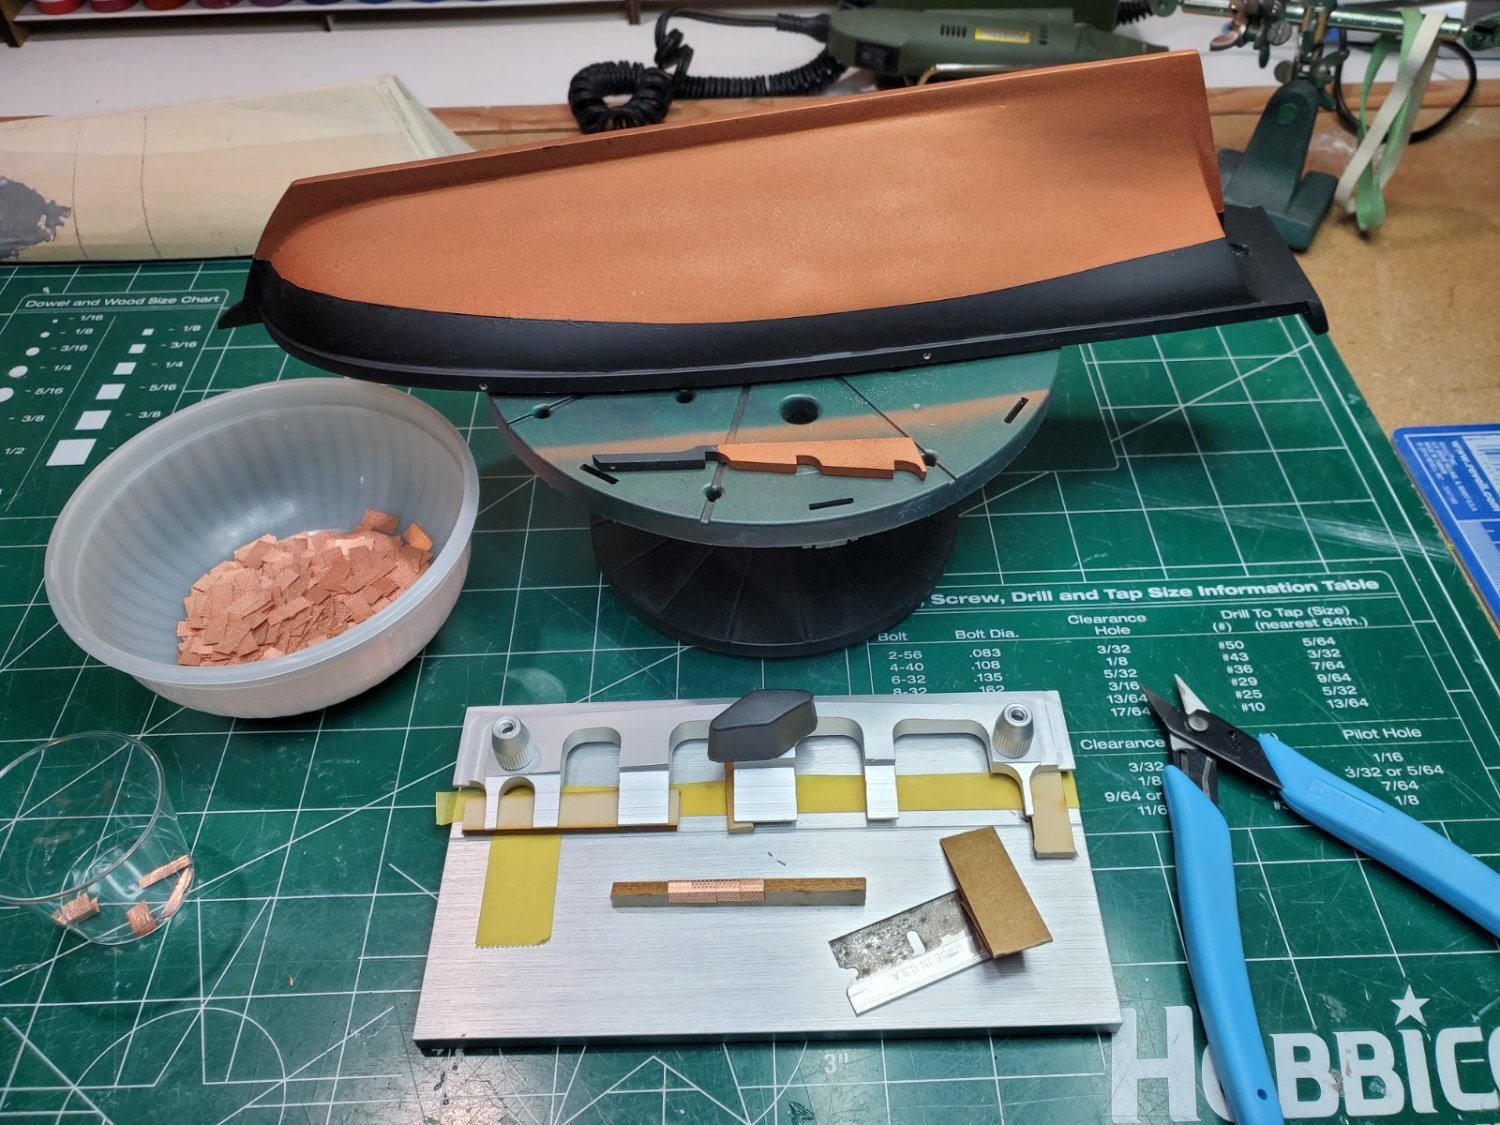
Hello Folks, Perfect: Blizzard = Revenue Cutter Post. So on my last post I was gearing up to start copper plating the Blue Jacket Revenue Cutter with apprehension and uncertainty. Did a ot homework and now I have a good vision on how to proceed thanks to posts from MrBlueJacket, SJanicki and EricWilliamMarshall build logs. Originally I was going to plate the false keel with plate directing vertical (untraditional on the right) because I do not have the steadiest of hands and vertical plates are easier for my to fit and work to bend. I actually took a page out of Eric's build for a jig from my photo-etch kit which I showed on the previous post which works perfect for the vertical plates. Then I decided to make another jig from my same photo-etch kit for tradition vertical plates for use along the false keel, bingo worked perfect. I will copper plate now with vertical plates on the false keel because I will now I have a consistent bend with vertical plates on the keel without any warping on the bend, crisp corners. Then I saw SJanicki use vertical plates in his RC log for his sternpost which originally I made a jig for which I will incorporate into my build (Now a hybrid jig, I guess I am going "green" in my old age). And as MrBlueJacket recommends, I will use silicone gel as a adhesive for a majority of the remaining plating. So now I have a clear vision on the first step(s) of coppering after doing some dry fitting. I am confident it will not be perfect however I have learned a ton without even affixing a plate yet. Feel good about this now, finally. Vertical plating v Horizontal plating: I will now be doing horizontal on the false keel on the left (Traditional) v Vertical on the right. Vertical plating on the kell (dry fitted). And my hybrid jig below, Vertical Bends on the left, Horizontal on the right. Catch everyone soon! Bill T.

- 89 replies
-
- 7
-
-
- bluejacket shipcrafters
- revenue cutter
- (and 1 more)
-
Hello Allan, That was a super kind response, I started to read the link and I am hooked. It heightens my interest in the R. Cutter which at times is needed as we all know. The detail on the plating was awesome! I am a little nervous on plating so I will forego the overlapping for a future build though. Most importantly thank you for taking the time and interest in posting on my build. It certainly motivates me! All the best, Bill T.
- 89 replies
-
- 3
-
-
- bluejacket shipcrafters
- revenue cutter
- (and 1 more)
-
Thank you Brian for taking the time to comment, I will post on the weekend. Supposed to get a storm this weekend which is good for an excuse to work. Bill T.
- 89 replies
-
- 2
-
-
- bluejacket shipcrafters
- revenue cutter
- (and 1 more)
-
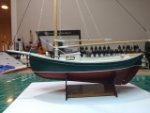
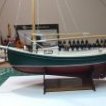
Very nice, display with pride! Cheers, Bill T.
- 81 replies
-
- 1
-
-
- Bluejacket Shipcrafters
- Yankee Hero
- (and 1 more)
-
Hello Folks, This is a great day, I began working on my Revenue Cutter again. A lot of procrastination over whether to copper plate the model or not over the past few months. Well, I bought the plates with the kit and after reading the builds by sjanicki and EricWilliamMarshall and decided to copper plate the boat (Thanks Stan for responding to my message). This will be my first shot at this, I'm a little nervous as I am super happy with the paint job and I am not the steadiest of hands! Nothing ventured, nothing gained. Current status is: Cut all plates off the sprue and trimmed all the burrs off the plates with a Xuron Photo etch cutter (Very good cutter, a little pricey however worth ever penny). That took a long time, I also sanded and file some of the plates for learning purposes. Gave the hull two light coats of Clear Satin Polyurethane spray for better copper plate adhesion over the copper paint. Plan on using Medium CA for my plating. Made a jig from my phot-etching tool based on what I saw EricWilliamMarshall's post. I am a copy cat a little here. My plating will be little different along the false keel, I plan on bending the copper plates vertically versus horizontally as one can see a sample below. Once that is complete the false keel, stem and the stern post I will follow the traditional format for copper plating. I broke my Proxxon rotary tool thinking, I will need this to shape some plates along the way. I will post progress as I go.

- 89 replies
-
- 9
-
-
- bluejacket shipcrafters
- revenue cutter
- (and 1 more)
-
Looking good. Good luck. I am following. All the best! Bill T.
-
Hello Stan, That is some accomplishment, it looks beautiful. Congrats! Bill T.
- 85 replies
-
- 1
-
-
- perry
- BlueJacket Shipcrafters
- (and 1 more)