mandolinut
-
Posts
151 -
Joined
-
Last visited
Recent Profile Visitors
1,264 profile views


-
 _SalD_ reacted to a post in a topic:
Calypso by mandolinut - Billing Boats - 1:45
_SalD_ reacted to a post in a topic:
Calypso by mandolinut - Billing Boats - 1:45
-
_SalD_ reacted to a post in a topic:
Calypso by mandolinut - Billing Boats - 1:45
-
Veszett Roka reacted to a post in a topic:
Calypso by mandolinut - Billing Boats - 1:45
-
mandolinut reacted to a post in a topic:
Lowell Grand Banks Dory by LoydB - Model Shipways - 1:24 - First Build
-
robert952 reacted to a post in a topic:
Calypso by mandolinut - Billing Boats - 1:45
-
Thanks for the comment and the photo Veszett. You are correct. It may be time to build a third shark cage. The first shark cage I made used small wire but was too big and I glued the wire on the outside which did not look so good. I will make an all wire panel with the wires closer together using glue and see how it turns out. I tried soldering using small straight copper wire initially but if I heated the copper up enough to except the solder the joint close by would come apart. Cheers.
-
yvesvidal reacted to a post in a topic:
Calypso by mandolinut - Billing Boats - 1:45
-
sheepsail reacted to a post in a topic:
Calypso by mandolinut - Billing Boats - 1:45
-
Nirvana reacted to a post in a topic:
Calypso by mandolinut - Billing Boats - 1:45
-
robert952 reacted to a post in a topic:
Calypso by mandolinut - Billing Boats - 1:45
-
Nunnehi (Don) reacted to a post in a topic:
Calypso by mandolinut - Billing Boats - 1:45
-
Nunnehi (Don) reacted to a post in a topic:
Calypso by mandolinut - Billing Boats - 1:45
-
I have decided to rebuild the shark cage. I was not happy with the quality of the first attempt. I am using extra long cocktail toothpicks for the bars. These will be painted gray to simulate metal. Now for a very subjective question........will they look better assembled or stacked up on the deck ready to be assembled?
-
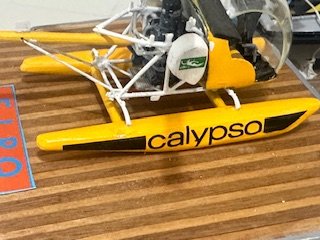
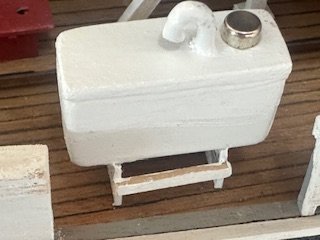
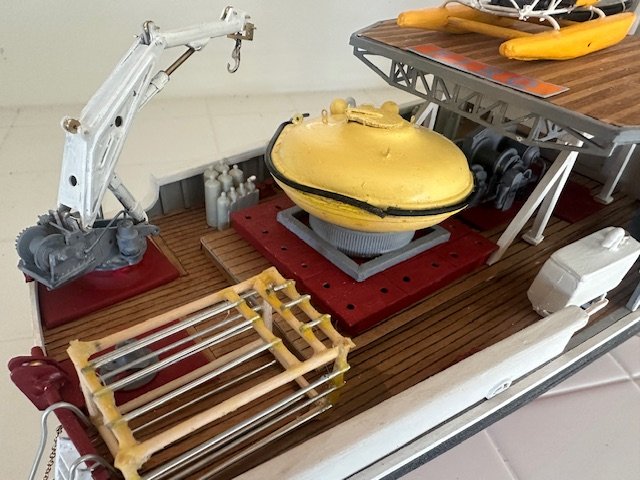
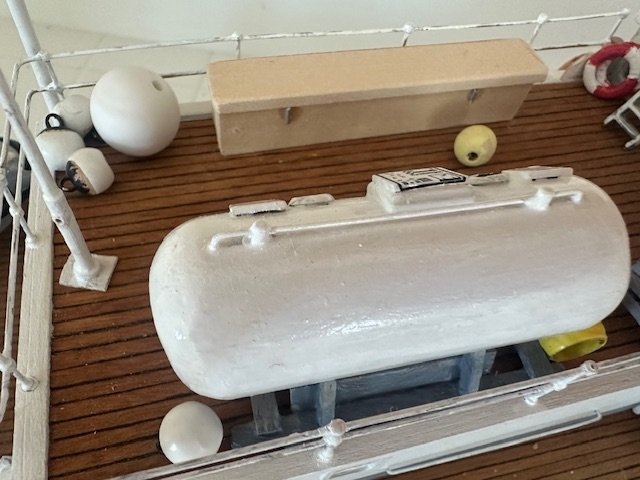
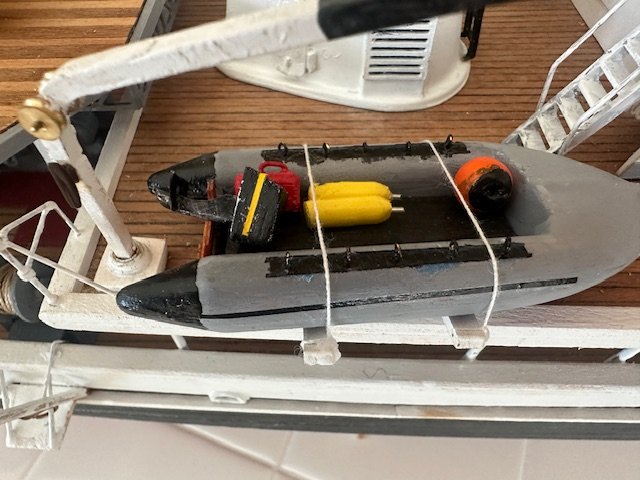
Well, I have been playing with a number of small details. To begin with I created the "window sweeper" using spare parts and a short piece of brass wire. Needs a bit of cleaning up. Thanks for the feedback regarding this feature. I added a wedge shaped piece of basswood under the flag pole to give it a tilt as seen in photos. I glued some small stock metal wire to the snaps and painted them to create shut off valves. Wrapped some small dredging hose to place on the deck Added the Calypso graphics to the helicopter pontoons I found some stainless "caps" that I added to the auxiliary fuel tanks Added line to the crane drum And lastly added brass loops to the radar reflectors which will be painted gray and hung vertically

-
mandolinut reacted to a post in a topic:
Calypso by mandolinut - Billing Boats - 1:45
-
mandolinut reacted to a post in a topic:
Calypso by mandolinut - Billing Boats - 1:45
-
mandolinut reacted to a post in a topic:
Calypso by mandolinut - Billing Boats - 1:45
-
Can somebody tell what this white round feature on the windshield is?
-
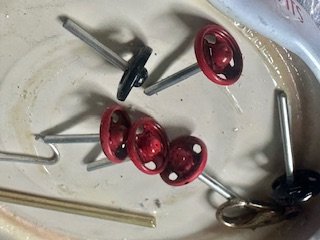
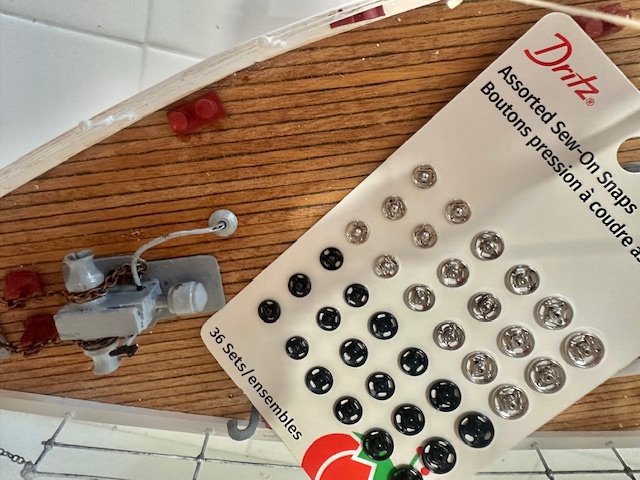
I wanted to add the ring like valves seen on a number of the winches. Seen here in red. https://static.rcgroups.net/forums/attachments/2/8/8/6/5/7/a3959848-193-IMG_8854.jpg I found these sew on snaps at Walmart in a variety size pack. The small ones, when painted , will work well and I will place them at the anchor windlass and the other winches. I finally got around to adding the pulleys to the crane as well as the large hook on the end. I used half of a "crab claw" jewelry clasp for the hook. I need to add line to the drum and lead it to the end with a separate small hook. Built a dry storage unit for the upper deck using small wire to represent clasps. Still needs painting.
-
mandolinut reacted to a post in a topic:
Calypso by mandolinut - Billing Boats - 1:45
-
Evolutionary biology and the Beagle. Perfect match. Enjoy the journey.
-
mandolinut reacted to a post in a topic:
Ahoy!
-
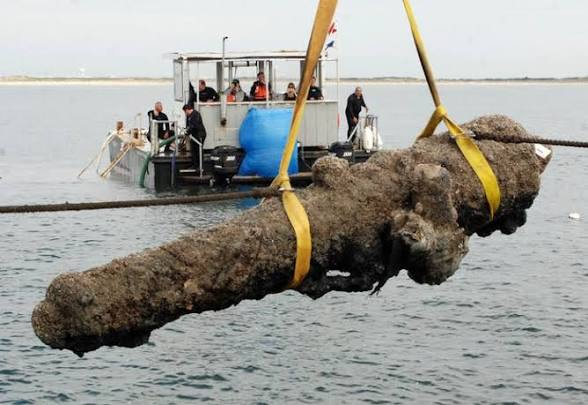
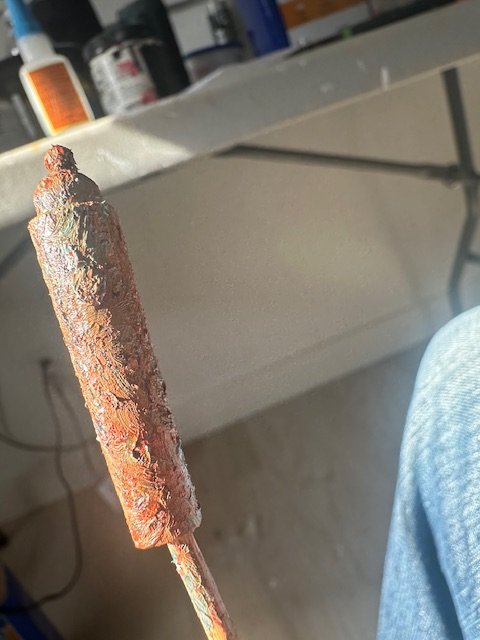
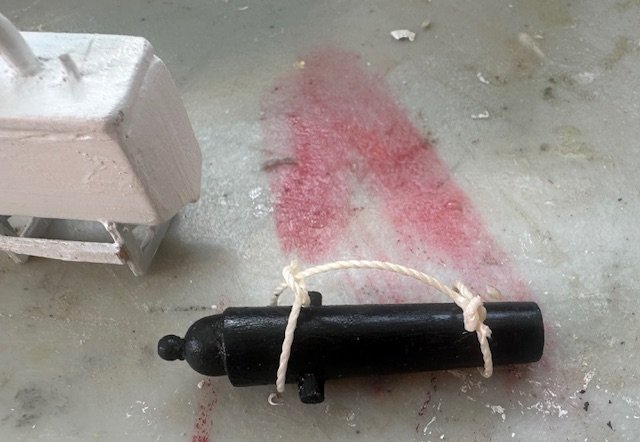
Very nice photos Veszette. Thank you. I started the weathering process on the cannon today. Began by dabbing plastic filler all over the cannon using toothpick tips as an applicator to get an encrusted barnacles / coral texture. Then dry brushed some paint over it for colors.

-
mandolinut reacted to a post in a topic:
Calypso by mandolinut - Billing Boats - 1:45
-
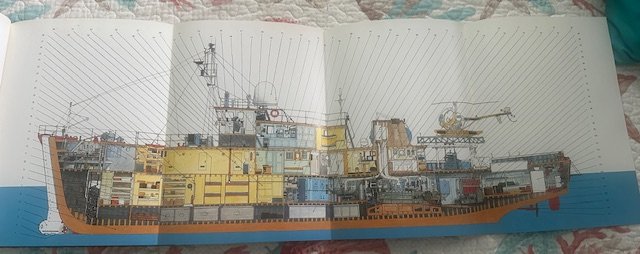
Thanks GeoMorrissey, Interesting background with your Navy diver Dad. Never heard the term "tubesucker"...made me laugh. I was an avid tubesucker most of my life diving the Atlantic off of Florida and the Bahamas. Captain Cousteau influenced myself along with many other young people with his television program and even more importantly created the aqualung/regulator which permitted recreational diving (tubesucking) for millions , allowing the ocean to be enjoyed first hand. The movie Ocea Aquatica is hilarious. They must have gotten the idea of the scene you sent from the book, "Jaques Cousteau's Calypso" which has this centerfold: Thanks for following the build and adding your story. Cheers, Patrick
-
Working on the shark cage for a few days. Slow going but should be a fun recognizable feature on the stern deck of Calypso. Tried various material and ended up with toothpick sized wood and aluminum straight wire. Needs a lot of cleaning up and filing and paint but should be a fun addition.

-
mandolinut reacted to a reply to a status update:
So, thank you for excepting me to the forum. A little introduction about me, I'm a re
-
mandolinut reacted to a post in a topic:
Emma C Berry by ahb26 - FINISHED - Model Shipways - 1/32
-
mandolinut reacted to a post in a topic:
Emma C Berry by ahb26 - FINISHED - Model Shipways - 1/32
-
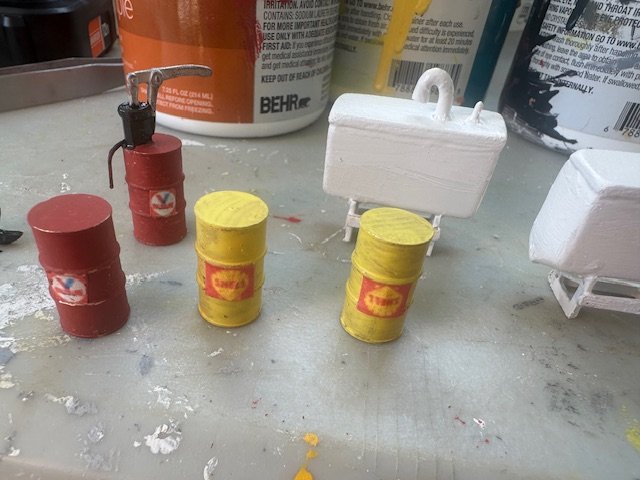
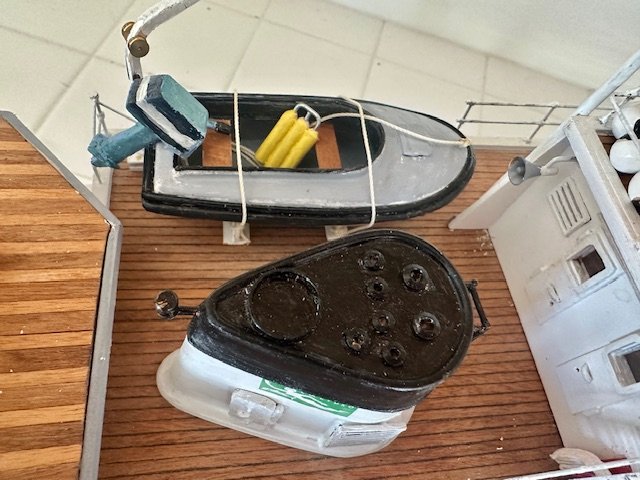
I had the day to work on more details. There is so much going on with this ship which keeps it exciting. I painted some of the 50 gallon barrels and added refinery names and another coat of paint for the spare tanks. At first I hung the cannon from the winch. I liked the idea but did not care for the look, so added a hook to tie off the starboard winch. If I had a 3D printer and created people on board, the cannon would have worked. The dinghy outboard was painted and striped. Painted the outboard on the runabout. And finally, made a cannon from an old hollow handled art paintbrush. Thinking this will be displayed on the stern deck. I may have to weather it a bit so it does not appear restored :0)
-
Enjoyed reading through your build as this will be on my bench soon. Cheers. Patrick
-
Thankyou Veszett. I will make adjustments. It would be nice to weather the hull like that. Cheers.
-
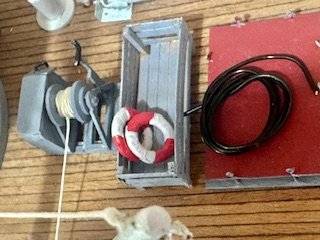
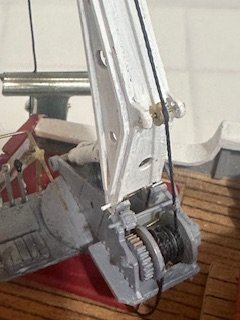
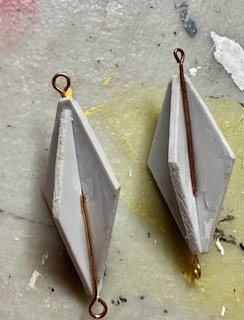
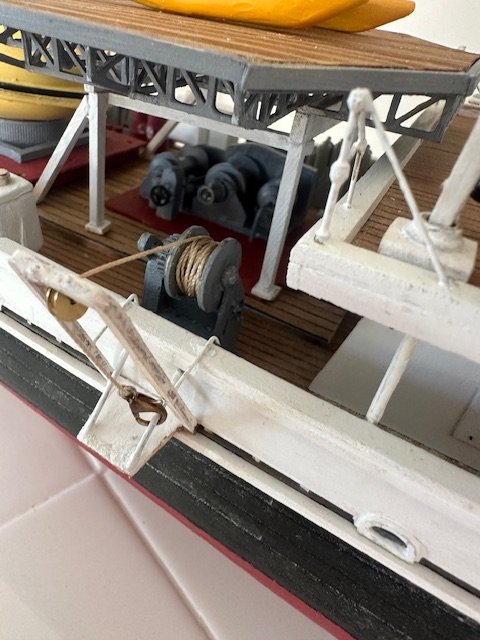
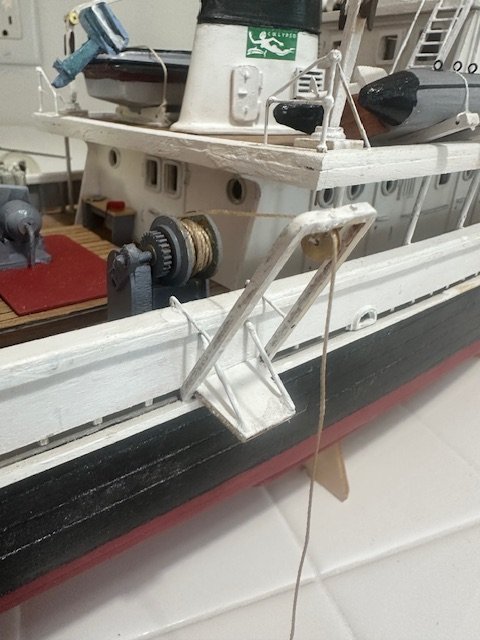
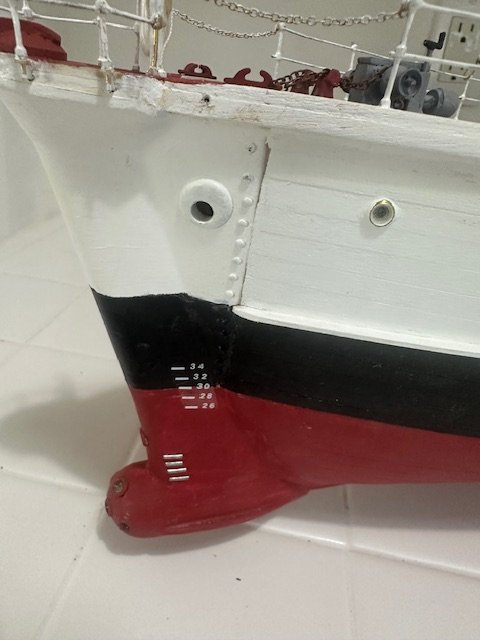
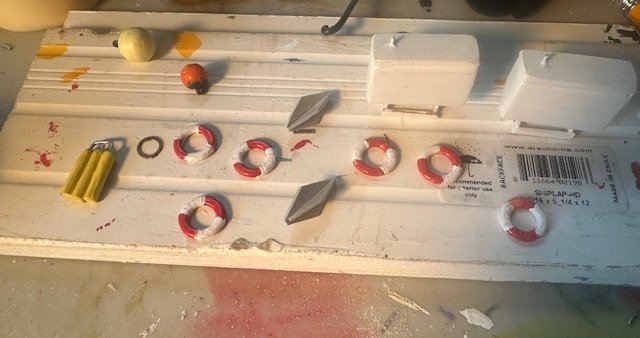
Spent a little time today adding a few more details. I started by adding cable to the starboard winch and threading it through the lift assembly. I have to decide whether or not to hang something from the cable such as a bathysphere or shark cage, or just tie it off. I saw on another Calypso build video where somebody added zincs to the steel bow addition to prevent electrolysis. I had some small aluminum wire which I hammered flat and cut into small pieces. Started the painting process on the life rings. Thanks to Mark for the good photo of Calypso's life rings. I decided to use that color scheme. Glued up the radar reflectors. Will add rings and lines. Happy New Year to everybody. I have really enjoyed your support, inspiration and comments over the past year. Patrick
-
Thanks so much Sal. This has been a special build for me. Looking forward to adding more to my Calypso. Cheers.
-
Thankyou Mark. Funny, that was a typo error. It was supposed to say "did not have". I fixed and edited the comment :0) Love the photo you included and will use it for detail. The picture I showed above was small but pointed out that there were no loops of rope around the life ring. I see the colors on the life ring, like many other things on the ship, changed over the years. Merry Christmas.